 BERNINA Corporate Blog -
A Folksy Book Cover
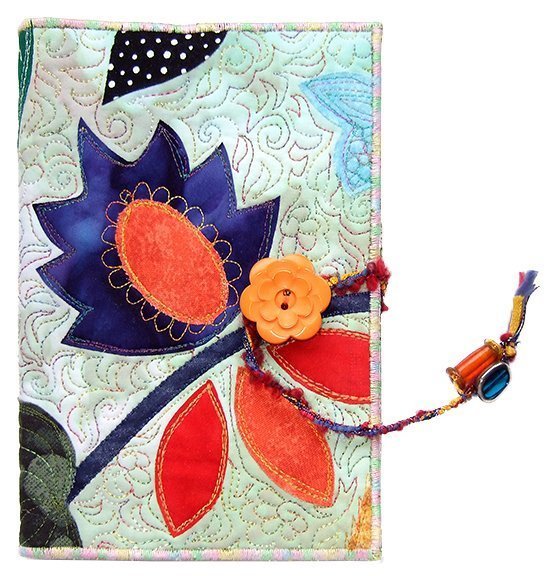
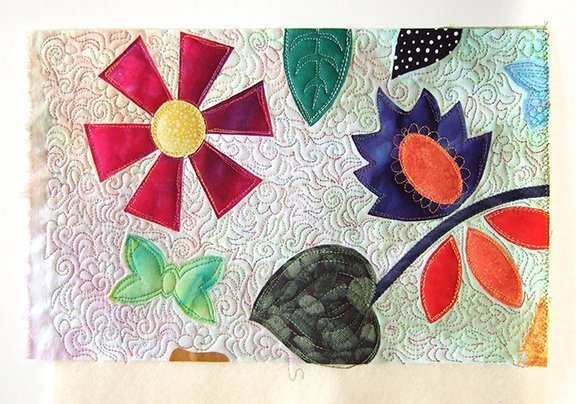
Another little project using up the appliqued fabric my sister and I created. (See the Folksy Bowl project.)
Supplies:
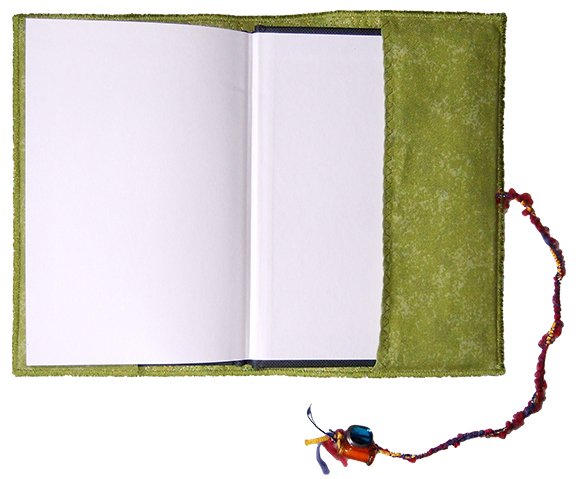
- A6 notebook with a hard cover.
- Two 11” x 8” pieces of fabric (outside and inside fabrics)
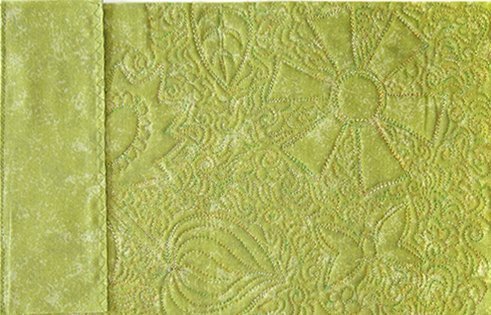
- 11” x 8” piece of acrylic felt
- Two pieces of inside fabric, each 2.75” x 6.5” (sleeves)
- Button (between 0.75″ and 1″ dia.)
- Yarns and threads or narrow ribbon
- Beads optional
Method:
1. Layer up your fabrics and felt: outside fabric/felt/inside fabric (fabric wrong sides against the felt).
2. Secure the layers (baste, spray baste or pin).
3. Free motion stitch the shapes in place for a stylish look. (Of course, you can use whatever method you prefer to secure the shapes.)
4. Quilt the layers.
5. Trim the quilted piece to measure 6.5” x 9.5”.
6. Turn under and neaten one long edge on each of the 2.75” x 6.5” sleeve pieces of fabric.
7. Place one sleeve on the inside at each end of the quilted piece, lining up the top, side and bottom edges. The neatened edges are towards the centre.
8. Baste the outside edges of the sleeves to the quilted piece by hand or machine.
9. You can create a fancy cord to fasten the book by twisting several co-ordinating yarns and threads together and zigzag stitching over them. Your cord should be about 6” long. Or use a 6″ length of narrow ribbon.
10. Slip the end of the cord or ribbon between the quilted piece and sleeve at the centre point on the back.
11. Oversew the edges with a satin stitch, securing the cord or ribbon in the process.
11. Sew a button on the front by hand (don’t sew through the sleeve on the inside).
12. Optional extra: decorate the end of your cord or ribbon with a bead or two.
13. When the book is closed wind the cord or ribbon around the button to secure it closed.
Of course, you can make a cover to fit any size of book and use great commercial or hand dyed fabrics of your own. You can be as creative as you like. Measure your book and allow for some shrinkage from quilting and a comfortable fit.
With the fabric my sister and I created we have plenty more to play with – watch this space!
Feet used:
#1 for neatening sleeve edges (step 6)
#15 for free machine quilting
#2A for satin stitching the outer edges (my favourite foot!)
0 Responses