 BERNINA Corporate Blog -
In my last post I mentioned that I’d chosen to buy the Spanish Hemstitch Equipment as a souvenir when we visited Steckborn. I was inspired by the samples I saw, in particular this rather snazzy book cover made by a member of the Bernina Creative team.

I fitted it to my 880 and sewed a couple of small pieces with it when I brought it home but put it away and since then, the box has stayed closed. Now, however, I’m ready to explore!
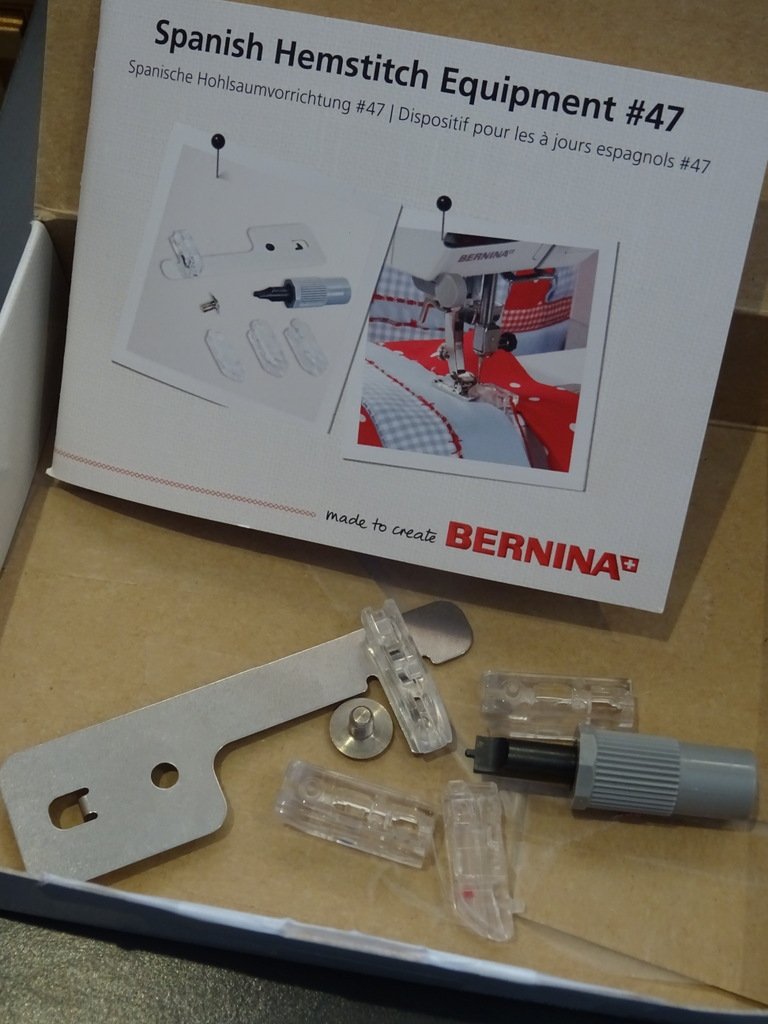
Inside the box are a few small components, including a metal plate, a small screw and screwdriver and four clear plastic “cord guides” for use with fine/coarse fabrics and of two different widths. There’s also a small instruction book in several languages
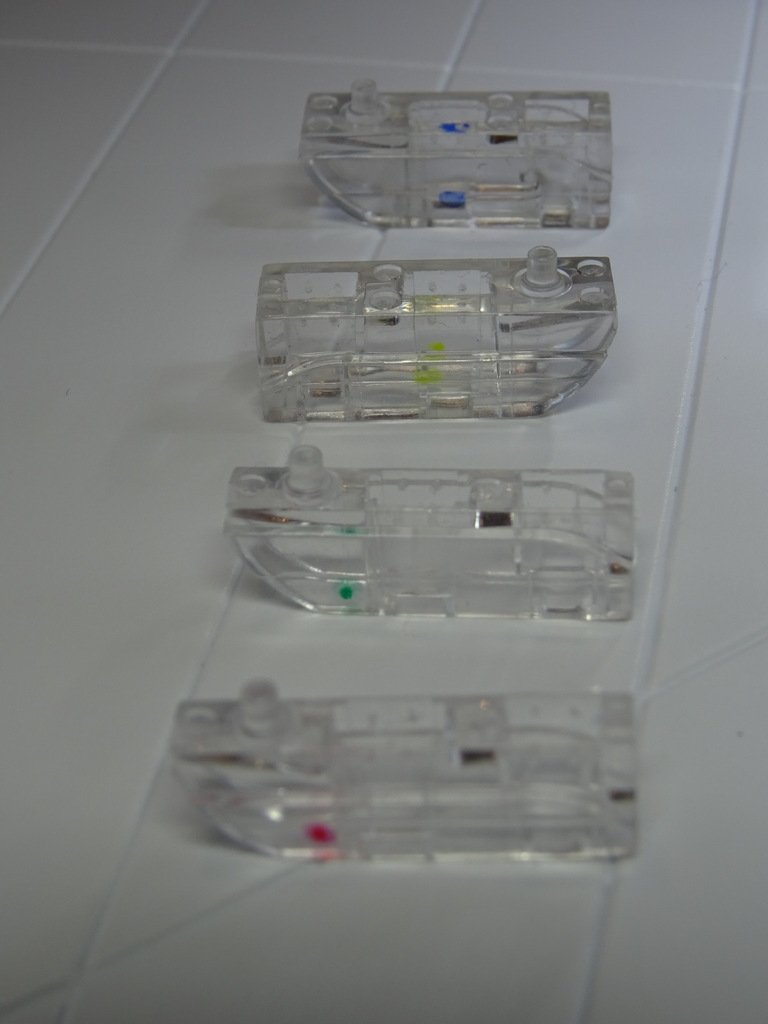
At first, I found it tricky to tell the difference between these four very similar parts, so once I’d identified which was which I placed a coloured spot on each of them using a pen – and added the same coloured spot by each diagram in the instruction book.

I was ready to begin.
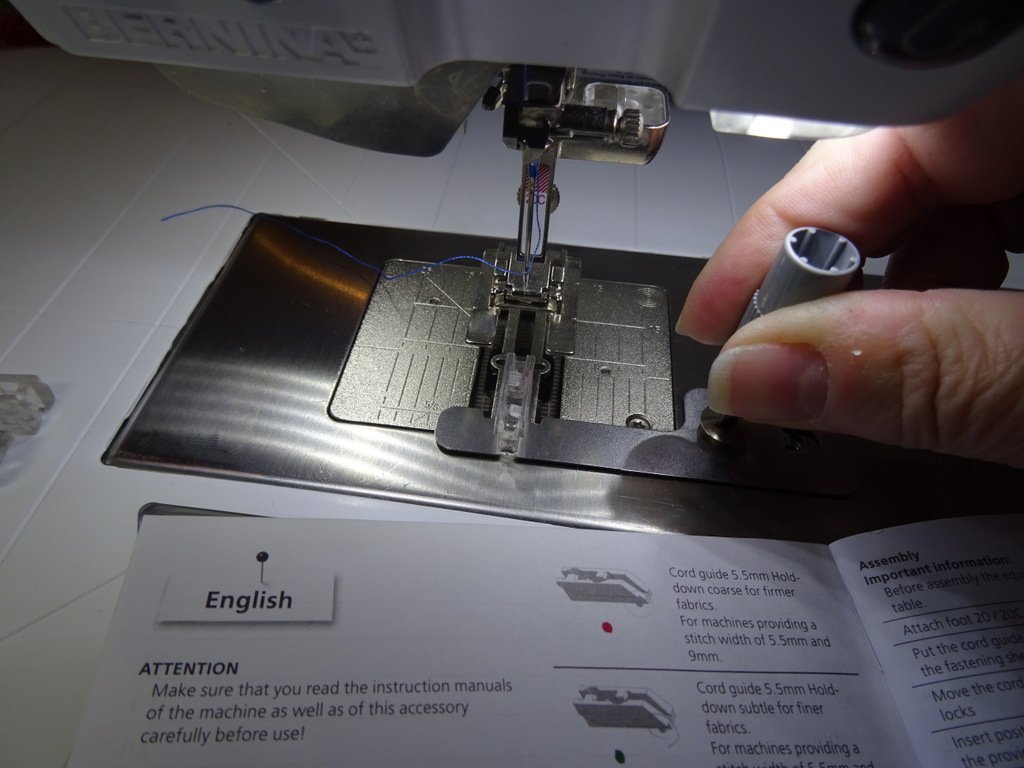
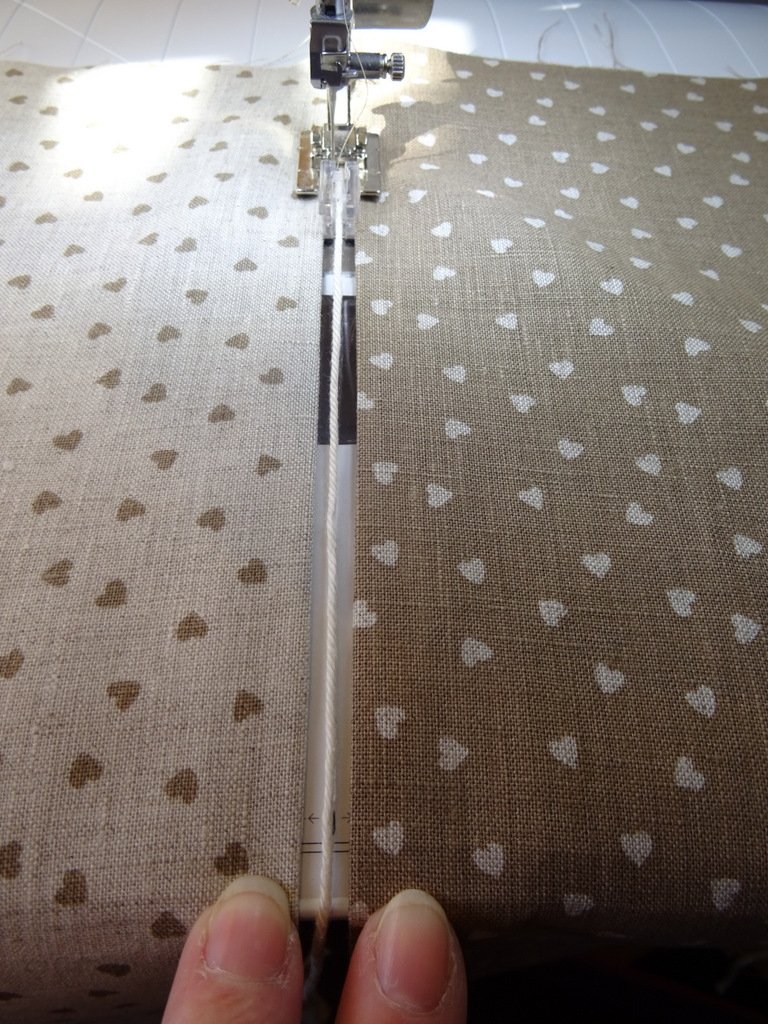
I found it really easy to fit the gadget to my sewing machine, since it all fits comfortably into place. I found I had to to unscrew the whole plate if I wanted to change the plastic cord guide but that was a quick and easy process.
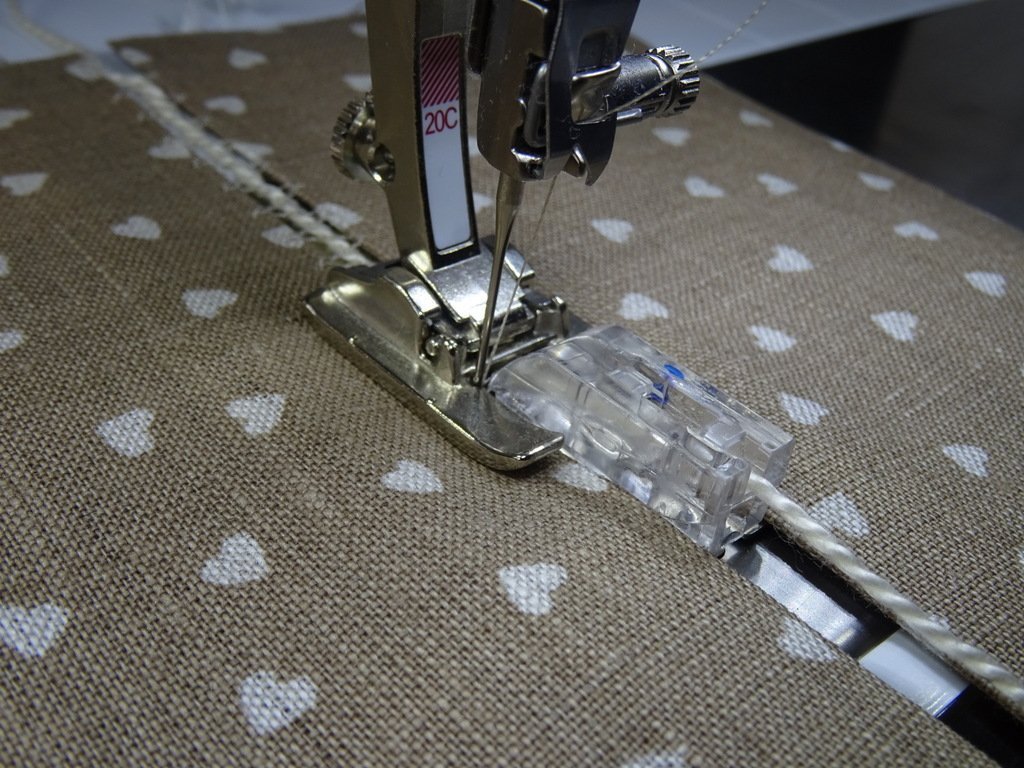
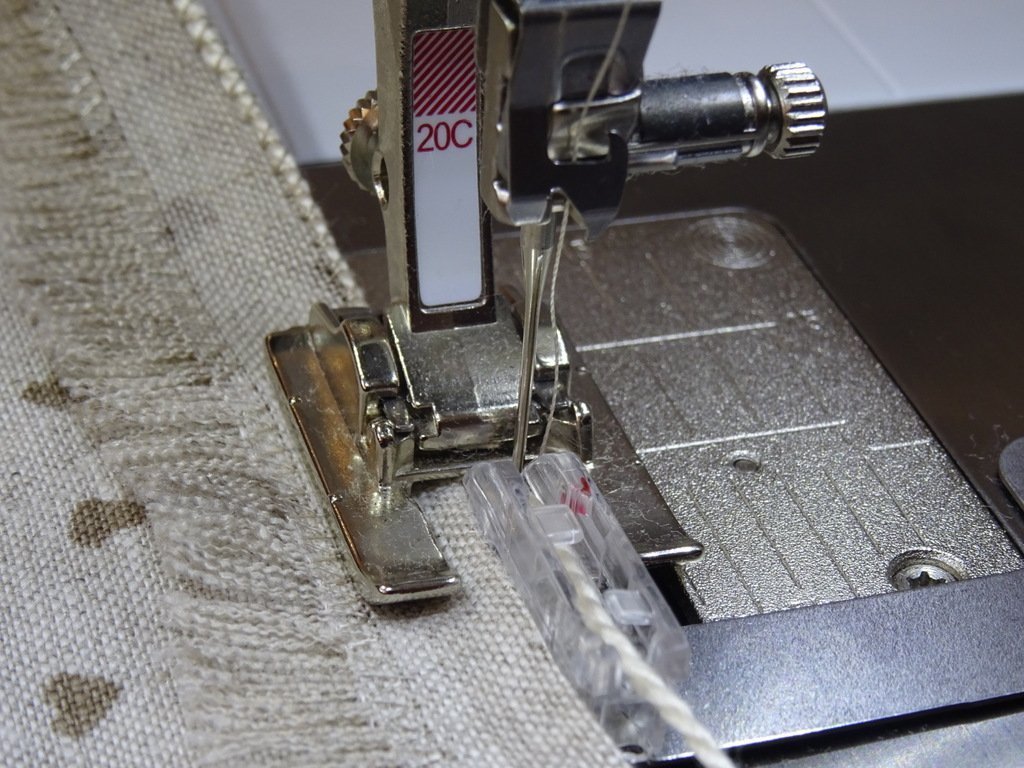
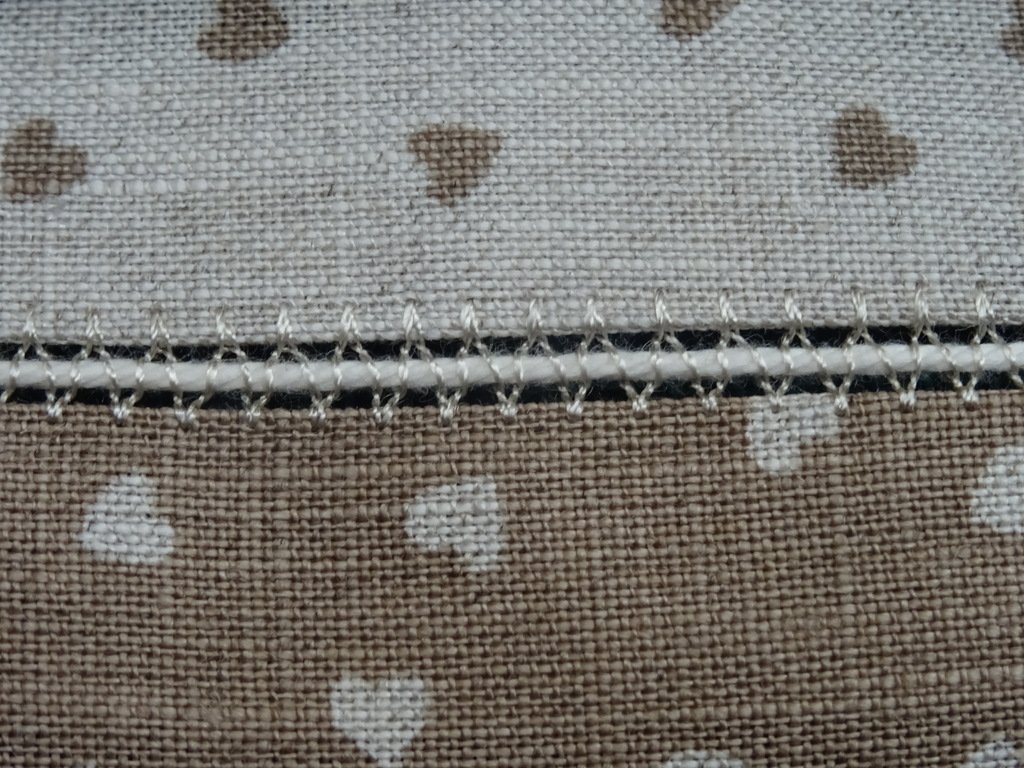
This plastic cord guide is the key component here, as it holds the two fabric edges apart as they are fed through and stitched together and there’s the additional facility to feed a cord of some kind through the guide, to bring a little more individuality to the work. Depending on which cord guide is selected, the gap between the two edges is held accurately at 5.5 or 9mm and the width and length of a decorative stitch can be adjusted to create many attractive results. As recommended, I fitted foot 20C, the open toe embroidery foot which meant I had a clear view of the stitching throughout.
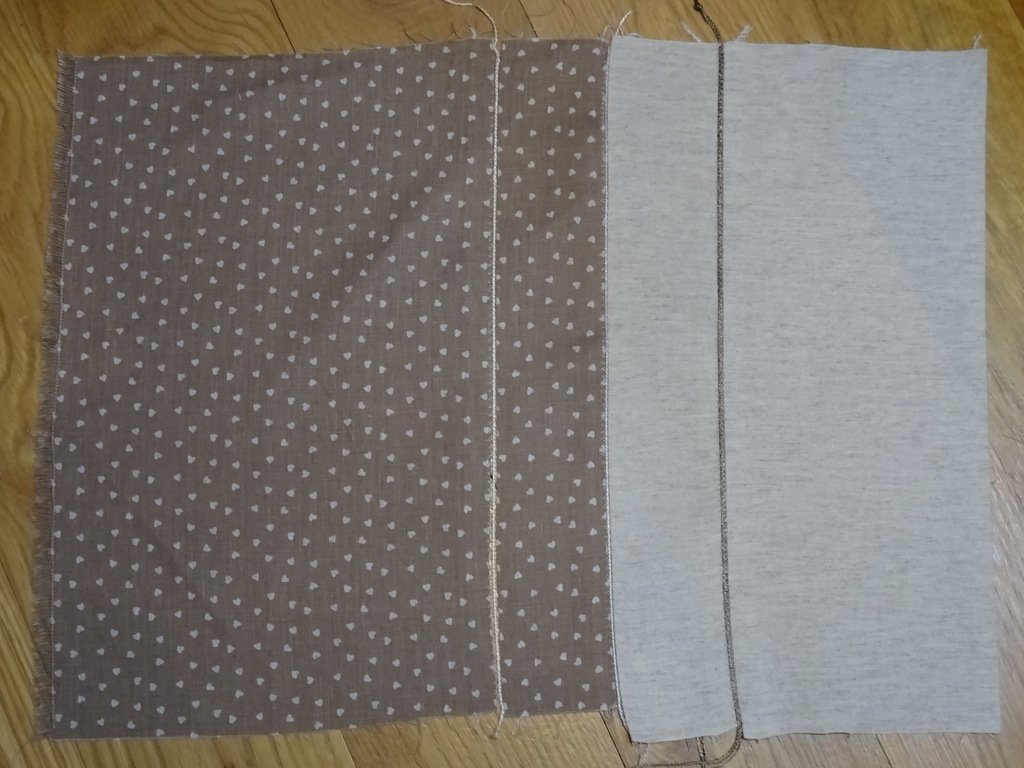
In no time at all, I was stitching. I’d noticed that in the small instruction book, there were the directions to create a table runner so I cut and prepared the pieces as shown and began my practice project.

The first results were pretty good and I felt pleased with them.
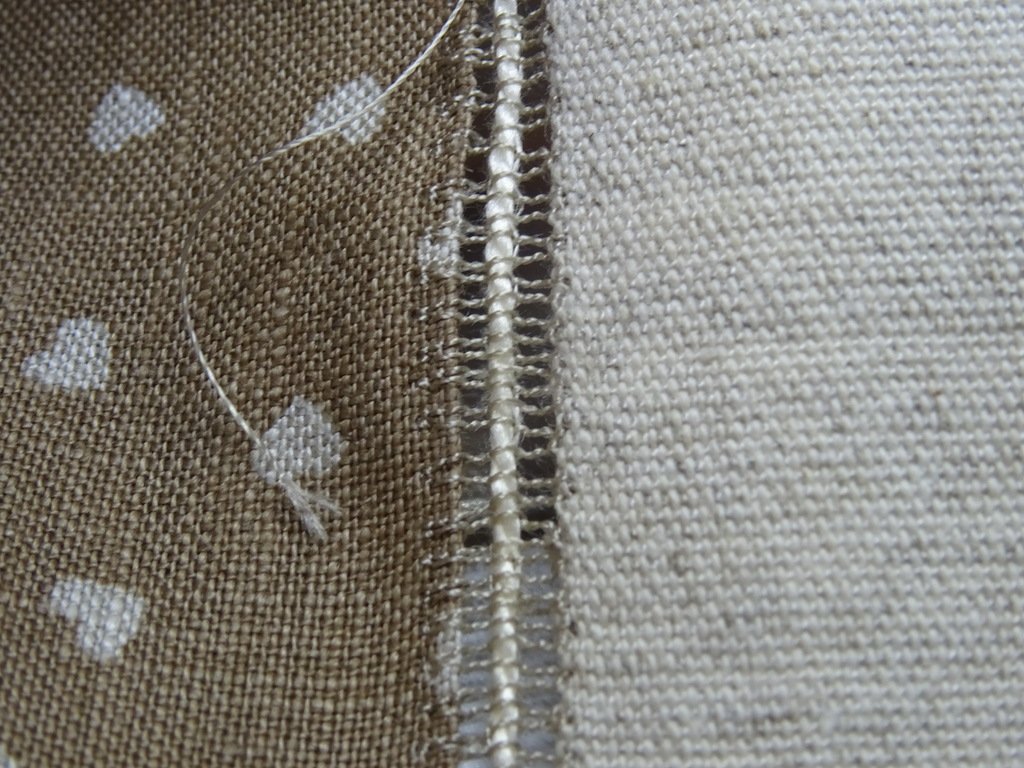
But sadly, it was beginner’s luck. The next line of sewing wasn’t good at all and I wasn’t happy with it. At times, the needle didn’t quite catch the fabric on one side or the other. At other times, the cord didn’t stay central in the gap but moved to one side, creating an uneven finish. What could I be doing wrong – for it was surely user error?

It took me ages to unpick it all. Those stitches were very secure!
I decided that it’s essential to practice first and cut a couple of strips so I could try out a stitch or two and not make a mess of my –ahem- practice project!
The third seam went well and I took it to the ironing board to press. That’s when I noticed the slight curve – oh dear. However neat and even those decorative seams are, if each seam is slightly curved, then the whole result is going to be very strange indeed. I thought about how I was working and watched carefully as I sewed the next one. I didn’t have a free hand to take a photograph, but as I sewed, I noticed that I was putting a little pressure on feeding the fabric through the machine and yes, I’m right handed. Perhaps that’s why my table runner was beginning to take on a curve?
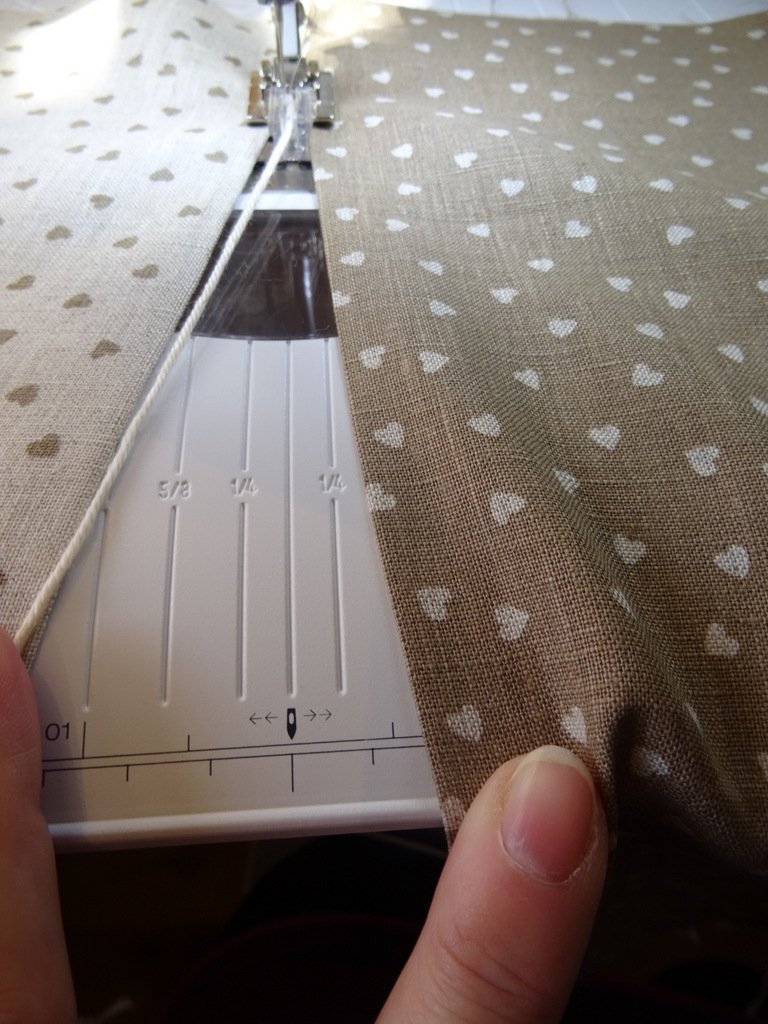
For the next seam, I took note of the marking on the sewing table.
Most of all, I made sure to hold the fabric and cord very lightly in place, not really guiding it at all, but allowing Bernina to do what it does best: sew a beautifully straight line without my help!
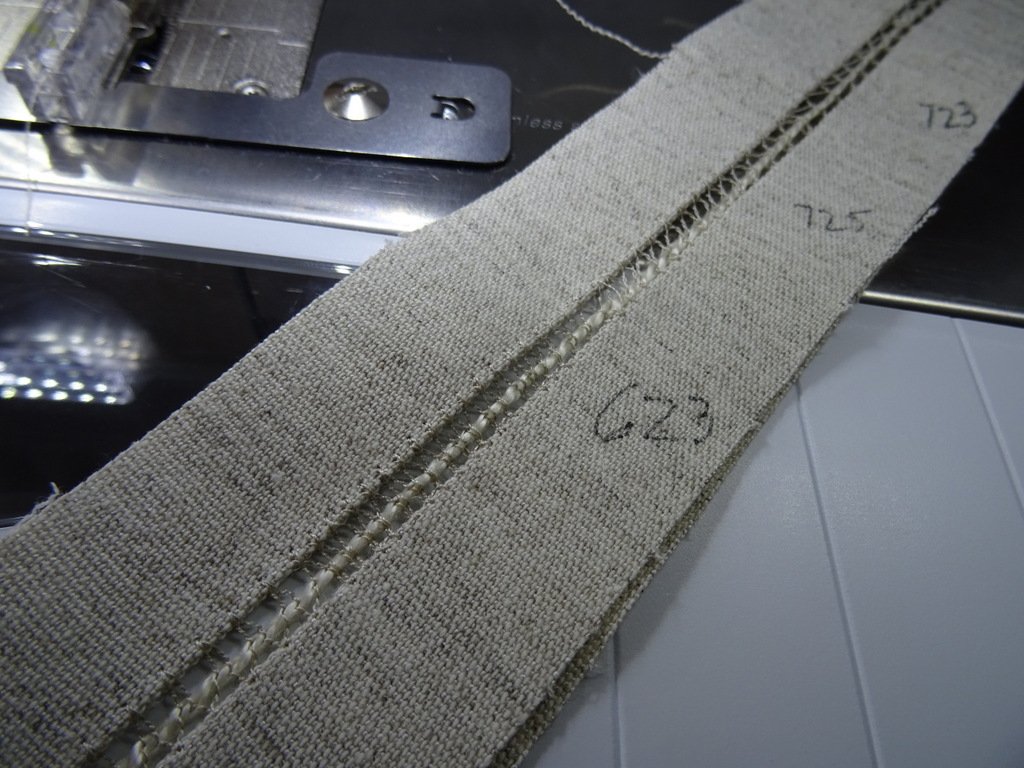
I continued and joined all the pieces together for my table runner, using a variety of stitches and decorative cords before finishing the edges using the other suggested application for the gadget: creating a corded edge. To try that, I followed the directions in the small instruction book and secured one frayed edge with a zigzag stitch in preparation. I folded the edge over and pressed into place before I started.
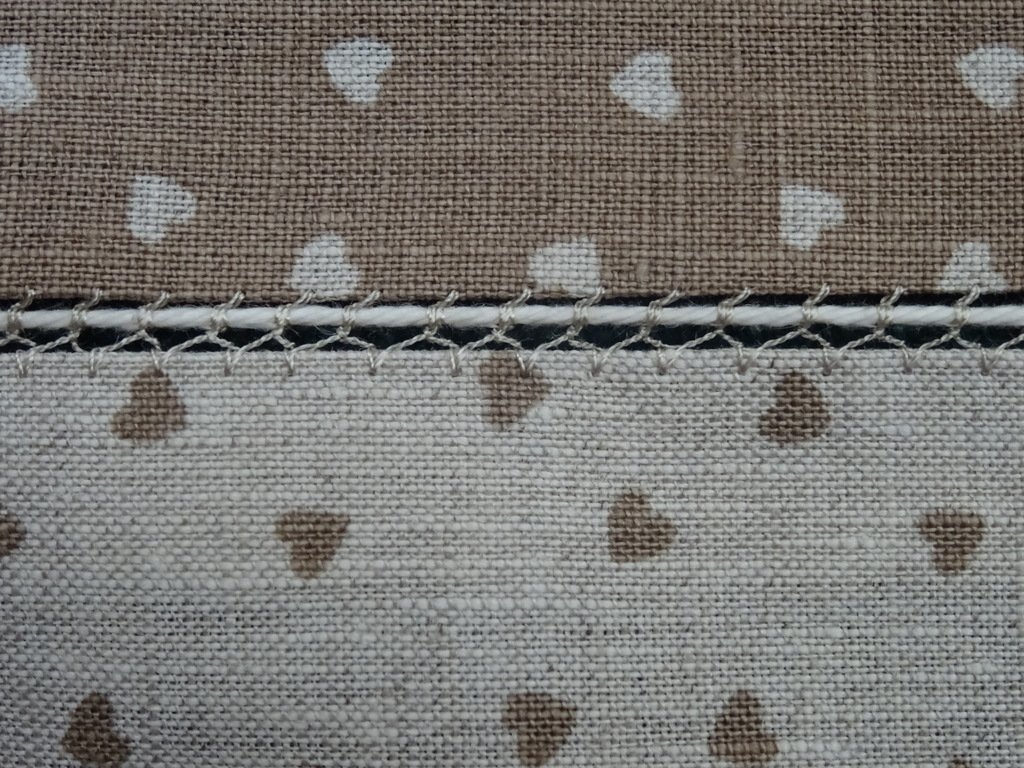
A simple zigzag stitch over a cord created a really neat finish I think and is probably something I’ll use again as it was so very easy to do.

I thought it looked good from both sides and the neat, even stitches were so very satisfying.
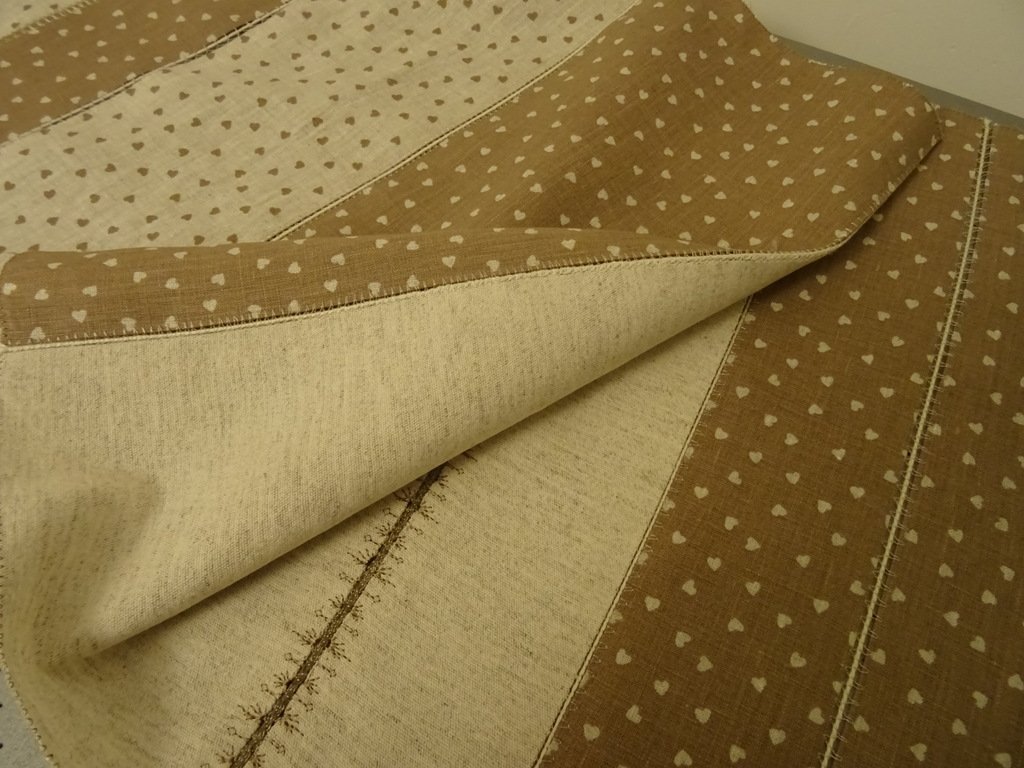
My table runner project was completed with a couple of rows of decorative stitching on the plain fabric – I chose a stitch in keeping with the “folksy” feel of the fabric I used and having stitched down one side, I mirrored the stitch to work the other side.
As I pressed the finished table runner, I reflected on what I’d learned:
- It’s worth keeping a practice piece on hand to try out a stitch first and to make adjustments to the stitch length and width to achieve the best result. If possible, use the same fabric and thread for that practice, because the results can be significantly different depending on both factors.
- The choice of cord is another significant factor: a smooth thread which slides through the guide easily is best. Too thin and it bunched up, too thick and it dragged the stitching. I found it tricky to find the one which was “just right” and having found it, I stuck with it! (DMC Cotton Perle #3)
- Bernina’s advice to select a stitch with only forward movement was sound. The stitched seam cannot back up with the cord guide in place.
- Above all I learned to be gentle in guiding the fabric through and allowing the machine to do most of the work, reducing the speed of the machine if necessary. Such care is rewarded with spectacular results; neat, even and very satisfying indeed.
I’m really happy with this small attachment and found it so easy to use, I want to do a little more with it. I want to try a small project to put what I learned to good use.
Come back soon and see what I made!
I would love to see a zoom class or u tube on this. It looks amazing and I can think of so many projects that could be enhanced by using this foot and stitches!
Dear Sheron,
Not a zoom class, but BERNINA has a Youtube Tutorial for the Spanisch Hemstitch Attachment, you can watch it here: https://www.youtube.com/watch?v=KprBhfBP6FQ
Kind regards, Ramona
Thank you for posting this article. I recently purchased the attachment and was really frustrated with my attempts to use it. This has inspired me to get it out again and use some of these tips.
Dear Sharon,
I am happy to hear the article has inspired you to pick it up again! It’s a wonderfull tool to play with. There is also a youtube Tutorial by BERNINA that may help: https://www.youtube.com/watch?v=KprBhfBP6FQ
Enjoy sewing!
Really helpful article. Thank you. I had to experiment lots too when I bought my set and then hadn’t realised some stitches actually needed a central cord to form correctly otherwise they just tangled. I’ll try the edging – looks interesting. More, please!
This looks so very interesting. Looking forward to experimenting with it. The imagination runs riot.
Me too recently. Do you always find it better with a cord centred? I struggle with some of the stitches tangling.
Ann, I preferred the effect with the centred cord, but filling the gap with a denser stitch some interesting effects could be possible? As always, I’d like a few more hours in the day to sit and play! (And practise, because I always want to do things perfectly first time ? )
?
Really enjoyed that Gill. Great to know some of the things to look for to make it successful. Like Hilary am sorely tempted to purchase and play …….as well.
Thanks, Gill. That is a very helpful and useful article. I am now sorely tempted to buy the attachments myself because the results look so good. Hilary
Love mine. It’s very easy to attach. So many pretty stitches and effects to explore.