 BERNINA Corporate Blog -
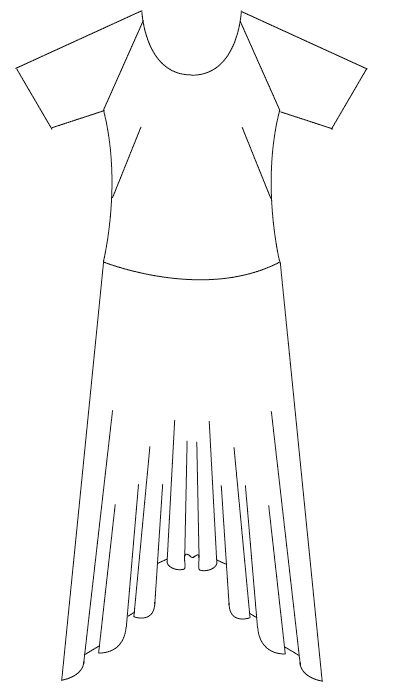
 I love a maxi dress with a hi-low hemline. They look great when you move and see a flash of leg. Here is my own version – the Handkerchief Hem Maxi. It’s a loose-fitting throw-on-over-a-swimsuit type of dress. It has a slightly dropped waist, raglan sleeves that finish above the elbow, very slight fitting around the torso and a full bias cut skirt with a high / low hemline.
 You can find the link to the free sewing pattern right here. It is a PDF that you can print on your home printer. It is set up for A4 size paper – you just stick the pieces together according to the numbering at the top of each page. Don’t forget to make sure that your printer sale is set to 100%. The dress pattern comes in a size 12, but don’t panic, there are instructions and measurements on the the Making a Pattern Fit page of my own Sew Different website that will help you to resize it up or down.
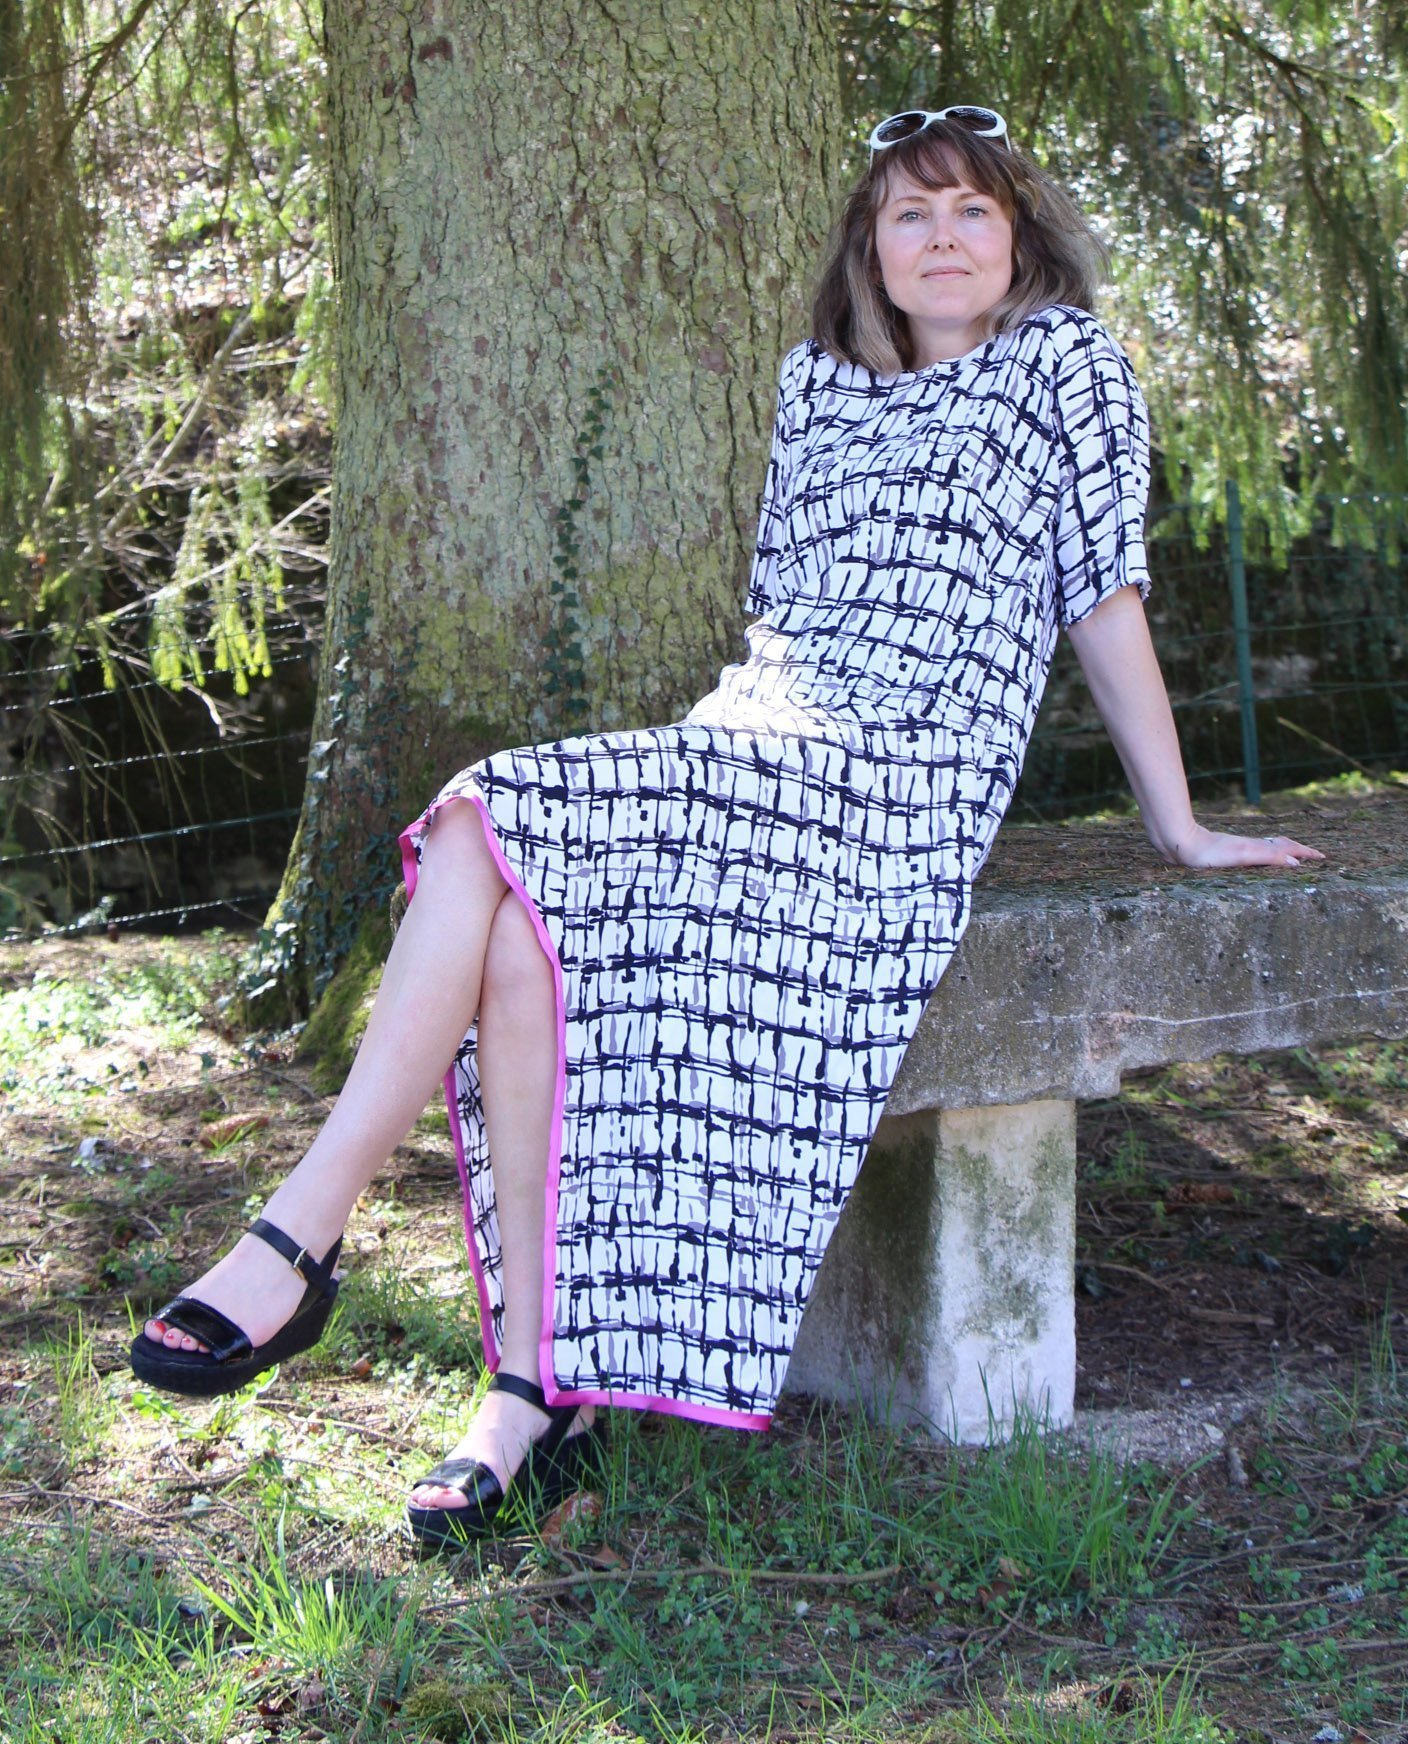
I first imagined this dress in a grey marl jersey with an orange trim but I got distracted by this fabulous black and white print and ended up going with a hot pink trim instead. For a pretty and swishy dress like this I would use a satin-finish bias binding like this one shown below, rather than the usual matt stuff. This dress is really easy to make but it does take quite a lot of fabric – between 2.5 & 3 metres. Your fabric needs to be something quite lightweight with a good drape-ability – suitable fabrics would be viscose, polyester or silk. I wouldn’t use 100% cotton as it sits a little too stiffly and will just look bulky around the skirt.
To accompany the pattern I have done some basic step-by-step instructions – see below. And to help you along the way here are a few links to relevant tutorials: if you are not familiar with sewing opposing curves then have a quick look at this tutorial first. Or try this one as a good alternative. It isn’t difficult but could be very confusing when faced with non matching pieces of fabric if you are not expecting it!
 Handkerchief Hem Maxi Dress – INSTRUCTIONS
1 Sew in the darts
On the FRONT BODICE, fold the fabric along the pink dashed line and sew in the dart from the red dot along the black dashed lines to the edge
2 Attach sleeves
Line up the blue dots on the FRONT BODICE and one of the SLEEVES with right sides together. Sew down to the green dot – the shapes do not match – you will have to gently ease the fabric round to make the cut edges align with each other. Do the same with the other sleeve and the other side of the FRONT BODICE.
With right sides together, align the yellow dot on the BACK BODICE with the yellow dot on one of the SLEEVES. Sew from yellow dot to green – again the curves don’t match – just ease the fabric round until the cut edges line up. Repeat with the other side
All 4 pieces of fabric (FRONT BODICE, BACK BODICE & 2 SLEEVES) should be joined
3 Join the sides
Line up the BACK BODICE and the FRONT BODICE with right sides together. (The sleeves will be folded along the original FOLD line). Sew the sides of the BODICE and along the under sides of the SLEEVES all the way from the purple dot to the orange dot
3 Attach the skirt
With right sides together, sew the FRONT SKIRT to the FRONT BODICE. (Again you will have to ease the curve of the skirt along the straight line of the BODICE). Repeat for the BACK SKIRT onto the BACK BODICE.
4 Sew the sides of the skirt
With right sides together sew up the sides of the skirt.
5 Finish the skirt hem with a contrasting bias binding so that it shows on the outside – there is another video tutorial here in case you’re not familiar with this way of using bias binding.
6 Finish the neckline and armholes with hidden bias binding. There is a good clear tutorial on this technique from Sewoverit just here.
That’s it! Have a great summer and HAPPY SEWING!


0 Responses