 BERNINA Corporate Blog -
Month 4 of this Crazy project… how wonderful to see what everybody is making. Pictures of blocks from all over the world, with beautiful stitches and effects. I’ve received many emails and questions about the free motion flower from Month 3, how difficult some of you thought this was, but after I’ve told everybody to just try it and quilt or embroider the flower, it came out allright. Some even digitized the flower in the Bernina software and embroidered it onto the sandwichc: very creative and of course that’s allright – just make the blocks the way you like them and have fun.
Here is the new block: you can download it again, it is presented in two pieces again: left and right.

After downloading and printing the left- and right pattern pieces for block 4,

tape or glue them together like you have done with the previous blocks. Place the pattern under a piece of Vlieseline L11 of 32 x 32 cm, and draw the lines of the Crazy Patchwork, with the square of 26 x 26 cm (dotted lines) in the middle. Make a sandwich from off-white fabric, batting and Vlieseline L11, each 32 x 32 cm, just like the other blocks. If you look at the Crazy pattern, you will see 10 sections in stead of 8. Because I am working with just 8 batiks, I have used two fabrics double: you can do that also, or use a ninth and tenth color/fabric to complete the block.

With Block four I have worked with my BERNINA 770QE using 3 different presser feet:
1) Open embroidery foot #20c for decorative stitches, which I have used for all previous blocks.
2) Braiding foot #21 for making quick work of couching thin ribbons, cords and yarn*.
3) 3-Groove cording foot #22 for the simultaneous couching of several yarns, woolen thread or cording, producing a decorative trim or braid effect on the block.* – you will find a video for using these last two feet at the bottom of this post.
Lets take a closer look to see what these special presser feet have to offer:
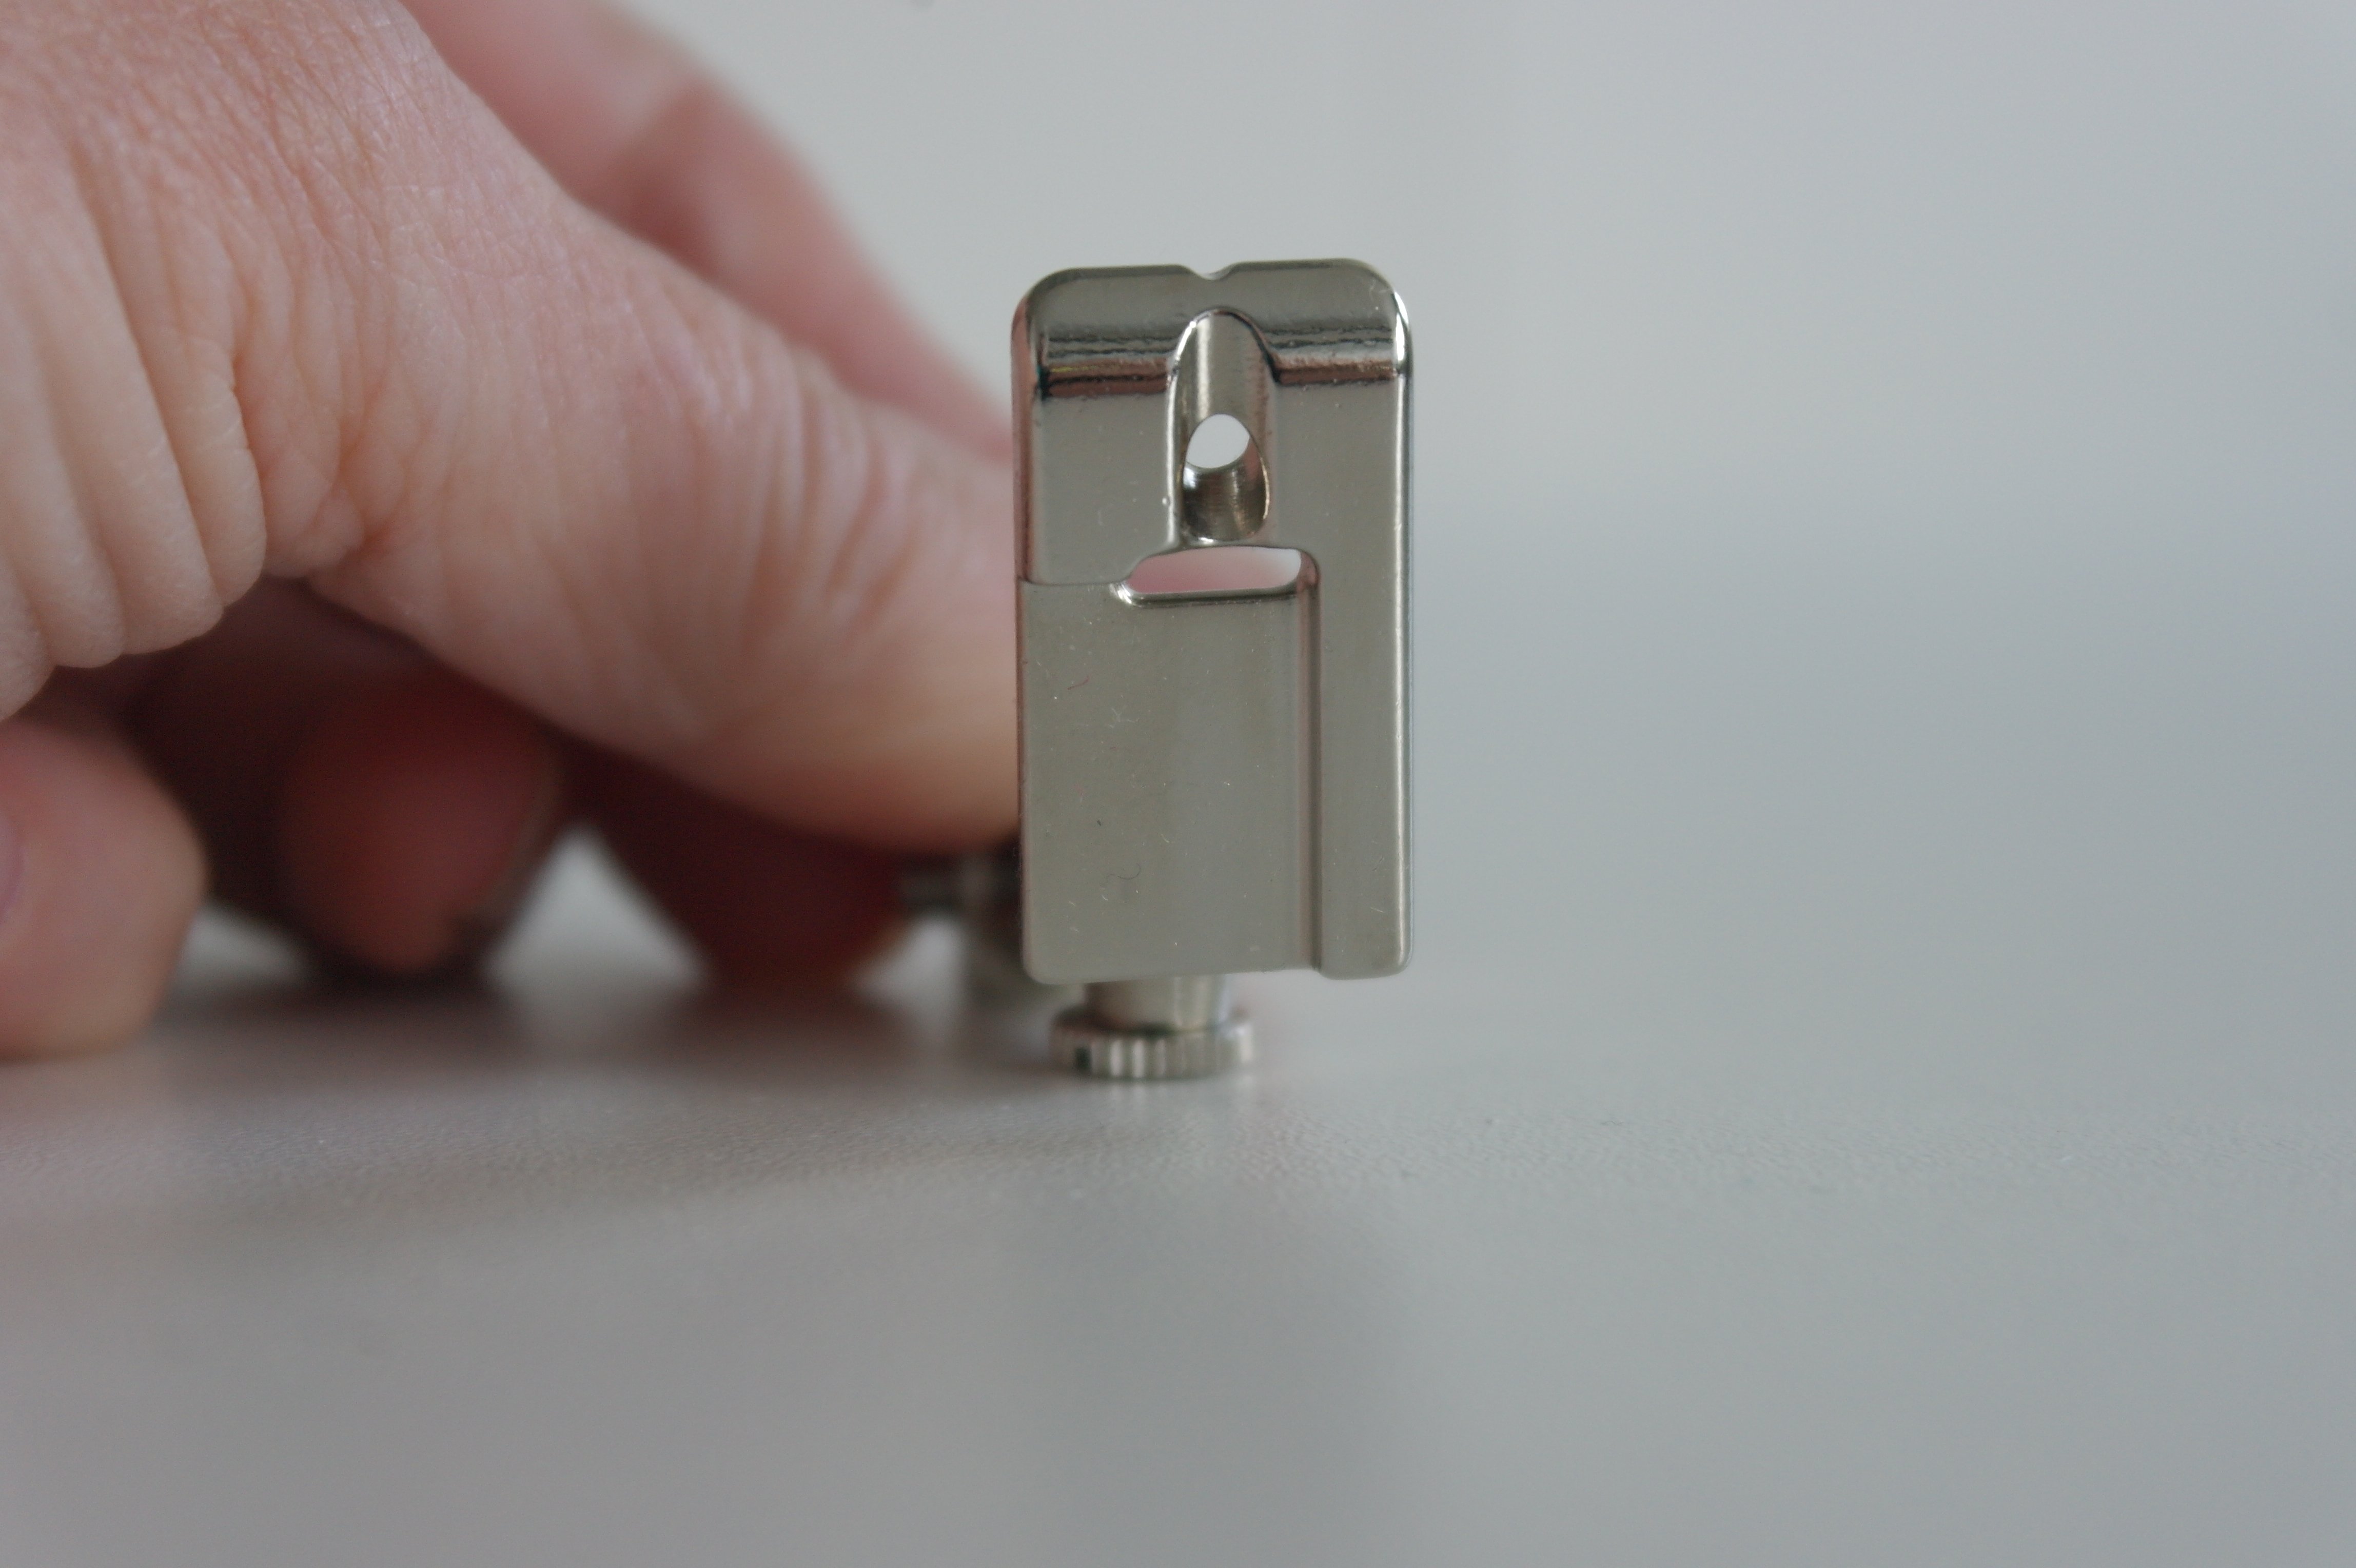
Braiding foot #21, underside. At the front of the foot (top part of the picture) there is a beveled hole for cords and yarns up to 3 mm in diameter, and a groove. When the foot is lowered, the material in the groove is cought underneath and will be pulled through while cording. A decorative thread on top gives you neat and even couching.
Braiding foot #21, top/front – here you can see the beveled hole. Pull your yarn, cord or small ribbon from front to back through this hole.
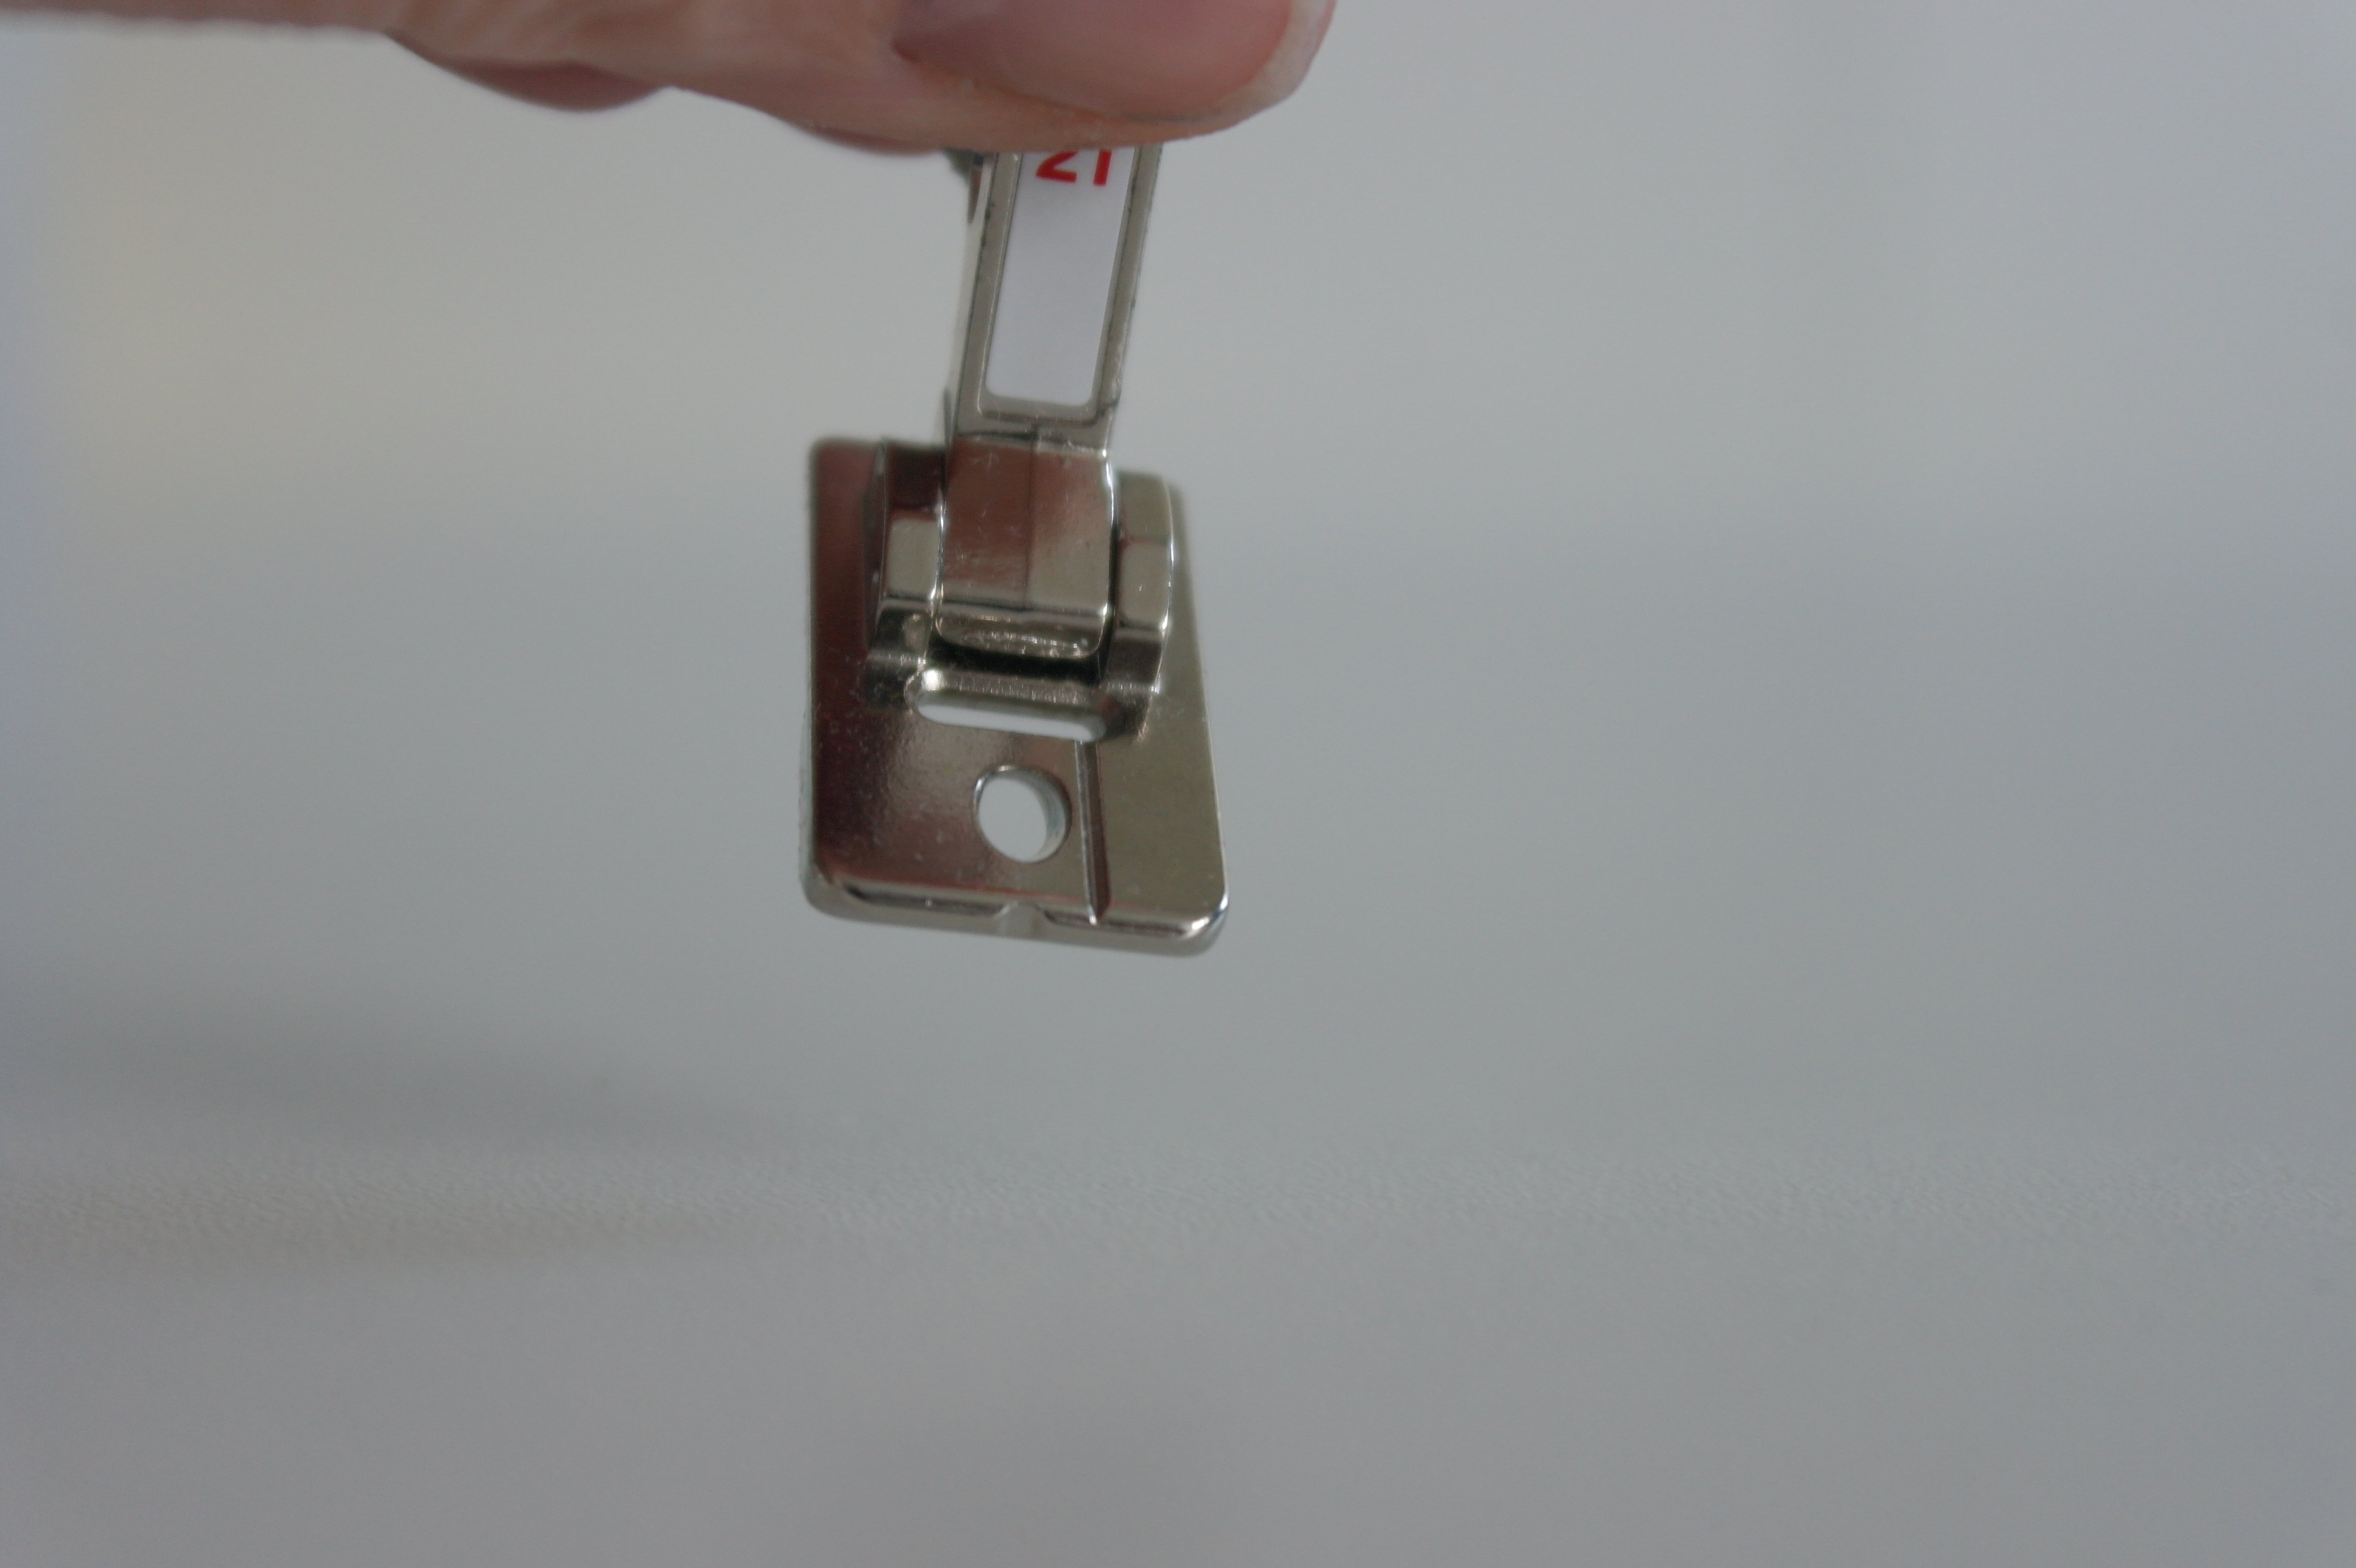
3-Groove cording foot #22, underside – you can see the three grooves on the bottom. You can use 1, 2 or 3 thin cords or yarn for simultaneous couching, with a decorative stitch on top, producing a decorative trim or braid effect. Either use one cord or yarn in the middle, two on each side (with an empty groove in the middle) or three for a wider effect. Use a decorative stitch which will cover the cords or yarn but don’t make it to wide: it has to be ajusted to the width of the number of cords/yarn you will pull through. Working on a sample first will show you what gives the best effect.
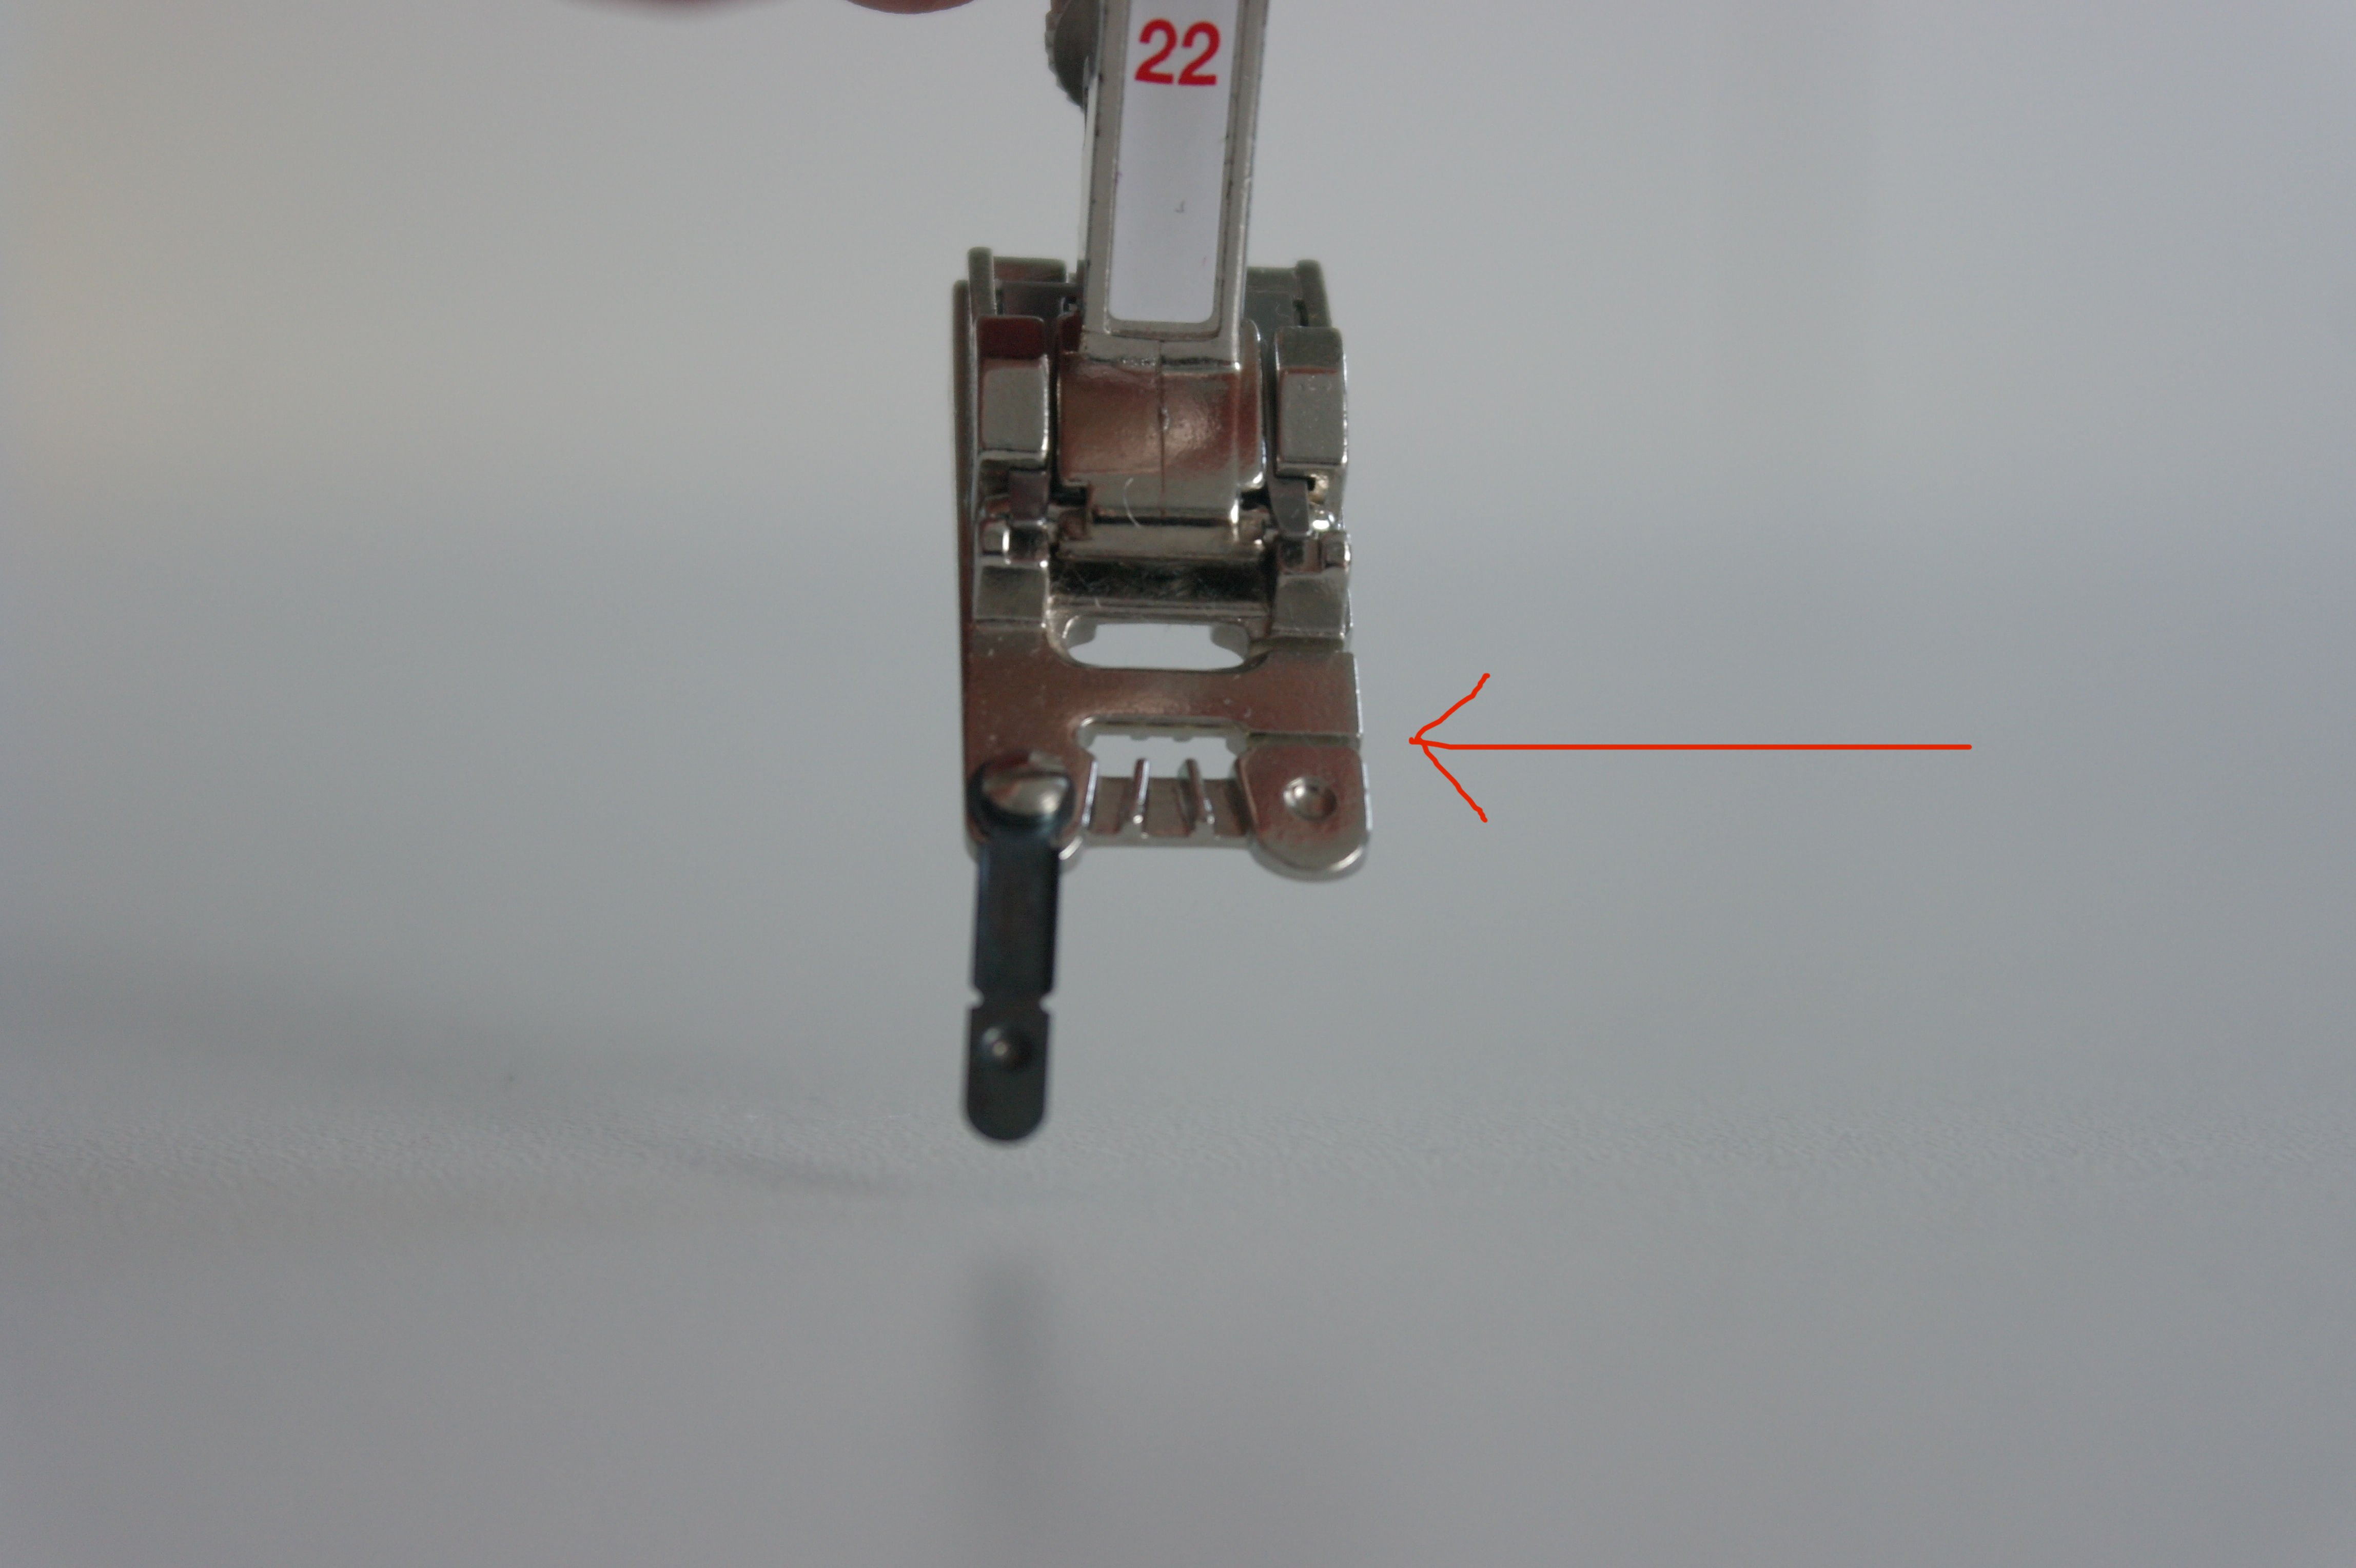
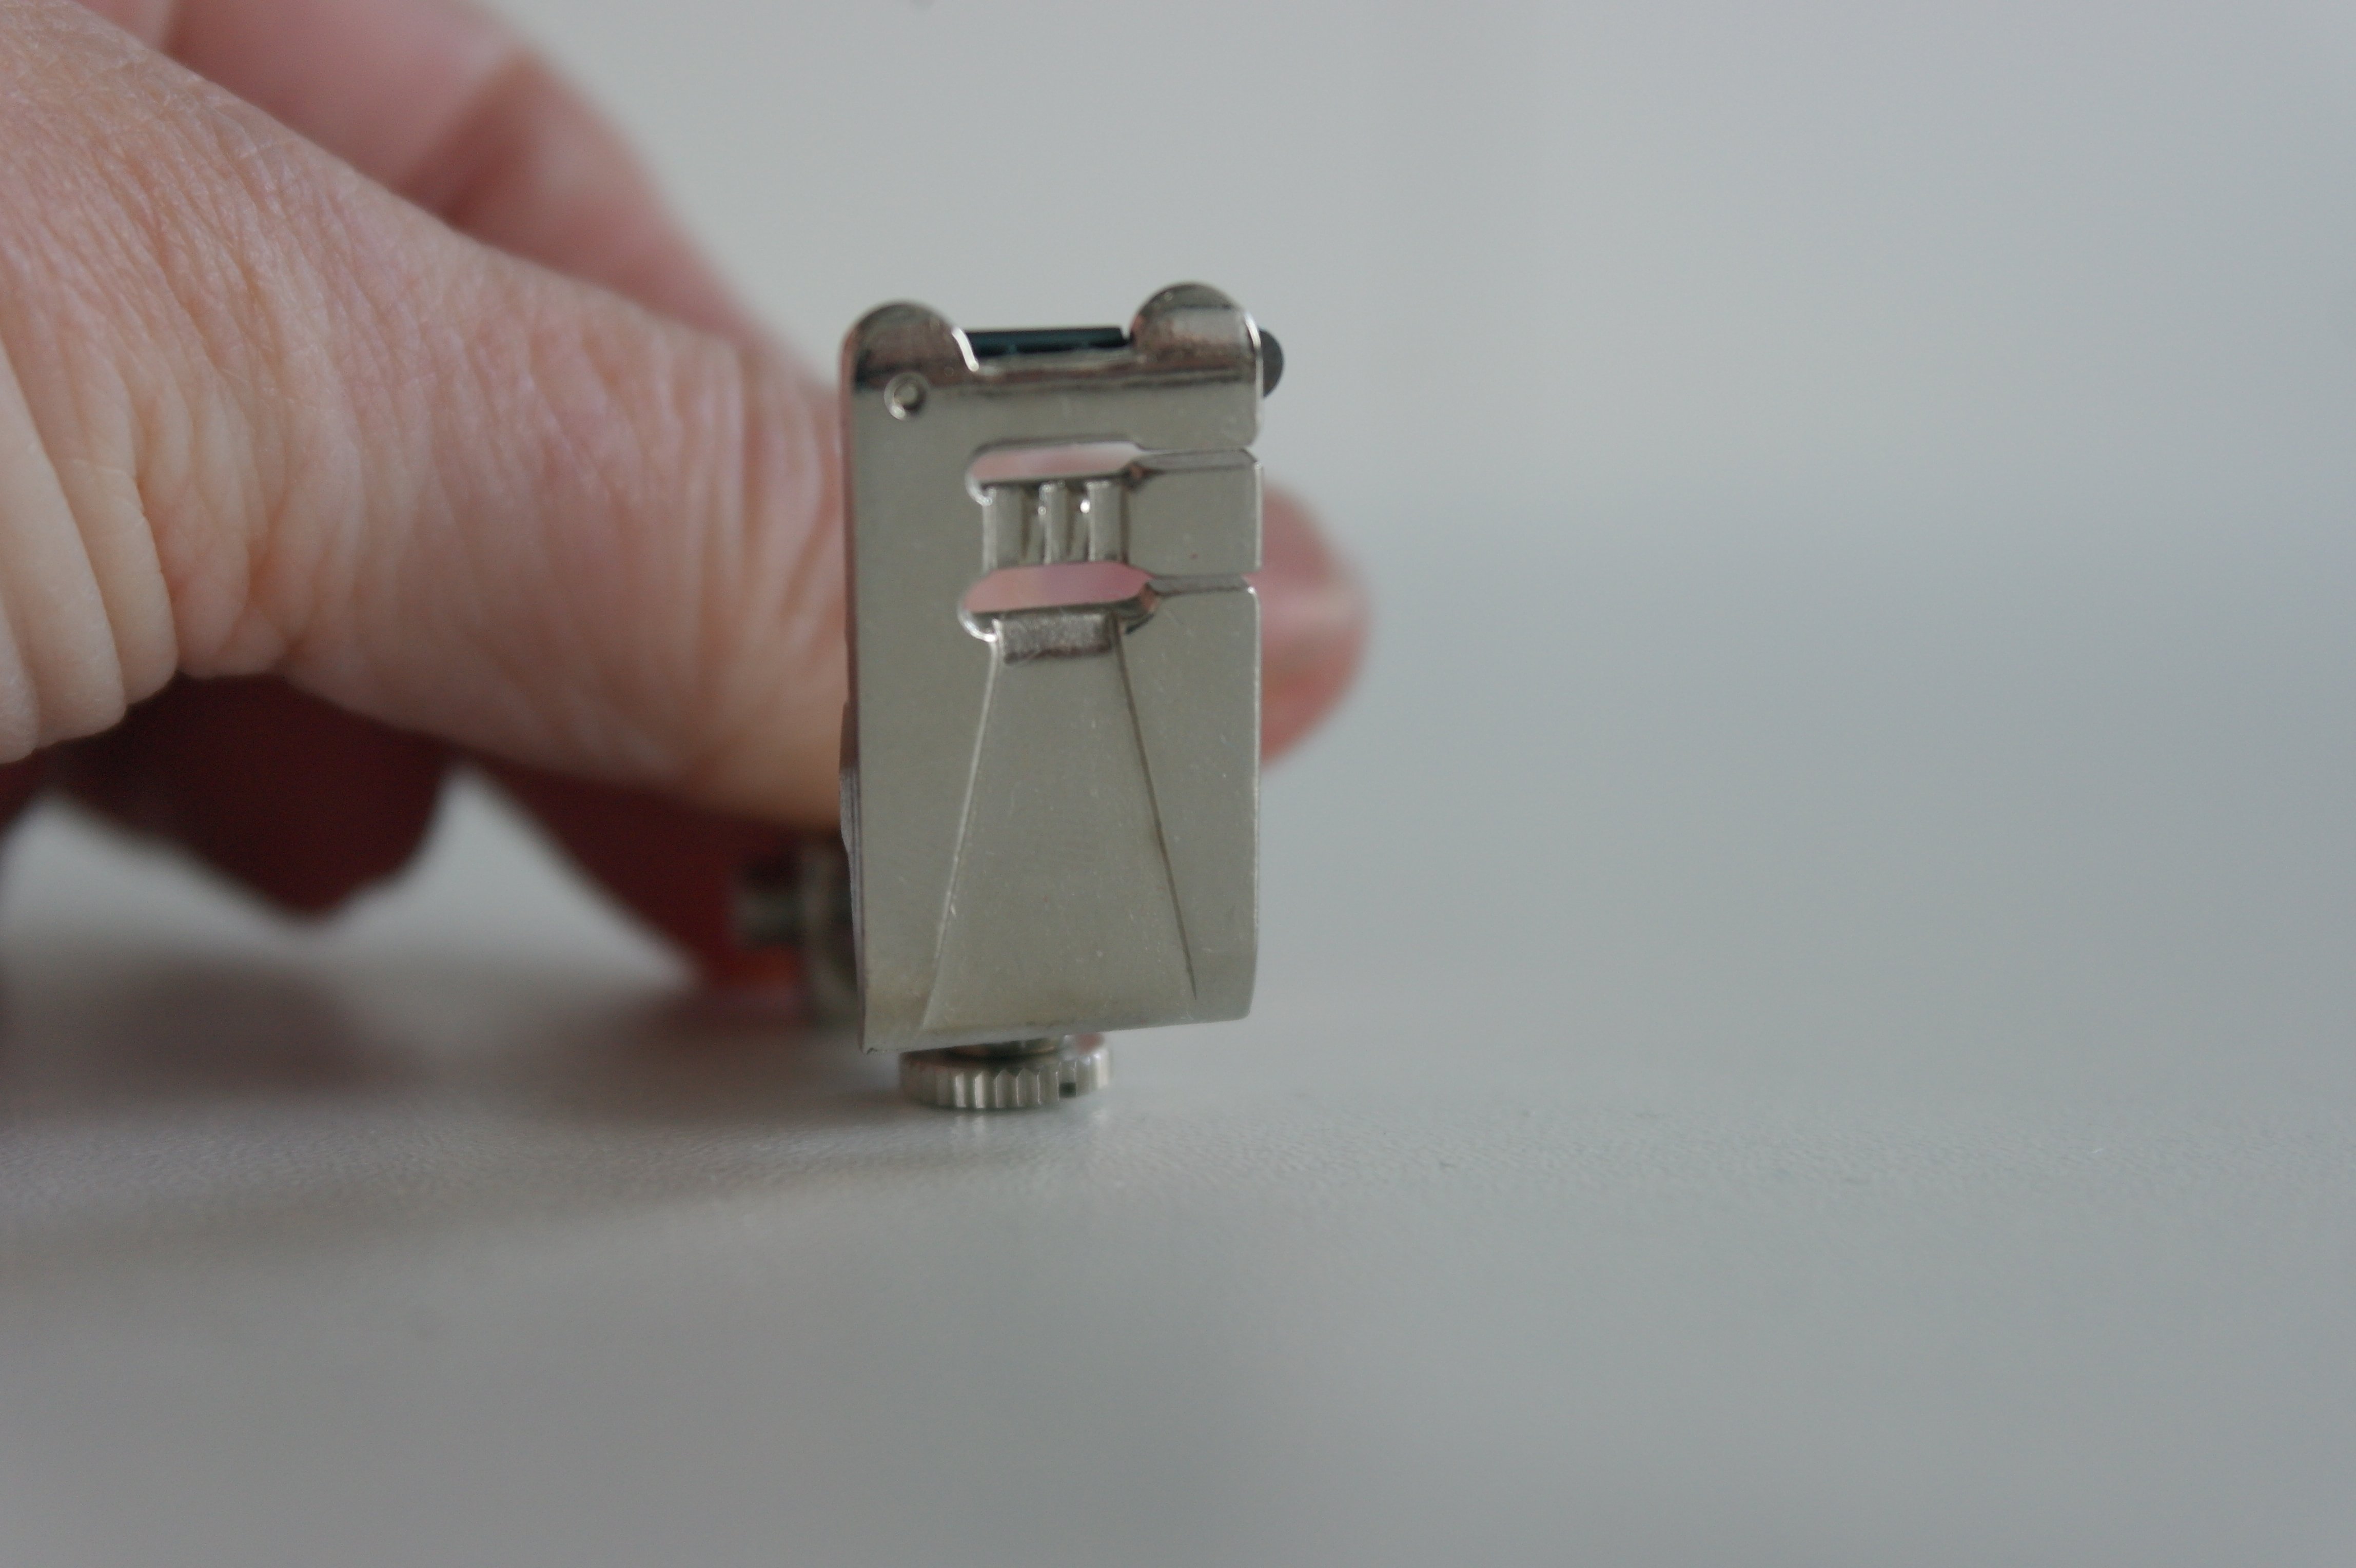
3-Groove cording foot #22 – top/front: the swing-out latch on top of 3-Groove cording foot # 22 holds the yarn or cords securely in place and prevents them from tangling during the sewing process. The result is a neat, consistently stitched braid-like embellishment. The cords or yarn will be pulled through the opening on the right side of the foot (arrow). The swing-out latch has to be closed after the cord or yarn is in place.

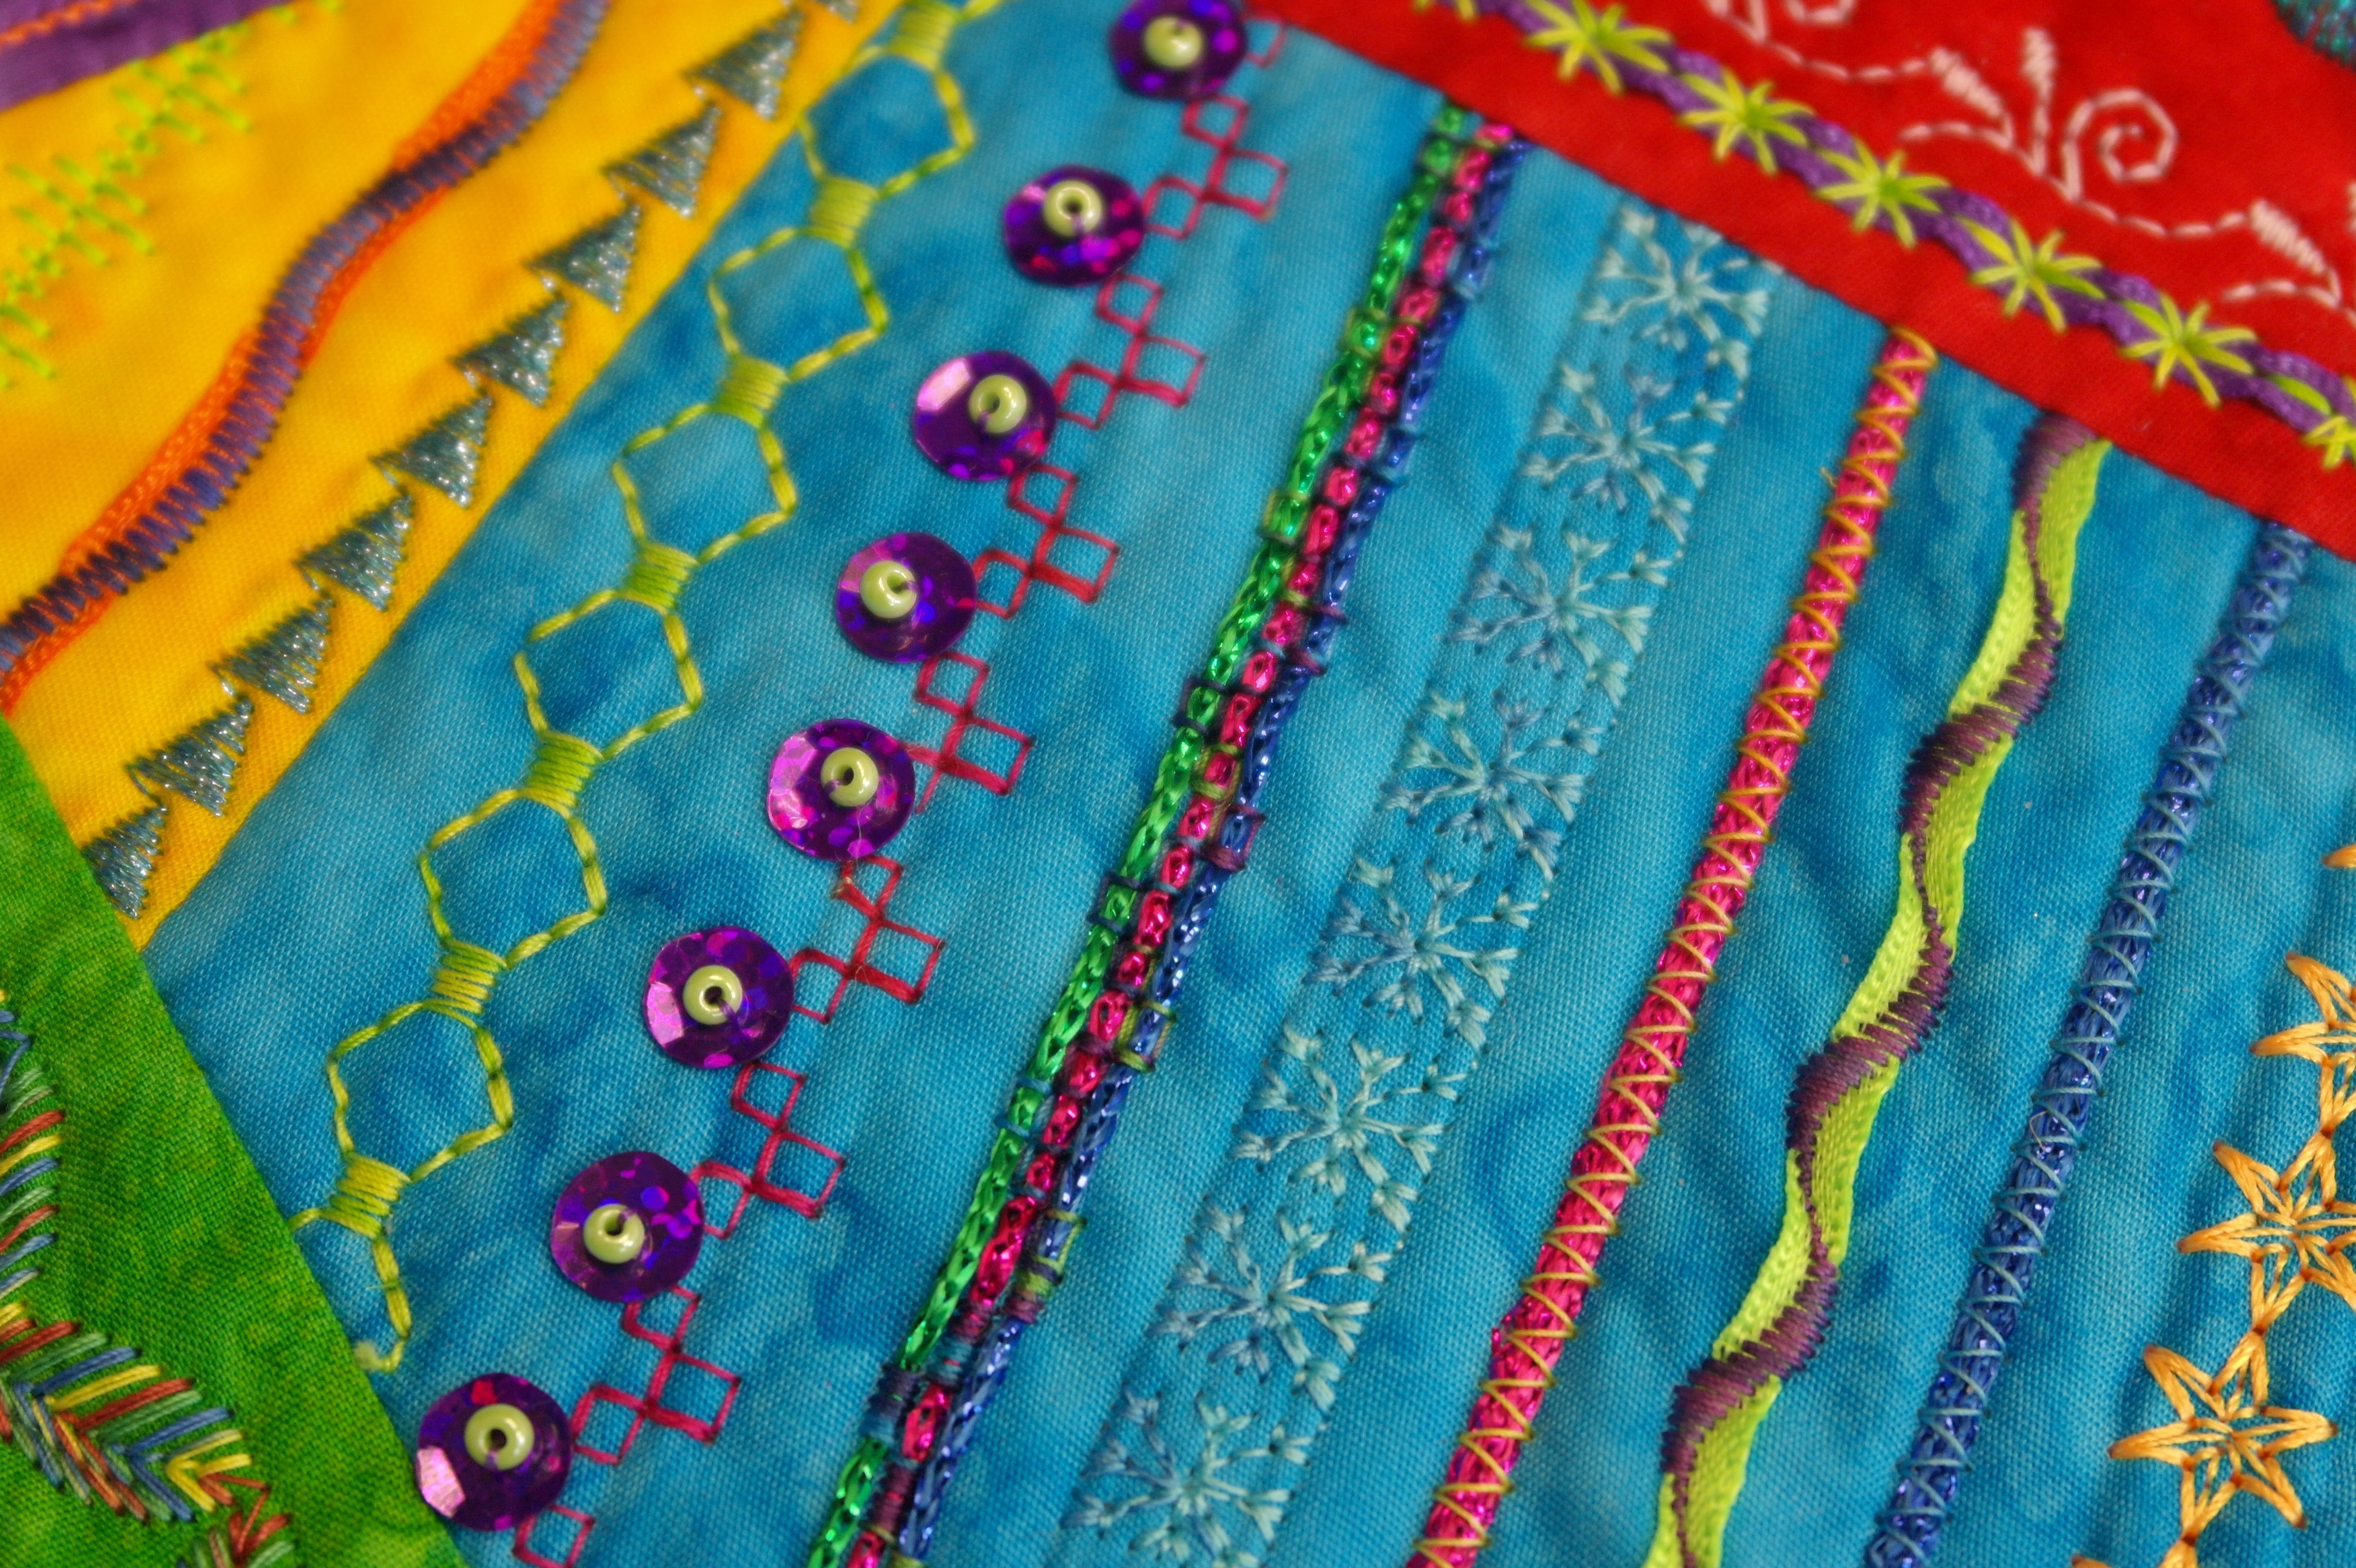
I’ve cut a batik for section 1, and placed it on my sandwich. I took Braiding foot #21, but didn’t put it on the machine at this time yet. I wanted to use a small ribbon in a bright green. This should be fun to use instead of a cord or yarn: it can be pulled easily through the beveled opening of the foot. It is a ribbon of 4mm, and I have a lot of colors!. Allthough it is slightly wider than a ribbon of 3 mm, it worked.
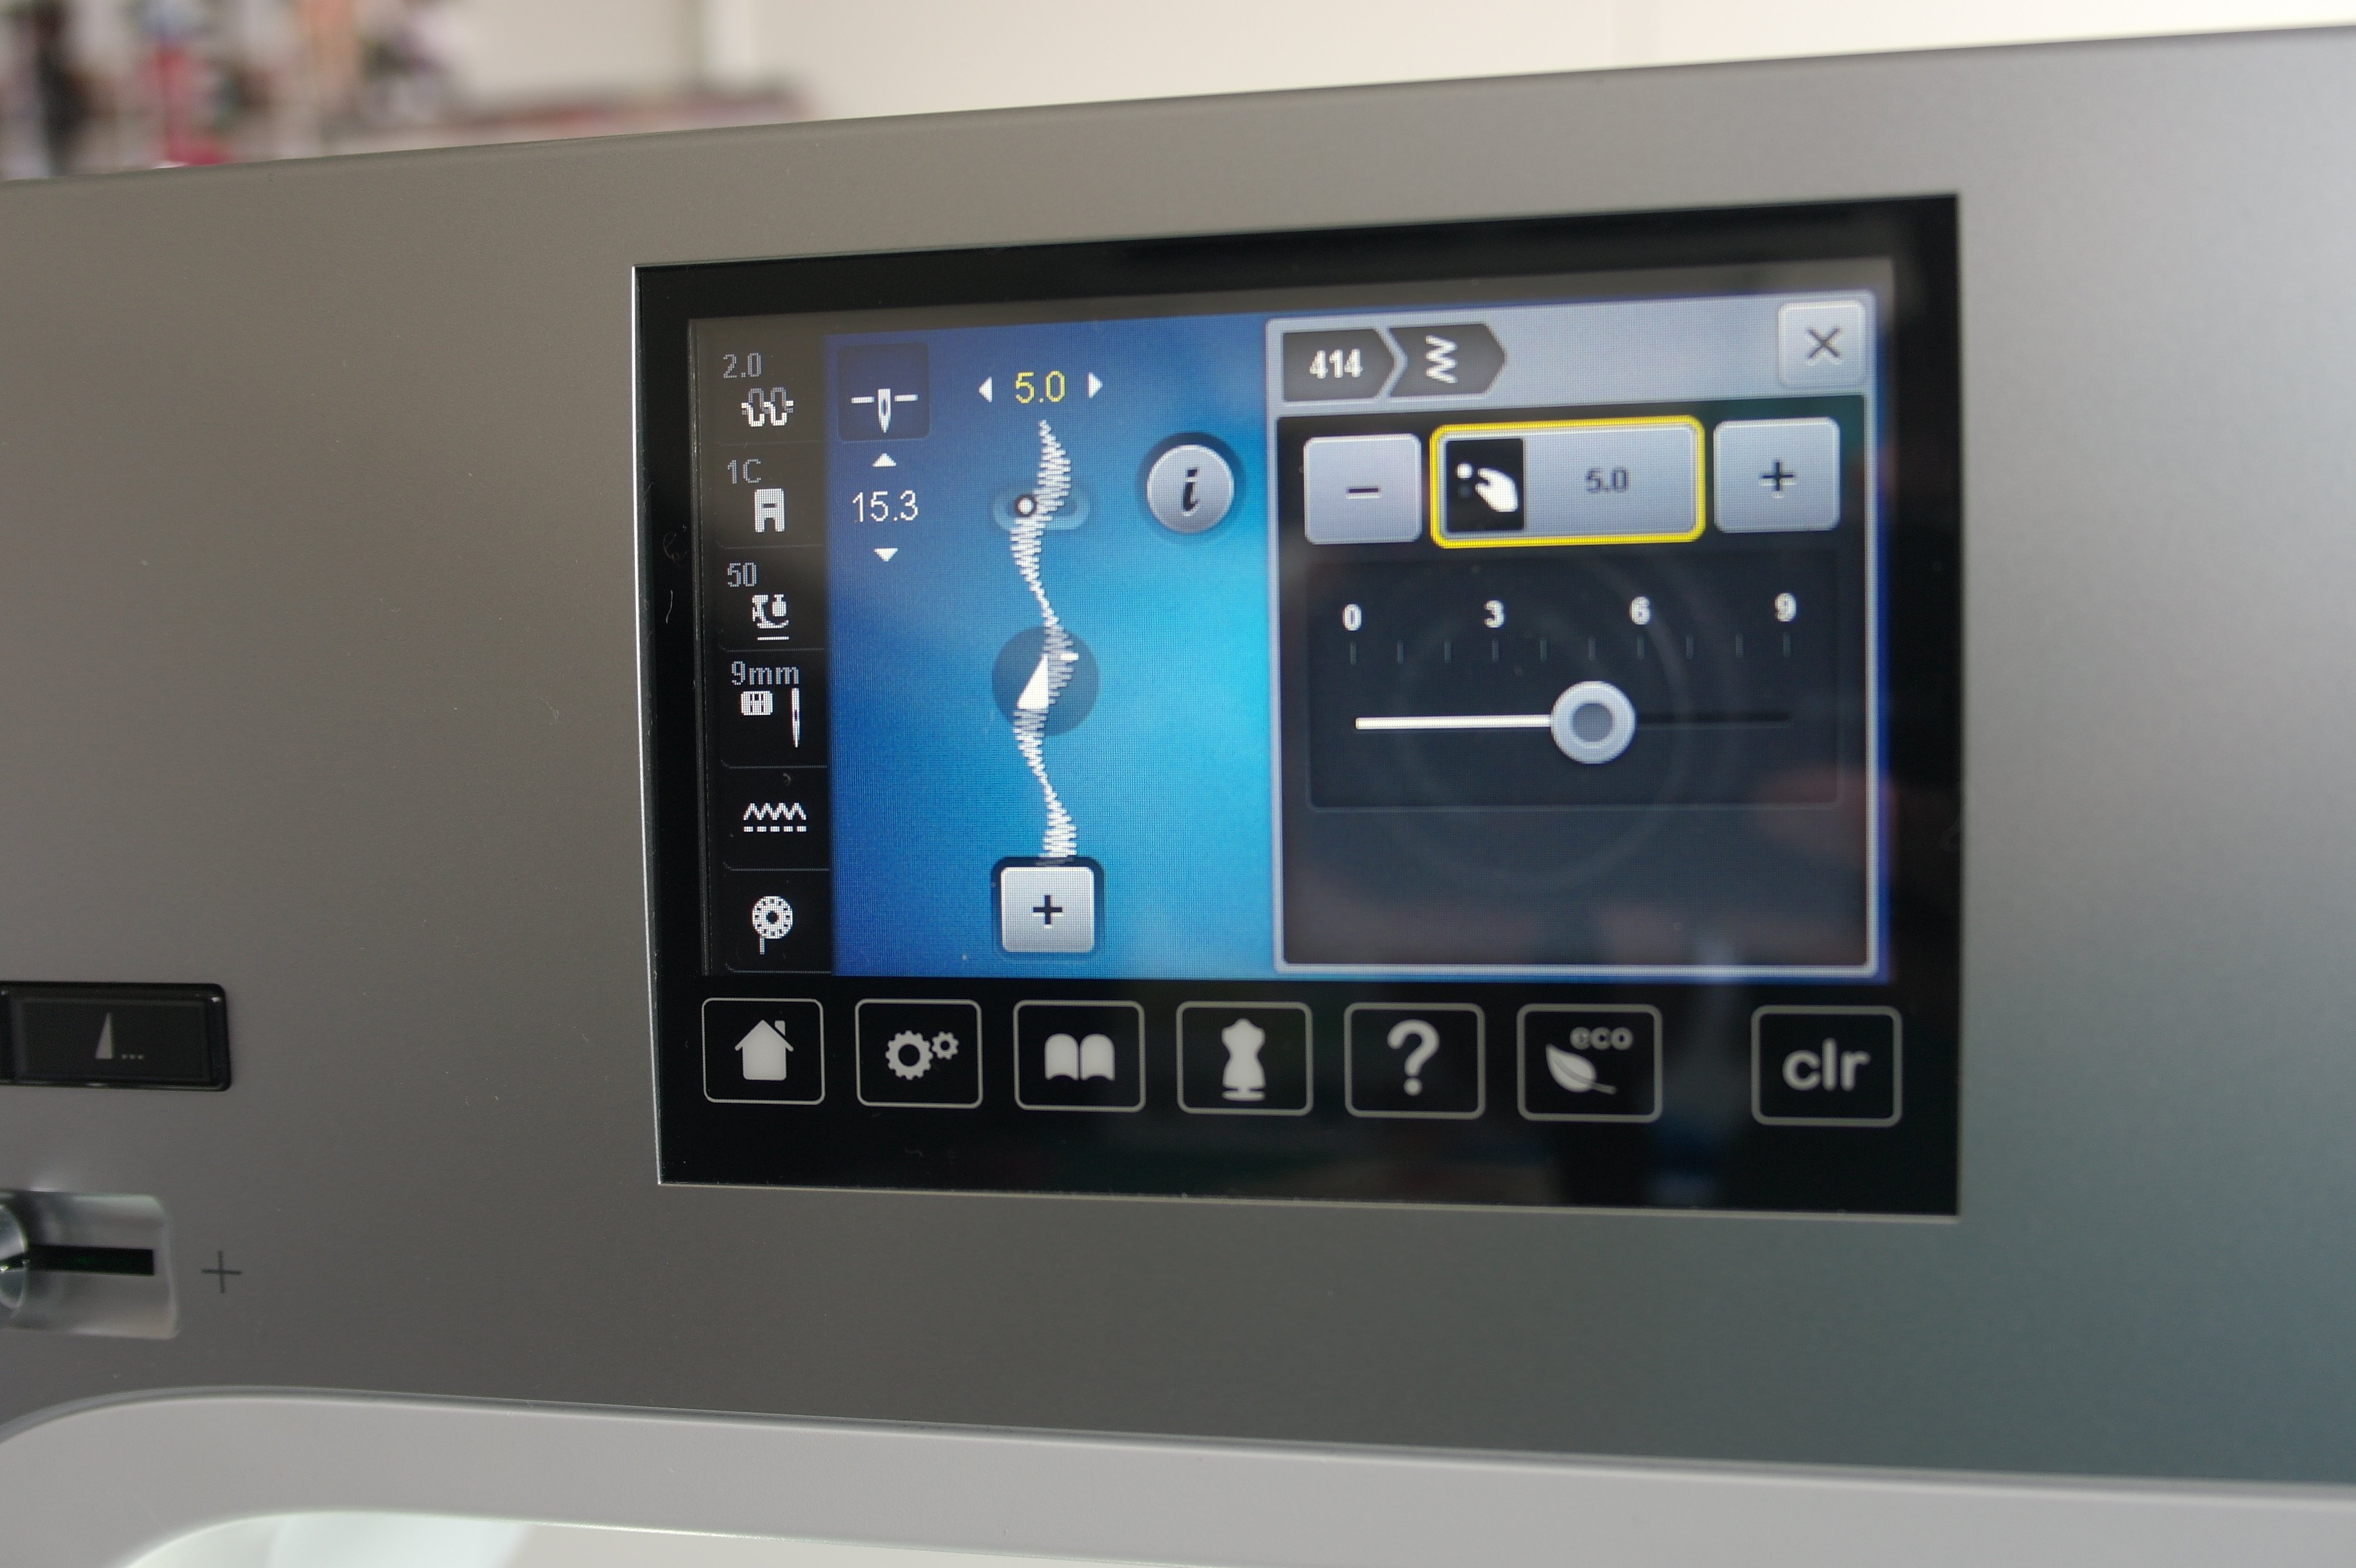
A fun decorative stitch is selected – of course you can use a zig zag stitch, but a lot of special decorative stitches can be used too. Just try them out on a sample before working on you block. I’ve choosen stitch 414 on my machine, and stretched it a bit, for showing more of the ribbon instead of just seeing the top thread. I’ve pulled the ribbon from front to back through the opening of the foot, and placed the foot on my machine. Of course you can pull ribbon etc. through the hole of the foot when it is mounted on your machine, but this gave me a bit more space to work. To take the foot of the machine and putting it back on again is not so much effort after all.

A beautiful color of variegated thread on top, matching bobbin thread and making decorative stitches: so much fun. The picture shows where I’ve started with the first row of stitches. I’ve pulled the fabric away to show you. A tail of aprox. 5 cm of the ribbon is left to protrude from the fabric, and again at the end after making stitches.
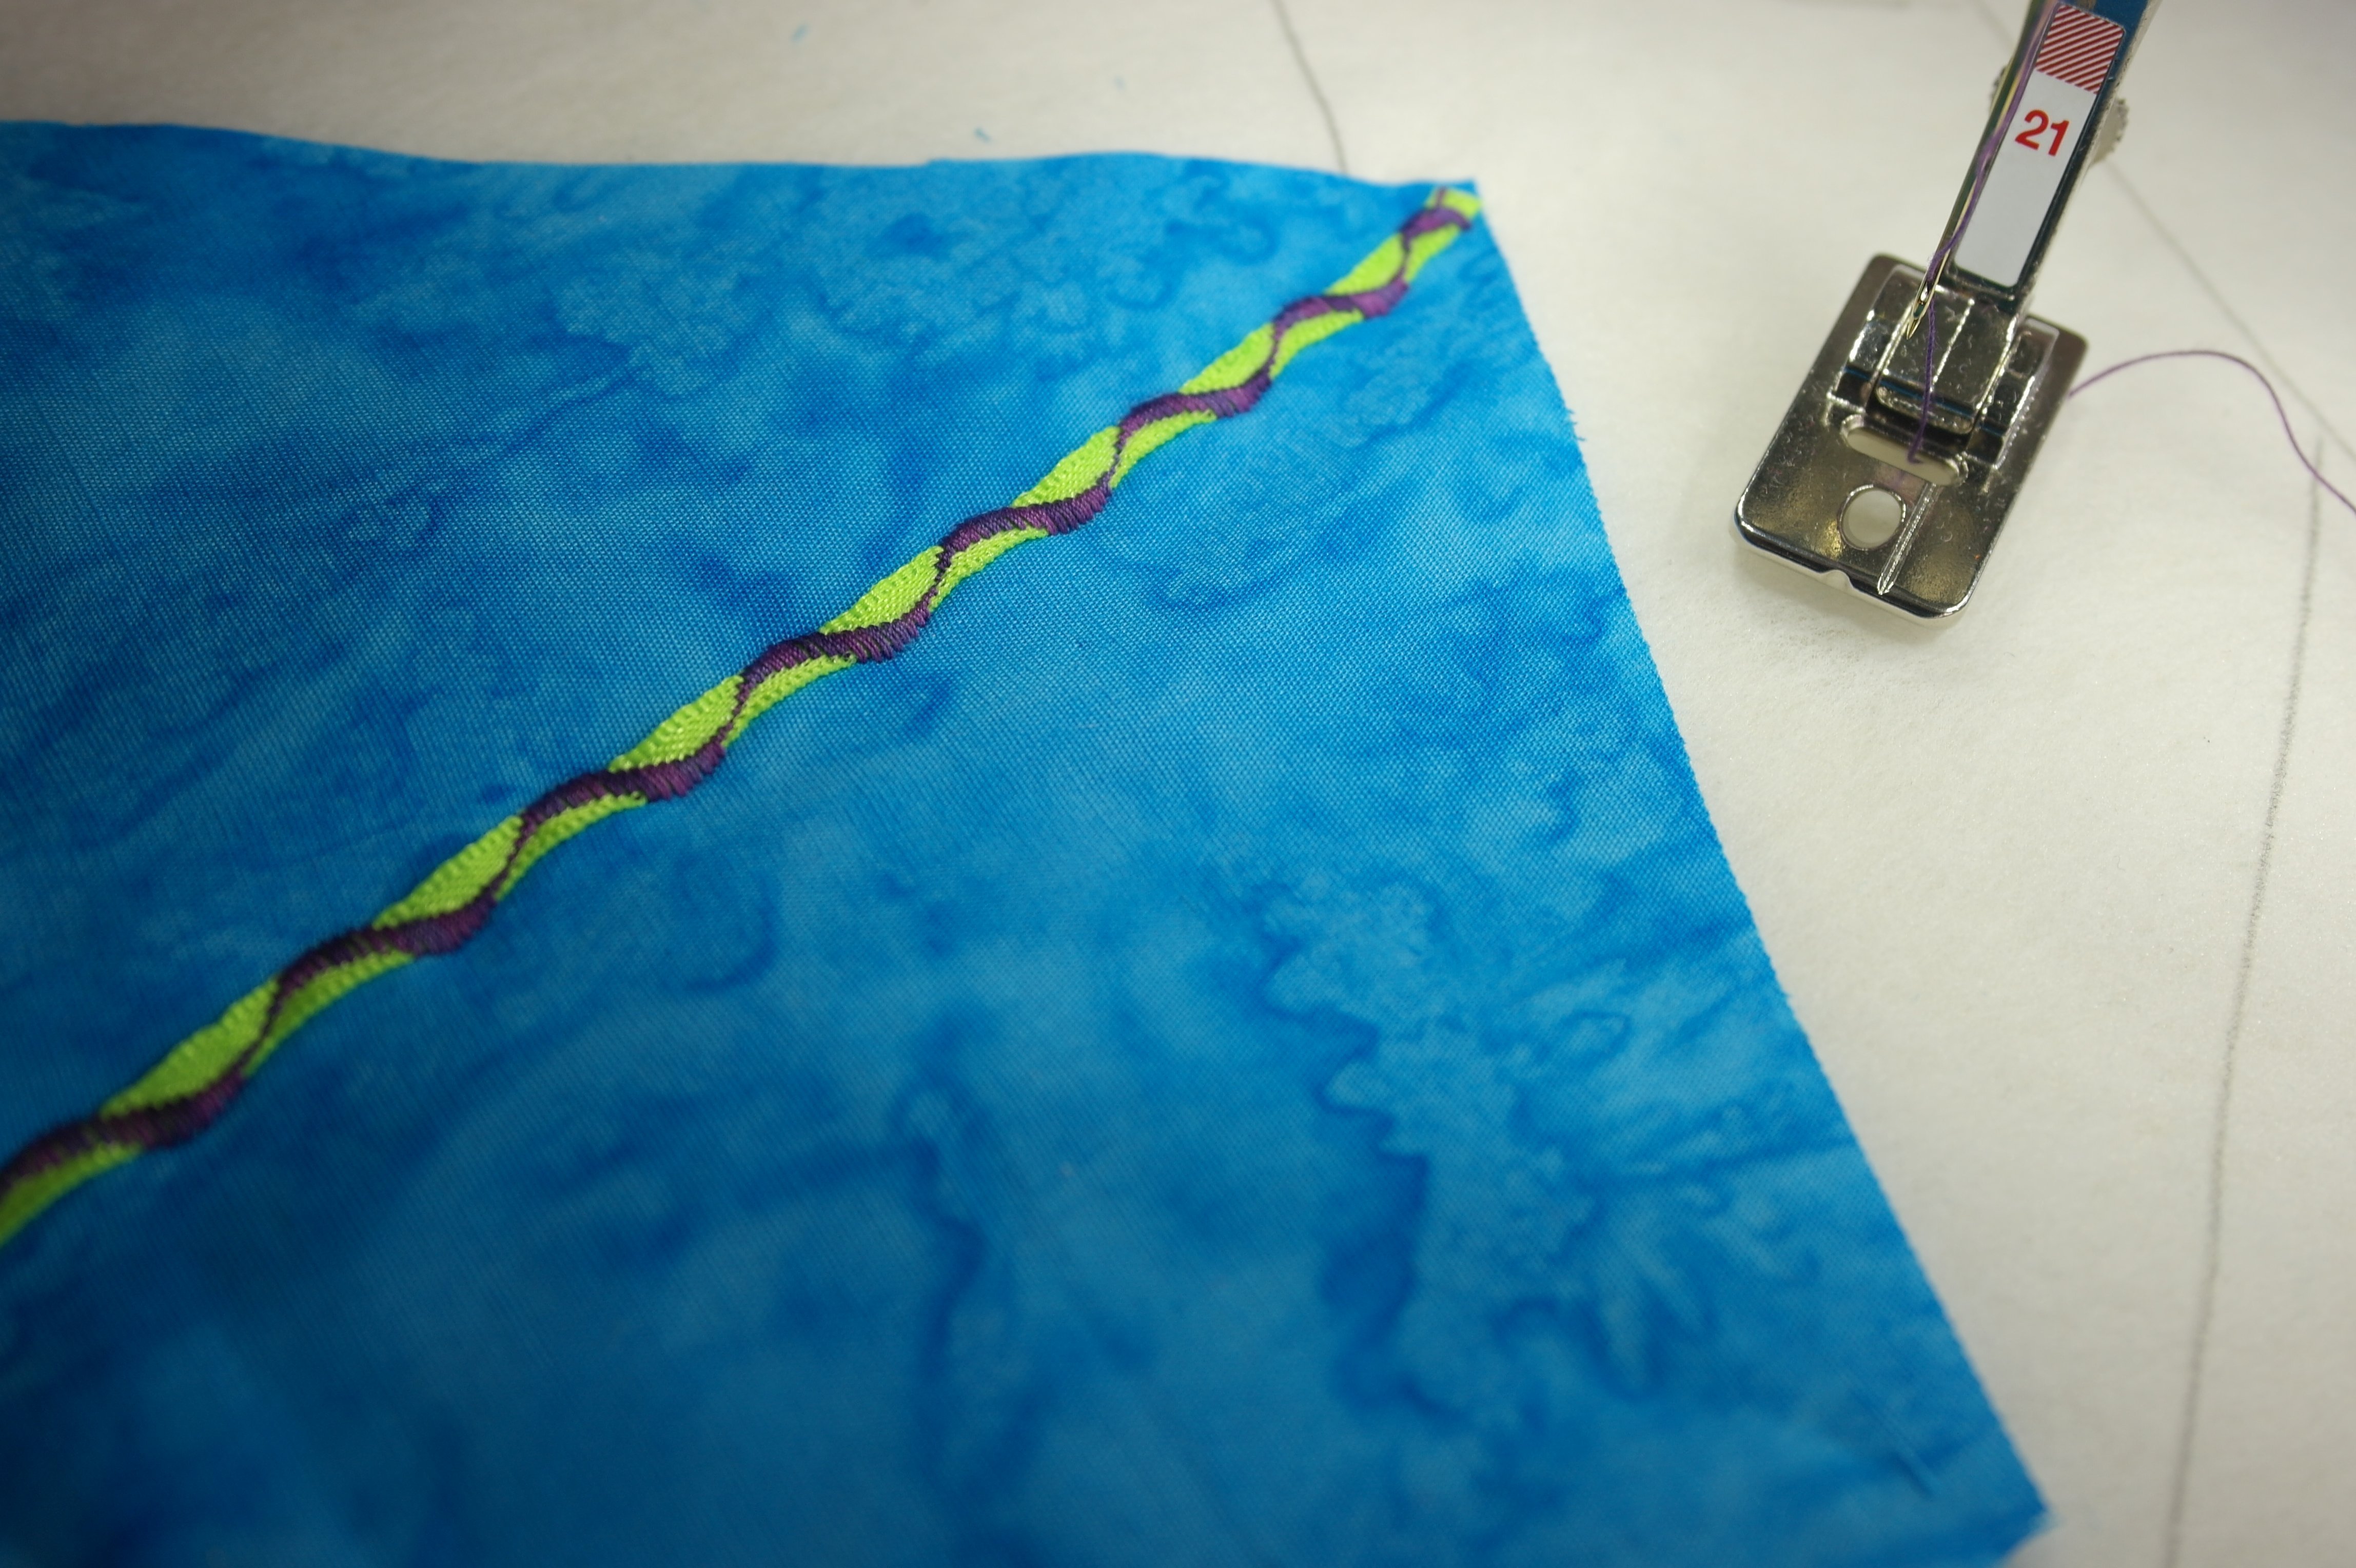
Isn’t it lovely? It is important to work slowly and beware of the fact that the ribbon has to be flat when making decorative stitches on top. That is why wider ribbons are not suitable for working with this foot. After stiching, I’ve clipped the tails from the ribbon, because they don’t fray.

After cording with small ribbon, I’ve worked with a metallic yarn, LIZZY – it’s available in 11 wonderful colors.

I am using them often to embellish a quilt: the effect is always spectacular, because of the sparkles. Lizzy is a yarn for knitting and crocheting, but if I use them with 4 pieces together, it will look like I’ve used a thick yarn.
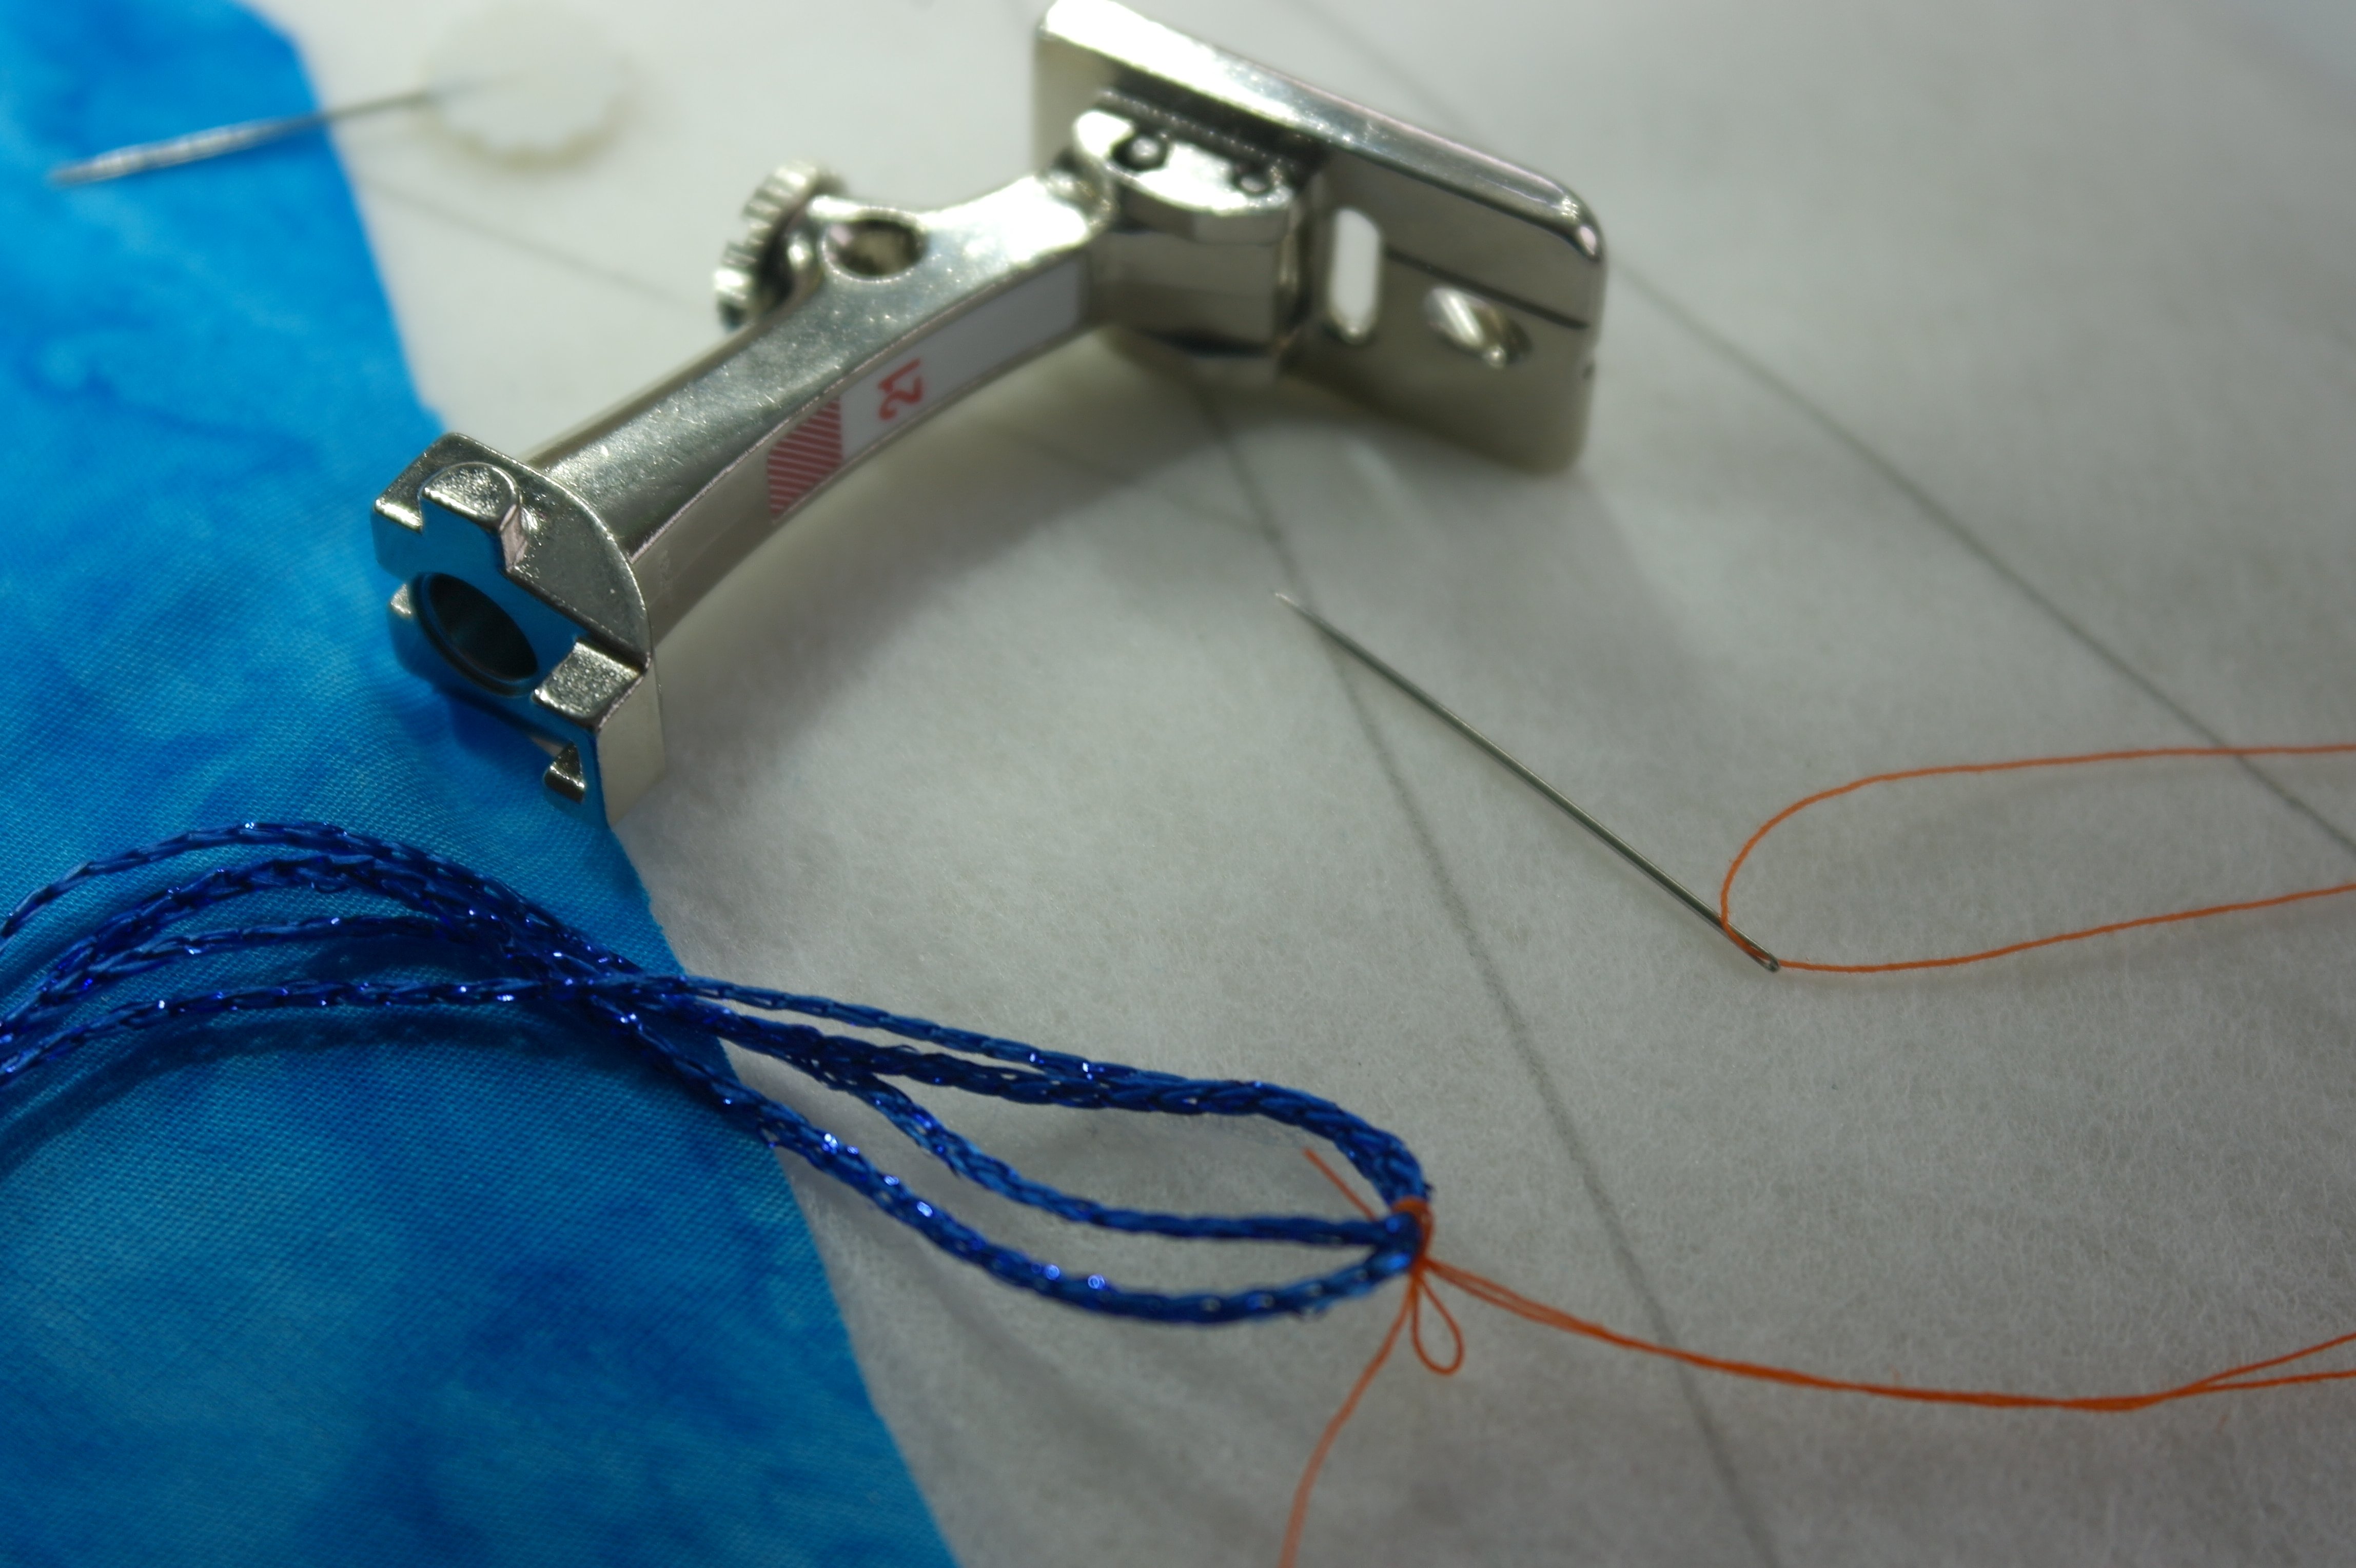
To pull loose pieces of yarn through a relative small opening of the foot, could be difficult. I’ve cut the yarn in two pieces, folded them in half to get two loops. I’ve knotted the end of a sewing thread with a needle, to catch the loops and pull them together.

I’ve inserted the needle in the hole, and pulled the sewing thread with the yarn through the hole. You can also use a threading aid if you have one.
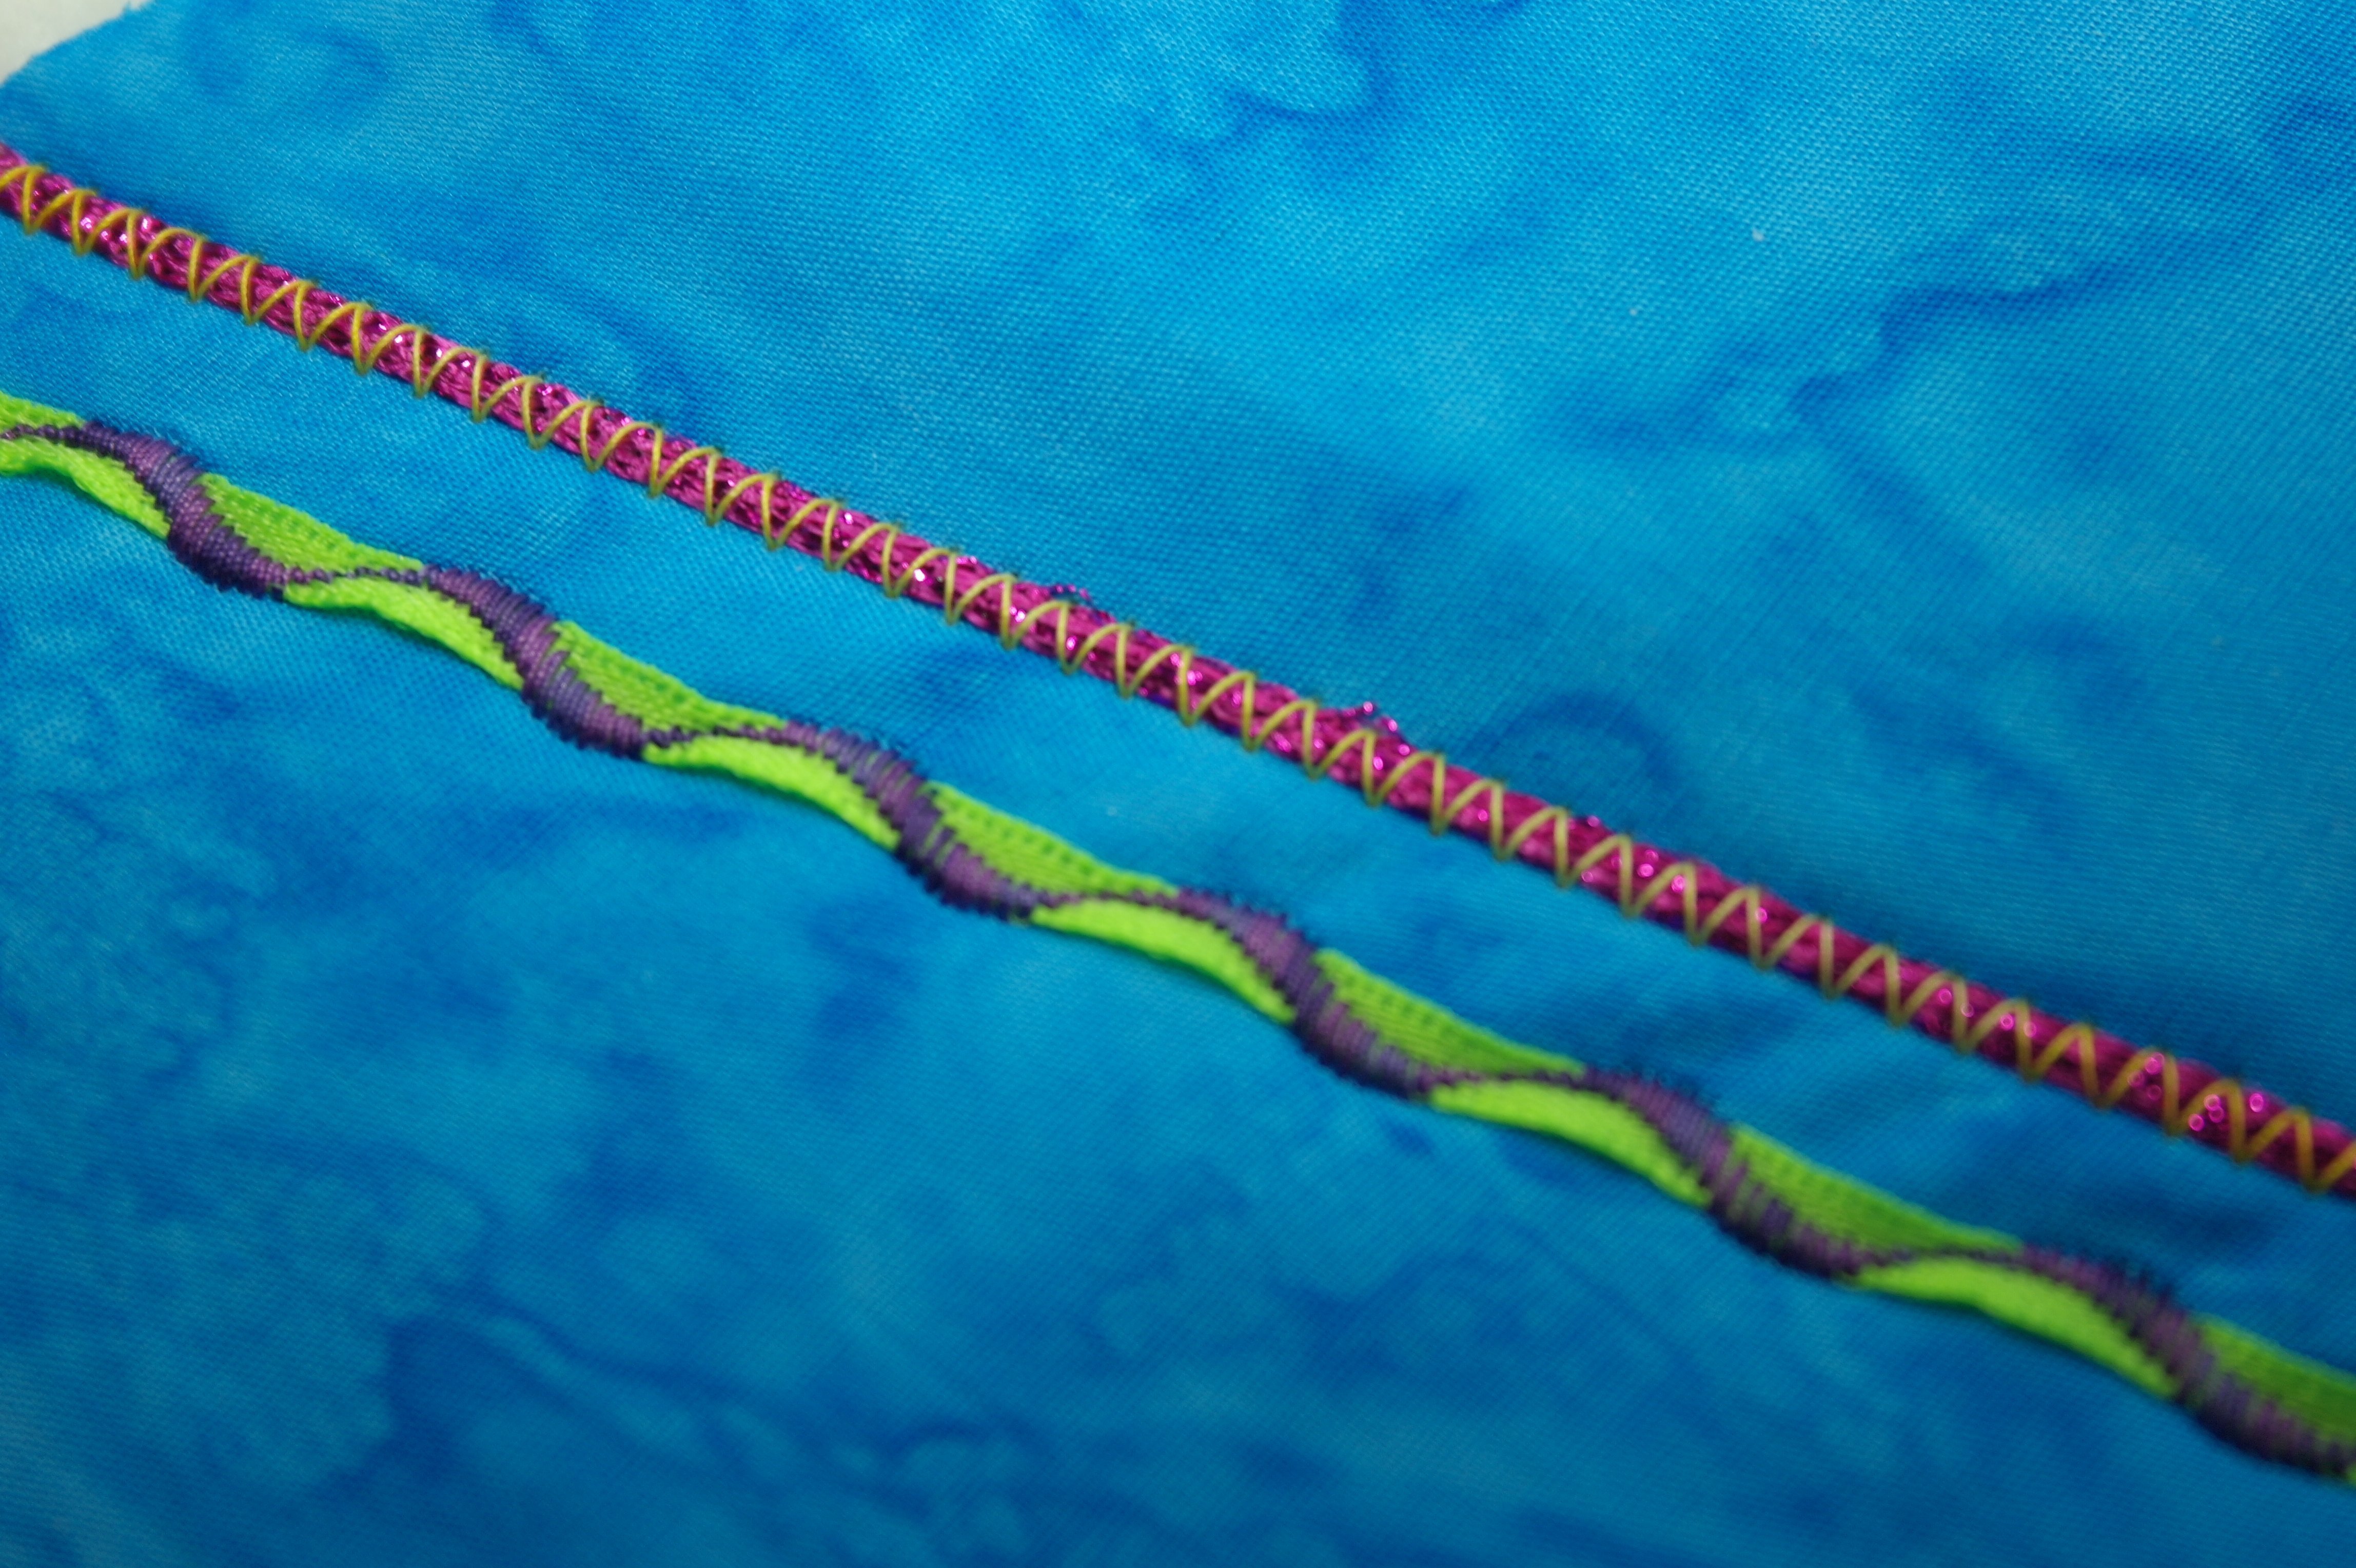
I’ve used a zig zag stitch for cording these four Lizzy threads to make a bundle. I’ve stretched the stitch again, because I want to see the yarn. You can choose many decorative stitches for cording.
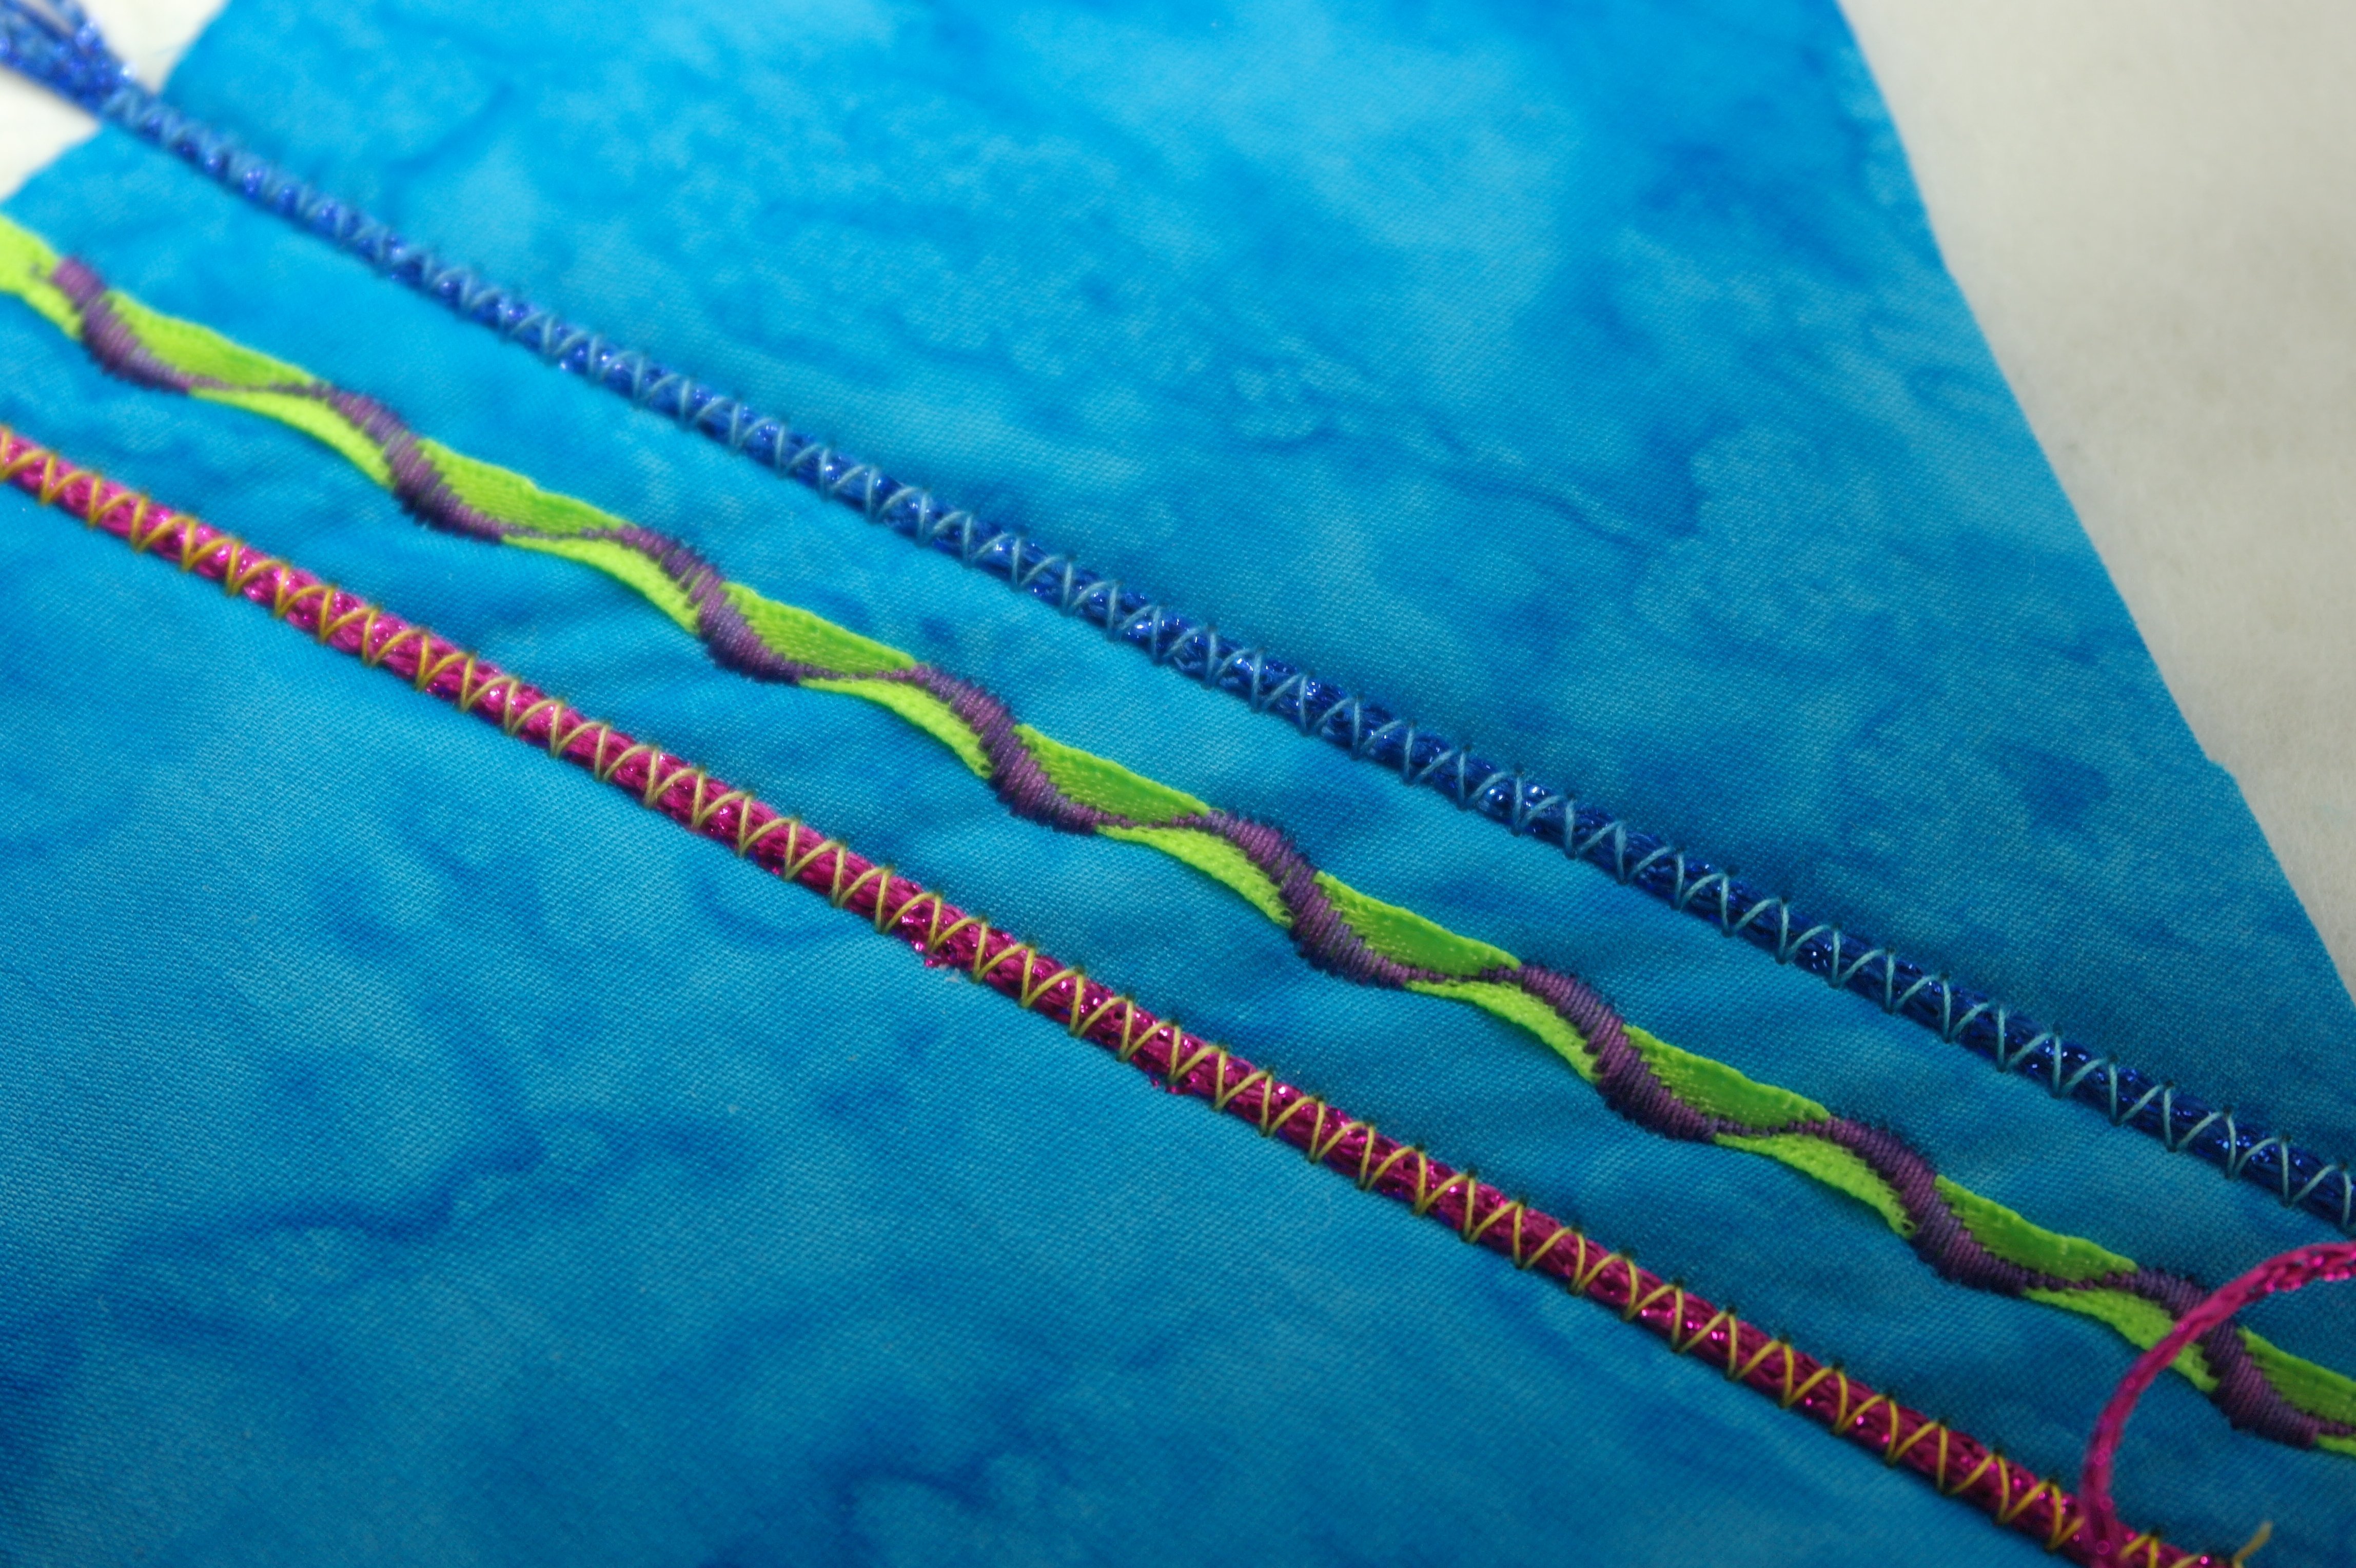
I’ve made another row of Lizzy at the other side of the first ribbon. I didn’t cut the tails of the yarn at this moment, because they will fray – Lizzy is a loosely braided yarn. I will cut them after I have sewn a batik to the side of these tails.
Of course I’ve worked with the Open embroidery foot #20C for making more decorative stitches.

Working with the 3-Groove cording foot #22, I’ve used Lizzy too. Because the yarn is very thin, I can use it as a single thread. Each groove another color.

It is important to move the swing-out latch away, before pullling the Lizzy through the side opening. The yarn will be placed on the grooves one by one. First the one for the left groove ..
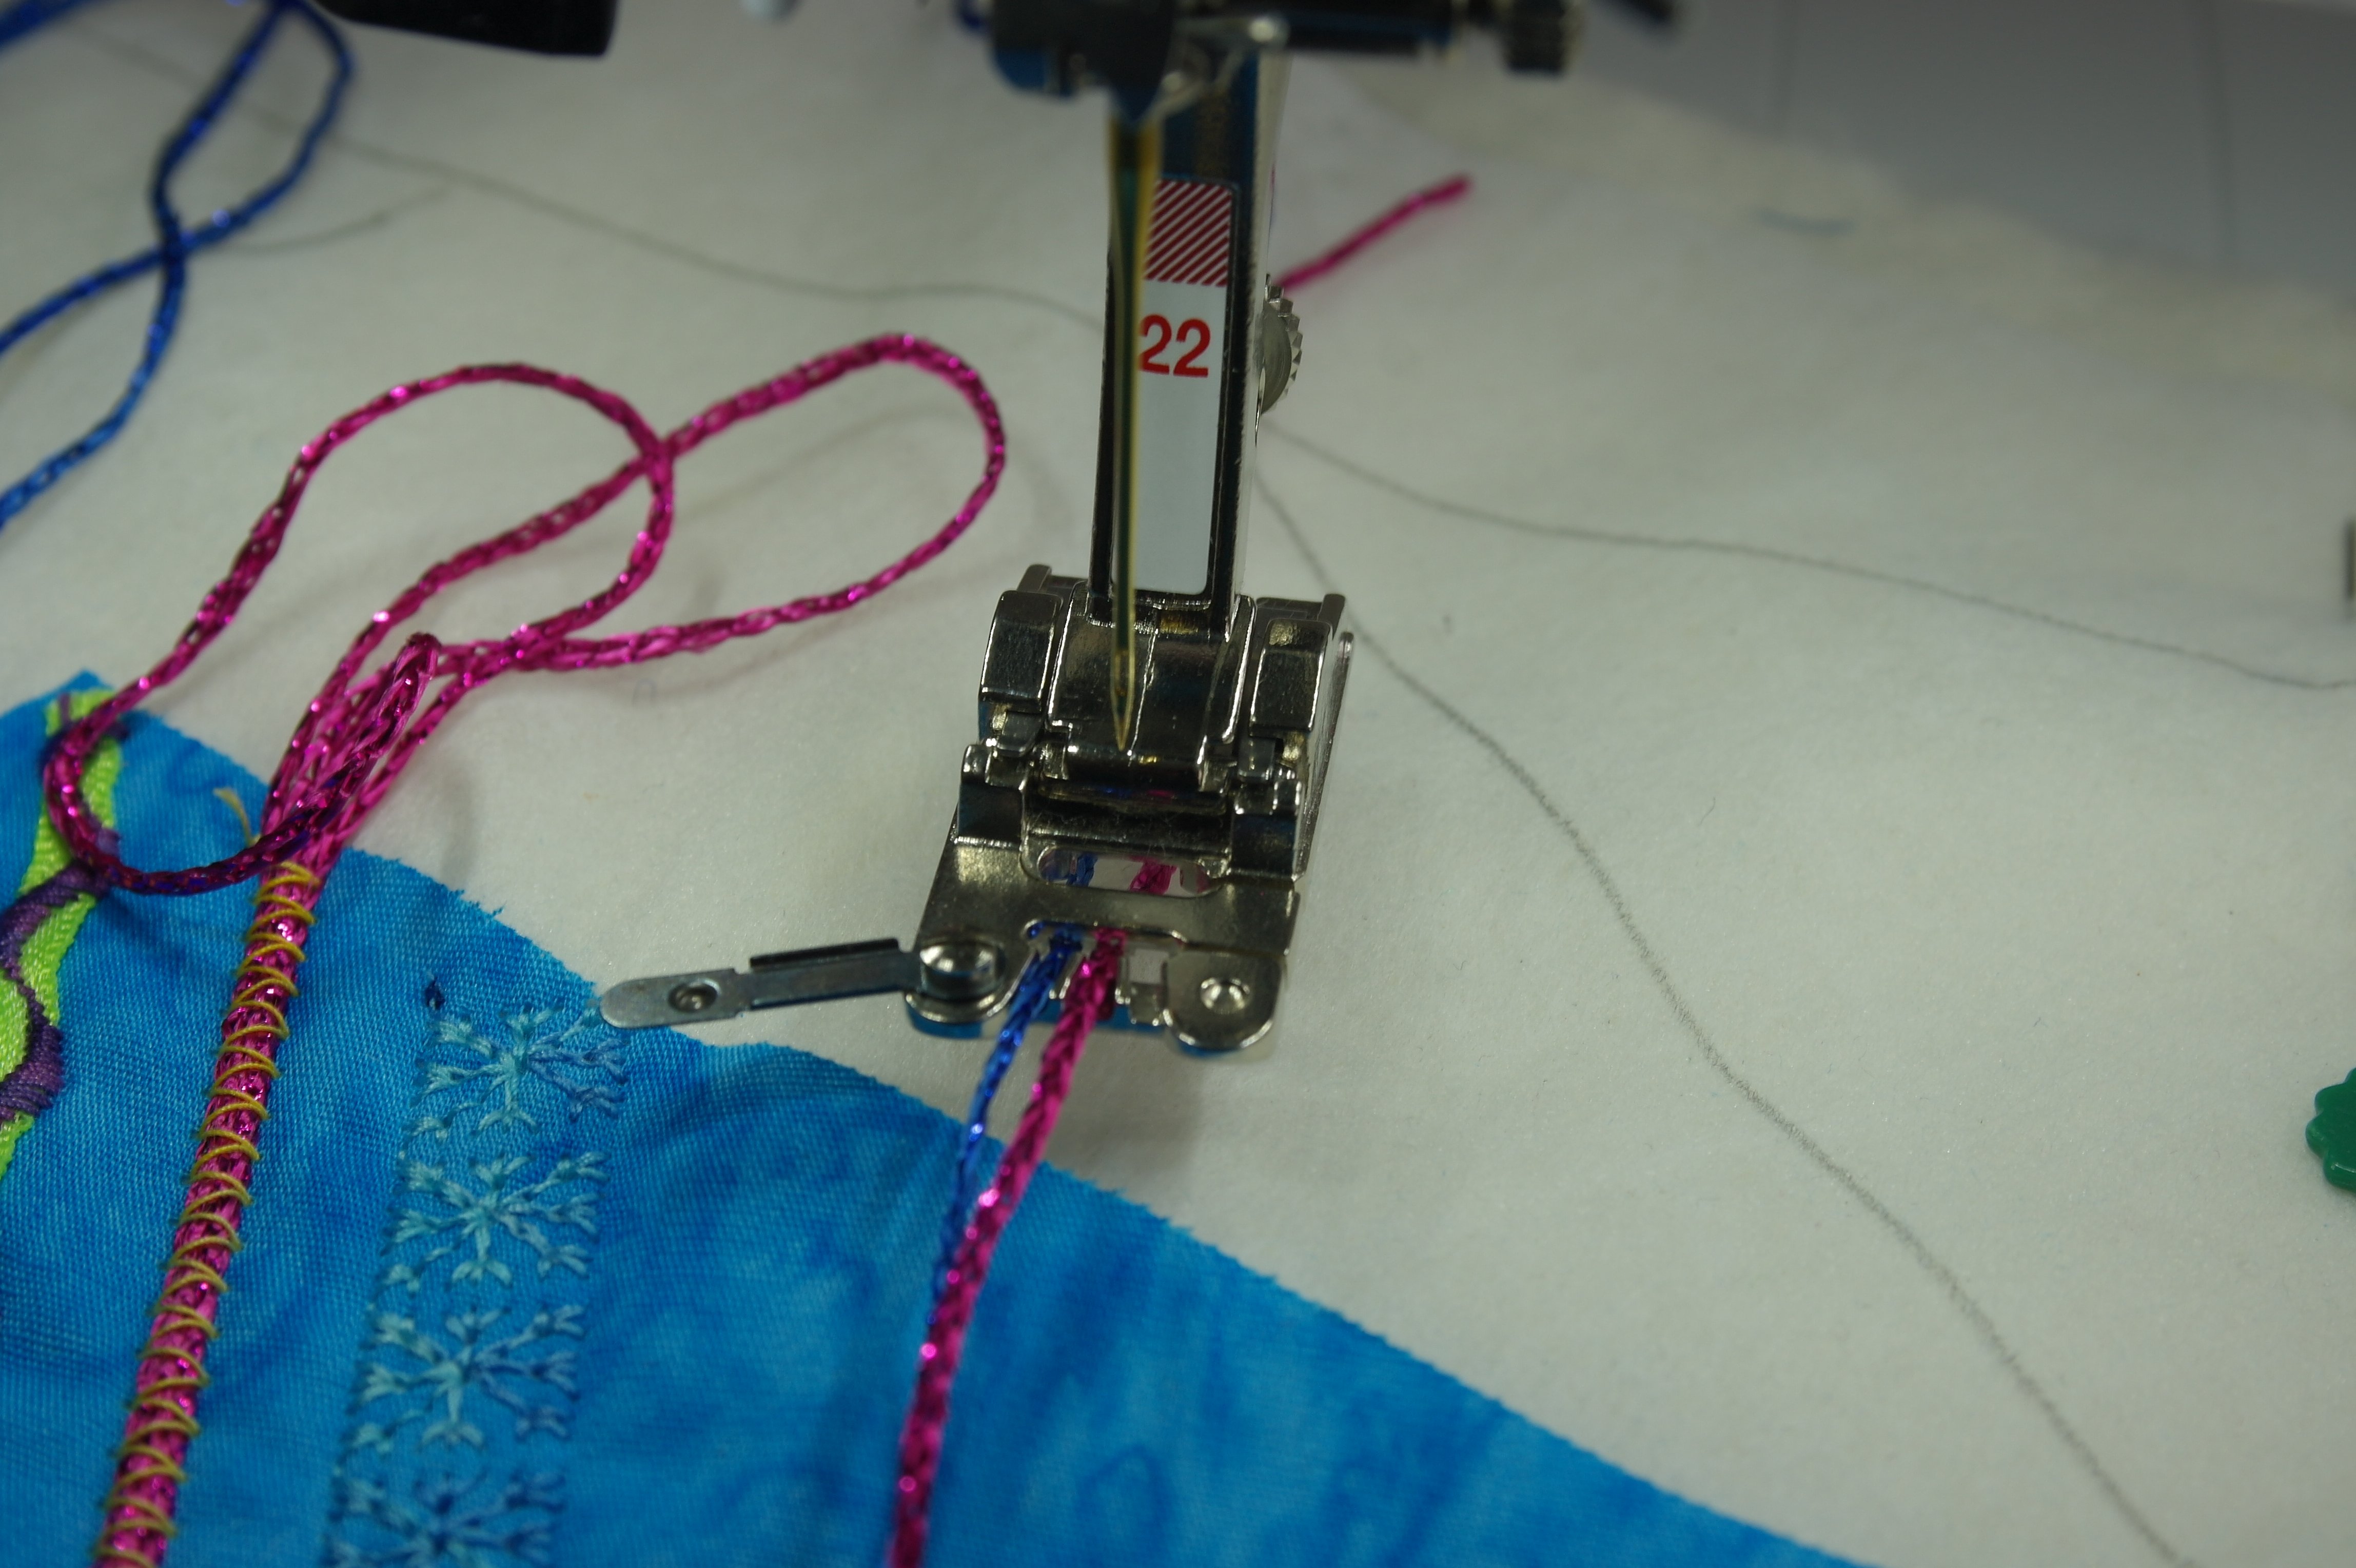
Then the second one in the middle…
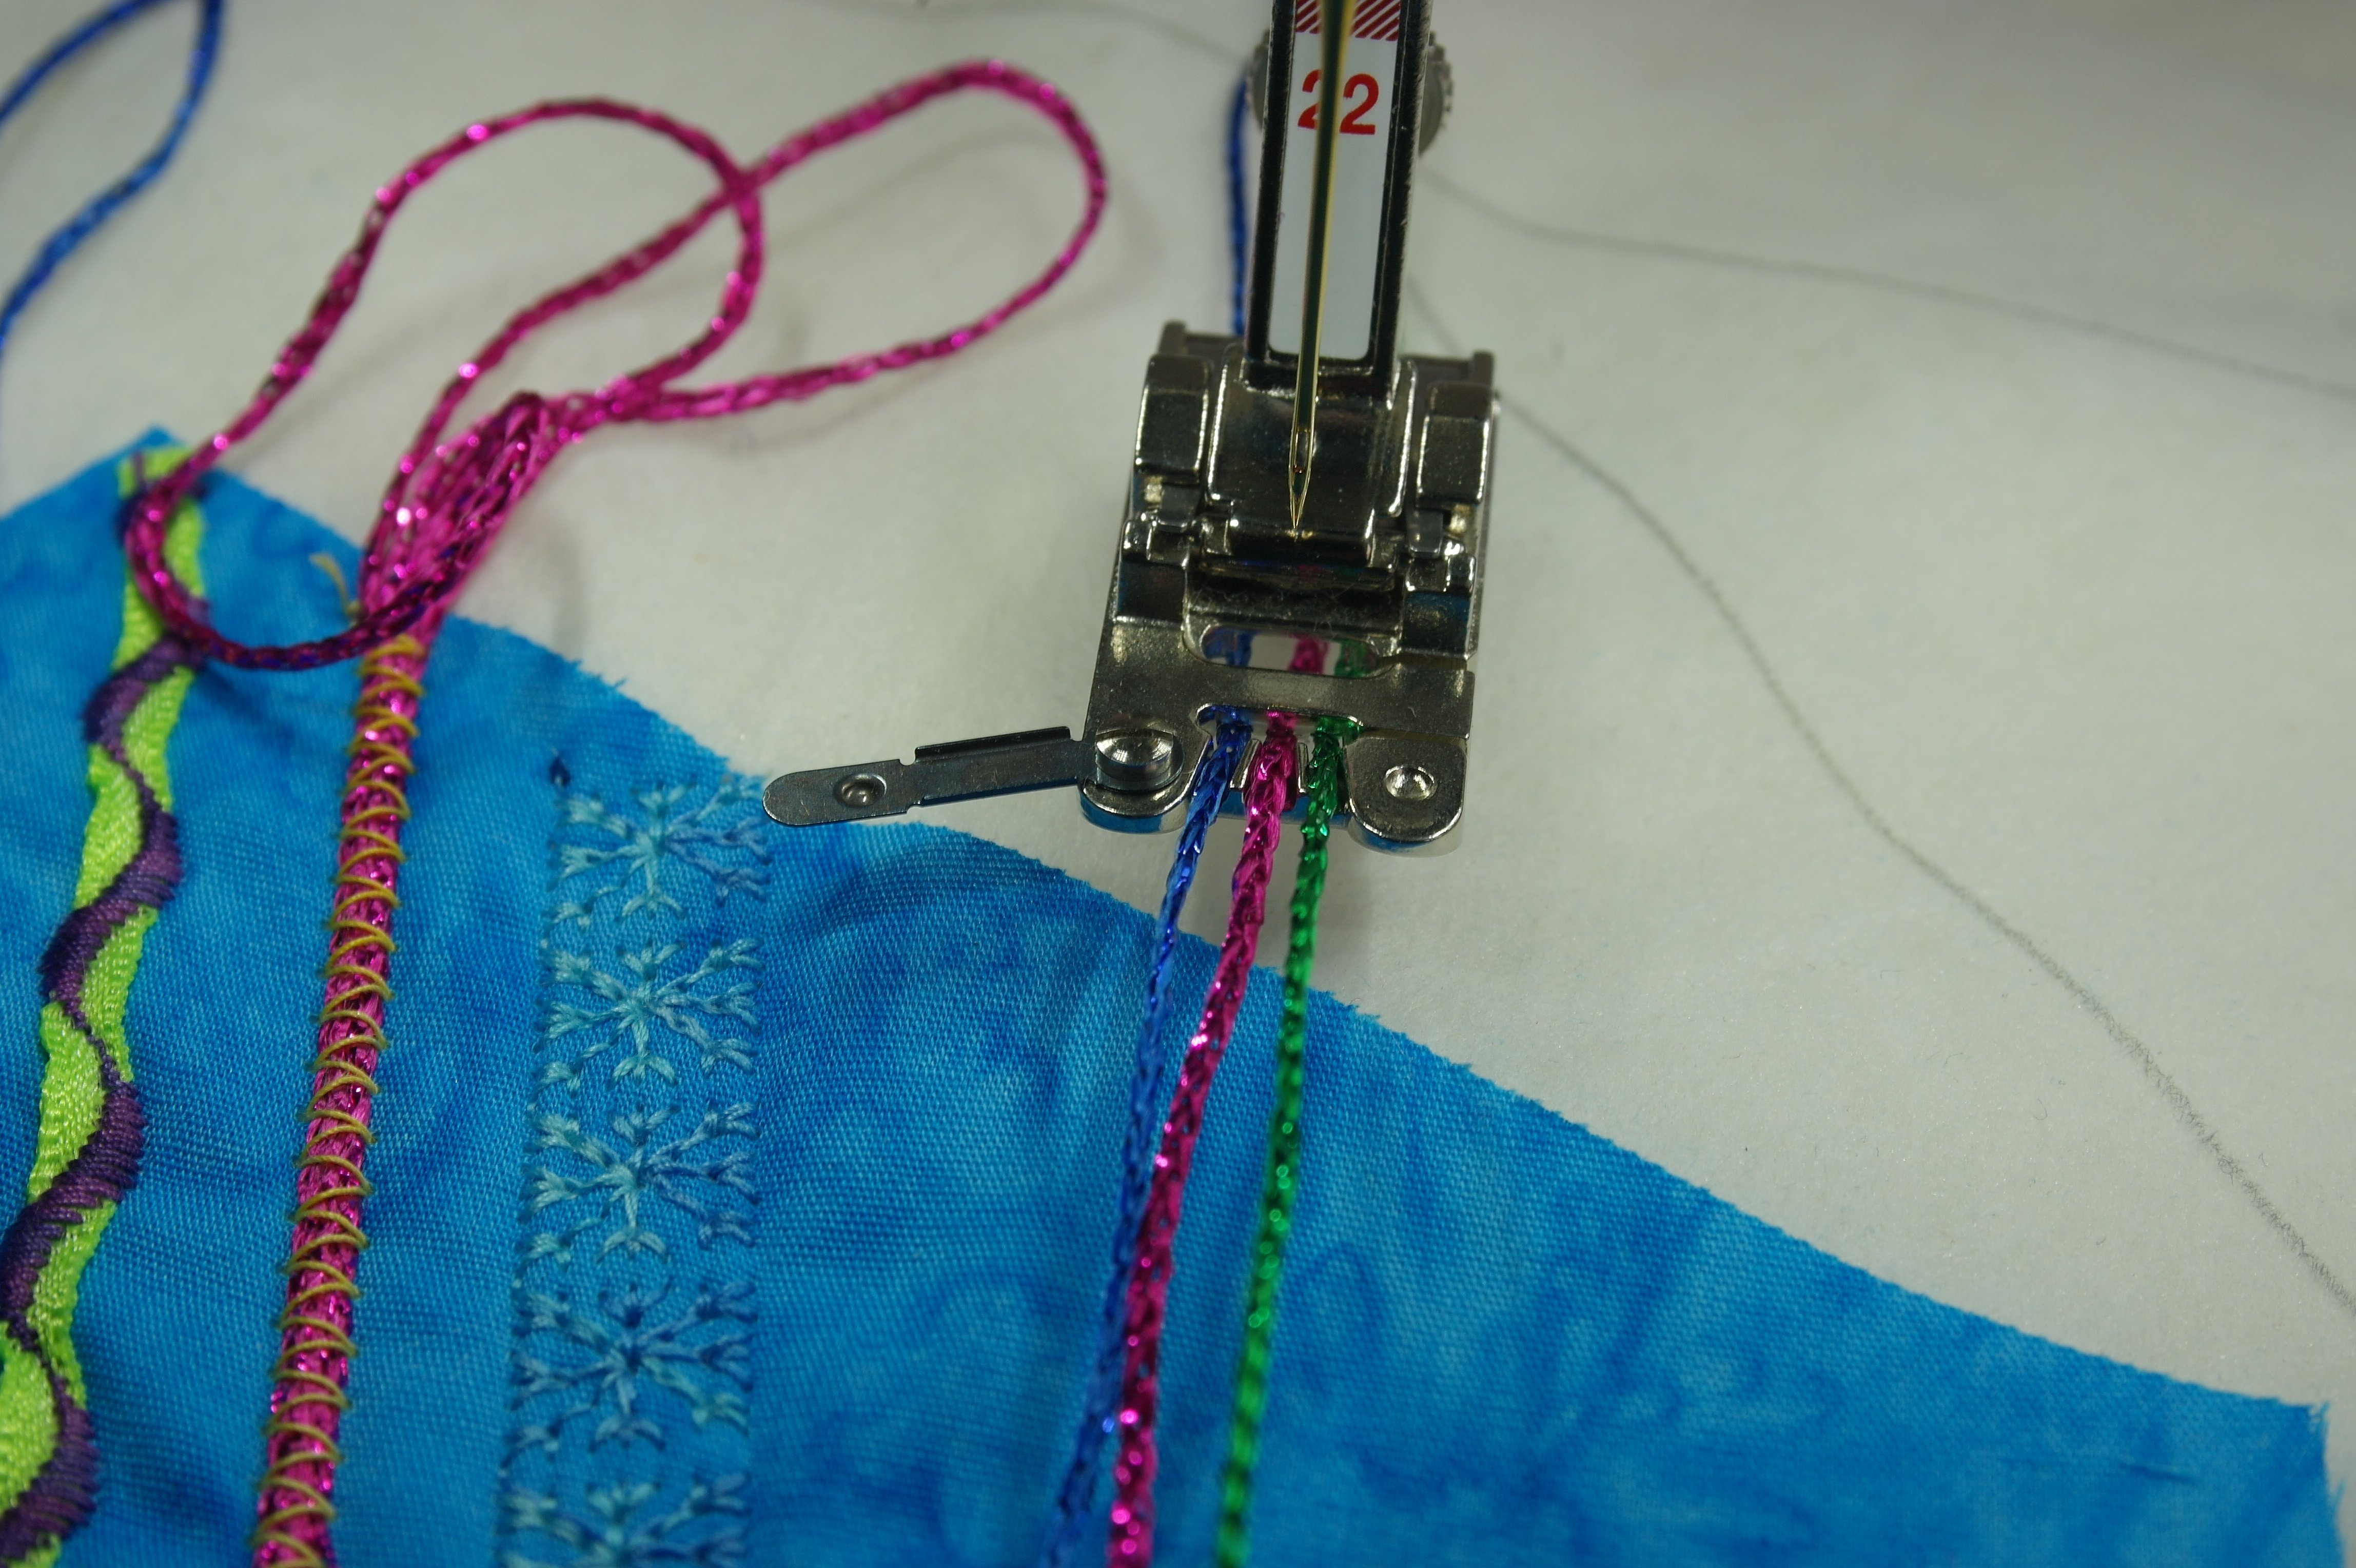
And the last one next, in the right groove.
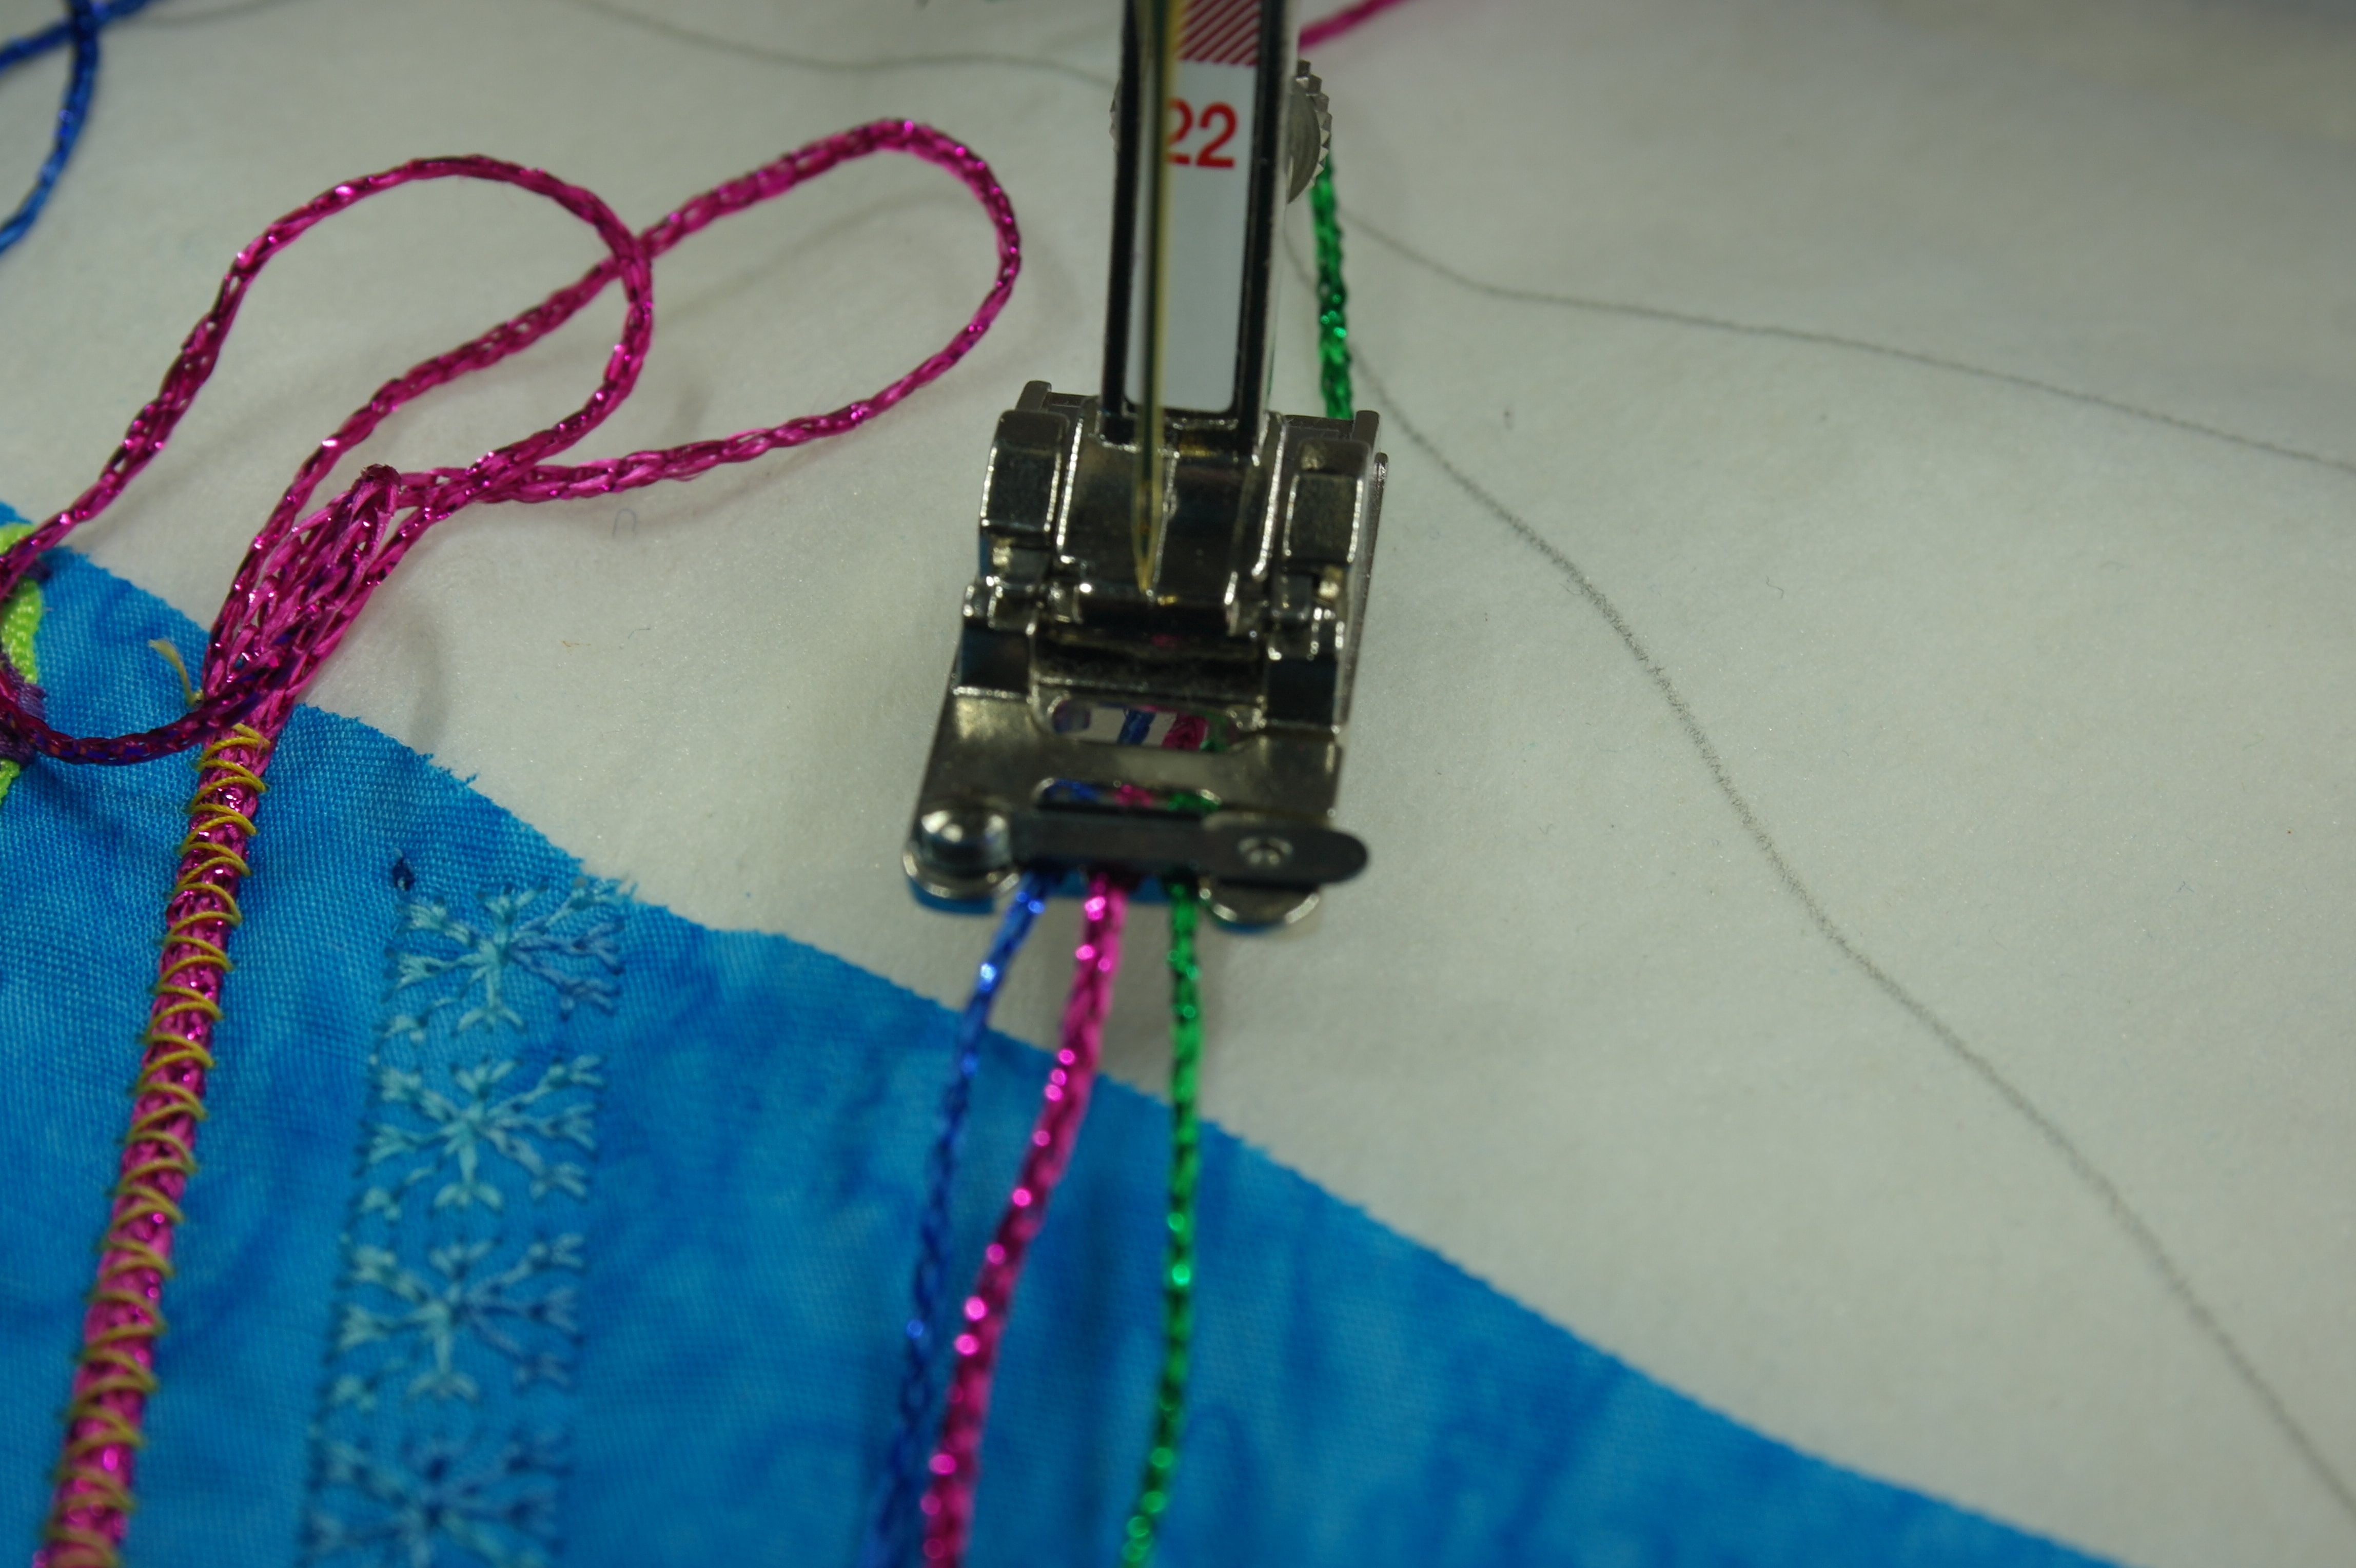
The swing-out latch has to be closed carefully, to secure the yarn. The tails of the yarn have to protrude aprox. 5 cm.
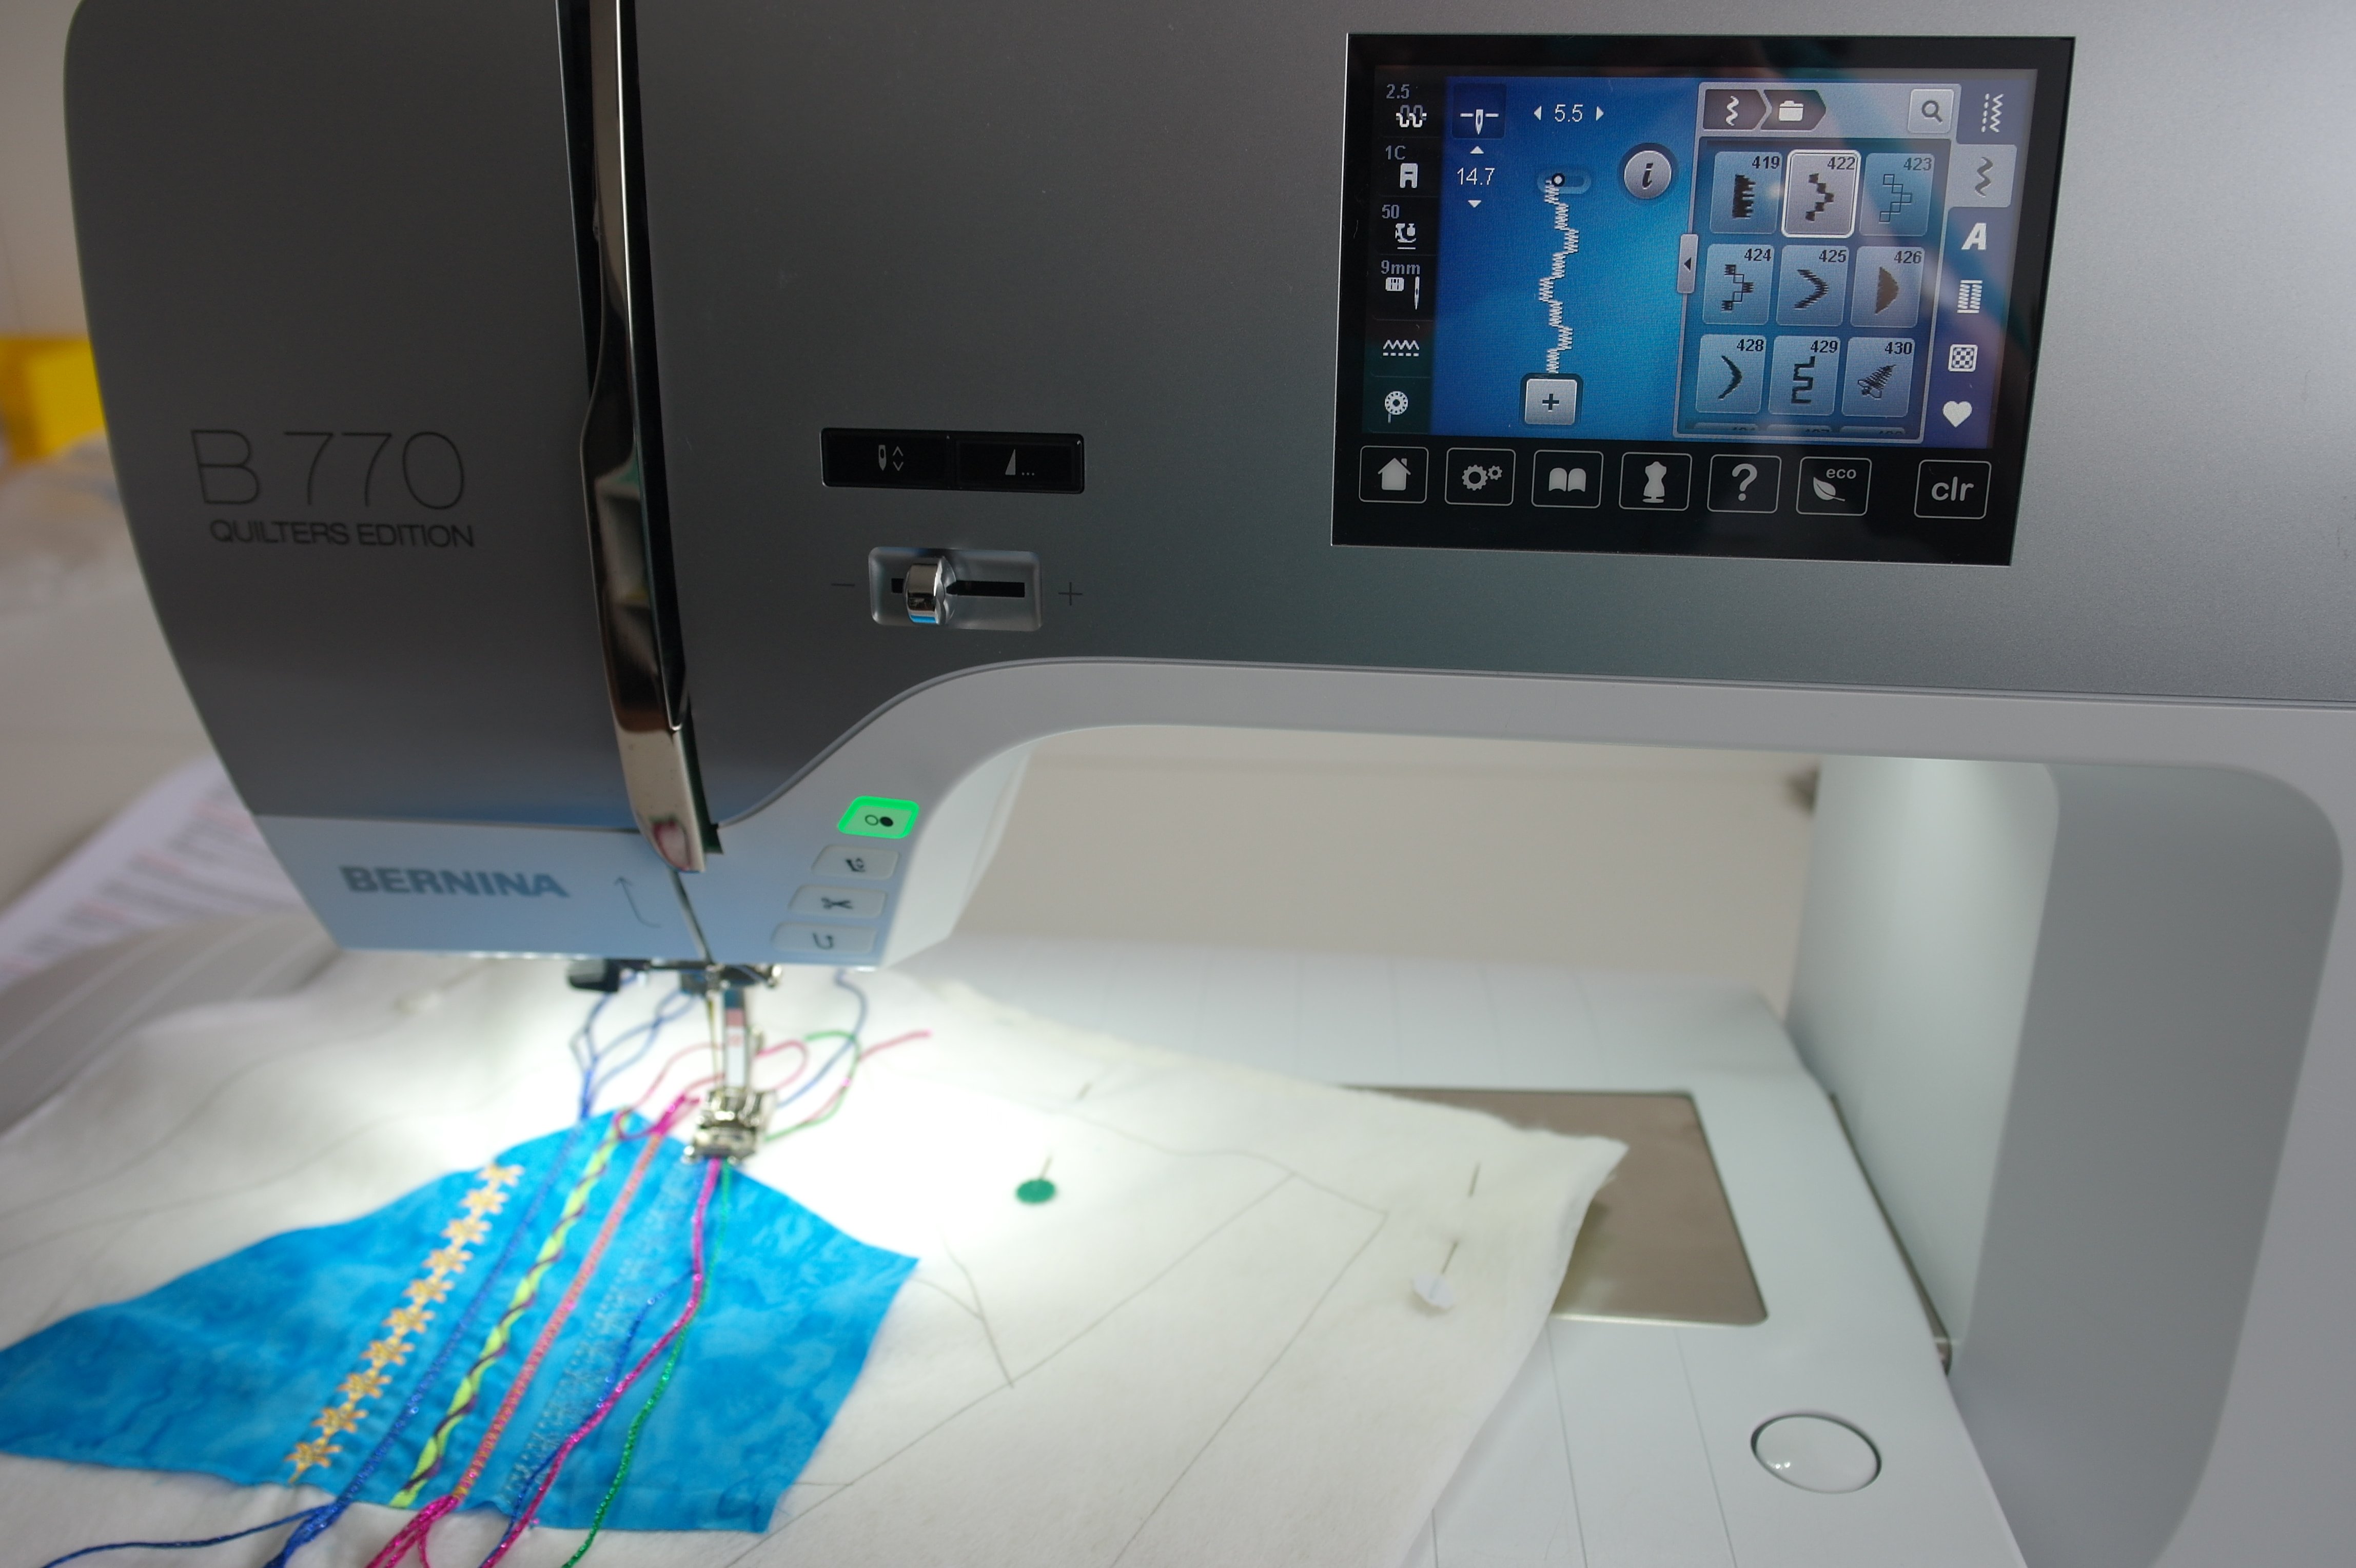
I’ve choosen another fun stitch: it is important to choose a stitch which will ‘catch’ all three pieces of yarn. Stitch 422 was ok, and halfway I changed it into Stitch 423 (just because I can!).

Looks great too, don’t you think?
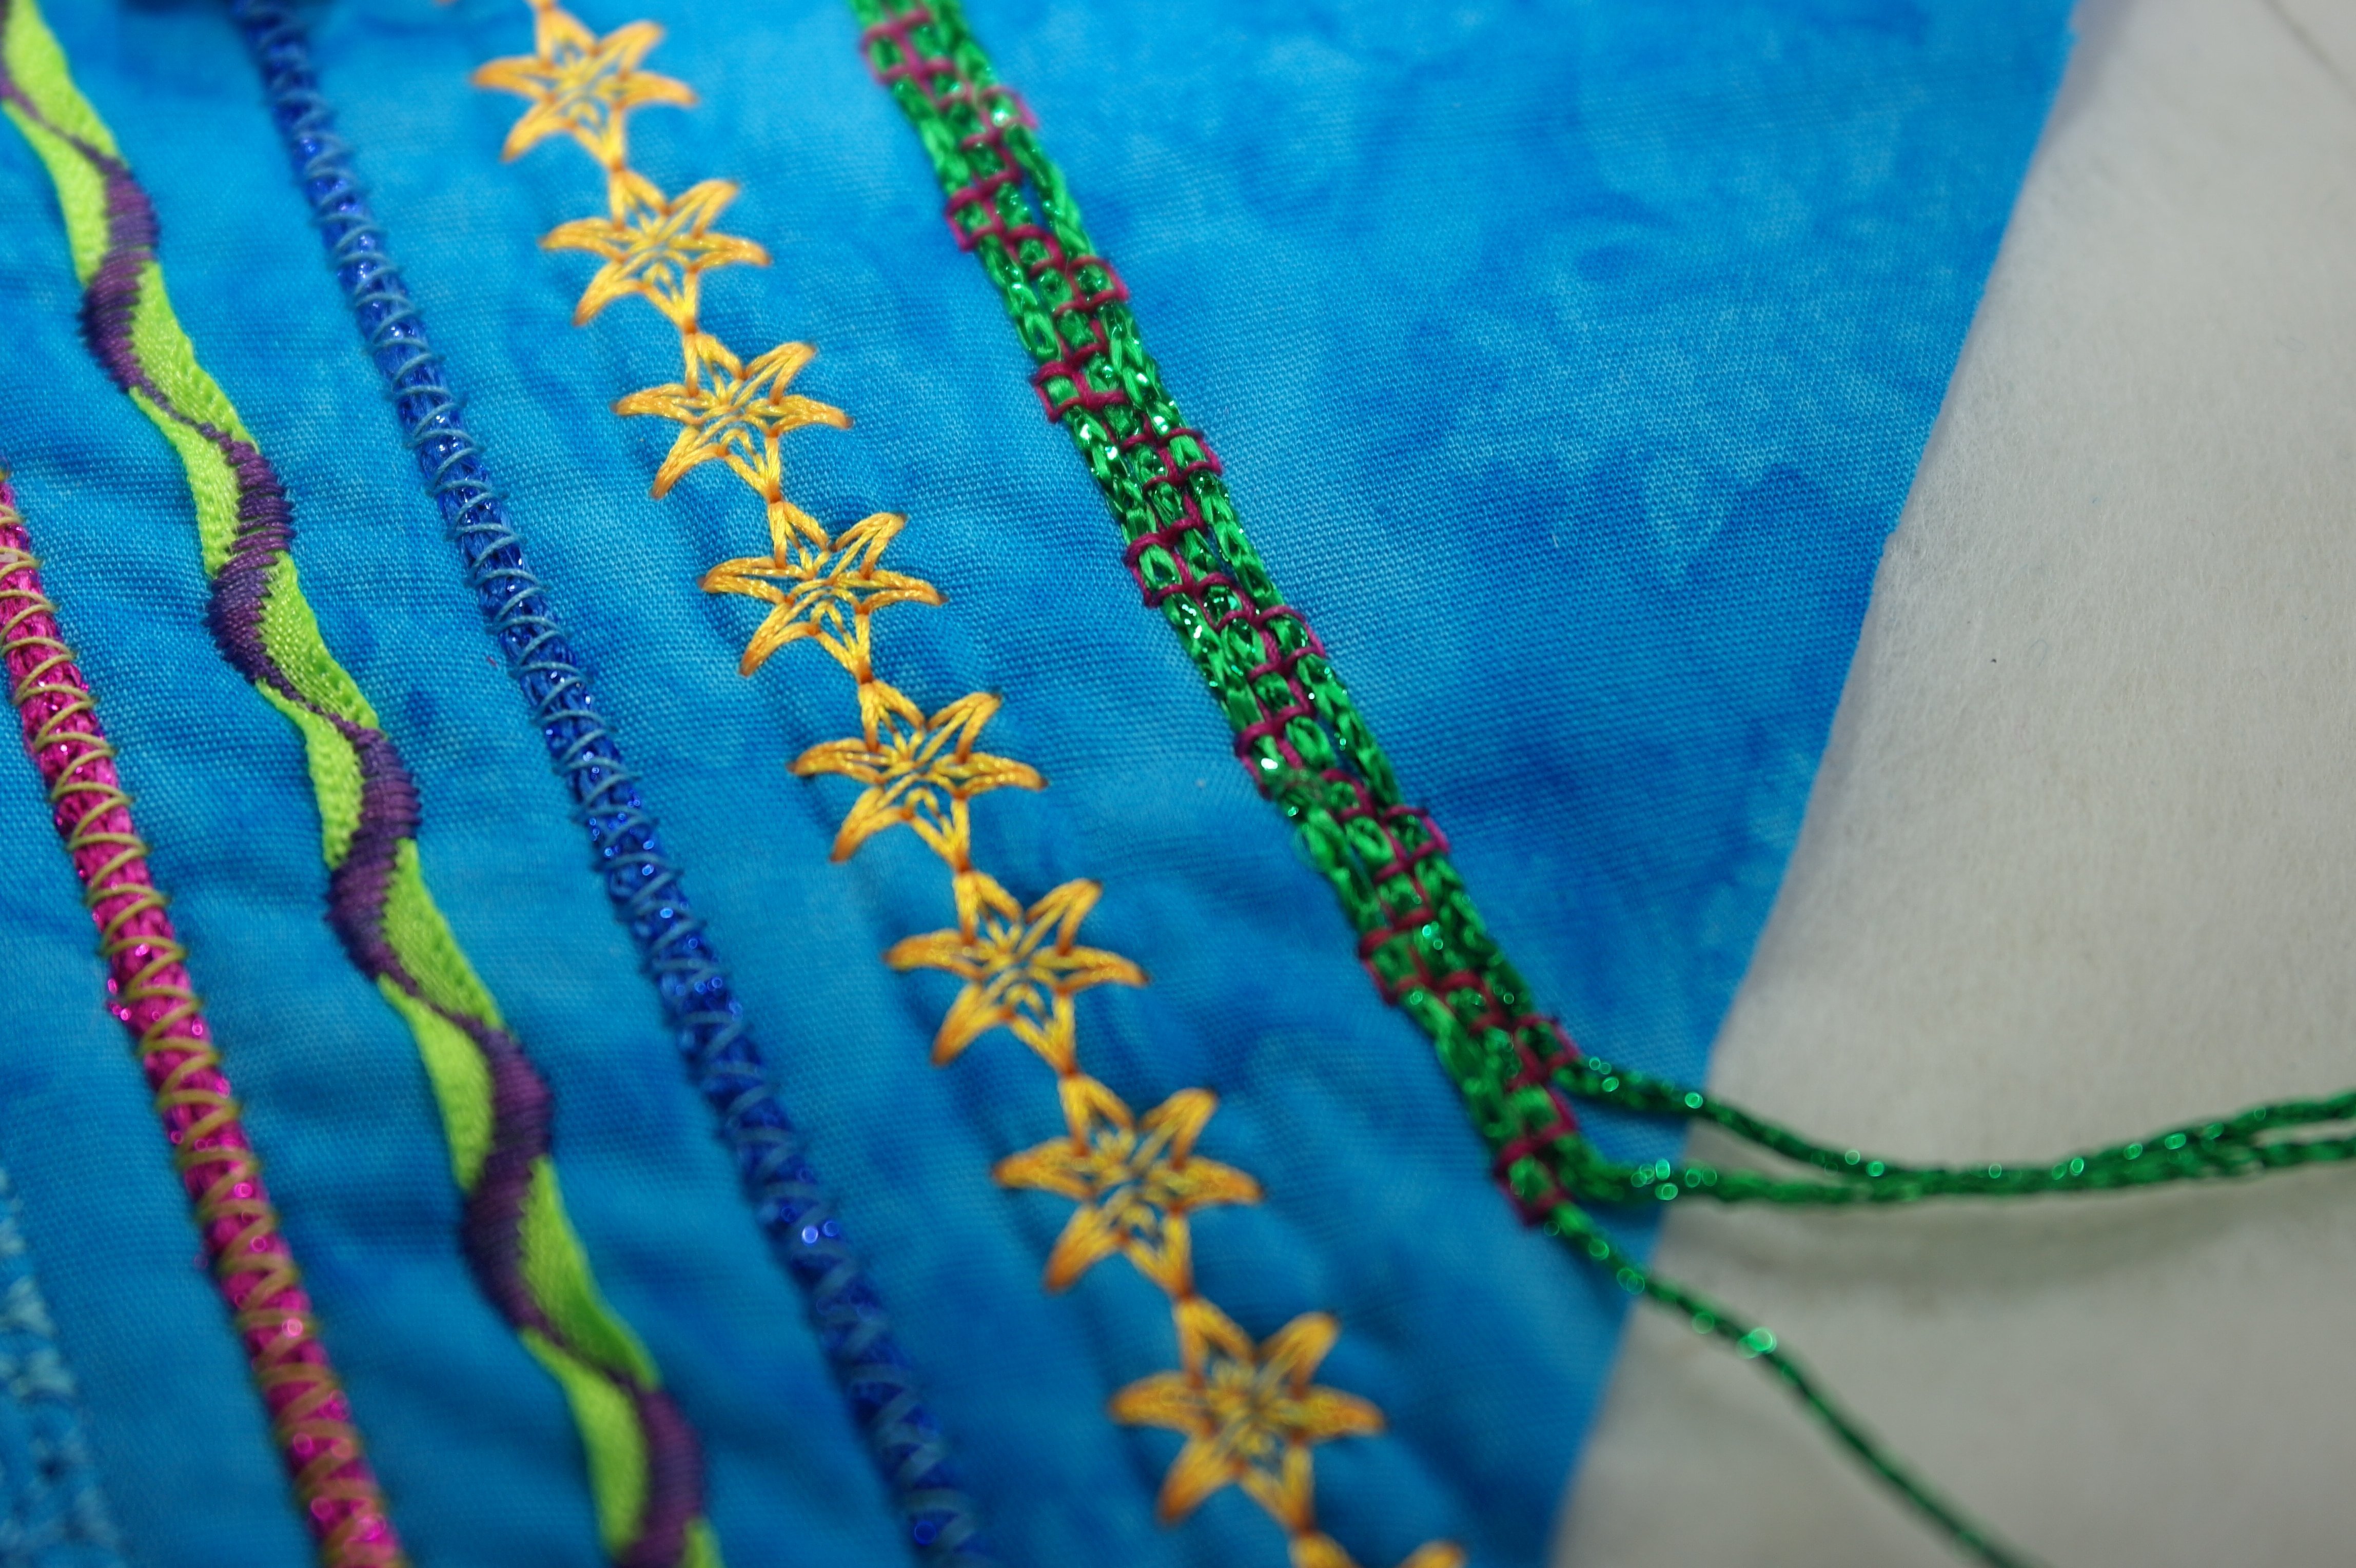
I’ve made more regular decorative stitches, changed presser feet, and used the 3-Groove cording foot #22 again. Also with Lizzy, but now all green. When the first batik was full with stitches, I’ve sewn on a second batik.
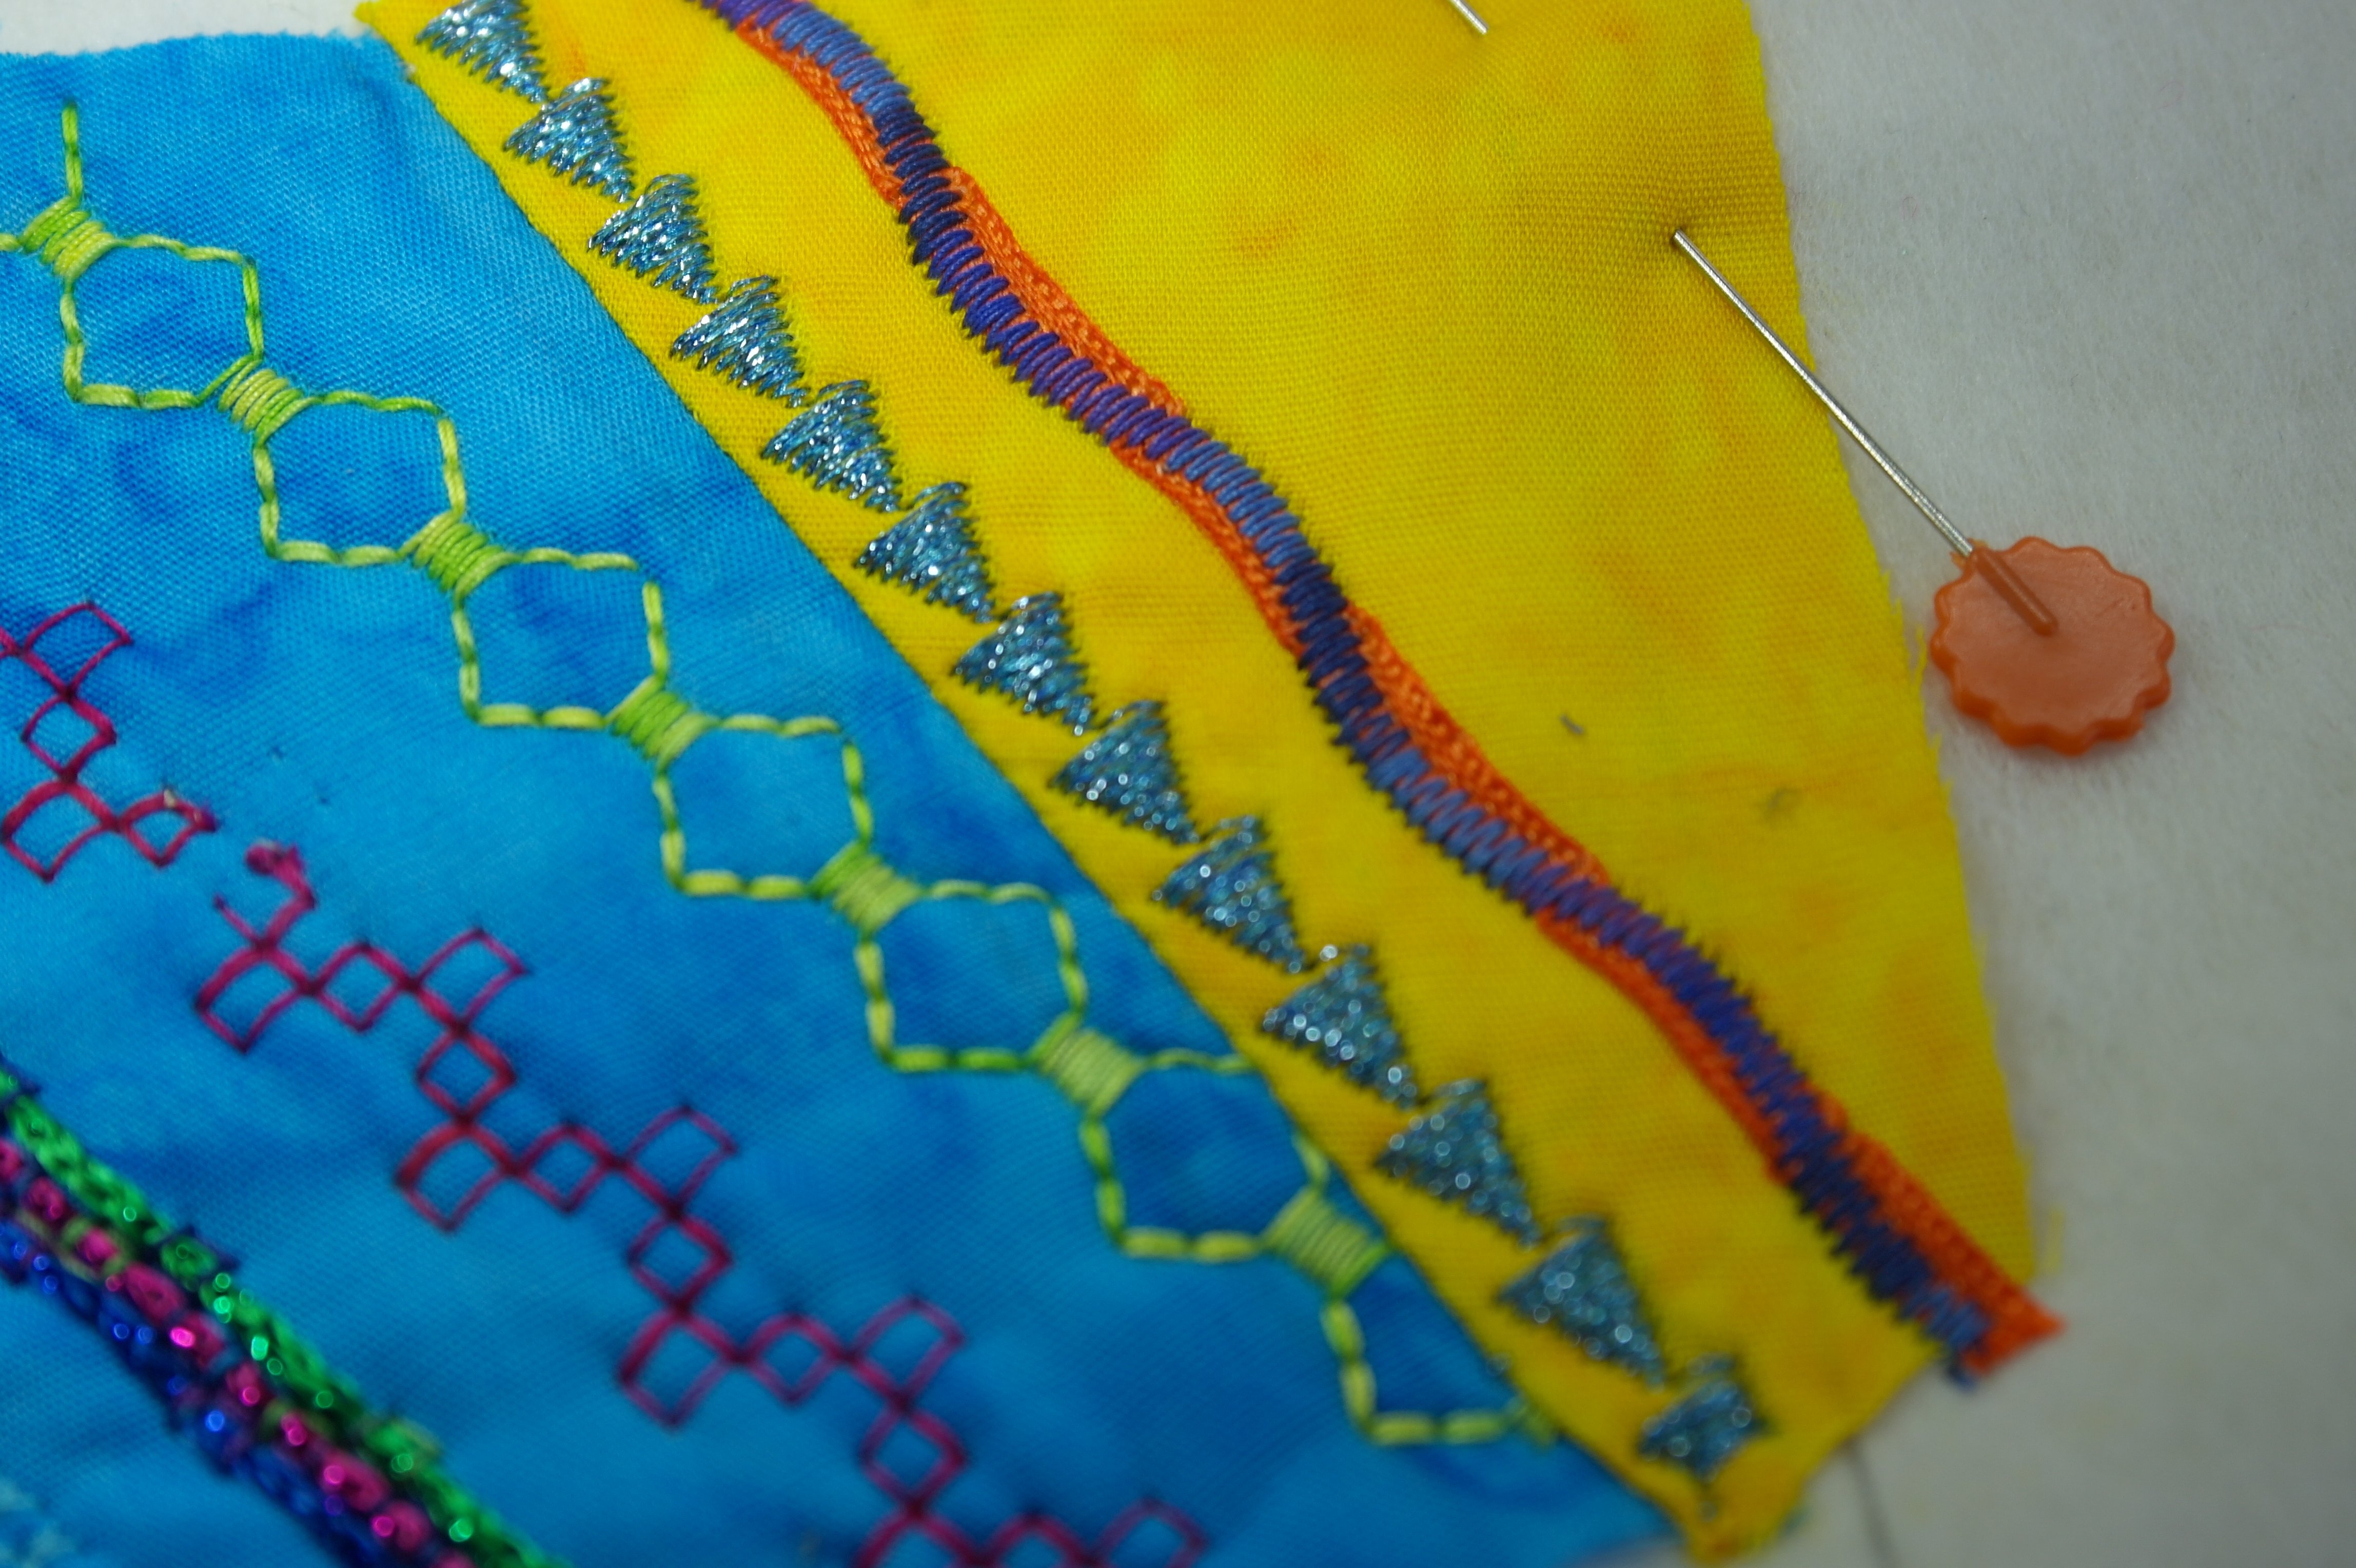
It is really fun to fill fabric with decorative stitches and work with beautiful (variegated) threads. But the more stitches and threads I’ve choosen, the more difficult it was to vary.. . That is why it is fun to work with embellishments too… changing presser feet and work with small ribbons, yarn and cord adds more depth to your work. Look how great the orange ribbon looks, after securing it with purple varigated thread ..
You van vary endlessly. Use your yarn, small ribbons and cords, but be sure they will fit easily in the hole or grooves of the two special presser feet.
I also found out how important it is to try things out on a sample. Decorative stitches that are too dense, will cover the ribbon, cord or yarn entirely and you won’t see them. So stretching stitches is sometimes neccessary. But if you stretch stitches too much, small ribbons, cords or yarn will just be ‘caught’ in a couple of places, and will lie too loose in certain areas, which is also not what you want. Practice, practice… that’s really important.
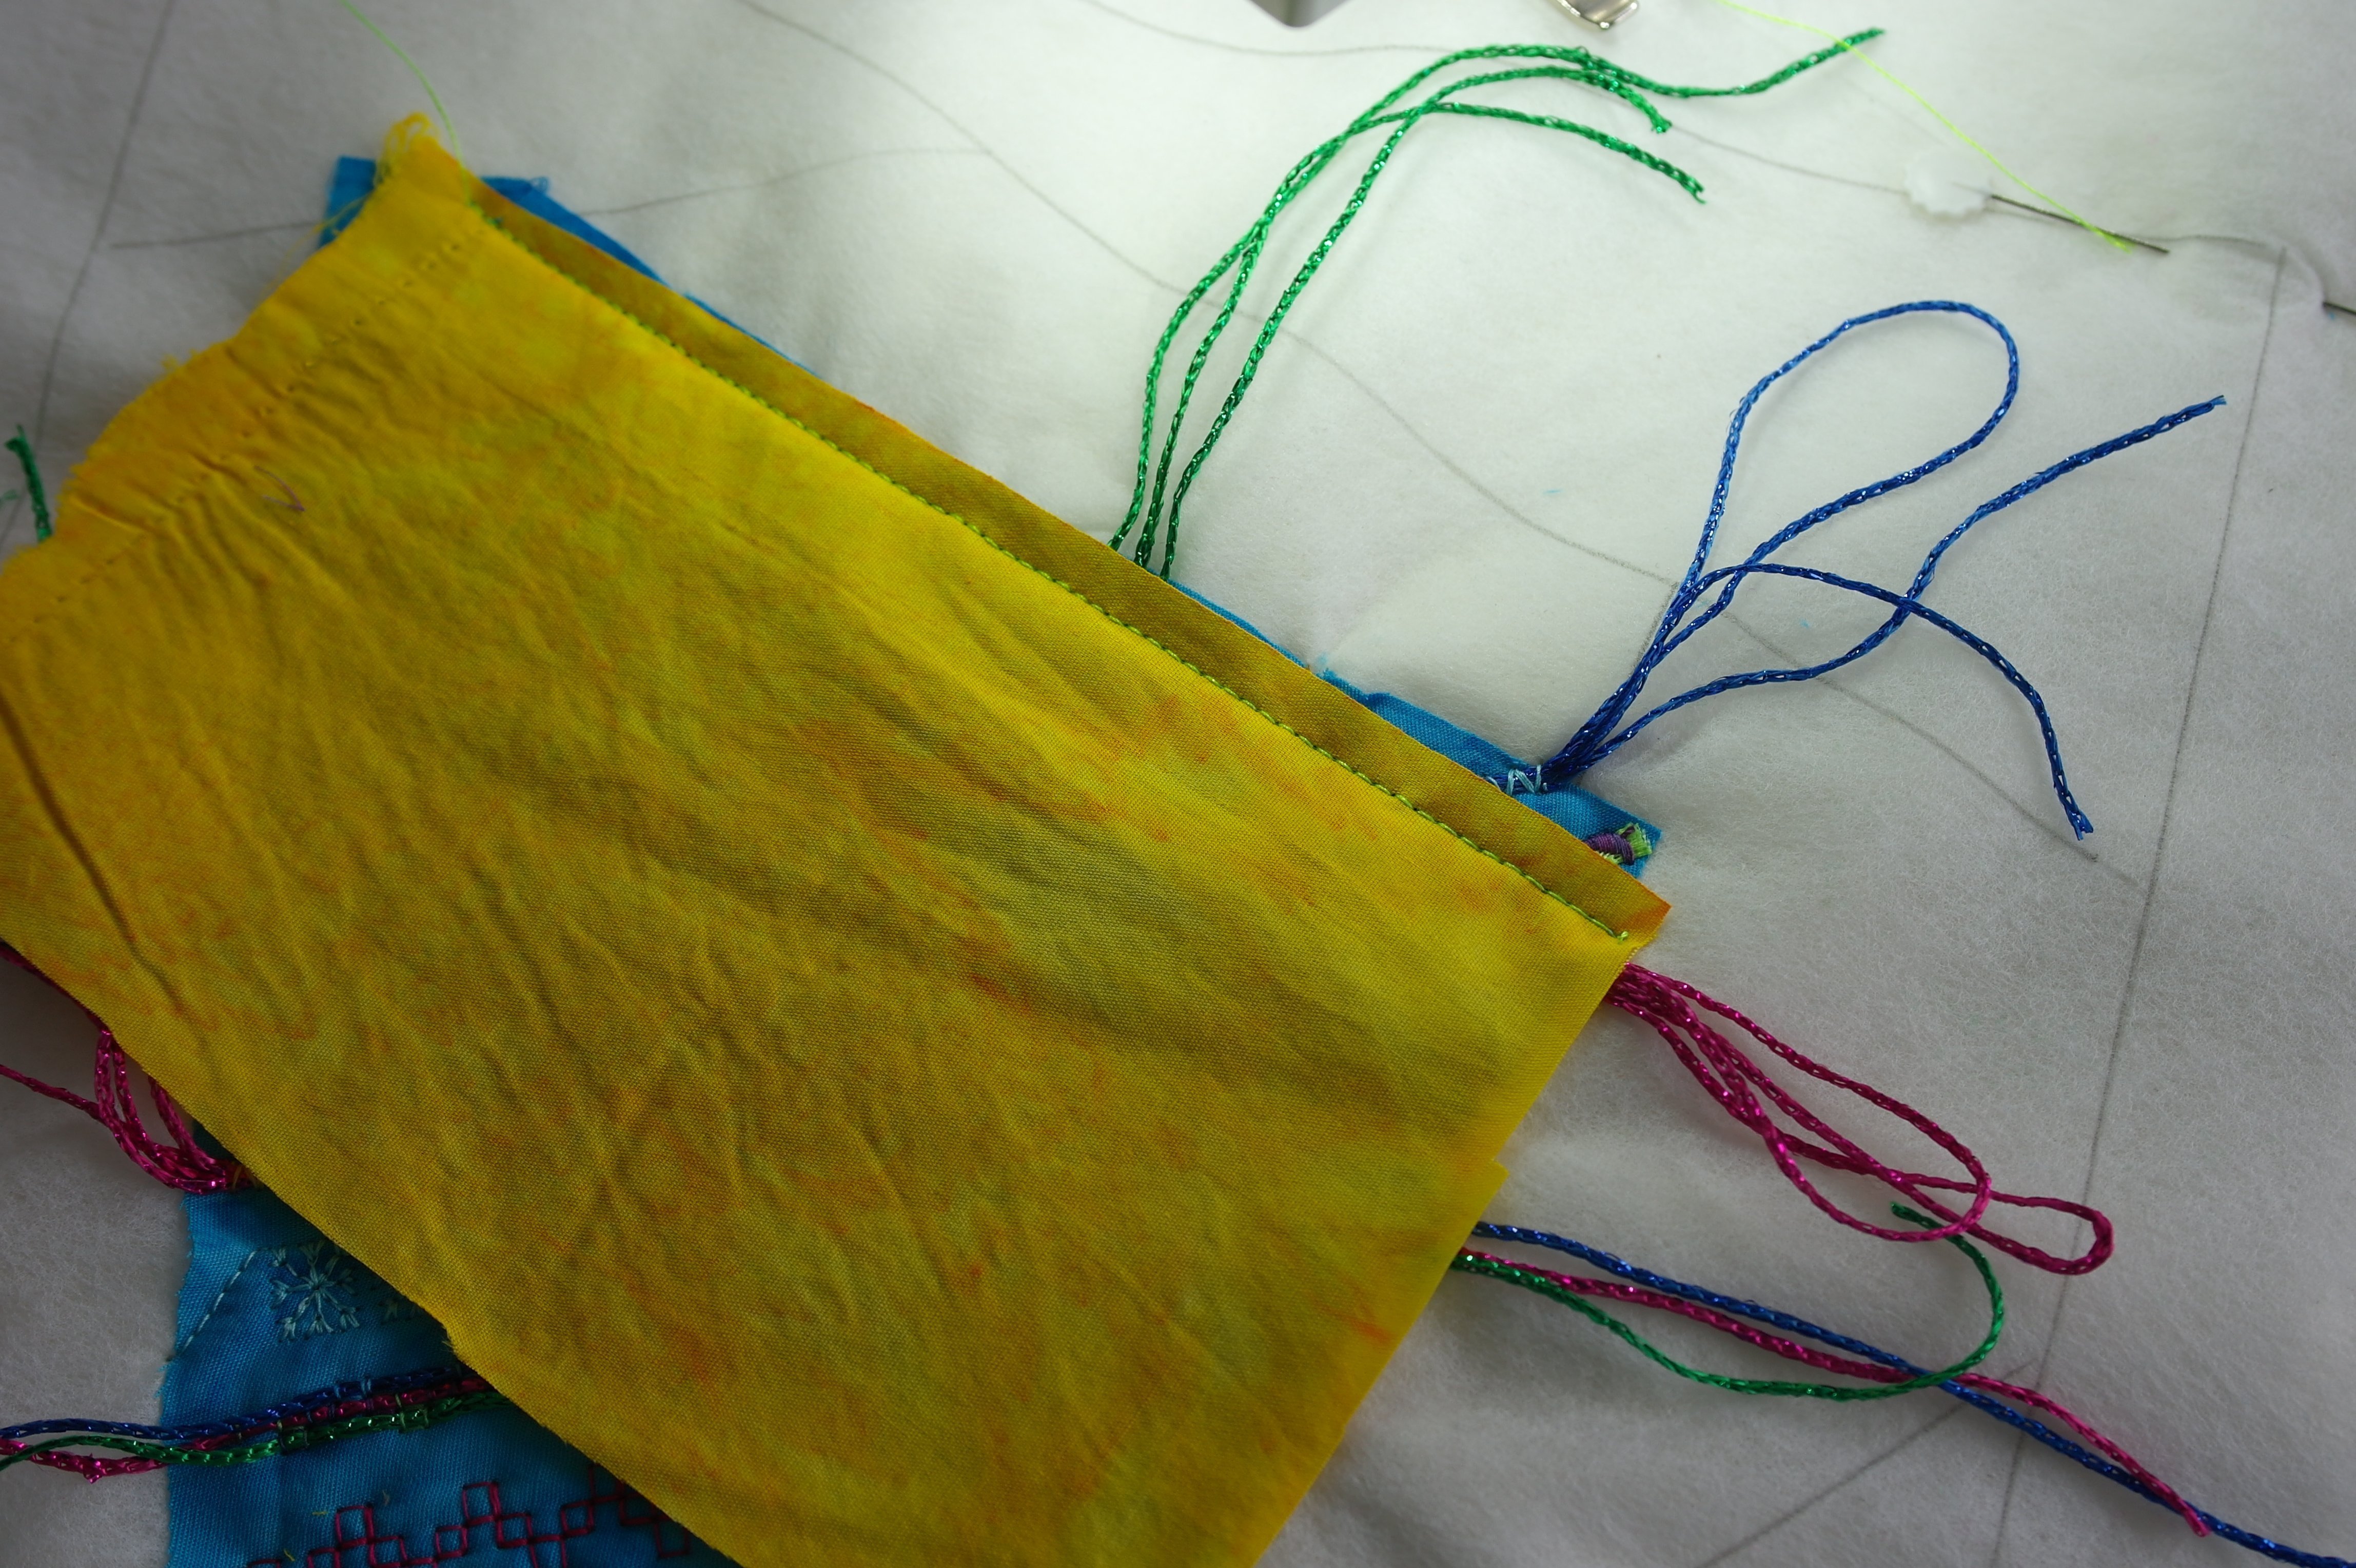
The picture above shows you that I have sewn on a yellow batik for the next section. You can see the tails of Lizzy, still protruding. I have clipped them after sewing the fabric onto the sandwich. I’ve compressed the stitches, to be sure to catch the yarn. You can also go over that area twice: go back and forth an extra time to secure the yarn. After stitching the fabric and thus catching the yarn, you can clip of the tails near the side of the fabric.
Again, ribbon can be clipped immediately after sewing, because that doesn’t fray. But every cord or yarn that frays easily, has to be cut after being secured with stitches.
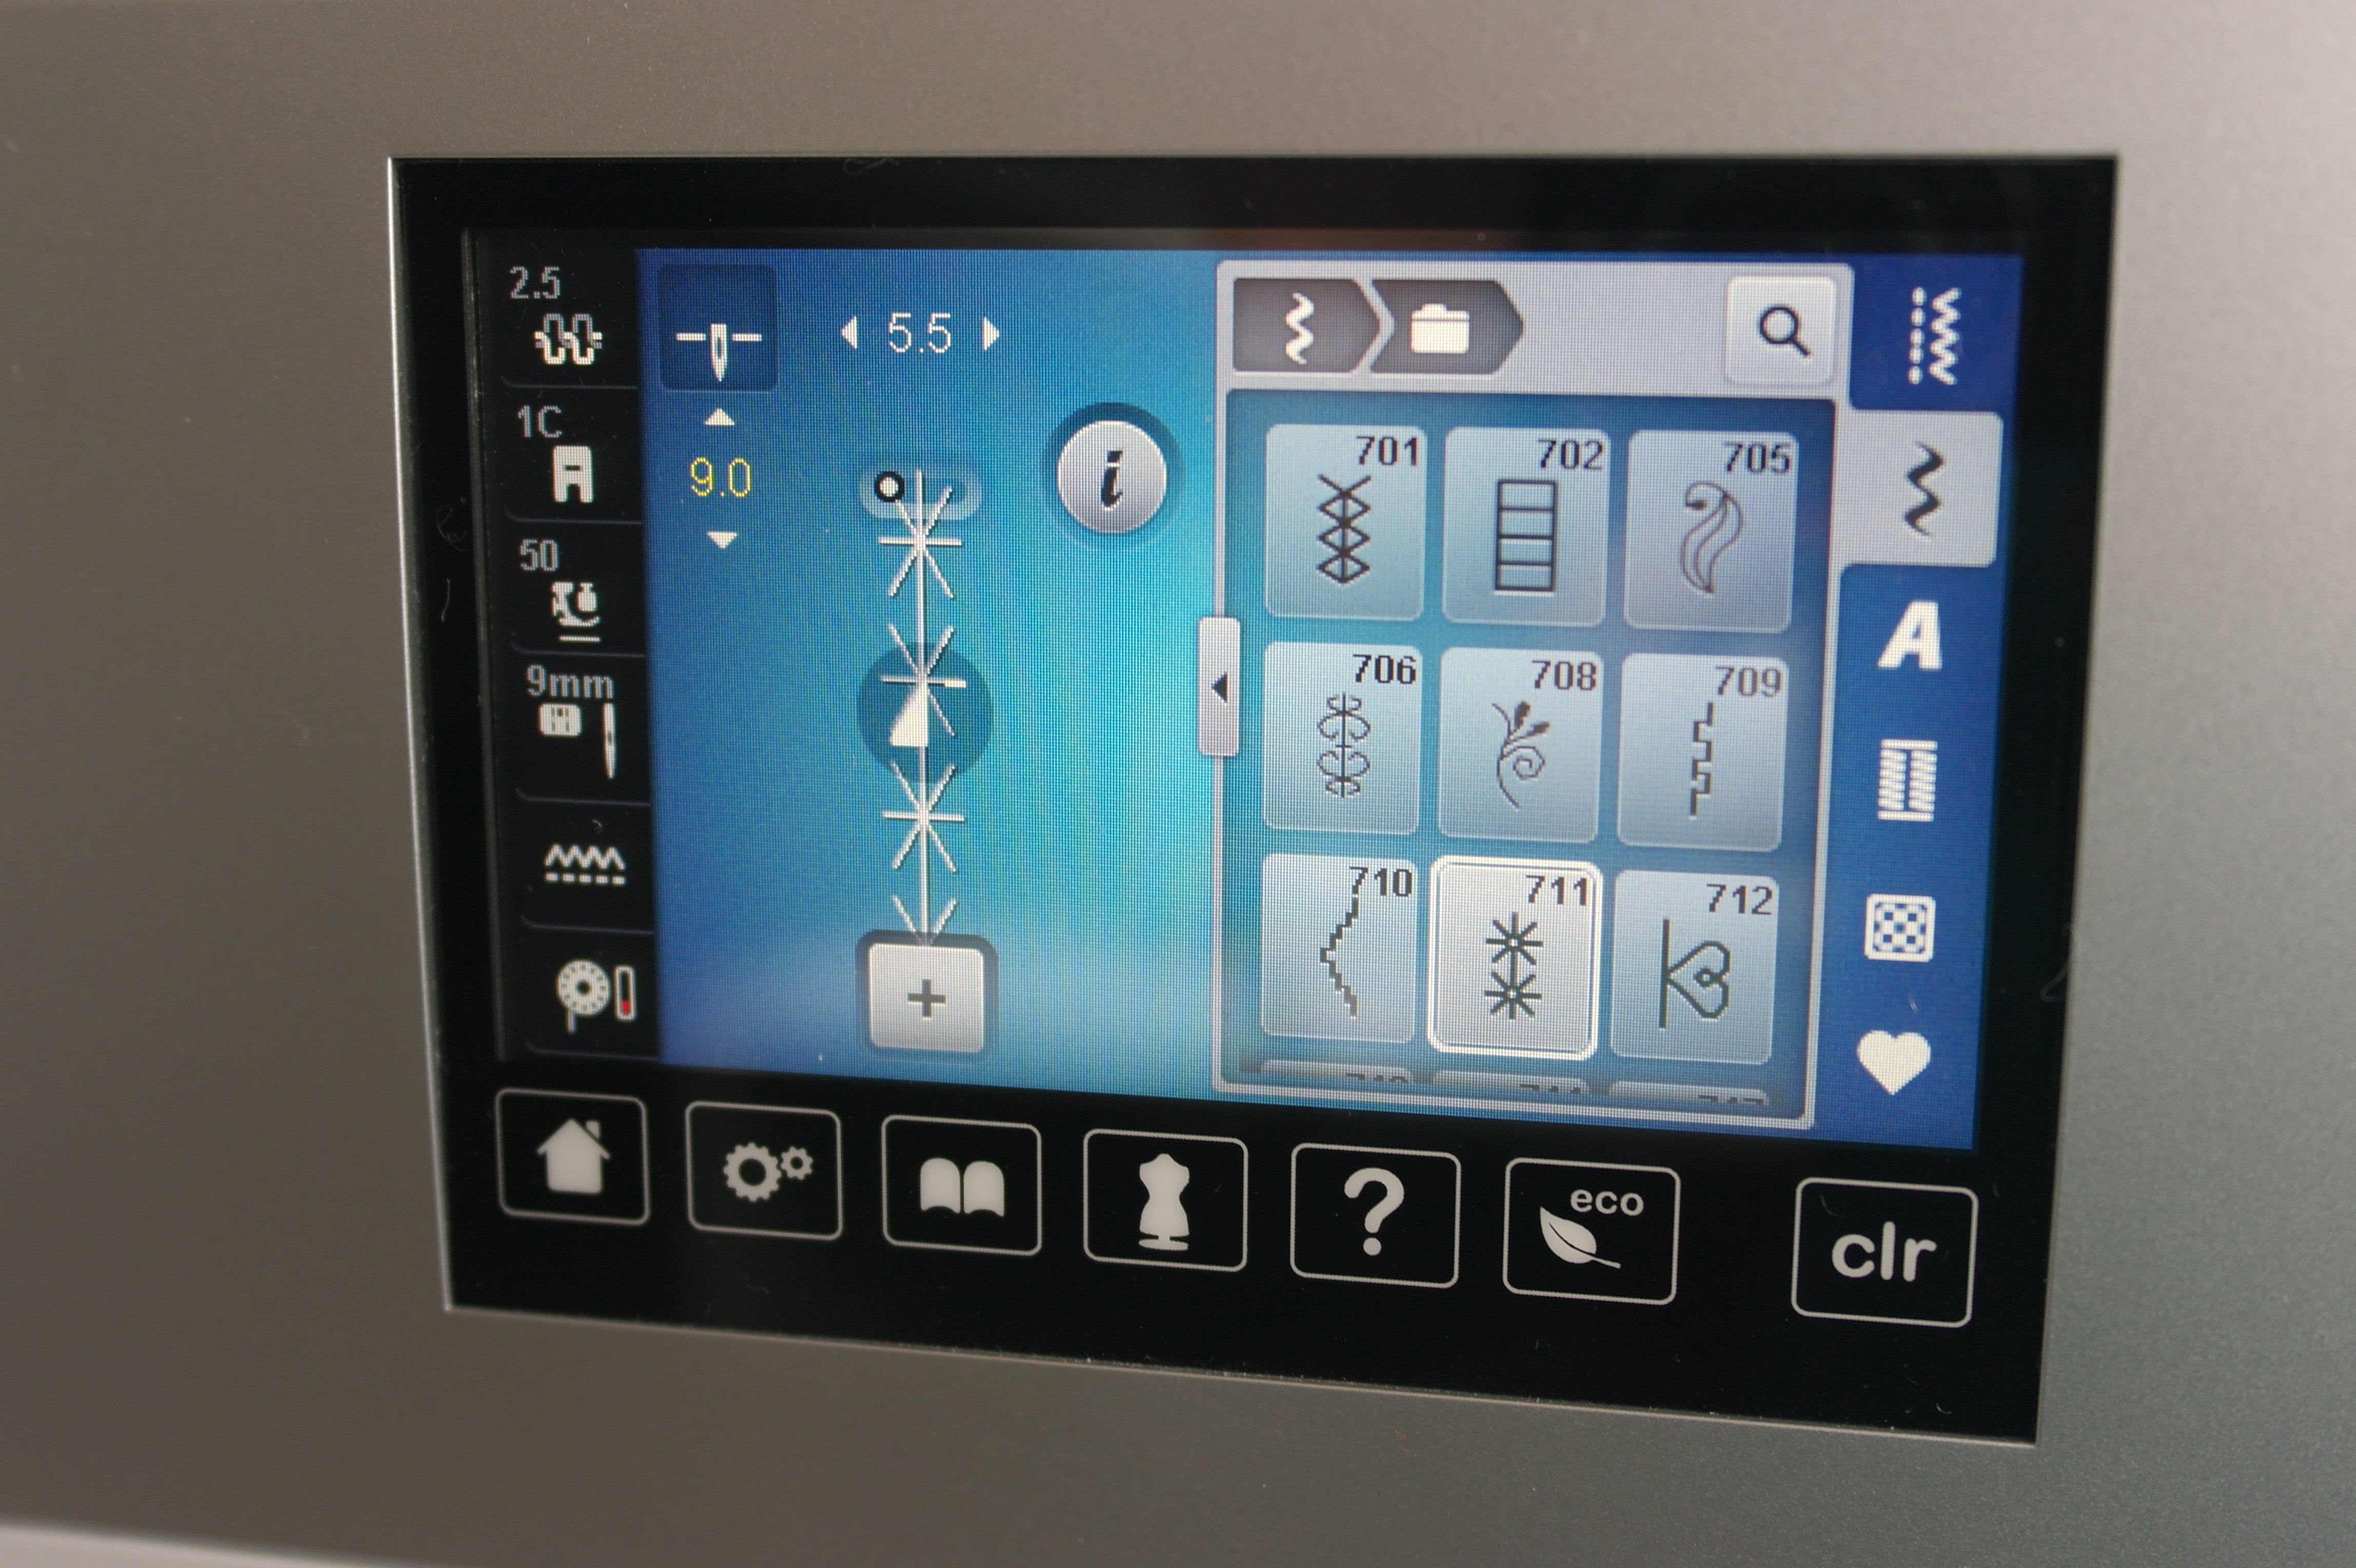
I’ve sewn a small purple ribbon on another fabric – inserted it in Braiding foot #21, and used stitch 711 to secure it. I’ve stretched this stitch too: you can see that on the picture above – if a number is displayed in yellow, you will know that you have changed a default setting, because that is always displayed in white, with the BERNINA 770QE.

I’ve used a bright green thread to make the decoative stitches on the purple ribbon stand out. After putting Braiding foot #21 on my machine, I’ve noticed that all the decoative stitches I’ve looked at, changed into a width of 5.5mm – the maximum width of the opening under the needle. After replacing the Braiding foot #21 with the Open Embroidery foot #20C, the width automatically changed back to 9 mm. This is an automatic ajustment of the 770QE, to prevent using stitches that are to wide, and your needle will break on your presser foot.
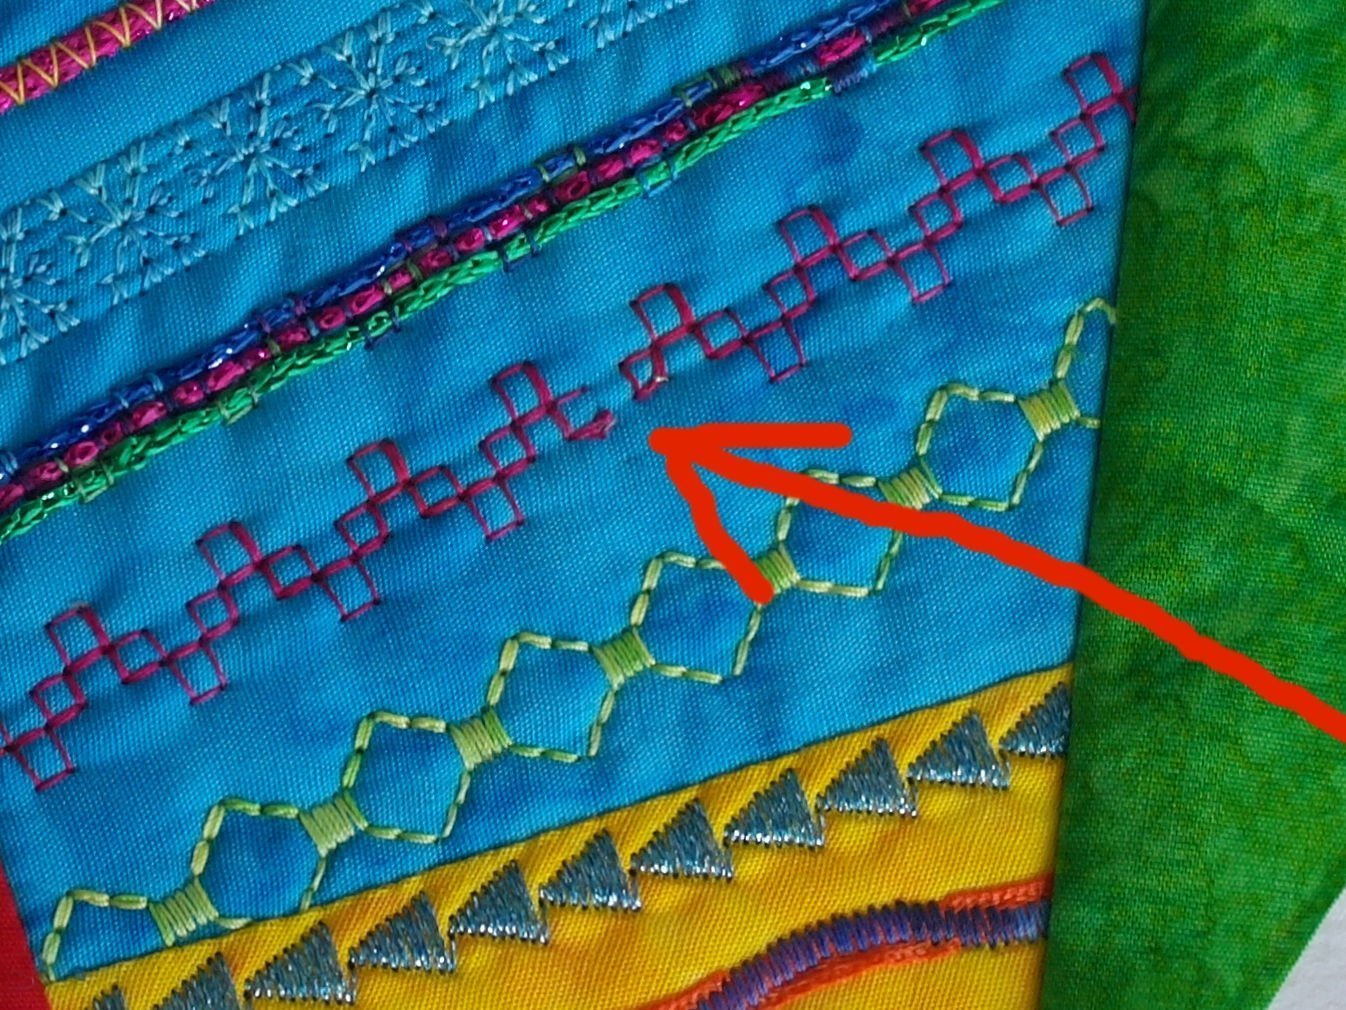
While making stitches on the next fabric, I’ve noticed that a couple of stitches on a previous row loosened: I’ve probably cut them at the back after removing some loops which were made with the bobbin thread. I’ve corrected the stitch by hand, making the same figures with the same top thread: I could do this, because I always look how a stitch is made.
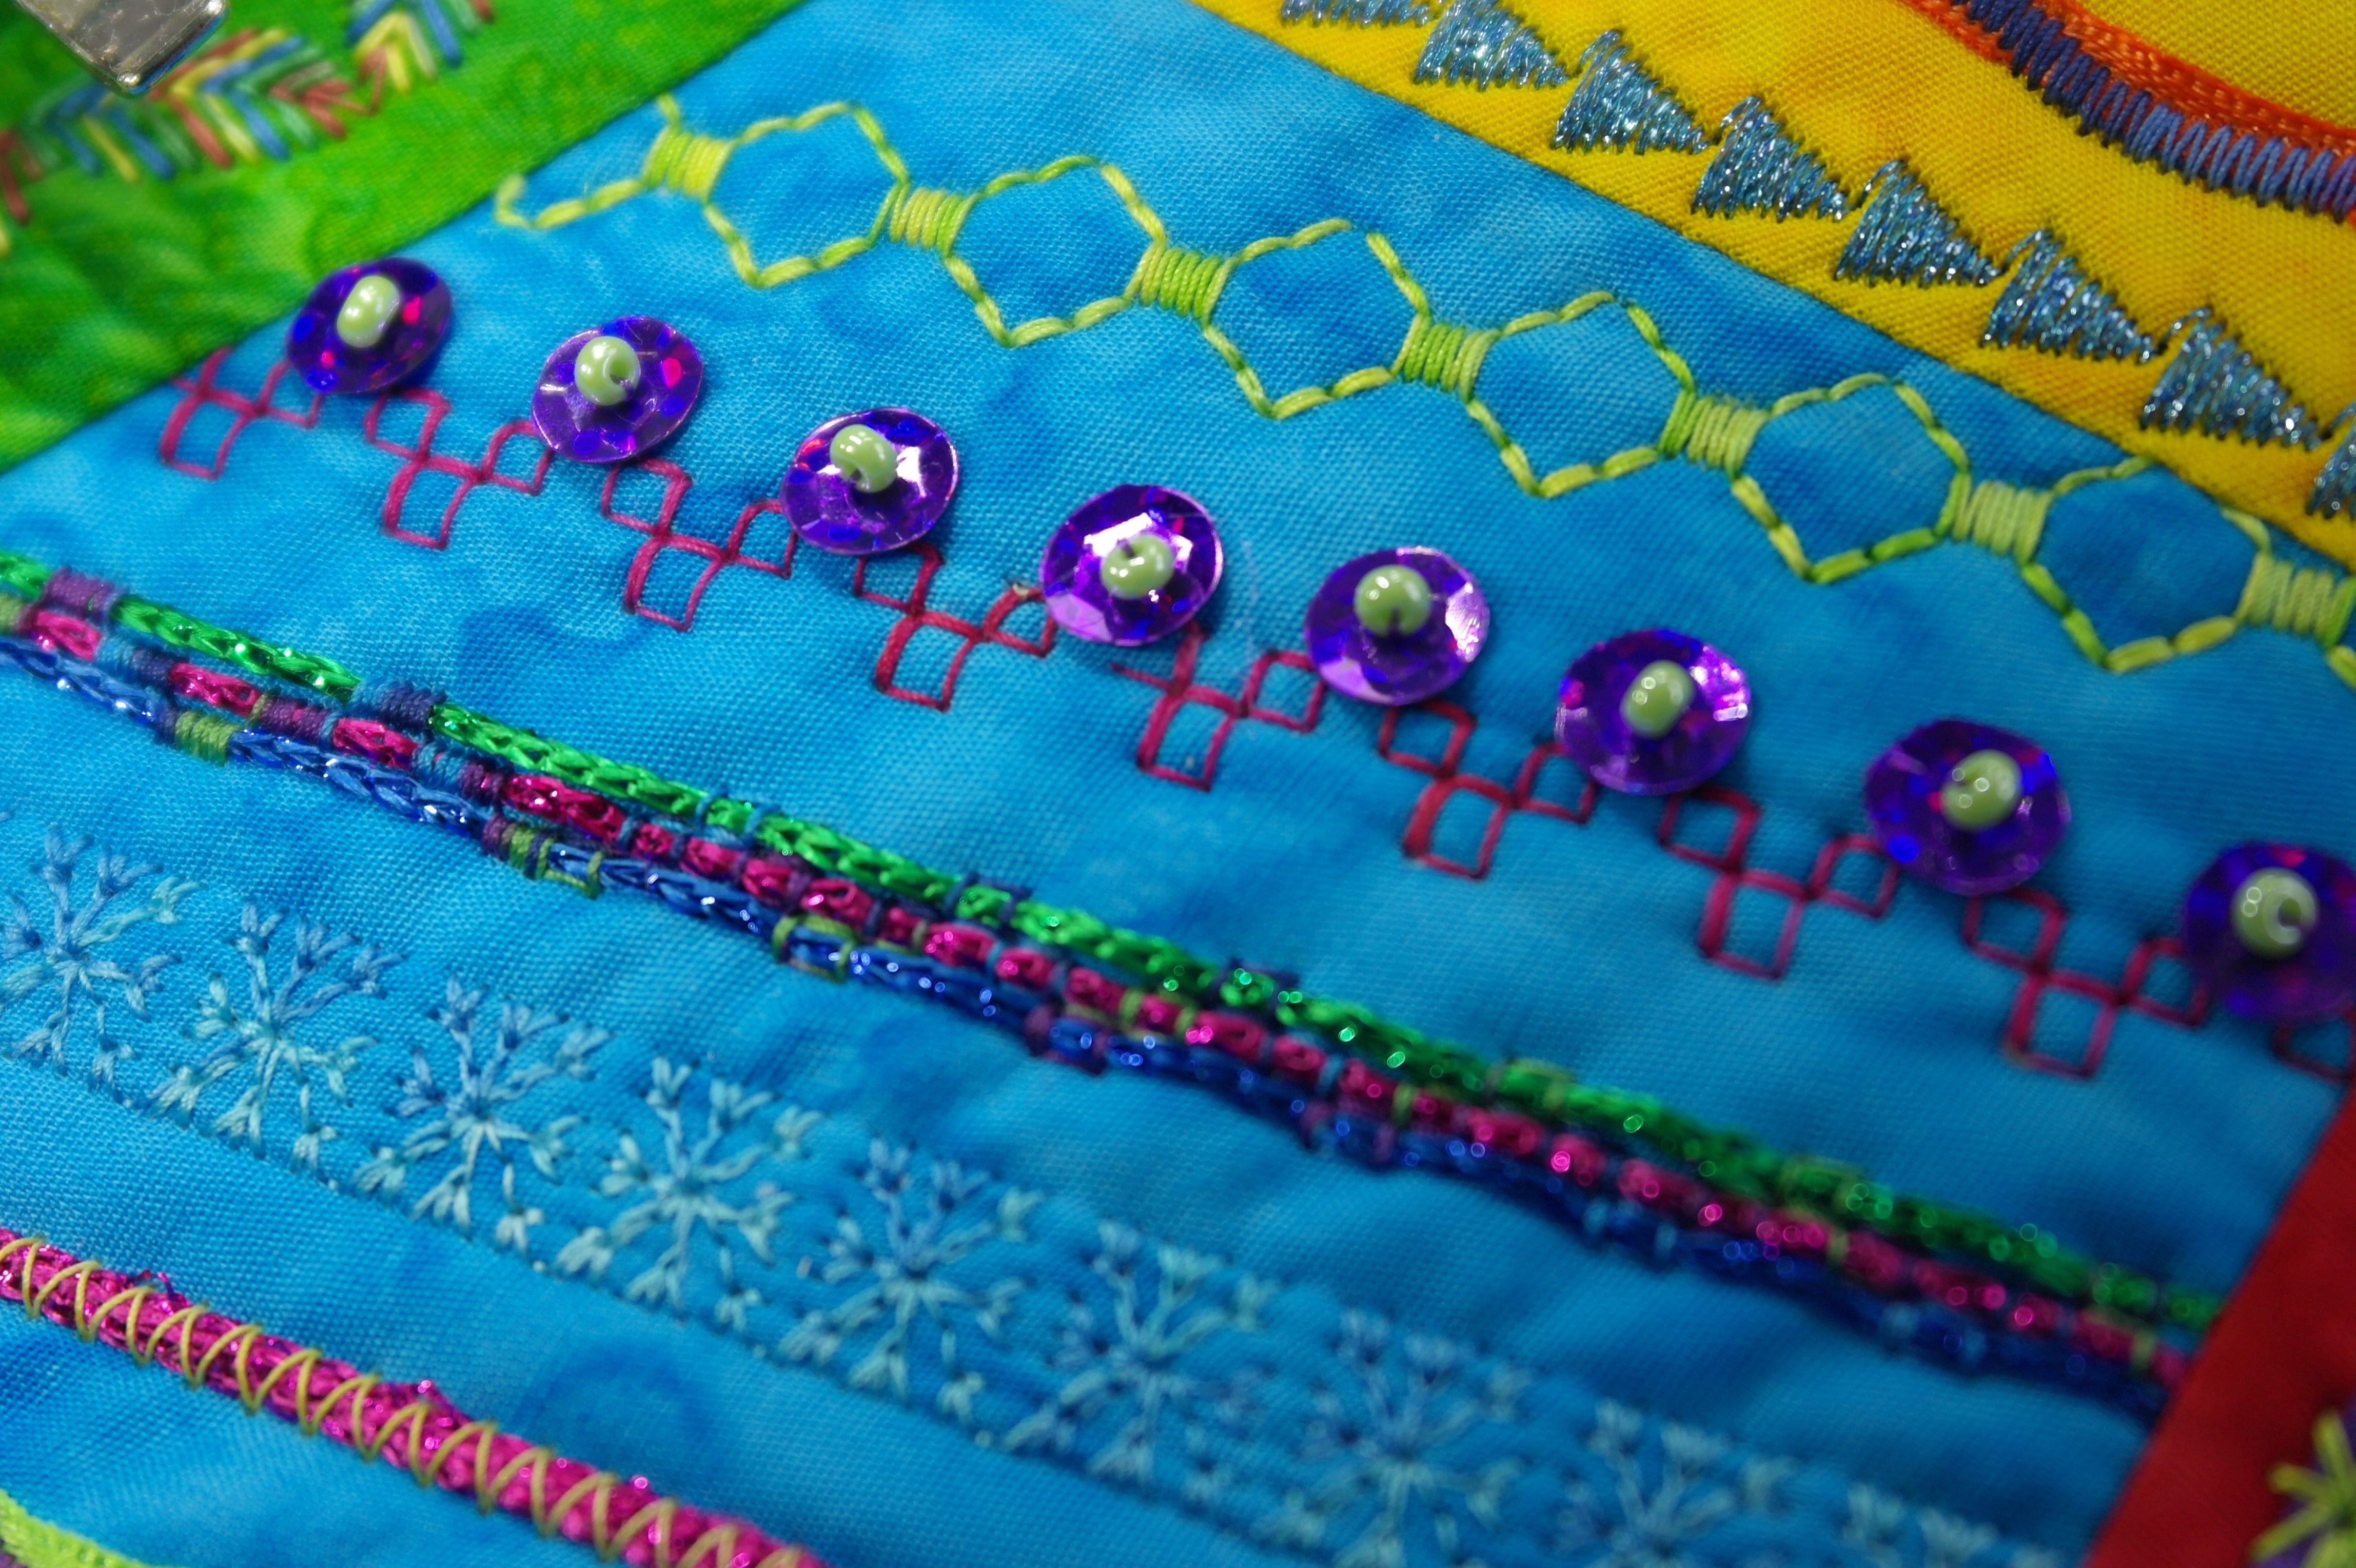
But still the stitch was somewhat different from the original row of stitches. To cover that up, I”ve sewn sequins with beads on top of the corrected part, but also on other parts of the row. Now it looks great again. I wanted to show you this, so you know you can always cover up mistakes or irregularities.
After adding more fabrics, I found out that one part of a previous section wasn’t entirely covered with stitches. So I made a single decorative stitch – a large one – and filled up that empty space. Of course you can cover such an area with sequins, beads, buttons or other embellishments, but this was fun to try too.

I’ve used Braiding foot #21 and the 3-Groove cordiing foot #22 multiple times – the last one mentioned with 3 pieces of Lizzy yarn, blue (top of the picture above). I’ve used a stitch which grabbed two pieces of yarn at the time, two on the left, two on the right etc. The fun effect shows, that the middle piece of yarn was formed into a wave. Such a surprise how decorative stitches work together with yarn, using this foot.
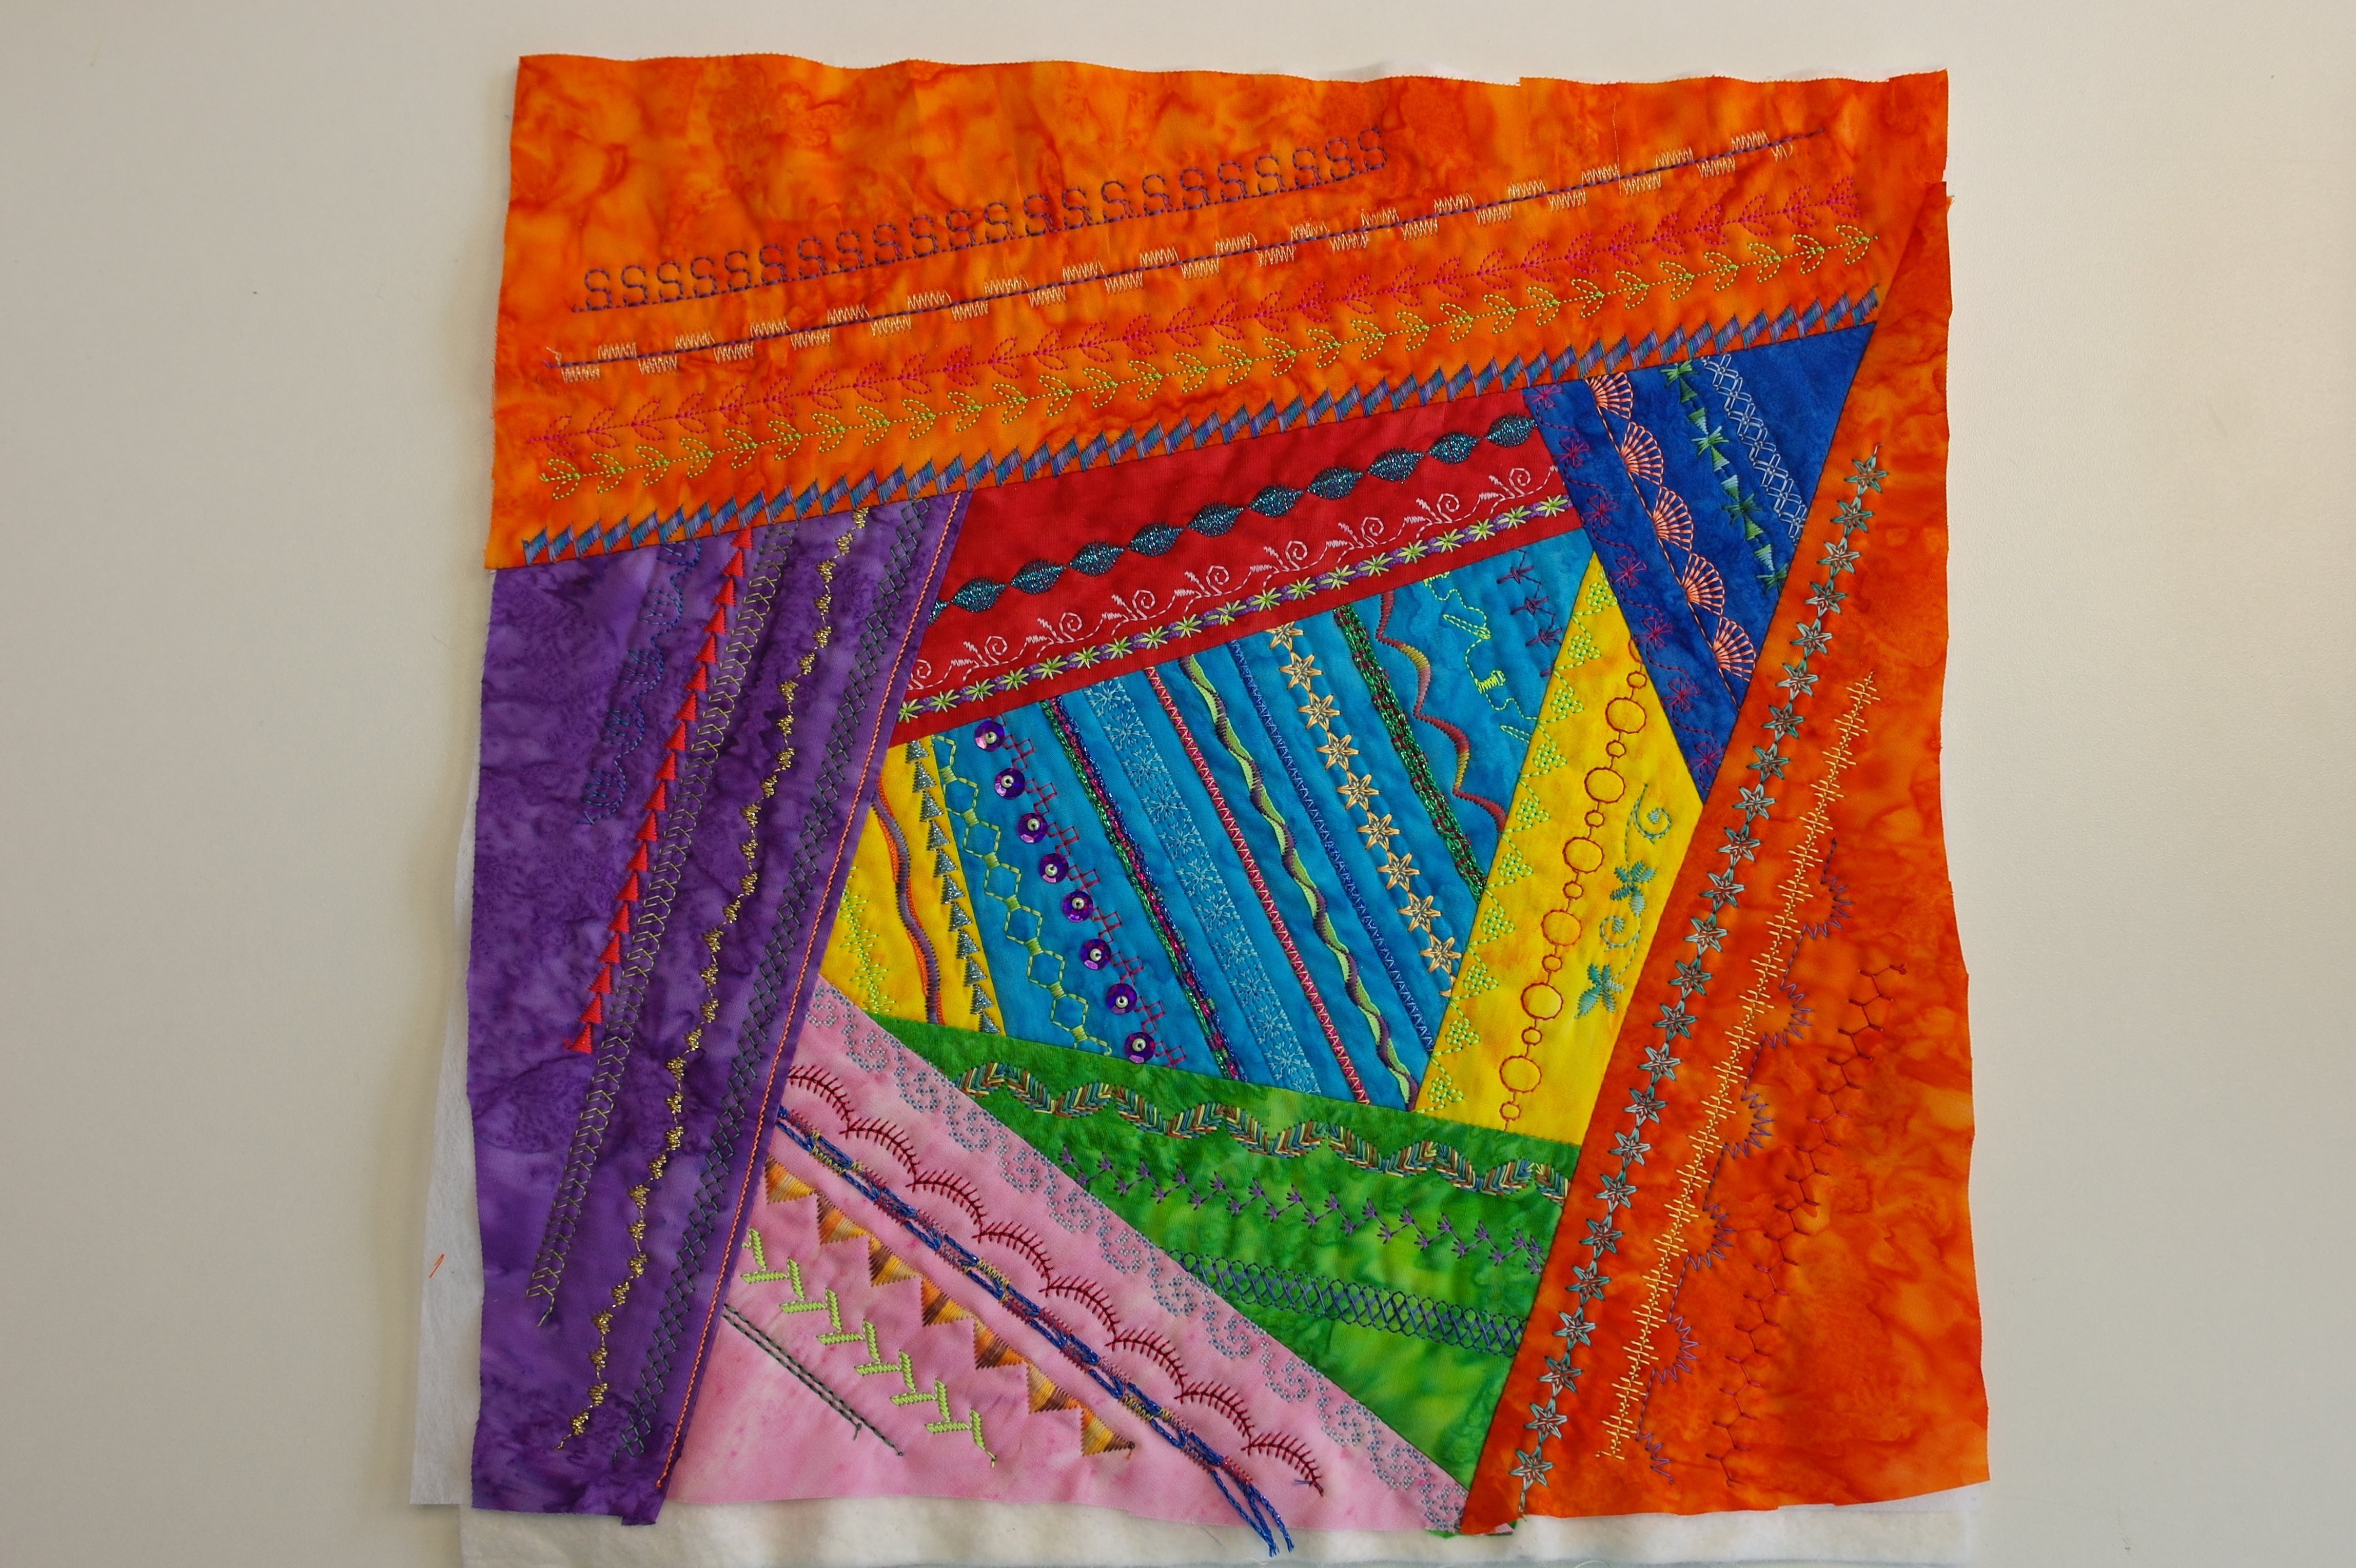
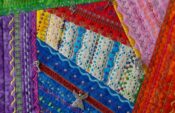
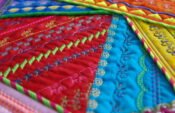
And then block 4 was ready. I’ve used the yellow fabric twice, and the orange two times too. Allthough the orange batiks meet in the corner, this is no problem. After assembly in month 12, you won’t notice that anymore.
I had so much fun, working on this block. Discovering what decorative stitches your machine makes, how the two special feet work and using small ribbons, cords or yarn for special effect. What a wonderful job I have!
If you would like to work with small ribbons, cords or yarn, but don’t own these special presser feet, you can try to cover them up with decorative stitches, just using your Open embroidery foot #20C. But be careful they don’t shift.
IMPORTANT: when your sandwich/block is finished, check if the size is aprox. 32 x 32 cm. It can be shrunken a bit because of the stitches you have made, and the freehand quilting. BUT DO NUT CUT THE SANDWICH, not even to make it tidy!!! Leave it like it is, and put it aside until month 12.
Have fun making block 4 and see you next month!
Sylvia Kaptein
Sylvia’s Art Quilts Studio
www.sylviasartquilts.nl
[email protected]
(* If you don’t own a Bernina sewing machine, but still want to work with the special presser feet, ask your local dealer for simular presser for your type/brand of machine)
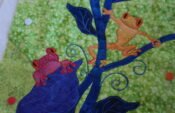
Block 4 Completed (x2 _ as I do each block twice)
Really enjoying the journey..
Thankyou sooo… much Silvia.. Lots of fun..
Purchased some more ribbons and lace for projects locally..
https://uploads.disquscdn.com/images/b255cc5c0a4d2c6583309549e5487246d58dc3a1ee43b0112c26ed8388f4dfeb.jpg https://uploads.disquscdn.com/images/63cf0030c0237490739c0453c950f5a6e689faf2014c7fb90fd3c40c2a7c50ca.jpg https://uploads.disquscdn.com/images/c230e43783979b7b2de83cae62585f4fe70ada87f9a2be9c21cedc9034dd4eee.jpg