 BERNINA Corporate Blog -
‘Time flies when you are having fun’…. and we all do have fun, don’t we? Using your time well, is mandatory if you are creative. Our ‘problem’ is that we have so much to do, and always seem to run out of time… but having fun while making things is really important, so lets start quickly with the 5th block of the Crazy Colors Mystery Quilt 2017.
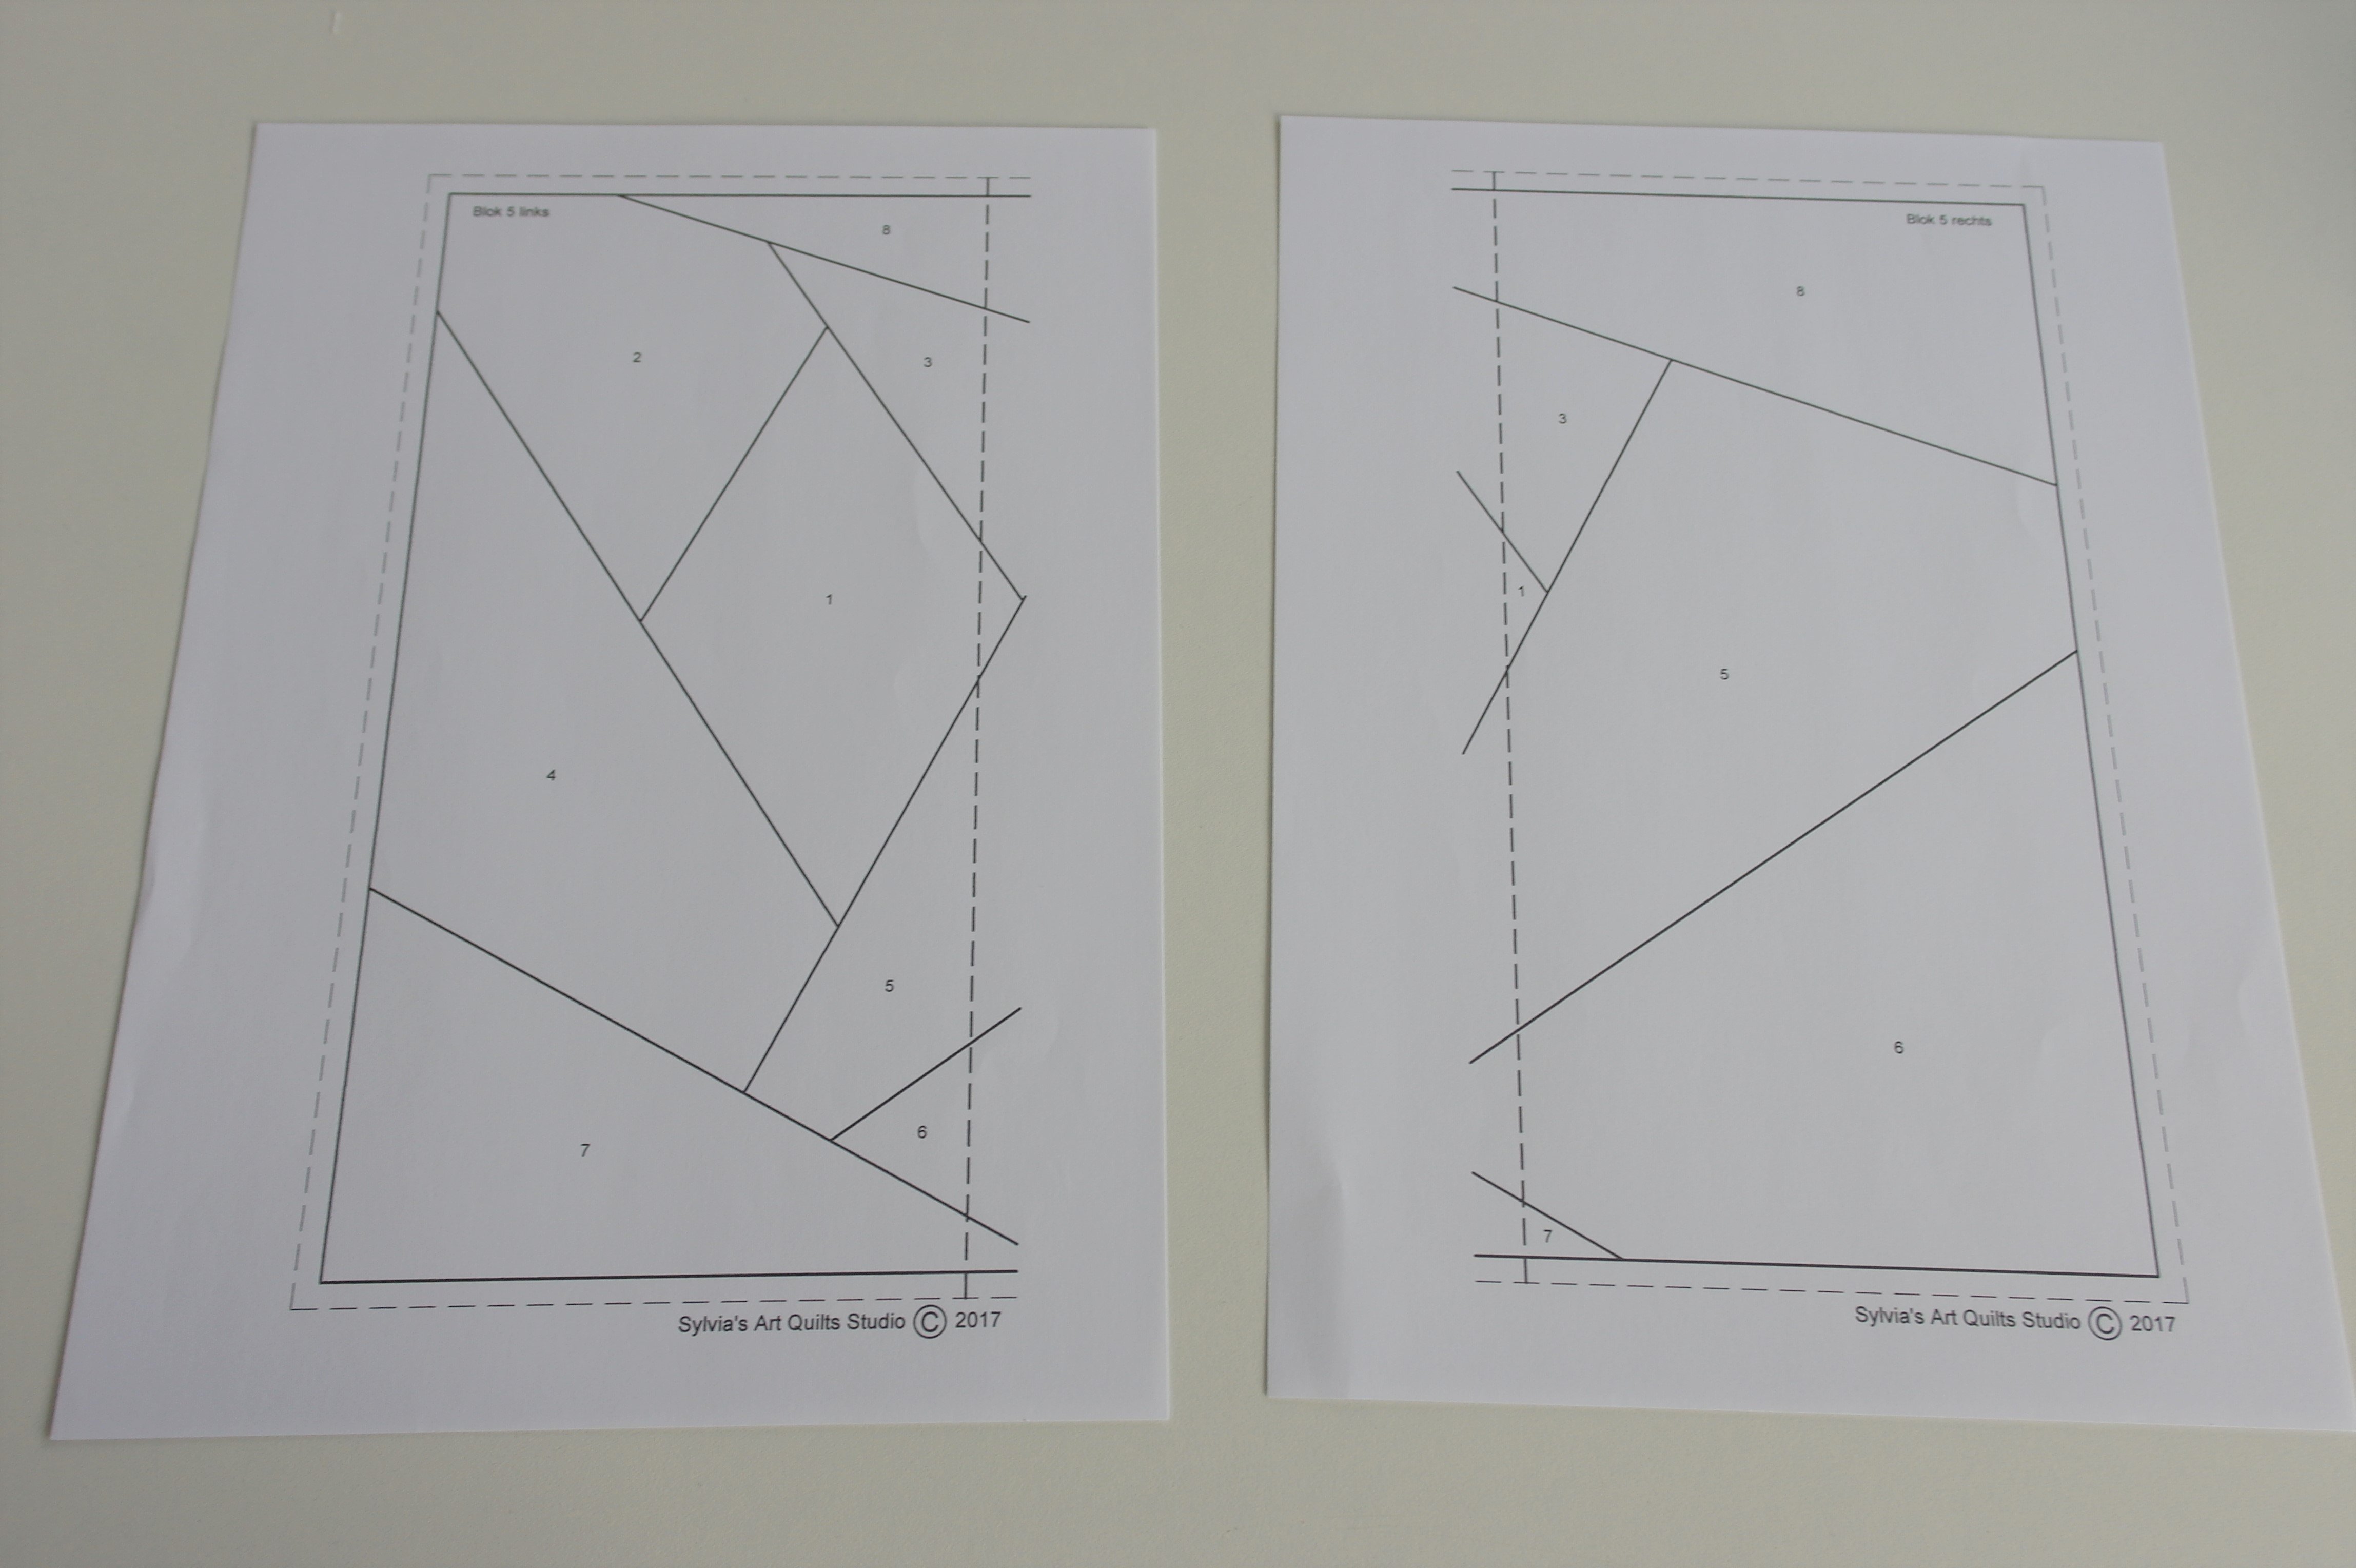
You can download both parts of the pattern here: LEFT and RICHT and make a sandwich of 32 x 32 cm.
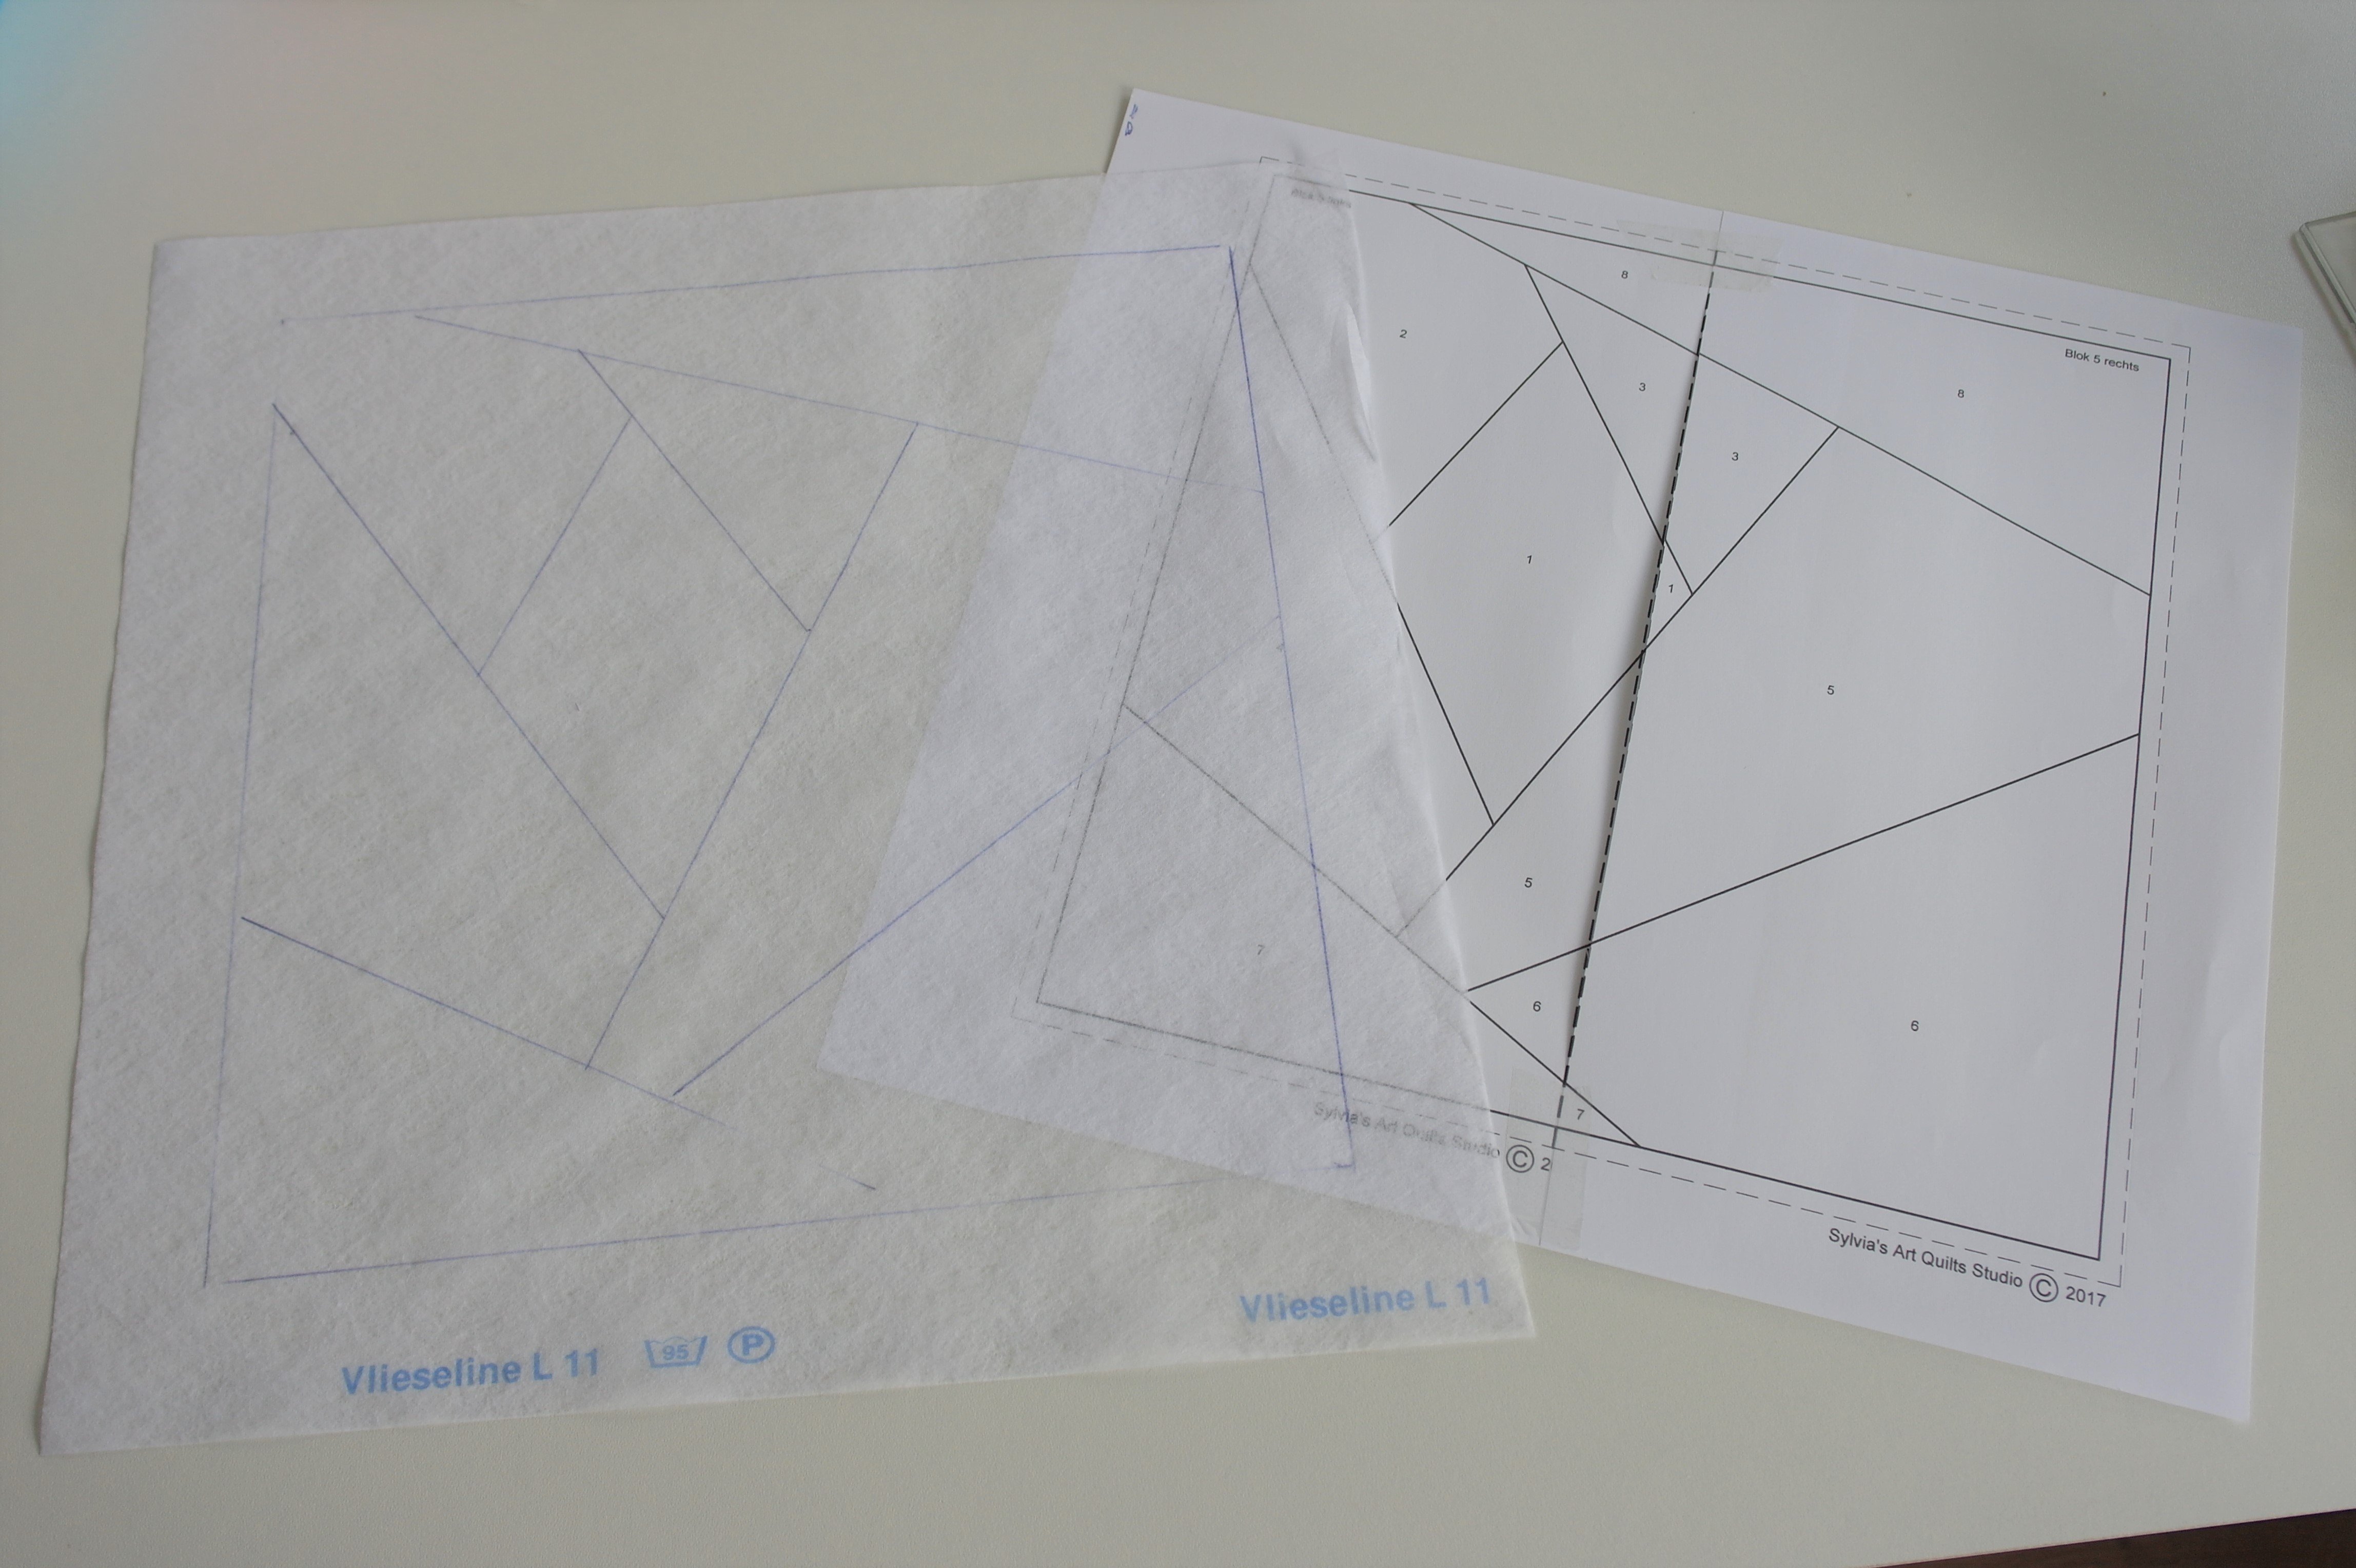
Print the patterns, tape them together and place the Vlieseline L11 (32x32cm) on top of the full pattern. Draw the outside lines of the square and all the lines of the sections inside the square.
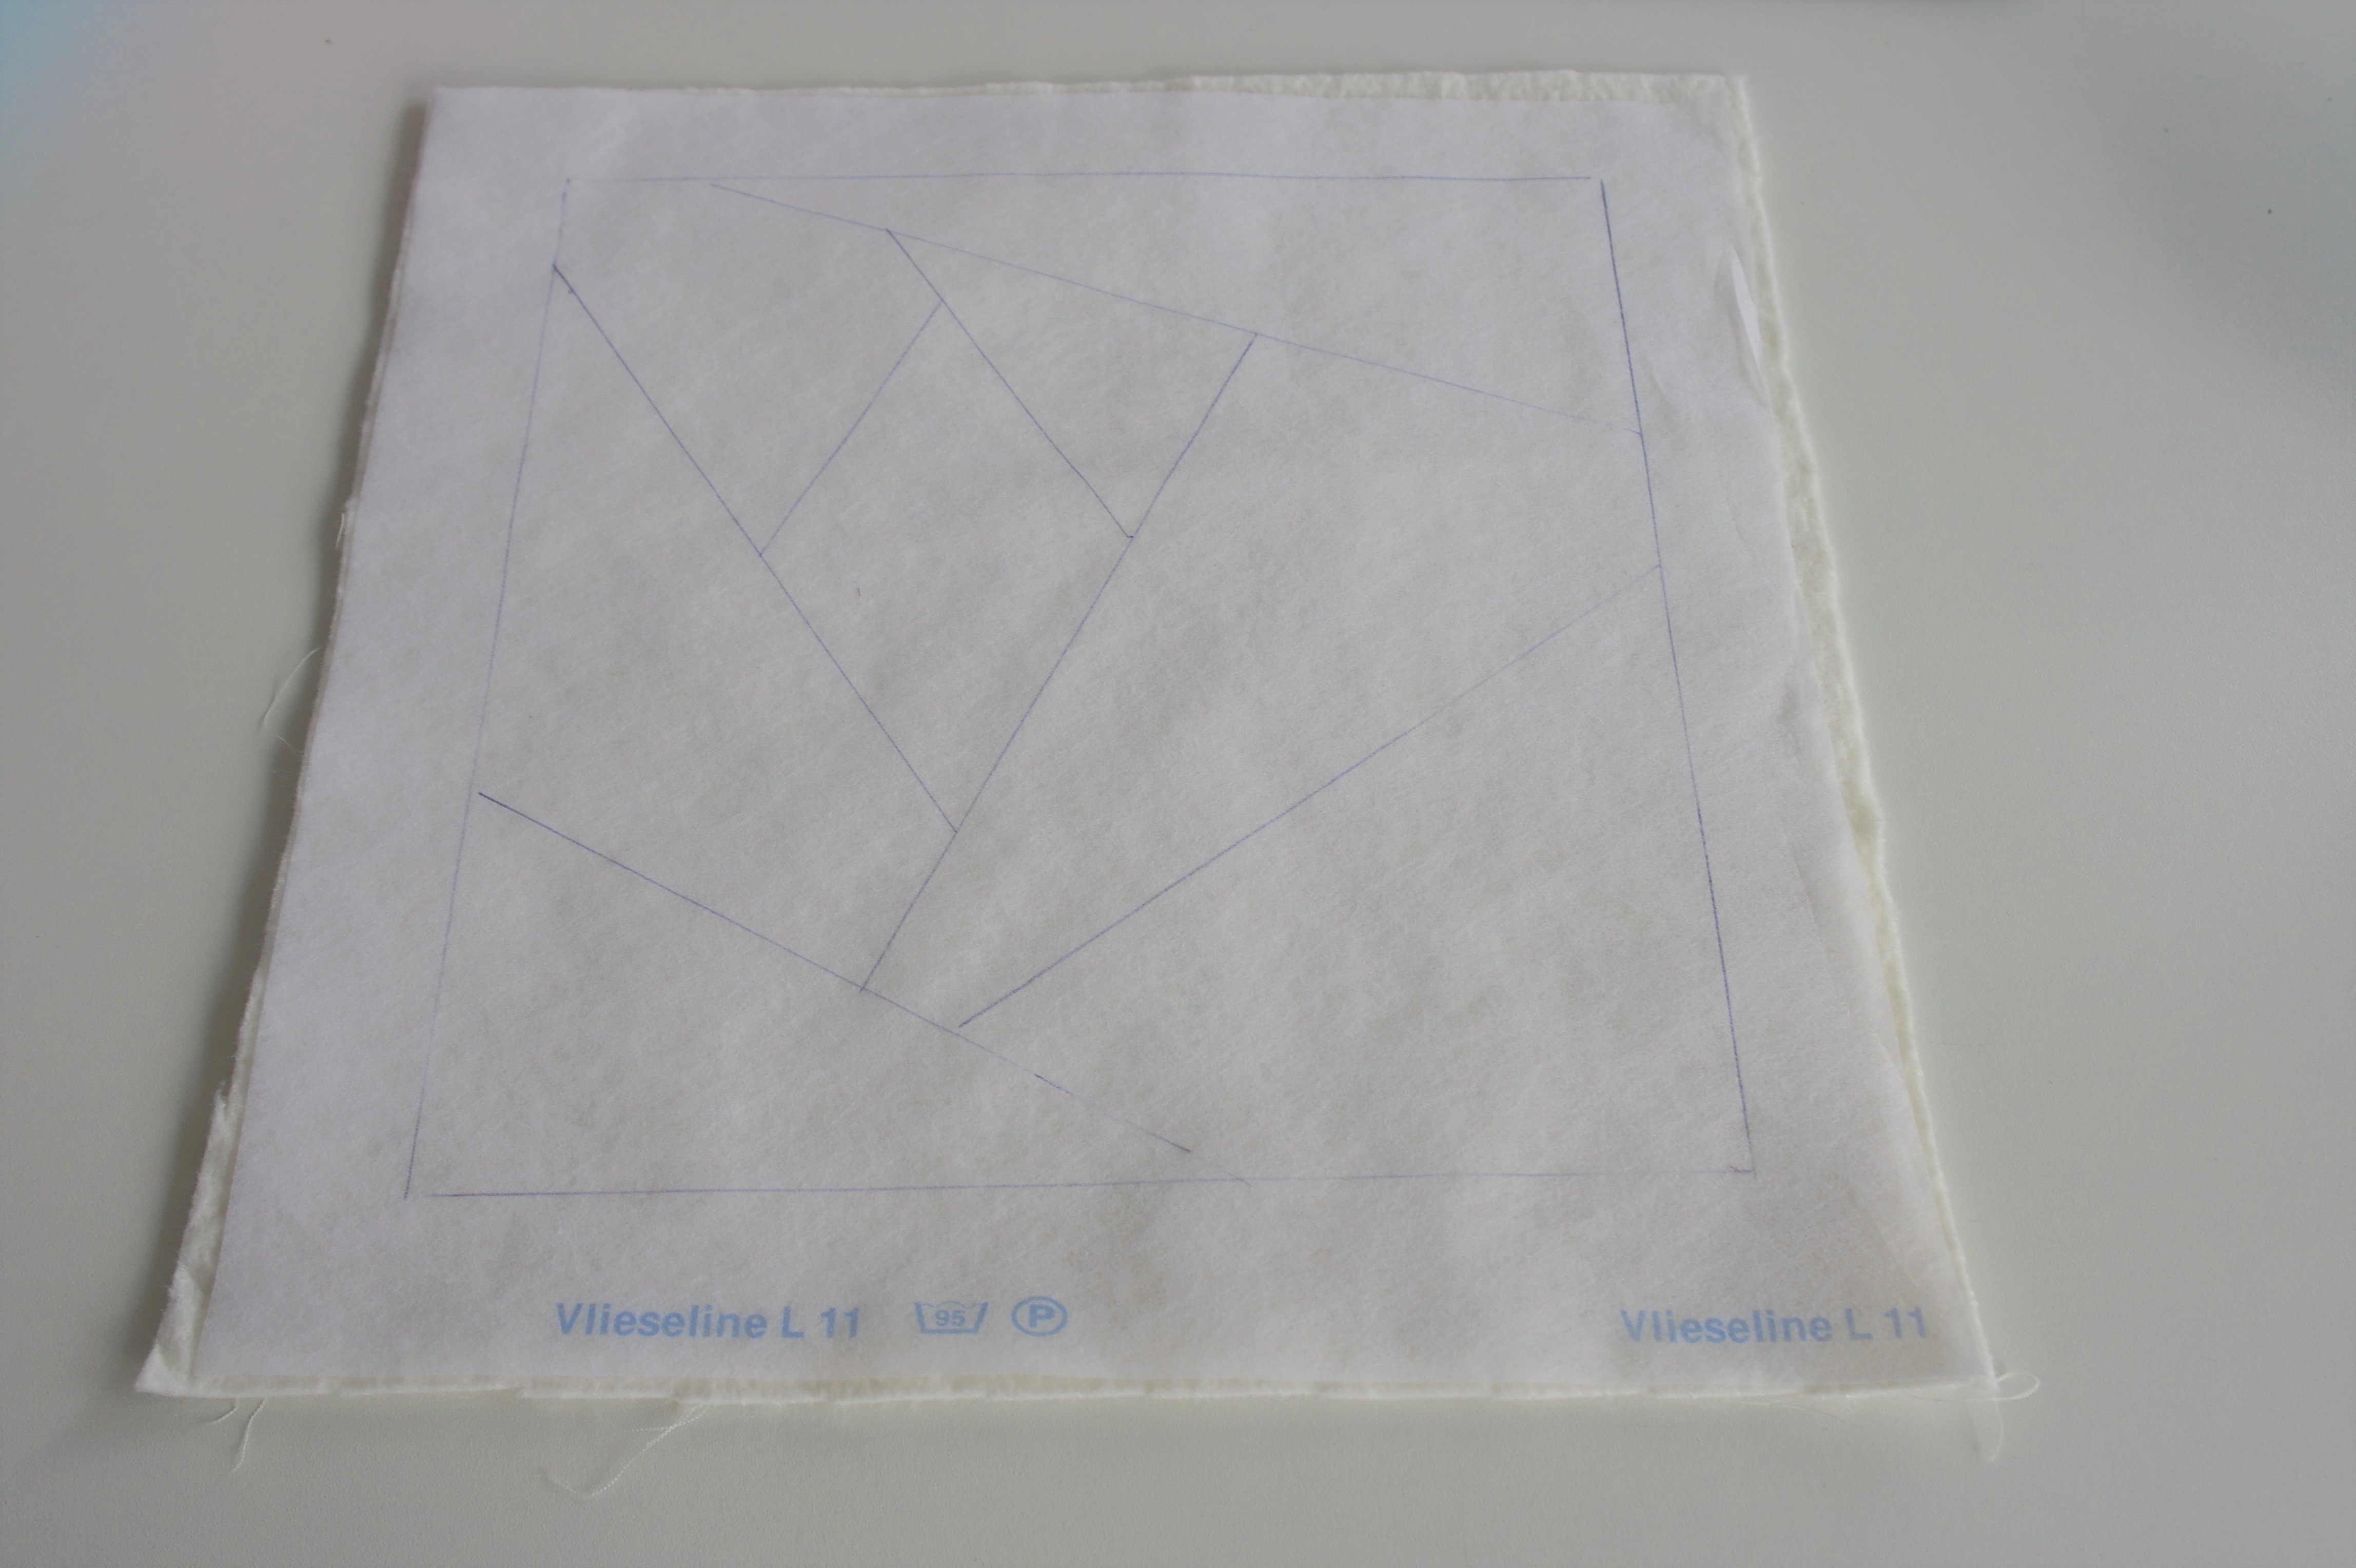
Make the sandwich, using off-white backing, batting and the Vlieseline L11, cut the first (batik) fabric for section 1 – that is the diamond shape in the ‘center’ of the pattern.
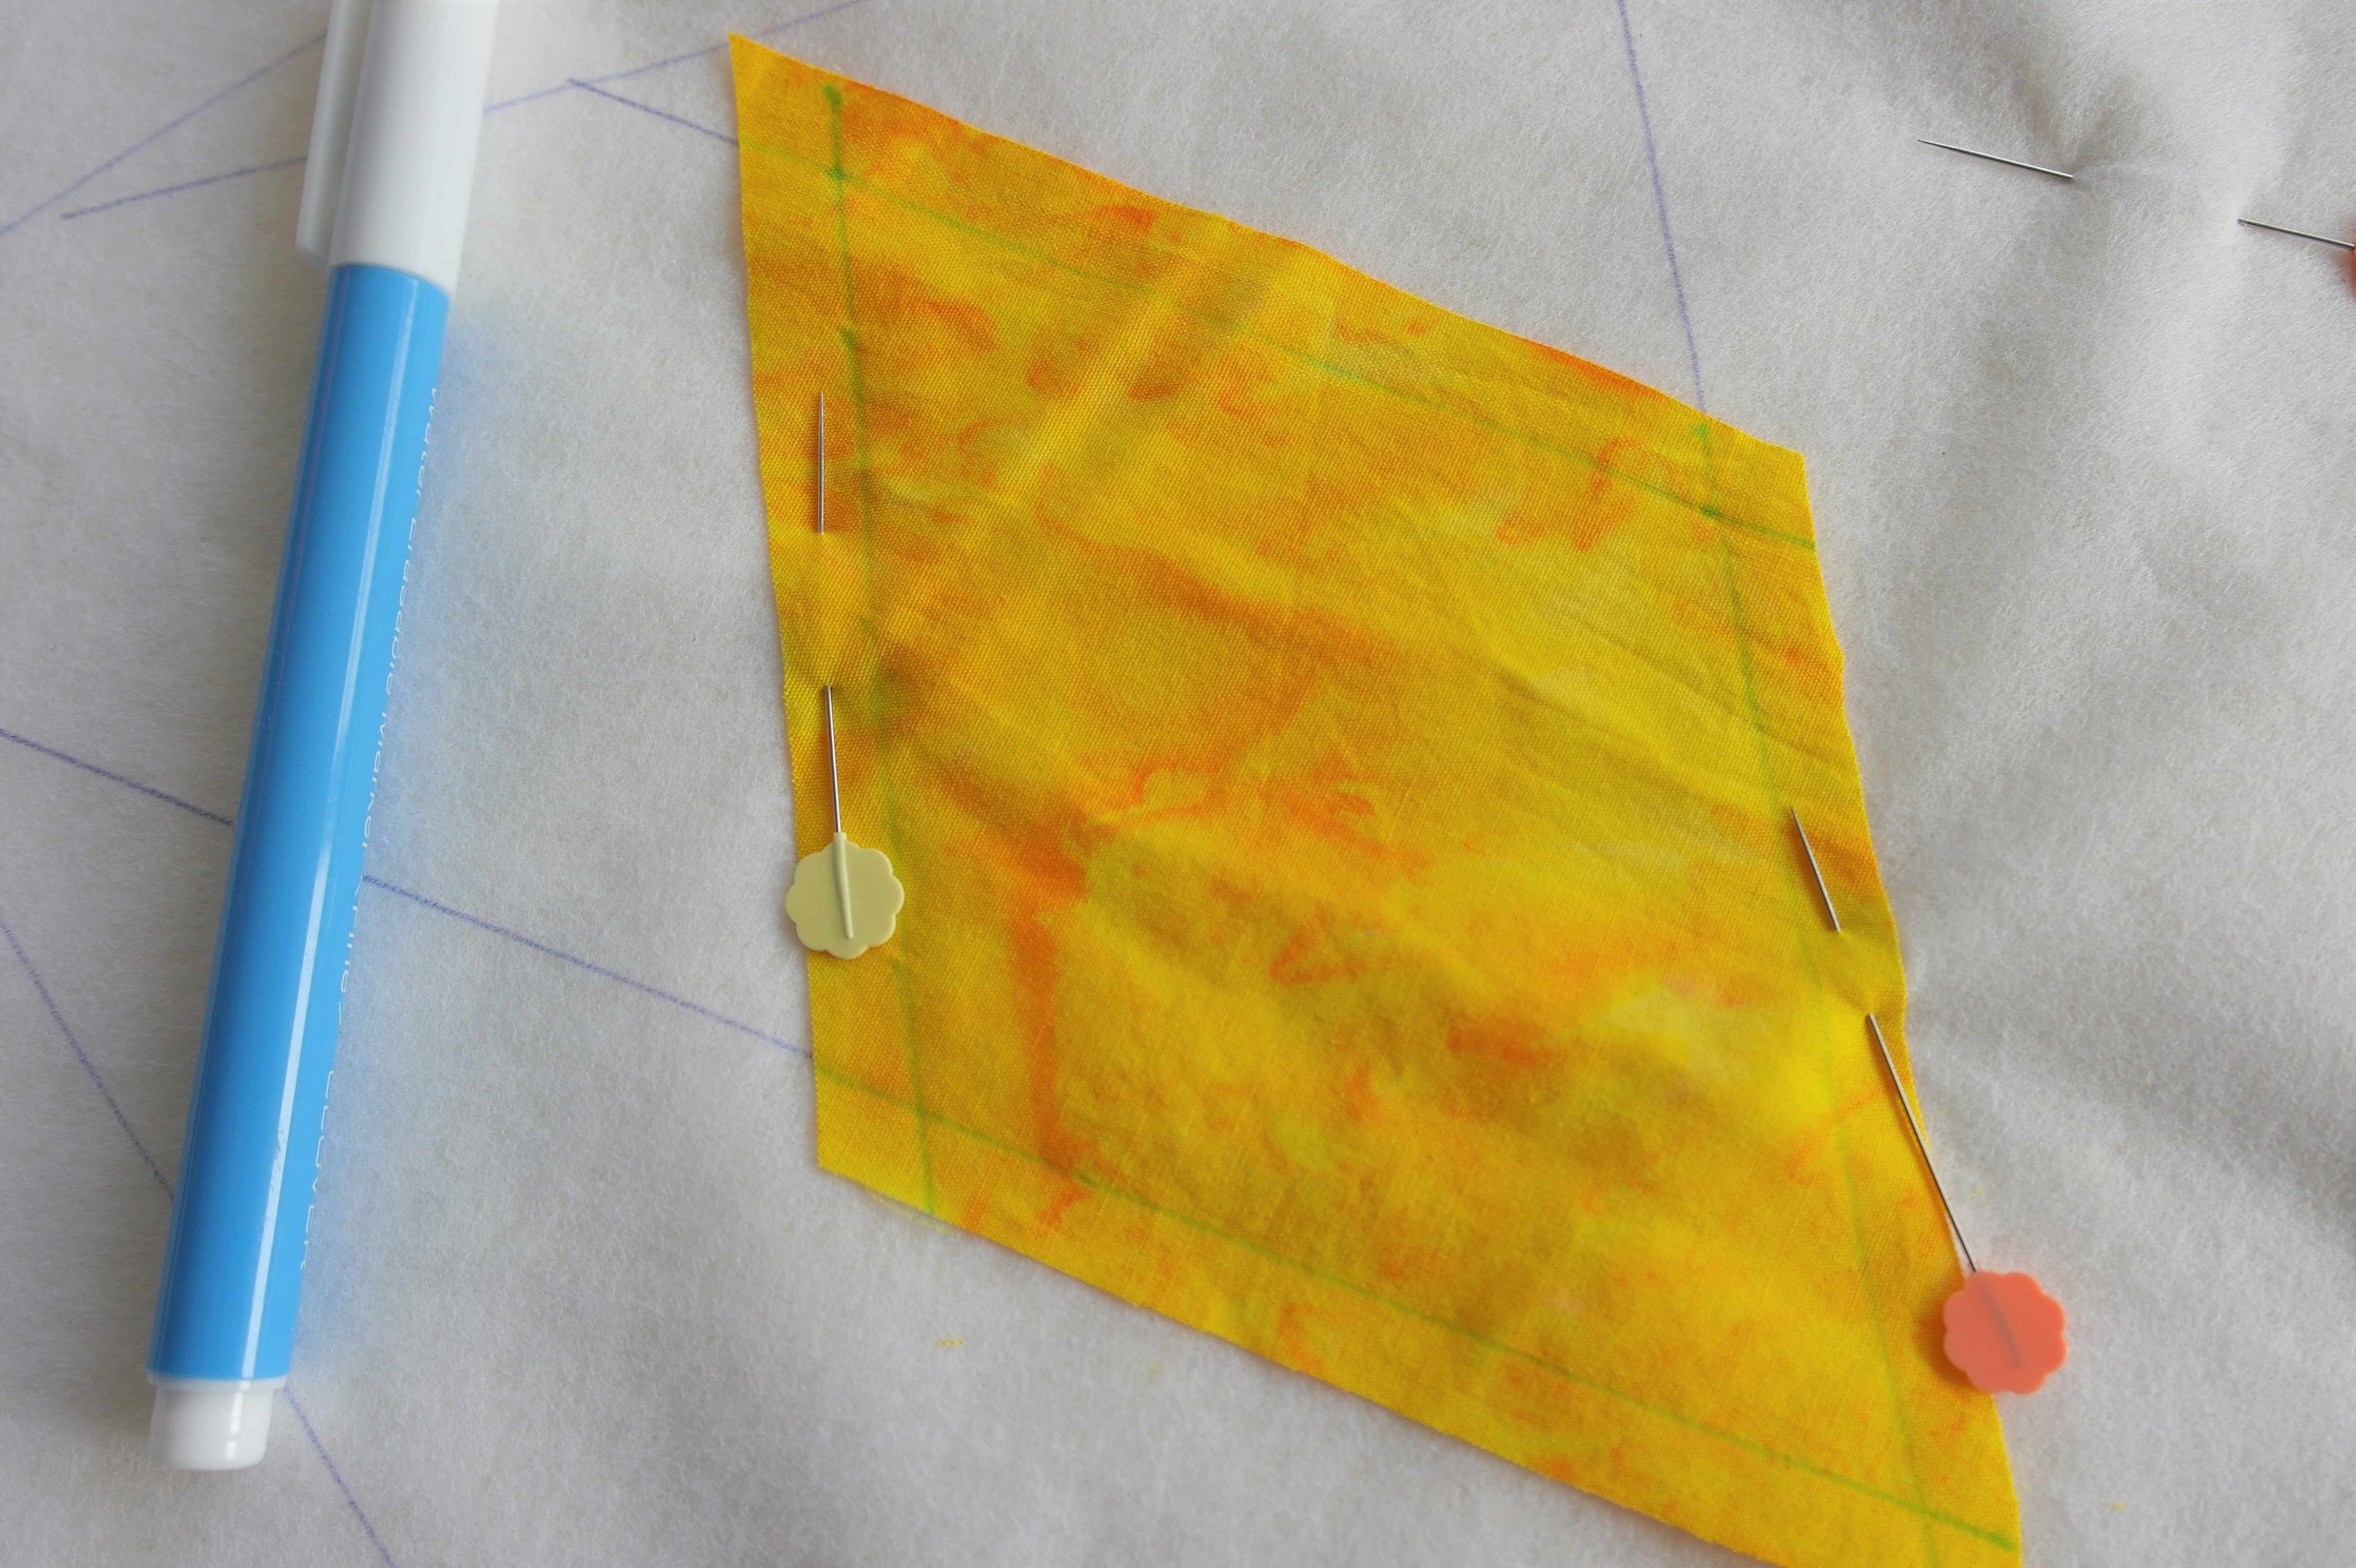
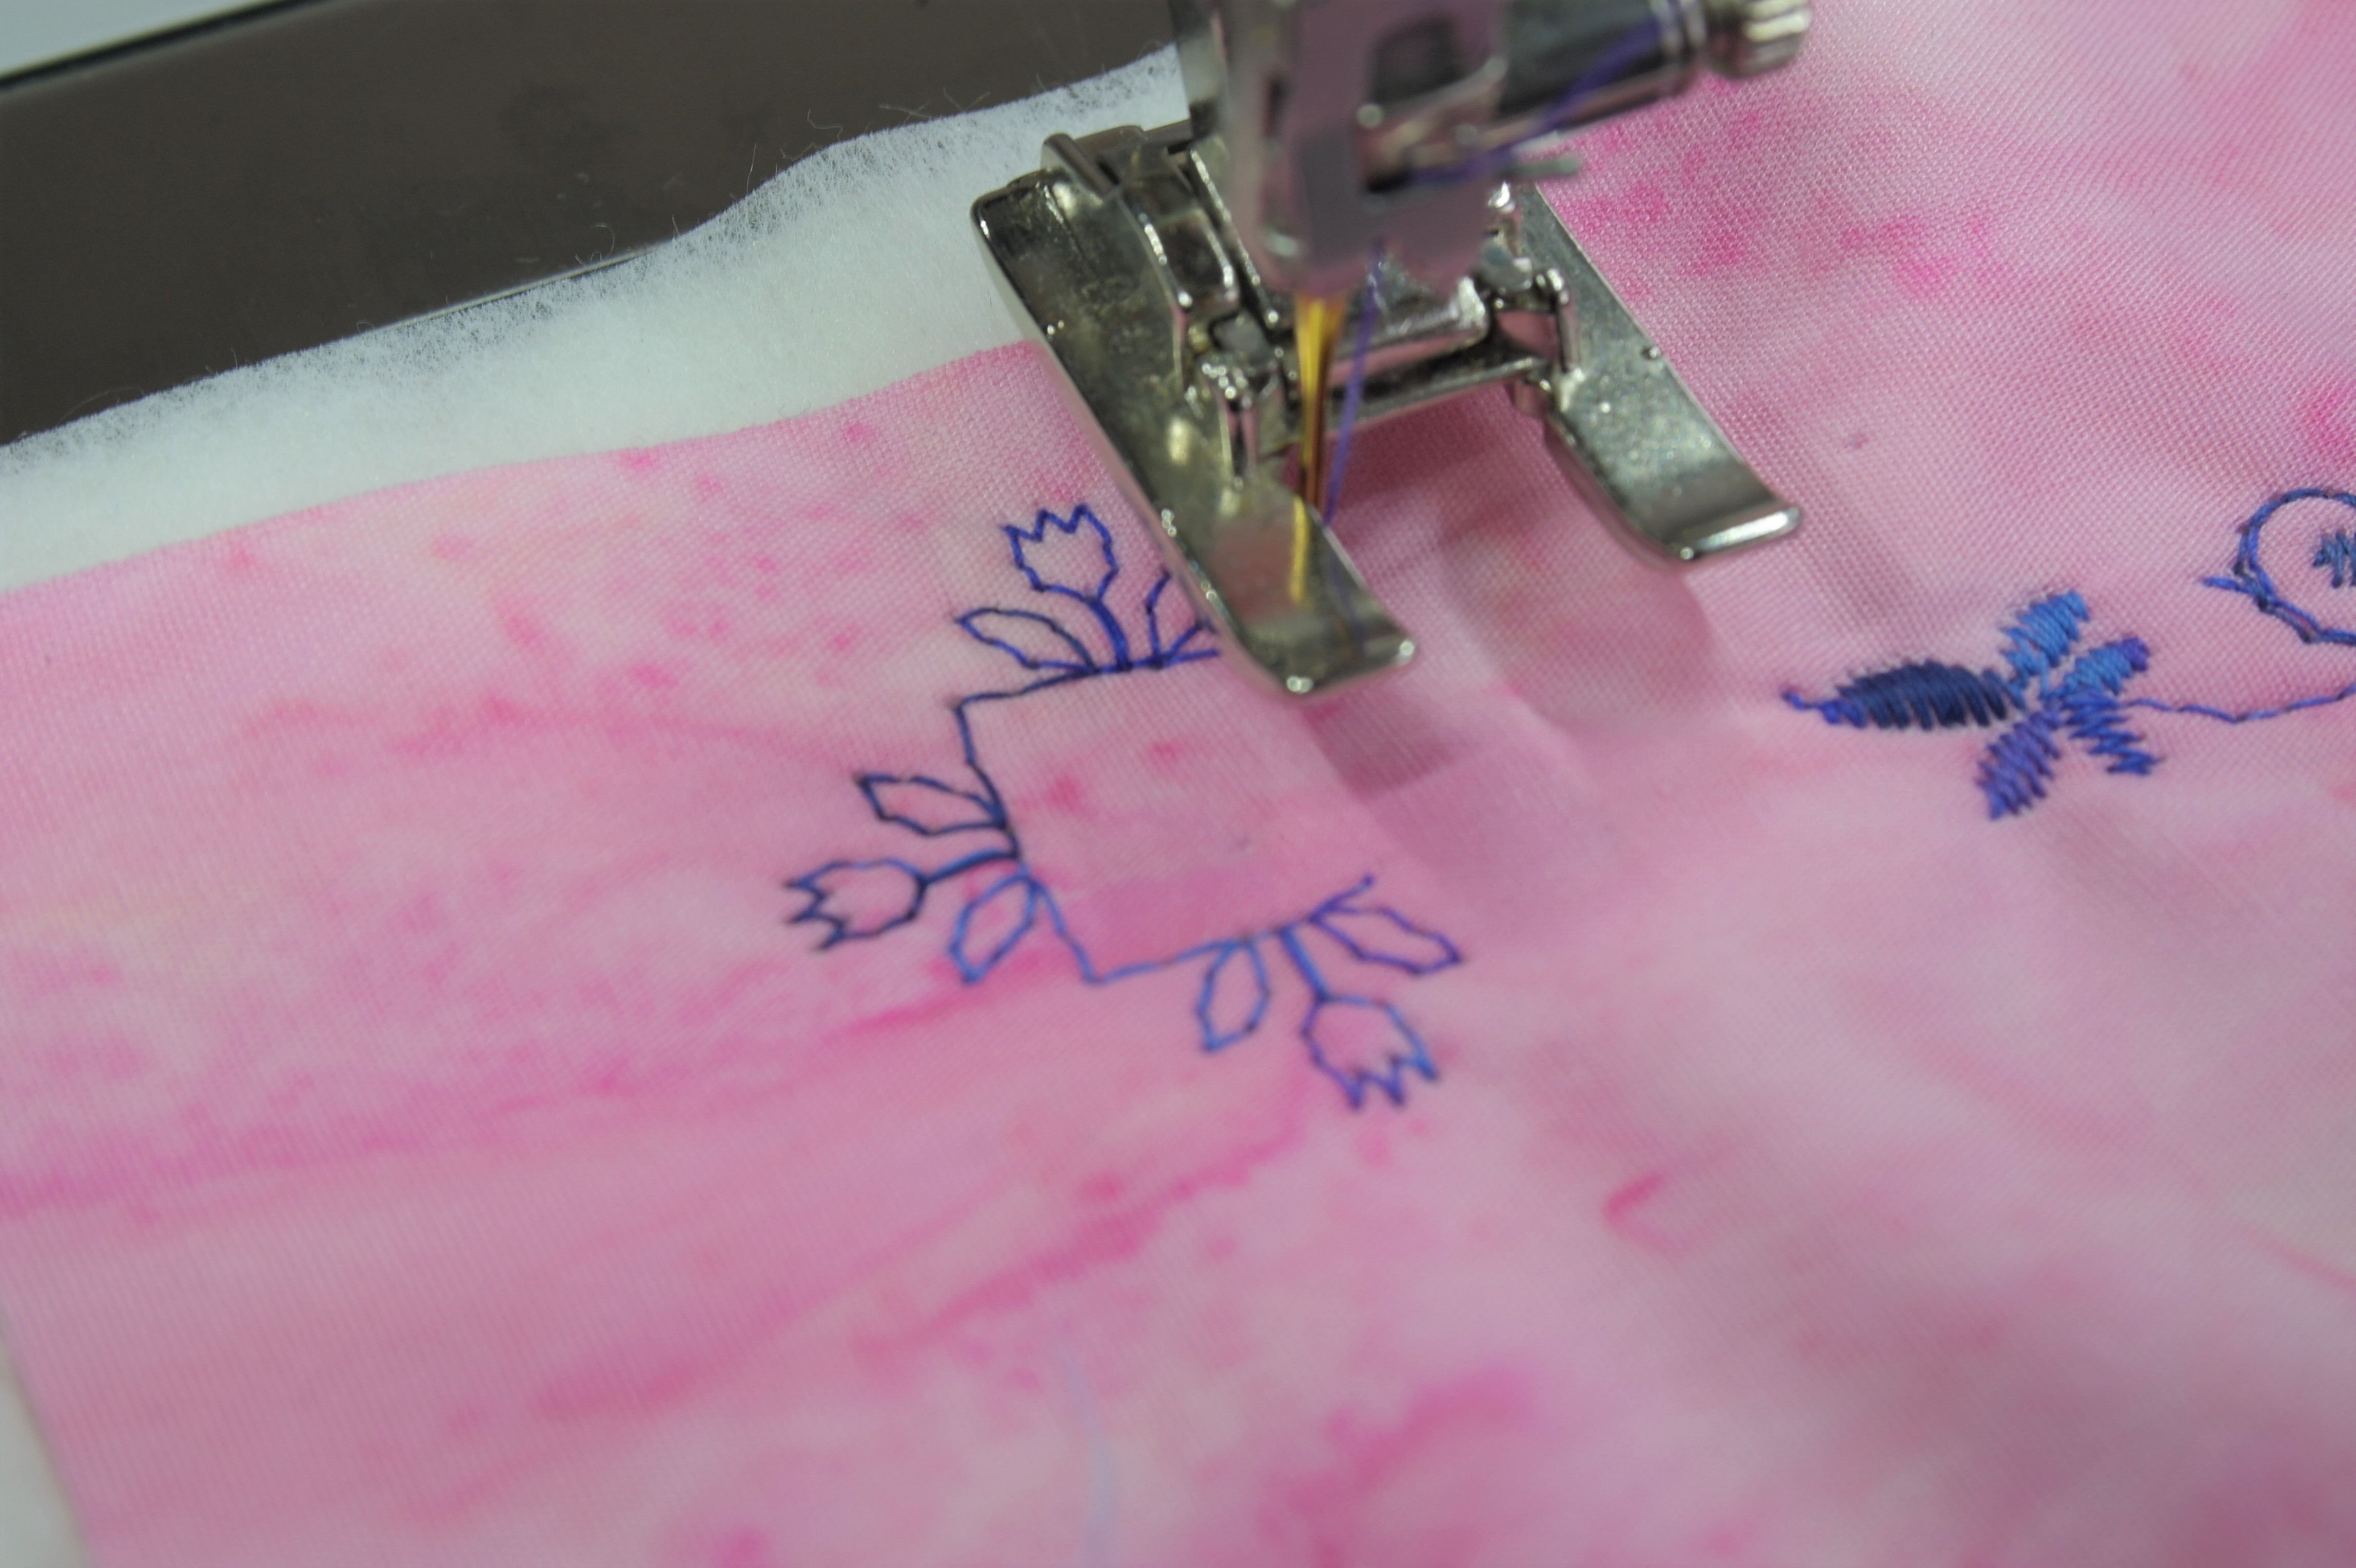
Use a blue water soluble pen to mark all sides of this diamond shape of section 1: they will have to show up on the (batik)fabric, so you can see an area to work in. Normally you don’t draw lines on top of the fabrics, but with this block you will be placing stitches ‘in a square’ on top of this section, so an indication of placement is neccessary.
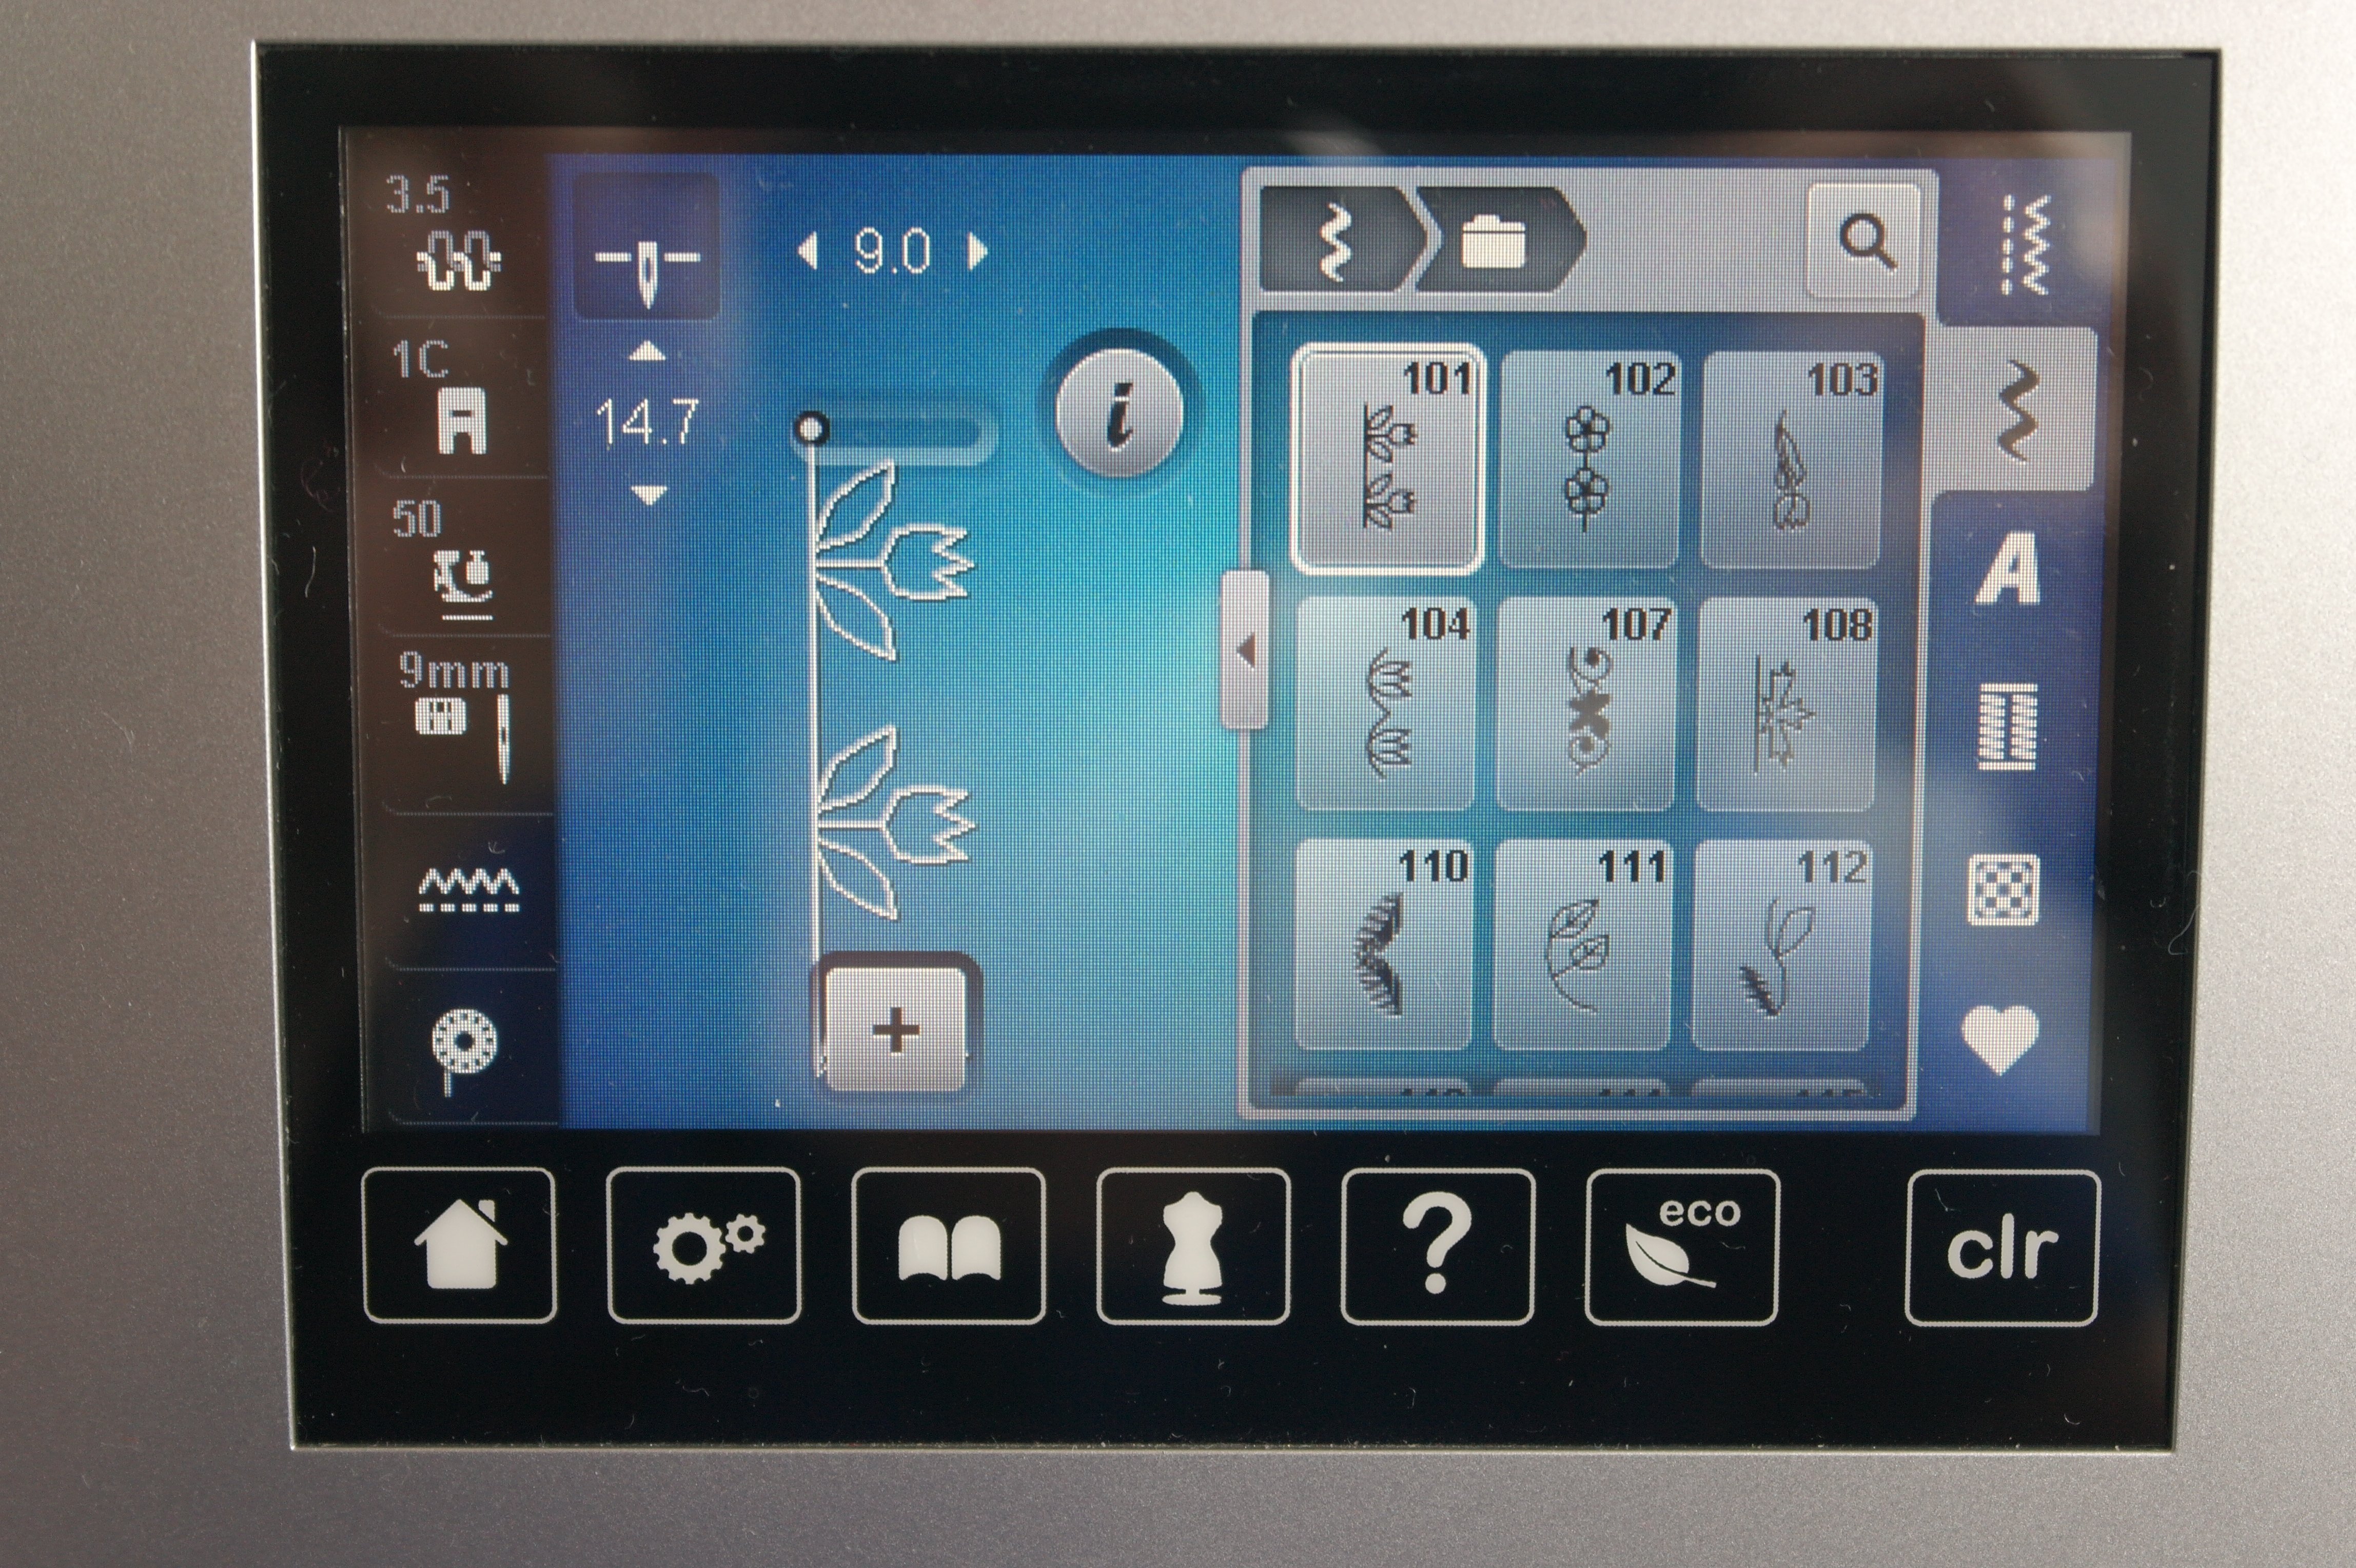
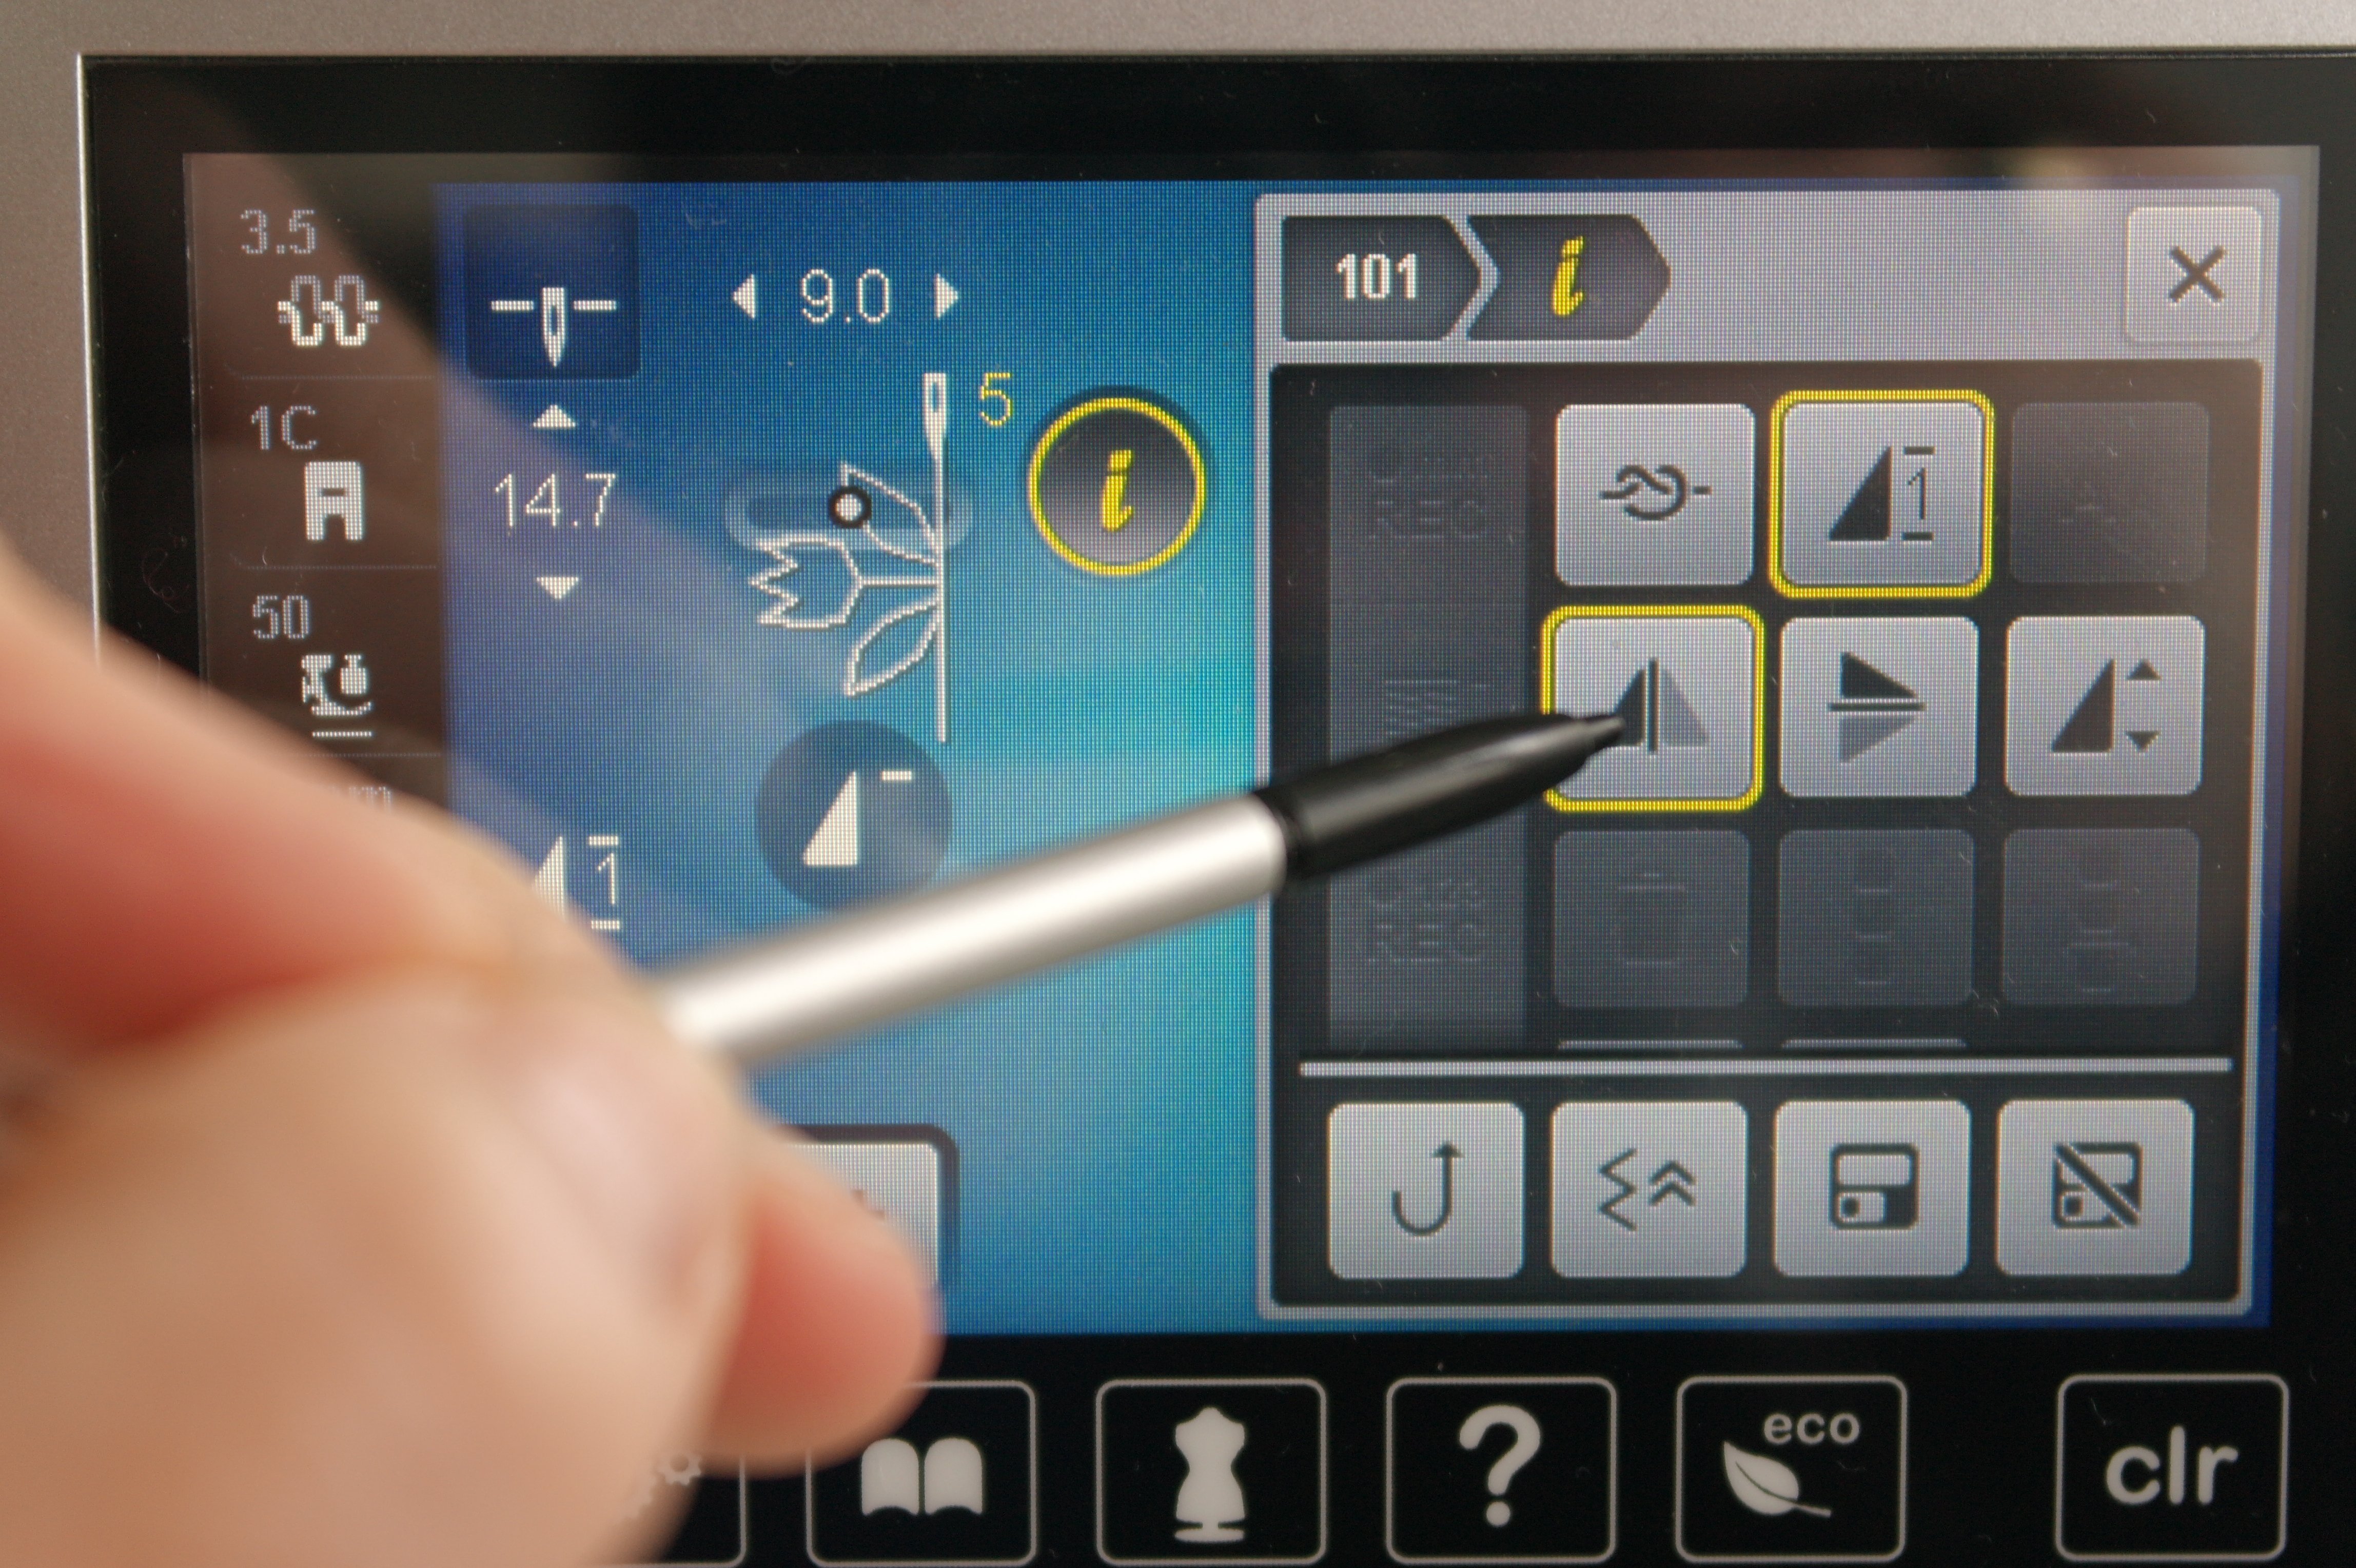
Select a fun decorative stitch on your machine: preferably one with a base of straight stitches. I have selected stitch ‘101’. As you can see on the display of my BERNINA 770QE , the stitch is shown as a row. But I would like to work with just one complete stitch.
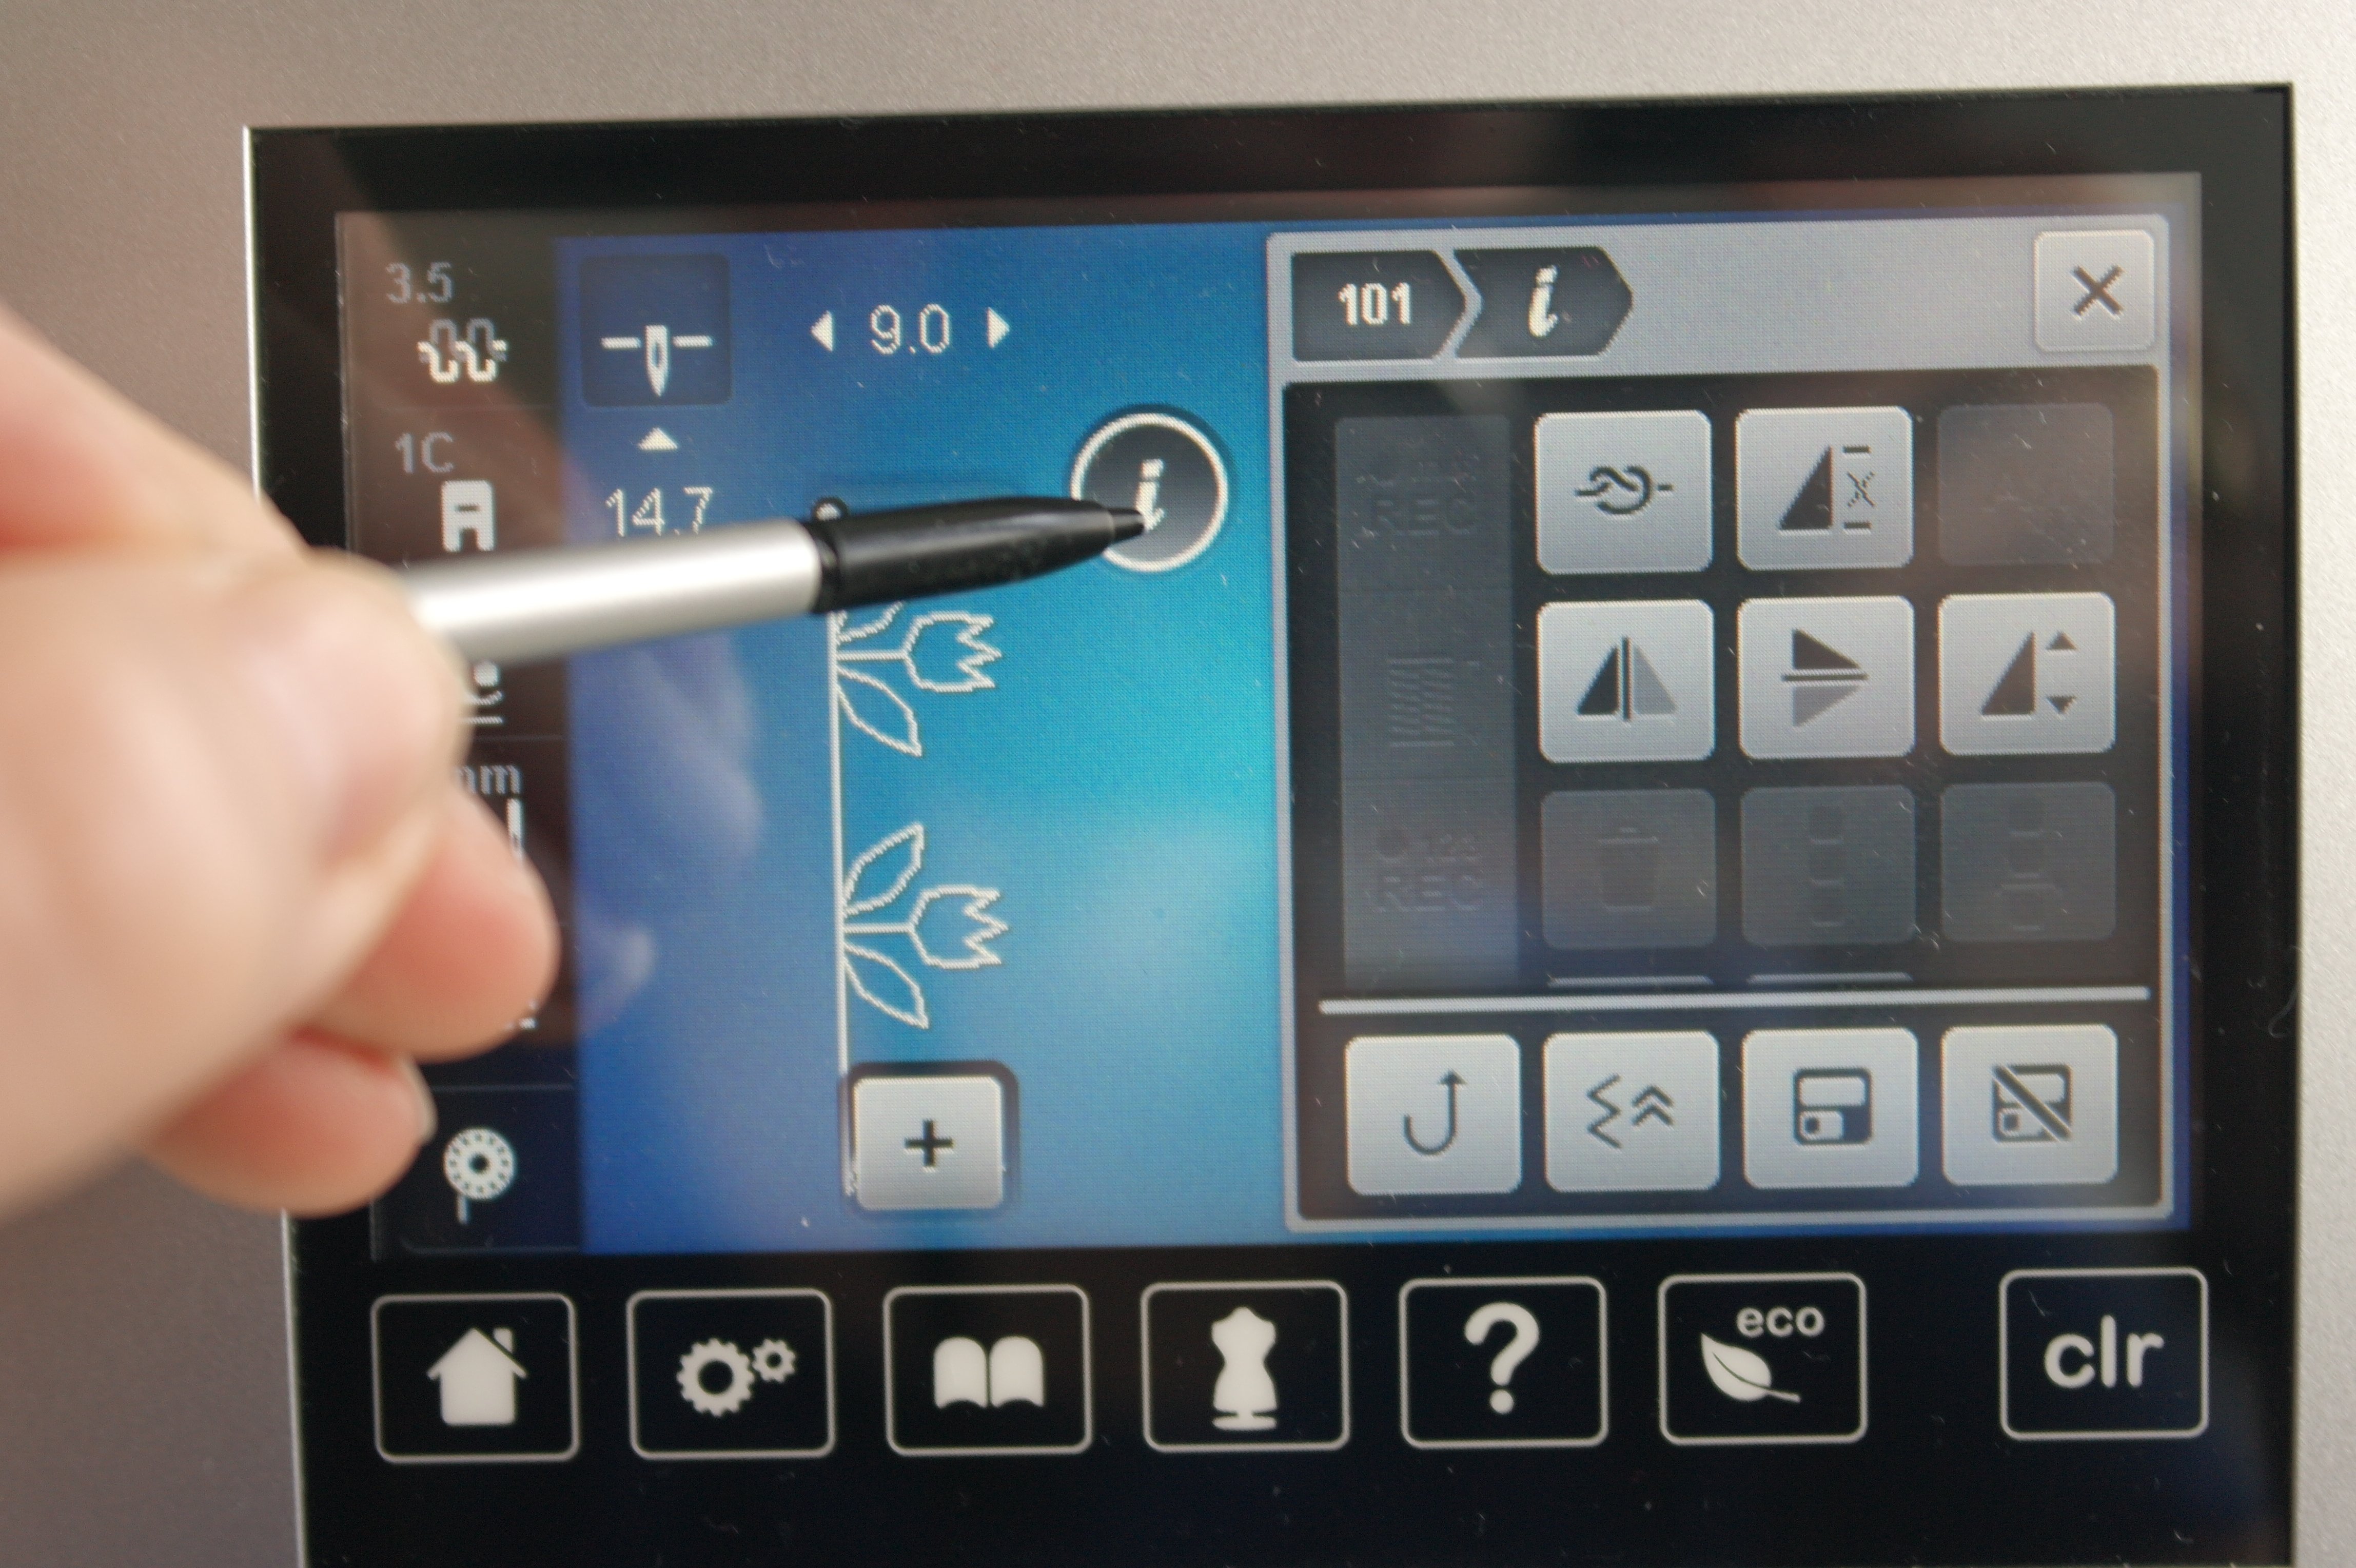
To do so, I am clicking with my stylus on the ‘i’ button, to the right of the stitches. An extra menu appears, with a lot of buttons: the one I am looking for is the triangle with two stripes and the ‘X’.
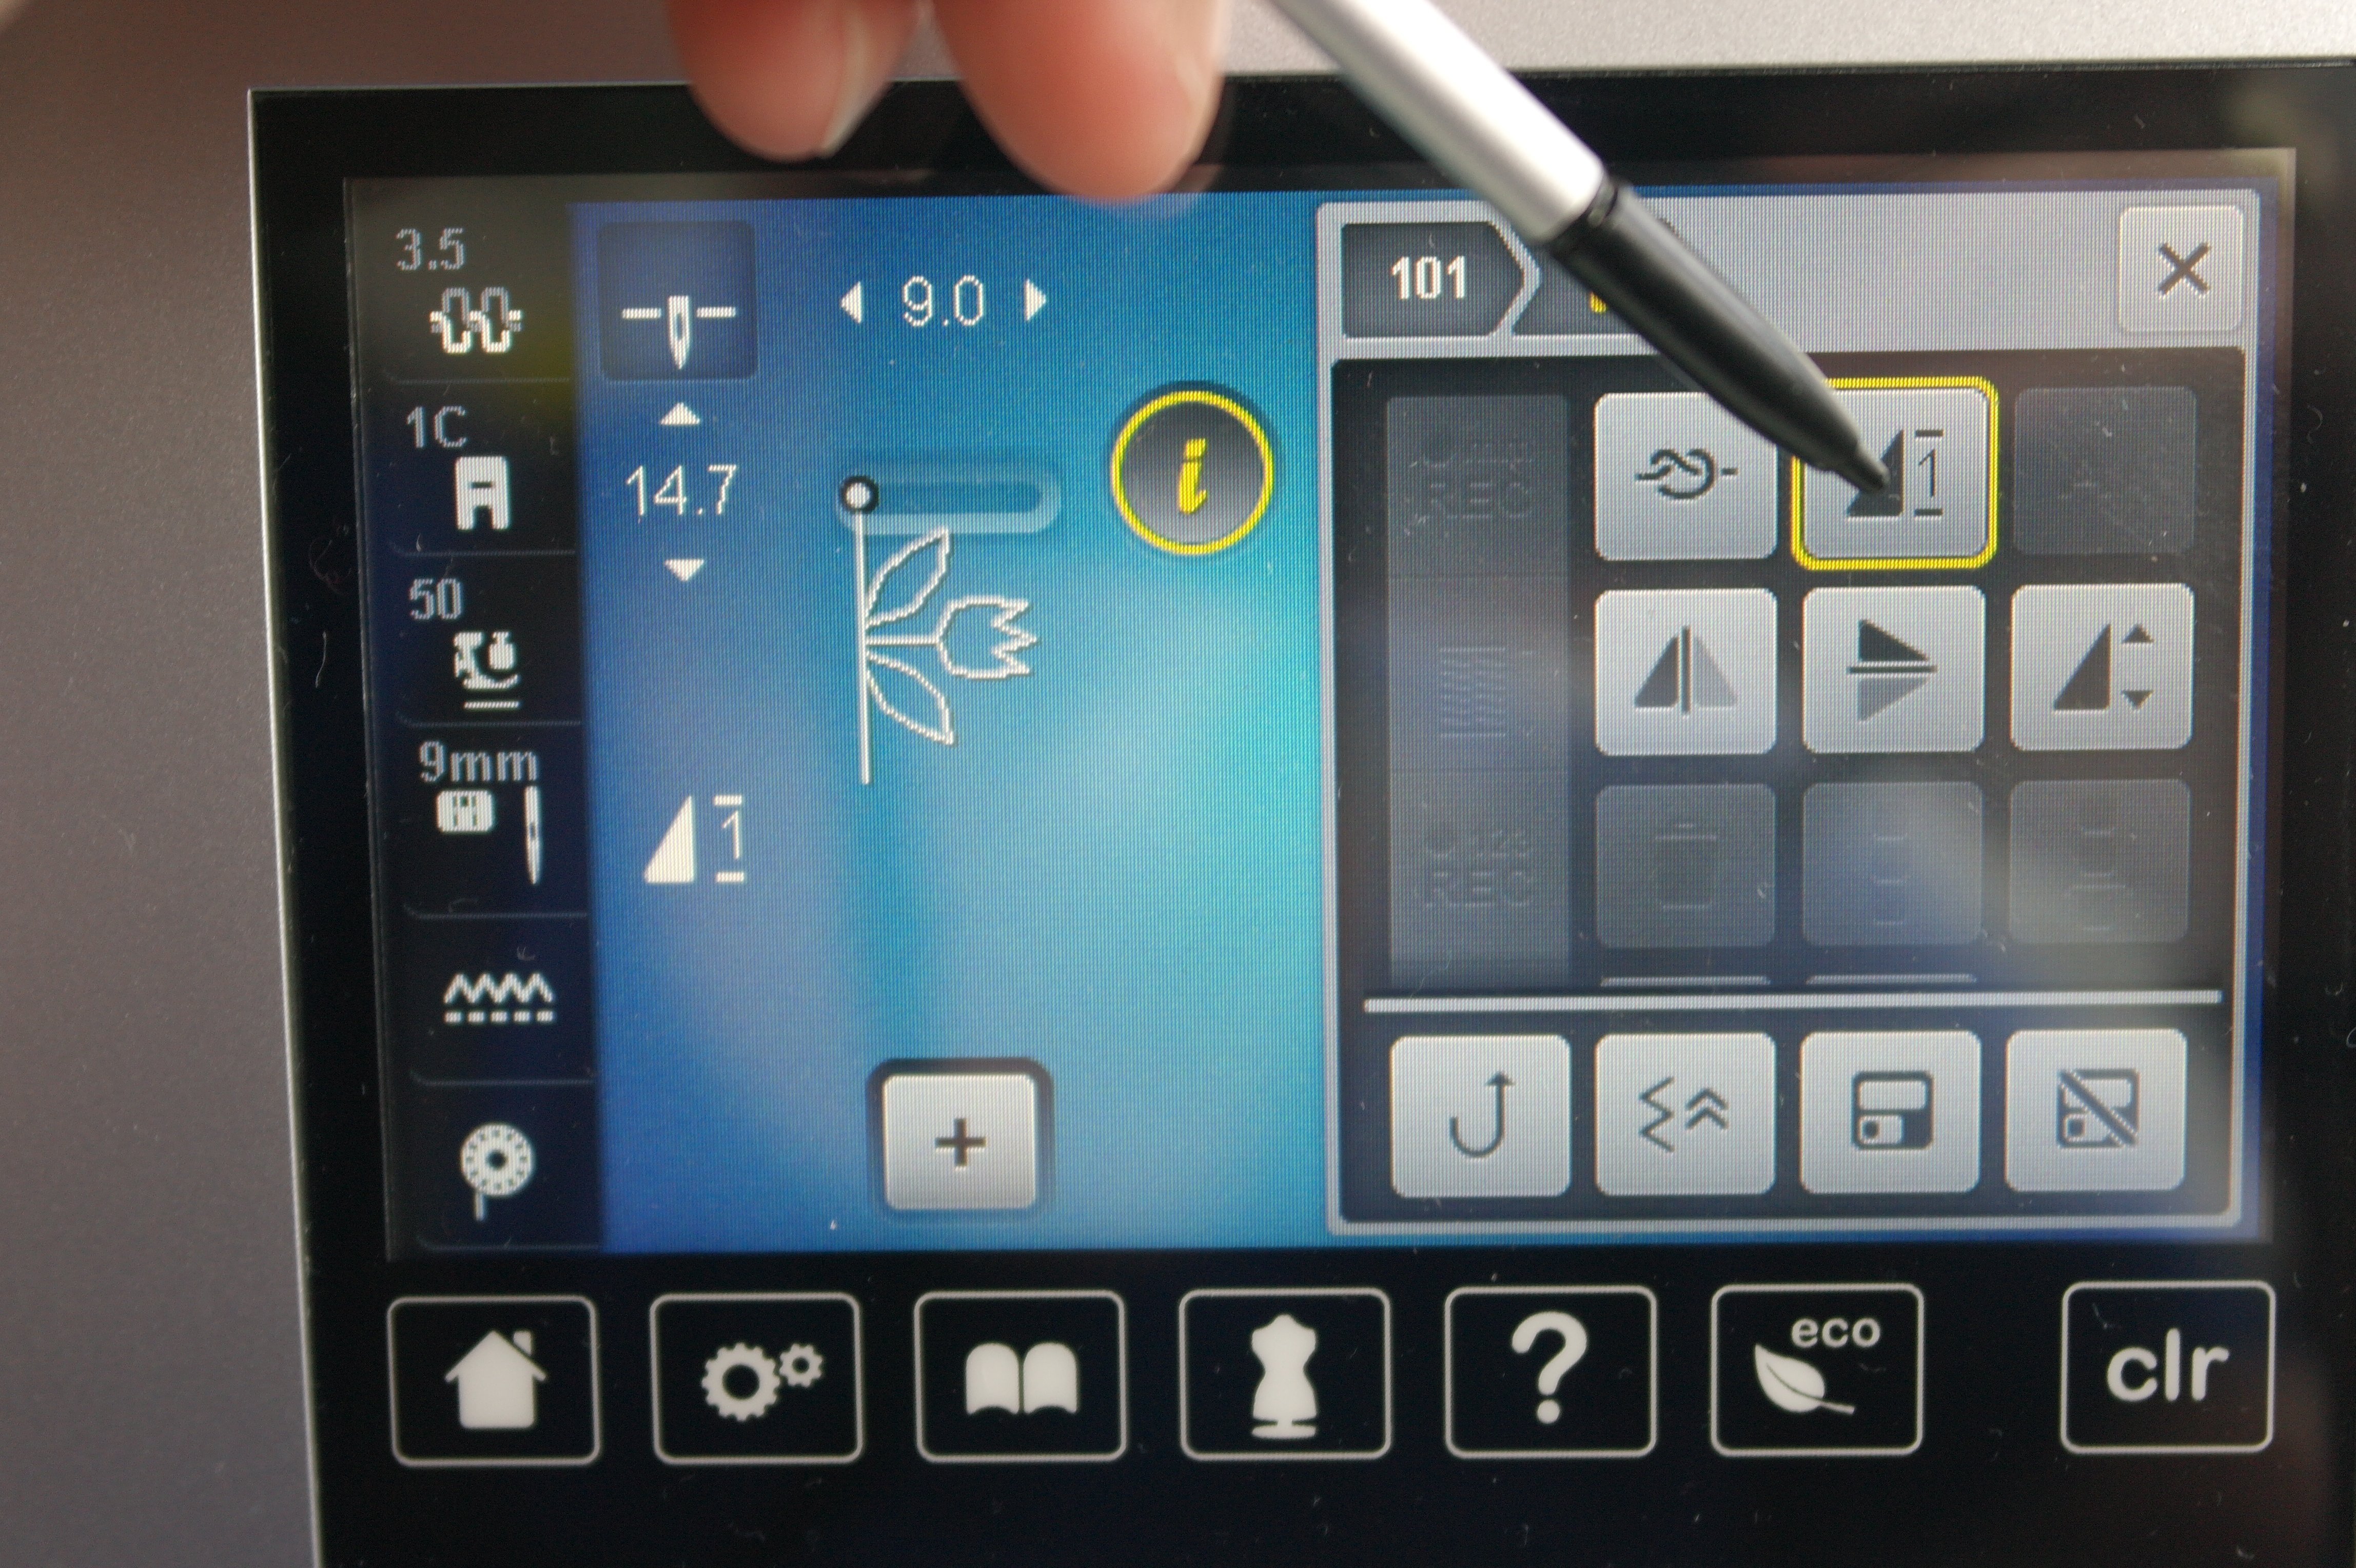
I will click on this button just once: instead of the ‘X’ a ‘1’ appears, which means that my machine will now only make one finished stitch.
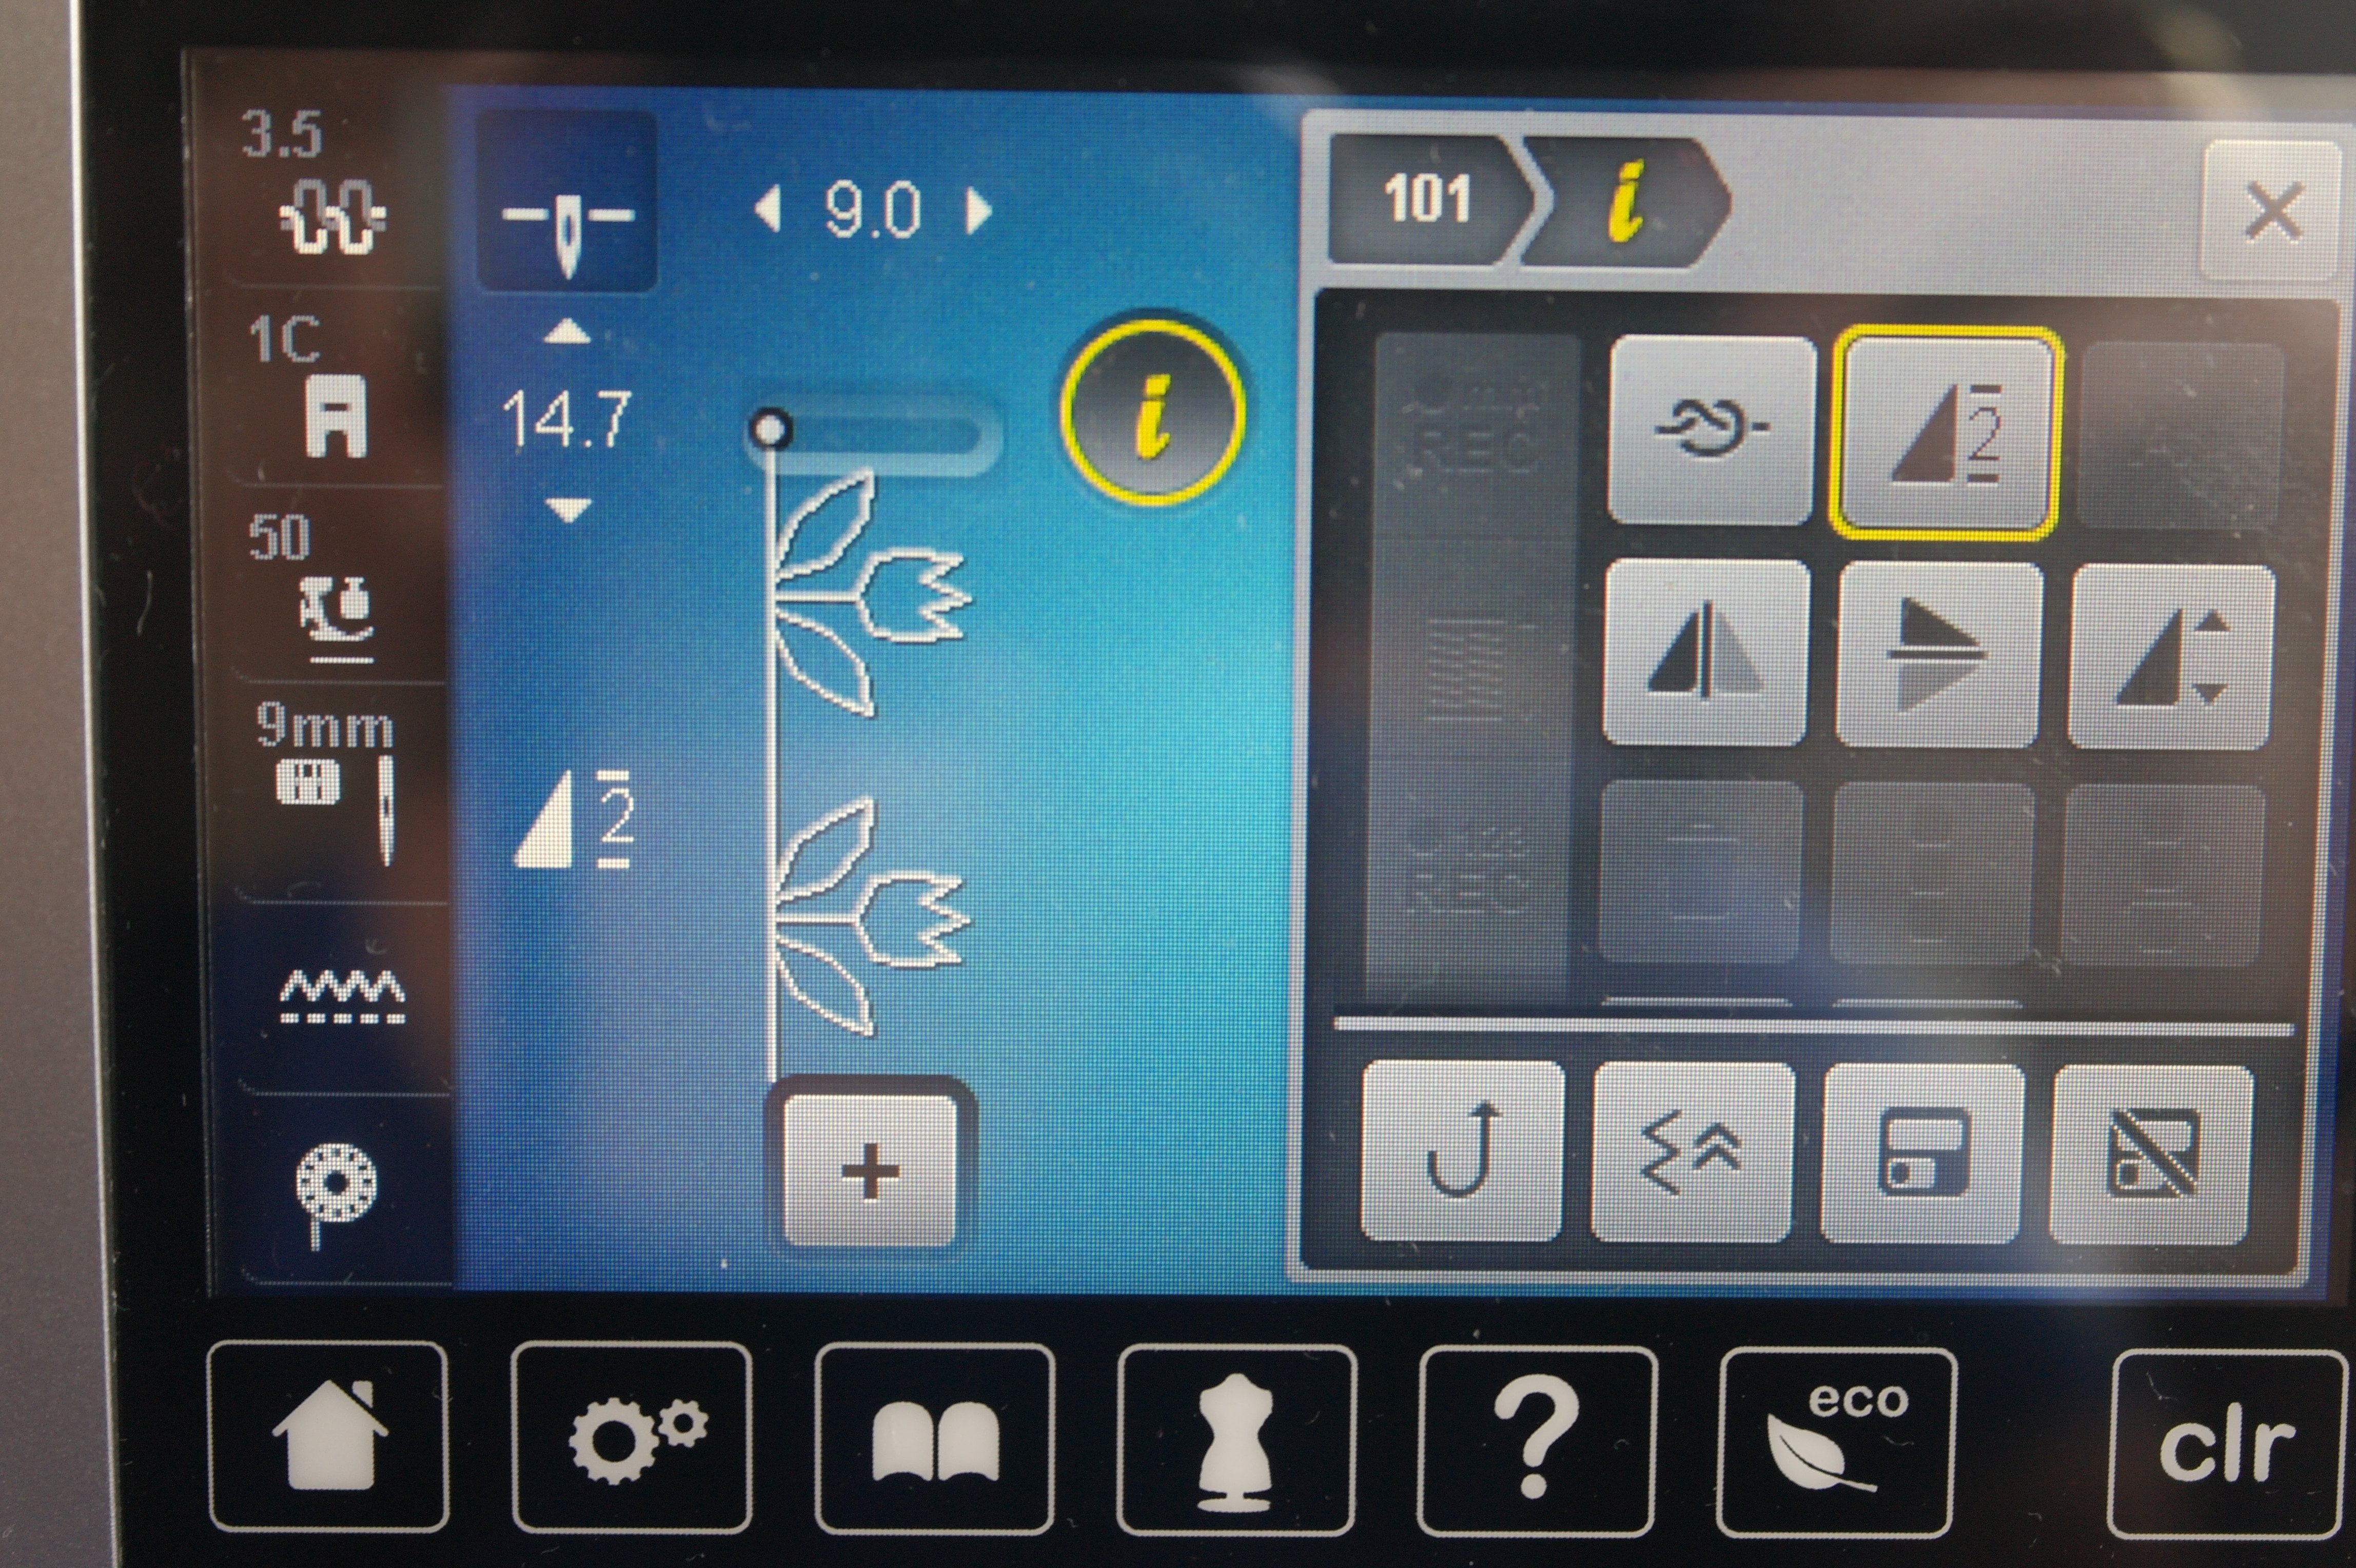
The more you click on this button, the higher the number will be – so clicking on it twice, a ‘2’ will show up, and clicking some more like 3, 4, 5, 6, 7, 8, 9 times will give you the number of repeats of the finished stitch. So clicking 9 x will give you a row of 9 finished stitches, which will be made without a stop. If you click one more time on this botton – which will be the tenth time – the setting will be ‘default’ again: a row of stitches will be sewn in an endless line, and will only stop if you’ll stop.
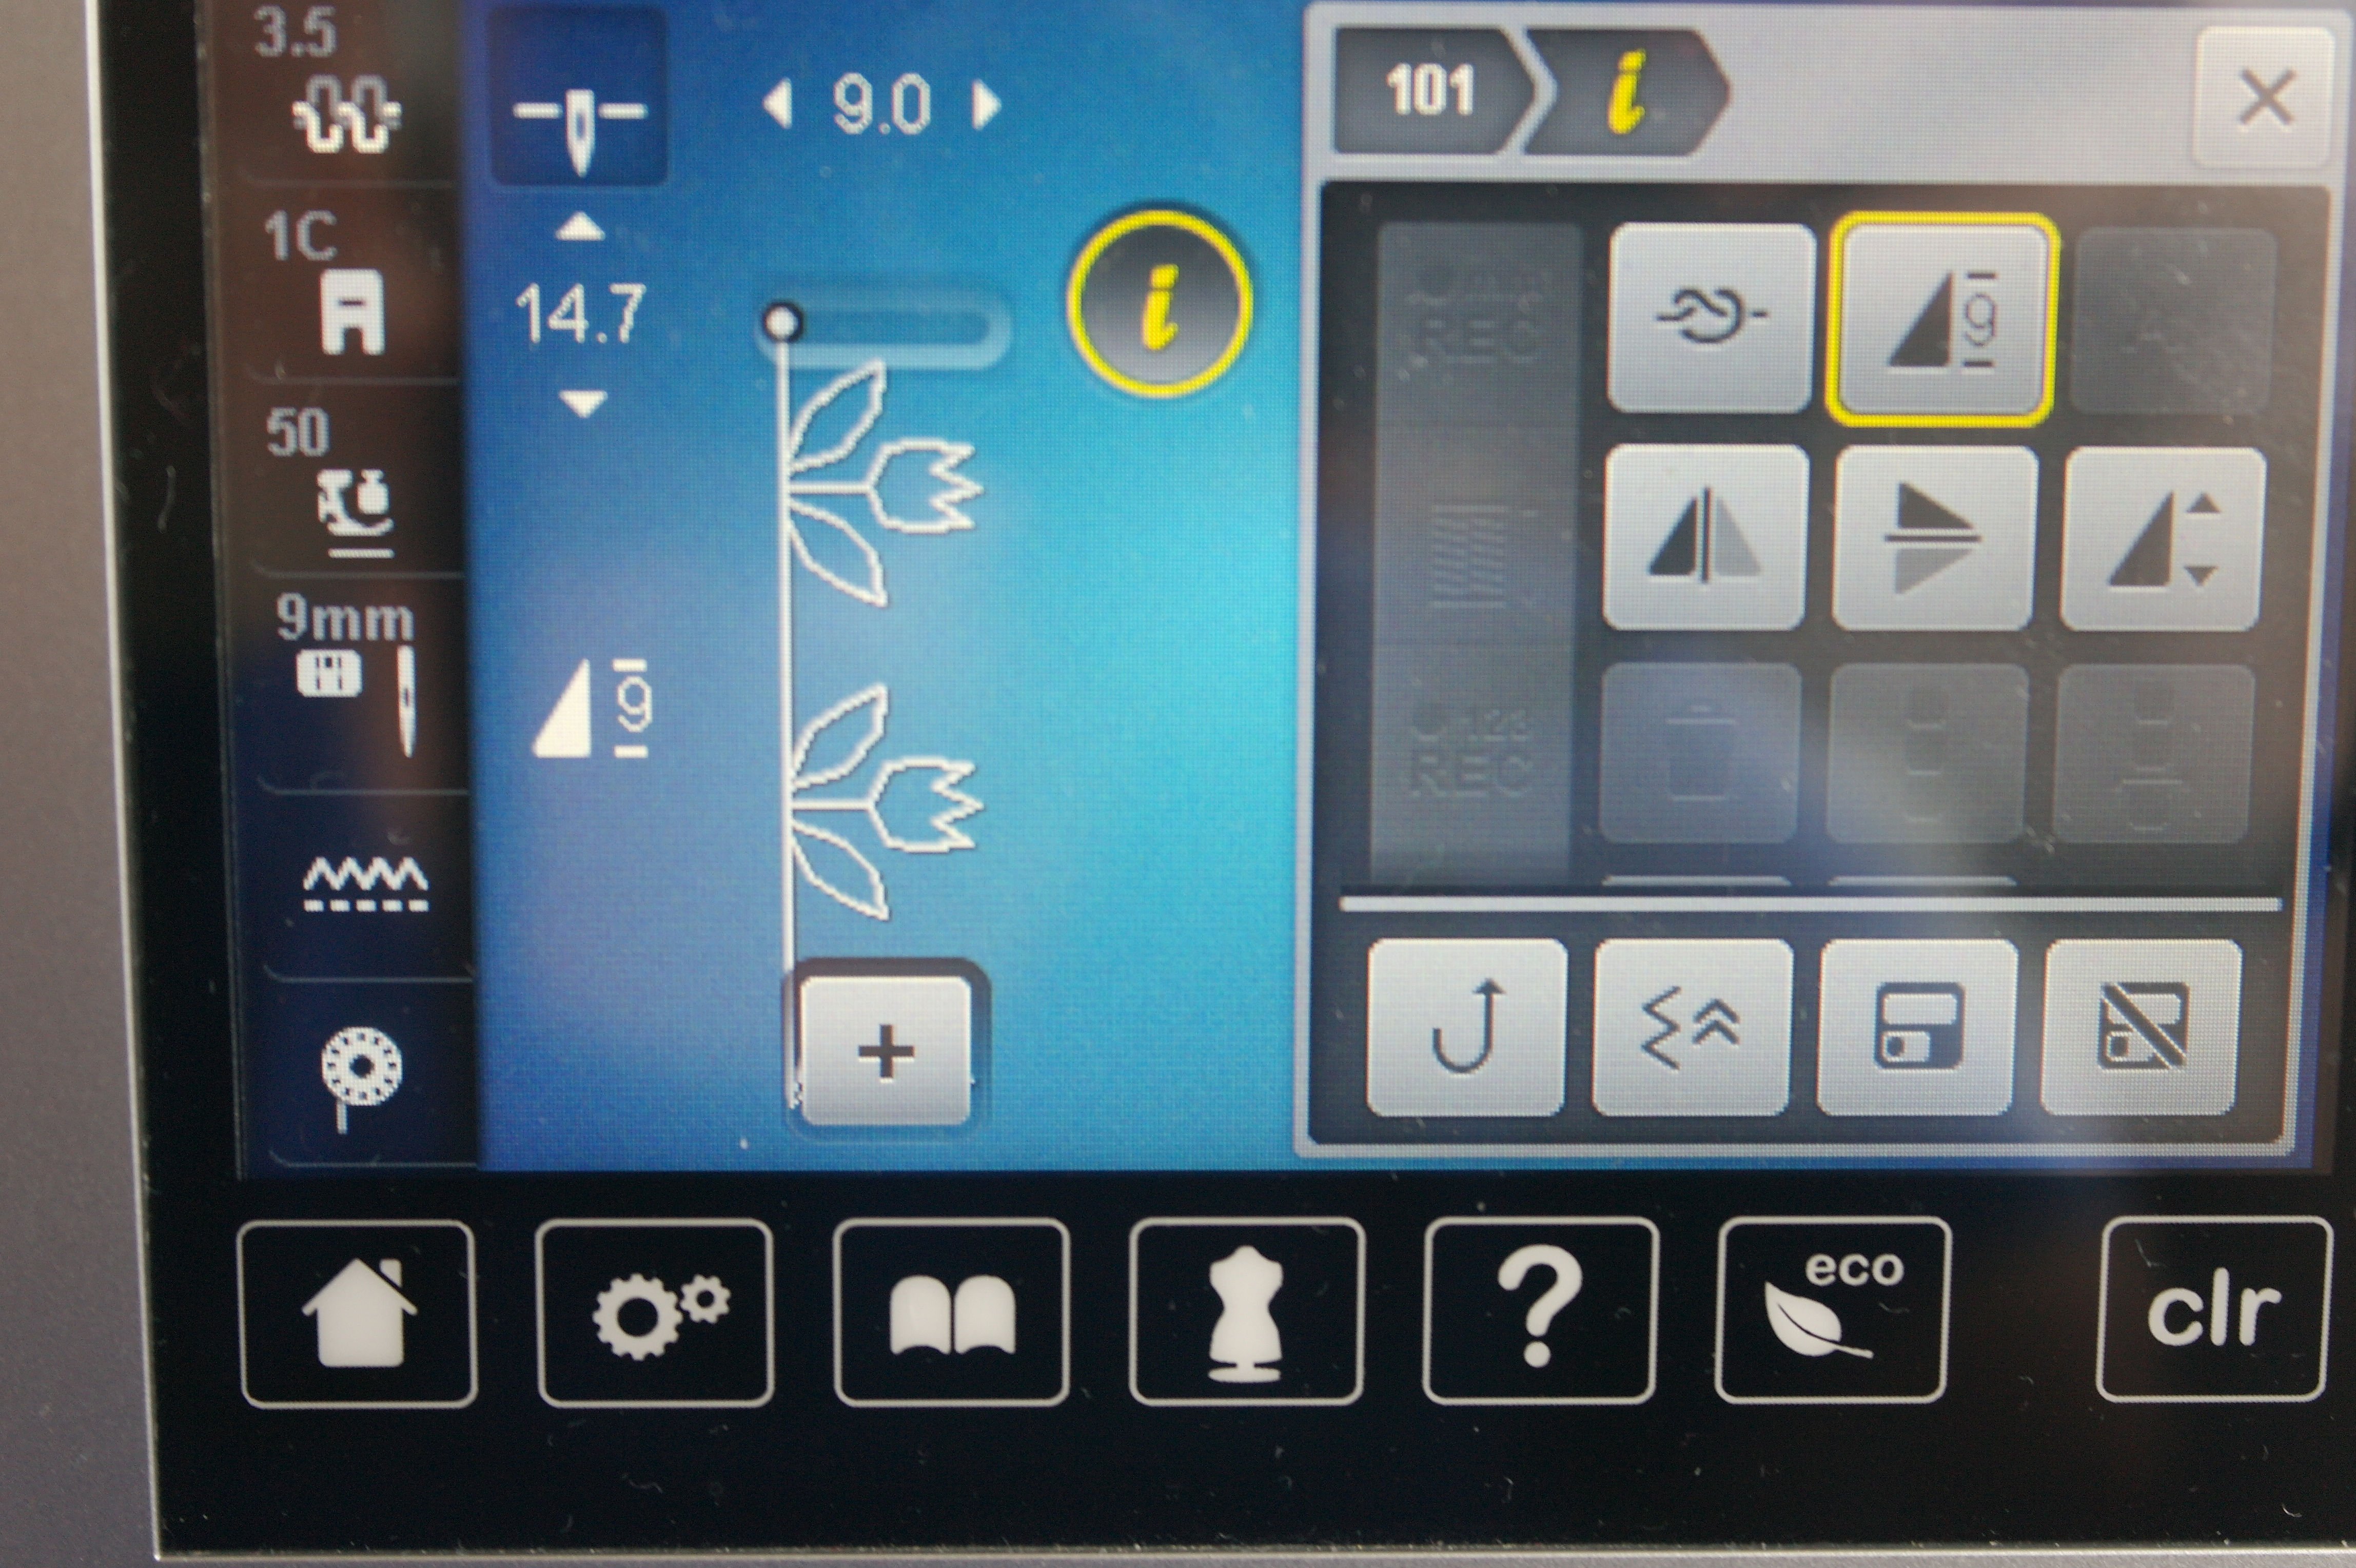
If you want to change the setting of this button after you have choosen for ‘1’ finished stitch, and go back to default, just press longer with your stylus on this button, and the setting is back to ‘normal’. You don’t have to click 9 times on the button to get everything back to default settings.
As long as you are working with this extra menu, you will see that the button with the ‘i’ has turned yellow. Also the botton for making a certain number of finished stitches is surrounded by a yellow line. That means you have changed something in the settings. As soon as you will change it back to default, the buttons are white again. Good to know, right?
What do you need to know about the length of a single finished decorative stitch? If you look in your manual, or at the info about stitches on your machine, you will see all stitches appear as if they are of the same length. Due to lack of space in a book or at your machine, because they have to show the stitches with their corresponding number too. But they are nót all of the same length! On the contrary; there are short stitches and long stitches. That’s why it is important to make the stitches up front, to check their length and width.
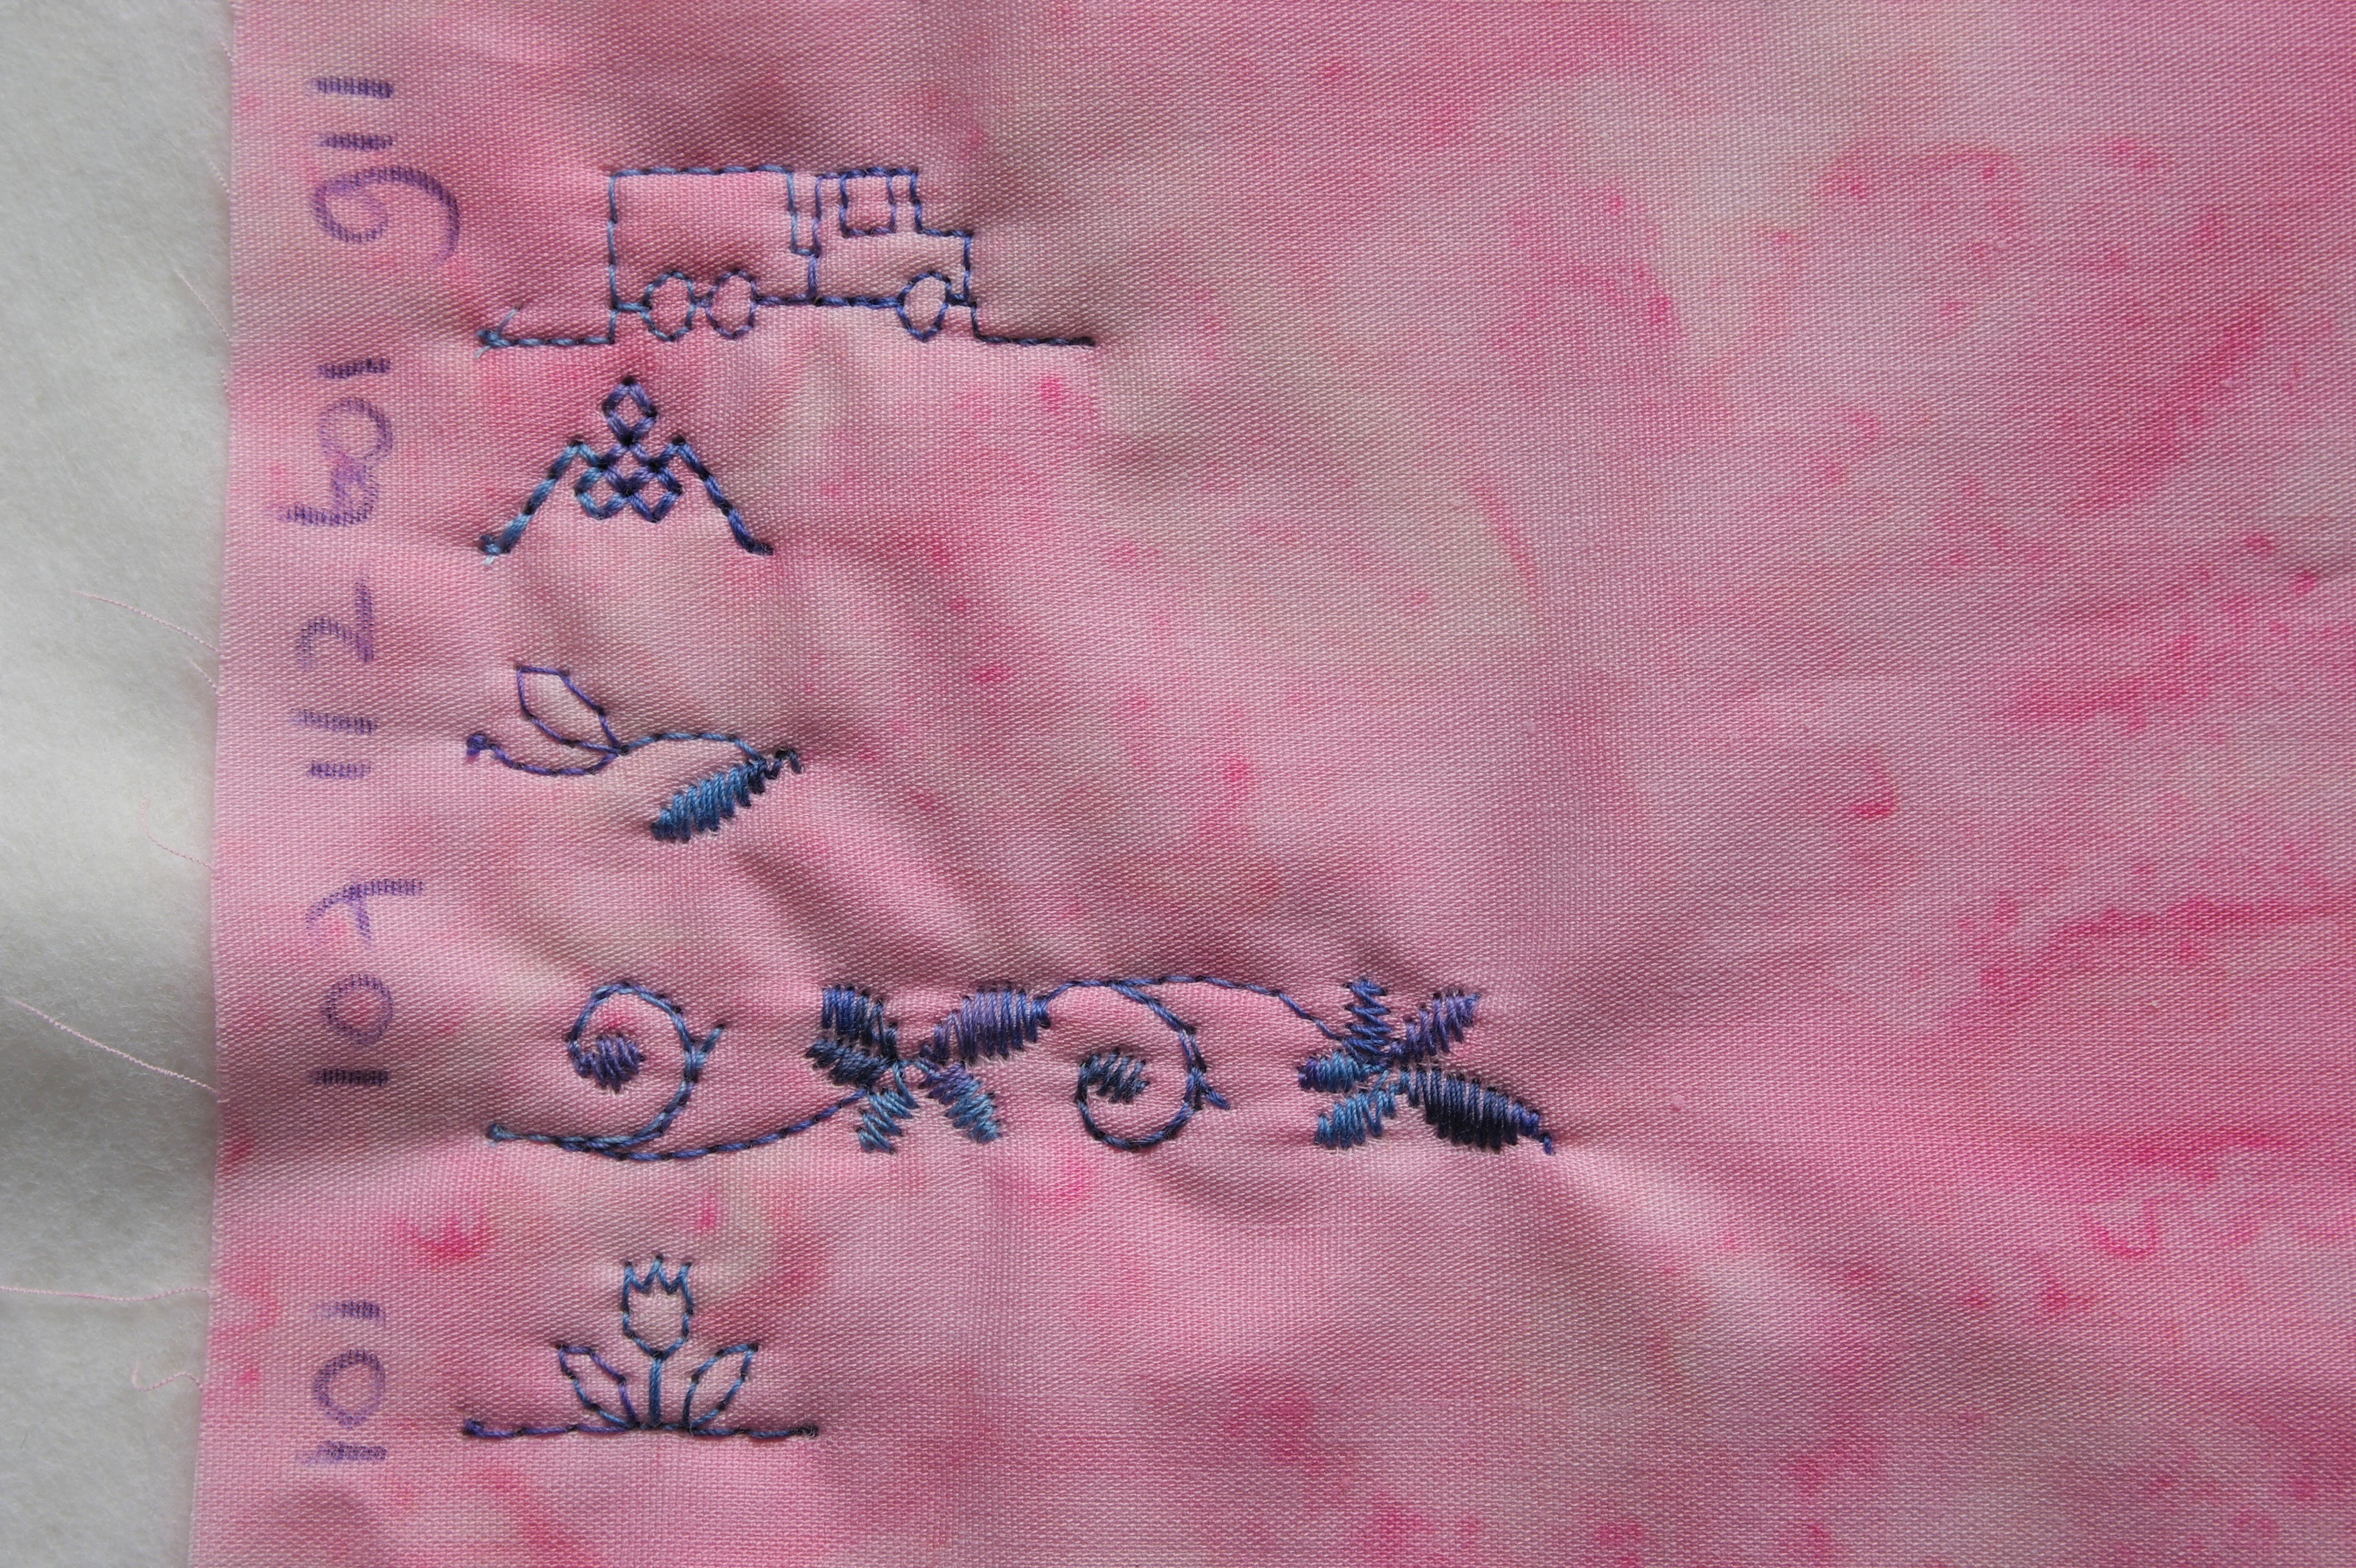
Use a sample, made out of the same materials as the ones from your sandwich. Select a stitch, and make one finished stitch. Select another stitch, and make one finished stitch out of that one too. Try different stitches – just look at my sample: I have first selected stitch 101; it has a length of aprox. 1.8cm. Stitch 107 – the one above – has a length of aprox 5.5cm. Stitch 112 is 1.8 cm long, stitch 601 is 1.5 cm long and the last one, stitch 911 – the truck – has a length of aprox. 3.2cm. (This can appear different on your sample due to different materials and circumstances.). I have noted the numbers of the stitch with a pen, for future reference.
This sample shows you how important it is to try a stitch before working on your actual sandwich/block. Knowing how a stitch is made, the length and width, and if it appeals to you is essential.
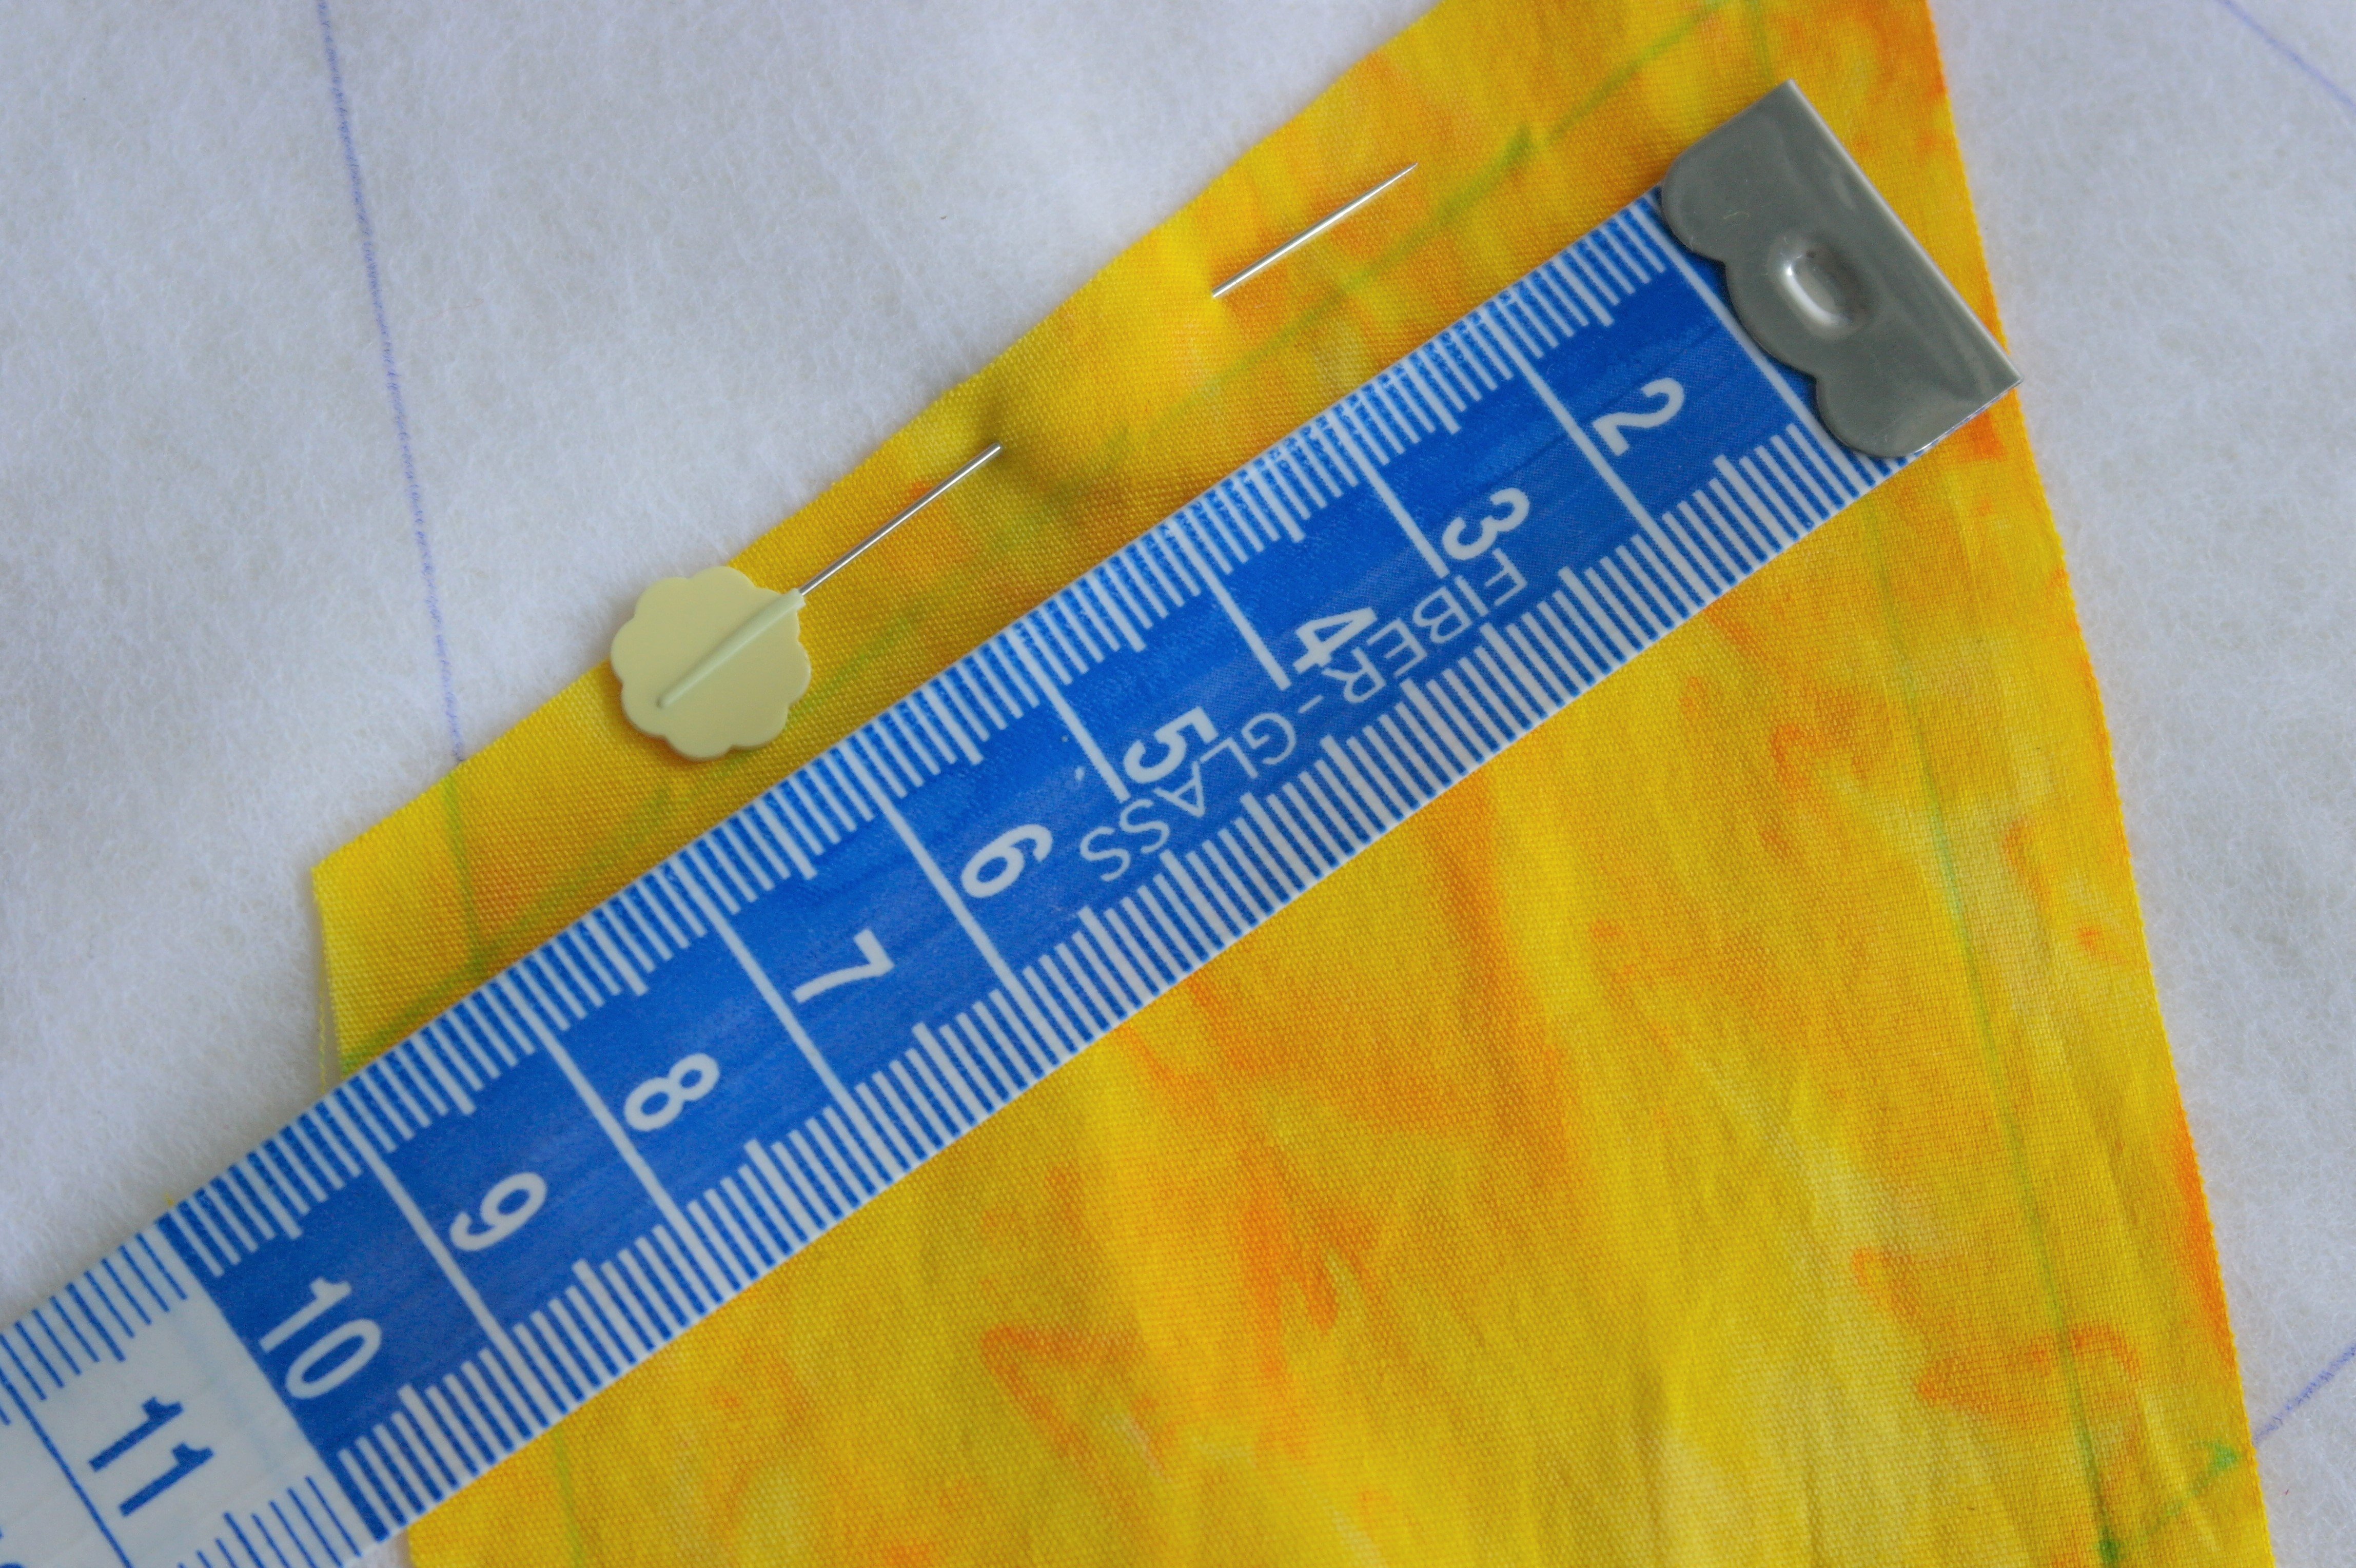
It is important to measure the area for making a square of single stitches, no matter what stitch you will choose. Measure the diamond of (batik)fabric along the lines you have drawn with the blue water soluble pen, and measure the surface of the diamond itself. Thean measure the selected stitch and check how it can be placed on the diamond. You can draw images of the stitch with the blue water soluble pen on your fabric.
Do you want to make one square or multiple squares? If you choose for the last option, make sure to select a small stitch (lengthwise), and measure how to divide it on the surface of the diamond fabric. Remember you can allways add sequins or beads if there are empty spaces…

How to work on you sample: Put the needle in the down-position. Make one finished stitch, take your foot off the foot control to stop, raise the presser foot (#20C), turn the sample to the left (90°),
make another stitch (1 x), take your foot off the foot control to stop, raise the presser foot and turn the sample in the same direction, again 90°,
repeat for the third side,

and for the fourth side: be sure to end your stitch in the beginning/first stitch of the first side. If you have selected a stitch with a straight line/base, it is important to know before stitching, if the motif is pointing ‘outside’ while making the square. Especially with a small motif: you don’t want a clutter of stitches on top of each other in the center of the square shape – you want the motifs/stitches óutside the square.
If you want to turn to the right when rounding a corner, be sure you motif is programmed to be sewn that way. Possibly your selected stitch has a default setting to the left, or you can mirror the stitch to get the same effect. Fun to try and see…
Also, try to make a rectangle instead of a square: long sides 2 x finished stitch – which means 2 x foot off the foot control -, short sides 1 x finished stitch. Or make larger rectangles with even more stitches. You can change the number of repeats of the finished stitches per side with the icon on the display of your machine, if that works for you. But remember to change it with each side, because with a larger rectangle made out of e.g. 3 motifs it is easy to let the machine make them all without having to count yourself, and take your foot of the foot control each time, but you have to be sure to change the number of stitches each time you round a corner. I have just raised and lowered my foot with the foot control, each time a finished stitch was ready, counted the number of motifs/stitches per time and kept the setting for ‘1’ stitch.
Before working on your sandwich/block, at section 1, it is important to check what size square fits on the space you’ve calculated. I have cho0sen stitch 101, which I’ve tried on my sample, to make a square, and another, on the diamond batik.
To do so, I’ve measured the size of the square on my sample: on the inside of the square and the outside of the motif. Be aware of the fact that – if you make two squares of the same stitches – they may differ slightly in size, because every time you make stiches, your sandwich can be pushed or pulled differently. It is not exact science, but measuring things up will give you the best option.

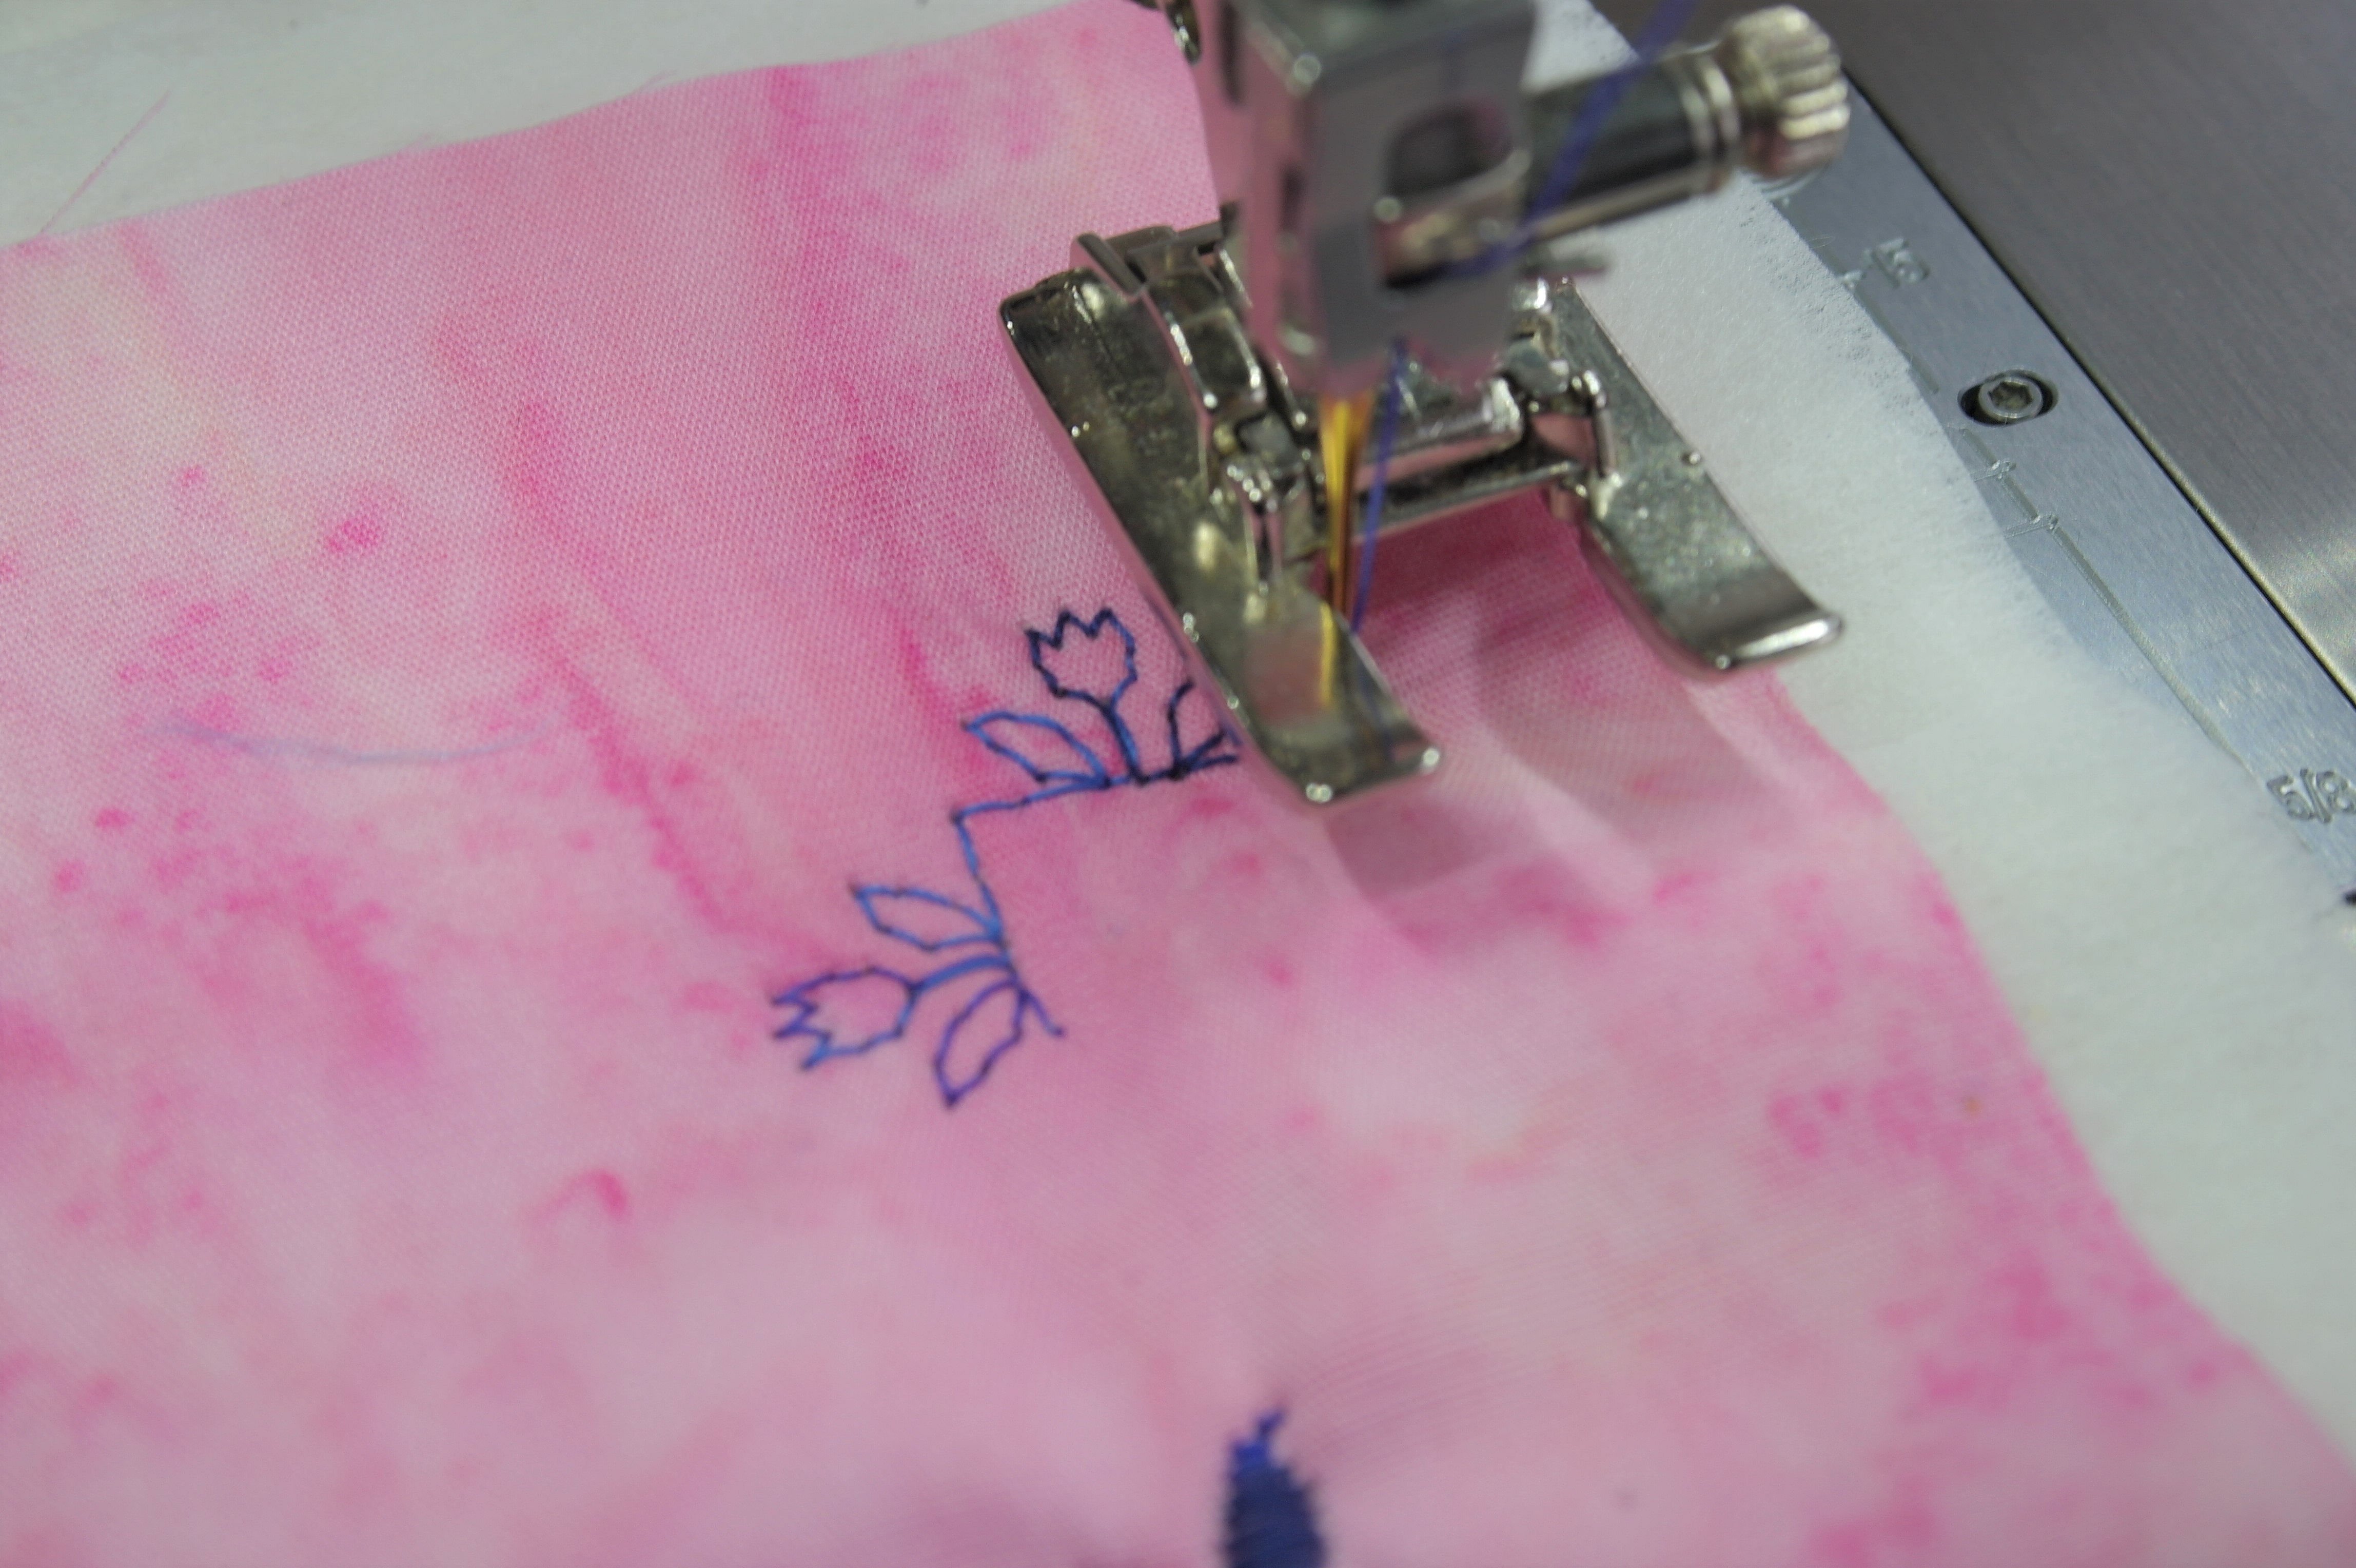
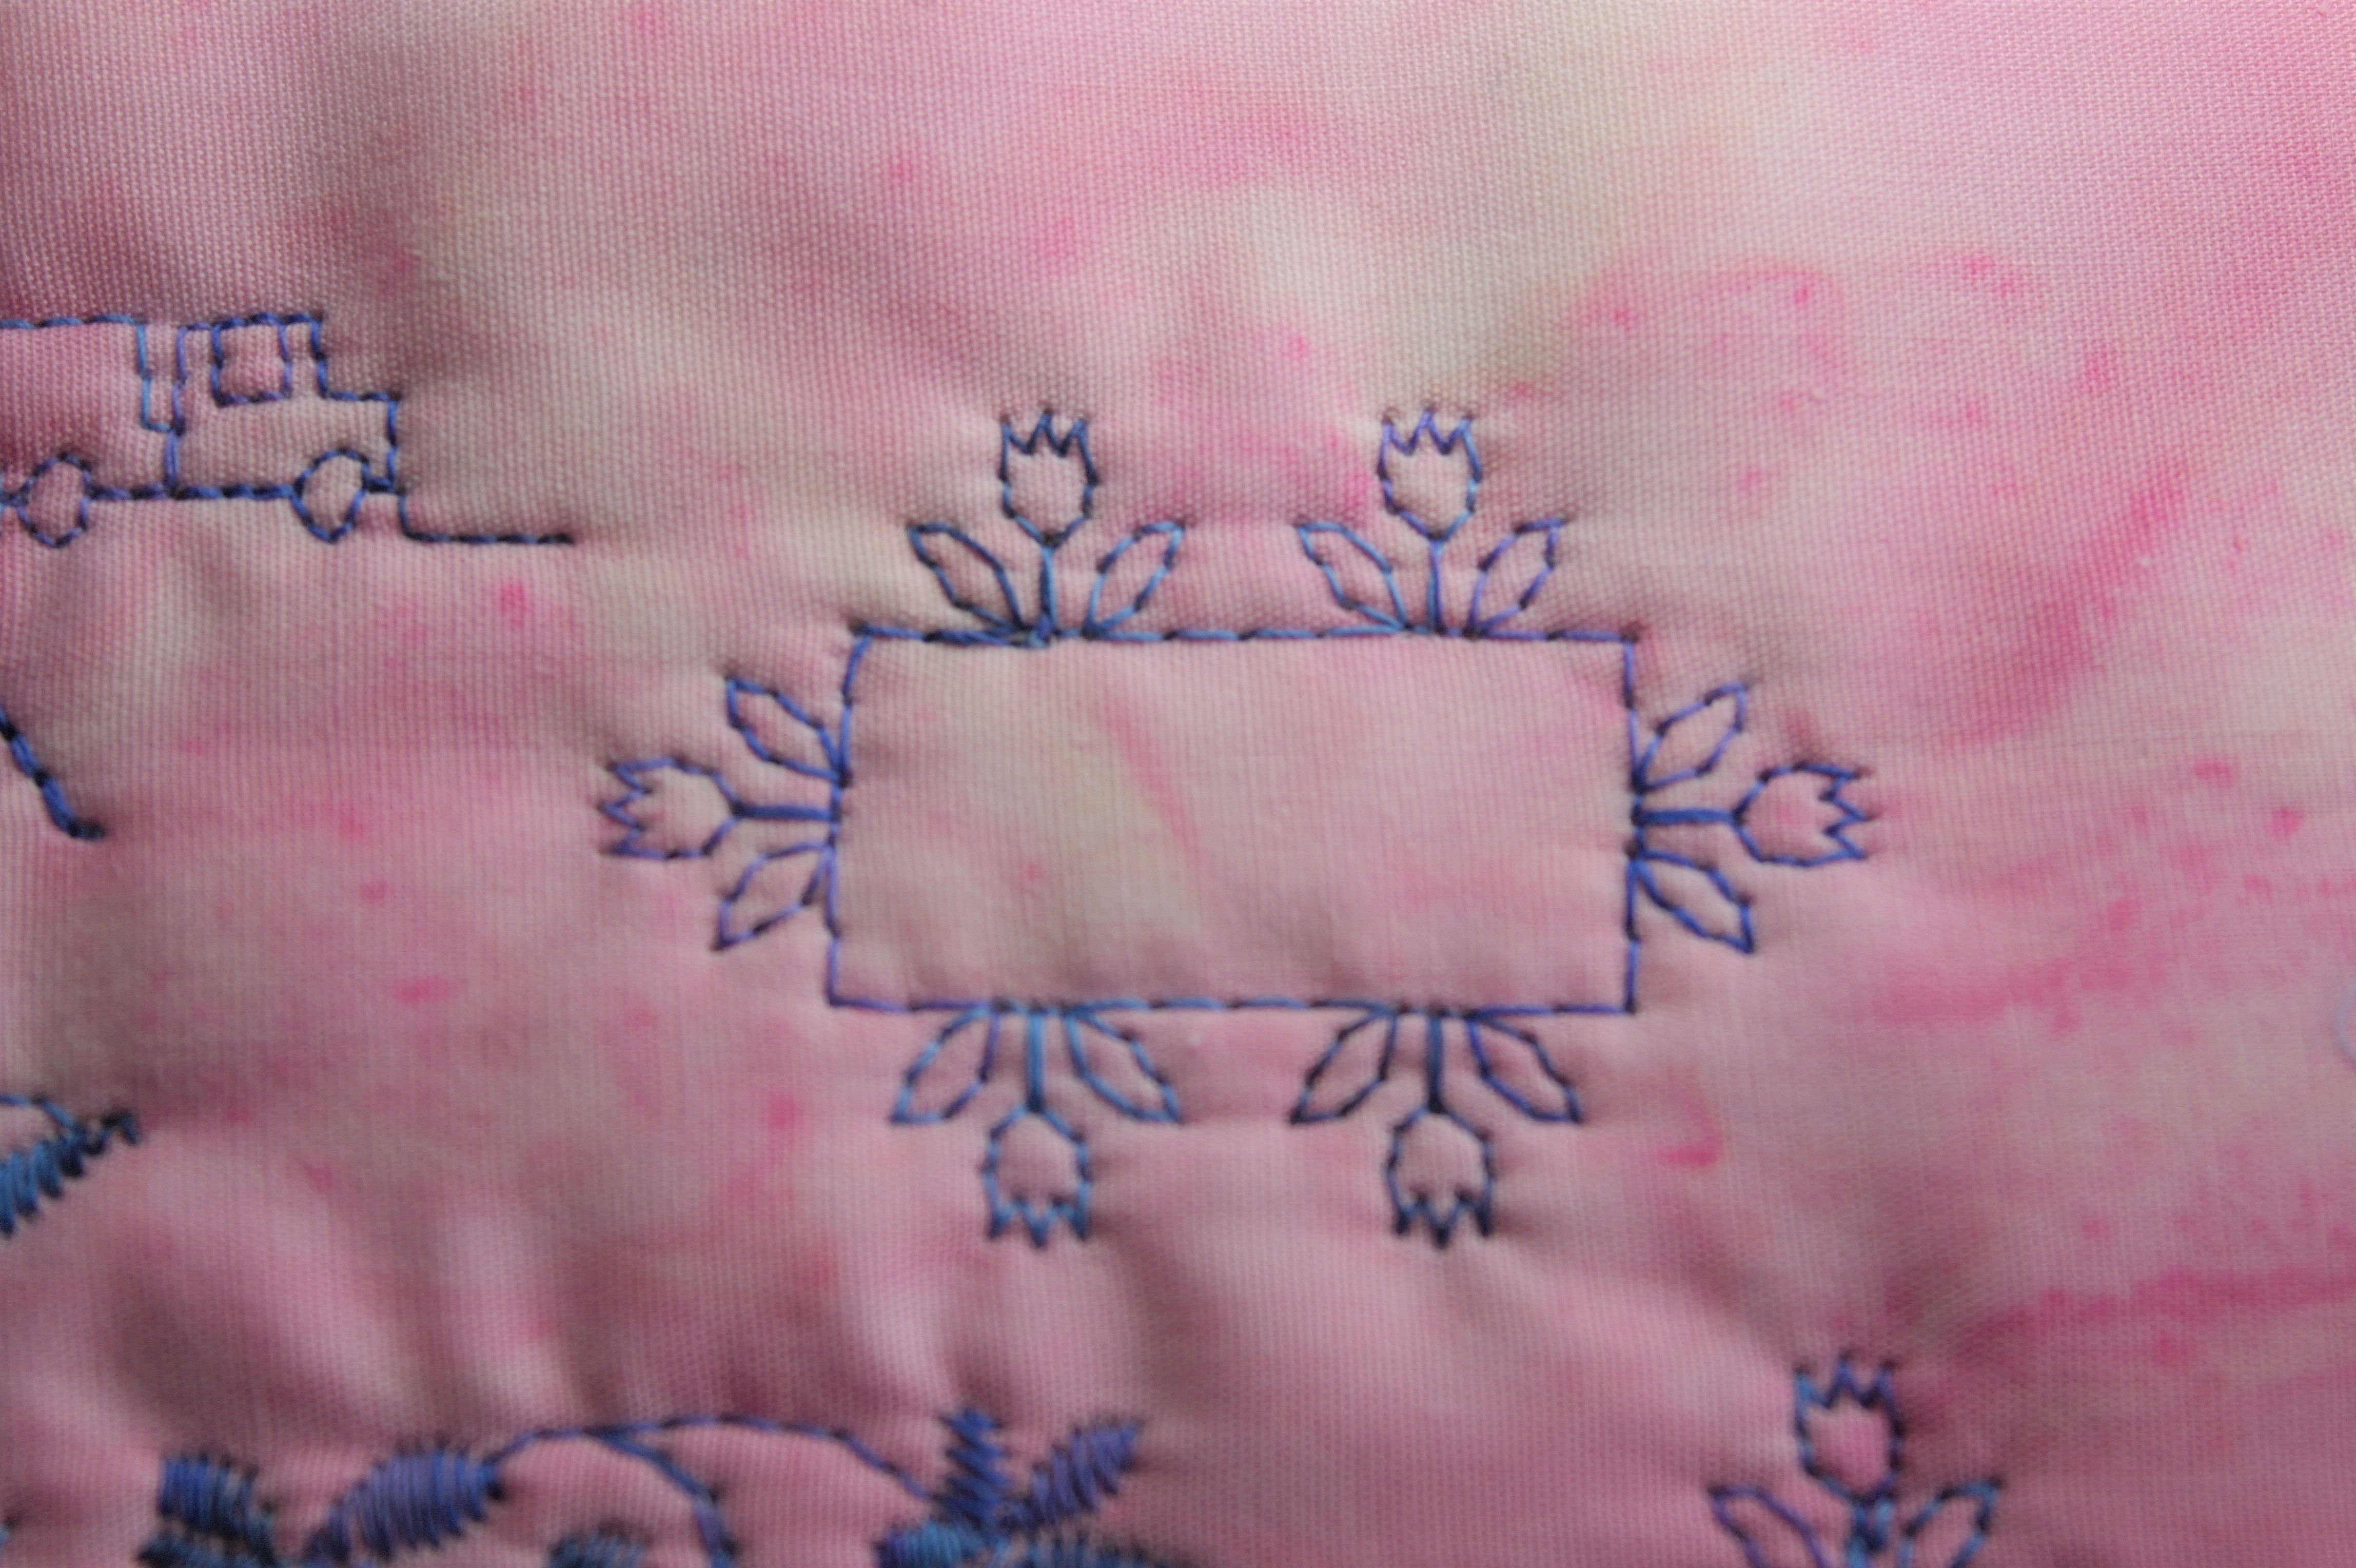
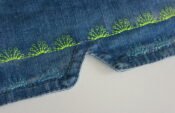
I have drawn with the blue water soluble pen, on my batik diamond: two squares, smaller one in the middle for the inner part of the square of stitches, larger one on the outside to indicate the outer lines. Two squares underneath each other. I’ve started making the stitches, and had to rip things out a couple of times, because my point of beginning was a bit off. After that everything went smooth and I like the way it turned out.

The stiches are made, two squares with tulips. After stitching, I’ve used a plant sprayer with clear water to get rid of the blue lines, let it dry and made more rows of stitches on either side of the squares.
If you turn of the machine, the selection for making ‘1’ finished stitch is gone. If you don’t turn your machine of, and work with different stitches, to come back to this first stitch, the ‘1’ is still selected. You will have to remove that selection to be able to make an endless line of stitches, and the setting is back to an ‘X’ again.
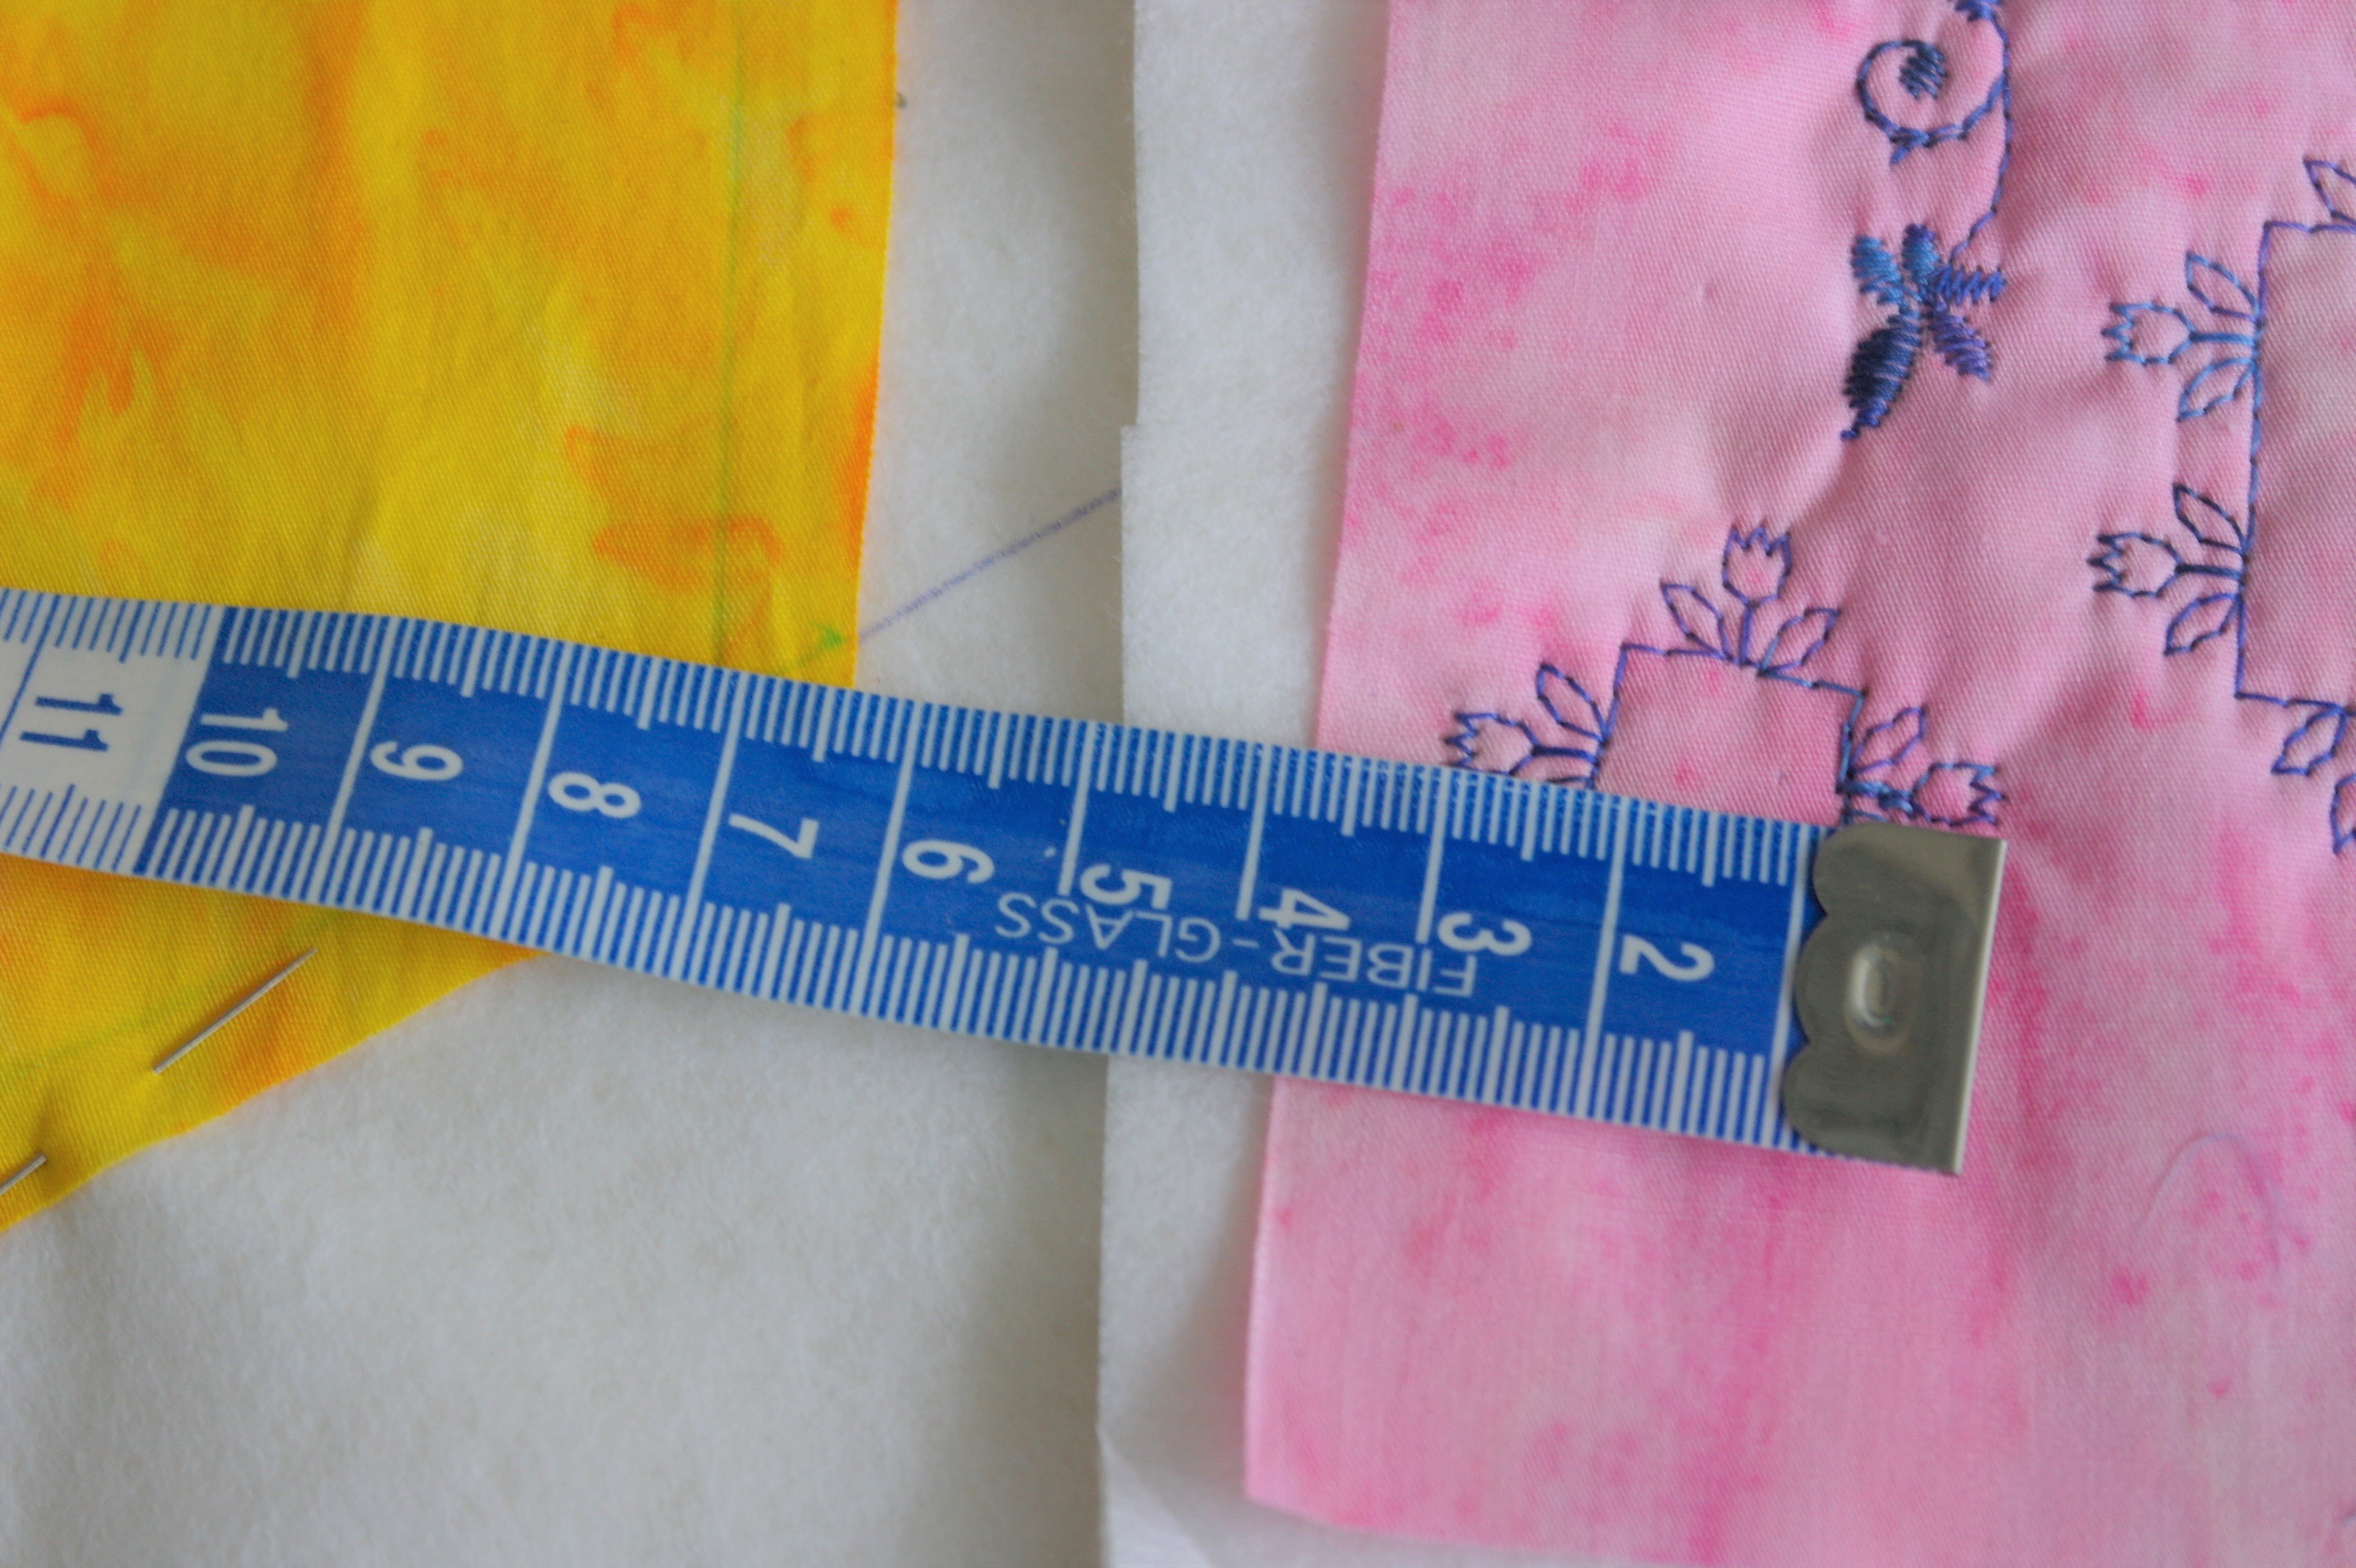
After making stitches, I’ve sewn fabric no. 2 on the next section, and I’ve noticed there is a lot of space left around the two squares. I wil add sequins and beads afterwards….
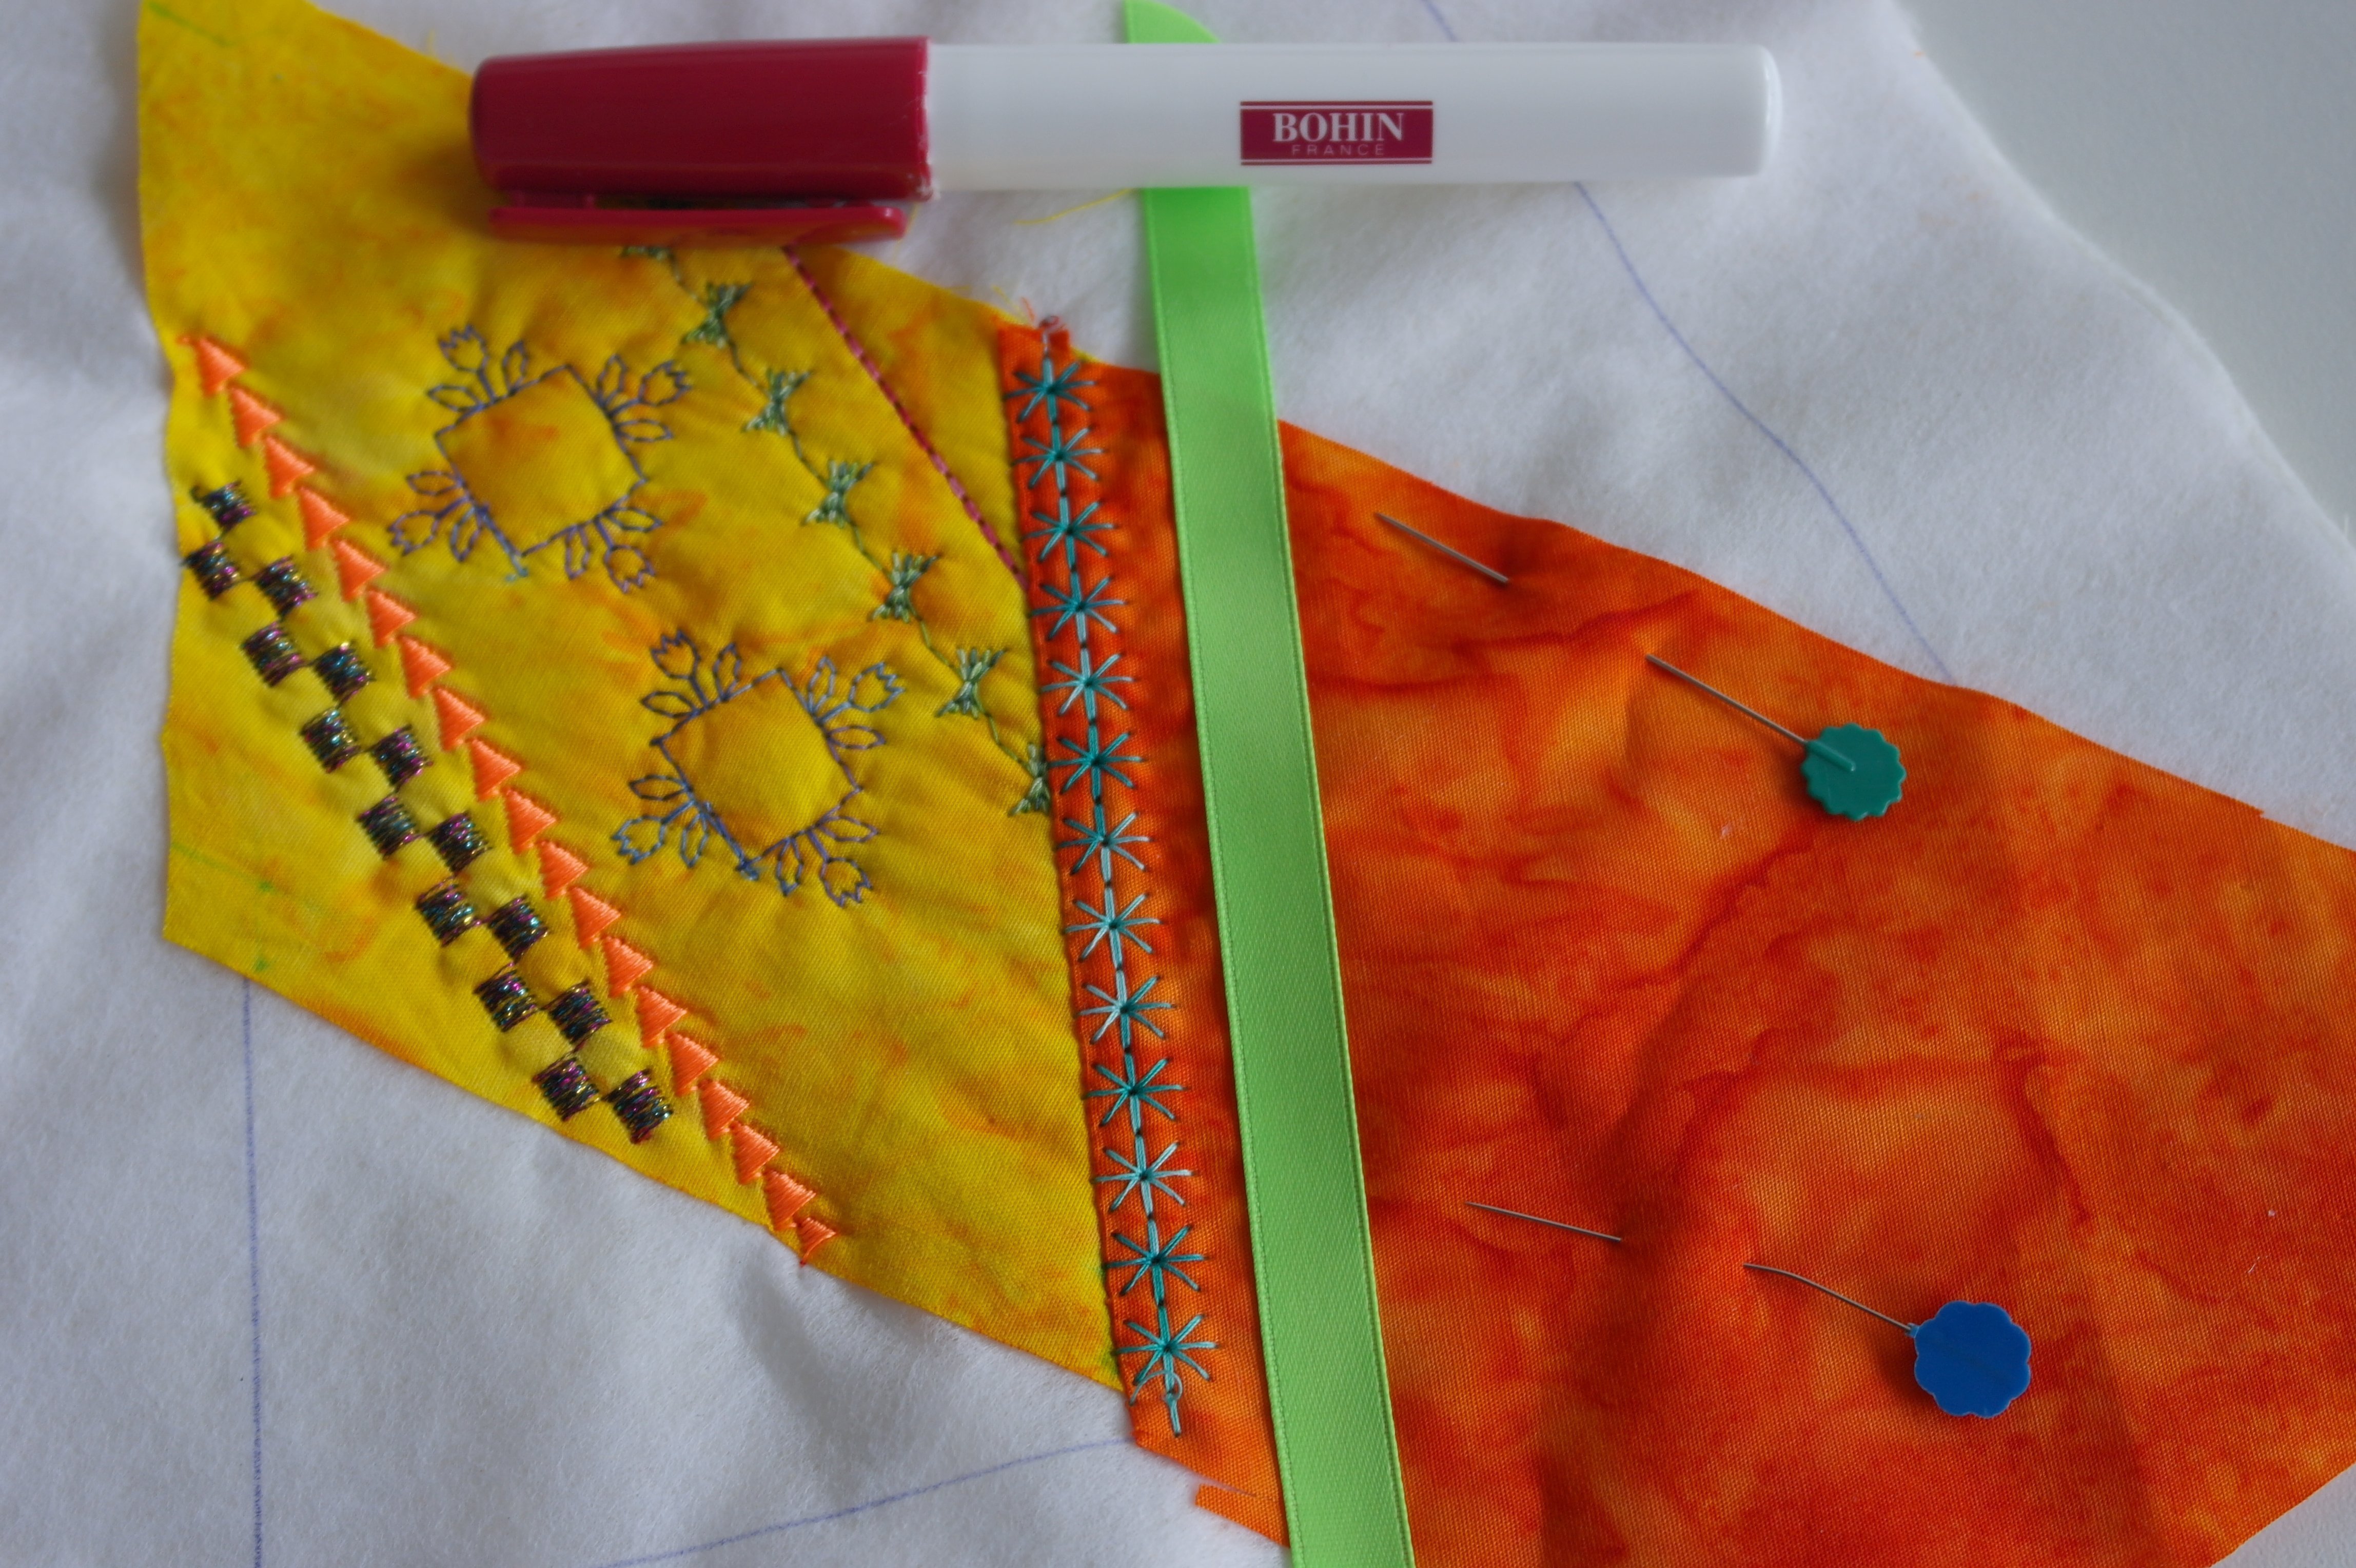
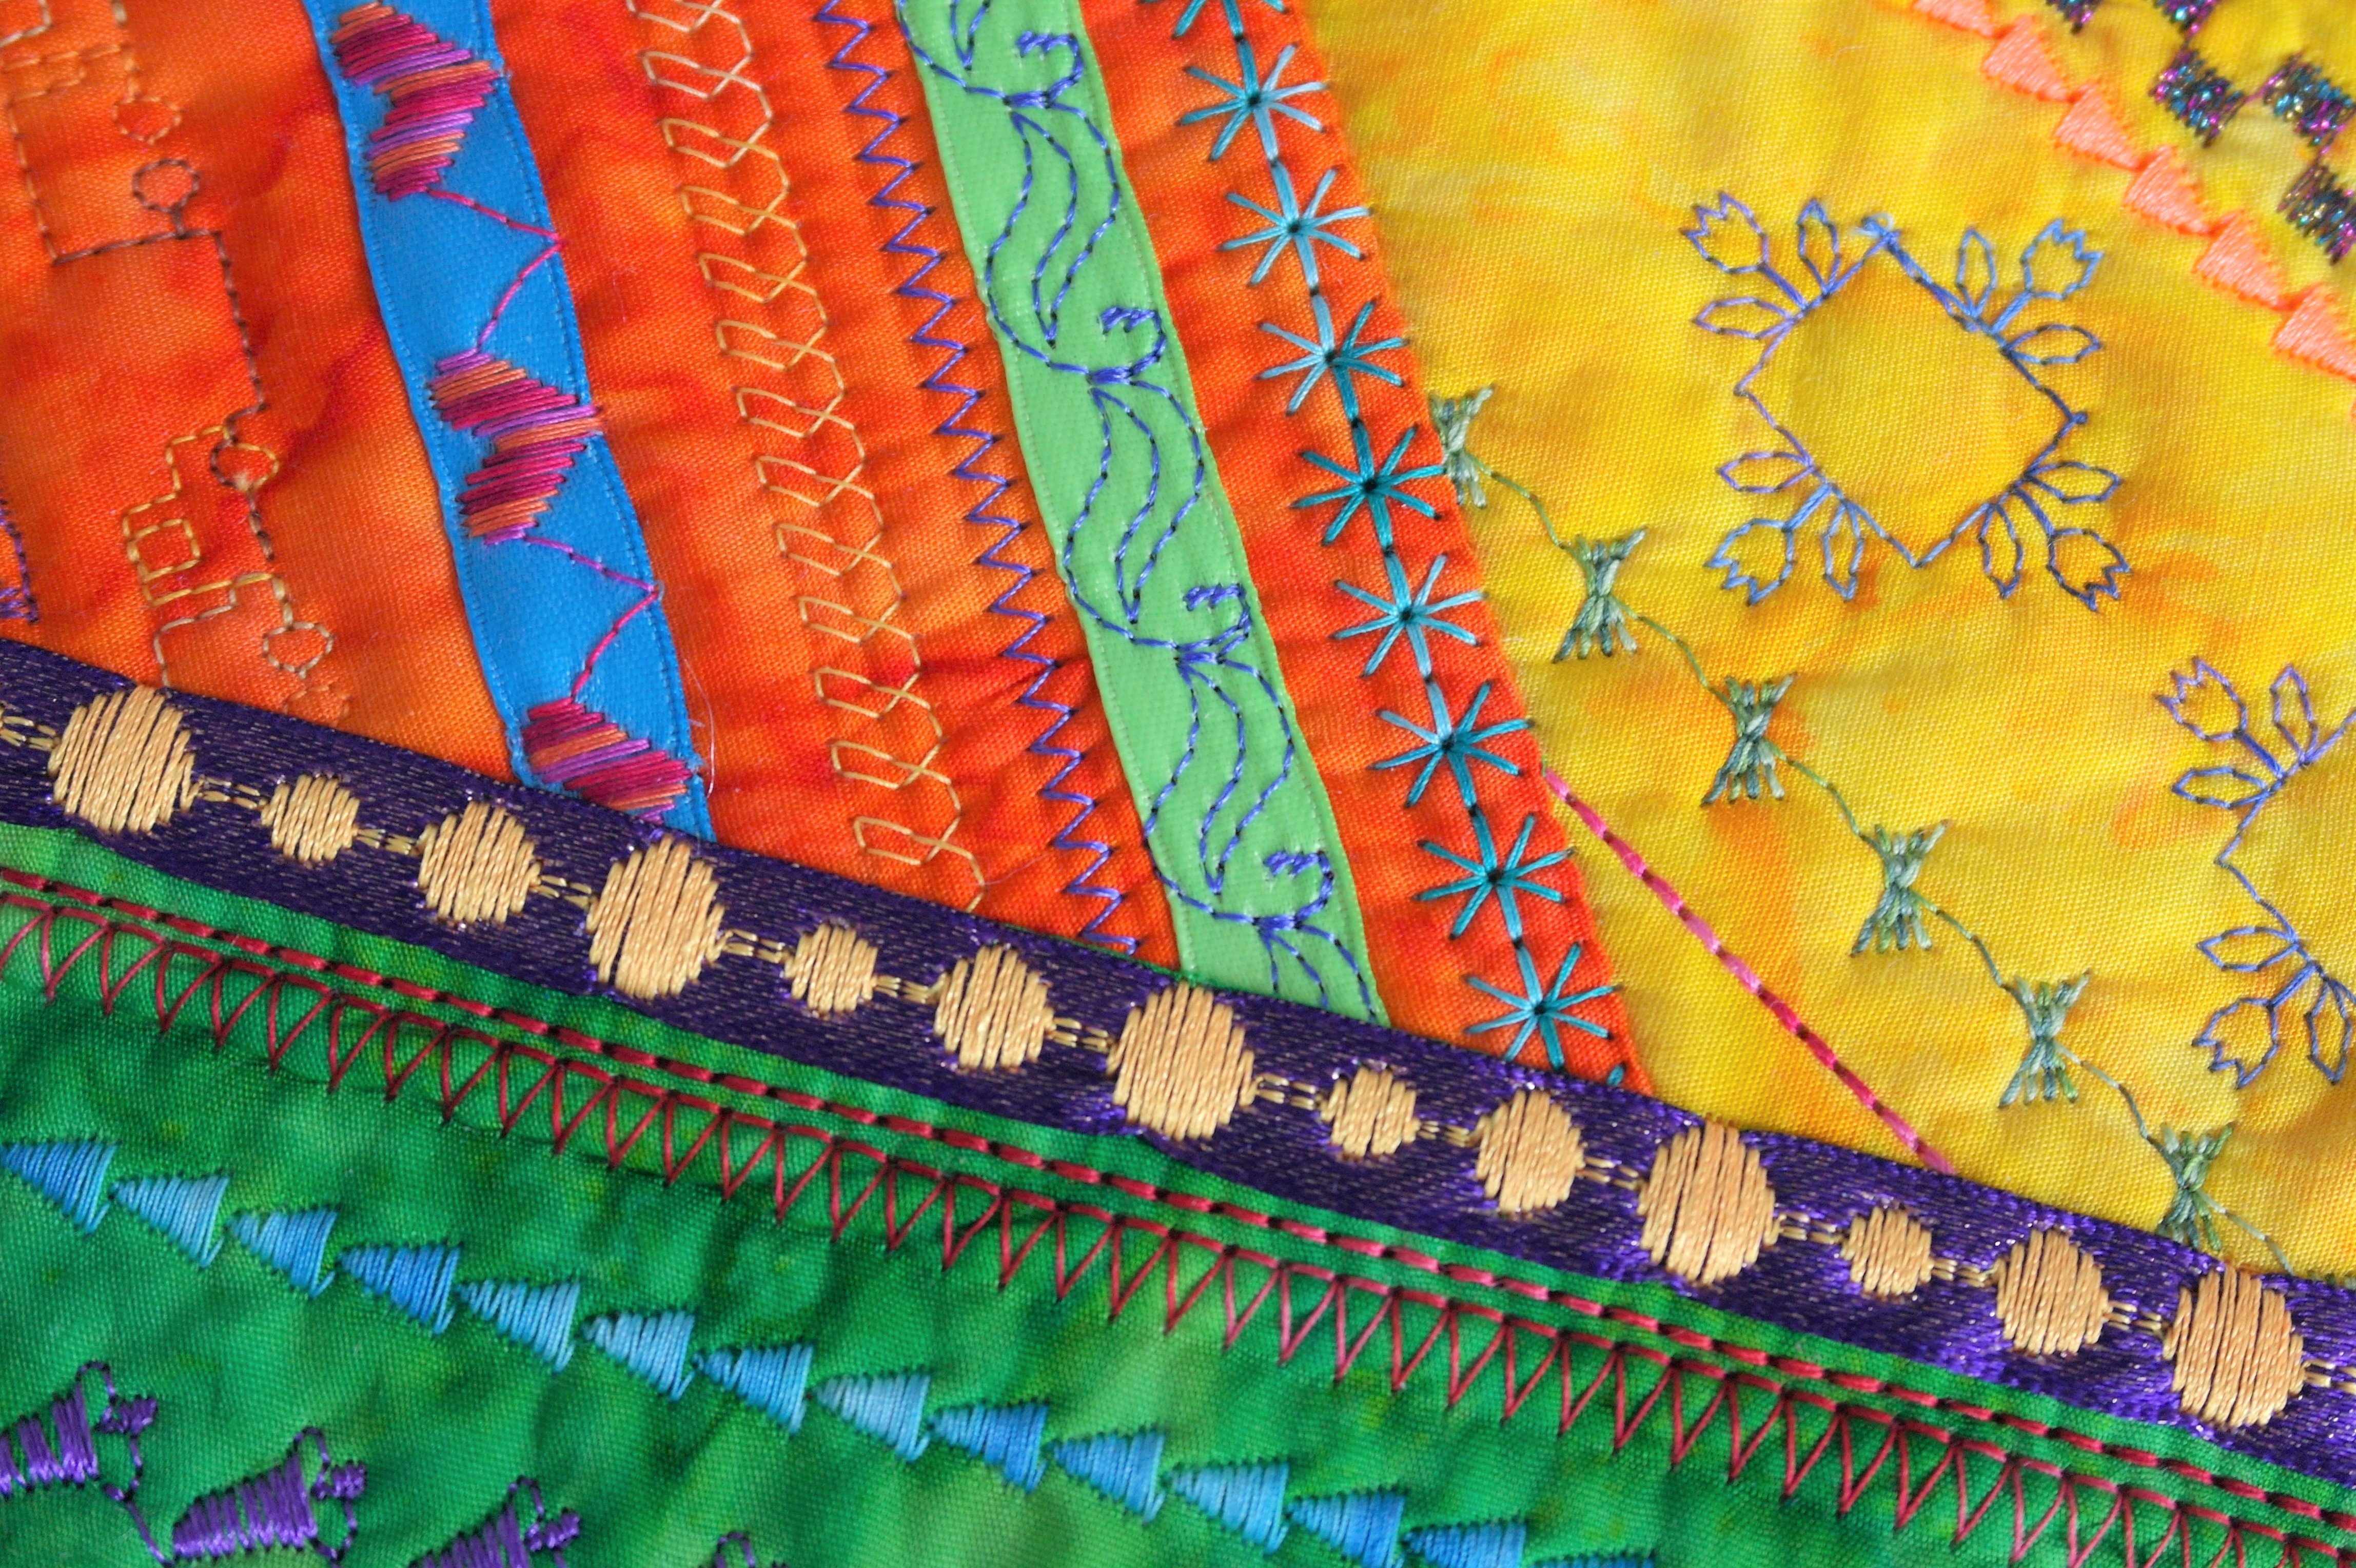
Ribbons are added- width 10 mm. I will make decorative stitches on those, but first I will glue them onto the fabric with Bohin Glue Pen, so the ribbons cannot move or wobble while making stitches.
And that’s really imortant if you select stitches which will be sewn over the entire width of the ribbon (9mm), if these stitches will have a high tension because of the lenth – stitches that are covering the entire width of a ribbon are always pulling a bit, because they want to span as short a distance as possible. If you secure the ribbon, the glue will keep everything in its place, and there is less pulling with the stitches. The picture above shows satin ribbon in bright colors, 10mm wide – fun to work with.
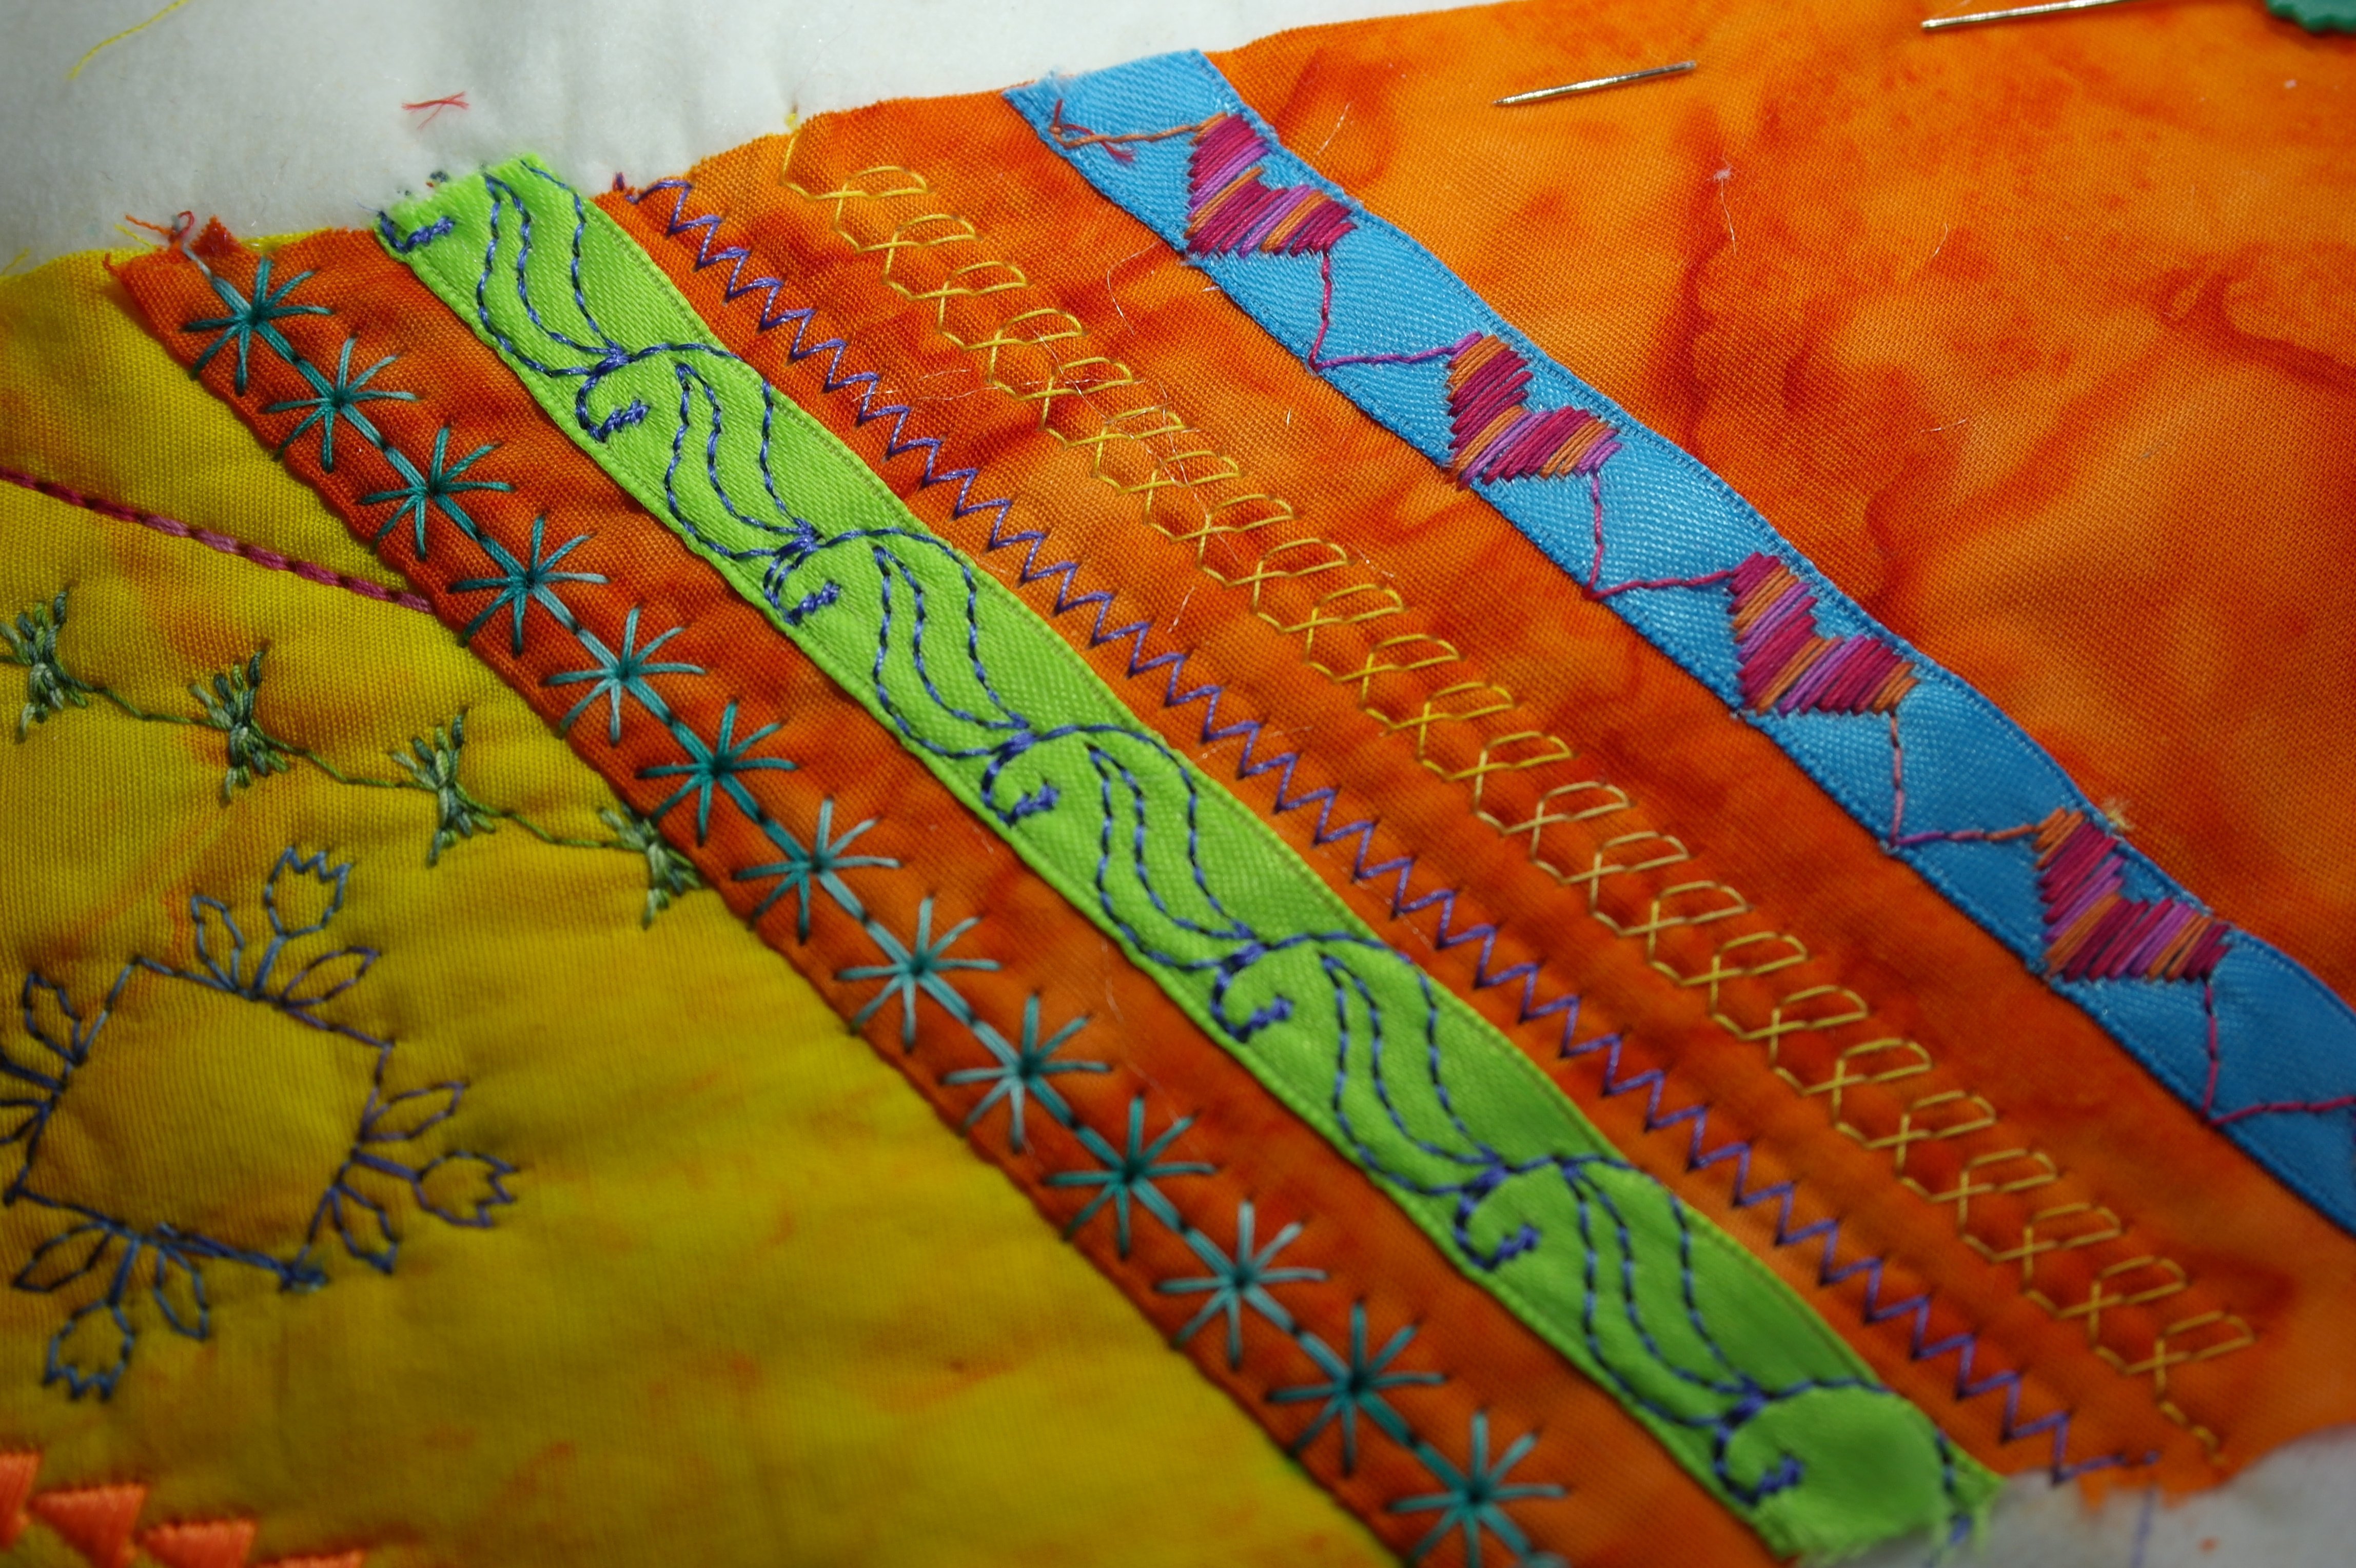
When using polyester threads, or metallic threads which almost always contain polyester, the effect is even greater, because this thread will stretch while making stitches. So work slowly, by reducing the speed of your machine.

I have made rows and rows of decorative stitches: the purple bells I’ve made with presser foot #20C are made in two rows, close to each other: one row default setting, one row mirror image.
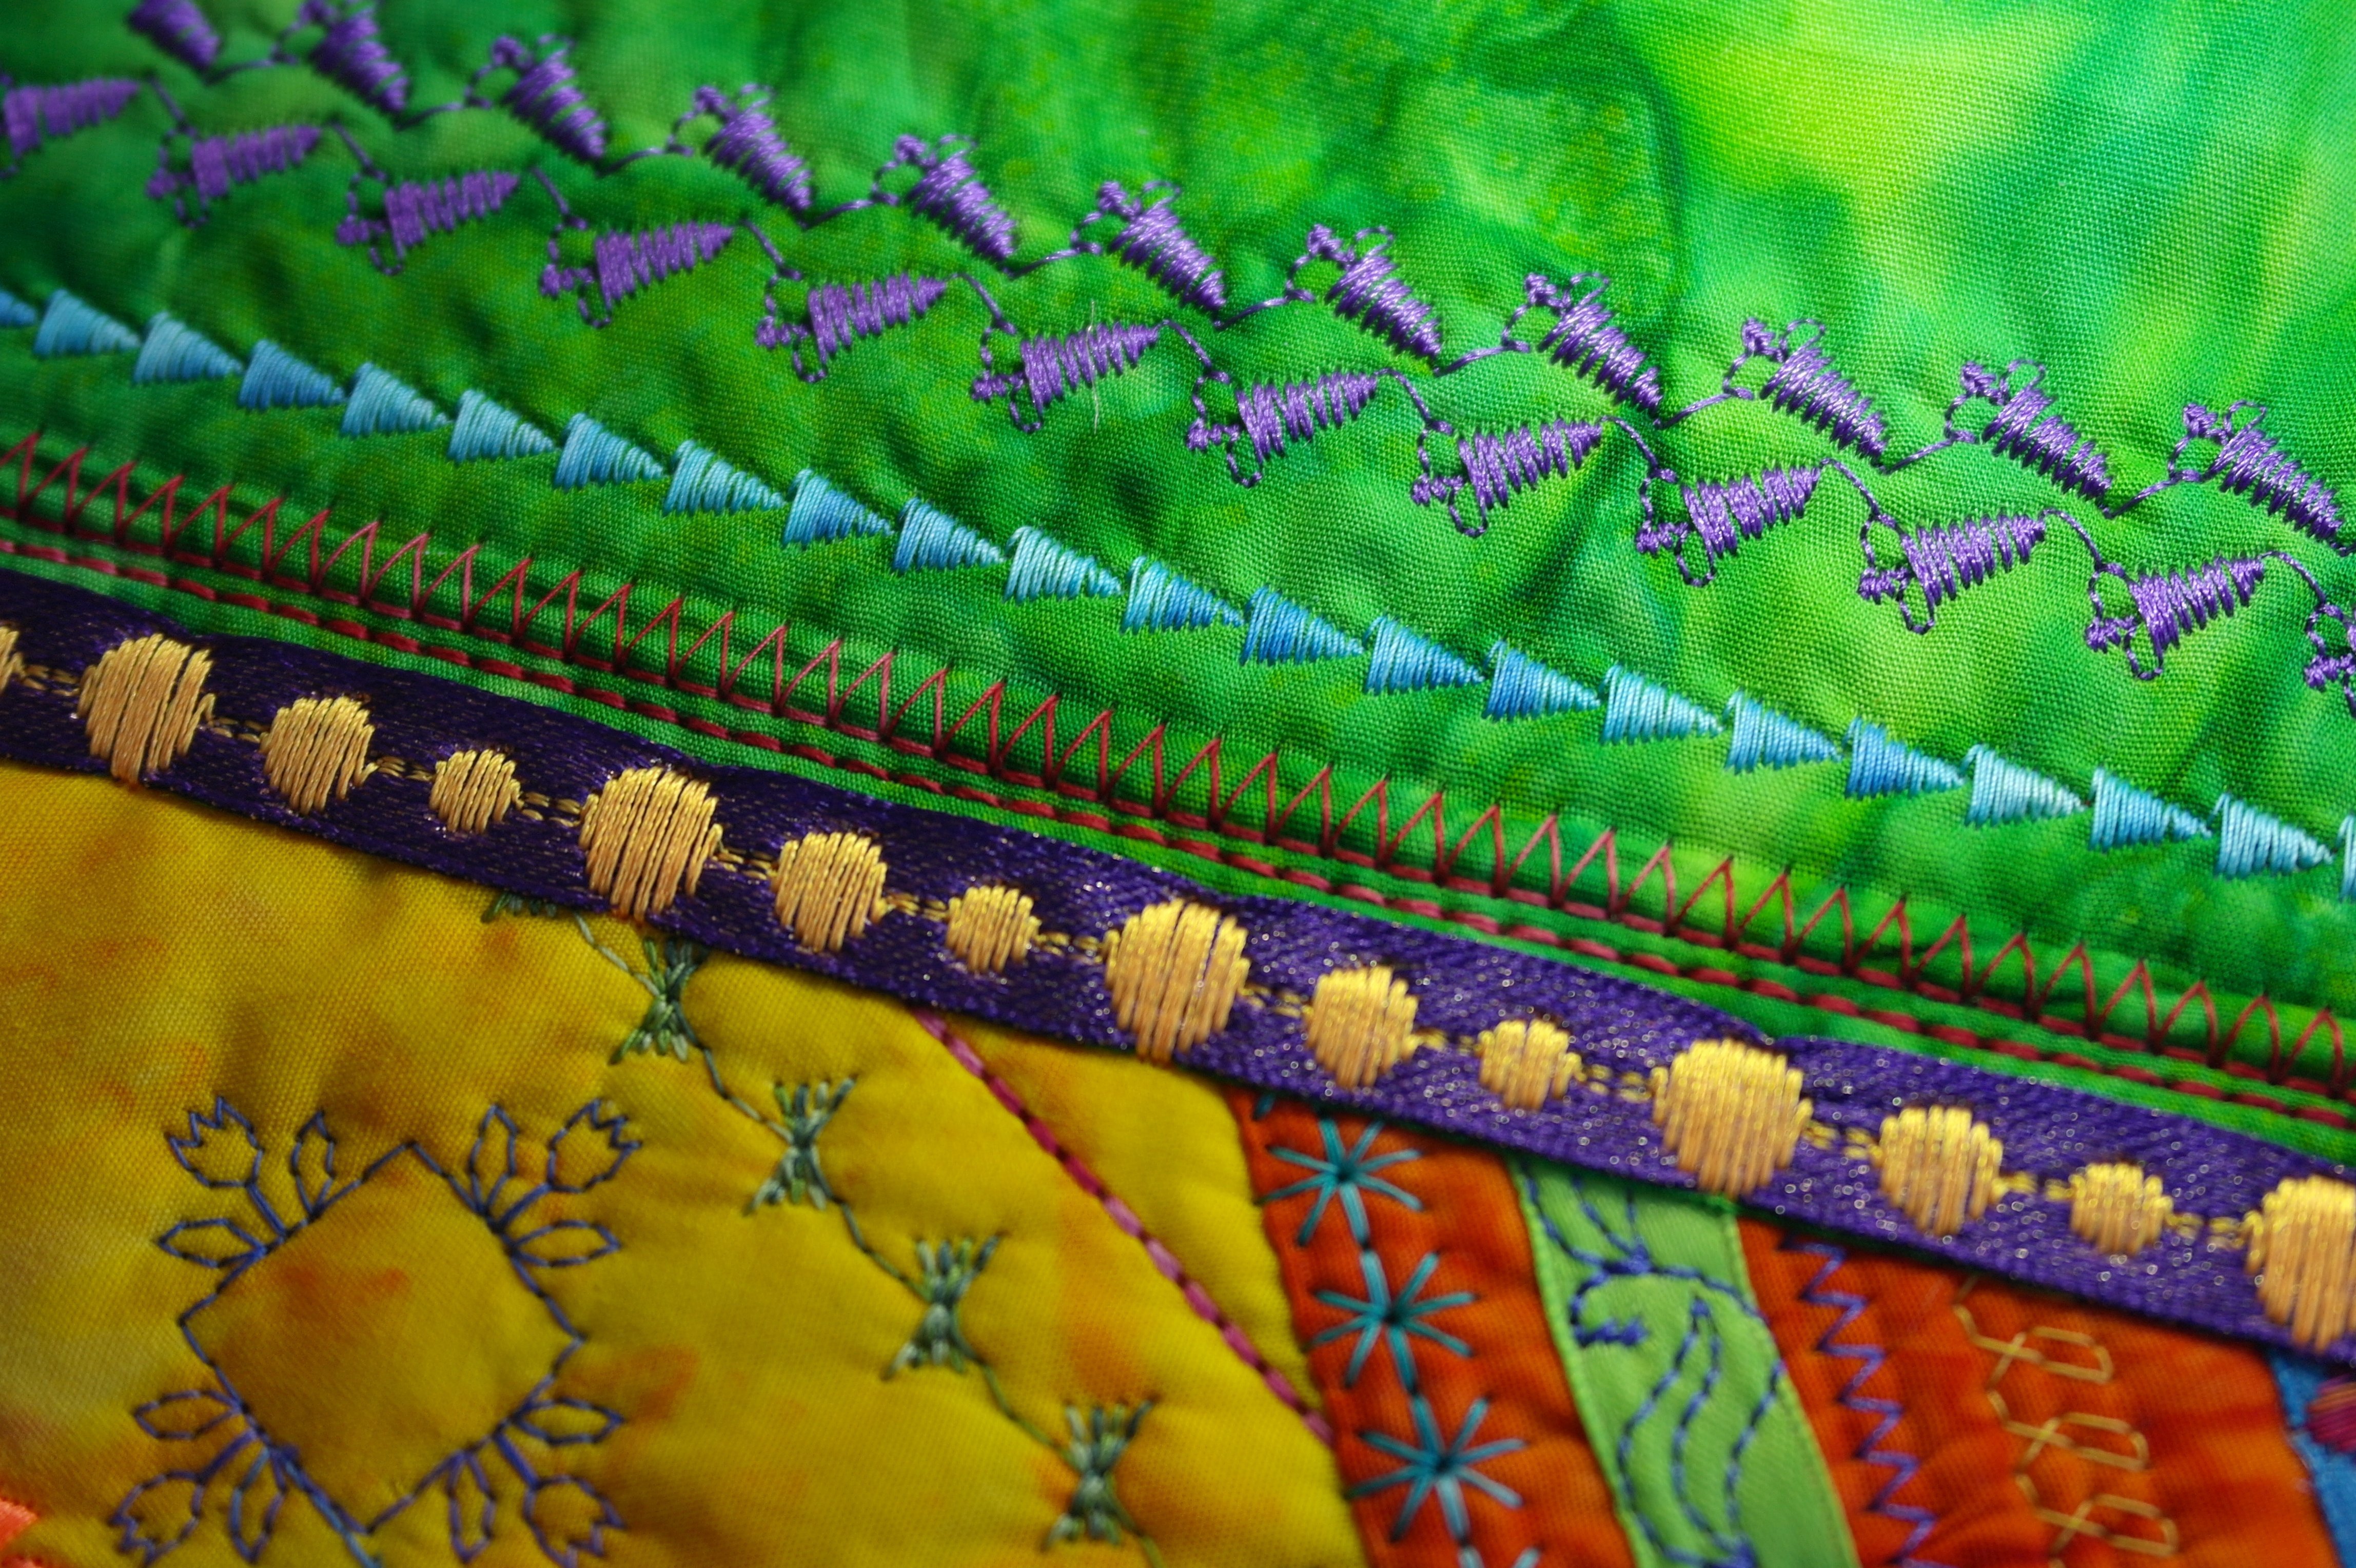
And that gives a great effect: it looks like I have made a very wide stitch all at once.
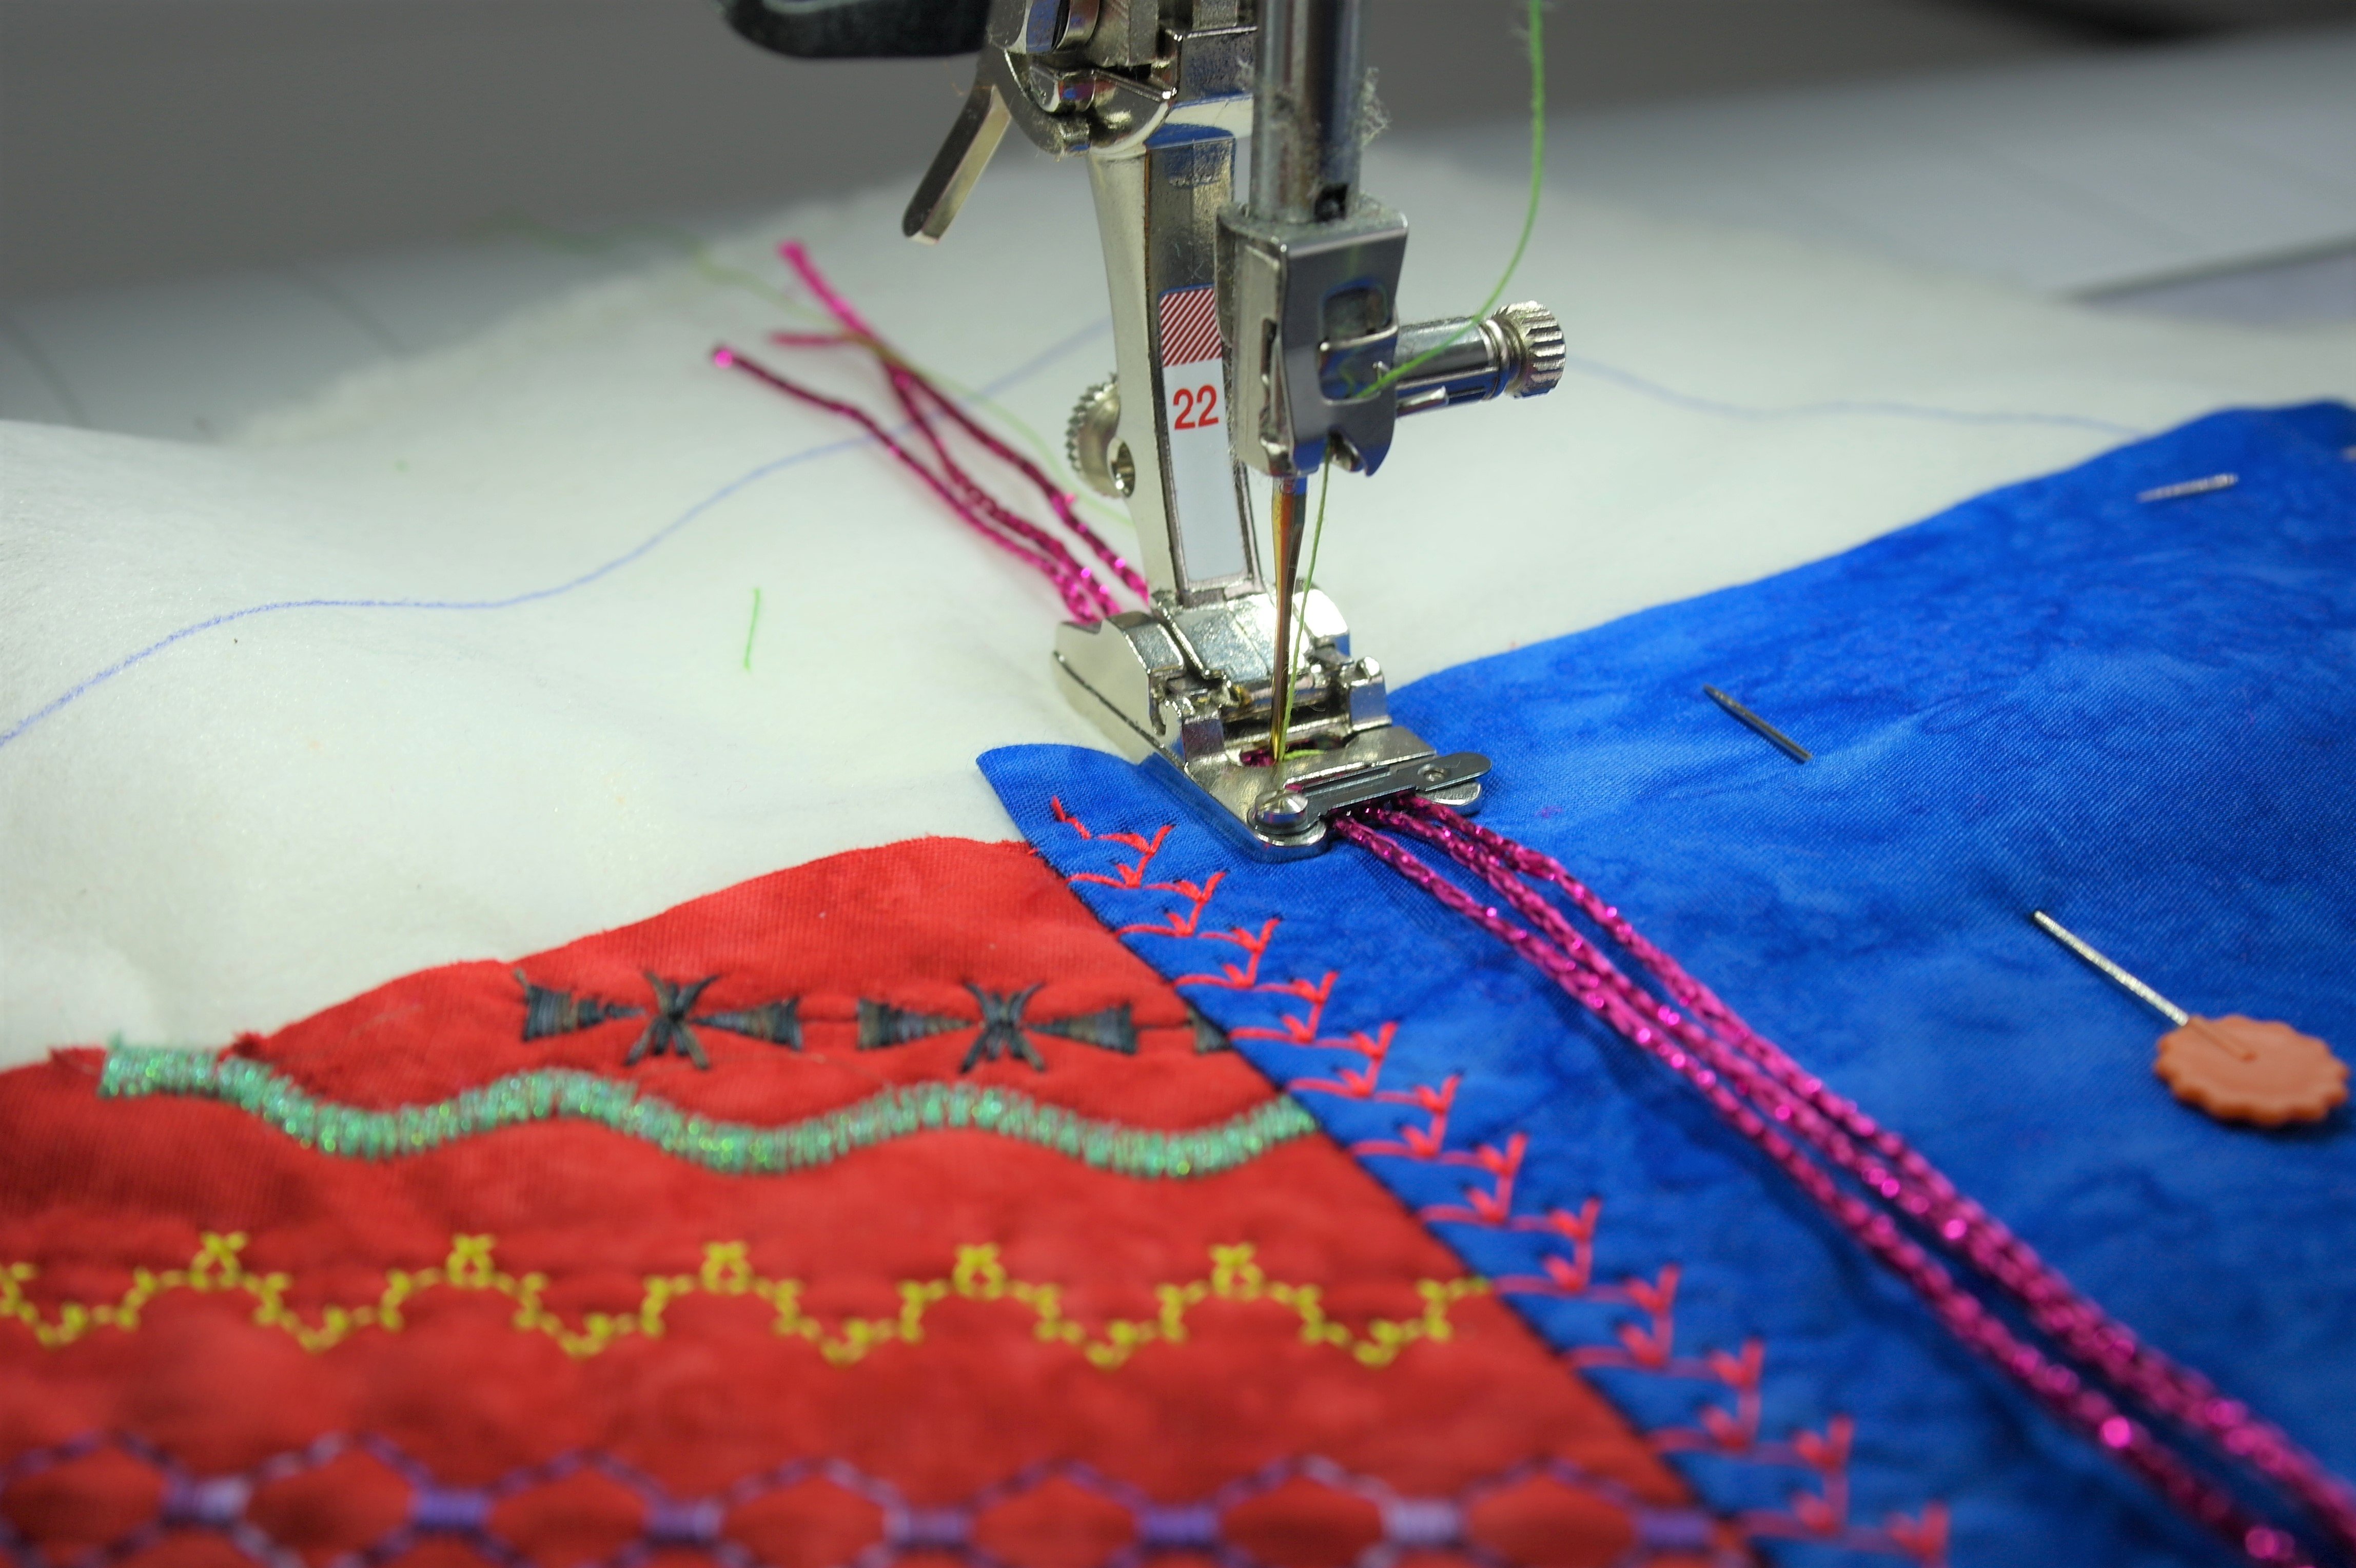
Don’t forget to use your special presser feet, like #21 and #22, we’ve used the last time. You don’t need directions for usage anymore, because you can find them with block 4 from last month. By varying with presser feet and stitches, threads and effects, each block will be something special. At the picture above you can see I have worked with presser foot #22, using LIZZY – nice, sparkling yarn. I’ve secured it with a decorative sttich and bright green thread.
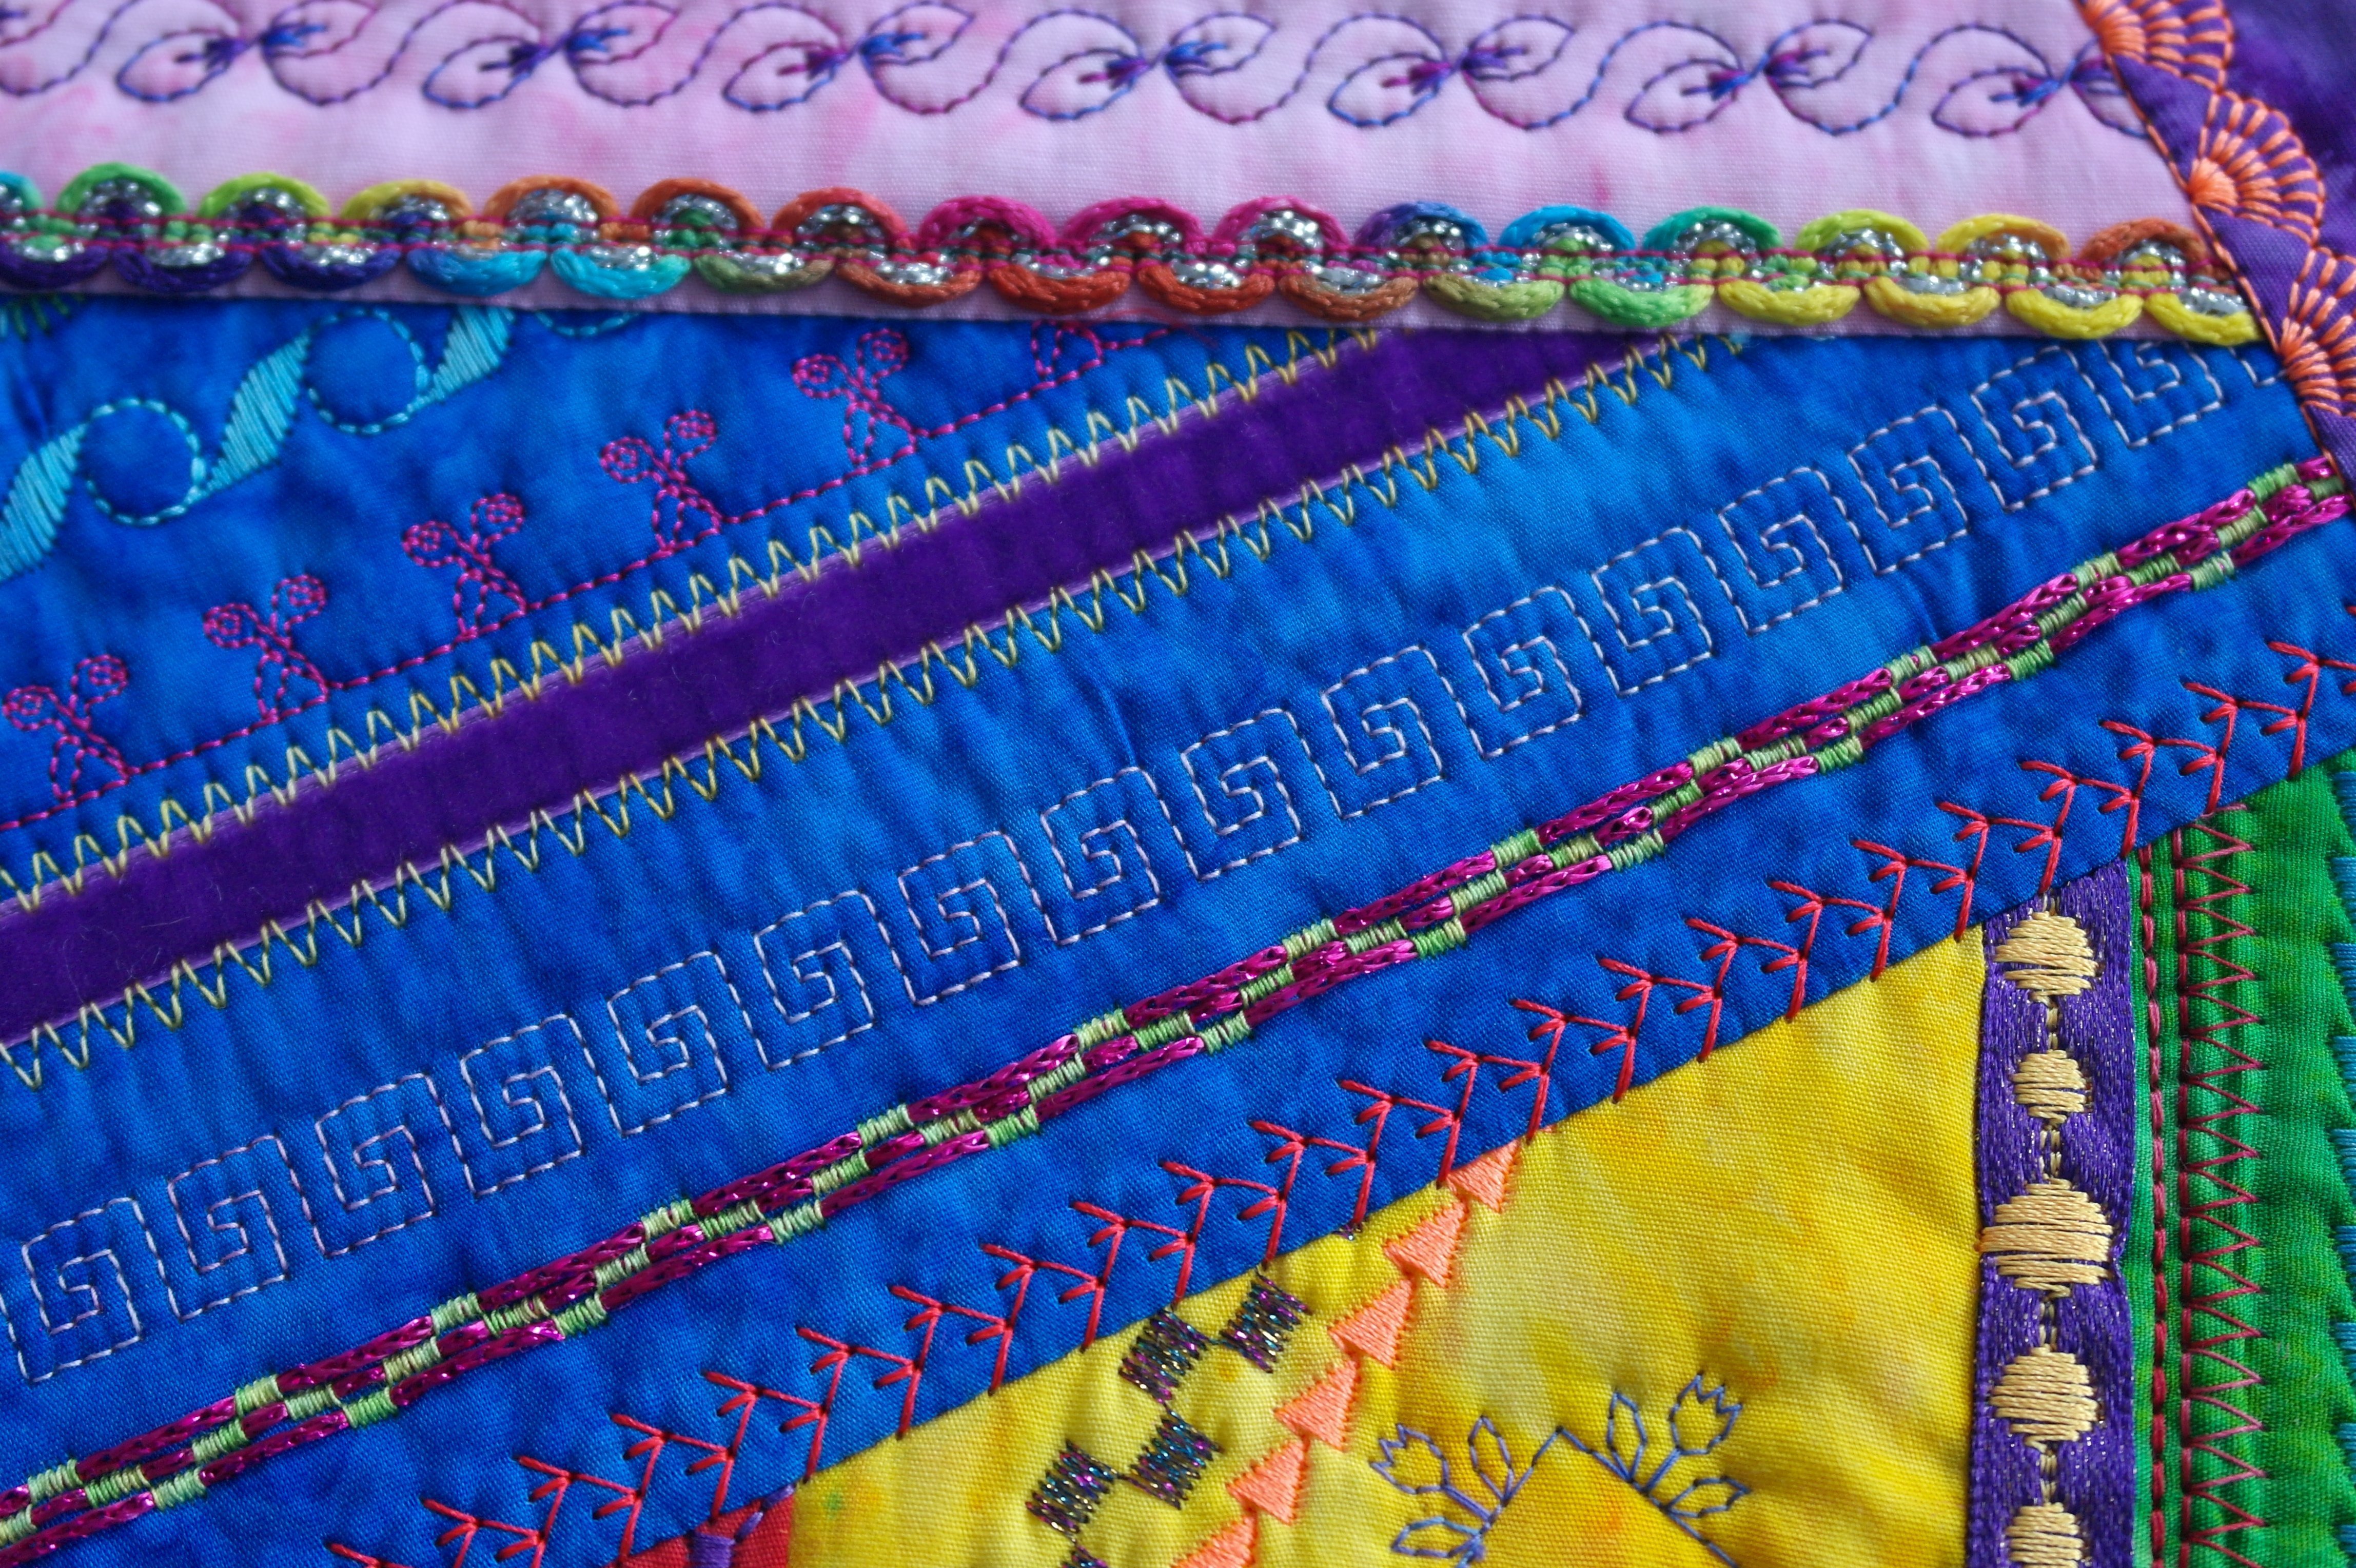
A lot of stitches are made: ribbons used too. The purple ribbon shown above, is velvet, 10mm. I’ve secured it with zigzag stitches on both sides in a contrasting color. This ribbon is glued before stitching. Works for me.
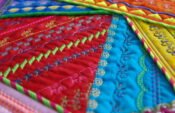
Everything is great, no matter what stitches you are making, or what threads you are using. It will be one of a kind..

And this is my block nr. 5: ready, exept for the diamond shape….

I’ve added some sequins and beads; detail shown above. I will add more later, on all my blocks. Be sure if you do, to keep a space of 5 cm free of sequins and/or beads or other embellishments, along all sides of your sandwich/block, because of assembly in month 12.
And now it is up to you: have a lot of fun making block 5, see you next month!
Happy Quilting!
Sylvia Kaptein
Sylvia’s Art Quilts Studio
IMPORTANT: when your sandwich/block is finished, check if the size is aprox. 32 x 32 cm. It can be shrunken a bit because of the stitches you have made, and the freehand quilting. BUT DO NUT CUT THE SANDWICH, not even to make it tidy!!! Leave it like it is, and put it aside until month 12.
0 Responses