 BERNINA Corporate Blog -
Have you ever sewn a yoke? I like yokes because they are great for adding a contrasting fabric. My latest sewing project, a oversized shirt dress, had a yoke, so I decided to take pictures of the sewing process and write this tutorial on how you can sew yokes super easily.
What is a yoke?
If a shirt, blouse or dress has a separate pattern piece for the shoulder area that attaches to the front or back of the garment, this piece is calles a yoke. A yoke can be in the front or back shoulder area only. Oftentimes, you’ll find that there is a combined piece for the back and the front without a shoulder seam.
Yokes can have different shapes. They can be straight, curved or pointed (think shirts in a Western/cowboy style – these often have pointed yokes). On store-bought clothing, yokes are often made from a different fabric, or from the same fabric that is cut for example on the bias. You see this often on gingham/checkered shirts – by cutting the yoke on the bias, the checks don’t have to be matched and it makes for a interesting detail because the print runs differently.
Yokes are mostly found on sportive and more casual clothes.
If you turn the garment inside out, you’ll notice that the yoke has a facing that conceals the seams where the yoke is attached. This makes your garment look nice inside and out!
You can use the same fabric for the yoke facing or use a different fabric. You can also embroider something or sew a label onto it for a neat and fun look.
How to sew a yoke – let’s go!
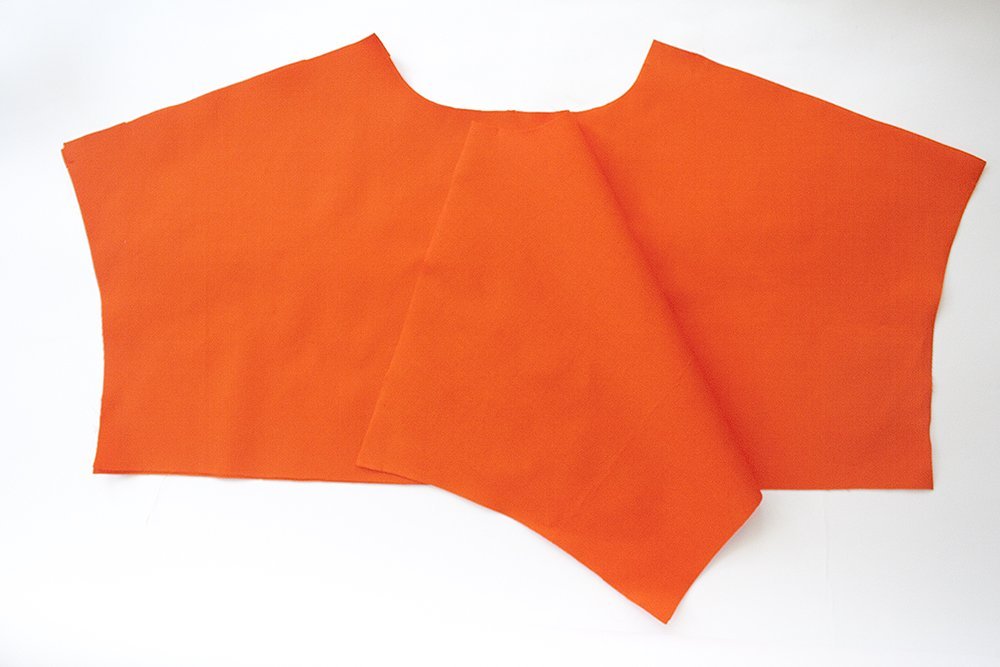
For my sewing project, I decided to use a solid coloured yoke as a contrast to my printed main fabric. I think that’s a nice contrast for a big and bold print like I used for the rest of the shirtdress.
I cut the yoke twice, as you can see. Both pieces are identical.
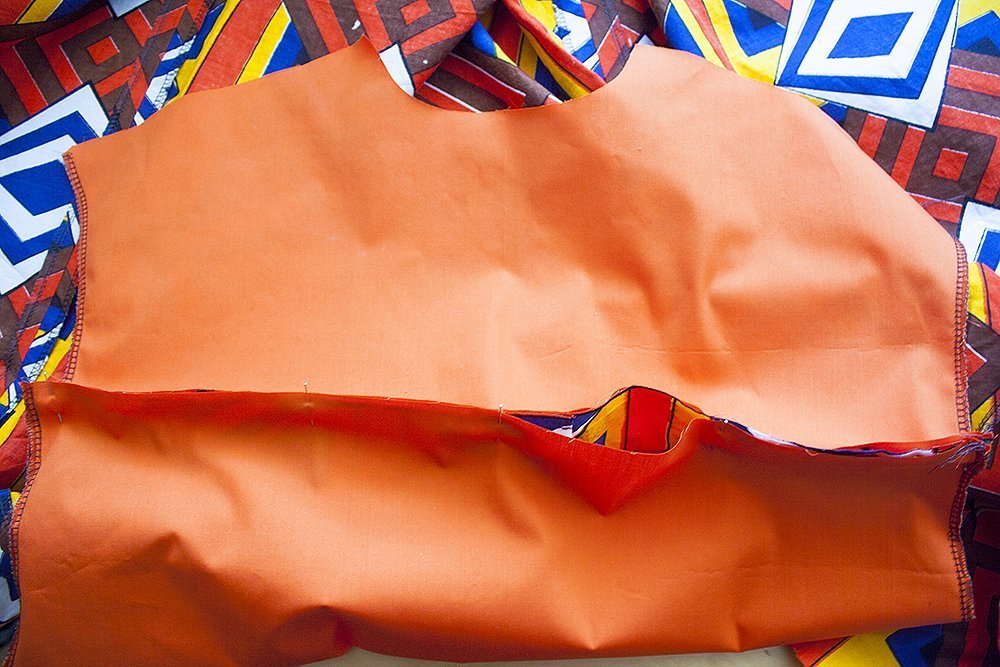
First, I pinned the yokes to the back piece of the shirtdress. Pin the outer yoke to the main fabric, right sides facing, and the yoke facing with its right side to the wrong side of the main fabric, so the back piece is enclosed by the yoke and the yoke facing.
I always mark the center backs, so I can pin all three pieces onto each other exactly in the middle. Going from the middle, I pin the rest of the seam to the right and left.
If you want to, you can sew this seam right now. You can also leave it pinned and sew it with the other seams, it doesn’t make much of a difference. I personally prefer to pin as many seams as possible first and then sew them all. This way, I can save time by not switching between pinning and sewing.
These seams don’t have to be serged, by the way, because they will be enclosed by the yokes.
Wether you decided to sew the seam or leave it pinned, it’s time to continue with the from seams of the yokes.
I like to close the side seams before sewing the yokes, but you don’t have to; you can close them after attaching the yokes.
Lay your front piece or pieces (like in my case – my dress had a button placked in the front, so I had two front pieces) onto the back piece, right sides facing.
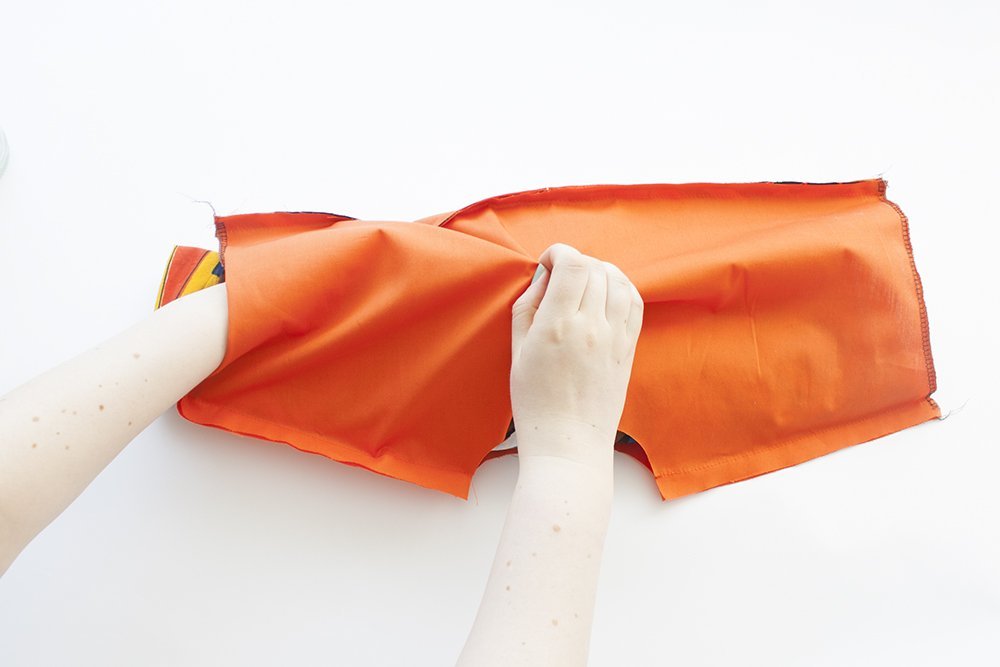
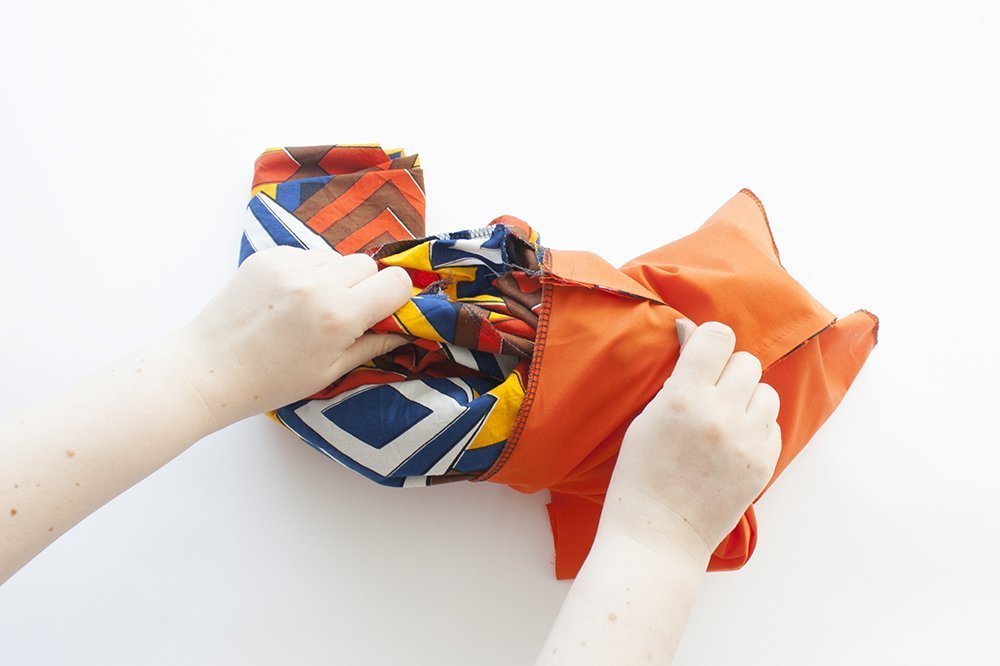
Now start rolling the pieces up together:
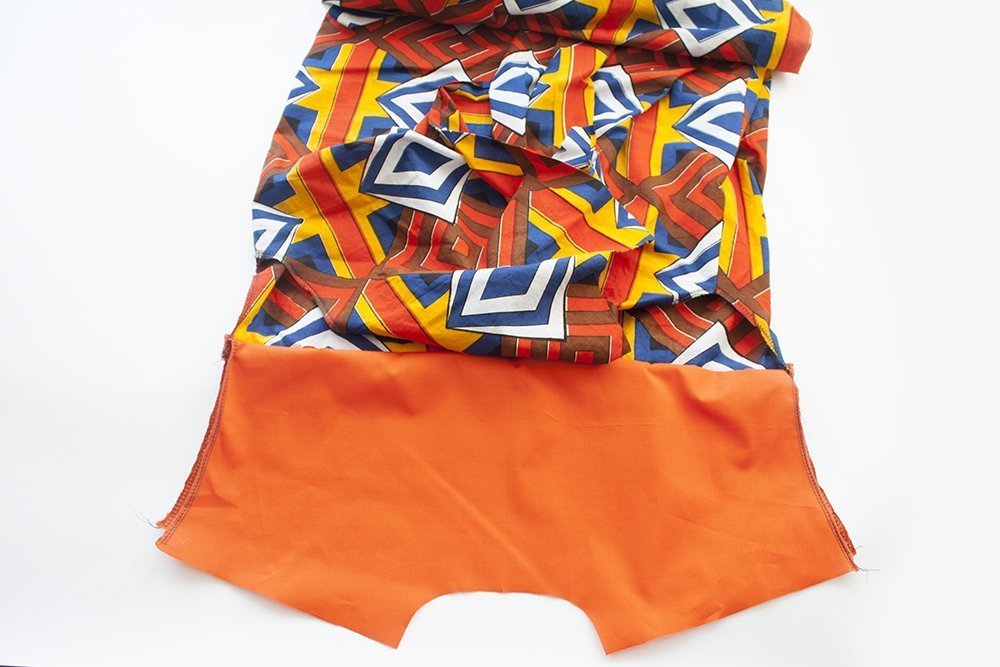
This doesn’t have to be super neat, the reason for rolling them is to make the pieces as small as possible. This is also called the “burrito method”.
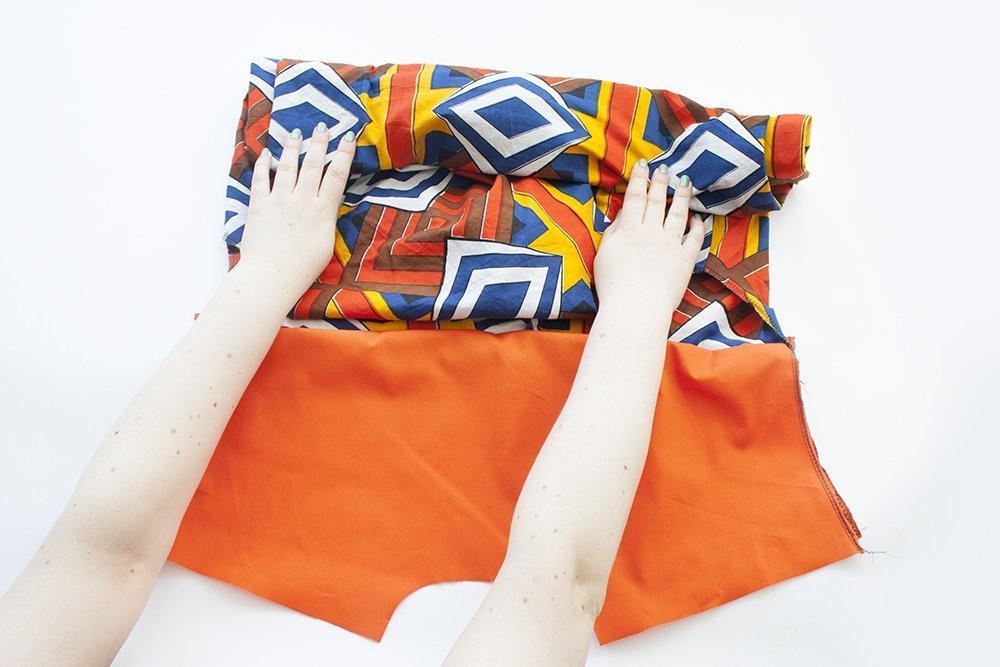
Now, we’ll sew the front yoke seams – you still need to access the seams in the front piece where the yoke will be attached, so don’t roll too far. 😉
These seams will be pinned like the seam in the back: outer yoke with its right side to the right side of the main fabric, yoke facing with its right side to the wrong side of the main fabric.
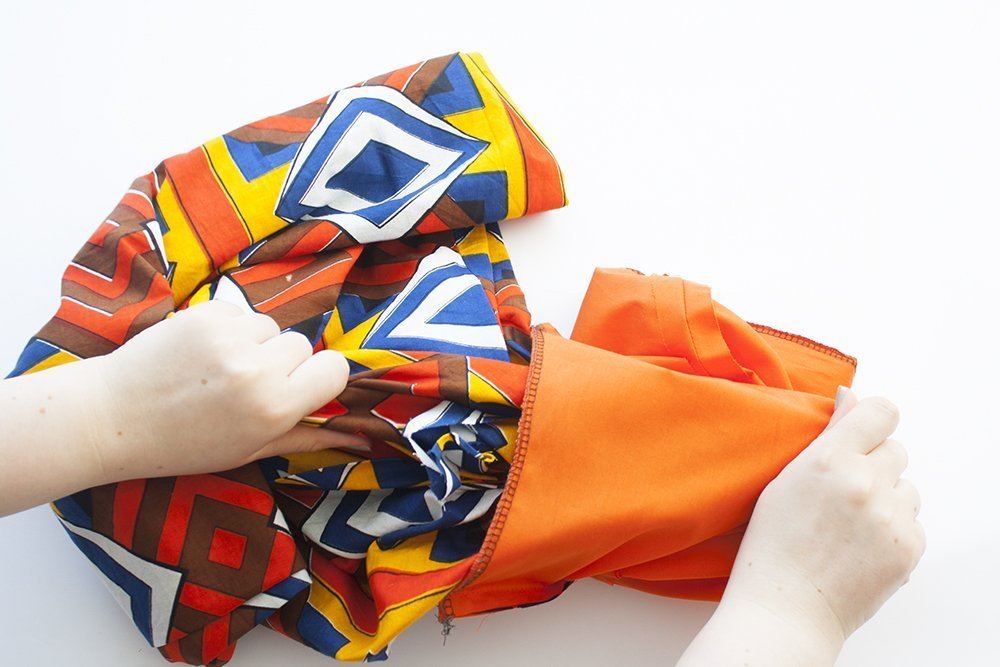
The rolled up front and back pieces are now enclosed between the yokes. Like this, you shouldn’t have problems closing these seams.
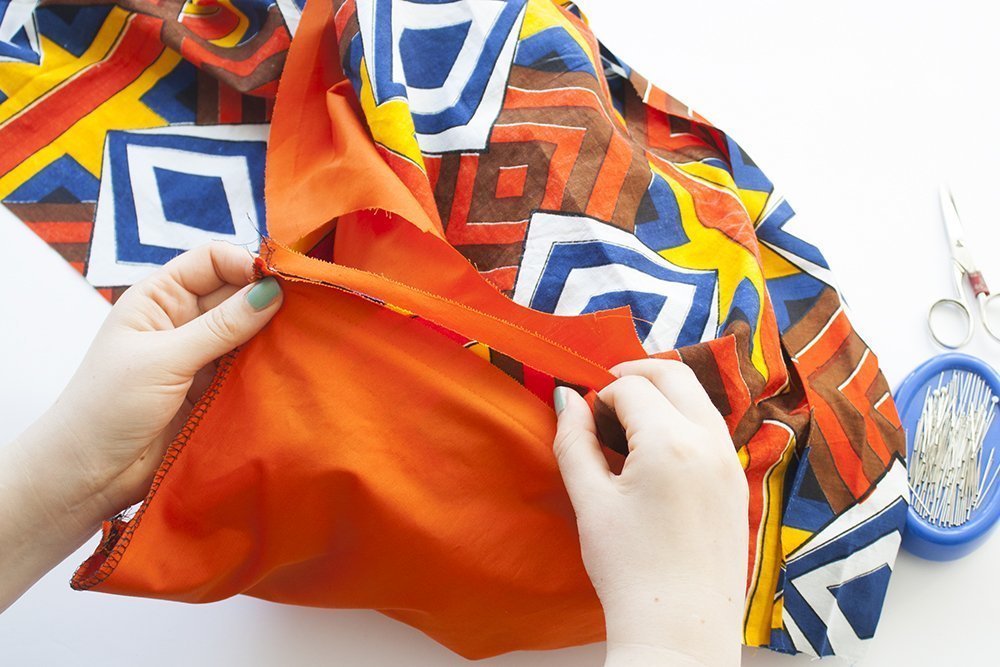
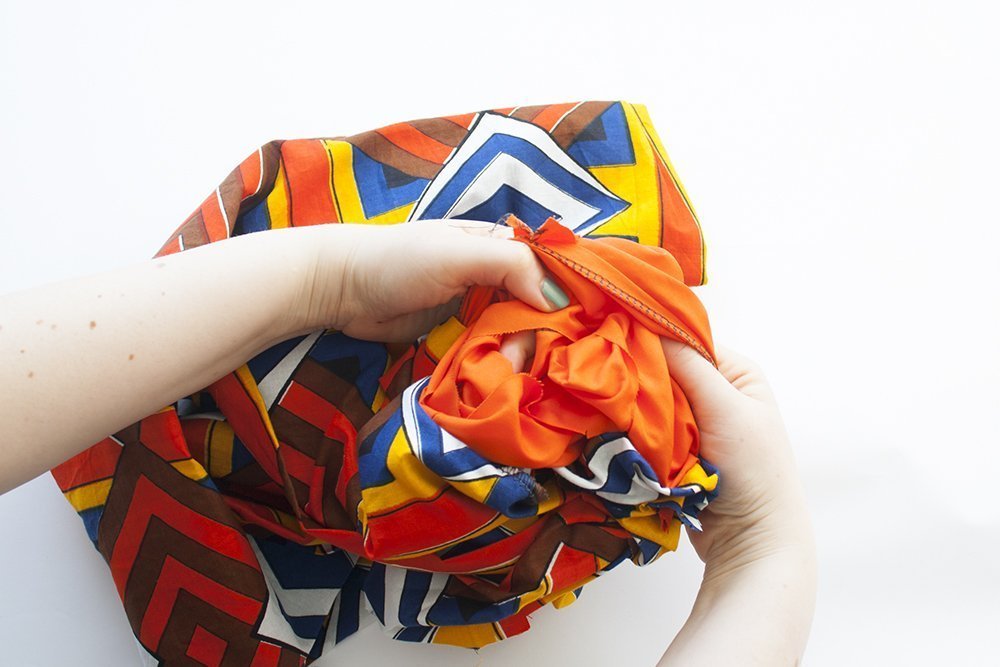
Now it’s time to untangle this fabric burrito! I like to grab the rolled pieces through one of the side openings.
Many instructions tell you to grab them trough the neck opening, but since the fabric is on the bias in this area, I’d recommend avoiding stretching it so the fabric won’t lose its shape.
However, your side openings may not be big enough to pull the fabric through them. Have a look at the pattern in the beginning – if the yoke is very narrow at the sides, you’ll need to turn this burrito inside out through the neck opening. In this case, staystitch both layers separately at the neck opening, so the fabric won’t lose its shape.
Turn the yoke inside out.
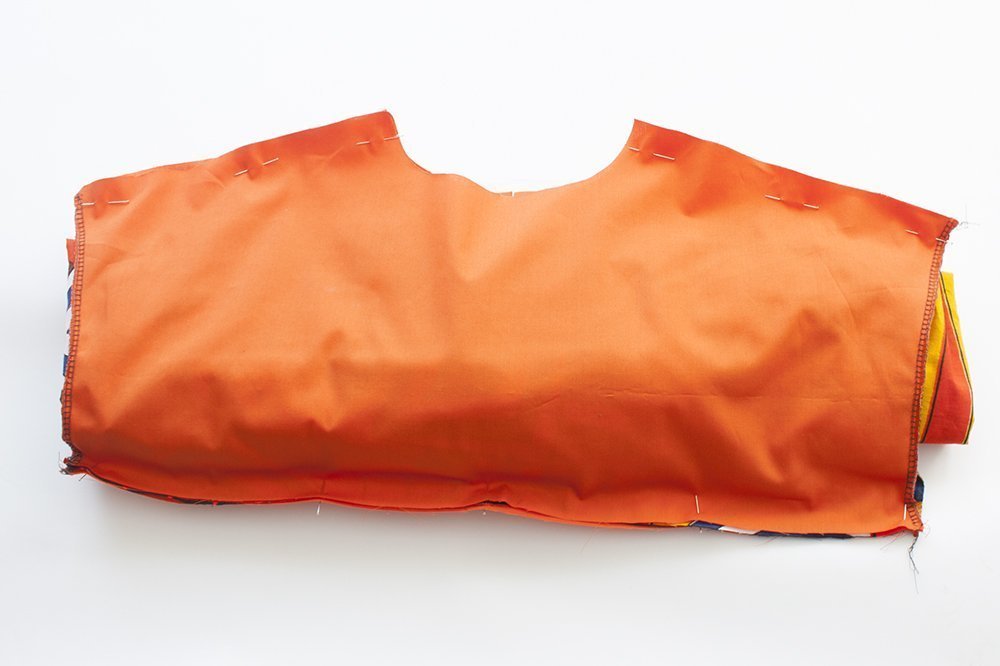
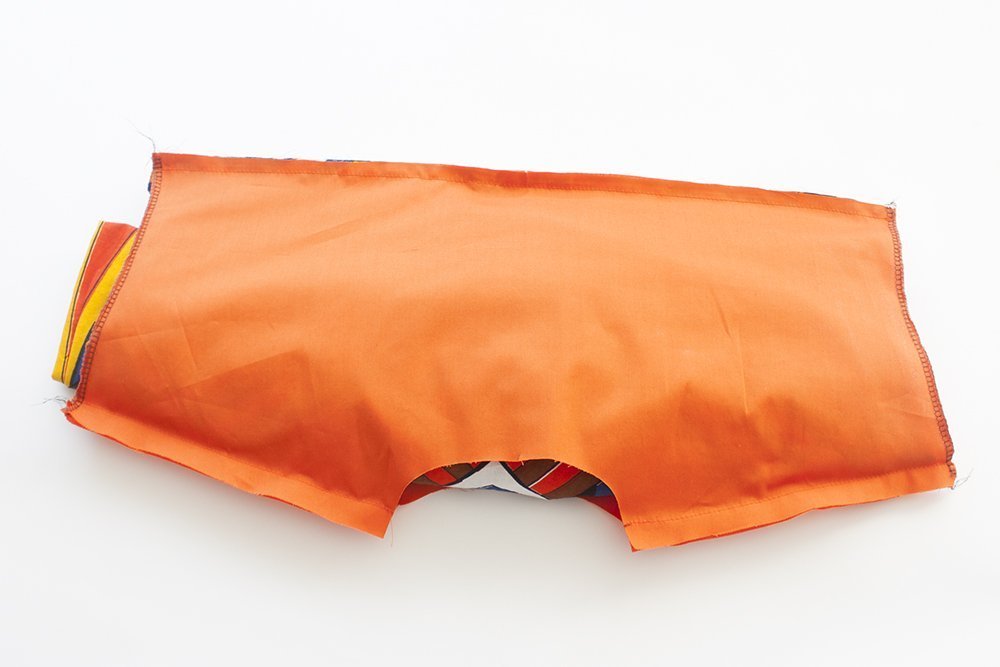
Now you have two facing yokes that enclose the seams and connect front and back piece.
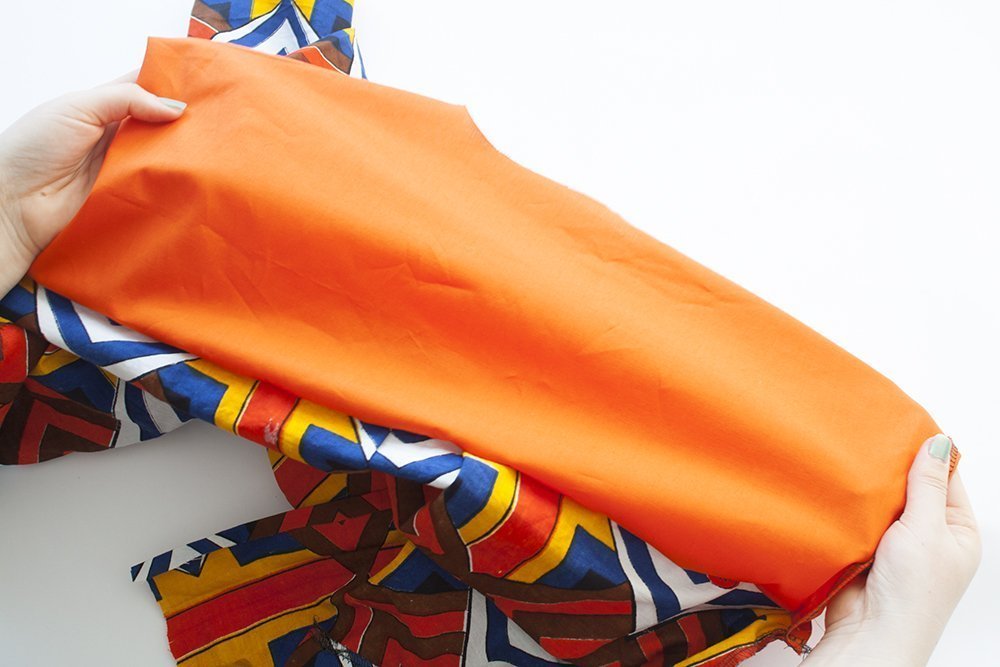
Press the seam allowances upwards.

I basted the yokes together at the neck opening and at the shoulder, using a long stitch length, so nothing shifts when I continue working.
If you want to attach a sleeve, you should serge the raw edges of the yokes at the shoulder/arm.
You can see the finished dress on my sewing blog, exclamation-point.de.


Perfect
you have lost your minds…but I did a lot worse at your age