 BERNINA Corporate Blog -
The post from September 12th was to show you the preperations for the Pumpkin appliqué; patterns, ironing and detail drawing. Now the sandwich for quilting has to be made.
I want to frame this quilt, using a large wooden frame, which I hade in stock for a while*, and measured the inner side of the frame = 38 cm x 68 cm. The frame itself measures 50 x 70 cm.
I will place the frame horizontal, because I like the landscape effect. I have purchased a couple of wooden frames and framed quilts before; it’s a big difference, comparing to the regular way we finish our quilts. If you are looking for frames, just check ware houses or your local frame shop, depending on your budget.
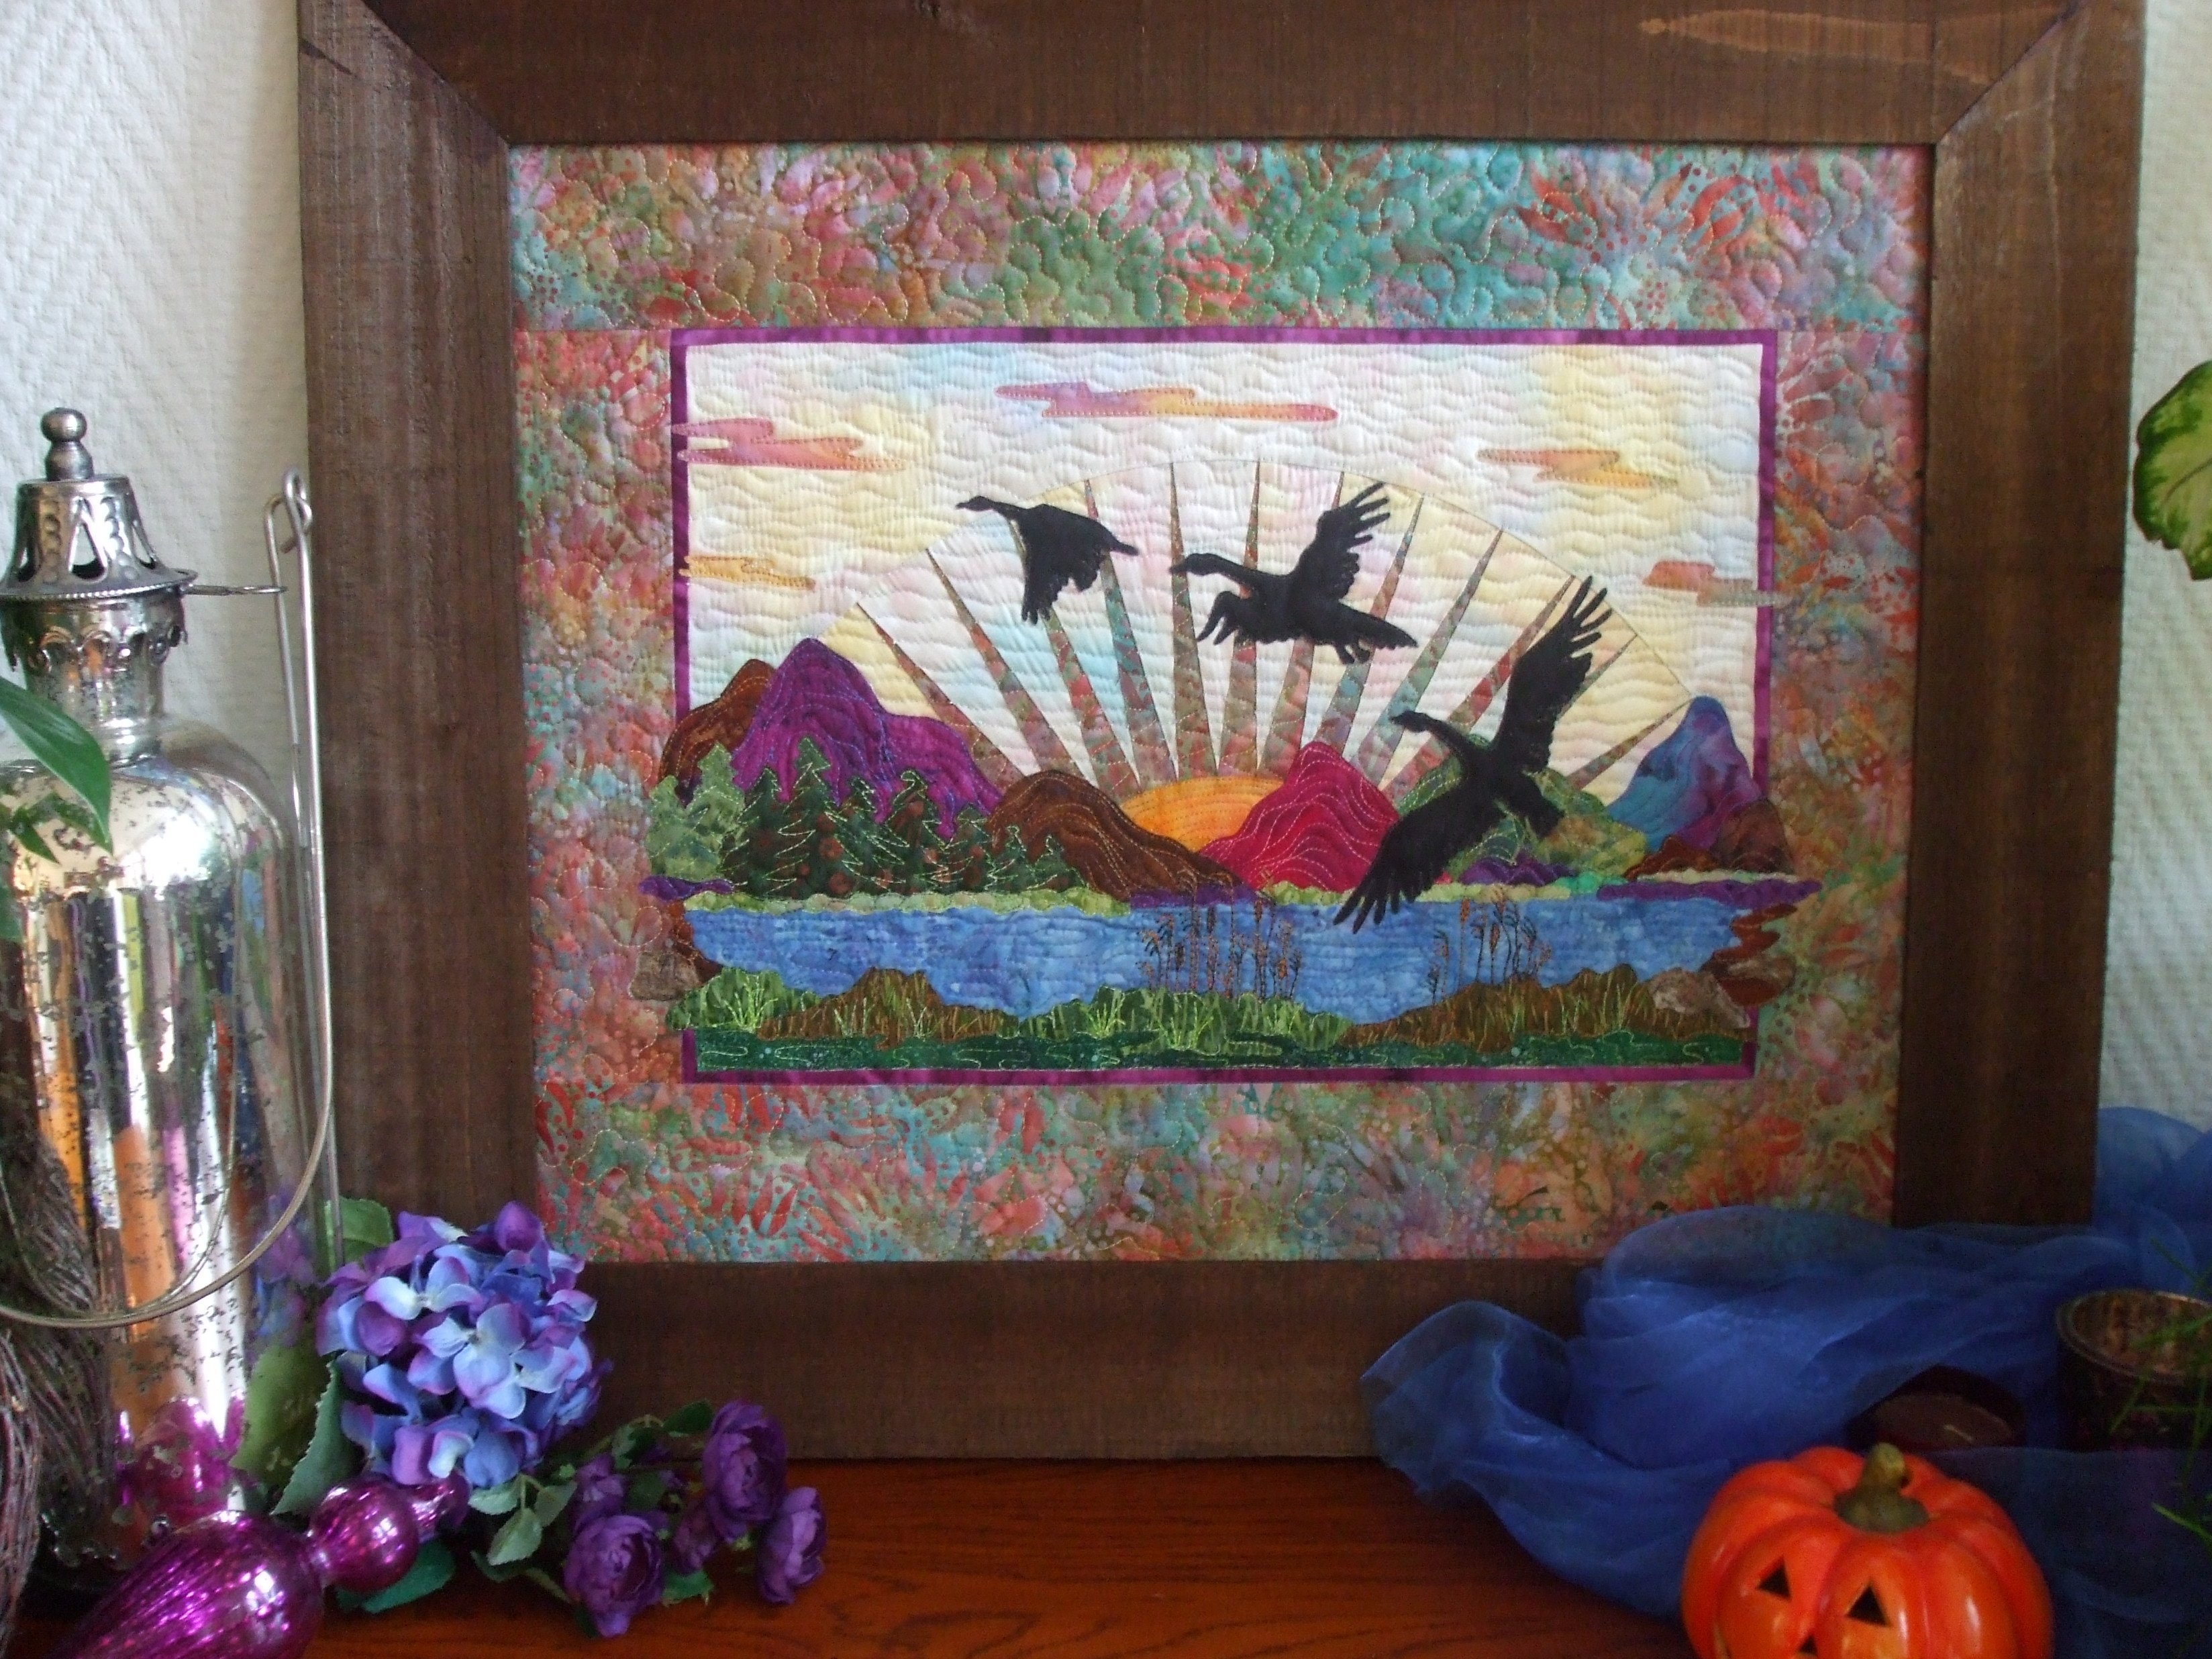
The quilts I have already framed, are ‘Over the mountains‘,
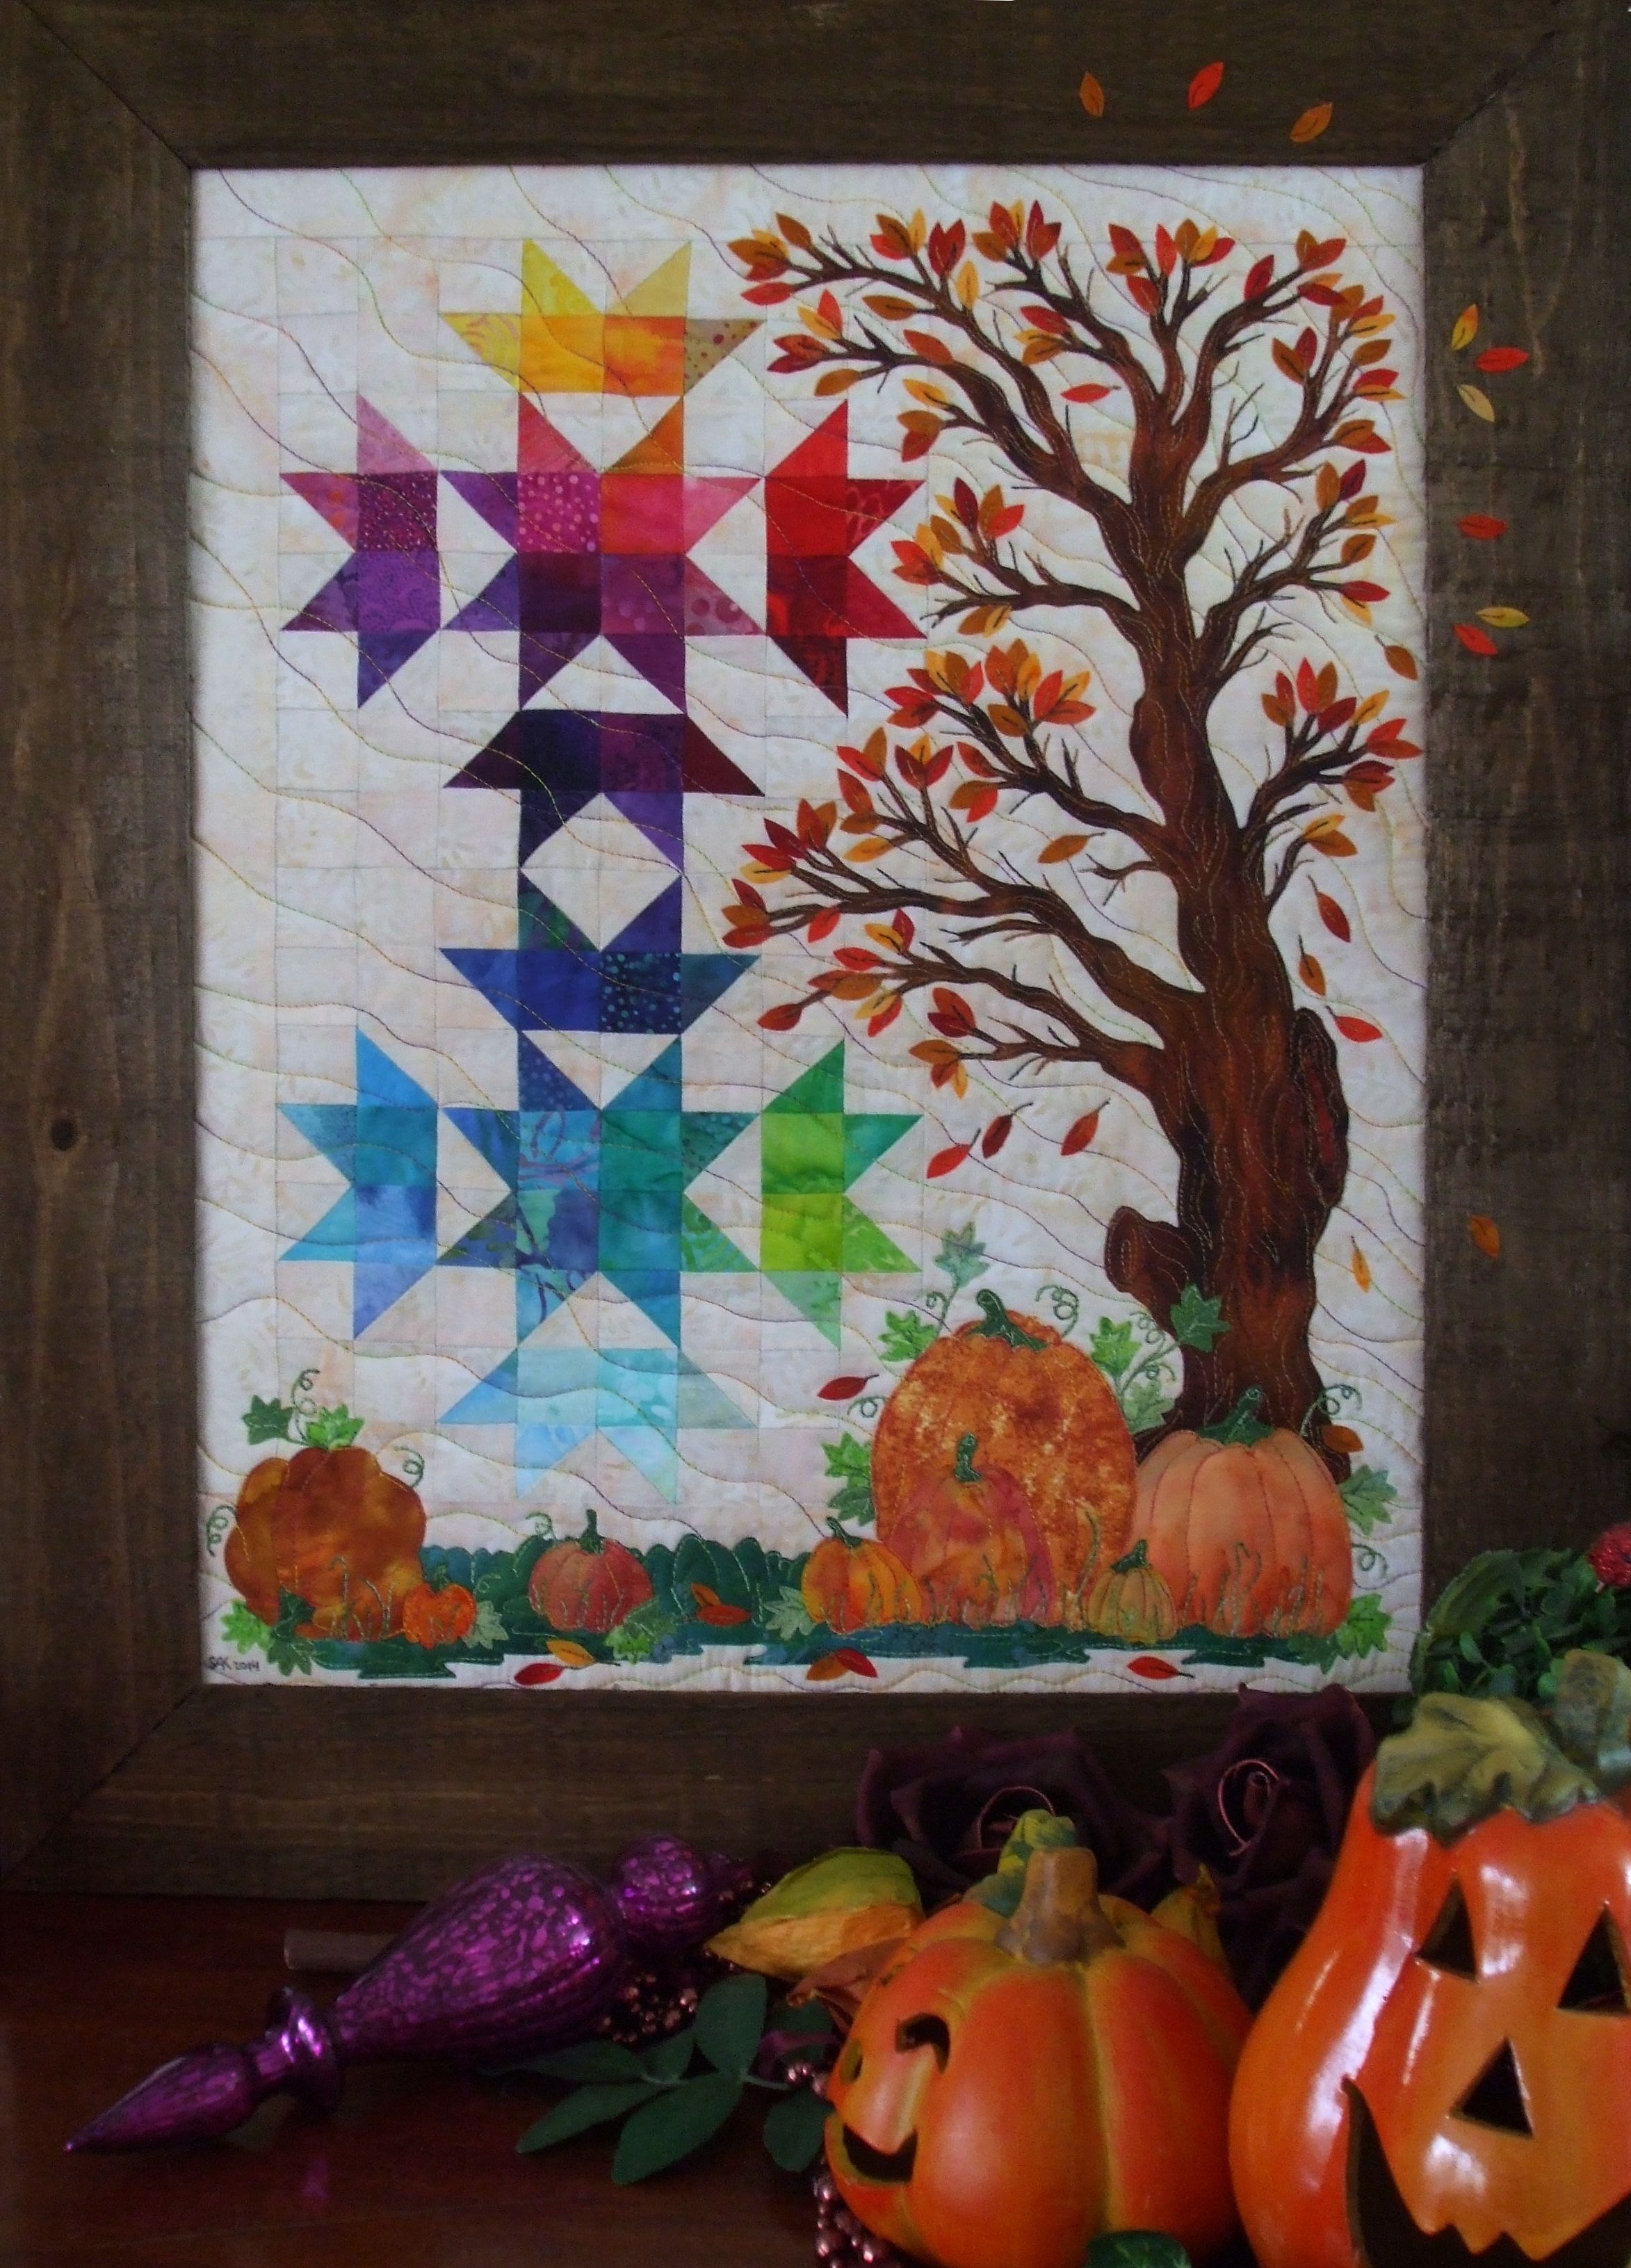
and ‘Colorful Season‘ – both my own designs.
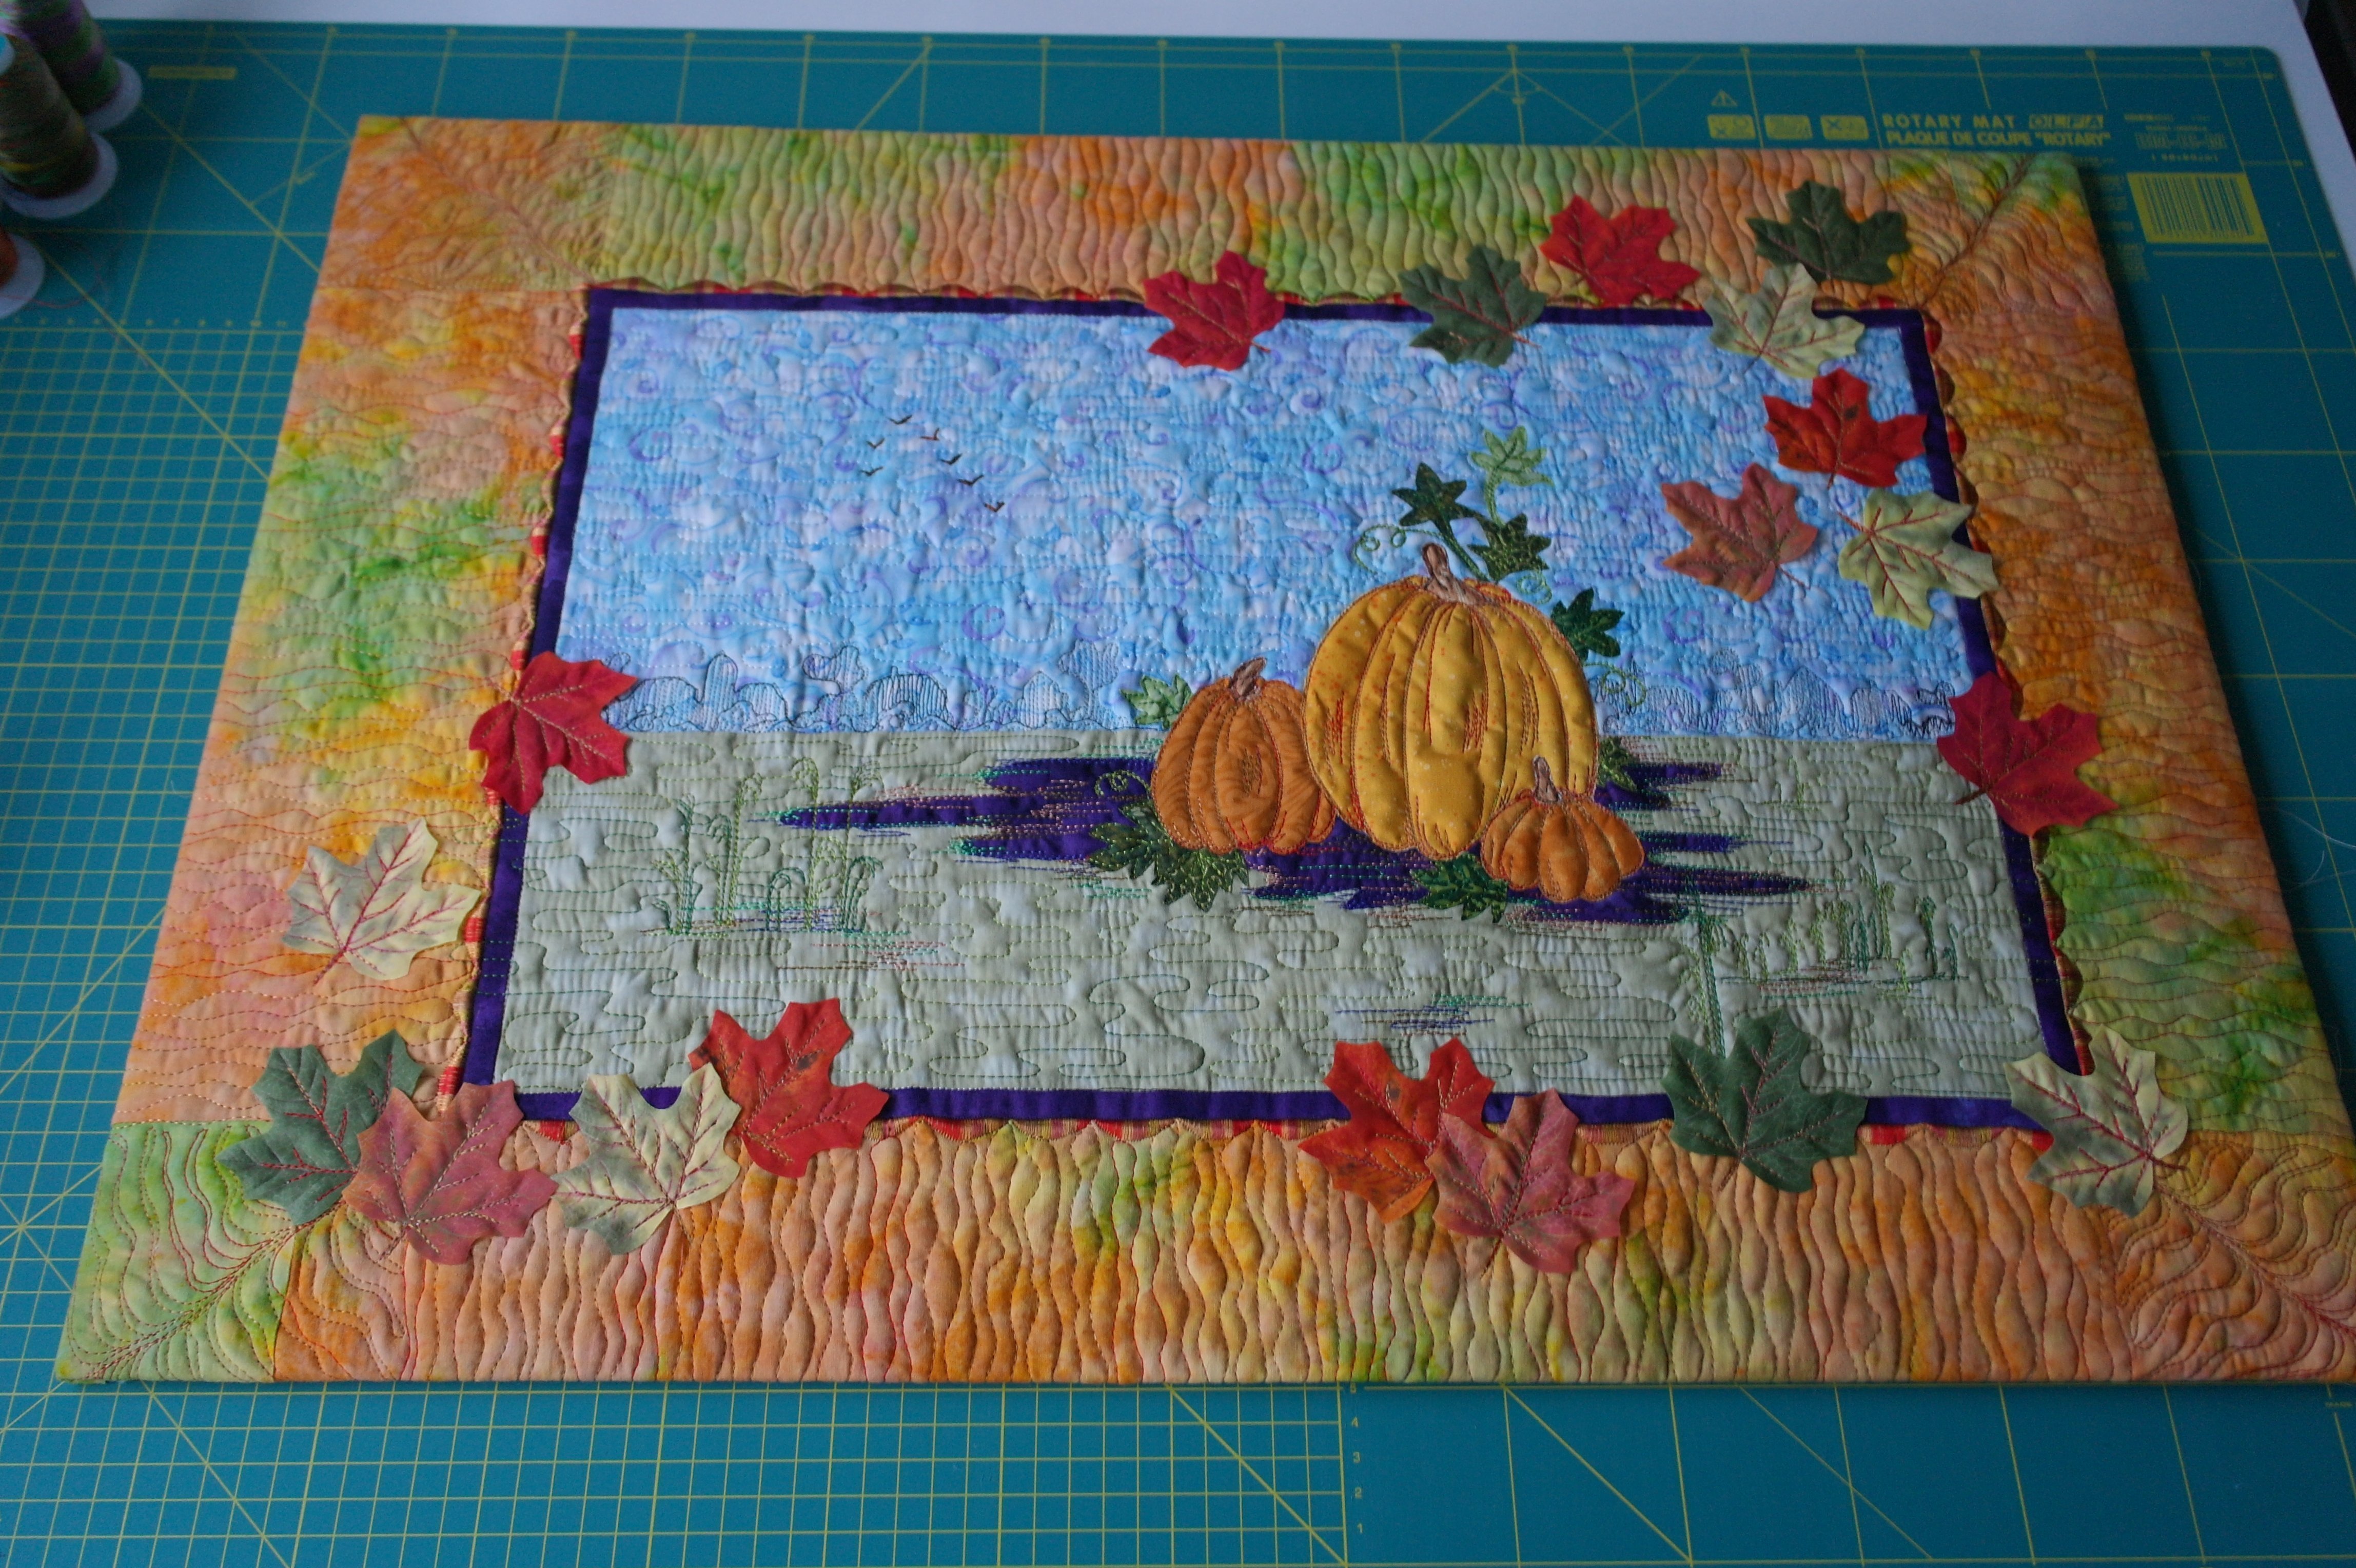
For this project I will add borders to the background/appliqué; I will use different widths, for whimsical effect.
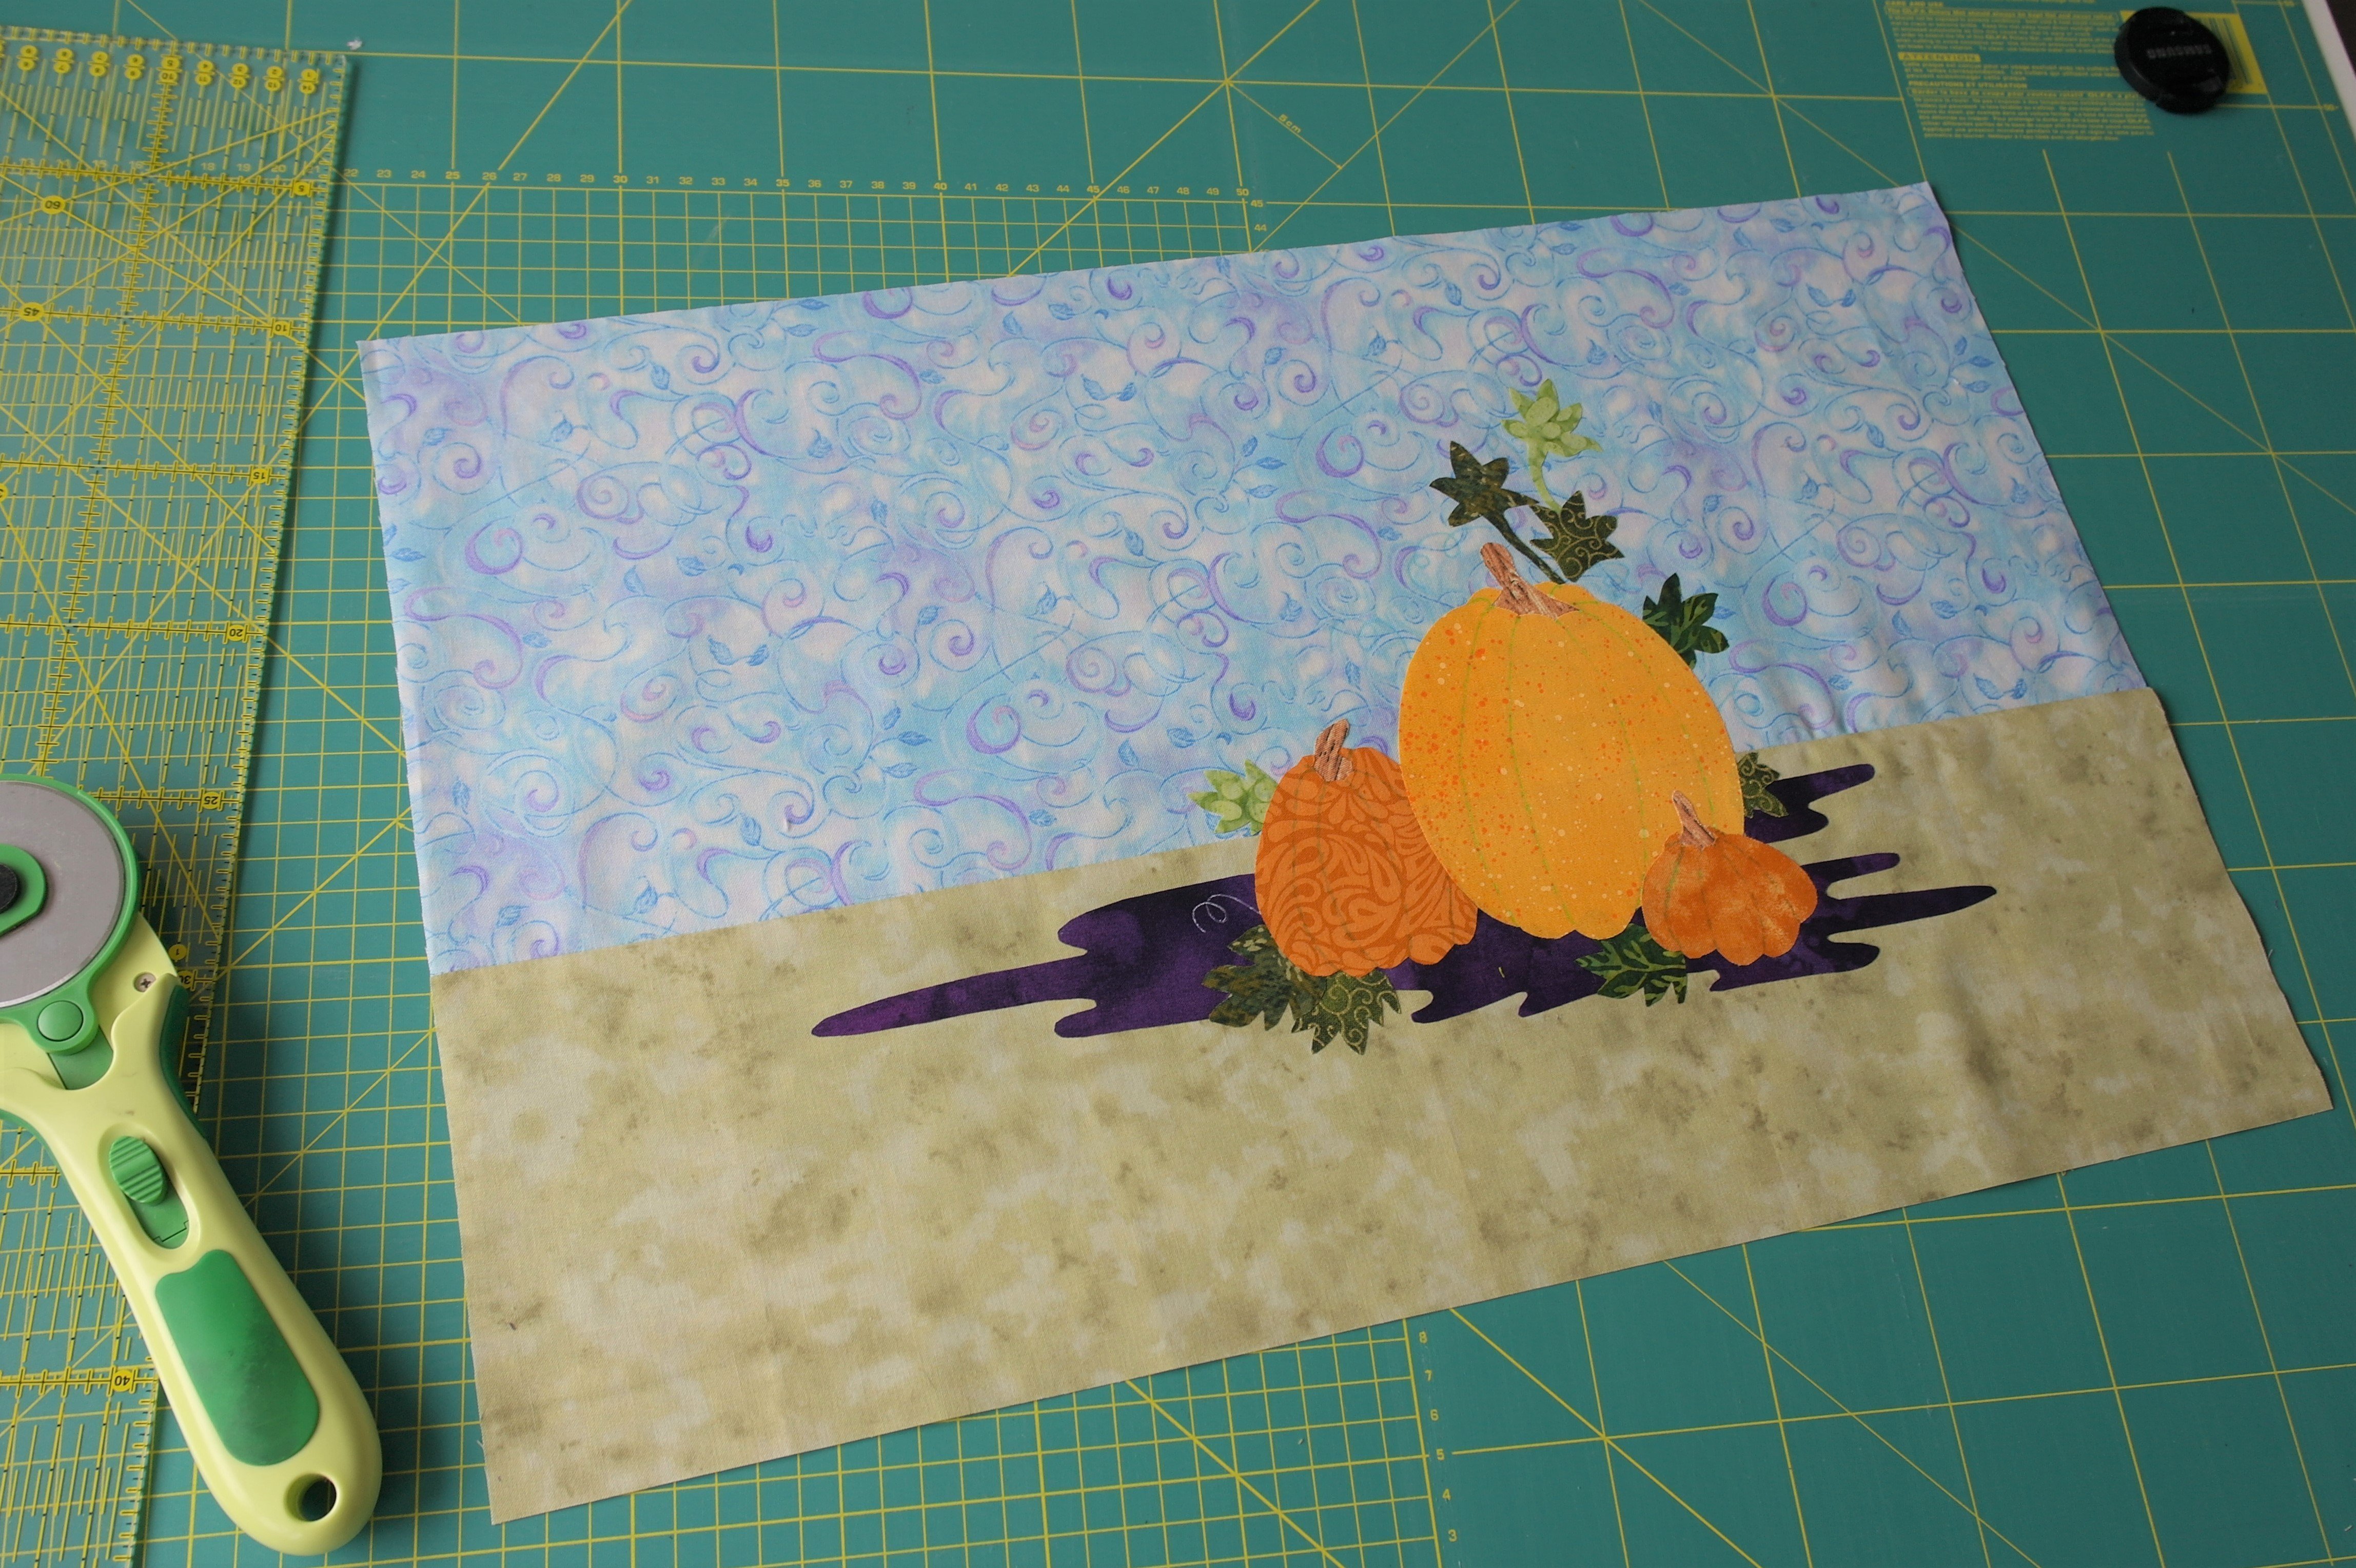
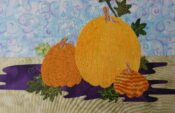
First I have cut the centre piece at the right size (my own measurements – yours can depend on how large you want your project to be.
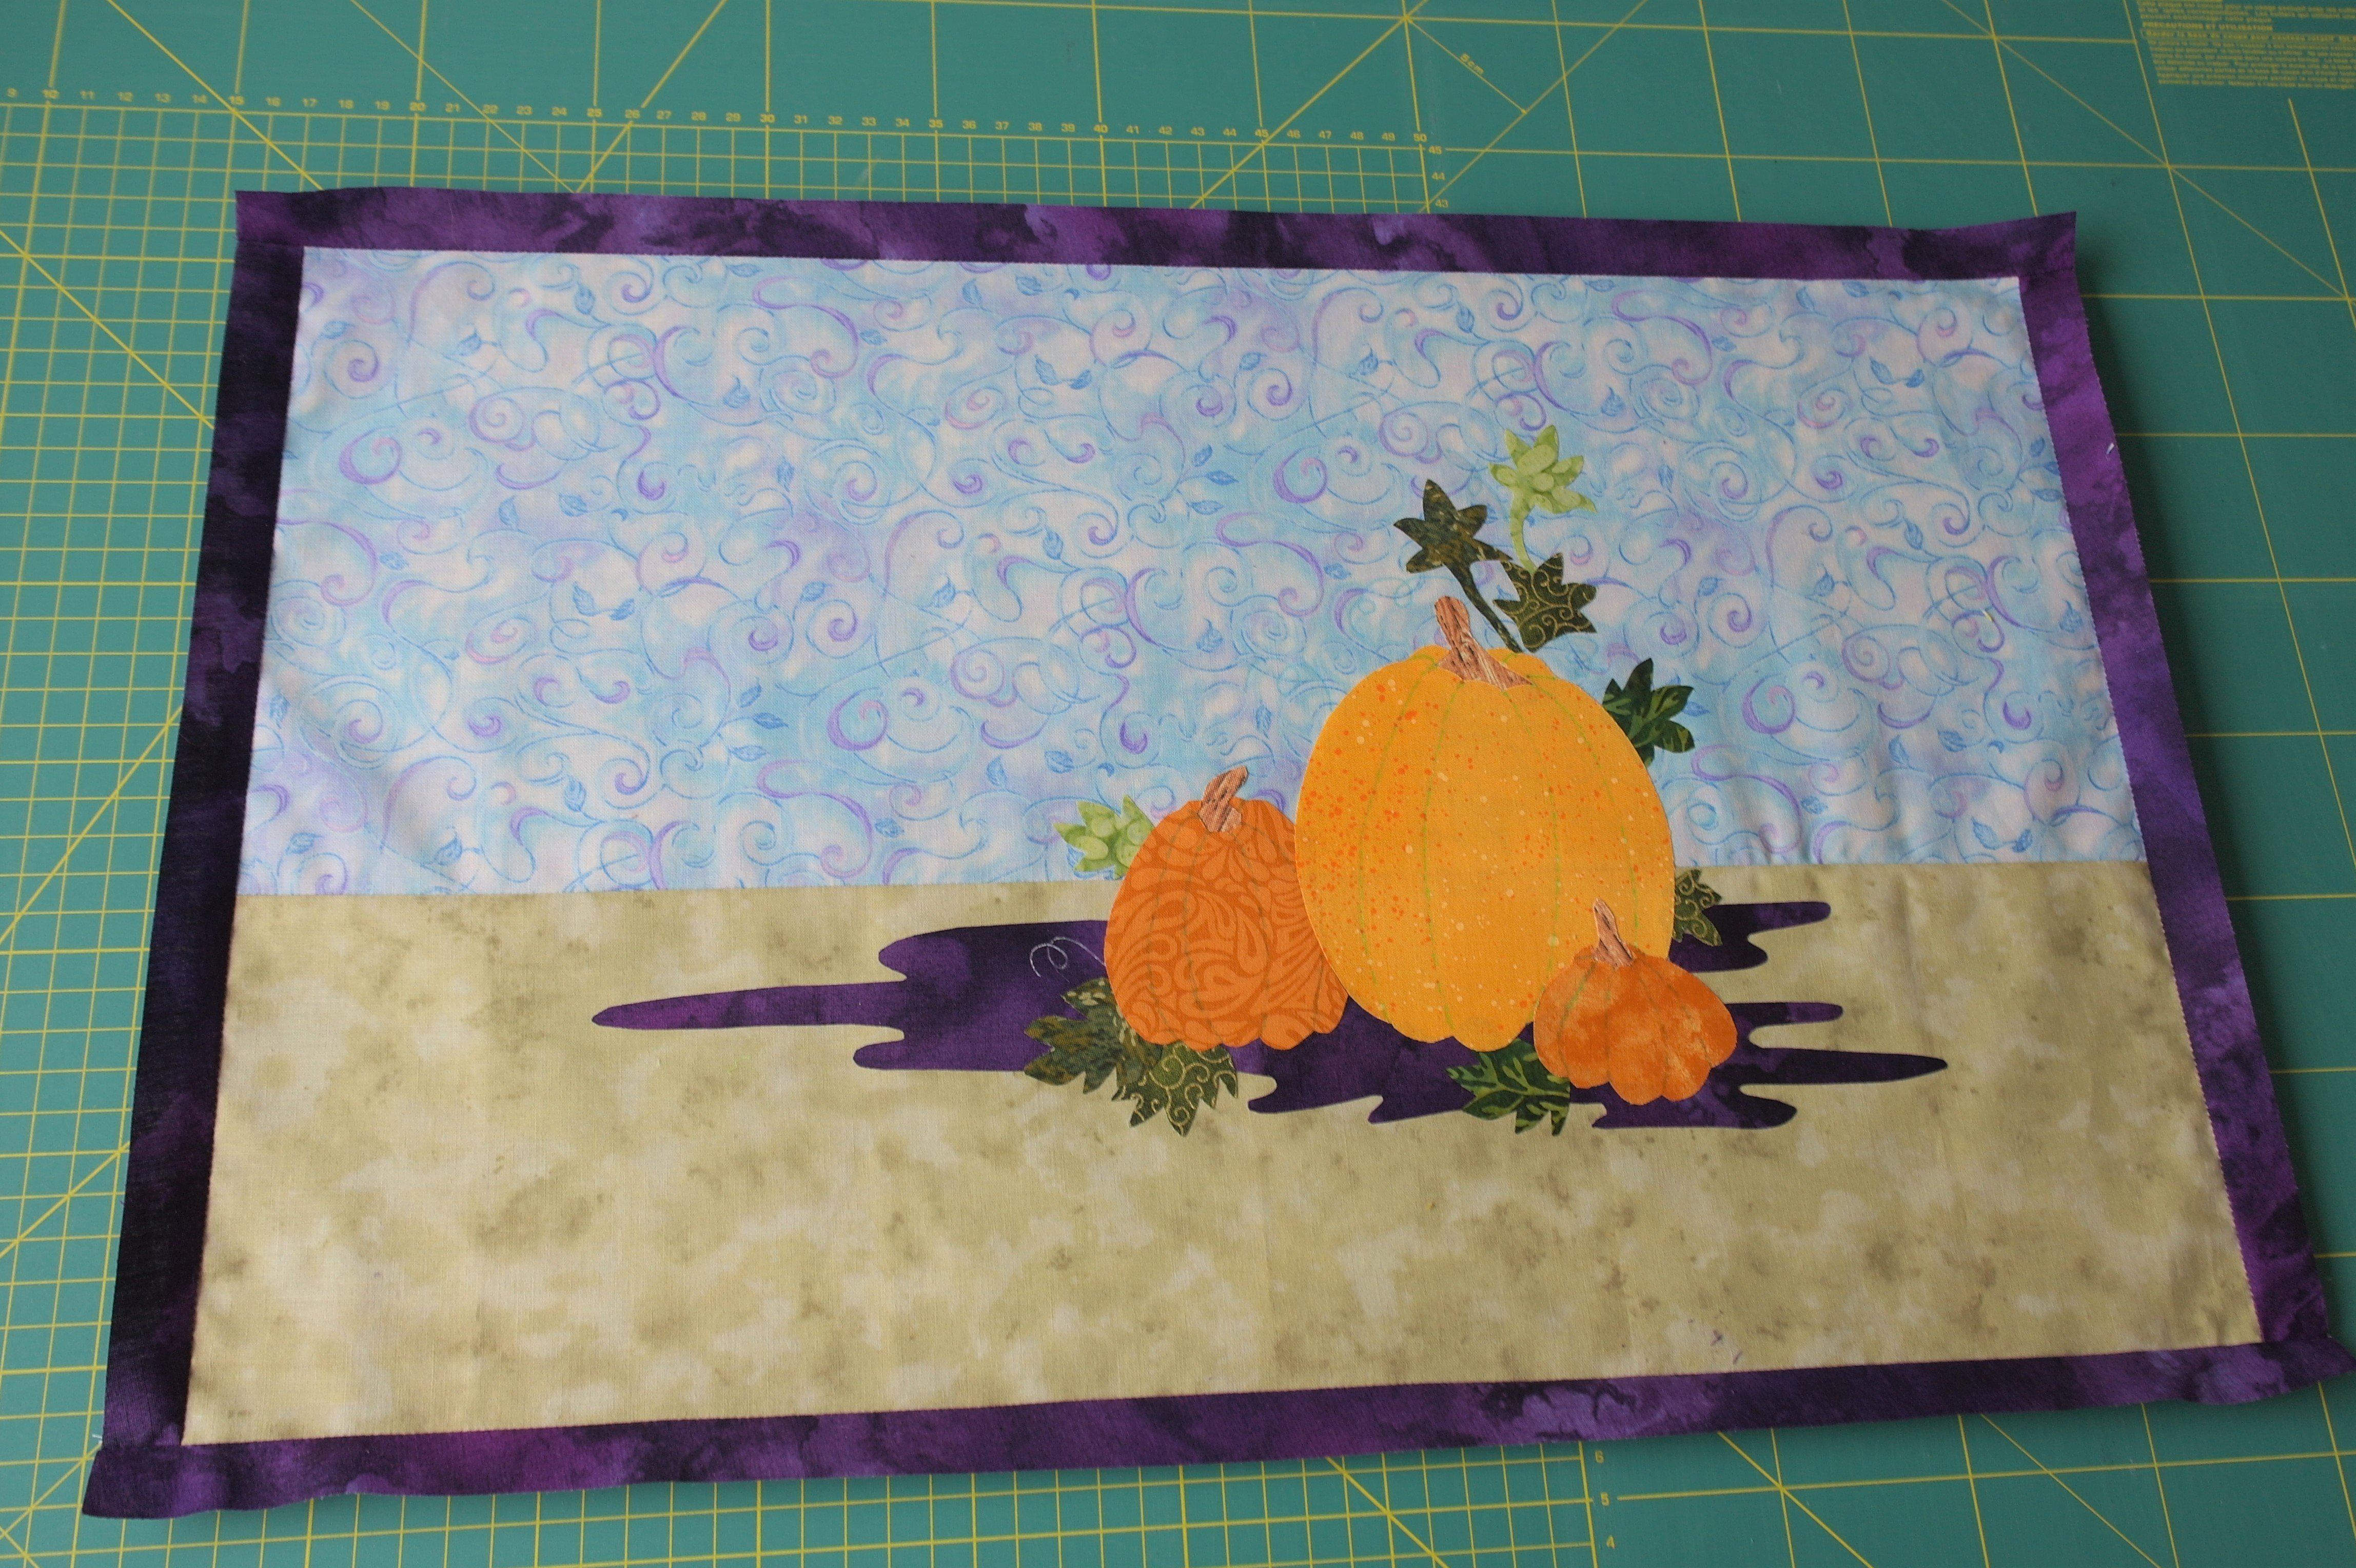
I have added a small purple accent border to the centre piece: I have used the same purple fabric as for shadow beneath the pumpkins.
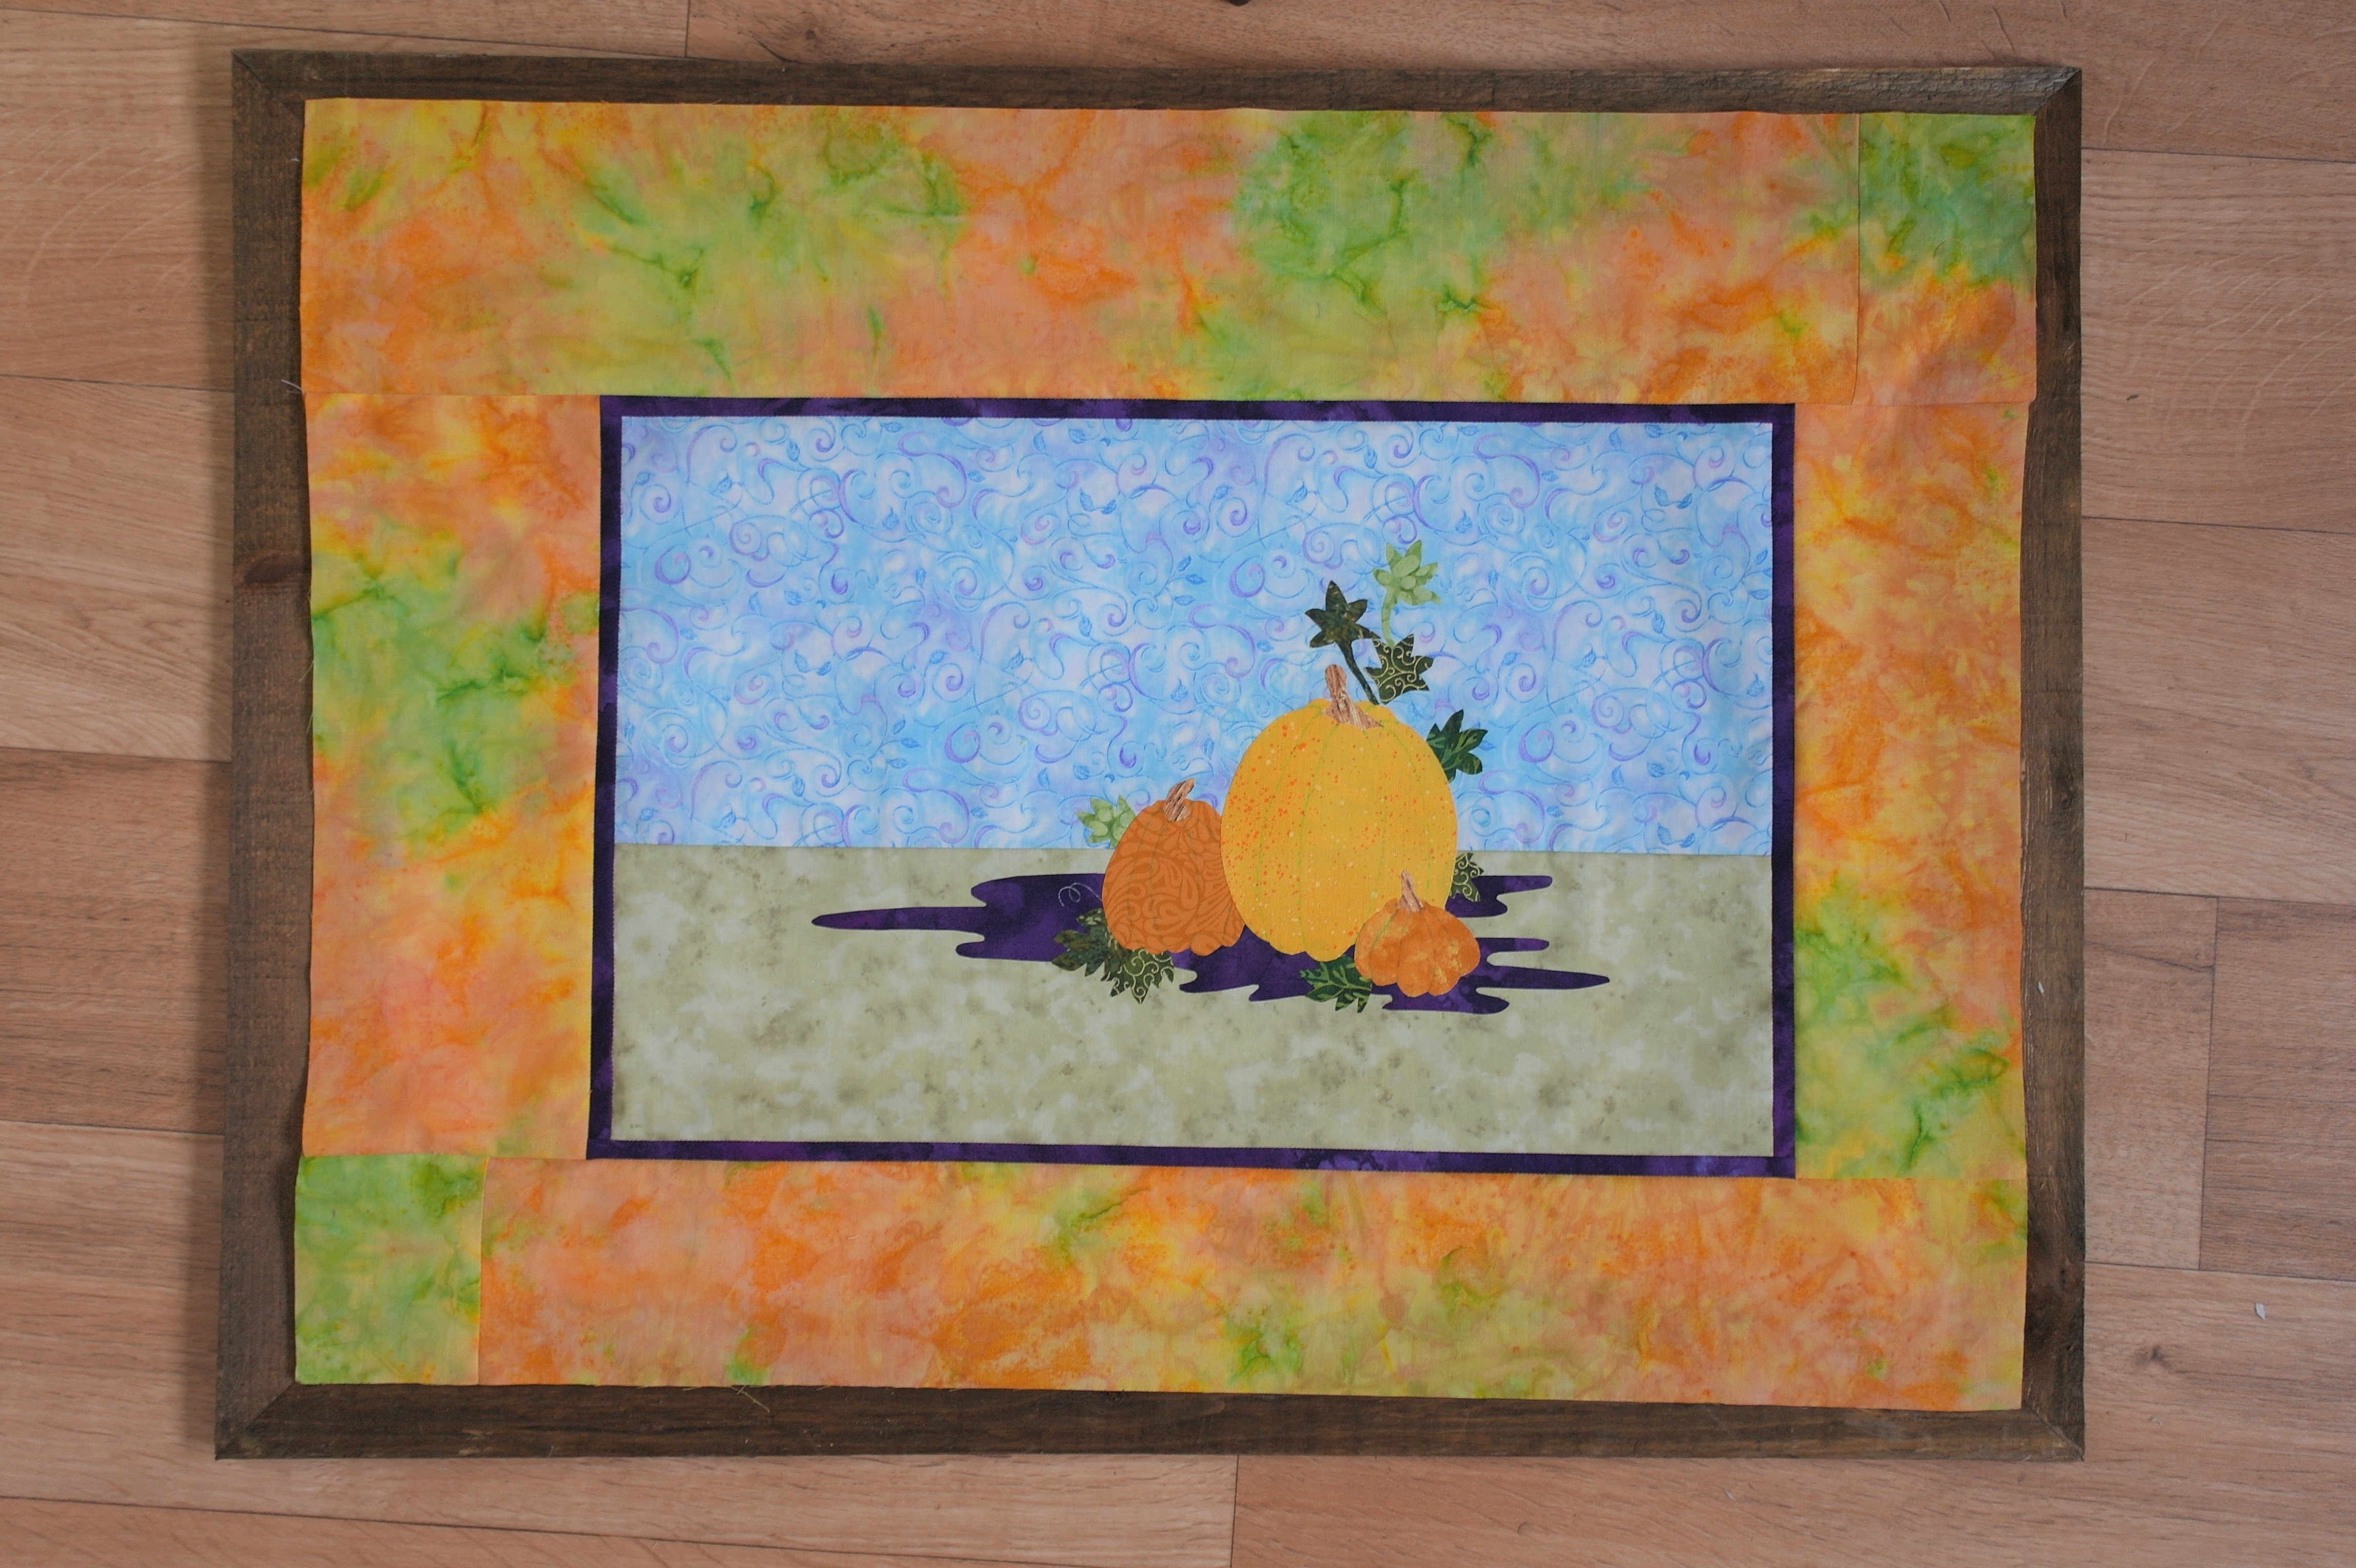
The wide borders are yellow/orange/green. I had to sew strips together, because they were not long enough. This won’t show when the quilt is done, because I will add more items to cover this up. The top is ready: I have placed it onto the frame, to check if everything is large enough, even though I have added extra seam allowance.
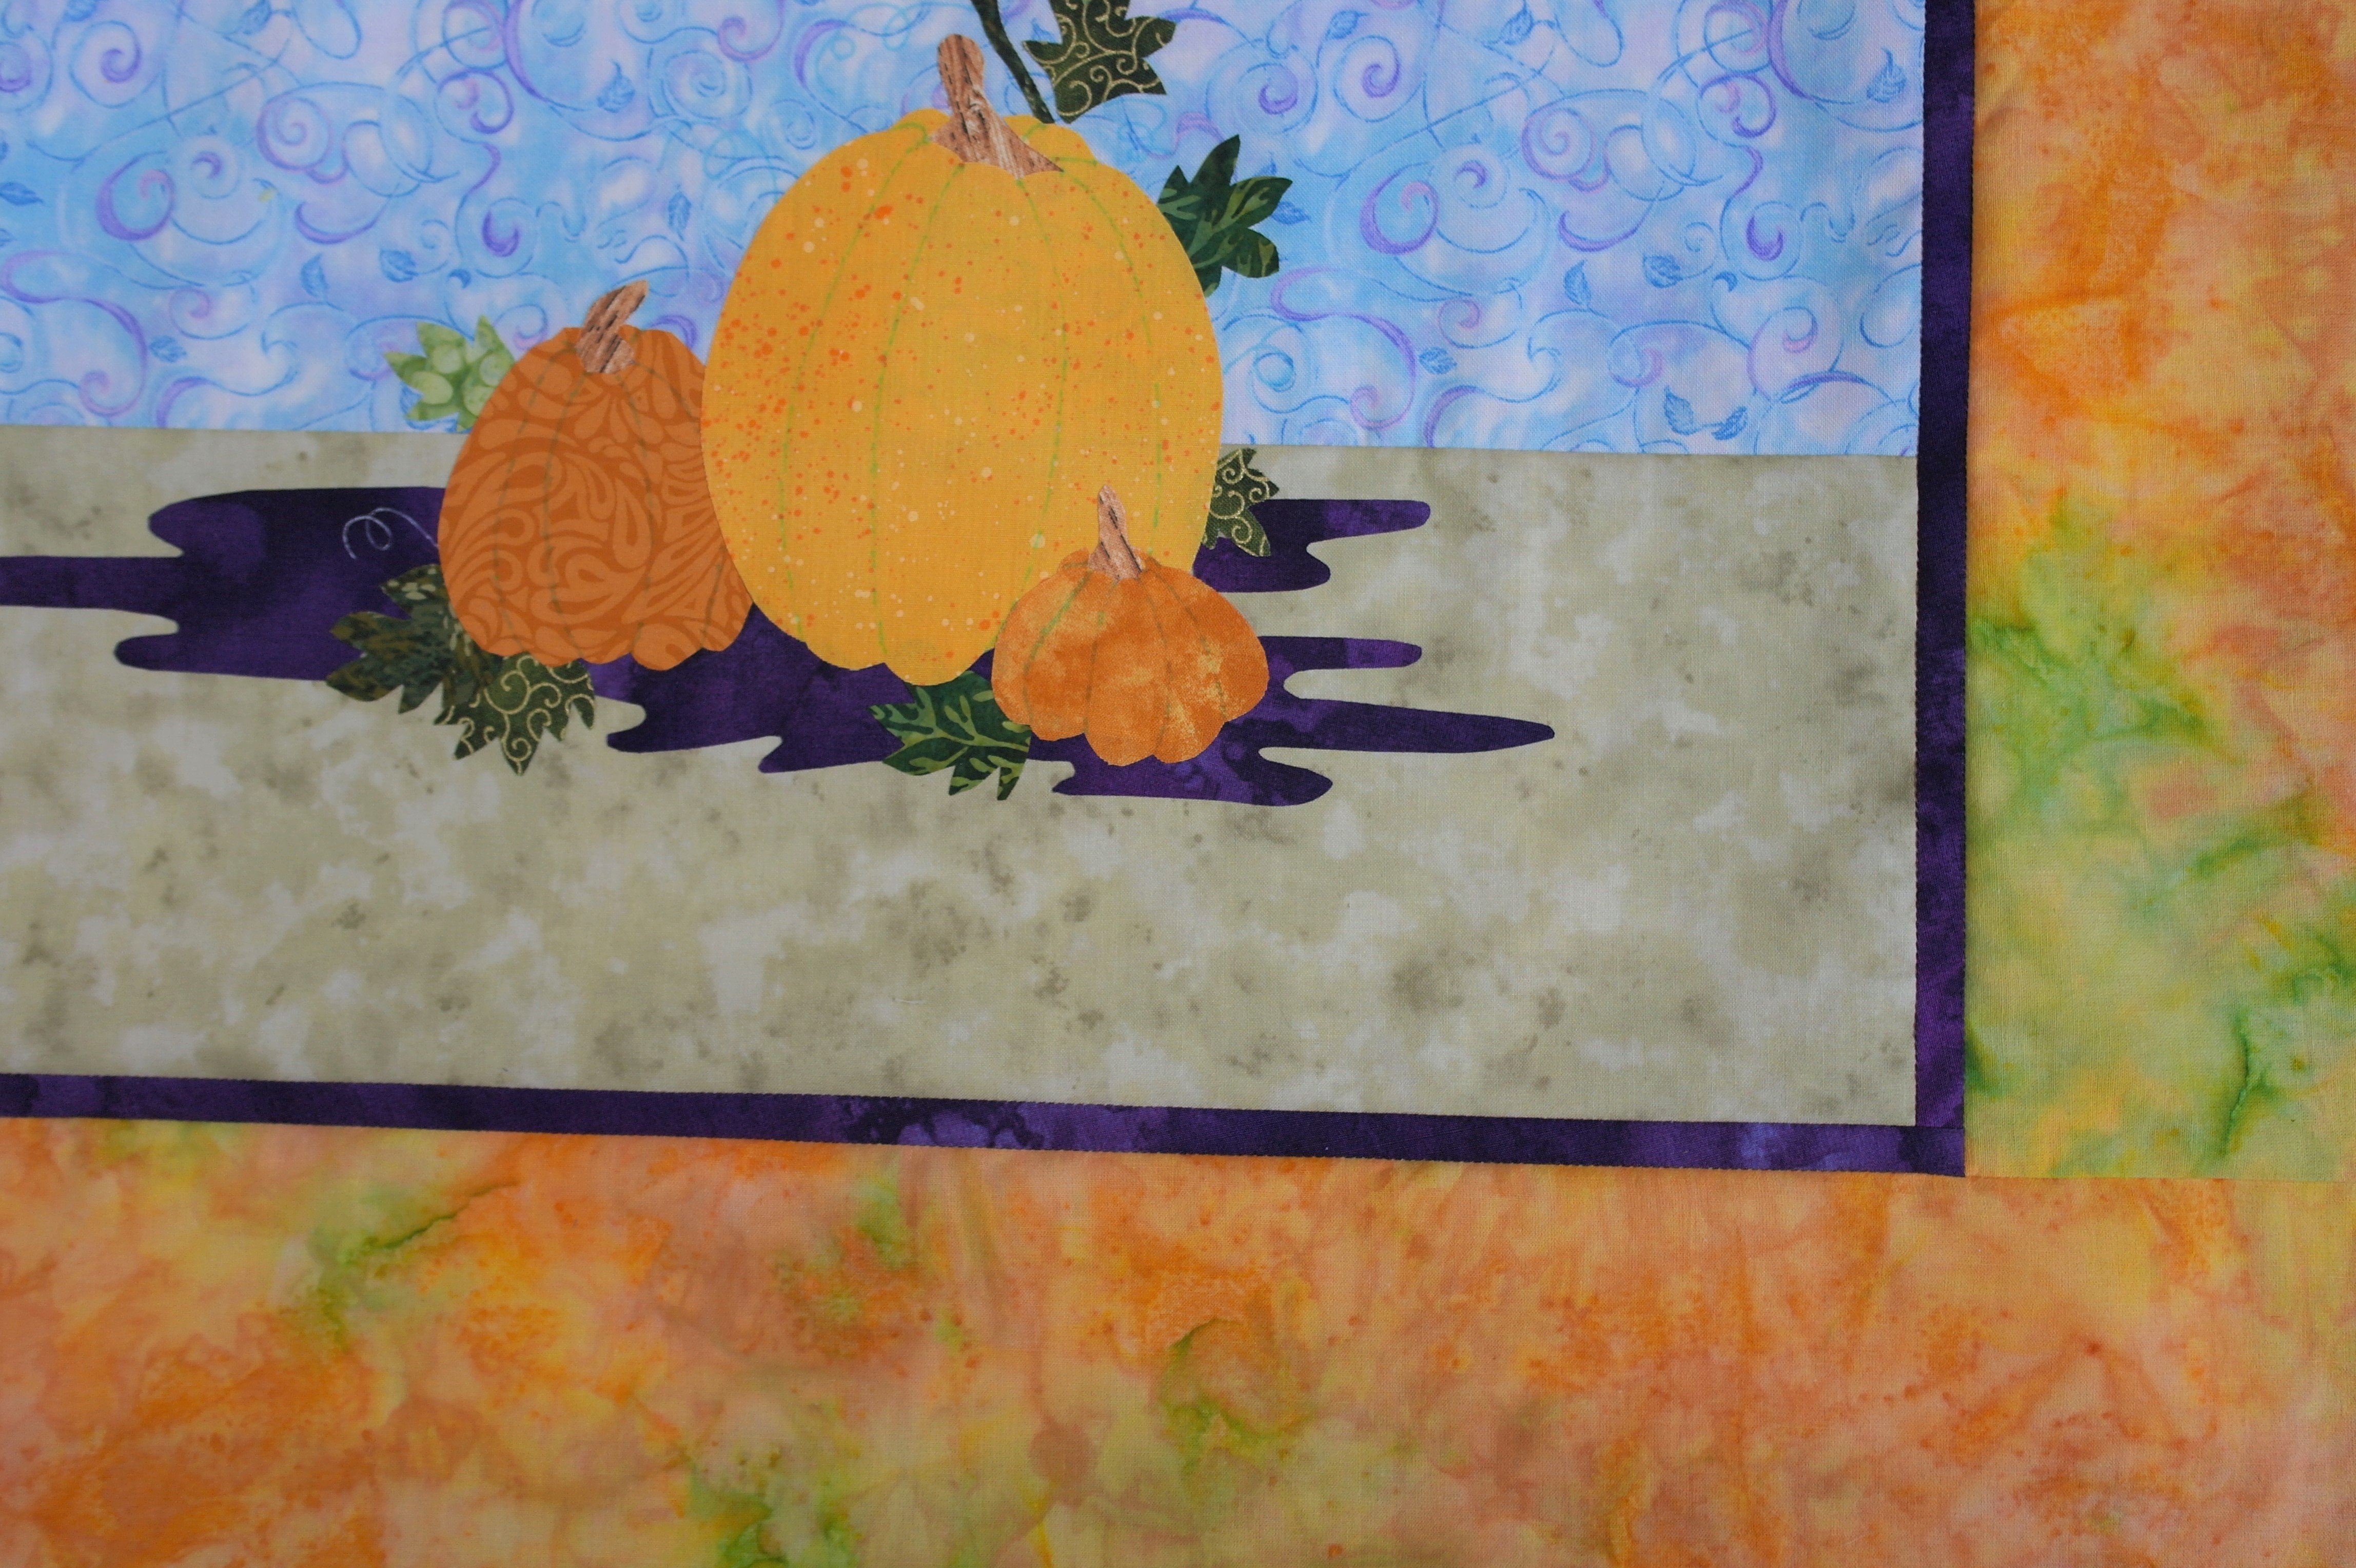
A detail of the top, with the small purple accent border, and the wide border.
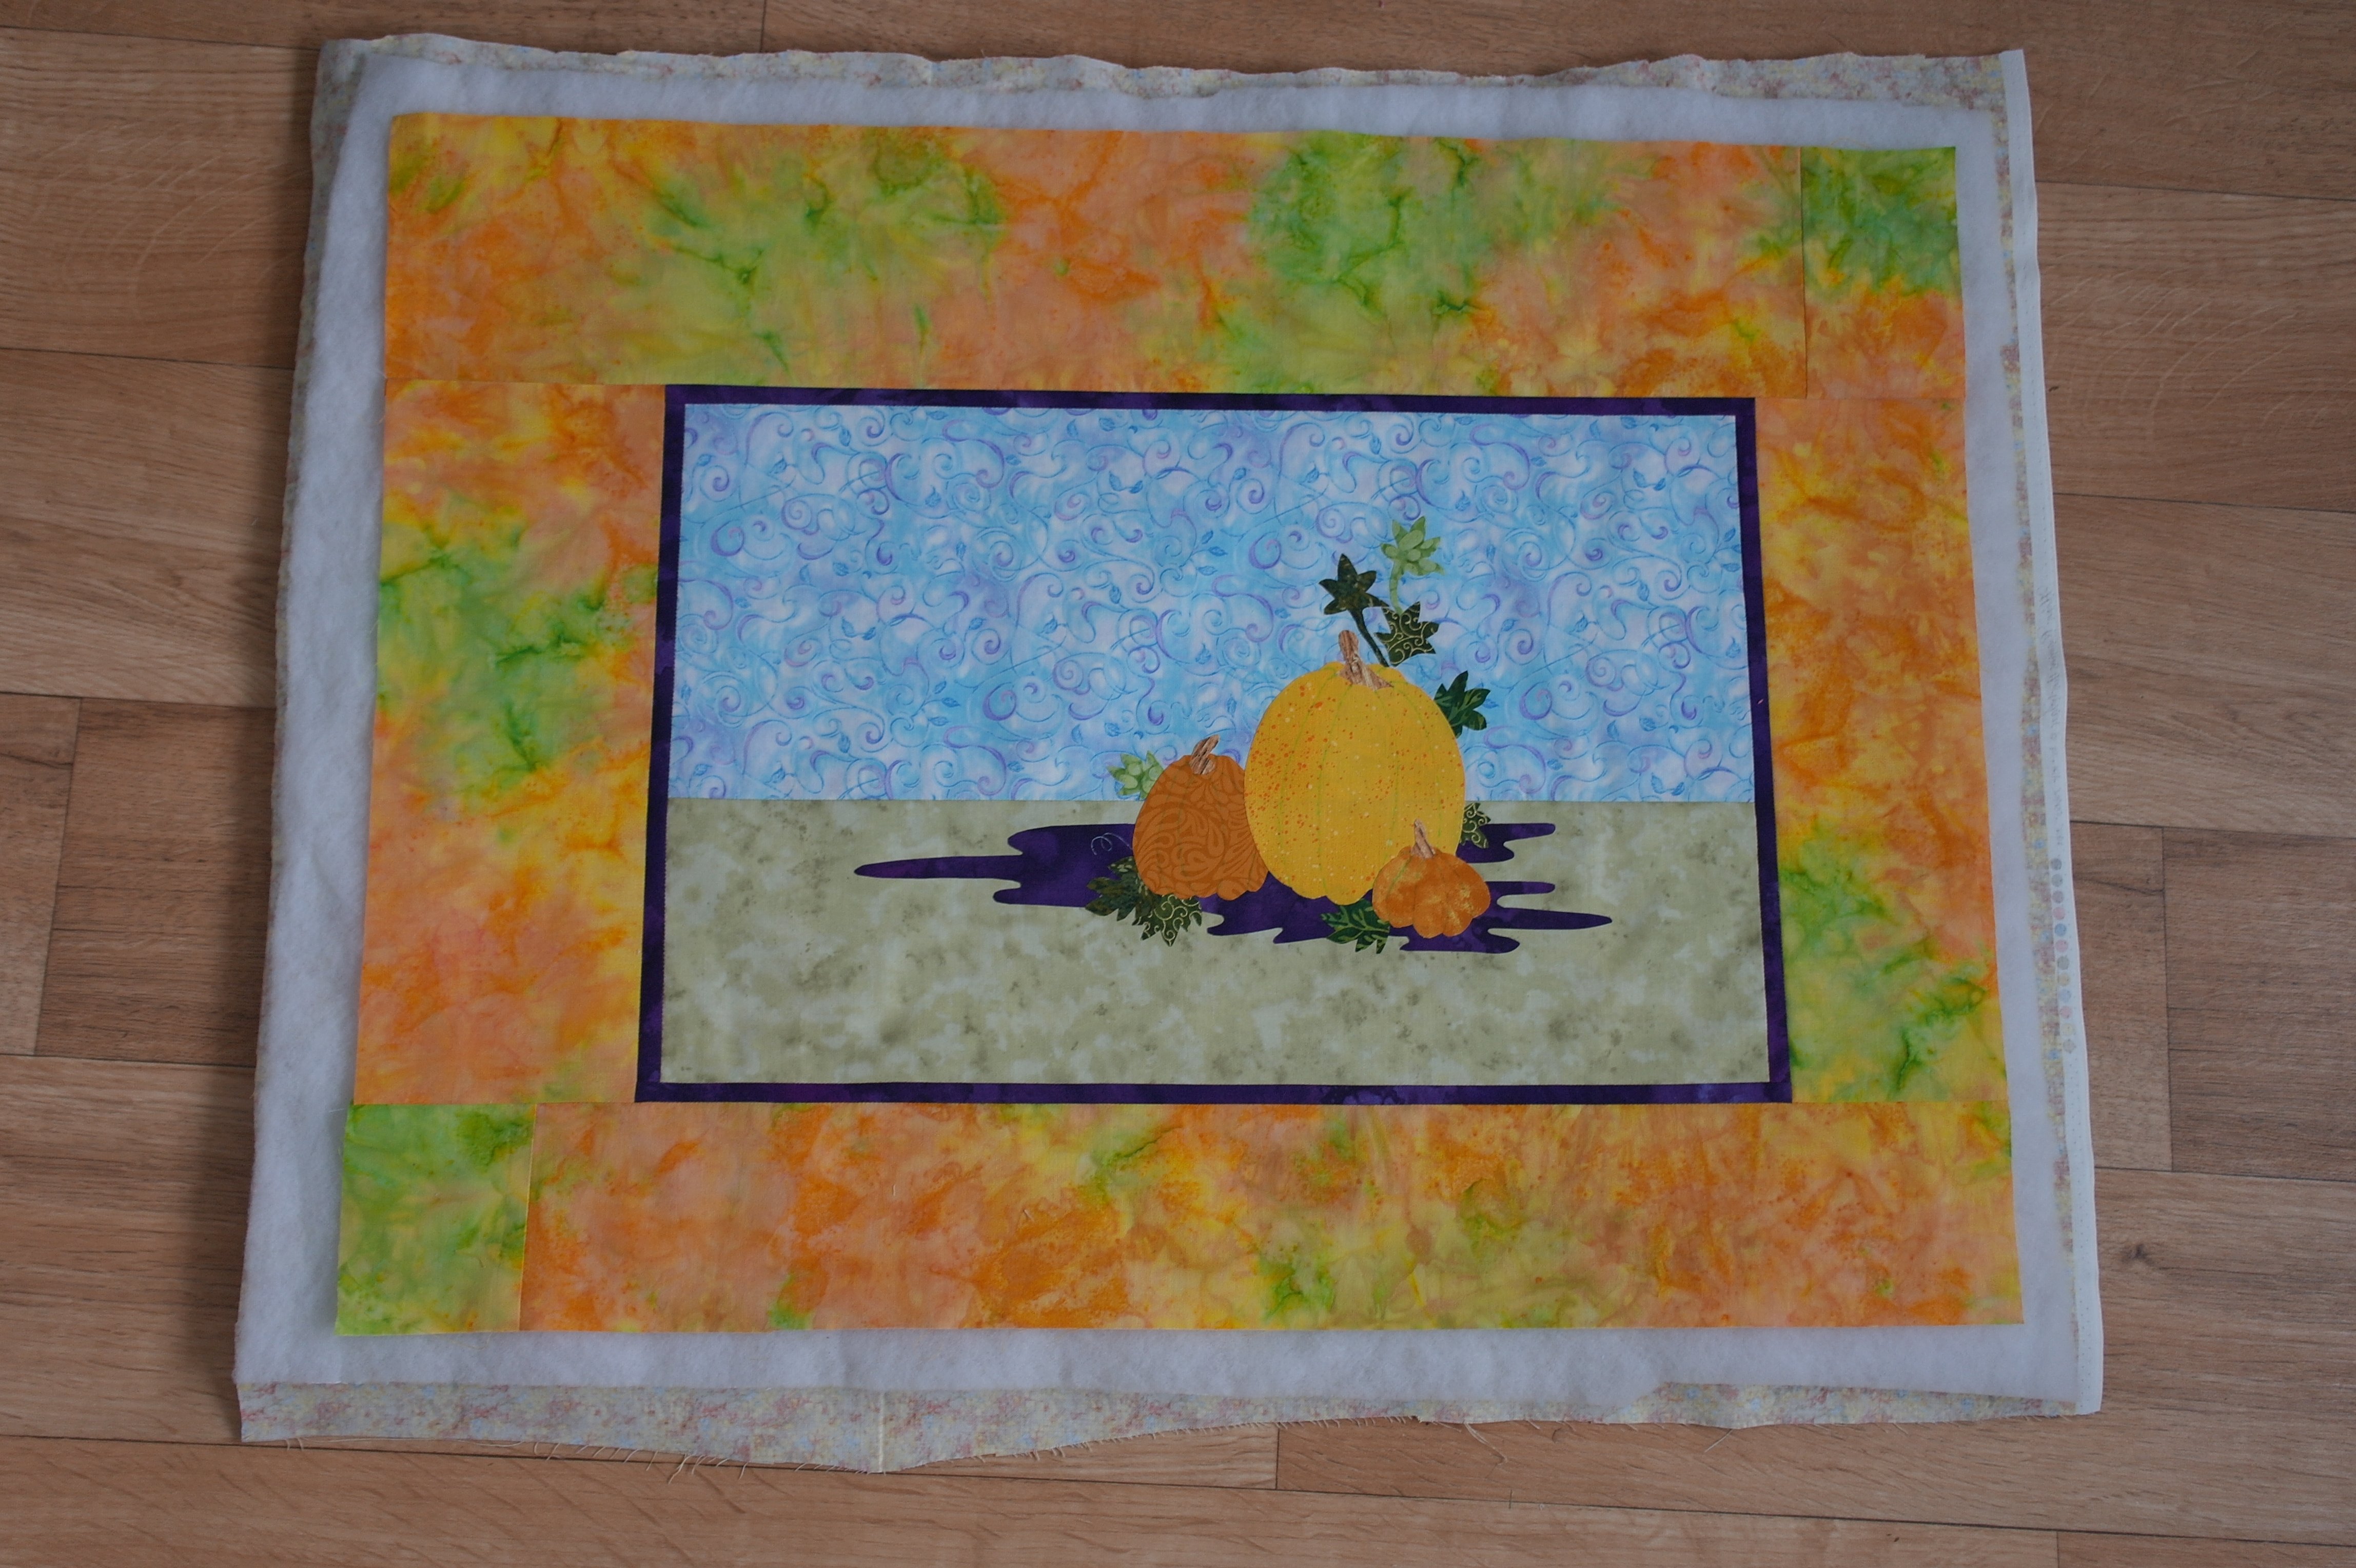
I’ve made the sandwich, using a cotton quilt fabric at the back and a polyester batting, with medium loft. Top of the quilt on top, pinning it and I am ready for quilting: because of the medium loft of the batting, the quilt may shrink a bit. I have added extra width to the end borders to compensate that.
Quilting starts in the centre and I will work my way to the sides: I have made a first row of quilting stitches, ‘drawing’ shapes of trees and houses, as if they can be seen in the distance. I have used MIRAGE/Wonderfil: 30Wt Rayon in randomly colored, variegated colors. And of course I have used DECOBOB/Wonderfil for the bobbin: that is really great to use with áll my decorative threads.
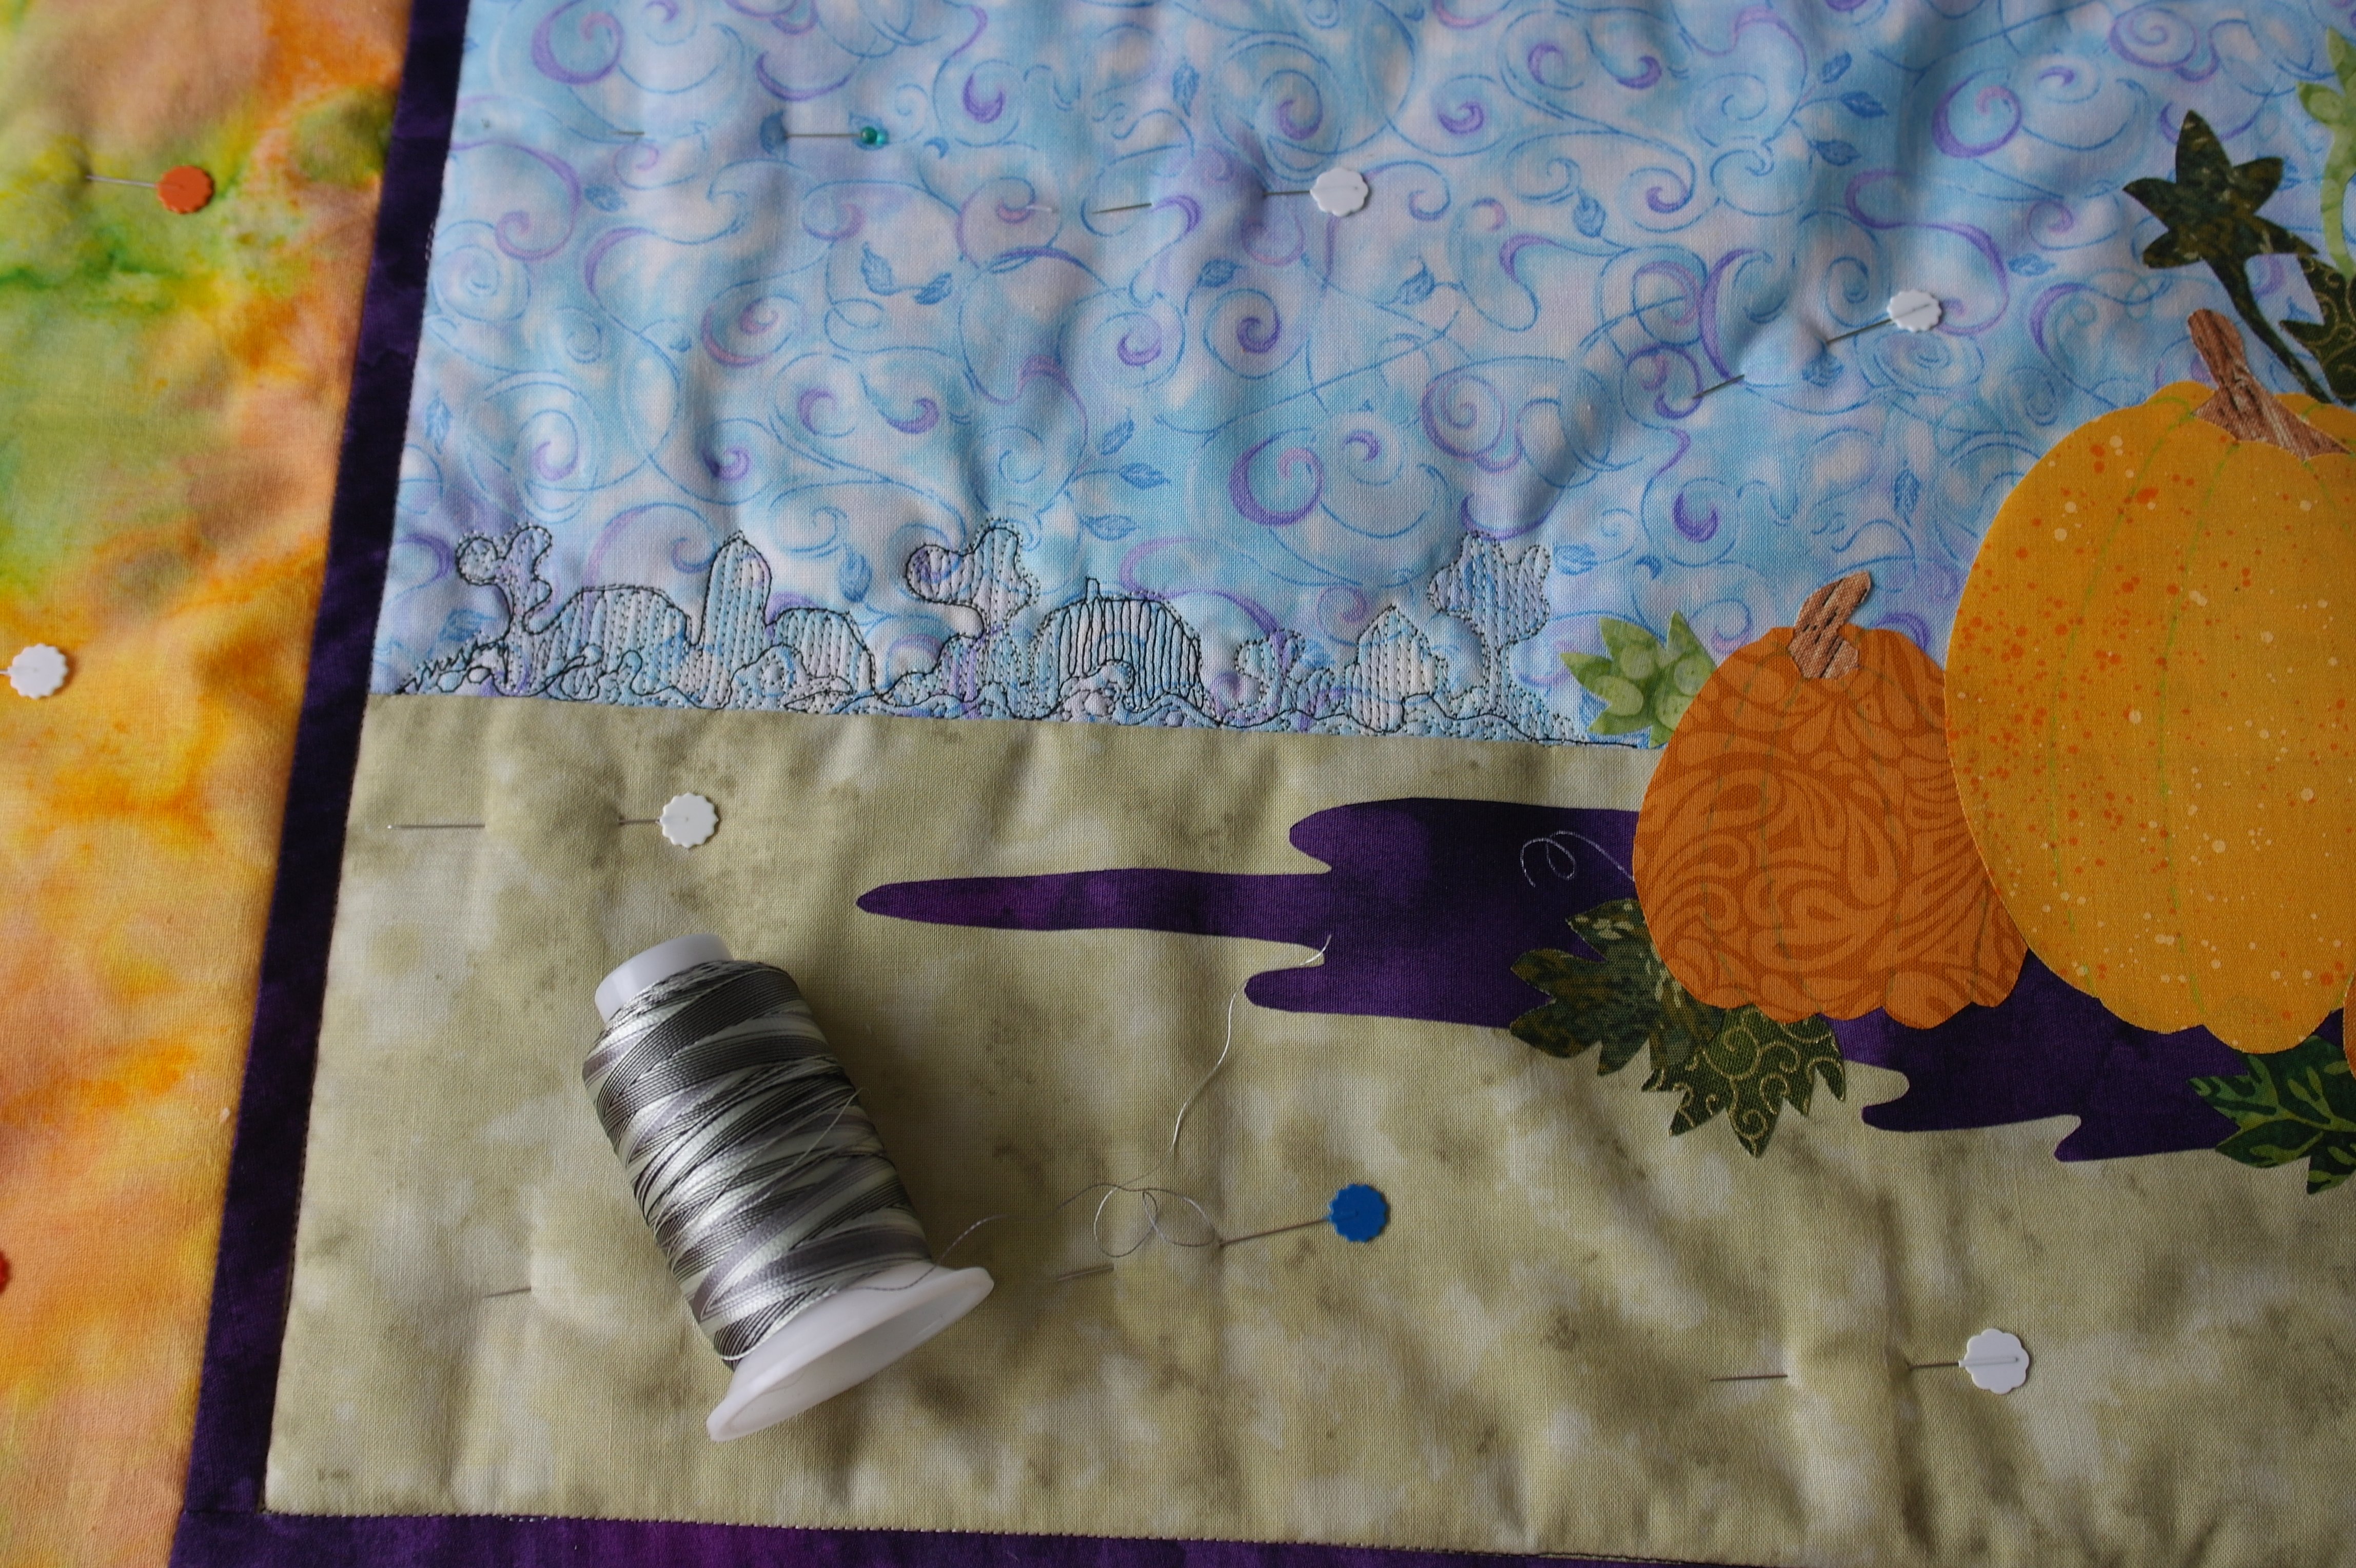
Mirage 28 – black/grey’s is the first color I have used. Because of the randomly colored thread, I have backed up often while quilting, to get certain coloring effects. I wanted to have a blurry effect, so that the shapes I was quilting could only be recognized if you look from a distance. Sometimes it is not important that you can see details, just the outlines.

All punpkins and details are made with color 31 orange/copper), and the leaves and other green with color 16, green foliage) and11, multi harvest). More colors are used for sky 13 washed denim.

Background quilting: it looks messy at the time; that’s because of shrinkage due to quilting. It will be flattened after the quilt is framed.
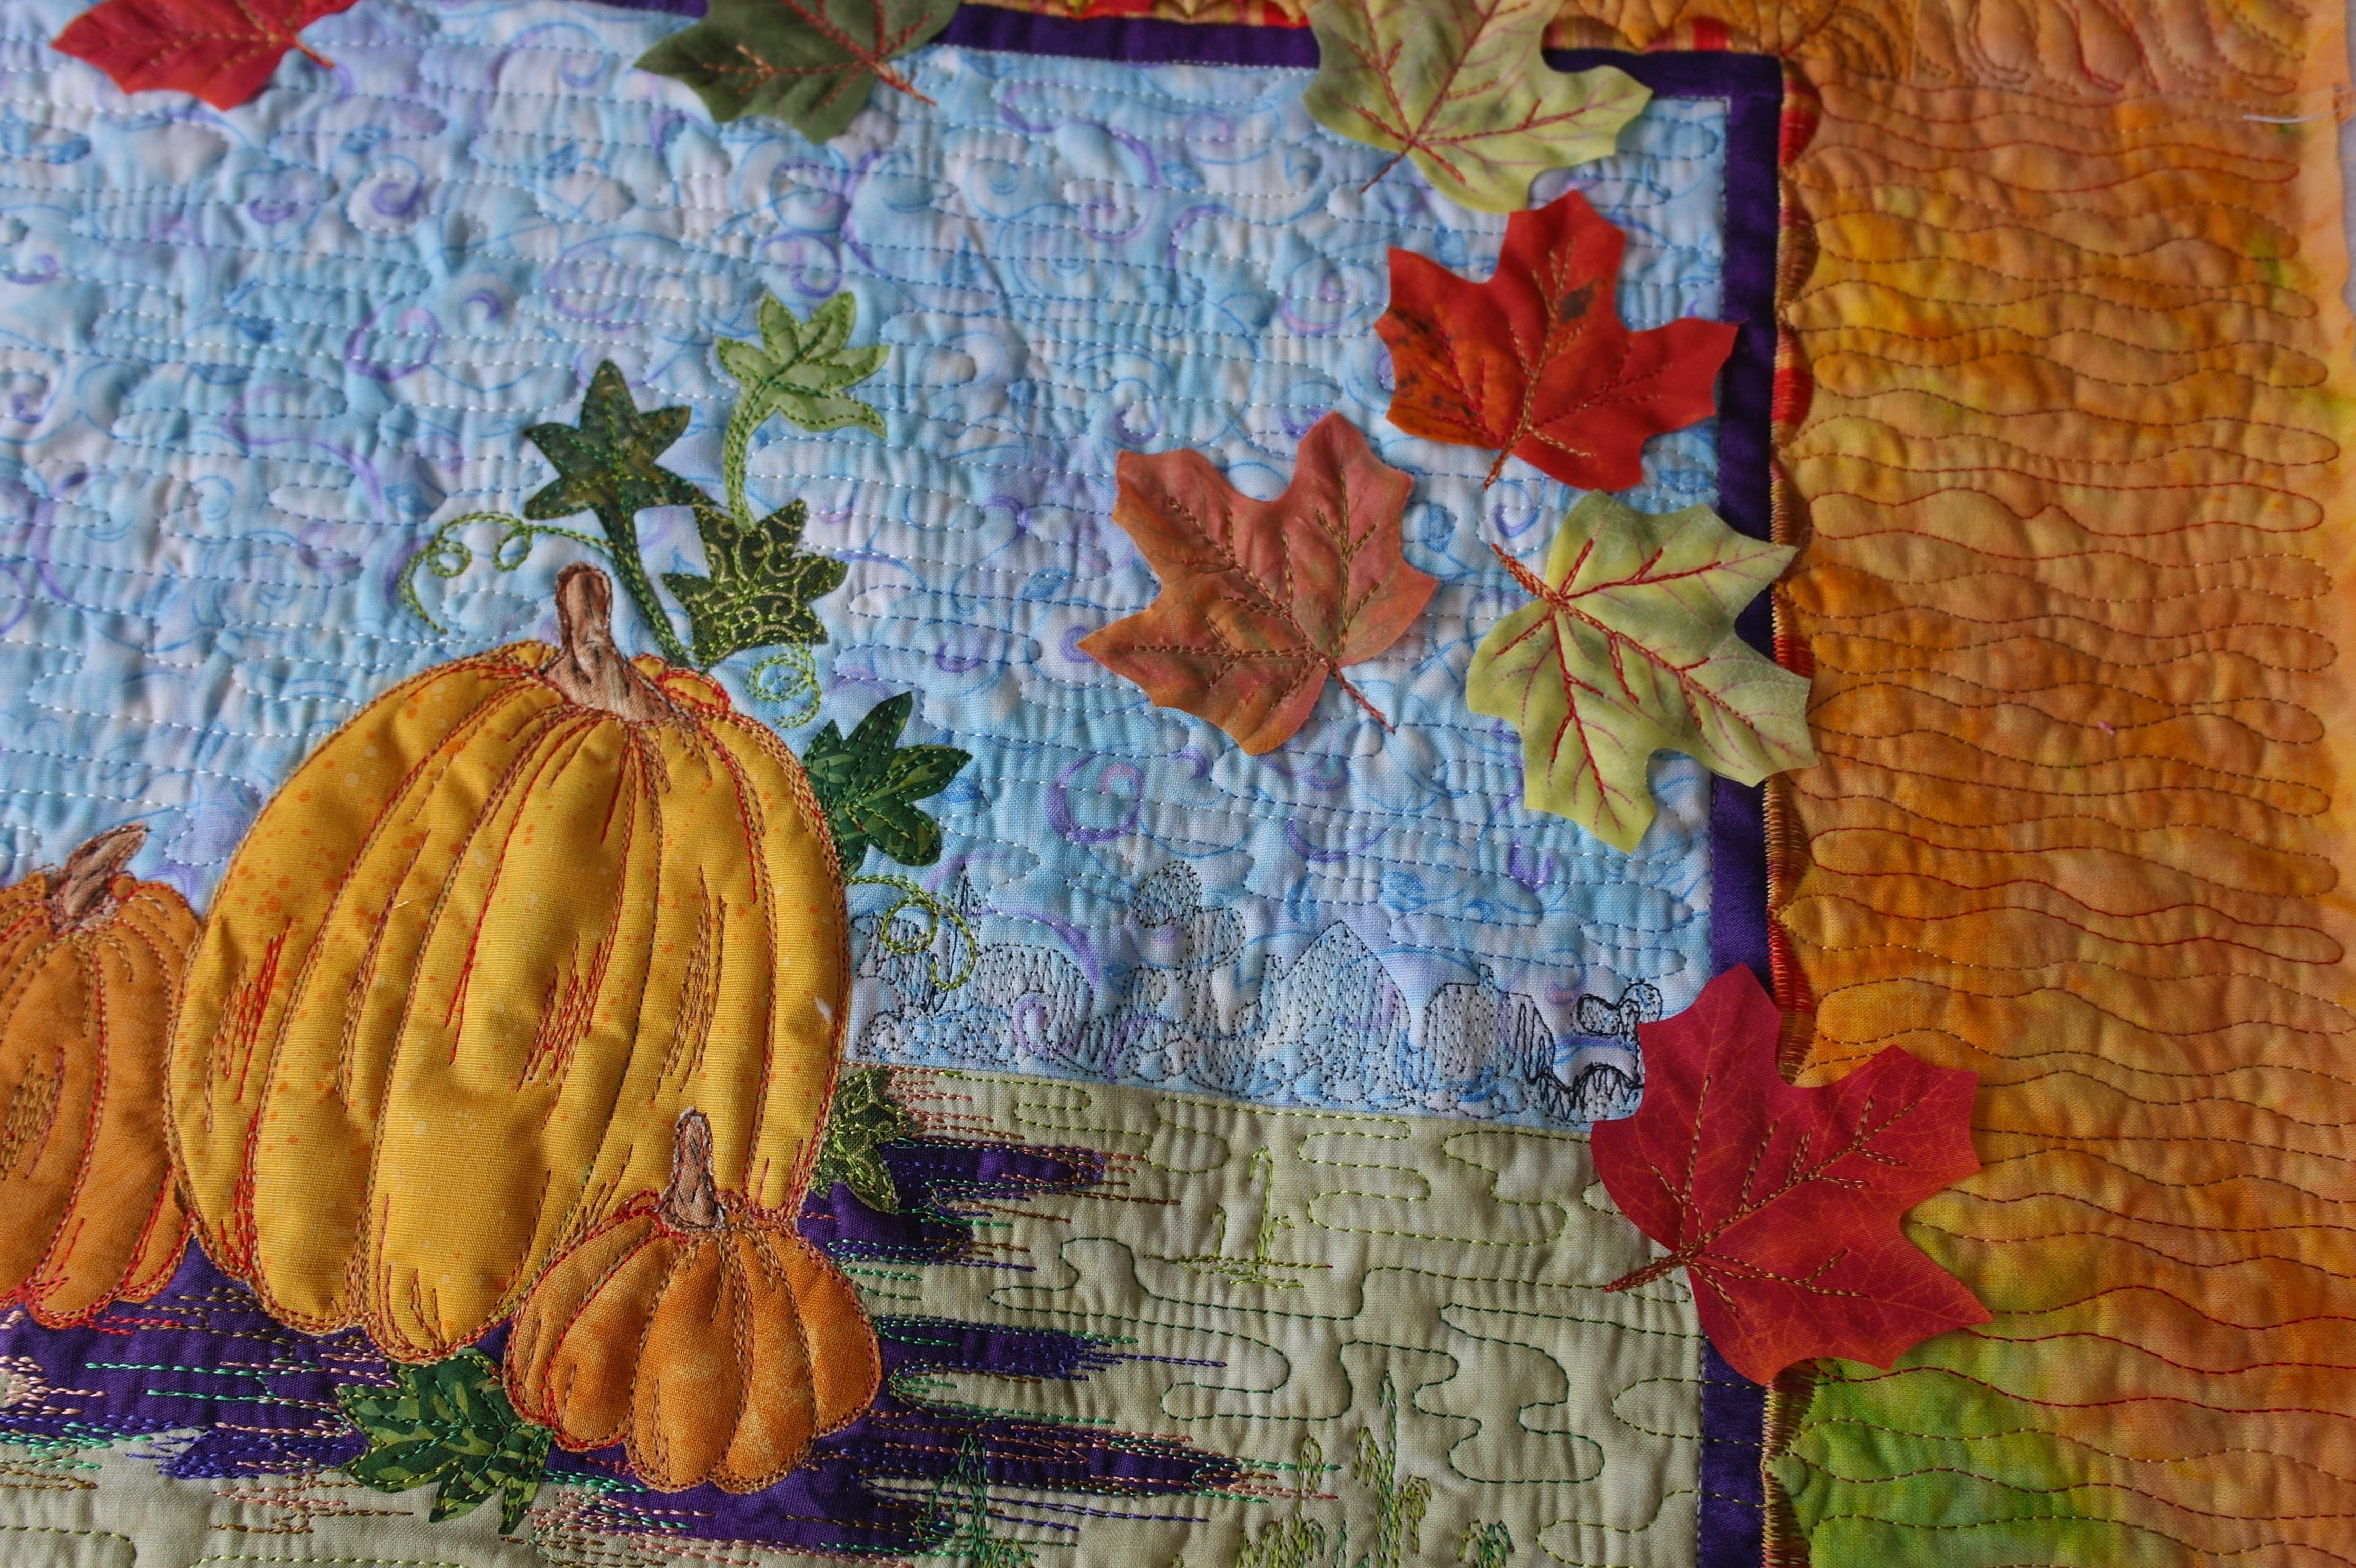
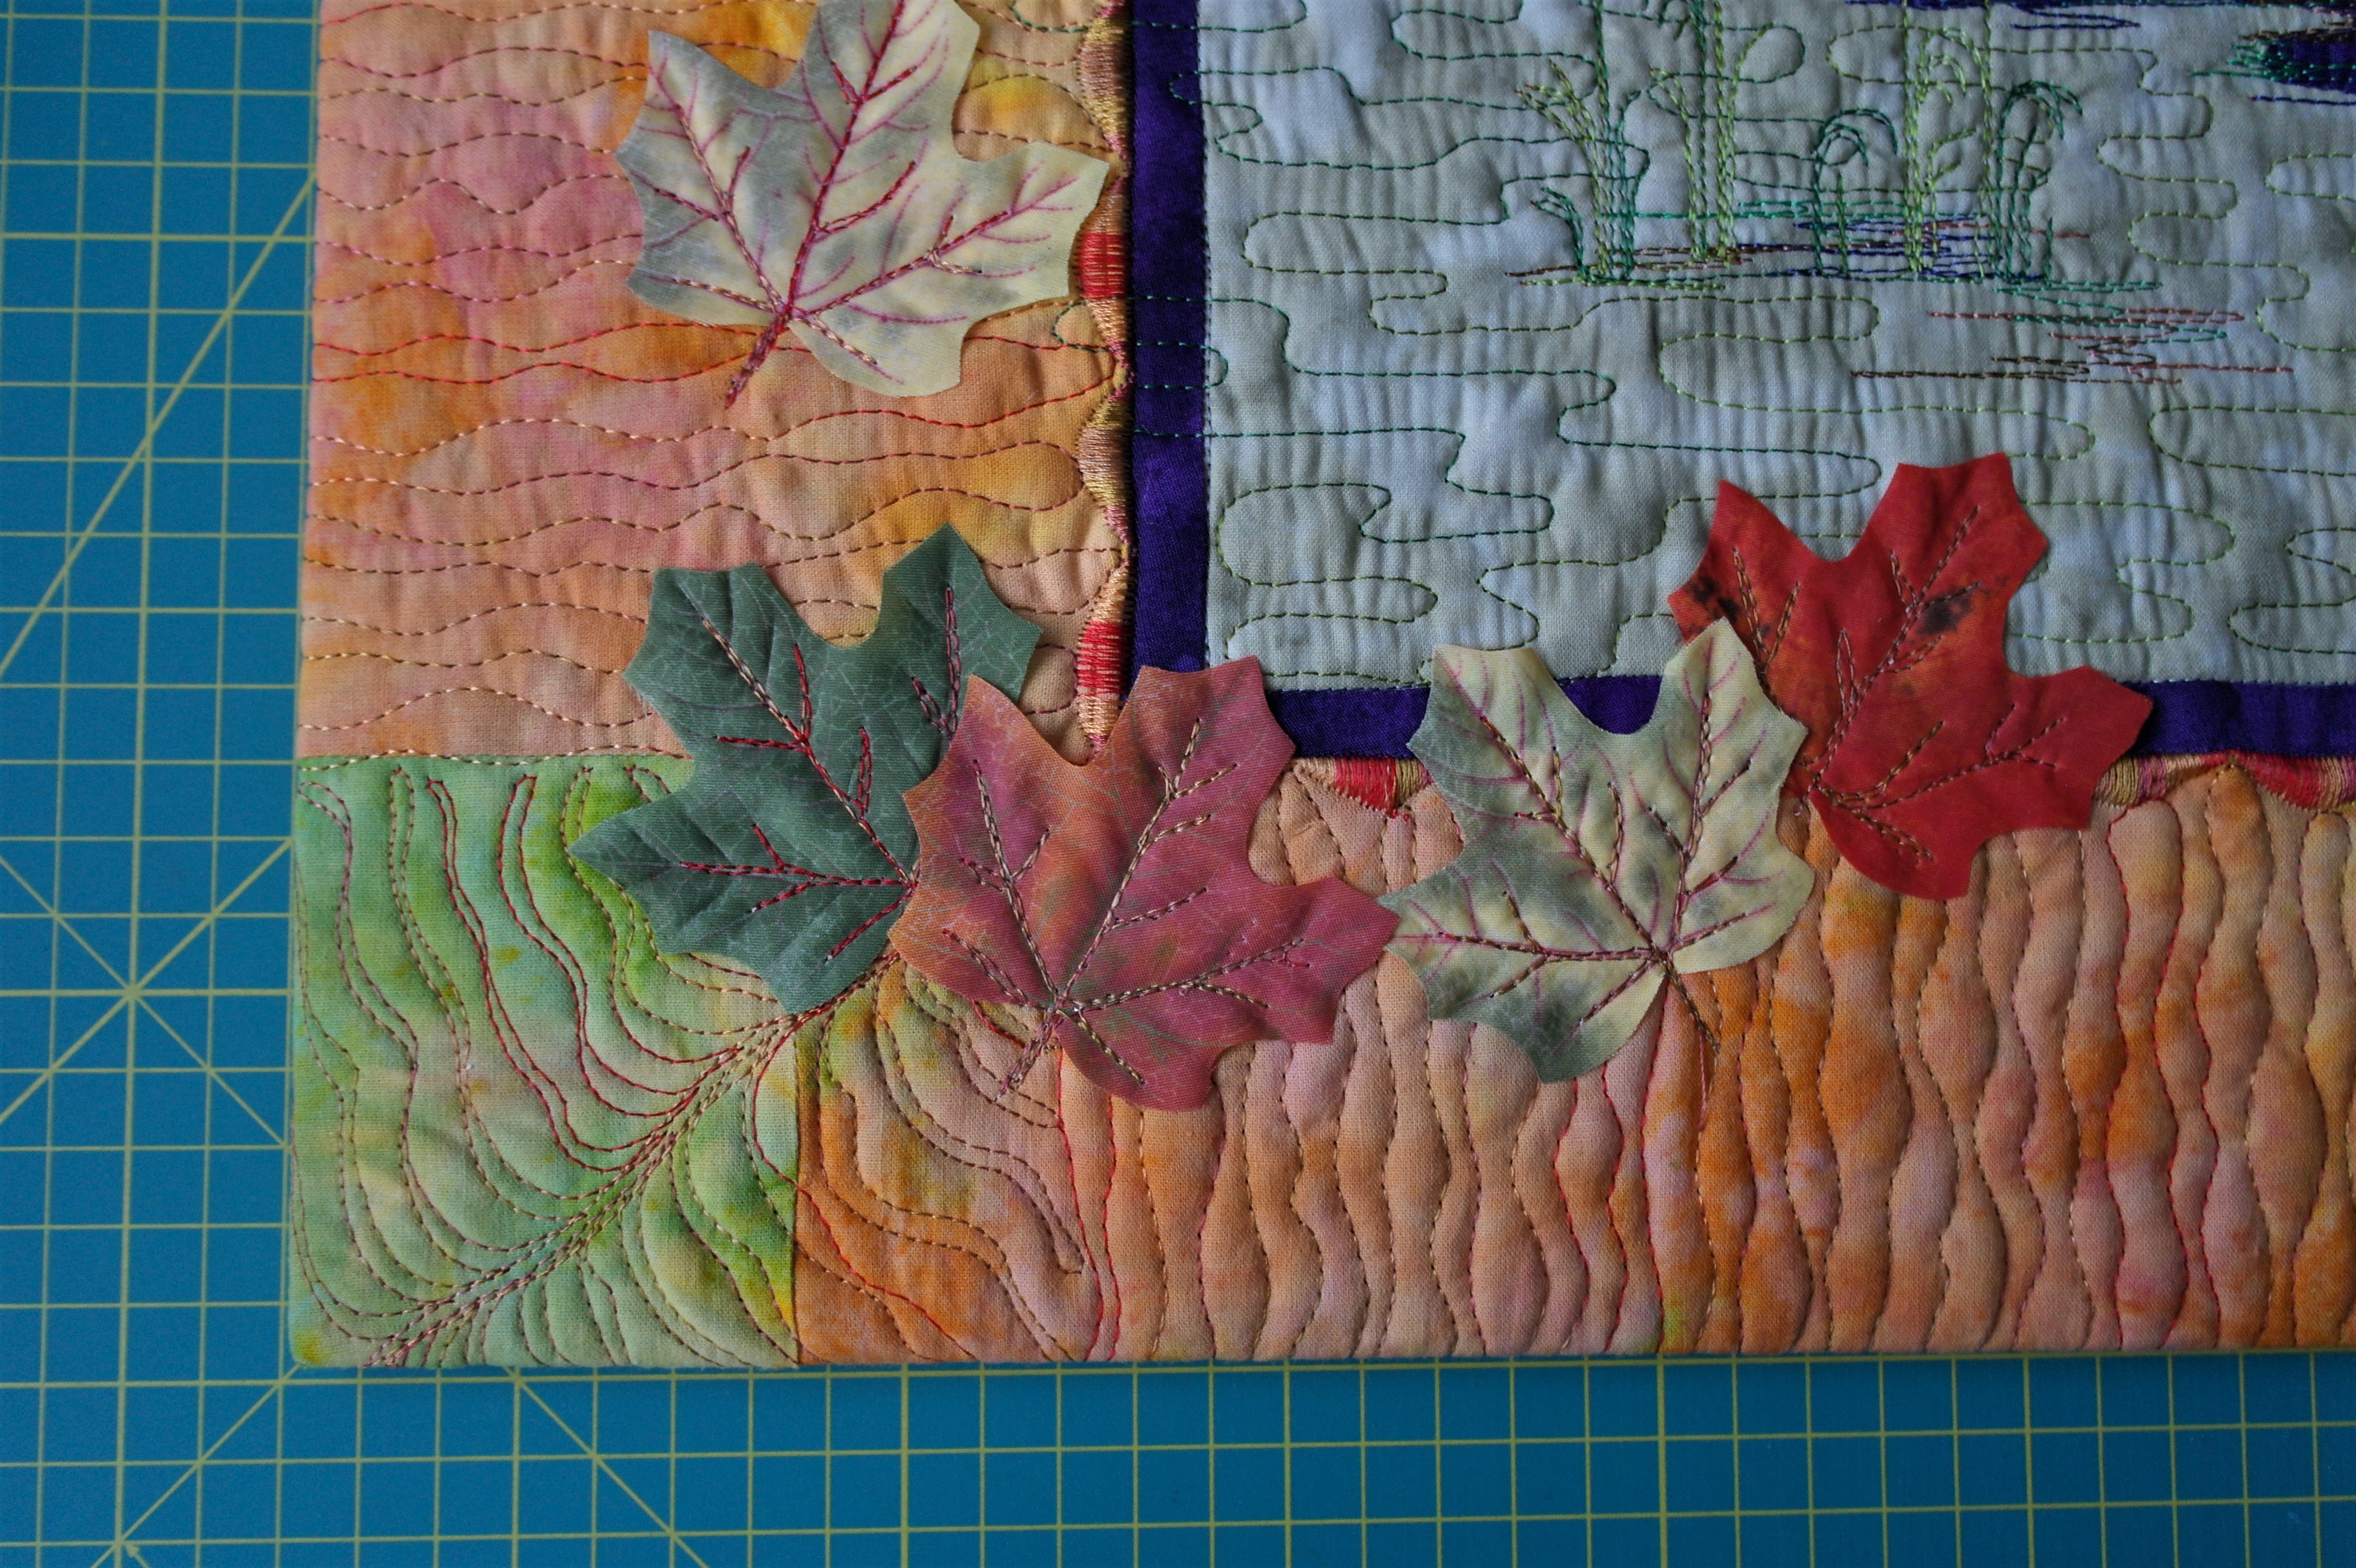
I’ve quilted the borders too with color 31 – I quilted almost up to the sides of the borders: parts of this will be under the quilt after framing. A scalloped, decorative border is added along the small purple accent border. And I have placed some silken leaves, which I have partly quilted to hold them in place.
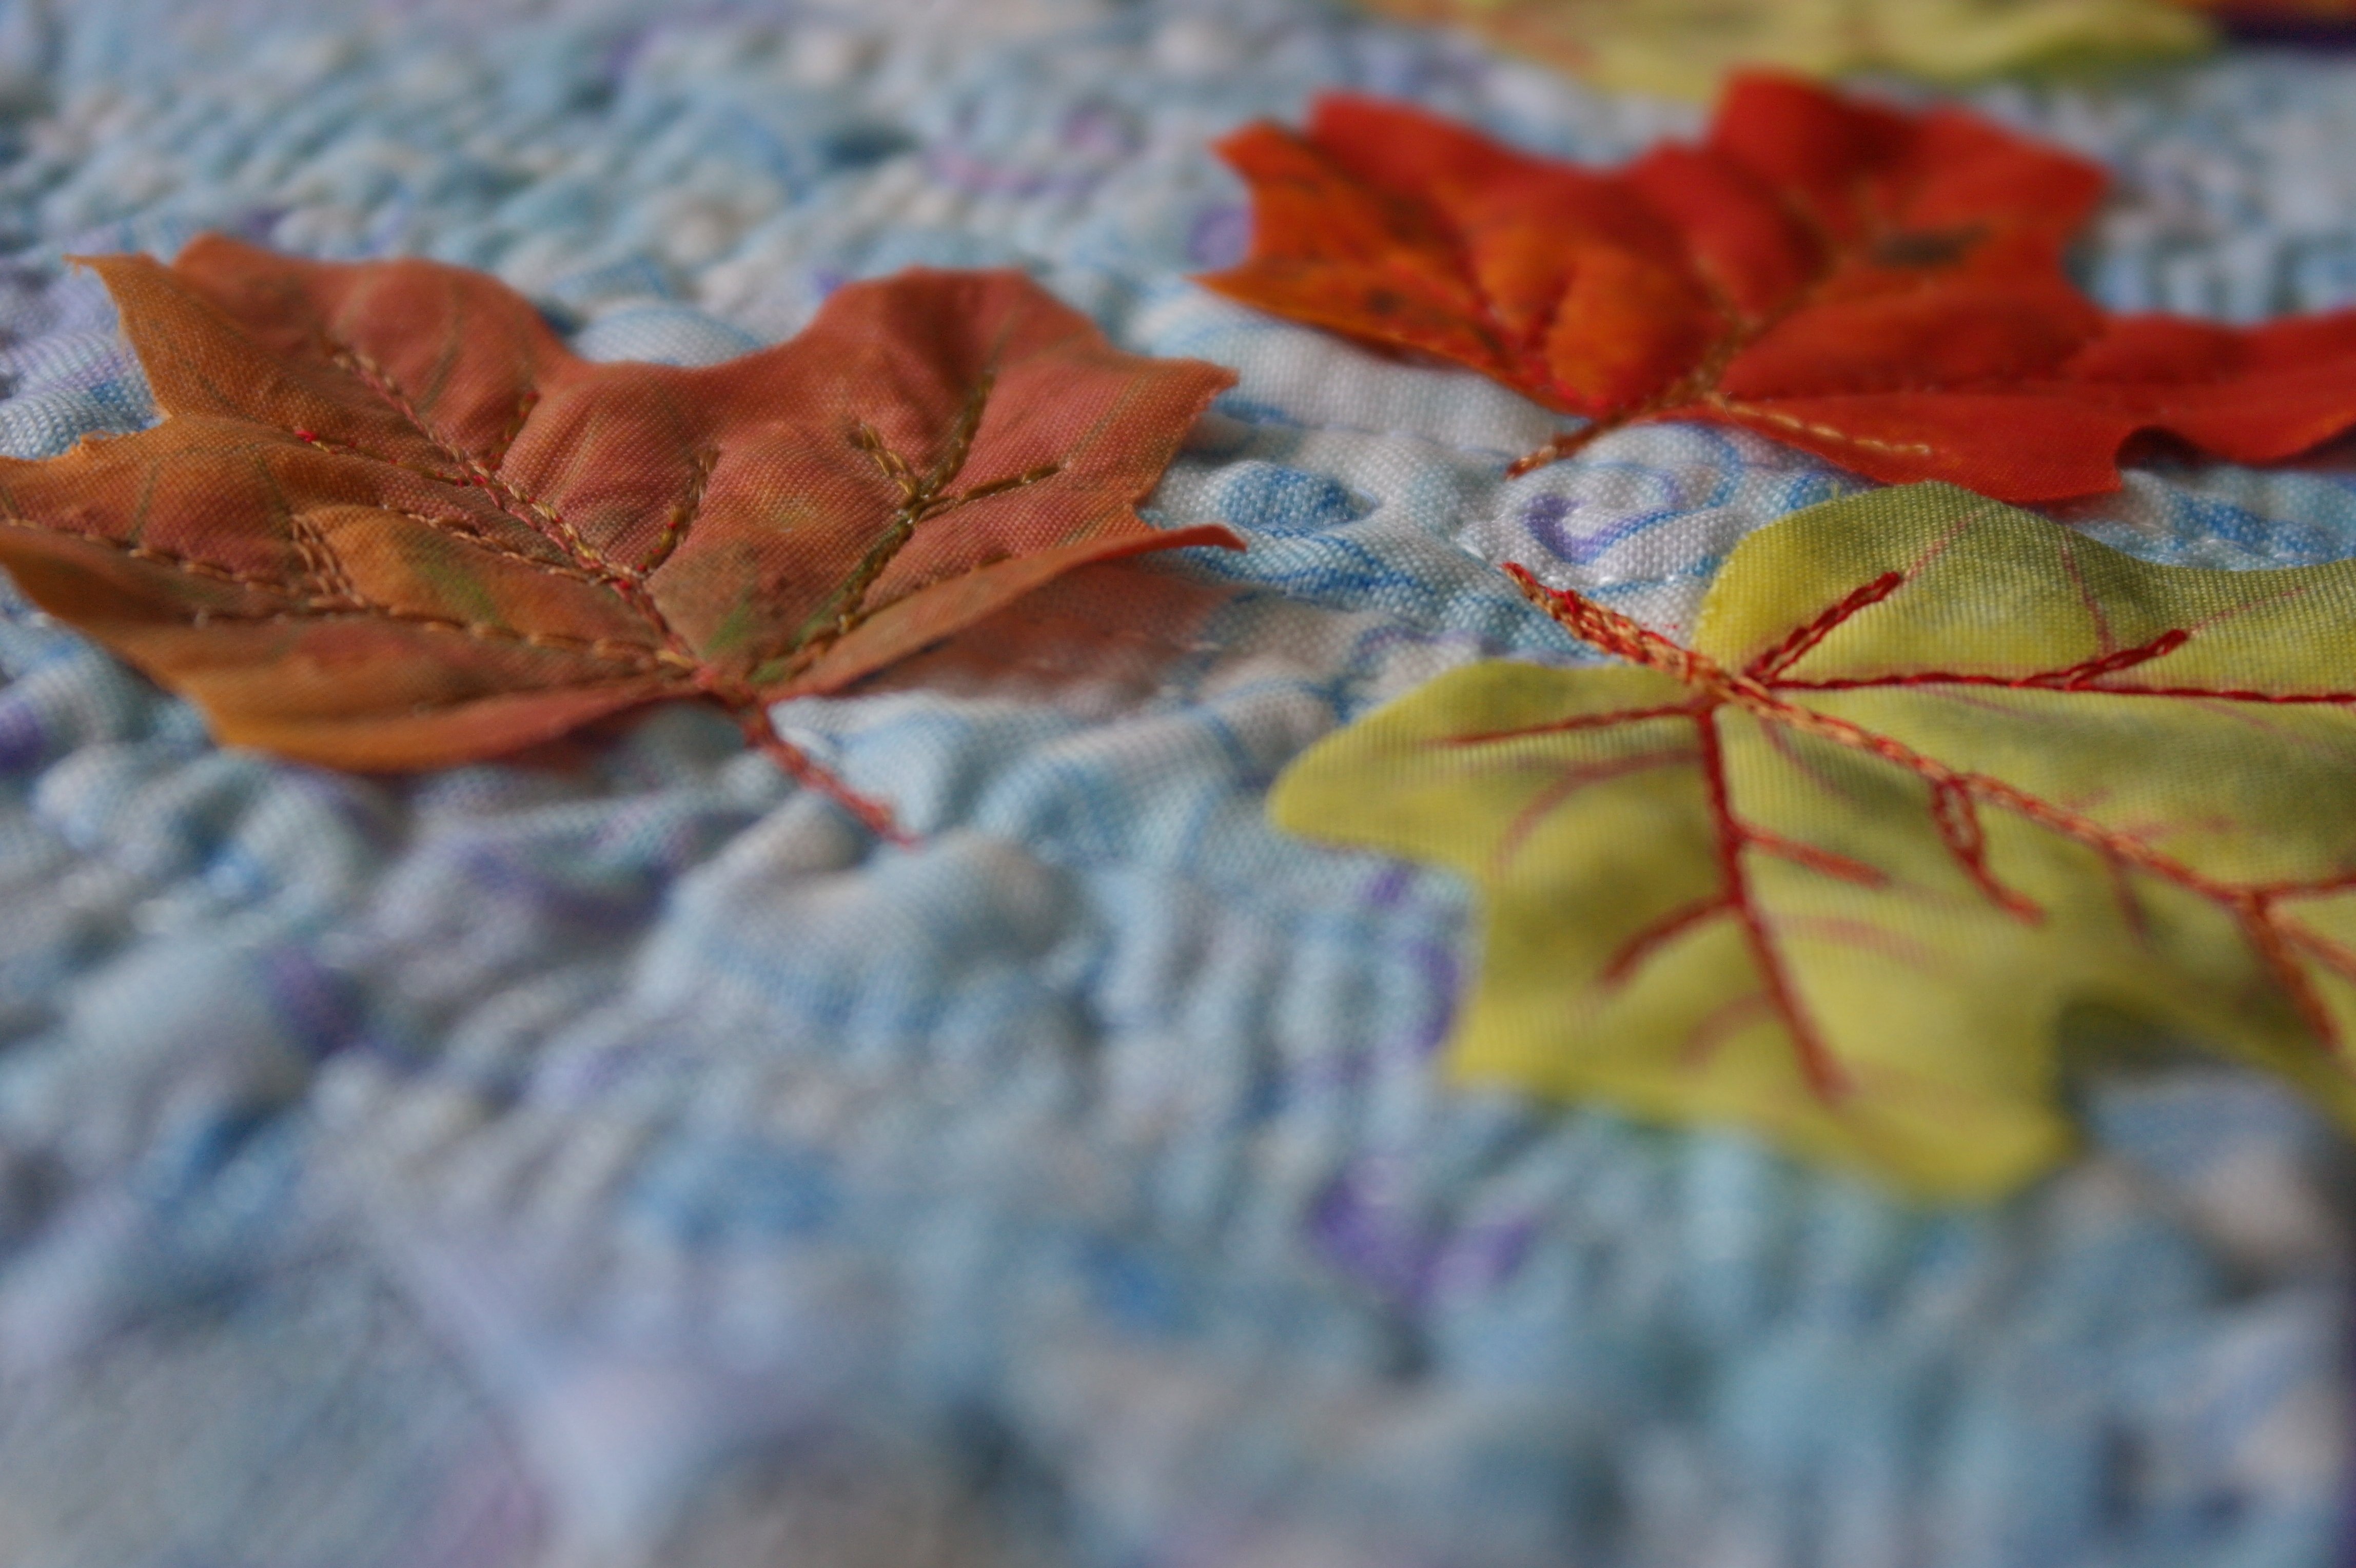
At the picture above, you can see that the leaves are not quilted completely, to get a 3D effect. I love these effects, using ready-made silken leaves or flowers on my quilts. I have purchased these at a Garden Centre: all year round I am looking for beautiful leaves and flowers… you never know when you will use them.
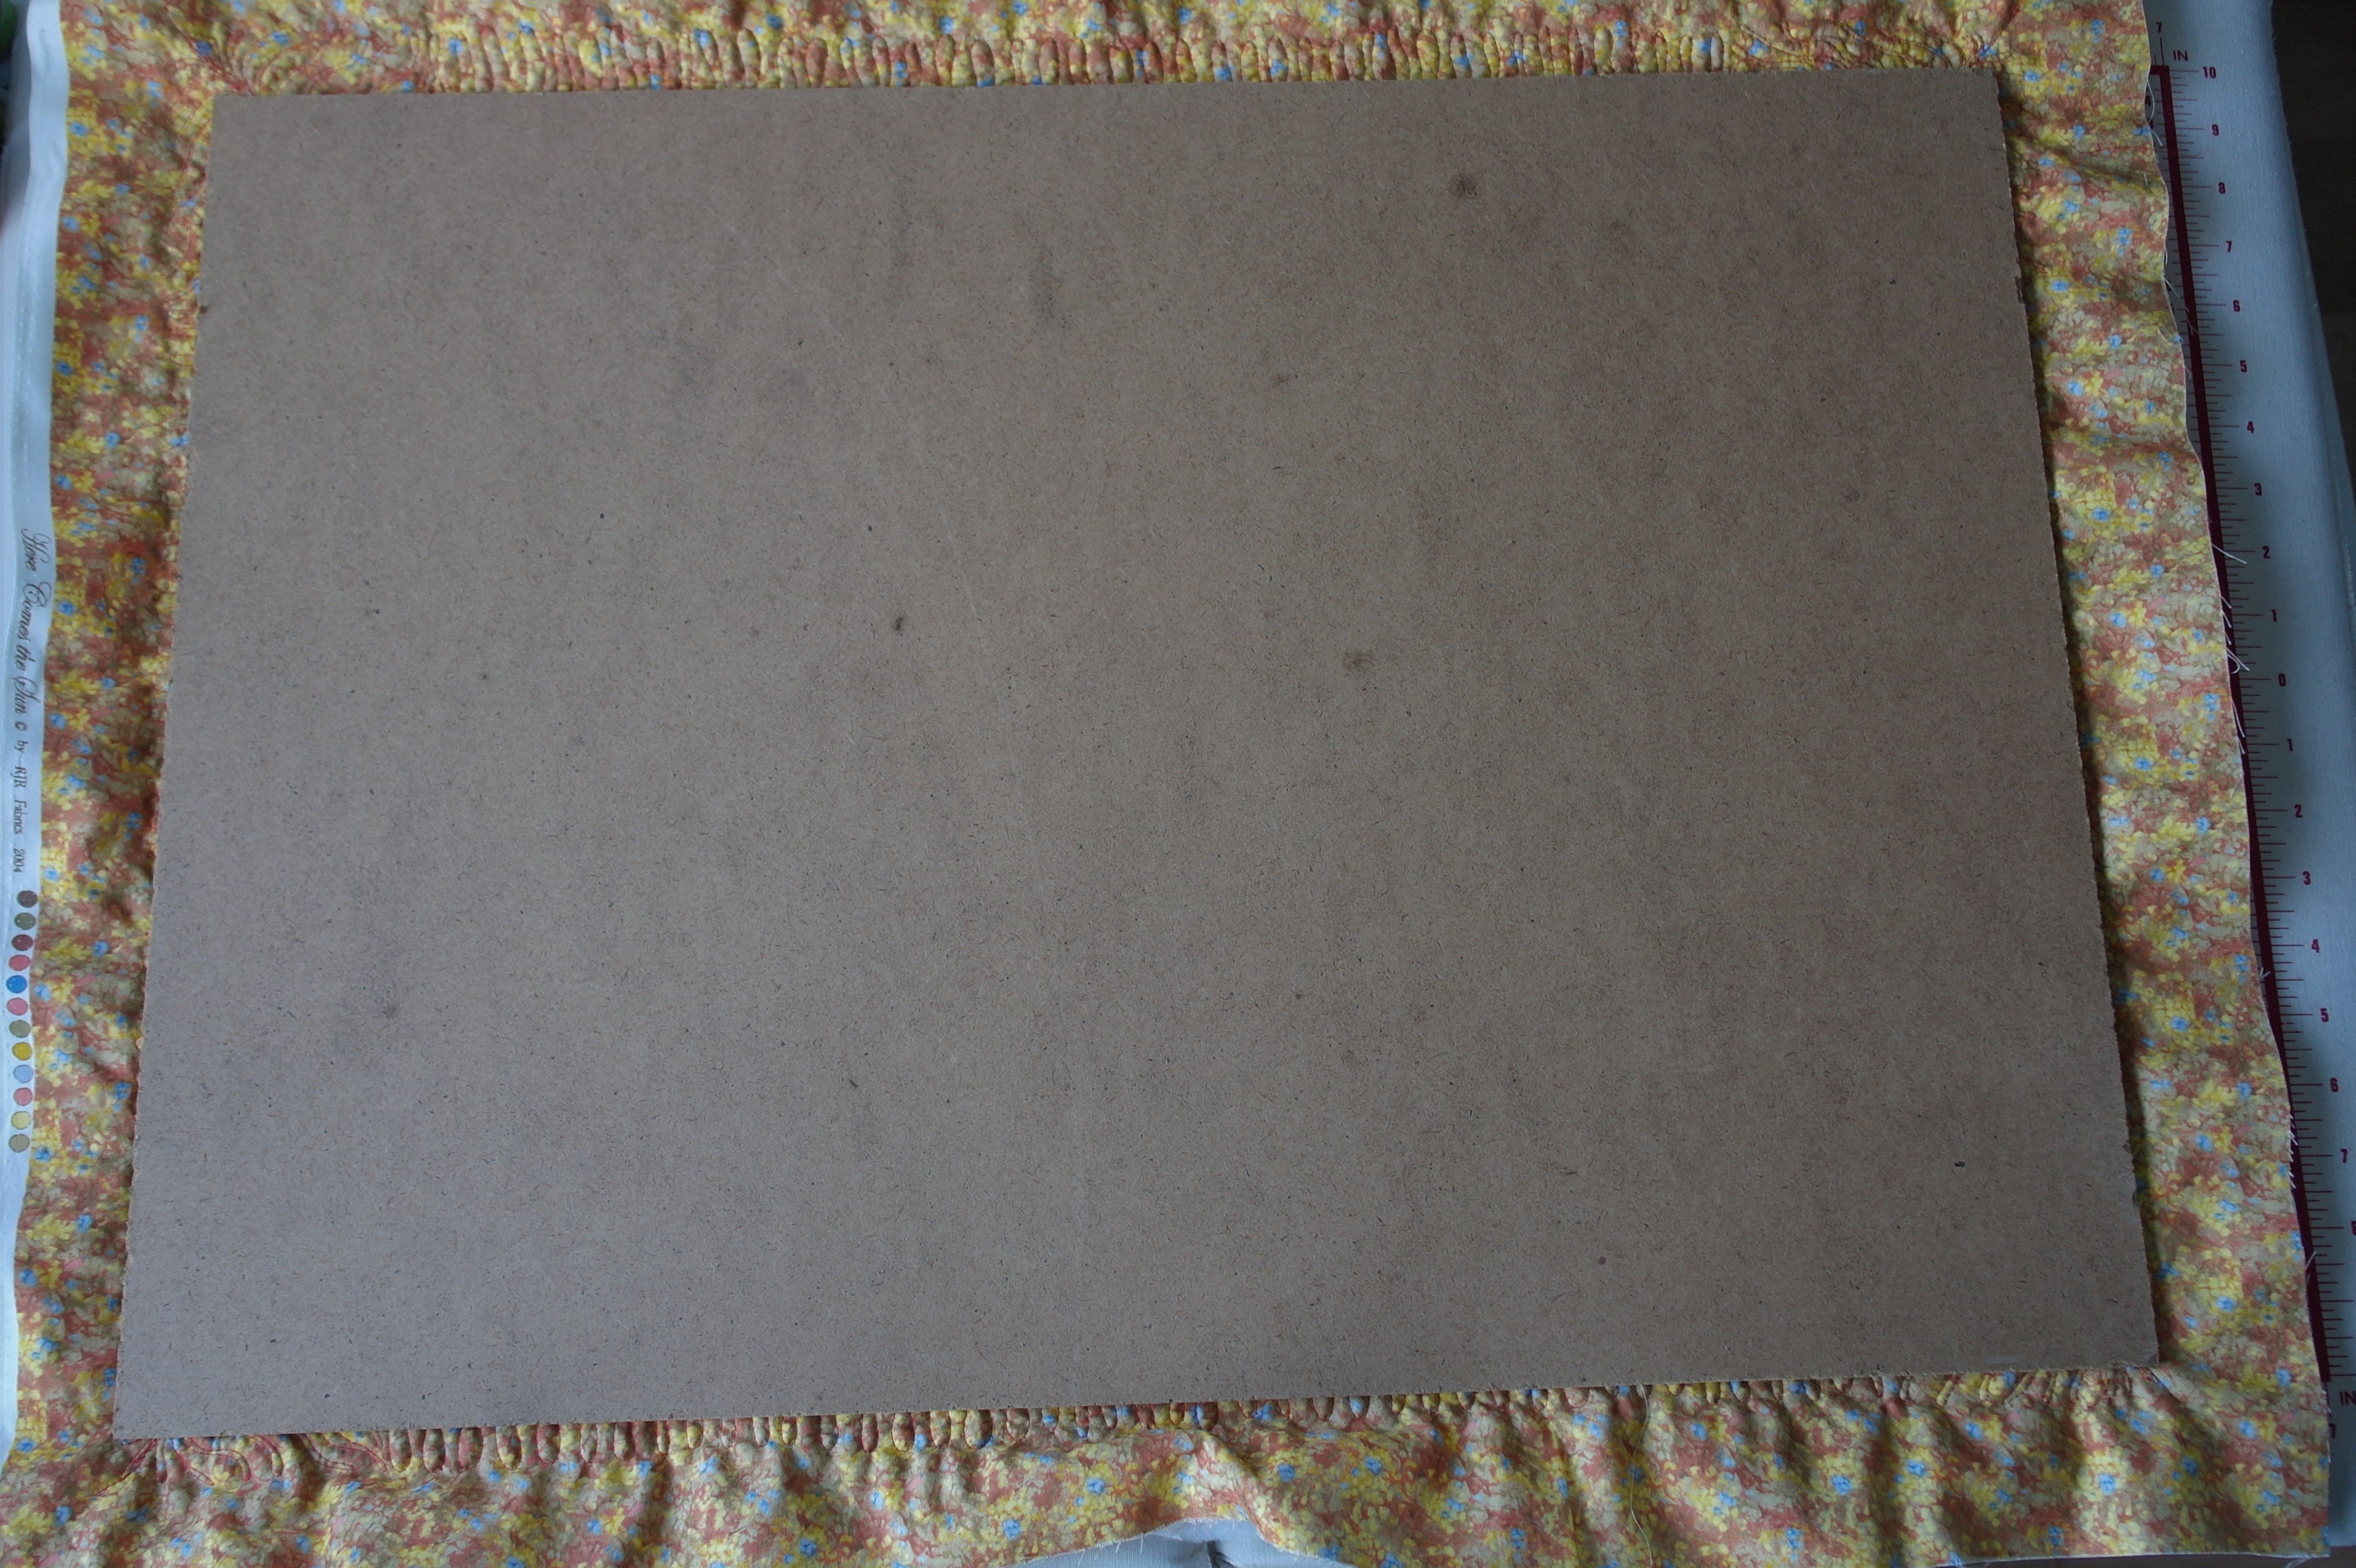
Quilting is done, and I have placed the piece of board – which came with the frame – on the back of the quilt.

Using thick thread double, I am threading a large needle, work from one side to the other and pull the sides to the back, so that the quilt is placed under tension. Starting from the middle, working toward one side,
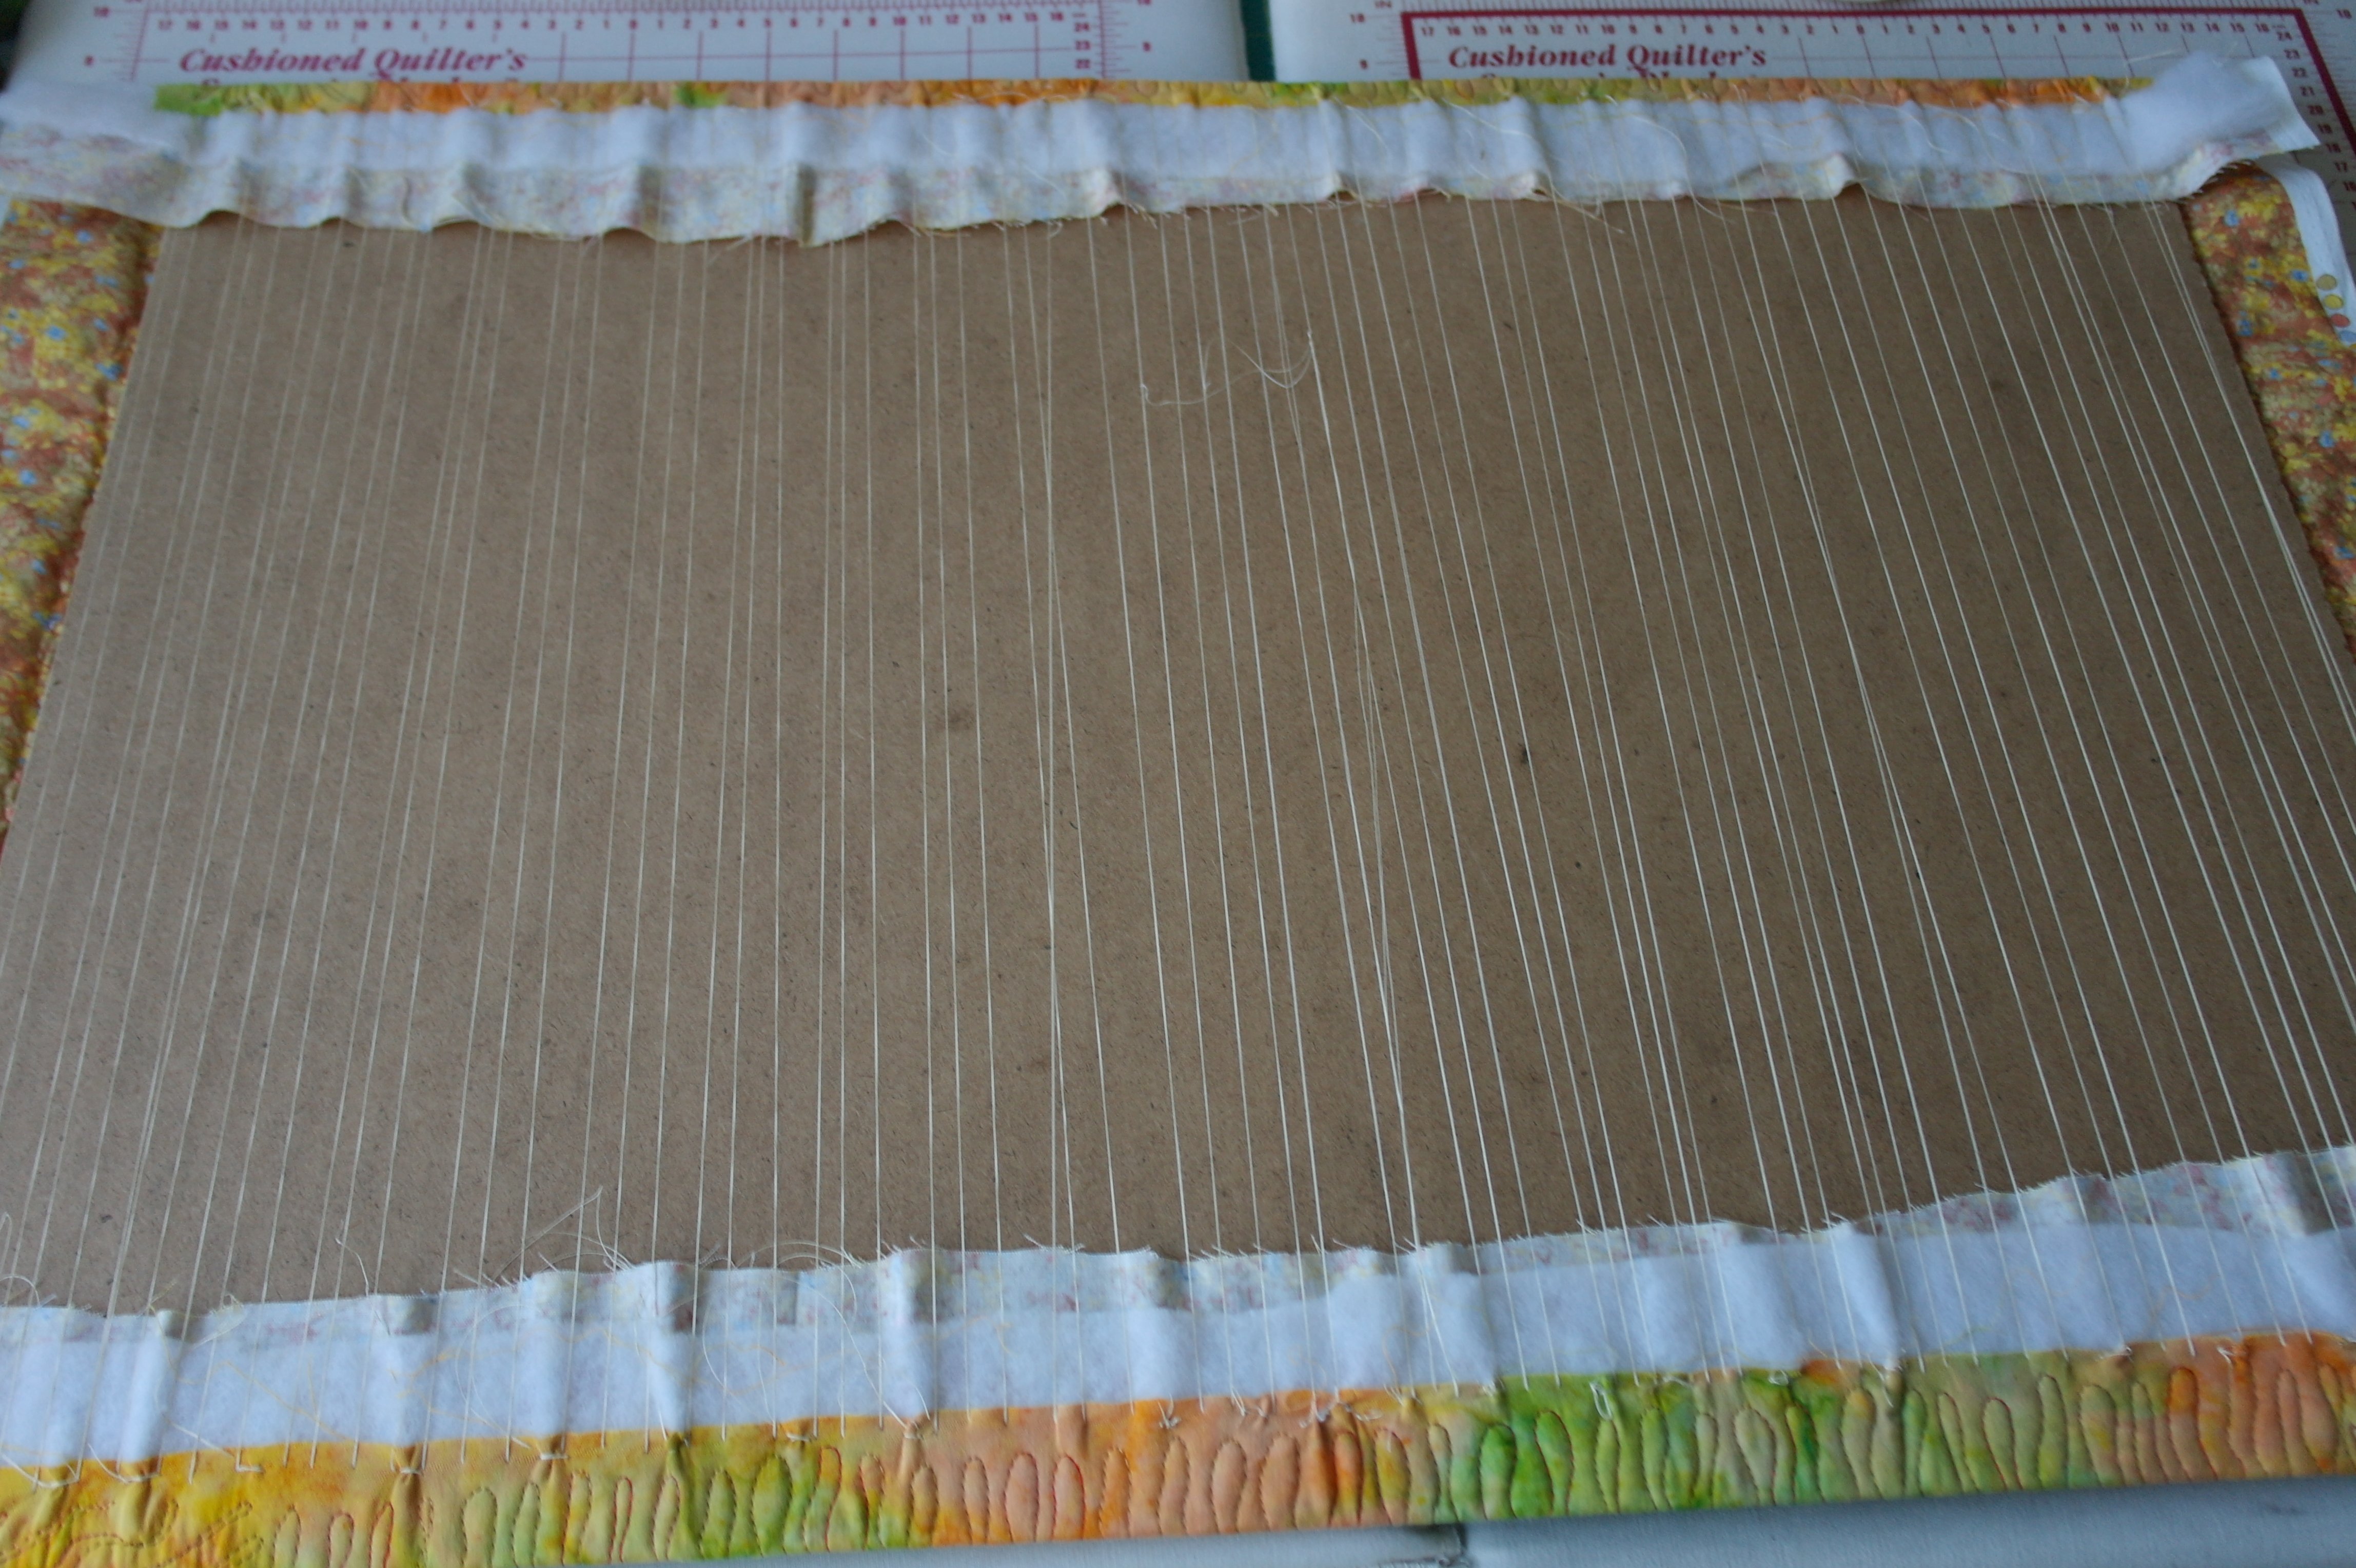
and after that to the other side. The threads are really taut!
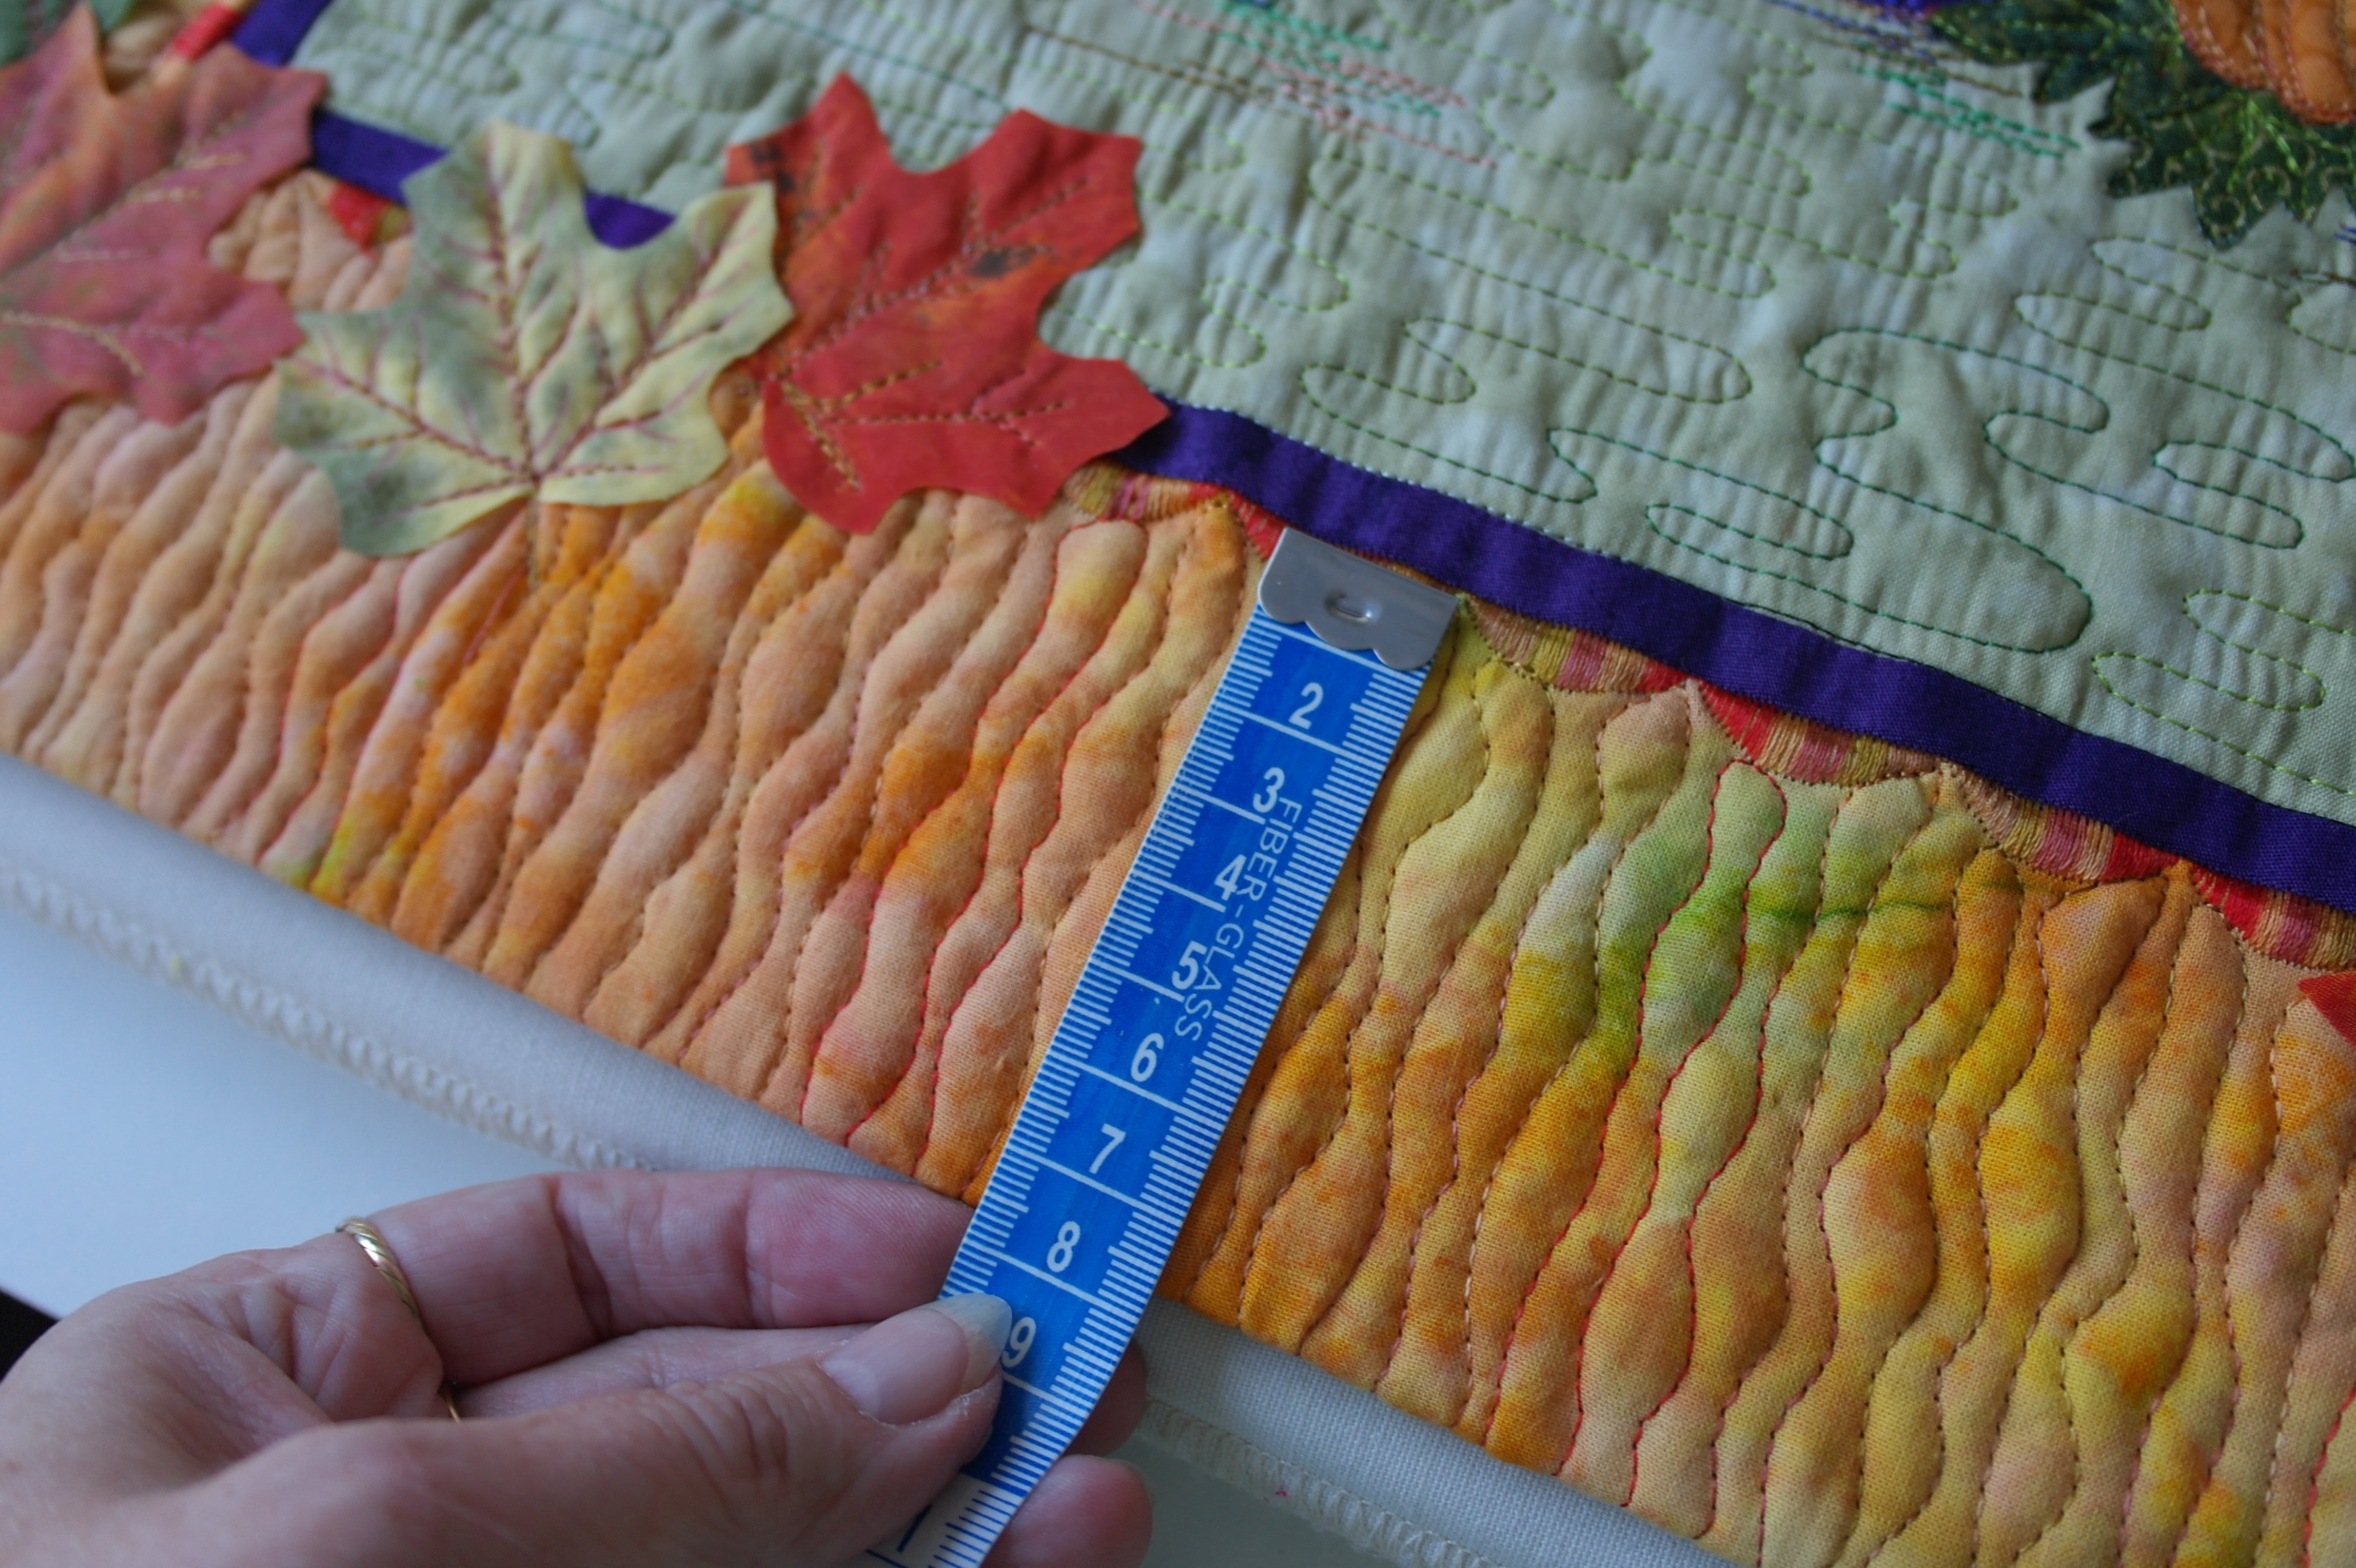
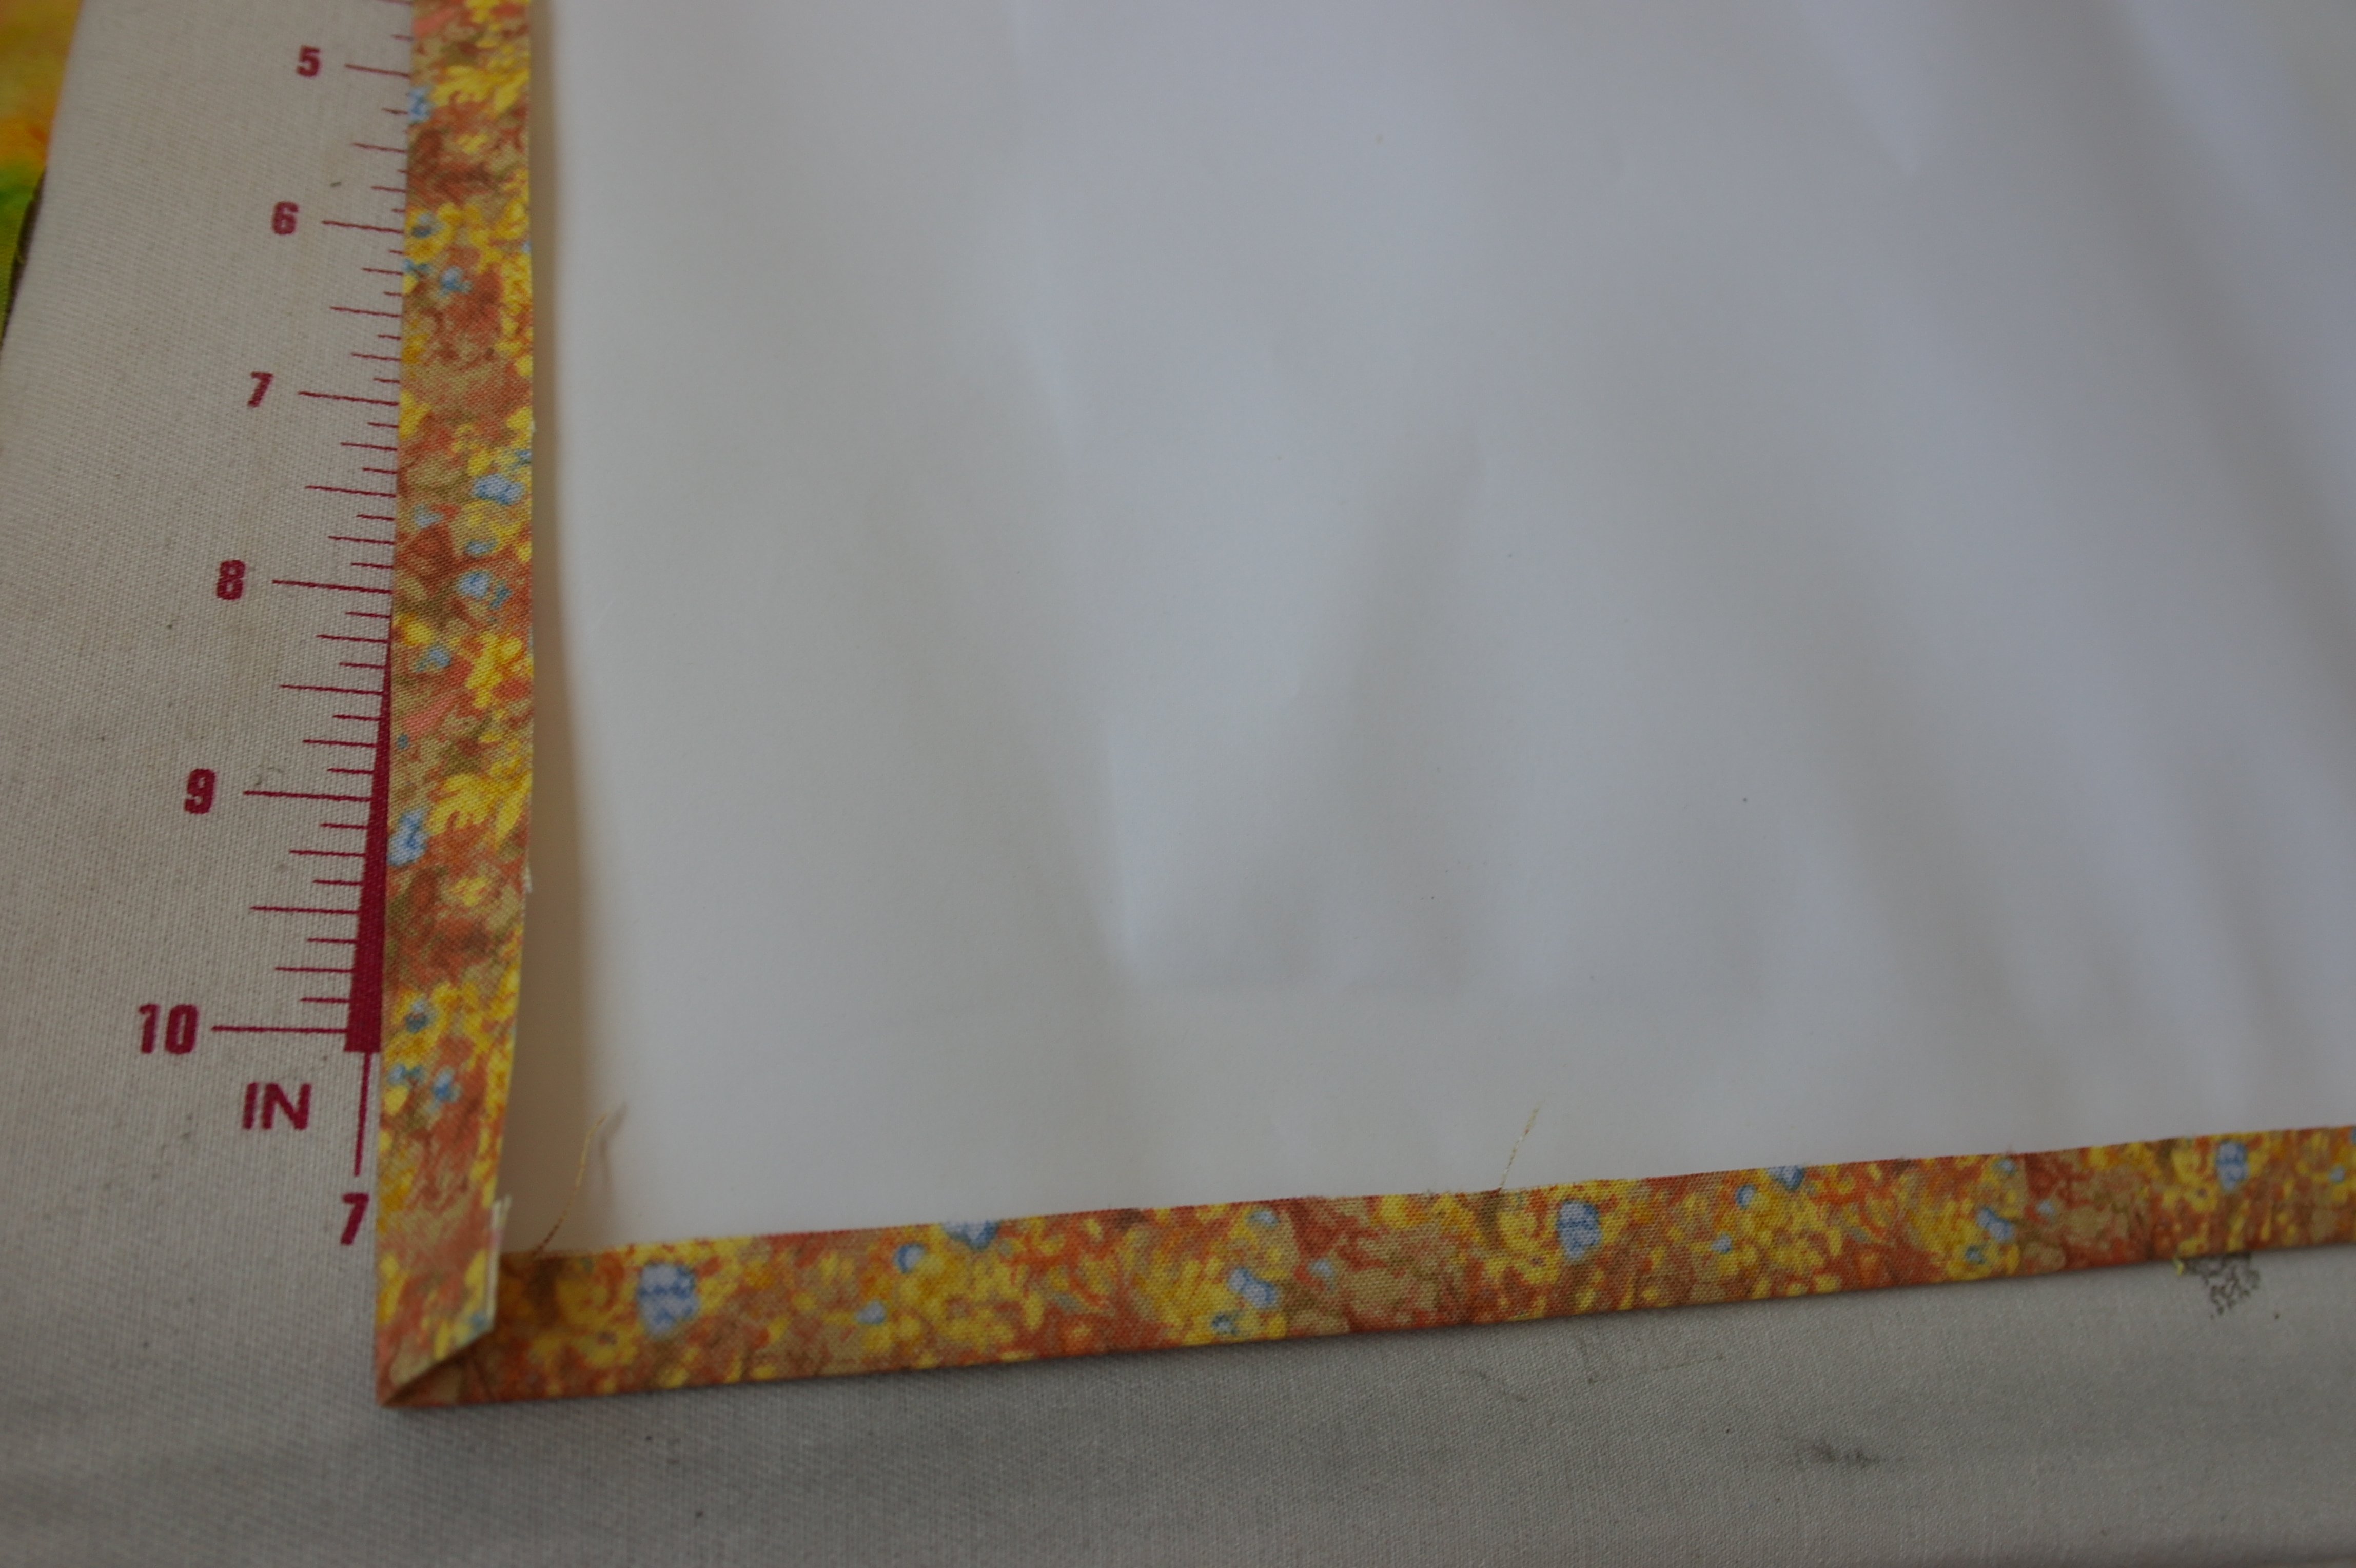
Checking every now and then if the borders are ok: they will not be of the same width, but a border should be of a certain measurement along the sides. I am measuring 7,5 cm for the bottom border, and this should be so from left to right. I can shift the quilt a bit, if the size is not right.
If all sides are under tension, I will check the front: even now I can move the quilt a bit, if necessary.
The corners are looking great: no, these are no 45° angles, due to the different widths of the outer borders.
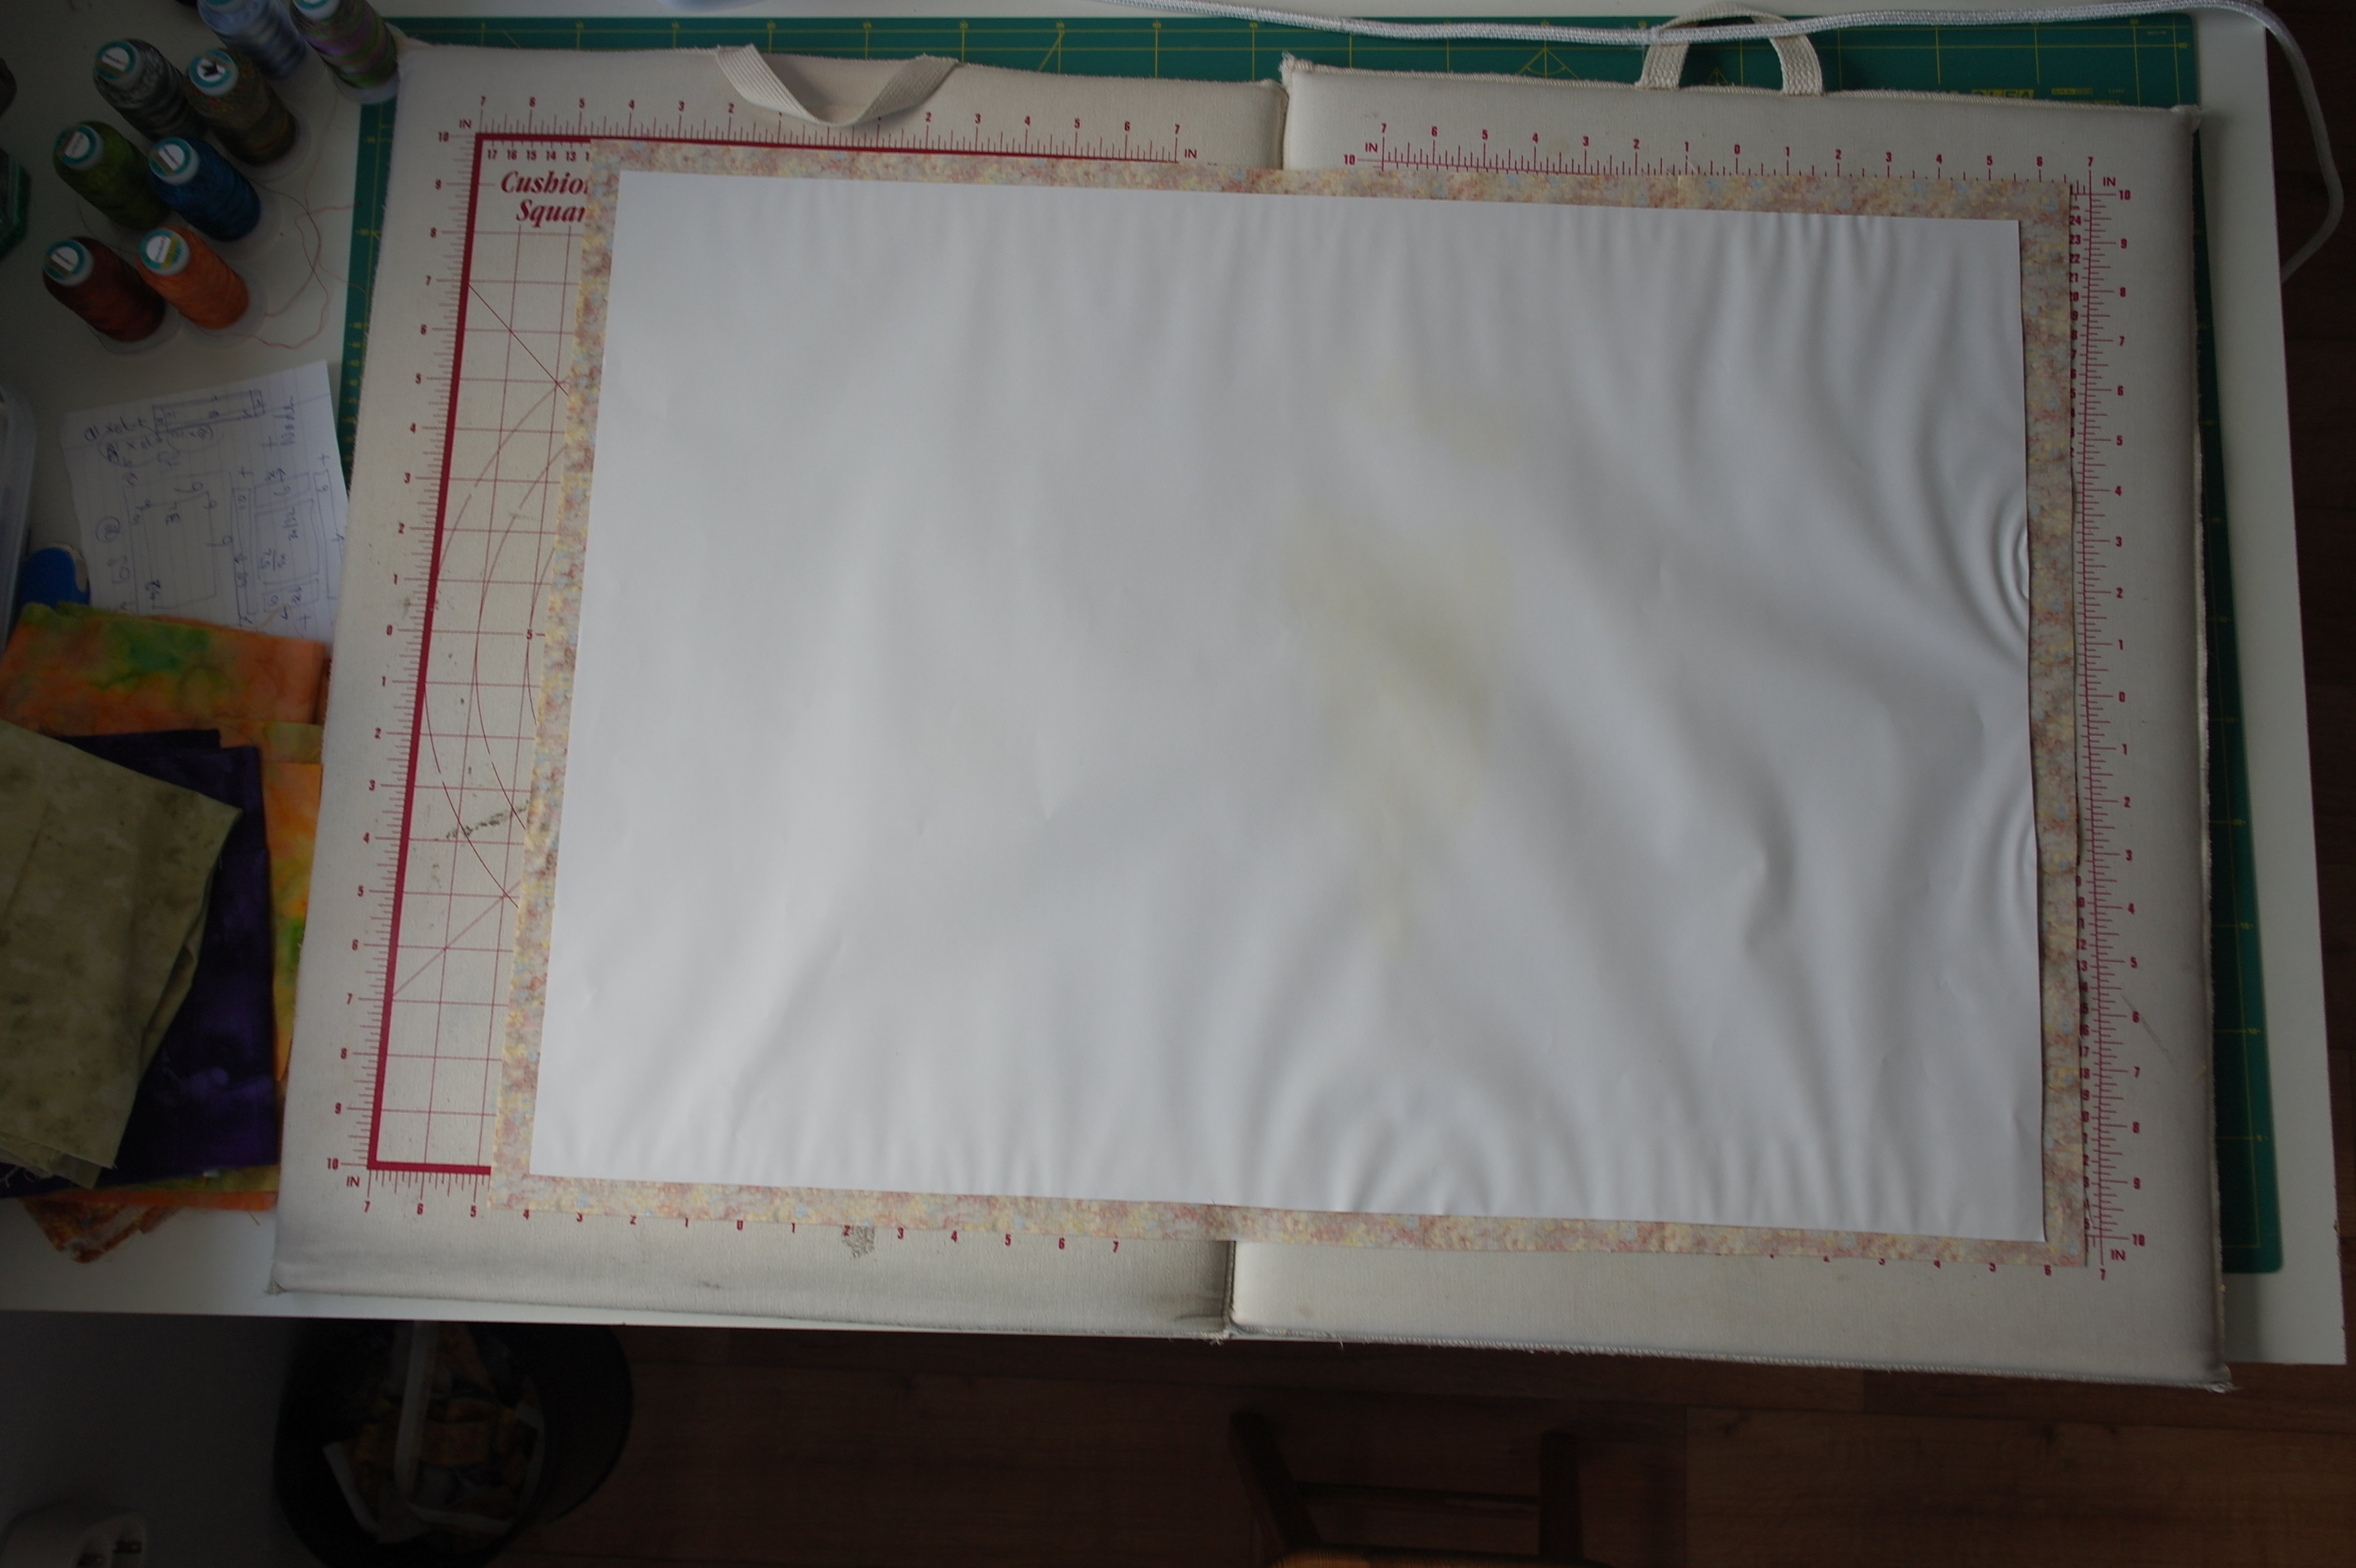
I can use the paper sheet which came with the frame too: I don’t need the glass though. I will use the paper as a template: cutting a small strip off one small and large side. This paper will be on top of the fabric I am using for the back of the frame (I want to cover the tension threads): the fabric is cut 1 cm larger than the paper template.
Ironing the 1 cm extra/seam allowance gives me a sharp fold, so I can place the fabric onto the back of the quilt with the board inside, and sew this with tiny stitches on top of each other.
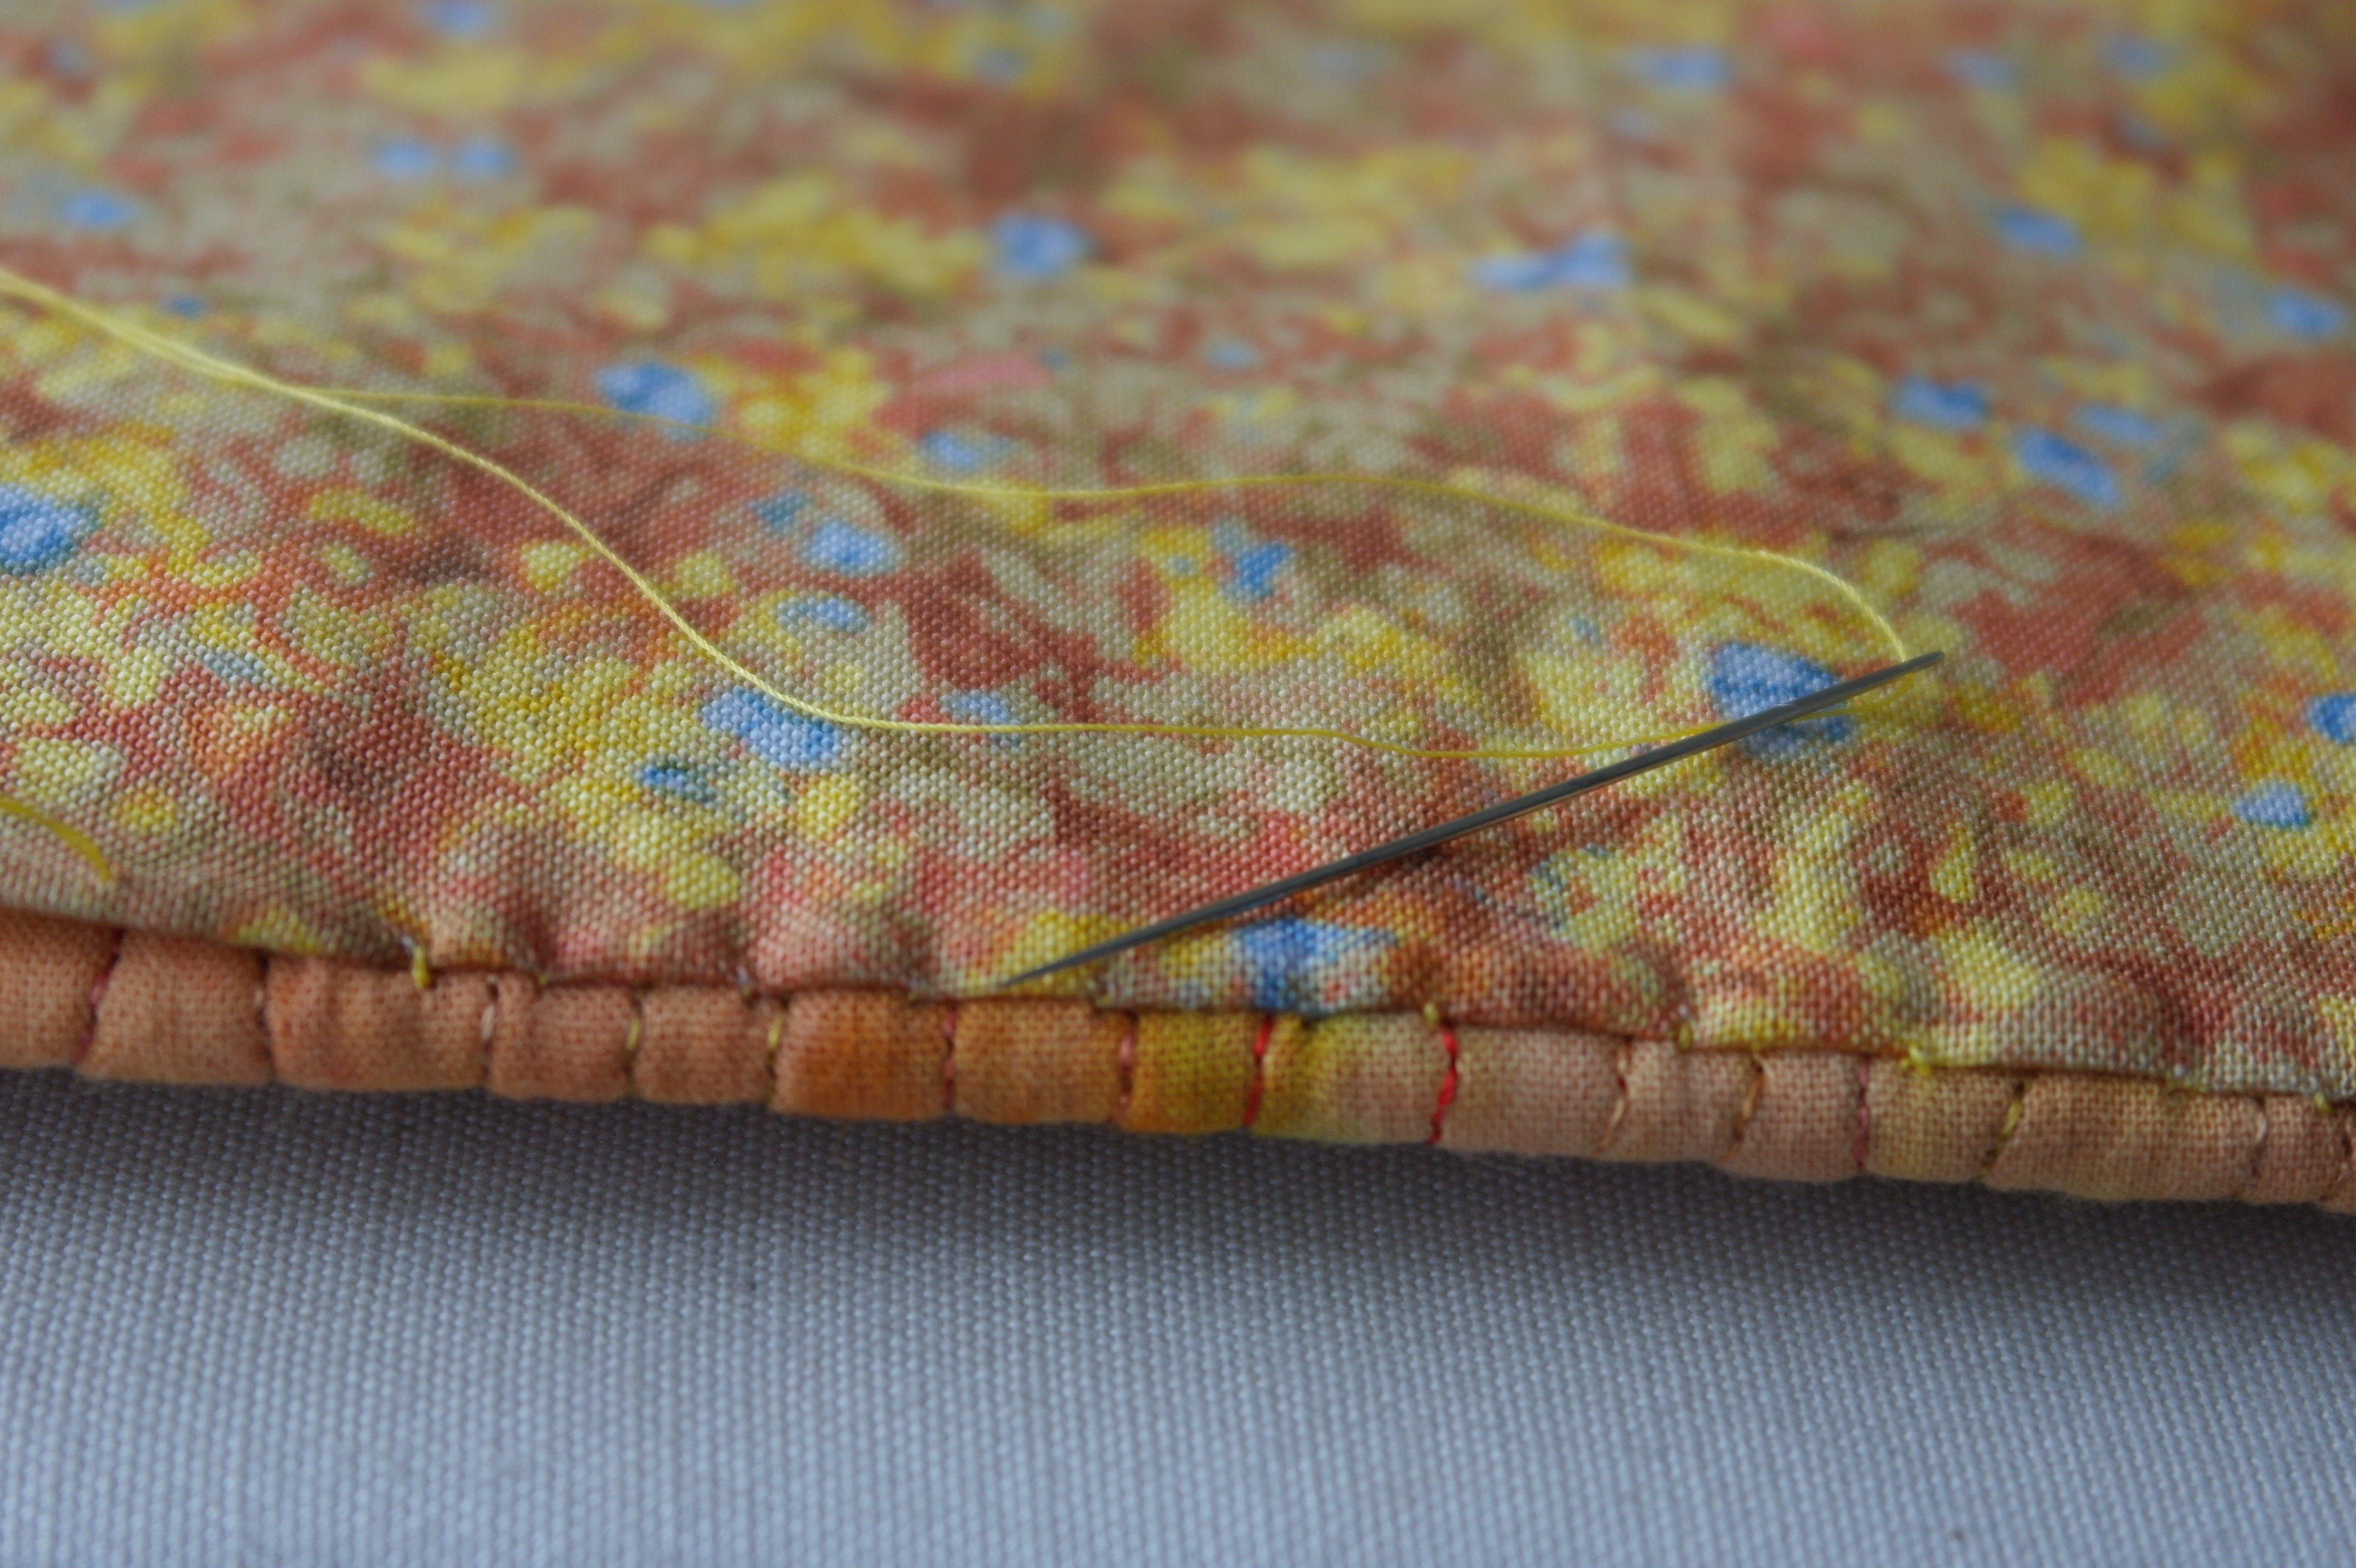
I have used matching threads, so the stitches are almost unvisilbe, even if this is the back of the frame, I want it to be neat.
For extra effect, I have used a lot of Hotfix stoness! I love the sparkle, specally when the light hits these stones at night.
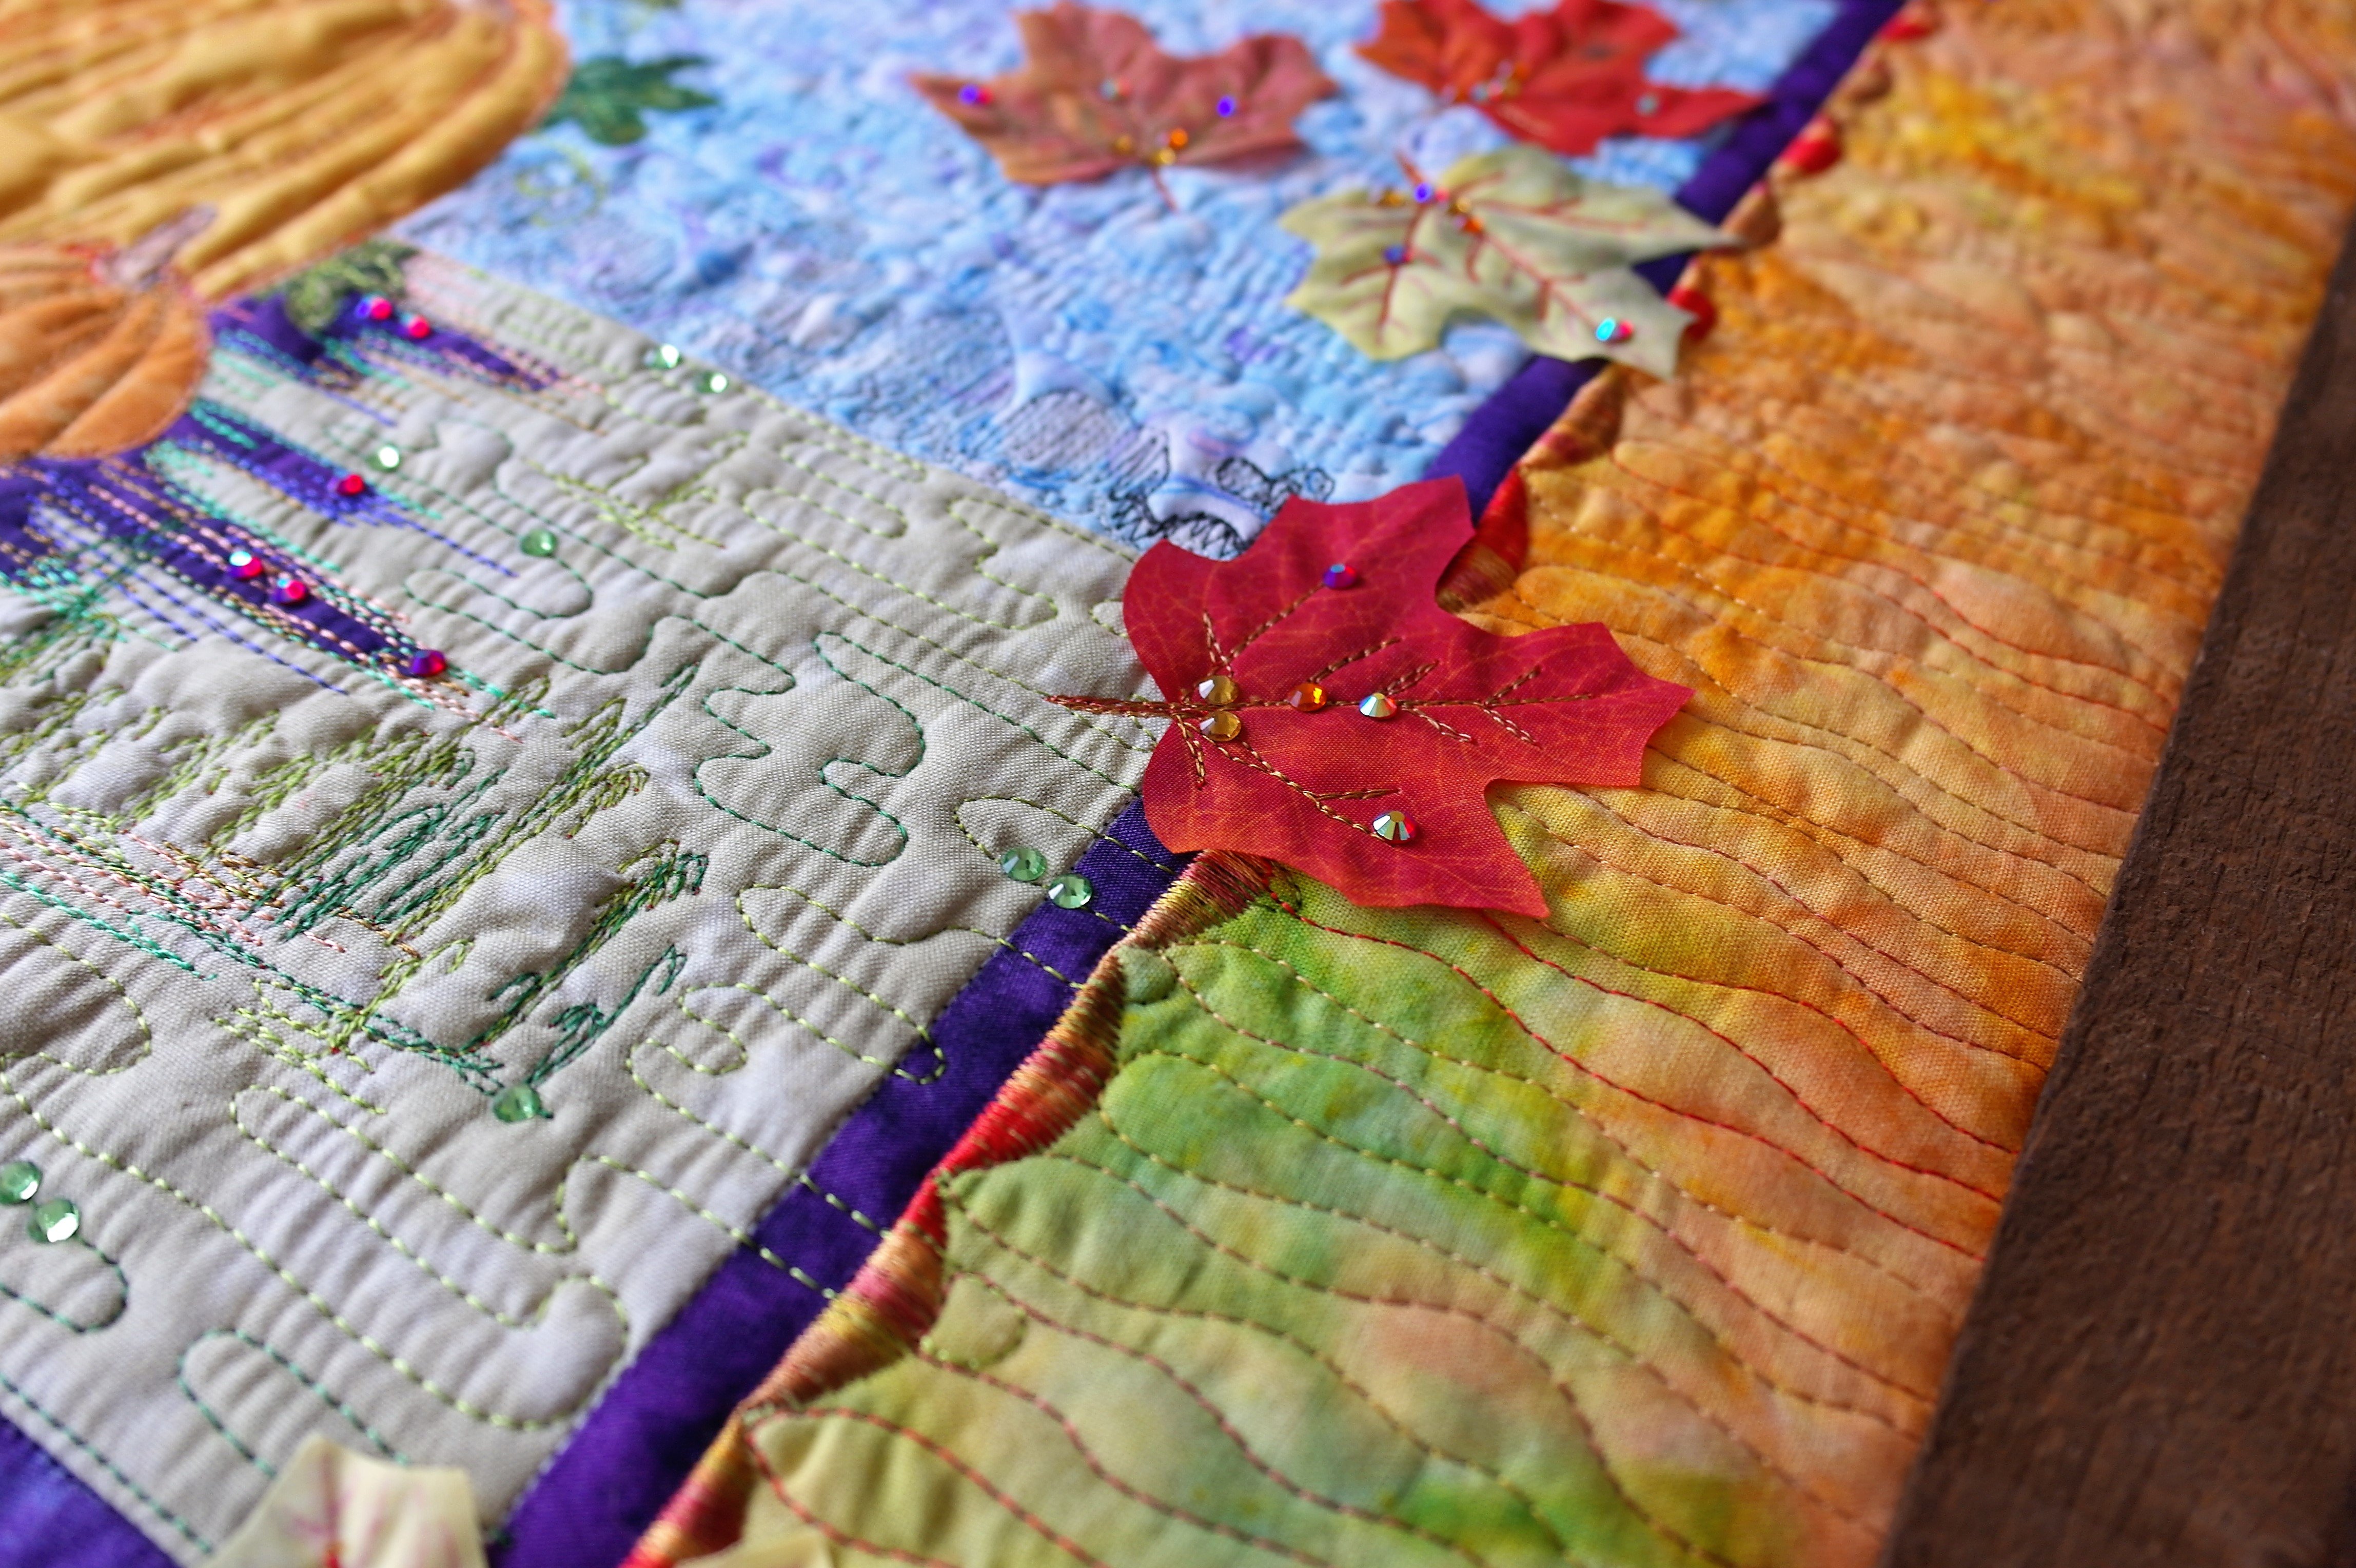
I have used size SS16 (3.8-4.0mm): colors Topaz, Orange, Orange AB, Peridot, Siam and Light Siam AB.
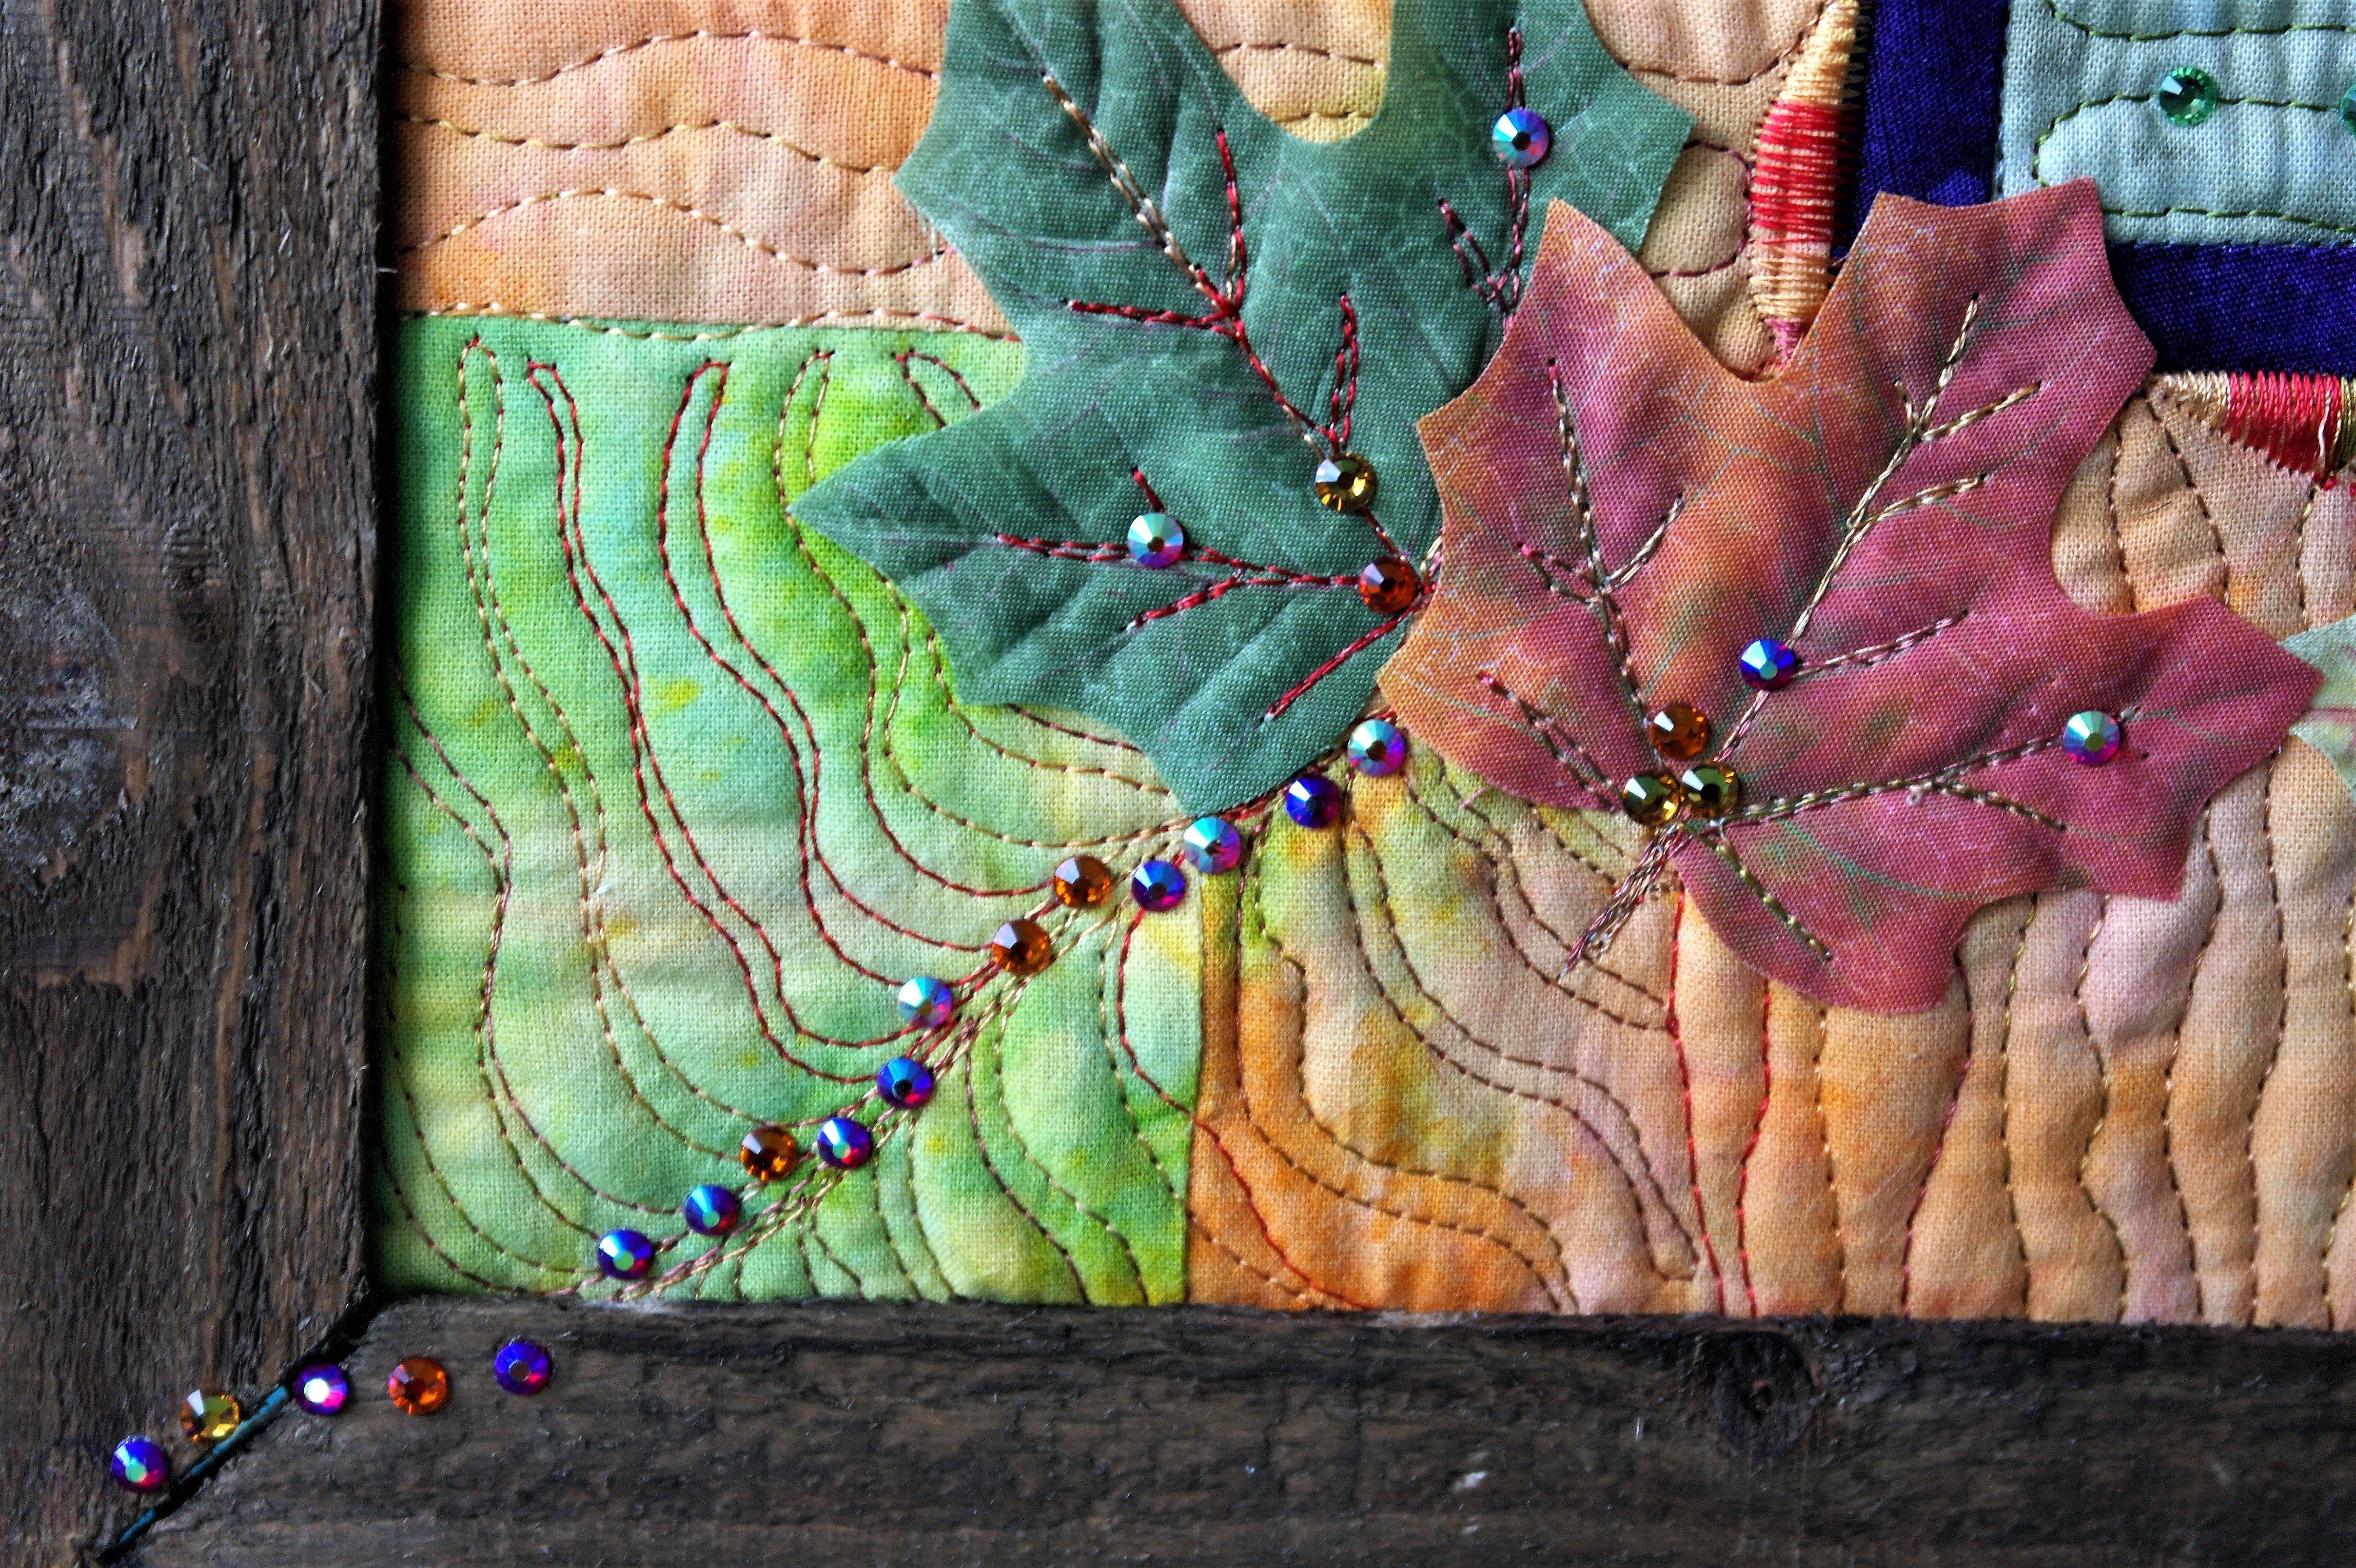
I have even added some Hotfix stones on top of the wood at the left bottom corner of the frame. I love these special details.
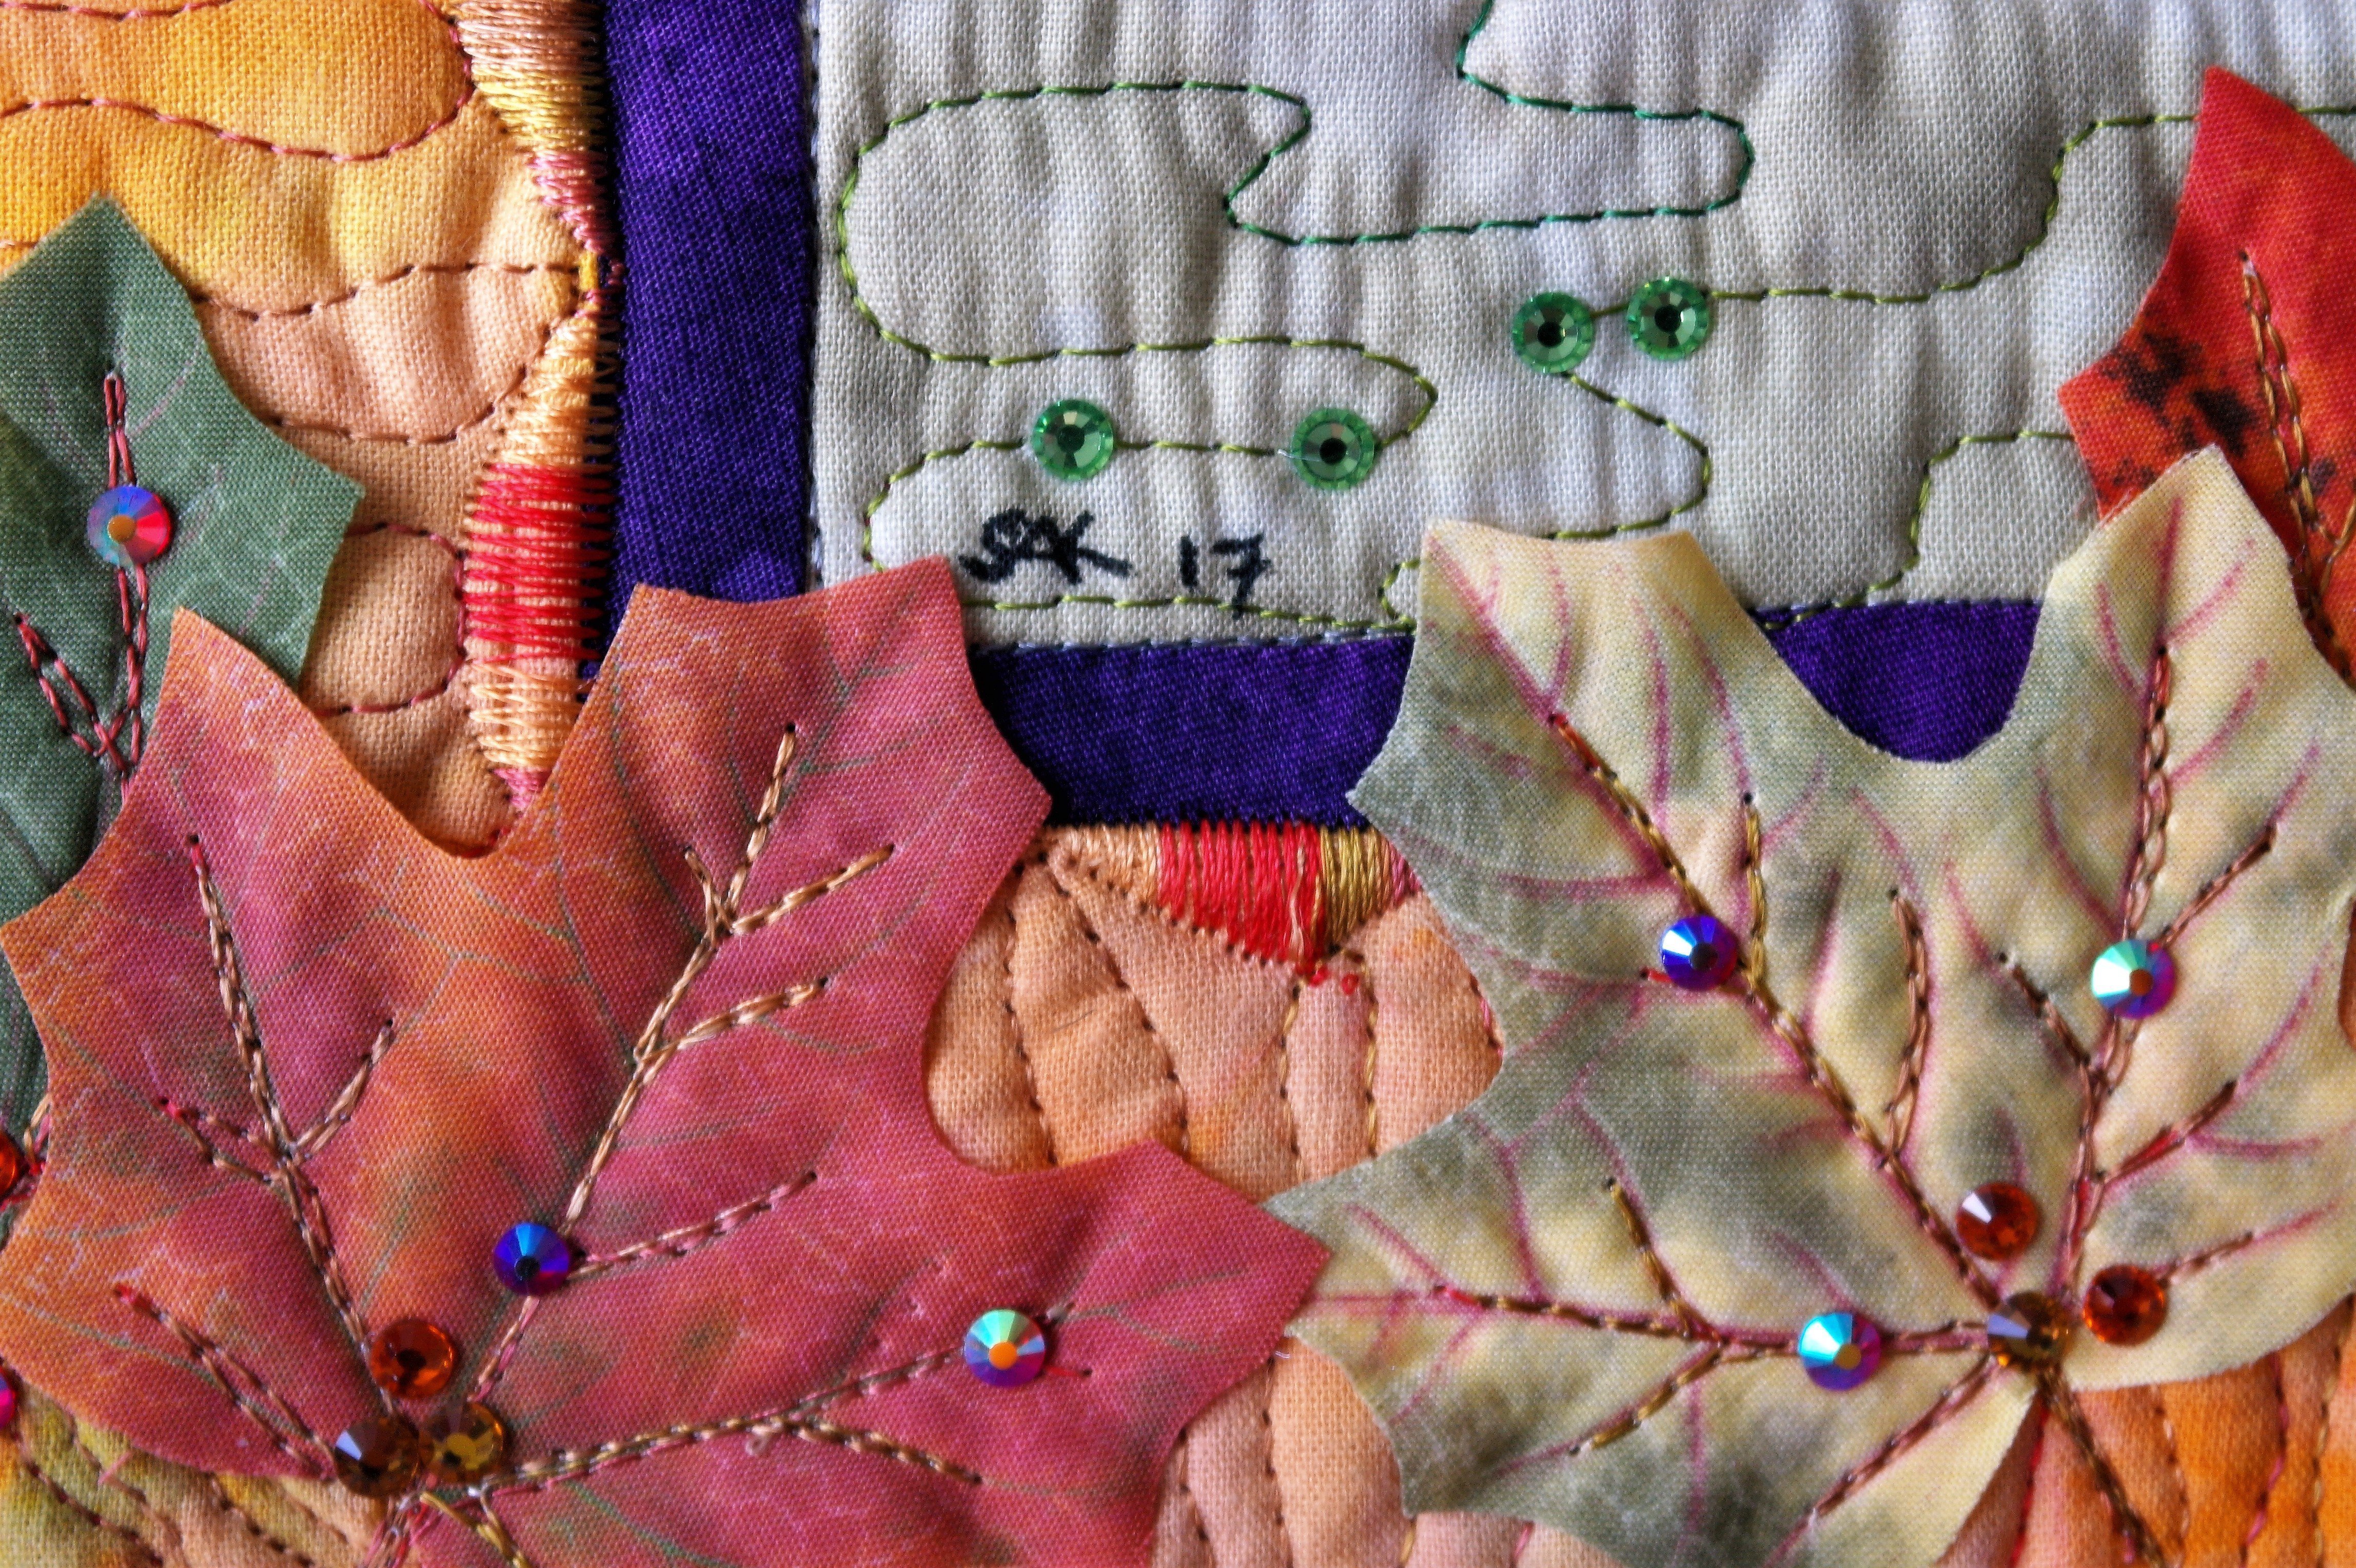
All’s finished: just placed my signature, which is proof of authenticity, so people will know this is my design.
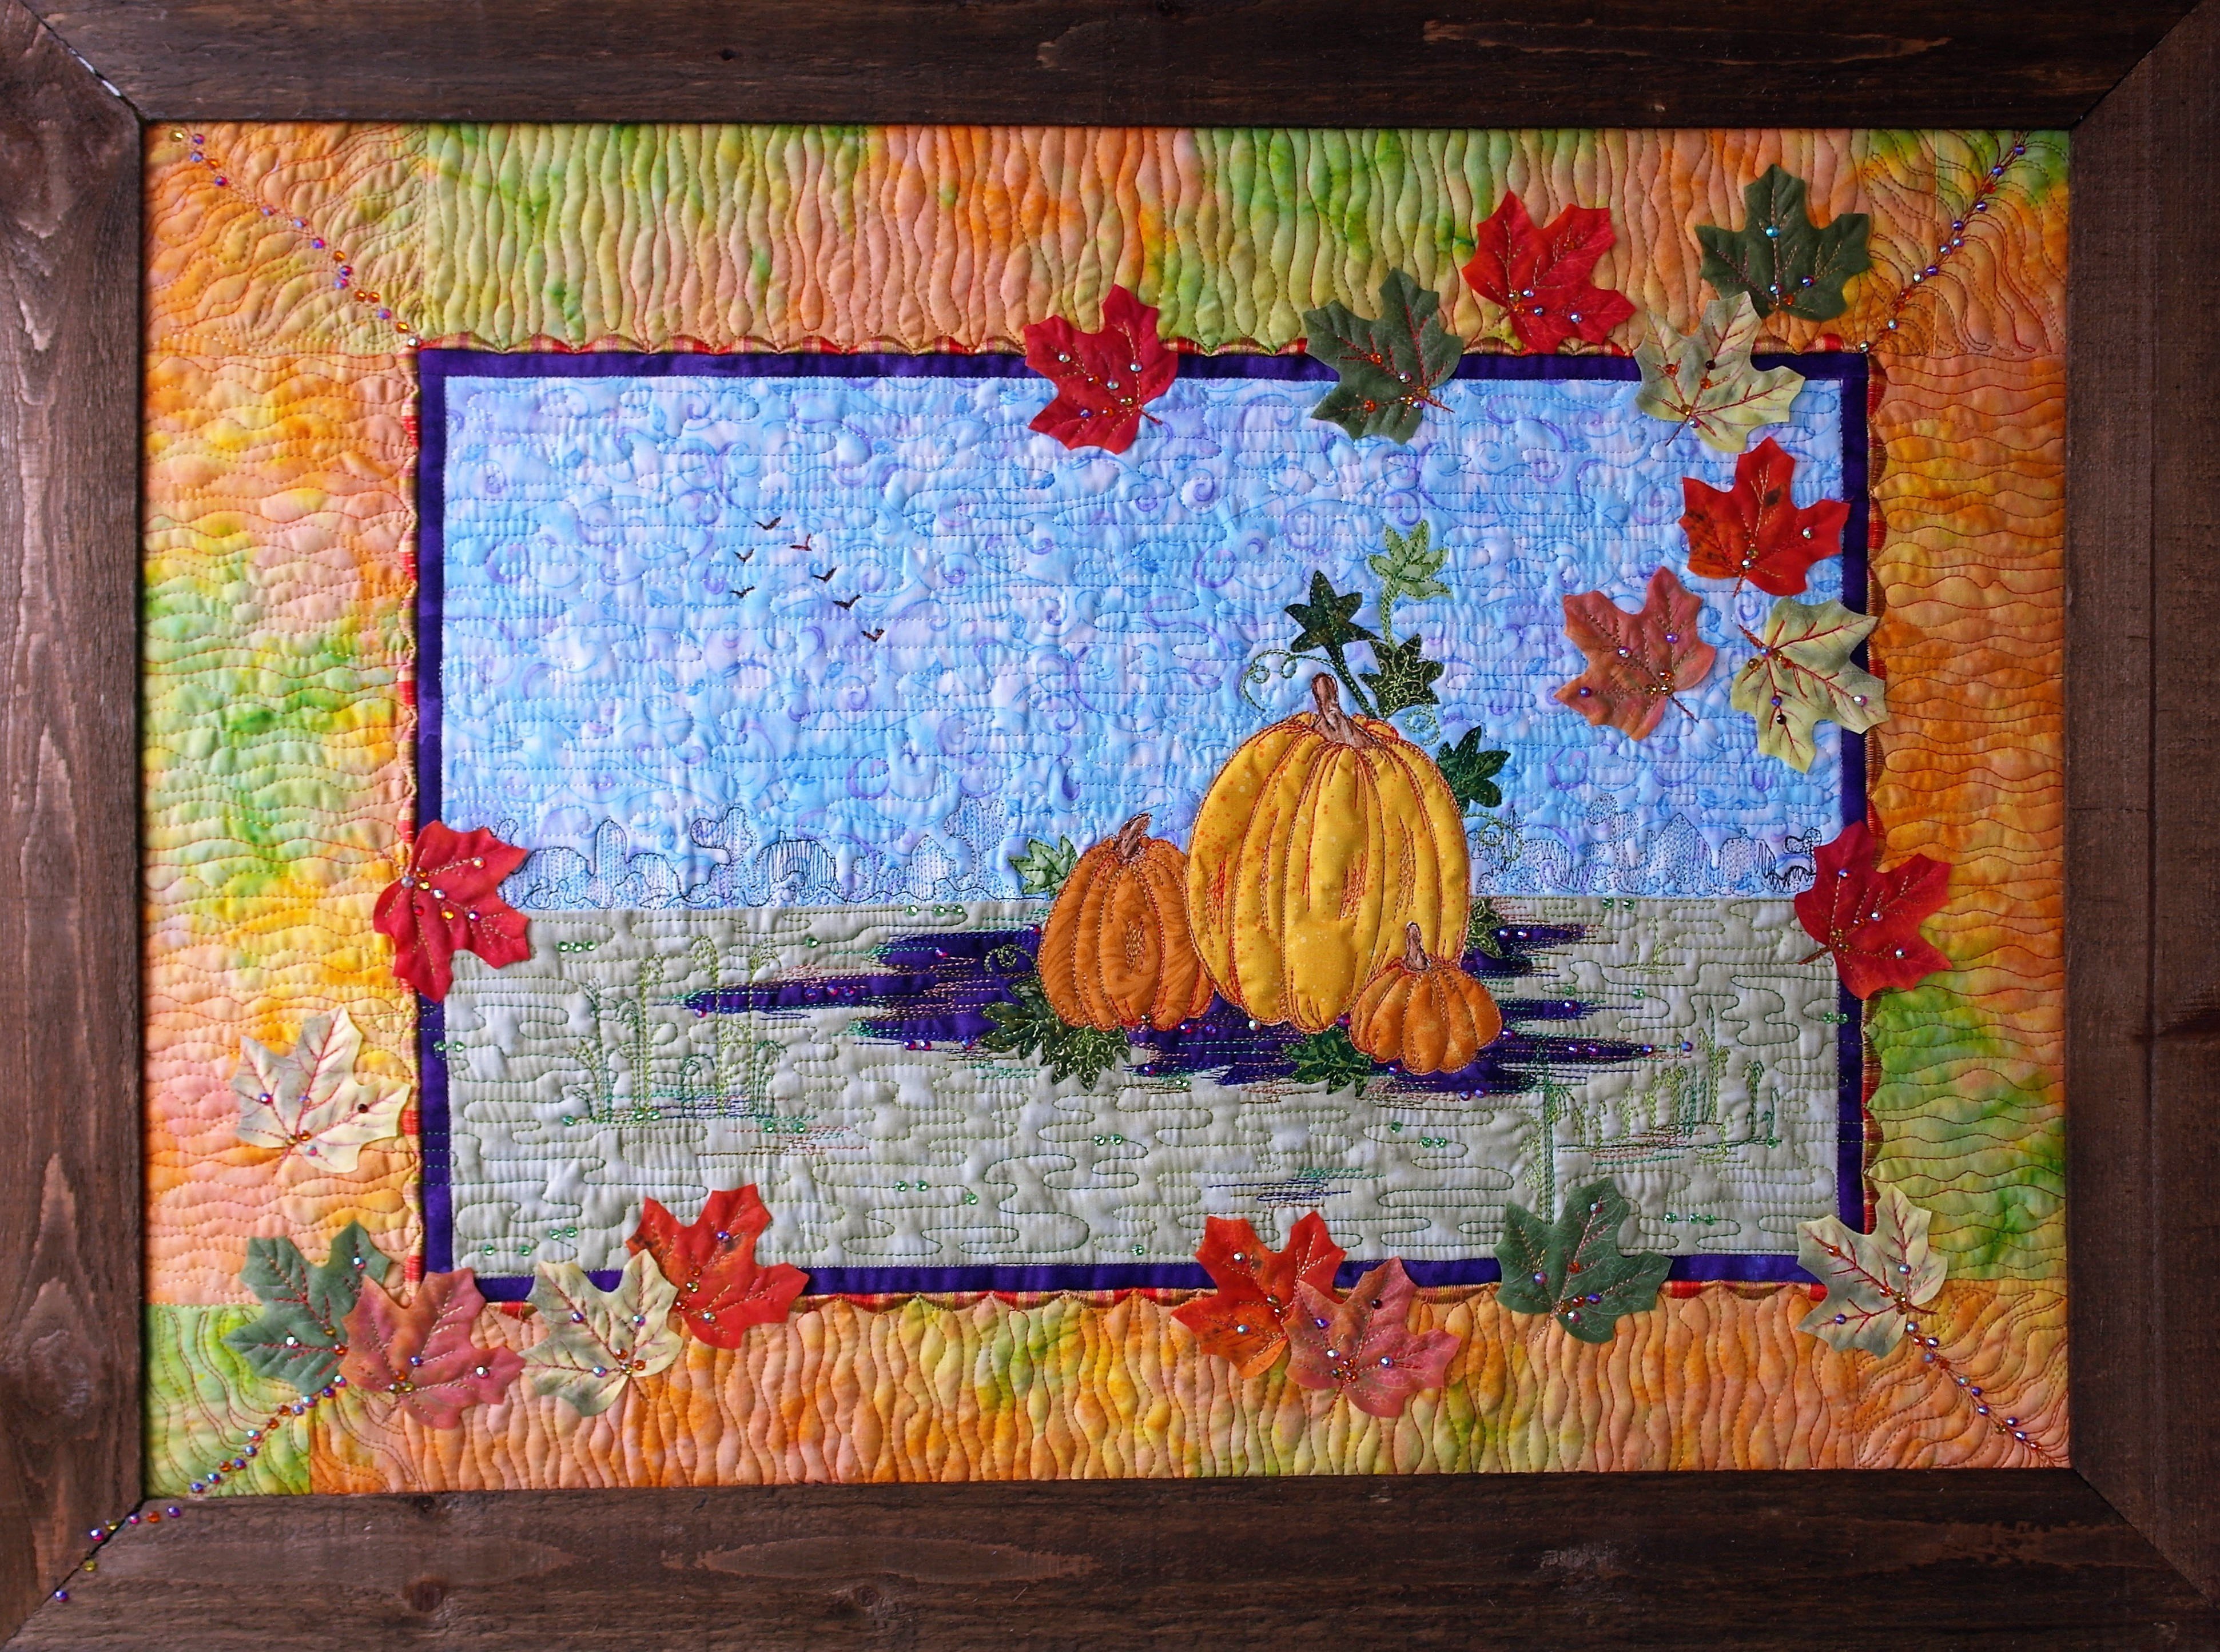
Ready for showing/hanging this framed quilt: I cannot wait for Autumn!
Happy Quilting
Sylvia Kaptein
Sylvia’s Art Quilts Studio
*Sometimes I purchase special frames, to finish my quilts. Binding quilts and hanging them on a wall is ok, but framing them can give an extra bold effect: the wood of this frame adds depth and color, which I wanted.

0 Responses