 BERNINA Corporate Blog -
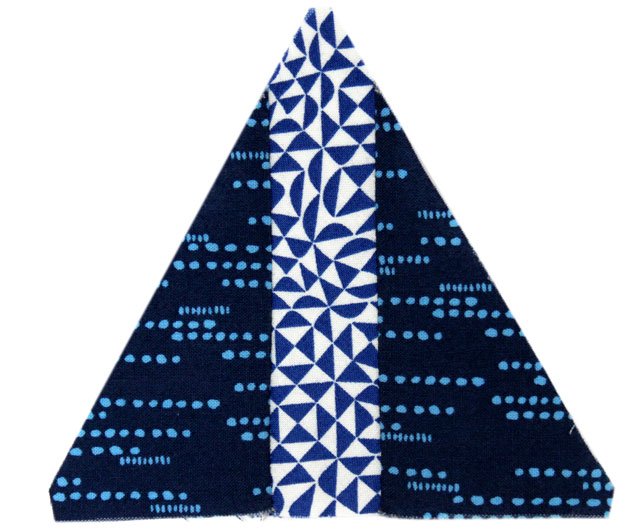
I am delighted that you are so excited about participating in this BERNINA Triangle Quilt-Along project with me.
I’m so pleased about all the suggestions of names for the last block, and I think it’s a matter of honour that we call it Piz Bernina, don’t you think? This suggestion came from Pia René Schmitt.
Block 1 and Block 2 were very easy, and with Block 3 we are going to take things up a notch – but don’t worry, any beginner can still master it.
It’s kind of like miniature golf: it gets a little trickier with each hole, but everyone can still play along. And if something goes wrong, just try again.
Triangle No. 3
As a reference for the completed block, I have once again drawn a paper template for you to download (always make sure when printing PDFs that the option “actual size” is selected in the print settings).
In order to have the least amount of waste as possible with this block, we will cut the wings in a way that there will be enough for the wings of a second block. However, the fabric for the middle strip in the second block may differ. This means that we will get two blocks with the same wings but possibly different middle strips.
First select three fabrics, one for the wings of 2 blocks, and 2 for the two different middle strips (or you choose the same fabric here too, it’s a matter of taste).
For the “wings”, cut two rectangles, each measuring 6″ x 3 ½”, out of the same fabric (enough for 2 blocks). For the middle section, cut strips, each measuring 5″ x 1 ½”.
Now cut the rectangle in half diagonally for the “wings”, as seen in the photo. Important: the diagonal lines must each run in different directions, otherwise you will inadvertently get identical wings.

Now sew a “wing” on to the right and left of the middle strip, as shown in the illustration. The wings are cut generously to ensure they will always fit. You can even let the bottom edge protrude a little past the middle strip so that you can subsequently cut a full, clean bottom edge using a ruler.
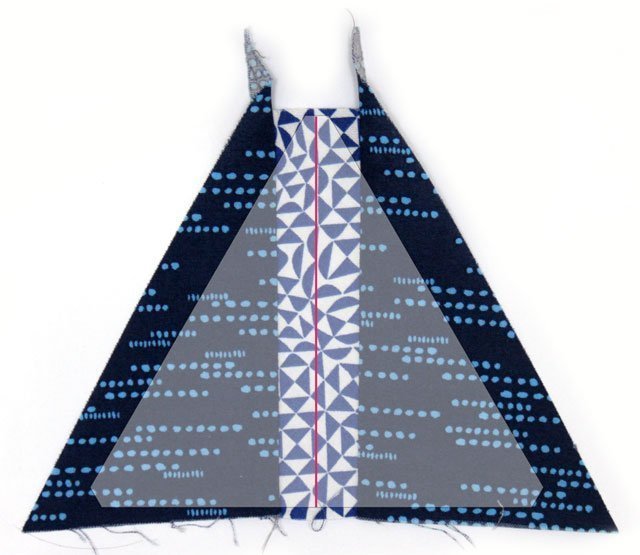
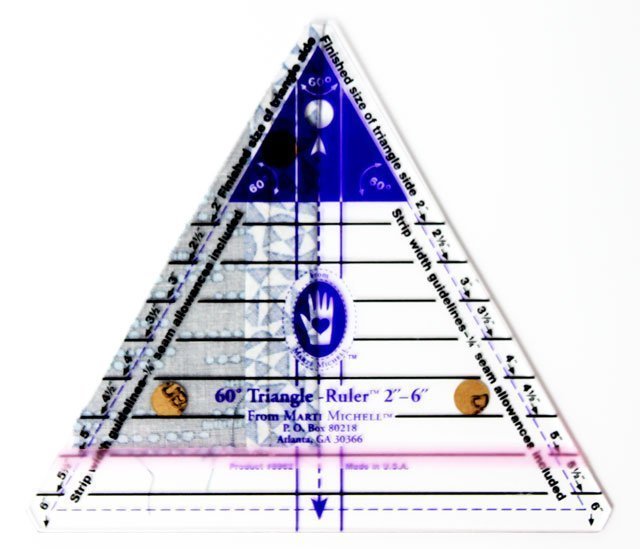
Now place the ruler on the assembled piece and cut out the triangle in the correct size. When doing so, it is important that the centerline of the triangle lies precisely on the centerline of the middle strip.
You can either do this by eyeballing or by folding the assembled block in half and placing the centerline of the ruler on the fold.
Don’t forget to trim down the corners!
Triangle No. 3 is finished, and we will need 8 of them in total.
I am already looking forward to seeing your blocks in the community or on Instagram.
By the way – a word about fabric use
As I mentioned before, as a Swabian, I tend to cut sparingly – but it’s not just that. I am using my entire True Blue box of left overs from my sample quilts. That is why it is very difficult for me to estimate how you will get along with fat quarters or 25 cm pieces of fabric. I have a sneaking suspicion that I might have calculated too sparingly. With the 16-piece block, a lot of fabric will be used up for the seam allowances.
I certainly don’t want anyone to sadly discover, shortly before the end of the project, that they did not have enough fabric and the prints they used in the quilt-along is now no longer available.
So please forgive me if I have to estimate here; I am sewing alongside you but I’ve got a box full of left overs to use up. So – better to buy a little extra now than to be disappointed later, okay?


0 Responses