 BERNINA Corporate Blog -
Sometimes you just cannot find a suitable birthday card, and sometimes you want to make something special: combining these two things enhances your creativity, which can result in a special gift for a birthday girl.
The woman I am making this card for, loves Eagles: she draws them herself, and has seen them in reality in the US. That’s why I have choosen this beautifil bird of prey for making a post card.
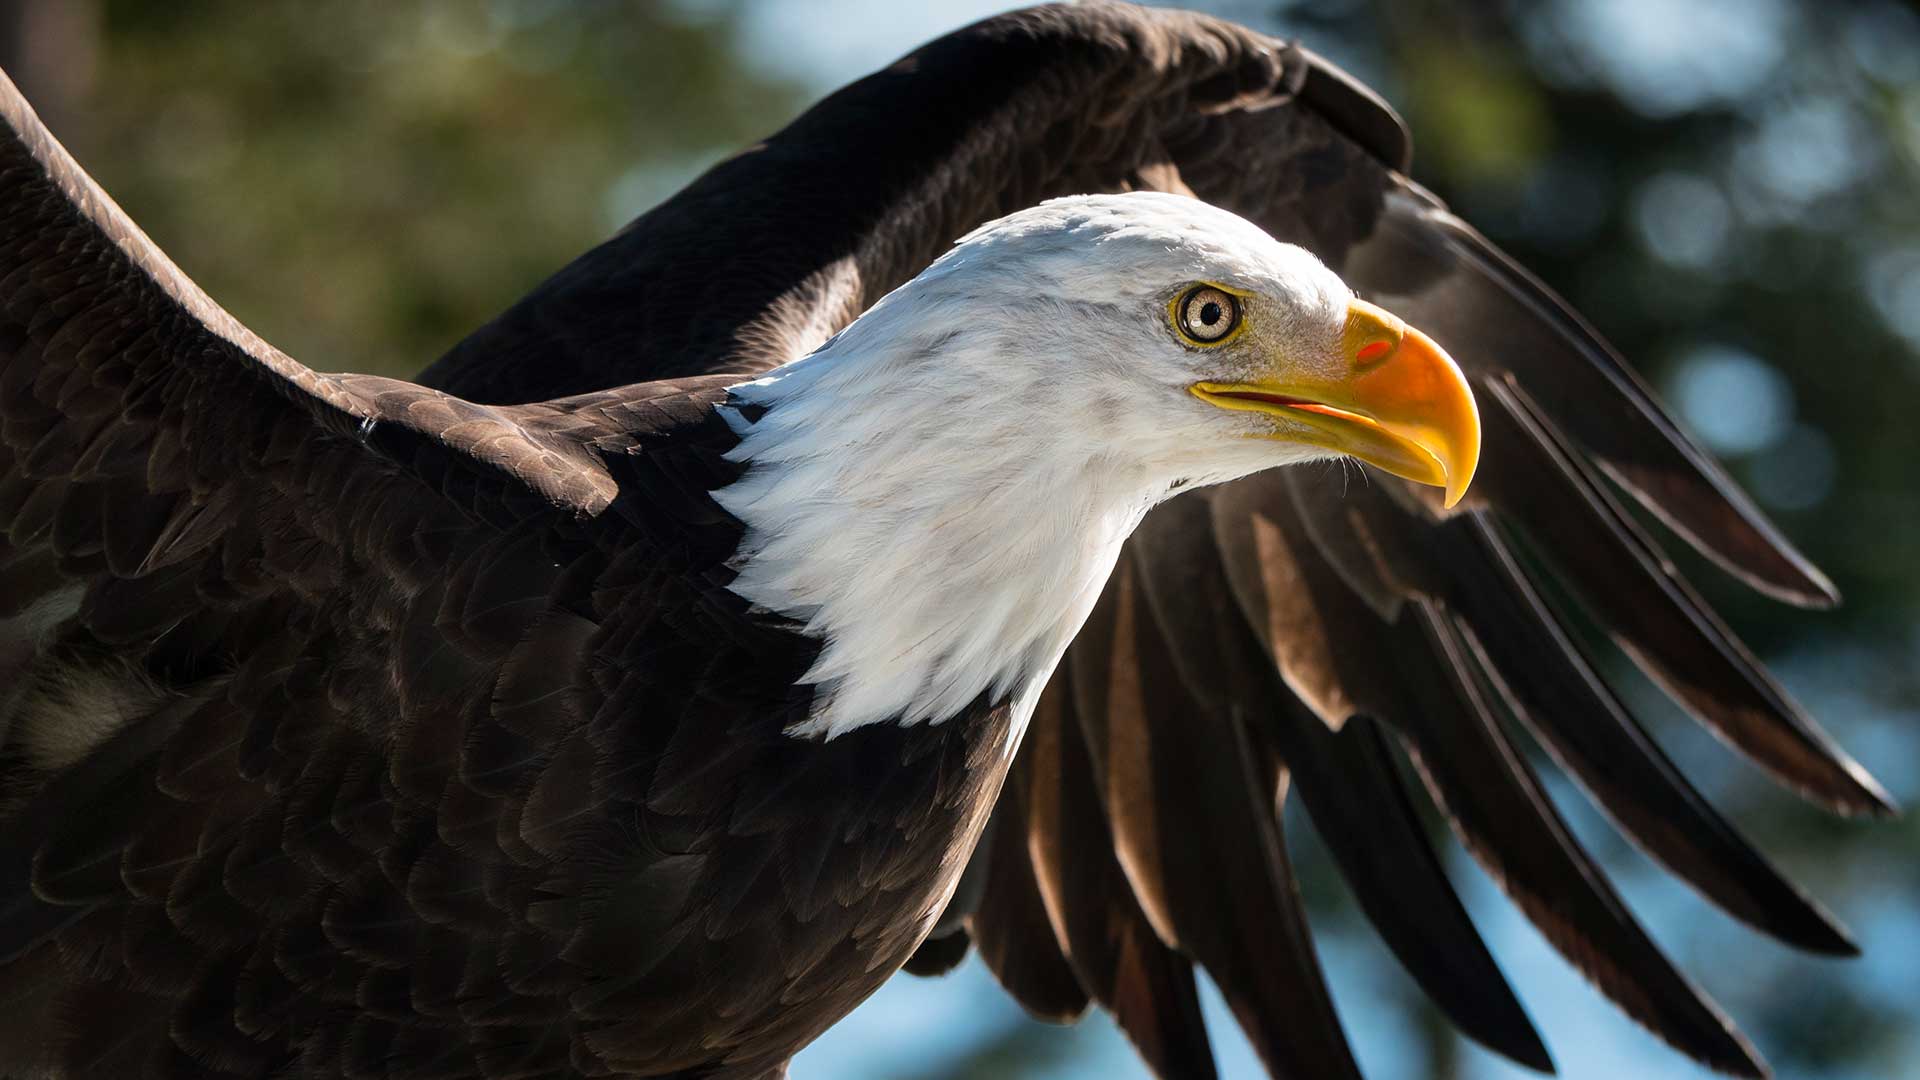
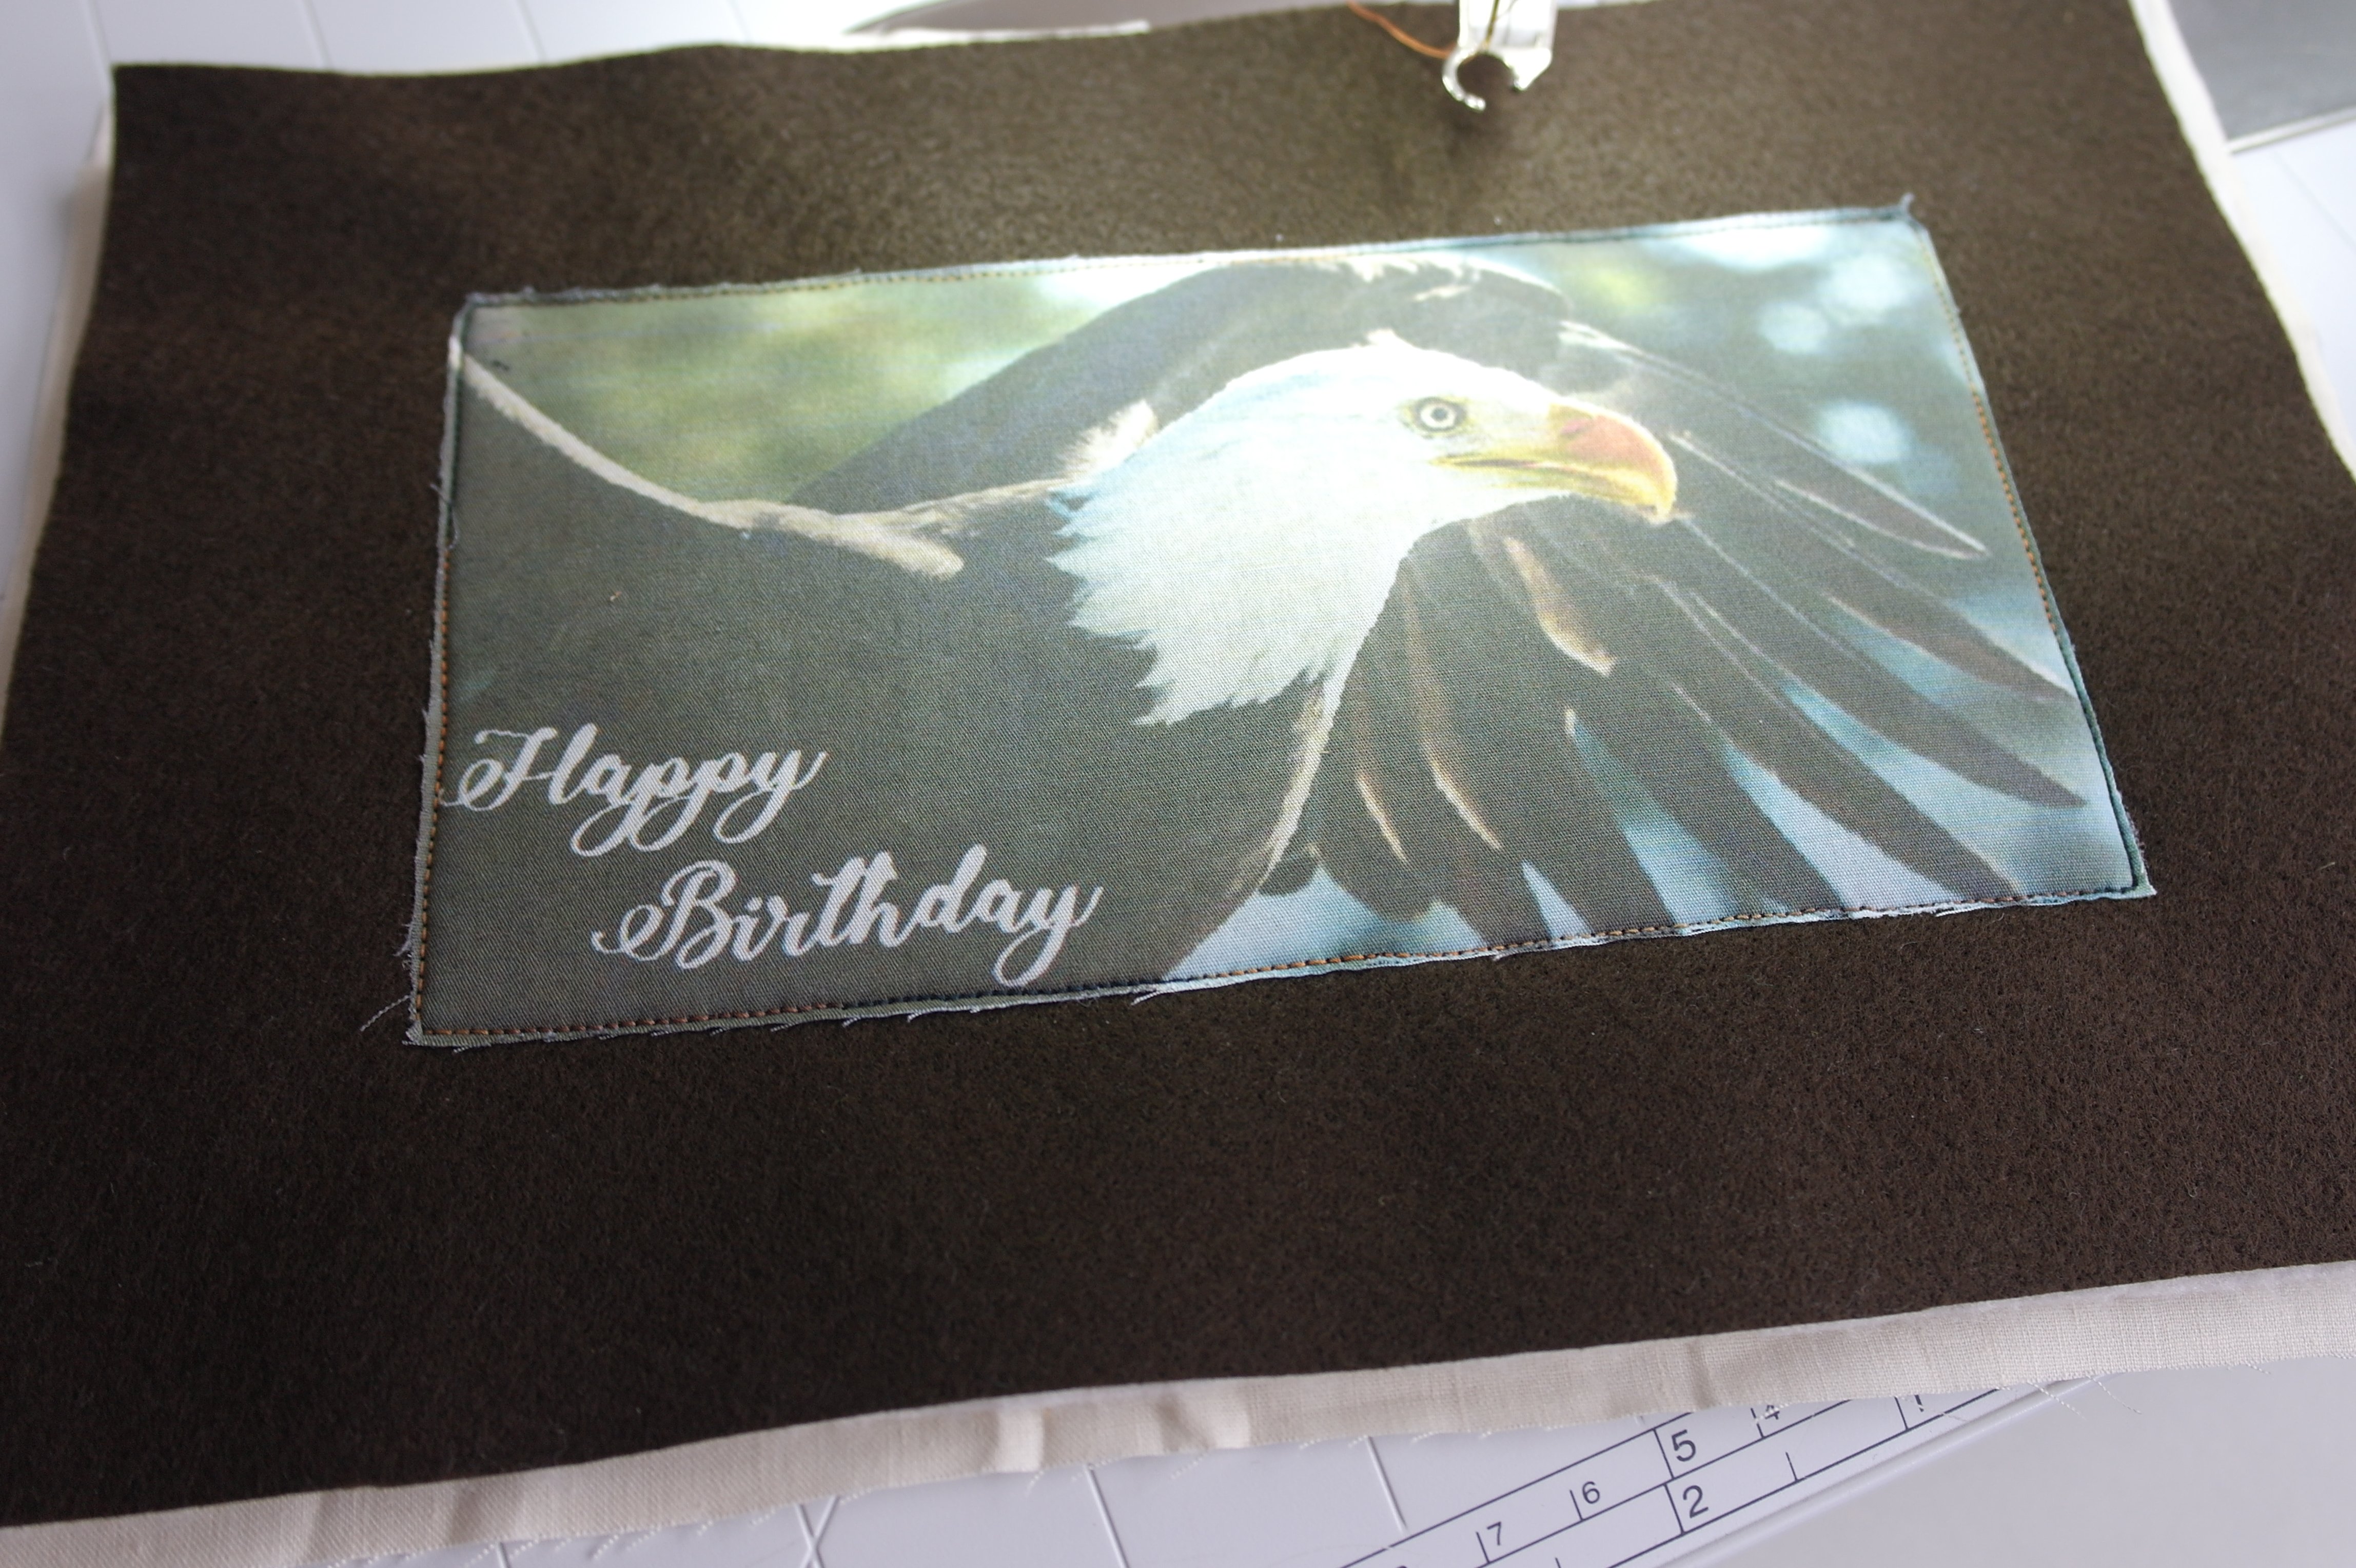
I have found a good, large picture on the Internet: an Eagle, just before it takes flight.
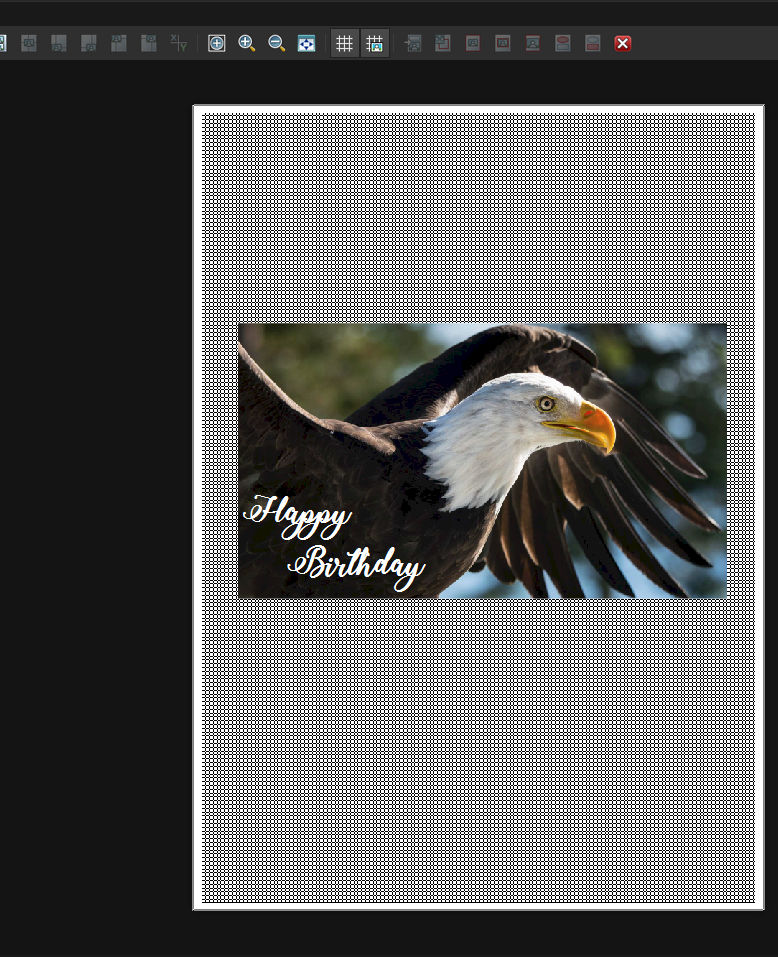
Via Corel PaintShop Pro, I have placed the picture in preview for printing, with a grid surrounding the picture. This is how I can see the measurements, before printing, to see if the card fits in the mailbox. Via ‘Text’ I have written ‘Happy Birthday’ in a fun curly font, placed that in white (otherwise you cannot see the text on the dark background). And now I will print this onto PhotoFabric.
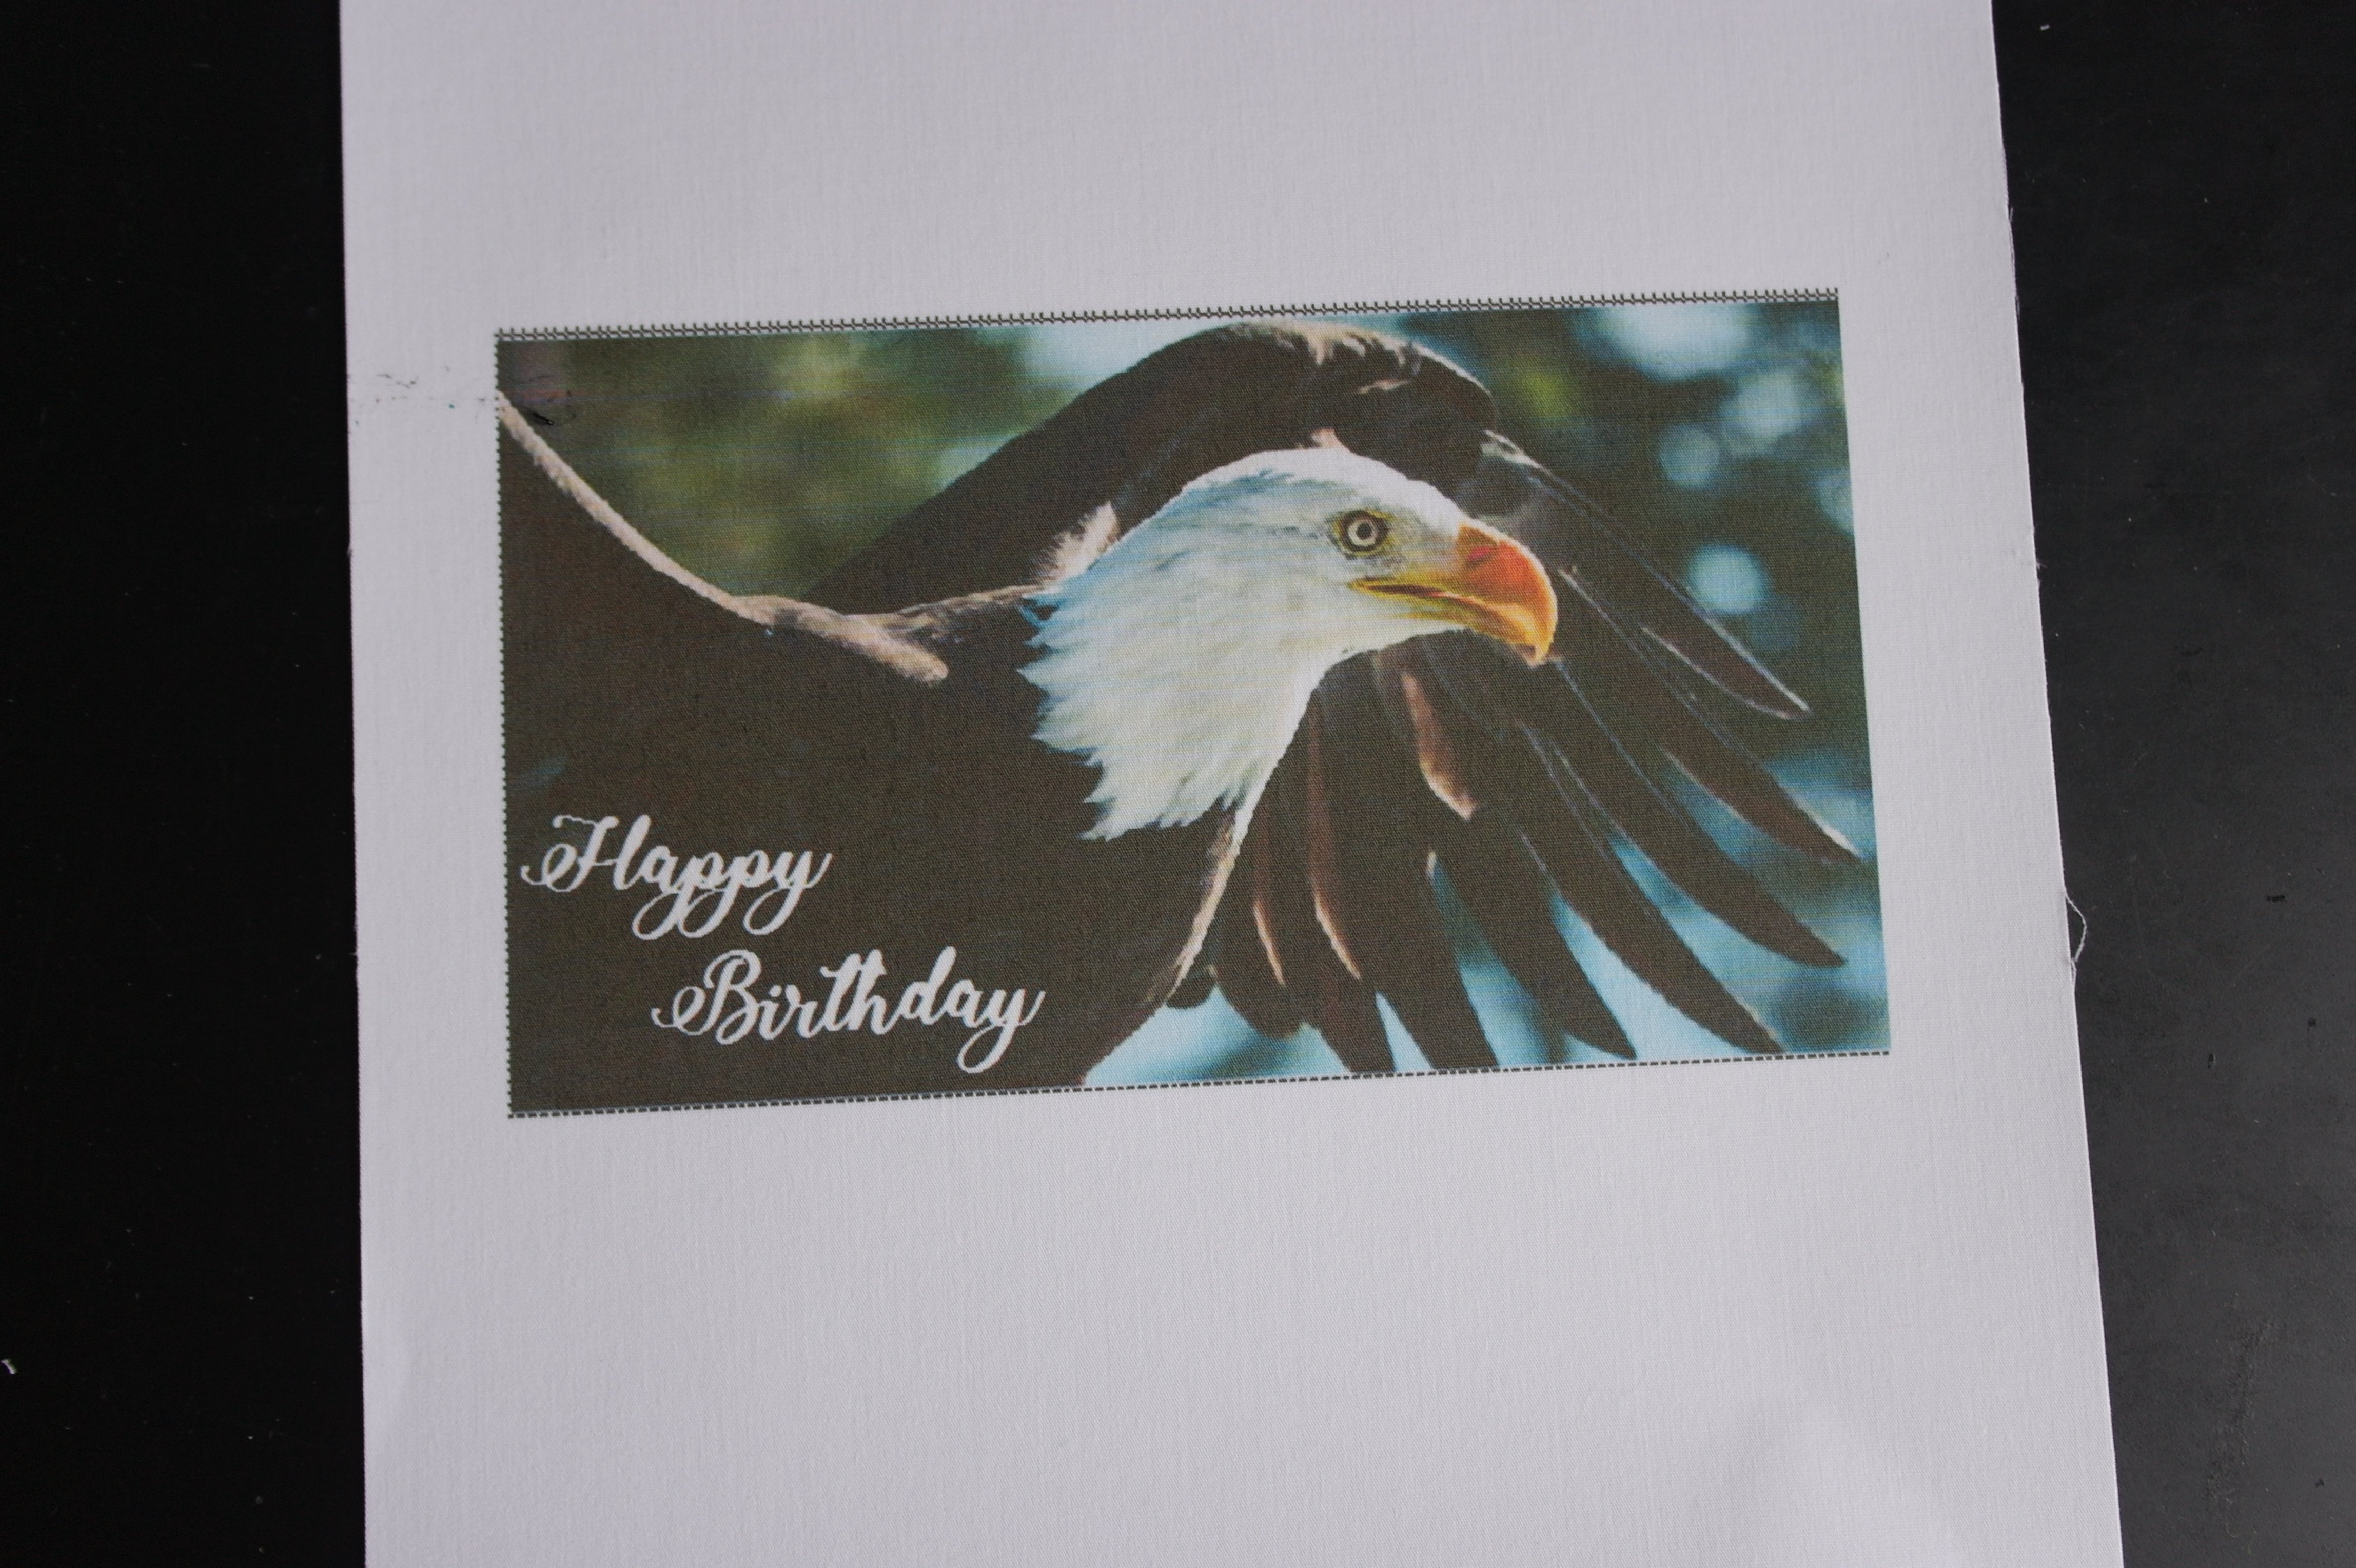
I am using PhotoFabric often, for transferring pictures onto fabric, via my inkjet printer. PhotoFabric is available in four different qualities: I am always using 100% Cotton Poplin, because it is similar to quilt fabric. The Poplin is a fabric attatched to paper, to be able to run it through the printer. After printing, I will let it dry for a while. Then remove the paper, wash the fabric in cold water until there is no bleeding anymore,
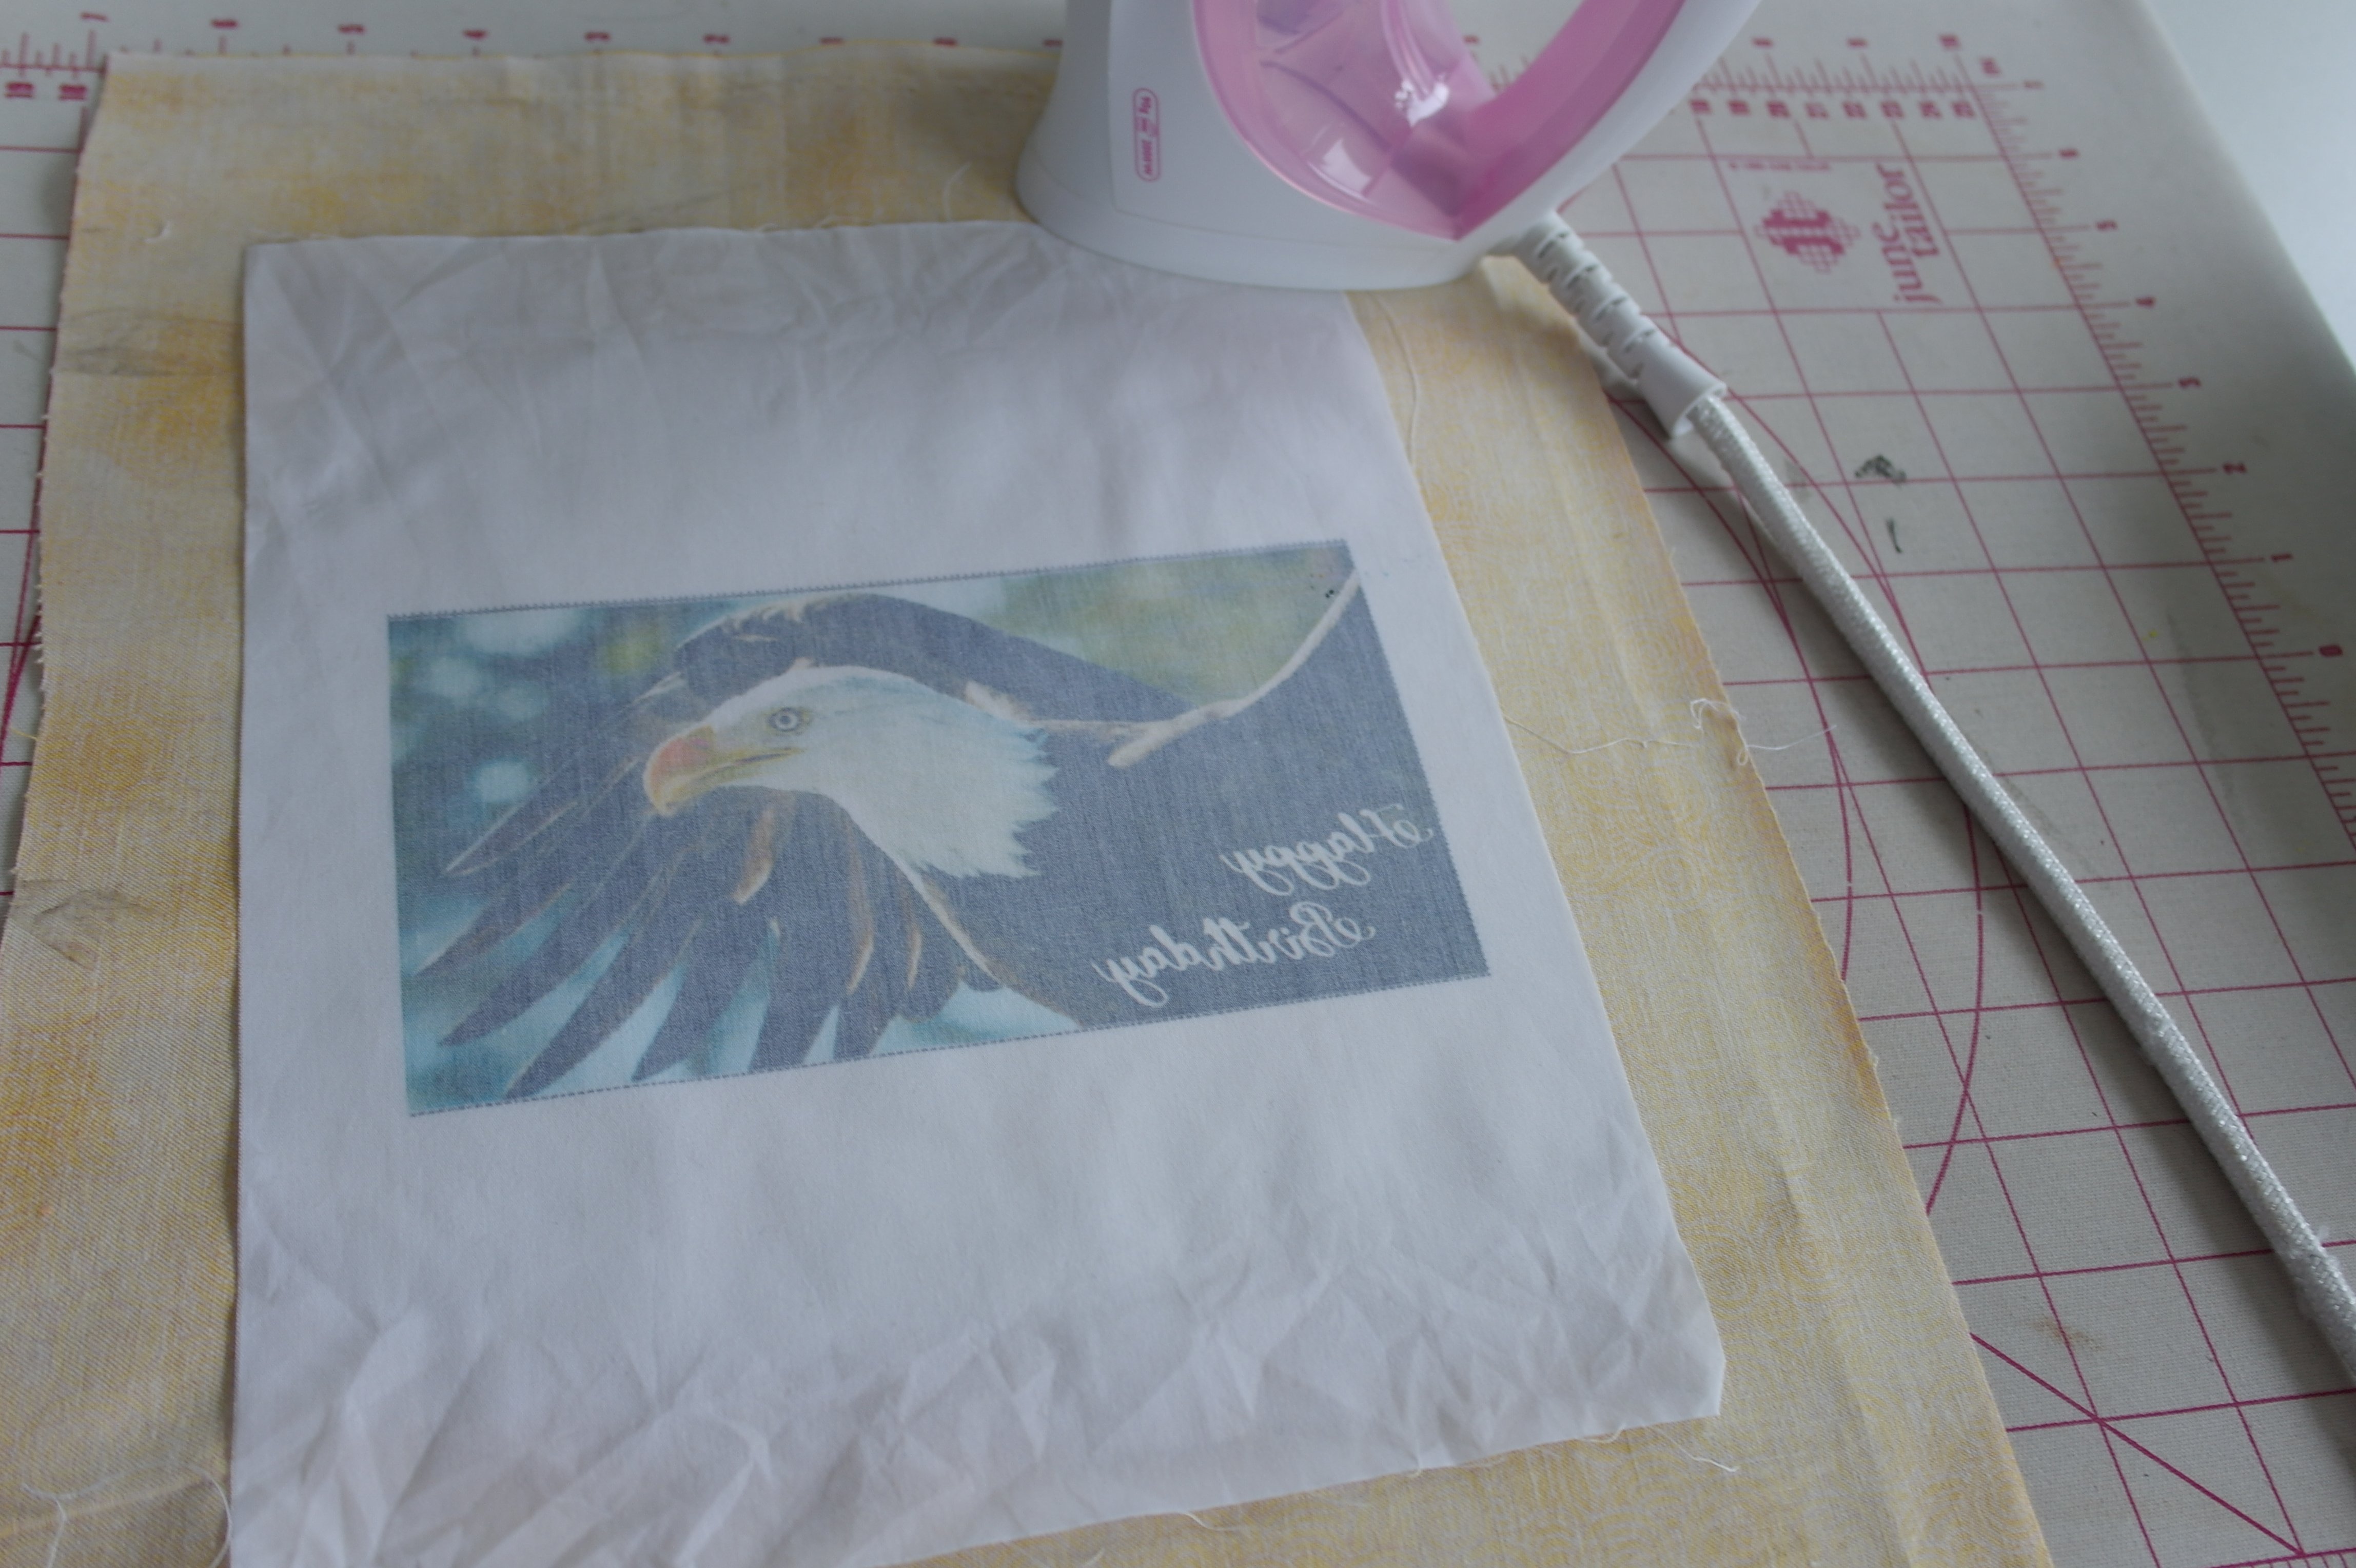
and iron it dry (placing a cloth between ironing mat and picture/poplin, because you never know if the ink still runs a bit..)
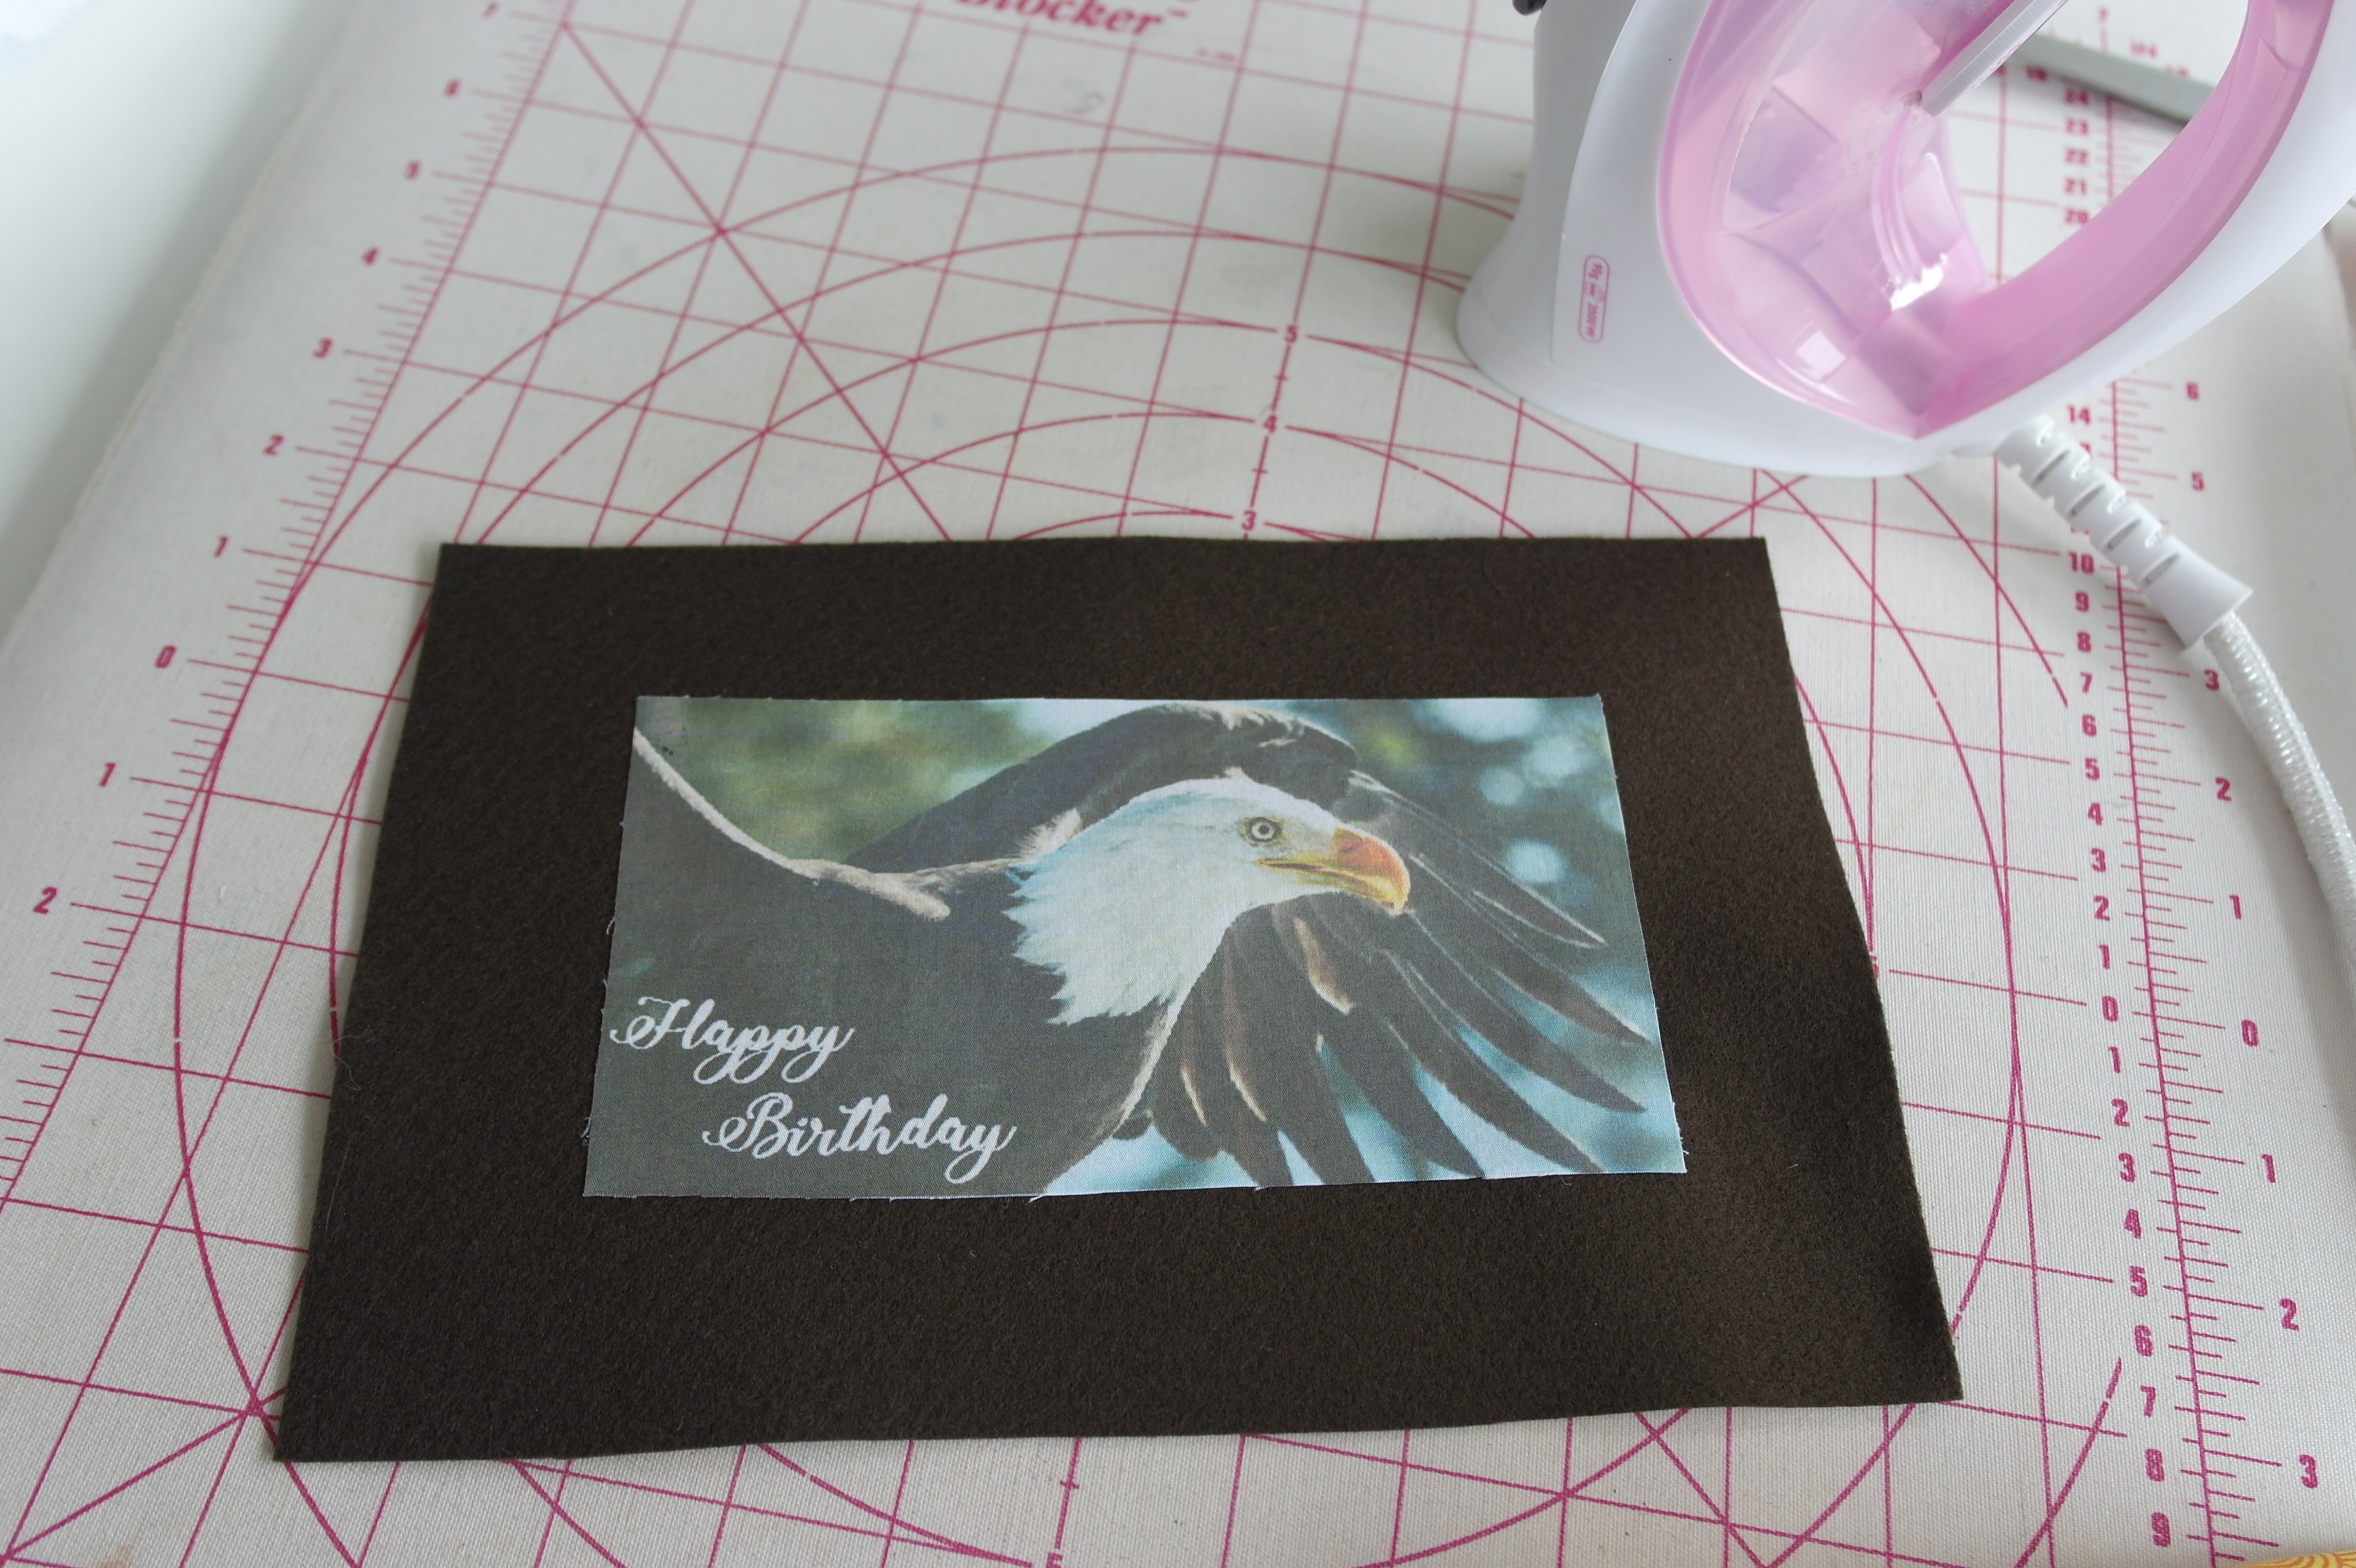
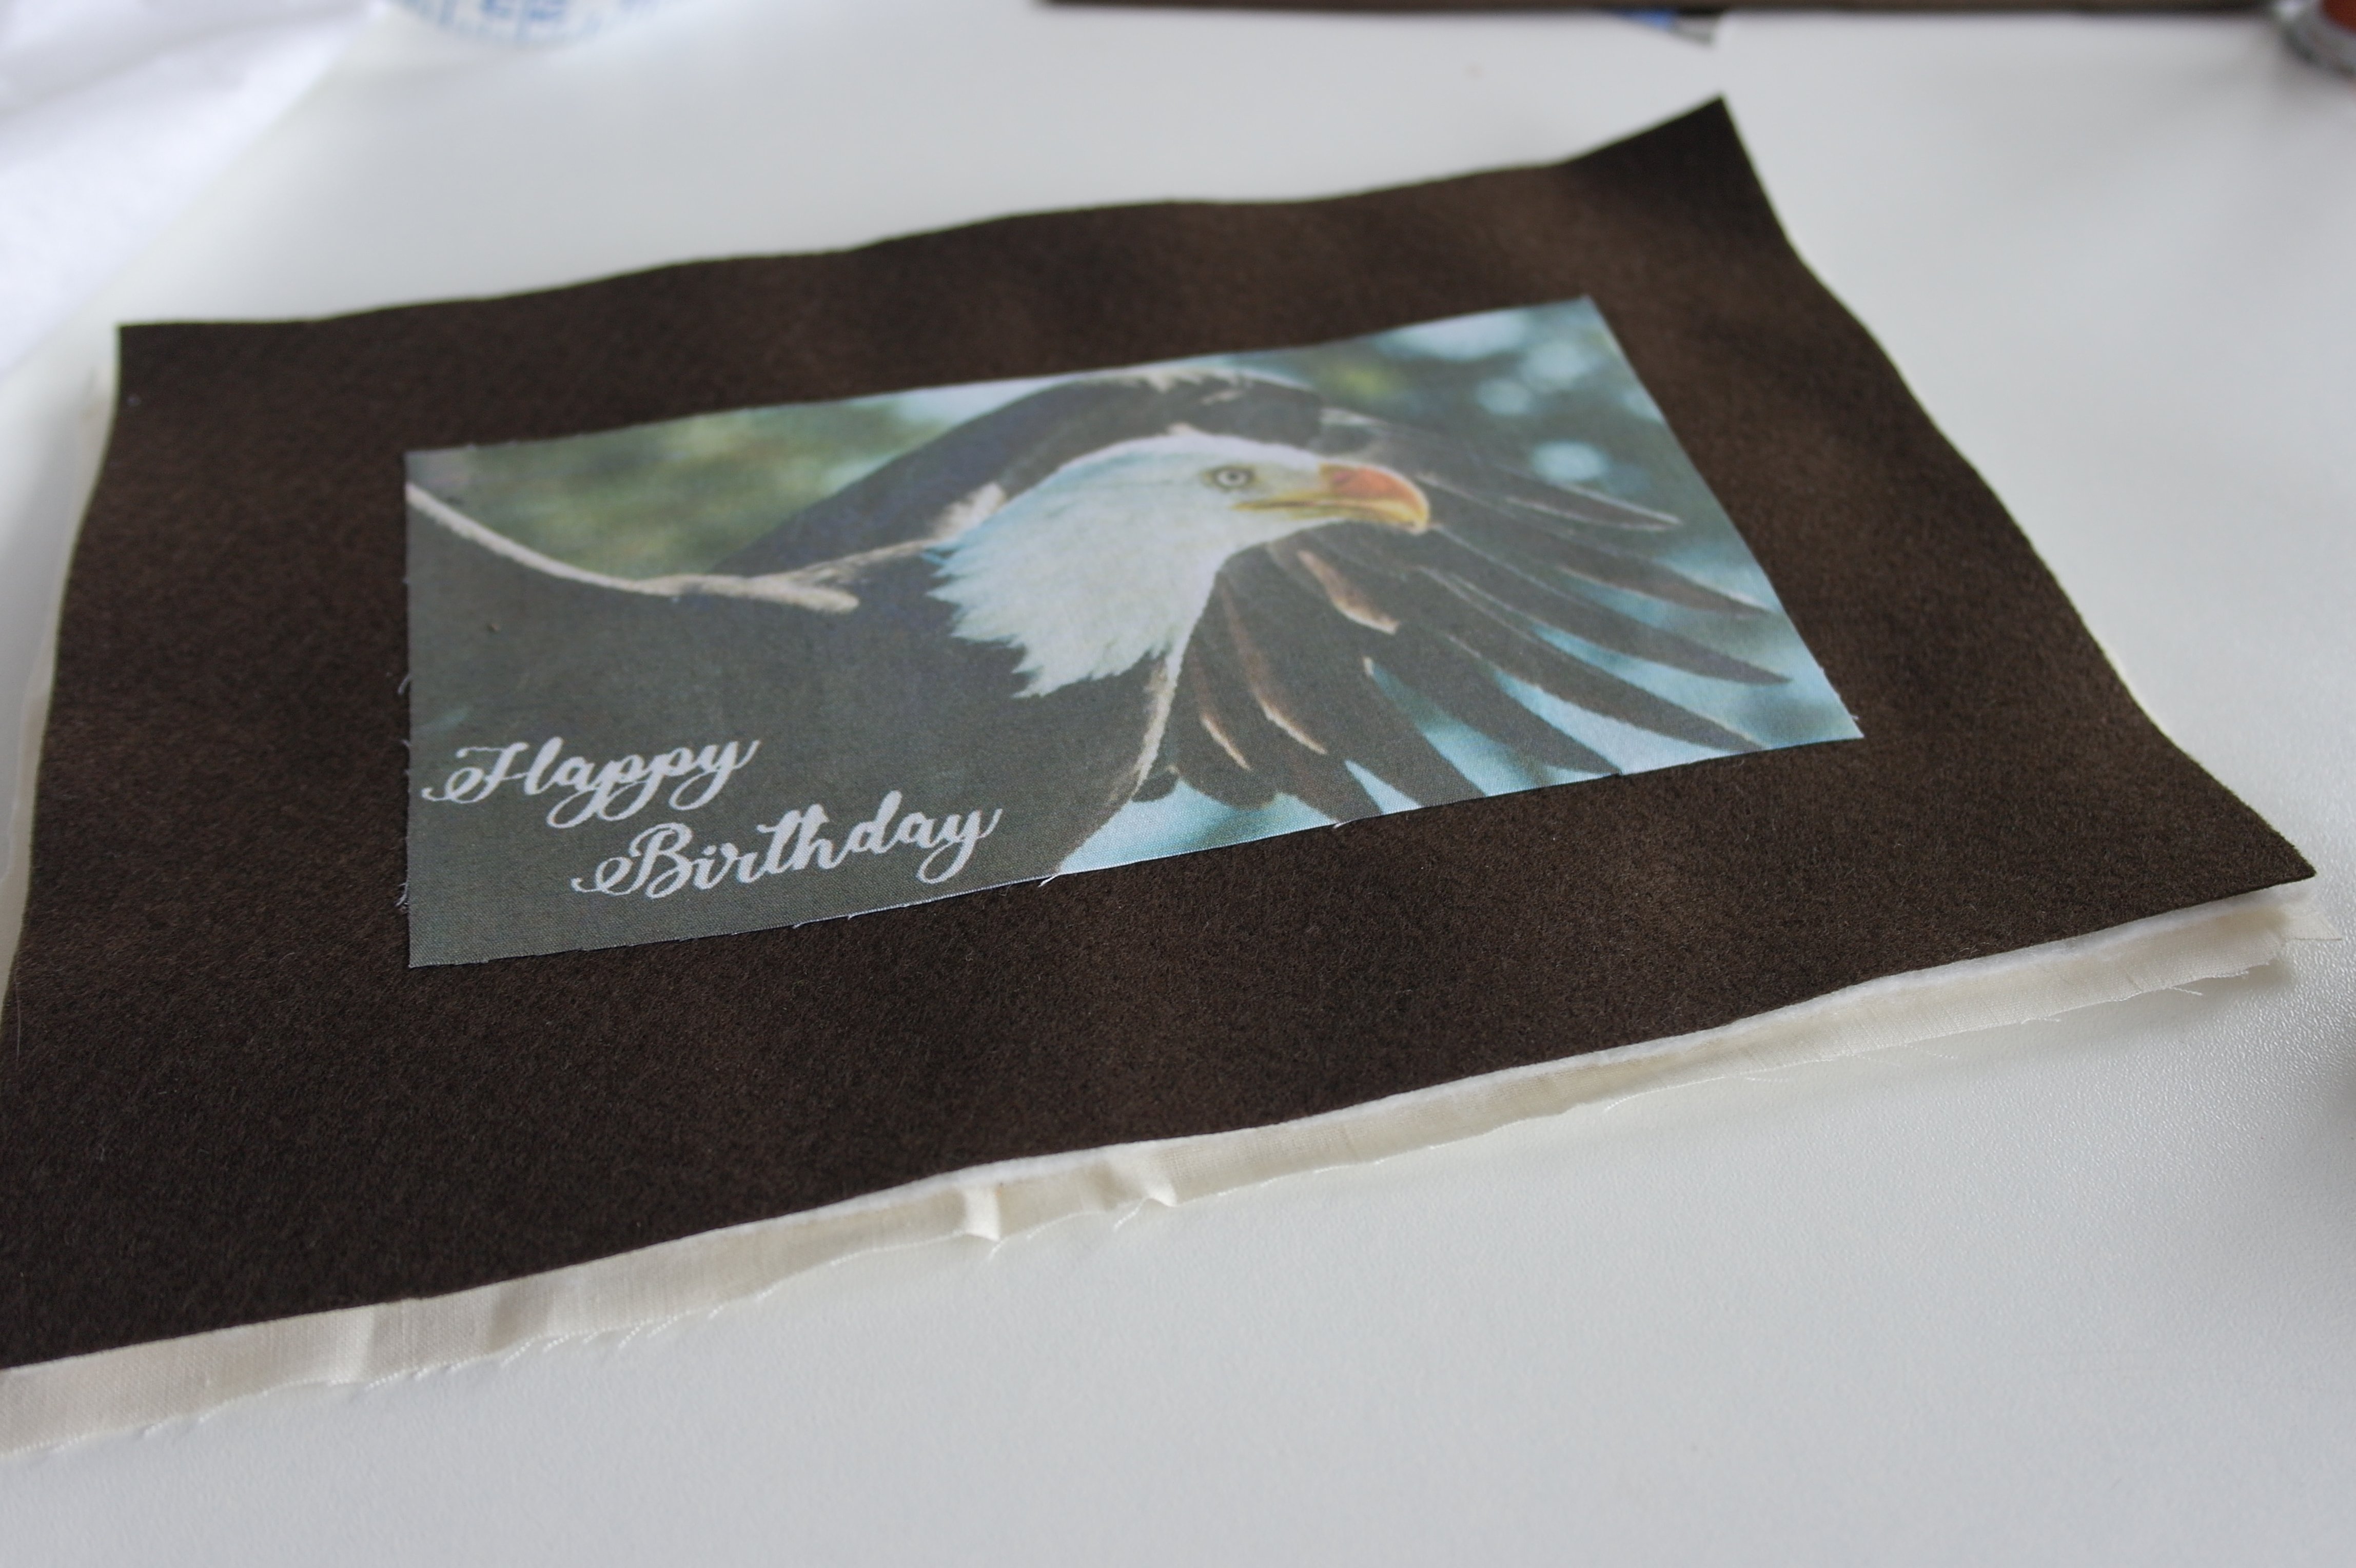
I will cut the picture along the sides, iron on Heat’n Bond Lite at the back, and iron this onto dark brown embroidery felt which is aprox. 3 to 4 cm larger than the picture – this is necessary because of shrinkage during quilting. I will quilt and make decorative stitches on my BERNINA 770QE. I will use the BSR, for free motion quilting, to give the bird some details.
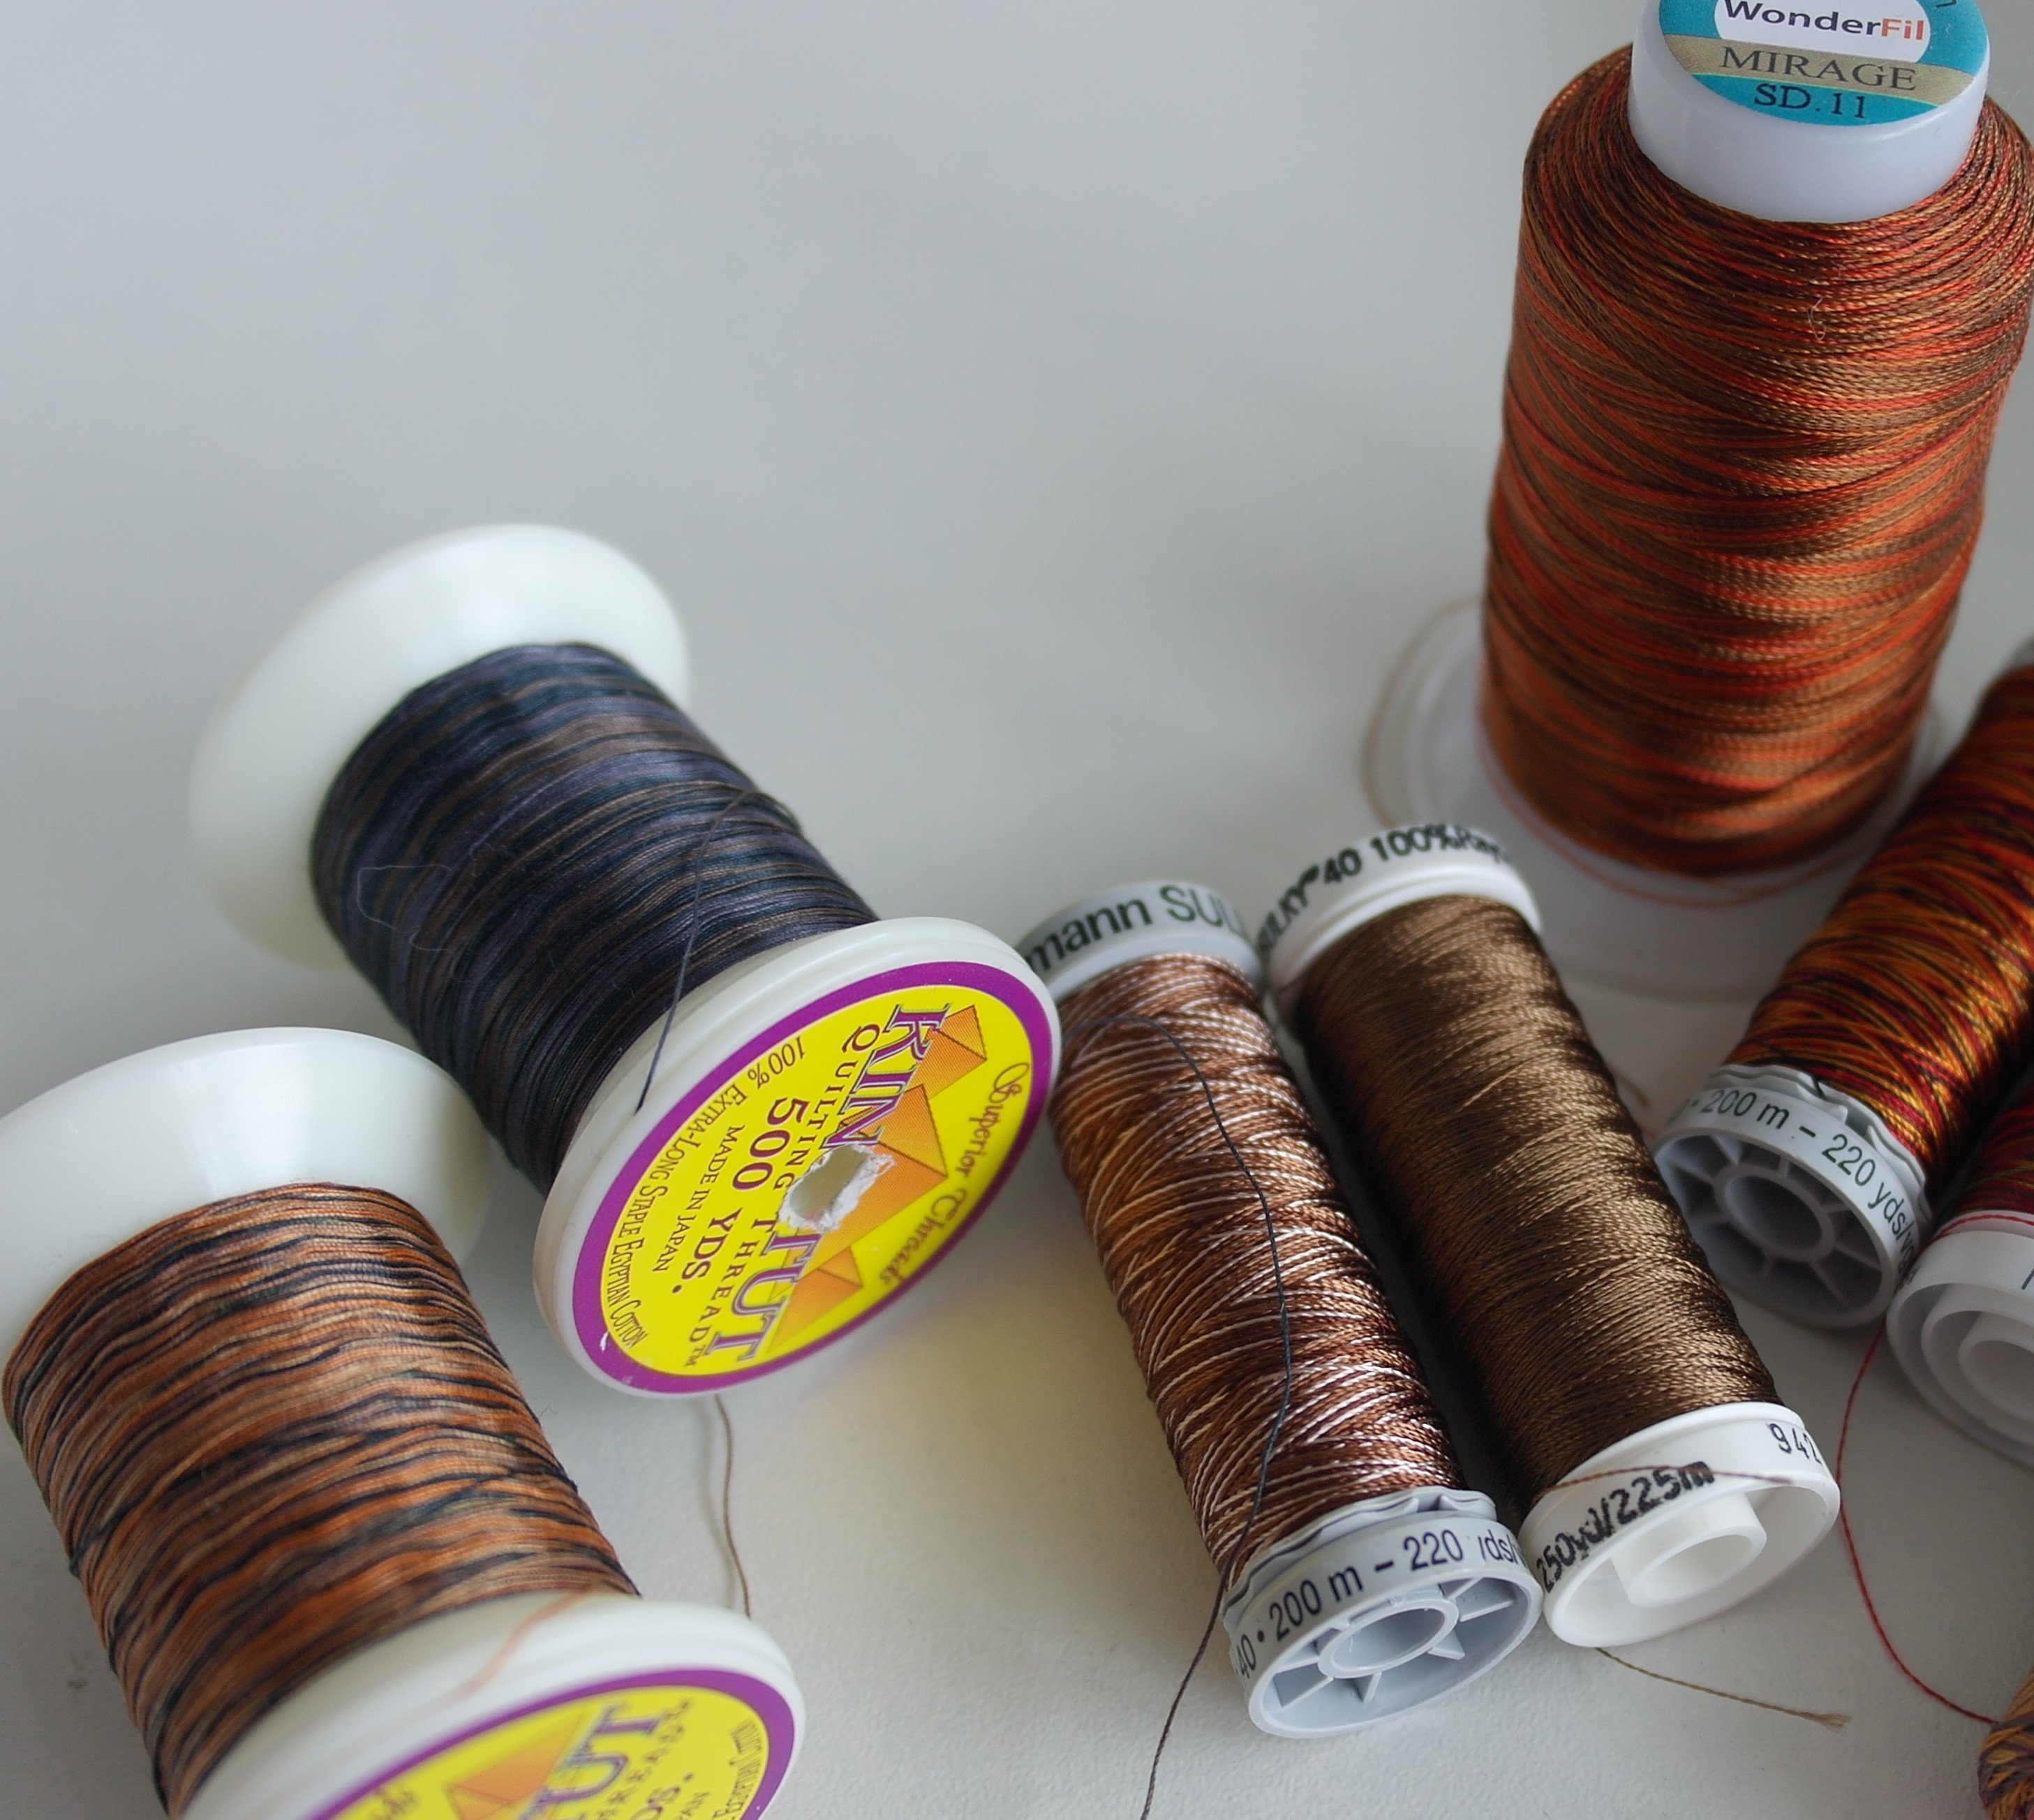
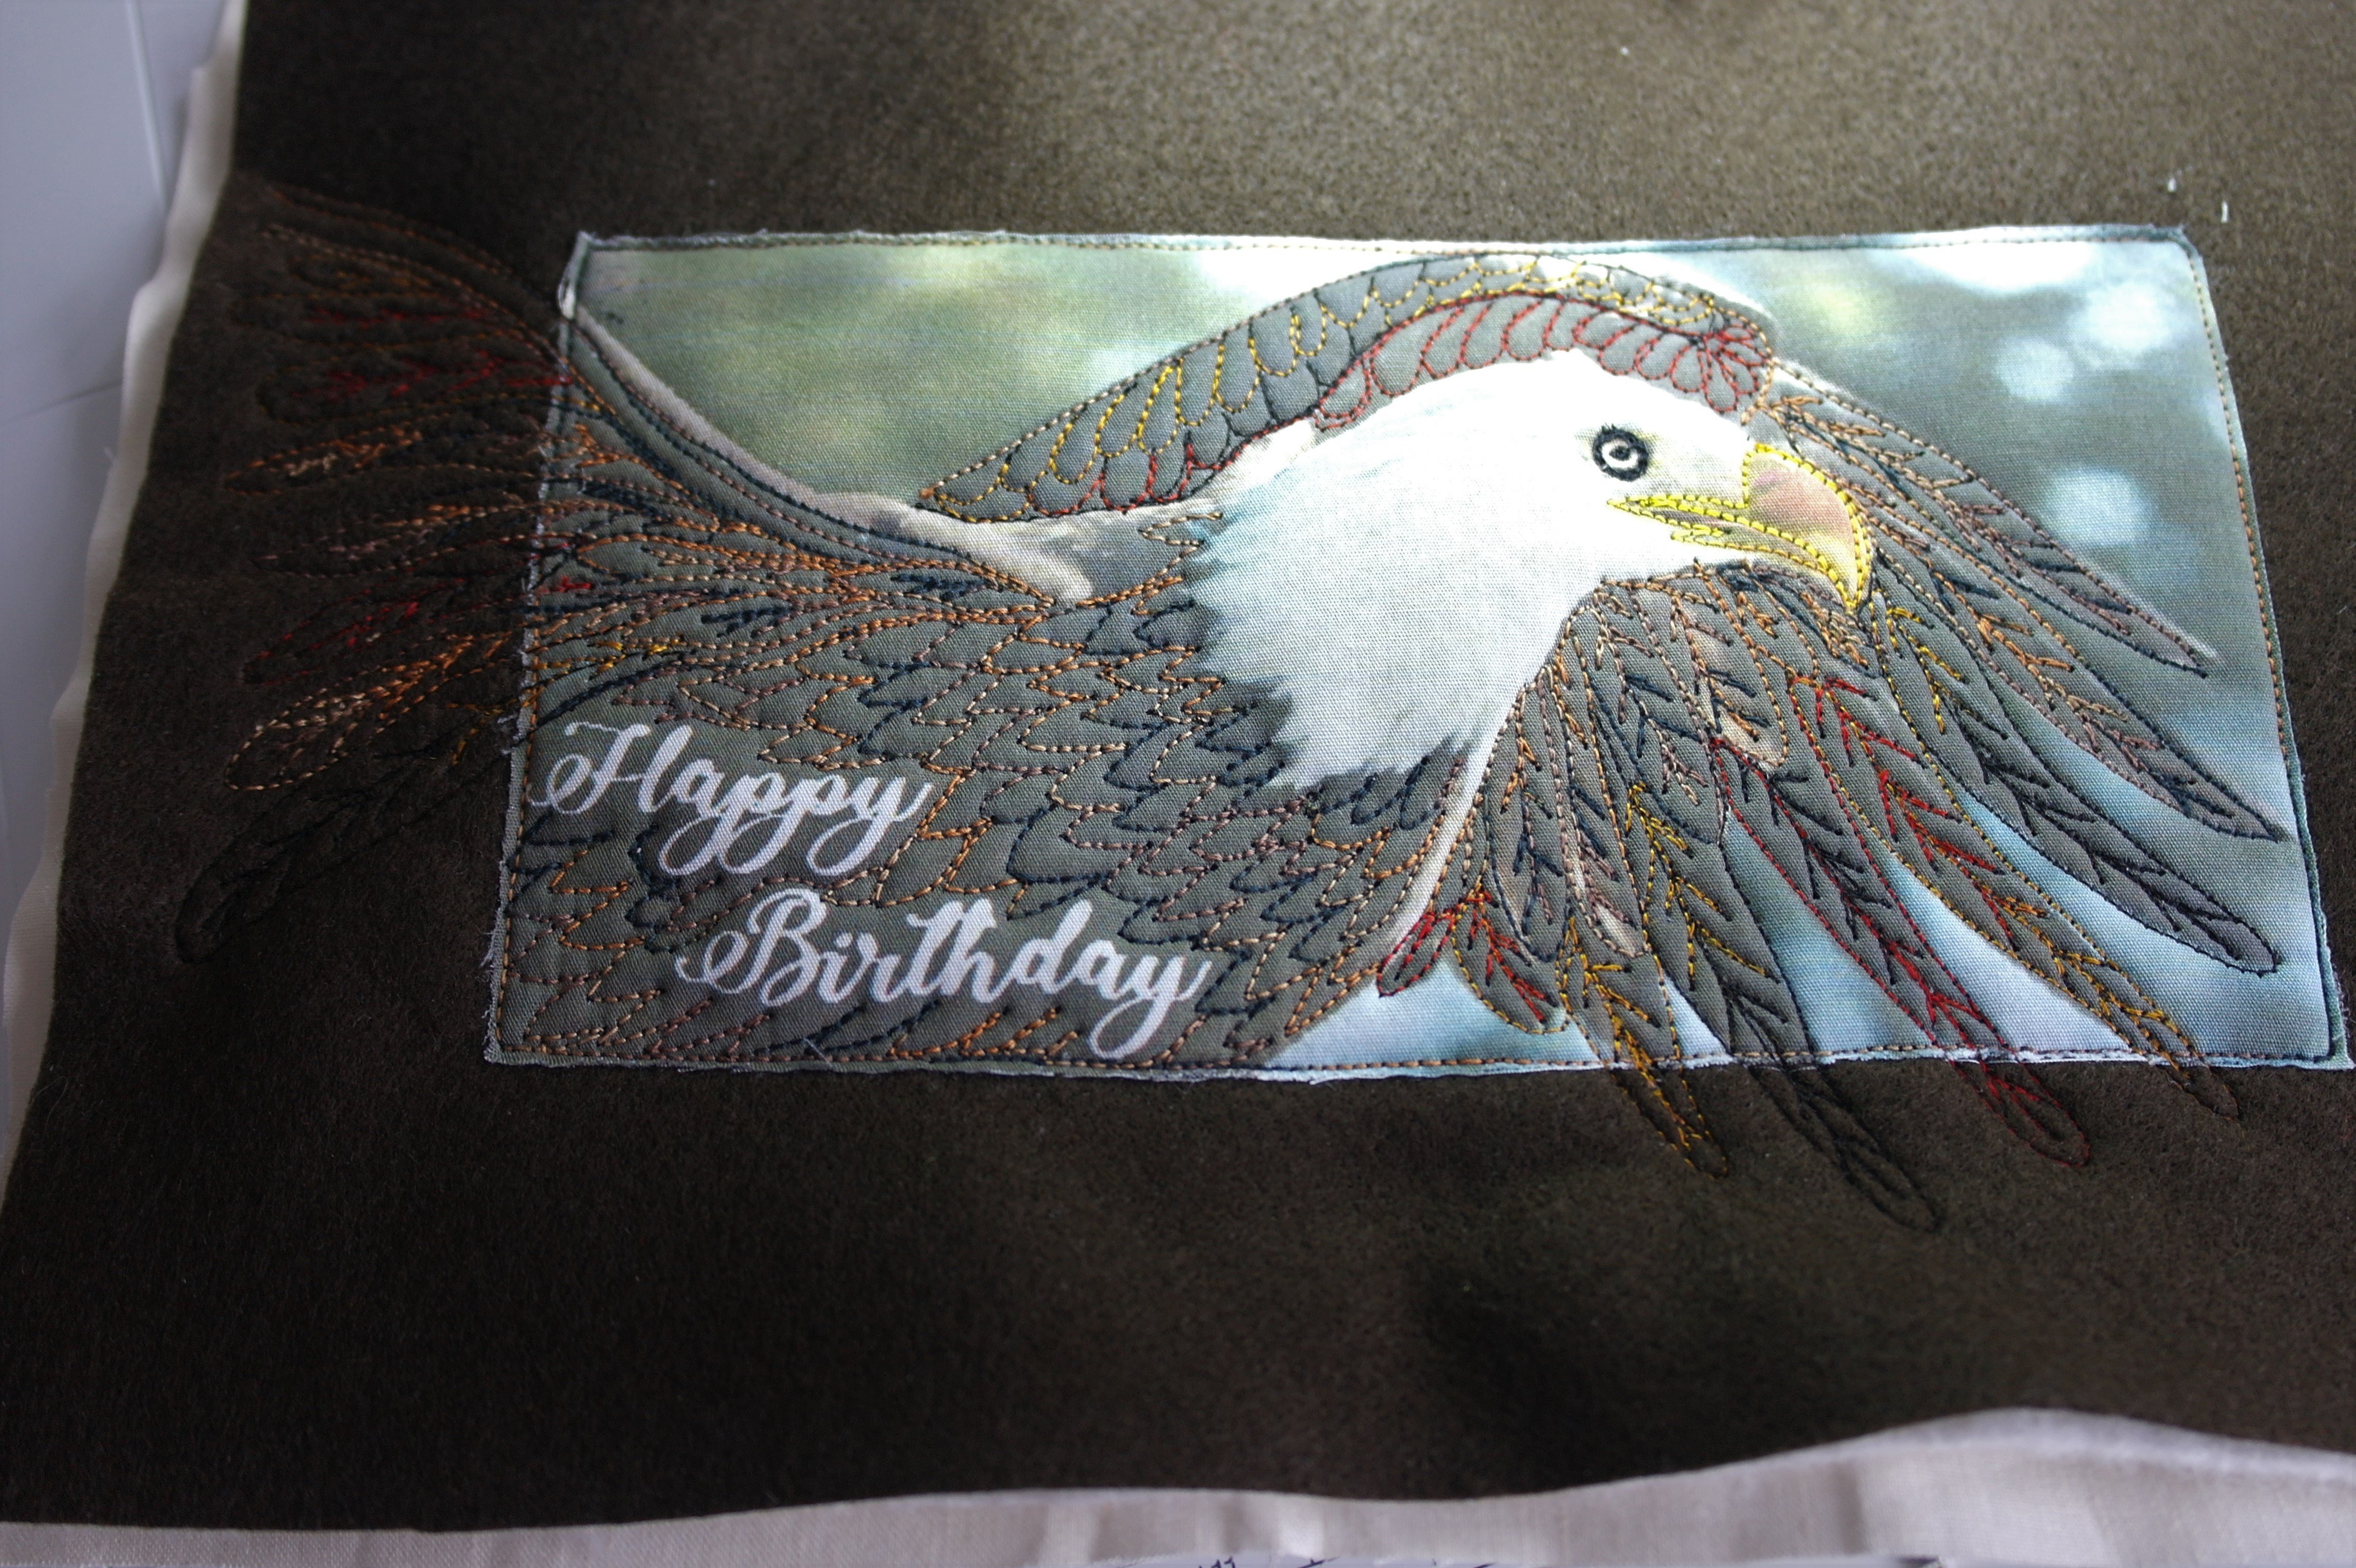
There are many wonderful machine threads to work with: I love the variegated threads in warm colors, from Sulky Rayon 40Wt, Tutti/Wonderfil, Mirage/Wonderfil and King Tut/Superior Threads. You can alternate them, it doesn’t matter if you use cotton, polyester or rayon – it is more about colors and effect. Bobbin thread will be a black DecoBob/Wonderfil.
Printing via PhotoFabric always gives a matte image, if you compare it to the original picture. This is because of the material: you can enhance everything by working with bright or shiny thread, using the picture as a background image.
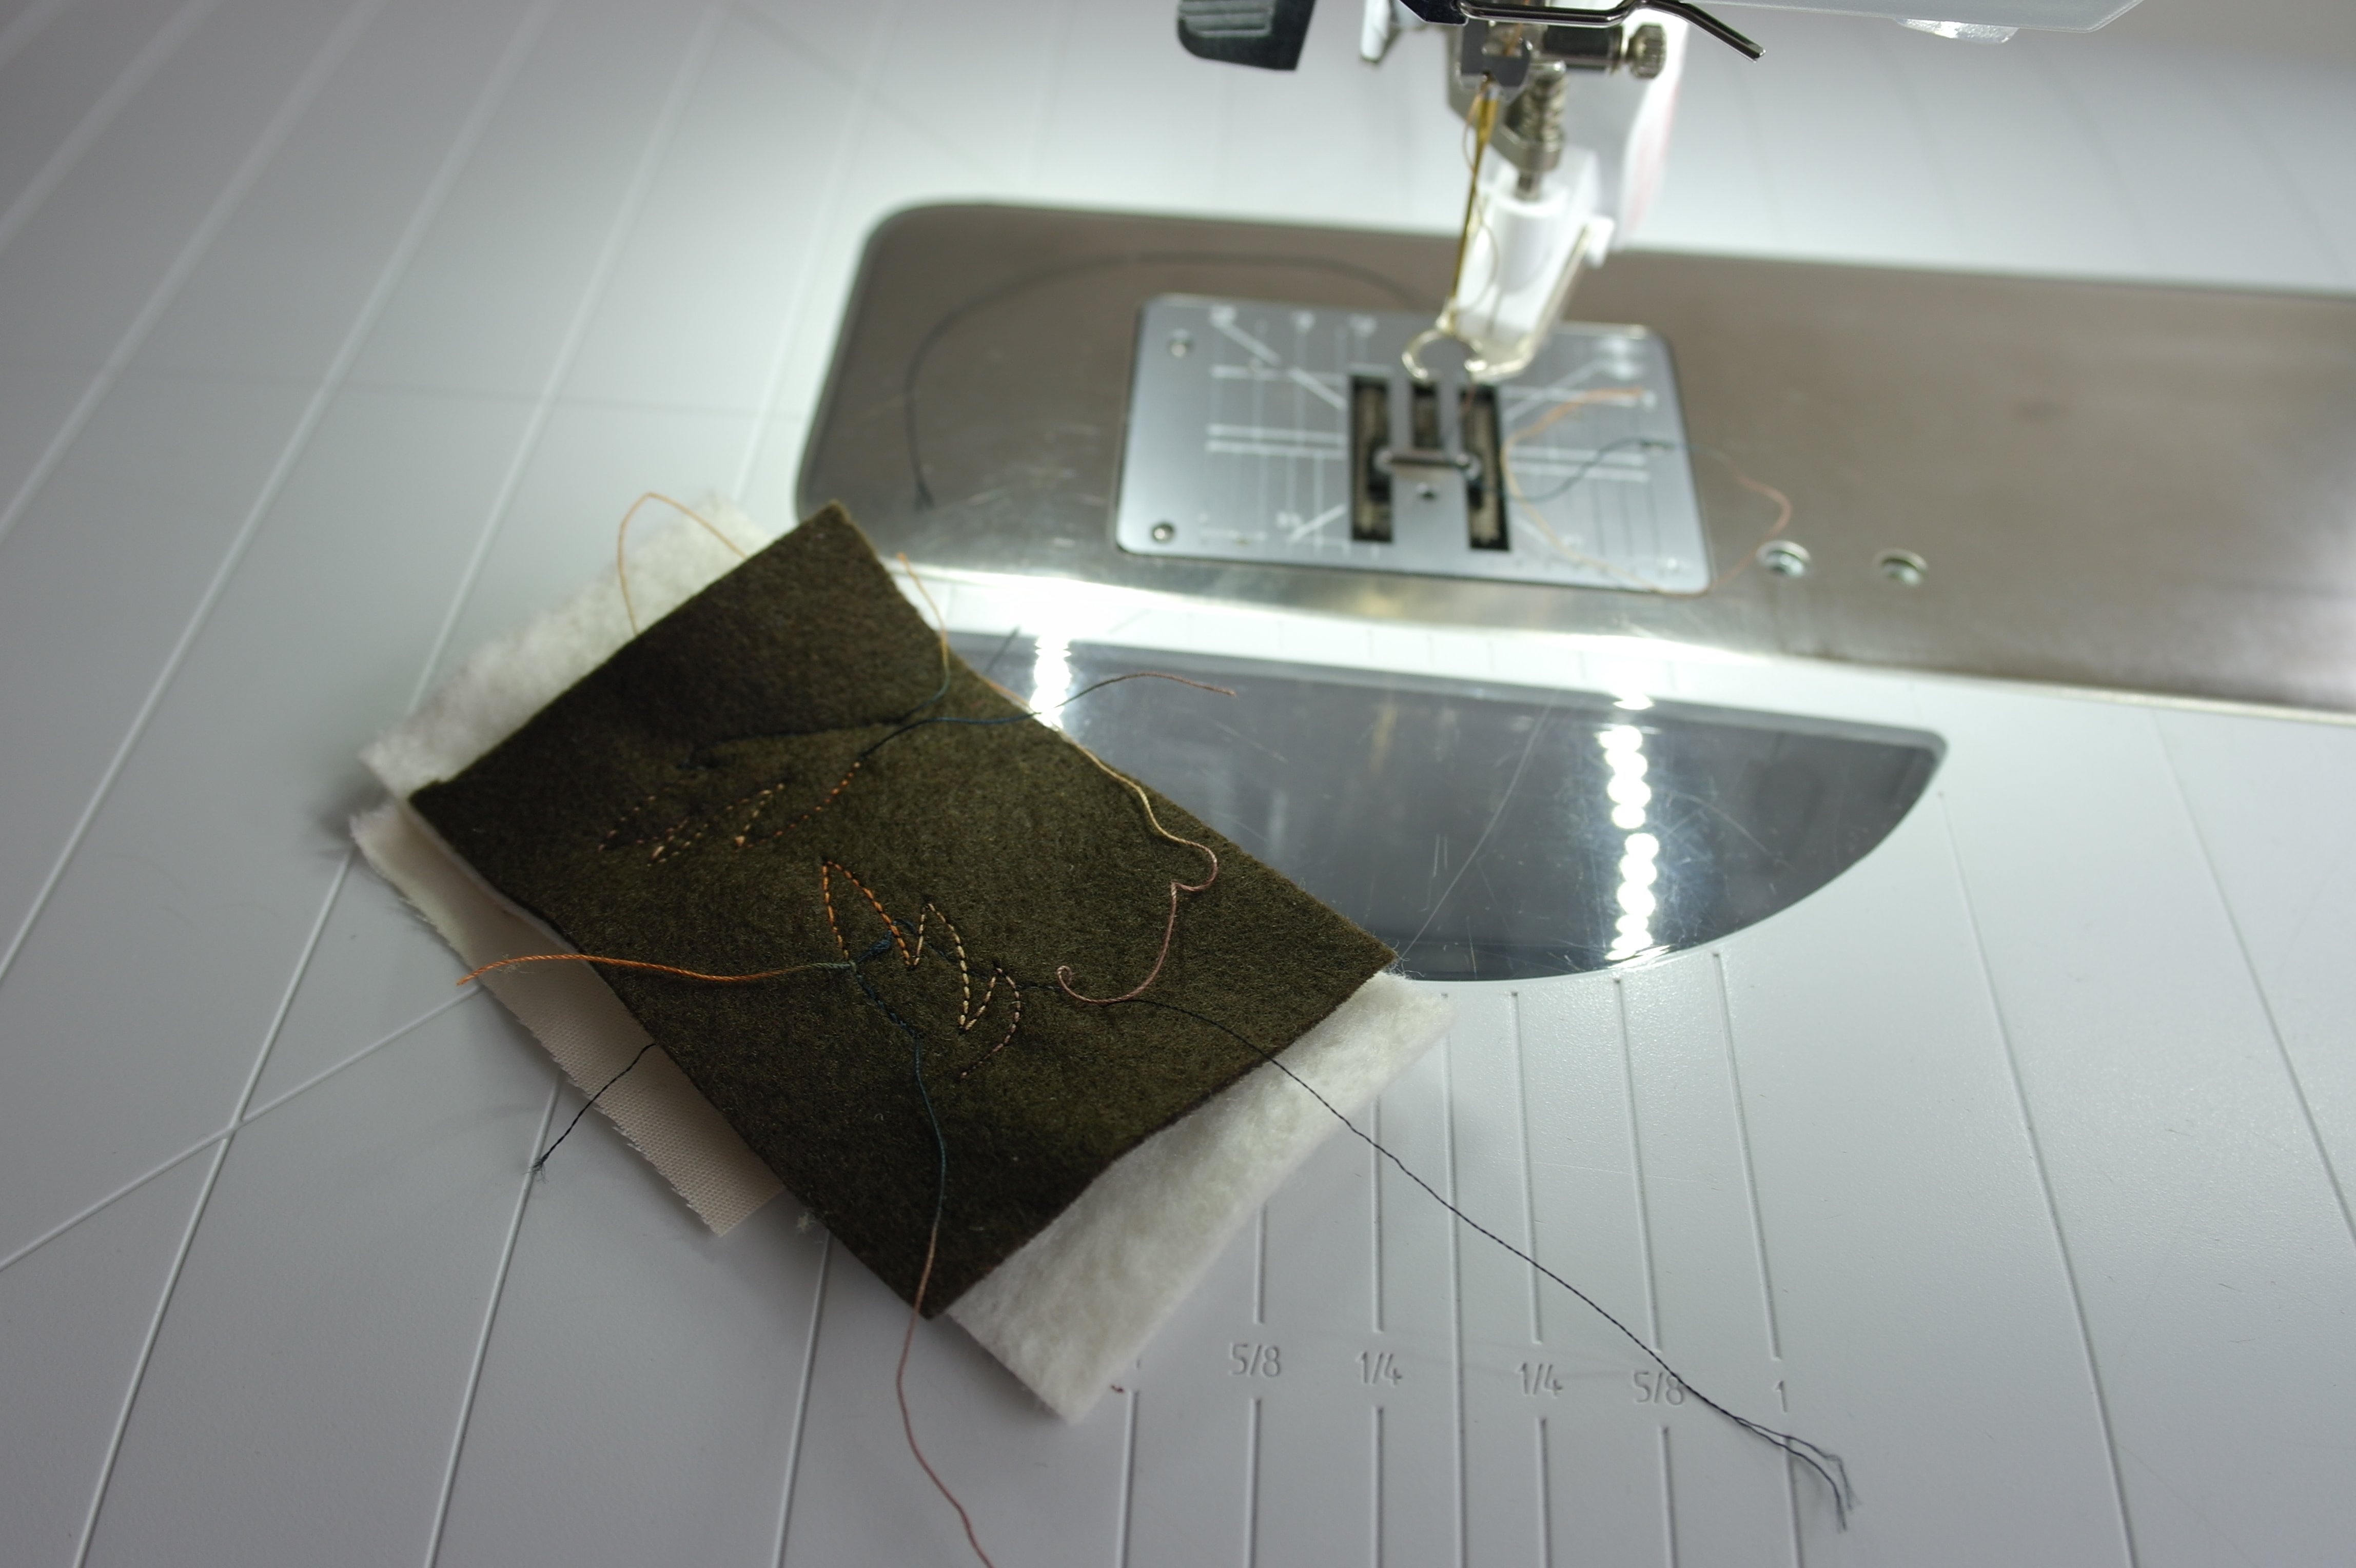
Making a sample for trying stitches is always advisable: I found out that working on just the embroidery felt, the stitches were compressed. That is why I have made a sandwich with 100% bamboo batting and off-white backing, which worked fine – even though this will be some kind of post card, it is made as a quilt.
The batting is very thin, and doesn’t shrink a lot. The off-white backing is necessary to get the right tension for the stitches. If you don’t use the off-white backing and work with just the batting on the bottom, the stitches will dissapear between the fibres, which will make them less tight. Also the fibres can work themselves in your bobbin case…you really don’t want that.
First I will secure the edges of the image, by making small stitches with my BSR. I will cover this up later with decorative stitches.
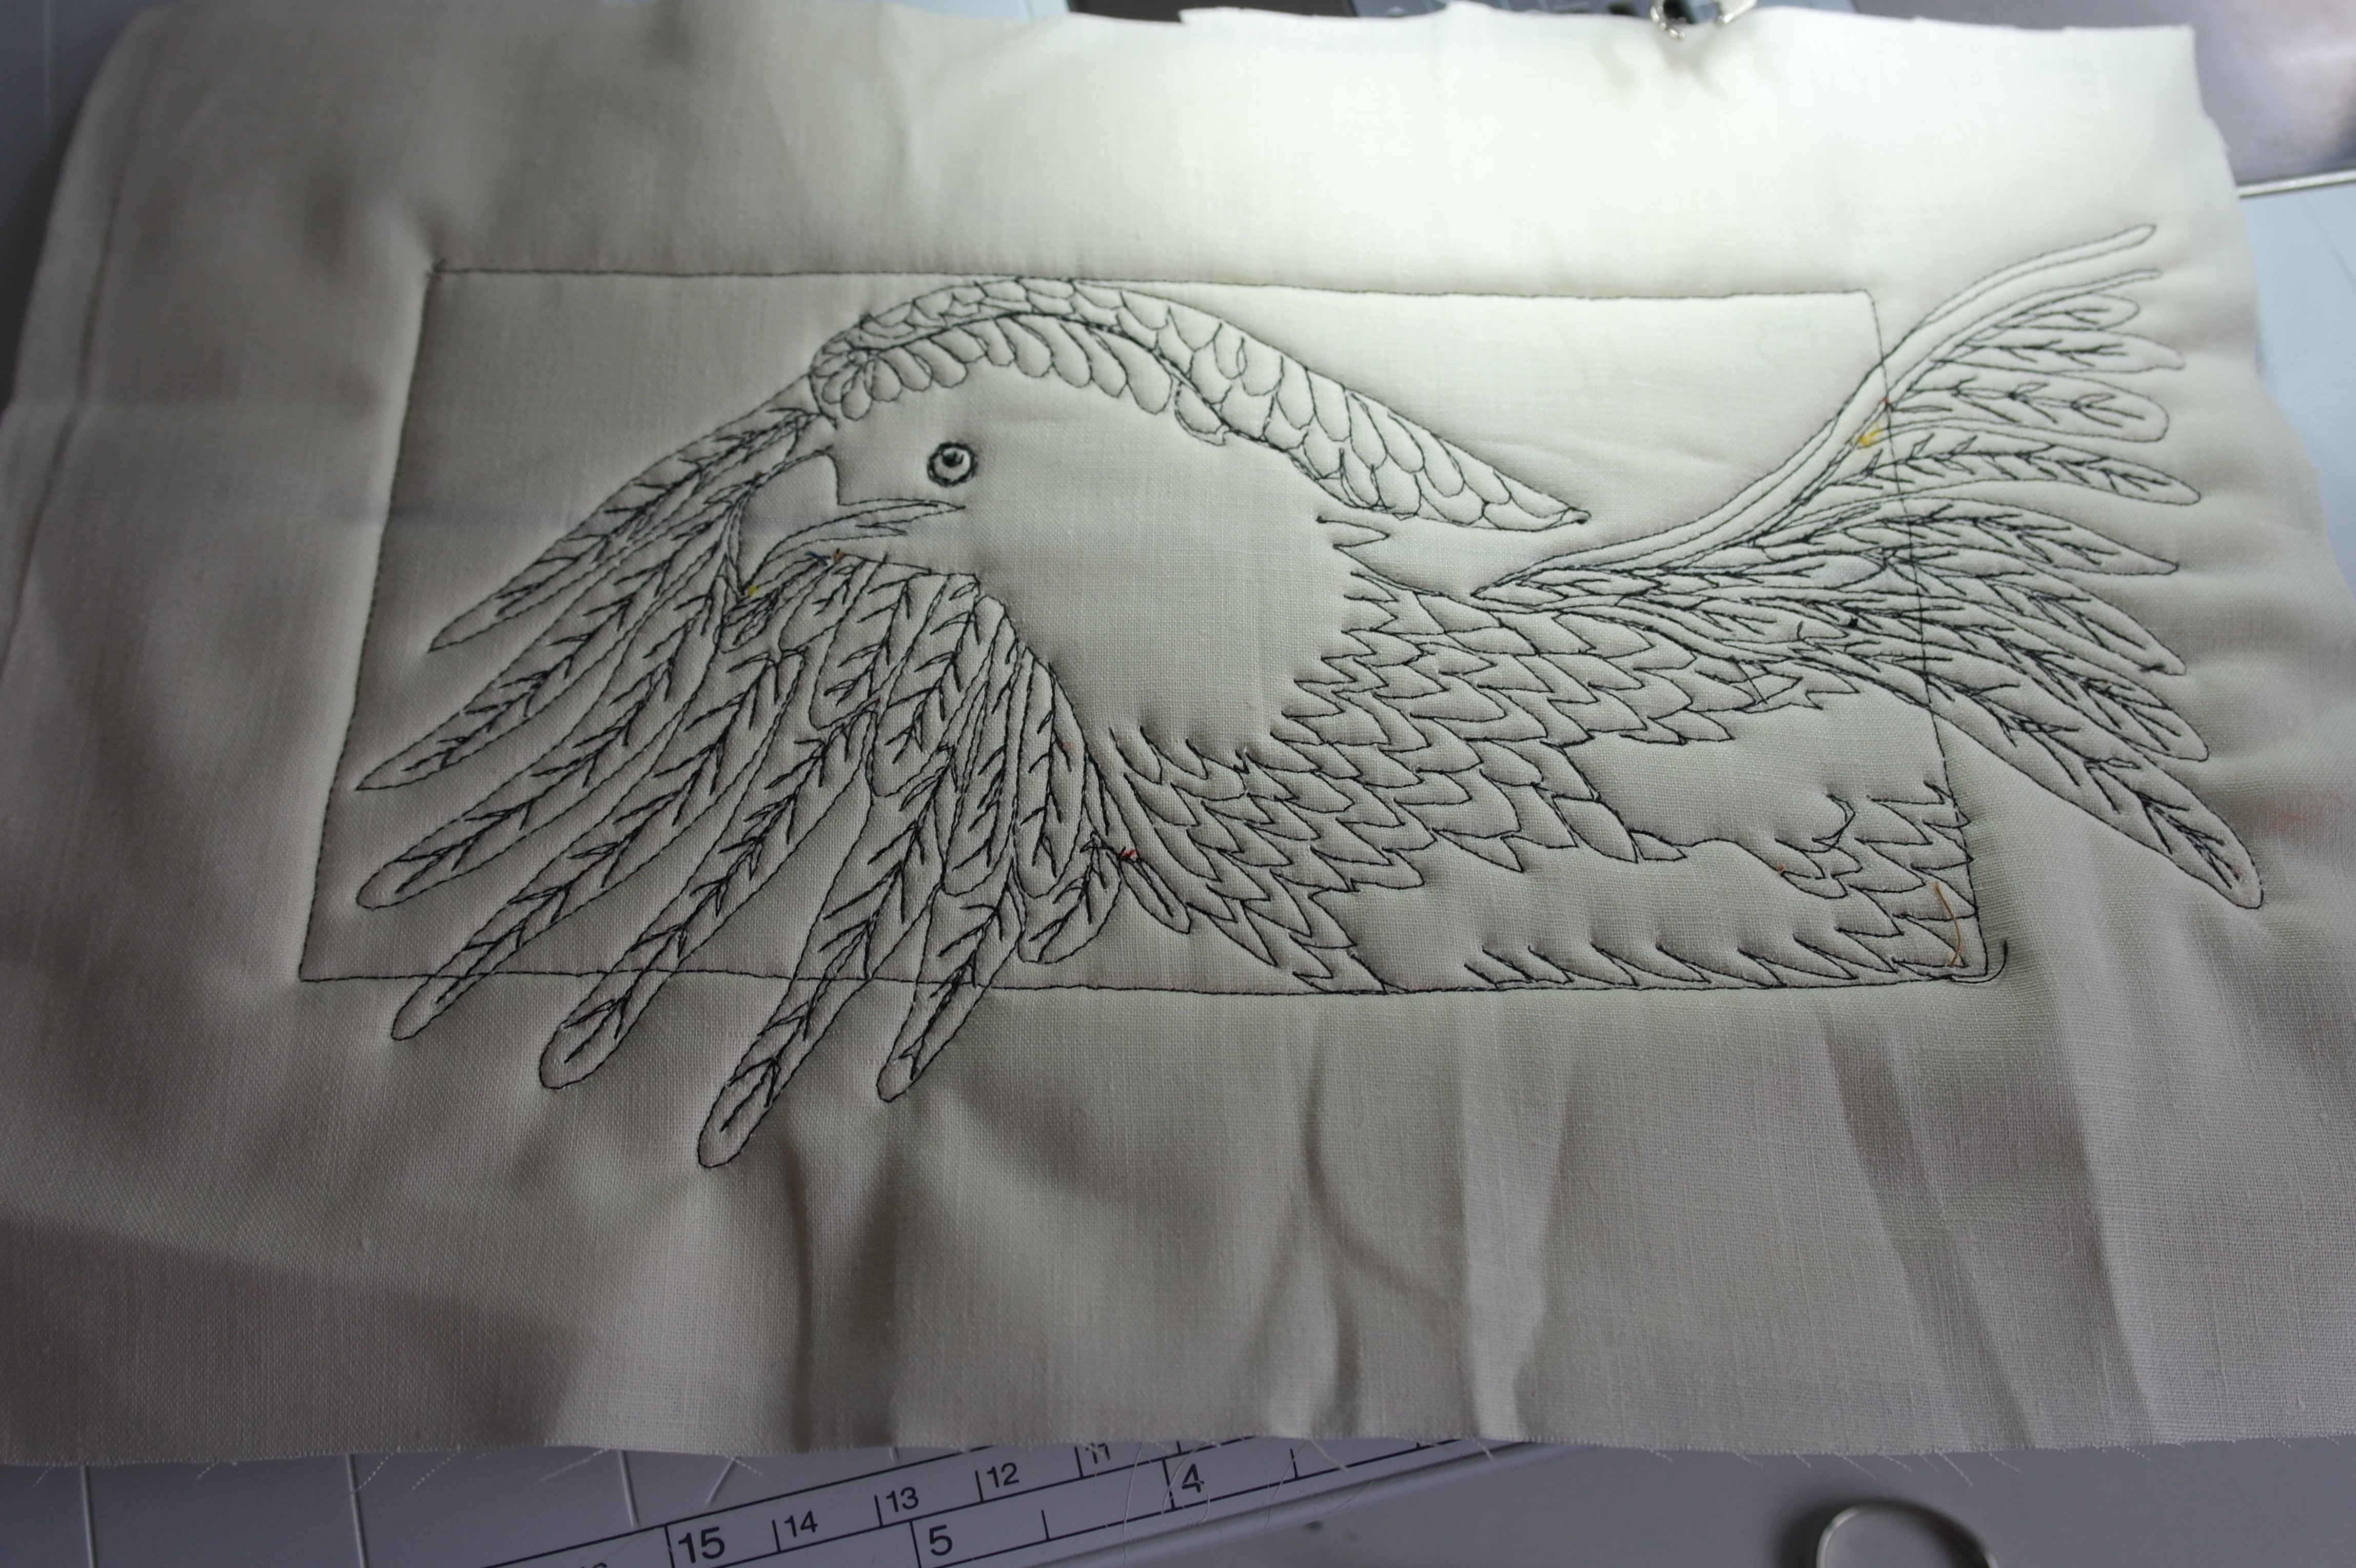
Making feathers while following the image is like drawing: showing you the inside of the card gives you a good look. I had a closer look at the original image – which I have enlarged in Corel PaintShopPro: that shows me more details, so I know in which direction the feathers will have to go. I have also quilted around and inside the eye with black thread, and enhanced the beak with yellow thread.
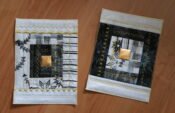
And this is how the front looks at this point.
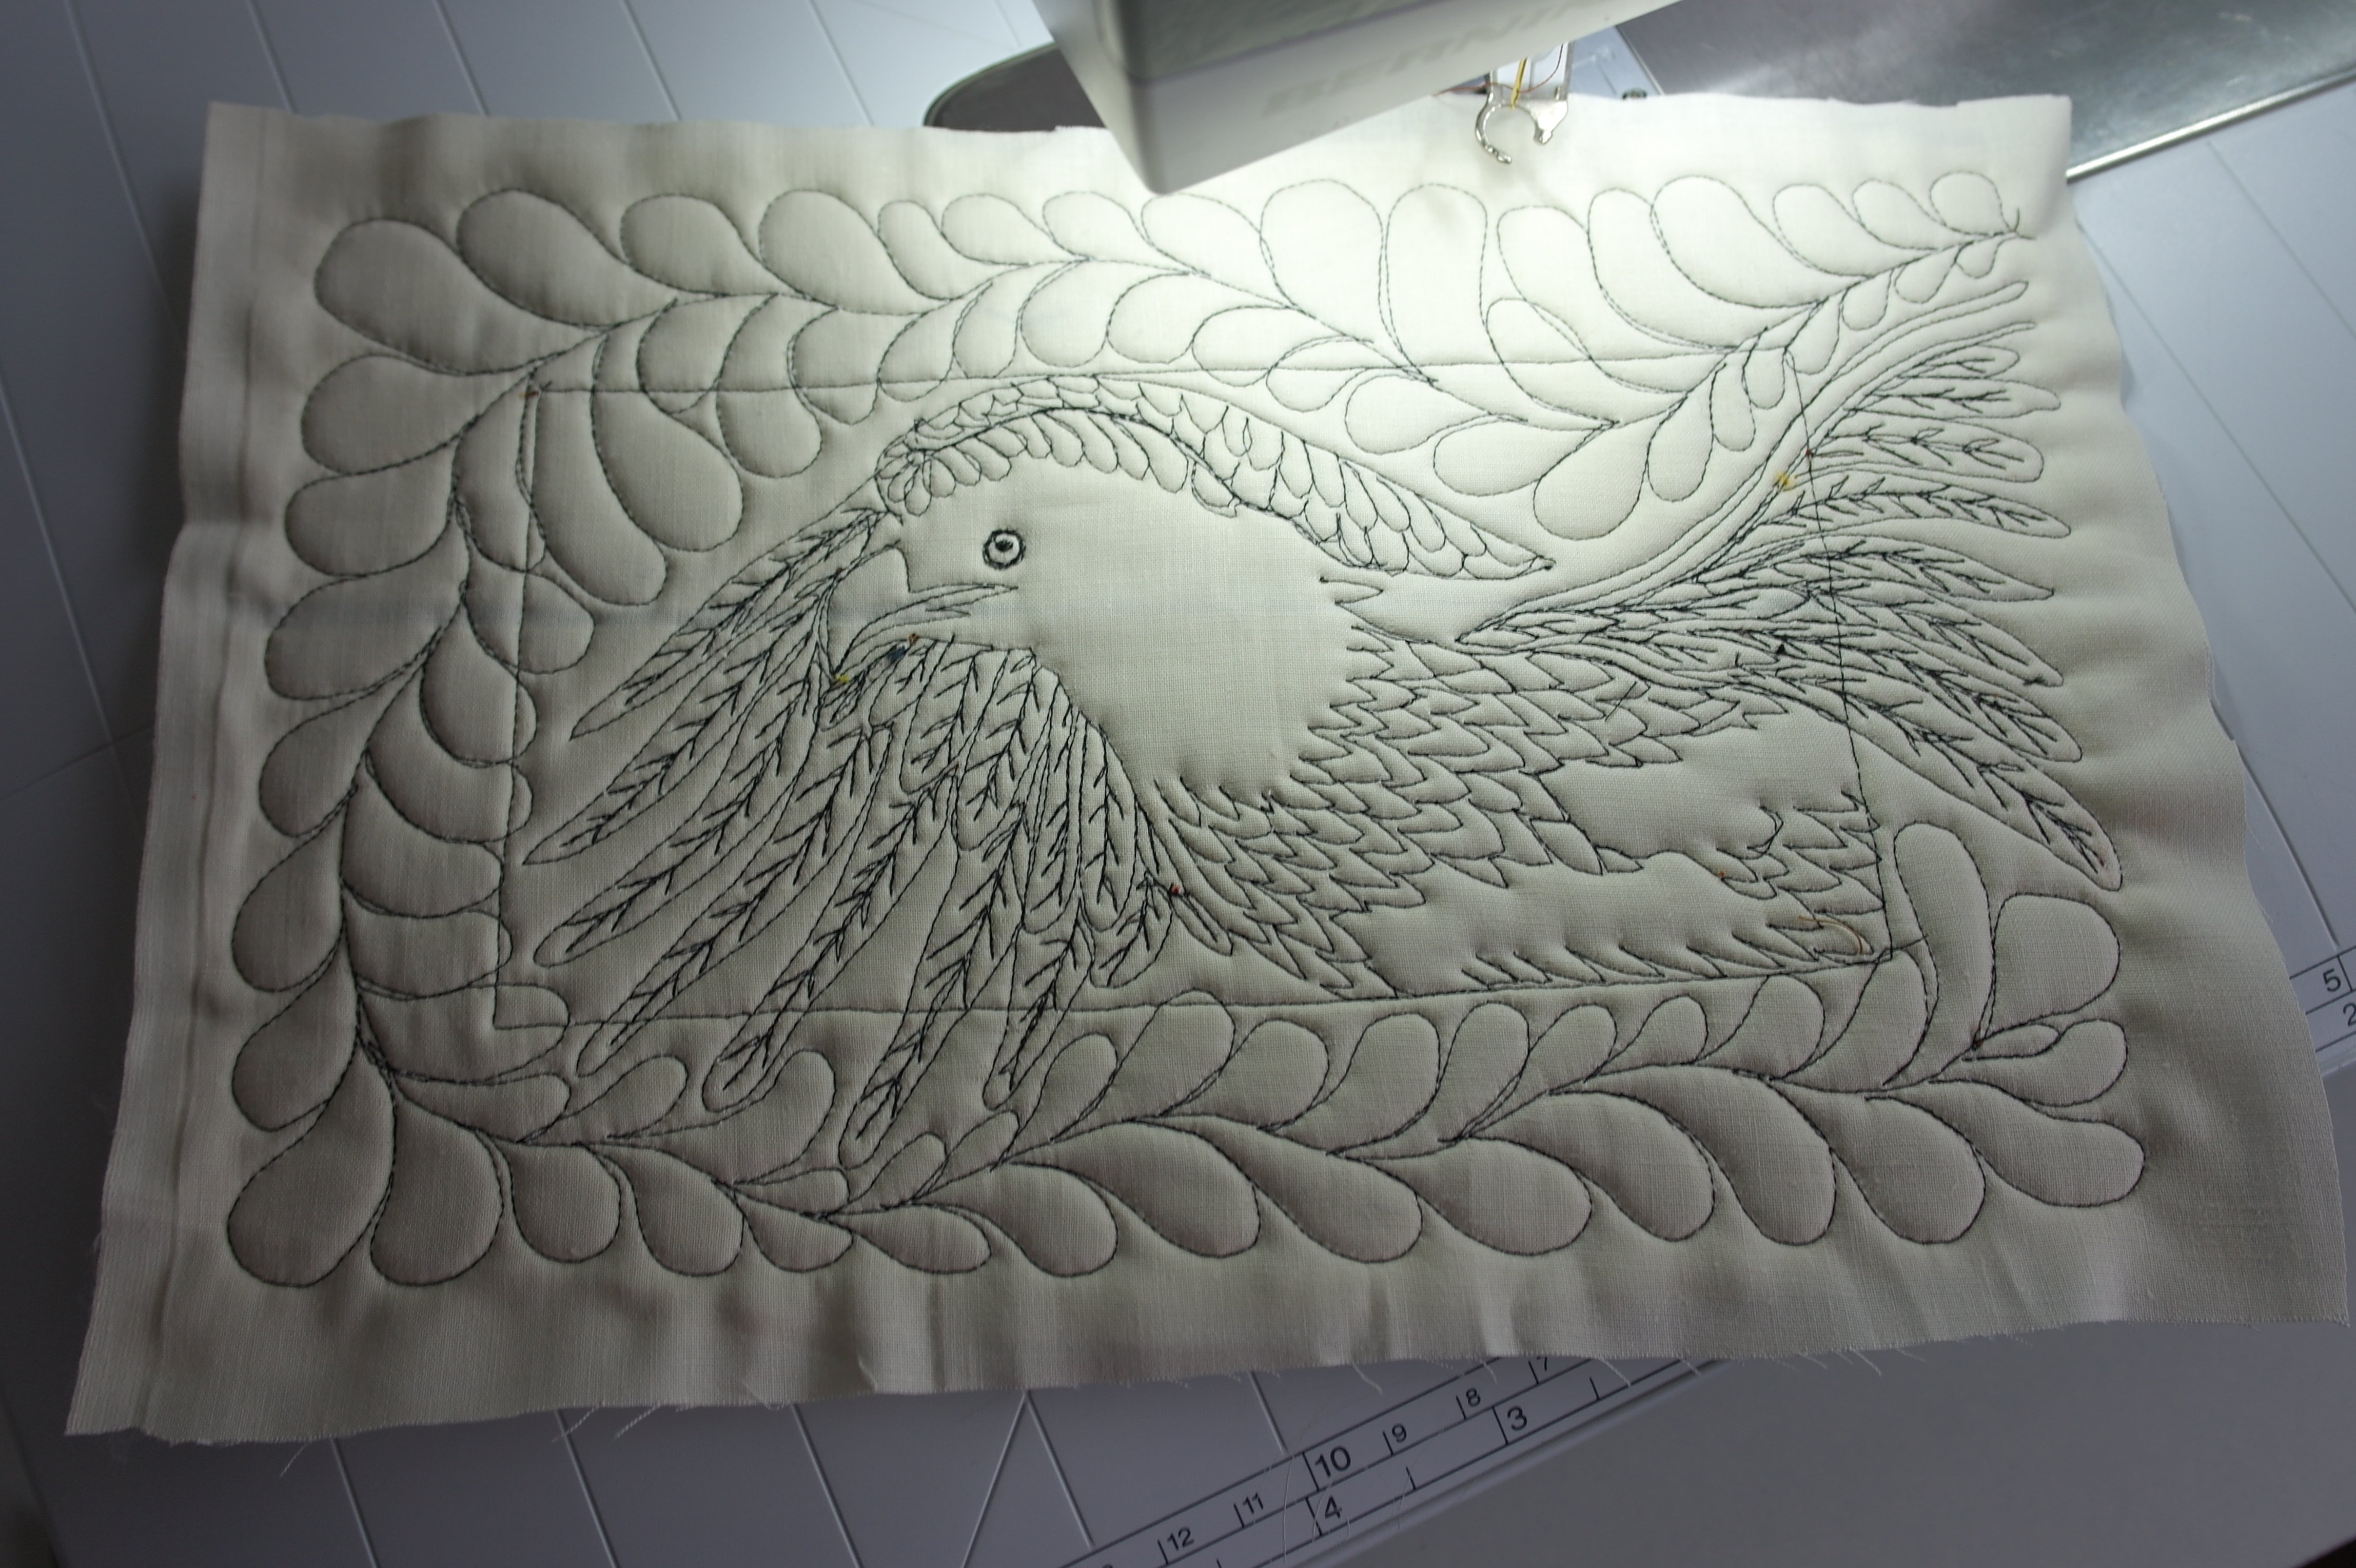
After this, I have made a feather motif, freehand with the BSR, again showing the inner side of the card….
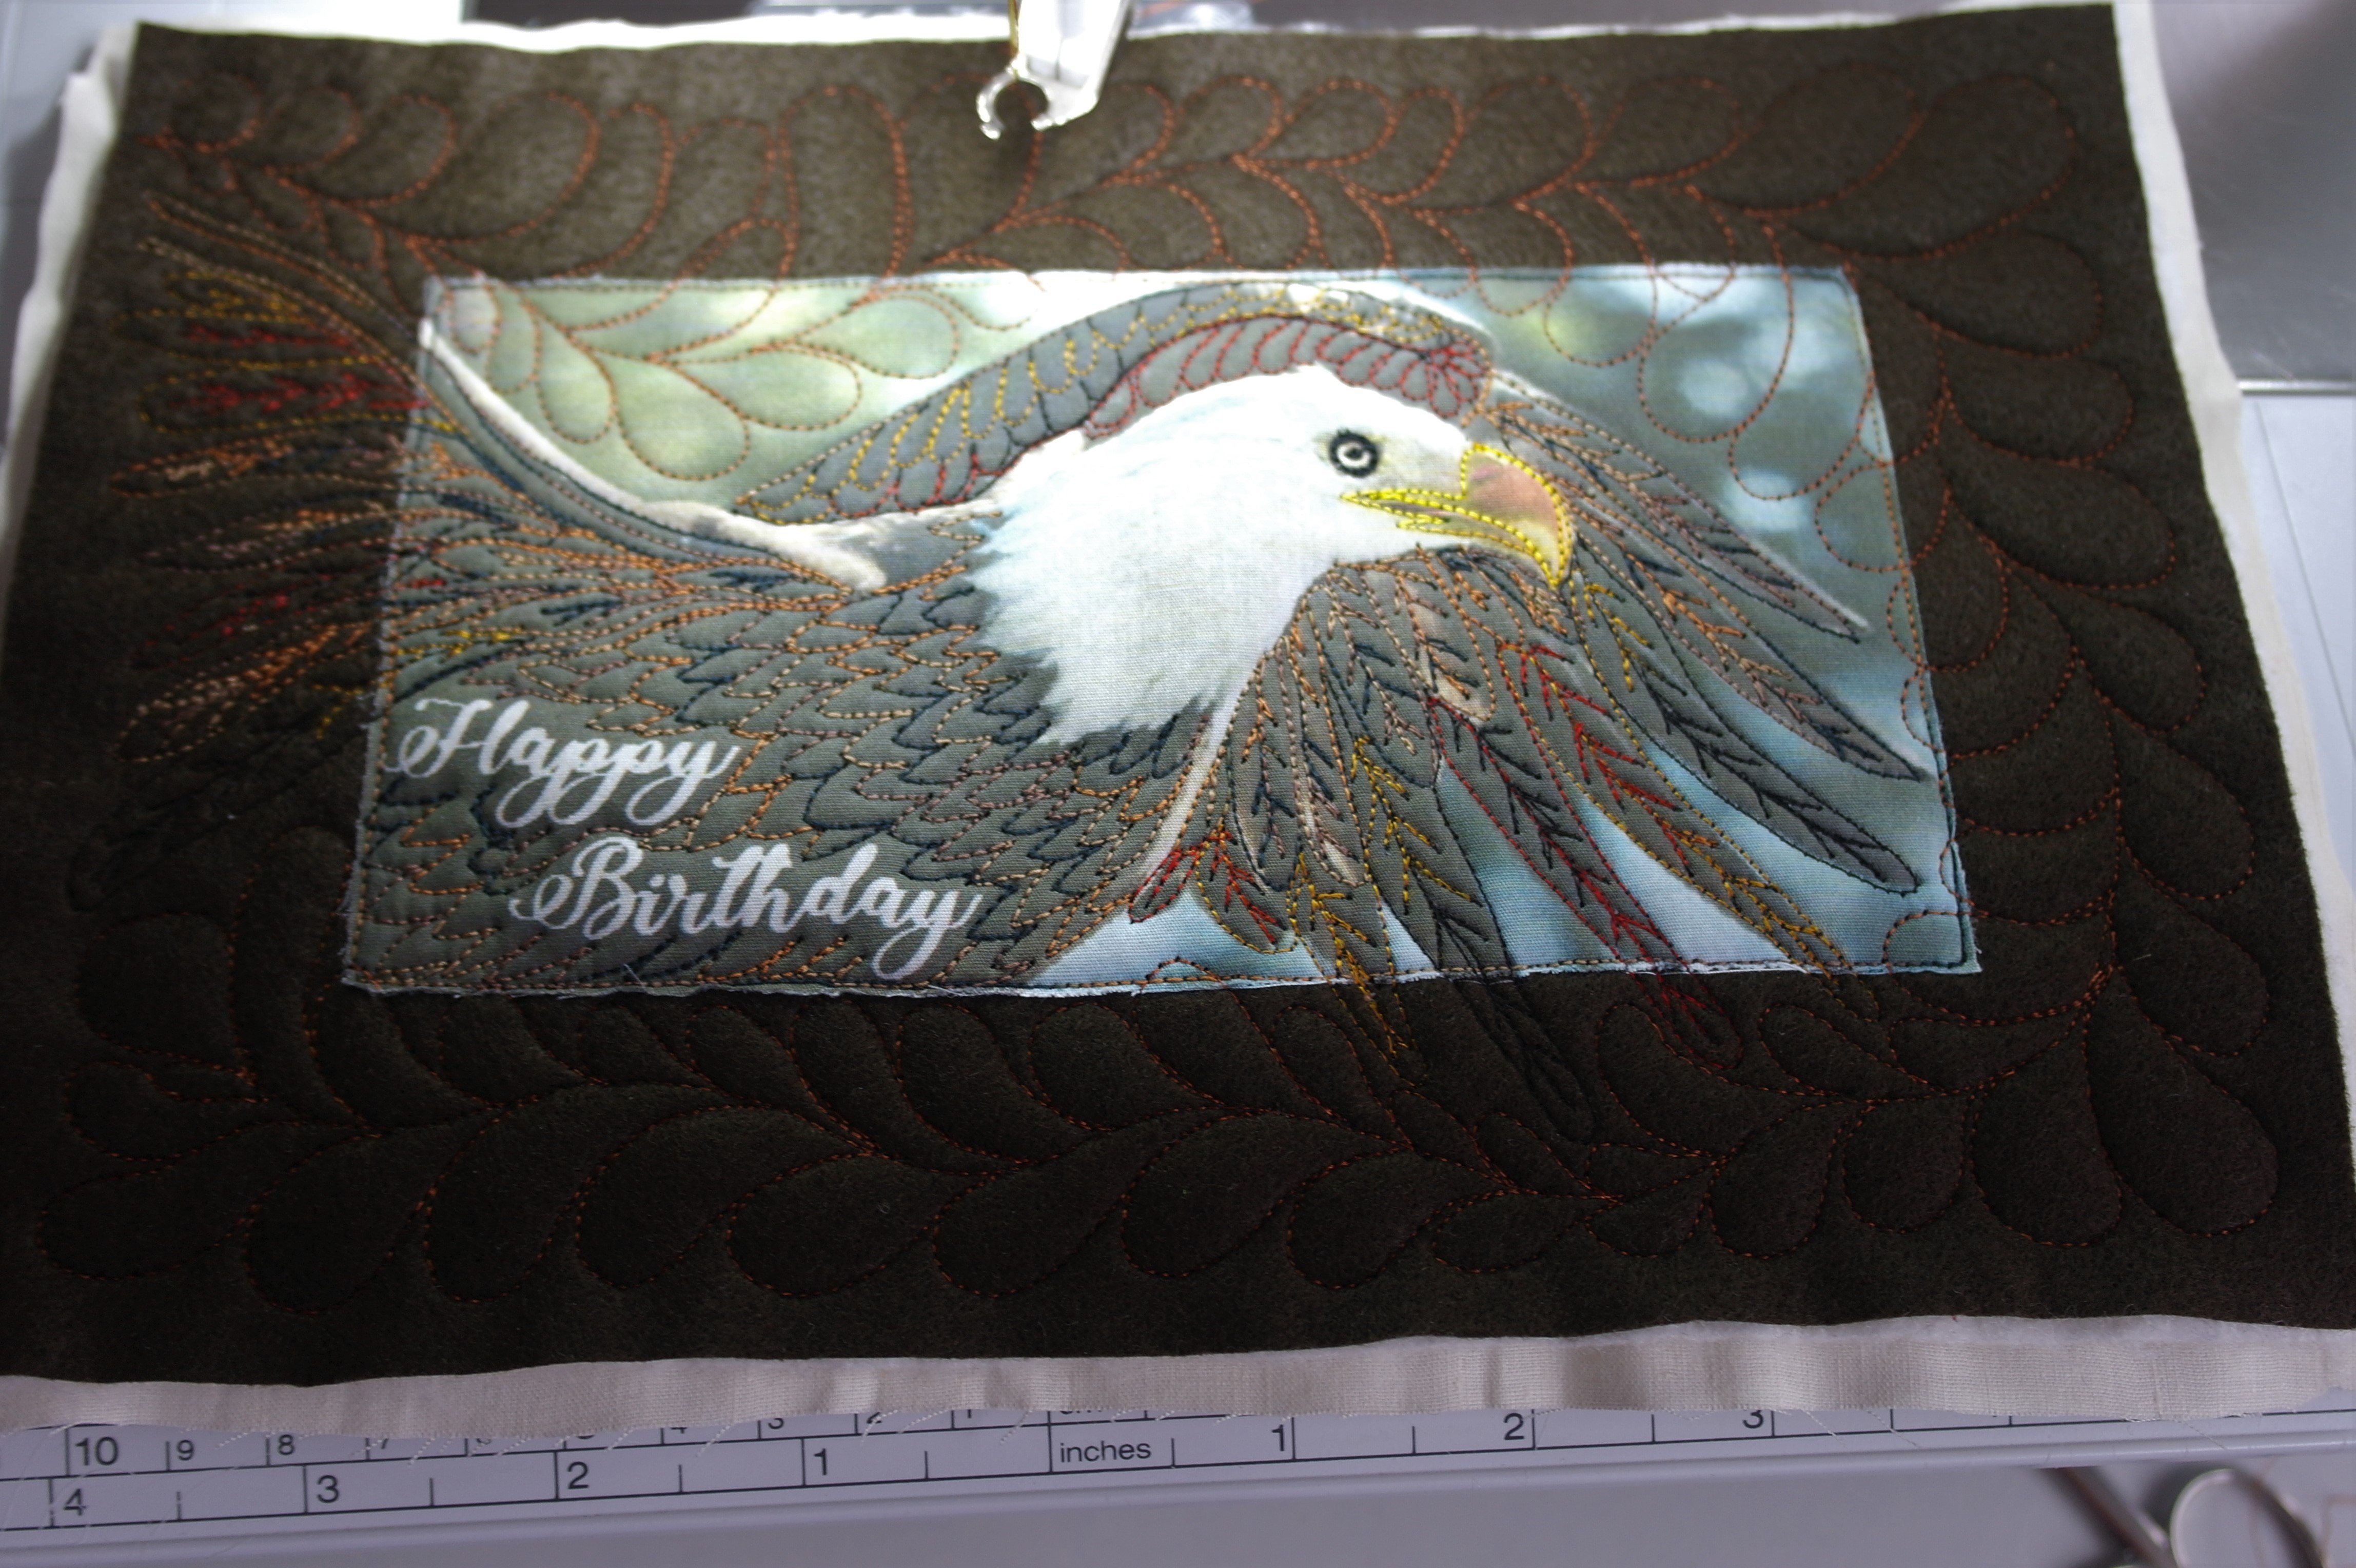
and the front. Everything about feathers….. But there will be more!
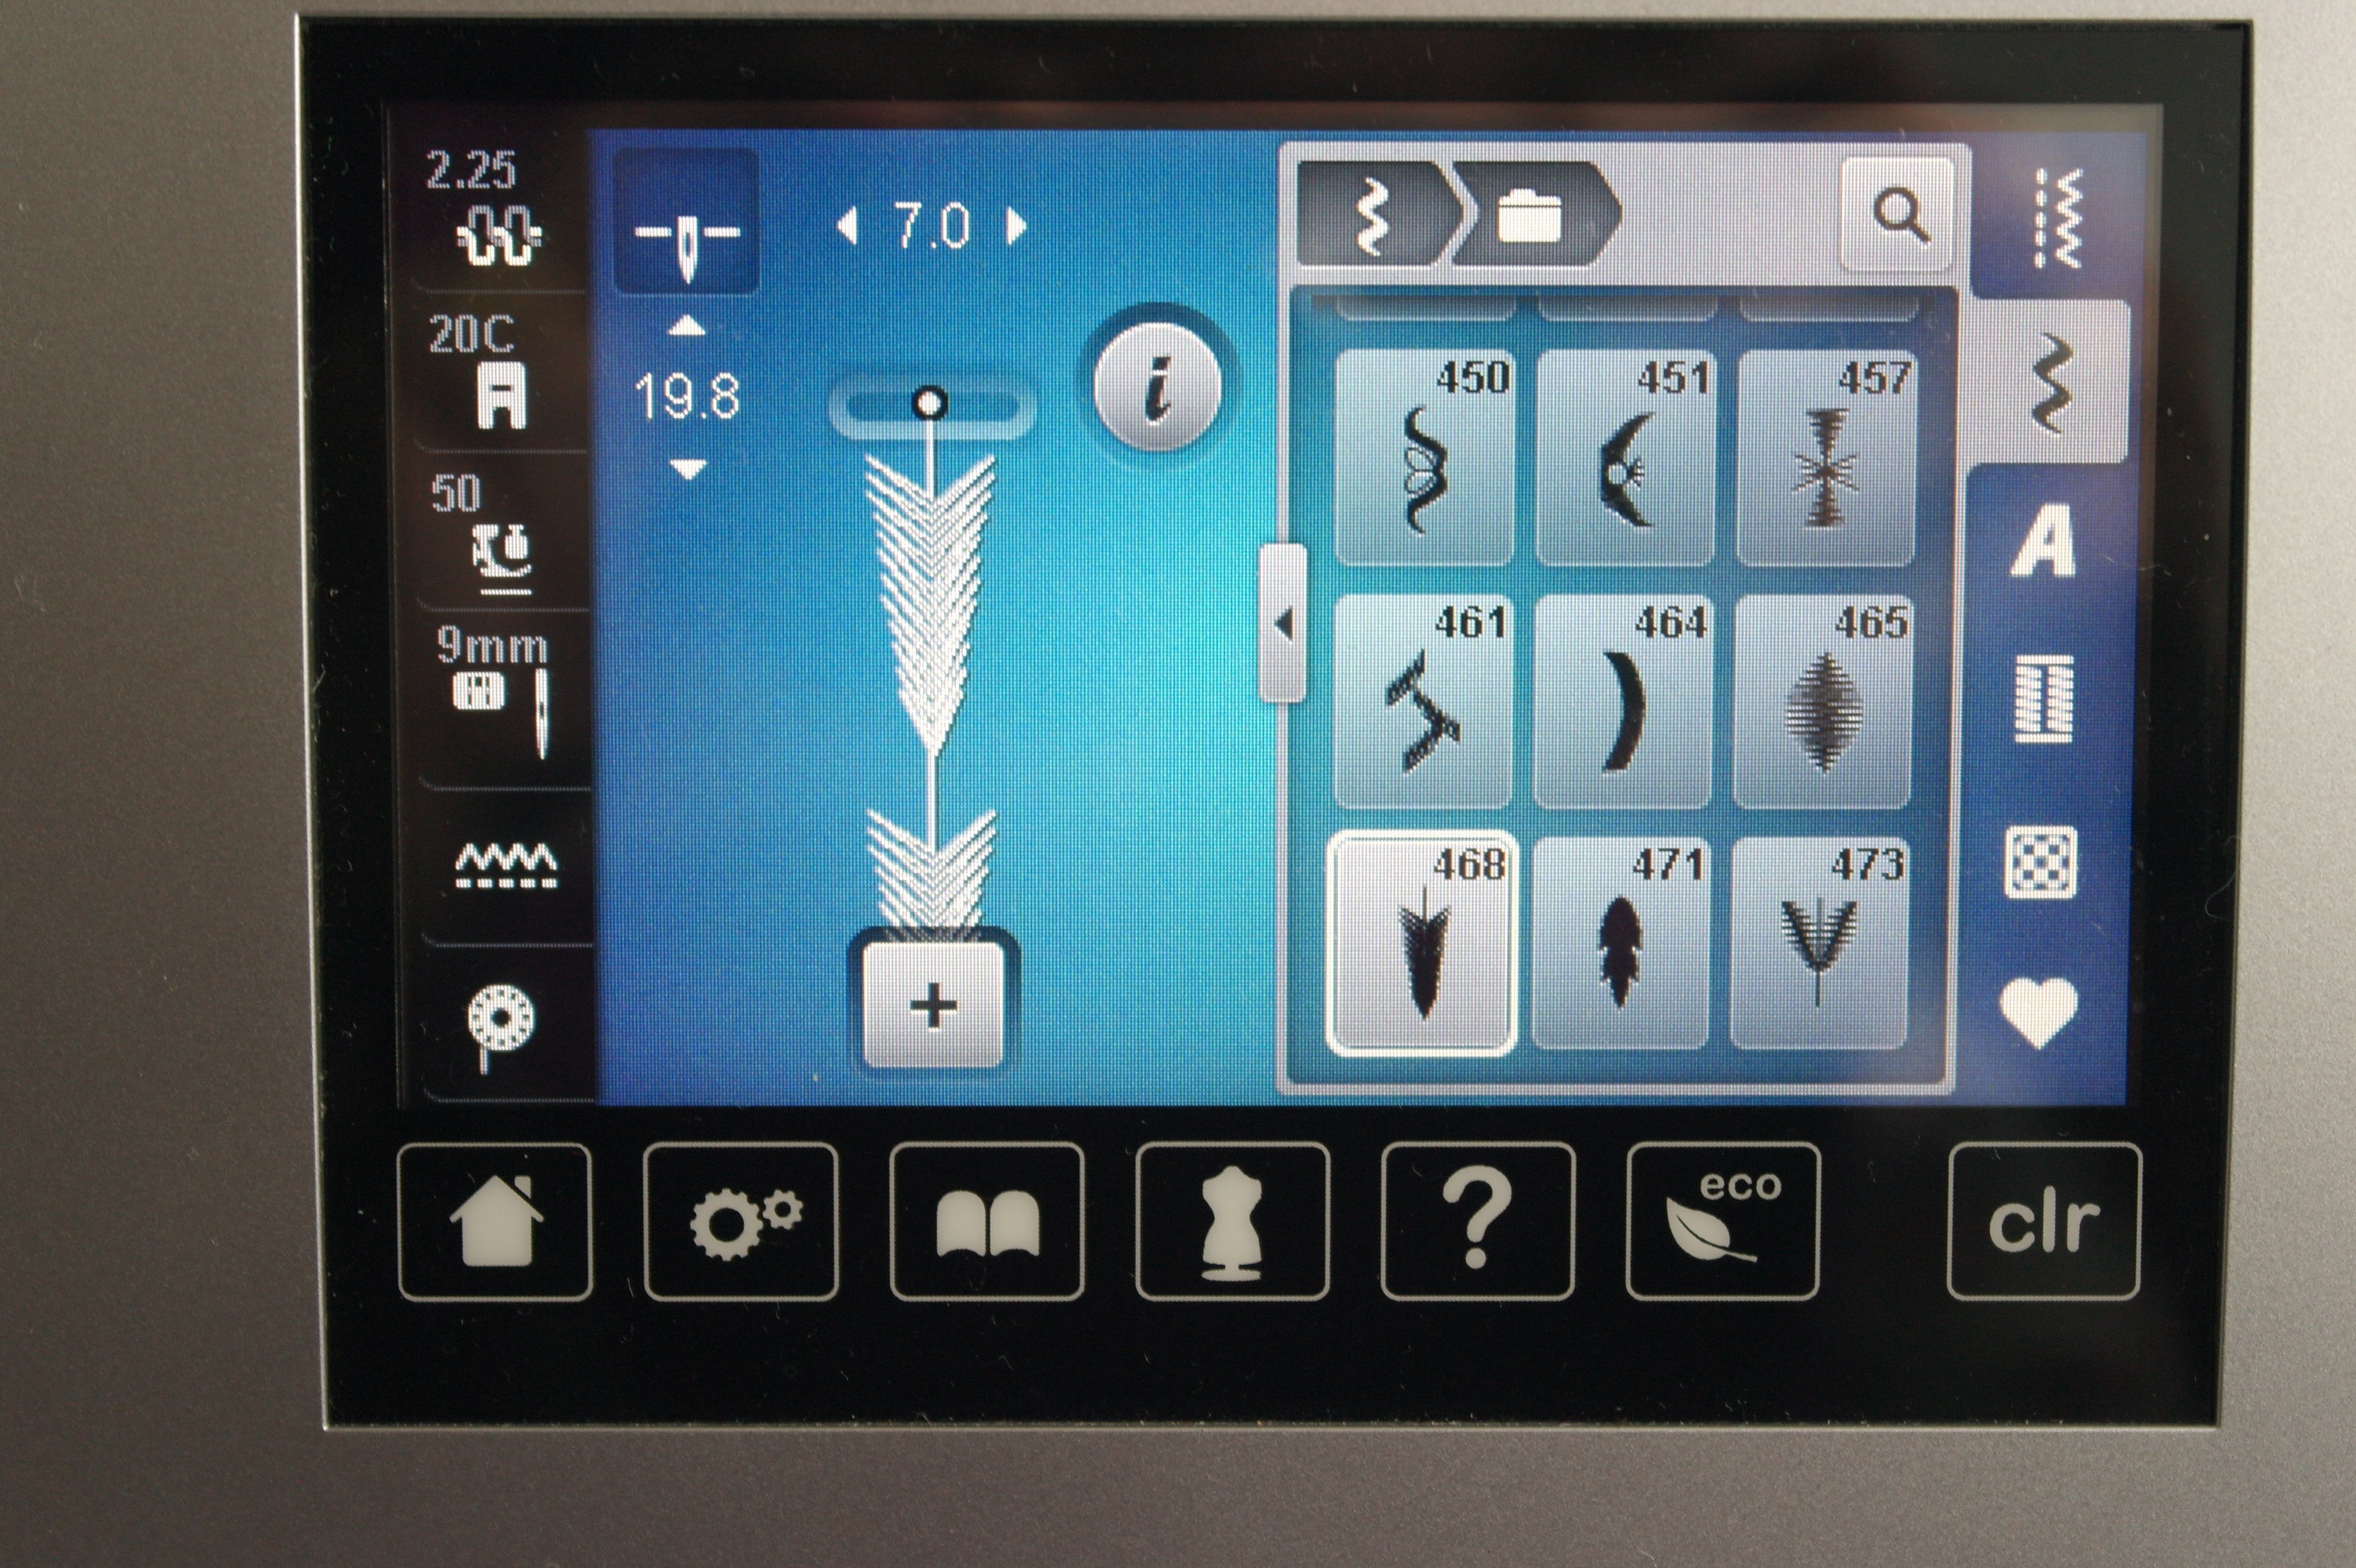
I have removed the BSR, and use the Open Embroidery Foot #20C for making decorative stitches (again feathers!), along the sides of the image.

Showing this from the inner side of the card…
and the front. I don’t mind if small pieces of the fraying edges of the image pop up through the decorative sttiches…
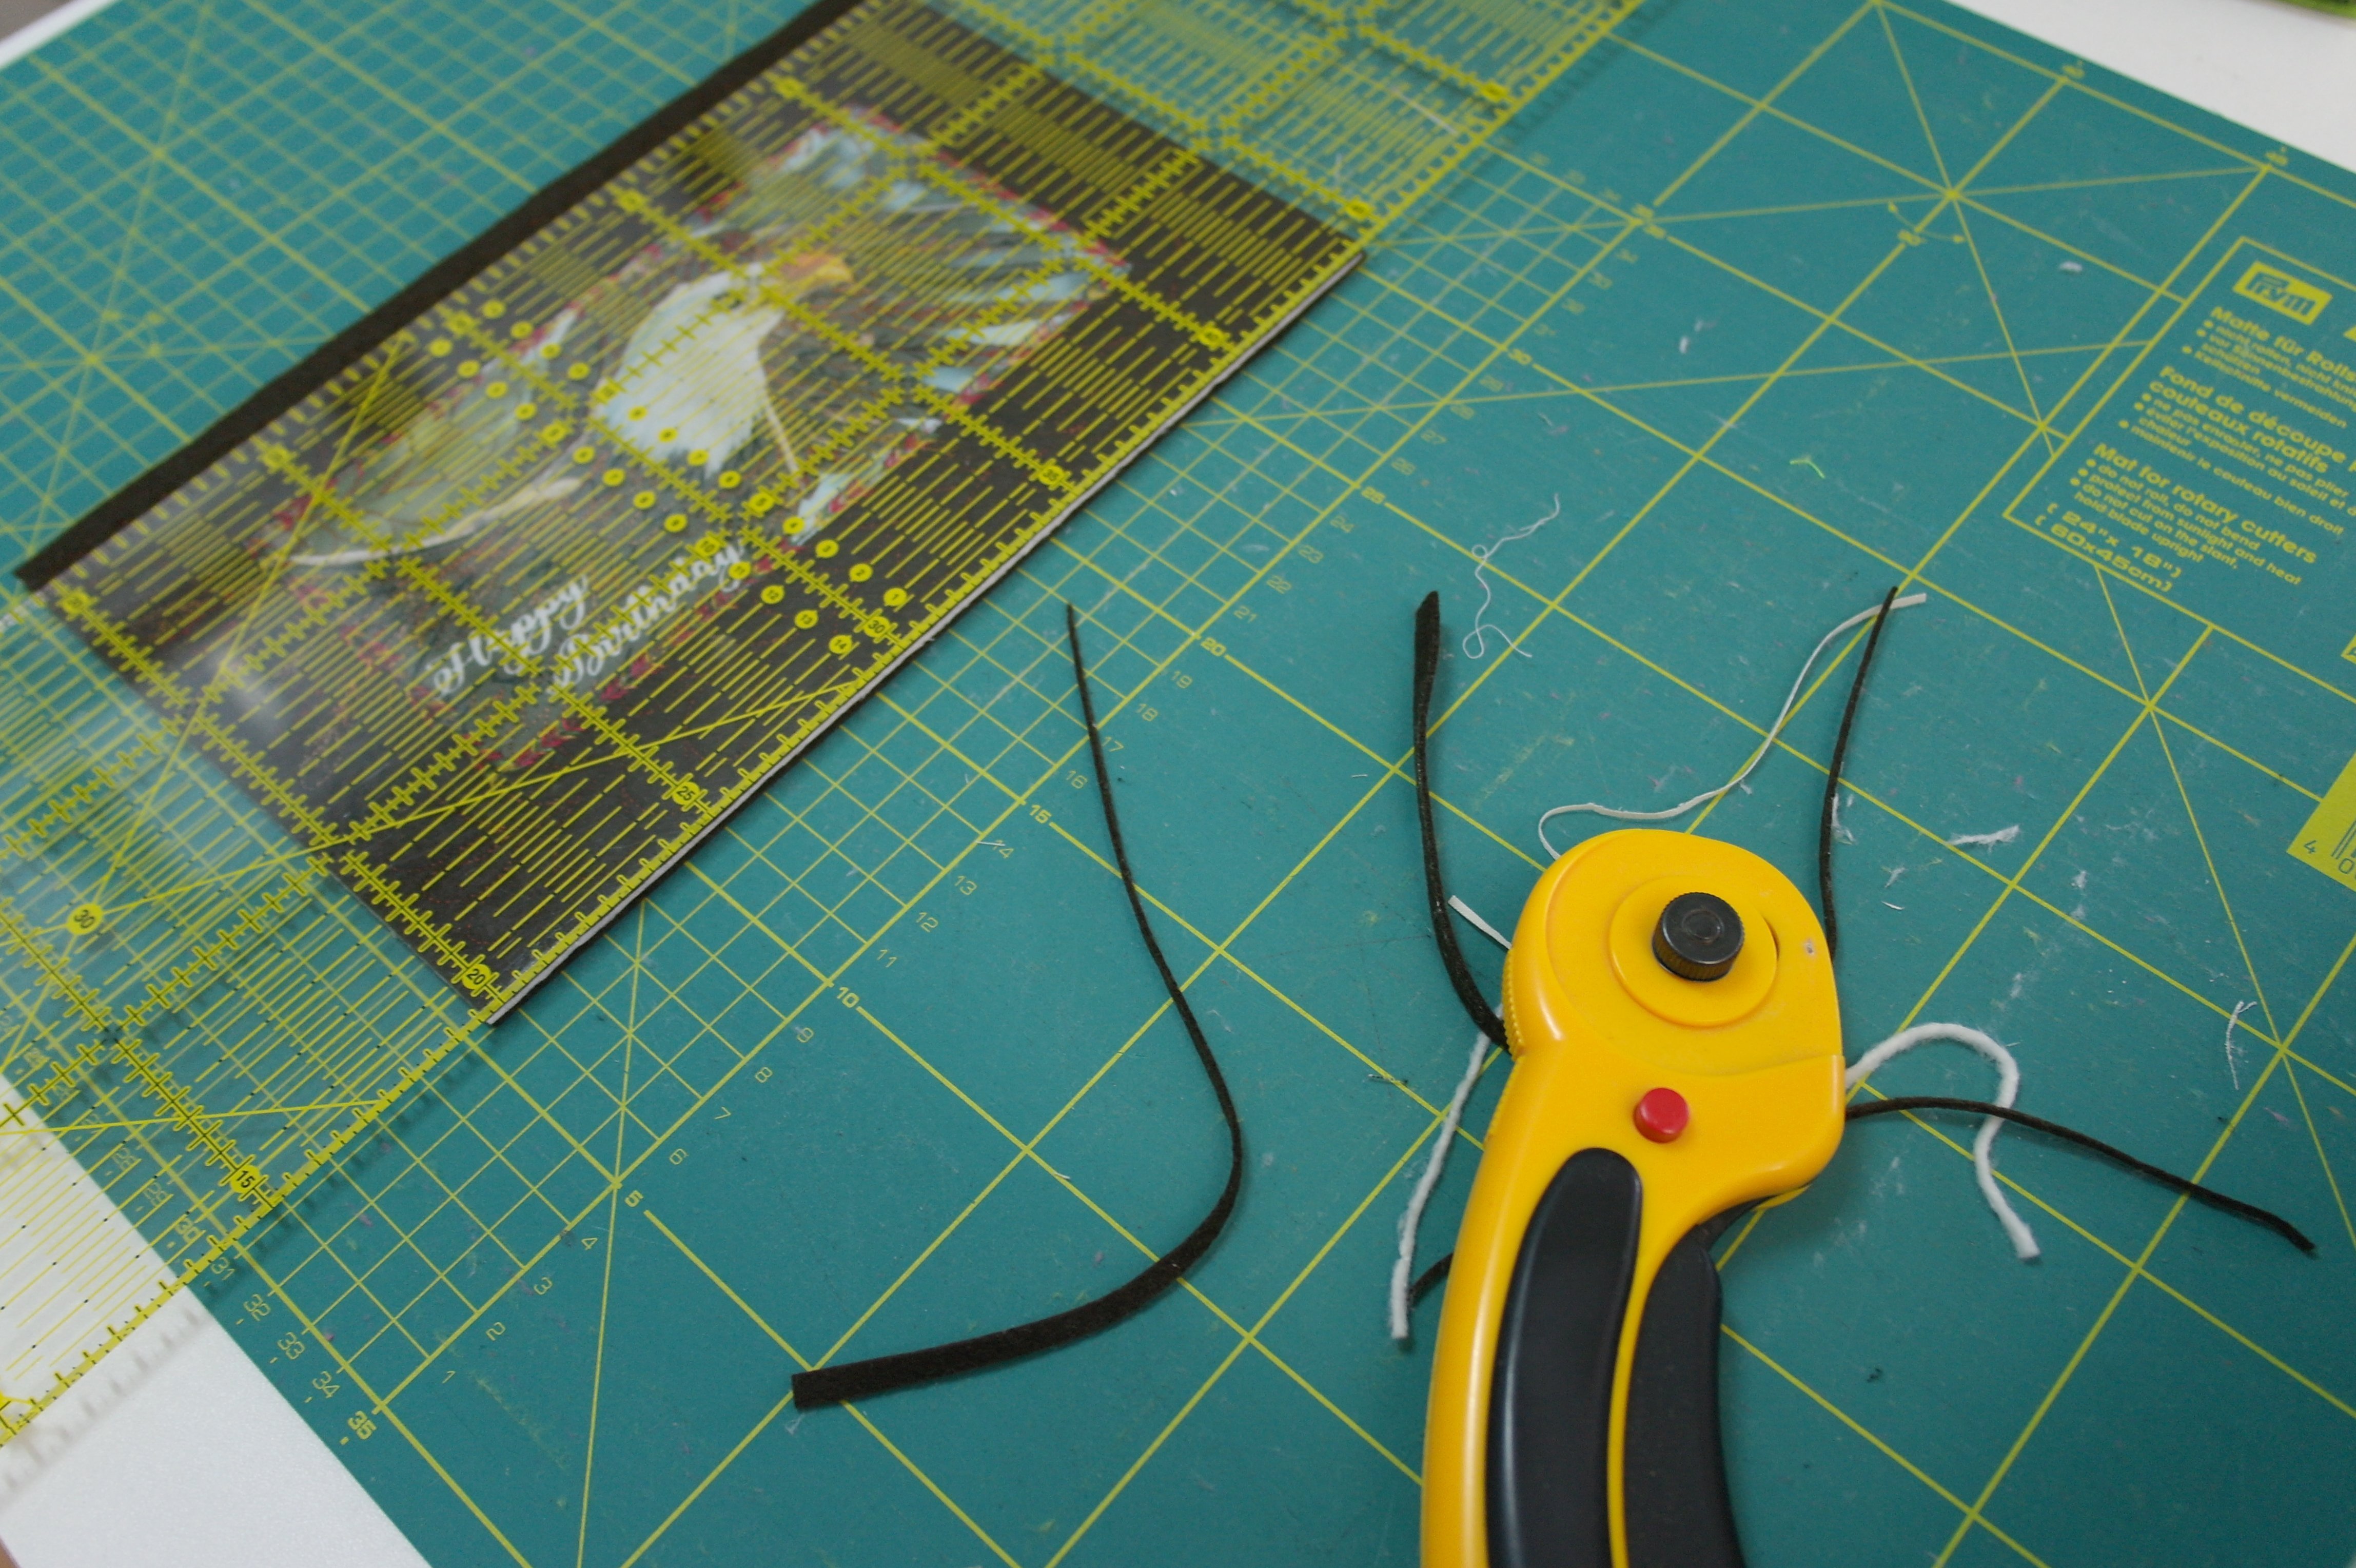
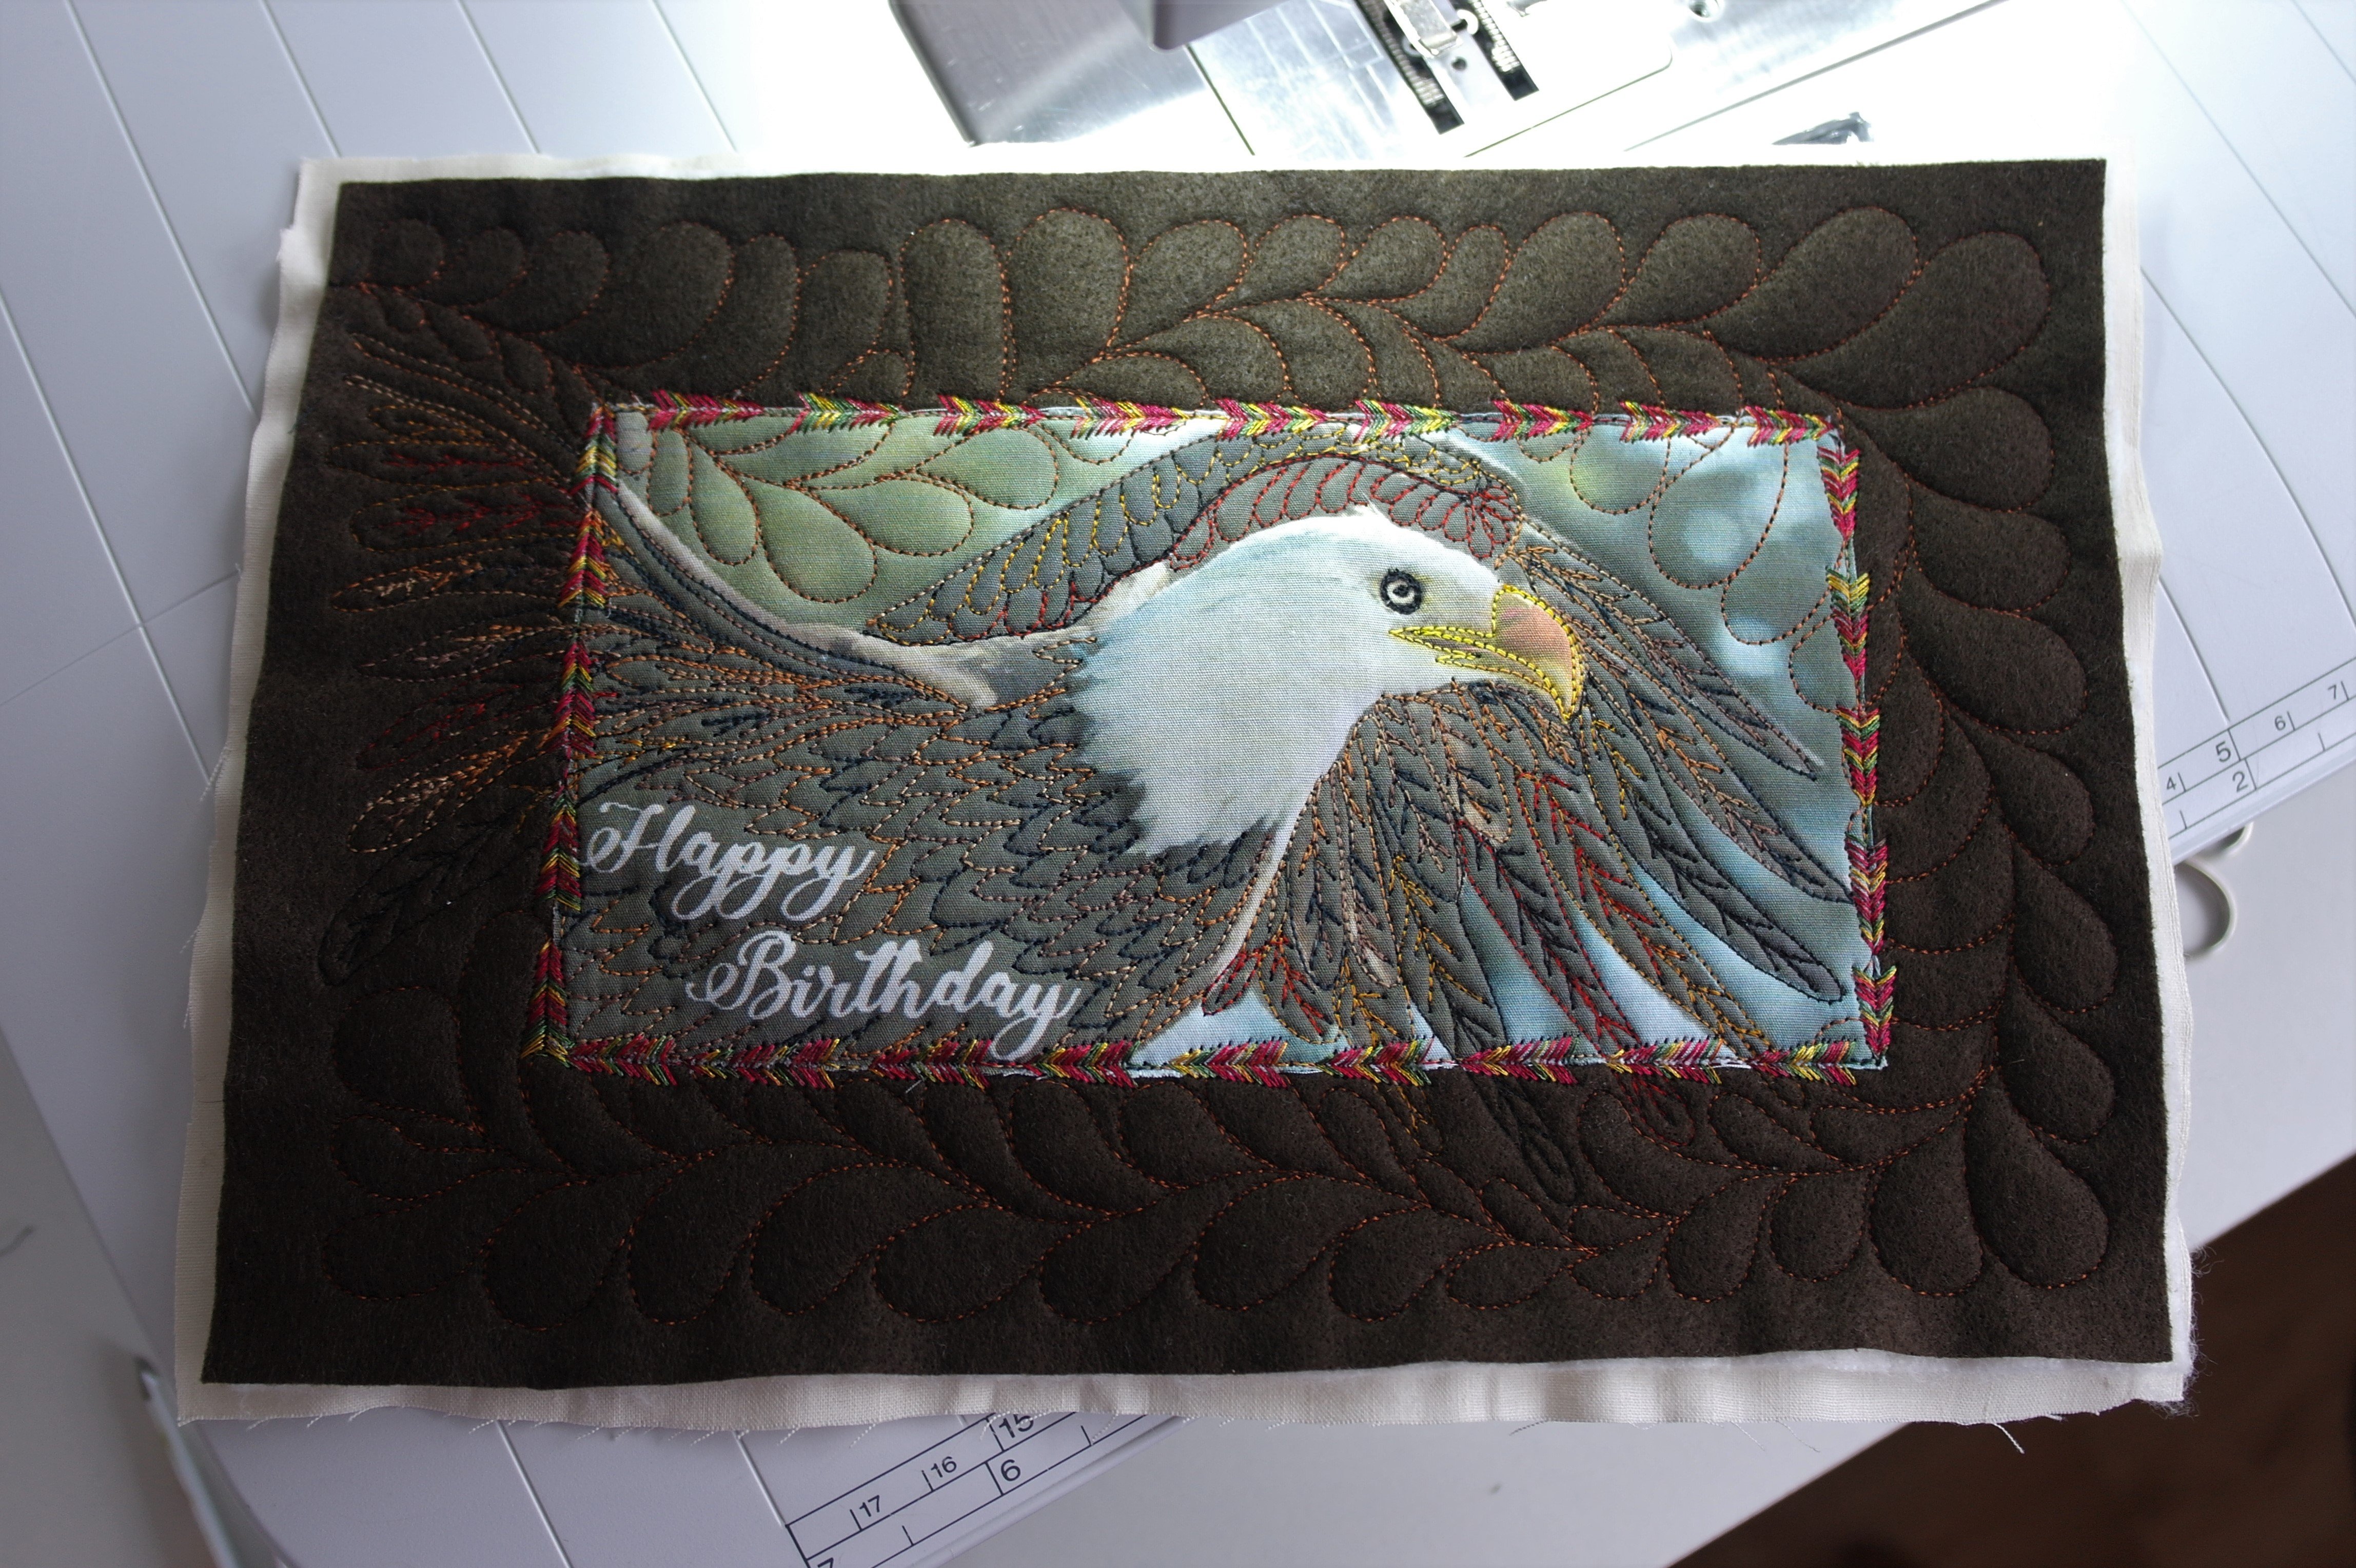
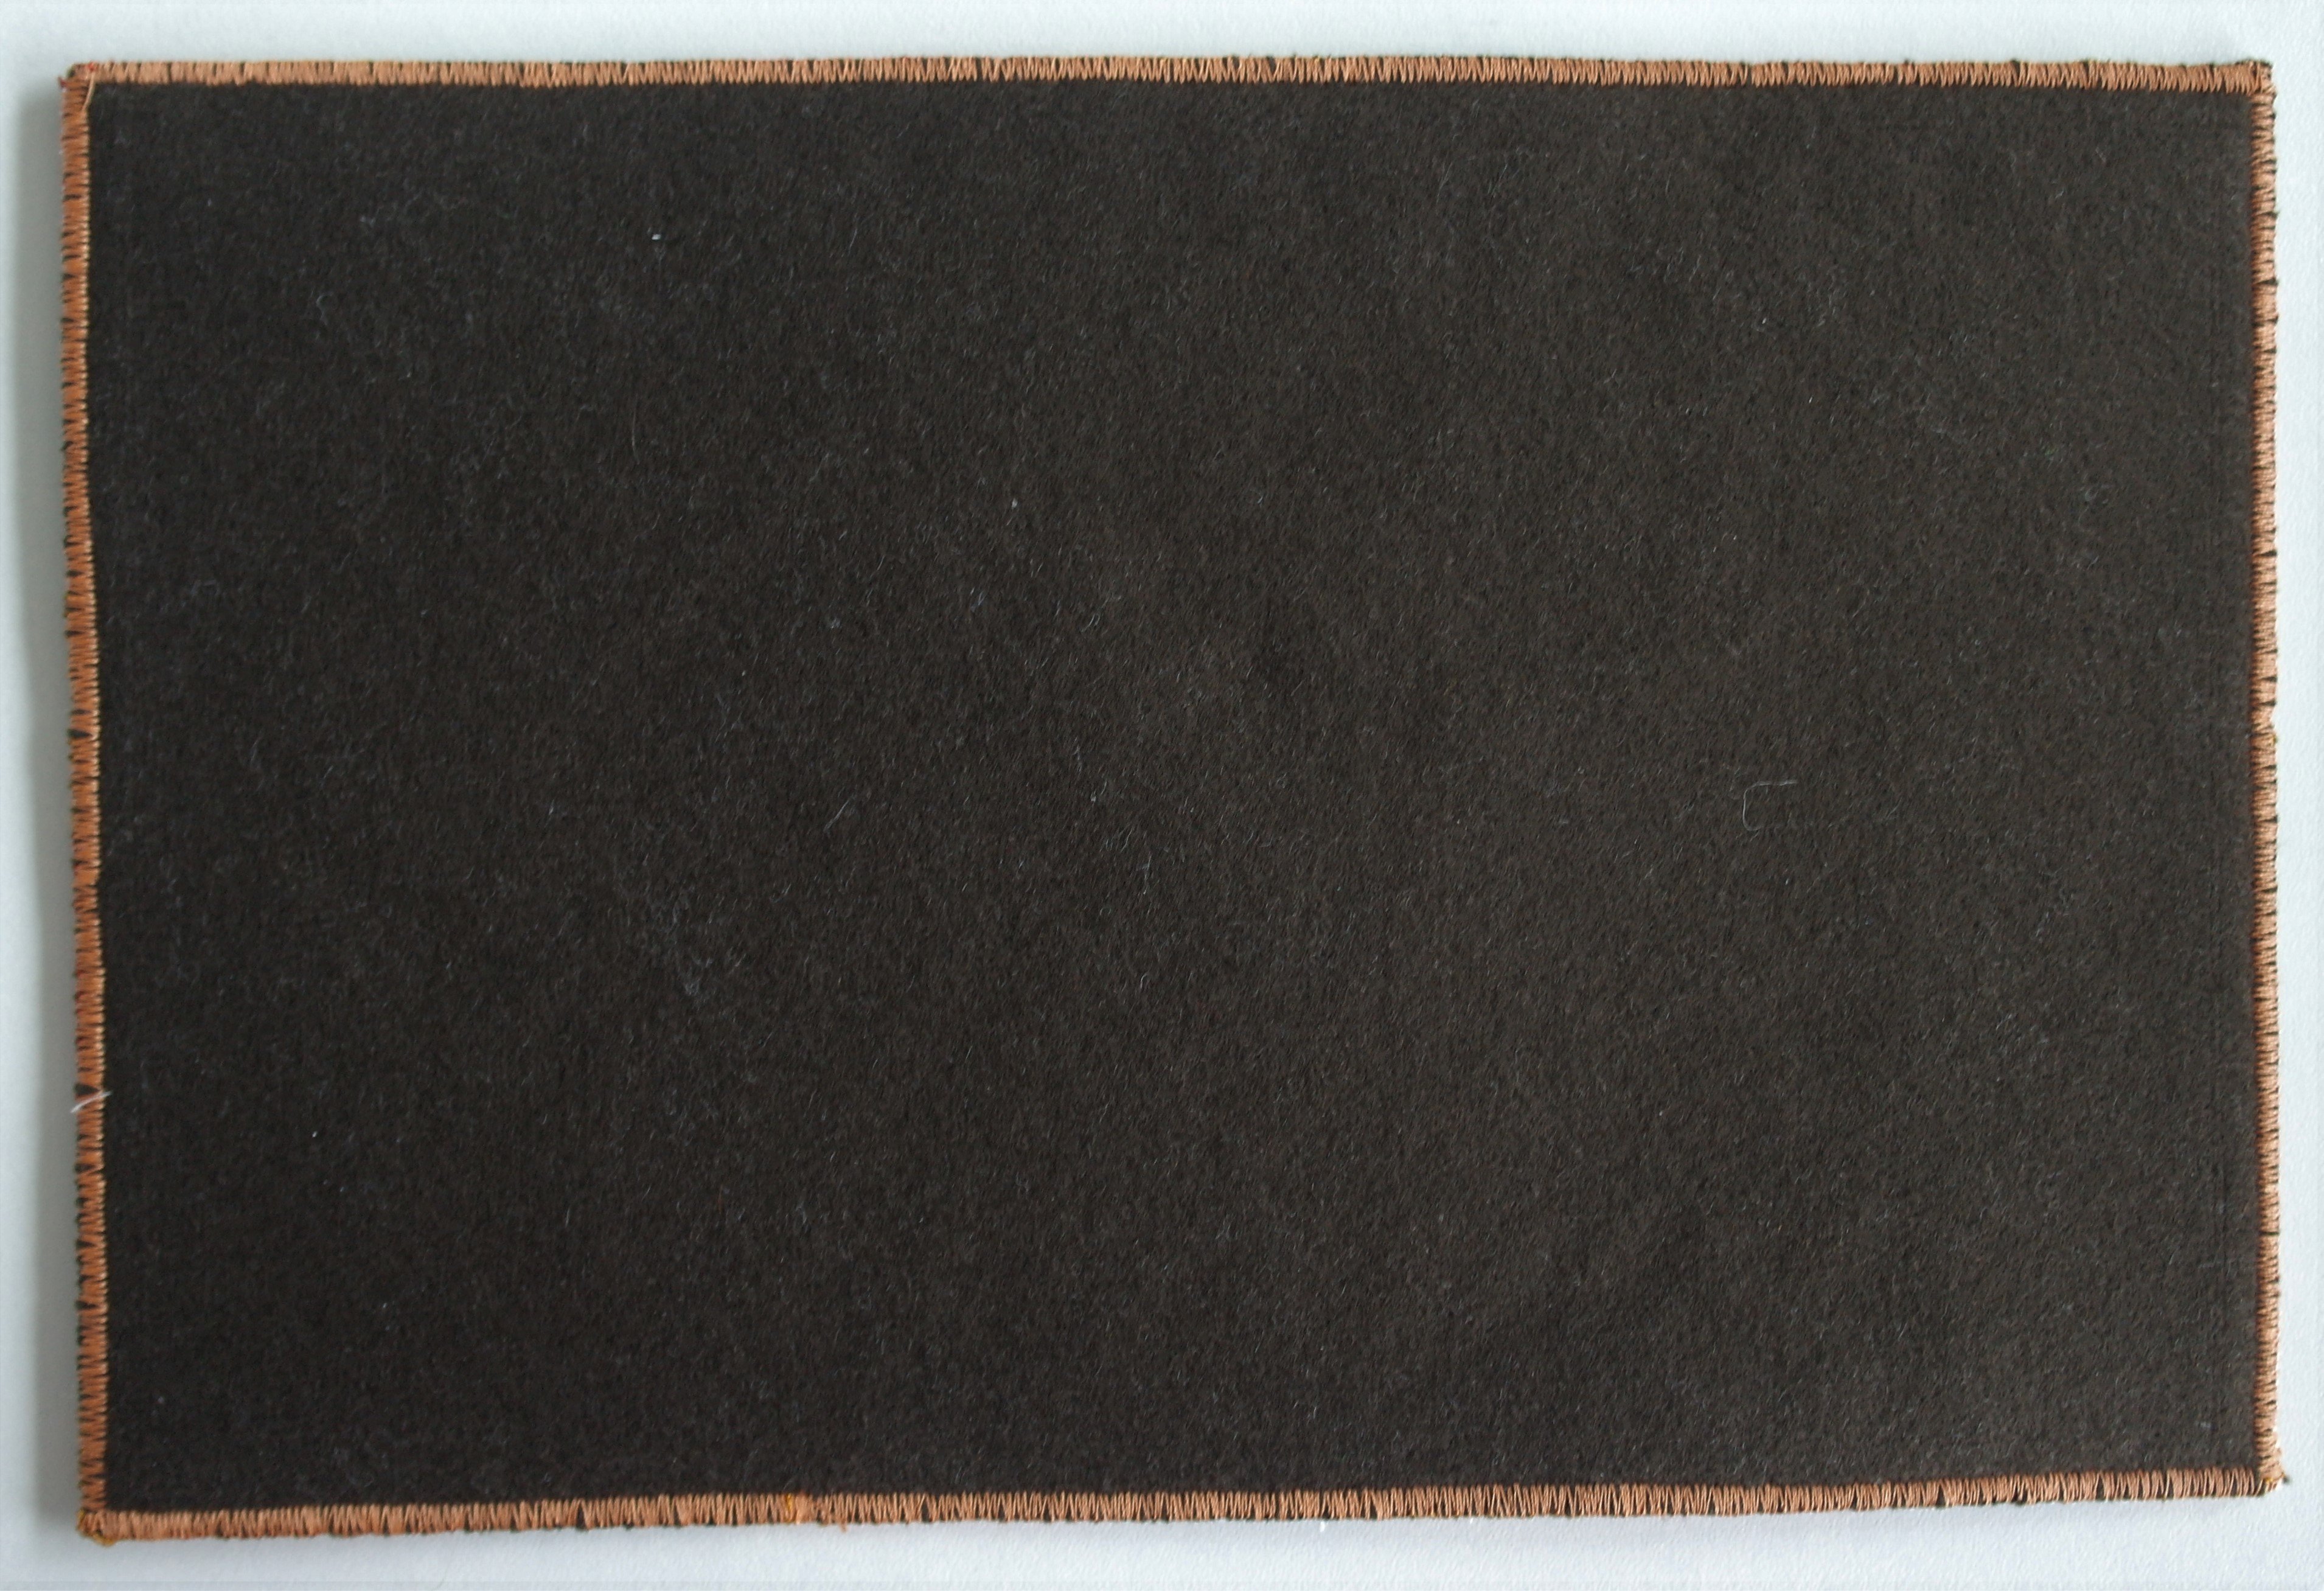
Cutting the card at the right size, together with another piece of dark brown embroidery felt for the back.
I have glued the front and back with my UHU glue stick, placed both pieces together, and put them under pressure for a while, to let it dry. Last I have made satin stitches all around the edges of the card, using a rust colored DecoBob in the bobbin…
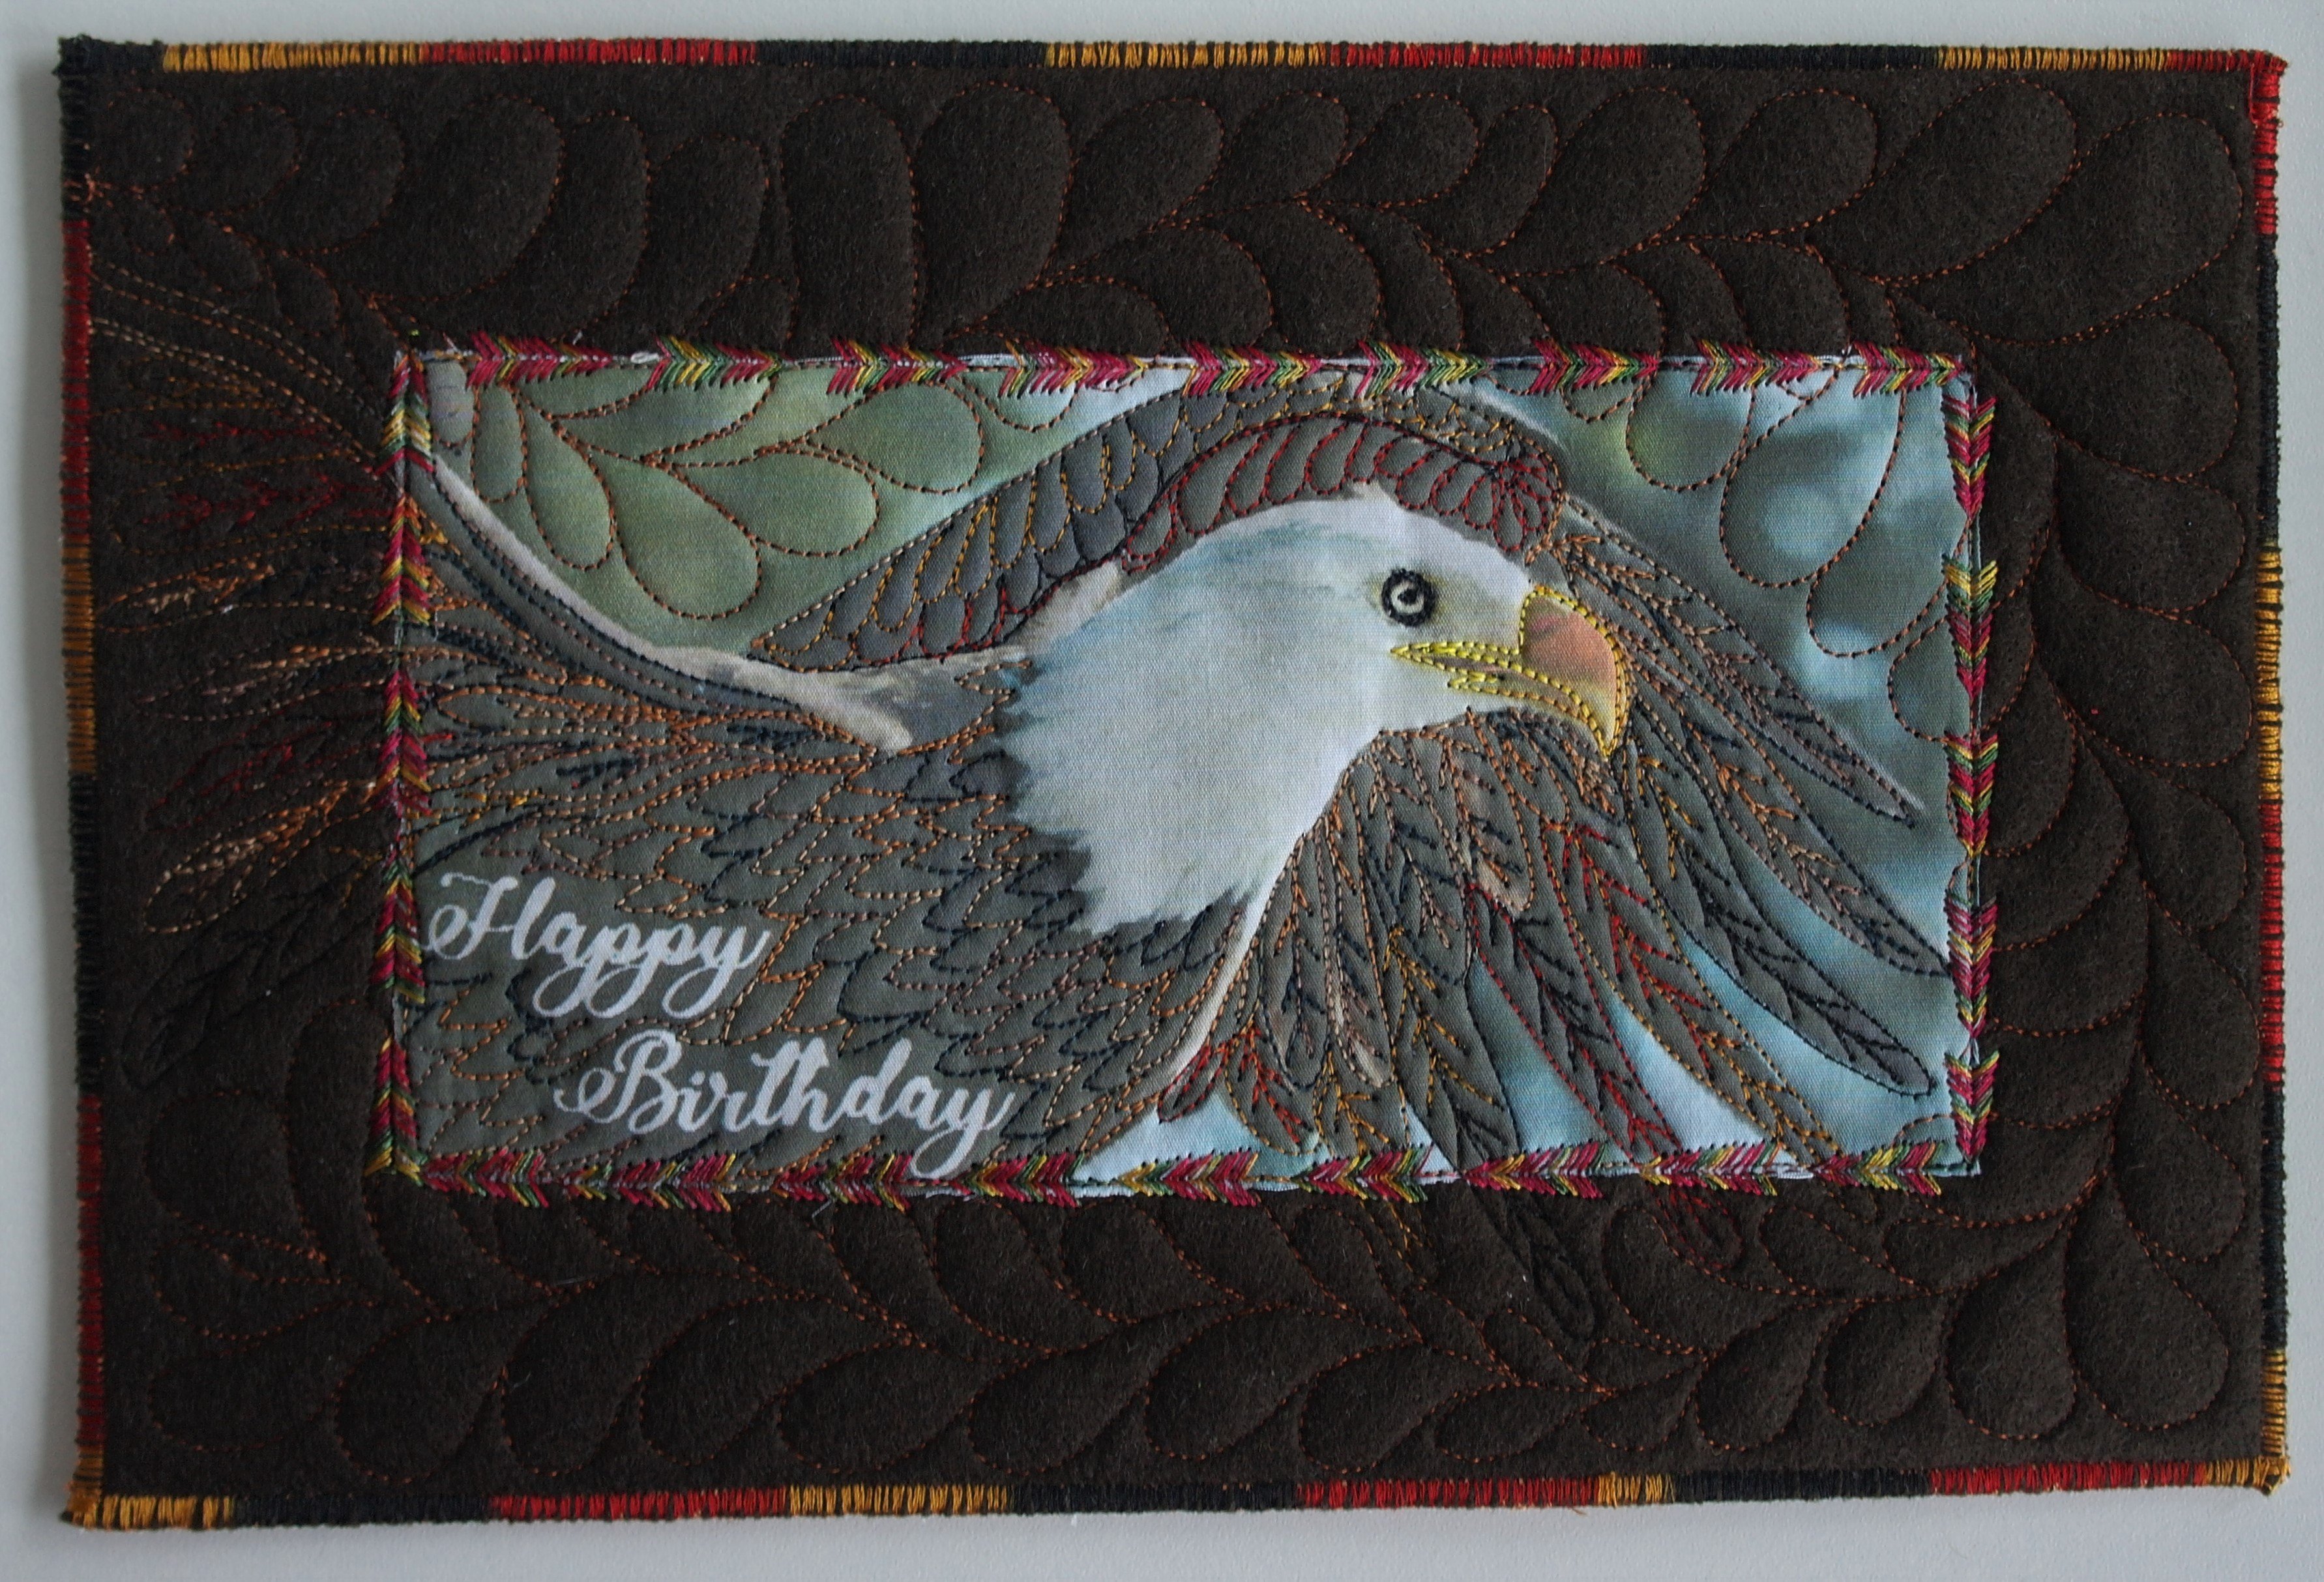
and a beautiful variegated thread on top. This specially ‘handmade’ post card will be given to a special person: isn’t it fun to make something that personal?
Happy quilting,
Sylvia Kaptein
Sylvia’s Art Quilts Studio
www.sylviasartquilts.nl/webshop
*The post card was too large to place in a regular envelope after all, so I have wrapped it in nice gift paper, with a personal note. Because the birthday girl lives close by, I will bring it myself and slid it through her mailbox. If you want to make sure the card fits in a regular envelope, stick to the required measurements, or just deliver the card in person.
0 Responses