 BERNINA Corporate Blog -
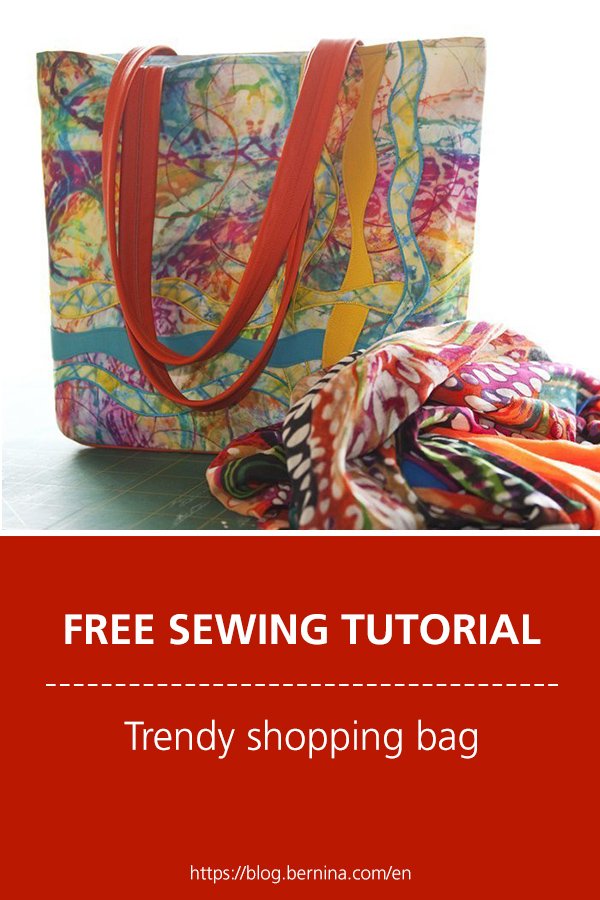
In one of my last courses, somebody asked me about one of my bag designs. I designed it a while ago, but the enquiry gave me the idea to make a new edition and put my weave technique shopping bag on the blog with photo instructions.

Maybe one or two of our blog readers will like the pattern and make one for themselves.
To start off, here’s the list of materials:
50 cm fabric for the exterior of the bag (110 cm wide)
35 cm fabric for the weave strips (110 cm wide)
40 cm x 50 cm fabric for interior pocket
50 cm fabric for bag lining (110 cm wide)
35 cm Vlieseline HH 650 double-sided, ironable interfacing (Freudenberg)
20 cm x 50 cm S320 saddlecloth interfacing (Freudenberg)
55 cm x 100 cm Thermolam (Freudenberg)
(or alternatively special bag liner from NadelundFarben)
25 cm Steam-a-Seam
1 magnetic transfixable press button
Spray adhesive
2 x 200 m sewing thread for the weave strips in an appropriate colour
40 cm Decovil I light (Freudenberg)
1 offcut Decovil I (Freudenberg) 10cm x 40cm
1 leather kit for weave technique shopping bag from NadelundFarben
Now I’ll explain the individual steps, illustrated with pictures, but before that I just want to say something about the various materials. If you’re familiar with my bags and bag courses, you’ll know that I work lots of different interfacings into my bags. I definitely favour a sturdy handbag and shopping bags that don’t collapse in on themselves. To achieve that, you need all the interfacings that are shown in the photo below. From left to right: double-sided ironable Vlieseline HH 650 interfacing, saddlecloth interfacing S320, both from Freudenberg, in the middle a special bag interfacing, a kind of needle felting that I always work into all my bags. Underneath that is Steam-a-Seam, as well as a magnetic transfixable press button, to the top right is Decovil I light and below Decovil I. Both Decovil stabiliser interfacings are already well established in the shoe industry. The thinner Decovil I light is principally used in boot legs, the thicker Decovil I, which also hardens when heat is applied, is used in toecaps and heelcaps. The letter I stands for “ironable”.

On Sunday, I dyed the fabrics especially for this bag, using the Deconstructed Screen Printing method. So now I’m excited to see what they turned out like.

First, iron the double-sided ironable Vlieseline HH 650 interfacing on both sides between 2 layers of fabric for the weave strips. Fabric width is min. 50 cm.

Then position the ready-cut wavy strips from the NadelundFarben leather kit on the Steam-a-Seam. The protective parchment layer was removed from this beforehand. Protect your work with baking paper before you iron. Iron temperature suitable for polyester. Cut out the strips after allowing them to cool.

Cut 8 wavy strips from the fabric you lined with double-sided Vlieseline earlier – cut these freehand using a rotary cutter and the leather wavy strip as a model. Cut the two outer sides of the bag to 40 cm x 48.5 cm and glue to the Thermolam or the bag interfacing using spray adhesive. Now you should have the following materials cut to size:

All the wavy fabric strips are now tidied up with a zigzag stitch along the edge. There are two steps to this. The first run through the Bernina 820 used a zigzag stitch with 3.5 mm stitch width and 1.4 mm stitch length. The important thing is to make sure the strip edge is positioned on the central marking of the Reverse pattern foot # 1 – this ensures that the needle comes down once into empty space and once into the fabric.


The second run through the machine used a zigzag stitch 5 mm wide and 0.25 mm long. One tip: If your sewing machine has problems transporting the fabric and little bobbles or knots form, decrease the presser foot pressure. But try not to pull on the fabric strip emerging behind the presser foot and lower feed, because that will alter the stitch density.


Now for the inner pocket, which is sewn to the bag lining. To do this, fold your desired fabric in half and iron a fold into it. Cut the saddlecloth interfacing S 320 to the size of the halved inner pocket, minus 1.5 cm height and iron (the interfacing is only ironable on one side). Then iron the excess lower edge on the S320 back. This will give a secure and flush edge.


Fold the two inner pocket sides together, fold the excess edge of the opposite side down and steam iron it down as well. Open up inner pocket, place both cleanly ironed sides together, pin together and then sew an ornamental seam along the closed upper edge of the inner pocket.


Place the inner pocket strips on a bag lining side, right side to right side. The minimum margin from the lower fabric edge is 10 cm. Make appropriate markings with a fabric pen and sew the inner pocket to the bag lining. Iron.

Place the lining sections together, right side to right side, pin and stitch along both long sides. Also sew the seam for the bag floor, keeping an opening in the centre of at least 18 cm. Firmly secure the seam ends.

Press the side seams inwards towards the centre of the floor so that they lie flat on each other. You will have 2 triangles at the sides, the floor corners. 8 cm from the outer point of these corners, sew a transverse seam. Ideally, iron the protruding corners beforehand. After sewing, cut the excess corners off and tidy them up with a zigzag stitch. The bag lining with inner pocket is now finished – ideally, this should be completed first, because the outer bag section is made in a very similar way.


Take the outer sides of the bag and freestyle quilt, embroider, decorate with whatever and however you like. I just freestyle quilted my dyed and printed fabrics with a slightly abstract design. For this, I selected my favourite quilting foot as usual, the Free-motion embroidery foot #24.

Now arrange the weave strips. Playing about is an absolute must here. Try out several possibilities to see which of the different wavy strips work the best with each other. Once you have decided which combination you are going to use, work on one side of the bag and then on the other side. Lay your pre-arranged strips at the edge of the fabric in the order that they will be attached to the fabric later. This way, nothing will get mixed up. Then remove the parchment paper of the Steam-a-Seam ironed onto the reverse side of the leather wavy strips. Then put the 6 strips together and weave the pattern together. Make sure you follow the right order for your weave pattern (see photo). As soon as everything is in the right place, secure the fabric strips with pins and iron the wavy leather strips, protecting them with a sheet of baking paper.


Then sew everything securely, piece by piece, strip by strip. To do this, sew along the zigzag stitch using a small straight stitch, 1.8 mm long. Tie off at the intersecting sections, lift needle and presser foot, move over the intersection and then continue sewing at the next section. I attached the fabric strips using the Reverse pattern foot #1 and the leather strips using the Straight stitch foot # 53 with non-stick sole . Finally, cut the connecting threads and shorten both outer sides of the bag to size.


The next step is to iron the Decovil I light to the reverse side of both outer sides of the bag. It is important to make sure that the stabiliser interfacing is cut to the right size so that there is a seam allowance of 1 cm on all outer edges. The interfacing, which starts off leathery and soft to the touch, goes hard after heating and creates unsightly, rubbery seam allowances – so it should always be cut short there. I forgot to photograph this step, so here’s an adapted image. Place the “slightly sticky” side of the Decovil on the reverse side of the outer side of the bag and iron. Protect it with a layer of baking paper. Cotton iron temperature. The adhesive step takes approx. 2 minutes to complete a whole side – make sure you iron in circular movements. The Decovil may discolour in places during this process. Important: The edges must stick extremely firmly.

Now it is time to do the bottom of the bag. This is included in the leather kit from NadelundFarben and has two double-sided adhesive strips on the sides. As leather is a flexible material and also should not be secured using pins, this adhesive helps to secure the leather and prevents it from distorting during sewing. Remove one protective strip from the adhesive strip and place the leather bag bottom flush on the bottom edge of one of the outer sides of the bag (right side to right side). Press down.


Now I also use a no. 90 leather needle and the zigzag foot with non-stick sole # 52 D and sew the first long edge of the leather bottom using 2 mm stitch length and a seam allowance of 1 cm. Then attach the second outer side of the bag to the opposite long edge of the leather bottom. Then I switch back to the straight stitch foot with non-stick sole, turn the whole outer bag section to the right side and sew close to the selvage along both long edges of the leather bottom again using a 2.8 mm long straight stitch. This makes the bag look really professional.


This is what the project looks like so far, from the front and the back:


Now, just like when I made the bag lining, the front and back part of the outer bag, incl. the leather bag bottom, are put together. Place both parts together precisely. Important: the leather seams must match exactly. Secure all the sides except the opening with pins and sew together along a line that is the width of the machine foot away from the edge. Always sew from the upper surface to the lower, right down into the leather. Firmly secure the seam ends.


Next come the corners of the bottom, which are a bit trickier than with the light bag lining. But the folding and sewing technique is the exactly the same. However, I used the straight stitch foot with non-stick sole # 53 again, because it just manages to sew over the thickest bulge of leather.

That’s most of the work done. In many courses, I’ve seen how various sewing machines have been able to sew this awkward bag bottom corner. Even if it came at the cost of gritted teeth and one or two broken needles. A no. 100 denim needle is ideal here, because the fabric is really thick. The two bag sections now look like this – at the very bottom is the outer bag and above it is the bag lining. Turn the outer bag right side out. The bottom corners on the outer bag are not cut back, but are just folded down towards the bottom and stuck to it with a piece of strong double-sided adhesive tape.


Now it’s time to attach the shoulder straps. As both parts of the bag will soon be pushed into each other, it’s practical to position and secure the shoulder straps with a few stitches. To do this, I measure 12 cm in from the side edge and place a pin in the fabric, place a shoulder strap next to it and place a second pin into the fabric at the other edge of the strap. I do the same thing on the opposite side. Here, you need to check whether you like the fit or whether you want to place the straps closer together in the middle. If necessary, alter the distance from the side edge of the outer bag. The shoulder straps should also reach approx. 3 cm over the edge of the bag and are currently placed right side to right side on the fabric.

Then I place the outer bag beneath the presser foot, check again that the shoulder straps are pointing straight down, that the margin at the top is correct and that the strap is positioned precisely between the two pins. Then I sew it in securely with a few stitches close to the selvage. Before you do the other strap end, check that it hasn’t twisted. Even though there are a lot of layers, the 820 Bernina glides effortlessly right on through, because the leather materials are very soft and not as tough as many commercial handles.

We’re getting close to the end now: Pull the bag lining right side to right side over the outer bag. The shoulder straps should be between the layers. Secure the upper edge firmly with pins. Make sure that the outer seams are matched precisely with the side sections. Now everything goes under the sewing machine again. Now I’ve put my brand new Patchwork foot with guide #57D to good use and I think it’s great. As soon as you’ve sewn all around the edge and upper edge is closed off, turn the bag through the opening in the bag lining. Then bring the bag lining in, pull it down and match it to the upper hems with pins. To ensure the edge can be sewn correctly and snag-free, I first iron this upper edge with the pins. Then sew again around the entire upper edge.


The final step is to attach the magnetic press button. I love fastenings of all kinds, because I’m not a fan of zips (even on shop-bought bags….). To insert the press button, you need two pieces of Decovil I light measuring 5cm x 5cm, two small scraps of Thermolam or bag interfacing, a pen, seam ripper and a magnetic press button with 2 washers.
The two pieces of Decovil should be pushed into the open bag lining from below up to the upper edge of the bag (the last seam you sewed) and positioned between the securely sewn shoulder straps. Adhesive side should face up towards the lining fabric. Smooth out the lining fabric and carefully iron the insert. Protect the leather of the shoulders straps with baking paper or fabric. Place the press button washer on the lining material, where it has been ironed with Decovil, and transfer the markings from the open side slit. Very carefully, open the two markings using the seam ripper. Mark the two scraps of Thermolam or bag interfacing in the same way and open using the seam ripper. Push the prongs of one of the two corresponding parts of the press button through the lining fabric from above; with your other hand grip between the bag lining and outer bag, push the opened scrap of liner over the prongs, place the washer over it and press the prongs out to the sides.
Then place the counterpart section of the press button on the secured press button, mark the end of the prongs with sewing chalk and press both outer sides together so that they match exactly. Now there’s a solid imprint on the opposite side of the bag that can be marked with a pen and the second part of the magnetic press button can be inserted in the same way.


Alternatively, a separate floor can be inserted to stabilise the bottom of the bag using a piece of Decovil I (the tough saddlecloth) and a specially made fabric covering, which is then just pushed into the bag. The opening in the bag lining has to be closed up, either by hand or with the sewing machine.
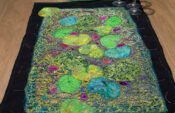
And now the shopping bag with weave strip trim is finished! Here are a couple of other bags that I made a few years ago, before I started dying and printing my own fabric – these bags look great in shop-bought fabrics as well. The leather kit includes 4 wavy strips, 1 bag bottom and 1 pair of shoulder straps. It is available in 17 great colours on request from www.nadelundfarben.de. (Click on the small photos to enlarge.)
Here is the link for the leather kit and more information:
http://www.nadelundfarben.de/index.php/80-nadelundfarben/home/129-lederkit-zum-trendigen-shopper


And these two evening bags made entirely using the weave technique were a lot of work – but worth it:


Have fun making your bags!
All the best,
Jutta Hellbach
//
Thankyou!