 BERNINA Corporate Blog -
Dear community,
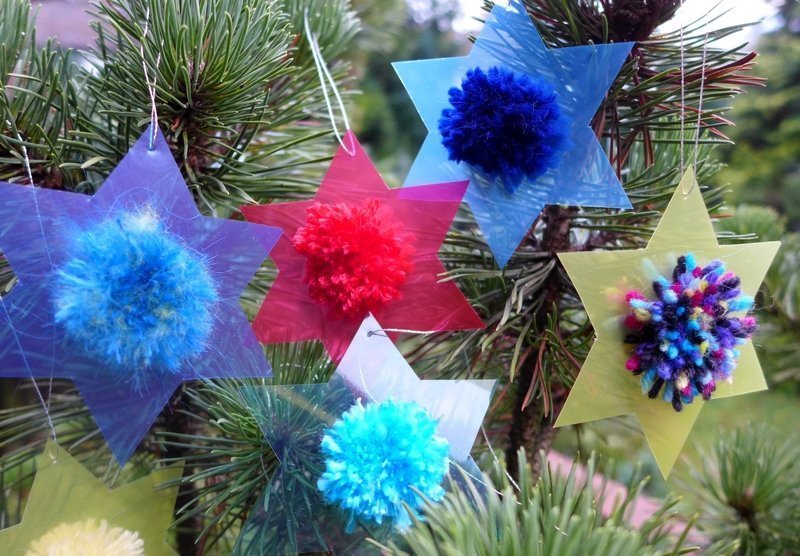
in this blog post you can find easy instructions for making star-shaped Christmas pendants (with free pattern) – perfect for Christmas and New Year’s Eve!
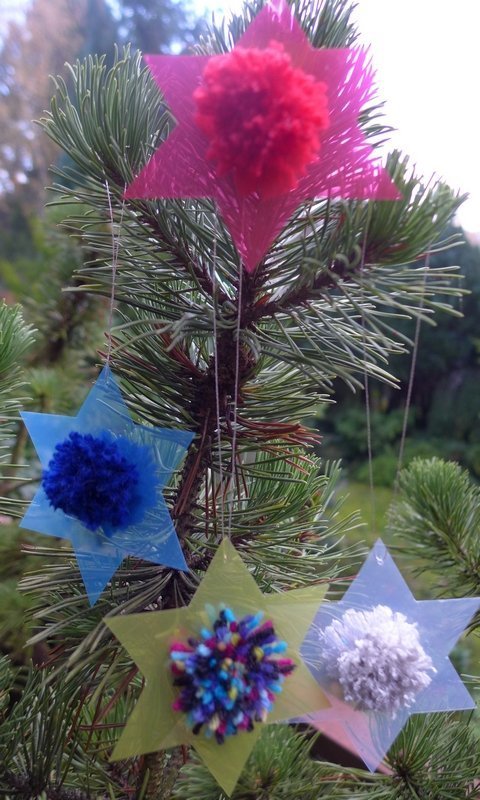
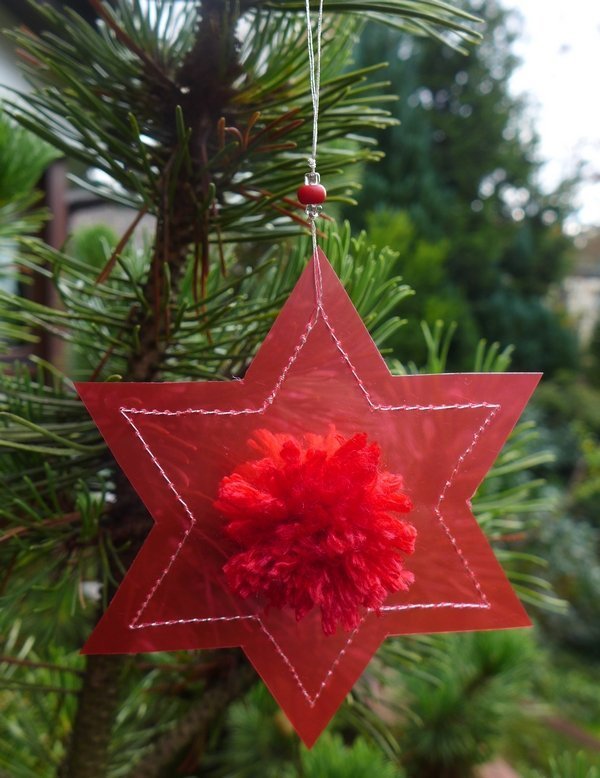
Shiny plastic film and wool. Tapered to a point and softly rounded. My love for material, shape and colour contrasts is reflected in my idea: new stars for Advent bouquets, Christmas trees, present decorations etc.
The material is easy to obtain. Just rummage around in your basket of scraps for wool for the cute little pom-poms. Thinner yarn is best for this, of about needle size 3.

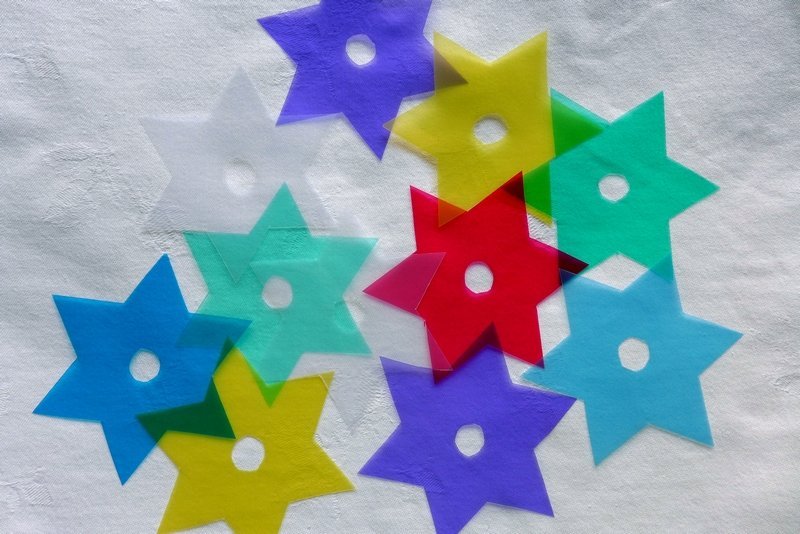
The stars have to be cut out of plastic film. You probably have a few of those protective plastic cases for letters or CDs hanging around somewhere. If not, your local stationery shop will have a whole assortment of suitable items made from coloured, shiny, transparent plastic film, such as file covers or sleeves, indexes, binders, elastic folders etc., that you can use for your own purposes.
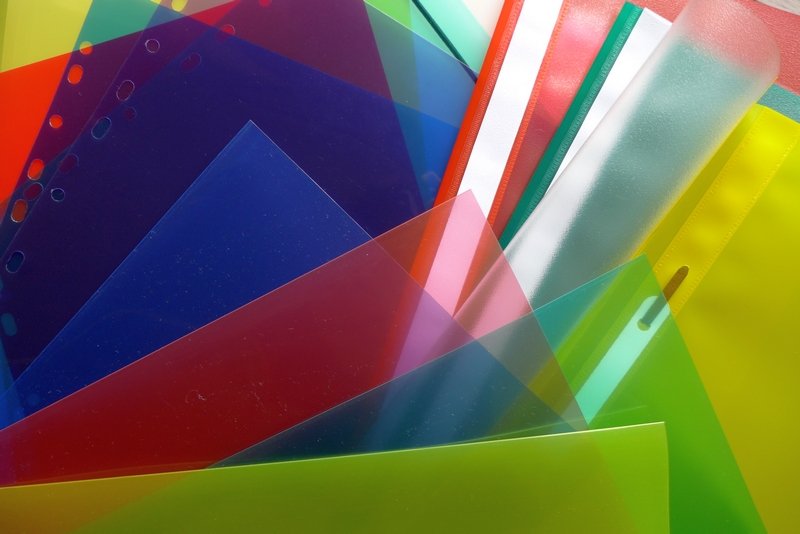
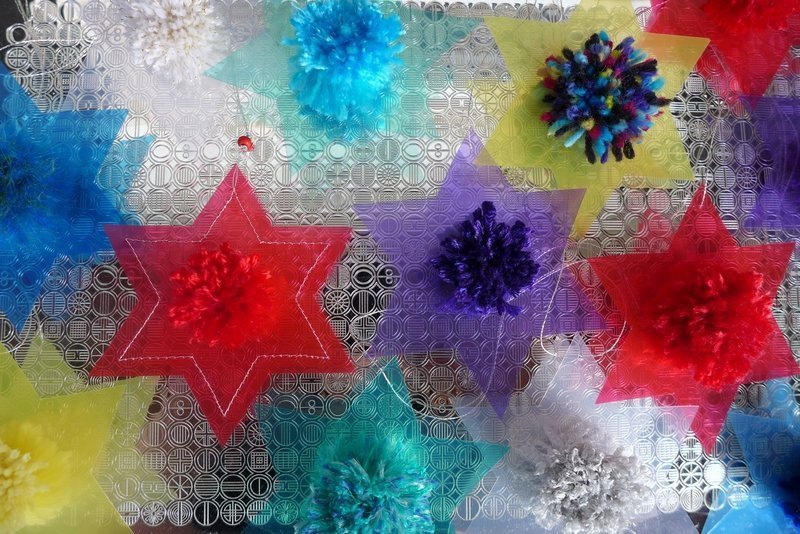
The colours of the wool and film should complement each other. And: Would you like your stars to be fun and colourful or would you prefer them in an elegant plain colour?
Next you will need a cardboard template (card of about the thickness of a postcard) for the six-pointed star shape.

My stars have a diameter of 8 cm and are designed with the method for making the mini pom-poms in mind.
The pattern to copy is available to download as a PDF: Star
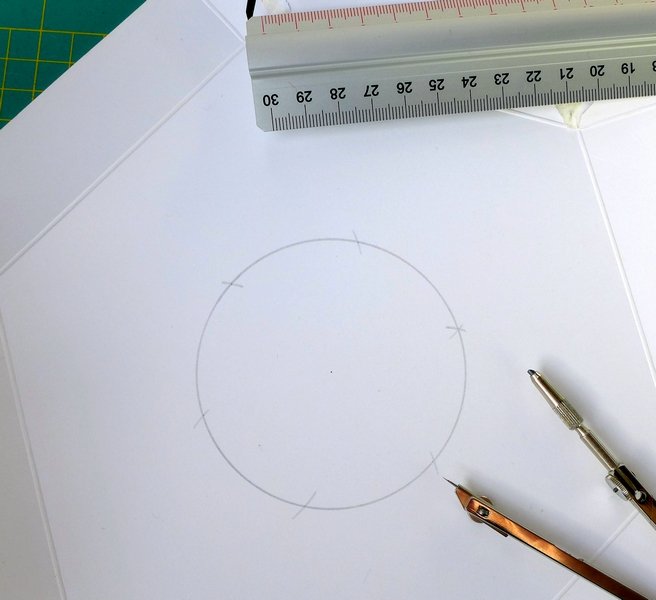
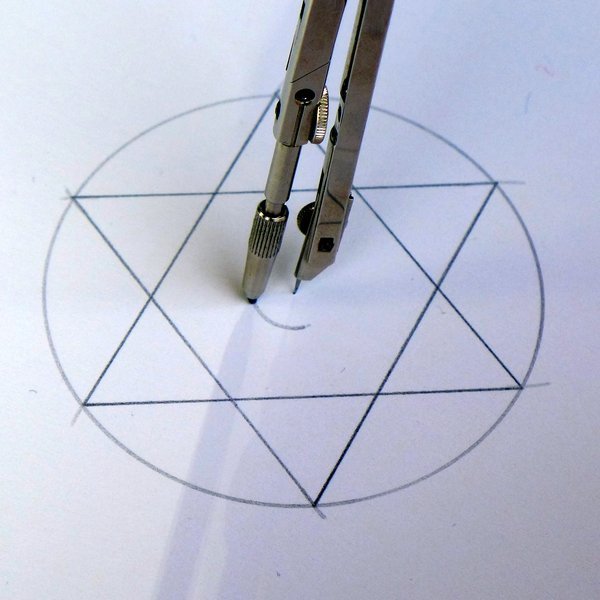
Anyone who would like to design their own six-pointed star should proceed as follows: It is easiest to first decide where the corner points will be for a six-pointed star, using a compass, ruler and pencil. Draw a circle with a radius of 4 cm on the reverse side of some packaging (e.g. packaging for chocolates or tablets – the thickness of the cardboard is usually perfect for this purpose) using your compass. Without adjusting the compass, set it at any point on the circumference of the circle and draw another circle. We only need the points of intersection. Set the compass on these points and draw in the next points of intersection. Continue until you have drawn six circles around your original circle. This technique uses the mathematical fact that the radius of a circle can be drawn as a chord exactly six times around the circumference of a circle.
Now you will need a ruler and a pencil. Connect the six intersection points with a continuous line to create a hexagon. Connect the points of the hexagon with lines in the shape of two triangles on top of each other facing opposite directions, both with equal sides, and you have your six-pointed star.
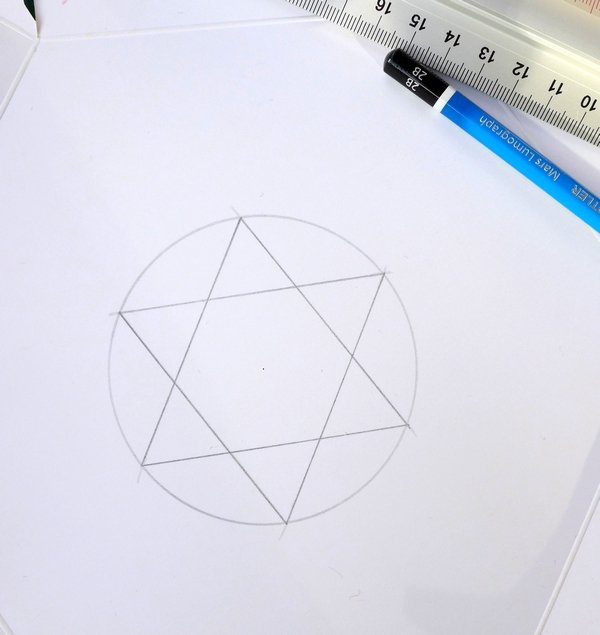
Now all we need is the small inner opening. Set your compass to a radius of 0.6 cm, set it in the centre of the circle again and draw a smaller circle.
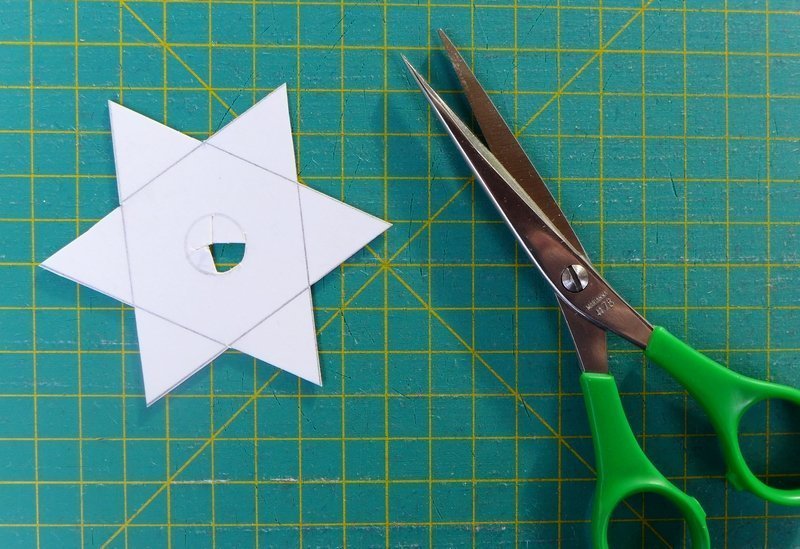
Cut out the star and the opening. The template is ready.
As well as the template and foil, you will need to have the following tools ready:
multi-purpose scissors, ballpoint pen and adhesive foil, for making the film stars.
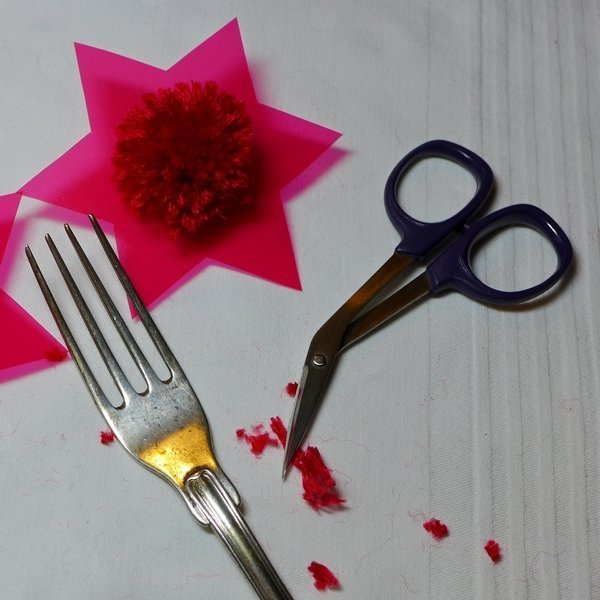
You will also need wool and sewing thread in complementary colours, a sharp pair of craft scissors and a fork for the next step.

Next, the stars have to be cut out of the colourful film. Lay the template on the film and fix it down with a small piece of adhesive tape over one of the points so it doesn’t slip. Draw the small circle for the opening in the middle. Hold the film and the template firmly, and first cut out the rough shape of the star, then trim to the exact shape along the edges of the card. NB: Cut the part with the adhesive tape out last, otherwise the template and film will slide out of place. And finally, cut out the opening in the middle.
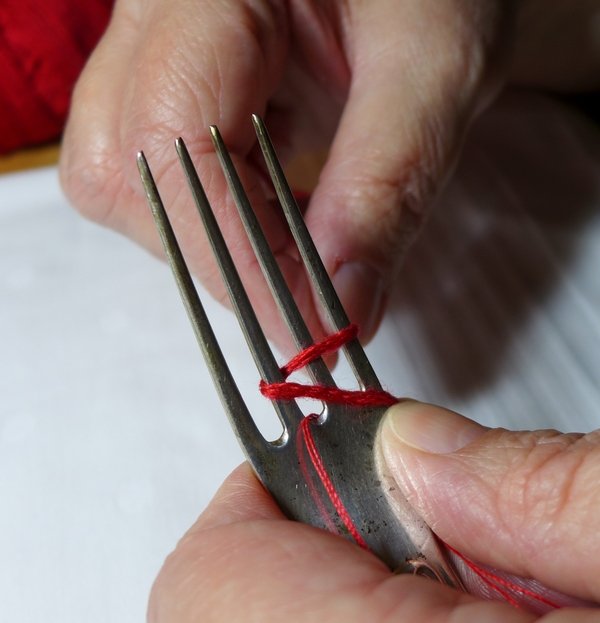
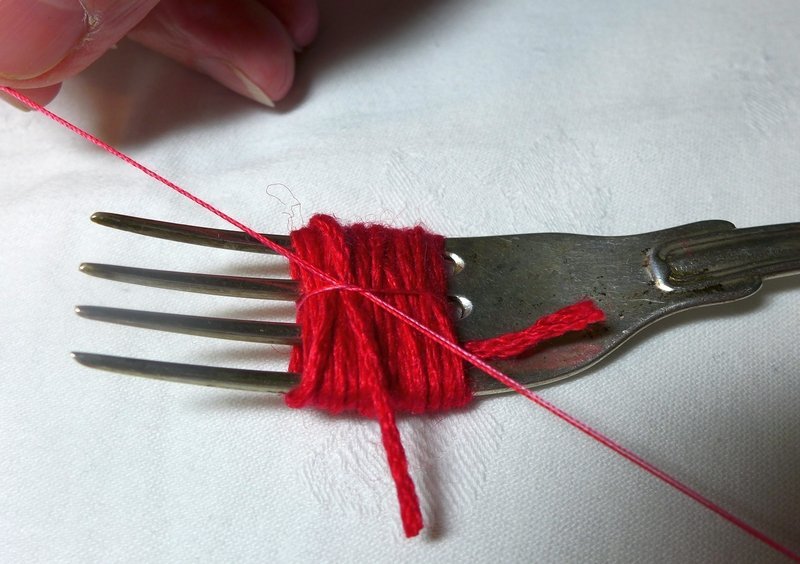
Now you need the fork, the wool and sewing thread in a suitable colour. Cut off an approximately 35 cm long piece of thread, fold it in two and insert it between the middle prongs of the fork, with half the length in front and half behind.
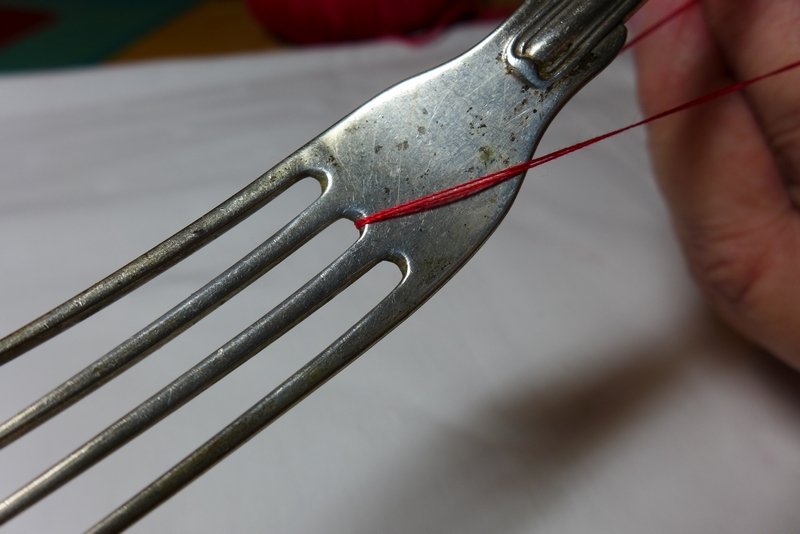
Hold the ends of the sewing thread firmly, along with the fork and the start of the wool thread. With your other hand, wind the wool thread around the inner prongs of the fork twice and then…
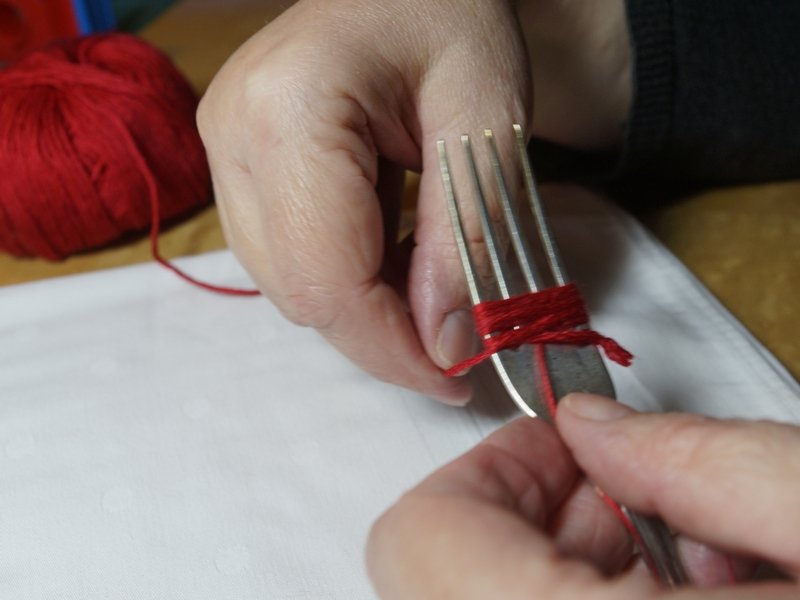
… wind the wool thread around all of the fork prongs, not too tightly but not too loosely …
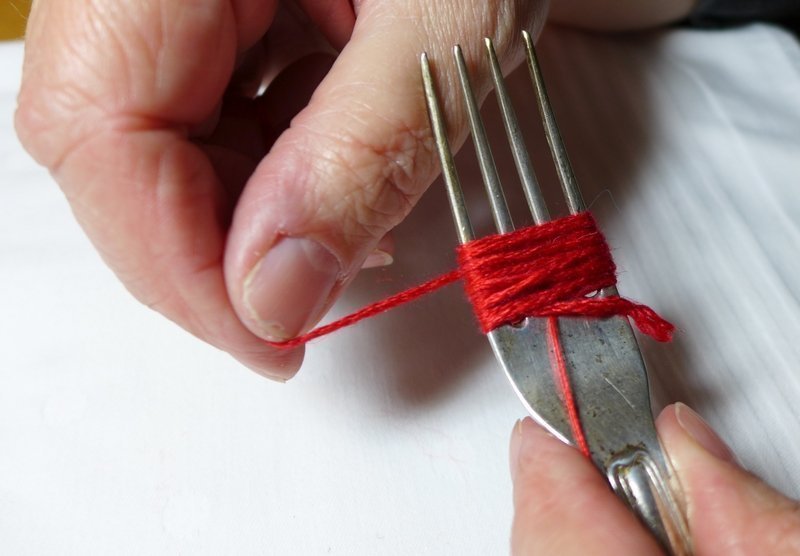
… until you have built up a little package of wound-up thread.
How much this is exactly depends on the thickness of the wool thread, but you will realise pretty quickly how much you need for the mini bobbles. For fleecy thread, e.g. mohair, you need a little less and the pom-poms will still be lovely and plump.
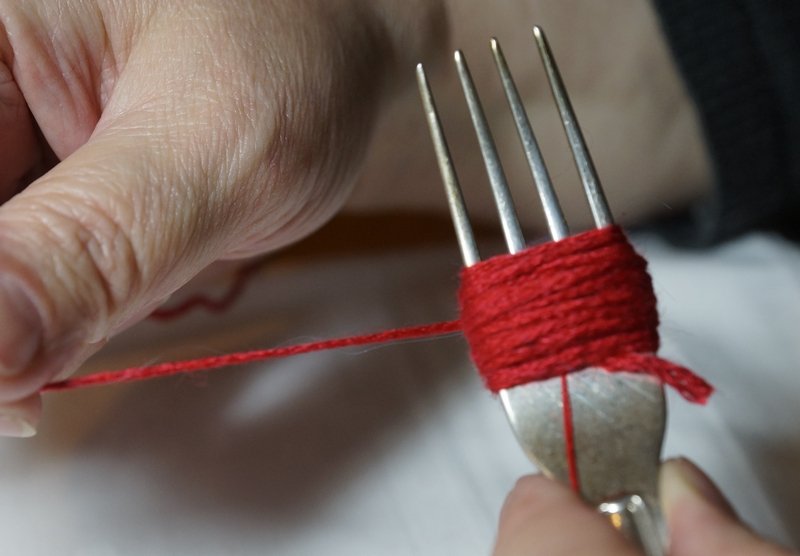
To fix the wool loops in place, the sewing thread ends are knotted together. To do this, push the bottom half through the middle gap between the prongs and knot together once loosely.
Hold the knot firm with your finger and …
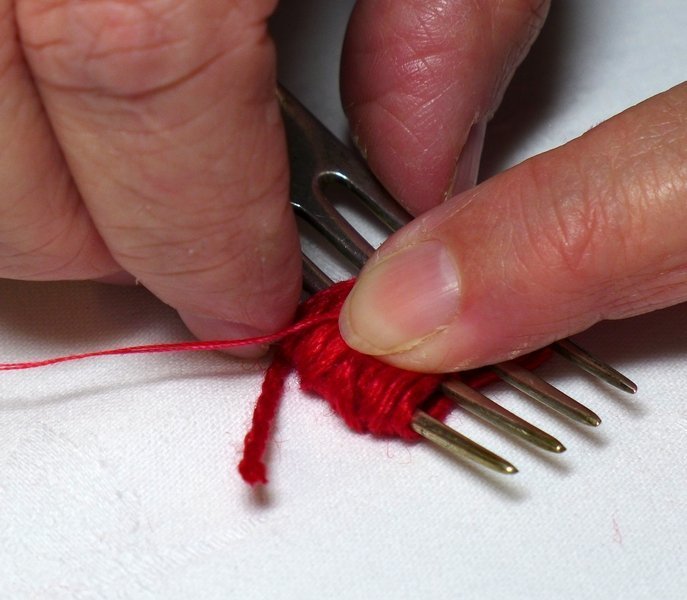
… with your other hand, push the wool loops off the fork carefully and pull the fork away.

Pull the first knotted loop firm, hold it with one finger and pull out the second loop of the knot. The firmer the knot sits and the ‘package’ holds together, the better.

Now pull one half of the wool loop package through the small opening in the middle of the star.
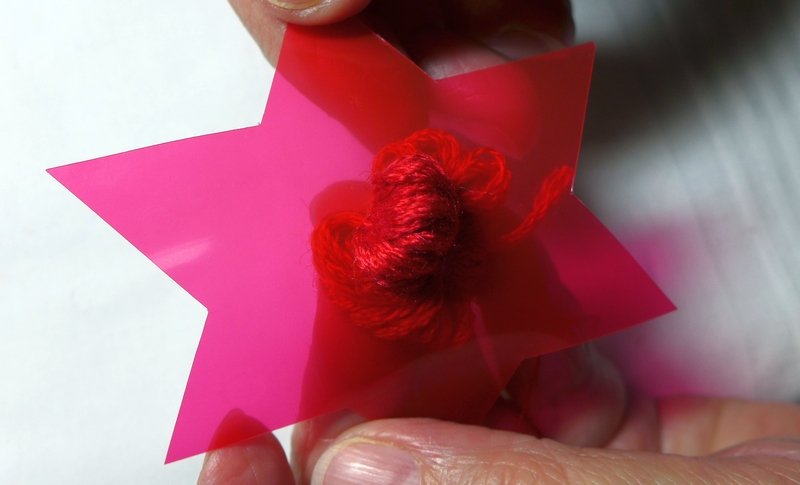
Hold the other half firmly in your hand.
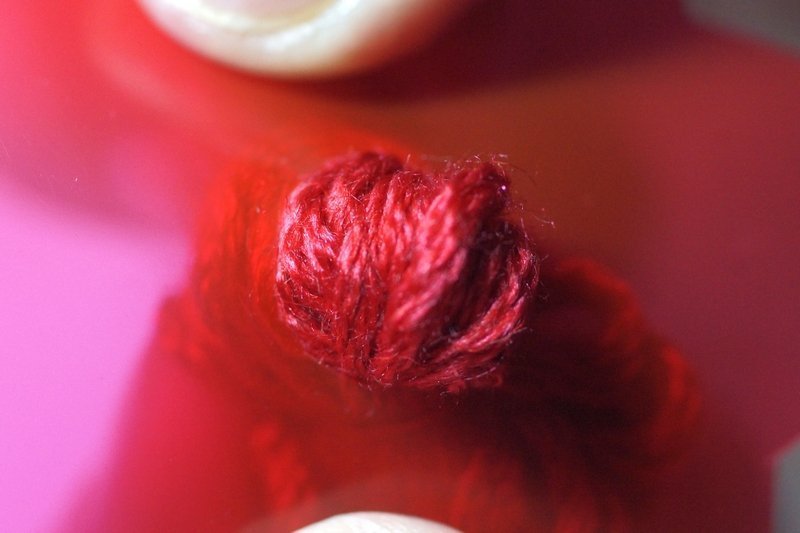
Although the first few loops will slide through by themselves, the rest will require a little delicacy and dexterity with your fingertips.
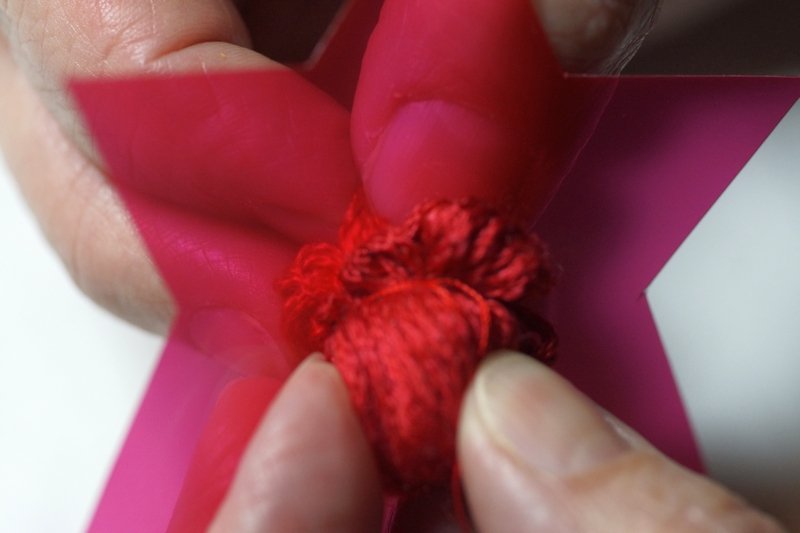
When the wool loops are finally distributed equally between both sides of the star …
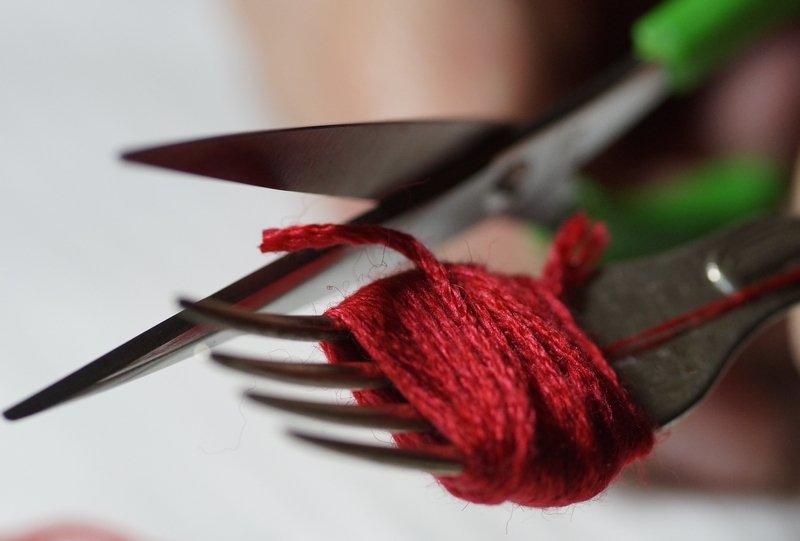
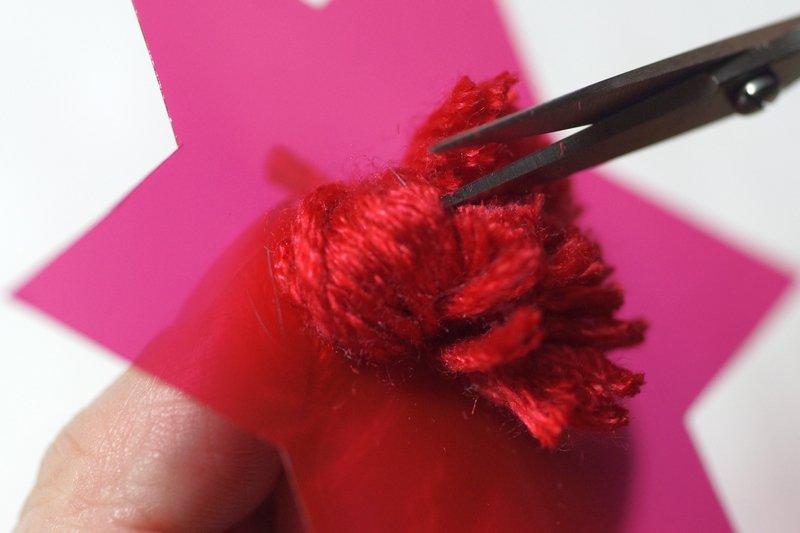
… the exciting moment has arrived: The loops are cut open in the middle …
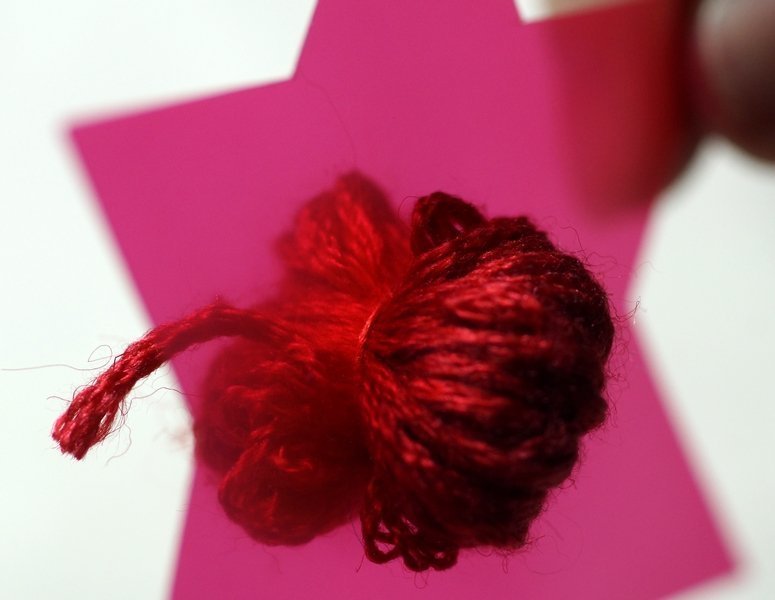
… and voilà: The little bobble unfolds itself. A pair of embroidery scissors is useful for this. But they must be sharp, because blunt scissors could easily pull out the short threads.
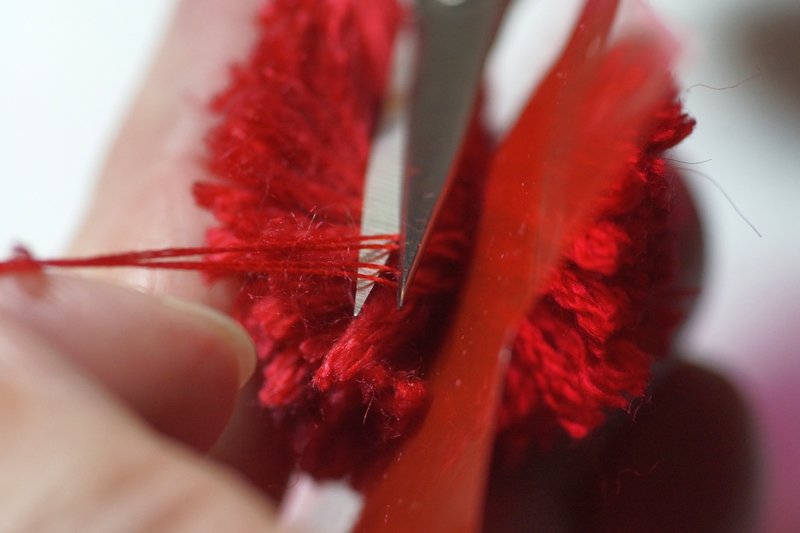
First work on one side, then turn it around and …

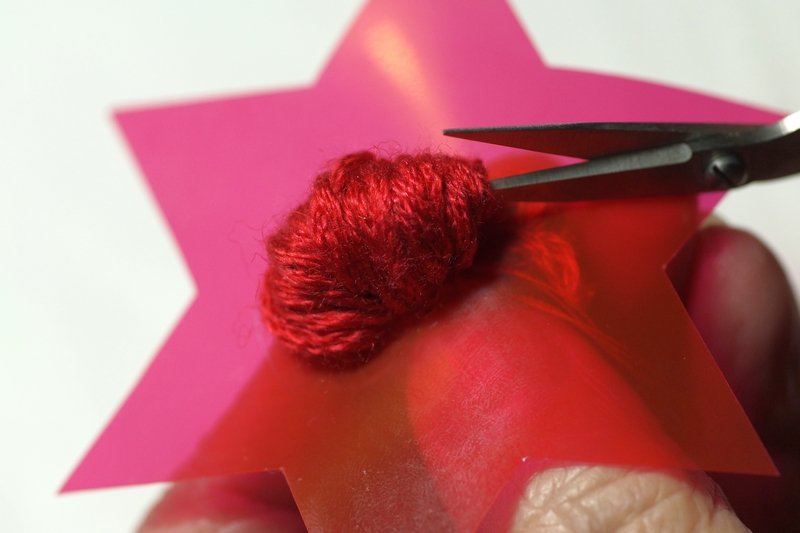
… cut open the loops on the other side.

Also, trim the ends of the sewing thread from the knot.
Now trim the pom-poms on both sides into a hemispherical shape …
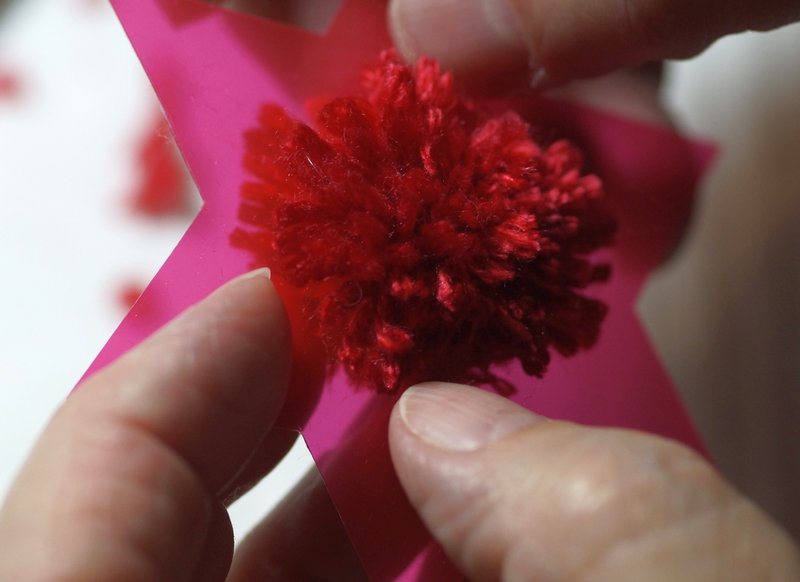
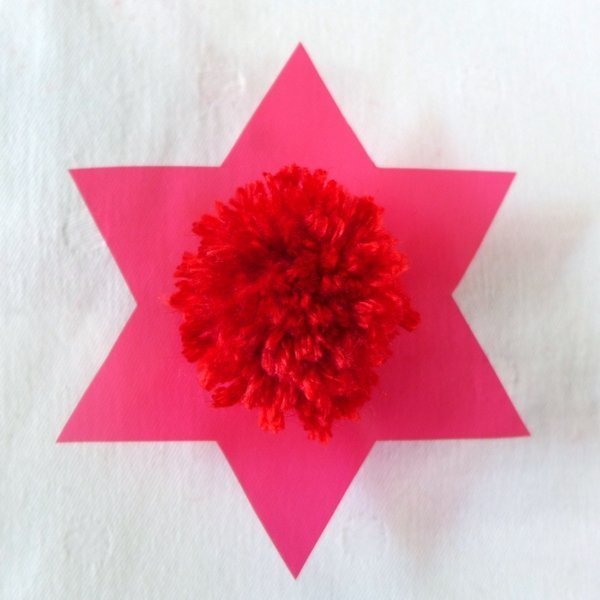
… stitch a silver or gold thread through one of the points of the star as a hanger, knot it and the new star is ready.
If you put the star under the needle of your sewing machine and accentuate the shape with a line of stitching in metallic thread, you can create a variant with a certain glamour factor.
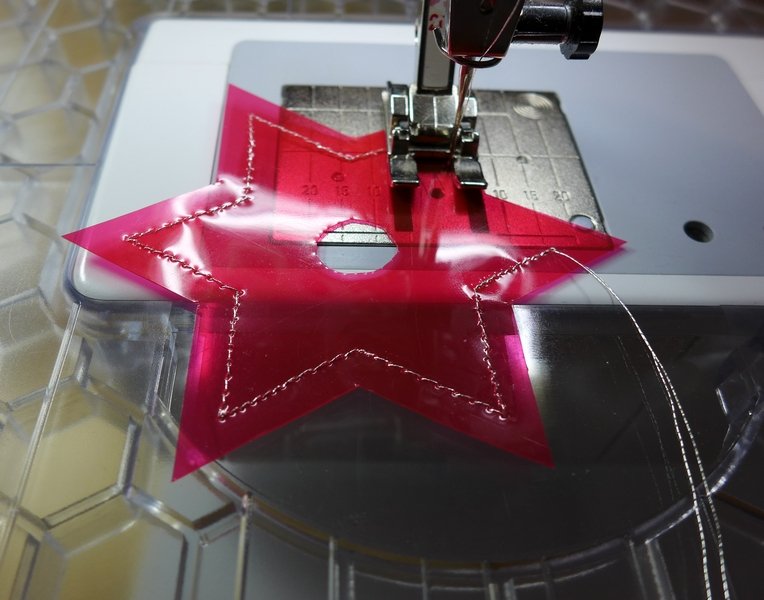
I used Mettler’s Metallic Silver thread, No. 40, as an upper and lower thread. I set the upper thread tension of my Aurora 440 QE to 5, set it to the open embroidery foot No. 20, adjusted the needle position to the far right and set the needle stop position to ‘down’ with the needle stop button, in order to be able to change the stitching direction properly in the corners. Do not change anything for the straight stitch setting, and do a test first on the remnants of the film. The seam should look perfect from both sides. Correct the thread tension if necessary. Although the smooth film is only made up of a single layer, my BERNINA stitched the outline without any problems.
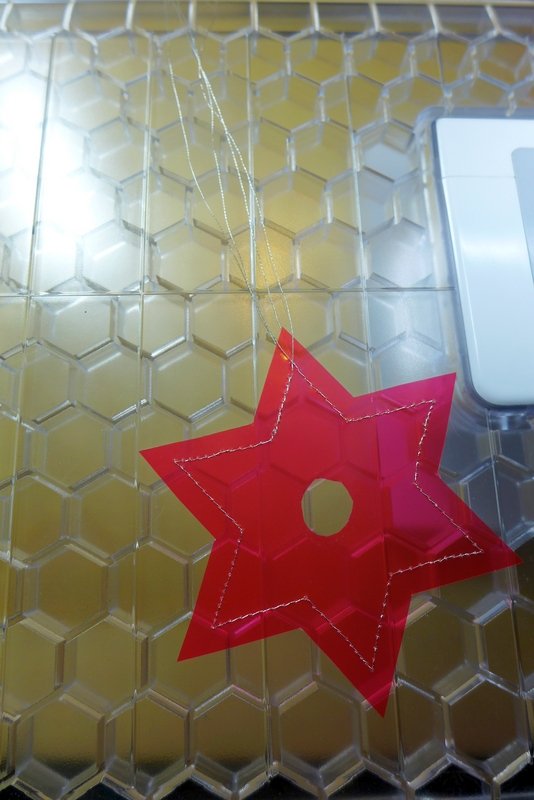
For the hanging loop, leave 20 cm of thread ends hanging at the beginning of the decorative seam and stitch around the edges of the star. Then at the end pull out another 20 cm of thread and leave it hanging before cutting off the thread. Knot the hanging threads together just above the point, thread little glass beads on as you wish, and then knot the threads together again. Now just prepare the pom-poms as described above and your new tree decoration is ready to use immediately.
Have lots of fun making the stars, decorating with them or using them for gifts and have a merry Advent and Christmas time!
Idea, method and photos: © 2014 Gudrun Heinz. Commercial use is not permitted.


So nice to read such kind comments! Many thanks!
Great idea! Such razzle dazzle potential.
Thank you so much, Hilary!
Wishing you and your family much fun while making,
Gudrun
Love them! My grandchildren will be occupied for ages making these. I can see that combining colours and swivelling the points would be fun as well. So many possibilities. Thank you.