 BERNINA Corporate Blog -
Dear community,
in this blog post you can find easy instructions on how to sew small linen baskets with Christmas trees (with free pattern).
Today you can open the 13th door of the Bernina Christmas calendar and receive instructions from me for making a small linen basket with Christmas trees!
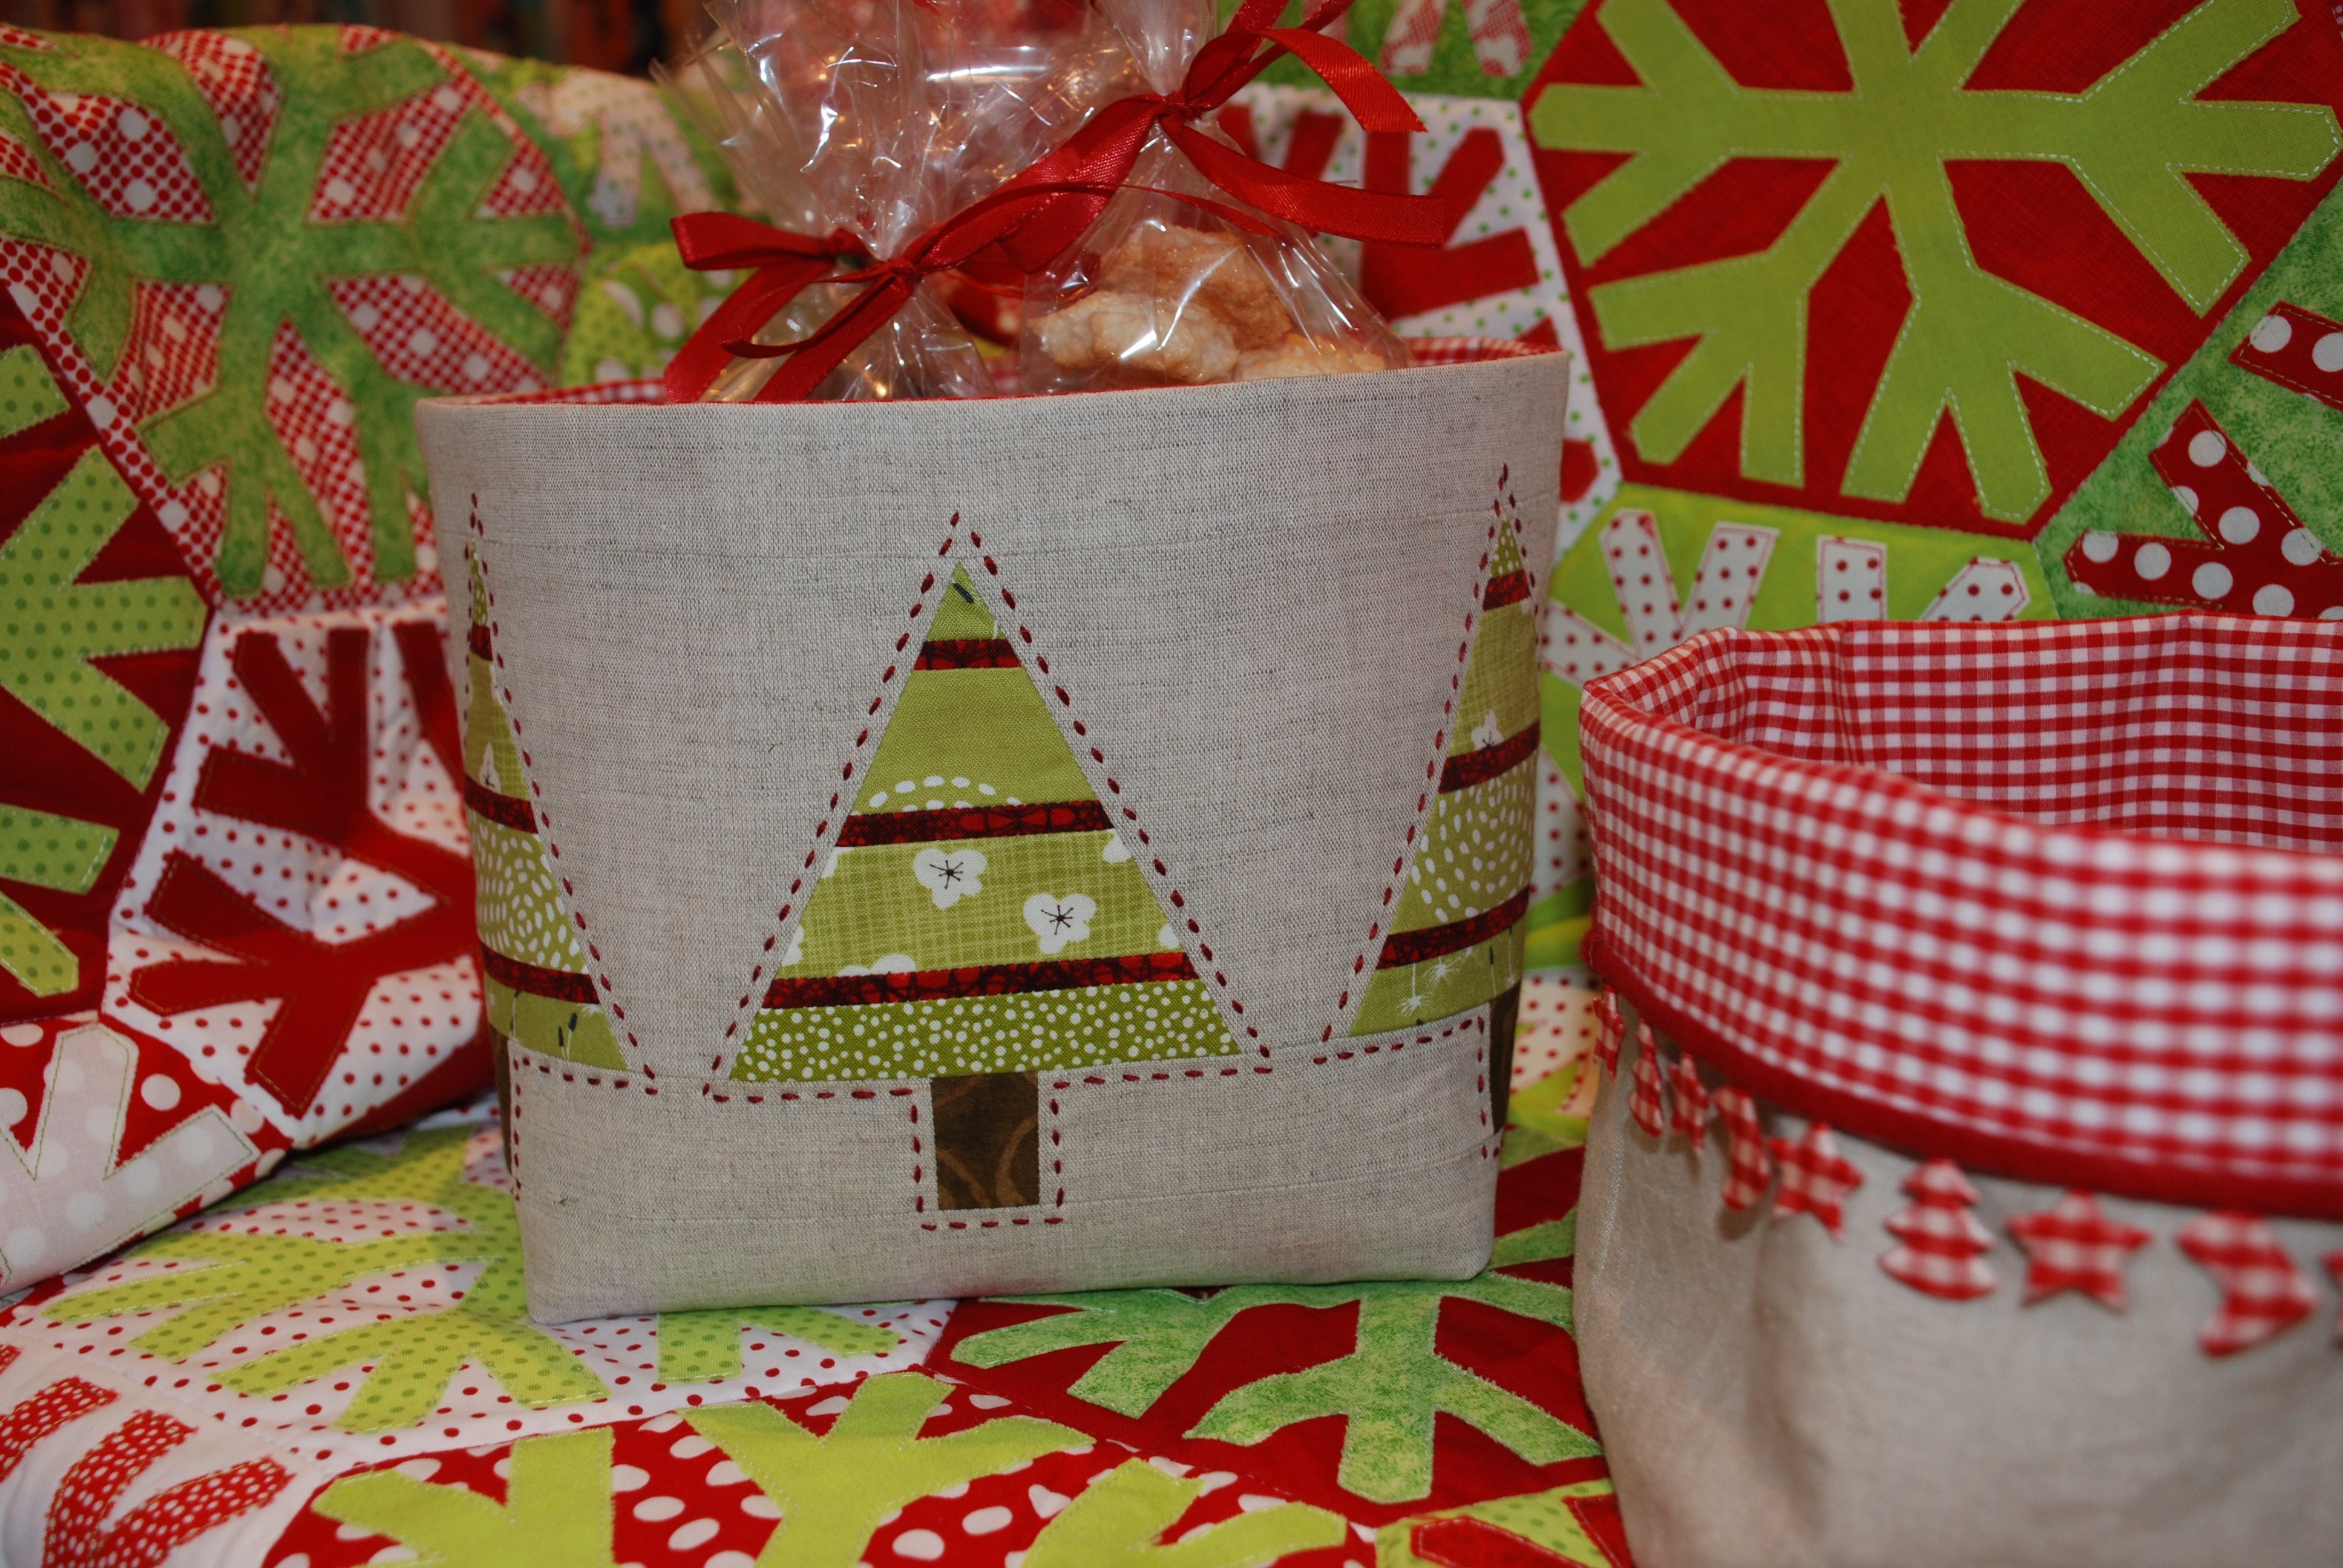
Last Christmas I made baskets like this out of lovely Christmas materials with plain inner lining and gave them as gifts to my loved ones. They were very well received and they can also be used the whole year round, not just at Christmas, as bread baskets, key holders etc. The use of an iron-on insert makes them very stable and they are even machine washable.
But first things first….
The Christmas basket is 18 cm high and its base is 18 x 18 cm. The instructions are in cm and the seam allowance is 1 cm.
Here is the material that you will need to recreate this basket:
35 cm linen (if it is too limp, then treat it with a decent dose of spray starch!)
30 cm fabric for the interior (cut out two rectangles of fabric of 30 x 38 cm each)
30 cm each of the H630 and S320 iron-on wadding inserts (from Freudenberg) (cut two rectangles of 30 x 38 cm from each wadding type)
Fabric remnants in green and brown
Embroidery thread
First, you can download the PDF with the pattern instructions for the Christmas basket. Make sure to download the file on your computer and to print from your Acrobat Reader software (printing directly from the web browser can lead to printing errors).
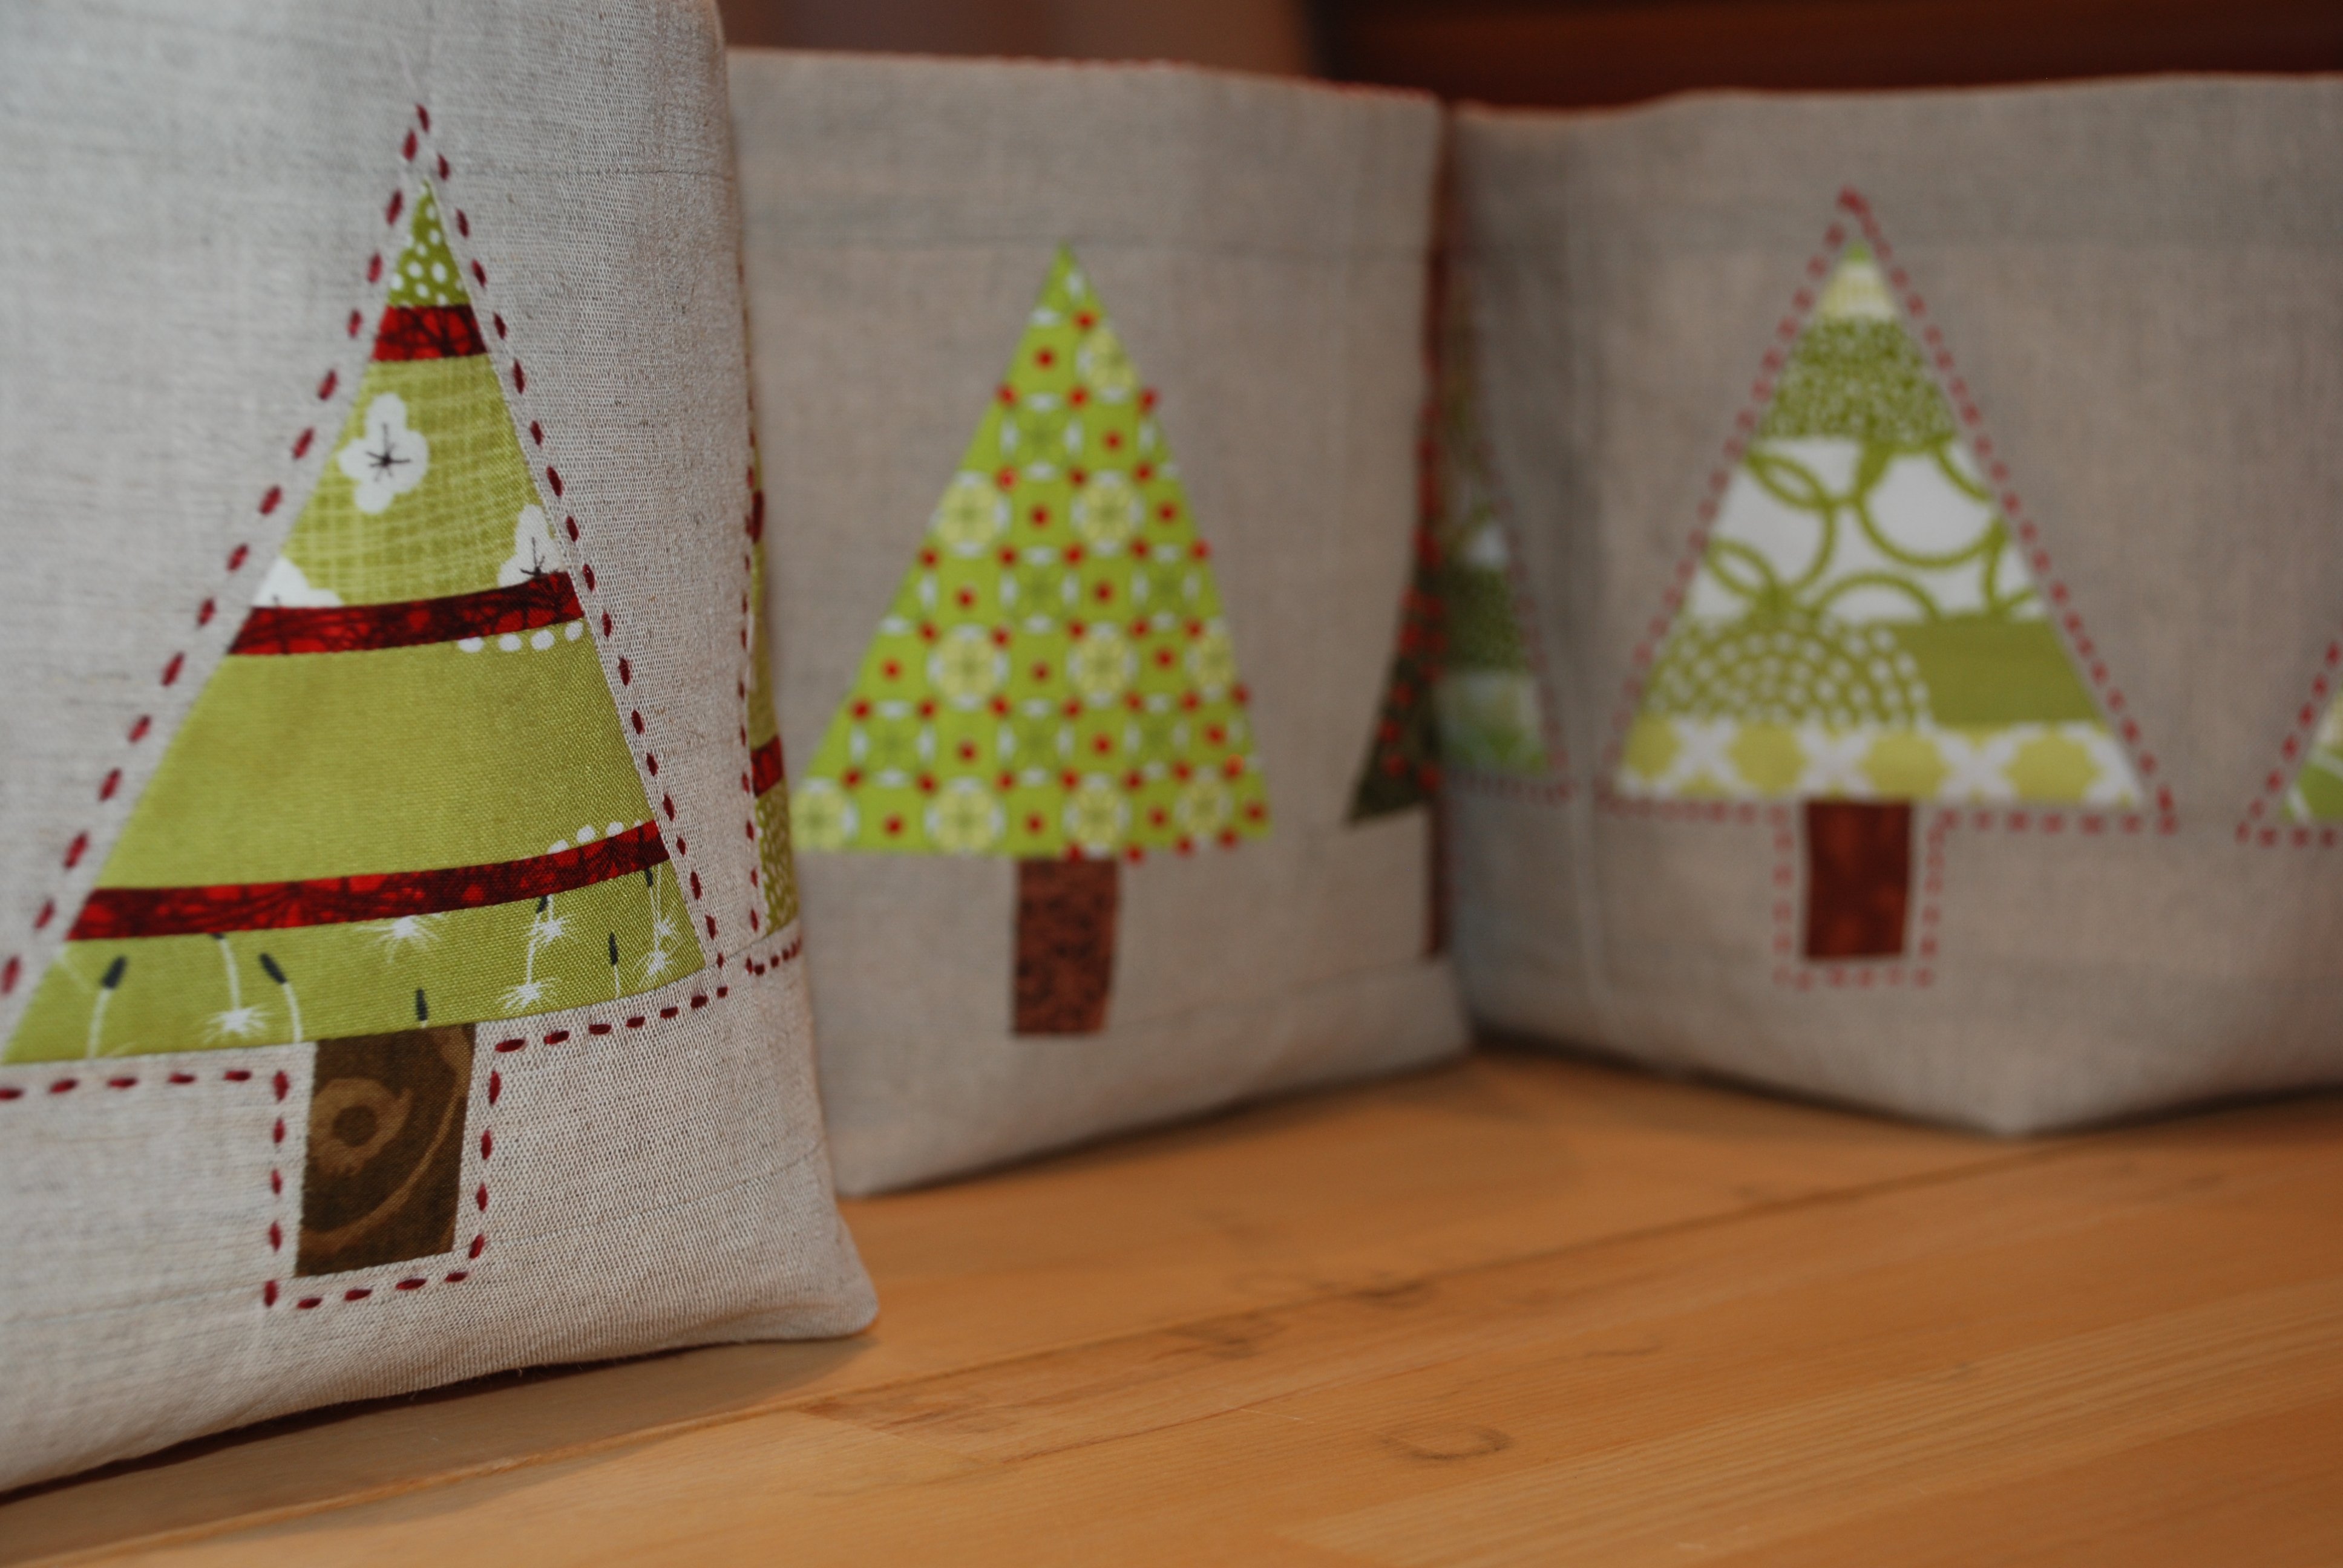
In the PDF you will find the individual sections that you must cut out of the linen and the two coloured fabrics. For the surfaces of the Christmas trees there are a few different options: You need 6 little trees, that you can simply cut out flat from a single piece of fabric or an assortment of green fabrics. You could also, however, cut stripes out of a variety of green fabrics, stitch these together and then finally cut the trees out of the resulting striped fabric. For this variant I followed the method below:

I cut off four green stripes of material of approximately 3 cm wide and stitched them together with red stripes of about 1 cm into a wide block. Finally, I laid the ‘Fir Tree’ template on the block of fabric and cut out the outline.
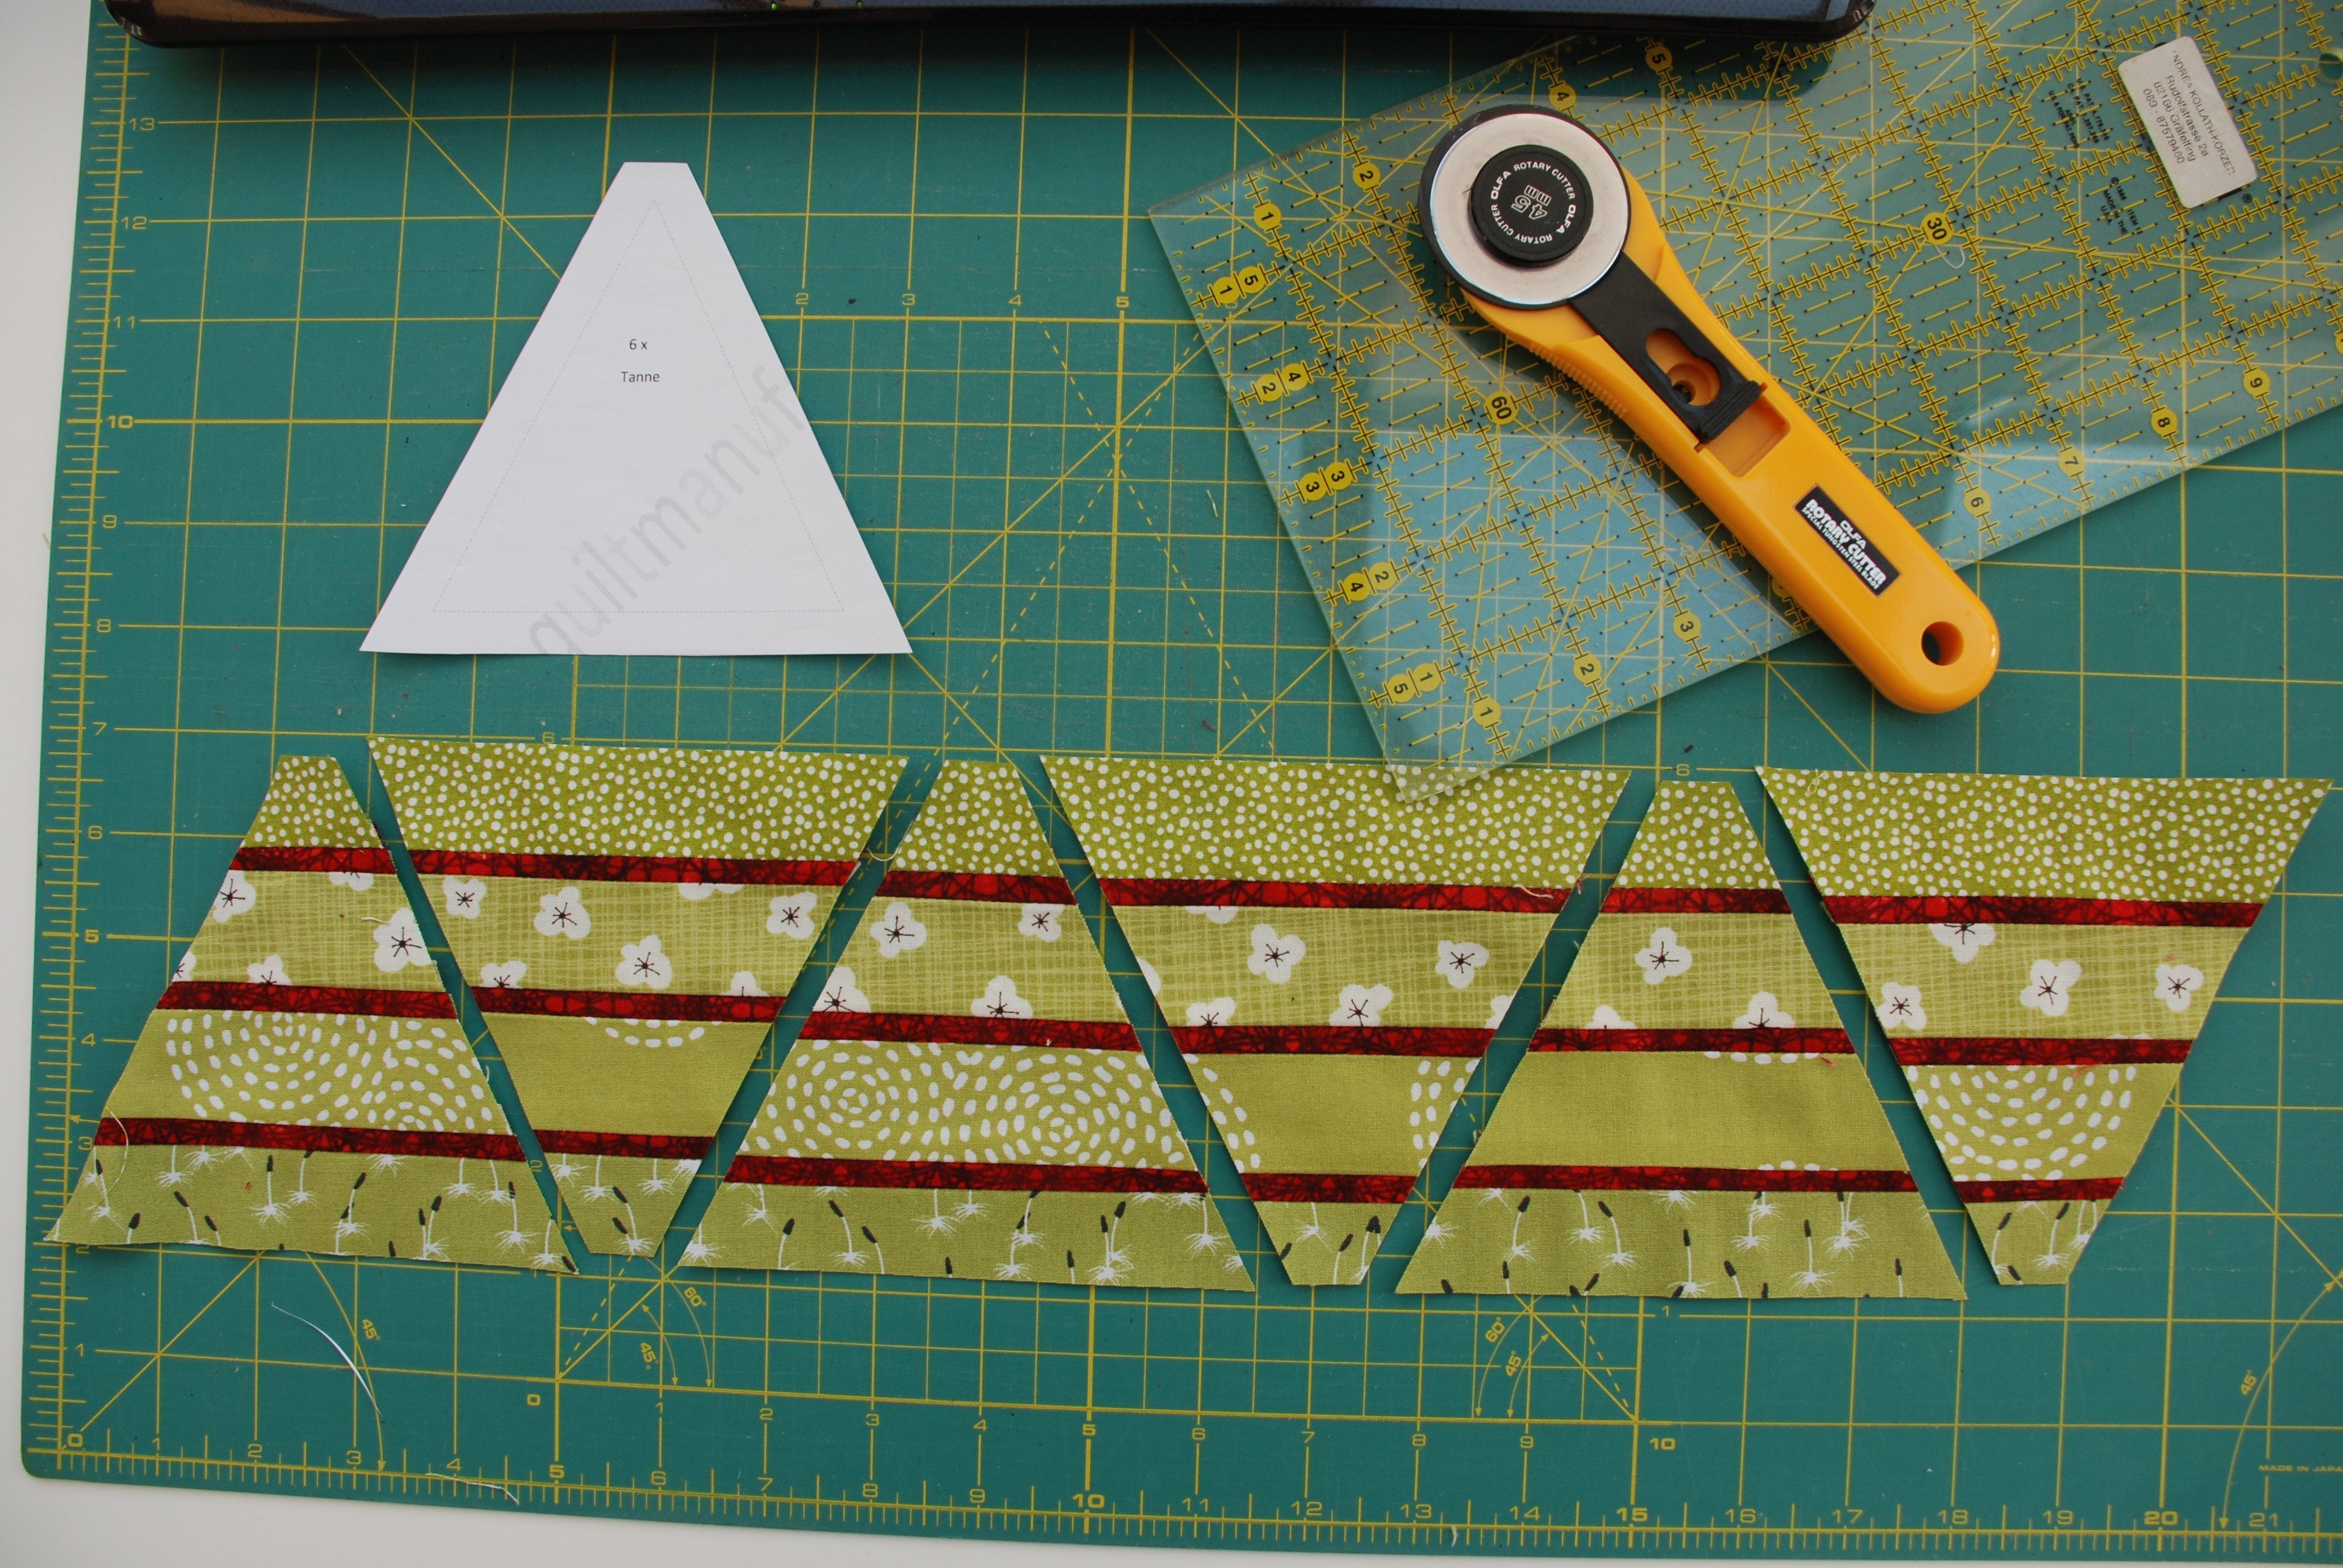
I alternated the position of the template on the fabric between pointing upwards and downwards before cutting each outline. With the help of a rotary cutter and a patchwork ruler you can achieve a wonderfully straight cut – but a pair of scissors works too 🙂
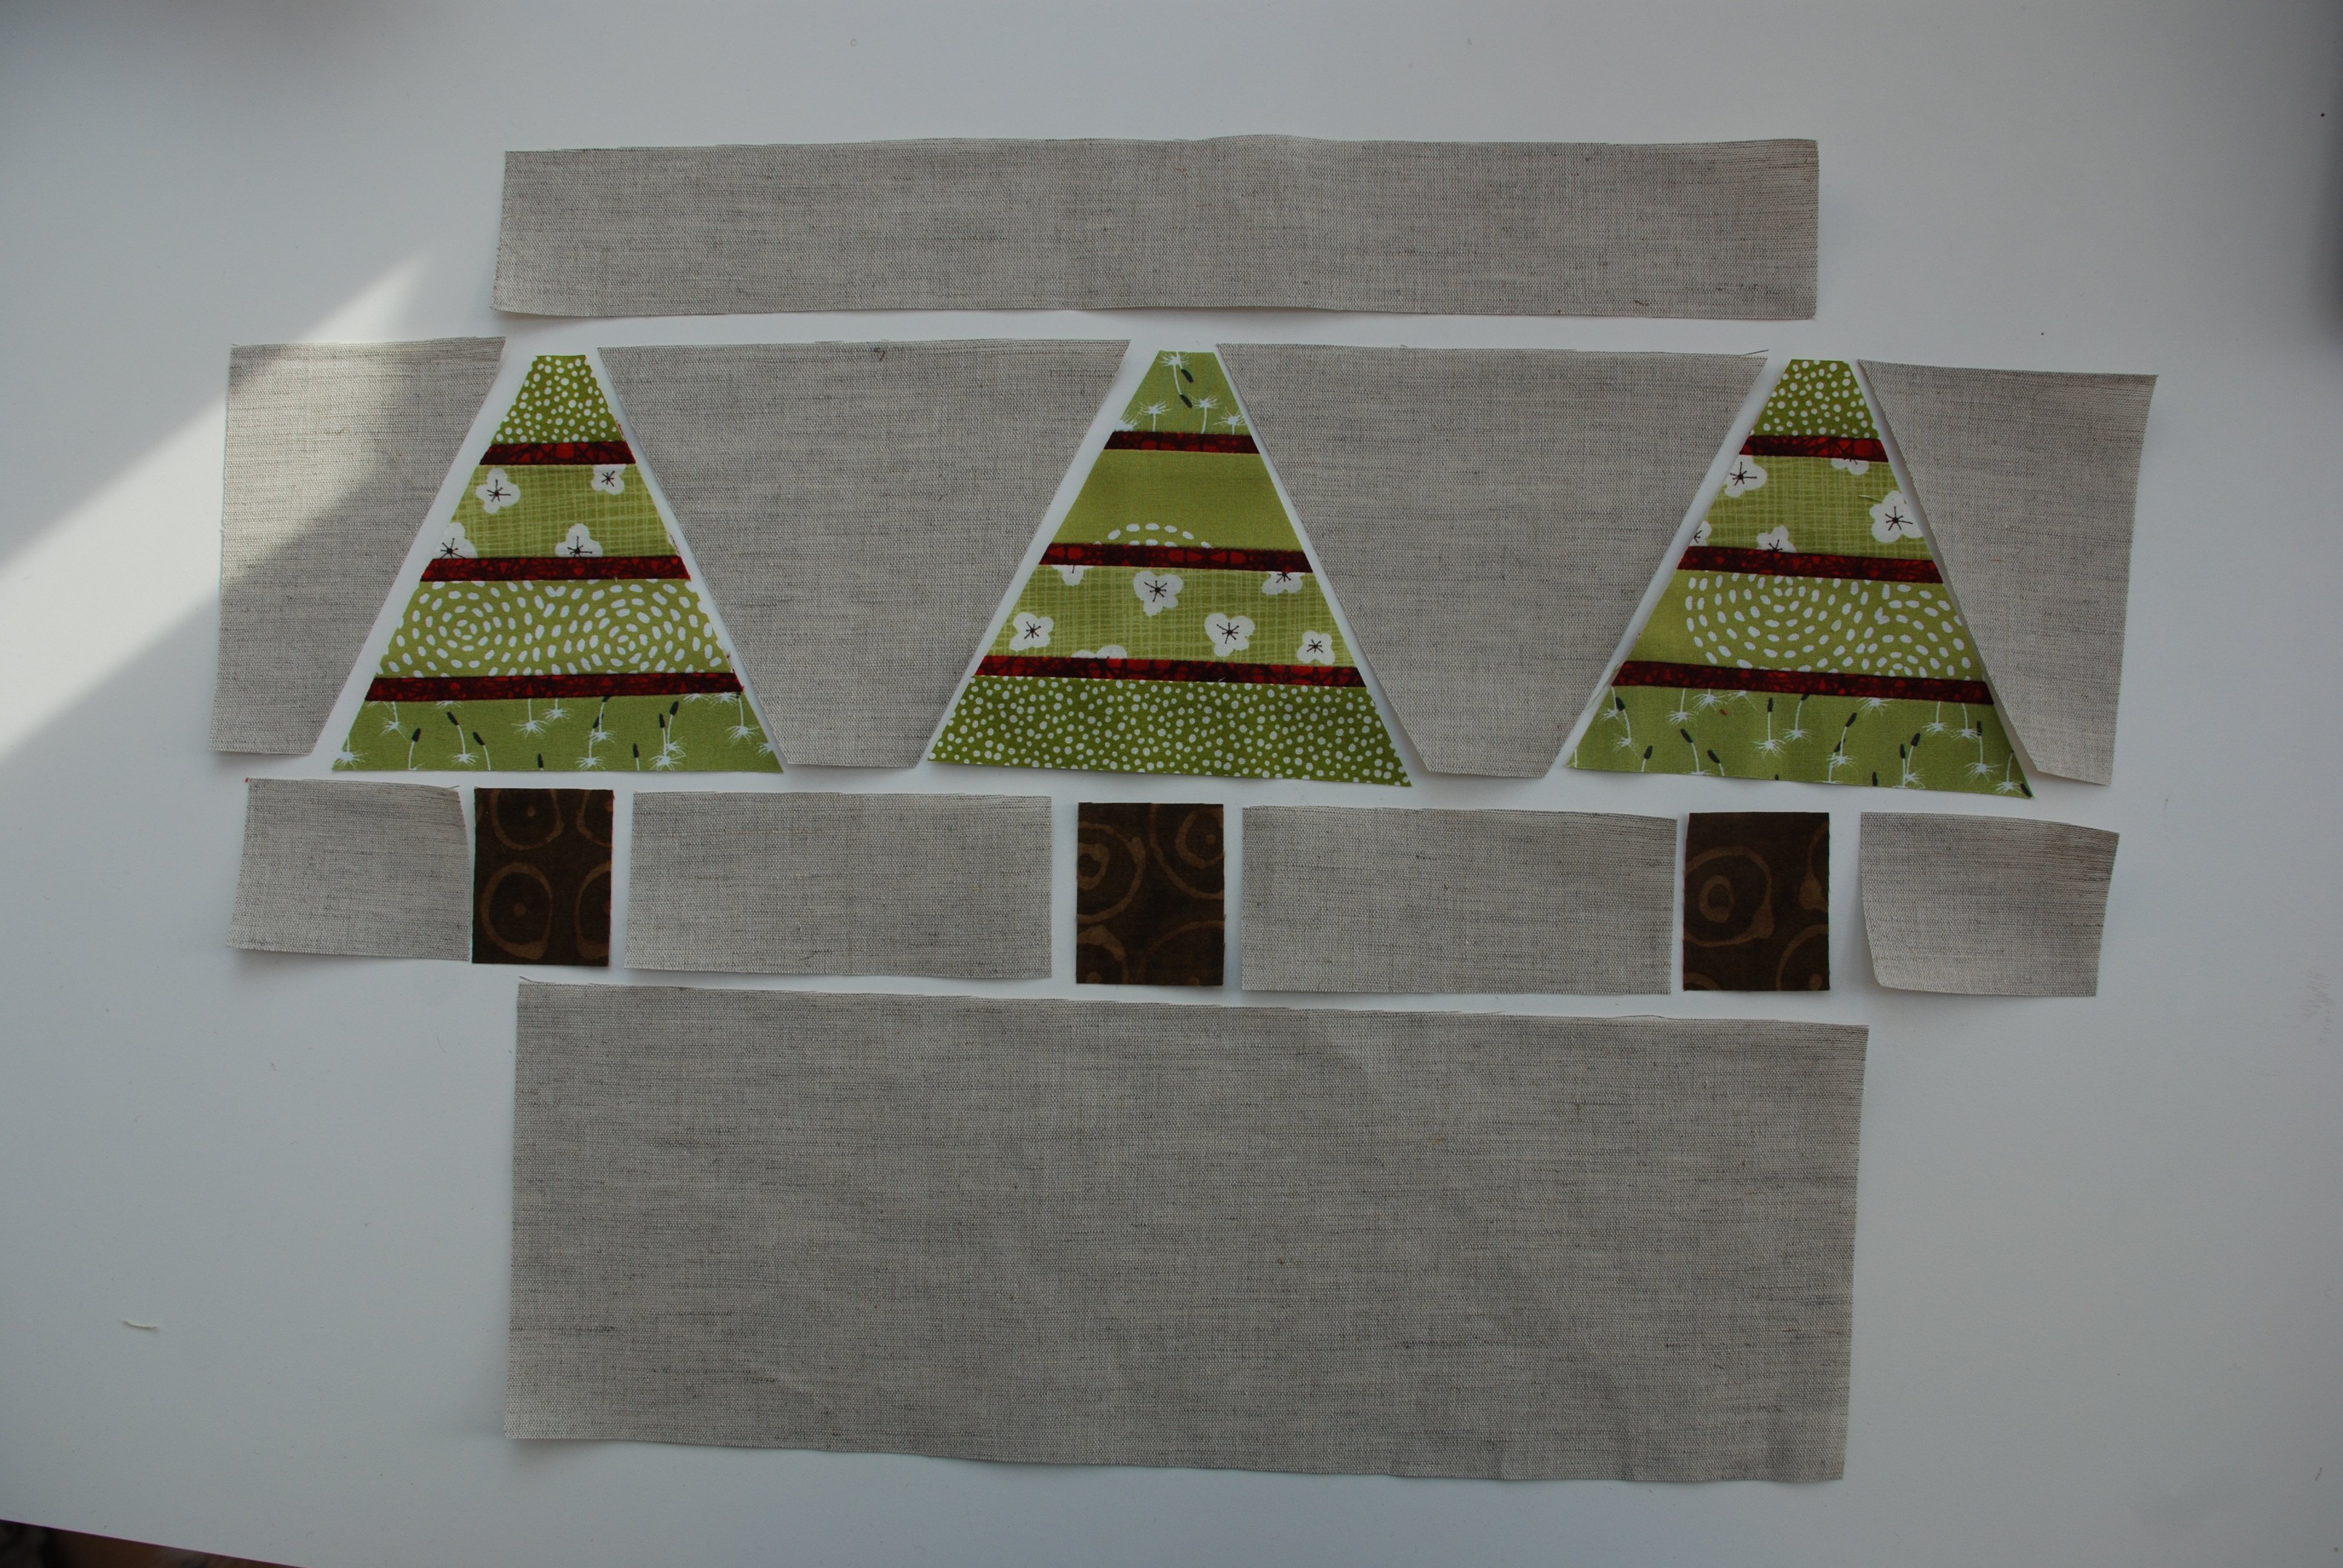
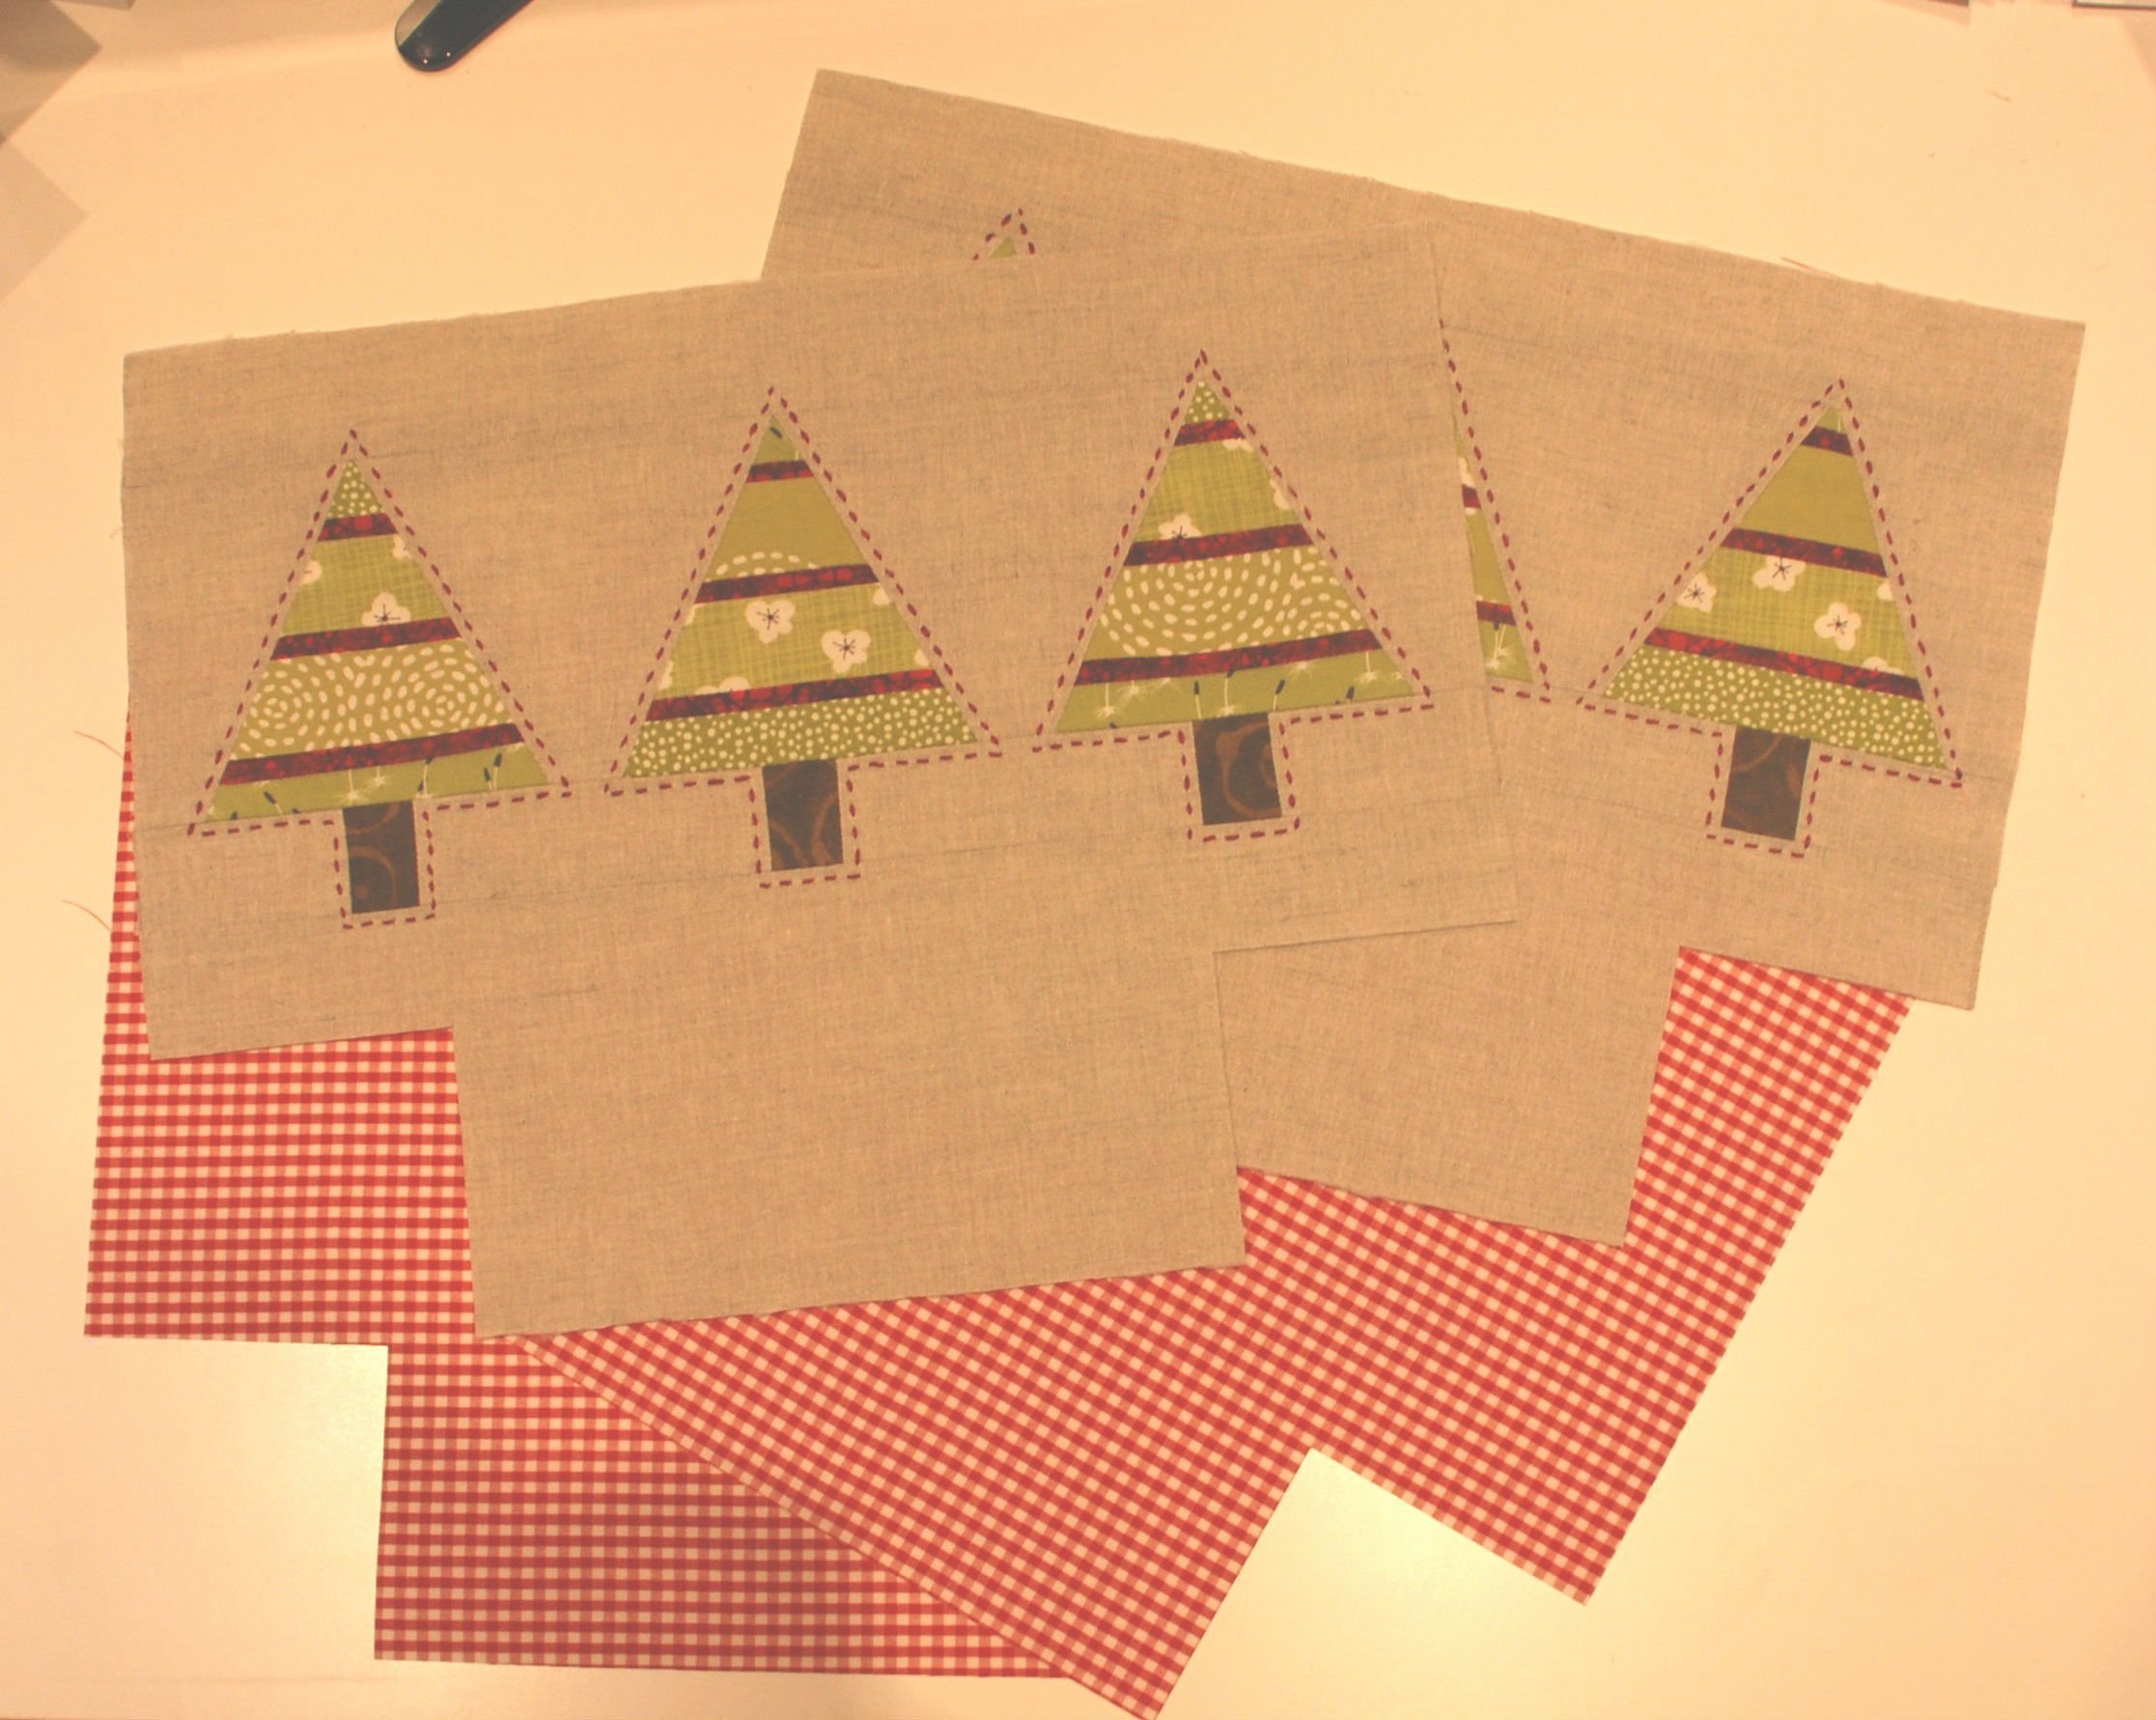
Then lay out the adjoining cut out sections for the outside of each side of the basket.
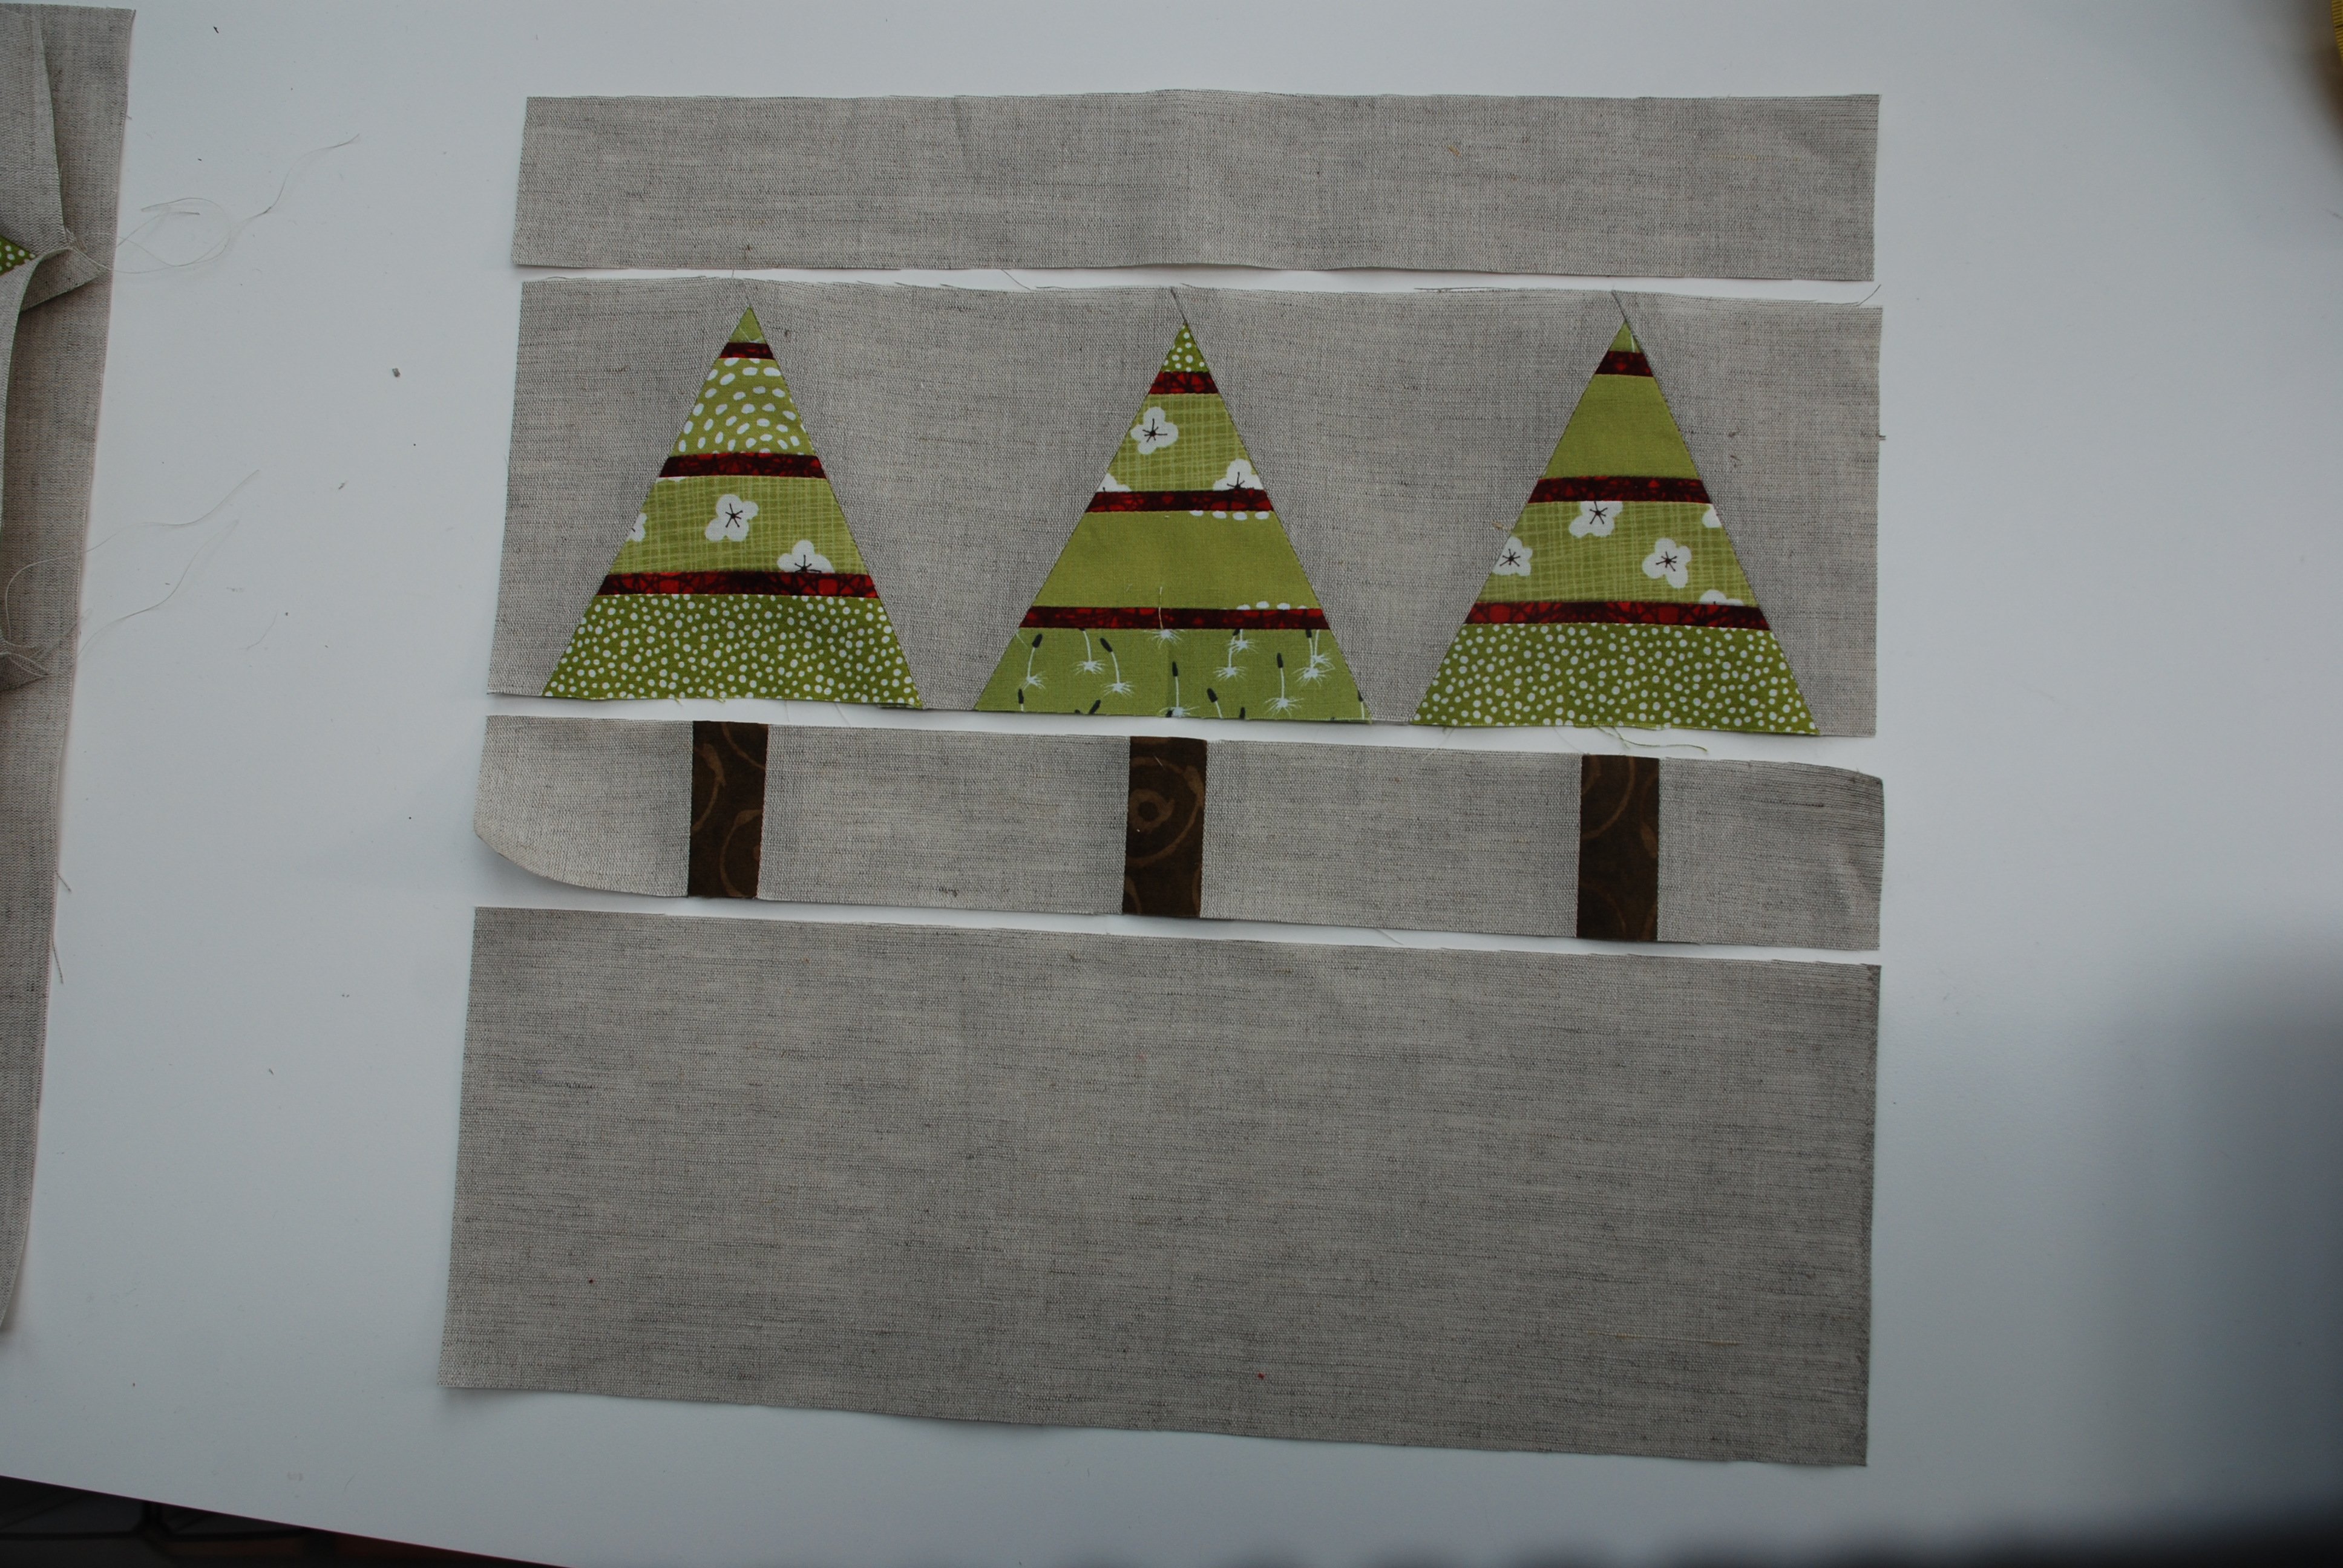
Stitch the row of trees and the row of trunks together. Then join the individual rows to the entire block.
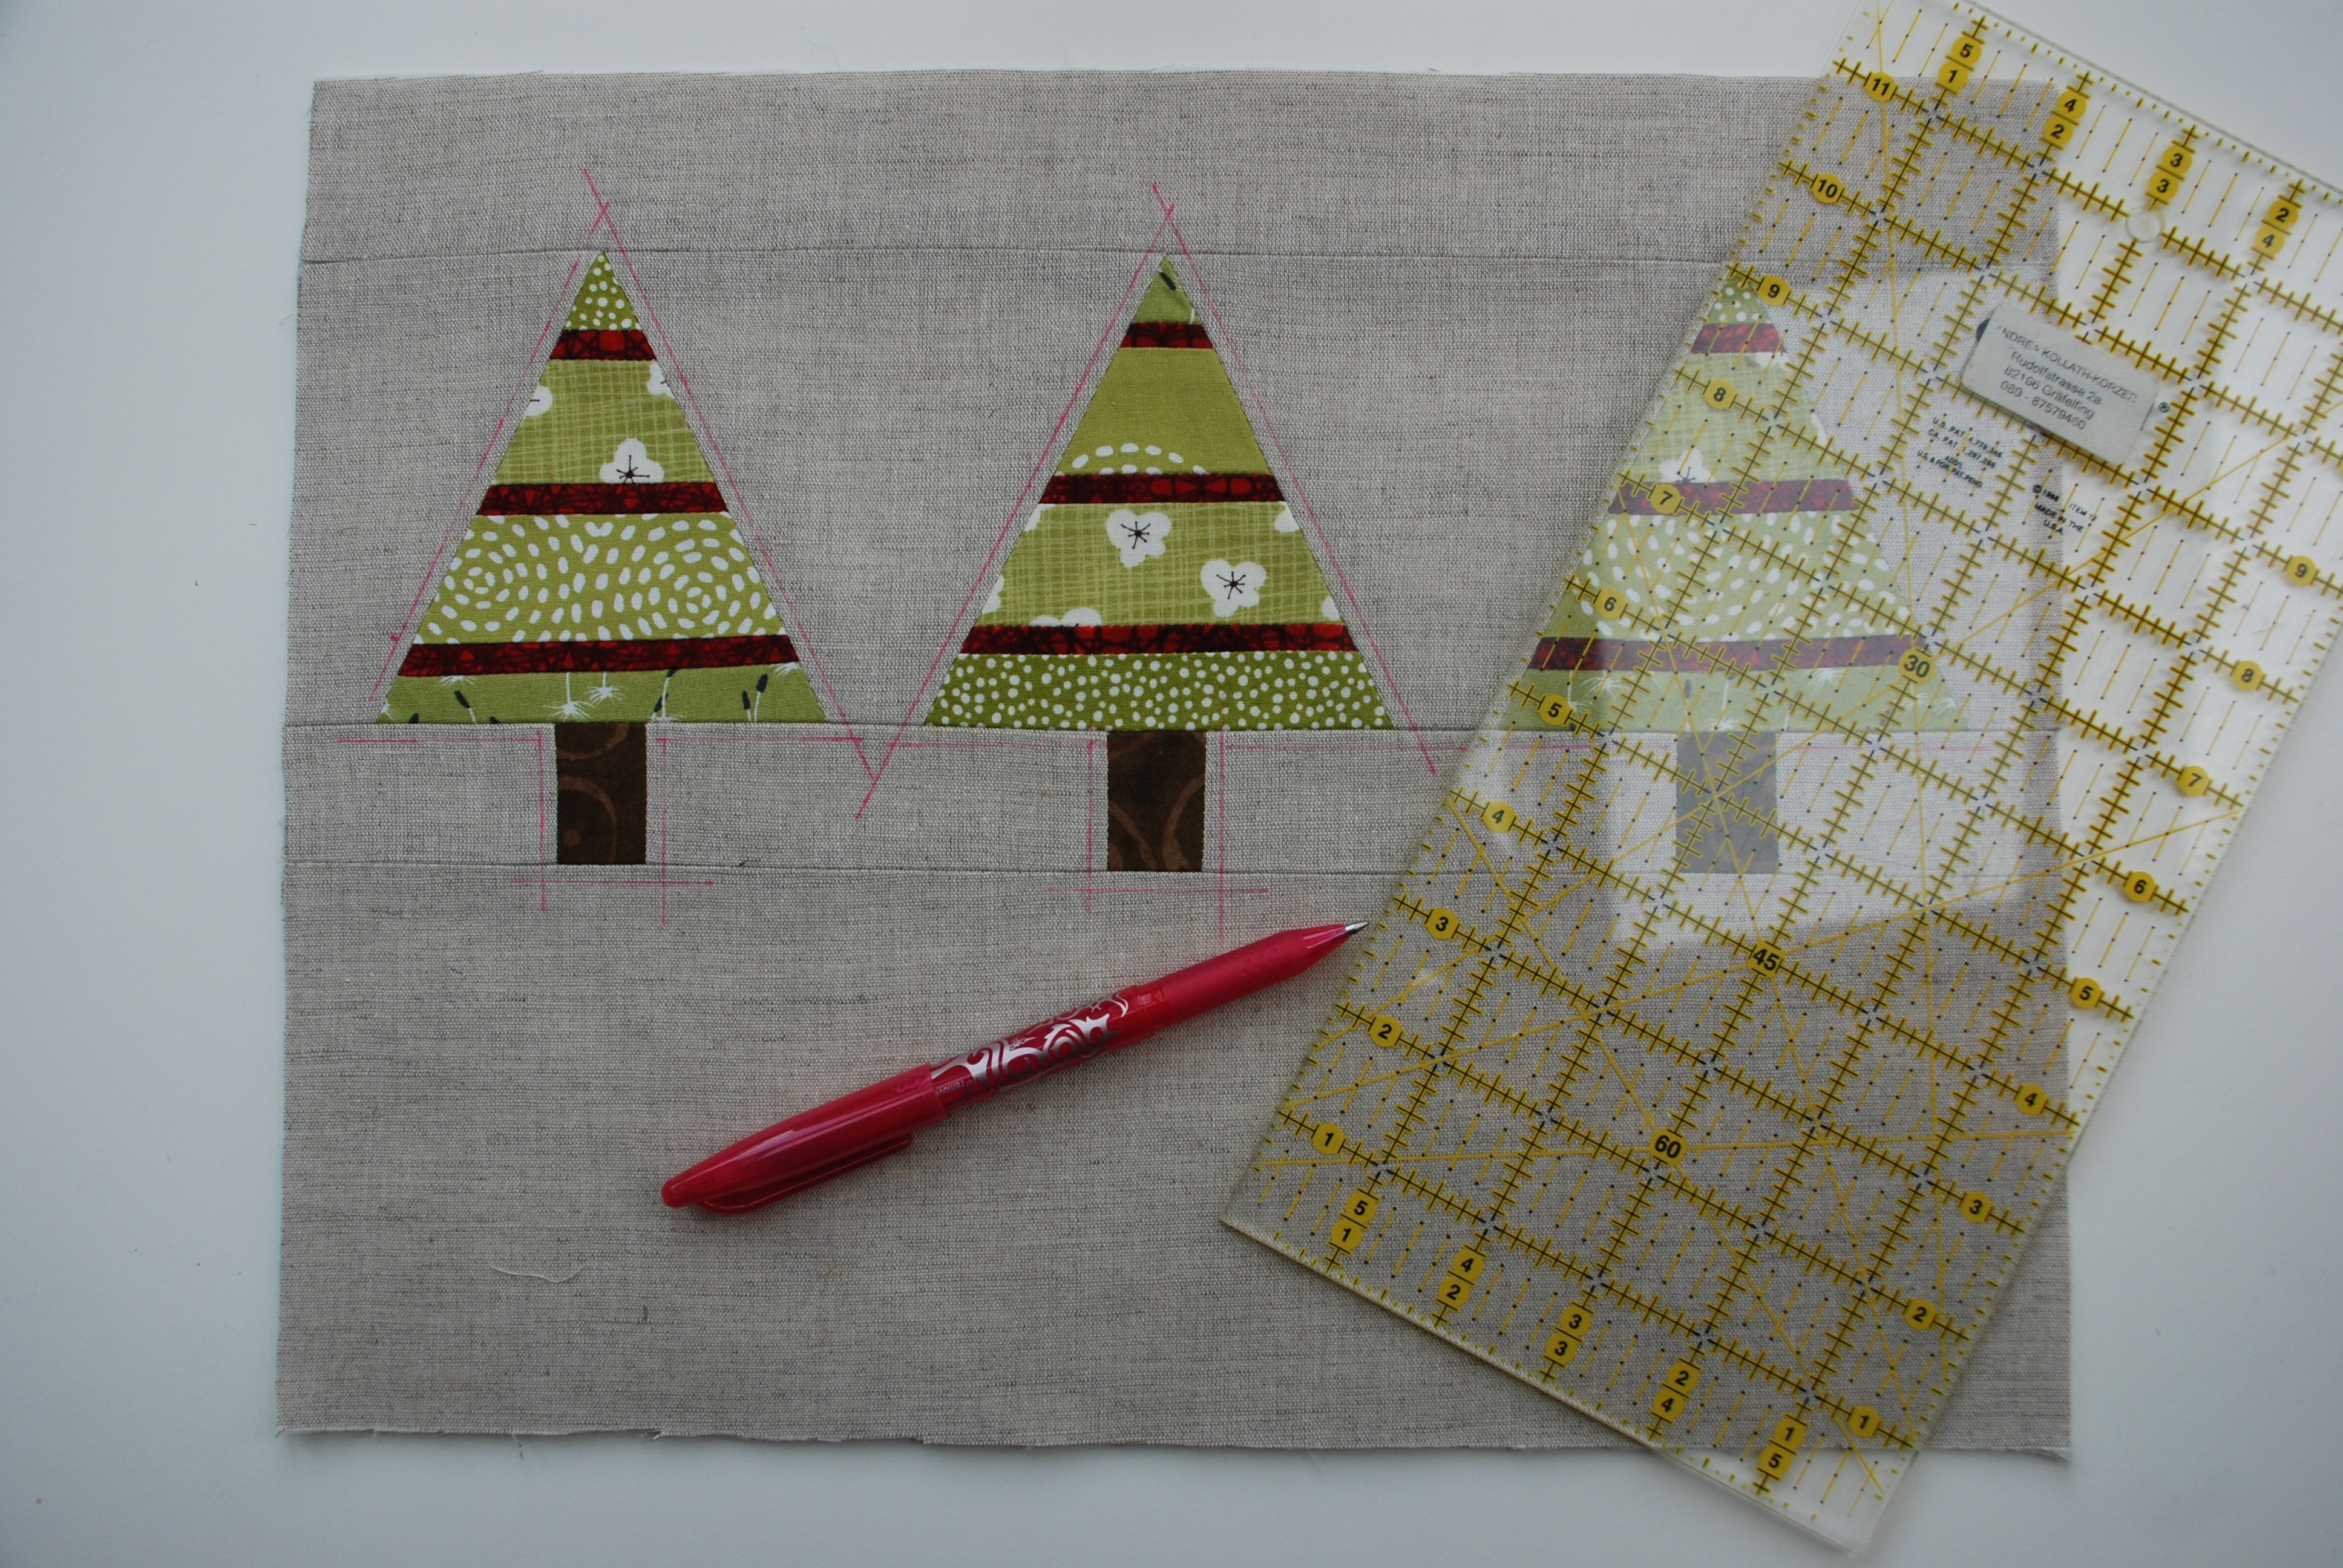
To stitch around the Christmas trees, I drew lines a short distance from the outline with a marking pen. Then I stitched around the trees along these lines with a Bordeaux red embroidery thread.
In the following step, I attached both external sides to the H630 iron-on wadding and reinforced both inner sections with the S320 wadding. Finally, I cut out a 9 x 9 cm square for each of the bottom sides.
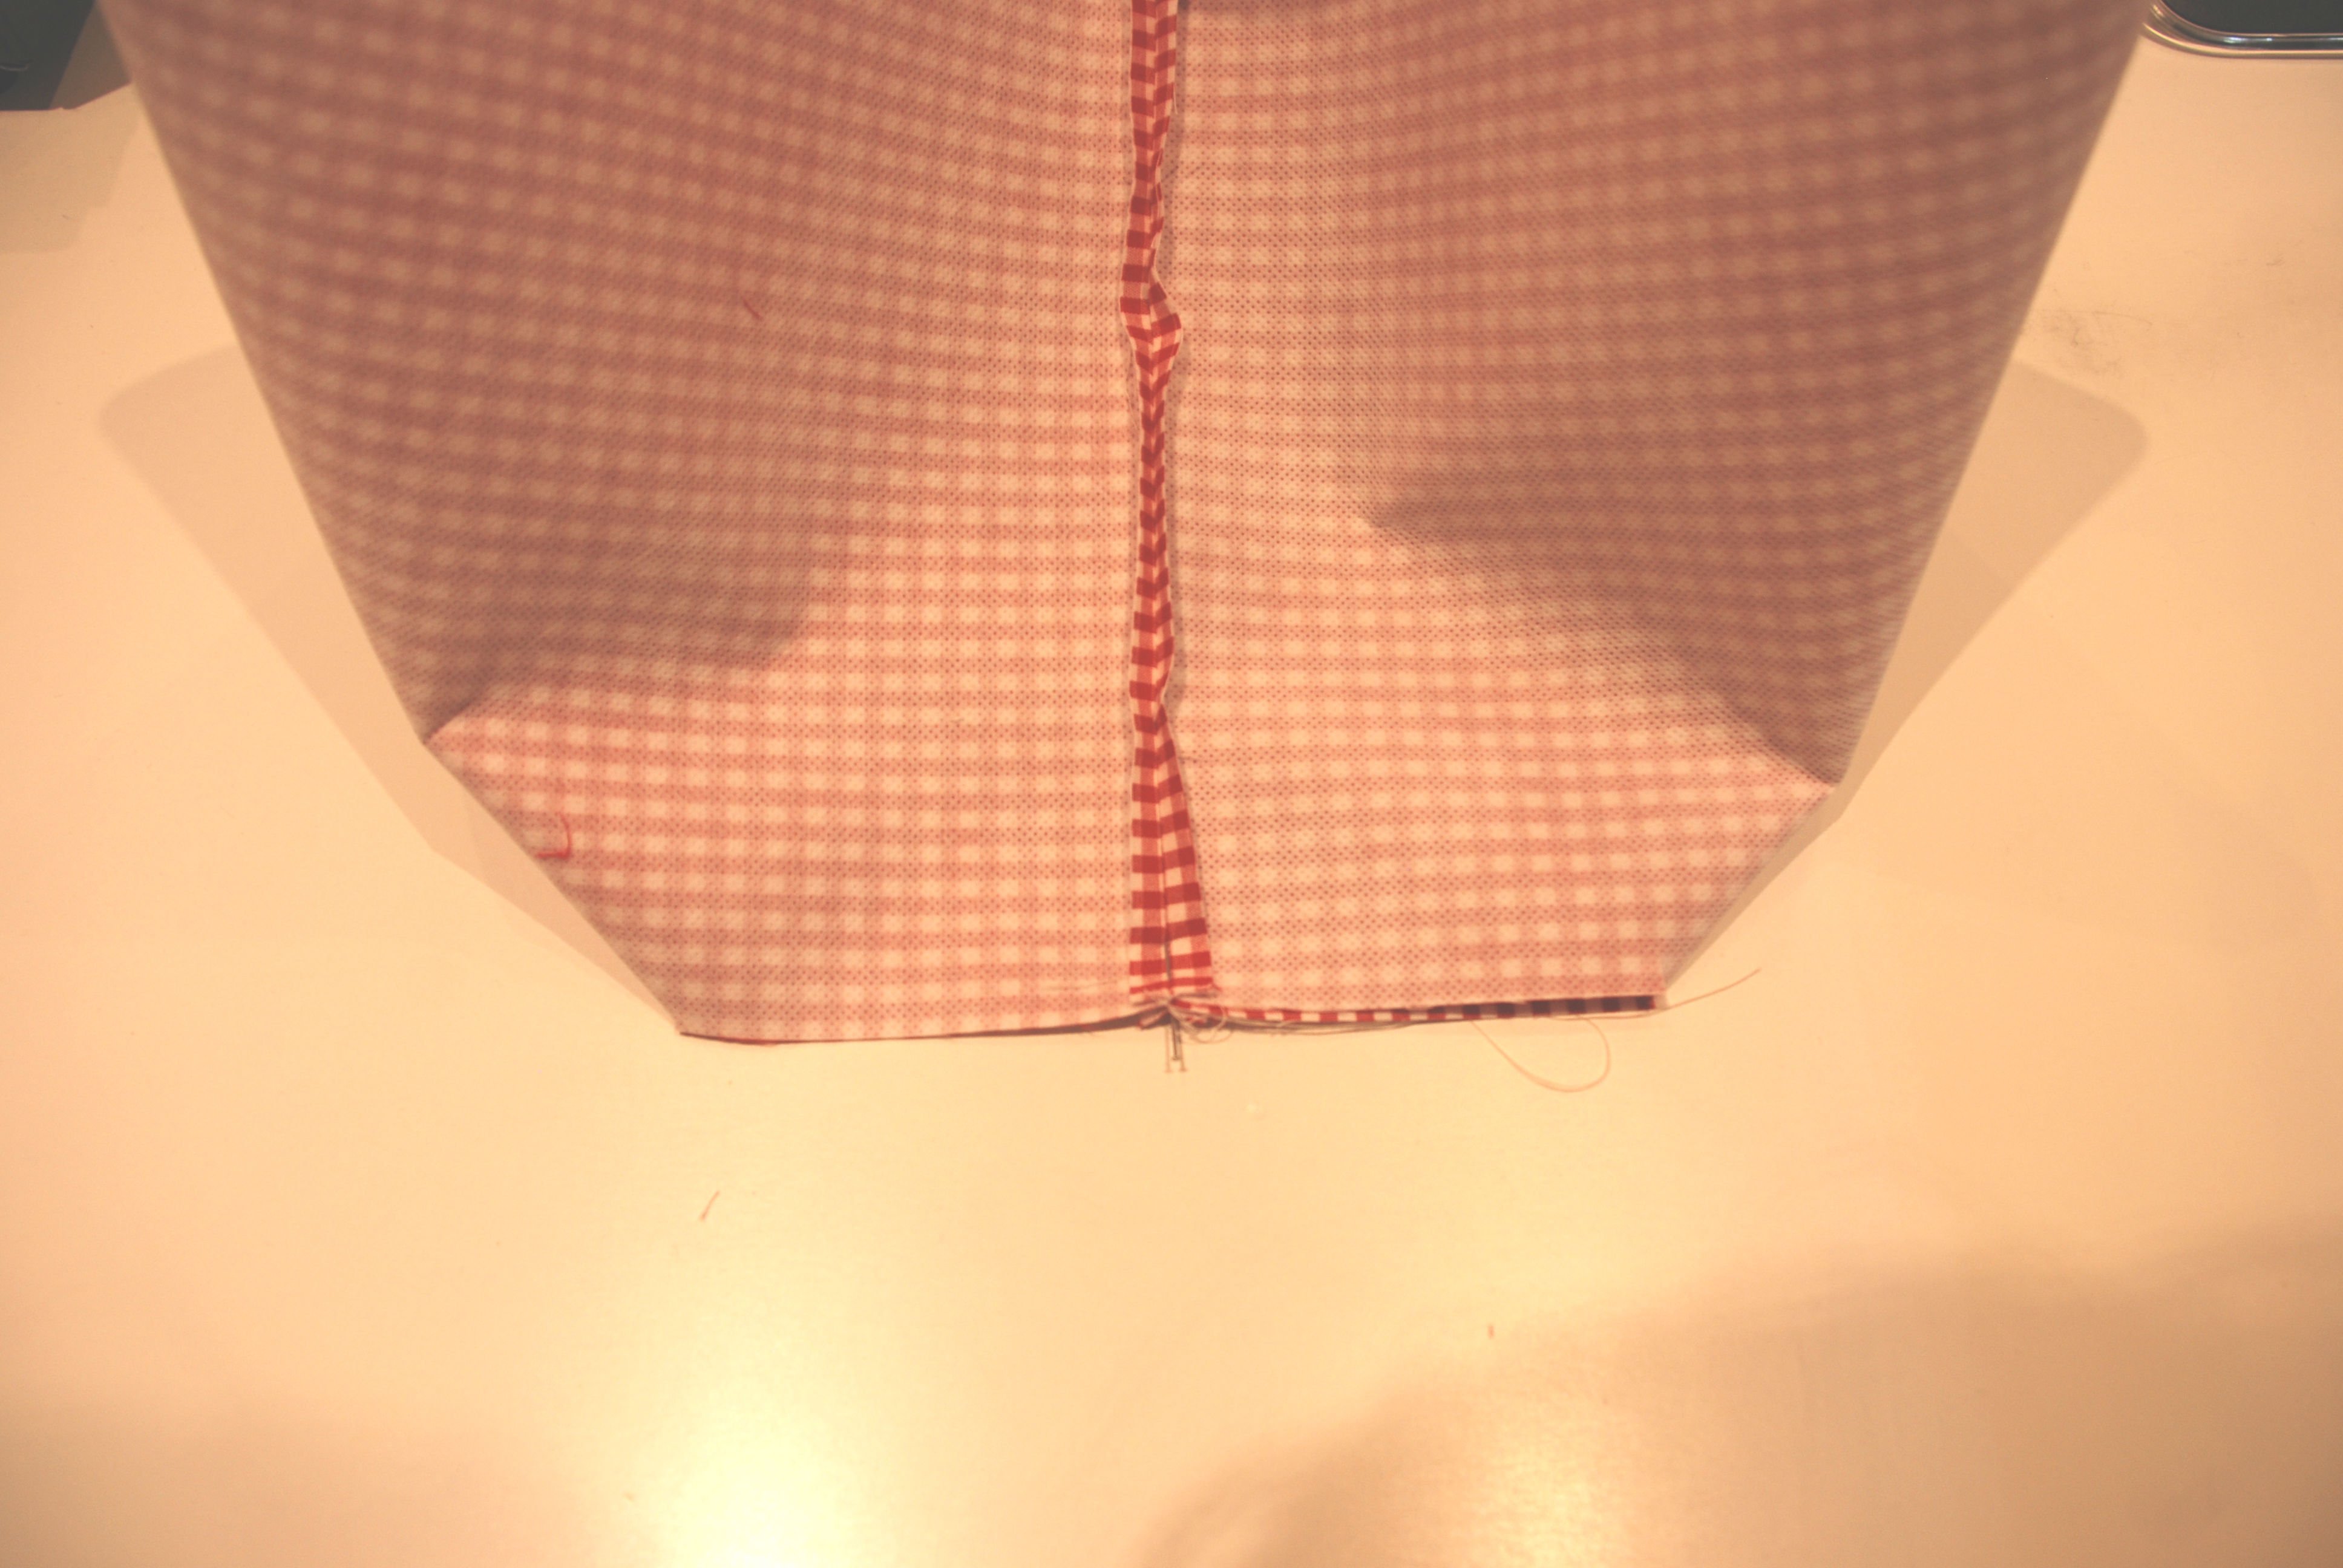
After I closed the bottom seam and the side seams (NB: leave a piece of the side seam of the inner material open so it can be turned right side out!!), I stitched up the dividing seam between the base and the sides.

Then the inner and outer baskets must be sewn together.
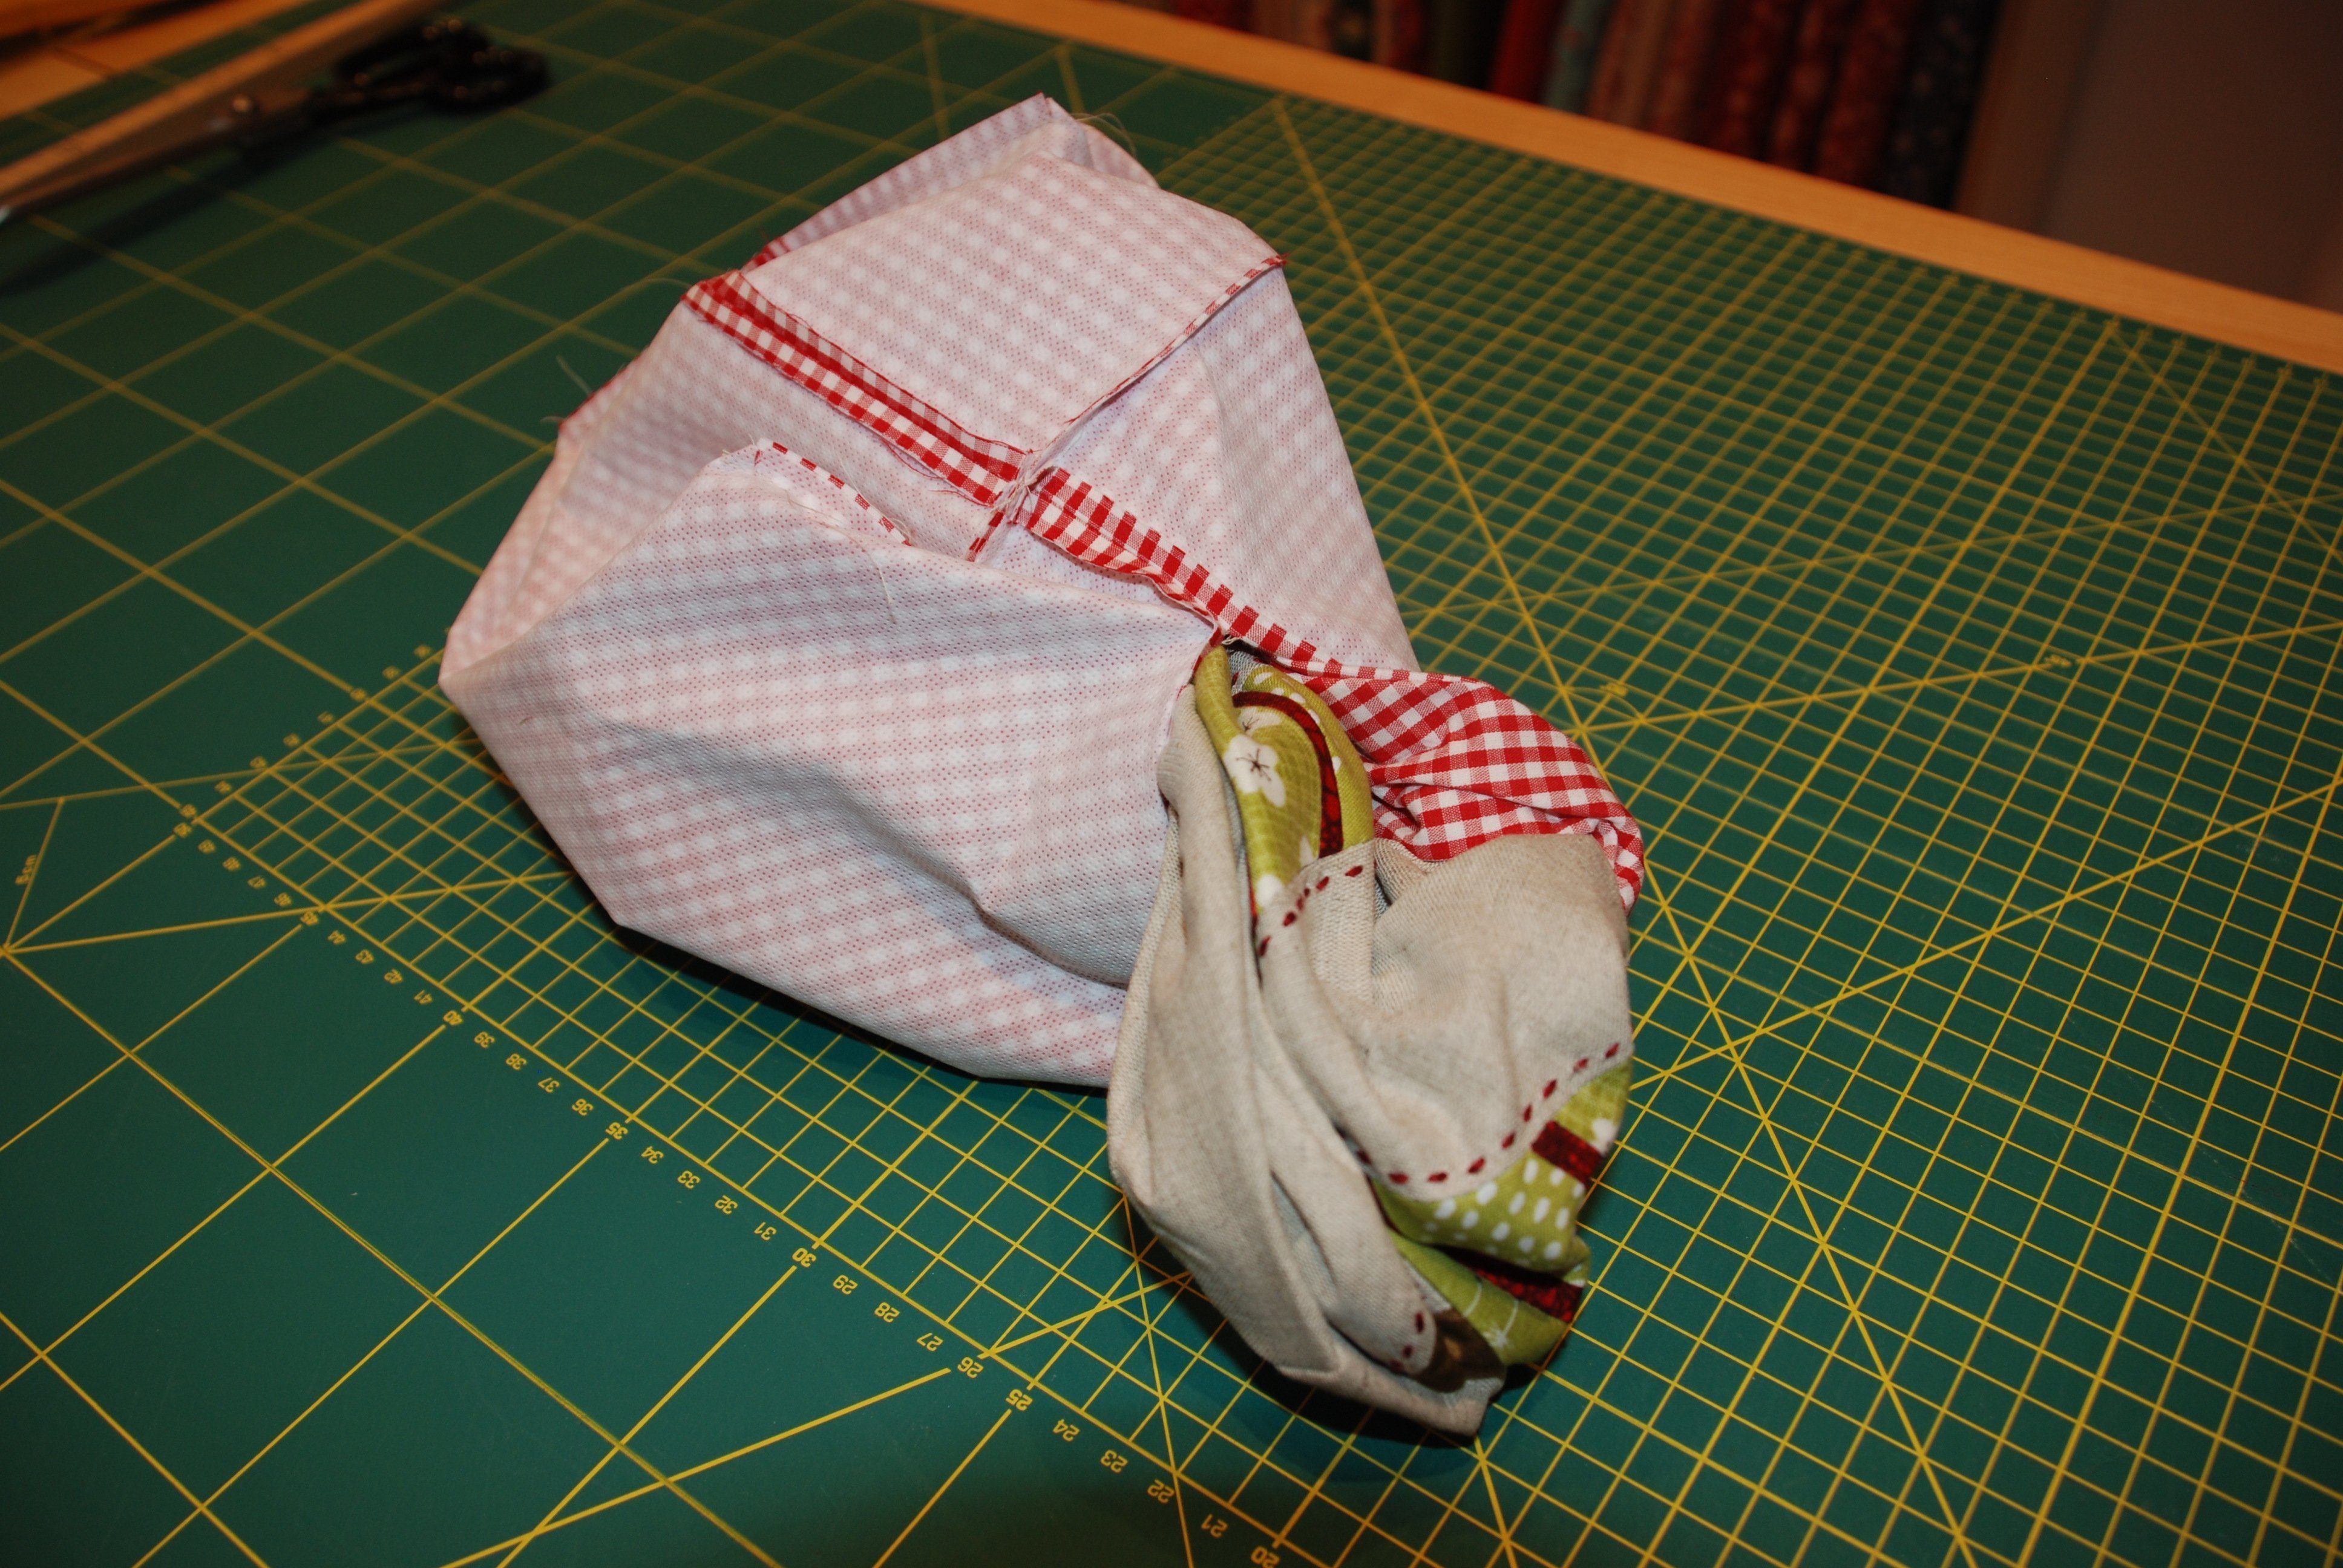
Use the opening in the side seam of the inner basket to turn the entire basket right side out.

Sew up the seam opening with a fine stitch.

Then iron out the upper edge of the basket nicely and – ta da! Your Christmas basket is ready!

Here is another variant with green stripes of varying width for the tree and no red stripes in between.
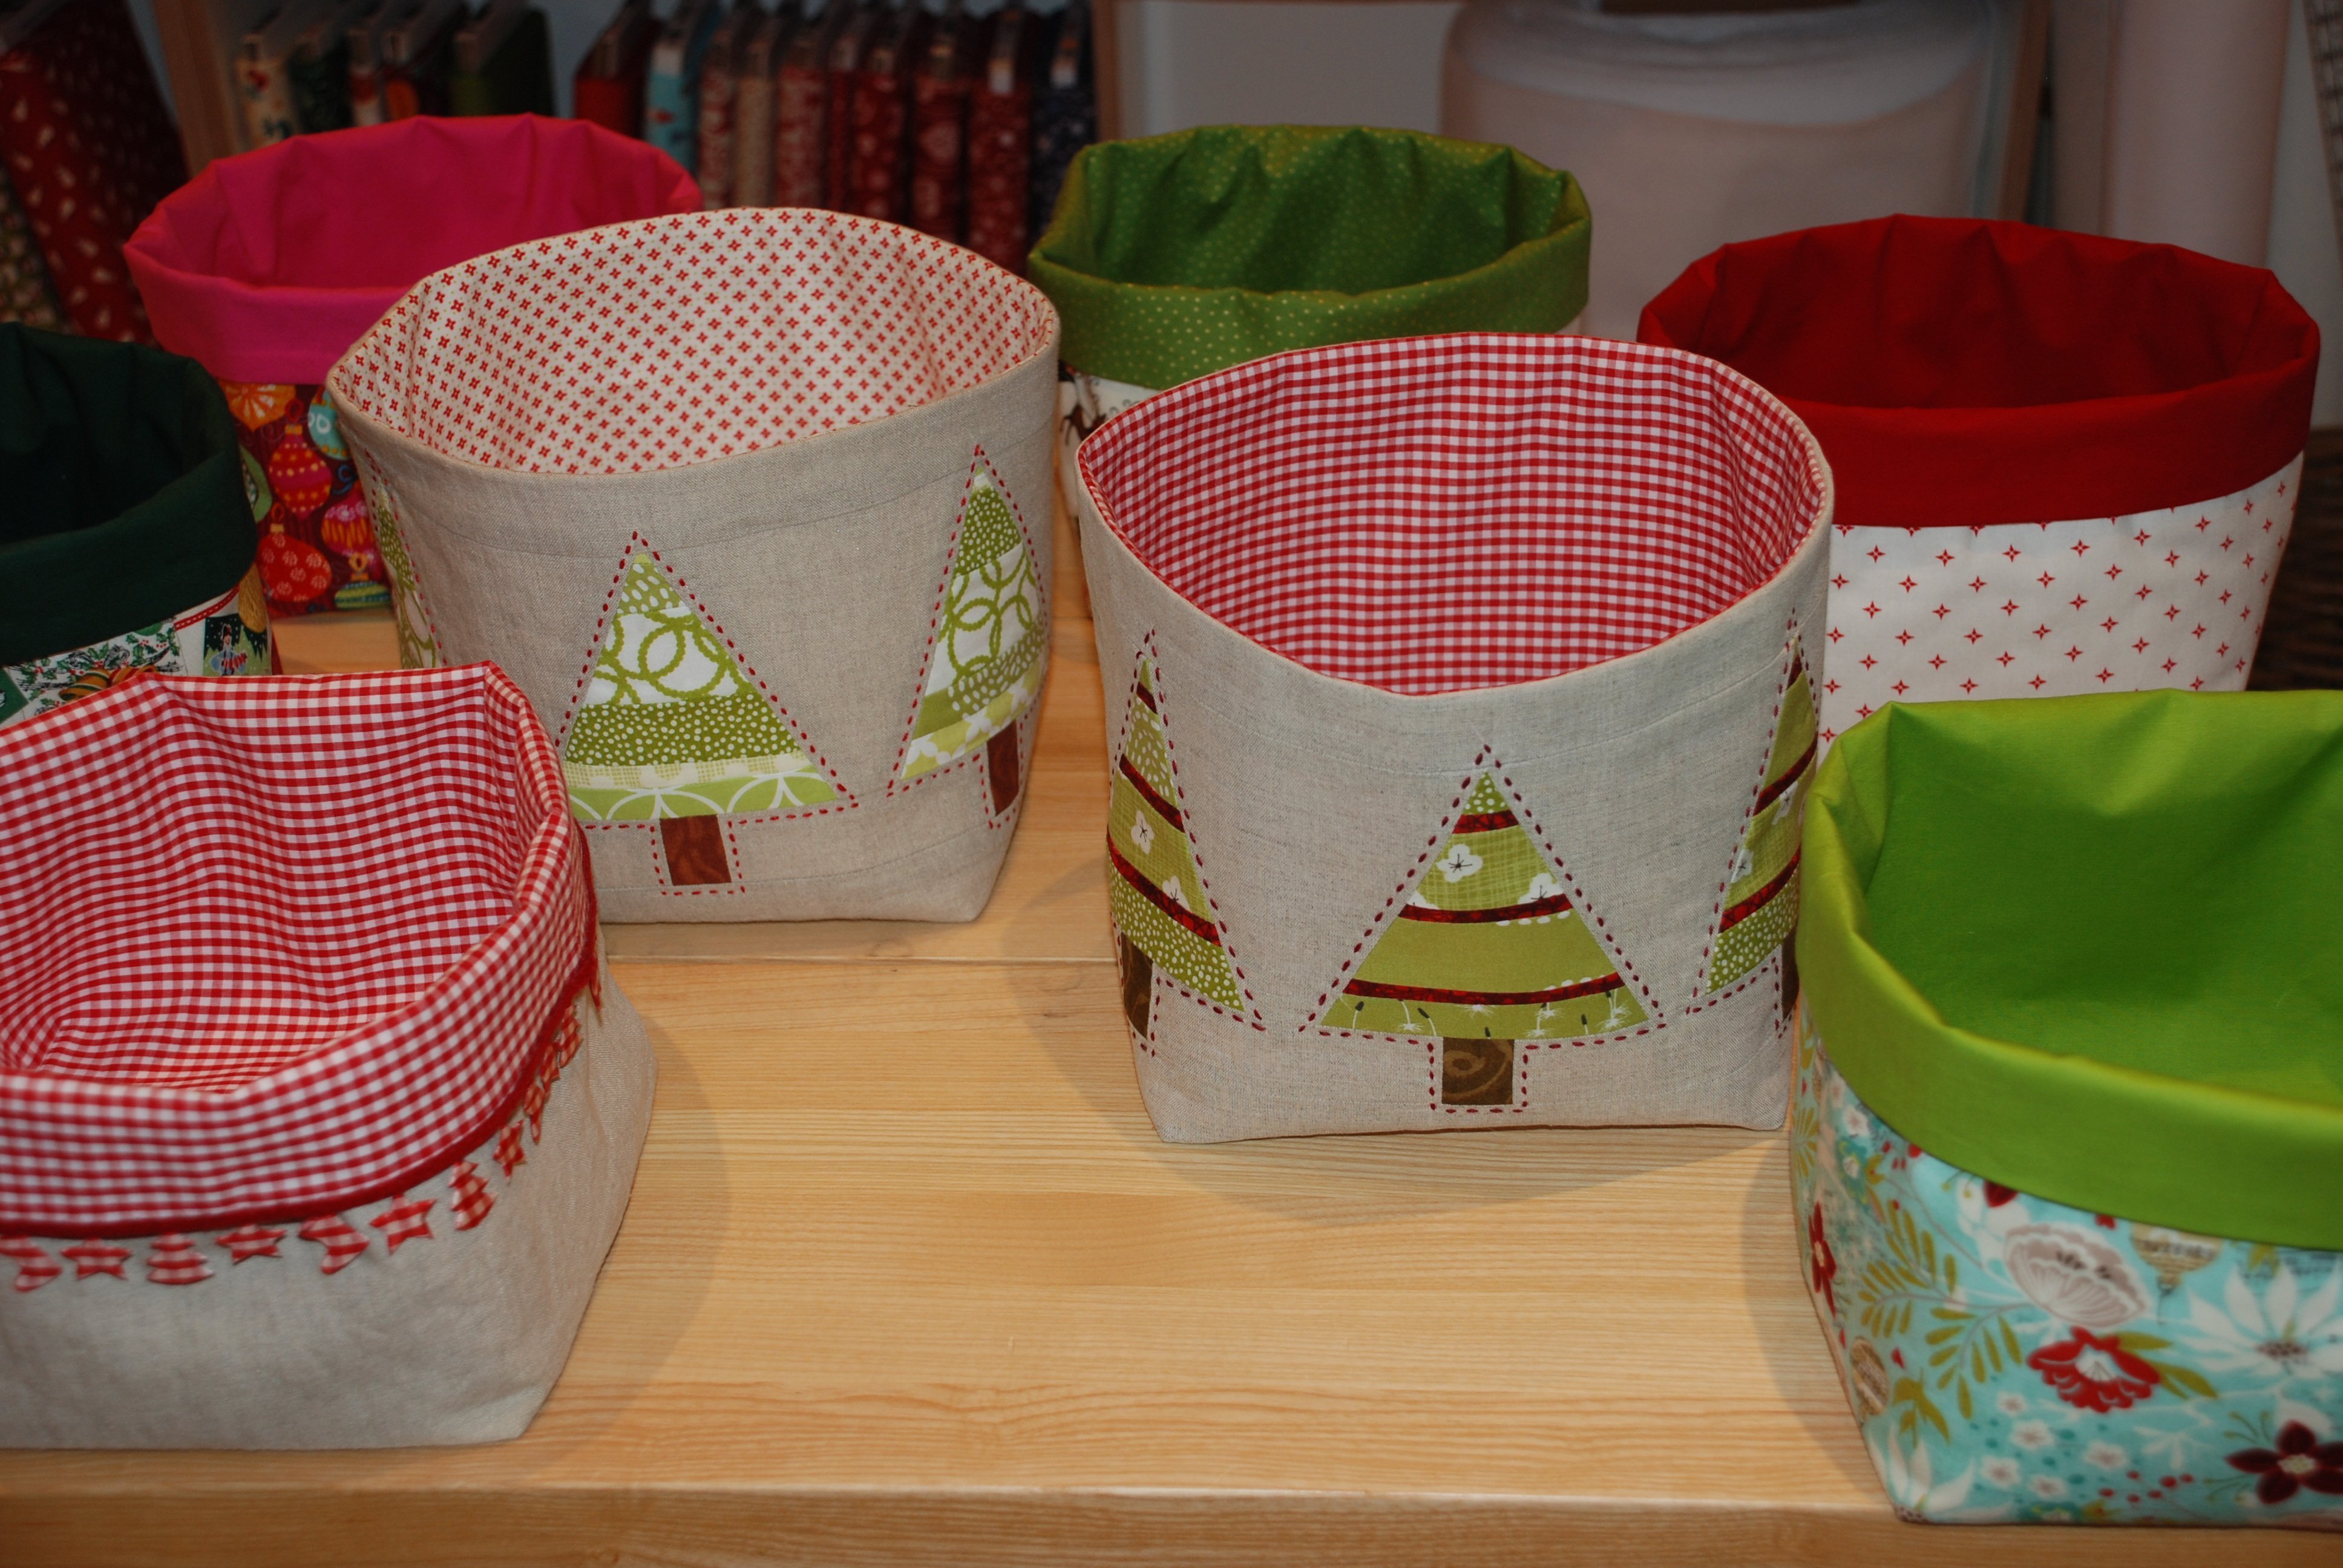
Here are some other options for how you can use the pattern (without the little tree) to create this basket with lovely Christmas materials. Use laces and ribbons or decorate the entire basket with beads – there’s no limit to the imagination!
I hope that I’ve succeeded in making you want to try out this delicate little project. Perhaps it has been an inspiration for a Christmas present you have yet to buy?
Wishing you a magical Advent, a merry Christmas and a happy New Year for 2015!


Hi again Andrea – what I meant to say first was – what a lovely project before I mentioned the download and wadding! Sorry. It’s really good and I’m planning to make some in various sizes.
Hi again, Jan 🙂
Thanks for your comments. The article above has now been updated. The link is there and the word fleece has been replaced by wadding.
Sorry for the mistakes. They are ours and the translation agency’s, not Andrea’s (the original article on the German blog is flawless).
Kind regards,
Matthias
Thank you again Matthias.
We have another problem now – sorry. Hilary pointed this out. The download works and we have the .PDF file, but when it is printed, the dotted lines do not print at all for Hilary or me. The page size is correct as the 2cm line is exactly 2cms long. Do you have a workaround for this?
Almost forgot – would it be possible to have the .PDF in English please?
Hi Jan
Hm, possibly an issue with laser printers. I have increased the stroke weight of the dotted line and have translated the file to my best knowledge and belief. I hope it’s understandable.
Have a nice weekend.
Kind regards,
Matthias
Thank you for the translation. As I have an inkjet printer, this is not the problem and the new one is still not printing the dotted lines.
Hi Jan
It worked fine on the two printers I tested with. I will revise the file again on Monday (had to do this in the office because I don’t have the tools at home) and increase the stroke weight even more.
Kind regards,
Matthias
Hi Jan
I have now updated the file. Can you please check if it works on your printer?
Thanks & kind regards,
Matthias
Hi Jan
I think I have now identified the problem: If you print the file directly from your web browser window, the dotted lines disappear. Please make sure to save/download the file on your PC and to then print from Acrobat reader. This should solve the problem.
Kind regards,
Matthias
Hi Matthias,
Thank you – it works now with your instructions. Other people will have this problem so it may be worth putting this added instruction into the body of the blog article. Hilary converted it to a Word document to get it to work but we don’t all have Adobe Acrobat full program to be able to do that.
Merry Christmas,
Jan
Hi Jan
I have again updated the article. It now specifies that the File must be downloaded and printed from Acrobat Reader.
You don’t need the full program (Acrobat Professional). Acrobat Reader, a free-to-use software which is pre-installed on most computers, does the job.
Kind regards,
Matthias
Hi Matthias,
Thank you. I have Acrobat Reader already – Hilary has the full program. Hopefully everyone will be able to download and use the templates now.
Regards,
Jan
Hi Andrea – Me again – there is no download with this one. Also, please be aware that “fleece” is what we call “wadding” in the UK and “batting” in the US. Hilary alerted me to this just now.