 BERNINA Corporate Blog -
A project for those with Designer Plus software.
- Open a new project. Choose the Oval Hoop and change the Hoop Setting Position to Manual.
- Use the closed object tool to draw a heart shape. Change the height and width to 100mm. Image 1
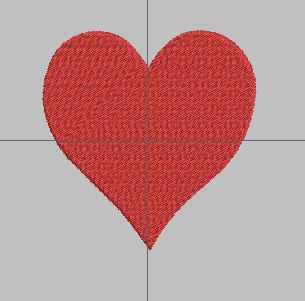 Image 1.
3. Right-click the heart and drag a duplicate to the right. Make this heart 75% of the size of the first one. Change the colour. Drag it back and centre it on the larger heart. Image 2
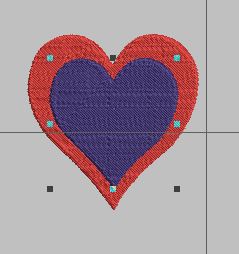
Image 2
4. Go to the Edit Menu and remove overlaps. This will leave a hole behind the smaller heart. Image 3.
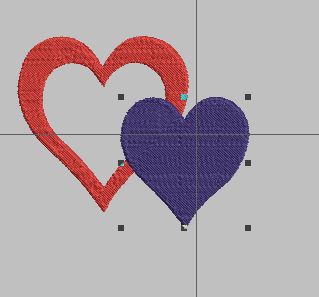
Image 3
5. Put the smaller heart back inside the larger heart. Repeat steps 3 and 4 twice more. You will have four hearts in total. Image 4, Image 5

Image 4

Image 5
6. Right-click the large heart and drag the duplicate large heart to the left. Image 5 above. Change the stitch type to Outline, single. You will have two new heart outlines.
7. Click on the filled large heart again and change the fill to “pattern”. Choose your decorative stitches from the pattern menu and change the sizes if necessary. Drag the two outline hearts over the filled one now if you wish or leave it till later. Image 6.
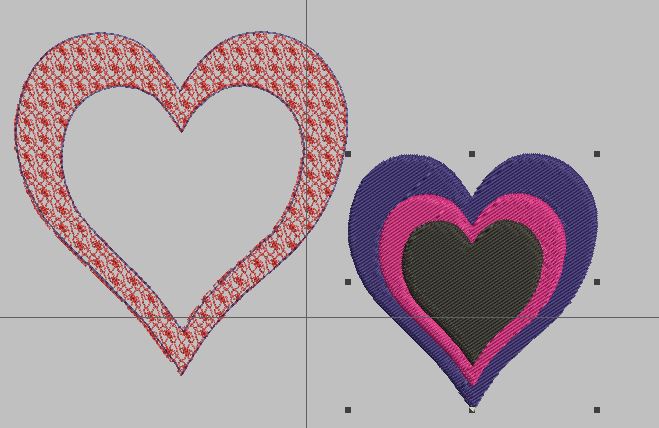
Image 6
8. Drag the second largest heart over on to the hole in the larger one and change the fill to candlewicking. Choose your stitches and adjust sizes if necessary. Image 7.

Image 7
9. Drag the third heart over to cover the hole in the second one. Leave this as a step fill. Image 8.

Image 8
10. Delete the smallest heart now as it is not required any more. Click on the Lettering tool and type the words “Love You” or choose your own message. Change to a colour you have not used yet. Change to a font you prefer and position the words in the hole in the centre of the heart design. Drag the two outline hearts over the largest heart now if you did not do it in the last step. Image 9.
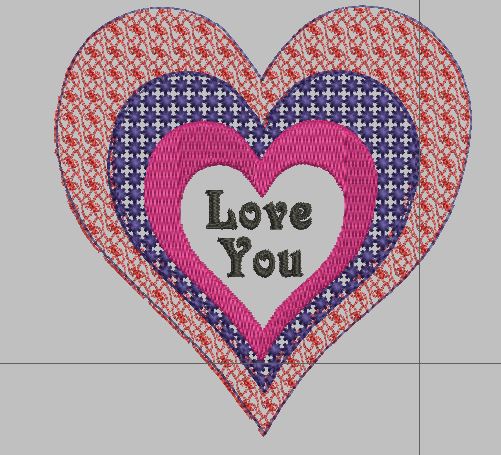
Image 9
11. Click on the large outline heart again and drag it to the right. Change the stitch to Satin and make it as wide or narrow as you wish. Image 10.
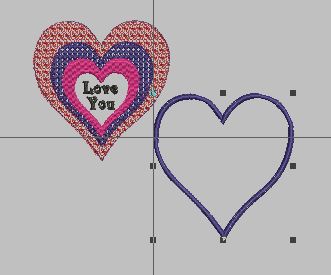
Image 10
12. Drag the satin heart outline over the large heart so that it covers the the complete outer edges of the heart. Image 11.
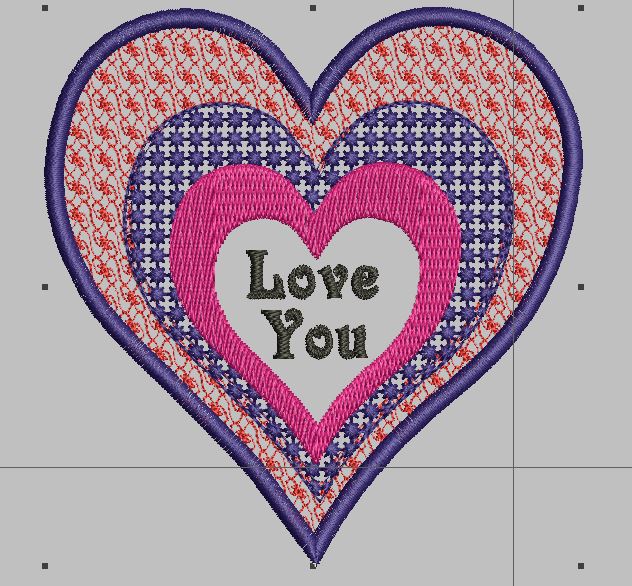
Image 11
13. Select all the objects in the design by dragging a marquee round the whole heart shape and change the colours to red. Image 12.
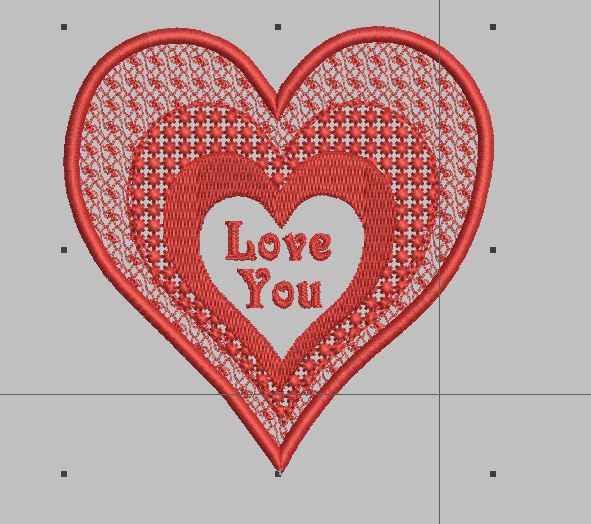
Image 12
14. Stitch out your design in the oval hoop using two layers of calico (muslin if you are in the US) with a sheet of tearaway stabiliser in between them. Carefully cut out the heart label being careful not to cut the satin stitch outline and use it to decorate the gift for your valentine on February 14th.
Jan Allston February 2015


What a wonderful project! Thank you for the instructions too!
Thanks, Jan. This is very helpful and inspirational for anyone wanting to get playing in the software.
You’re welcome Hilary. Hope everyone enjoys it!
Perfect timing Jan. Thank you for the project and for explaining so clearly how to achieve all the different fills. Hilary