I love knit fabric. I admit I spent the first 10 years of my sewing career absolutely terrified of touching the stuff but many years and countless disasters later I have mastered the stuff (well as much as any sewer really can). But there is still one thing that I hate about knit, the range of prints available.
Now I don’t want to lump all designers of knit fabric into the same heap, there are some people designing really great and funky knit prints, however I will say that the vast majority are not exactly designing with my generation in mind. So with my options being either never use knit again, or be stuck with the plain variety I decided to simply create my own print. That of course led to the obvious question, how does one do that?
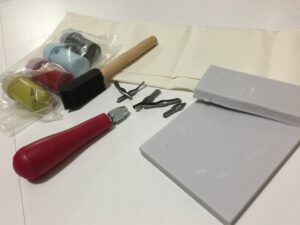
When it comes to printing your own fabric there are multiple options, but with my lack of artistic ability and general time poor-ness, I decided to go with the simplest option: Lino Printing. I remembered doing Lino printing as a kid in art class, so when I saw a kit with everything I needed I decided to give it a shot.
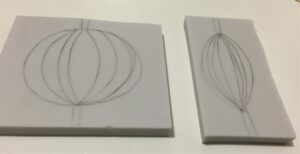
First things first, pick your design. As previously mentioned, I have no real artistic talent, so I kept it simple and decided on two geometric shapes that could be placed together.
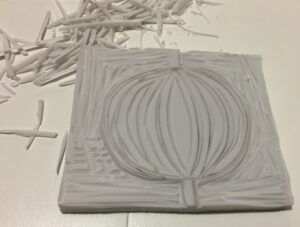
Next comes the carving. The most important thing to remember is that you need to create the negative image of what you want to see, so for me that meant carving out the majority of the shape. Word to the wise, pick the size of tool wisely. I thought I would just go with the largest size tool to make it easier (ps. It doesn’t), you really need a small tool to get round the curves. To make things neater, try and carve in small sections at a time.
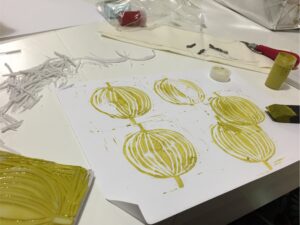
So with my two stamps carved out, it’s time for testing. I was lucky, my kit came with paint as well, but any fabric paint will do the trick. FYI fabric paint stinks to high heaven so be sure and do this in a ventilated space. My first few tests I spread way to much paint on the stamp and got really smudged looking prints, but by the third or fourth try and I had learned to live by the motto that less is more.
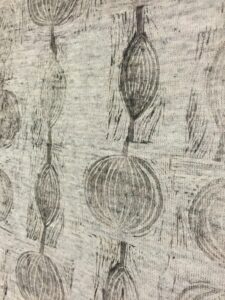
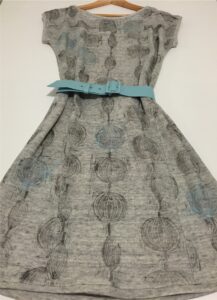
So with my confidence brimming, I moved onto my knit. I chose a nice and stable cotton knit for this, which had mottled colours through it to start. The big advantage of printing fabric yourself is cutting your pattern pieces first. I picked a simple dress pattern that has multiple panels, so I could really show off my design. So working slowly, one panel at a time, I printed up the entire dress. Big tip: You might want to do a quick drawing on the back of your stamp, so you know which way is up. My dress may contain some “style features” that consist of the print being the wrong way round.
When the panels were all dry, I gave them a press with a hot iron to seal the paint and make it permanent. It was then the simple matter of whizzing up the dress (3 different neckline treatments later mind you) and there you have it, a truly unique printed knit dress that I can’t wait to wear! Well after I wash it that is, the fabric paint still smells funky, and not in a good way.
I would love to see any printed creations you’ve made! Share them at:
https://www.facebook.com/TheSharedStitch
 BERNINA Corporate Blog -


Thanks for showing these. I haven’t seen them elsewhere yet, but I’ll look into them.