Today, I would like to take you a little further, and do some exercises with curves. Again, I would recommend starting out with some exercises on paper.
Small spirals are good to start with on paper, then you go directly to the screen.
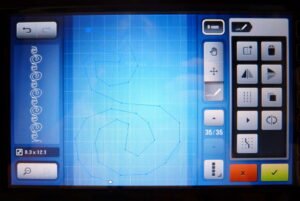
Please draw two small spirals, one below the other, directly on your screen. On the left of your screen you can see how it it will look after it has been stitched. Please remember to draw in one go, without interruptions.
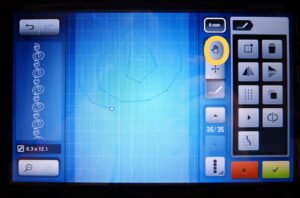
We are still using a width of 9mm, but we can increase the length. Please click on the hand. By doing this you can shift the screen upwards and you get more room below.
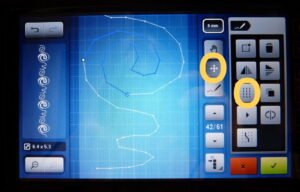
I have increased the motive by a wavy line. One more hint: If you want to enhance your curves, please press the „Moving points“ button, select a point and change its position vertically and/or horizontally by one of the turning knobs This makes your curve more elegant and rounder. Make sure that the „Single Point“ button (lower right) has been pressed.
Finally I accentuated one sequence with the triple stitch, as I did in Part 1.
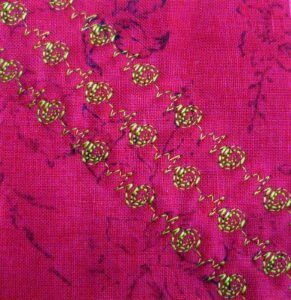
The first row was stitched without corrections. In the second row I smoothed several curves, and in the third row I especially accentuated one sequence.
I like this pattern especially when it is stitched with a variegated thread.
…but it looks good also just in one color.
Stitched spirals always look very good. For this reason I urgently recommend you to do many studies and exercises with them. I am sure you will be thrilled!
In Part 1, we did beautiful spikes, and in this Part 2 we are doing curves. How about combining the two? That’s what we’ll do in Part 3. See you again soon!
Have fun with your exercises!
Yours
Pia
 BERNINA Corporate Blog -


0 Responses