 BERNINA Corporate Blog -
How many occasions in life do we get to wear a fancy hat? Really think about it, I can count the occasions that would be fancy hat suitable on one hand and still have 4 fingers left over. So when spring racing carnival rolls around, even though I know diddly squat about horses, it’s the perfect opportunity to hat up………. well fascinator up anyway!
I think people get quite intimated about making hats or fascinators, but truthfully they can be really easy, especially if you cheat and buy a pre-made base. You can get these in all shapes, sizes and colours. I chose a simple shape for a base and went through my stash fabric to find some bits to turn into decorations.
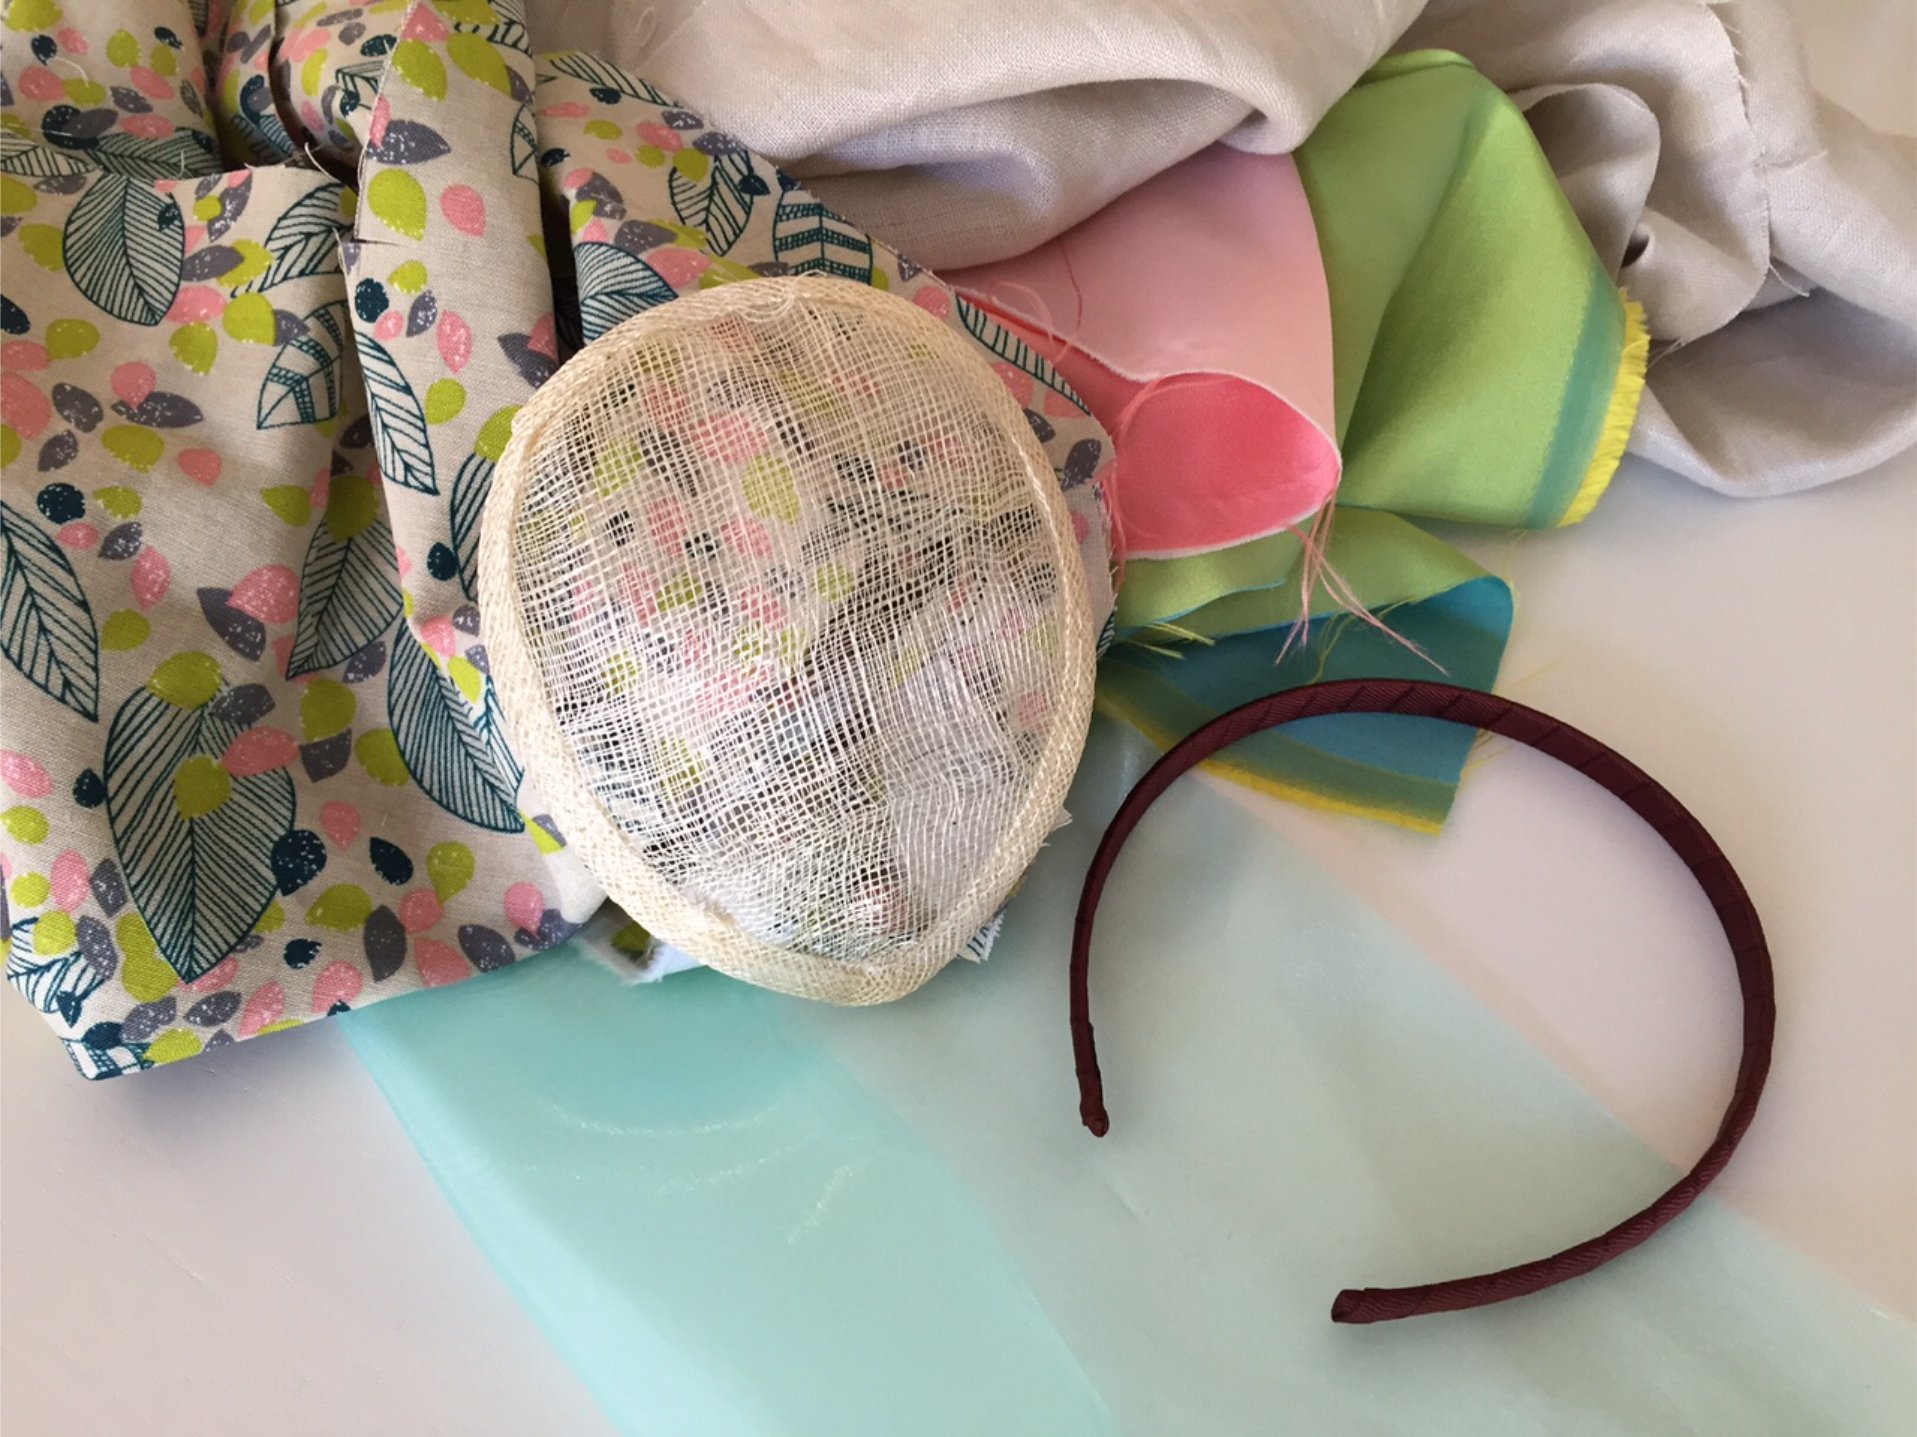
I knew I didn’t want to go down the feather path, so I gave Pinterest a good work out and found my inspiration in 1950’s fascinators. I will admit that I fell in love with all the handmade flowers that were used so much in the 50’s.
The hardest thing when making fabric flowers is to get them to hold their shape. You can use specialty tools on flowers, but they are a bit pricey and frankly there is quite a knack to it (a knack I do not possess!). So the simplest solution was to stitch wire around the outside.
Before I get to that, I need to do some prep. I find flower petals work best with two layers of fabric, rather than a single. I like to join my two layers of fabric together with vlisofix or similar double-sided fusible stabilizer. It’s a really simple process, iron the glue side of the vlisofix to the wrong side of one layer of your fabric. Then peel the paper backing off the vlisofix and place the wrong side of your other layer of fabric over the glue left behind. Iron it into place.
****A little warning here, don’t try this with organza or similar open fabric. Not unless you want the glue all over your ironing board. Learnt that one, the hard way*****
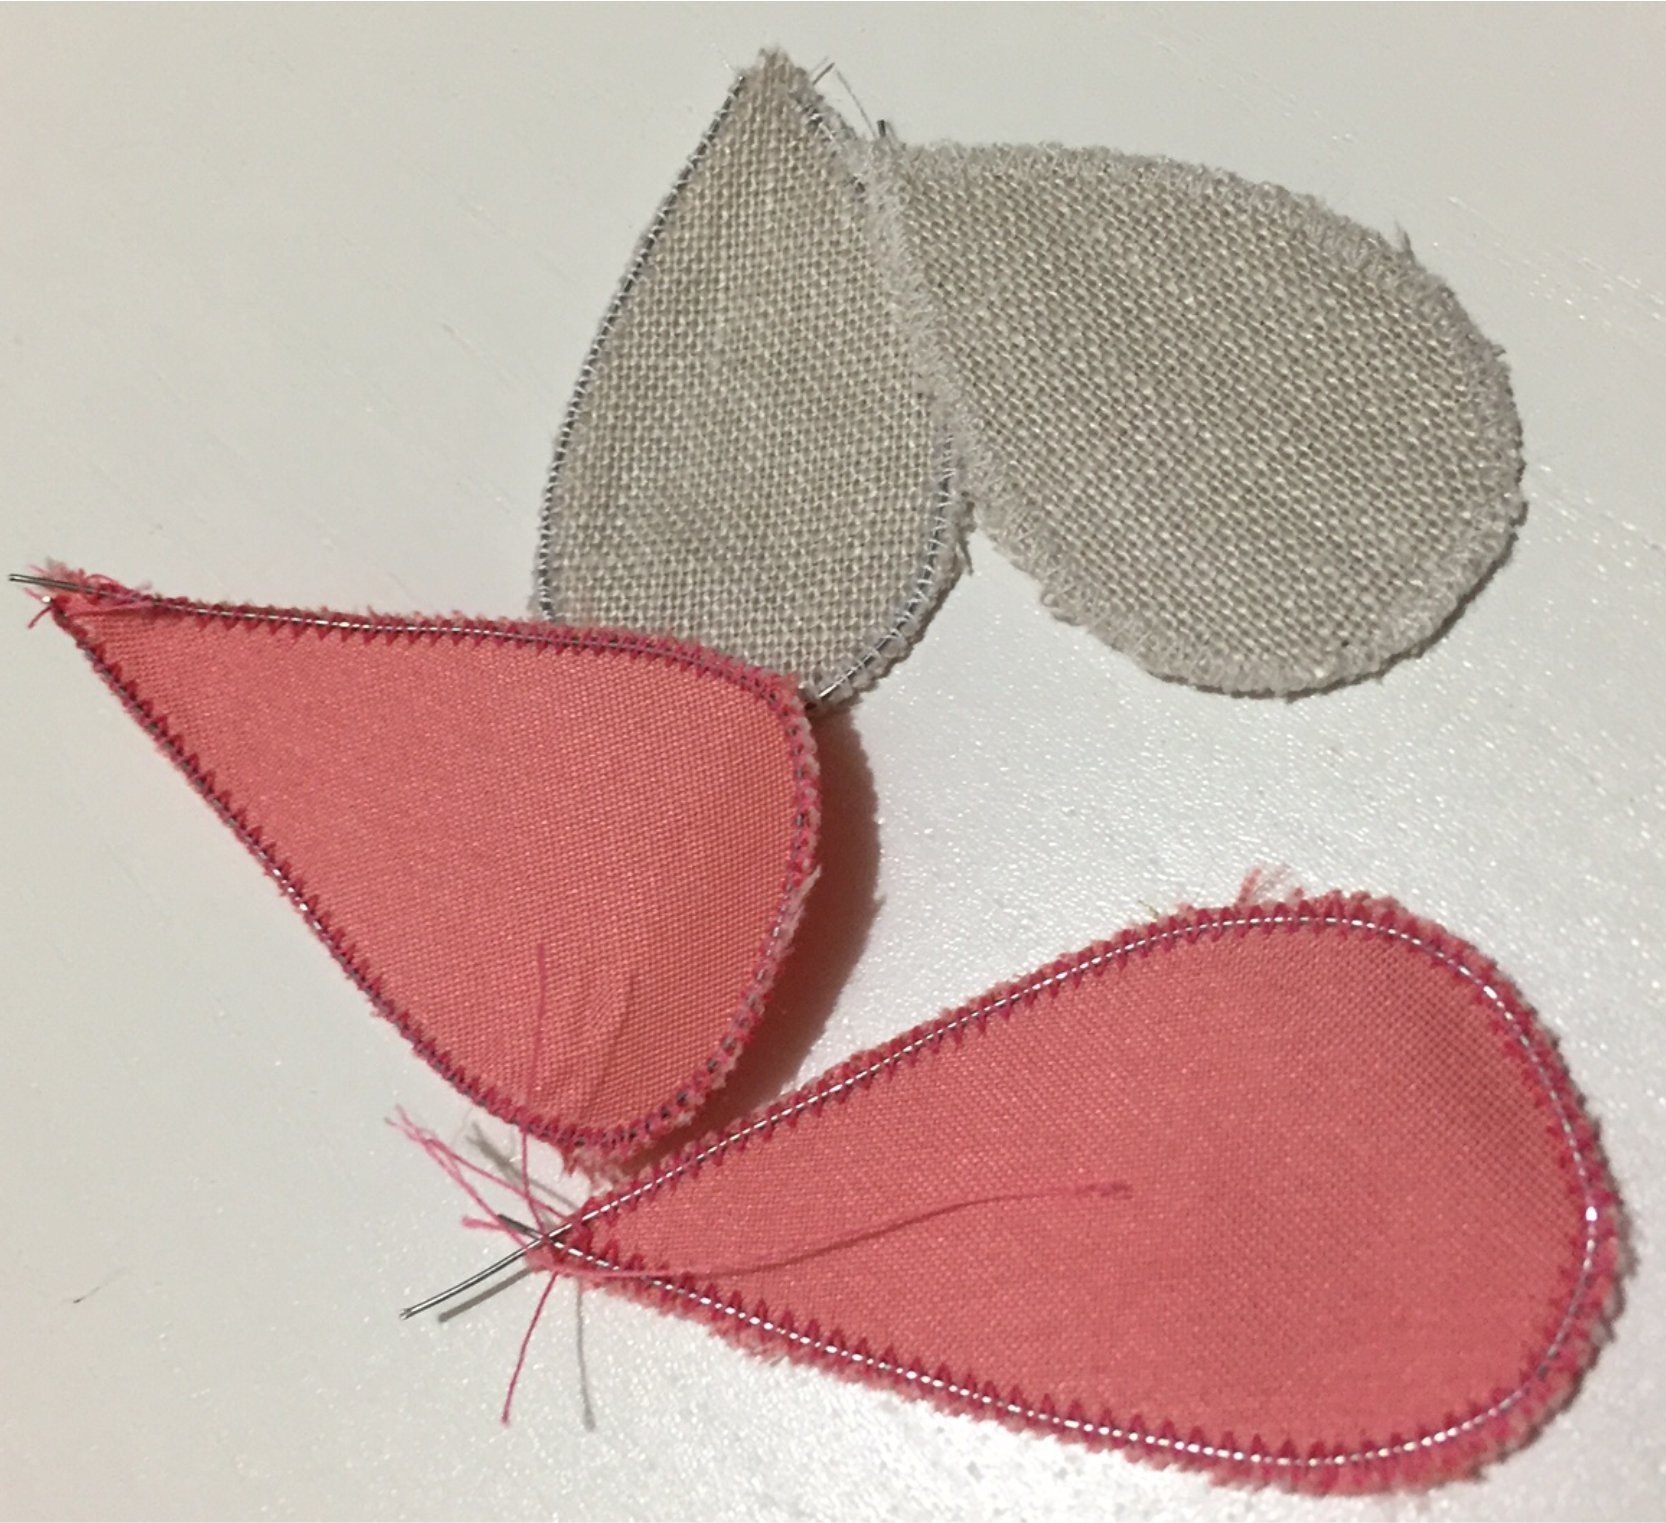
Since I knew I wanted to stitch wire around the edges, I decided to go with a rounded petal shape, rather than a pointed one (not that you can’t do points, I was just took the easier option). I made three different sized templates to make them easier to trace around.

Once I had all petals cut out, it was time for the stitching to begin. Now the trick to stitching on wire is BERNINA Foot #6. The foot has a small hole in the centre front designed for wire or cord to fit through making it almost impossible to miss when stitching. All you have to do is line the edge of the petal up with the hole.
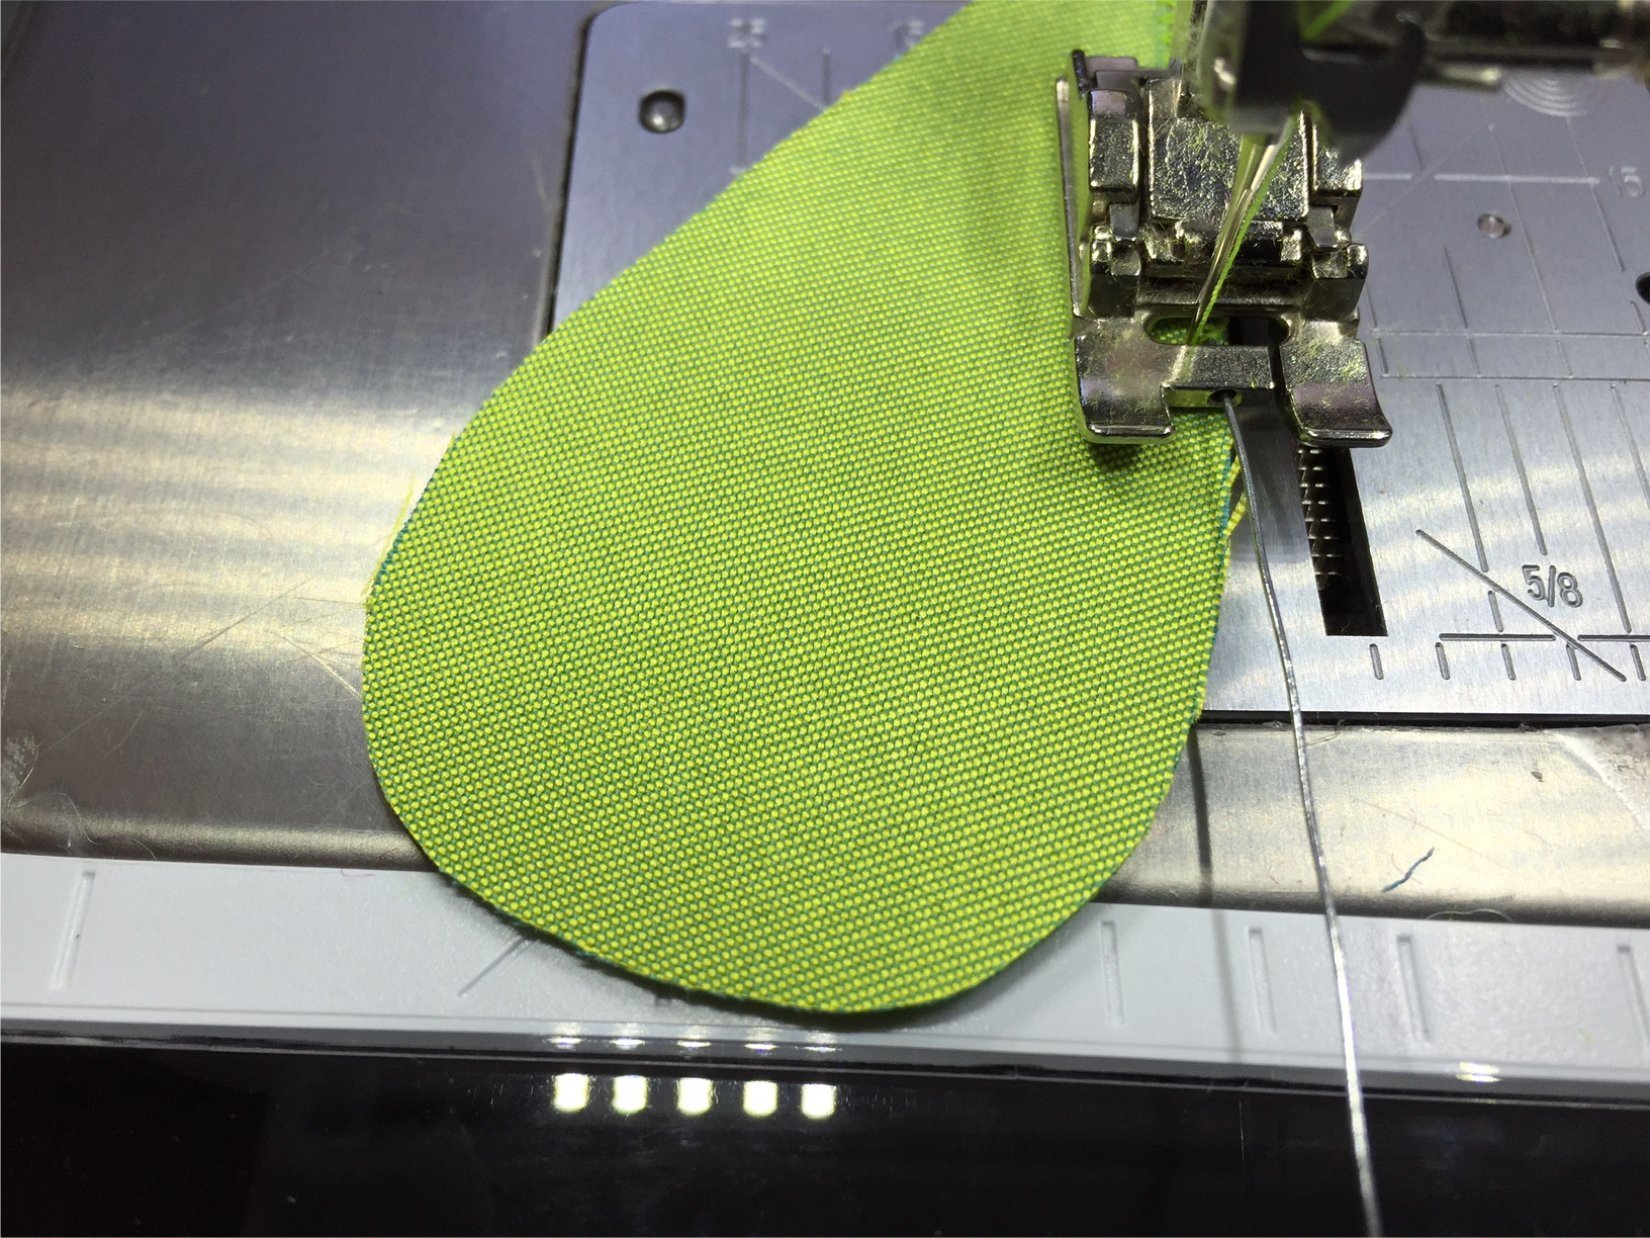
I used a more open zig zag (just make sure it’s wider than the wire), which means you can see the wire a little. I did this so I would have a more delicate edge. If you want to hide the wire completely, shorten the length of your zig zag to make it more of a satin stitch. I would recommend that you work with the petal right side up if using a satin stitch, or wrong side up if using a more open stitch that way the wire is on the back.
Don’t worry about being too neat with the ends of the wire, you can cut them all off at the end.
With all the petals completed it was time to stitch them to the base. For all of my flower inspiration, I decided to opt out of the more tradition shape and go with something a little more abstract.

Now off to the races I go!
I would love to see photos of any race day outfits, please share them at
https://www.facebook.com/TheSharedStitch
0 Responses