 BERNINA Corporate Blog -
Dear community,
in this blog post you can find detailed instructions on how to make a poinsettia decoration (with free template).
I know you are always delighted to have instructions involving software. So hidden behind this Advent calendar window are some instructions for which you will need BERNINA DesignWorks – the CUTWORK Tool. I love poinsettias but I usually don’t have much luck with the real ones, so here is an alternative made out of felt.
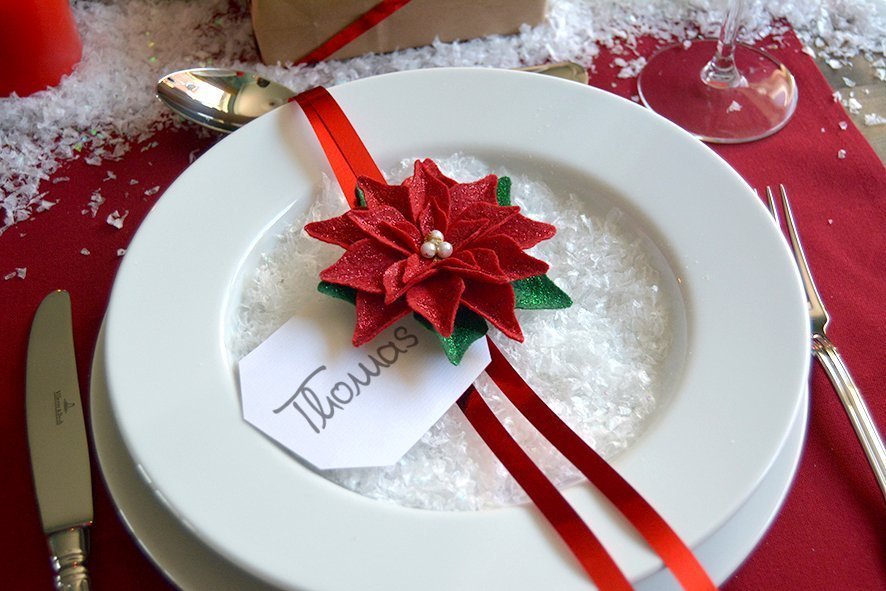
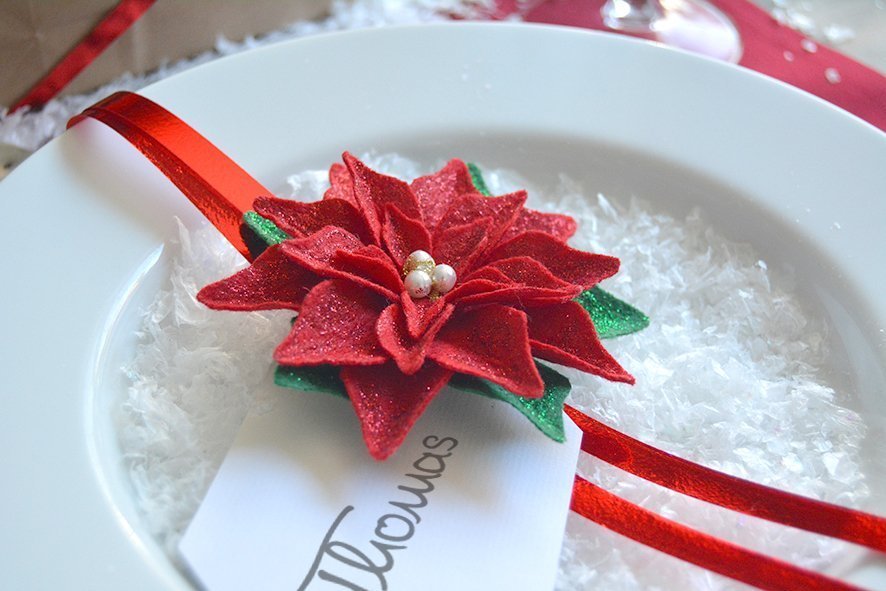
You could use it as a place card for the festive table.
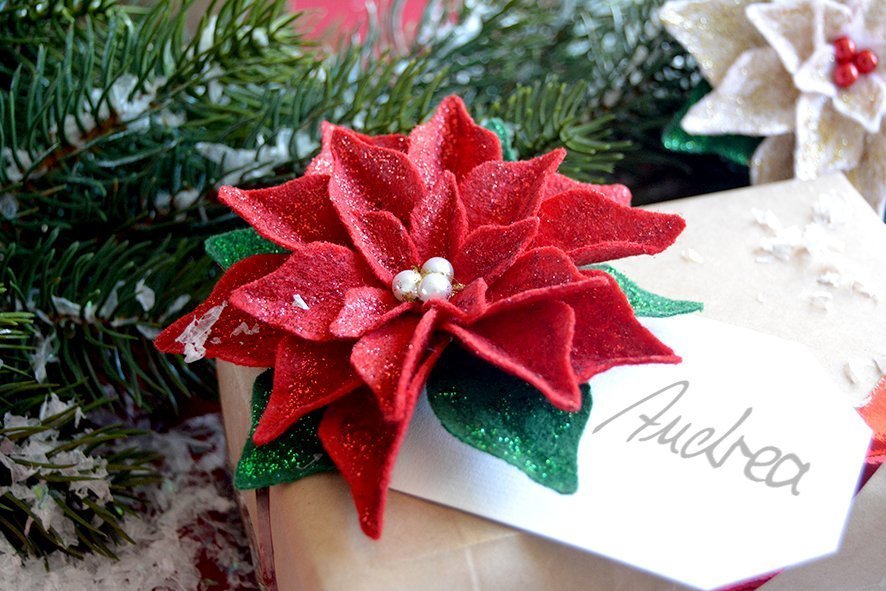
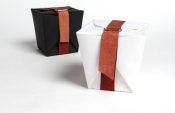
for decorating presents

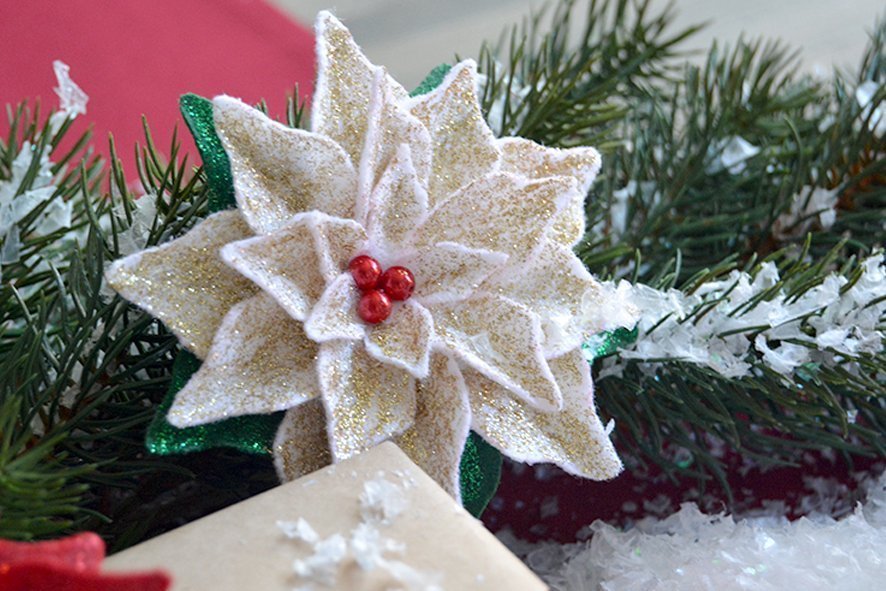
or simply as a decoration for your Christmas tree or wreath.
For this, you will need:
- my poinsettia template, which you can download here Poinsetta1
- 1 sheet of moulding felt each, approx. 30×45 cm, 2-2.5 mm thick, in red, dark green and if you want, white. Make sure you only use moulding felt, as otherwise the instruction won’t work! I will come on to its special properties later.
- 1 bottle of metallic glitter glue each of red, dark green, and optionally gold, silver or white
- 1 bag of wooden clothes pegs, natural, about 4.5 cm long
- matching coloured beads, or alternatively small buttons
- adhesive, such as UHU All Purpose Adhesive or a mini hot-glue gun
- self-adhesive backing fleece, e.g. Cut-Away stabiliser from OESD
- Sewing thread in matching colours
- BERNINA DesignWorks software
- BERNINA CutWork Tool
- BERNINA presser foot Nr. 18
Software instructions:
First, download the folder Poinsetta1. Save and unzip it. In the folder, there are two Illustrator.eps files: “Poinsetta 1” and “Poinsetta 2”. These are the template files, which you can simply load into the BERNINA DesignWorks software. The project: The poinsettia consists of one green felt piece and 4 red or white felt pieces in 4 different sizes.

The file “Poinsetta1.eps” is the template for the green and the first red or white felt piece. Both pieces are the same size and form the basis of the decoration. The file is cut out 1x in green and 1x in red or white. As we are using the “BERNINA Large Oval Hoop, 255 x 145”, #44, 2 poinsettias are created simultaneously. The file “Poinsetta2.eps” is the template for the red and white felt pieces in the other sizes. This is cut out twice, or if you fold the felt double, once. Of course, if you have a large machine, you can arrange all the red felt pieces in the JumboHoop.
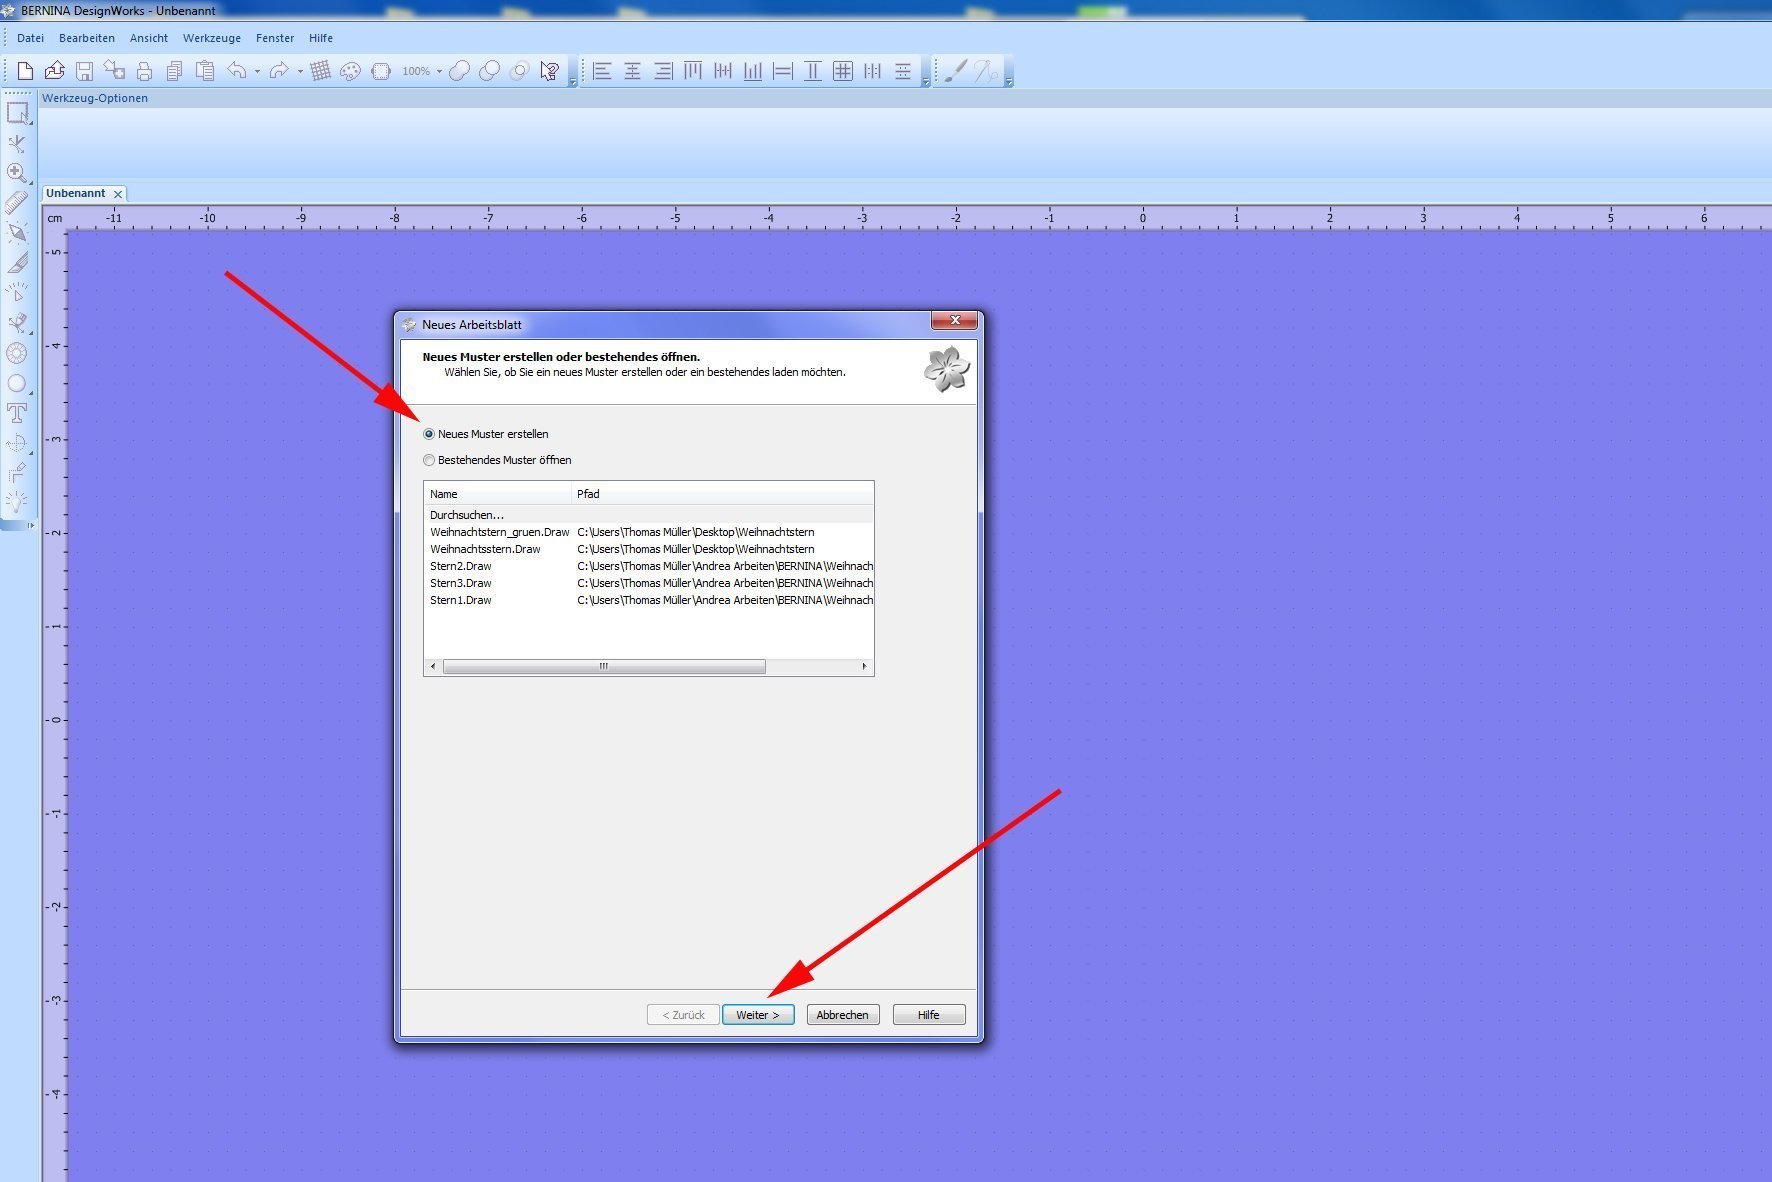
How to go about it: Double click on the BERNINA DesignWorks icon to open the program. The “New design” dialogue box opens. Select “Create New” and click “Next”.
The next dialogue box, “Select the fabric that you will embroider on”, opens. As this is not important for us, just click on “Next”.

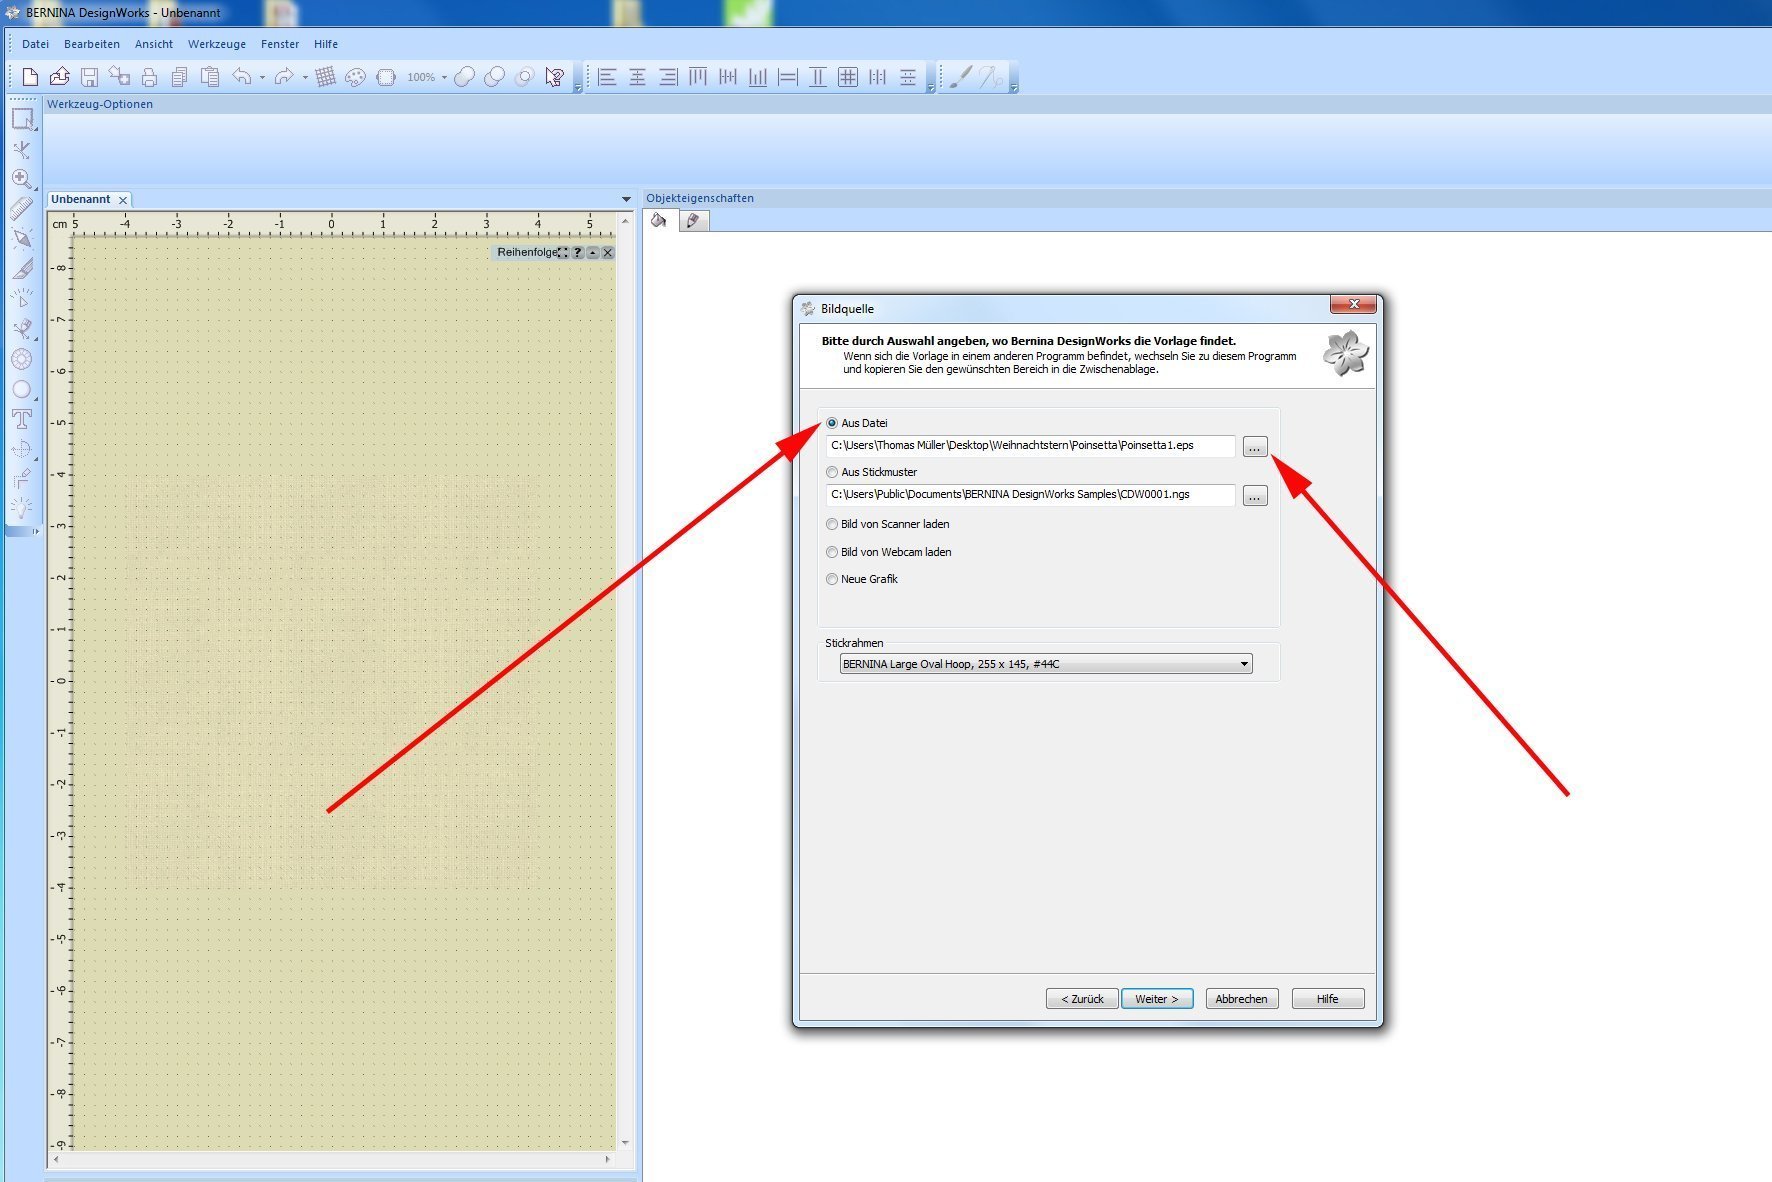
Now the “Artwork source” dialogue box opens. Choose the option “From file” and click the box with three dots.
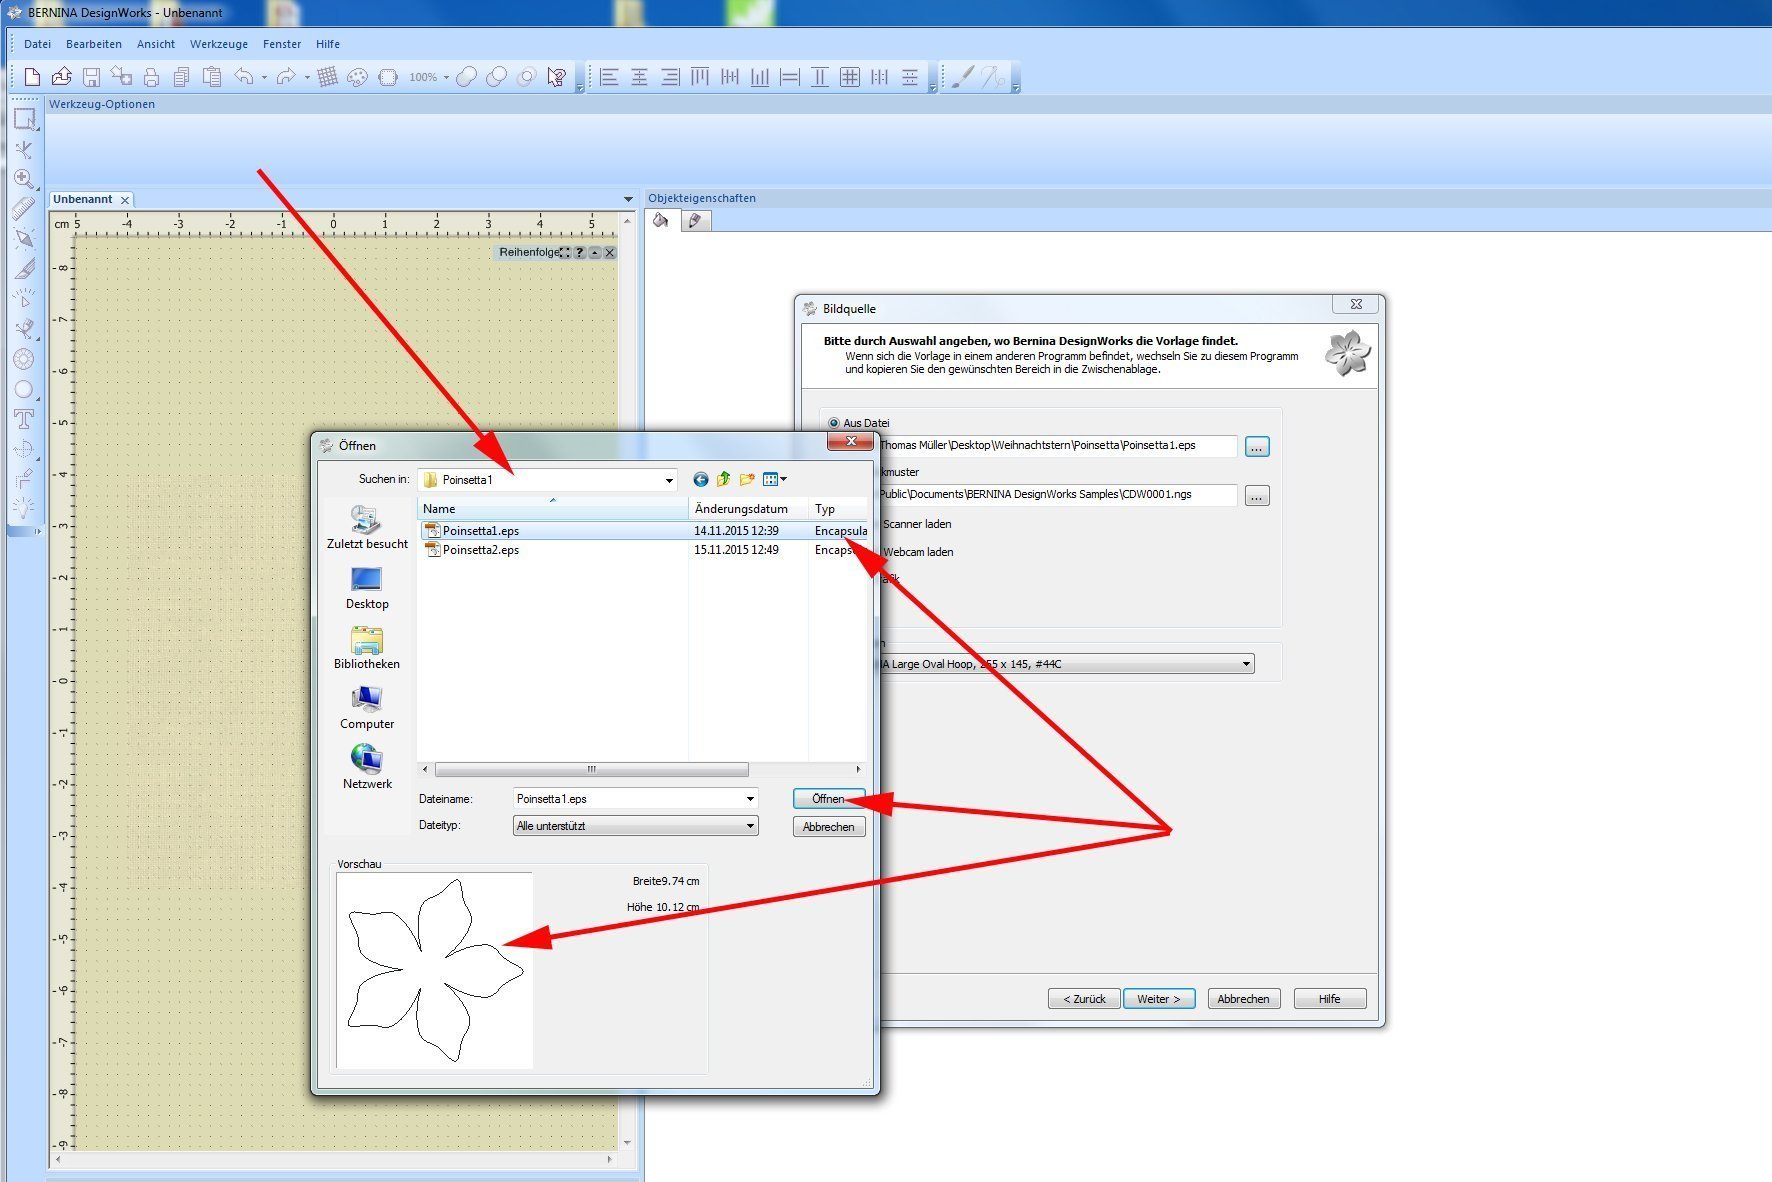
Another dialogue box appears. Here, select the folder with the poinsettia templates that you previously saved on your hard drive.
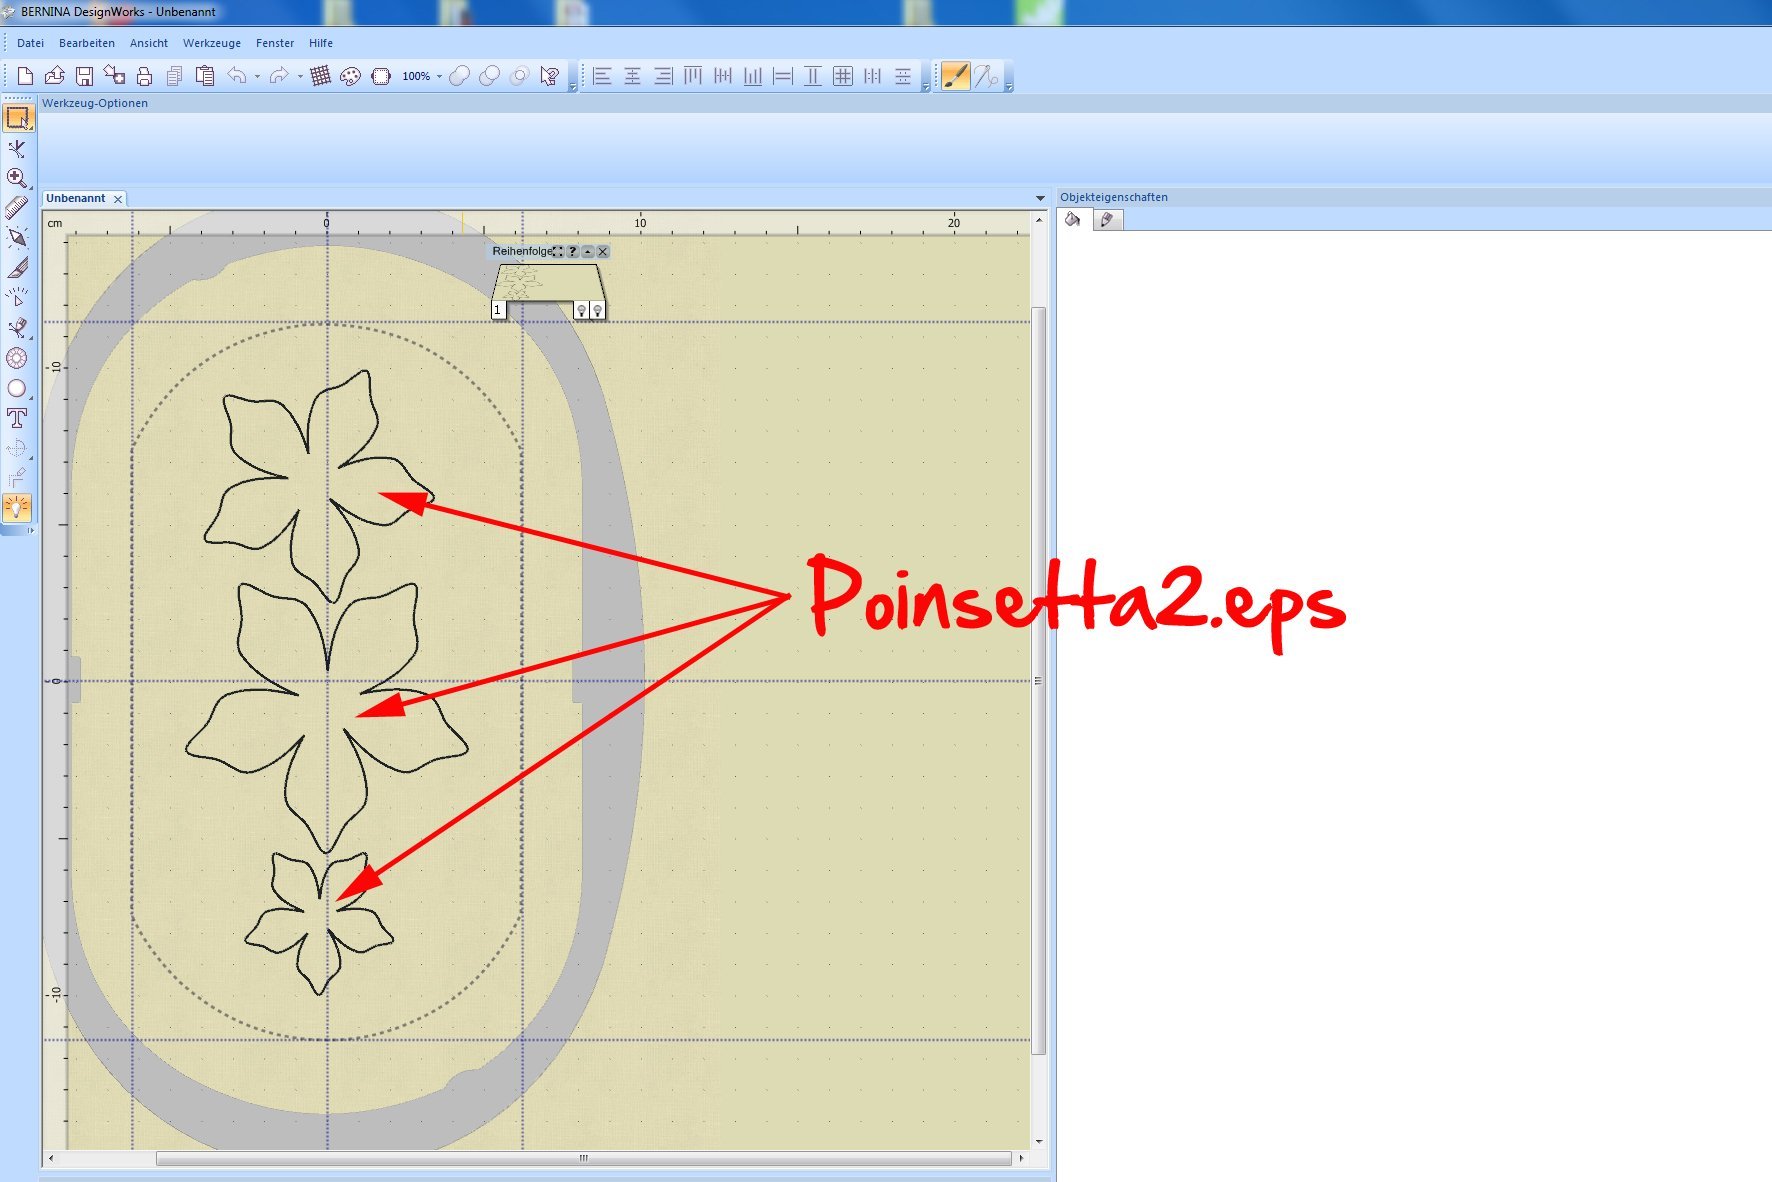
There are 2 files: Poinsetta1.eps and Poinsetta2.eps. You can see the outline in the preview. If you cannot see an image, please check whether the file type “All supported” is selected. Select the file “Poinsetta1.eps” and click the “Open” button.
Next, go to the “Hoop” field and and select “BERNINA Large Oval Hoop, 255 x 145″, #44”.
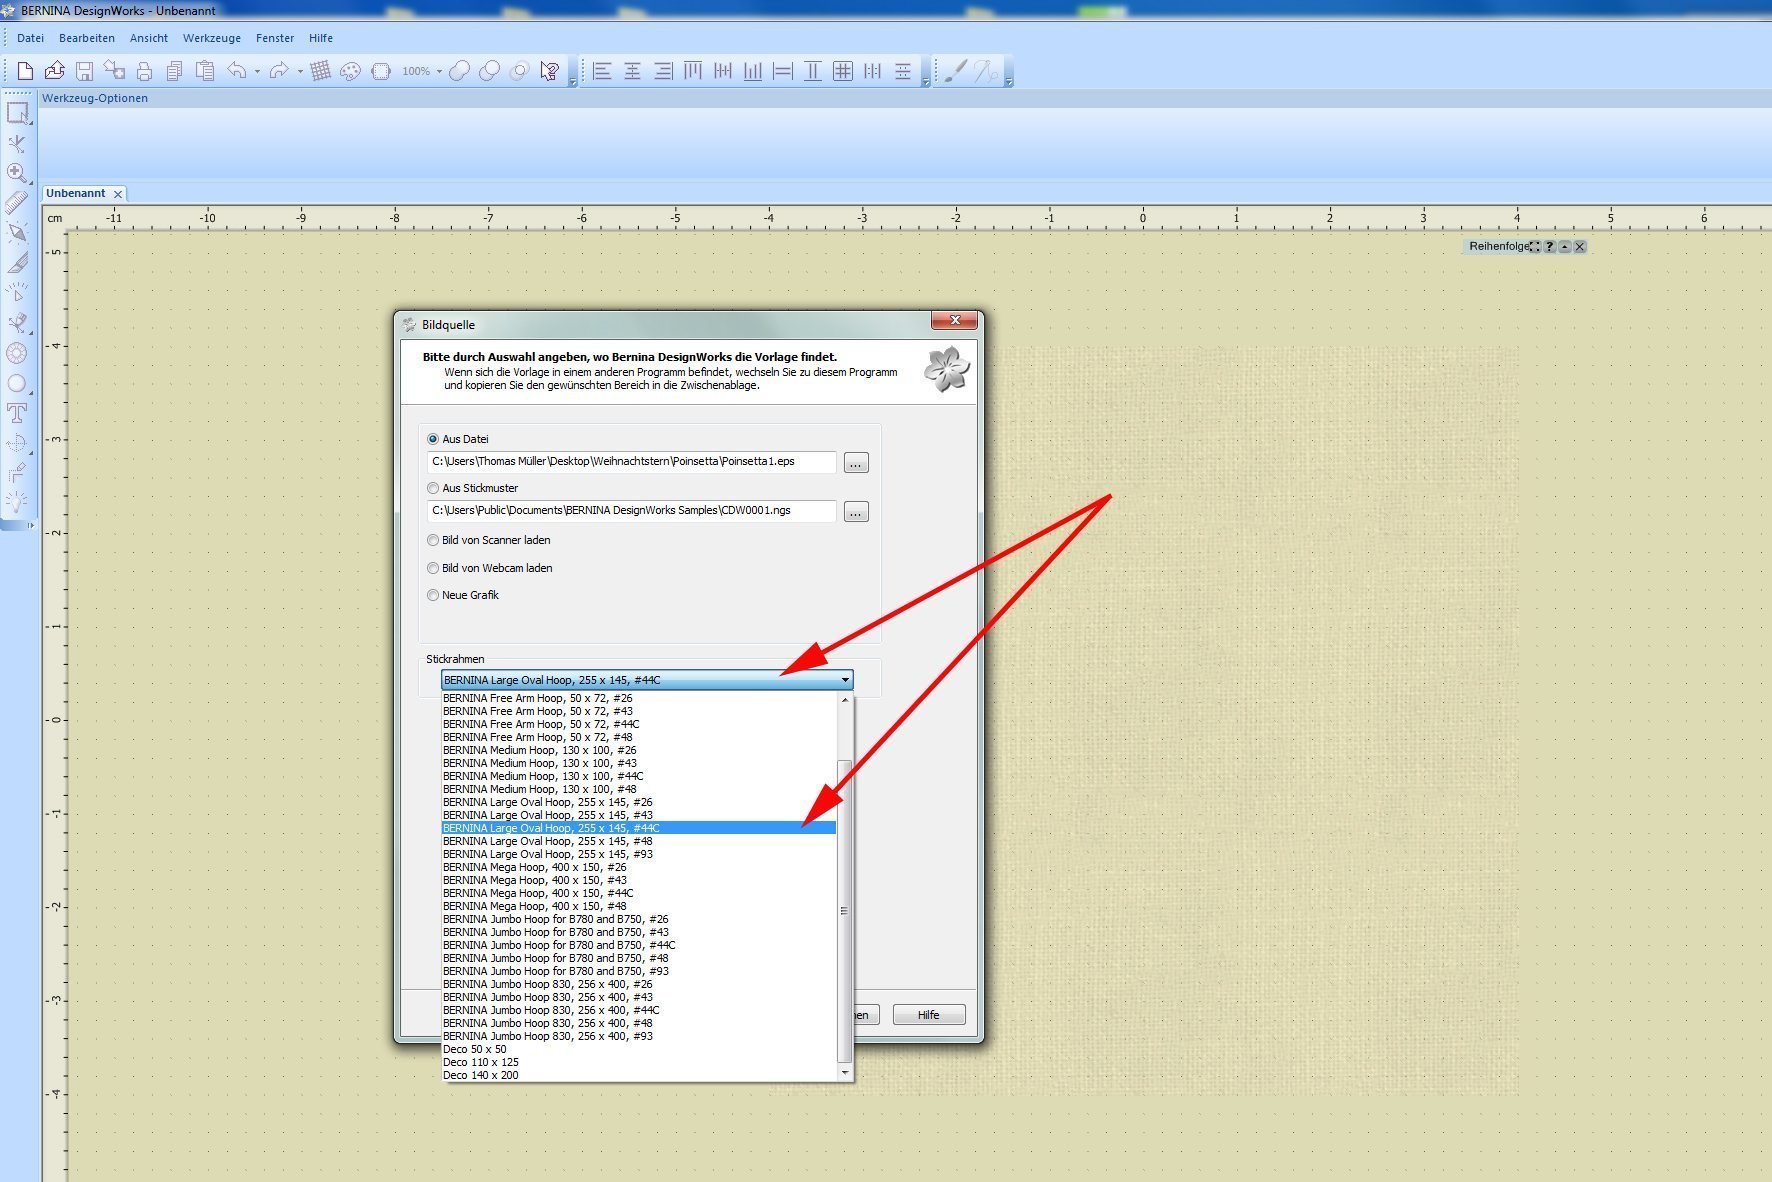
Then click “Next”.

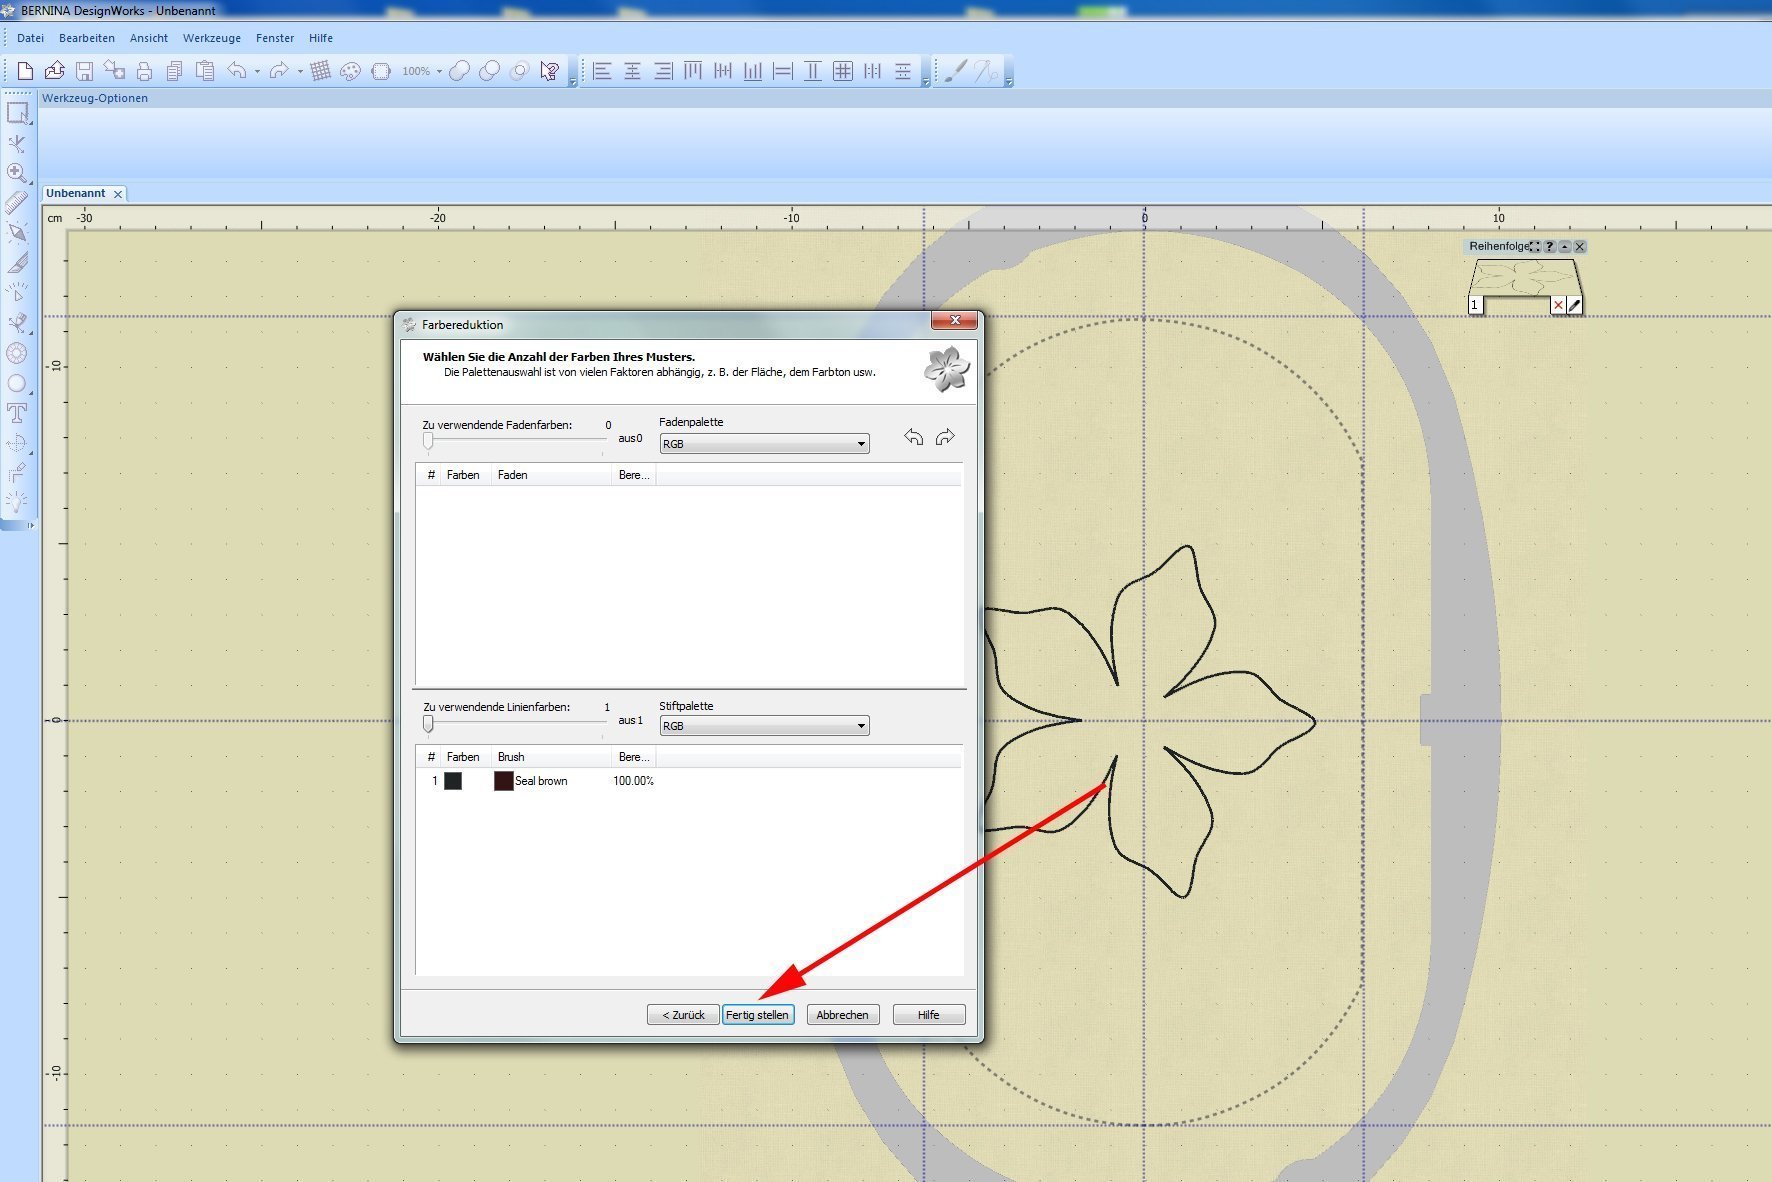
The “Colour Reduction” dialogue box opens. As we are not interested in this dialogue box, just click on “Finish”.
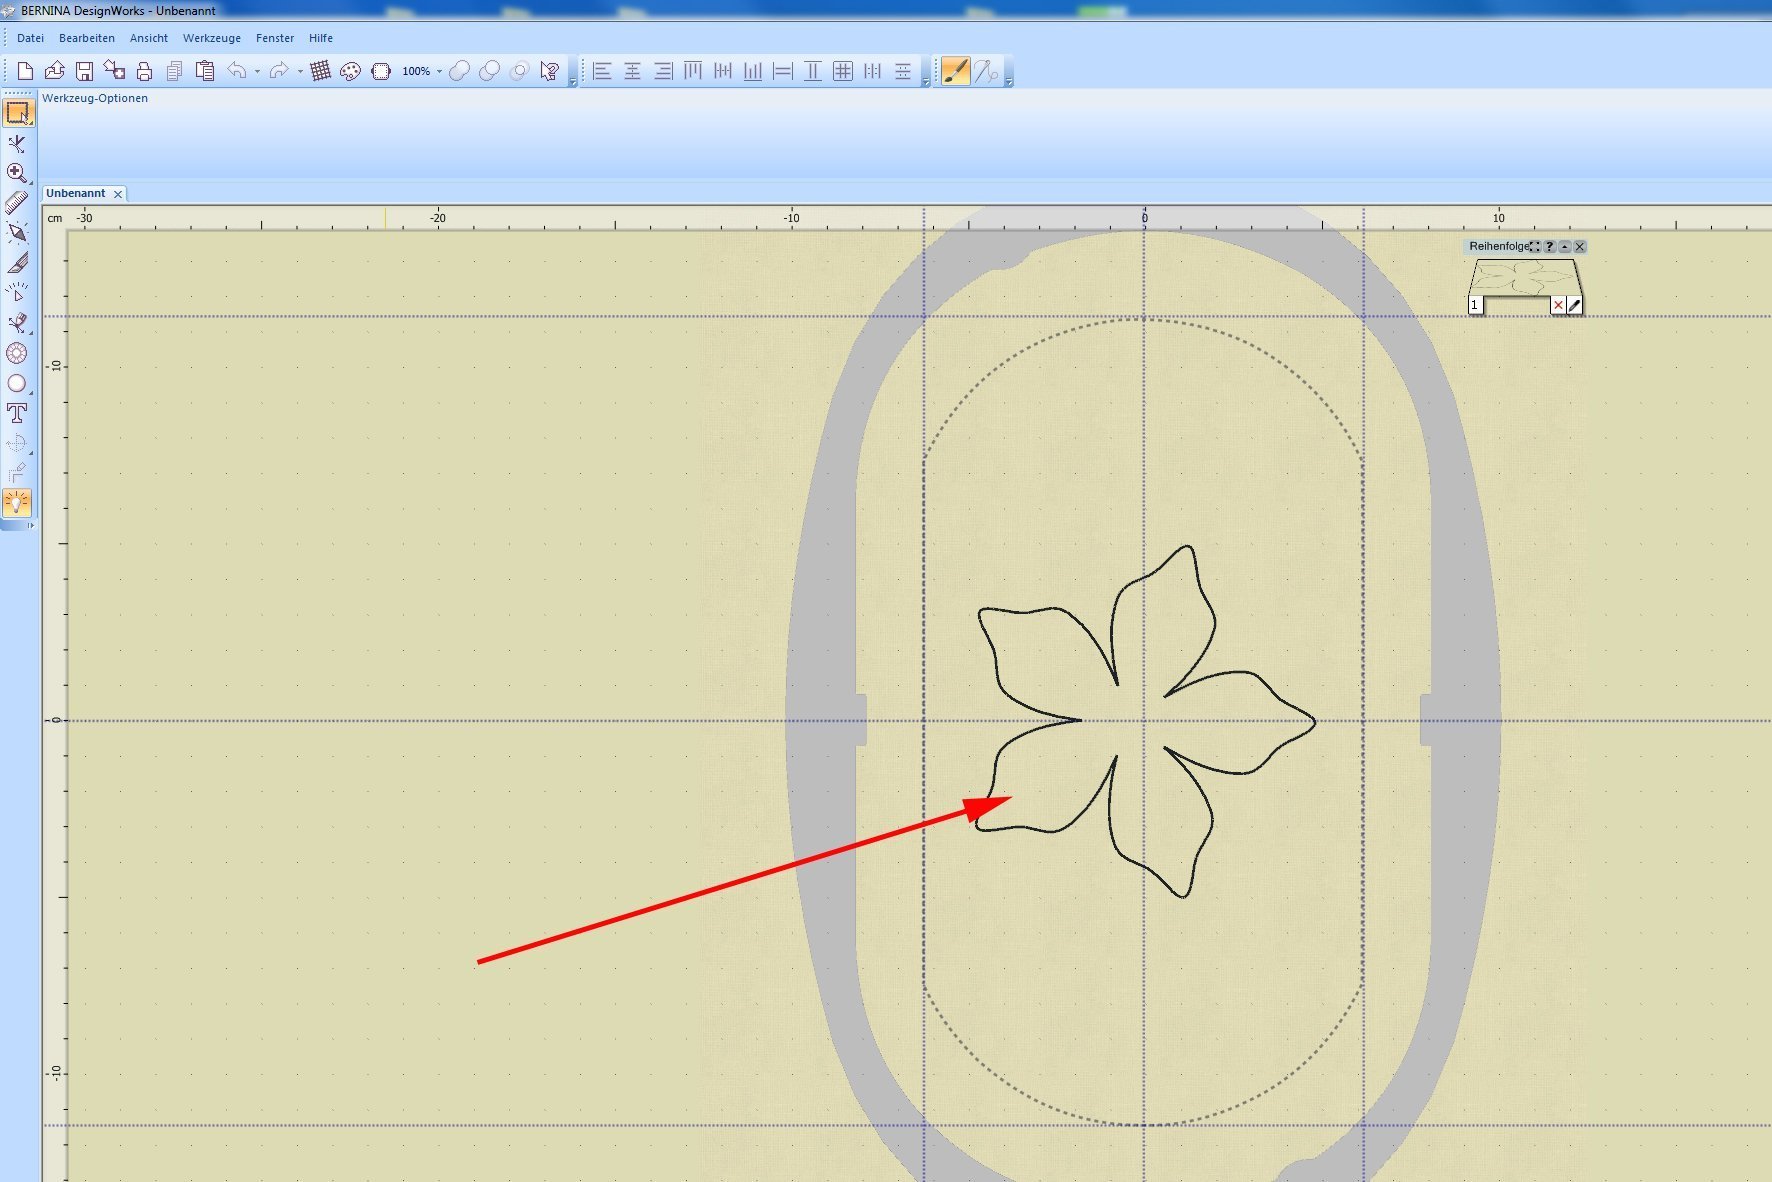
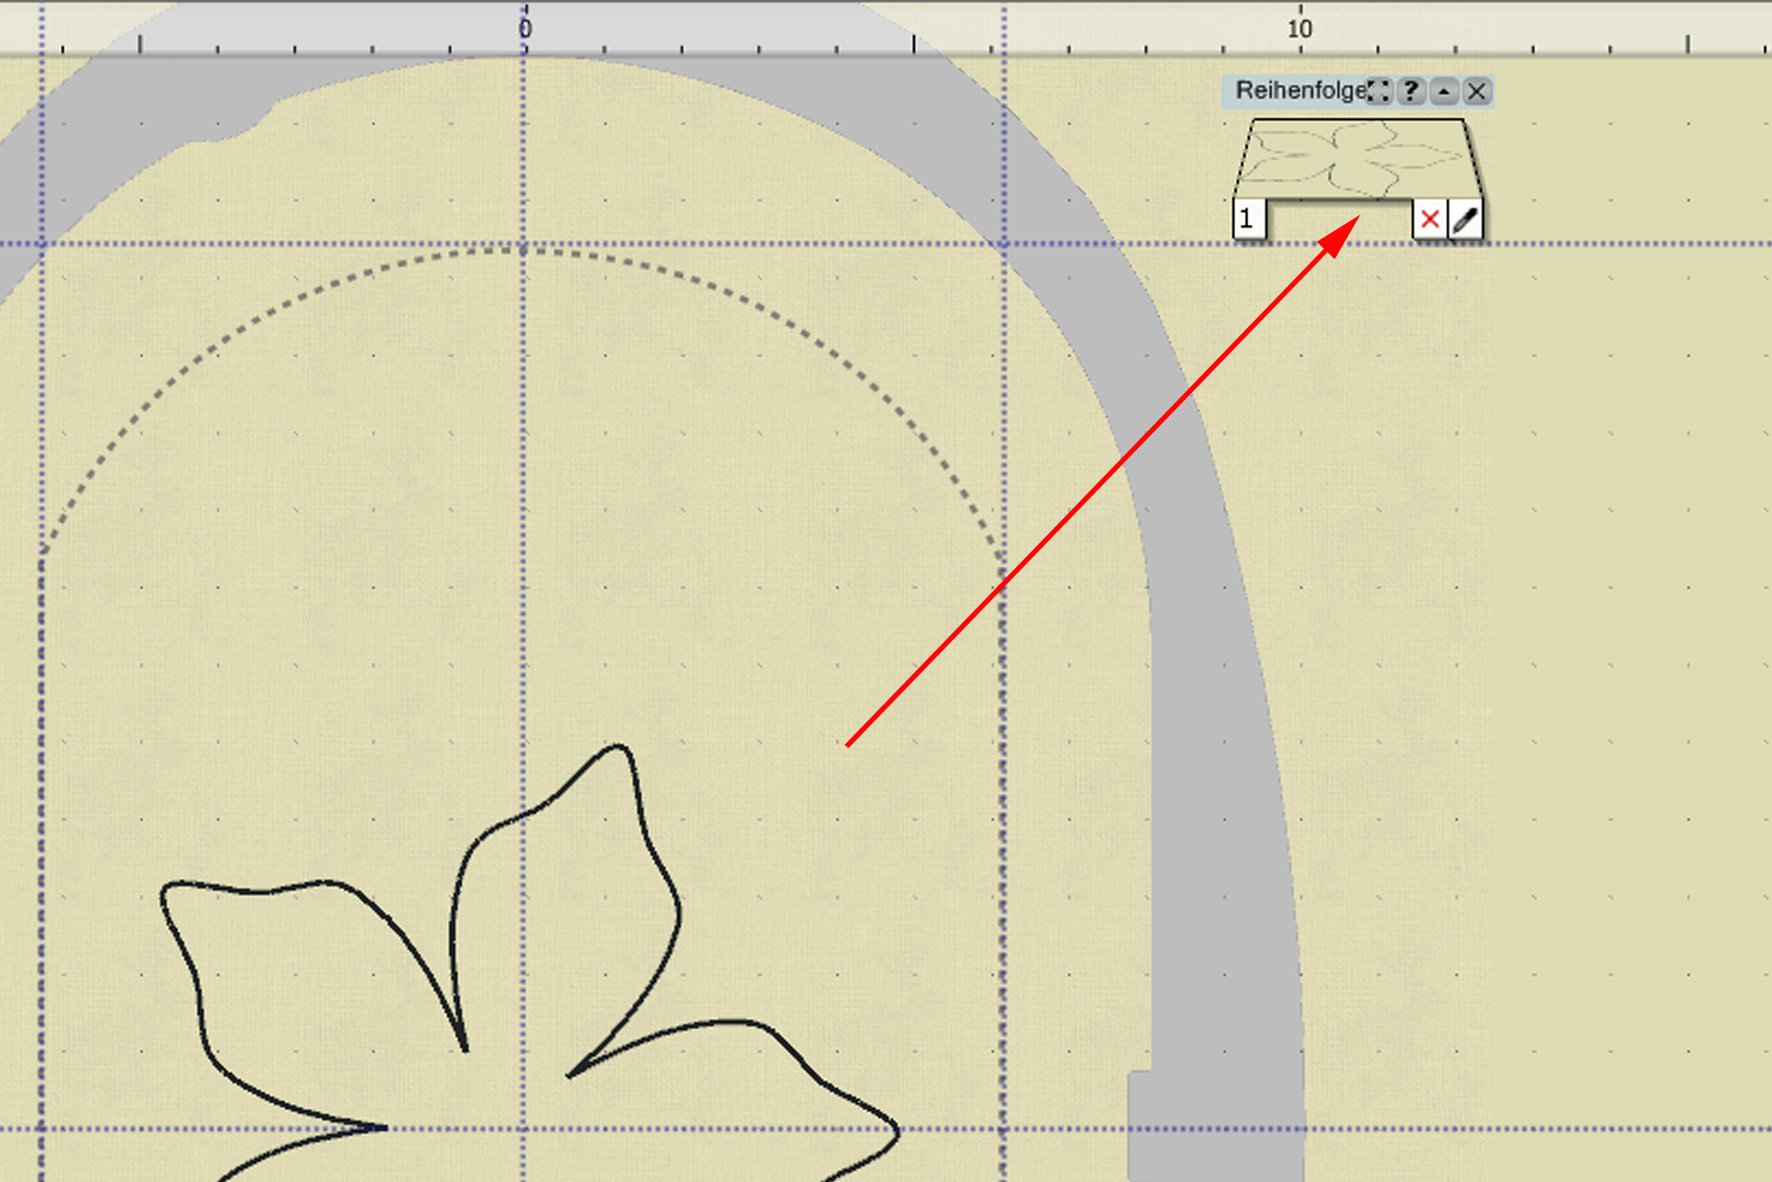
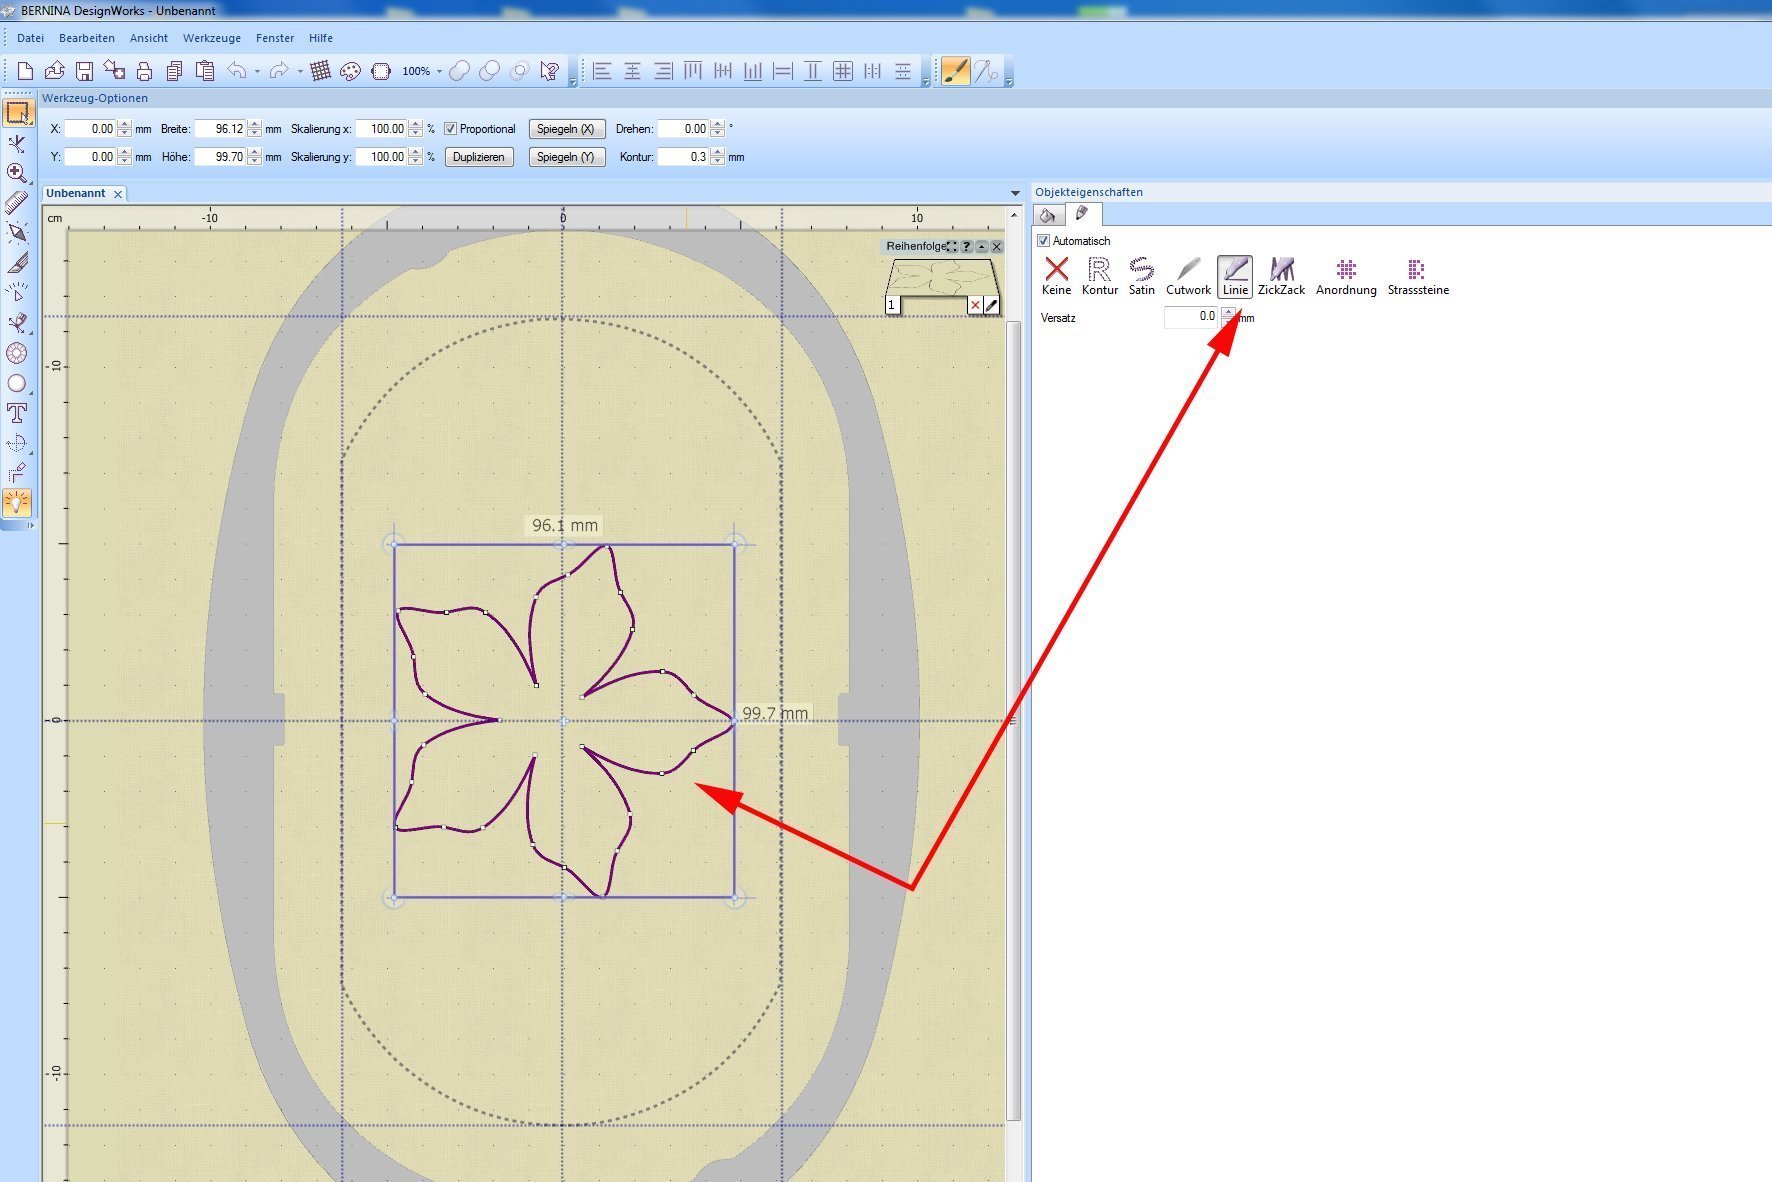
And that’s it. You can now see the outlines of the first template. In “Sequence Manager” (top right), you can see that the outline is defined as a “Line” (pen symbol) and the area is defined as “red X” (no fill).
.
Select the “Select Hoop” icon on the toolbar and click on the poinsettia with the mouse.
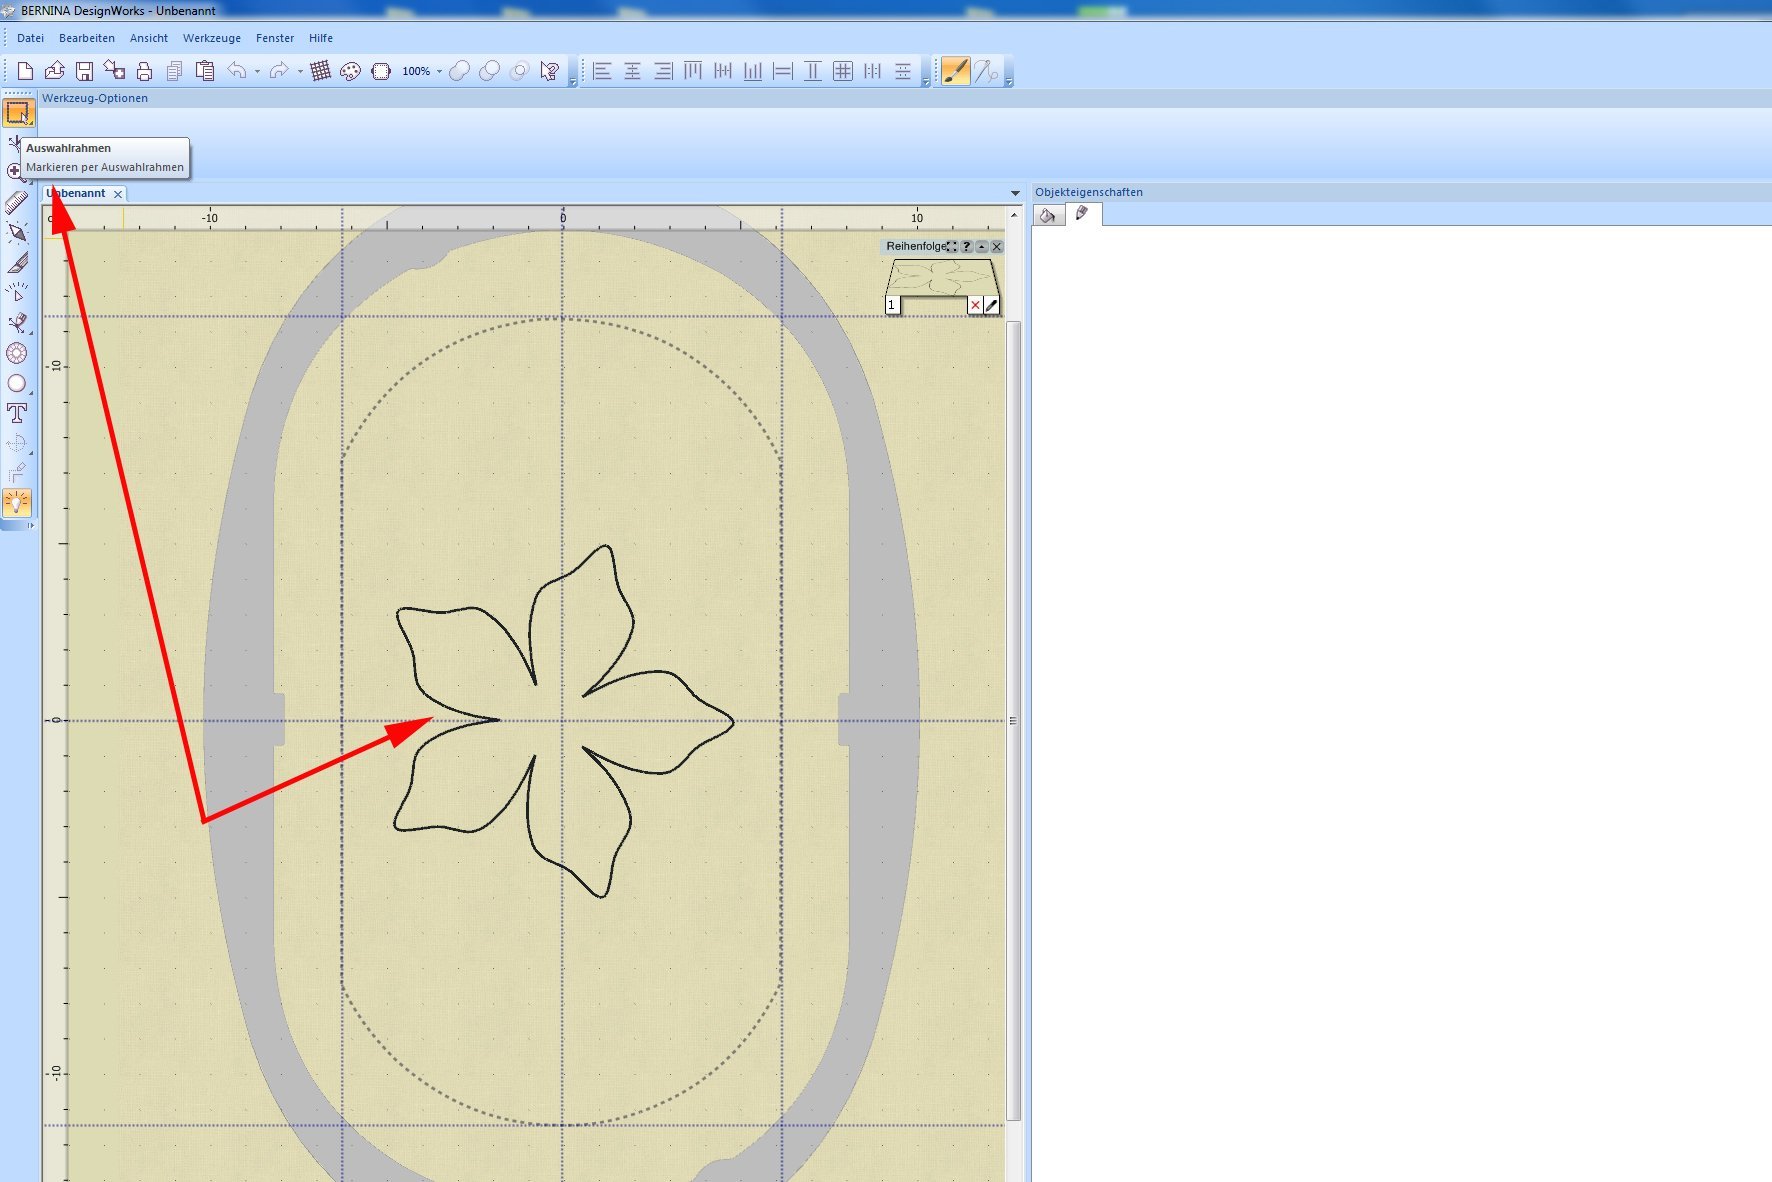
You have now selected the poinsettia. We can now look to the right, at the “Object Properties” tab. You can see that for “Outline”, “Line” is selected. As we want to cut the poinsettia out, select the “CutWork” icon next to it on the left.
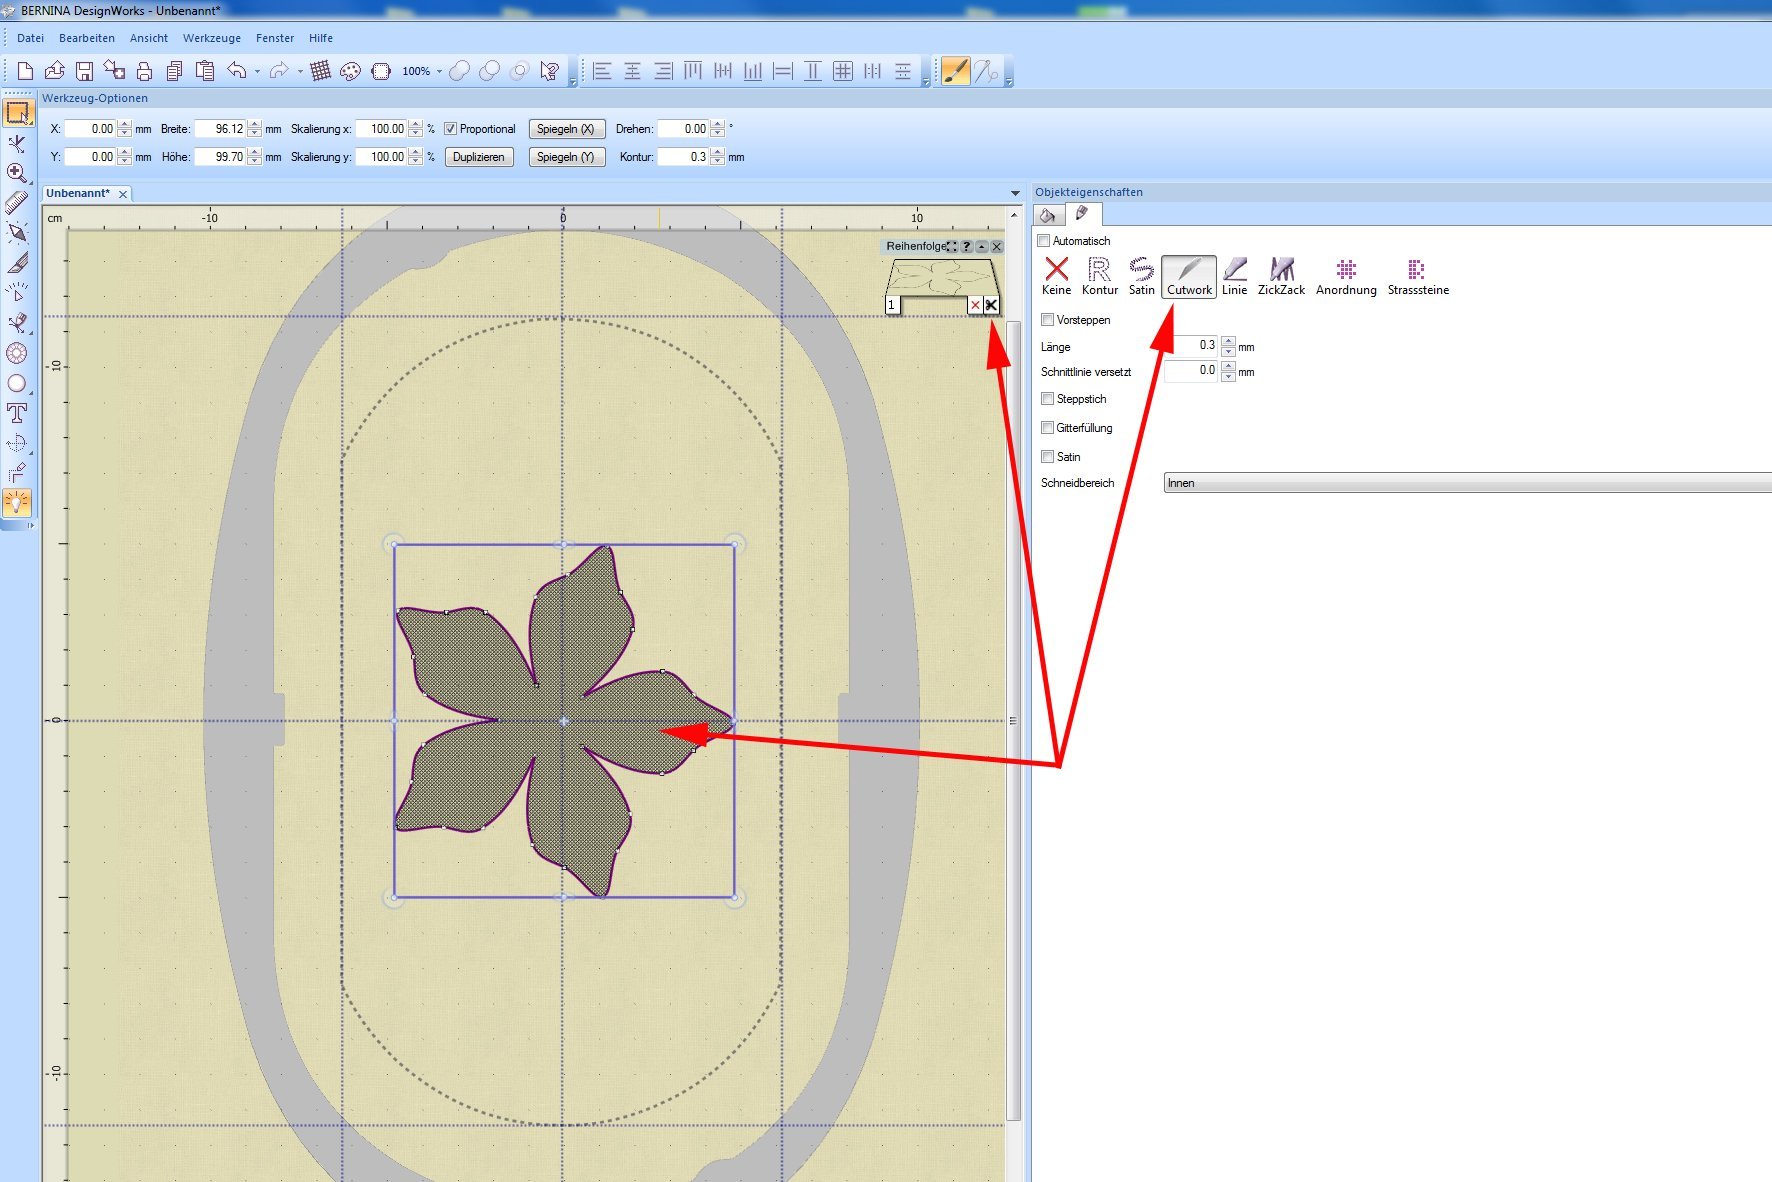
After selecting the “CutWork” icon, you immediately see the change. Our poinsettia is filed with a grey grid and in “Sequence Manager” you will now see a pair of scissors. In the “Object Properties” tab, there has also been a change. However, in this case it does not matter whether you set the cutting area to internal or external. You don’t need to make any changes here.
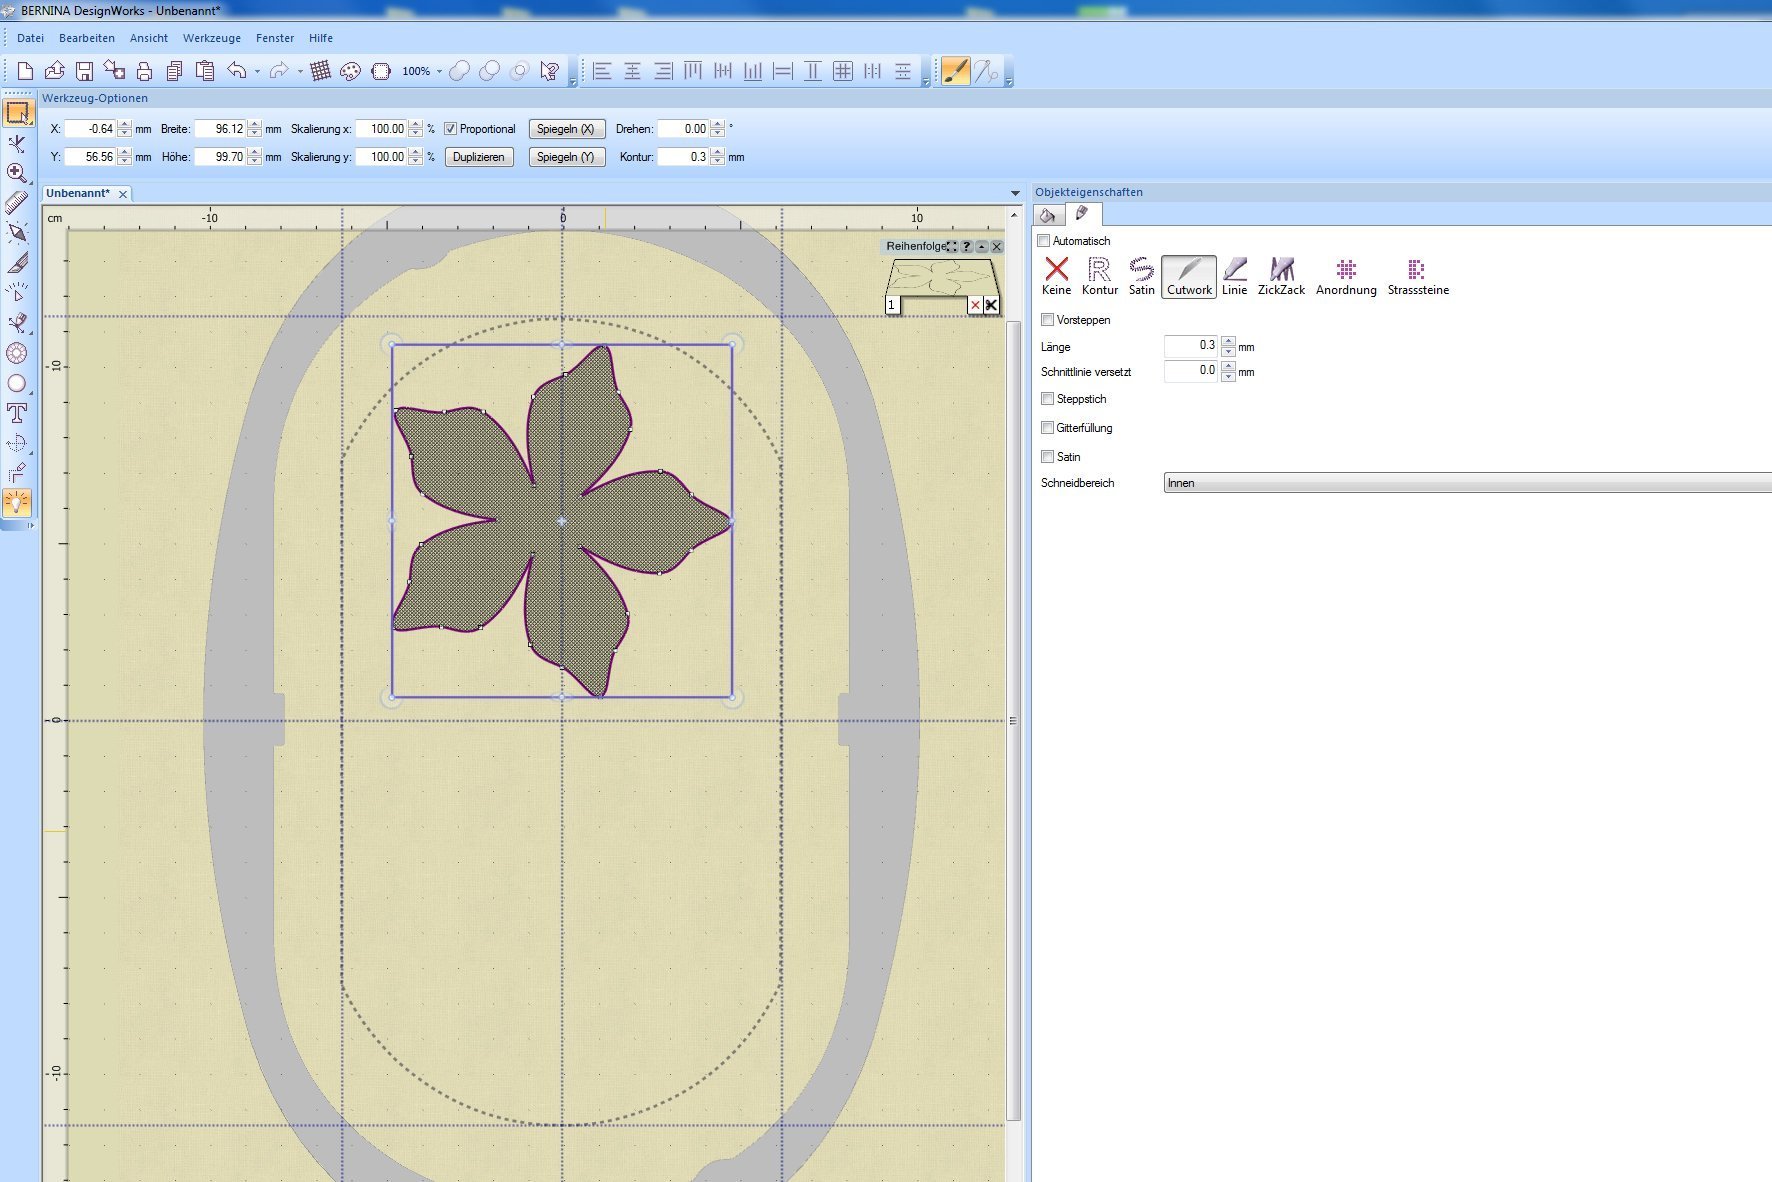
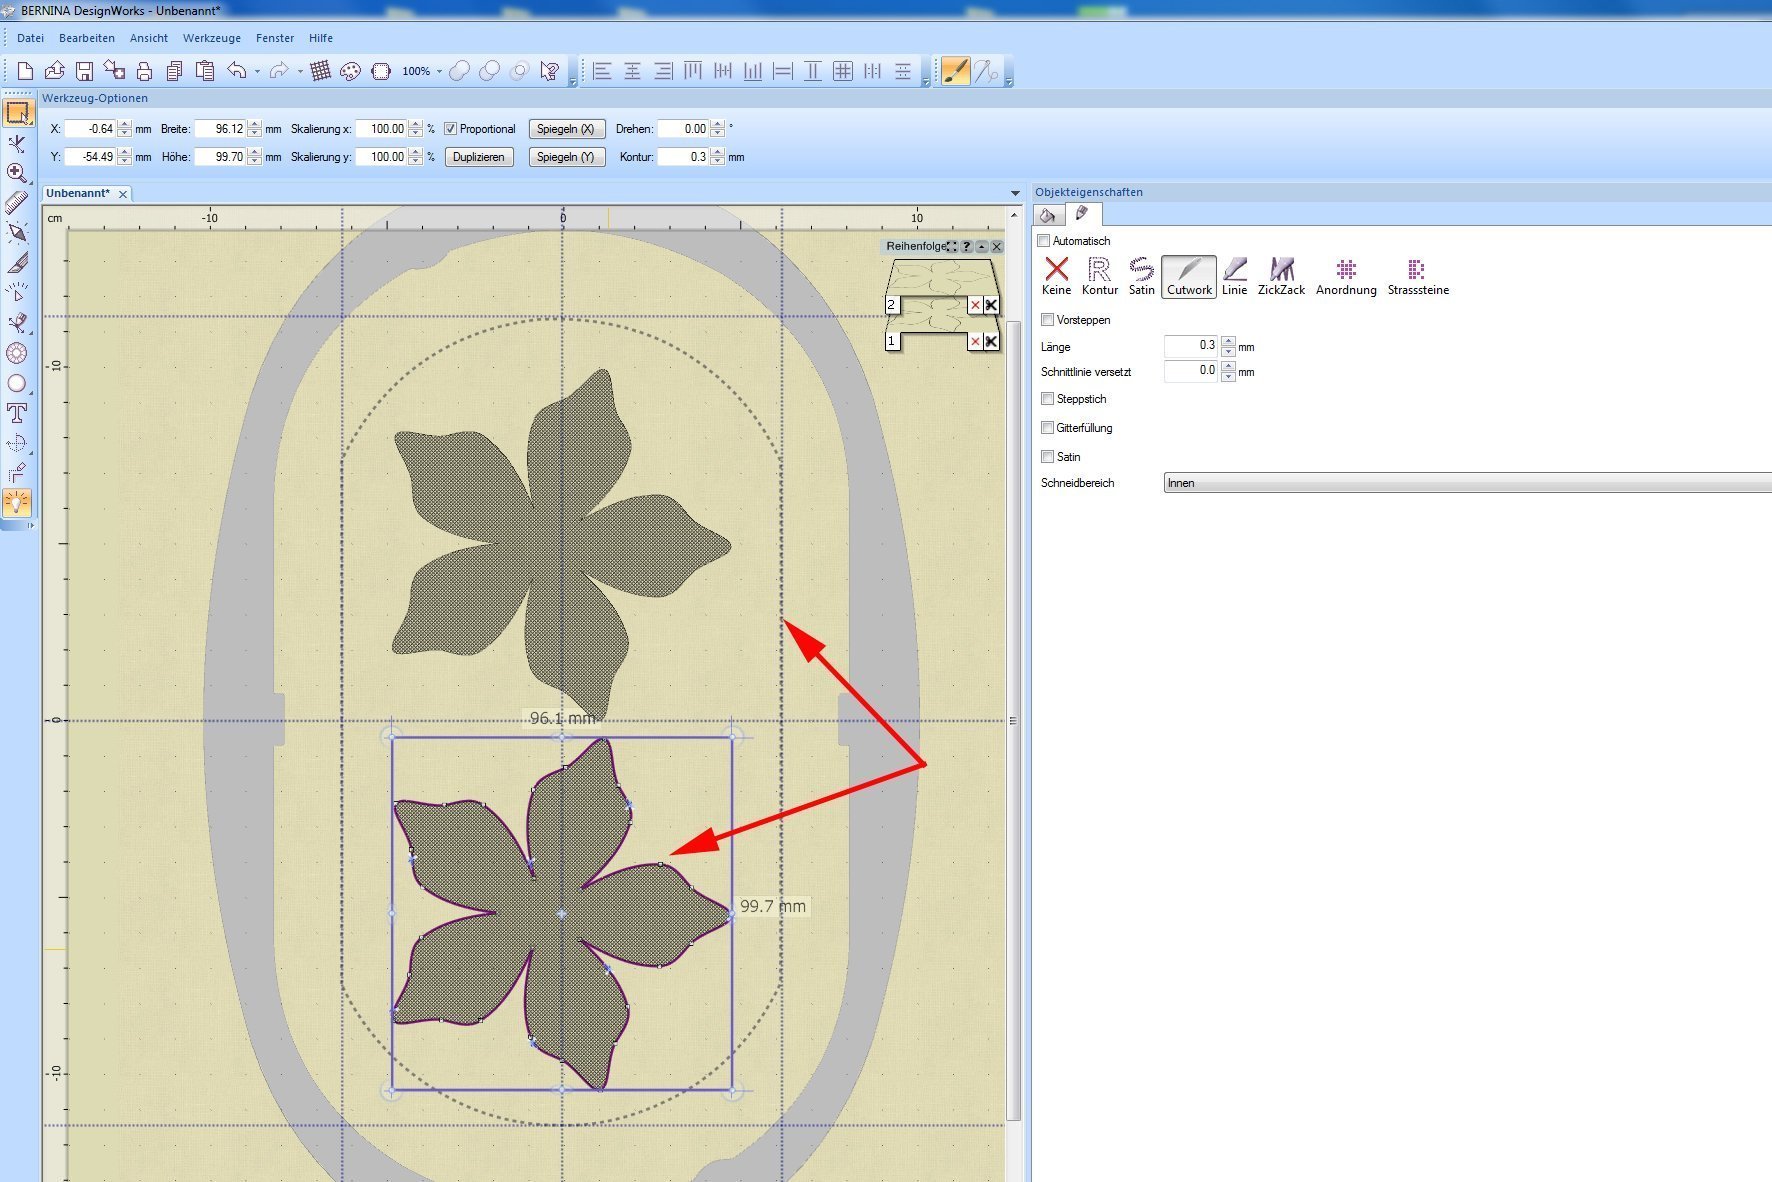
Now, when you click the poinsettia and hold down the mouse button, you can move the star shape upwards or downwards. Move the star upwards.
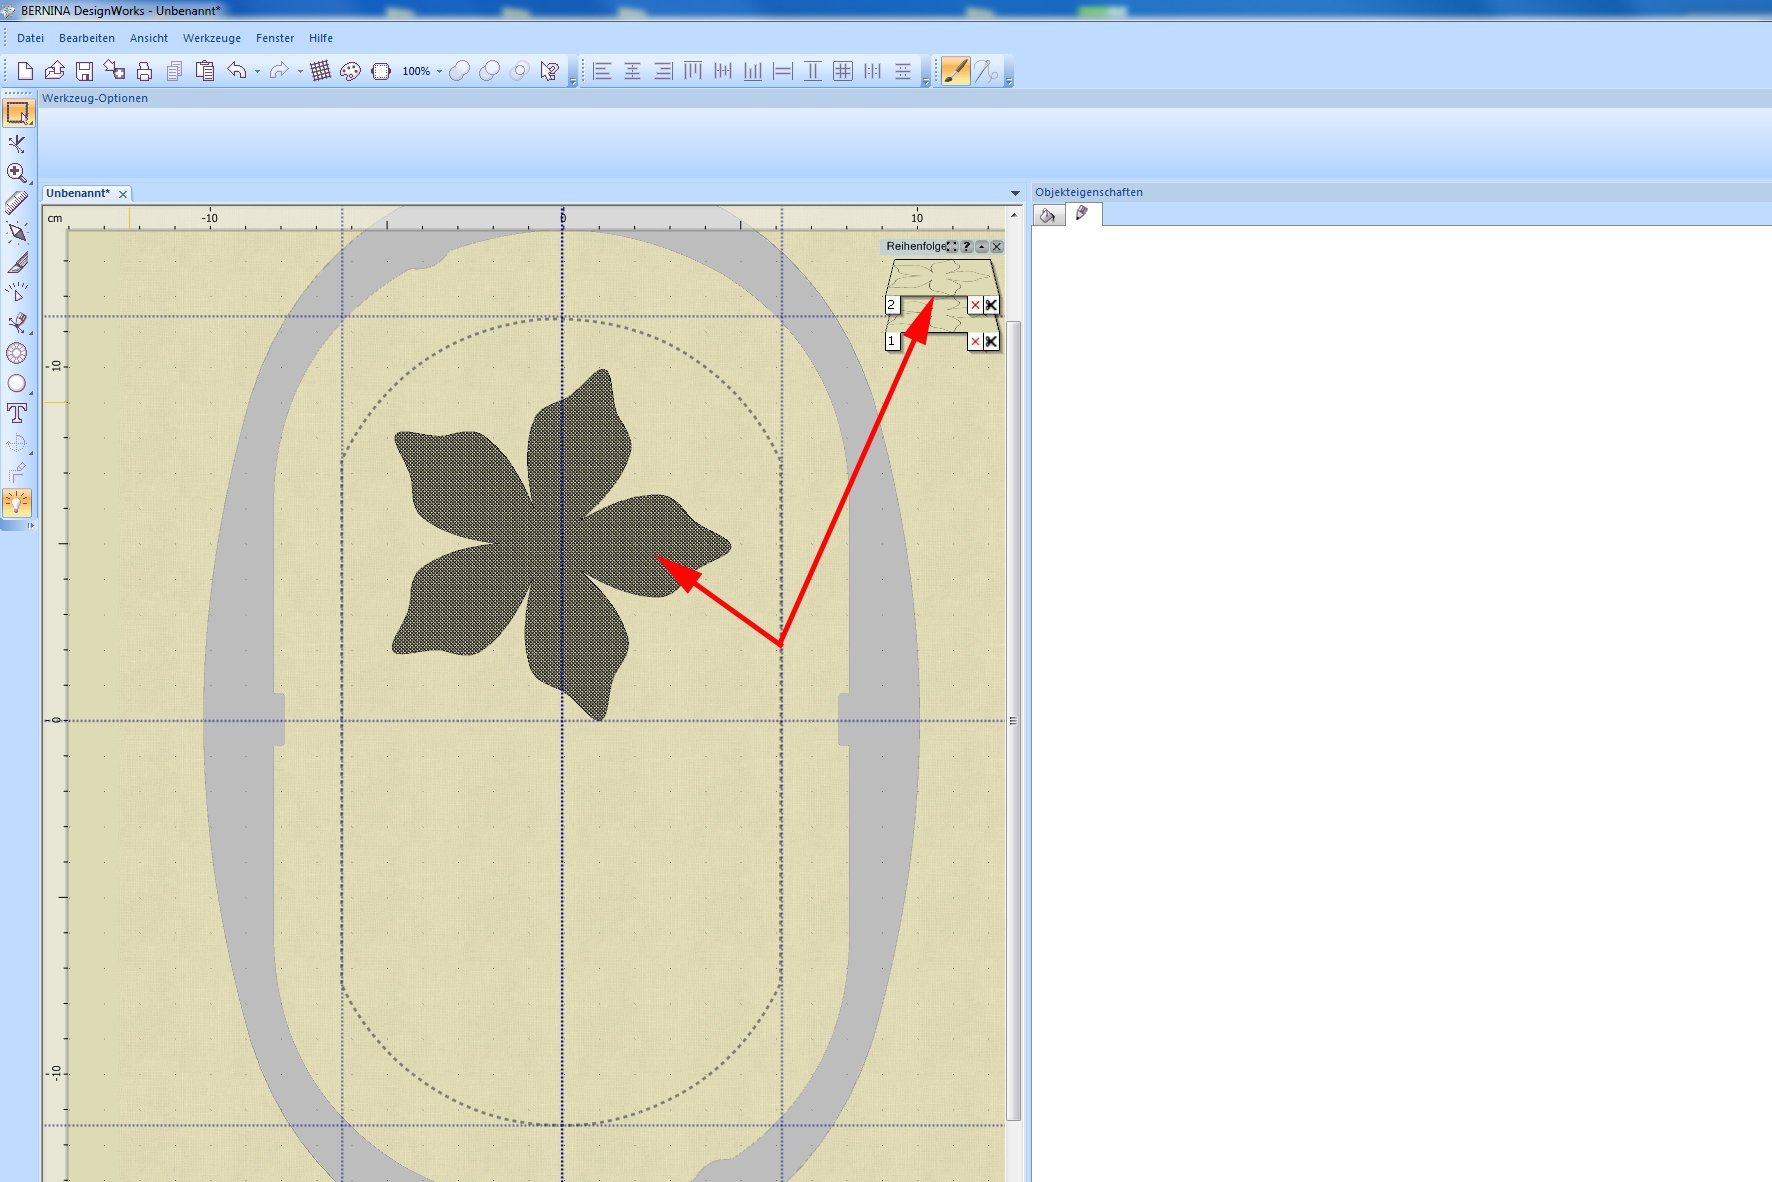
Select “Edit” from the menu with the mouse. A dialogue box drops down, from which you select “Copy”. Then select “Paste” from the “Edit” menu, which pastes in a second poinsettia. You can now see a 2nd layer in “Sequence Manager”.
Now click with the mouse on the poinsettia on “layer 2” and move with the star downwards with the mouse button held down. Please make sure that you stay within the dotted line. This is the maximum area available for the designs. Designs outside this area cannot be cut out.
If you select the “Slow Redraw” option in the toolbar…

…you get a preview of how your design would be cut out.
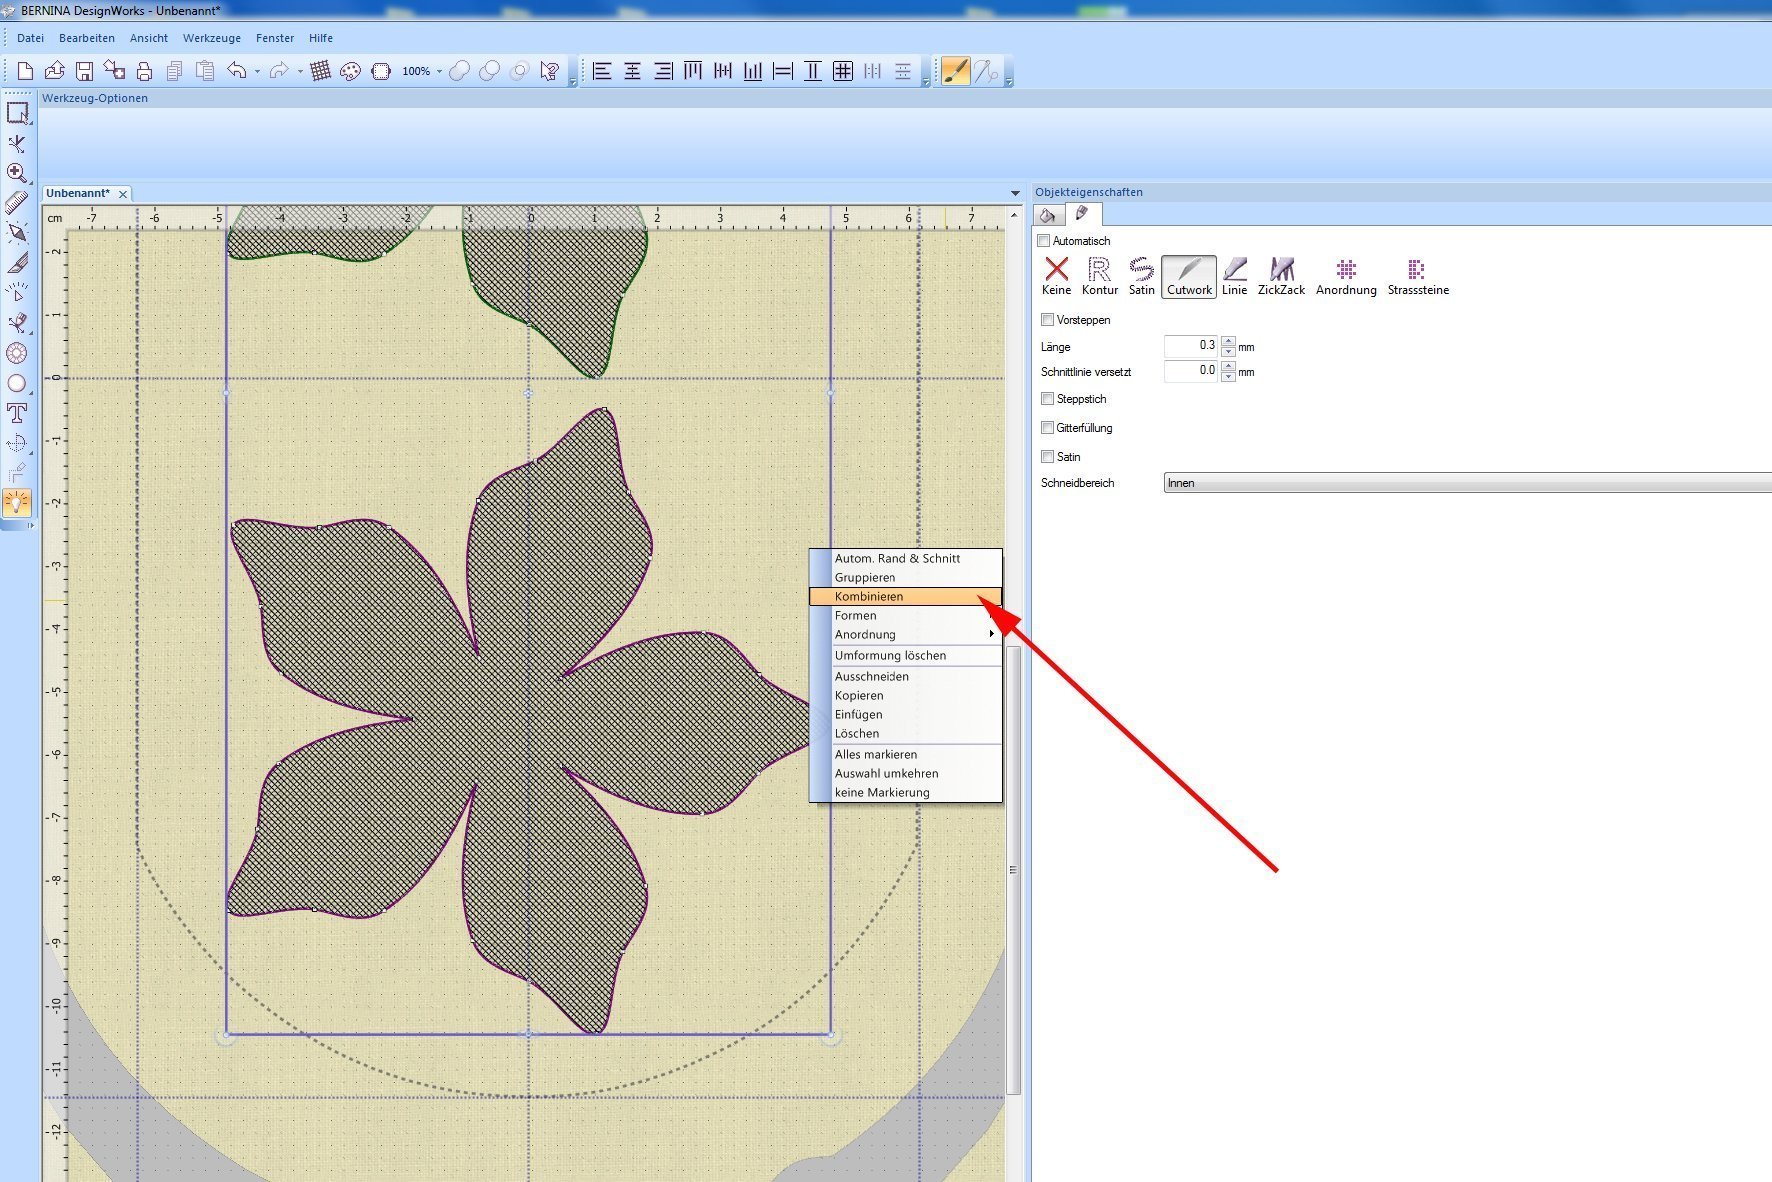
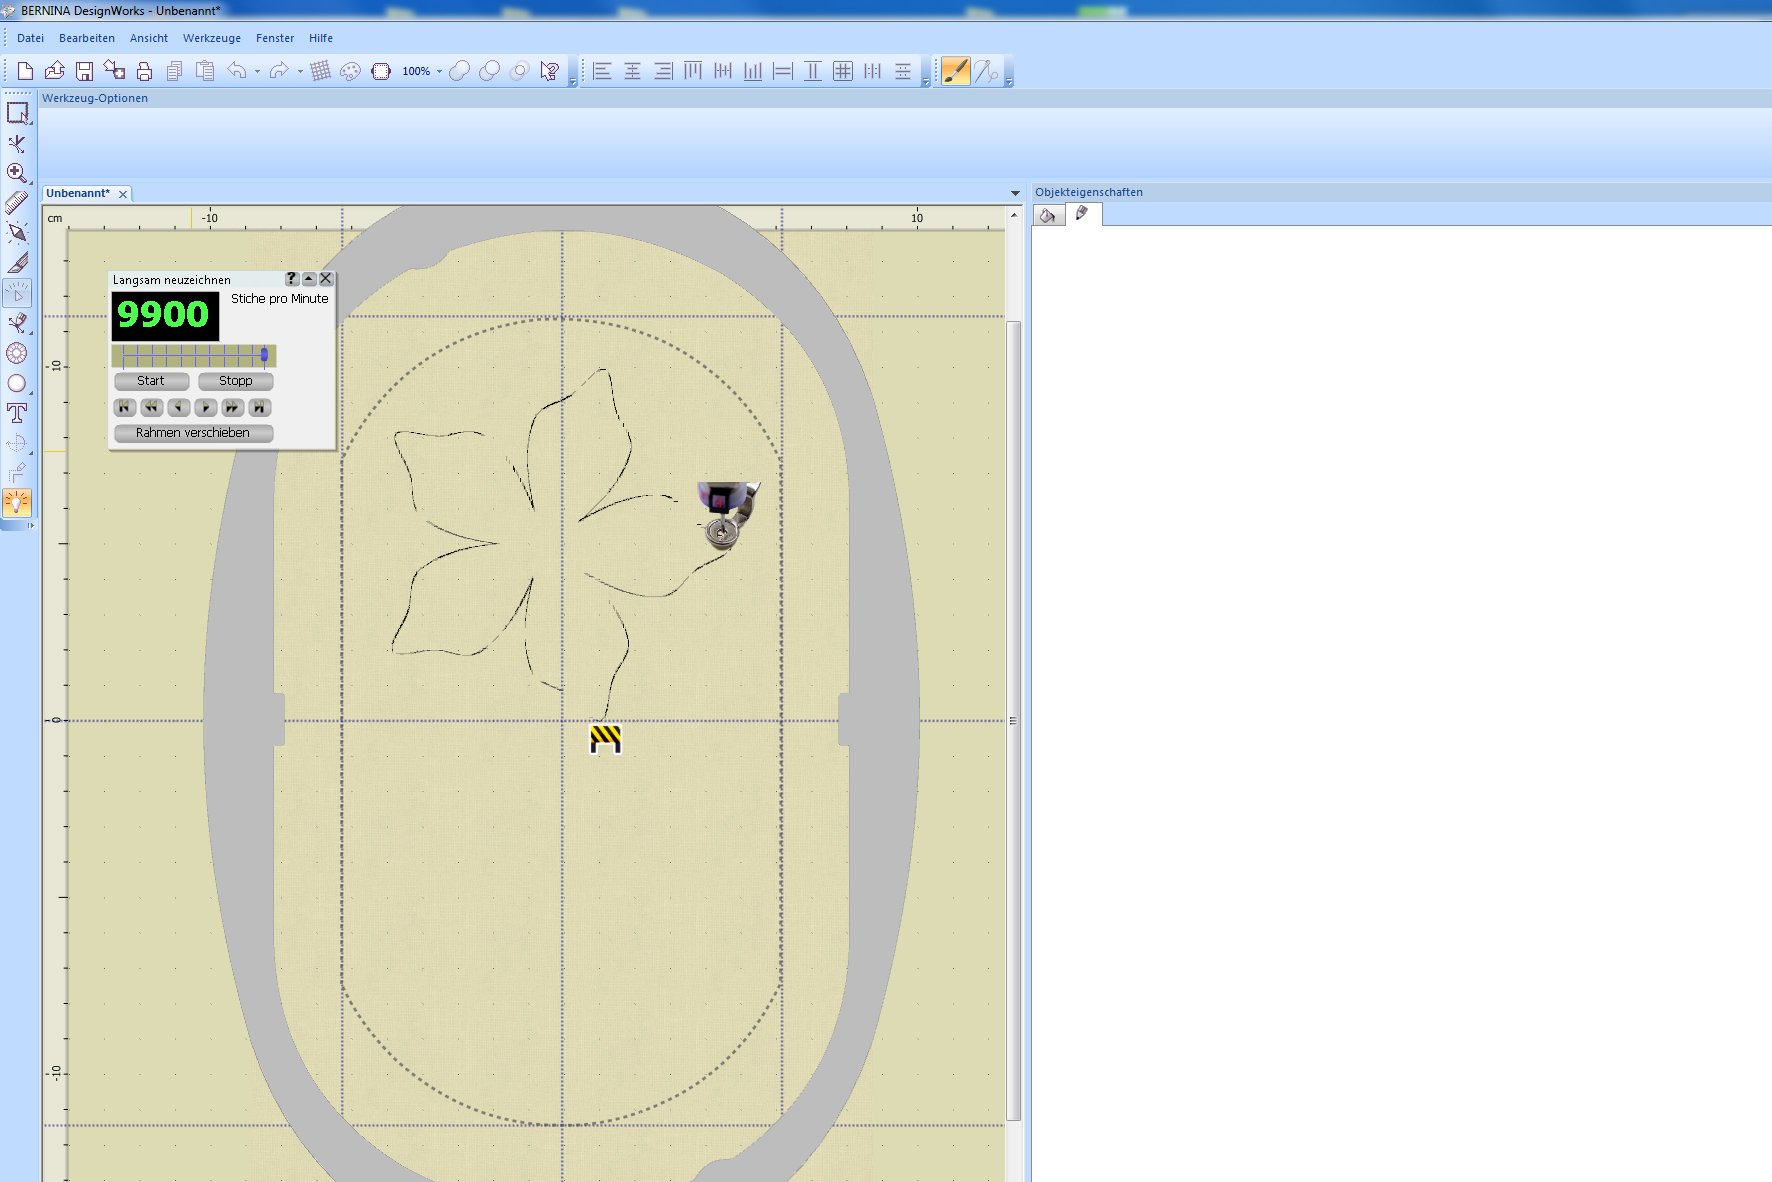 You will notice that layer 1 – your first poinsettia – would be cut out first, and then layer 2 – your second poinsettia. You would have to adjust the blade position on the machine eight times. That’s not too bad, but there is a more elegant way to do it. For this, select both poinsettias, press down the right mouse button and another dialogue box will appear. Select “Combine”.
This combines the poinsettias onto one layer.

Select the “Slow Redraw” option in the toolbar again.
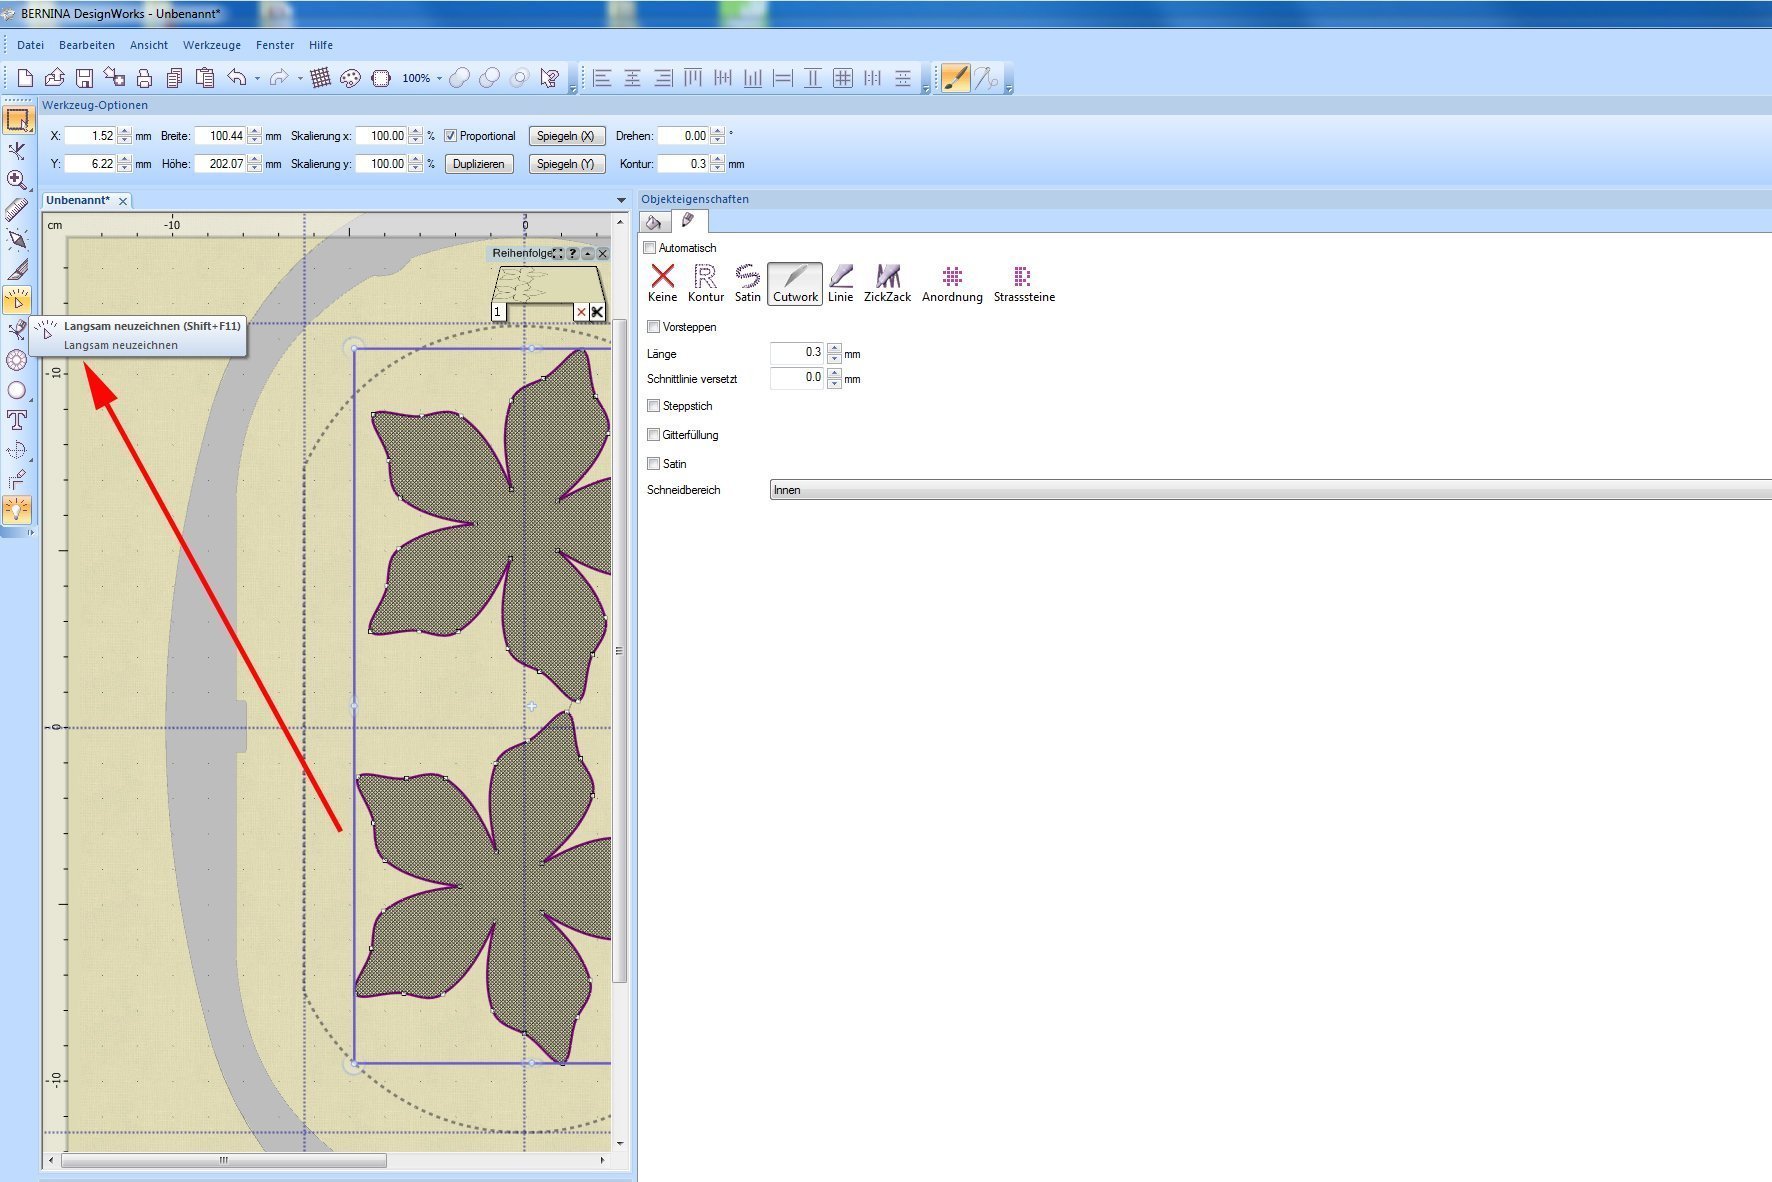
Now you can see that both poinsettias can be edited simultaneously. You only have to adjust the needle position four times.

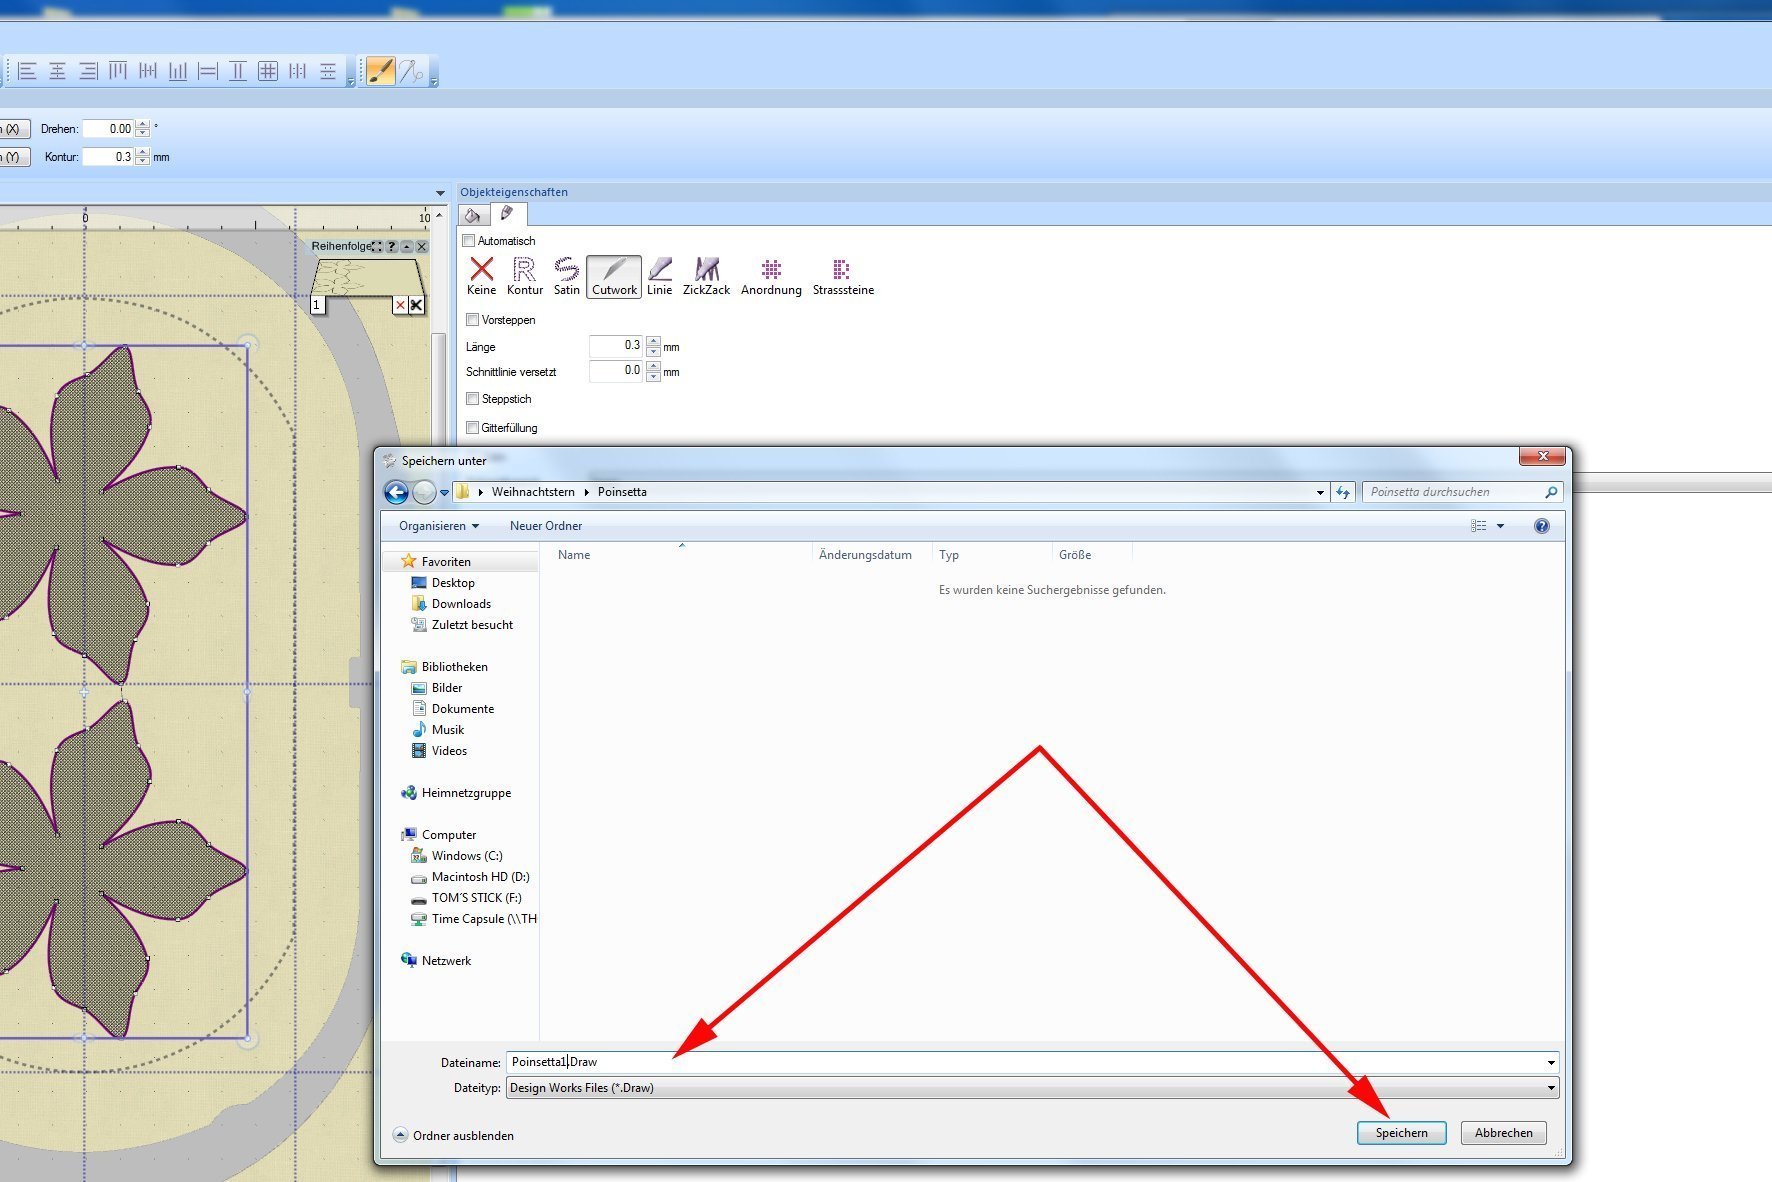
Now, in the menu bar under “File”, select the file command “Save”.

Name your document “Poinsetta1.Draw” and save it in the desired folder.
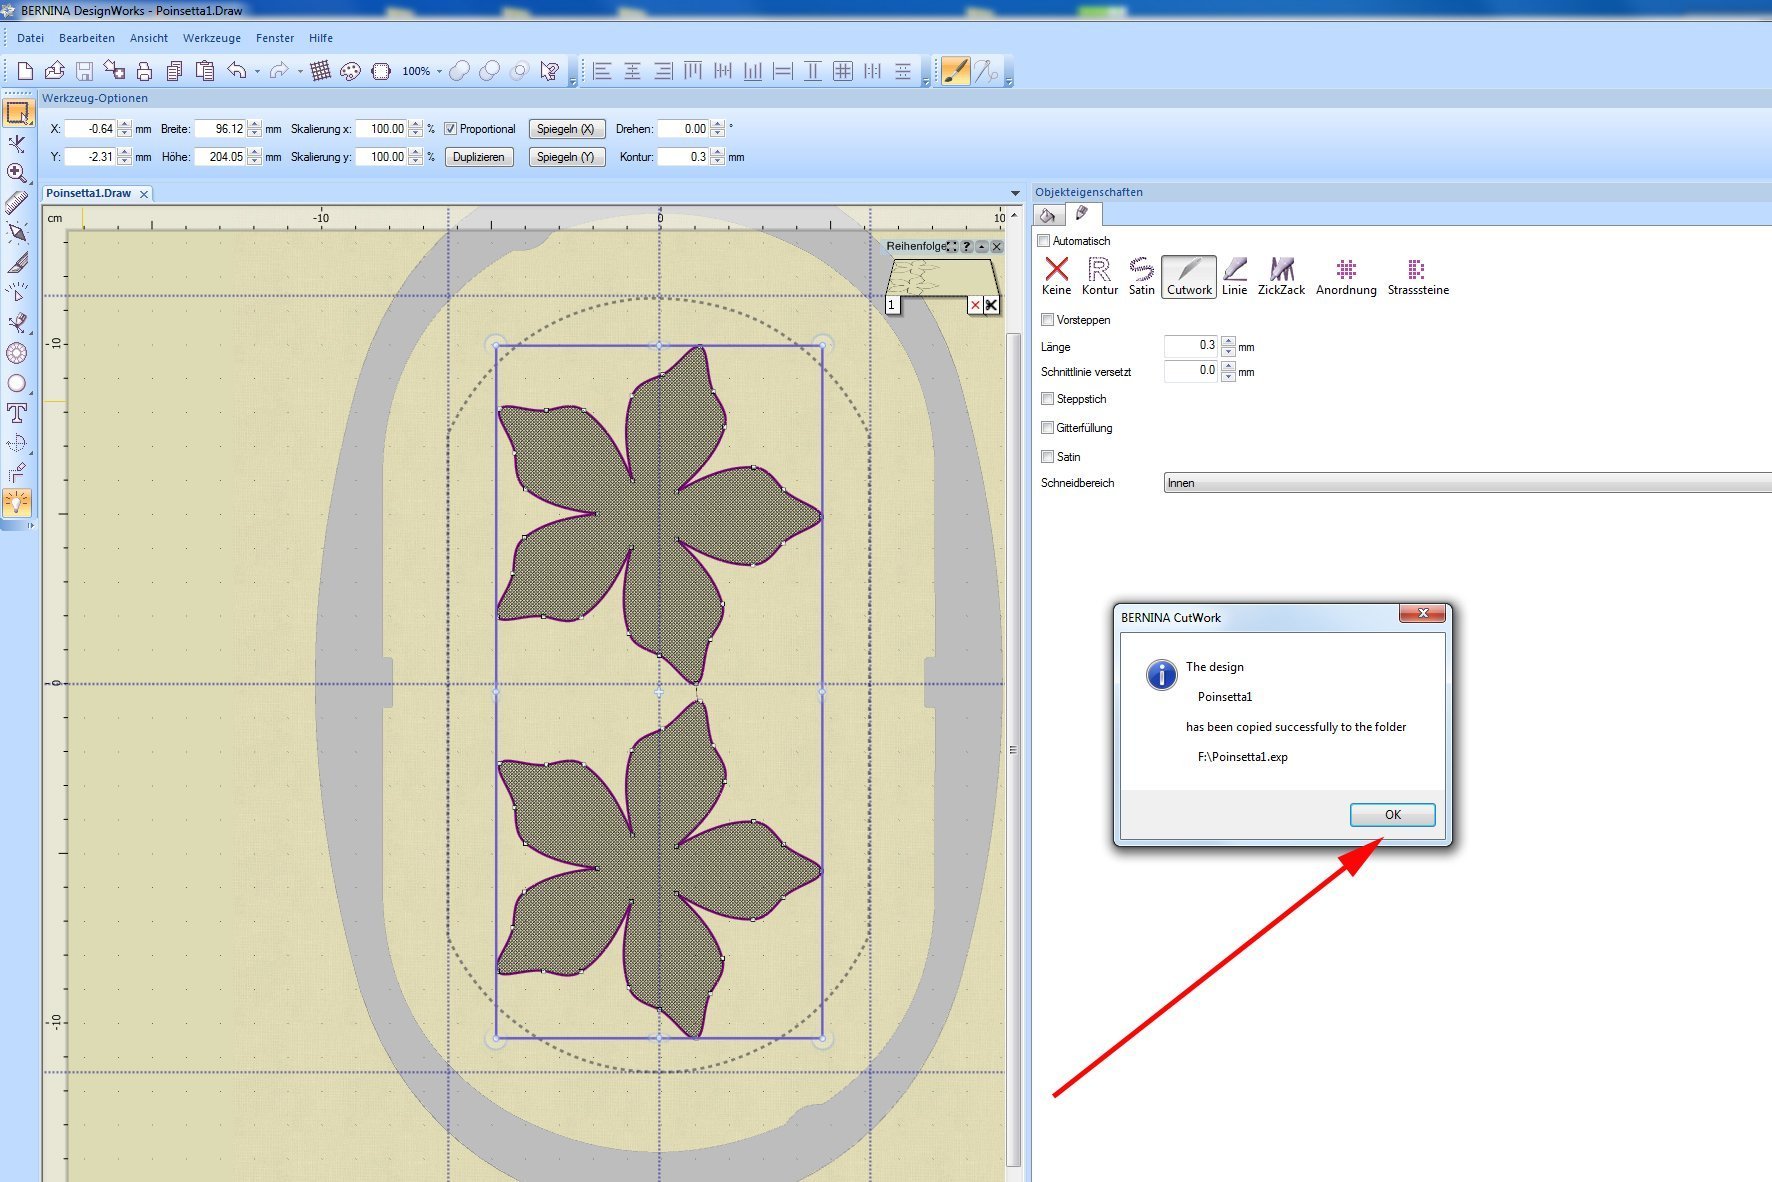
To cut out the file on the machine, go to “File” on the menu bar. select the command “Export” and then “BERNINA”.
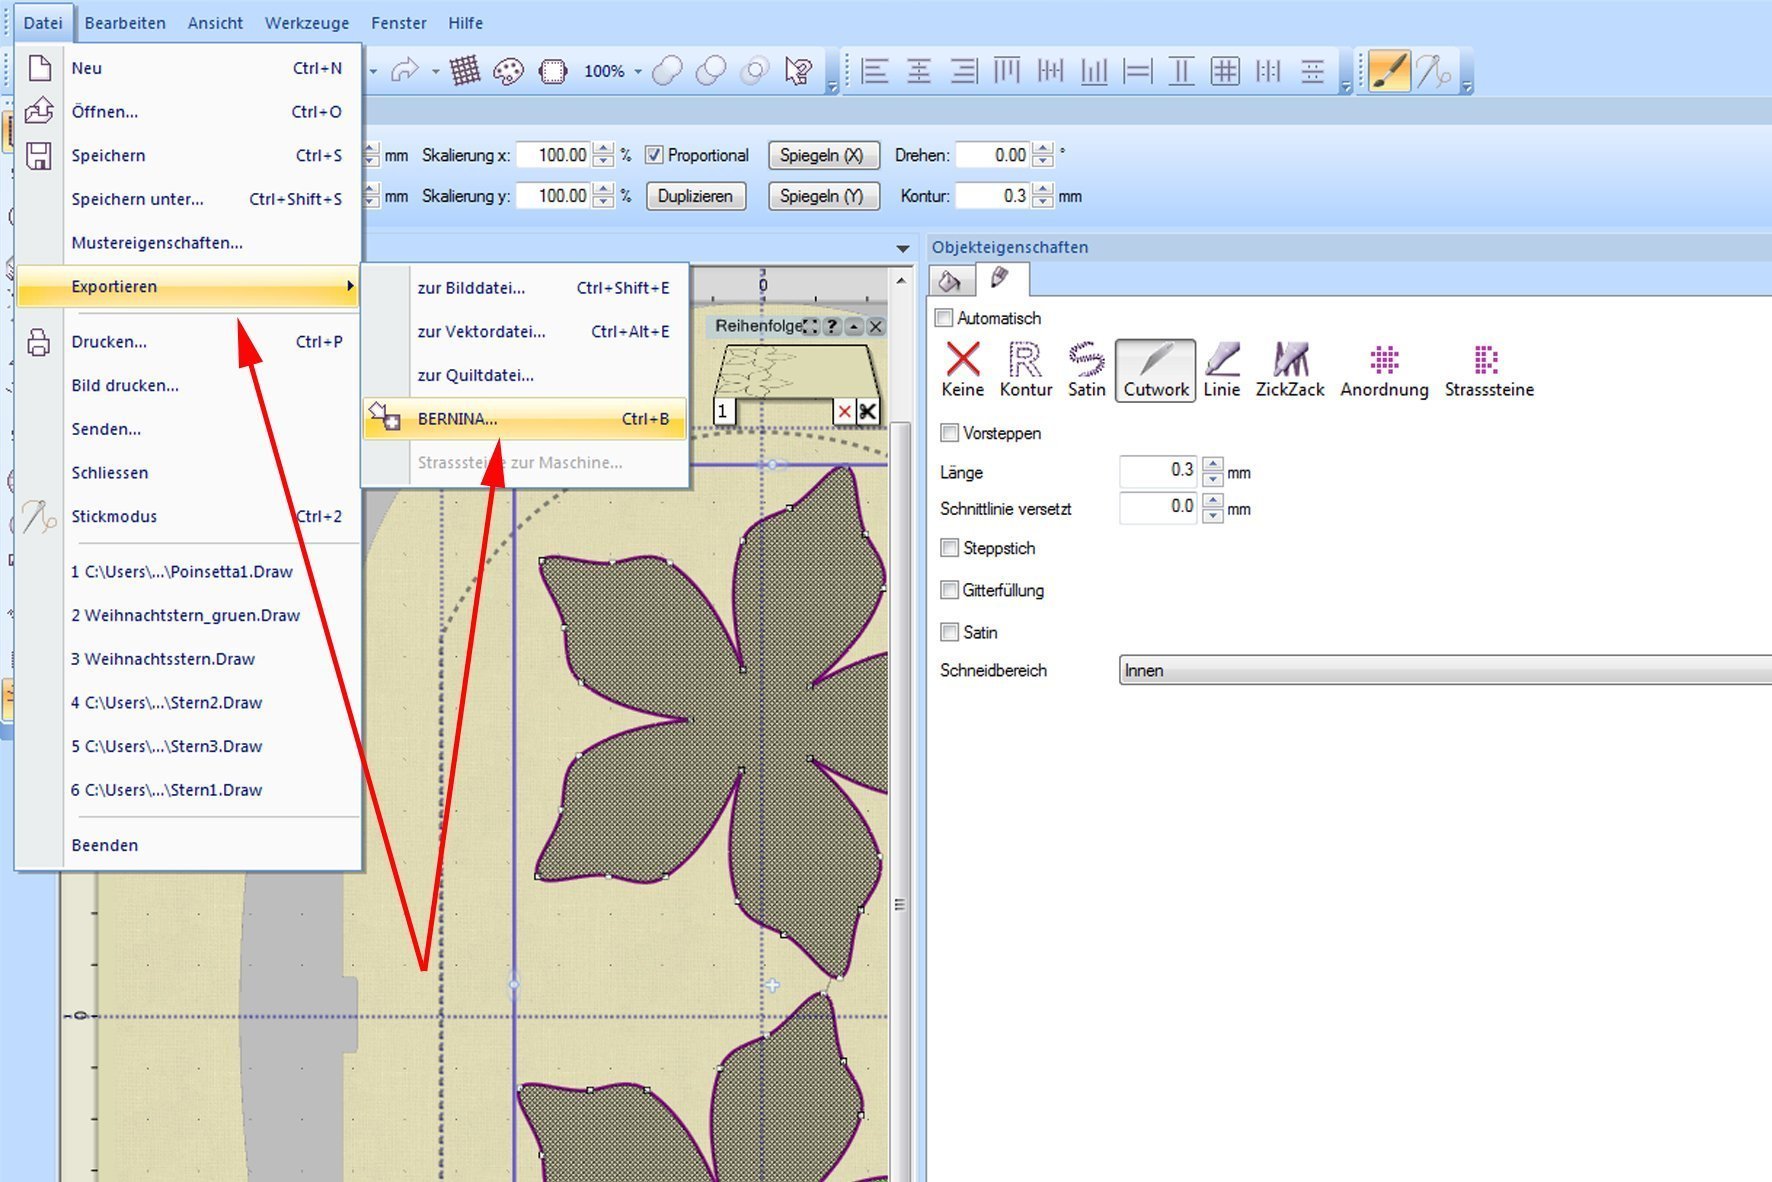
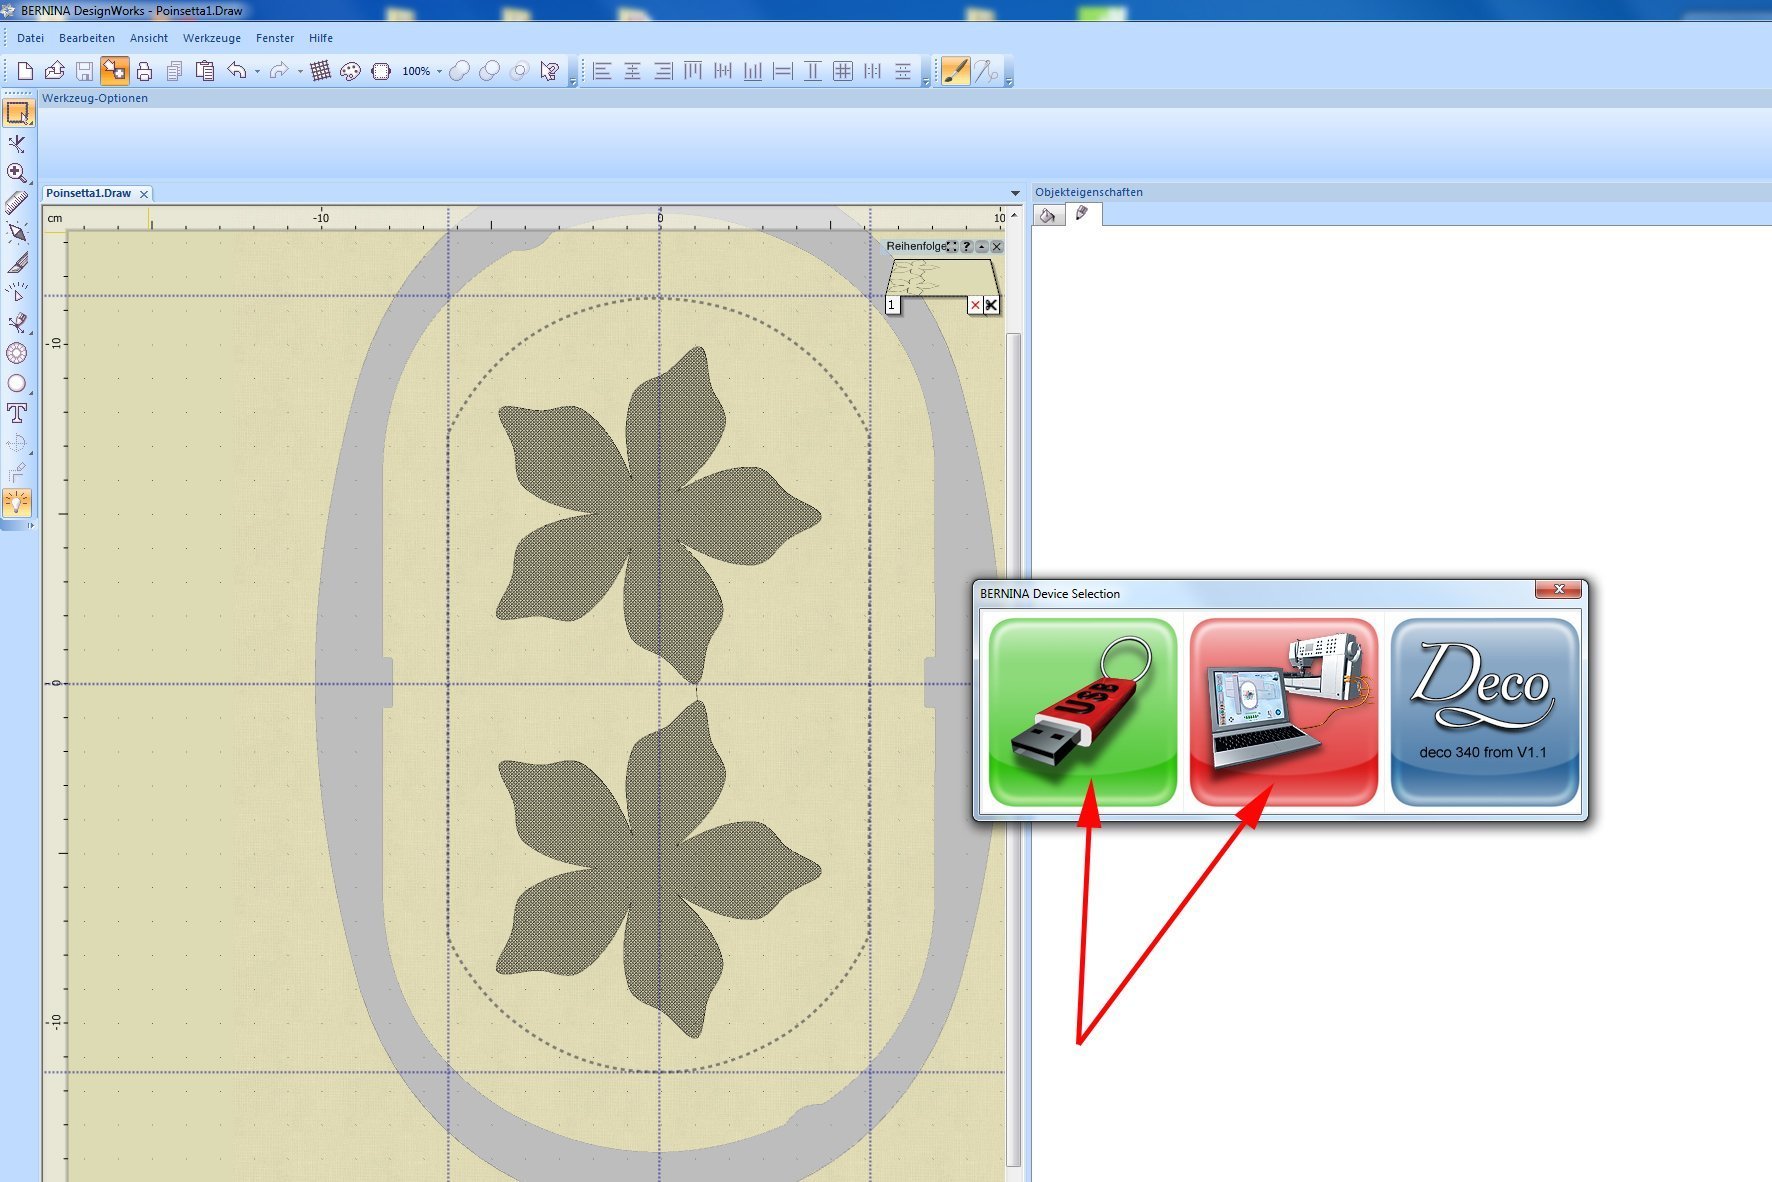
You can now export the file to a USB stick or via cable directly to the machine.
Now do exactly the same with the file “Pointsetta2.eps” as described for “Pointsetta1.eps”.
Making-up:
First, a few words about moulding felt. You can get this felt in various online craft shops and retail stores in sheets approx. 30×45 cm in size. It feels a bit stiff, and visually it looks like crafting felt. However, the fun starts when you moisten the felt – it then becomes soft and pliable and can be moulded into shape. Once dry, it keeps its three-dimensional shape and becomes firm again. The moulded shape is retained. I think it’s fantastic!
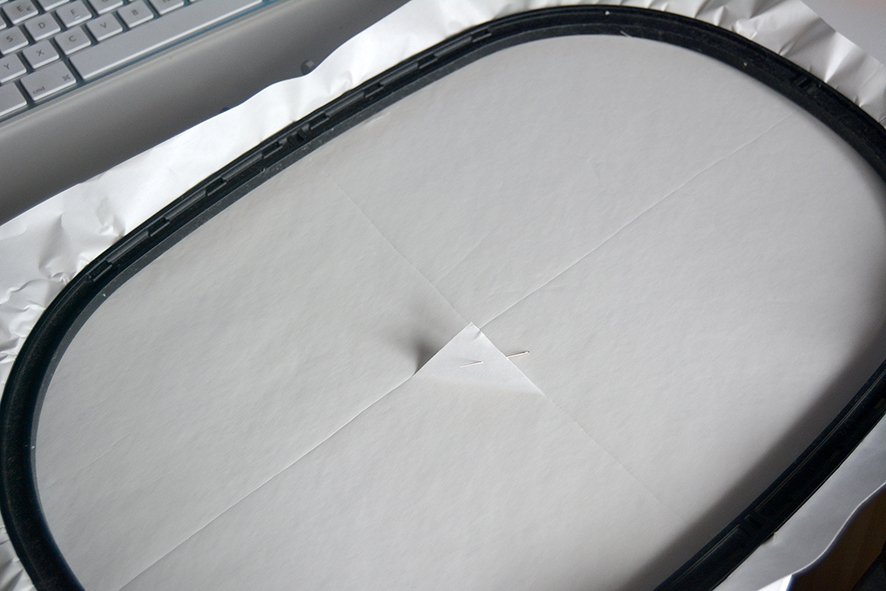
First, clamp the self-adhesive fleece backing into a suitable embroidery hoop. I used my large JumboHoop and cut out all the red pieces in one go. You can use the “BERNINA Large Oval Hoop, 255 x 145, #44”. Then make a small cross-shaped tear in the middle with a pin so that you can remove the foil…
Now cut the green and red/white moulding felt into three equal pieces (15×30 cm each) and cut to the required length using the positioning plate. The felt is a bit stiff and it can be better to stick it to fleece backing because it makes it nice and flat. It is perfectly possible to cut out several layers of felt at once. If you have a machine with a tacking hoop function, you can tack the layers in the hoop before cutting. This ensures that nothing can slip.

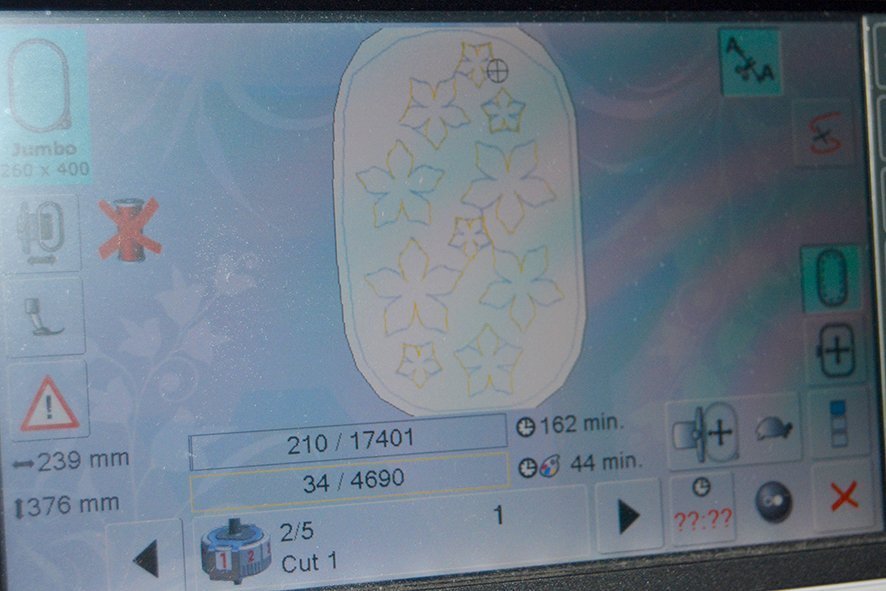
Save the two CutWork files onto a USB stick, use the CutWork plate and cutting tool, clamp the embroidery hoop, and download the CutWork patterns. It doesn’t matter what order you choose. The only important thing is that for the file “Poinsetta 1”, you need 1x green and 1x red or white. If two layers of fabric are cut at once, you can produce the felt pieces for both colours at the same time. The file “Poinsetta2” needs cutting out 2x in red or white. Here too, you can place two layers together and cut out all 6 felt pieces at once…
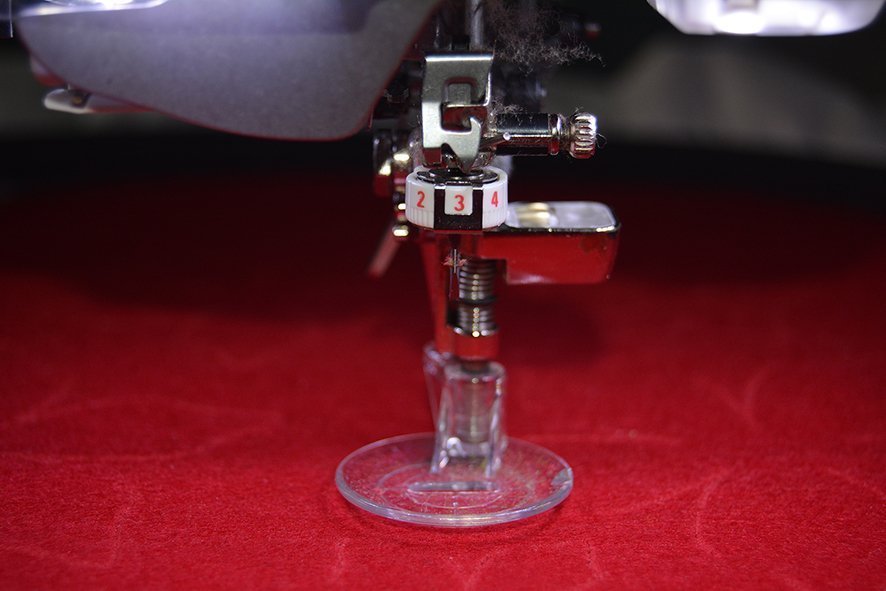
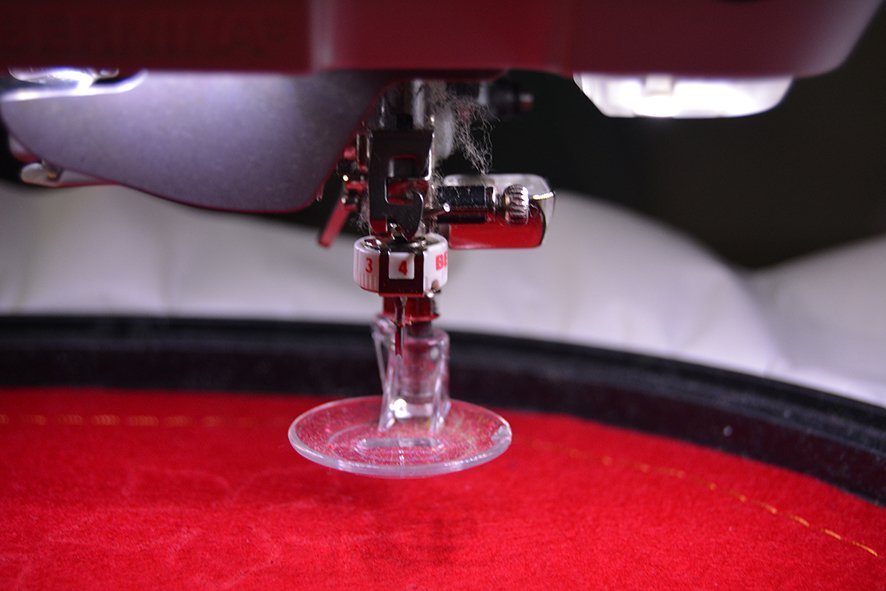
Make sure that the cutting tool is at Position 1…
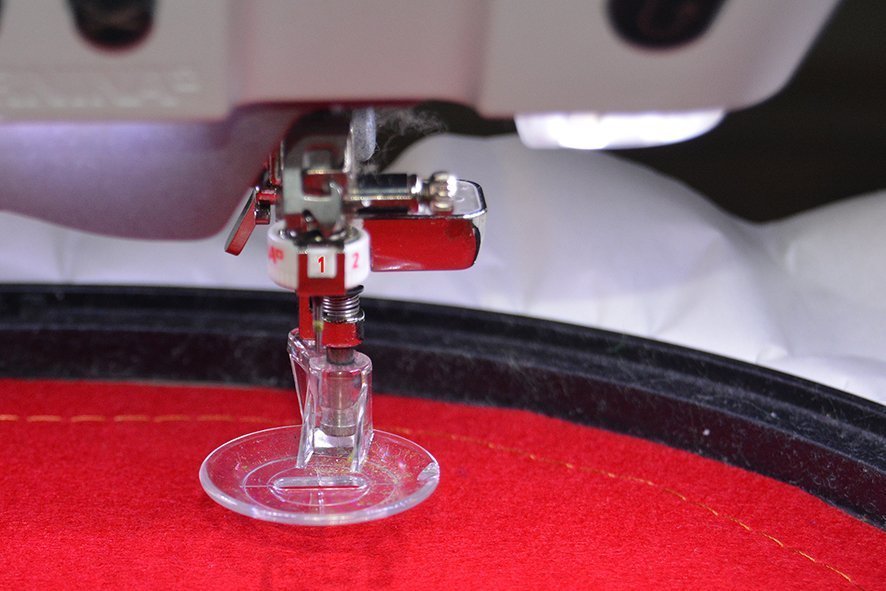
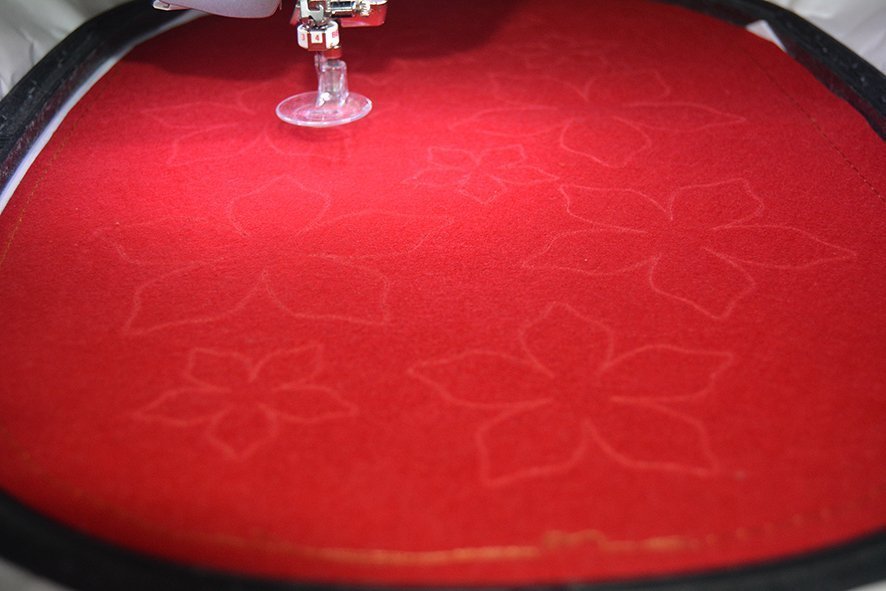
And you’re away! Cut out the poinsettias and adjust the needle position according to the instructions…

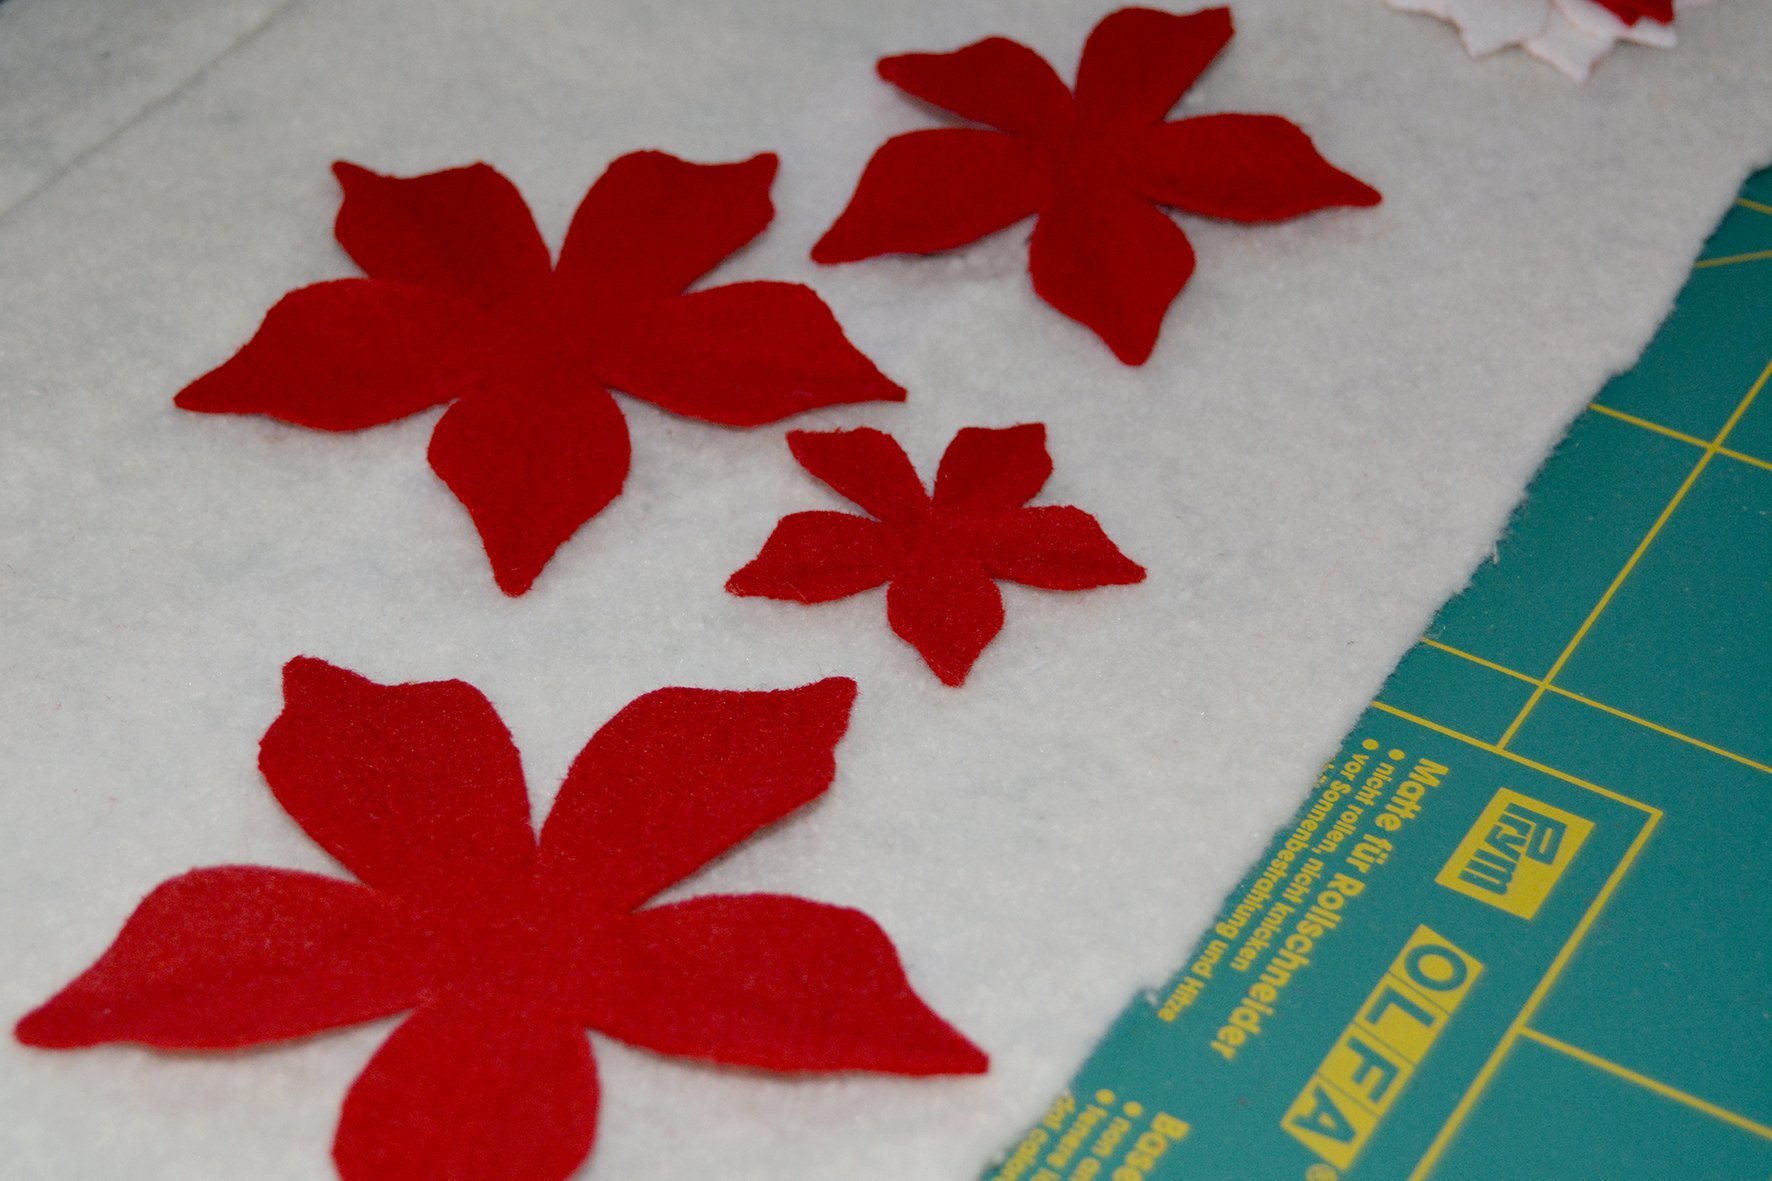
This is what it looks like when it is cut out…
It is easy to press the designs out of the border.
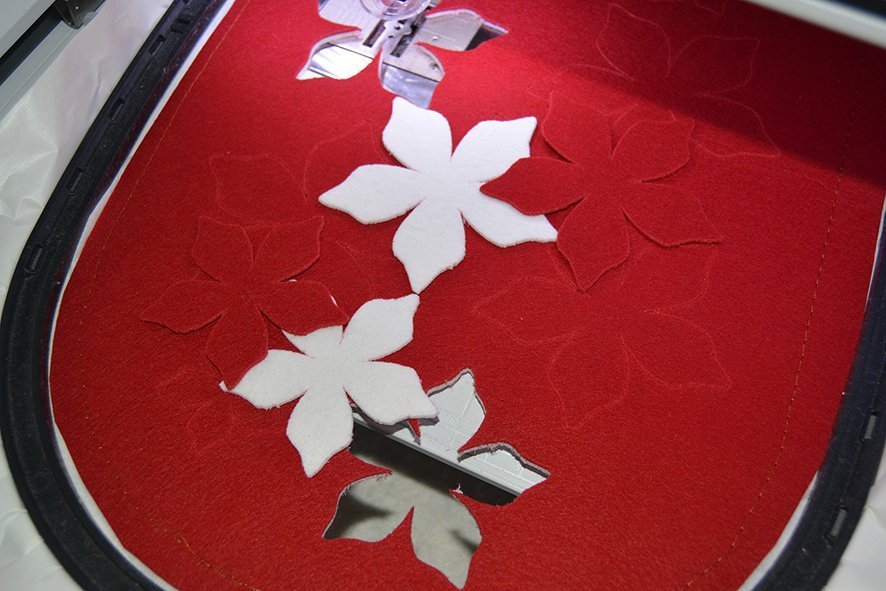
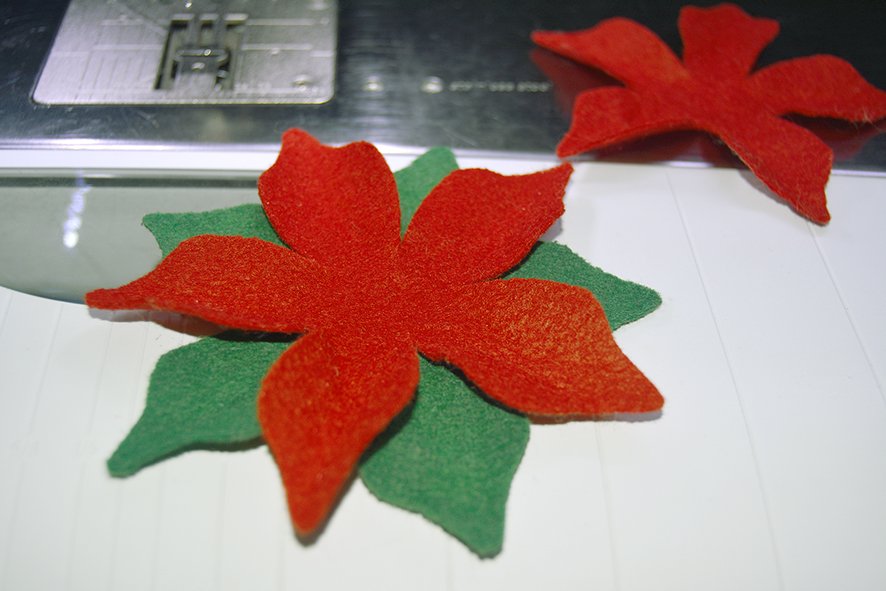
Then you can assemble the poinsettias. For the white or red flowers, there are four flowers in four different sizes and a large one in green.

Before sewing the poinsettia together, mould the individual flowers into the right shape. To do this, moisten each layer individually one by one. Only moisten them. The felt should not be dripping wet. I used a small bowl of water and moistened the petals individually with my fingers. I then compressed the petals lengthwise with my fingers. If necessary, this can be repeated several times. Then leave to dry on a flat surface. As they are drying, you can always reshape them if necessary.
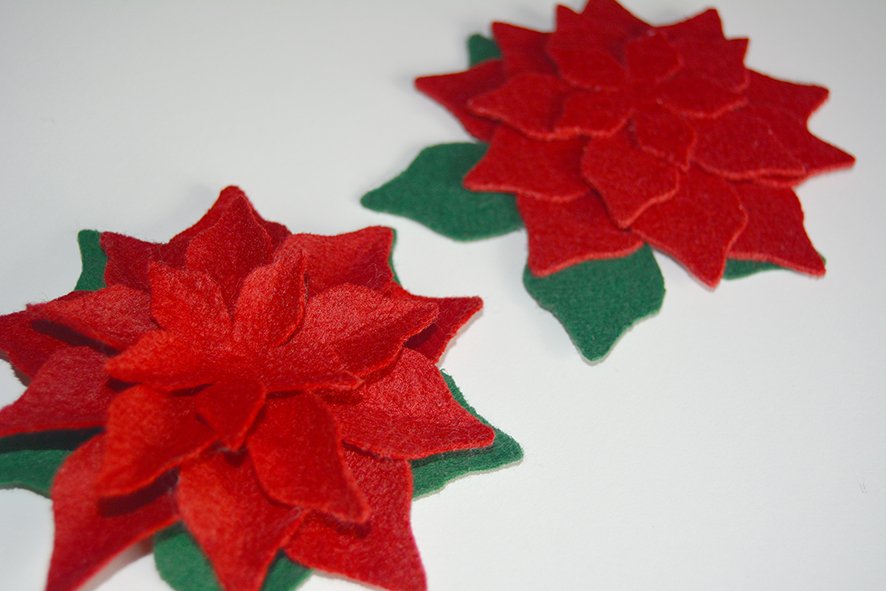
It is possible to speed up the drying process with the aid of a hair dryer. When everything is dry, the individual layers are assembled. At the bottom is the green flower, followed by the four red or white flowers, which are each offset. It should look something like this
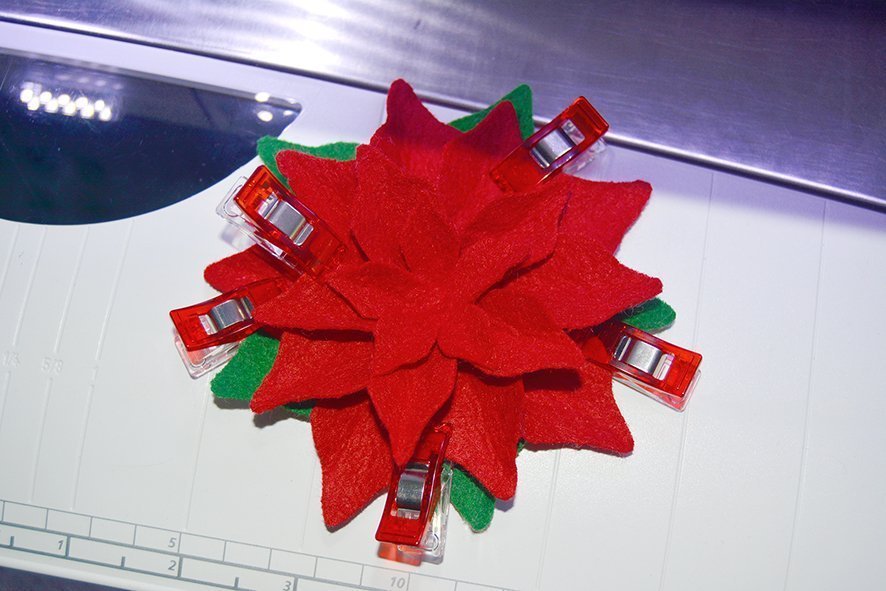
To hold it in place more firmly while you sew it together, you can fix the individual layers with Wonder Clips
Dann setzt Ihr den Nähmaschinenfuß Nr. 18 zum Knöpfe annähen ein und mit farblich passendem Garn werden die einzelnen Lagen schön mittig zusammengenäht.

Now insert presser foot no. 18 for sewing on buttons and sew the individual layers together in the centre, using matching coloured thread.

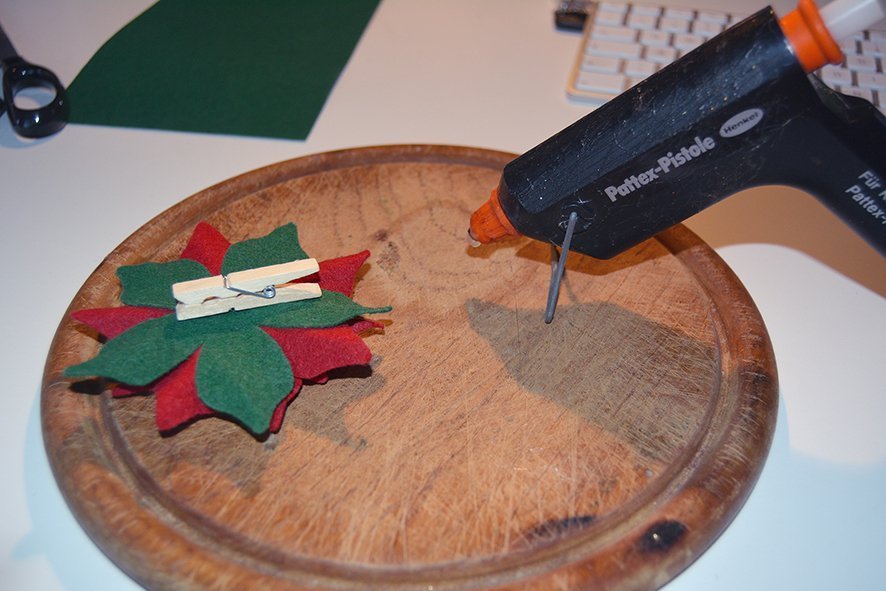
Using a hot glue gun or UHU All Purpose Adhesive, attach the wooden clothes peg to the back.
If you like a natural look, it is now finished. As it is also nice to add a bit of sparkle at Christmas time, you could decorate your poinsettias with red and green glitter glue. To do this, apply the glue to the petals and spread it around using a really old, cheap brush. You can then throw the brush away! If you want, you can also sprinkle some gold in the middle of the pistils.

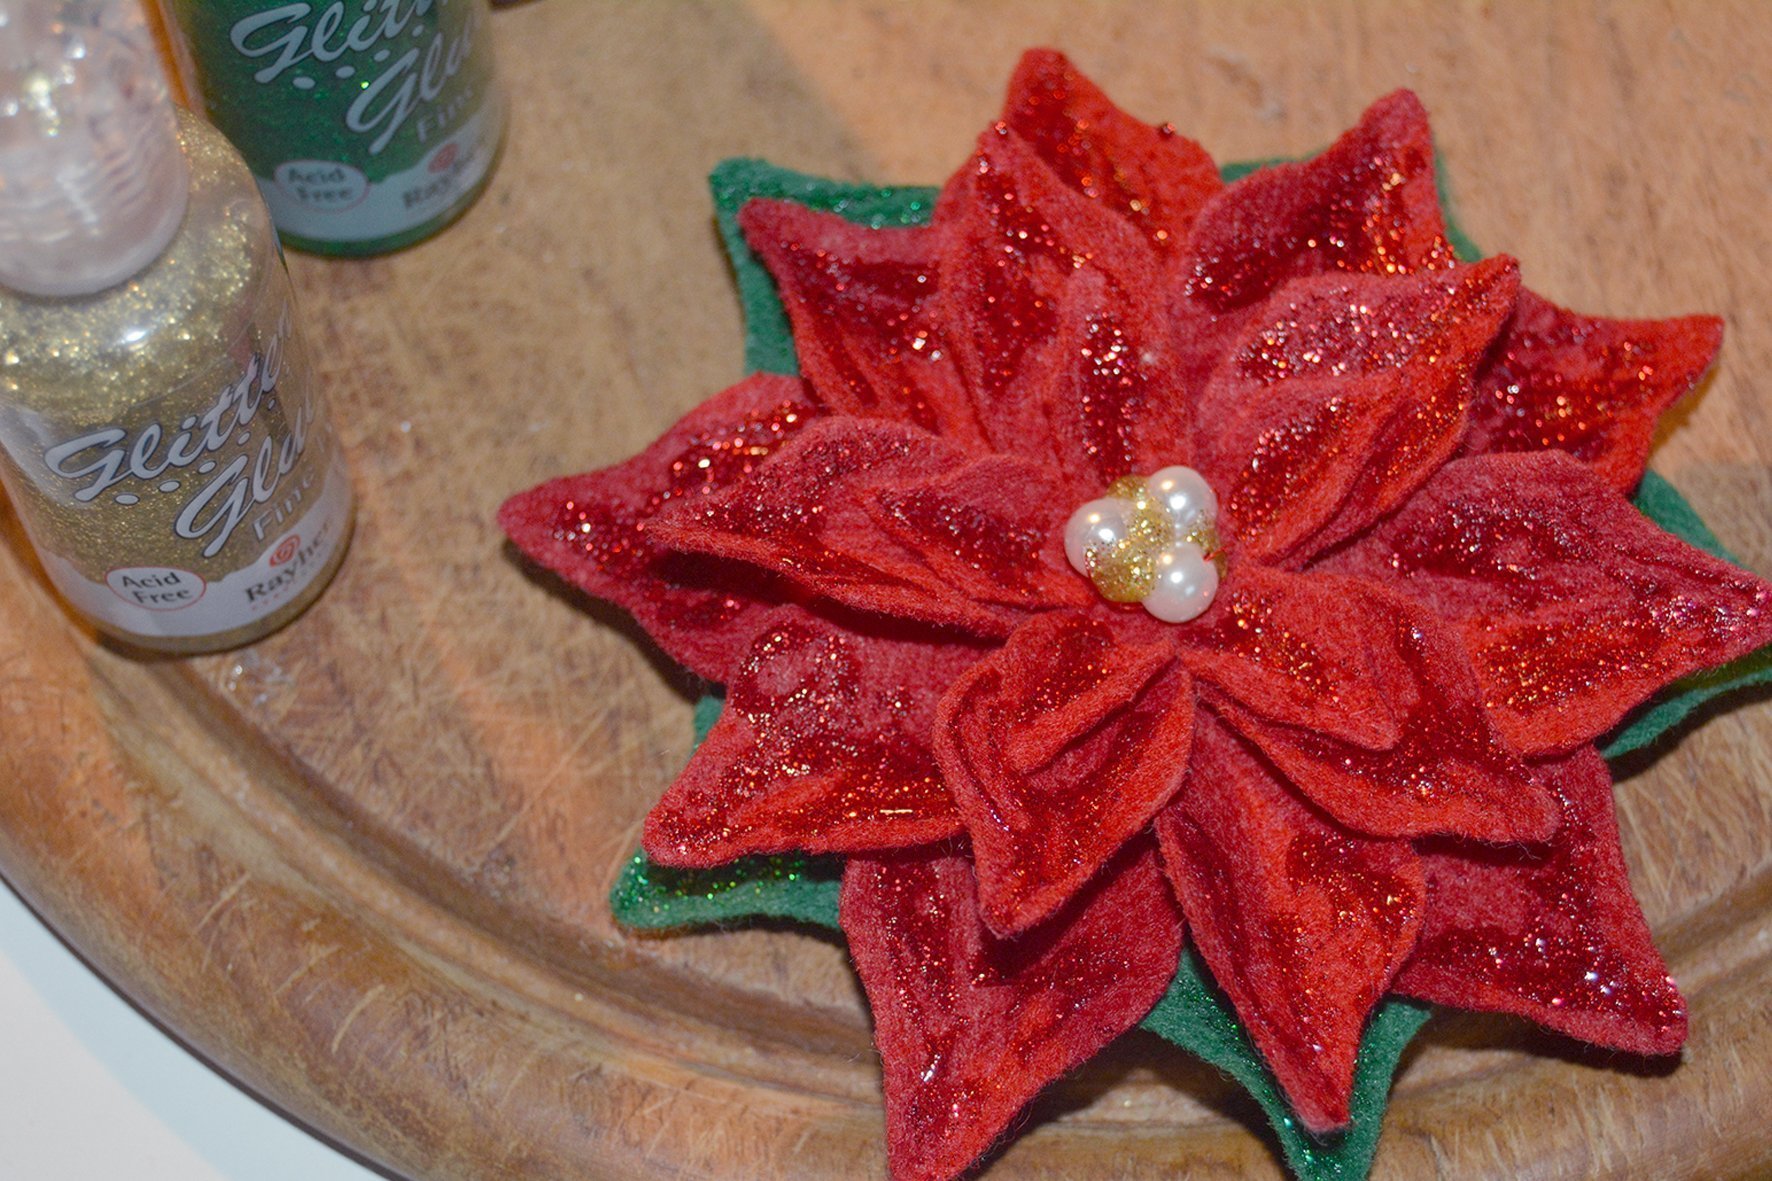
Leave it to dry. Your poinsettia decoration is finished…

I wish you a Merry Christmas and lots of fun making your poinsettias.
Bye for now,
Andrea


I need help with my Dress with DesignWorks Embellishments. Please, thank you.
Thanks Andrea. What a good excuse to get my Designworks software “dusted off” and get back into it again. Such a pretty decoration!