 BERNINA Corporate Blog -
Working with paper
I love to incorporate many different textures and materials into my textile art work. One of the materials I adore to work with is paper. All sorts of paper – gift wrapping, tissue paper, craft paper, scrapbooking paper, paper doilies, paper towel, paper bags – the list goes on.
You can rework papers by painting, distressing, hand stitching, layering fabrics, glimmer, folding, tearing cutting and wherever your creative mind takes you.
Grab some paper and experiment.
A hint for you if you are intending to free motion embroider or to sew paper, I strengthen the paper by ironing a fabric backing the sewing paper by using fusible web. To do this cut a piece of fusible web the same size as the paper you are going to sew lay it over the back of the sewing paper and without removing the backing which is attached to the fusible web use a dry iron the melt and fuse the web to the paper. Then peel the paper backing off the fusible web and iron it to a piece of fabric trimmed to the size of the sewing paper (I use calico or gauze) .Fusible web melts when dry heat is applied.
A quick paper project
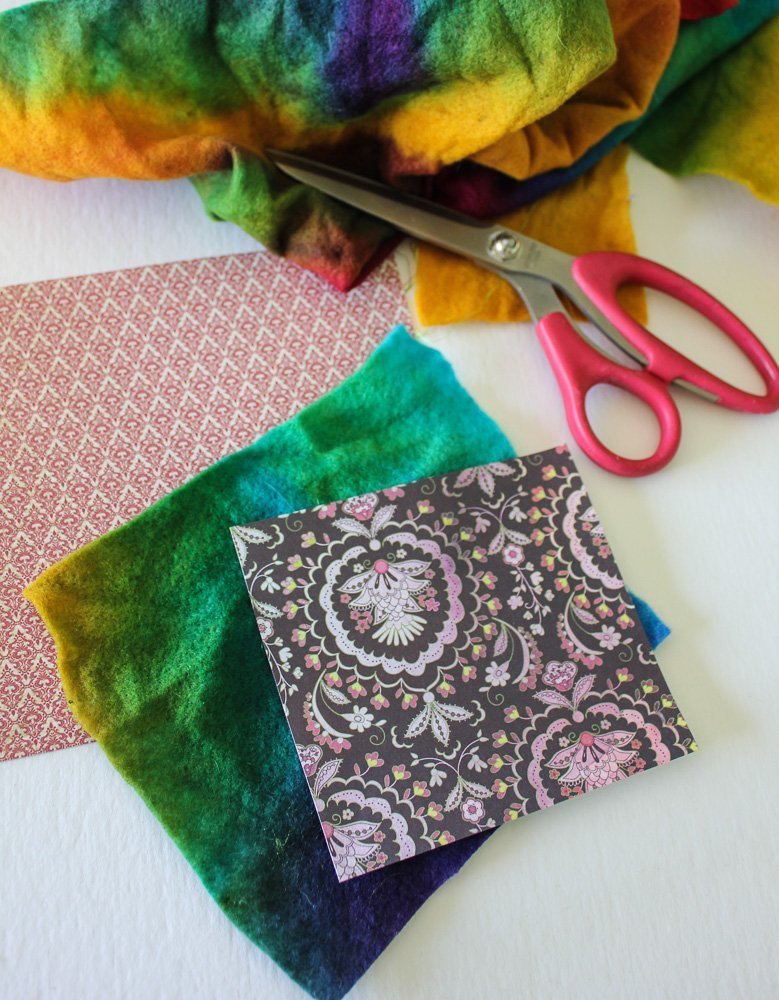
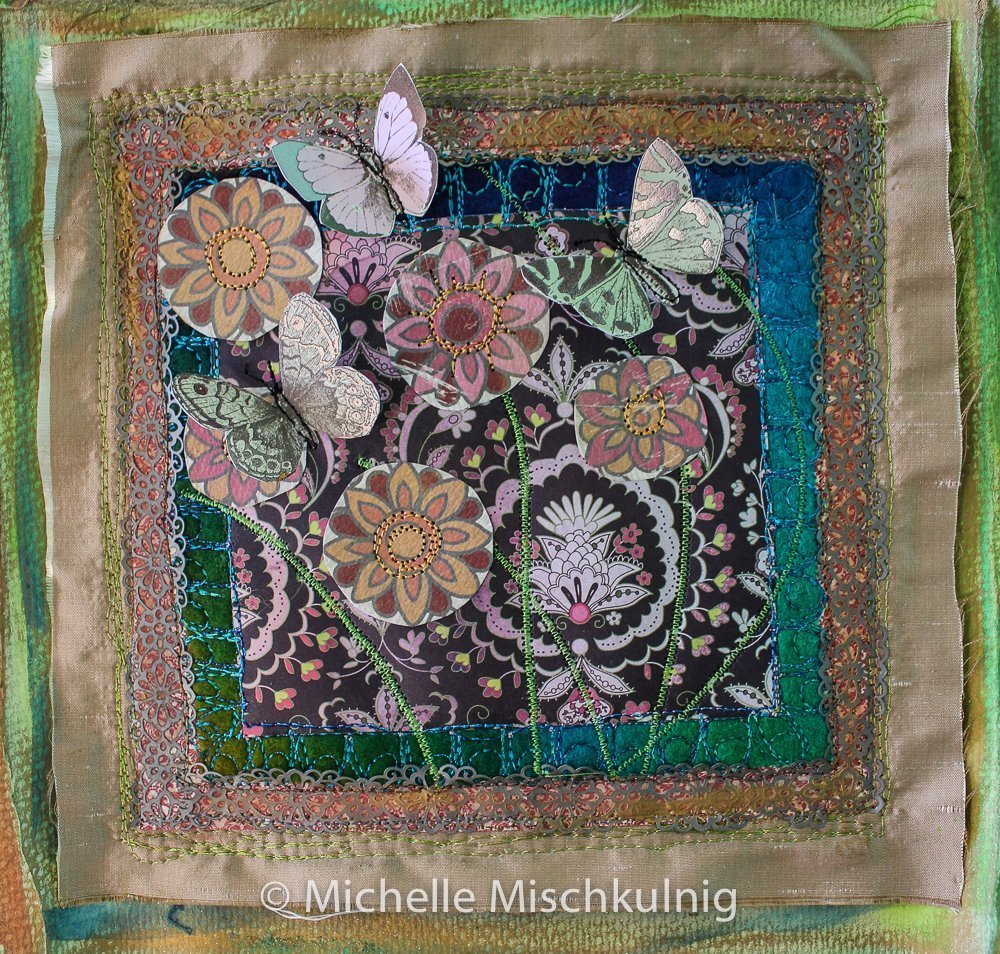
Choose some fabric and paper, in this project I have used a medium to heavy weight scrap booking paper, hand dyed felt, water colour paper and silk fabric.
Materials
Fusible web, felt or any fabric, water colour paper or such and another plain fabric. I chose four different scrap booking papers two patterned, one with butterflies and one with flowers.

To start cut three square layers, two paper, one fabric and each should be cut slightly larger than the other, as you can see in this image to create boarders.
You will be sandwich the felt/fabric between to layers of paper.
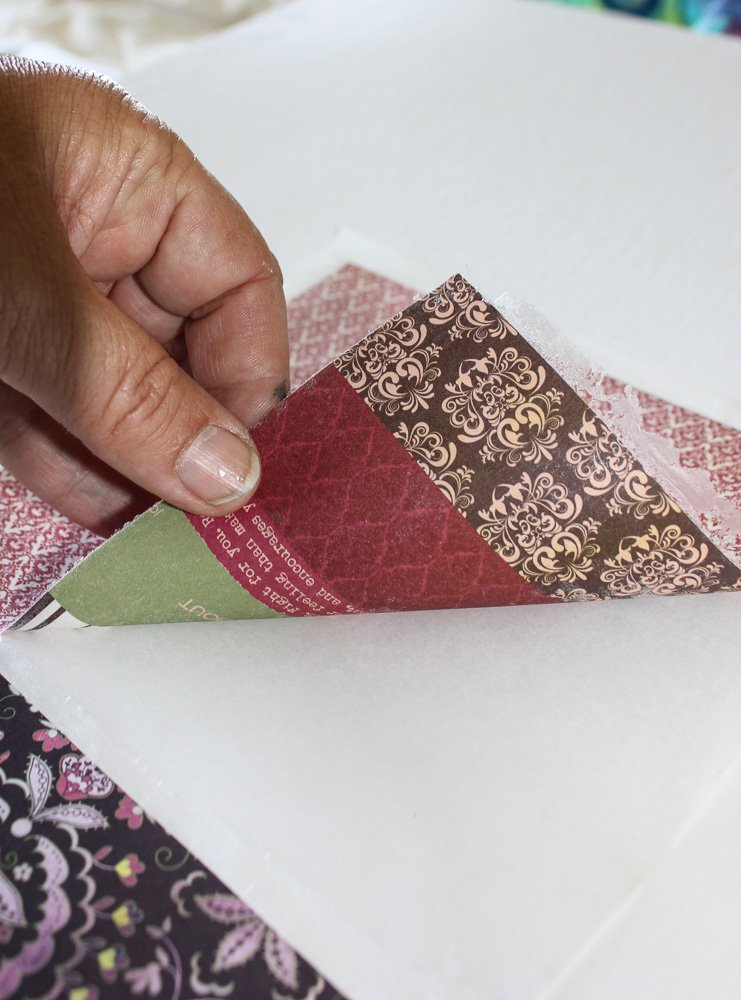
Cut the fusible web to the same size as your top layer of patterned paper and another for your felt/fabric layer.
Iron the fusible web to the back of the patterned paper and felt/ fabric. Make sure you leave the the backing paper attached to fusible web when ironing.
If you have not ever used fusible web before there is a fabric side and a paper side, the fabric side is what melts and adheres.
After the web is fused to the patterned paper and the felt/fabric peel the attached backing paper away from the fusible web.
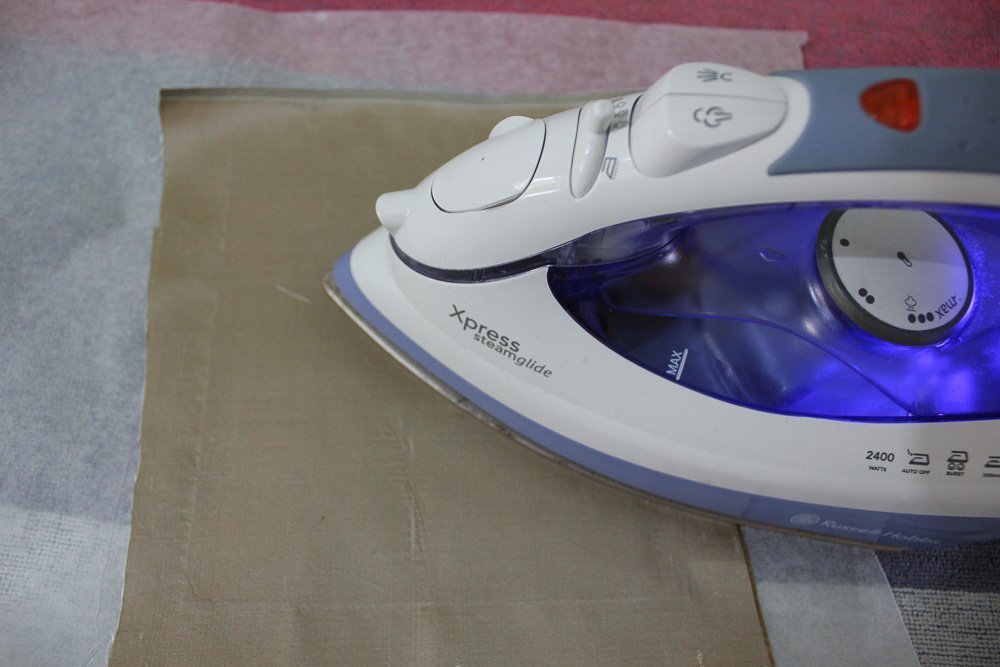
Now place the patterned paper on top of the felt/fabric and iron with a dry iron until the fusible web has melted.
Handy hint use baking paper underneath and on top of the project to protect iron and easy to peel off.
Do same with the felt/fabric to the bottom paper layer.
Cut your bottom layer of plain fabric slightly larger than the existing bottom patterned paper layer.

You will need to cut a piece of fusible web the same size as your bottom patterned paper piece.
Dry iron the fusible web onto the back of the bottom layer of patterned paper, remember not to peel the attached fusible web backing until it has fused. Keeping the layers upside down (large piece of paper is now at top) peel the backing off the fusible web and place your plain fabric on the sticky side and iron again until it has fused together. Now you are ready for sewing.
To make your sewing machine ready for free motion stitch attach the free motion embroidery foot and dropping the feed dogs.you may need to adjust your tension depending on your threads.
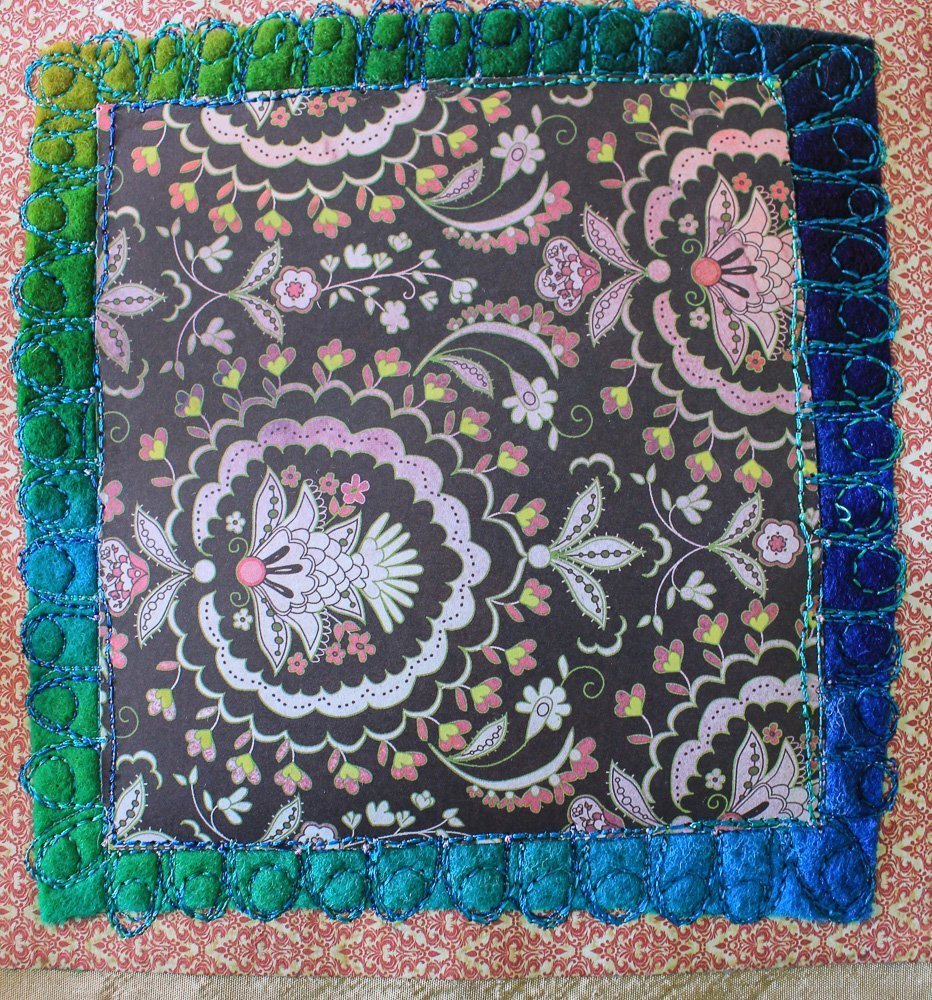
The first layer of stitching I have created a boarder which is free and organic, not measured. I only use straight stitch, go for it make it your own.
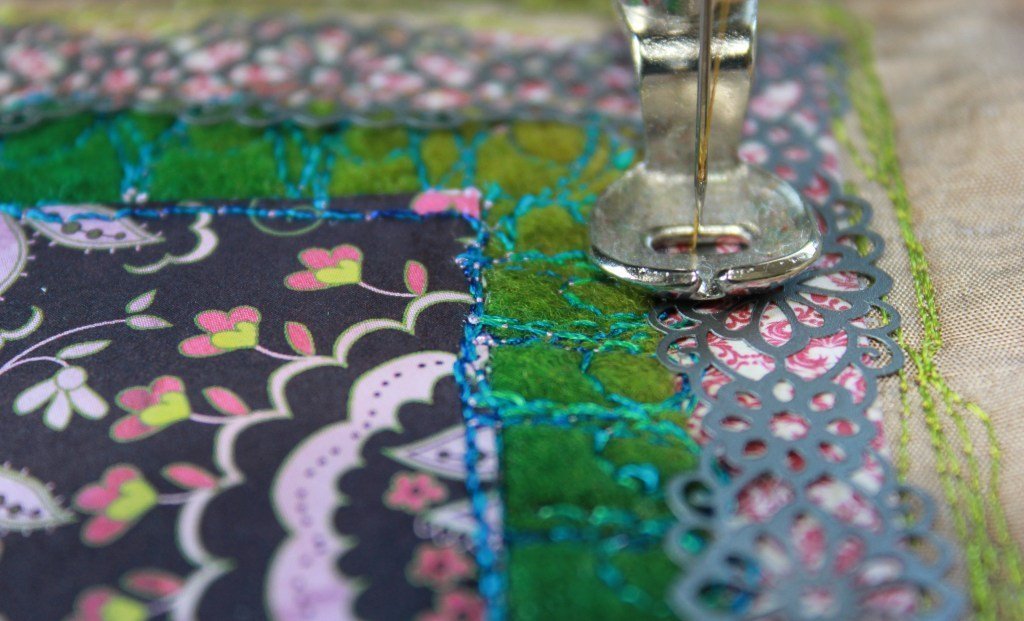
You will see in the image just for a bit of fun and extra dimension I have used decorative tape such as what is used in scrapbooking .I am stitching it close to the original felt/fabric boarder.
I have added more stitching to the outside of the tape and onto the back piece of fabric. Just play and see what you like best.
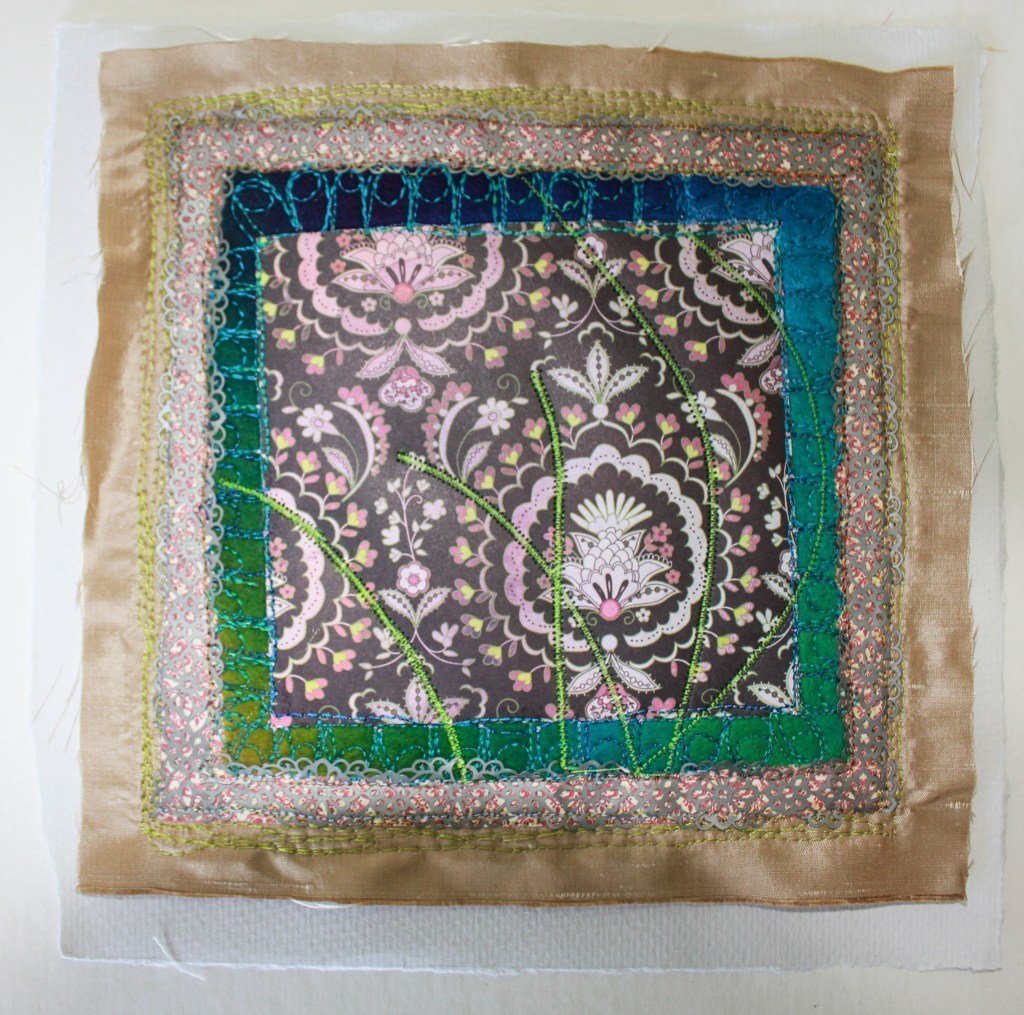
When this art work is finished it is going to be flowers and butterflies so I have added green satin stitch stalks.
I cut out the butterflies and flowers from the paper you can see in the background, I add theses to the existing art work and create a 3d effect.
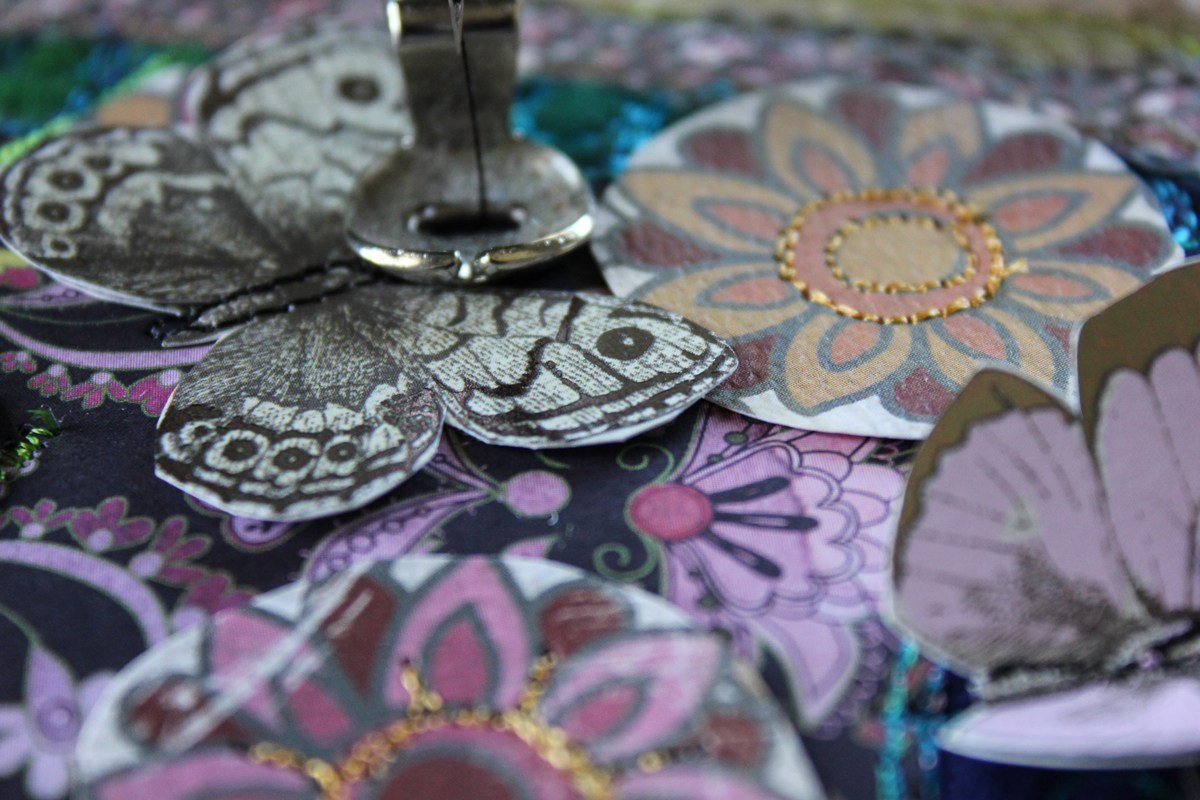
You can see in this image I have just used a straight stitch and different coloured threads to attach the flowers and butterflies.
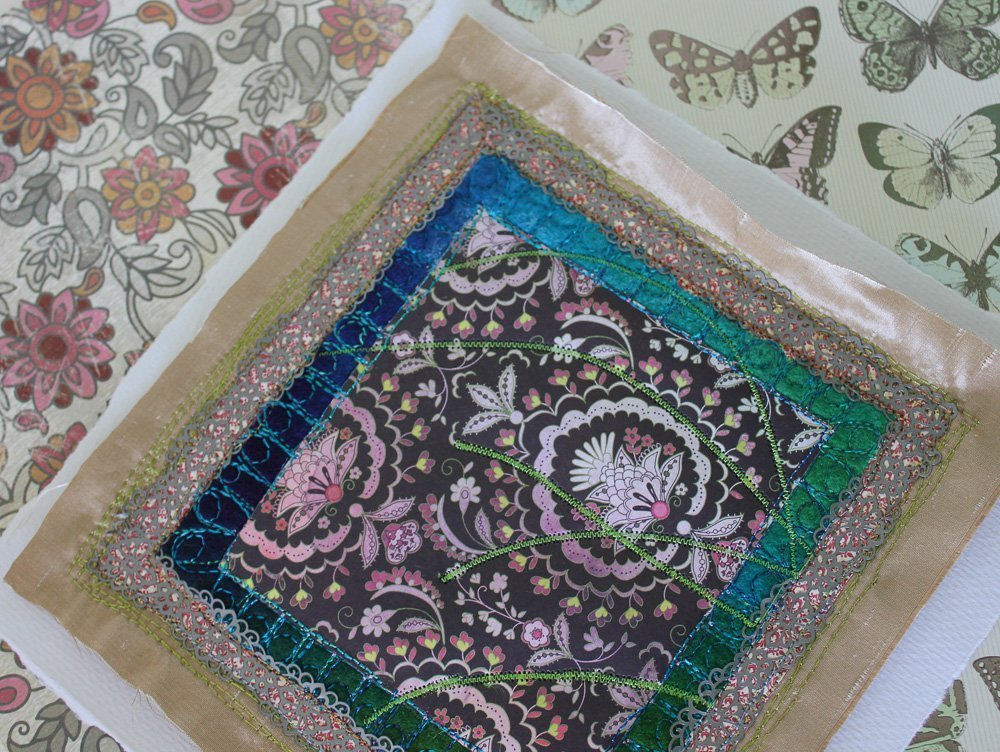
Finally I mount it onto a piece of water colour paper. Dabble round the edges in a little water colour paint and then rub a gold glimmer or buff over the tape and edges.
This project is just for fun please enjoy the play and take creating with paper as far as you desire. The last image shows you some different ways I have used paper.
I have given you a possibility what you make of it is your own.
If you would like to visit my website and see my recent art works

I love your beautiful and imaginative textile embroidery art. This is something I’ve always fancied having a go at, but have never really known where to start. Your explanation and demonstration of the ‘Working with Paper’ project is great. May I ask what size needle you recommend and should it been an ordinary one or a ball point? Thank you for the guidance.Rebecca
Dear Rebecca,
I have not tried this myself, but if nothing is indicated, I would go with an ordinary needle. Definitely not a ball point, since ball point pushes the threads of fabric apart, but I guess that wont work with paper and will rip it apart even more.
Kind regards, Ramona
I love to play like this. Thank you.
I have recently purchased a Bernina and would love to do something creative like this. Could you tell me the type of needle you used and which presser foot #? Thank you so much for sharing your beautiful artwork.
Dear Peggy,
A standard needle should be fine for most projects like this. Regarding the presser foot, there are lots of possibilities. I suggest you use the search function and check other Blog Posts with Free Motion Embroidery as their topic. Have a look at the different feet they are using and this will give you an idea of what you might be looking for. Be it the Embroidery Foot #15, Free Motion Embroidery Foot #24 or even the BERNINA Stitch Regulator (BSR), there are a lot of options and I am sure you will find one you like. Another option is to call your BERNINA dealer and ask if you could visit and test some of the options to find the perfect one for you.
I wish you a lot of fun with your new BERNINA!
Kind regards, Ramona from BERNINA International
Hey, nice blog thanks for sharing it’s really awesome I really enjoyed a lot