 BERNINA Corporate Blog -
One of the things I like most about corset making is the embellishment. I love using antique lace, delicate beads and fun embroideries. Currently I am working on an emerald green corset with antique frivolité lace (tatting) to which I am adding small embroidered silk ribbon roses. You can embroider these roses by hand of course, but did you know you can make them with the use of a sewing machine? In this tutorial I will show you how to make a rosebud with stem using your sewing machine.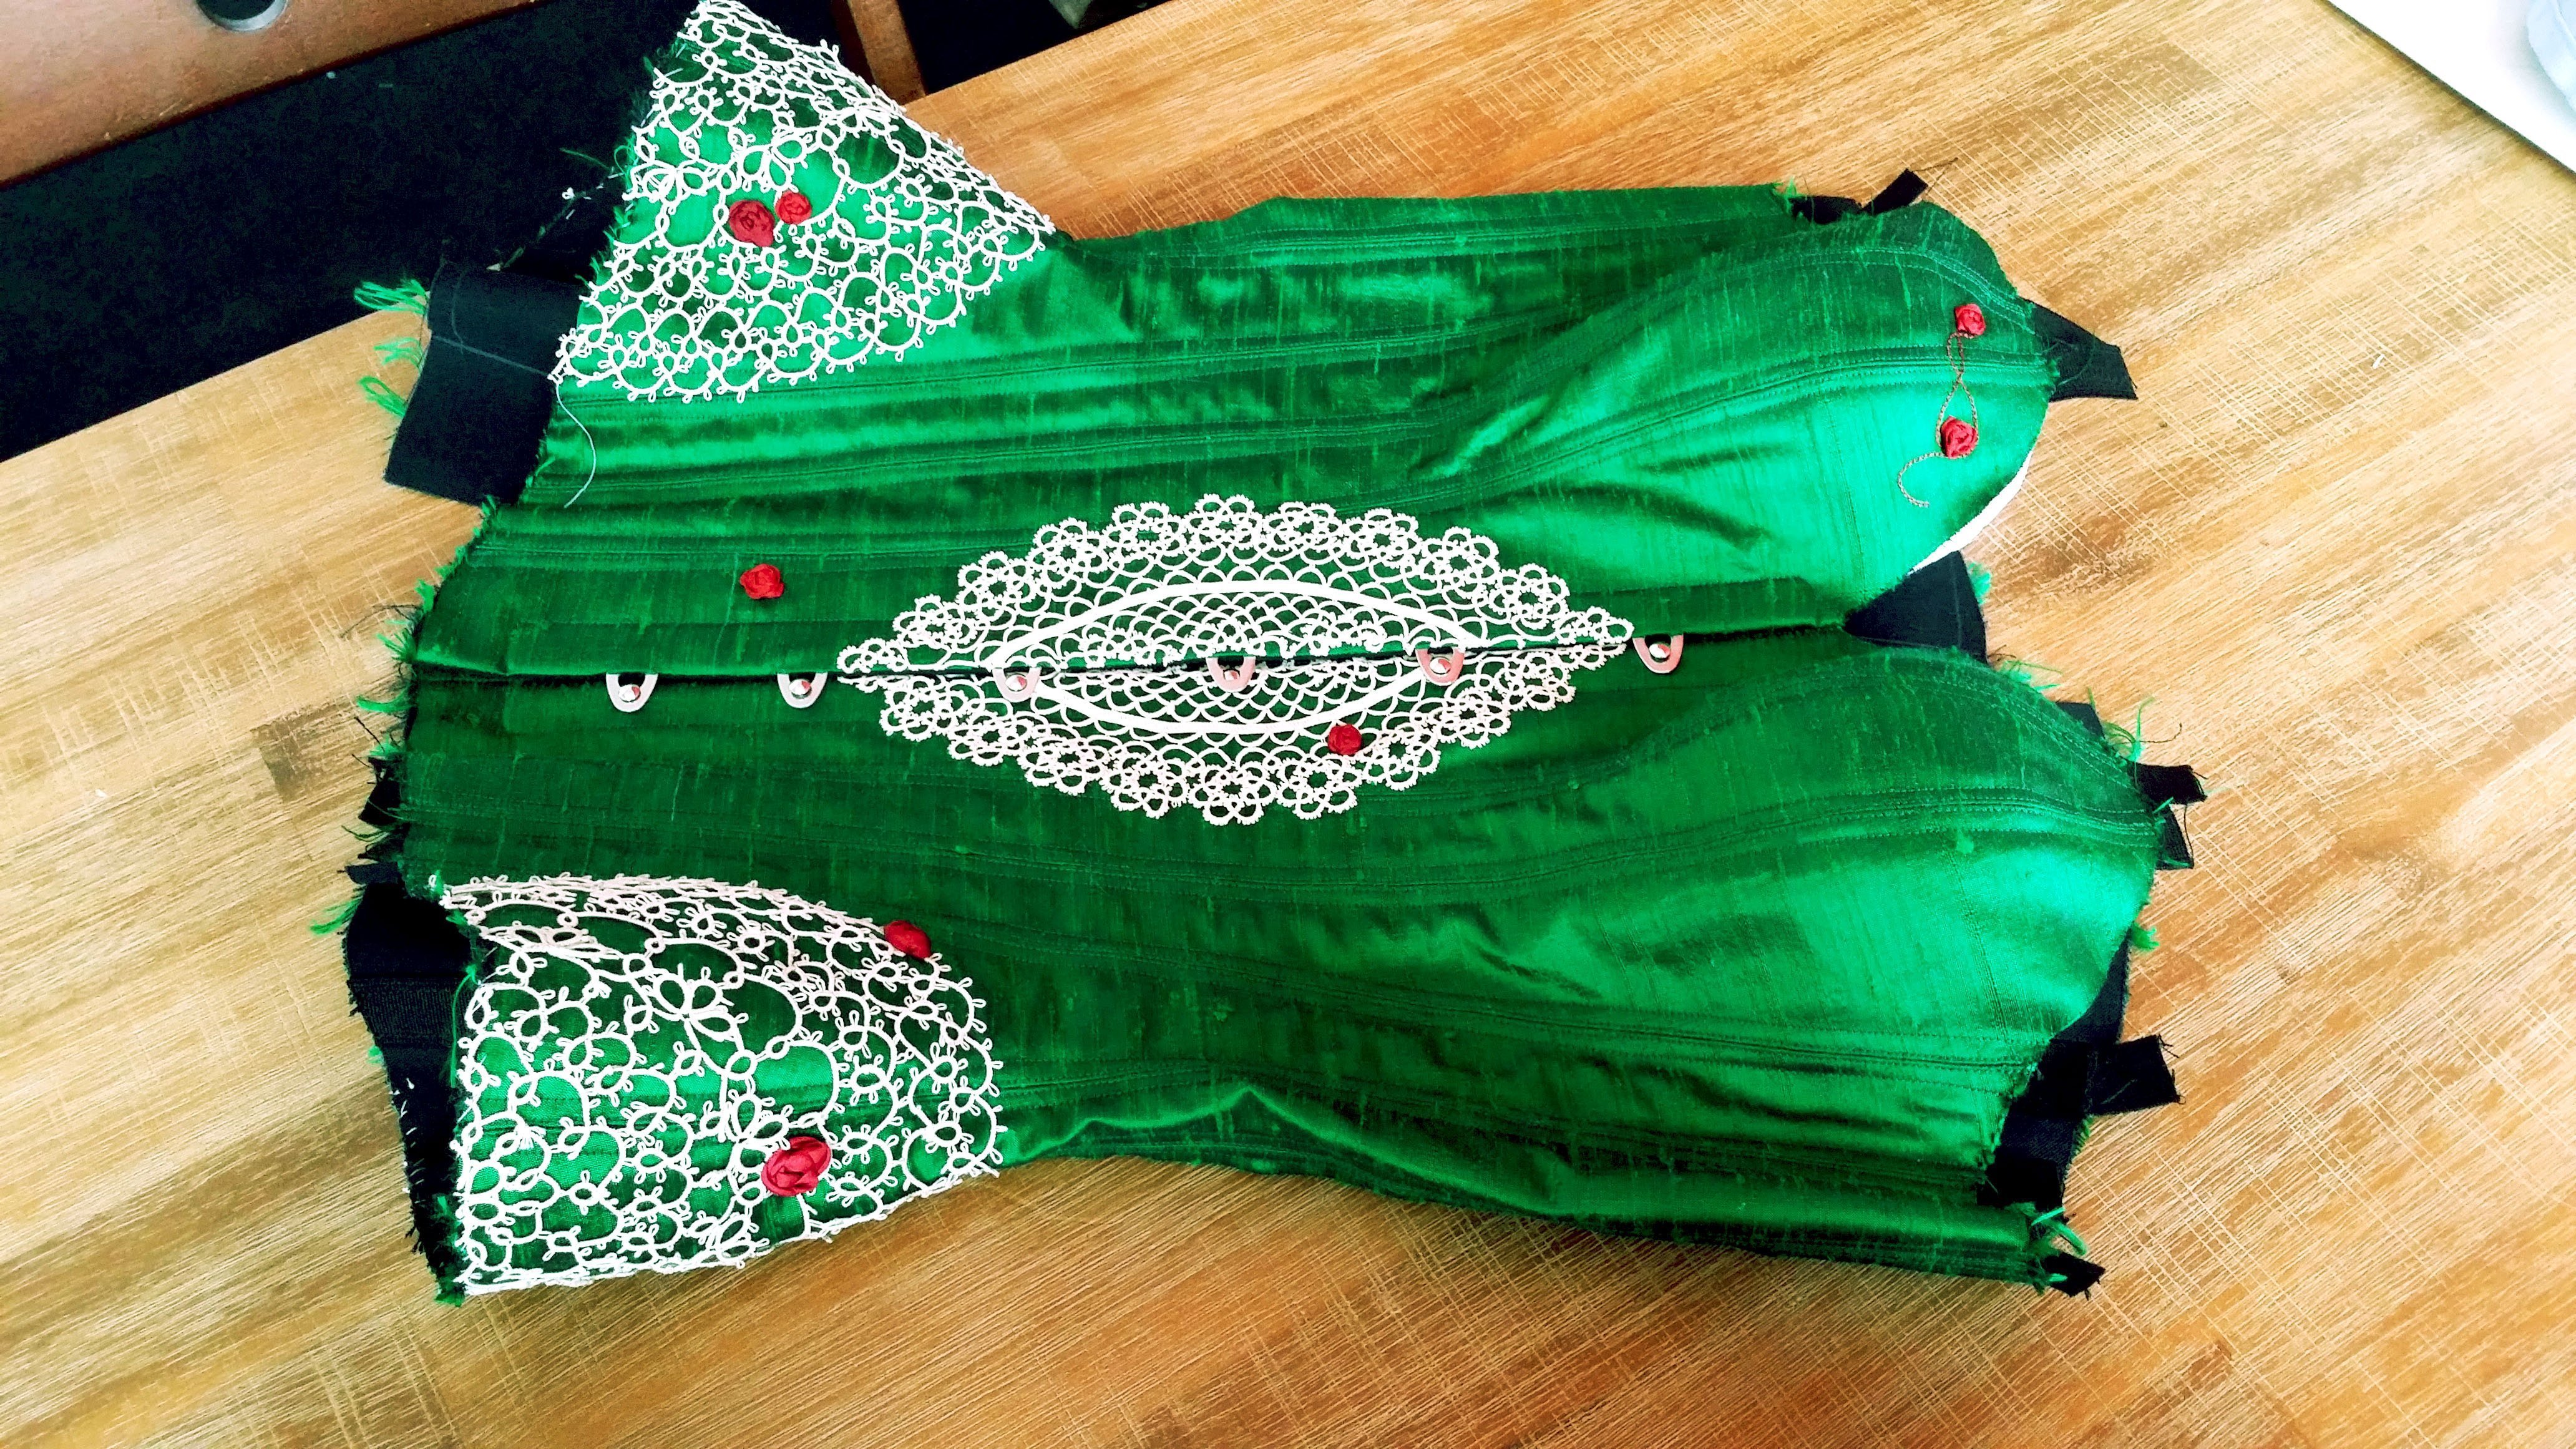
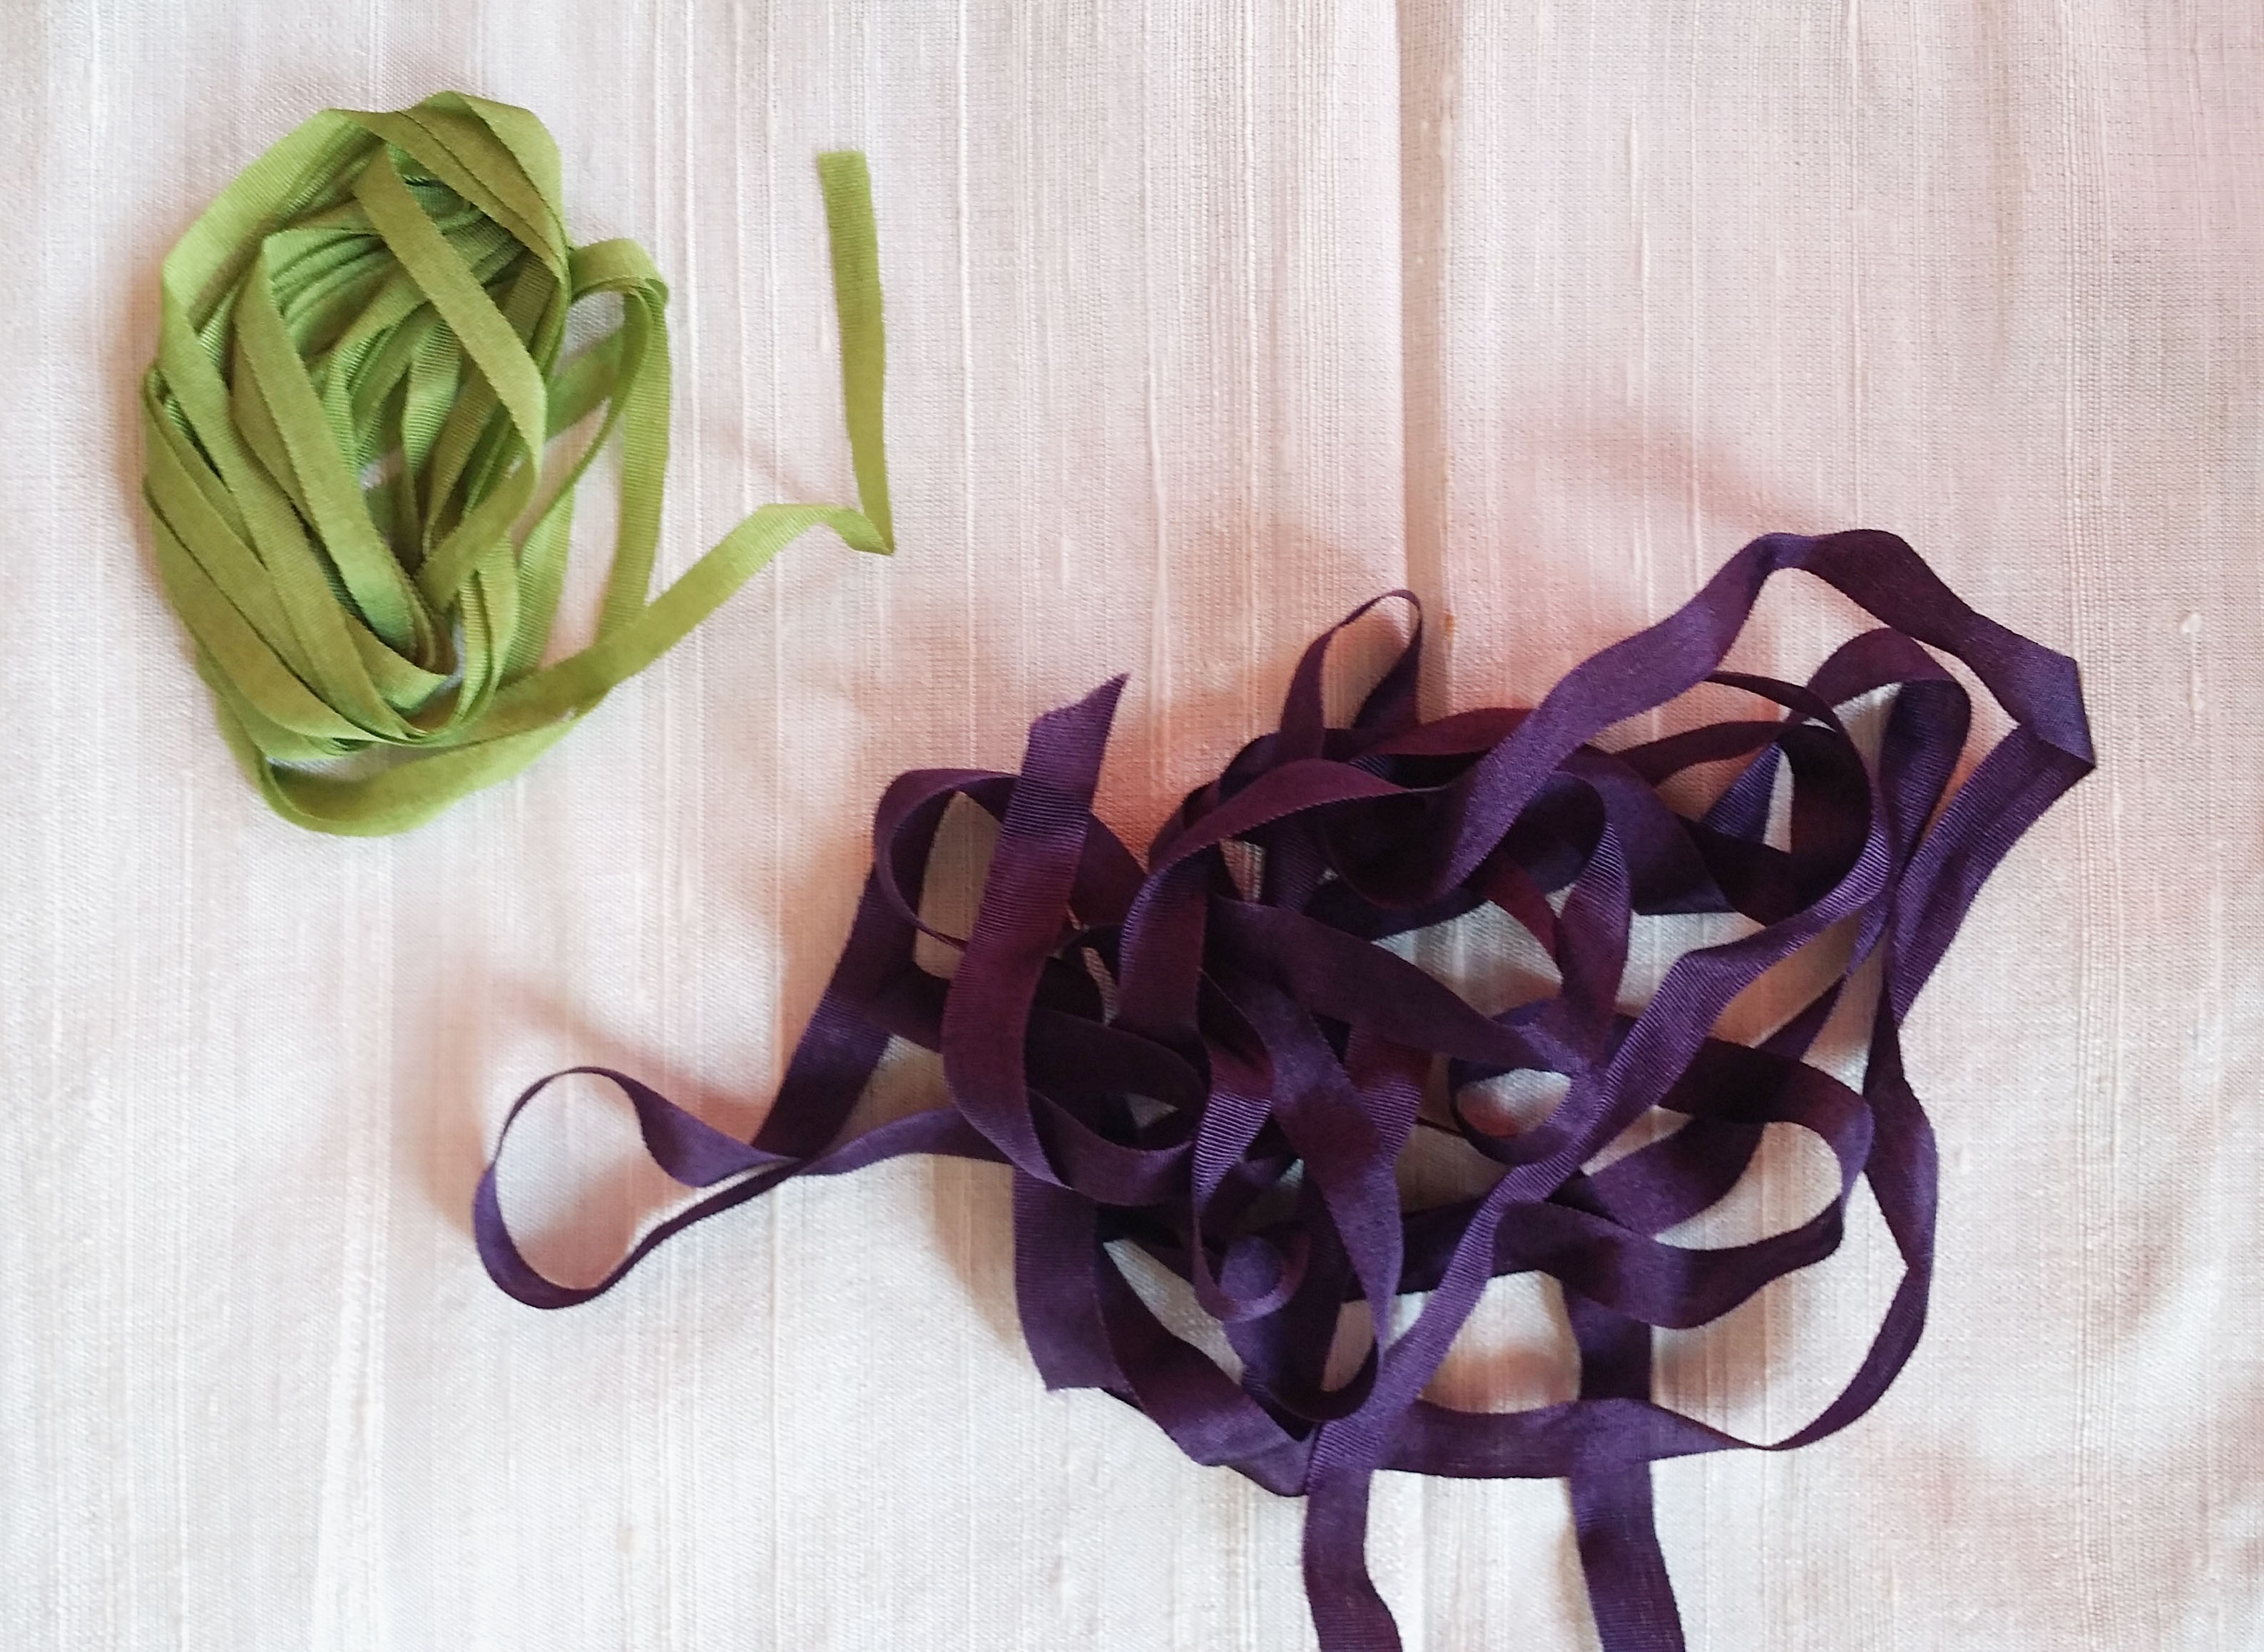
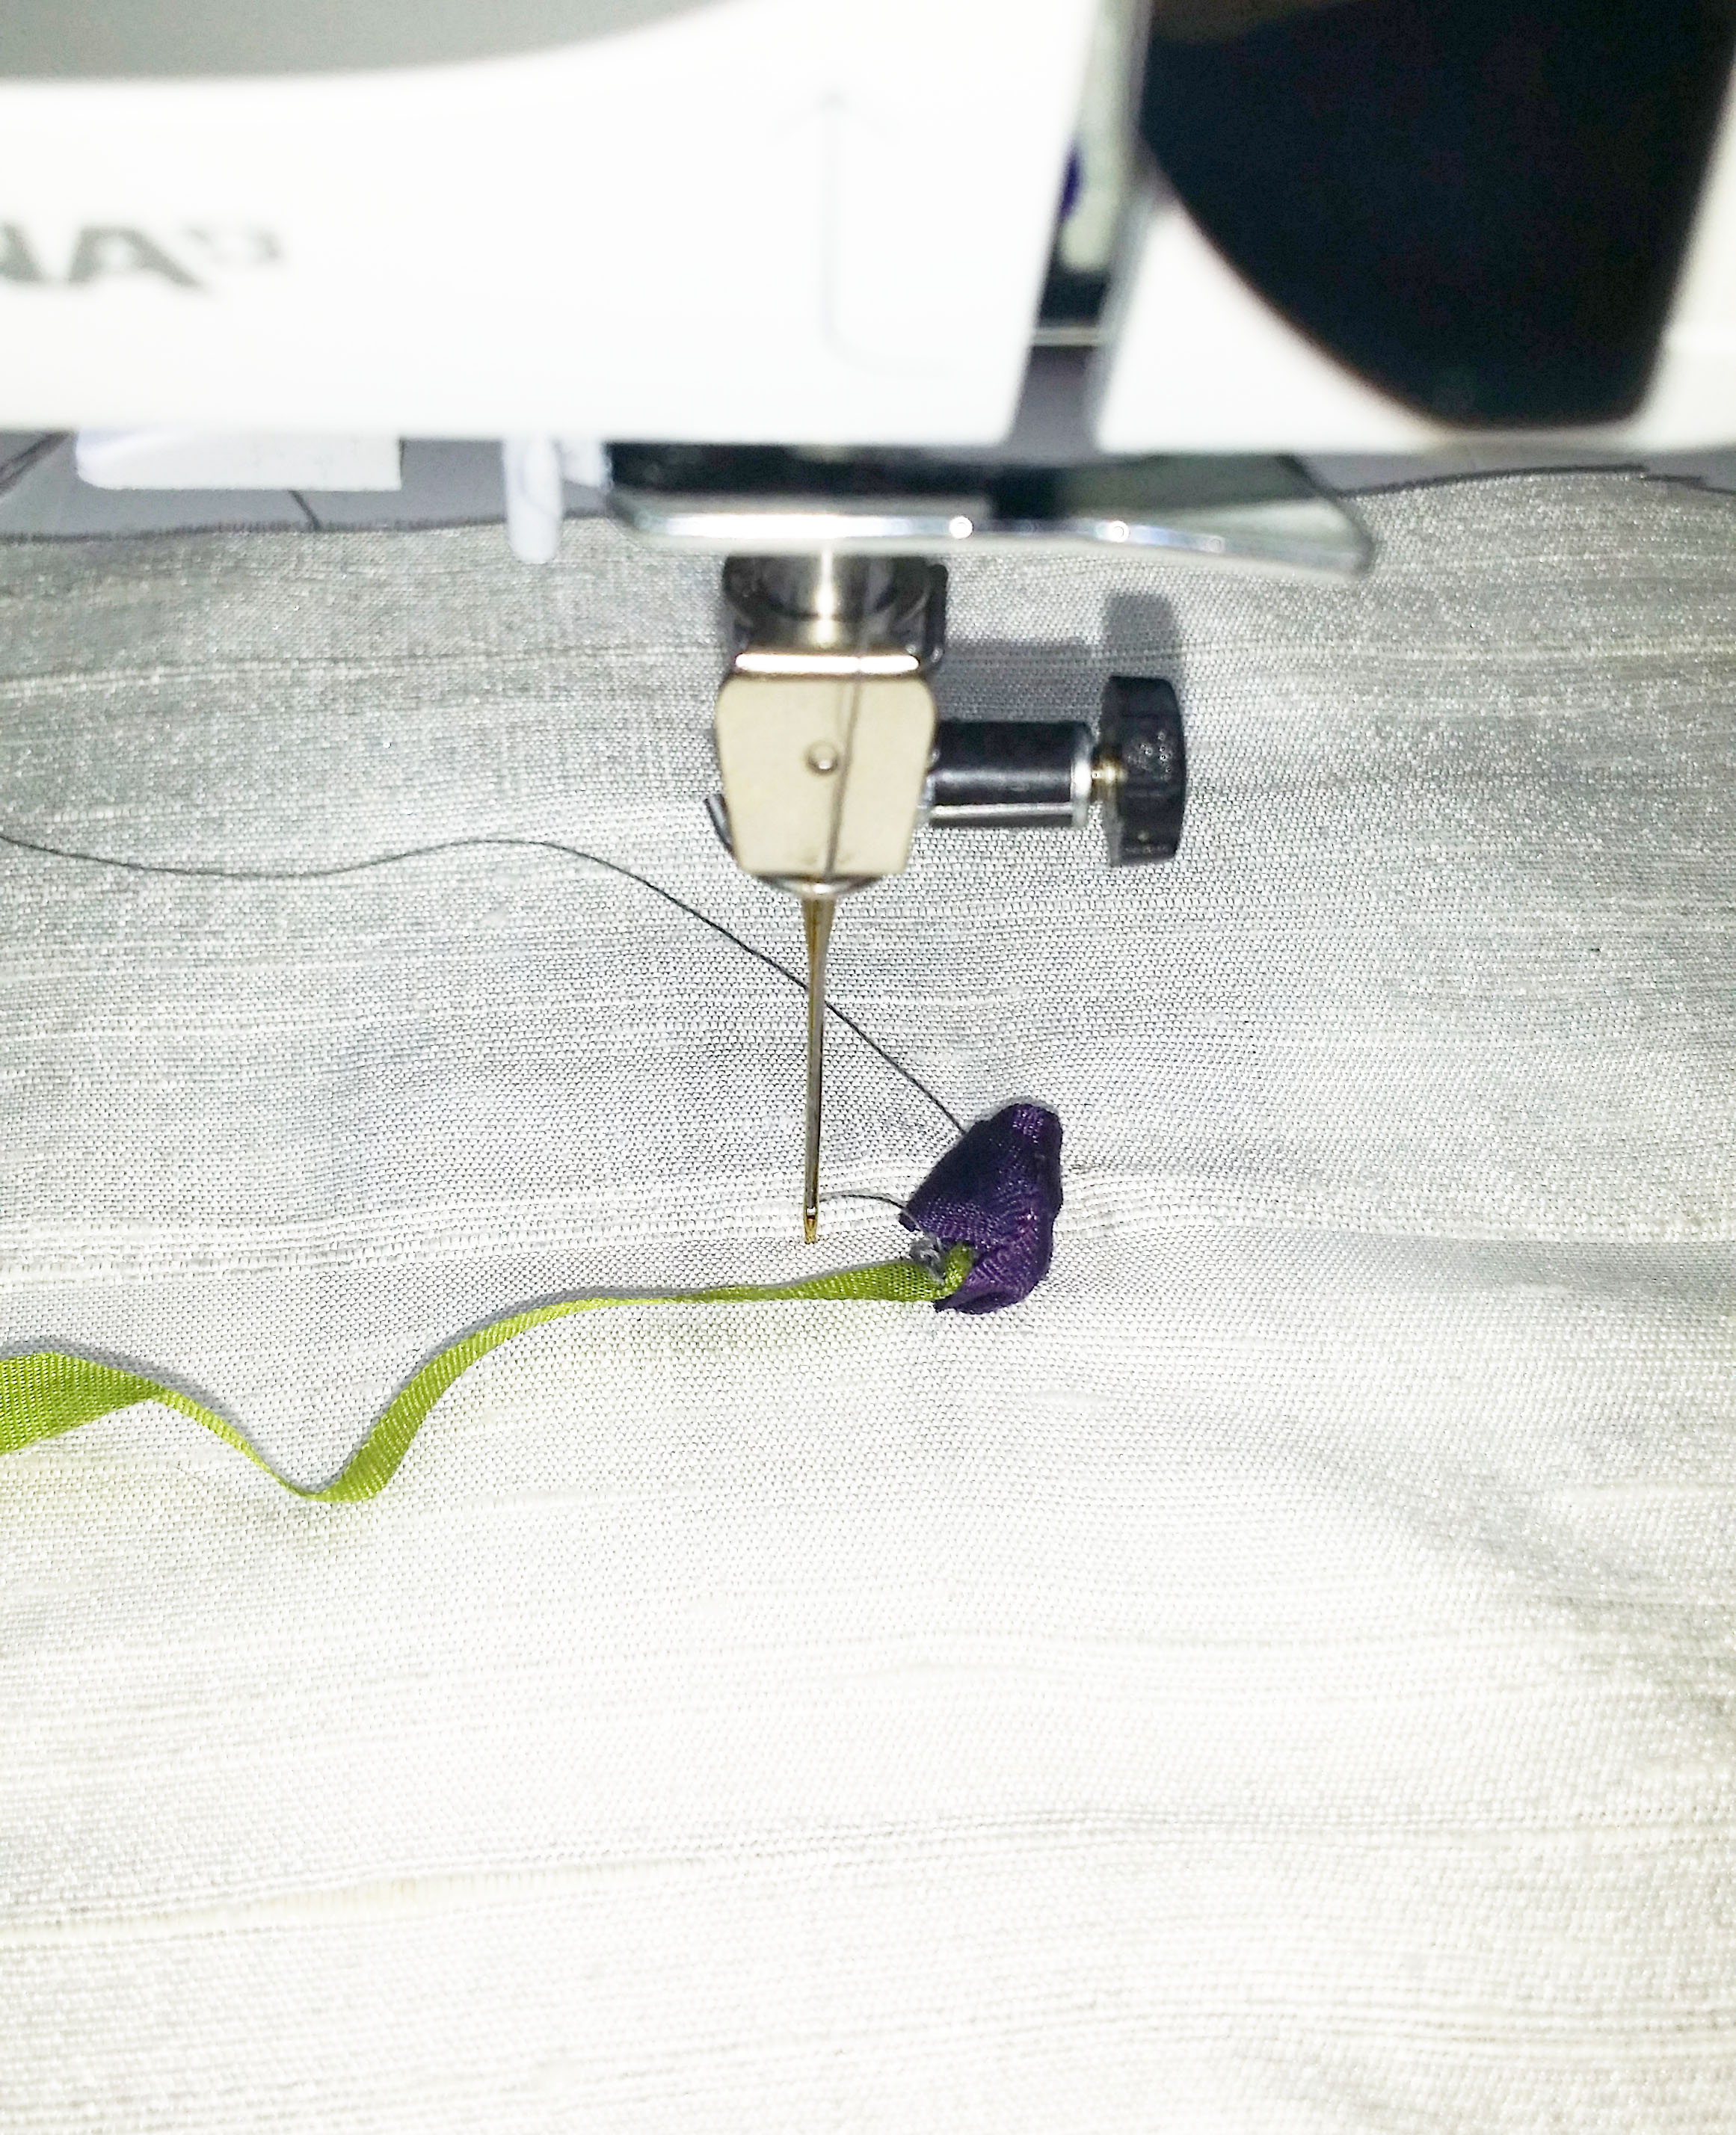
I started off with a narrow green silk ribbon and a slightly wider purple silk ribbon and some silk fabric.
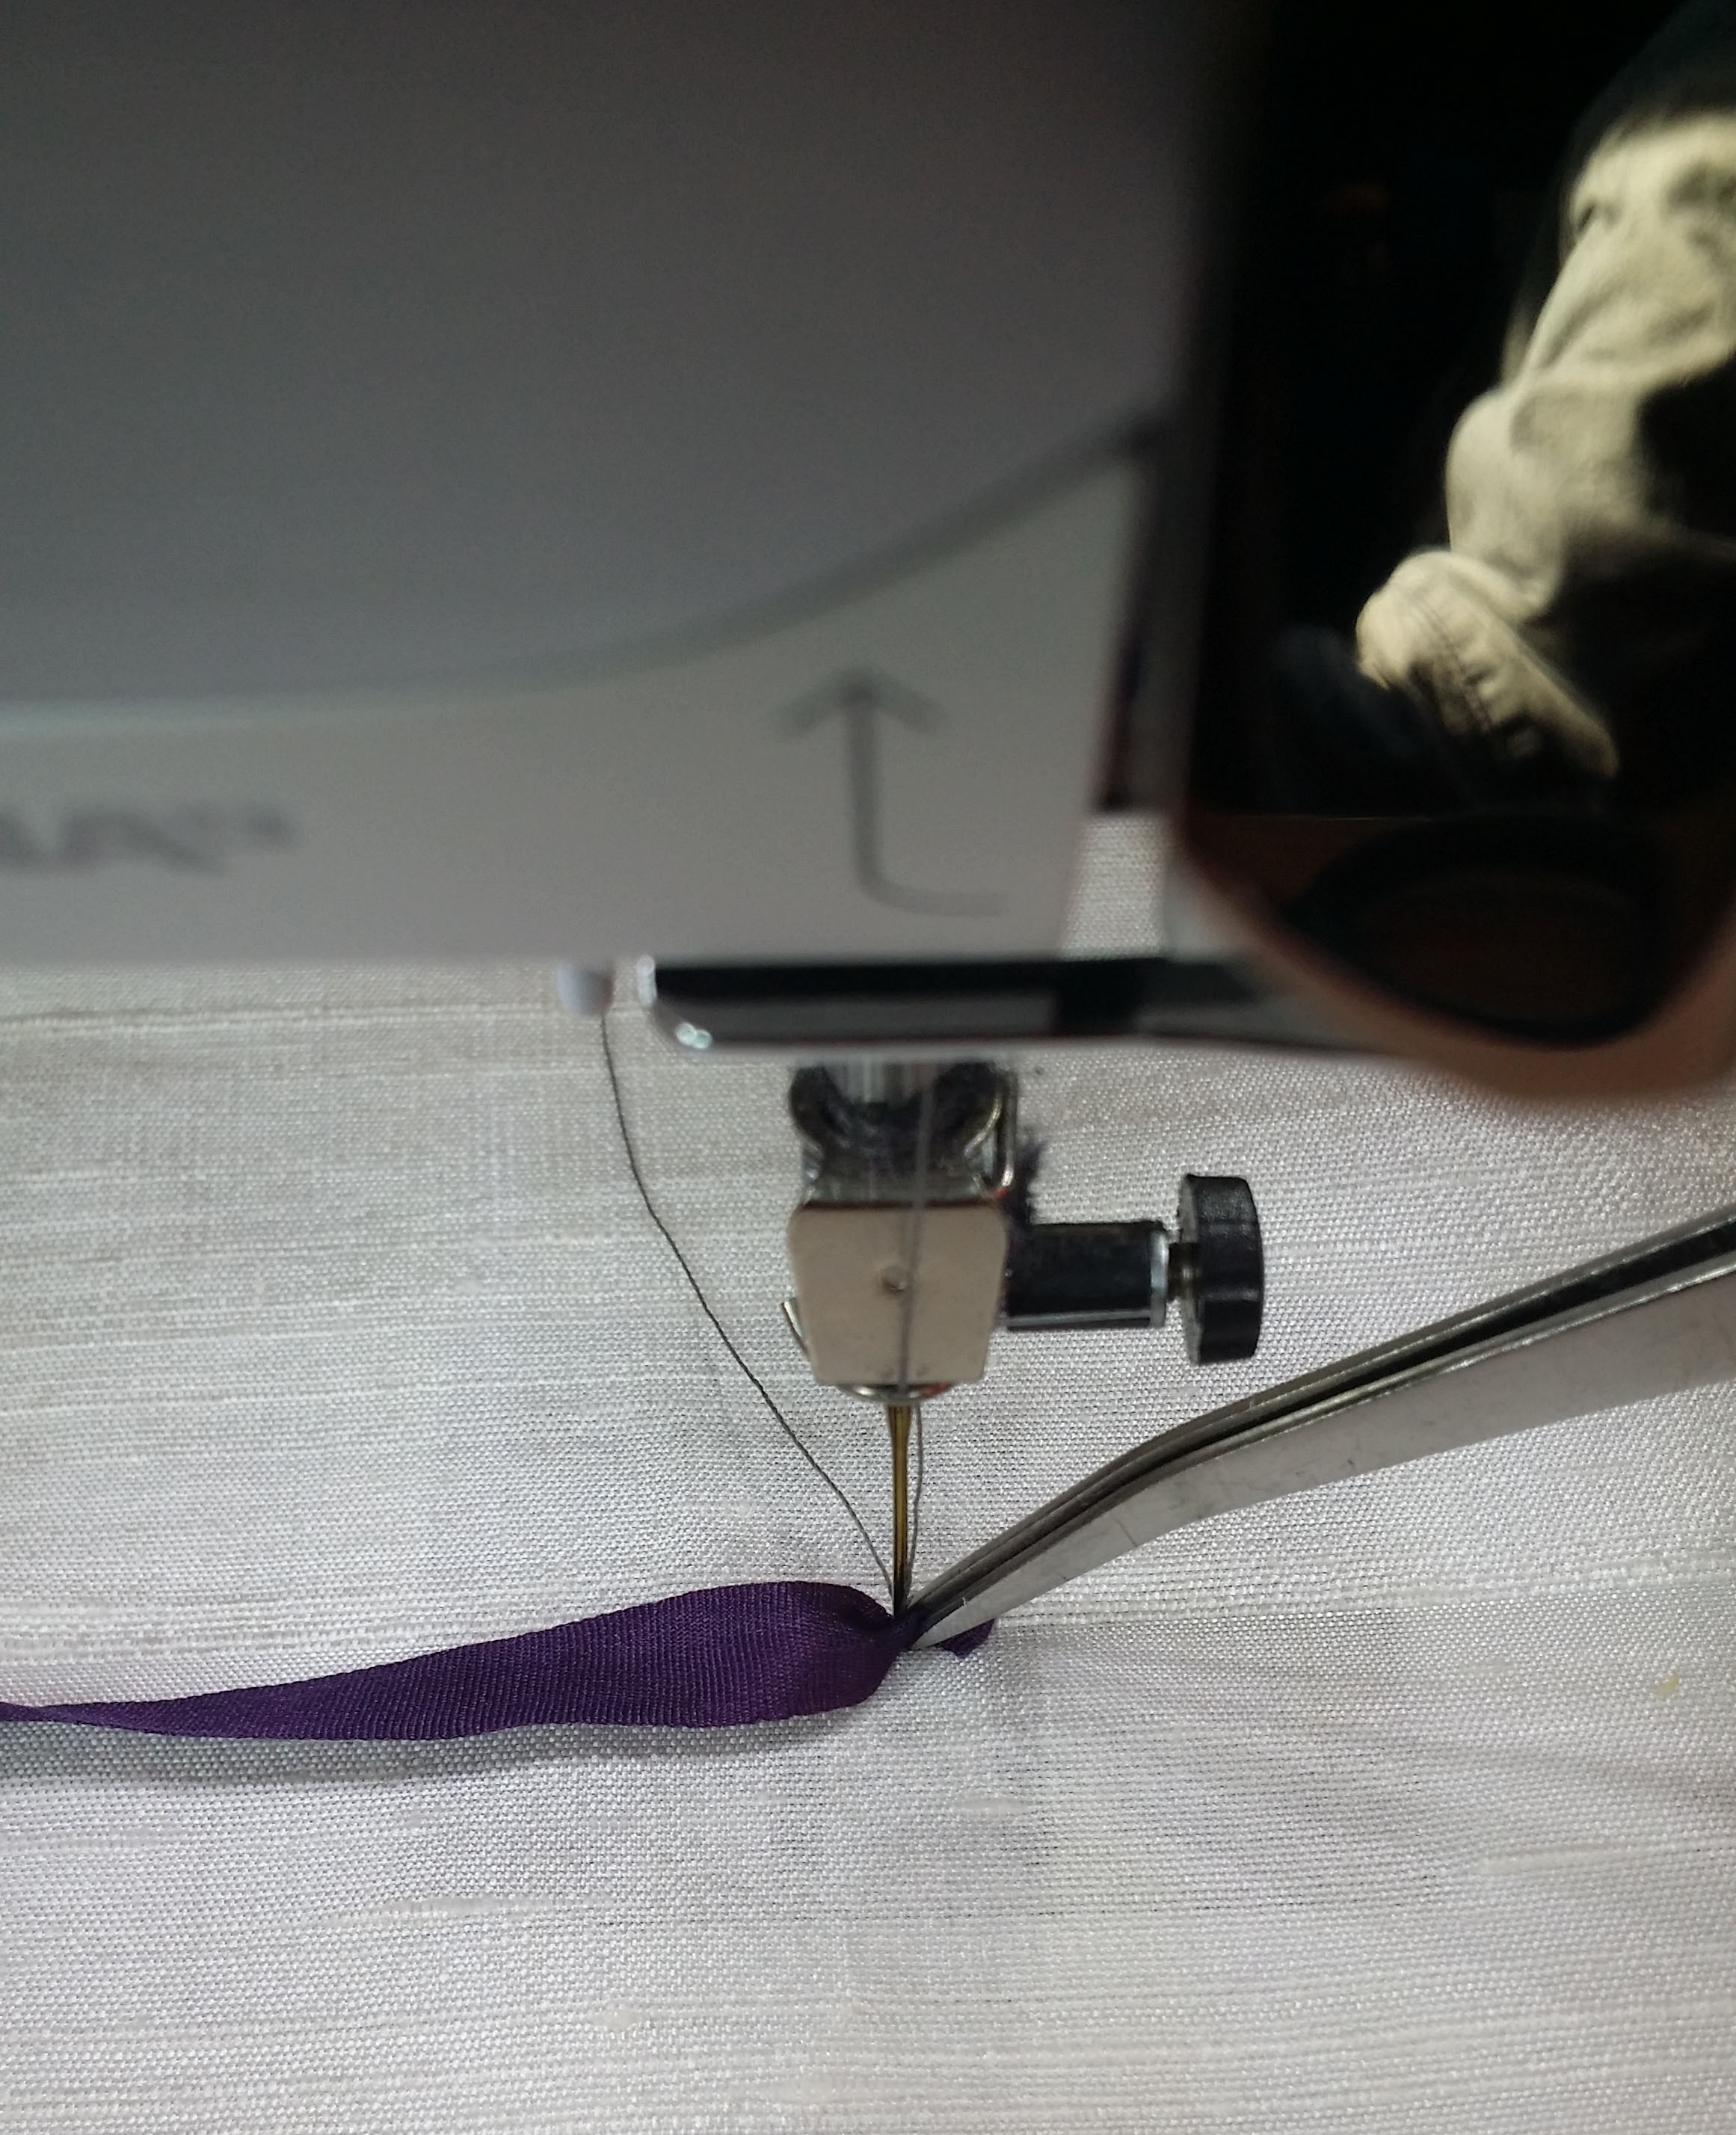
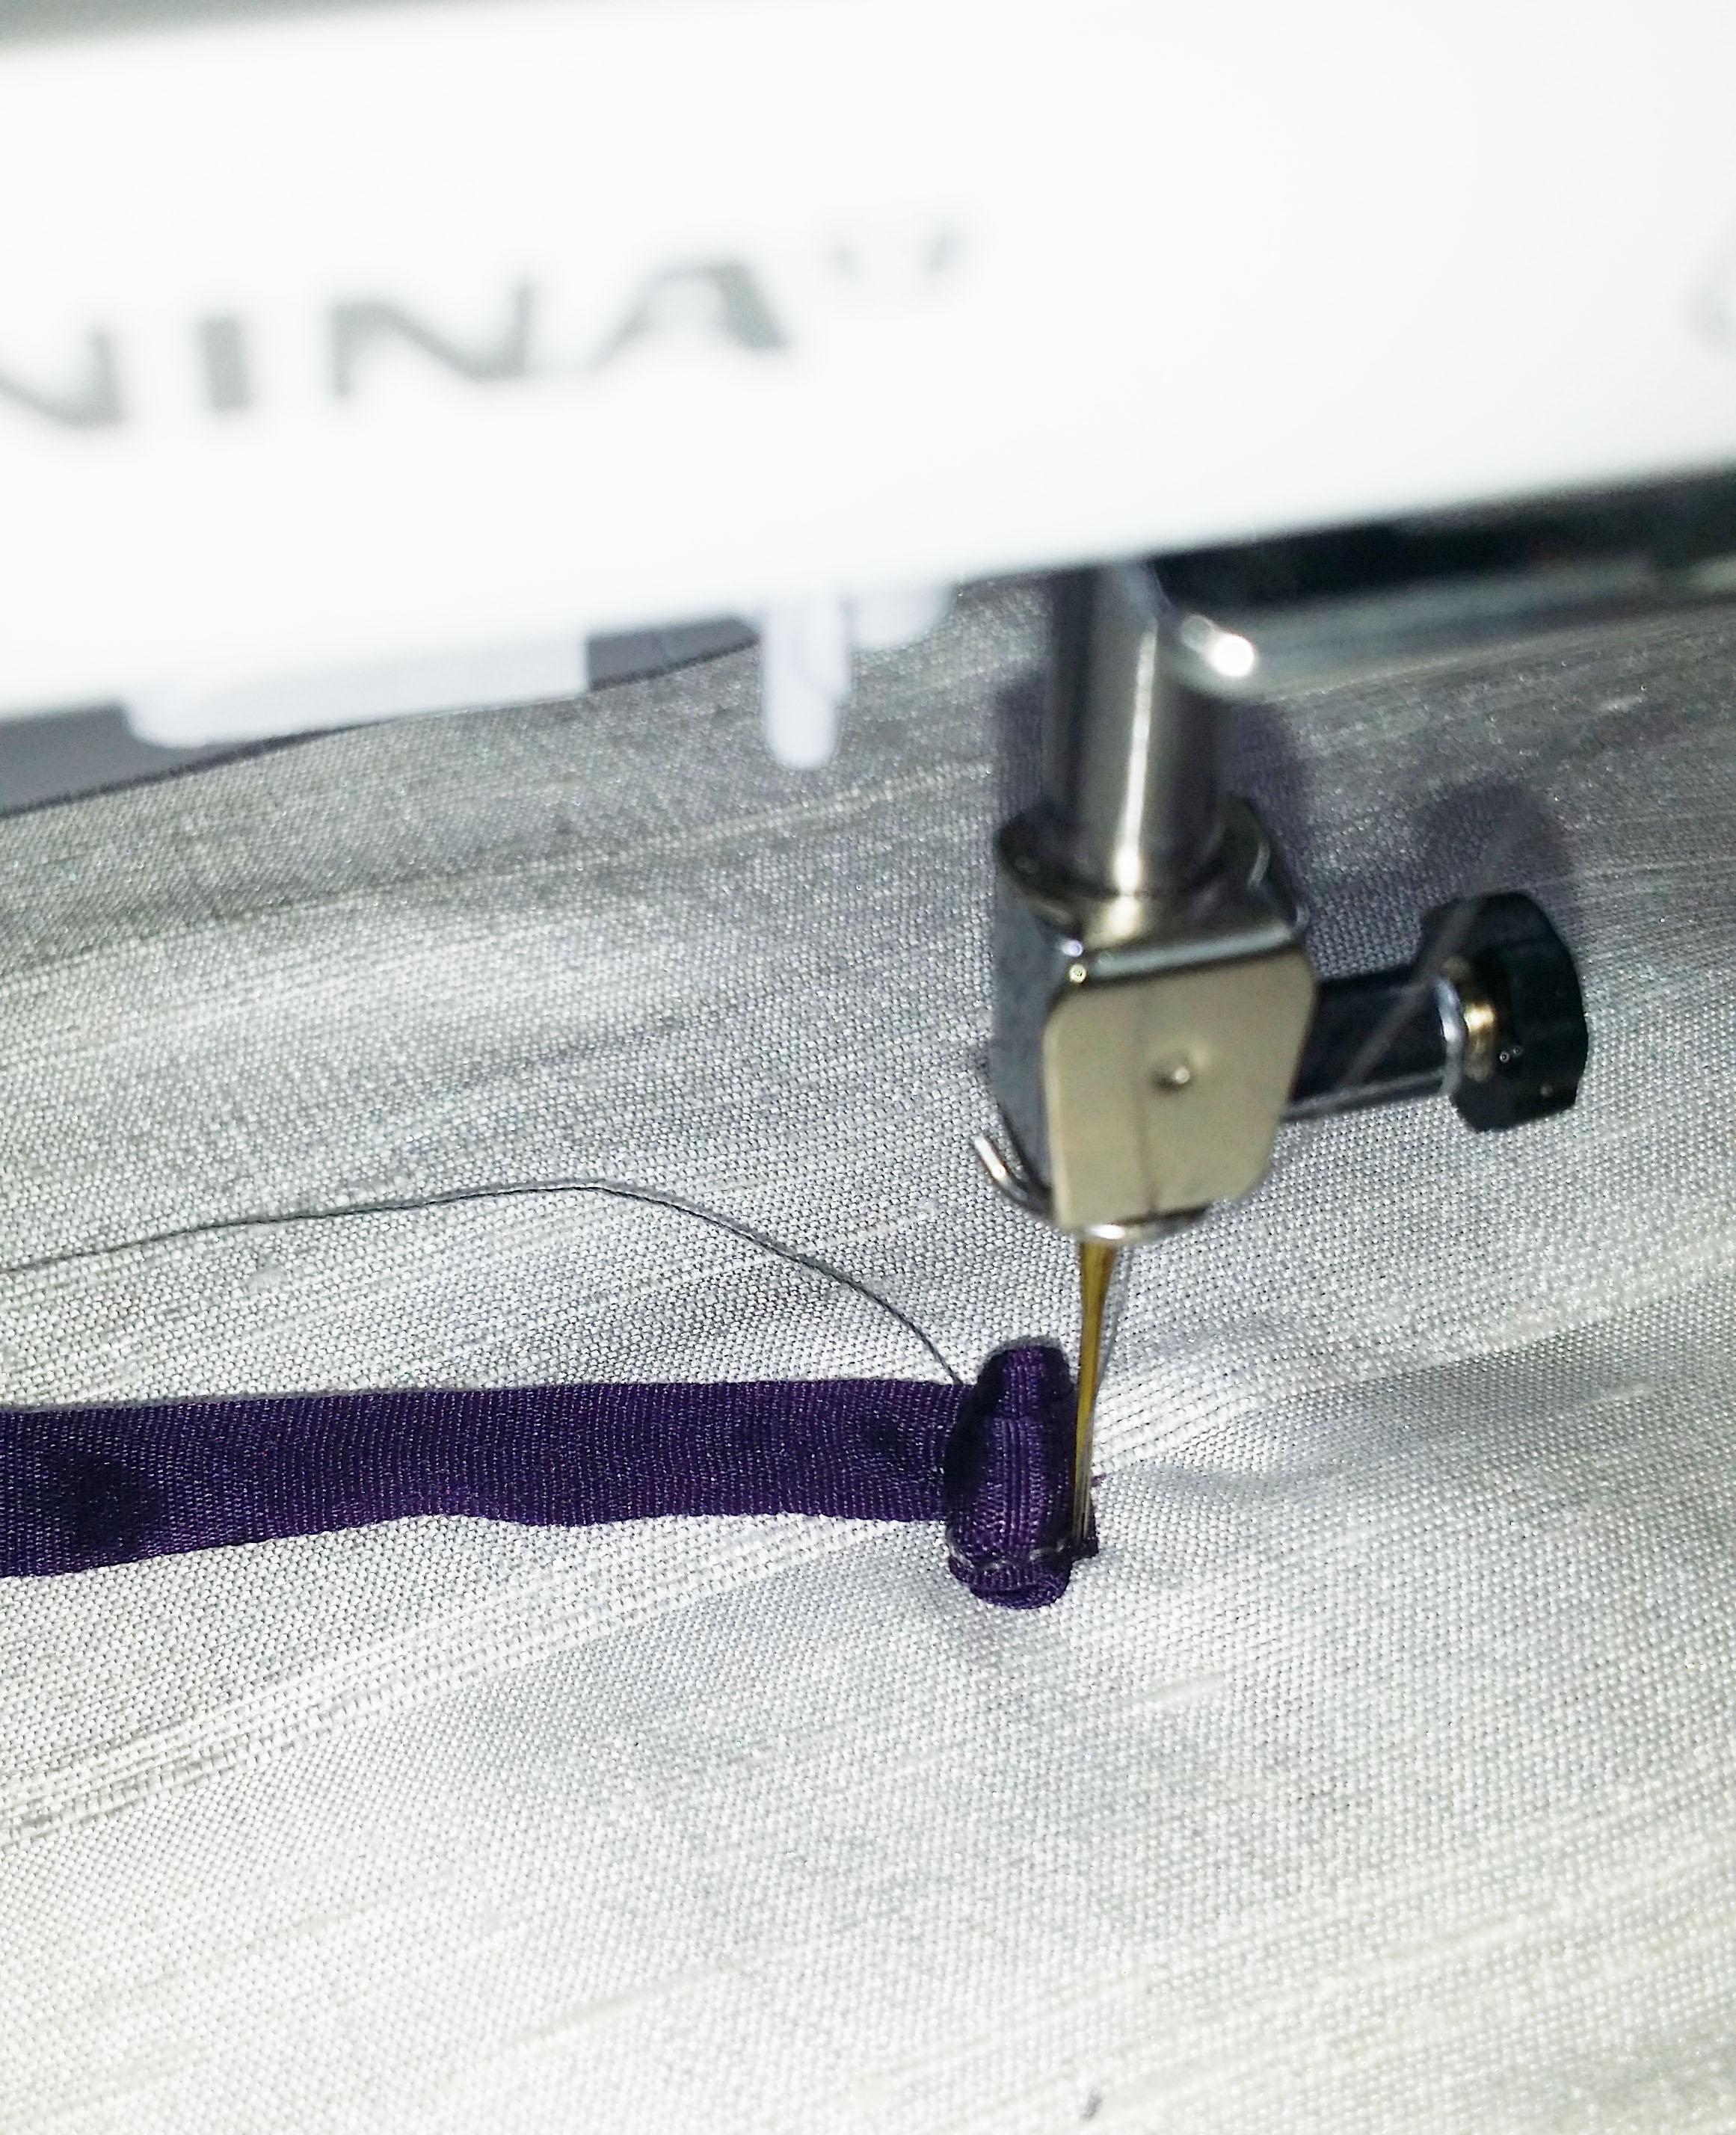
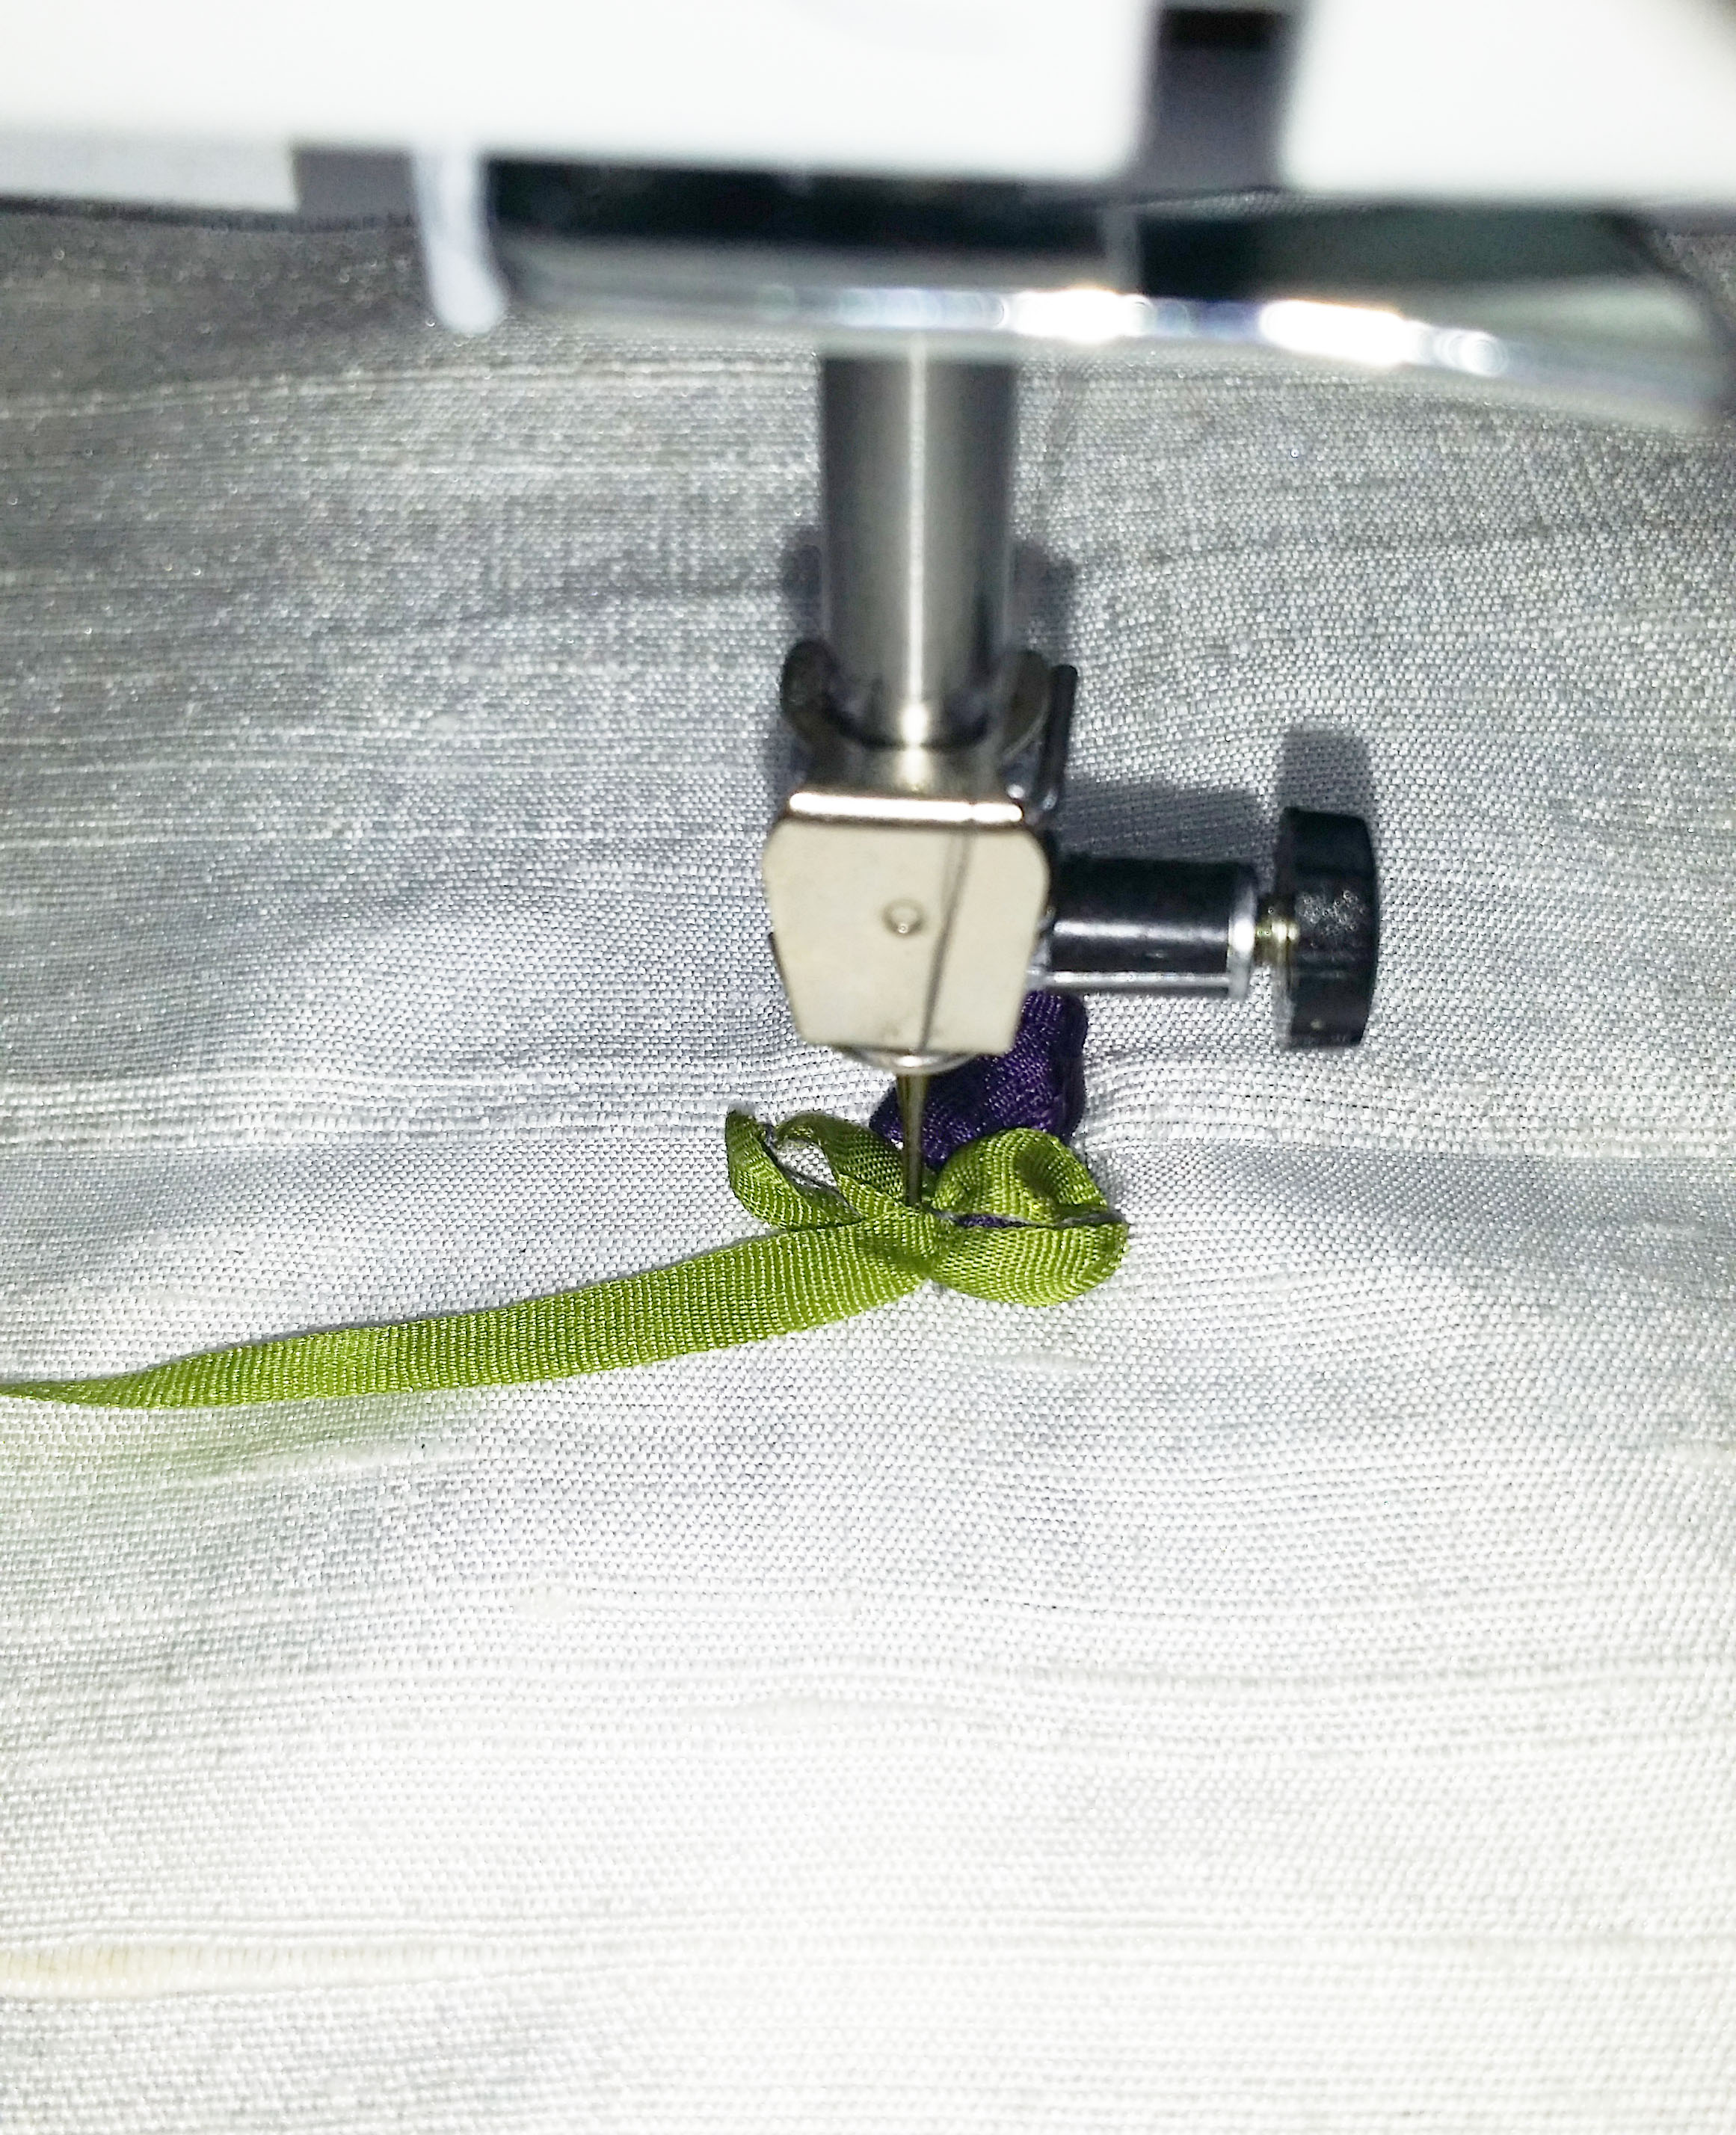
You don’t need a sewing machine foot at all, so remove it before you start your project. This way the needle is free standing and you can wrap and twist the ribbons around it a lot easier.
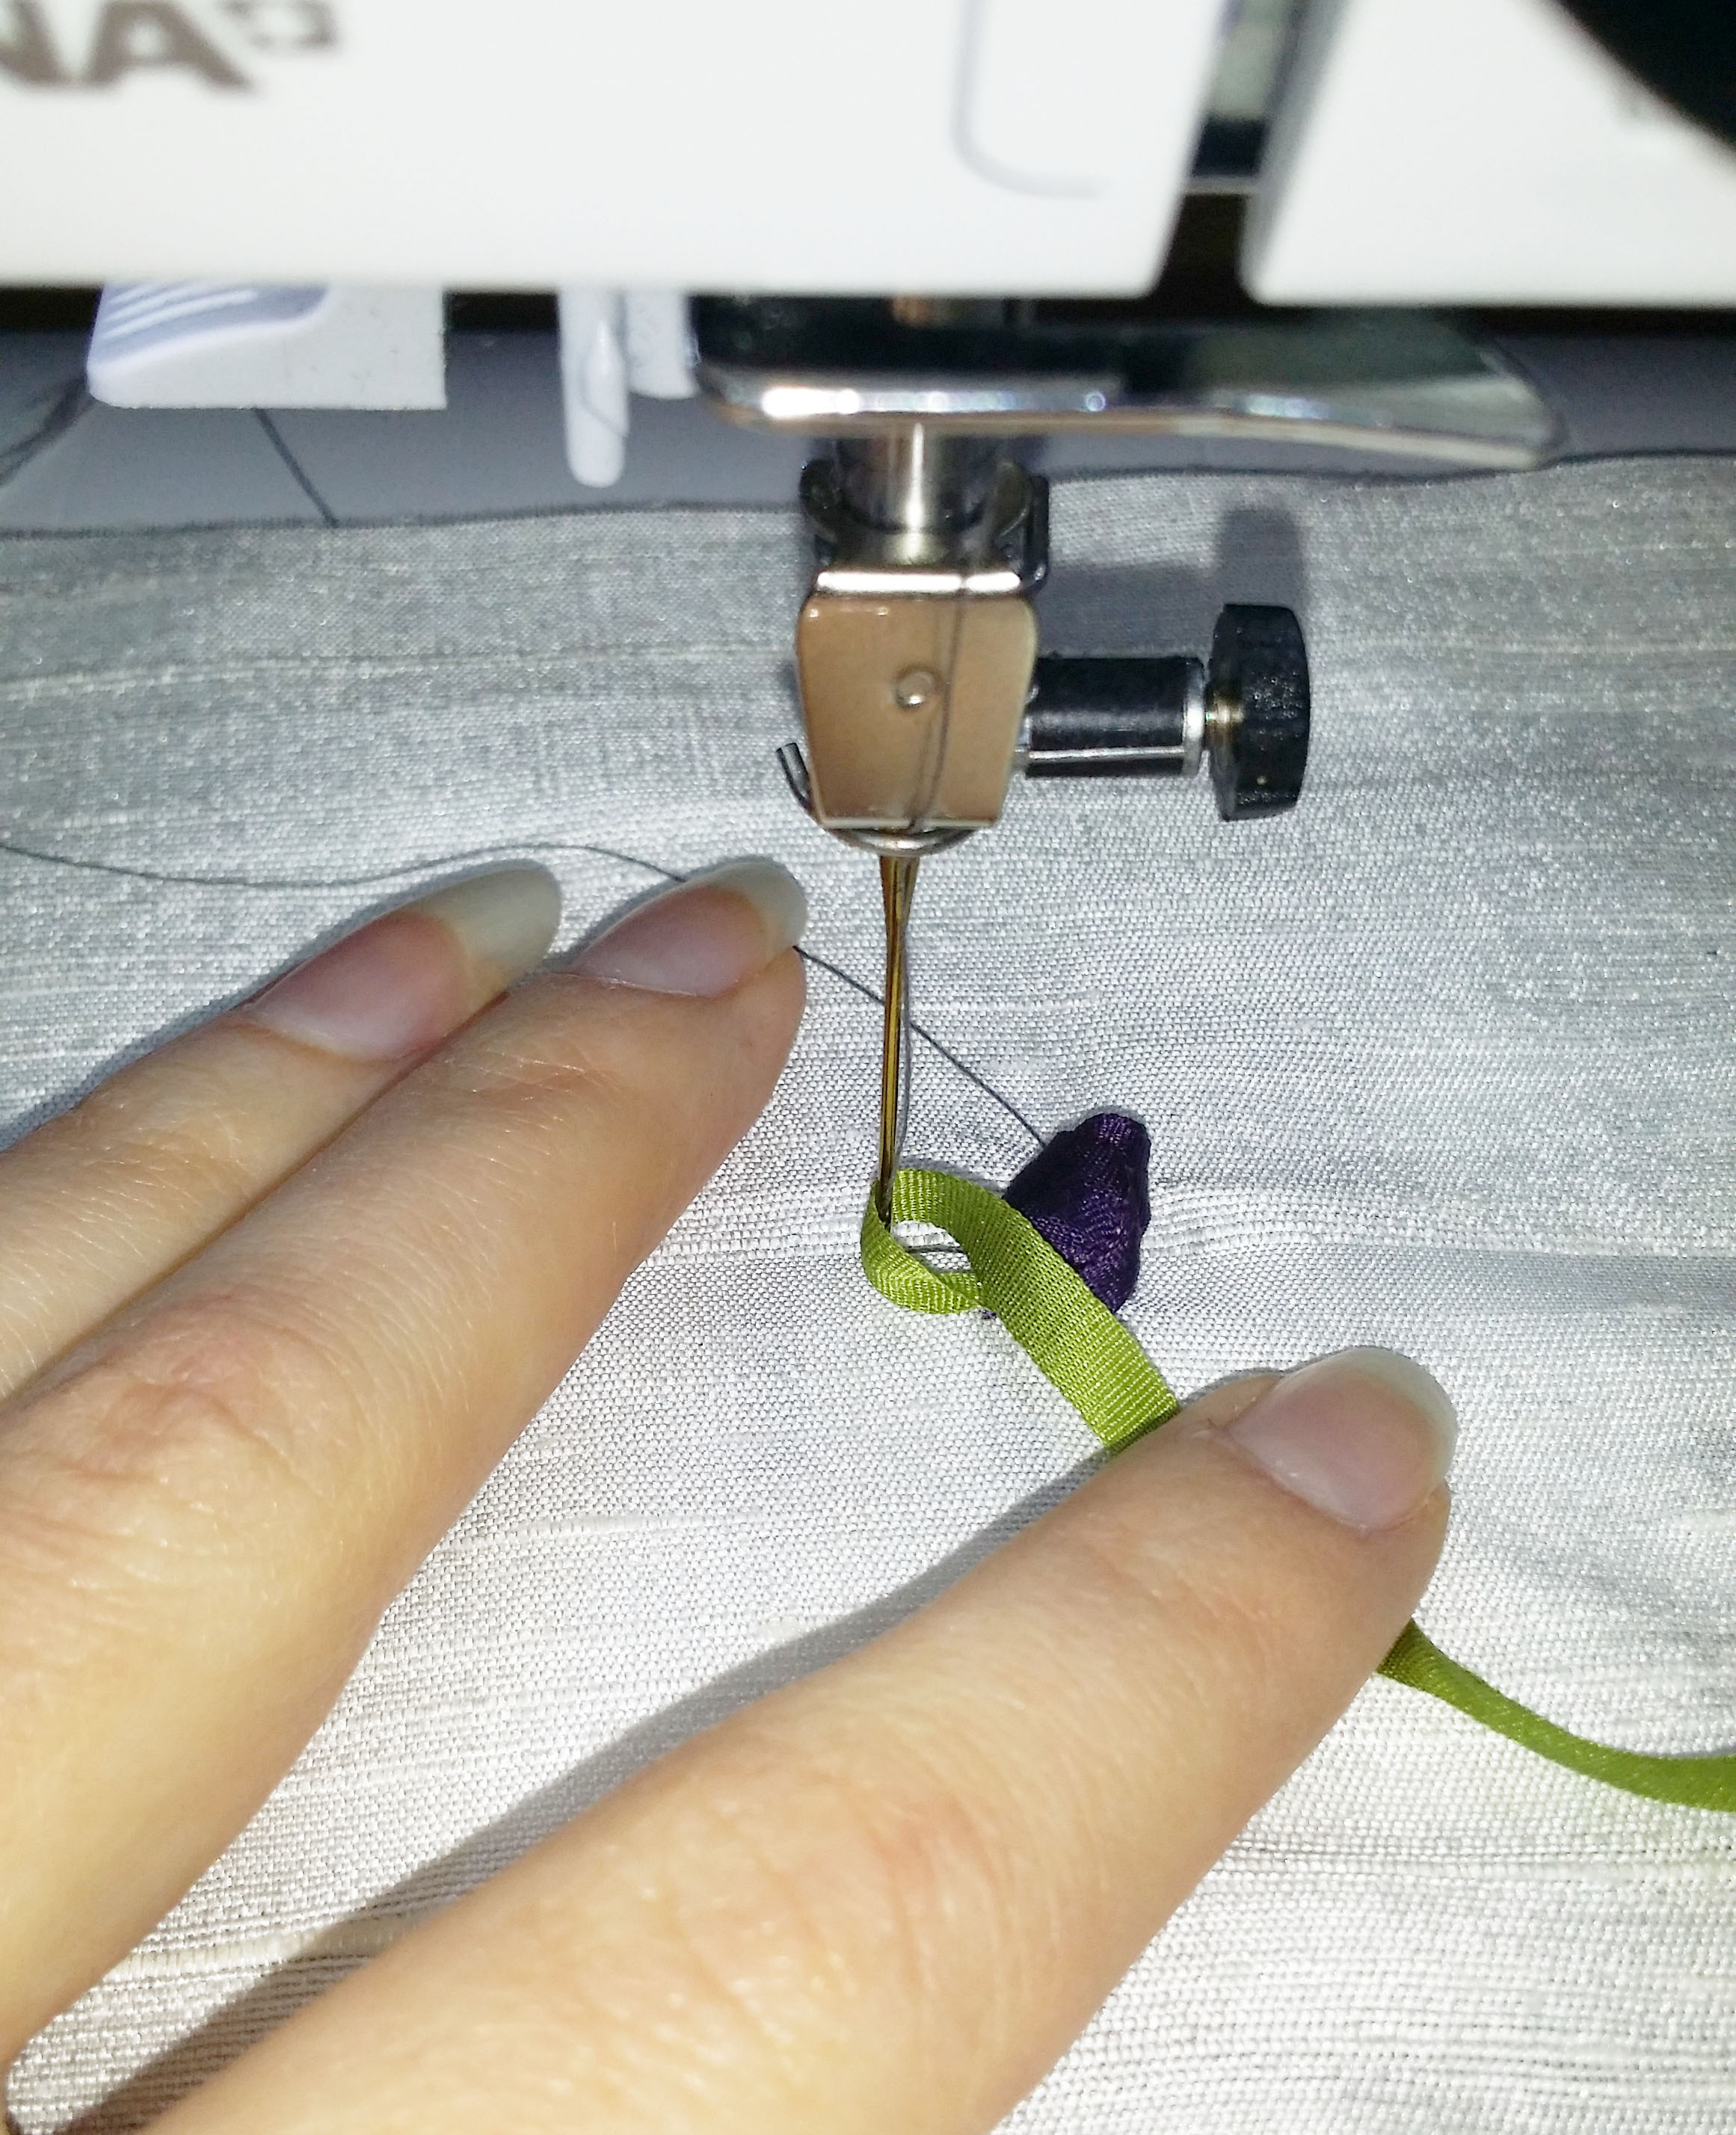
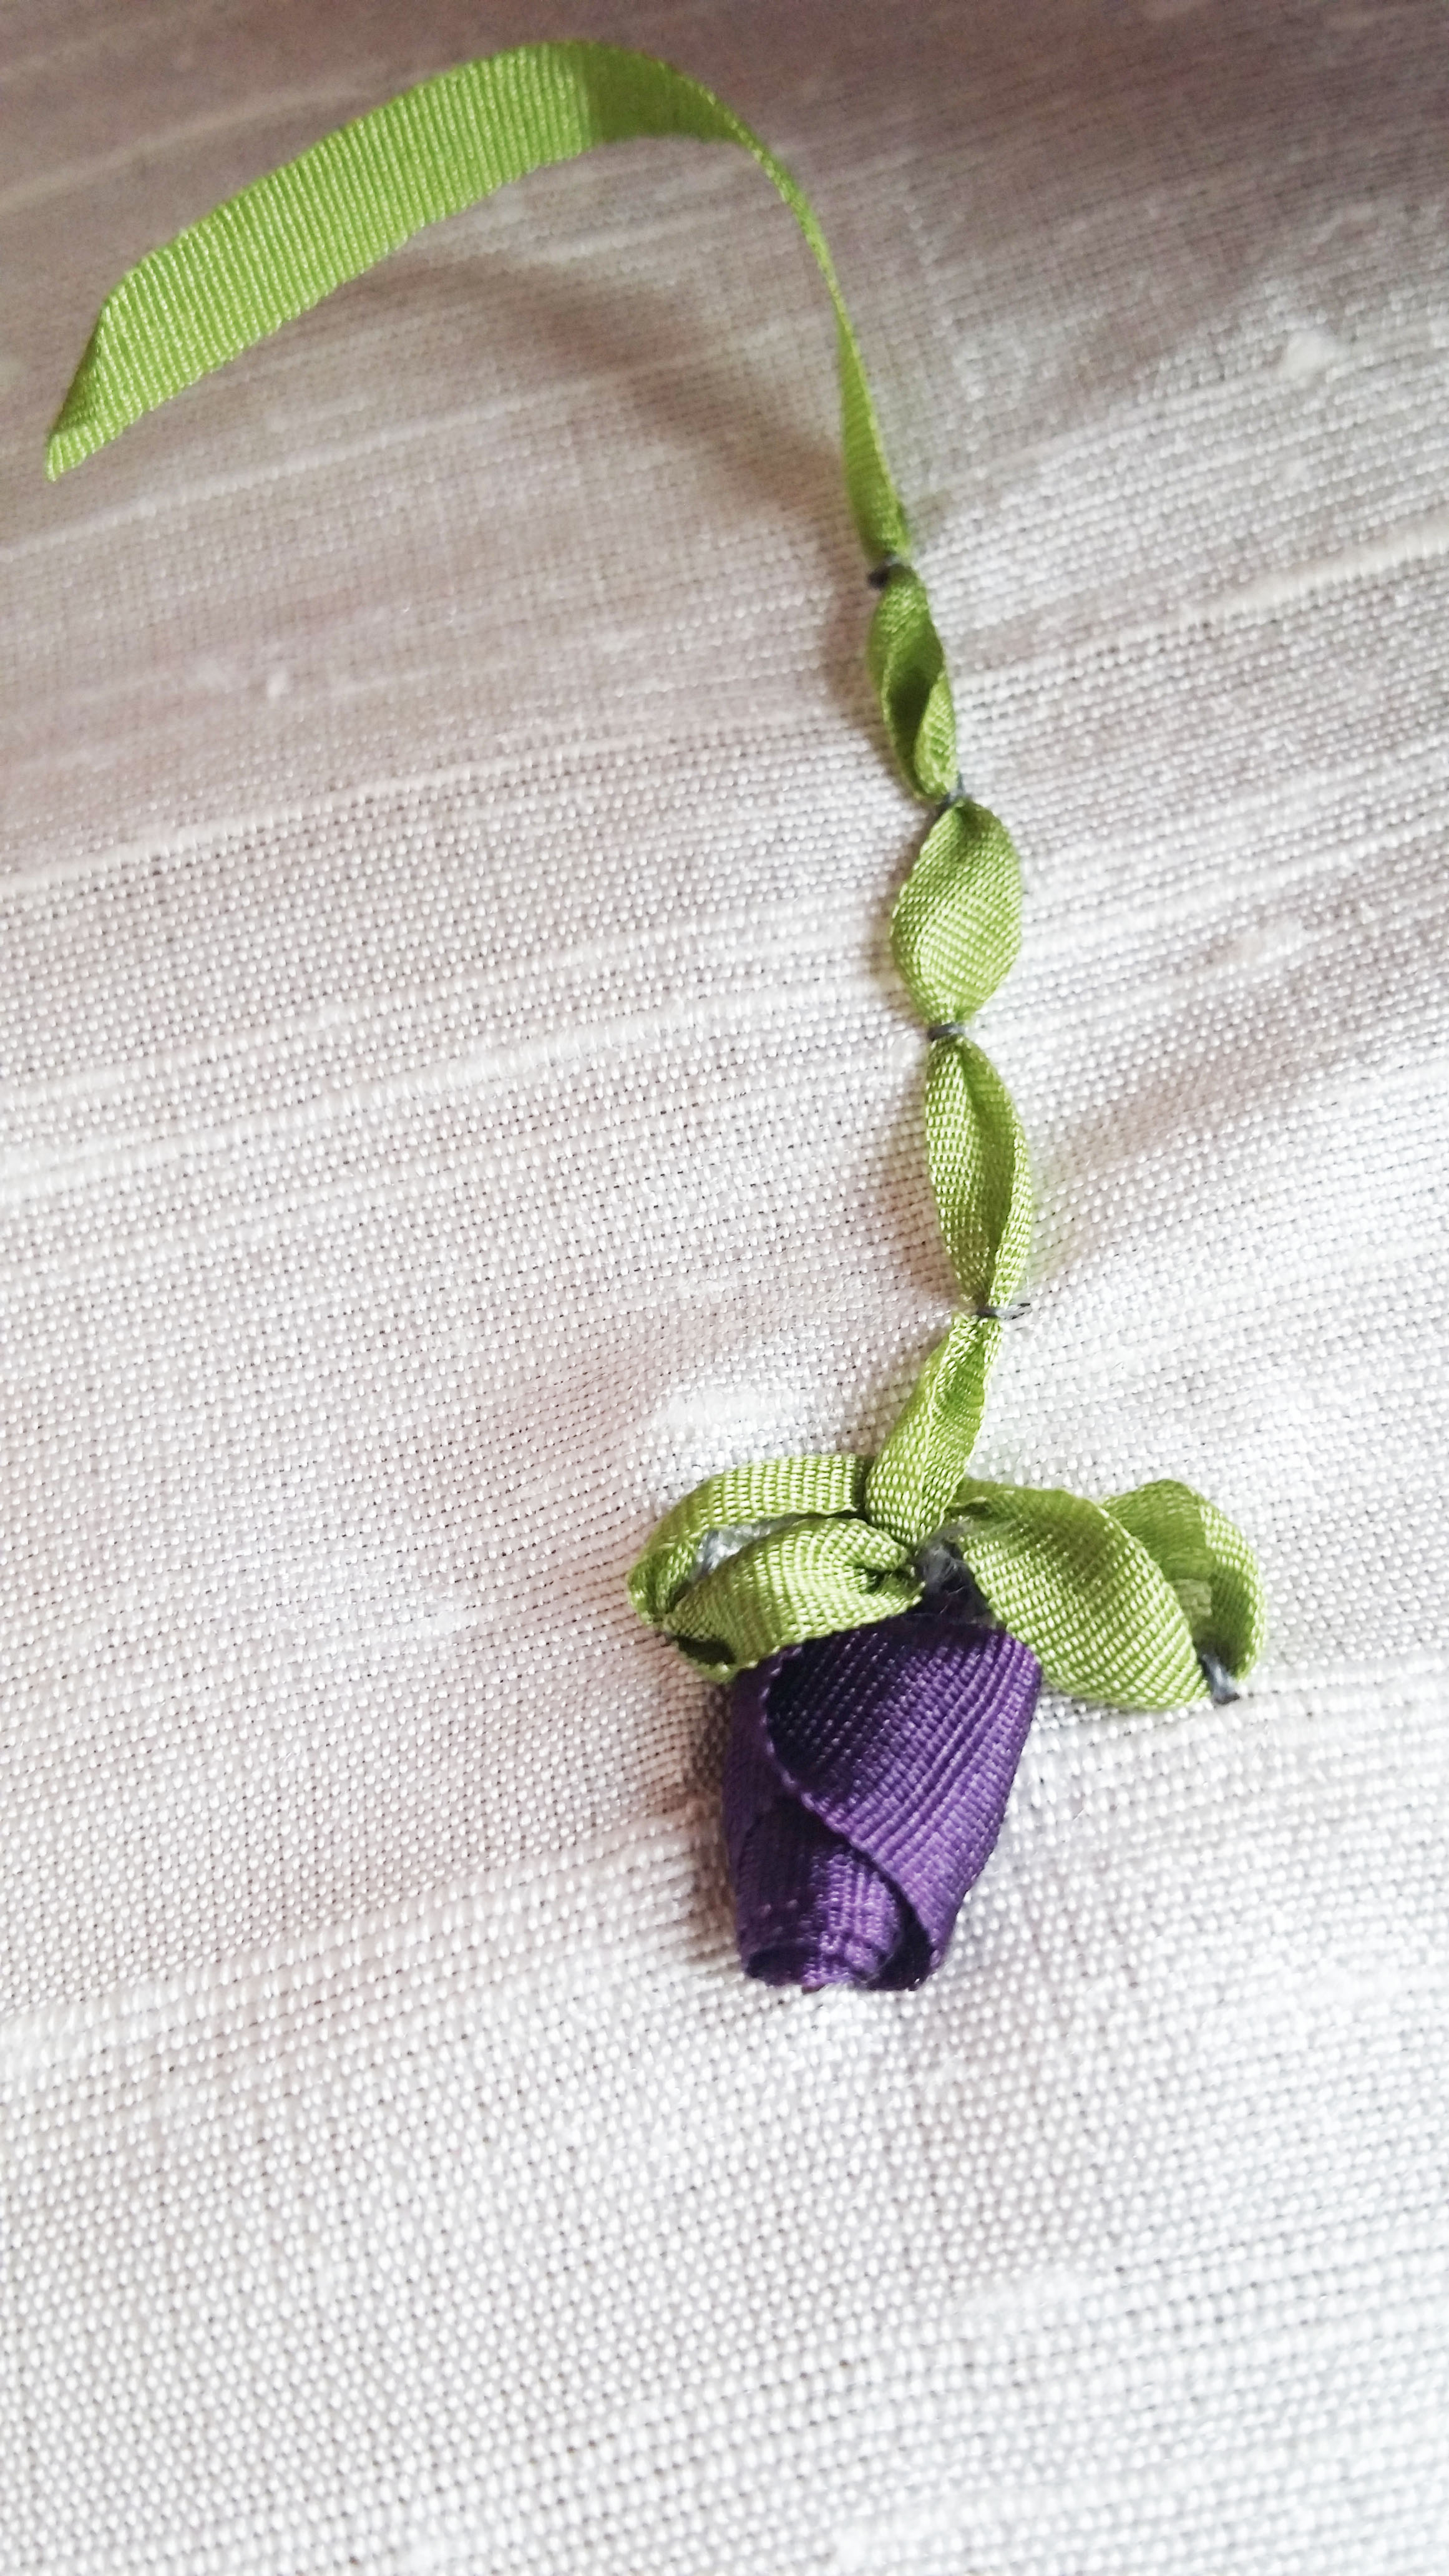
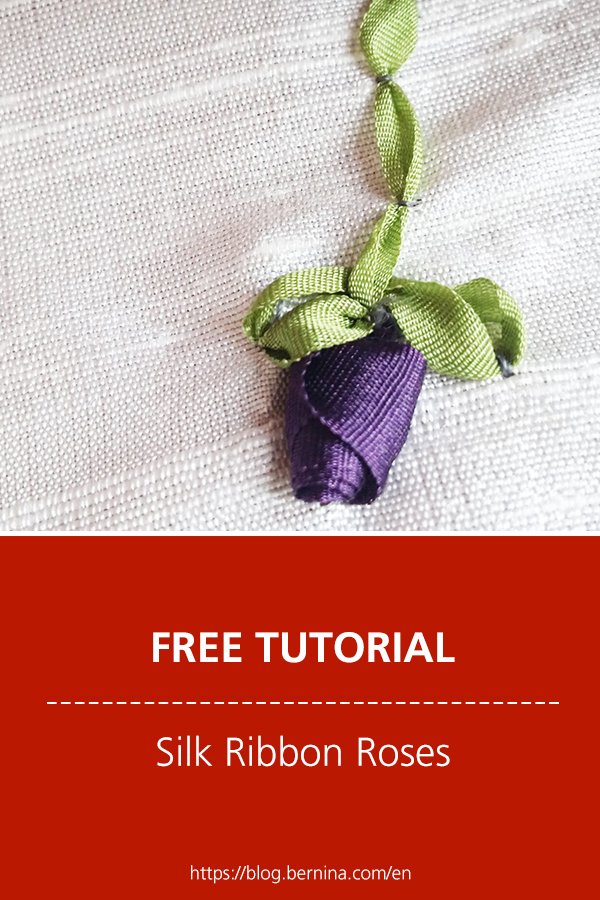
With a pair of pointy nosed tweezers you hold the end of the purple ribbon and using a very small stitch length you secure the end onto your fabric. Once secured with a few stitches you drop the needle through the fabric and keep it there. You then wrap the strand of ribbon around the needle to create the first part of the rosebud. Wrap it a few times. Now lift the needle and move the fabric the width of the ribbon away from your starting point. Make a stitch to secure the little roll, this way it lays flat on the fabric.

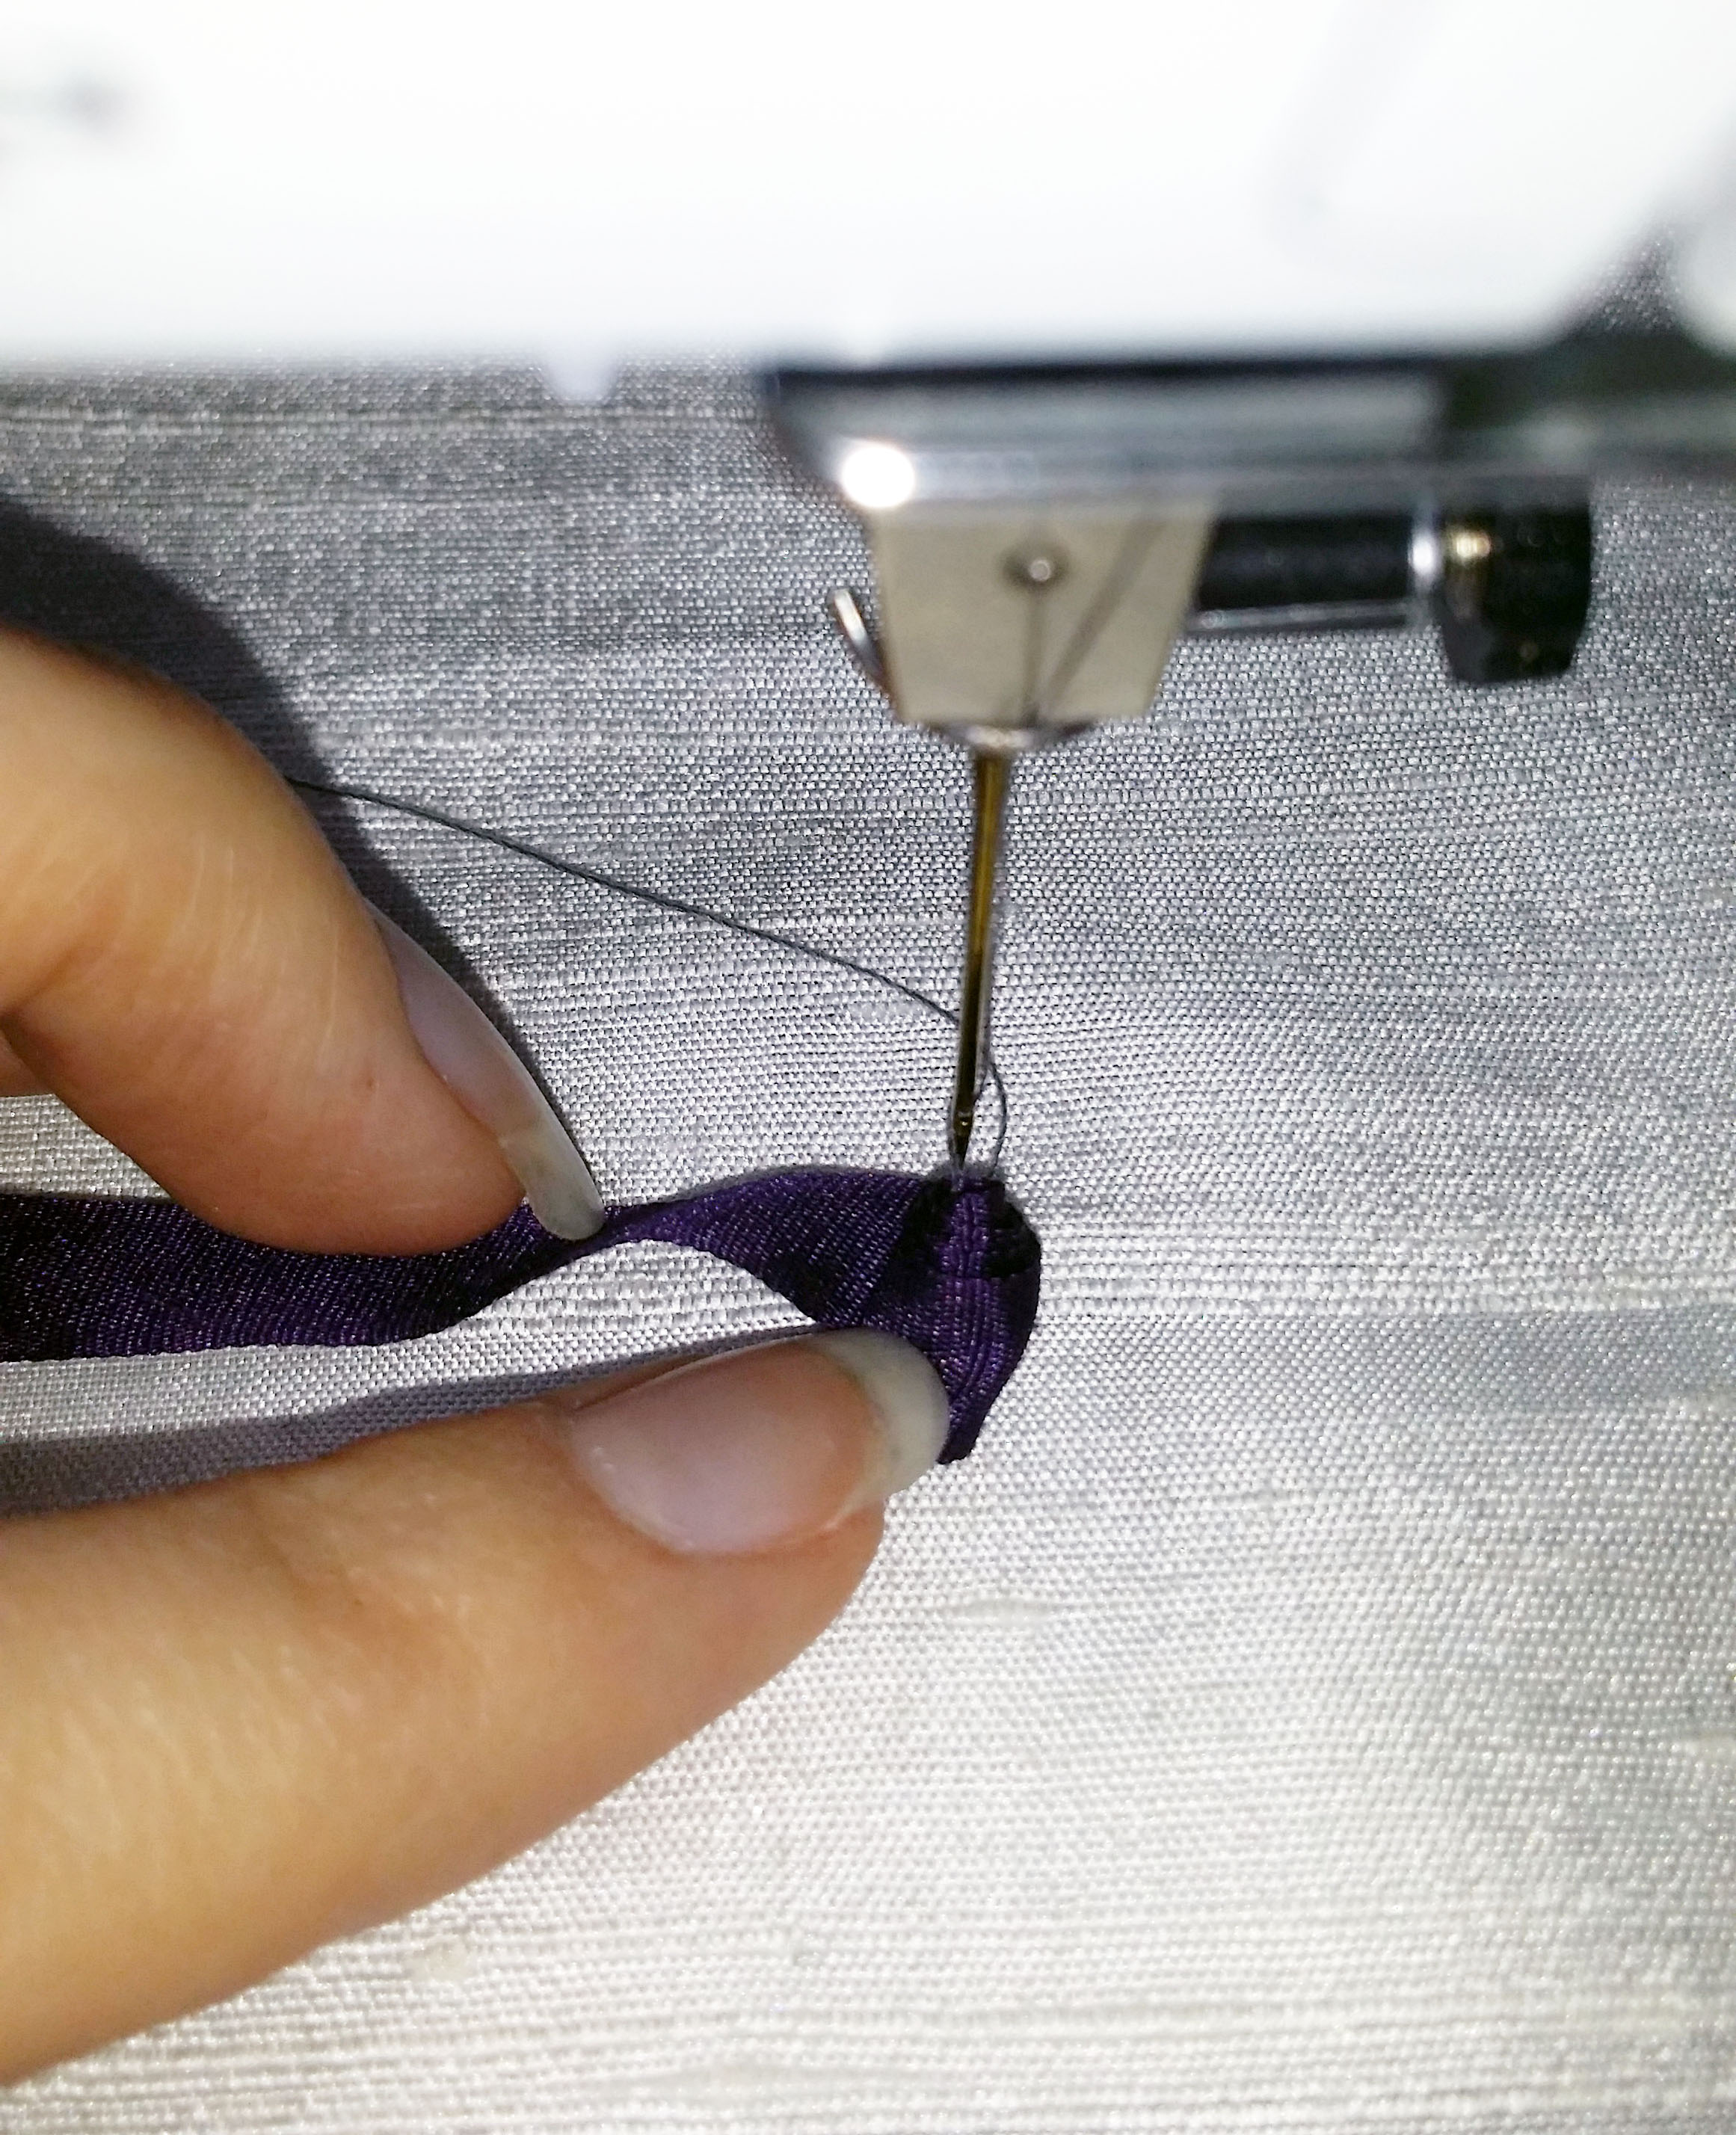
Now stitch in a reverse J shape around the little roll making sure you catch the bottom of the roll. Wrap the ribbon behind the needle and then to the left creating a S shape. Secure with a stitch.

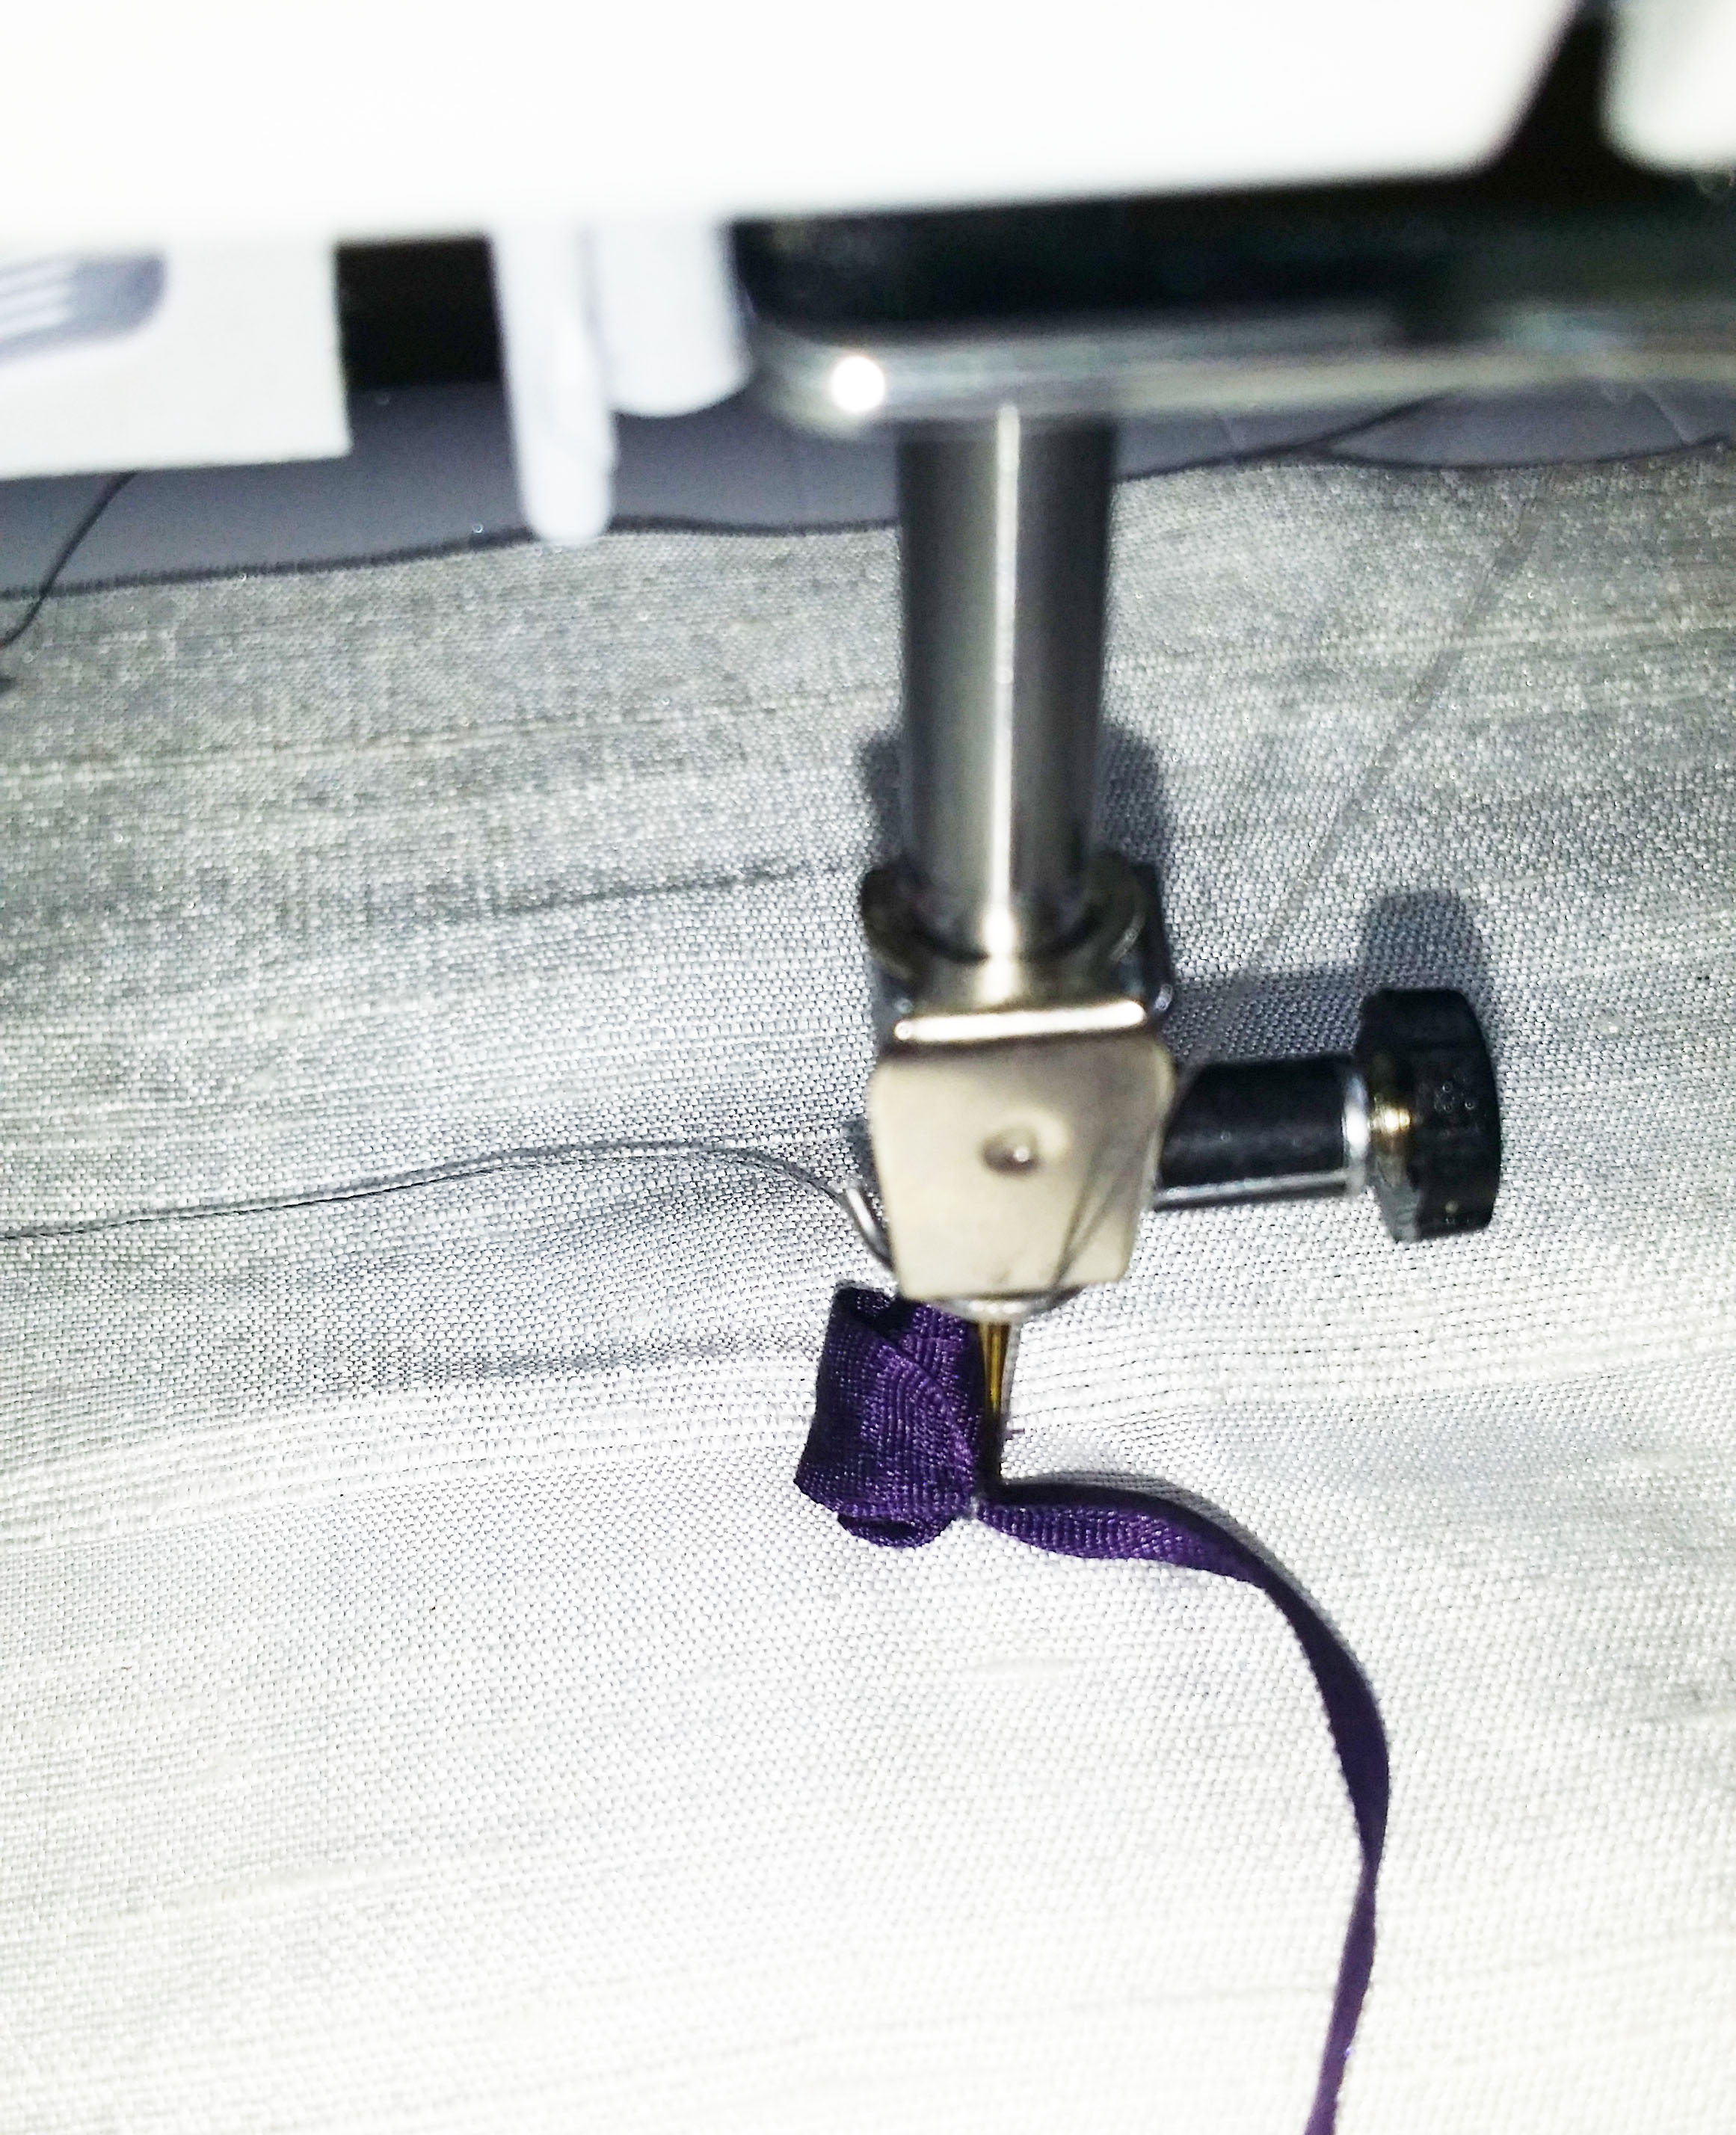
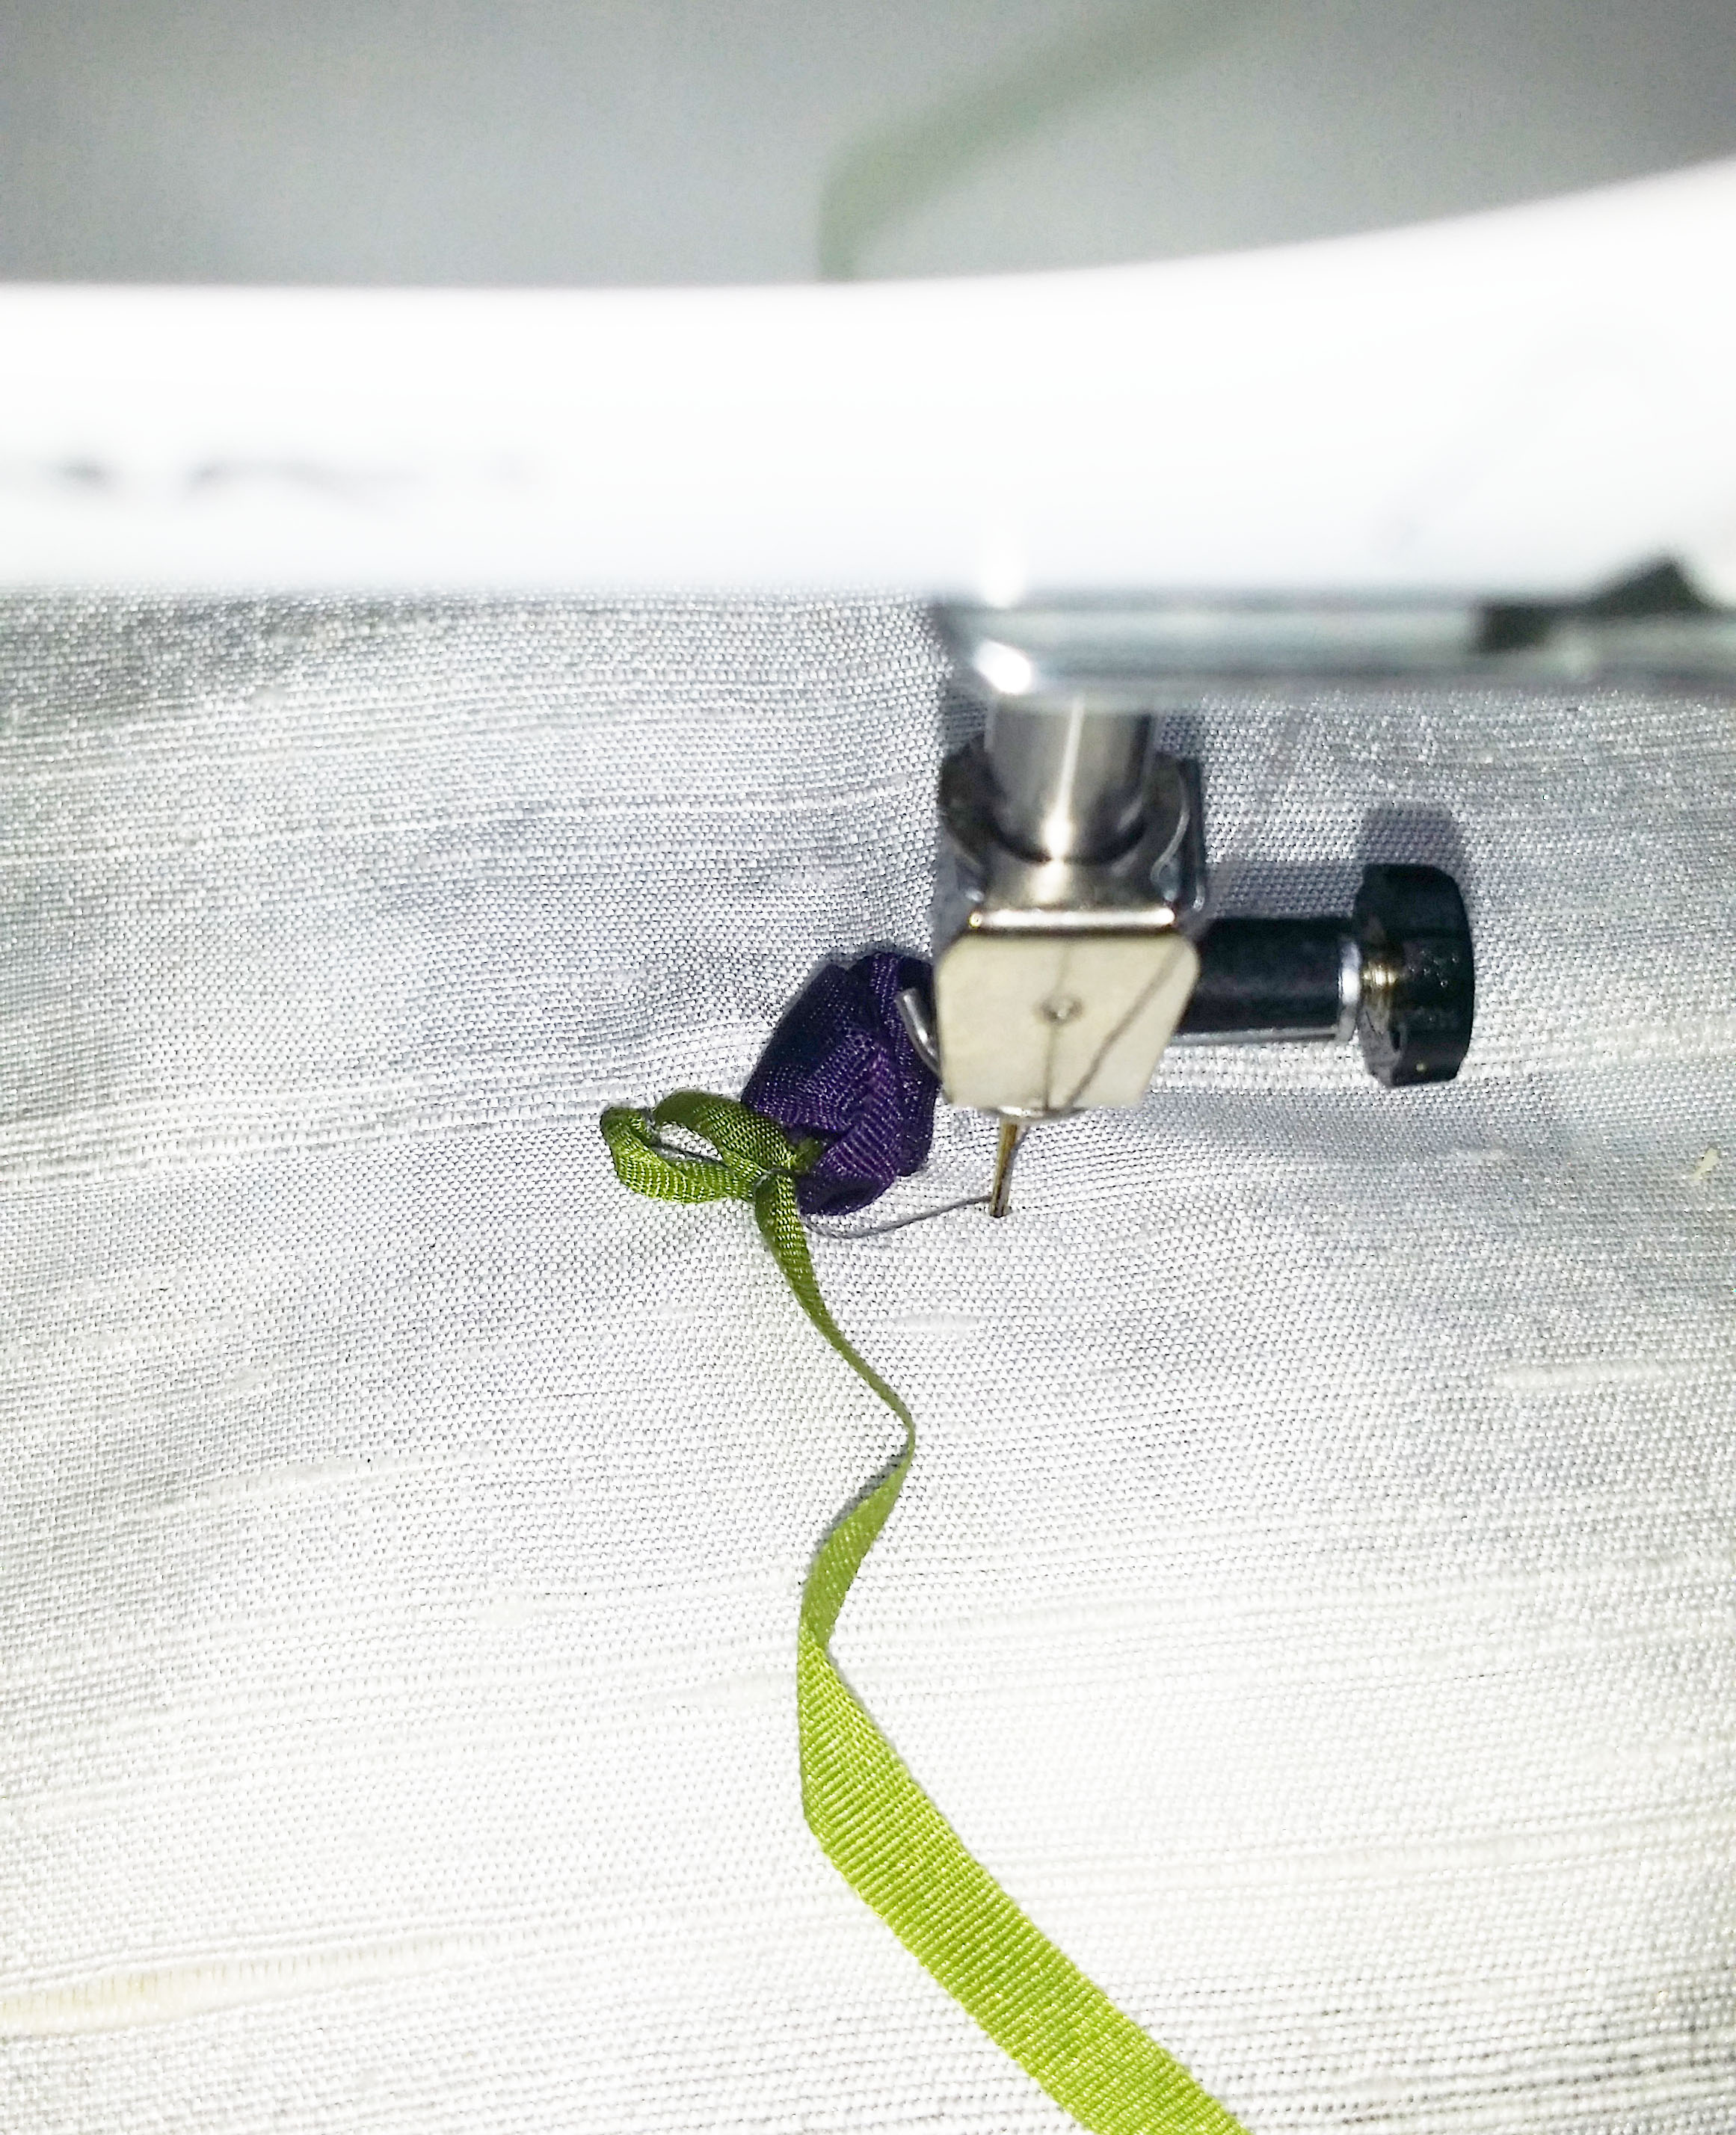
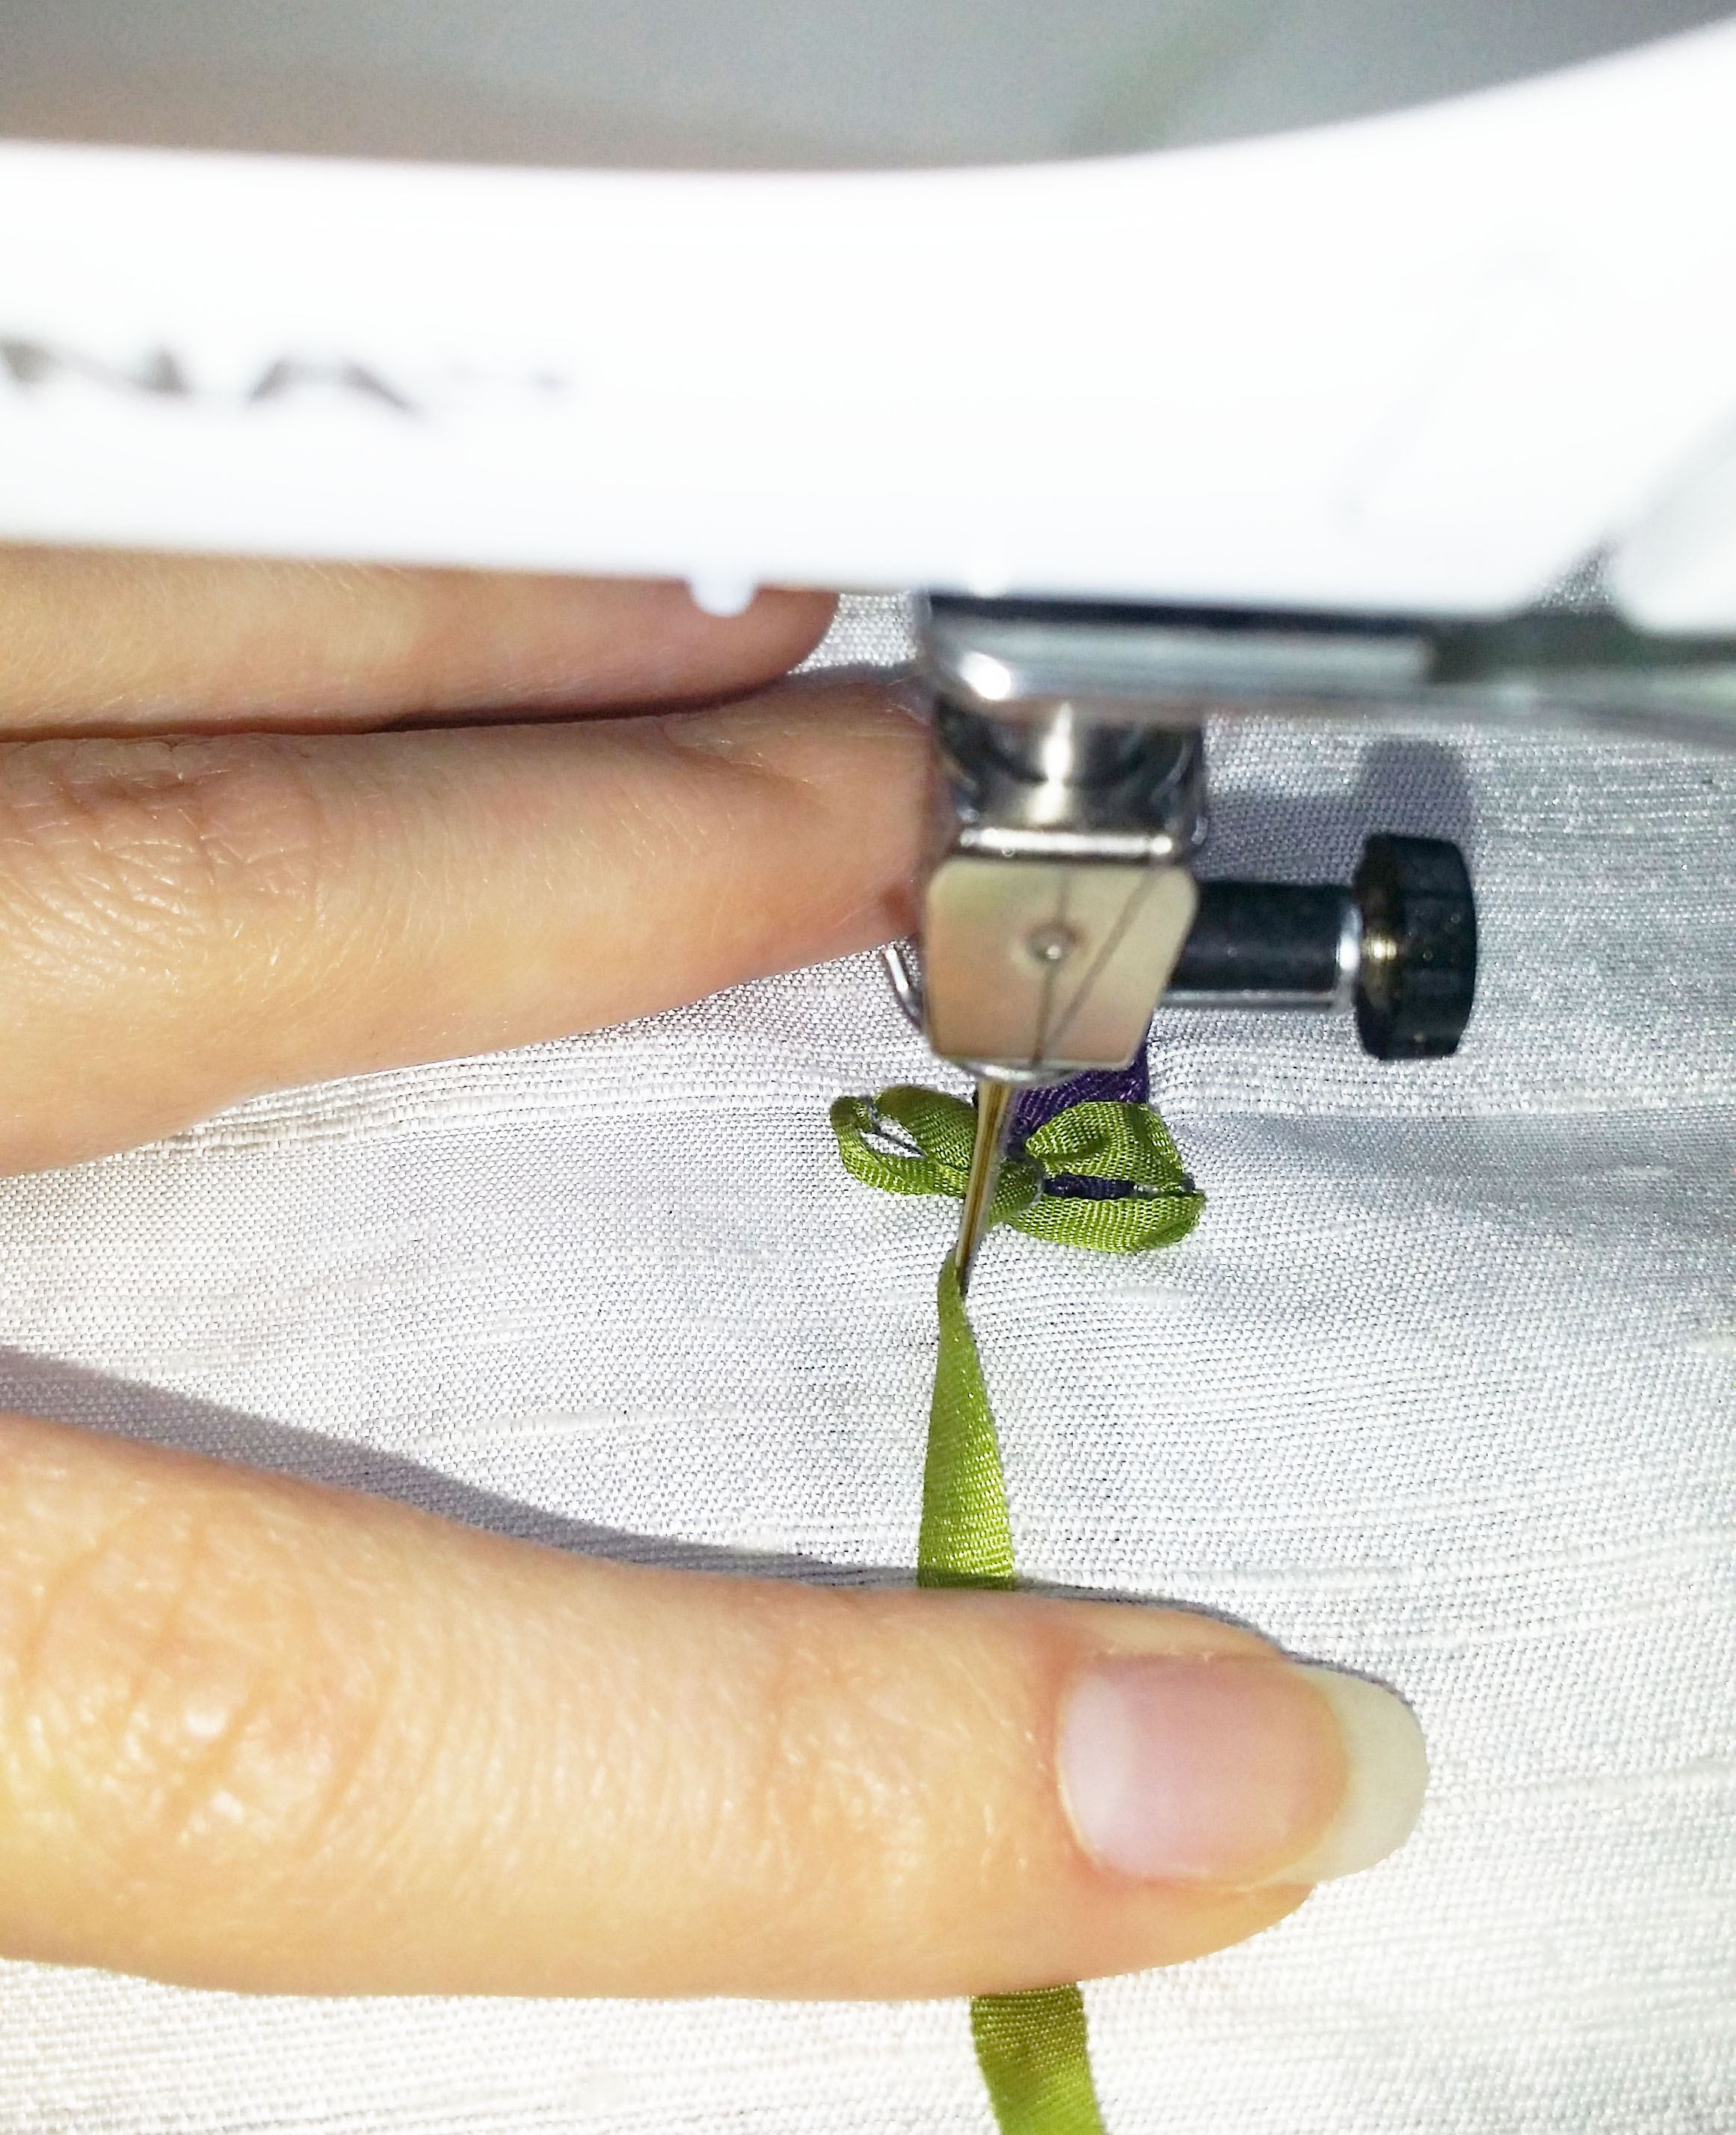
Move the fabric to the right and secure the end of the purple ribbon. Cut the purple ribbon off using small scissors. Using your tweezers grab the end of the green ribbon and stitch it in place where the purple one ended. Again move your fabric to the right so your needle ends up just under 1 cm to the left of the rosebud. Make a stitch.
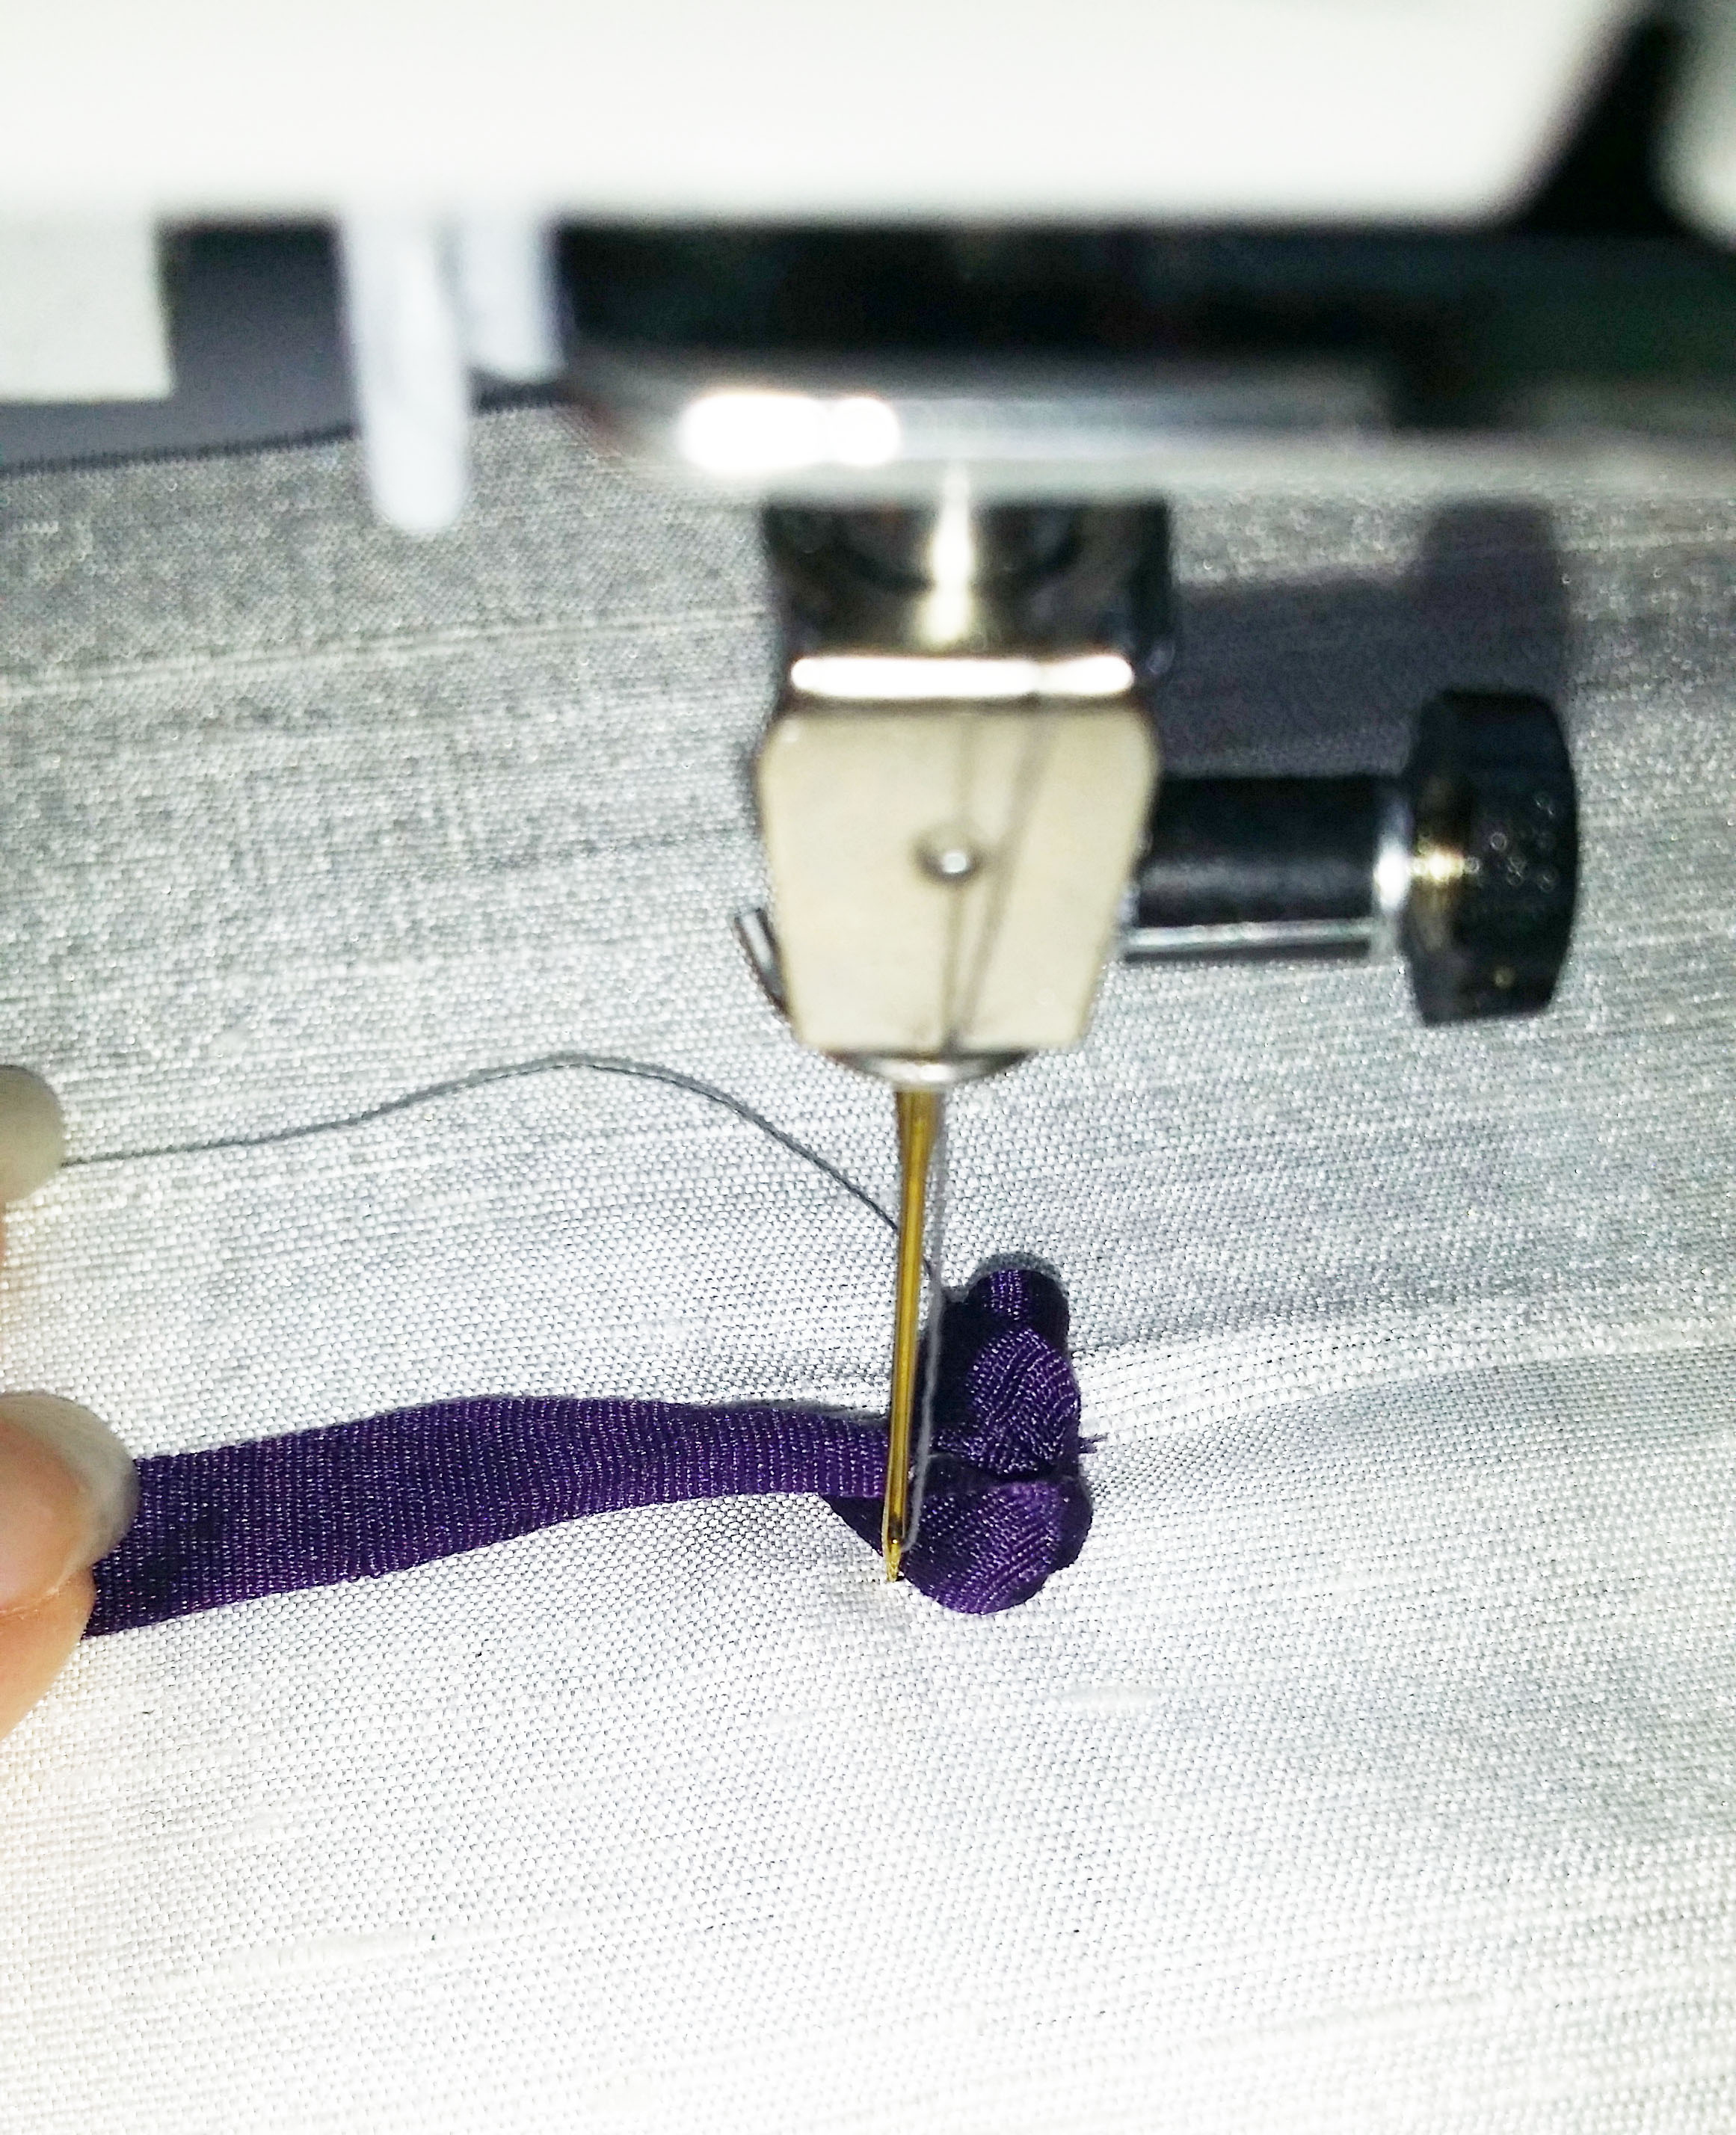
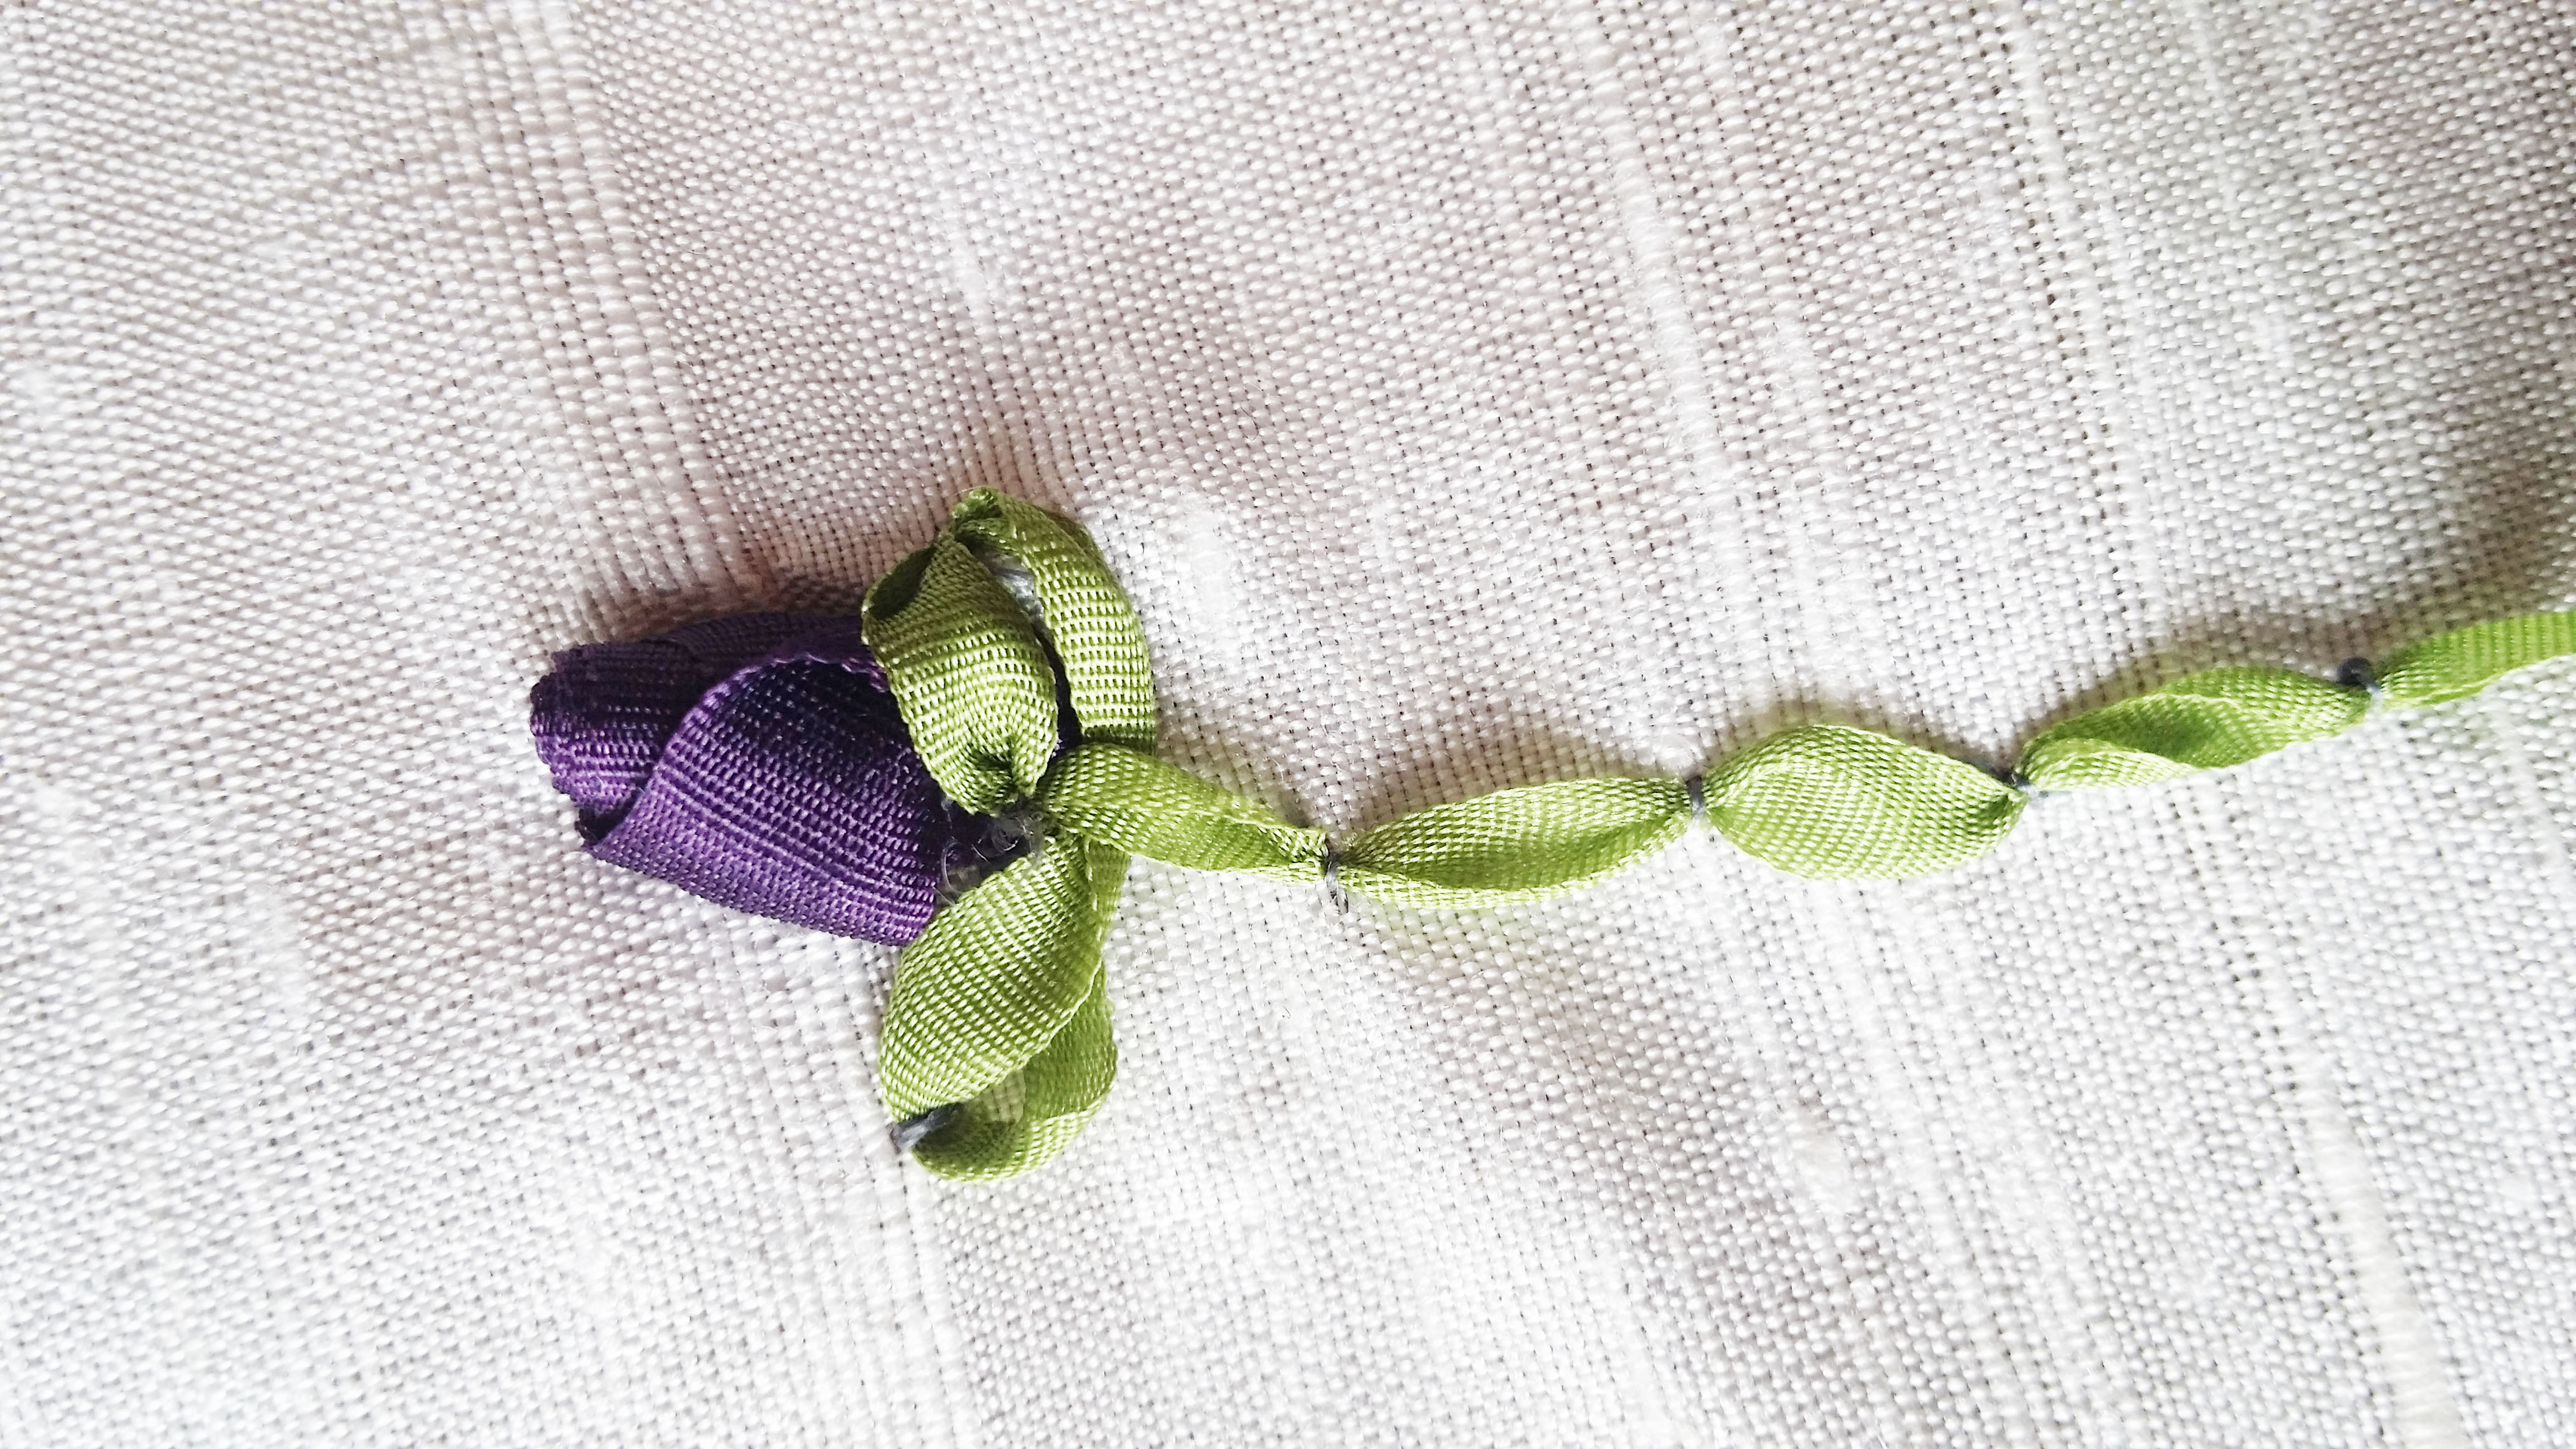
Wrap the green ribbon around the needle and stitch it in place. Move your fabric so you return to the starting point of the green ribbon and stitch it in place. You have now created a little leaf shape. Repeat this on the right hand side of the rosebud.
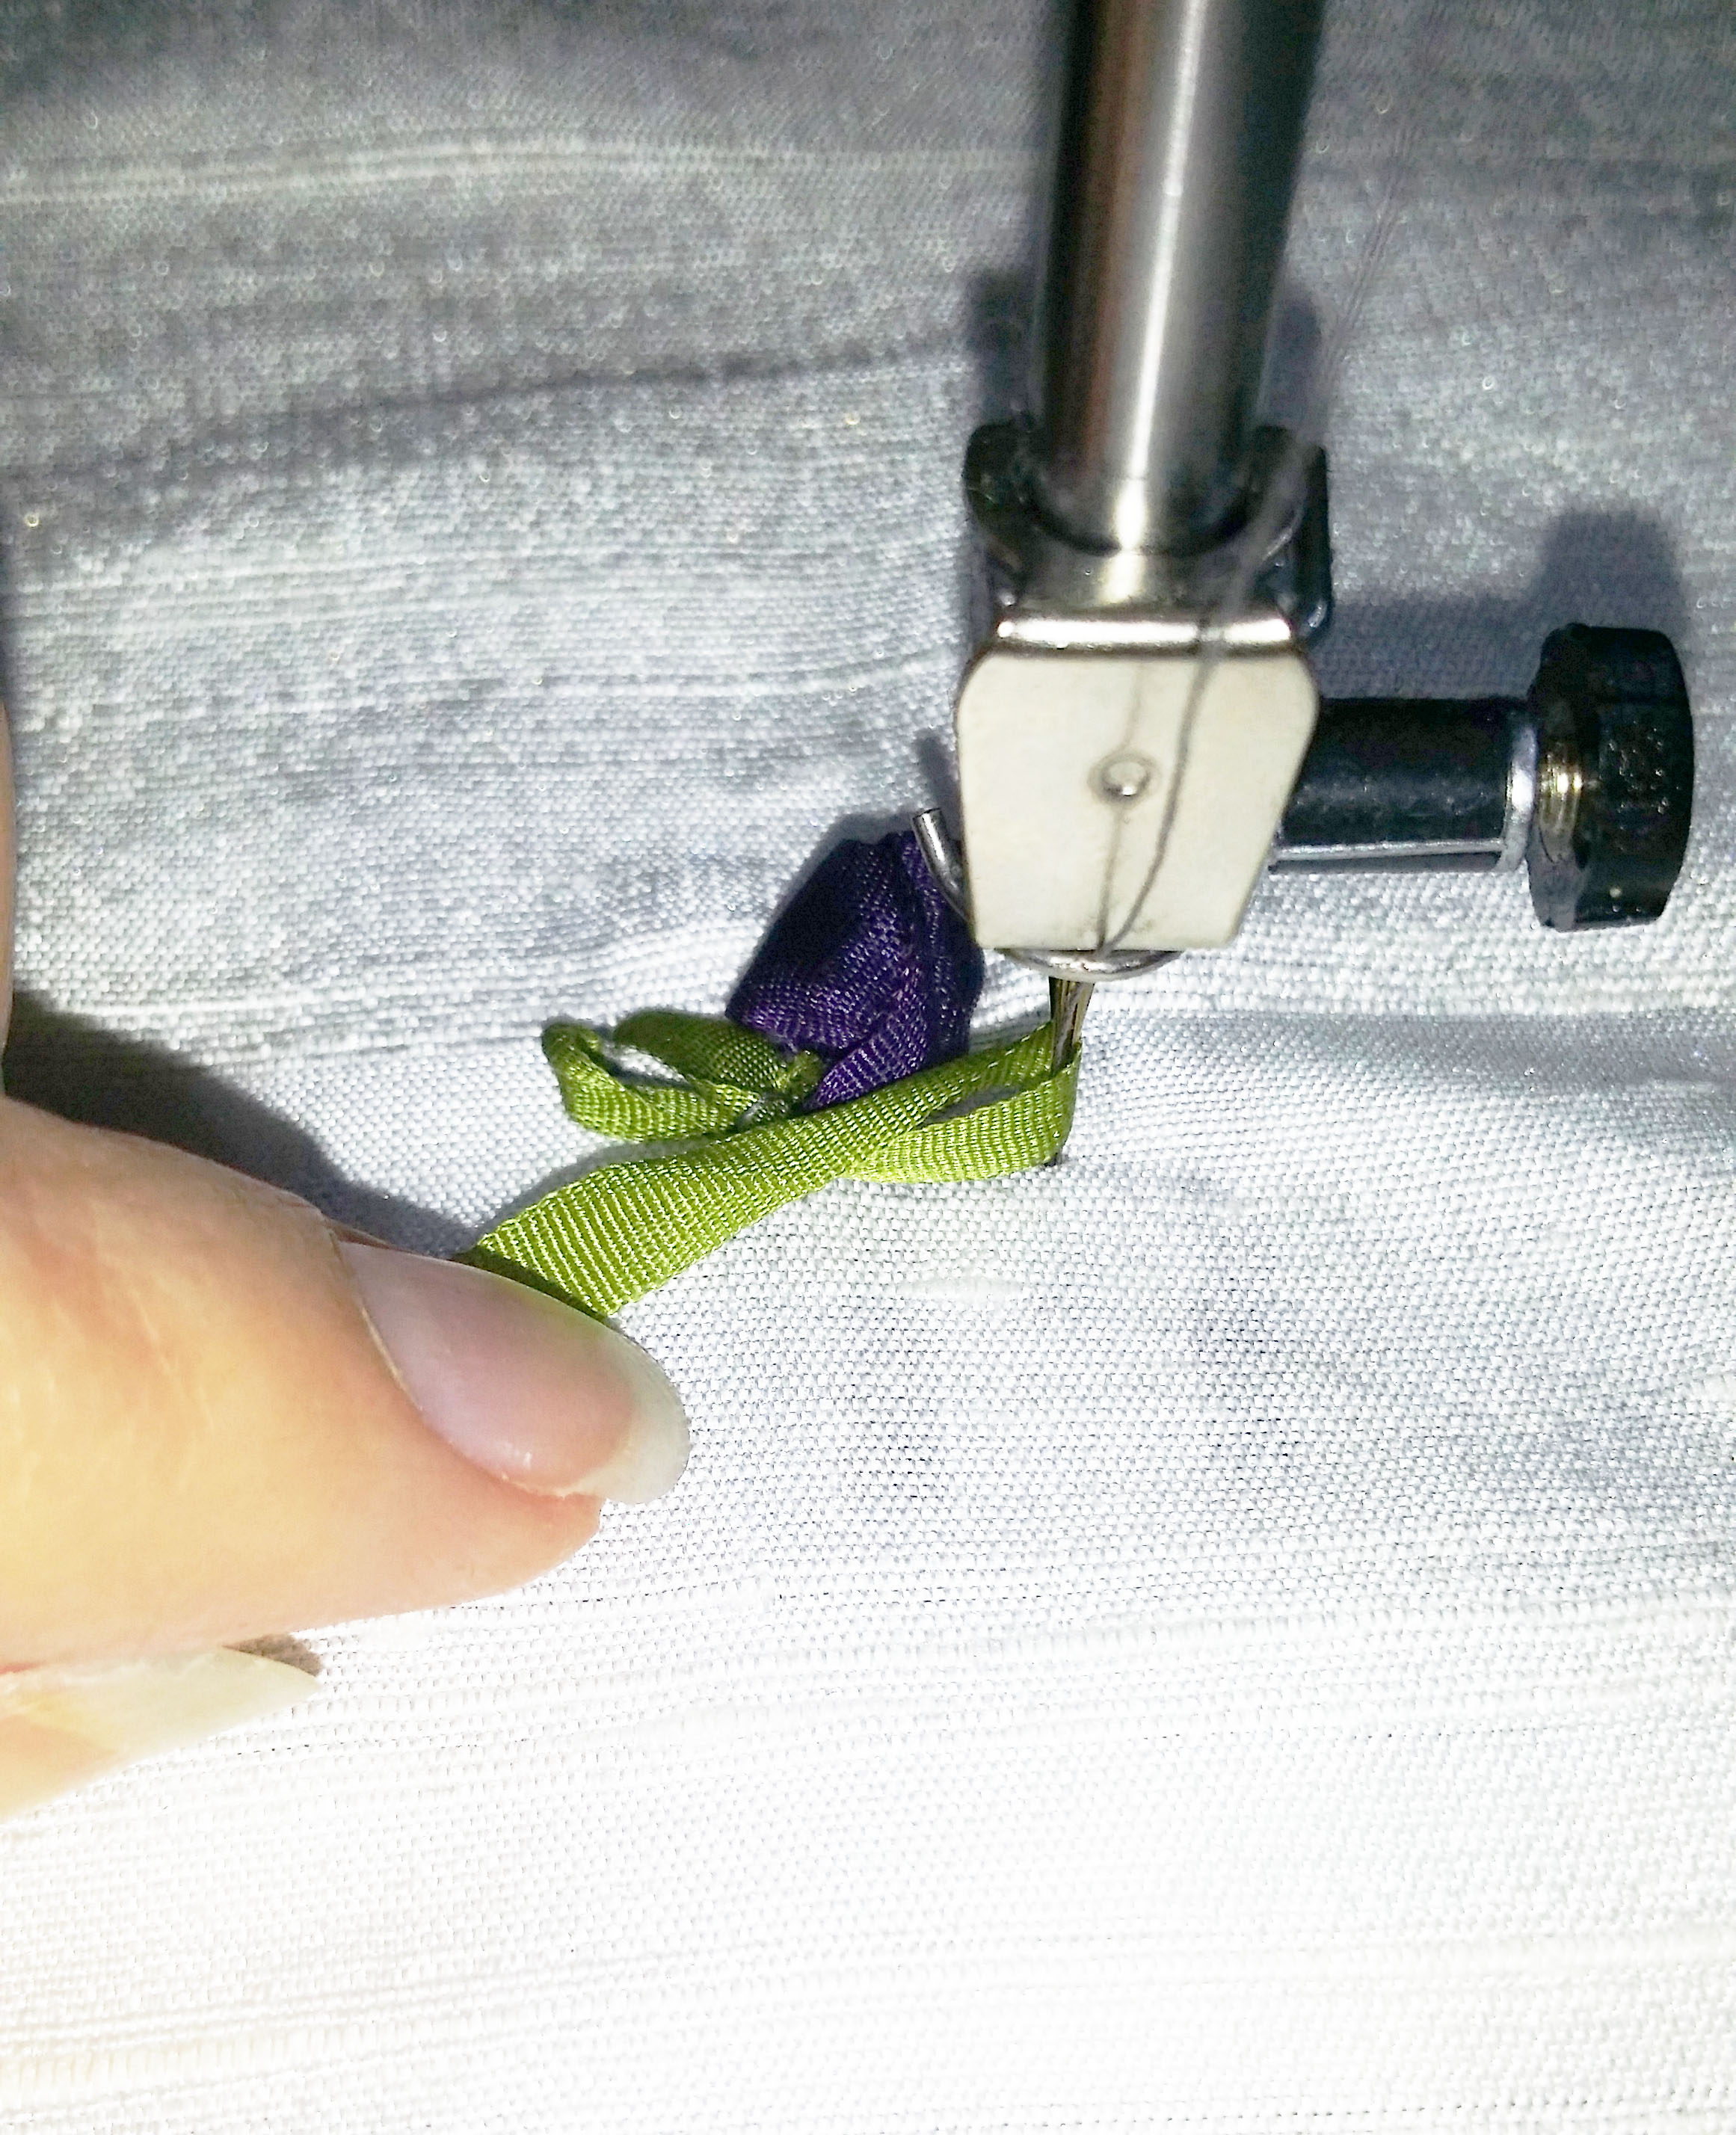
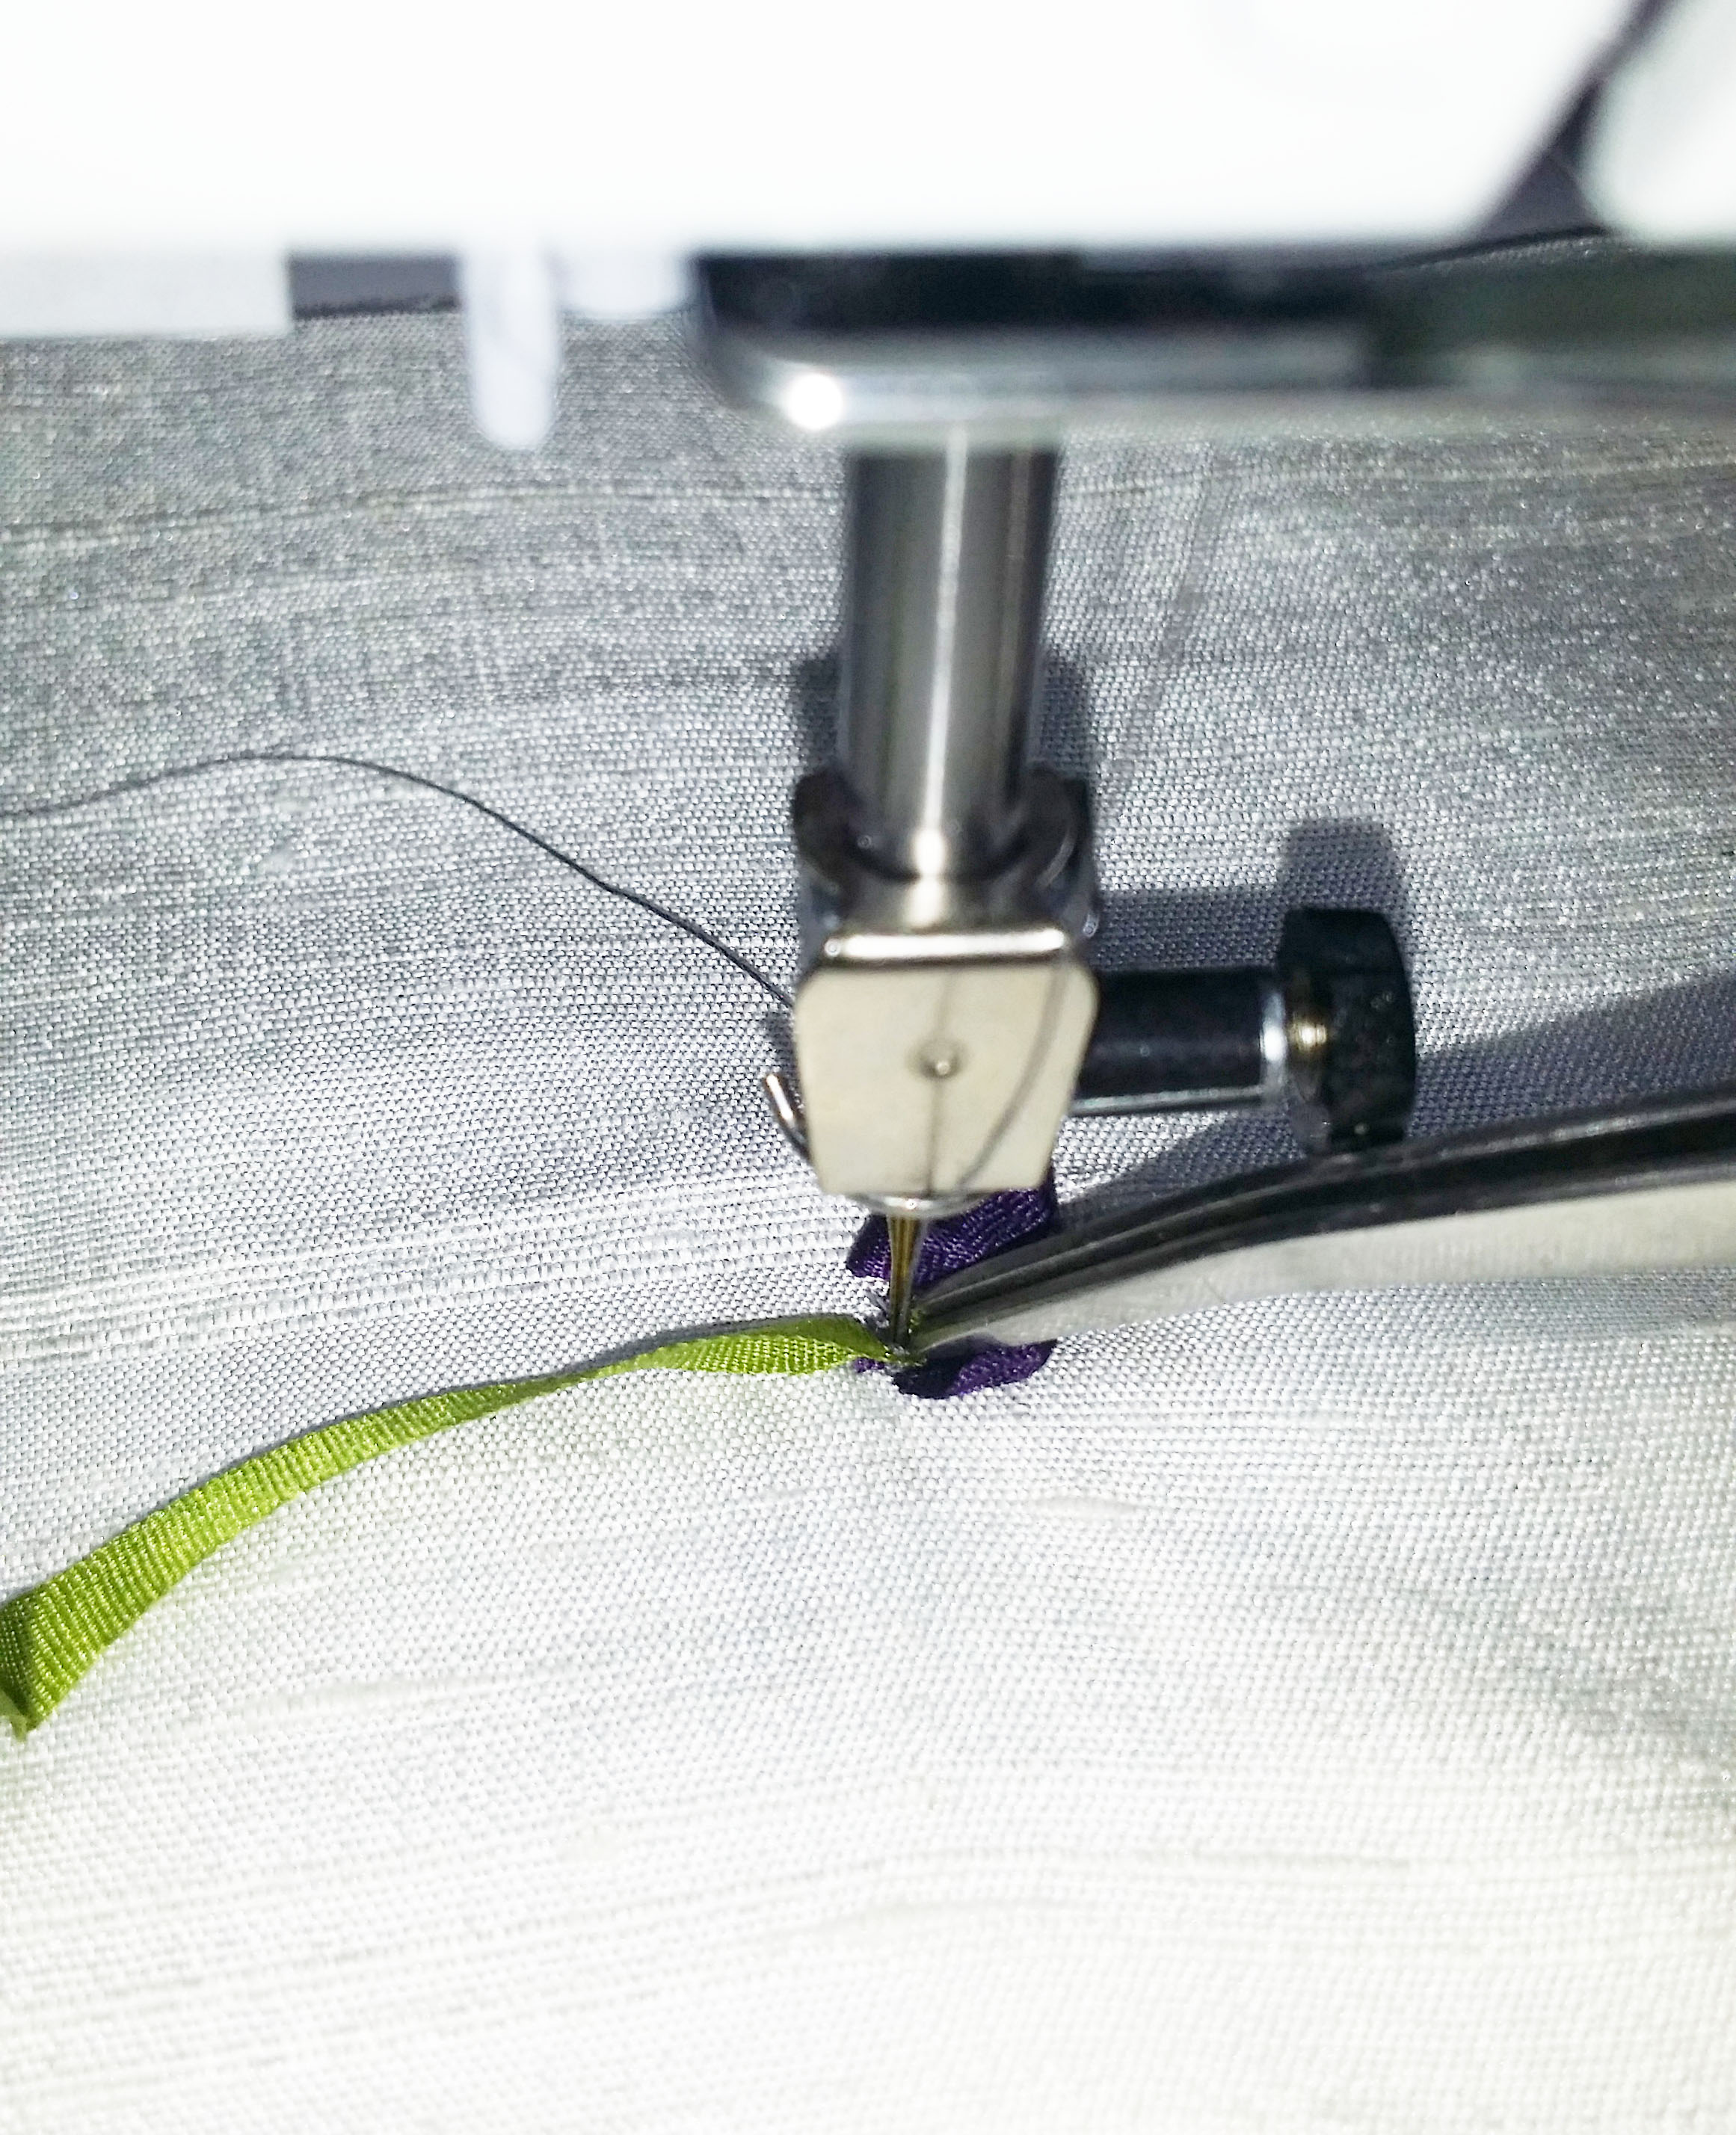
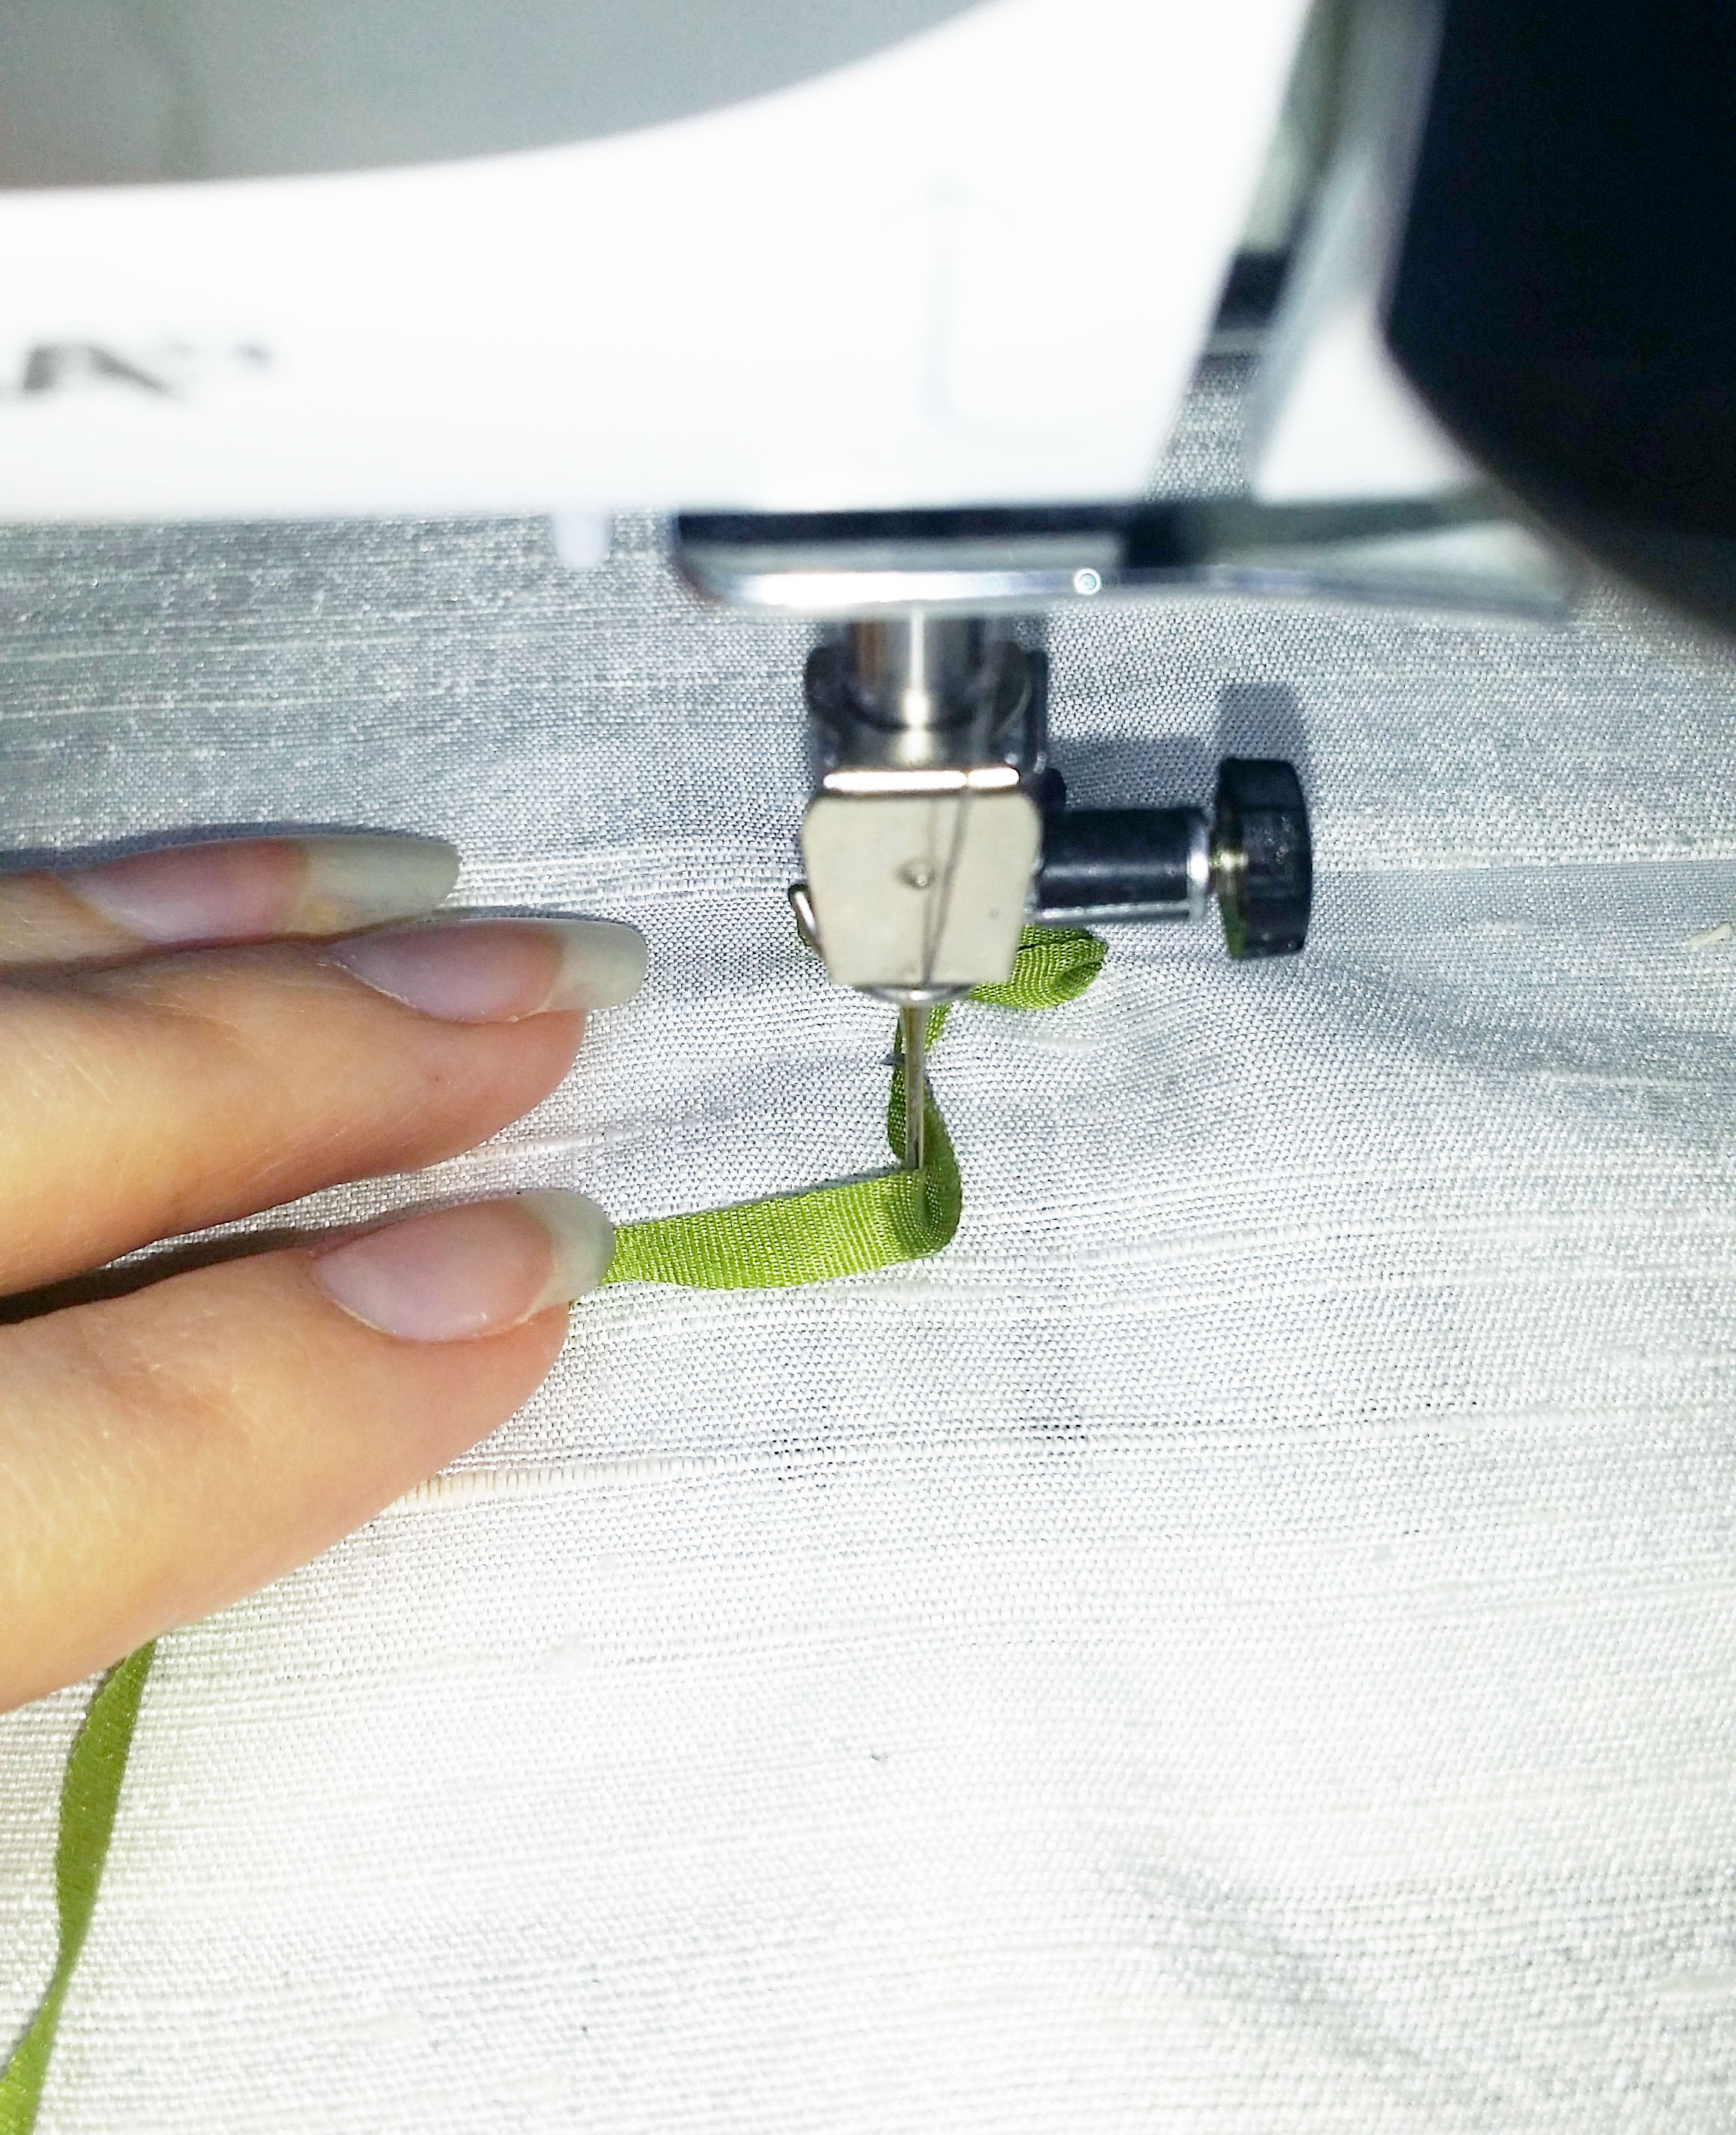
Stitch through the end of the bow shape to secure the leafs into place. Move the fabric just under 1 cm away from you so the needle ends up just under your project. Wrap the ribbon in front of the needle and alternating wrapping from left to right, each turn you secure with a stitch. This creates the stem of the flower. The stem can be straight but also curved or going into a spiral. The trick is to move slow and steady, using tiny stitches and twisting the wheel of the machine by hand if necessary.
You can add this embellishment to a corset but also to the collar of a jacket or blouse, on belt or other accessory. The possibilities are endless! I hope you enjoyed this tutorial and I would love to see your silk ribbon embroidery projects!
Follow my projects on Facebook and Instagram.
For made to measure corsets and made to measure courses in corsetry check my website http://www.bespoke-corsetry.com/


Are your feed dogs up or down for this project? TIA Margaret
Dear Margaret,
Since this article is from 2016, I guess the author does not check comments anymore. I would suggest to leave your feed dog down for this, since you move the ribbon from let to right as well or want to sew at the same point. Without a presser foot, there is nothing to press down on the feed dog anyway, so it will mostly be inneffective.