 BERNINA Corporate Blog -
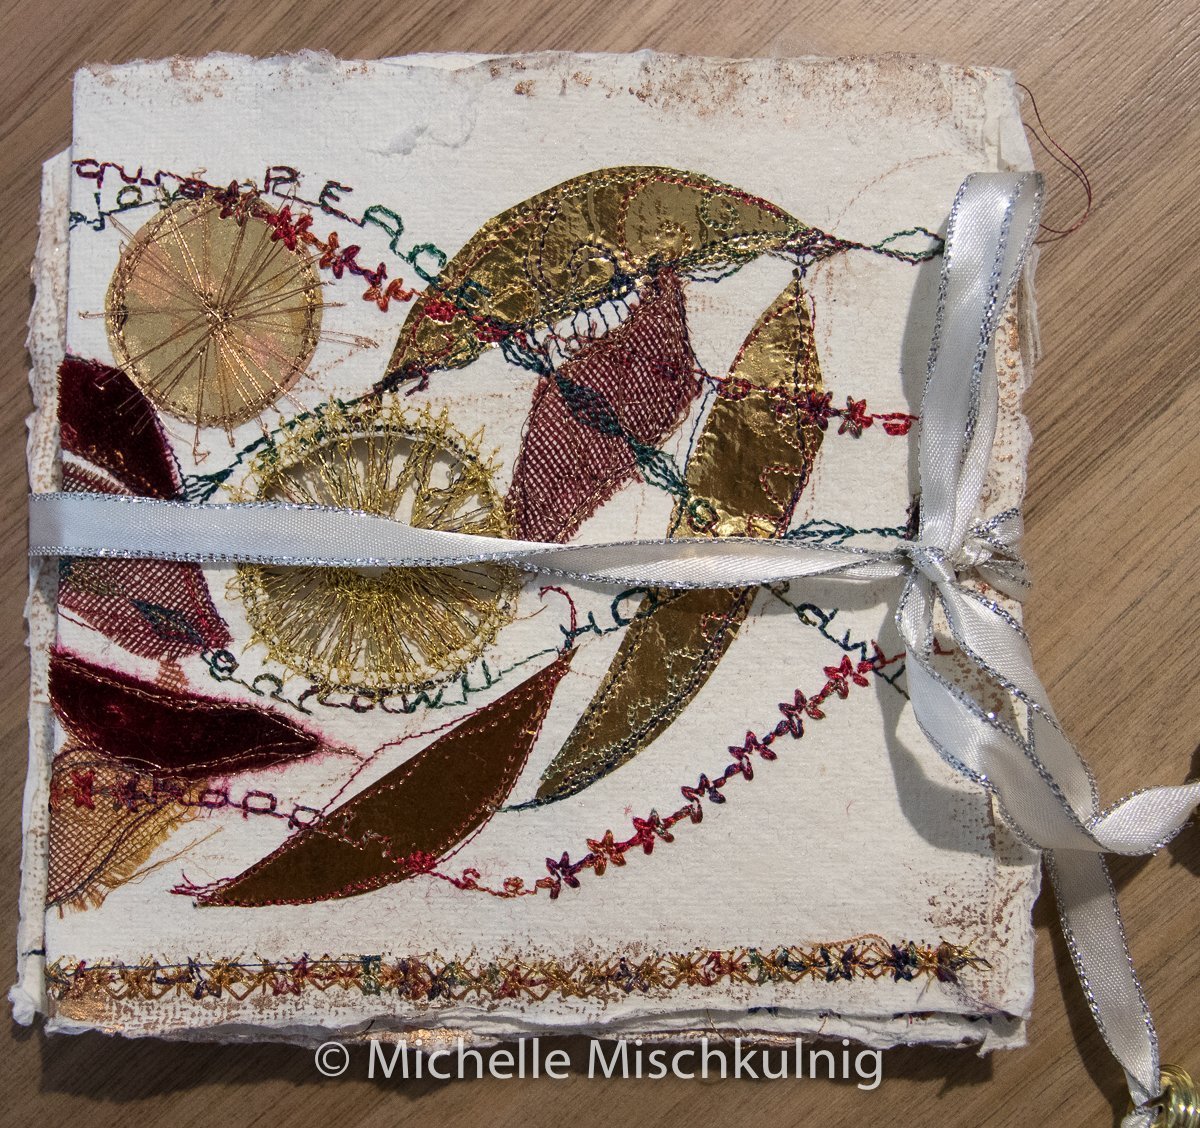
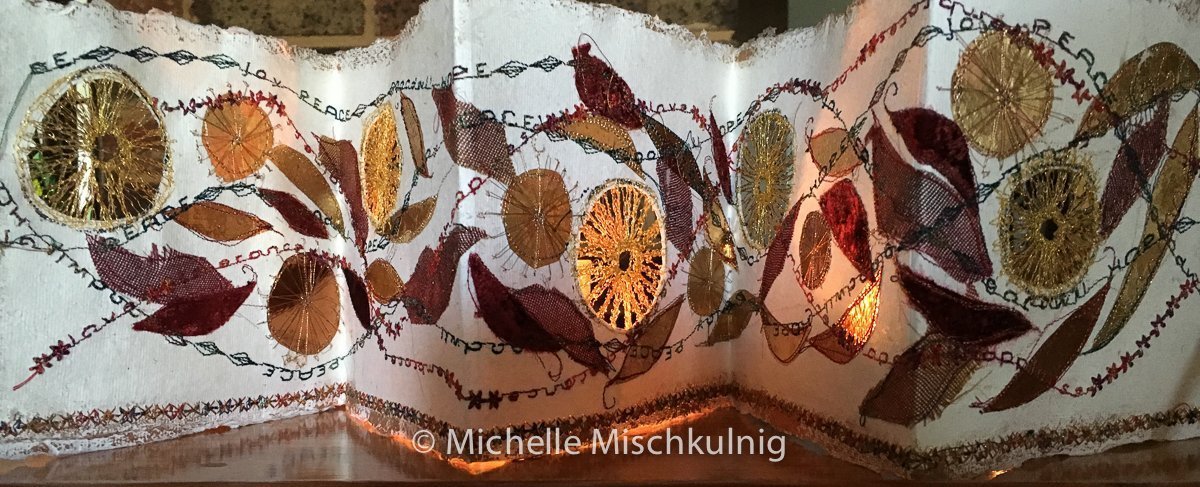
Give a beautiful hand made gift, a card that becomes a back lit feature stitched by you and given from the heart.
Materials
Khadi zig zag book 15cm sq or similar x 2 ( you can google these or find here http://thethreadstudio.com/catalogue/exp/papers.htm or make your self out of 210 g paper).Khadi zig zag book is paper made form cotton rag and it is moulded into a zig zag form
Fusible web
Metallic foil small amount
Luxury feel fabrics small amounts ( scraps ) I used hand dyed velvet and silk mesh because I liked their texture and lustre on the paper.
Metallic embroidery threads.
Rayon metallic threads.
Satin ribbon to match for tie.
Little bells or other for card tie.
Sticky sided water soluble fabric.
Pen/pencil marker.
Sewing machine free motion ready.
Closed toe sewing machine foot.
Computerised lettering program on your sewing machine or free motion stitch words.
Battery operated tee lights.
Iron.
Baking paper.
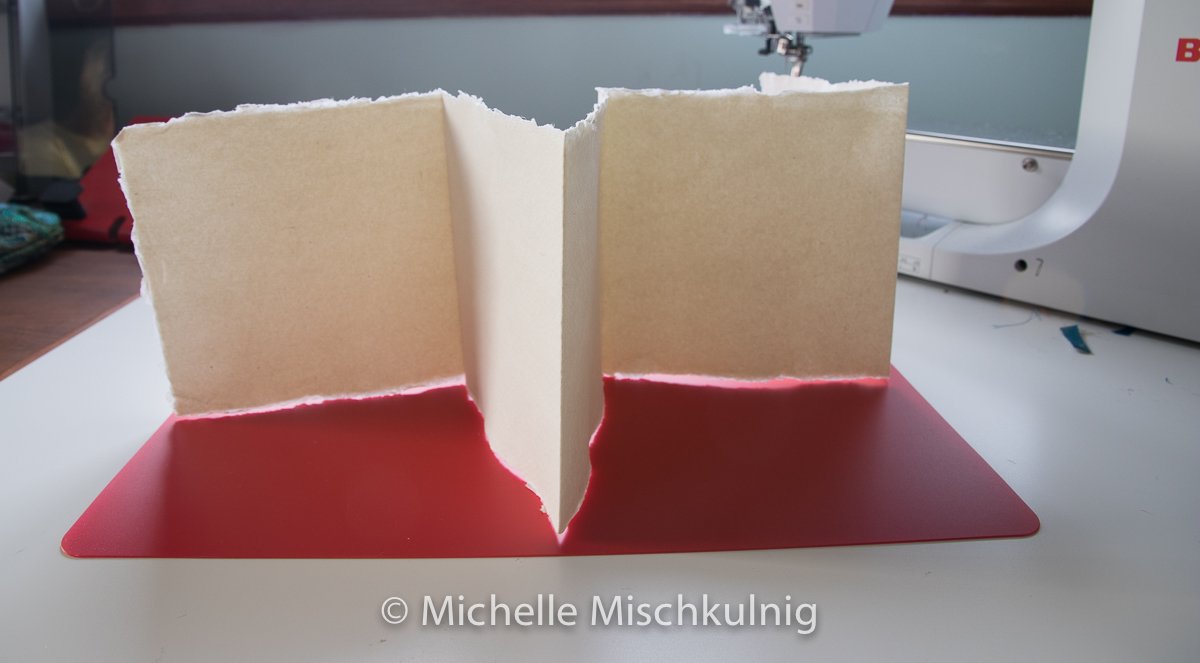
I have used 2 sheets of Khadi cotton rag zig zag book 15cm sq. Khadi is a beautiful
white rag paper and comes in packs of five folded zig zag cards in 210gsm, made from 100% long fibred cotton rag. Internally sized with neutral pH size and are acid free.This paper is wonderful to stitch and holds its shape and body.
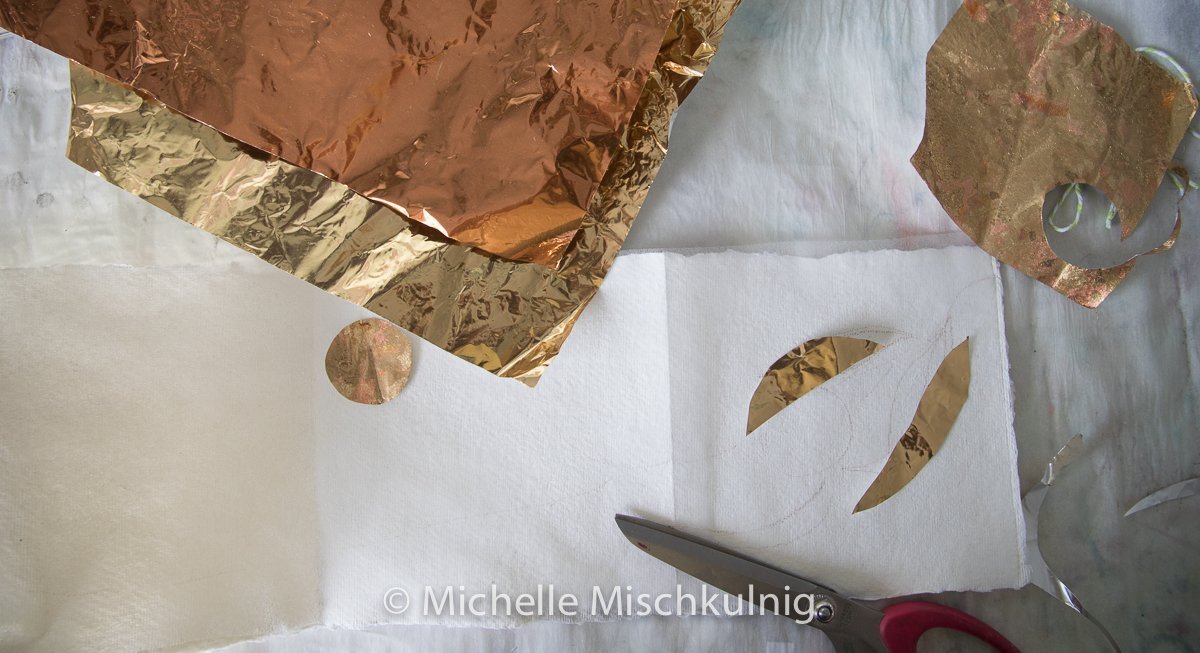
Cut the fusible web to the same size as your zig zag card and peel the backing off the web.
Lay your peeled layer of fusible web on top the zig zag card and then lay out your cut and shaped foils and fabrics .I have used hand dyed silk mesh and velvet for their texture and lustre to contrast against the zig zag card.I am sure you will have some treasured bibs and bobs of luxurious fabric that you can use.
When it is all layed out, carefully place a piece baking paper to cover the entire design and zig zag card, fuse using a dry hot iron.The baking paper protects your iron and surface of art work.
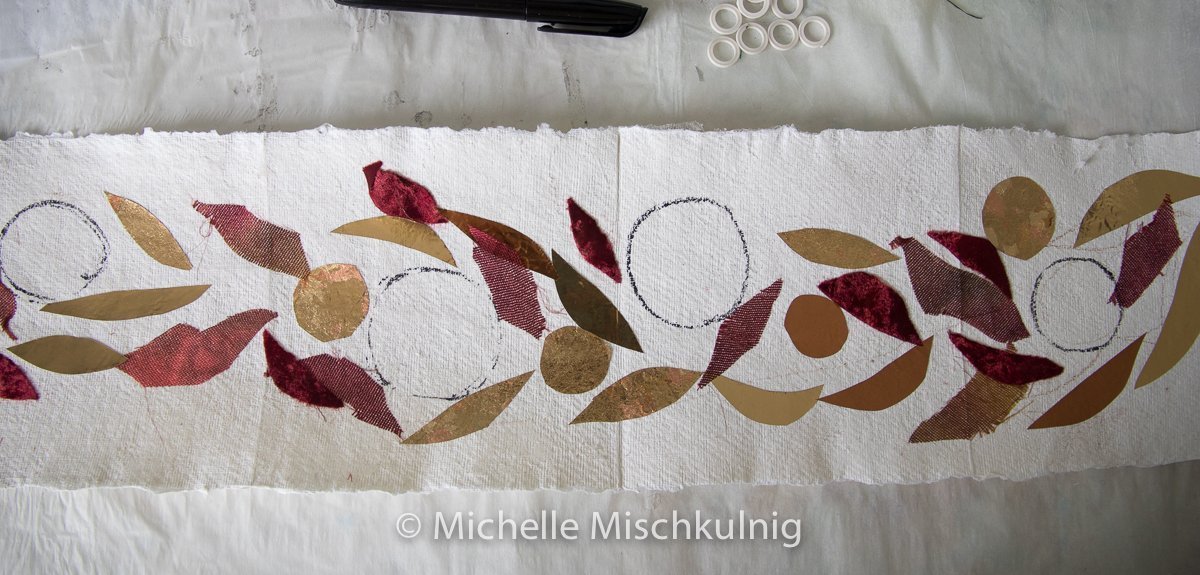
After fusing randomly mark circles which you will cut out in a later step.
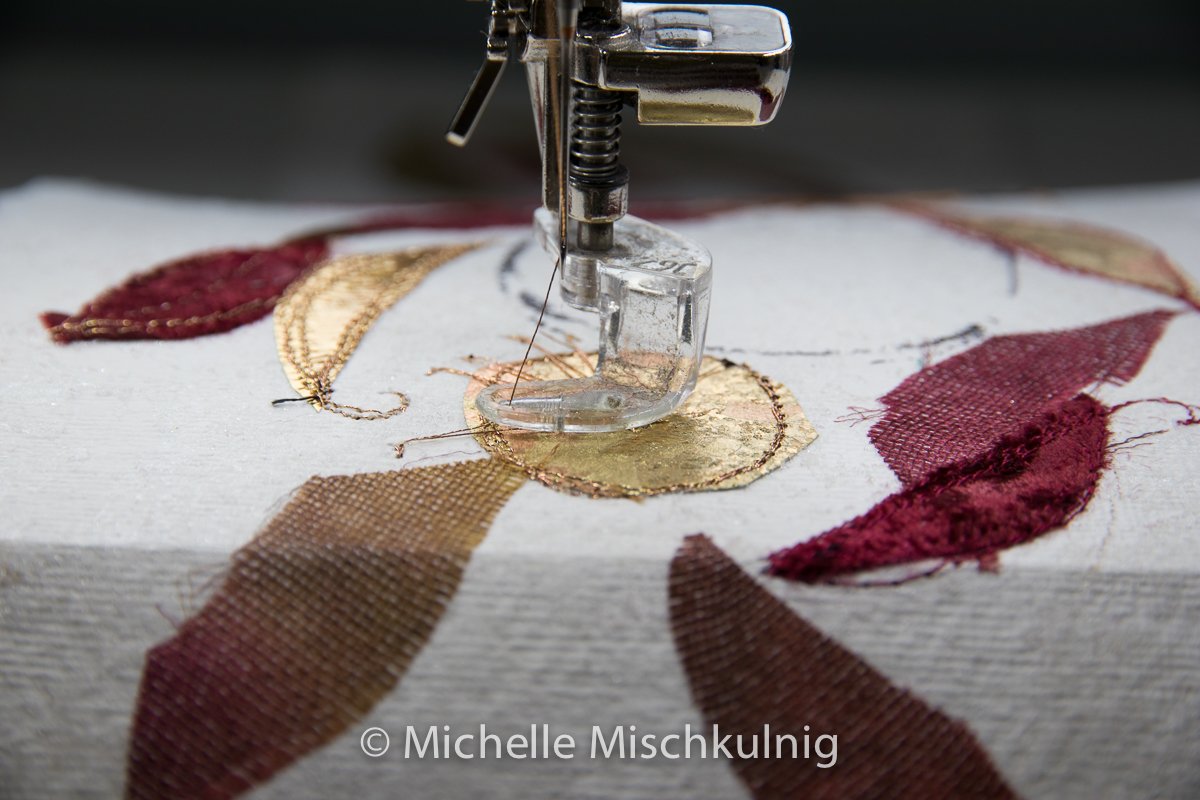
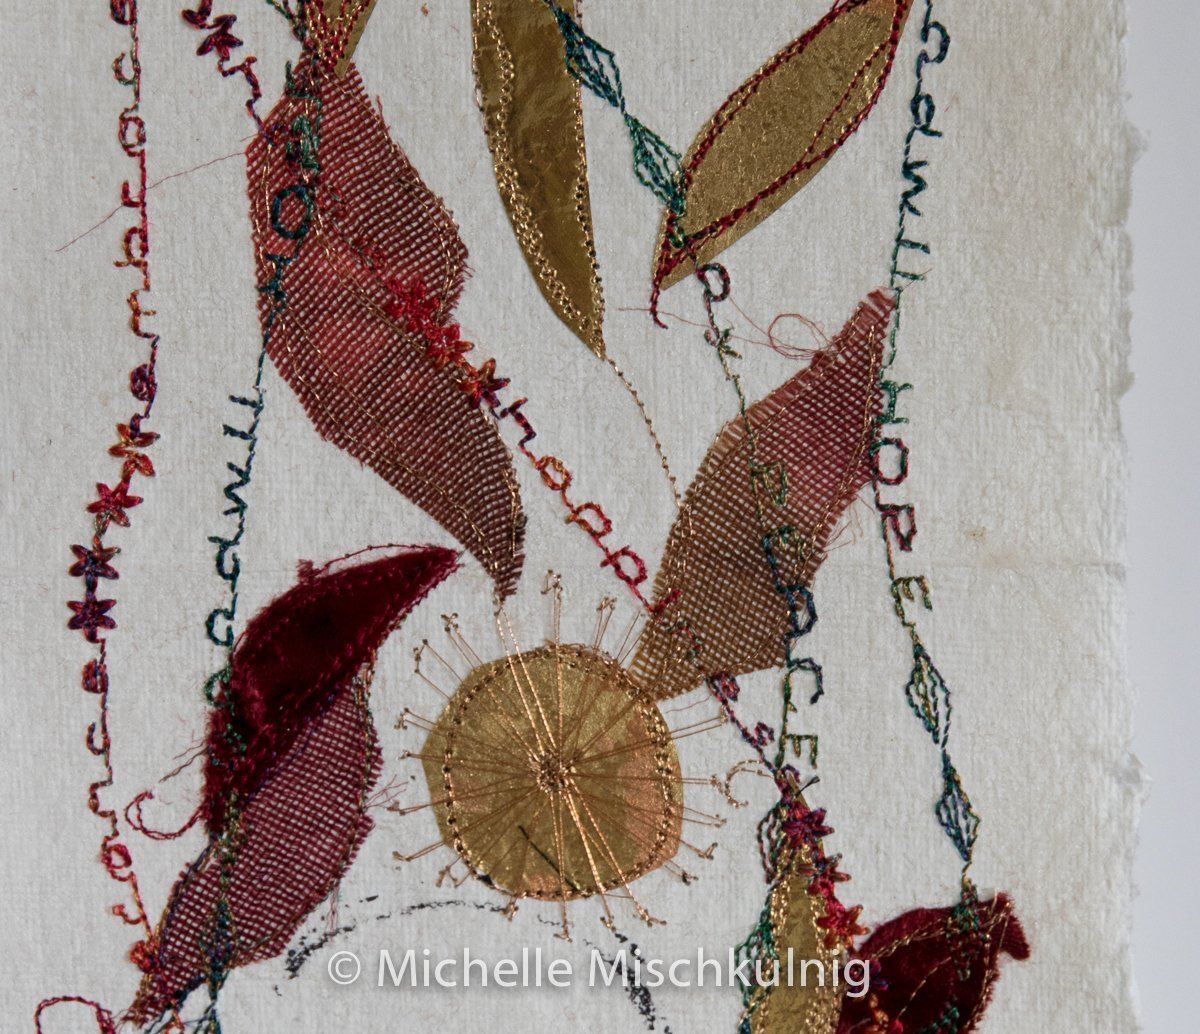
Set your machine up for free motion stitching and use a top stitch 70-80 needle use metallic threads and other matching embroidery threads to stitch around the edge and decoratively on your fused shapes .
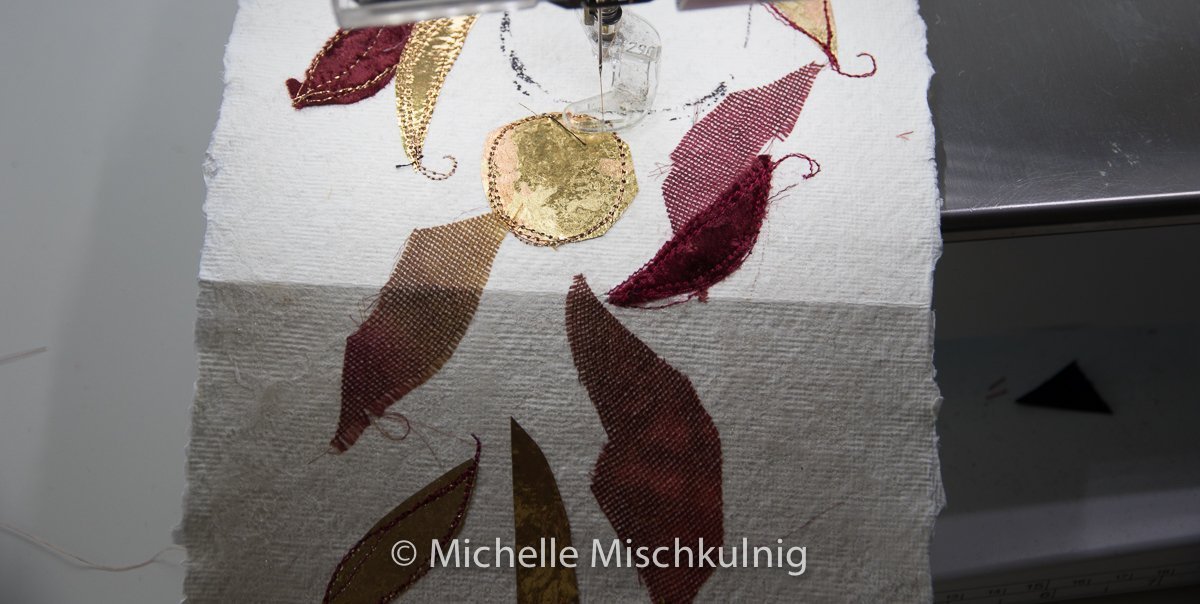
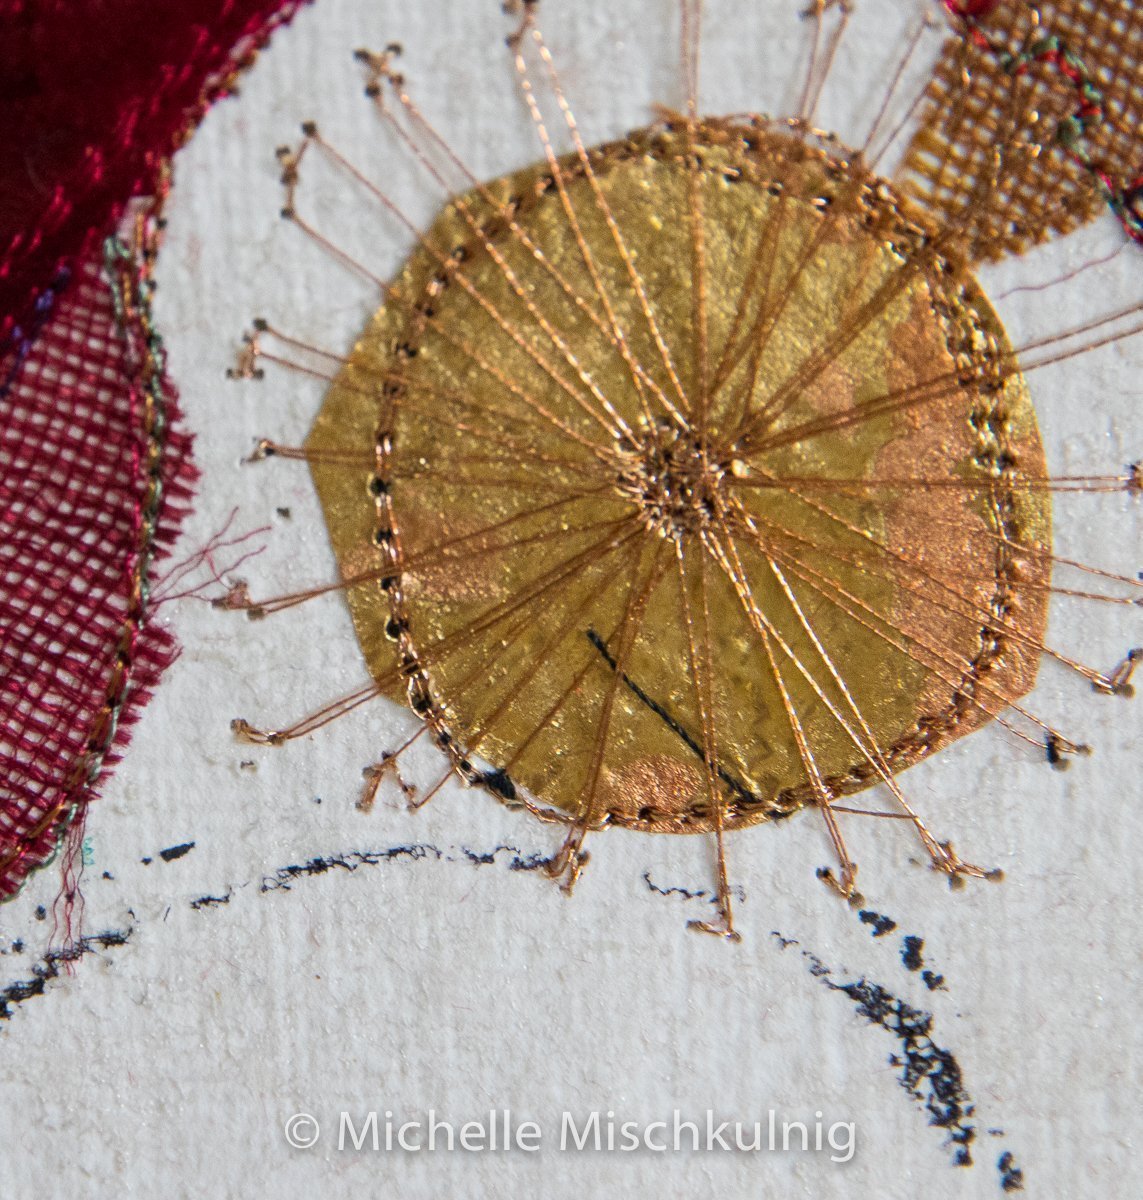
I use a “drag stitch” to enhance the circular shapes. To do this I do a couple of stitches close together on the outer edge of the circle and then carefully drag the thread to the middle of the circle where I secure with another couple of stitches and then drag back to the out side of the circle. Continue this until the circle is filled.
When you have completed your free motion stitching to enhance your shapes on the zig zag card, set your machine up for computerised lettering. My machine is a Bernina 720 and I found this youtube link best way for me to learn how to join letters and words https://www.youtube.com/watch?v=5YLy4u-xEQ0. I chose words that were relevant to me and what Christmas means, joy, peace, love, tolerance, happiness etc and I have joined them with some embroidery stitches .I have used a double thread through the one needle for the lettering. A variegated rayon combine with a plain rayon.This helps the lettering to stand out against the back ground design.
When you have completed your lettering glue the second piece of of zig zag paper to the back of the stitched piece matching the folds and then cut out your previously marked circles form the double layer.
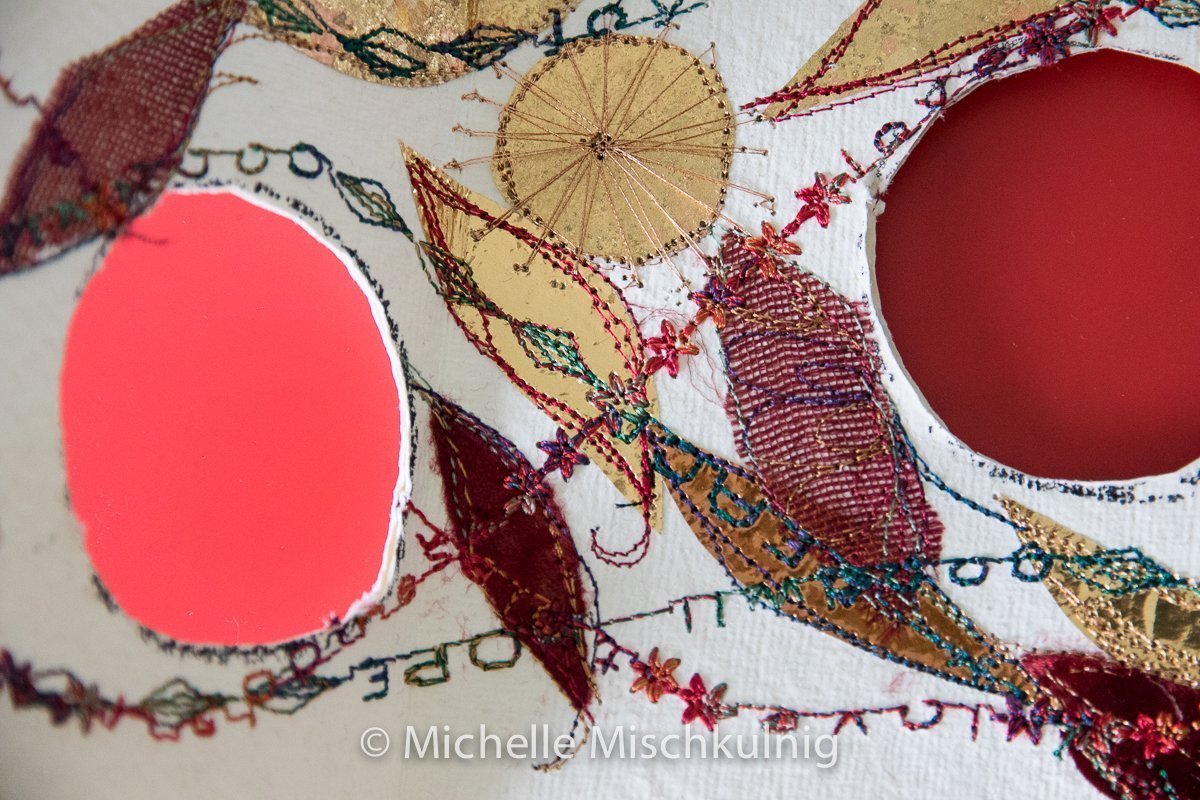
To prepare the cut out area for stitching place a piece of sticky sided water soluble fabric on both sides of the cut out circle and press the two sides together to adhere.
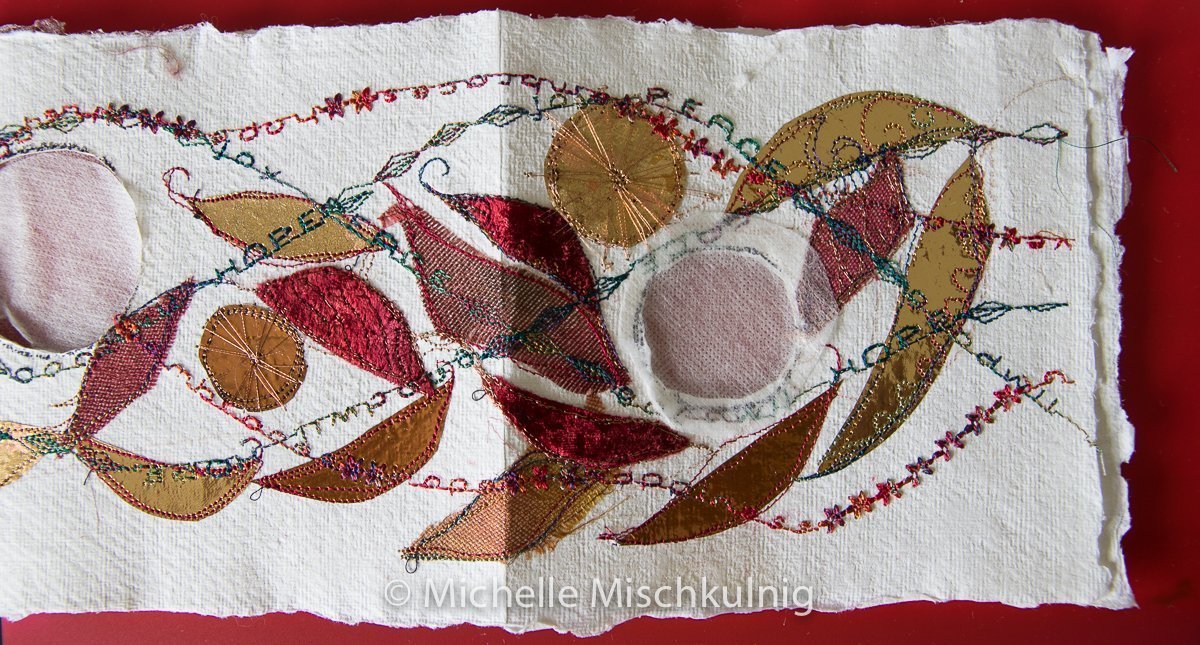
To fill in the cut out area of the circles I have used a straight stitch and metallic thread.
Outline the outer edge of the circle with several rows of straight stitch in metallic thread.
Stitch a smal circle centrally inside your cut out and then run straight stitches from the outer edge of the cut out circle into the centre of your circle until circle is filled. After it is filled go back into the centre of your cut out circle and add a few more rows of straight stitching to your inner circle. Fill all the cut out areas.
When you have filled all the cut out areas it is time to dissolve the water soluble fabric. I place a wad of paper towelling under the cut out area and use another wad of paper towel which is wet with warm water, dab the cut out area, you may need to do this several times to dissolve the water soluble fabric.You will need to do this from the back and front of zig zag card until it has dissolved. There should be a sticky feeling left in your stitch work to create a stiff feeling when dry. This is hard to judge, but it is not important as long as the gum has disappeared.

To finish the card I stitch the bottom edge with a decorative stitch and rubbed gold buff on all the edges. Finally attaching a ribbon to tie the card together for postage or storage.Free motion stitch a small circular shape through both layers of the zig zag card and tie a ribbon into the eyelet you have made. I tied the ends of the ribbon with 2 little decorative bells.

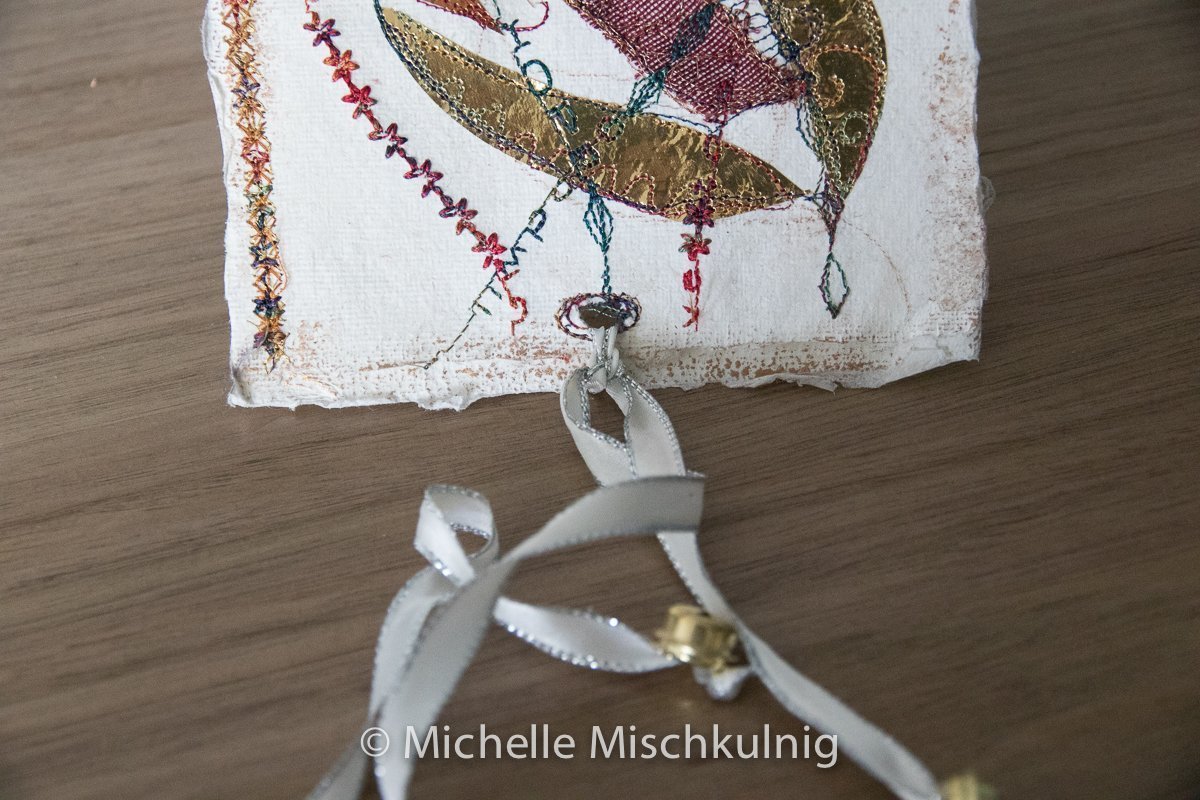
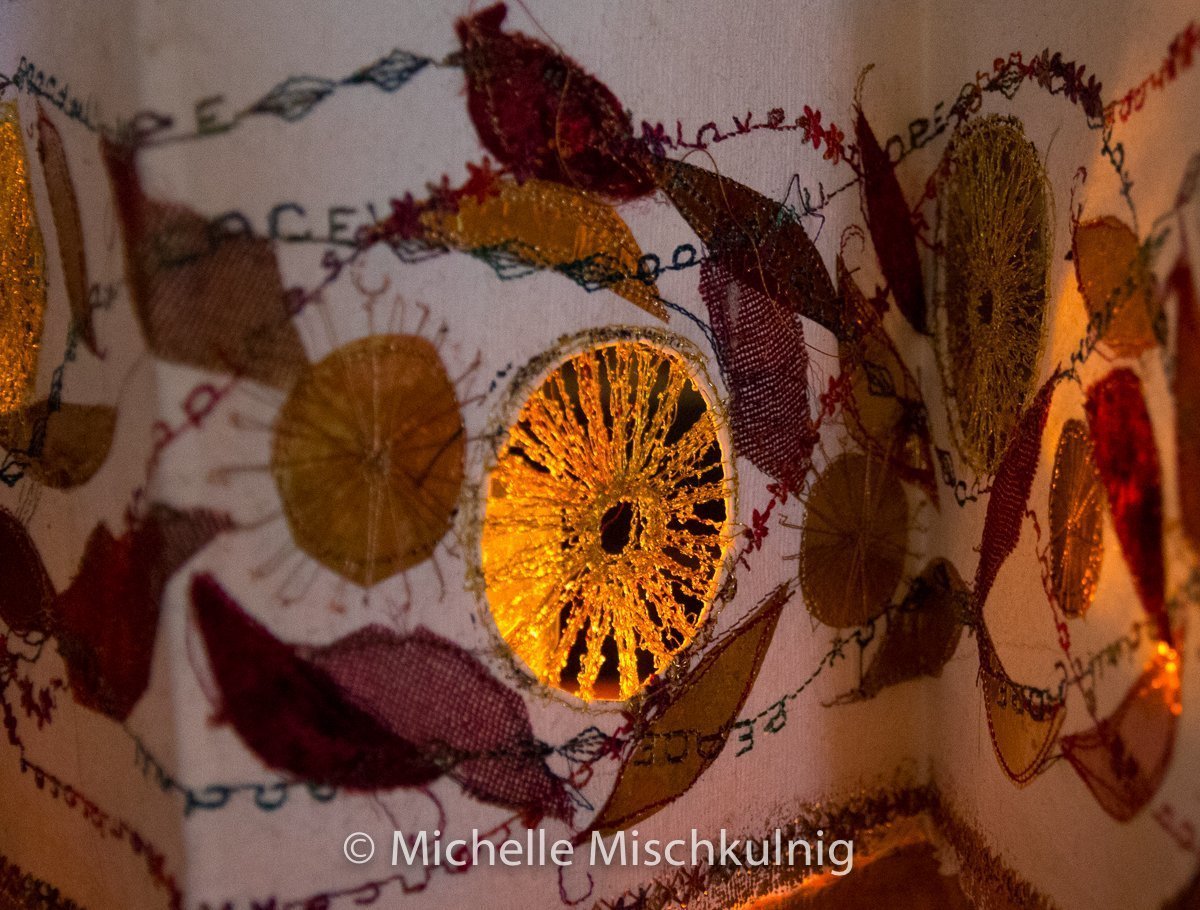
Now you have completed your art work which makes a lovely gift, it can be back lit with battery operated tee lights please don’t ever use a naked flame. It would make wonderful present as a card and a decoration you could gift the battery operated teee lights with it .
Enjoy the process and make someone very special to gift
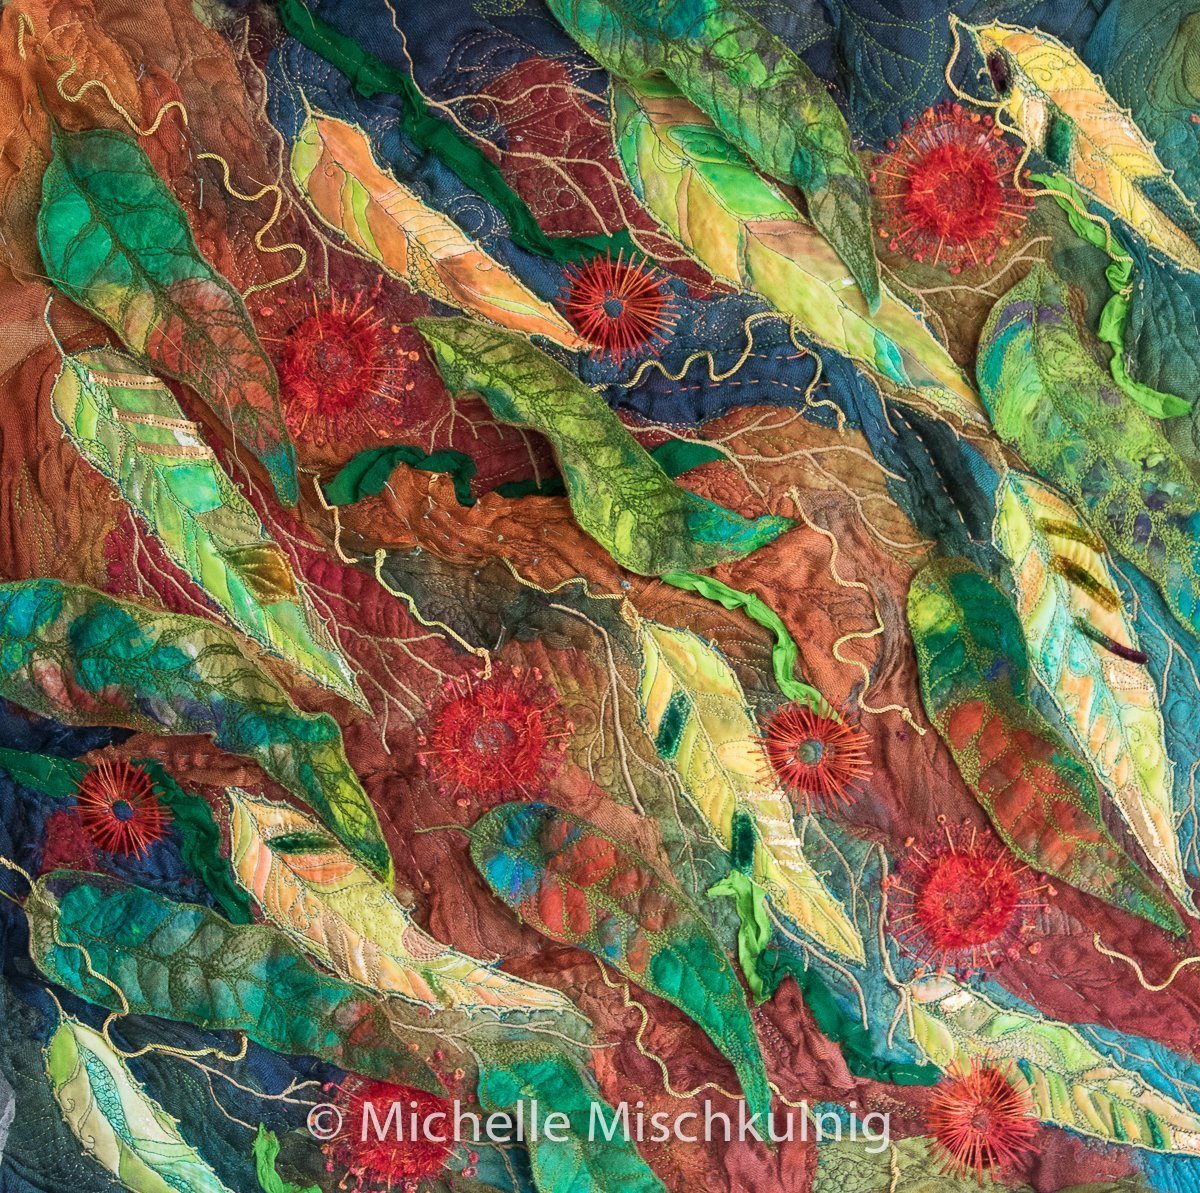
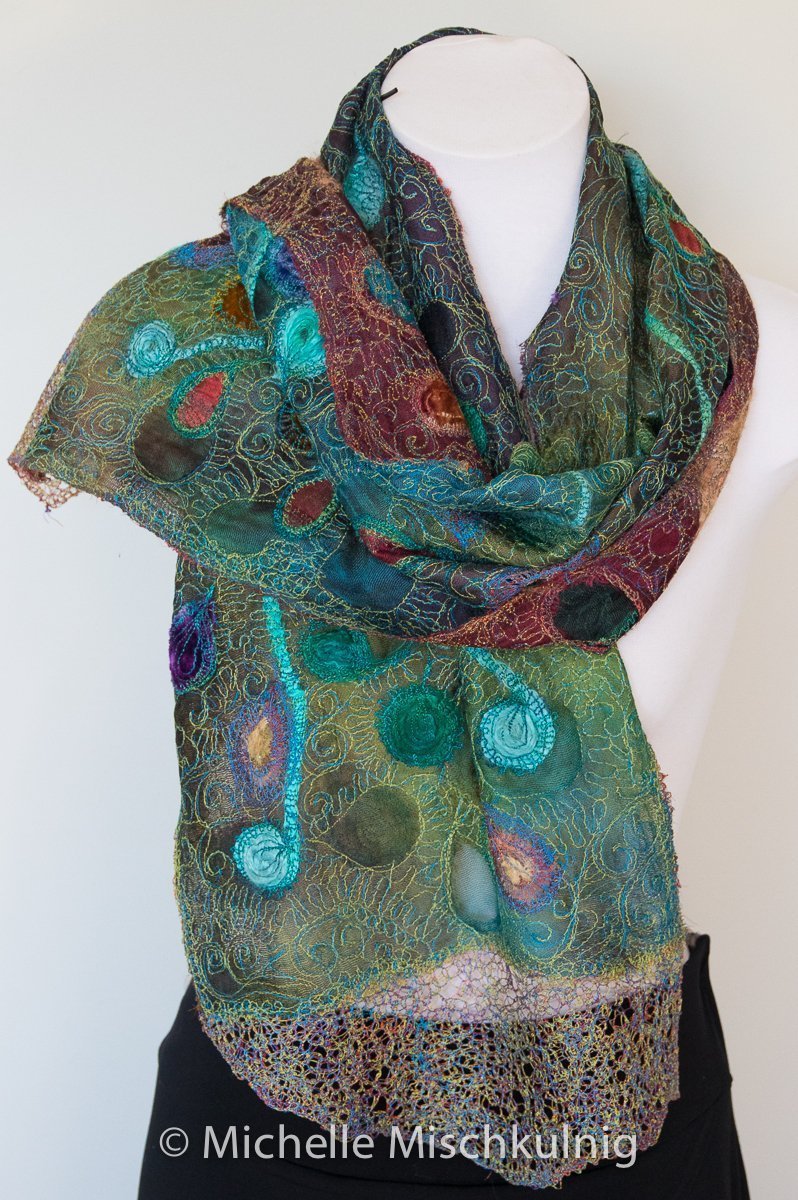
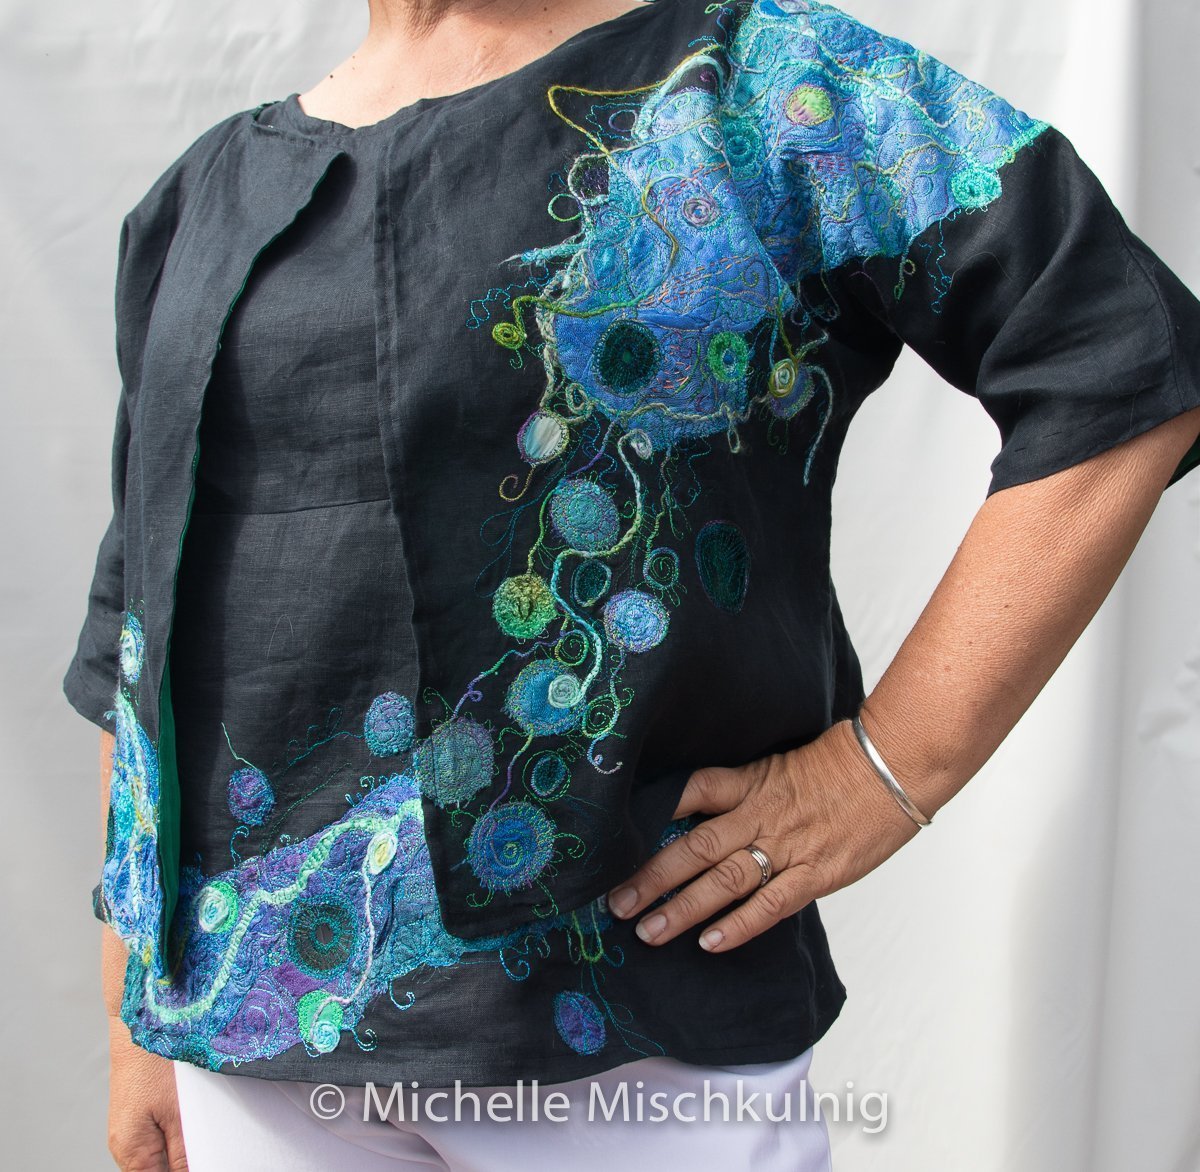
Some work from my studio this week all made on my bernini 720
Please visit my website chelletextiles.com.au
Teaching http://chelletextiles.com.au/events/
Blog http://chelletextiles.com.au/blog/
Facebook https://www.facebook.com/Chelle.Textiles/

Lots of beautiful inspirations! Thank you very much Michelle!
Thank you Annette I appreciate your lovely words .