 BERNINA Corporate Blog -
Dear community,
in this blog post you can find detailed instructions for making a practical tool belt for young handymen.
Practical tool belt for young handymen
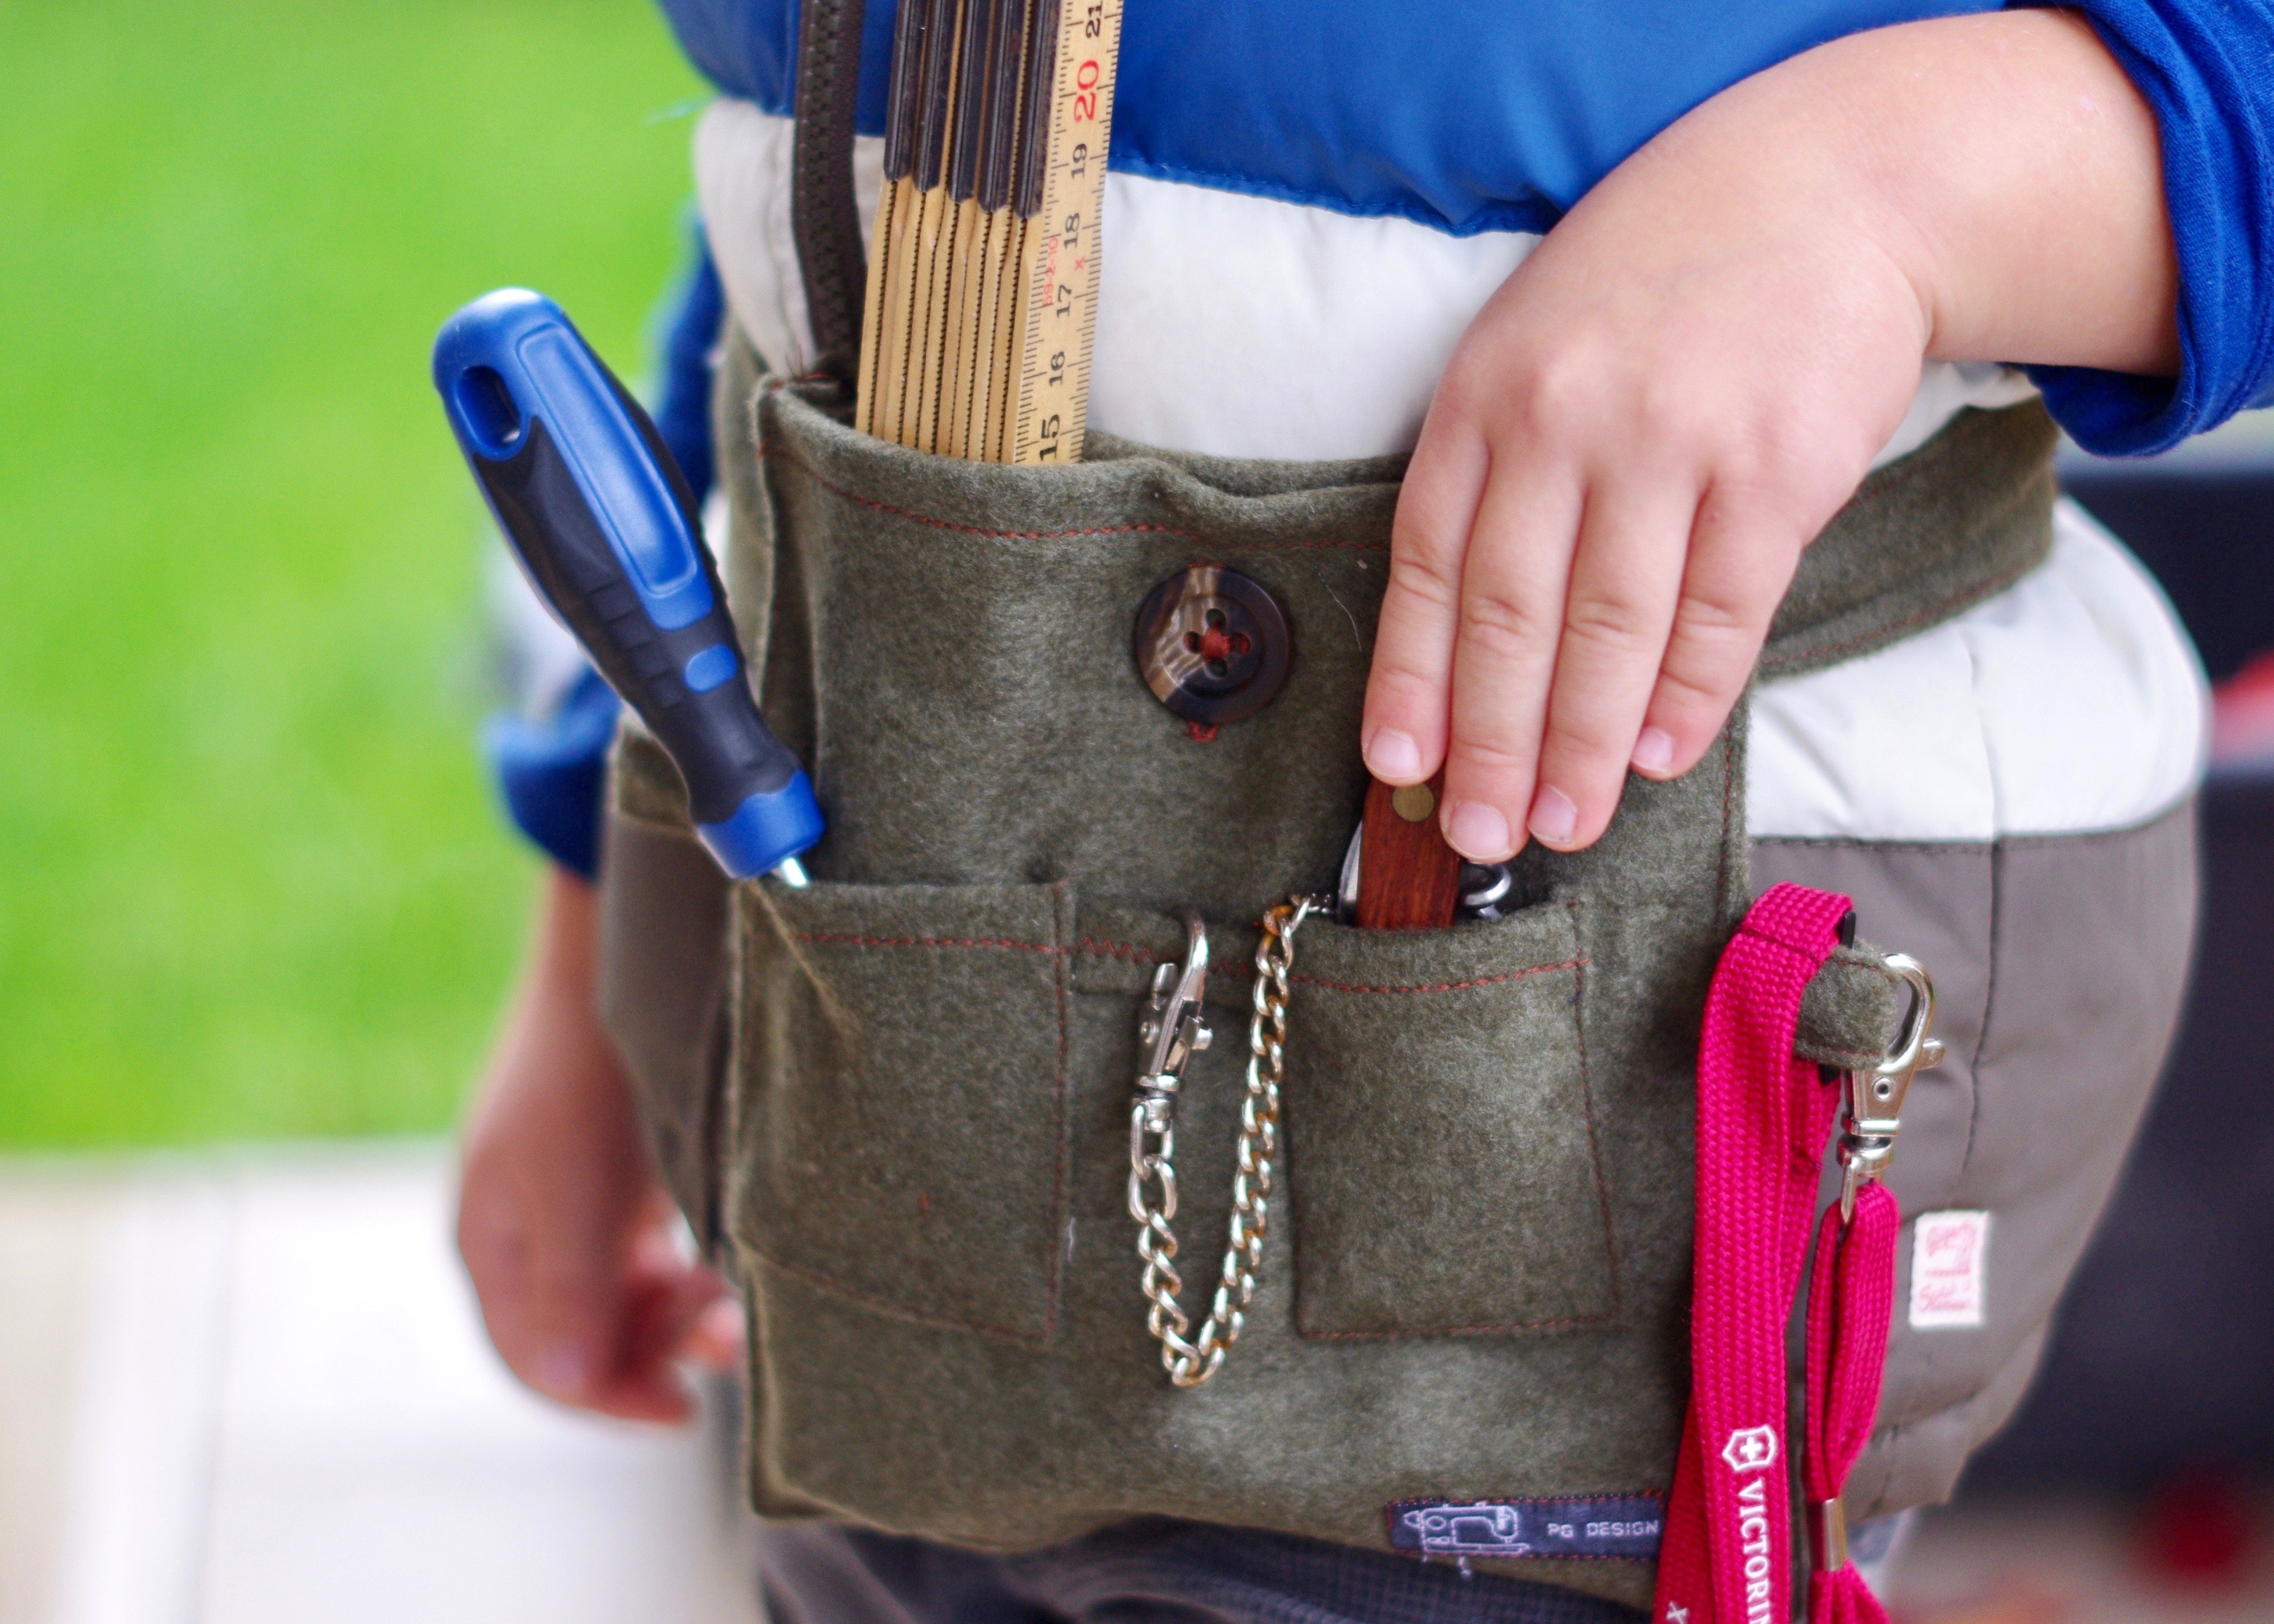
My 5-year-old son Lennard always needs a set of tools with him whenever he goes out to play. Recently he made himself a tool bag out of paper, and when it tore he came to me in floods of tears, so I quickly designed this tool belt for him. The key thing was to ensure that he could stow his tools safely without losing any of them. The Velcro fastener means that he can put the belt on himself, plus he can wear it in different positions on his body. A personalised belt is also a wonderful Christmas present idea.
Materials
- 0.5 m Loden cloth or similarly strong, non-fraying fabric
- 25 cm Velcro
- Sewing thread, sewing machine, tailor’s chalk, fabric shears
Cutting the pattern pieces to size
There is no limit to the size and design of this belt. For my son I worked with the following dimensions:
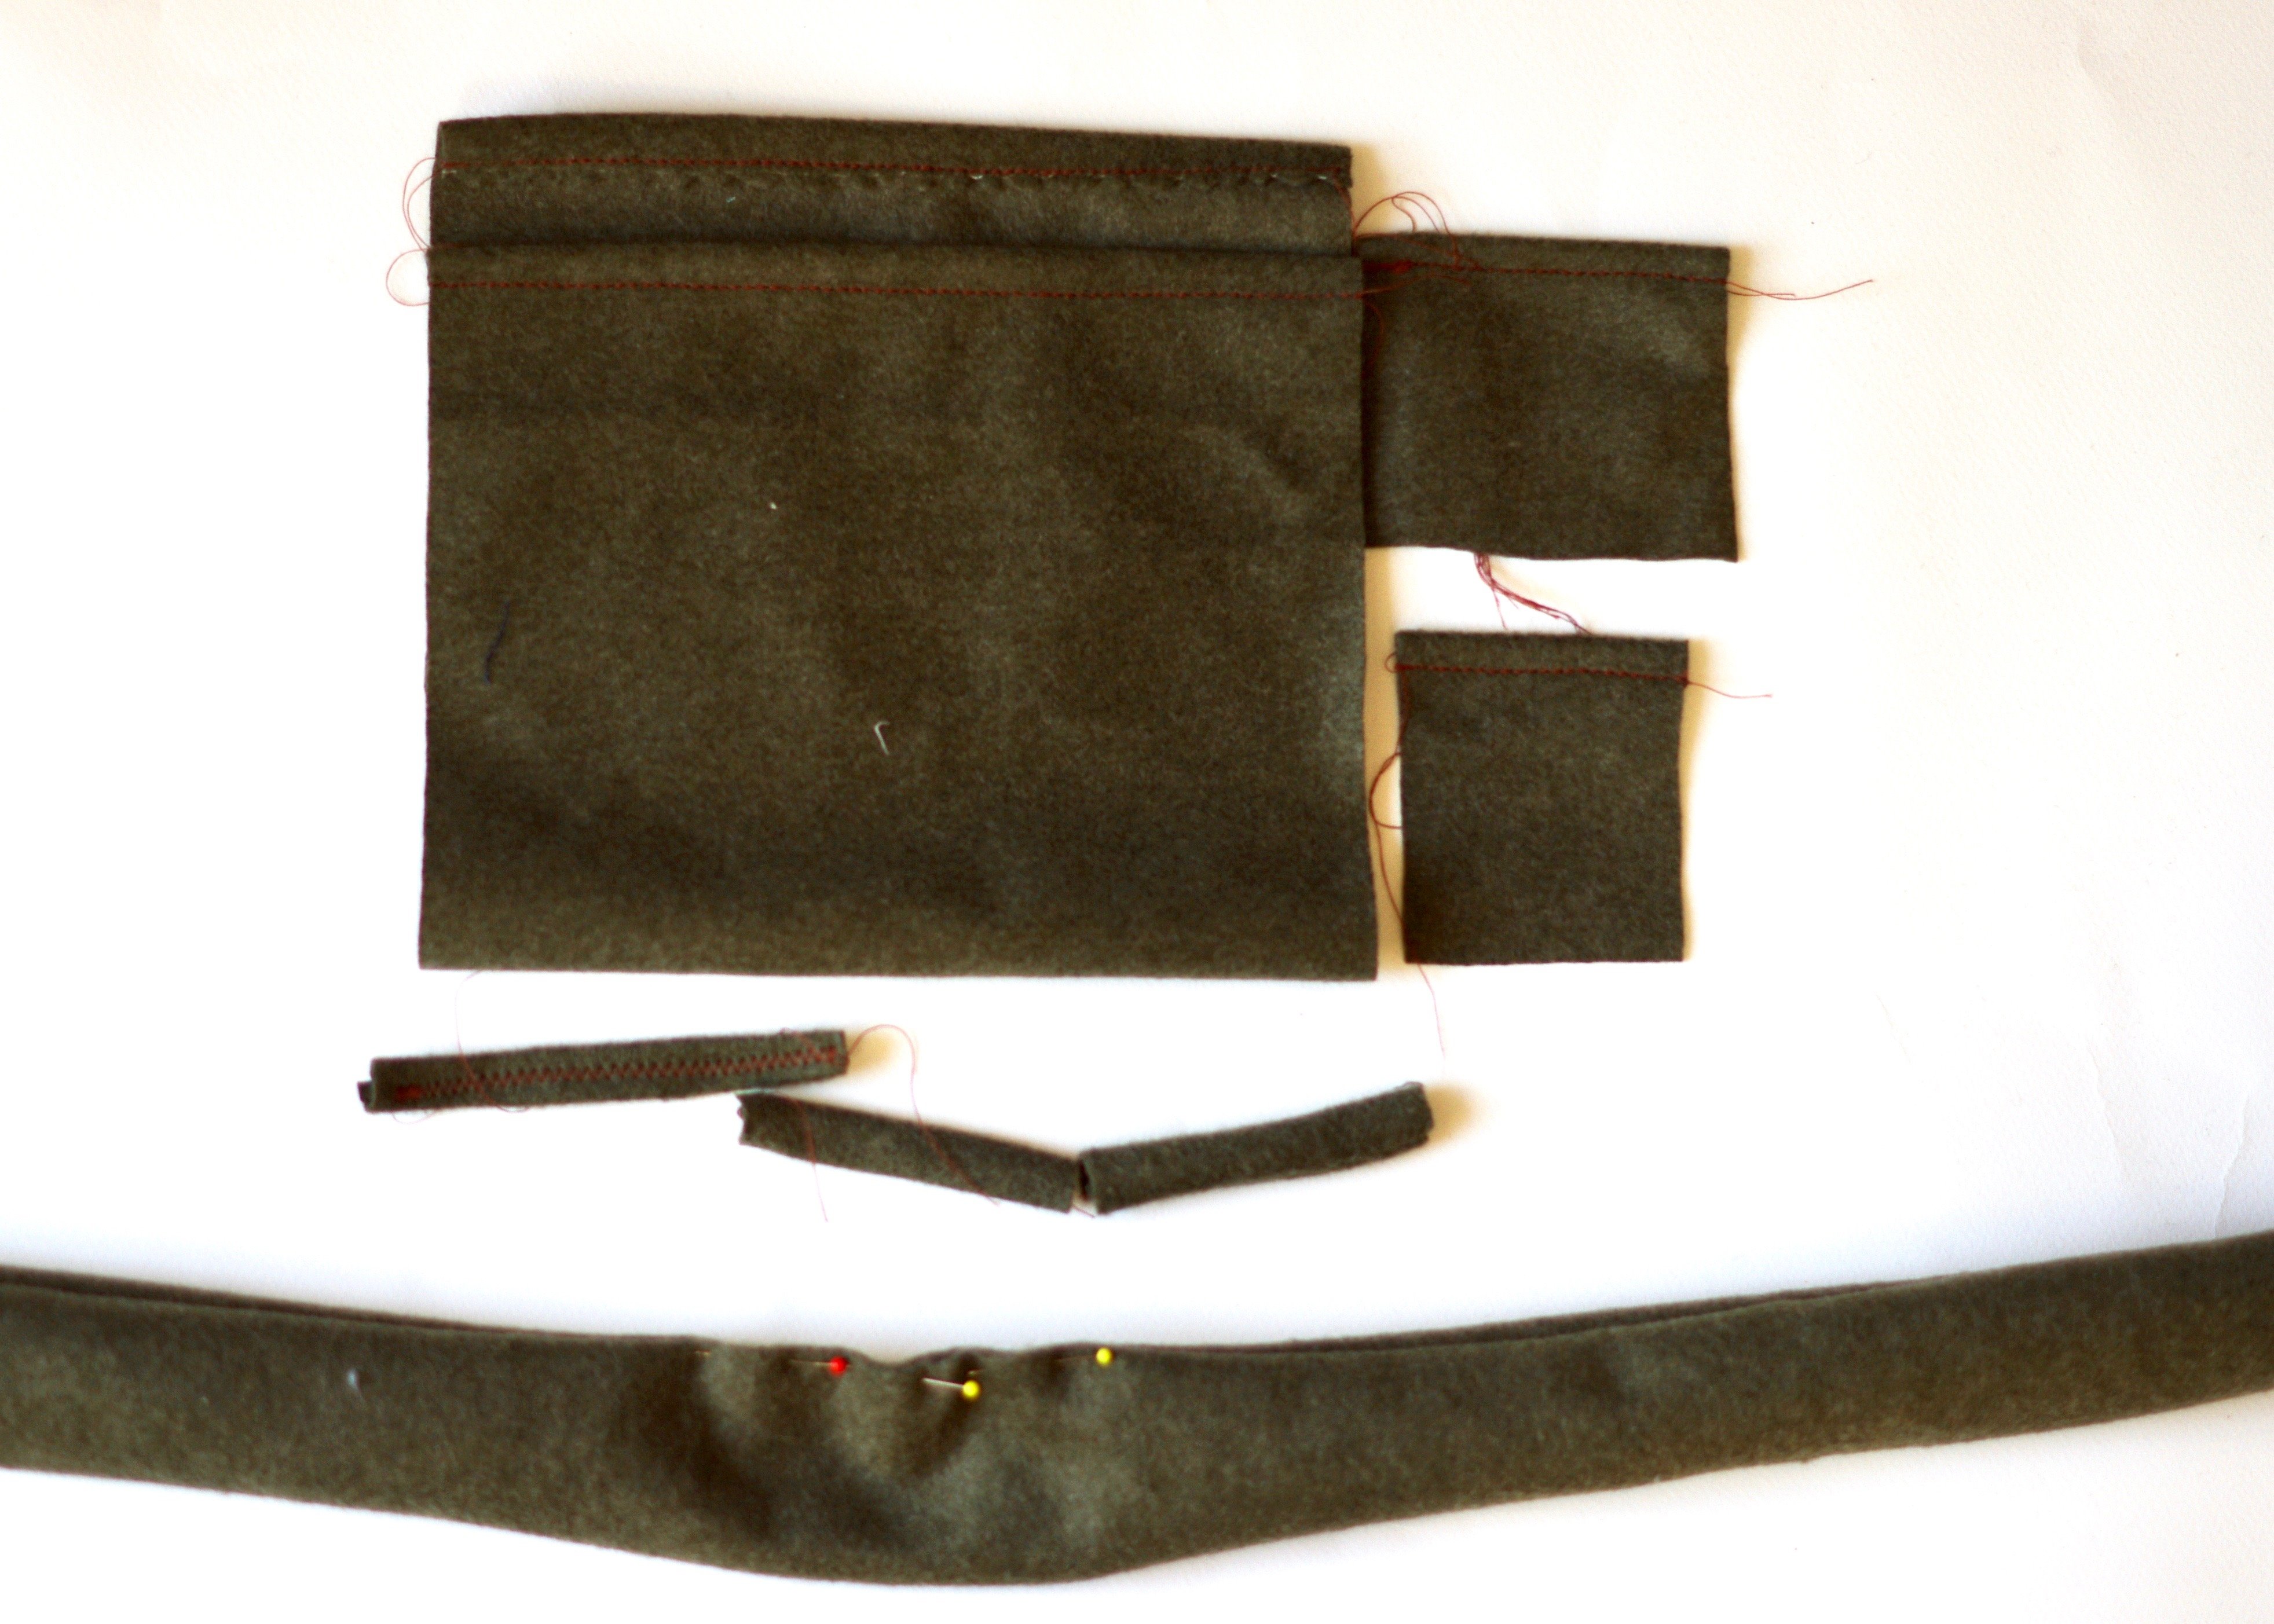
Cutting dimensions incl. seam allowance:
- Belt 75cm x 12cm
- Main pocket 38cm x 20cm
- Small pockets 8cm x 8 cm and 6cm x 8cm
- Front loop 2.5cm x 7cm
- Side loops 2 times 2cm x 7cm
- Velcro fastening 12.5cm x 2cm
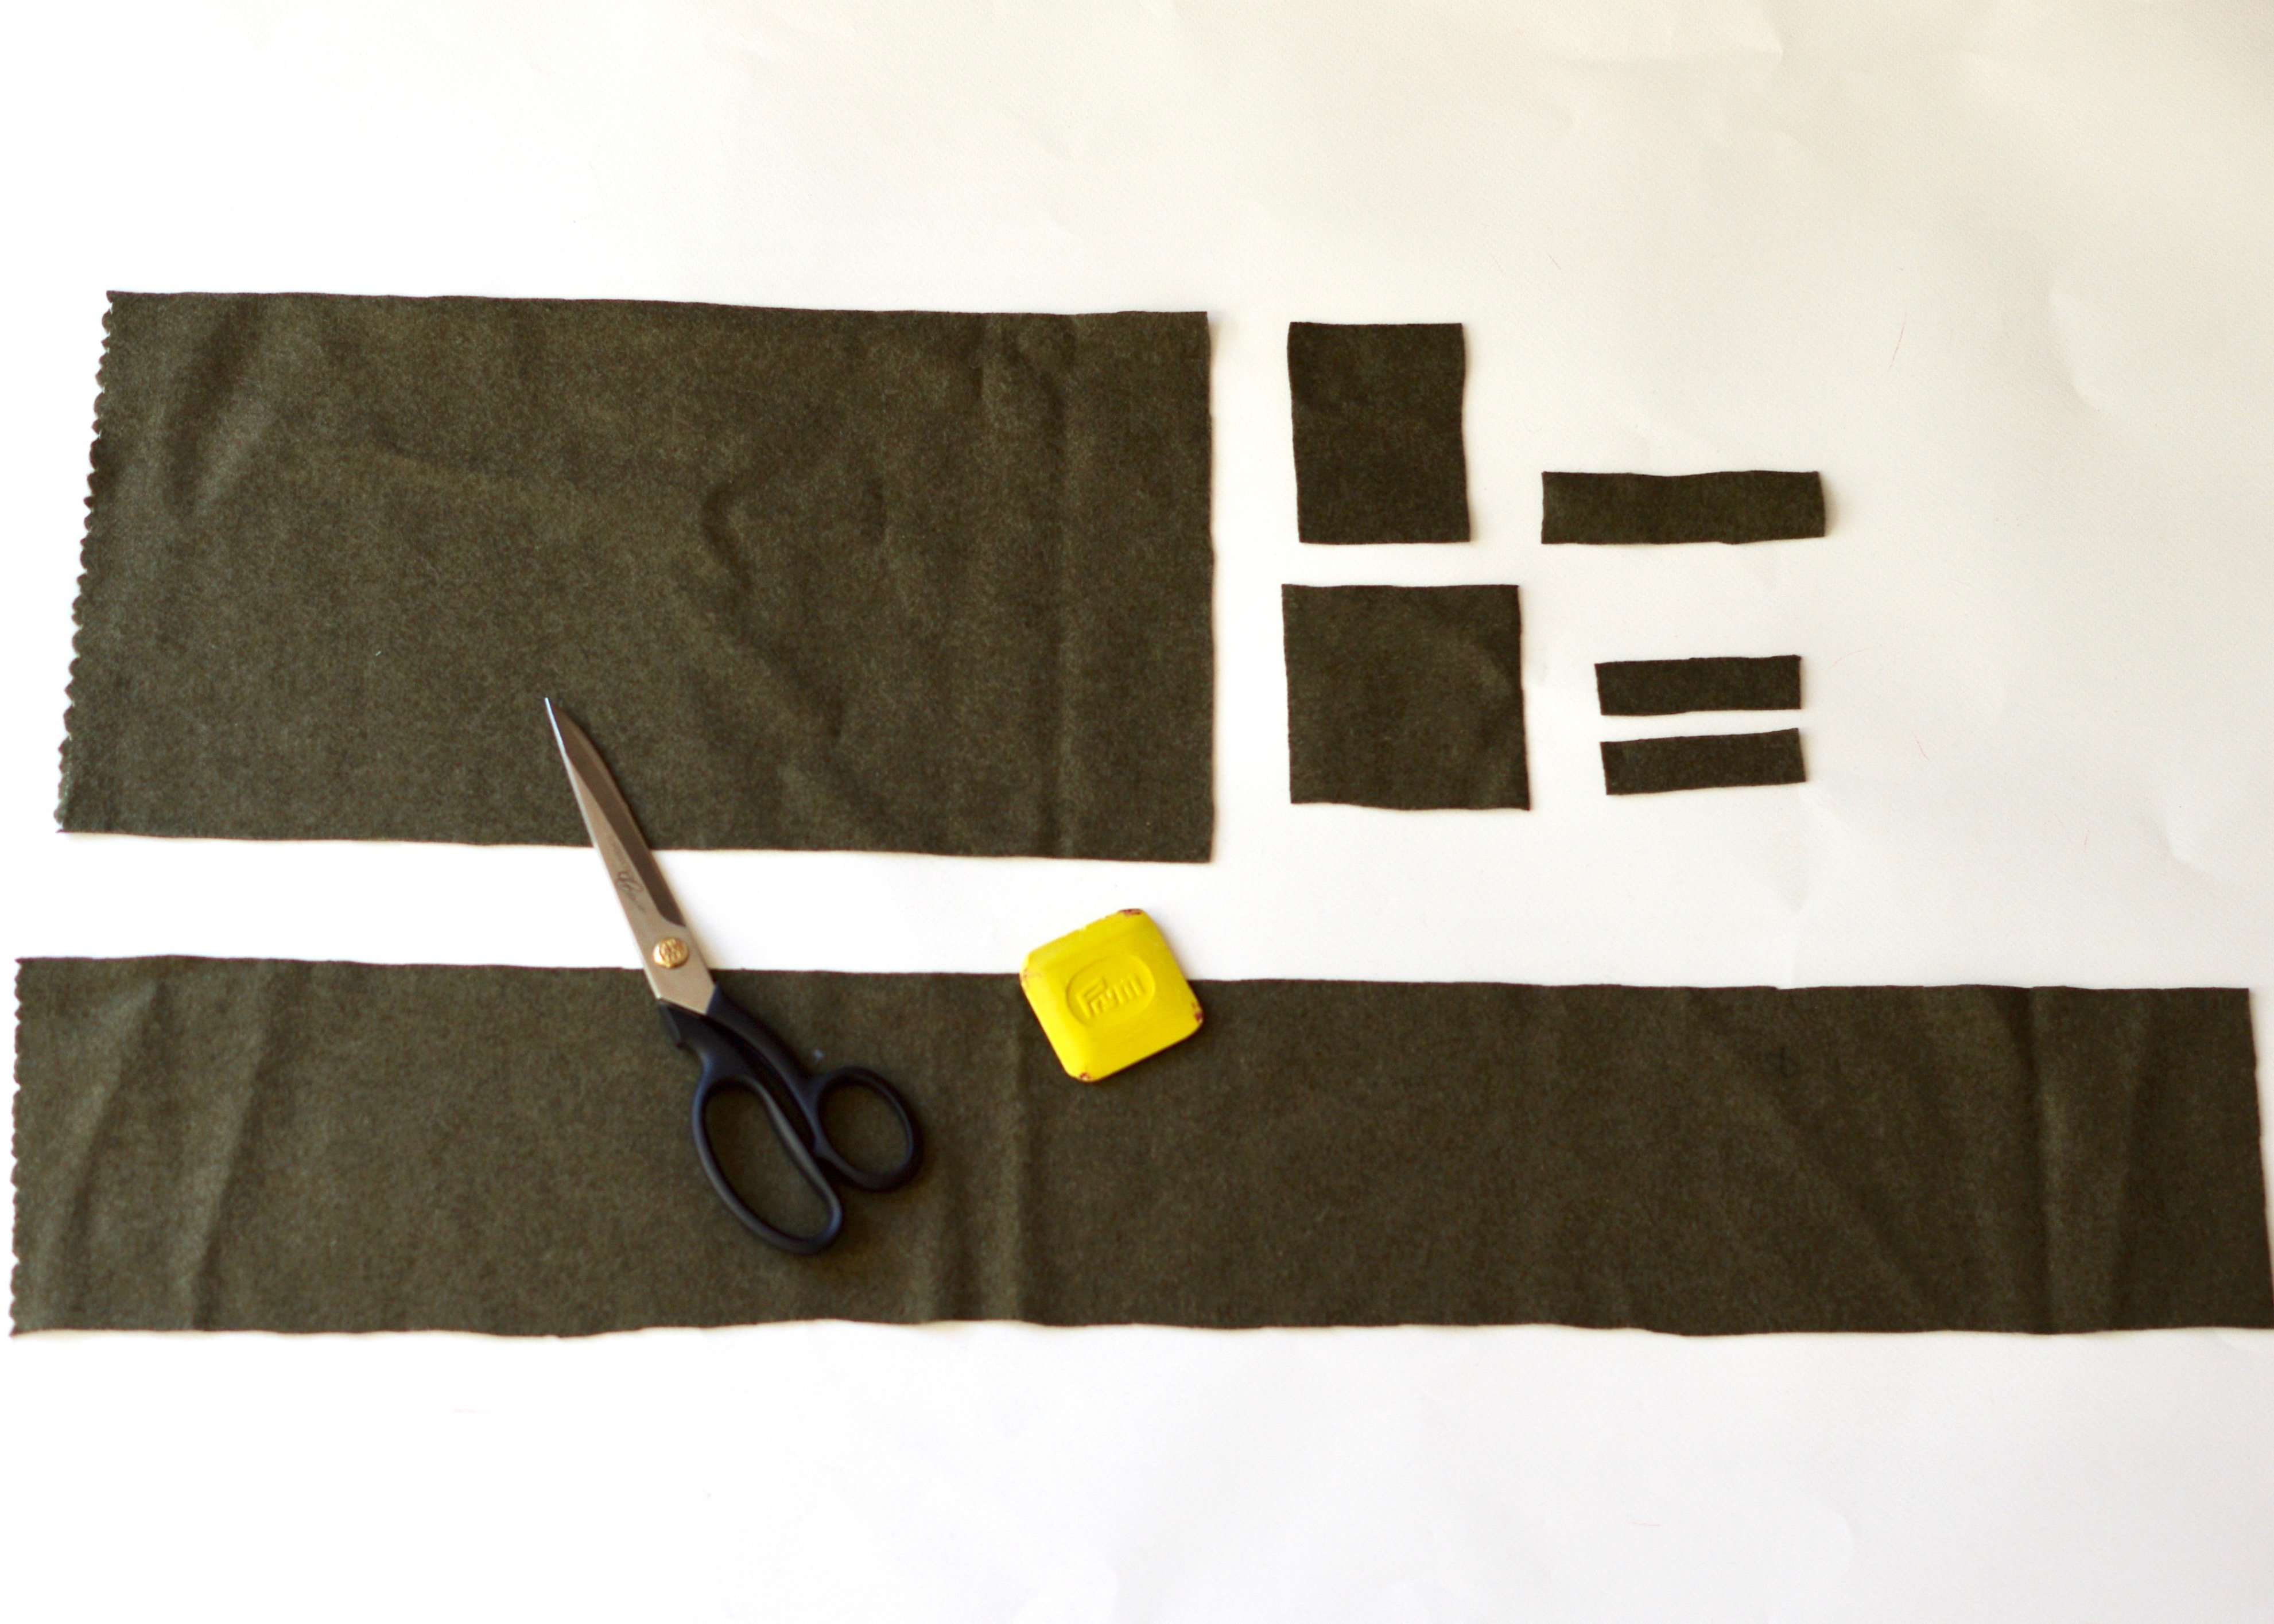
Cut out all the individual pieces.
Preparing the pieces
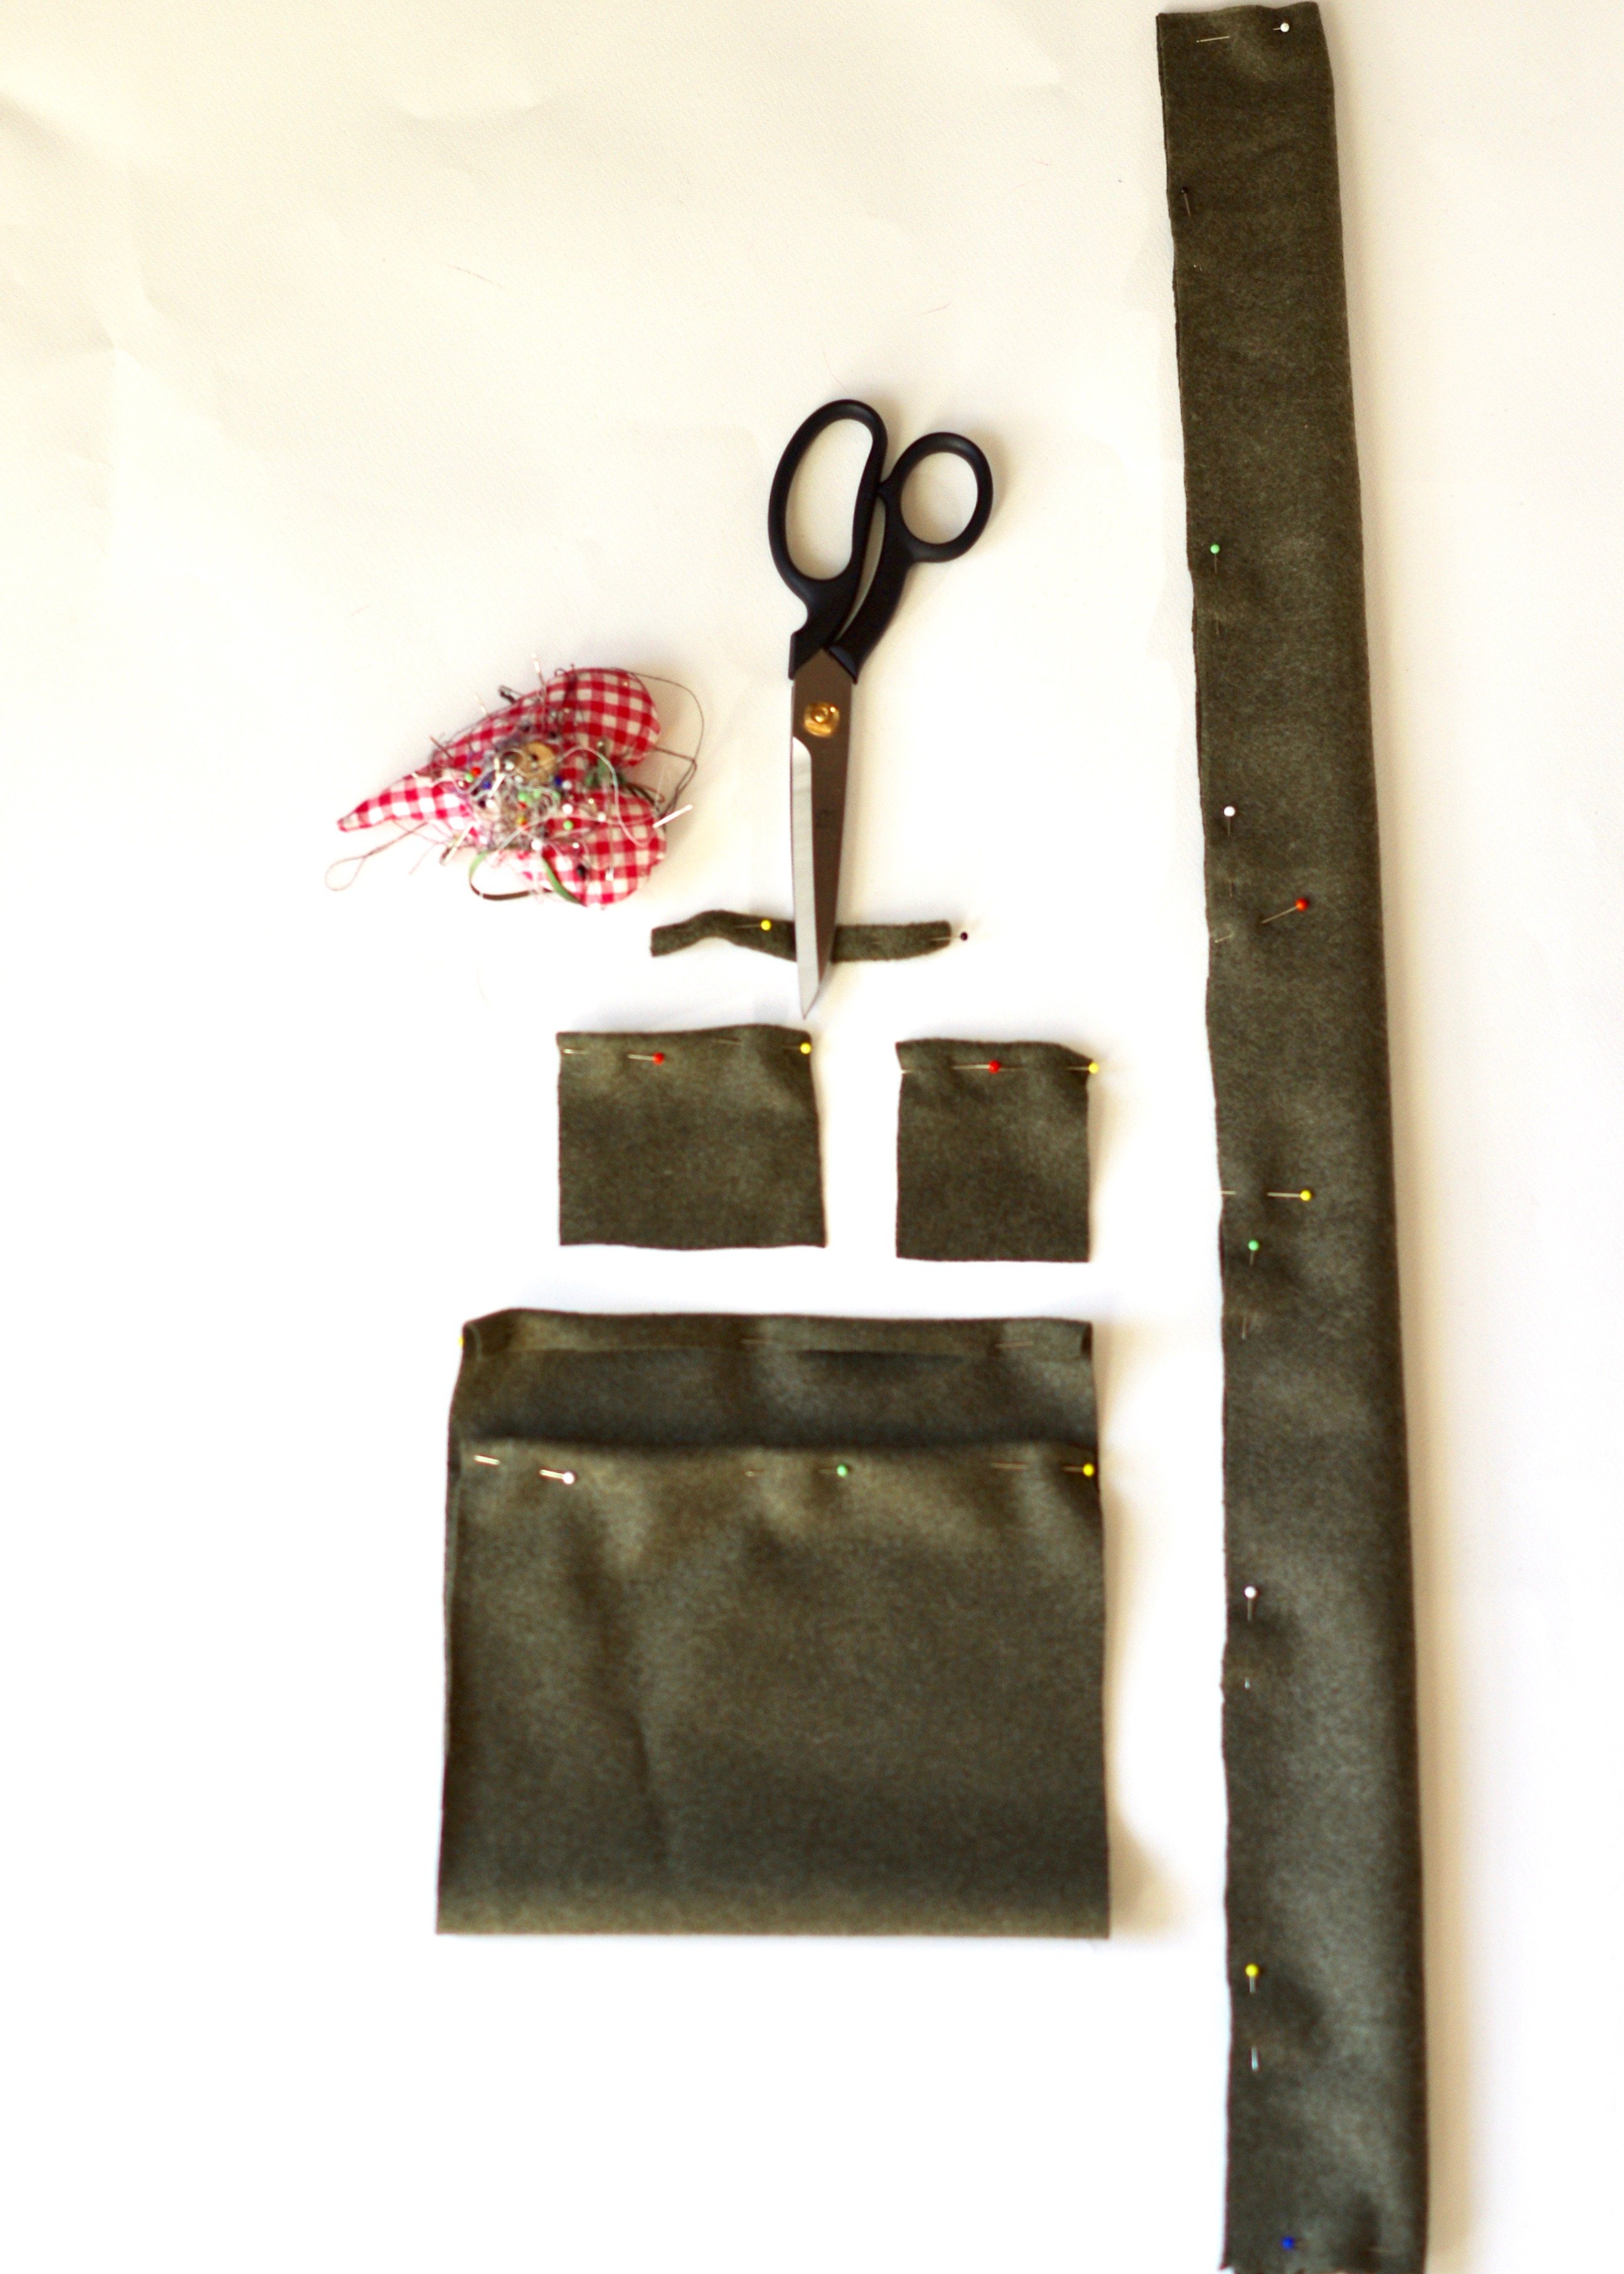
Fold the upper seam allowances for the main pocket and the side pockets in by 1 cm, then place the belt right sides together. For the loop, make sure the seam allowances meet in the middle at the back.
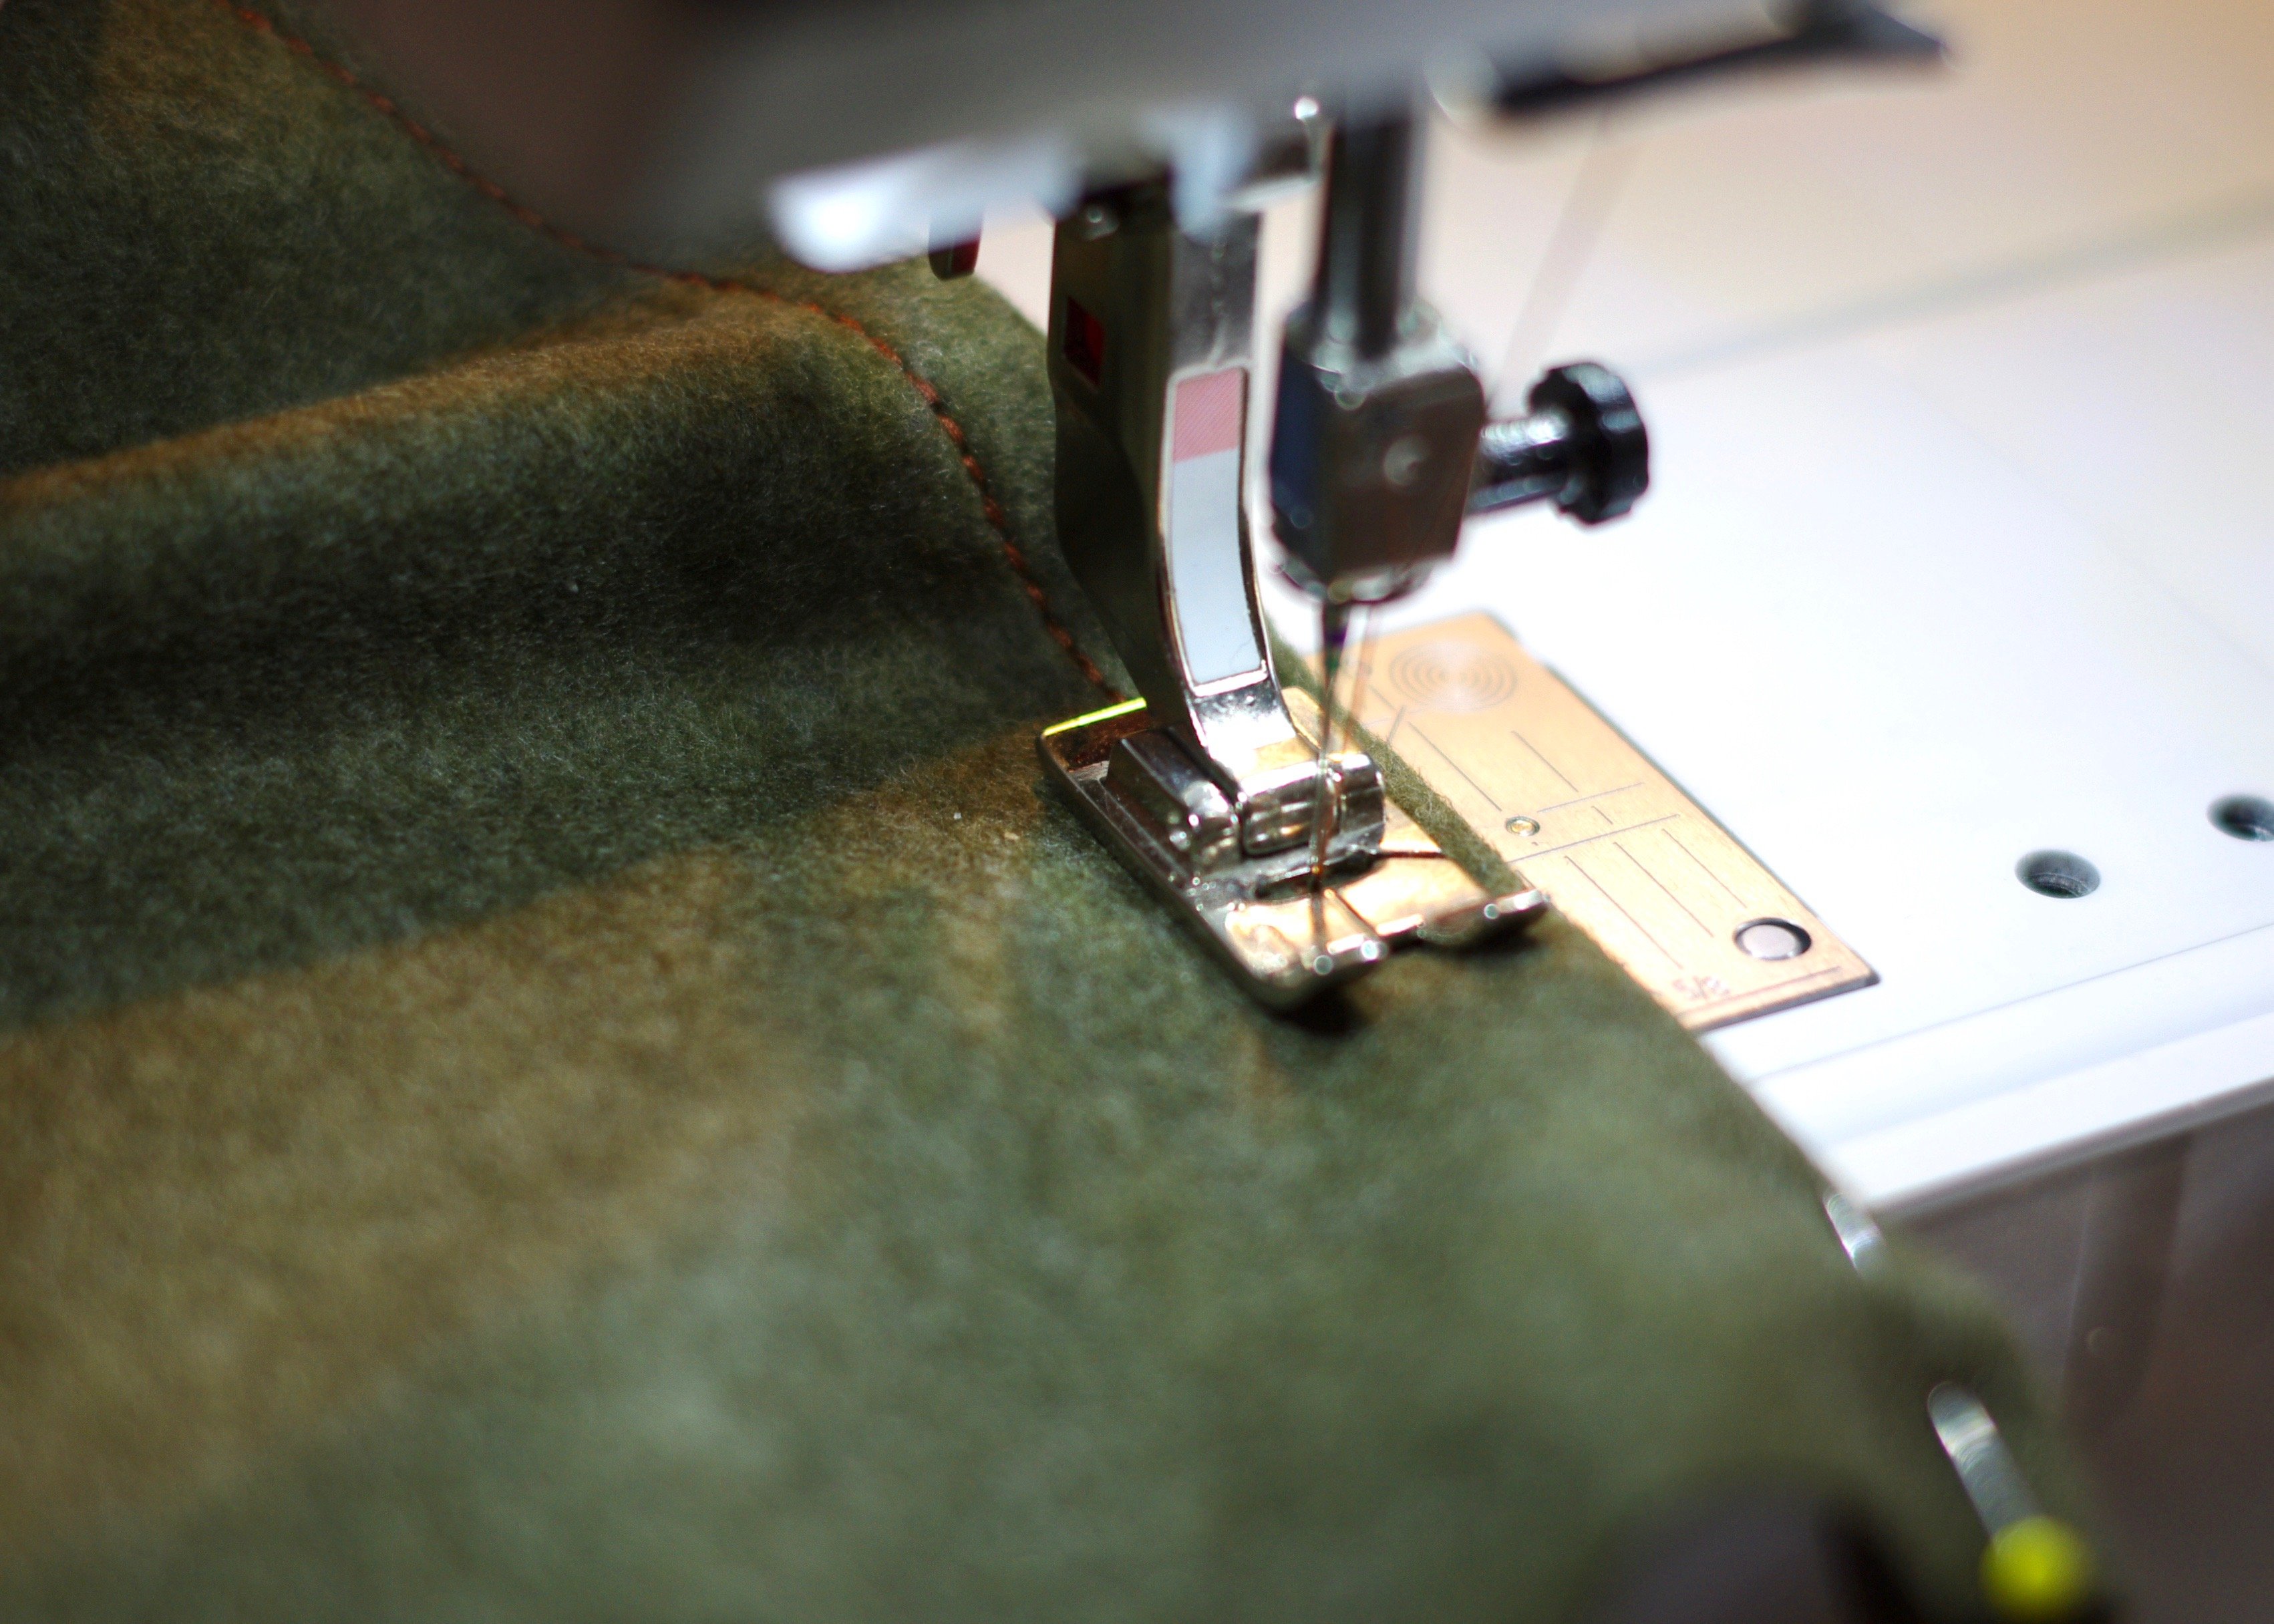
Stitch the seam allowances together near the edge. I particularly like the 3-way straight stitch for this.
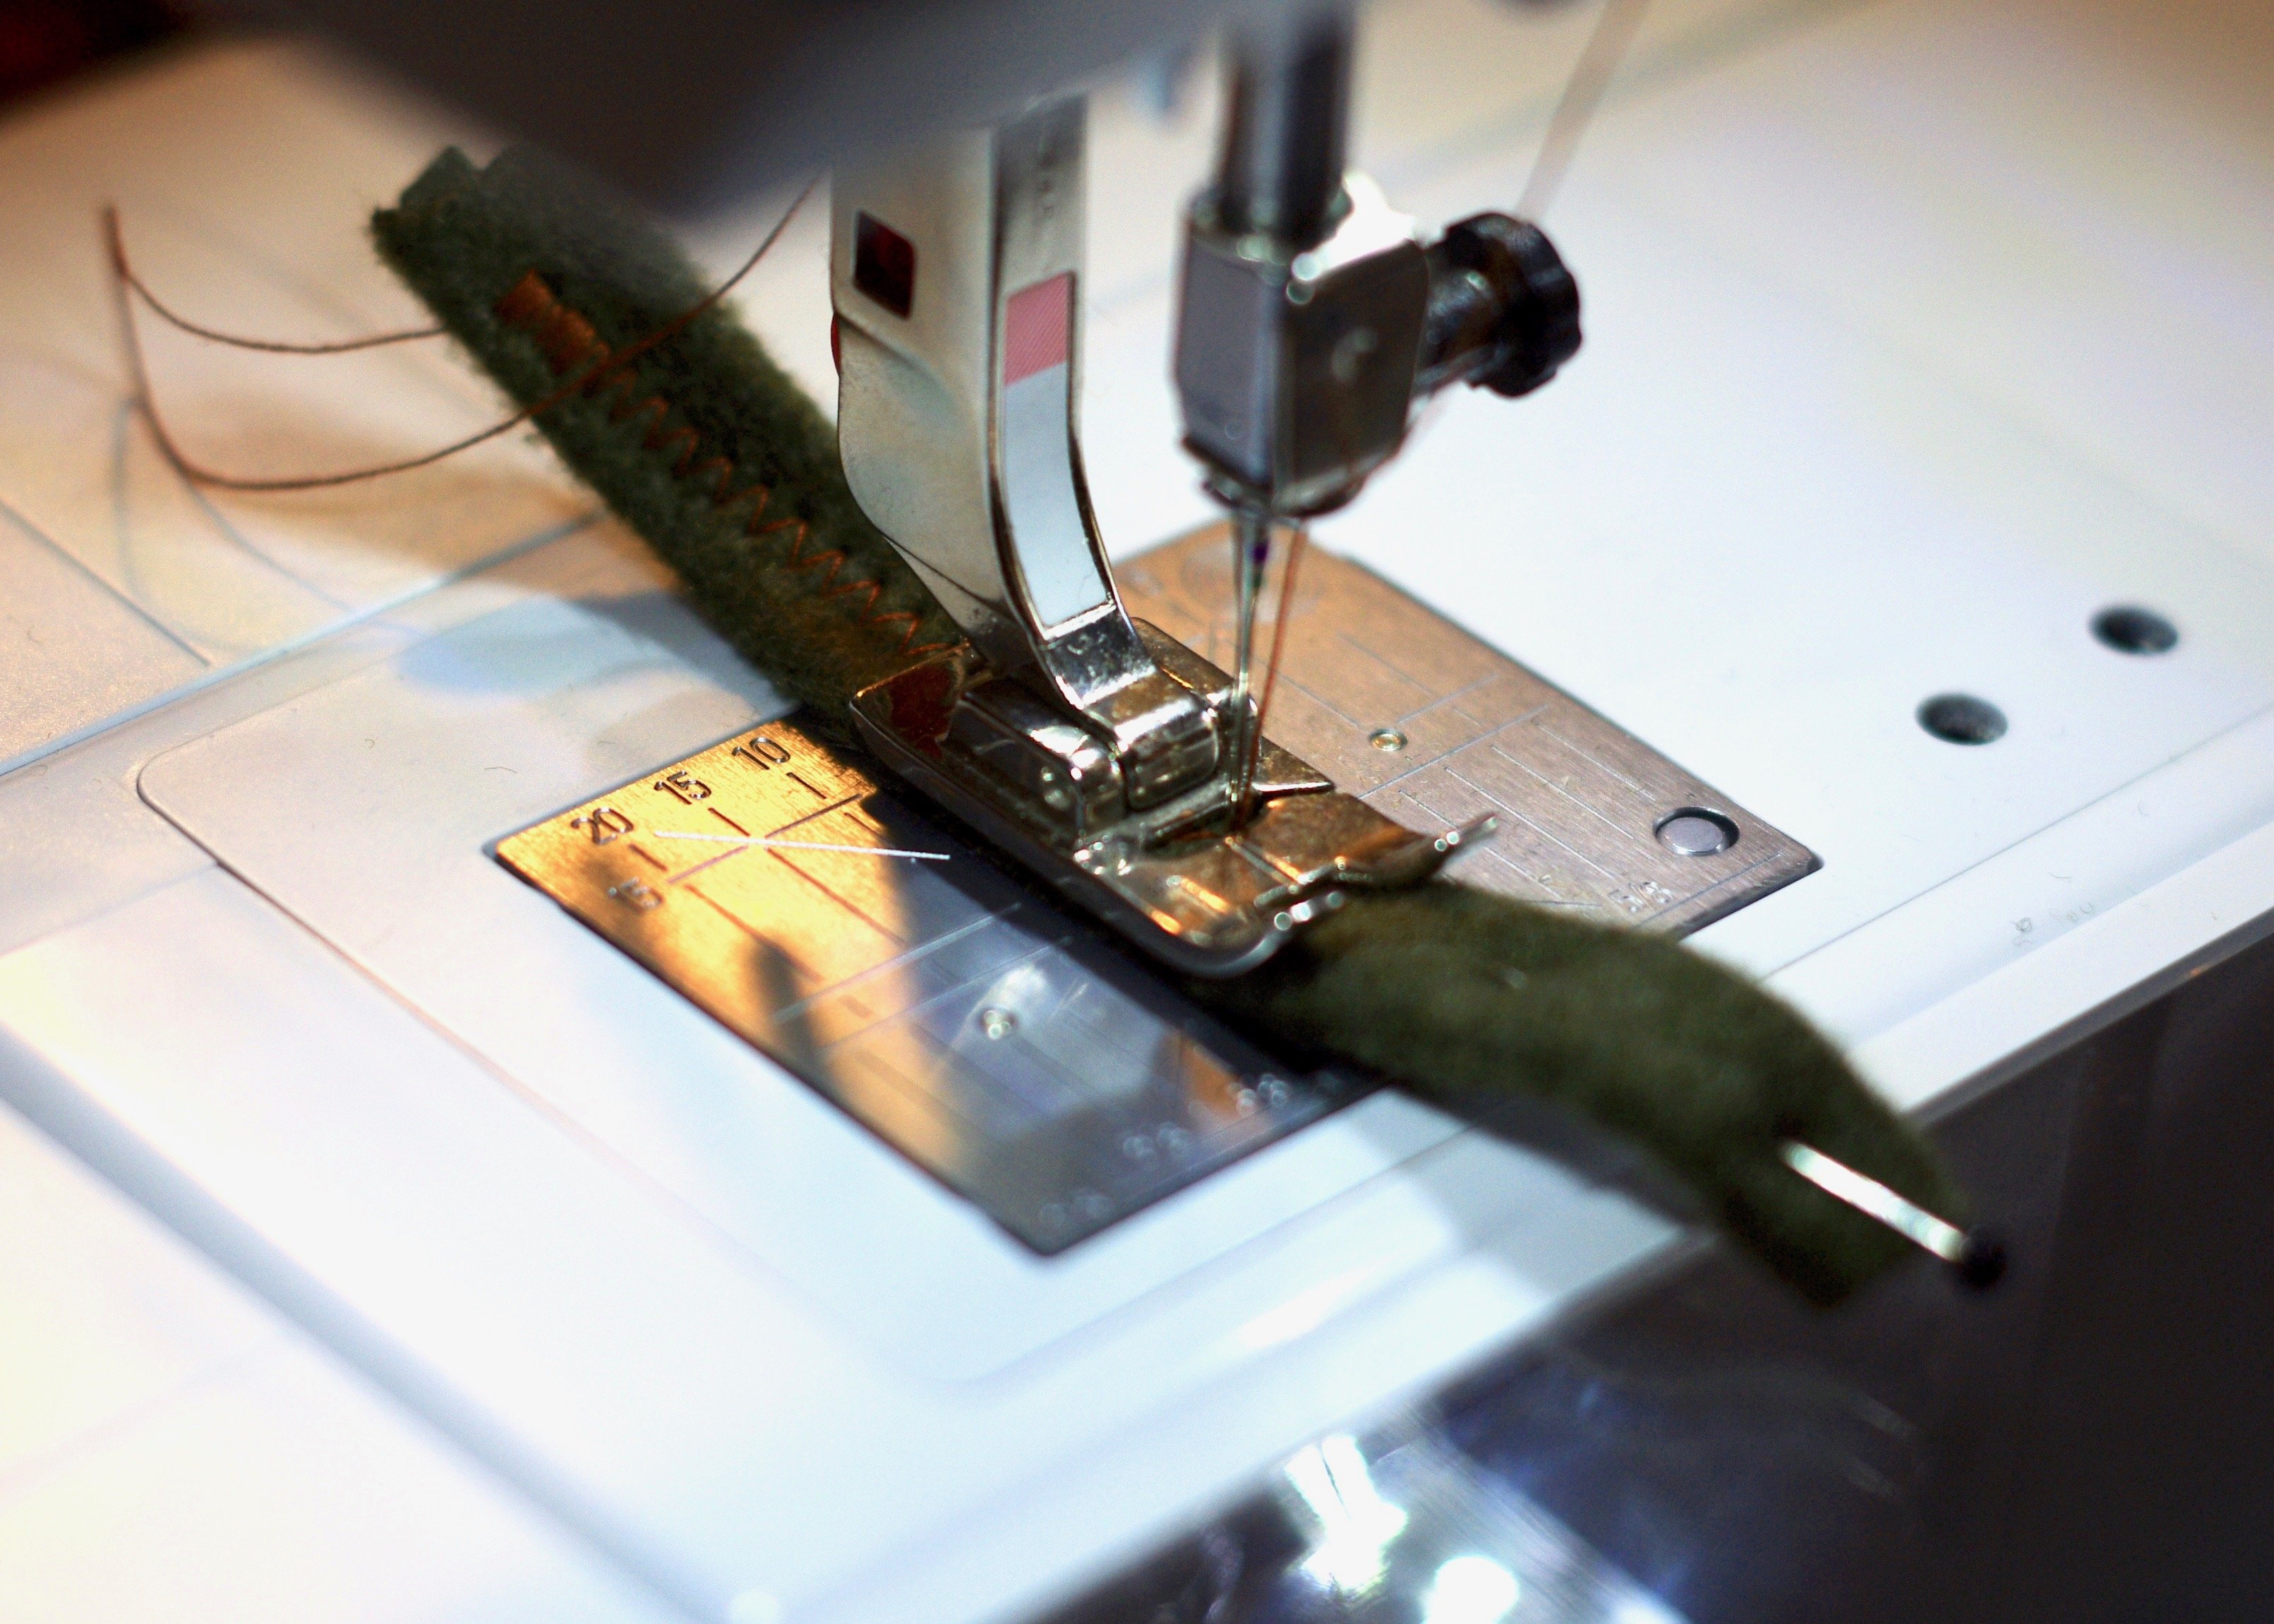
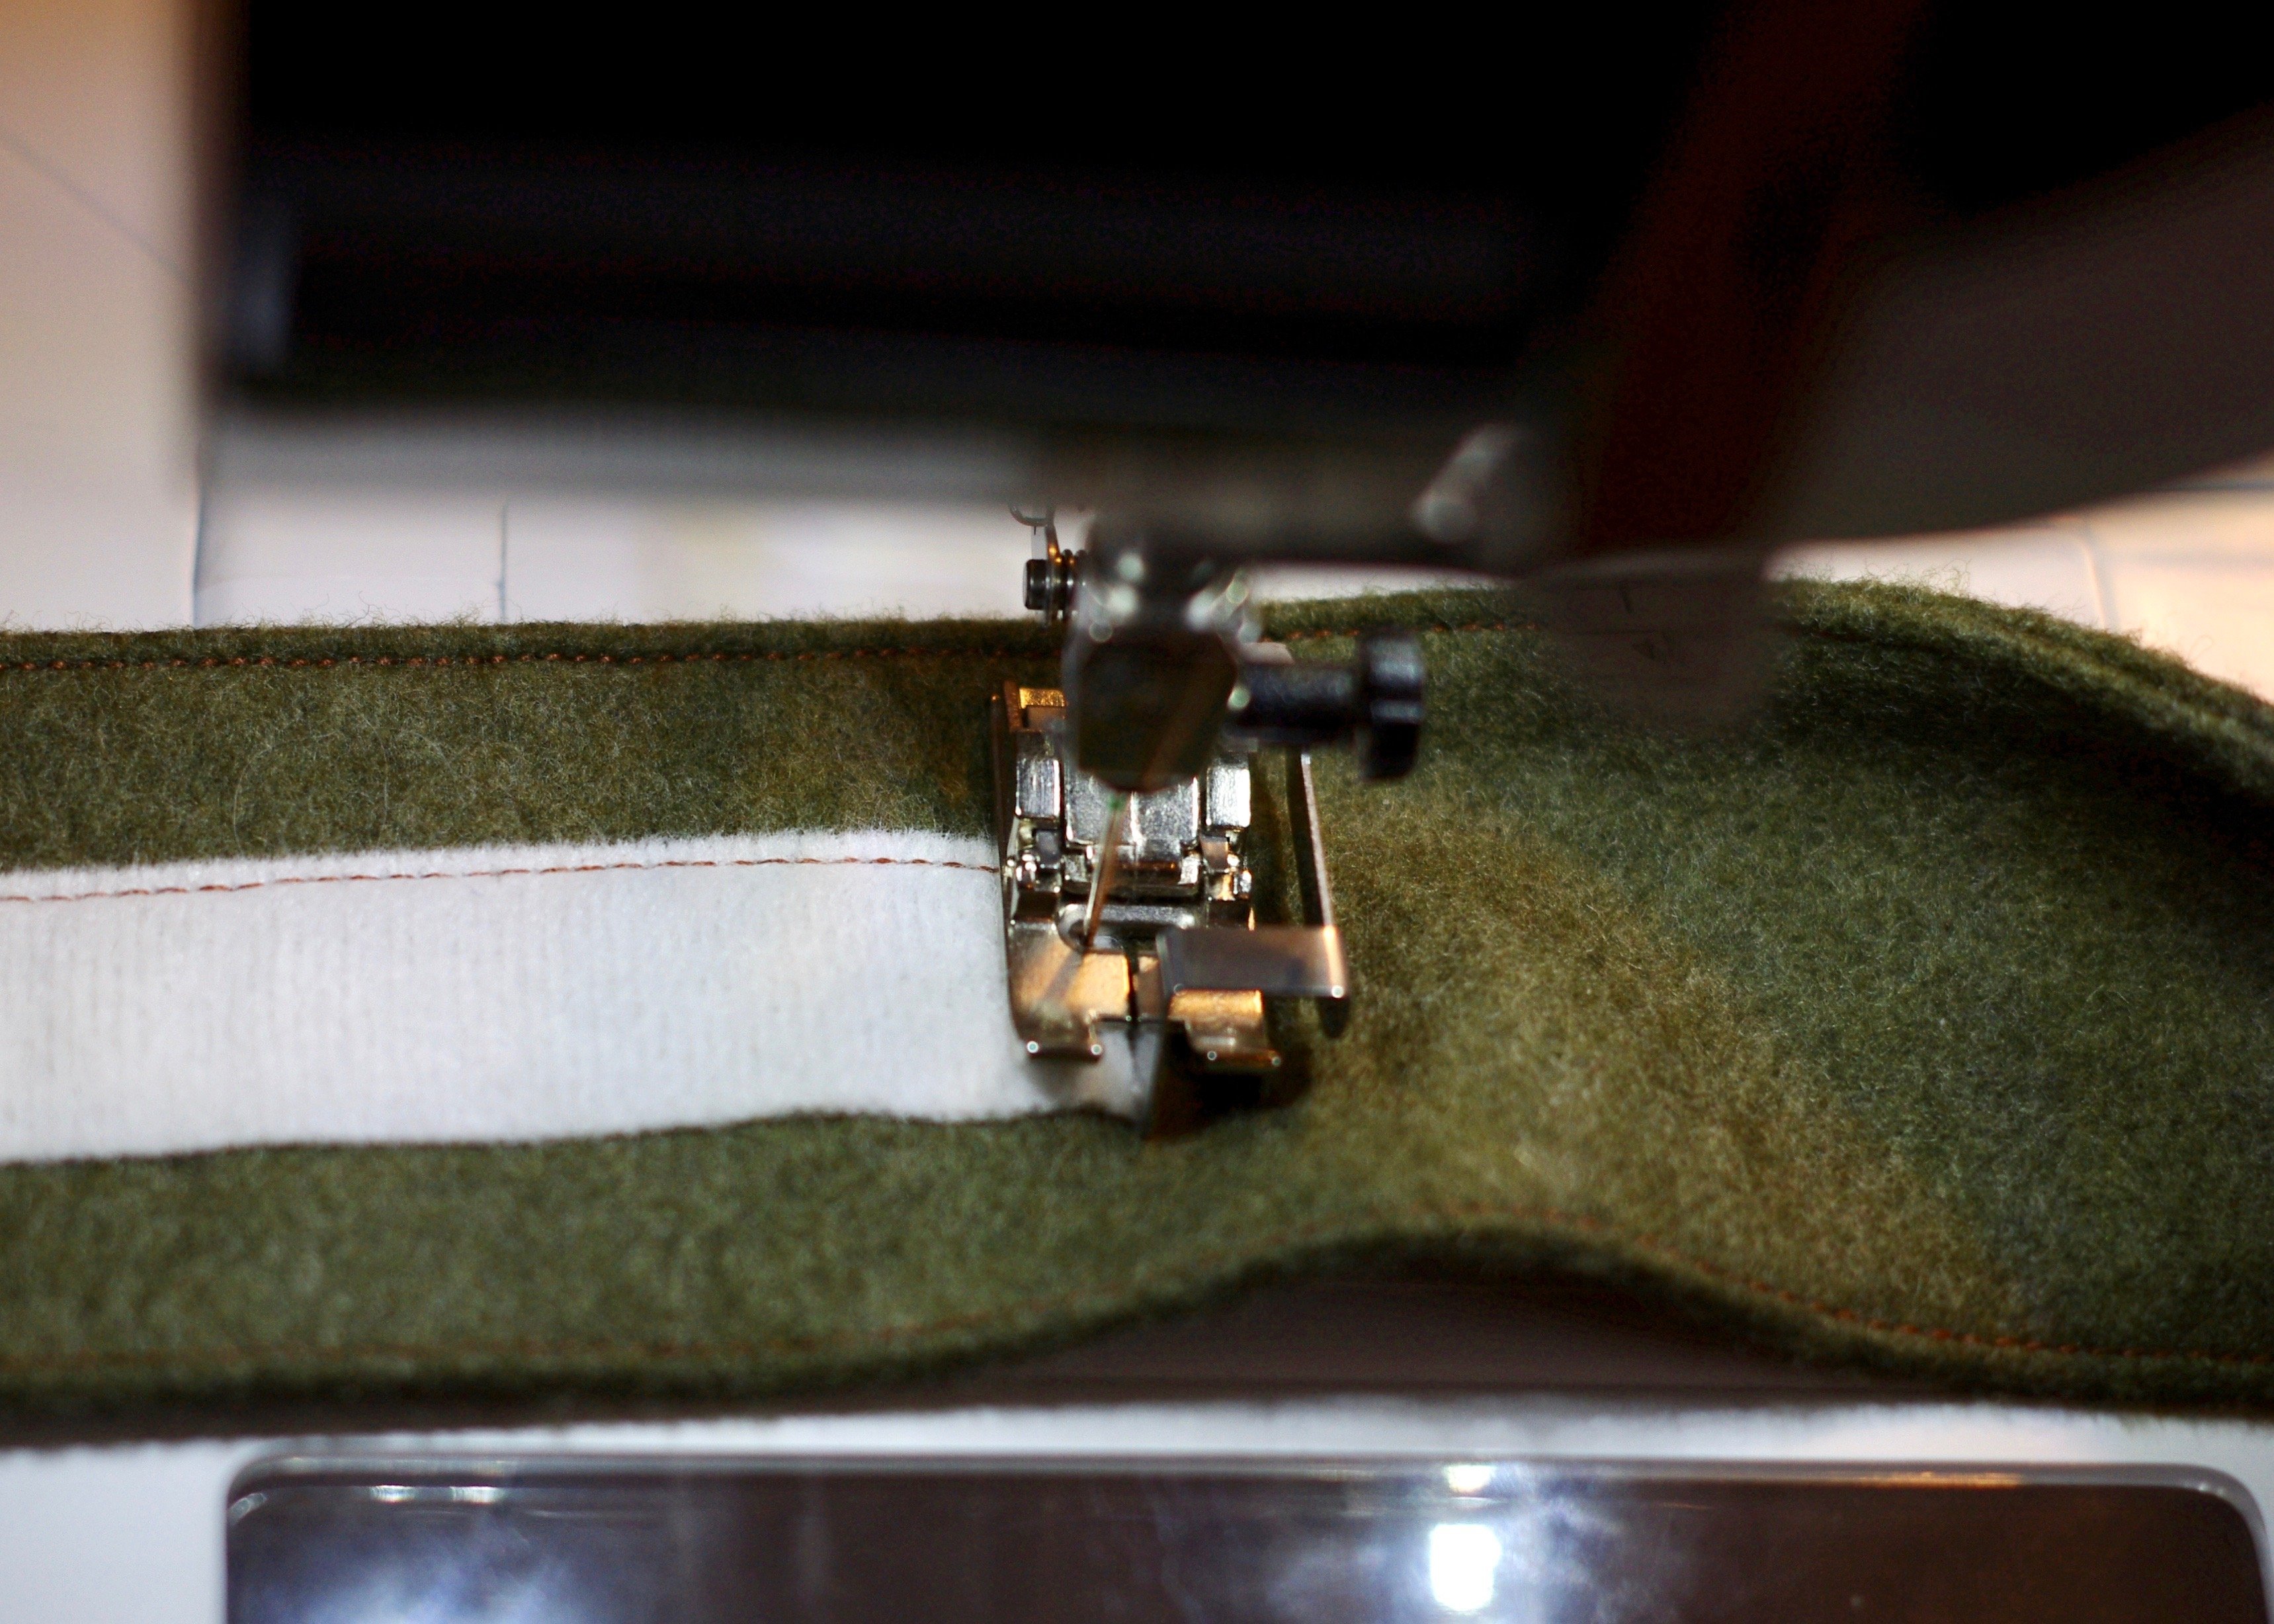
I use a zig-zag stitch for the loop. The seam allowances are now fixed on the back. Sew round the edge of the belt, leaving an opening for turning inside out.
Turn the belt inside out and pull into shape. Sew up the opening.
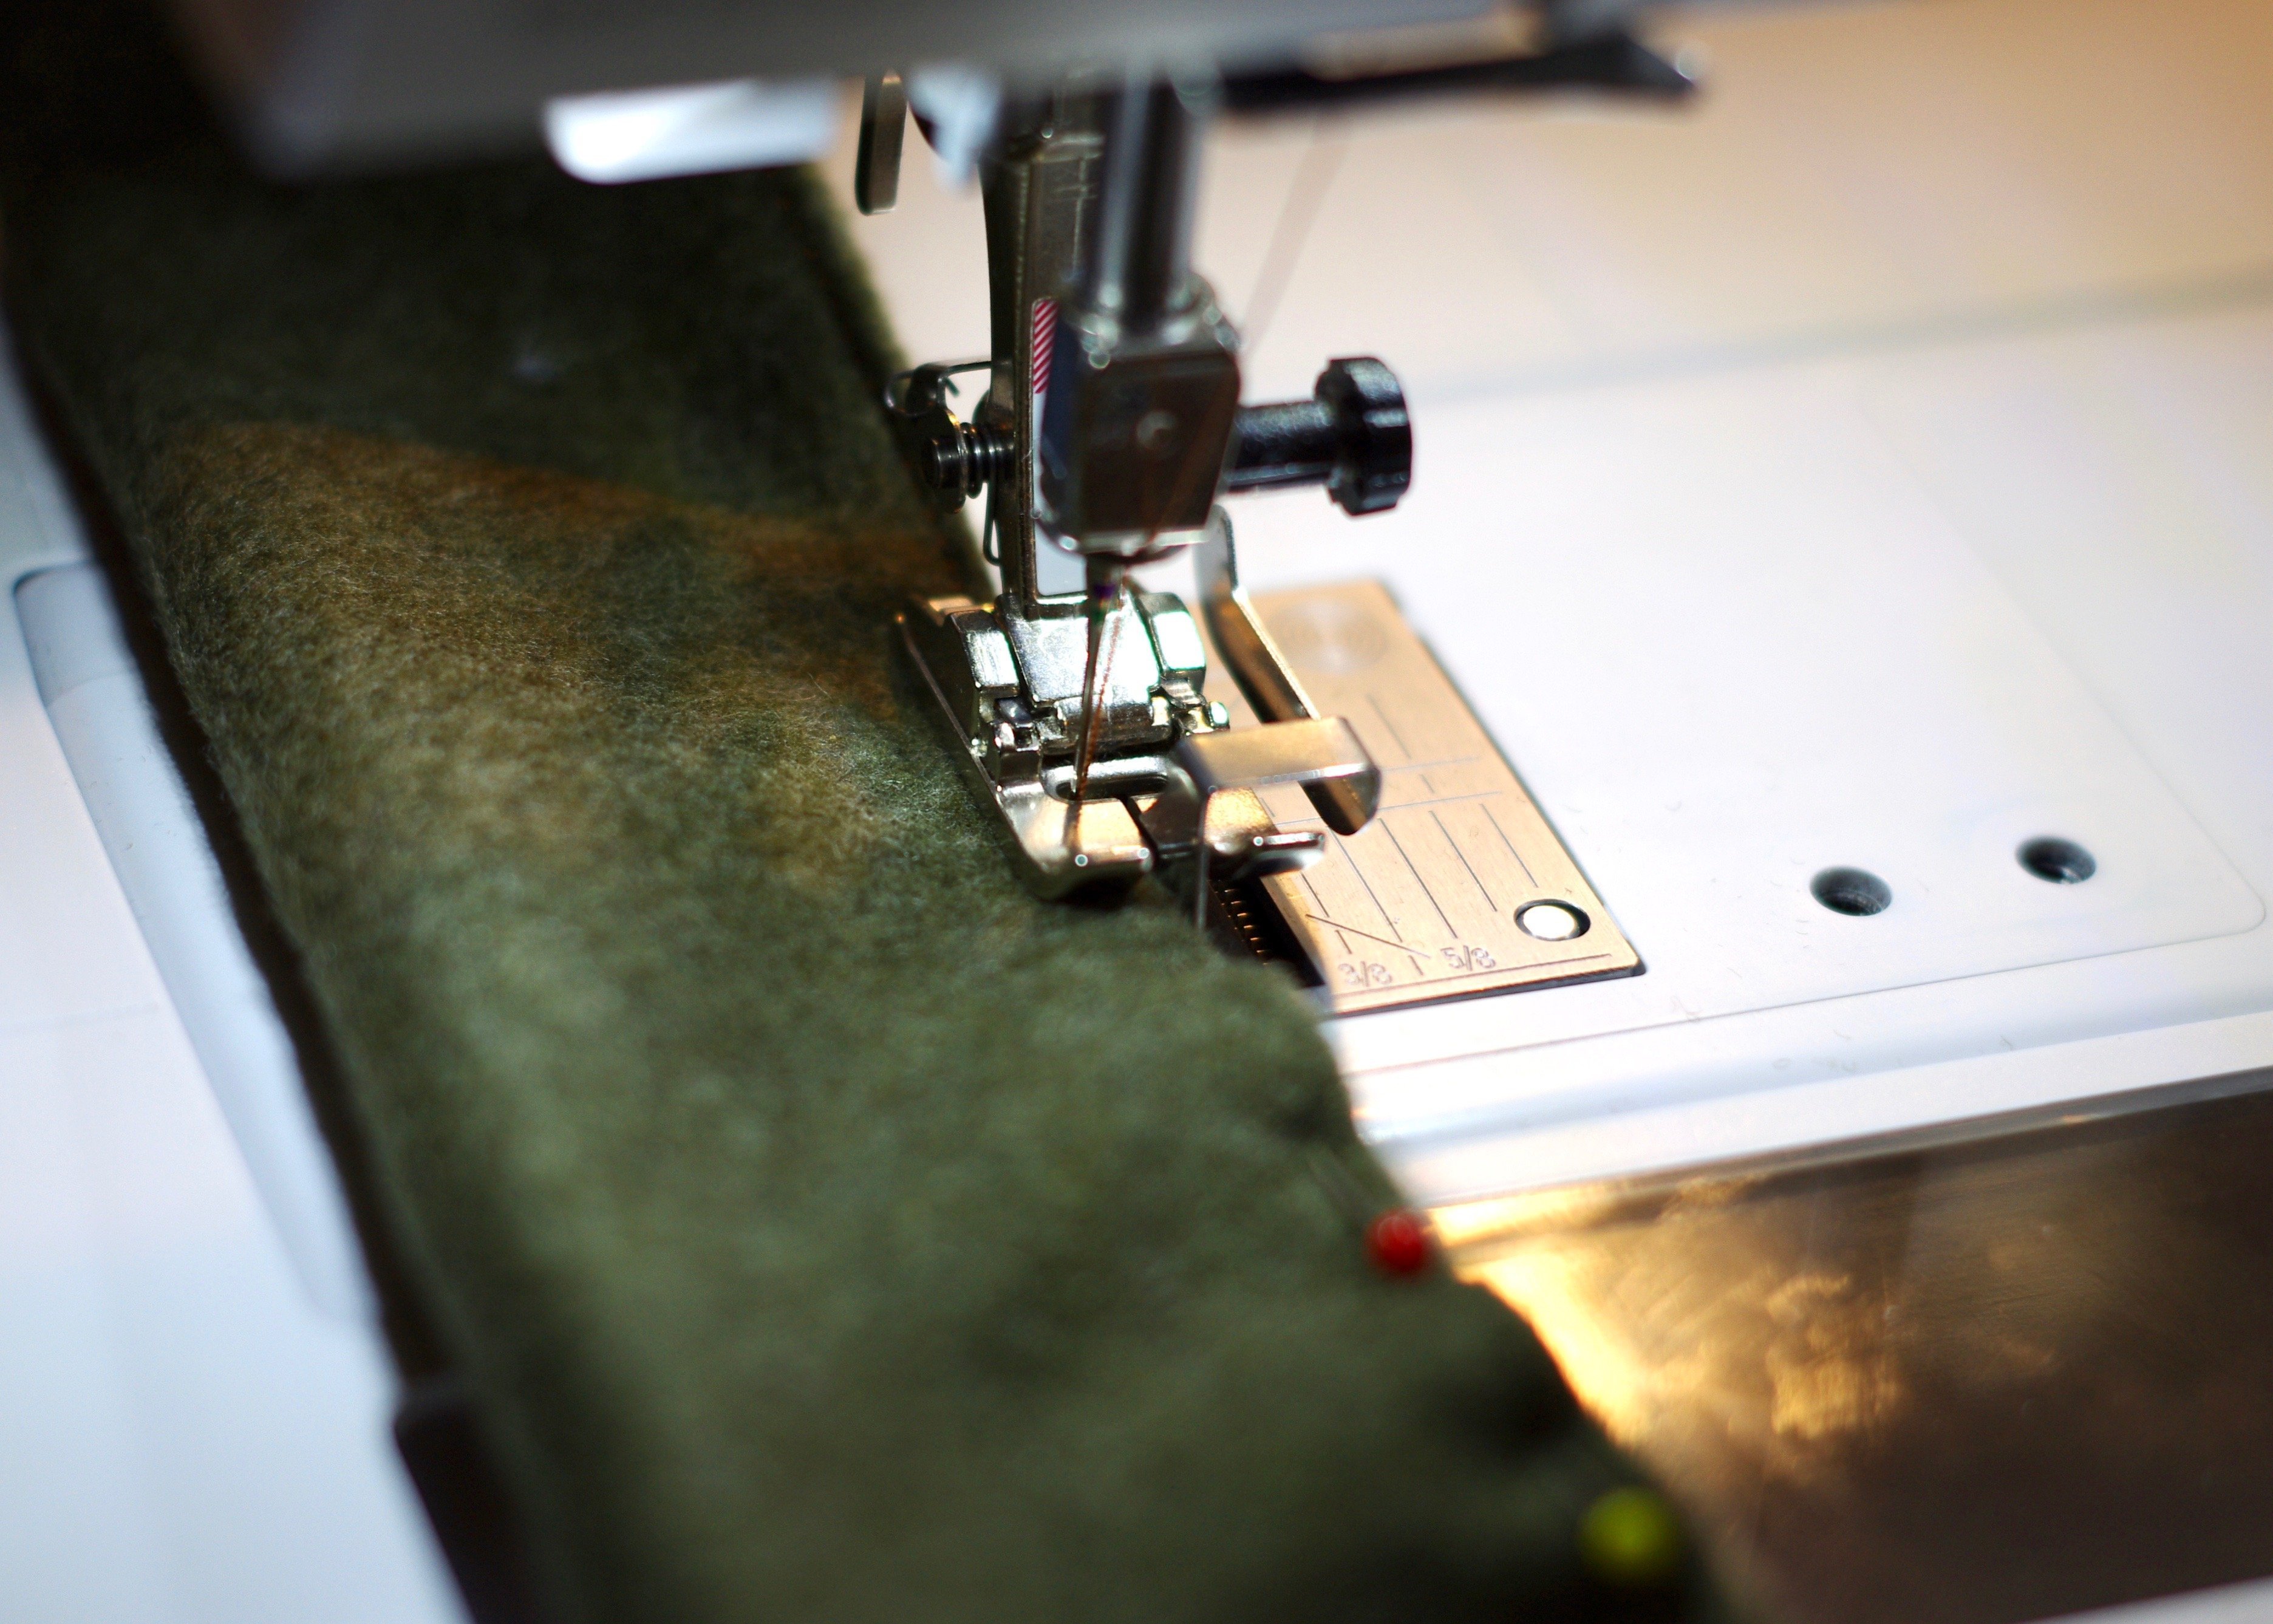
Finally, use the BERNINA edgestitch foot No.10 to sew close to the edge all the way round. The opening for turning right side out is sealed when sewing.
Positioning the pockets
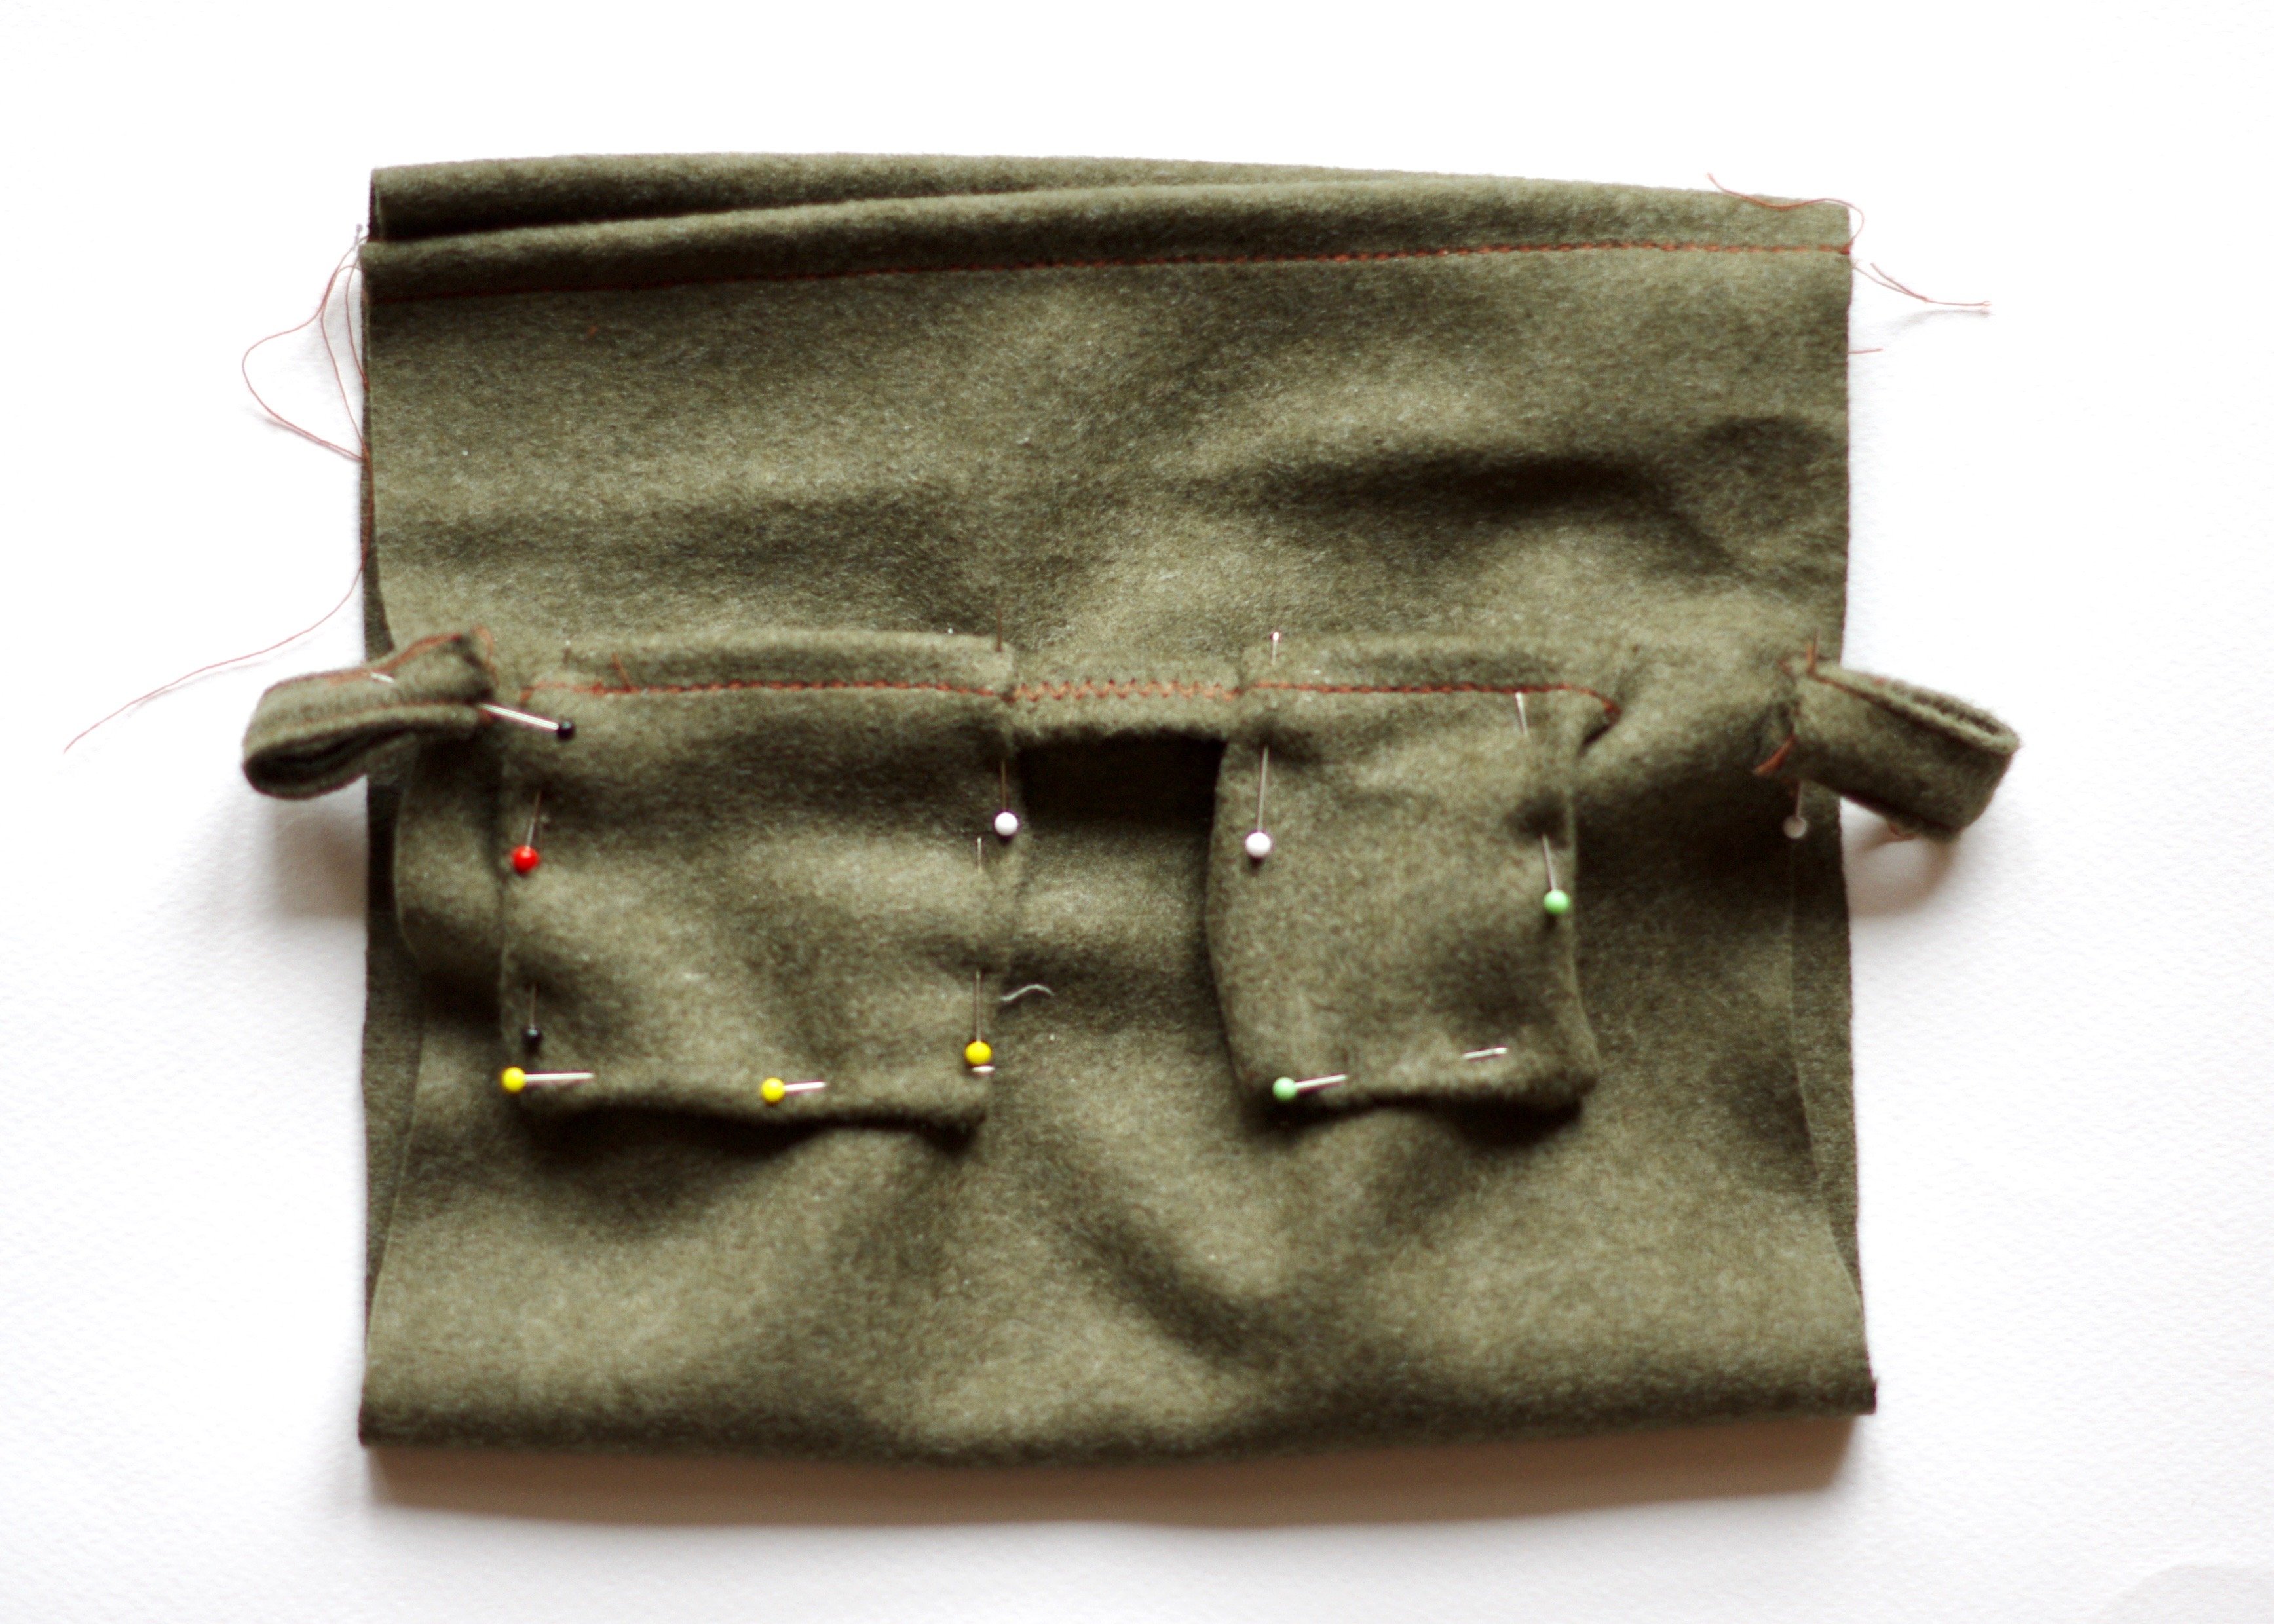
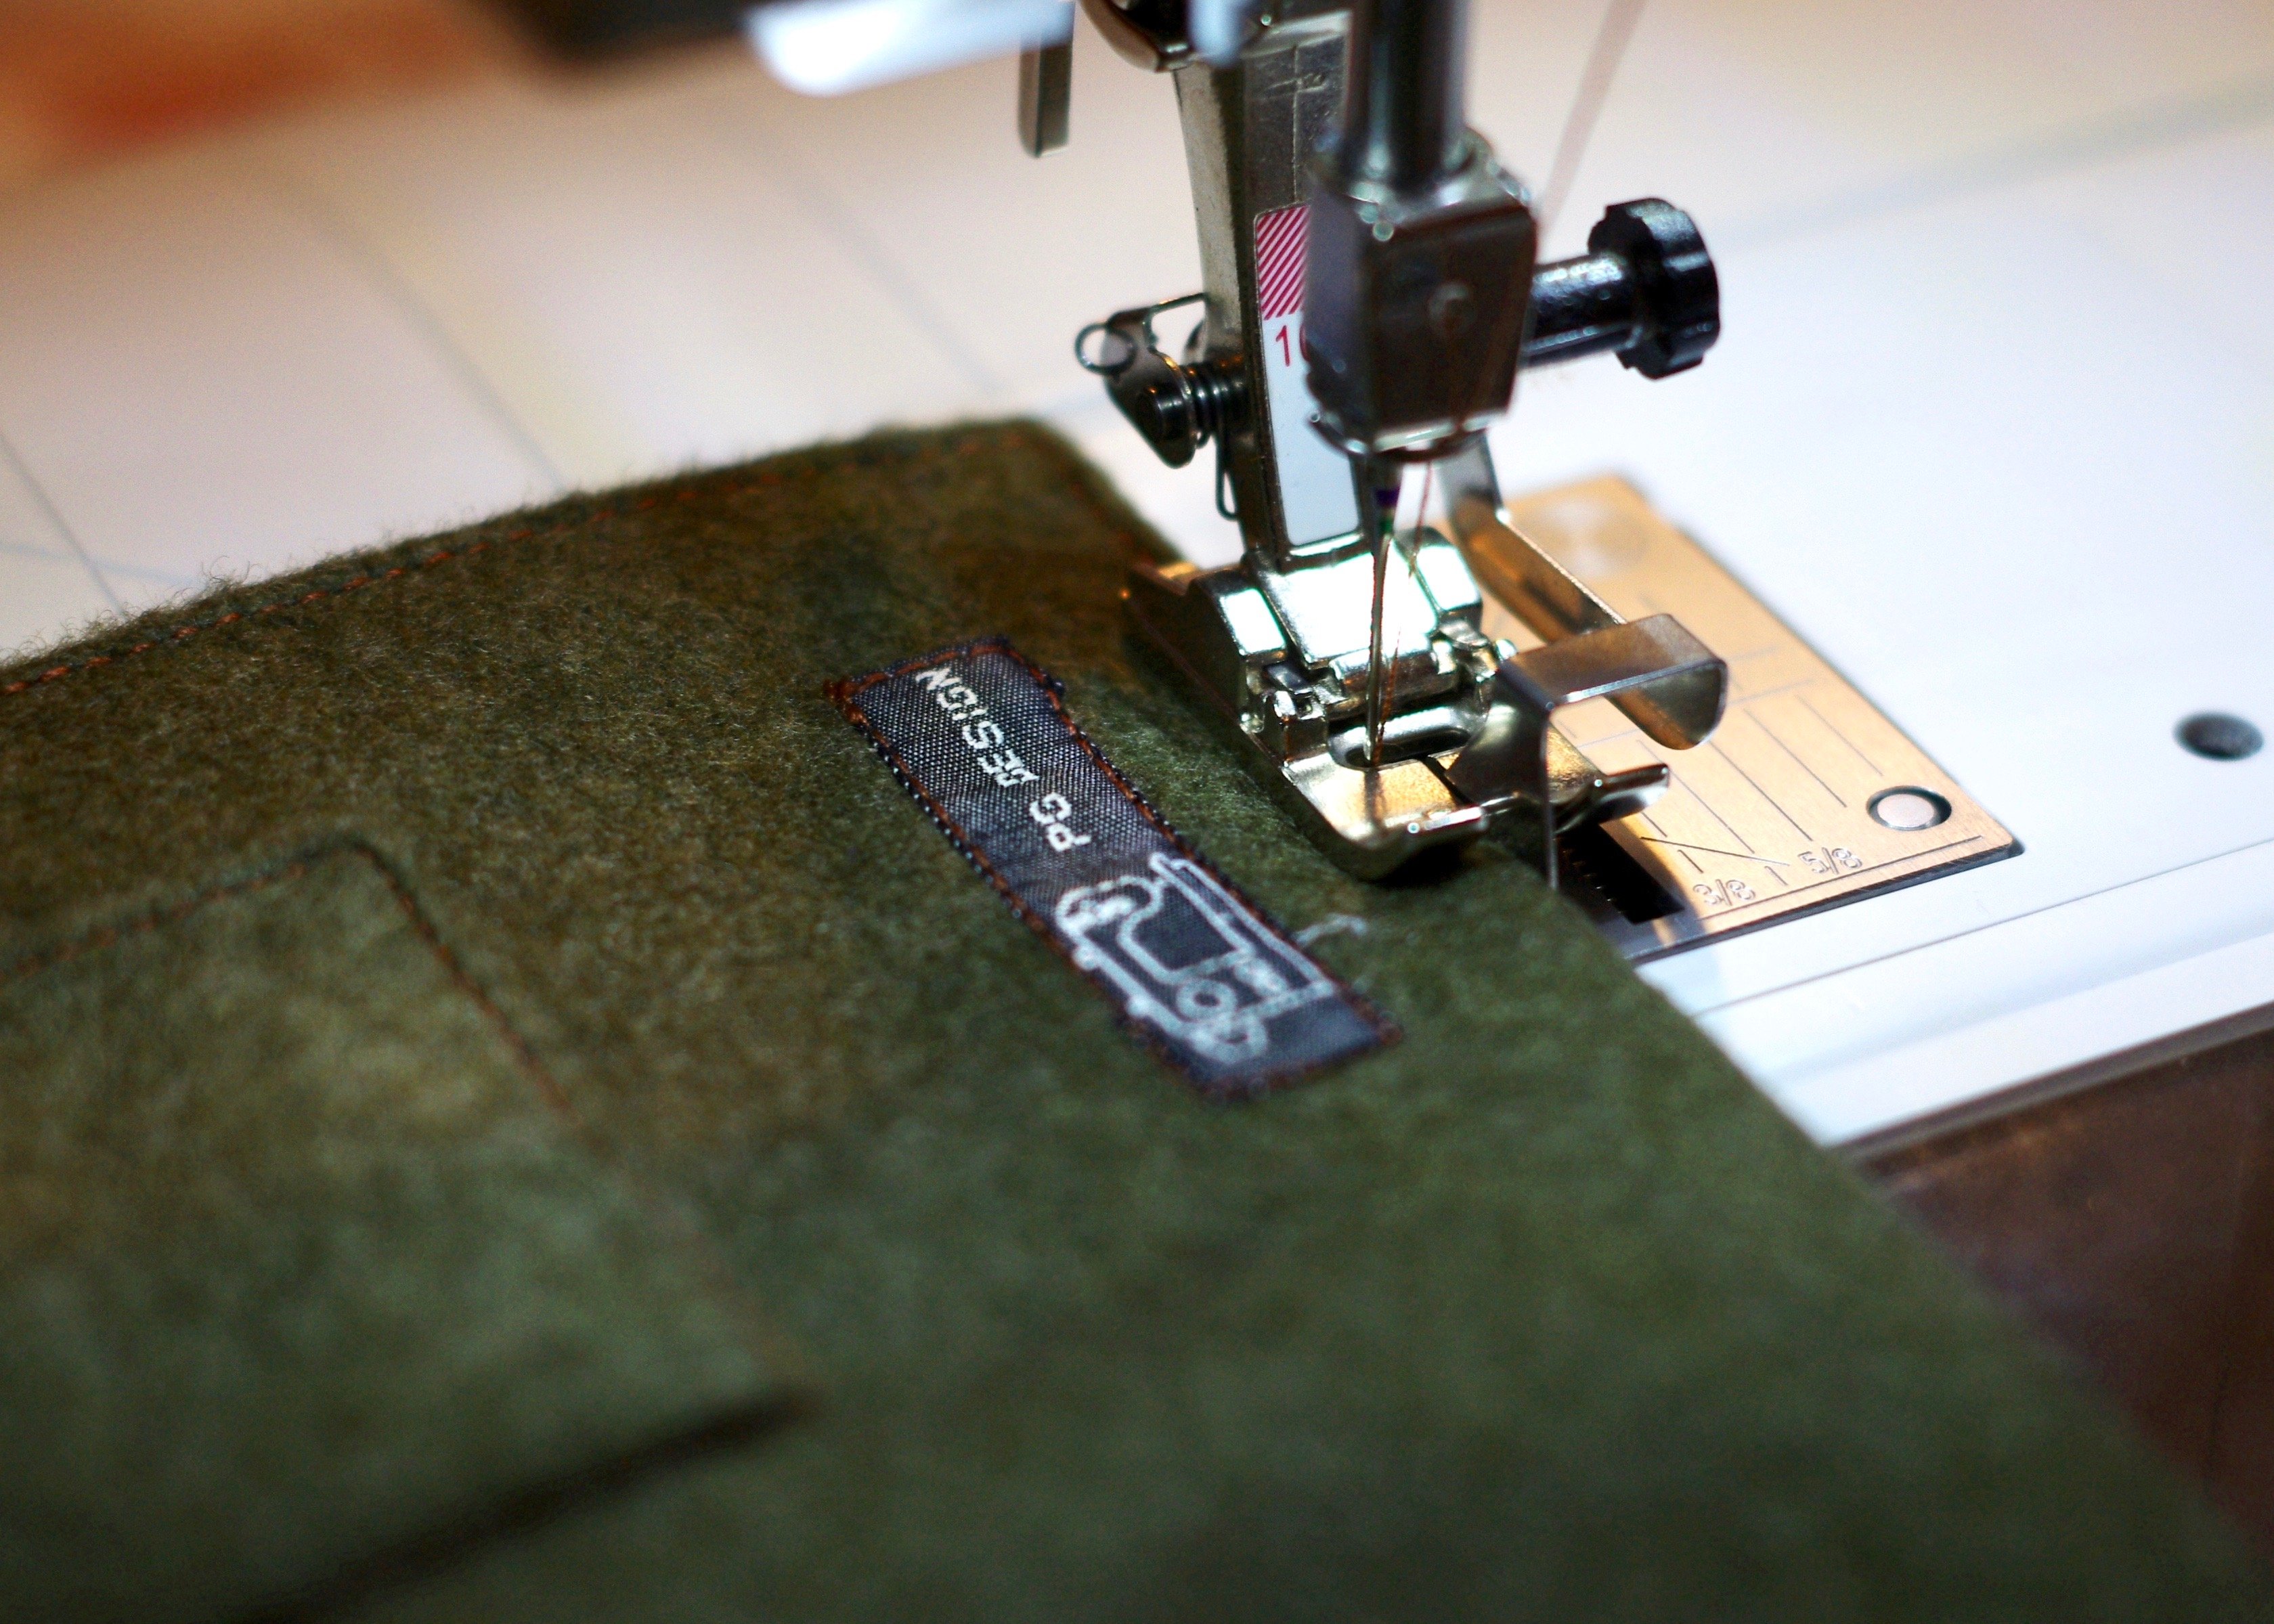
In the next step, the pockets are sewn onto the right side of the tool belt. The seam allowances are folded in at this point. Now is also the time to position the loops on the side edges. I have pinned them onto the outside here so that they are easier to identify, but they are sewn onto the inside.
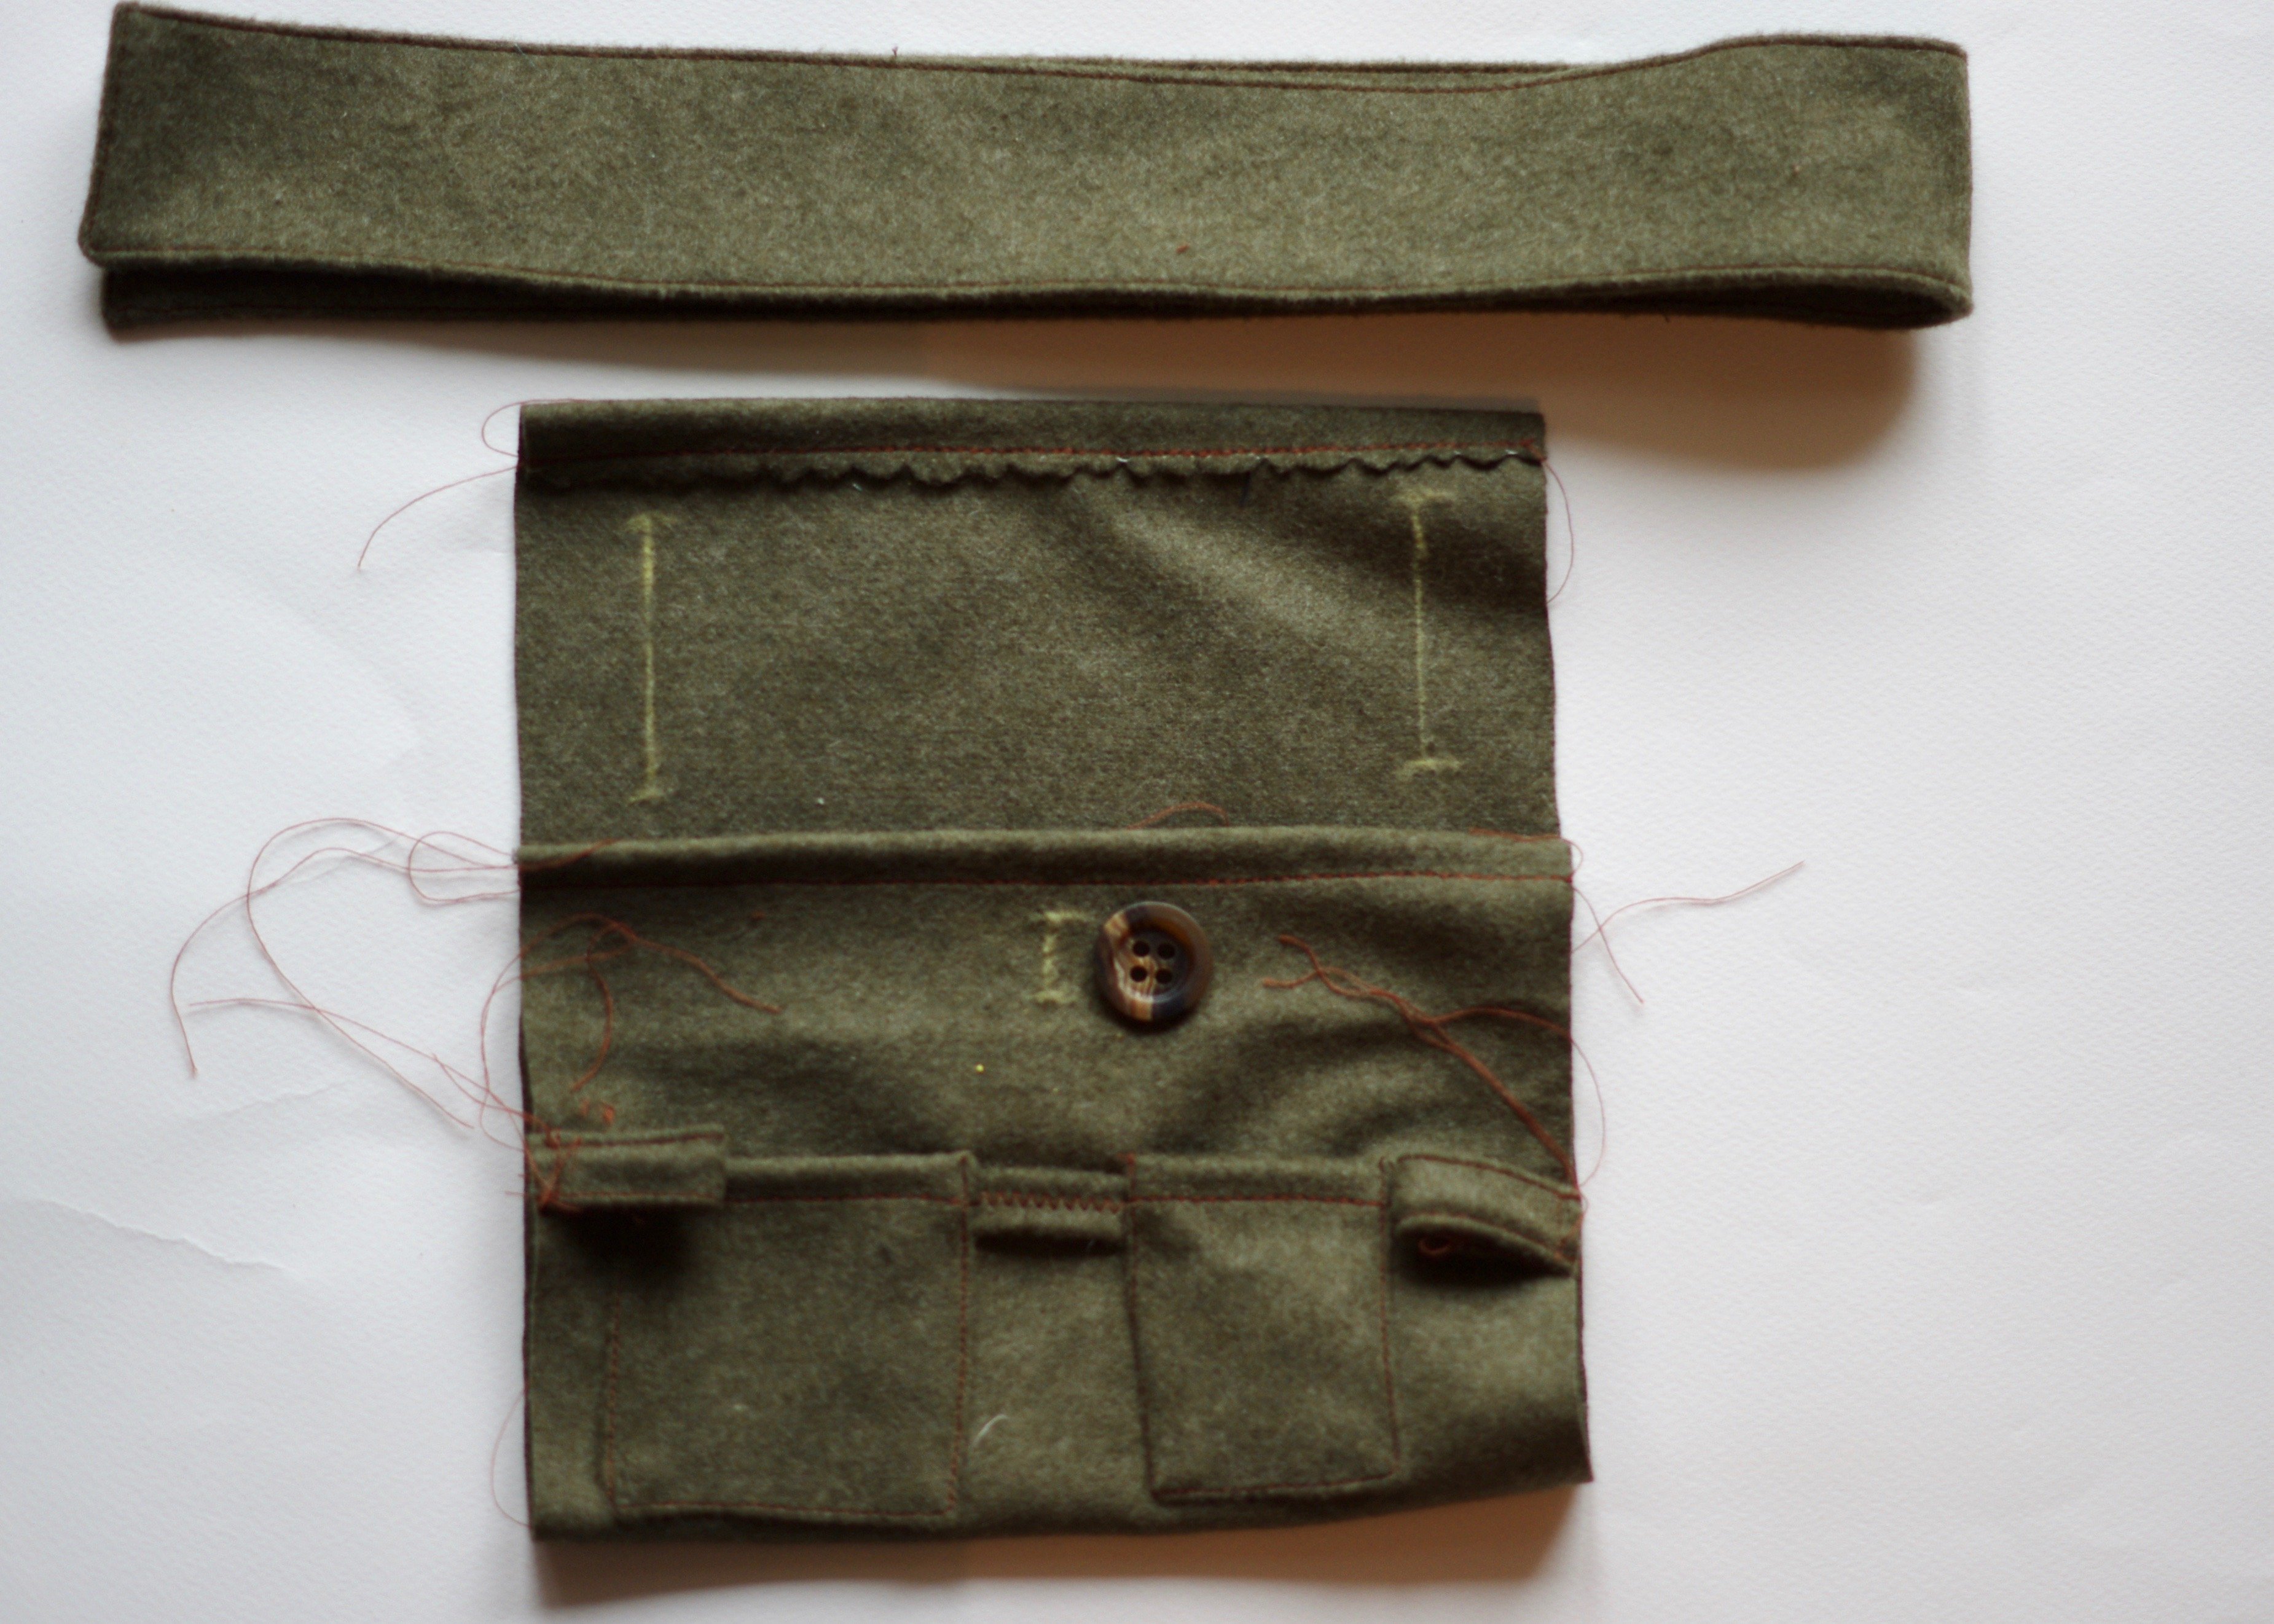
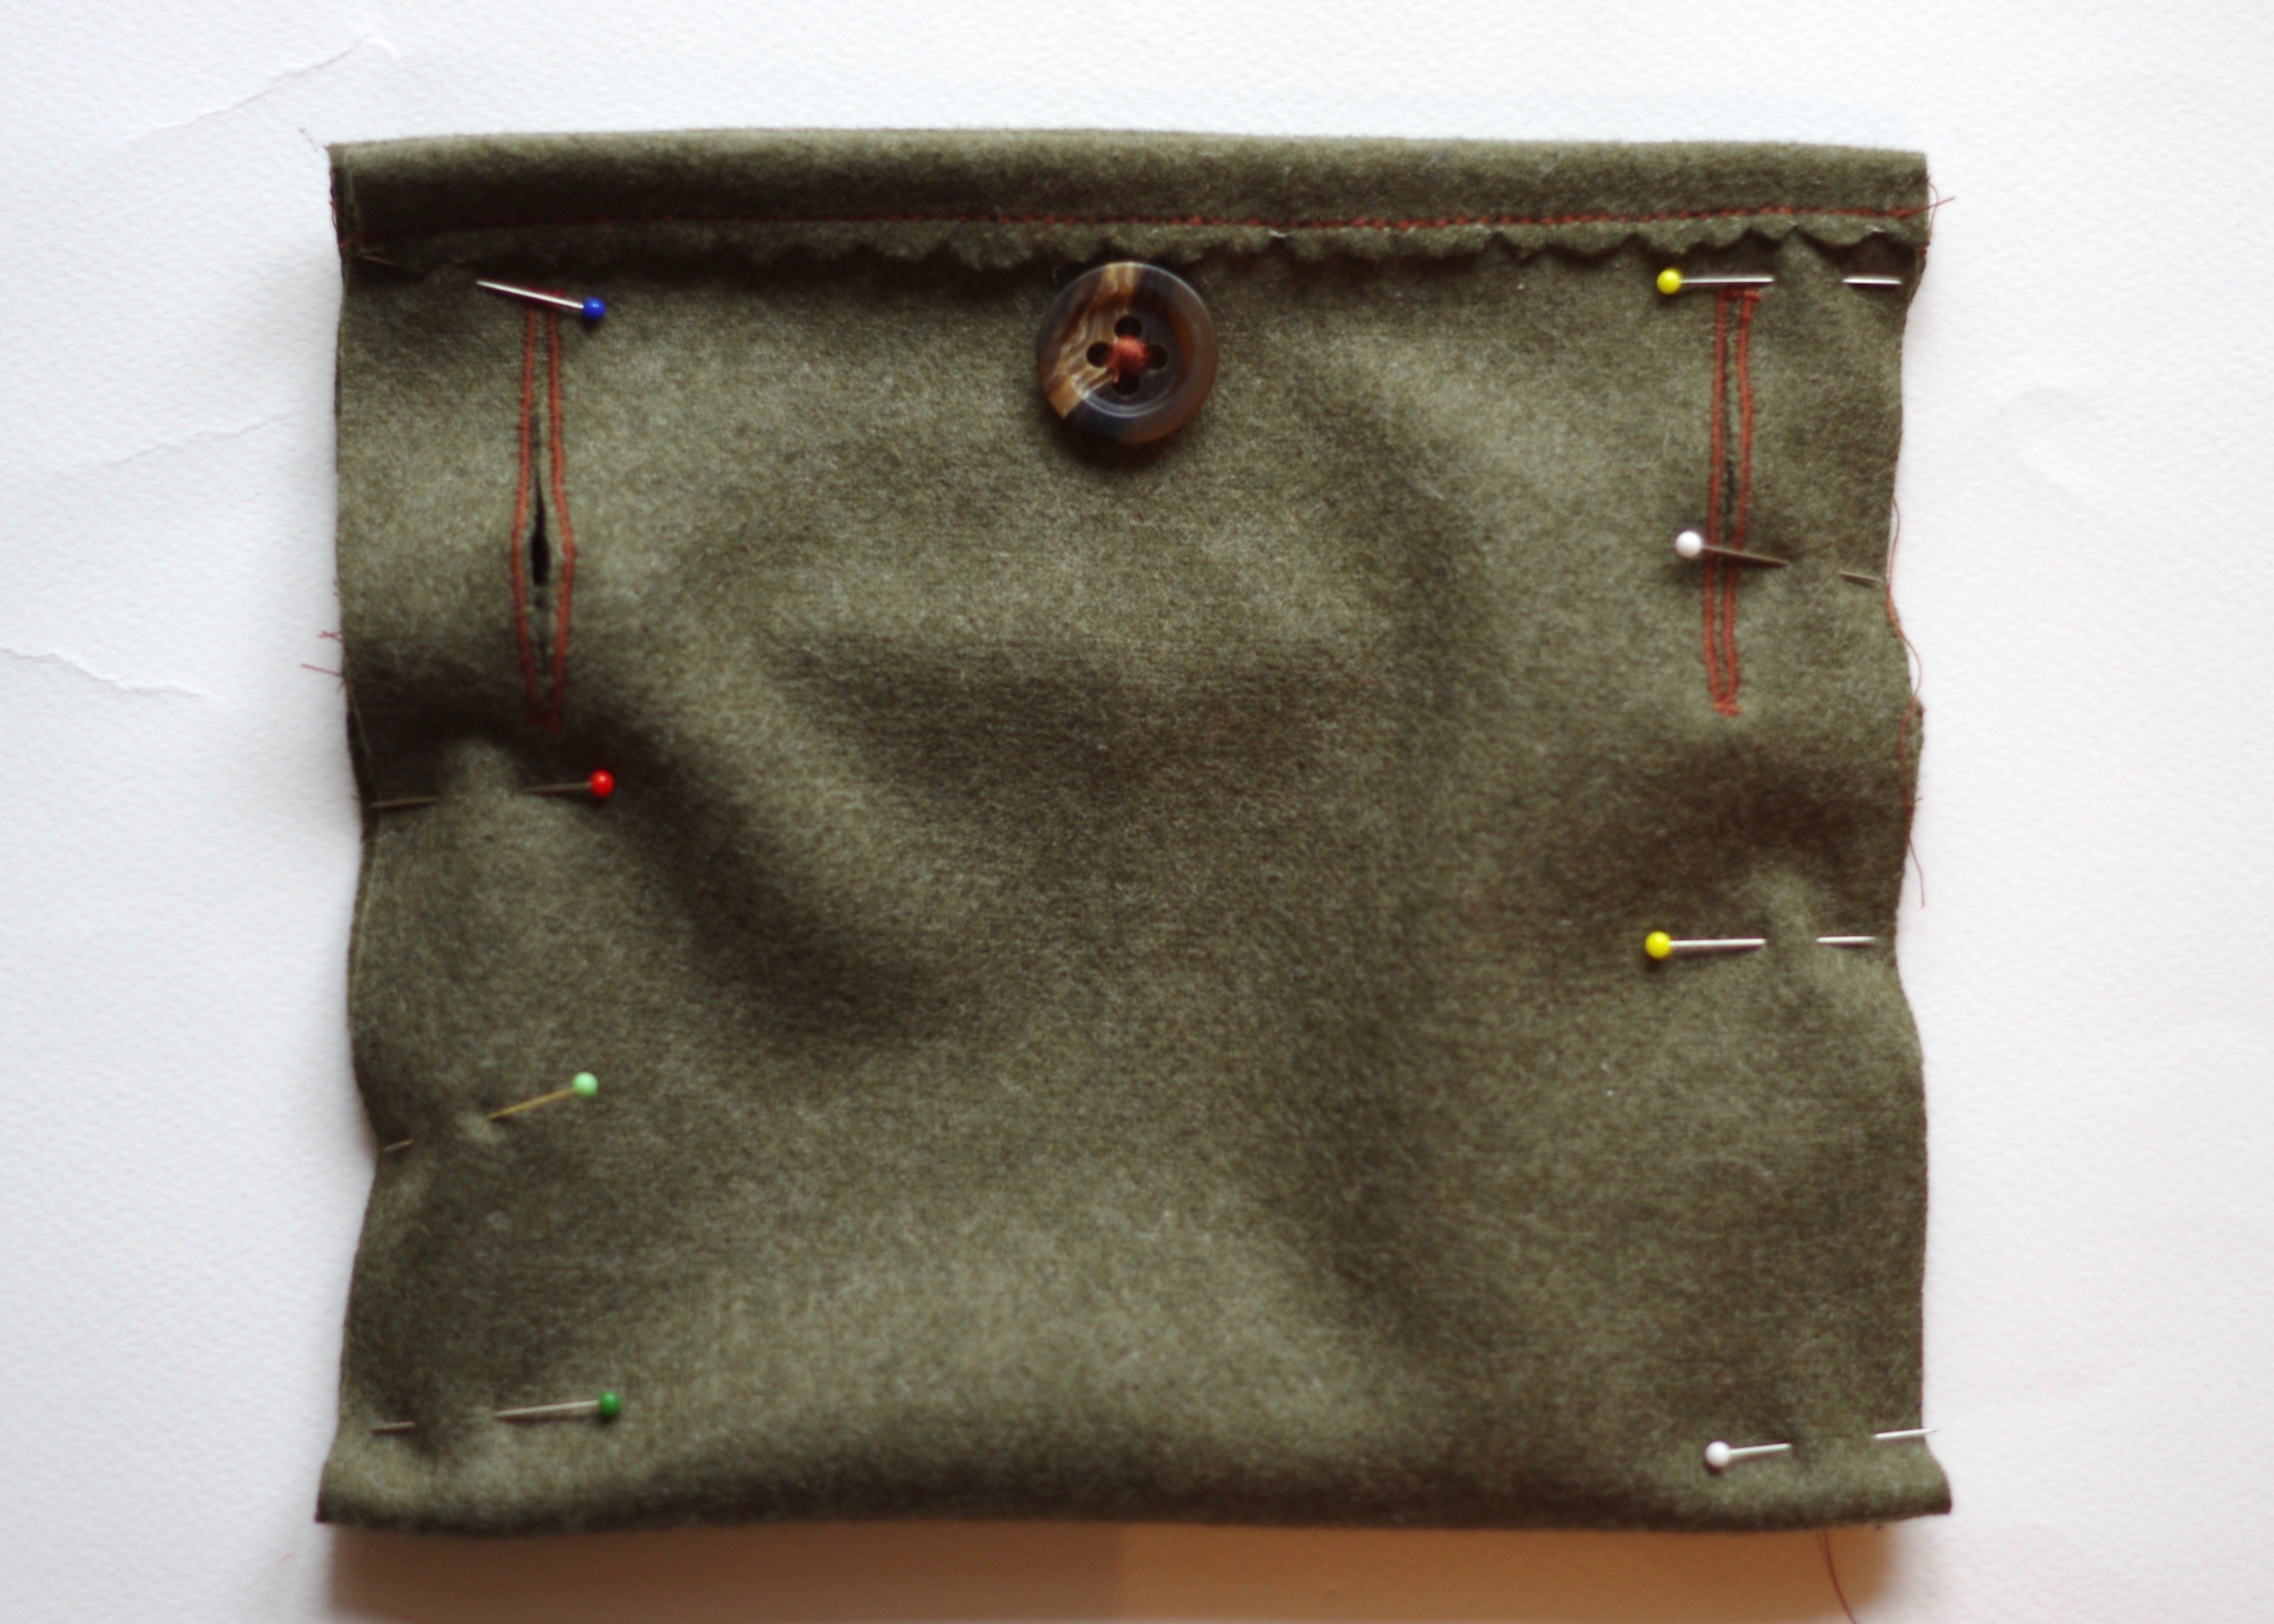
Stitch the pockets close to the selvedge and fix the loops in place with a couple of stitches. Establish where the front buttonhole needs to be and mark the holes for the belt slits.
Sewing the buttonholes

I used the BERNINA sewing foot No. 3A for the front buttonhole.

I sewed the holes for the belt slits by hand using satin stitch as the holes are 5.2 cm long.
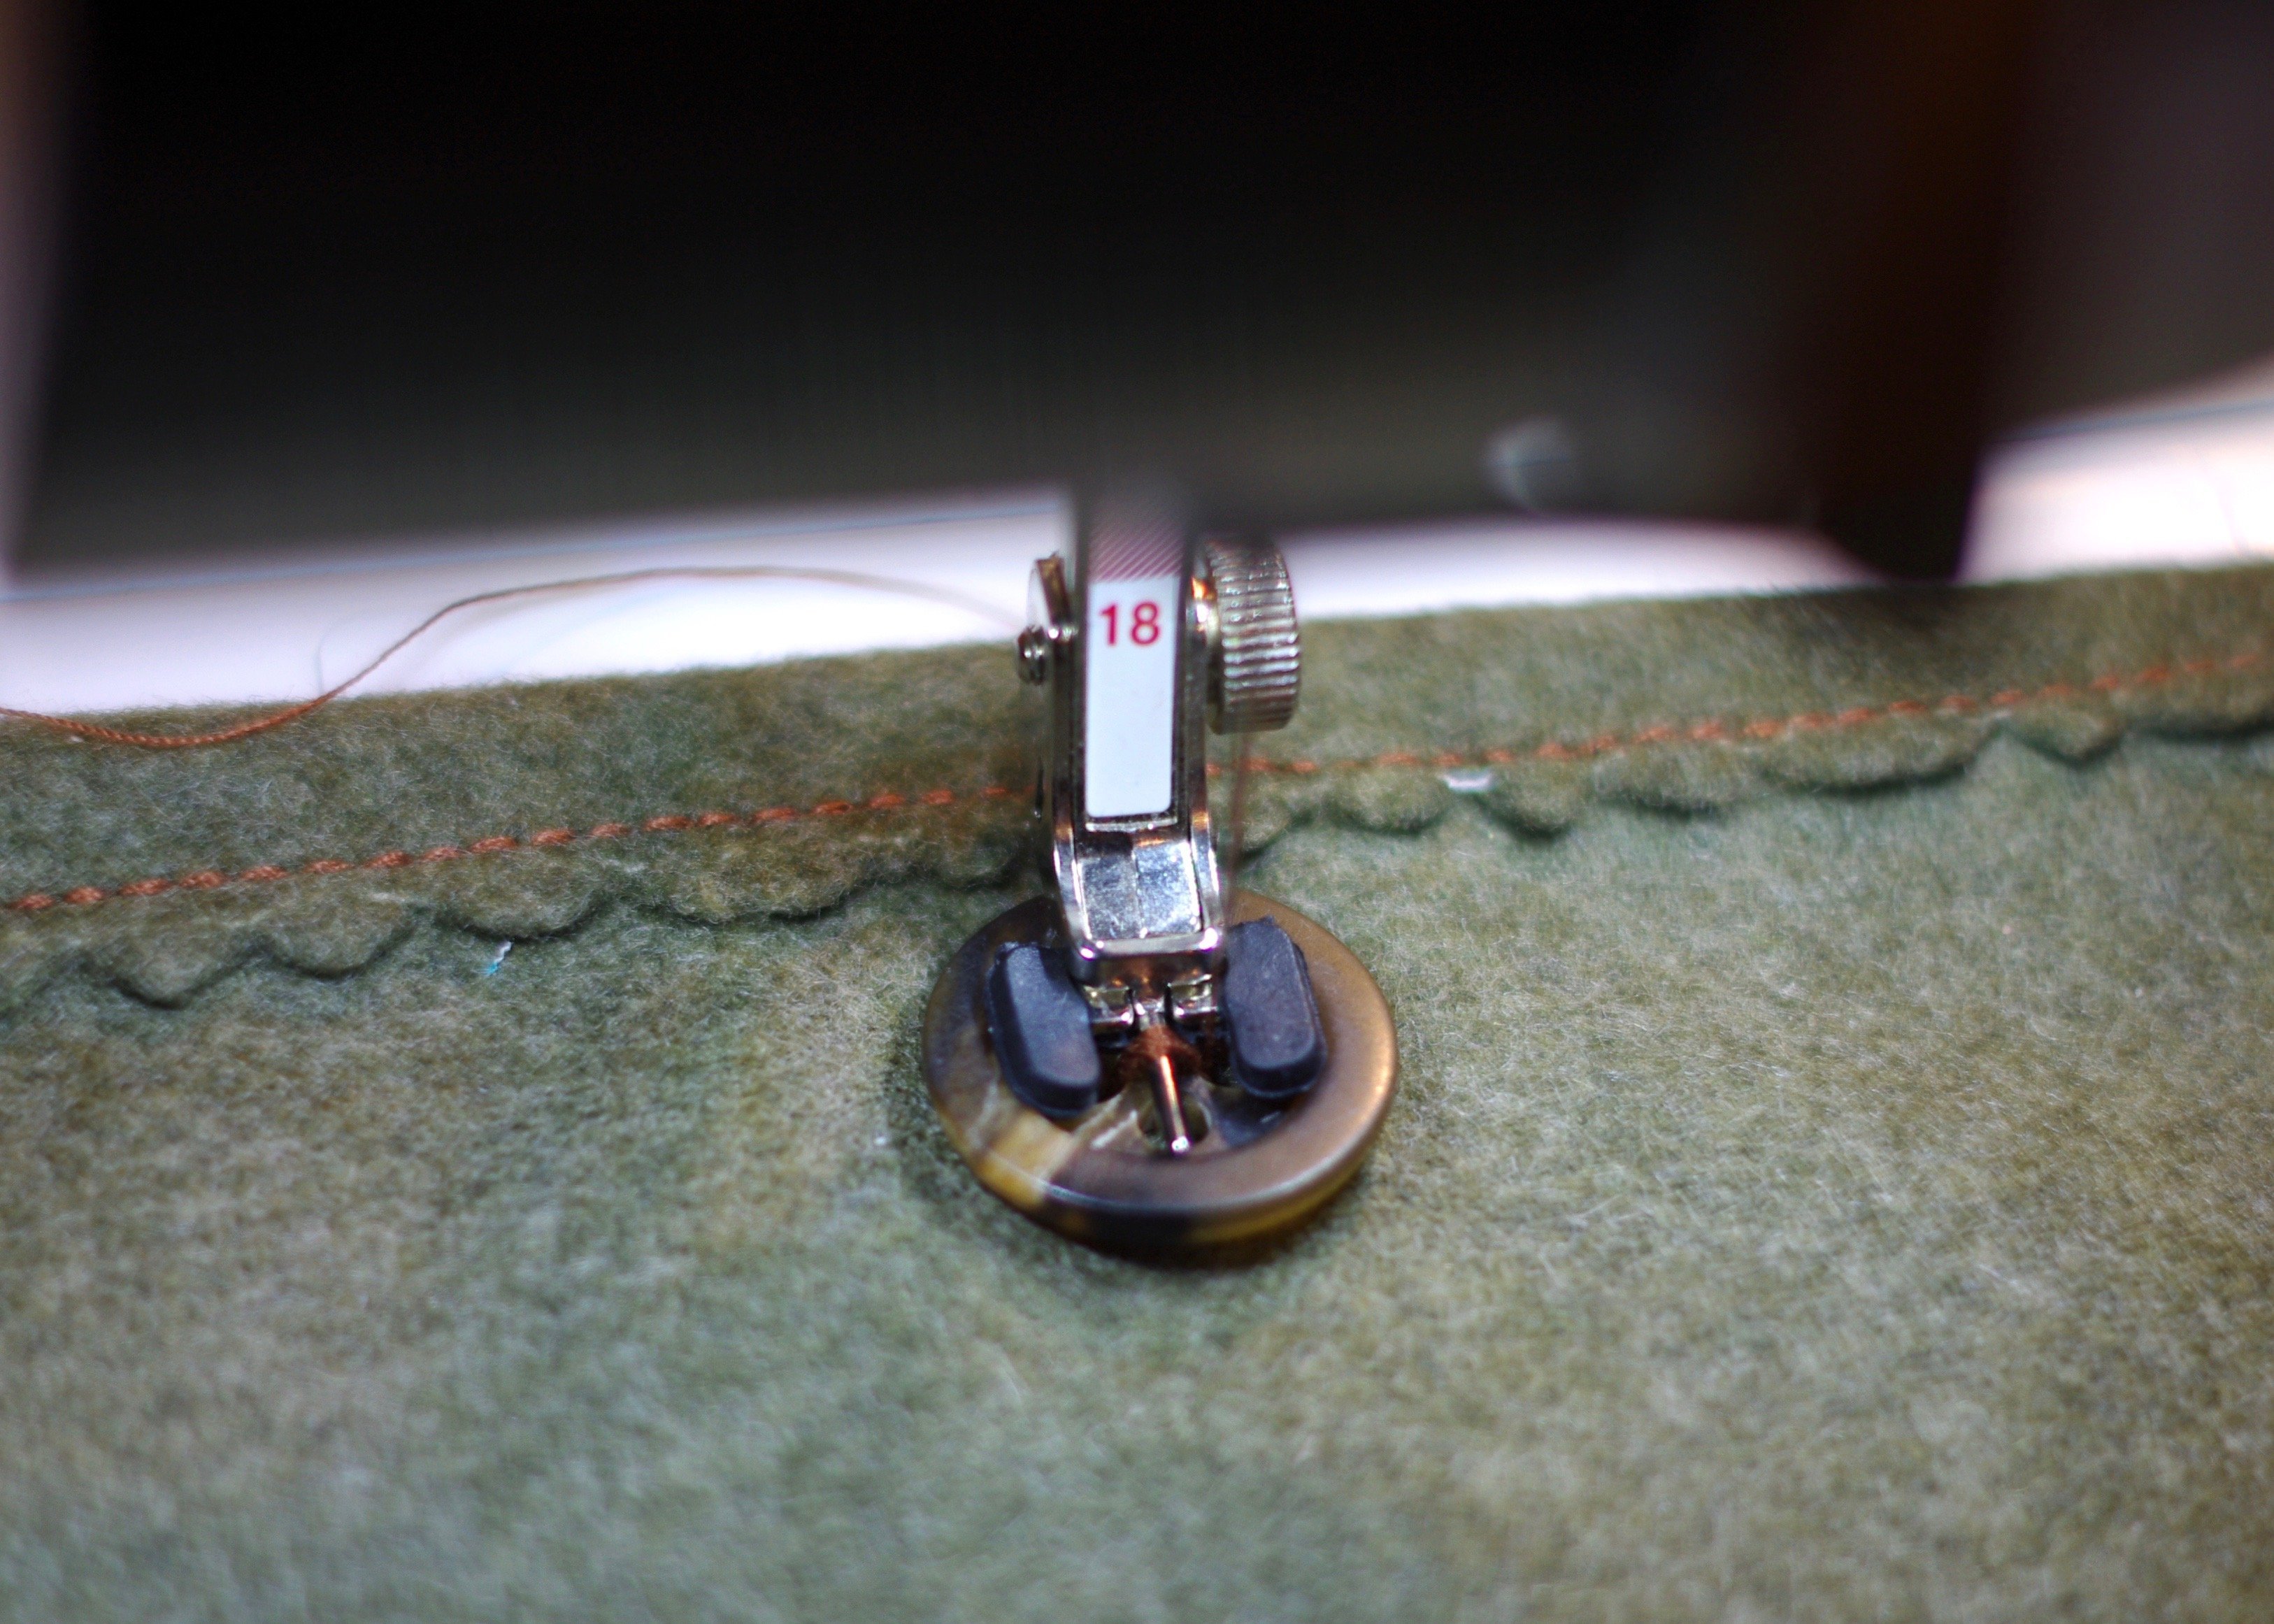
For sewing on buttons I always opt for the BERNINA sewing foot No. 18.
Finishing the pockets and belt
If you like you can sew a label or the child’s name on the front. Decorative stitching can also be used. The side seams are then closed by putting the pocket right sides together and stitching up the sides the width of the foot.
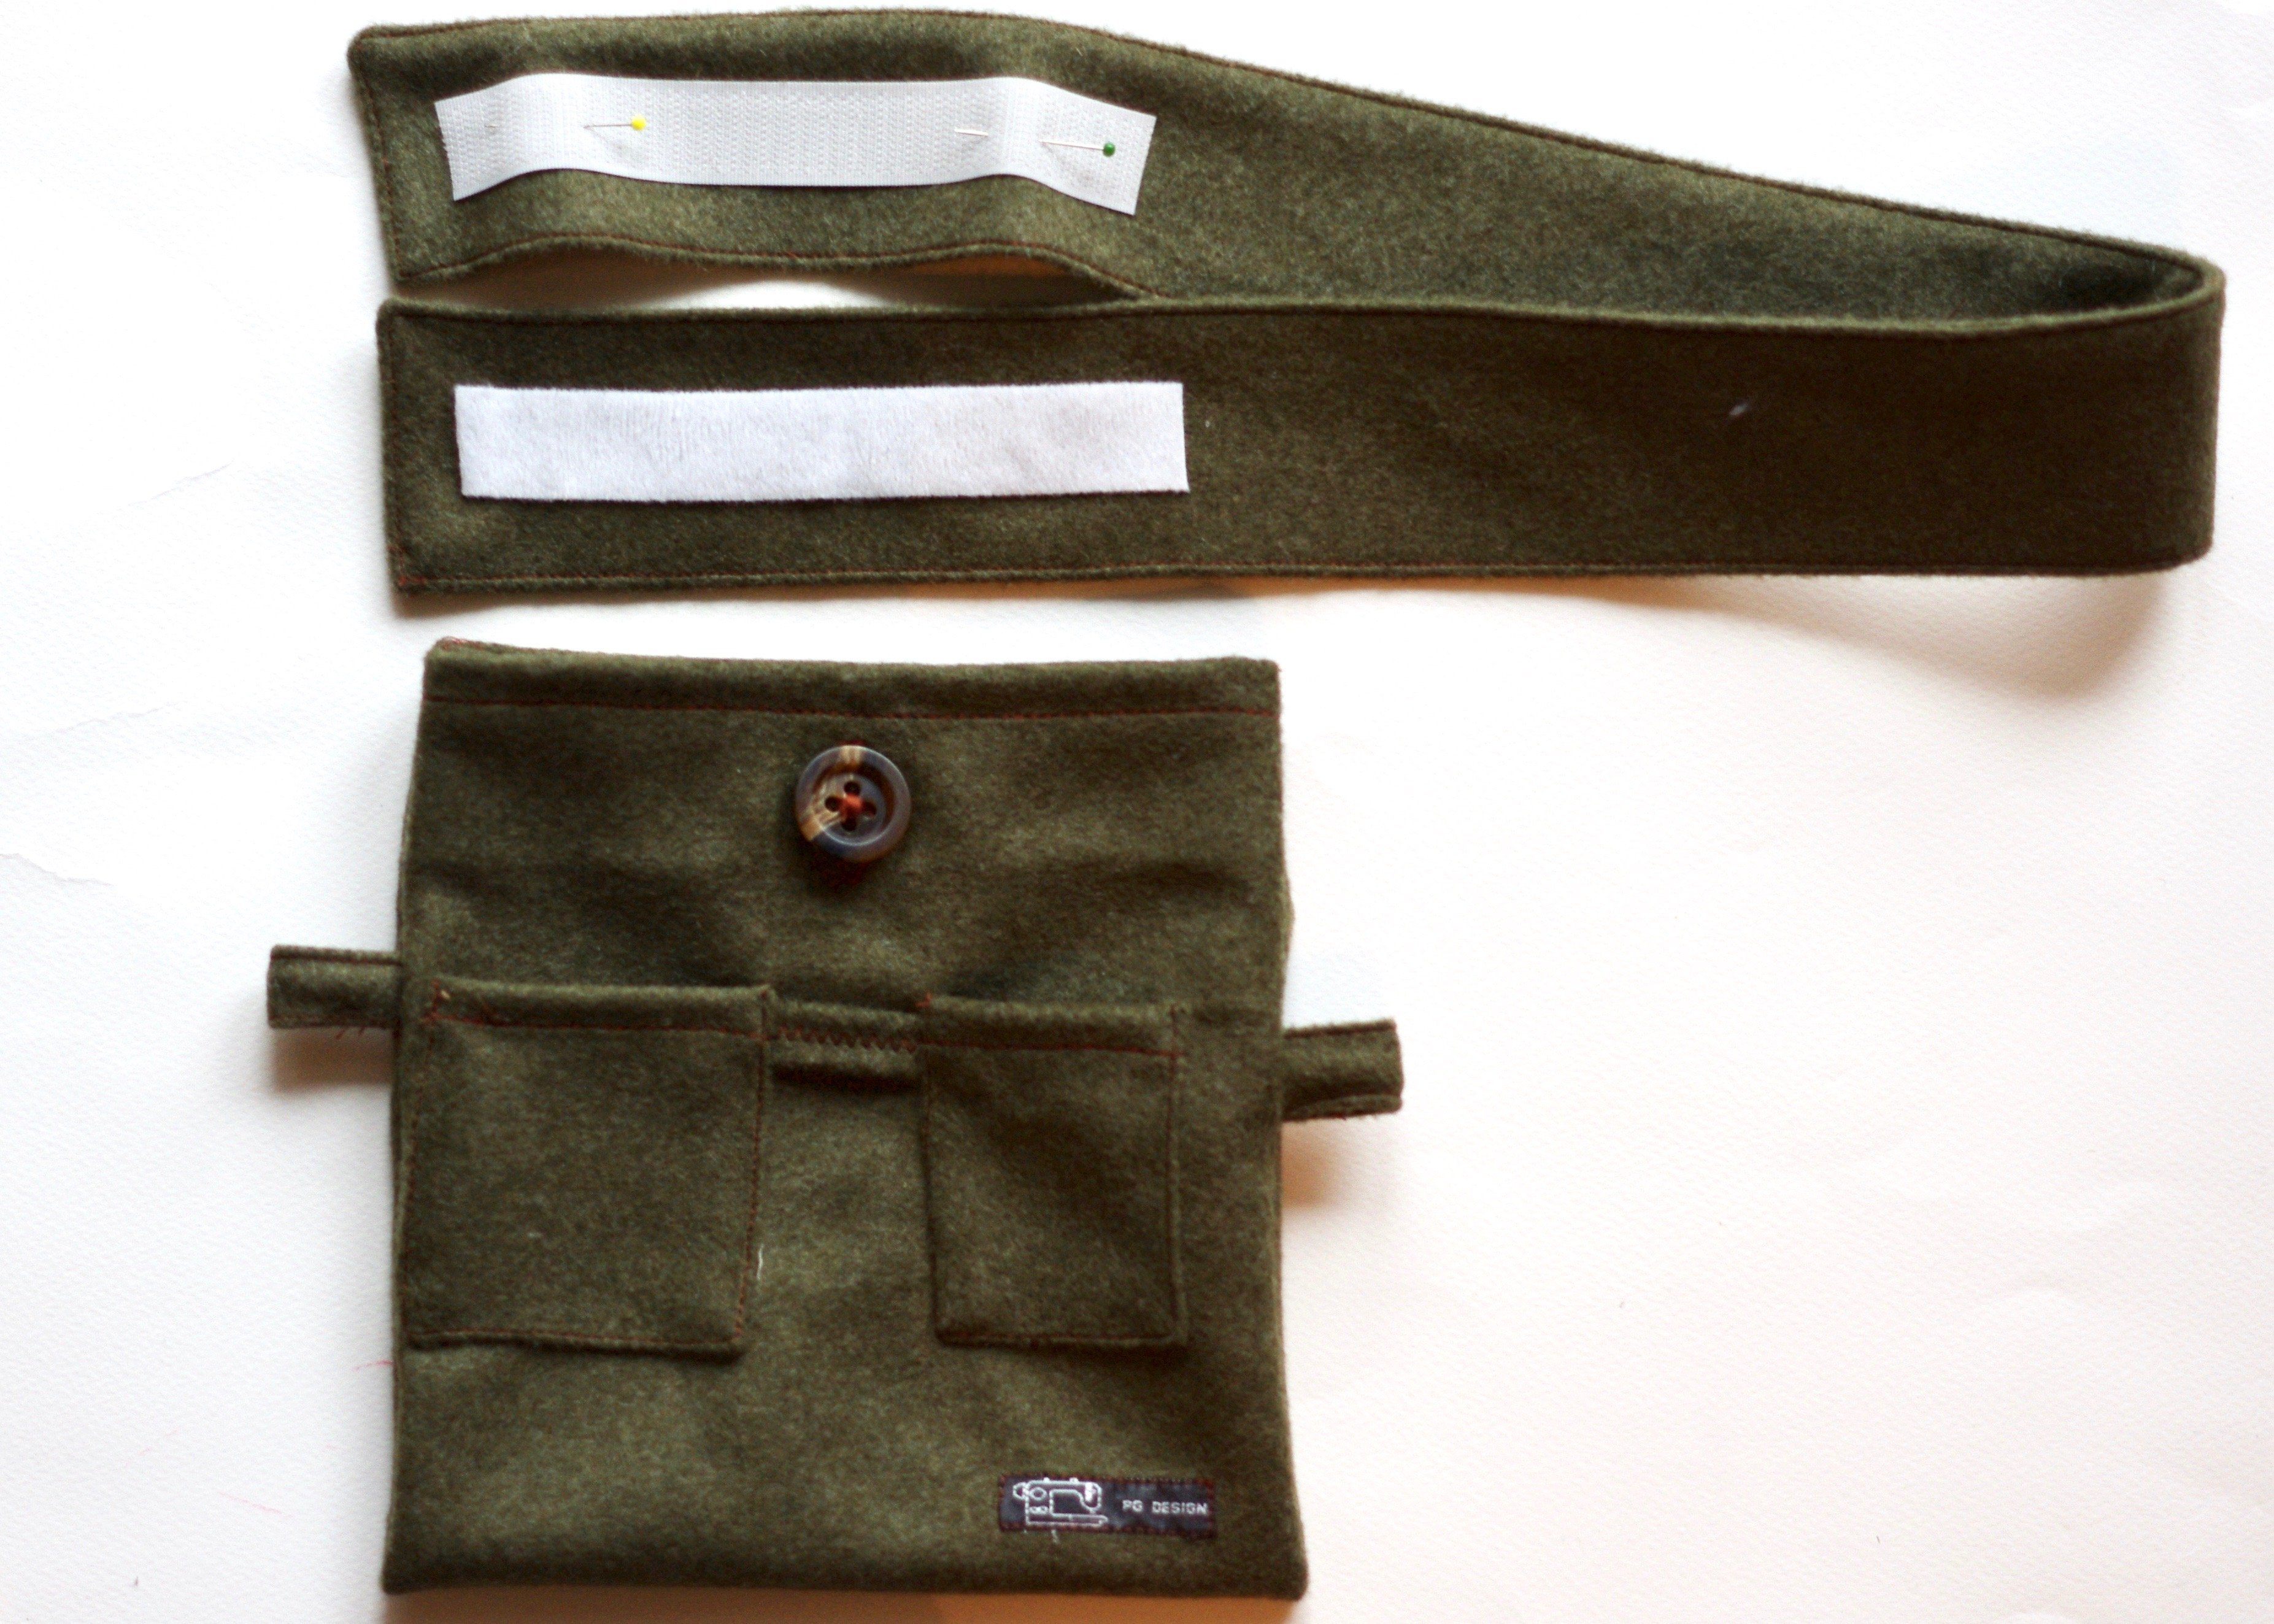
Turn the pocket inside out and attach the Velcro to the belt.
Use the BERNINA edgestitch foot No. 10 for this.
I also used top stitch close to the edge on the sides and bottom of the pocket.
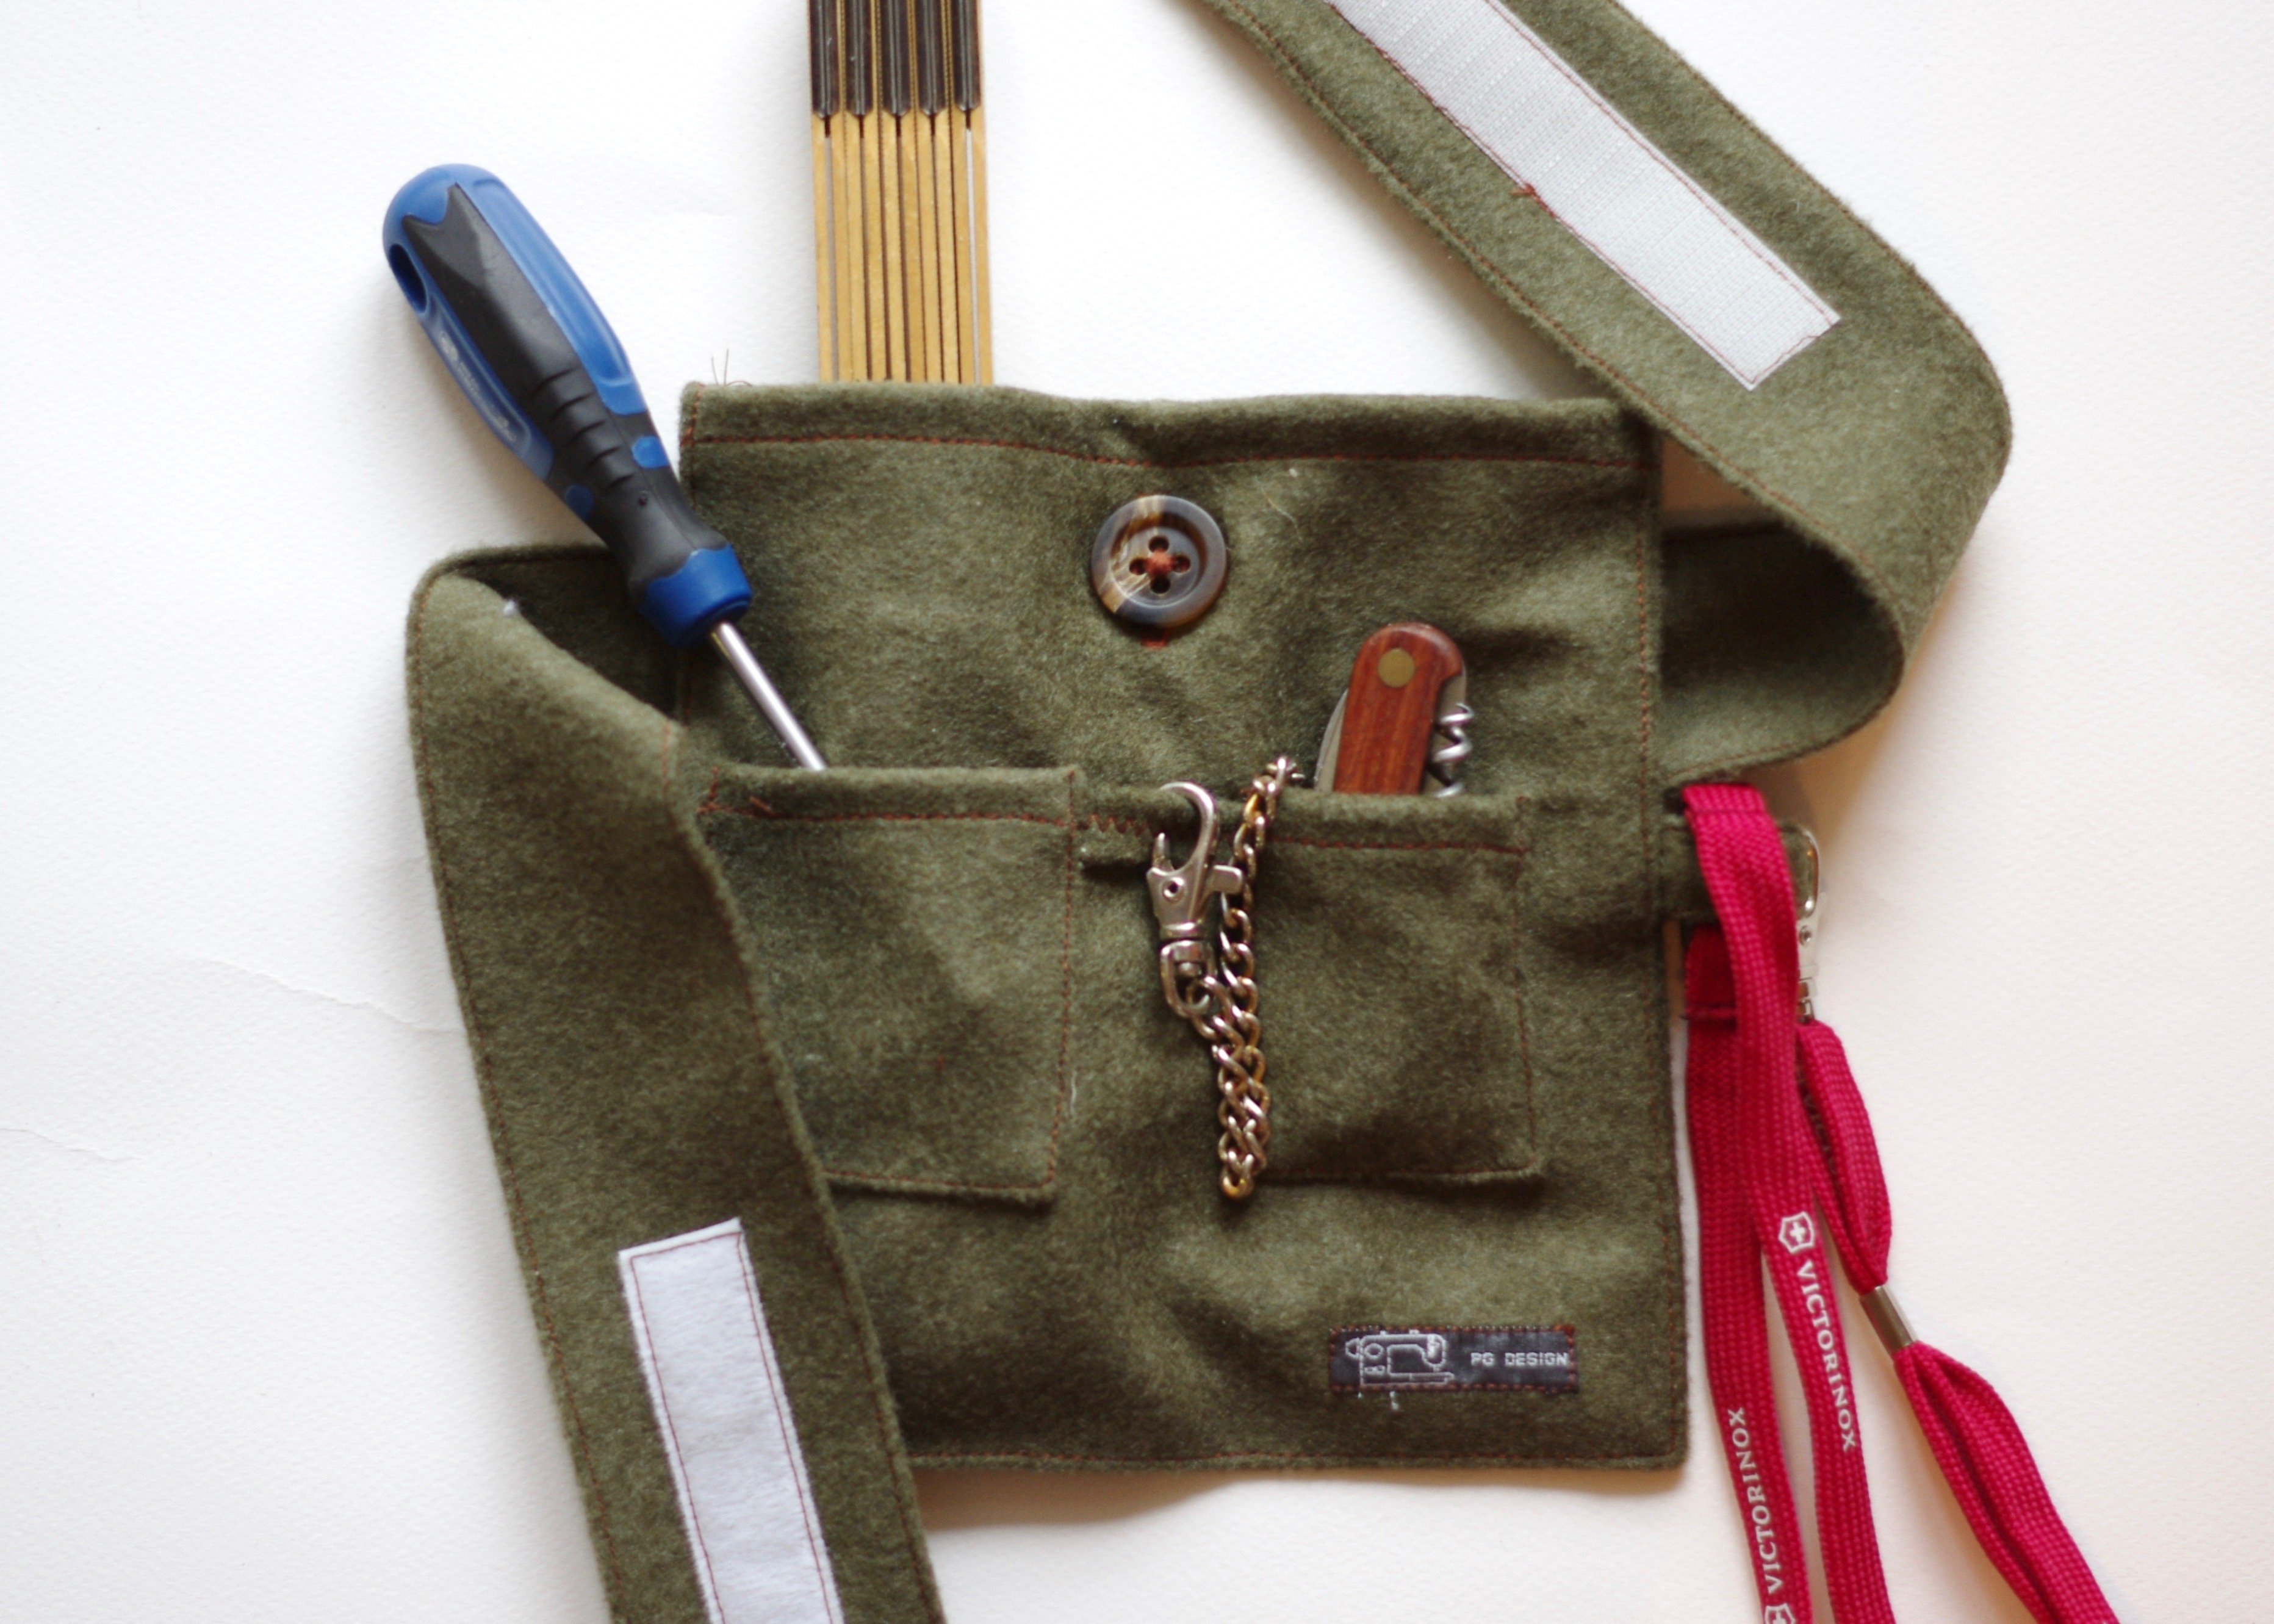
This is the finished belt. You can choose whether to make the pockets bigger or smaller, or to add more buttons and loops. Have a happy and creative Christmas! 🙂


0 Responses