 BERNINA Corporate Blog -
Dear community,
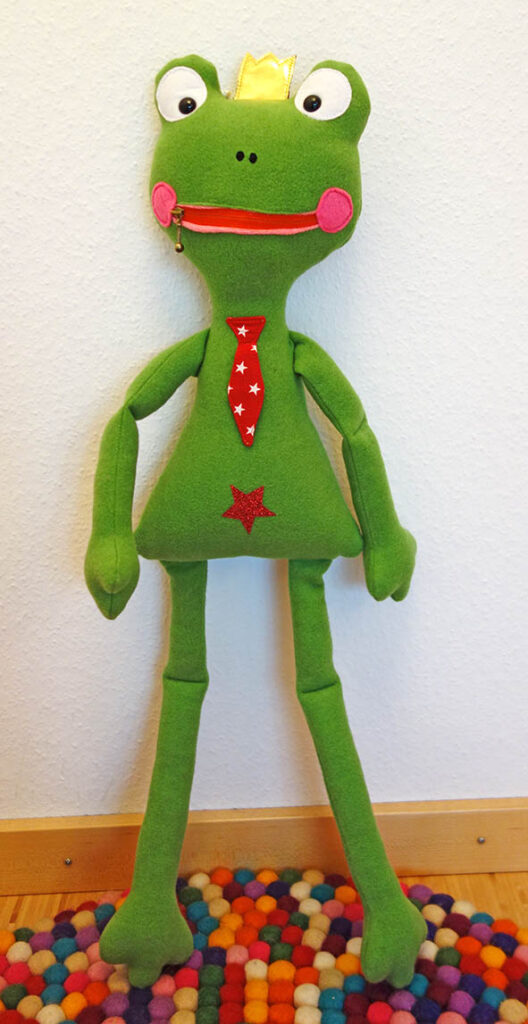
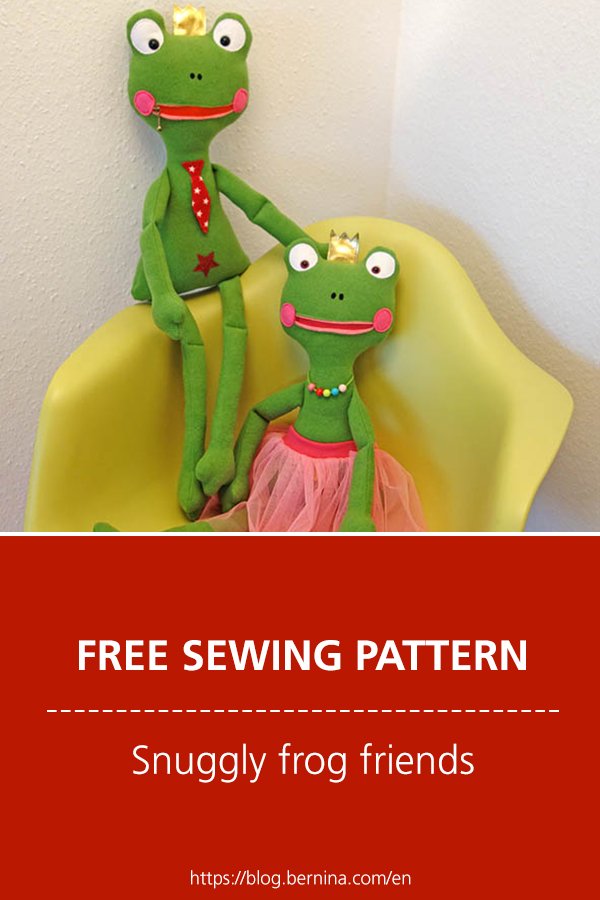
in this blog post you can find detailed instructions for sewing snuggly frog friends (with free pattern).
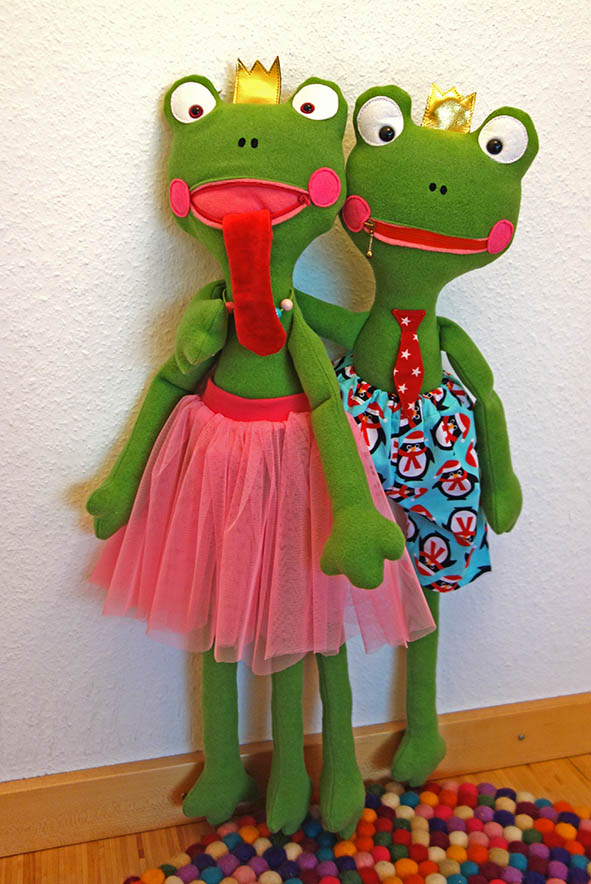
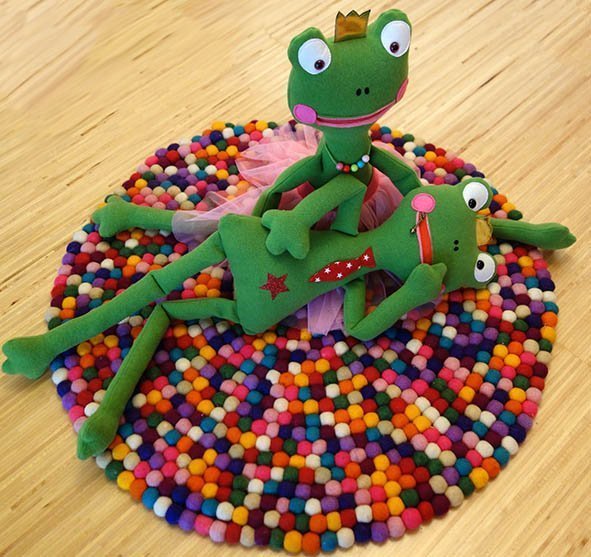
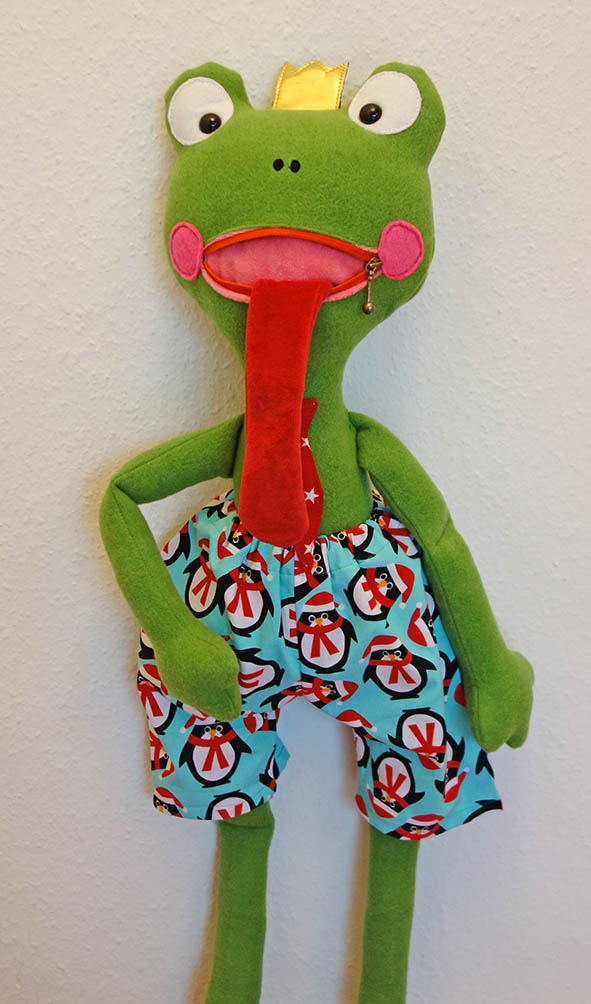
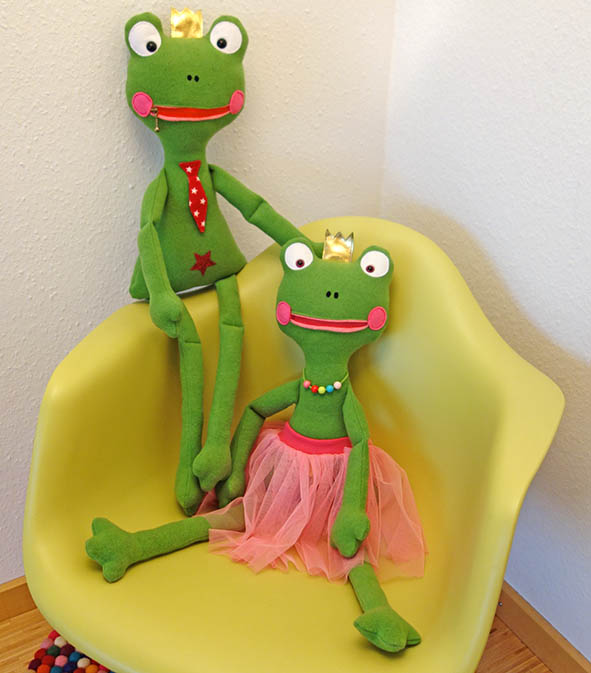
Christmas time is family time, time to cuddle up and the perfect opportunity to gift and to see the little eyes light up. As I started with this project, I only wanted to make the “boy- frog” named Frank, but as I was done sewing my little one told me that Frank definitely need a girlfriend. Smile! I will show you here how to make Frank, and at the end of the tutorial will explain the small differences in making Franzi.
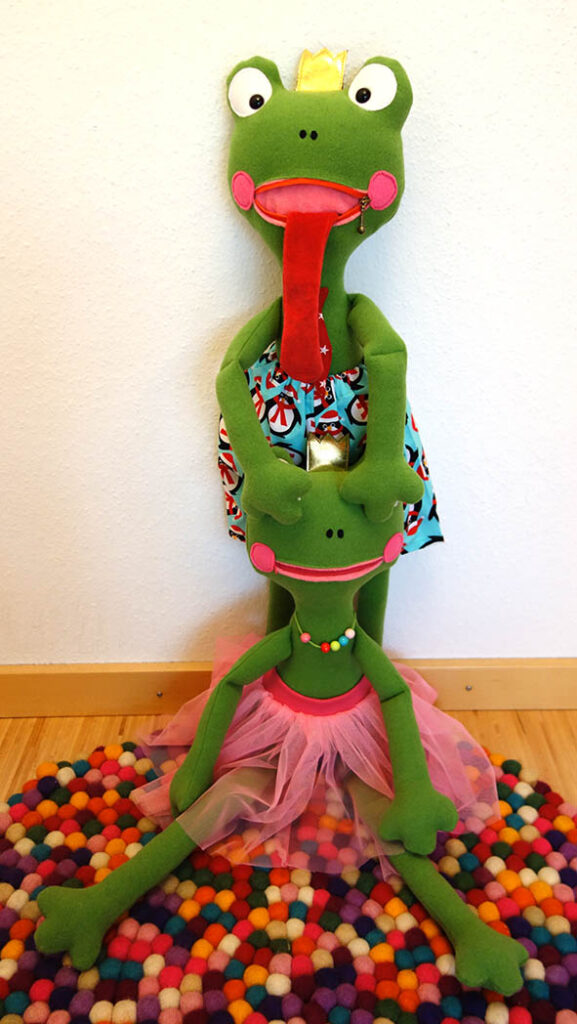
Frog „Frank“and Miss „Franzi“are no ordinary frogs. They belong to the royal family and have lots of attitude. They play lots of pranks and continuously stick their tongues out. They can both listen very well and can make worries disappear. If one has some worries, he only have to write them down and place them in the mouth of Frank or Franzi and close the zipper overnight. The next day all of the worries are gone. Magical!
Materials needed:
Frog Frank
- 45 cm fleece or woll fabric, green for the body
- 10 cm velvet or thin terry fleece , rose fort he mouth pocket
- 5 cm velvet, red for the tongue
- 6 x 10 cm faux leather gold , or wool felt yellow
- 18 cm zipper, red or orange
- 5 x 10 cm wool or embroidery felt, white for the eyes
- 4 x 10 cm wool or embroidery felt, rose/ pink for the cheeks
- small remnant wool or embroidery felt, black for the nose holes
- 2 x 10 to 15 mm safety plastic eyes, alternatively black wool or embroidery felt
- 13 x 10 cm cotton print – tie
- 13 x 5 cm remnant batting for the tie
- 35 cm cotton print – pants
- 40 cm elastic, 1 cm wide
- 15 x20 cm tear away embroidery stabilizer
- marking pen for fabric
- optional: special double sided tape to fixate the zipper while sewing
- matching threads
- cutting tools
- polyester fill at least 250 gr.
- optional: chopsticks and batting remnant to stabilize the neck
Helpful tools: chopsticks for turning to the right side and stuffing tool
Presser feet needed:
- 1C or 1D
- 10C or 10D
- Zipper foot 4 or 4D
- Darning foot Nr. 9 or 24
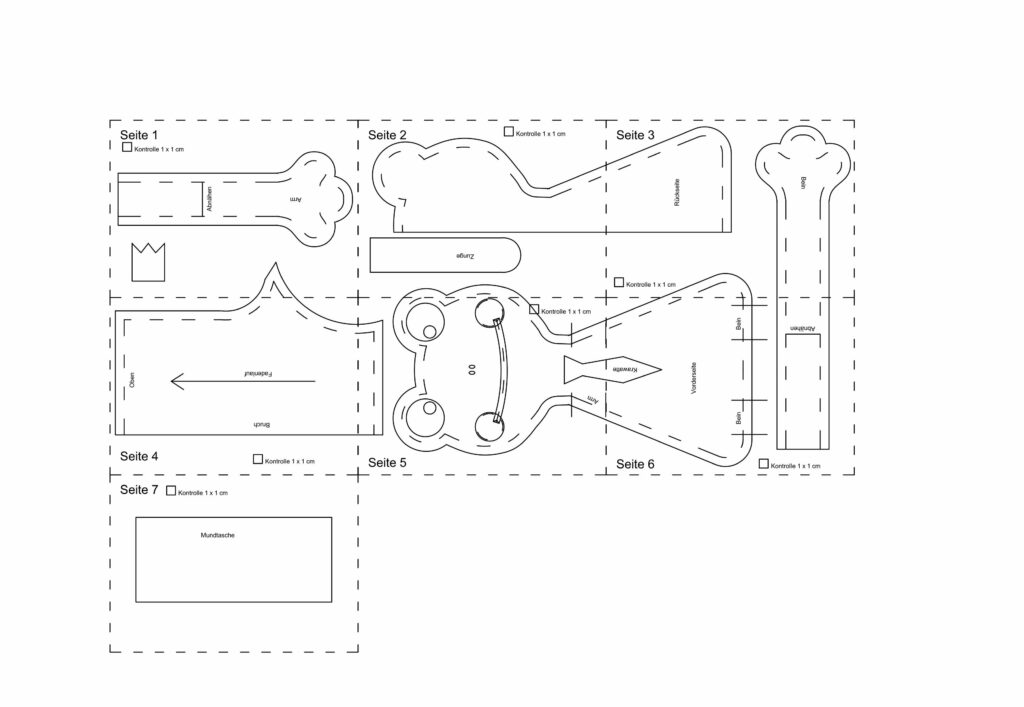
Download the pattern here:
For your information: I rated this project for intermediate users. Adventurous beginners will also be able to make this, but might need some more time.
Printing and gluing the pattern together:
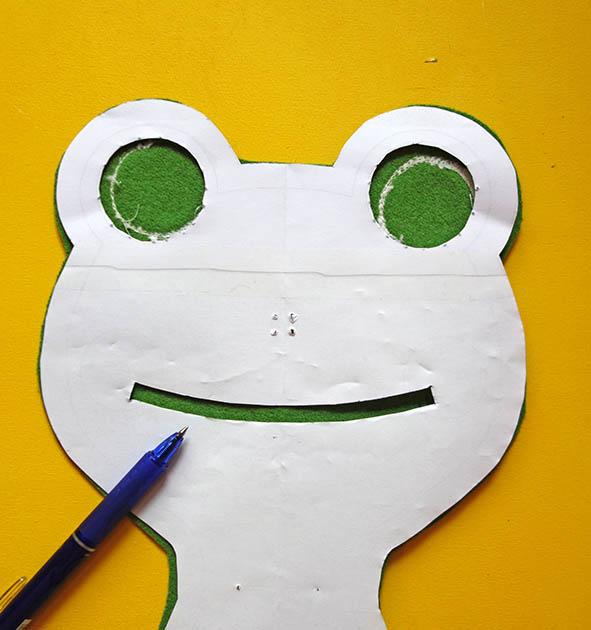
This pattern is formatted for the European A4 paper size. Print the pattern without scaling it and cut it out on the dashed lines. Glue the pattern pieces edge on edge. Cut the eyes and mouth out- this is helpful for the positioning during the construction.
Cutting:
1 cm seam allowance is included. The pattern pieces are named in German- see the translations below.
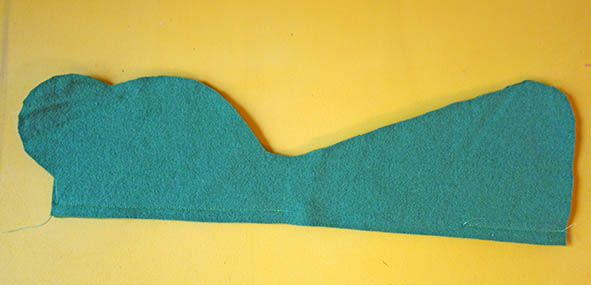
Frog:
- 1 x front (Vorderseite)
- 2 x back (Rückseite)
- 4 x arm (Arm)
- 4 x leg (Bein)
- 2 x mouth pocket (Mundtasche)
- 2 x eye (Auge)
- 2 x nose hole (Nasenloch)
- 2 x cheek (Backe)
* The tie (Krawatte), crown (Krone) and tongue (Zunge) are done with the “sew first, then cut” method – see further in the tutorial
Pants (Hose):
- 2 x on fold (Bruch)
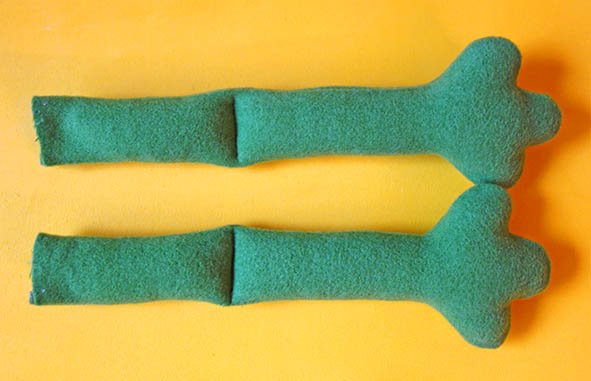
Sewing the arms and legs
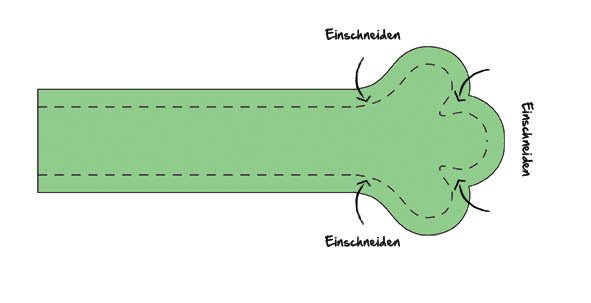
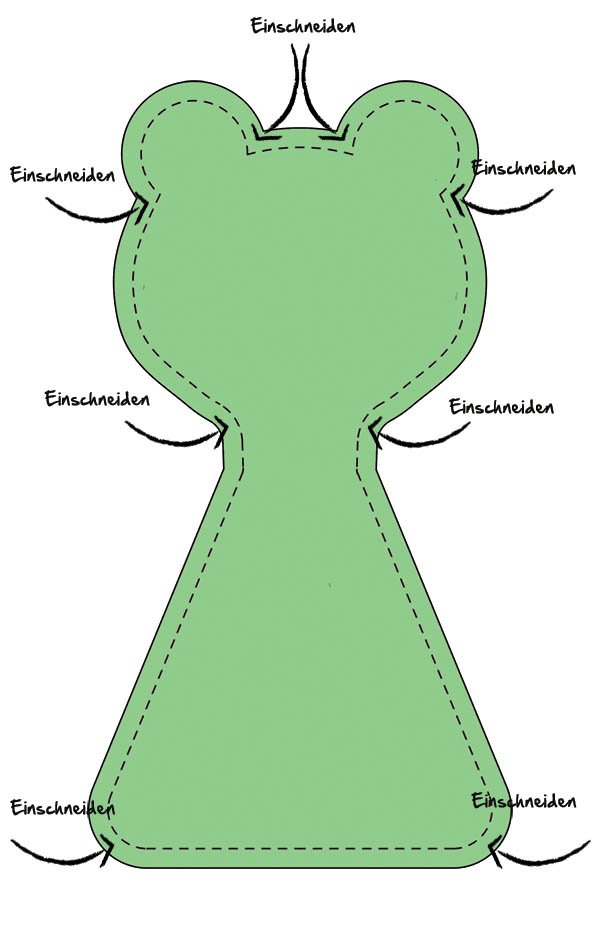
Place each two arm, respectively leg pieces right sides together, pin and sew all around leaving the top straight edge open for turning. Sew with a short straight stitch (1,9 mm). As seen in the picture below clip the seam allowances close to the stitches and trim the seam allowance to about 5mm.
Jeweils 2 Arm- respektive Beinteile rechts auf rechts feststecken, und rundherum bis auf die obere Kante mit einer 1,9 mm Stichlänge nähen. Wie in der Abbildung gezeigt, bis kurz vor der Naht einschneiden und die Nahtzugaben bis auf 5 mm kürzen. “Einschneiden” = clip.
Turn to the right side and iron if necessary. Transfer the line with the text “Abnähen” for the topstitching of the elbow, respectively knee. Fill with fiber fill to the line marked and topstitch on the line. Fill some more leaving the top 2 cm free. Set the finished arms and legs to aside.
Sewing the tie, crown and tongue
(sew with a straight stitch of 2,5 mm length)
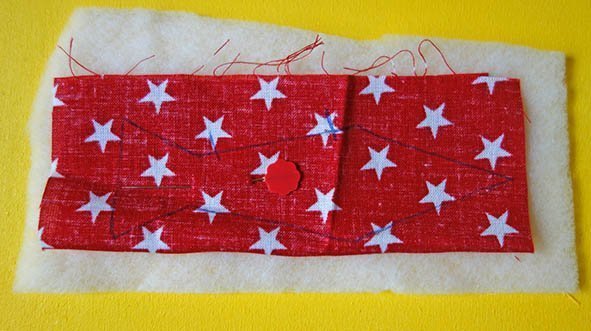
I very often use the “sew first, then cut” method for small pieces. To do this the shape to be sewn is traced onto one left side of a bigger piece of fabric, the second piece of fabric is laid underneath right sides together and the line drawn is sewn. The shape is then cut out with a seam allowance of 5mm.
Tie
Trace the tie to one left side of your fabric. Place a second piece of fabric right sides together underneath and a piece of batting on the very bottom. Sew the line marked leaving an opening for turning.
Trim the batting close to the line sewed and cut the tie out using a 5mm allowance. Leave some more fabric at the opening for turning.
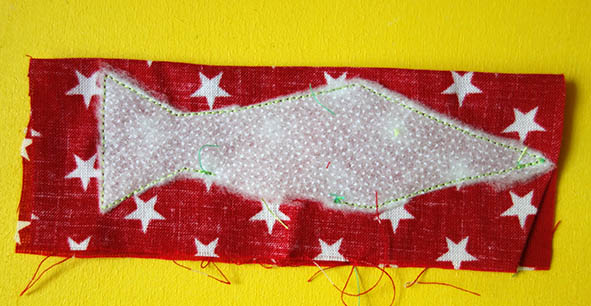
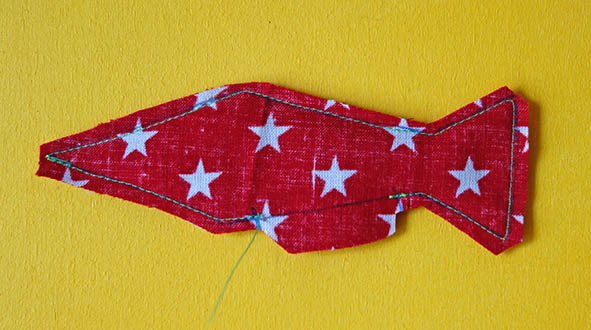
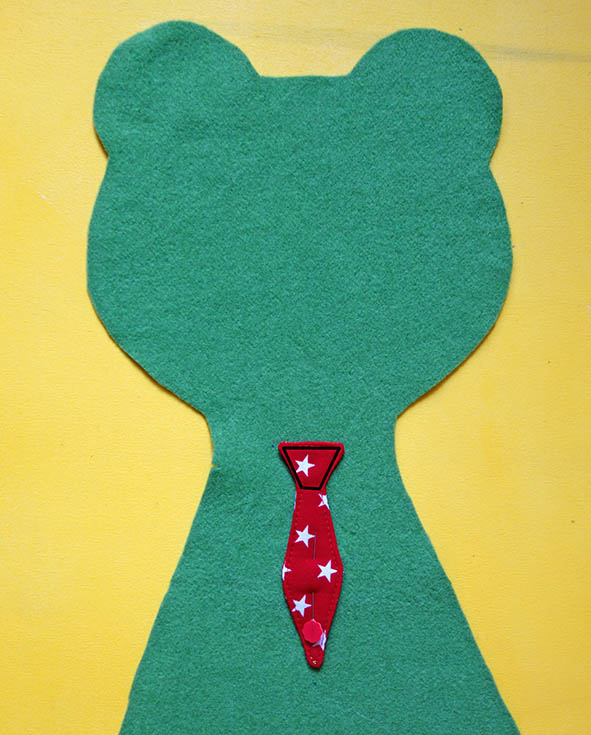
Turn to right side and iron well. Edge stitch using the edge foot number 10. Topstitch the tie onto the front of the frog.
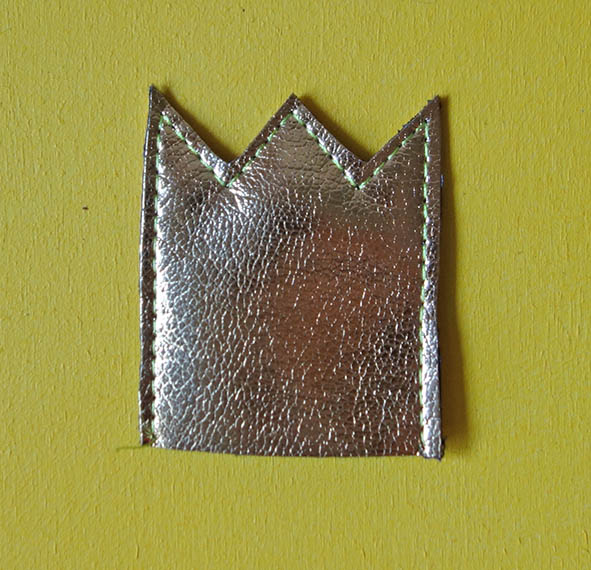
Crown
Trace the crown onto the right side of the leather. Place another piece of leather left sides together and sew the line marked leaving the bottom open. Cut the crown out using a 2mm allowance and either set aside or edge stitch already onto the front of the frog.
Tongue
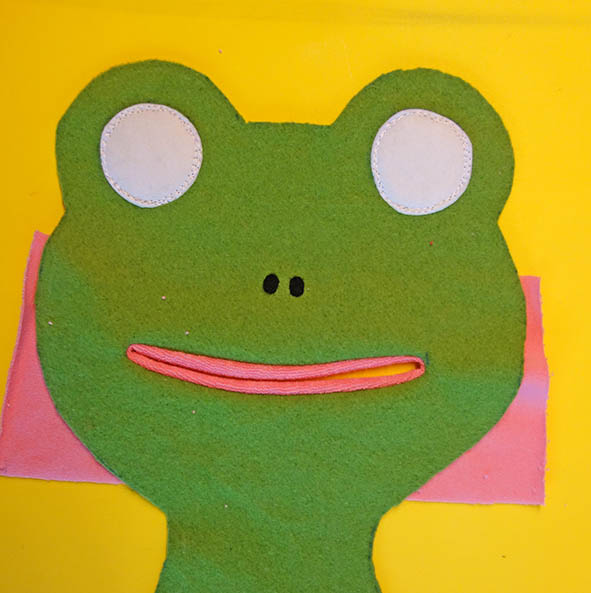
Trace the tongue onto one left side of the fabric and place another piece of fabric right sides together. Sew all aropund leaving the top straight edge open. Cut out using a 5mm allowance ad set aside.
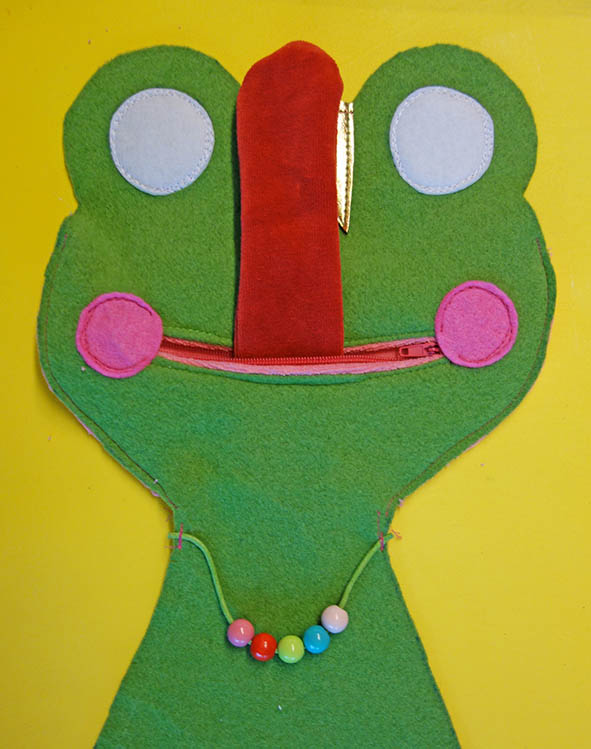
Sewing the eyes and nose
Place the eyes onto the front of the frog using the holes in the pattern. Position the nose holes either by eye or push small holes through the paper pattern to mark the position.

My tip: use a bit of paper glue to secure the eyes and nose- those are difficult to pin.
Attach a darning foot and lower the feed dogs. Place the embroidery stabilizer underneath and free motion the eyes and nose. Remove the stabilizer but do not throw it away yet. We will still use it for the cheeks. If you are not using safety eyes, sew the pupils out of felt now.
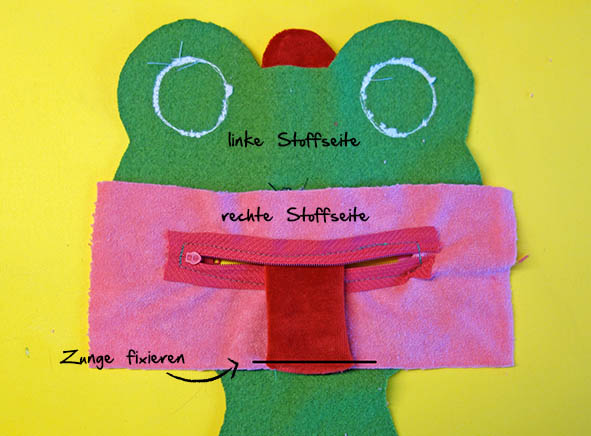
Sewing mouth pocket and cheeks
Trace the mouth – opening onto the left side of the front piece.
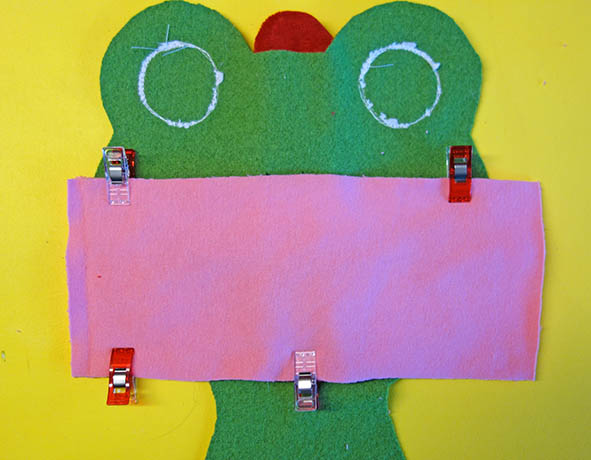
Place one piece for the mouth pocket right sides together aligning the bottom edge of the pocket piece with the top edge of the neck.
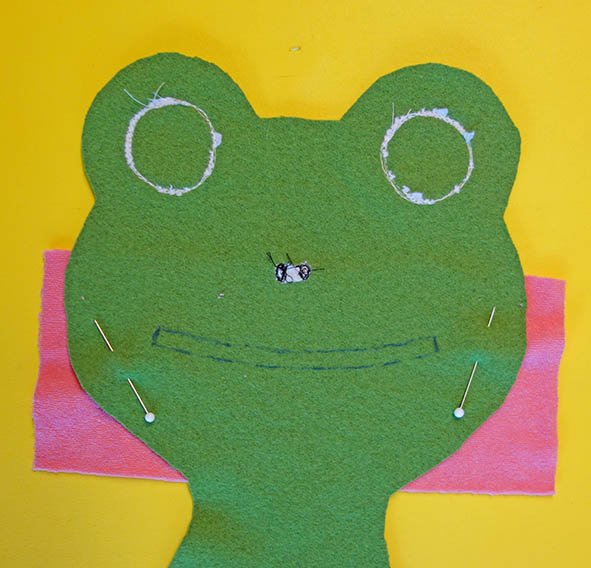
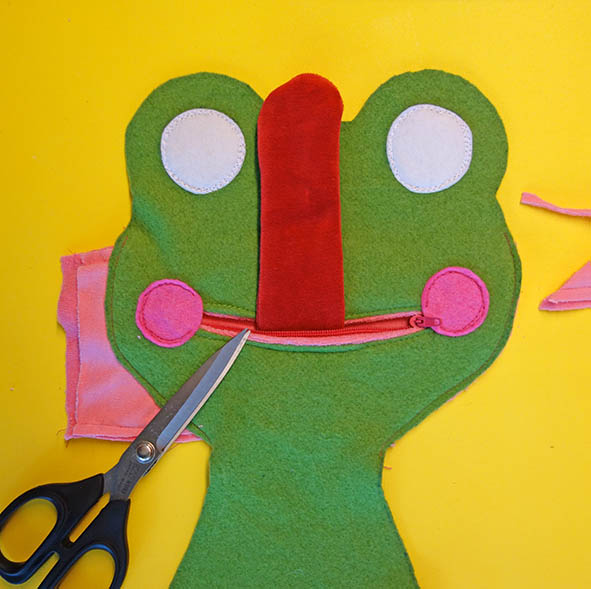
Sew on the line marked on the left side of the front piece and then cut through both layers as marked. Pull the pocket piece to the left side through the hole and iron. I like to have some of the pink fabric poking onto the right side because it looks like lips of the frog. You do as you please – no rule here!
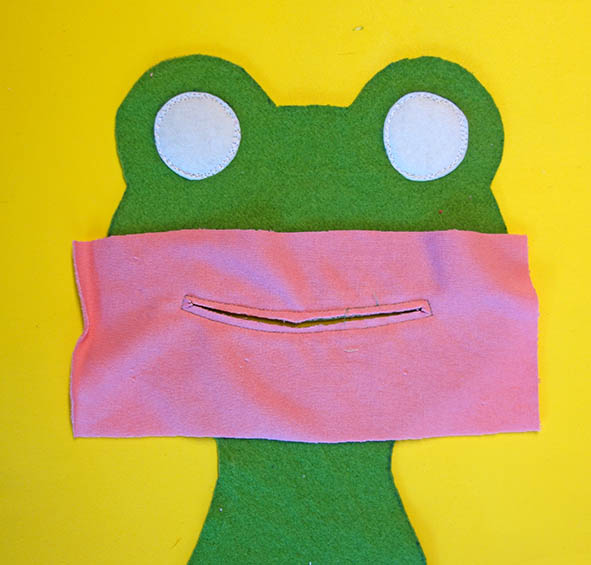
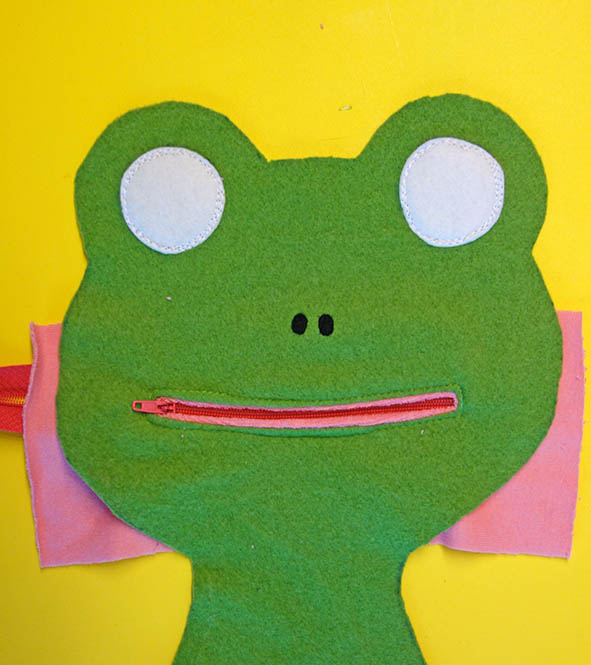
Pin or glue the zipper underneath the opening and sew the zipper on. Use the zipper foot for this.
Cheeks
This part is a bit tricky but it works just fine. Pin the cheeks onto the front. Place some stabilizer underneath and freemotion them from edge to edge of the zipper. While doing this you have to keep the pocket piece away from the sewing space so that you do not sew it.
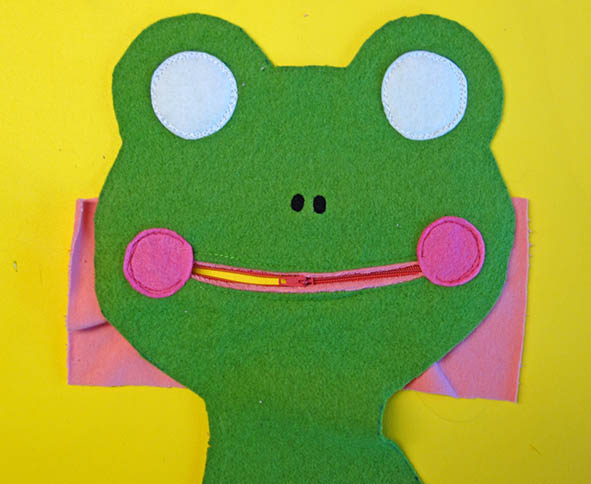
Finish the mouth pocket
Edge stitch the tongue on the bottom middle of the pocket.
Pin the other pocket piece right sides together on top and sew both of the straight edges.
Make sure that the pocket lays flat and edge stitch on the sides. Trim the overlapping fabric away.
Preparing the back
Sew the back pieces right sides together but leave an opening for turning (about 10 cm). Iron the allowances apart.
My Tip: if you like you can iron a cute glittery star or similar. I used a star I have had cut out of smooth transfer heat material.
Final construction
Edge stitch the arms and legs on referring to the markings on the pattern. If you are using safety eyes, you can install them now if you have not yet done so.
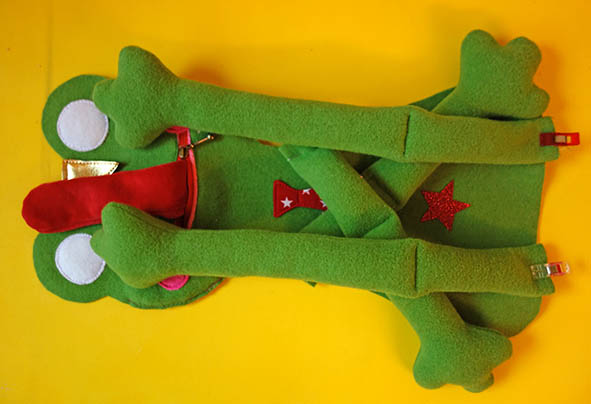
Pin front and back right sides together and do not be cheap on pins. Slip the arms and legs through the opening for turning – this makes the sewing much easier. Sew with a short stitch (1,9 mm)
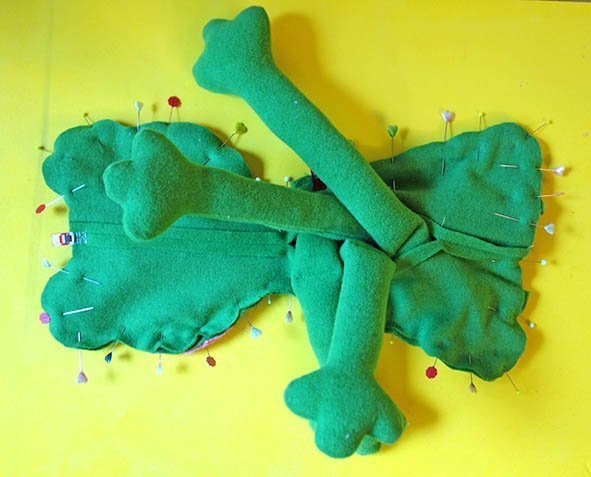
Clip the seam allowances as markt in the picture below. “Einschneiden” = clip.
Turn to the right side and fill. Finally close the opening for turning by hand using a ladder- stitch.
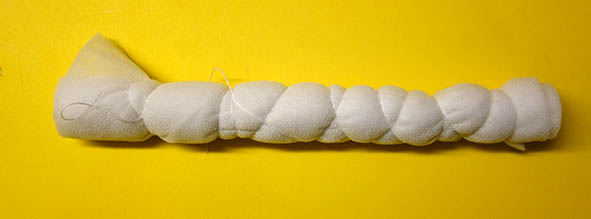
My Tip: The frog has a quiet long neck. Even if one stuffs the animal very well, it could happen that the head does not stand and falls down as if the frog were sleeping. Professional doll makers stabilize the neck by inserting a piece of wood or plastic into an animal. For this you can wrap two chopsticks with some batting and secure the batting with some yarn, then insert this construction into the head and torso of the frog while stuffing.
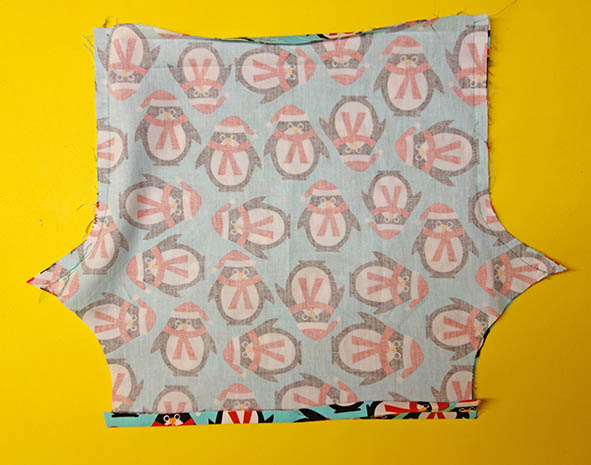
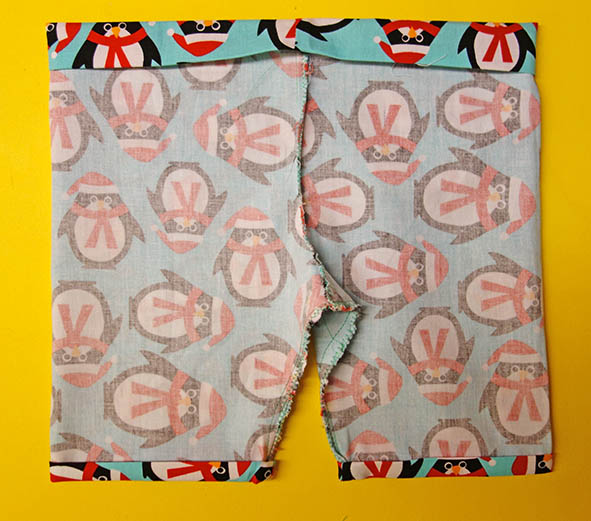
Sewing the pants
Iron the bottom edge of the pants 2 x 1 cm to the left side. The top edge 1 cm and then again by 2 cm. Those are construction lines that will help us later.
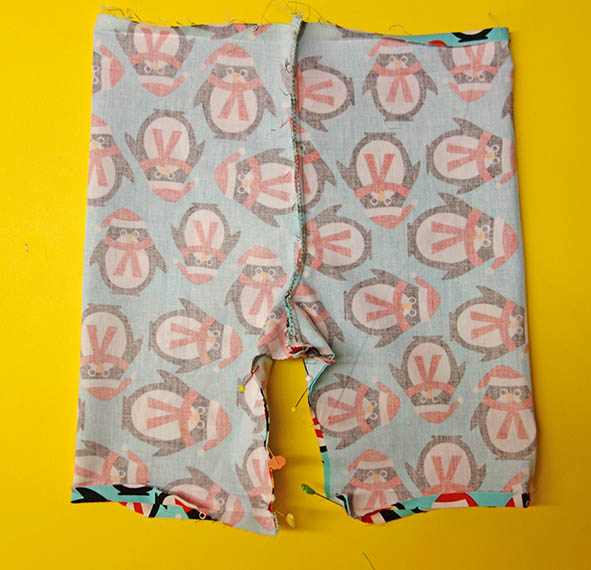
Pin both pieces right sides together and sew the crotch. Neaten the seam allowances with a serger or a zigzag stitch.
Now lay the pants so that the crotch seams lay on one another and sew the inner- leg seam. Trim the little point between the legs away and neaten the seam allowance.
Now we can use the ironed over edges to help us in the final construction. If necessary iron the edges again and place the seam allowances to one side.
Top stitch the bottom of the legs and do the same for the tunnel but here leaving a small opening so that you can insert the elastic.
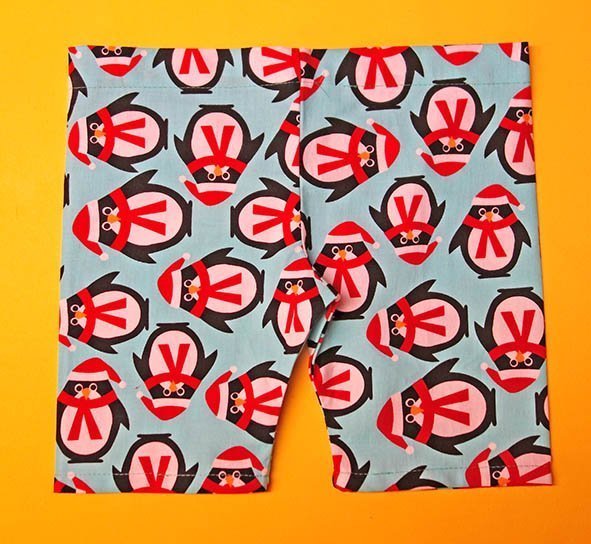
Insert the elastic and check the needed length on the frog. Either knot the elastic and burry the knot in the tunnel or sew it together. Sew the opening shut.
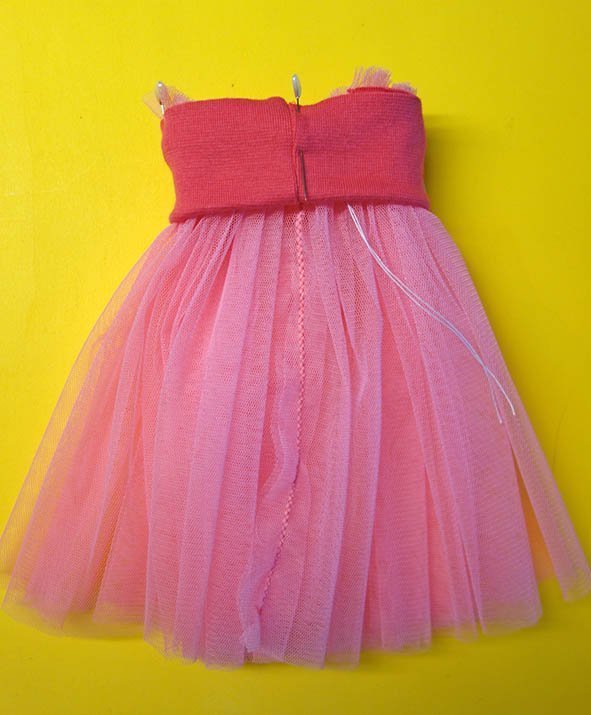
Differences for „Franzi“
All the steps are the same but here you will sew a string with some beads instead of the tie.
To make the skirt I cut 2 x 25 x 160 cm out of soft tulle. I sewed both of the strips together and ruffled the top edge. To ruffle I sewed a zigzag on the top edge over some yarn and pulled the yarn to create the ruffles.
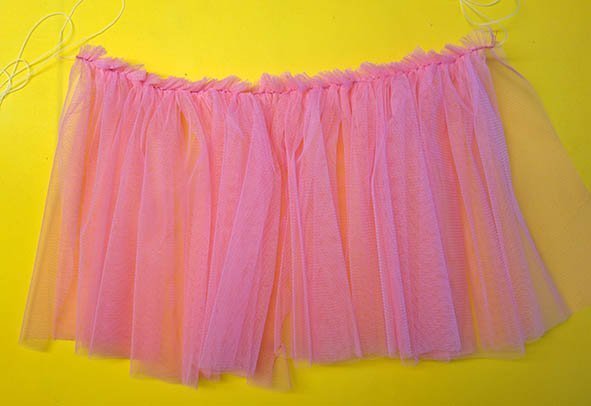
Following I sewed the strip end together to form a tube.
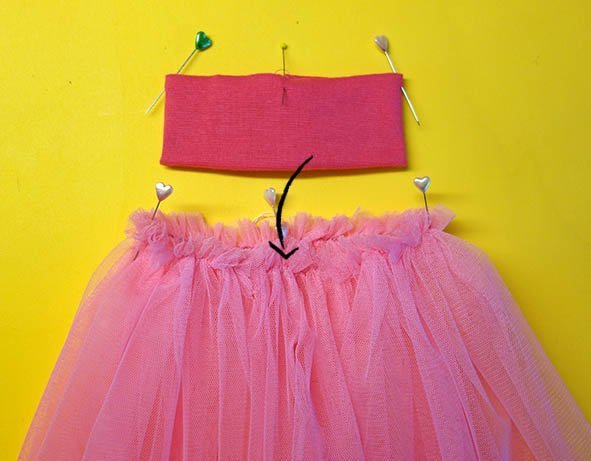
Then I cut a 27 x 8 cm piece out of ribbing and sewed the short end to form a tube. Folded the tube left sides together in half and market quarters on the band and the skirt pinning both pieces left sides together at the marked quarters. Finally I sewed all around with the serger (zigzag is also ok) and removed the yarn.
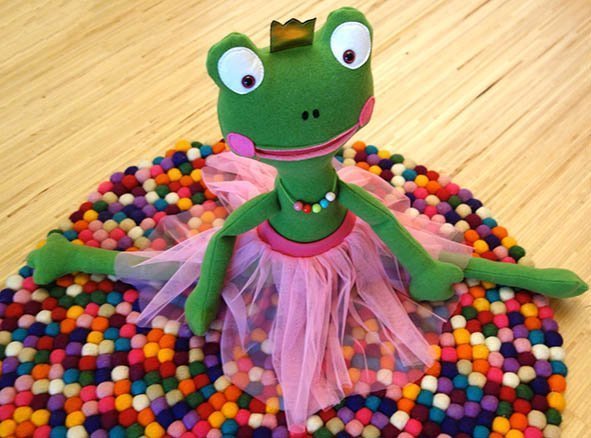
Have fun making your frogs and enjoy the holiday season!
Kasia


Sew cute 🙂