 BERNINA Corporate Blog -
As we’ve already mentioned in our blog post about the new bernette sewing machines, we will publish three nice sewing projects each coming with a free sewing pattern in the following months. And today we start out with the first one, the retro-sytle red dress.
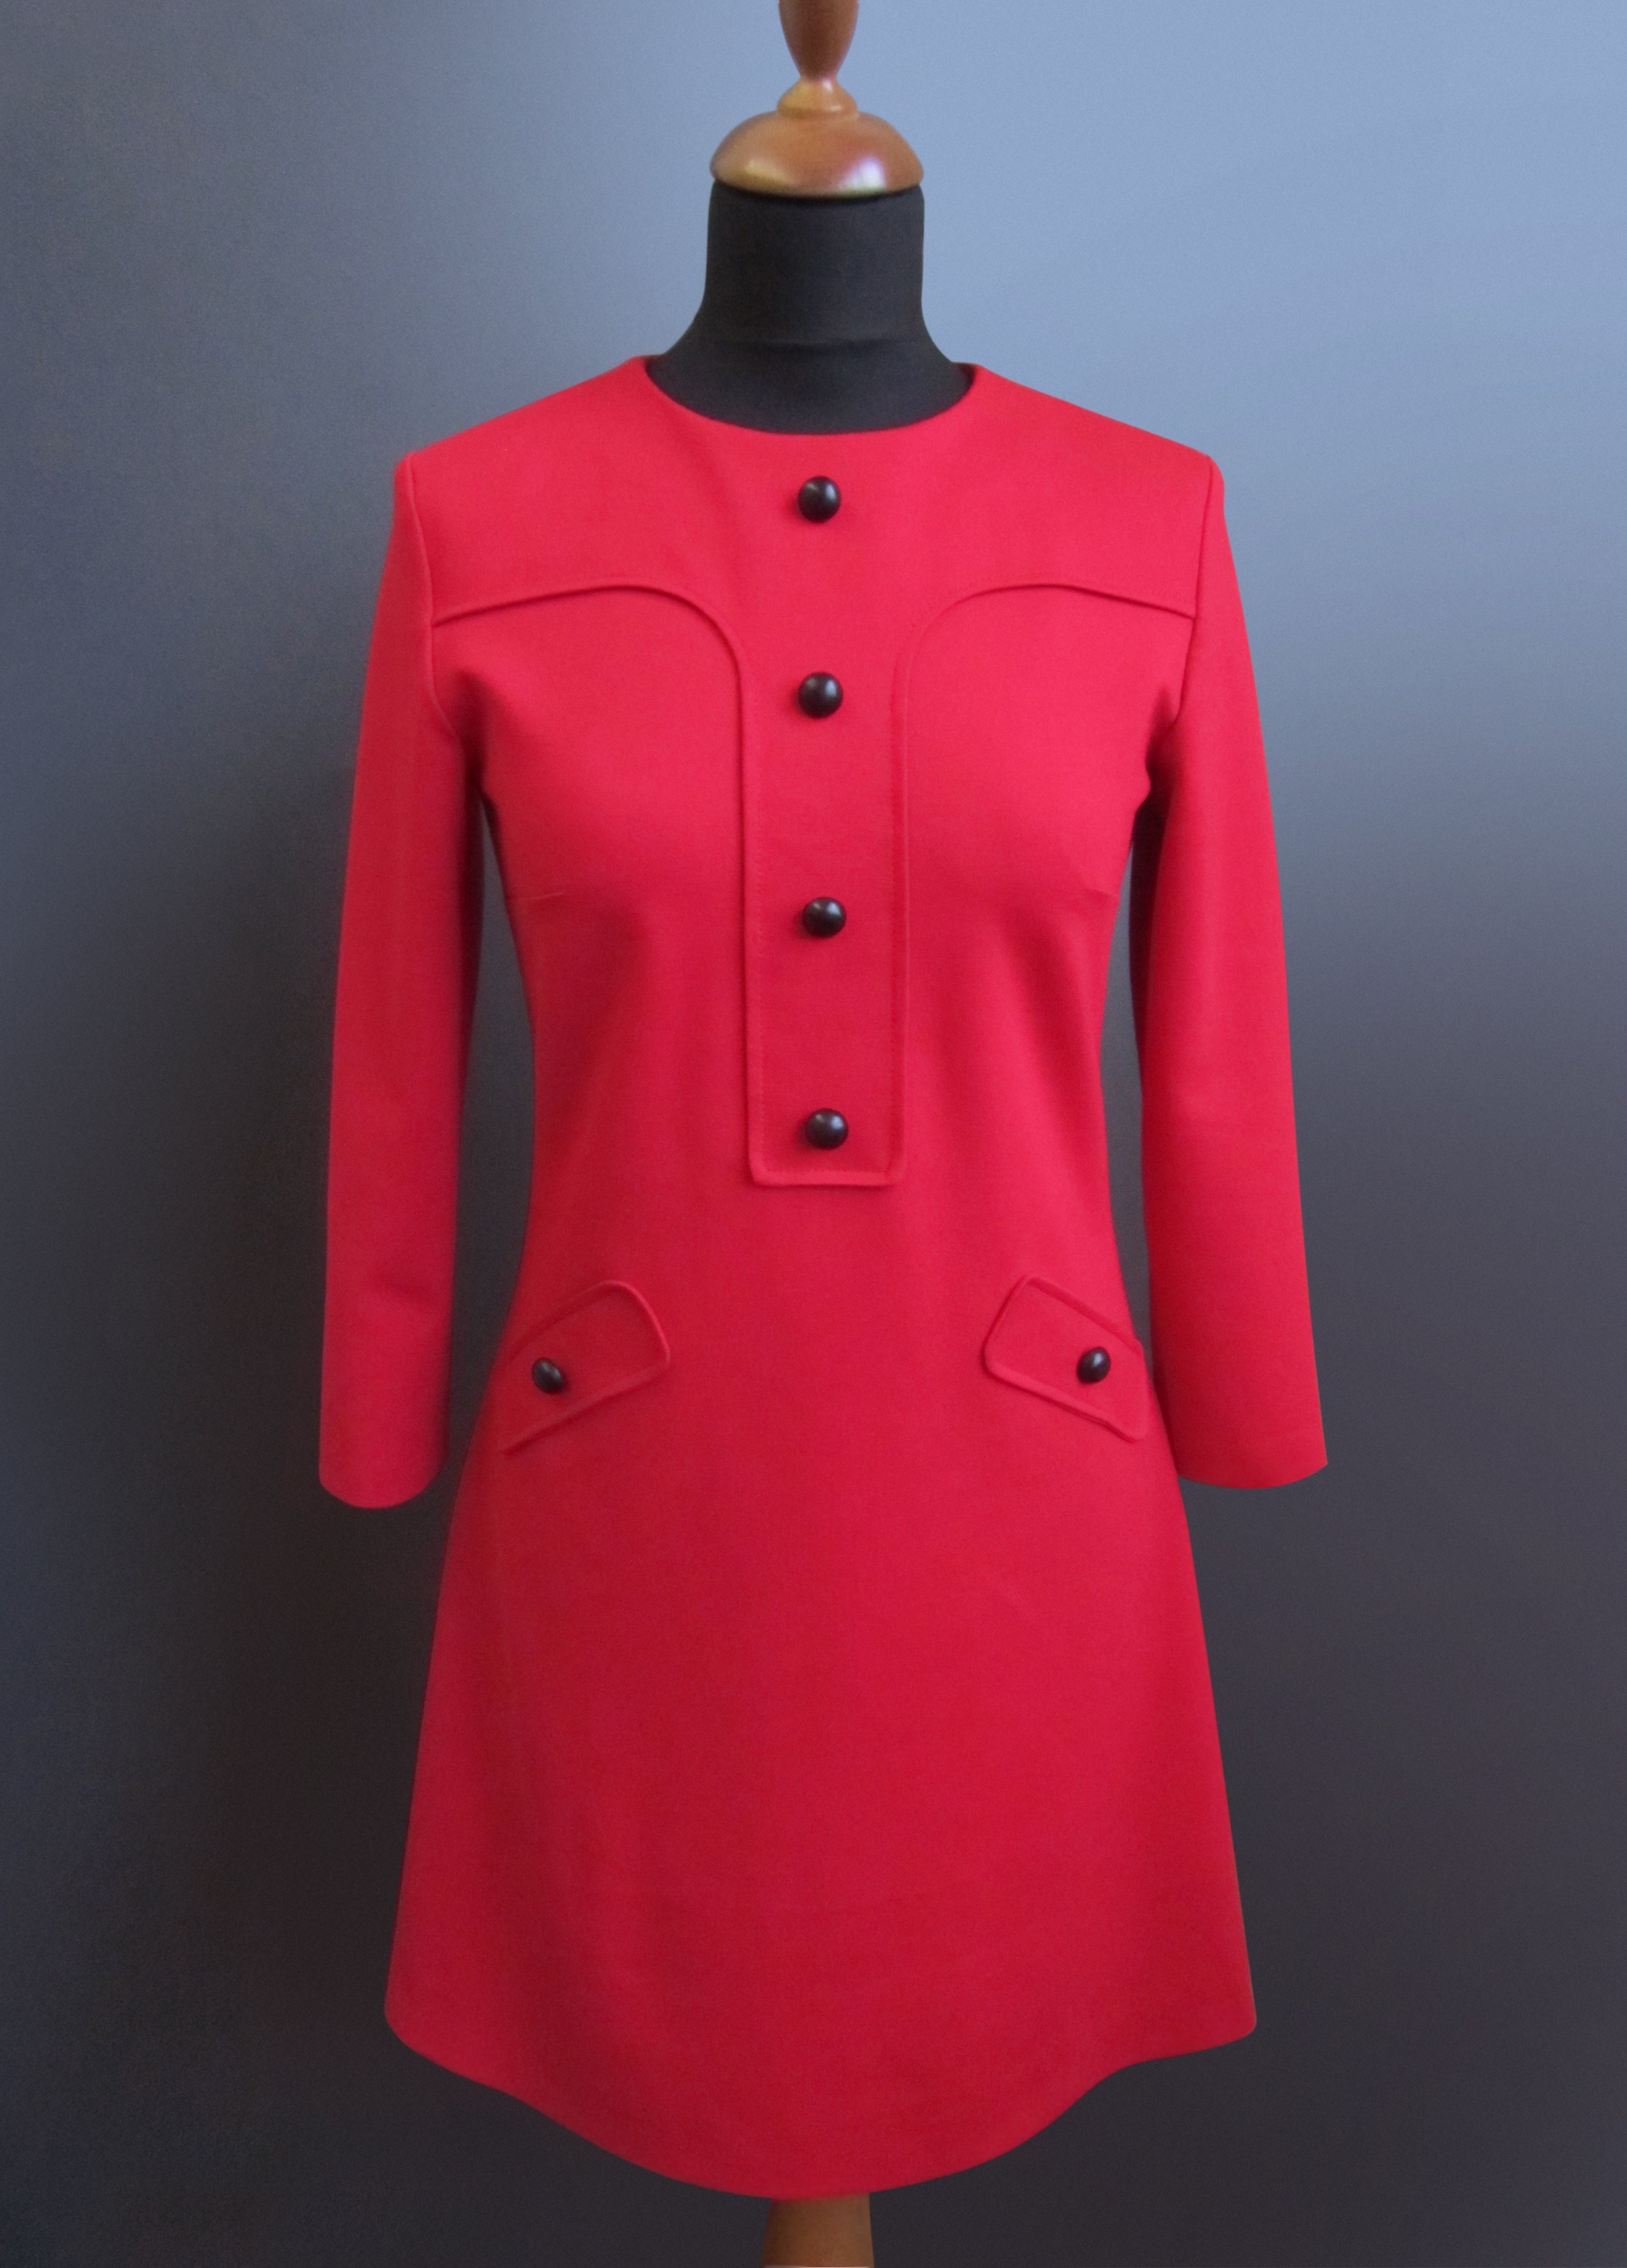
The sewing pattern is availabe in sizes 34 to 46. You’ll find the step-by-step instrcutions below.
Free download of the sewing pattern for the red dress
You can download the free sewing pattern from mybernette.com here: Download sewing pattern red dress
Materials
• 1.6 – 1.9 m double jersey (romanit), 150 cm wide
• 40 to 45 x 30 to 35 cm cotton lining
• 1 invisible zipper, 60 cm
• 6 rounded shank buttons, diameter 18 cm
• Sewing thread
• bernette sewing machine
• Edgestitch foot S
• Invisible zipper foot Z
Tips
Wash all fabrics before cutting out, as fabrics can shrink. Transfer all the markings (marking lines for the pocket position and buttons) and all the notches (small cuts
at the edge of the fabric as a marker indicating where pattern pieces should meet) from the pattern onto the fabric.
Seam allowances
Use the numbers in circles on the pattern.
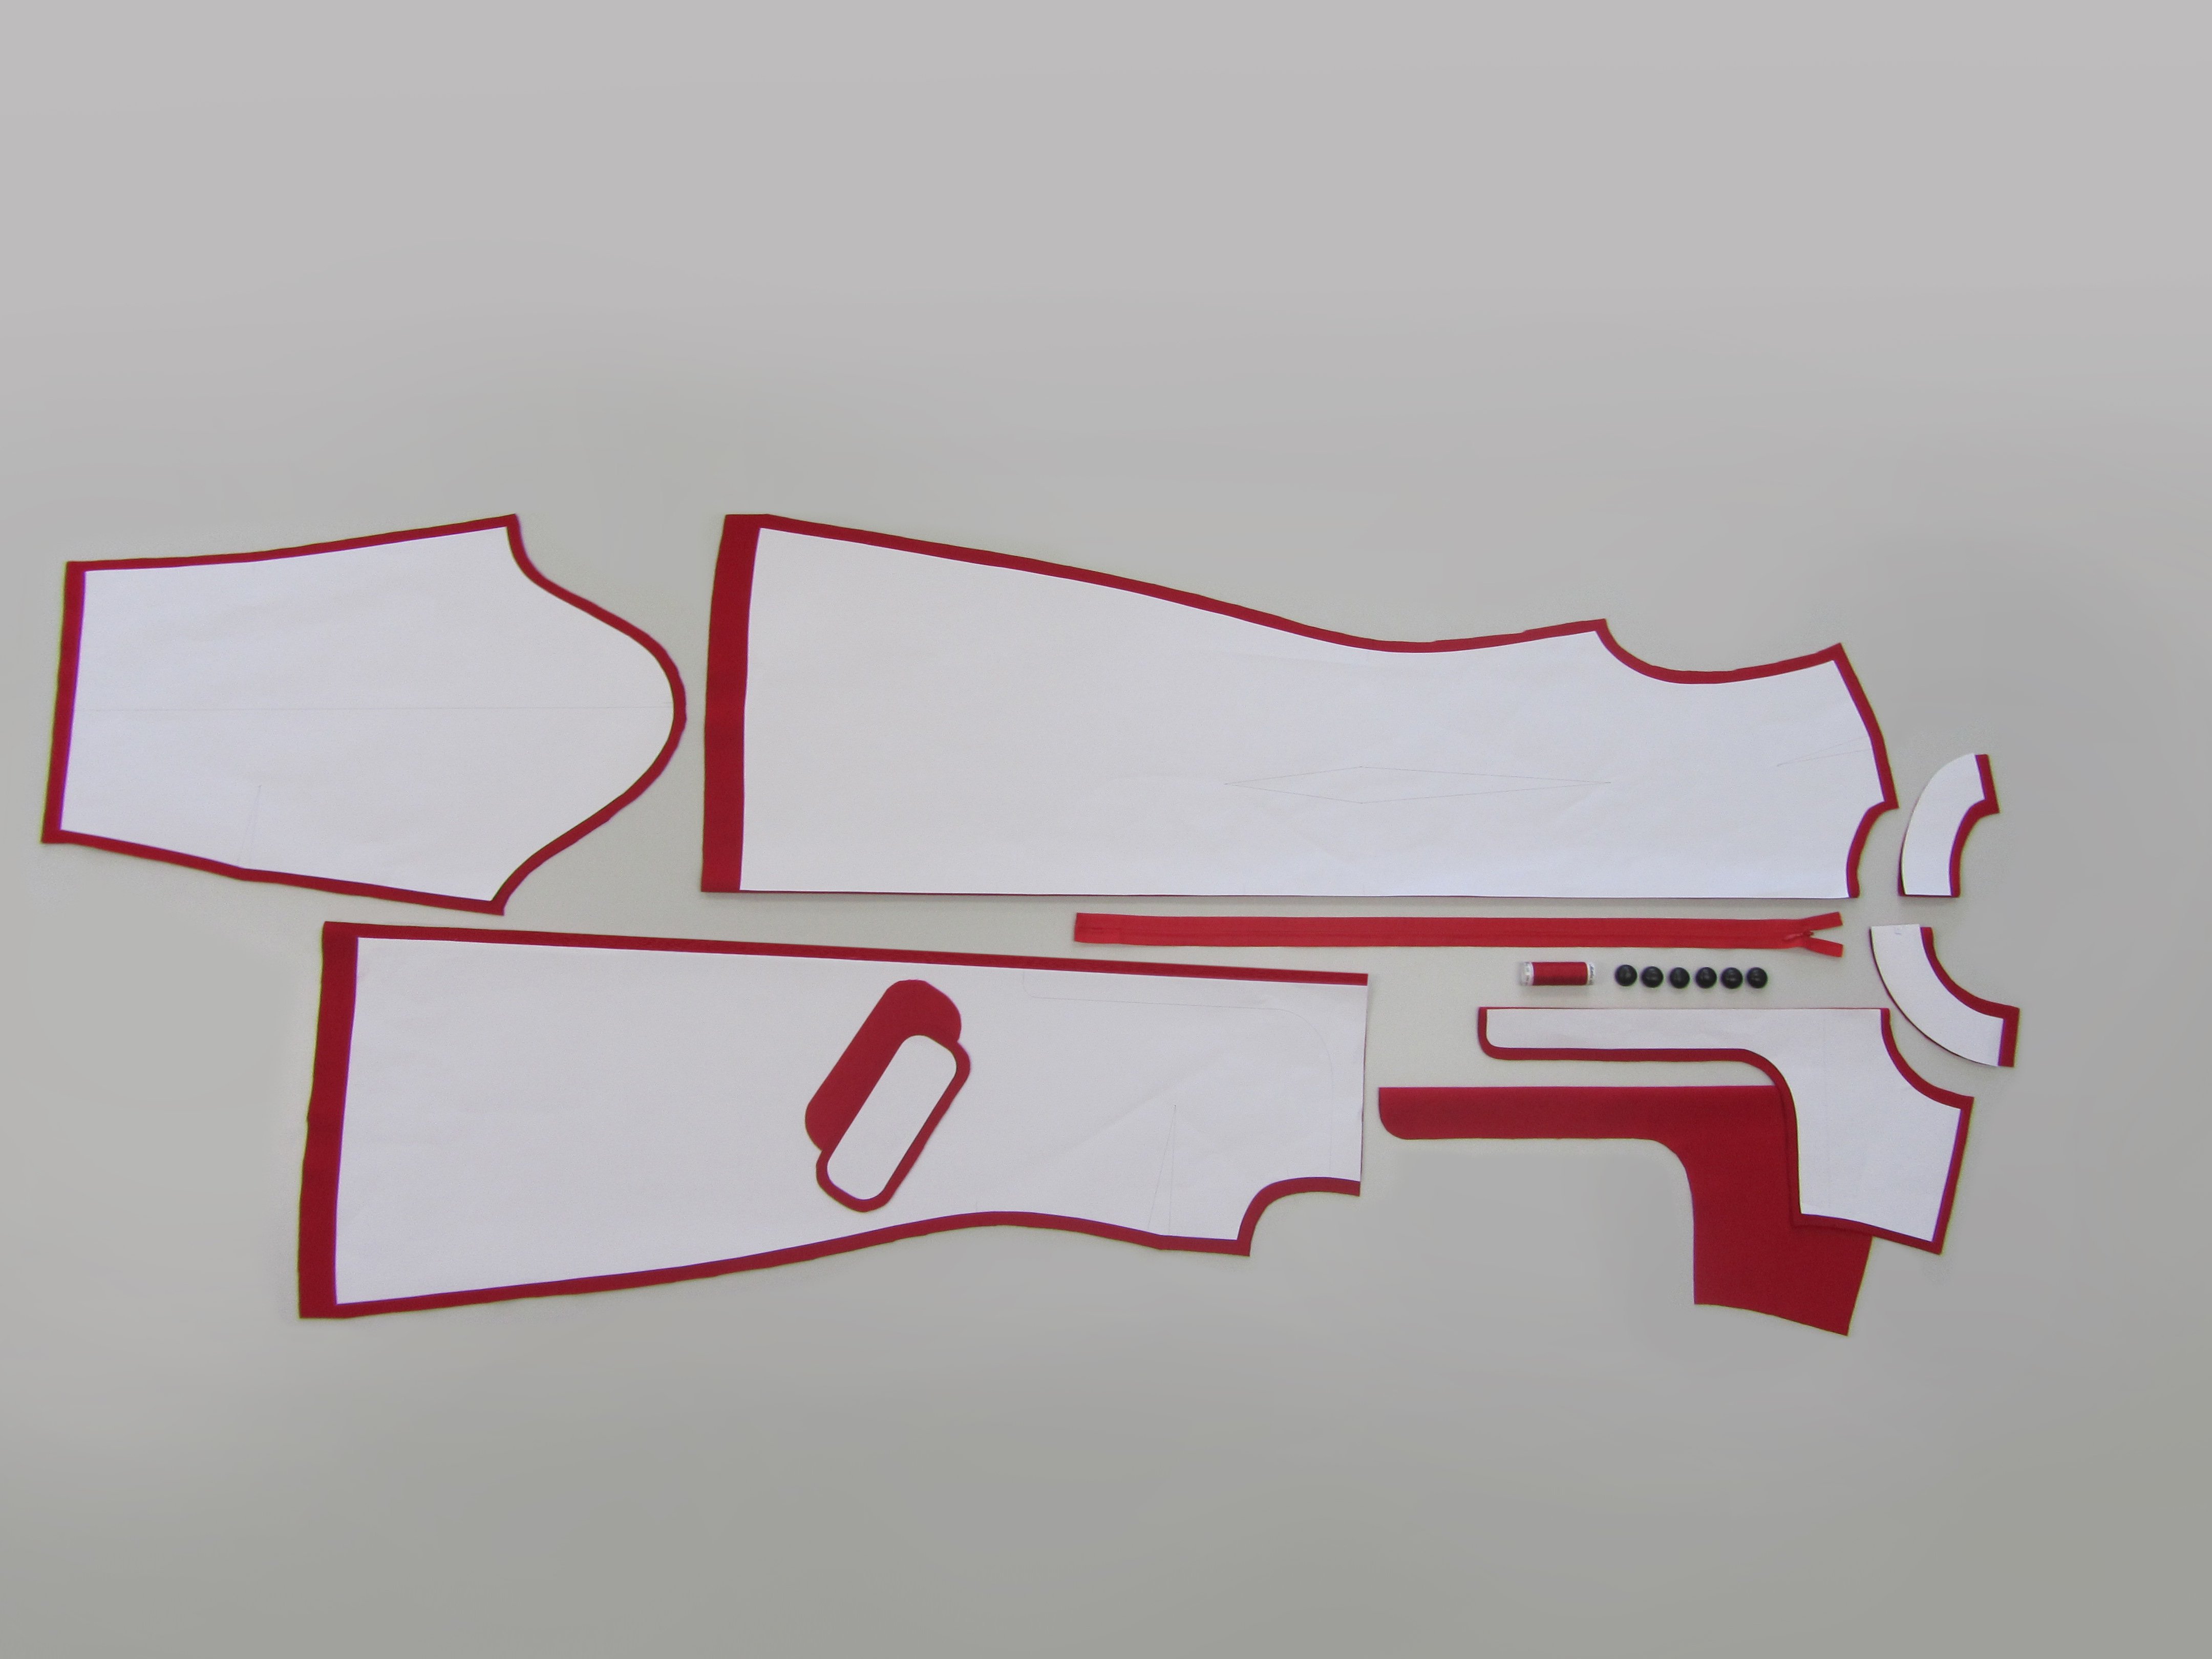
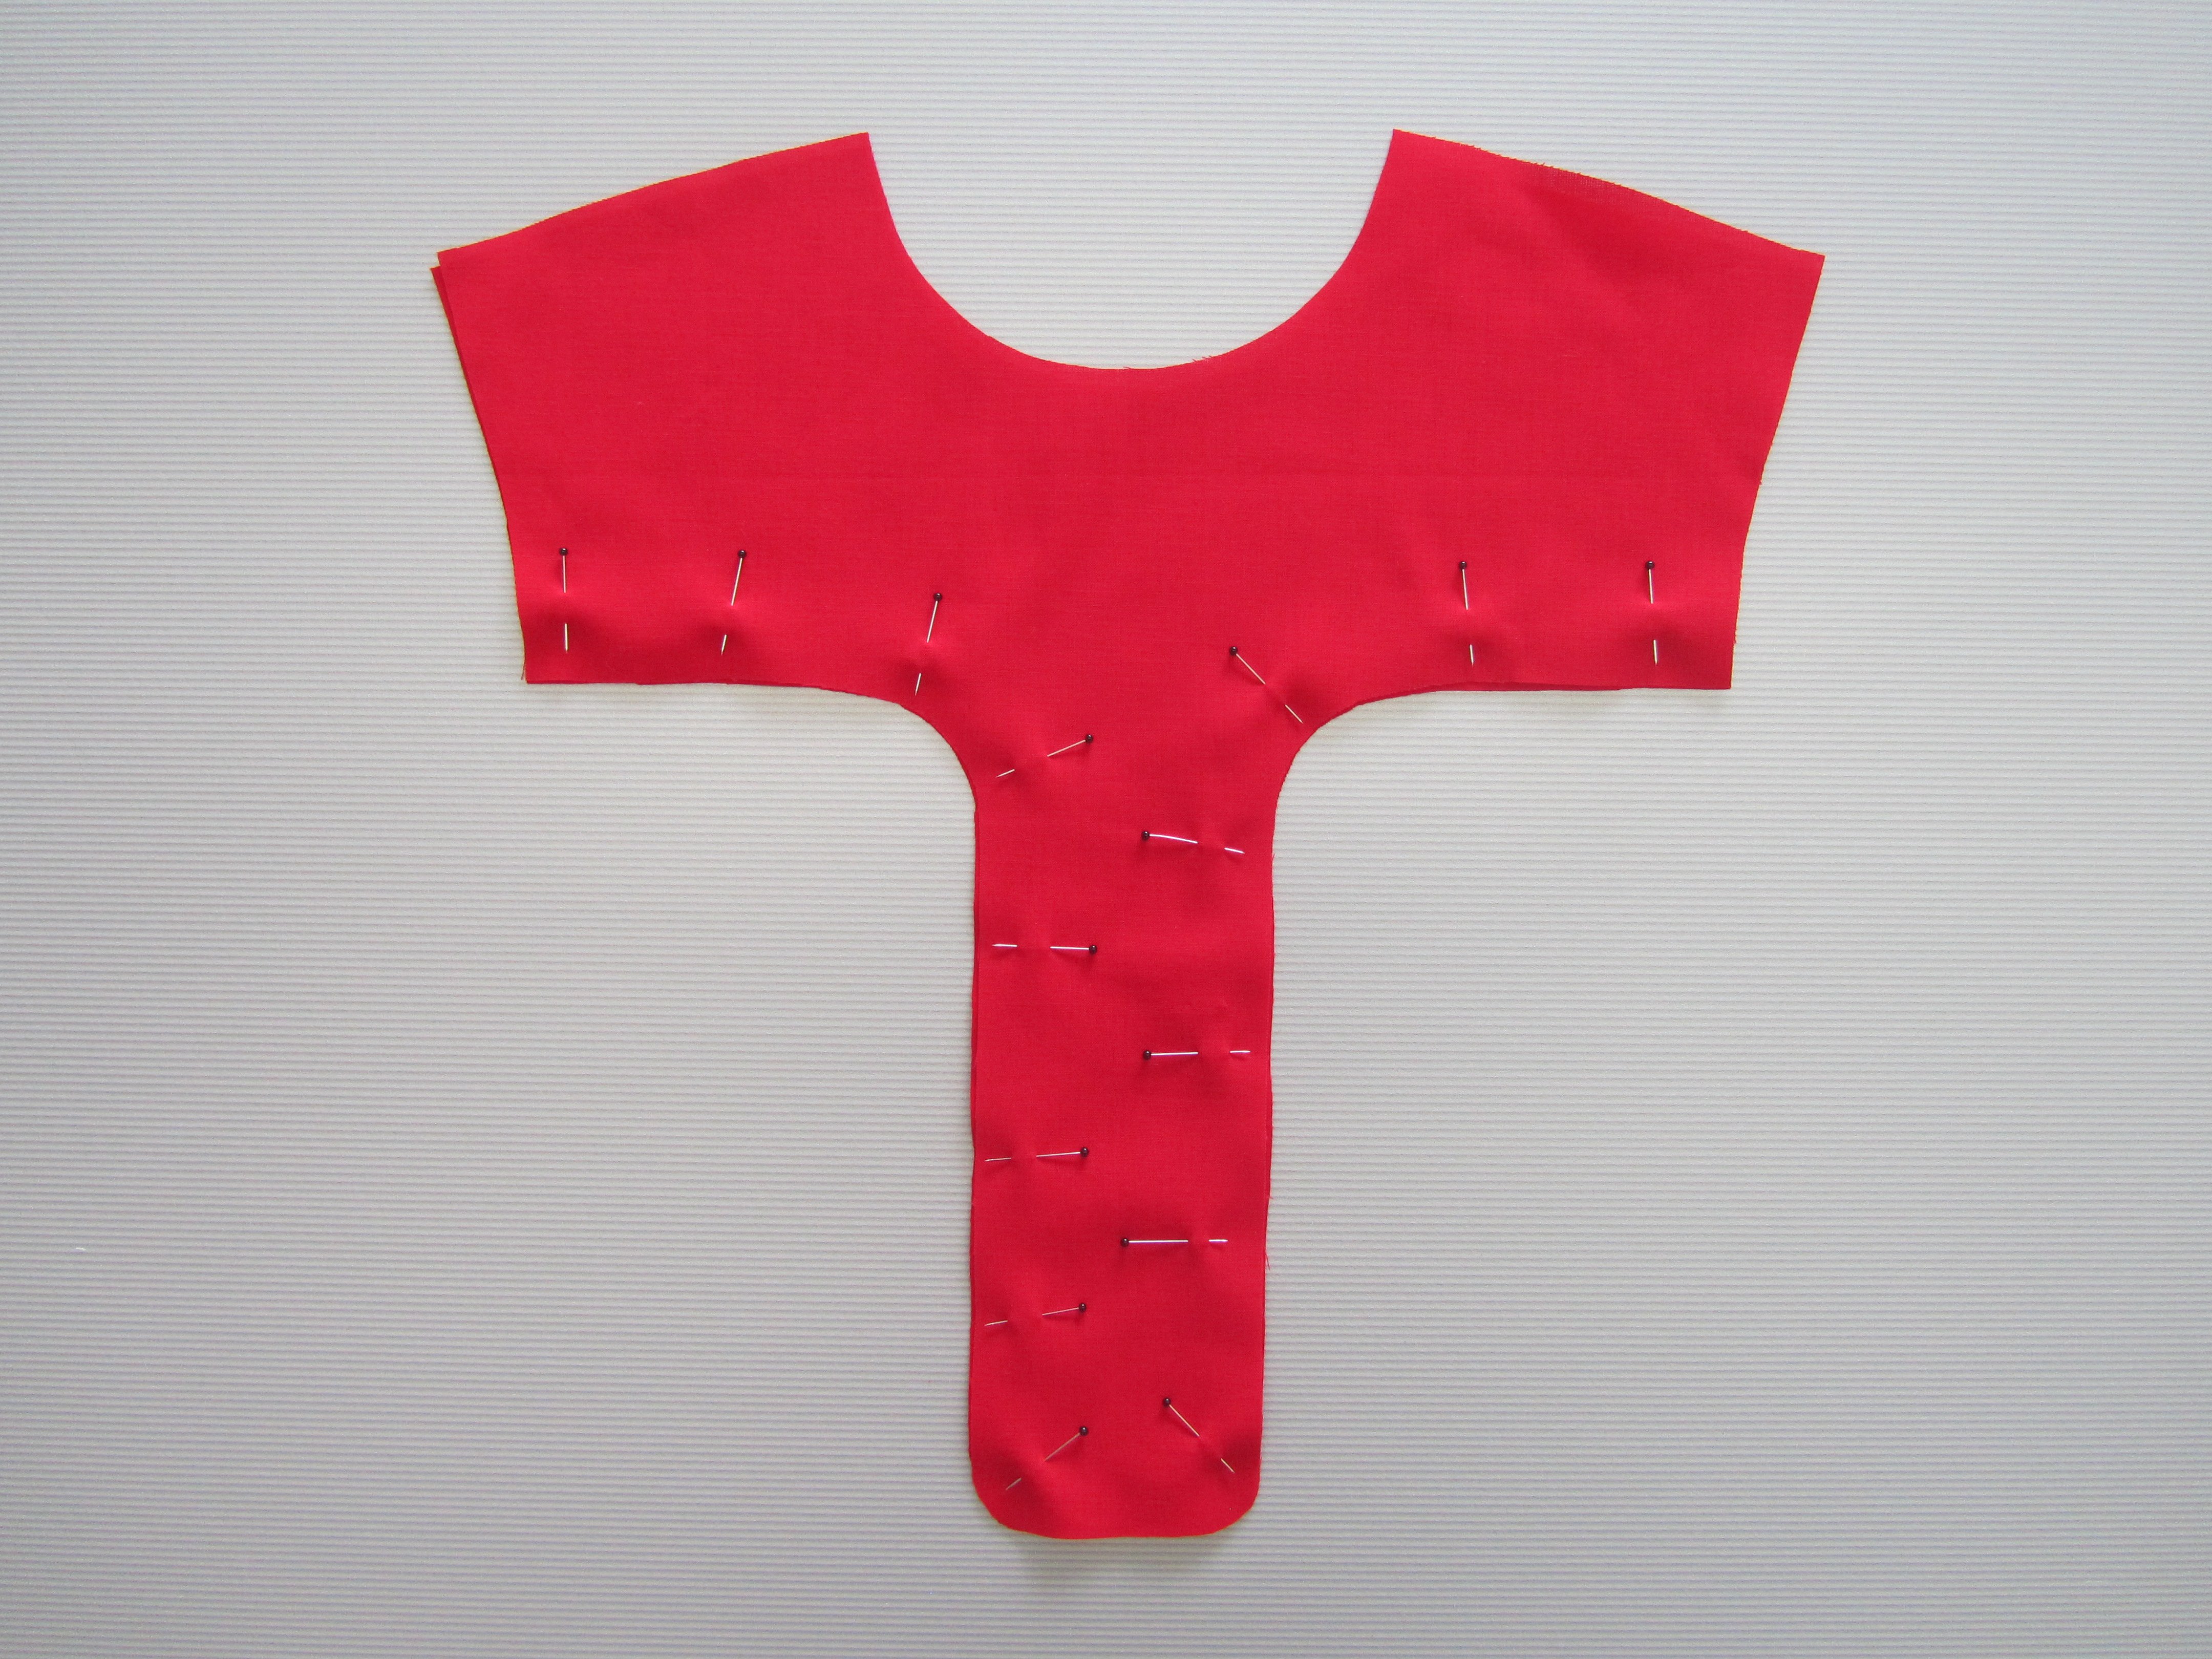
Cutting out the shell fabric pieces
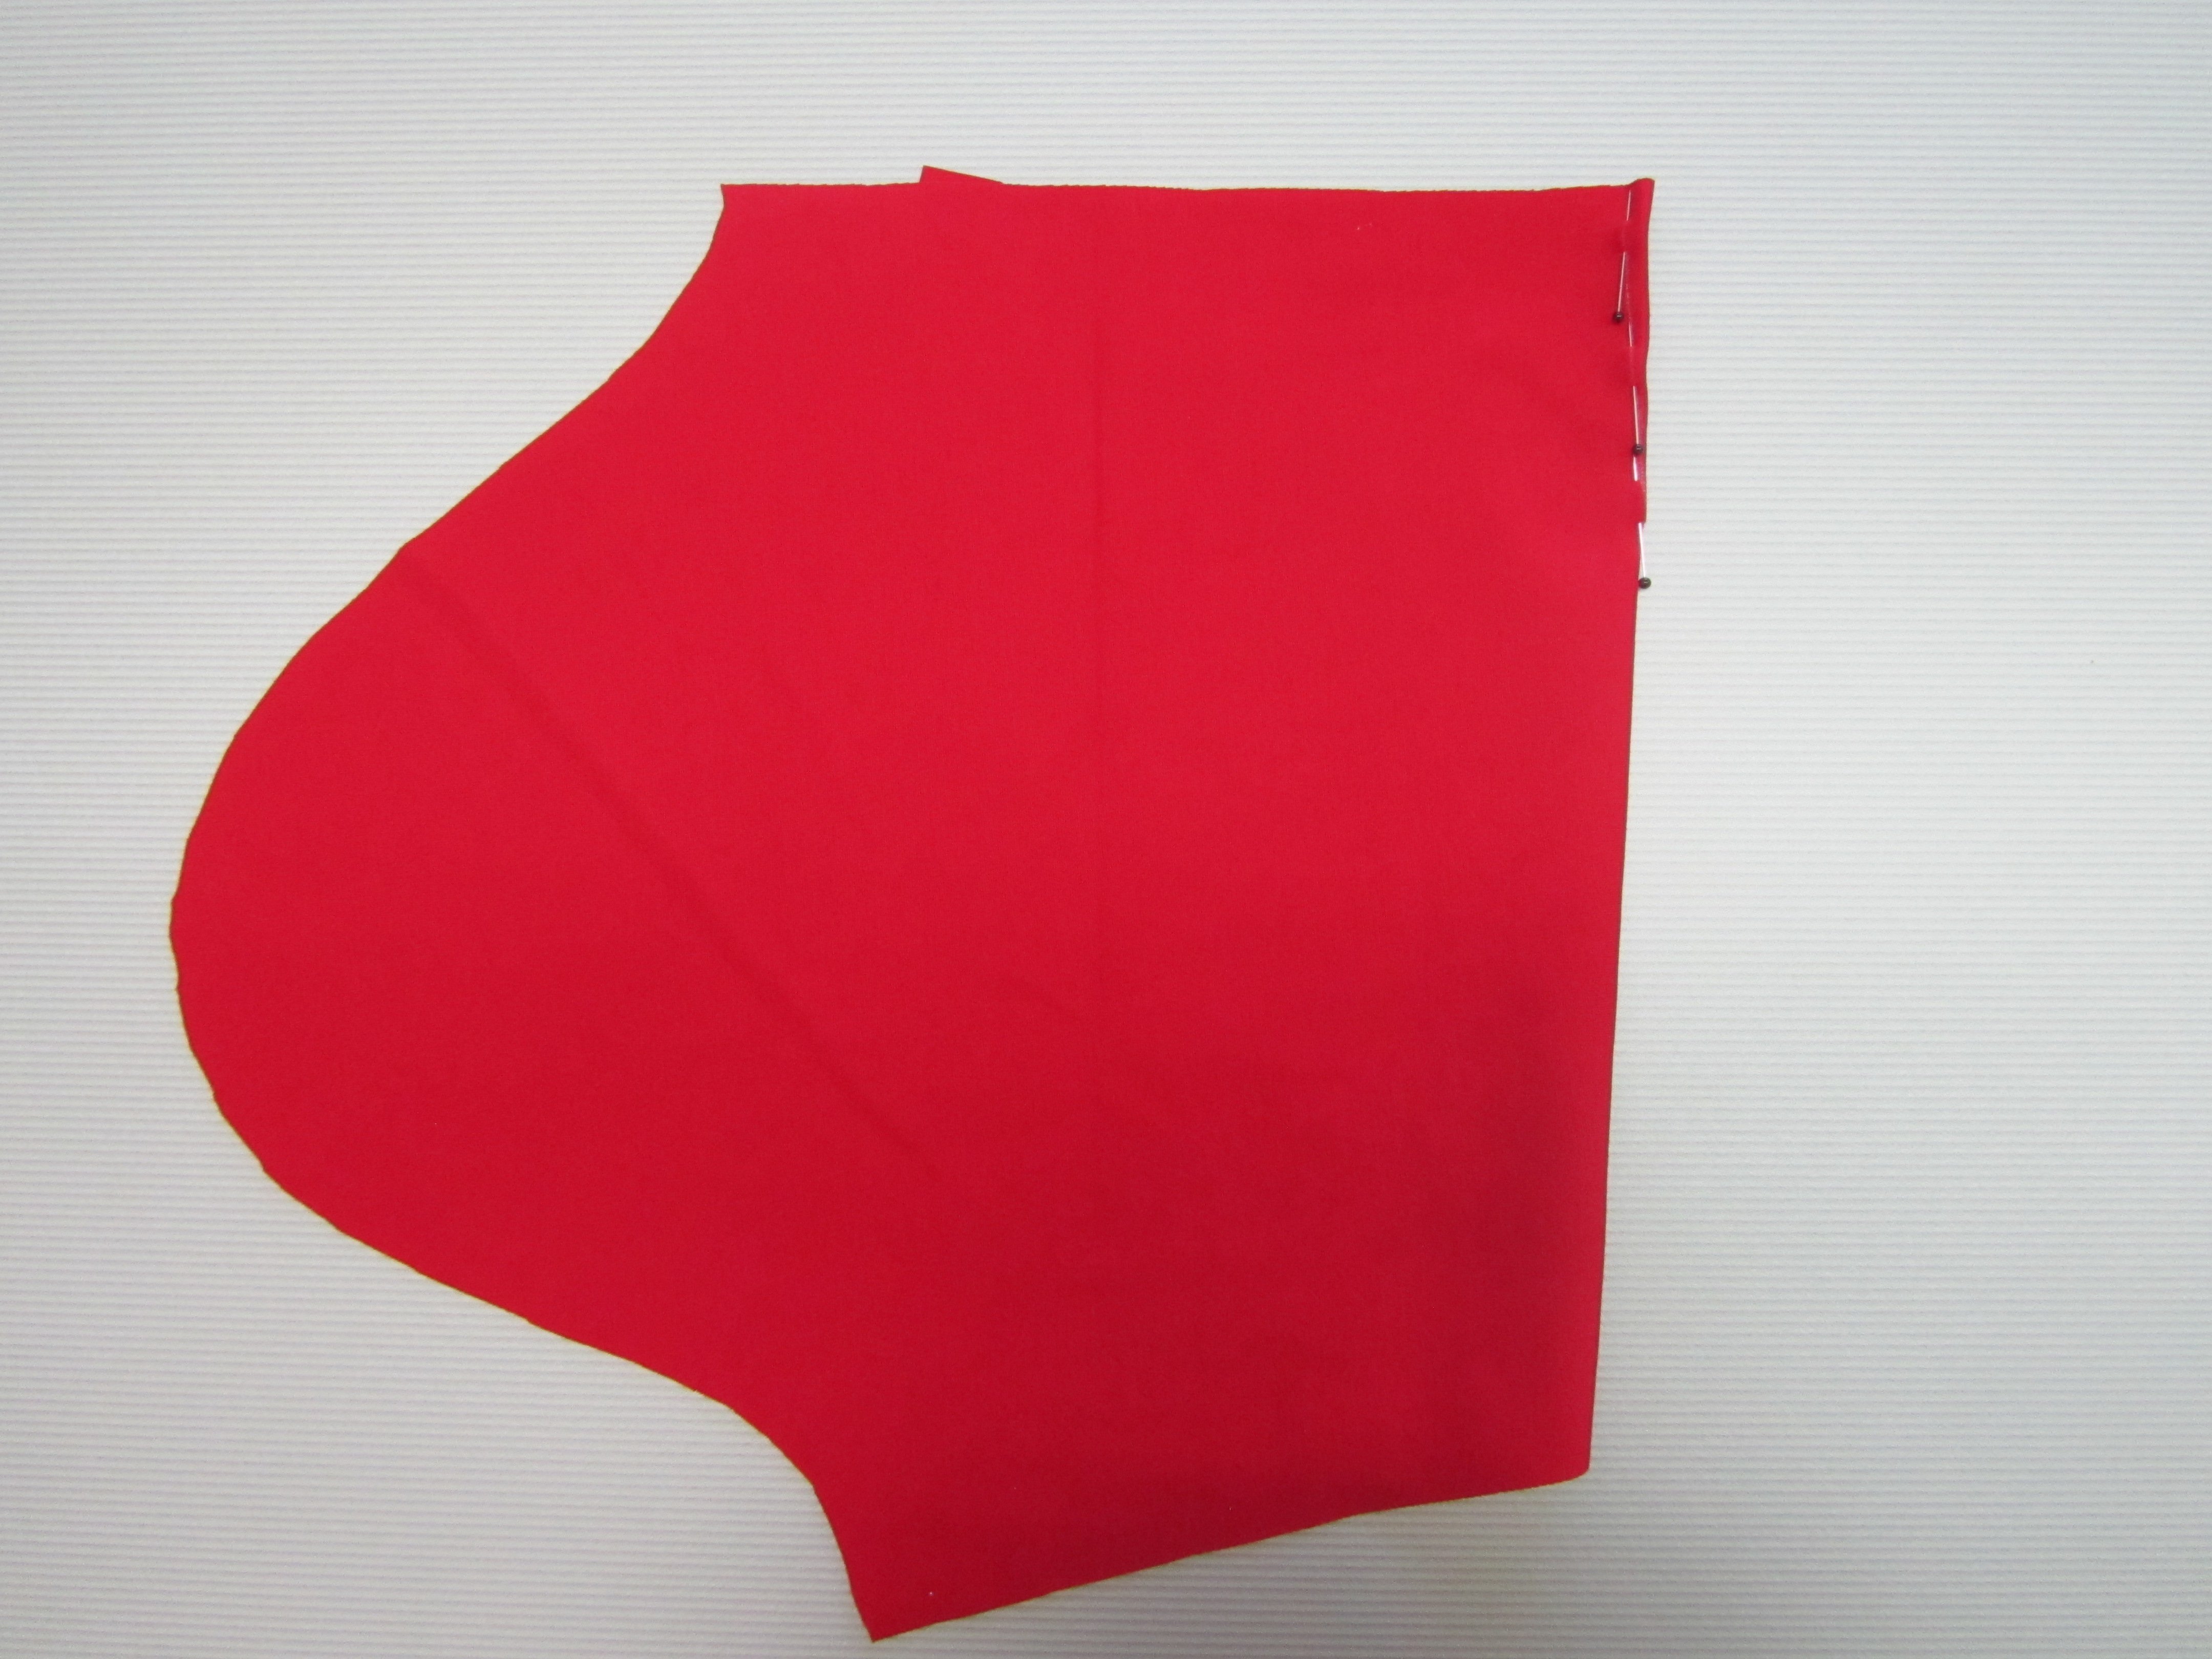
A 1 x front piece on the fold
B 1 x front yoke on the fold
C 1 x front neckline facing on the fold
D 2 x pocket trim
E 2 x back piece
F 2 x back neckline facing
G 2 x sleeve

Cutting out the lining pieces
B 1 x front yoke on the fold
D 2 x pocket trim
Seams: Stitch length standard setting 2.4
Topstitching: Increase the stitch length to 3 – 3.5
Neatening the edges: Using an overlock stitch or a serger/overlocker
Instructions
Darts: Using foot A. Sew up the bust darts on the front and the shoulder and waist darts on the back pieces.

Iron the darts in the front piece downwards and iron the darts in the back pieces towards the center of the back.
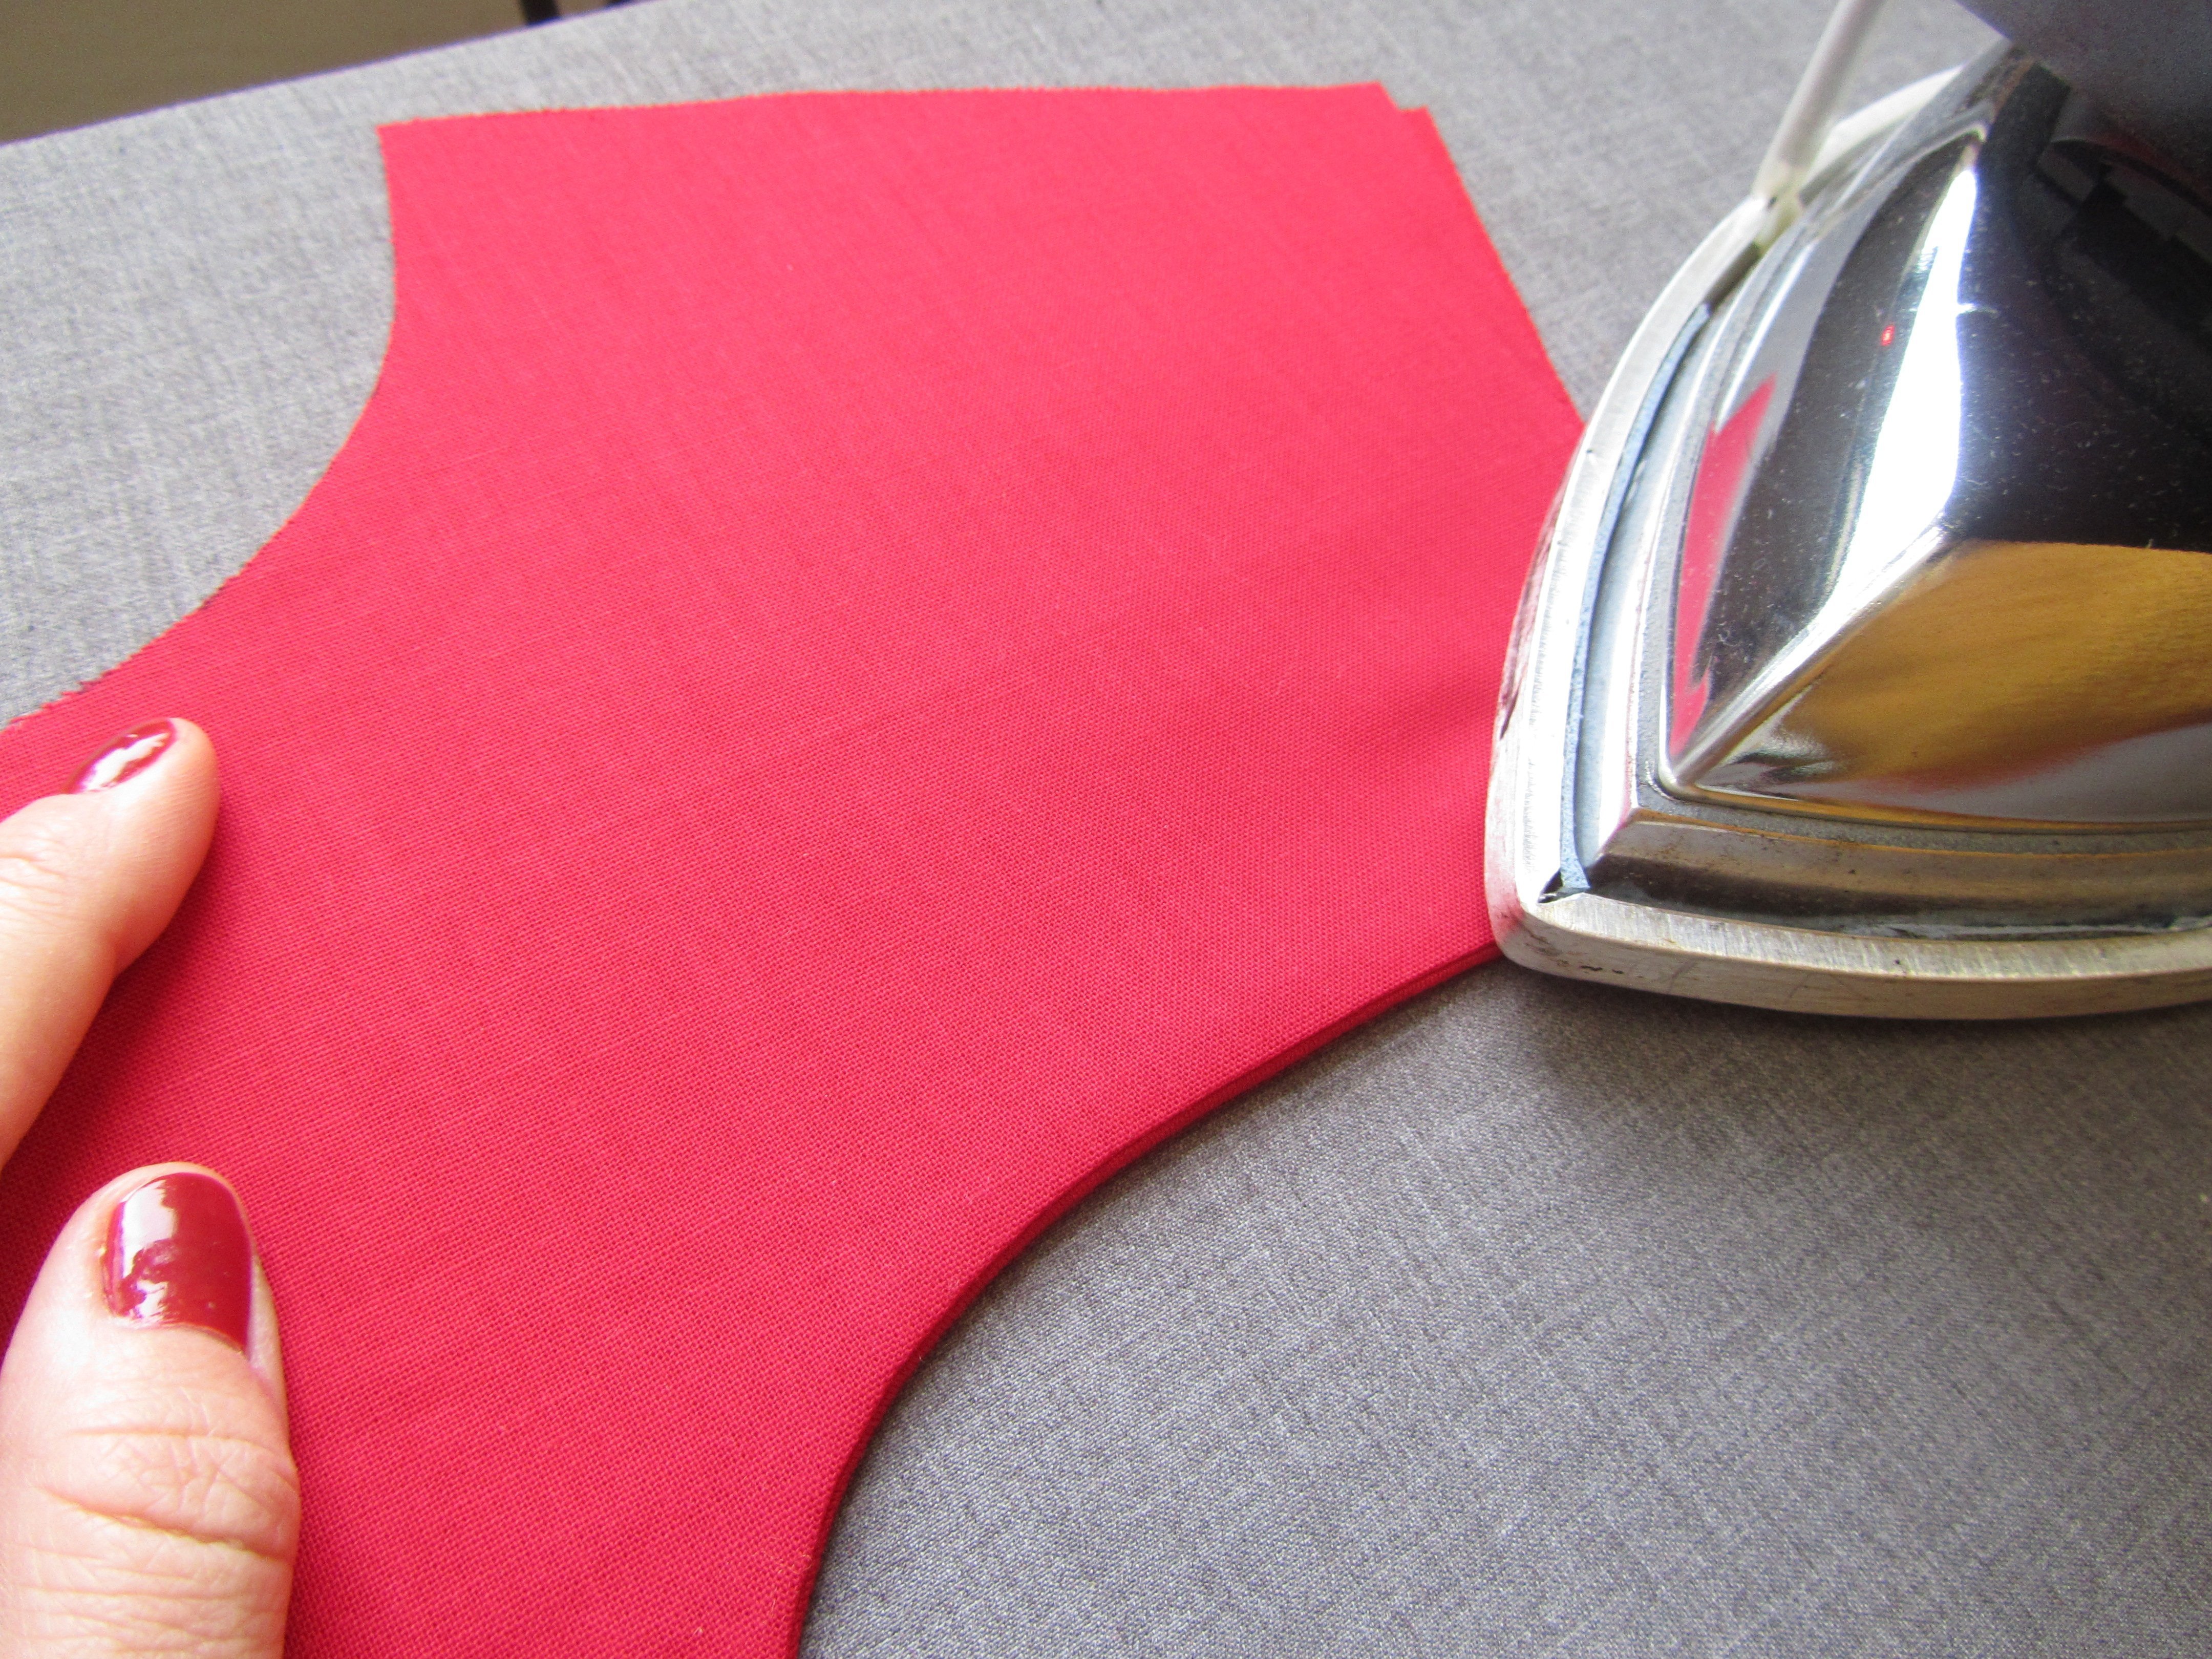
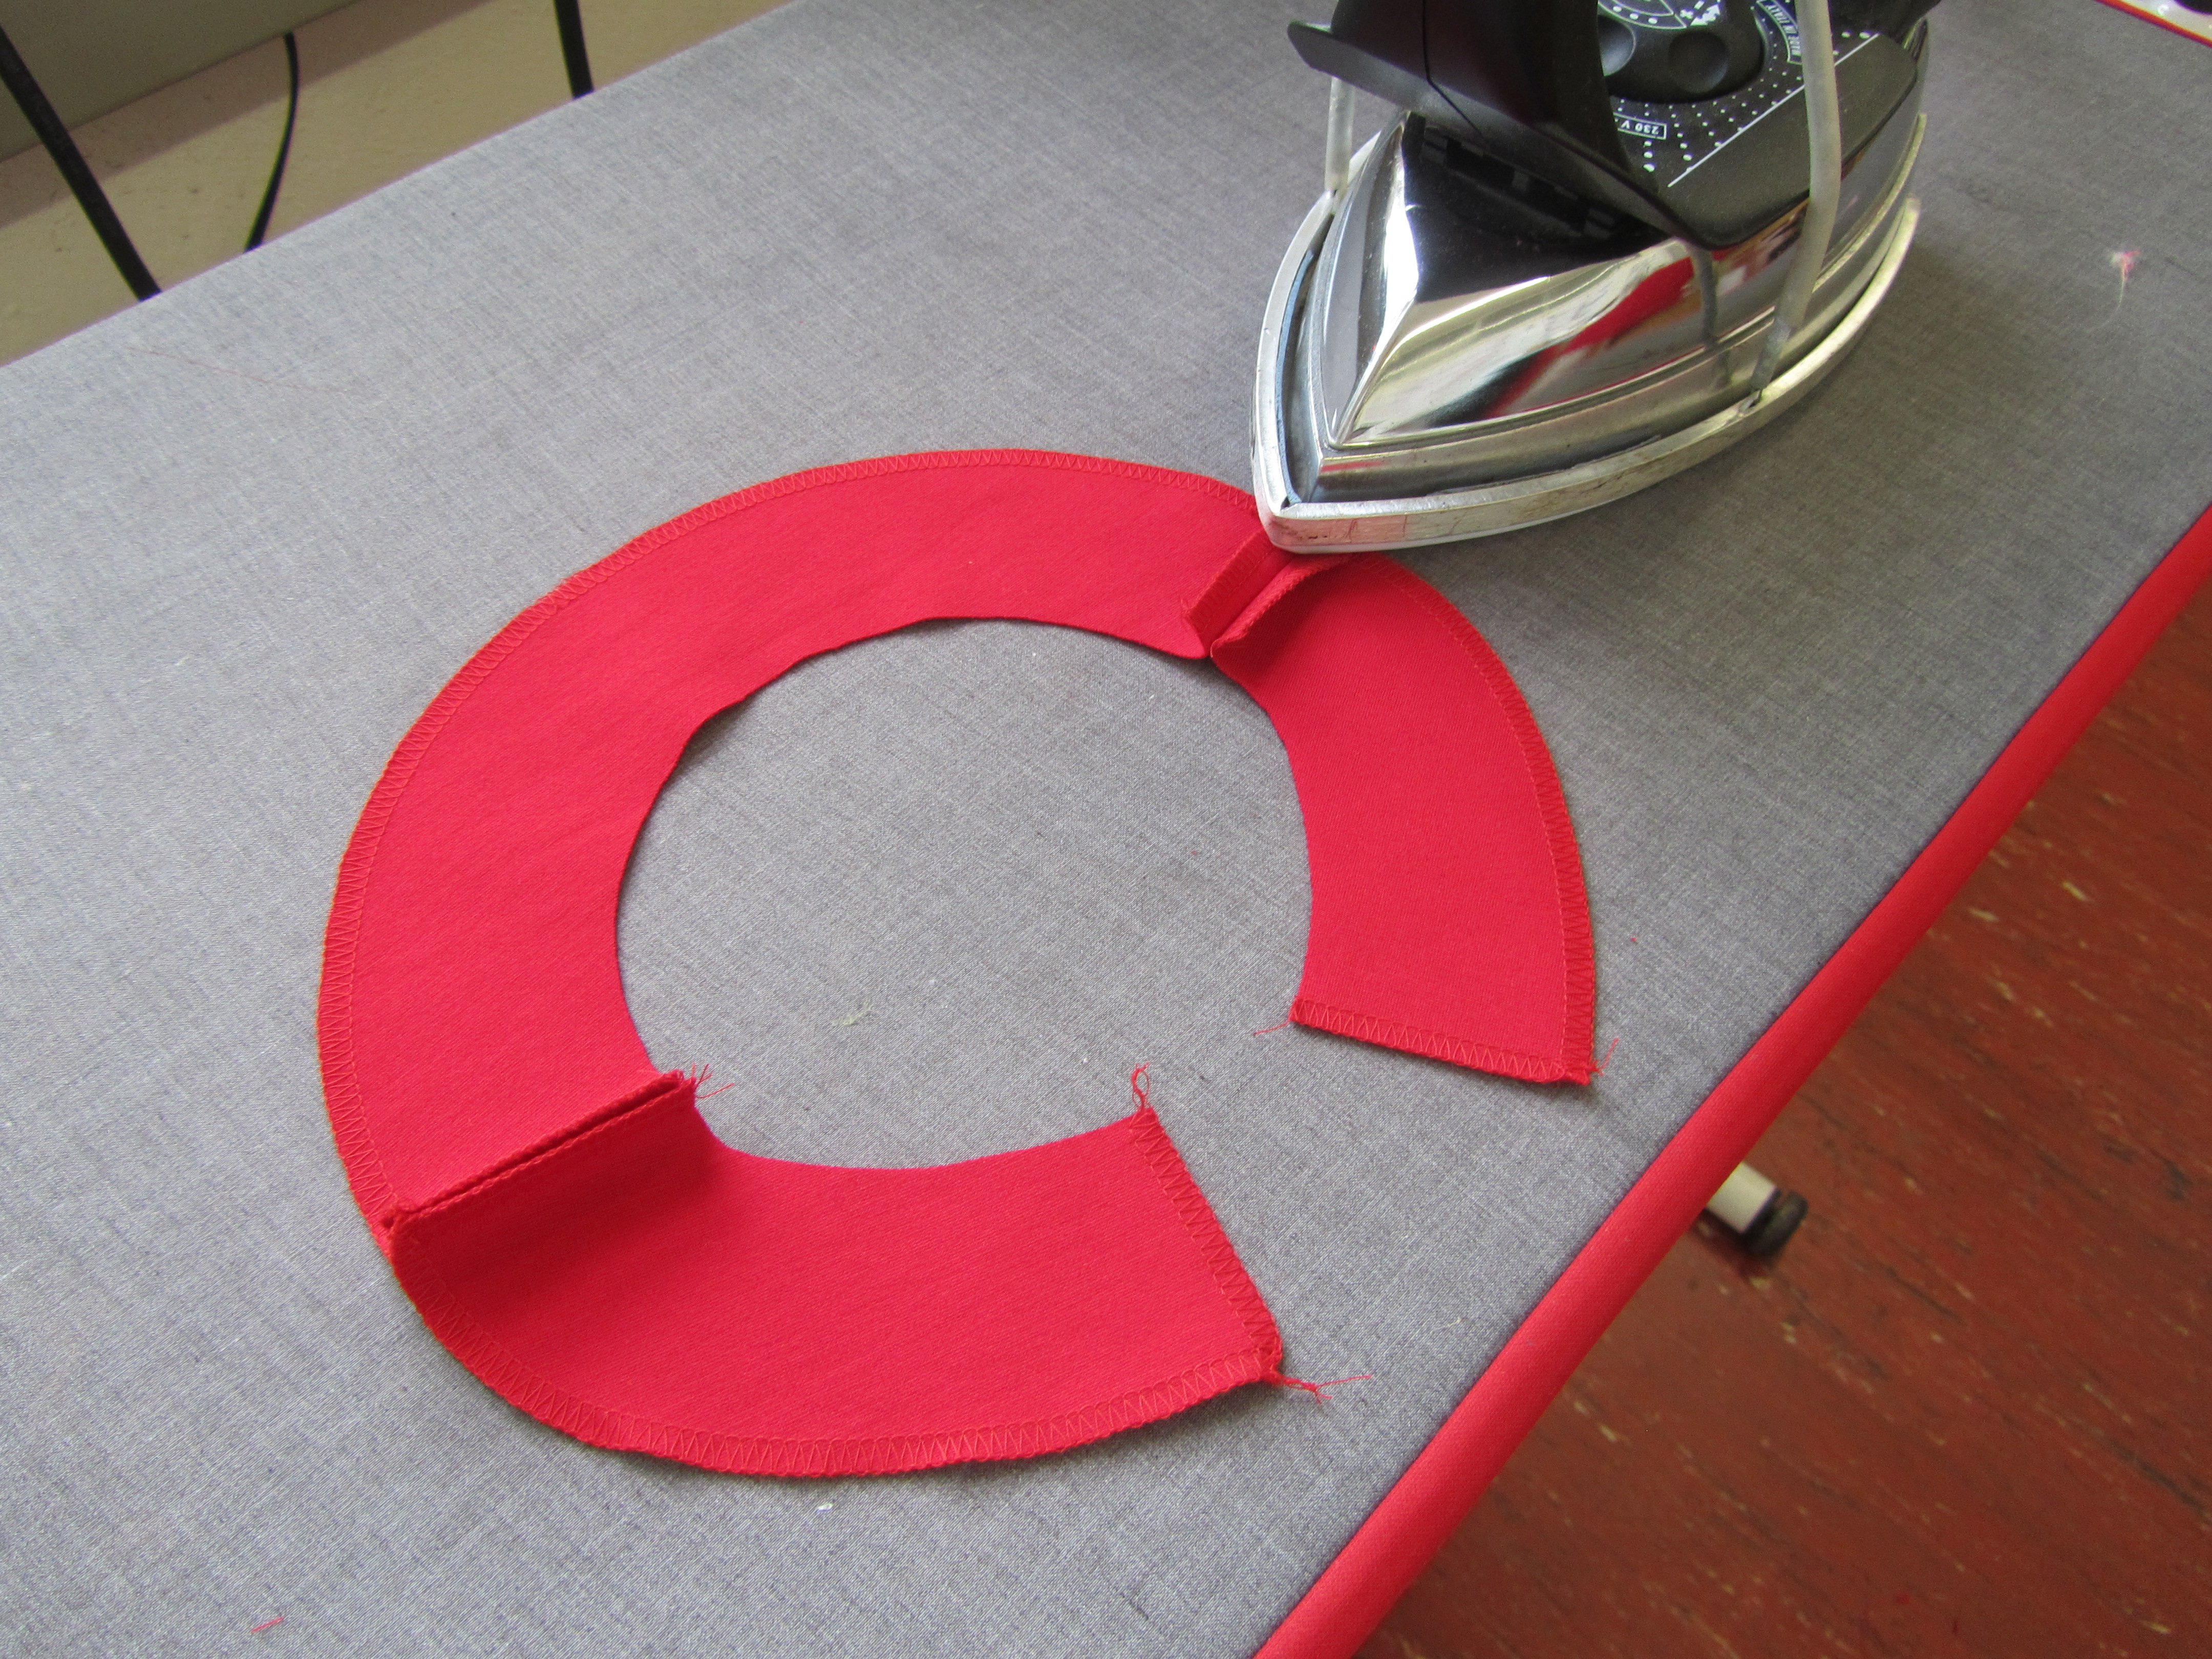
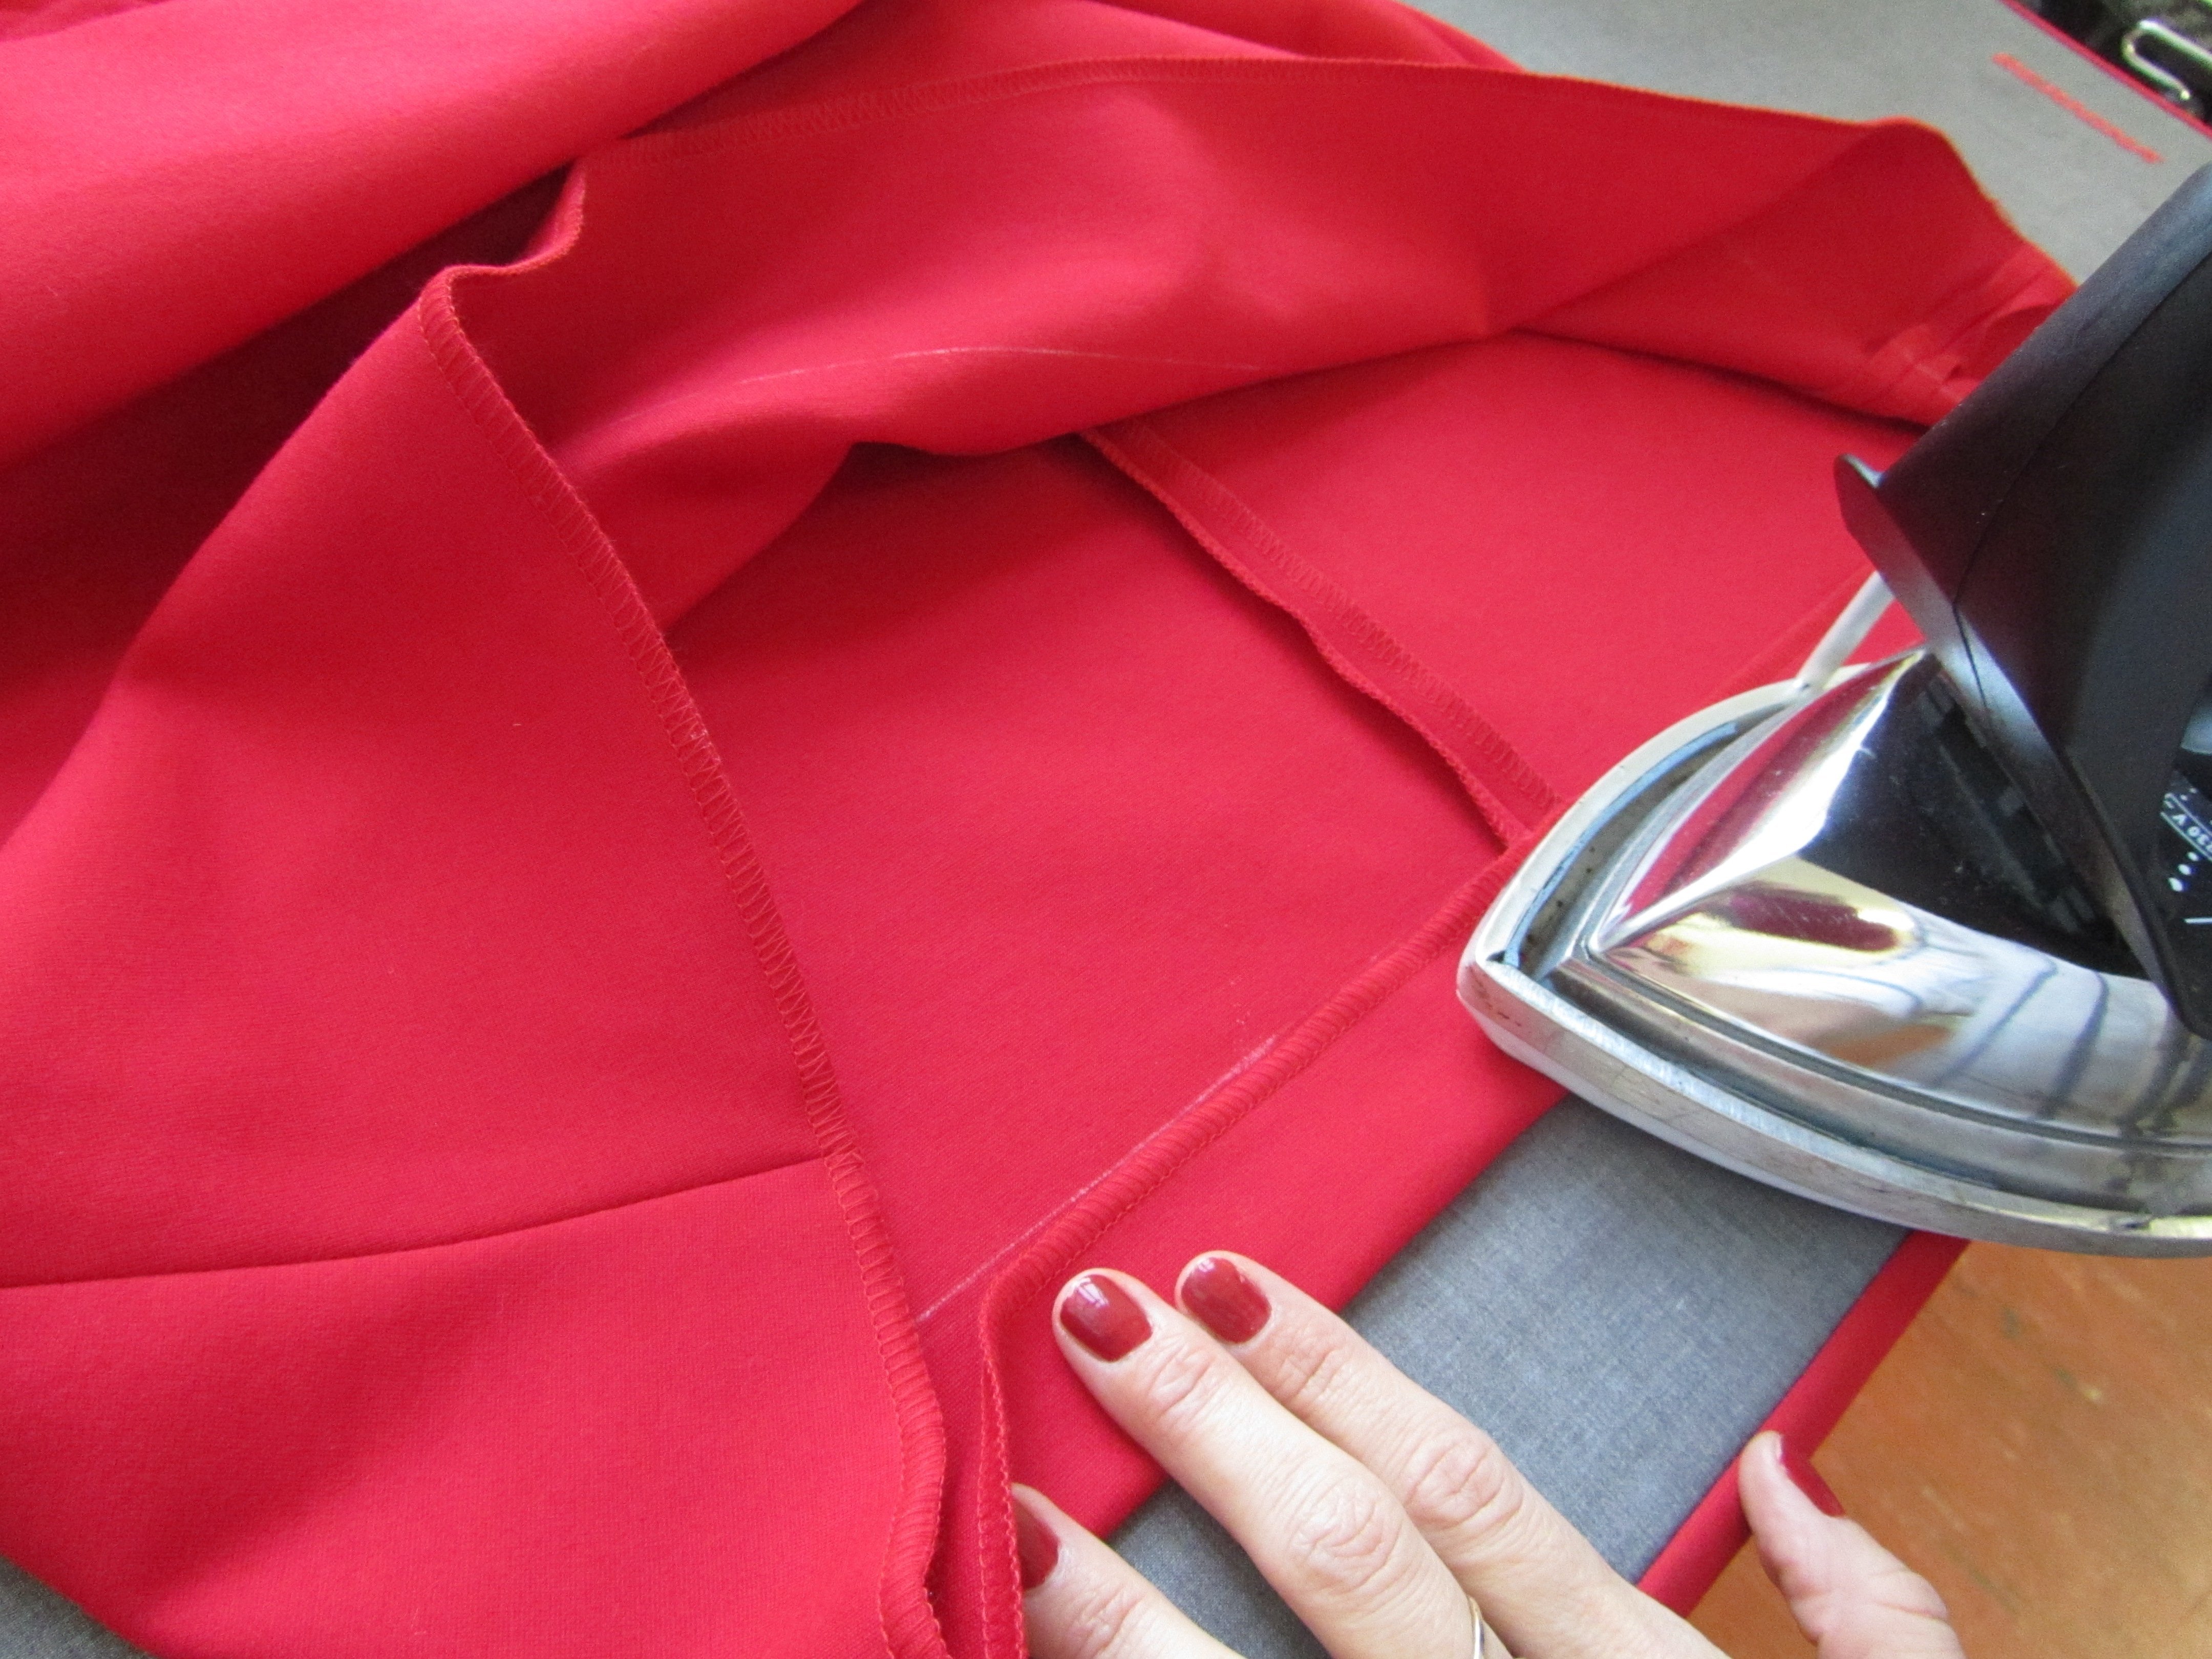
Front yoke: Place the lining piece on the shell fabric with the right sides together. Sew all the bottom edges together
Cut the seam allowances down to 0.5 cm, cut notches into the curves up to 1 mm from the seam and trim the seam allowance on the bottom curves.


Iron the seam allowances open, turn the yoke and iron the edges.
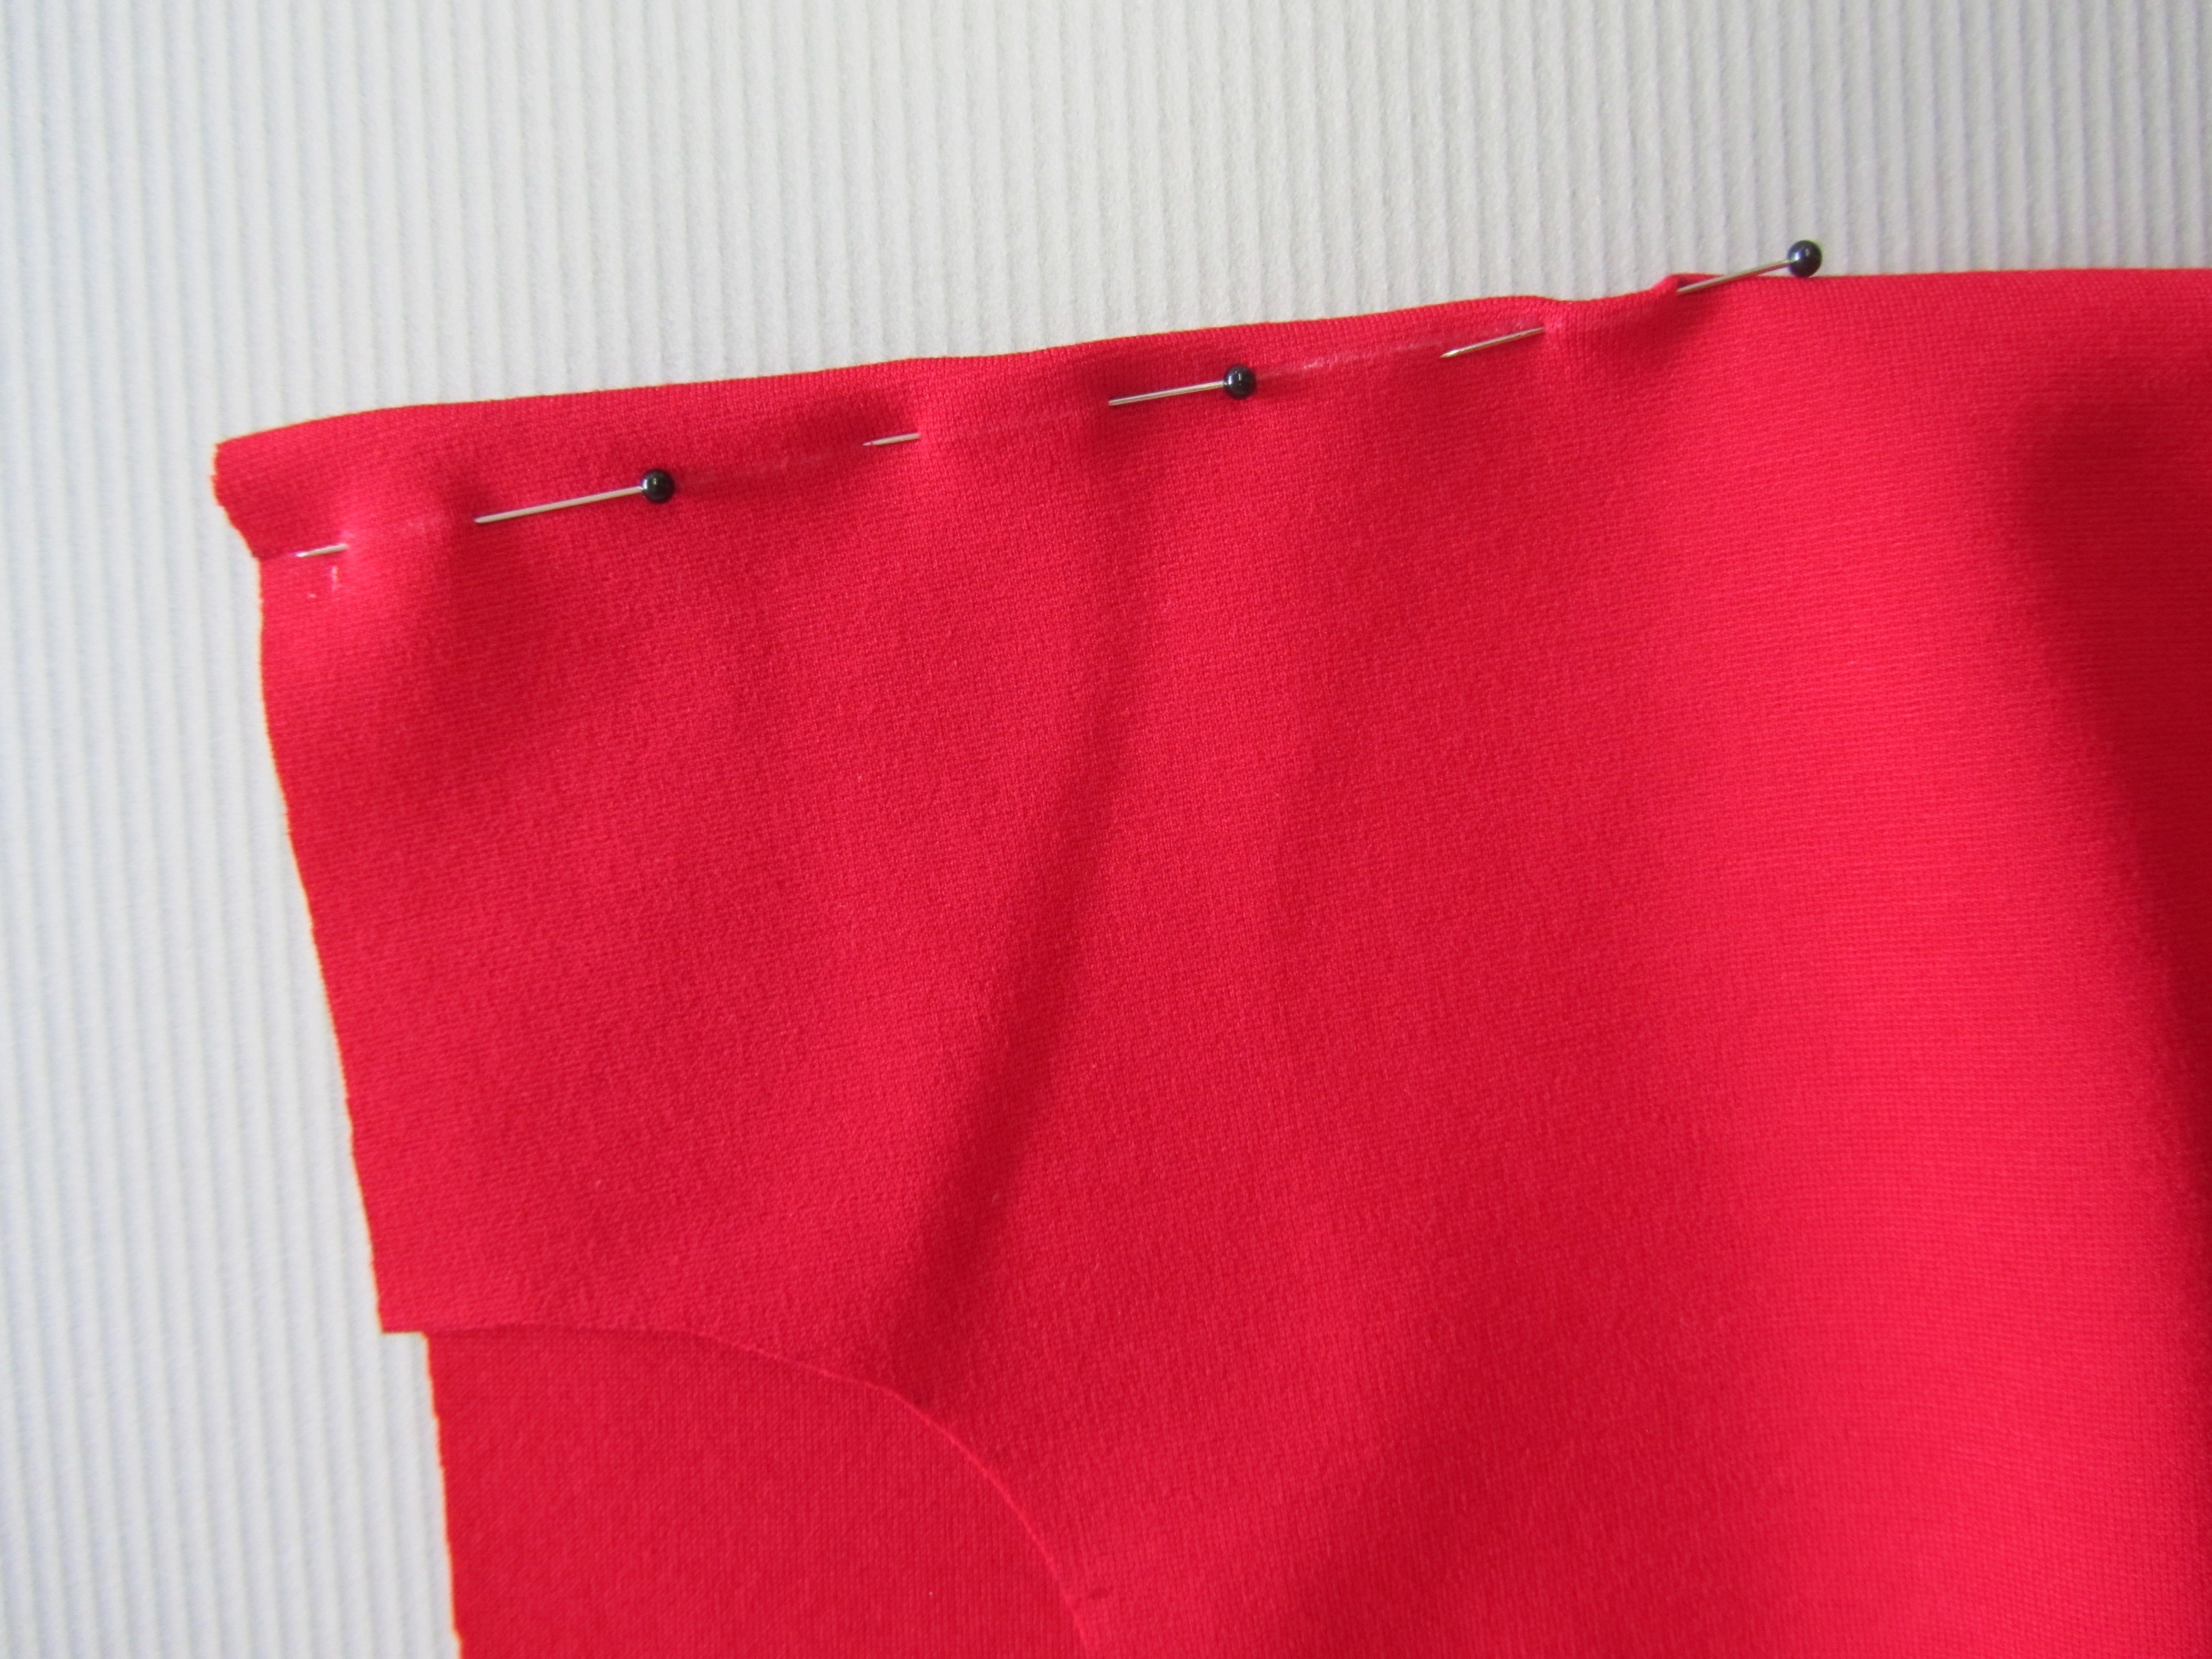
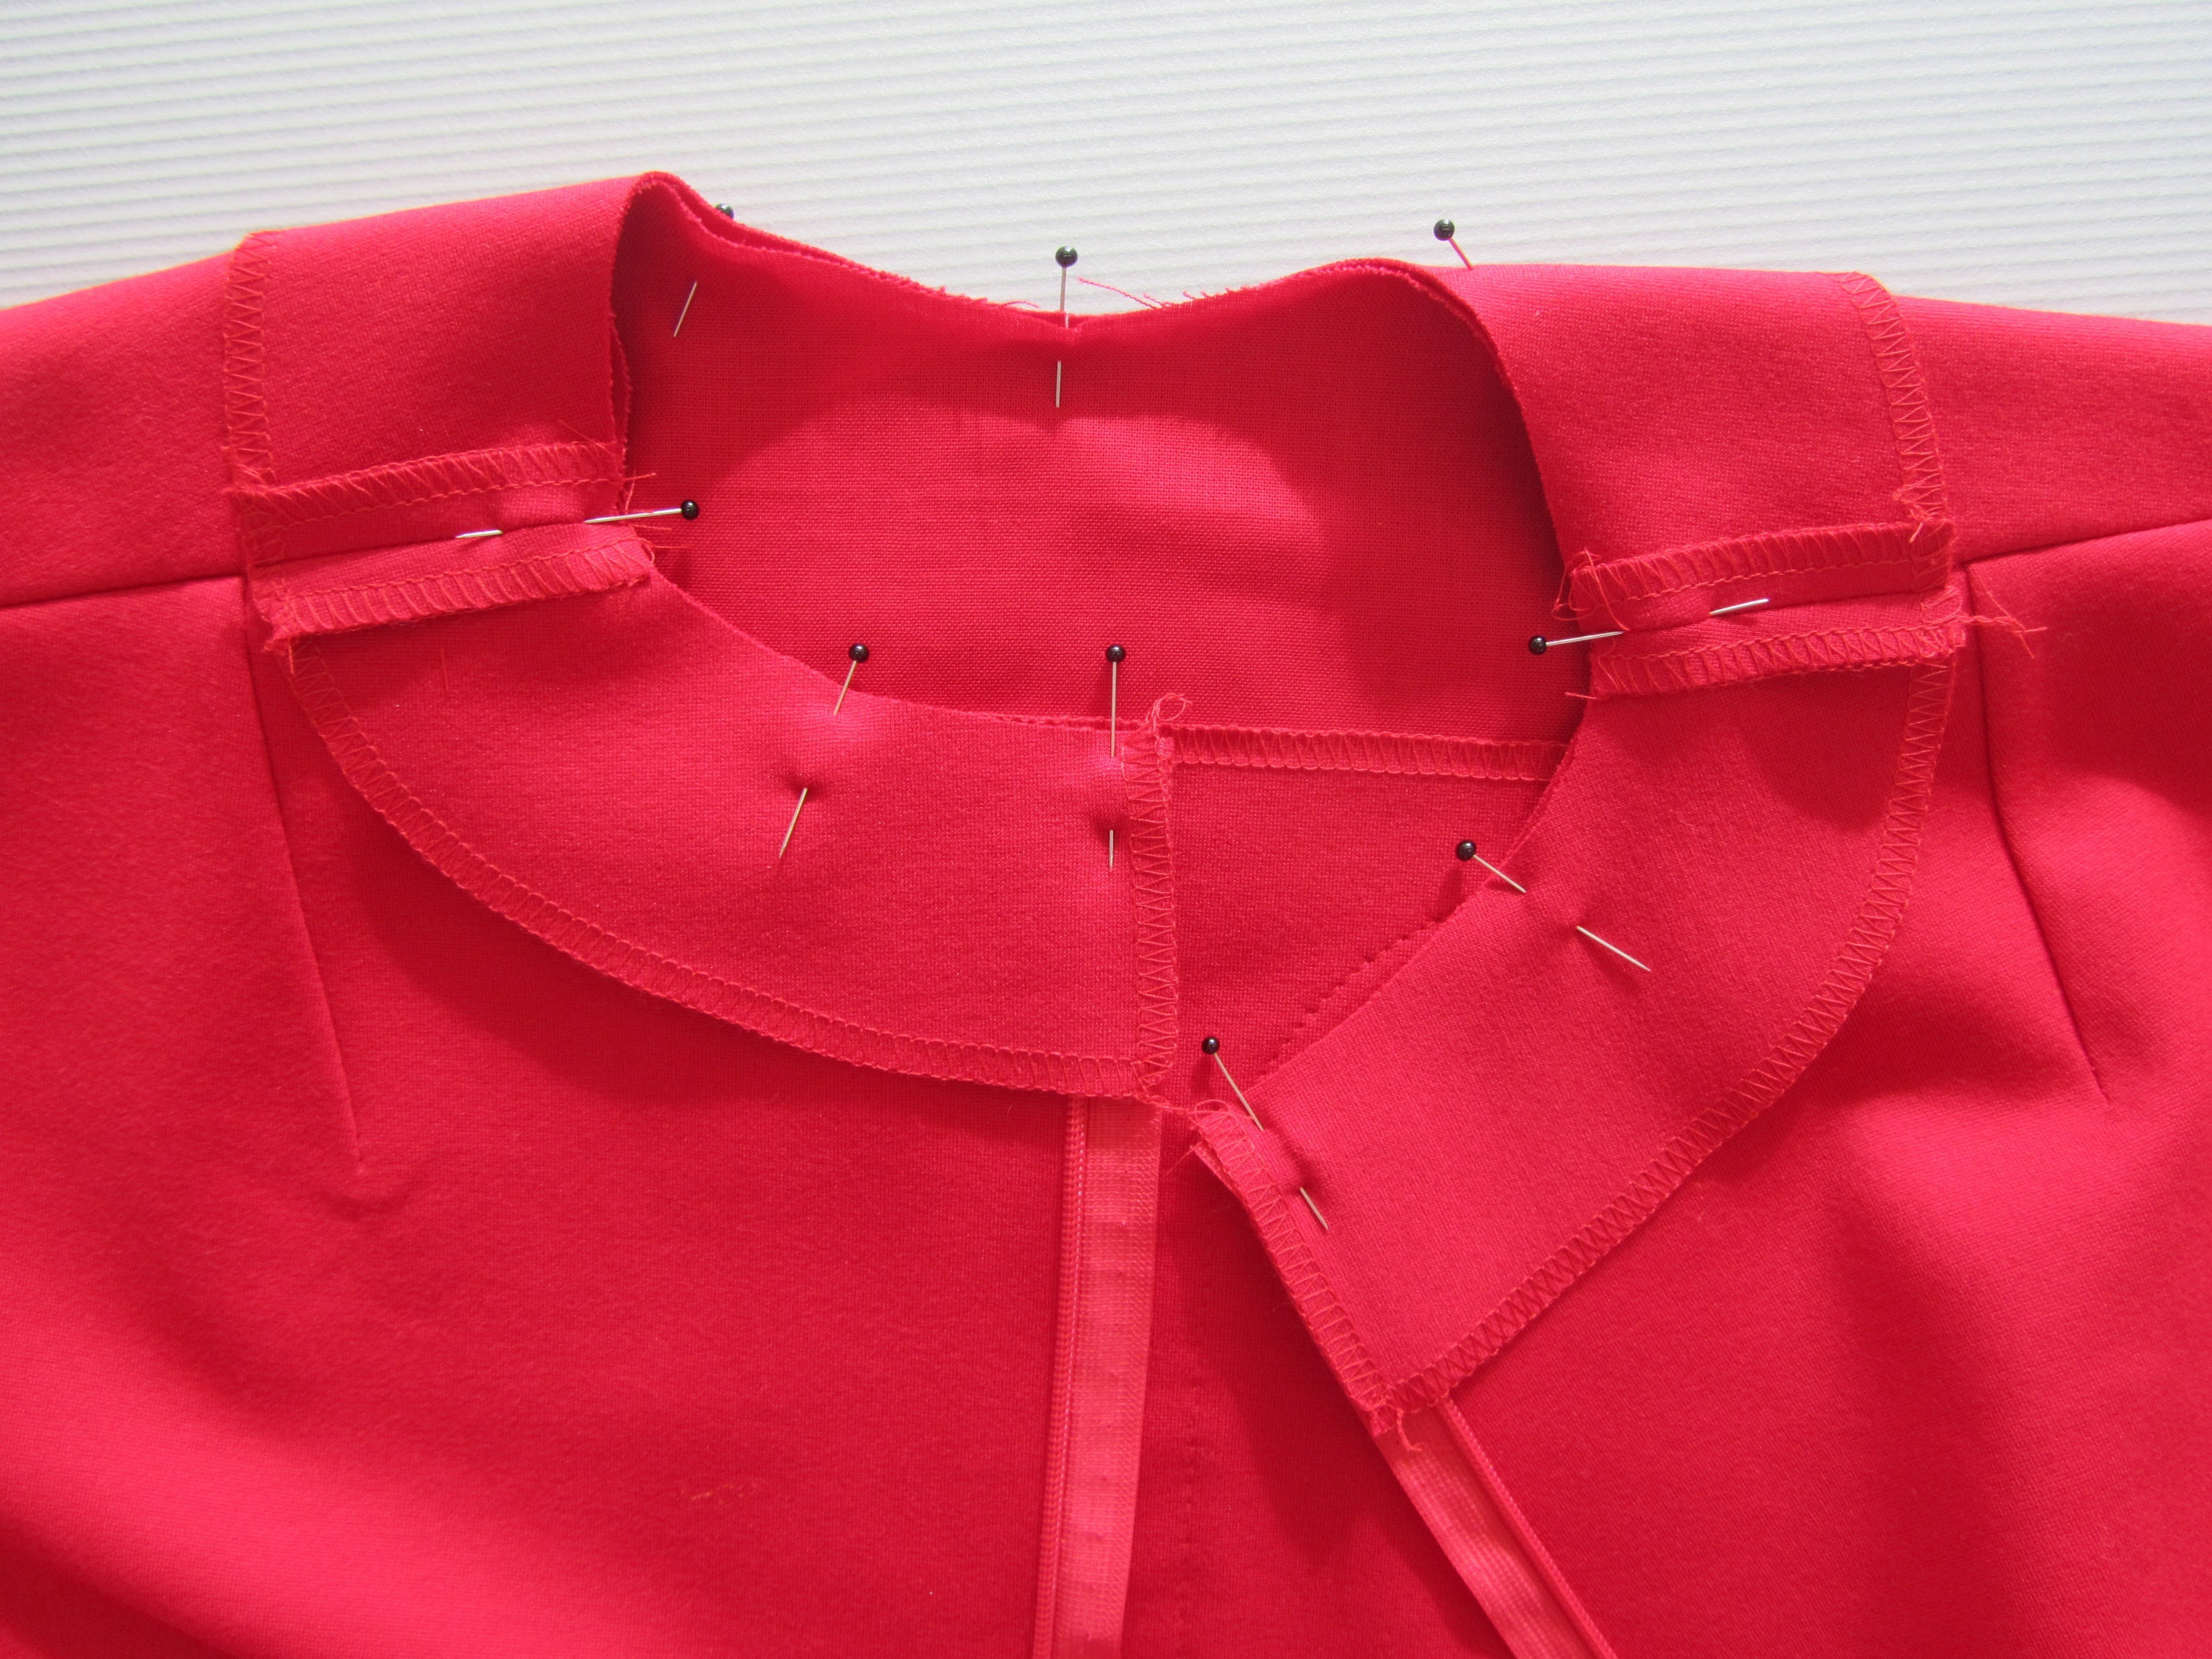
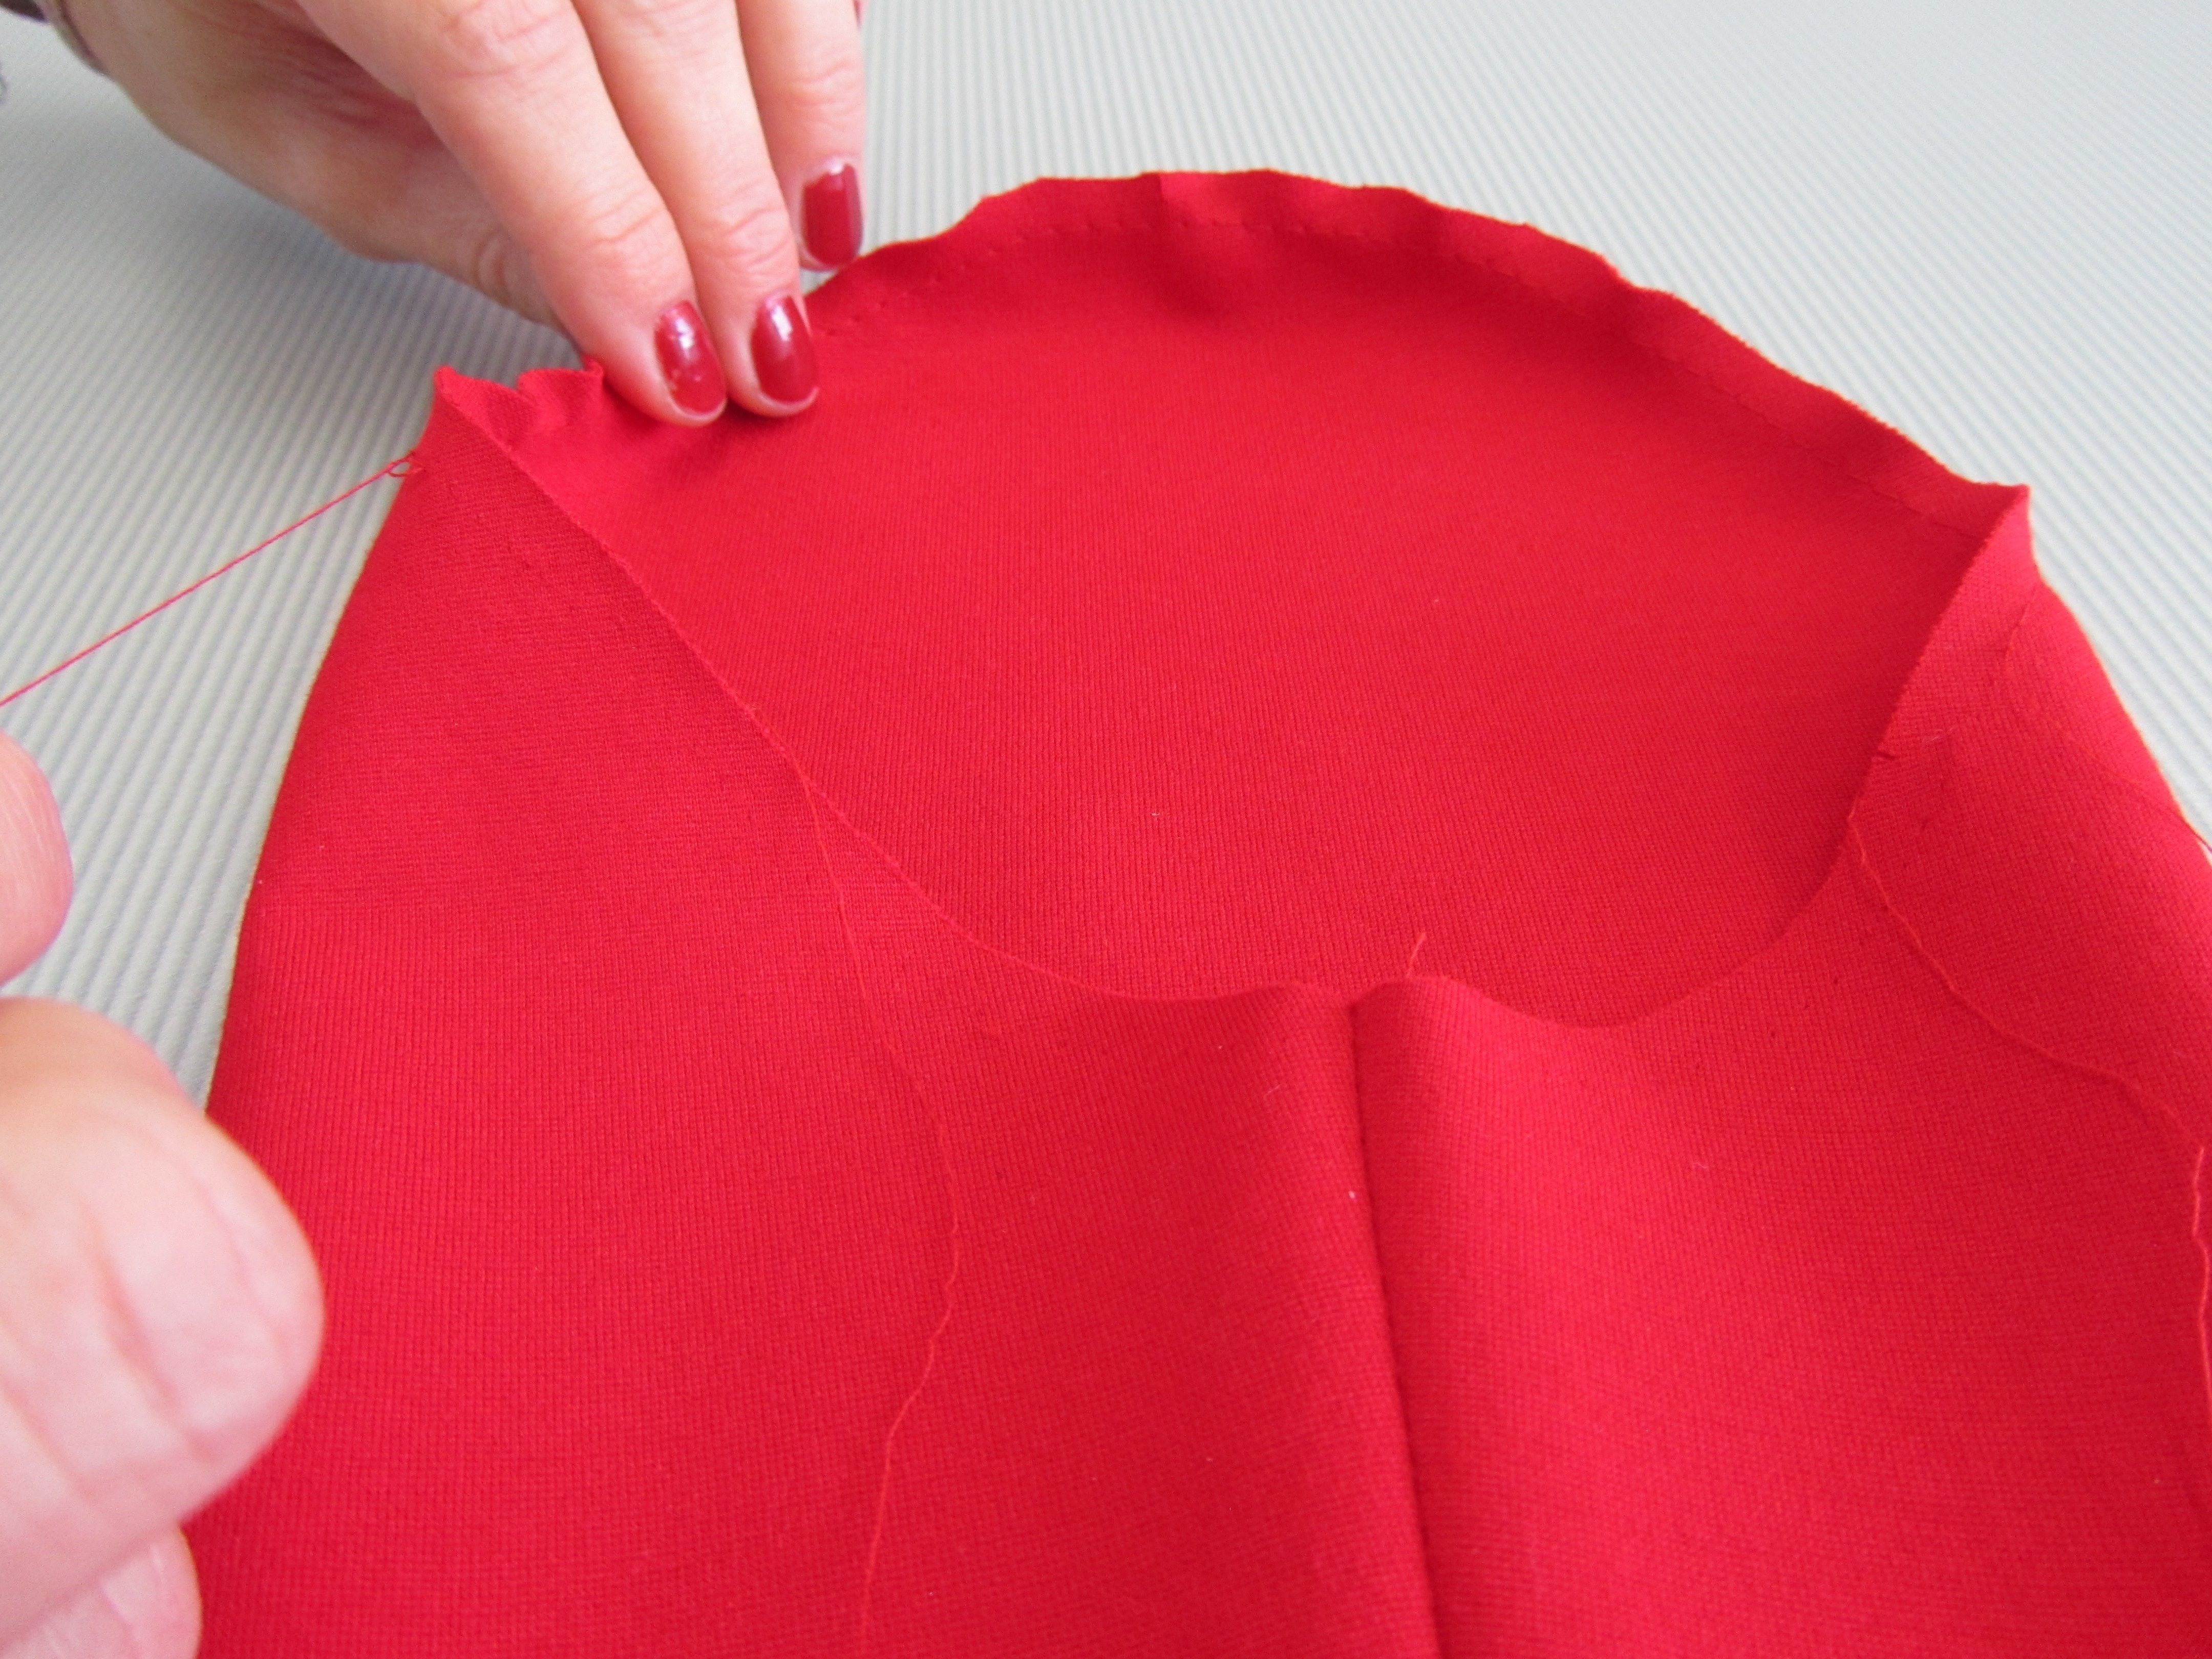
Neaten the top edge of the front. Pin the wrong side of the yoke onto the right side of the front, taking care that all the markings on the armhole line up!
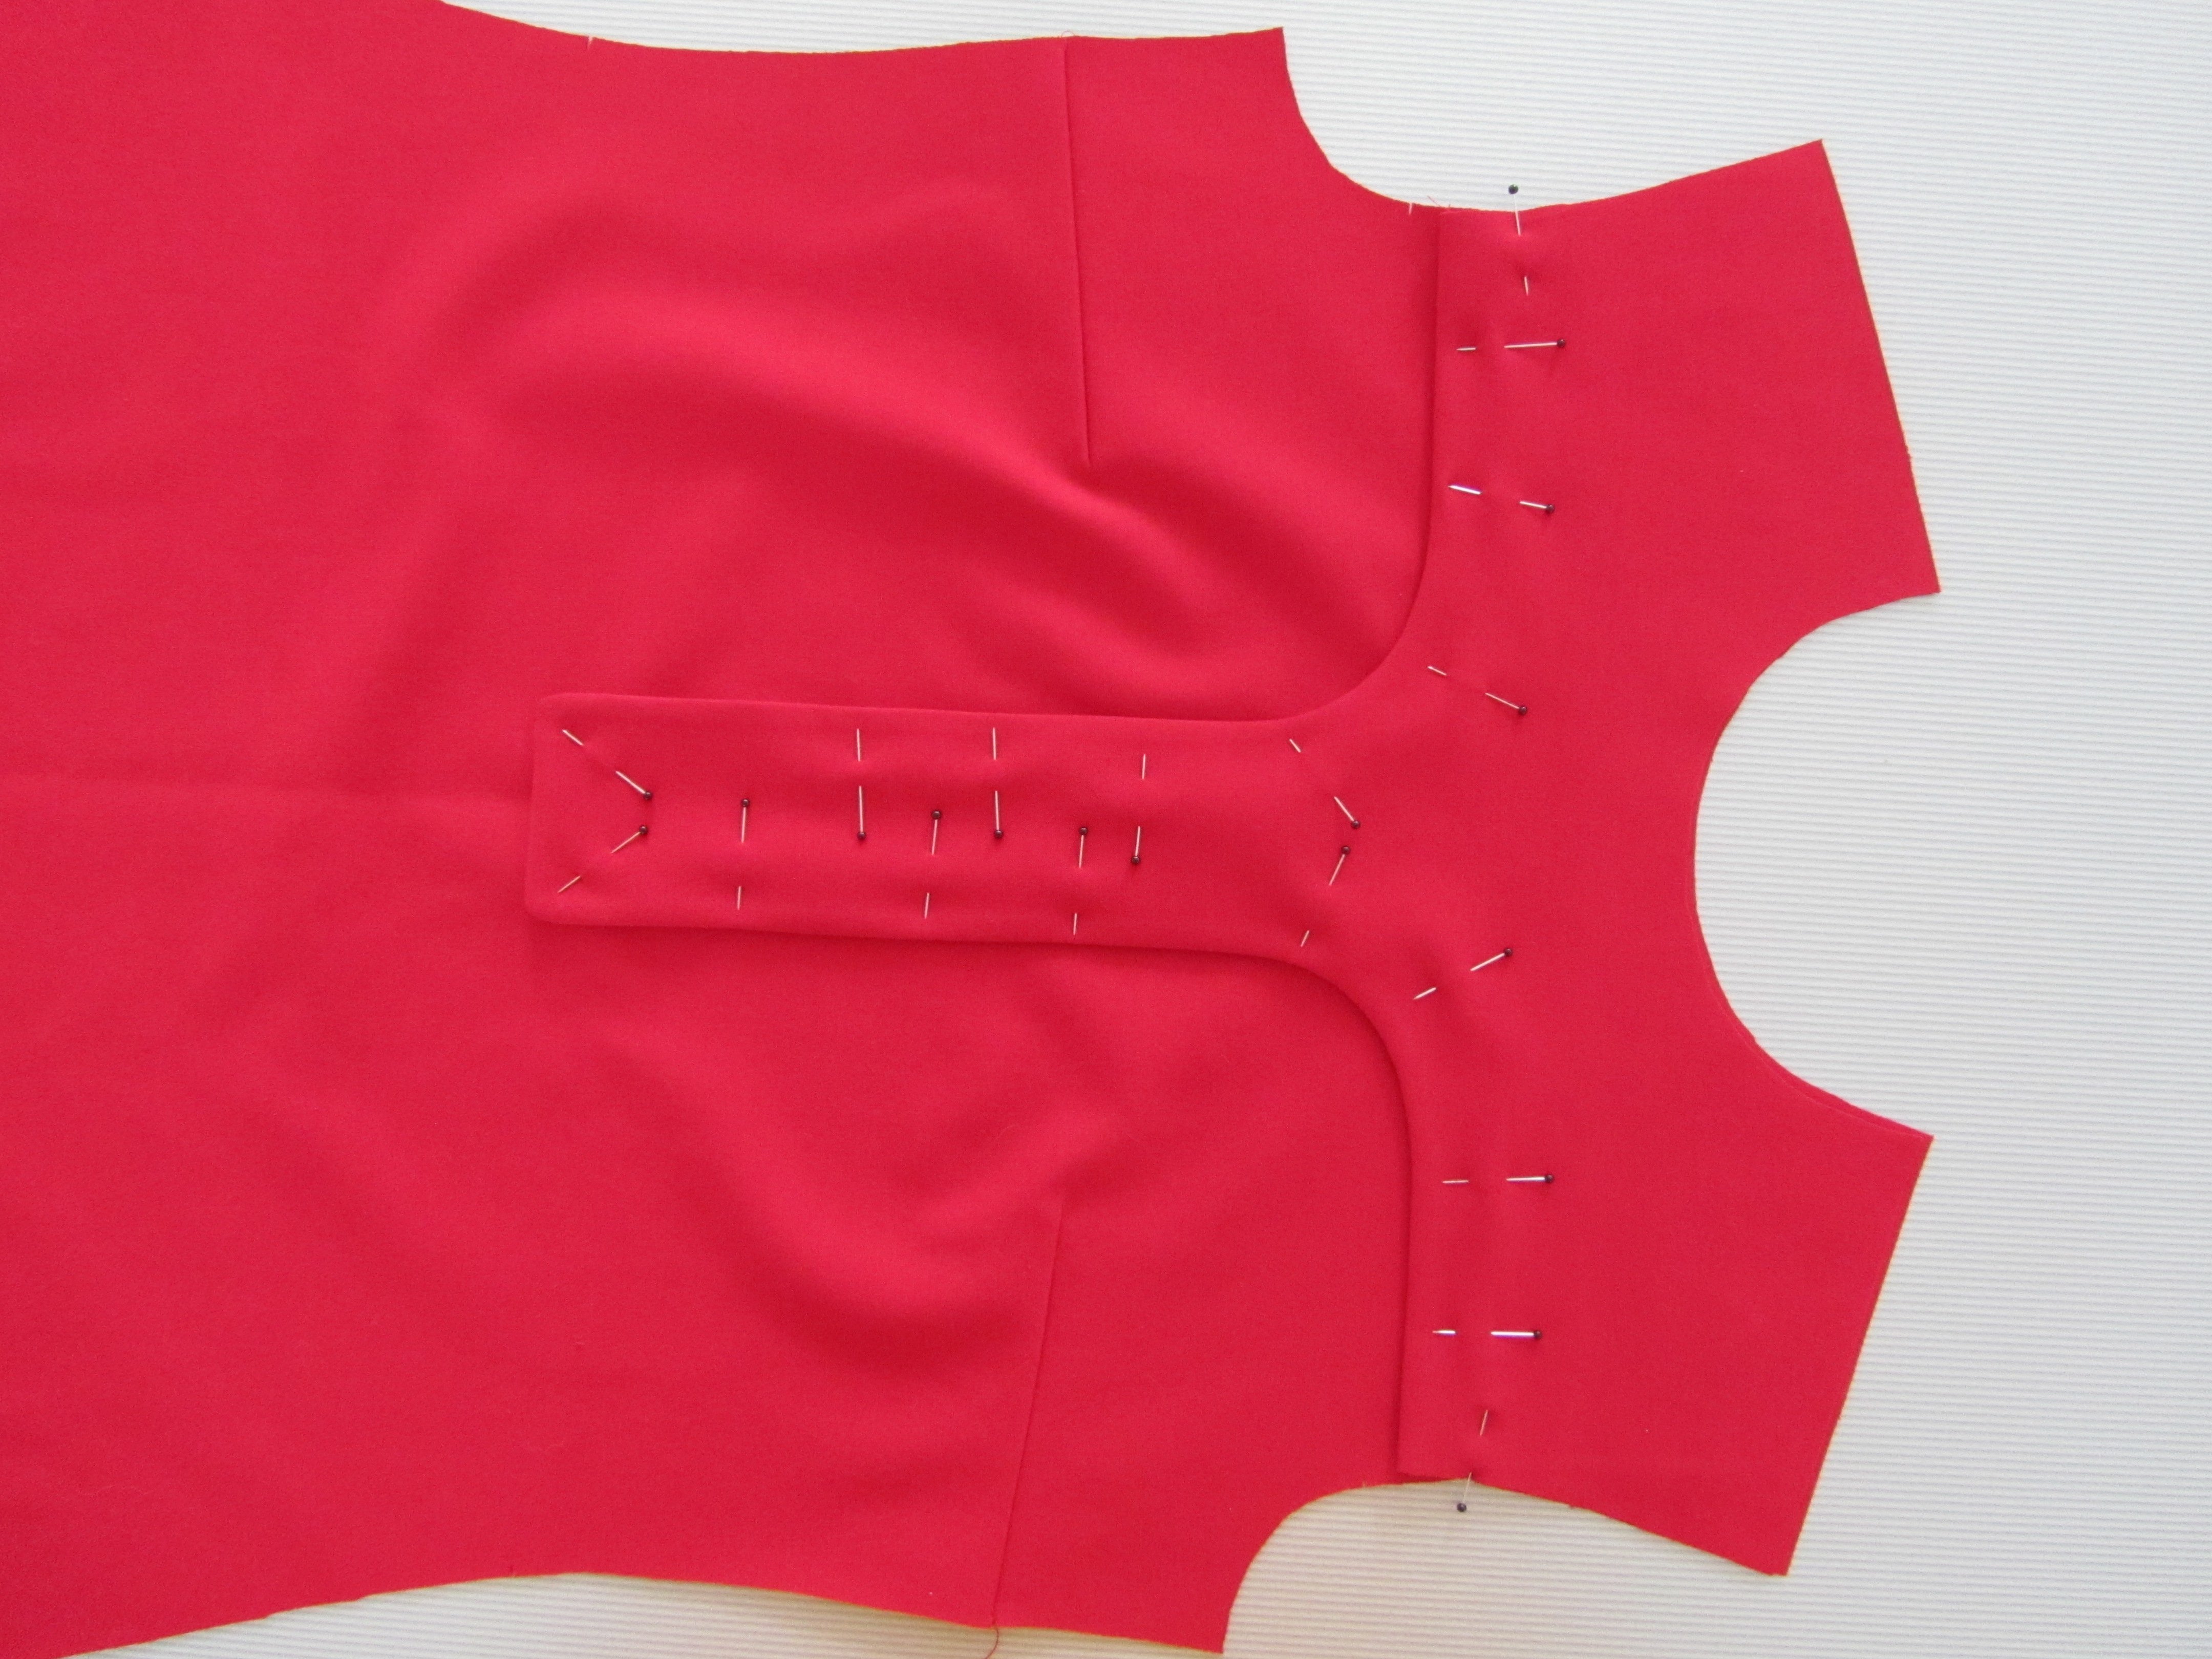
Select “Needle stop down” on the sewing machine. Topstitch the yoke approximately 5 mm from the edge, sewing slowly stitch by stitch around the curves and lifting the presser foot to turn the fabric.

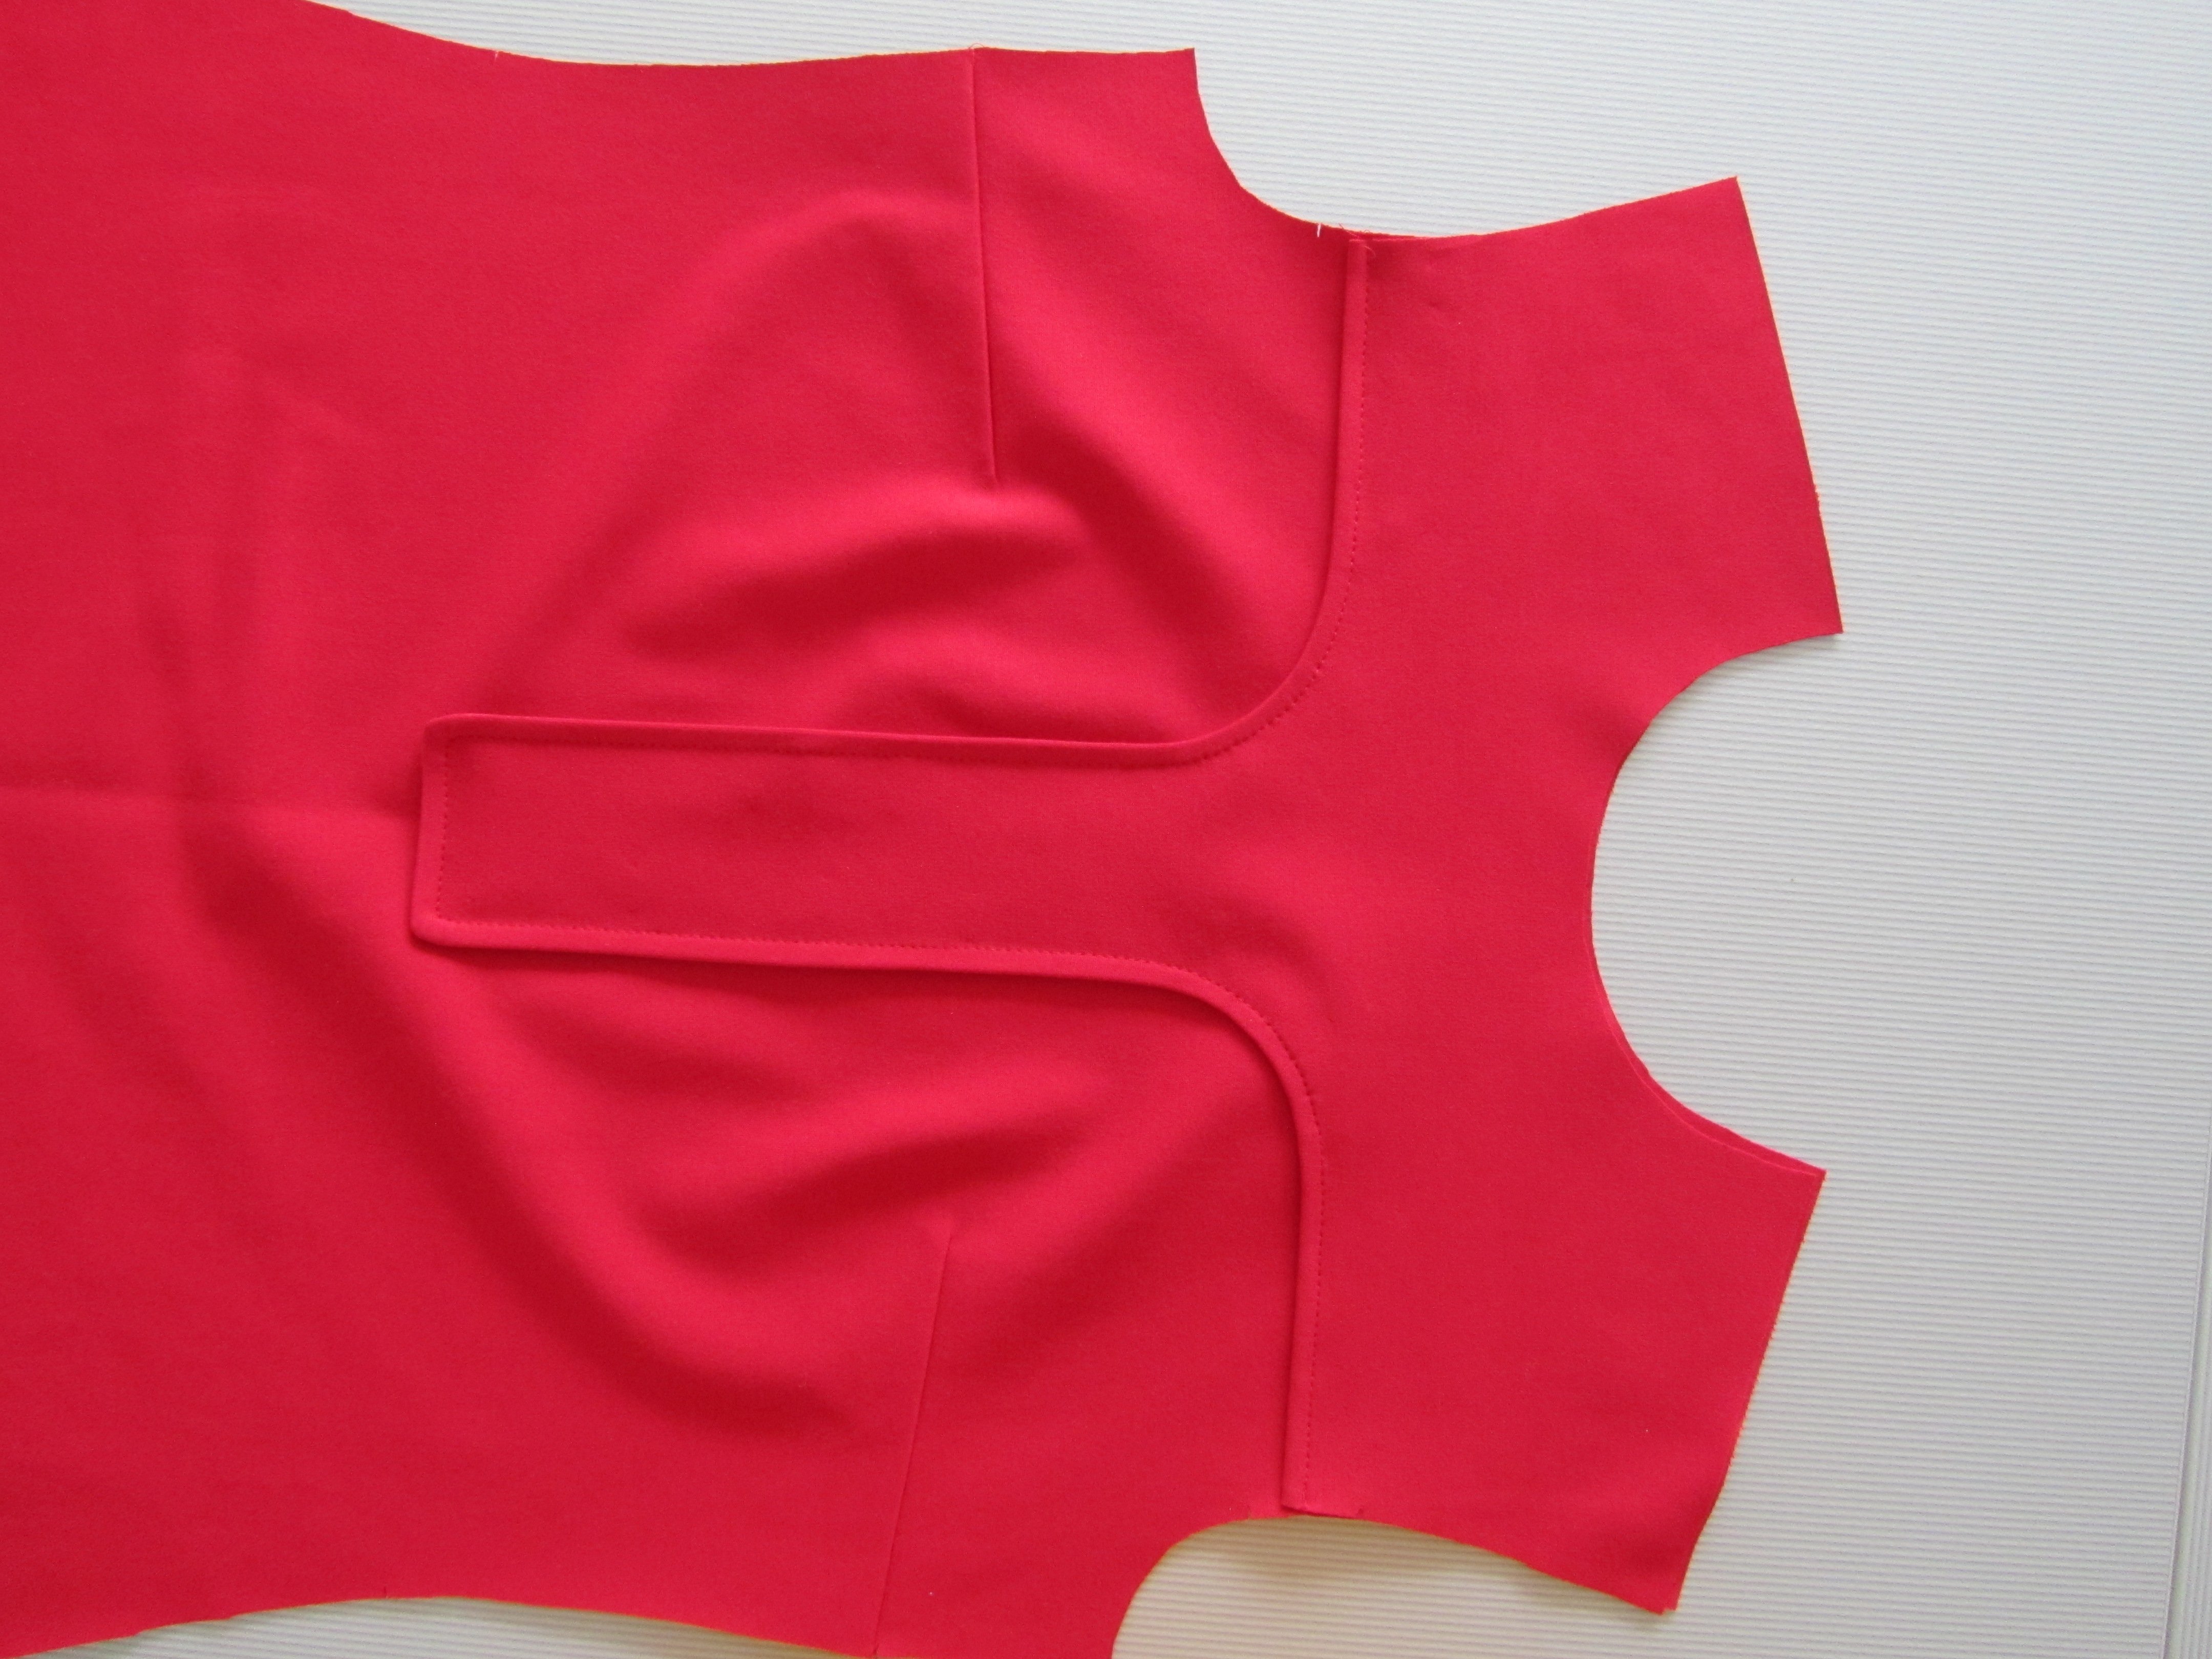
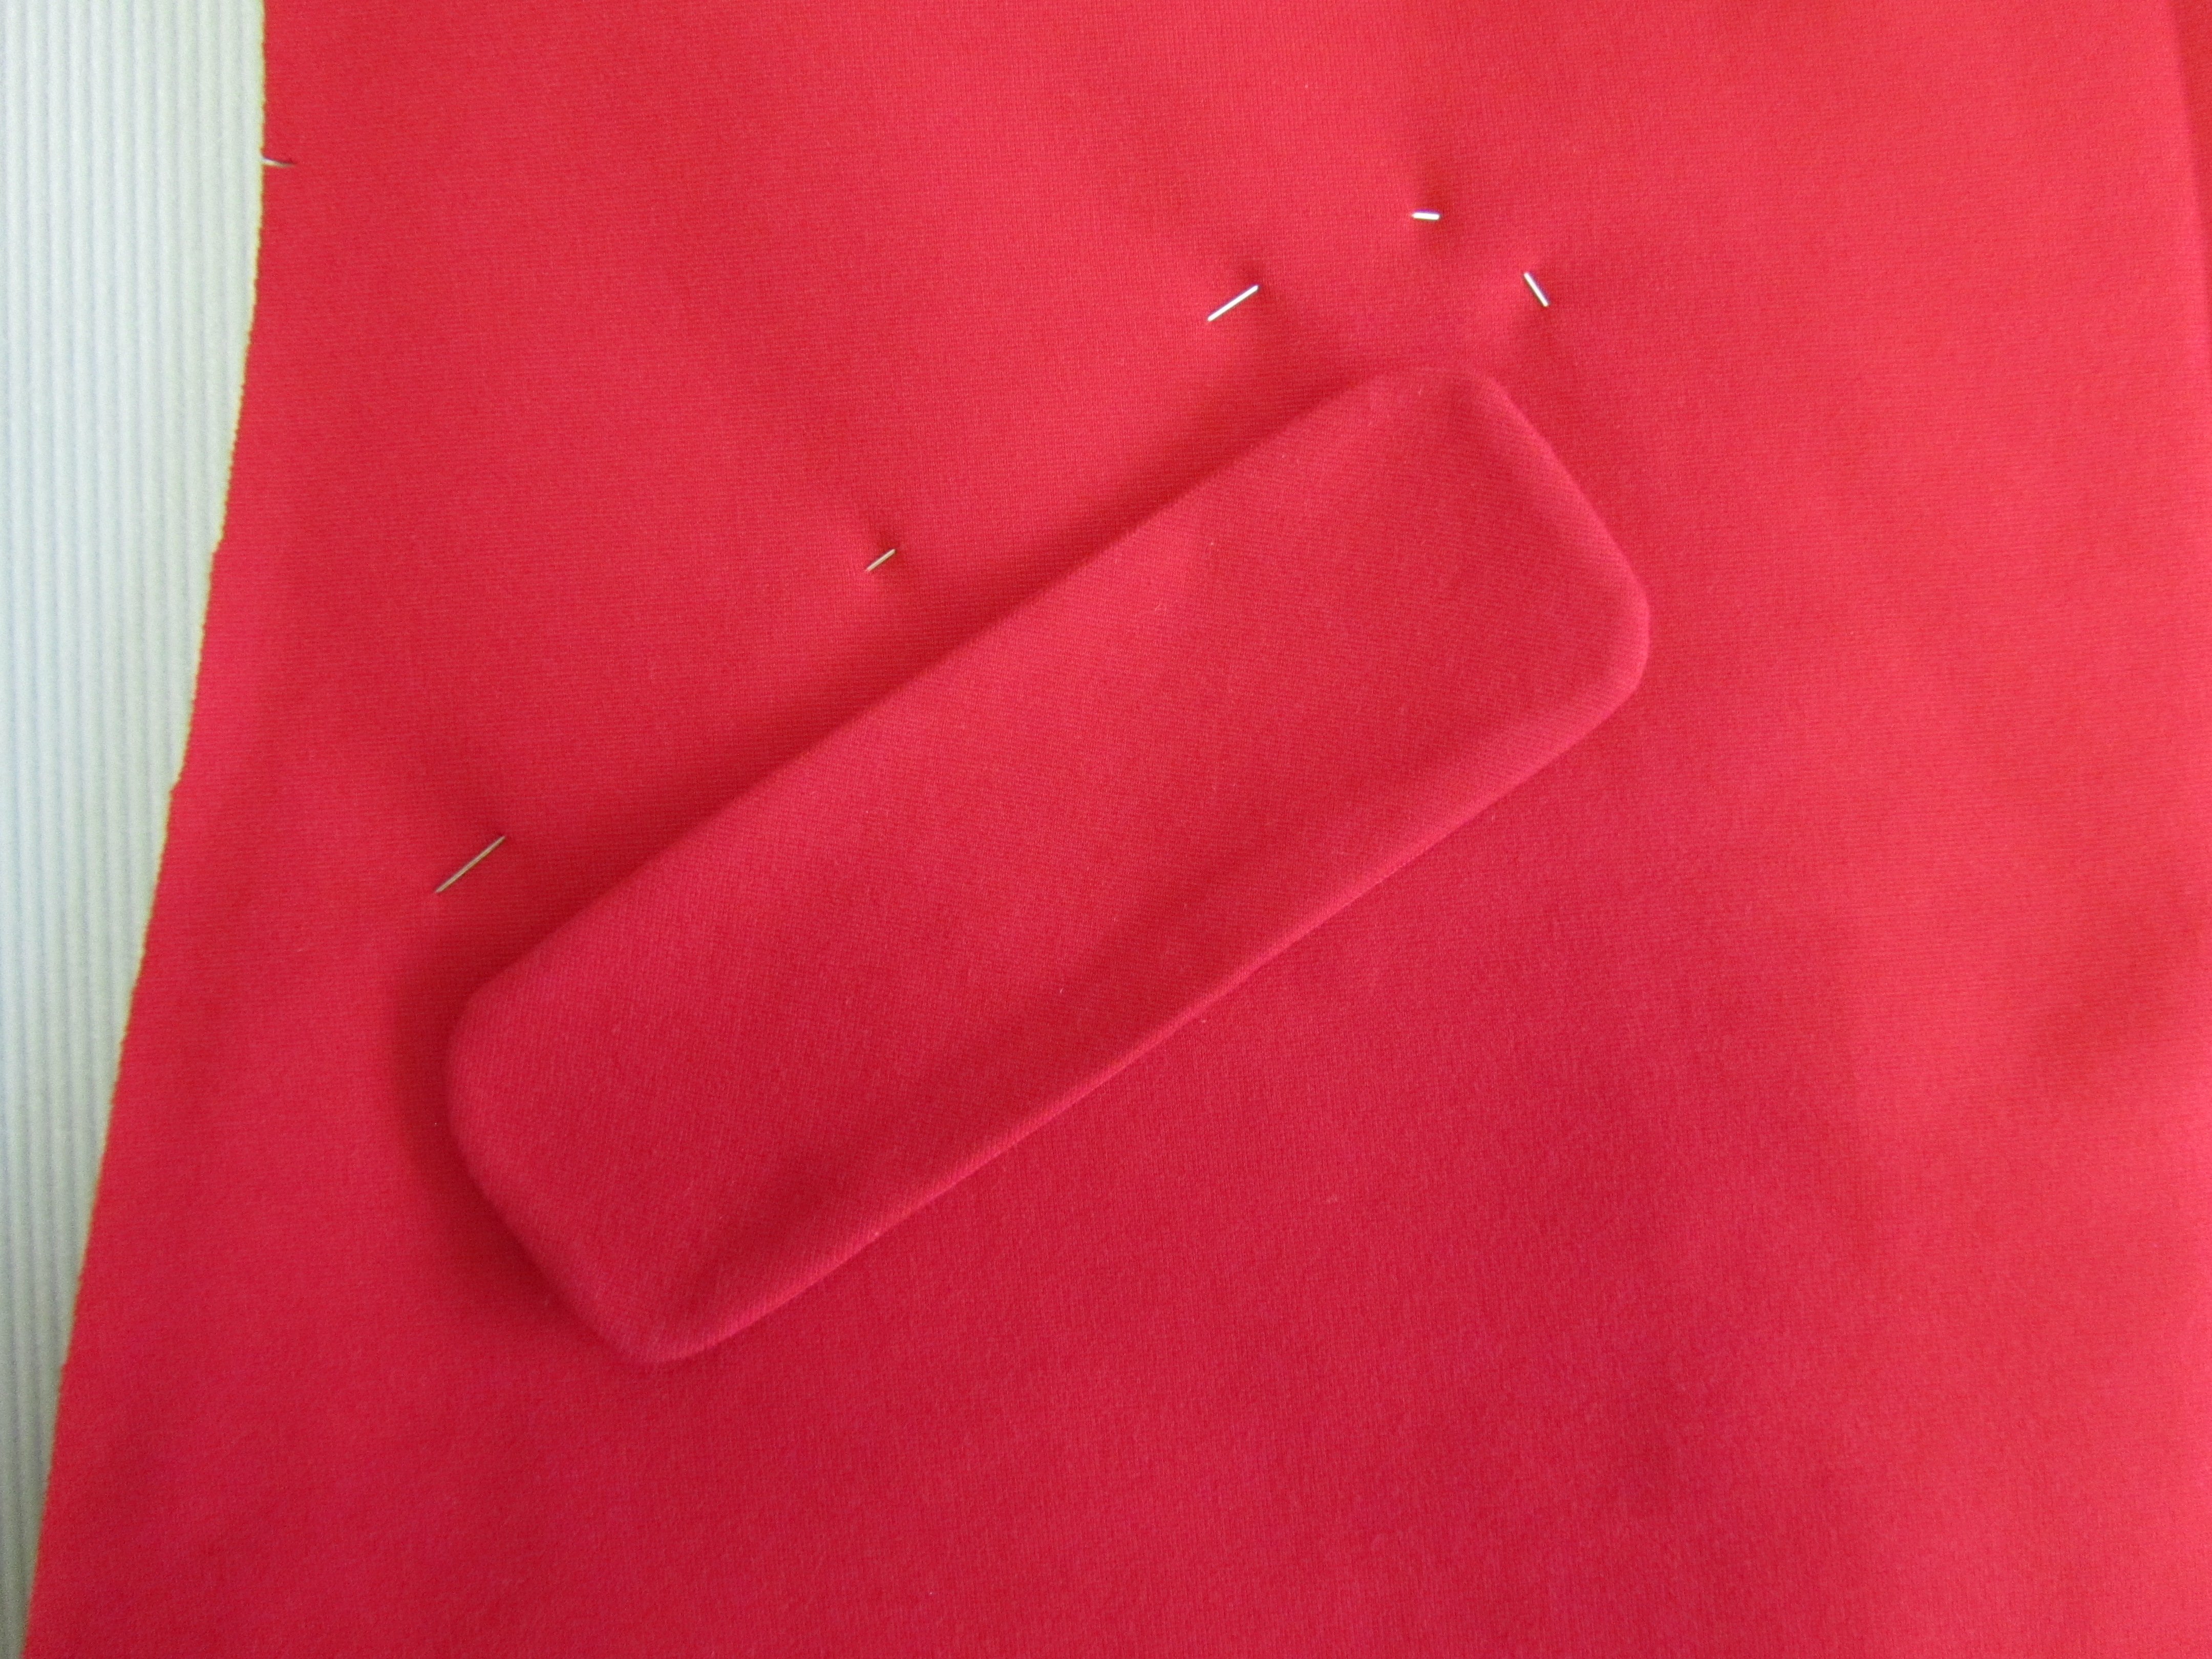
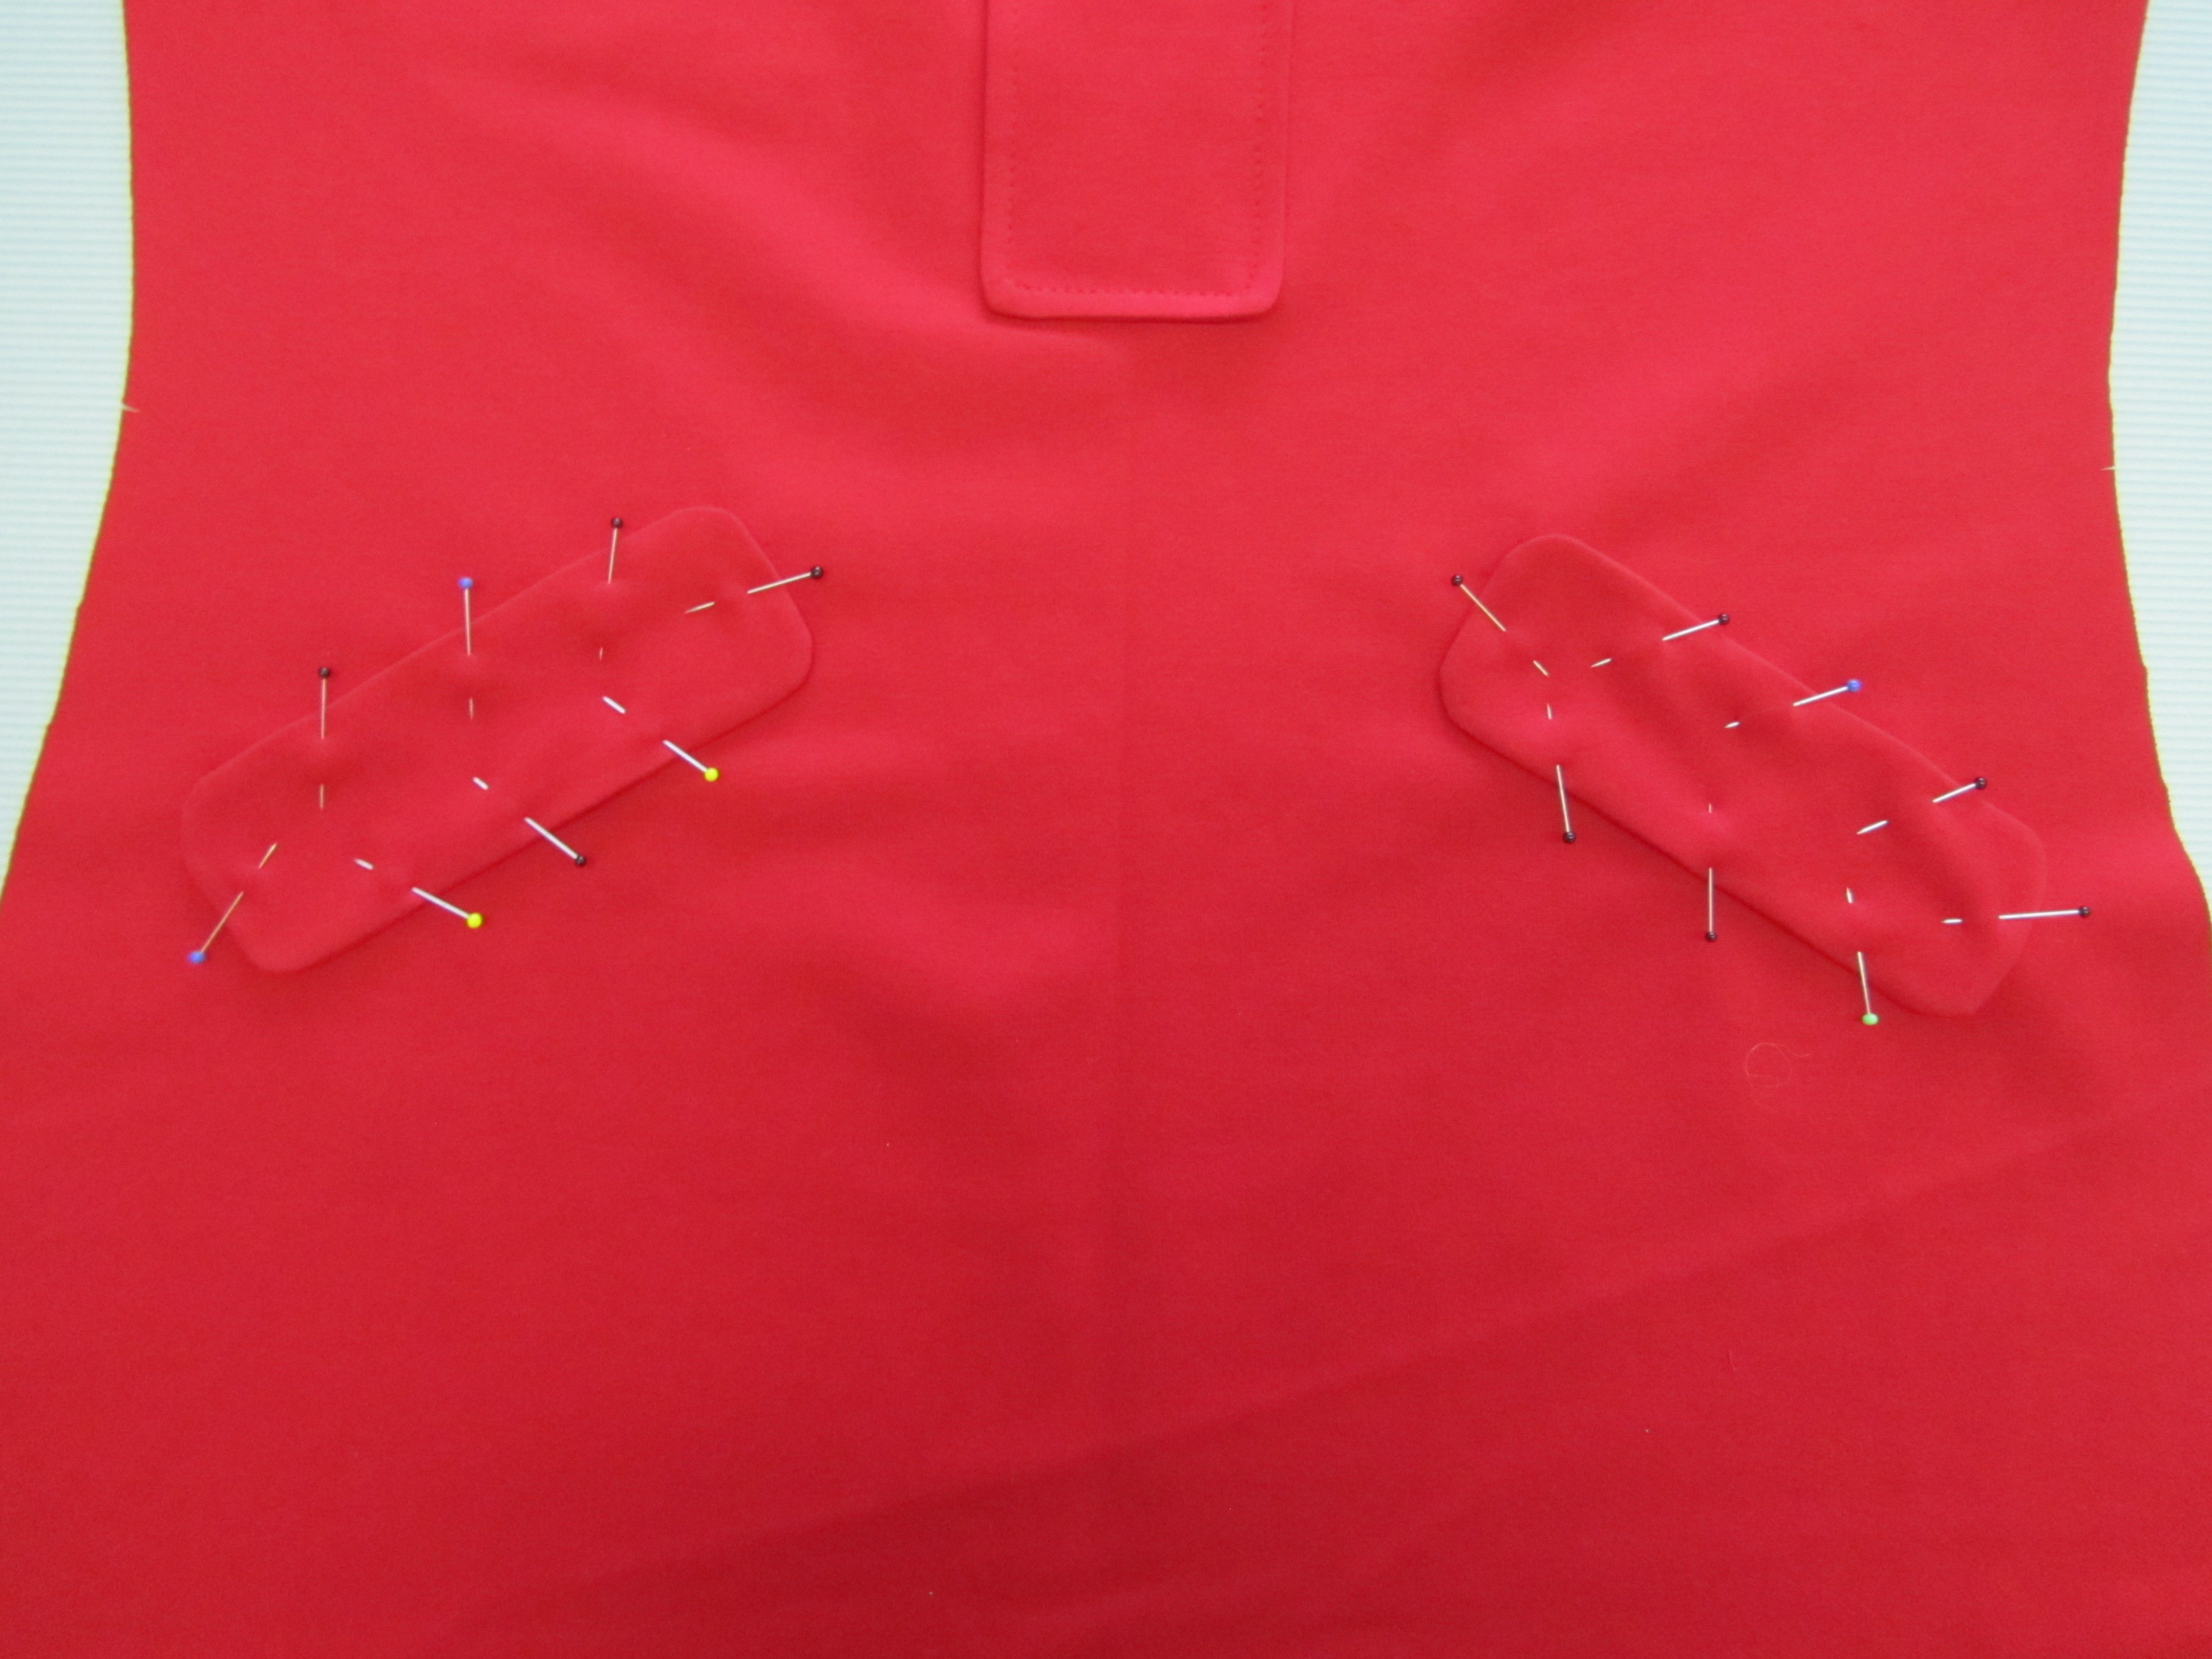
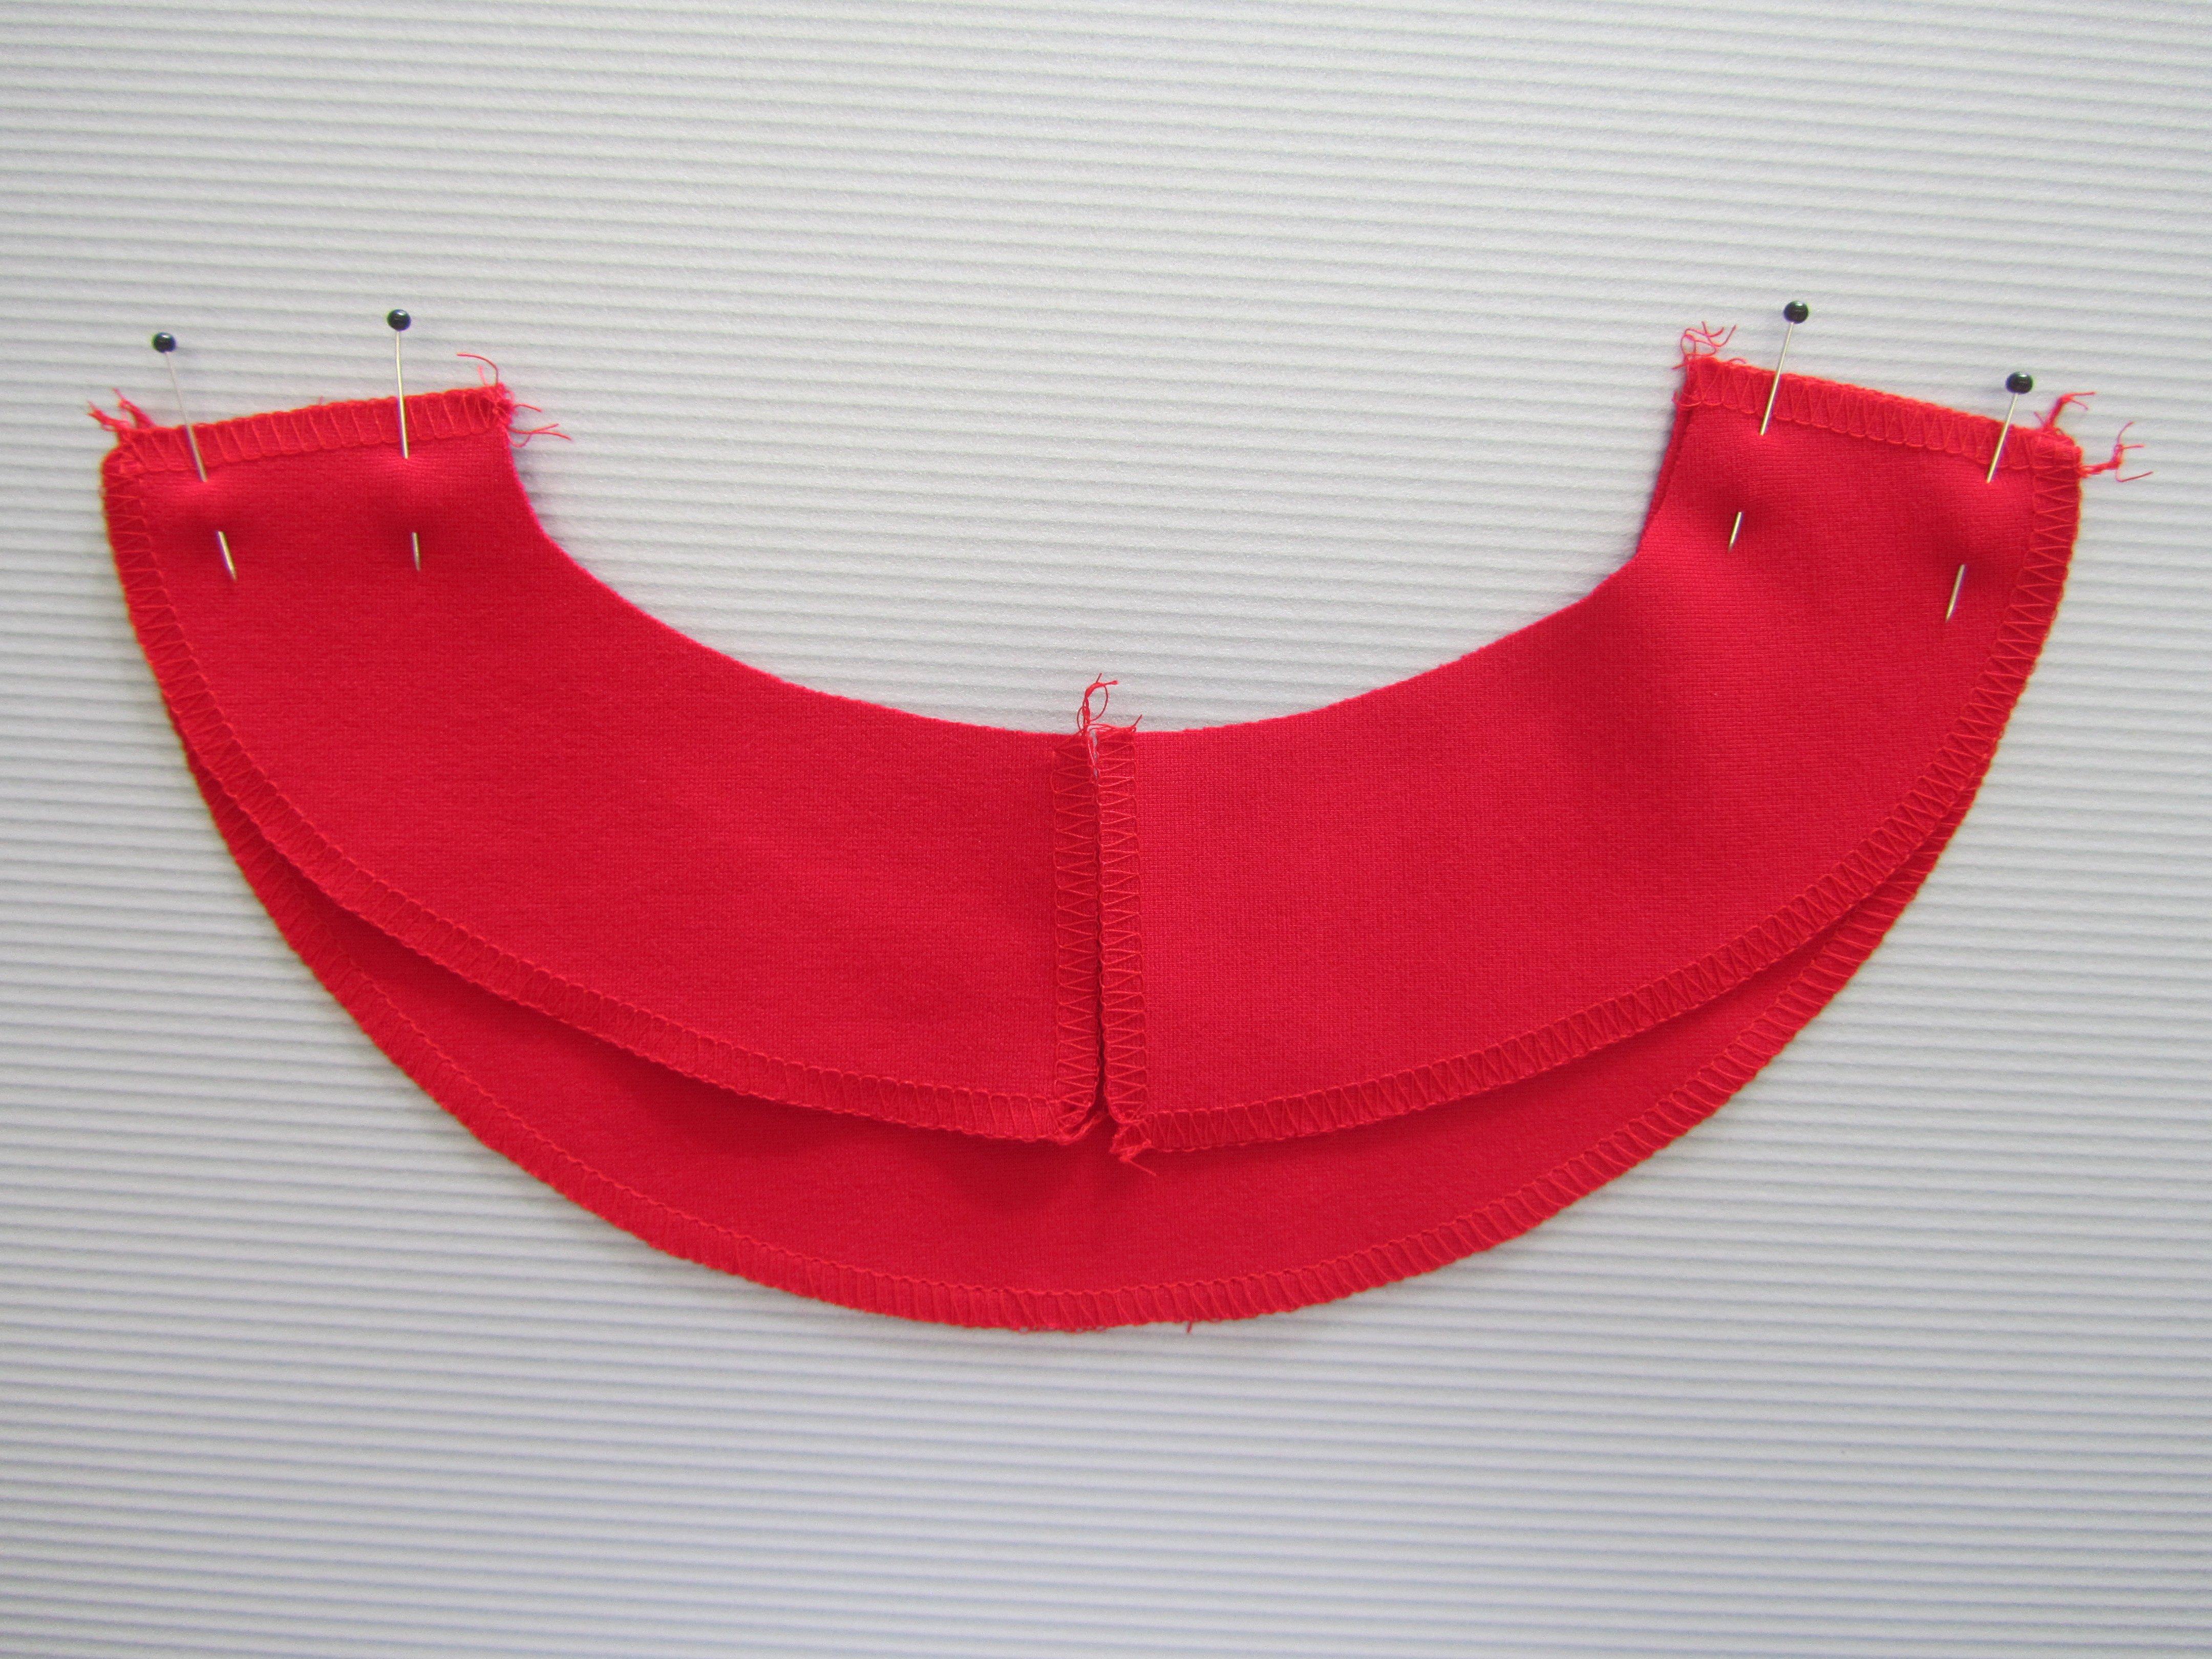
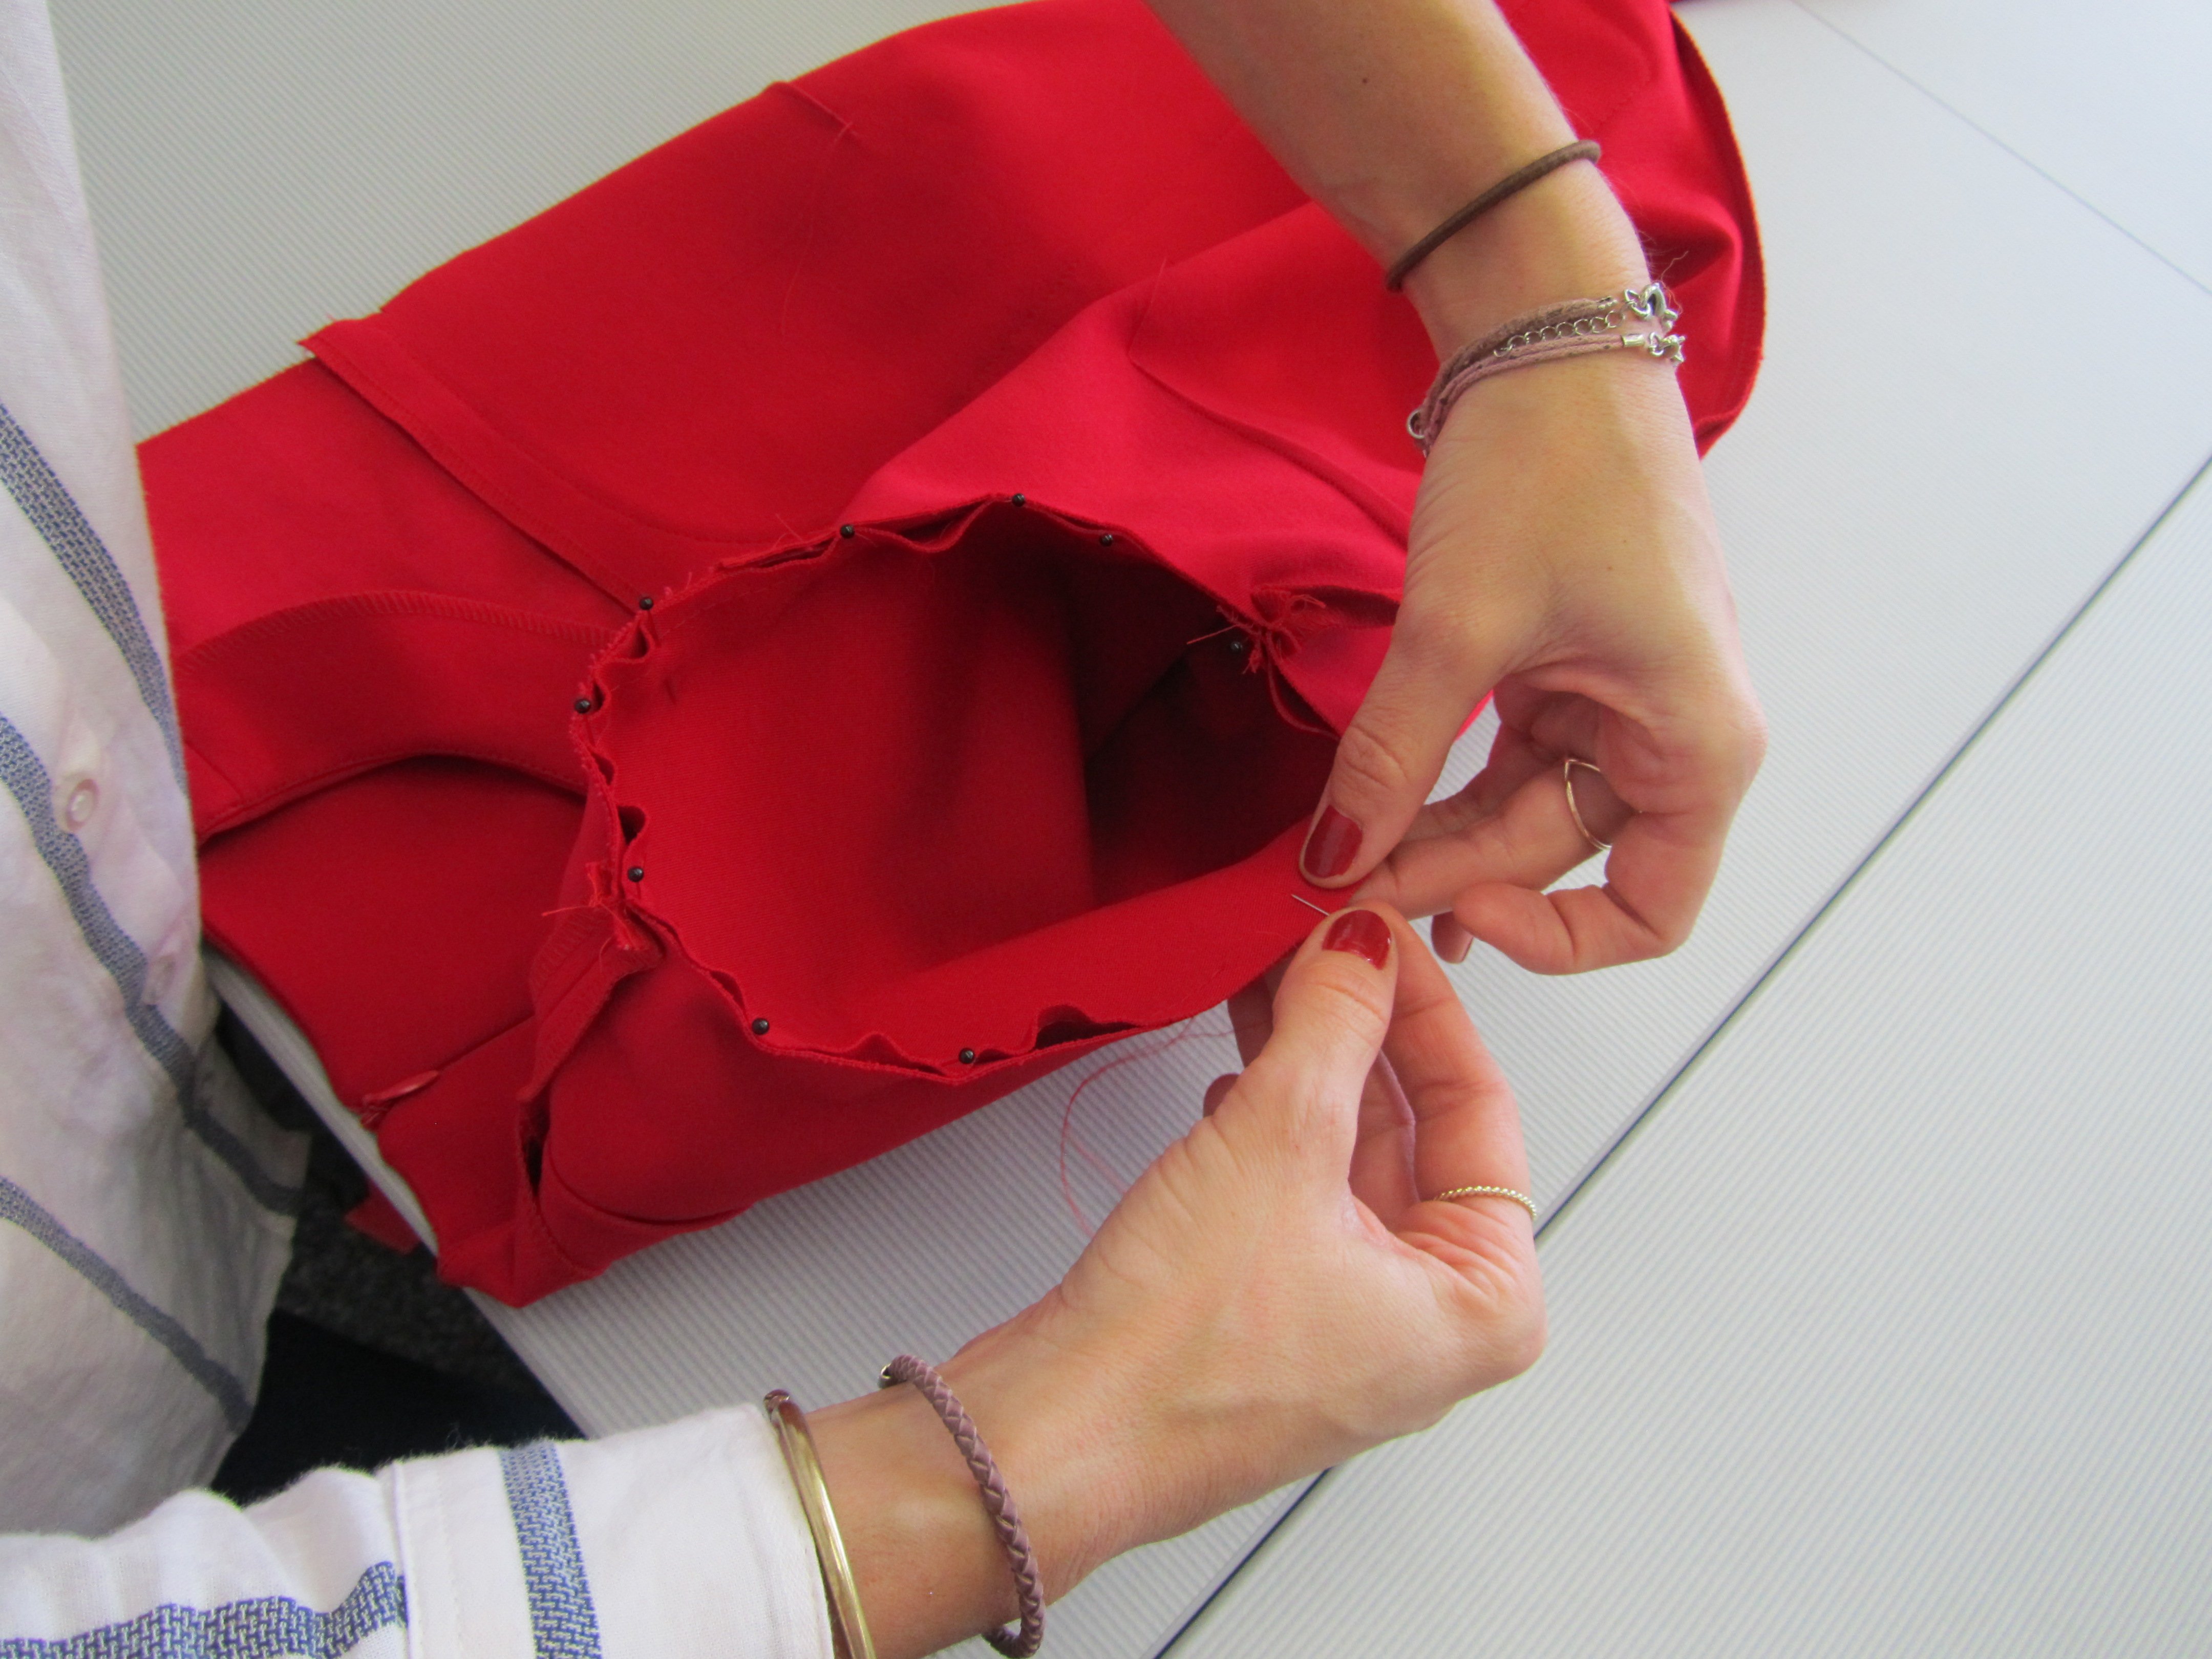
Pocket trims: Place a lining trim onto each shell trim with the right sides together.
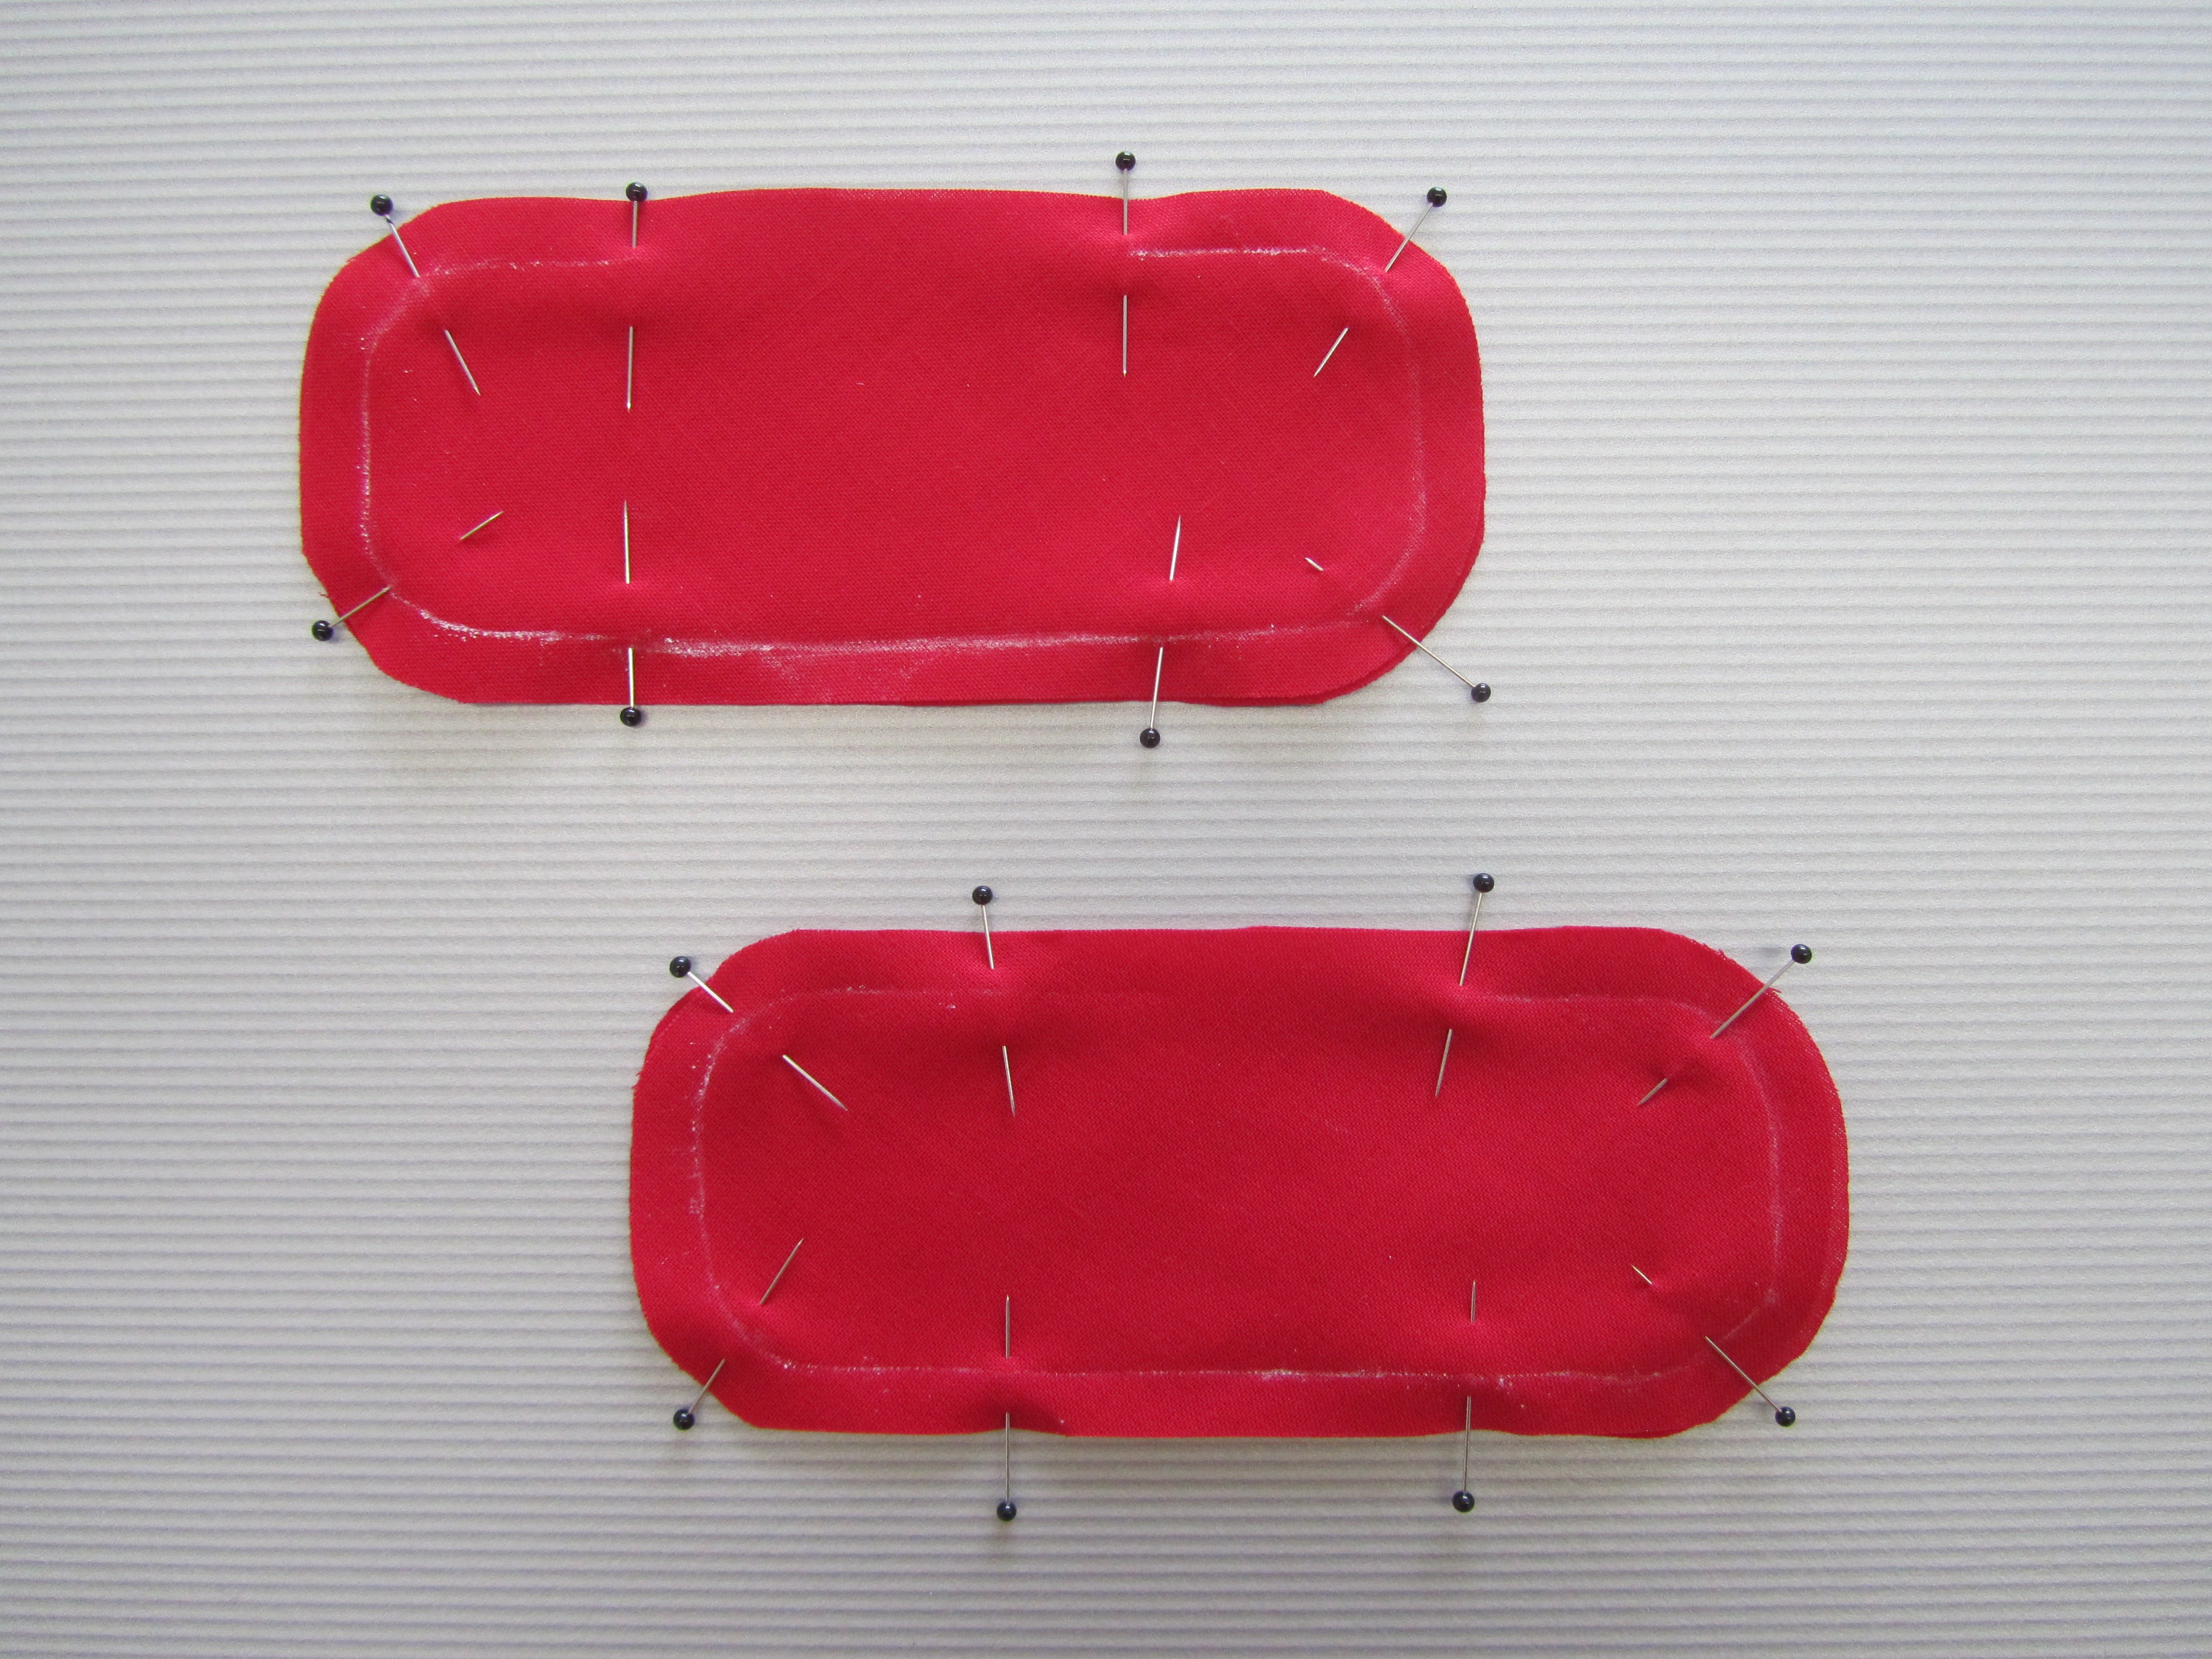
Tip: To ensure that the curves are as smooth as possible, place the paper pattern on top and mark the line using chalk. Sew around the edge, leaving a turning opening about 6 cm long. Tip: For a better view of the marked line, use satin stitch foot F or open embroidery foot F2. Cut seam allowances down to 0.5 cm, apart from at the turning opening. Trim the seam allowances on the curves. Iron the seam allowances open, turn and iron the edges. Sew up the turning opening by hand or stitch directly round the pockets, as with the trim, on the pocket markings.
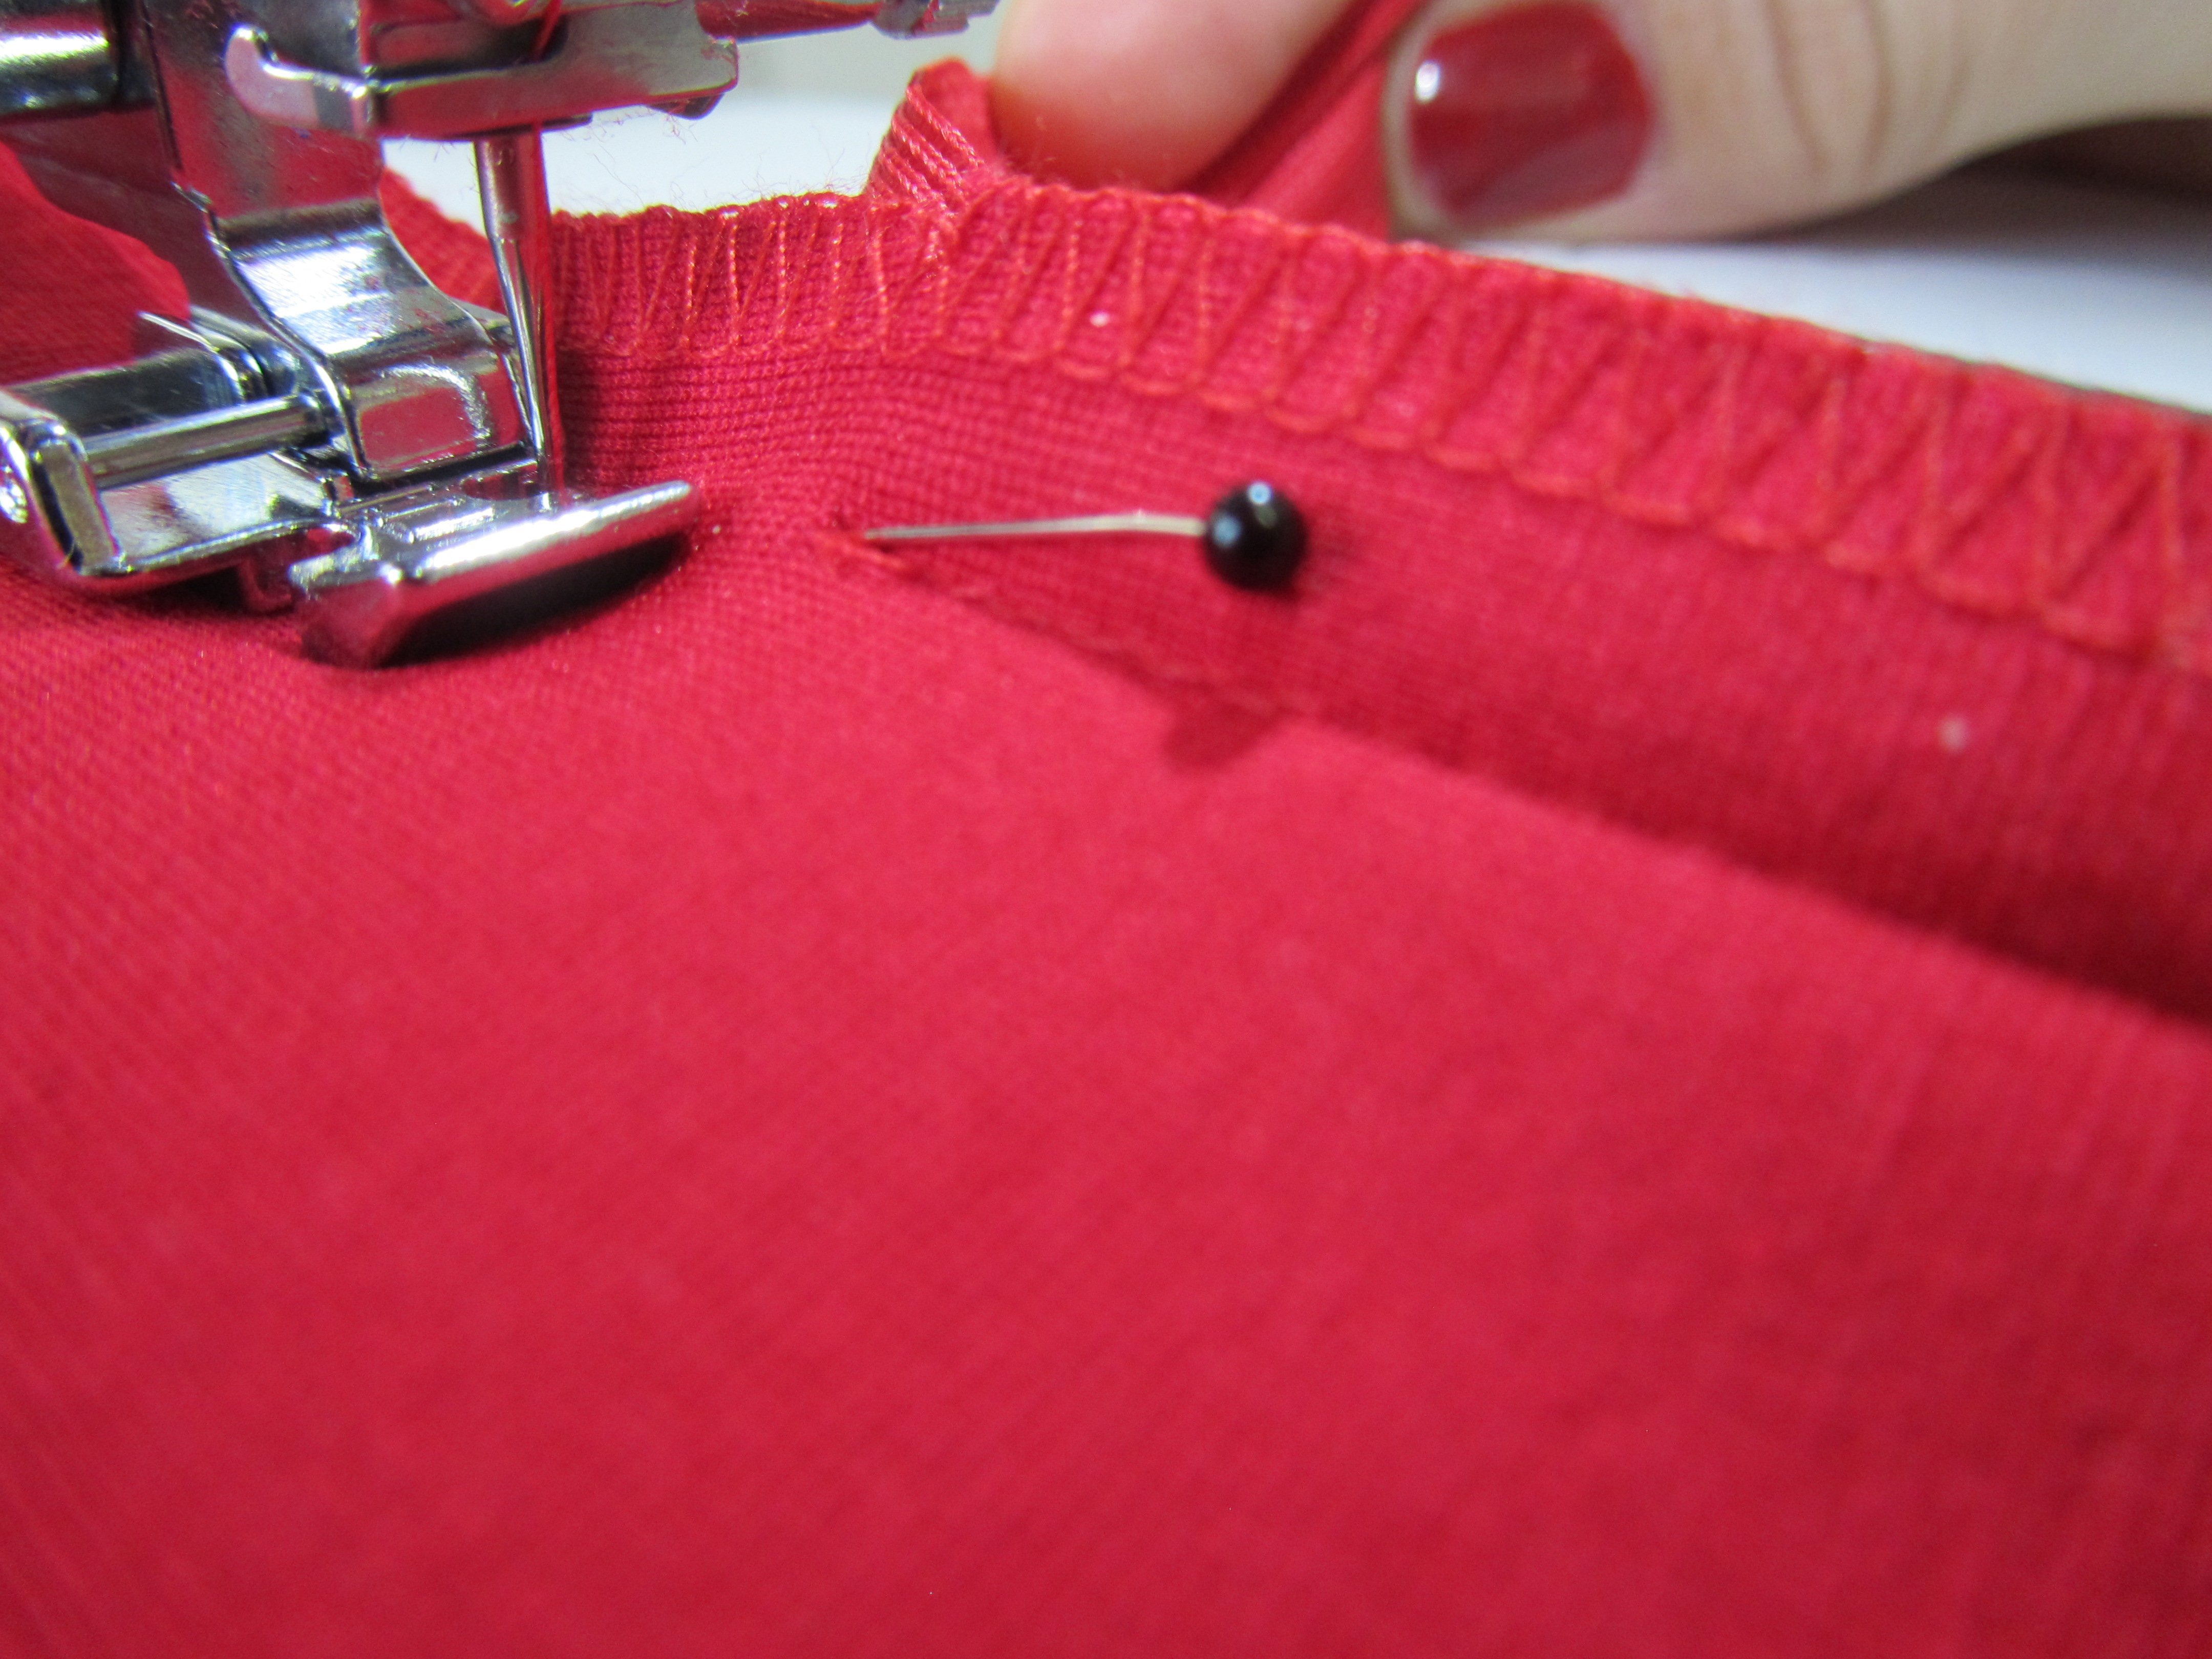
Neatening: Neaten the seam allowances of the side seams, the back center seam and the shoulder seams.
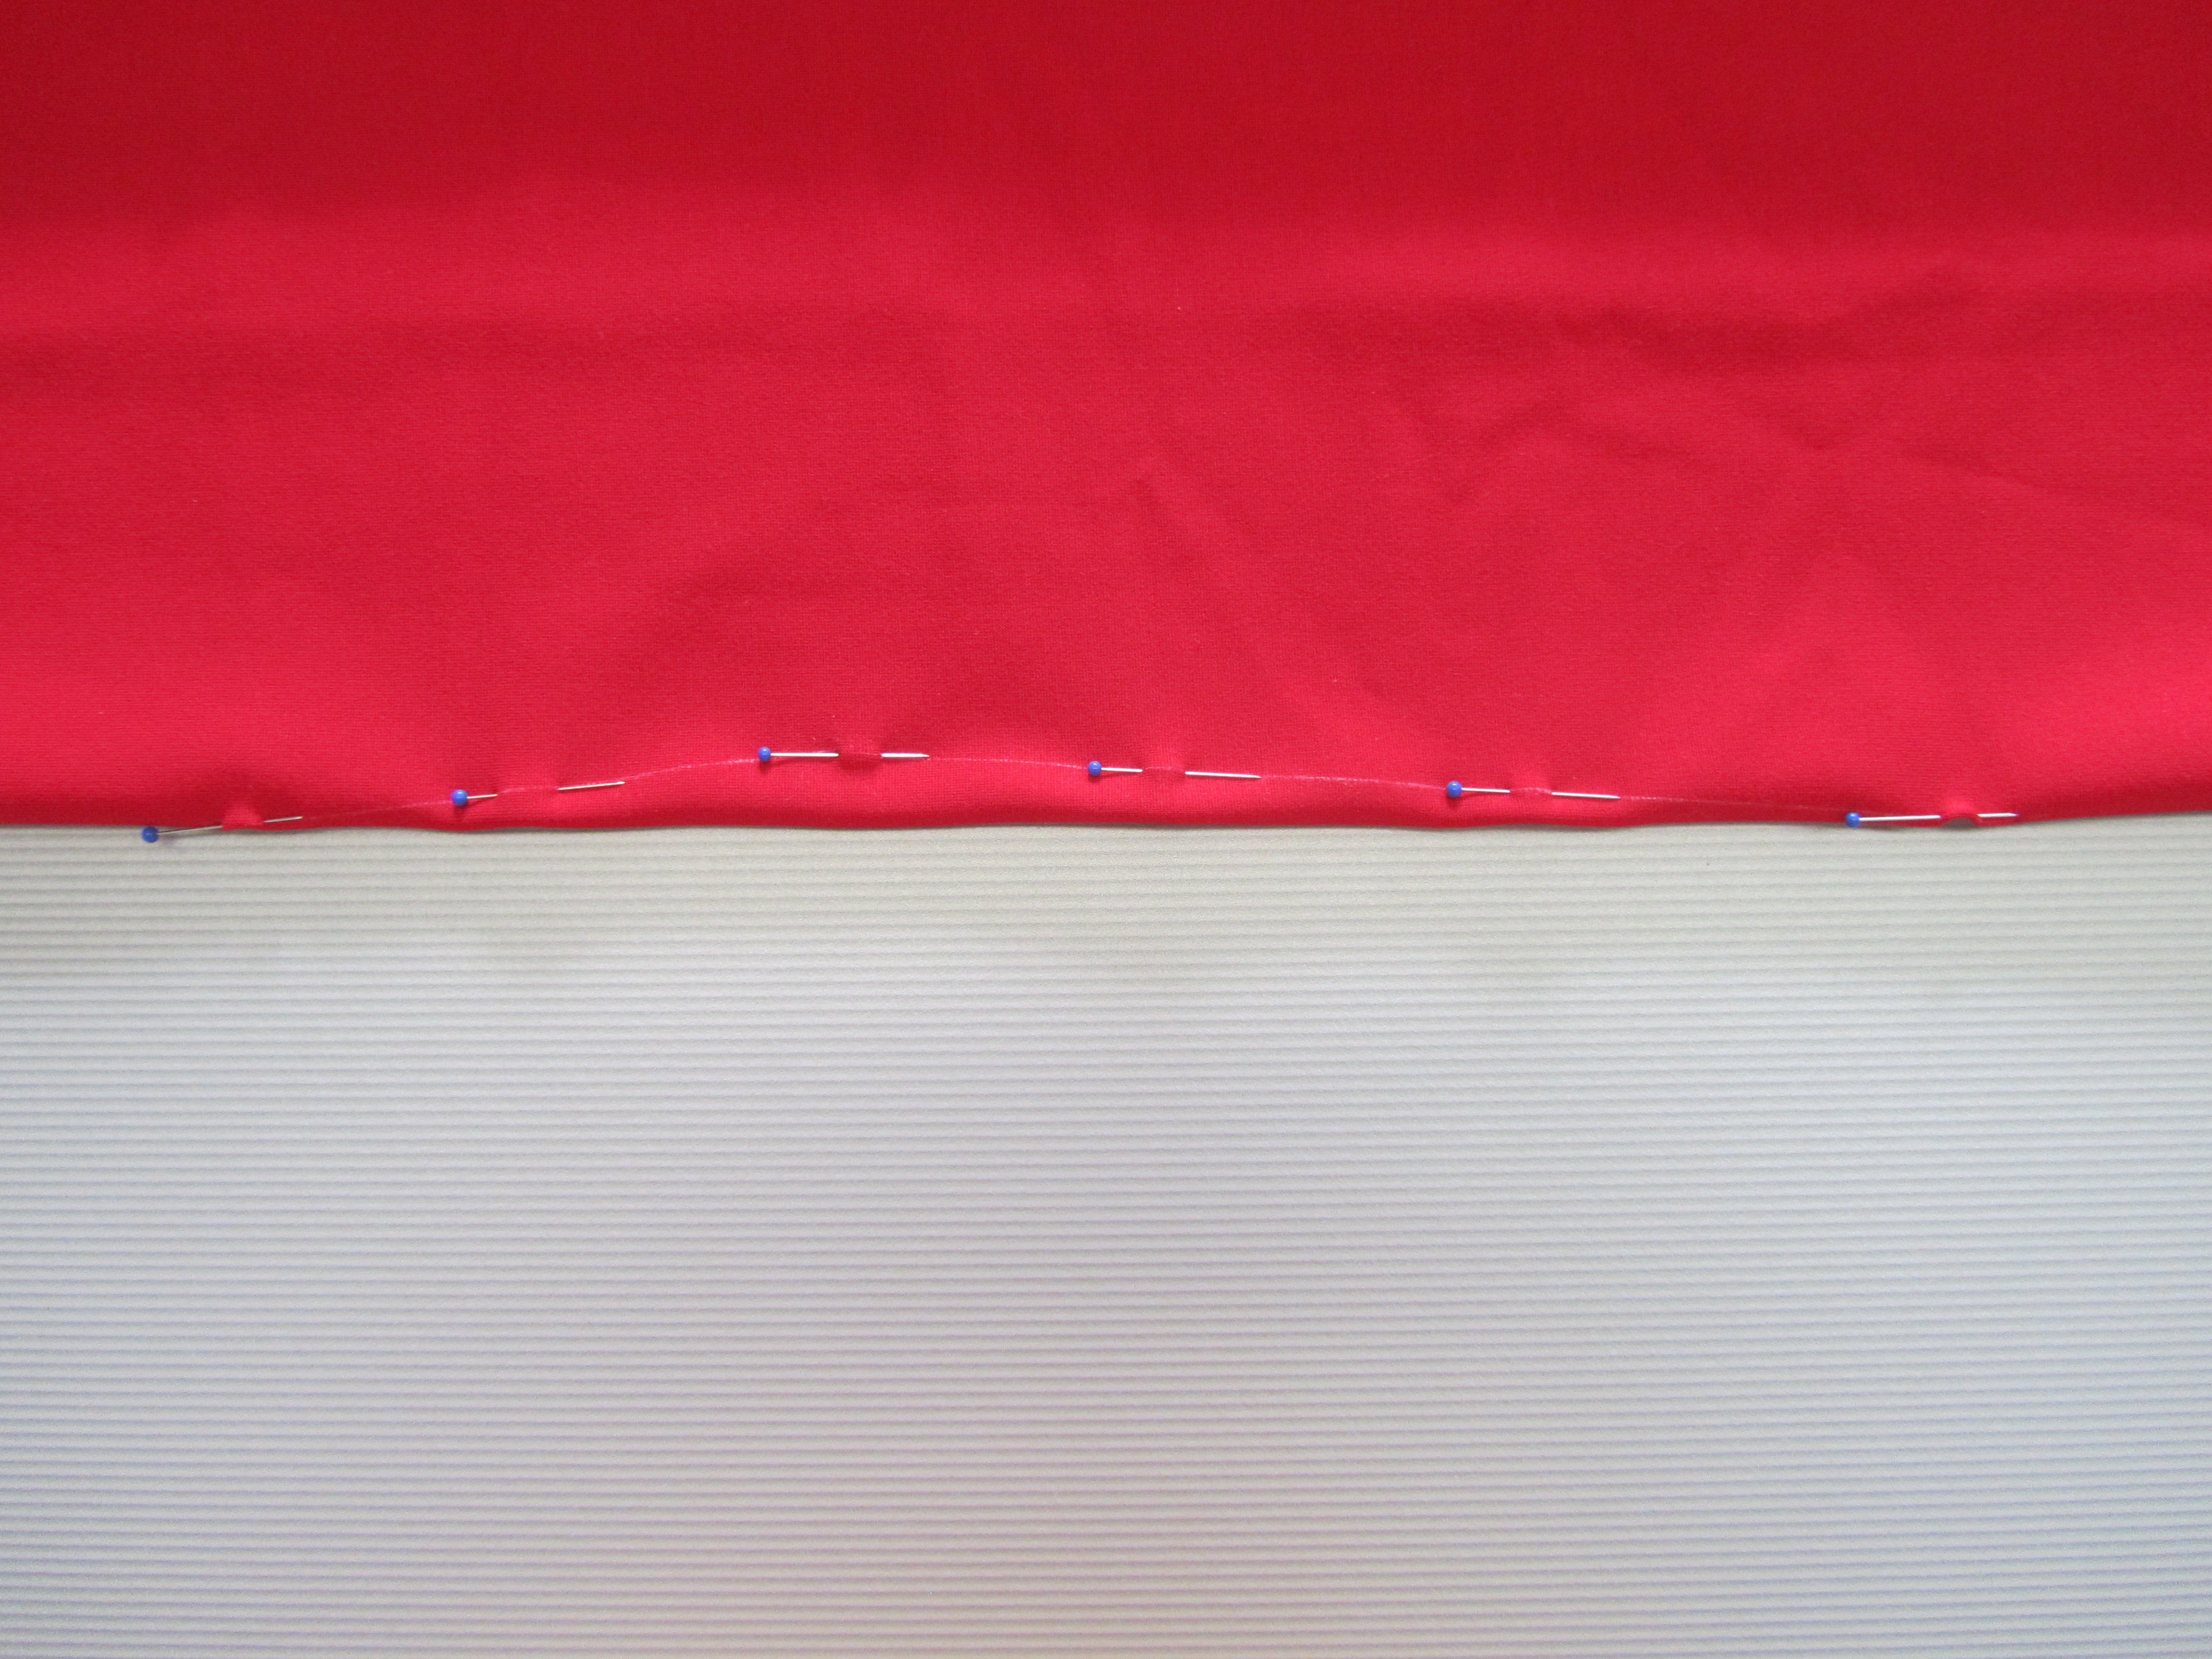
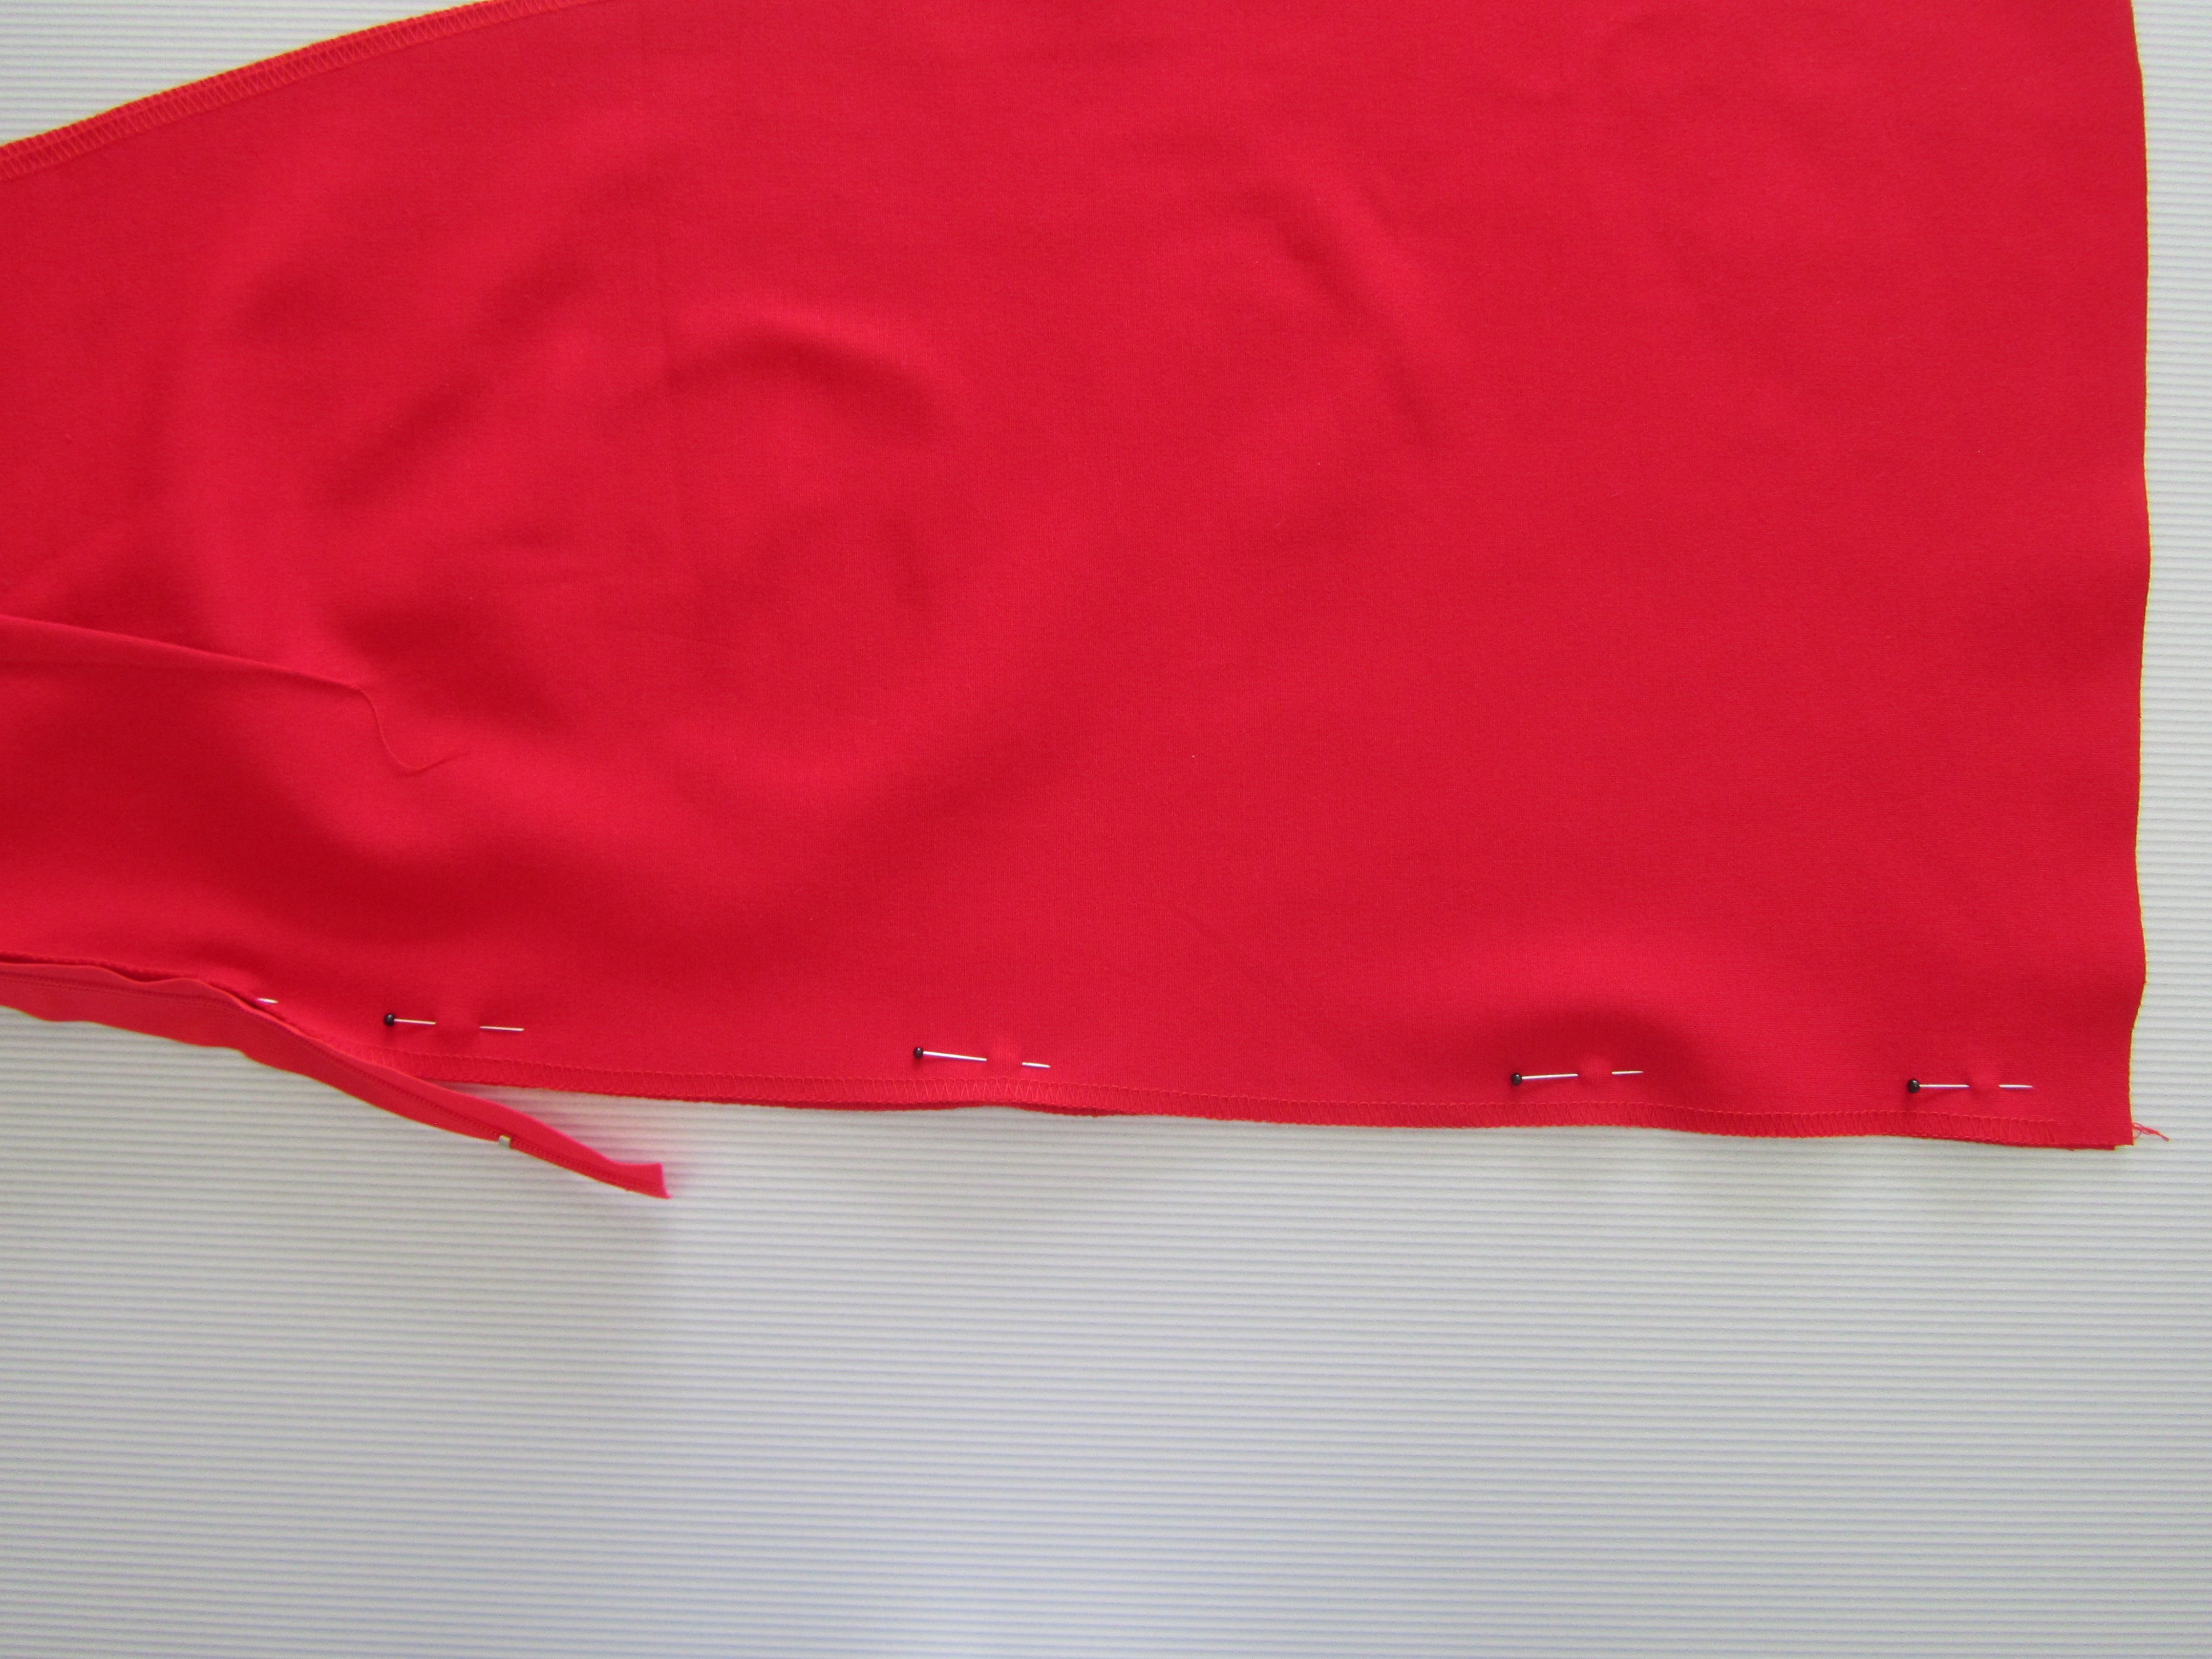
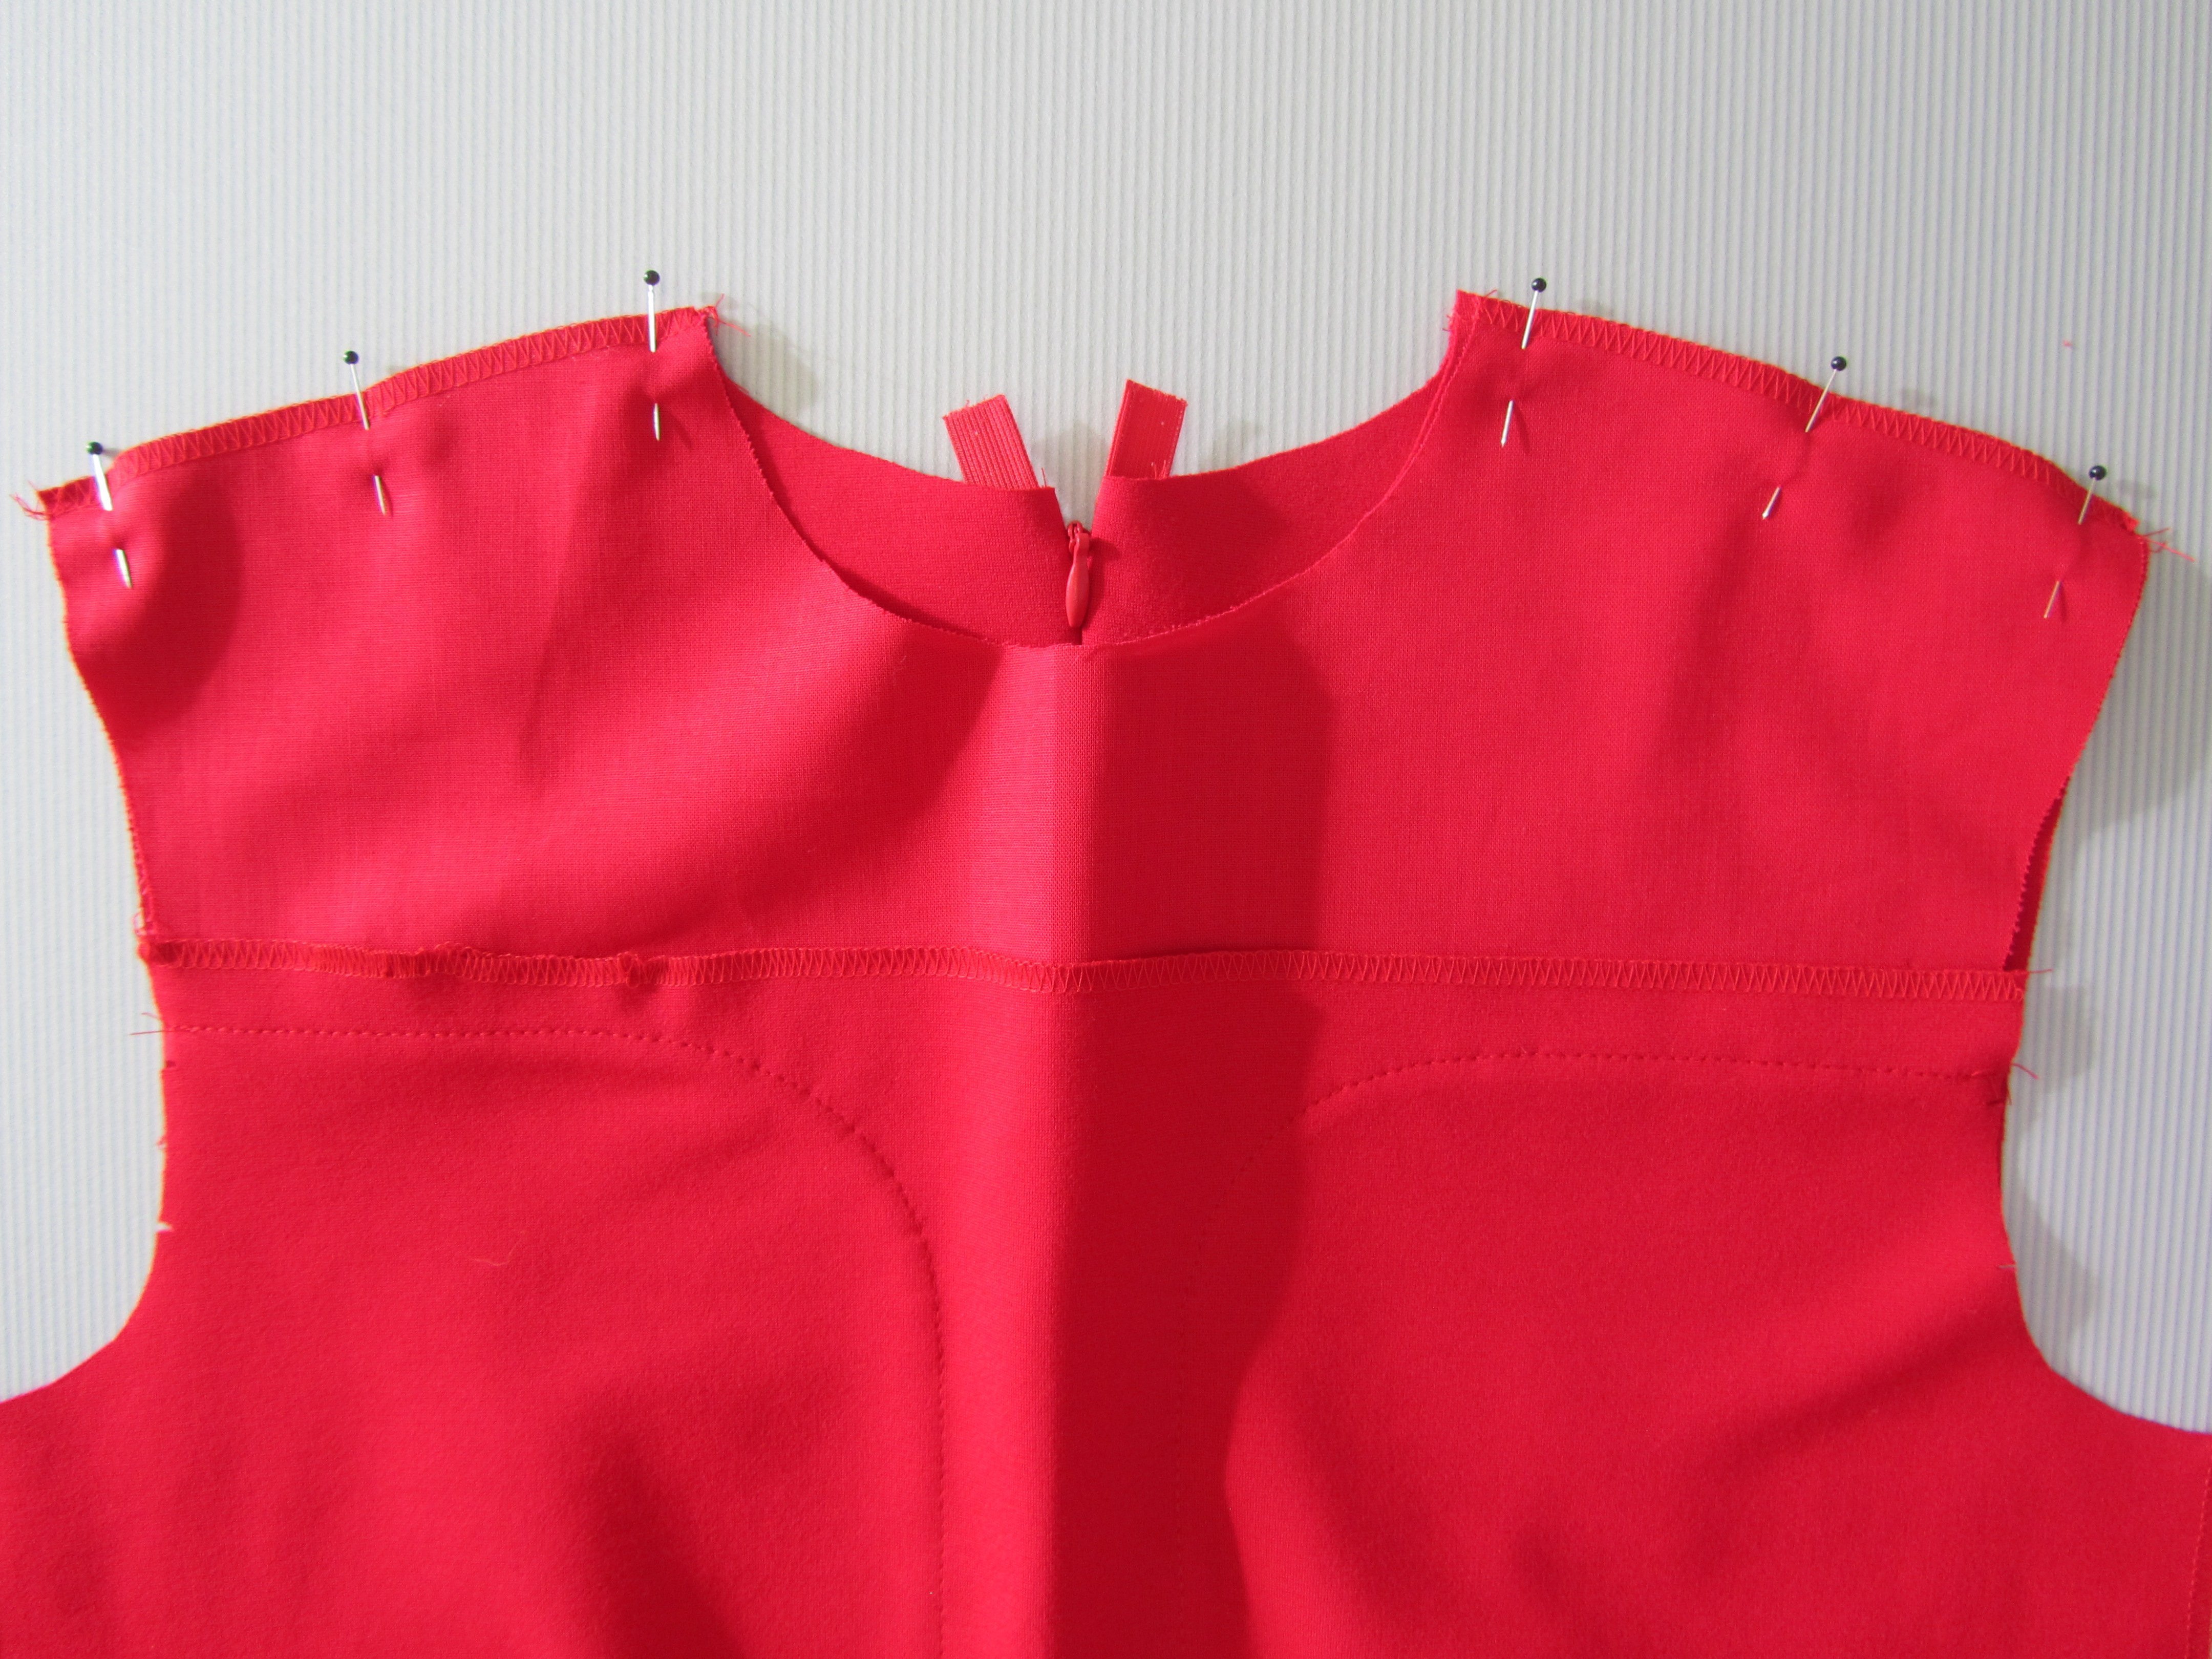
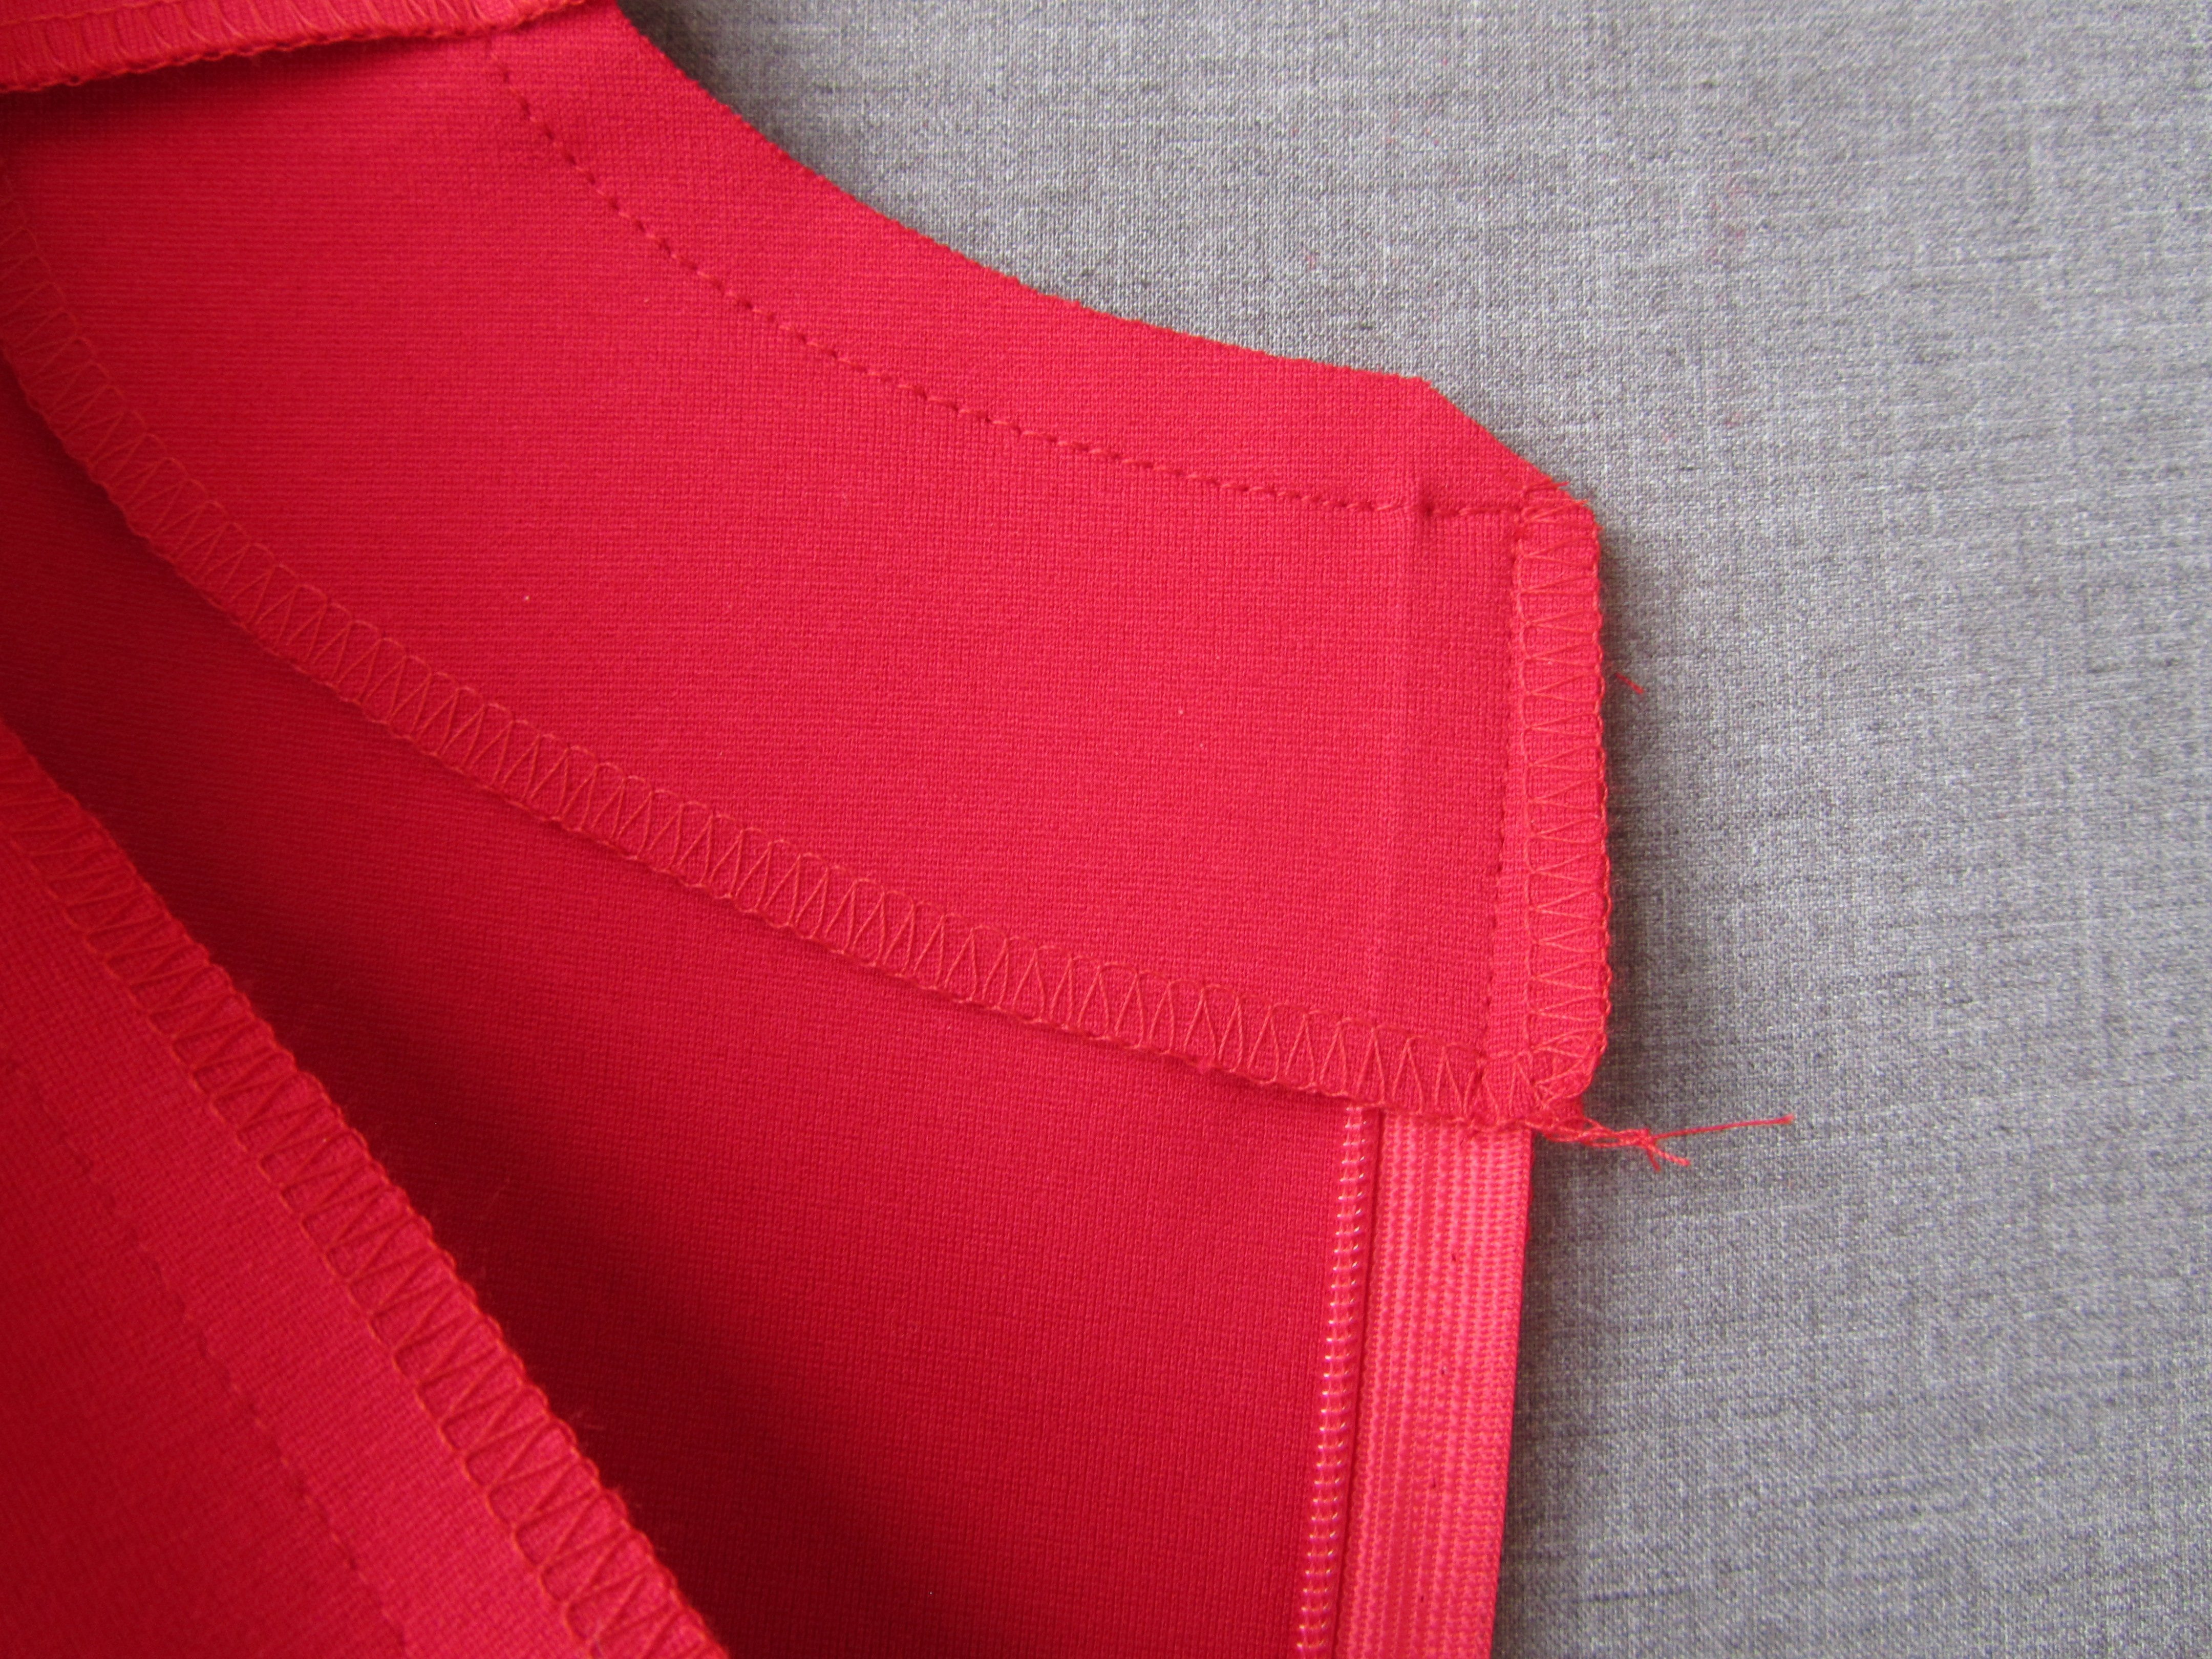
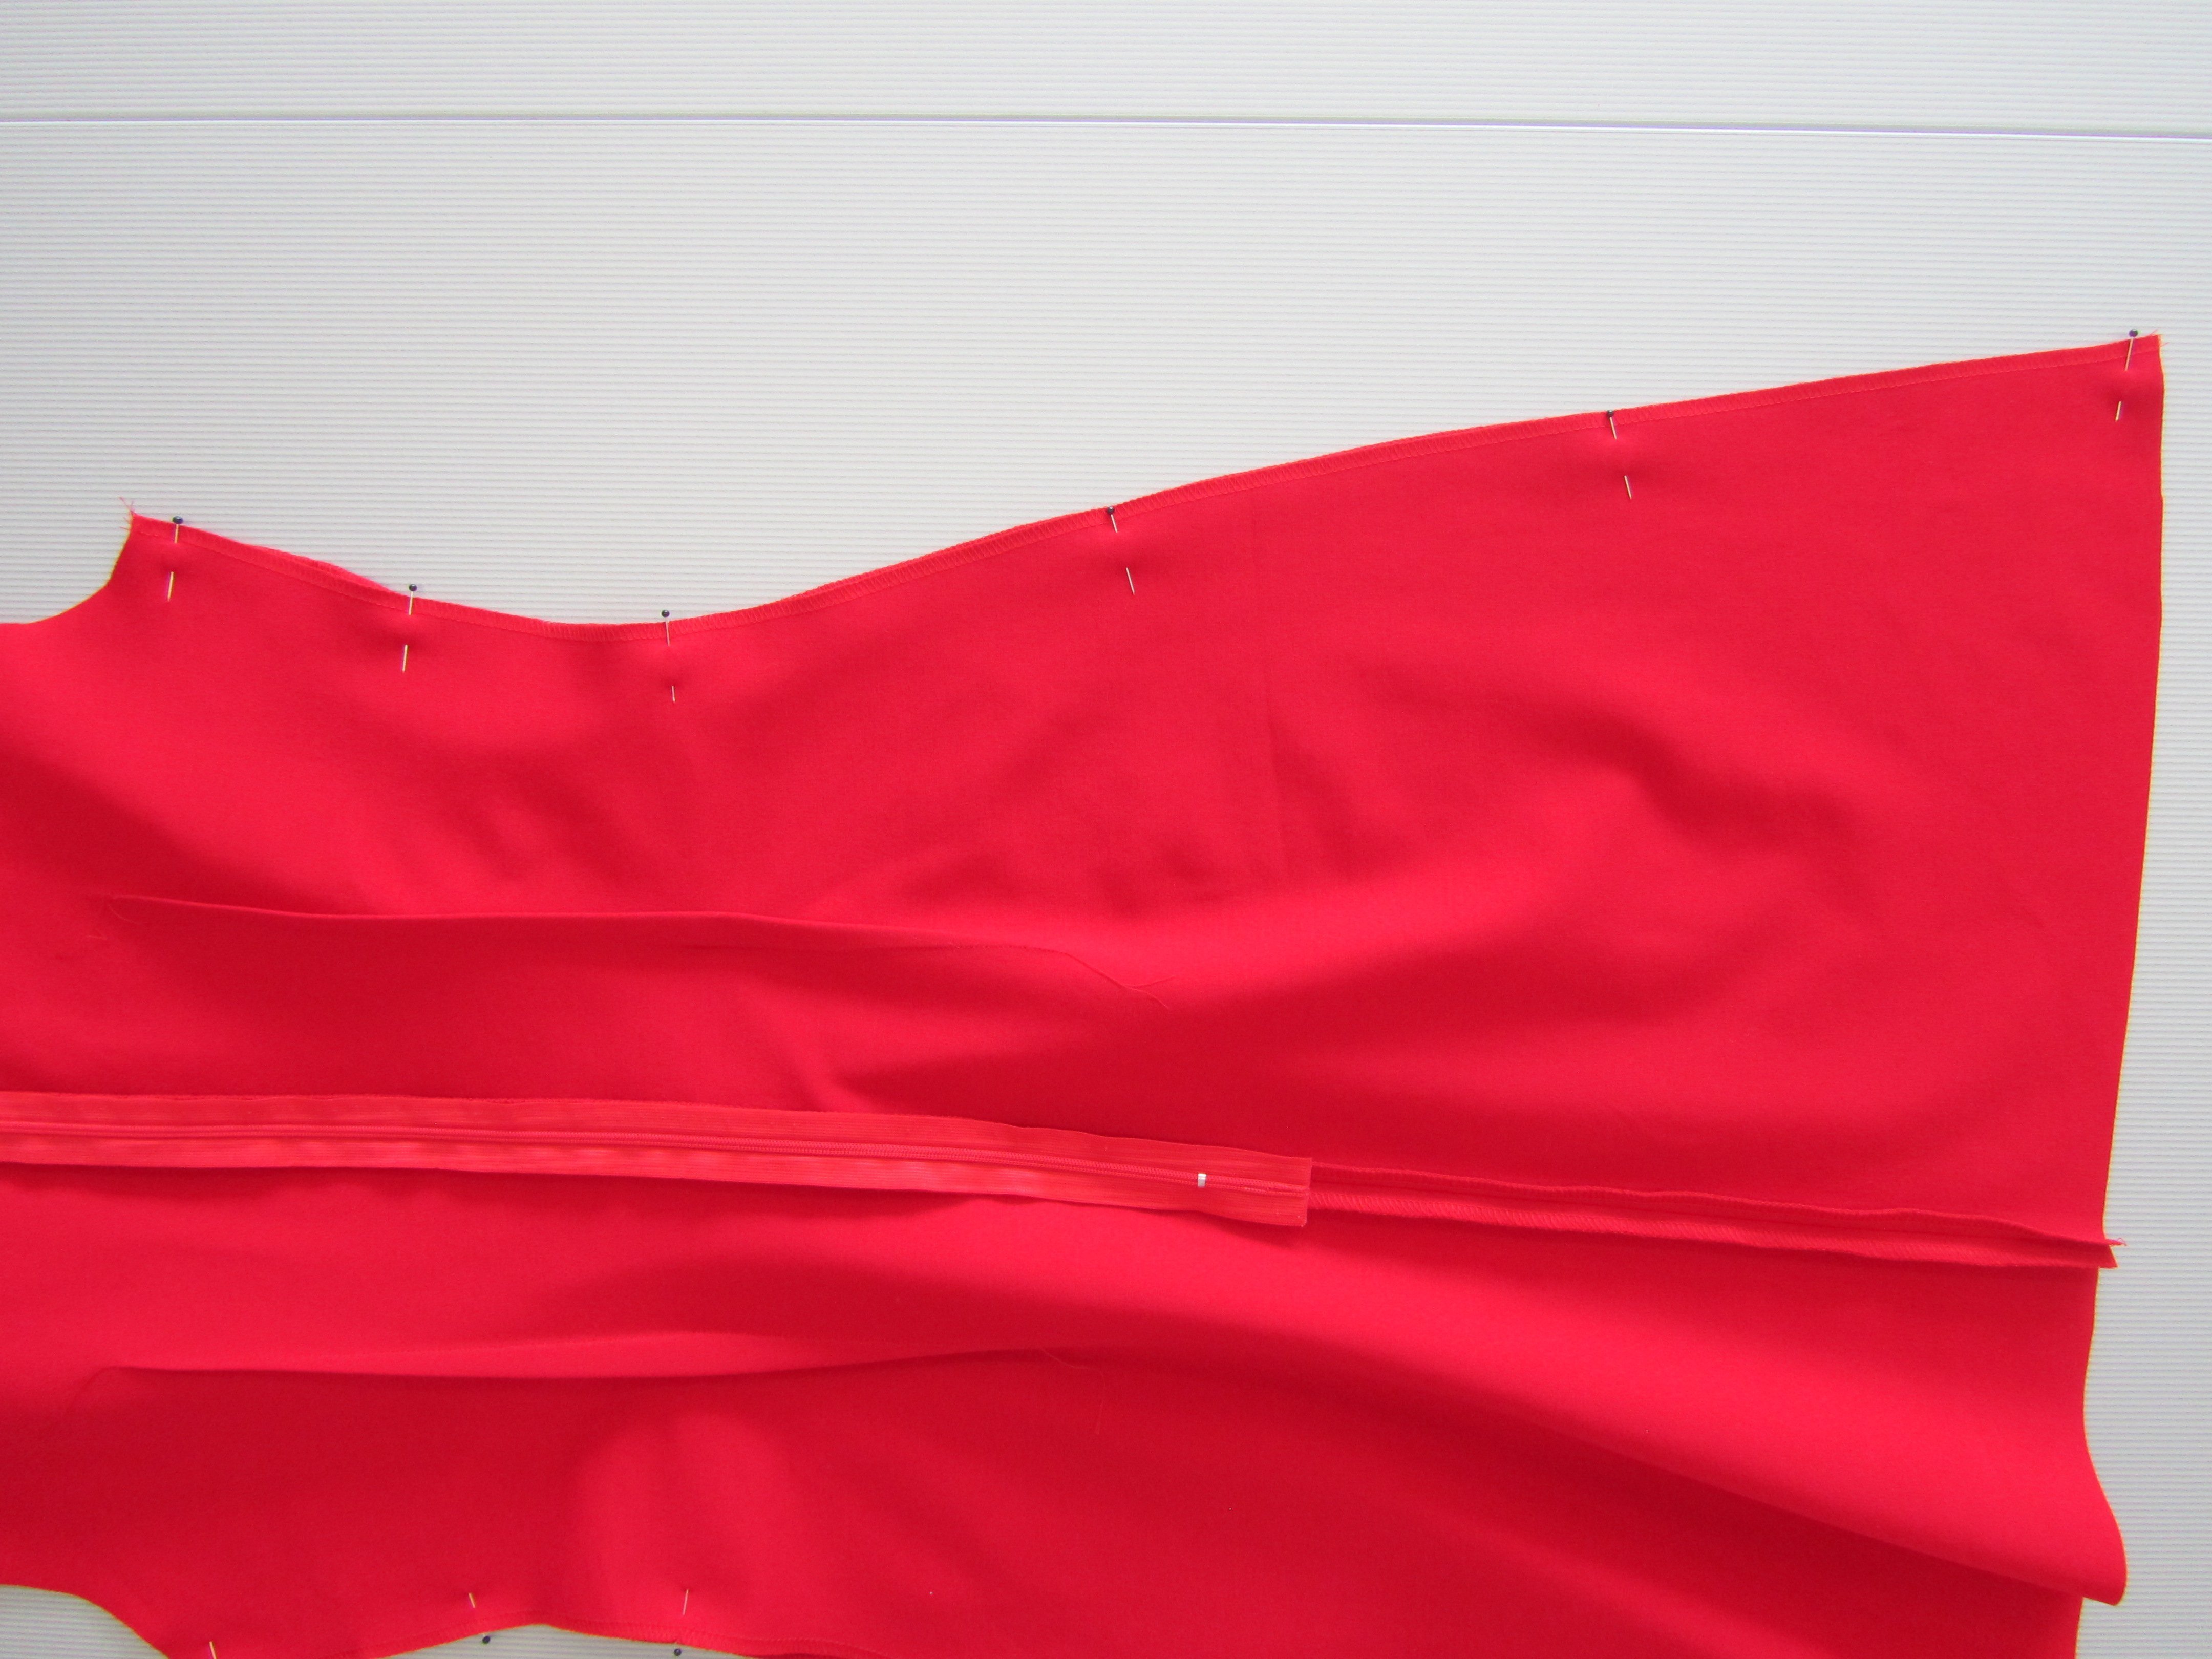
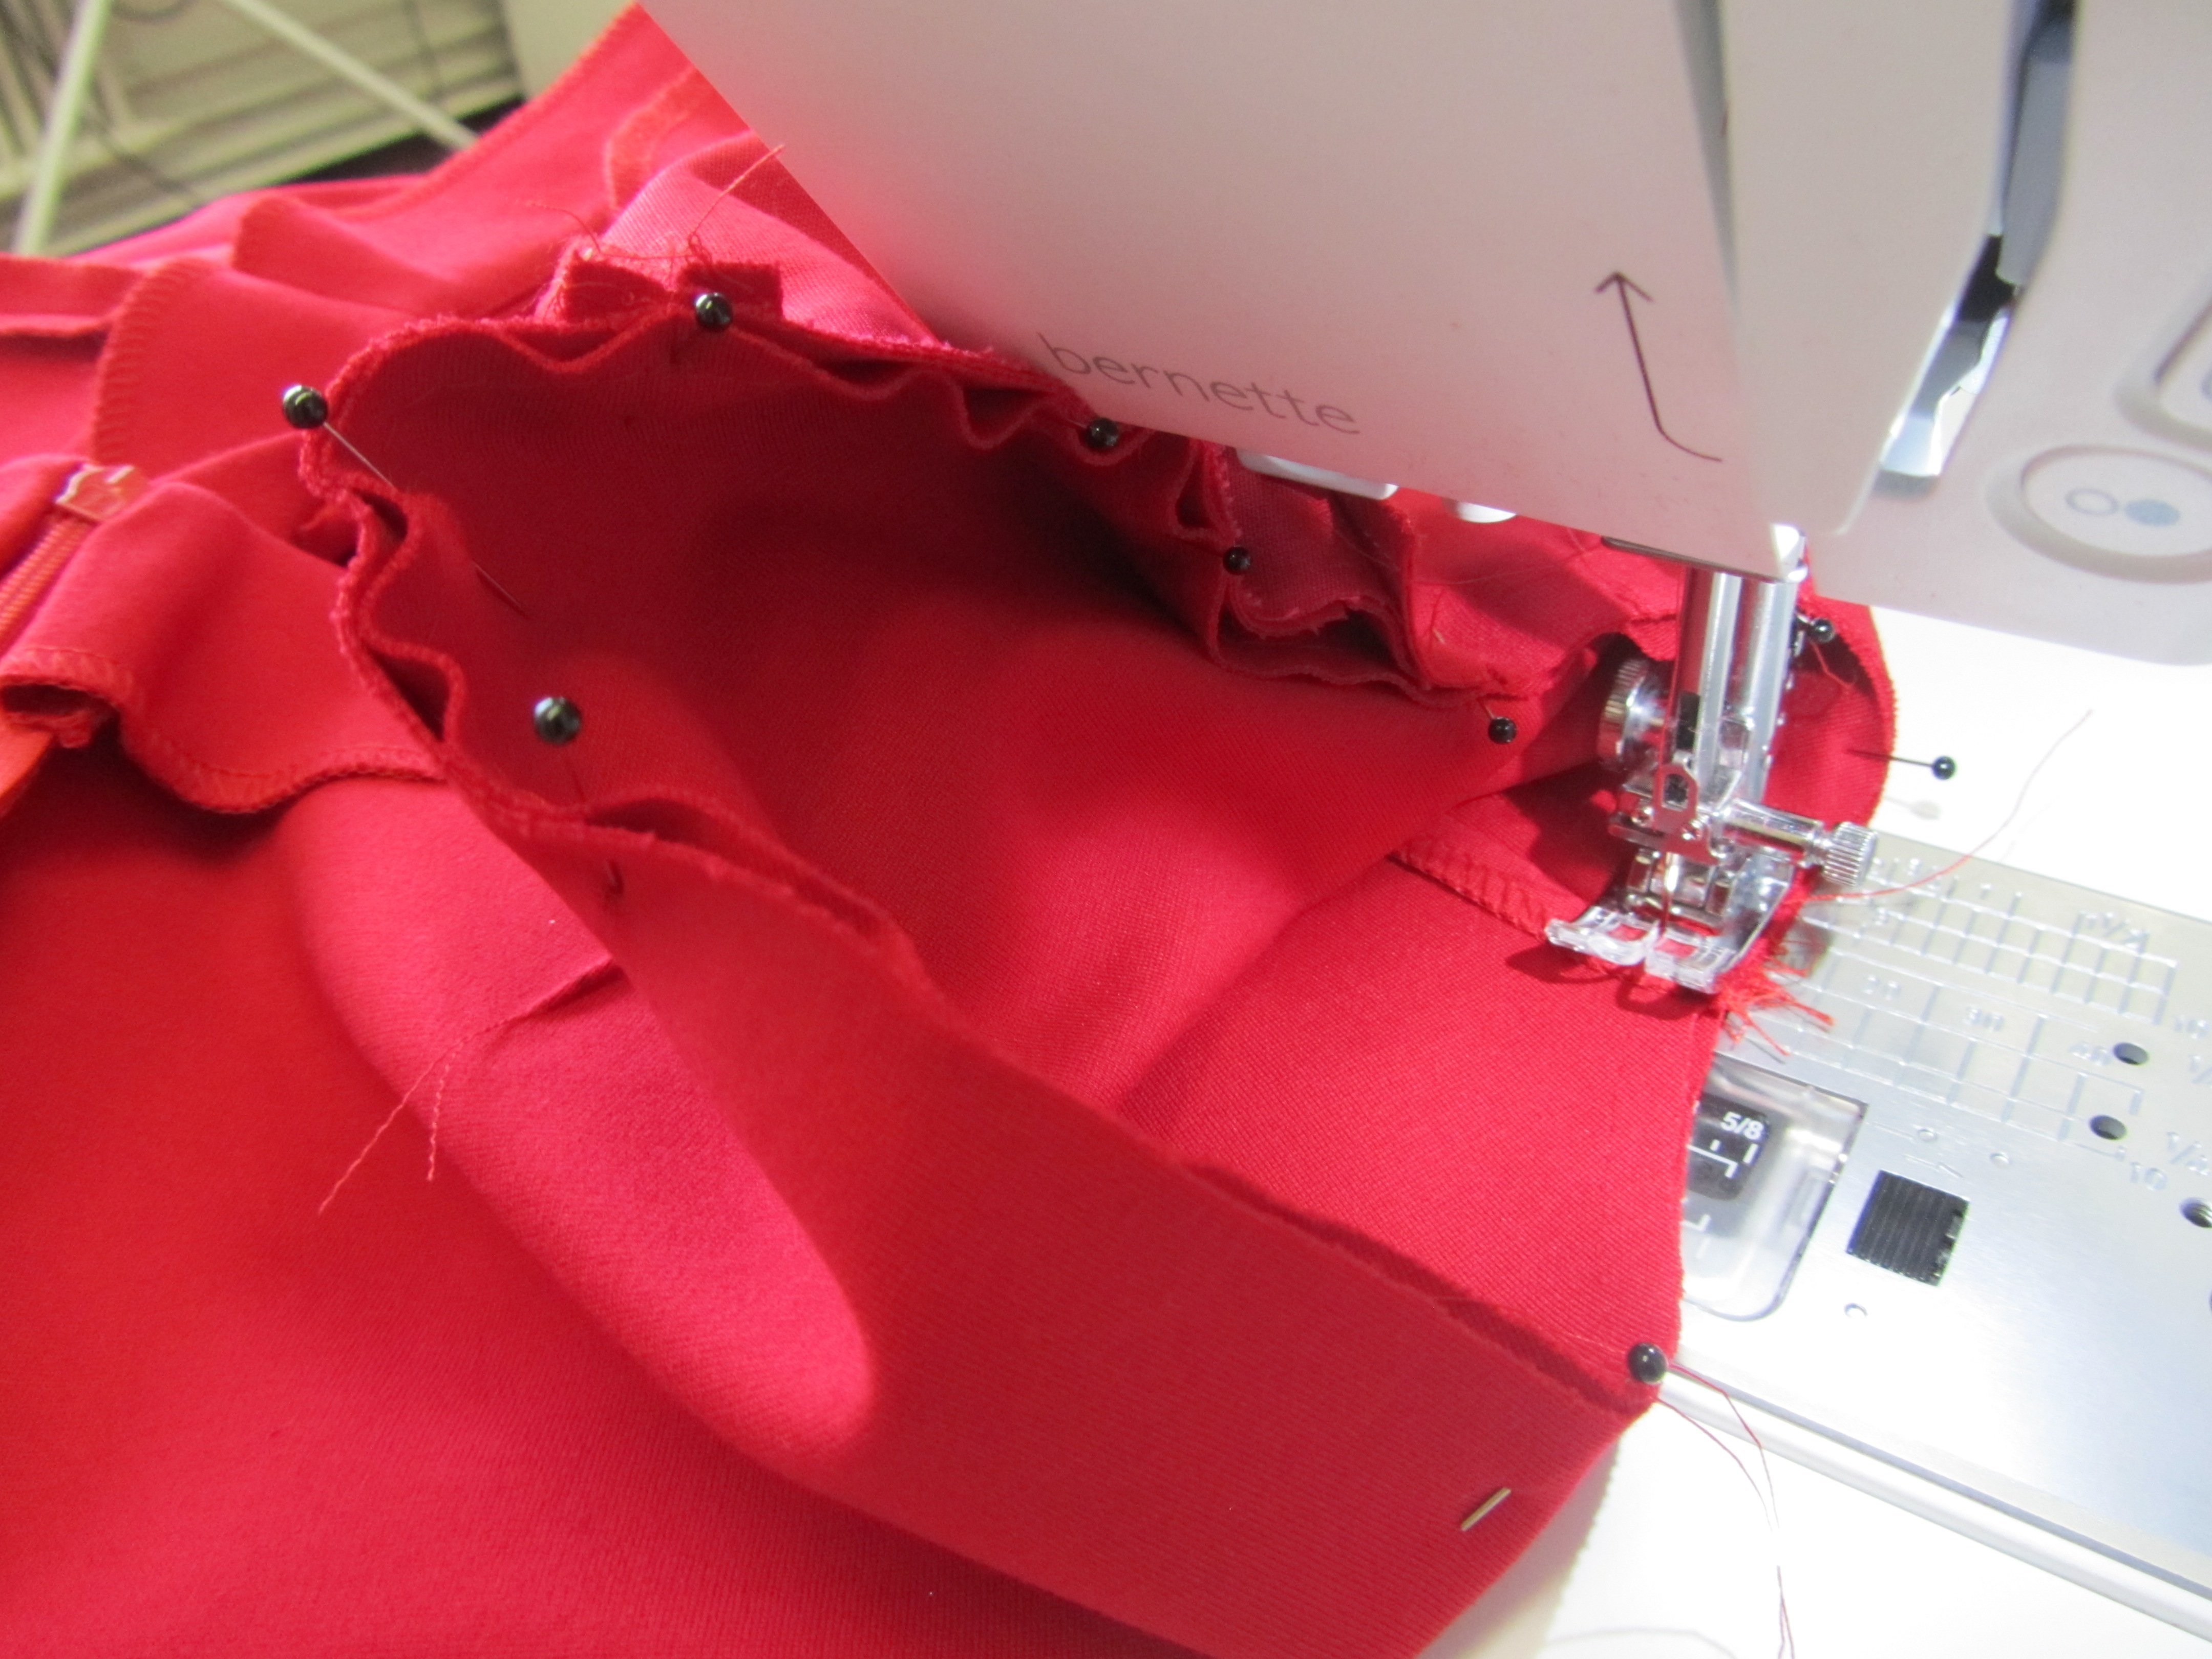
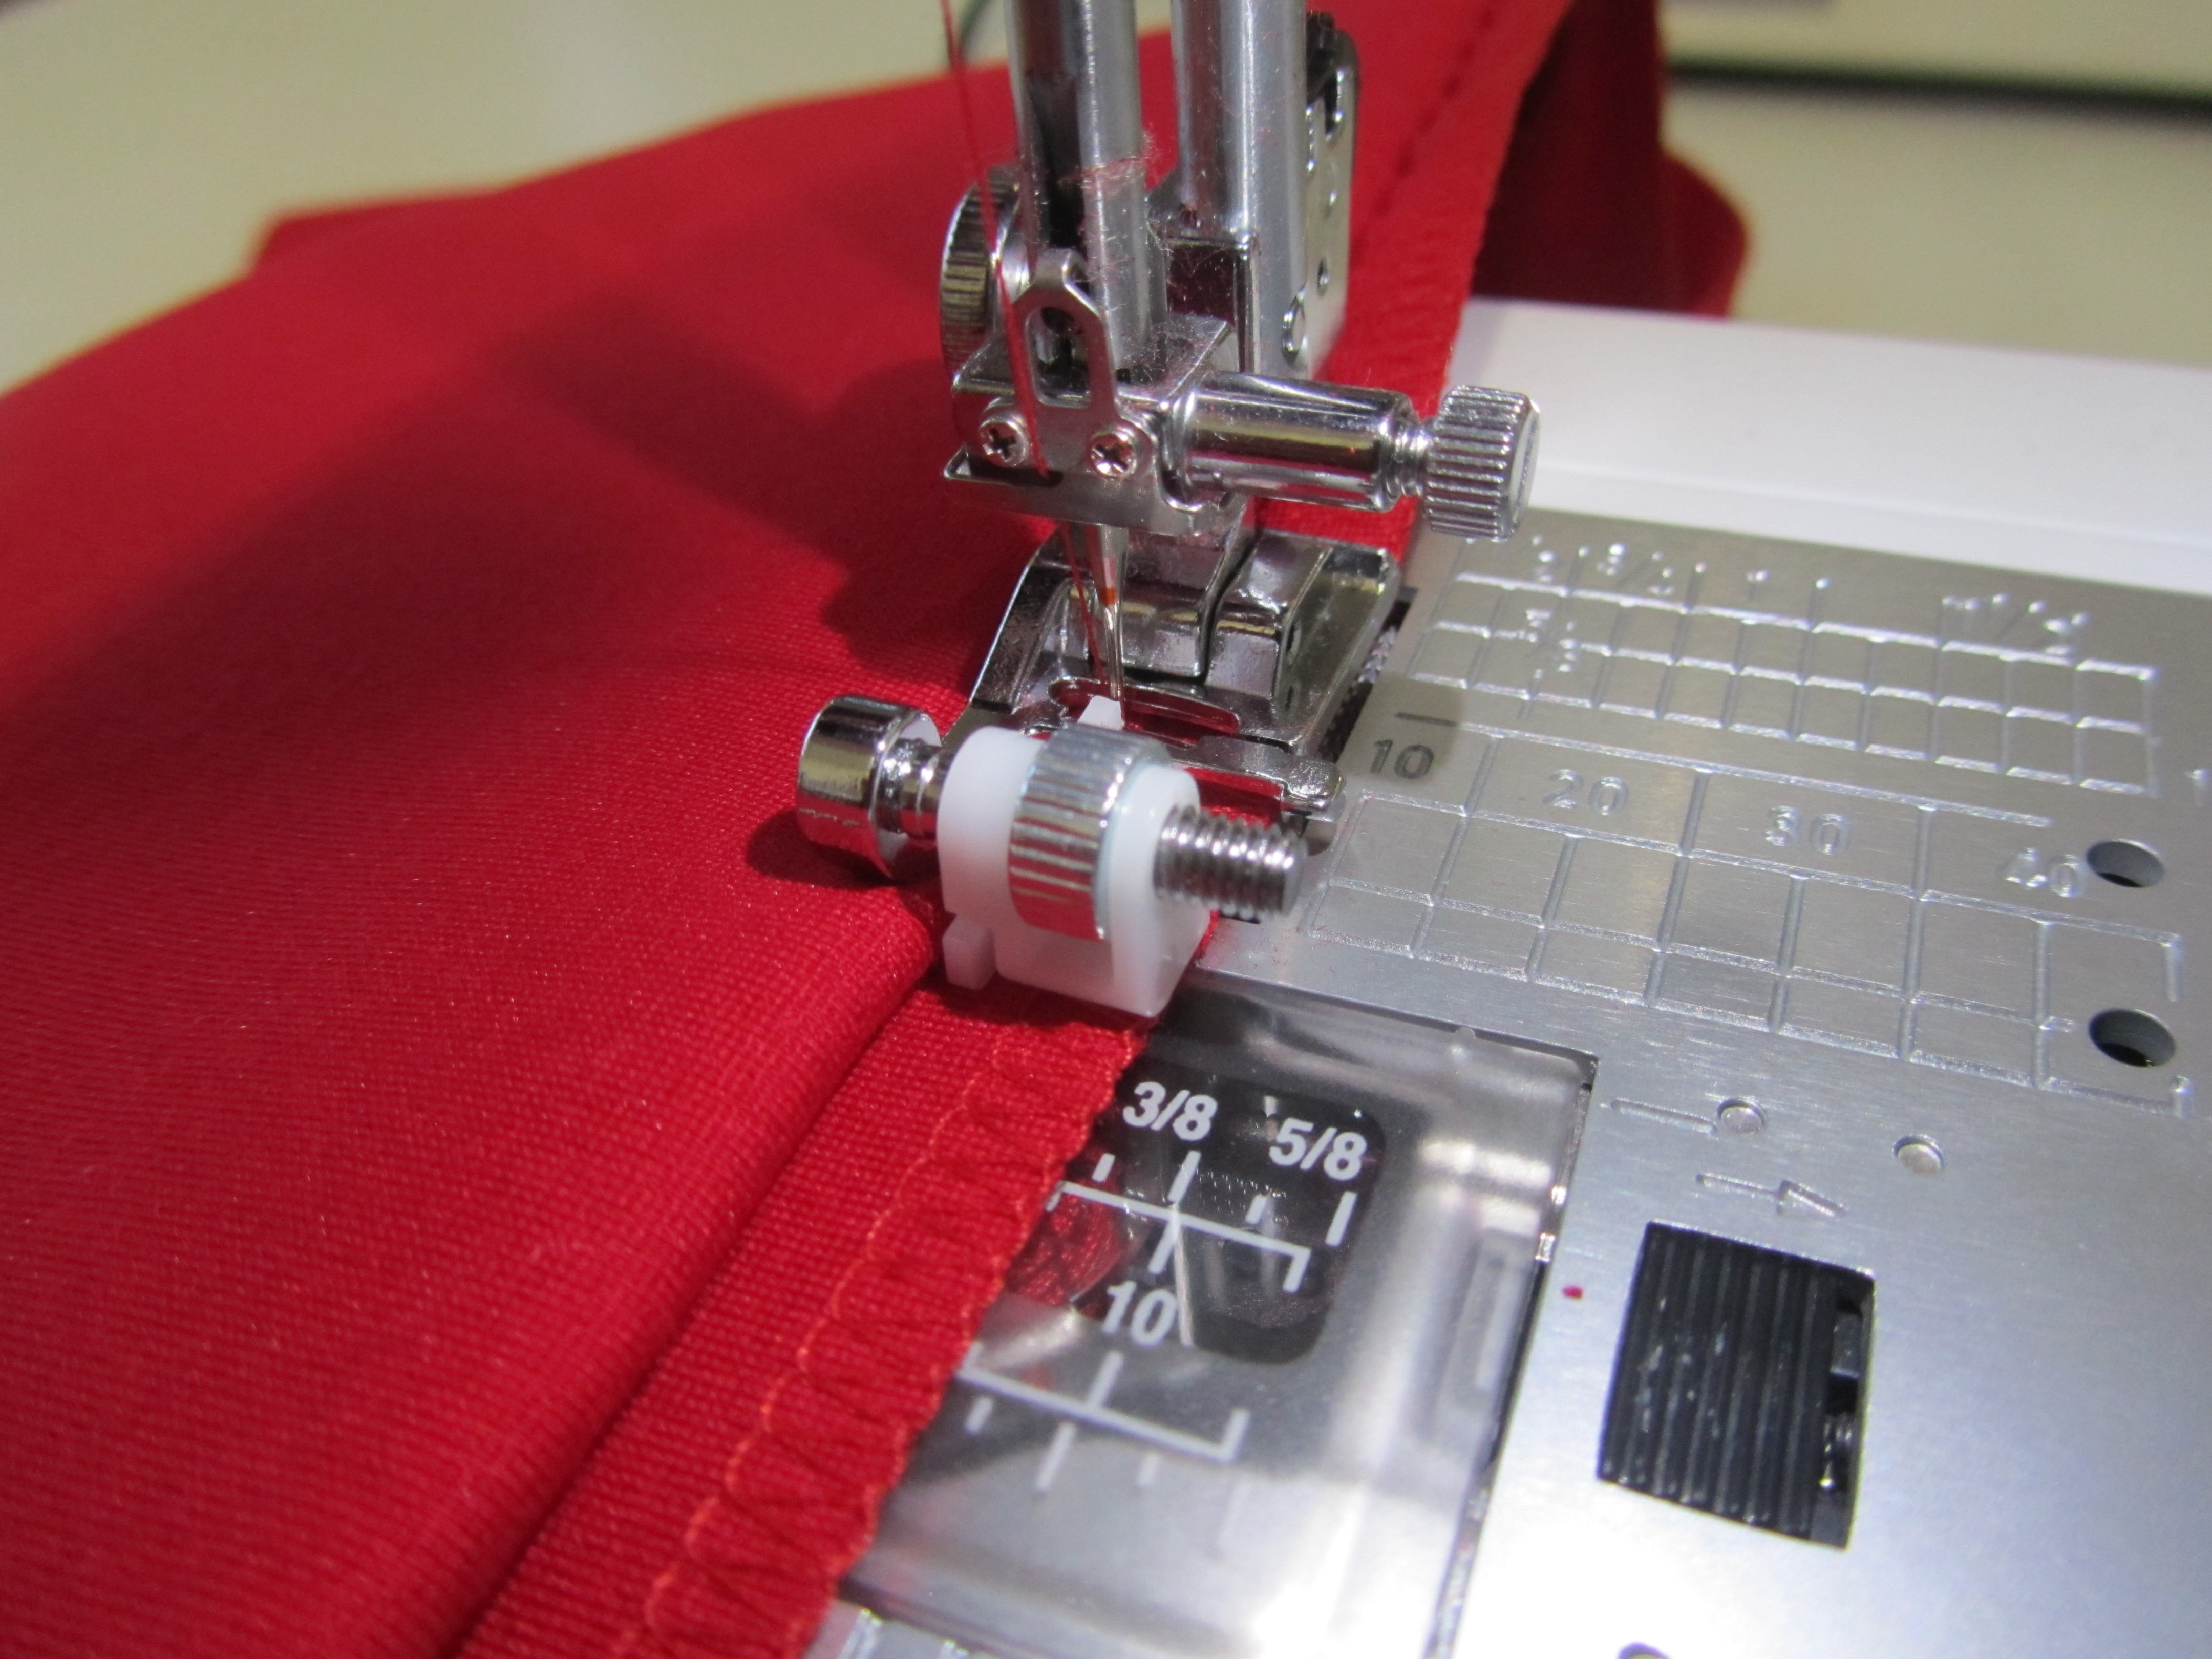
Sew in the zipper: Attach the invisible zipper foot. Pin one side of the zipper tape onto the back center seam with the right sides together, leaving out the seam allowance at the neckline, and sew in from the top to the mark.
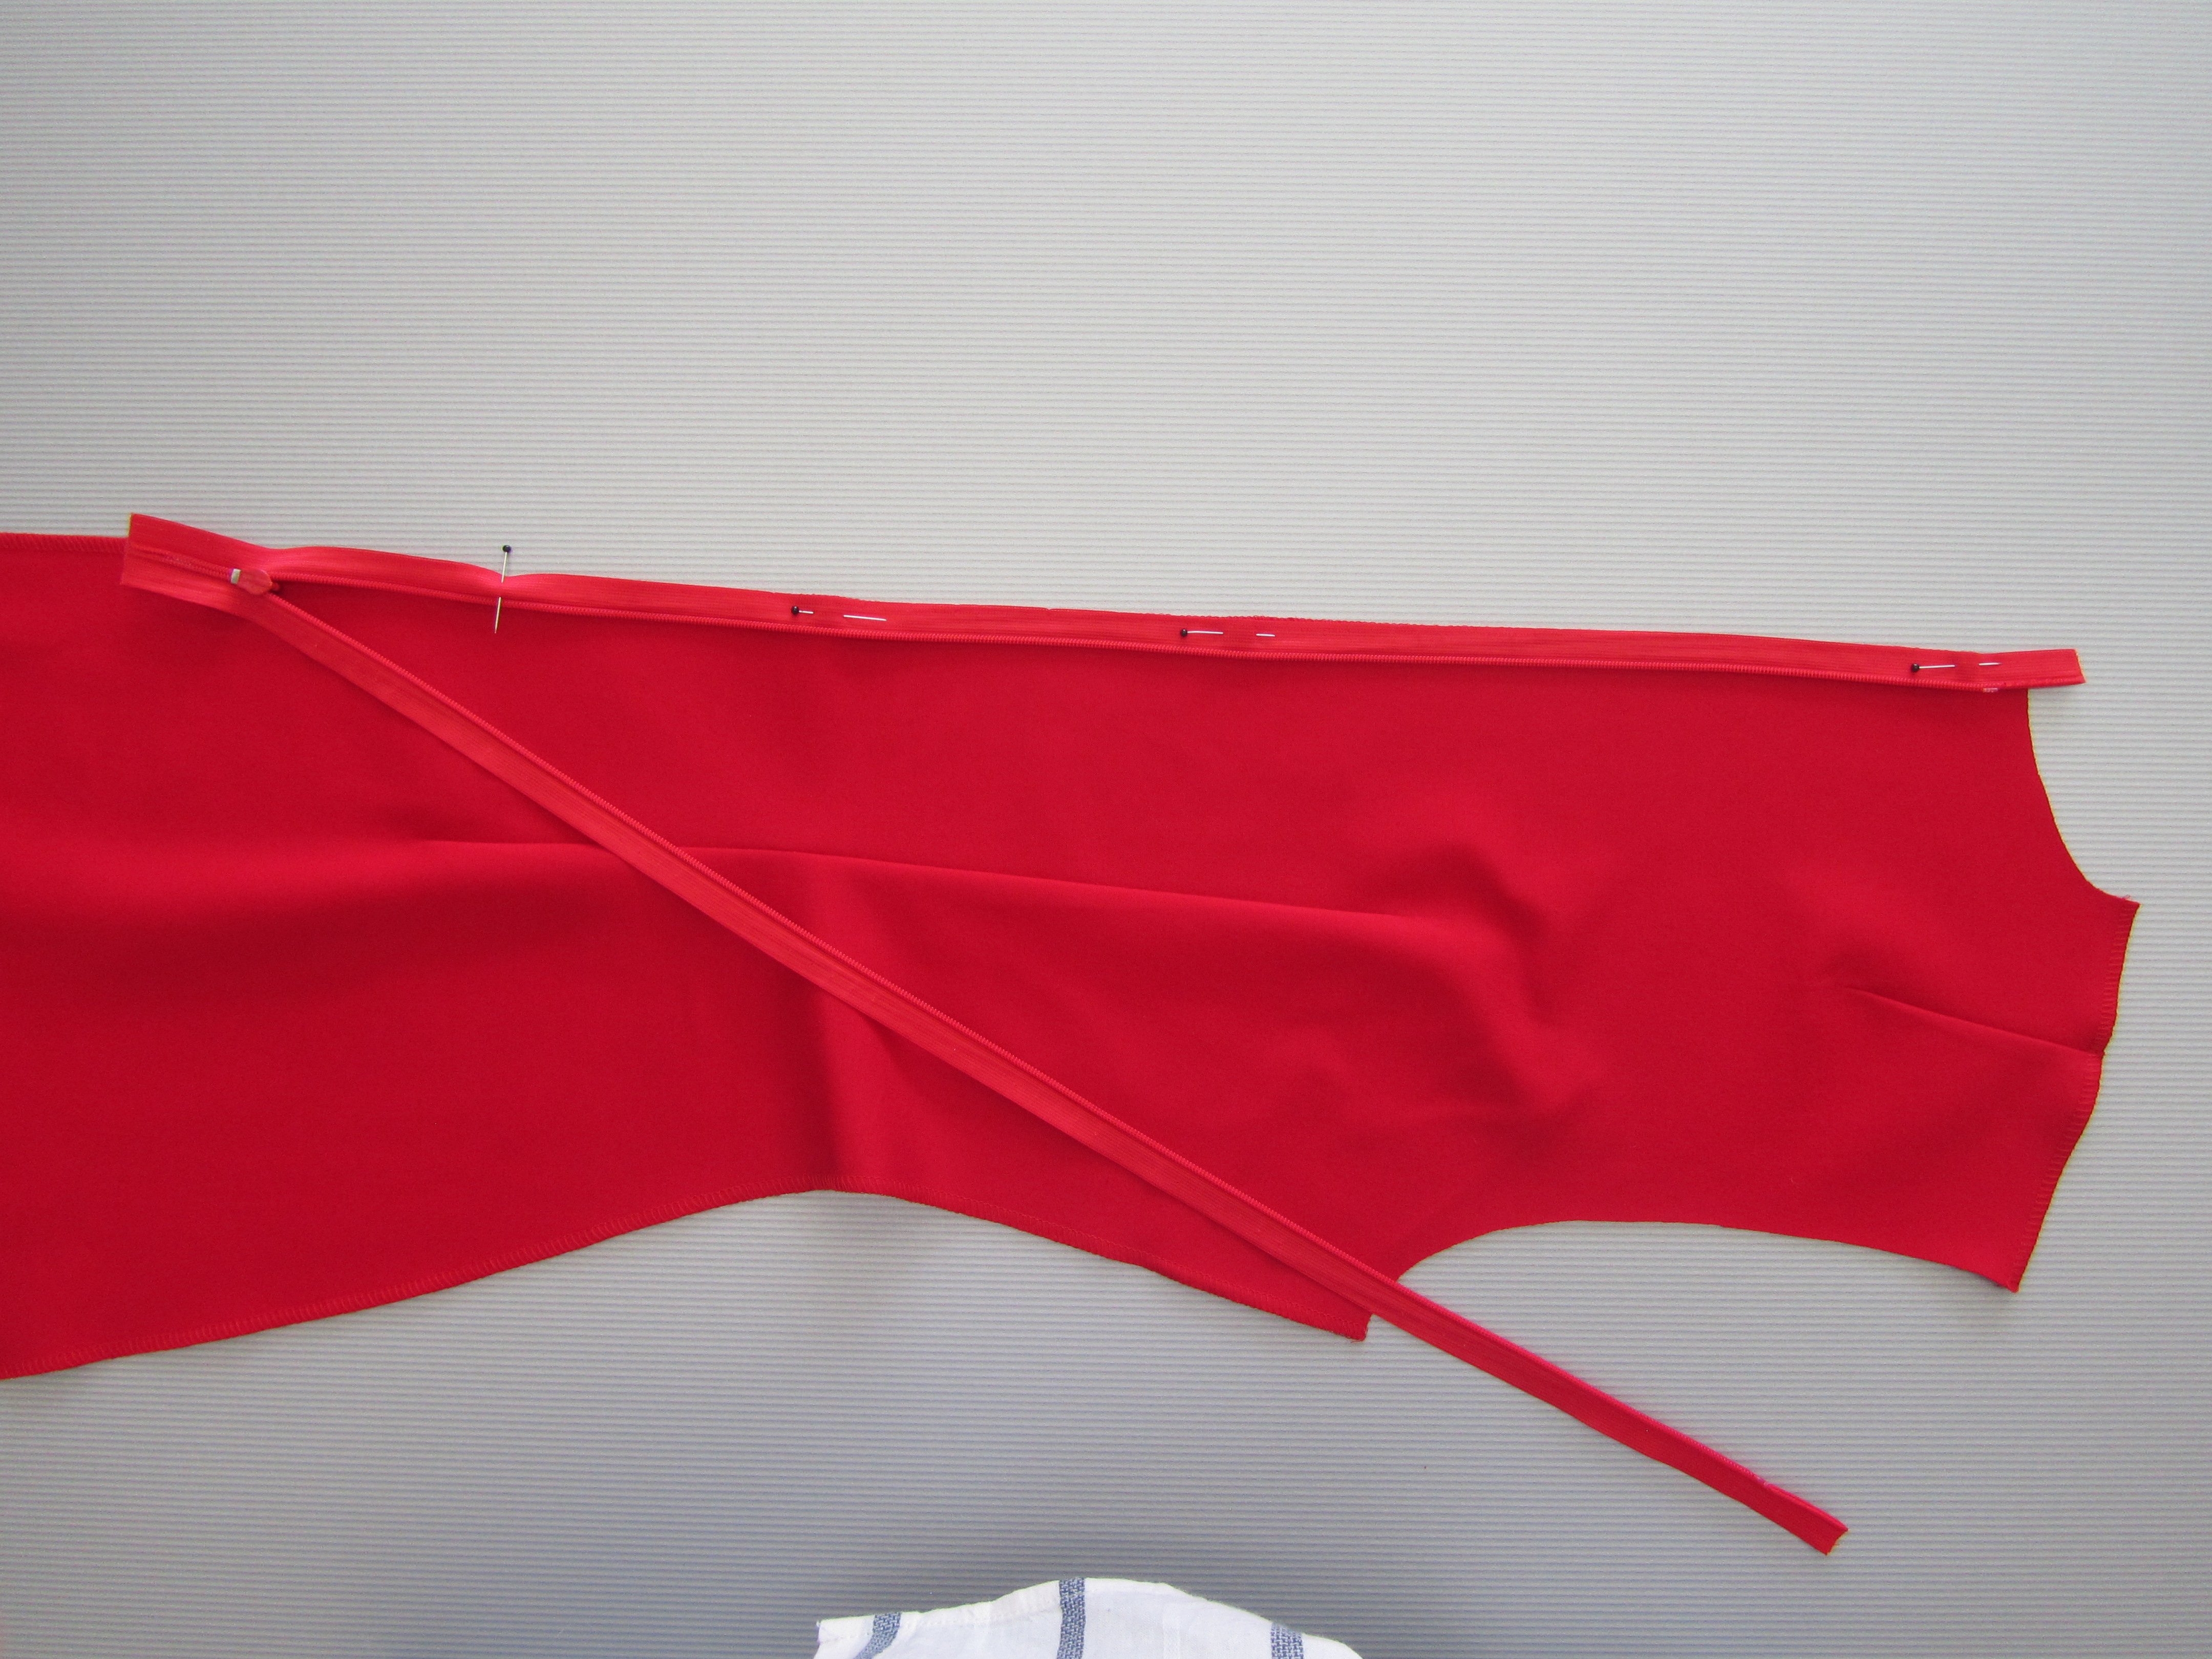
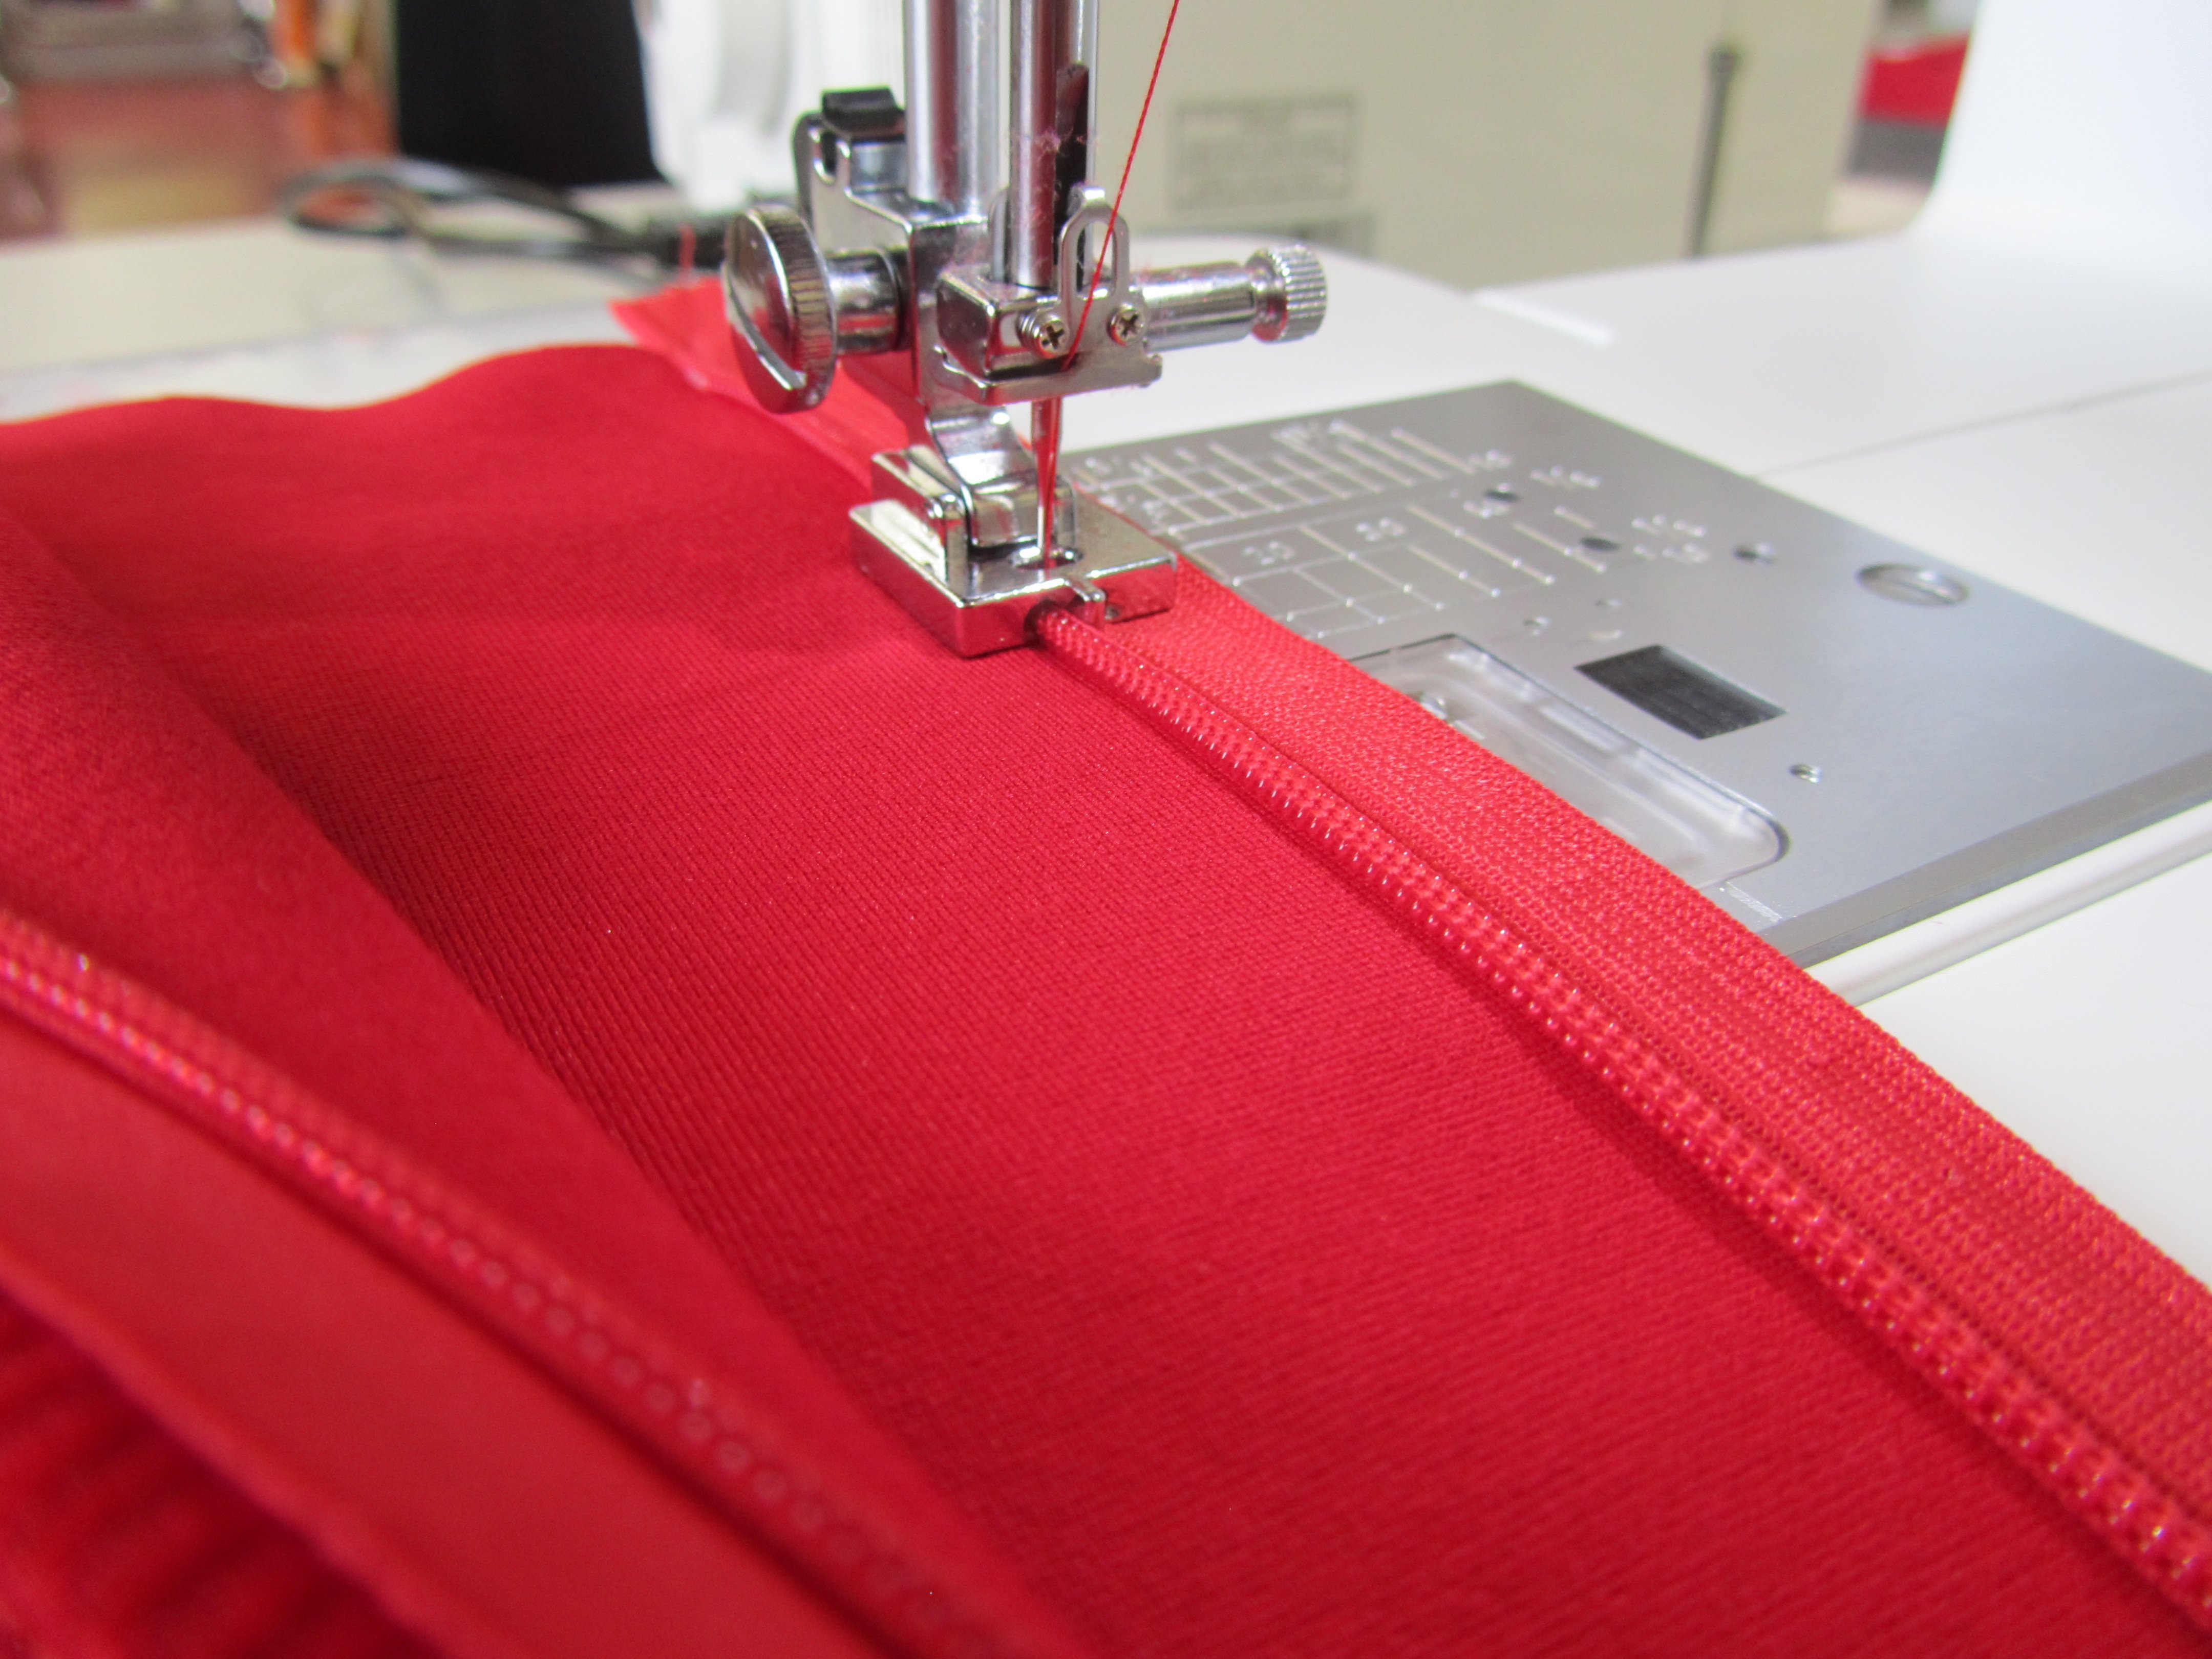
Pin the other side of the zipper tape in the same way and sew in.

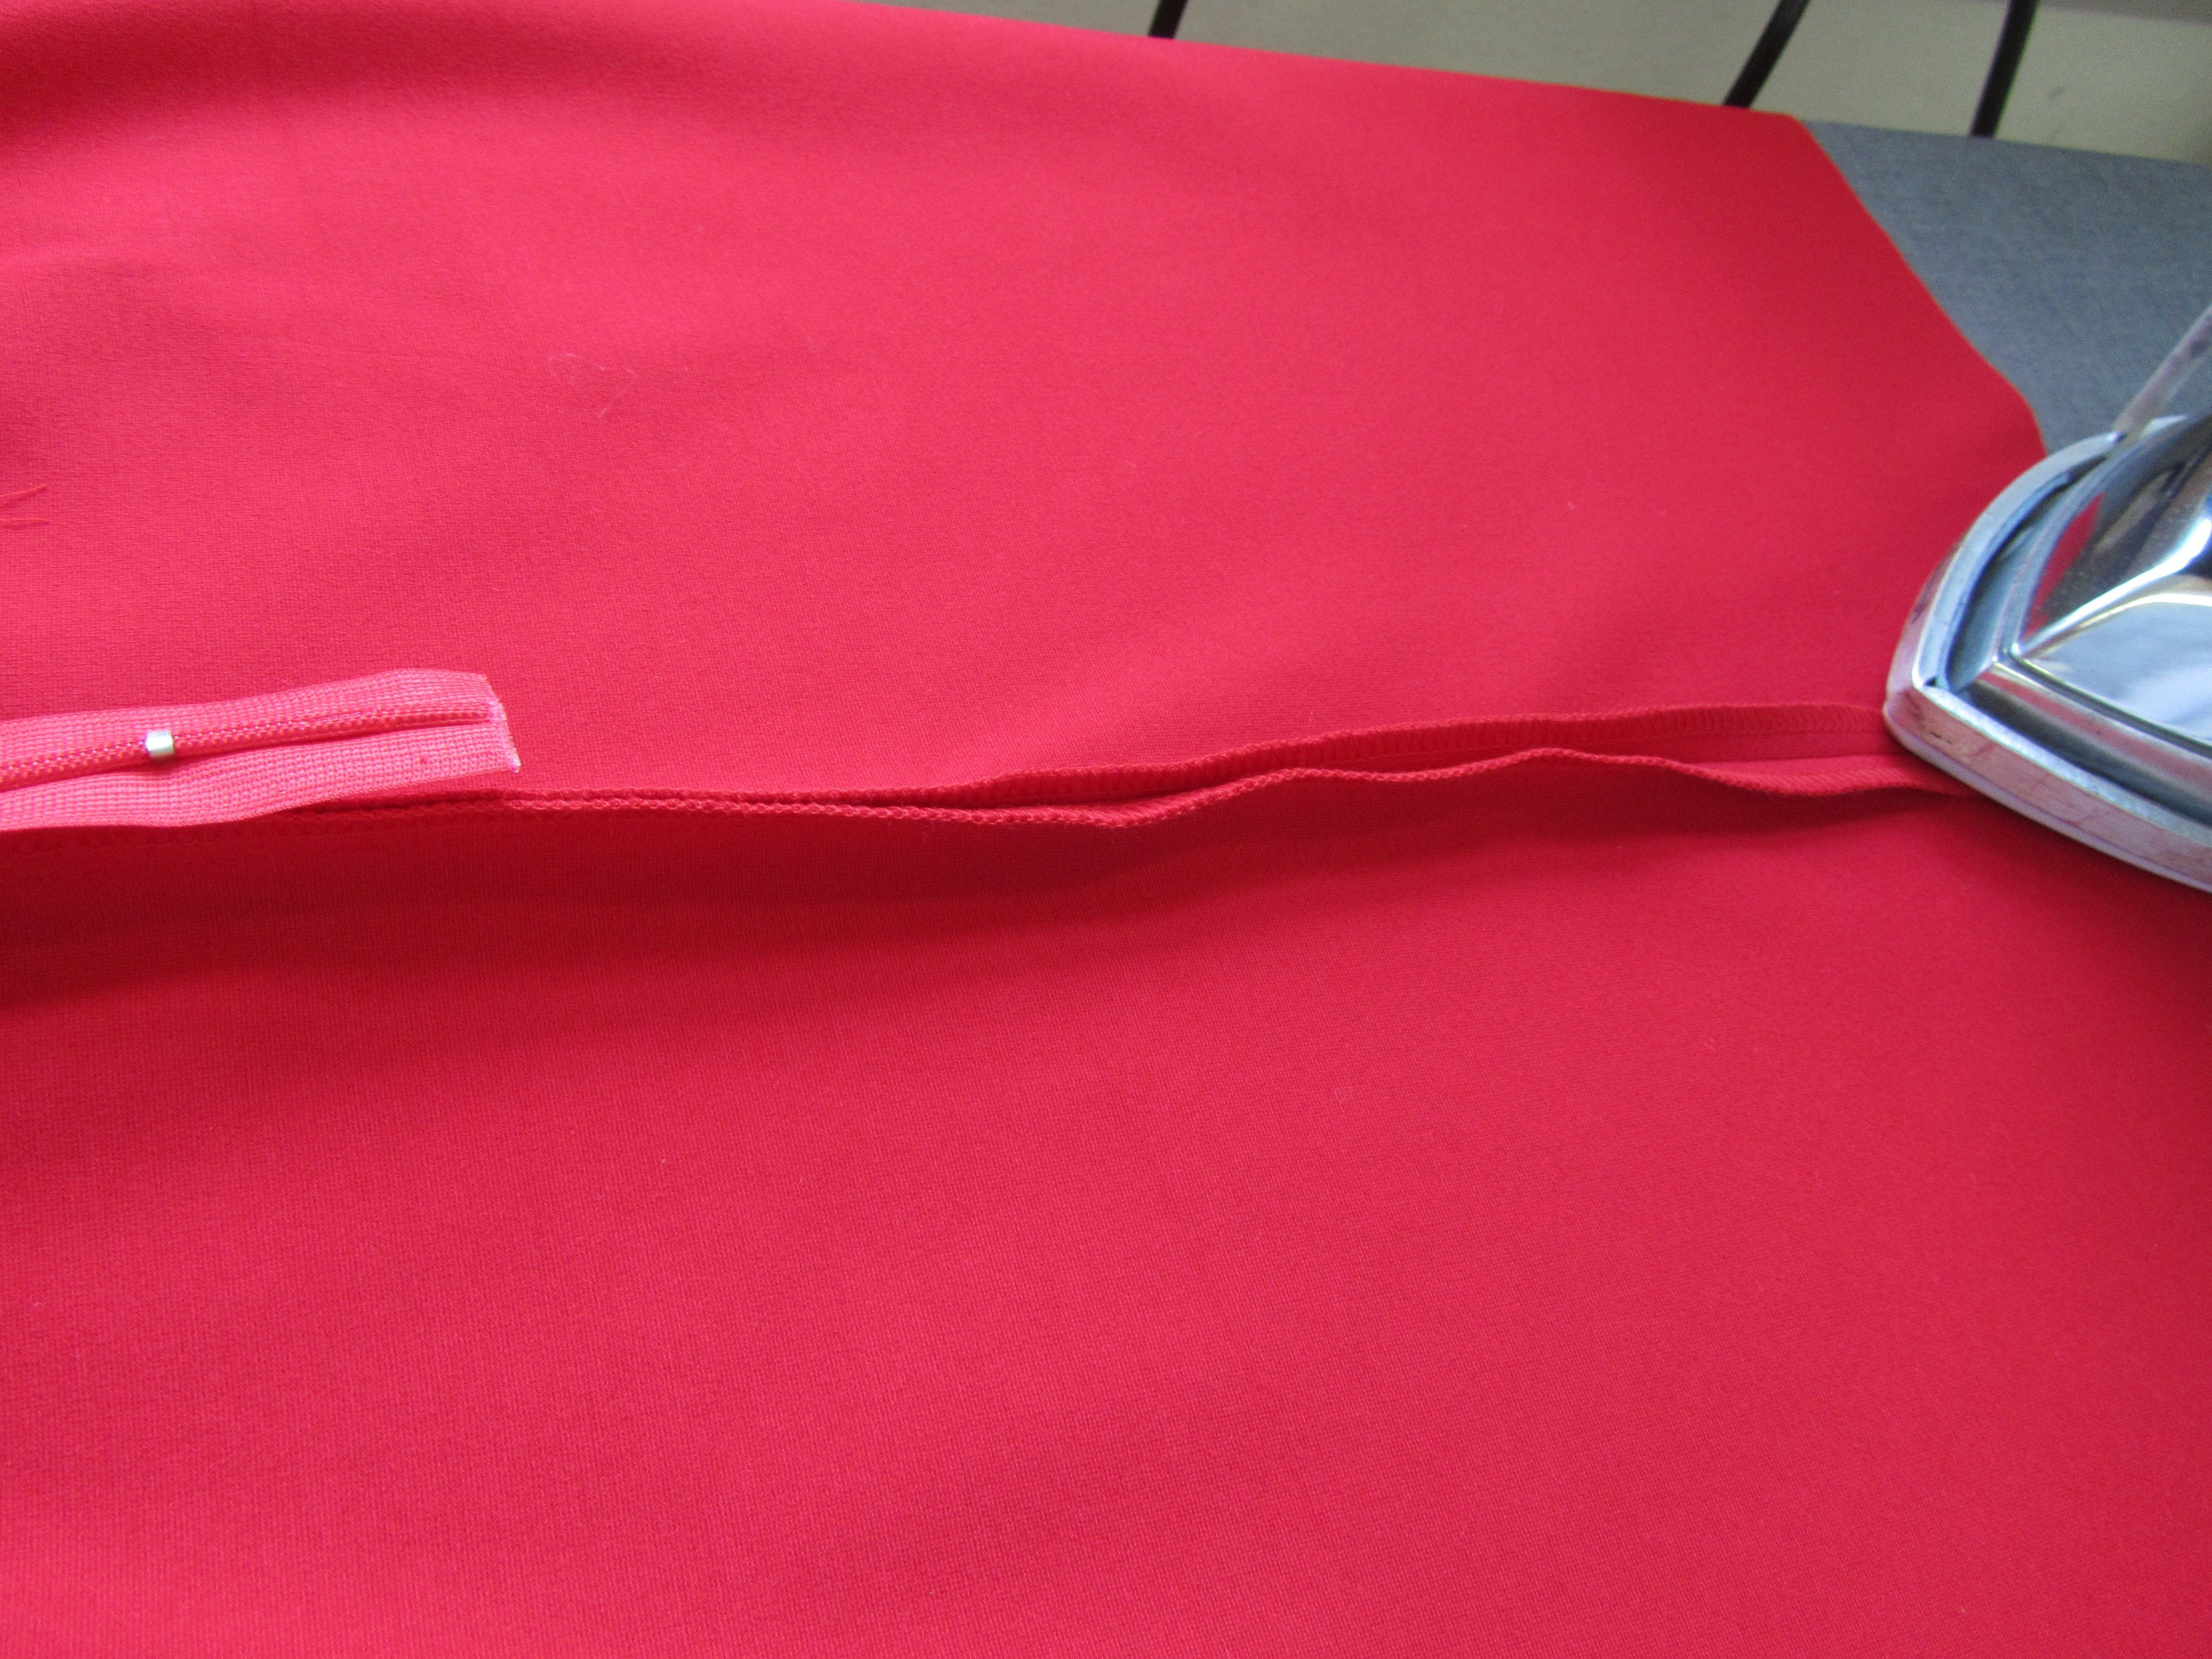
Close the seam underneath the zipper using zipper foot E (in order to get as close as possible to the sewn in zipper) from the hem to approx. two stitches into the zipper seam.
Iron the seam open.
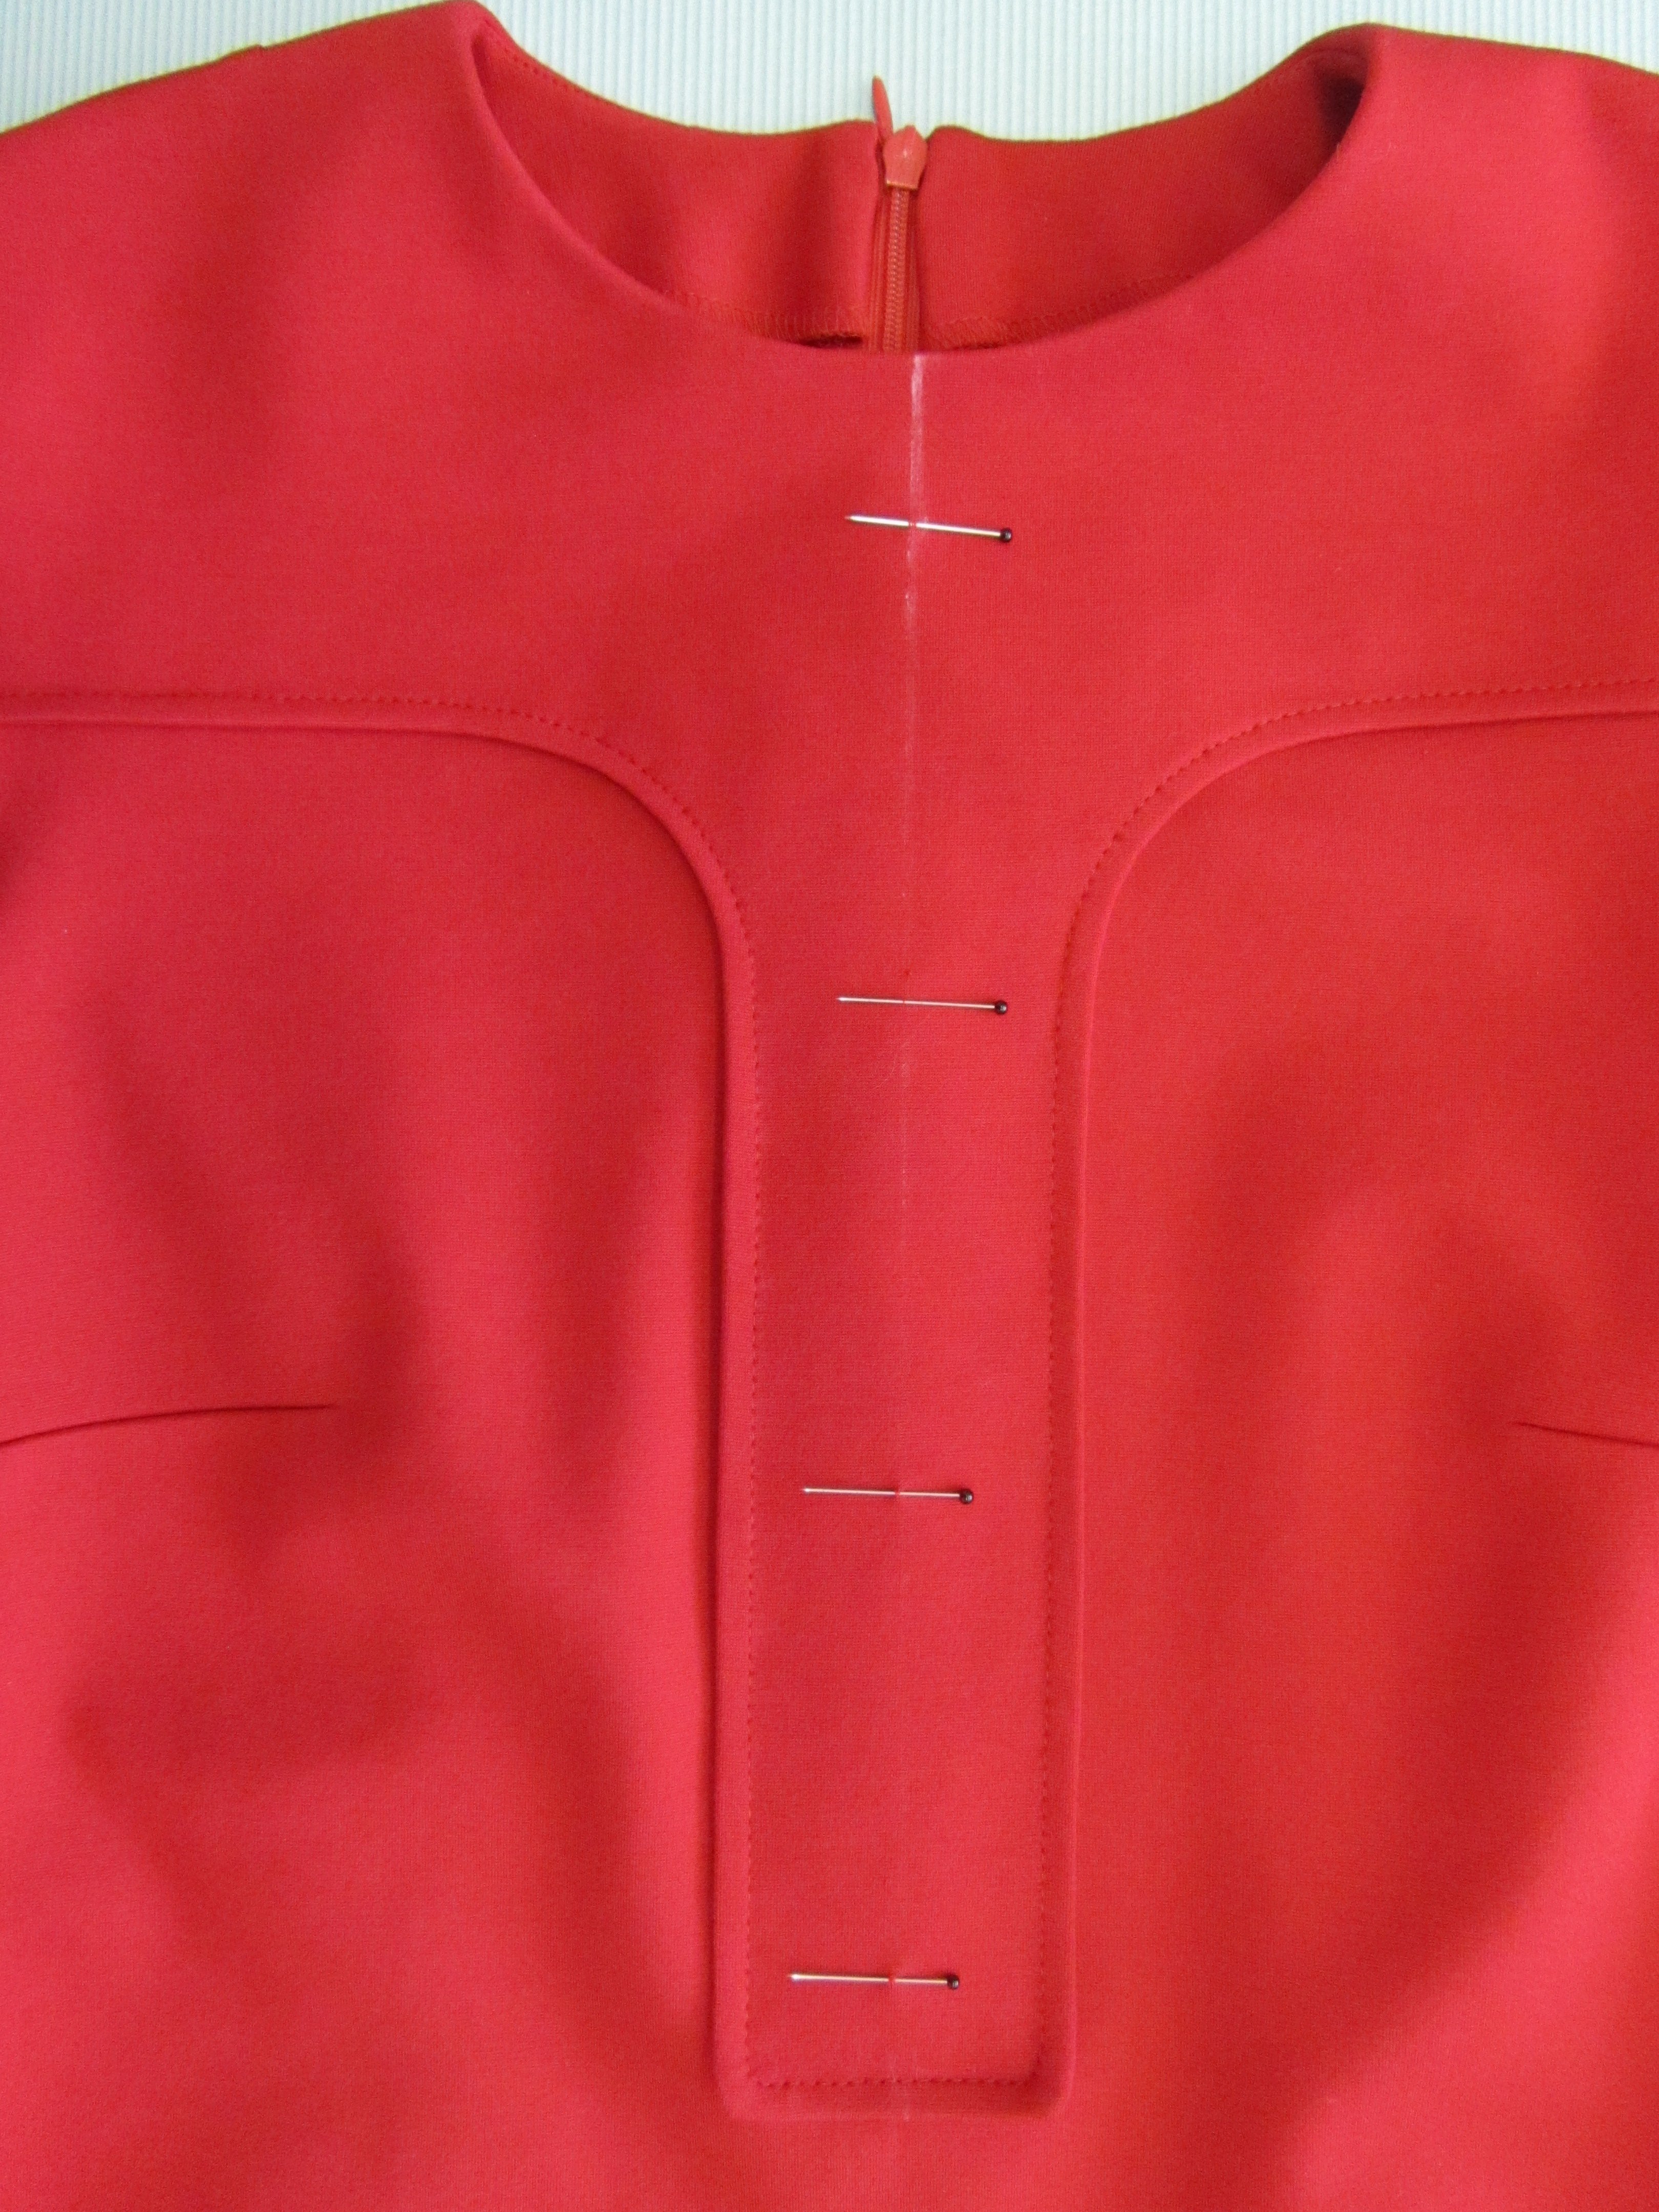
Neckline facing: Neaten the shoulder seams and bottom edges of the facings and close the shoulder seams with the right sides together
Close the shoulder seams of the dress with the right sides together.
Iron the seams open.
Sew the facing onto the edge of the neckline with the right sides together and stitch down the edges of the facing and the zipper tape at the back center.

Cut off the seam allowance at the top corner diagonally towards the zipper, cut down the seam allowance on the facing to 0.5 cm and cut notches into the facing and the dress.
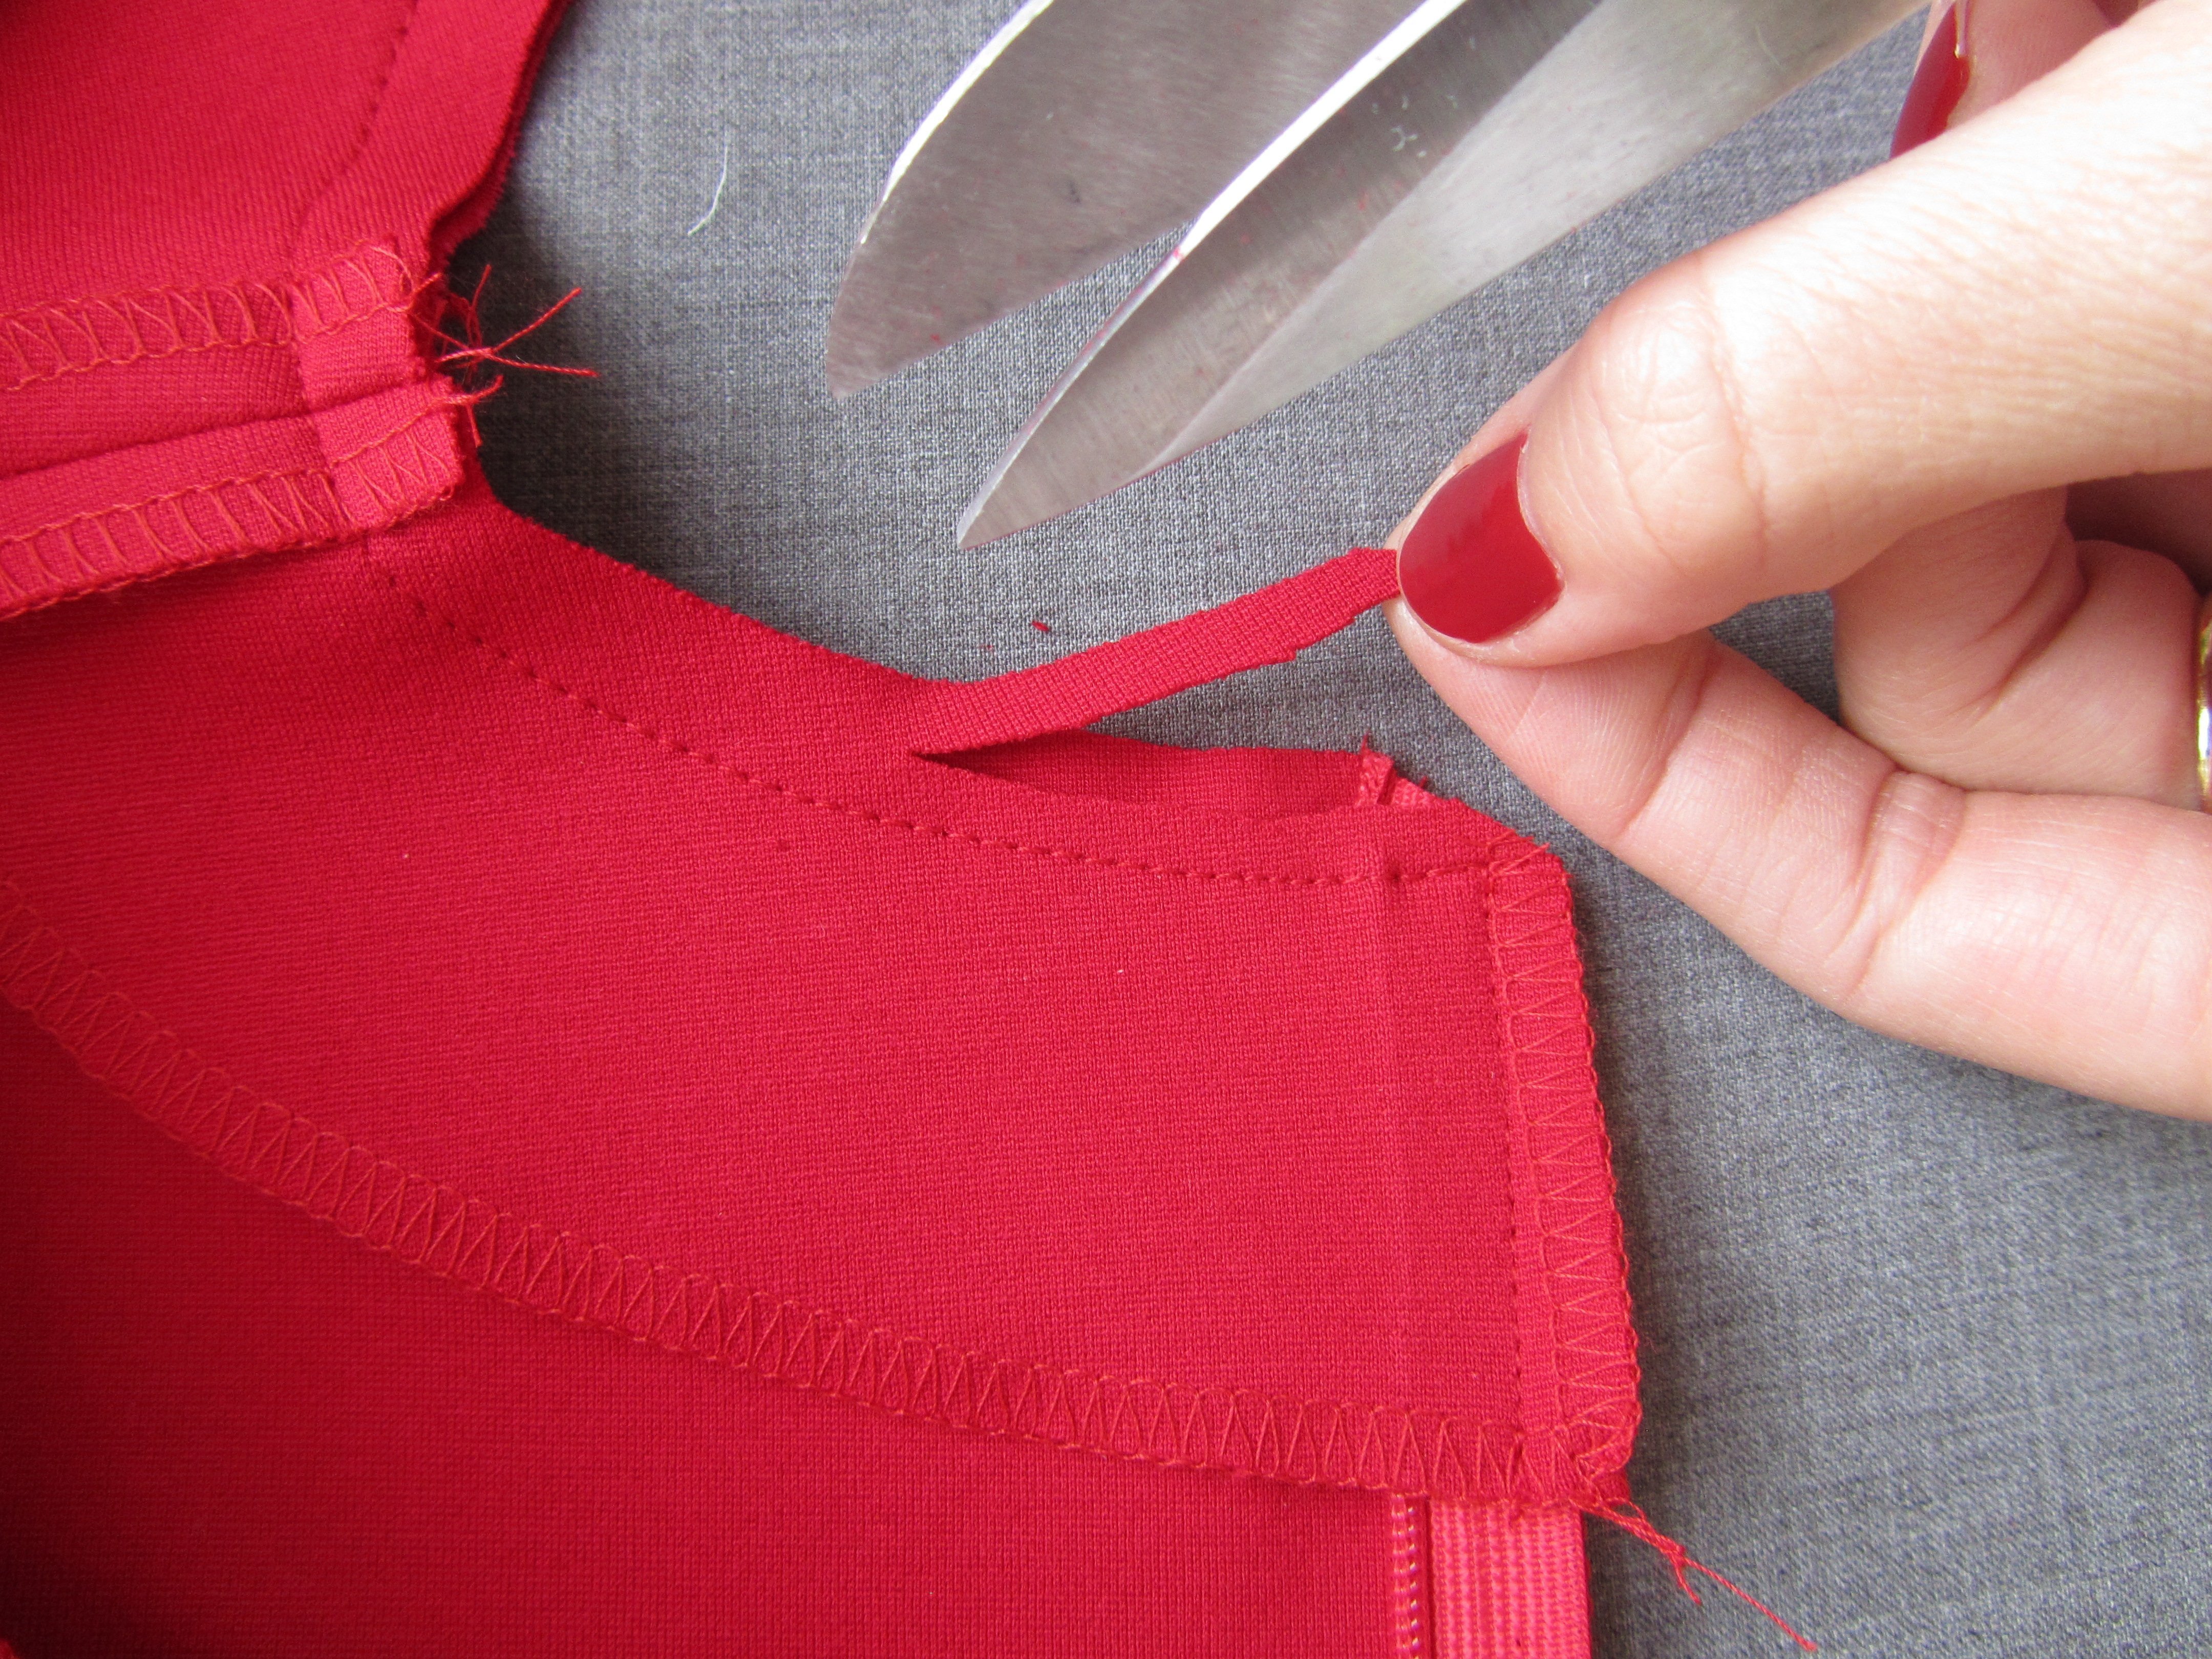
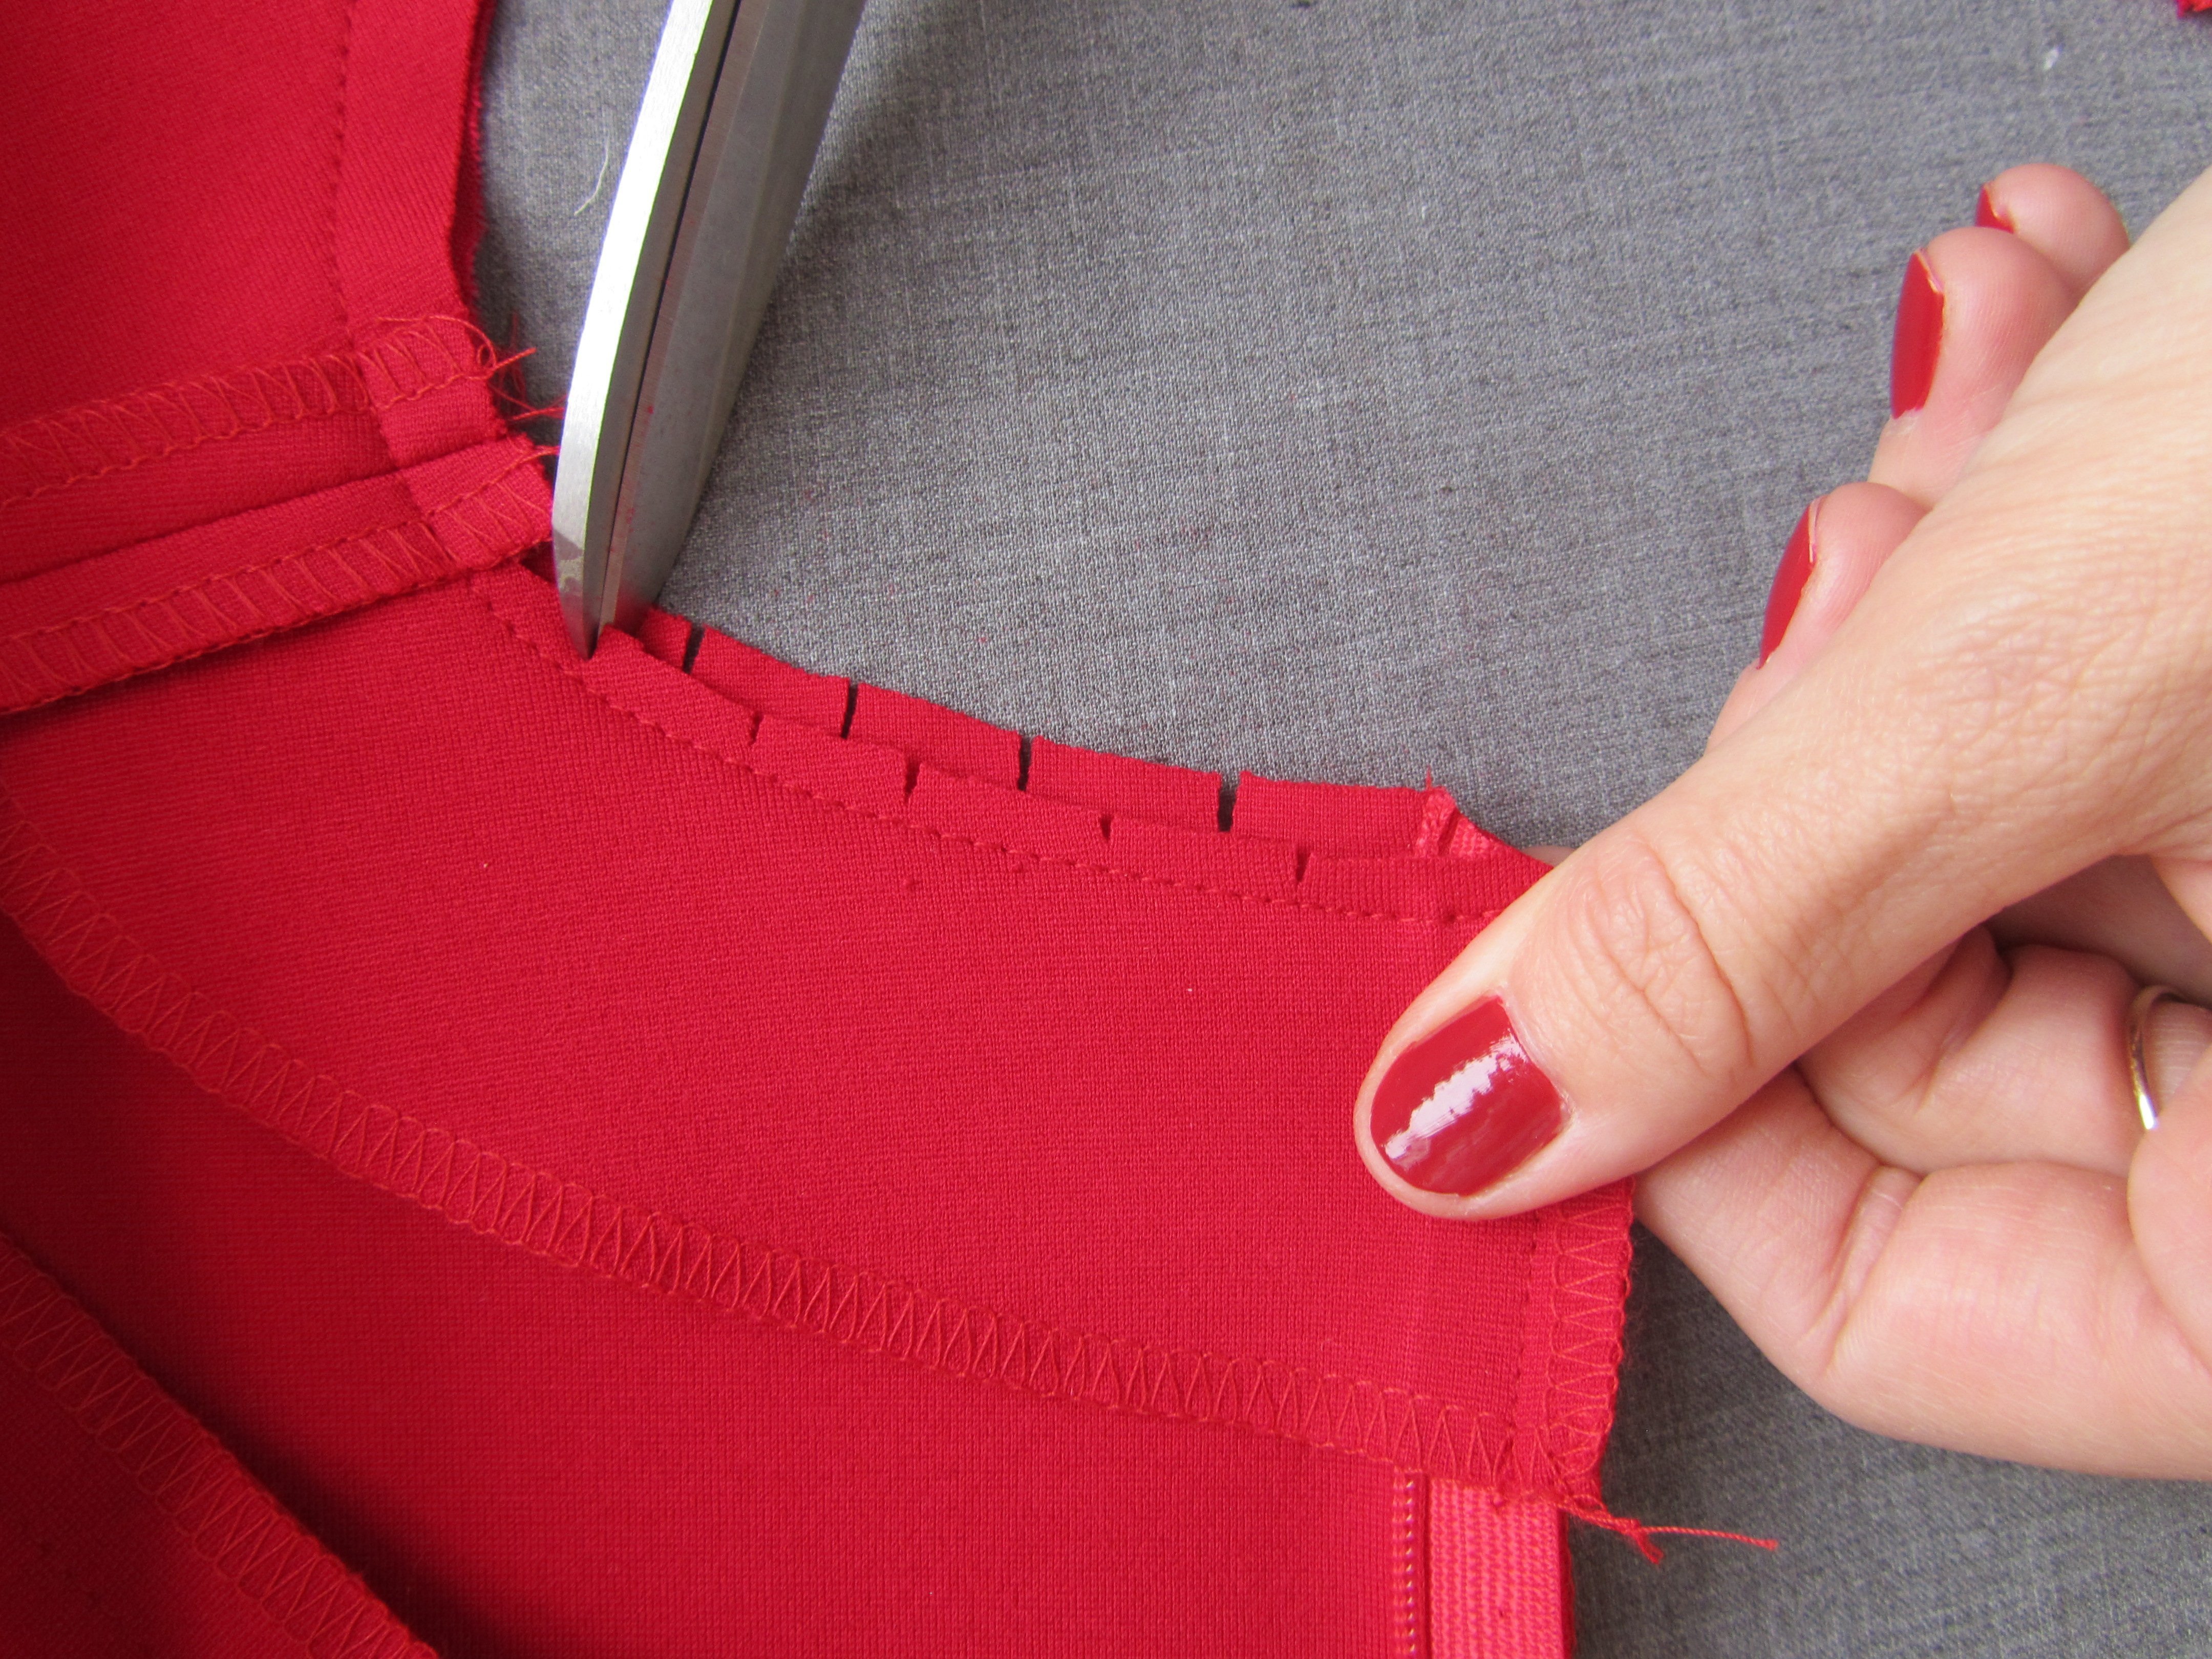
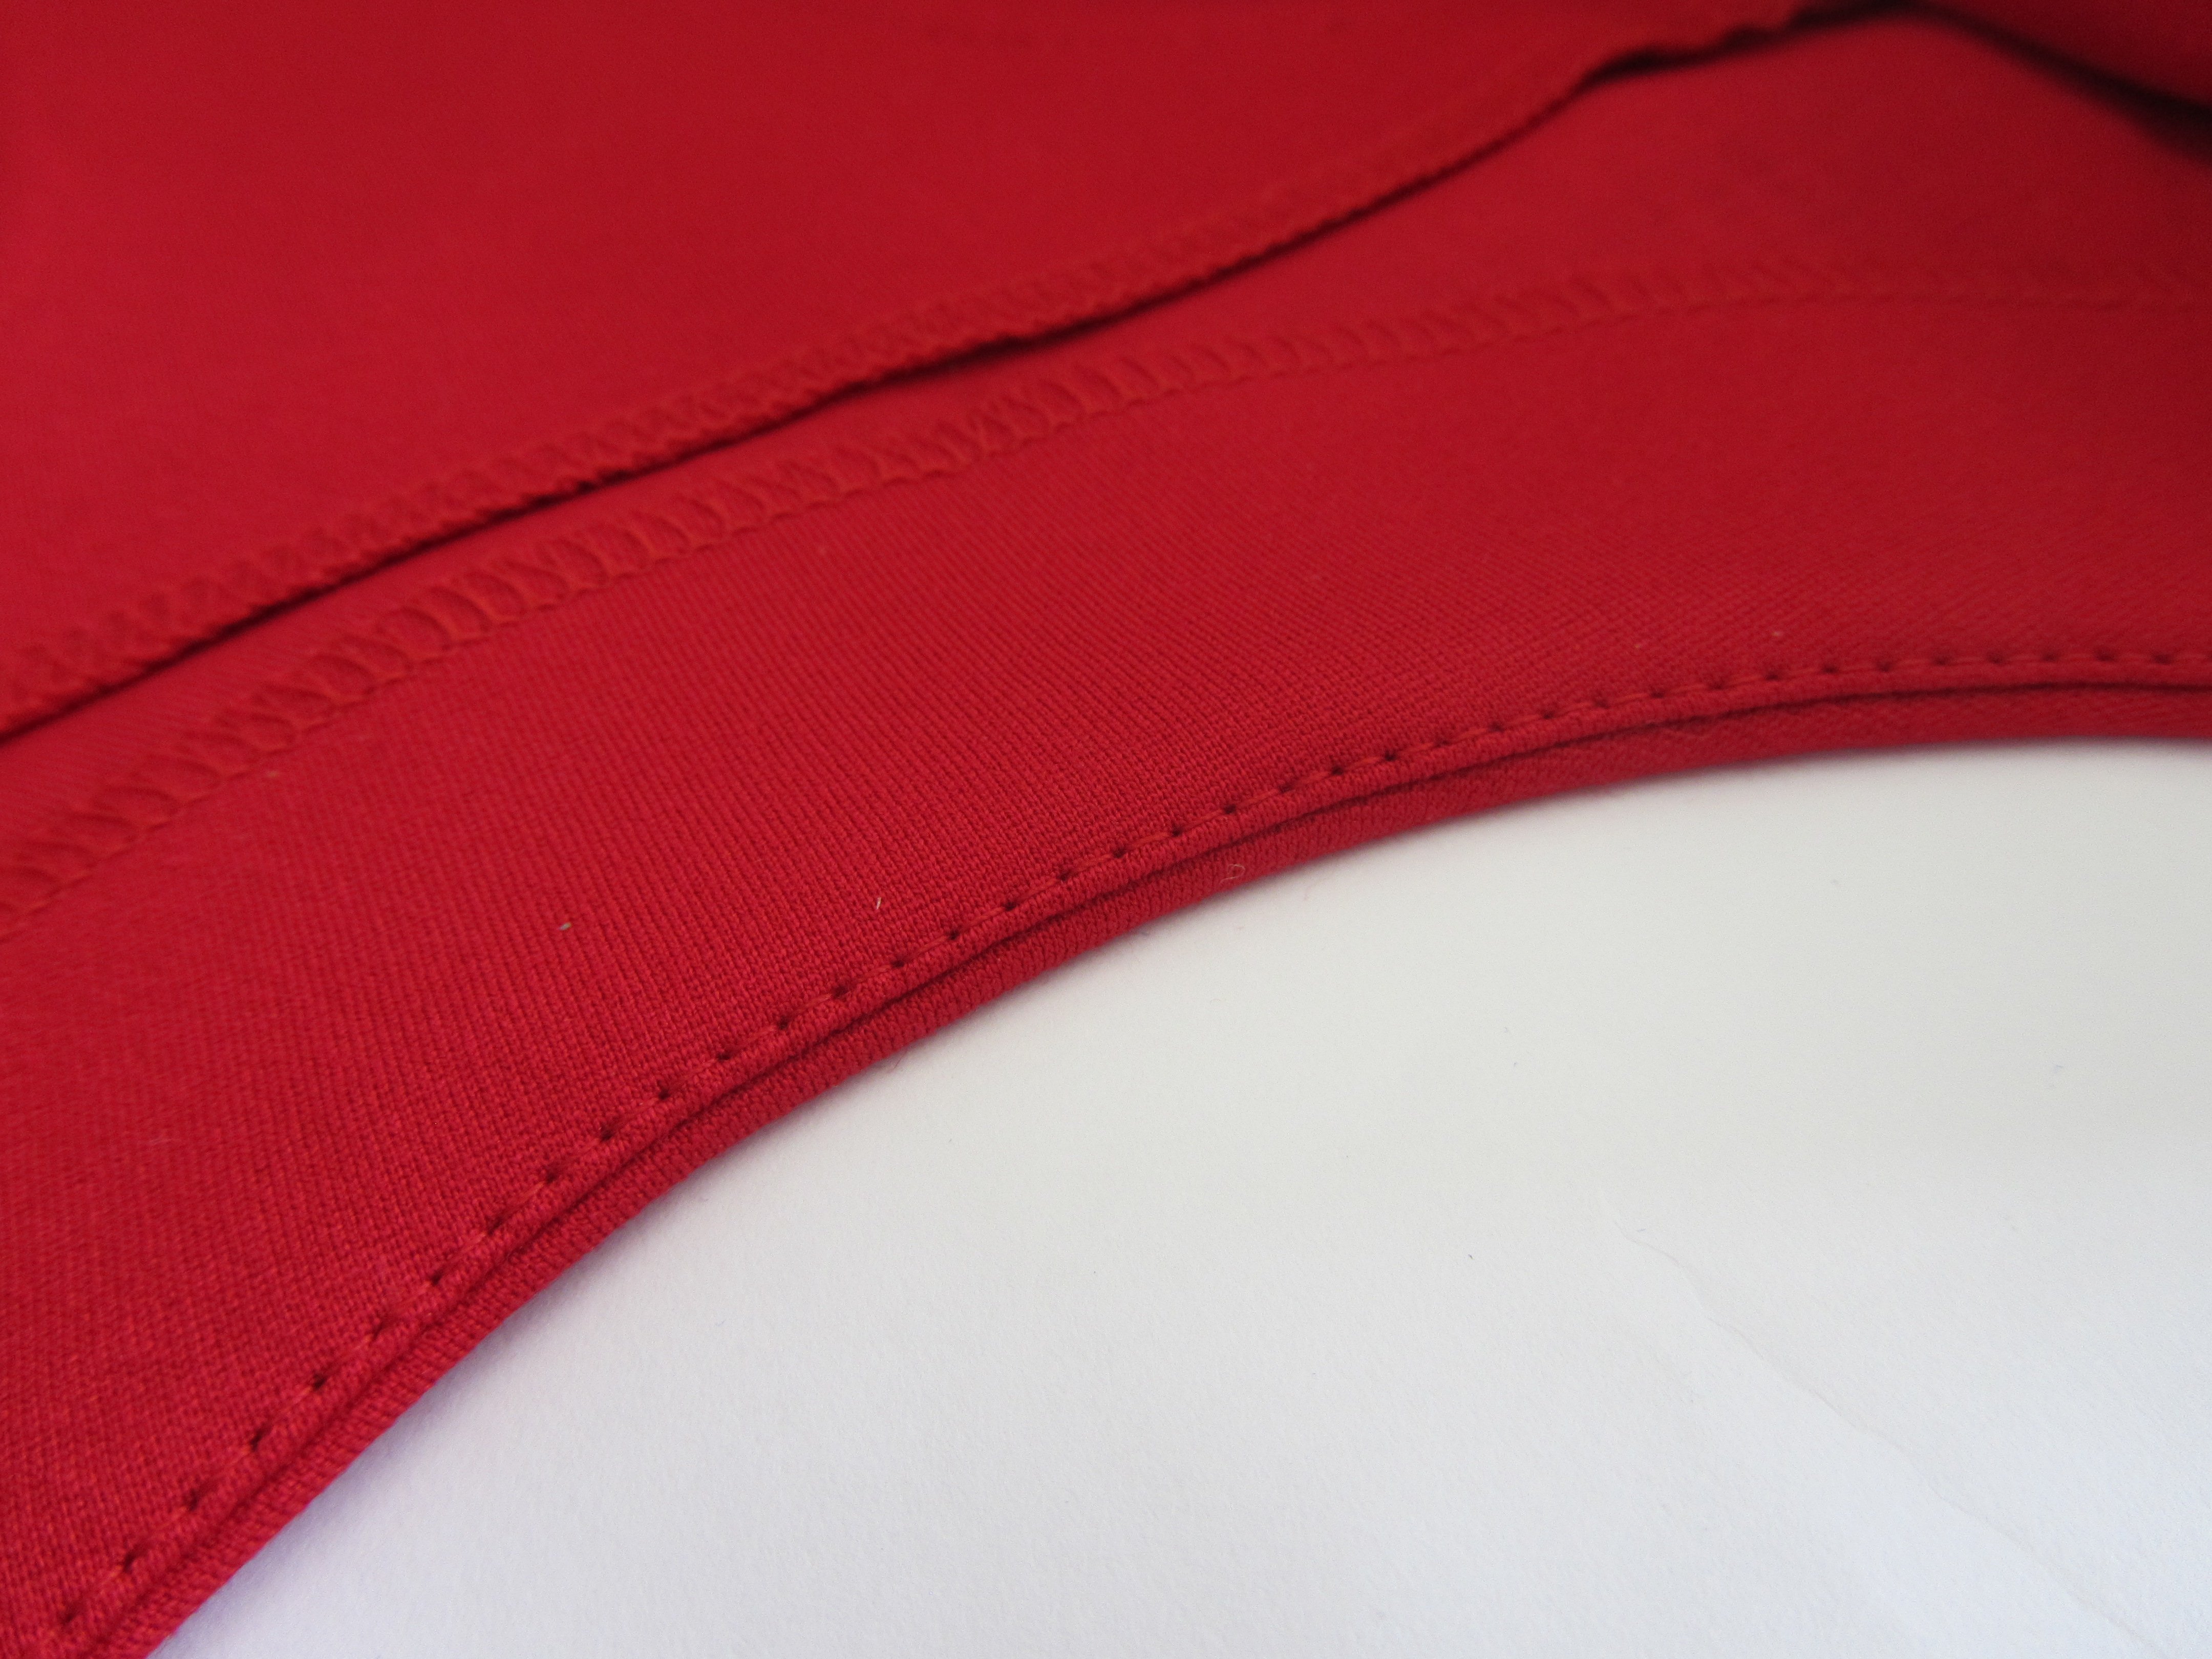
Place seam allowance into the facing and edgestitch the facing close to the edge as far as possible along the neckline using edgestitch foot S and straight stitch to the right.

Turn, iron the edges and attach the seam allowances of the shoulder seams of the dress and the facing to each other with a few stitches.
Close the side seams of the dress.
Sleeves: Sew up the darts on the sleeves and iron them downwards.
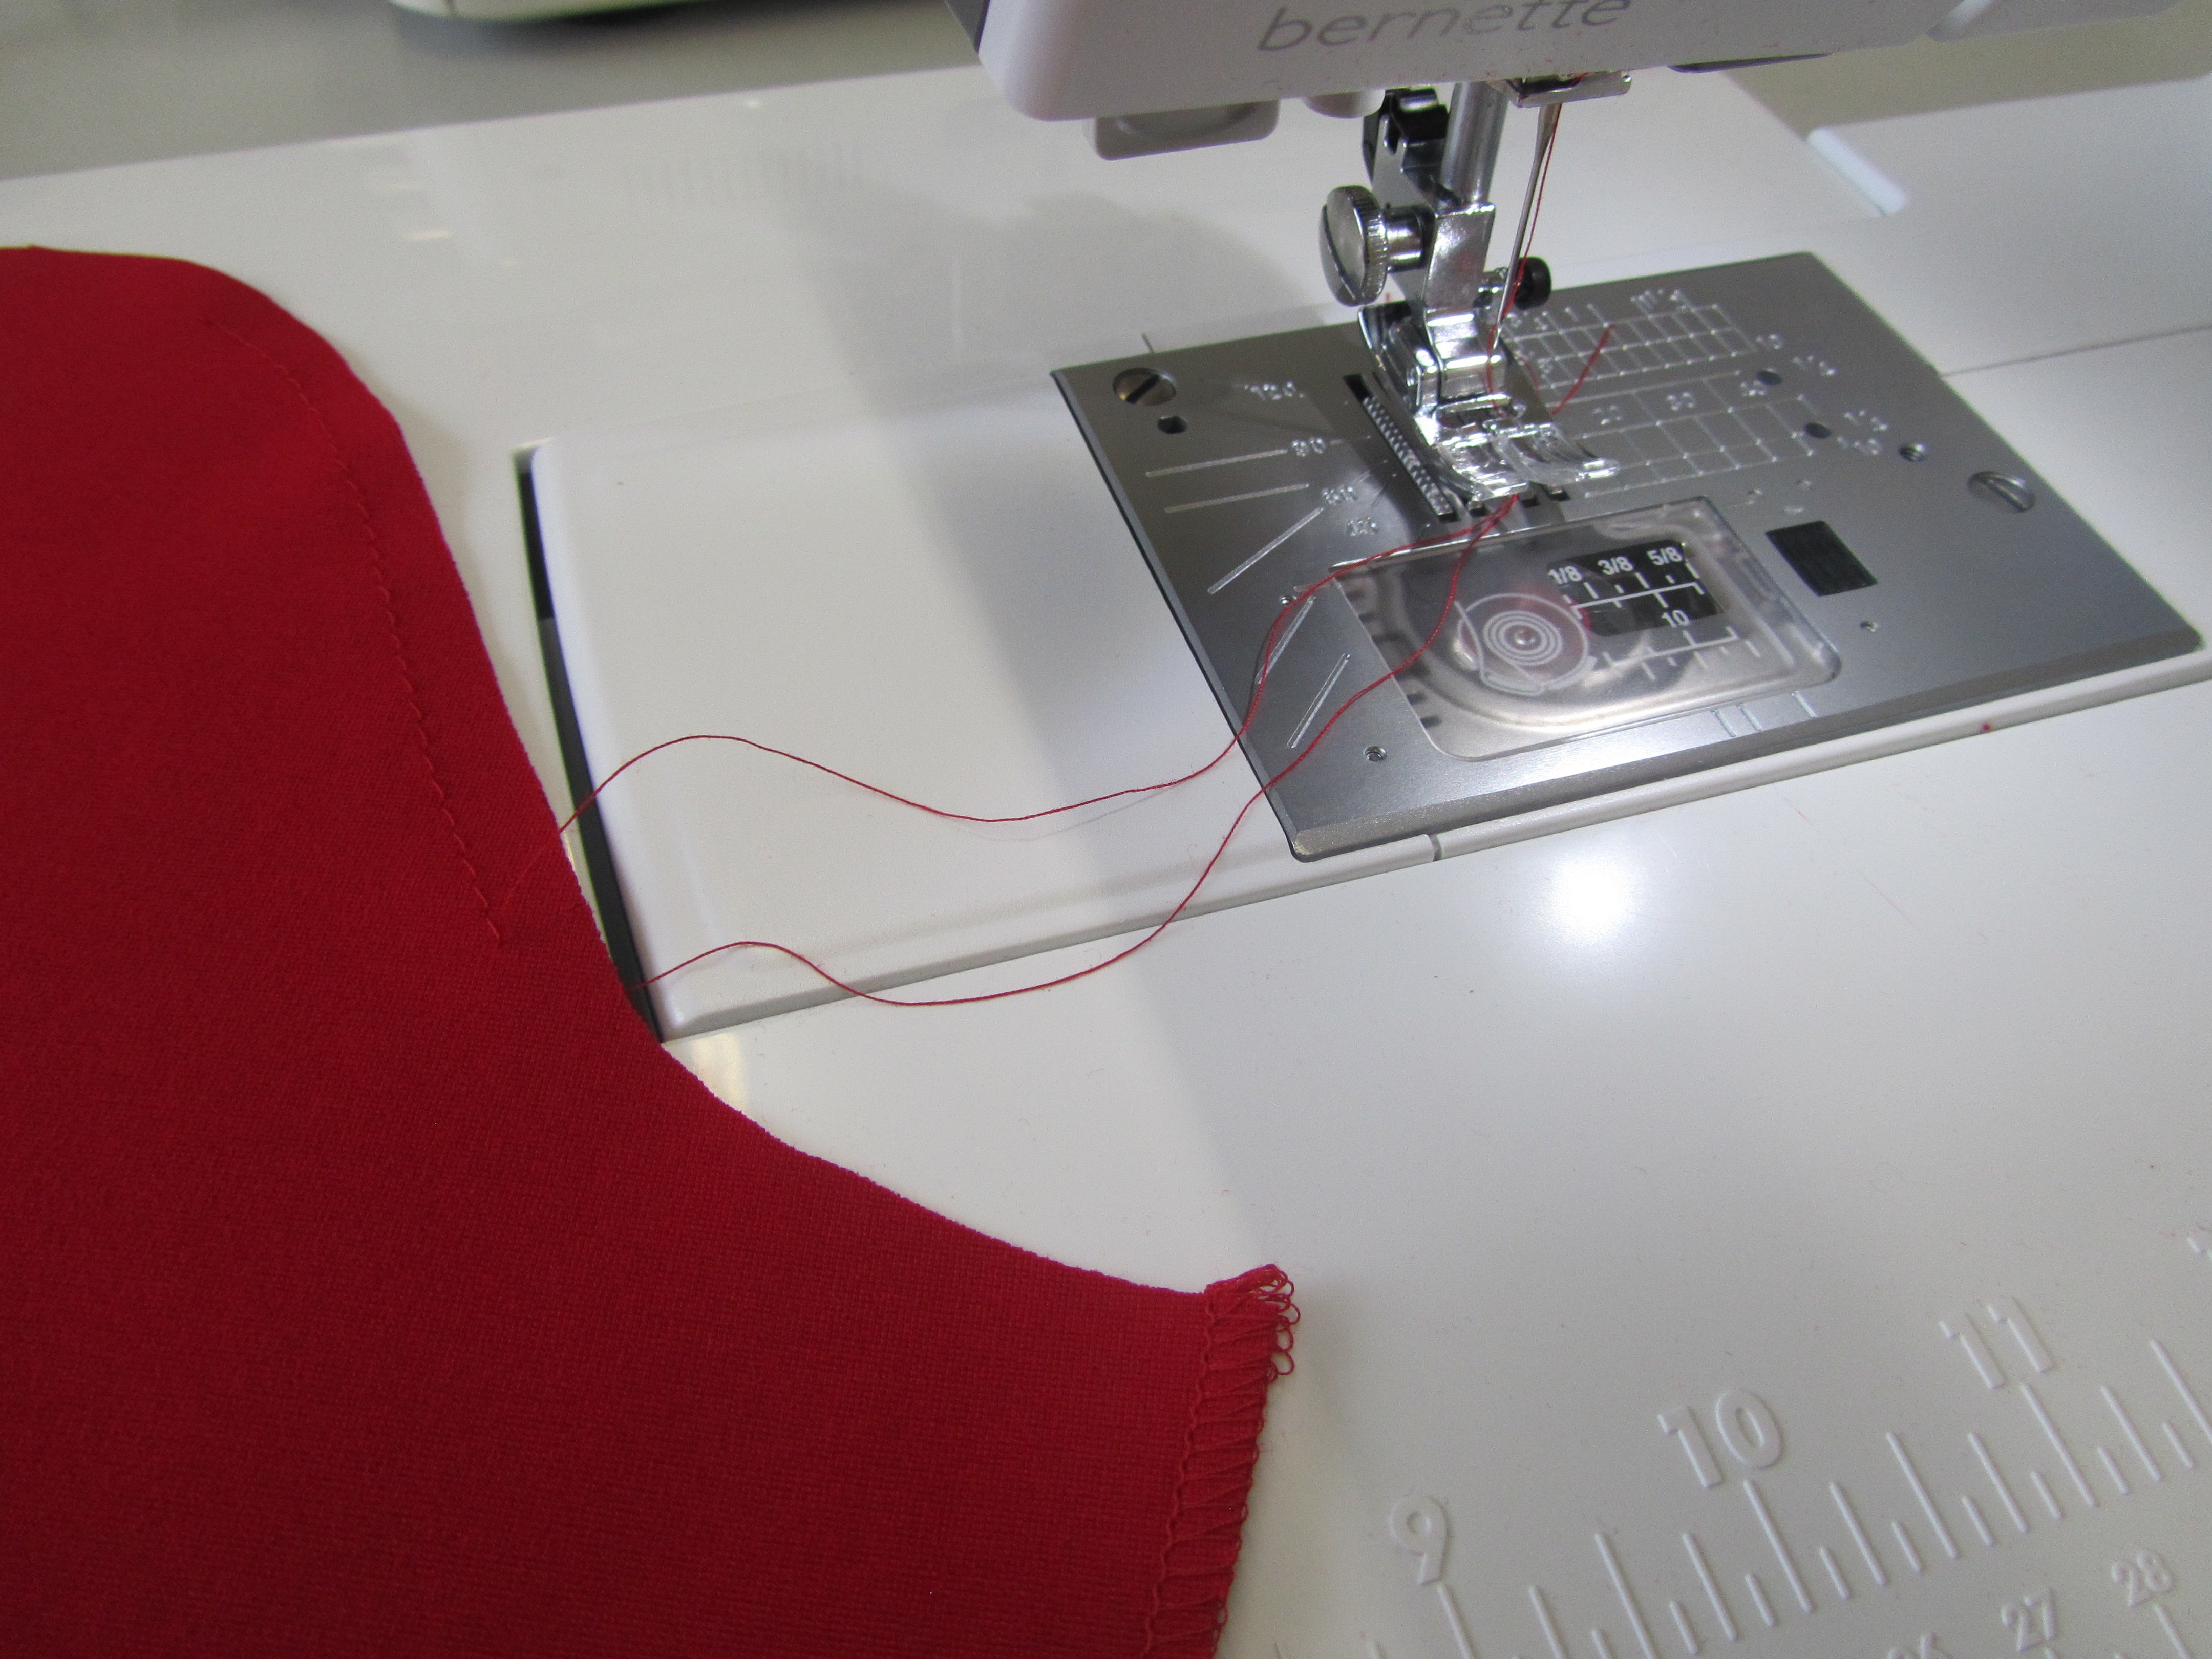
Neaten the sleeve seams. Increase the stitch length to 5, pull up the bobbin thread and, together with the needle thread, pull out about 10 cm. In the region of the sleeve head, sew a seam approx. 5 mm away from the edge and, at the end, leave the thread about 10 cm long again.
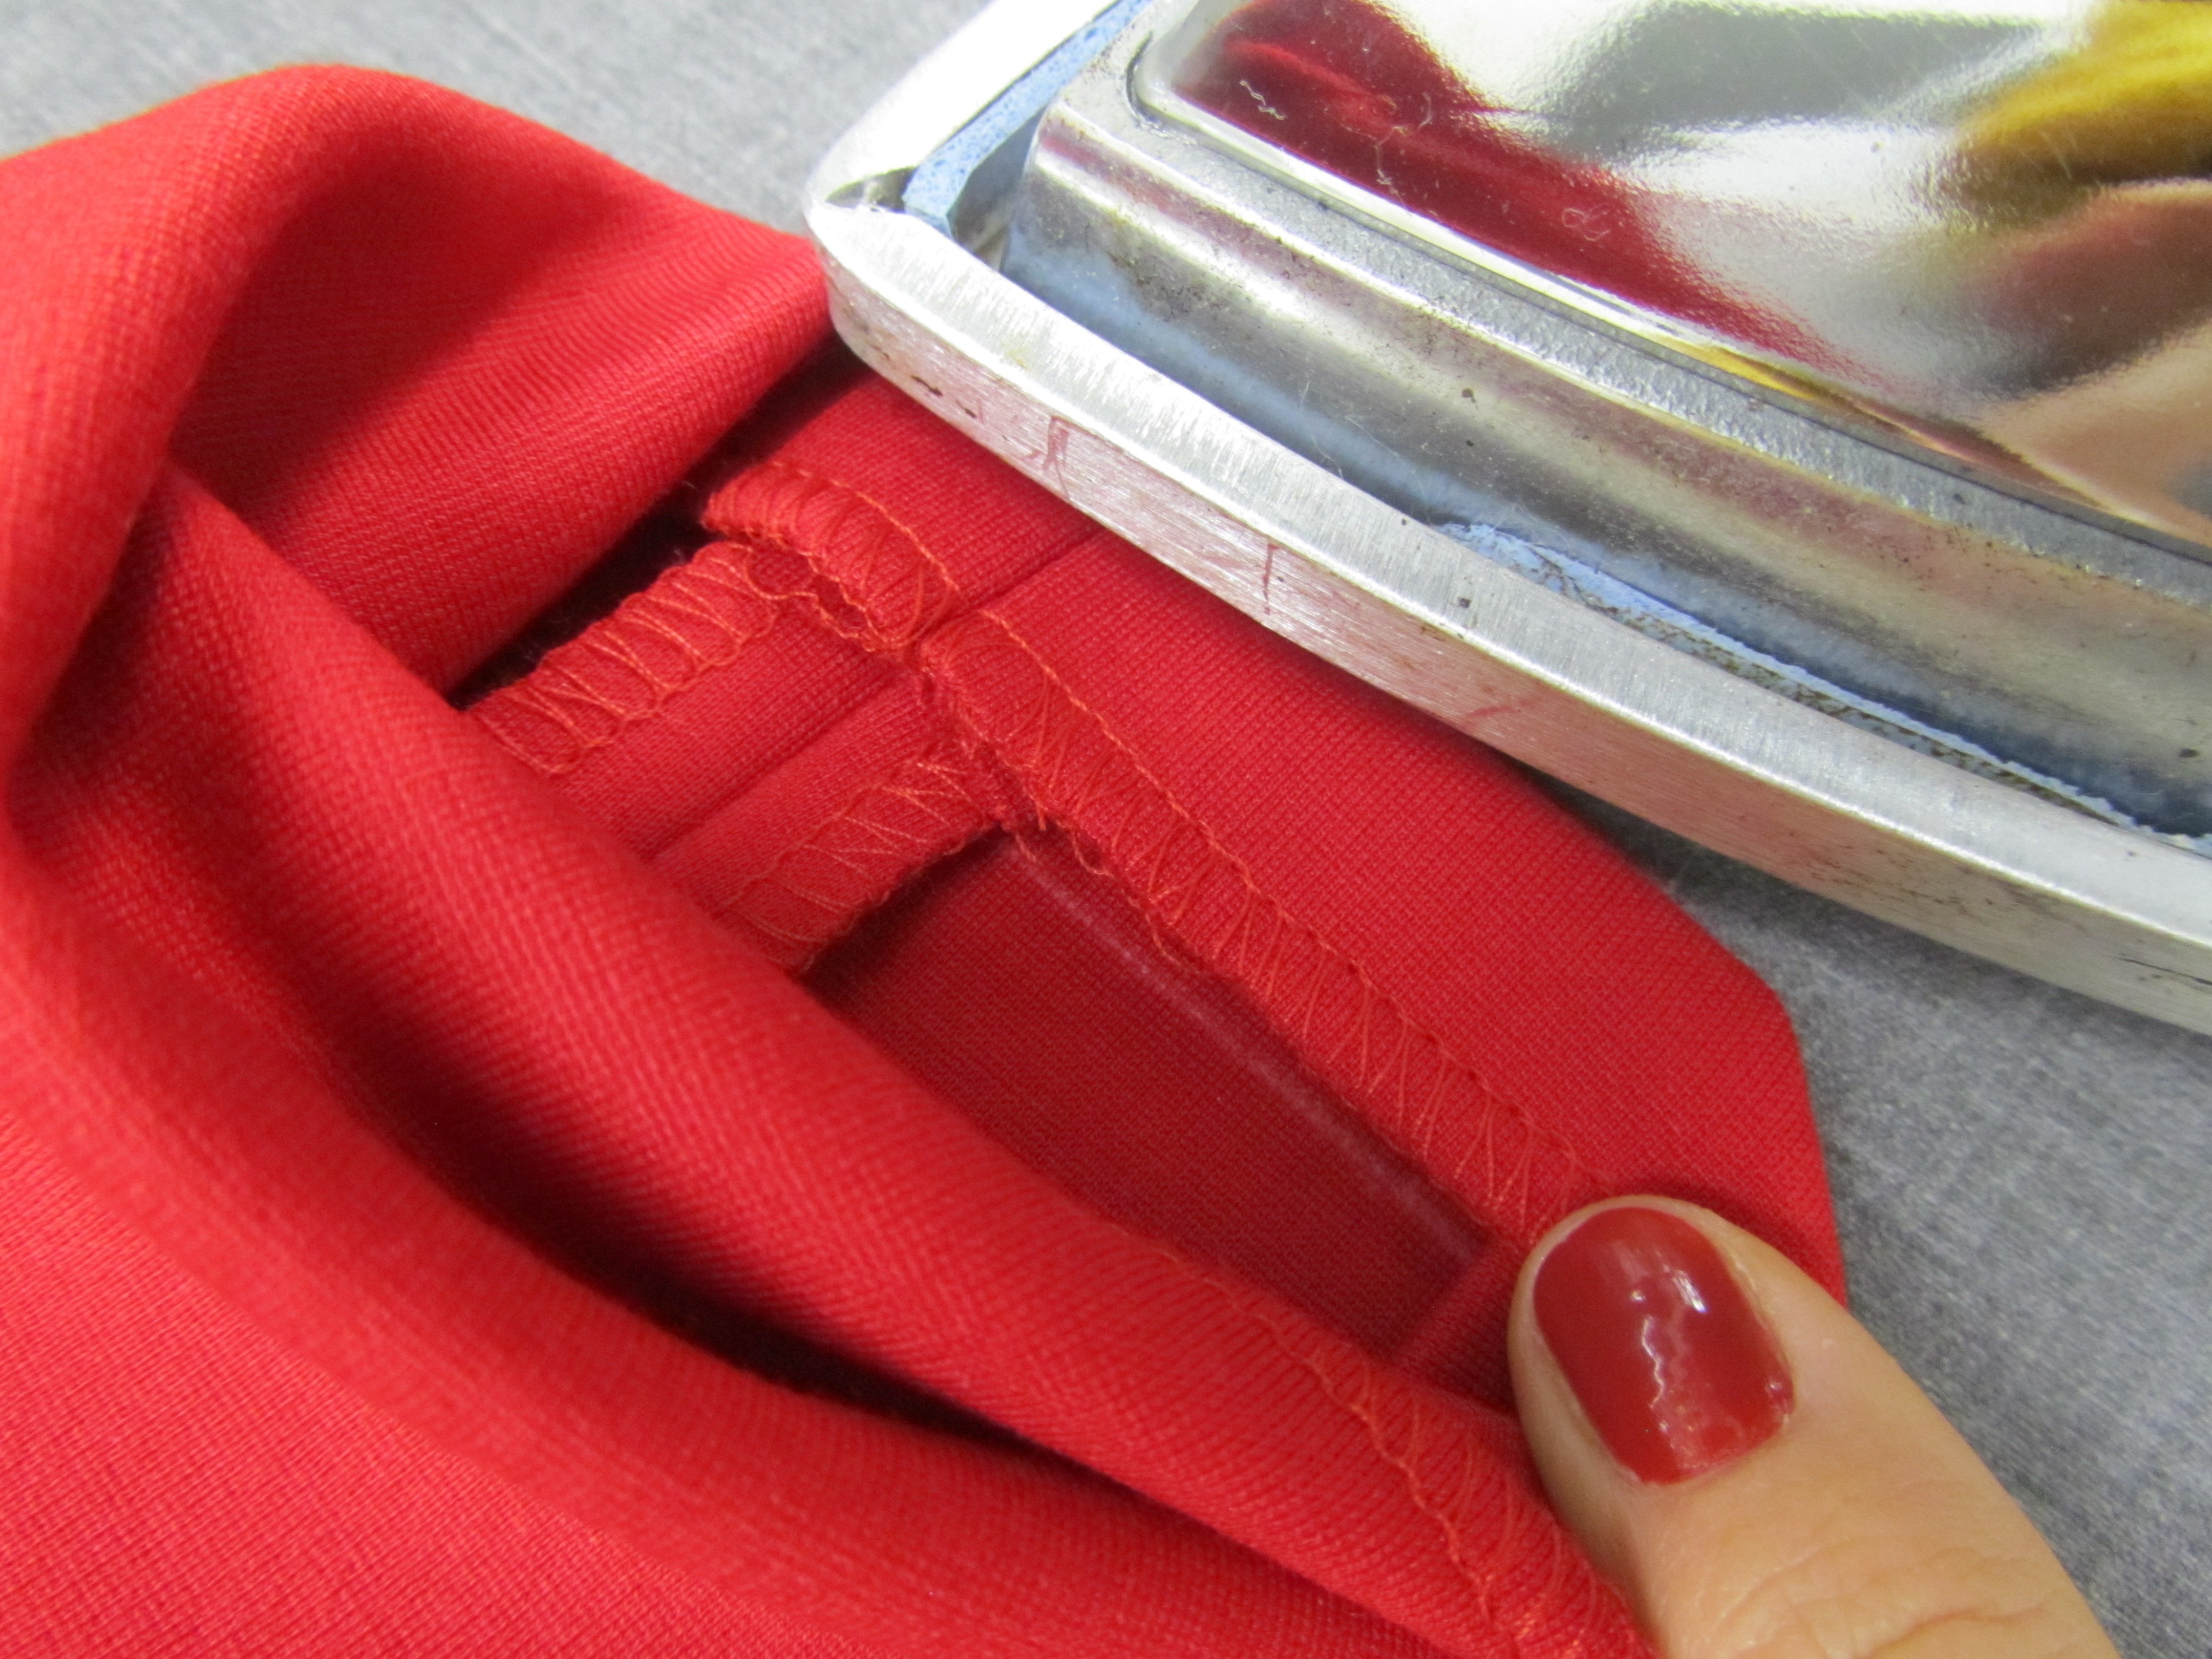
At the sleeve hems, draw a line 4 cm from the edge on the wrong side of the fabric. Close the sleeve seams with the right sides together and iron the seams flat. Place the bottom edge of the fabric on the marked line and iron the folded hem.
Gather the sleeve head slightly by pulling on the bobbin thread in the sleeve head seam.
Pin the sleeve into the armhole, making sure that the notches on the armhole and the sleeve head line up, and sew in the sleeve.
Neaten the armhole.
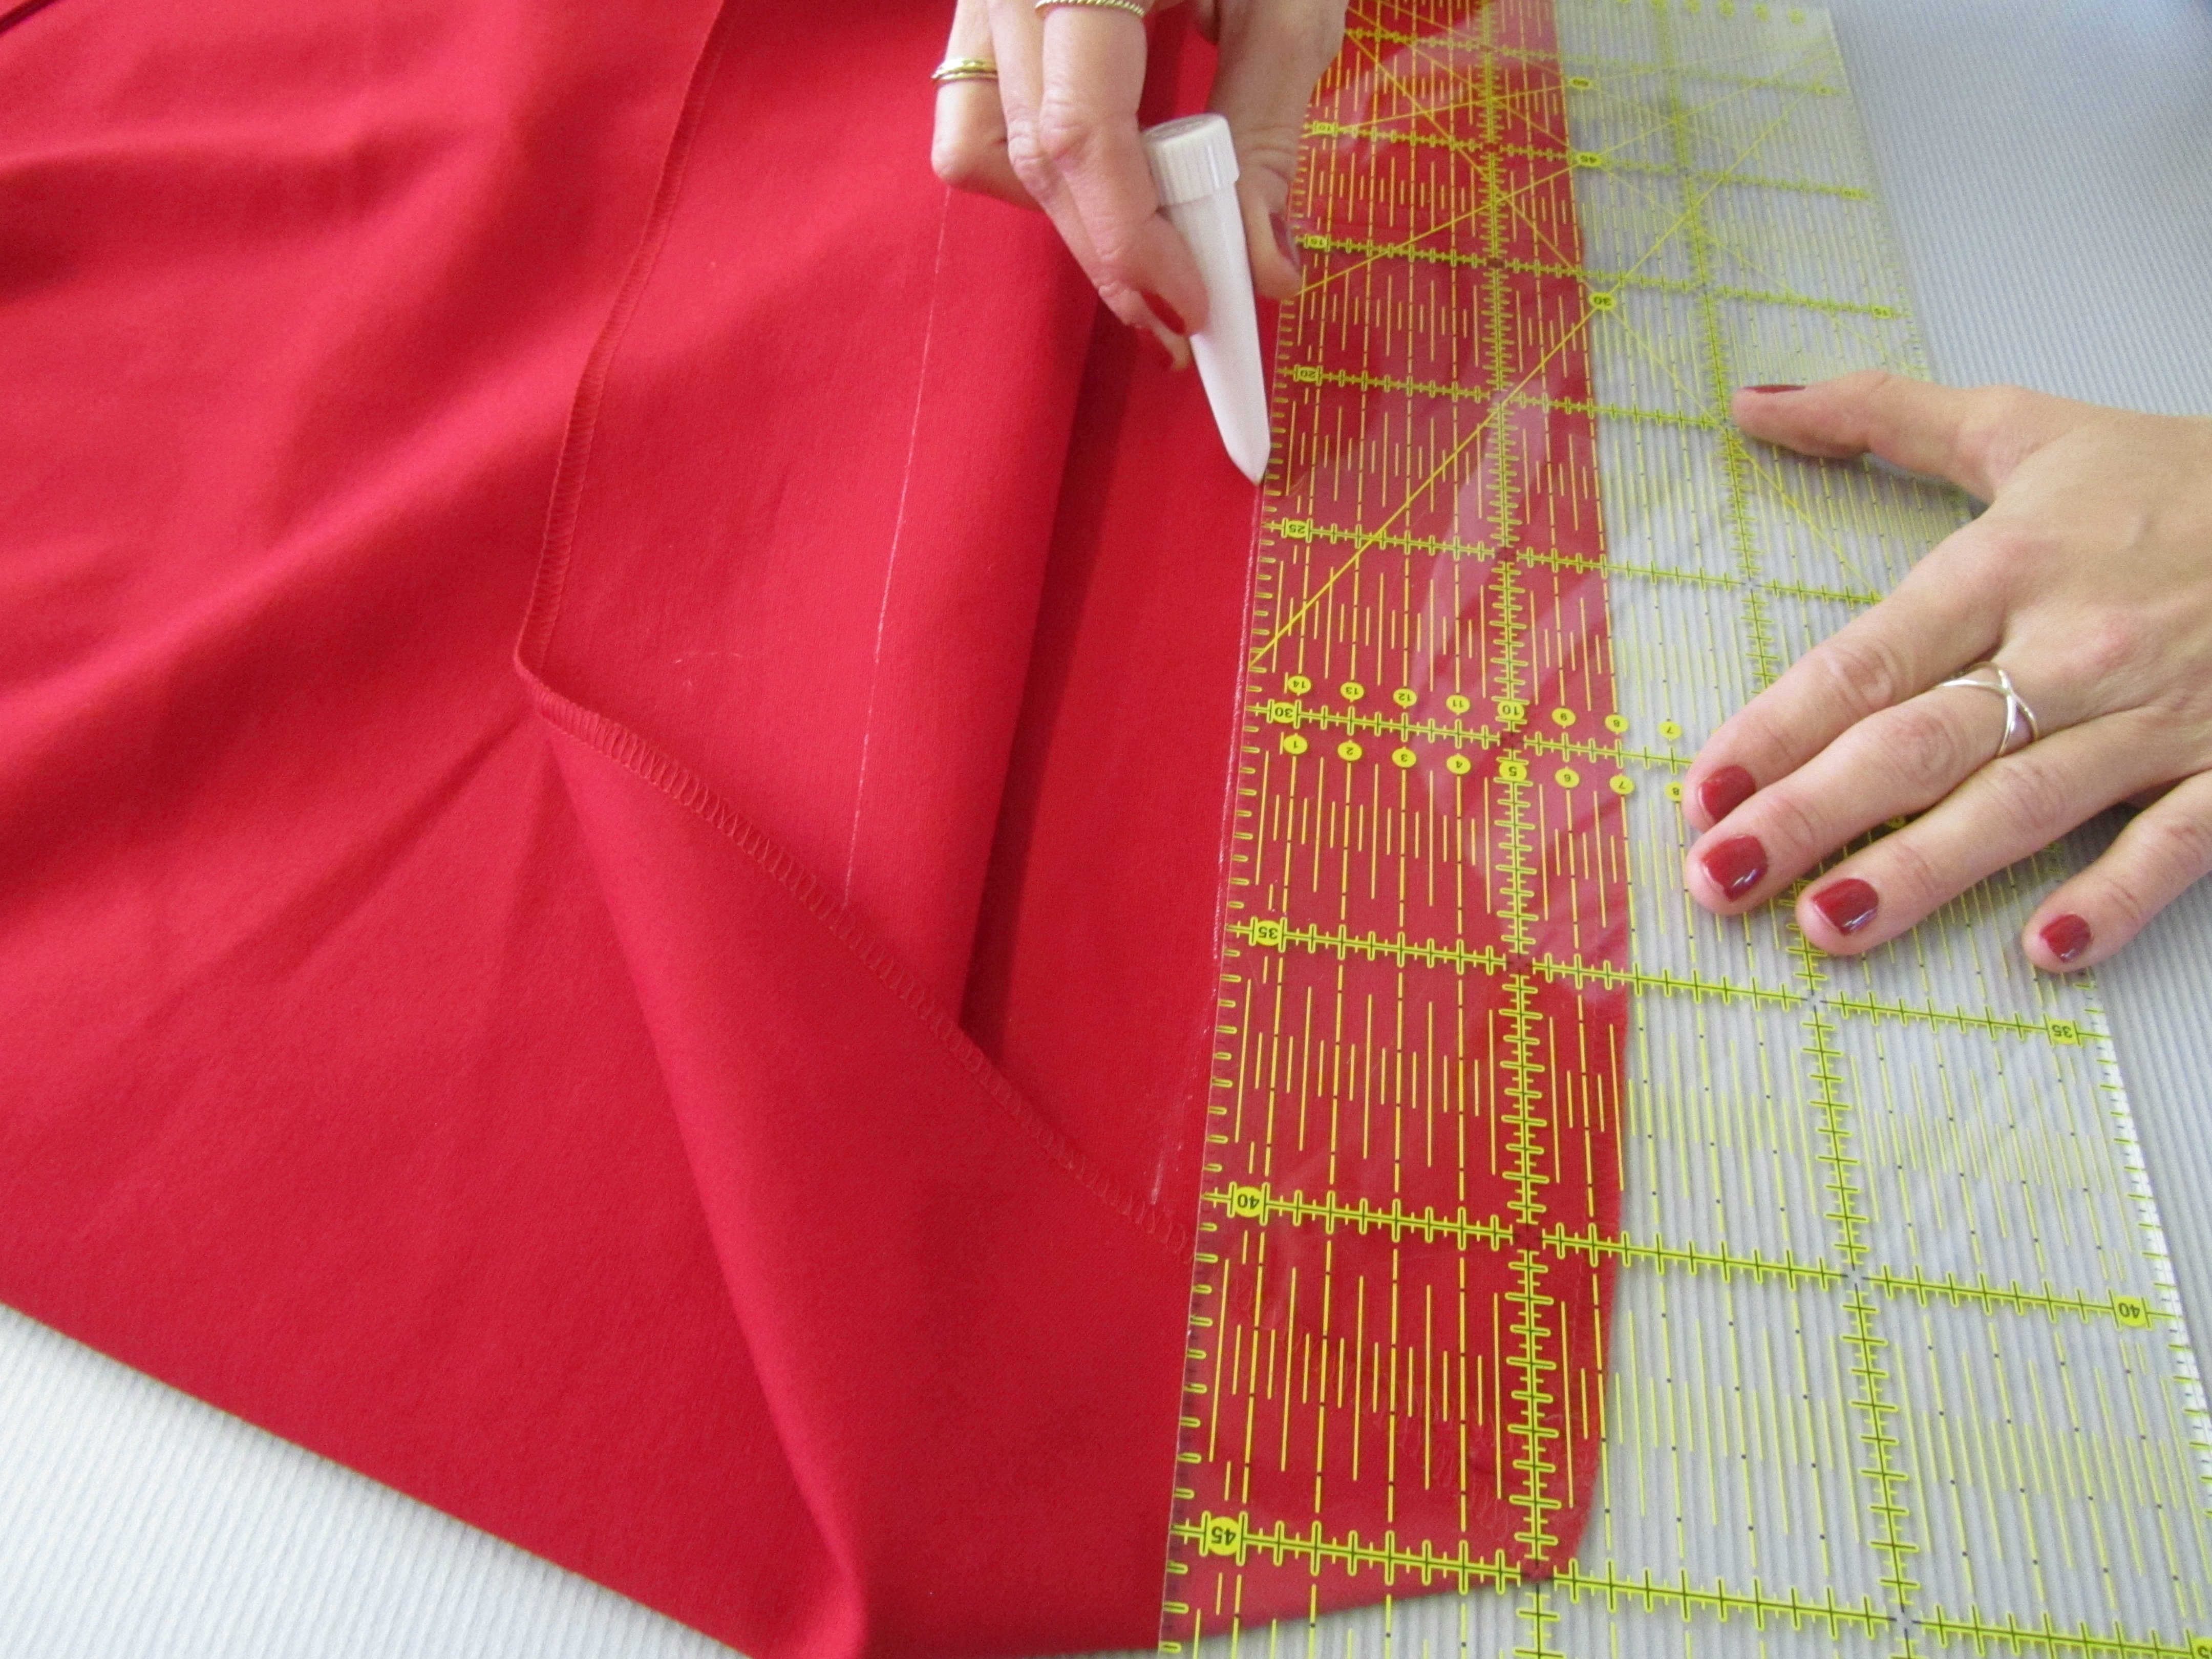
Hems: At the hem of the dress, on the wrong side, draw a line 7 cm from the edge (with a seam allowance of 3.5 cm), place the edge of the fabric on the marked line and iron the edge of the hem.
Attach the blindstitch foot and select the appropriate stitch, adjusting the settings to suit the fabric (see manual). Blind hem the dress and the sleeves.
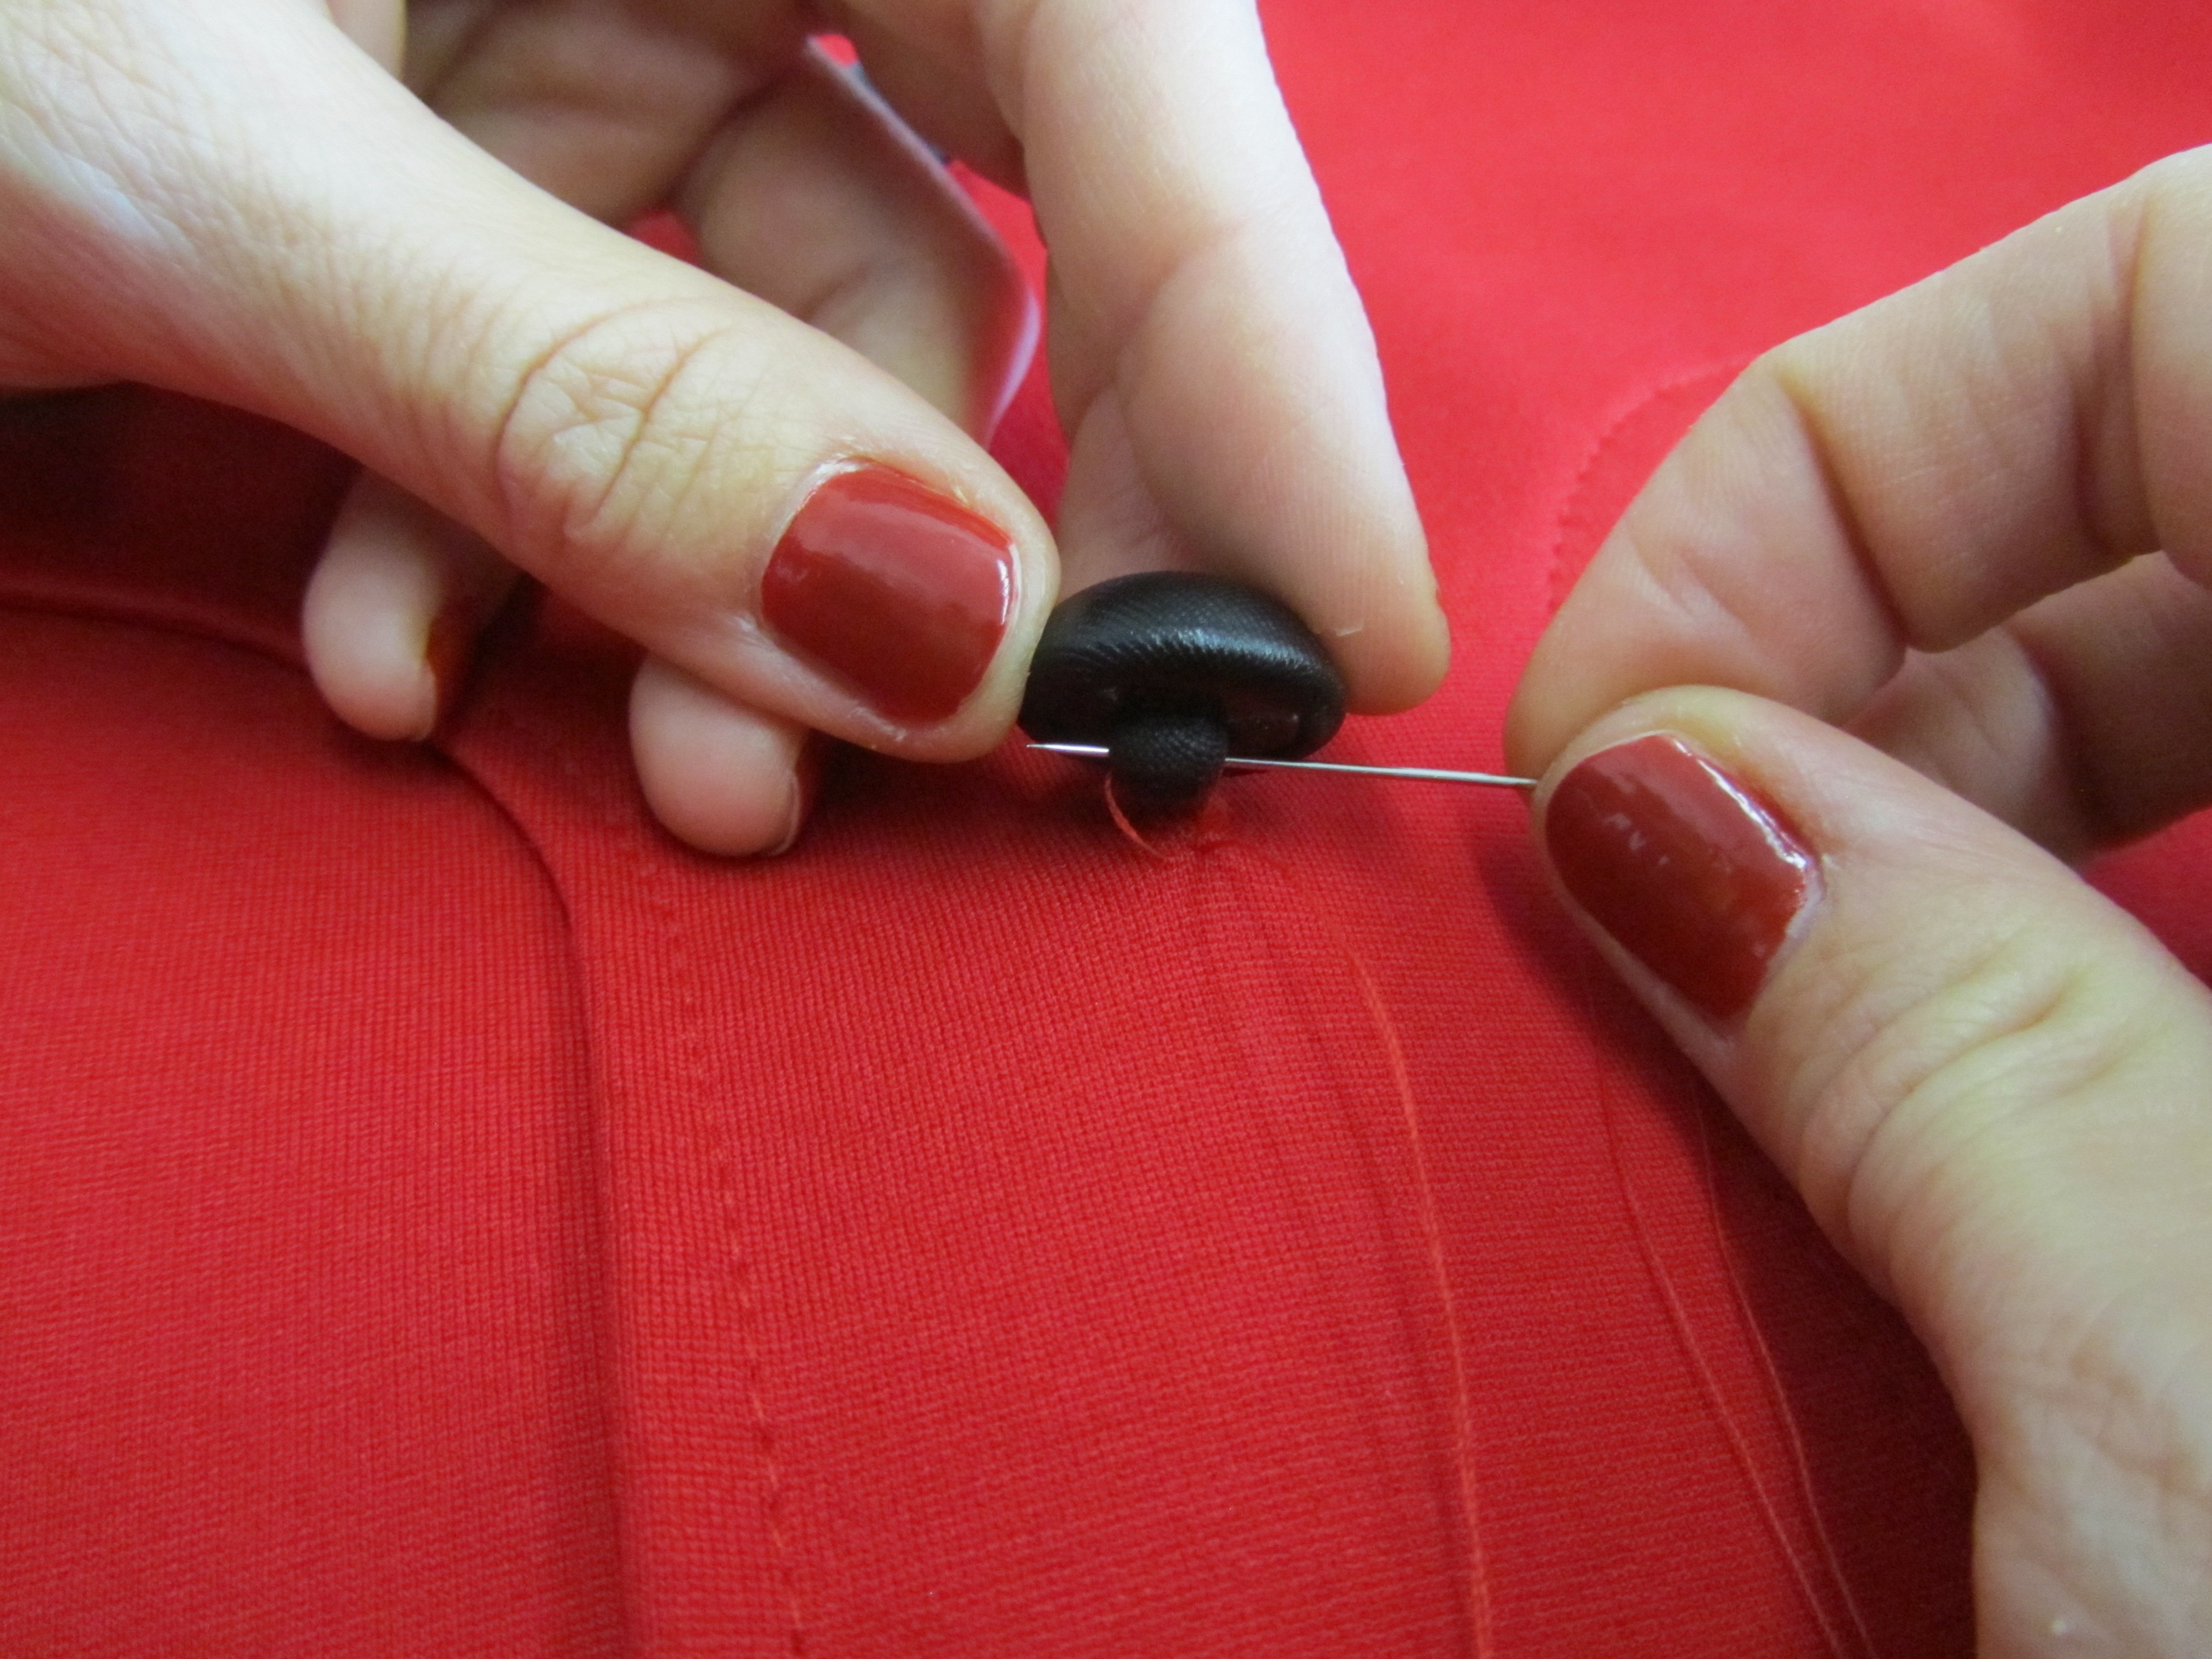
Sew on the buttons: Transfer the button positions as marked on the pattern and sew on the buttons by hand.

Done!
Need help? You can also watch our tutorial for the red dress on YouTube:
You want more information about the new bernette sewing machines?
Just visit bernette.com to get more details.
Have fun in sewing this nice retro-style red dress!
Kind regards
Caro


0 Responses