 BERNINA Corporate Blog -
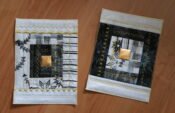
My eldest sister likes to make cross sttich projects. But to have them framed each time is impossible. She made a quilt out of three of these projects, and used a beautiful borderprint to ‘frame’ them with fabrics to make a bedrunner.
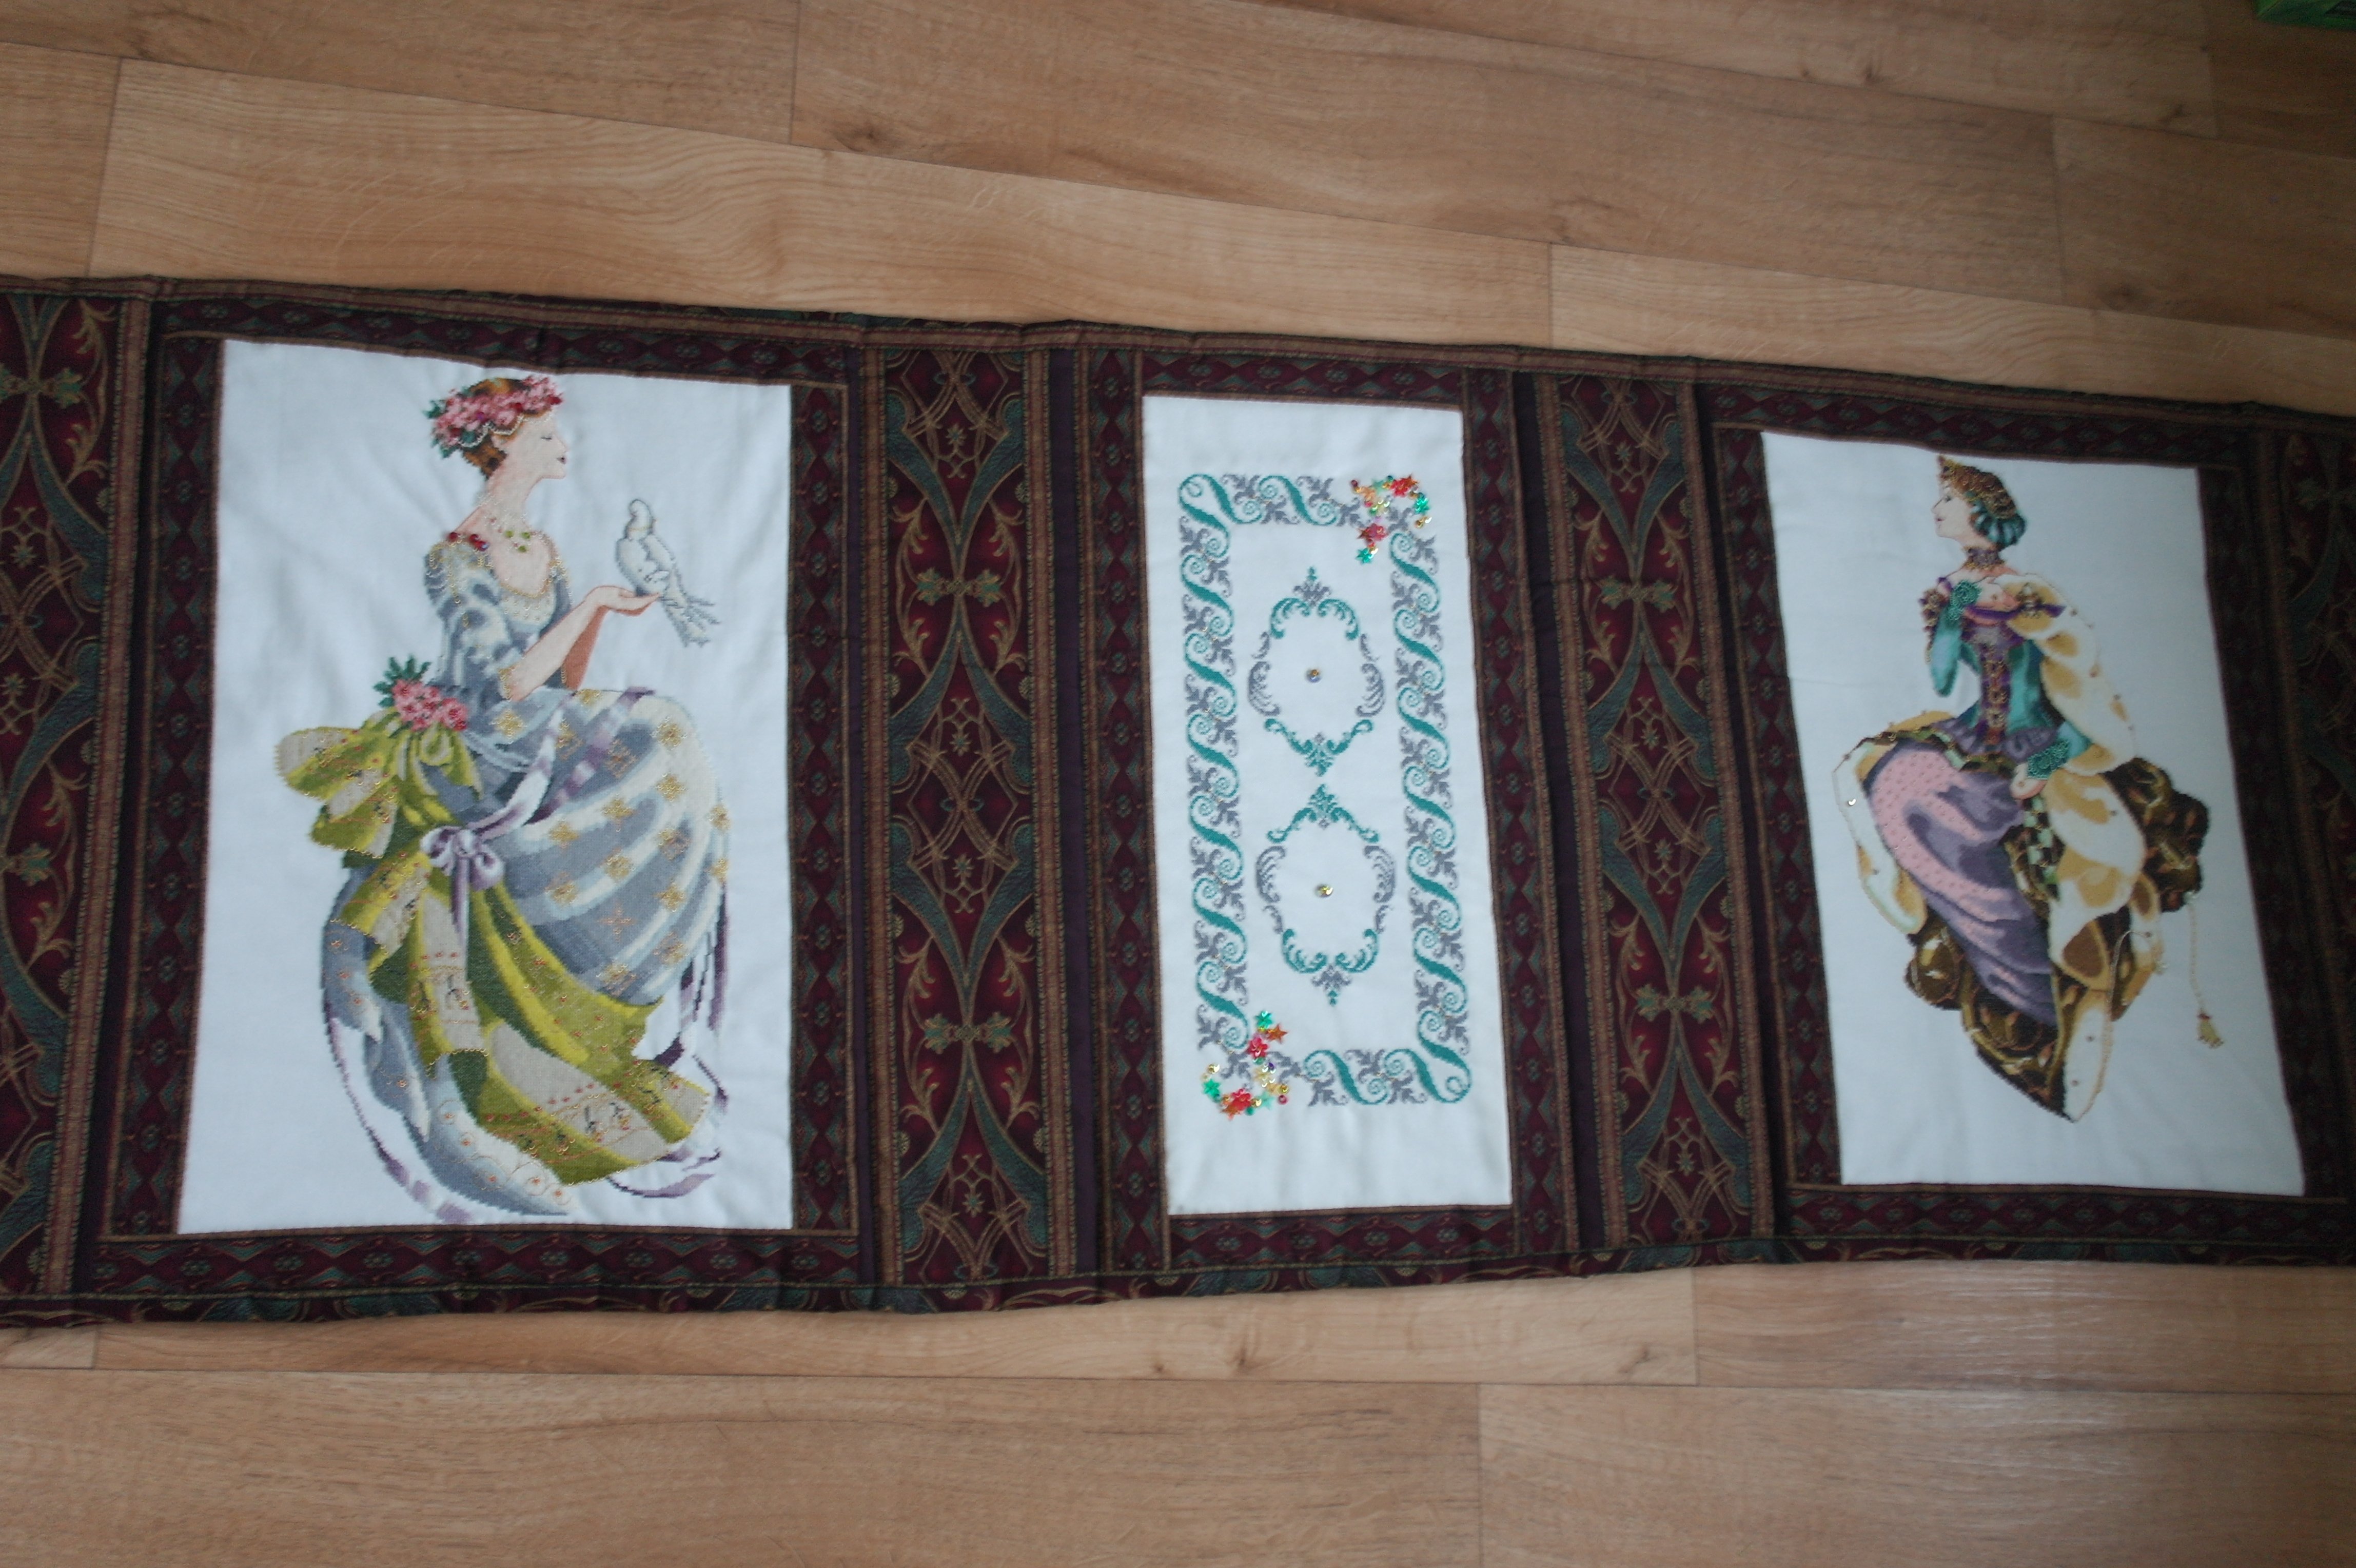
It looks great, but she thought it was a bit dull. The cross stitch is embellished with beads, but she didn’t want to do the same with the fabrics.
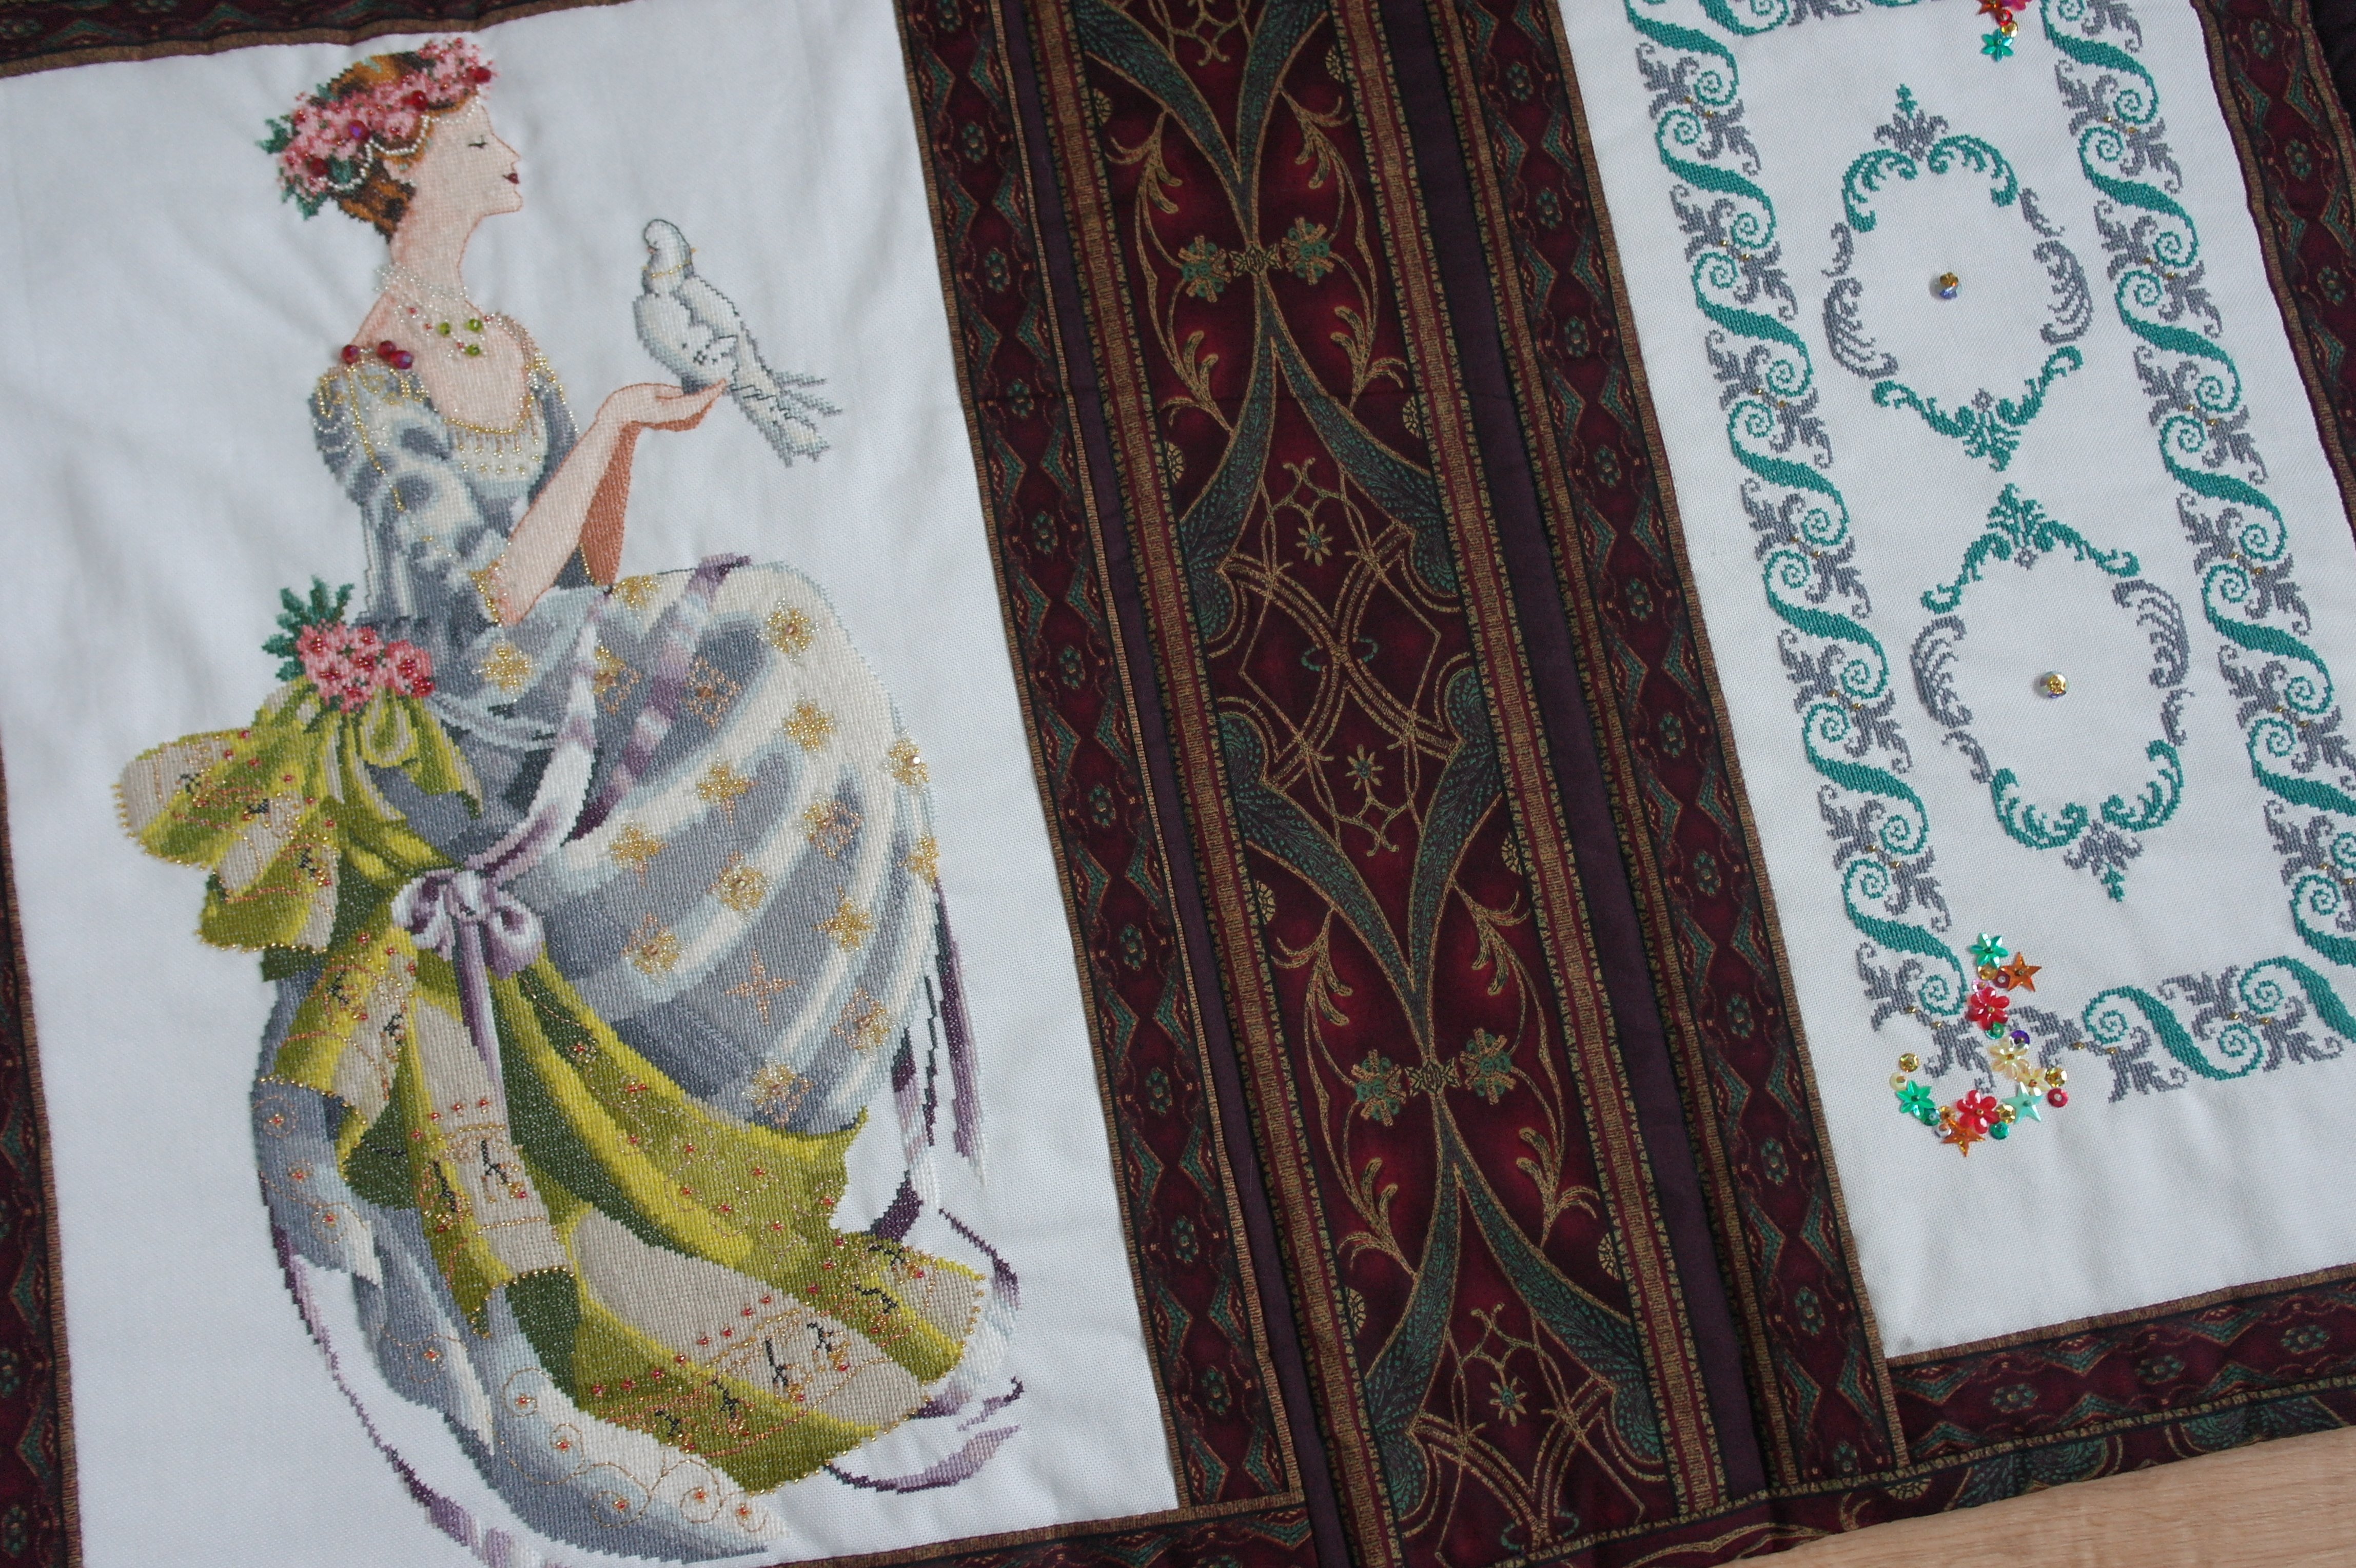
This is her bedrunner, up close.
I had a wonderful idea, to work with the Freemotion chouching foot #43 on my BERNINA 770QE., to embellish the fabrics.

I’ve used Lizzy/Scheepjeswol: this is a thin, cord like metallic yarn, used for knitting and crochet. I have used it for couching – because that is what you will do with the Freemotion couching foot #43. The yarn is available in 11 colors; I’ve used the gold (number 03). The yarn is actually a bit thin for the opening of the couching foot: using thicker cord (1 1/2 to 2 mm) is easier, because the straight stitch that will be made in the center of the cord catches thicker cord better than this slightly open yarn. But because I have worked slowly, it came out fine.
For the top and bobbin I’ve used DecoBob/Wonderfil in a matching color. The straight stitch will blend in if you use a matching color. You can also use a monofil, transparent thread… or even a contrasting color, for dramatic effect.
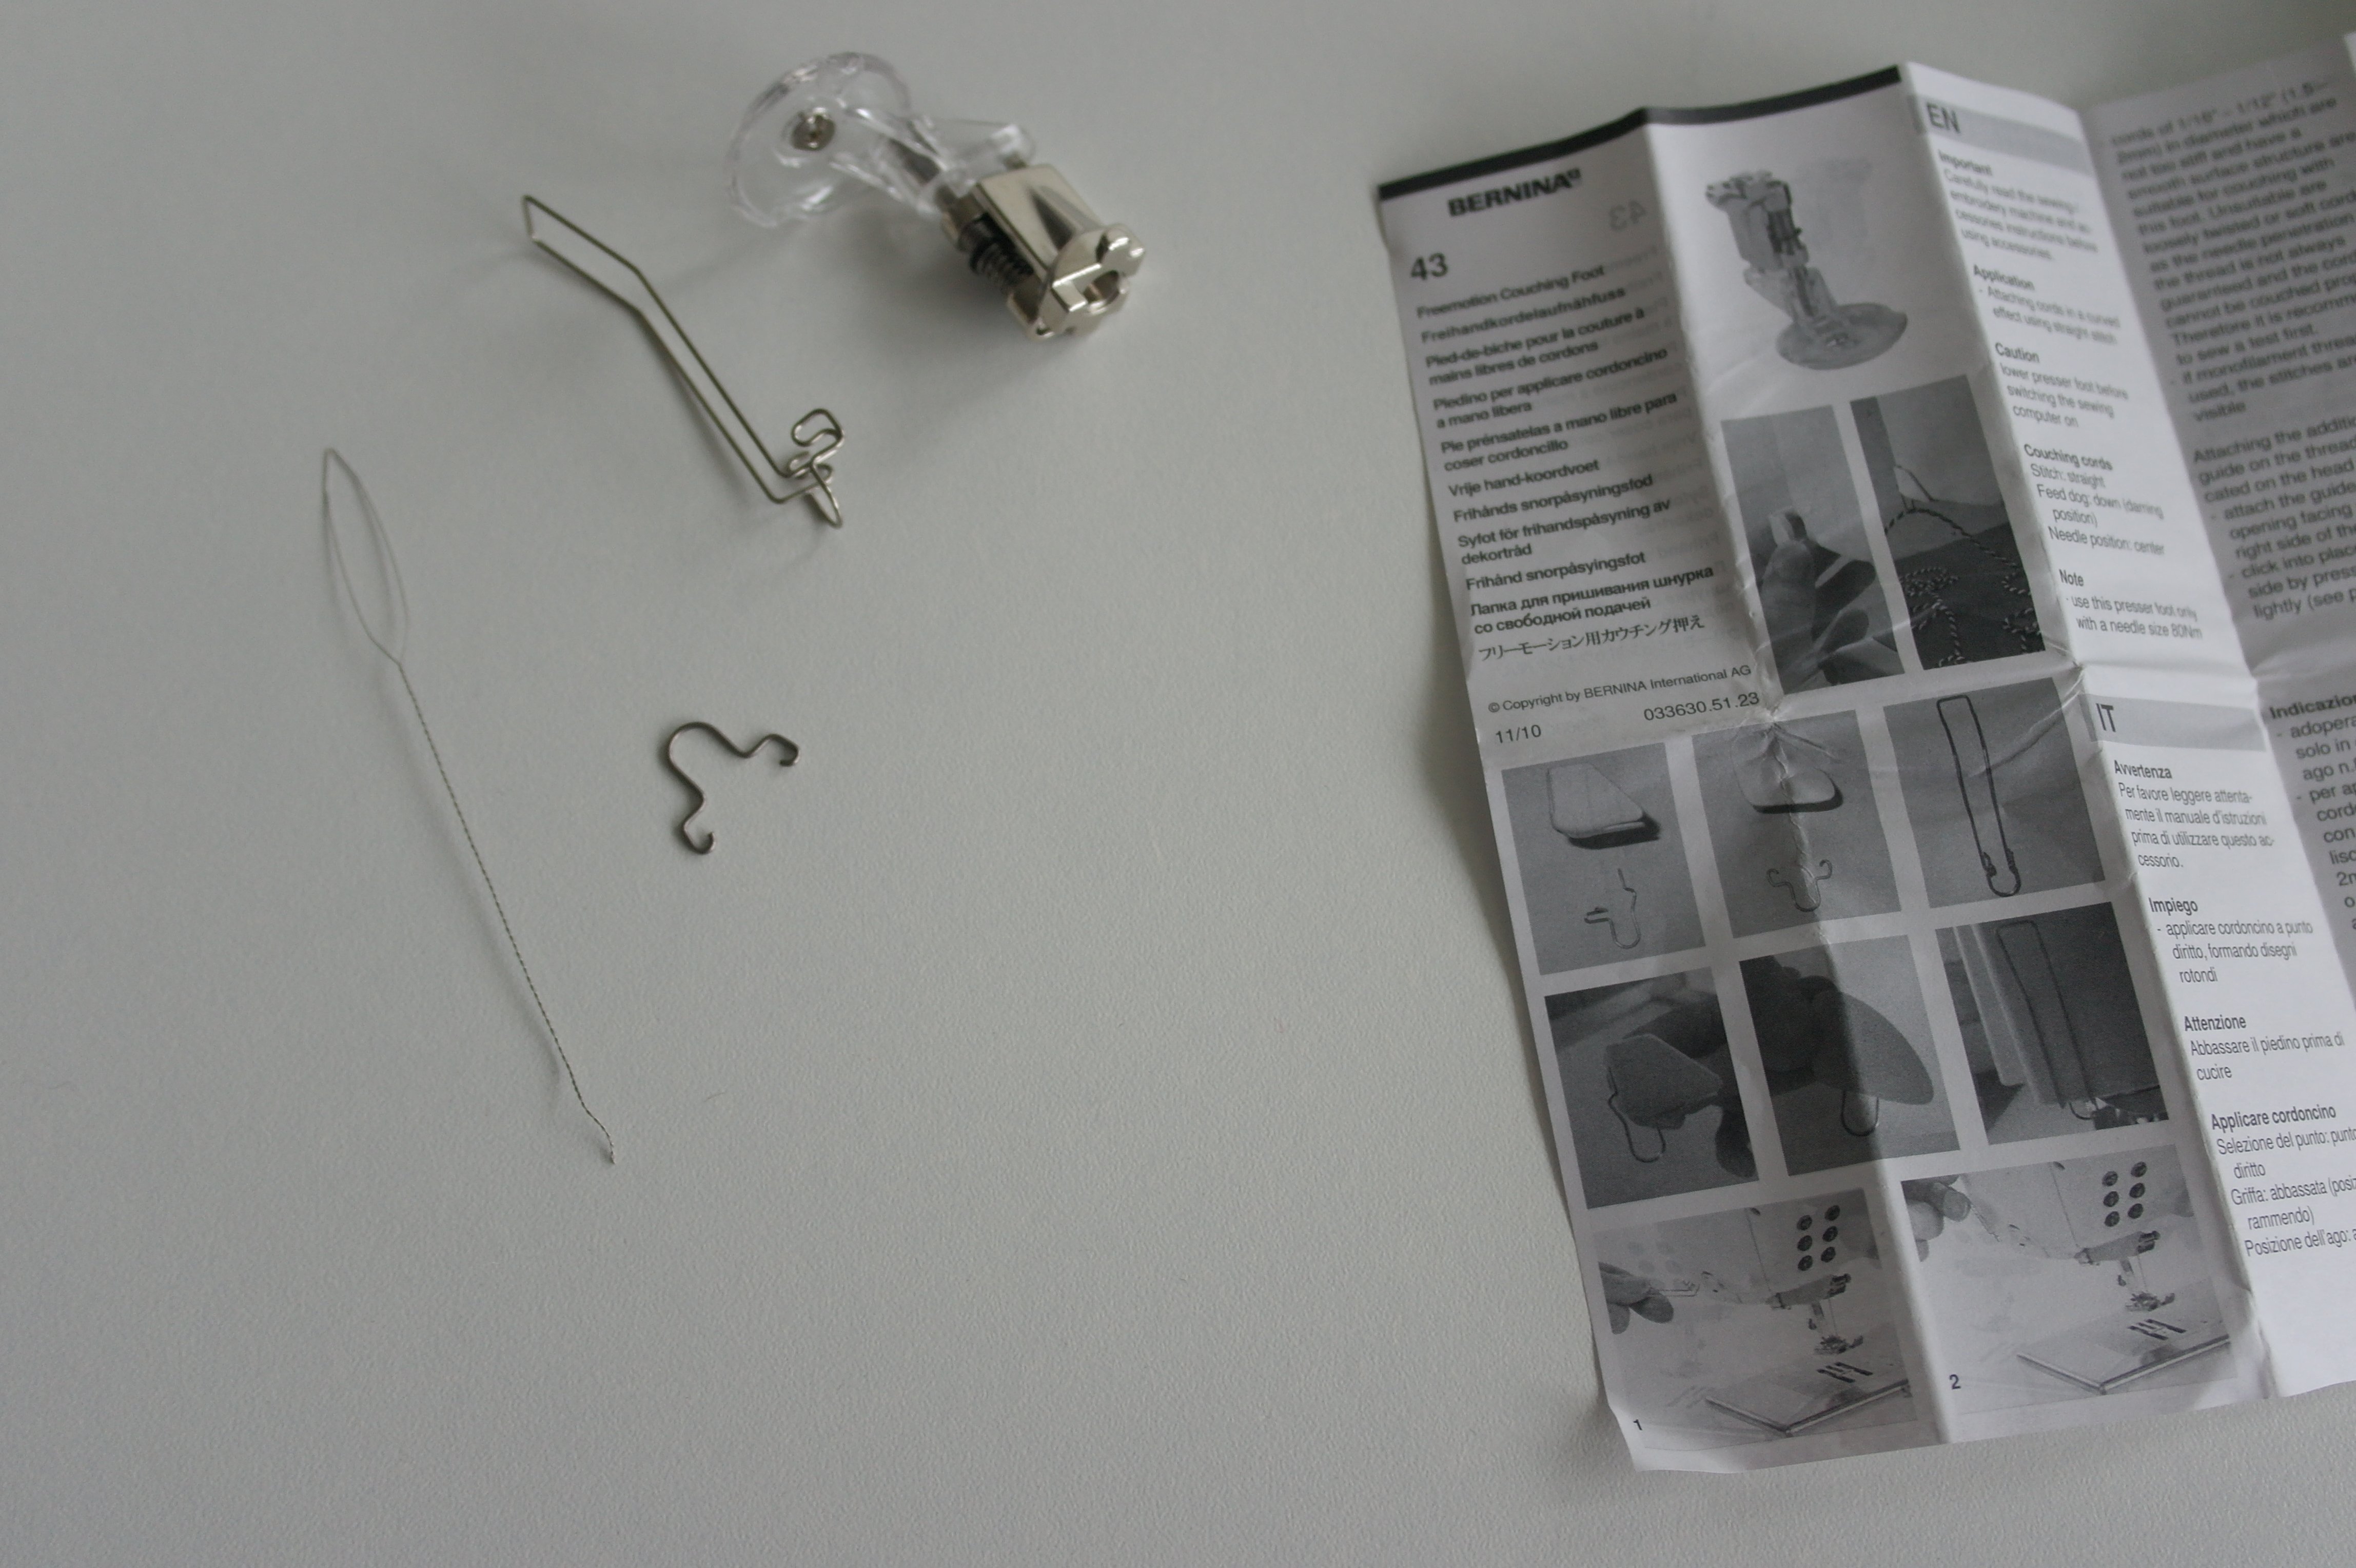
This is the Freemotion Couching Foot #43 with a manual. From left to right: the threader, a small thread guide, a large thread guide and the couching foot (upside down).
I’ve used the large thread guide for my Bernina 770QE: you can see it attatched at the side of my machine. For the Bernina series 7 and 8, this is the right thread guide to use.
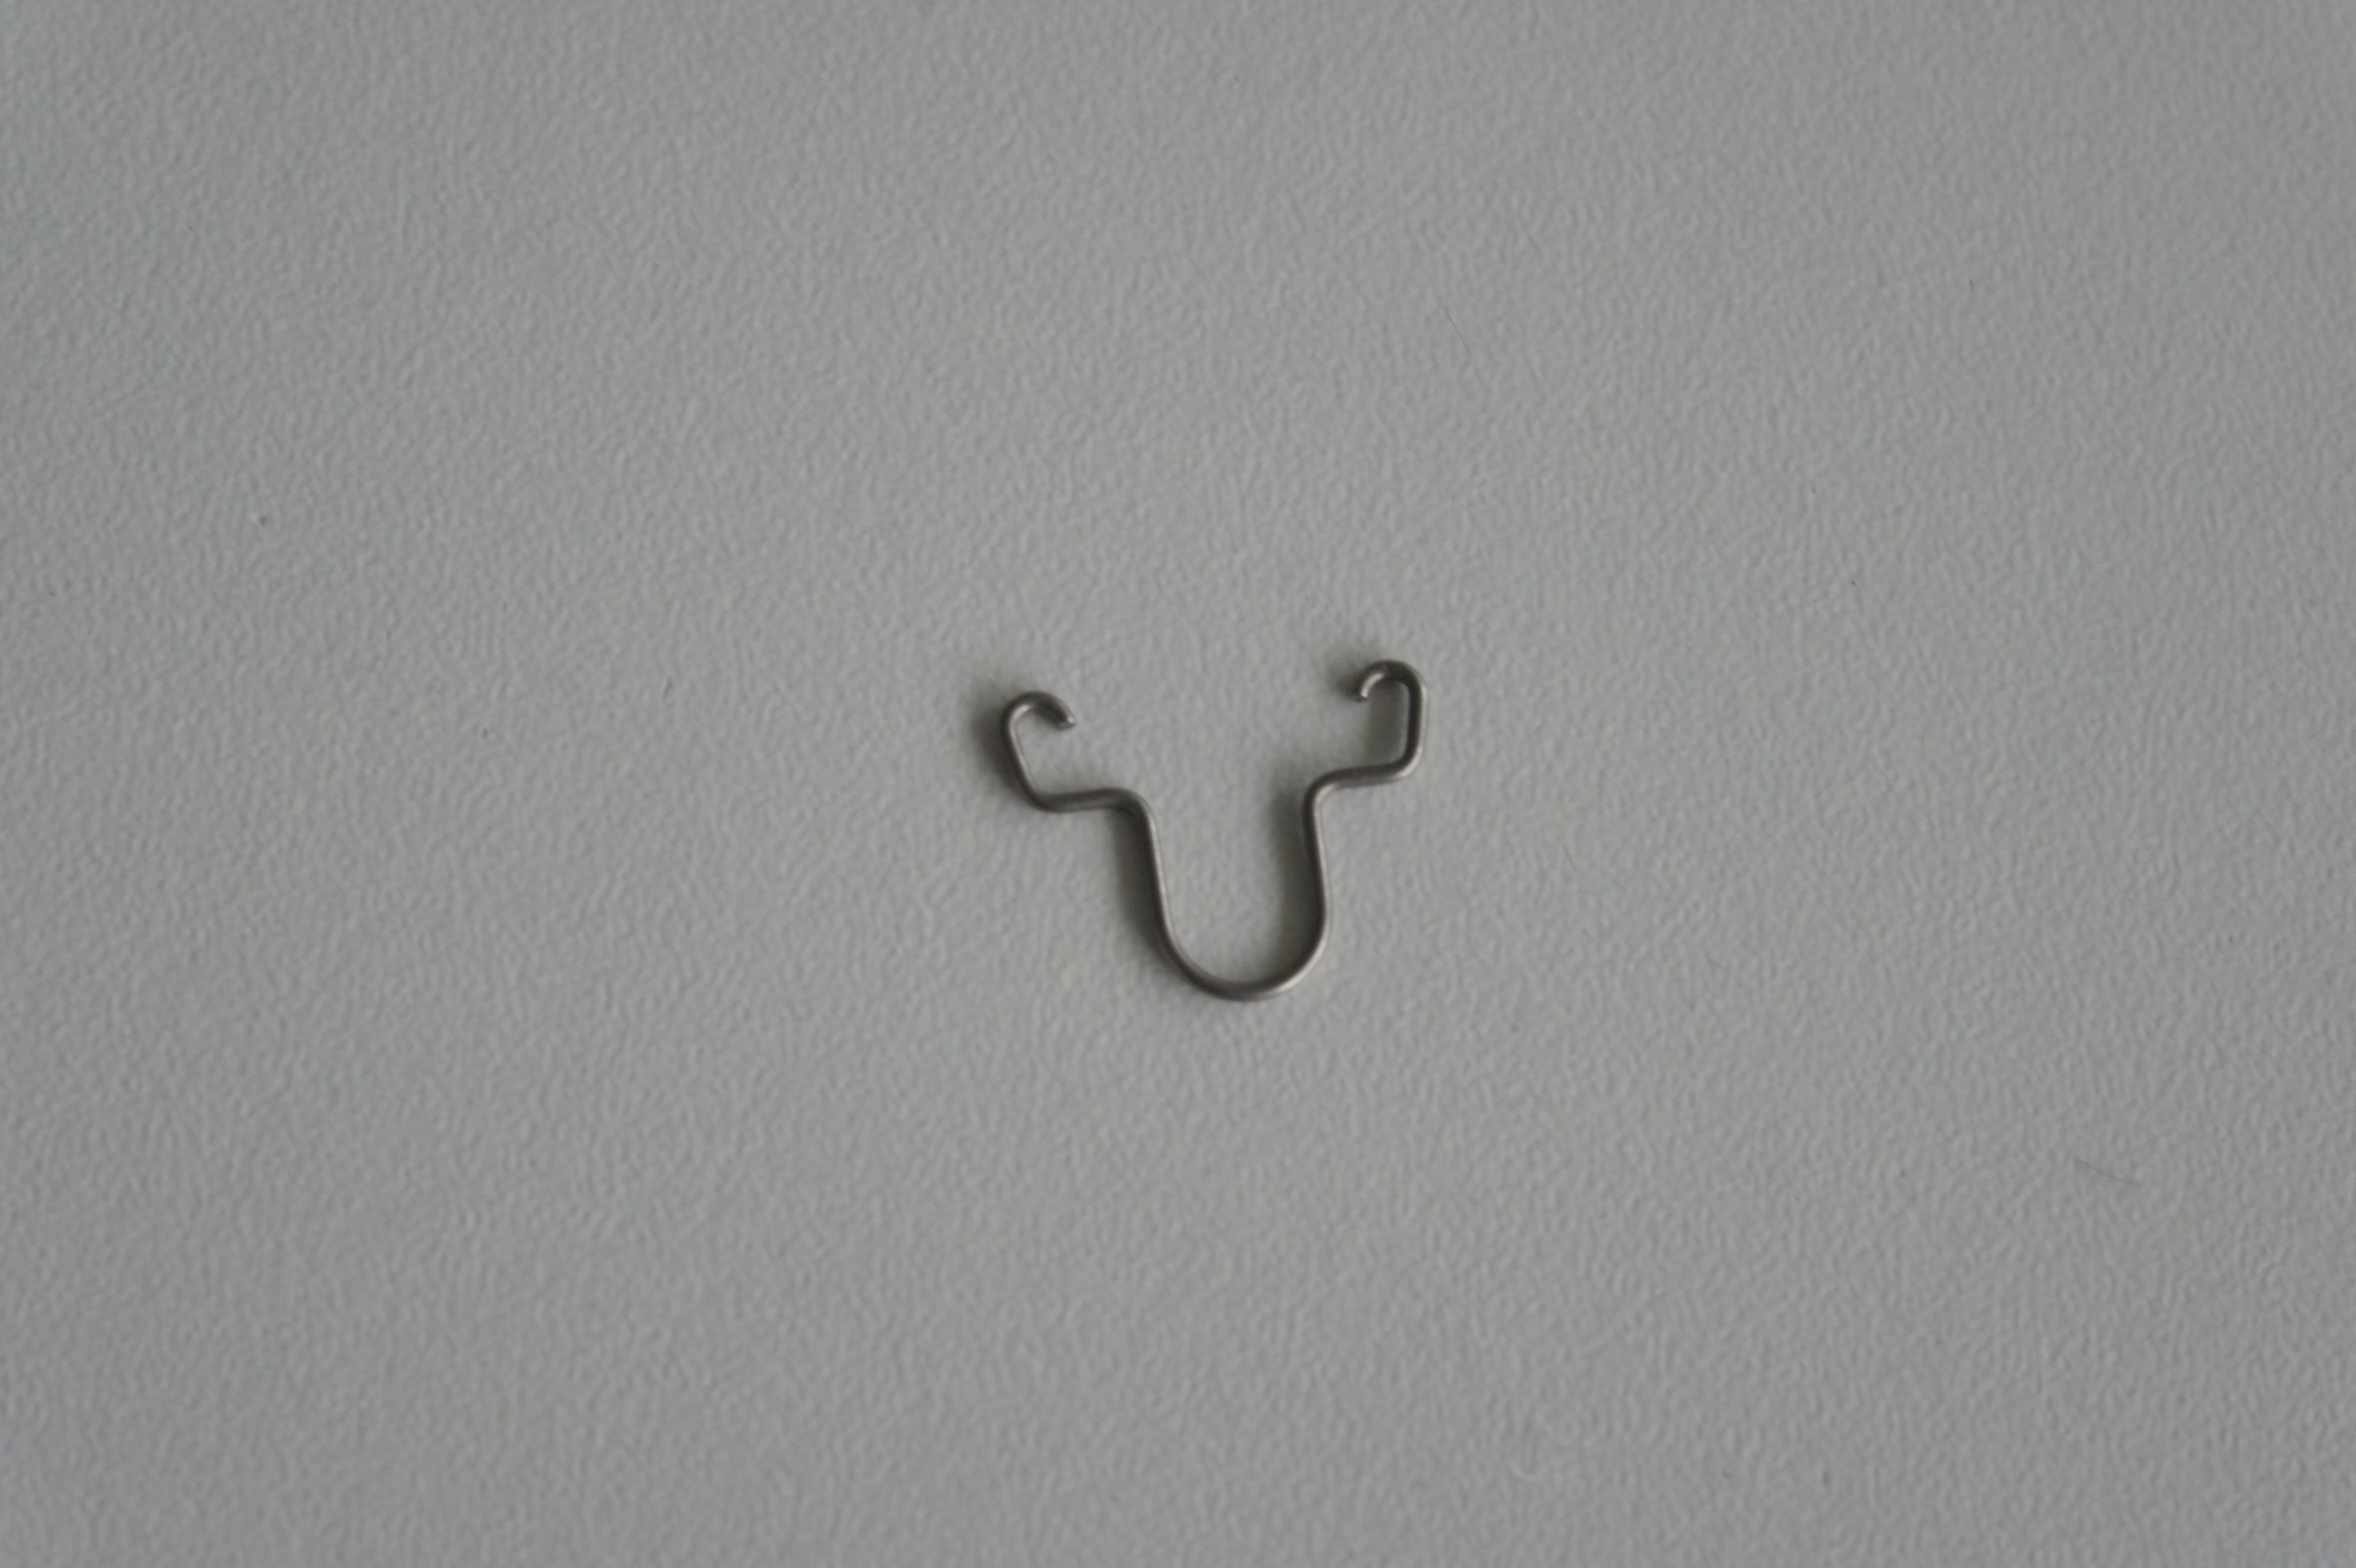
For different types of Bernina machines, you will need the small thread guide – this will be attatched to the bottom of your thread cutter, on the side of your machine. Please read the manual before attatching these thread guides.
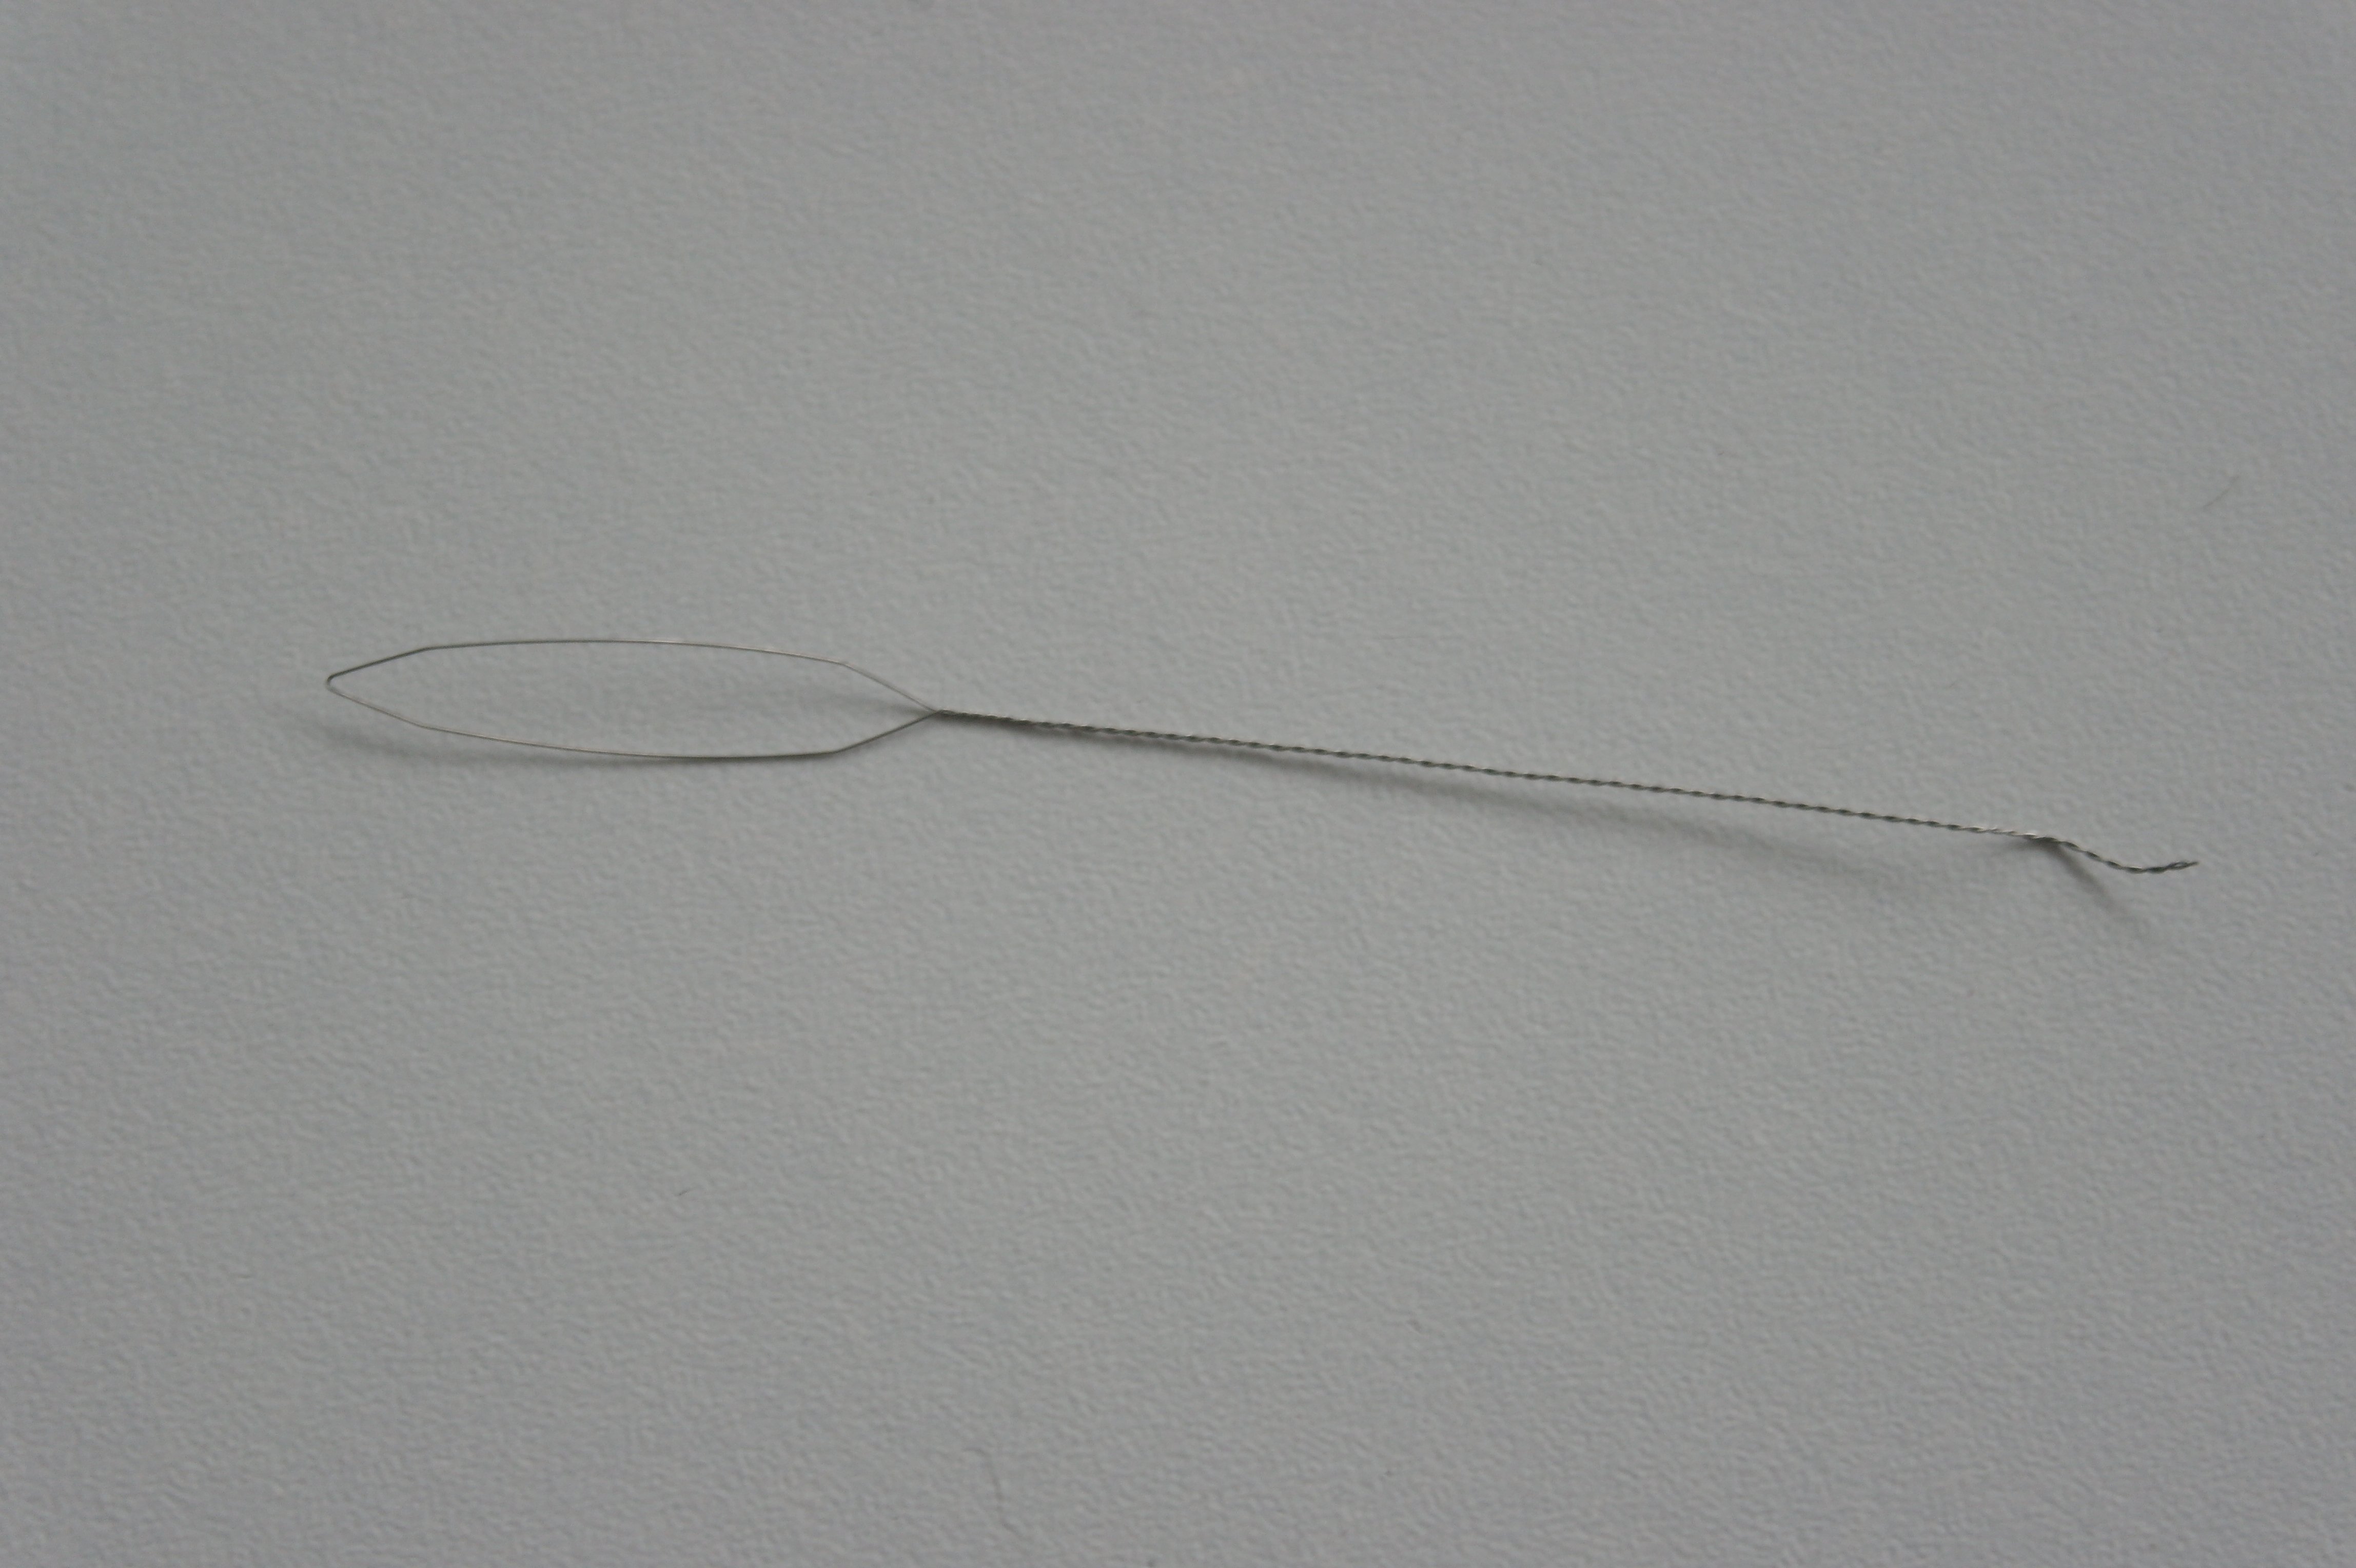
To guide the thicker yarn/cord through openings of thread guide and foot, you will use the threader.
 The foot itself has an opening on the side, for passing the thick yarn/cord through, and an opening in the center of the foot – also for the yard/cord, and for the needle of course.
I have pulled the metallic yarn through the eye of the threader, pulled it through all the holes of the foot, and placed the foot on my machine. I’ve lowered the feed dogs and my machine is ready for freemotion couching.
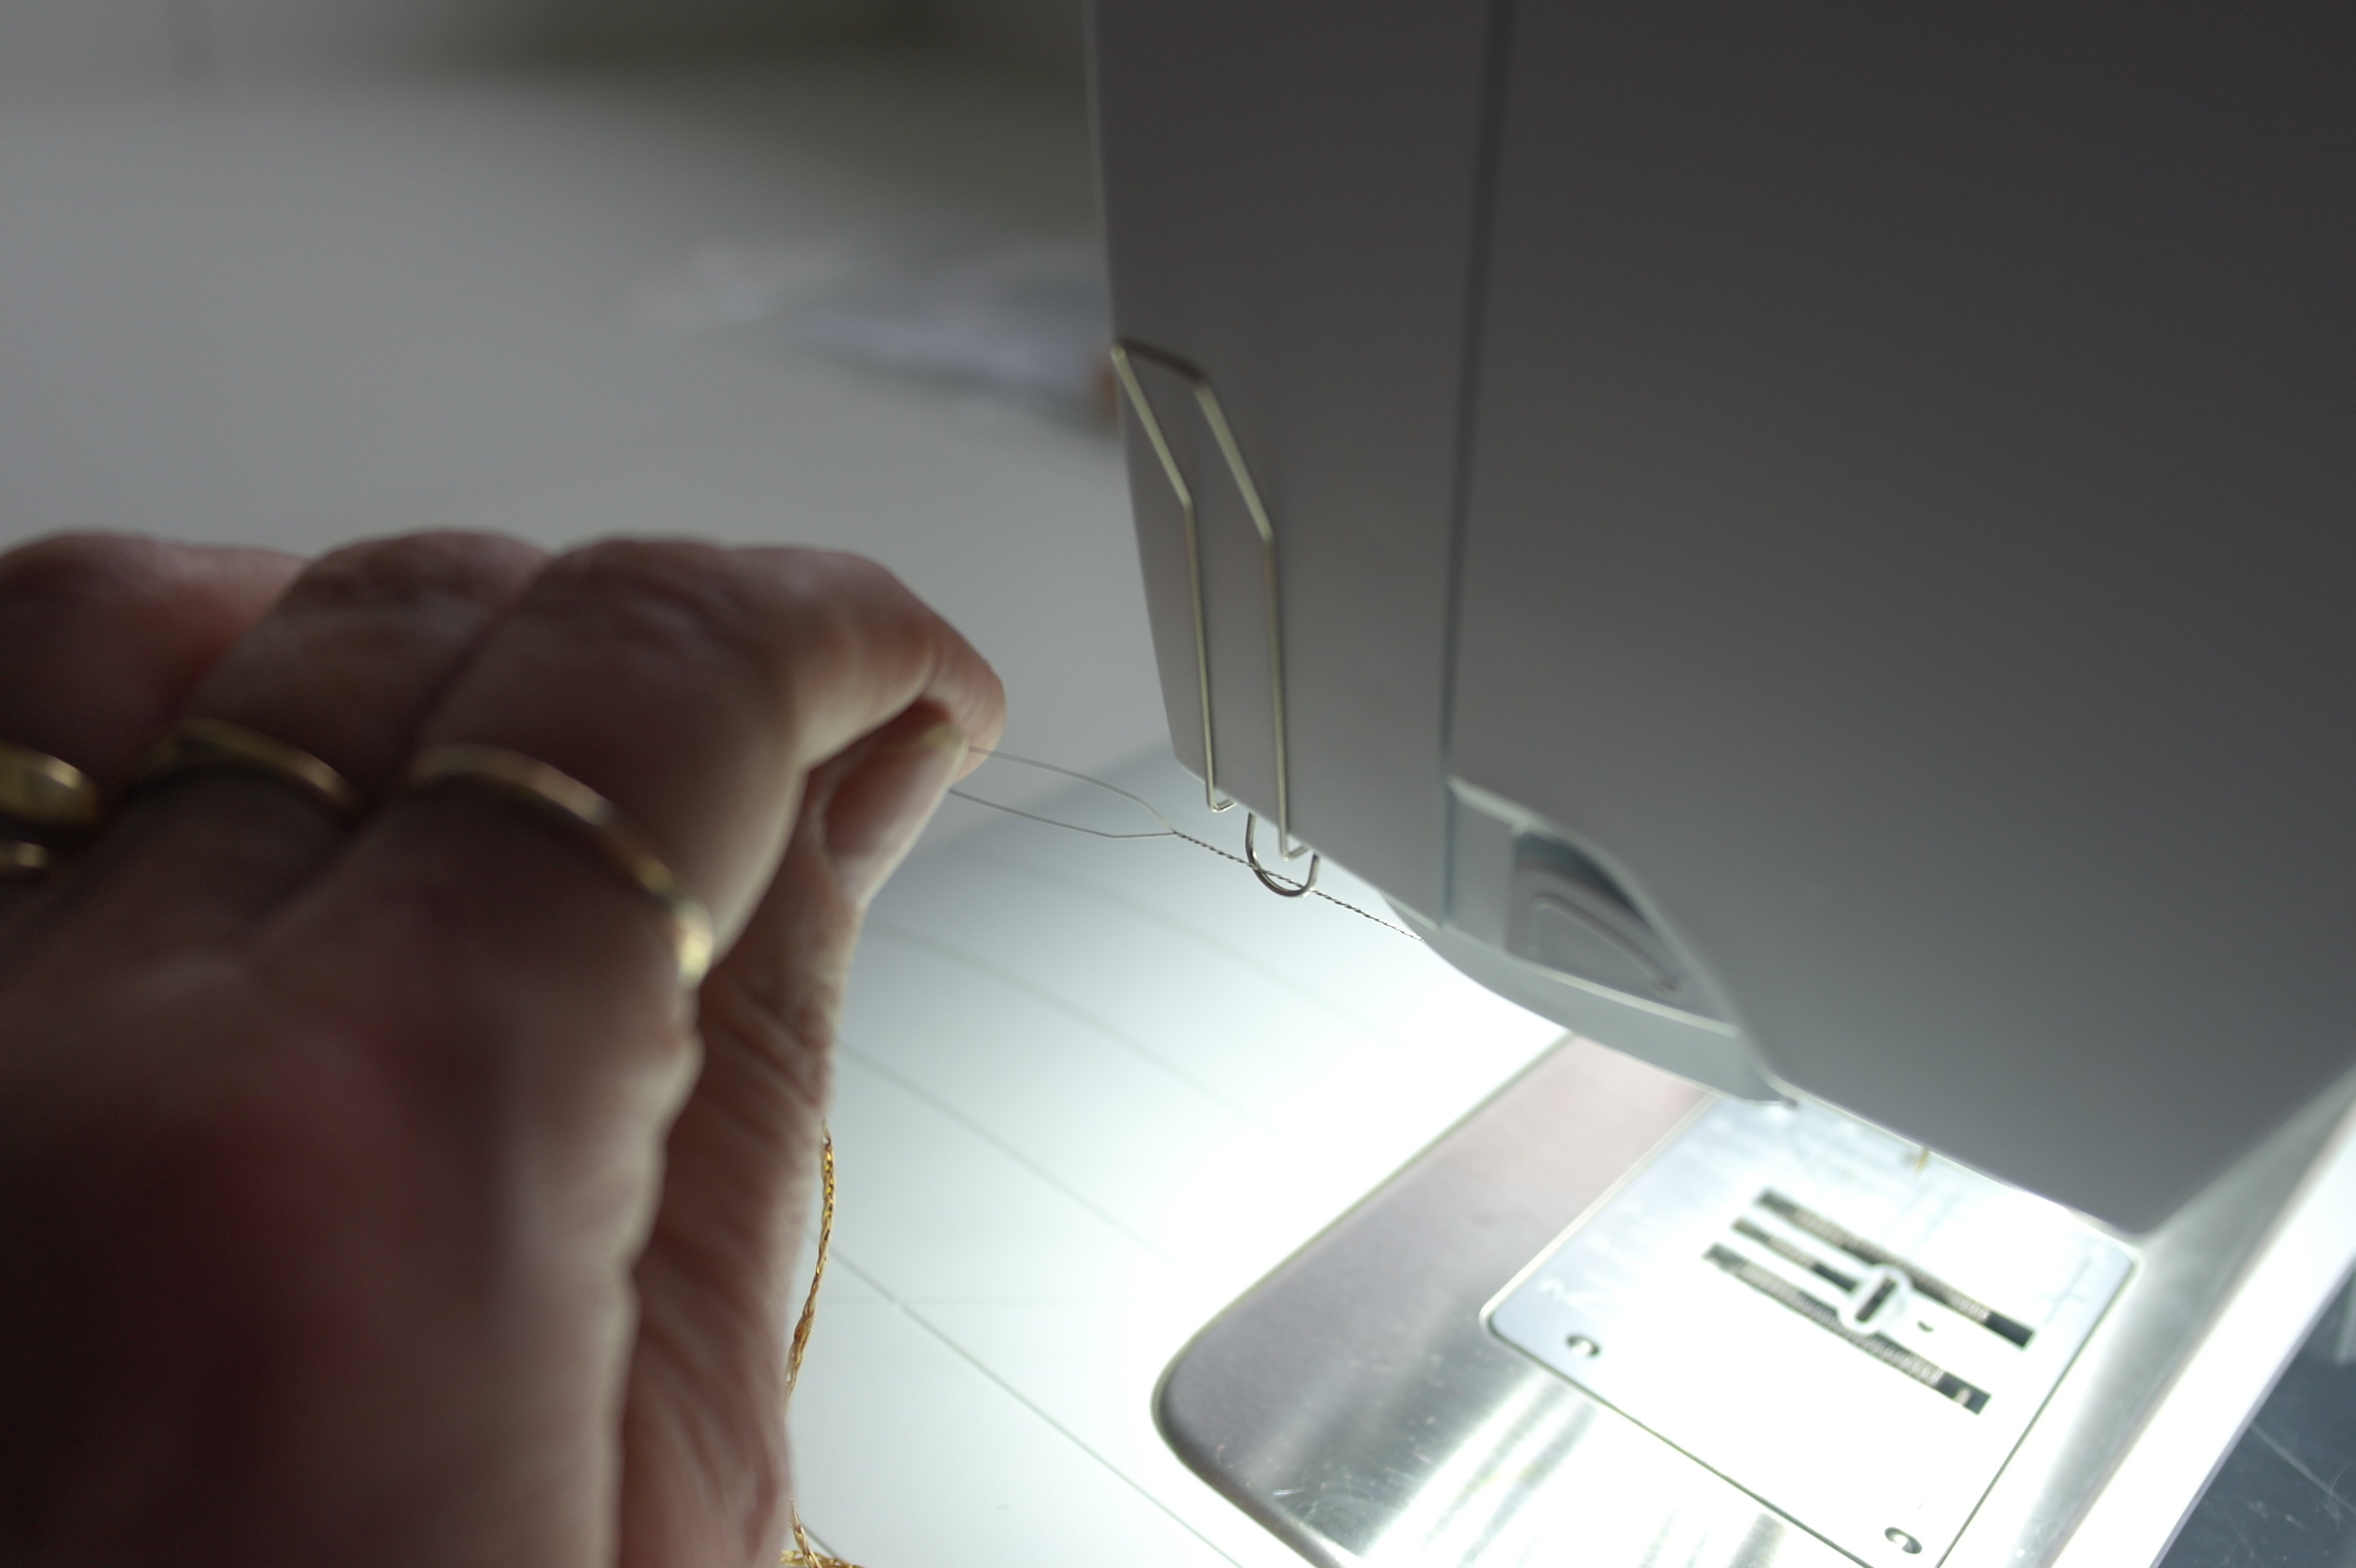
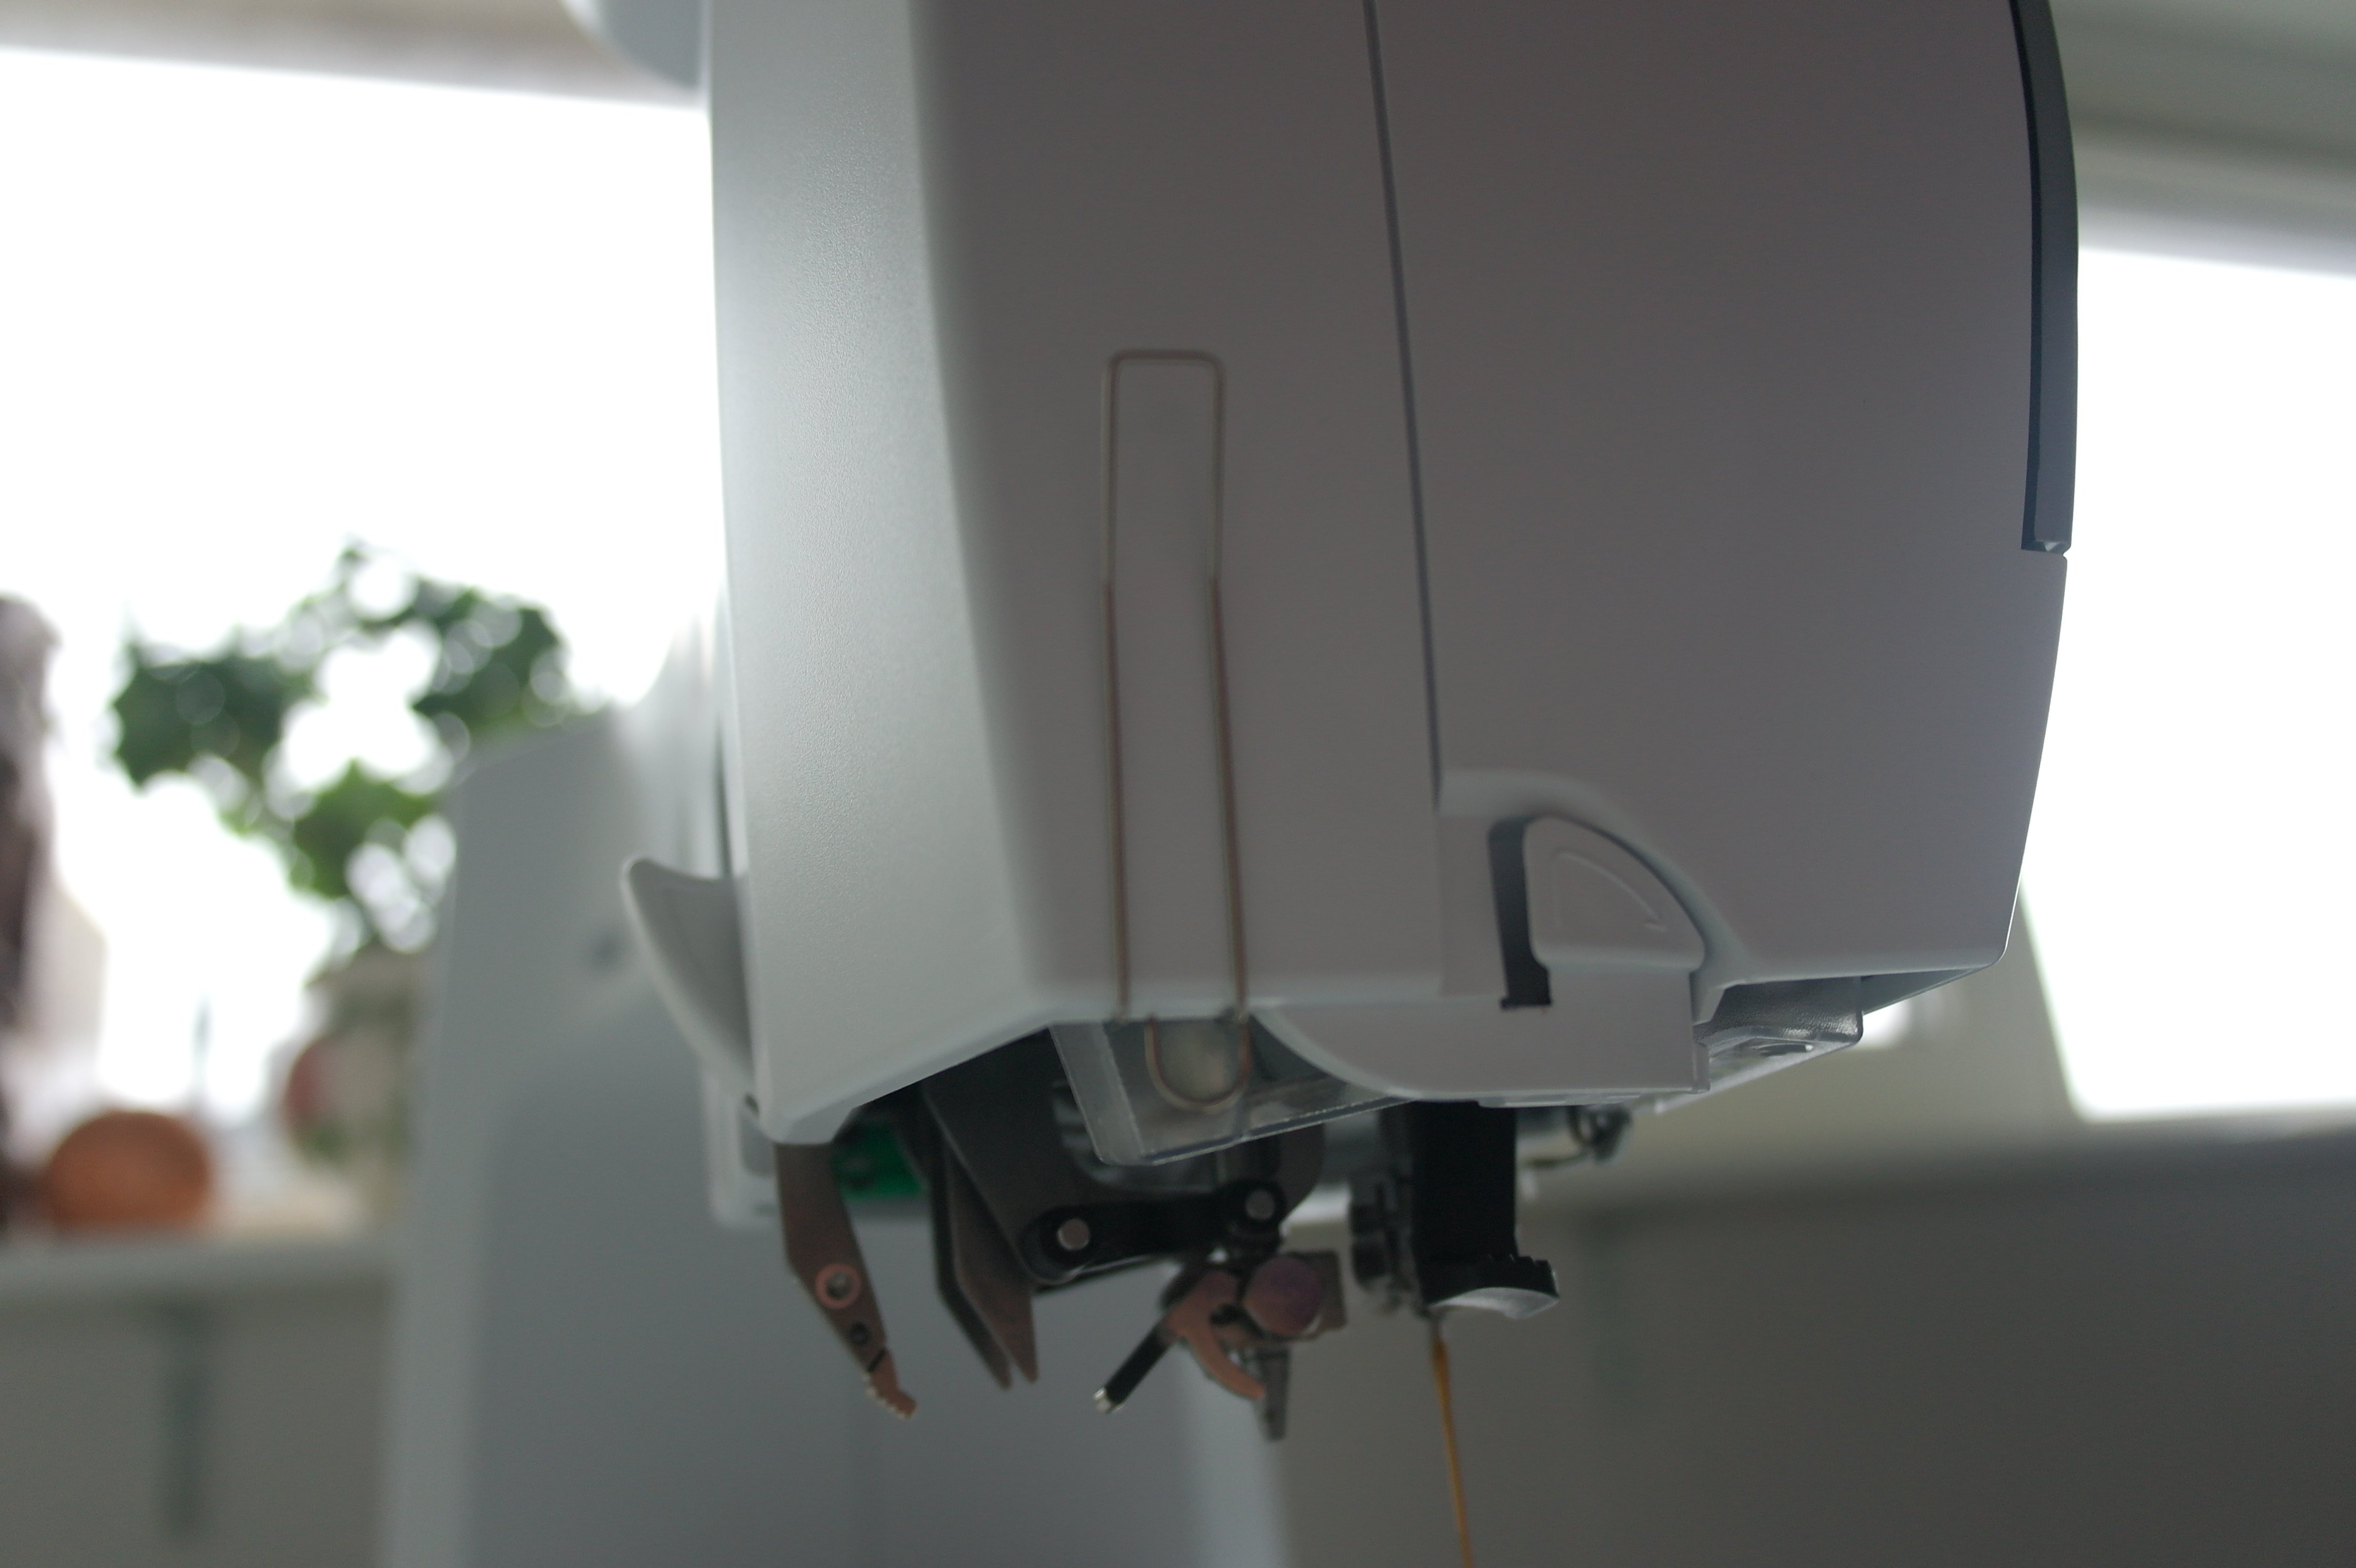
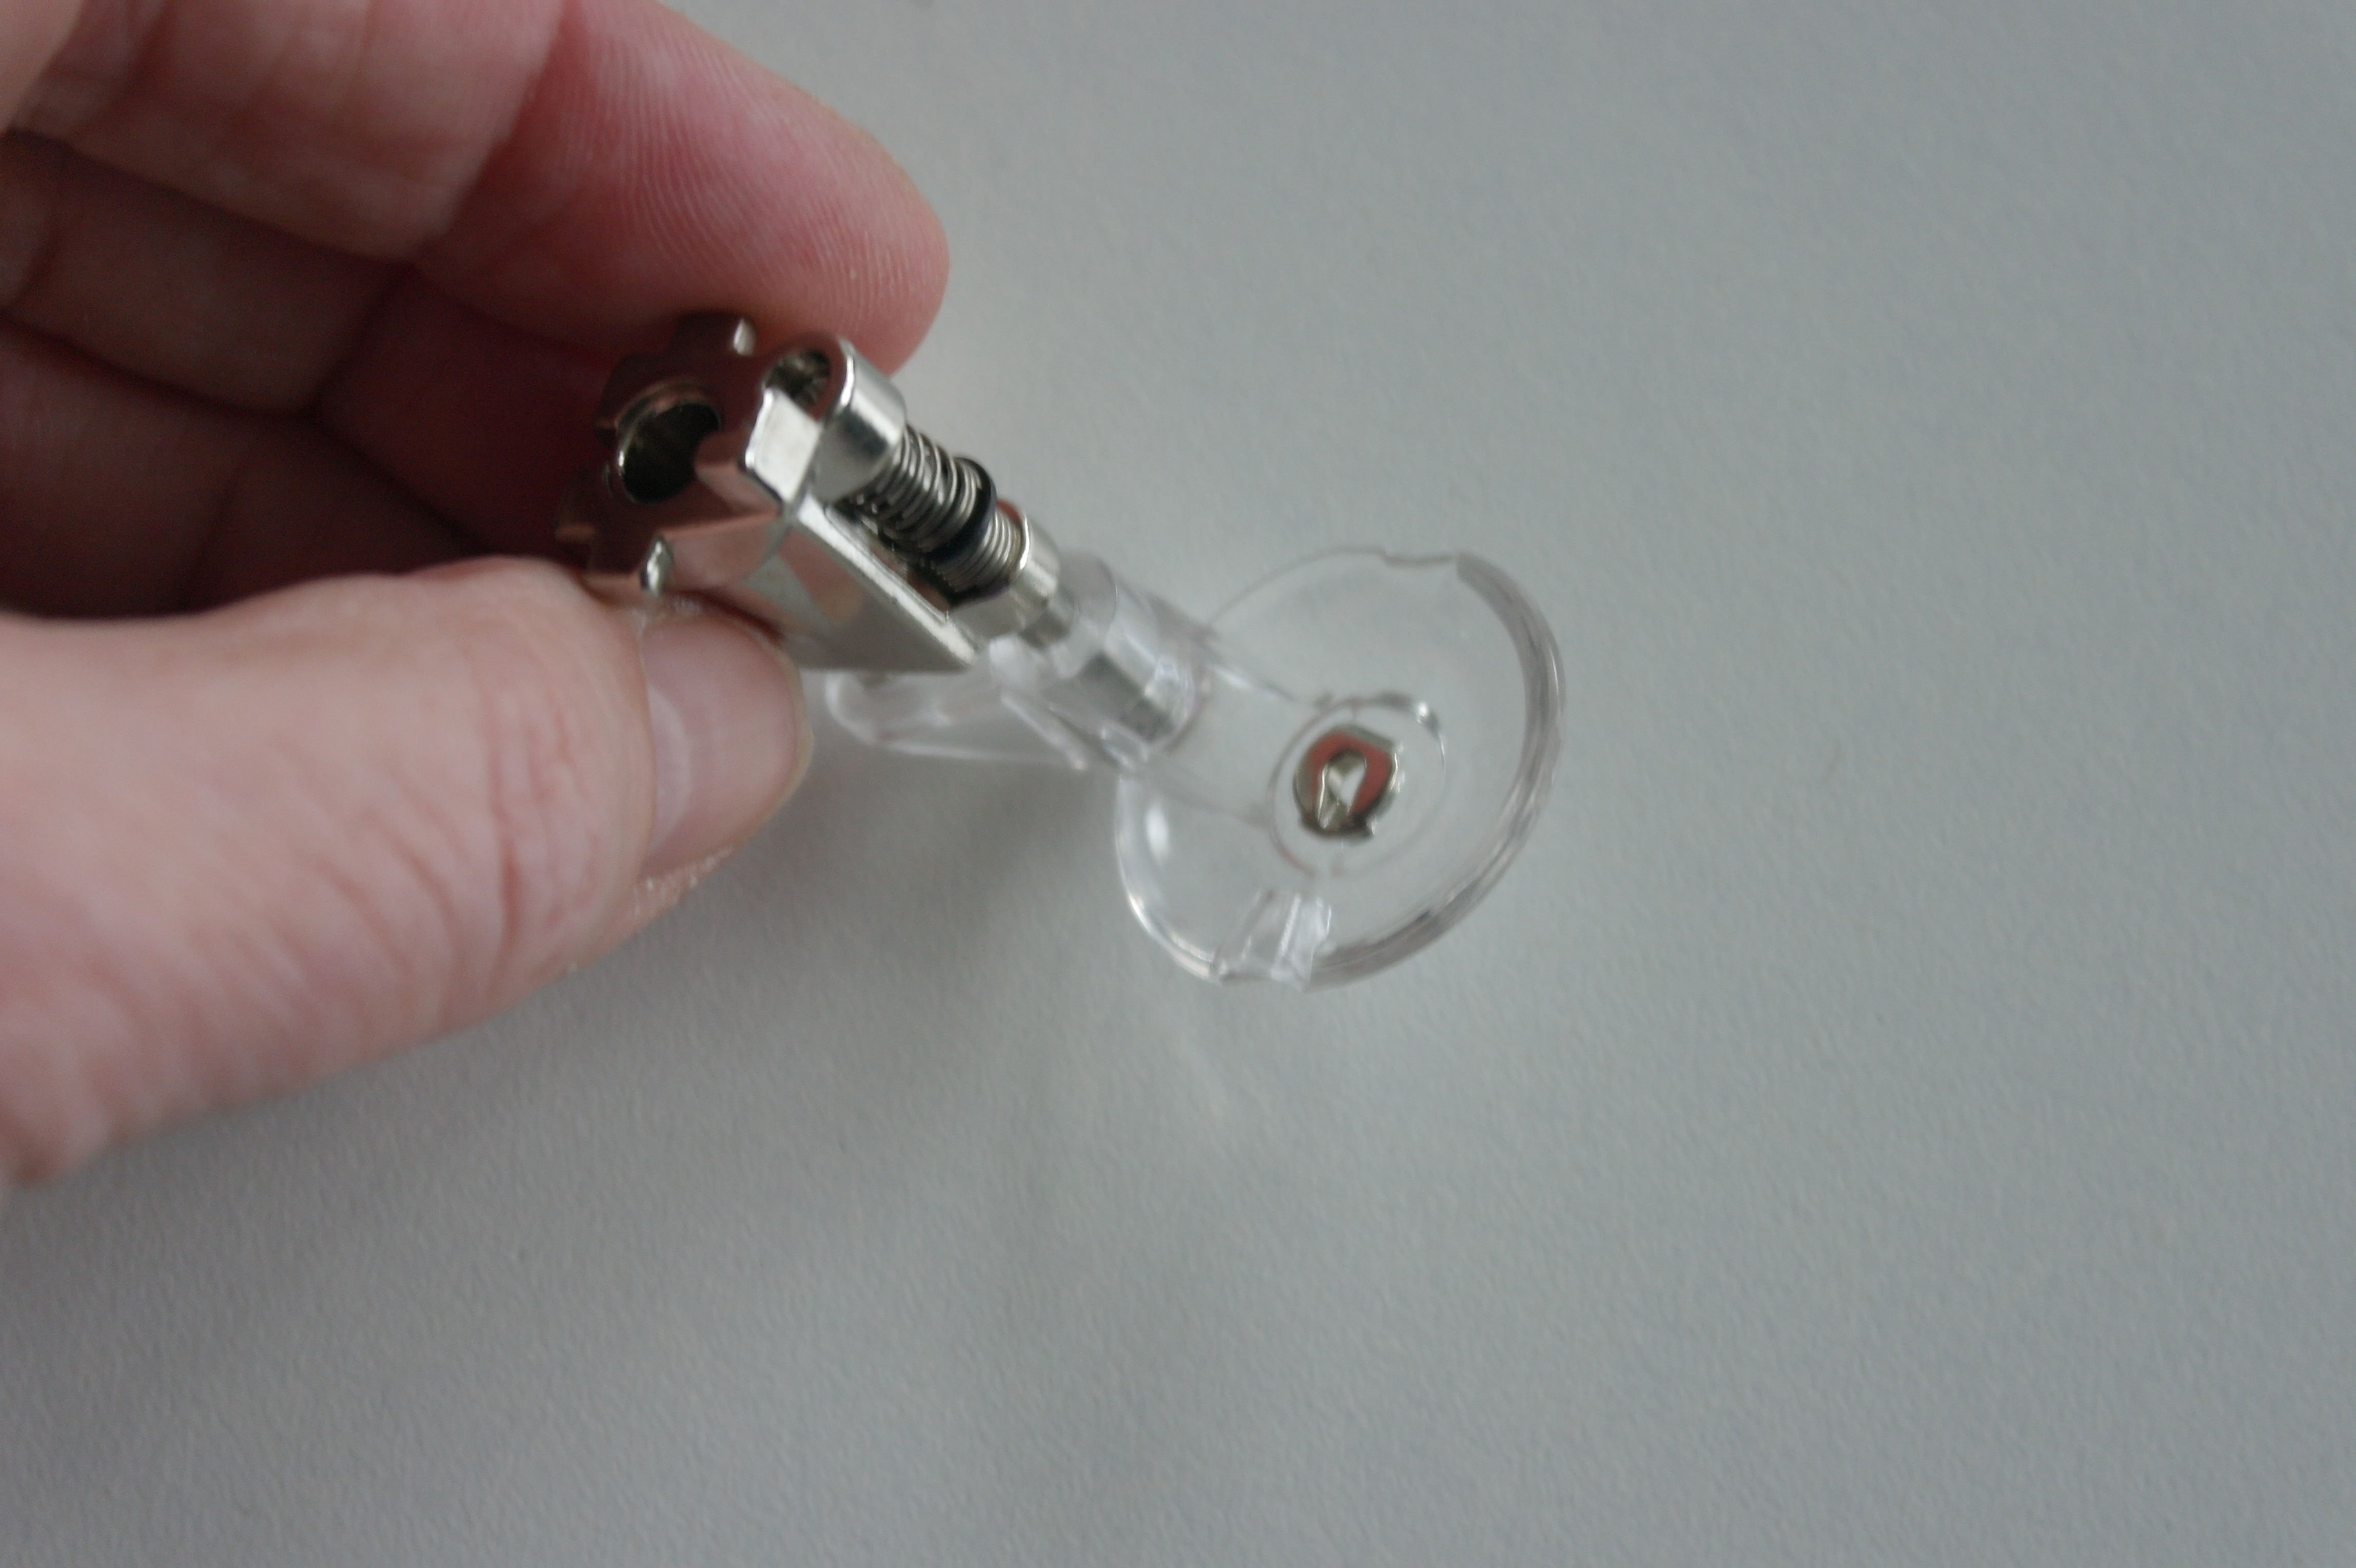
Here you see that the threader with the metallic yarn goes through the thread guide on the side of my machine.
After that through the hole in the side of the foot…

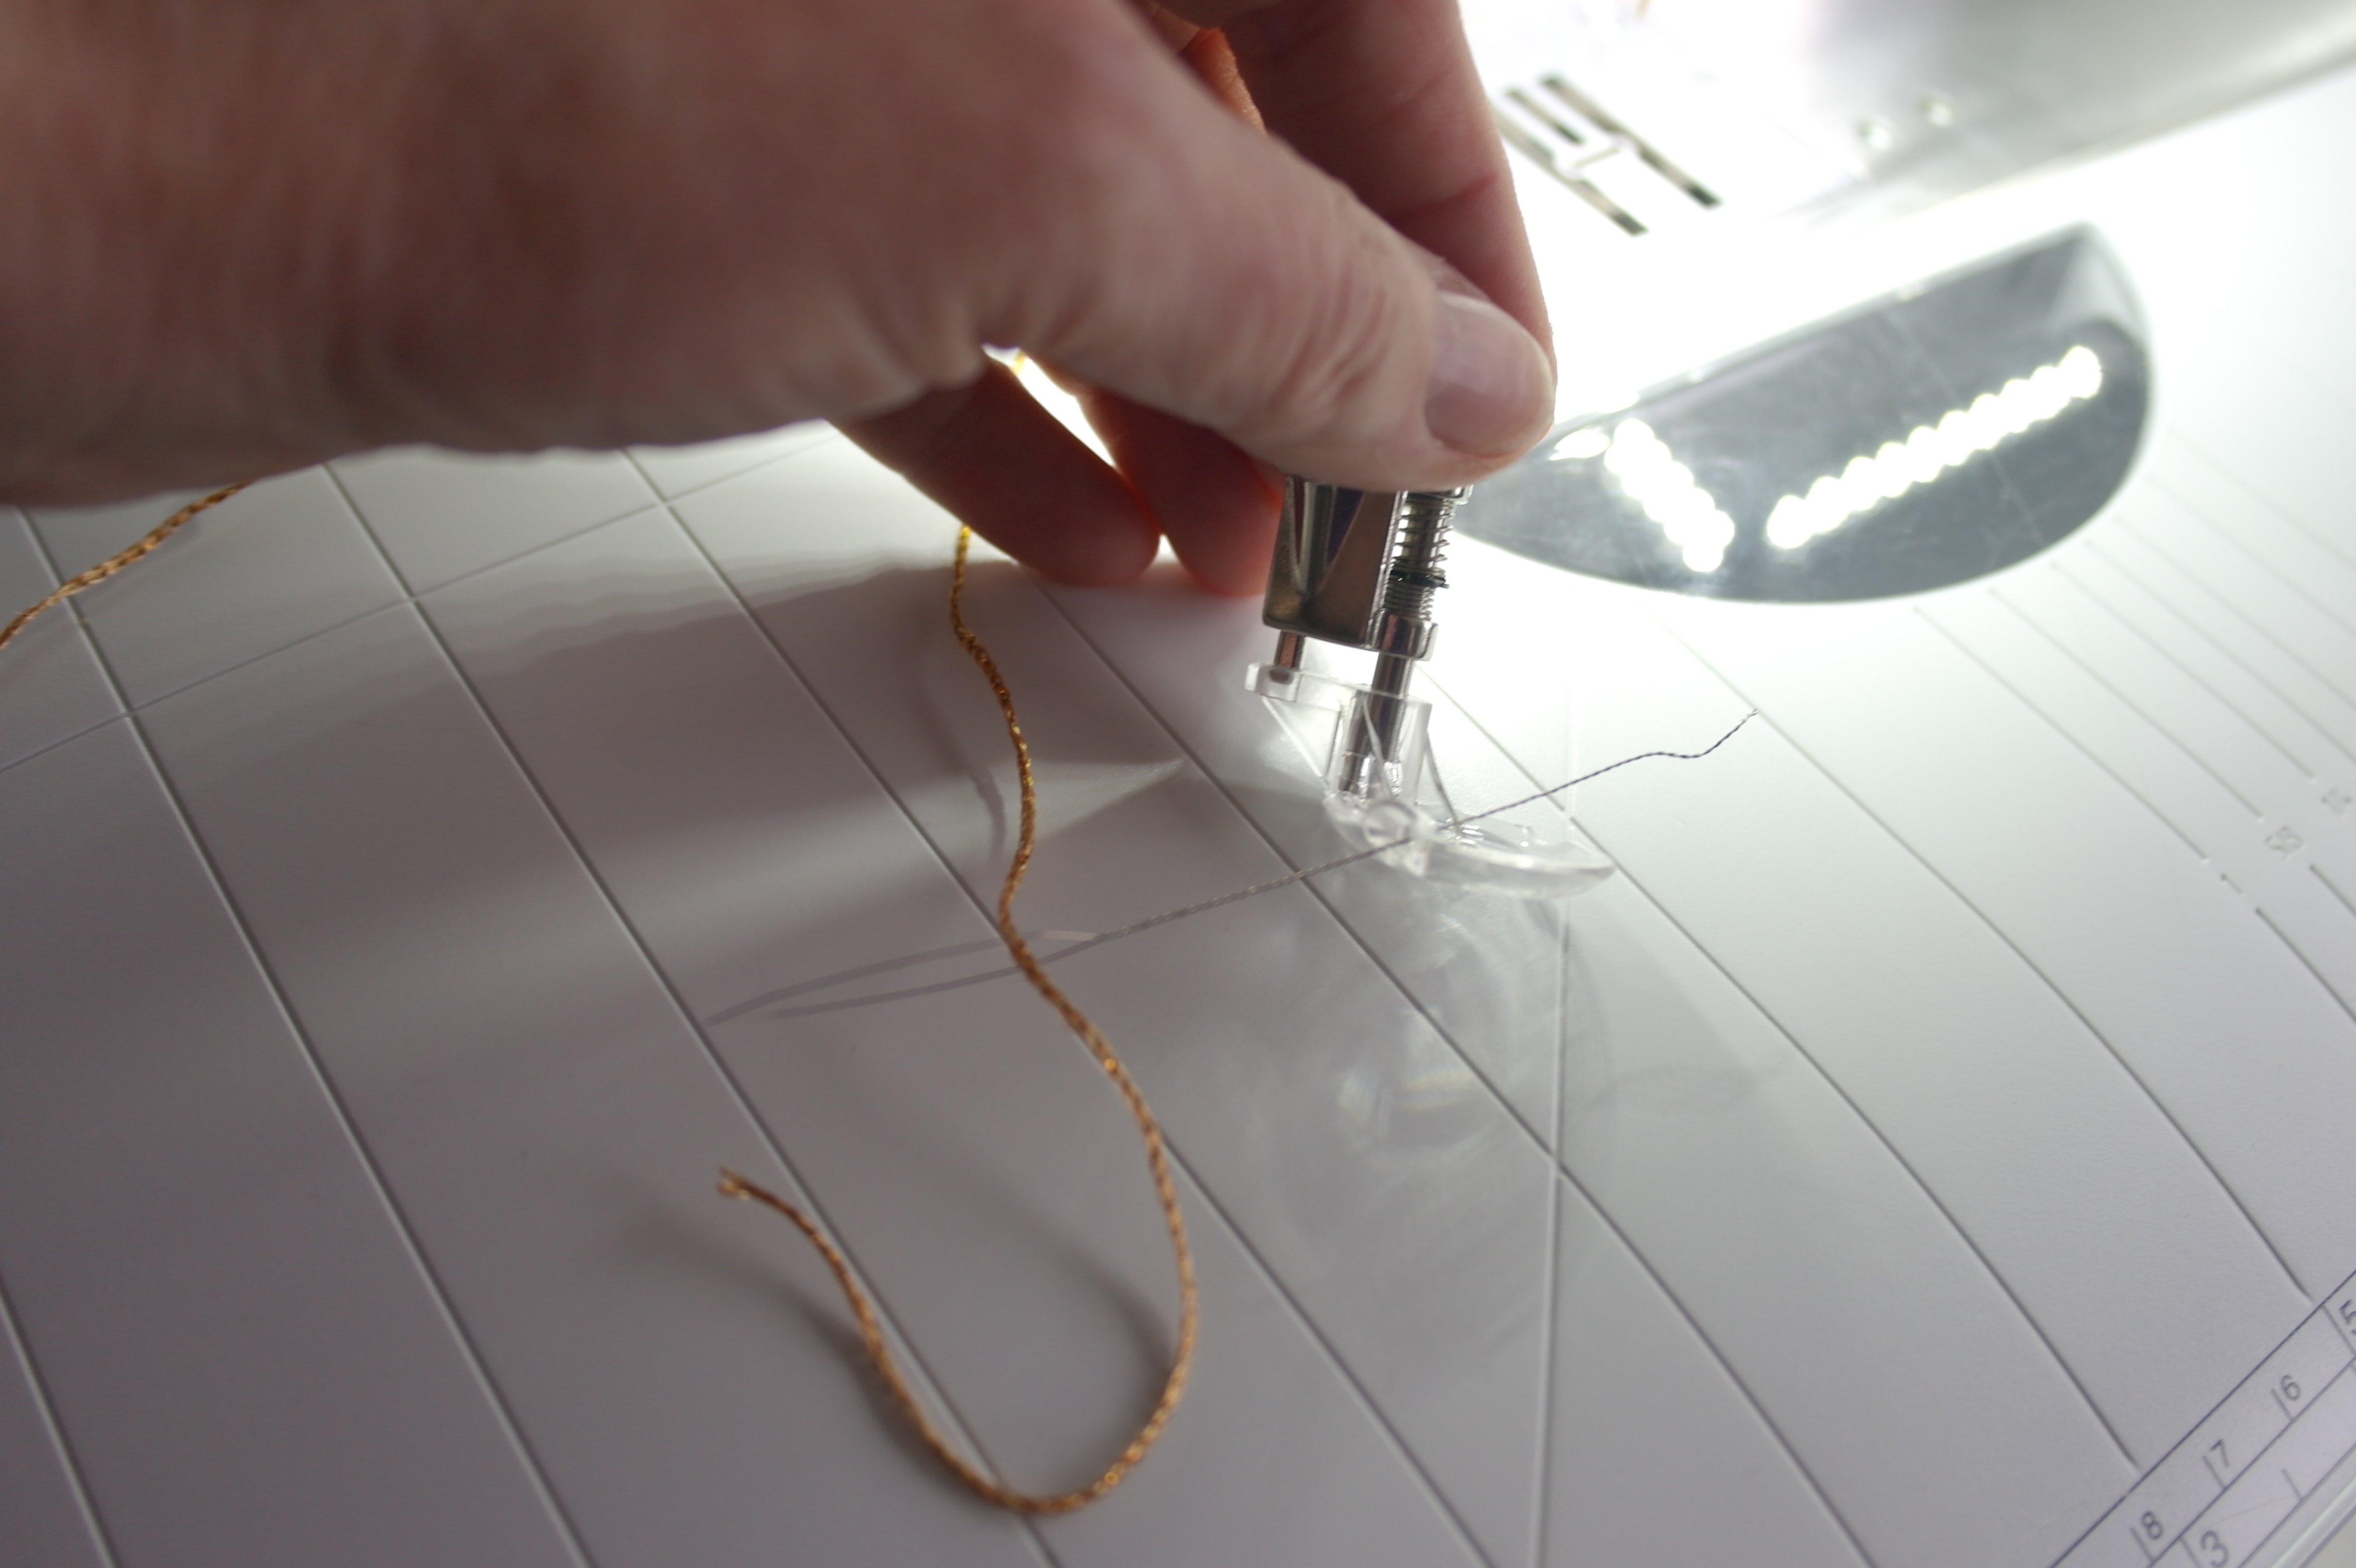
and then through the hole in the center of the foot.

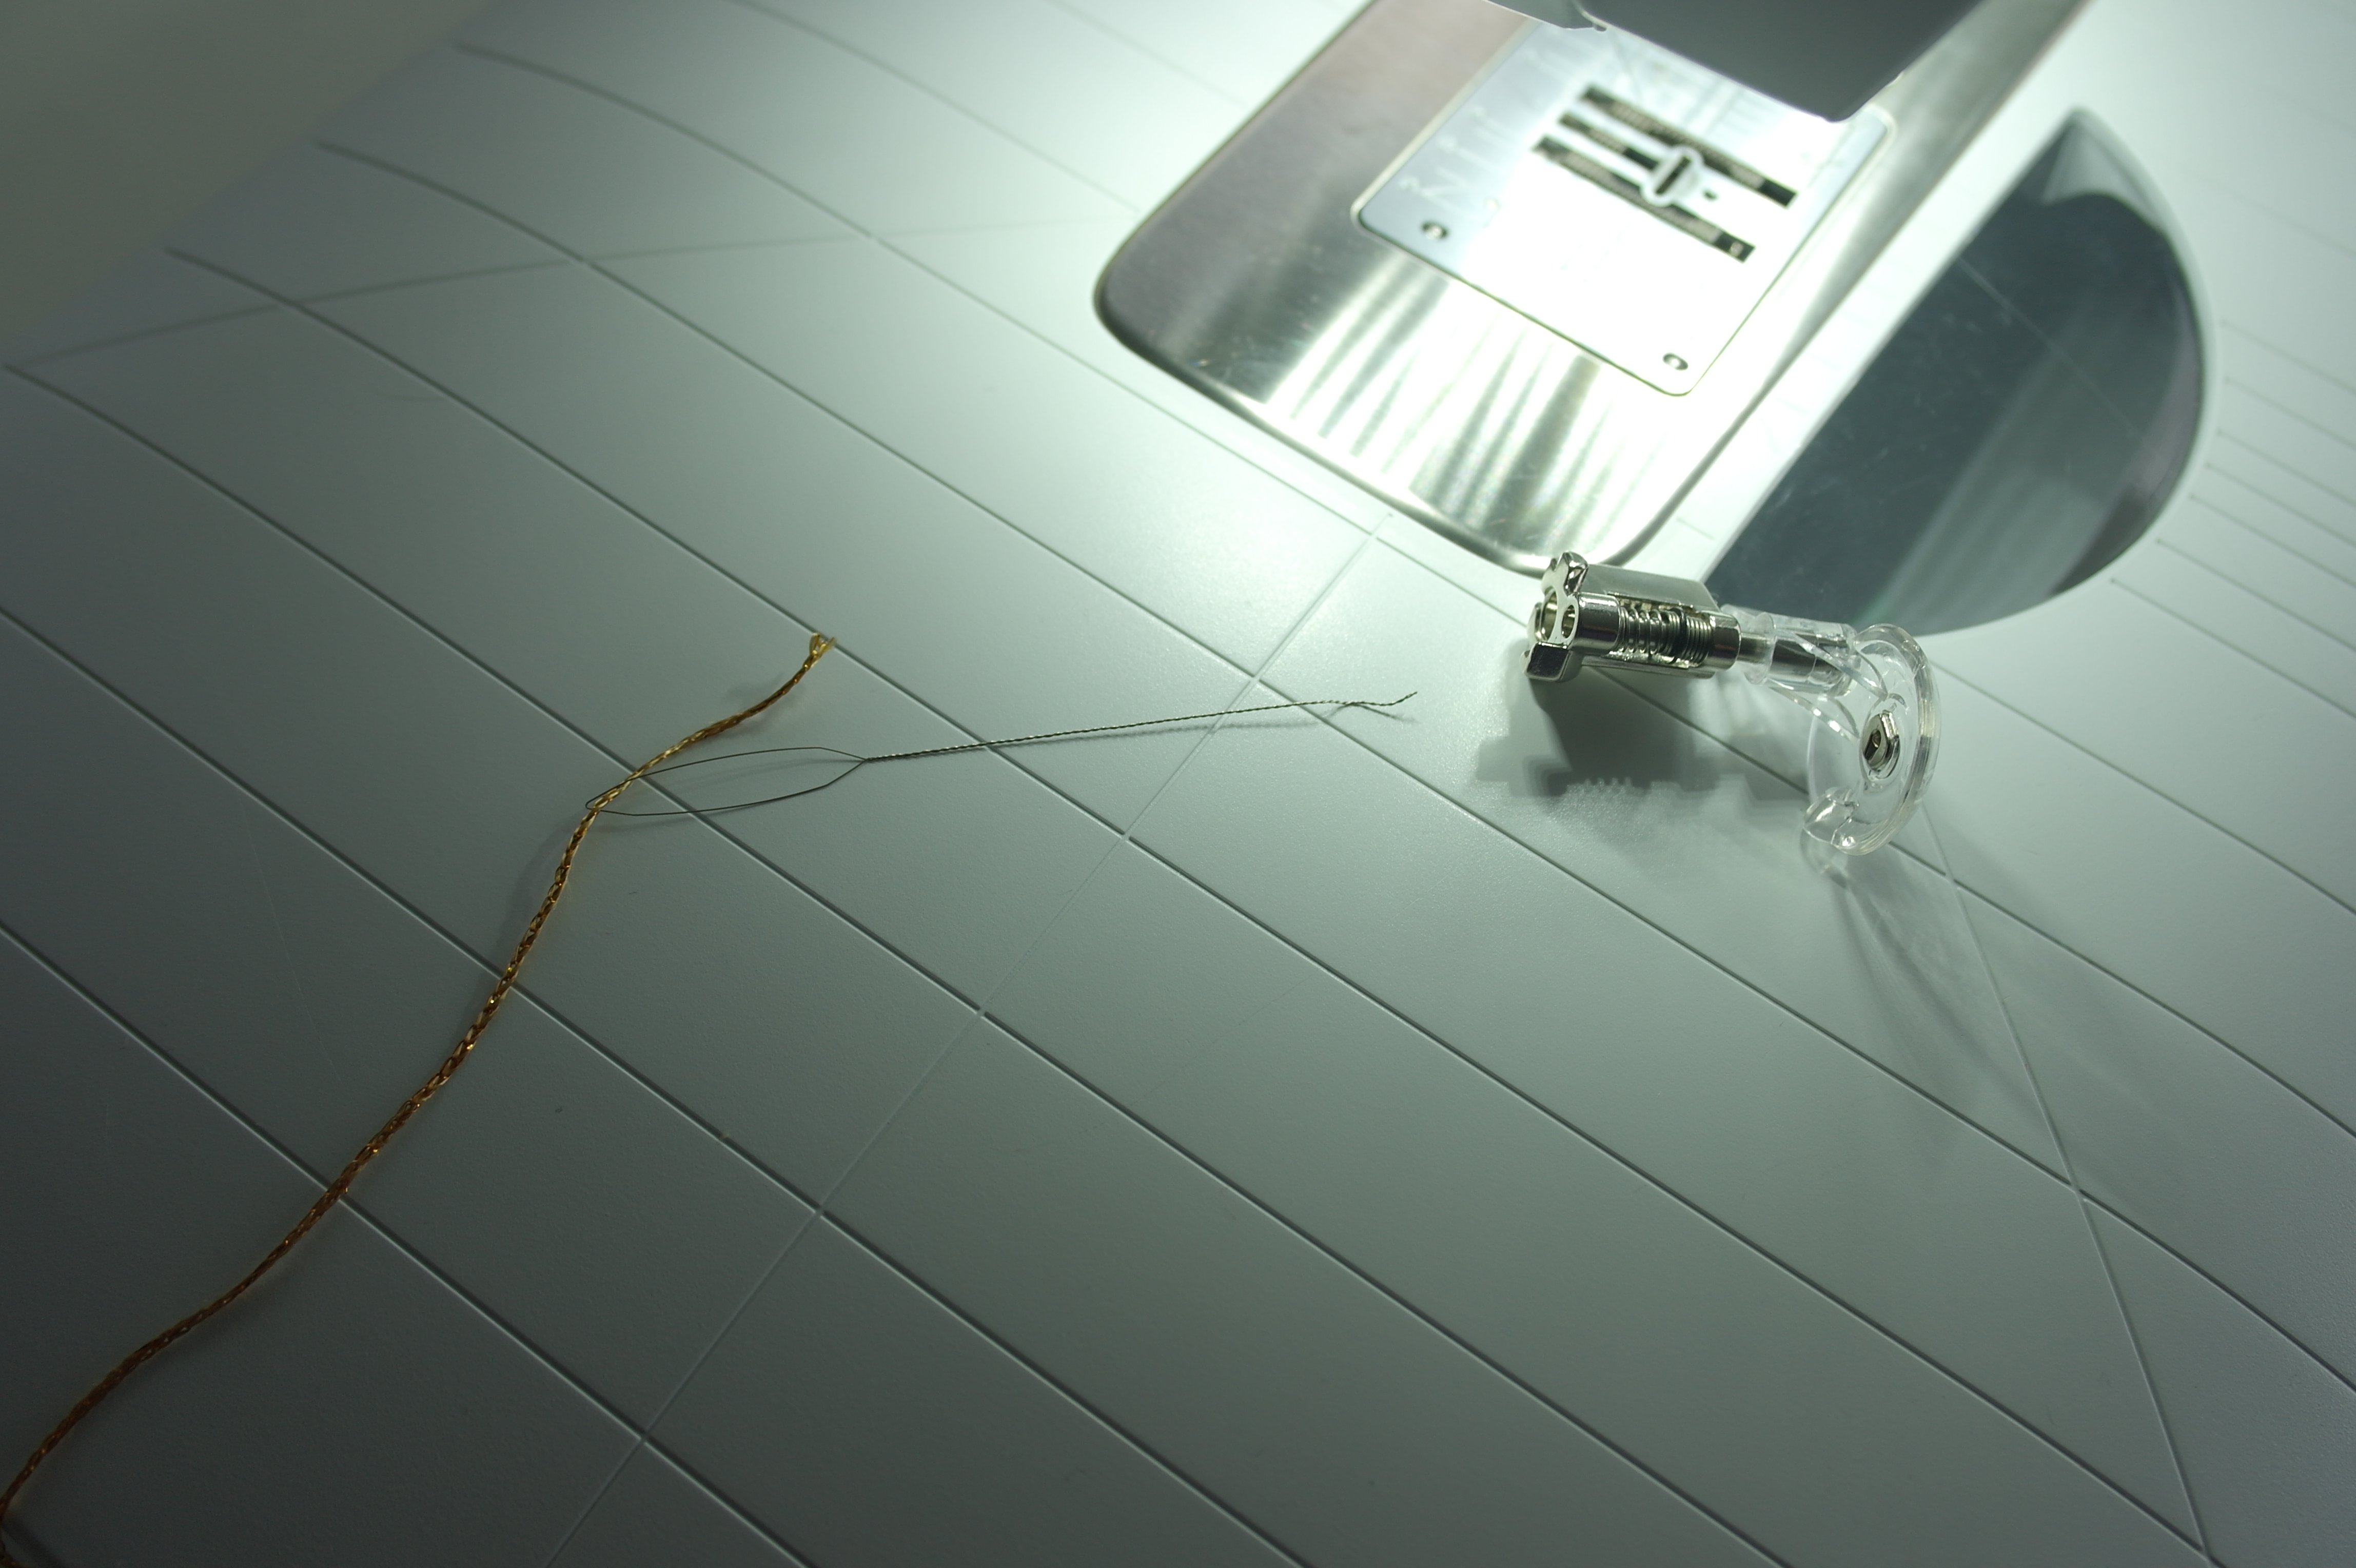
and the foot is placed on my machine. Everything is ready for couching. Be sure to use a machine needle 80/12: this is advised in the manual and also on the video (below this message). Also be sure the position of the needle is in the middle, and the needlestop is ‘down’.
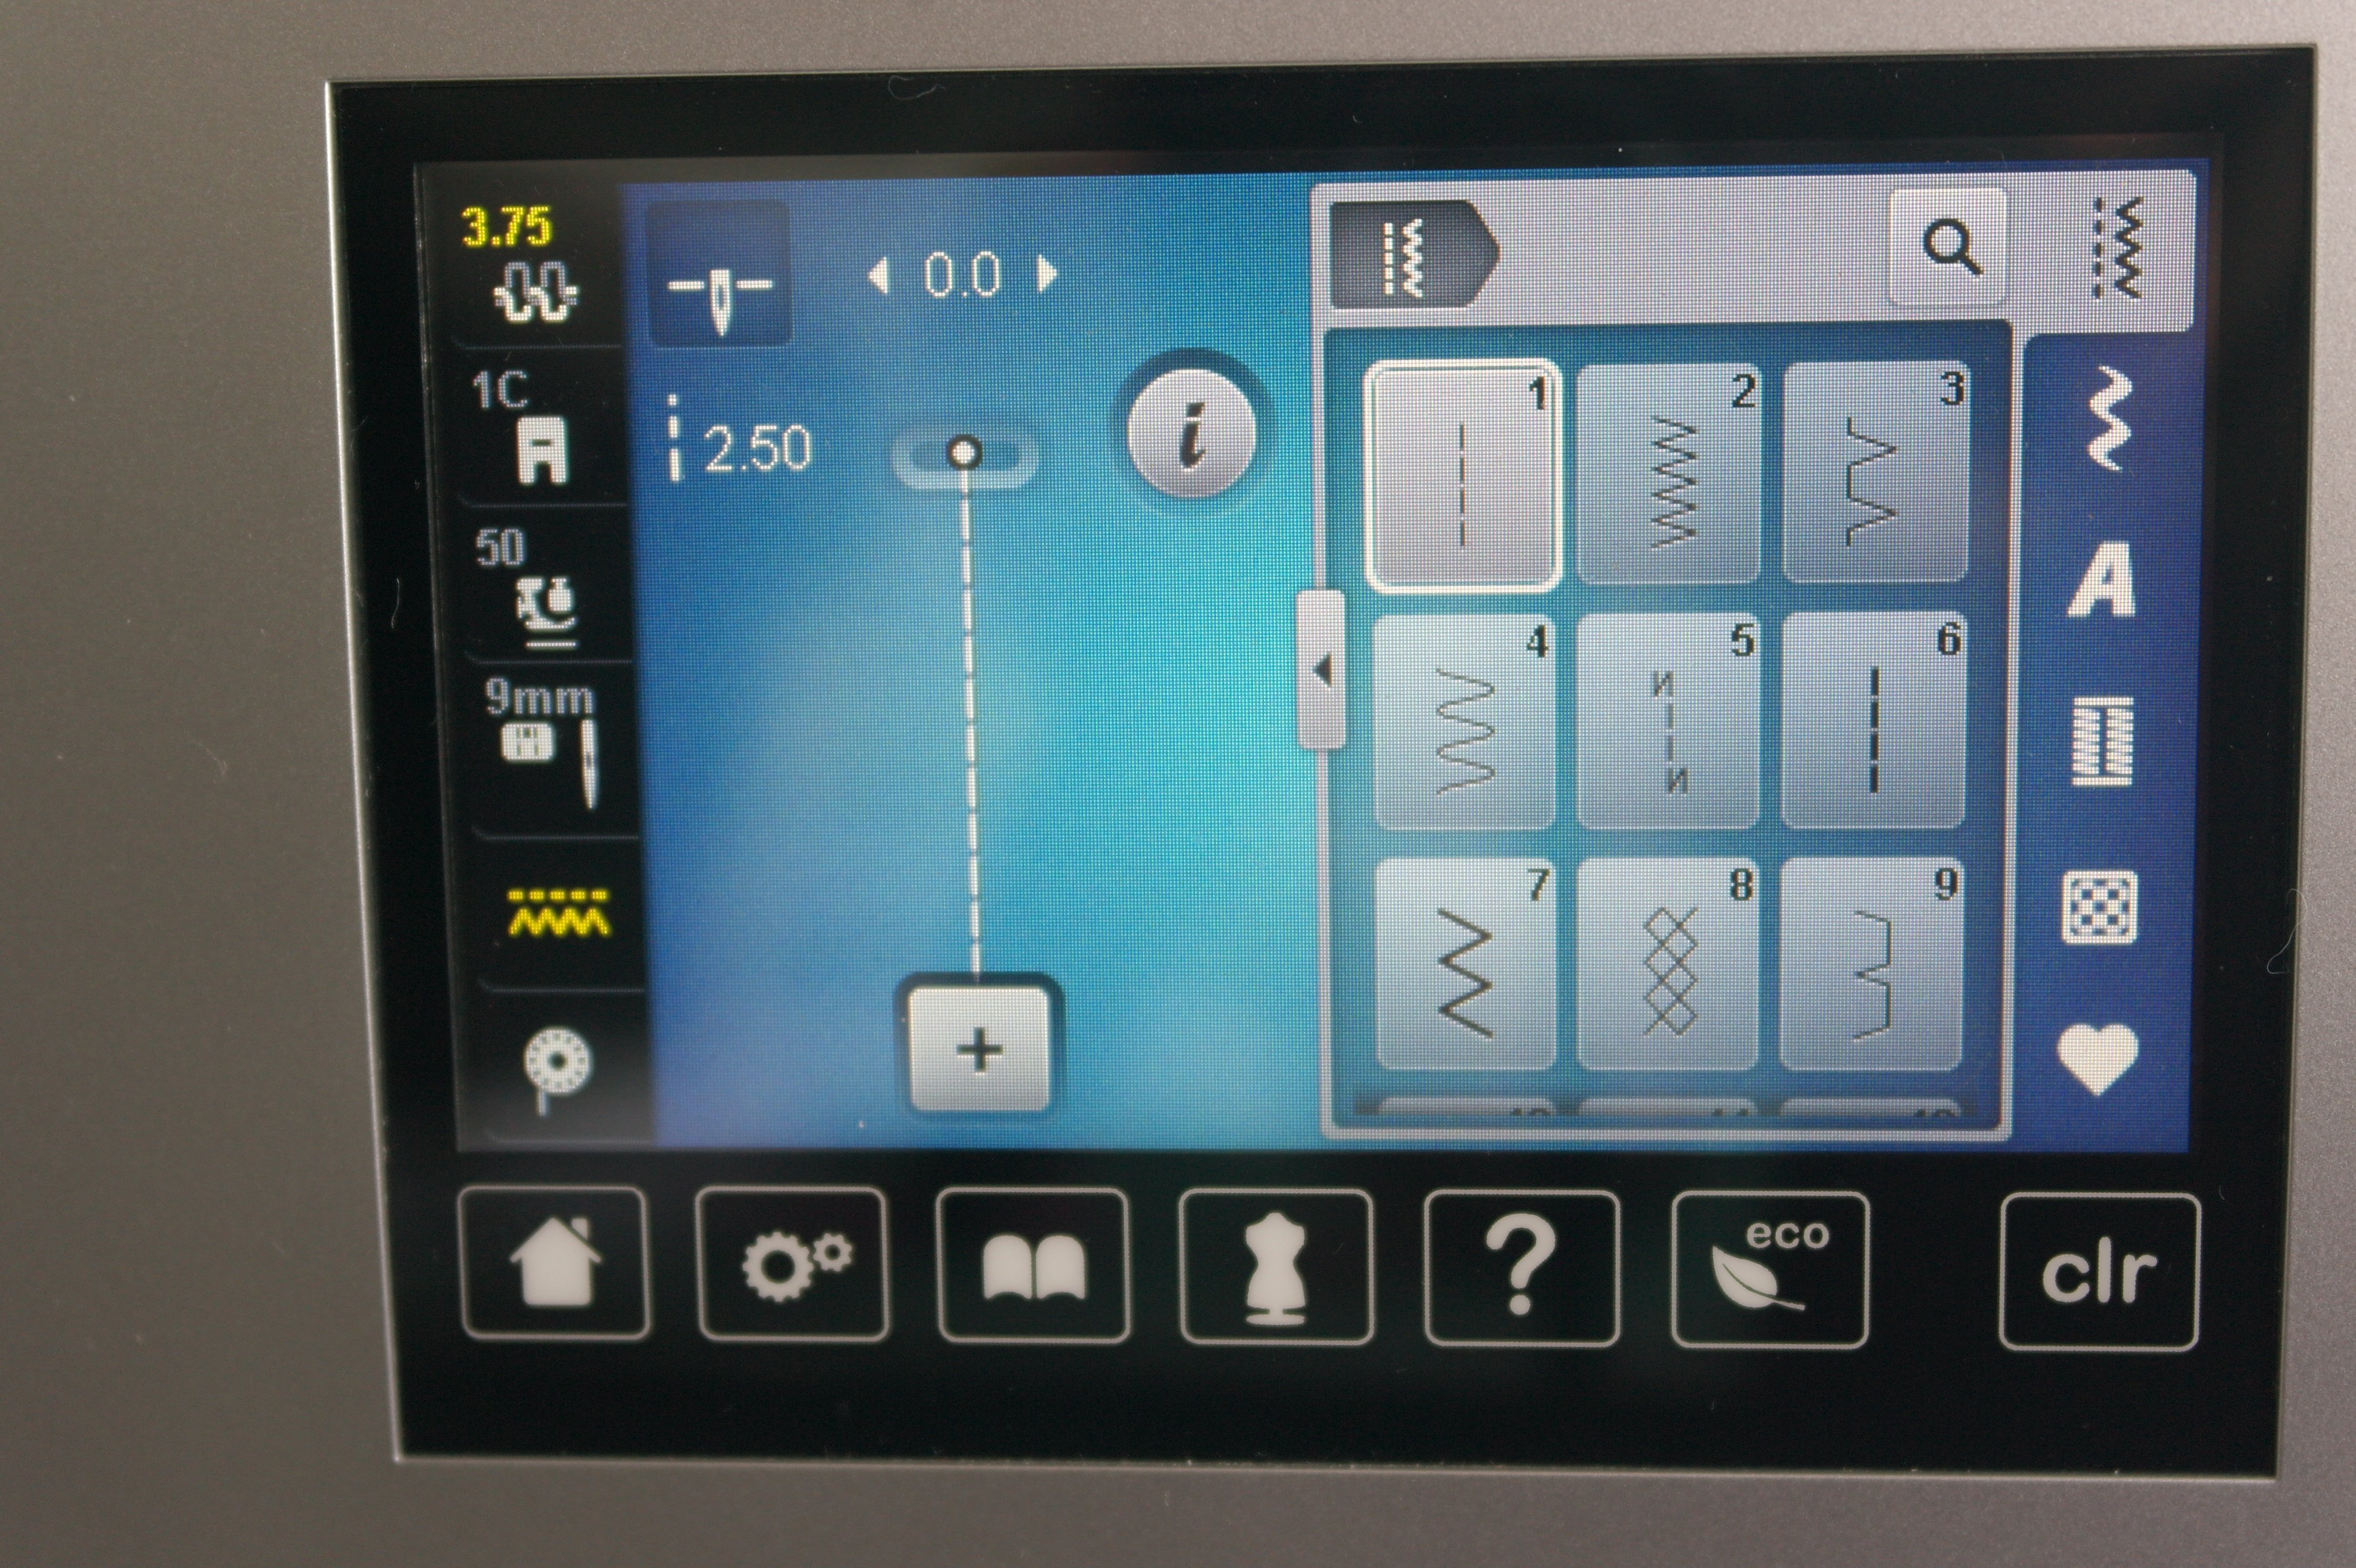
I’ve made a sample first, and noticed that I had to lower the upper tention quite a bit. It is reccomended to always make a sample first, to see if the effect is what you want. Another thing caught my eye: look at the presser foot indication on the upper left of the screen of my machine: it stell says ‘1C’. Allthough I’ve clicked on presser foot #43, nothing changed, I only saw a message telling me what kind of presser foot #43 is. With some sewing machines there is no visible change after clicking on a different presser foot, but with other machines the presser foot of your choice will appear on the screen, when selected. It was no problem with my machine: I’ve placed the couching foot, lowered the feed dogs and it worked ok.
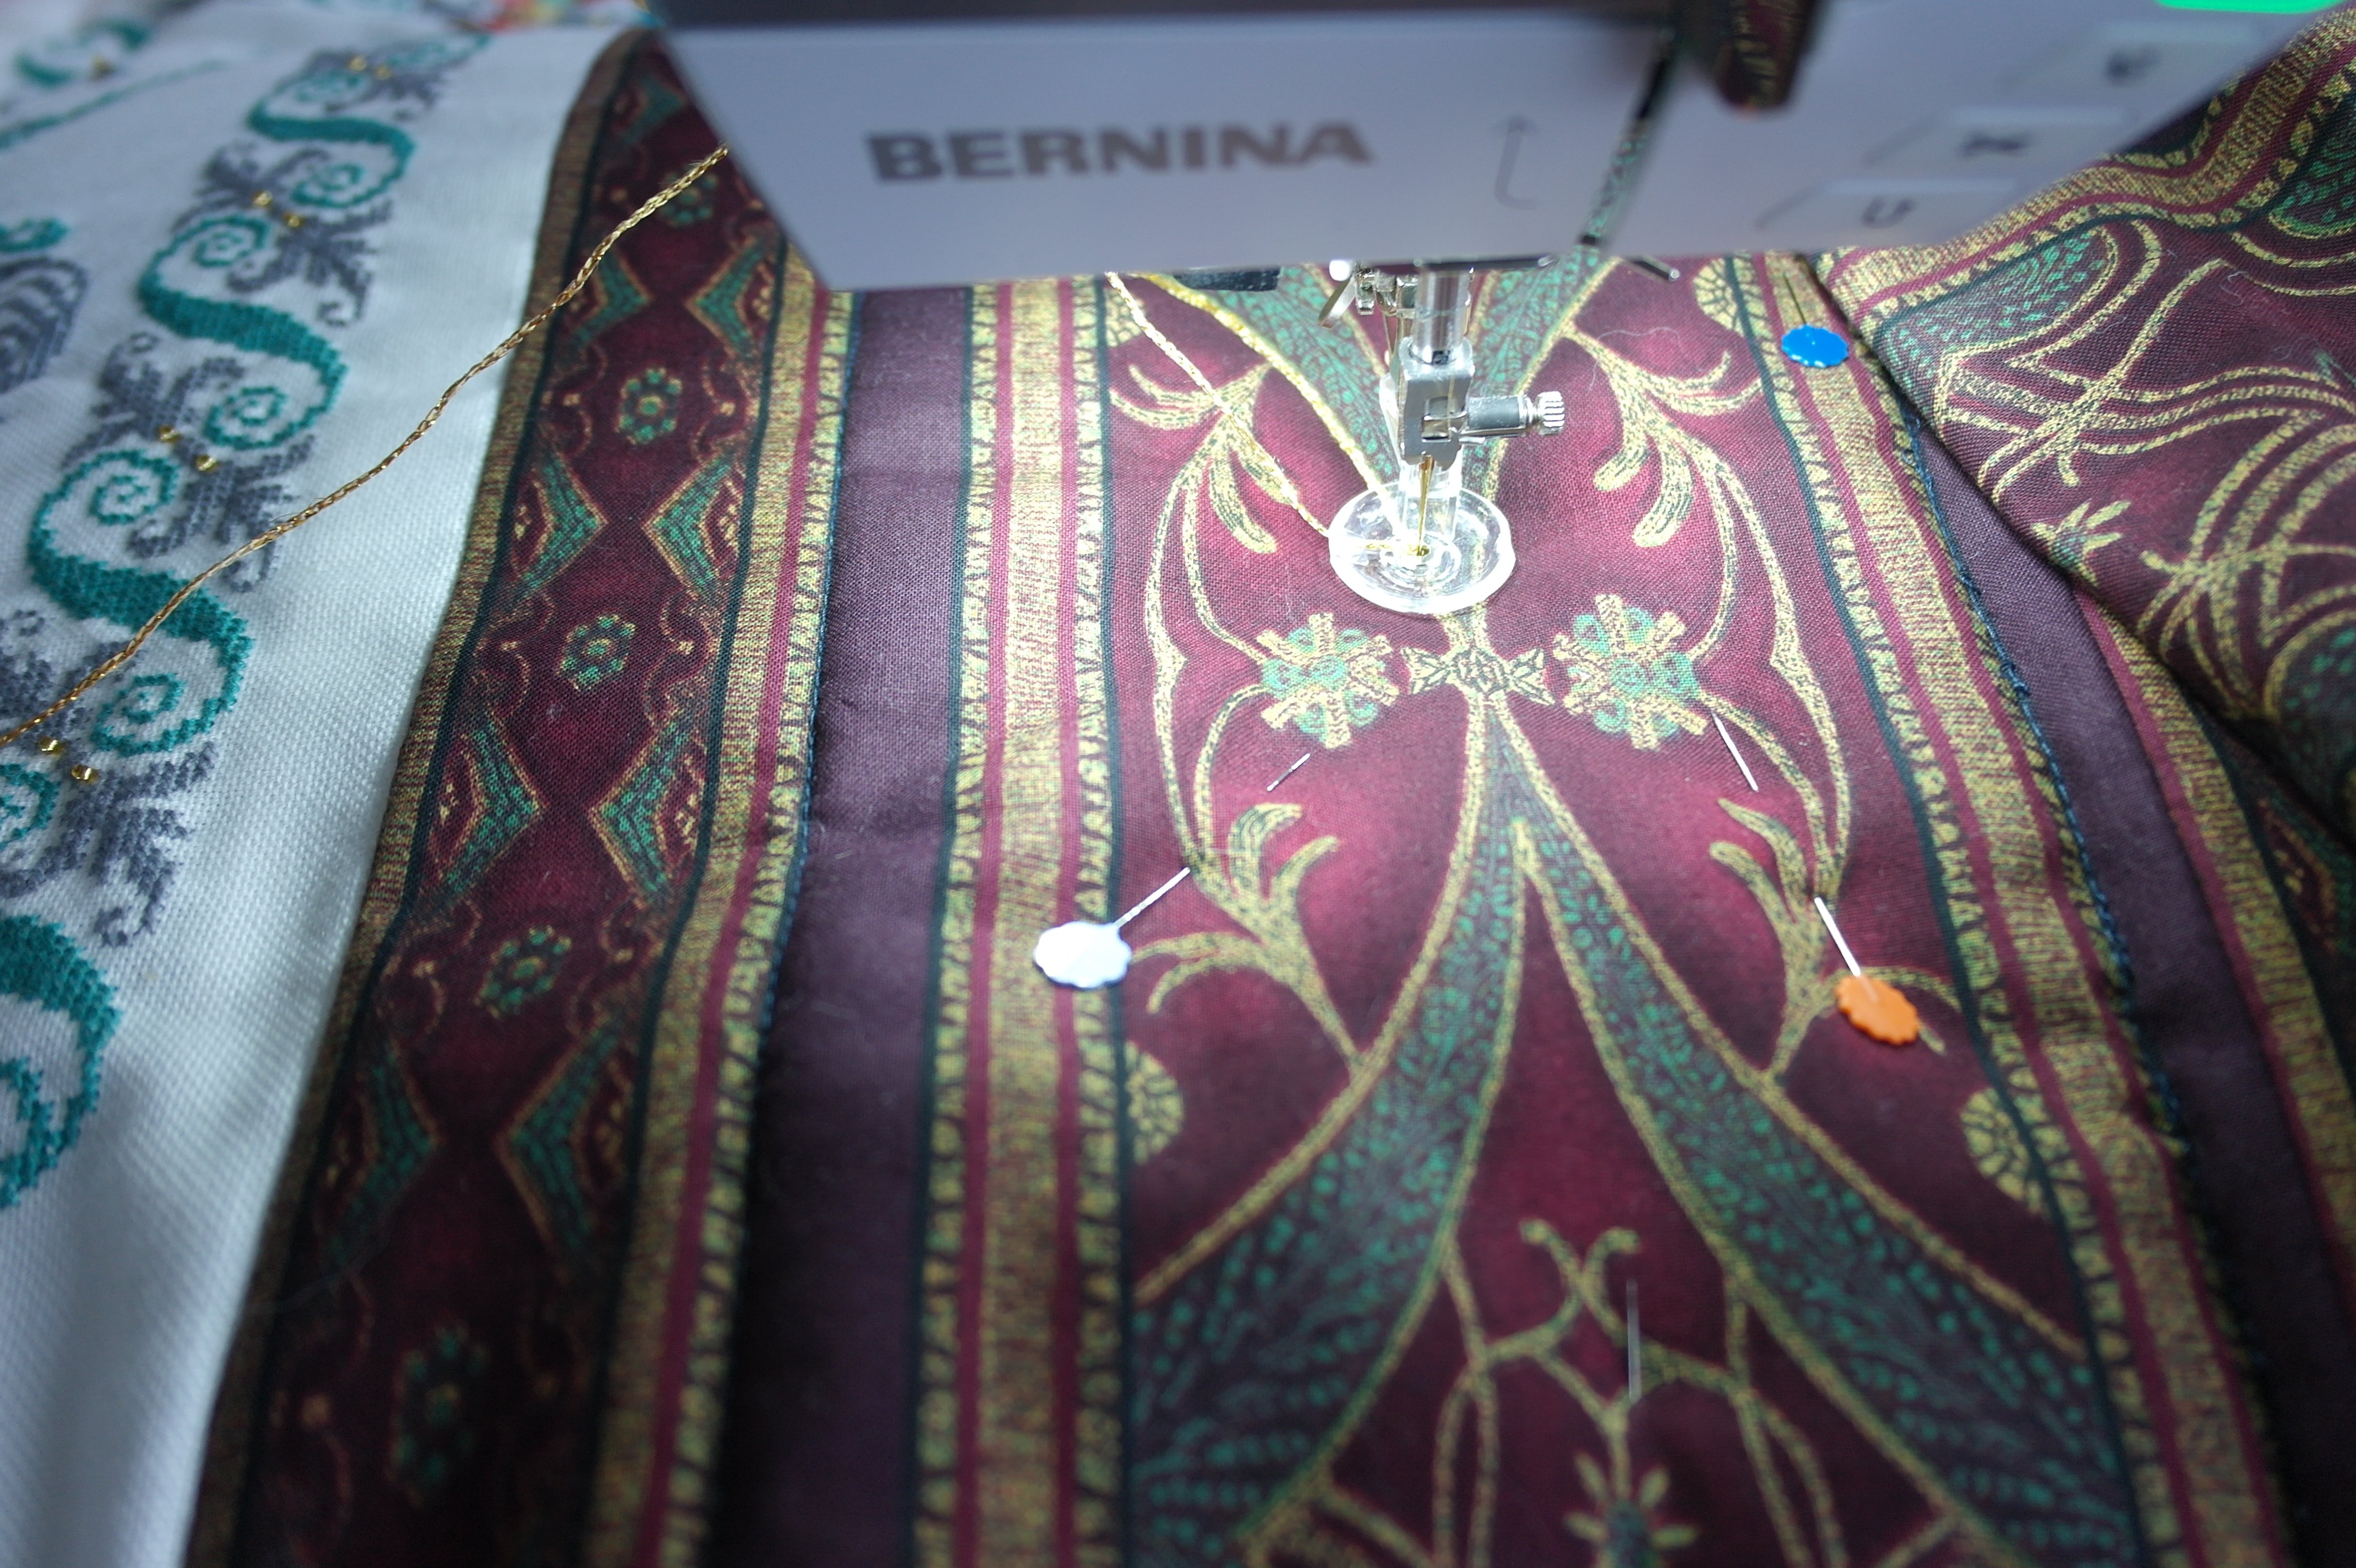
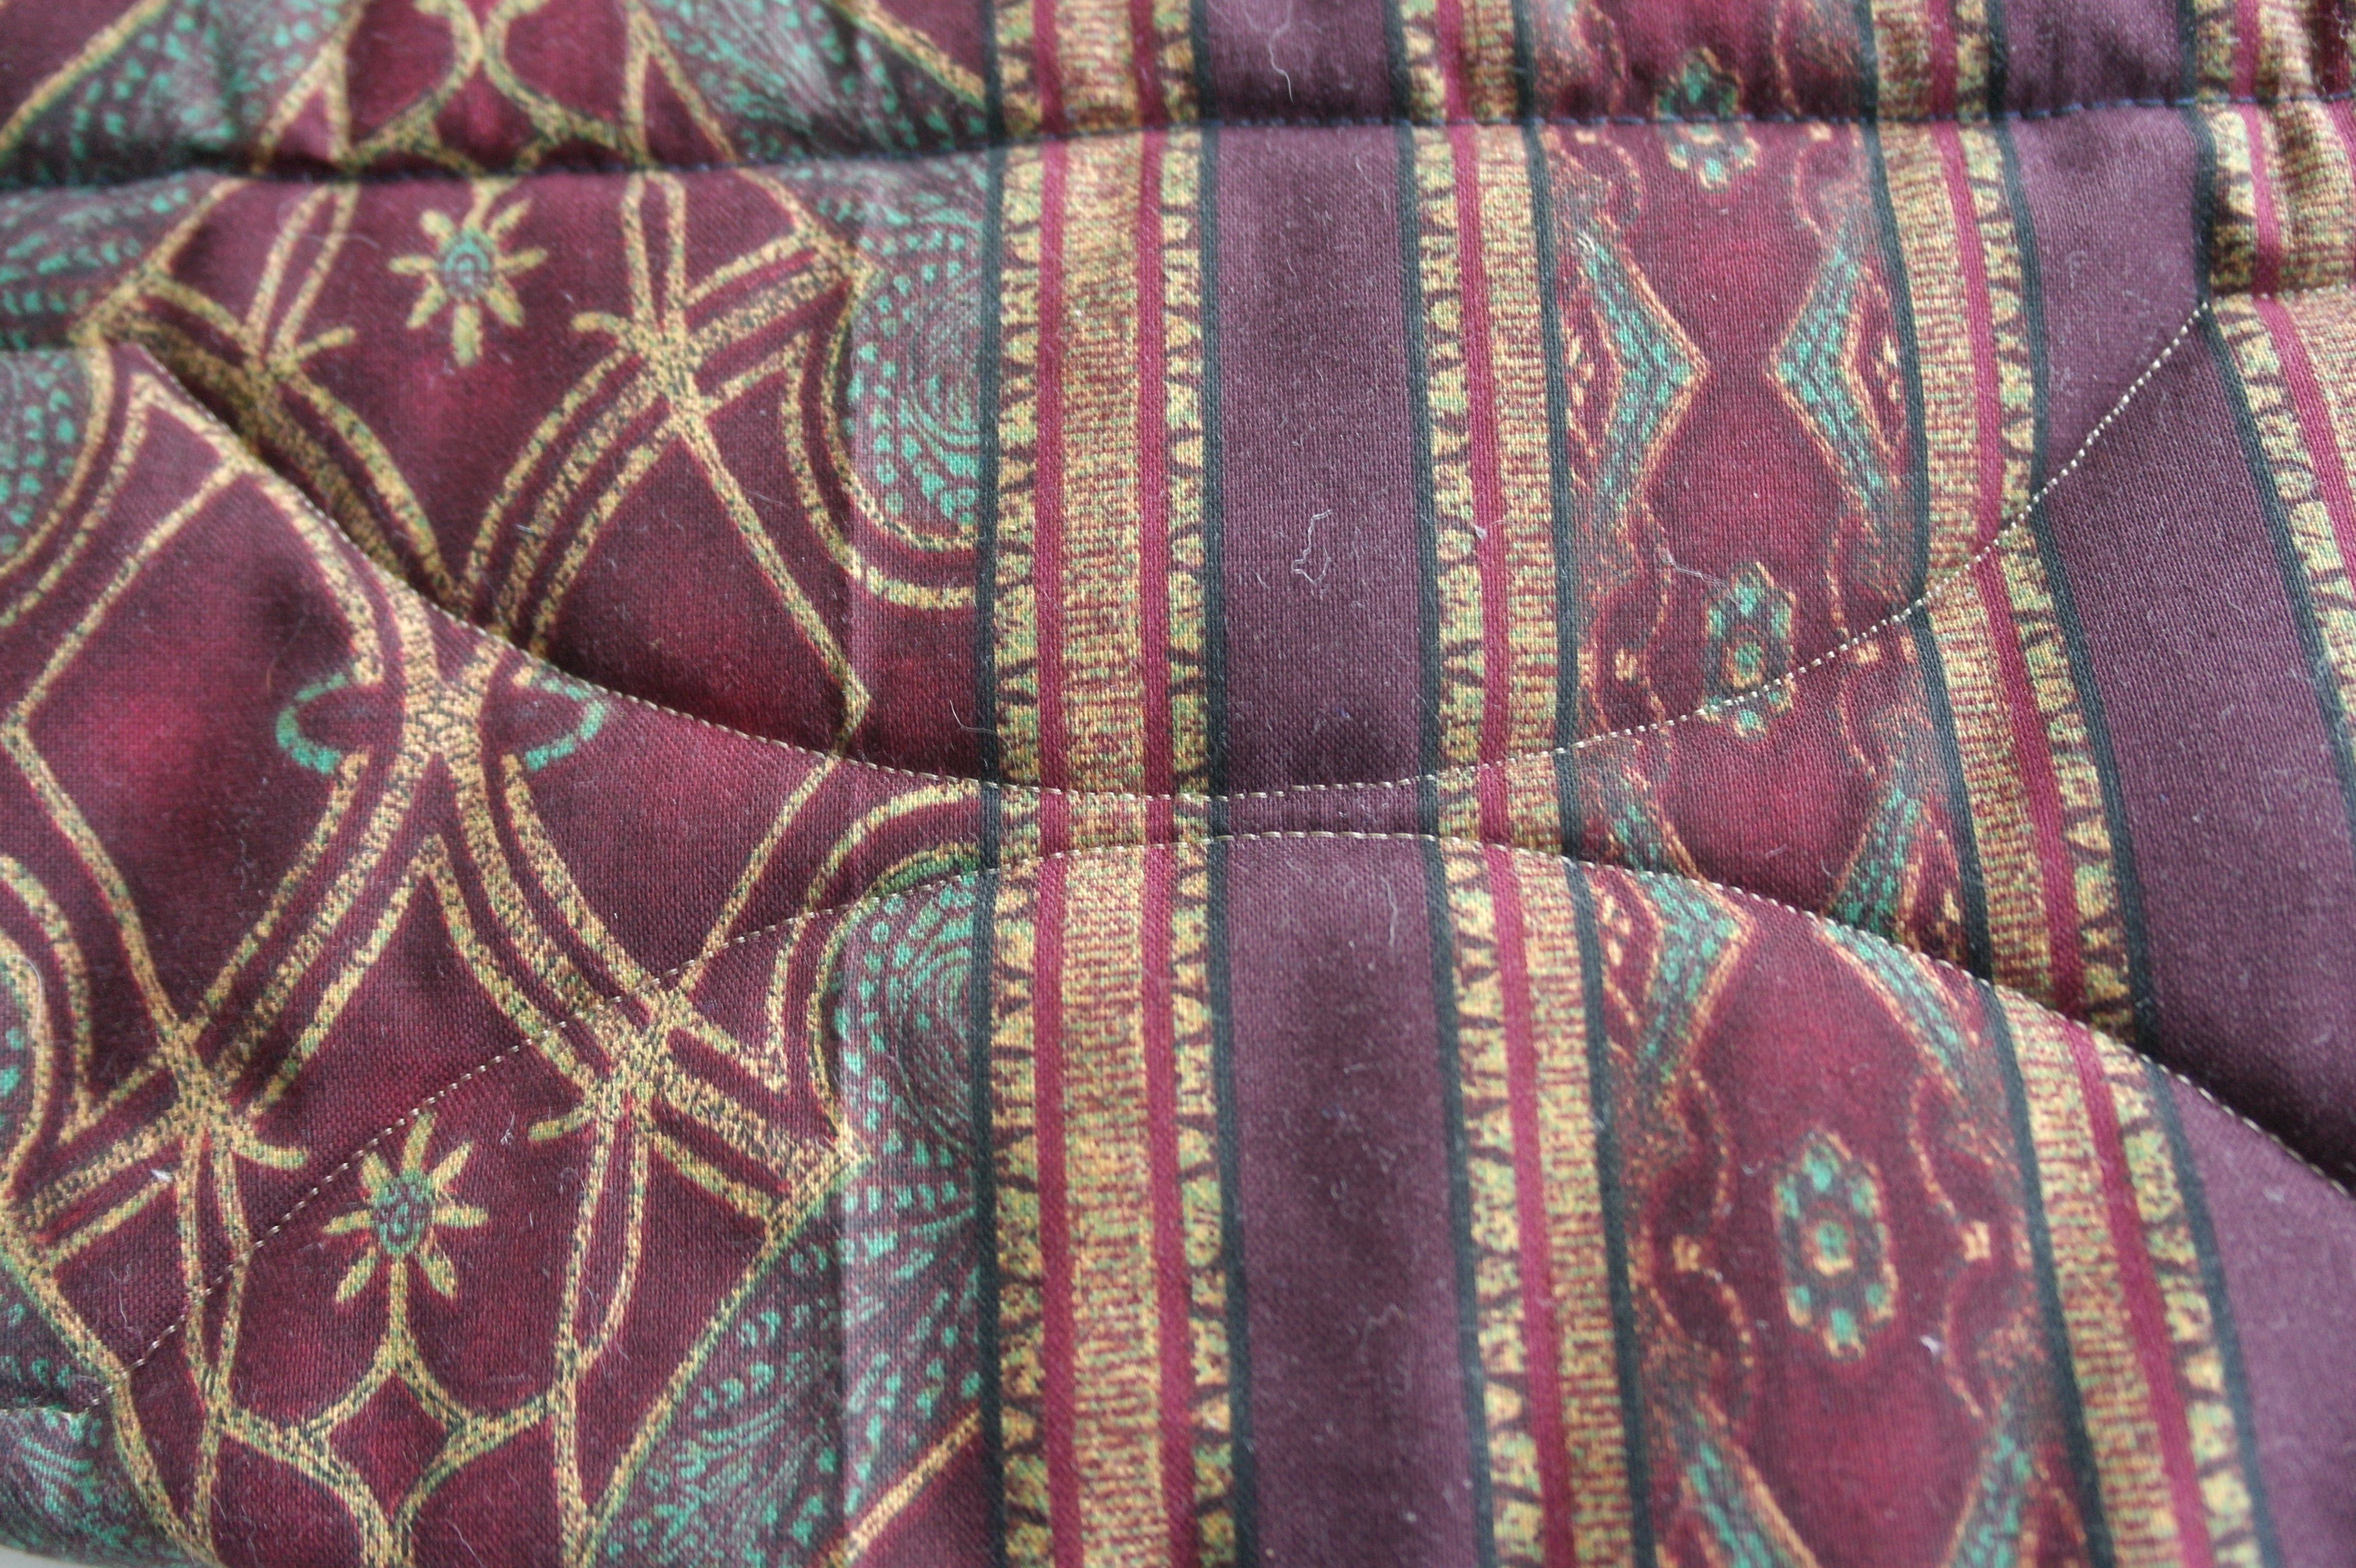
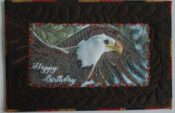
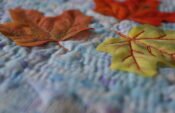
I’ve used some printed lines of the fabric as guidence, for couching with the metallic yarn. I’ve also worked around the cross sttich. Luckely my sister didn’t quilt in the fabric, so my ‘quilting’/couching looked great. I hade to beware of puckering etc. because she already binded the quilt, but in the end everything went smooth.
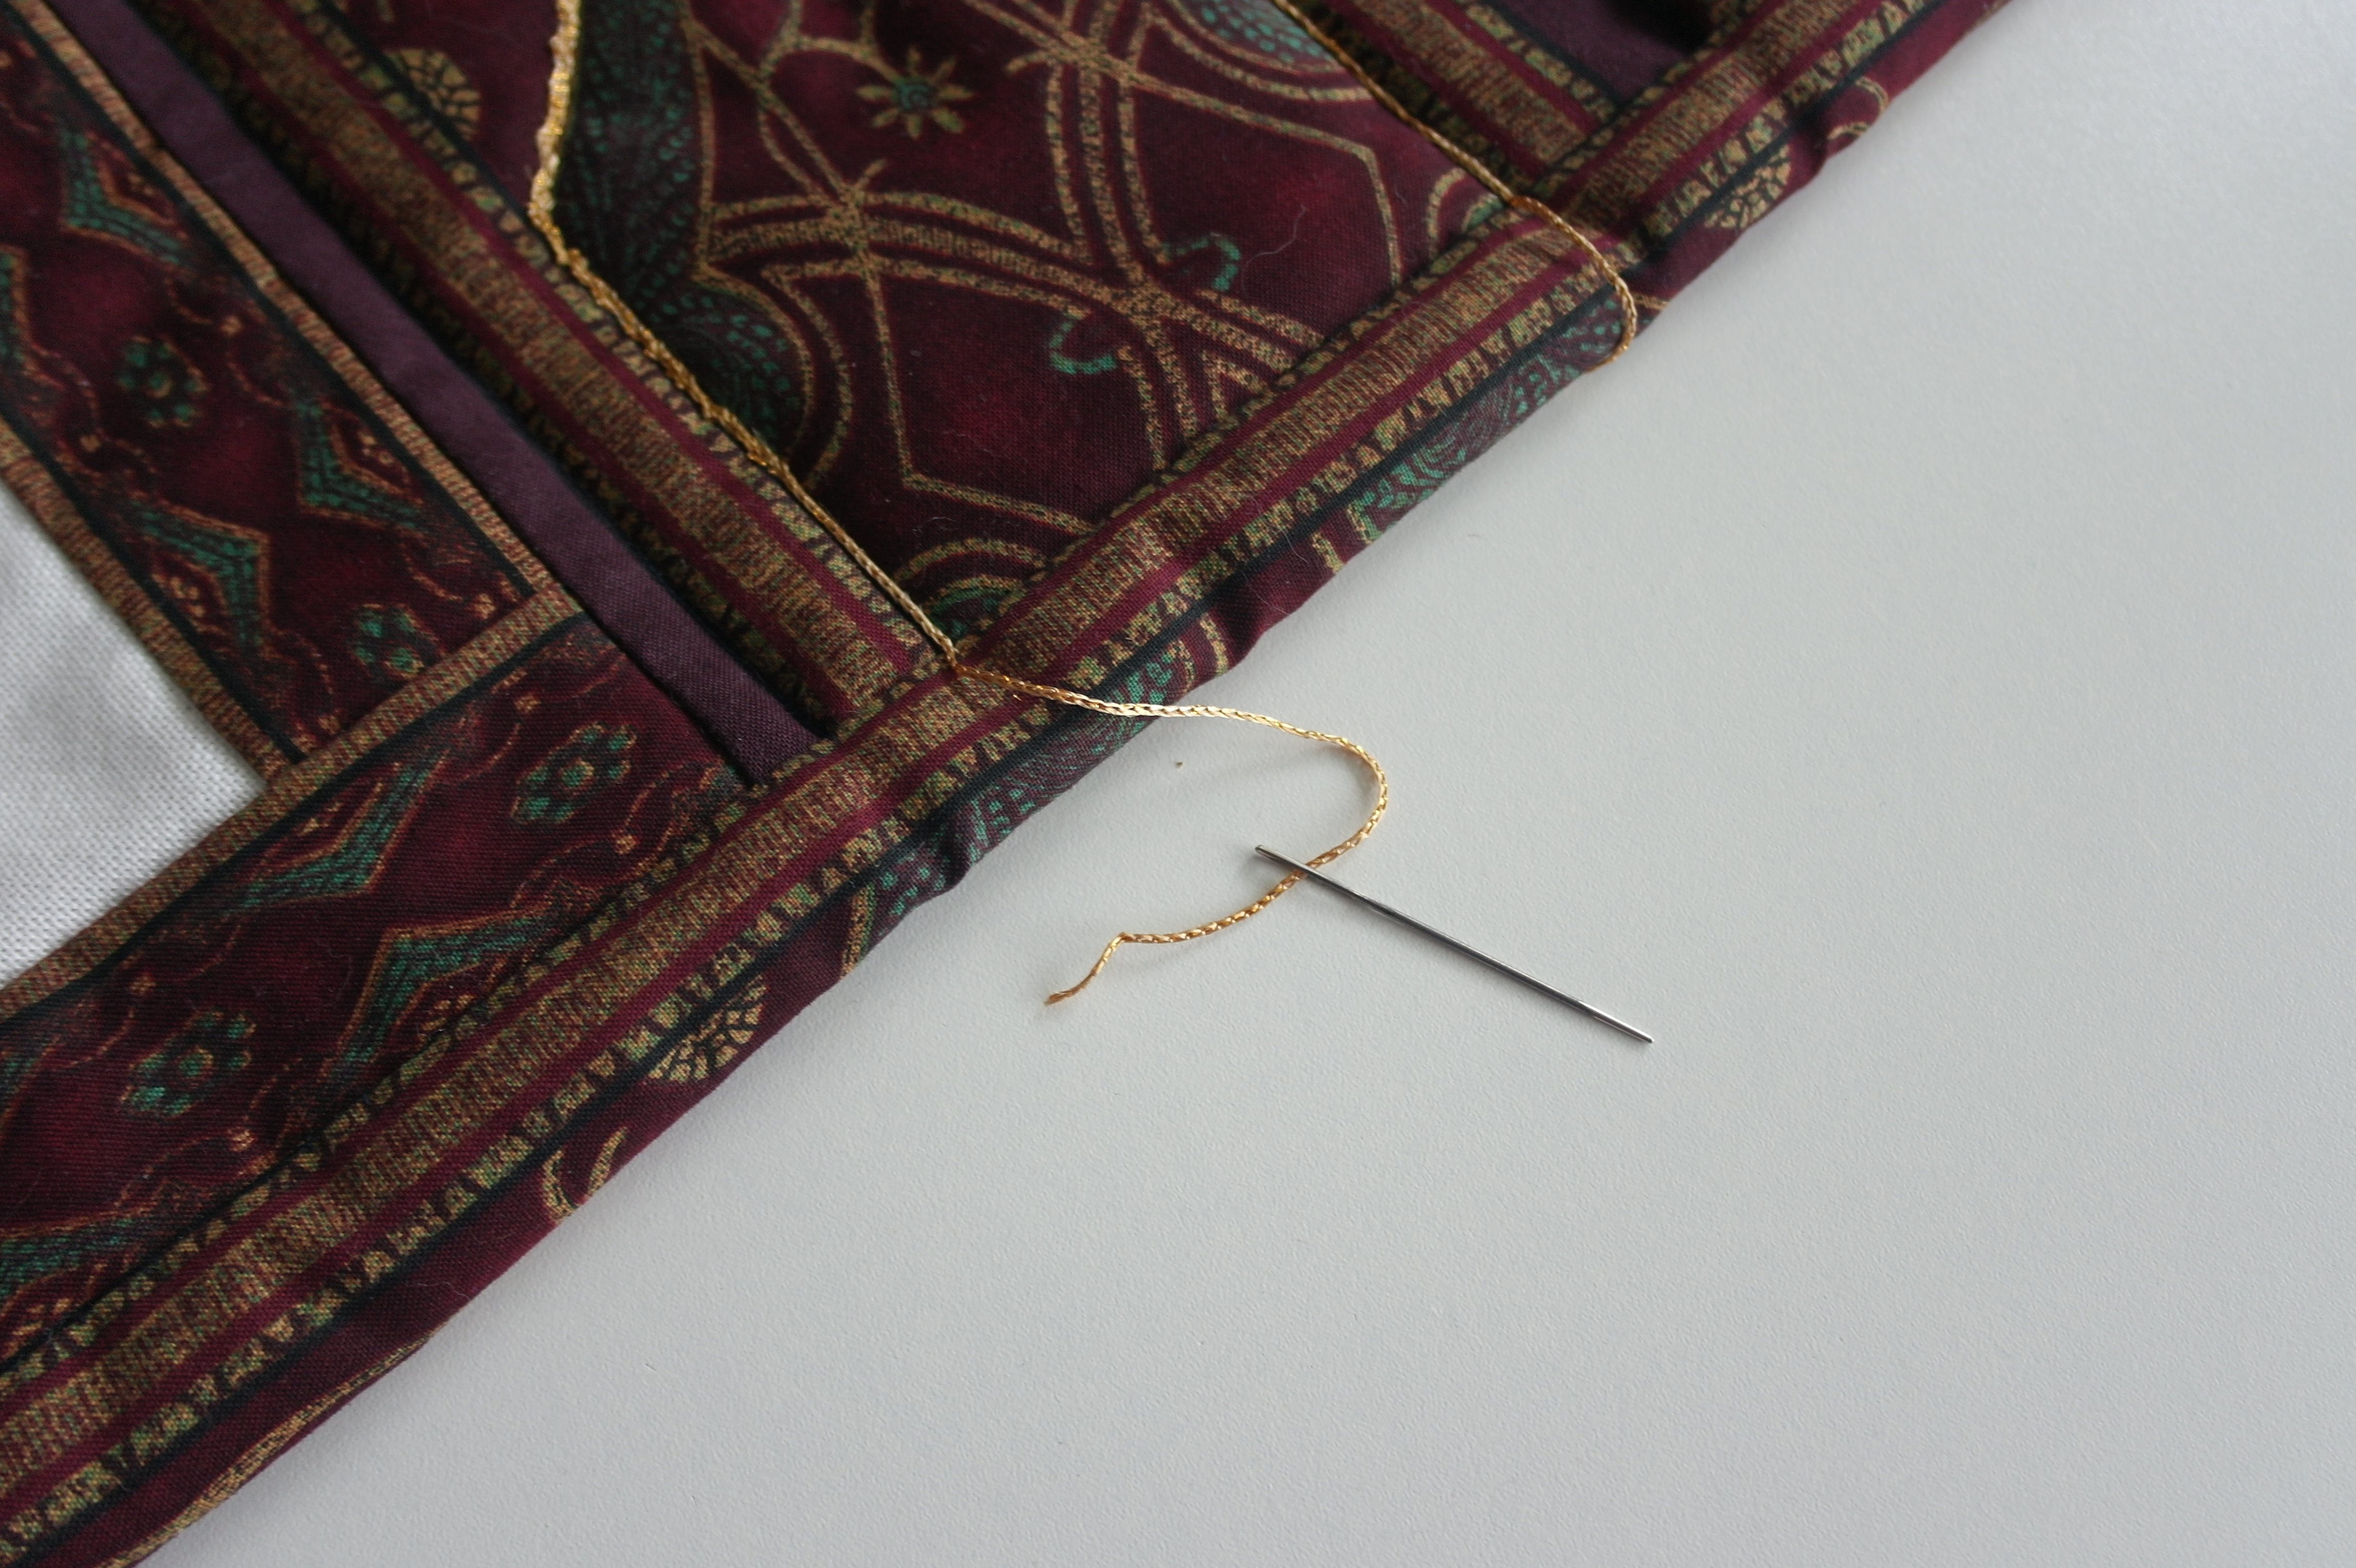
The tails of the beginning and end of the metallic yarn were sewn in between the layers of the quilt, after couching.
This is how the stitches appear at the back of the quilt: very thin stitches because of the DecoBob I’ve used.
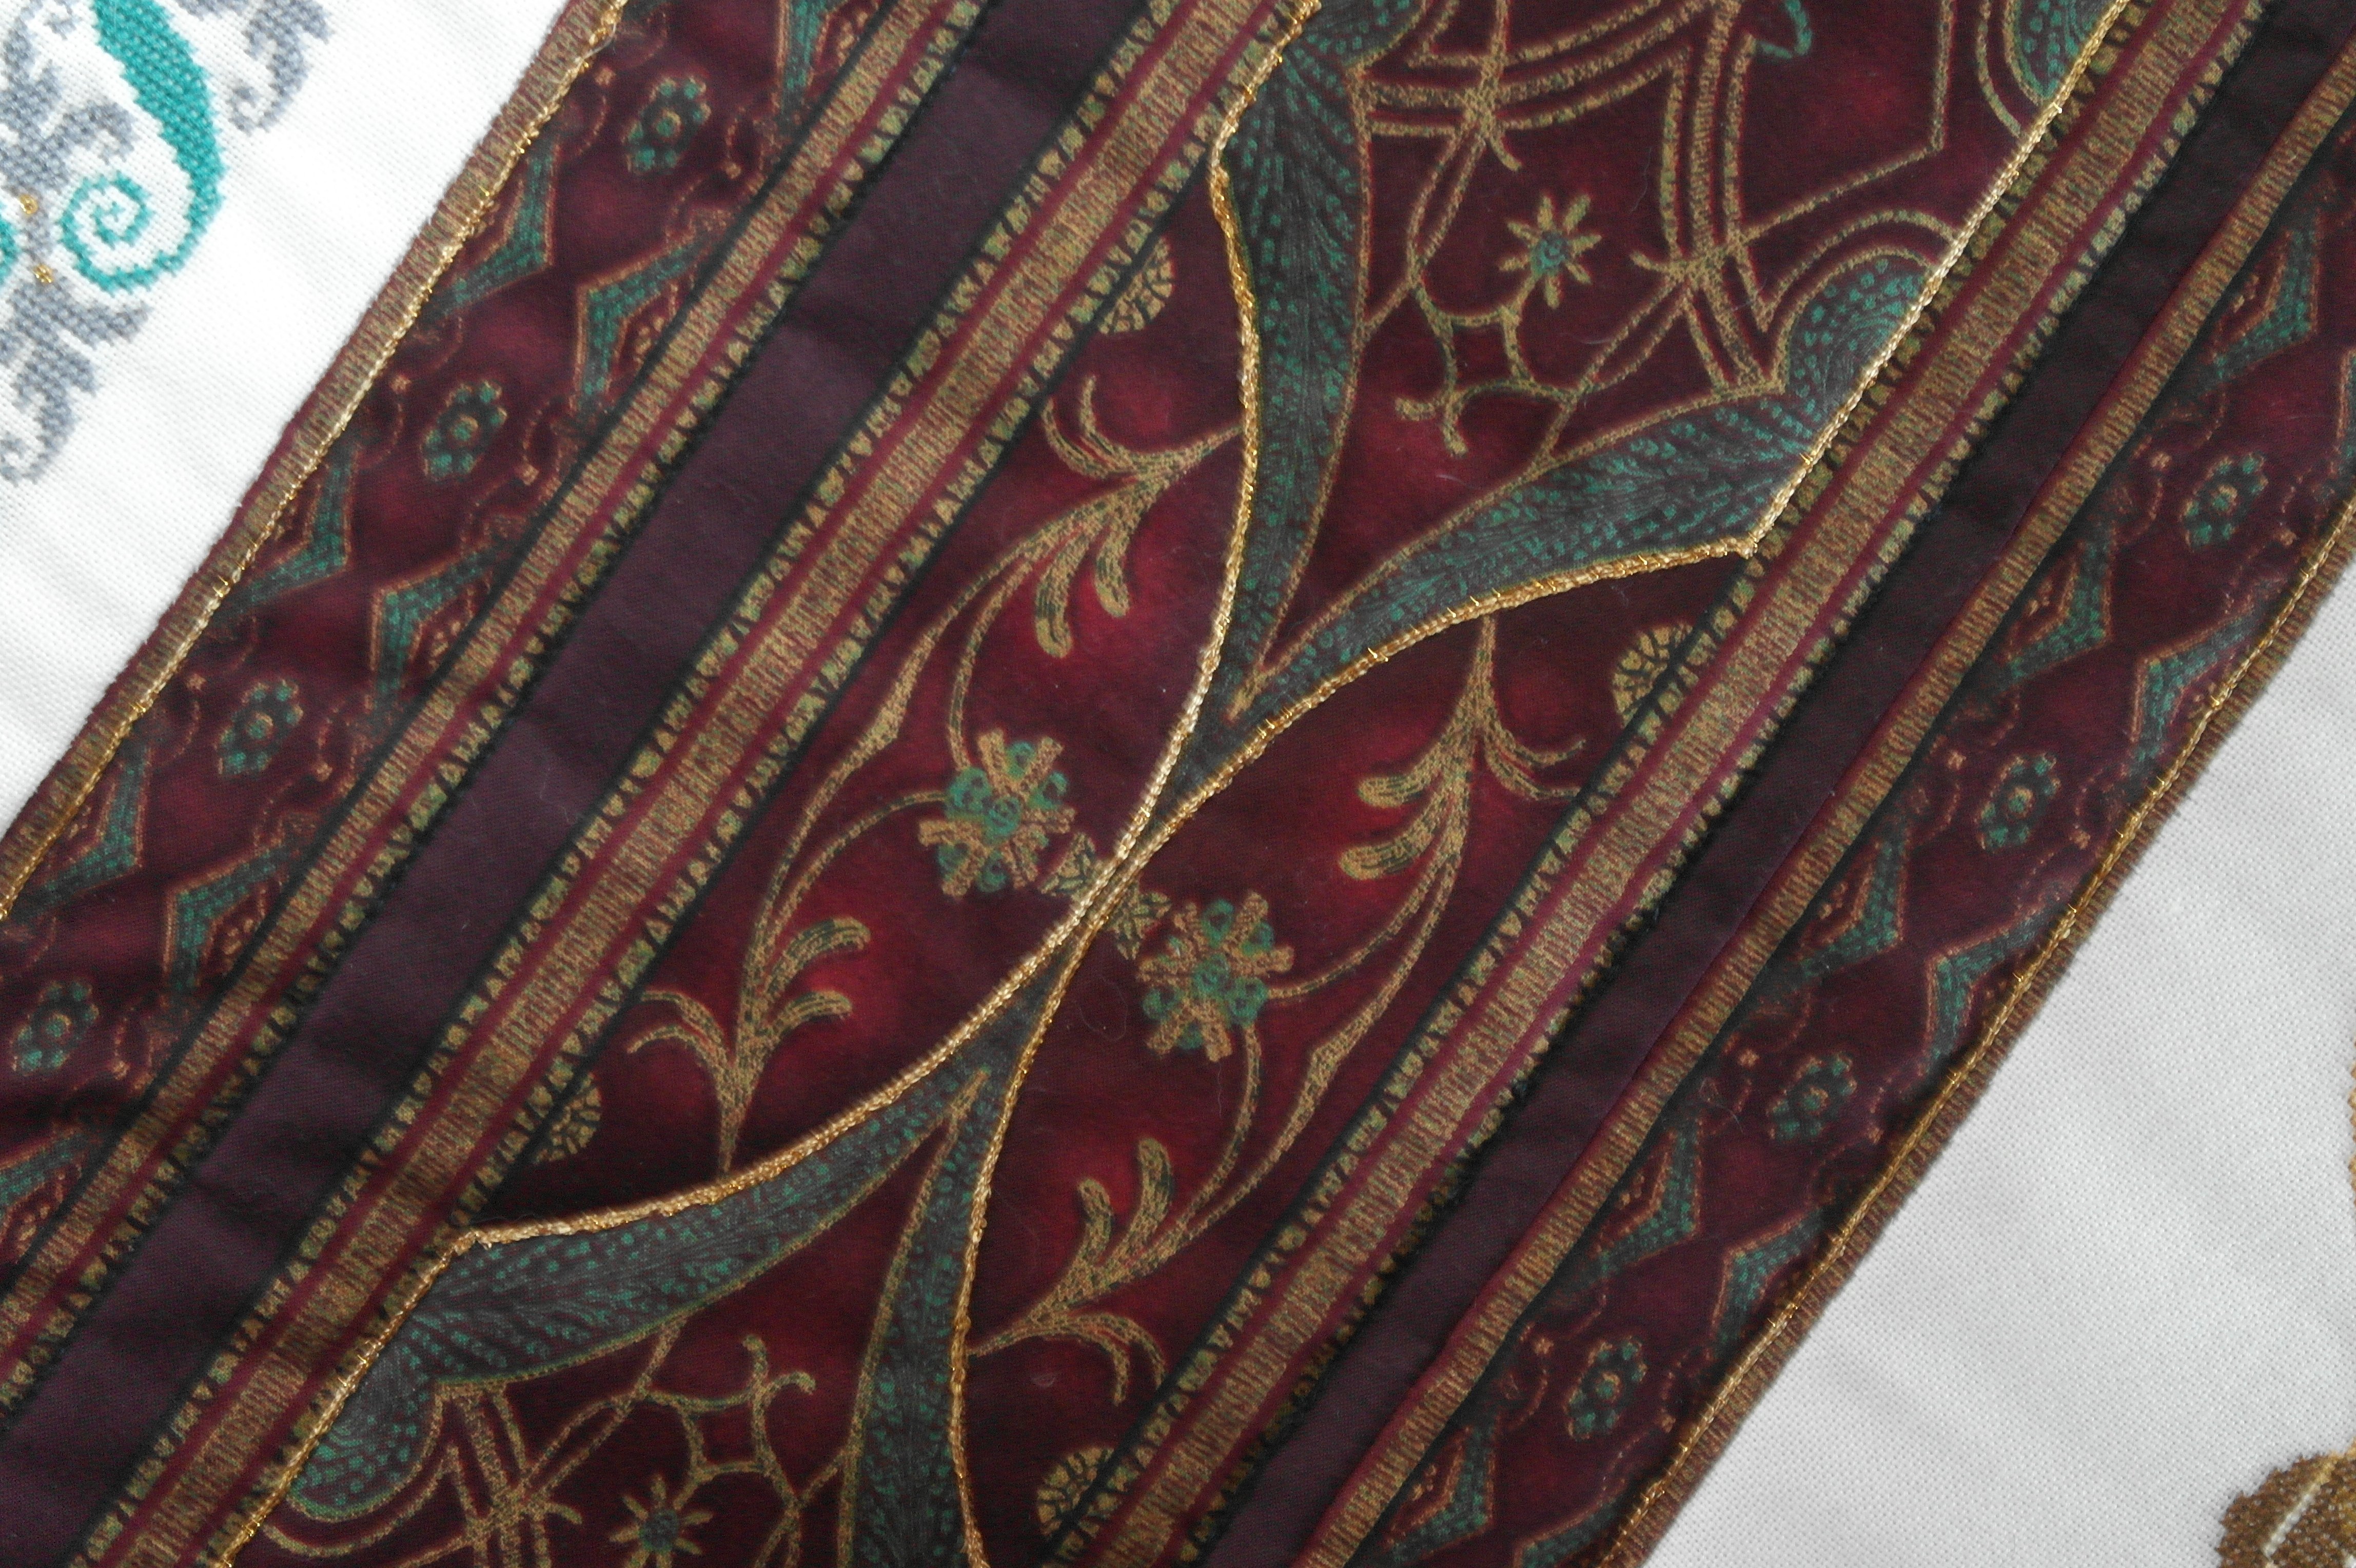
And the front looks better: not too much couching, just enough to make it stand out!.
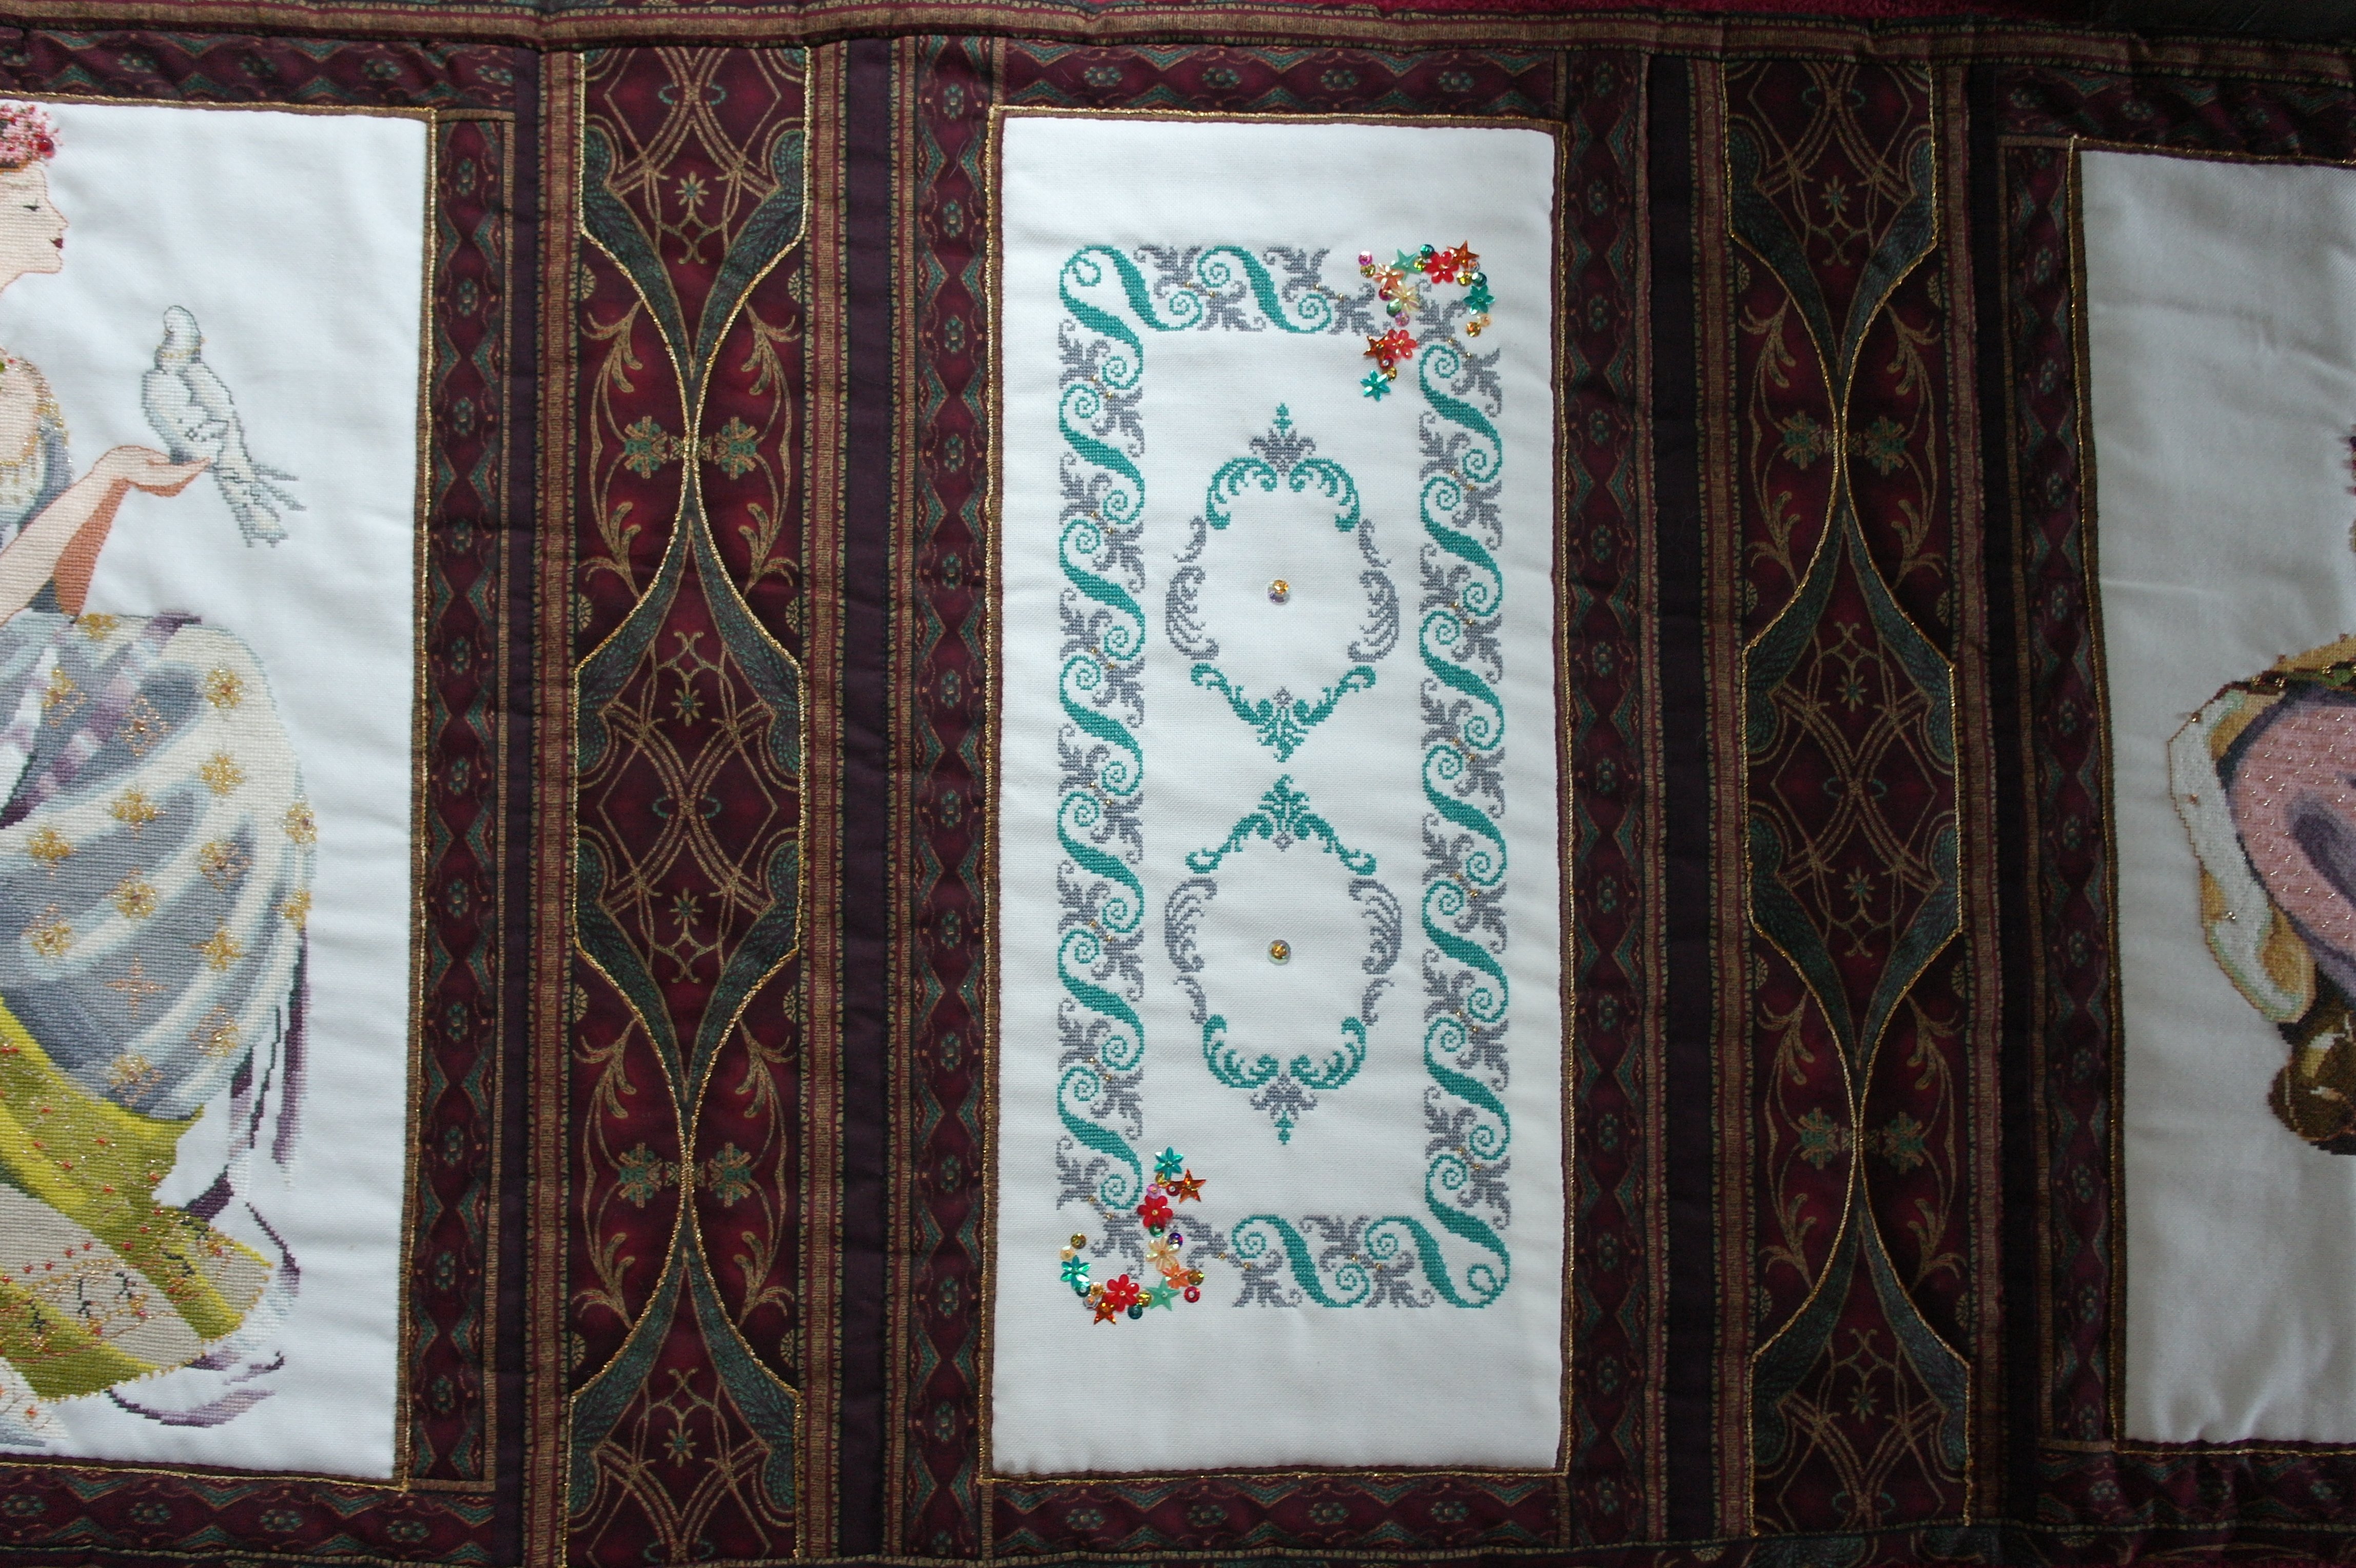
I hope my sister is pleased, her bedrunner will be returned to her so she can enjoy it again. And I have learned another skill, and had fun using this Freemotion couching foot #43.
Happy quilting!
Sylvia Kaptein
Sylvia’s Art Quilts Studio
www.sylviasartquilts.nl
[email protected]
Please watch the video below!
0 Responses