 BERNINA Corporate Blog -
In april it was the 8th birthday of my eldest granddaughter. What could more fun than to make her a personal gift. She is very interested in the Dutch Coast Guard, SAR and resque missions, and wants to be a flight nurse when she grows up. She makes bracelets out of paracord by herself, and sells them, giving the full amount of her sale to the KNRM (Royal Dutch Resque Company). So I’ve made her a personal cover for a binder with all her interests at the front.
I needed a couple of materials which I’ve prepared:
1) Embroidery motif with medic items – I made sure that the motif was of the right size to fit the cover.
2) PhotoFabric for printing badges (one is her own design) and ironing on Heatn’Bond LIte. The images were taken from pictures, and resized
3) Fabric and batting for making the cover. I’ve measured the binder first to calculate how much material I needed. The yellow fabric is for the right- and inner side of the cover, red fabric for binding, and blue thread for finishing: these are the colors of the rescue helicopter she likes very much.
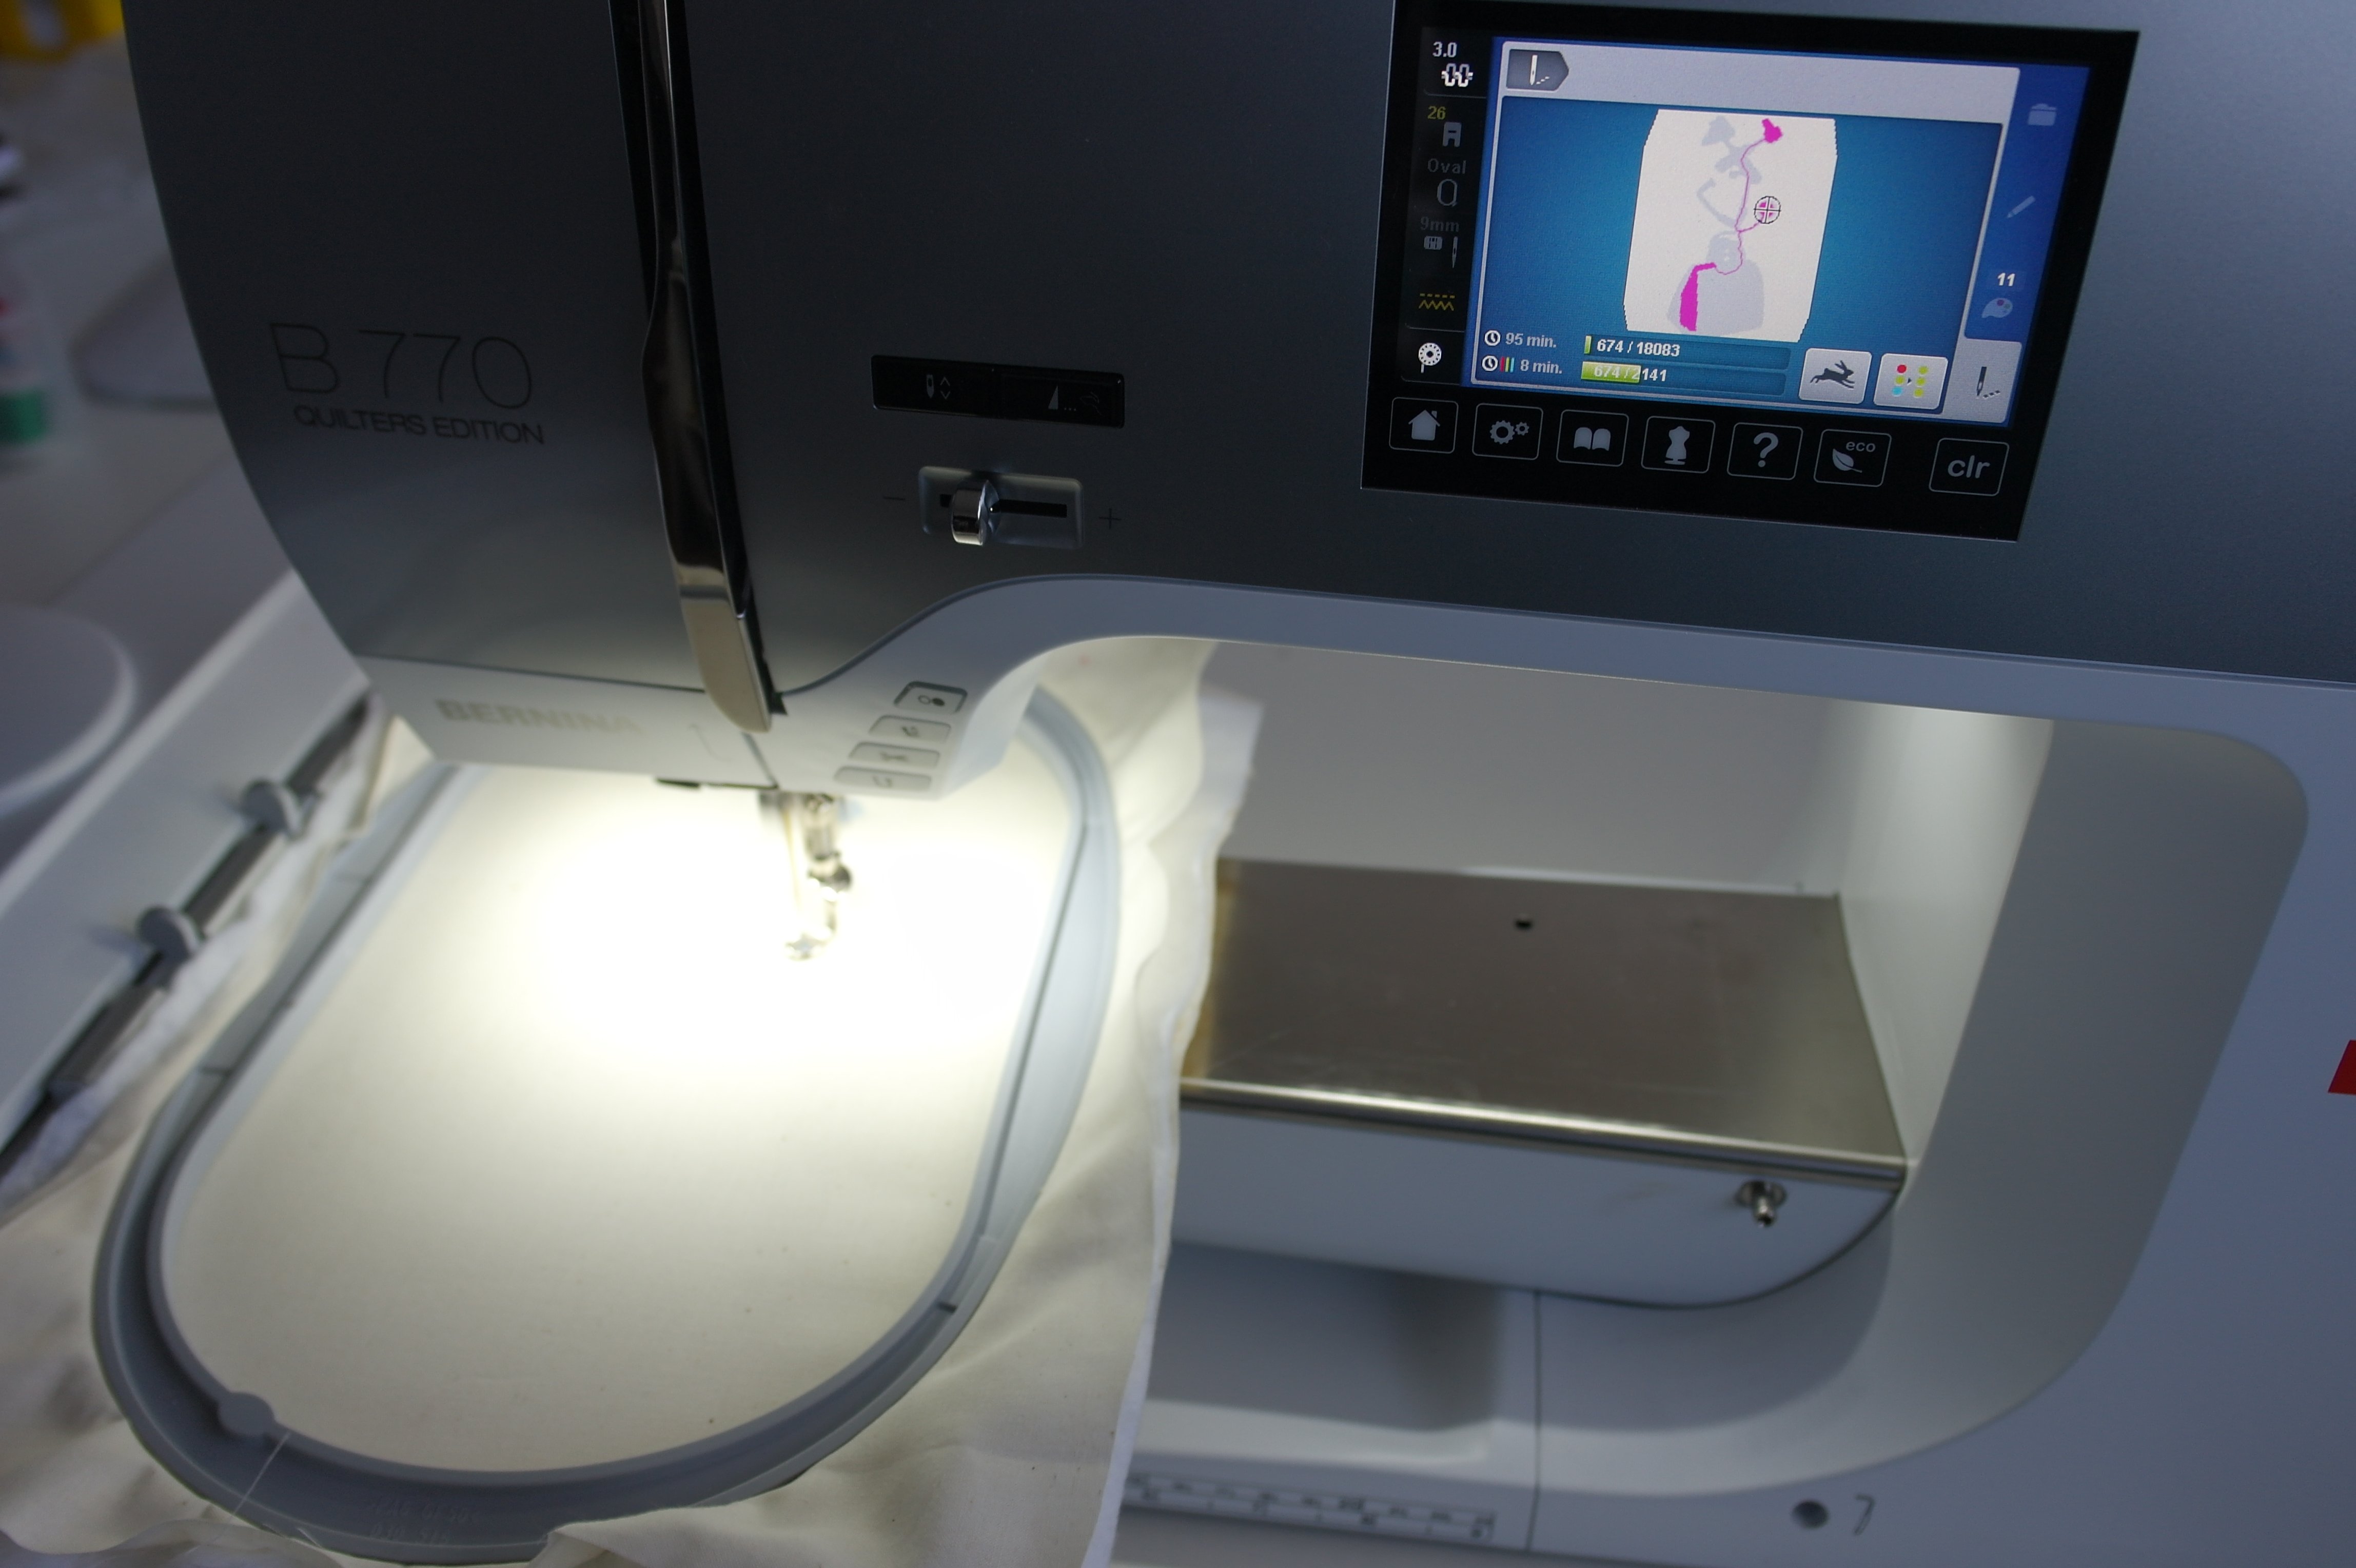
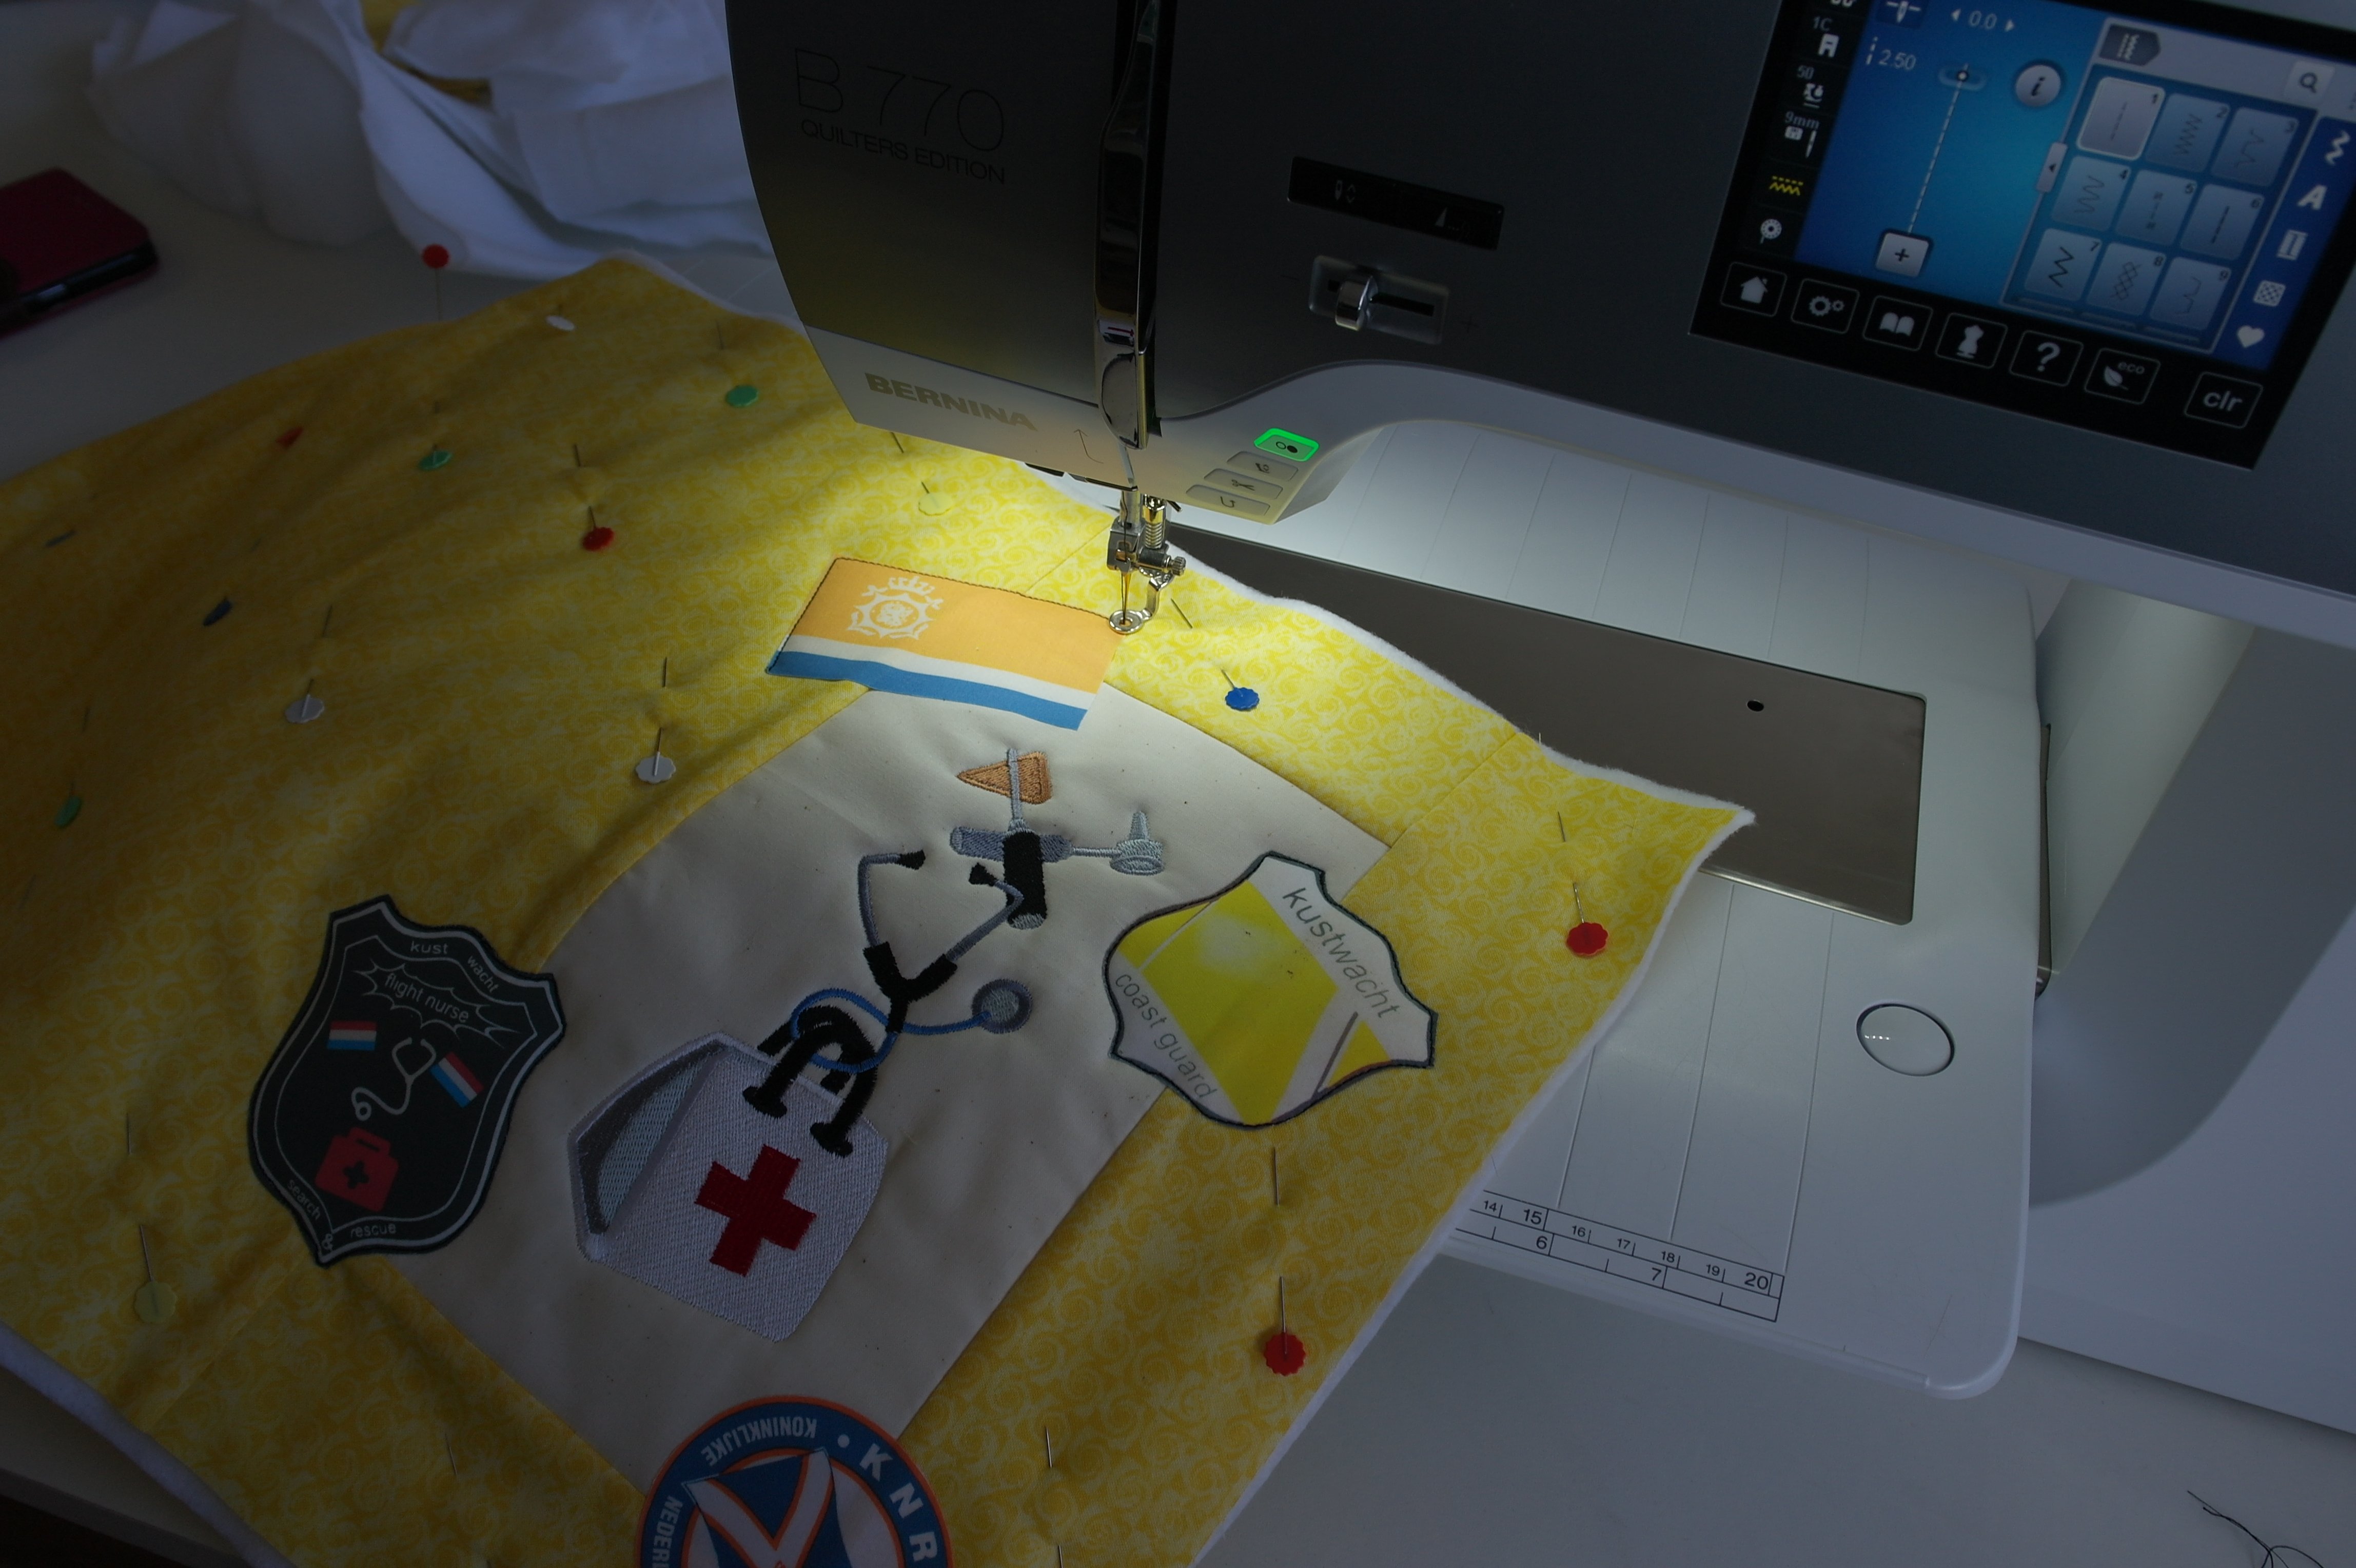
The first thing I did was transferring the embroidery motif to my USB-stick, loaded it on my machine, and used the oval hoop to frame a sandwich, made out of backing, batting and fabric for the top. I have worked again with the BERNINA 770QE, using the embroidery module.
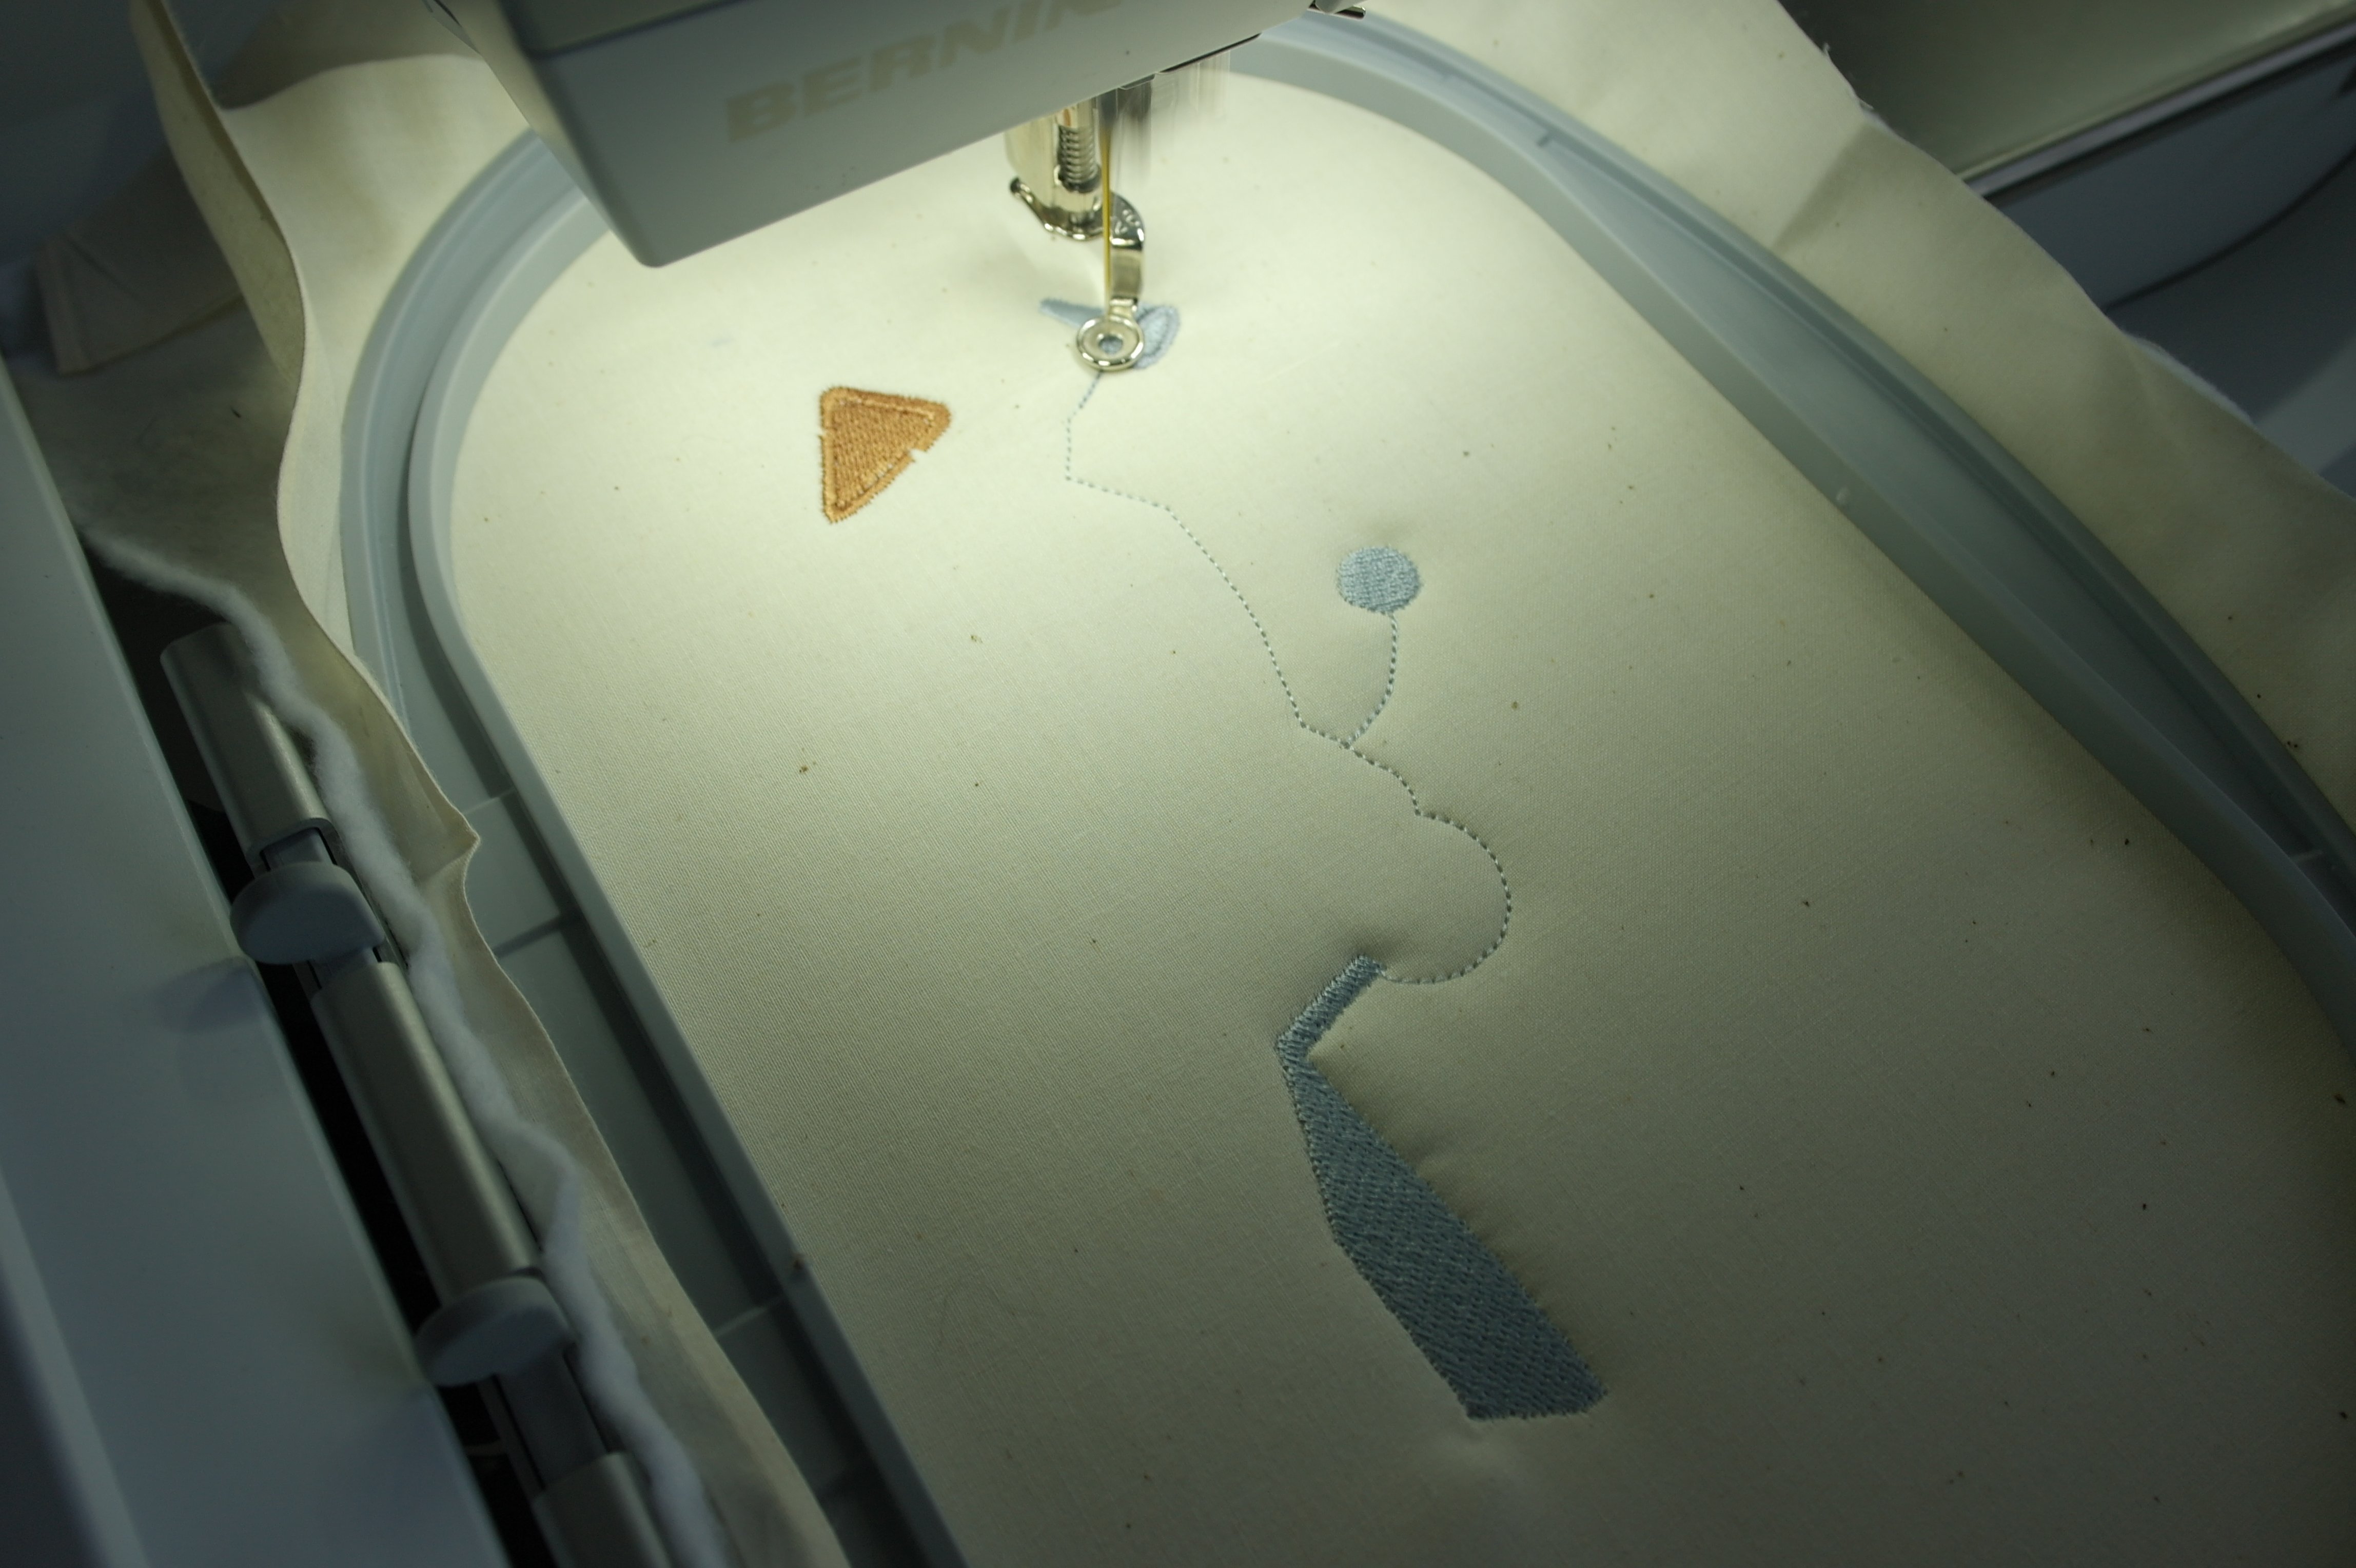
My machine purred… and the motif came out just fine. It is fun to see something like that grow, while changing colors/threads…

It looks great, doesn’t it? Just the image she would want…
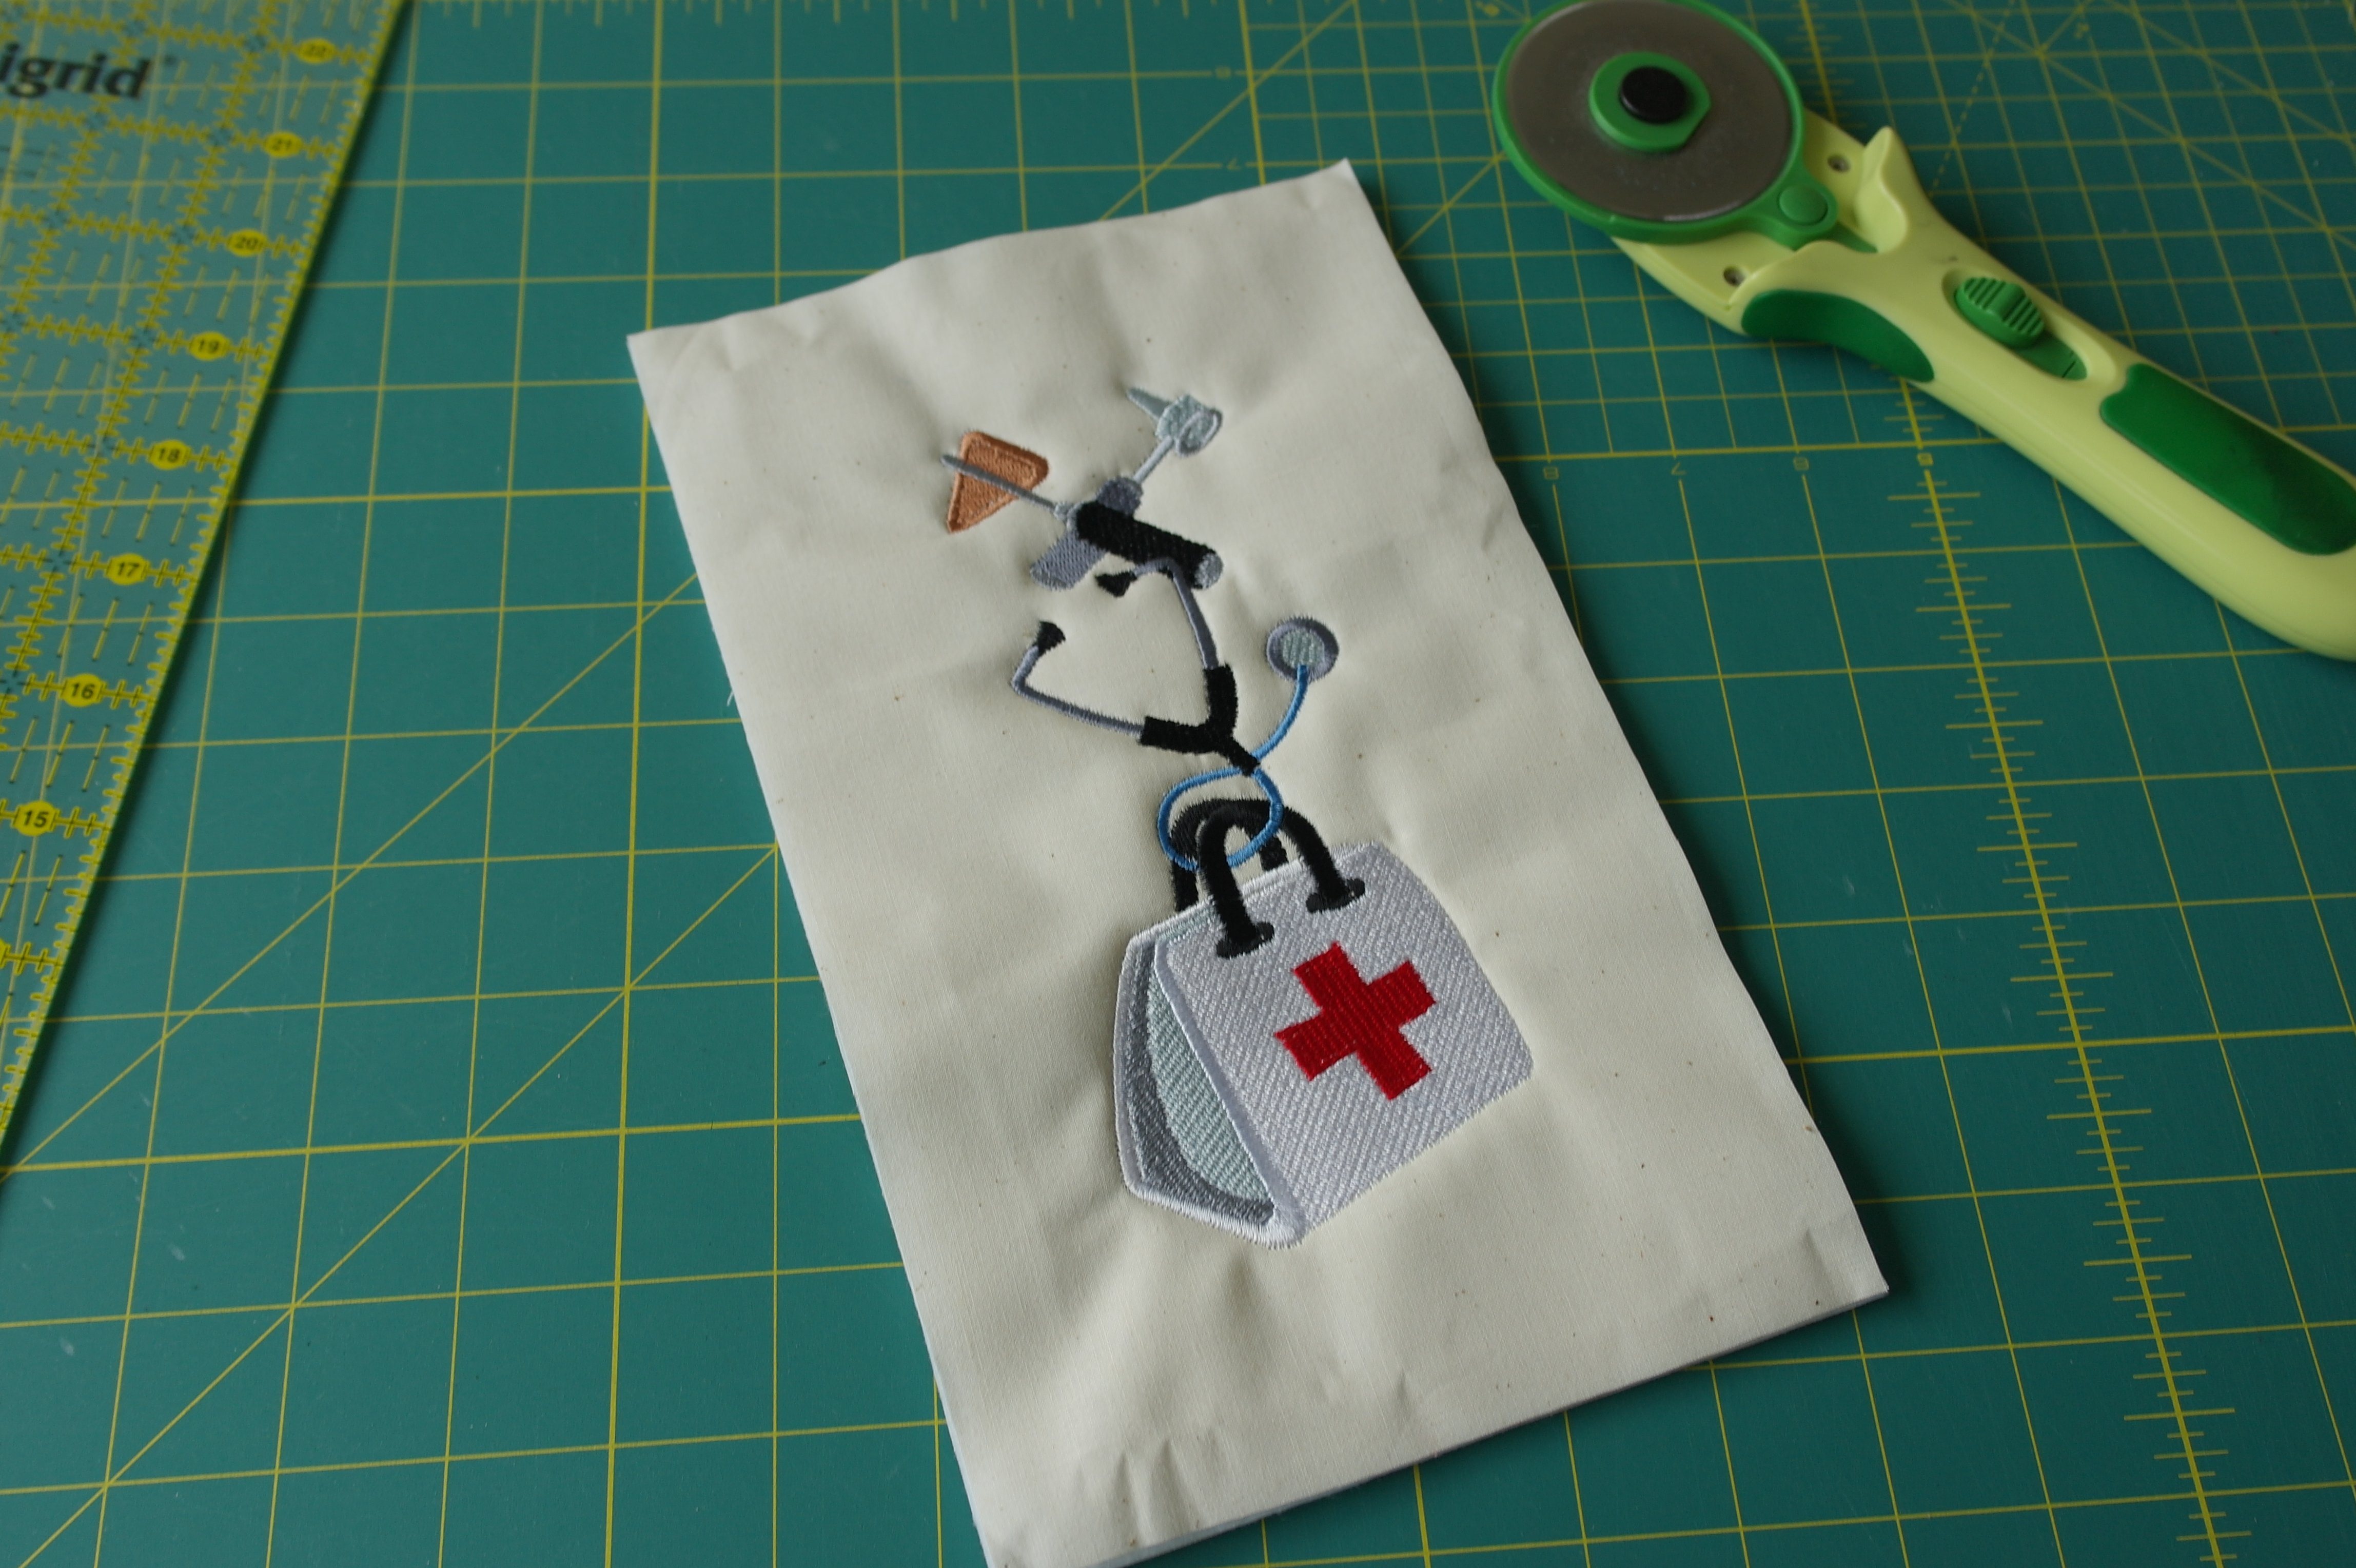
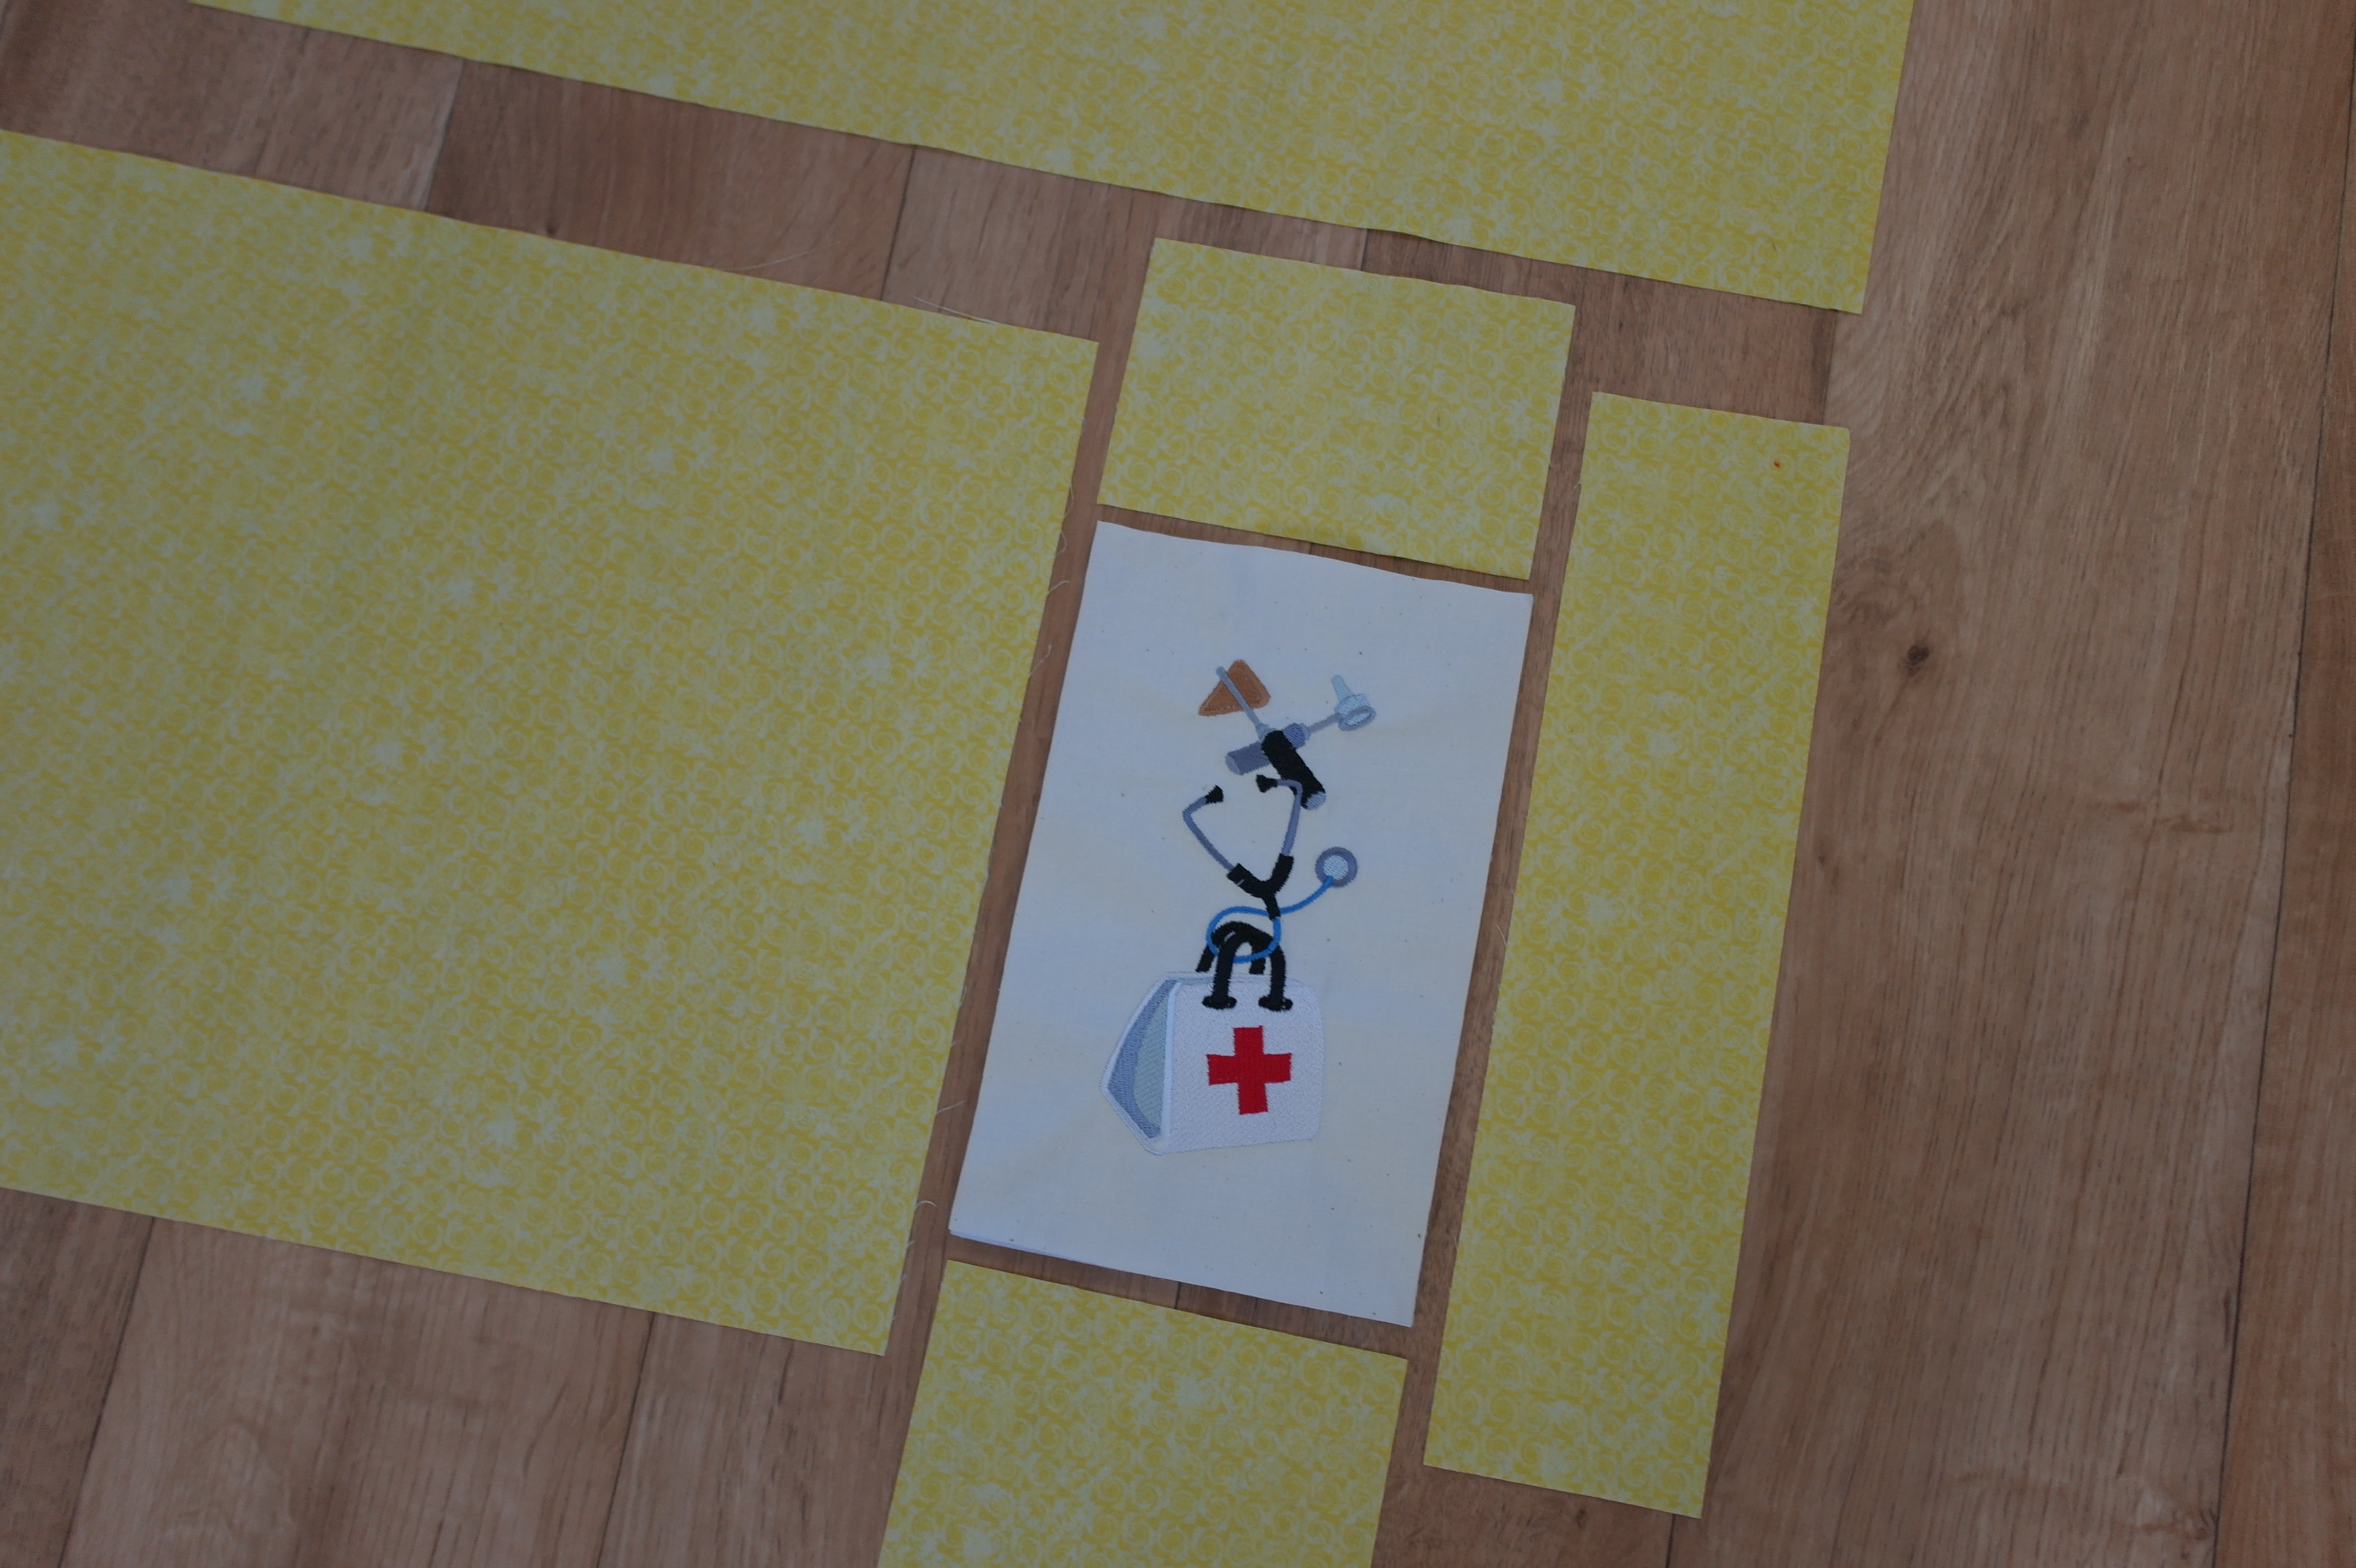
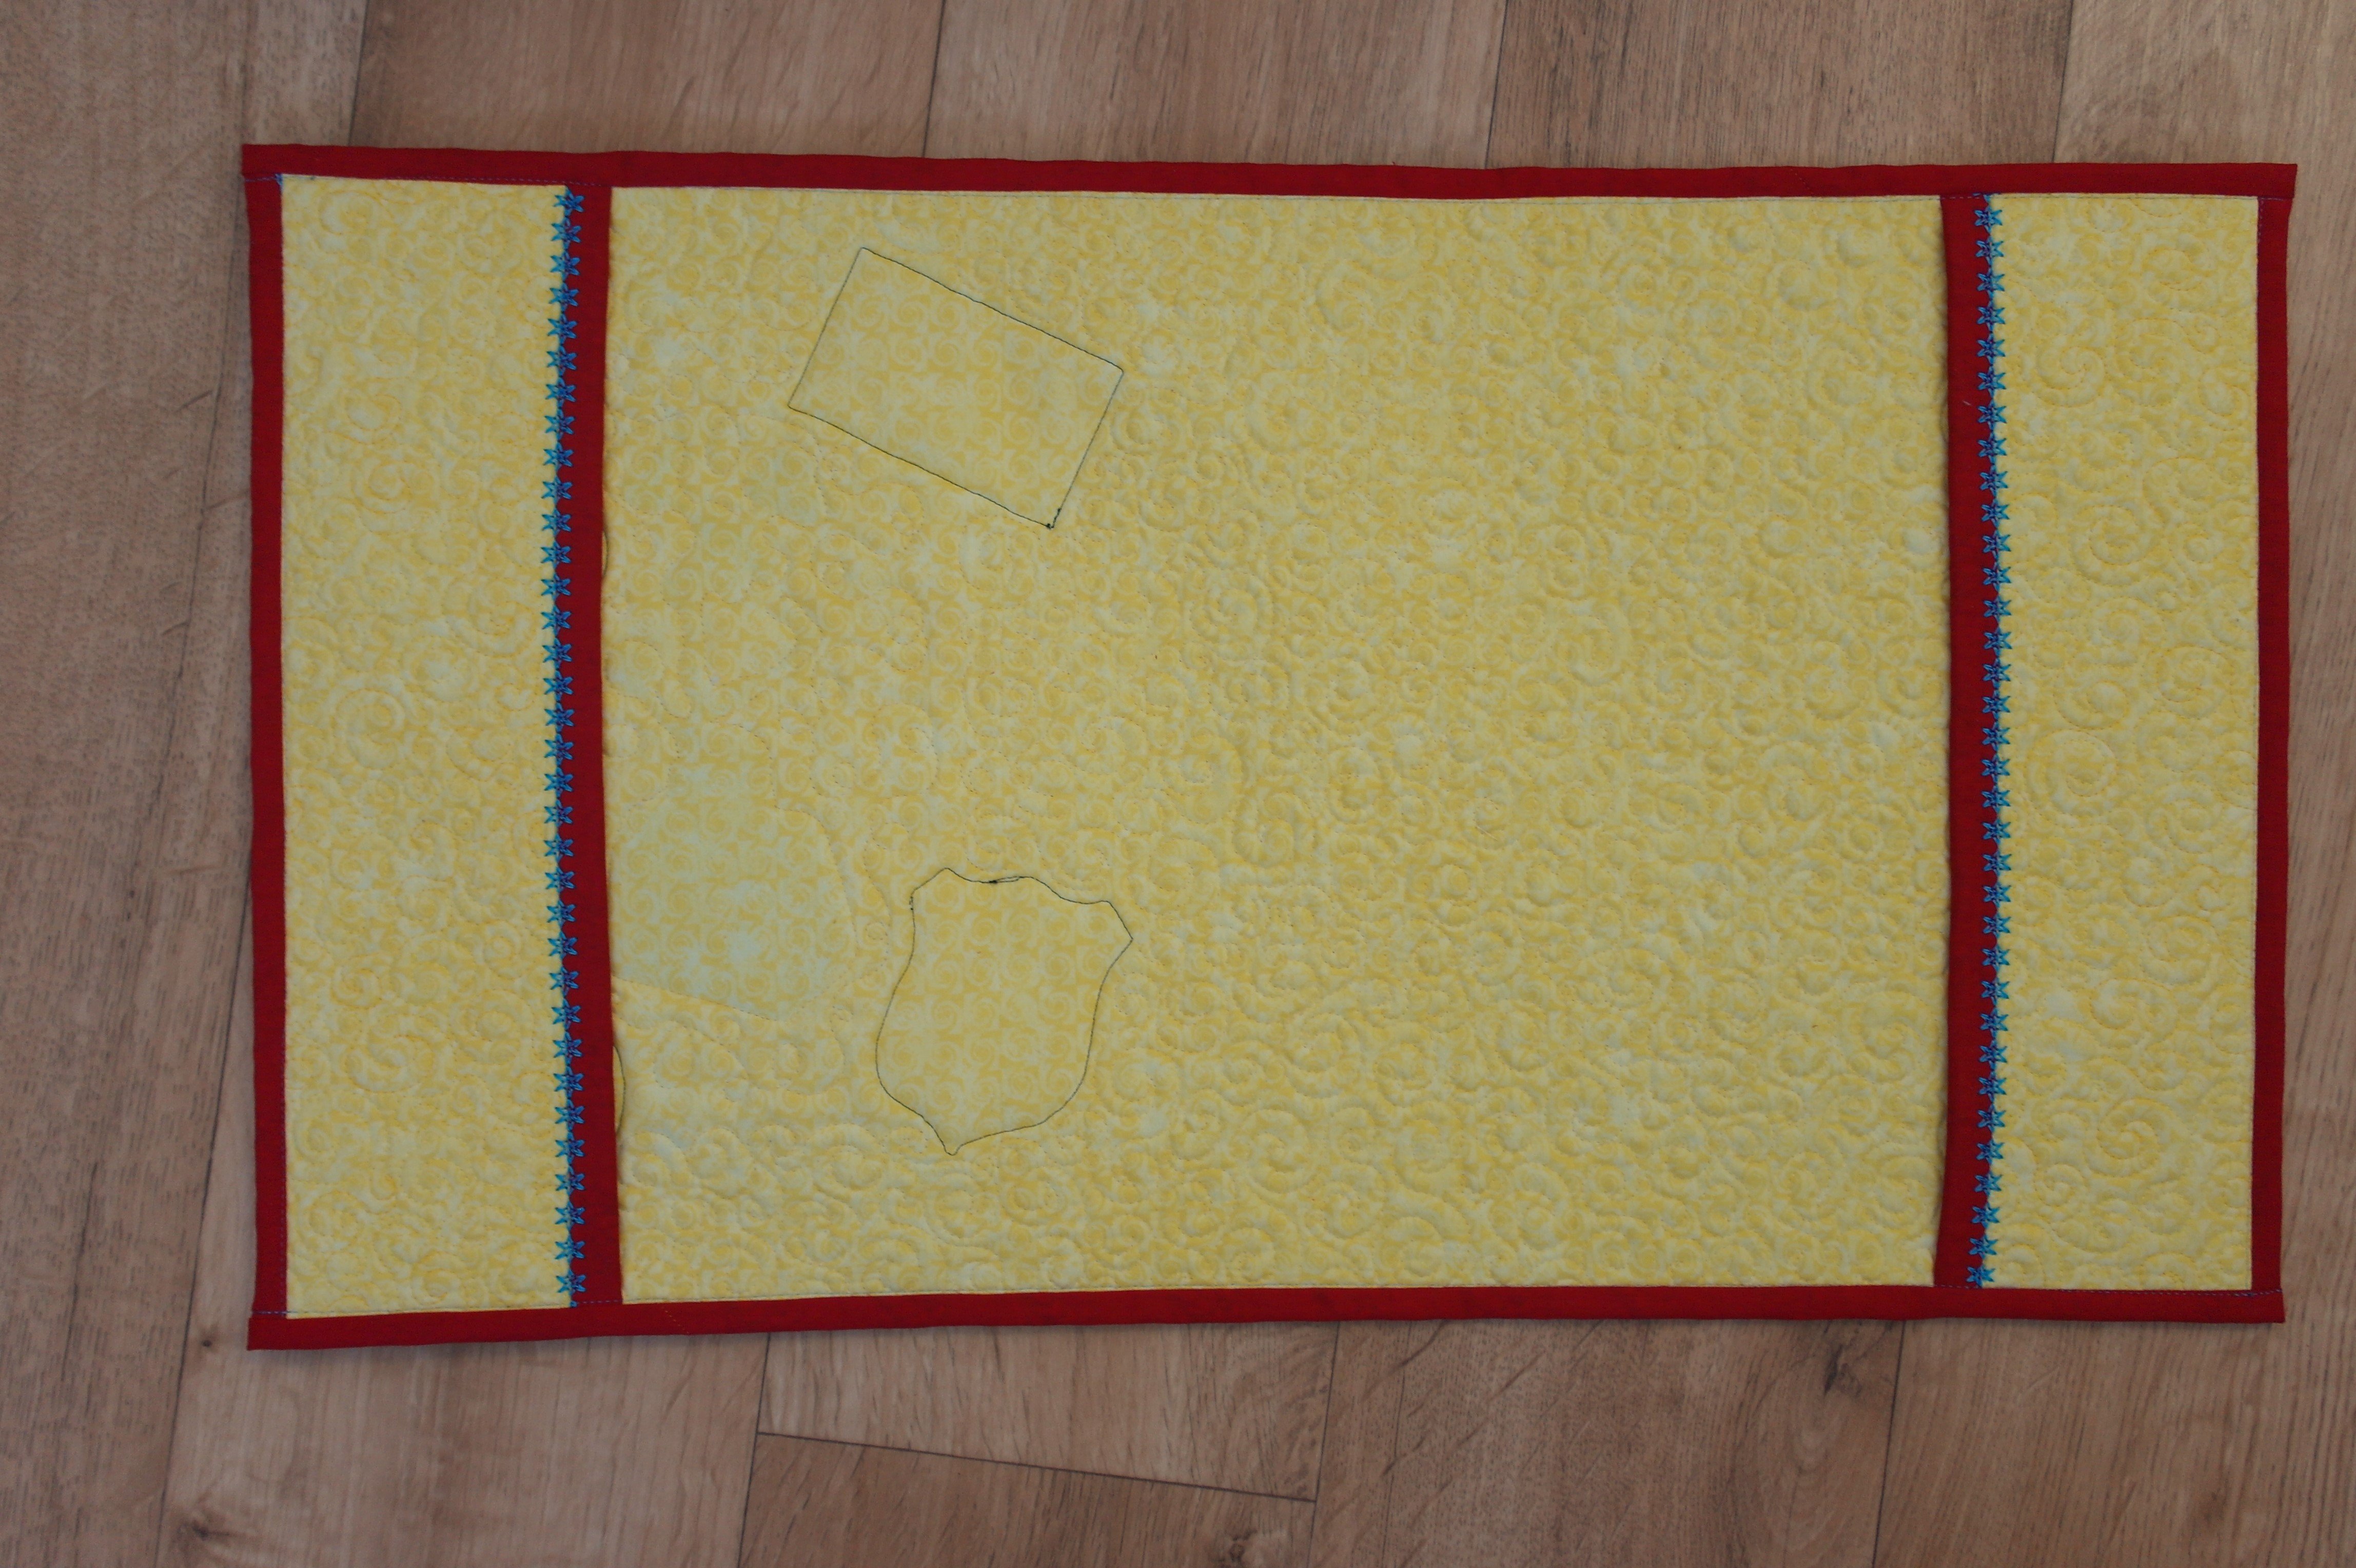
I’ve cut off the extra fabric around embroidery, large enough for the middle part of the cover.
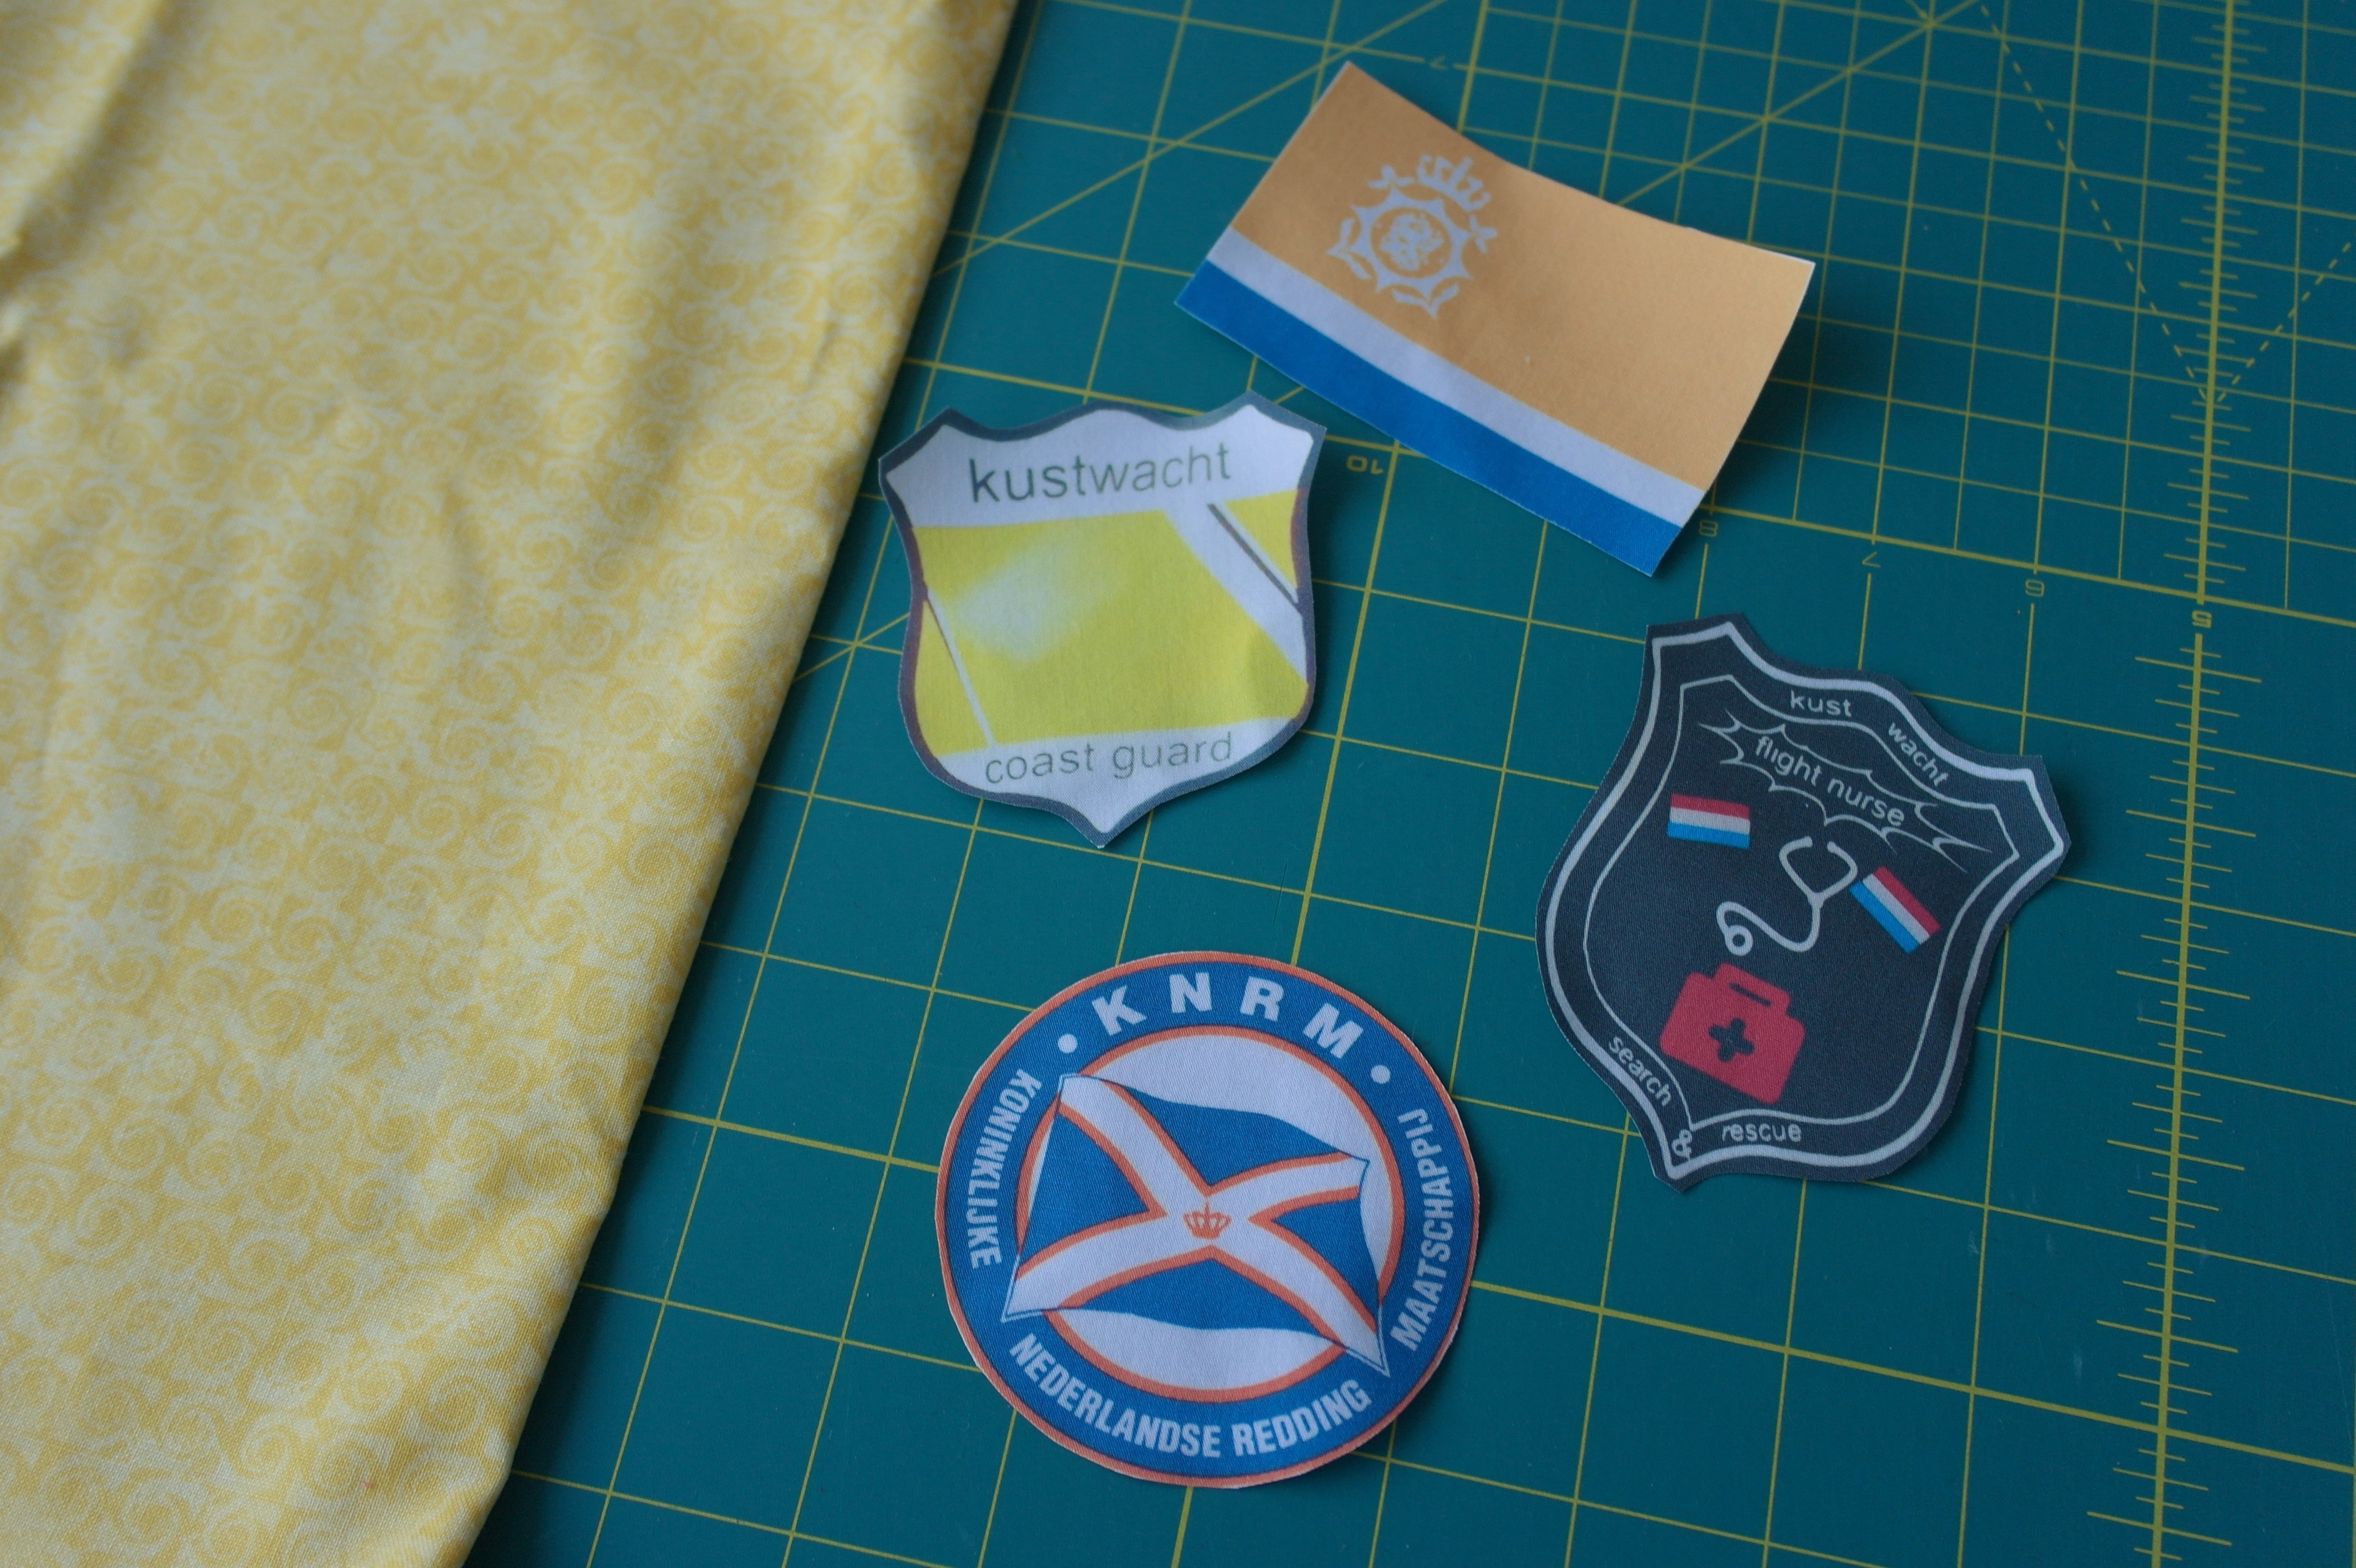
And these are the badges I’ve made: printed them on PhotoFabric and ironed them on Heatn’Bond Lite, cut them out and they are ready to use. The black badge on the right is the one my granddaughter has designed herself (but she didn’t knew that I would use the image for this cover).

To be sure everything fits to the front of the cover, I’ve placed it on the front of the binder: this looks ok.
I need multiple pieces of fabric, to make one cover. I’ve cut different sizes from the yellow fabric. Eventually they will be sewn together, to make a large piece. The measurement of the cover – laying flat – will be aprox. 36 x 61 cm (it is important to measure the binder before cutting fabric and batting). Remember that quilting shrinks the material, so be sure to have extra seam allowance.
The fabric is ironed and cut to the right sizes: two small parts for above- and beneath the embroidery motif, one part for the right side, one large part for the left.
Also a larger piece for the entire cover, which will be the inner side. I’ve cut that already because I will need it for quilting the cover.
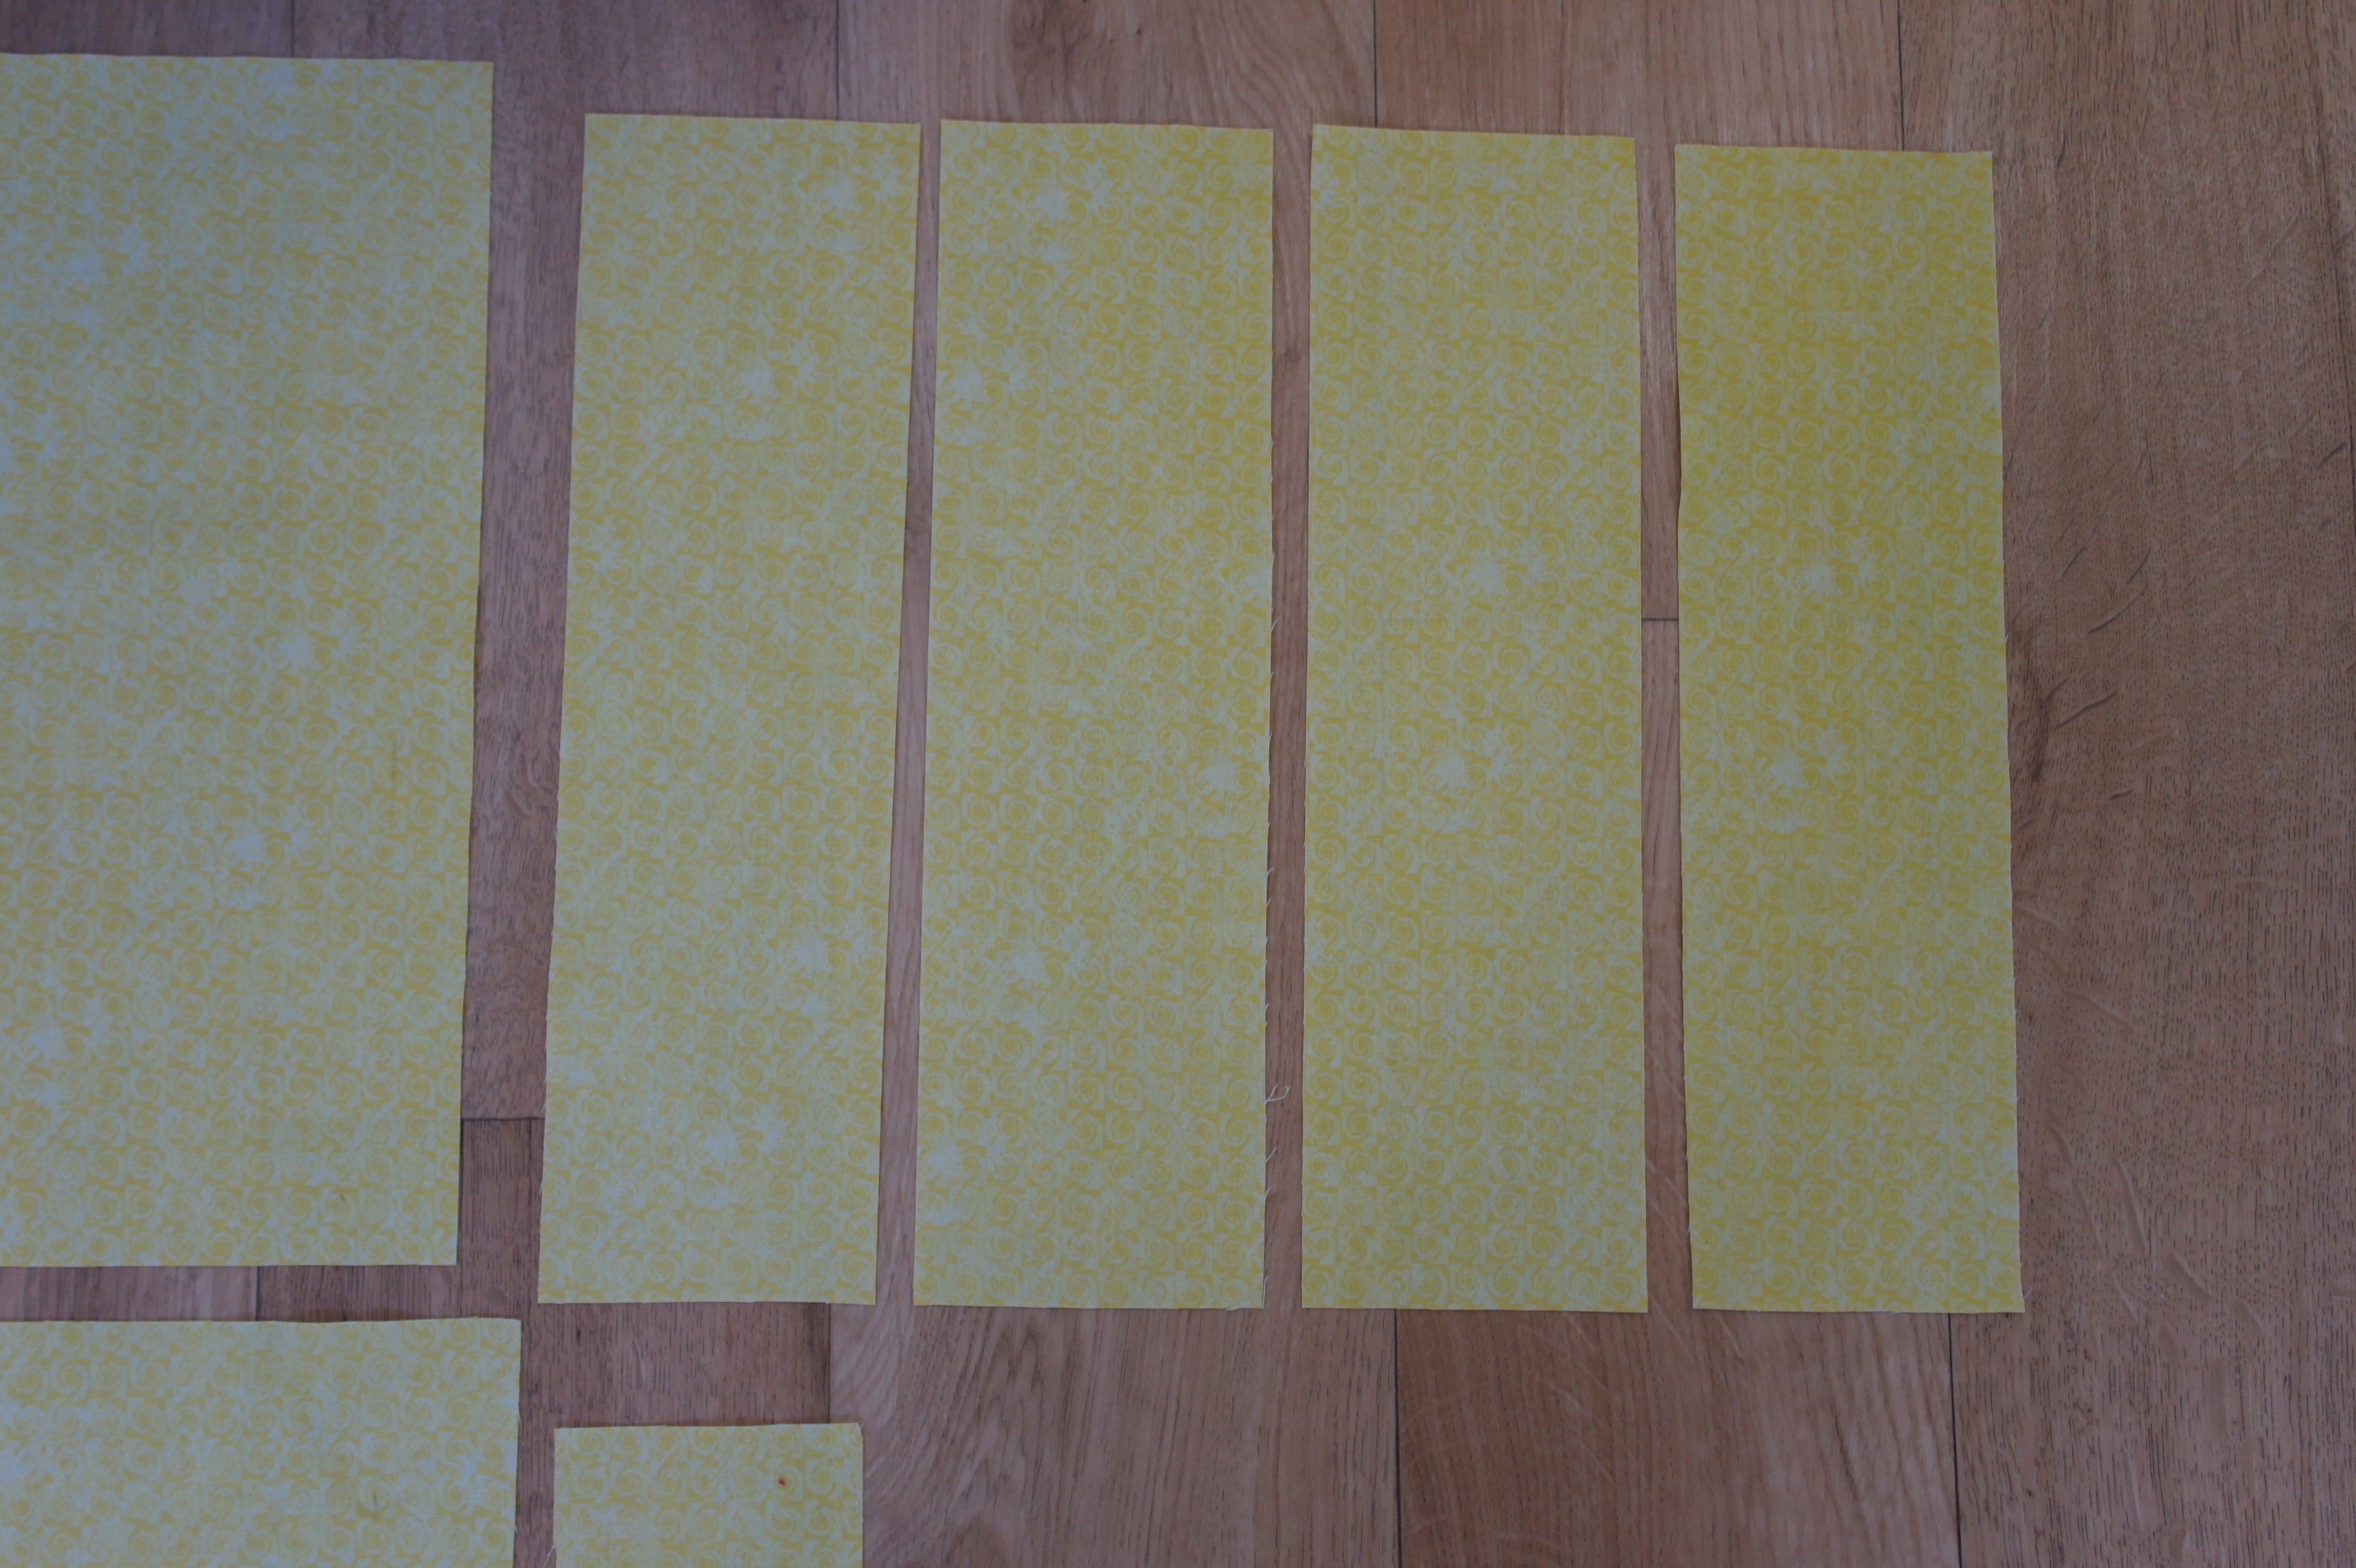
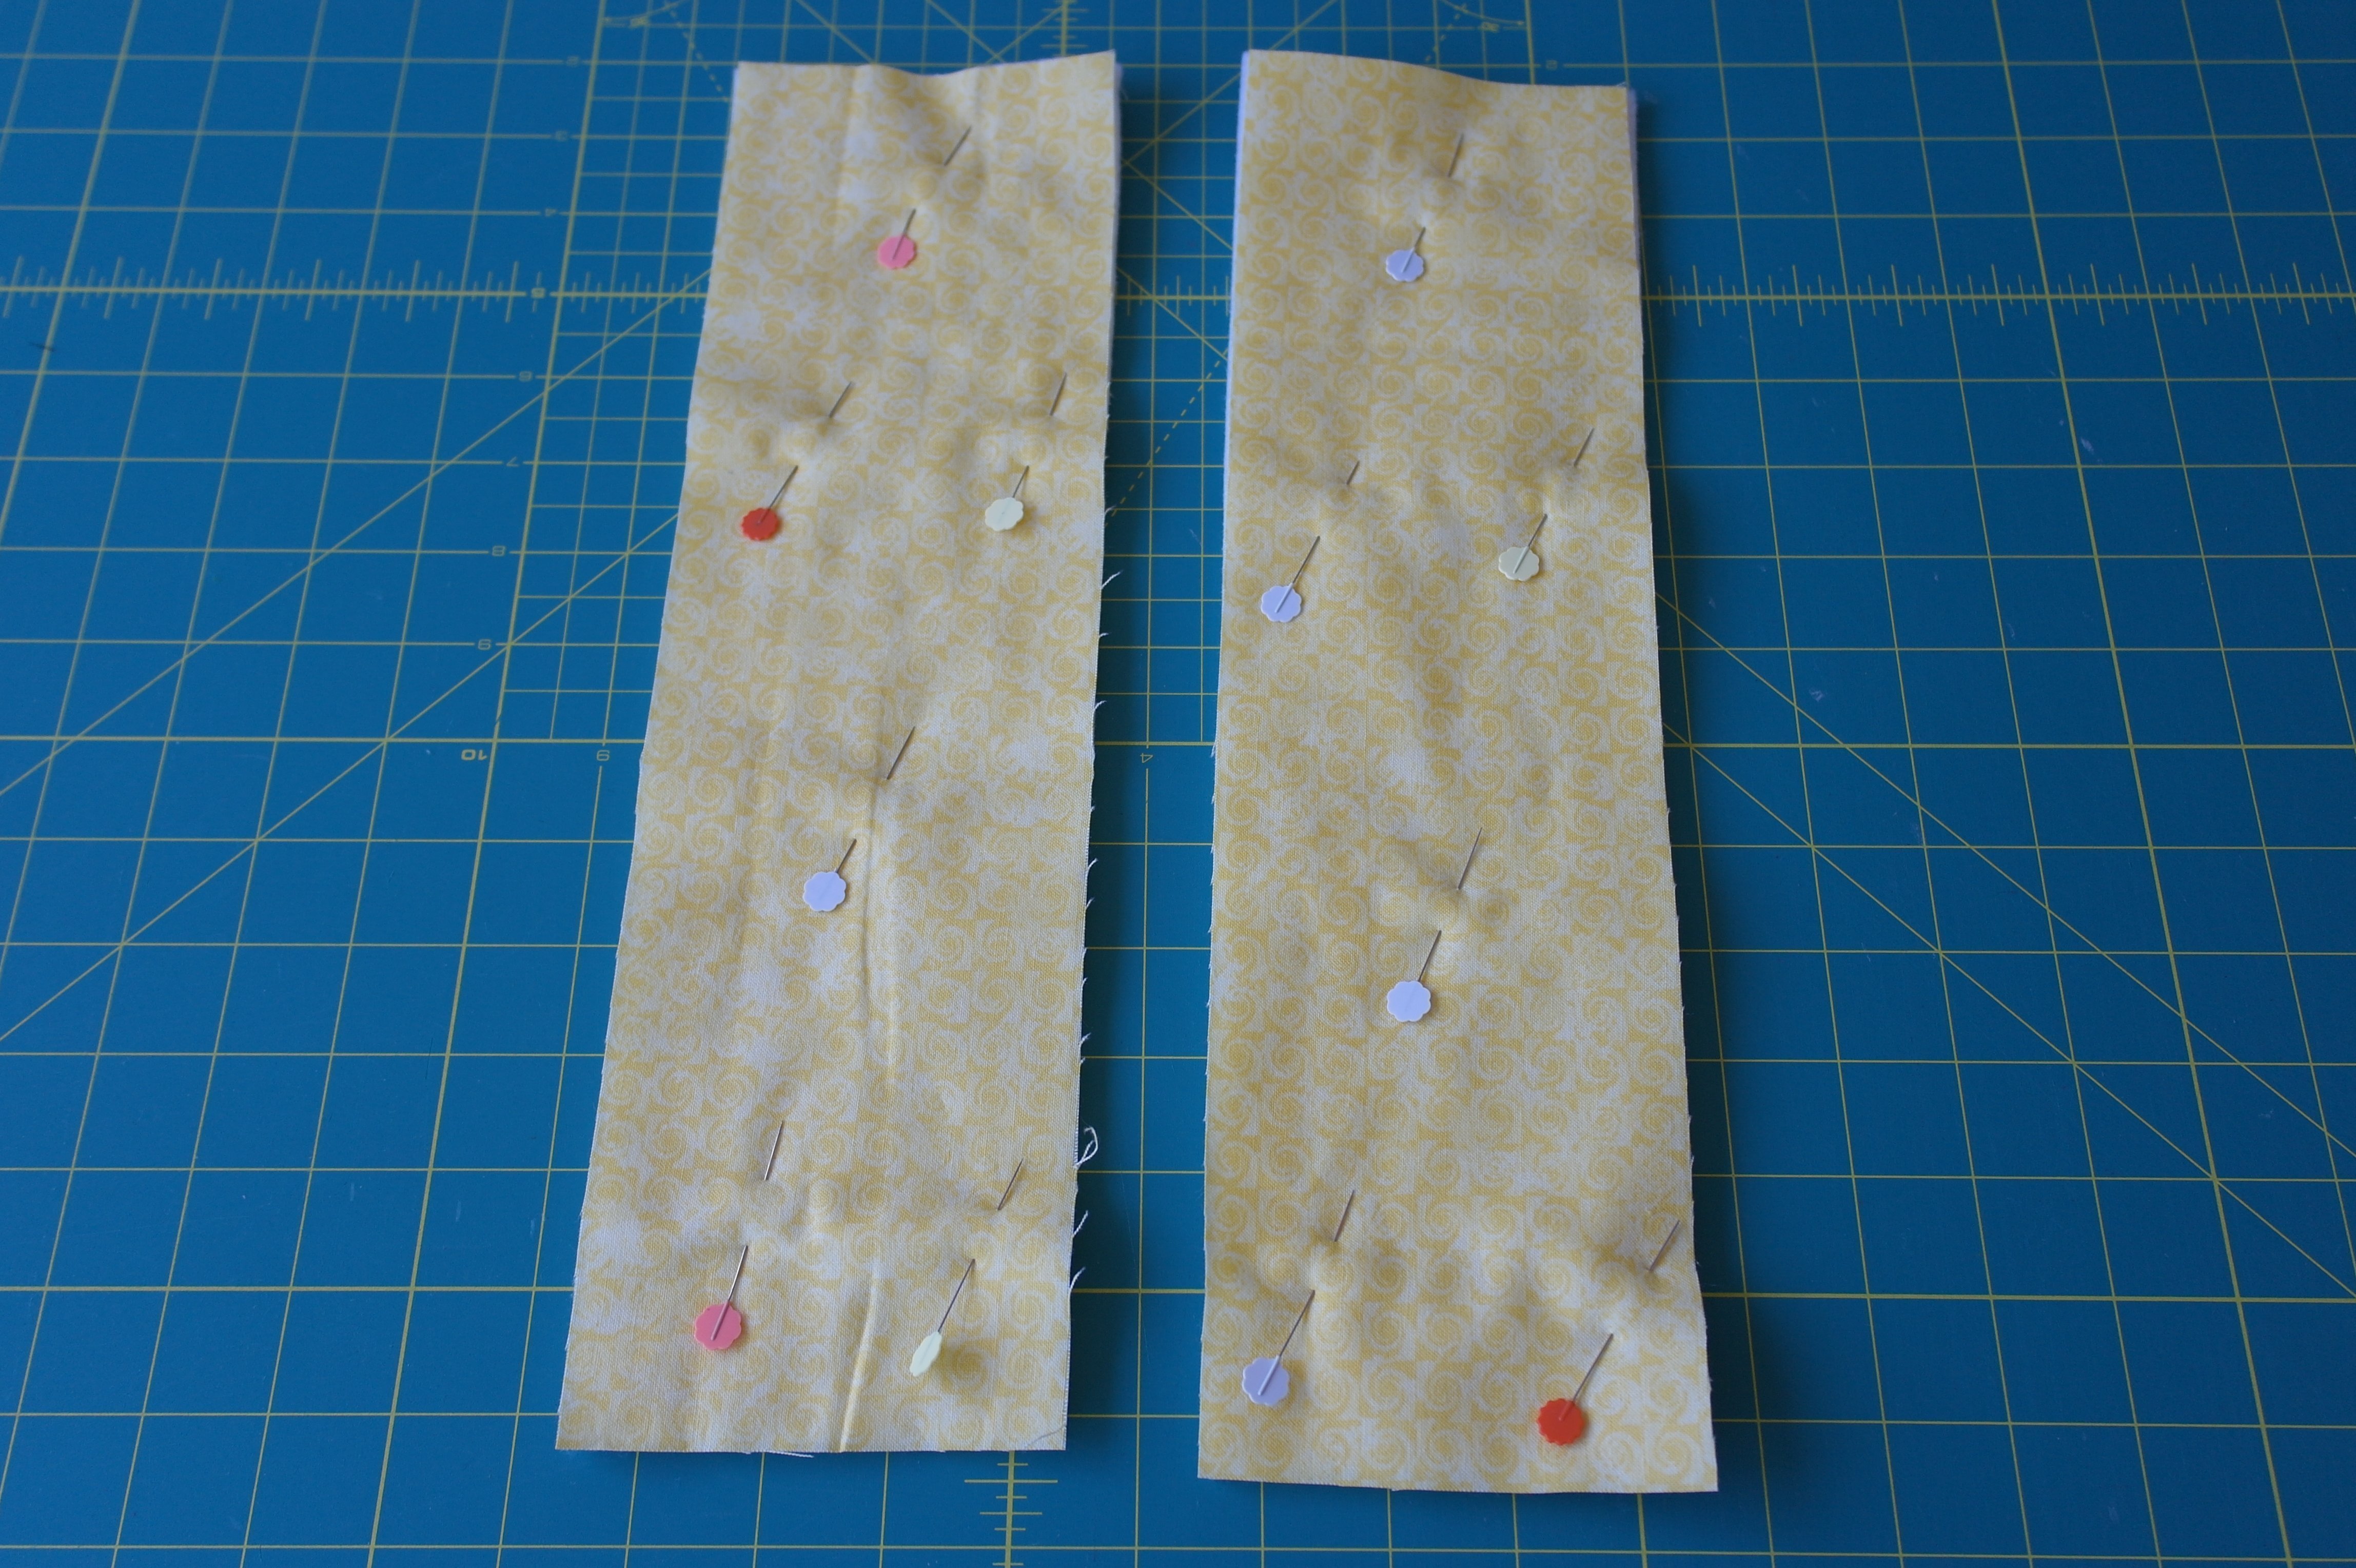
Pieces for the flaps – the binder will be inserted here – I will need small strips of fabric: I’ve cut them to a size of 10 x 36 cm each, four pieces. I will need two for backing and two for the front.

And of course the batting has to be cut too: one large piece for the entire cover, and two small strips for the flaps.
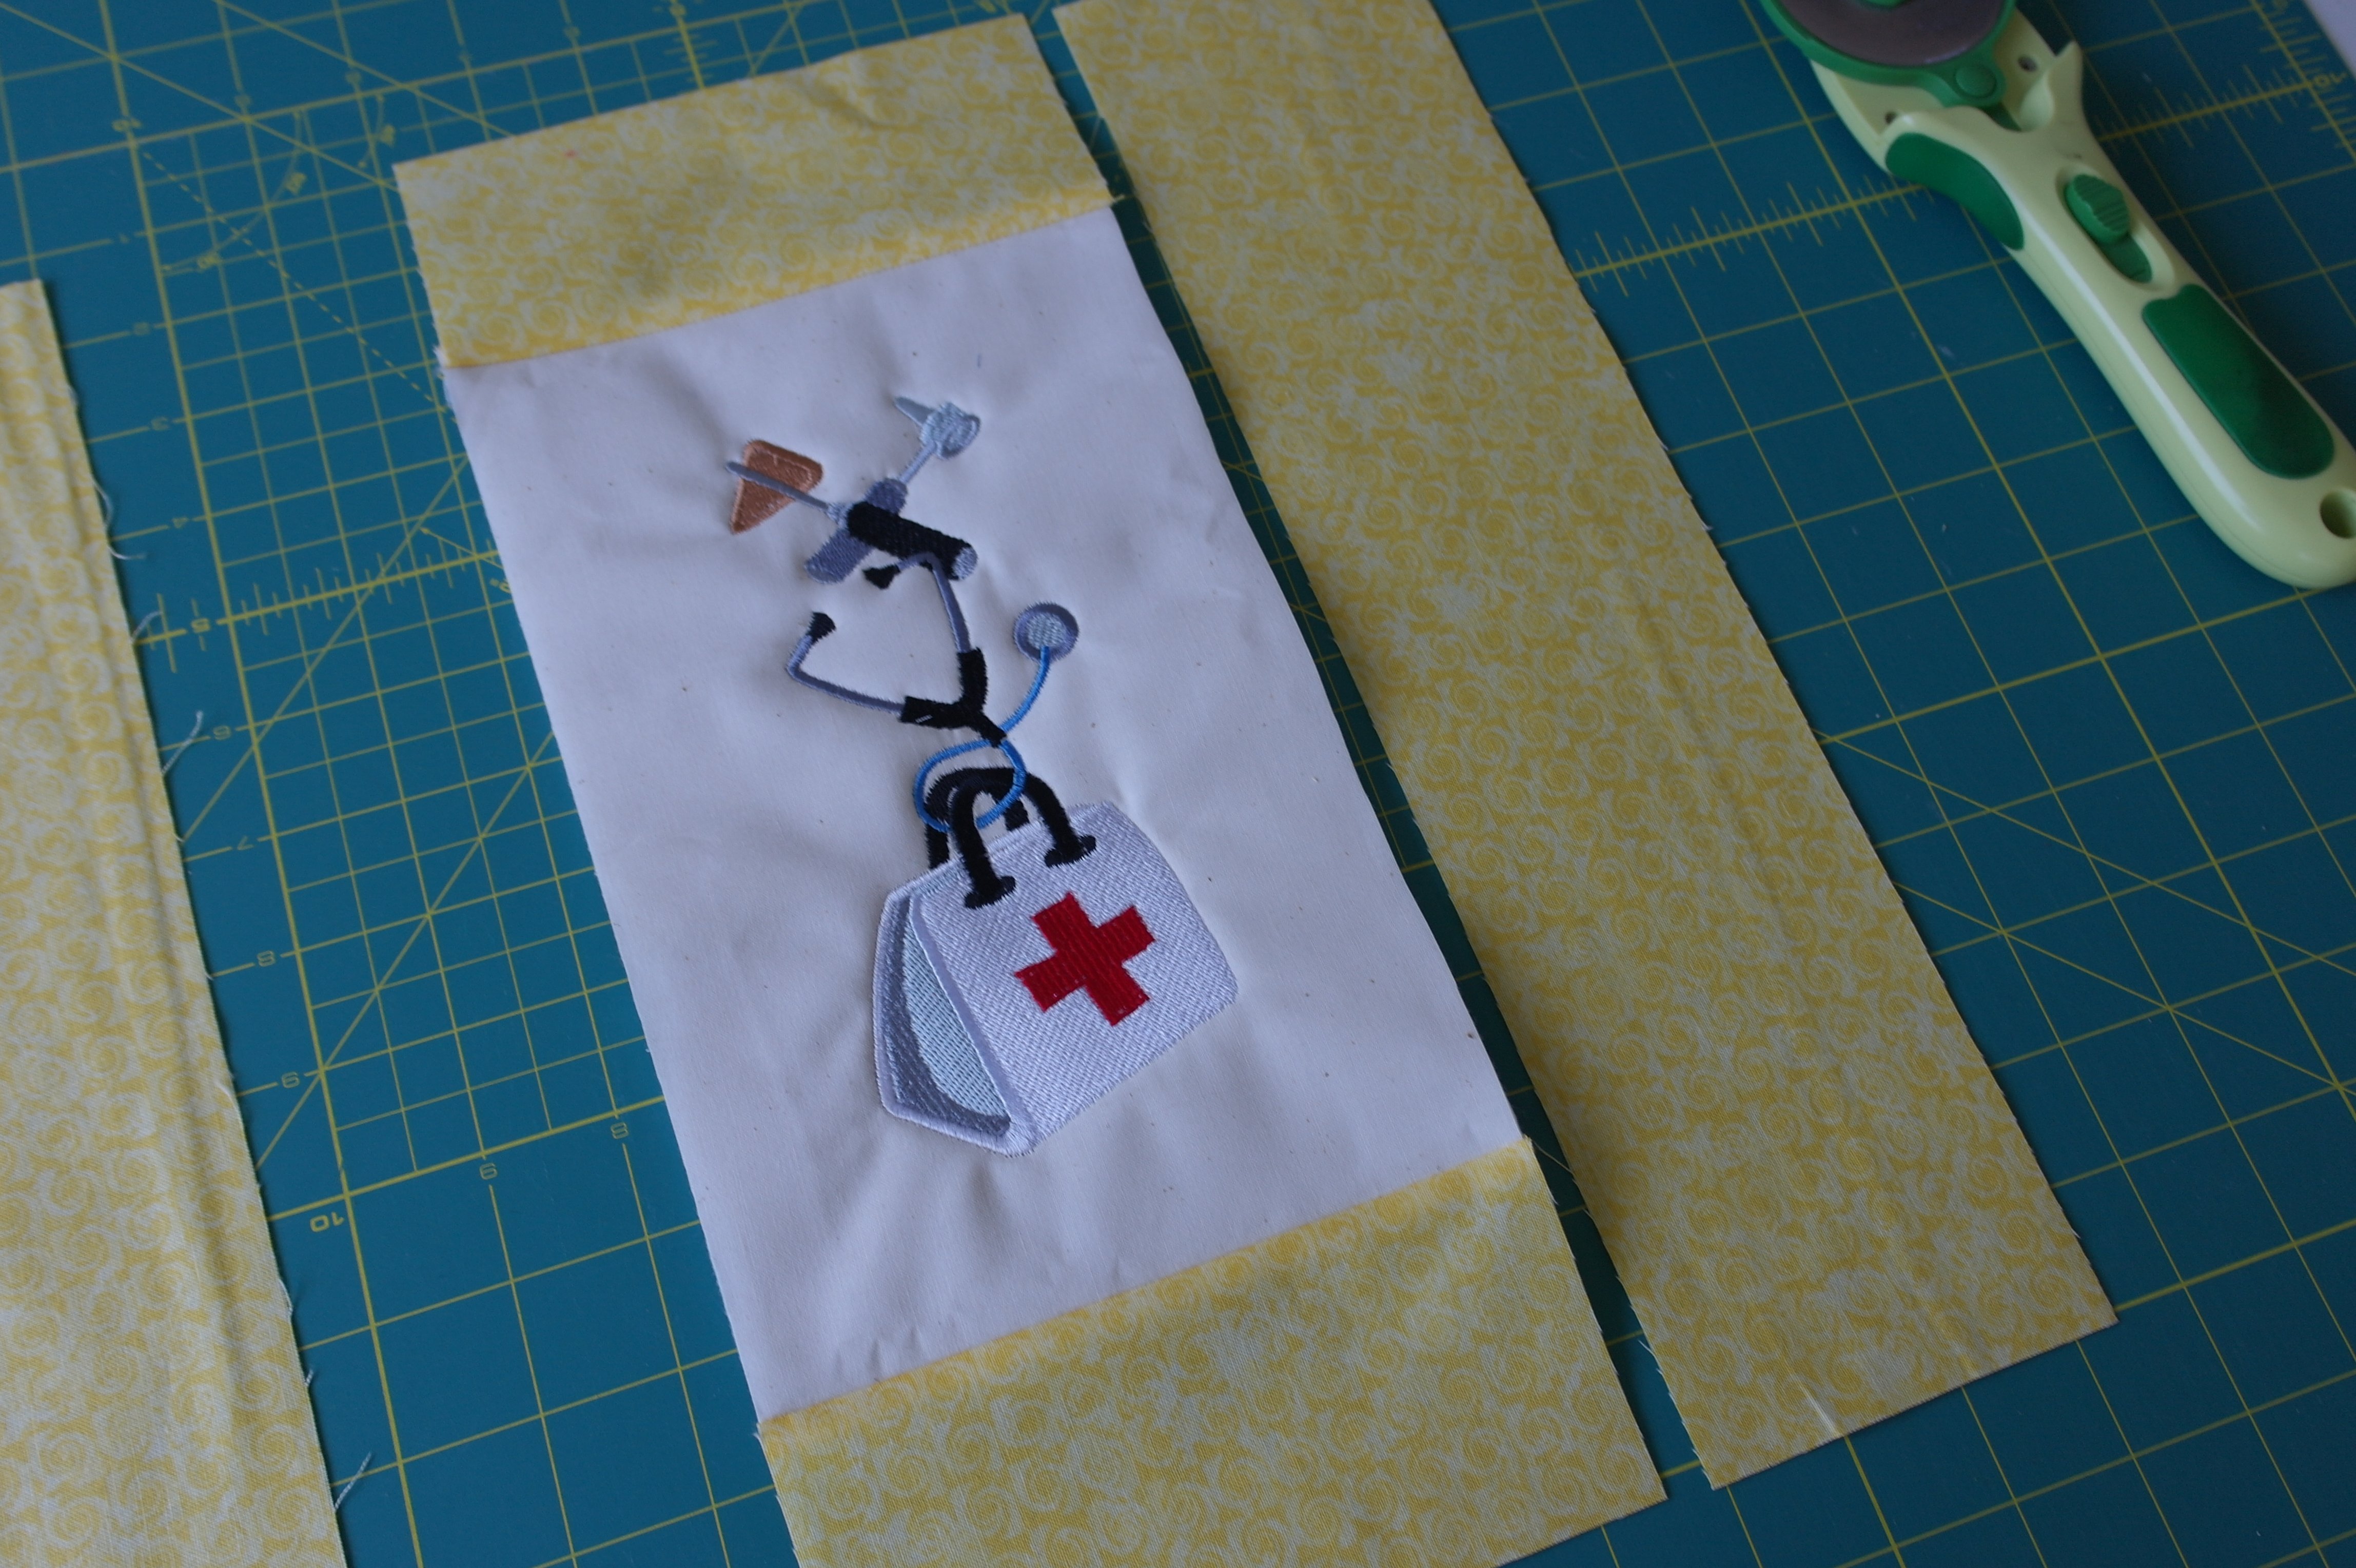
I’ve sewn the small pieces of yellow fabric to the top and bottom of the embroidered piece.
The small strip tot the right….
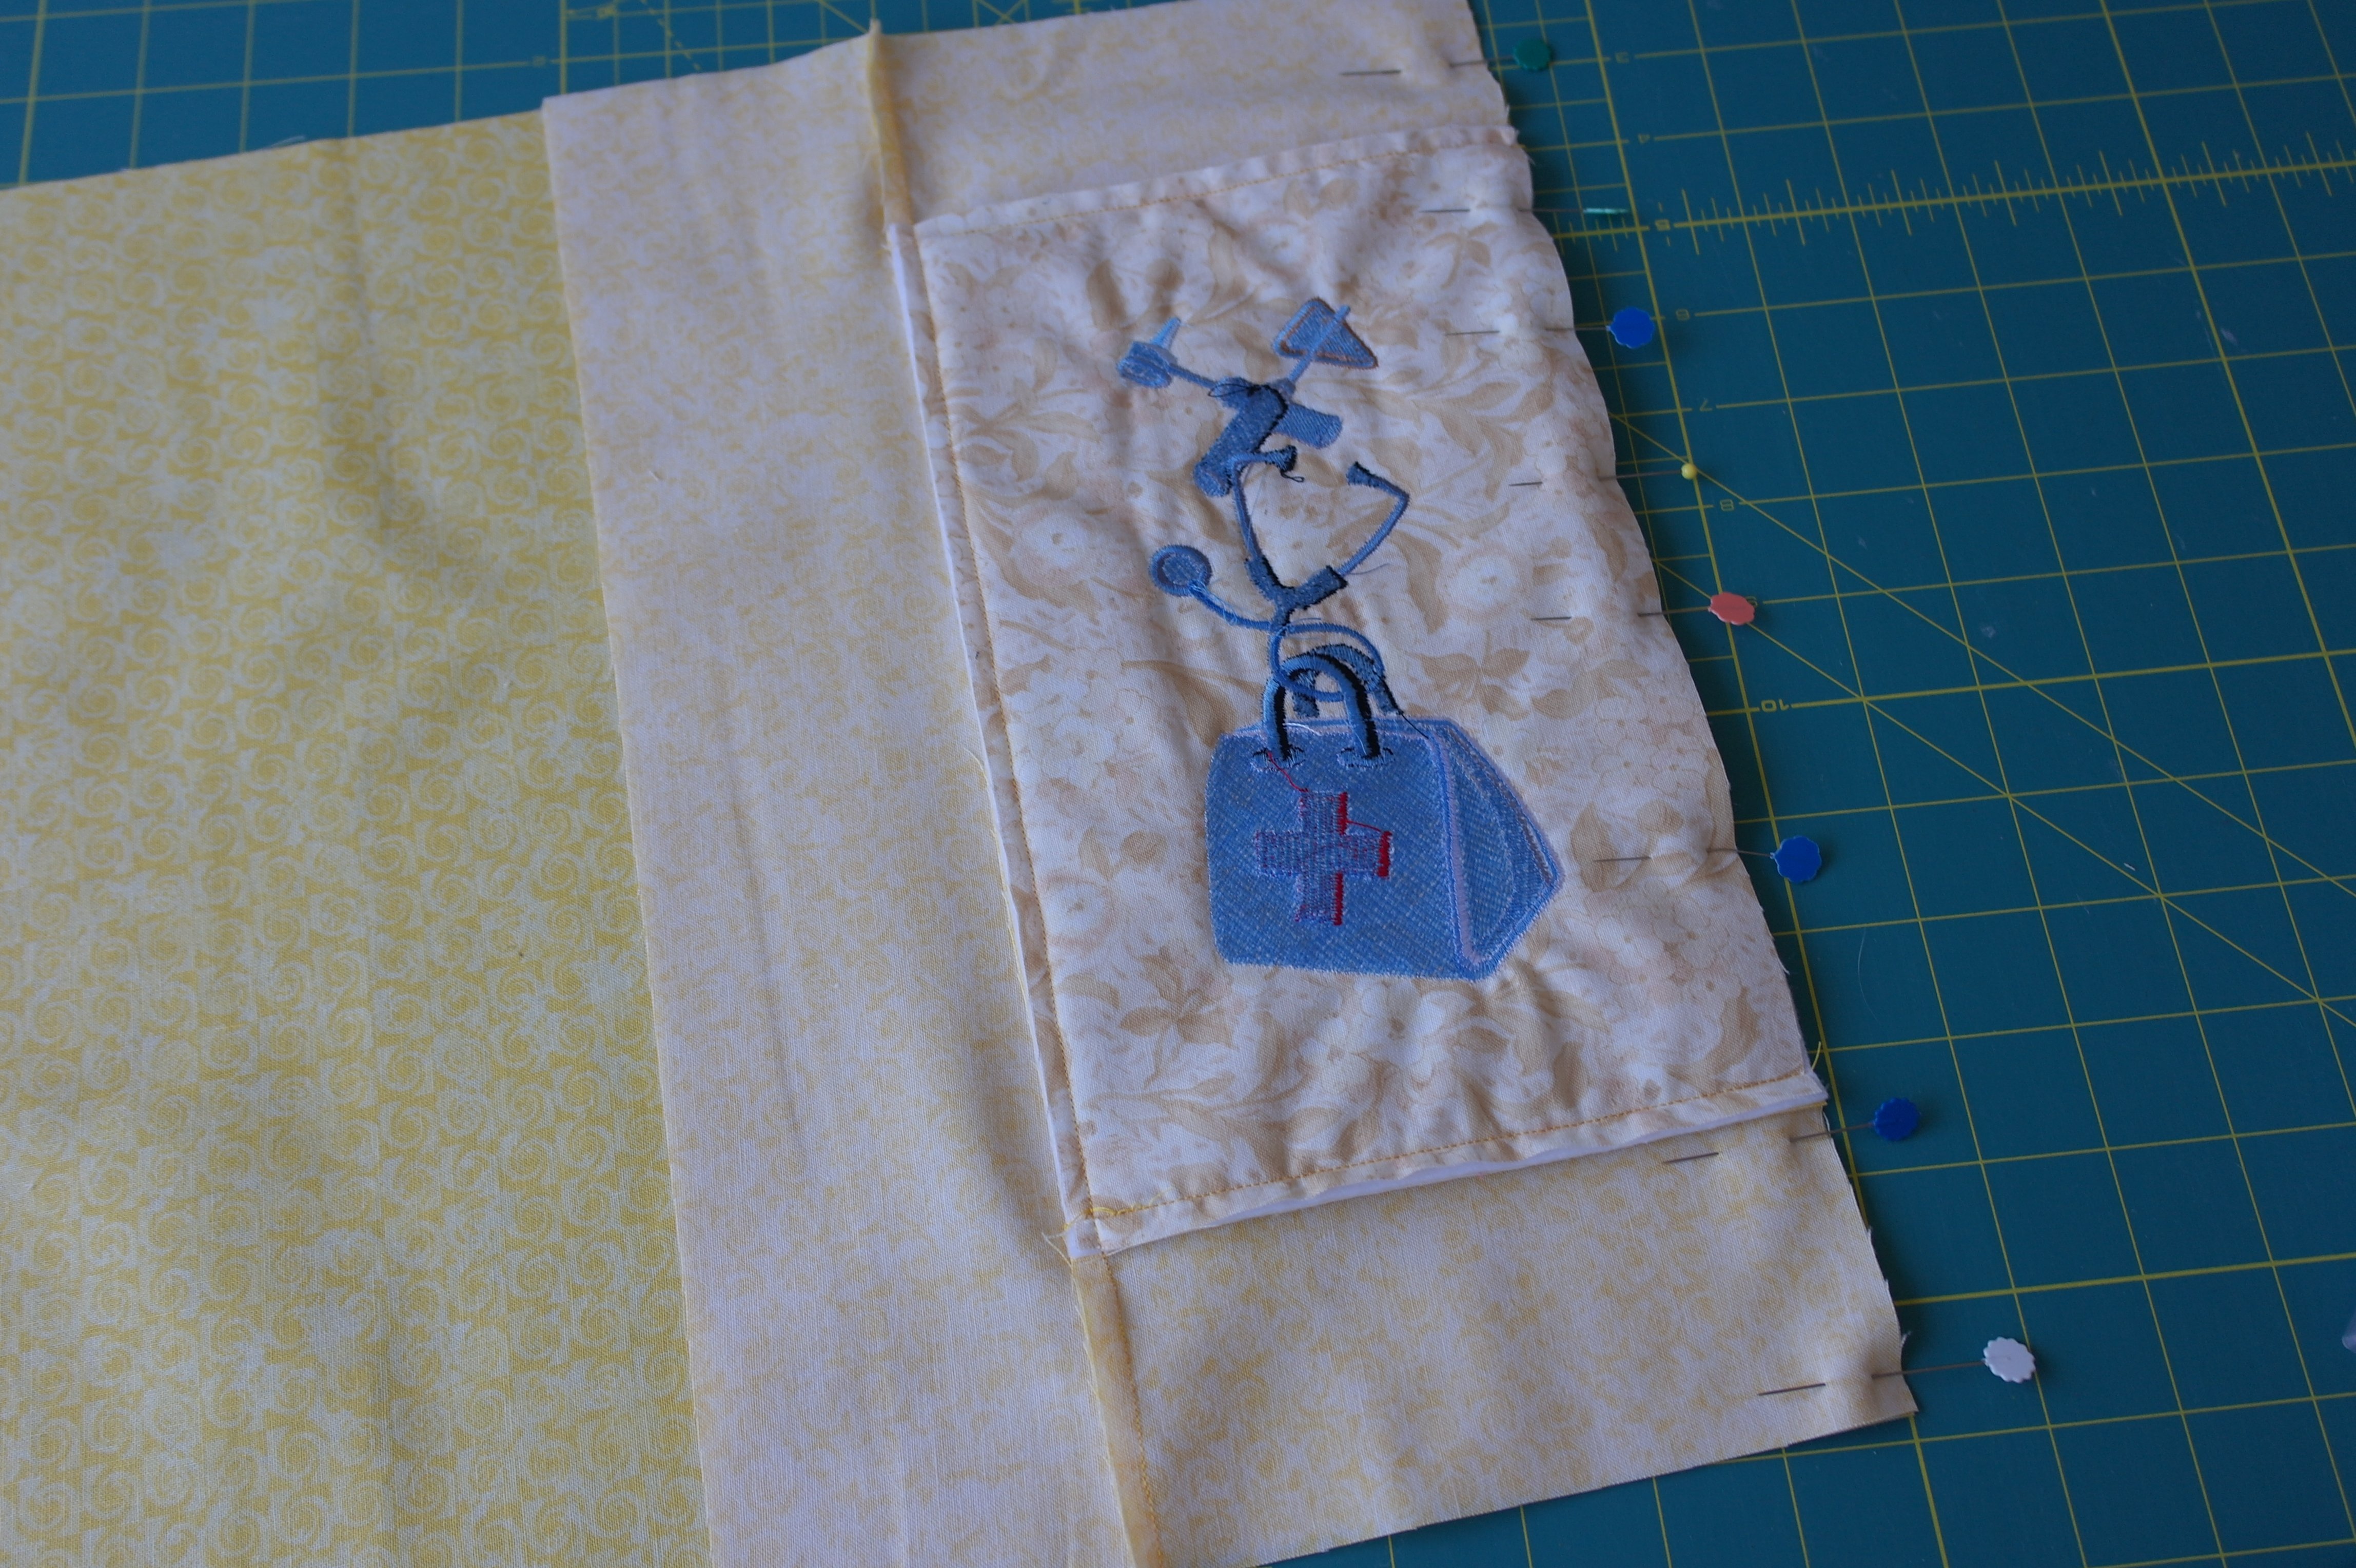
and the large piece to the left. On the picture above you will see that I have pinned the sides together: I often use a Bohin Glue pen to glue seams together. But because the middle part with the embroidered motif is thicker, I will pin it also. Just to be sure the material doesn’t shift while sewing.
I had the embroidered motif framed in the hoop as a sandwich: I often work this way, so I don’t need special stabilizers. I am making a lot of quilts this way all the time, with embroidery directly on that quilt. It works fine, framing it like this in a hoop. And now I like it that this part is raised a bit…
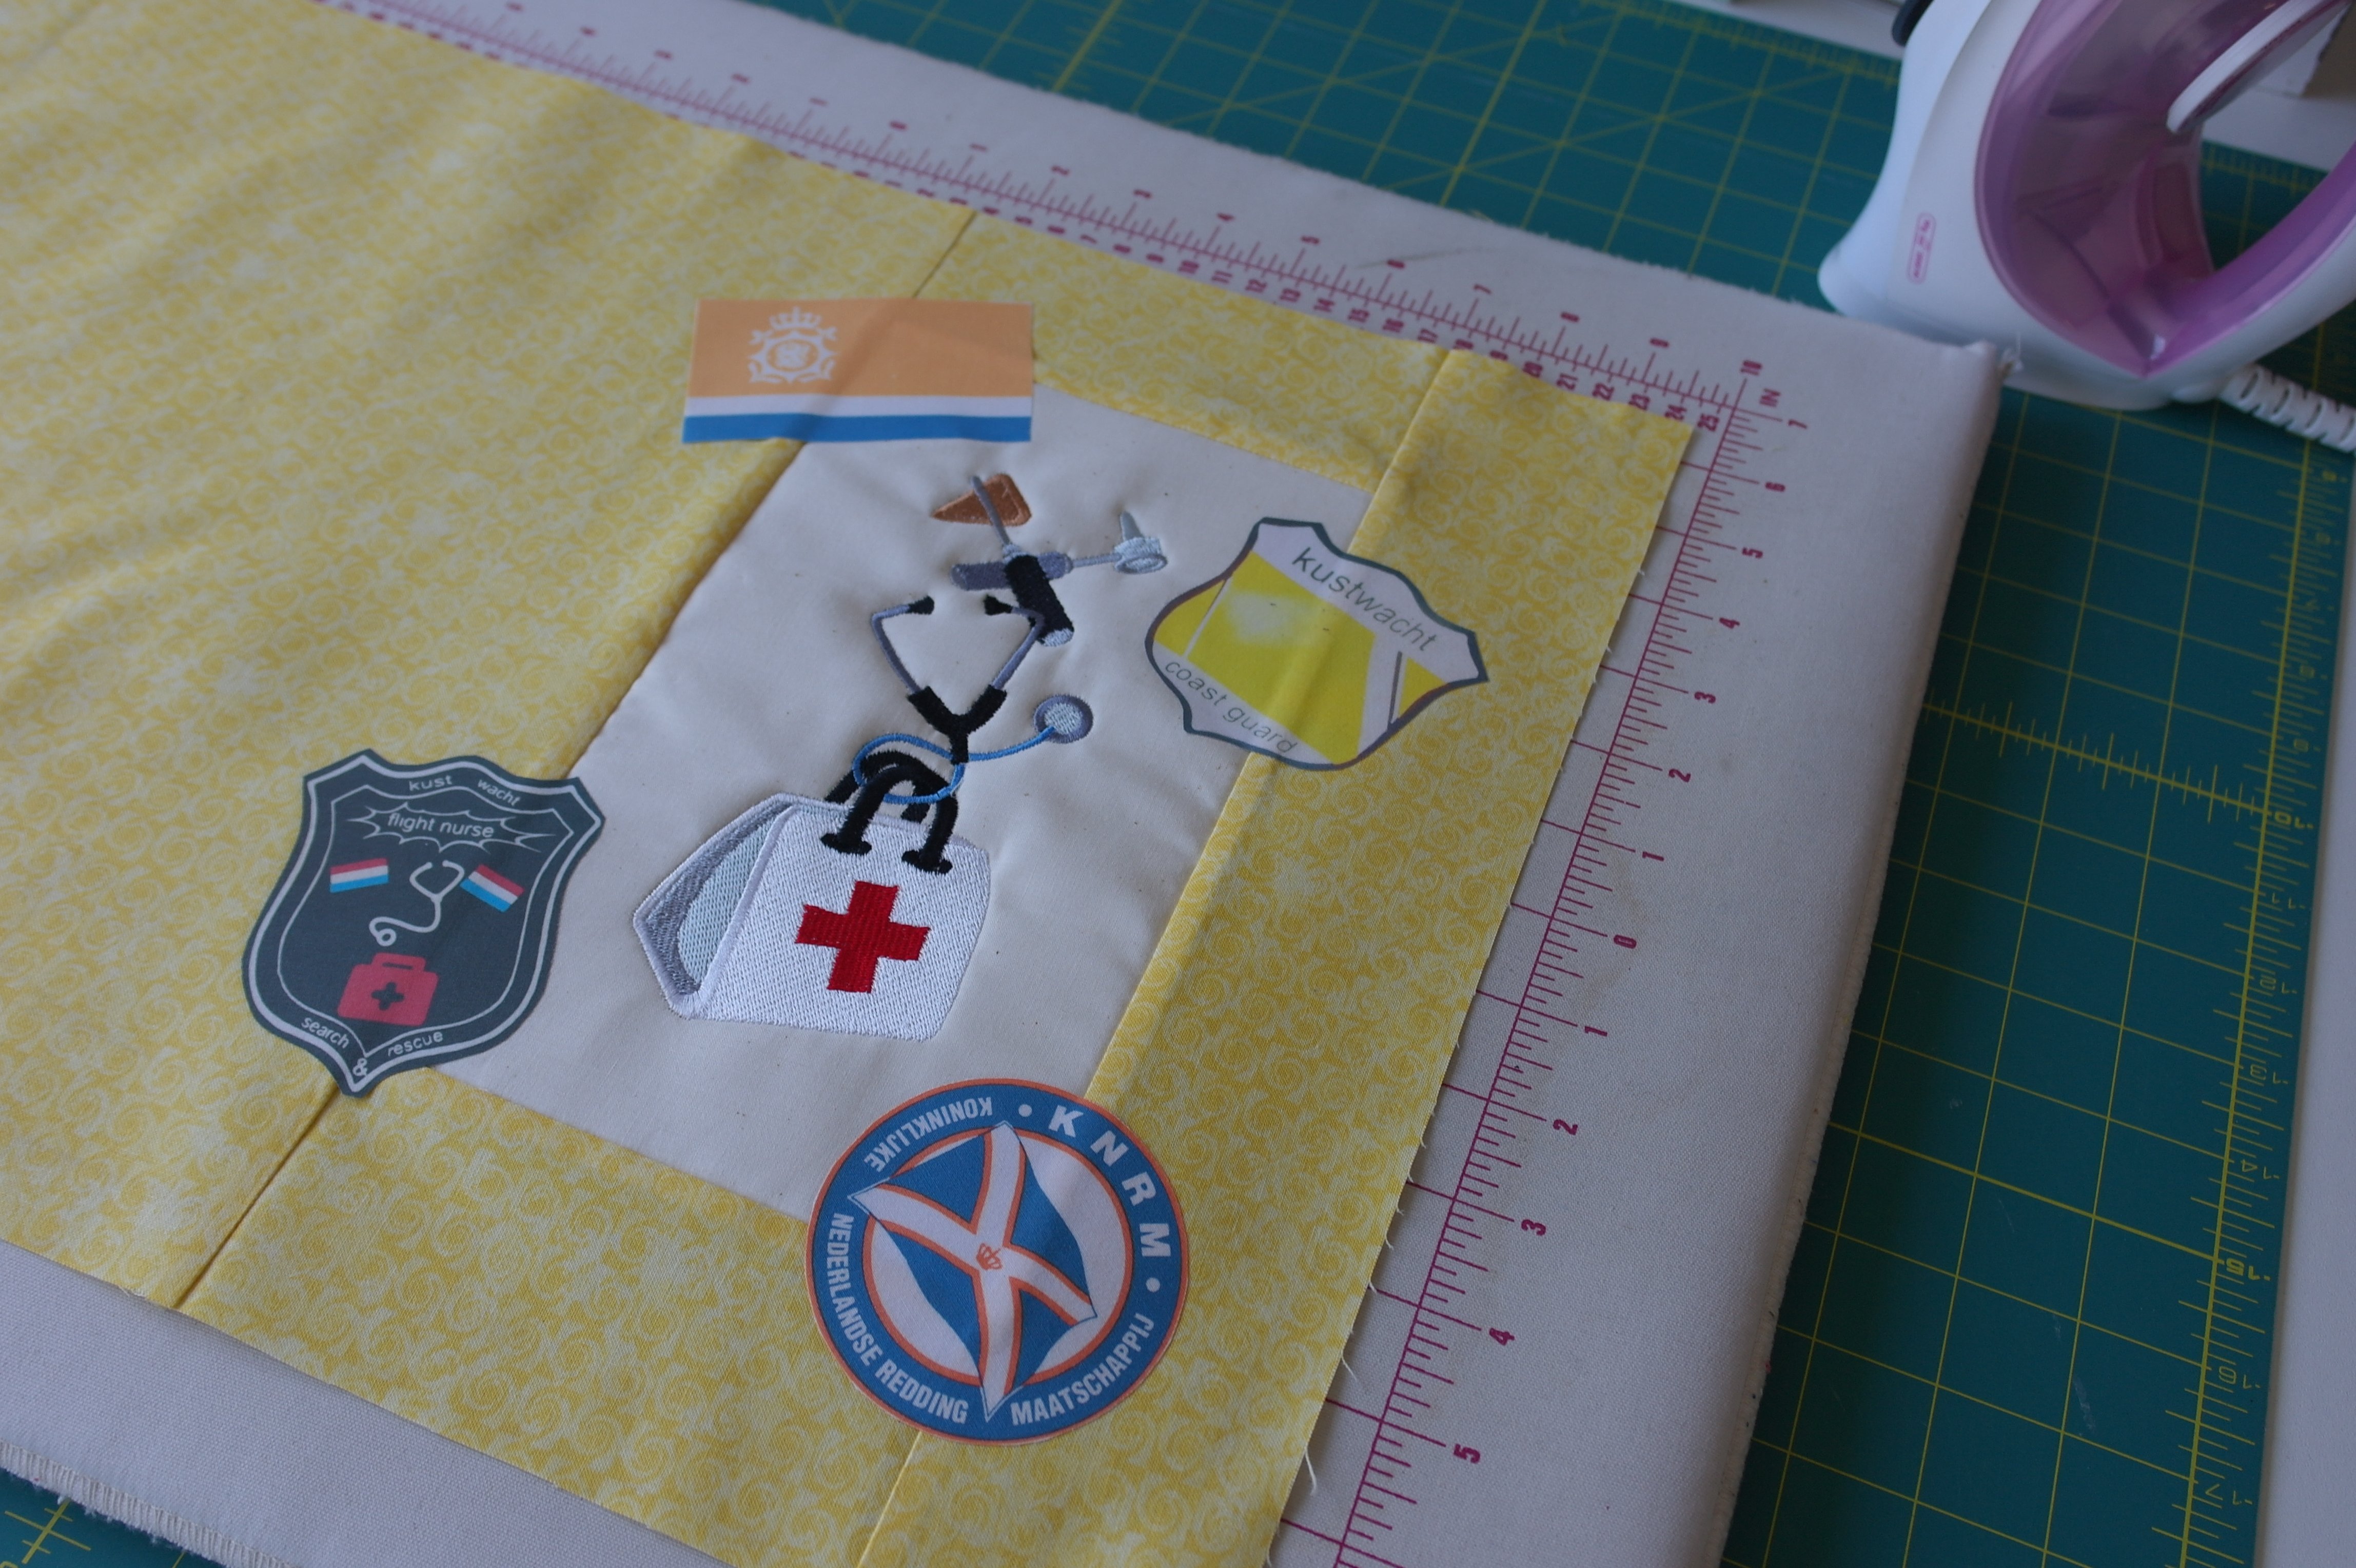
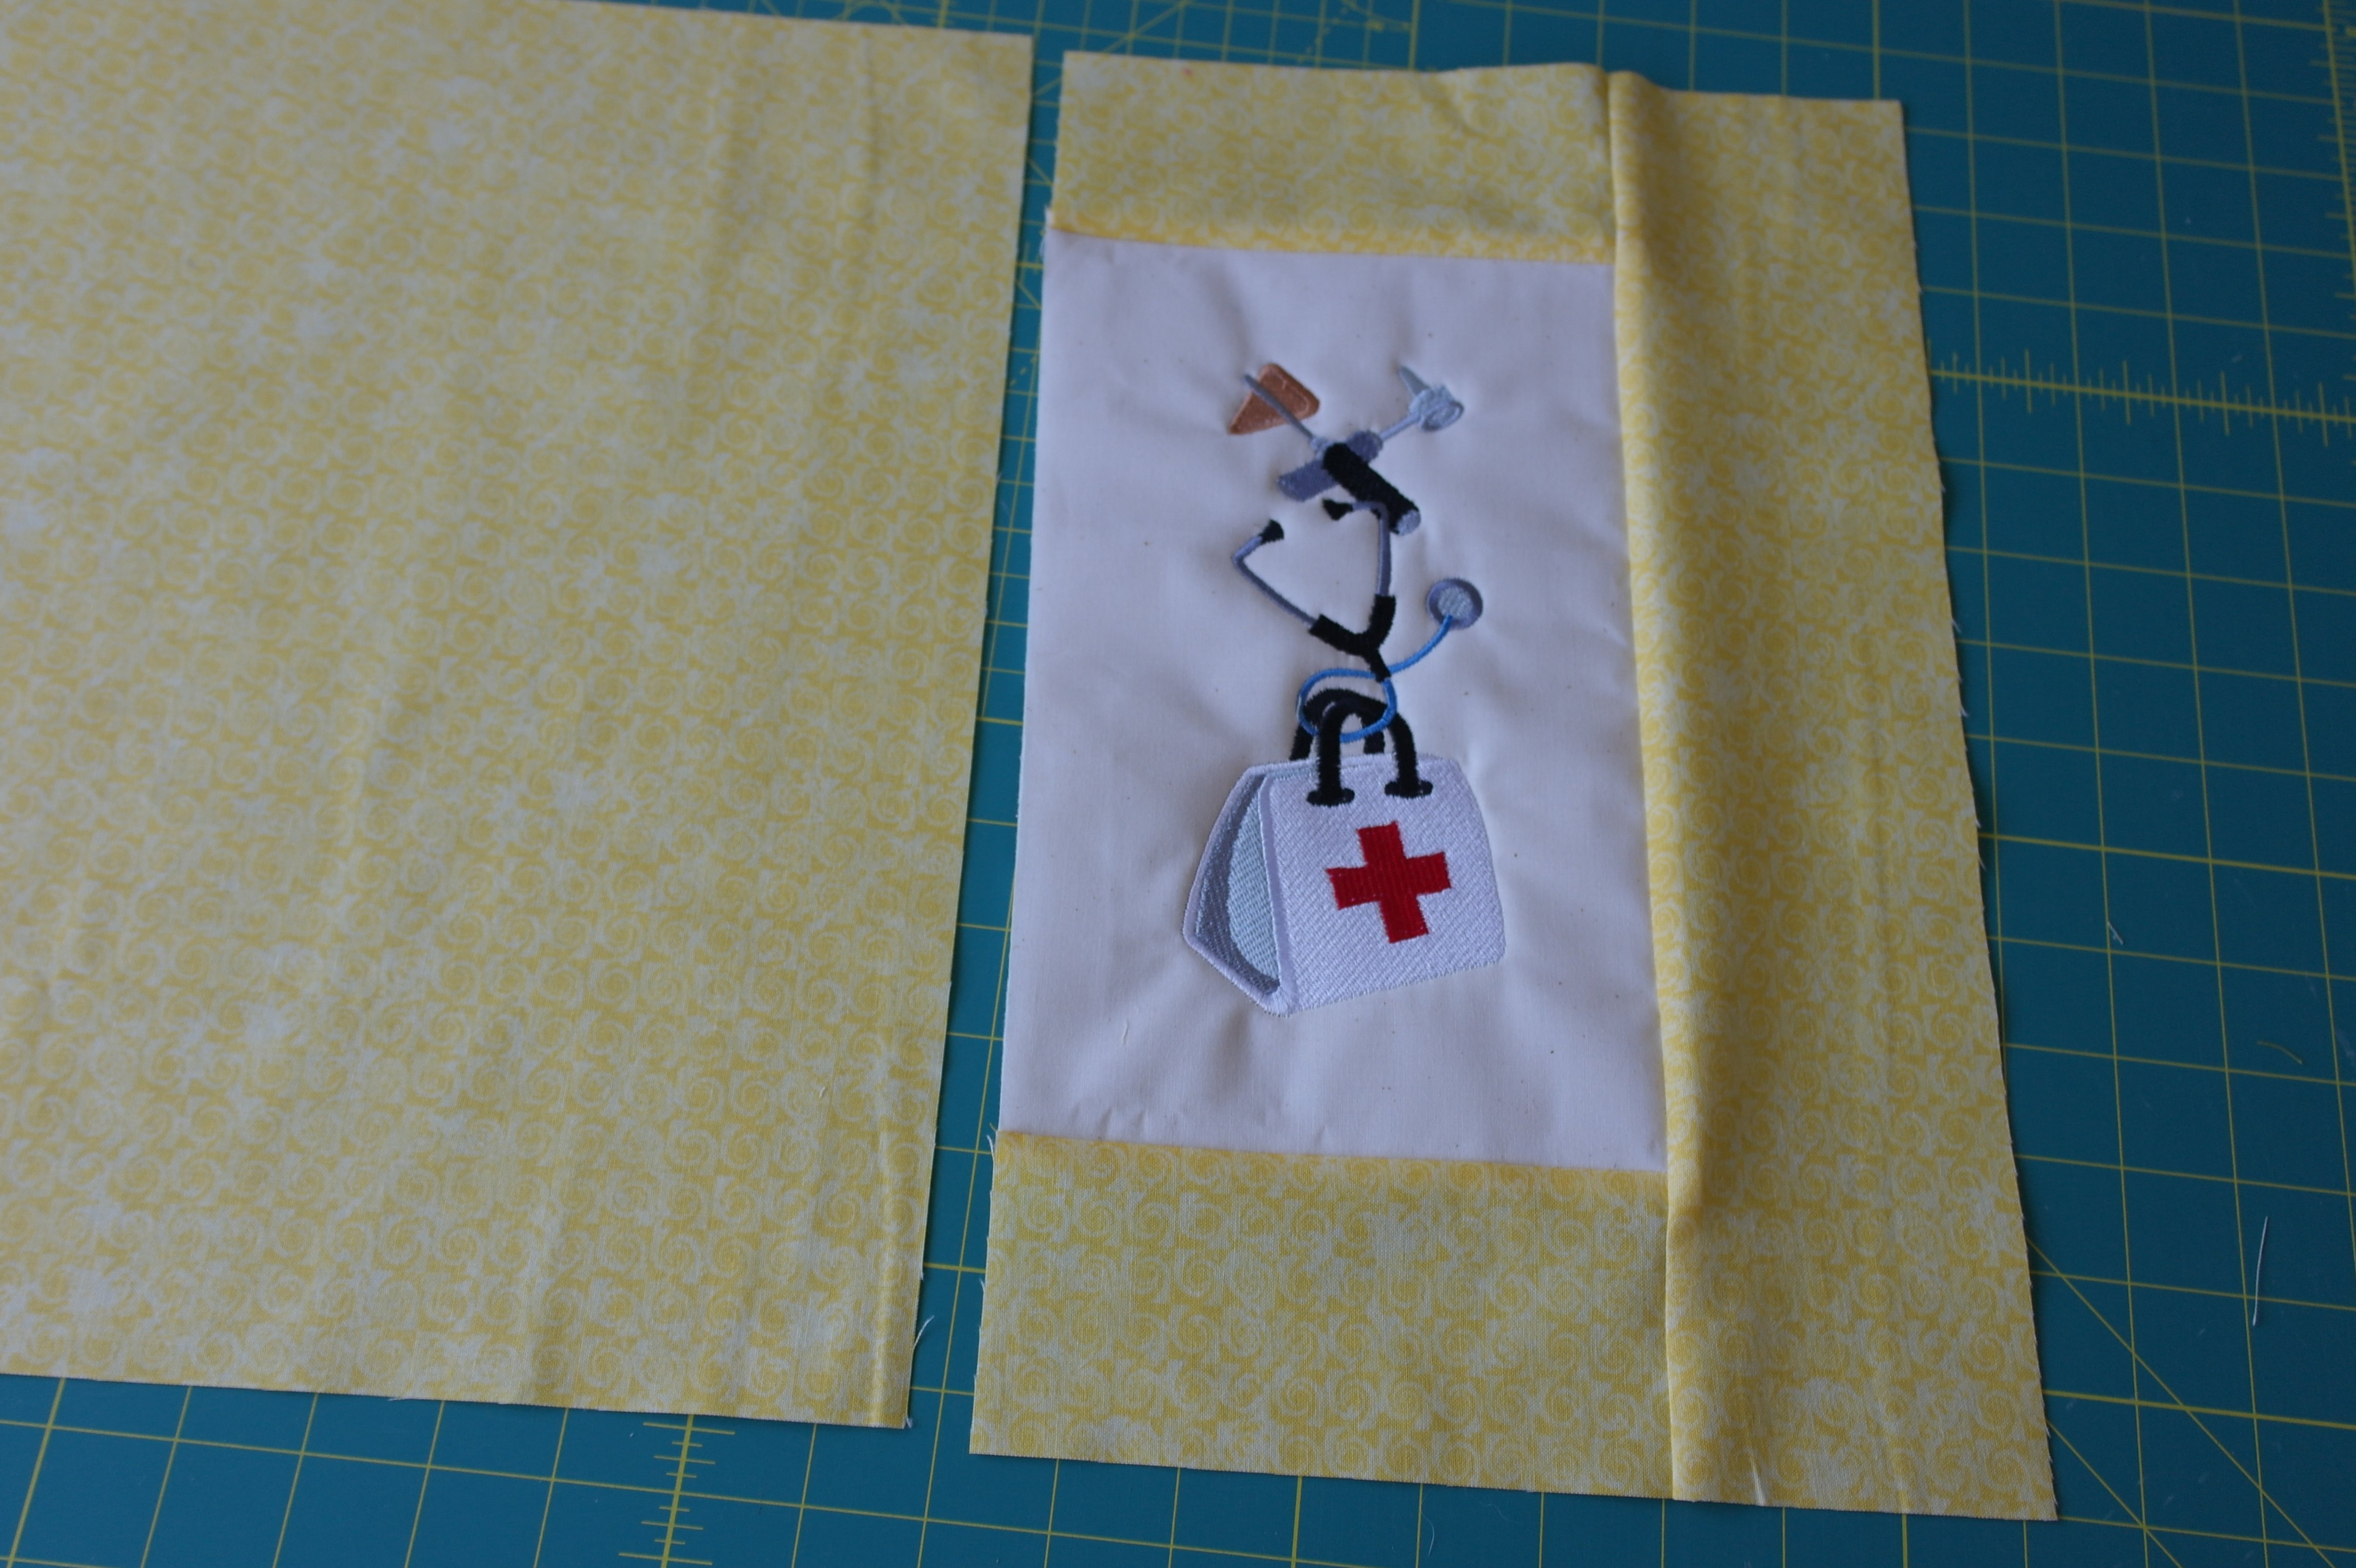
After sewing the yellow fabrics together, I’ve ironed the badges onto the front part of the cover.
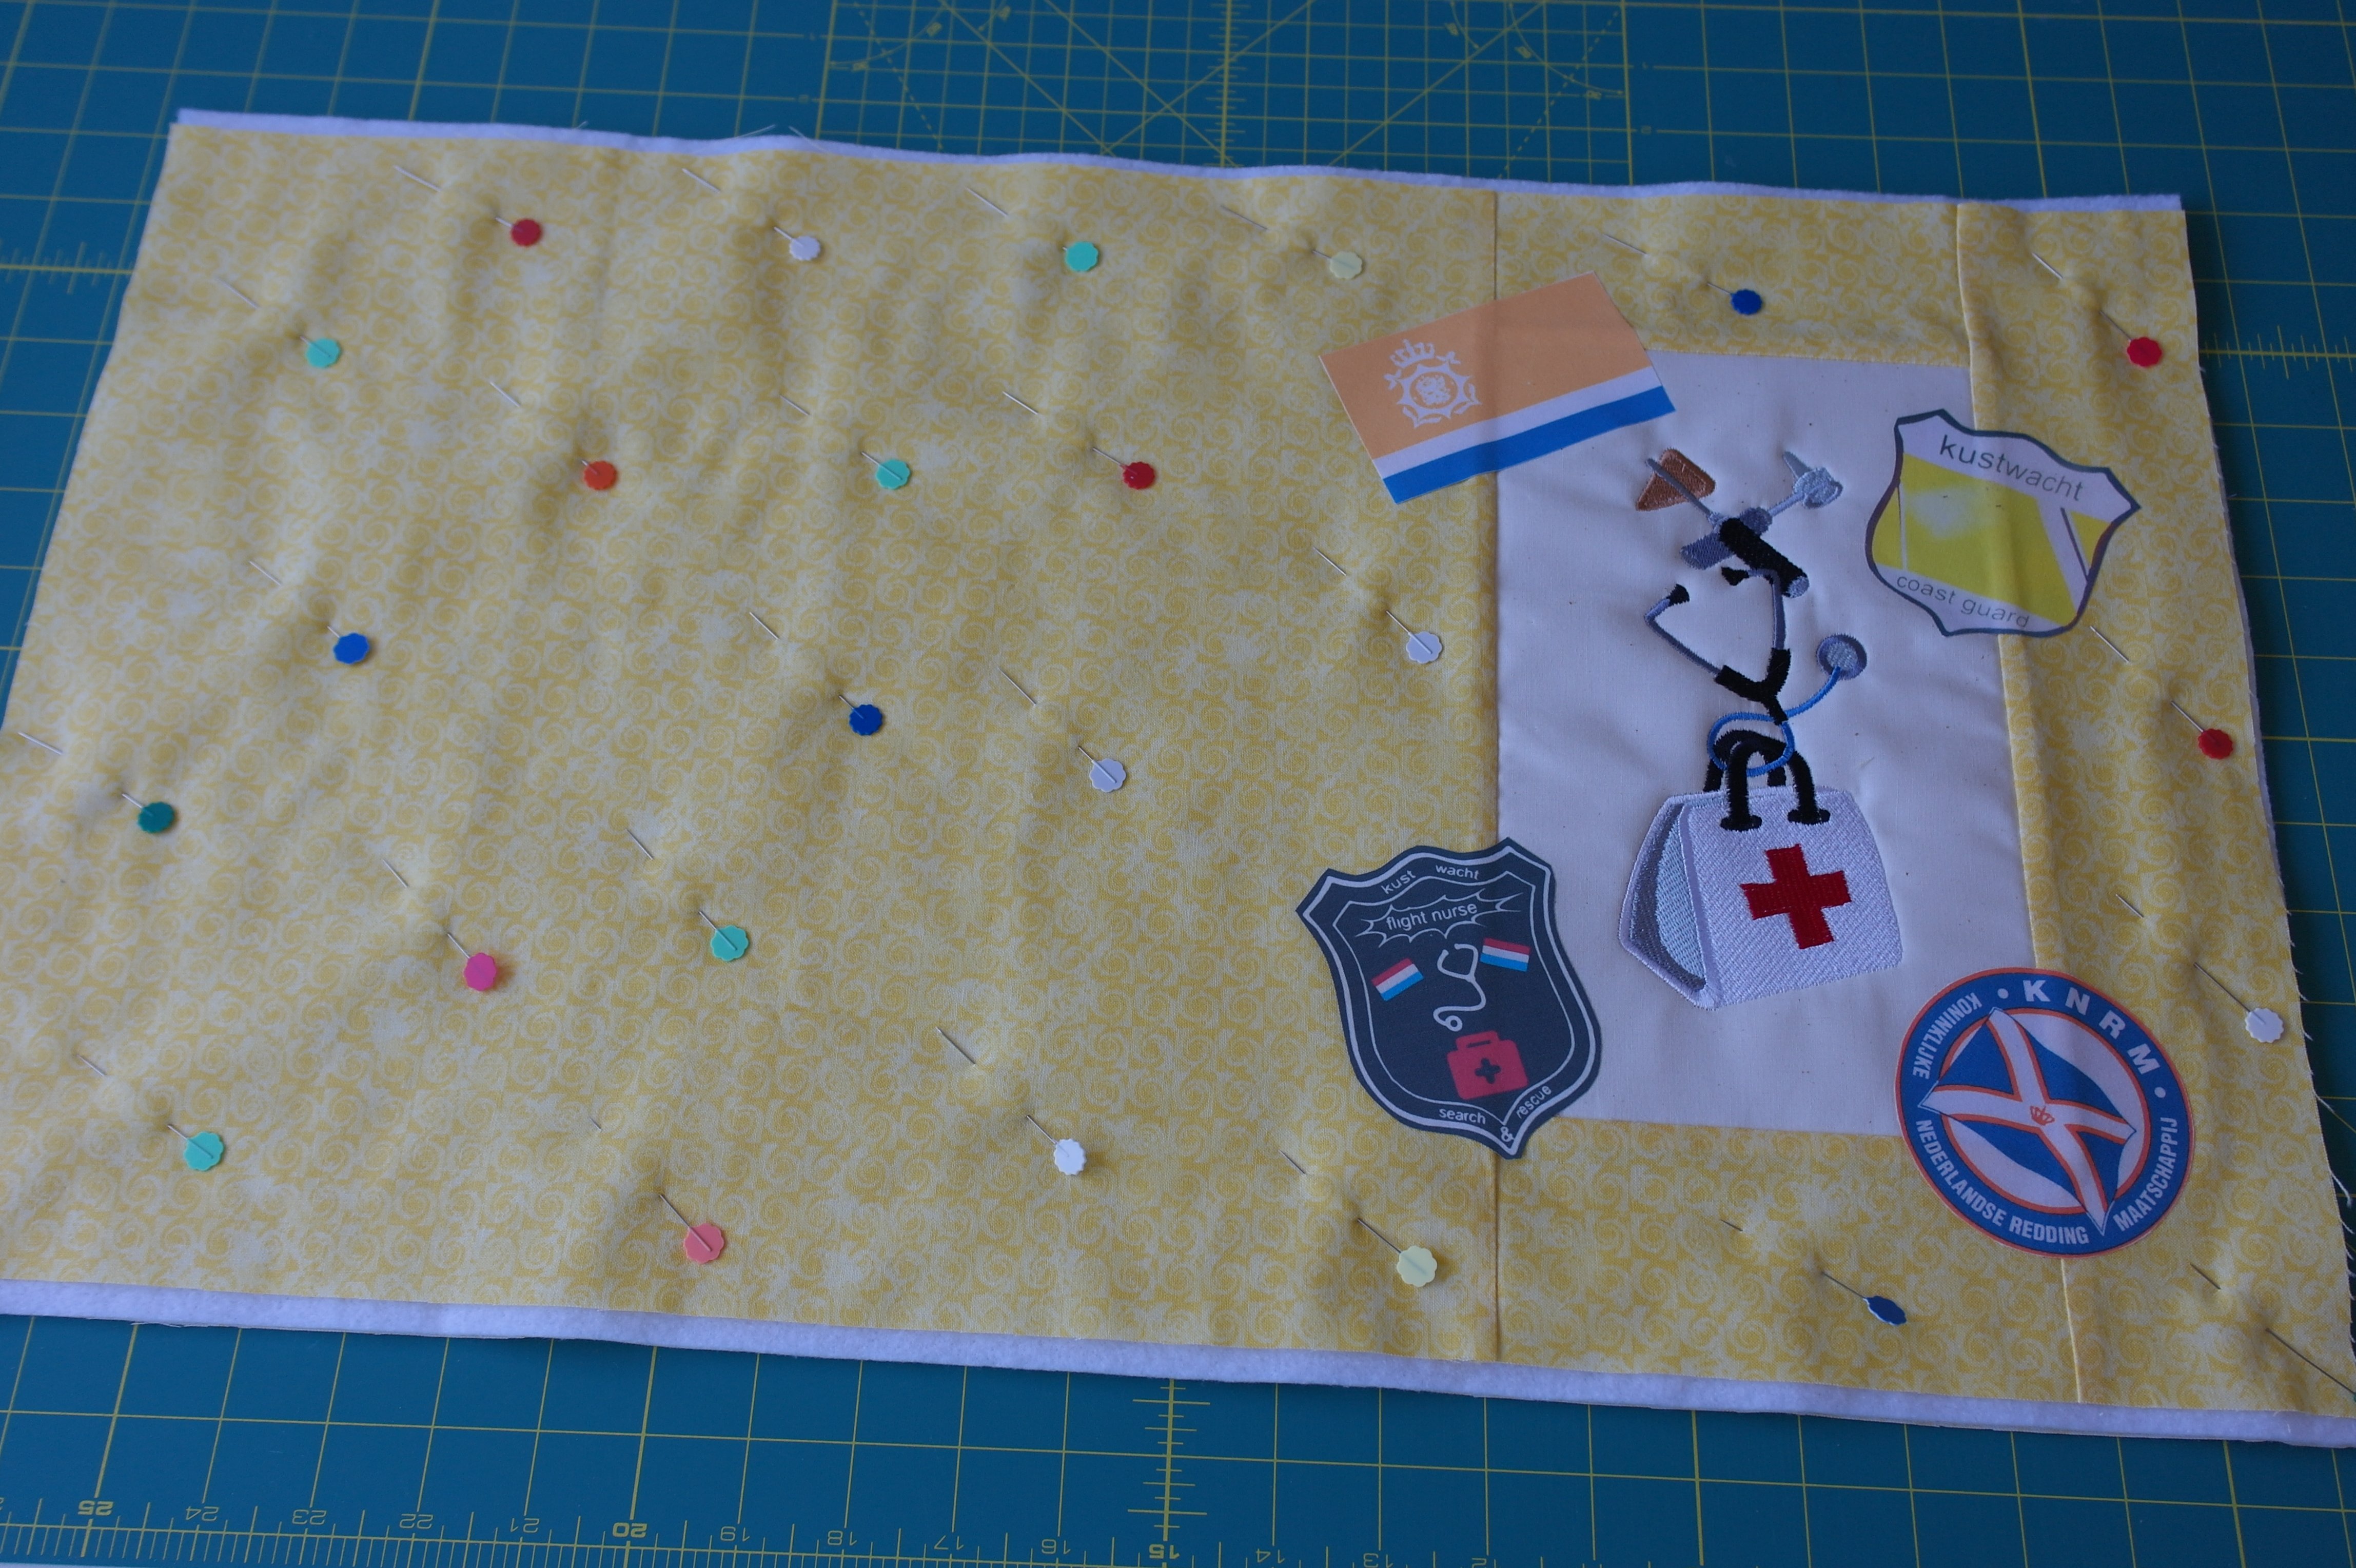
And made the sandwich for the cover – pinning it with Flower Pins. I like the way they lay flat on the sandwich.
I’ve also made sandwiches for both flaps. They will be quilted seperately.
Embroidery module off, quilting foot and settings for free motion on… I’ve quilted around the badges first, with black thread, so they will stand out a bit.
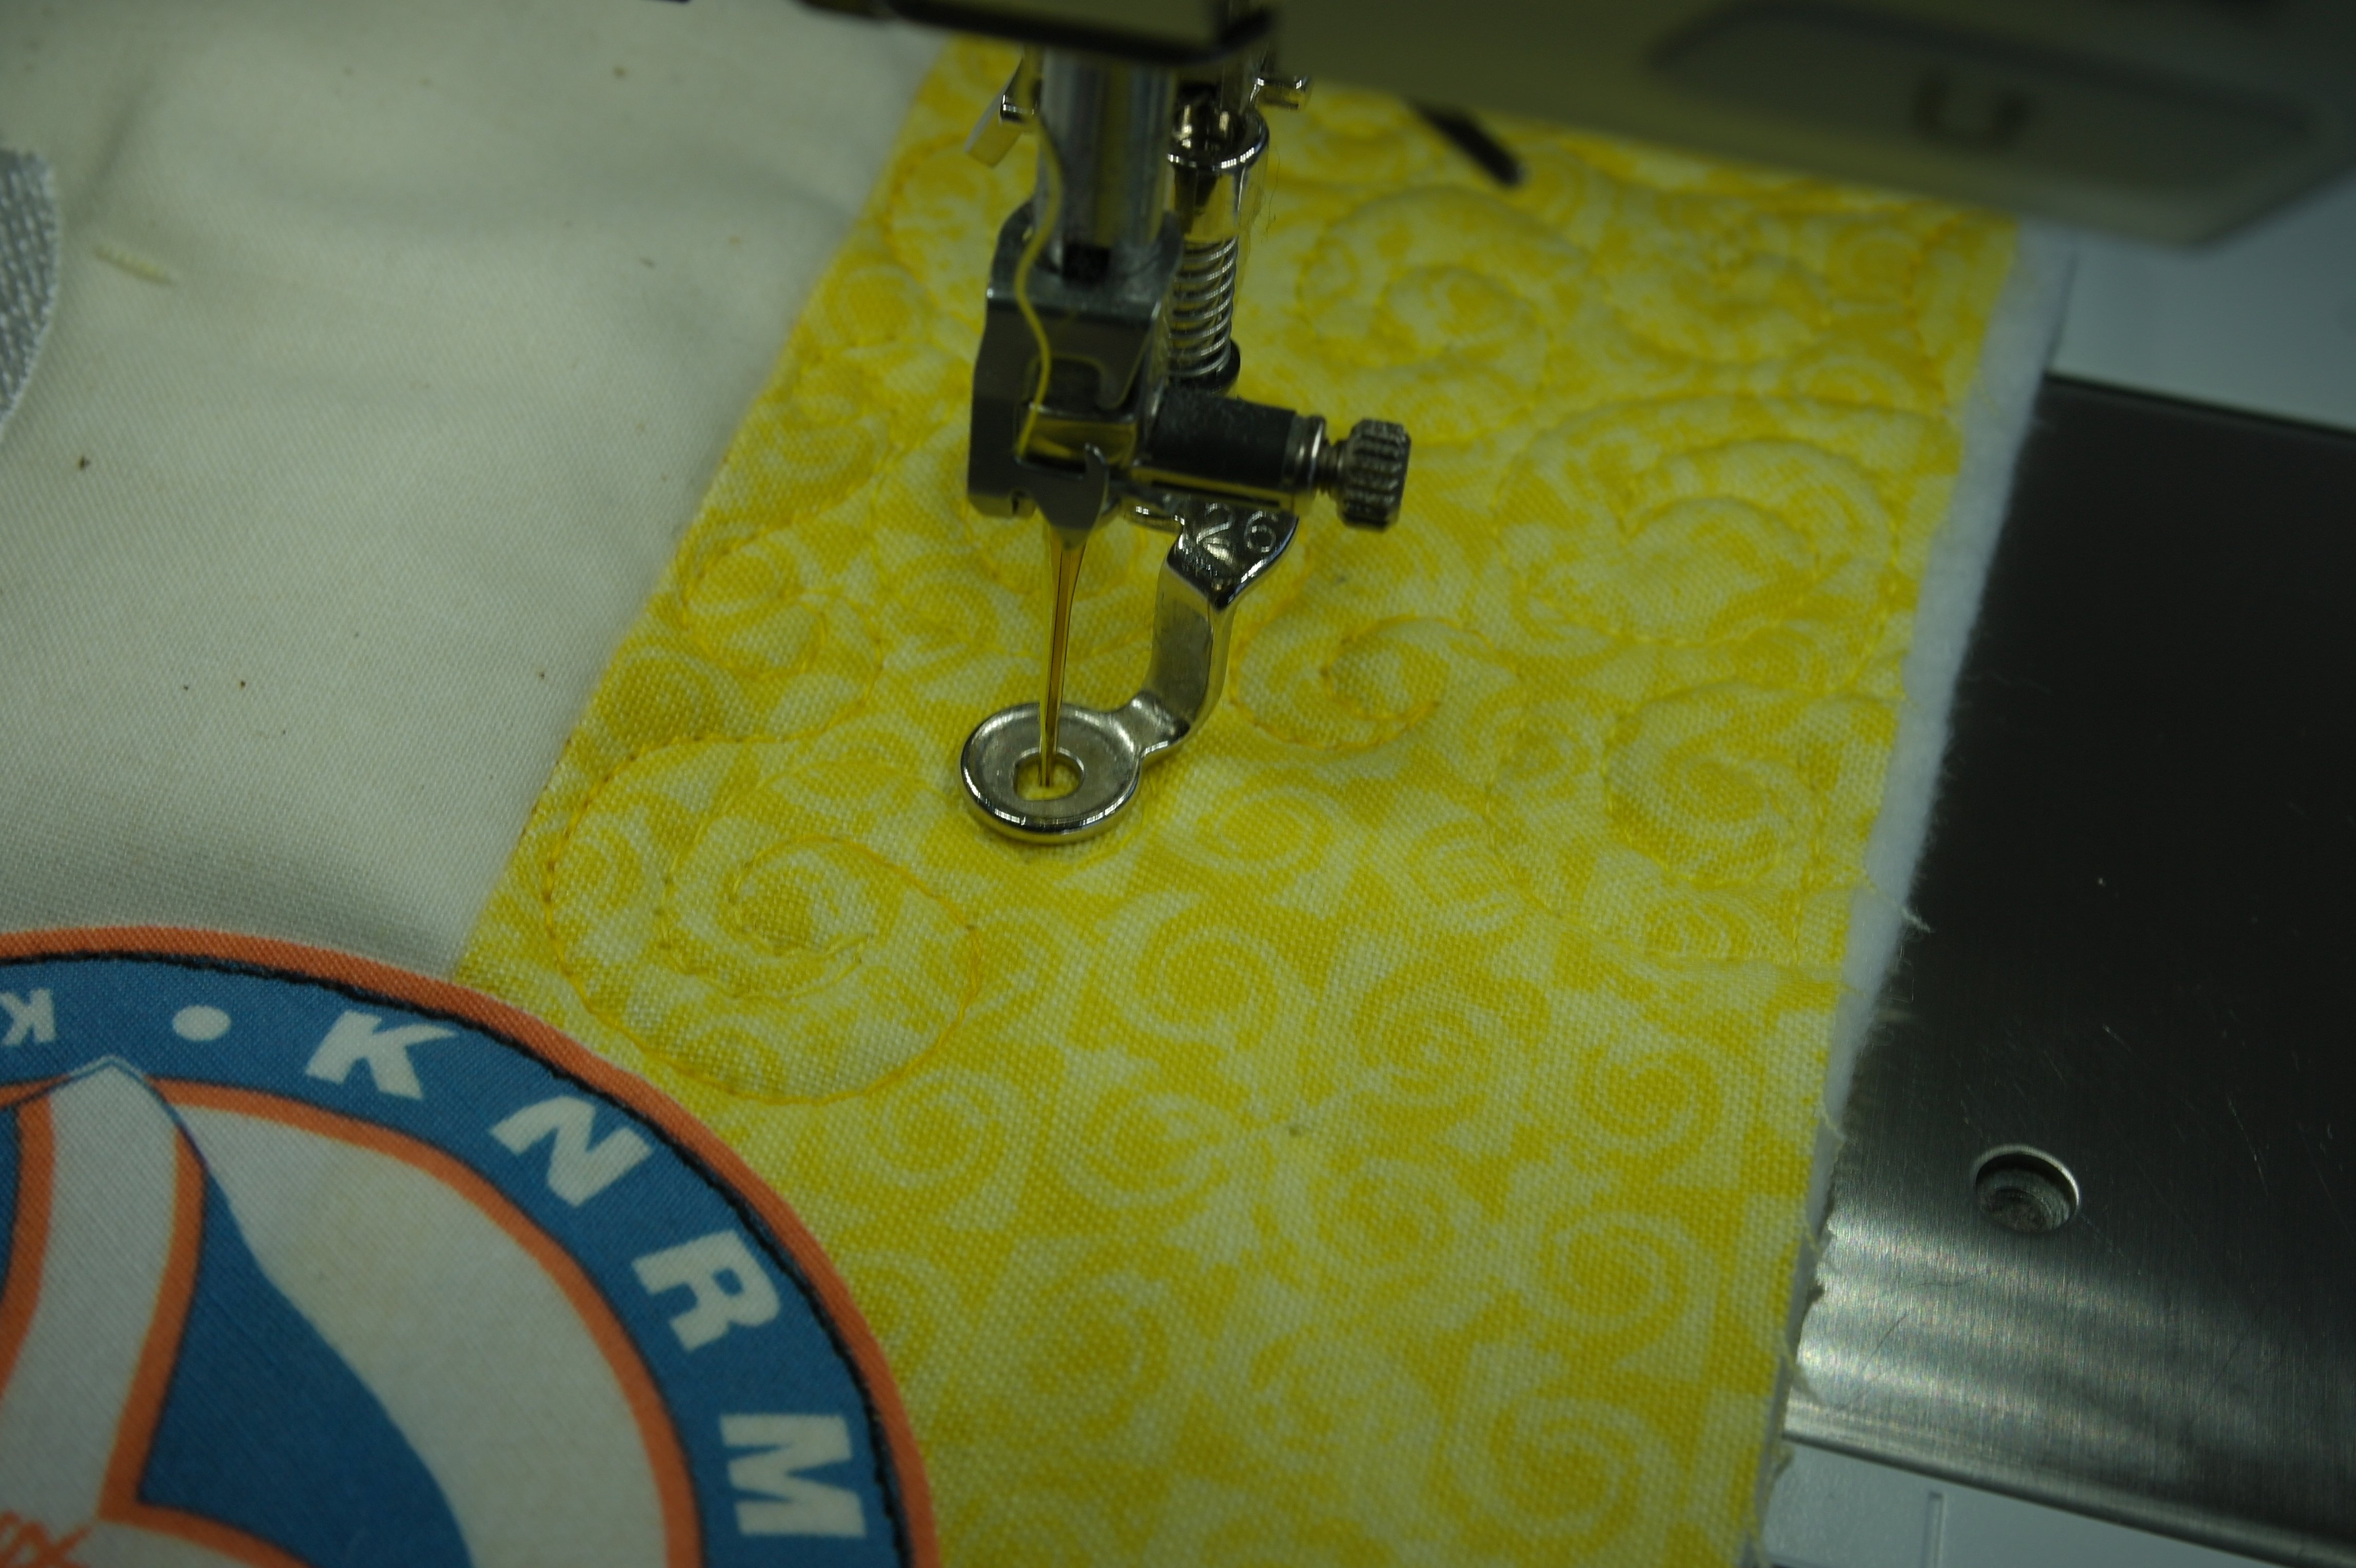
I’ve quilted small curles on the off-white fabric around the embroidery motif, and curls with spirals, with yellow Tutti/Wonderfil on the yellow fabrics. My bobbin thread is DecoBob/Wonderfil in a matching color.
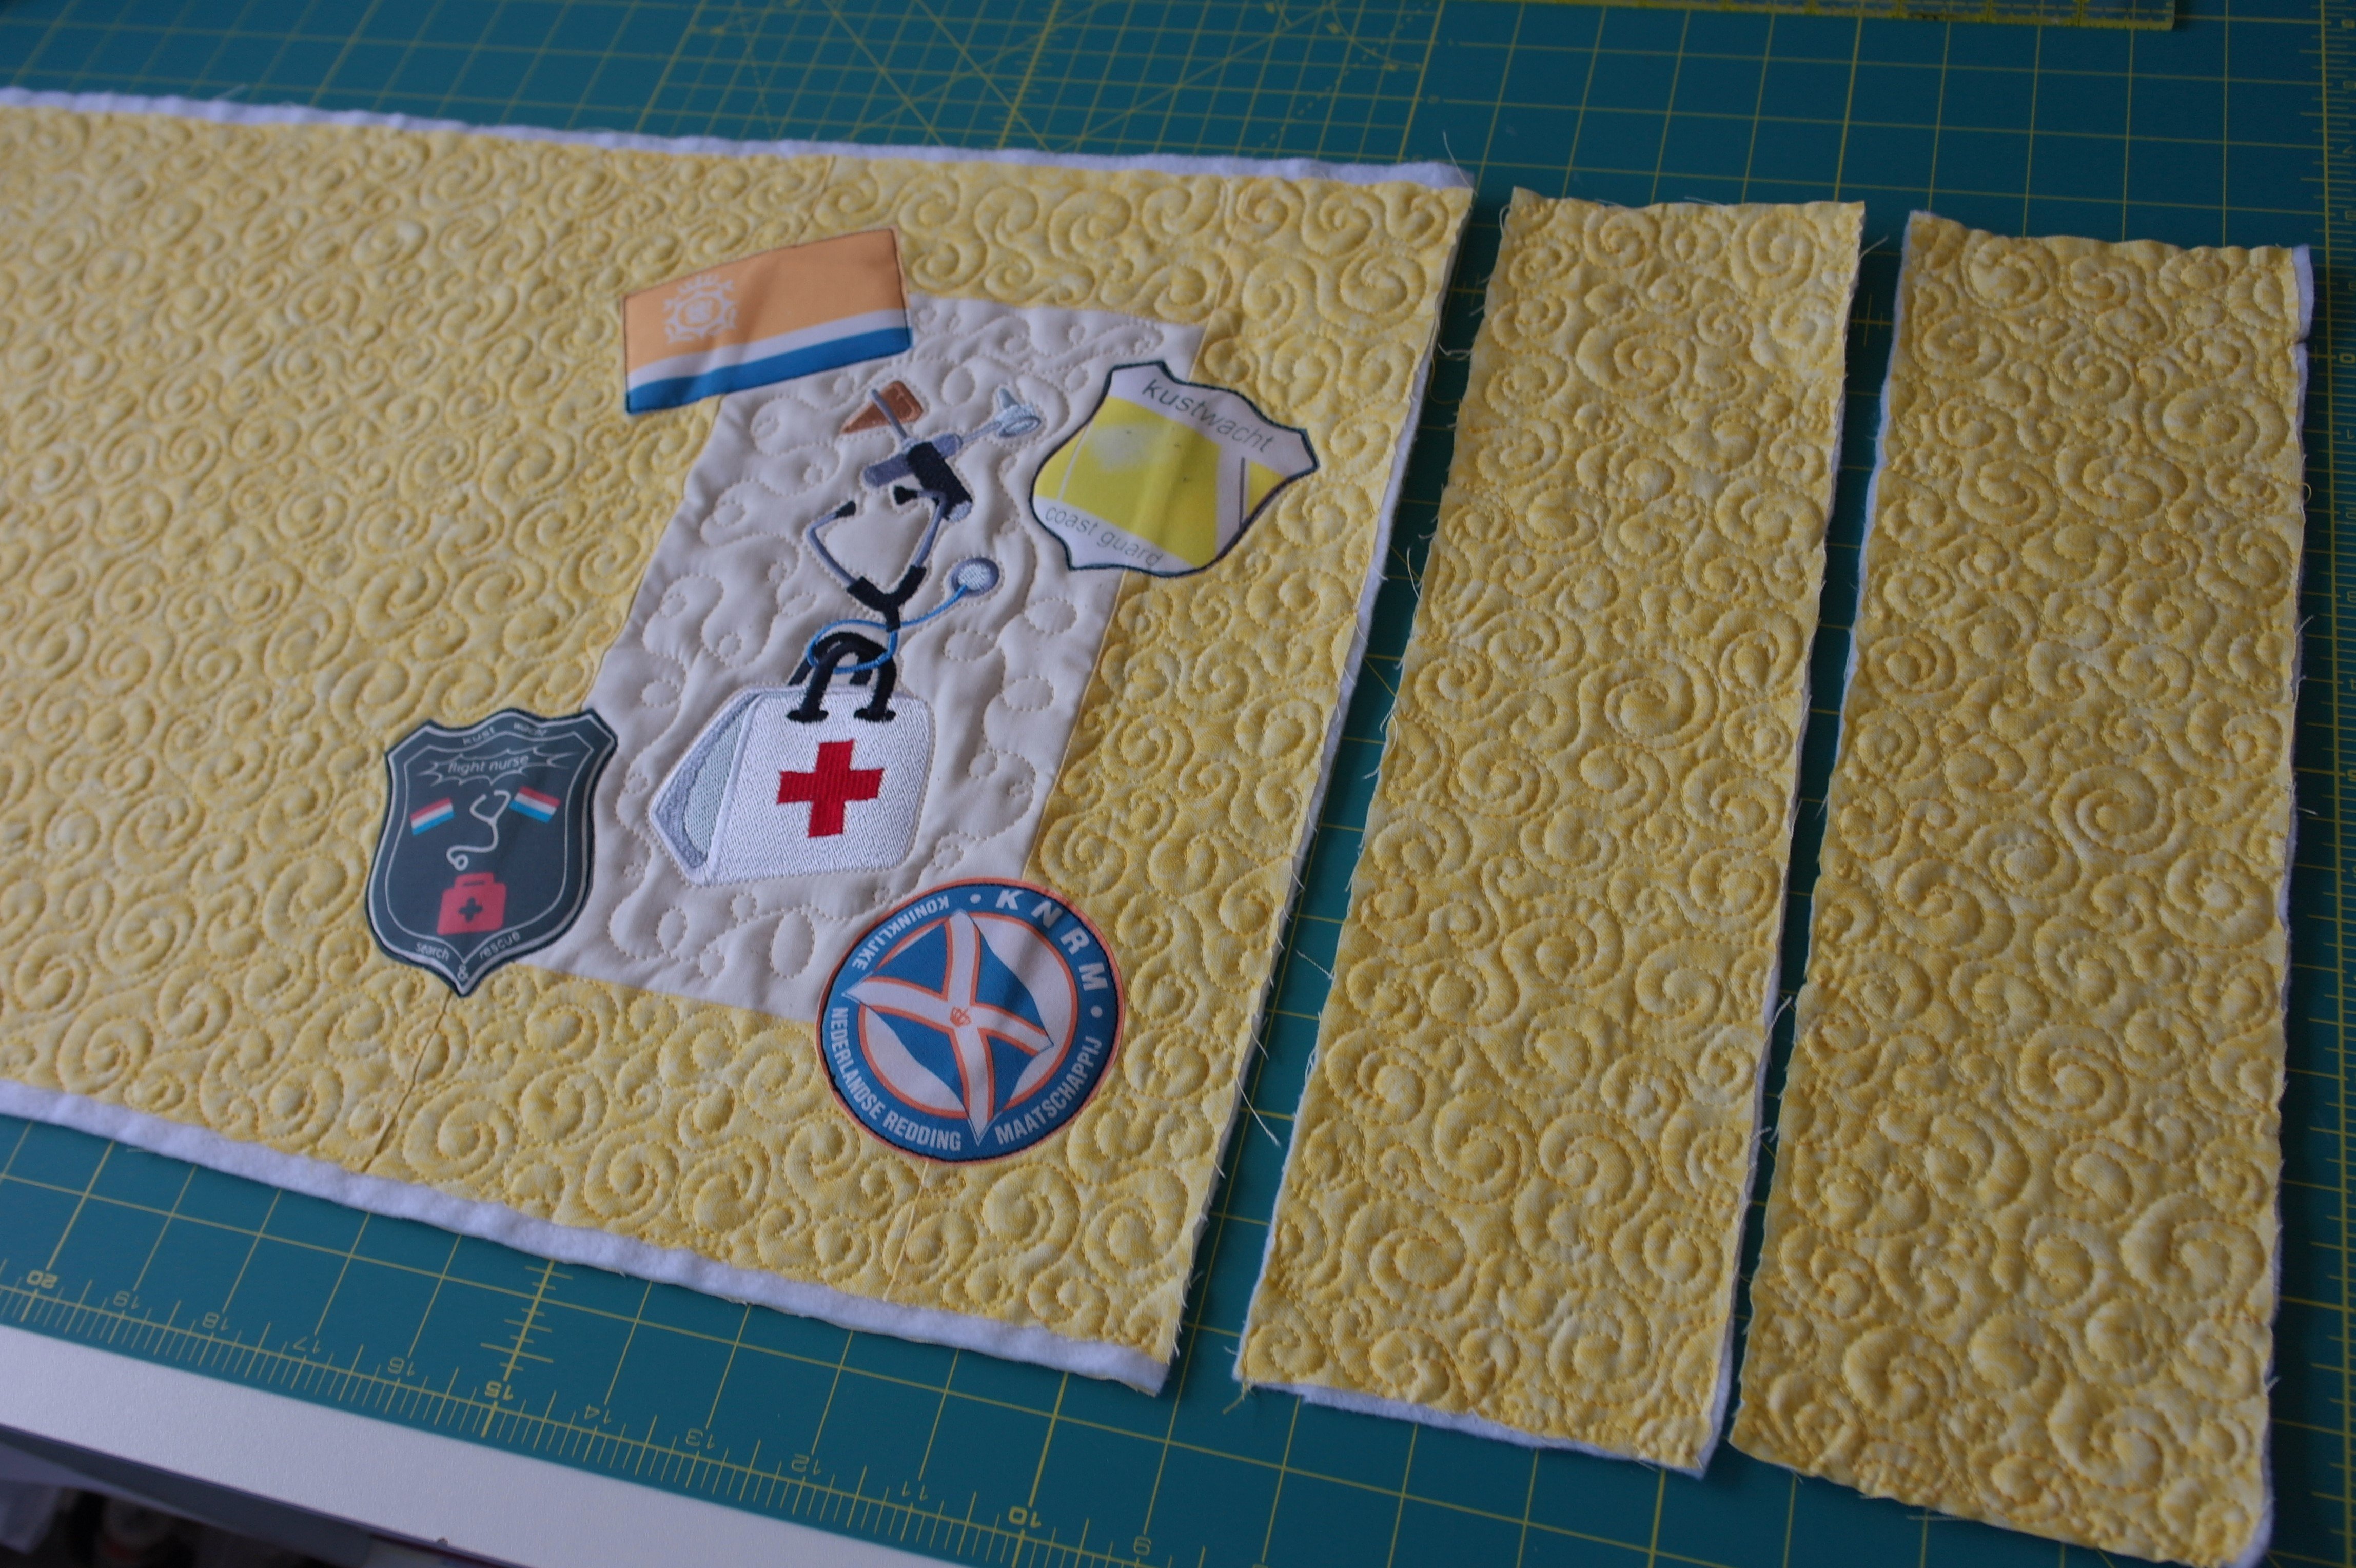
All three pieces are quilted: one large, and two small ones. Because I’ve quilted really intense, everything is a bit smaller because of shrinkage. Still I have enough extra to cut these pieces to the right size.
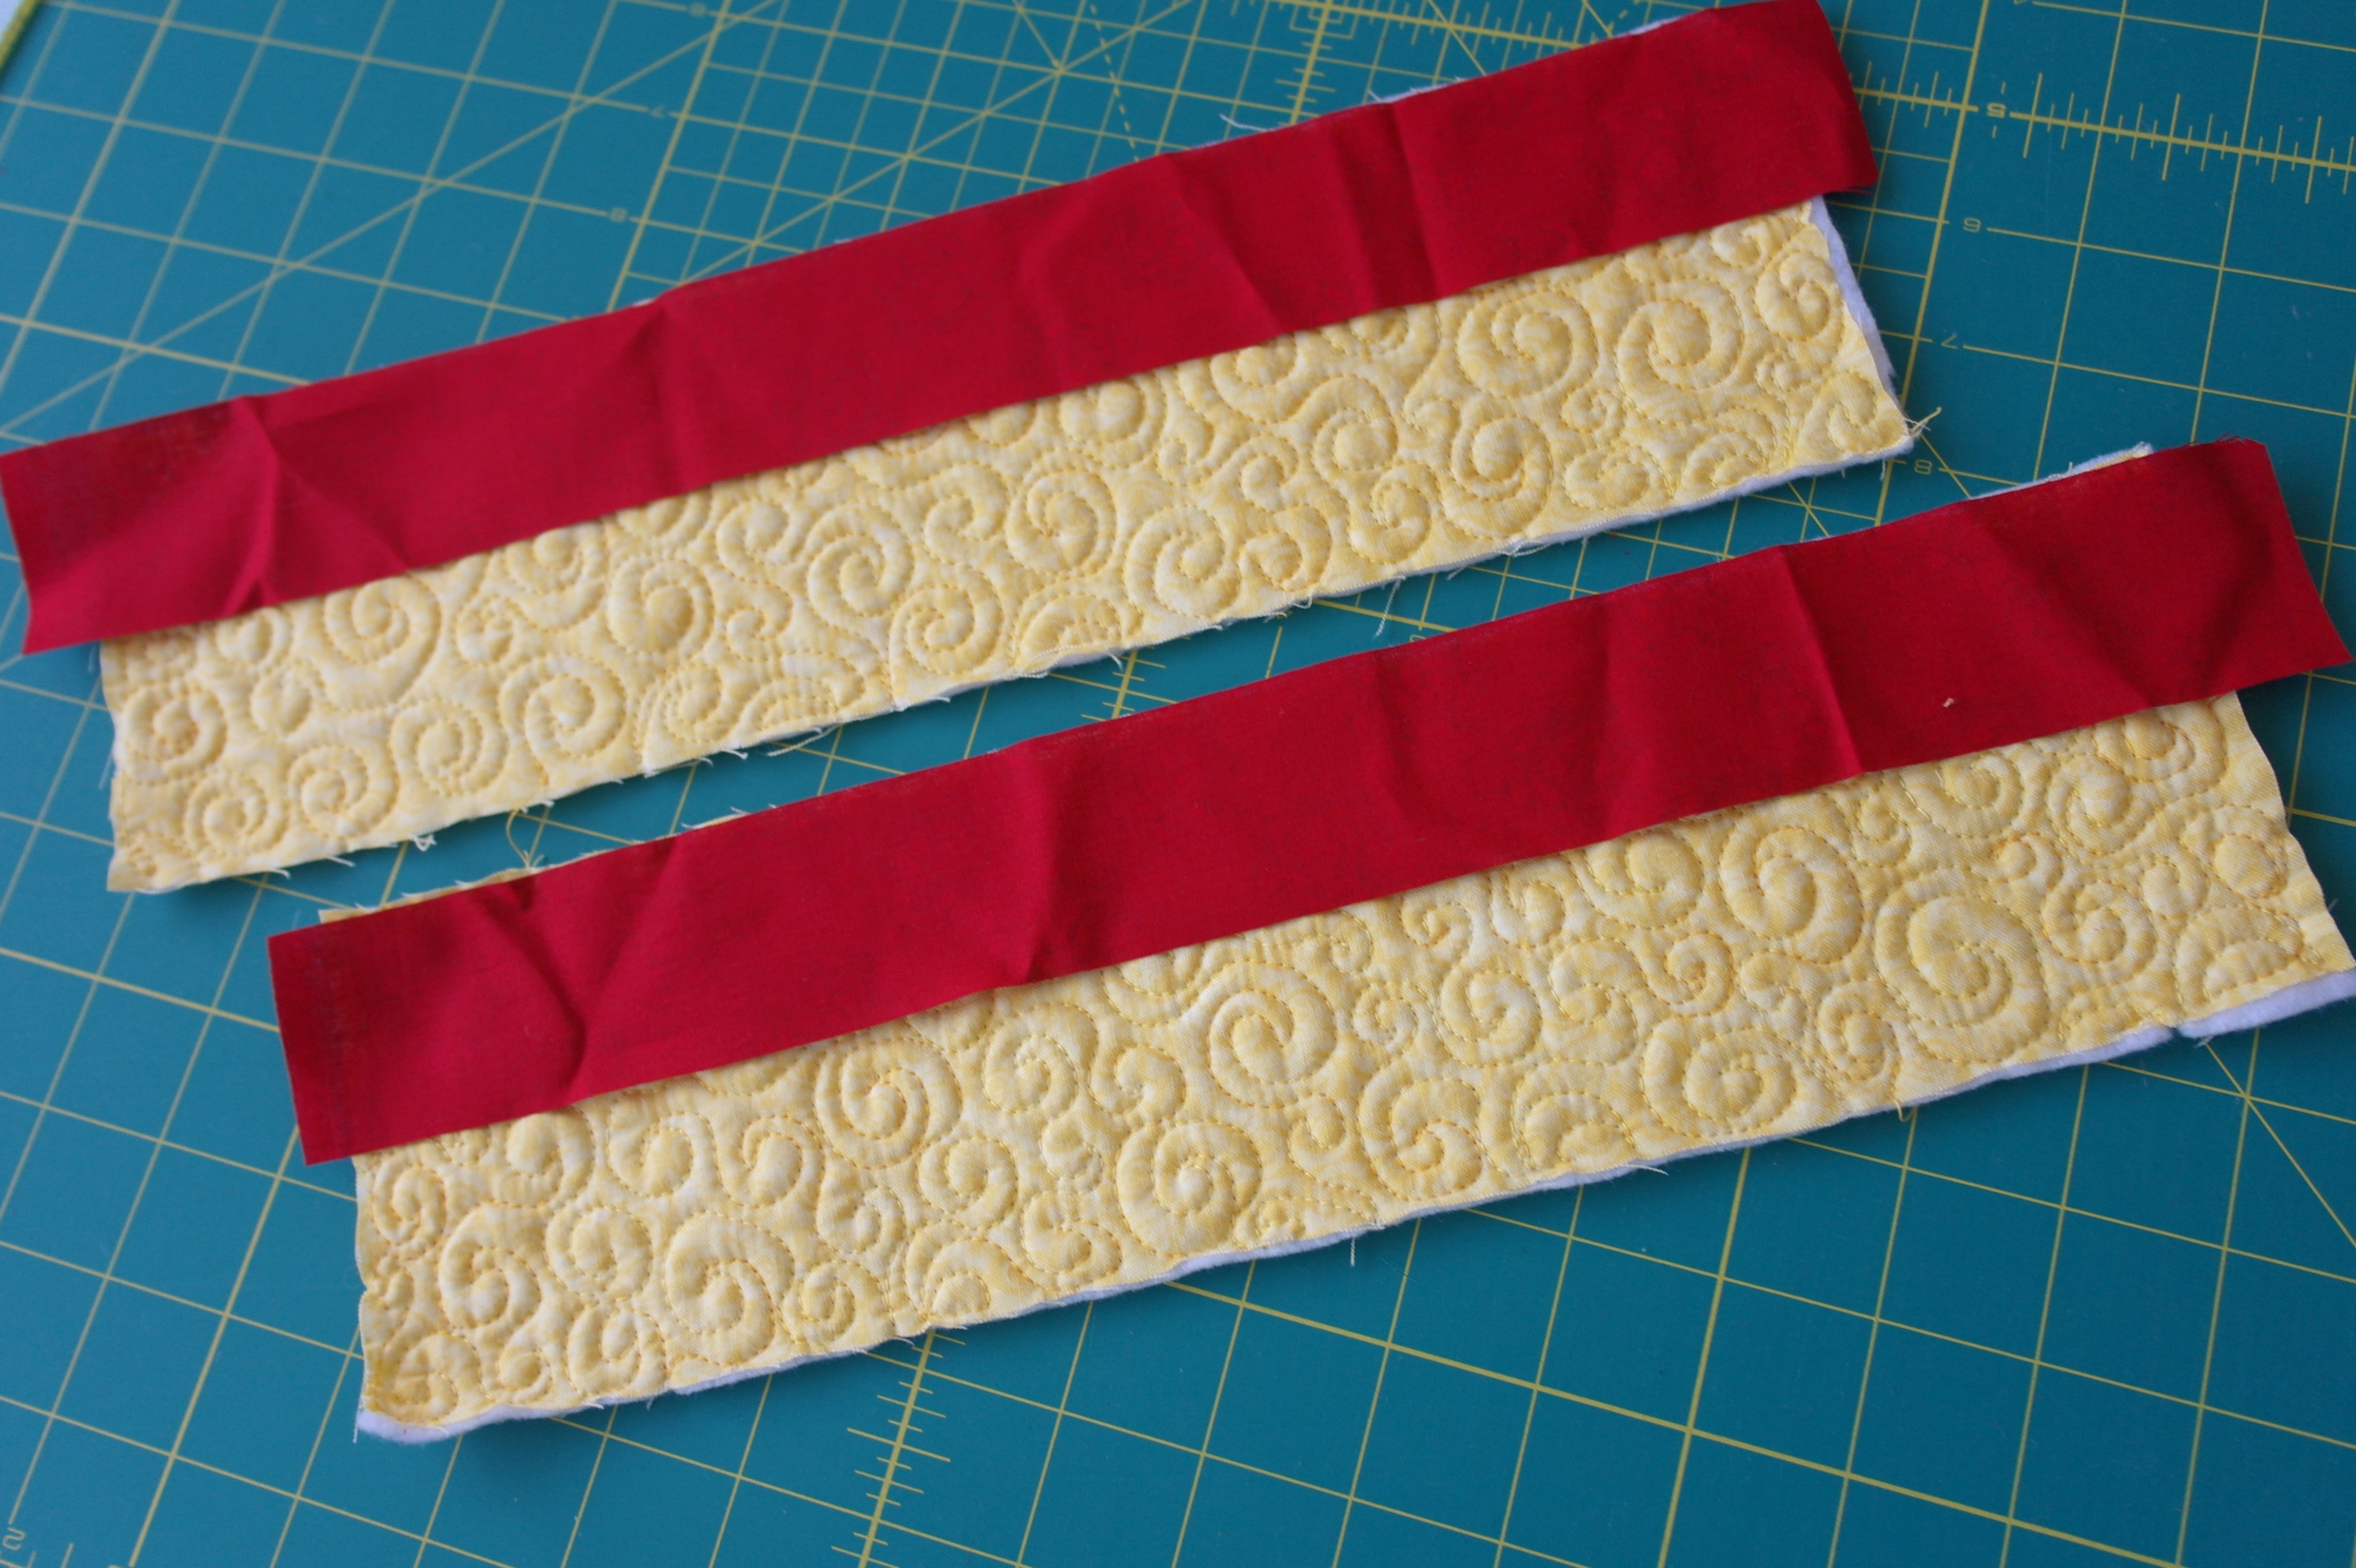
I”ve cut strips for the binding, out of red fabric – width 4 cm. They don’t have to be cut on the bias, because they will be sewn on straight edges.
I’ve sewn them on the back of the quilted flaps first, so I can fold them to the front and sew them, all by machine.
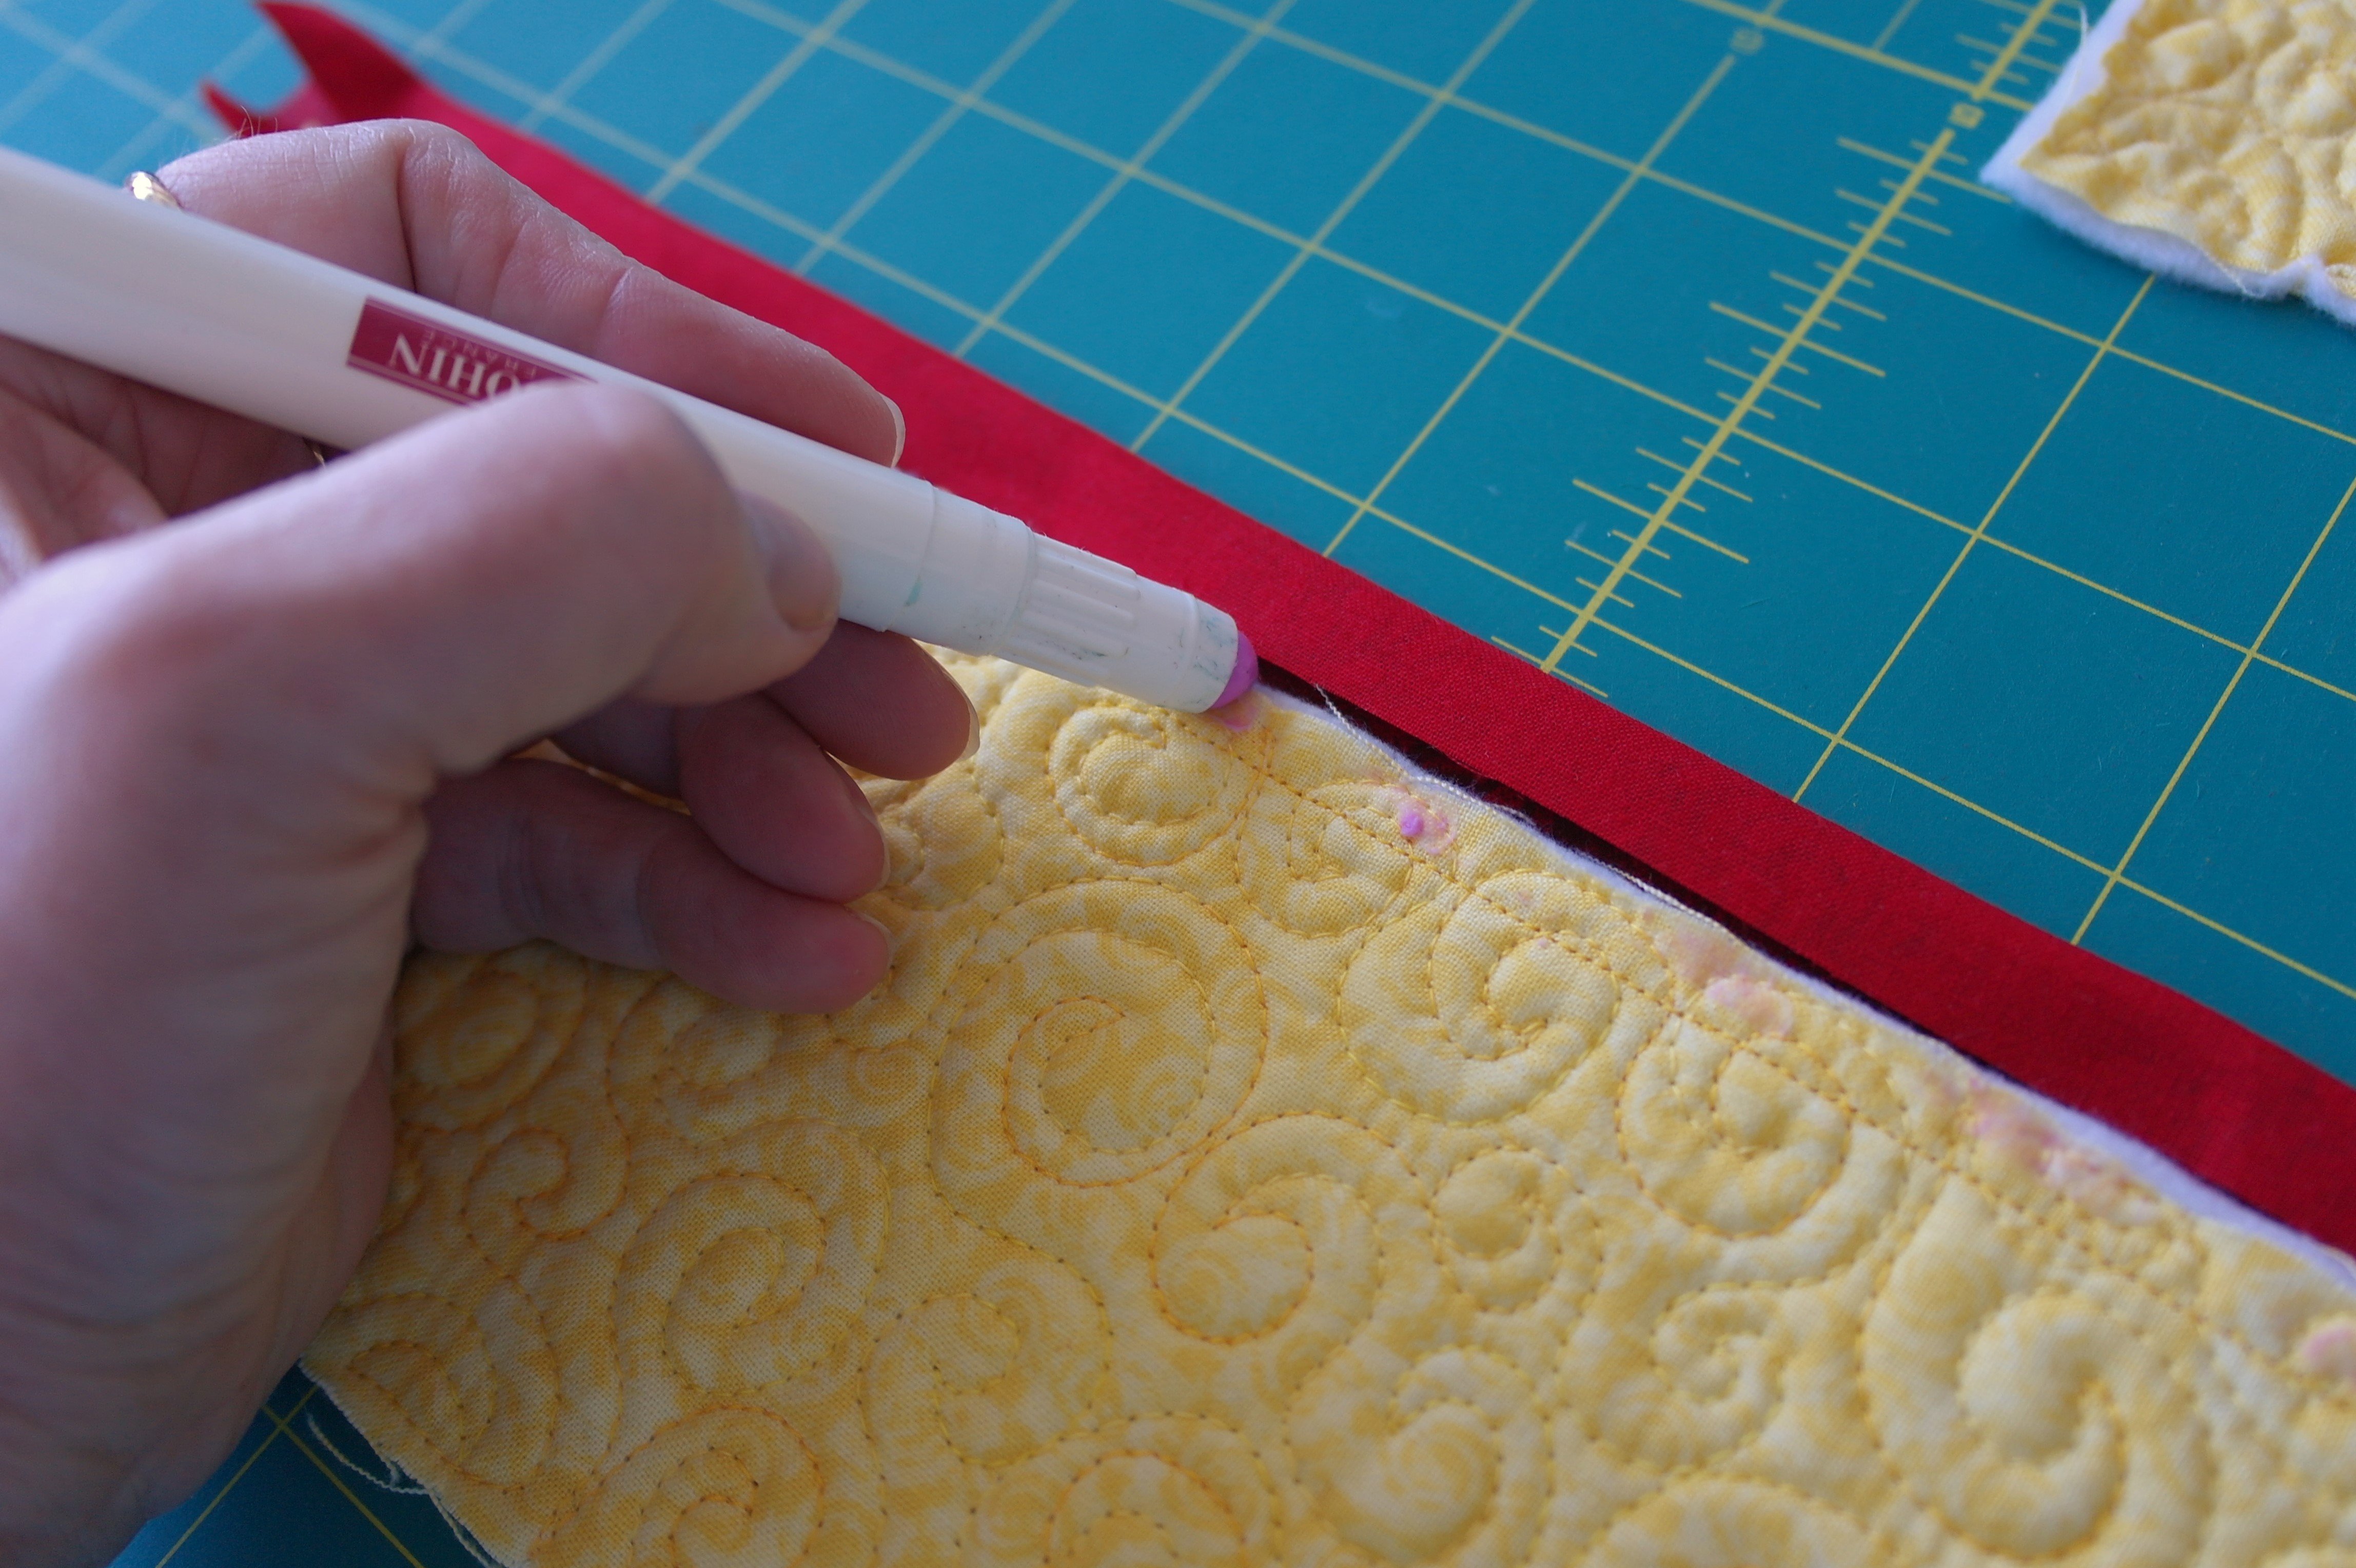
Then I’ve folded the strips to the front, inserted the first part and glued this with Bohin Glue pen.Then put glue on the seam allowance of the quilted side, and placed the binding to the front. This way I didn’t have to use pins. Because I have only put glue directly on the seamallowance, the needle of the machine will not touch this. Anyway, it is watersoluble, so even if the needle will penetrate the parts with glue, it will not hurt the needle.
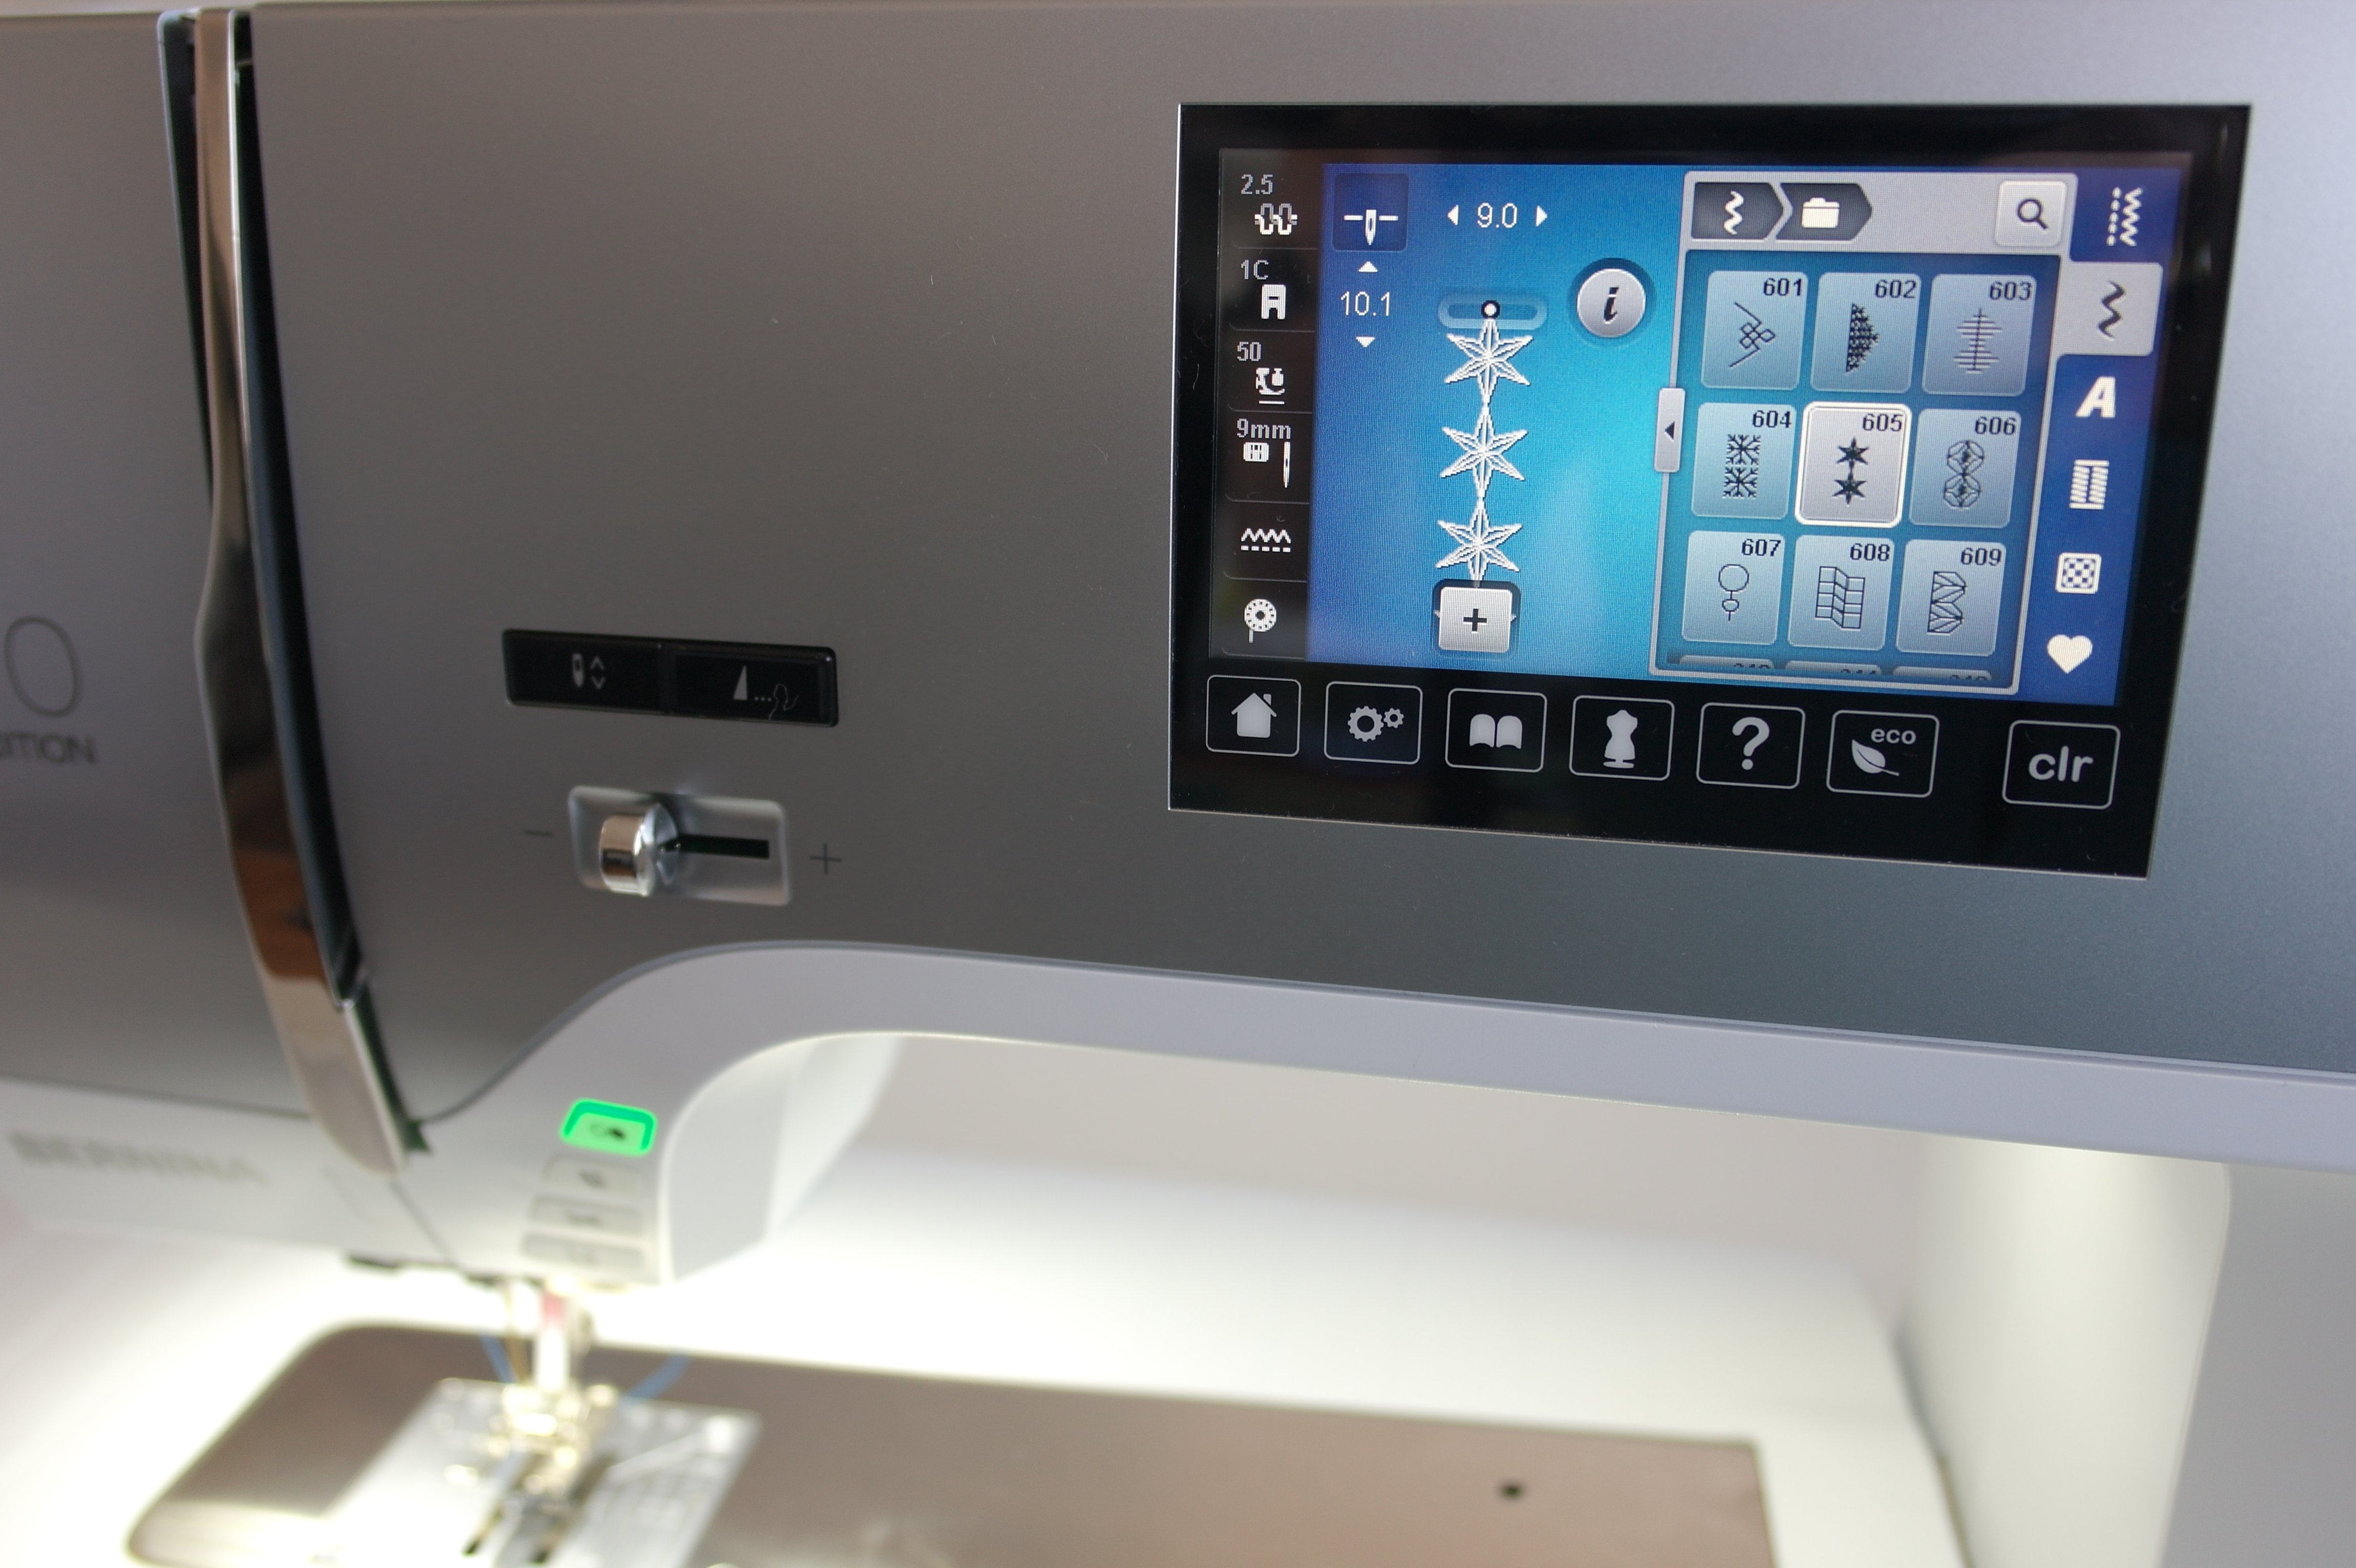
I’ve used a decorative stitch (nr. 605) for the edge of the flaps, made them with a blue Magnifico/Superior Threads. Working with the Open embroidery #20C.
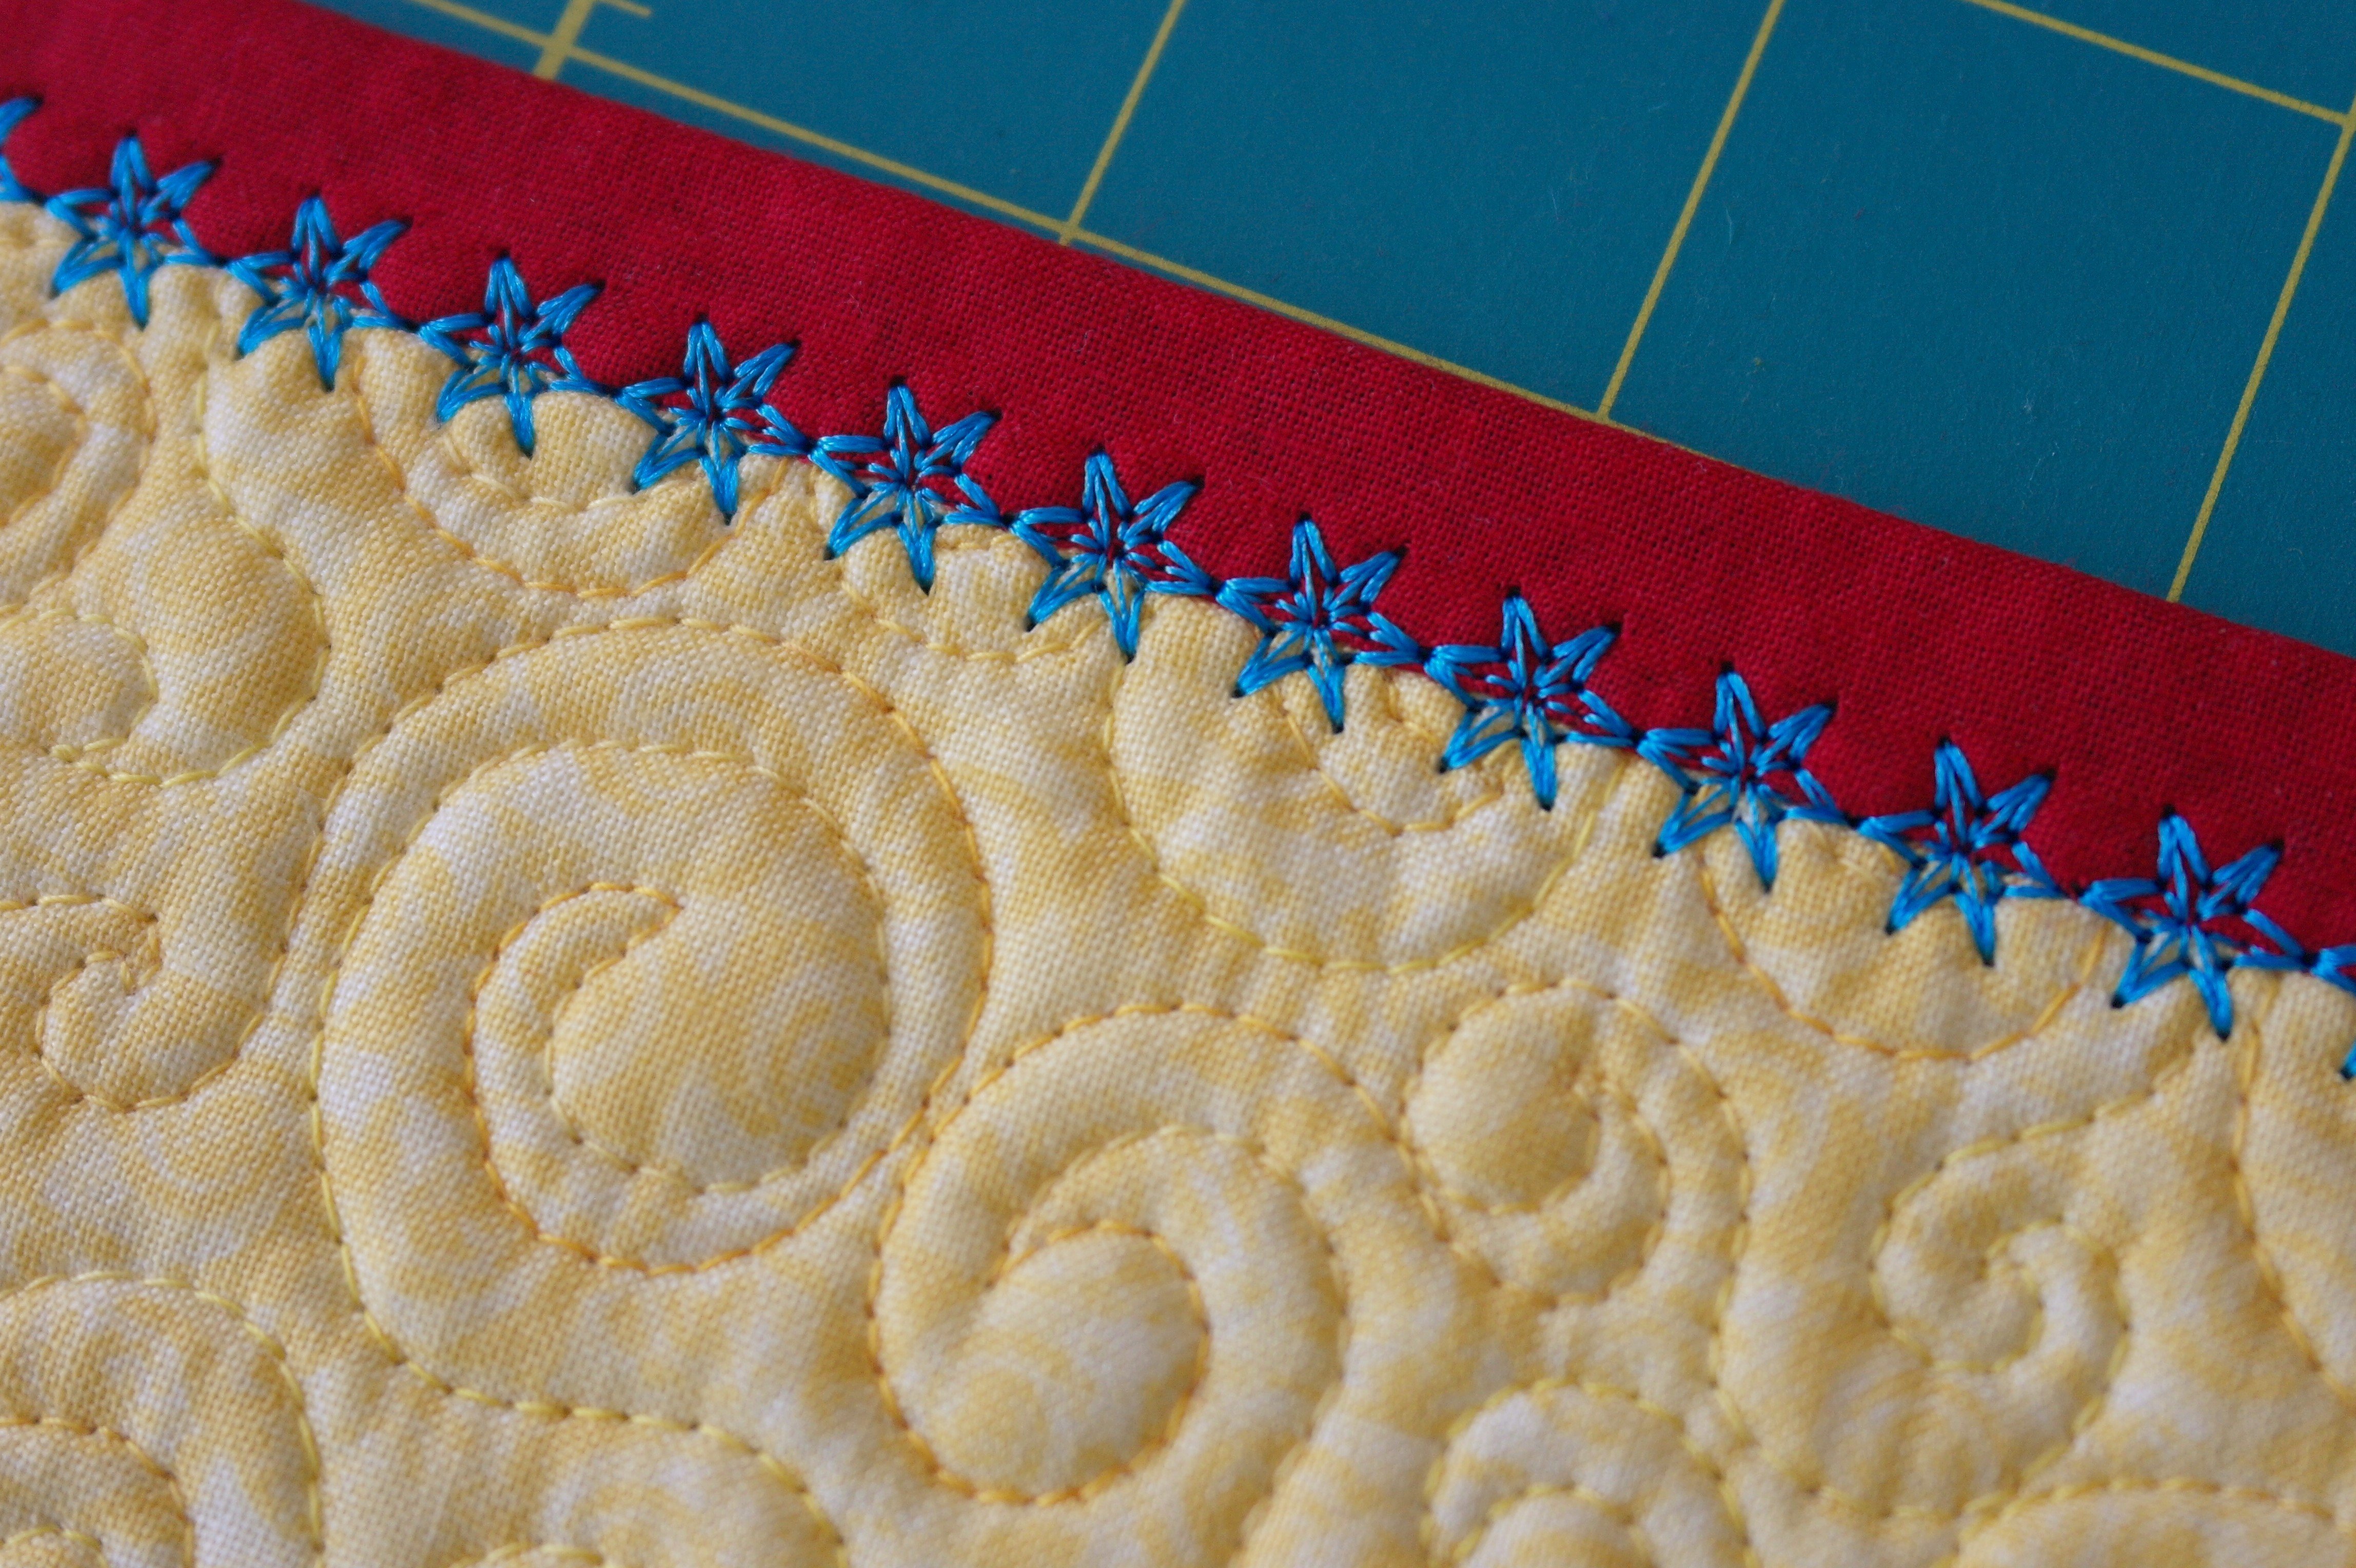
Looks great… I can use this stitch only on a single quilted layer. This small flap will be sewn onto the large quilted piece for the cover, and two of those layers are just too thick for this decorative stitch (believe me, I’ve tried).
Everything is quilted, and the flaps are binded. Now it is time to measure the cover again, and cut it to the right size. I’ve placed the open binder on the pieces of the cover to see if there is enough seam allowance for the next binding. It seems to be ok.

First the flaps are placed on the cover. It is important that they will be placed with the wrong sides together.
To sew the binding to the sides of flap and cover, placed on top of each other, I’ve glued them together again, folded the strip to the front (of the cover) after sewing, and used glue again to fold this to the right side of the cover. Made straight stitches instead of a decorative stitch, with blue thread because of the thick layers.
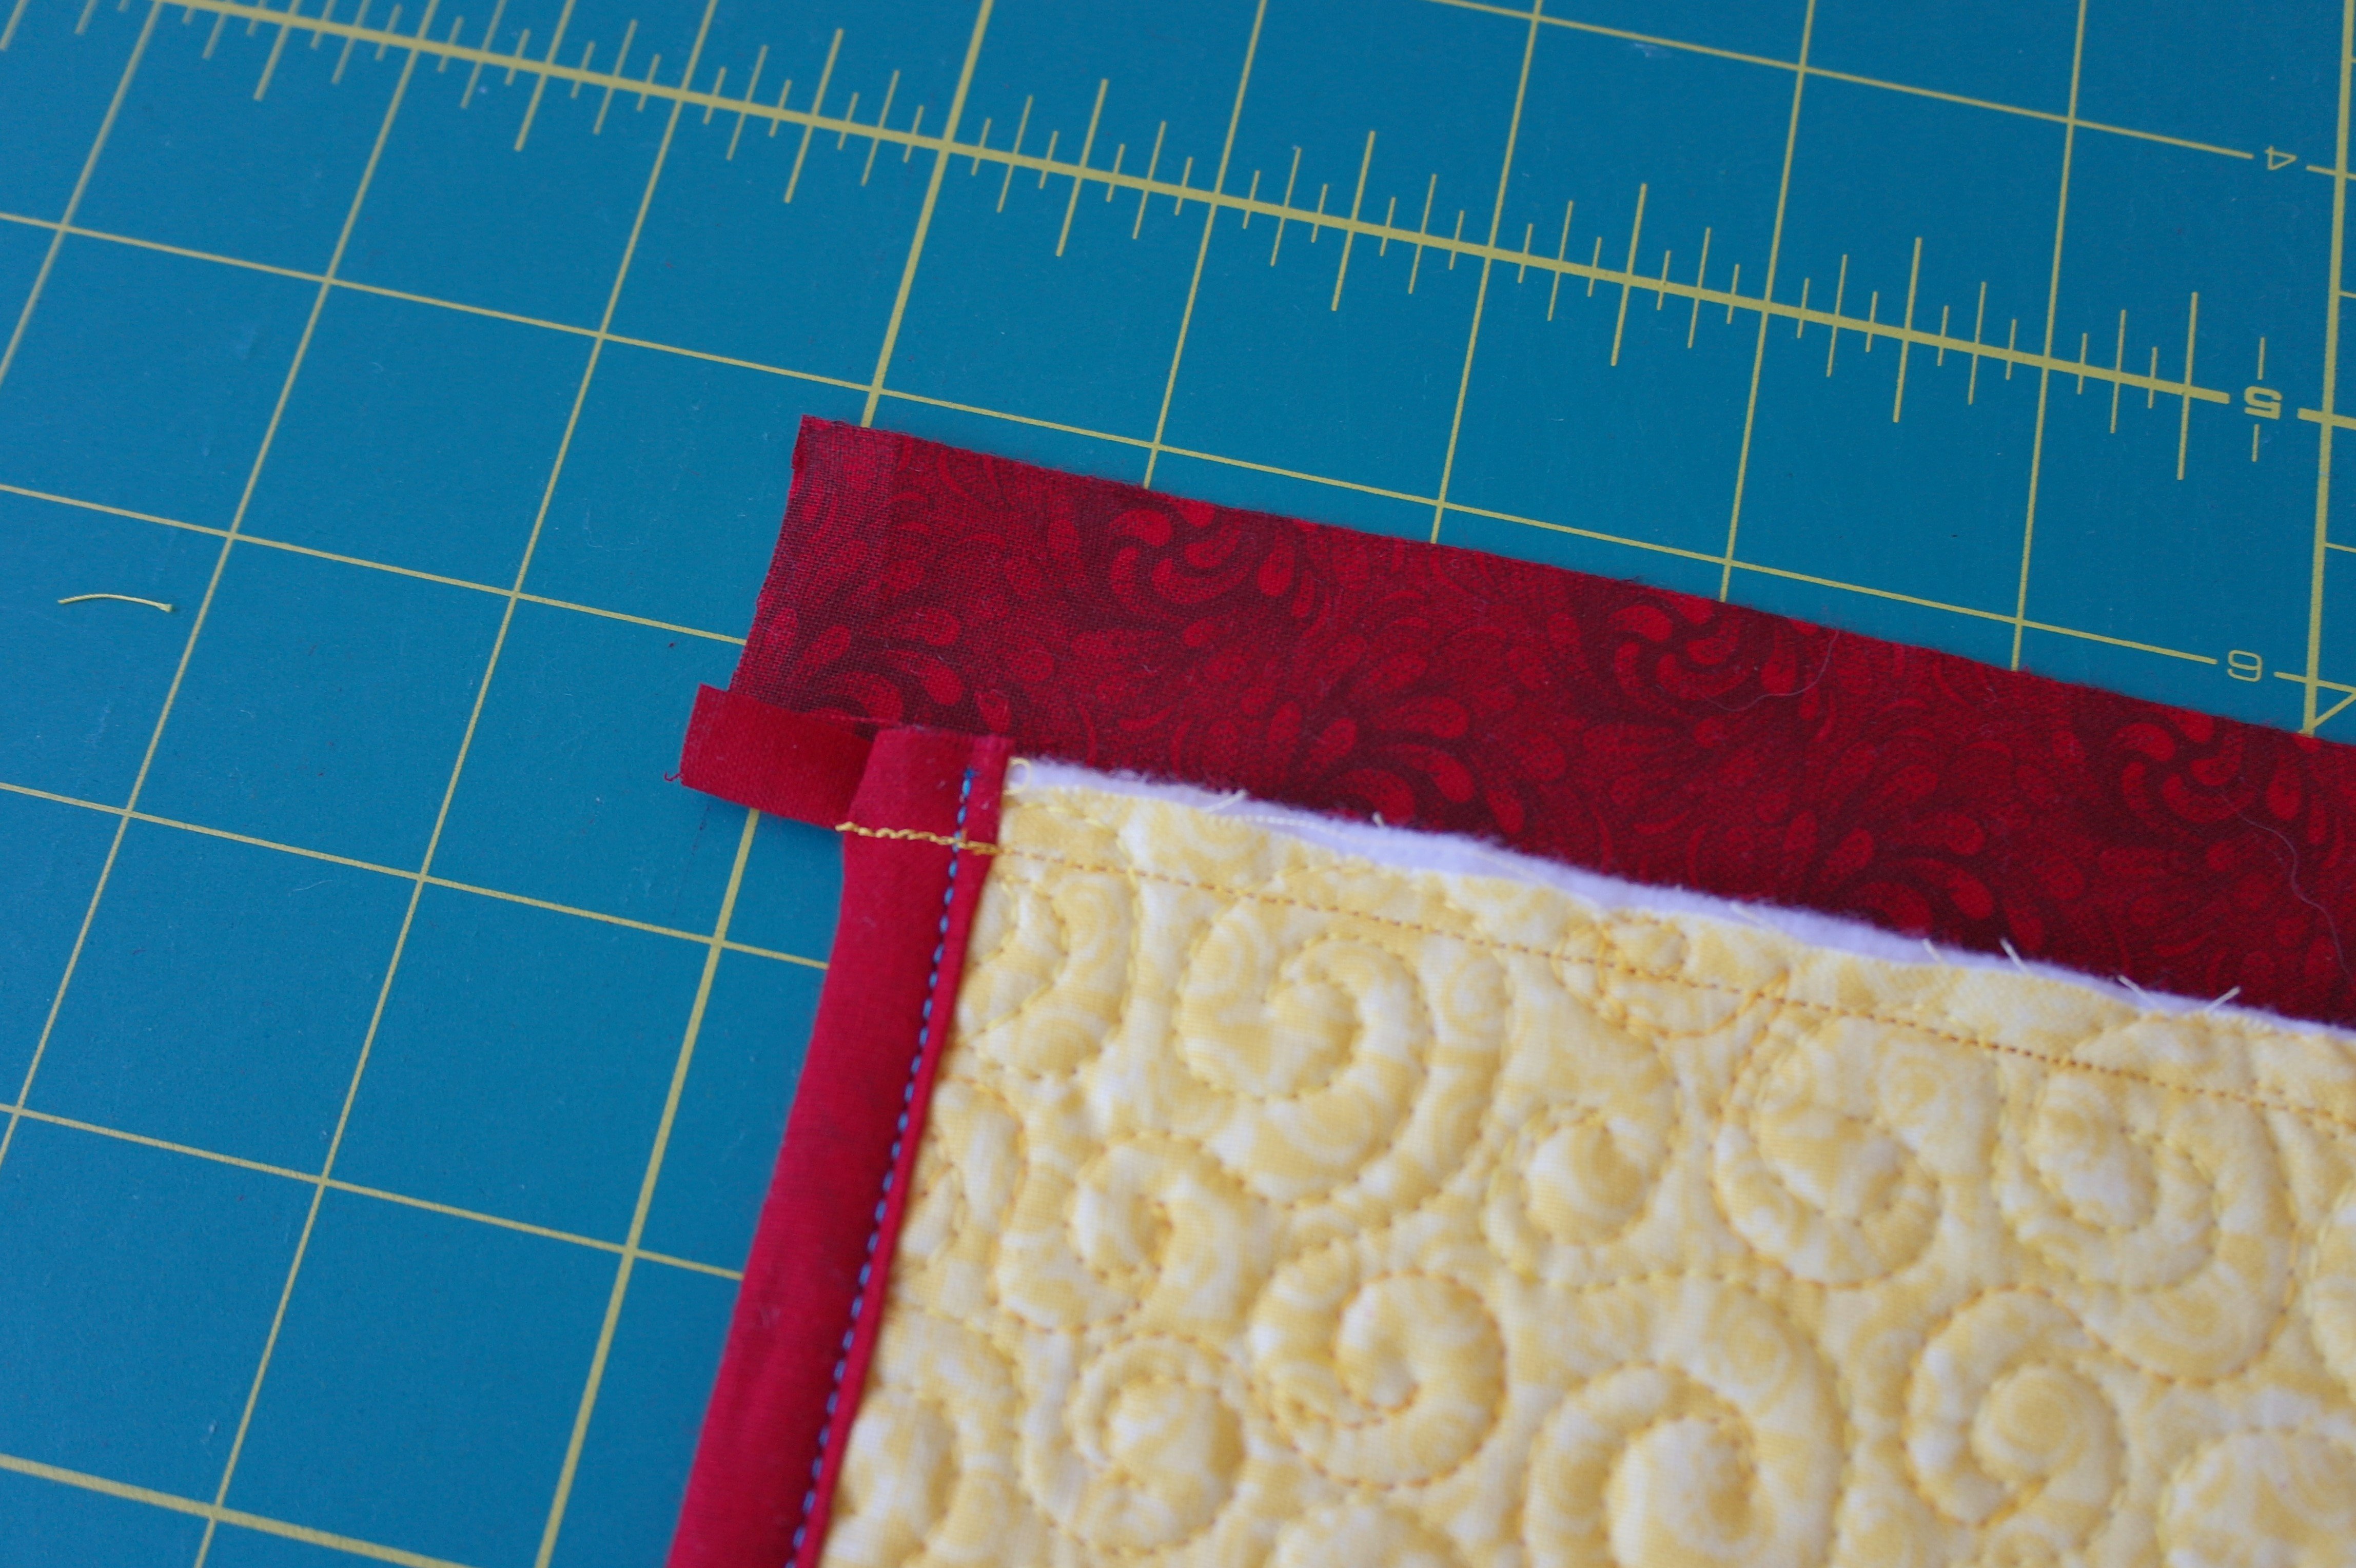
After this the binding for the long edges had to be sewn on. I had to be sure that the binding would protrude on both sides, aprox. 1 – 1 1/2 cm, to fold it in.
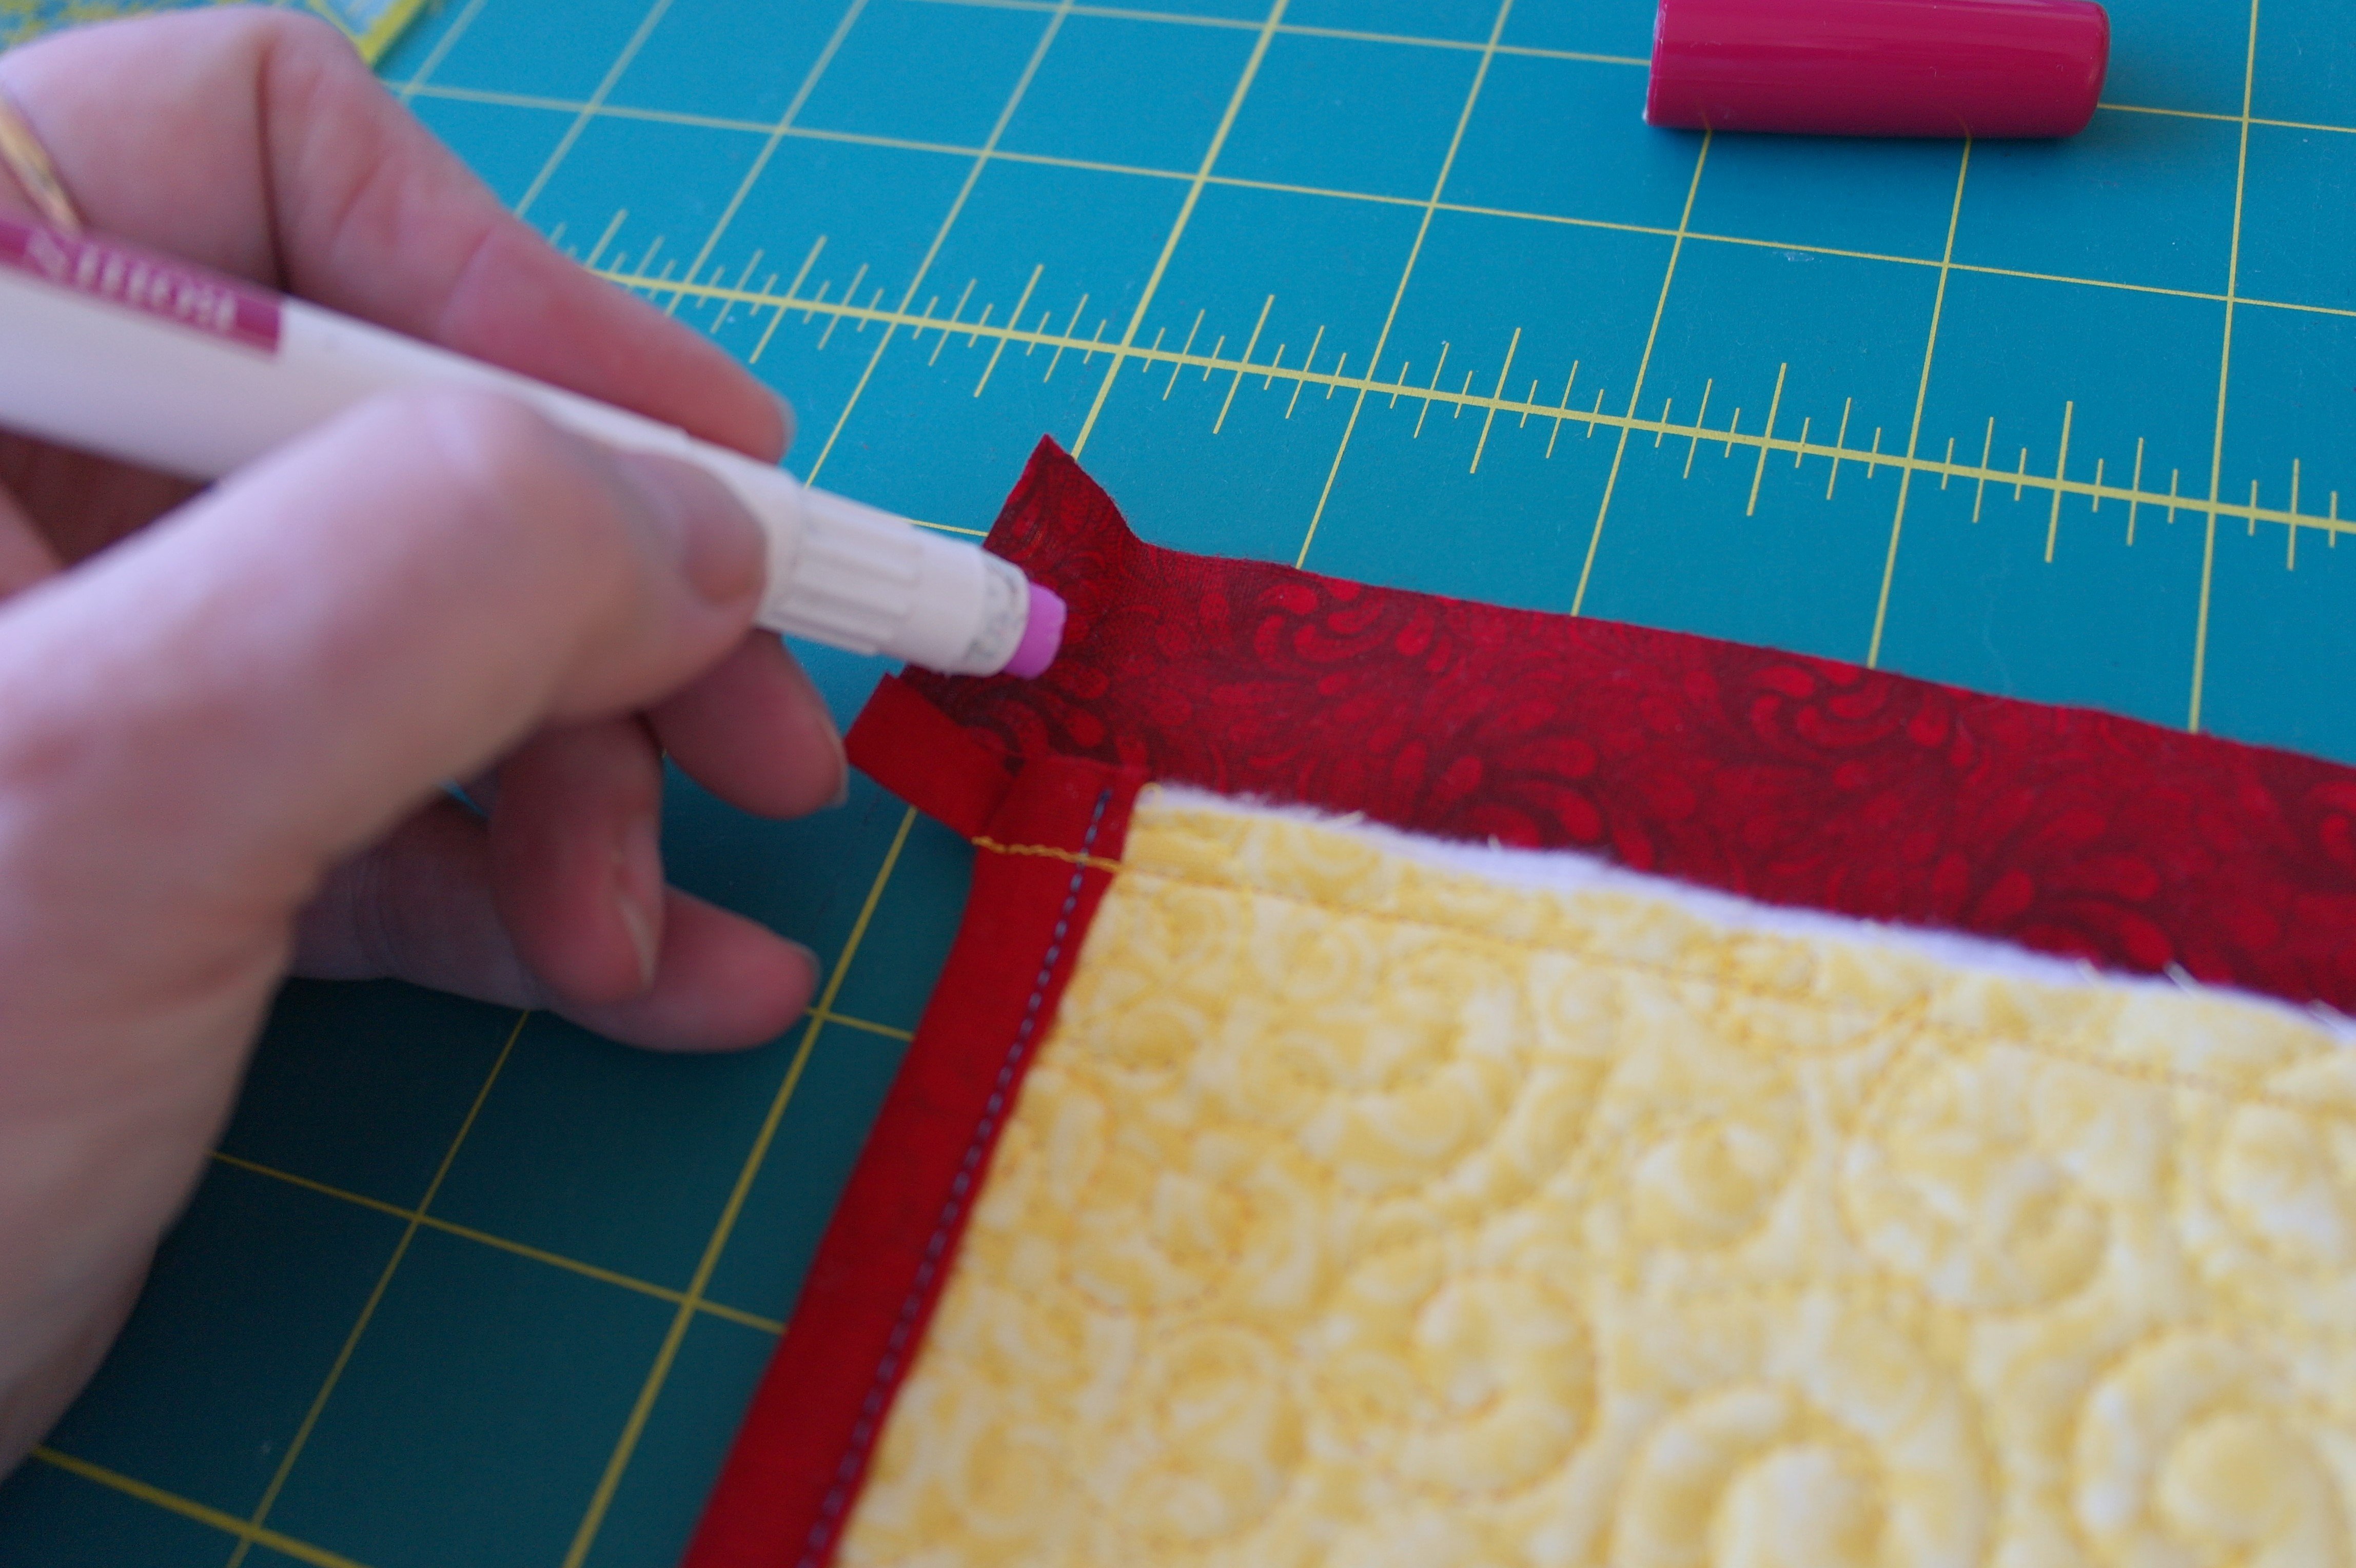
Again, using the Bohin Glue pen to secure the fabric when it was folded in,
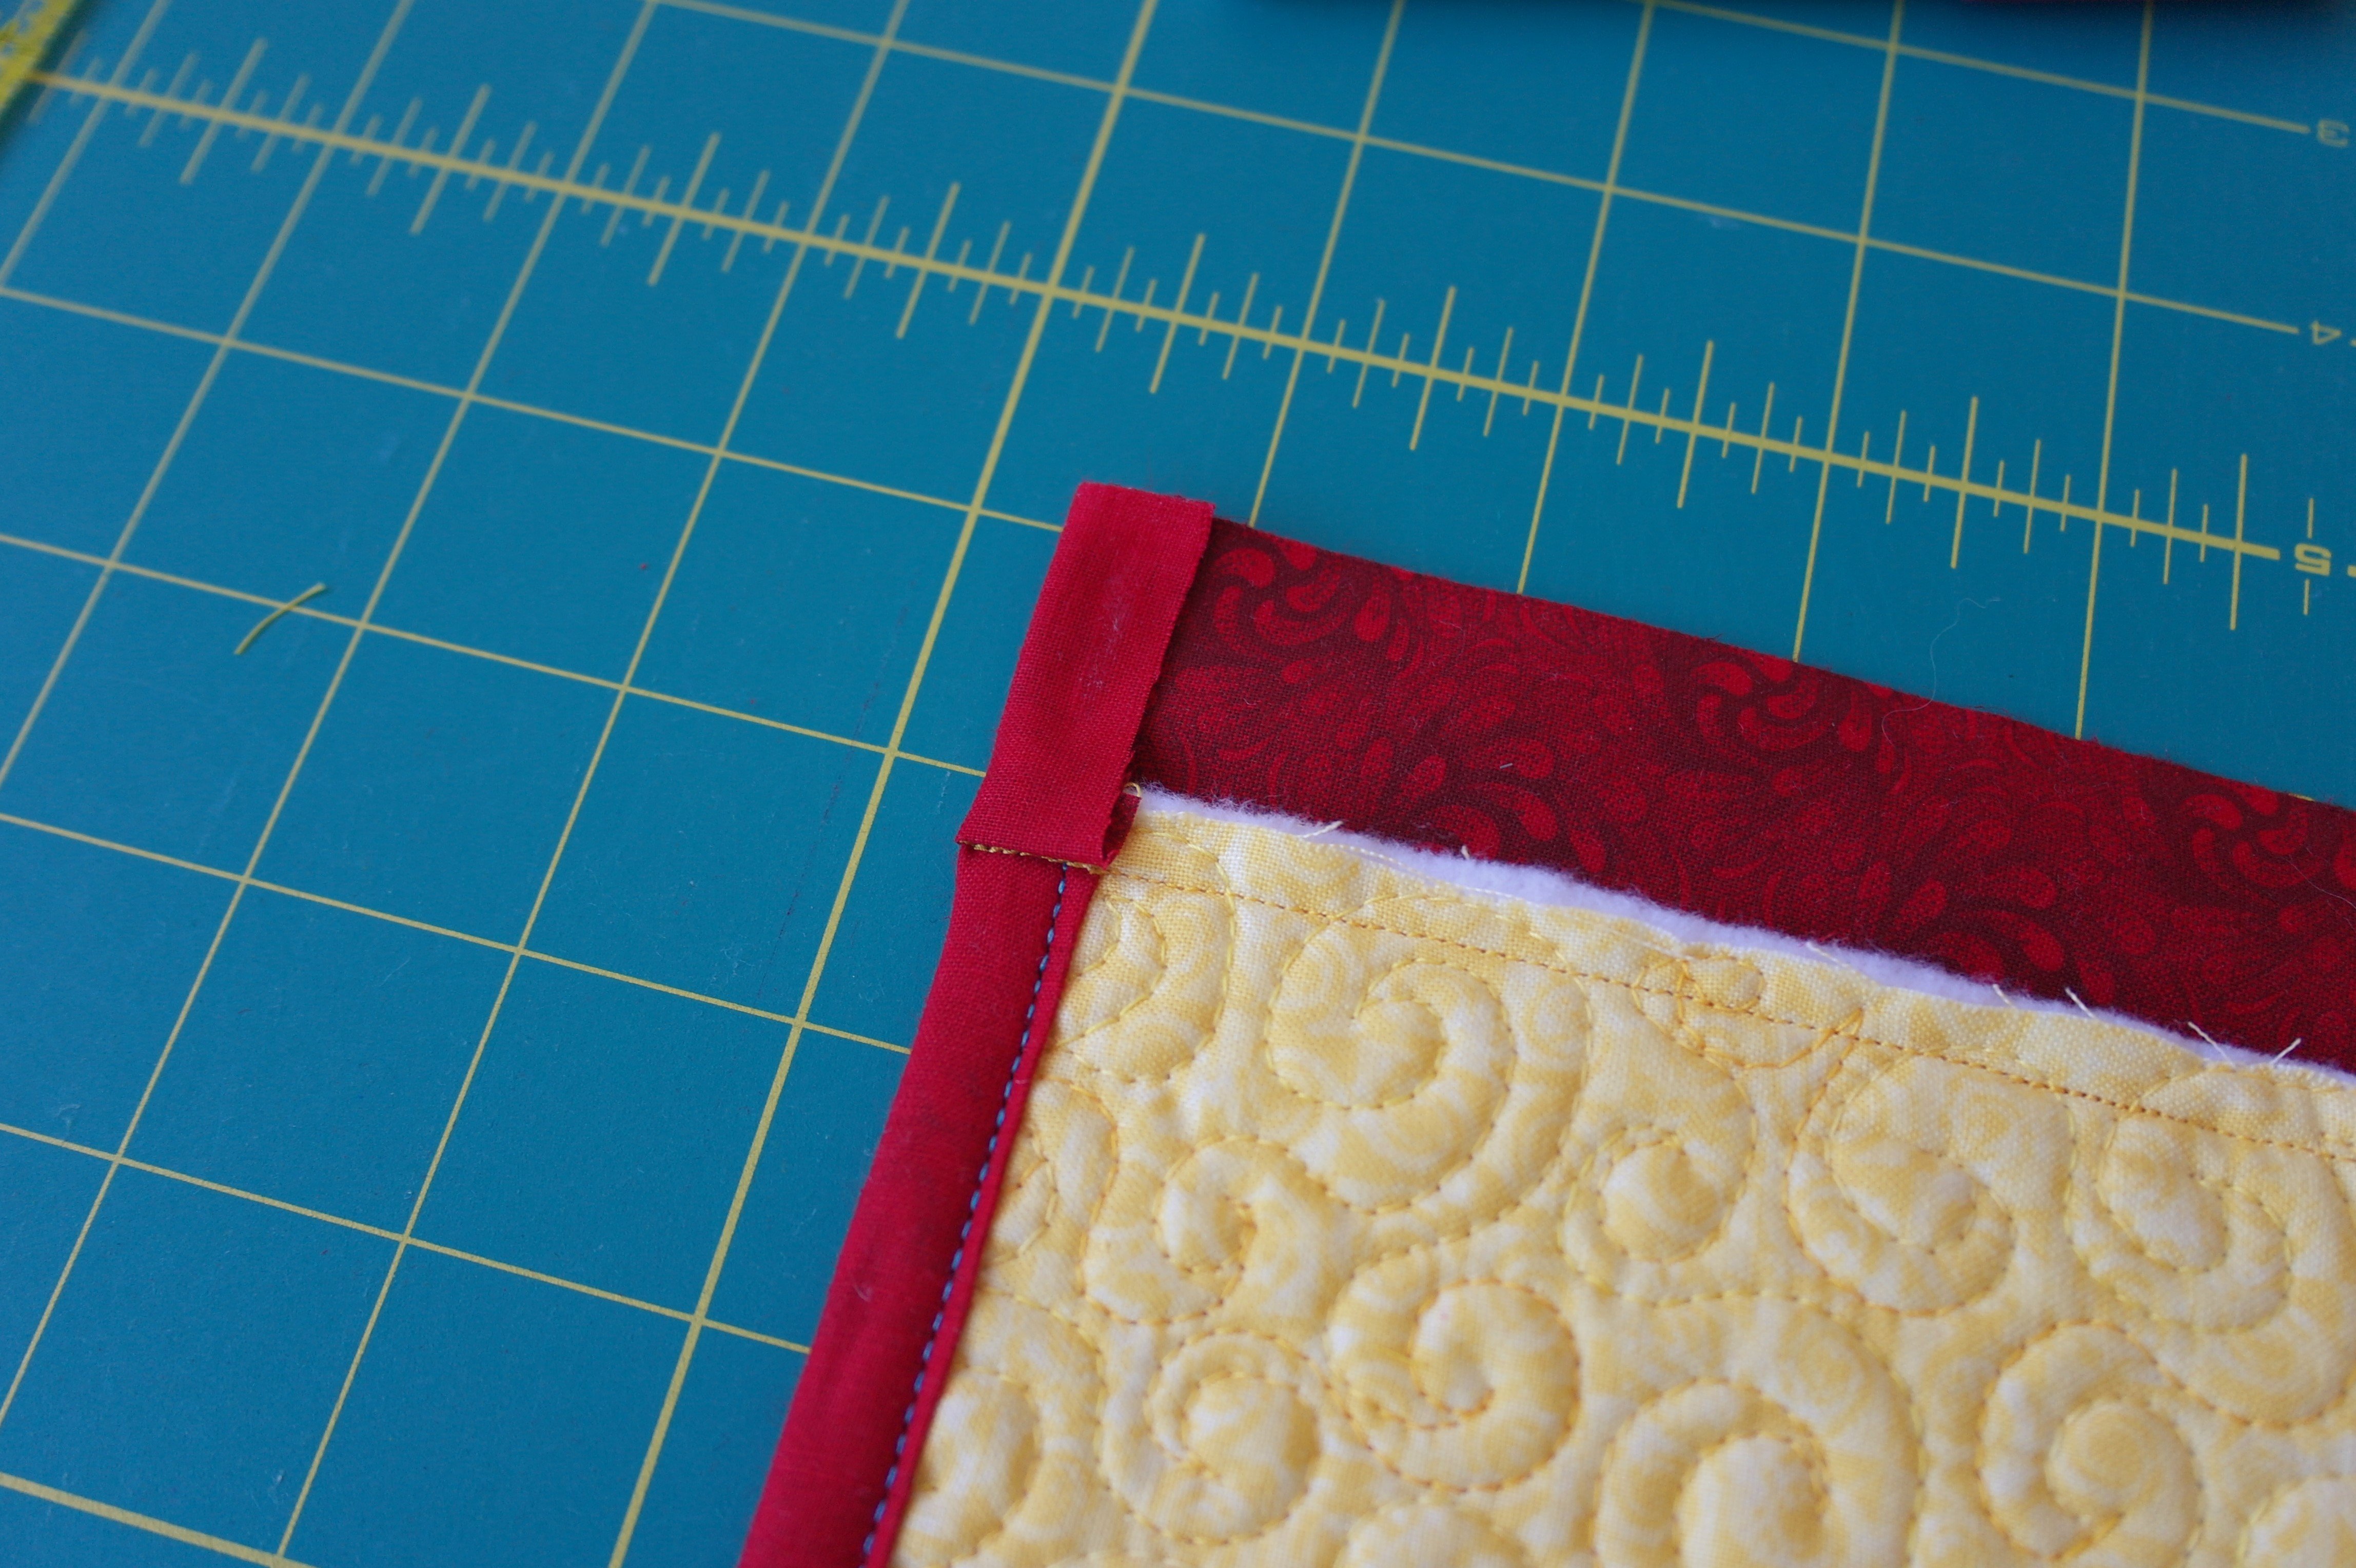
and it was secured (temporarily) before the long side of the binding was folded too.
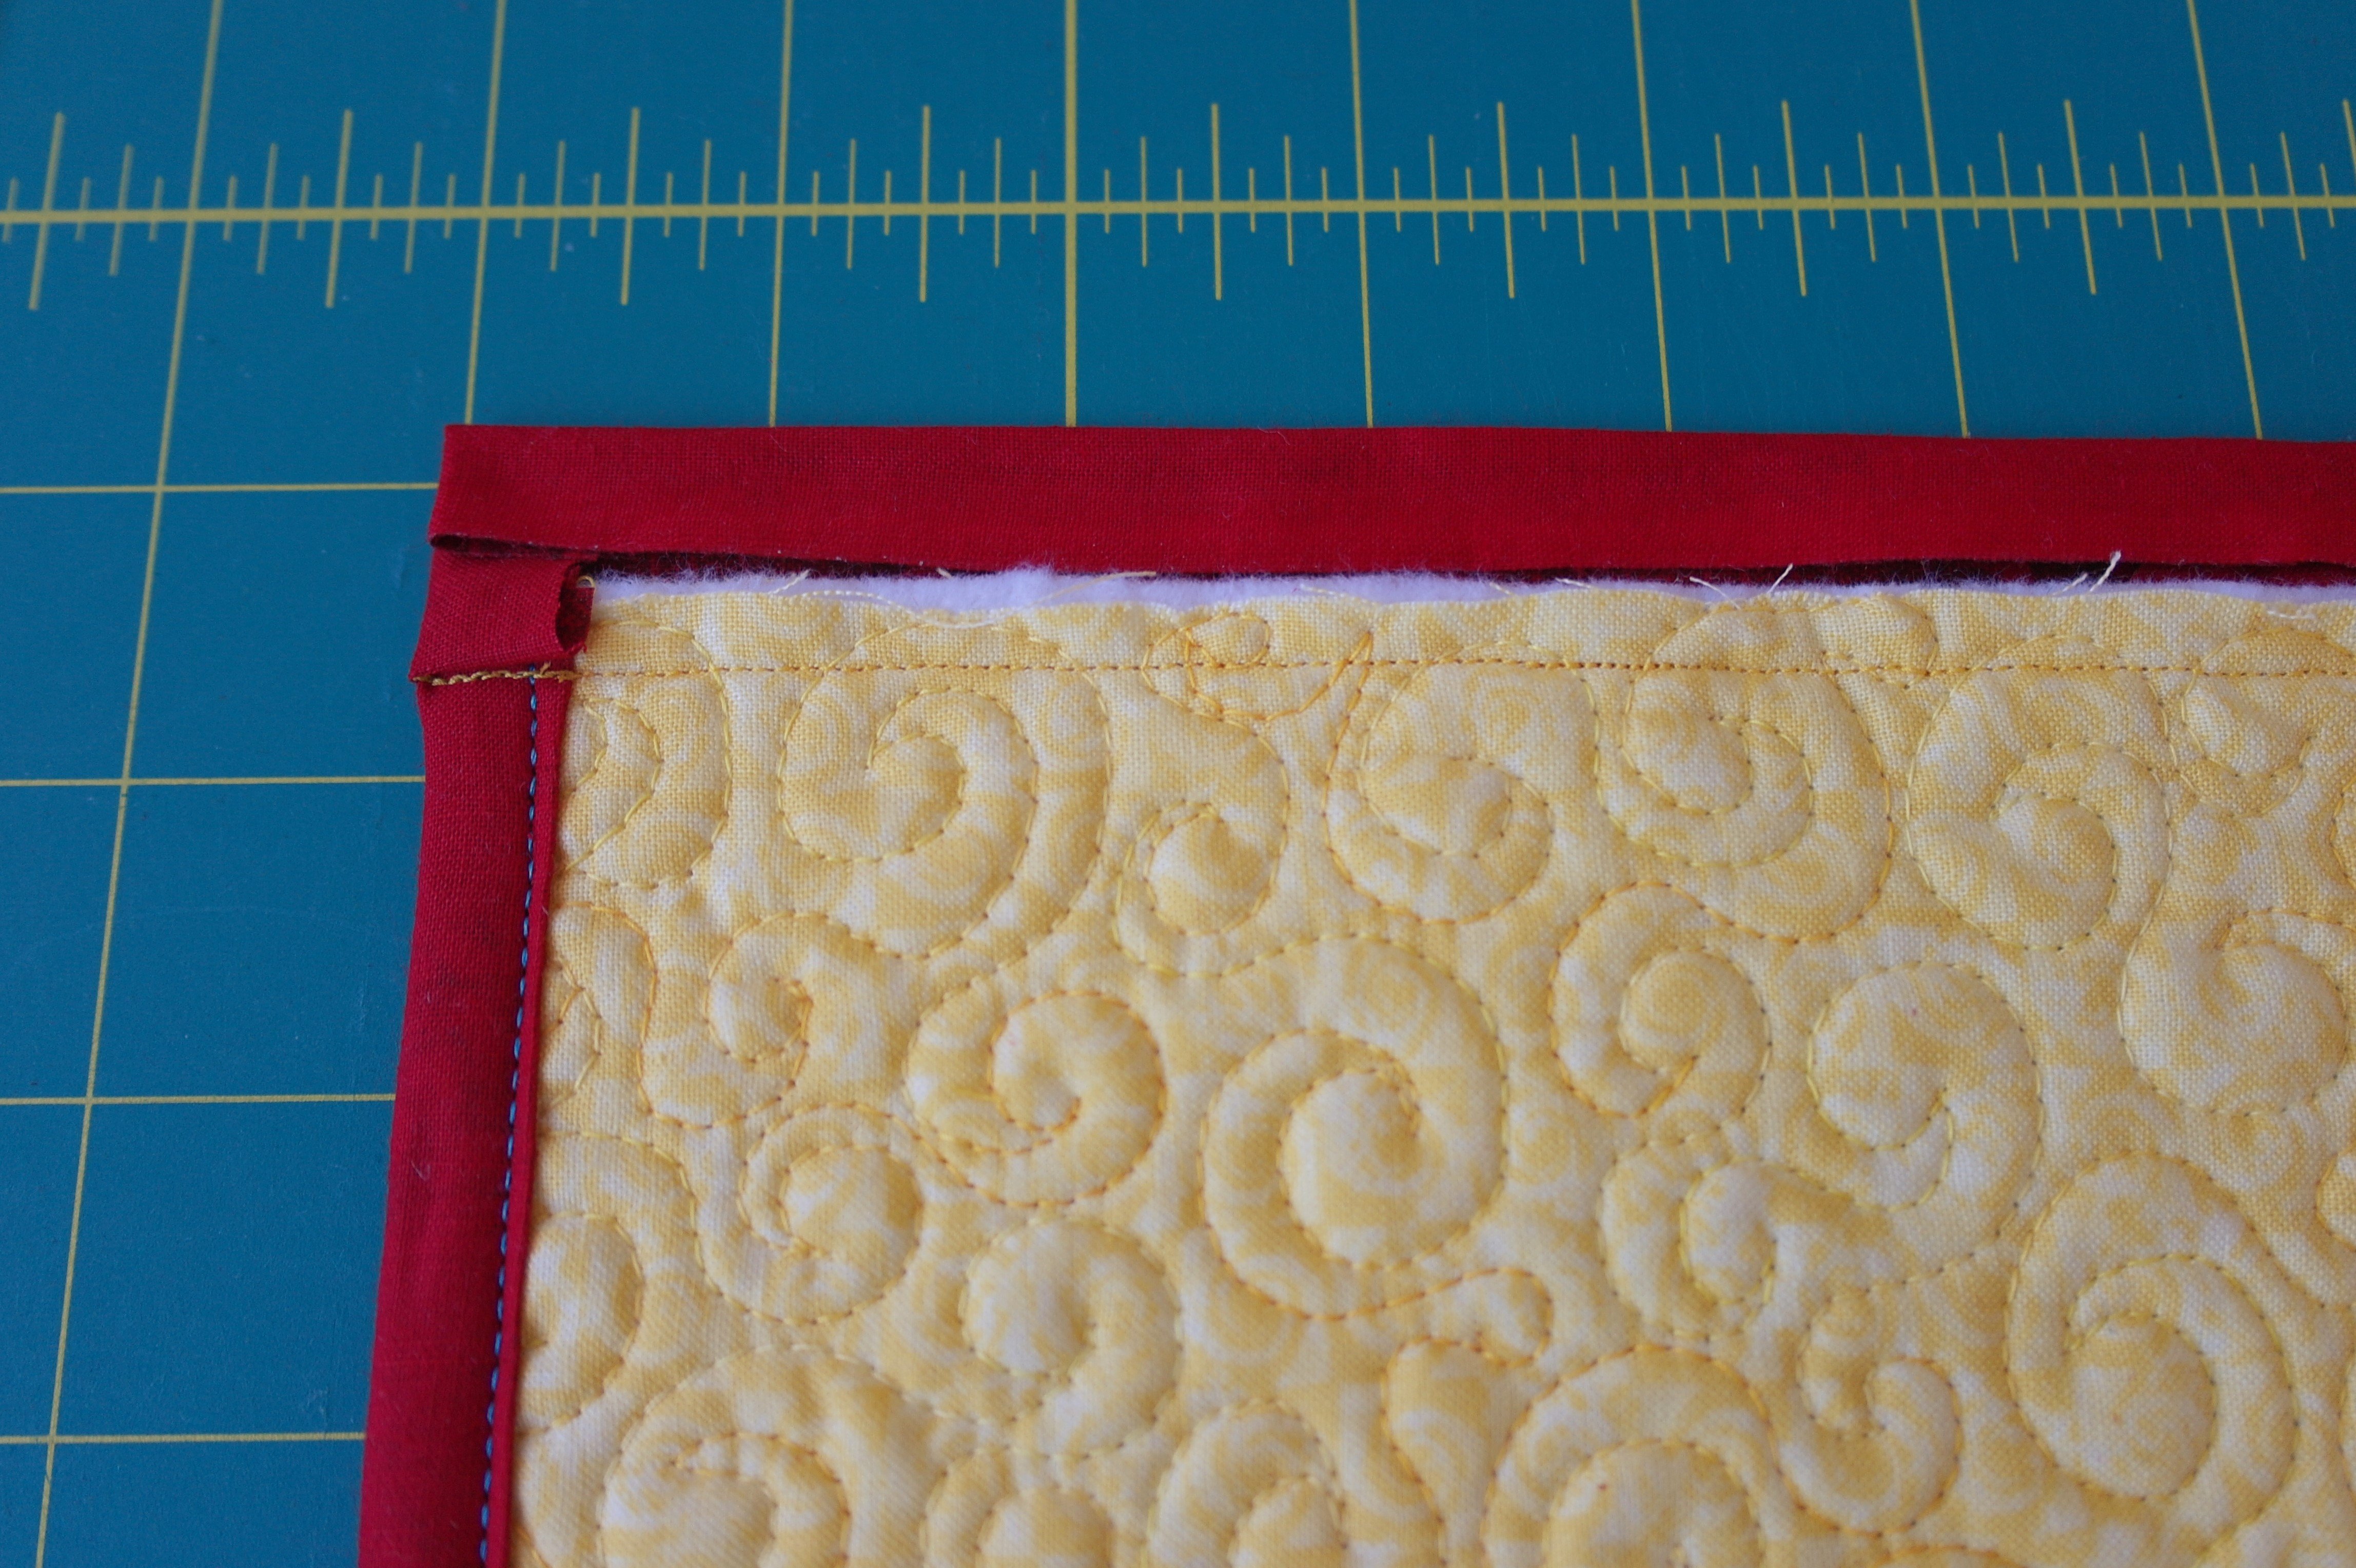
After that the long side of the binding was glued: folding it in, and placing the binding to the front, is really easy with the Bohin Glue pen. After this just sewing and it’s done.

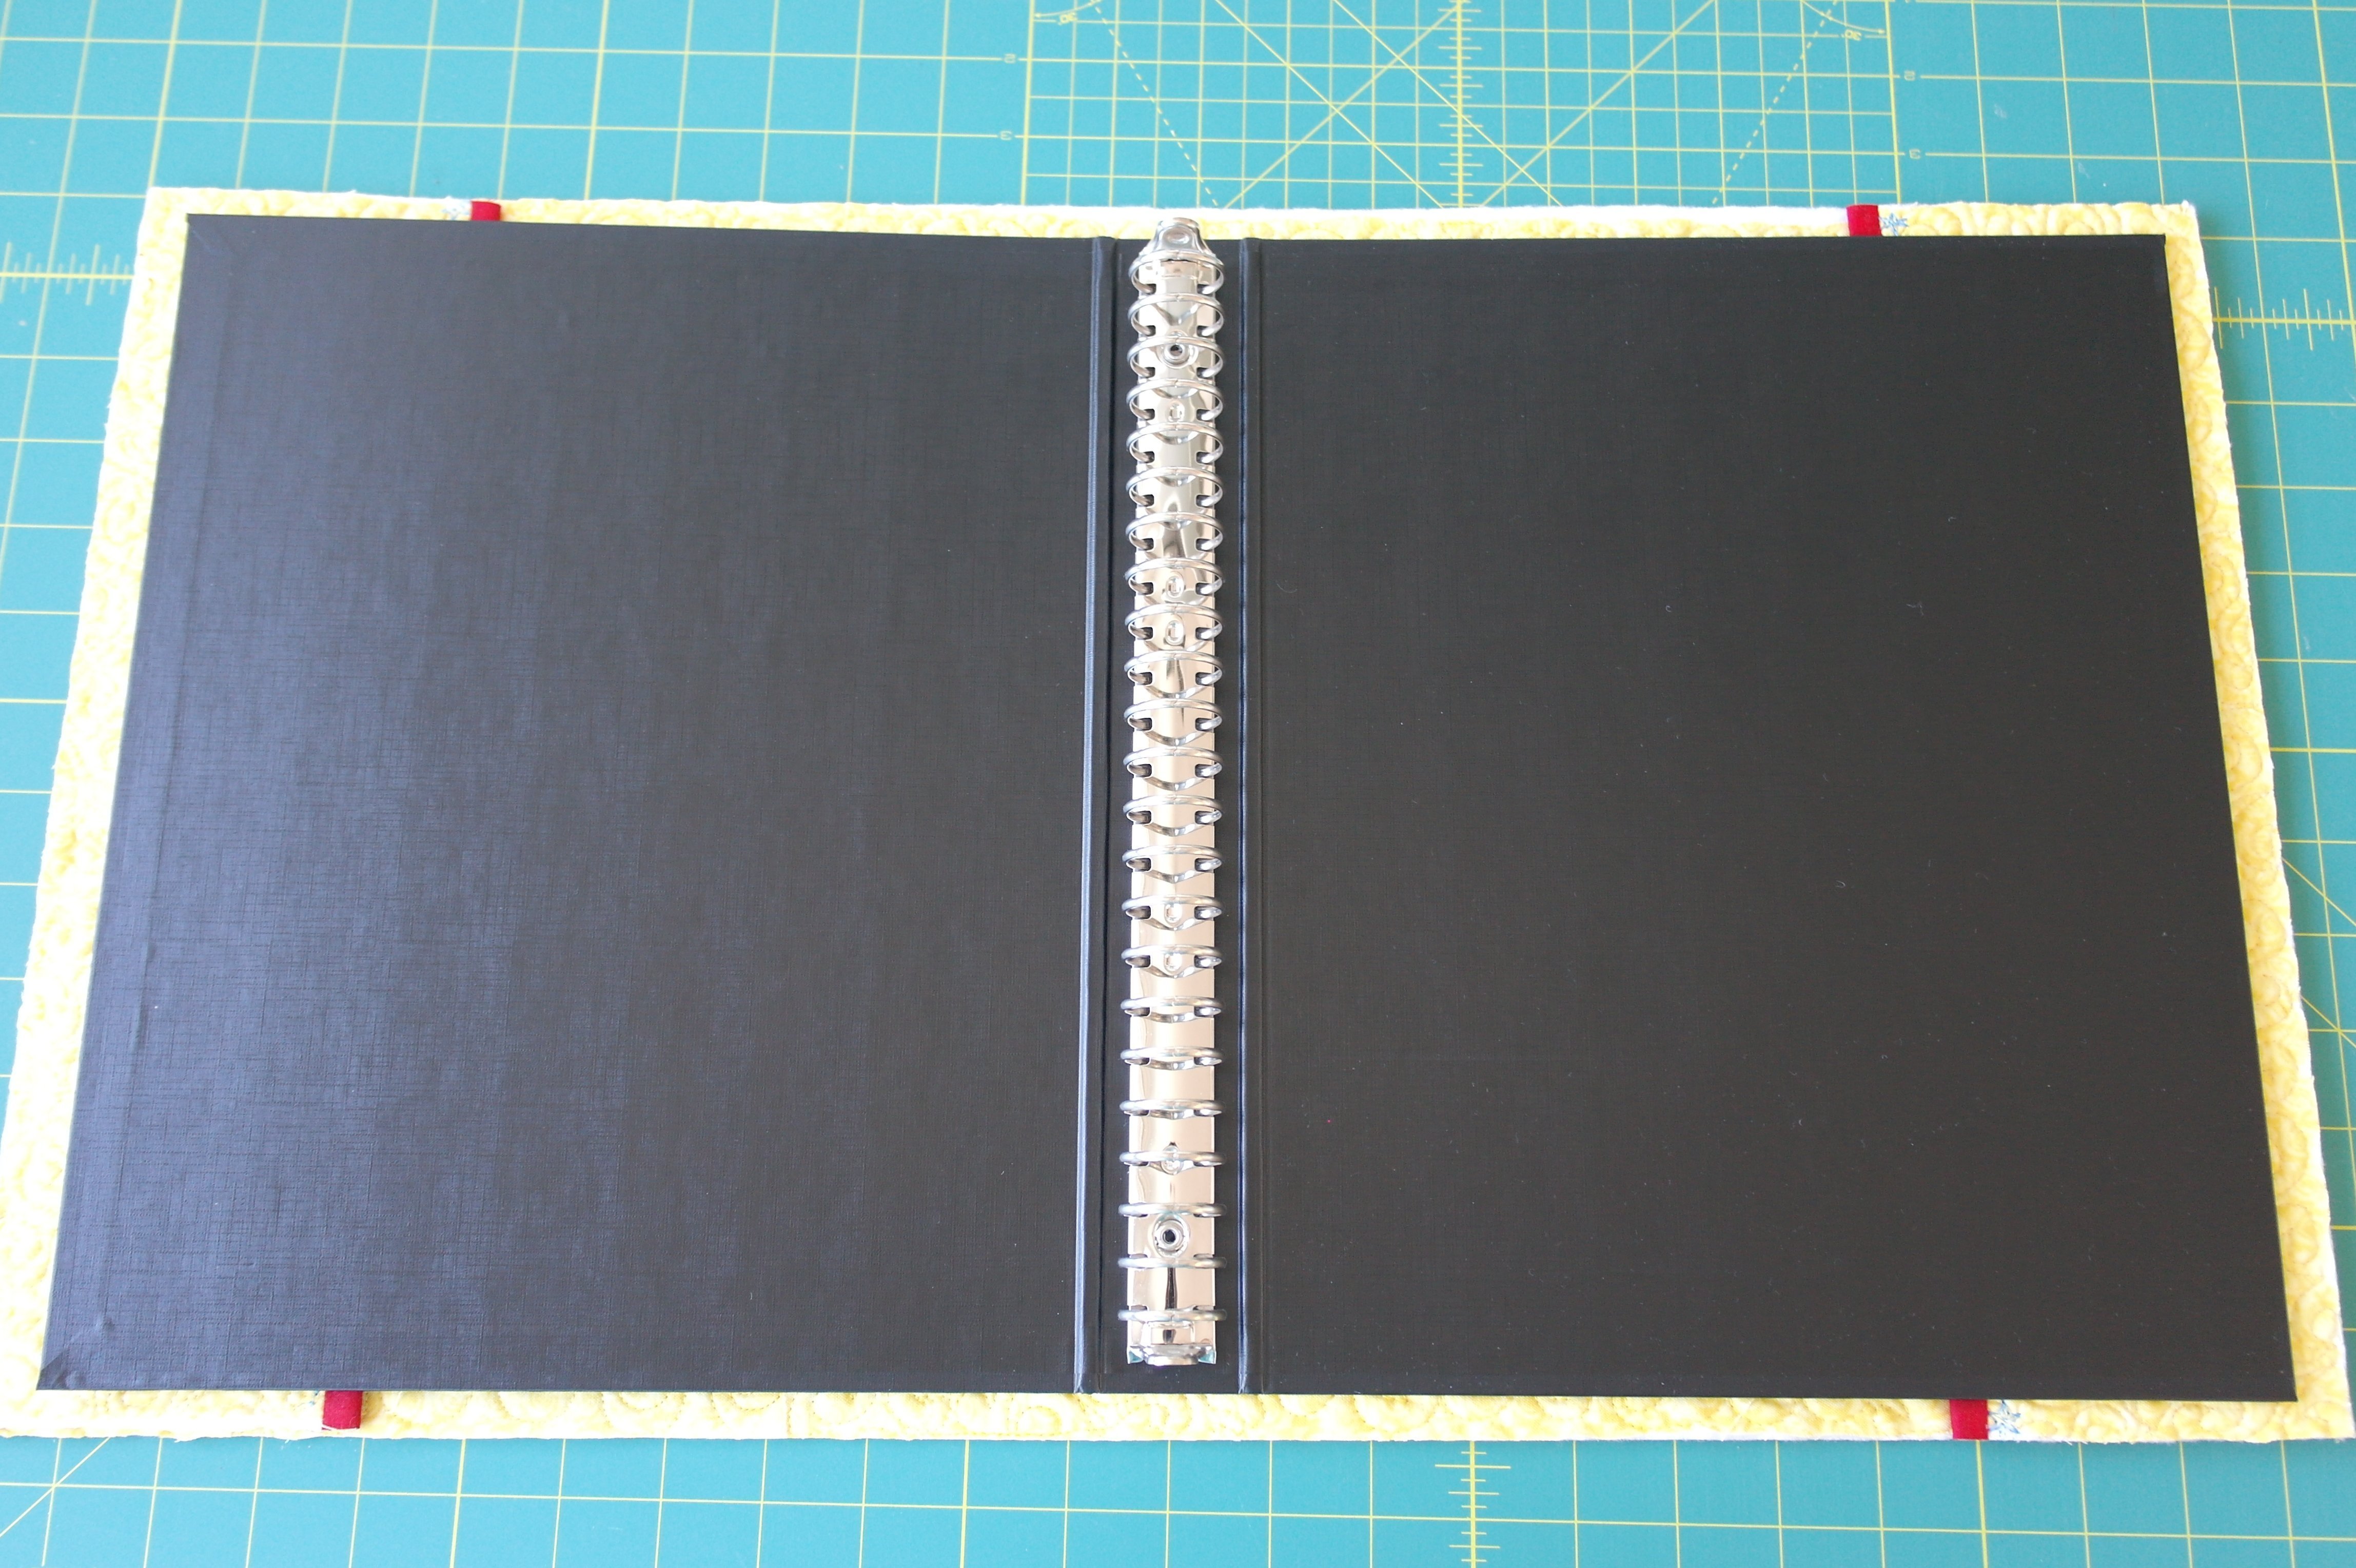
The cover is ready: this is the front, opened to show you the whole area…
and the (opened) inner part of the cover.
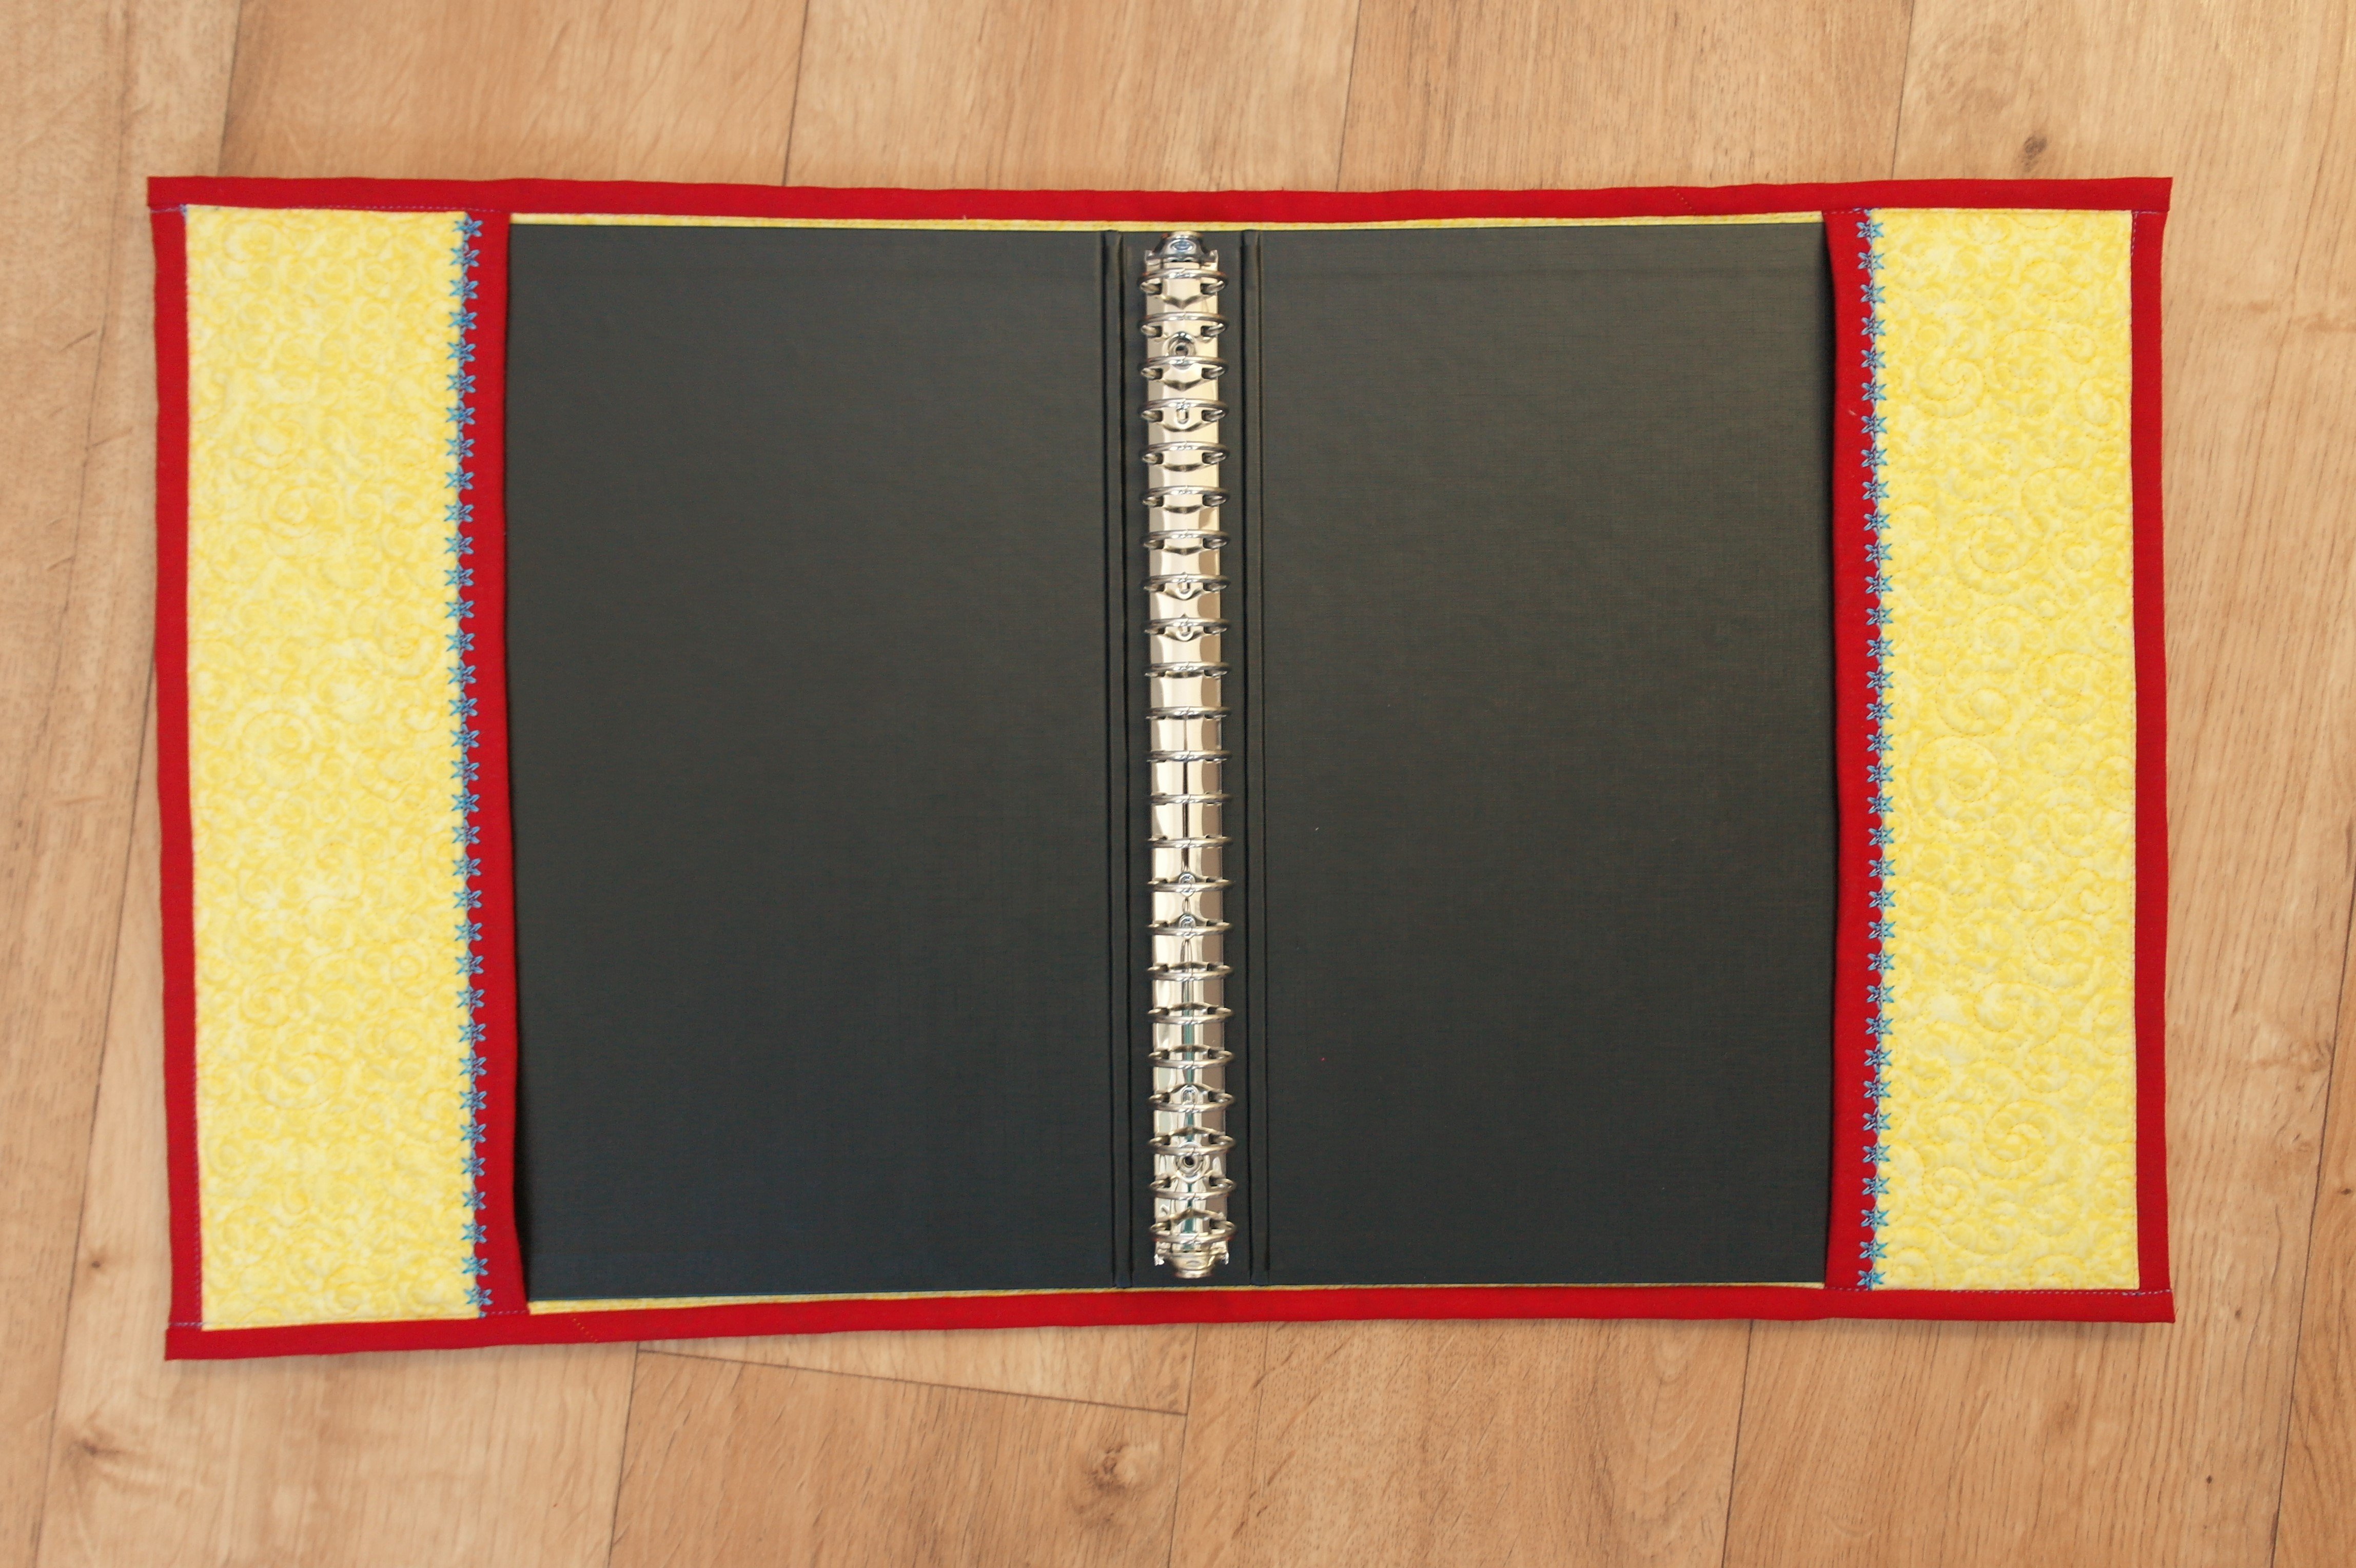
The binder can be inserted: you always have to bend it a bit to insert under the flaps. Lined paper was added and everything was ready for my granddaughter’s birthday.
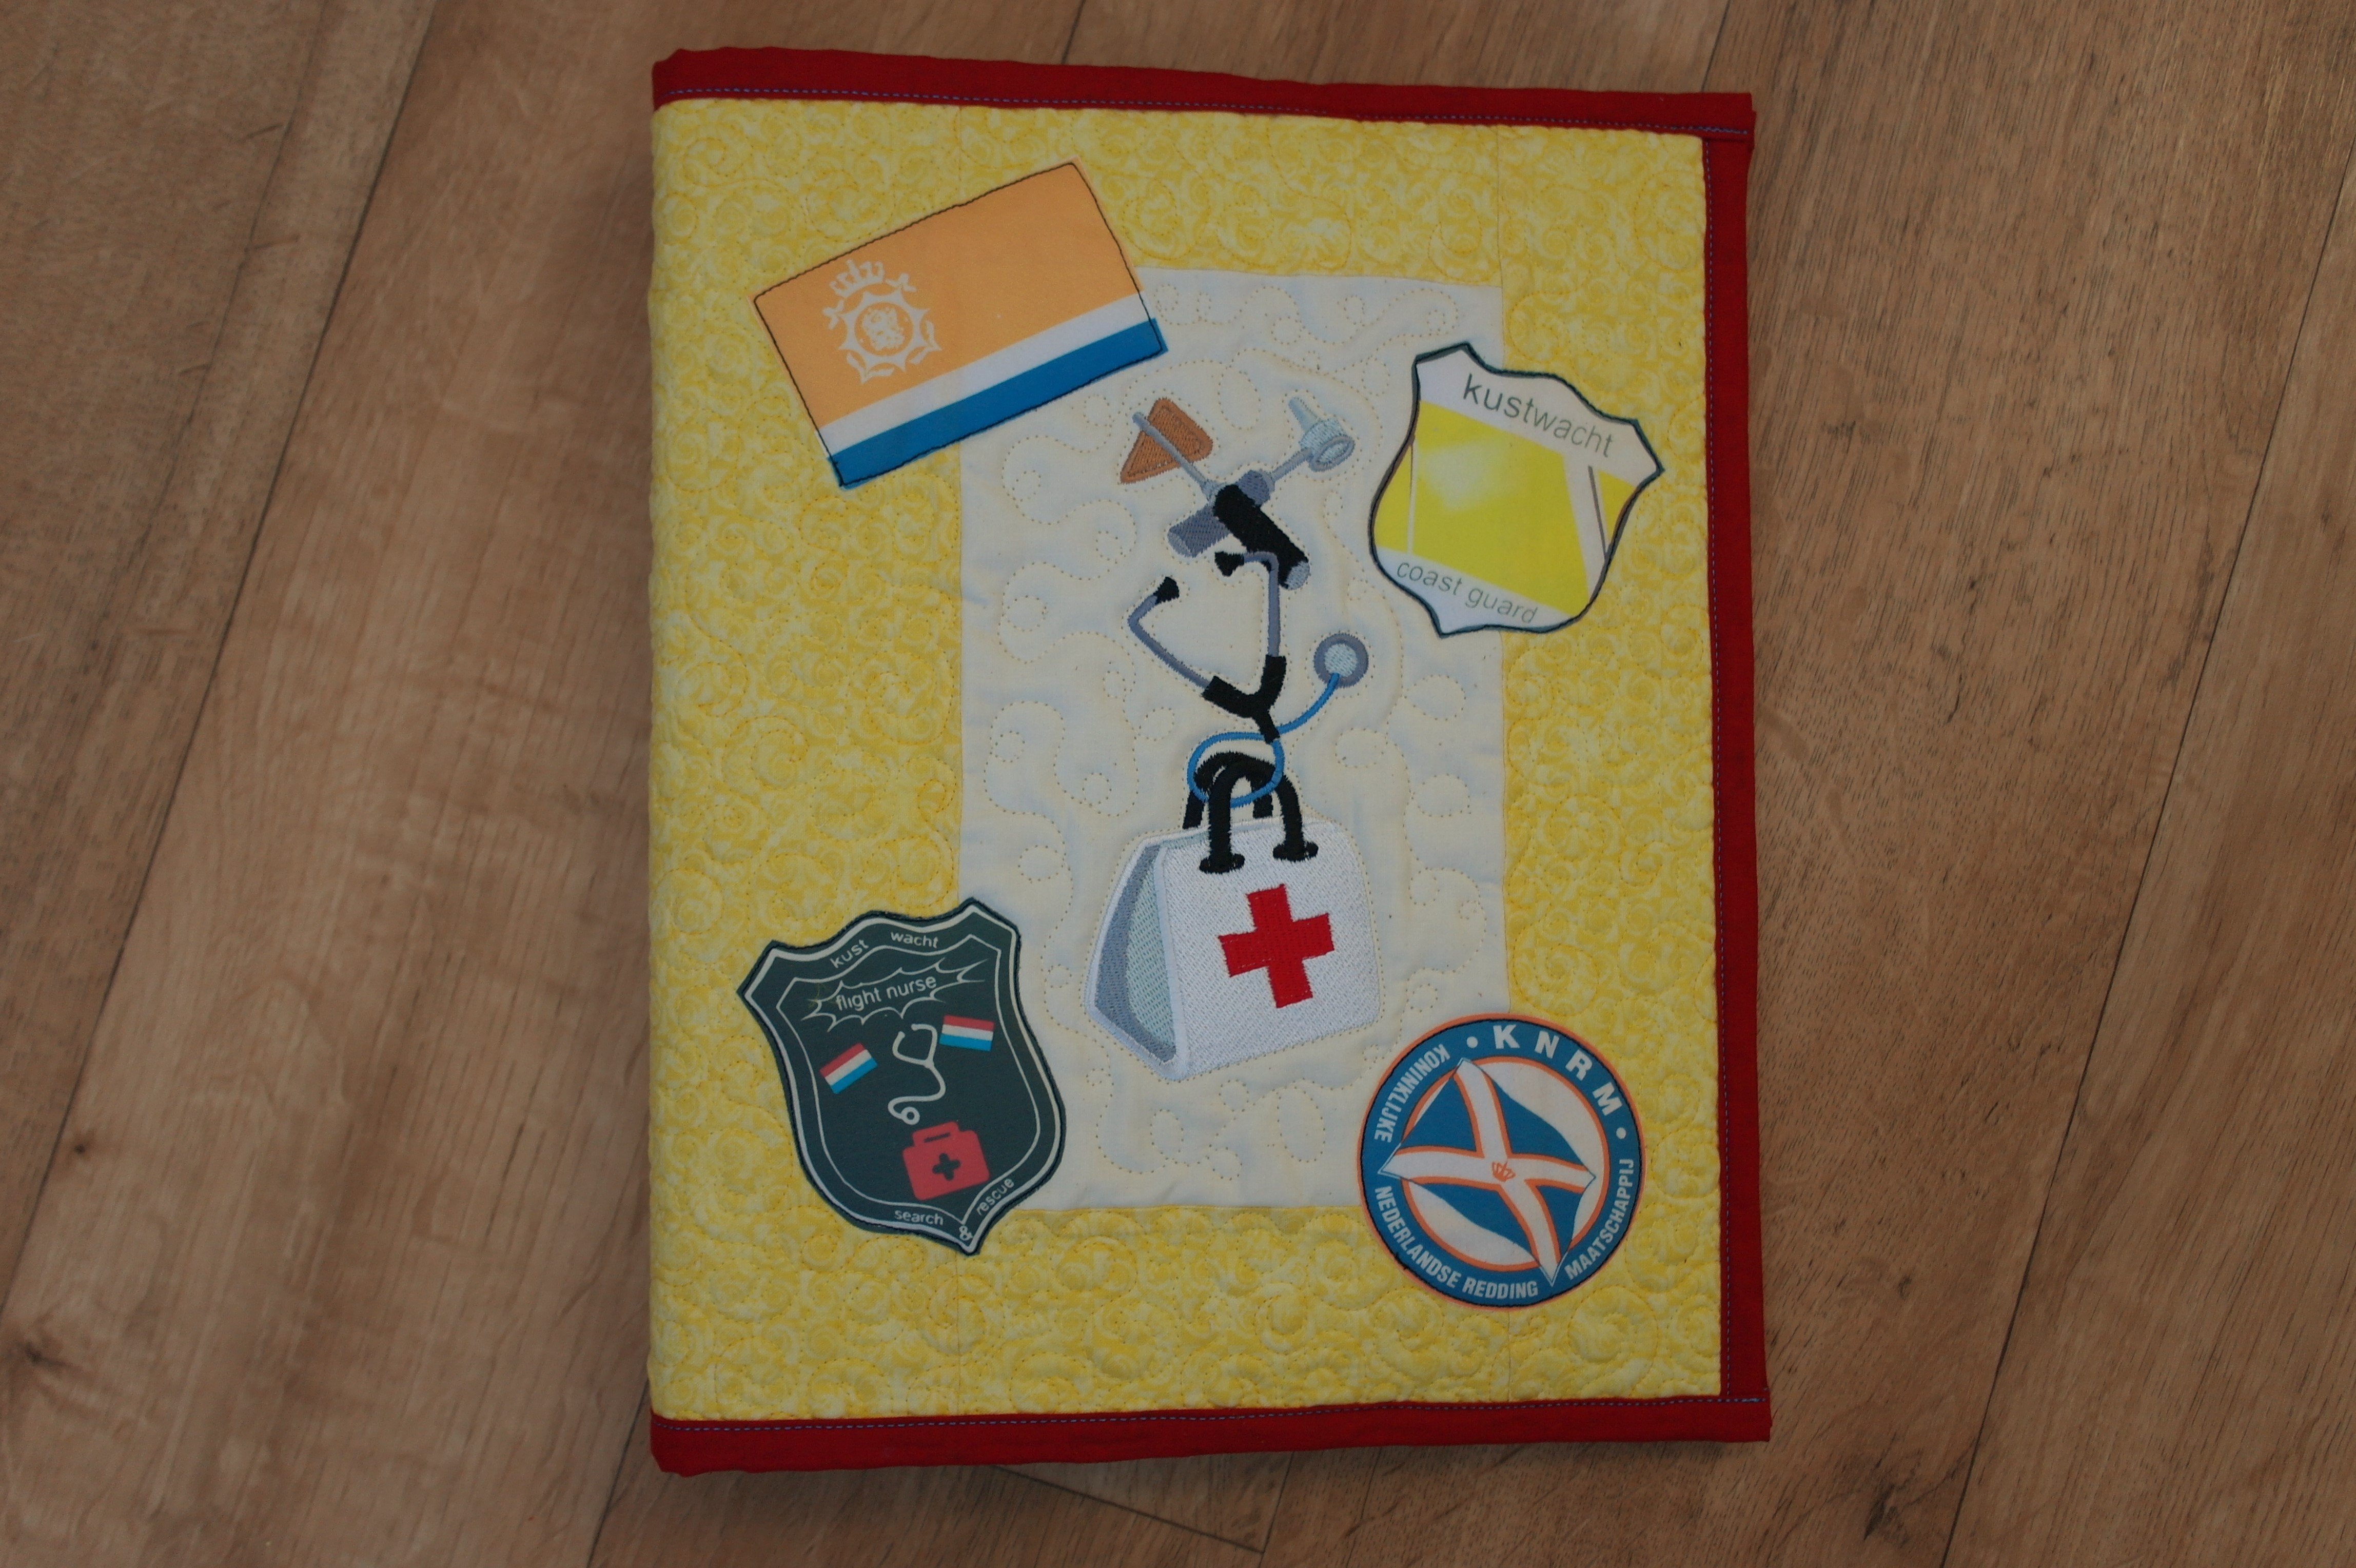
She can write or draw anything she wants, having her personal cover on this binder. It was a lot of fun to make this birthday present… but come to think of it.. I have three granddaughters.. and the second one has her birthday coming the next month…..
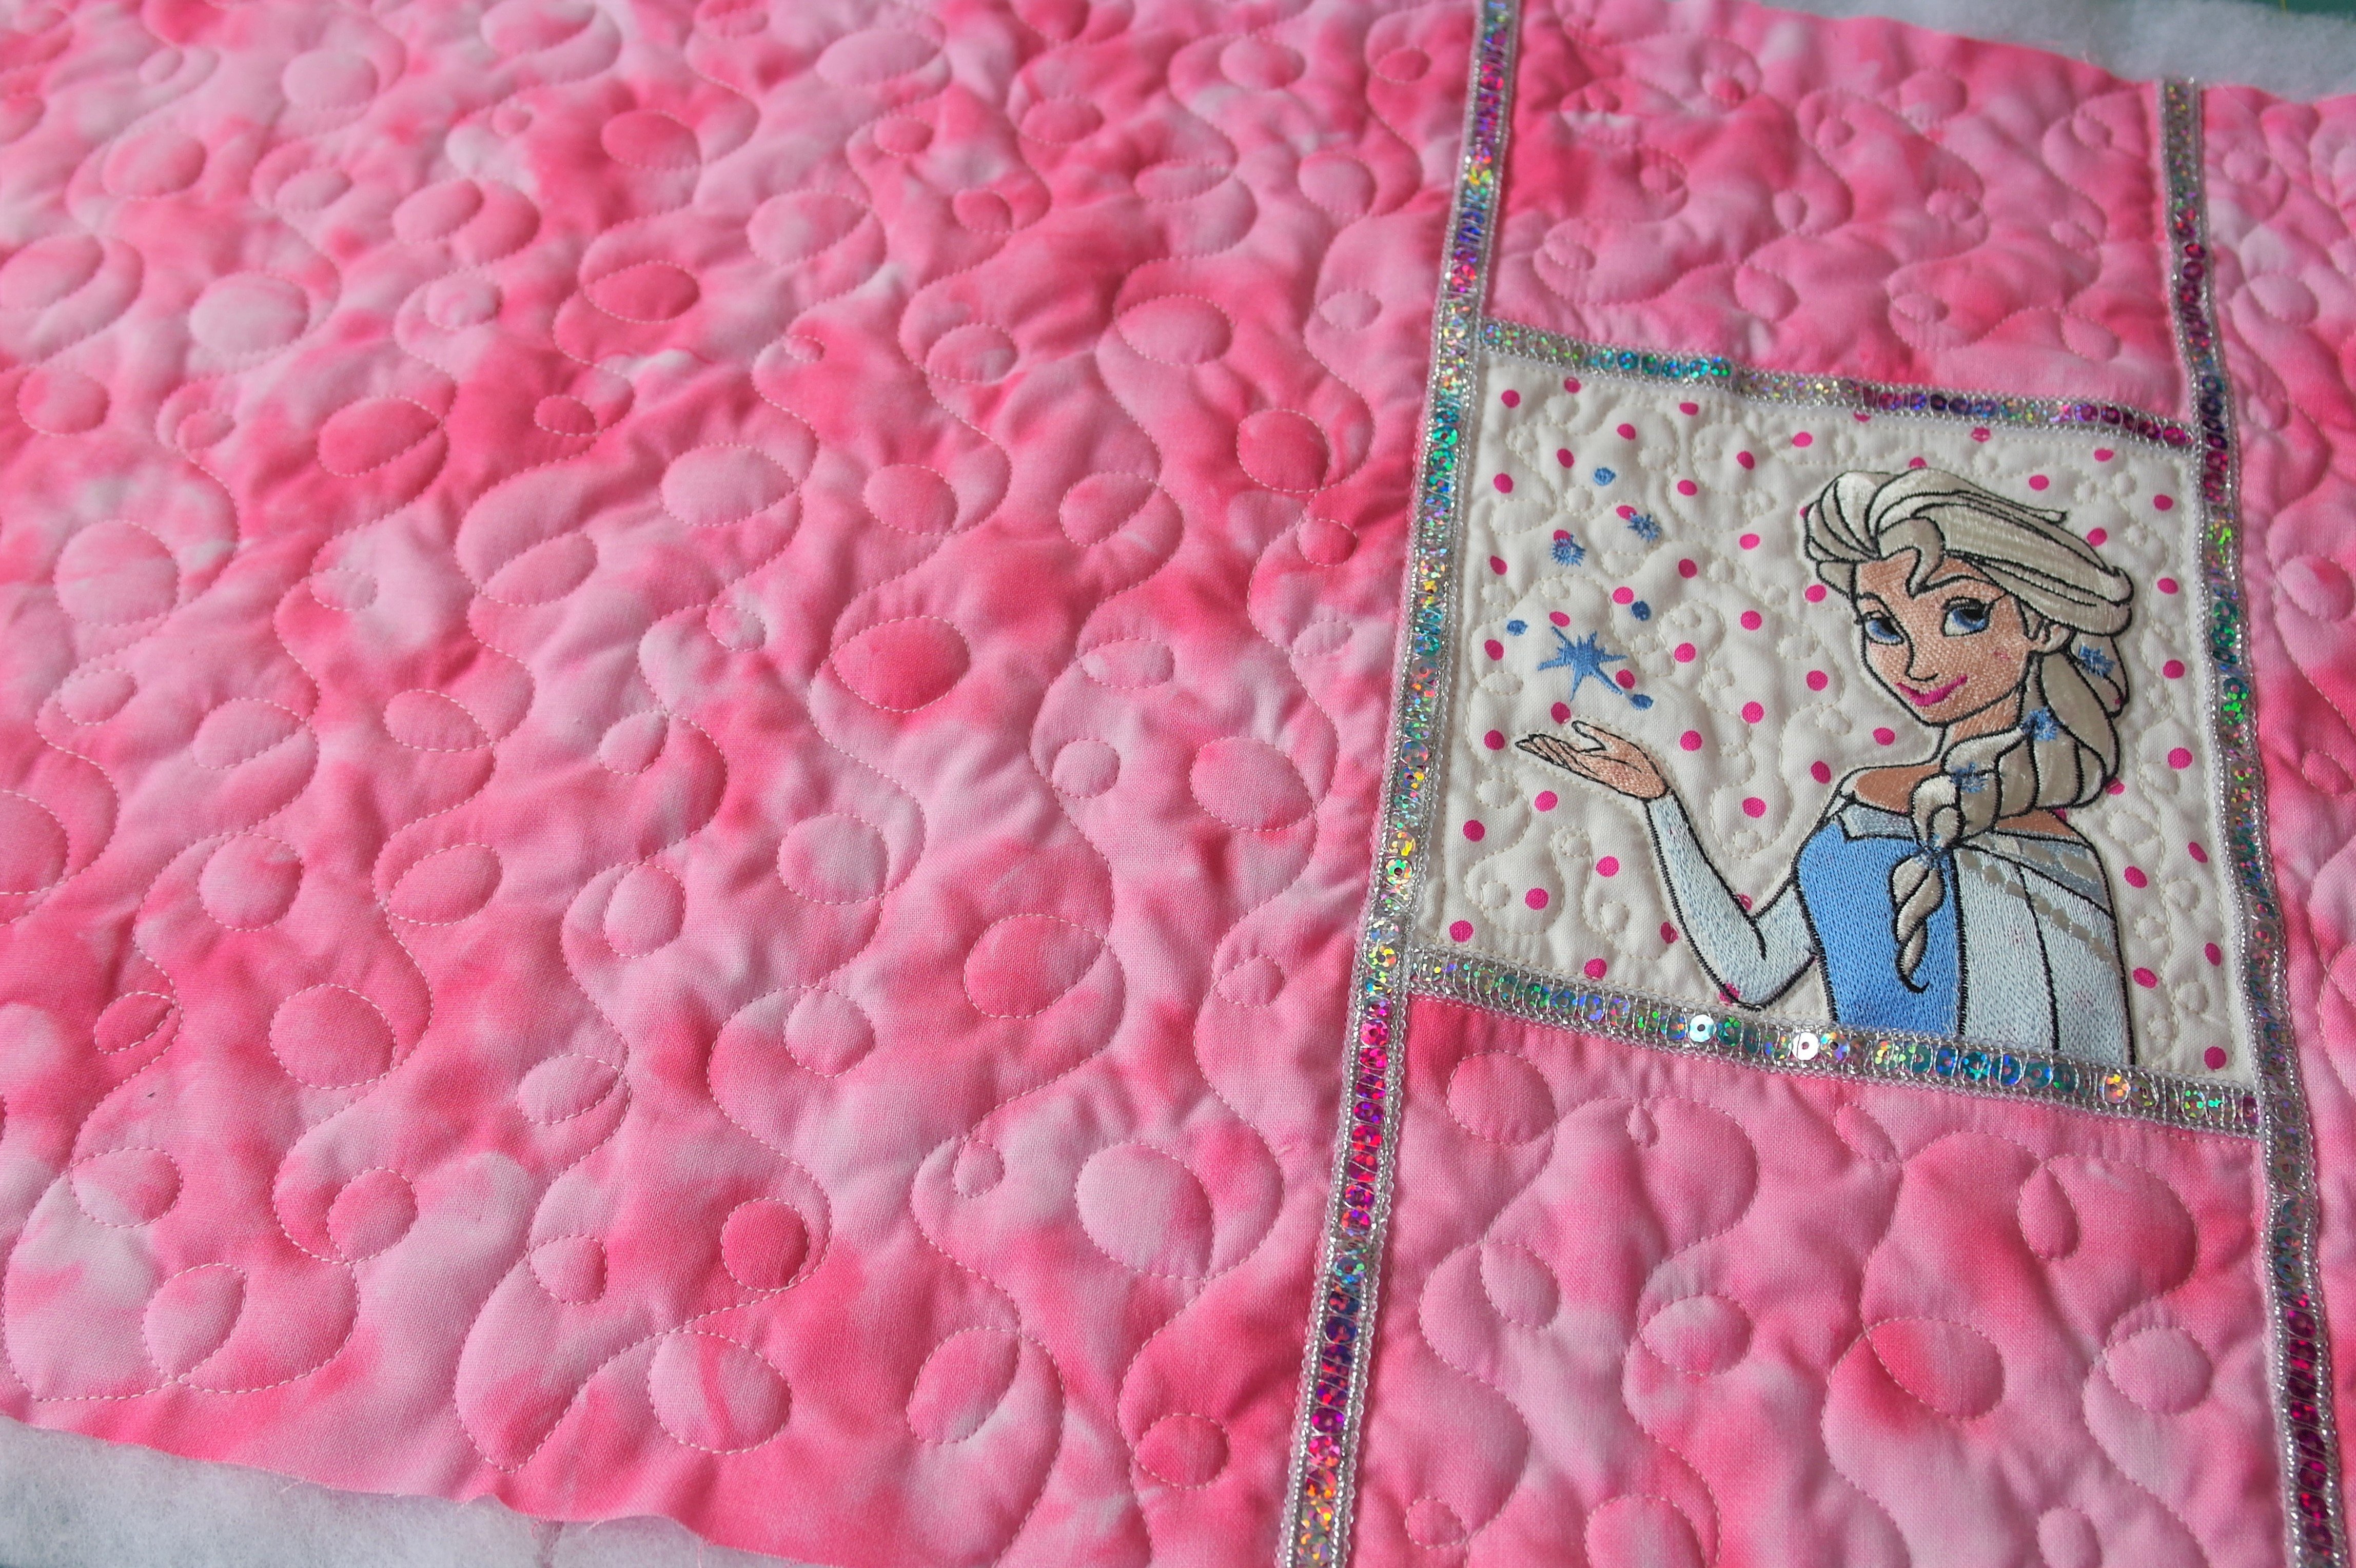
So I made her a cover too, with Elsa and pink, her favorite colors. I’ve made two little ladies happy… and luckely my third and youngest granddaughter has her birthday in december, so I have enough time to make her something too.
Happy Quilting!
Sylvia Kaptein
Sylvia’s Art Quilts Studio
www.sylviasartquilts.nl
[email protected]
0 Responses