 BERNINA Corporate Blog -
Today I will show you the new 3D globe effect, a great feature of the new embroidery software that allows you to create all kinds of cool effects. The globe effect works in conjunction with blackwork fill stitch, candlewick fills, net and pattern fills.
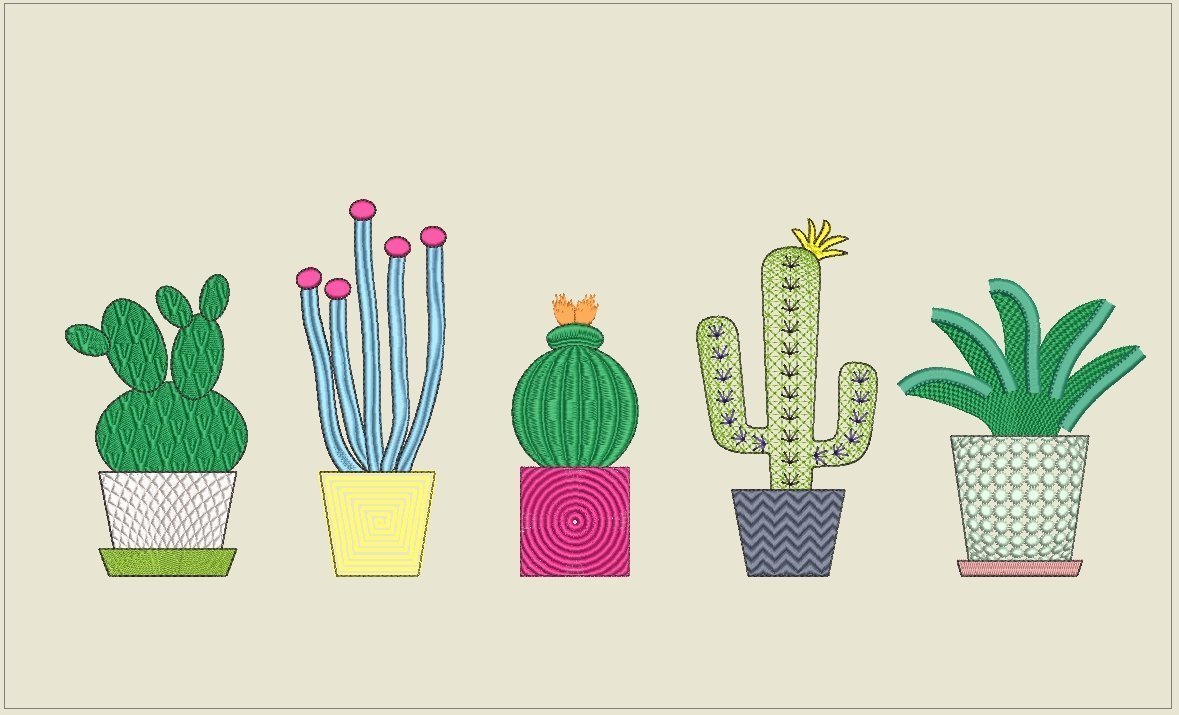
Cactus 4
The plant also gets a new fill. Click on it, change the colour if necessary, then right-click on the “Blackwork Fill Stitch” icon with the four single flowers. Enter the following settings:
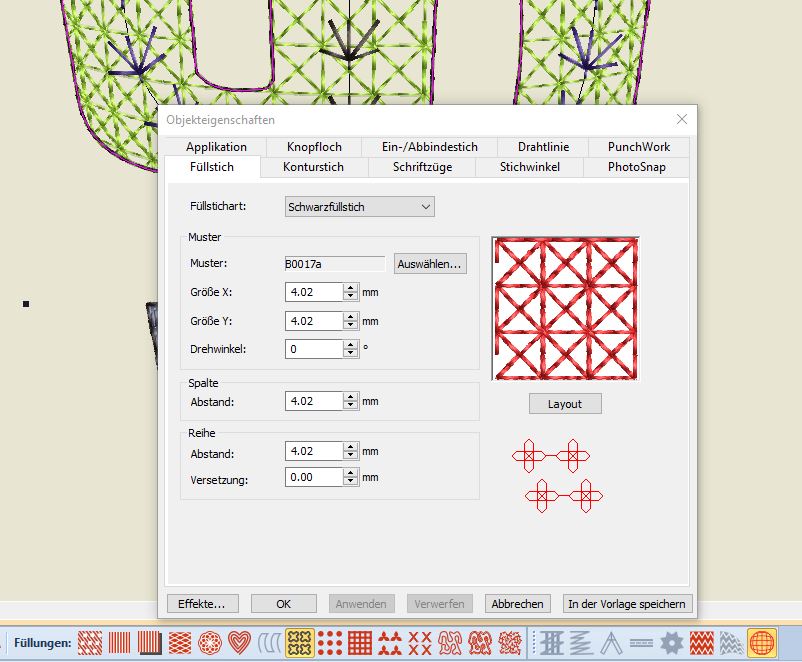
Then click on “3D Globe Effect“. In the image above, you can see the relevant icon at the bottom right with the chequered circle already highlighted in yellow. This makes the fill on the cactus denser at the top and sides compared to the middle. You can find an even more impressive example of this effect in the forthcoming issue 68 of our magazine Inspiration. You can also find out more about this effect in the User Manual (PDF), starting at page 211.
The effect will not look quite as striking for you at first, but you can further increase the effect using the reshaping tool. Just change the globe shape so it is similar to the picture here.

You can now change the plant pot back and, if you wish, change the colour and give it a new plain fill. We used this one:
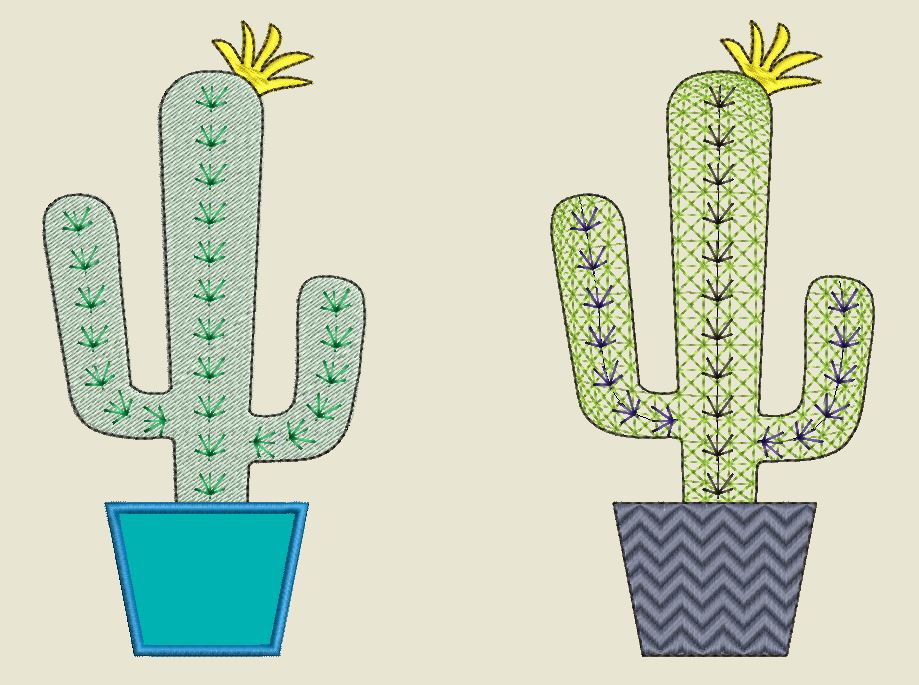
Here’s what it looked like before and after:
Cactus 5
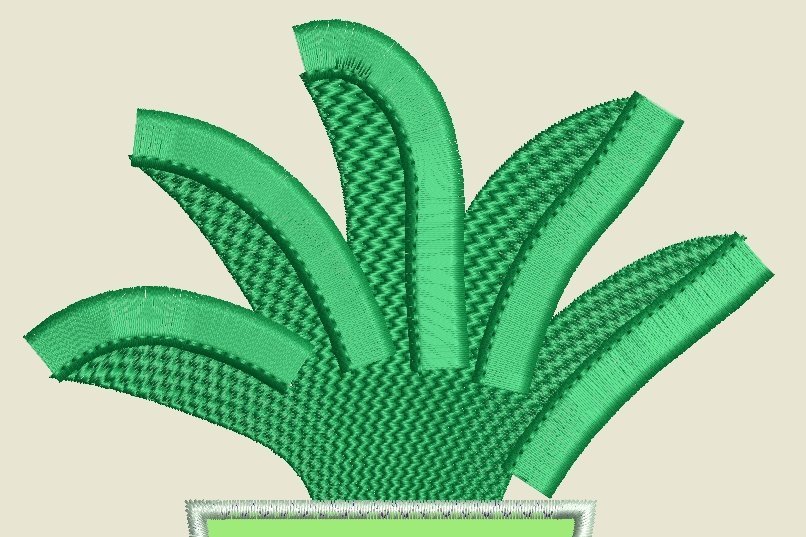
The most impressive part of cactus 5 is its fringed edge. This is achieved by embroidering this satin-stitch outline with the thread tension drastically reduced, almost to 0. The stitch width used here is 8 mm, but it can be increased substantially for other objects. Once you have finished embroidering, cut through the lower thread on the reverse and pull the upper thread carefully, bit by bit, through to the front. The upper thread is held in place by the closely set straight stitches embroidered over them. However, this type of fringe is only suitable for items that are not subjected to heavy stresses.

I therefore only made slight changes to the cactus plant. As already described for the plant pot on cactus 1, I simply left-clicked on “Weave Fill”. And the cactus already looks more dynamic. Of course, the software does not show the subsequent fringing process.
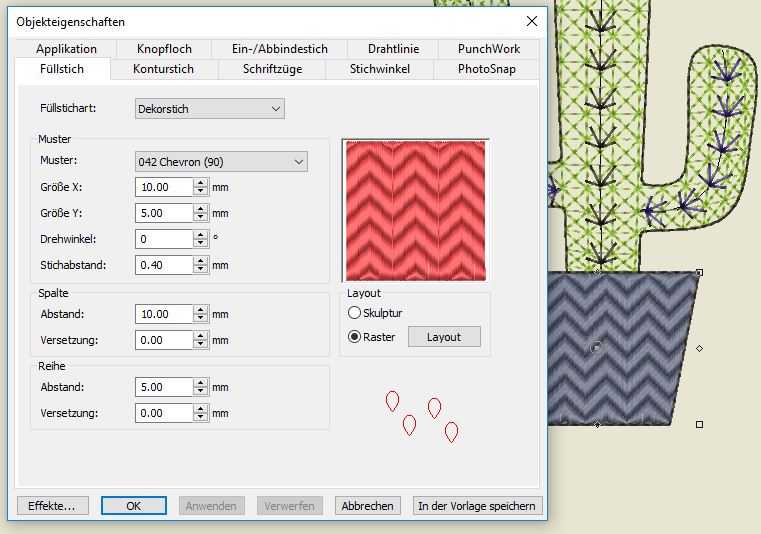
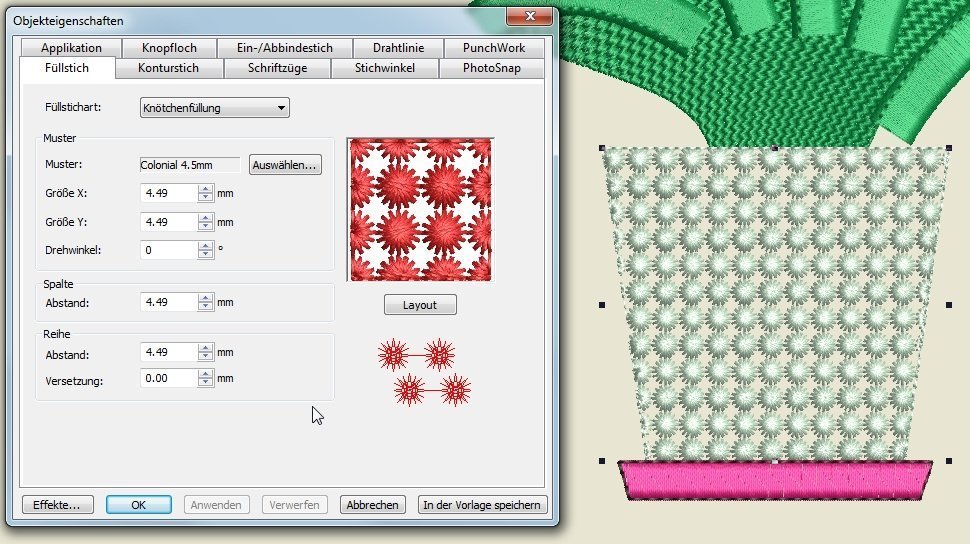
Change the plant pot design back to the original embroidery object as described in Part 1 of this short software series. Change the satin outline to candlewick fill, colour mint, with the following settings:
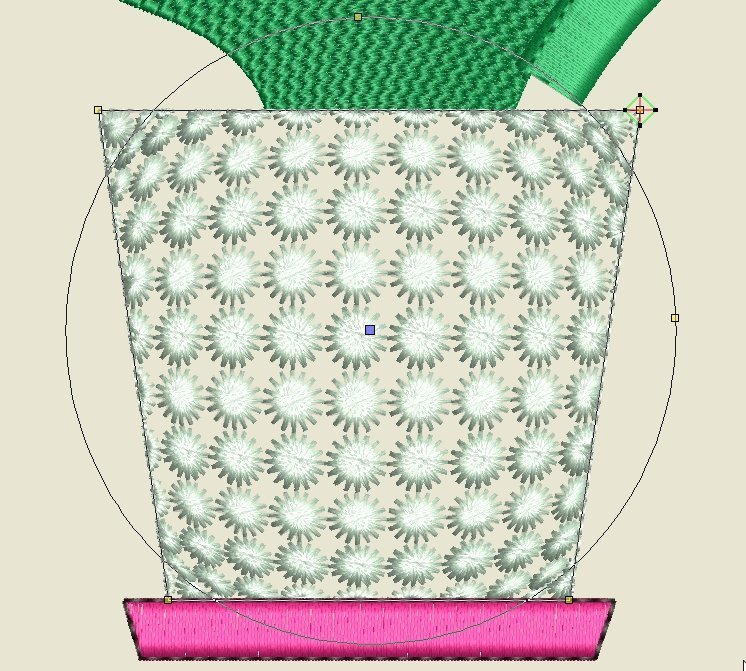
Another left-click on the 3D globe effect and you are almost done. You can see that the effect is much more noticeable here than before on the cactus with arms. Here too you can increase the effect by using the reshaping tool. To do this, reduce the size of the circle and move the centre upwards slightly, as shown in the picture:
For the saucer, I simply used a backstitch fill and a different colour. And finally, the pot and saucer get an outline again. You can do this either by copying and pasting – but this gives you a double outline between the pot and the saucer – or much more elegantly under “Outlines and Offsets”, thereby avoiding a double outline. I described this earlier for cactus 3.
Here once again is a direct comparison between the original embroidery file from Version 7 and our new version that has been modified using BERNINA Embroidery Software V8:

Due to the changes in the colours and the increase in the number of objects, you should of course sort the file again by colour before starting to embroider.
Tip: Bear in mind the machine running time when working on such large embroidery projects. You can see this when you go to the print view. Under Options, check the “Machine runtime” box:
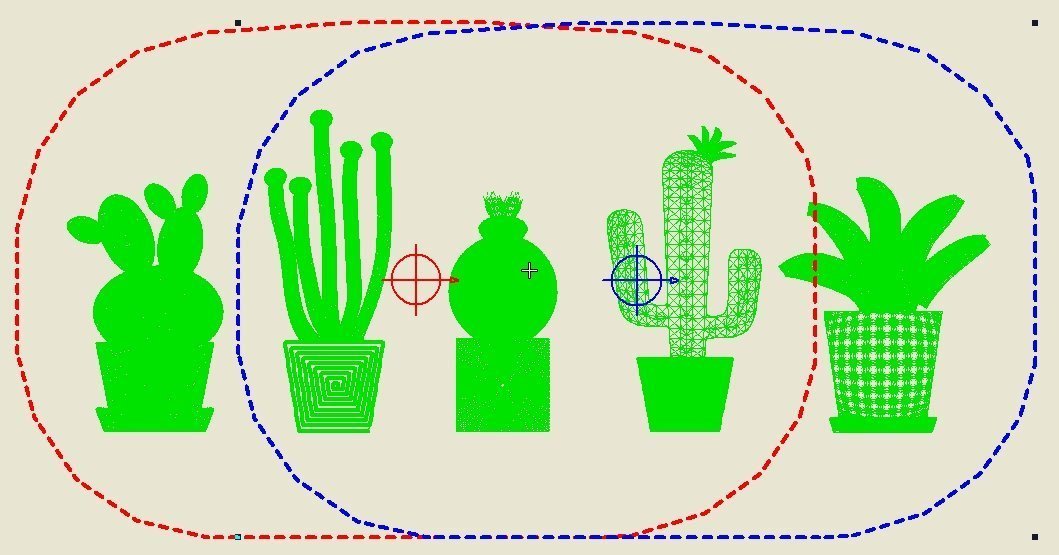
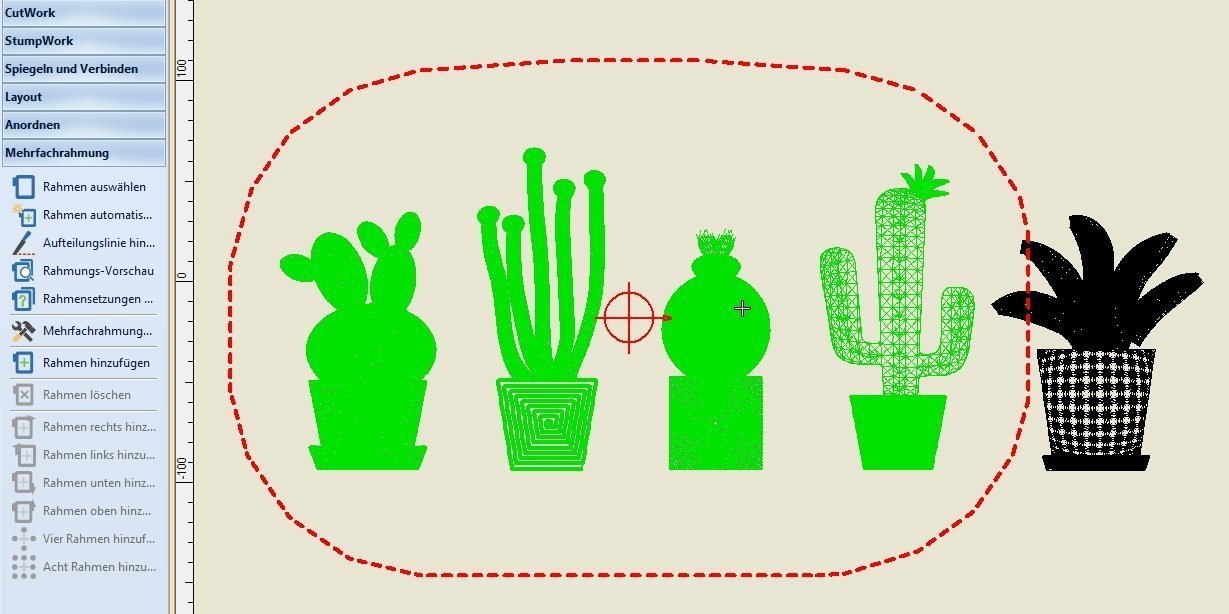
You then have to divide the cacti into frame-sized chunks. You have already selected the correct embroidery hoop and machine. We are working here with the Jumbo Hoop and the 8 Series, which is the quickest way, but the picture also works with the Oval Hoop and other sewing/embroidery machines.
If you embroider using a smaller hoop, go to the “Multi-hooping” toolbar. This displays all the objects that fit into the hoop in green. Here, you can, for example, move, rotate or add more hoops, and also delete them if want to do it a different way. At the end, all the objects should be covered, and the frames should overlap as much as possible for exact positioning. You can find more information in the User Manual on page 375.
All that remains is for me to wish you lots of fun experimenting and embroidering. I hope I have been able to awaken your curiosity, because there are still lots of exciting things to discover in the BERNINA Embroidery Software! And make sure you check out the video guides on YouTube:
Yours Claudia Giesser


0 Responses