 BERNINA Corporate Blog -
These are great patterns: easy paper piecing by Judy Niemeyer – I am making the four African Violets Placemats, little quilts. Judy is a great designer; she listens to quilters and makes things easier for us. Comprehensive directions and step-by-step diagrams yo makeUnits, which are all pre-printed on newspaper. So you don’t have to draw anything anymore: just cut the paper and fabrics and you are on your way.

This is the pattern ‘African Violets‘, of which I have made the variation ‘Dutch Violets’: of course I will work on the BERNINA 770QE. I will do the paper piecing, and afterwards quilt them. It is a fun pattern, which originally was ment to work with many colors, two colorways for 2 placemats.
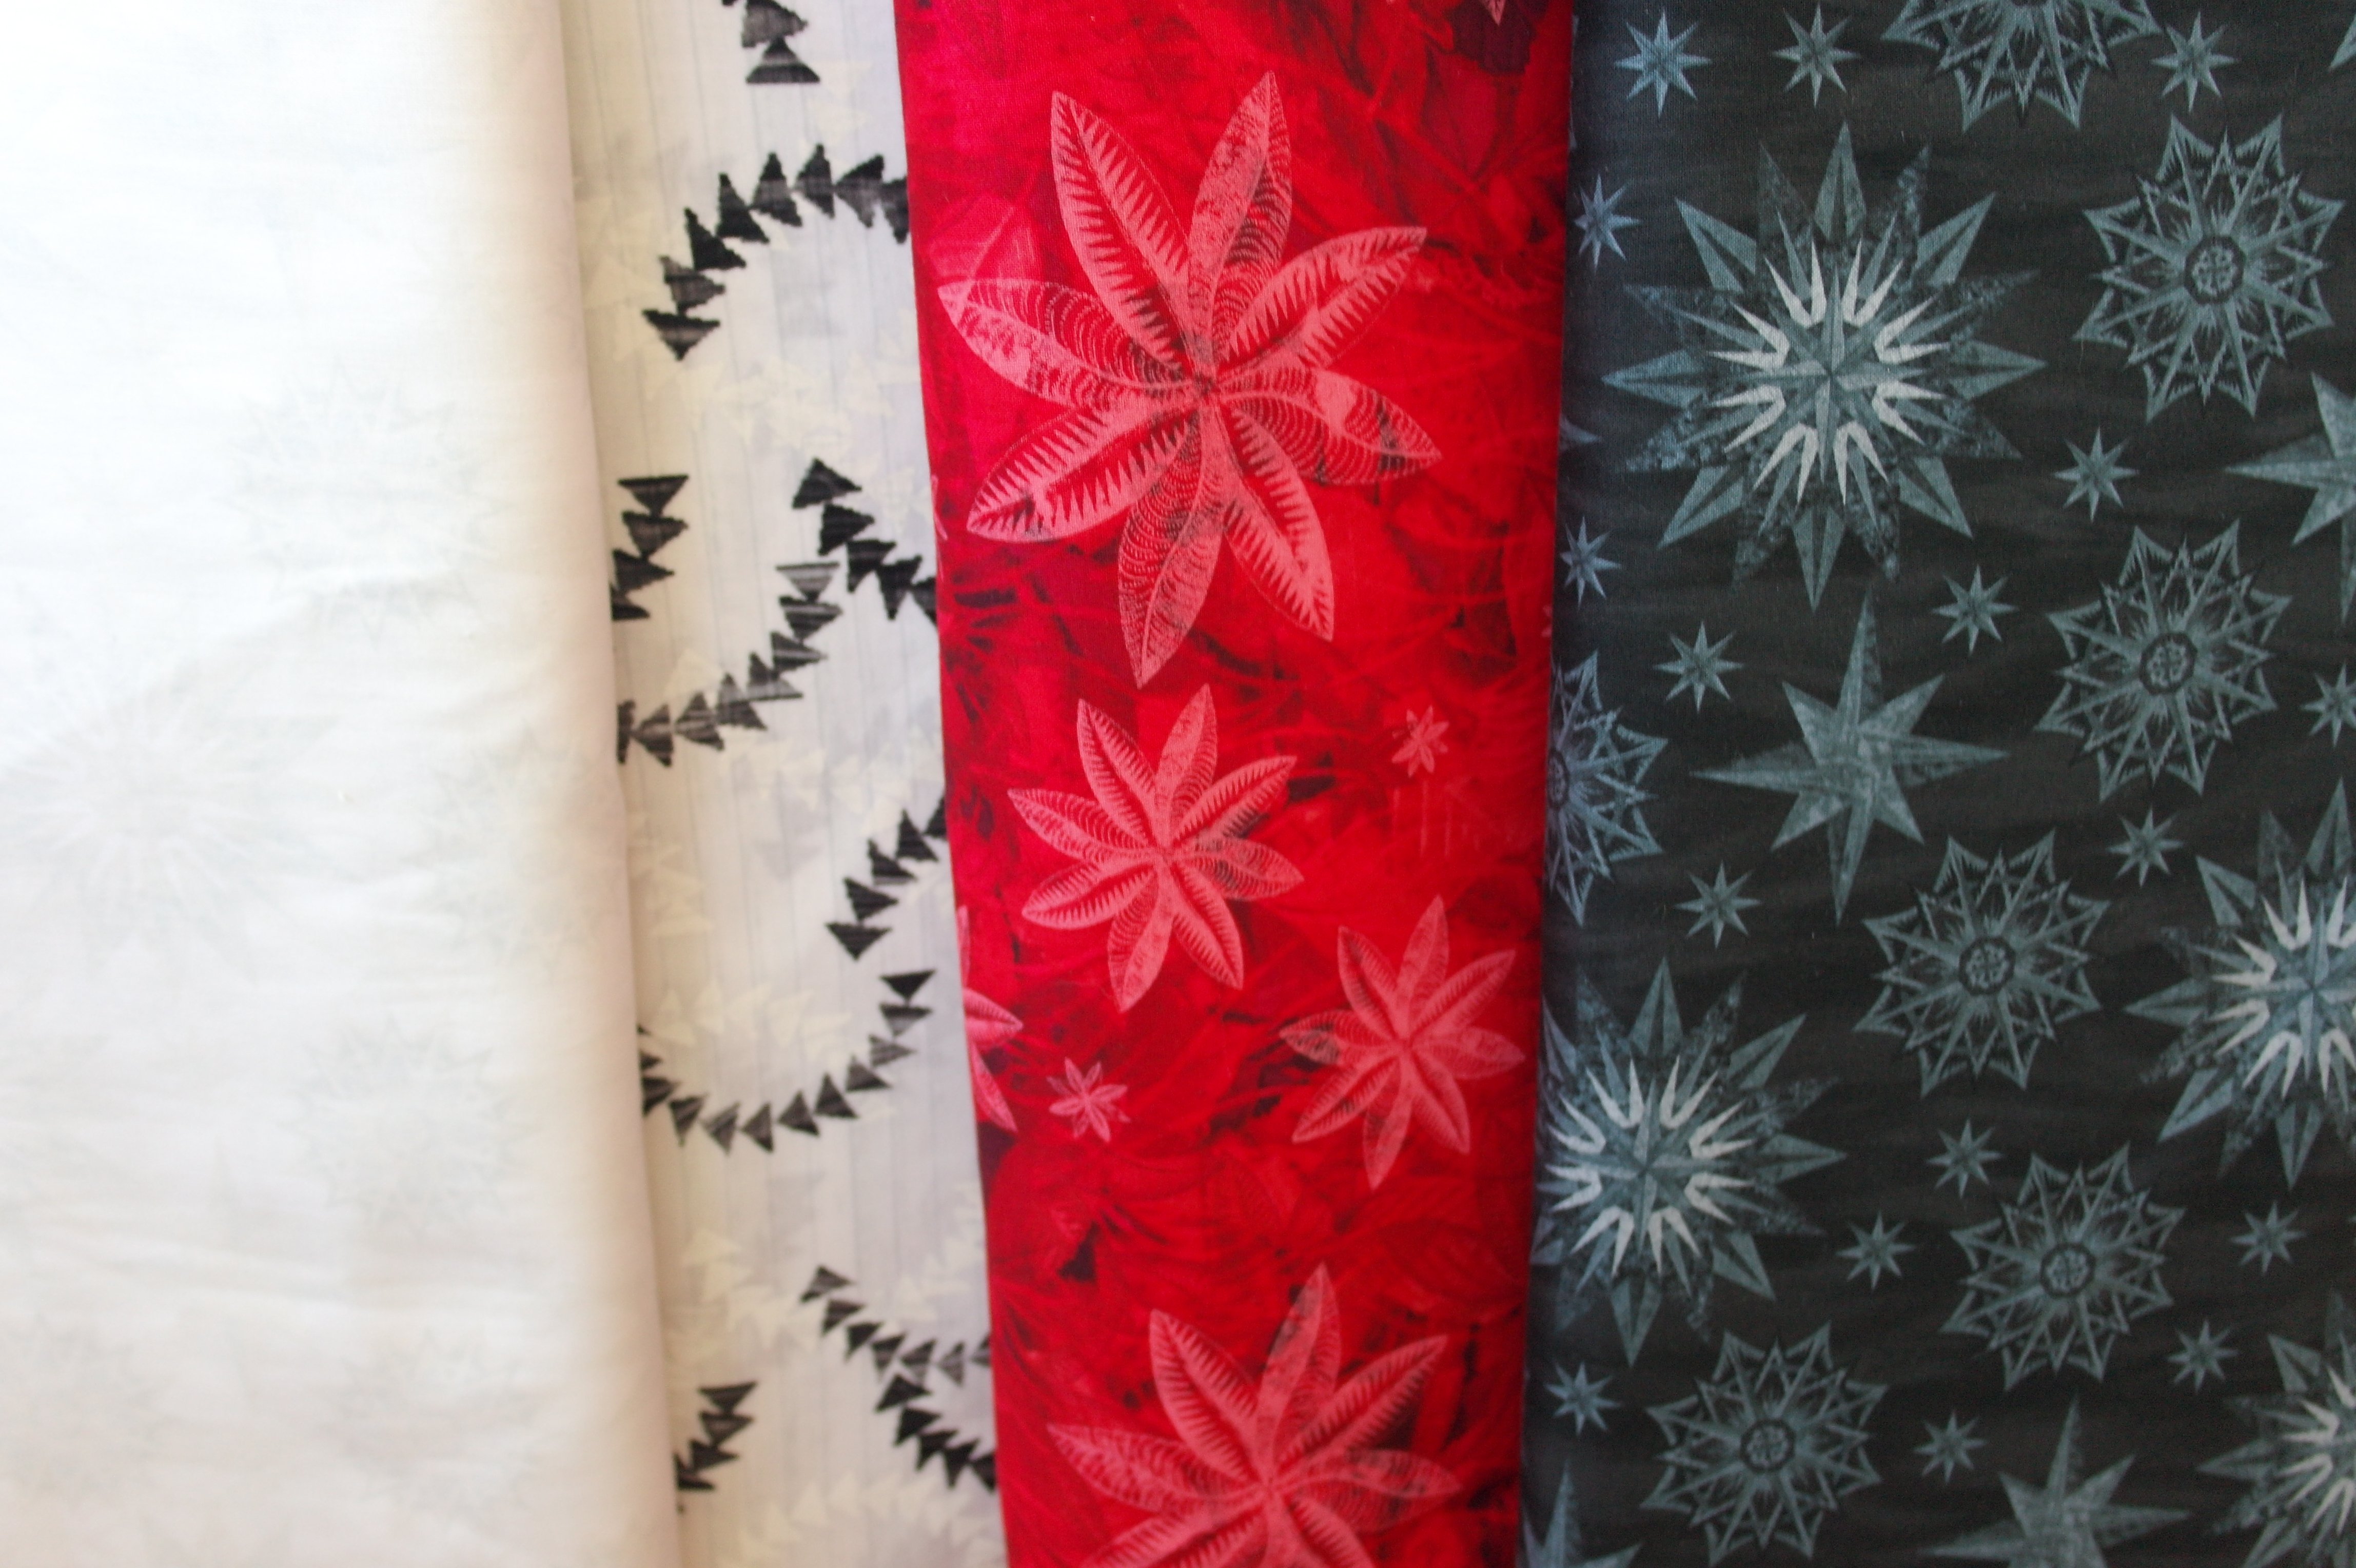
I have adapted the pattern, and will make all 4 flowers the same, using just 4 fabrics: a red, a white, a black and a white with black, from the fabric series ‘Forever’, designed by Judy en Judel Niemeyer*. Just because I like to bring more unity to the flowers, but I will quilt them all different (eventually).
I will not tell you how to make the paper piecing: you can find in these directens with the pattern. But I will show you how much fun this technique is, and how quick you can make these flower placemats. Every section of the Units will be sewn in numerical order, so you will finish the Units all at once. After that you will go to the next Units etc. A logical order, which is faster and much easier.
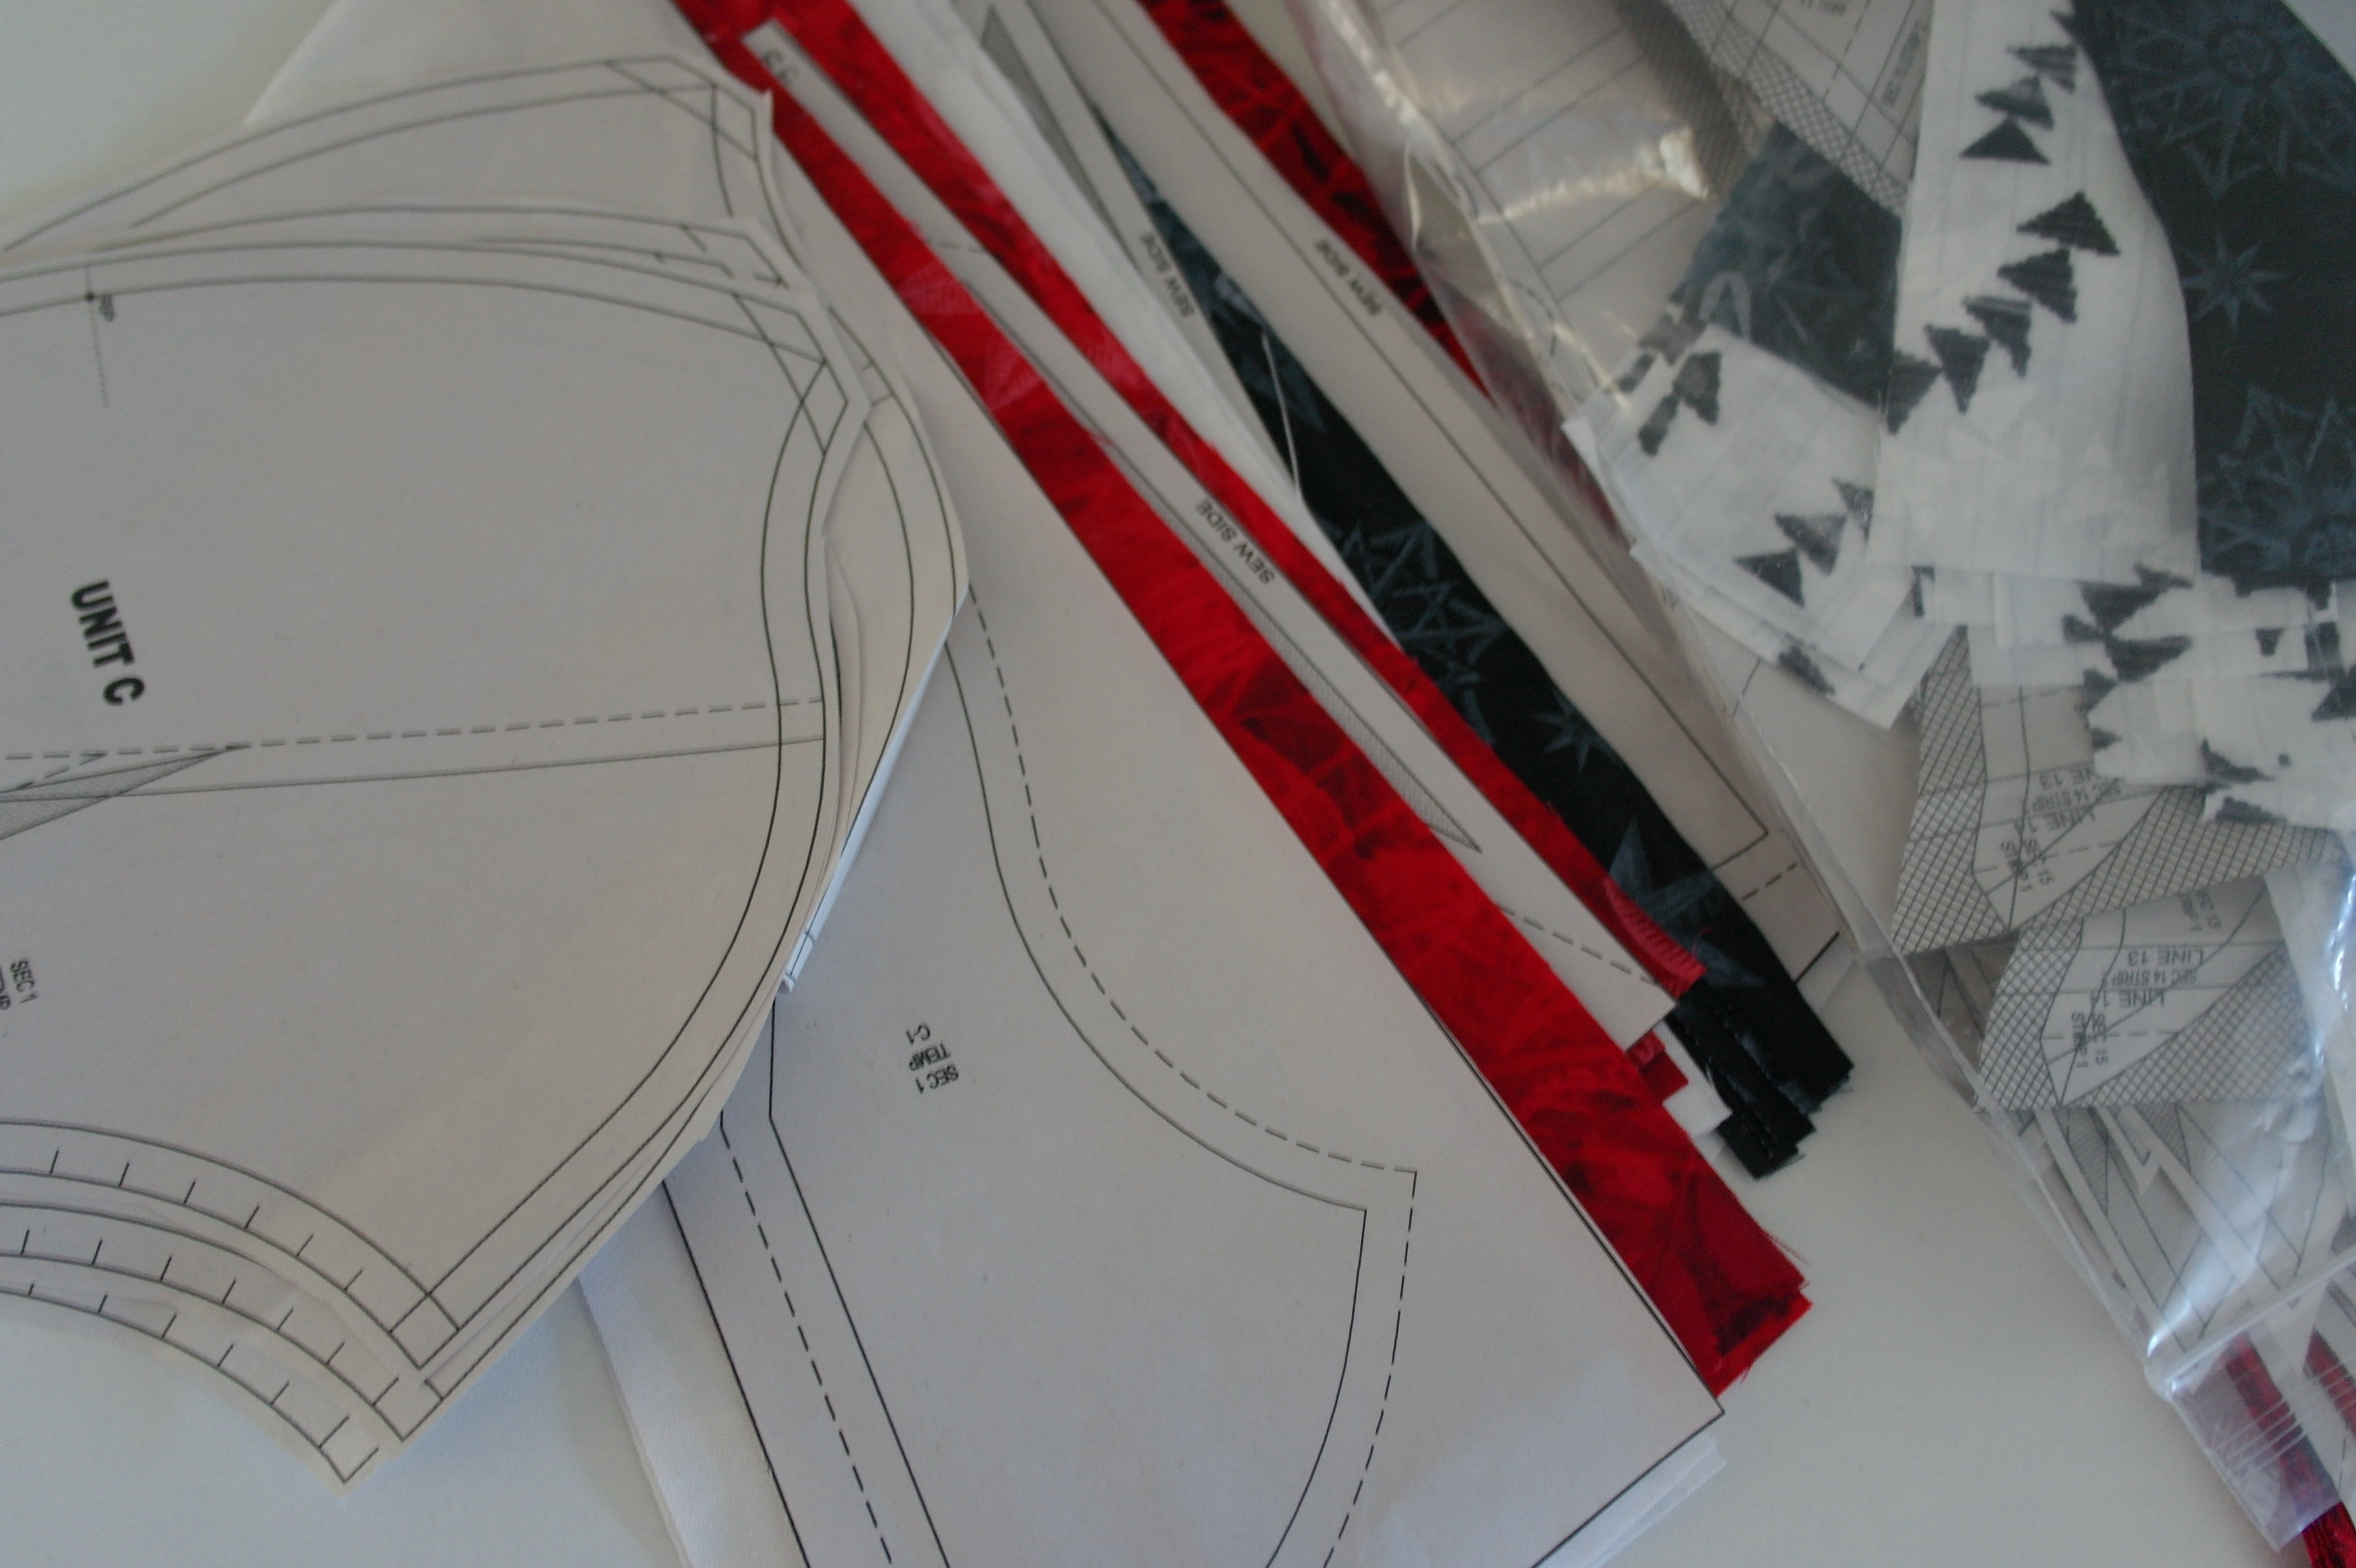
First you have to cut all patterns and templates – then cut the fabrics, by following the directions, and the paper piecing begins…
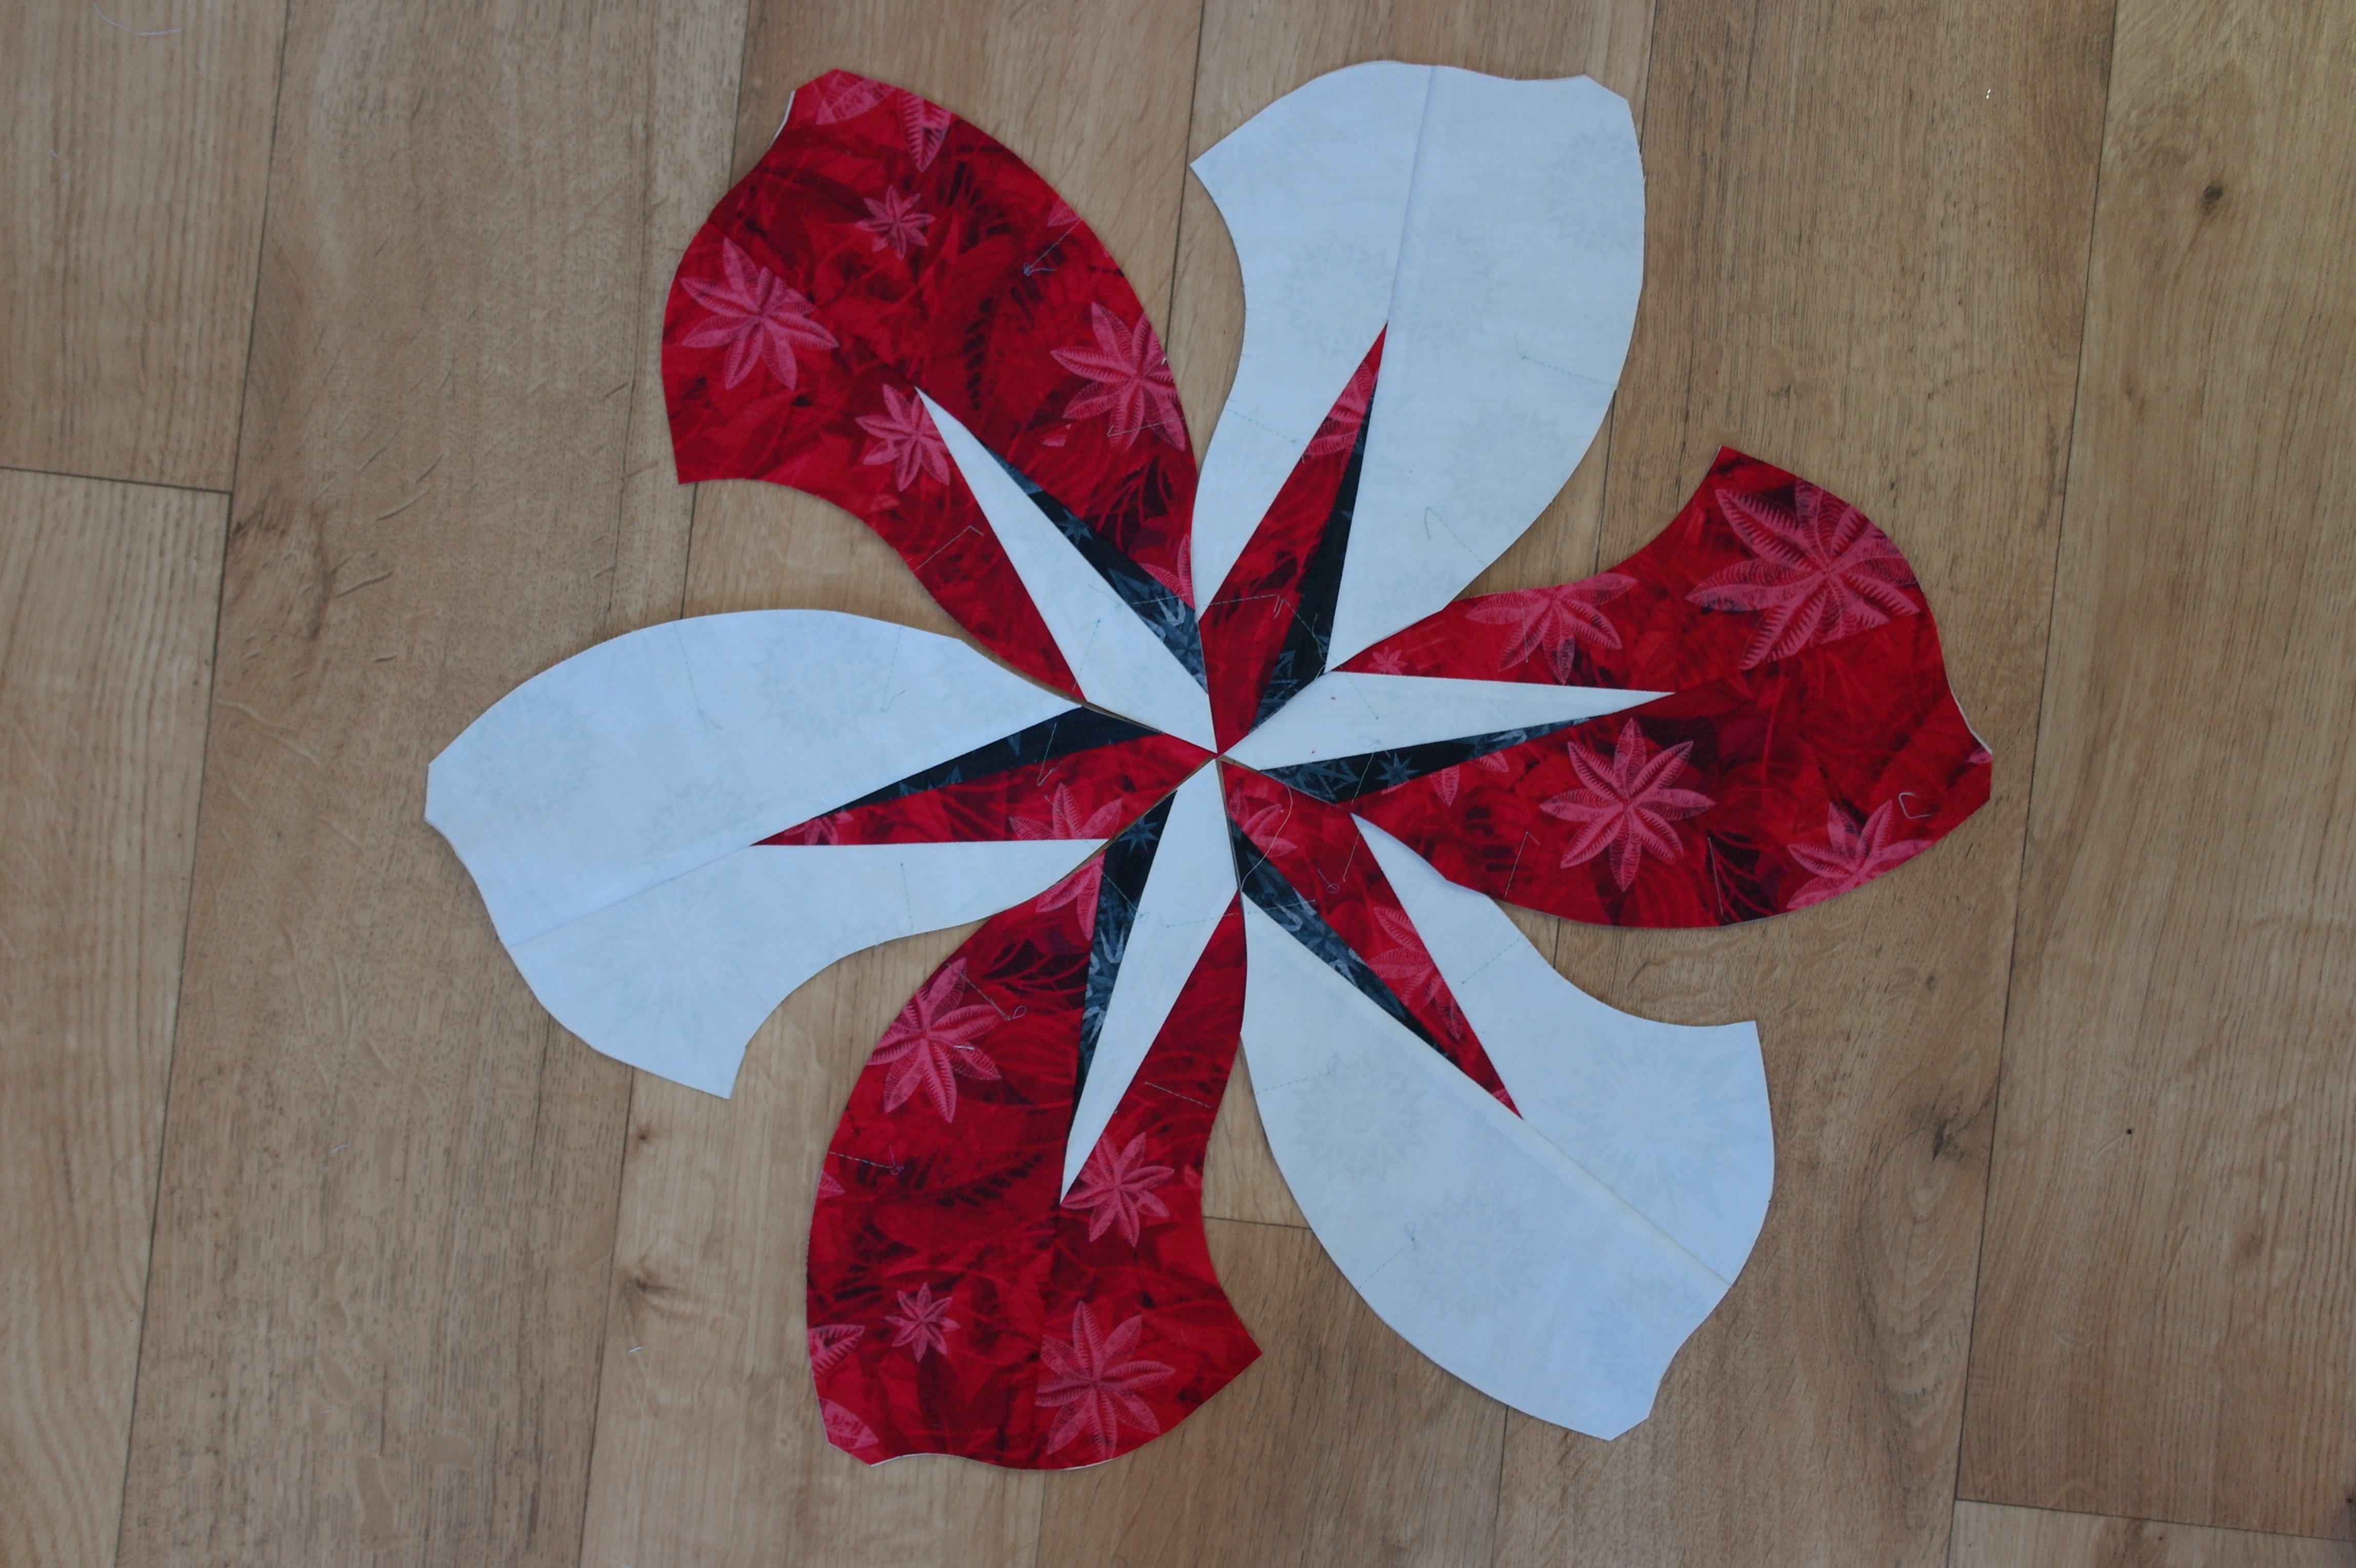
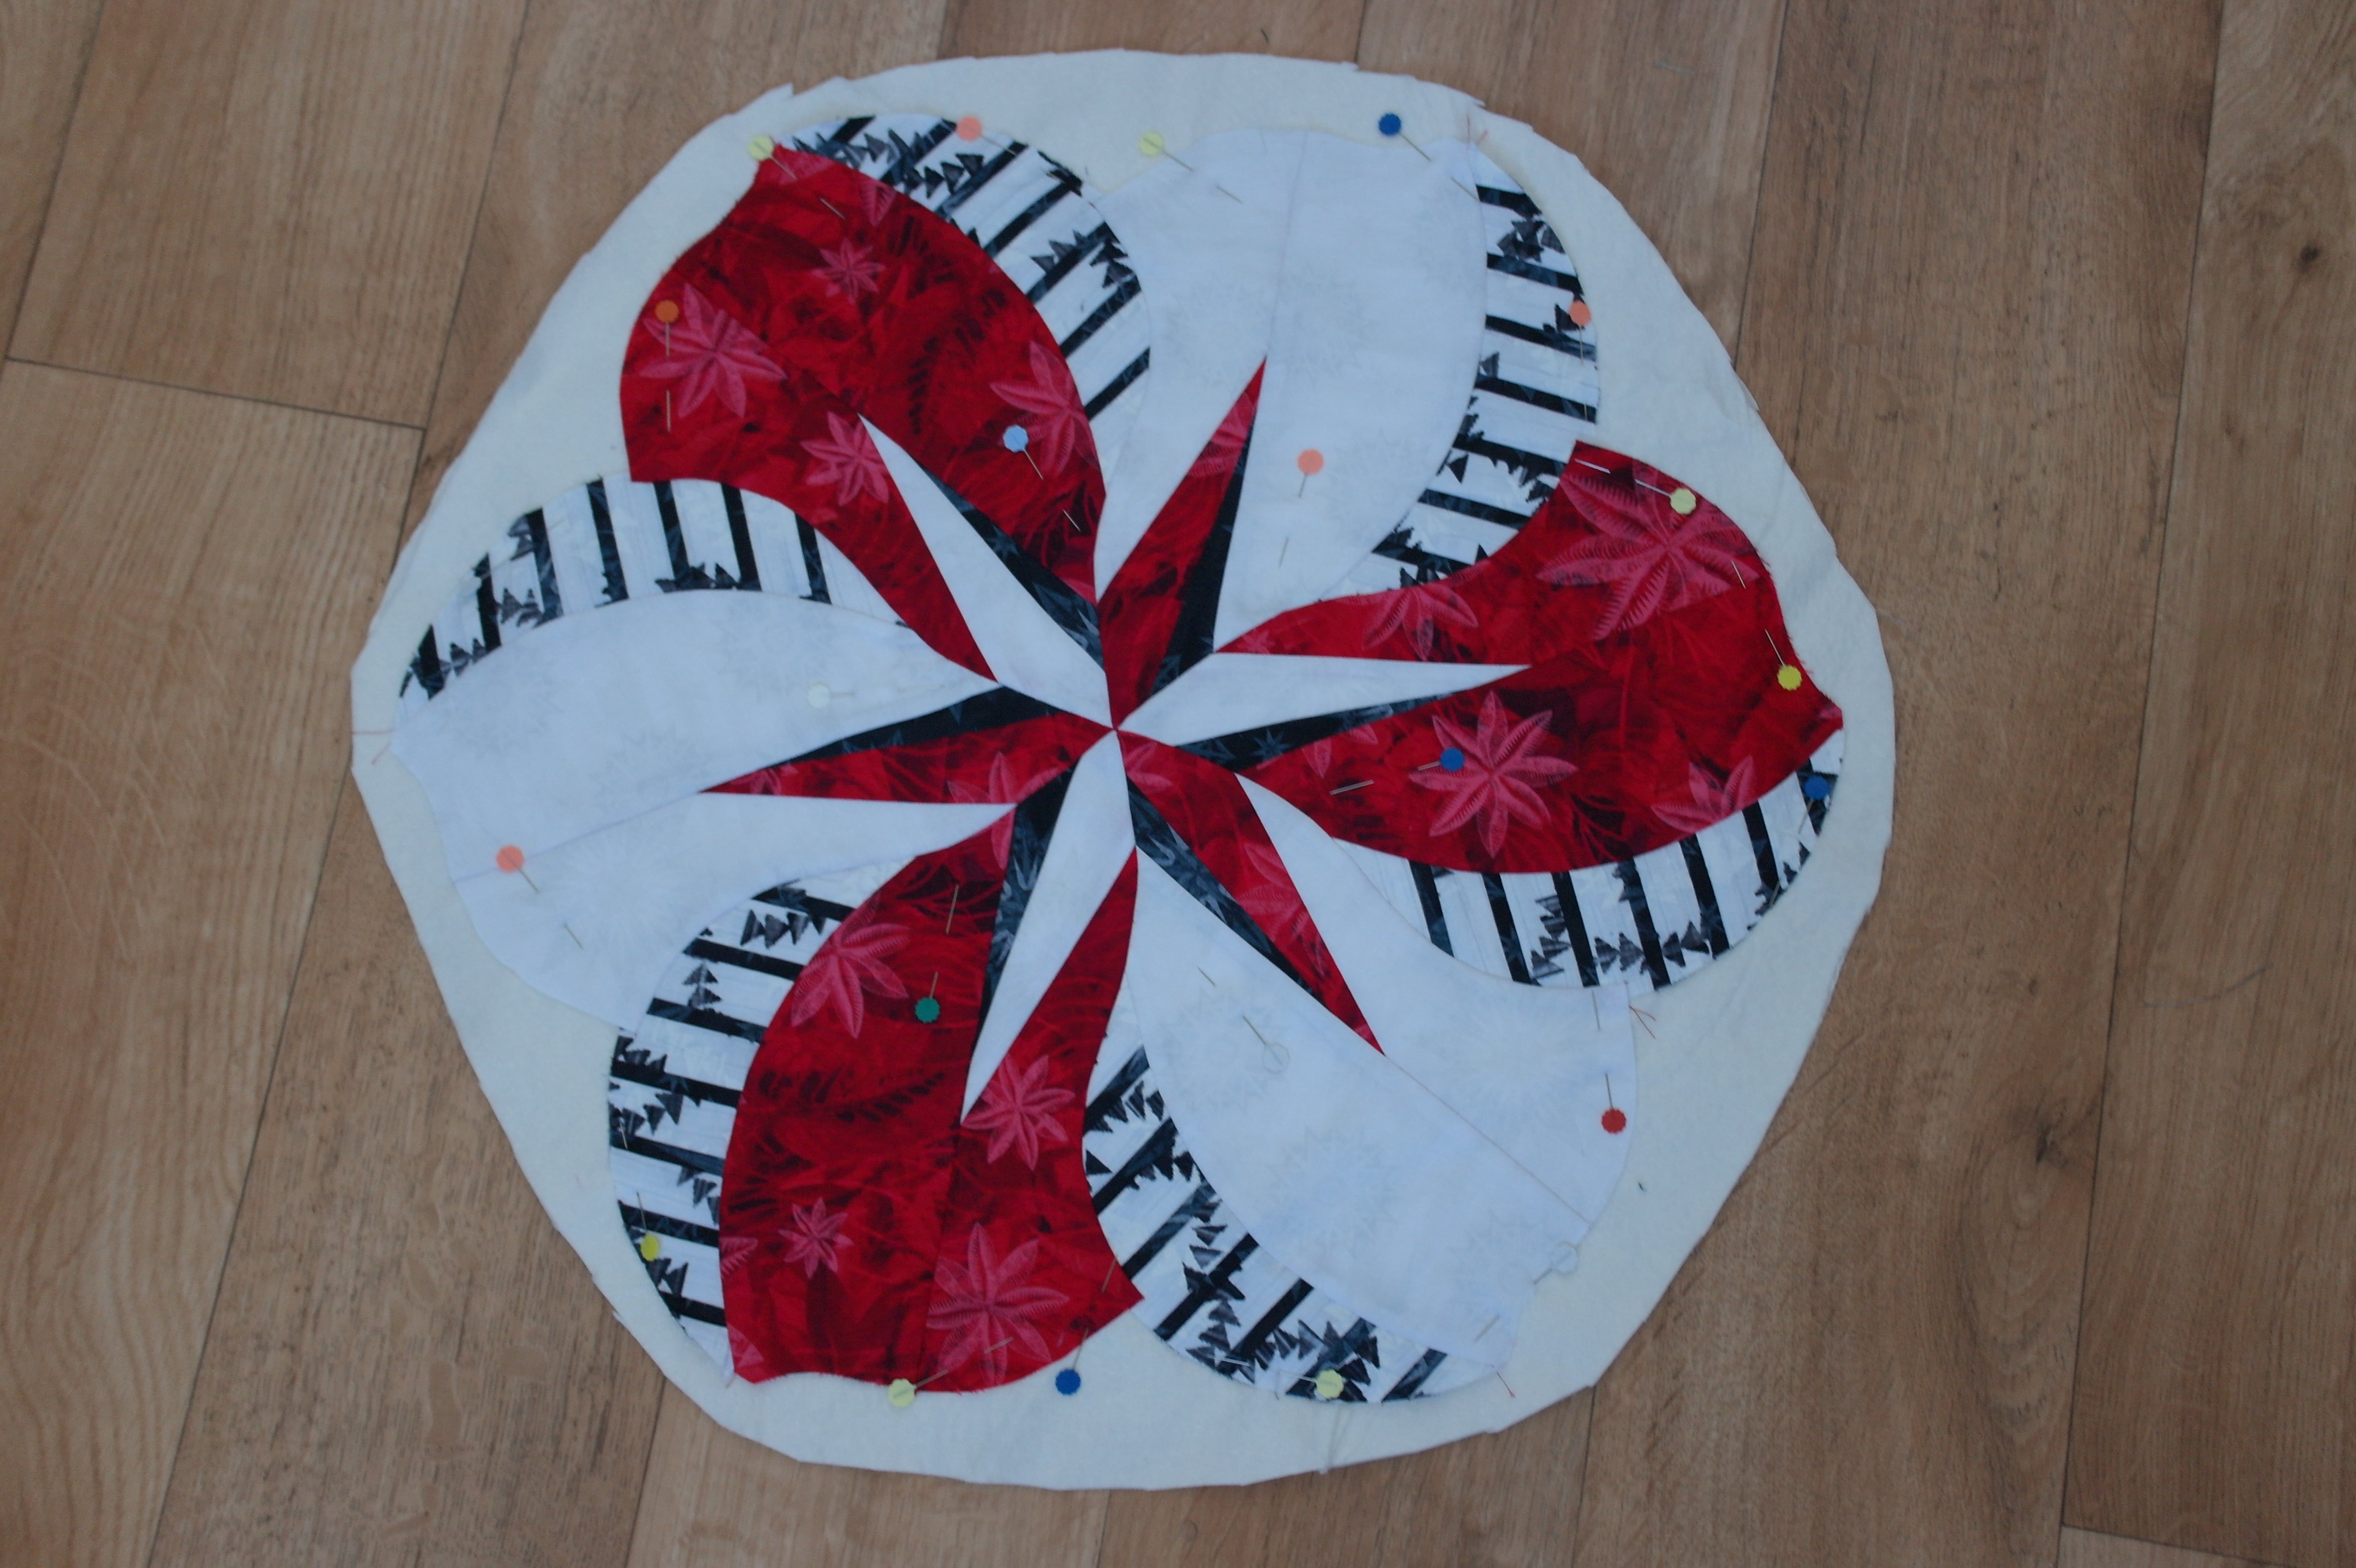
Flower petals are ready, I have placed them together just to see how they will look in the placemat.
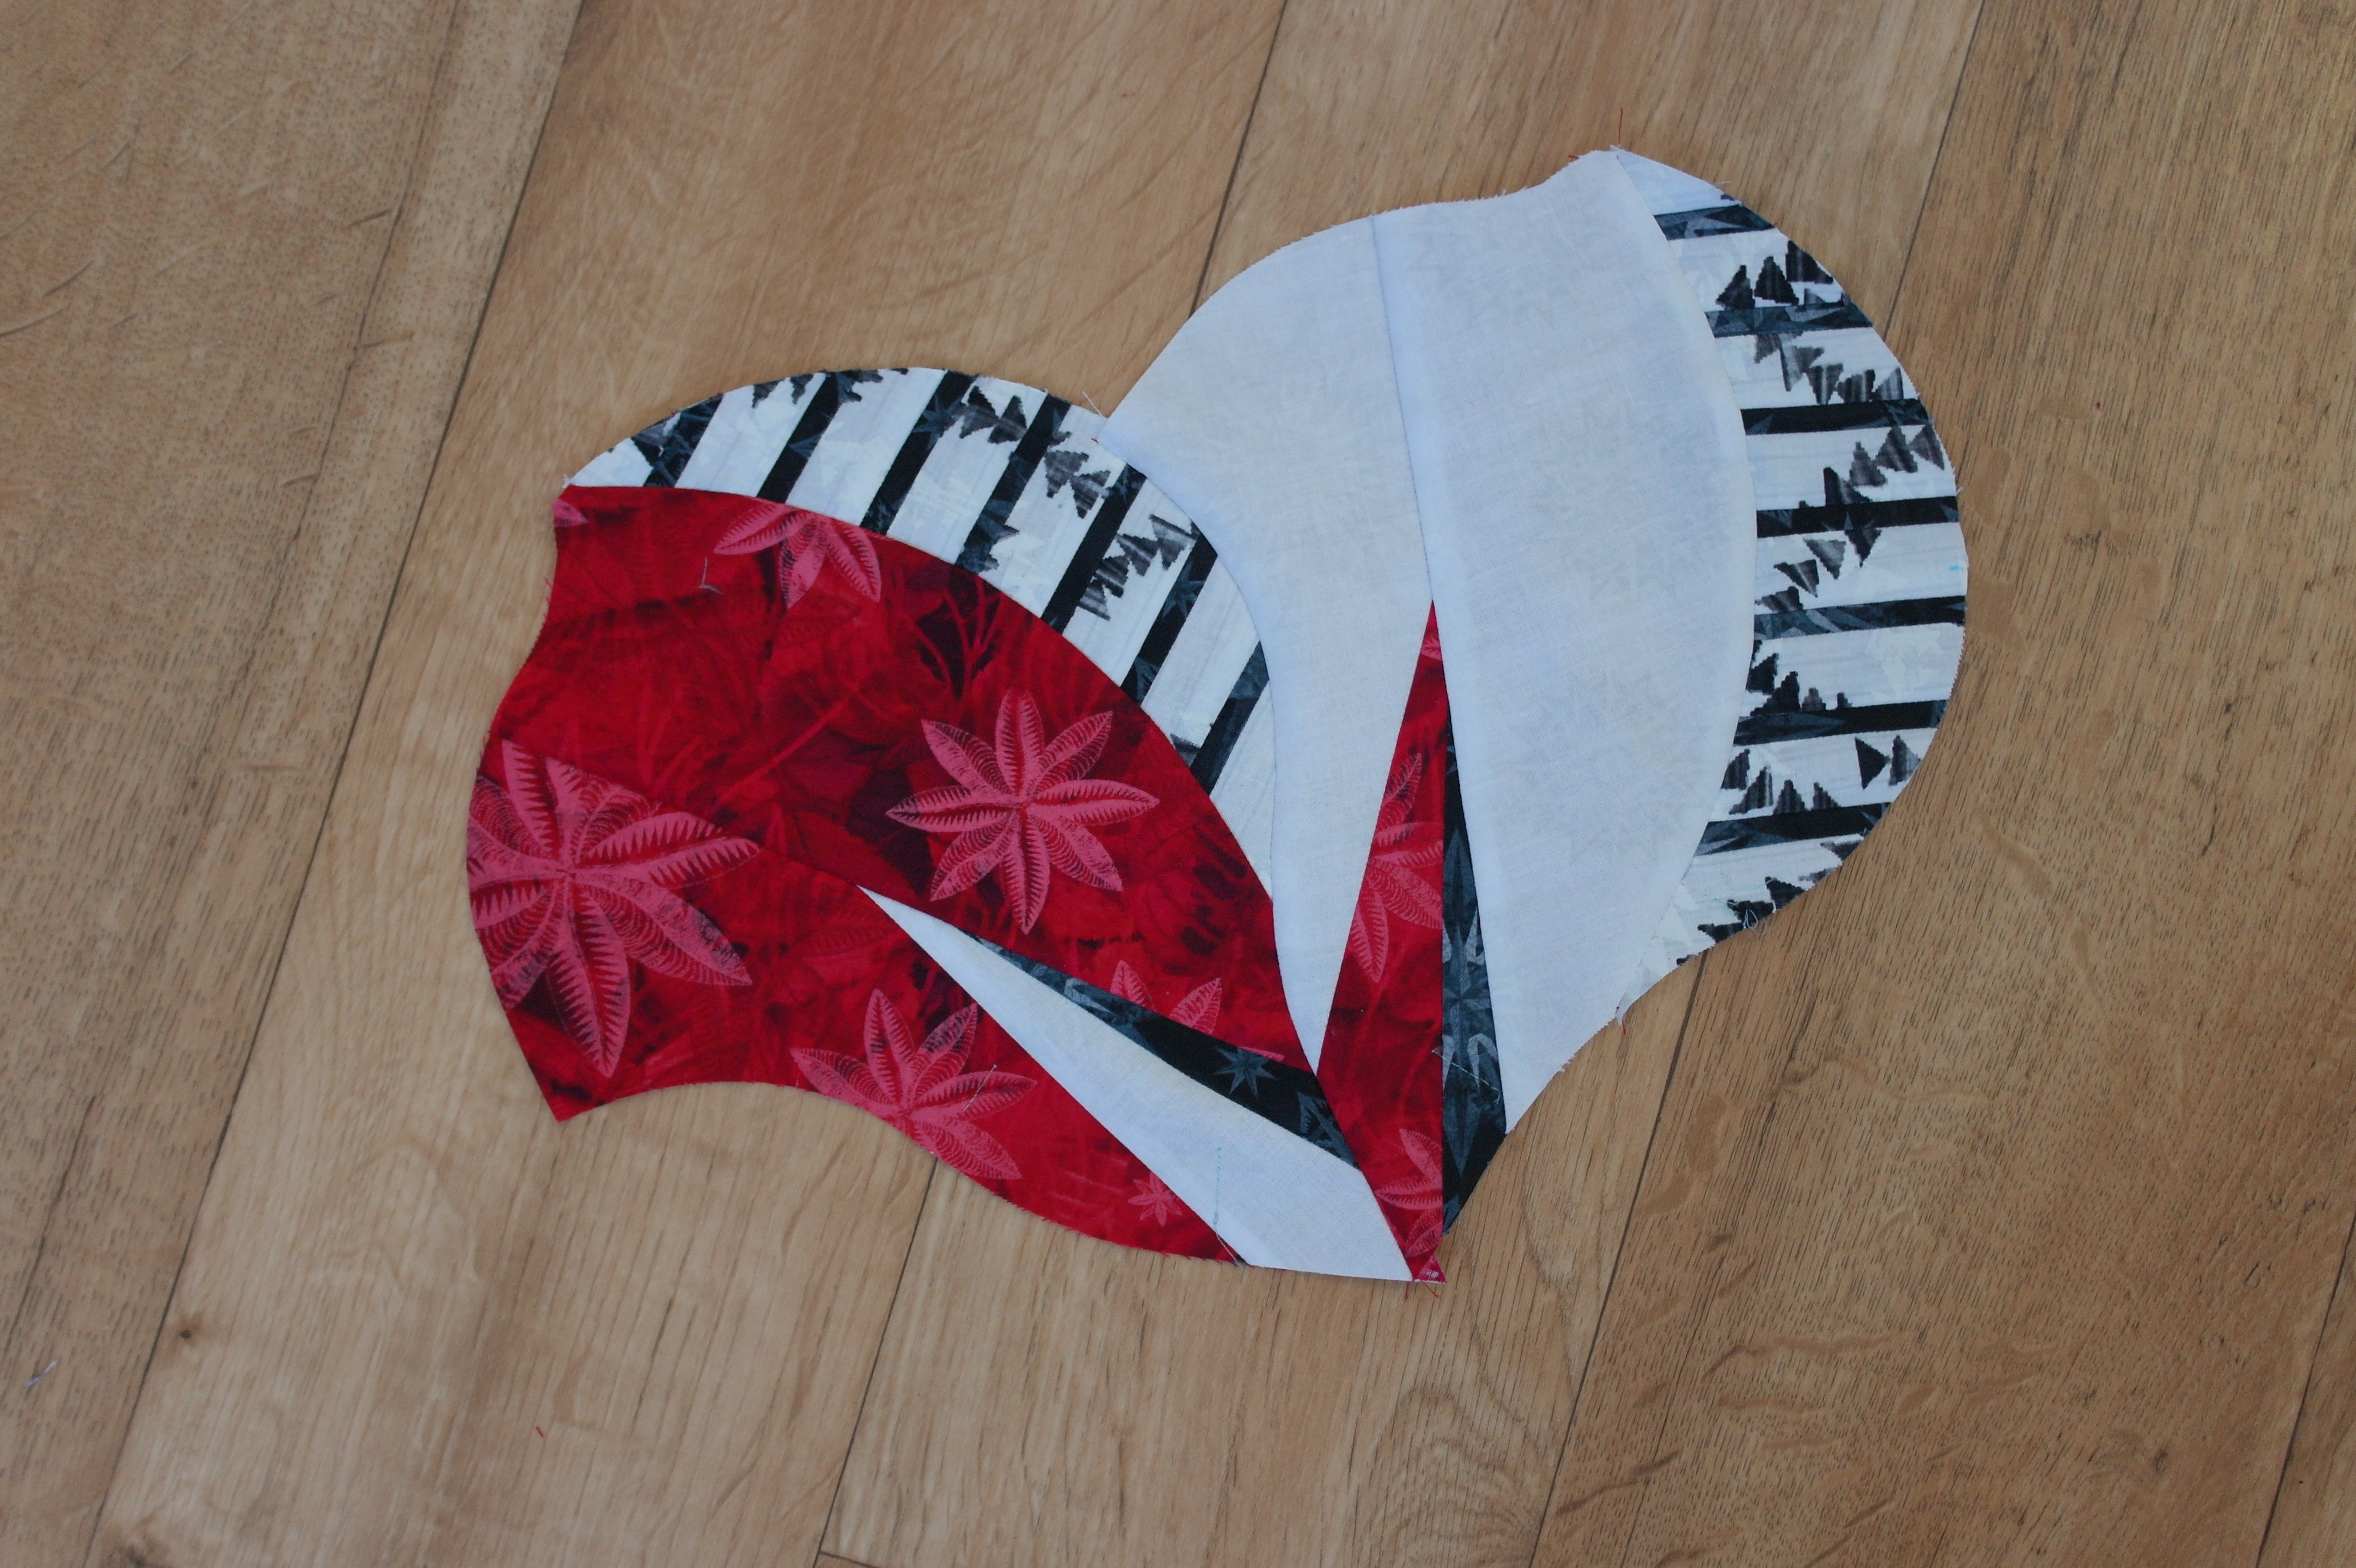
Combining the Units and sewing them together, after removing the paper. The black strips really stand out: I love the effect.

And eventually all 6 petals are sewn together to make one flower. Doesn’t this looks great? You don’t have to use that many fabrics to make a beautiful project.
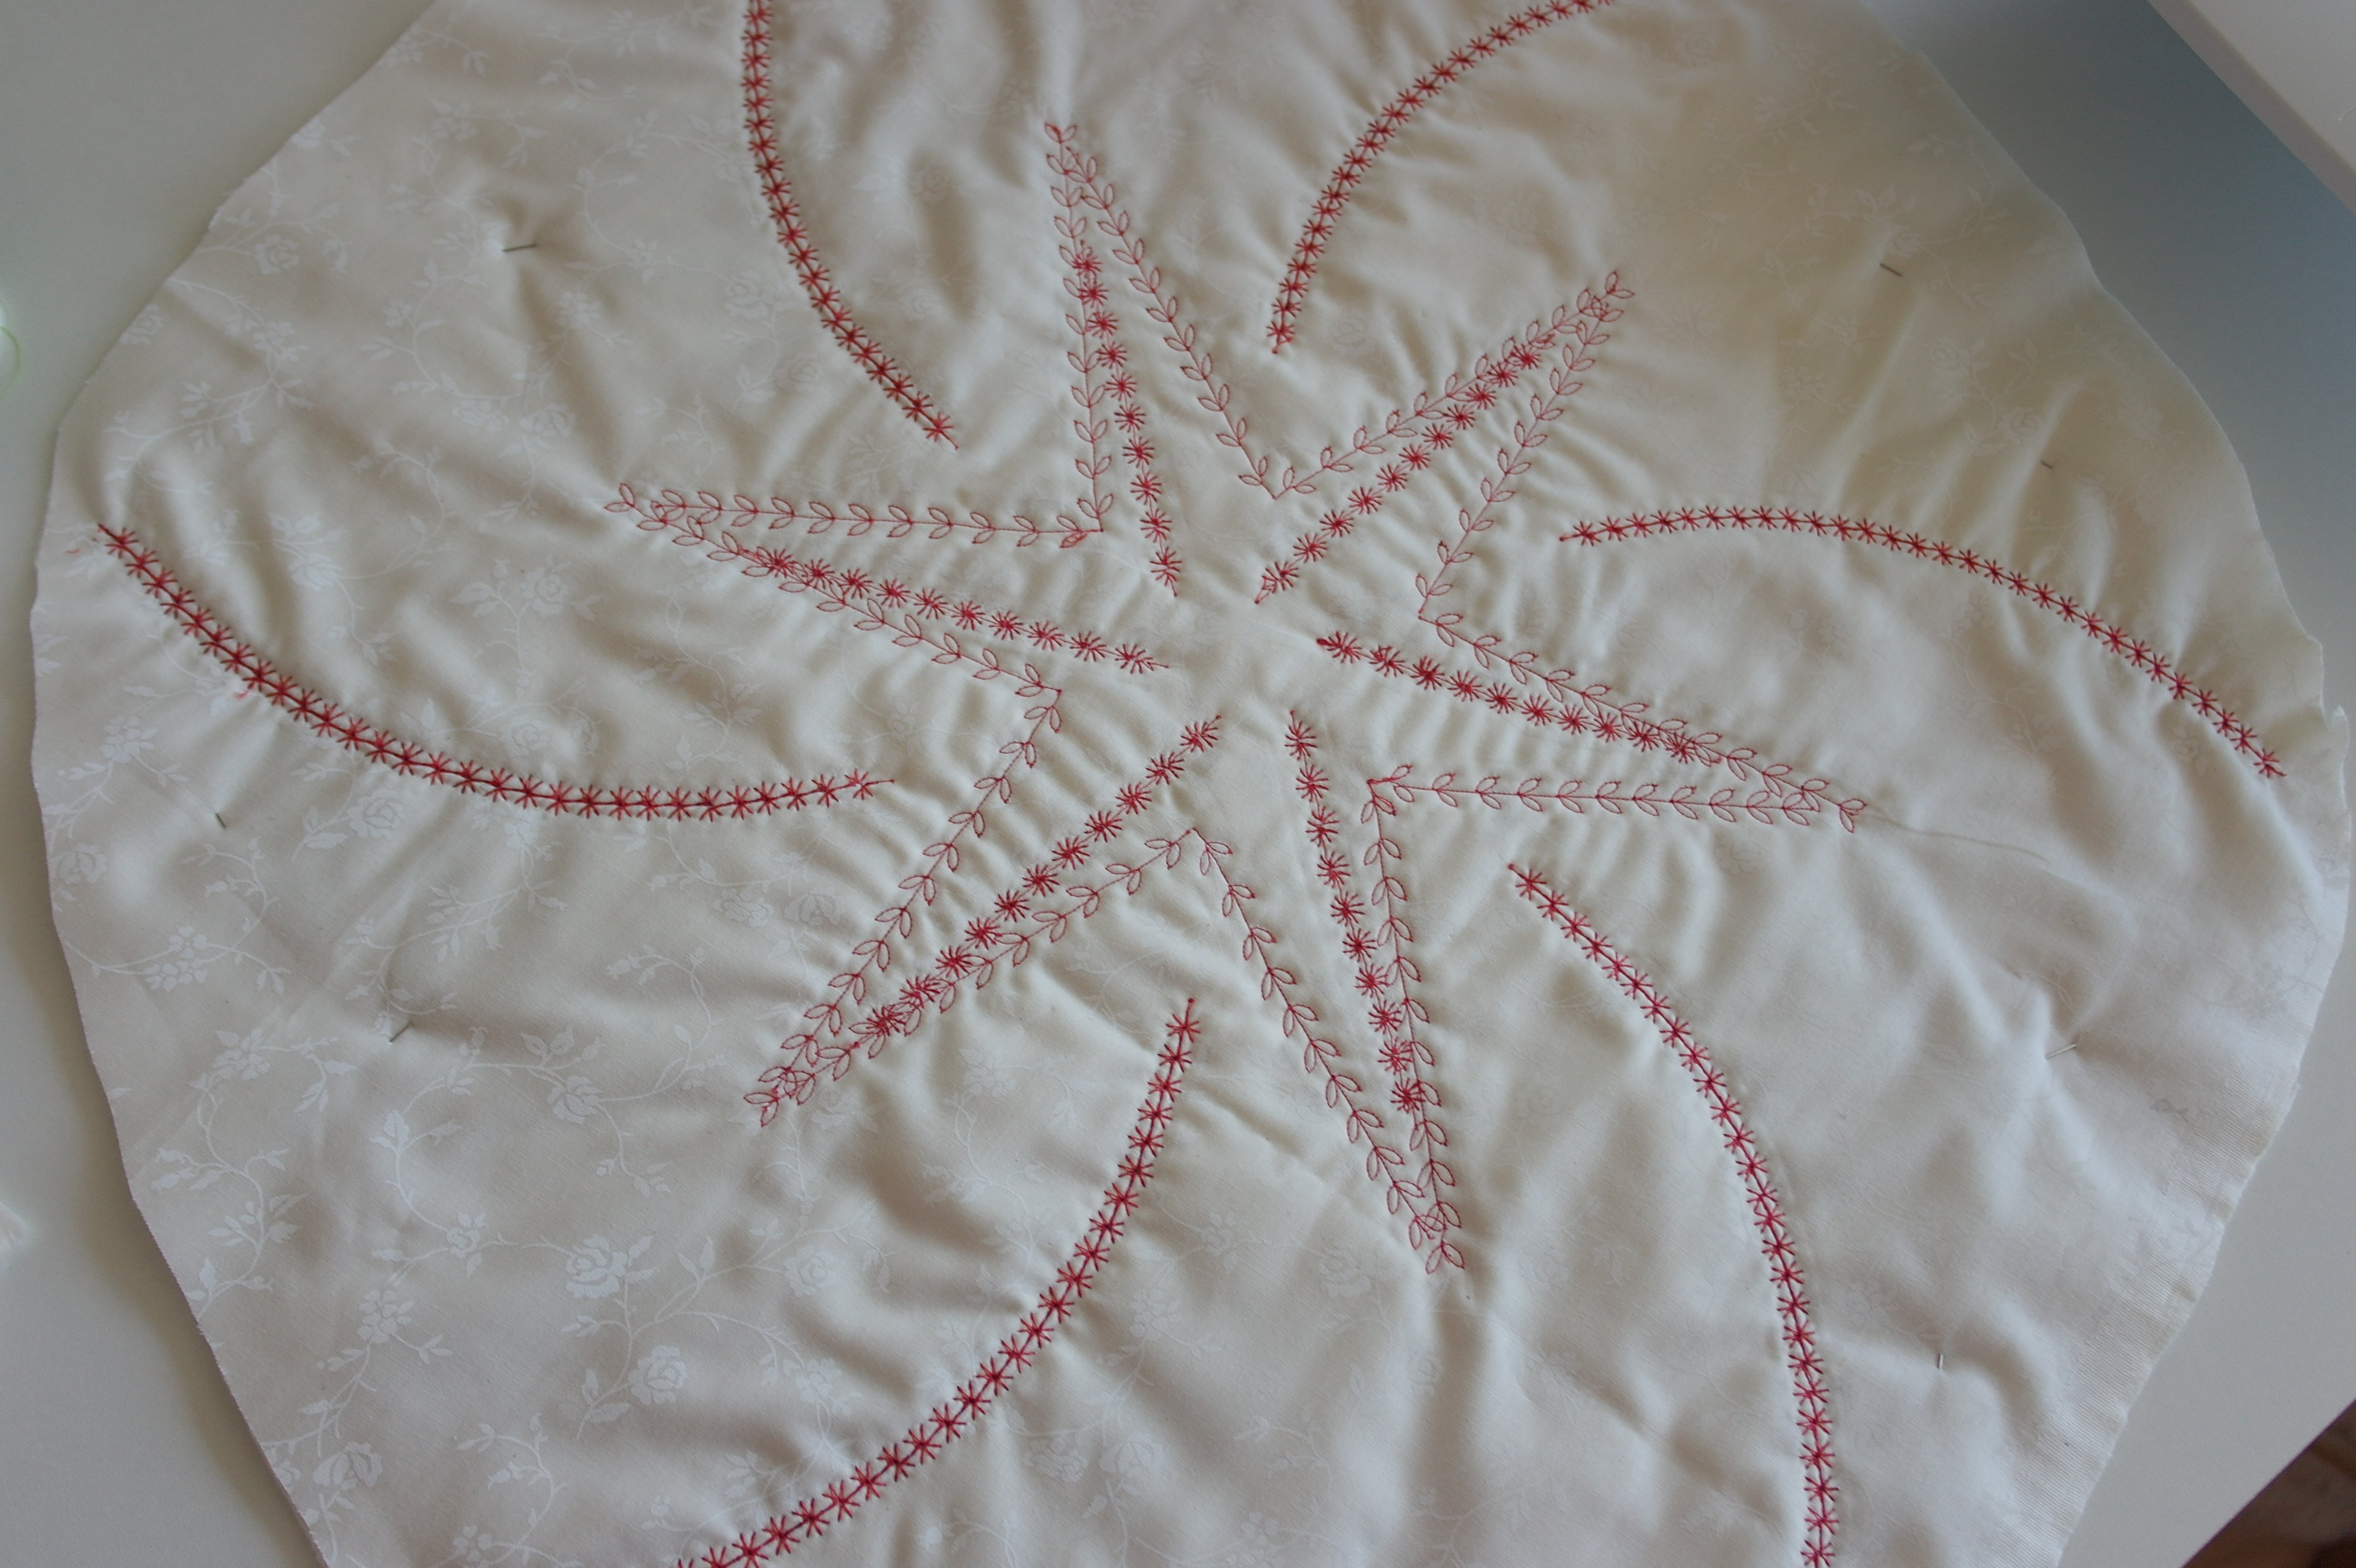
I’ve made a sandwich: off-white backing, batting 100% bamboo (Matilda’s Own), and the top of the flower on top – pinned it down for quilting.
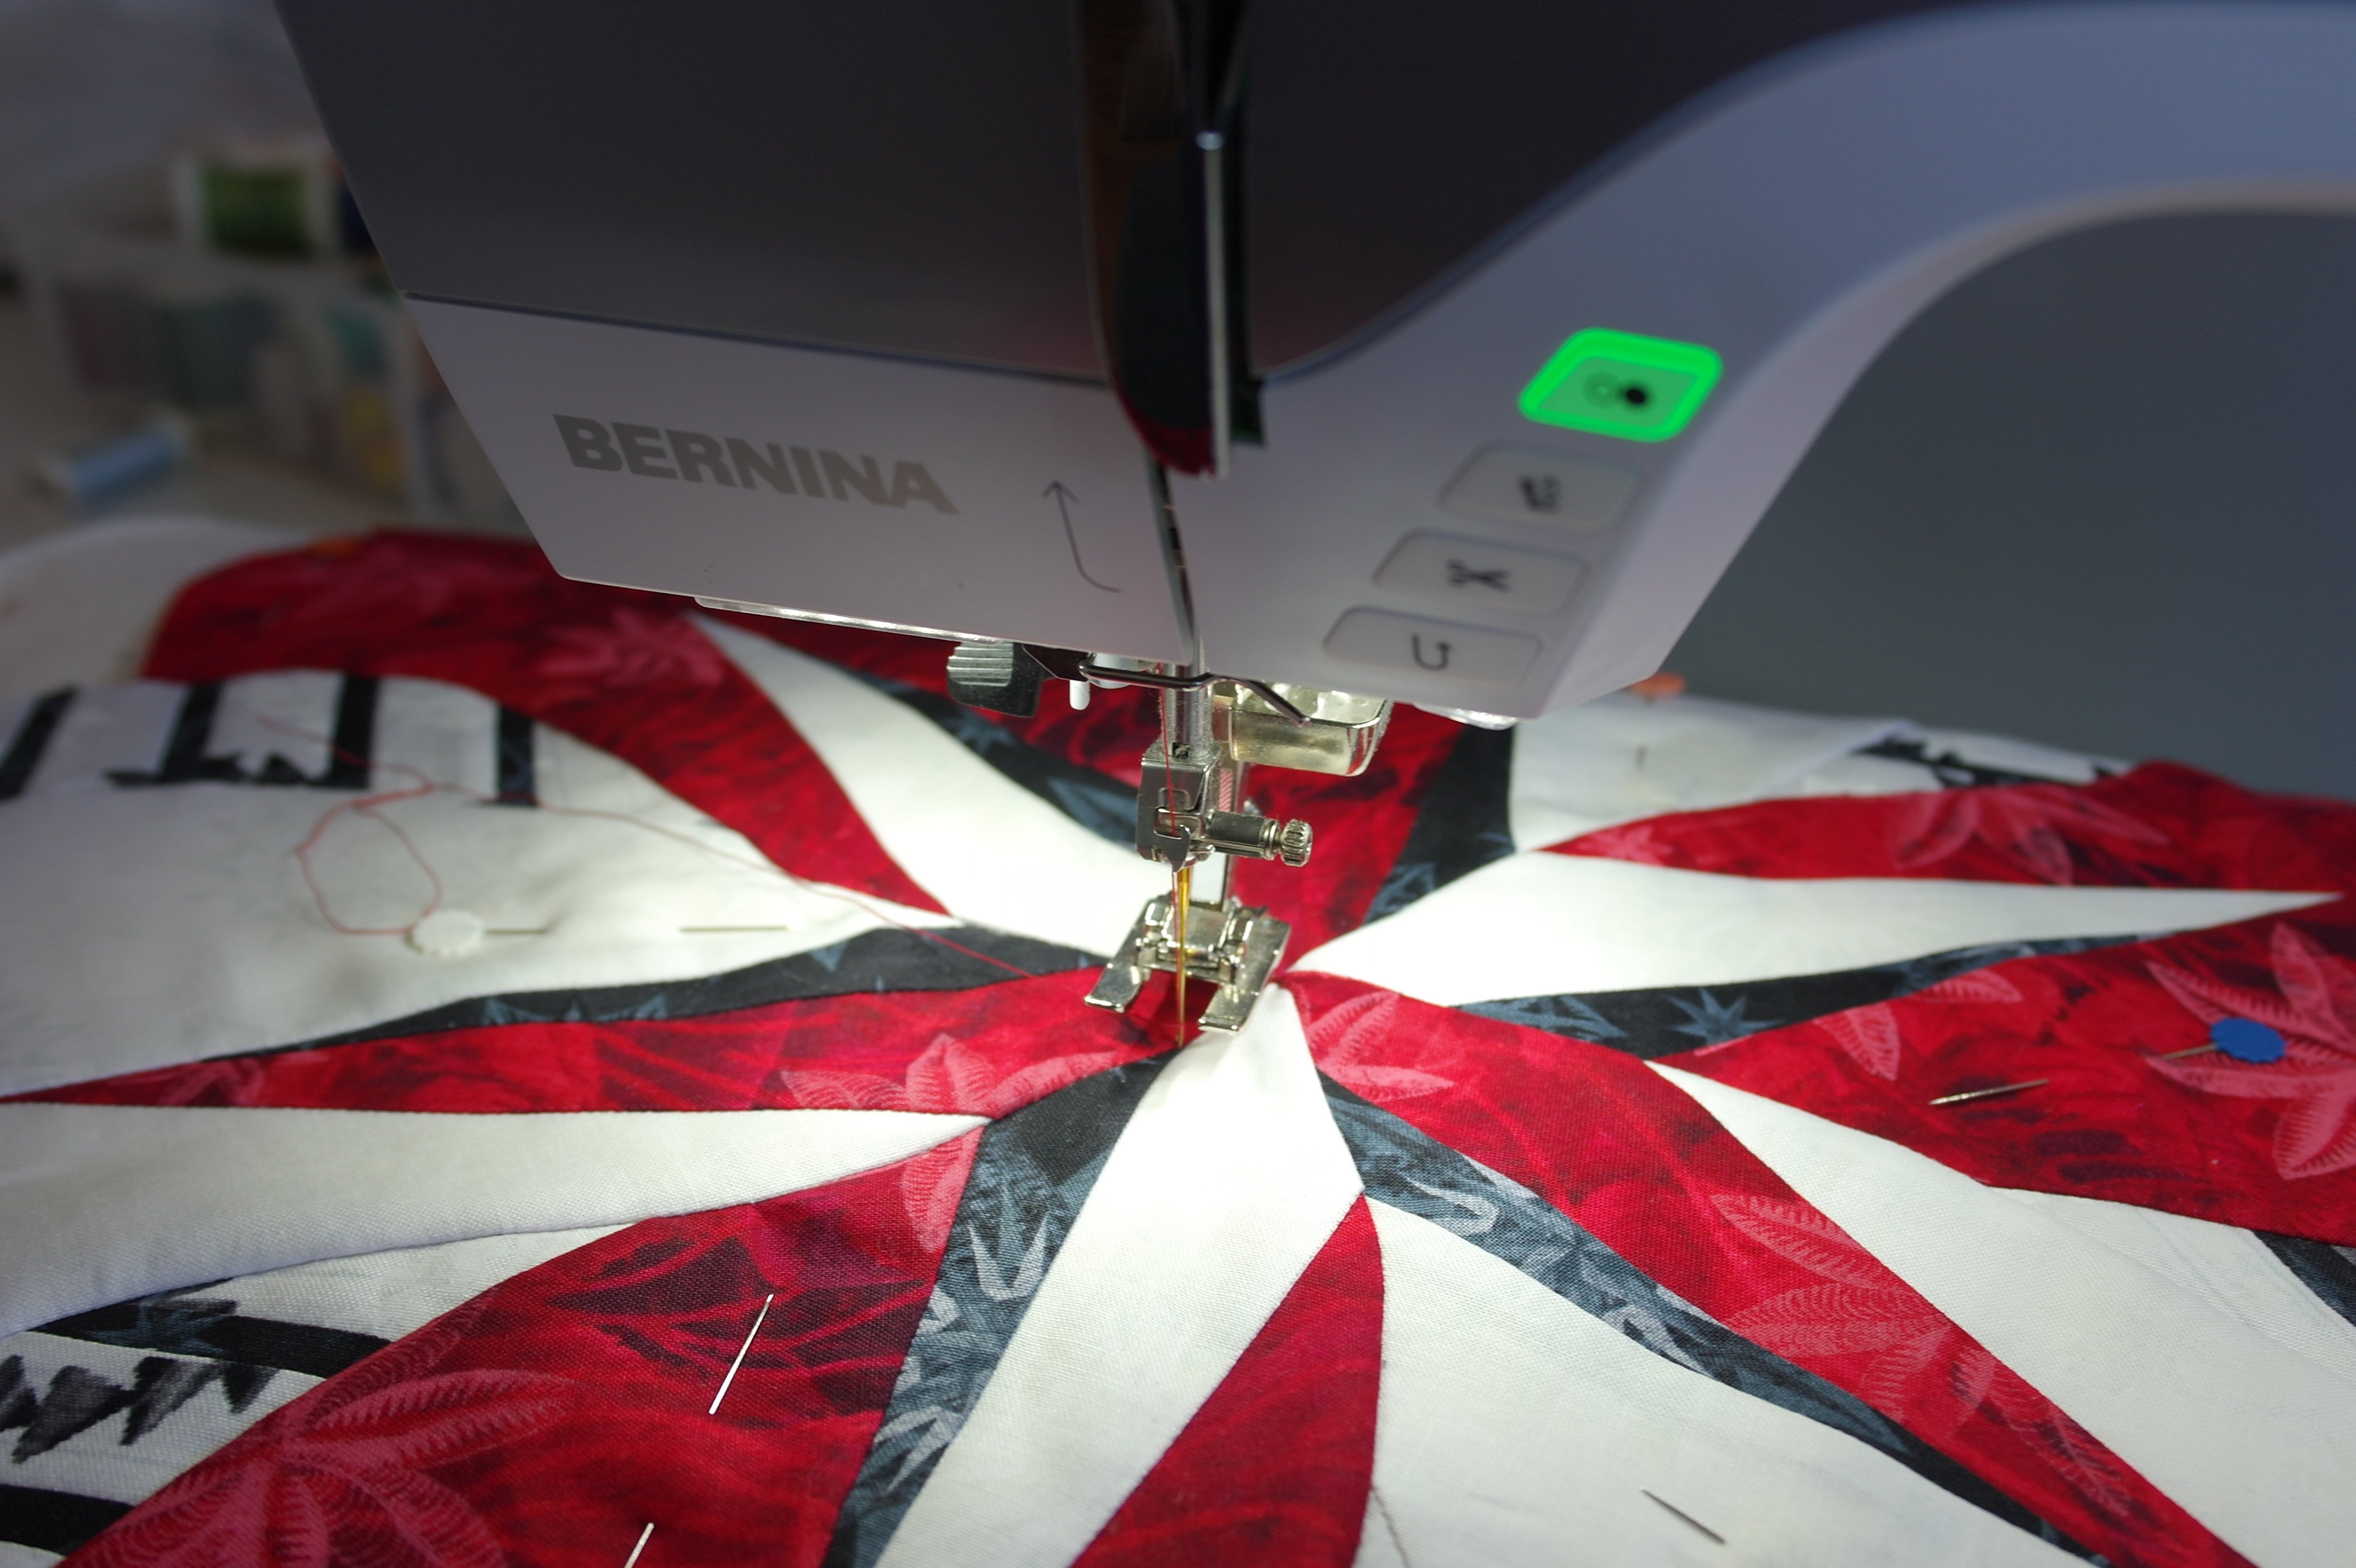
I will use presser foot #20C for making decorative stitches: I will work with red machine threads (top and bobbin).
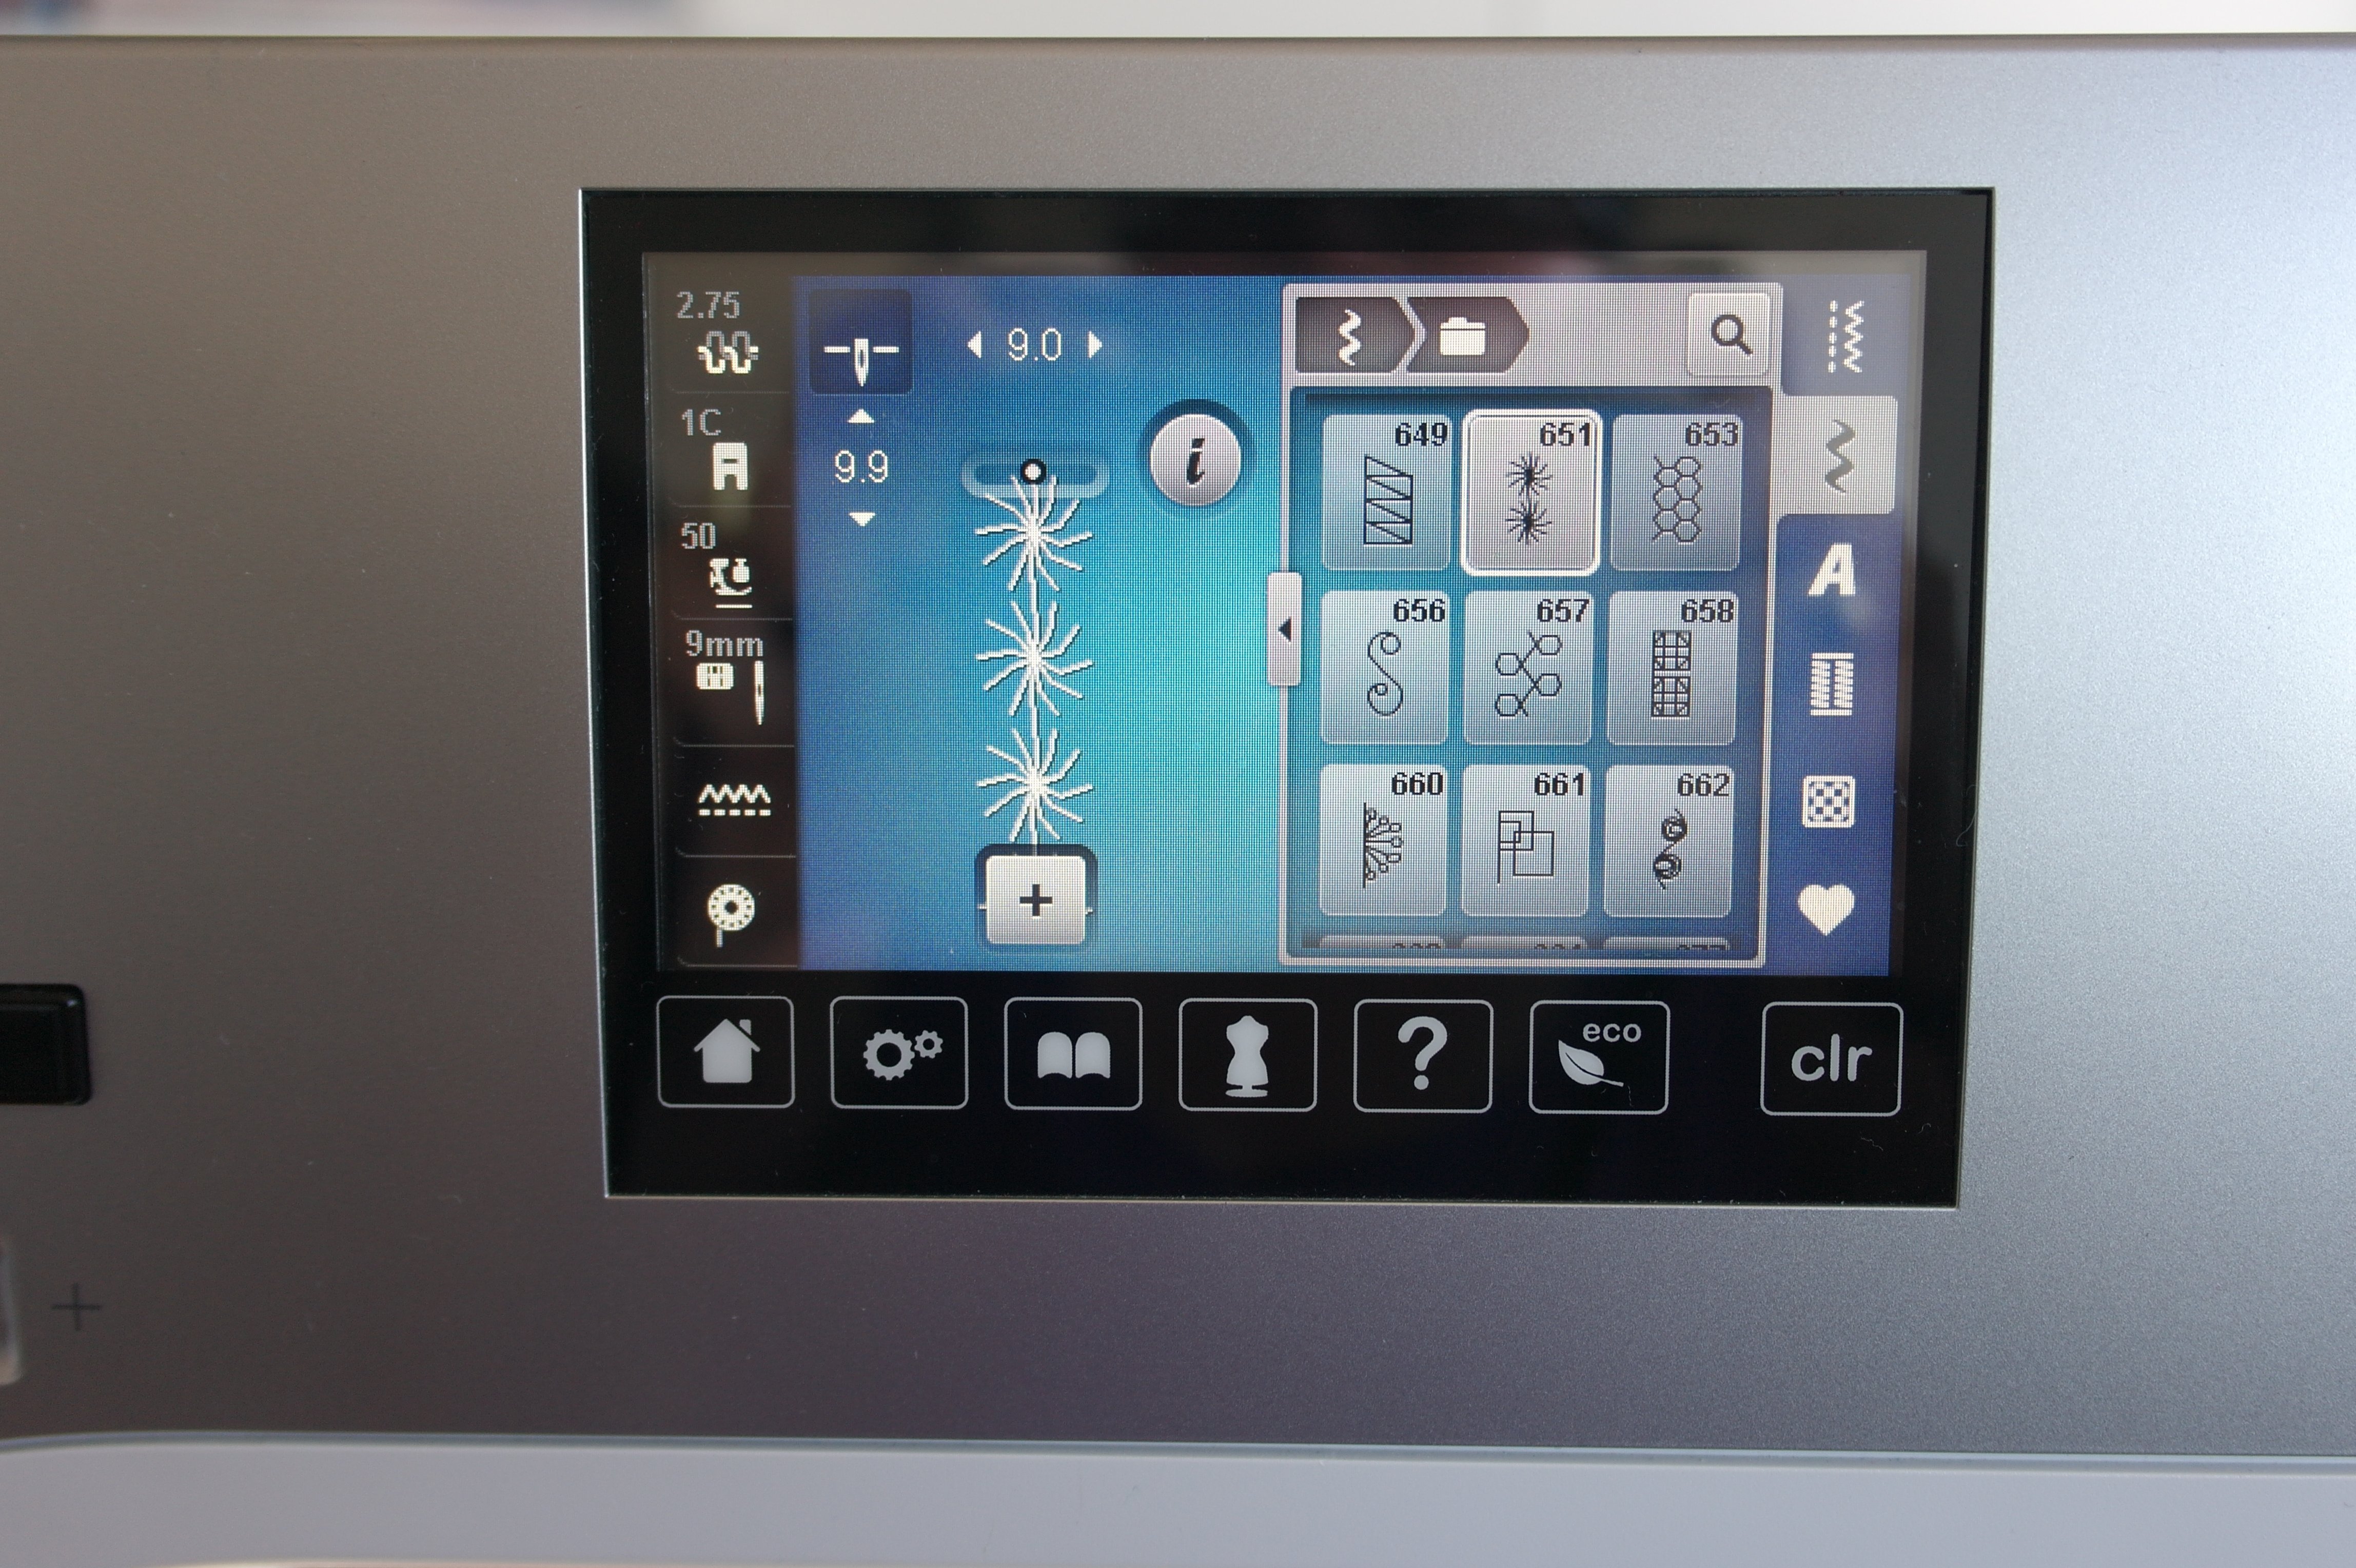
The first stitches no. 651 – I will make these on the seams of the shortest spikes first.

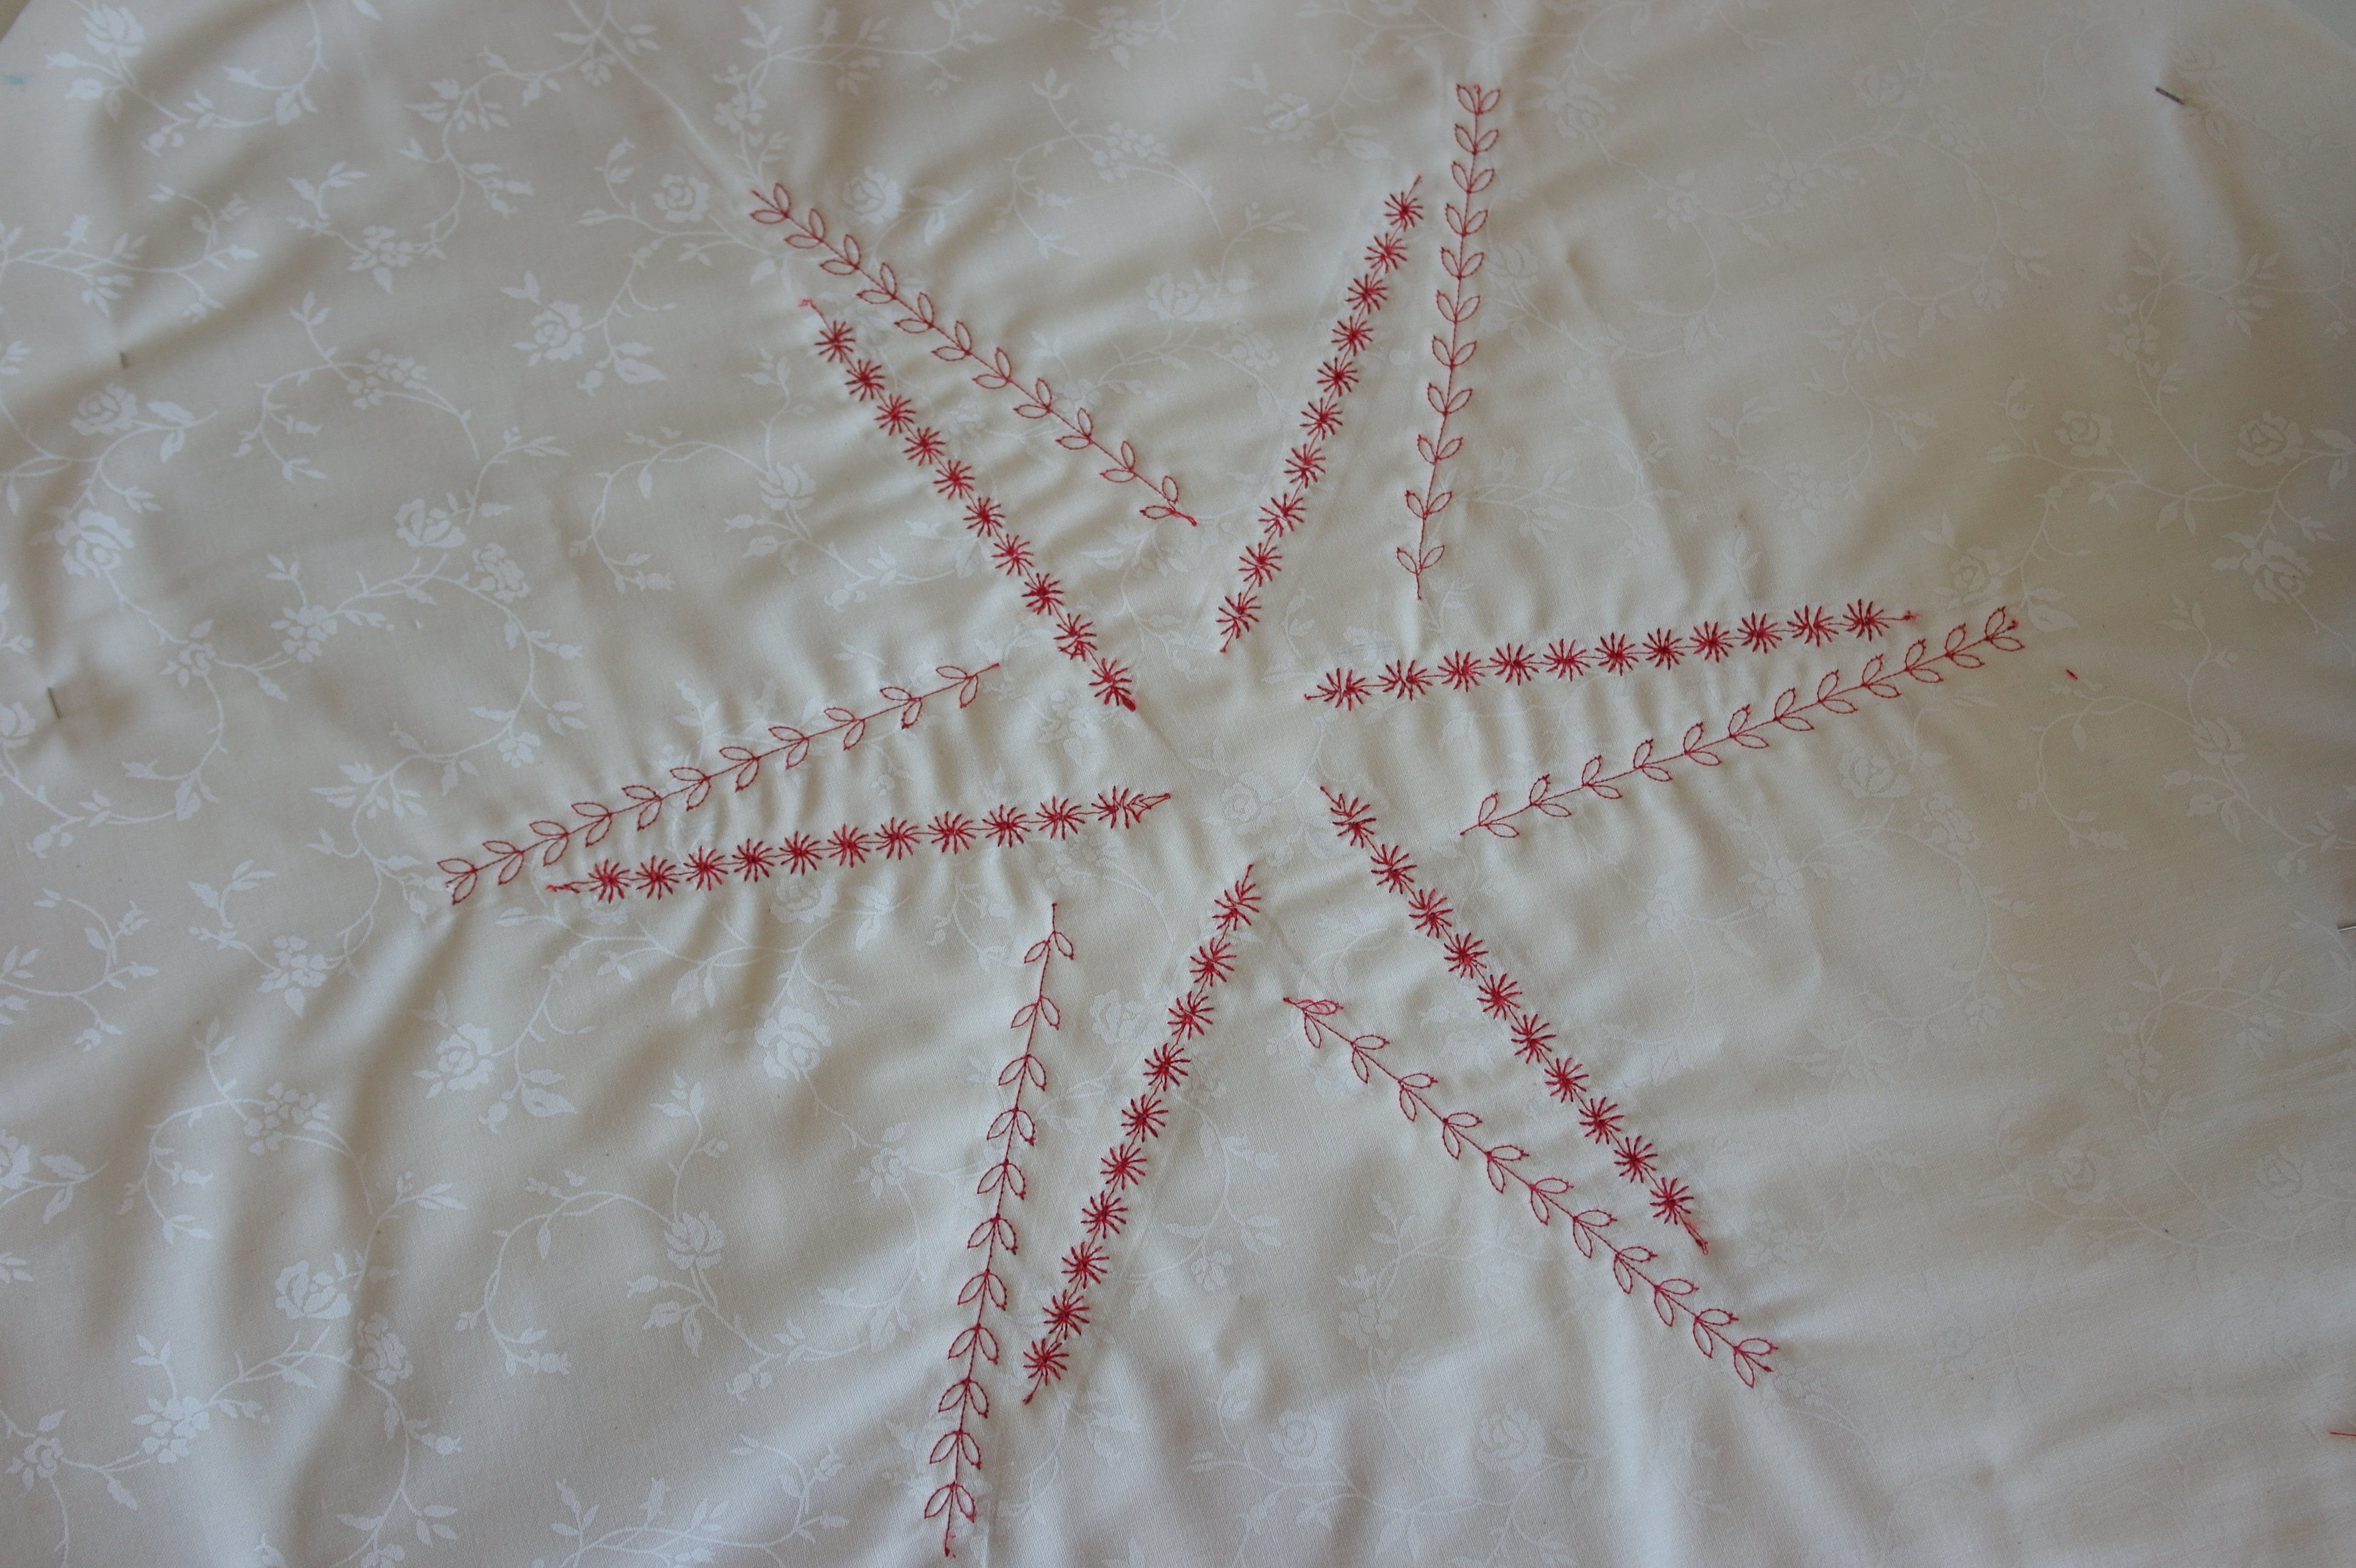
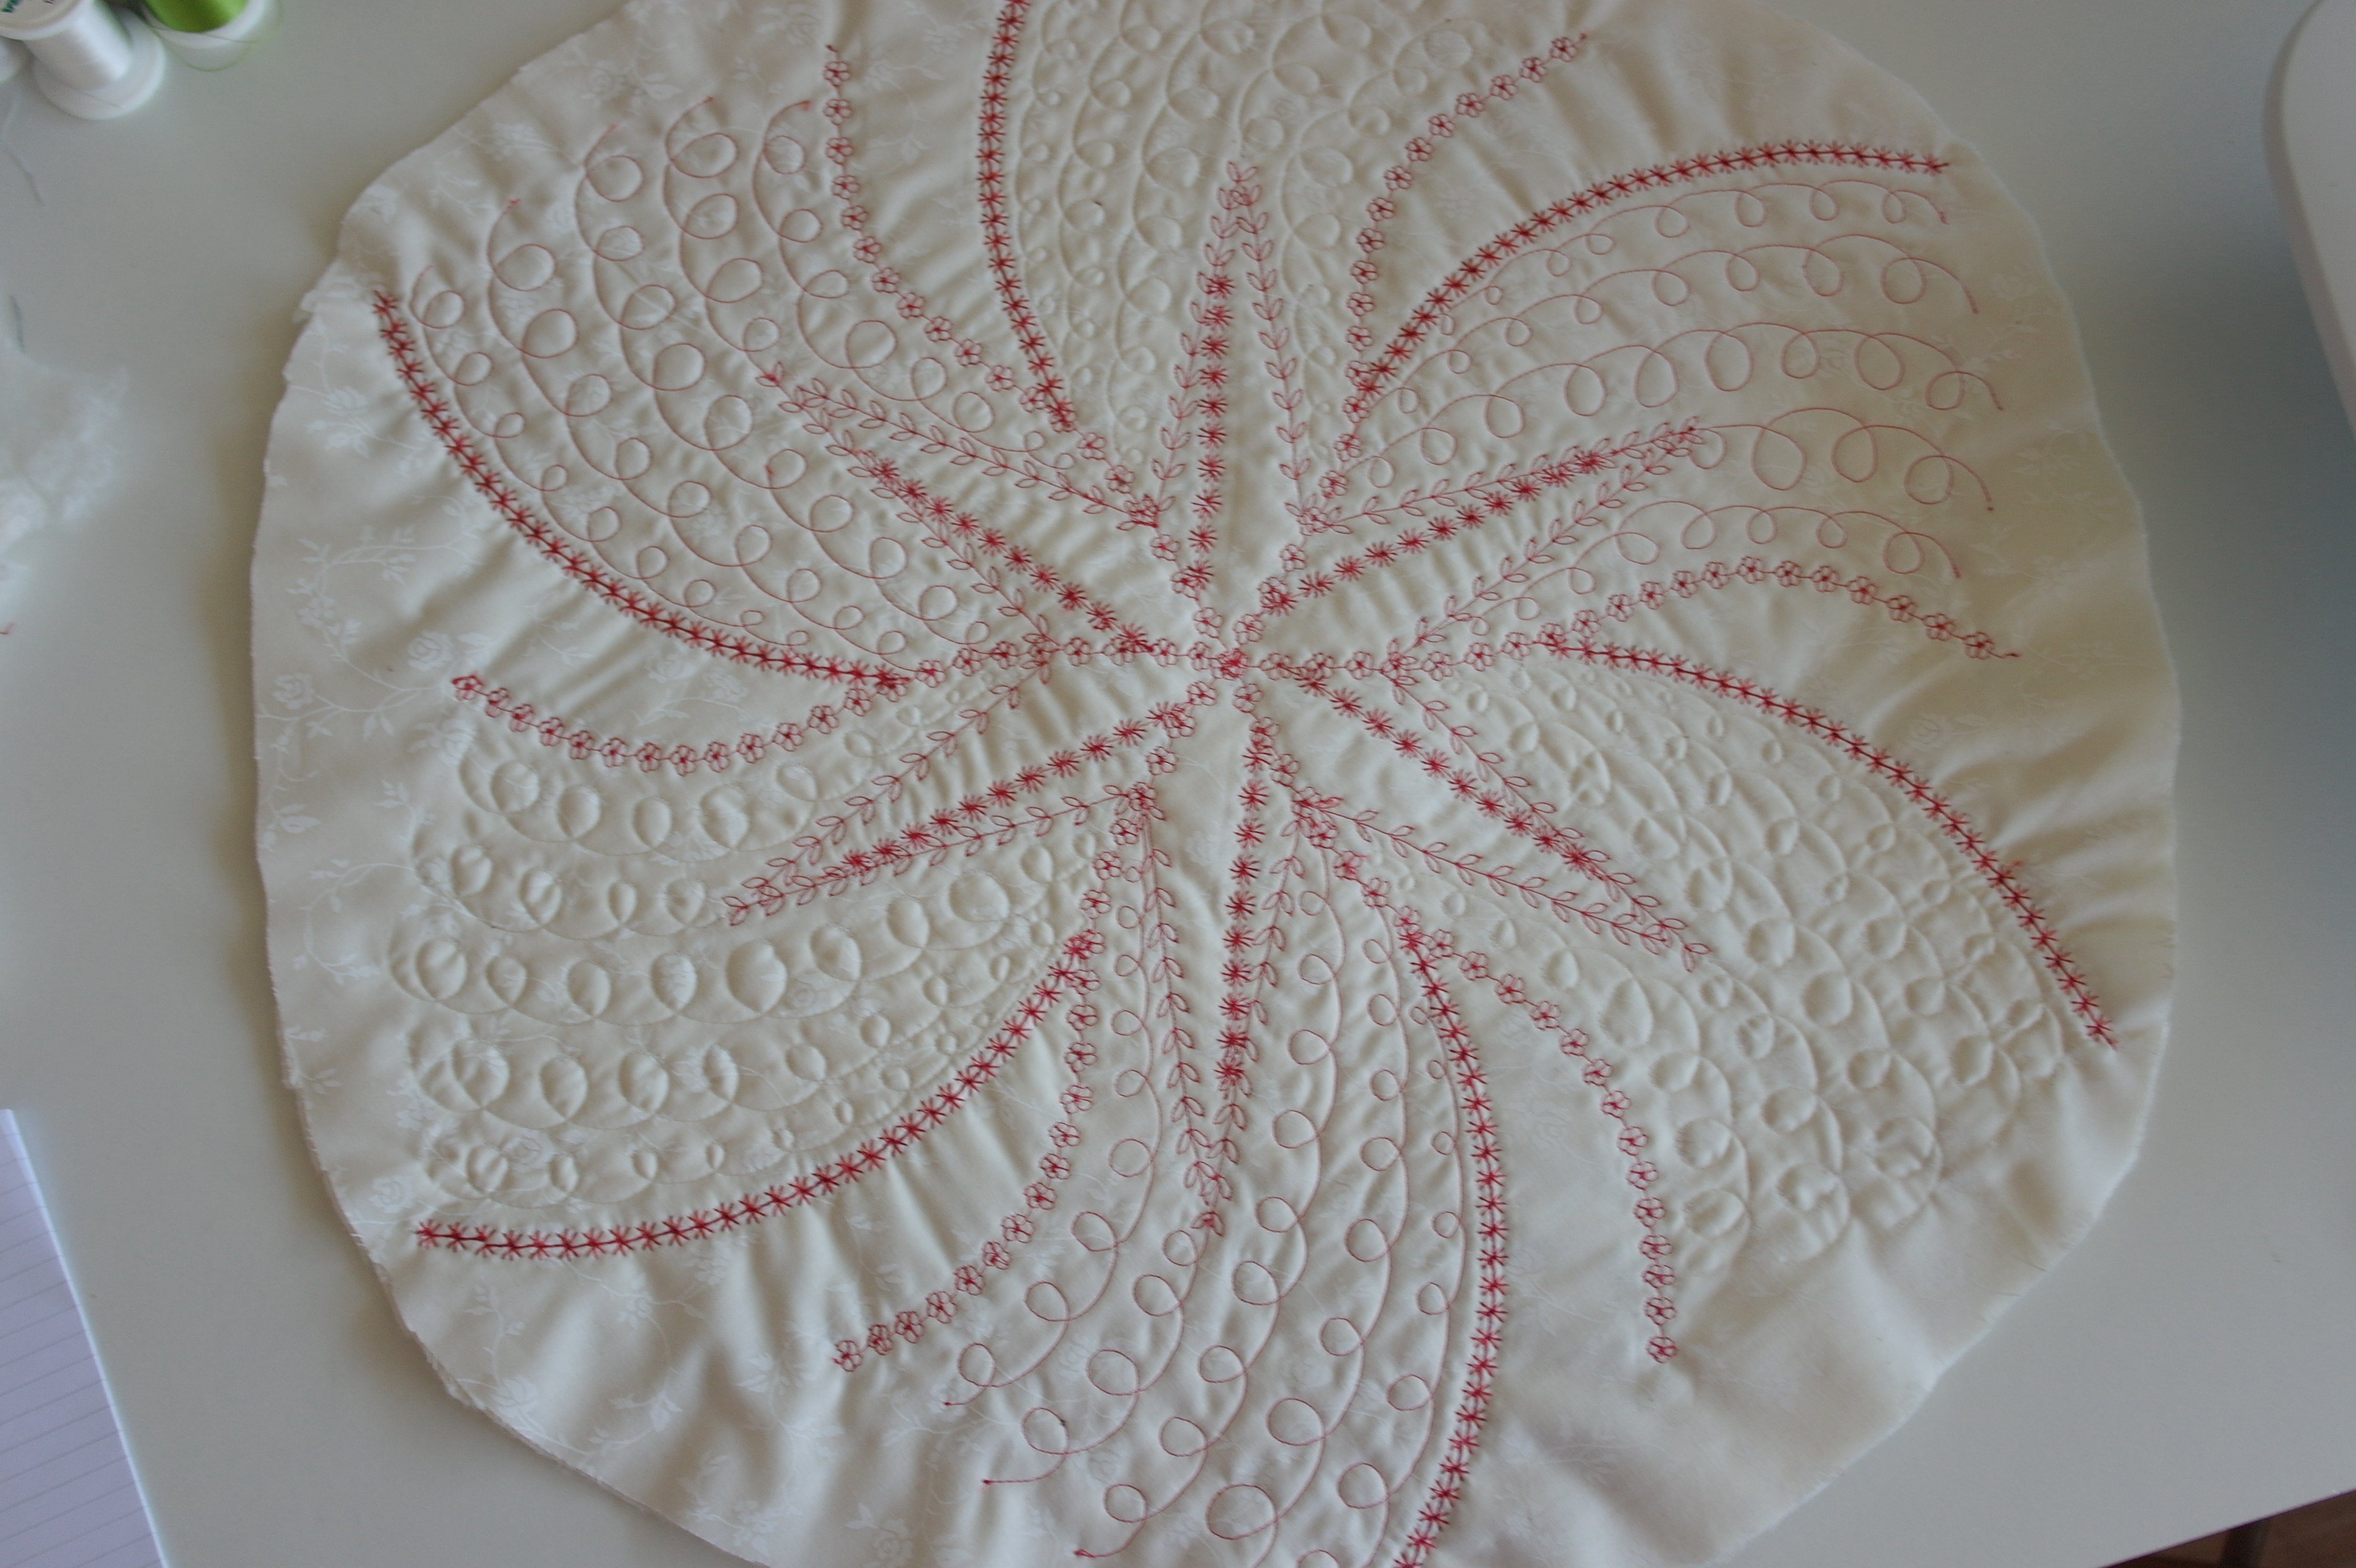
You can see the effect at the back, where I have the off-white fabric: the stitches really stand out.
The next stitches no. 137 – a star appears. It is fun to quilt like this! And yes, this is quilting too, because I am working on a sandwich.

It is important to be sure that your stitch is centered at a seam: this is easy with straight seams, but more difficult with curved seams. The presserfoot gives me a great view to make the stitches. I just have to work slowly.
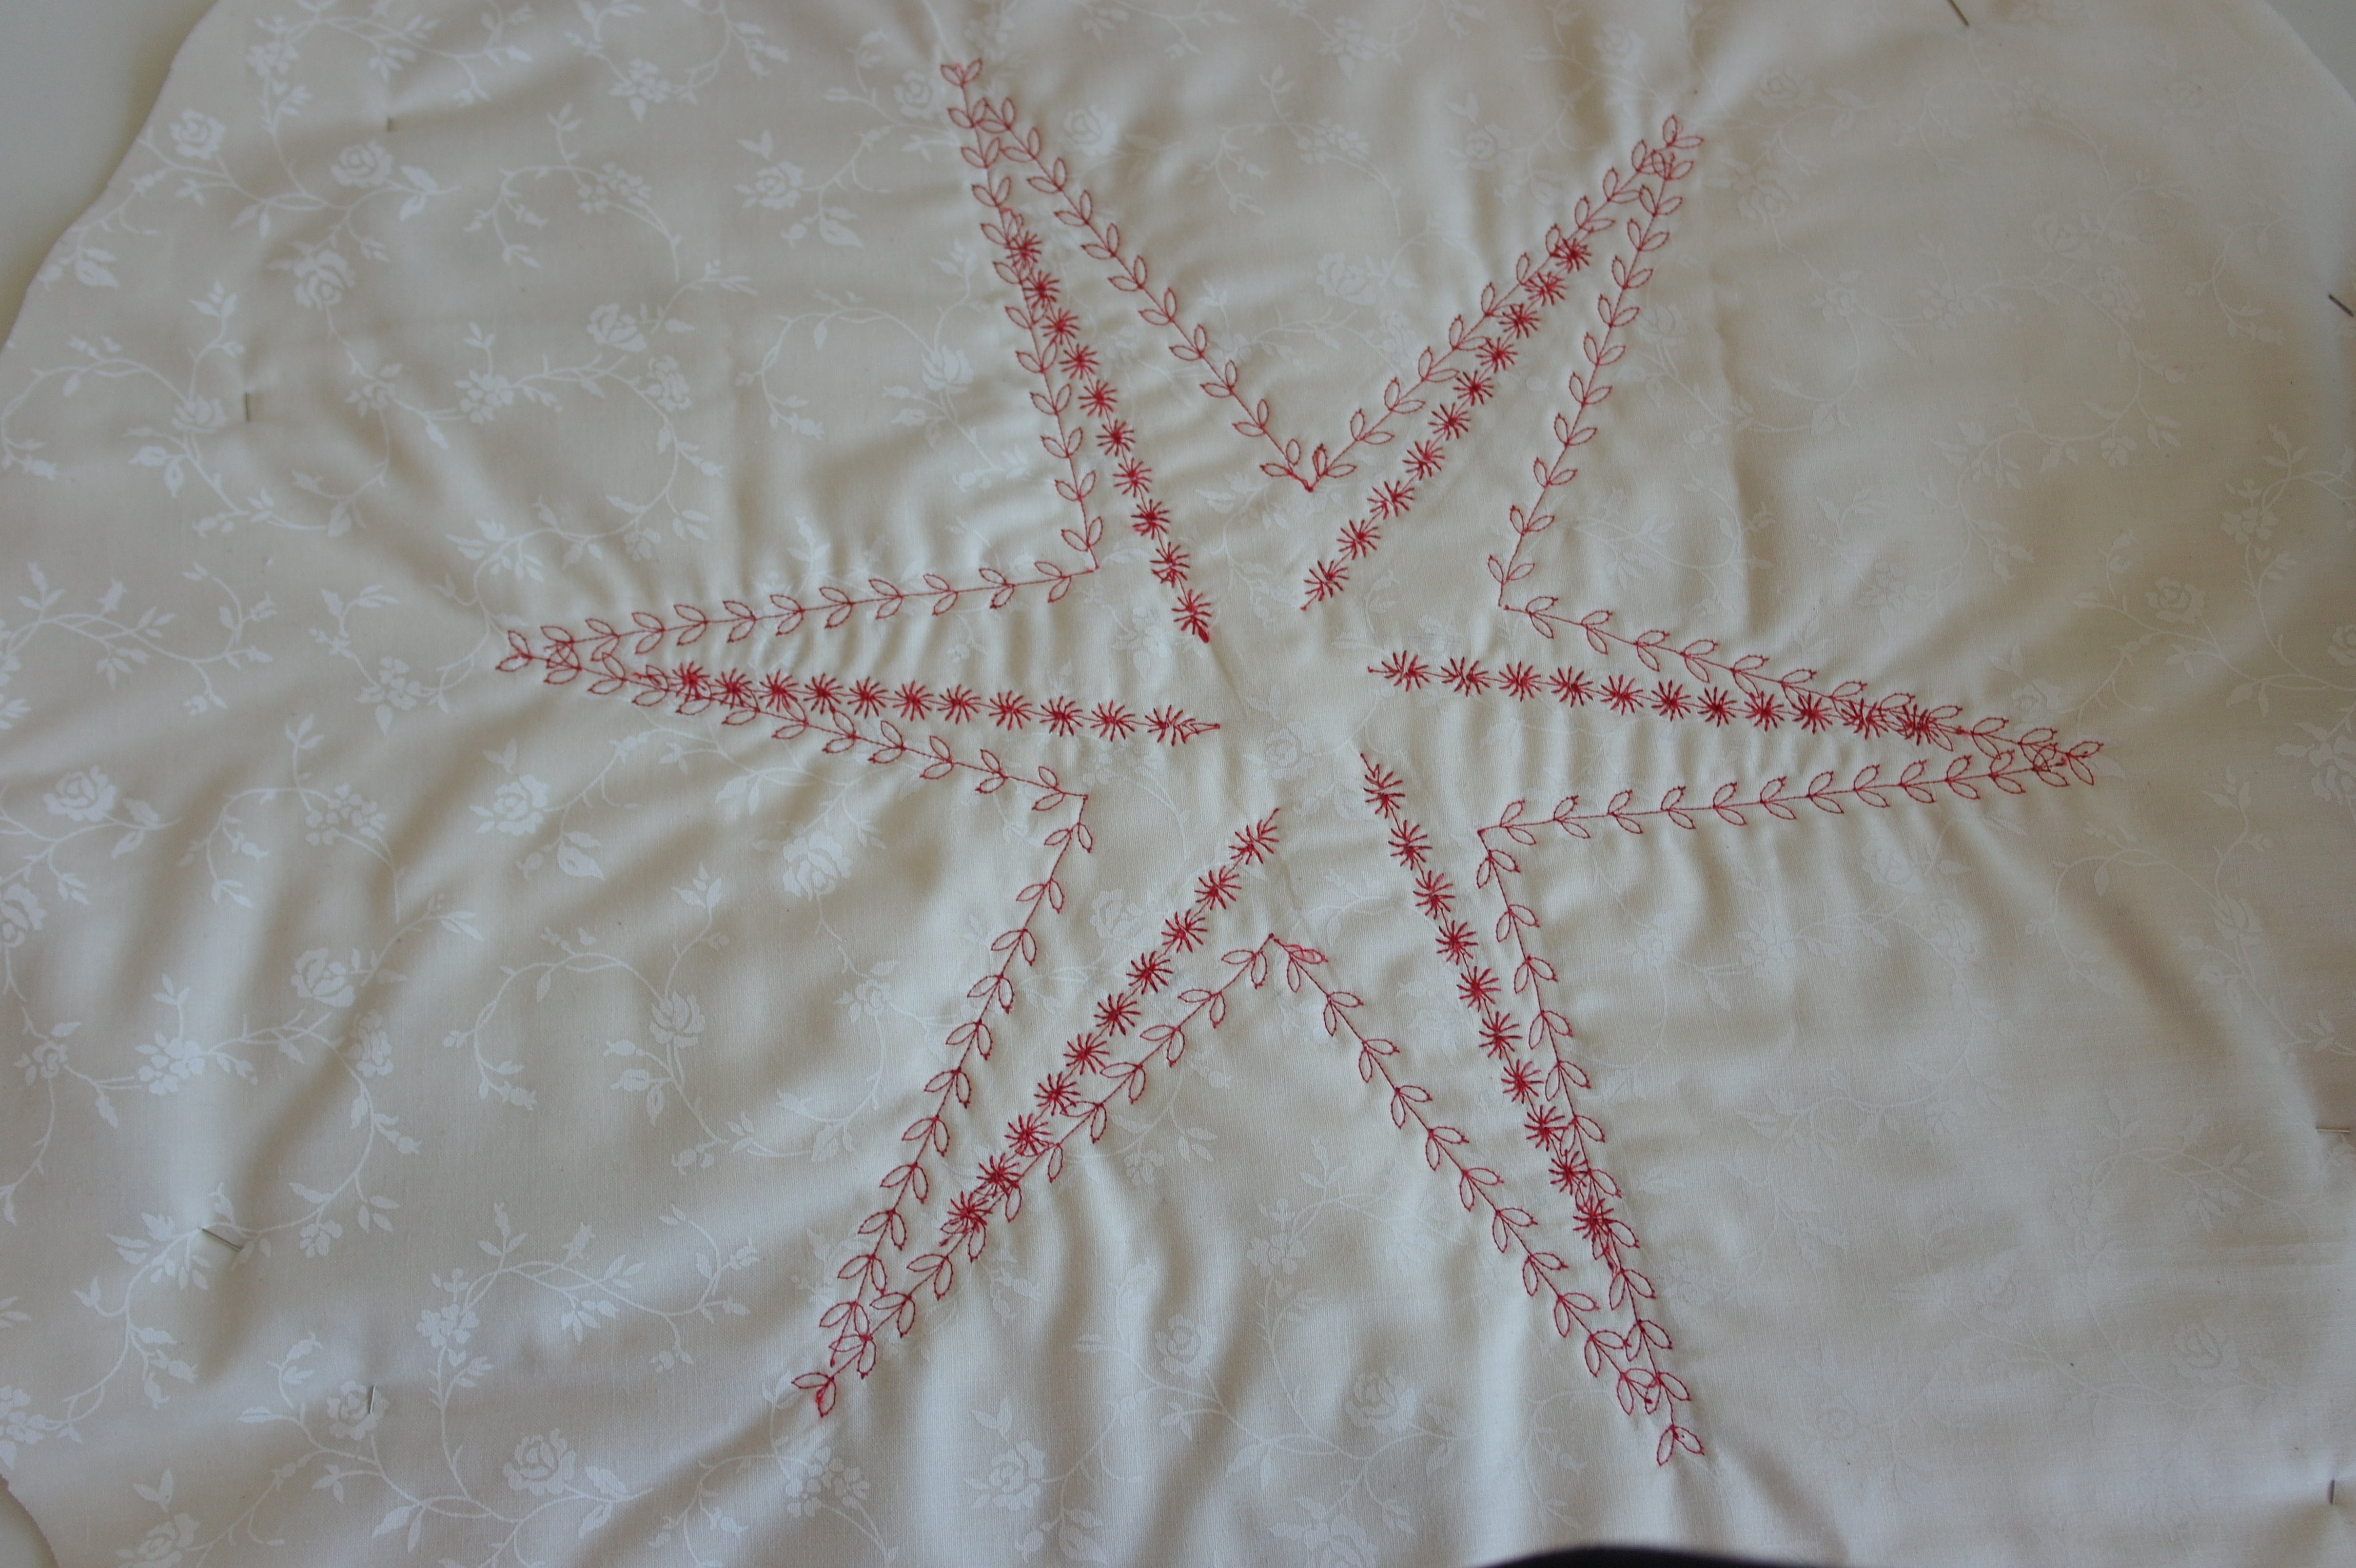
And the back shows the star, which is growing after adding more decorative stitches.
This is how those stitches appear on top: they will not stand out that much on the red fabrics, but they do stand out on the whites..
For the next seams I will use stitches no. 711. These seams are curved, so I have to work slowly. I always try stitches on a sample first, just to know how they are made. This way I know when to turn or follow a curve, before I am working on my sandwich.
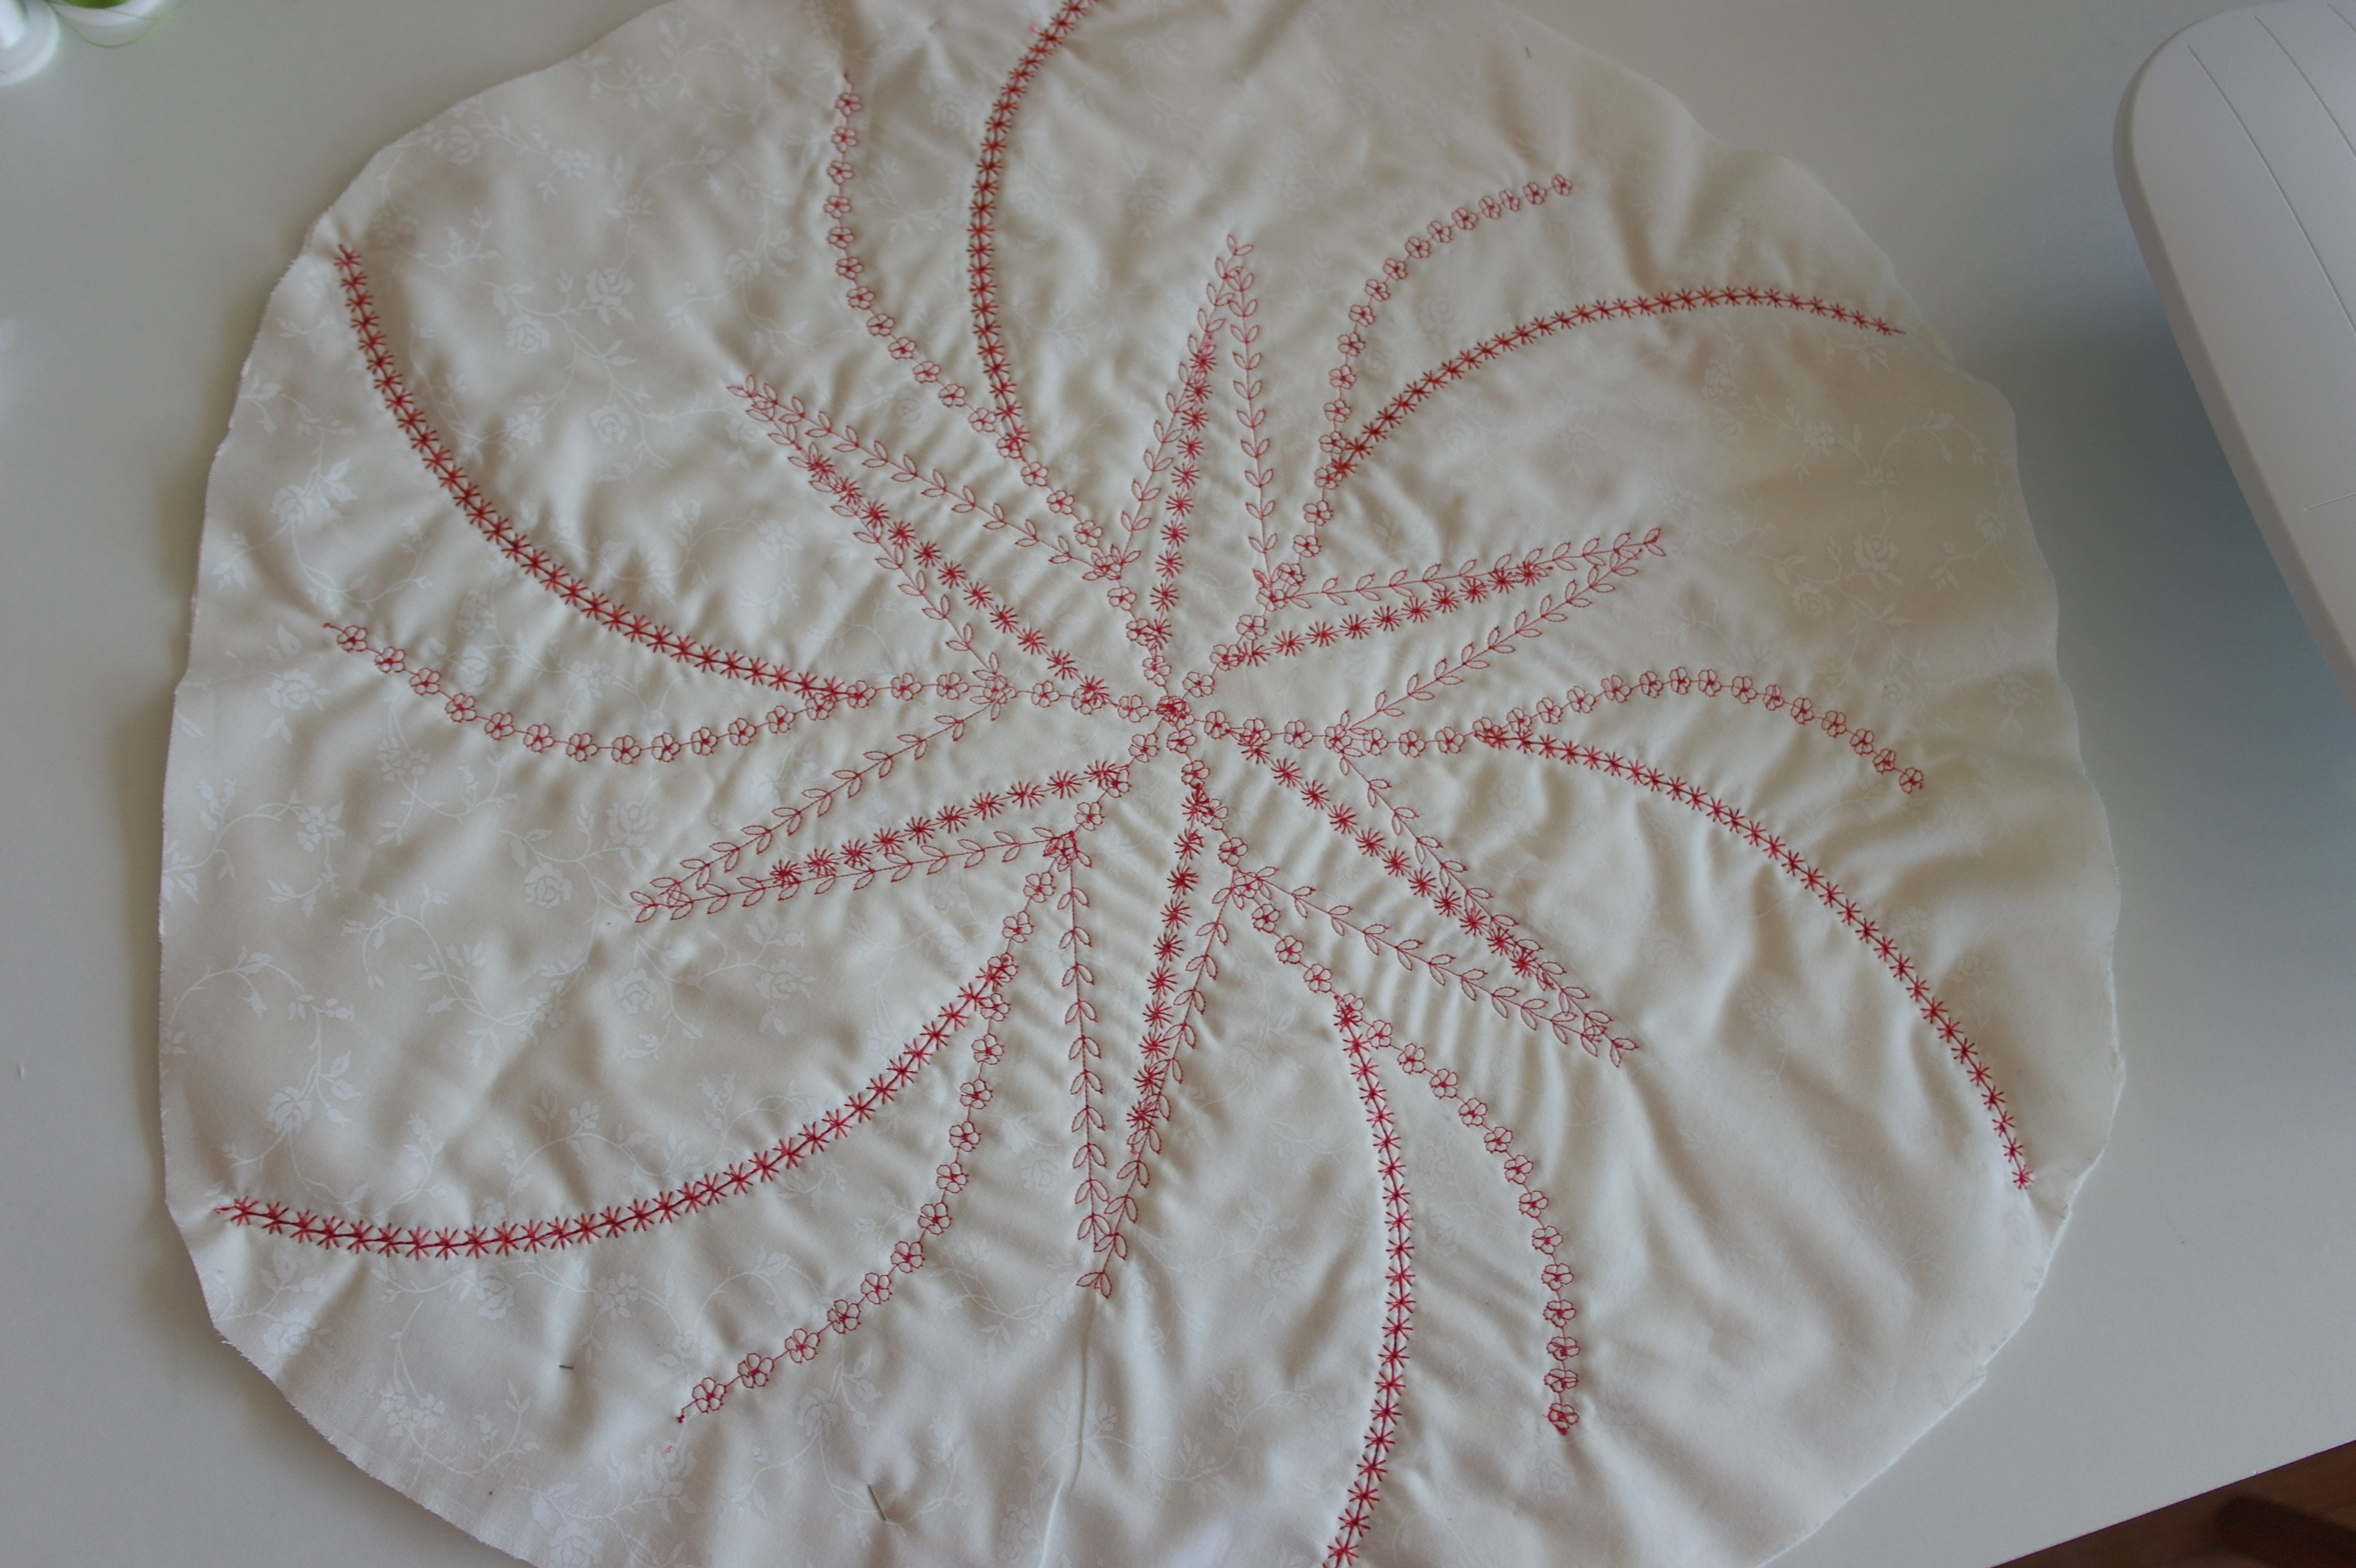
And the last stitches no. 102 are made: this is fun, to quilt with decorative stitches – something different…
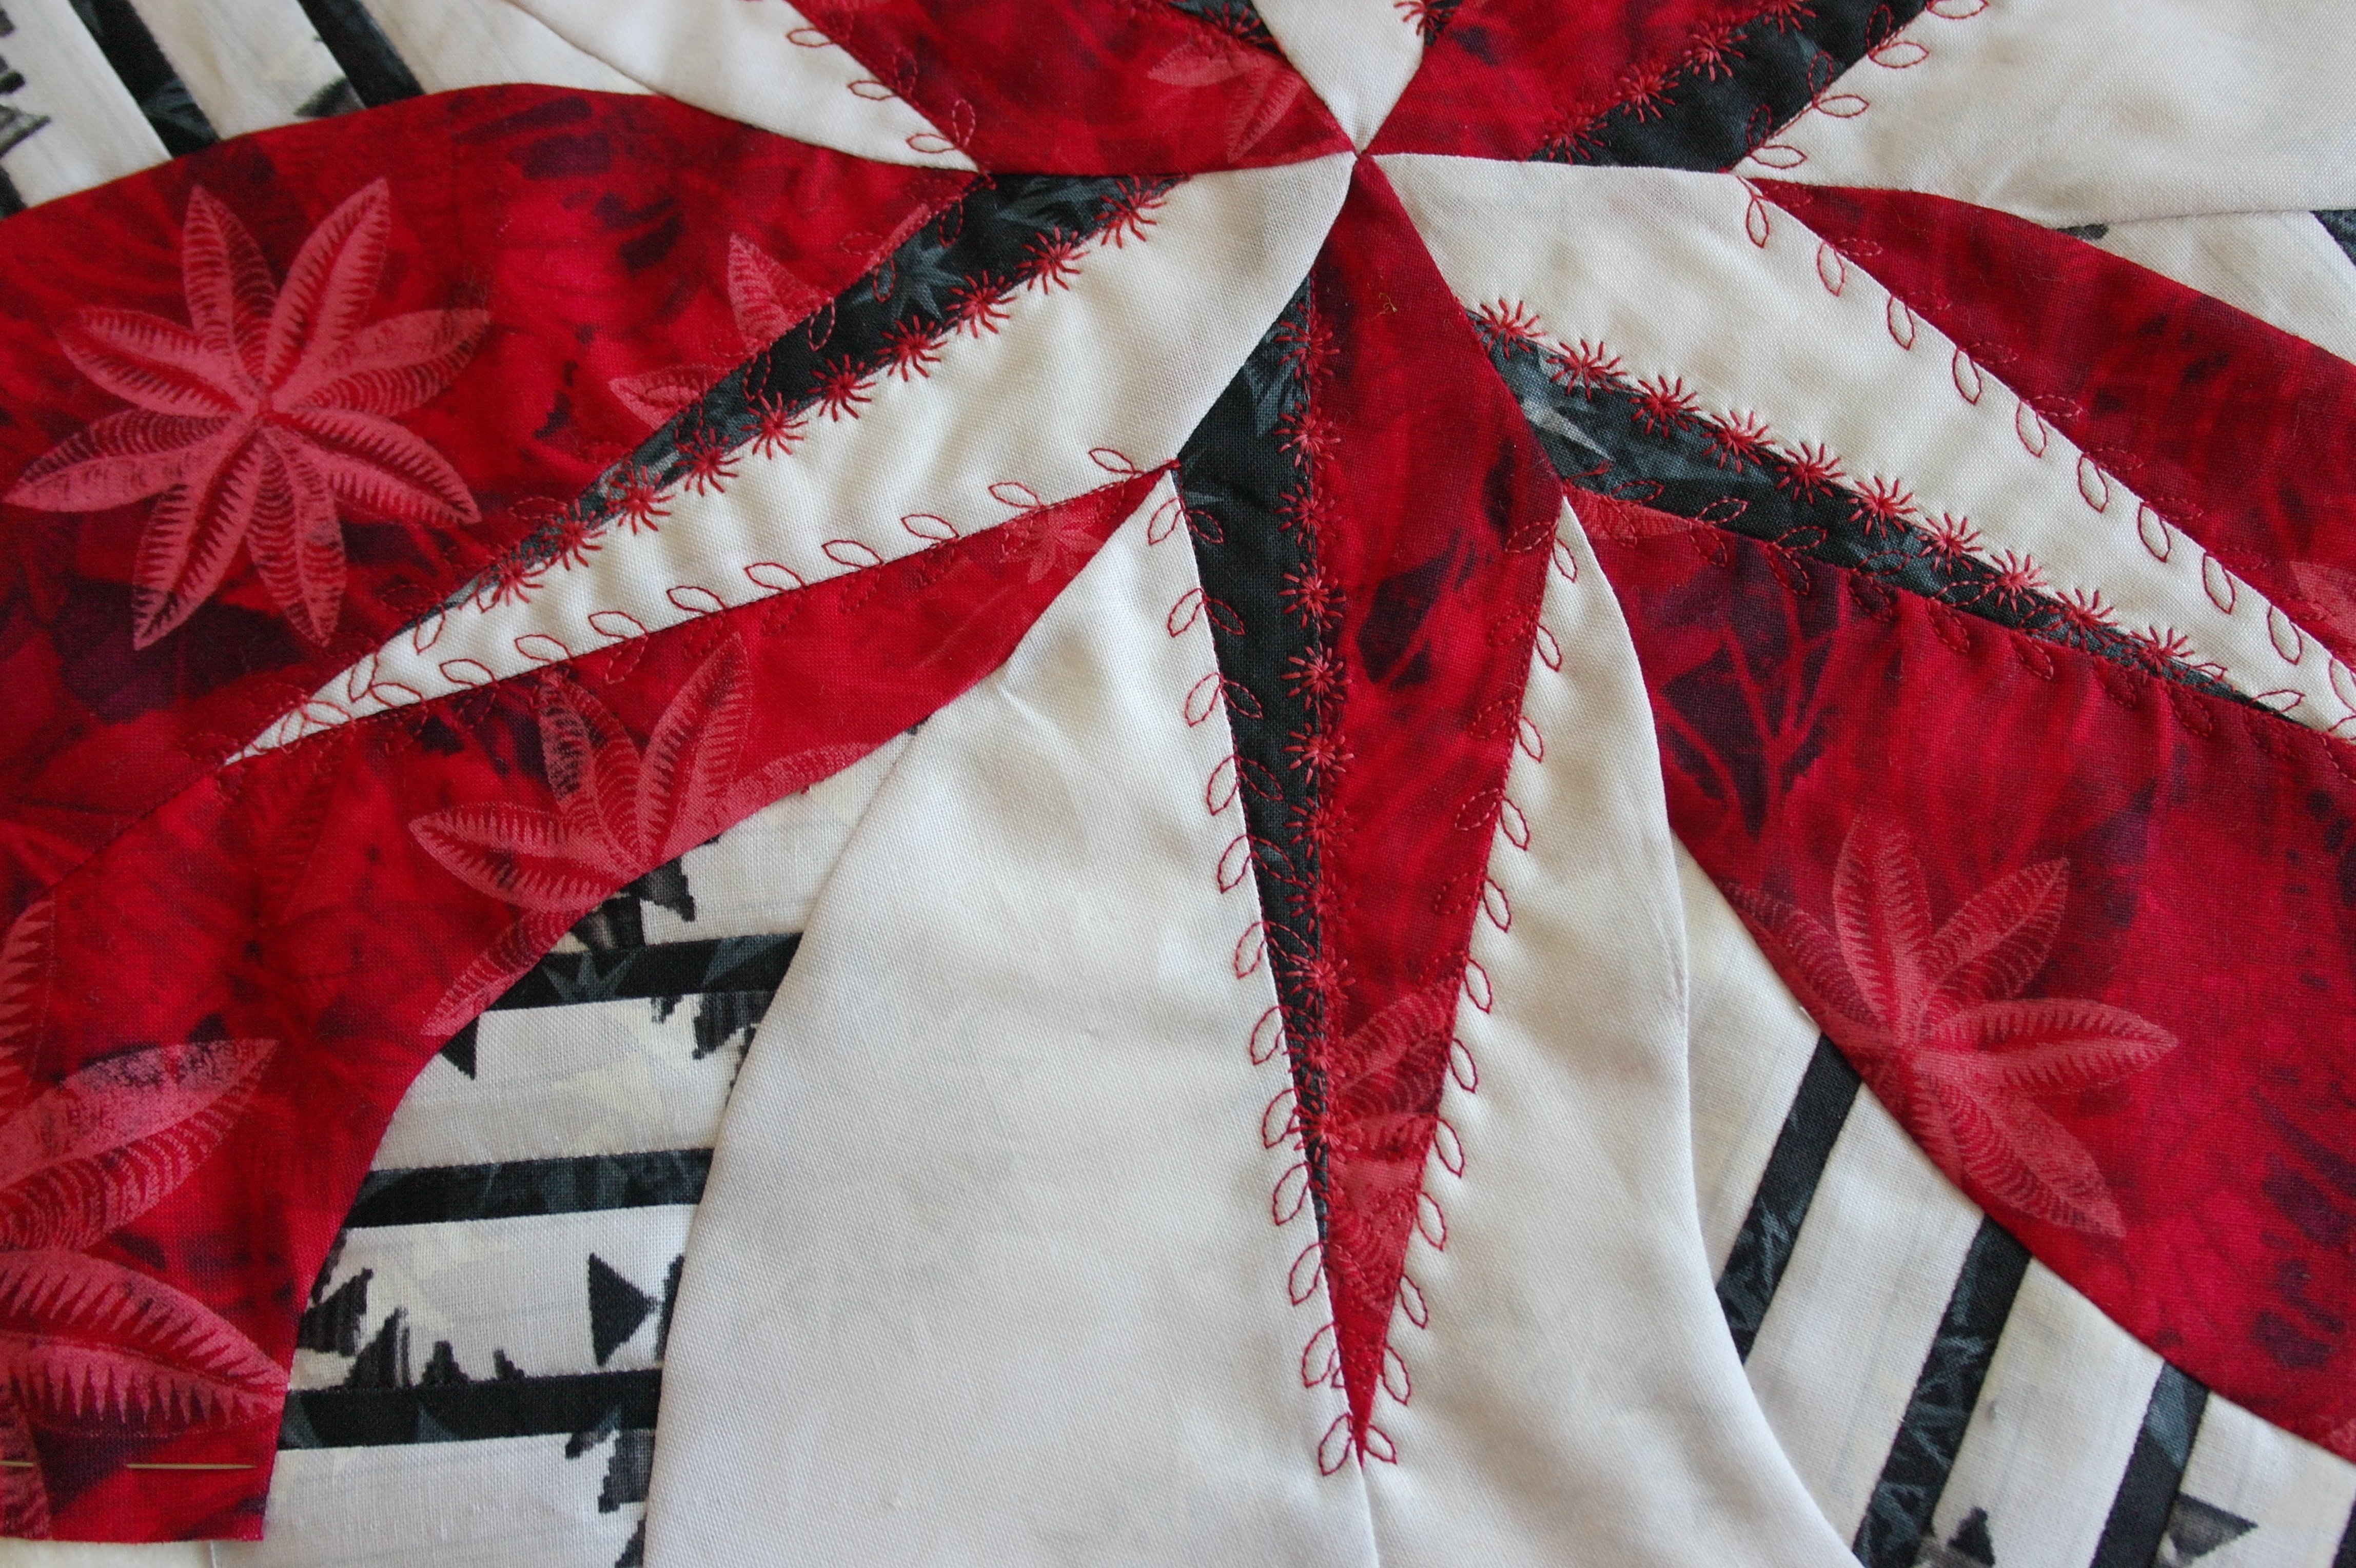
I have free-motion quilted the large white and red areas with the petals – white on white and red on red. I have used embroidery foot #26, lowered the feed dogs and quilted simple curls.

A detail with decorative stitches and free-motion quilting.
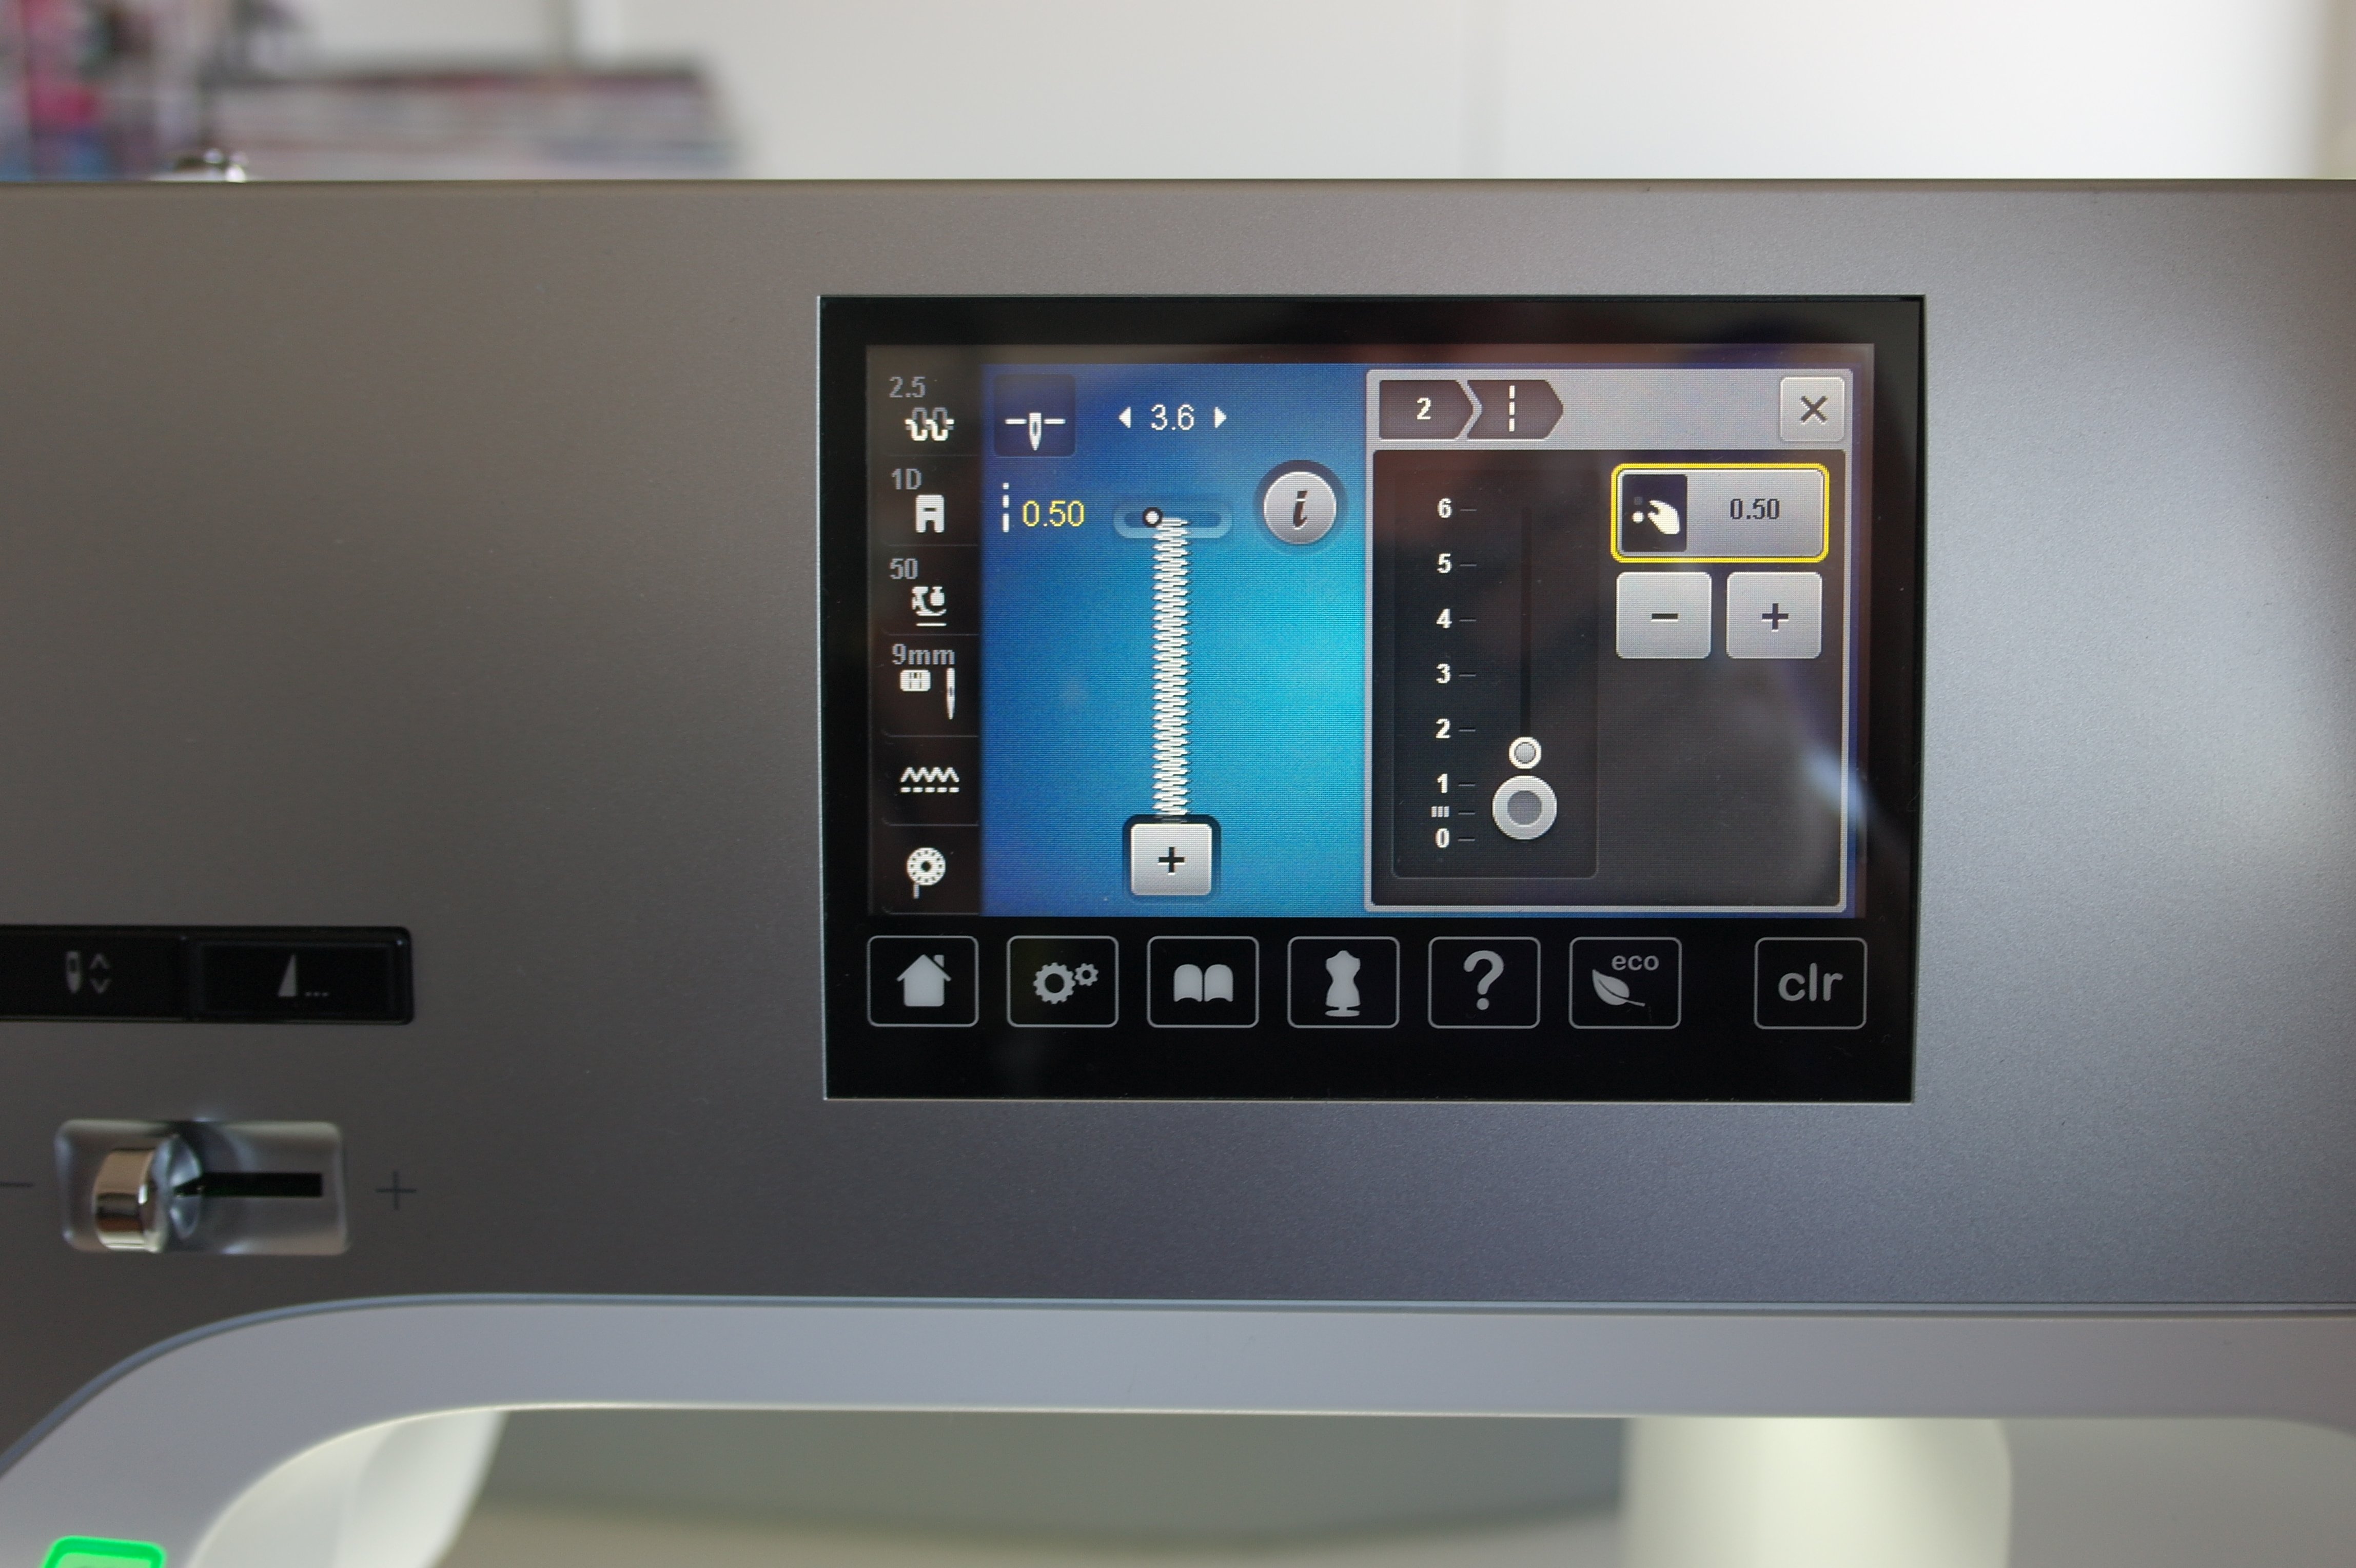
I will not bind the sides the usual way, but zigzag through all layers along the edges, just to do something different. I choose a zigzag stitch, made it dense (0.50) and left the width at 3.6mm for the first round. A went over this border a second time, and made the zigzag stitches 5.0mm wide. I have used presser foot #97D with dual transport.
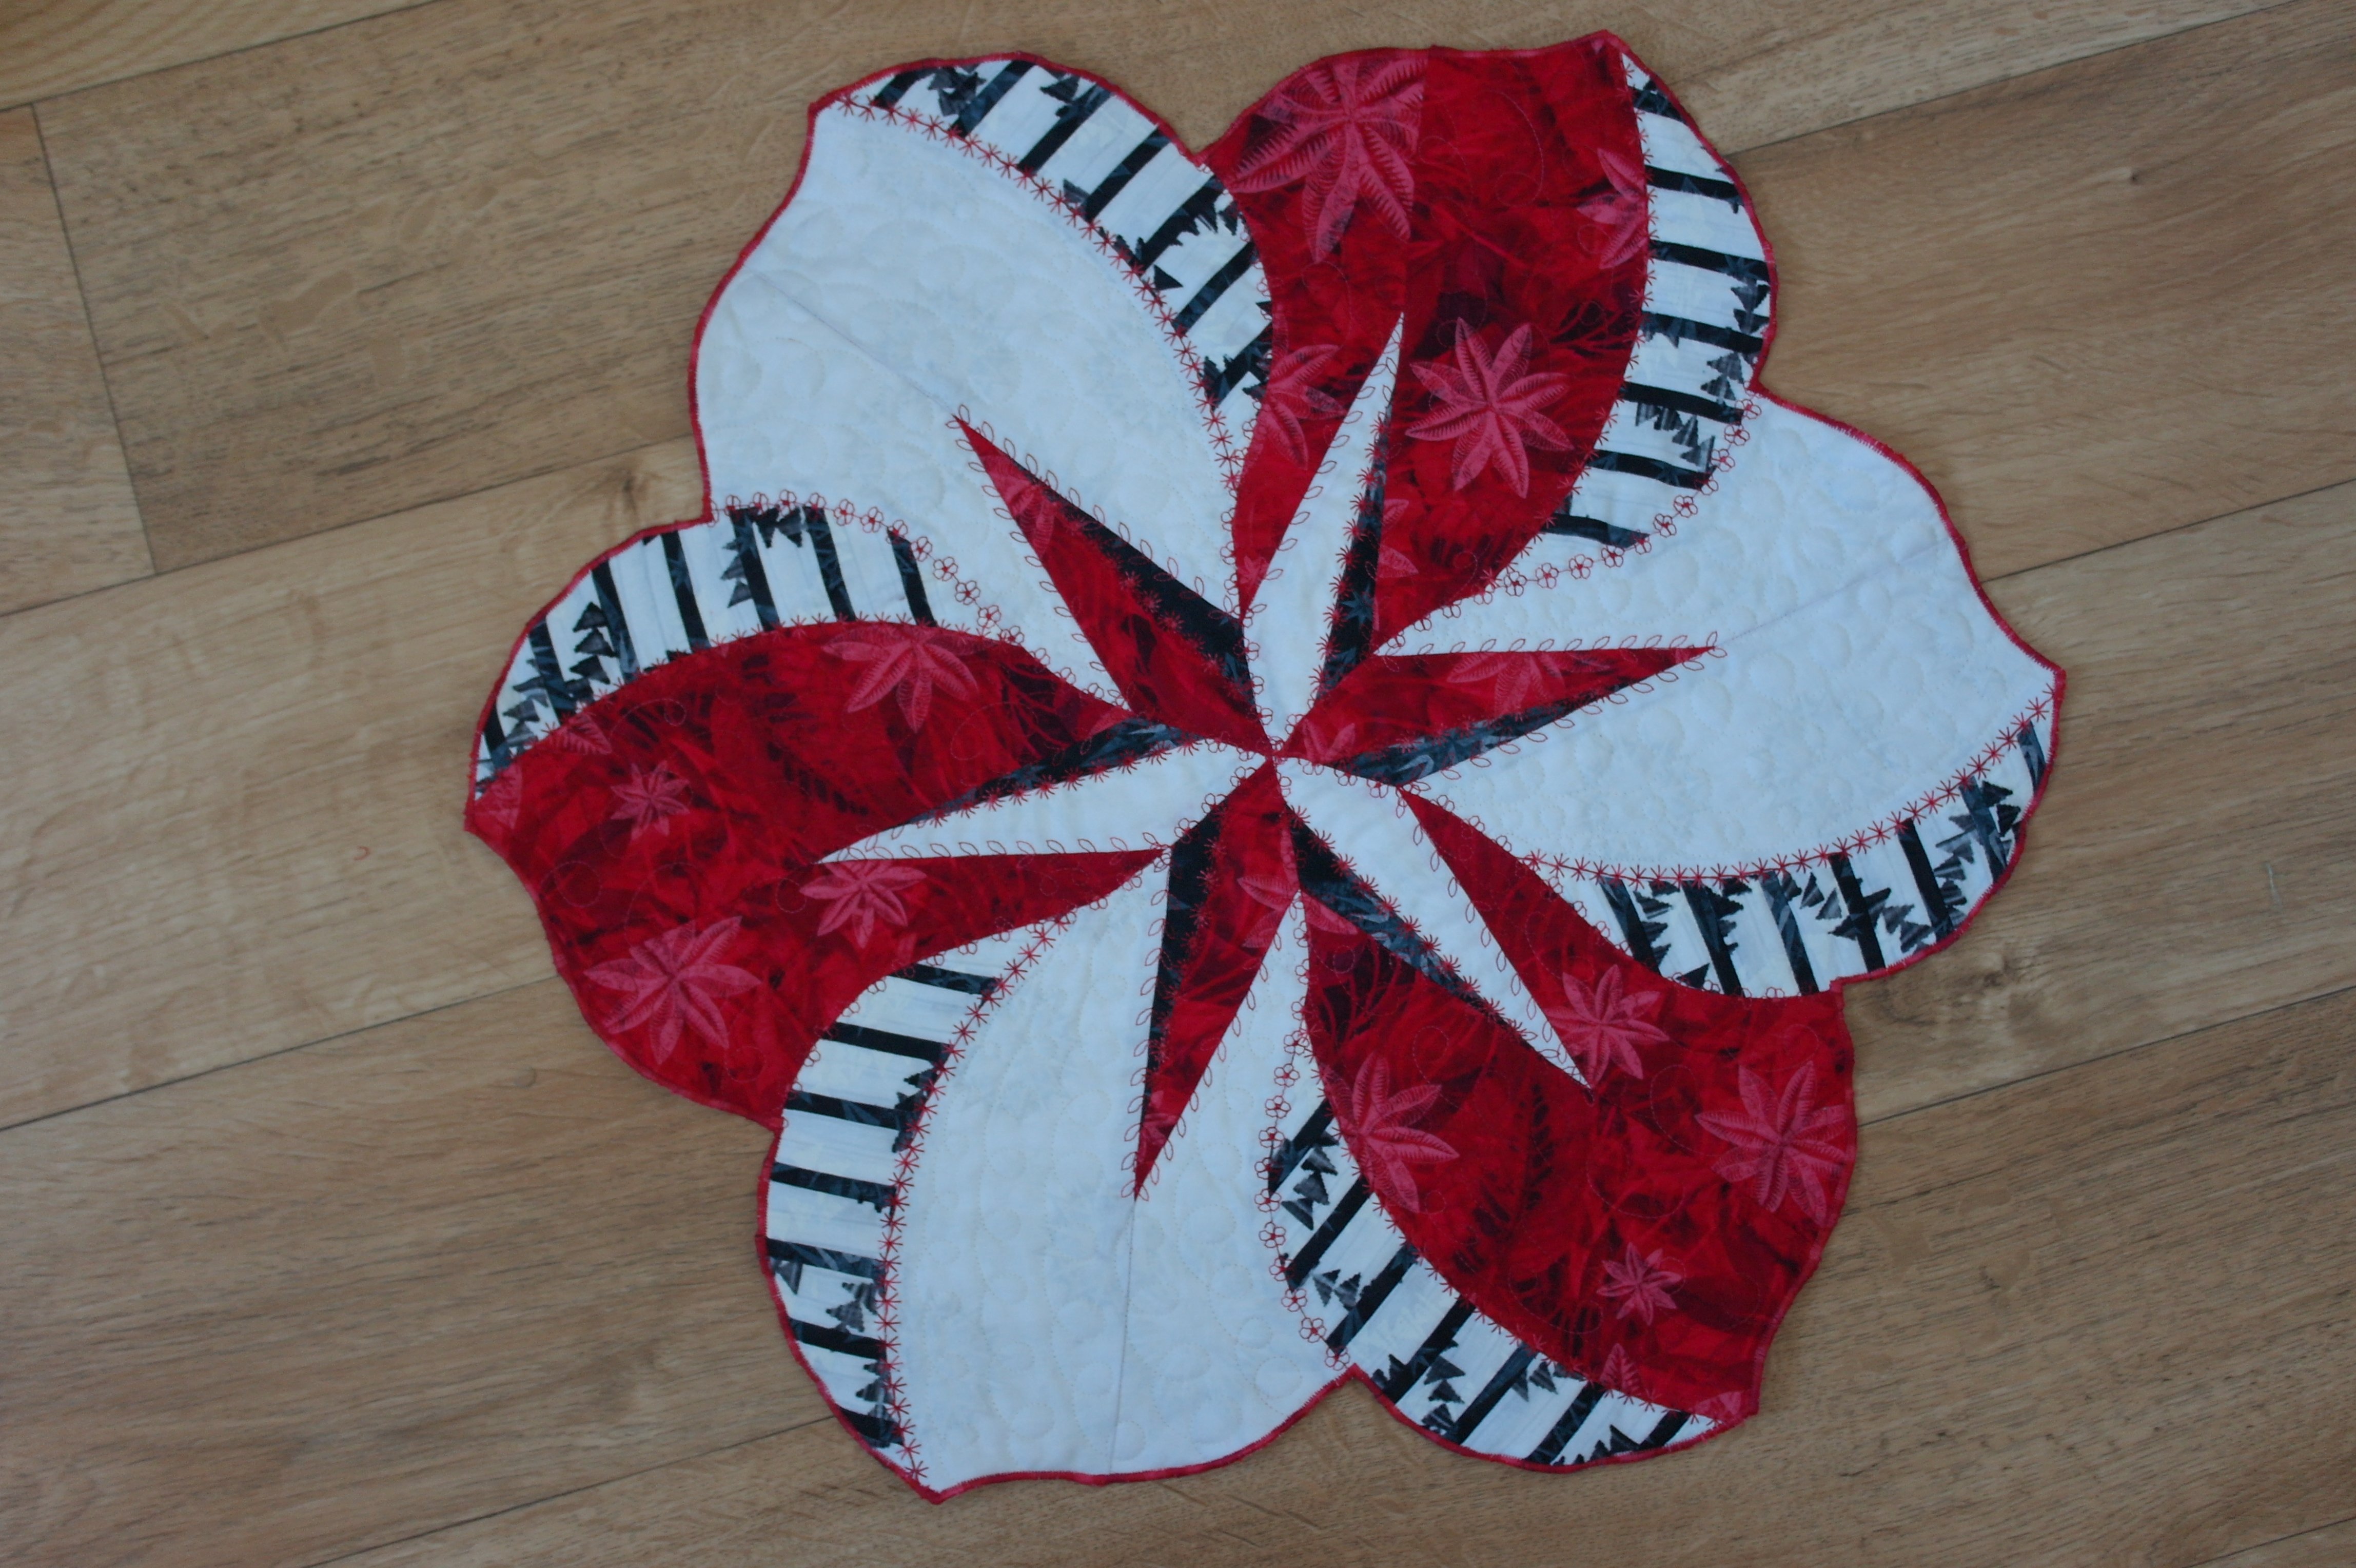
The first flower placemat is ready: because at some parts threads of the white fabric were showing through the red zigzag stitches, I have used a red textile pen to cover this (a bit of cheating? But it workes for me). I think this flower looks great – I will make the other flowers too, and quilt them differently.
You can make one flower as a gift, or all 4 flowers to have 4 placemats. You can even appliqué these flowers to a fabric background to make a quilt. They are fun to make. That’s all for now, on to the next project.
Happy Quilting,
Sylvia Kaptein
Sylvia’s Art Quilts Studio
www.sylviasartquilts.nl/webshop
*The fabric series Forever – 30 different prints in red, white, grey and black – can be ordered via my webshop, per half meter (0.50×1.10m), per pack of 30 strips or a fat quarter pack – as long as they are in stock!


0 Responses