 BERNINA Corporate Blog -
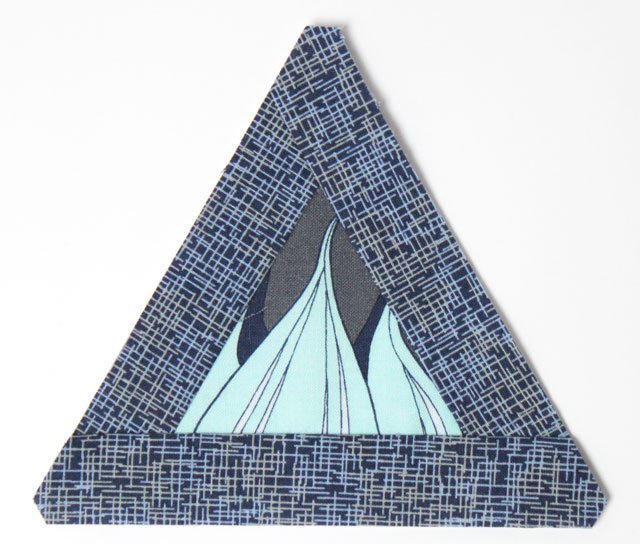
In Block 4, we learned and practiced the FPP technique. All the steps are explained in detail in that entry. If you don’t feel fully comfortable with this technique yet, just read through it again to jog your memory. Because we are going to be using this technique again for Block 5. I’m calling this block the “Log Cabin Triangle”.
You can also sew the block without using paper, by specifying the cutting dimensions for the smaller triangle, sewing a strip along all three sides, and then cutting out the original size of the triangle you need. Of course, this then raises the question: How do you place the 60° ruler precisely enough so that it lies exactly in the middle, so that all three strips will be cut out with equal width? This requires a good eye and would probably be a little difficult to do.
The paper method eliminates this issue, since the exact measurements are already printed on the paper.
TRIANGLE No. 5
First, please print out seven pages of the attached paper template (for 7 finished blocks).
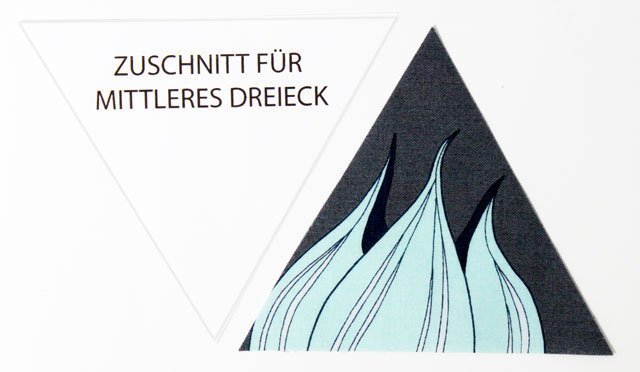
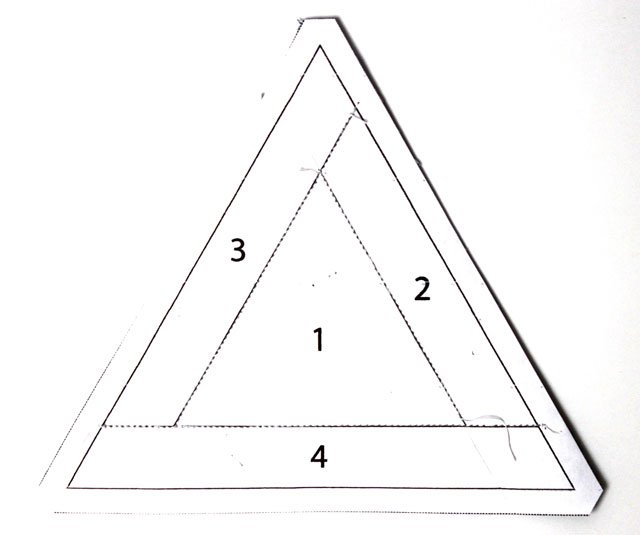
Using the “Cutting for Middle Triangle” pattern, cut out the triangle for area 1 (the pattern already includes the necessary seam allowances).
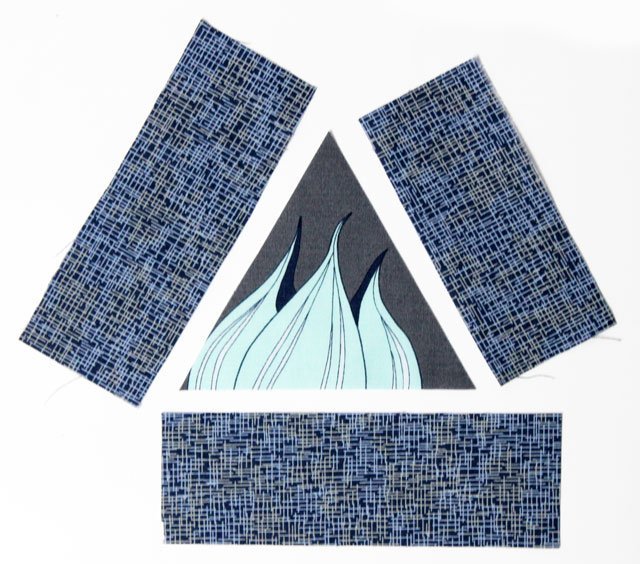
Cut three strips from the material for the border:
A strip measuring 1 ¾” x 4 ½” for area 2,
a strip measuring 1 ¾” x 5 ½” for area 3, and
a strip measuring 1 ¾” x 6″ for area 4.
A reminder when using the
FPP technique:
It basically involves sewing onto the printed side of the paper with the fabric on the blank side (back) of the paper. Sew the pieces for the blog in numerical sequence.
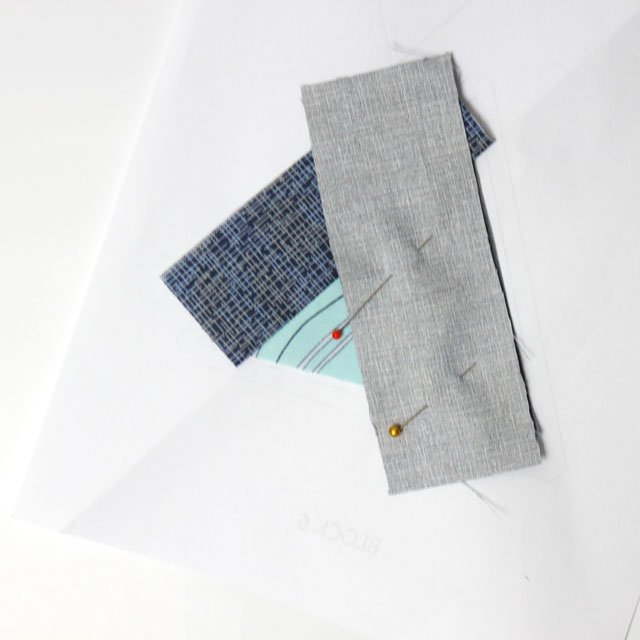
Place the middle triangle on surface 1 with the right side on the blank side of the paper, so that it completely covers the middle triangle of the graphic. The easiest way to check this is by holding the paper up to the light.
When the triangle is placed correctly, set the strip for area 2 on top, specifically on the side of the triangle adjacent to the 2. It should be laid right side on right side with the edges lined up and pinned down, and then it should be sewn from the printed side of the paper with a stitch length of 1.5.
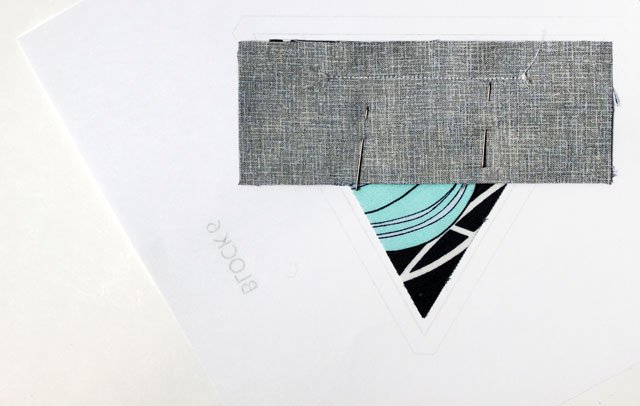
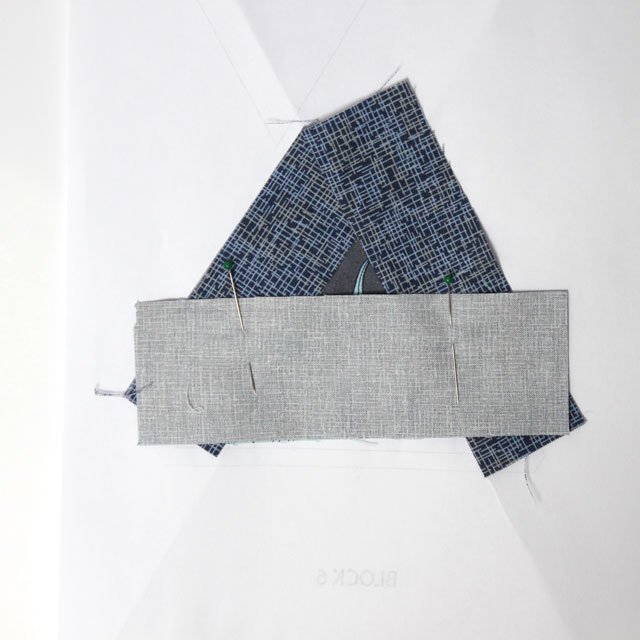
After the strips have been sewn on, you can fold the paper on the seam and cut off the excess material to ¼”.

Using the same technique, sew on the strips for area 3 and then those for area 4.
At this point, the assembled piece will look like this:
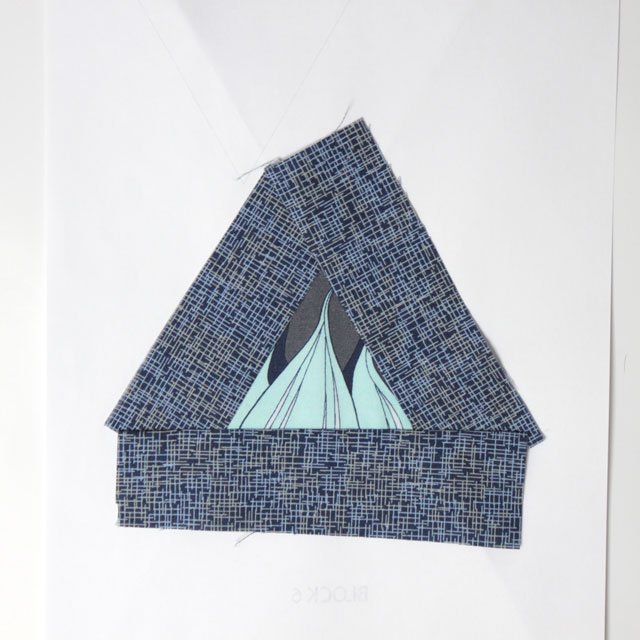
Then cut out the triangle shapes precisely (using the markings on the paper, with shortened corners), tear the paper off, and you have the finished triangle.
We need a total of 7 of these triangles.
This was basically quite straightforward and if you could master Block 4, then Block 5 will be a piece of cake since it’s really just a variation on the same technique.
It is fantastic to see so many enthusiastic sewers in the community and on Instagram. And I am especially pleased that you are supporting each other in the comments with advice and ideas (because: more heads = more ideas).


0 Responses