 BERNINA Corporate Blog -
Not just one block to make this month, but eight: 6 rectangular and 2 square blocks. The sandwiches for the rectangular blocks are cut at 16 x 32 cm(+), and for the square blocks 16 x 16cm (+). The (+) indicates that they can be cut slightly bigger, should you still have to cut them. If you already cut them, be sure to work over the entire sandwiches, from sides to sides, not leaving any space between the sides and the beginning/ends of the rows of stitches.
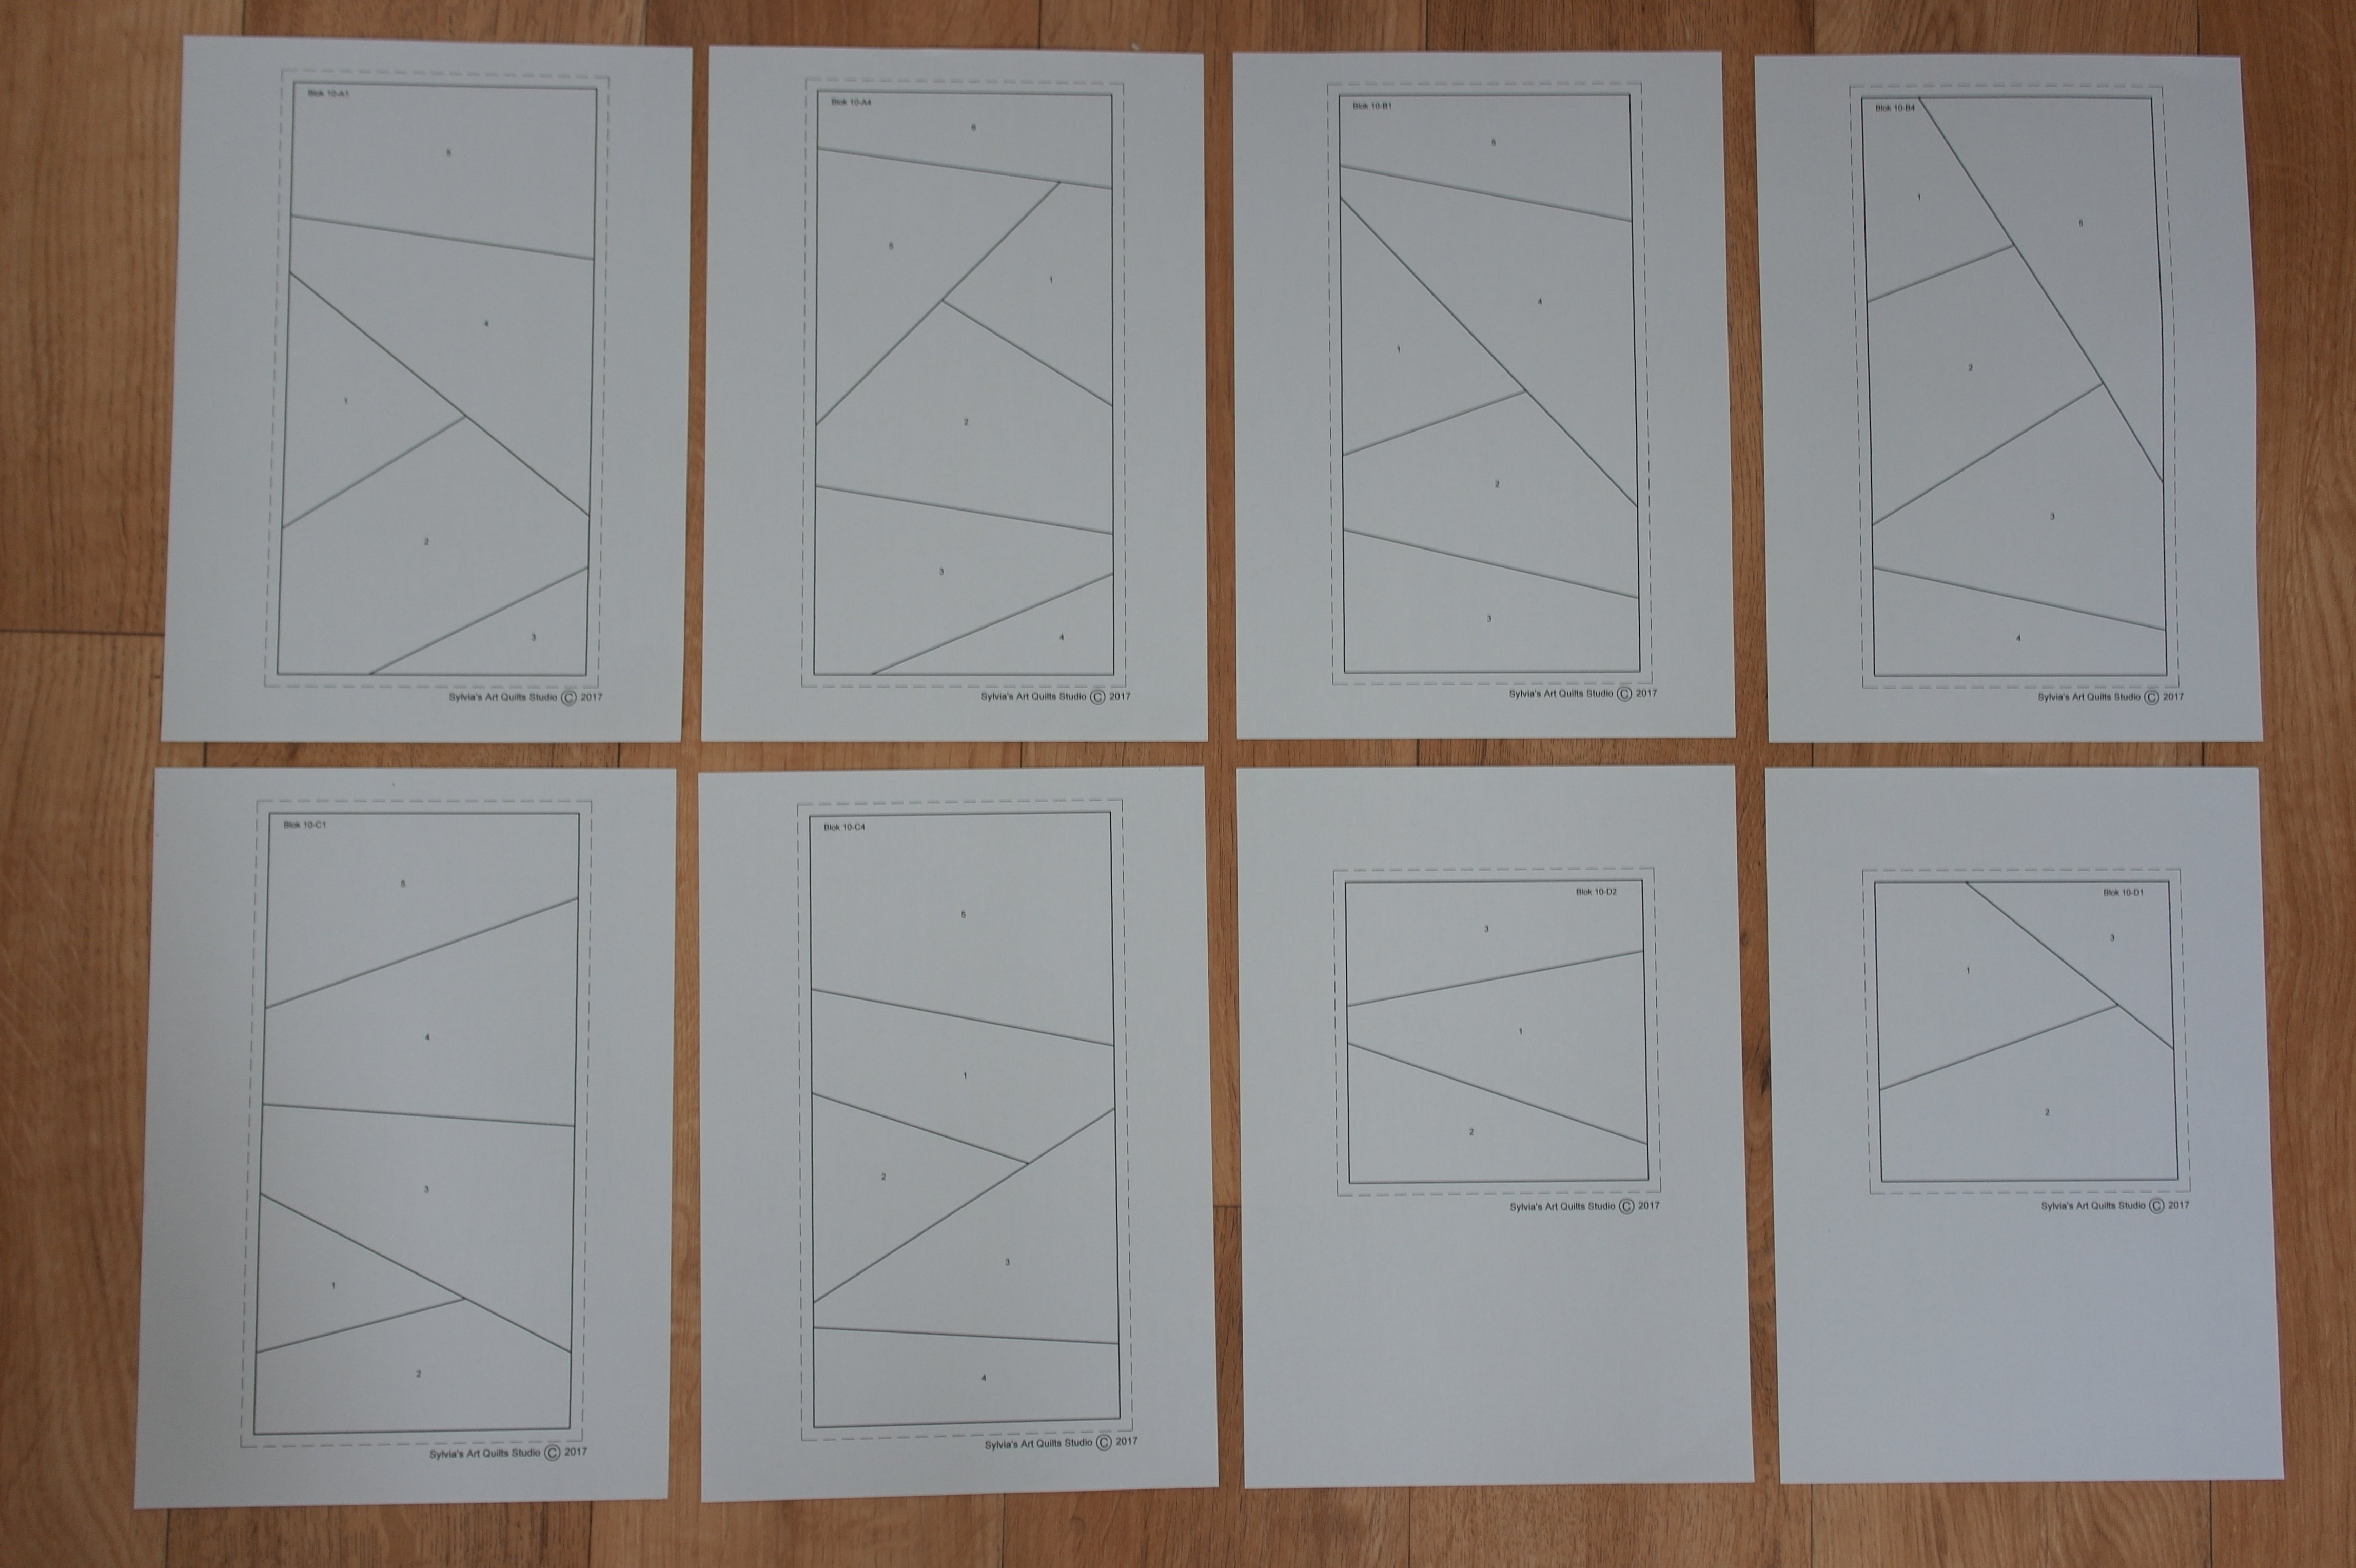
You can download the rectangular/square blocks here: Blok A1, Blok A4, Blok B1, Blok B4, Blok C1, Blok C4, Blok D1 en Blok D2.
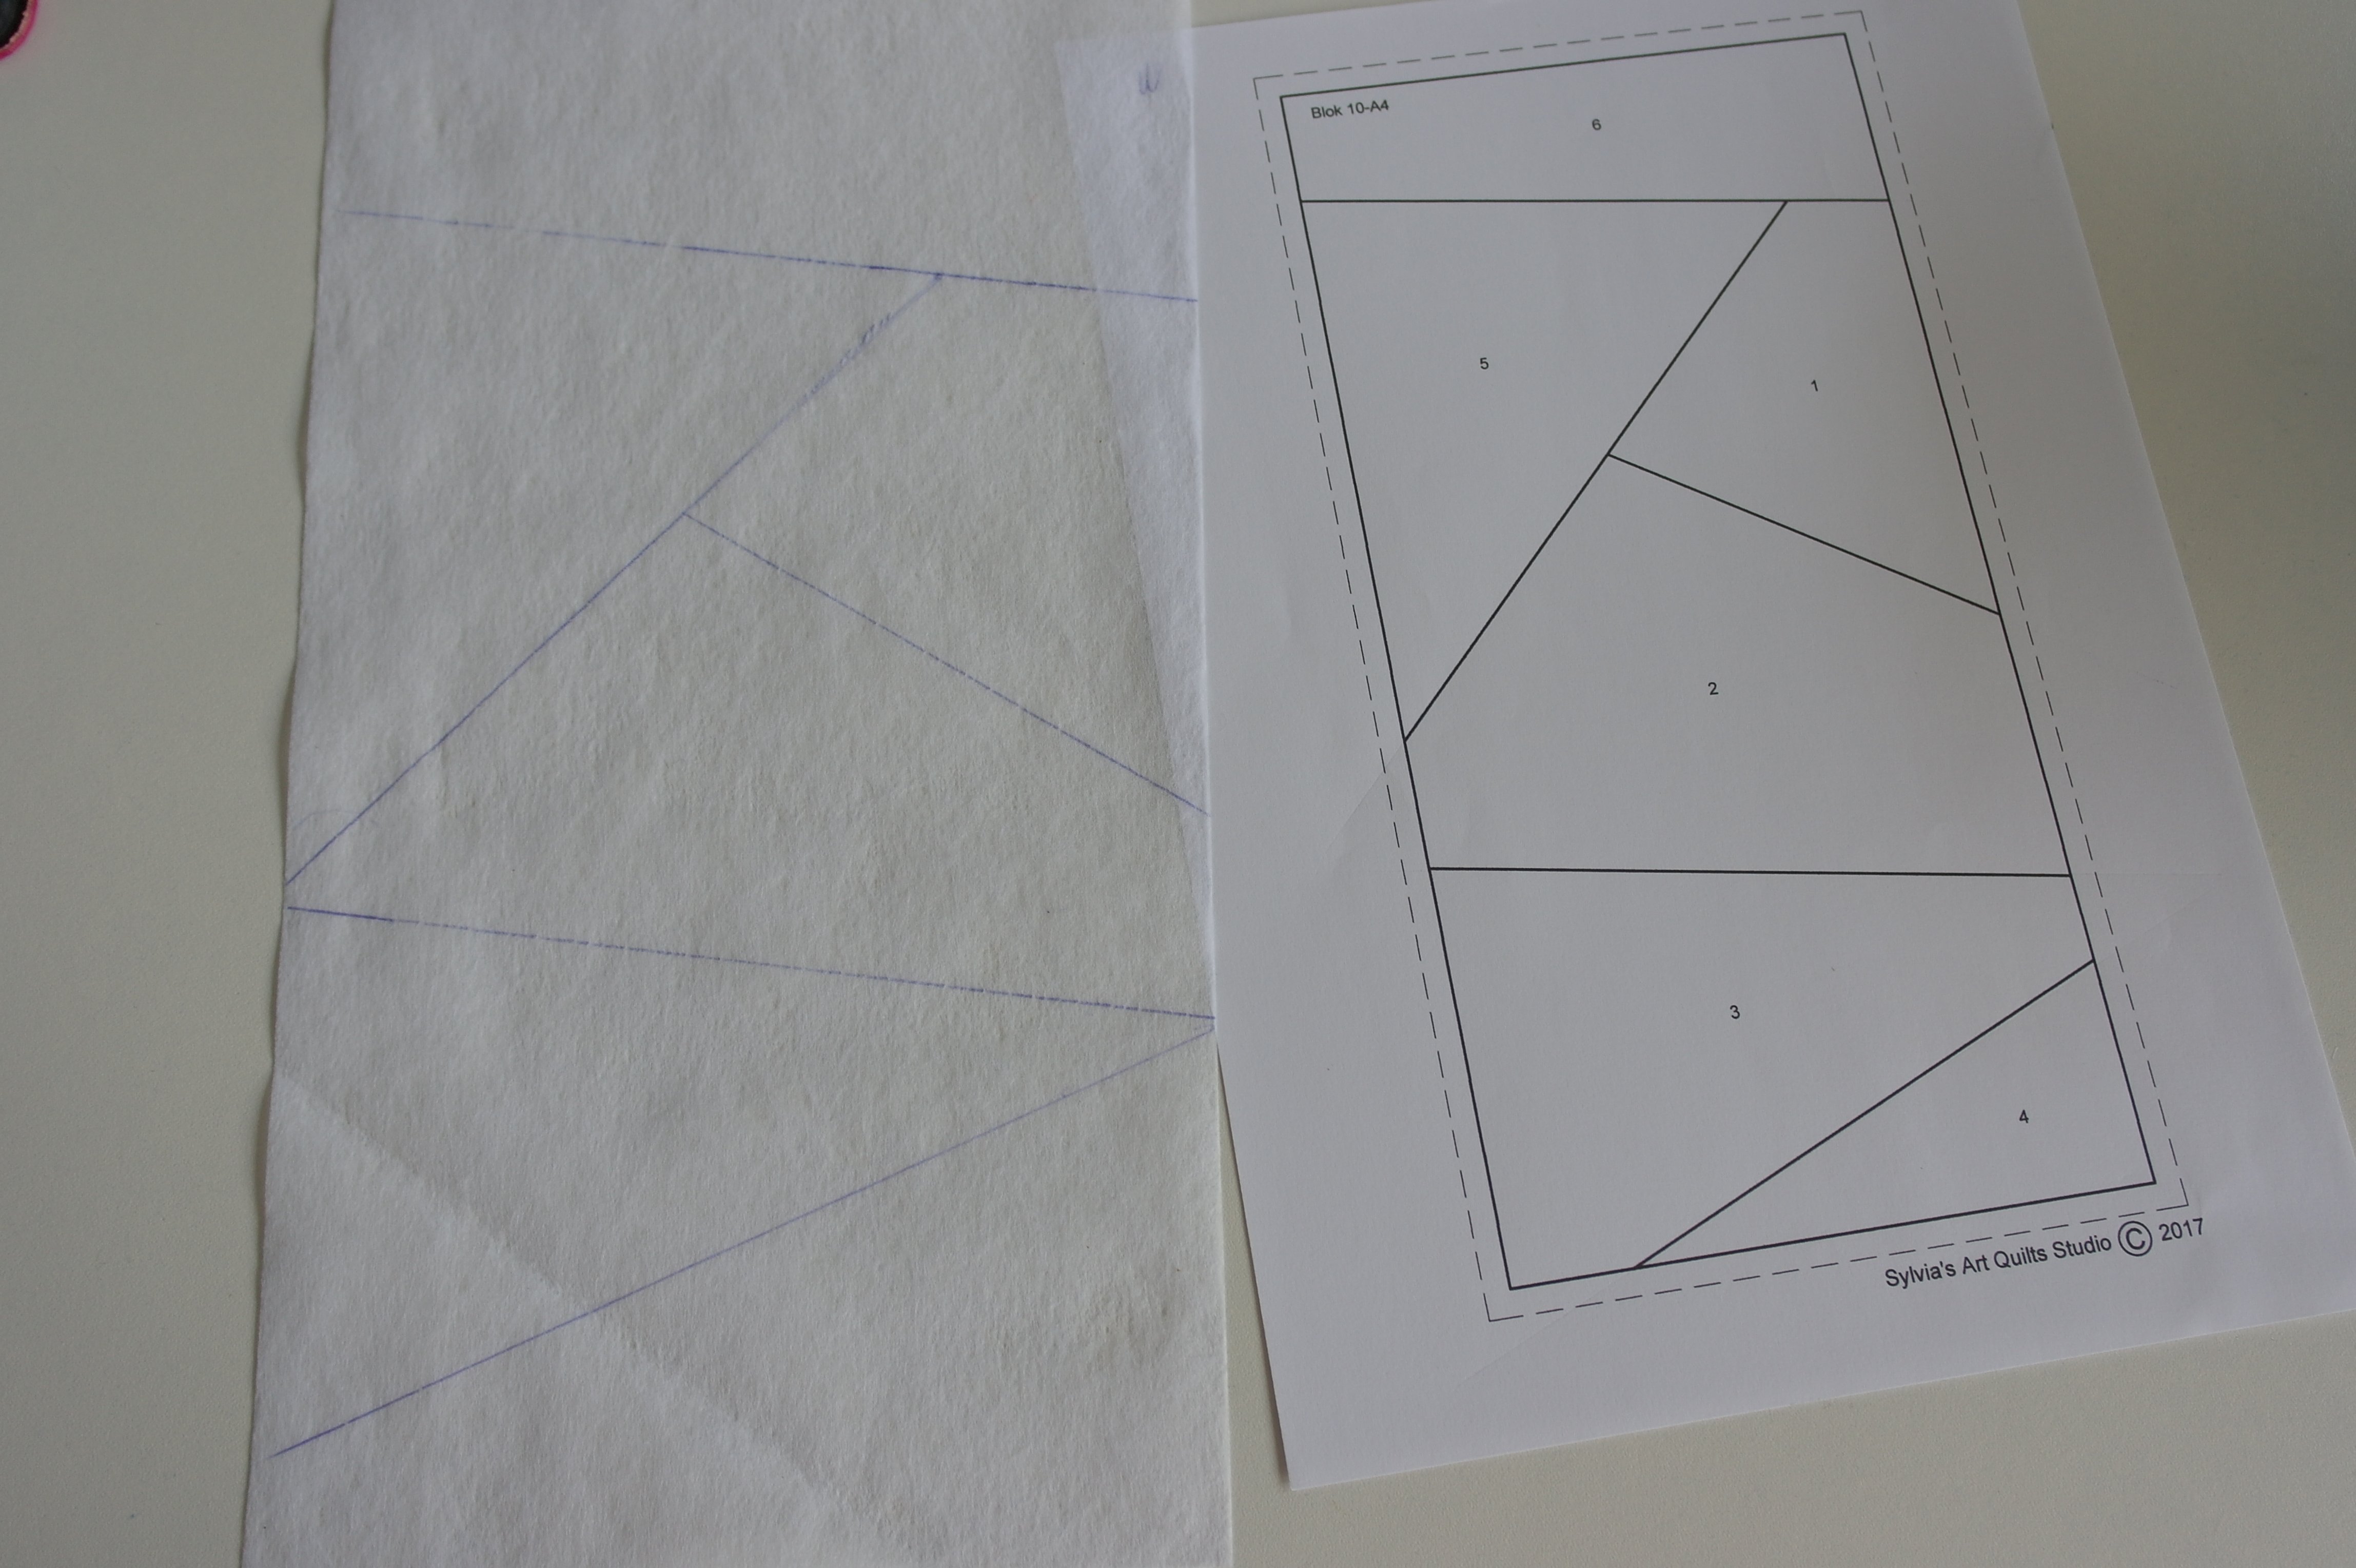
After downloading the patterns, print them, an draw the lines for the 8 blocks onto Vlieseline L11 – each block 1 x BUT BEWARE: be sure all the lines of the Crazy patchwork are running all the way to the sides untill the reach the outer edges of the Vlieseline L11 – so draw beyond the dotted lines of the rectangular/square shapes, from side to side onto the Vlieseline L11. This is to be sure that all fabrics that are added will run OVER the sides of the sandwiches. You can check my piece of Vlieseline L11 in the picture above – all drawn lines run from side to side. I didn’t draw the rectangular shape: it is there only to indicate the actual size you will see after assembly, and not for making the block.
There is not so much extra space with these blocks, as you had with the 9 previous blocks – because of shrinkage while making sttiches, you will have to fully add decorative stitches etc. from side to side. Should you not do that, you will find that these blocks will be to short while assembling them in month 12. I know that it can be fixed, but then your quilt will be smaller…. o well, you will find out with the directions of the last month, but please try to stick to the information given here.
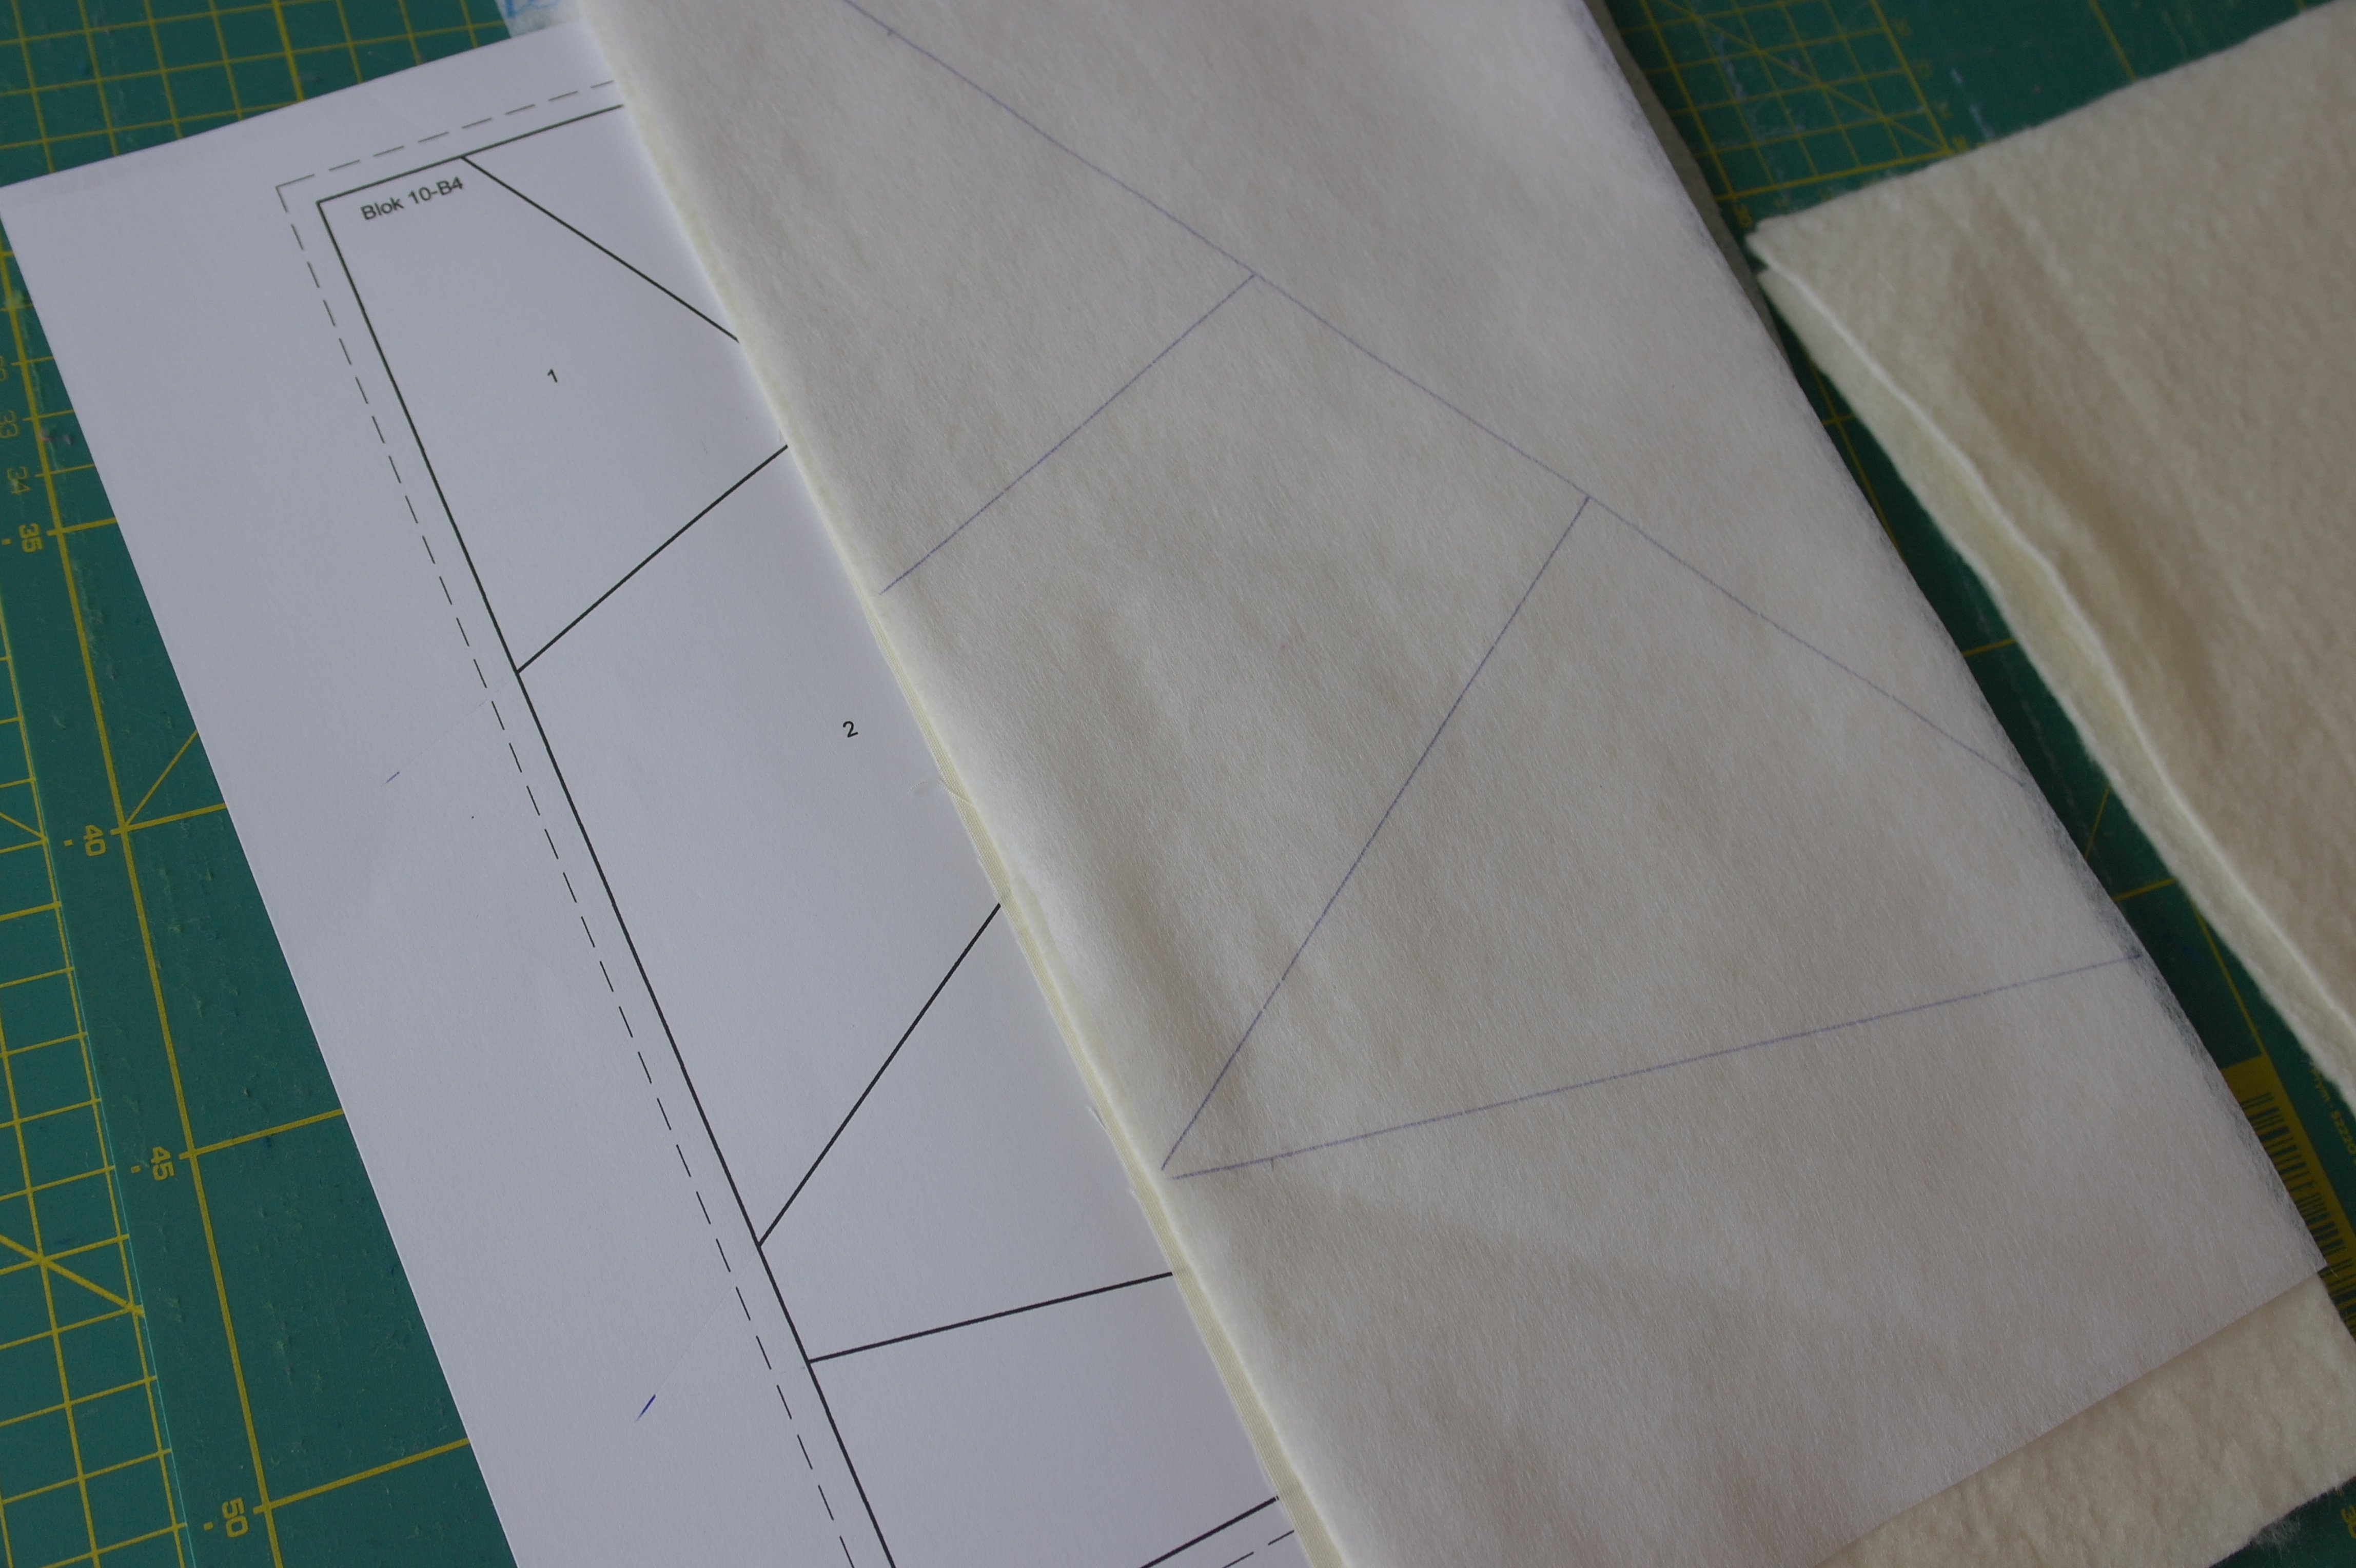
Preparing the sandwiches: 6 made 16 x 32 cm and 2 made 16 x 16 cm. Place the patterns under each sandwich,
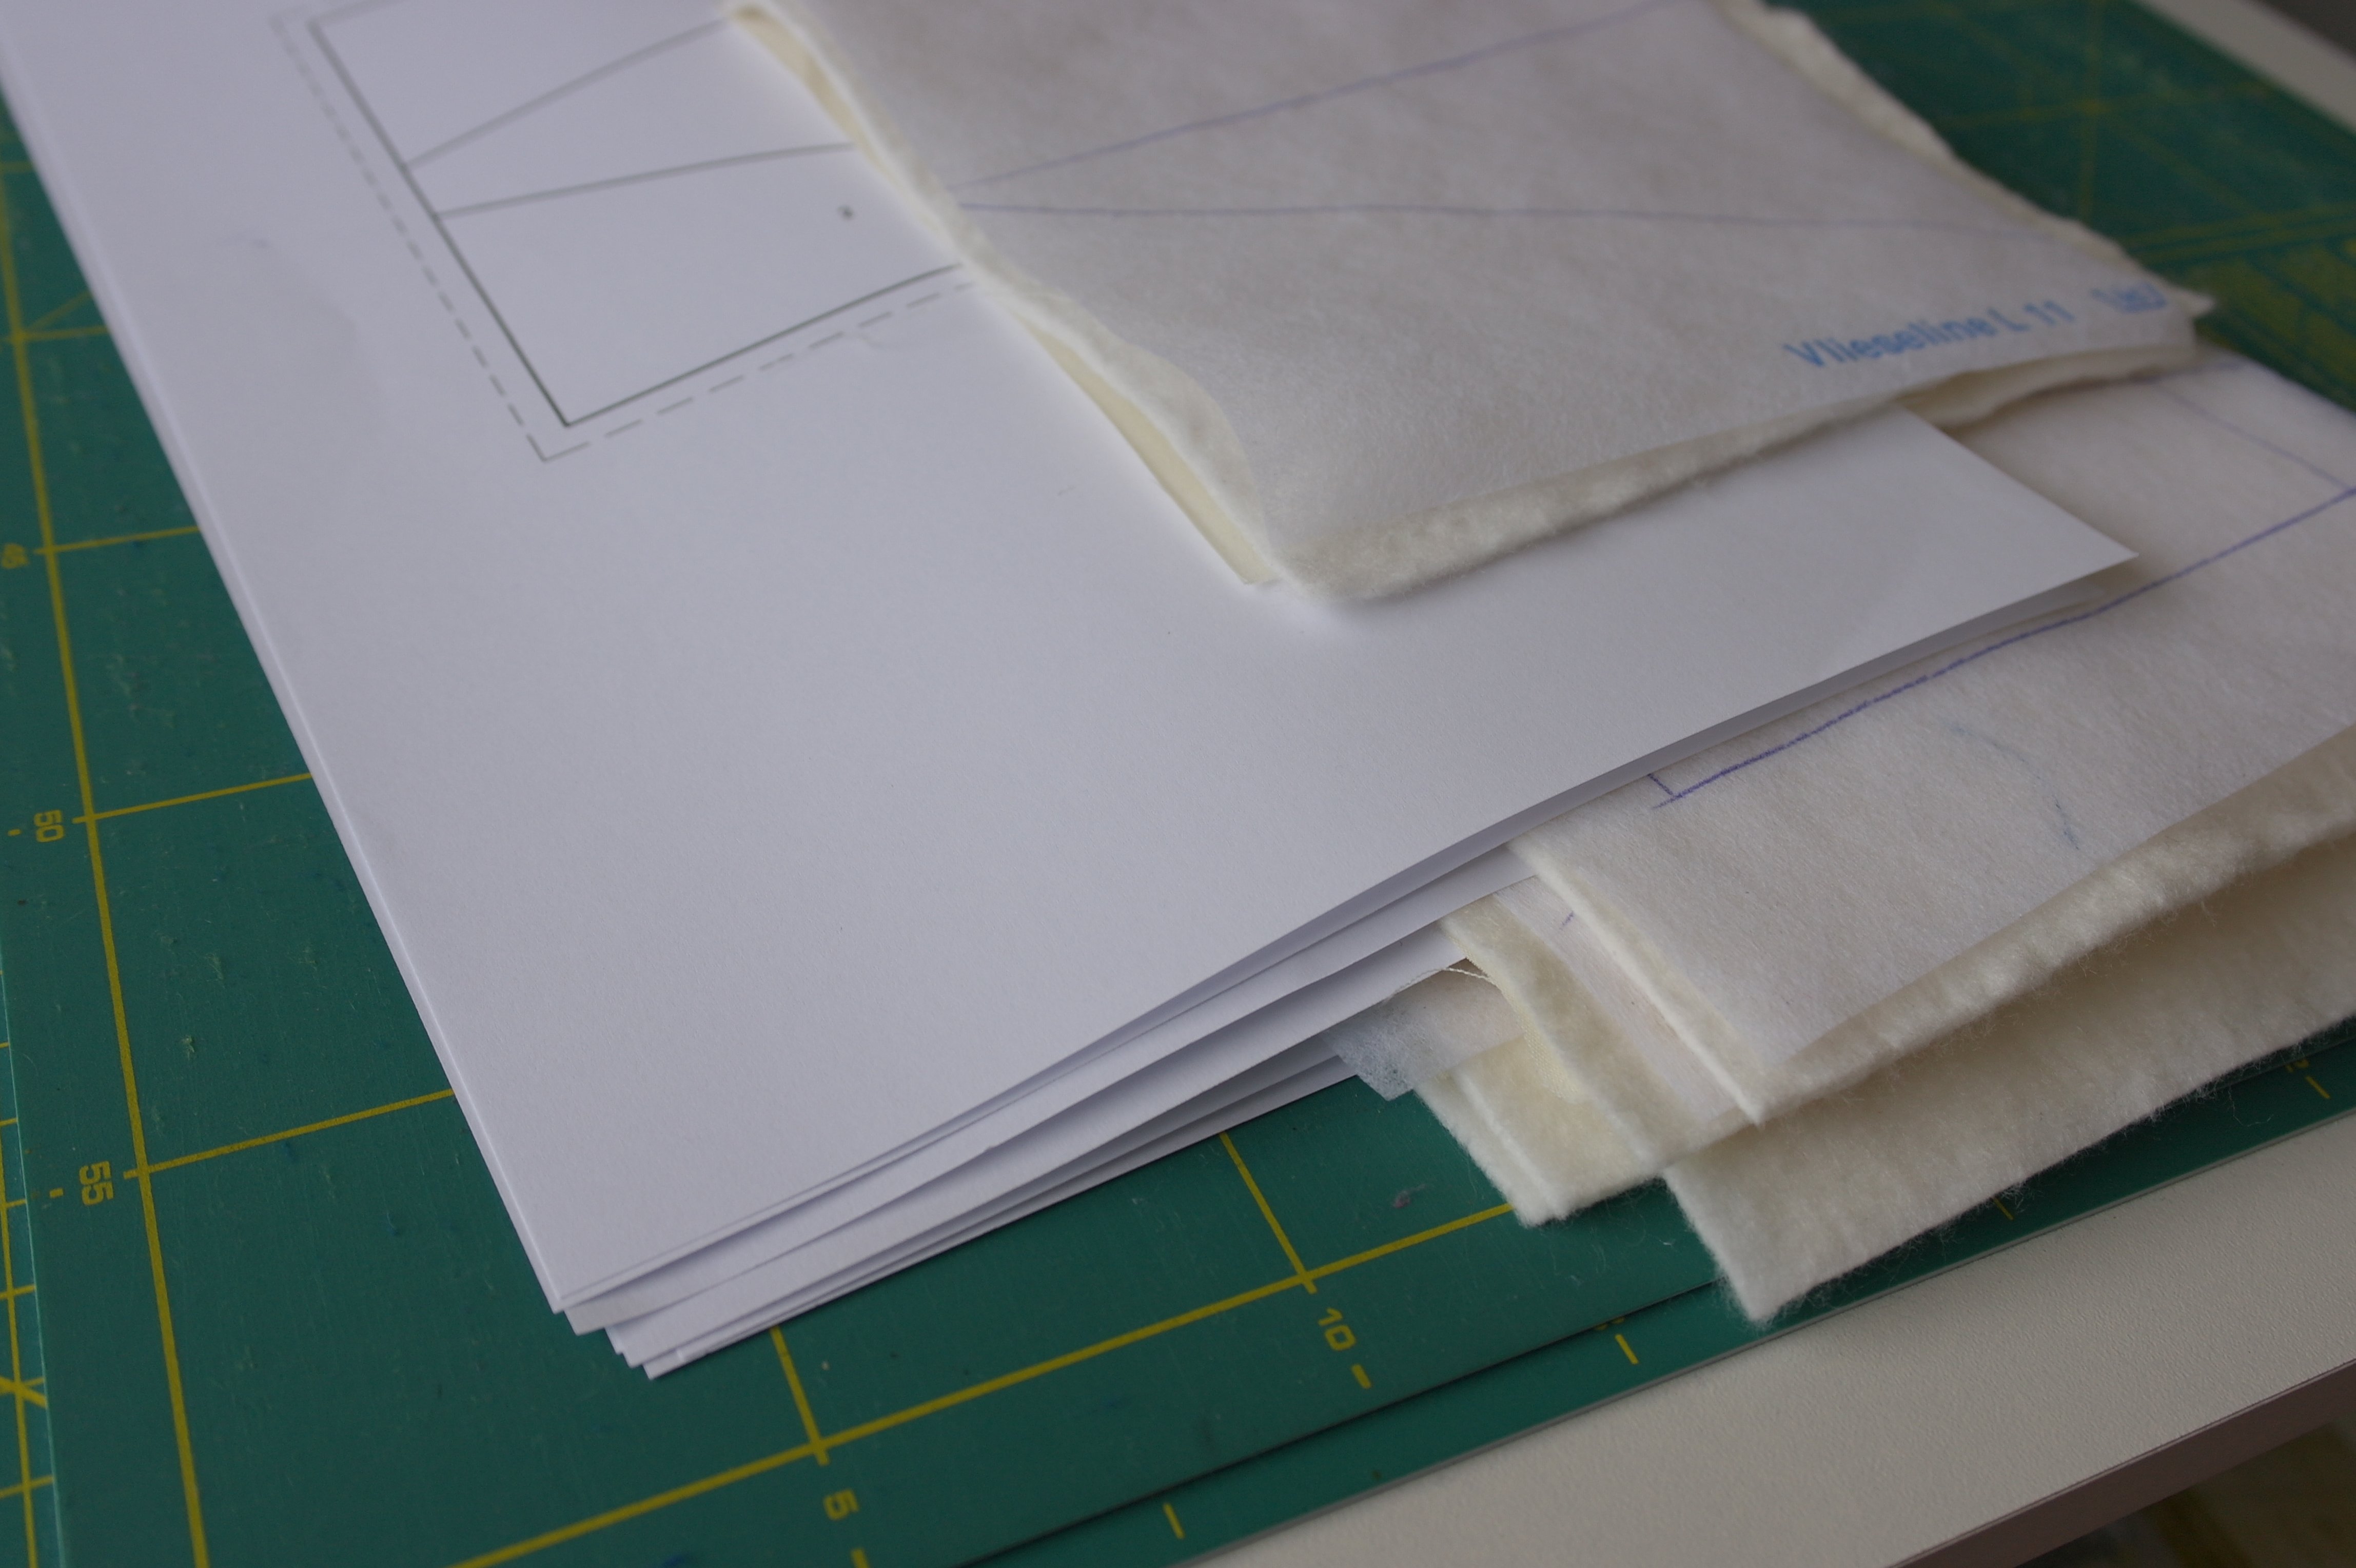
and pile them up – work with one sandwich at the time and keep the pattern close, to check which one you have already made.
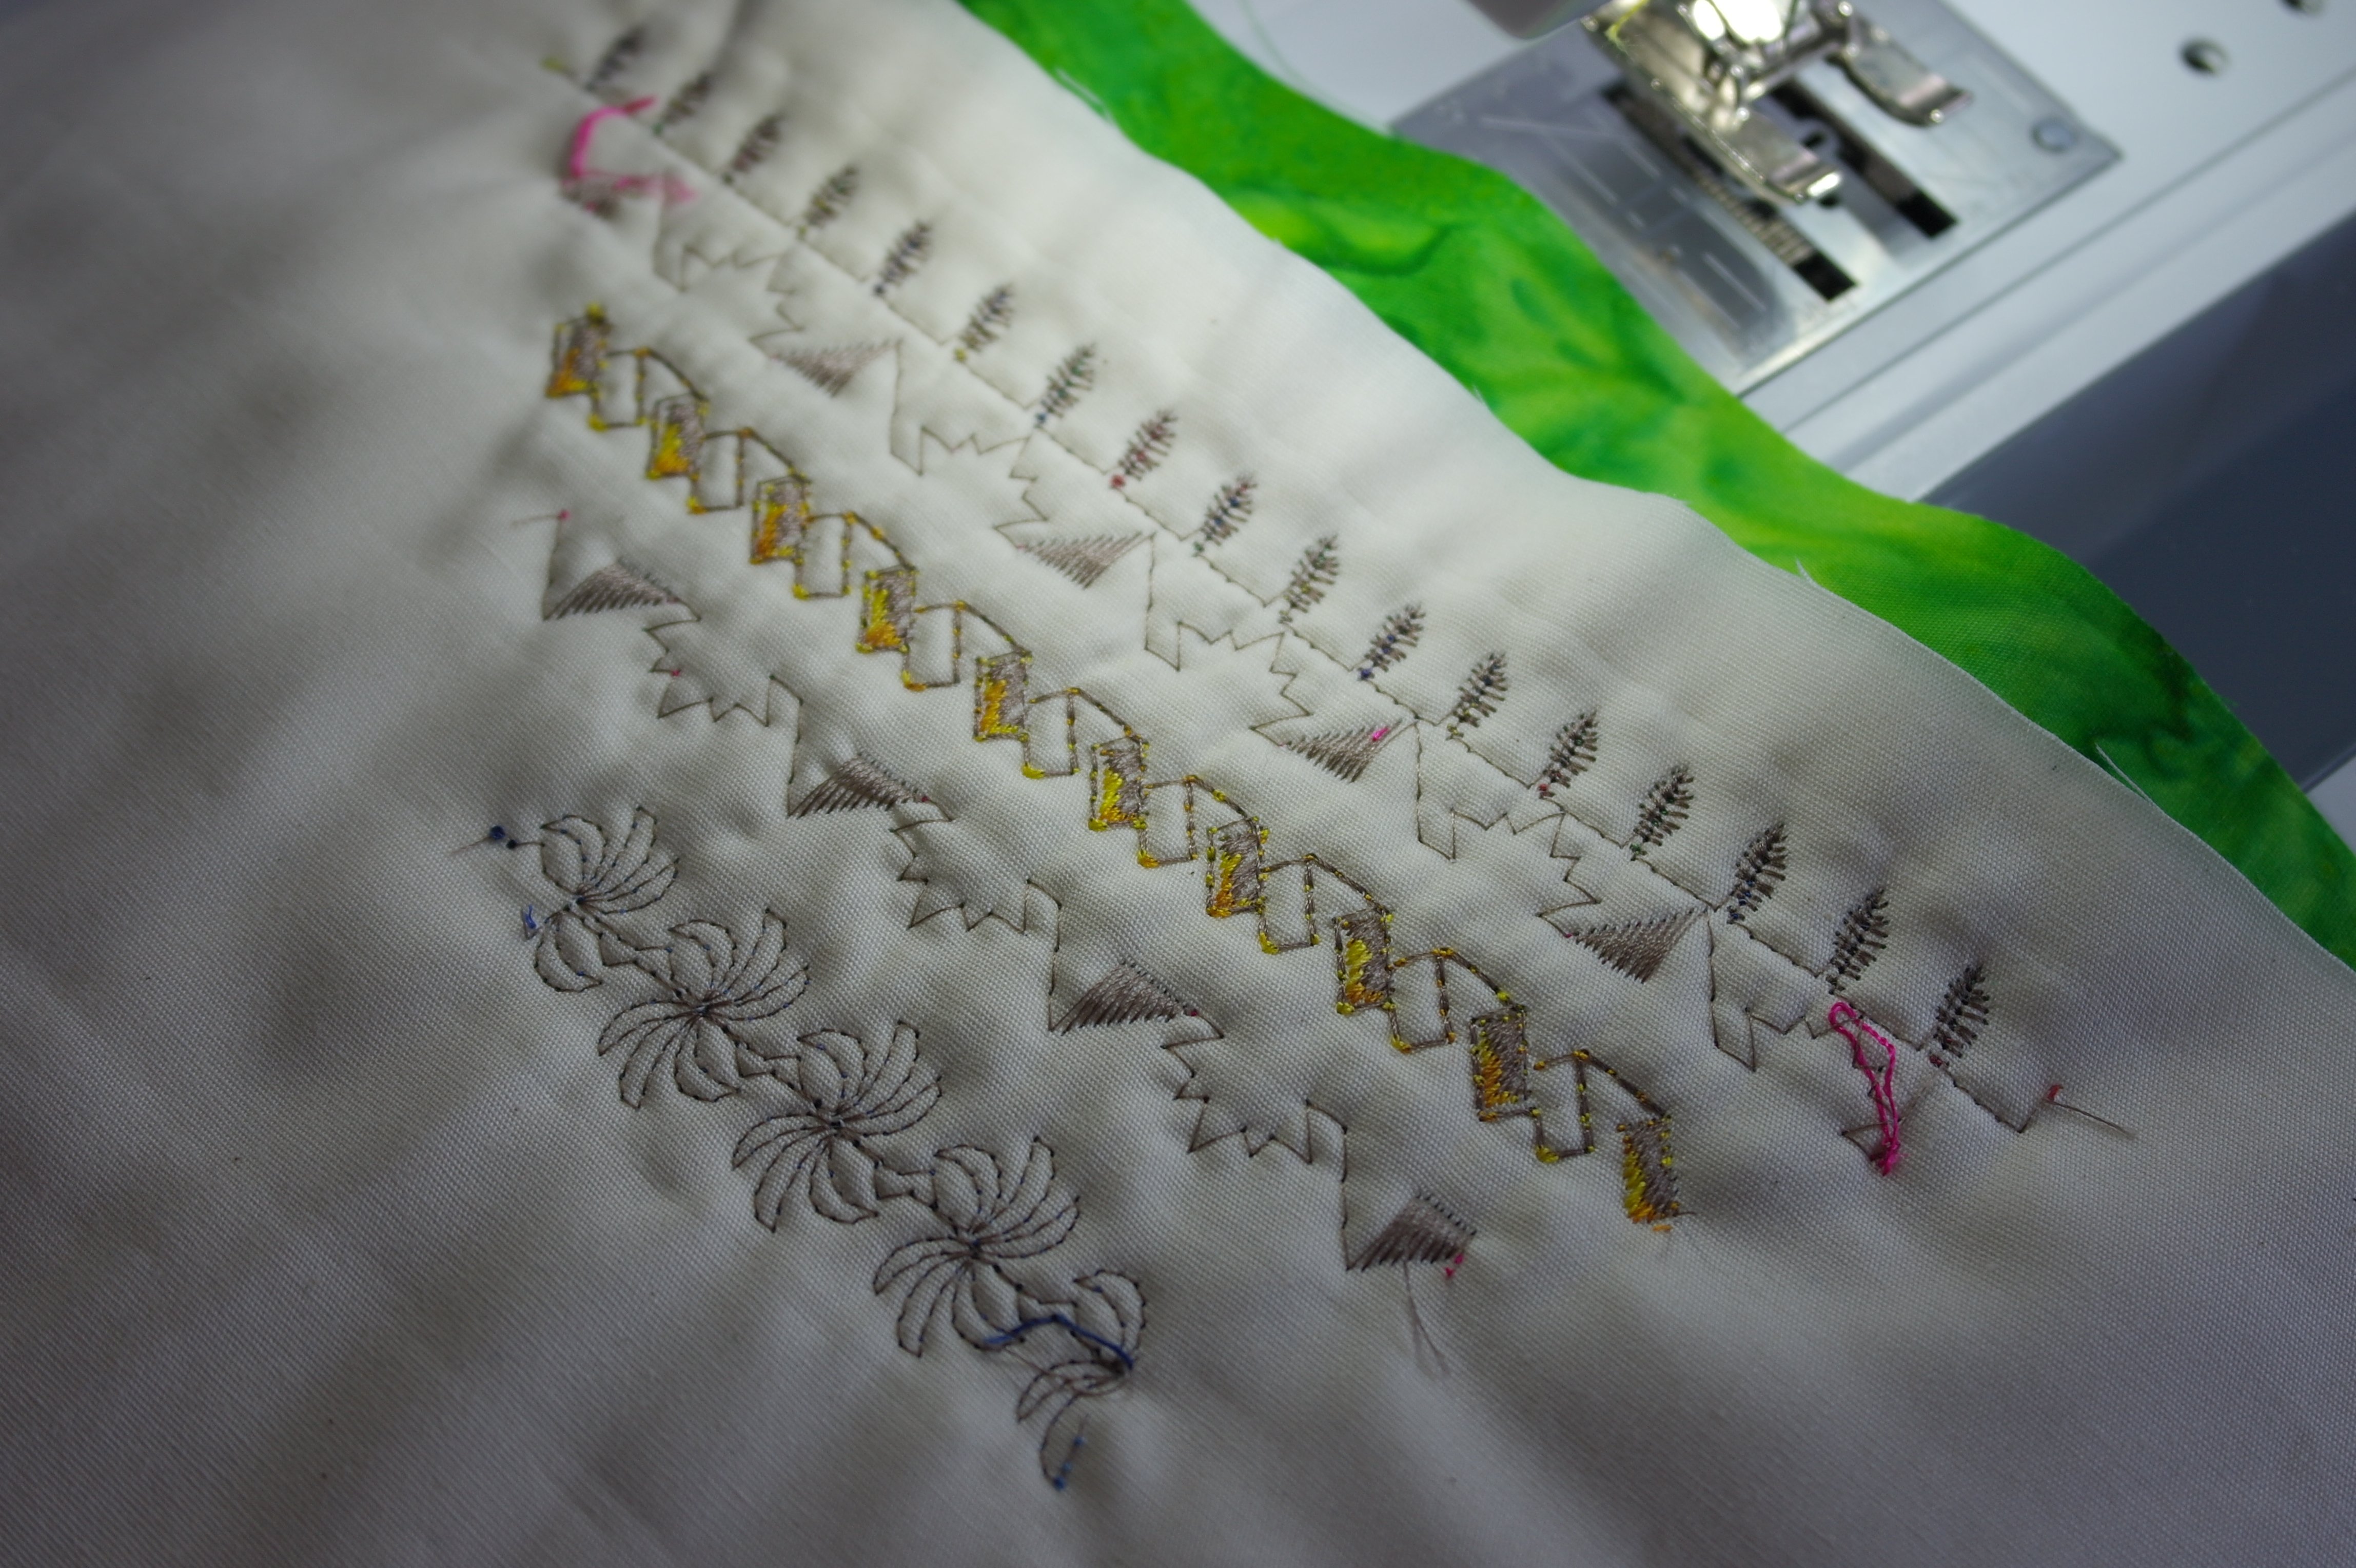
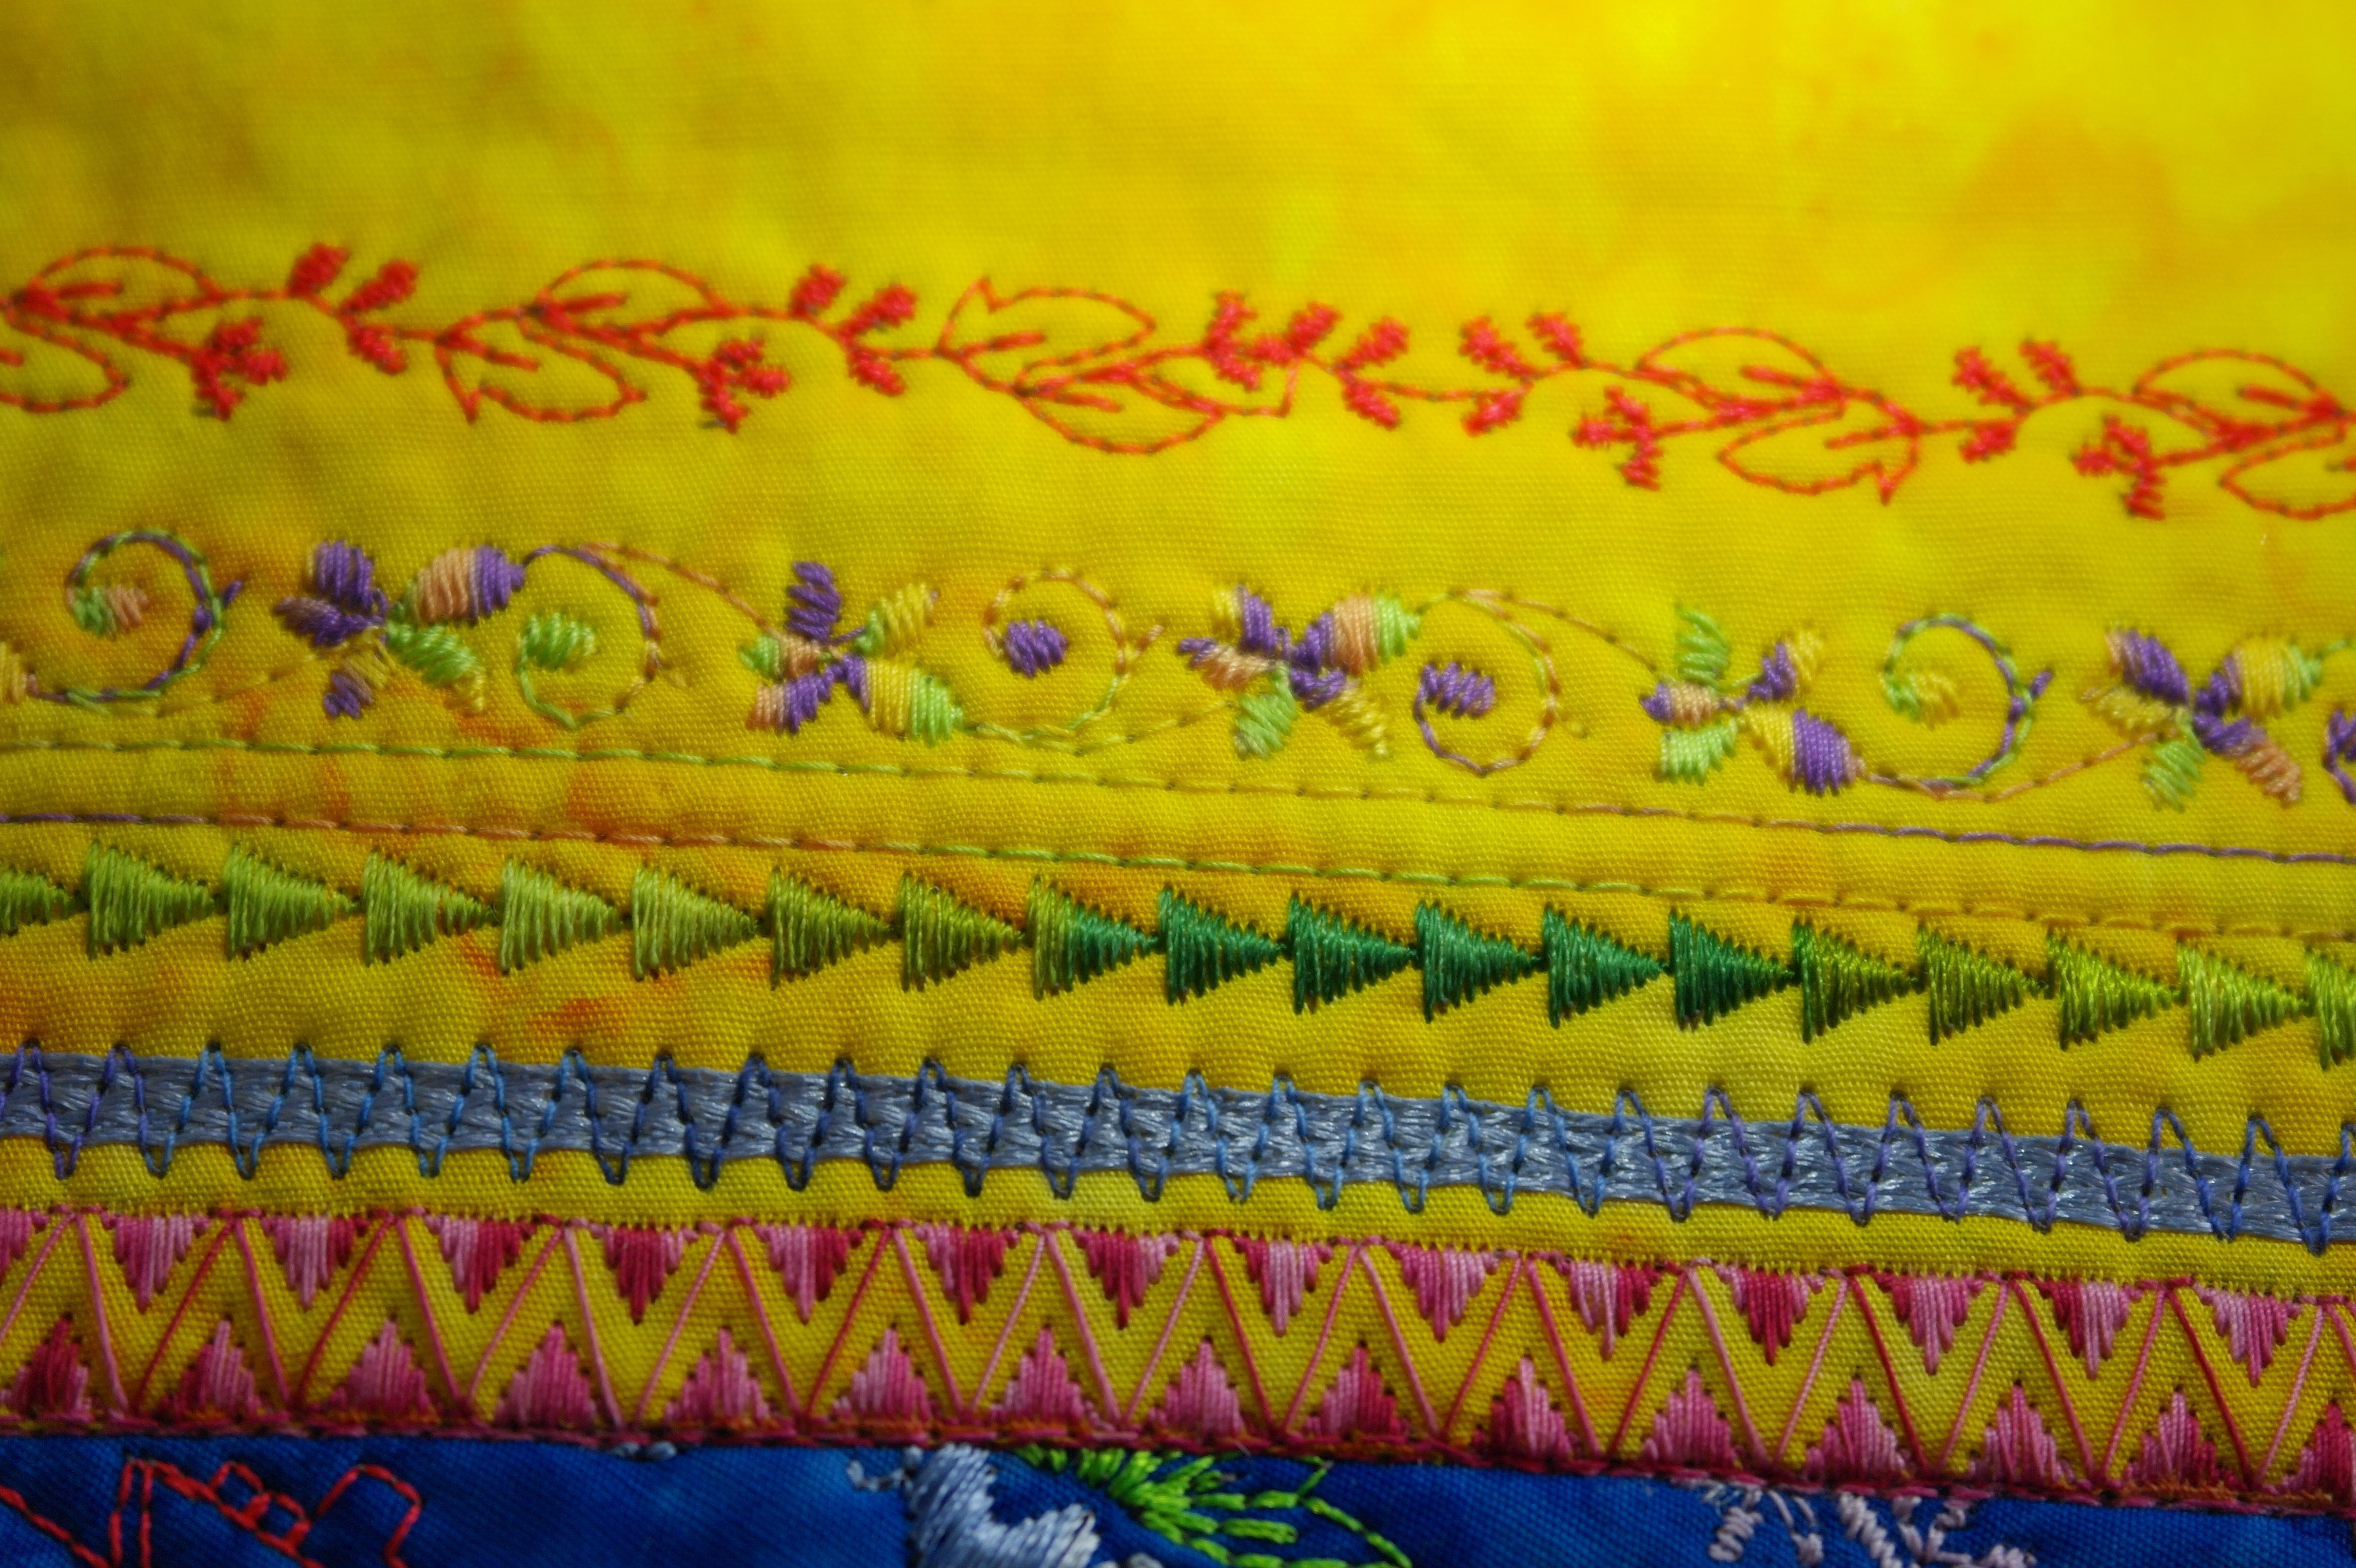
Each sandwich will be fully covered with fabrics and stitches. The advantage of the measurements of this month is that you don’t need so much fabric: the area you will have to cover is smaller, comparing to the previous 9 blocks. So making them will be faster…
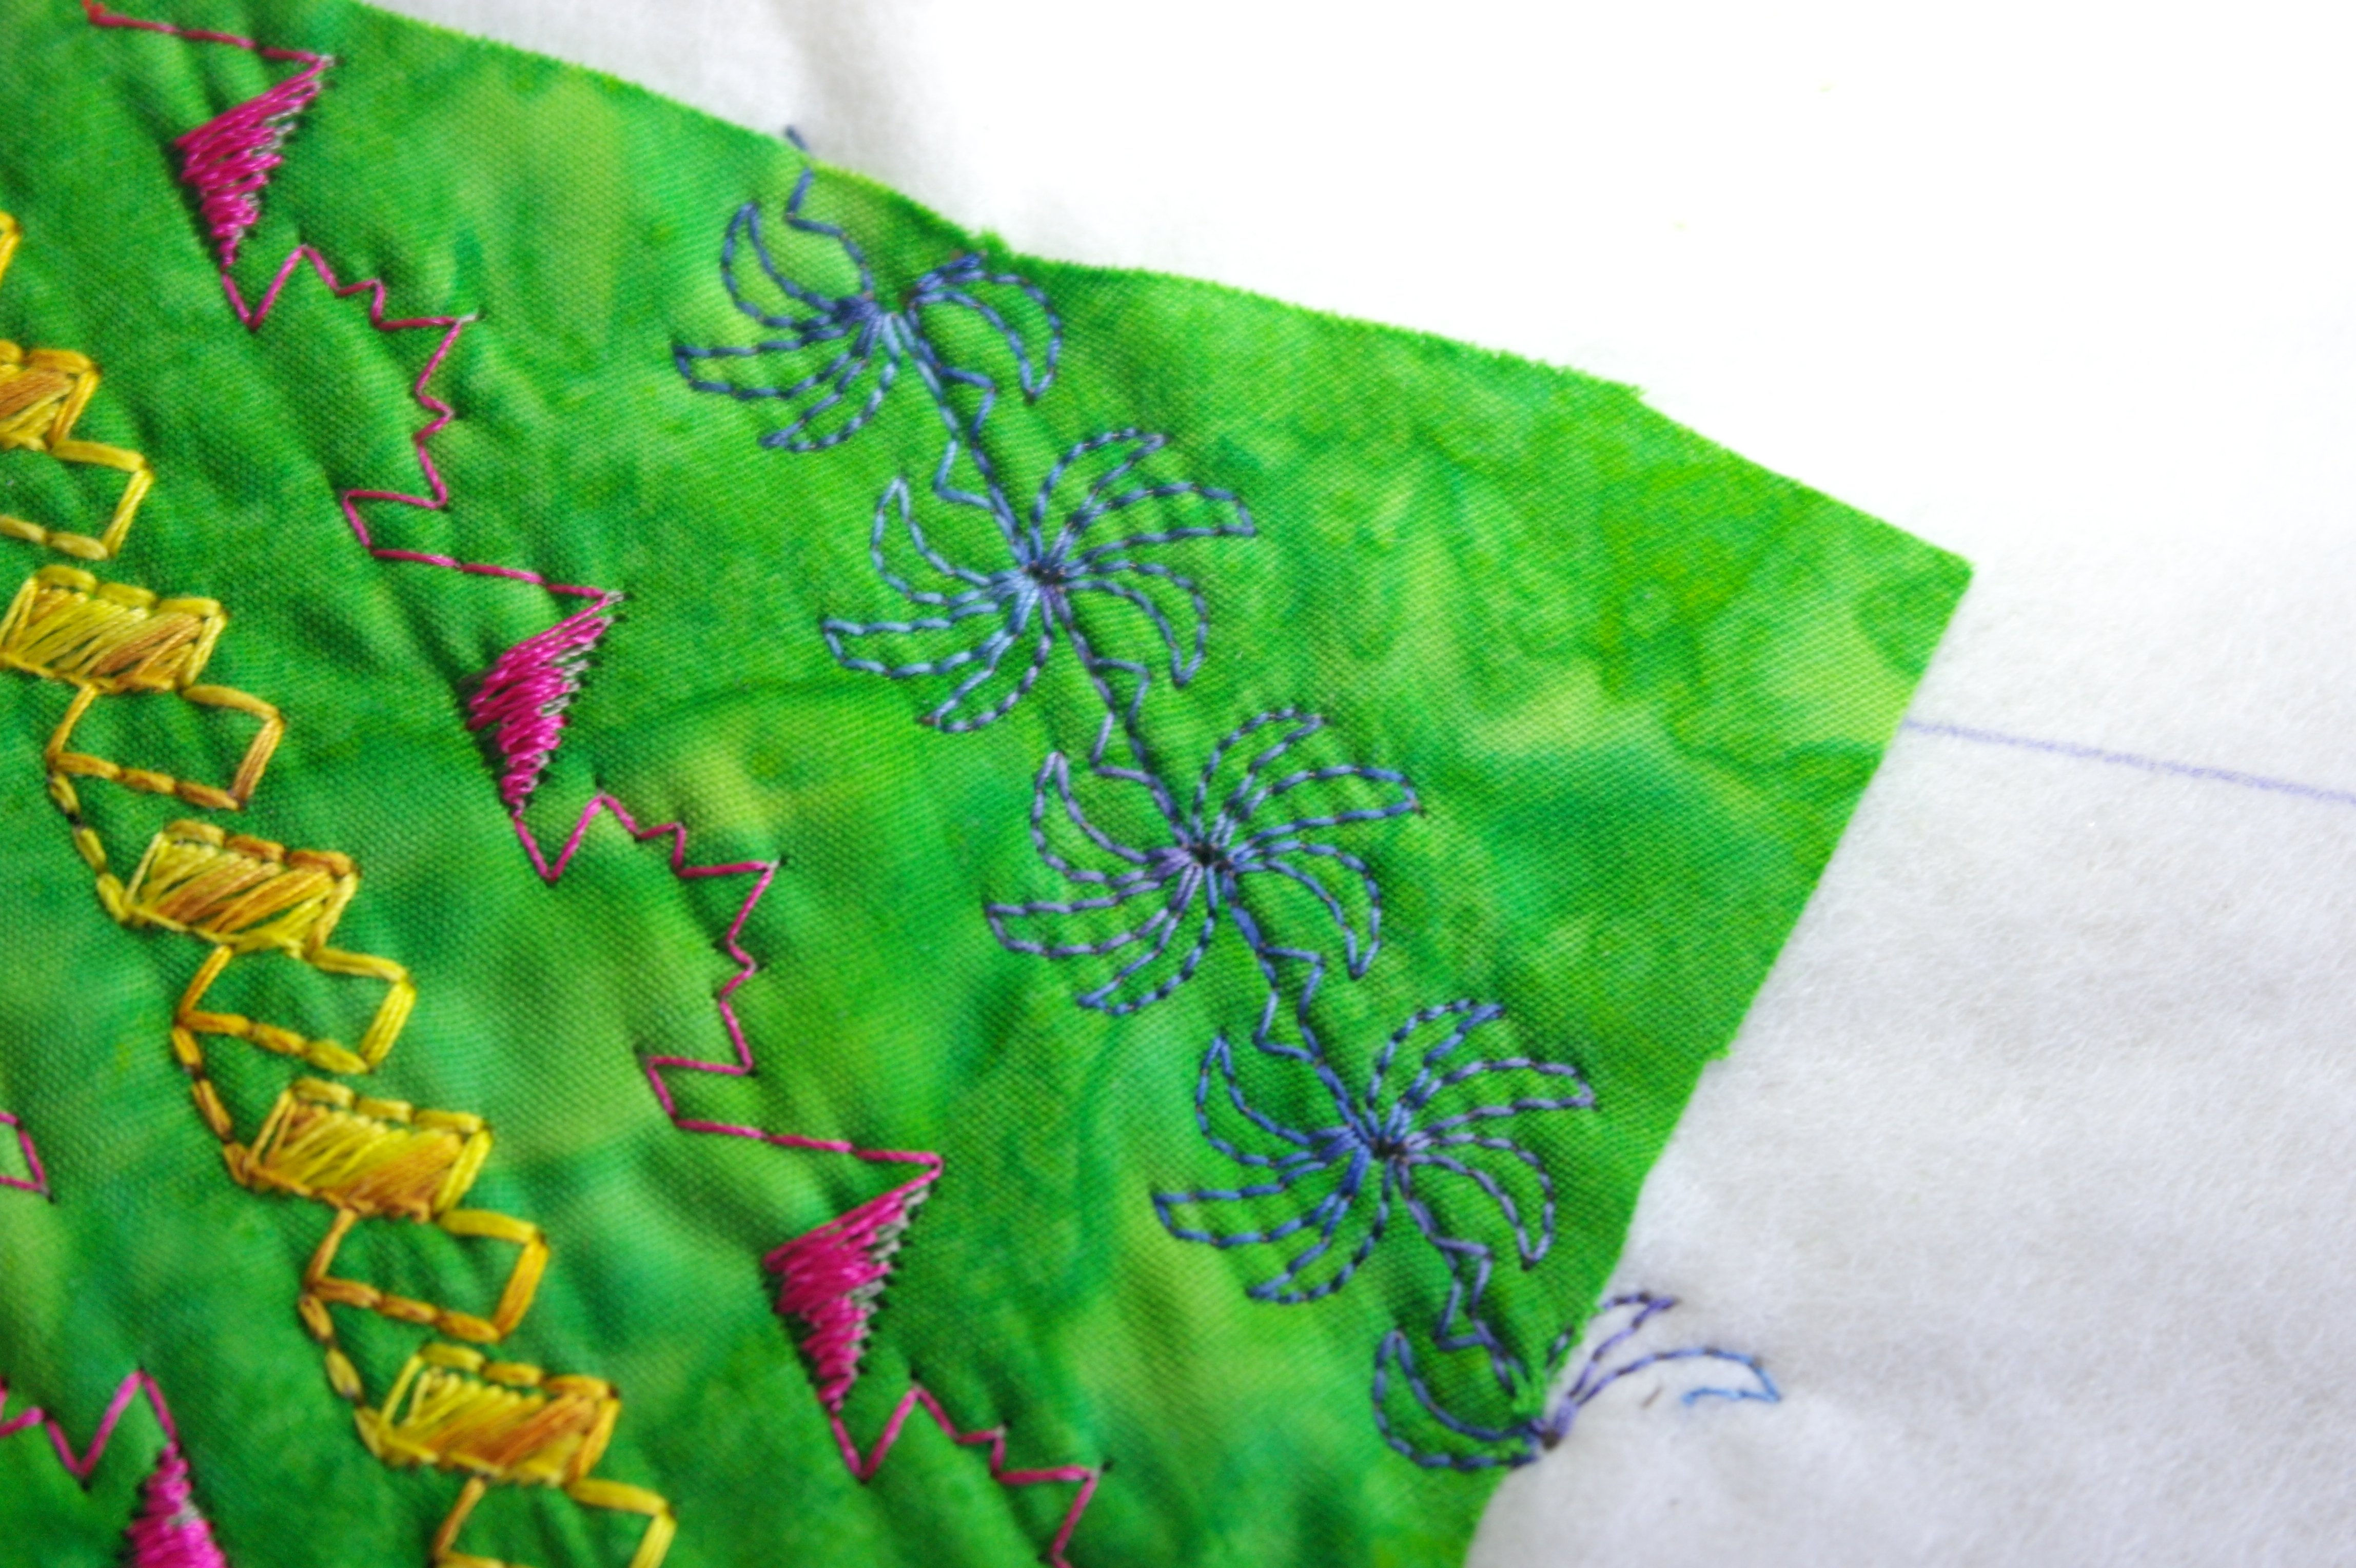
Try to work with combinations of stitches that will make small scenery’s – like landscapes etc. You can follow my example to find out what I am doing with the blocks.
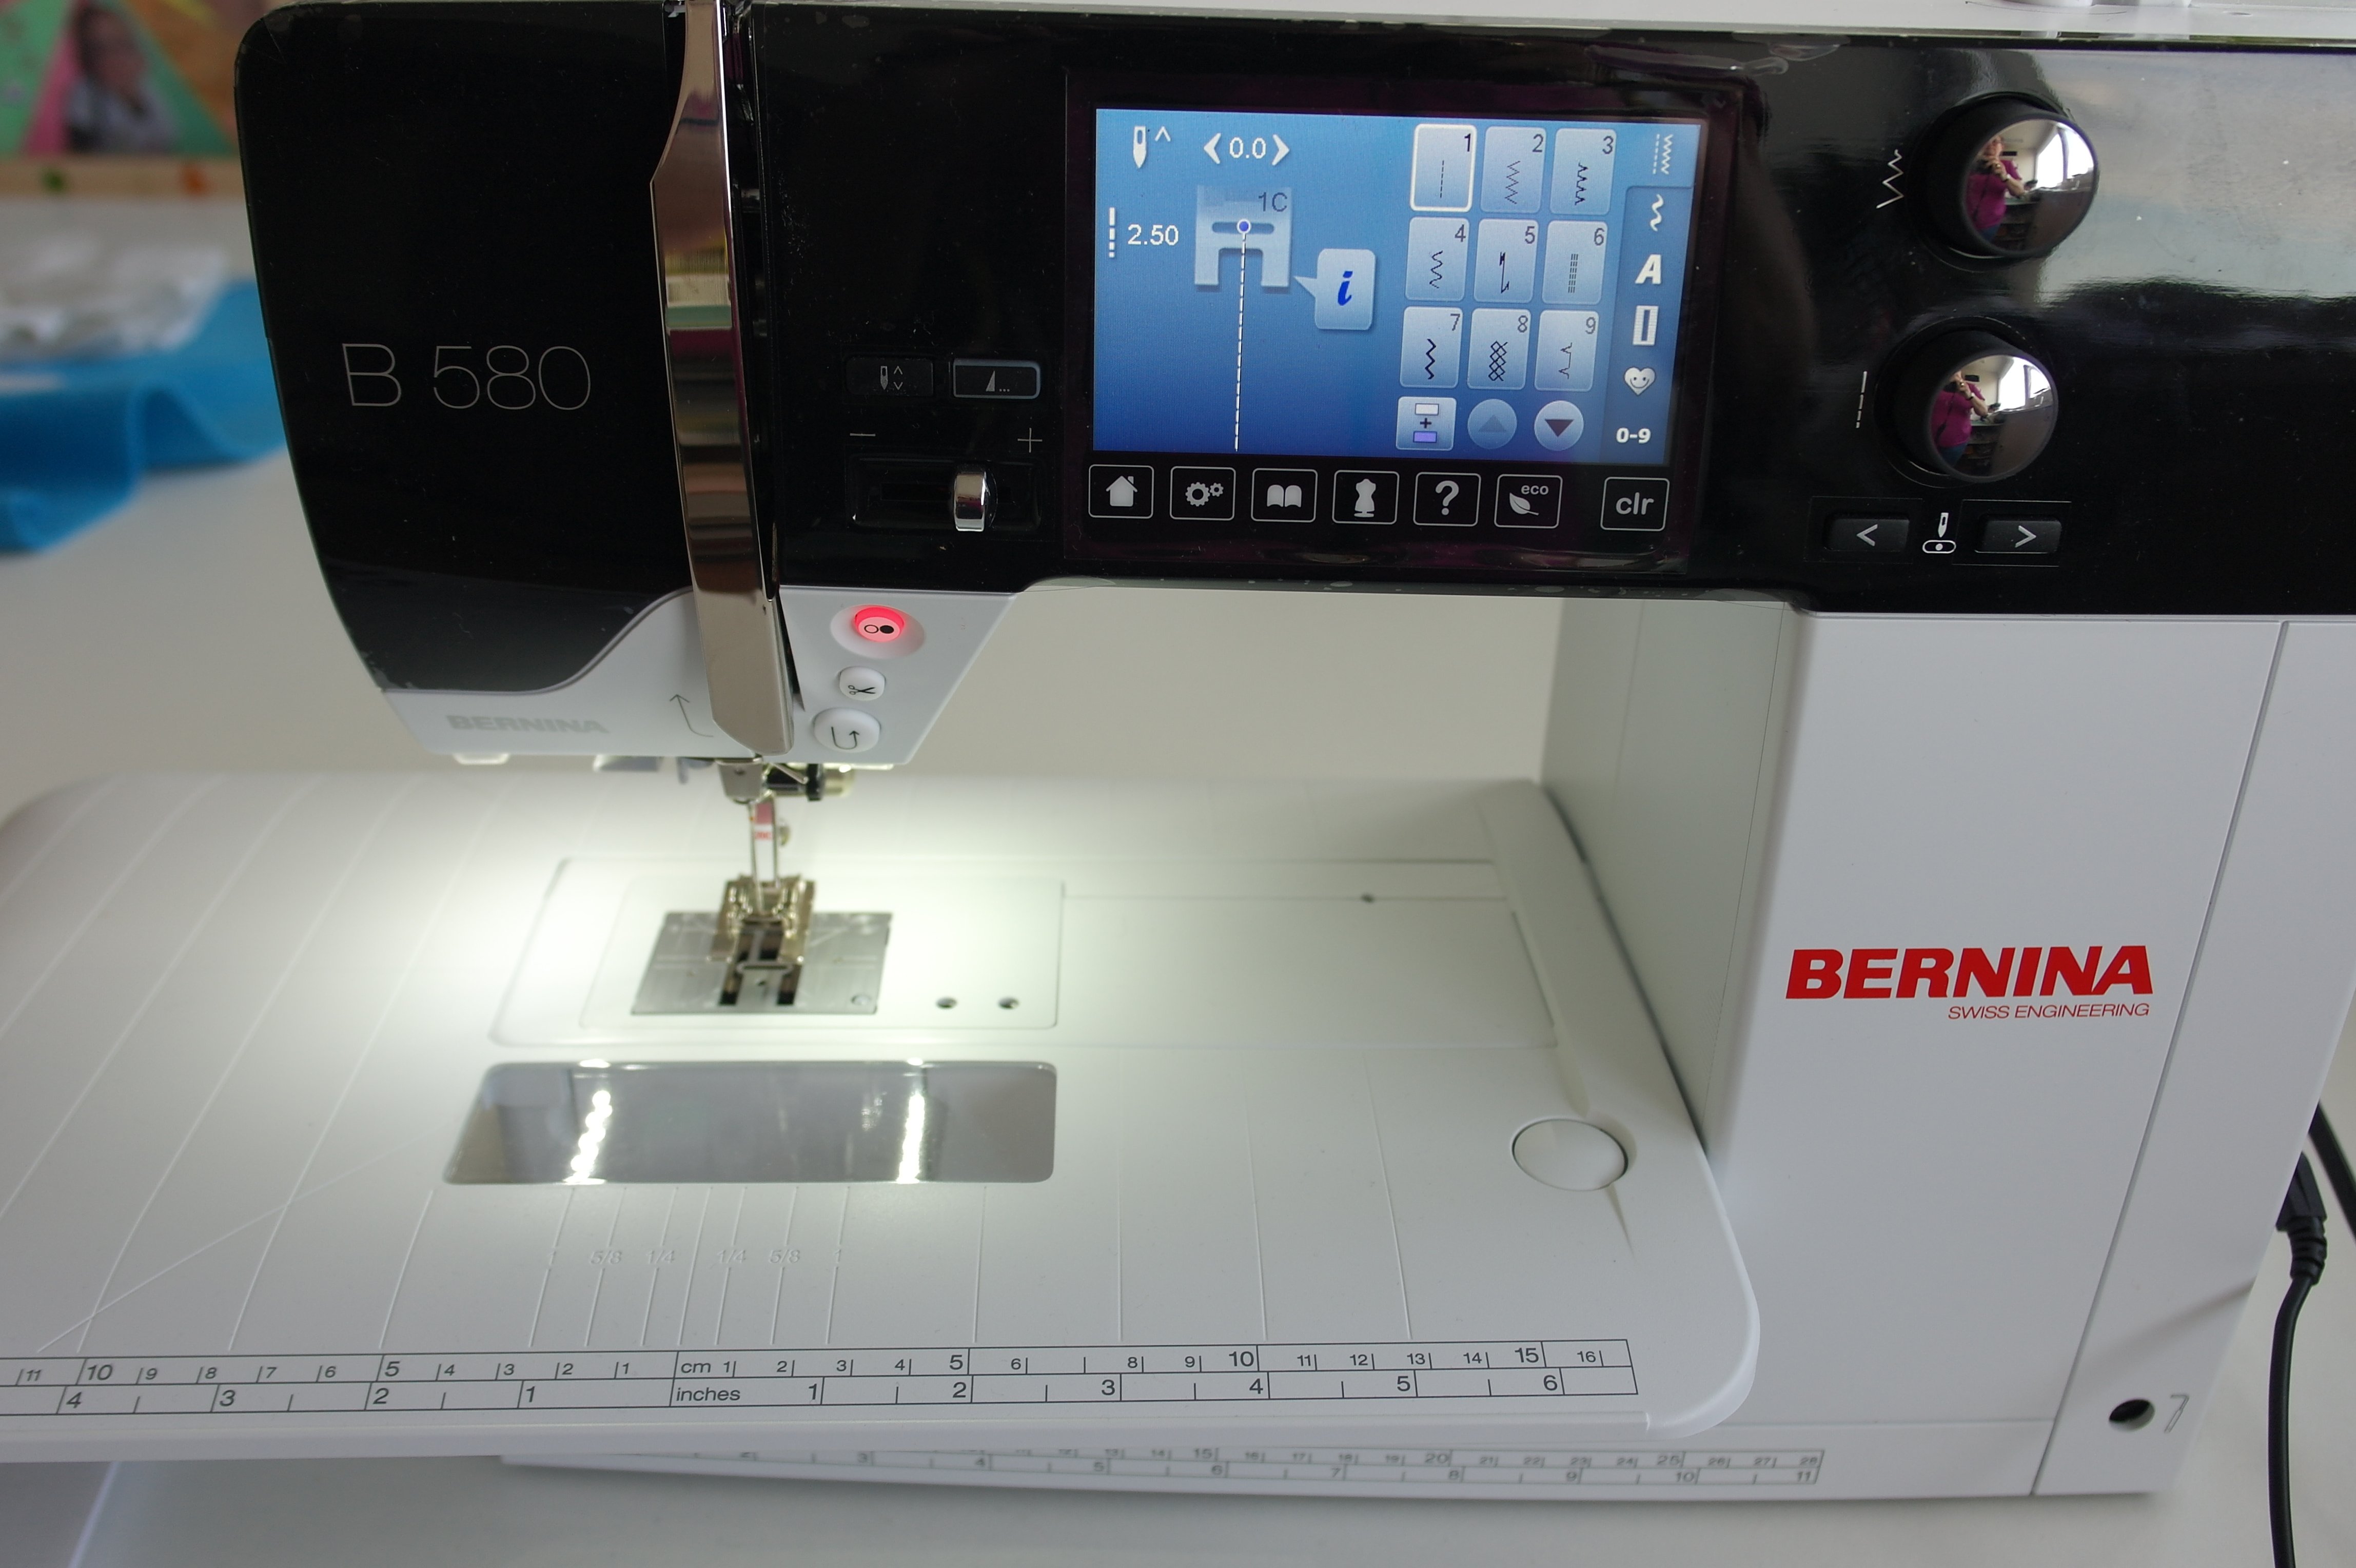
The coming months I will work on the BERNINA 580: this sewing machine is added on a temporarely base to my studio: to practice. I will give a couple of workshops in the Bernina Creative Center in Breda/the Netherlands, ‘Crazy Stitches by Machine’, while working with the BERNINA 580, which is available for class attenders. Since I have a BERNINA 770, I had to find out how the BERNINA 580 works, what the differences are between the 770QE and the 580, but also the similarities. the only way to find out is to practice.
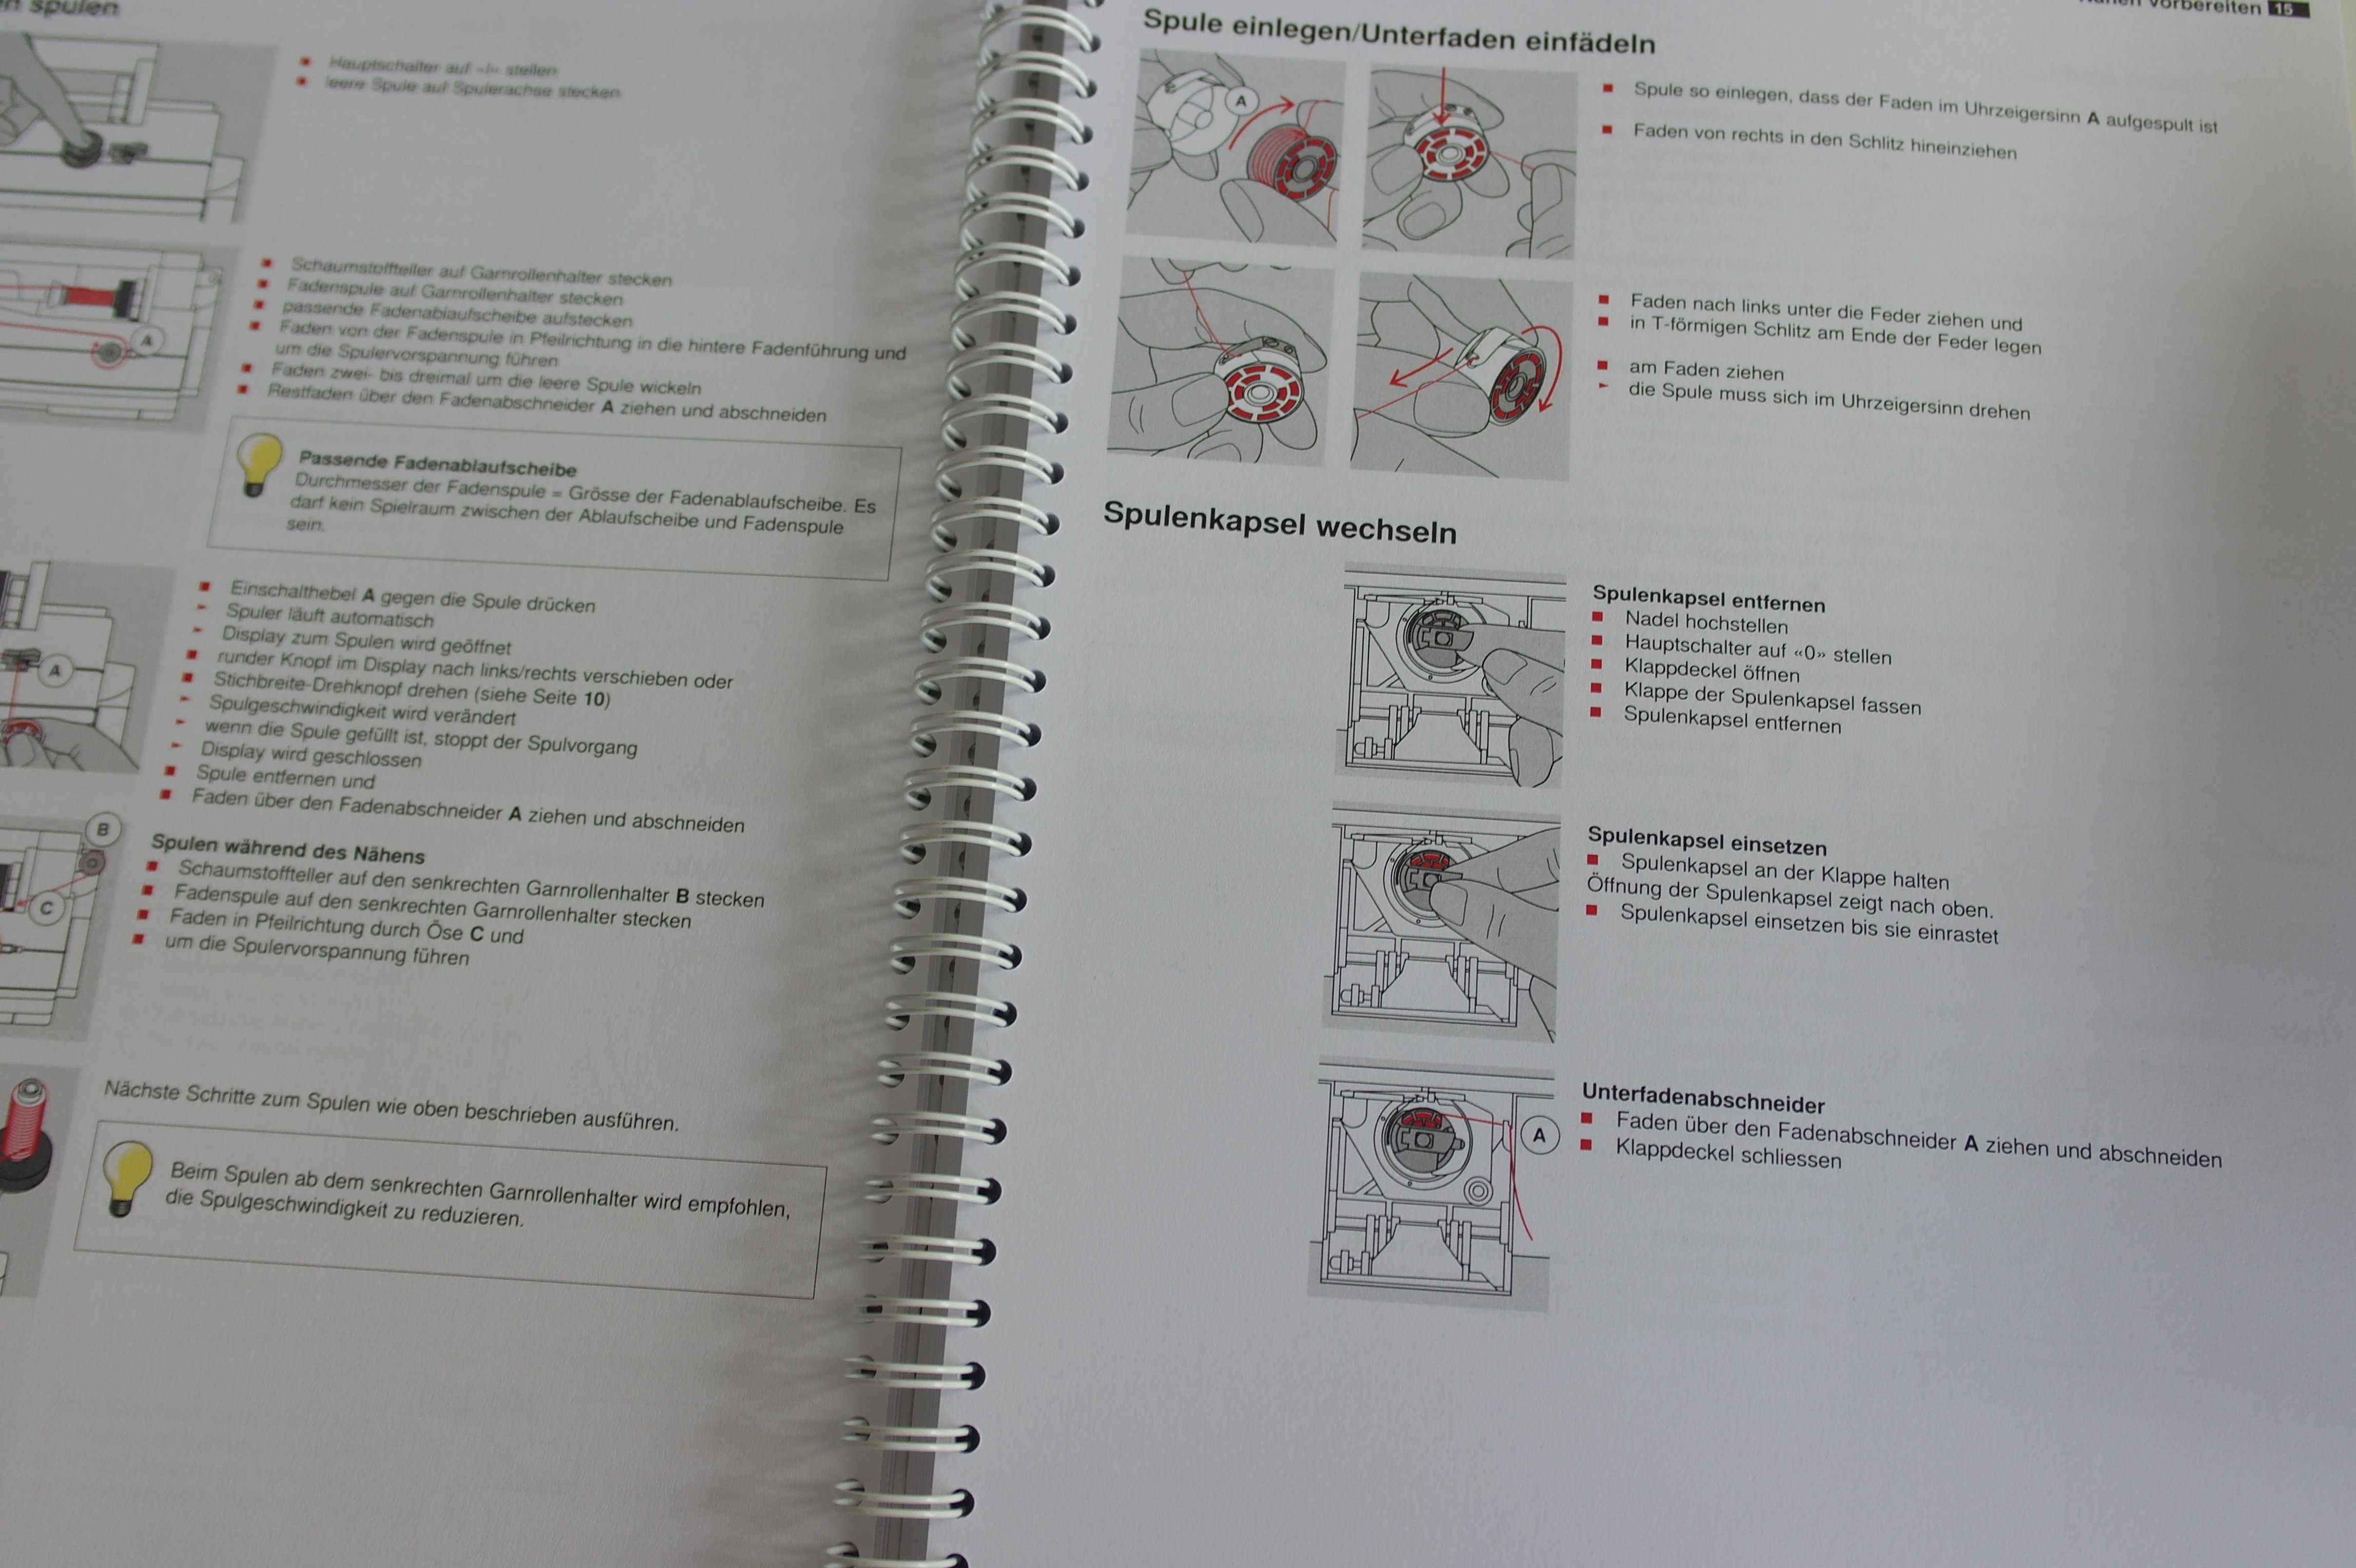
One of the differences is, that the B580 uses smaller bobbins: I am used to the large bobbins of the B770QE, which can hold more bobbin thread. The B580 uses regular metallic bobbins, which I will fill with Decobob/Wonderfill. Working with the manual next to the machine comes in handy: I can check what to do and what to use.
The decorative stitches are similar but there are also many stitches available on the B580, which are not on my B770QE: really fun to make these. The B580 is a wonderful machine, slightly more compact than the B770QE, but large enough for making the Crazy Colors Mystery Quilt 2017, because of the size of the blocks.
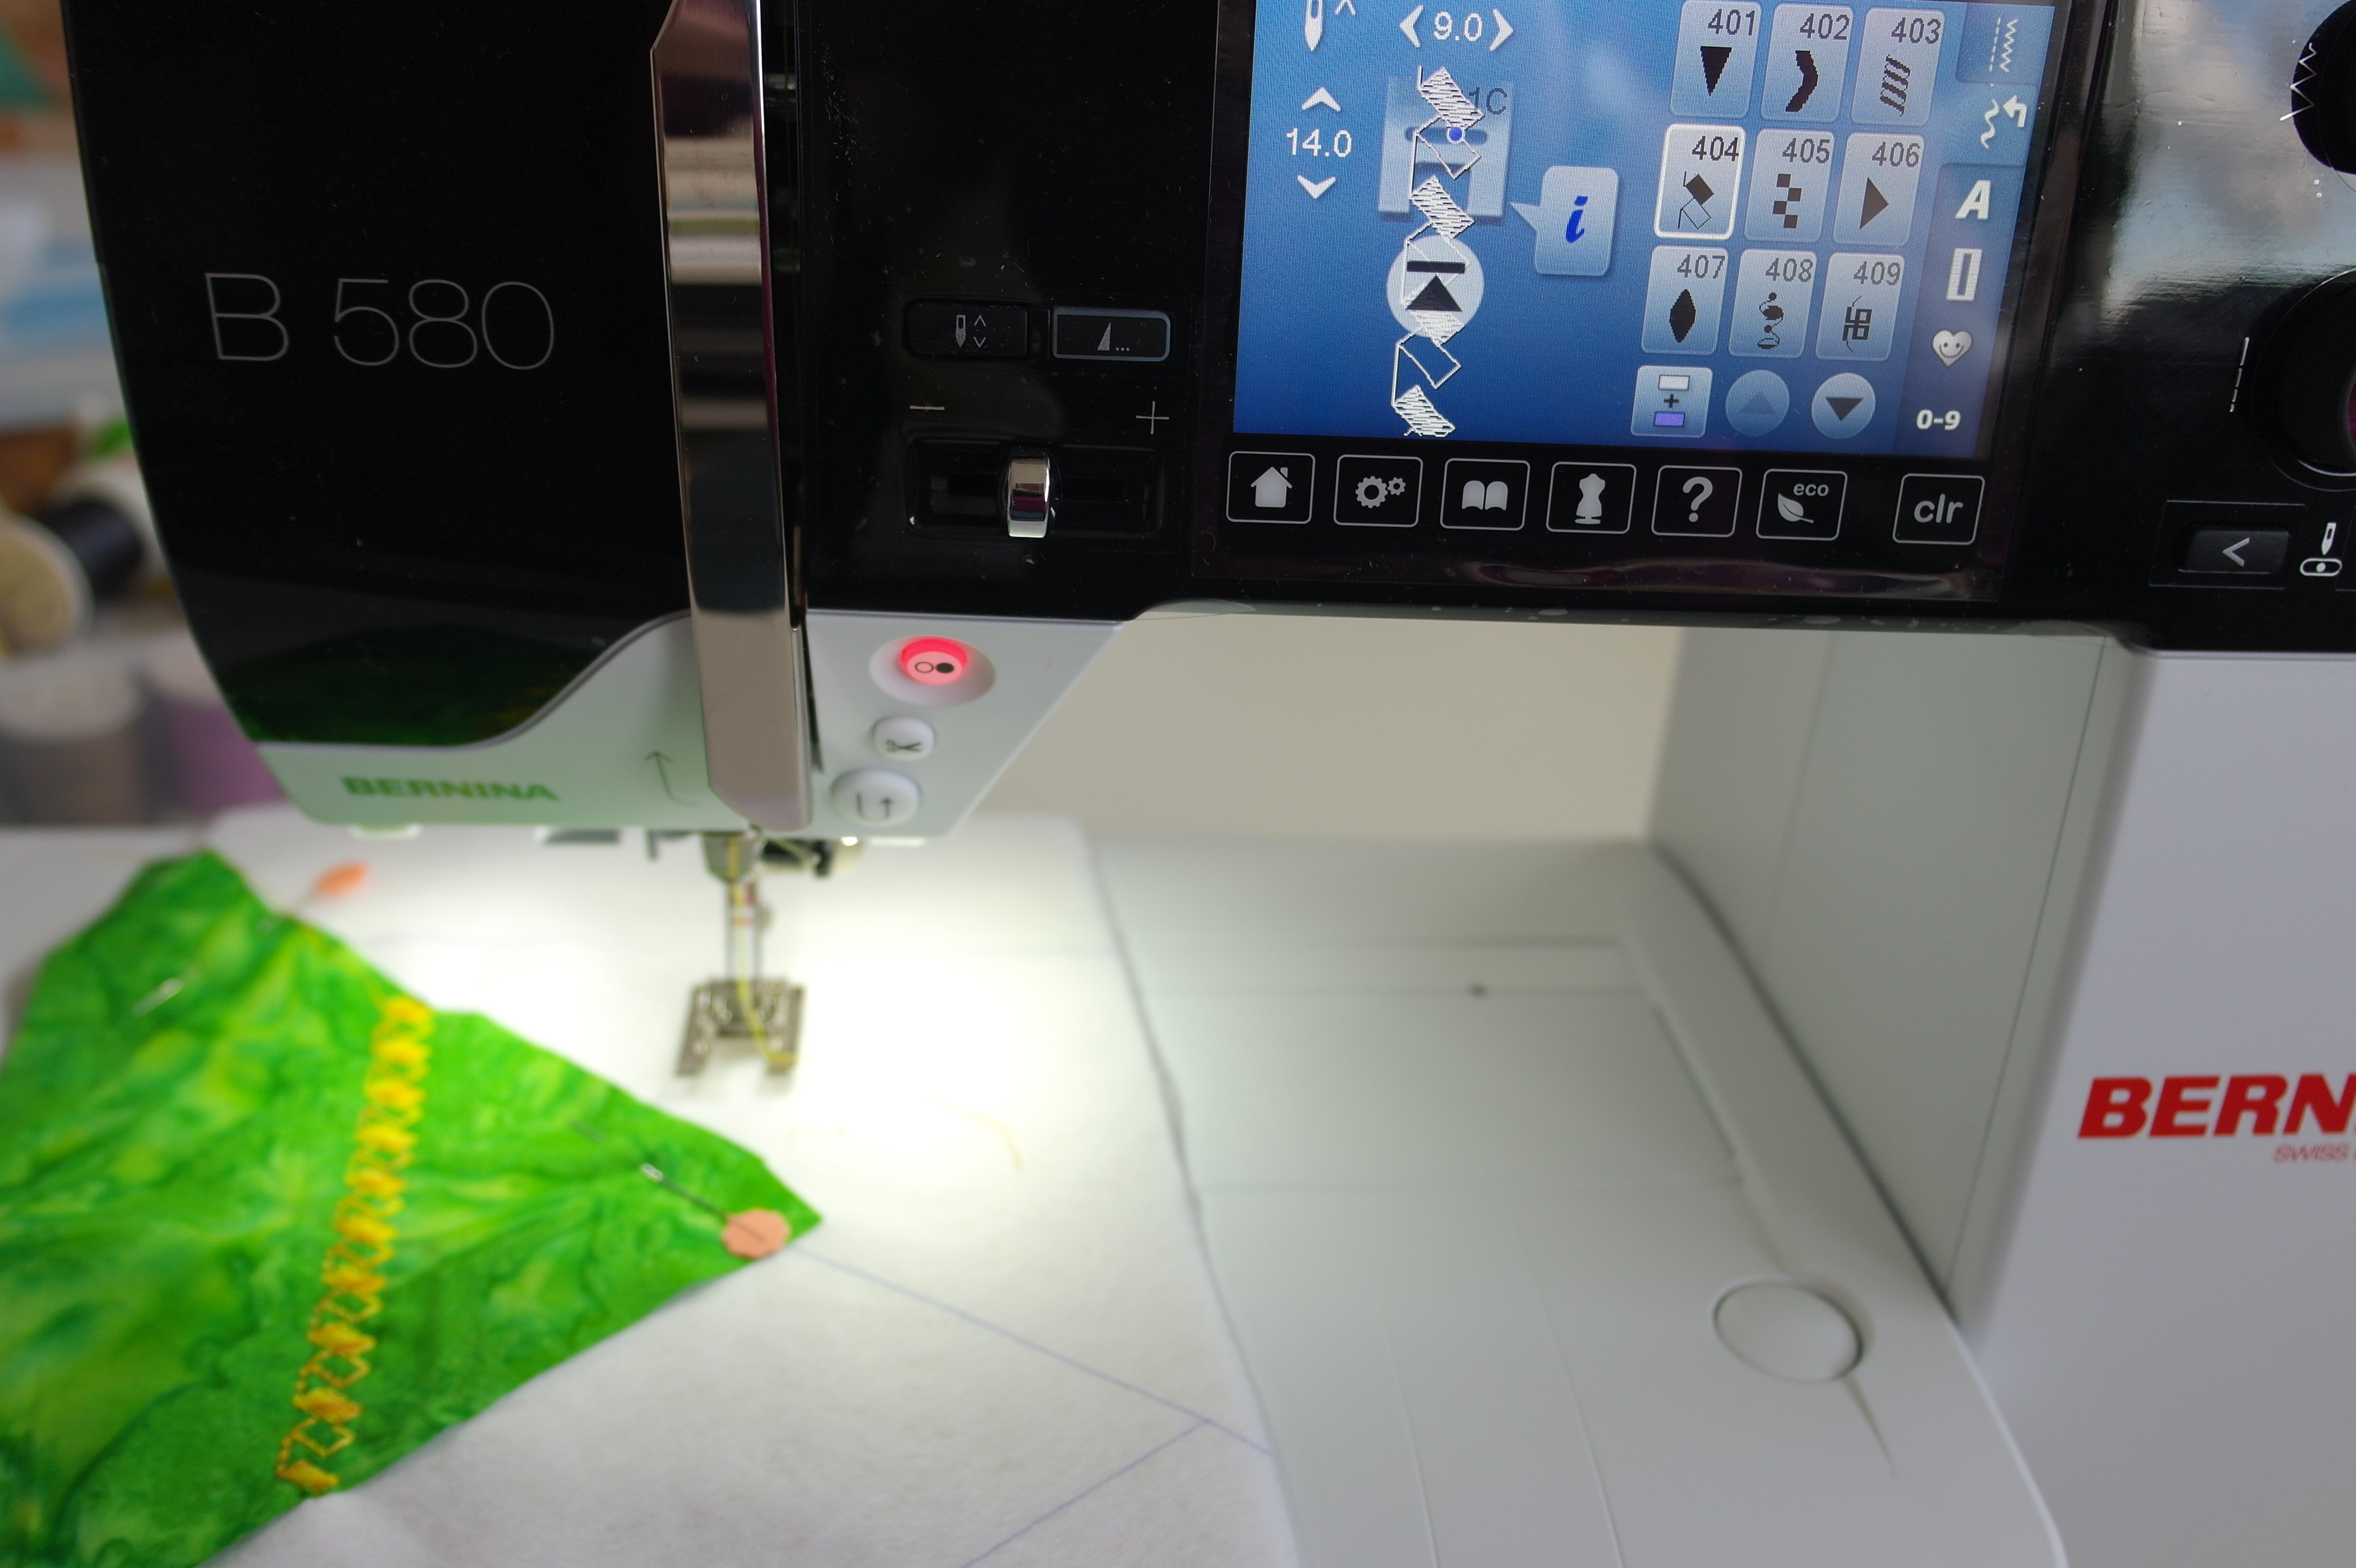
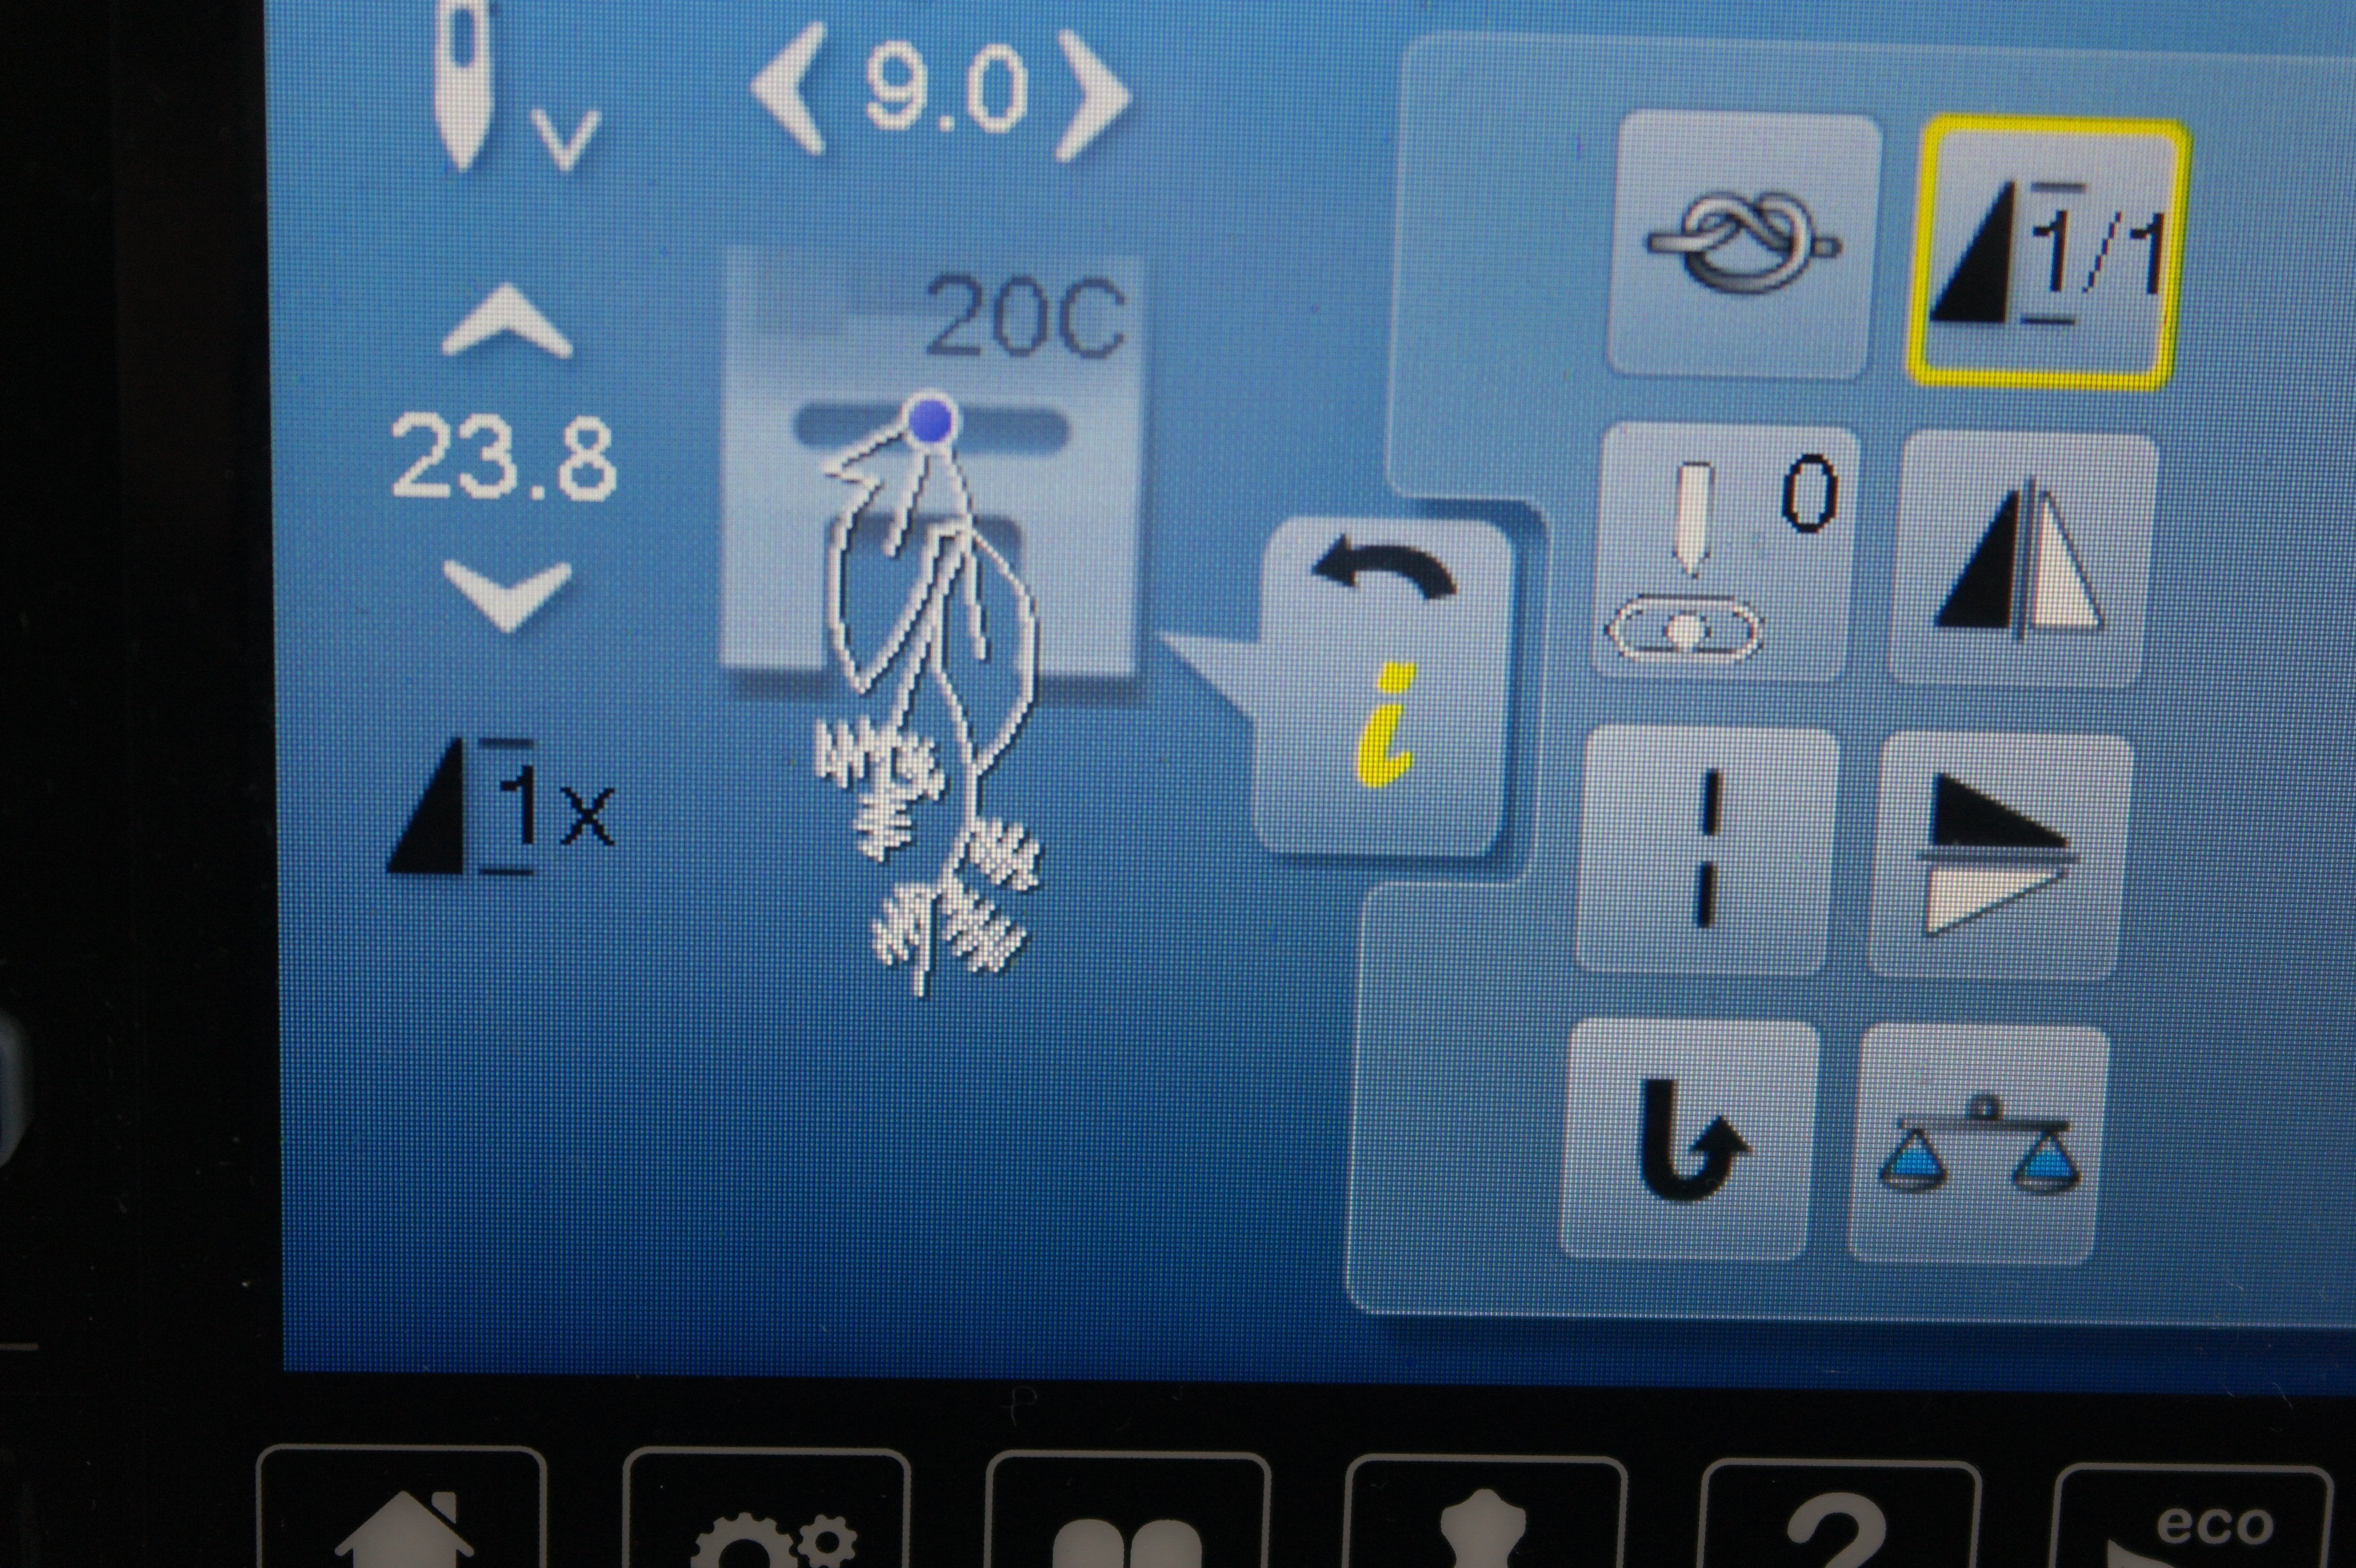
I am making the sandwiches one by one: first one A1. Fabric 1 is placed on section 1, a bit ‘over’ the edge of the sandwich, to be sure the fabric won’t be pulled back onto the sandwich, if stitches are a bit dense: you are actually quilting while making decorative stitches, because of the sandwich, and that can cause shrinkage. The first stitch is a fun stitch: 404 – not available on the B770QE heb! The picture above shows the stitch already made. I will make all stitches for section 1/fabric 1 of each sandwich vertical, to have a different direction comparing to the next sections/fabrics.
Stitches can be made up to 9mm with the B580 (same as B770QE). Not all stitches are wide – sometimes you can widen them, but with some stitches you will have a ‘lock’, because of the maximum width. Finding stitches works well on the touch screen: using your fingertips to tip icons, each time you will hear a soft beep, to indicate you have changed something.
Another different item: the handle to raise and lower the presser foot: with the B770QE this is done automatic after removing your foot off the foot control. No problem, because you will also hear a soft beep, if you forget to lover the presser foot, and a warning on the touch screen, indicating the foot has to be lowered, showing an arrow which is pointing down.
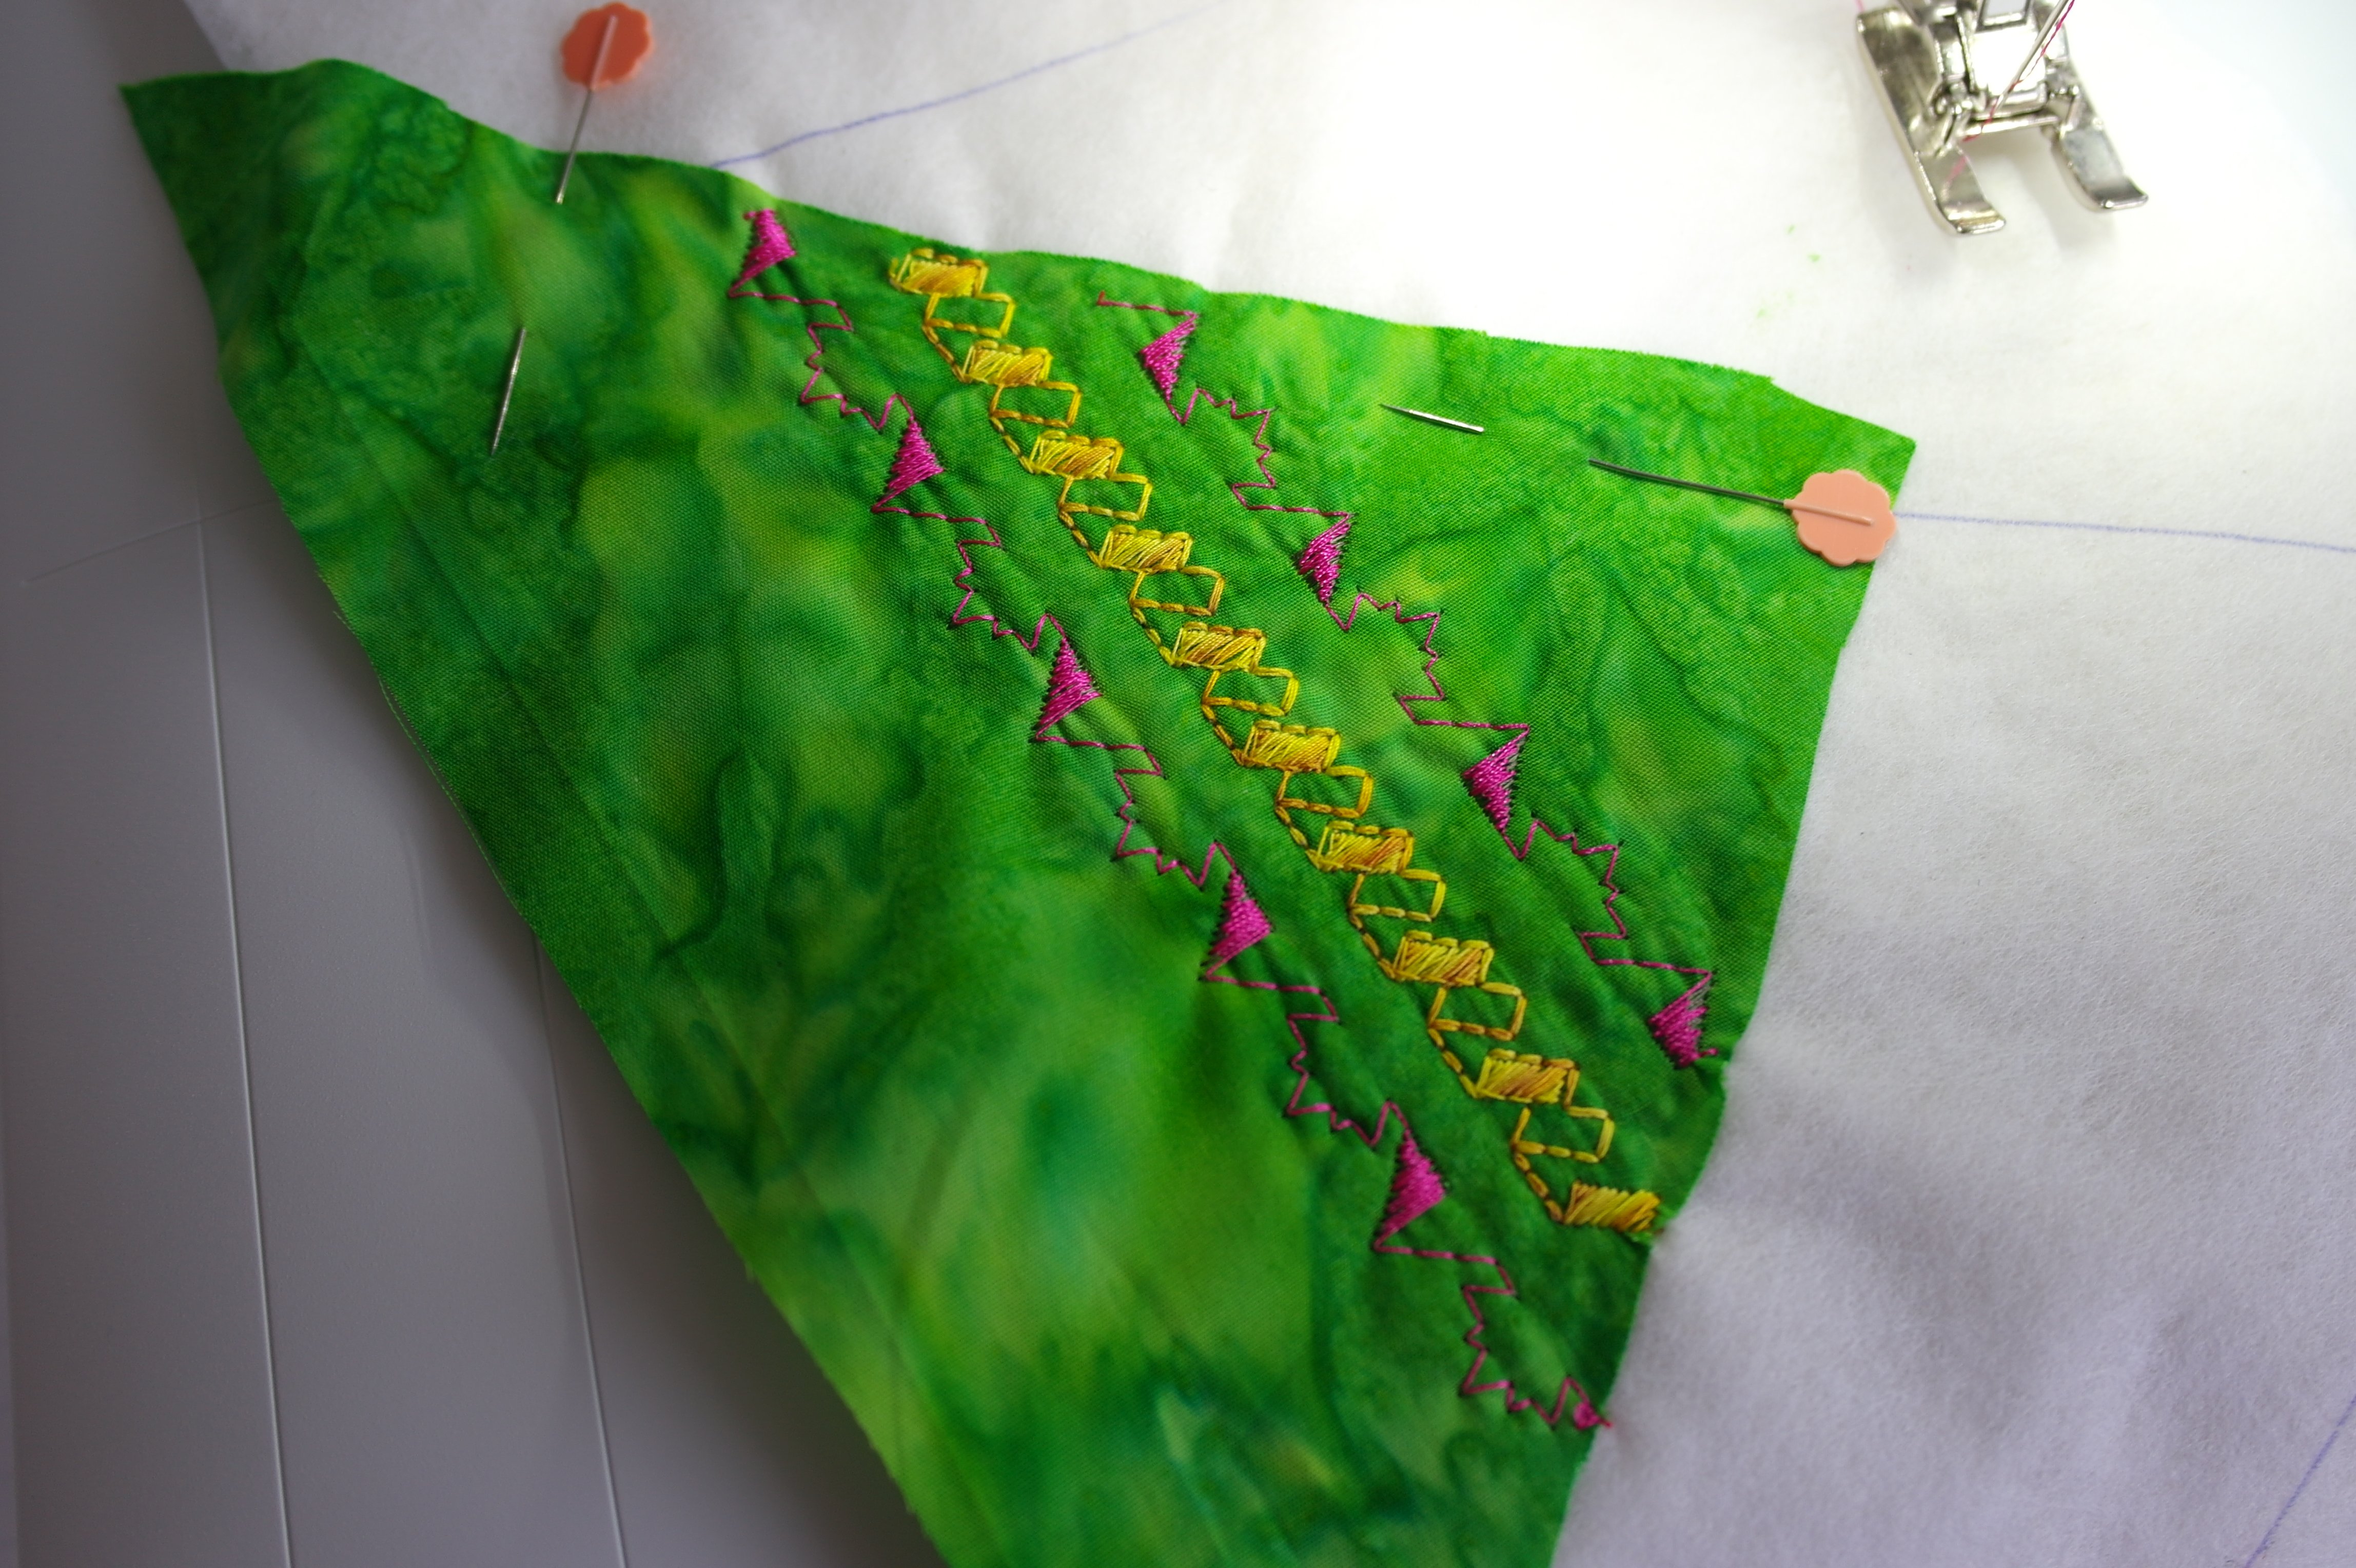
The next rows of stitches are placed on either side of the first row: it looks like I have made a wide row of stitches all together…
And these next rows – using blue Tutti/Wonderfil – are joined at the base line. I have tried this first on a sample, to see how to combine both stitches. Now it looks like one wide row of stitches, but there are actually two. Do you notice the length of the rows? All the way to the edges of the sandwich!
This is the back of the first section – as you can see, the batik fabric of the front protrudes slightly to be sure it competely covers the sandwich after making the stitches.
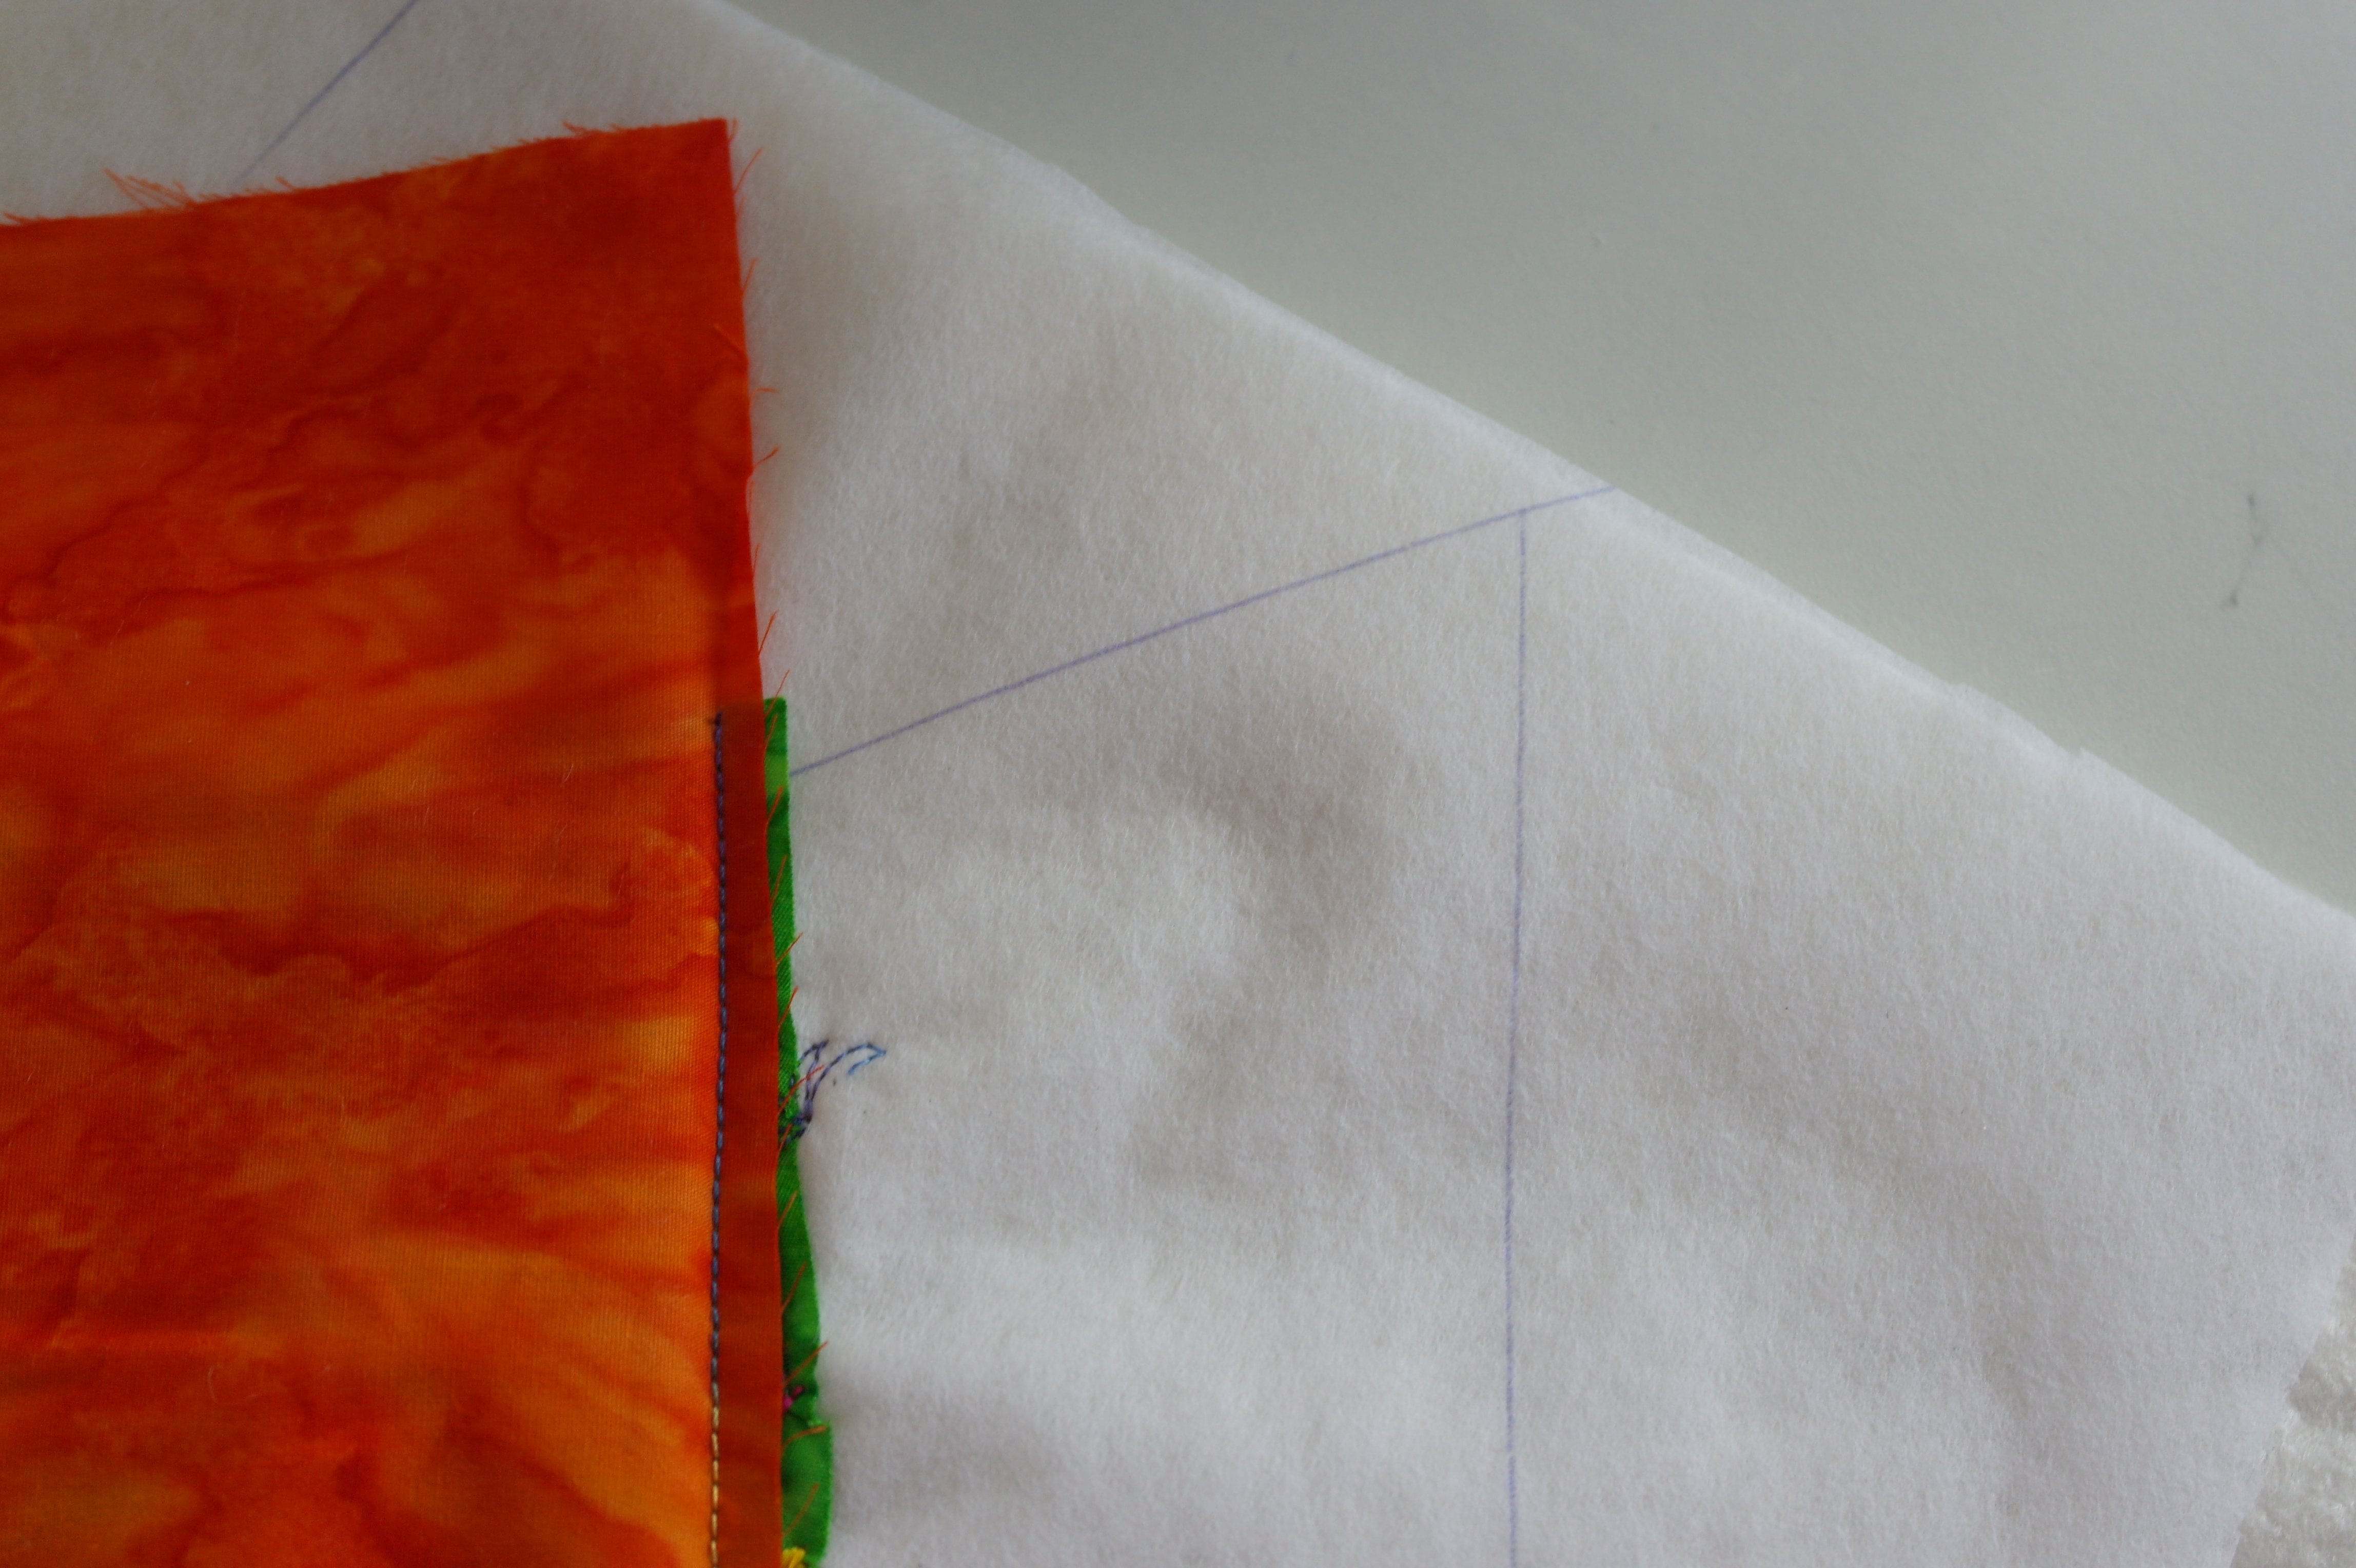
The next fabric is placed right side onto the first fabric, making sure the edge of the fabric itself is pointing out quite a bit, because it has to extend to/slightly over the edge of the sandwich when it is turned to the right side. Be sure to check this, before attatching the fabric onto the sandwich.

I am having fun working with just one stitch: you can make them one at the time, instead of an entire row, by clicking on the icon with the yellow square: every time you change a default, it turns up yellow on your touch screen. Not only the ‘i’ is yellow, but also the icon you have changed. Don’t forget to change it back after finishing your stitch/row, by clicking on the icon again, or by using ‘CLR’, at the bottom right of your screen.
Working with just 1 stitch is fun, but also with 2 stitches – click on the icon again, and you will see 2x. You can click up to 9 x, and after that it is ‘0’ again, meaning an endless row.
Put the needle in the ‘down’ position, turn your work after making just one stitch, etc. By turning your sandwich eacht time one complete stitch is finished, you change direction of the row, making it like a wave. That’s different from a straight row. Using wide and smaller rows of stitches makes a baseline/foundationi for landsapes, where stitches can be added to make flowers, leaves, grass etc.
First rows are waving their way through each other: again, needle in the down position after finishing a stitch, or reaching the point where you want to change direction is essential.
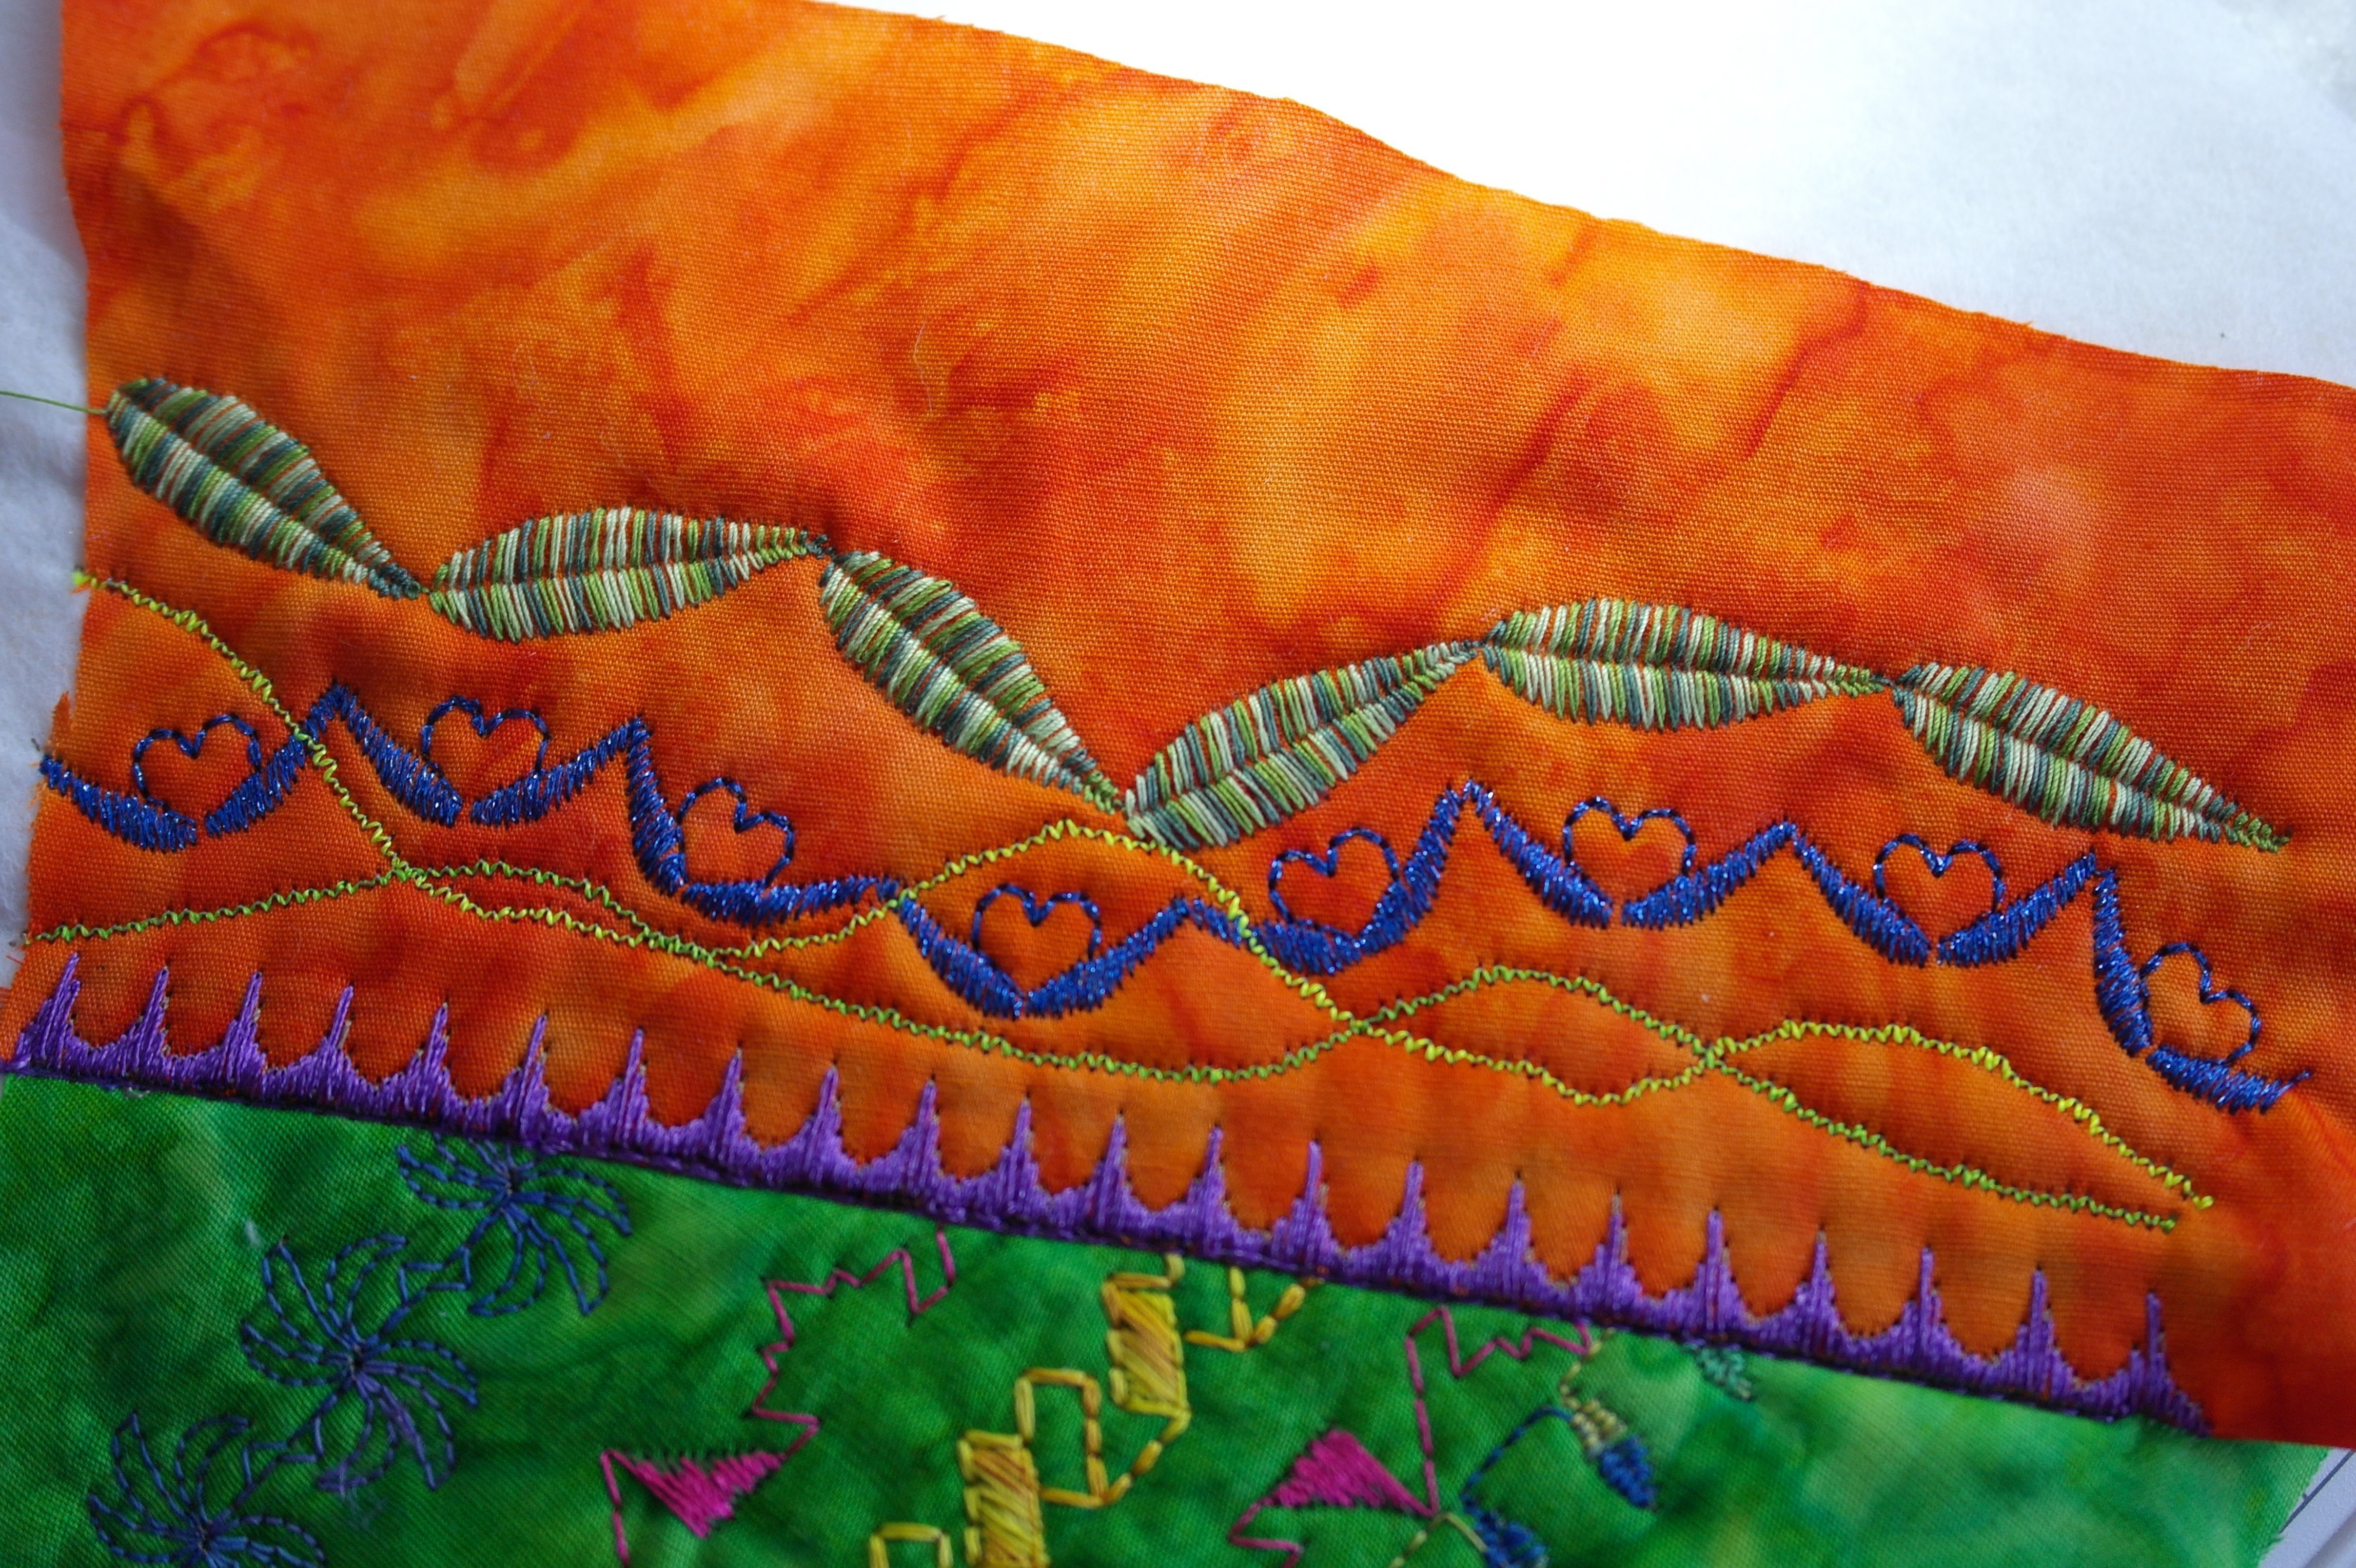
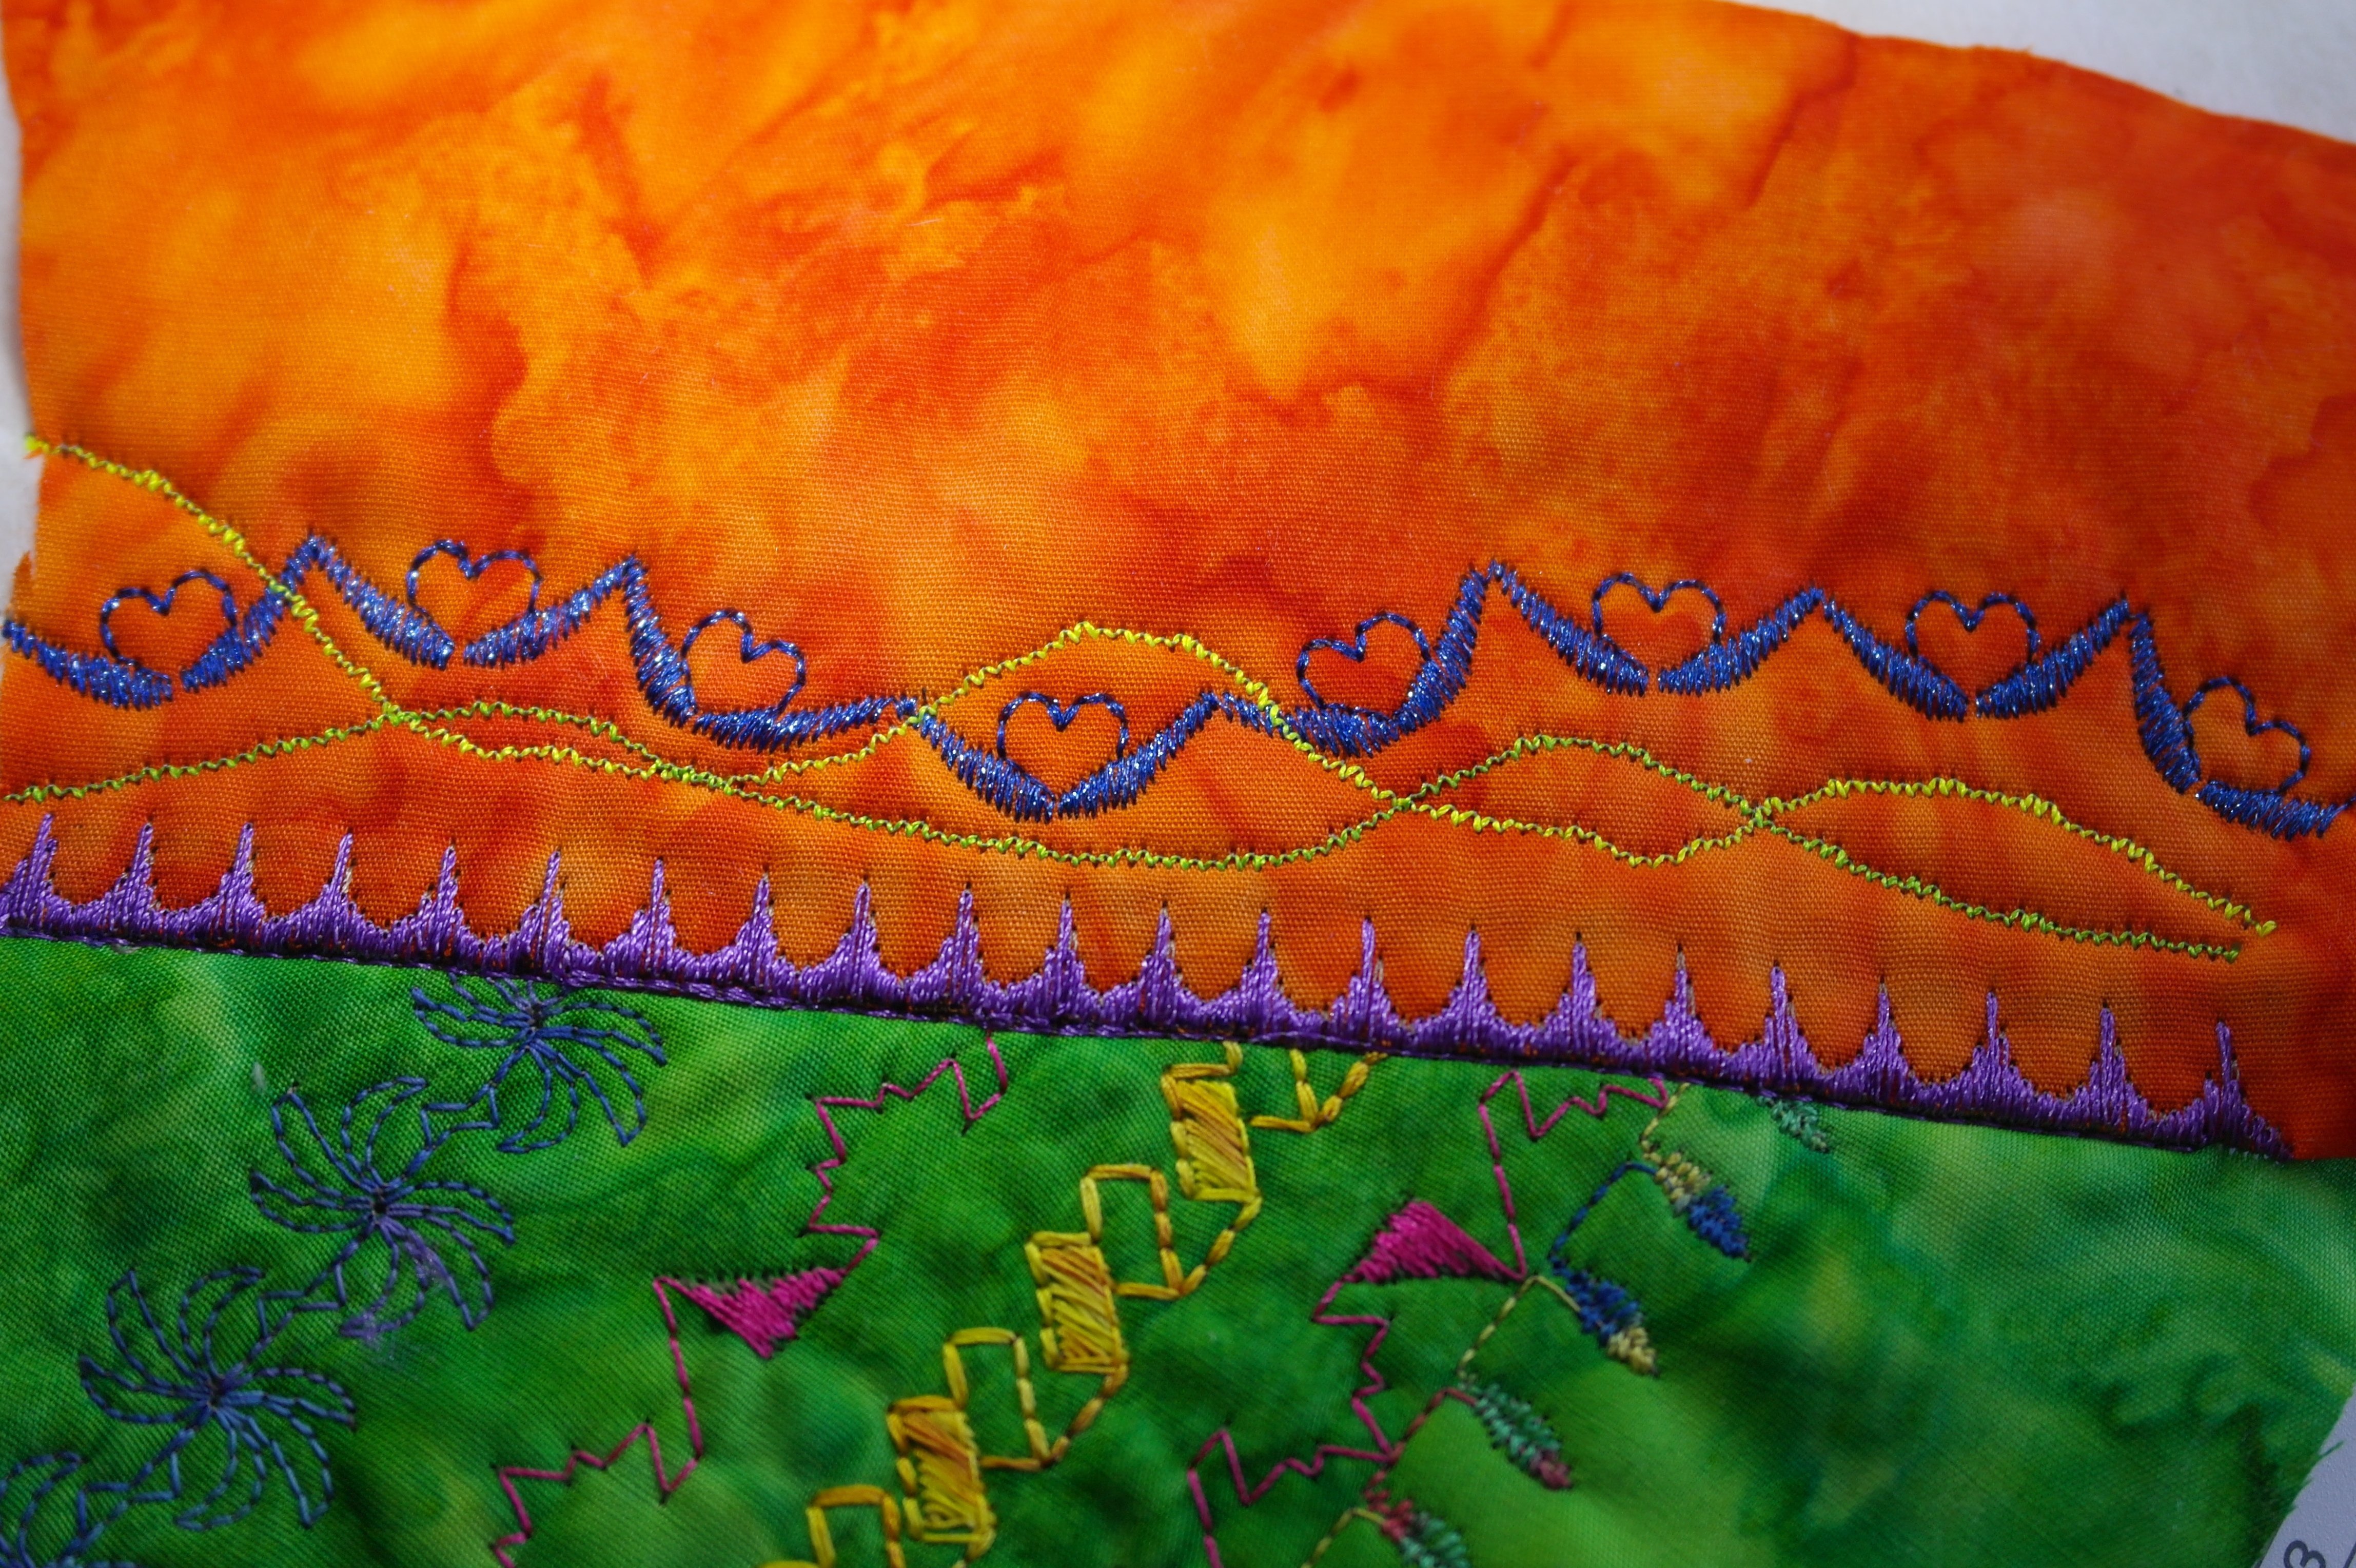
The next row is made out of large leaves, with variegated threads.

By adding stitches, like button hole stitch 61), which can be made using the Open Embroidery foot #20C, and randomly stitch them at different places, you will create flowers.
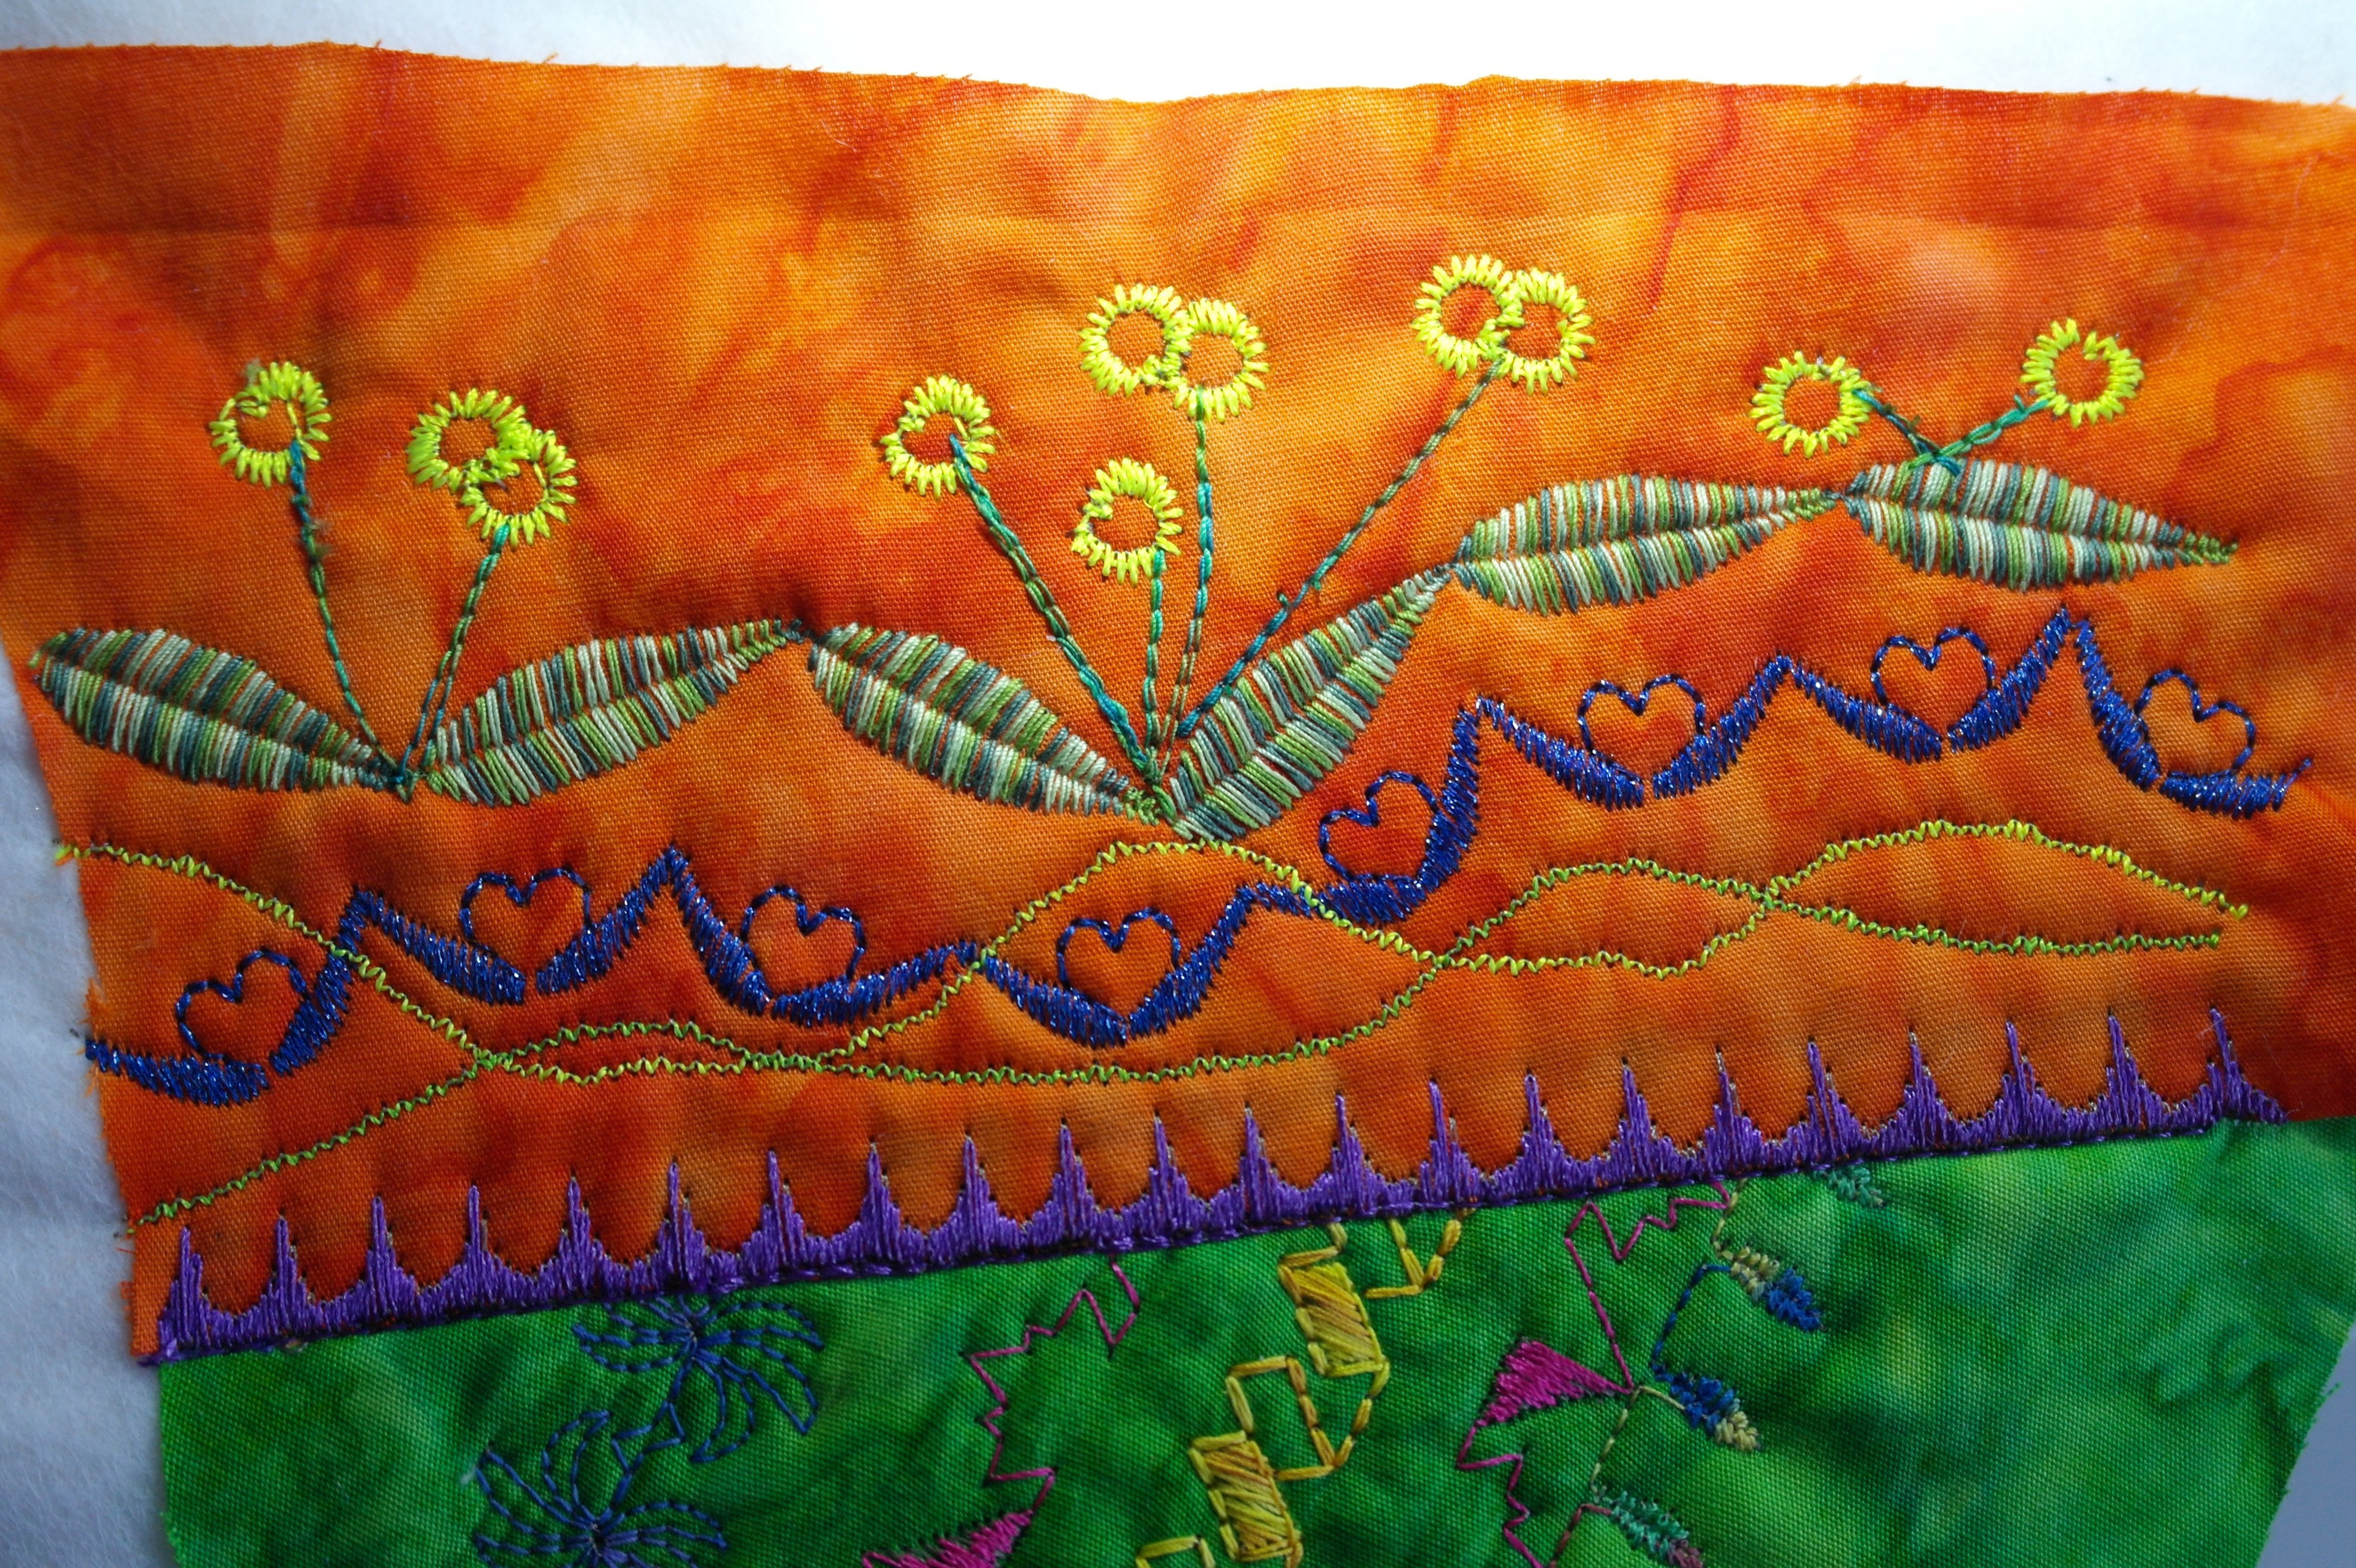
Finishing this ‘landscape’ with stems, making them with straight stitches back and forth, and again a green variagated thread: now you can see the flowers, is’nt this nice?
The next fabric (nr. 3) is added, making straight rows again. Making a ‘landschape’ of any kind on just one section/fabric, makes it stand out. If I would assemble my quilt, using this block the way it is placed as a pattern, the landscape would be facing upside down – but don’t worry: you can change directions of any block, which I will show in month 12.
Another great effect is to change direction of the row of stitches, halfway. Make a row of stitches and stop where the center of the row should be. Push the ‘1/1’ button to finish the stitch, but don’t cut the thread.

Push the ‘mirror’ icon, be sure to check if the stitch is made in the other direction (not side ways, but vertical). Then click on the ‘1/1’ icon untill the yellow border dissapears, and finish the row. You cannot use ‘CLR’, because every change will be deleted by then, and you want to keep the ‘mirror’ for making stitches in the other direction.
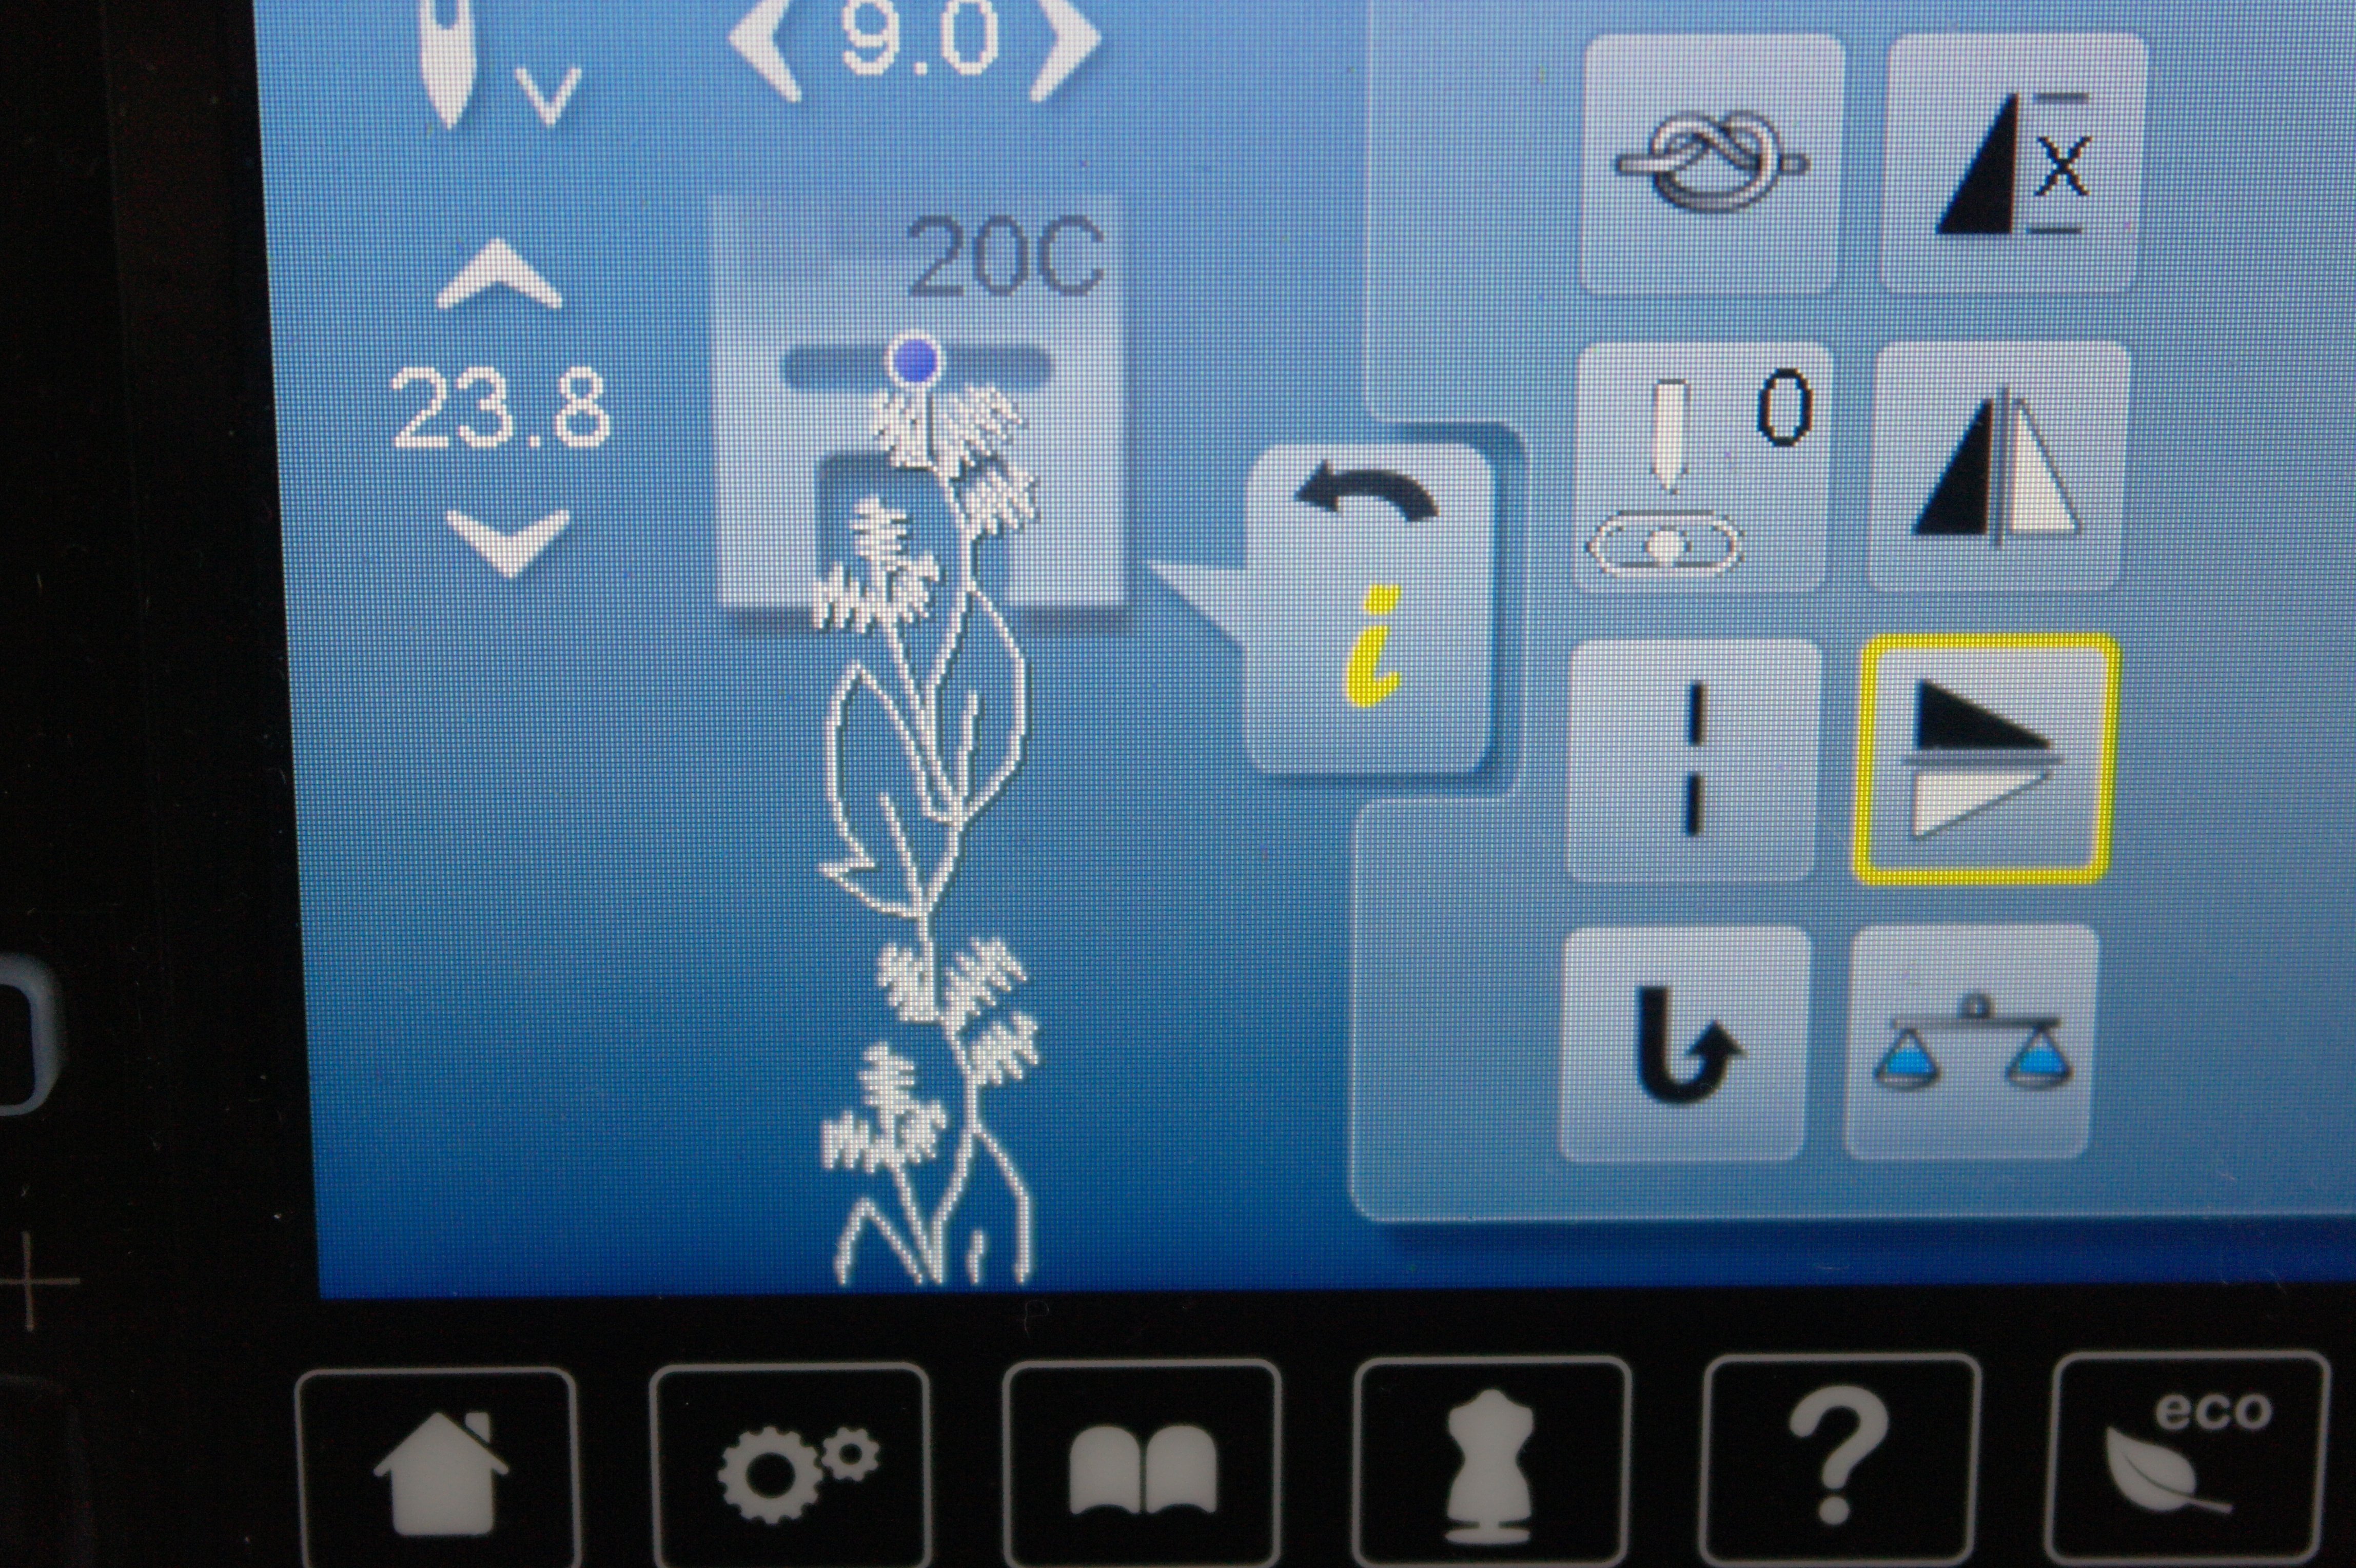
Now you will see a row of stitches appear on your screen, indicating an endless row will be made untill you stop.
The upper row of red stitches is the one I’ve made, while changing direction in the center of the row.
Because there are more blocks to be made, try to decorate each block with your own version of ‘landscape’, single stitches, waves of rows etc. Try to find out how the efffects in a row of stitches can be manipulated by changing direction, and placing them seperately on your block.
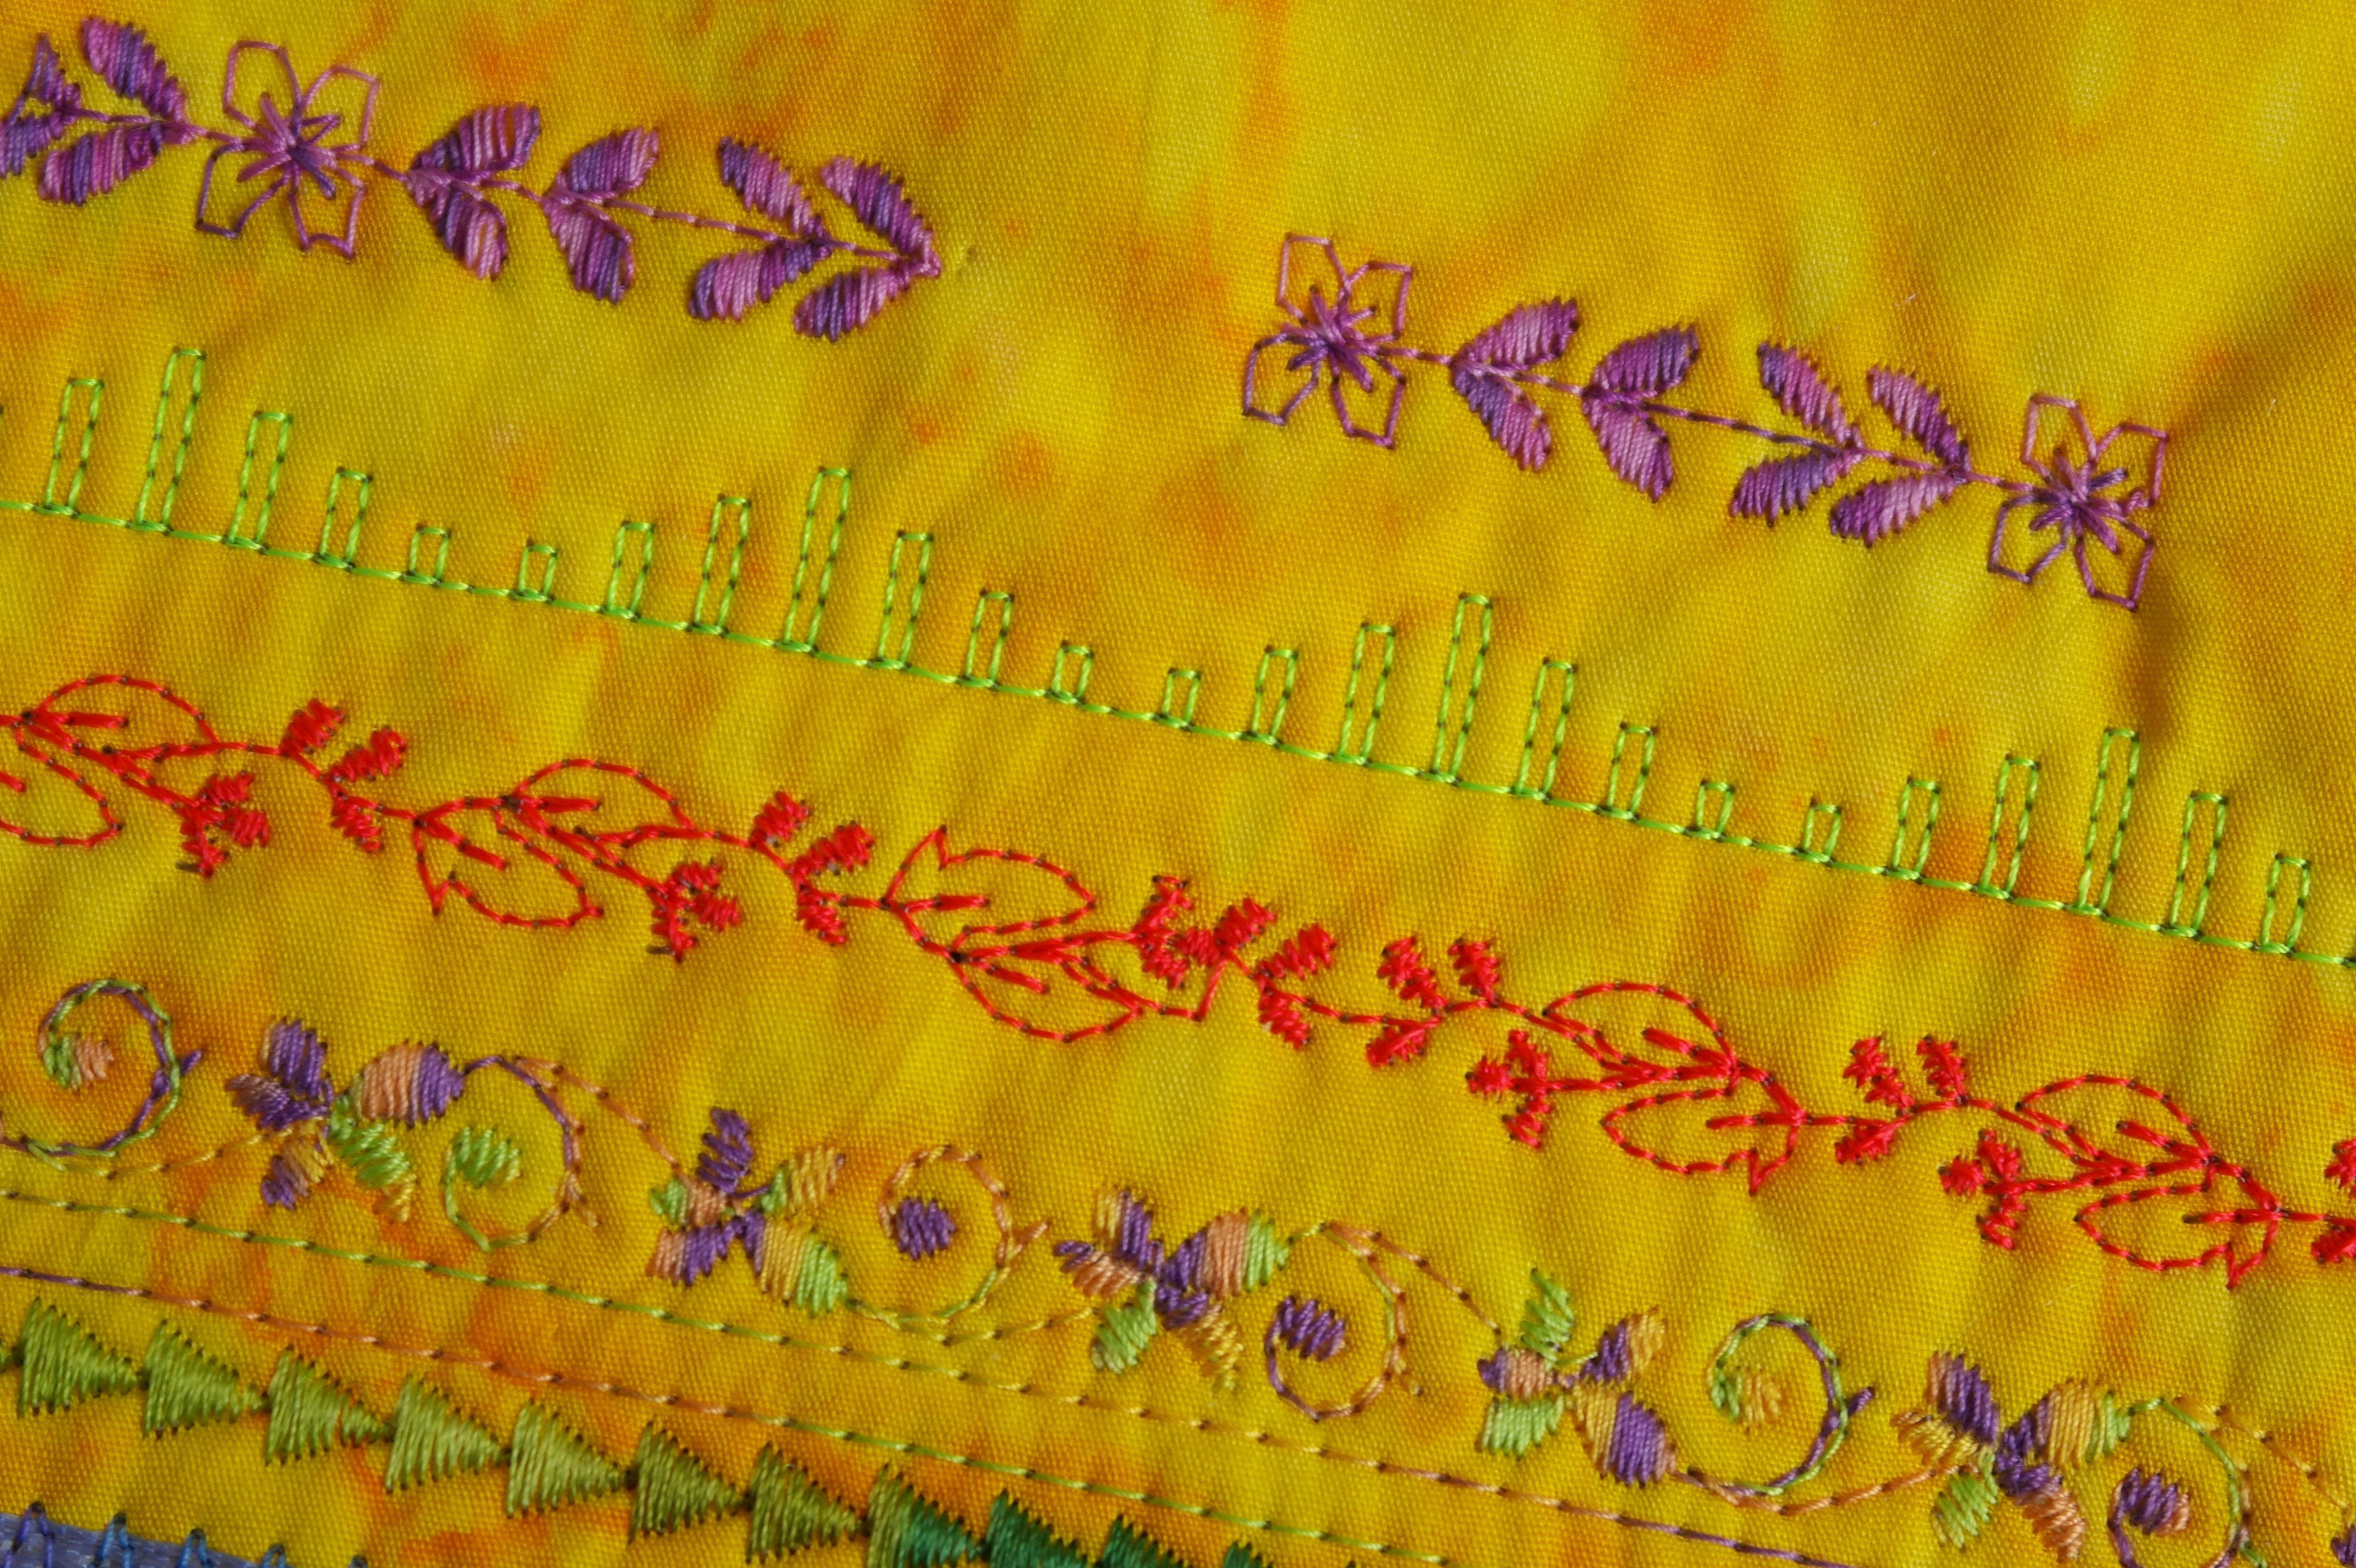
One of the stitches contained flowers and leaves. By starting at a certain point of a stitch, and ending at the same point, you can make different rows (purple stitches upper row). With the left row I’ve started with the leaves, with the right row I’ve started with the flowers. Just try longer stitches on you sample, to see how they are build up.
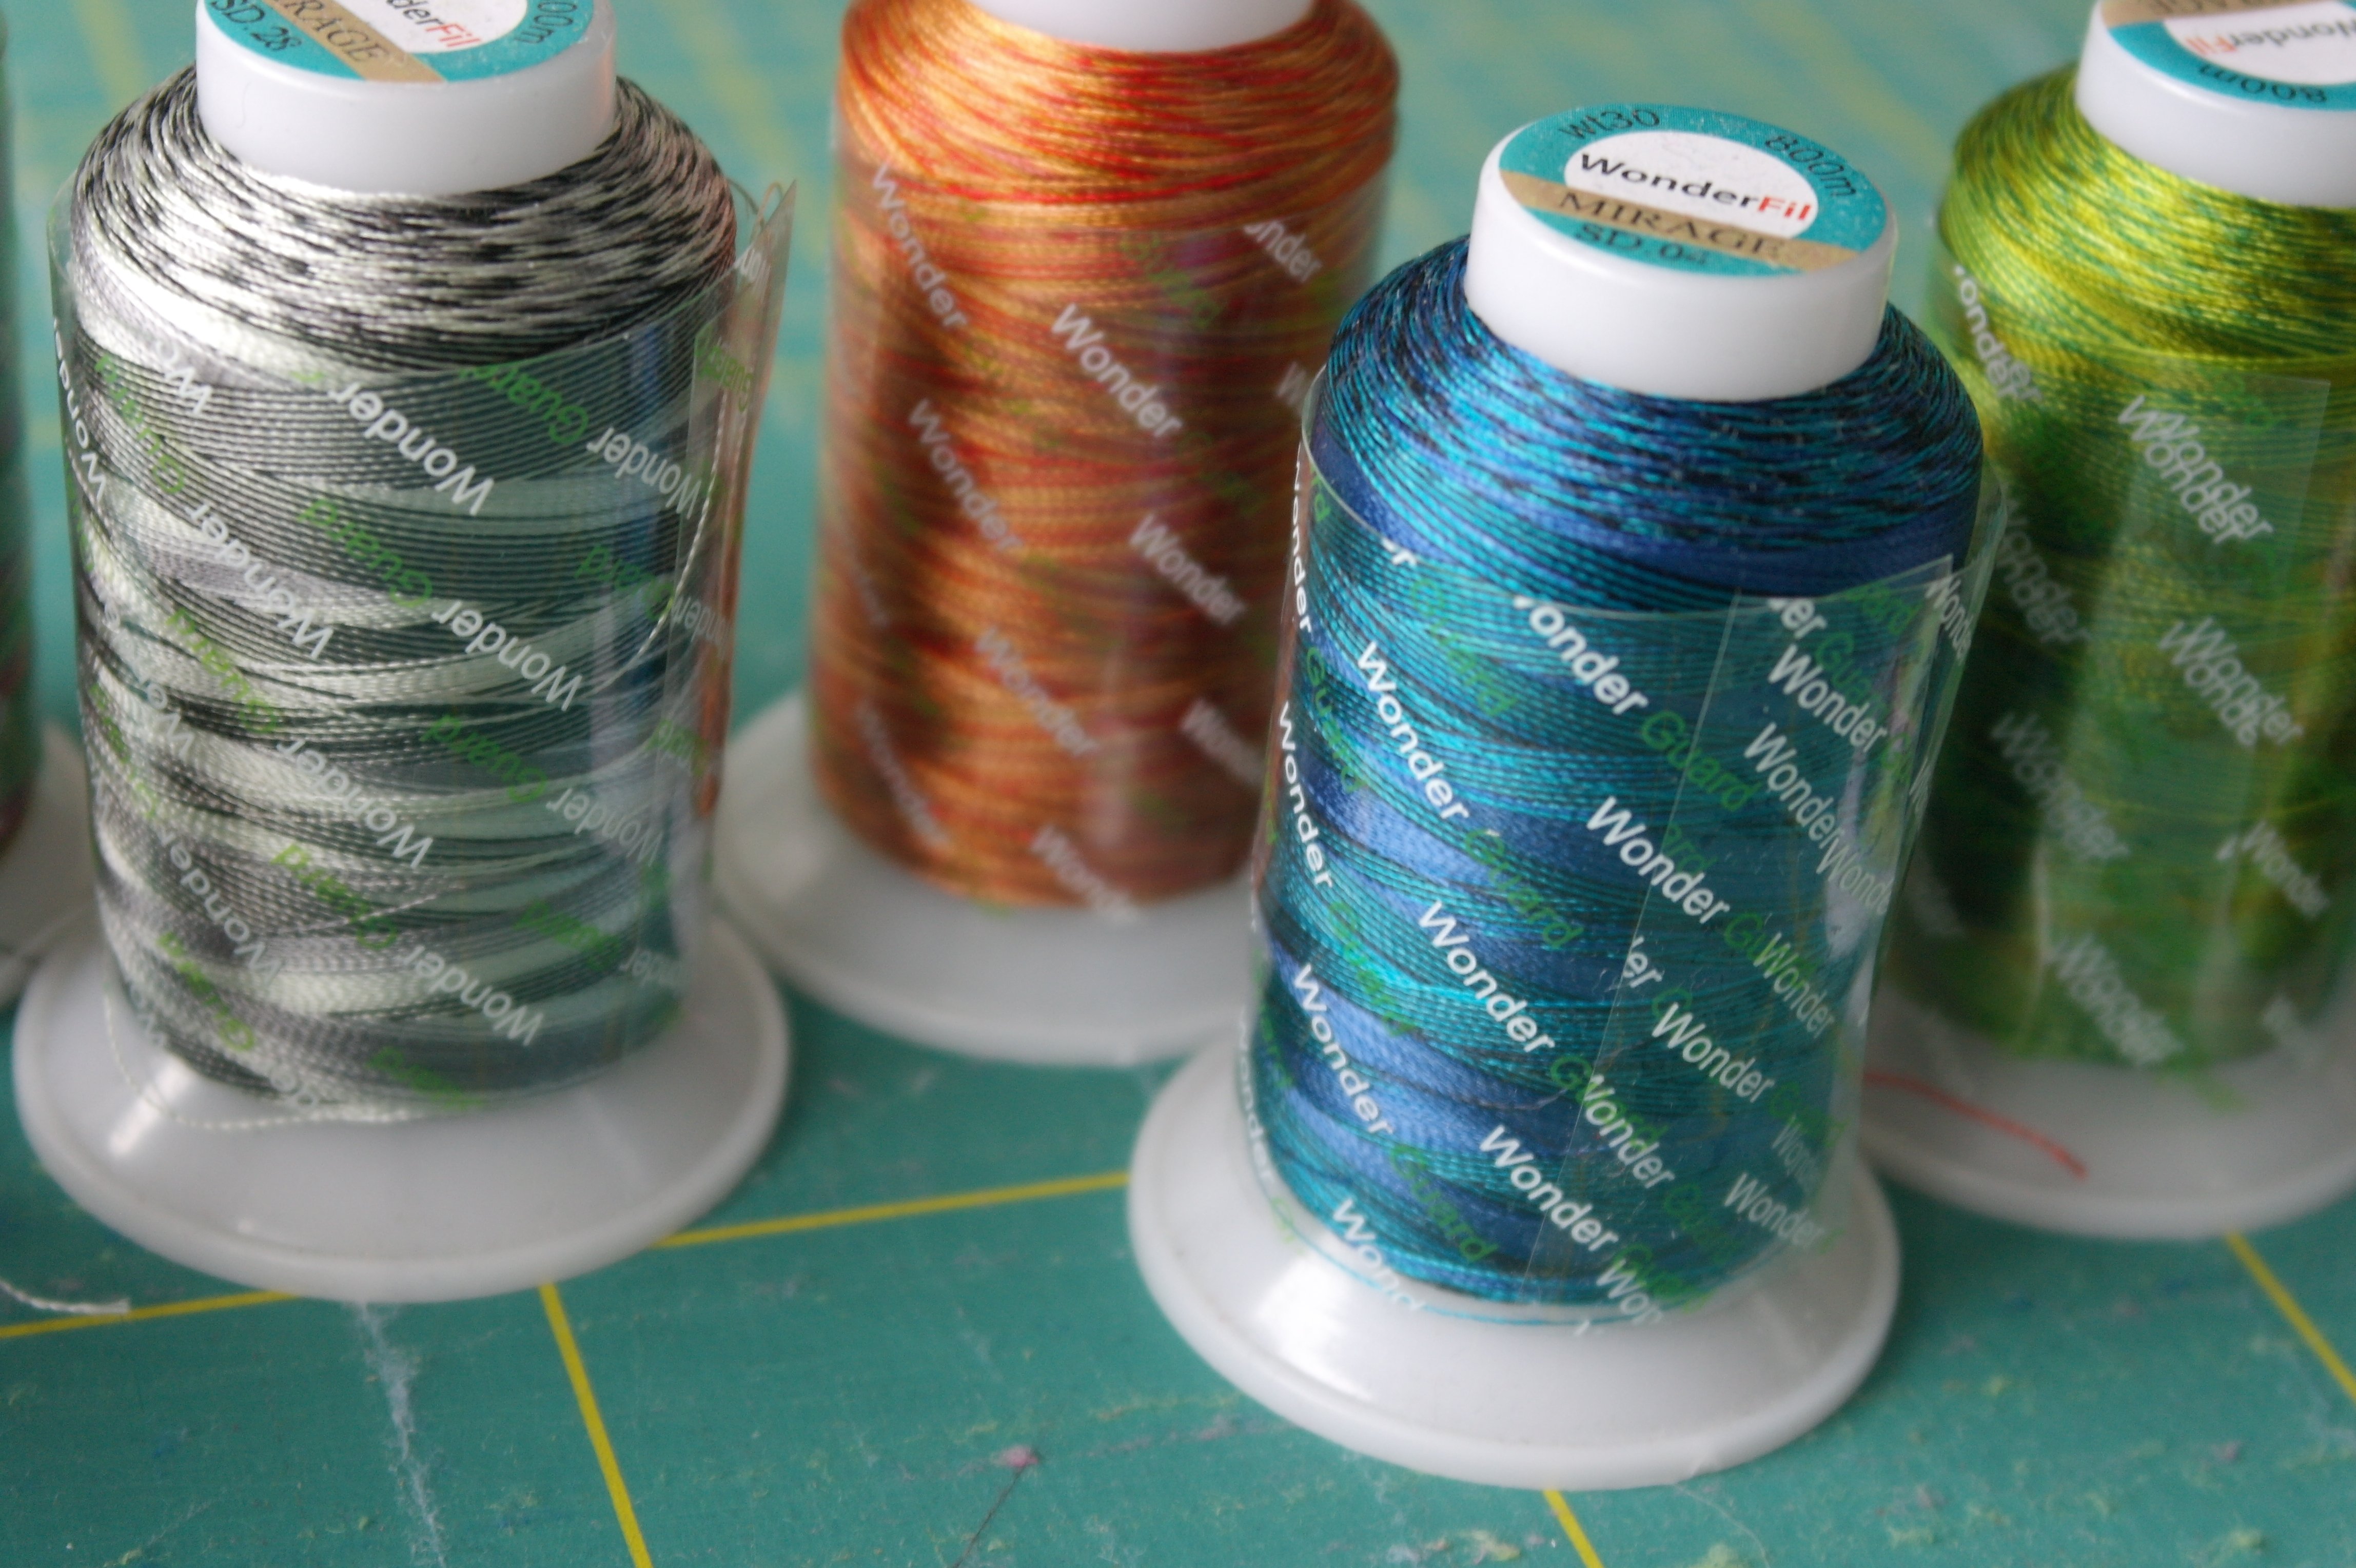
I like to work with varigated threads, because of the special effect. With some brands of thread, there is no snap on the side of the spool, to push the thread ends in. That’s why I am using Wonder Guard: a clear plastic sheet, wrapping around the spool. You can see I have used it with Mirage/Wonderfil, and also with DecoBob/Wonderfil. You can even leave the clear sheet in place when sewing, just let the end of the thread come up on top of the spool. Works fine.
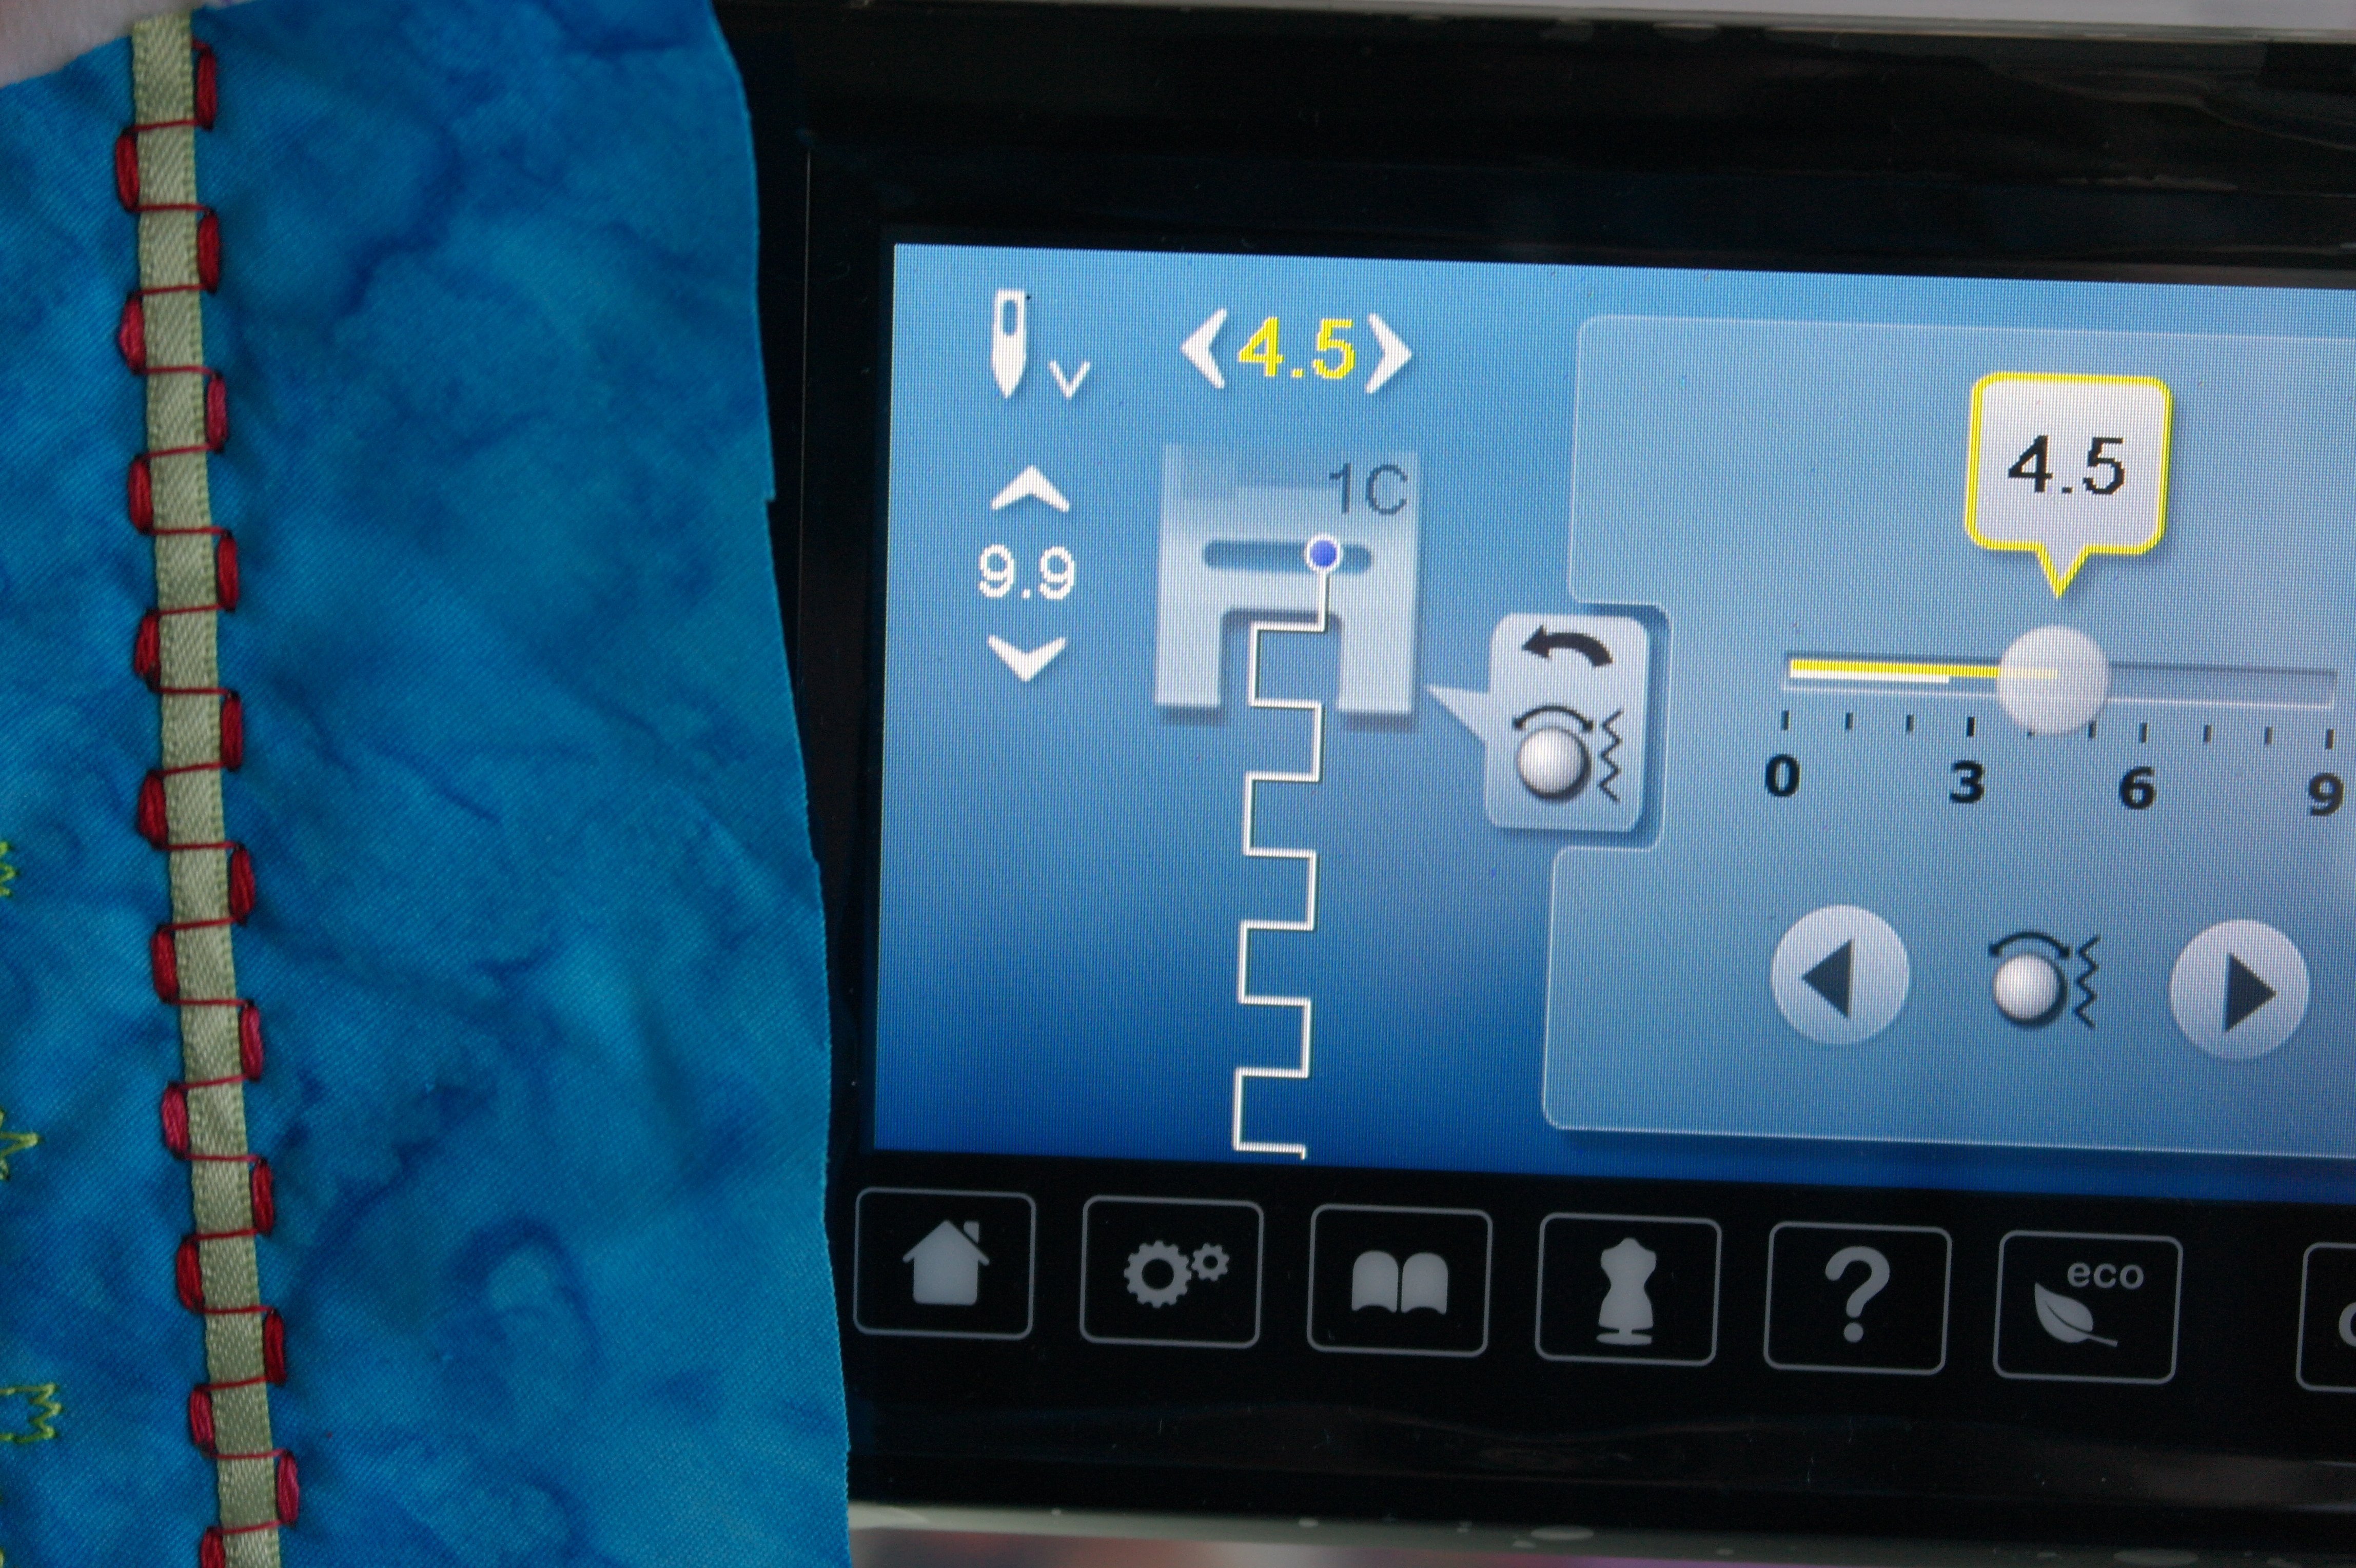
Do you still use ribbons and lace? Working with a small ribbon of aprox. 3mm is fun: I have used stitch 709 – I have widened the stitch up to 4,5mm, to be sure the group of stitches made on both sides of the ribbon are placed next to the ribbon, and not on top. Changing the width of the stitch is easy: just plce your finger on the indication of width on your touch screen: and increase or decrease the number indicated. Again you will see the yellow numbers and lines around the icons, letting you know you have changed a default. BEWARE: this stich is a jumping stitch, which means it goes back and forth a couple of times, making your sandwich want to jump too. Work slow to keep control over the direction of the stitch, making sure the ribbon is kept between them.
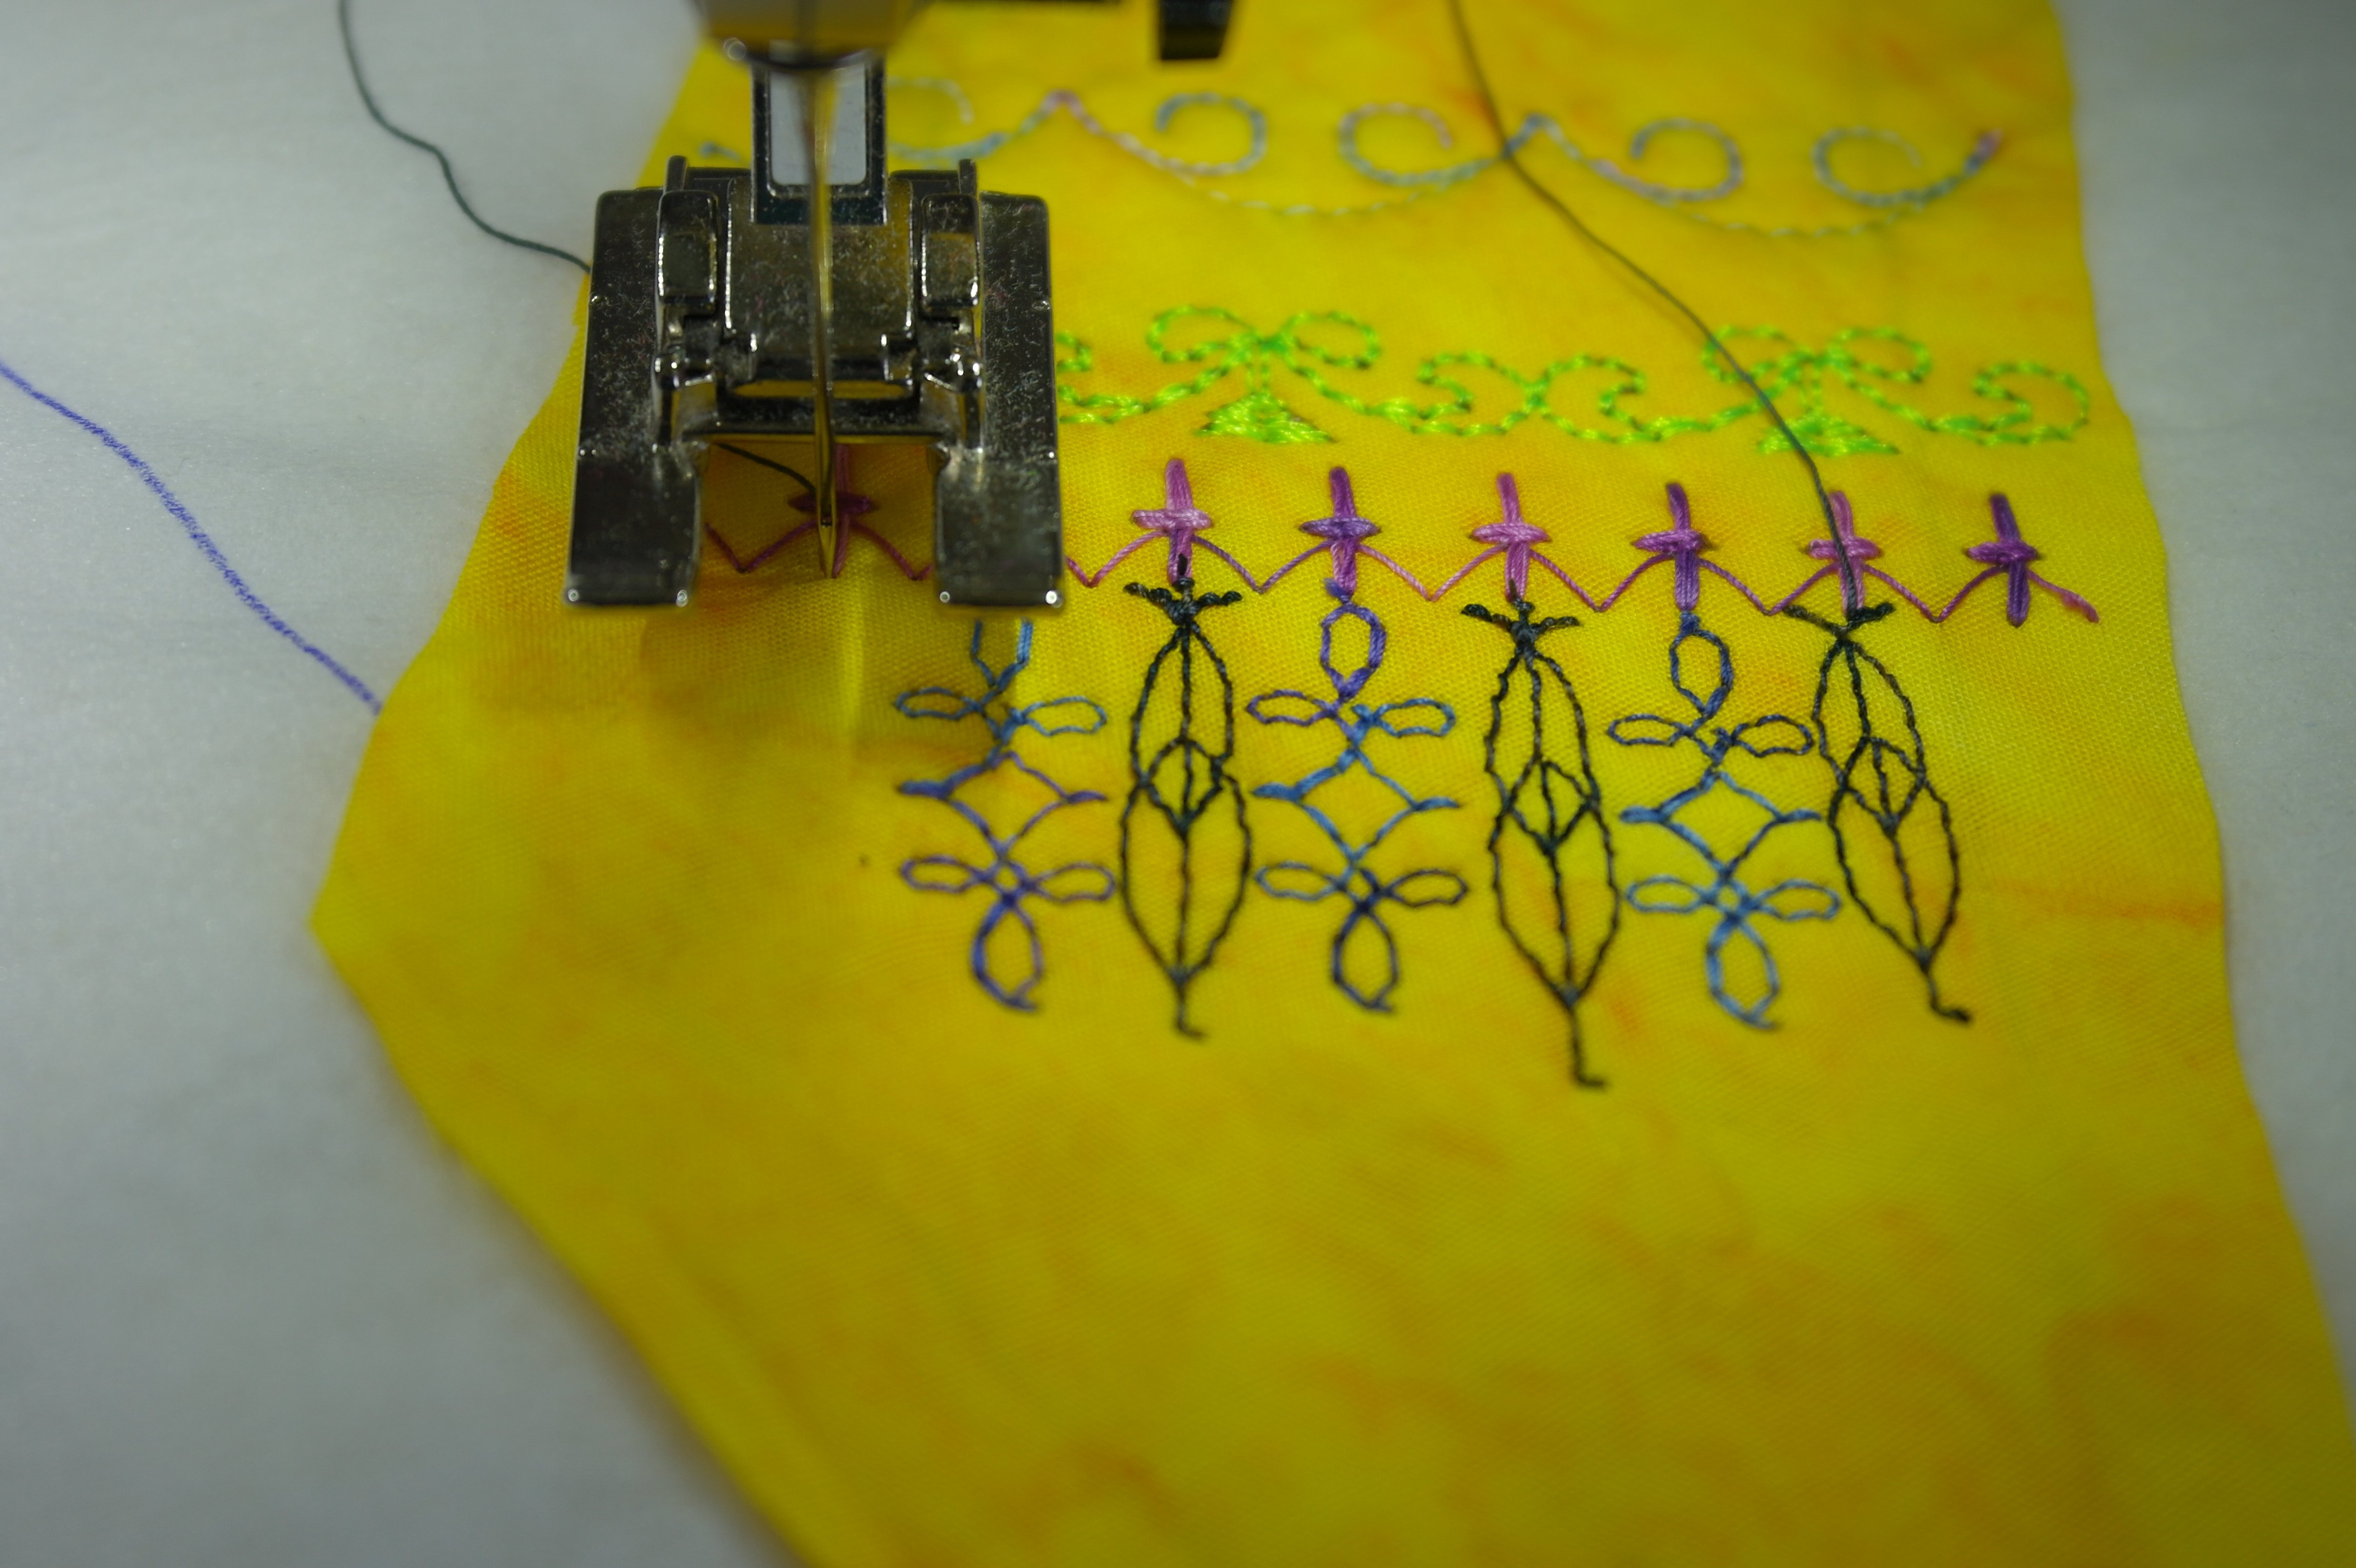
Another fun variation make a row of stitches. Place single stitches vertical to connect with this first row, beginning point on top of a stitch of that row. You can secure the beginning of the thread/stitch by clicing on the icon with the ‘knot’. Just place the needle where to start (see picture), before lowering the presser foot, to be sure that’s where your stitch will begin.
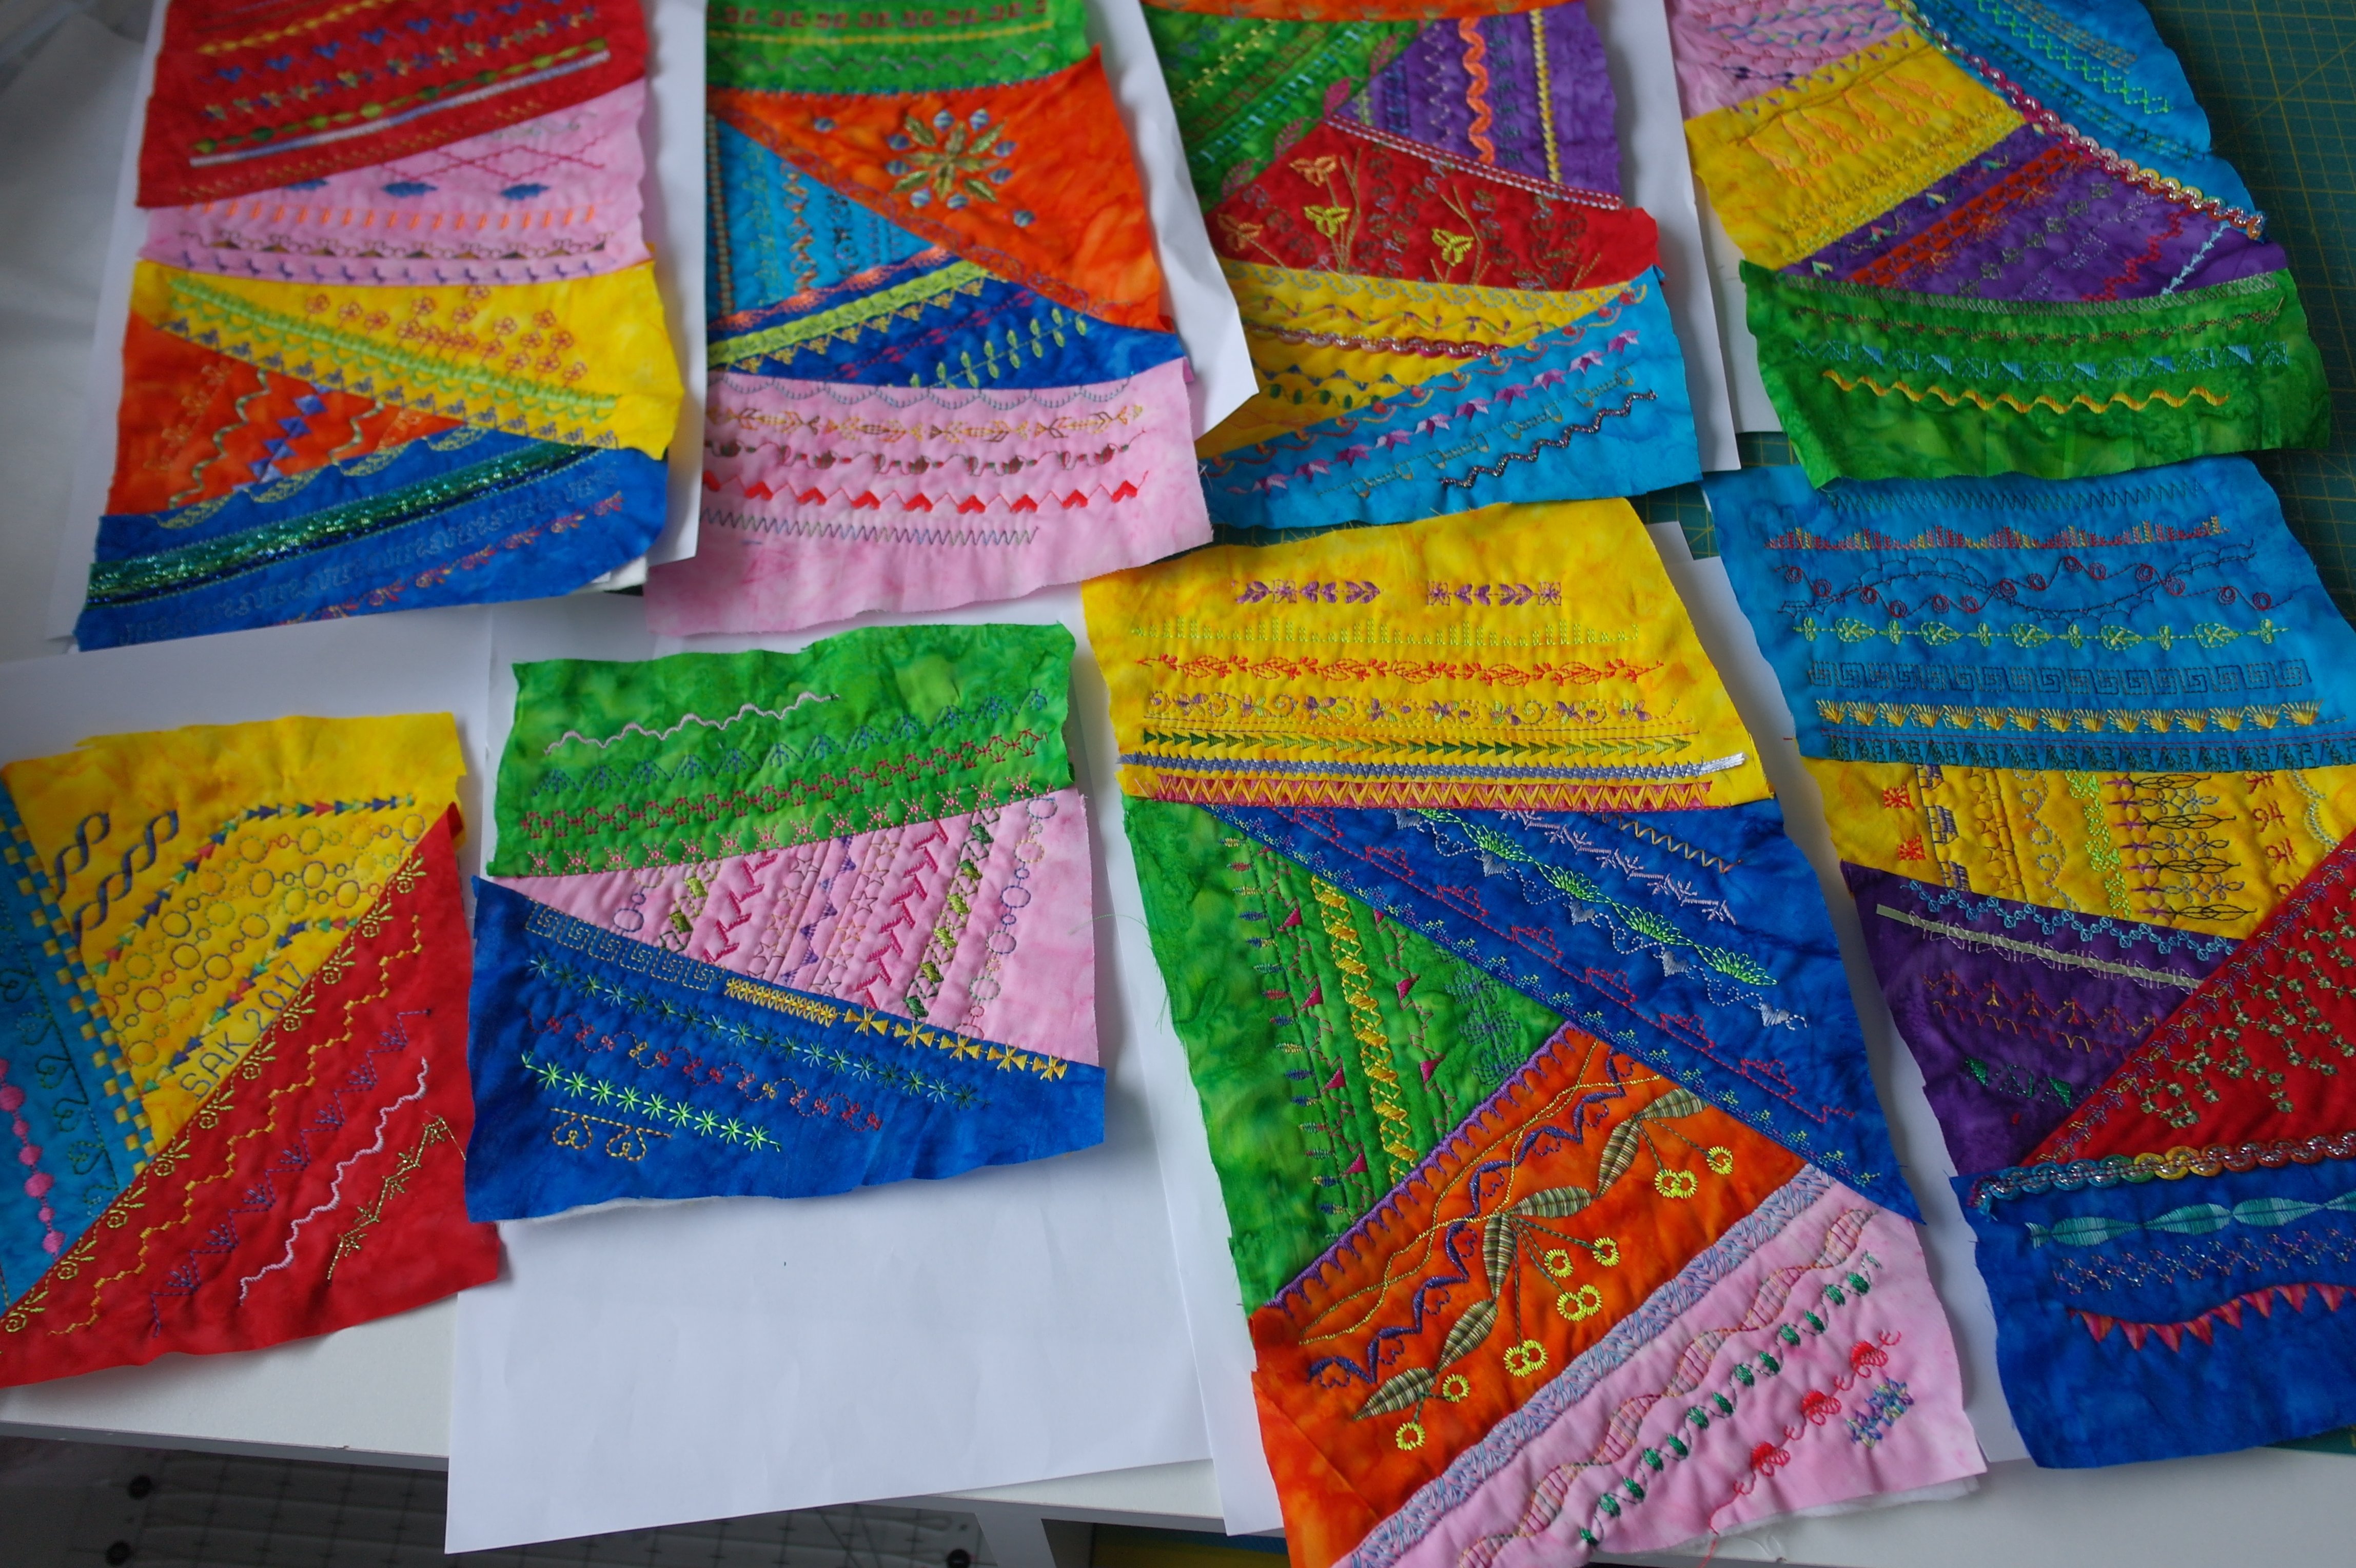
Working with these blocks was fun. Finishing them after a couple of days, this is my ‘harvest’: my blocks for month 10. It took me longer than the previous months, because I have actualle made 3 1/4 blocks, comparing them with the single large blocks of 32 x 32 cm. And also because the rows of stitches will have to extend to the sides of all blocks. But it was fun again, hope you will have fun making them too.
Don’t worry if there are empty spots left, after making the stitches. You can add sequins, beads, buttons, Hotfix stones etc. after assembly.
Have fun with making your blocks of month 10 – remember to place pictures in the COMMUNITY of the BERNINA Blog, so we can all enjoy your work? Next month blocks for month 11. Will you join me again?
Happy quilting!
Sylvia Kaptein
Sylvia’s Art Quilts Studio
For this month too, it is important NOT TO CUT your blocks after finishing them. Leave them the way they are, untill month 12. No straightening or cutting them to a certain size, because you don’t know how large they will have to be in the end!

0 Responses