 BERNINA Corporate Blog -
The end is approaching, this Crazy Project is almost finished, these last 8 blocks are the final blocks you will make: 6 halve, rectangular blocks, and 2 quarter, square blocks.
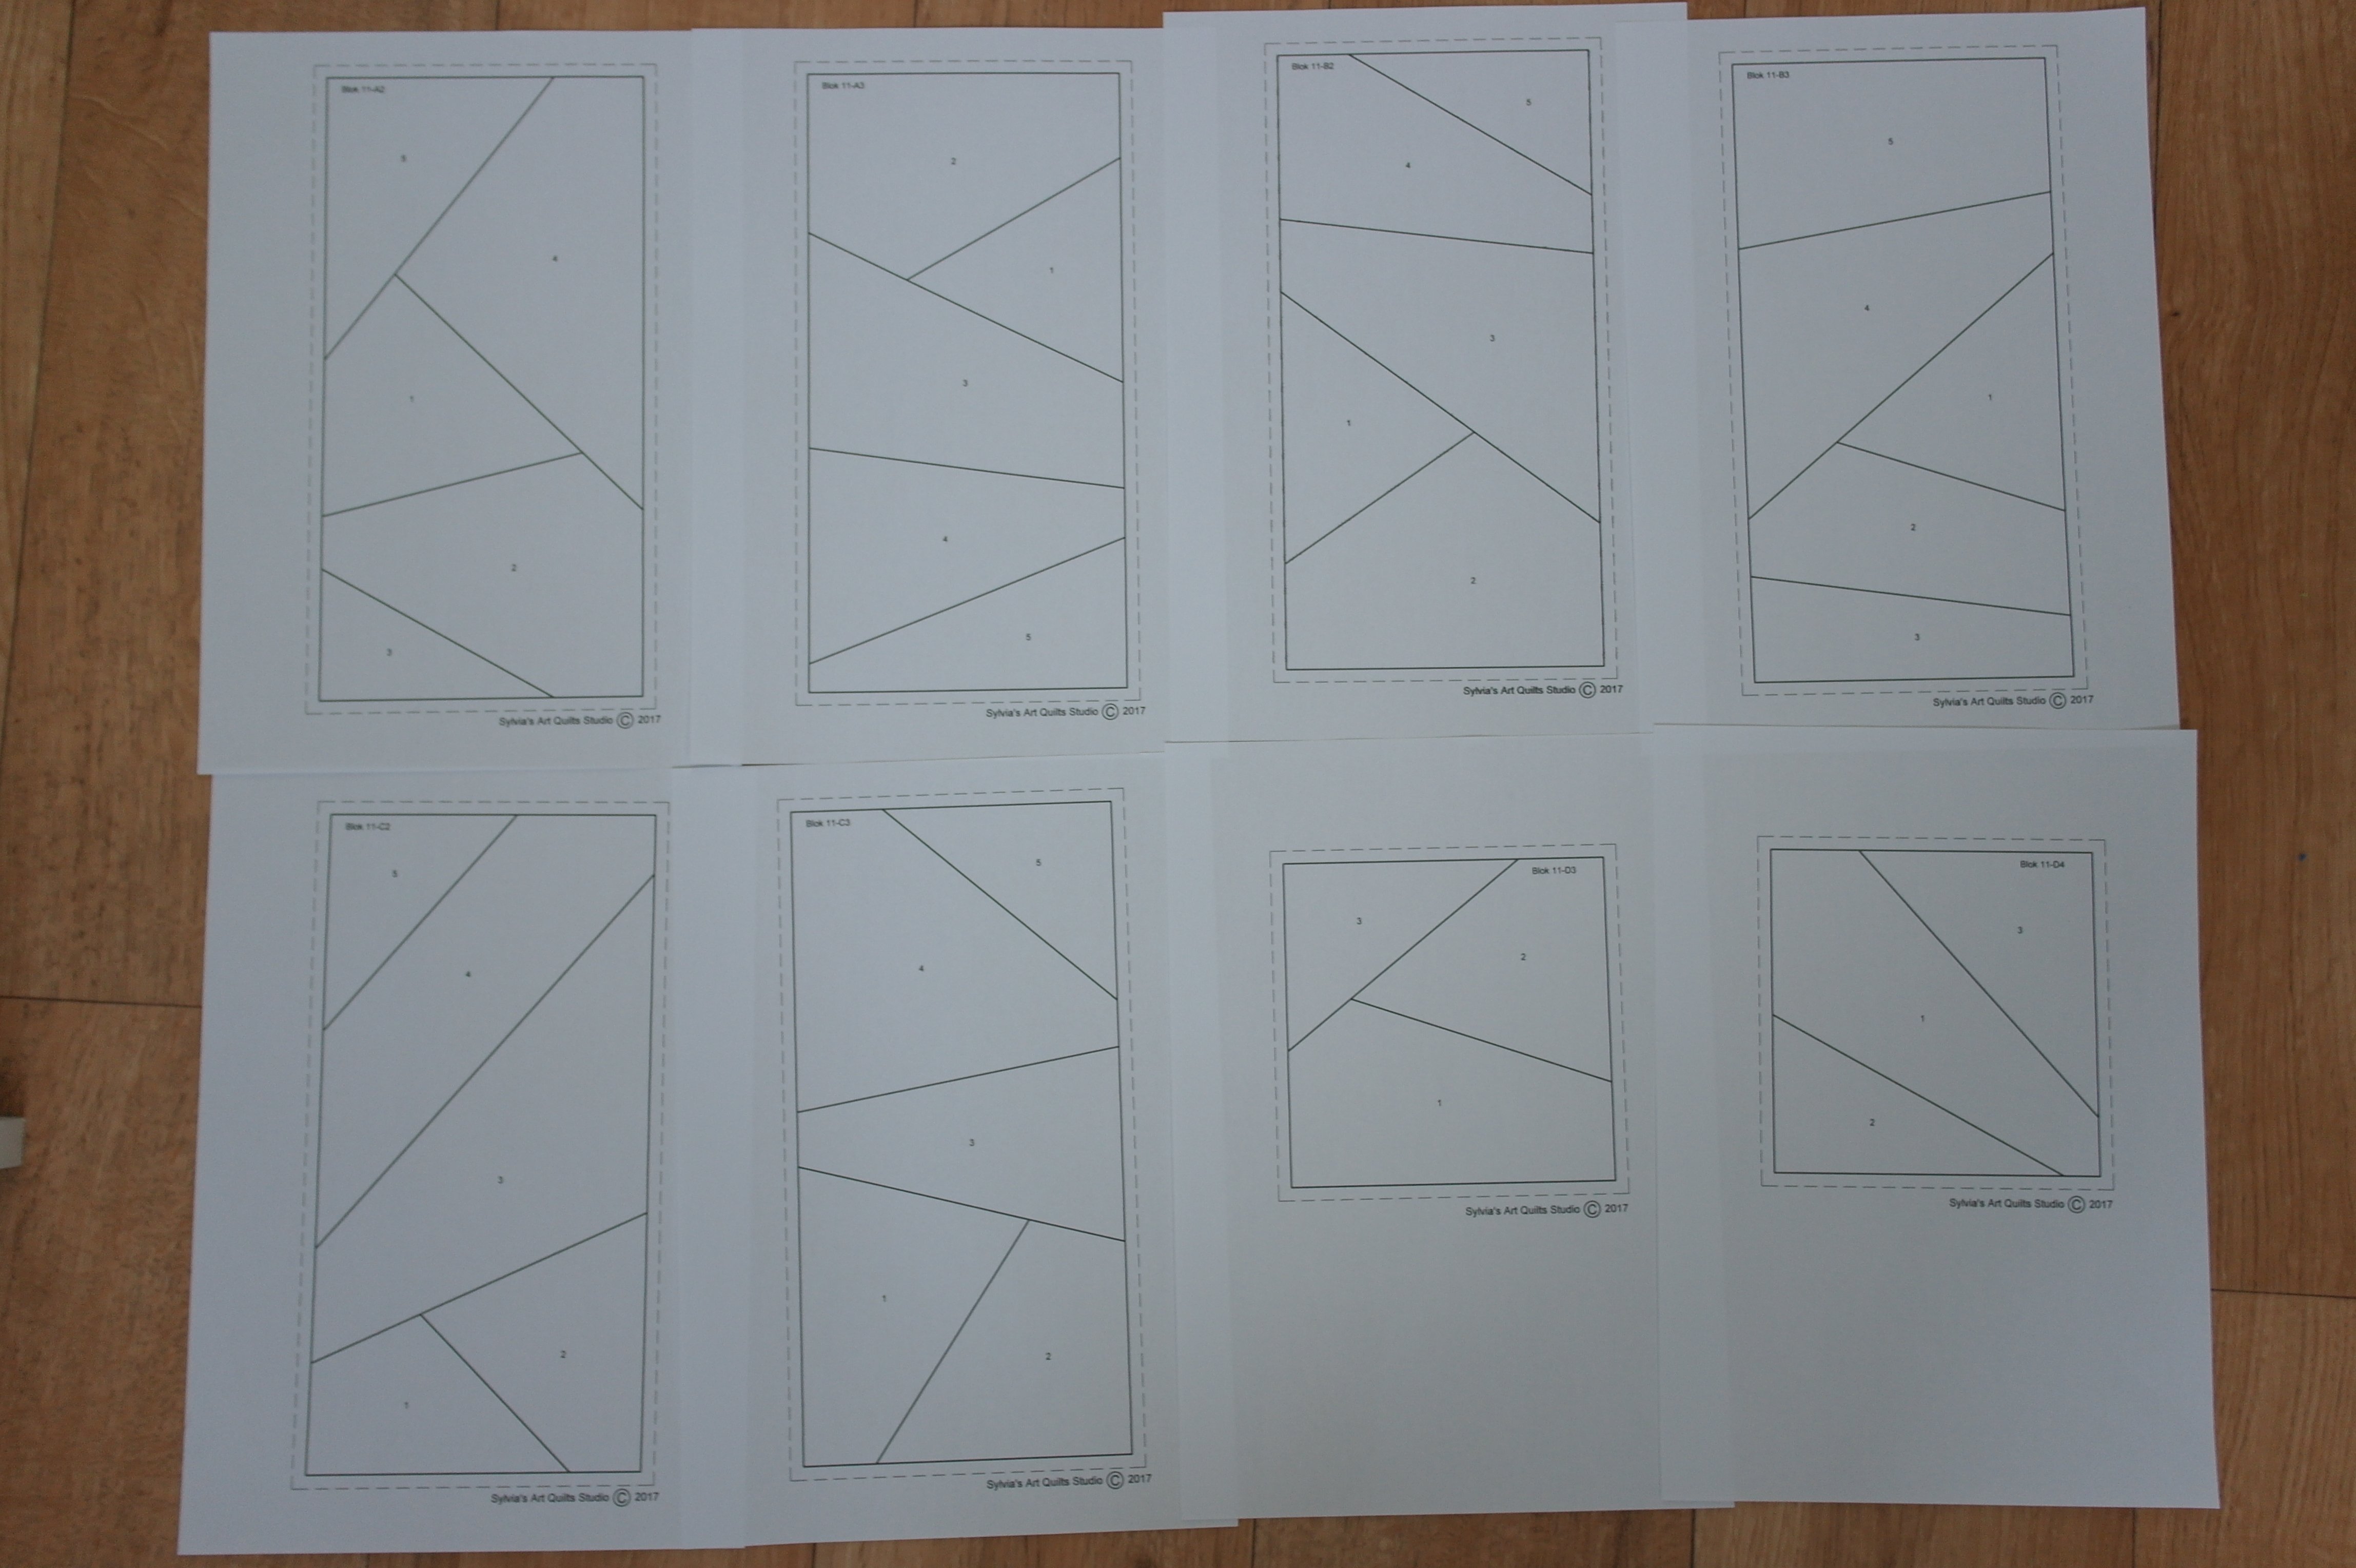
Just like last month, there are seperate patterns for downloading: pattern A2, pattern A3, pattern B2, pattern B3, pattern C2, pattern C3, pattern D3 and pattern D4.
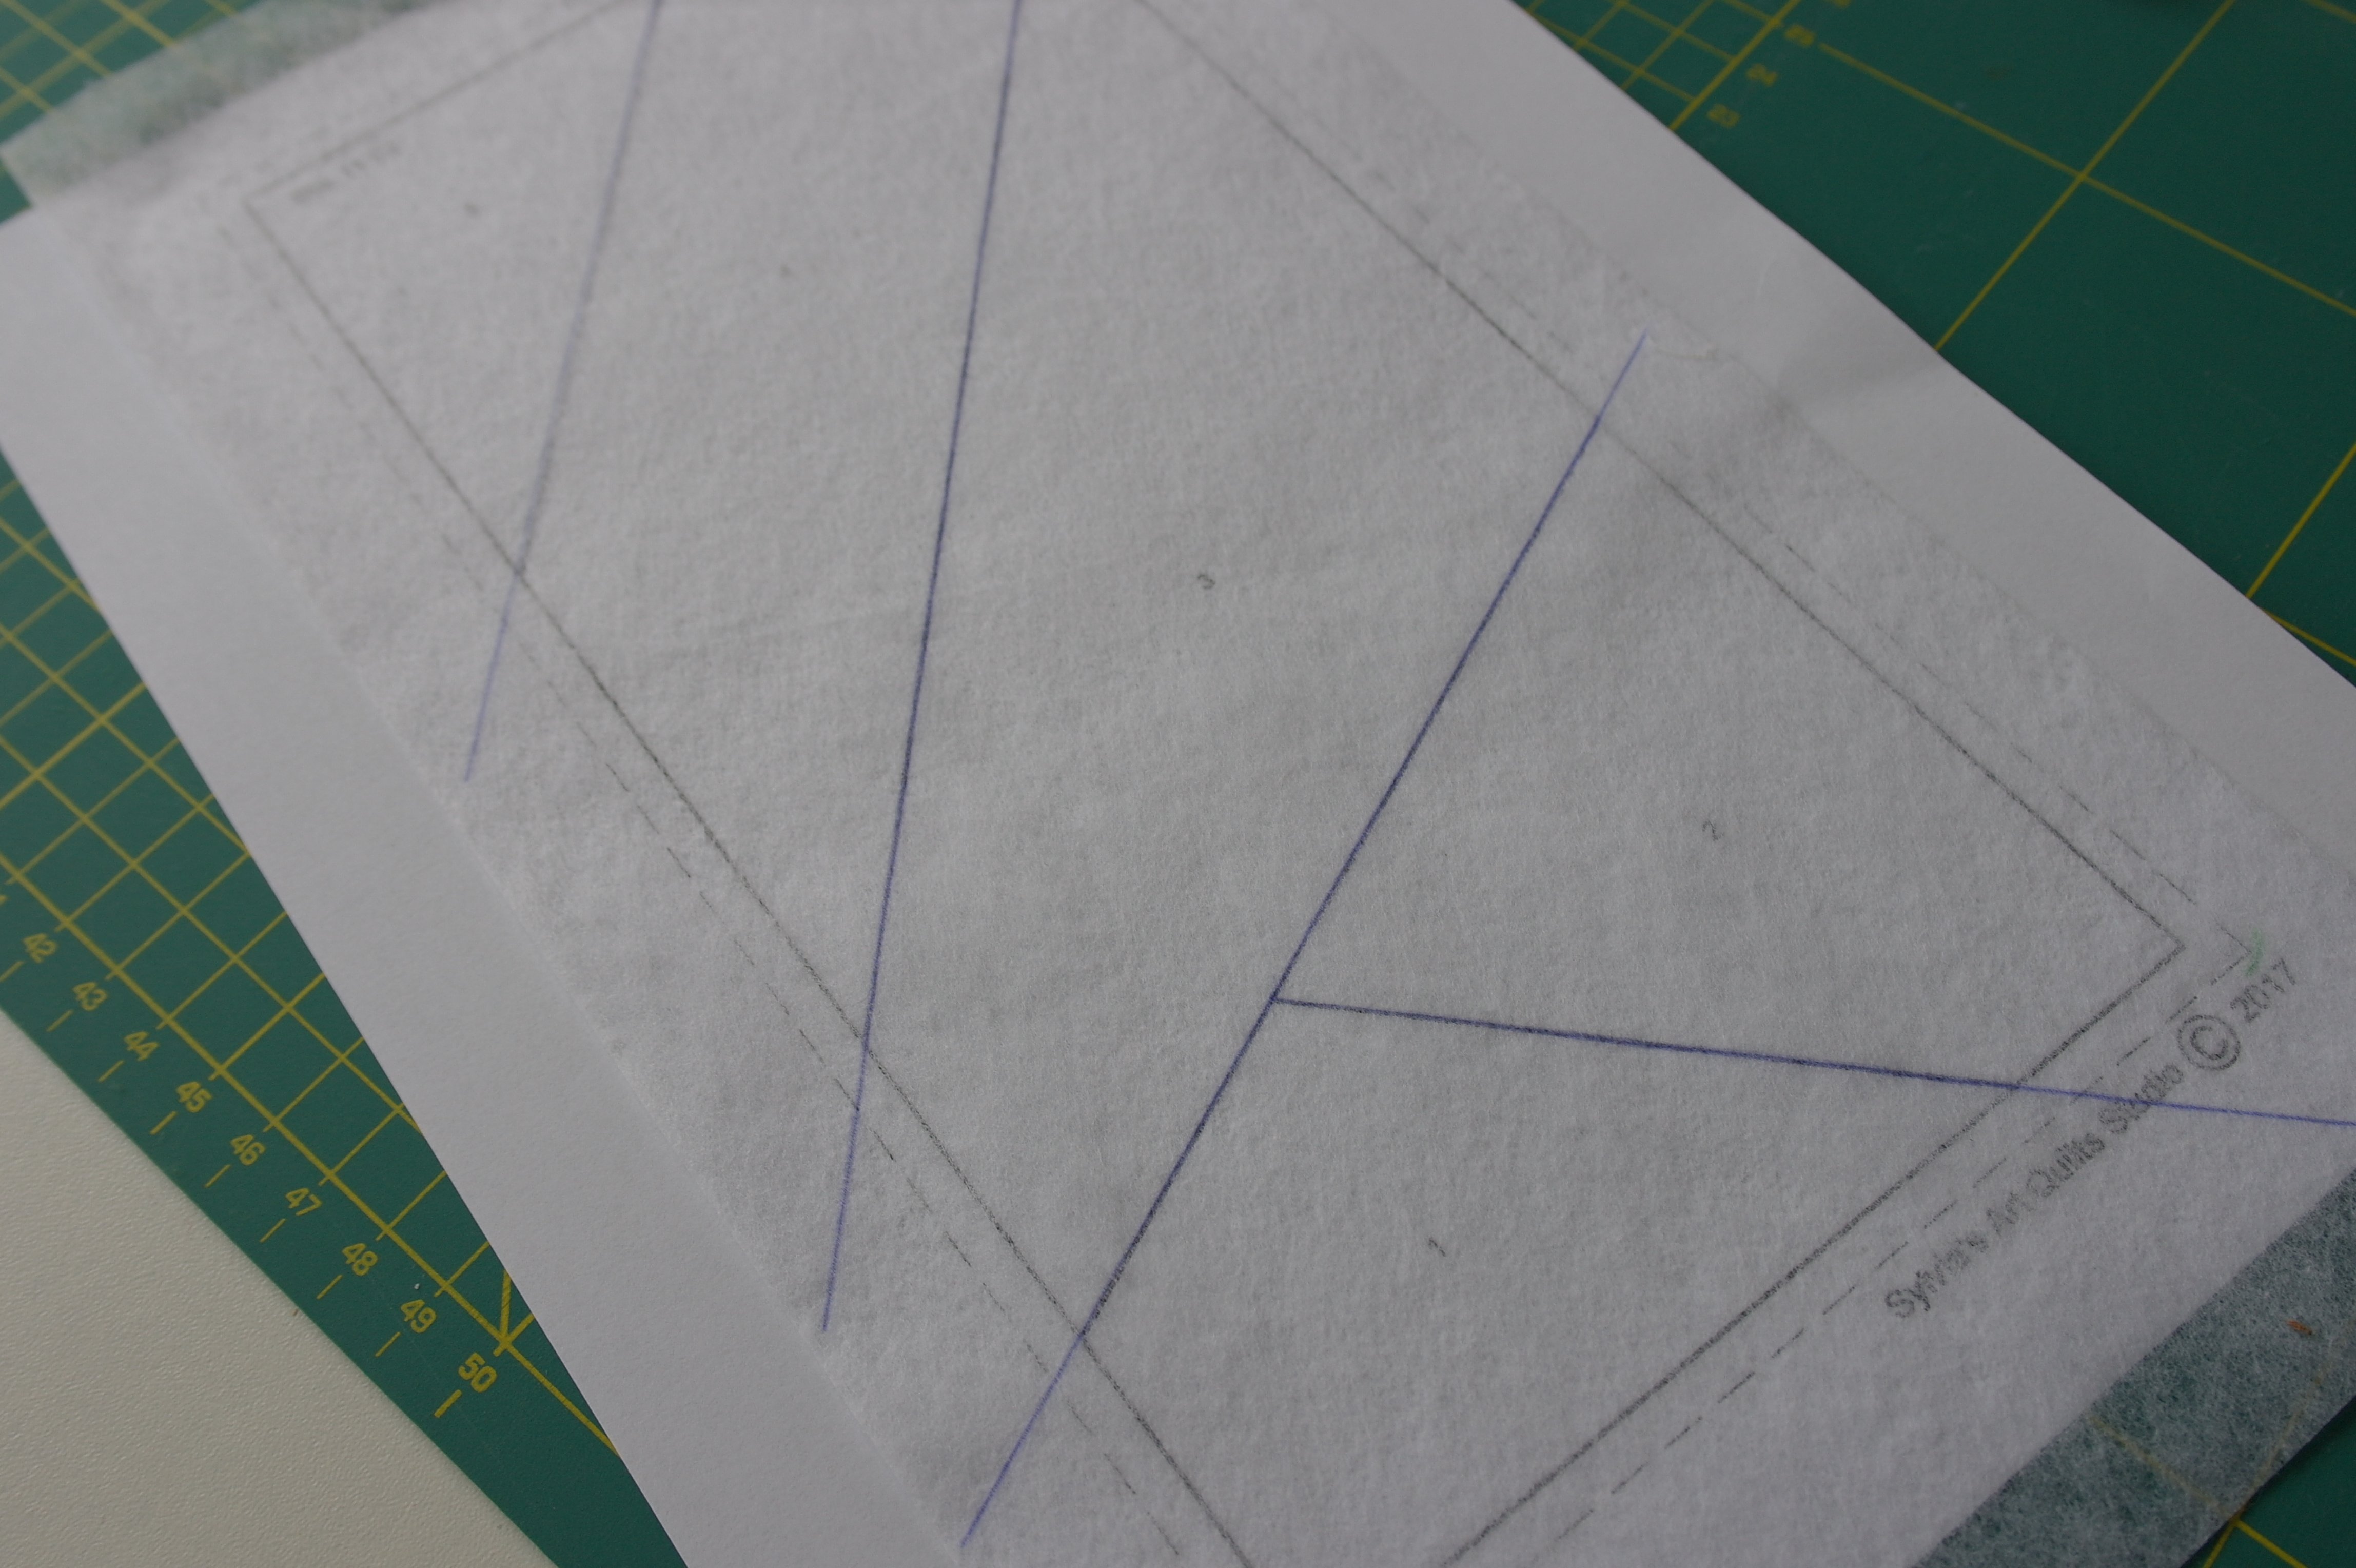
After downloading the patterns, print them, an draw the lines for the 8 blocks onto Vlieseline L11 – each block 1 x BUT BEWARE: be sure all the lines of the Crazy patchwork are running all the way to the sides untill the reach the outer edges of the Vlieseline L11 – so draw beyond the dotted lines of the rectangular/square shapes, from side to side onto the Vlieseline L11, just like you did last month. This is to be sure that all fabrics that are added will run OVER the sides of the sandwiches. You can check my piece of Vlieseline L11 in the picture above – all drawn lines run from side to side. I didn’t draw the rectangular shape: it is there only to indicate the actual size you will see after assembly, and not for making the block.
There is not so much extra space with these blocks, as you had with the 9 previous blocks – because of shrinkage while making sttiches, you will have to fully add decorative stitches etc. from side to side. Should you not do that, you will find that these blocks will be to short while assembling them in month 12. I know that it can be fixed, but then your quilt will be smaller…. o well, you will find out with the directions of the last month, but please try to stick to the information/measurements given here.
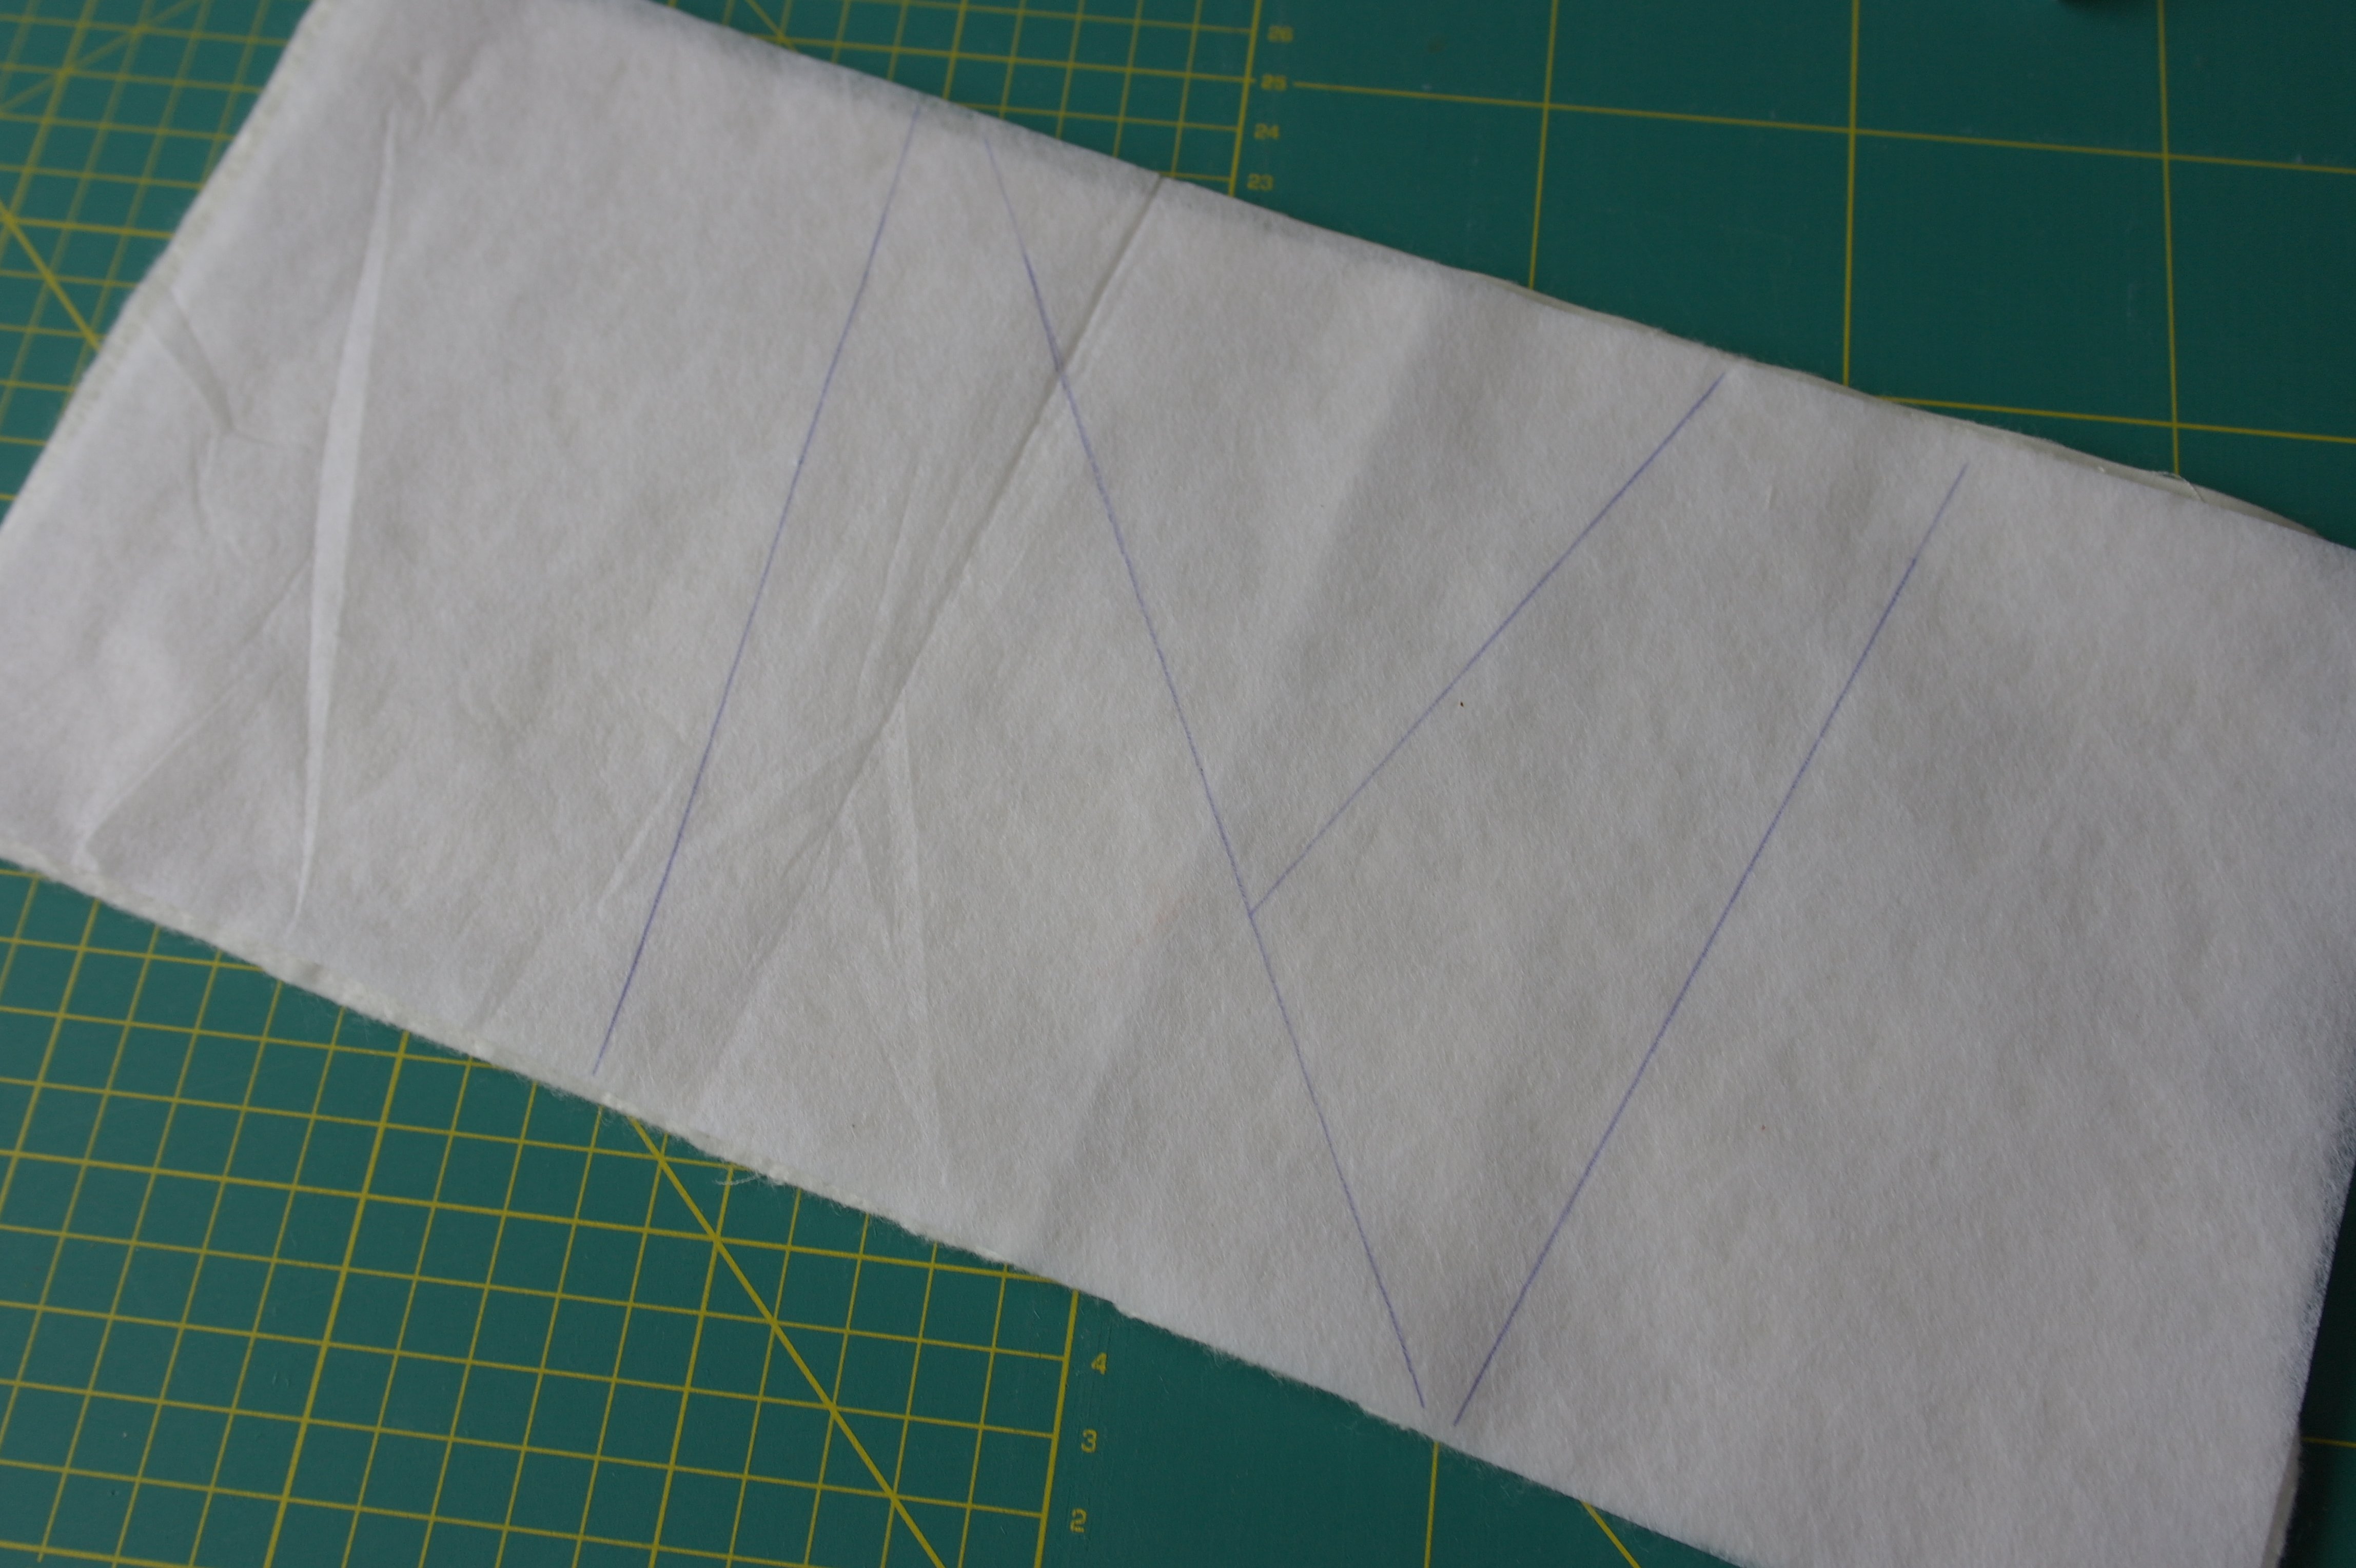
Make 8 sandwiches: 6 sandwiches at least 16 x 32 cm and 2 sandwiches at least 16 x 16 cm, or a bit larger if possible. Place the patterns under each sandwich,
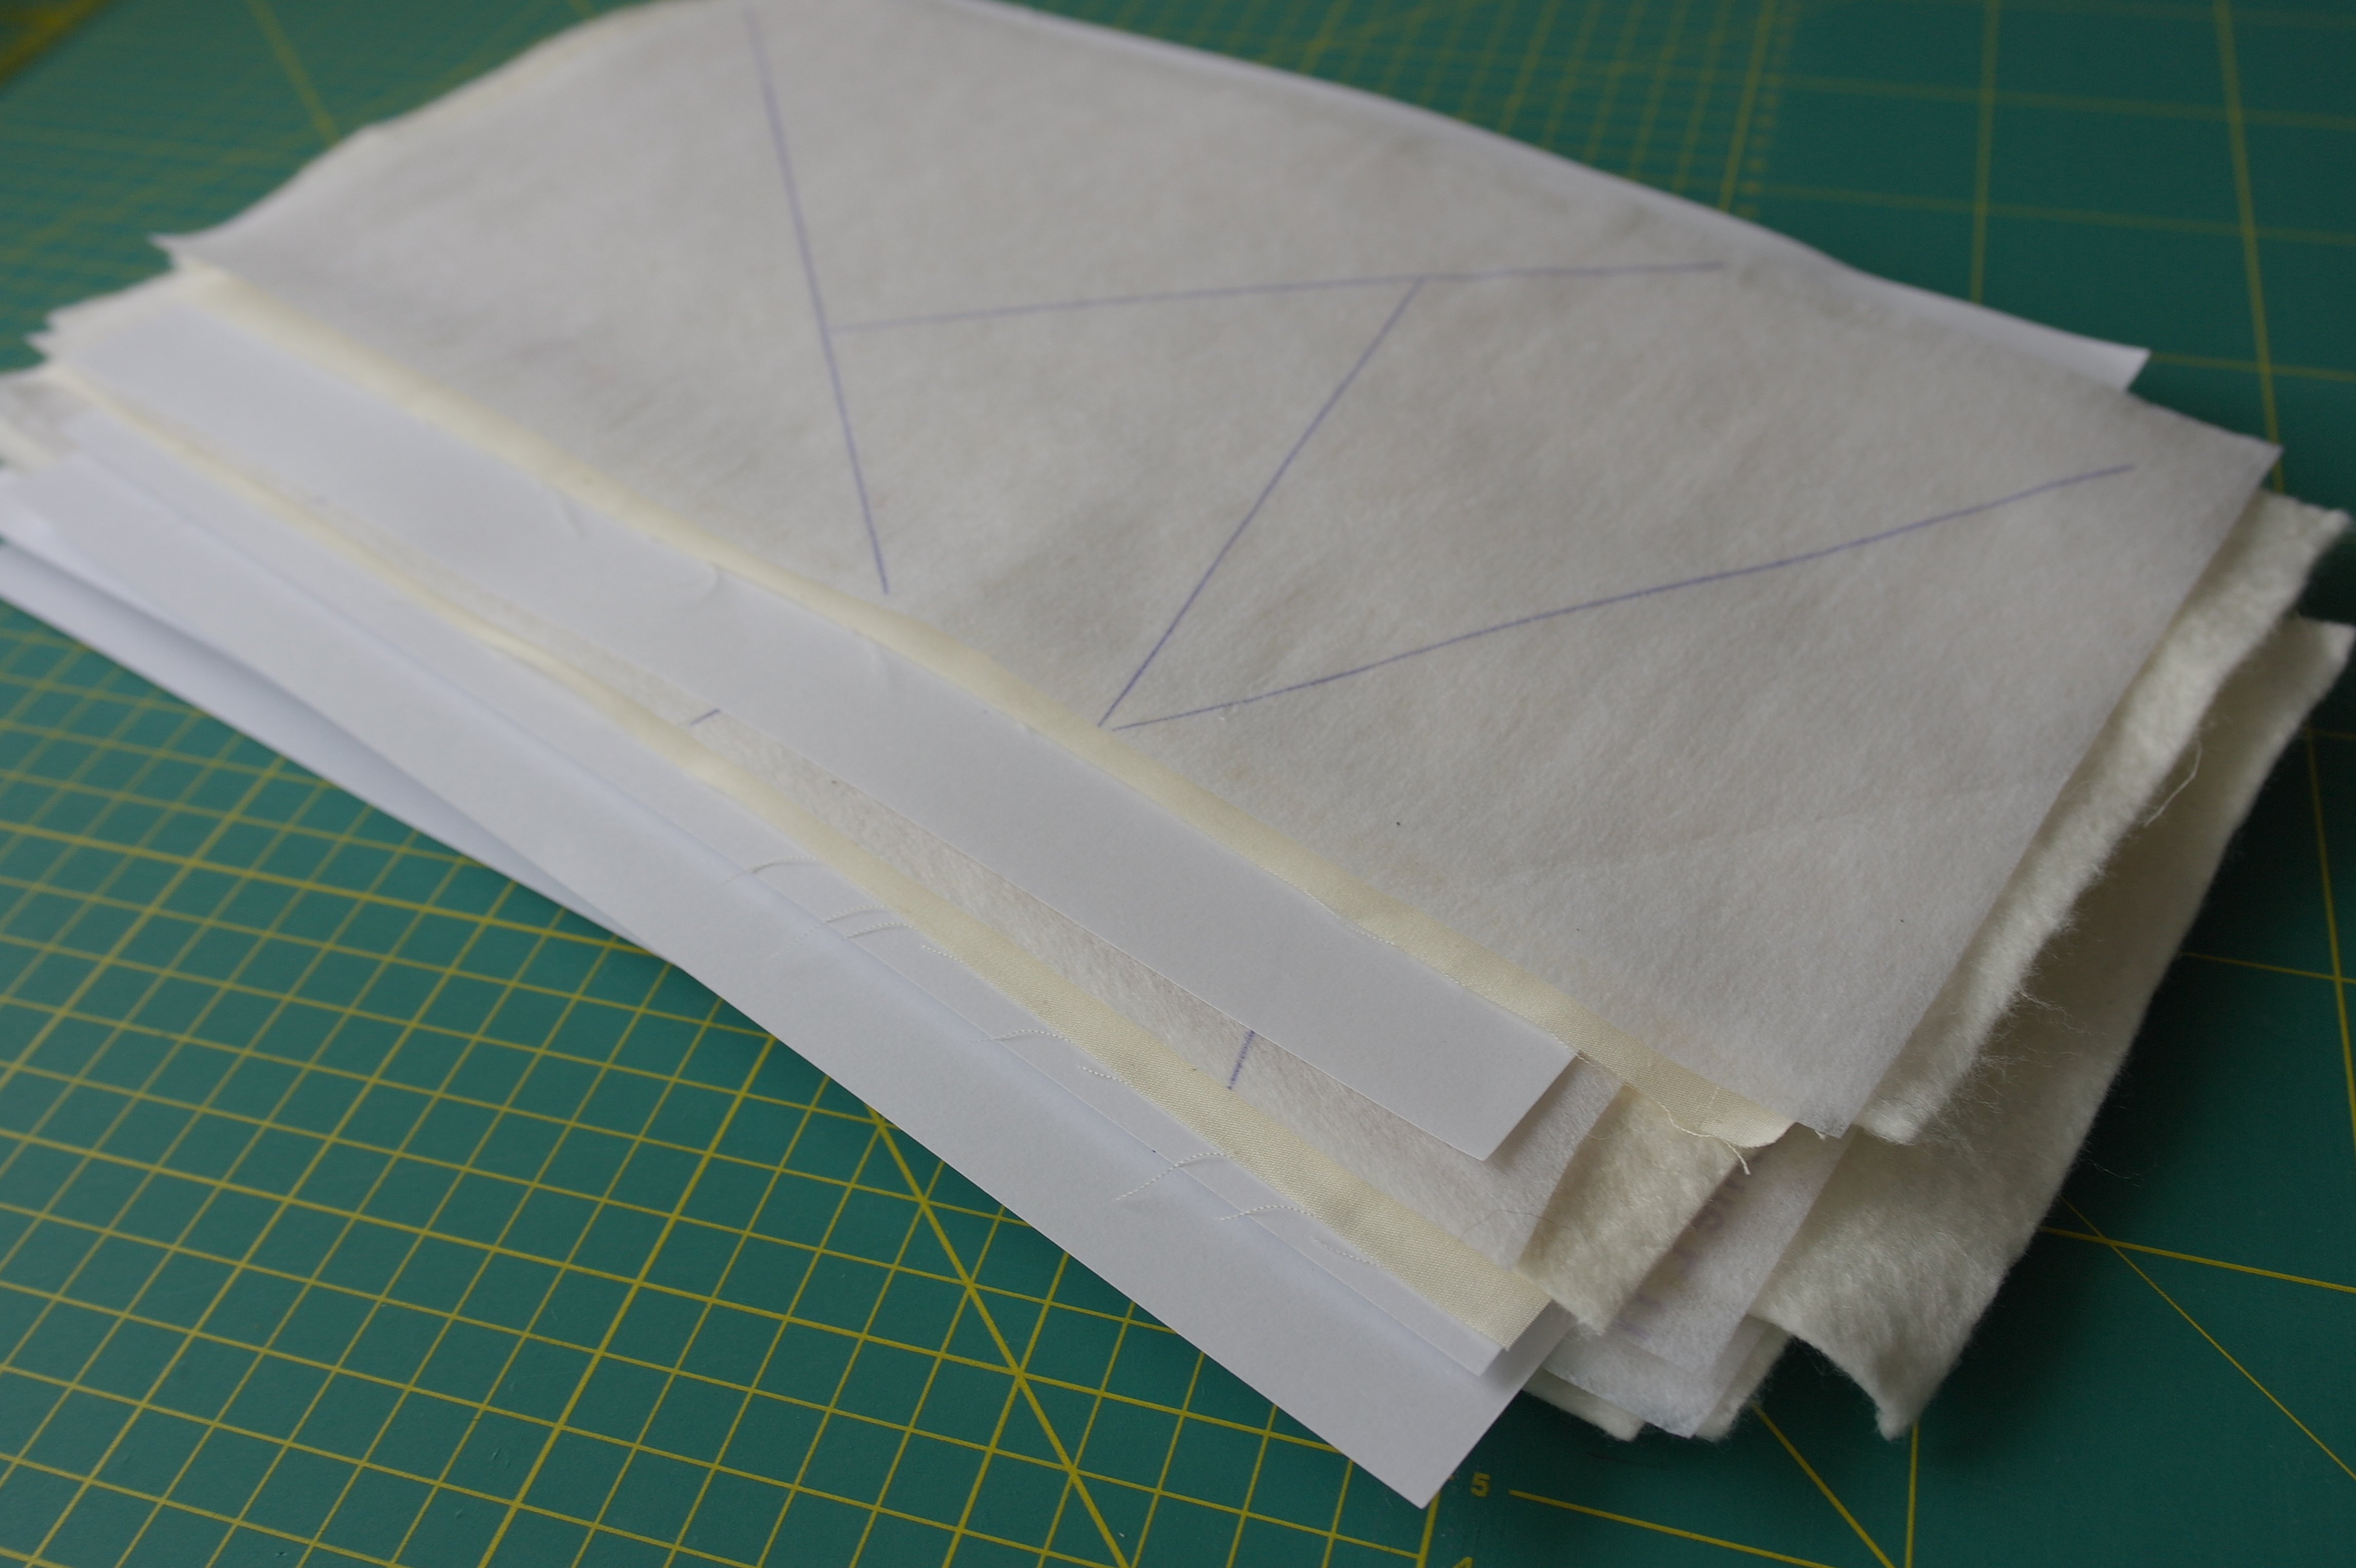
and pile them up – work on one sandwich at the time and be sure to keep sandwich/block and pattern together after sewing.
Again, make decorative stitches from side to side with each sandwich. This month we will use button holes as decorative stitches too, making them with multicolor thread, or metallic thread, gives them a festive look.
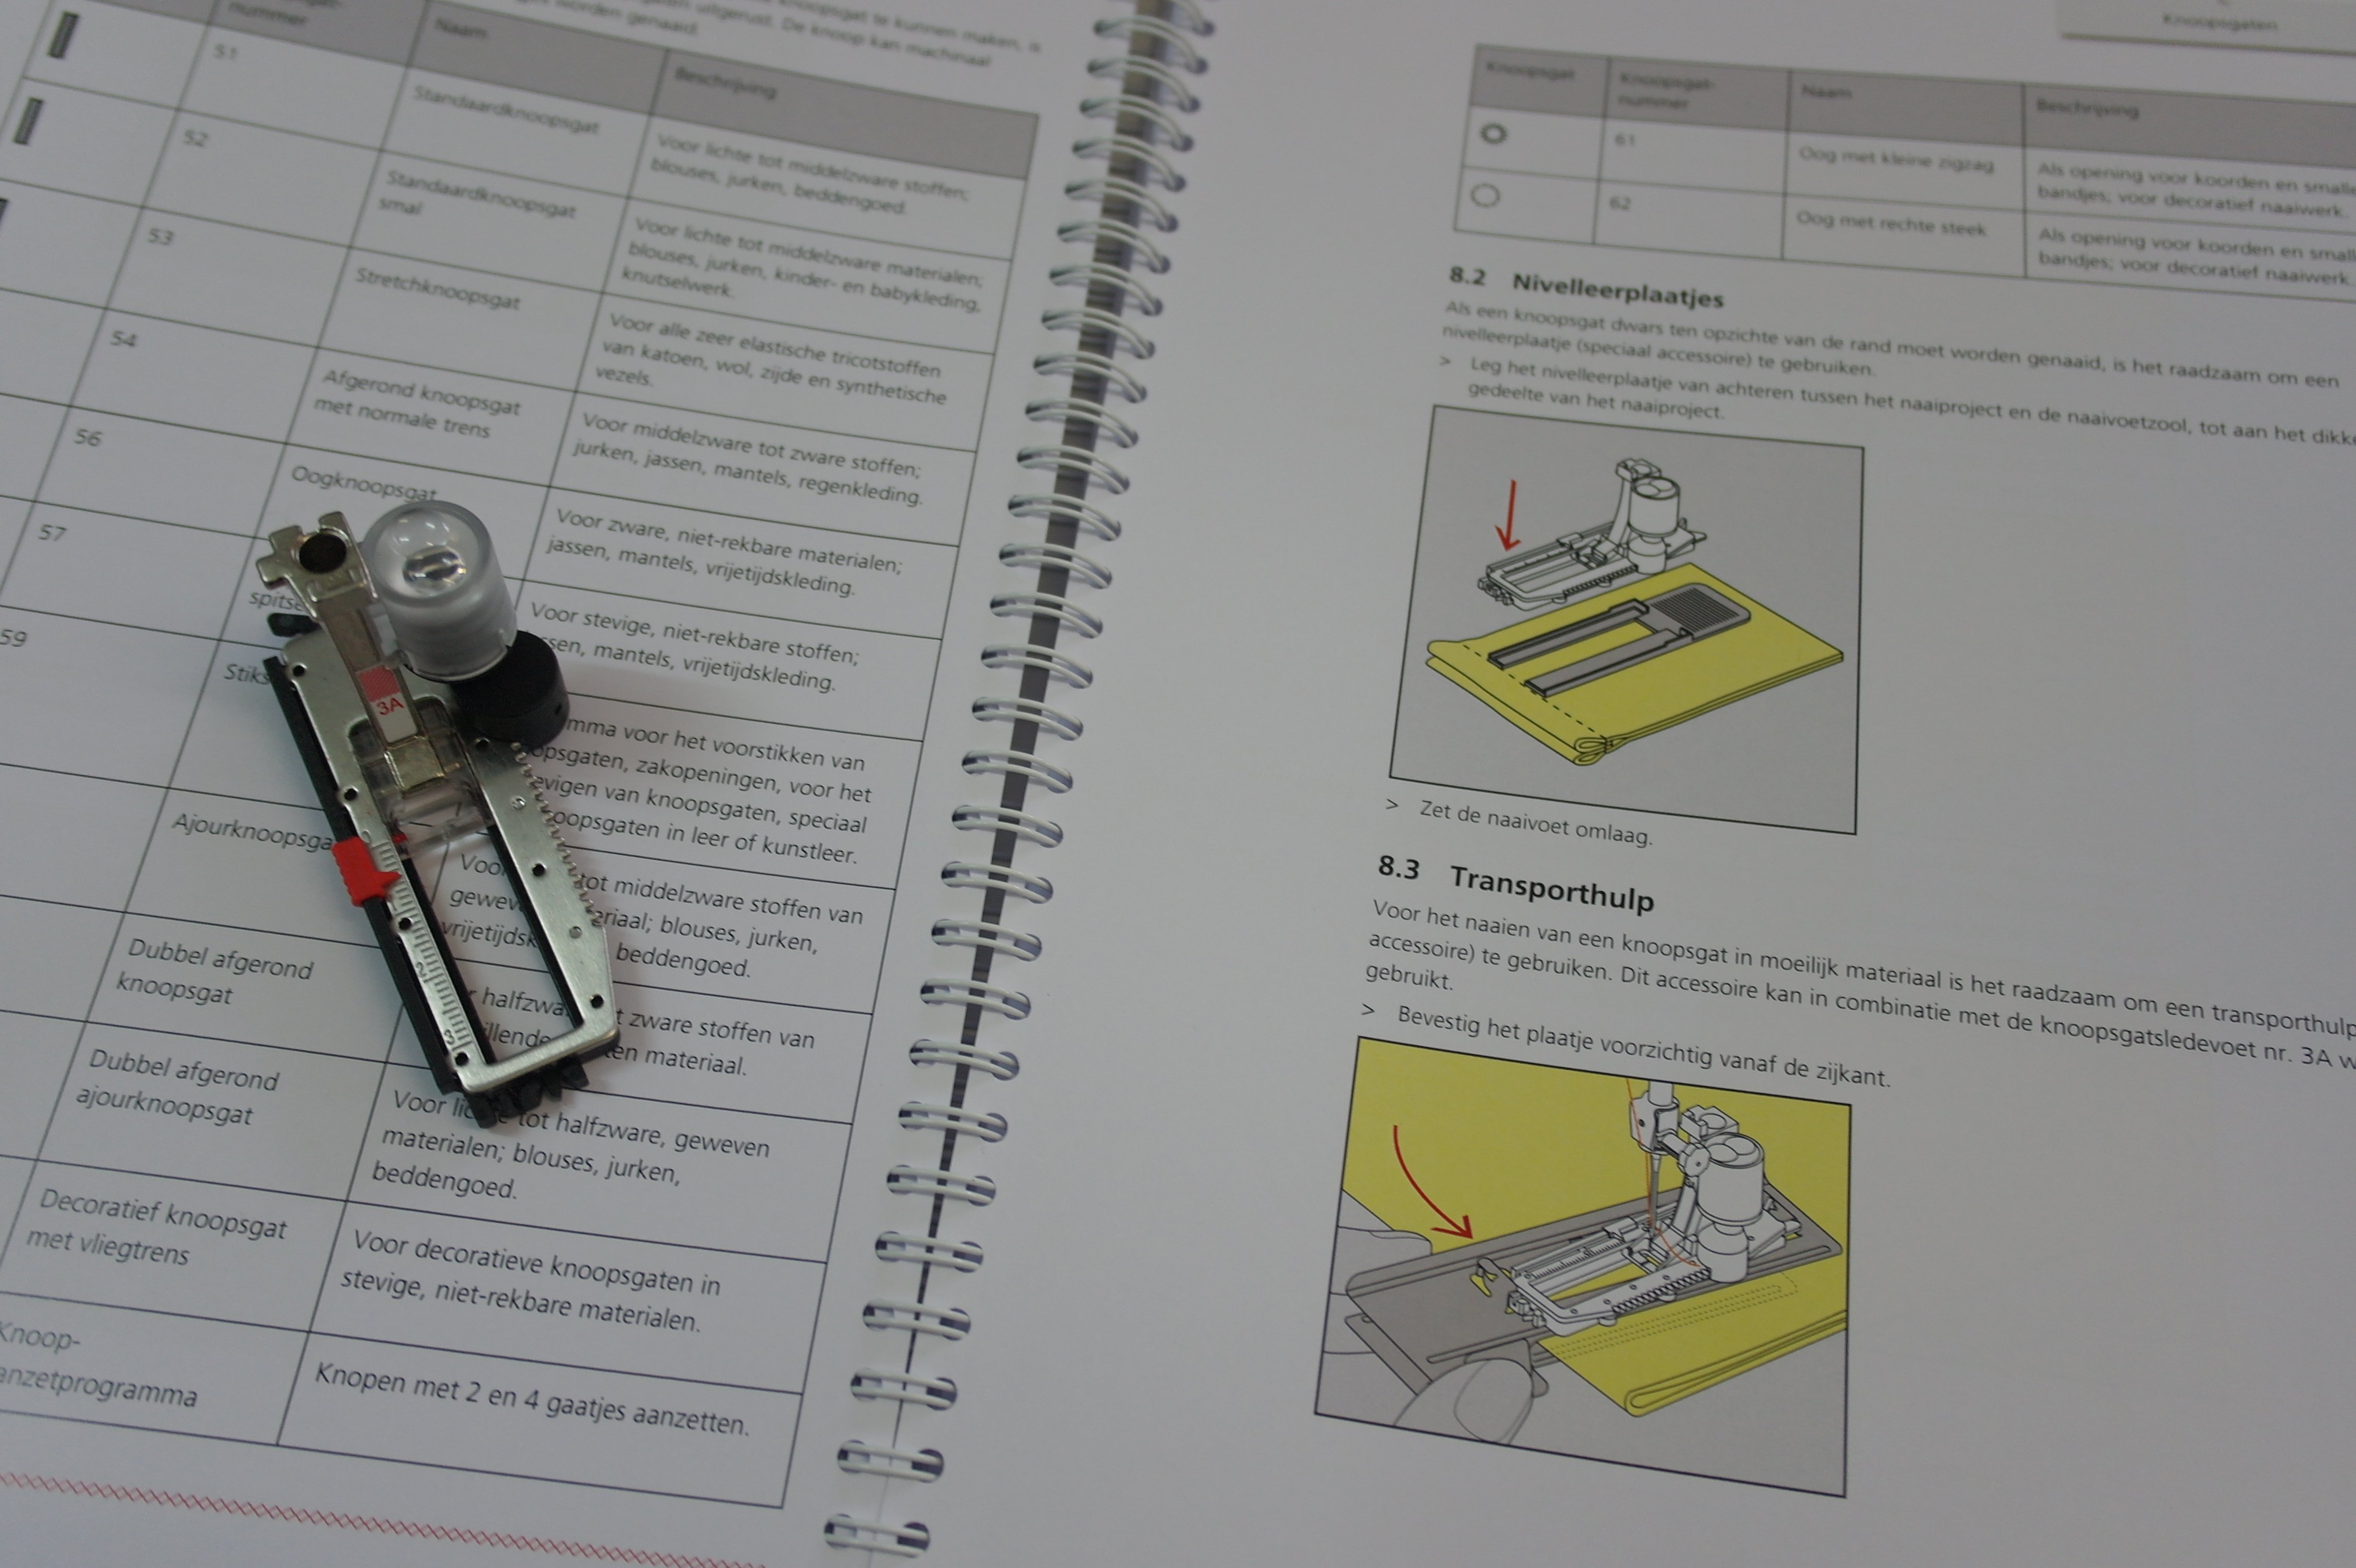
Check if you own a foot for making button holes. With my BERNINA 770QE this is button hole foot with slide #3A. Check your manual, to see how this foot is used. There are so much possibilities for making different button holes, it is handy to check this out first. The button hole foot I’ve mentioned is also available for the BERNINA 580 (my temporary machine) and perhaps for many other types of Bernina machines. If you don’t own a Bernina machine, check what button hole foot there is available for the machine you will be working with, or how you can make button holes without such a foot.
The button hole foot with slide #3A has an electronic sensor, by which your sewing machine measures the size of the buttonhole; it will remember this (unless this function is not available with your machine). With Buttonhole foot with slide # 3A, a sensor on the presser foot determines the buttonhole length and relays the dimensions to the sewing machine. This allows perfectly identical buttonholes to be sewn again, until the size is changed. It is important to keep the sensor clean, for the machine to ‘read’ all information.
Don’t pull the sandwich, while making button holes. The foot cannot ‘read’ information well, and button holes will distort by pulling or pushing the sandwich. Gently guide the sandwich under the button hole.
Button holes are often the finishing touch when making clothes. With our project, you will NOT open the butten holes: leave them closed – they provide just another decorative stitch on your blocks, especially when made with multicolor or metallic threads.
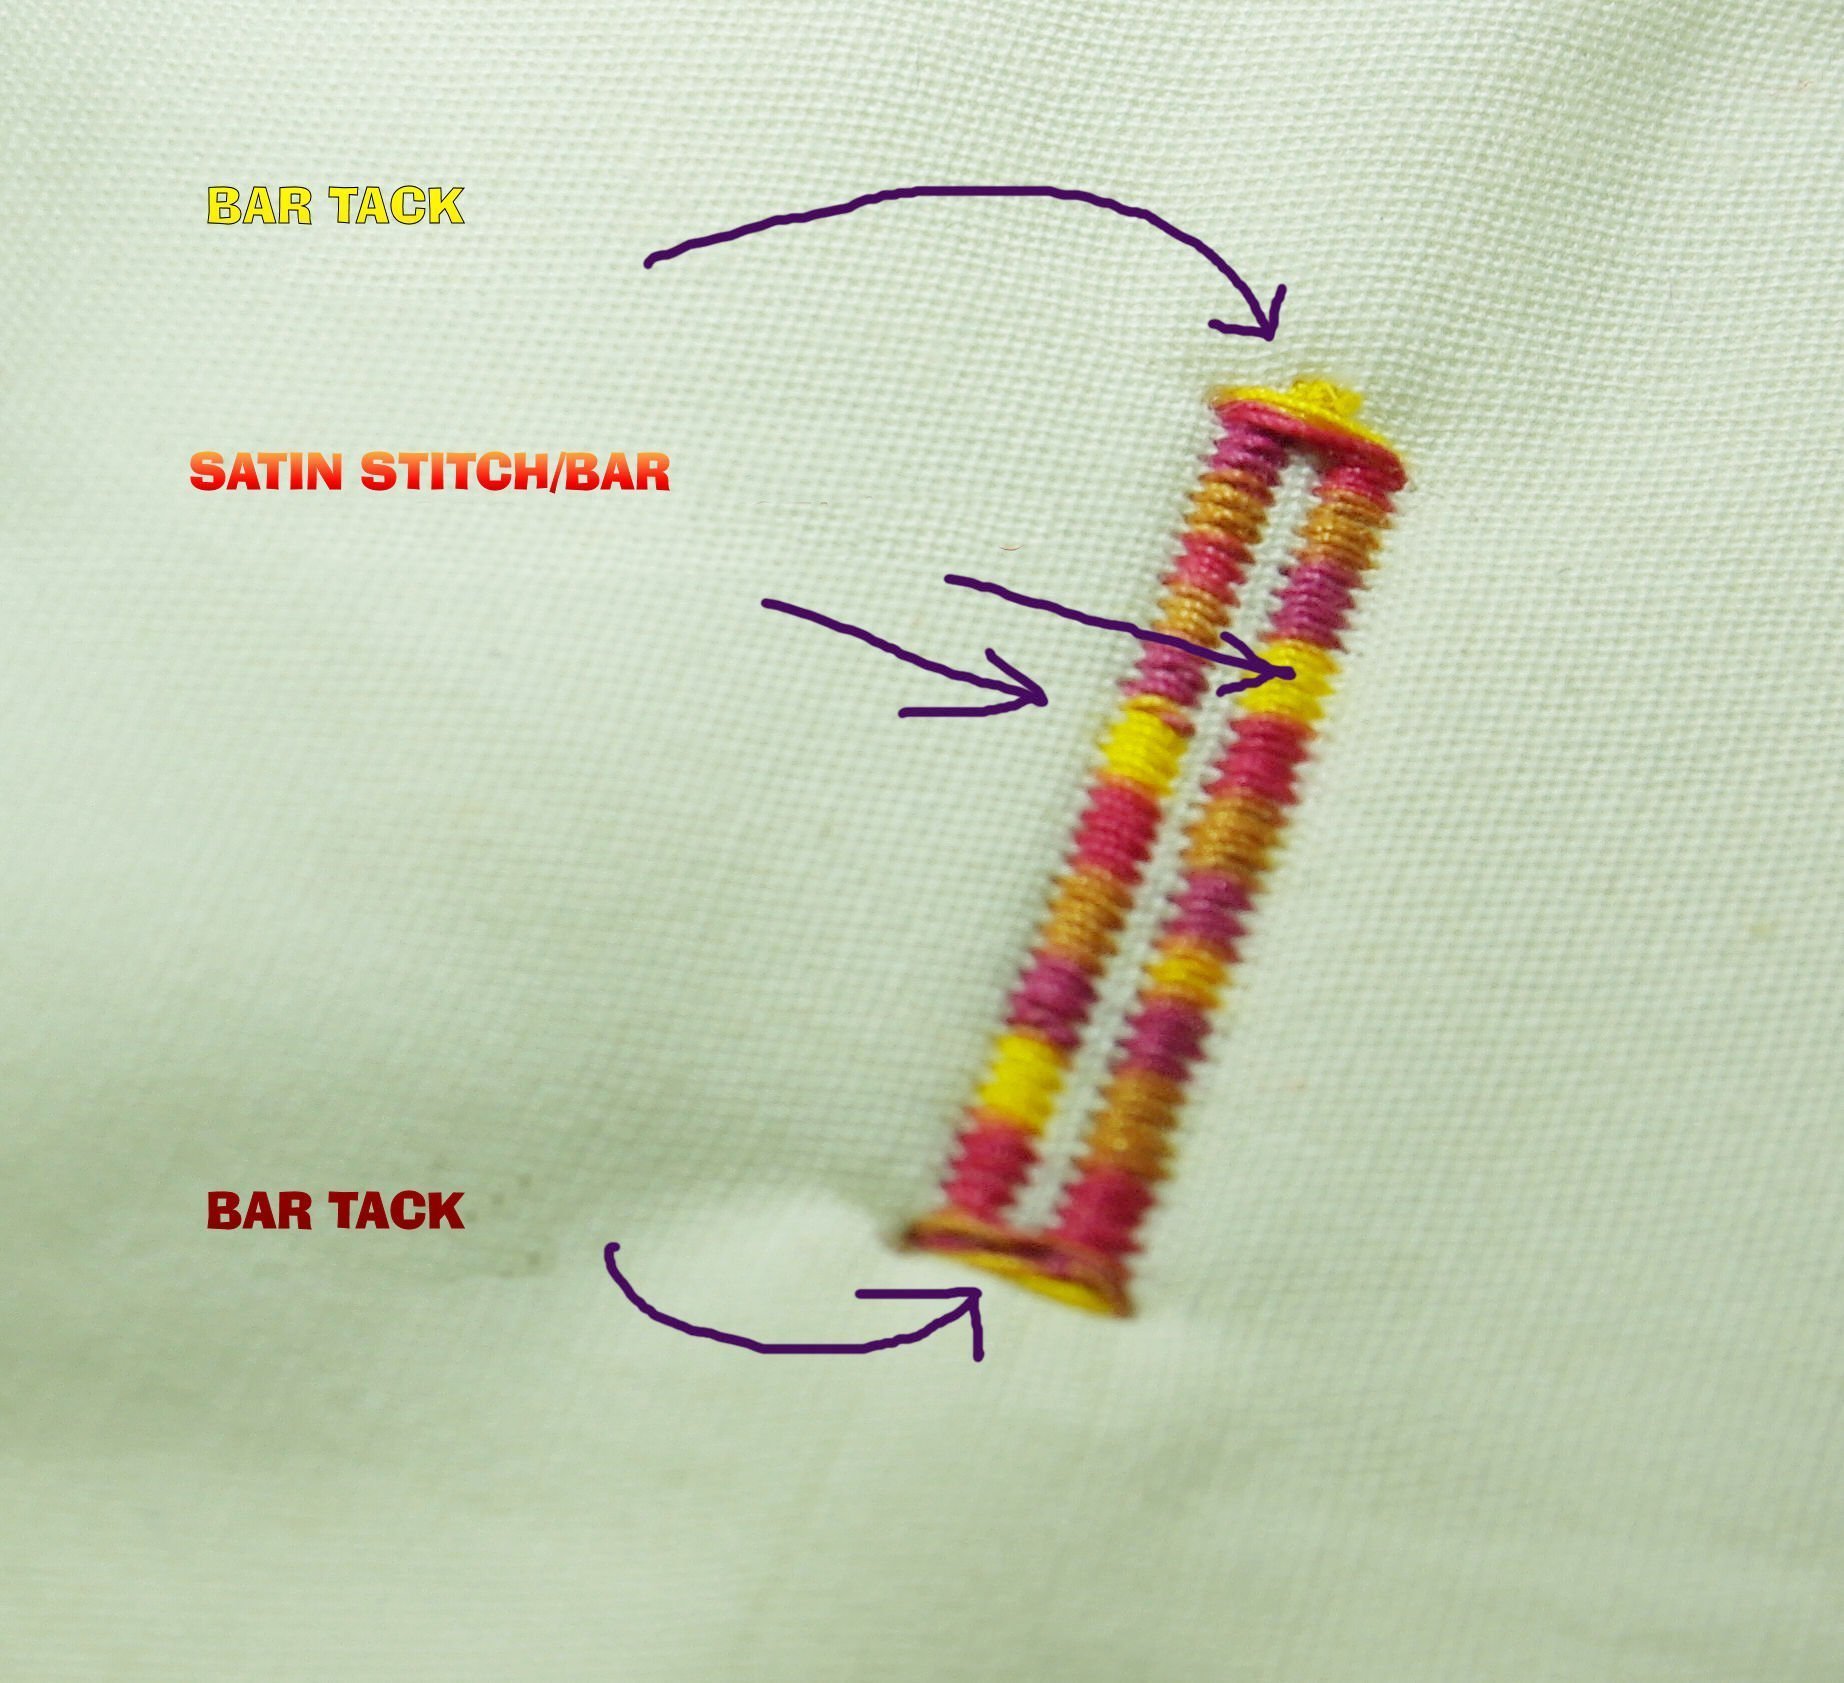
Before working with this button hole foot, check out how button hole 51 is made (Bernina machines): This stitch starts at the ‘back’, works its way to make a bar on the left, makes a row of travel stitches to the back again and finishes by making the right bar. At the back and the front of the button hole, a bar tack is made.

I have tested this button hole on a sample, before working on my Crazy block. This way I know how this button hole works, and if it is made the way I like.

I have placed the first fabric for Block A2, ready for making button holes. I will make these on the first fabrics on each of the 8 blocks. To make the button holes, press the icon on your screen for ‘Button Hole’.
I have selected button hole 51, and will make several on the first fabric. I am looking at the screen, and see that presser foot #3A is selected: this is important. Always check if the right foot for the job is selected, after mounting the foot on your machine.
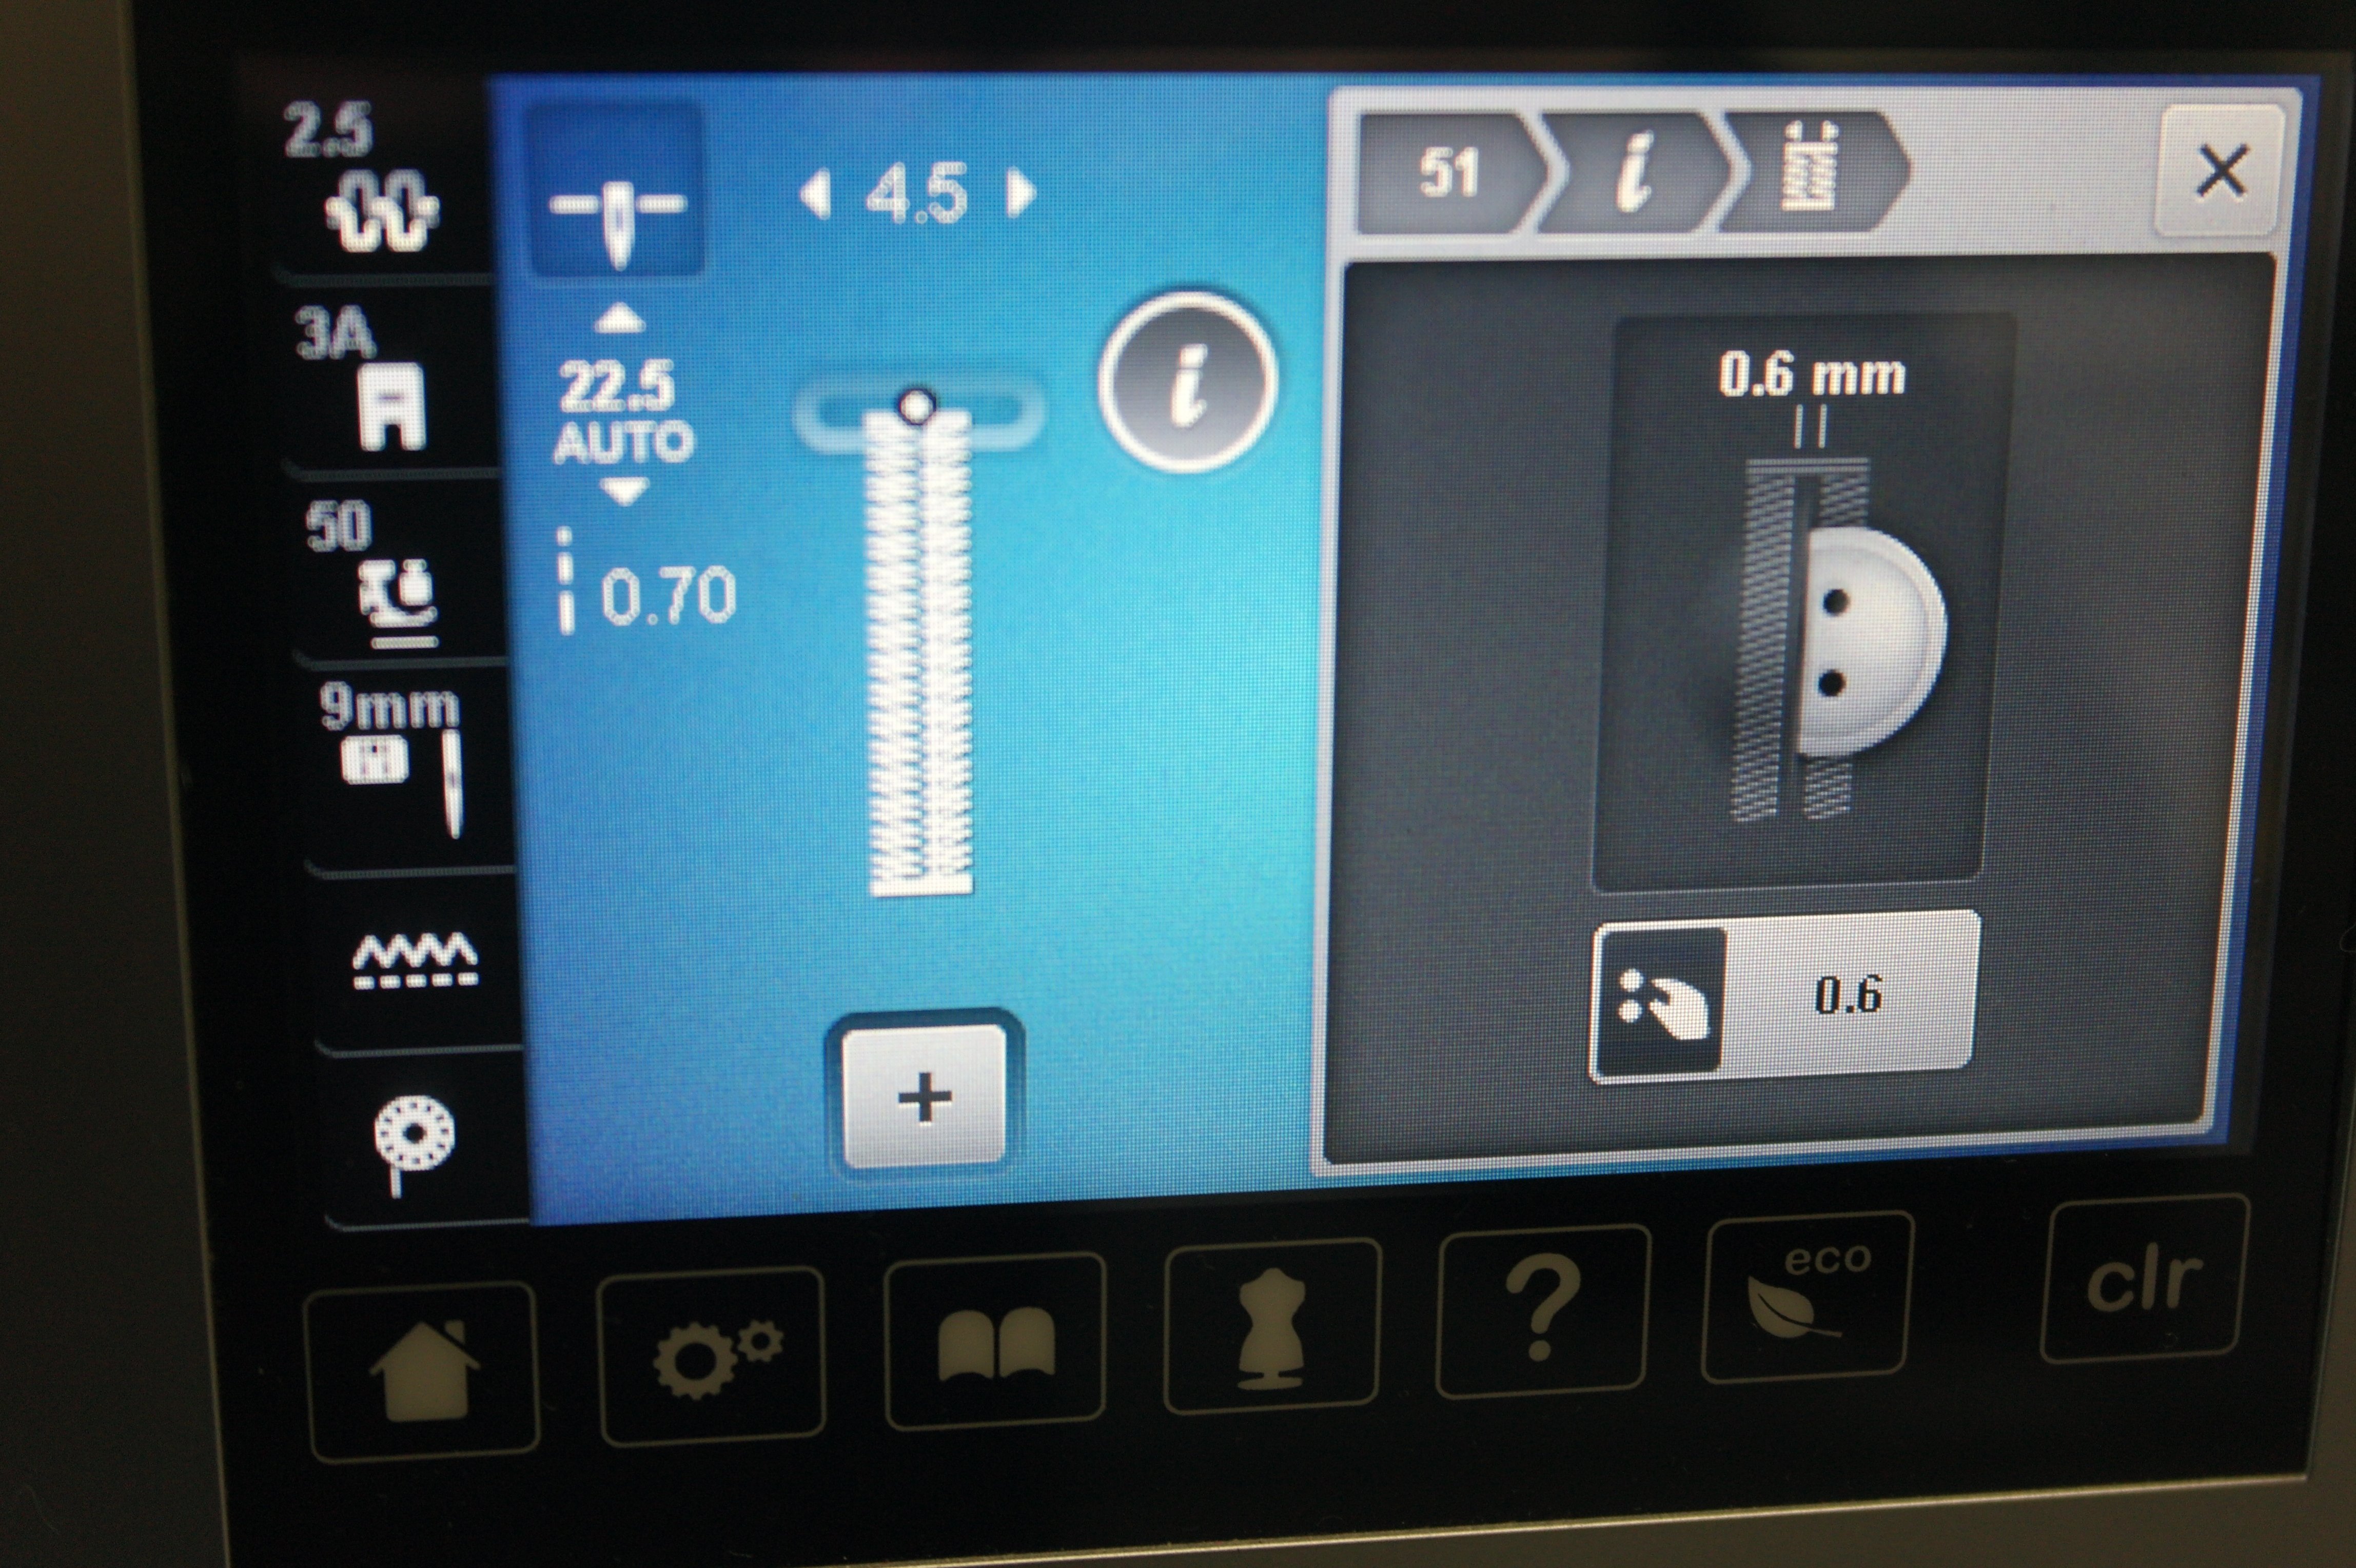
You can change measurements of width and length of a button hole. With the width you can change the size of the opening – if you have thick, large buttons, you will need a wider buttonhole, but with our Crazy project, you don’t have to change the width. With B770QE I can click at the ‘i’ for an extra menu. The right screen shows the length and the width. The width is set (default) on 0.6mm, which is ok. You can vary this with from 0.1 up to 2.0mm. Just click on the number at the bottom and + or – to change this, or use the knob on the right of your machine.
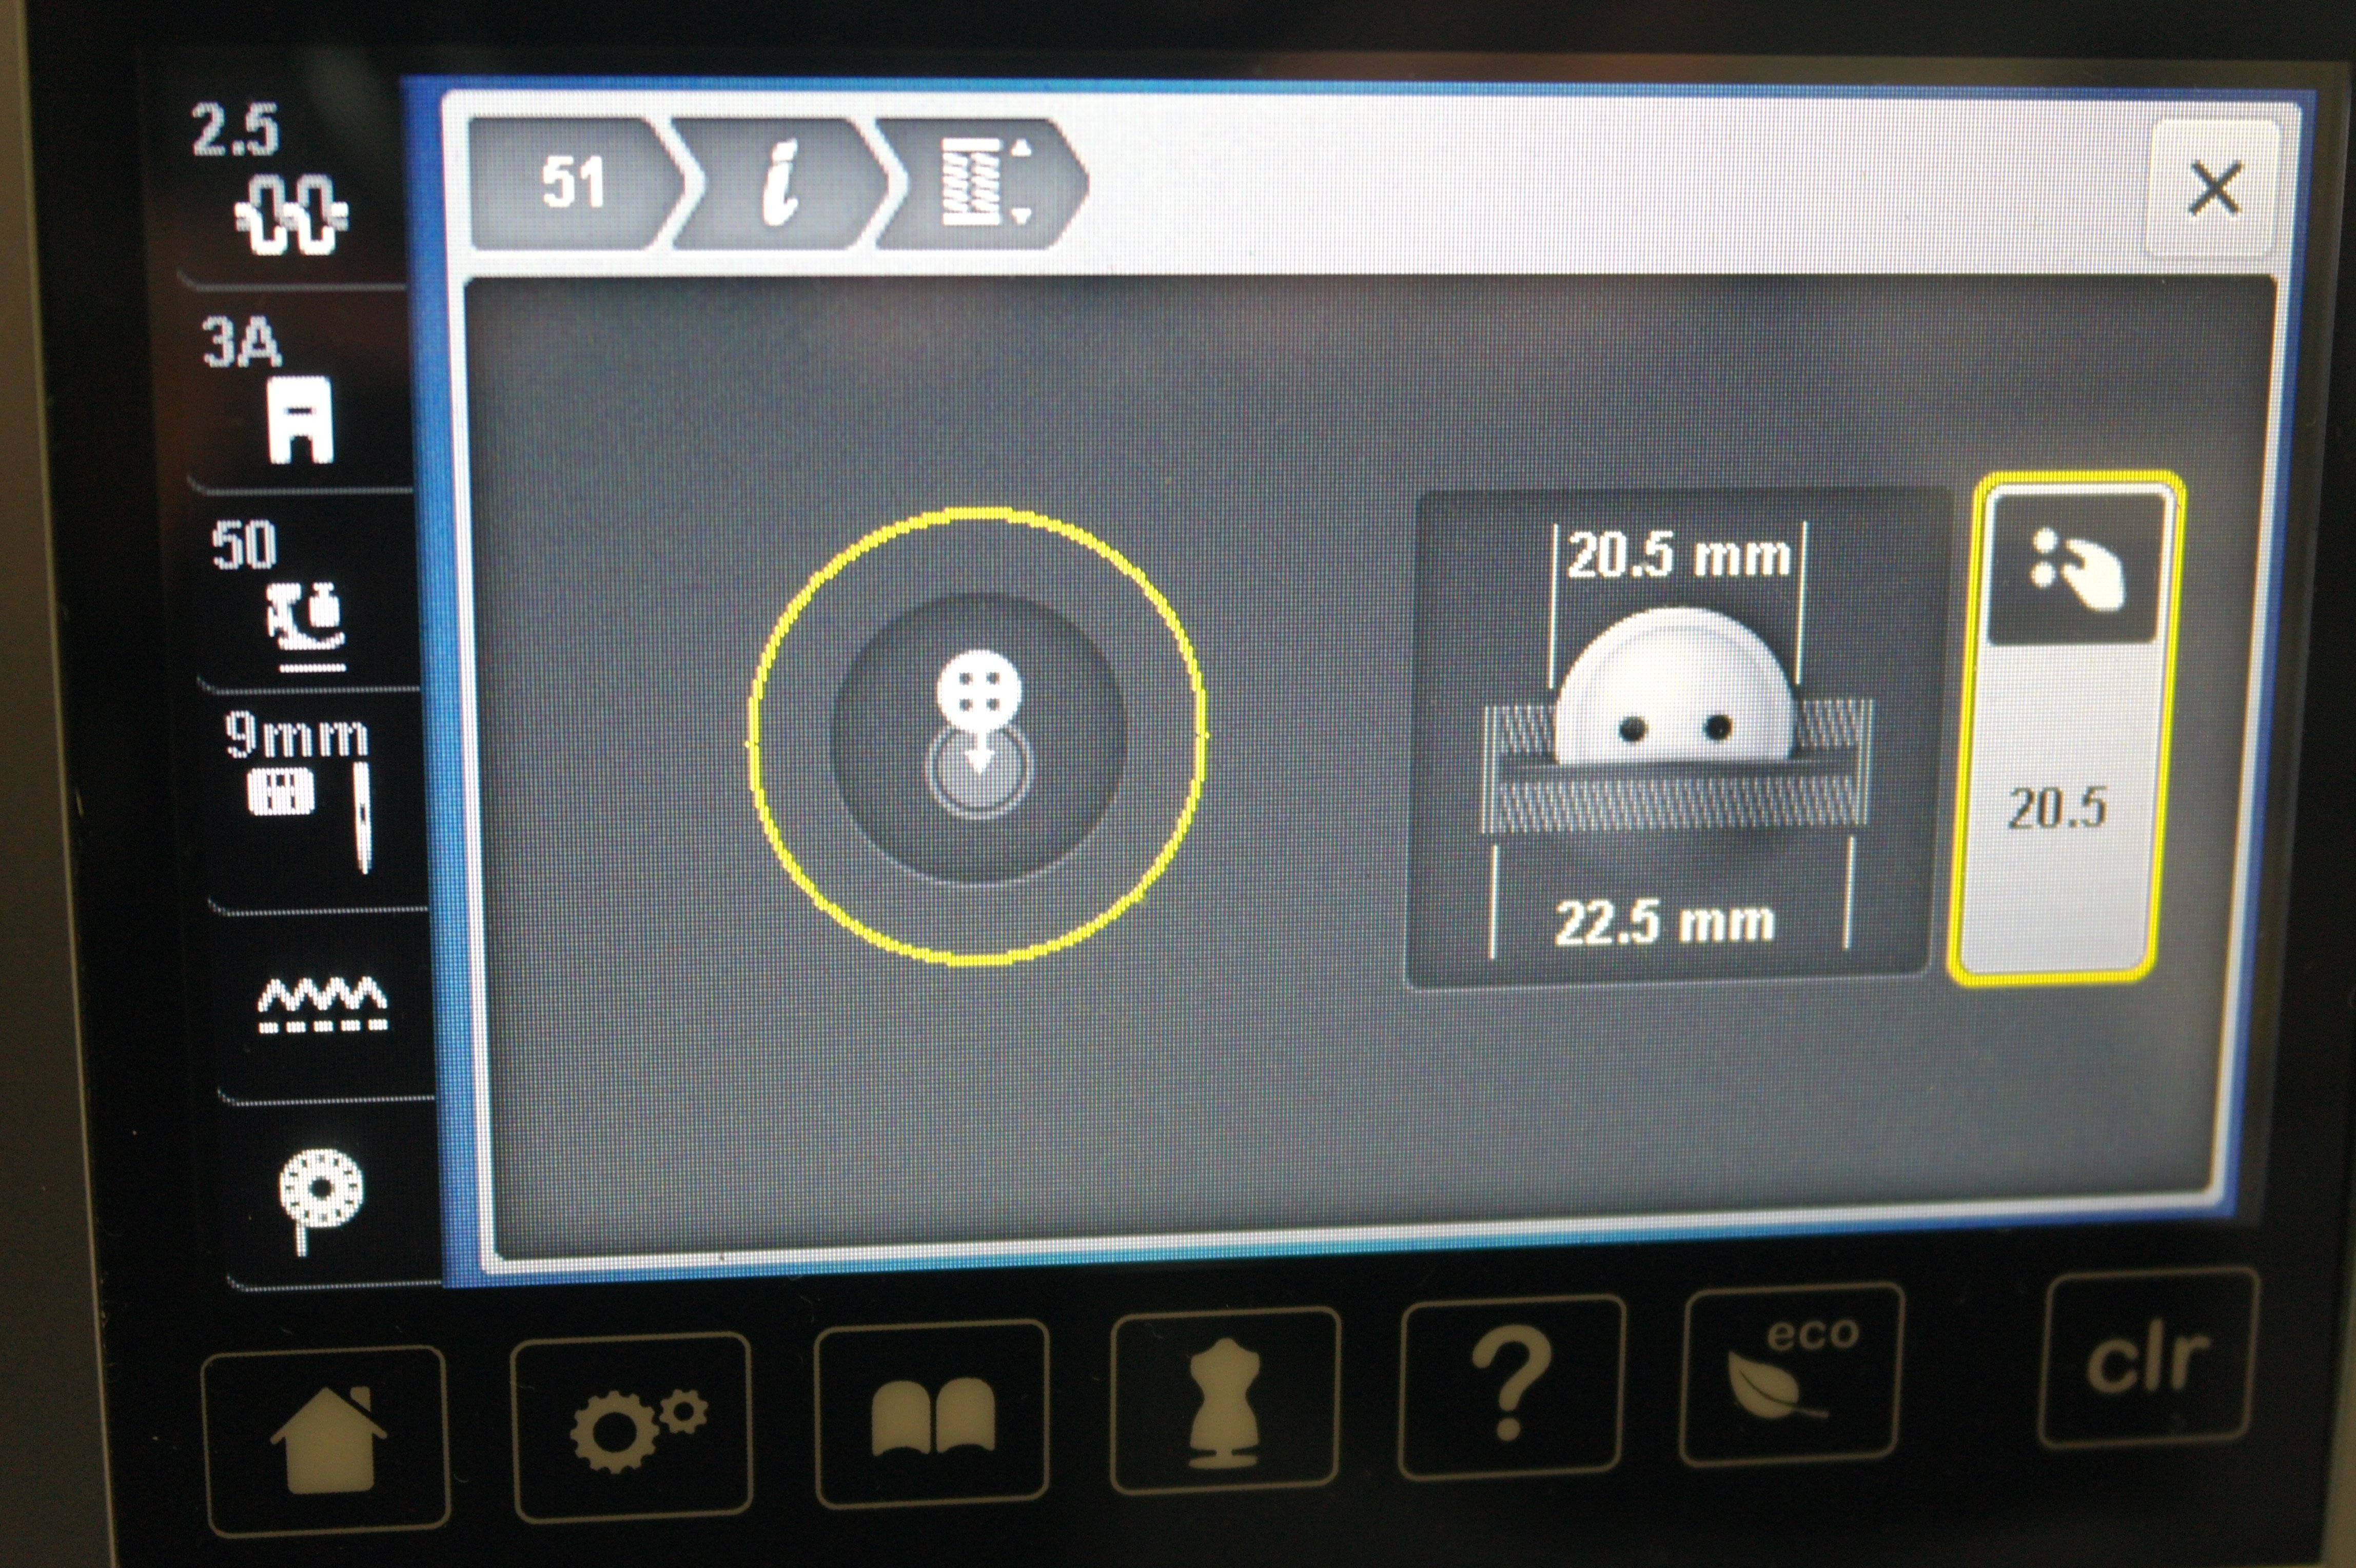
Changing the length could be interesting: again click on the ‘i’ and then on the left icon, ajust the length: I have increased mine to 20,5 cm, making the button hole itself 22,5 mm. You can see that I have changed something, because of the yellow lines around some items. If you are using a default setting, these lines should be white.

I have choosen DecoBob/Wonderfil for the bobbin (I am using this all the time when making decorative stitches), and will use King Tut/Superior Threads on top, multicolor. By using a water soluble marking pen, I can place little stripes or dots on my fabric; startingpoints for the button holes. These are the points to place my needle, so I know the button holes will be made on the right spot. You can only just see them on the picture above.
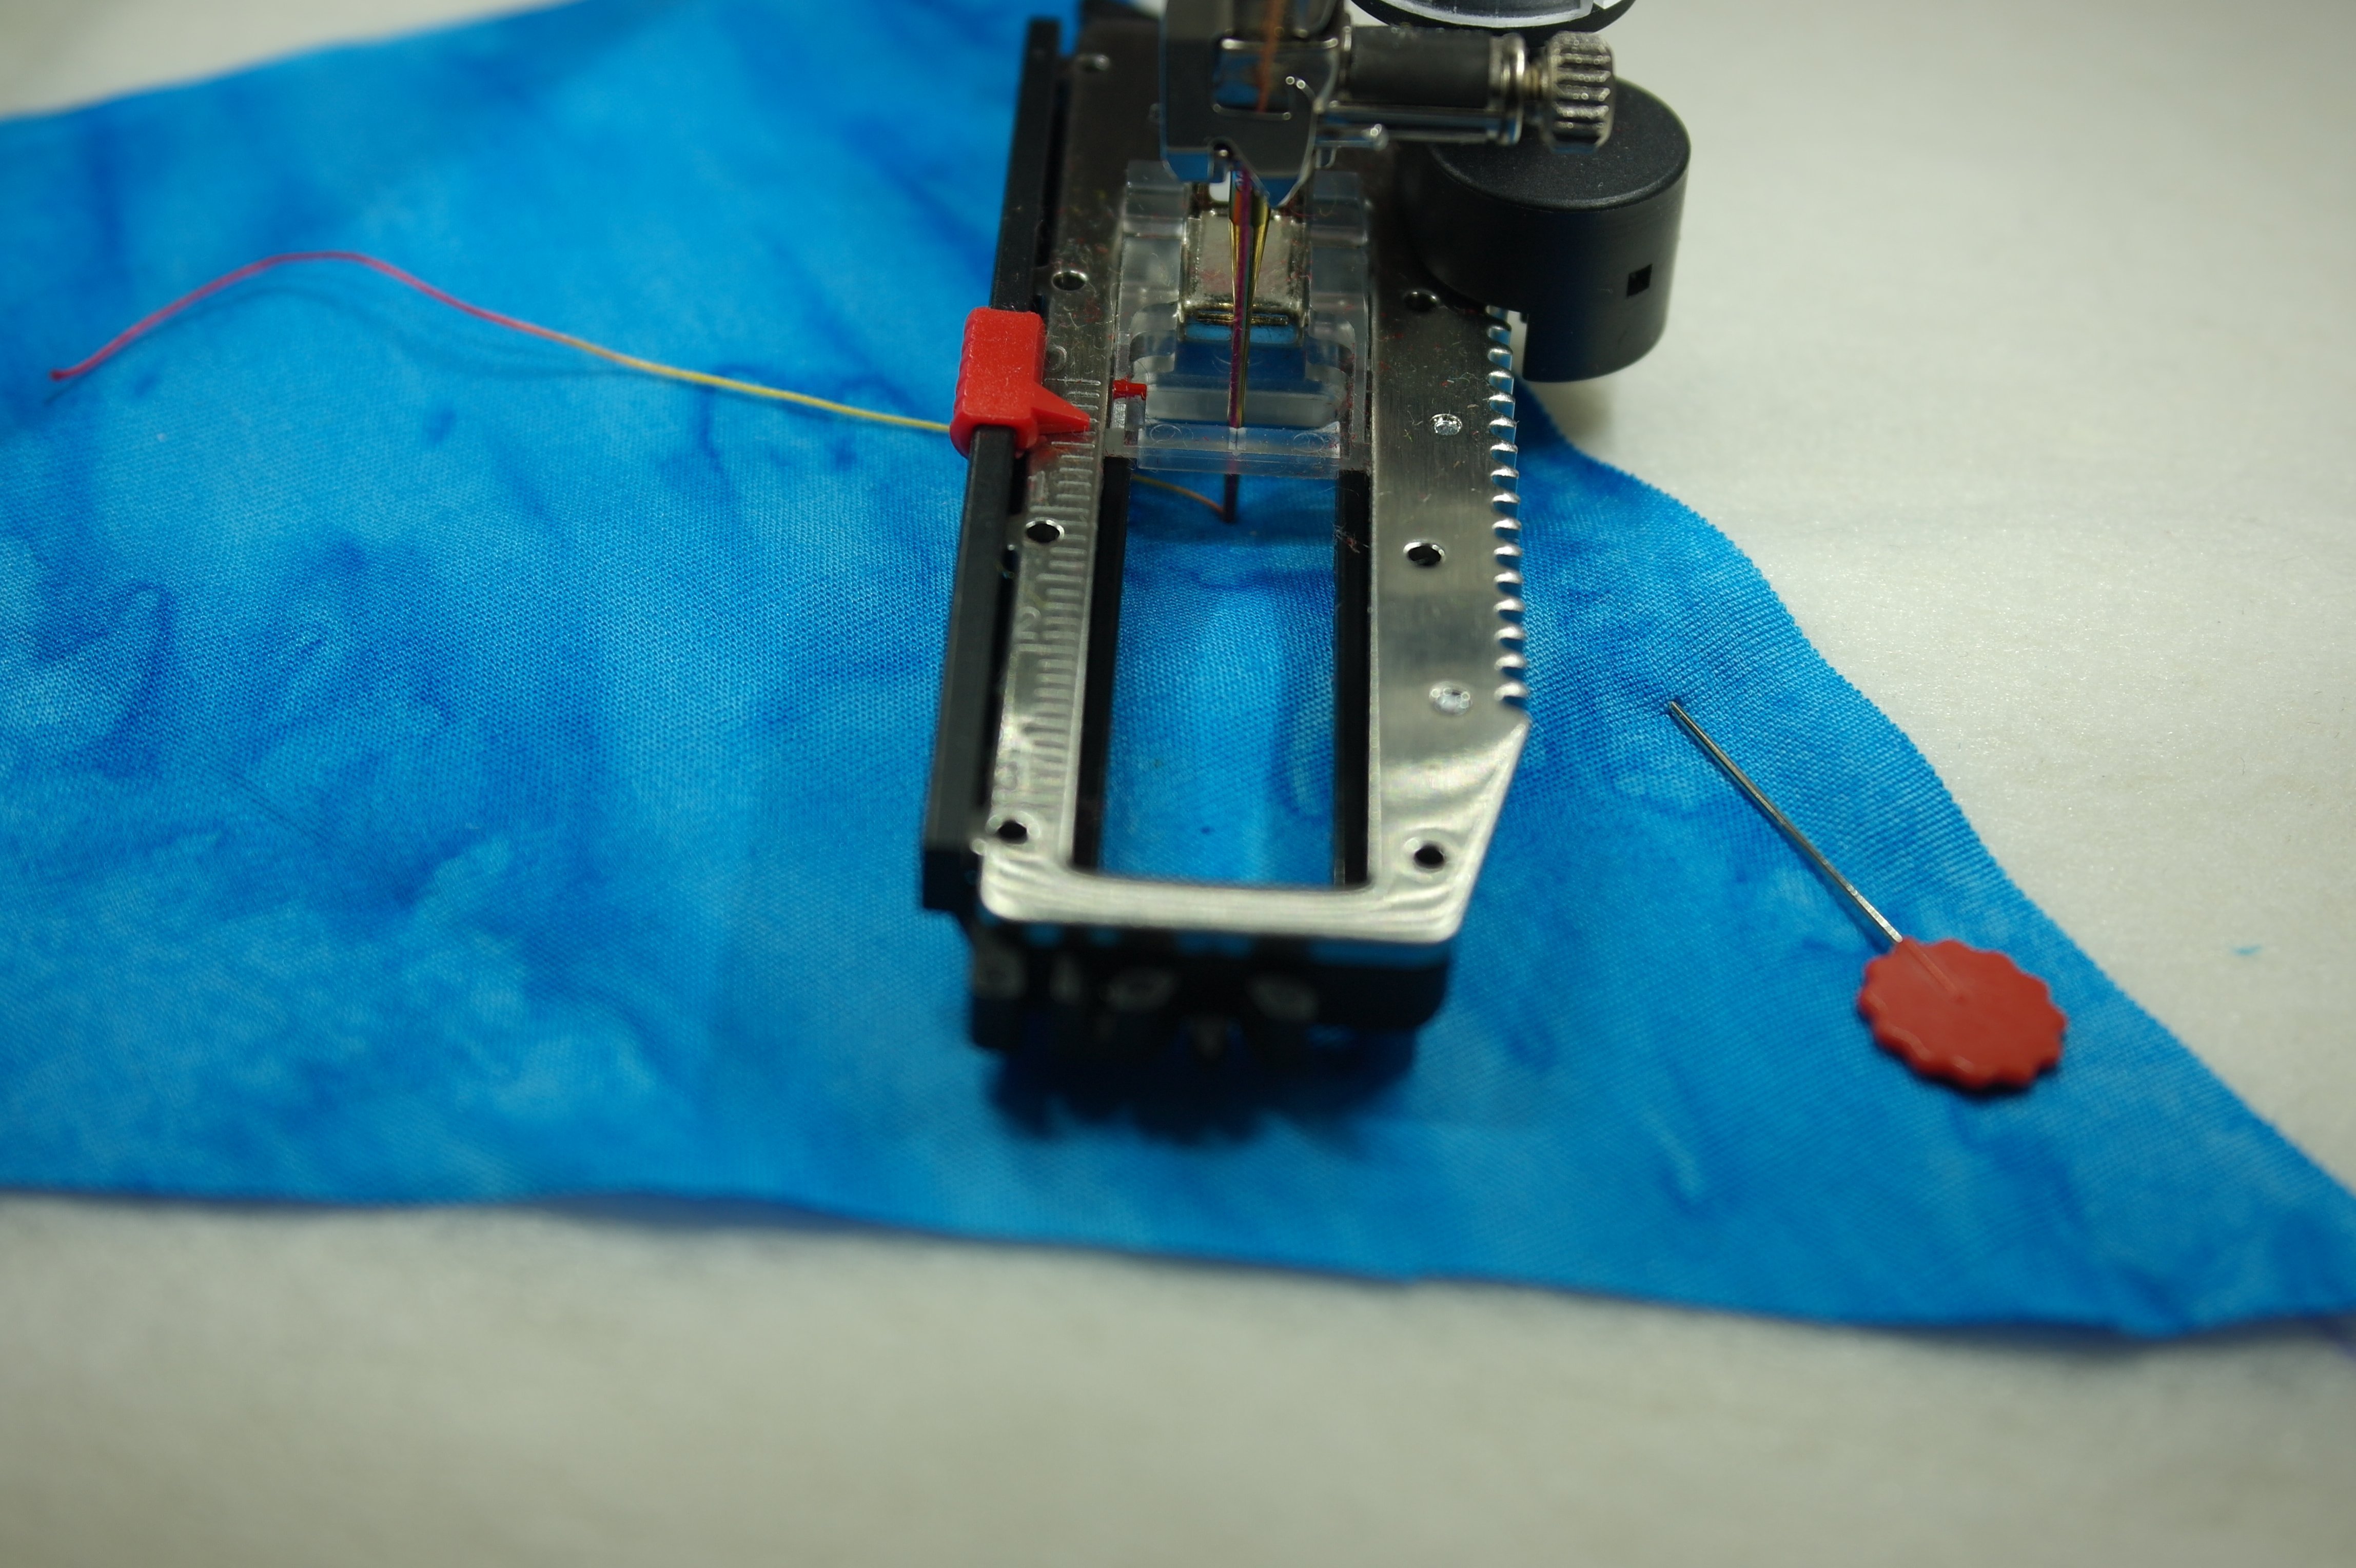
Placing the needle on the first point of penetration, by turning the wheel of the machine towards me, makes sure that I will start at the right spot.
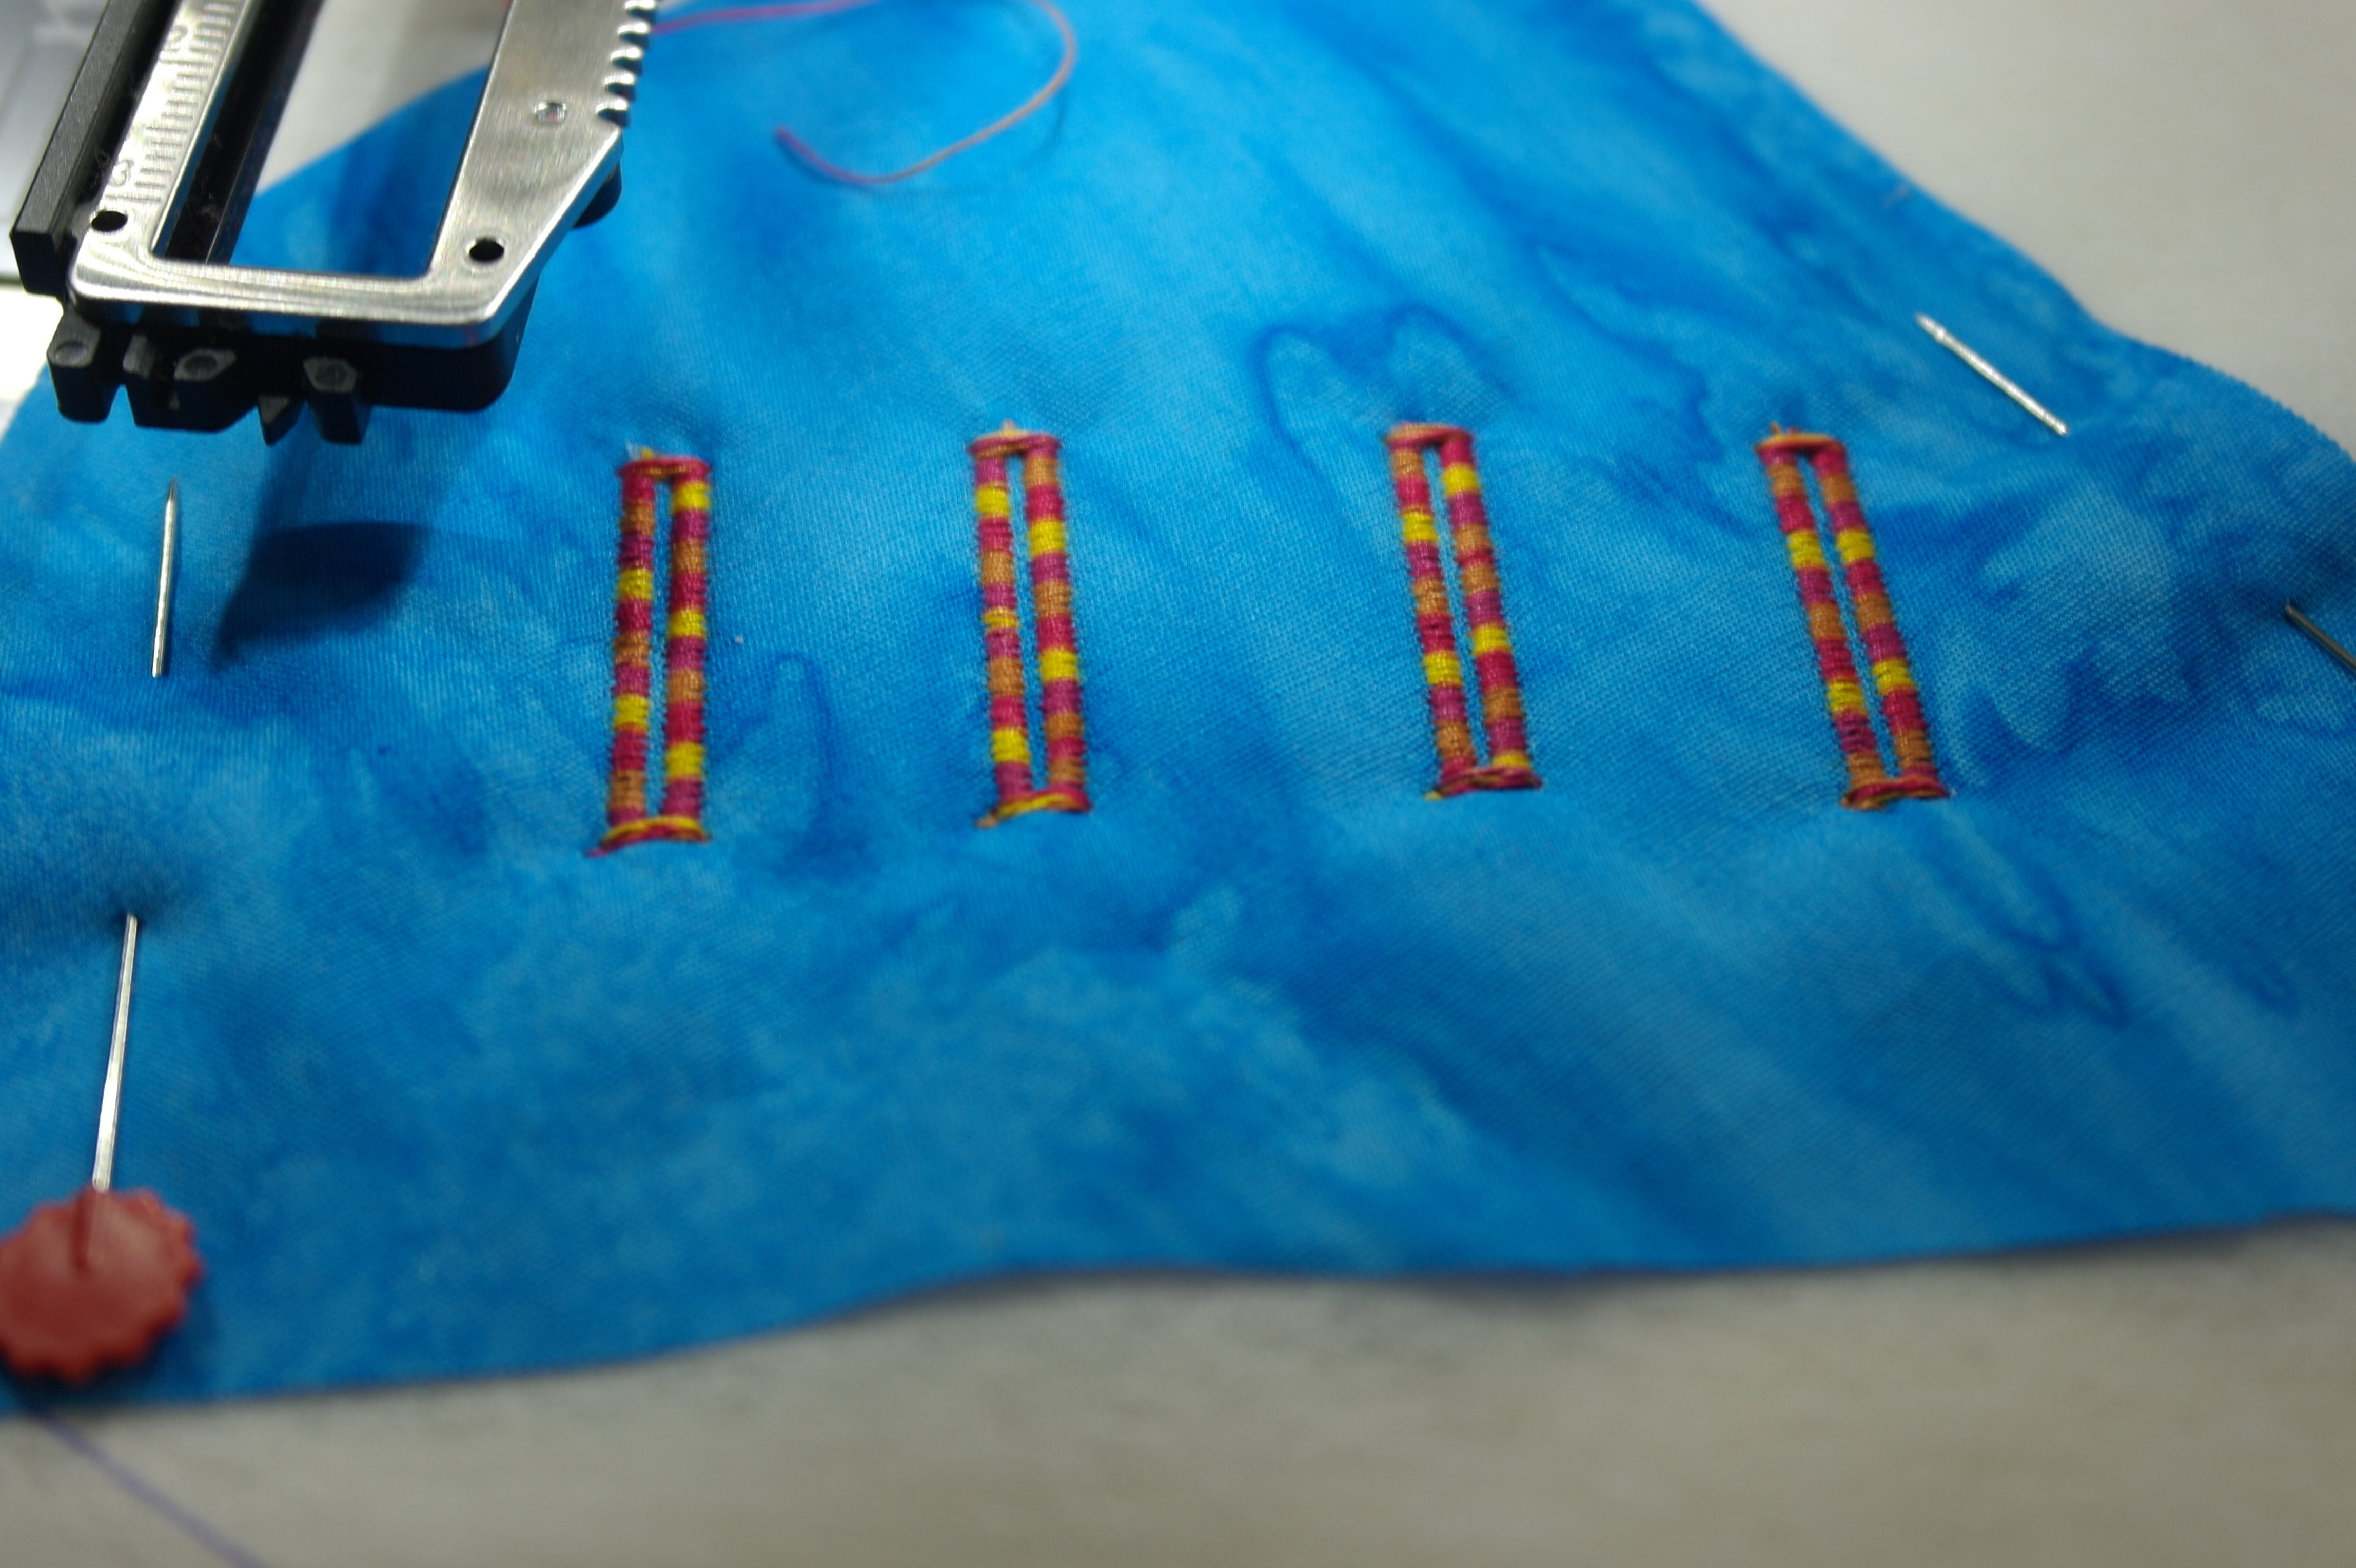
I have made 4 button holes, next to each other. Don’t they look wonderful with the multicolor thread? The contrast between threads and fabric is just right for the button holes to stand out.

I will fill up the fabric with decorative stitches, using the open embroidery foot #20C. With these last blocks, I will use one thread/color per fabric, just to make these blocks different from all the others.

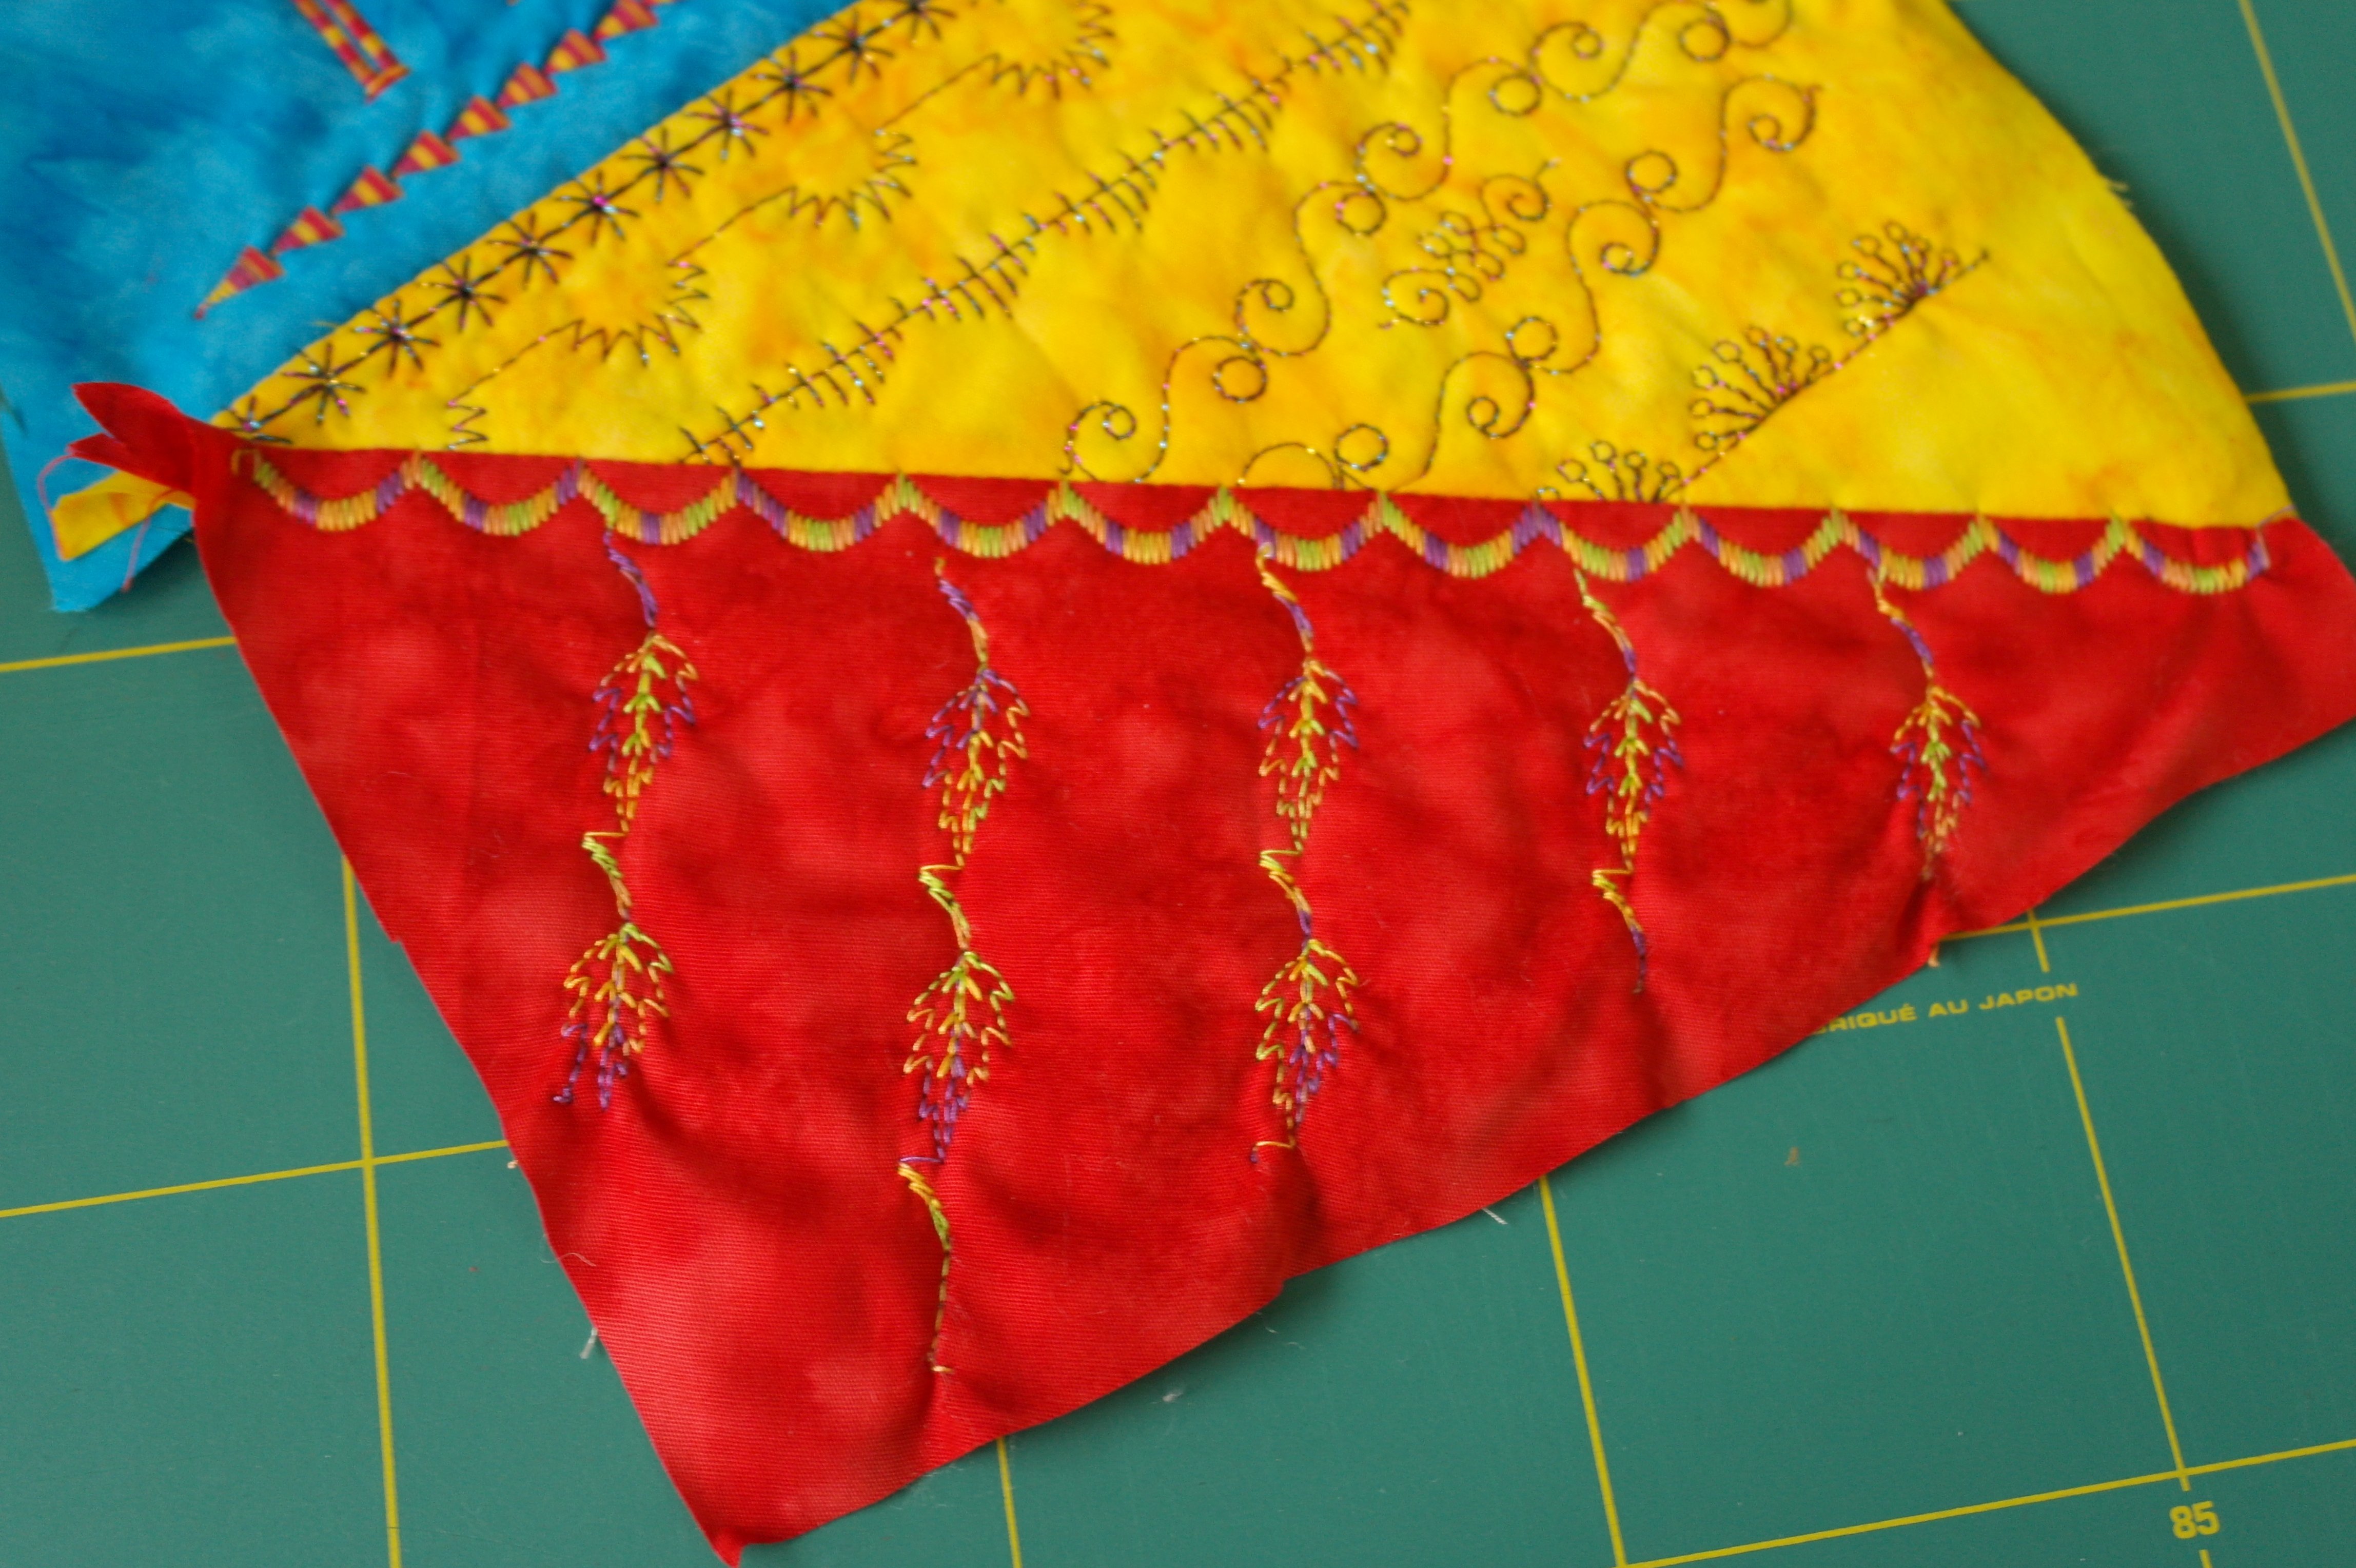
With the second fabric, I have used metallic thread: Madeira 40, multicolor. Making decorative stitches in a slight curve, two rows in a mirror image, gives me enough space in between to place a single larger decorative stitch. This is fun!
More fun is to variate with different settings – making a row of stitches, and then more stitches placed perpendicular…
Make corners and fill these up with other stitches…
Make curved lines of decorative stitches and alternate them with straight lines…
Vary as much as you can!

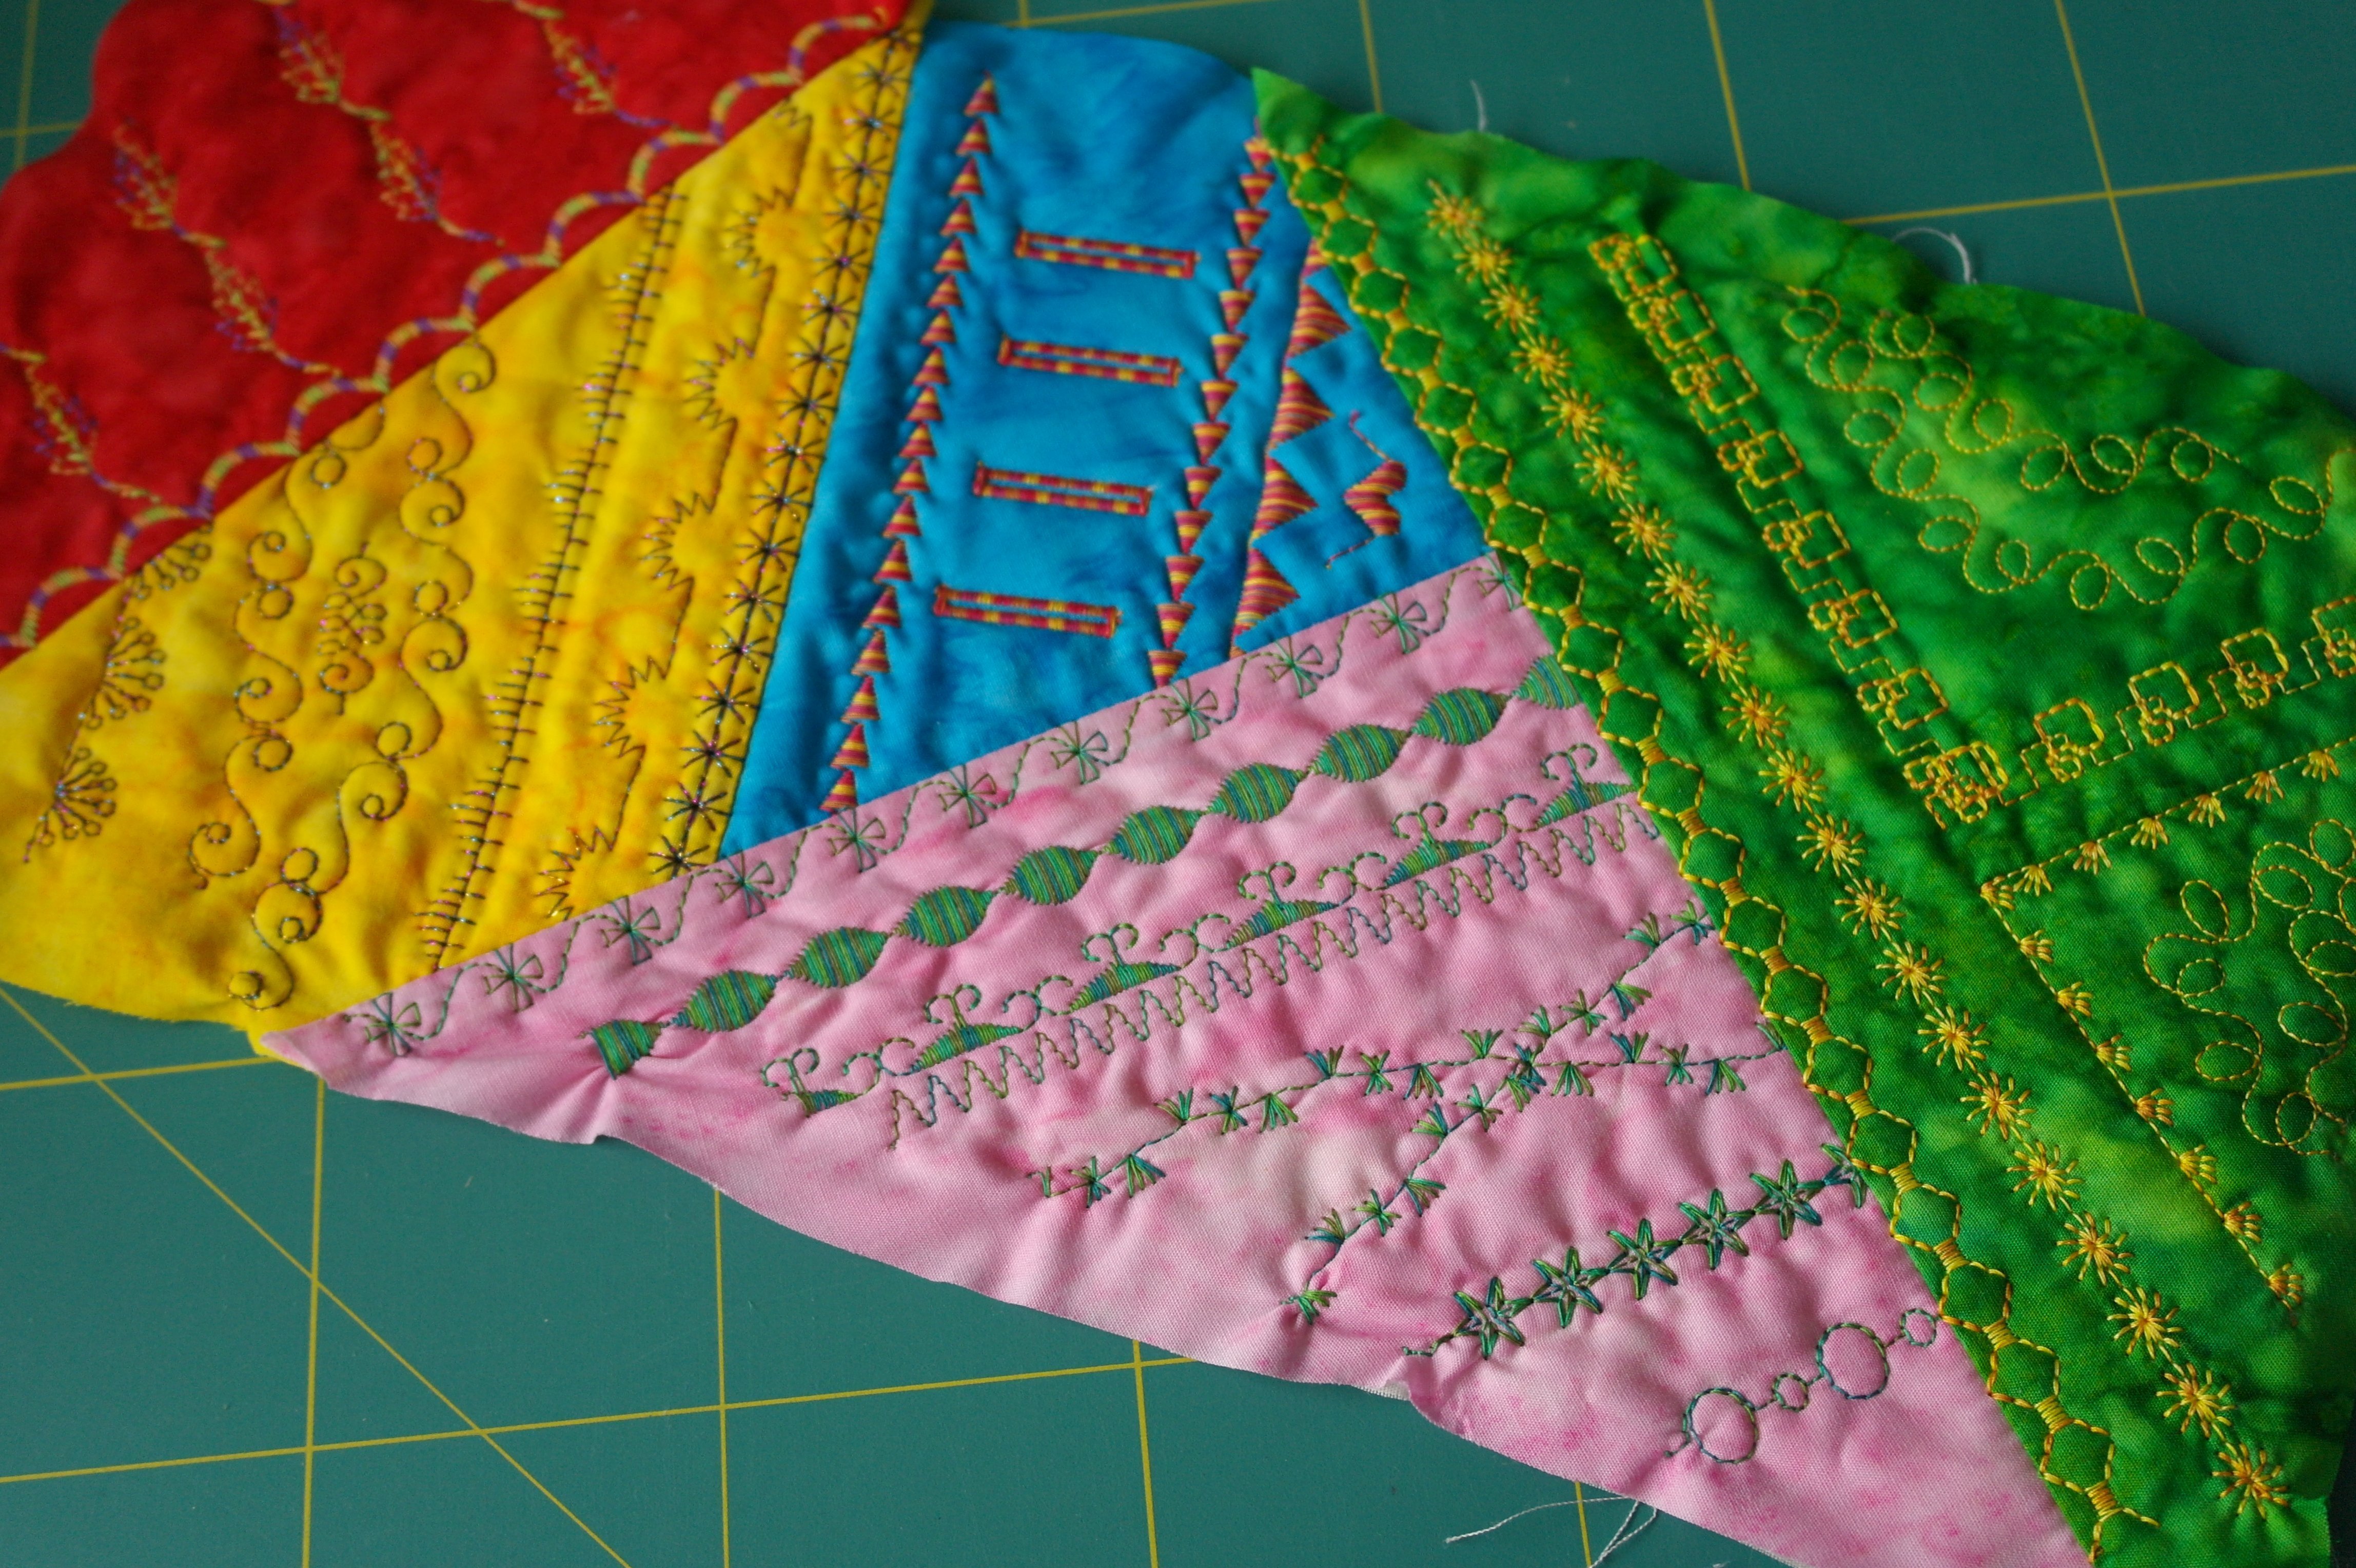
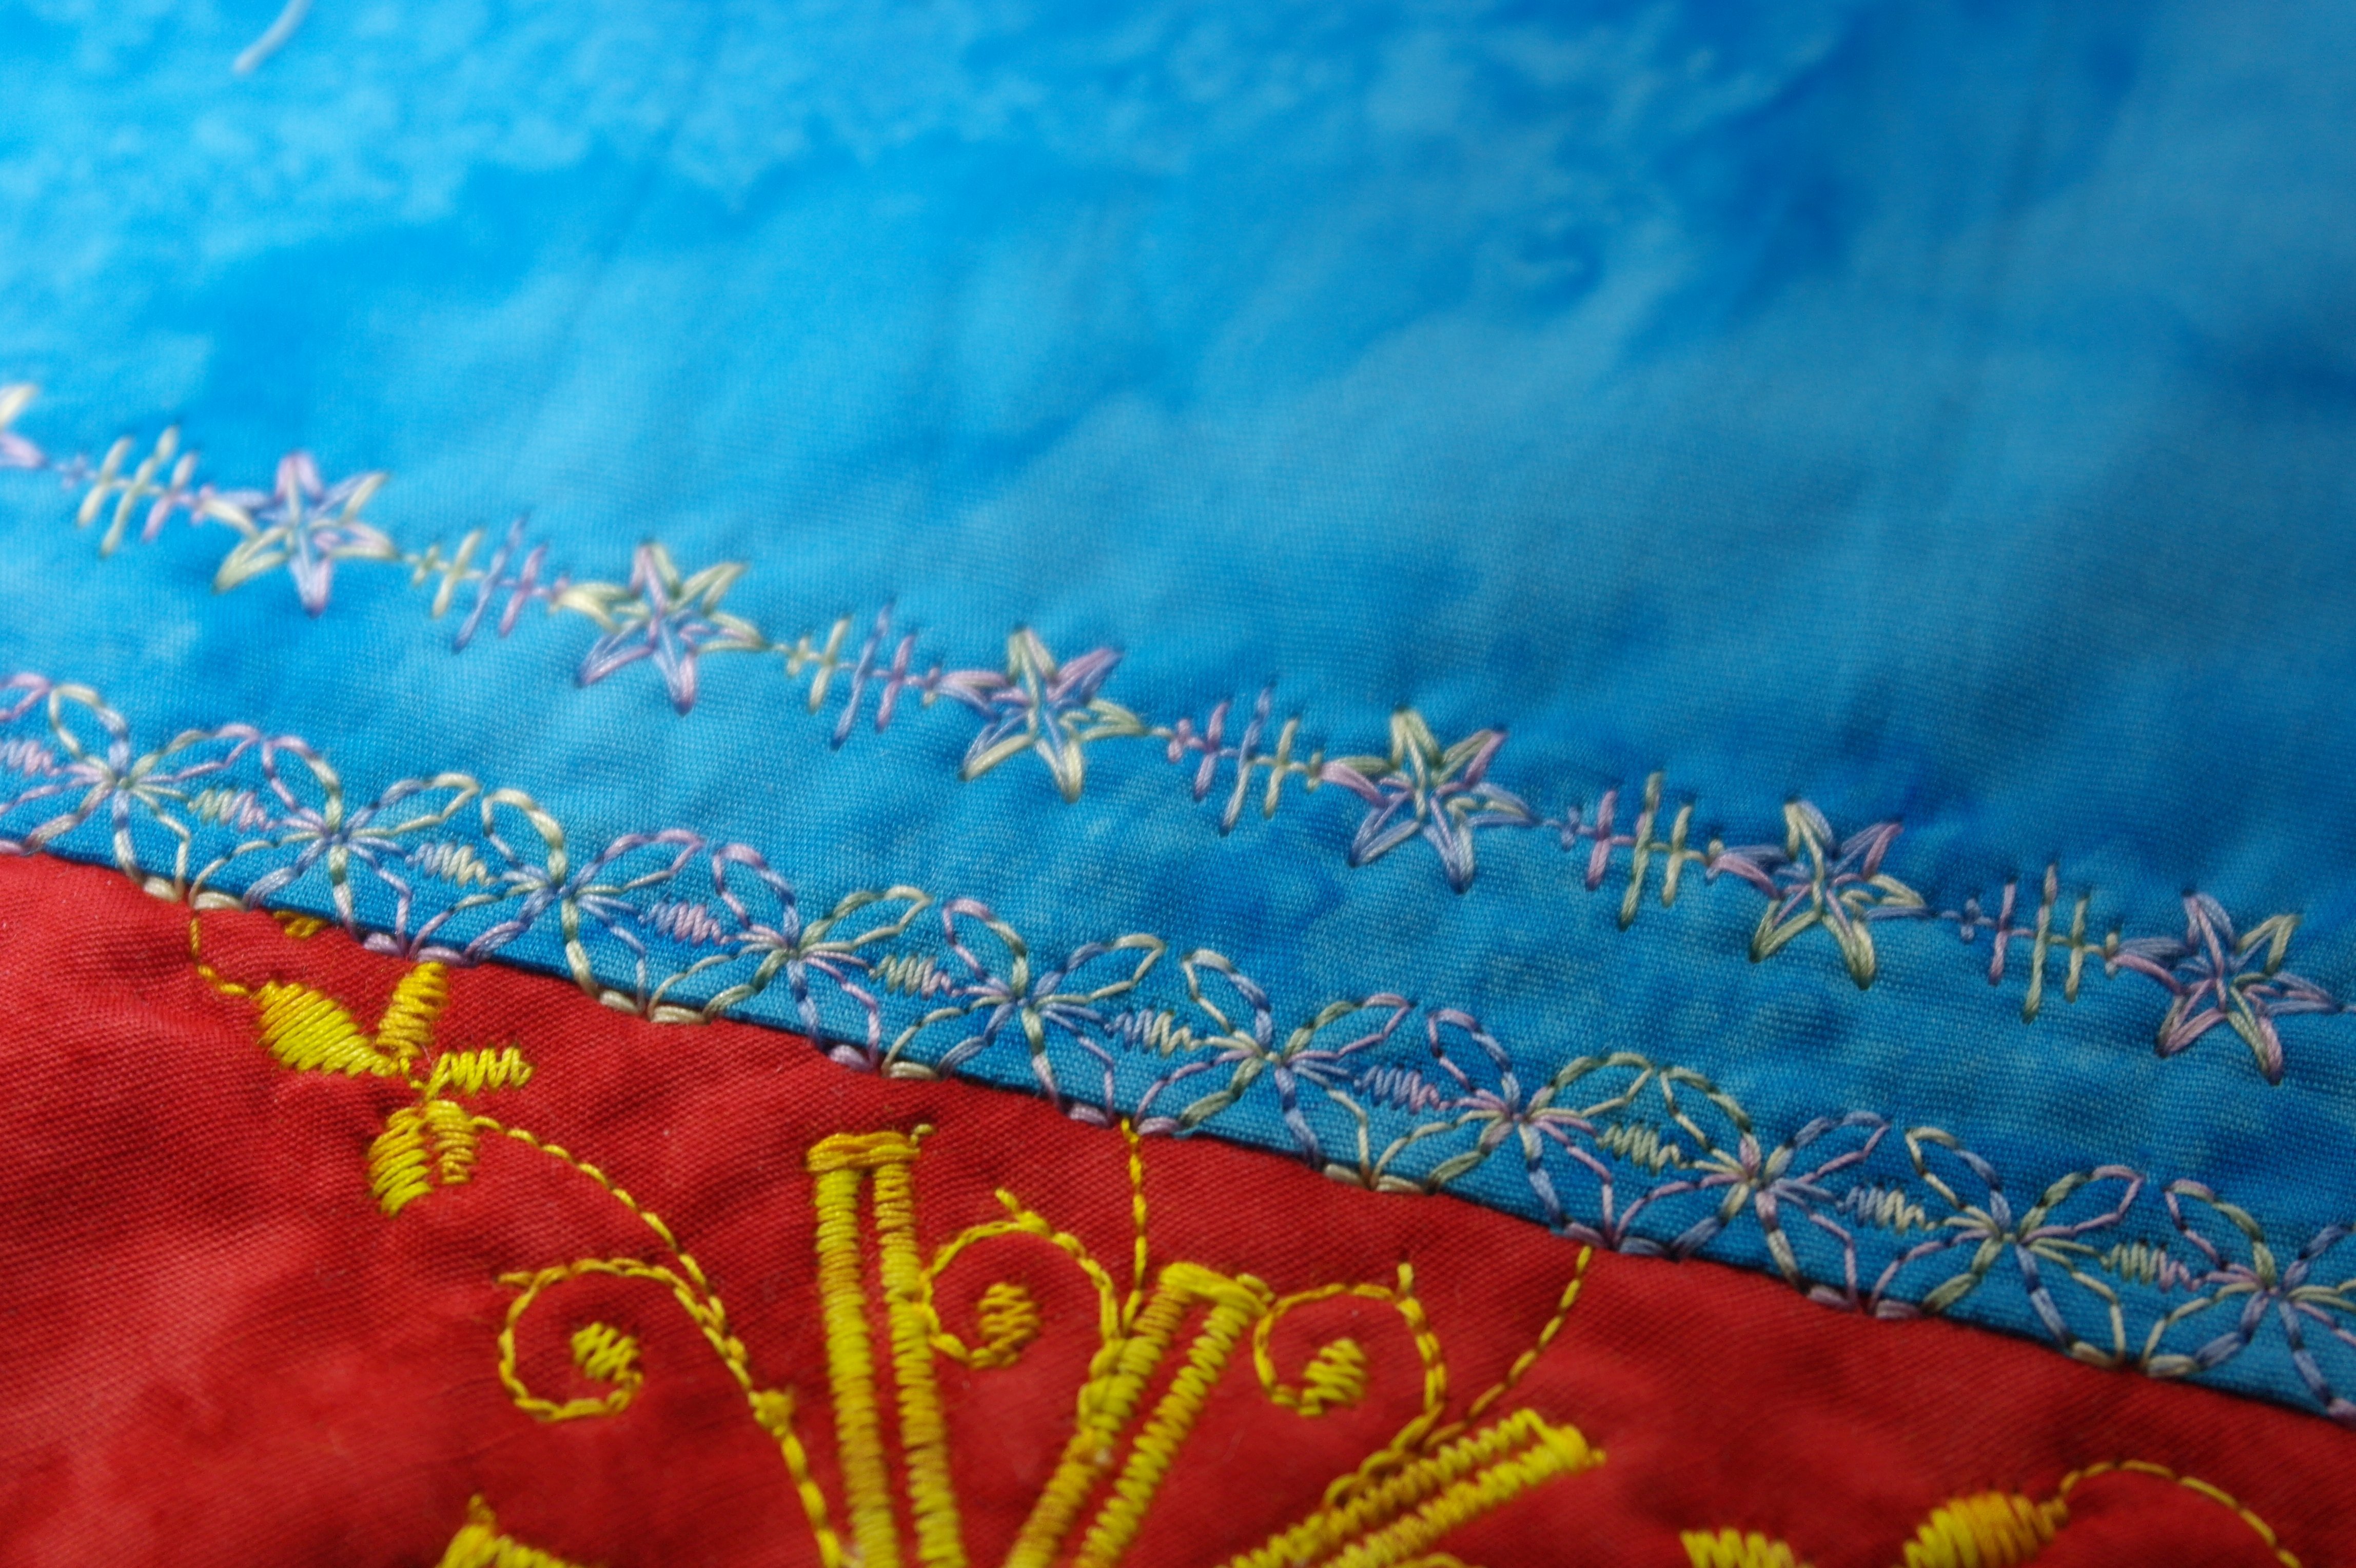
With the next block, I have made button holes in a star pattern. Don’t worry if the center of this ‘star’ is not flat: remember you can add embellishments afterwards to hide certain points, or to enhance the effect of such a star for instance. I have added singular stitches in the spaces between the buttonholes, just because I can…
You can make all kinds of different button holes: try them first on a sample. You will see how many different button holes there are, and how they are made. Check your manual.

Making combination of stitches in one row is fun too with the B770QE. To do so, I have clicked on the +, and clicked on a stitch. This stitch is shown in blue, indicating it is selected. One of these stitches will be made, unless you click on the same stitch again, then two of these stitches are made.
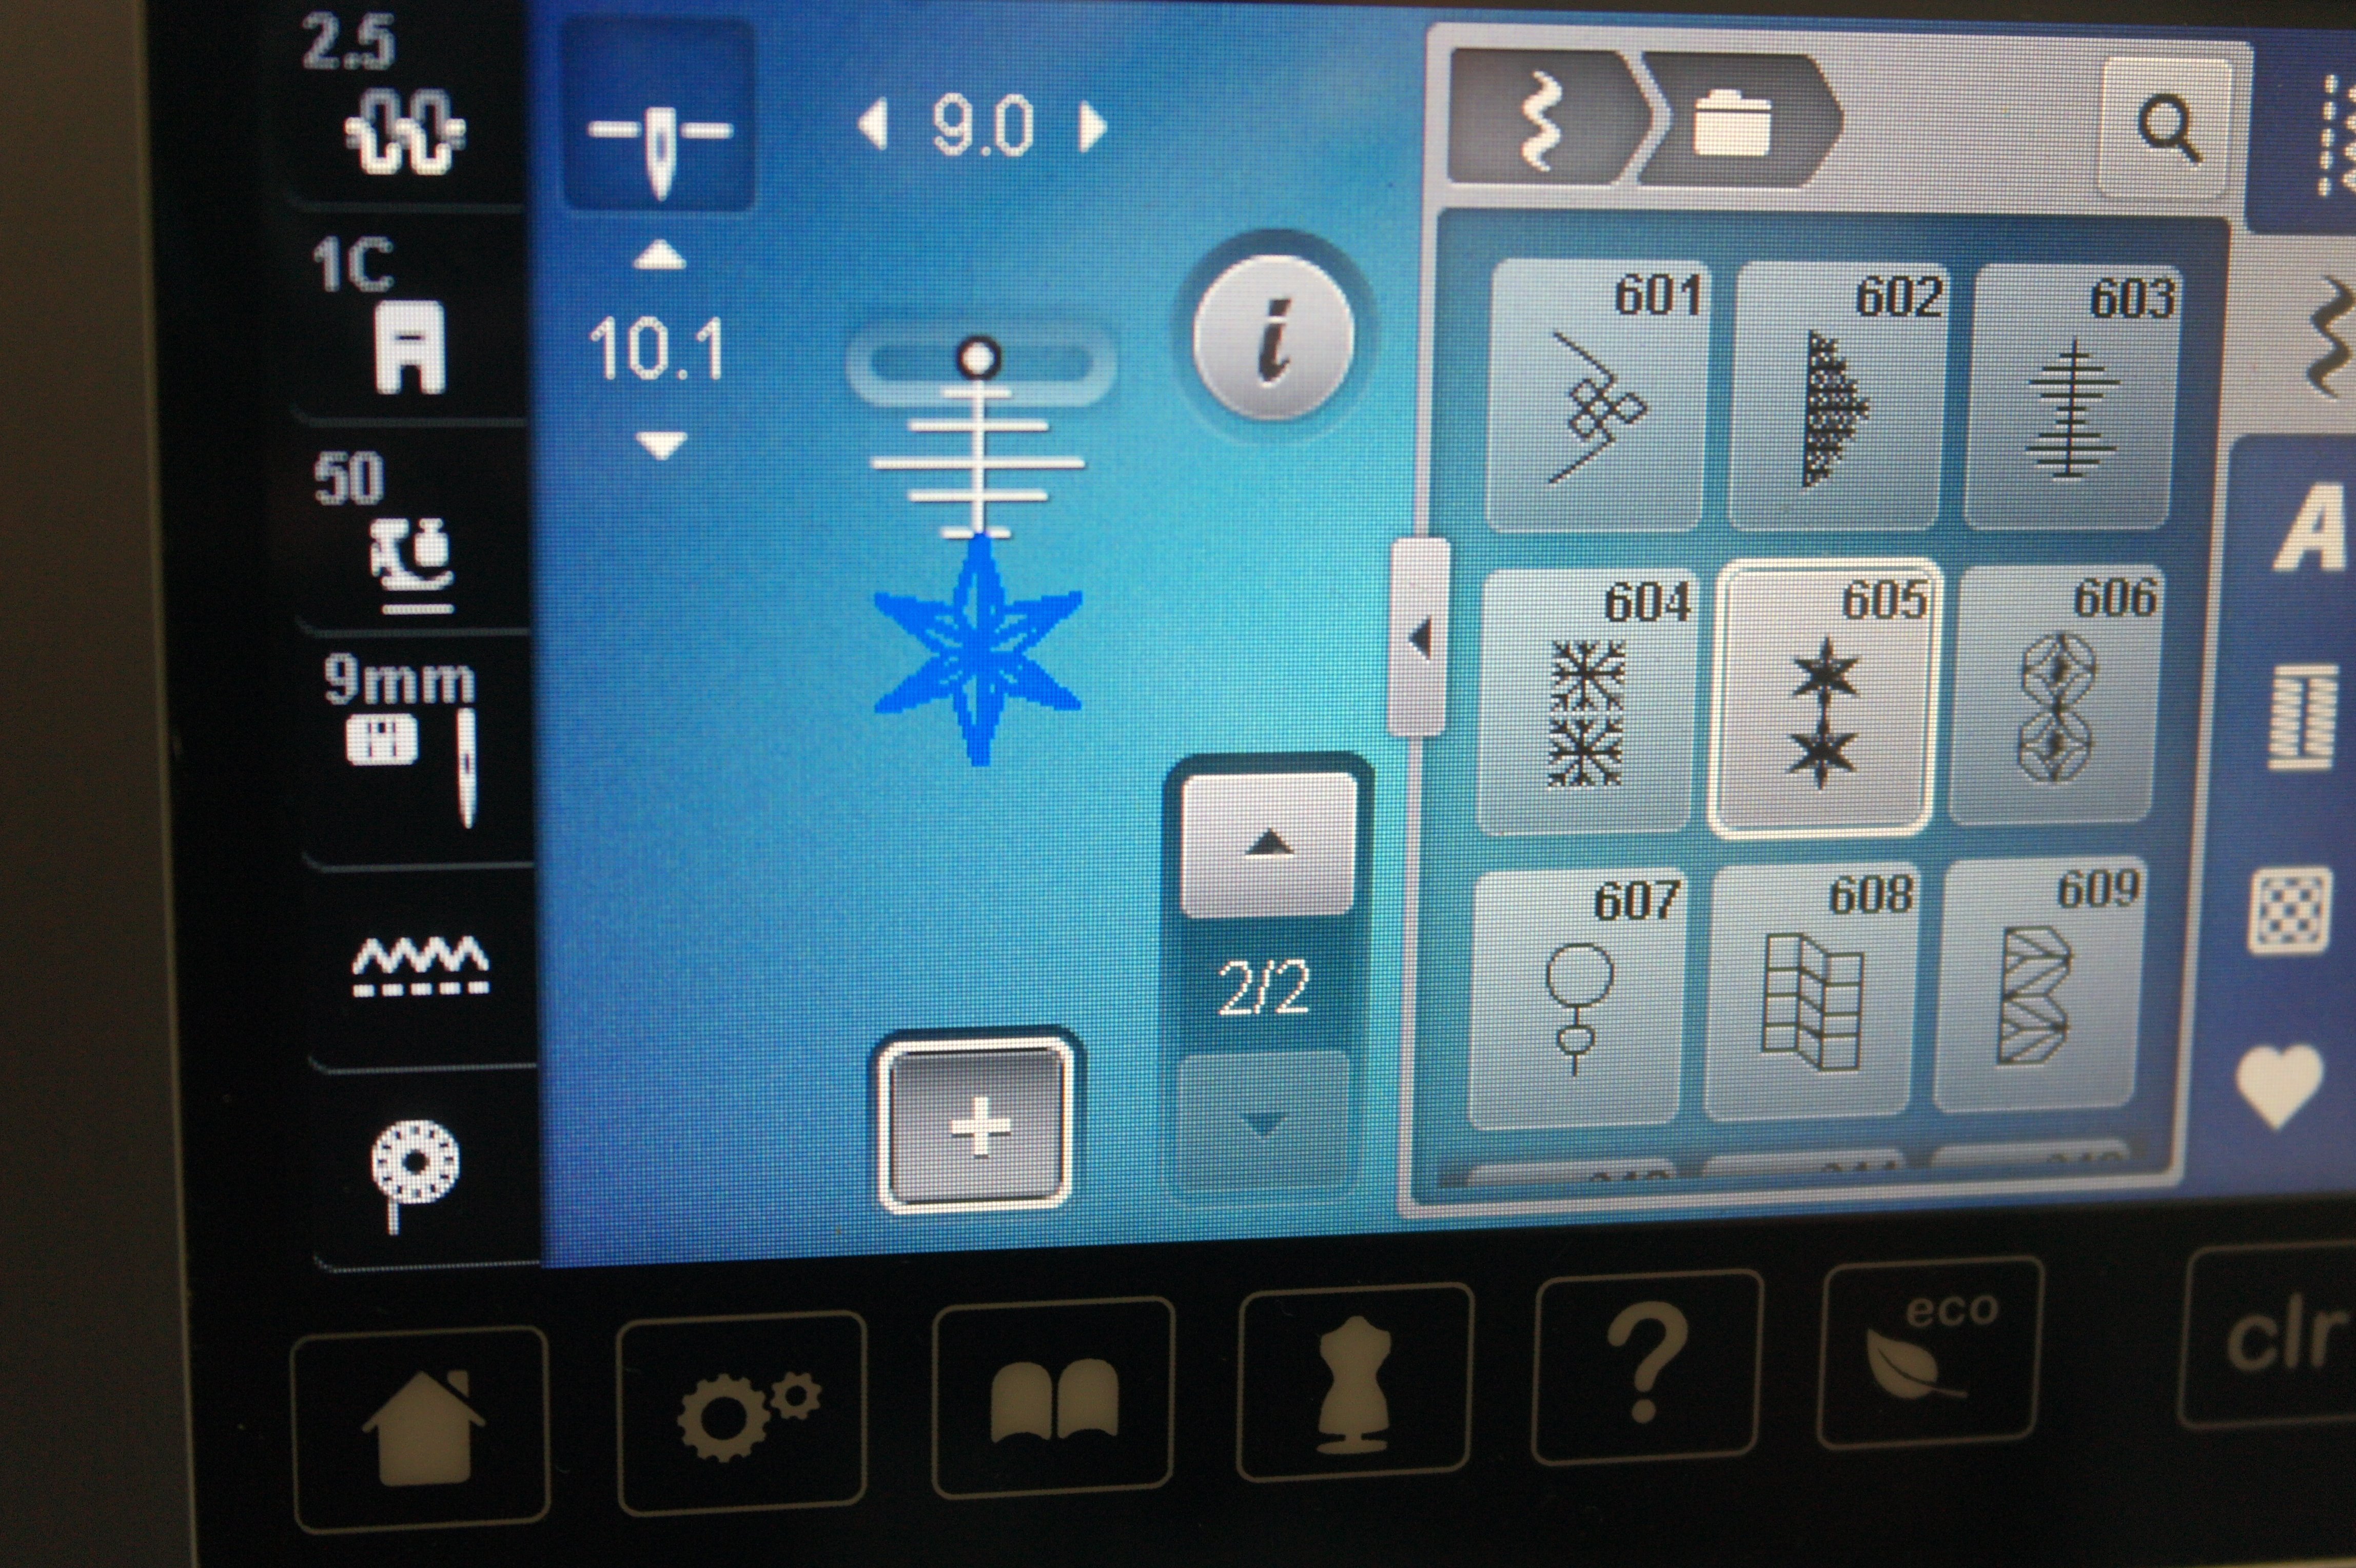
For adding another stitch, just click on that stitch, and it will be added to the row, also one at the time (the star). You can make a lot of combinations this way. On the right side of the + you can see 2/2, because I have 2 stitches in this row/combination. The more stitches you will add, the highter this number will be. If all your stitches in the new row will be too much for showing on the screen, you can click on the arrow up and the arrow down to ‘walk’ through the row, before making the stitches on your block.

If you would like to save this combination, click on the heart, bottom right of your screen. This will open your personal folder – there are four folders to fill.
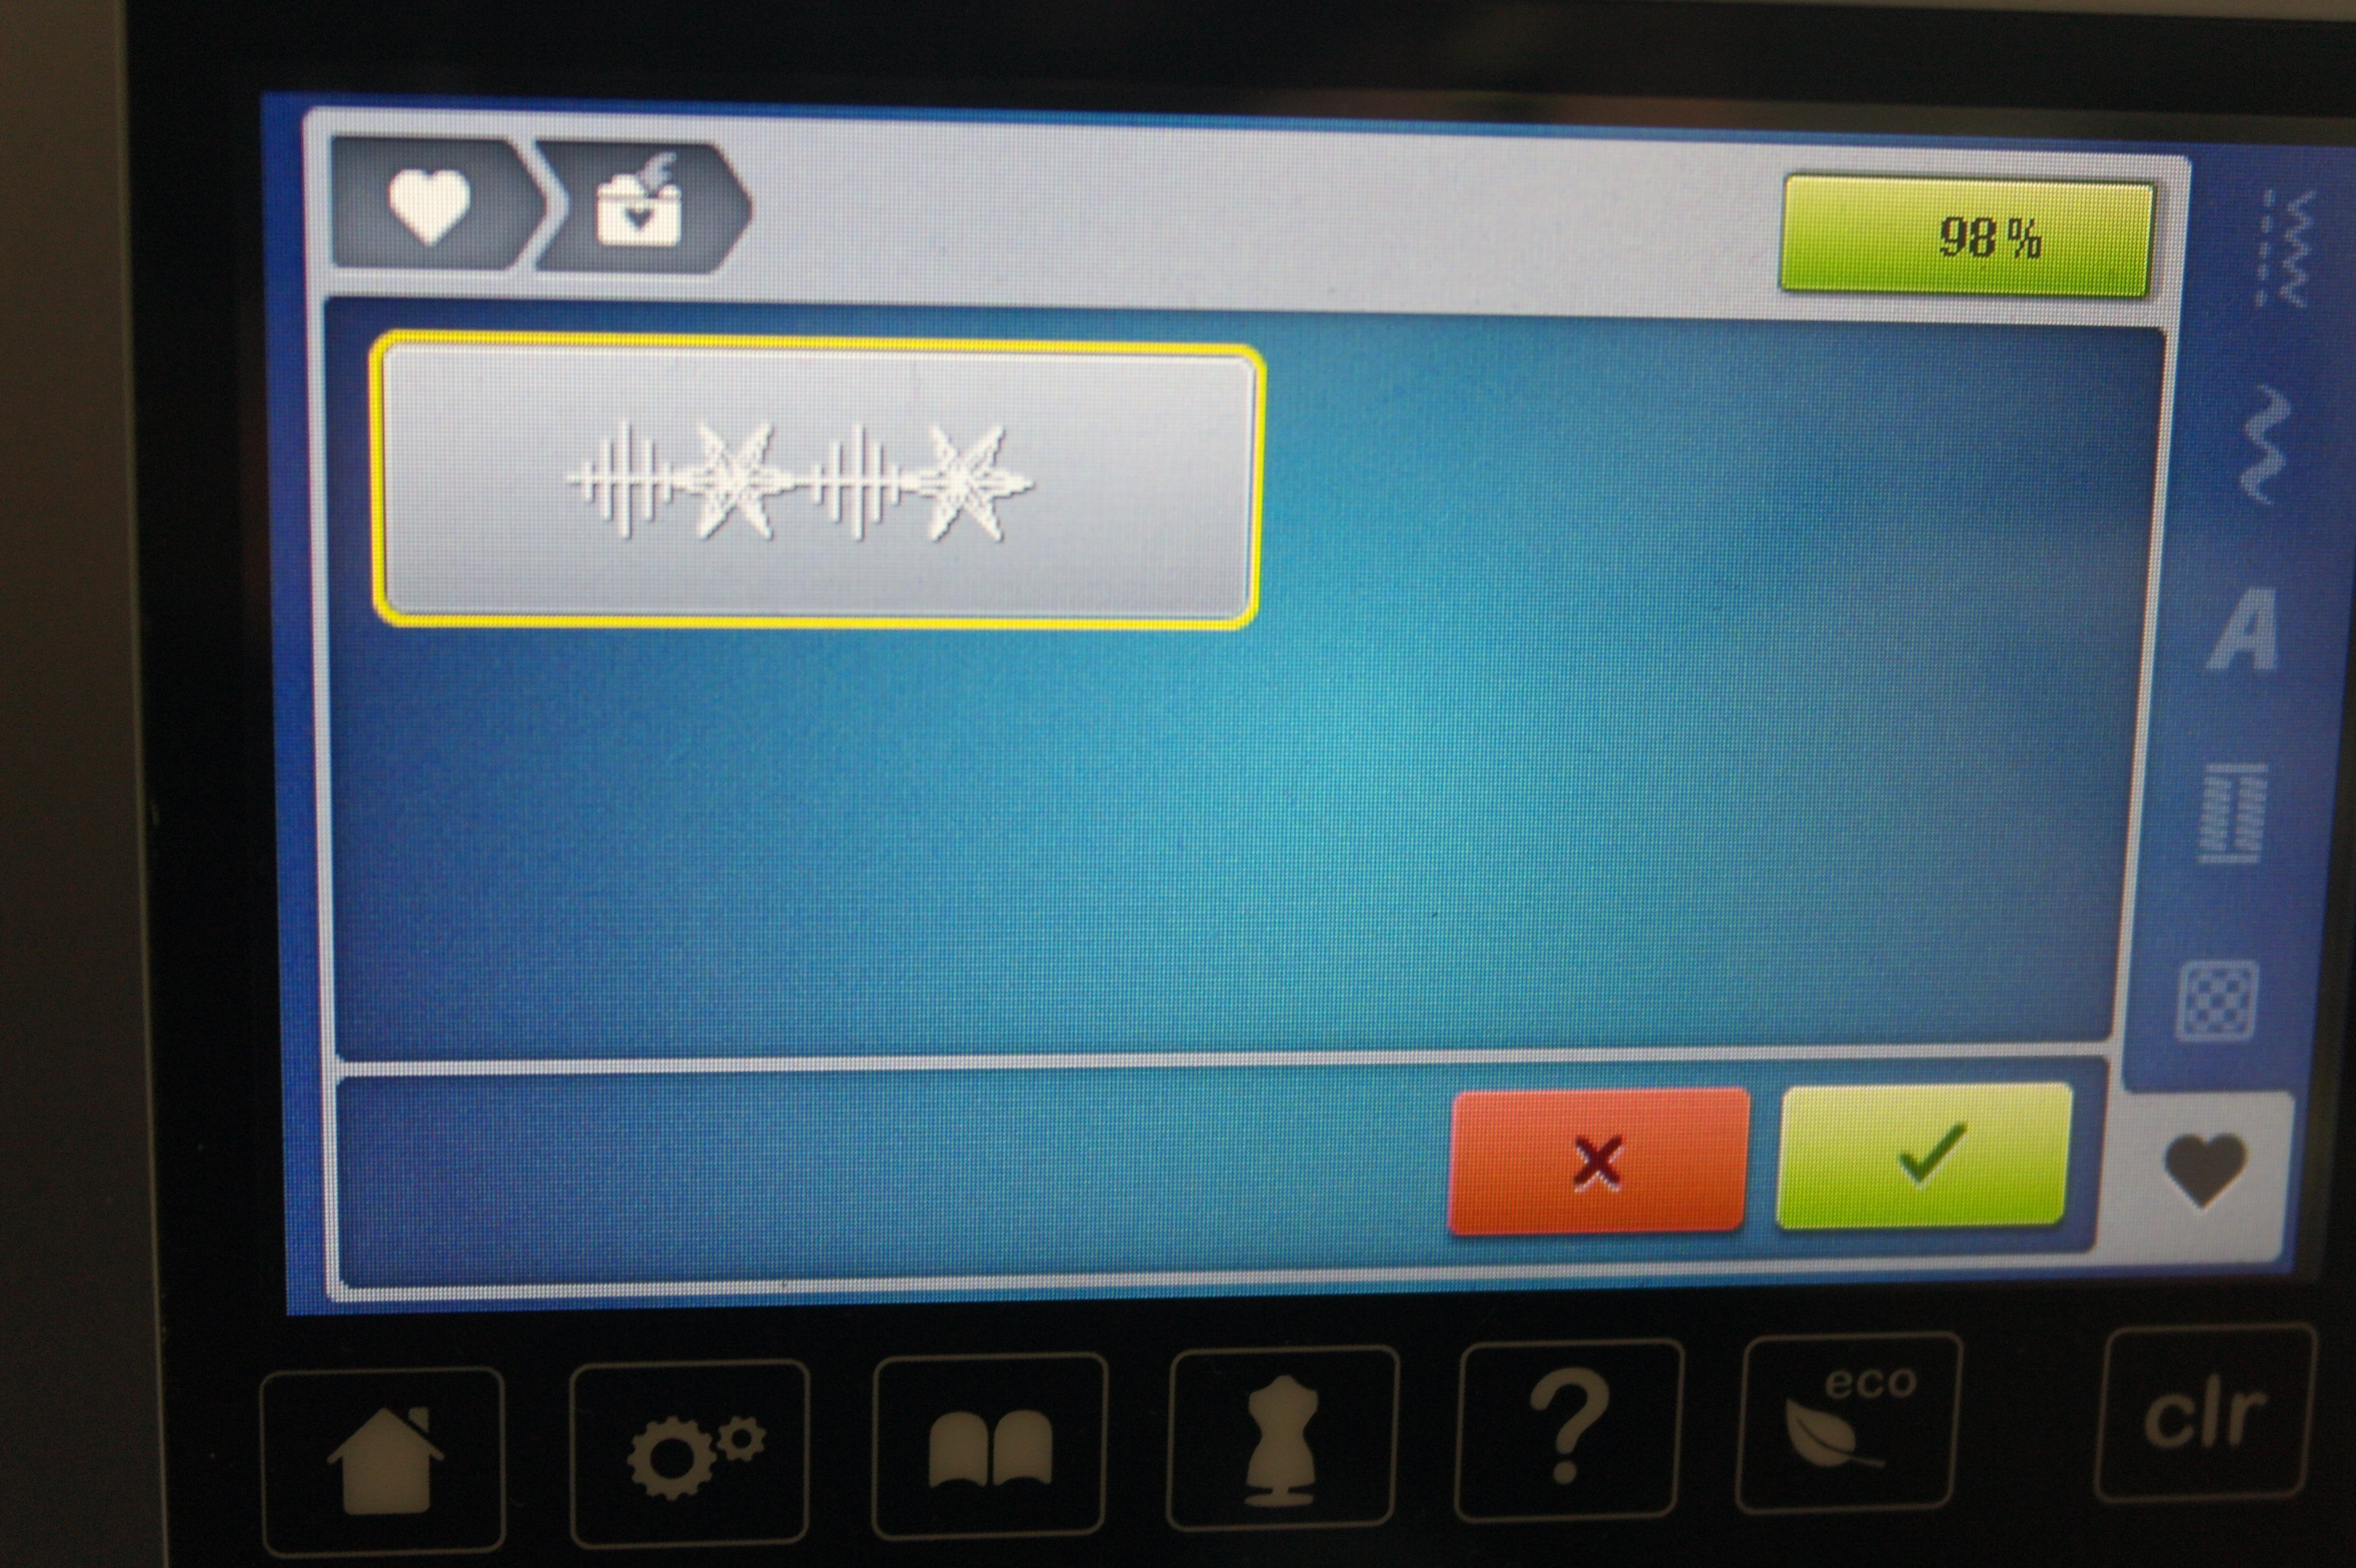
Go to folder 1 (untill this is full), and you will see your new combination row. Click on the green V if you want to save this row, or on the red X if you don’t want to save it.
And there is my row: just two stitches, repeated in a long row.

You can make words and sentences too, with letters, numbers and characters of ‘Alphabet’. It works in the same way. Made a mistake? Just click on the ‘i’, and click on the waste basket. With every click something is deleted from your row (the blue letter is selected, so this one will be deleted). Add your own combinations, words etc., save them for future use in your personal folder, or just use them once. To return to a default row of stitches, click on the waste basket untill all the stitches are removed, then click on the + to end making combinations. You will see a regular row of stitches again.
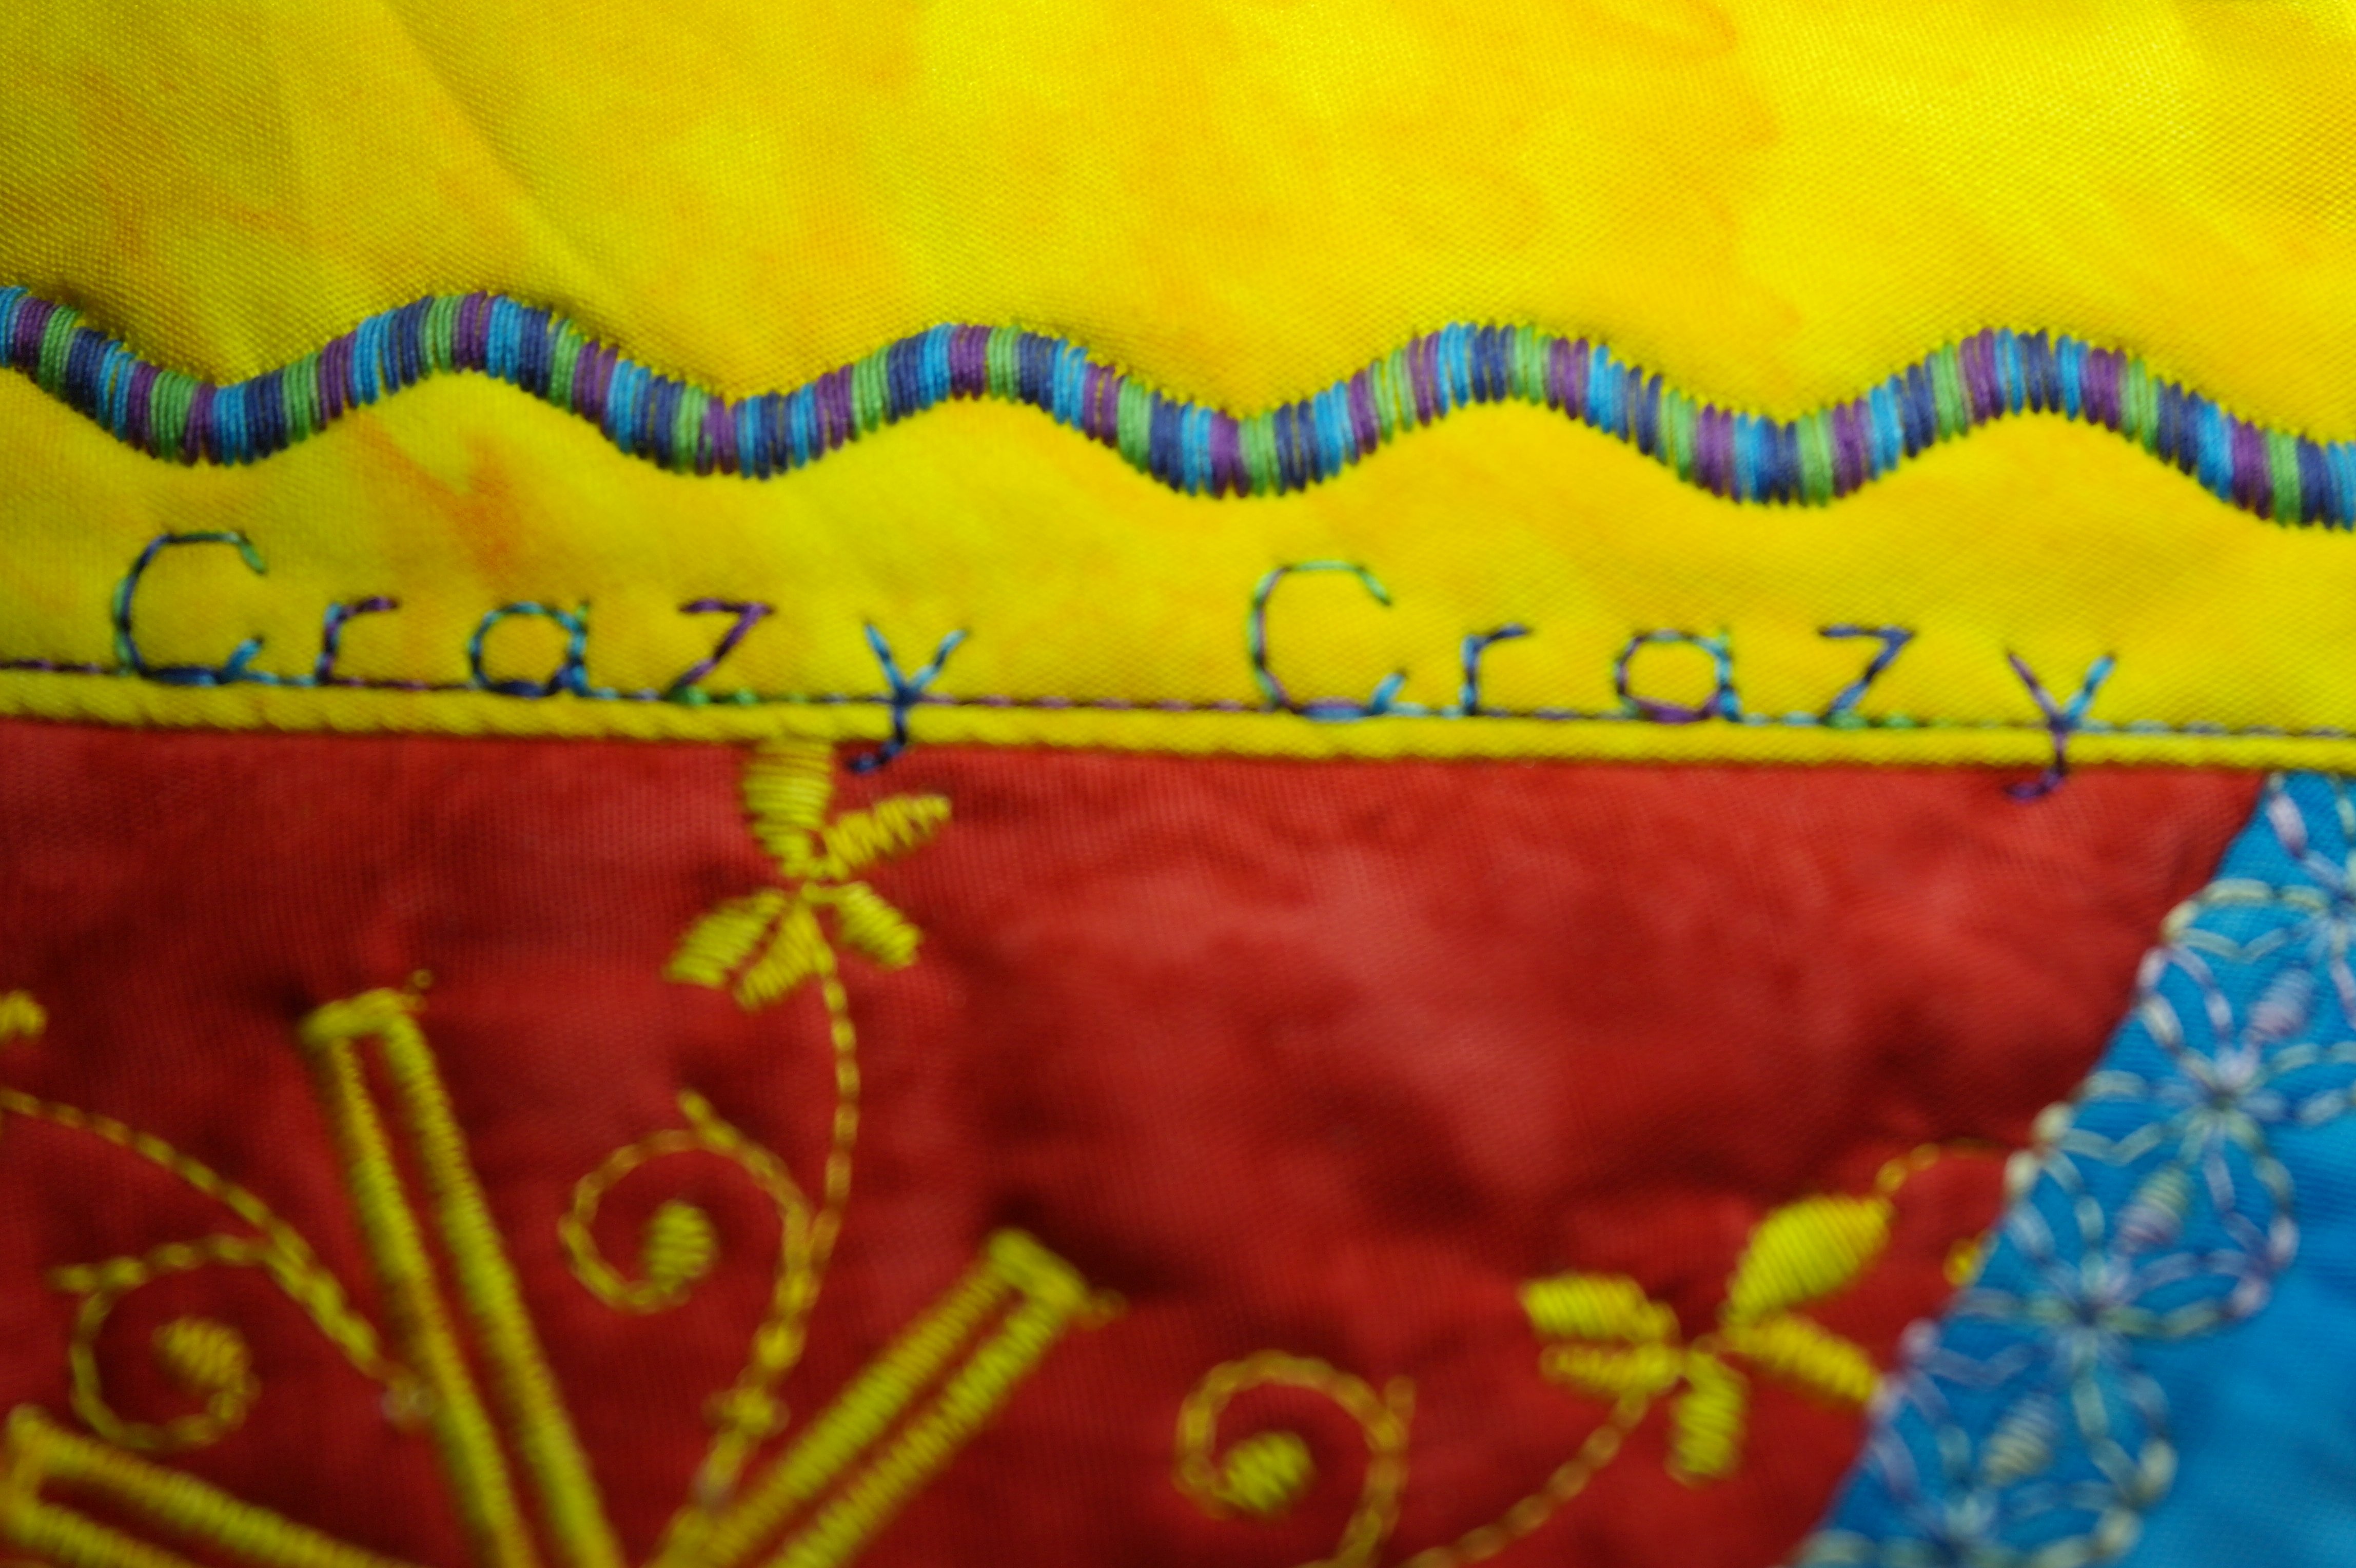
It is fun to personalize your project… crazy, crazy, well, that’s what this project is, right?
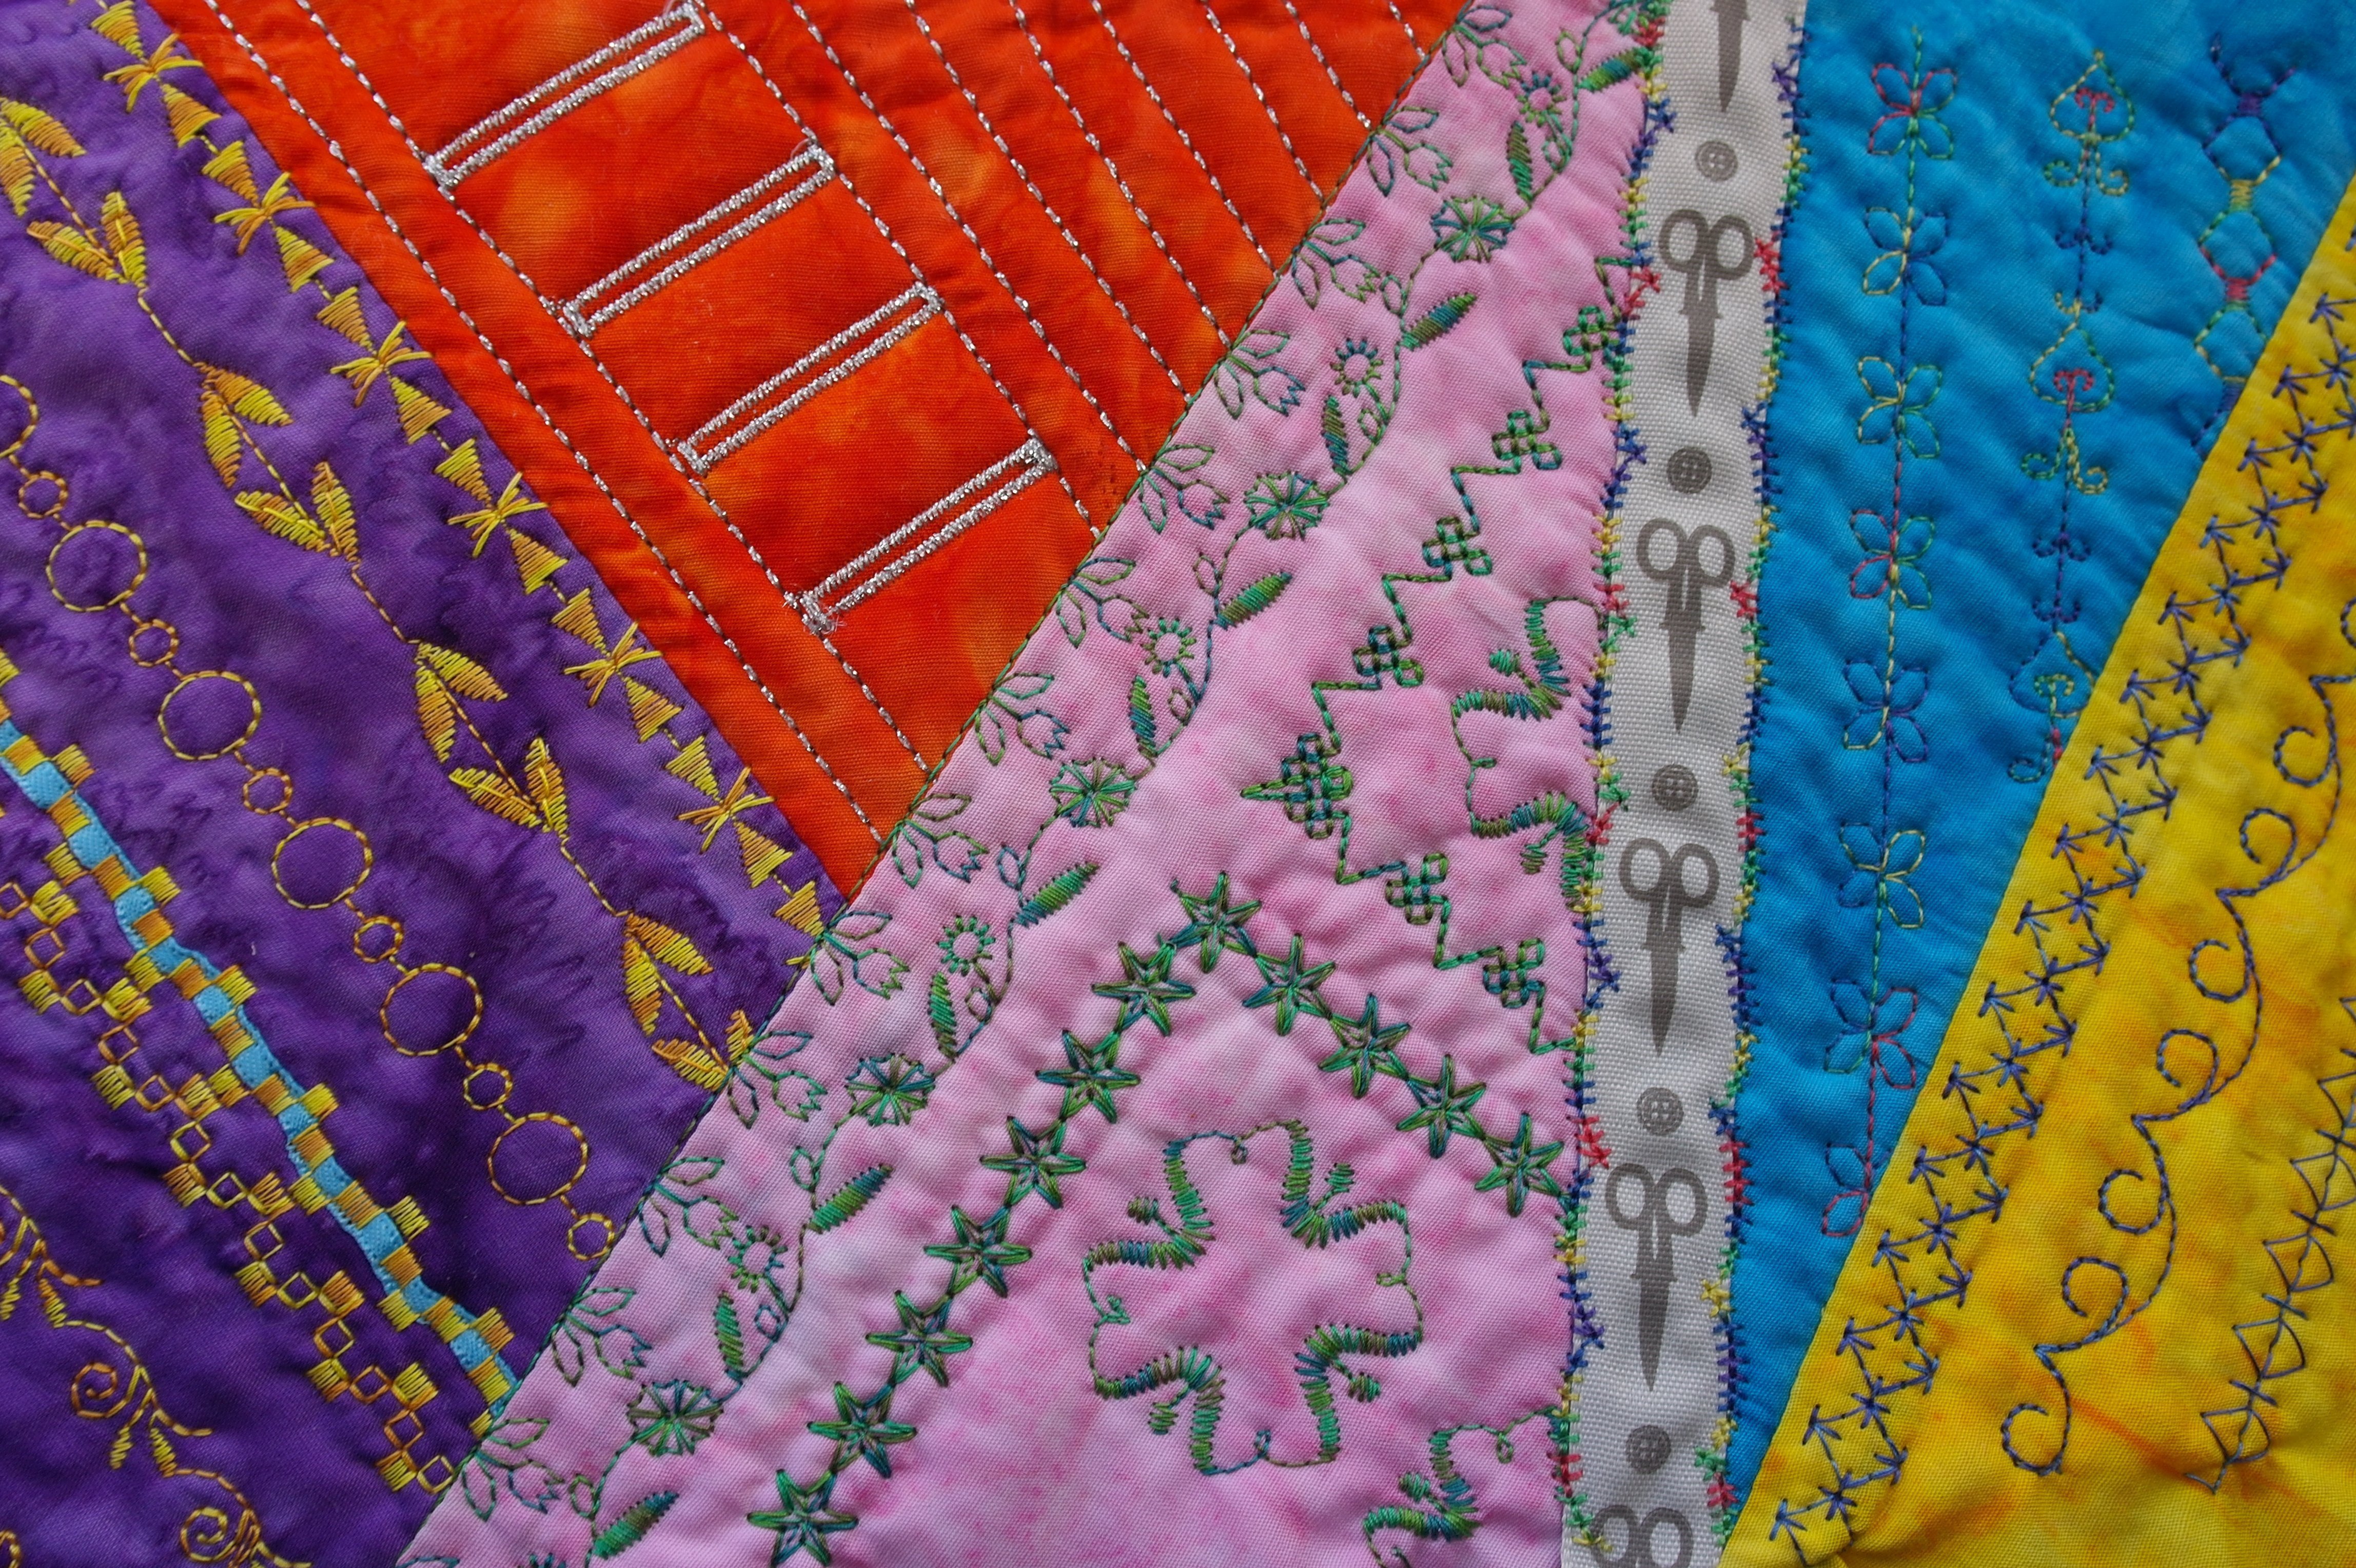
With the next block, I have used silver metallic thread (Madeira Metallic 40) with making the button holes. It is important to work slowly, to prevent breakage of the thread. Allthough I am always using Topstich needles, with some sitches – where the distance from one side to the other is very large – I am working in a slow pace, to make a beautiful stitch.When working on the back and front of the button hole (bar tack), the machine makes stitches from one side to the other, which is a larger area comparing to the smaller bars on the sides.
Noticed the fun ribbon with scissors and buttons? I have glued it onto the fabric, and made stitches on both sides to tack it down, using a multicolor thread again. You can also see that I have made stitches ‘around the corner’ on the pink fabric, and filled the spaces up with stitches in a square (we have done that in a previous month).
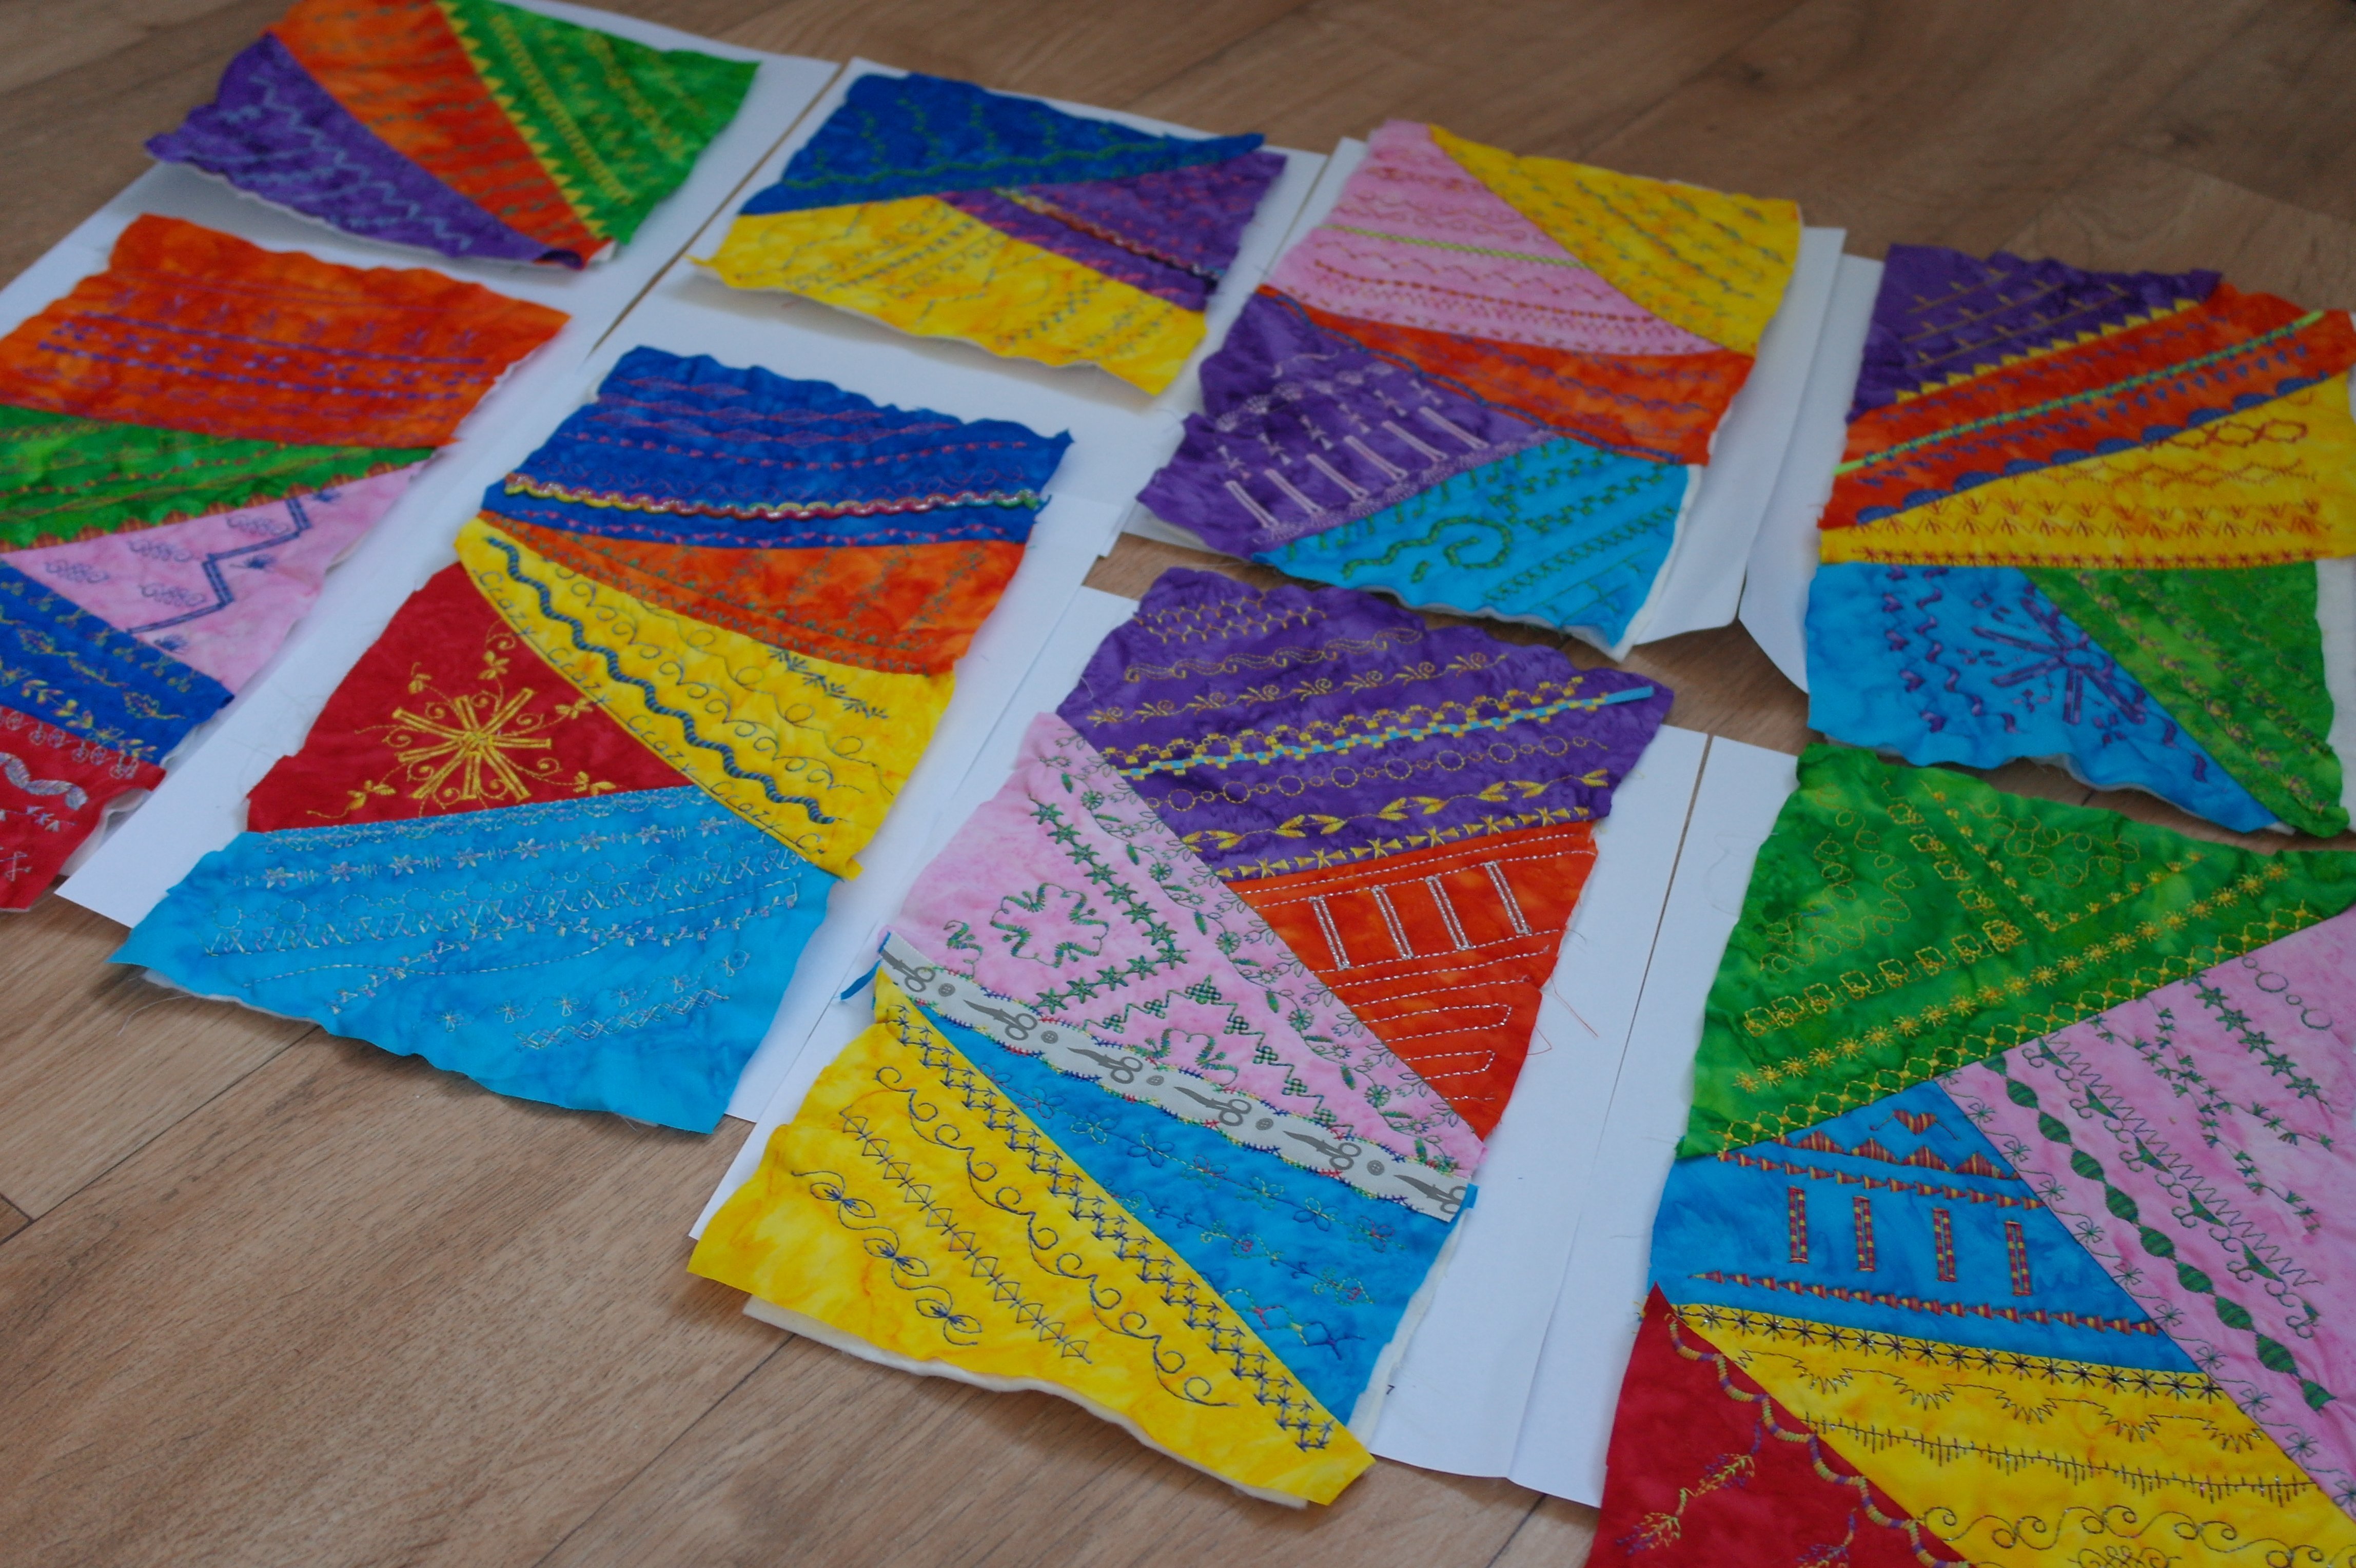
HAVE FUN: This is the last time you can be creative, filling the blocks with your stitches and threads. My blocks – month 11 – are ready. Remember: empty spaces can be filled out with sequins, beads, Hotfix stones, buttons, and much more, after your quilt is ready!
For this month too, it is important NOT TO CUT your blocks after finishing them. Leave them the way they are, untill month 12. No straightening or cutting them to a certain size, because you don’t know how large they will have to be in the end!
So be sure to make beautiful blocks for month 11. Remember to place pictures in the COMMUNITY of this BERNINA Blog, so we can all enjoy? NEXT MONTH YOU WILL FIND OUT HOW THE FINISHED PROJECT WILL BE/YOU WILL GET DIRECTIONS FOR THE ASSEMBLY AND FINALLY KNOW THE END RESULT!
(Do you know by the way, that I have designed a new Crazy Mystery project for 2018, which will be available at this BERNINA Blog, the same as this 2017 project? Different blocks, and fun to make again – more news about this new project in december 2017).
0 Responses