 BERNINA Corporate Blog -
Dear community,
in this blog post you can find tipps & instructions on how to make a decorative star-shaped candle decoration – perfect for Christmas eve and other festive occasions.
I had seen several of these at various places so decided I would try to make one myself and when I worked out the maths it seemed quite an easy project to do.
As it’s all based around the 360° in a circle and there are 12 segments then the angle between each has to be 36°. “Simples”, as Alexander Orloff would say. (He’s peeping from behind the decoration in the last photo. If you are not in the UK you may not know Alexander because he is a puppet meerkat who appears in adverts on our TV screens. He is very popular in the UK.)
Each of the segments of the circle starts off as a square. You need to cut the following:-
- 12 x 6” squares in red
- 12 x 8” squares in green
- 12 x 6” squares of double sided fusible interfacing – like Steam-A-Seam 2, Heat N Bond Ultra or Bondaweb heavy duty. You can add a 6” fusible wadding square to each segment as well if you wish to give a more puffy look. Sandwich it between the two coloured squares. I didn’t use wadding in mine as I wanted a smoother finish.
Method:
Press all the fabric squares to remove creases. Iron the fusible interfacing to the wrong side of the red squares, following the manufacturers’ instructions. I used sheets of baking parchment below and on top of the pieces to be fused in case any melted glue got on to the iron or the ironing board.
To get the backing paper off the red fabric, score it with a pin to get a slit in it

and then tear off the paper to leave the glued fabric.
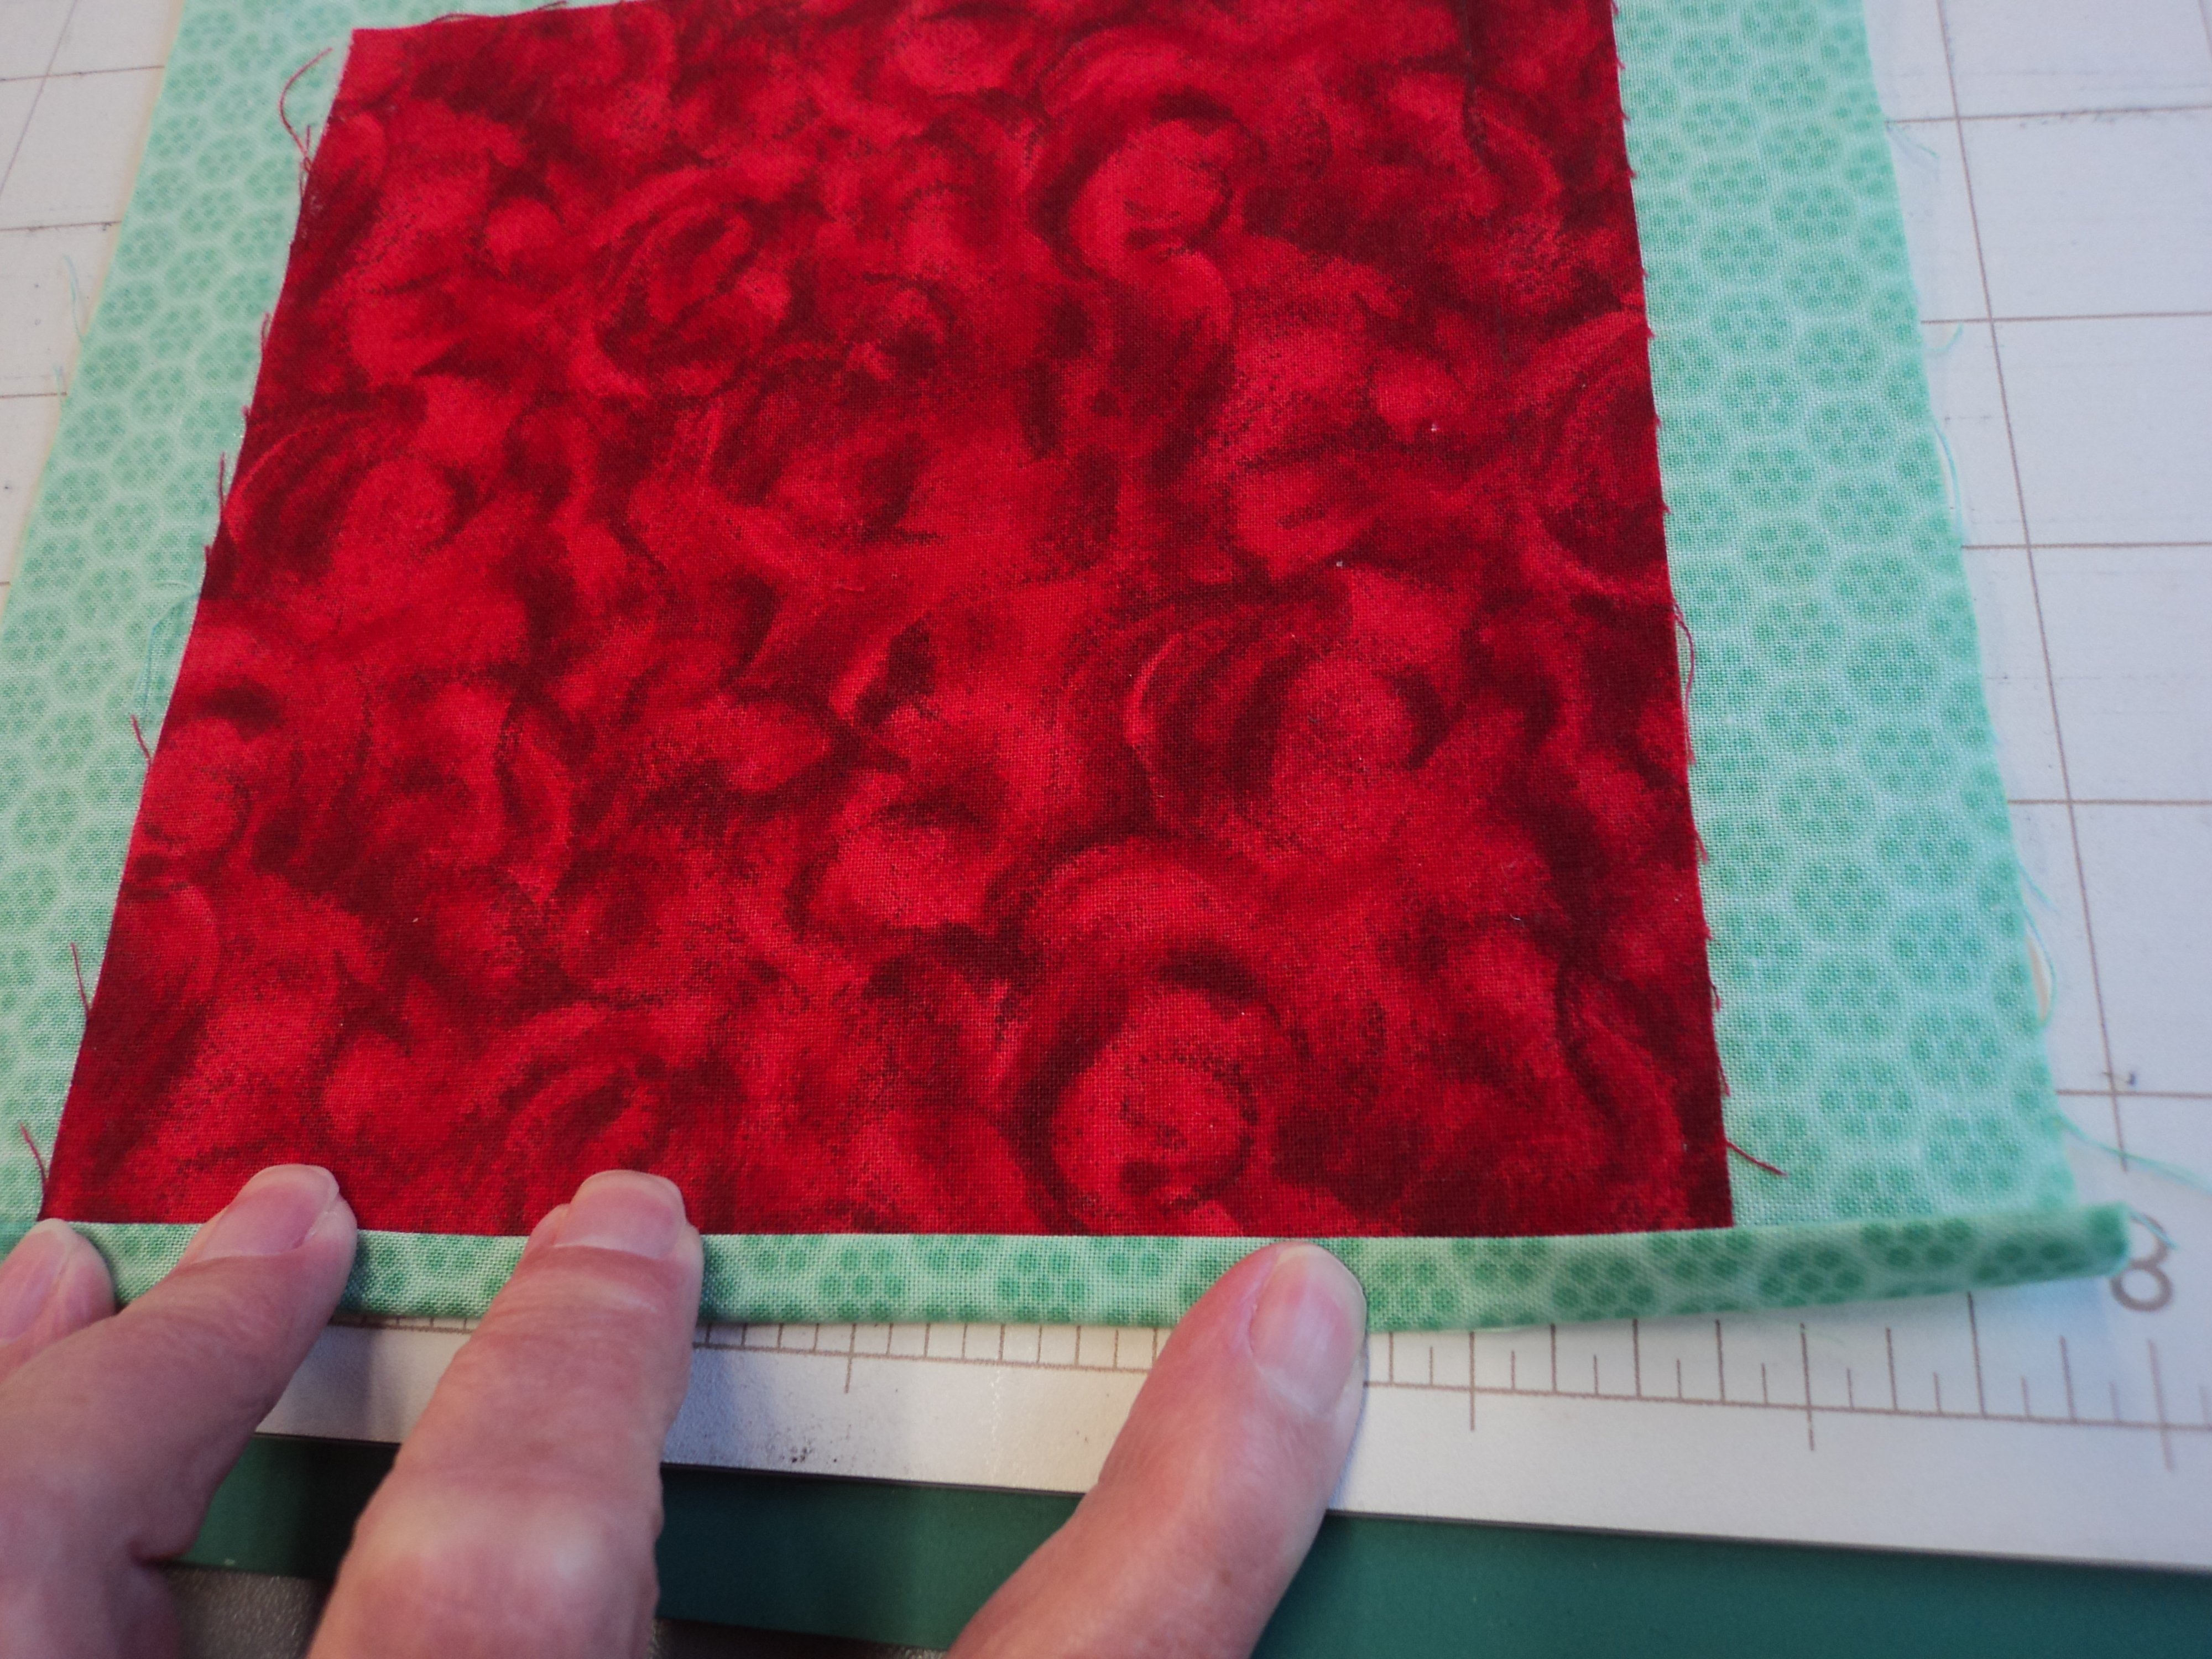
Place the red fabric on top of the green fabric, wrong sides together, making sure the red fabric is in the centre of the green square. Add the fusible wadding now if you want it. Place the side without glue on to the red fabric and the side with glue on to the green fabric so the whole sandwich is all fused together after you’ve ironed it. Use the baking parchment again to save the iron and board from getting sticky.

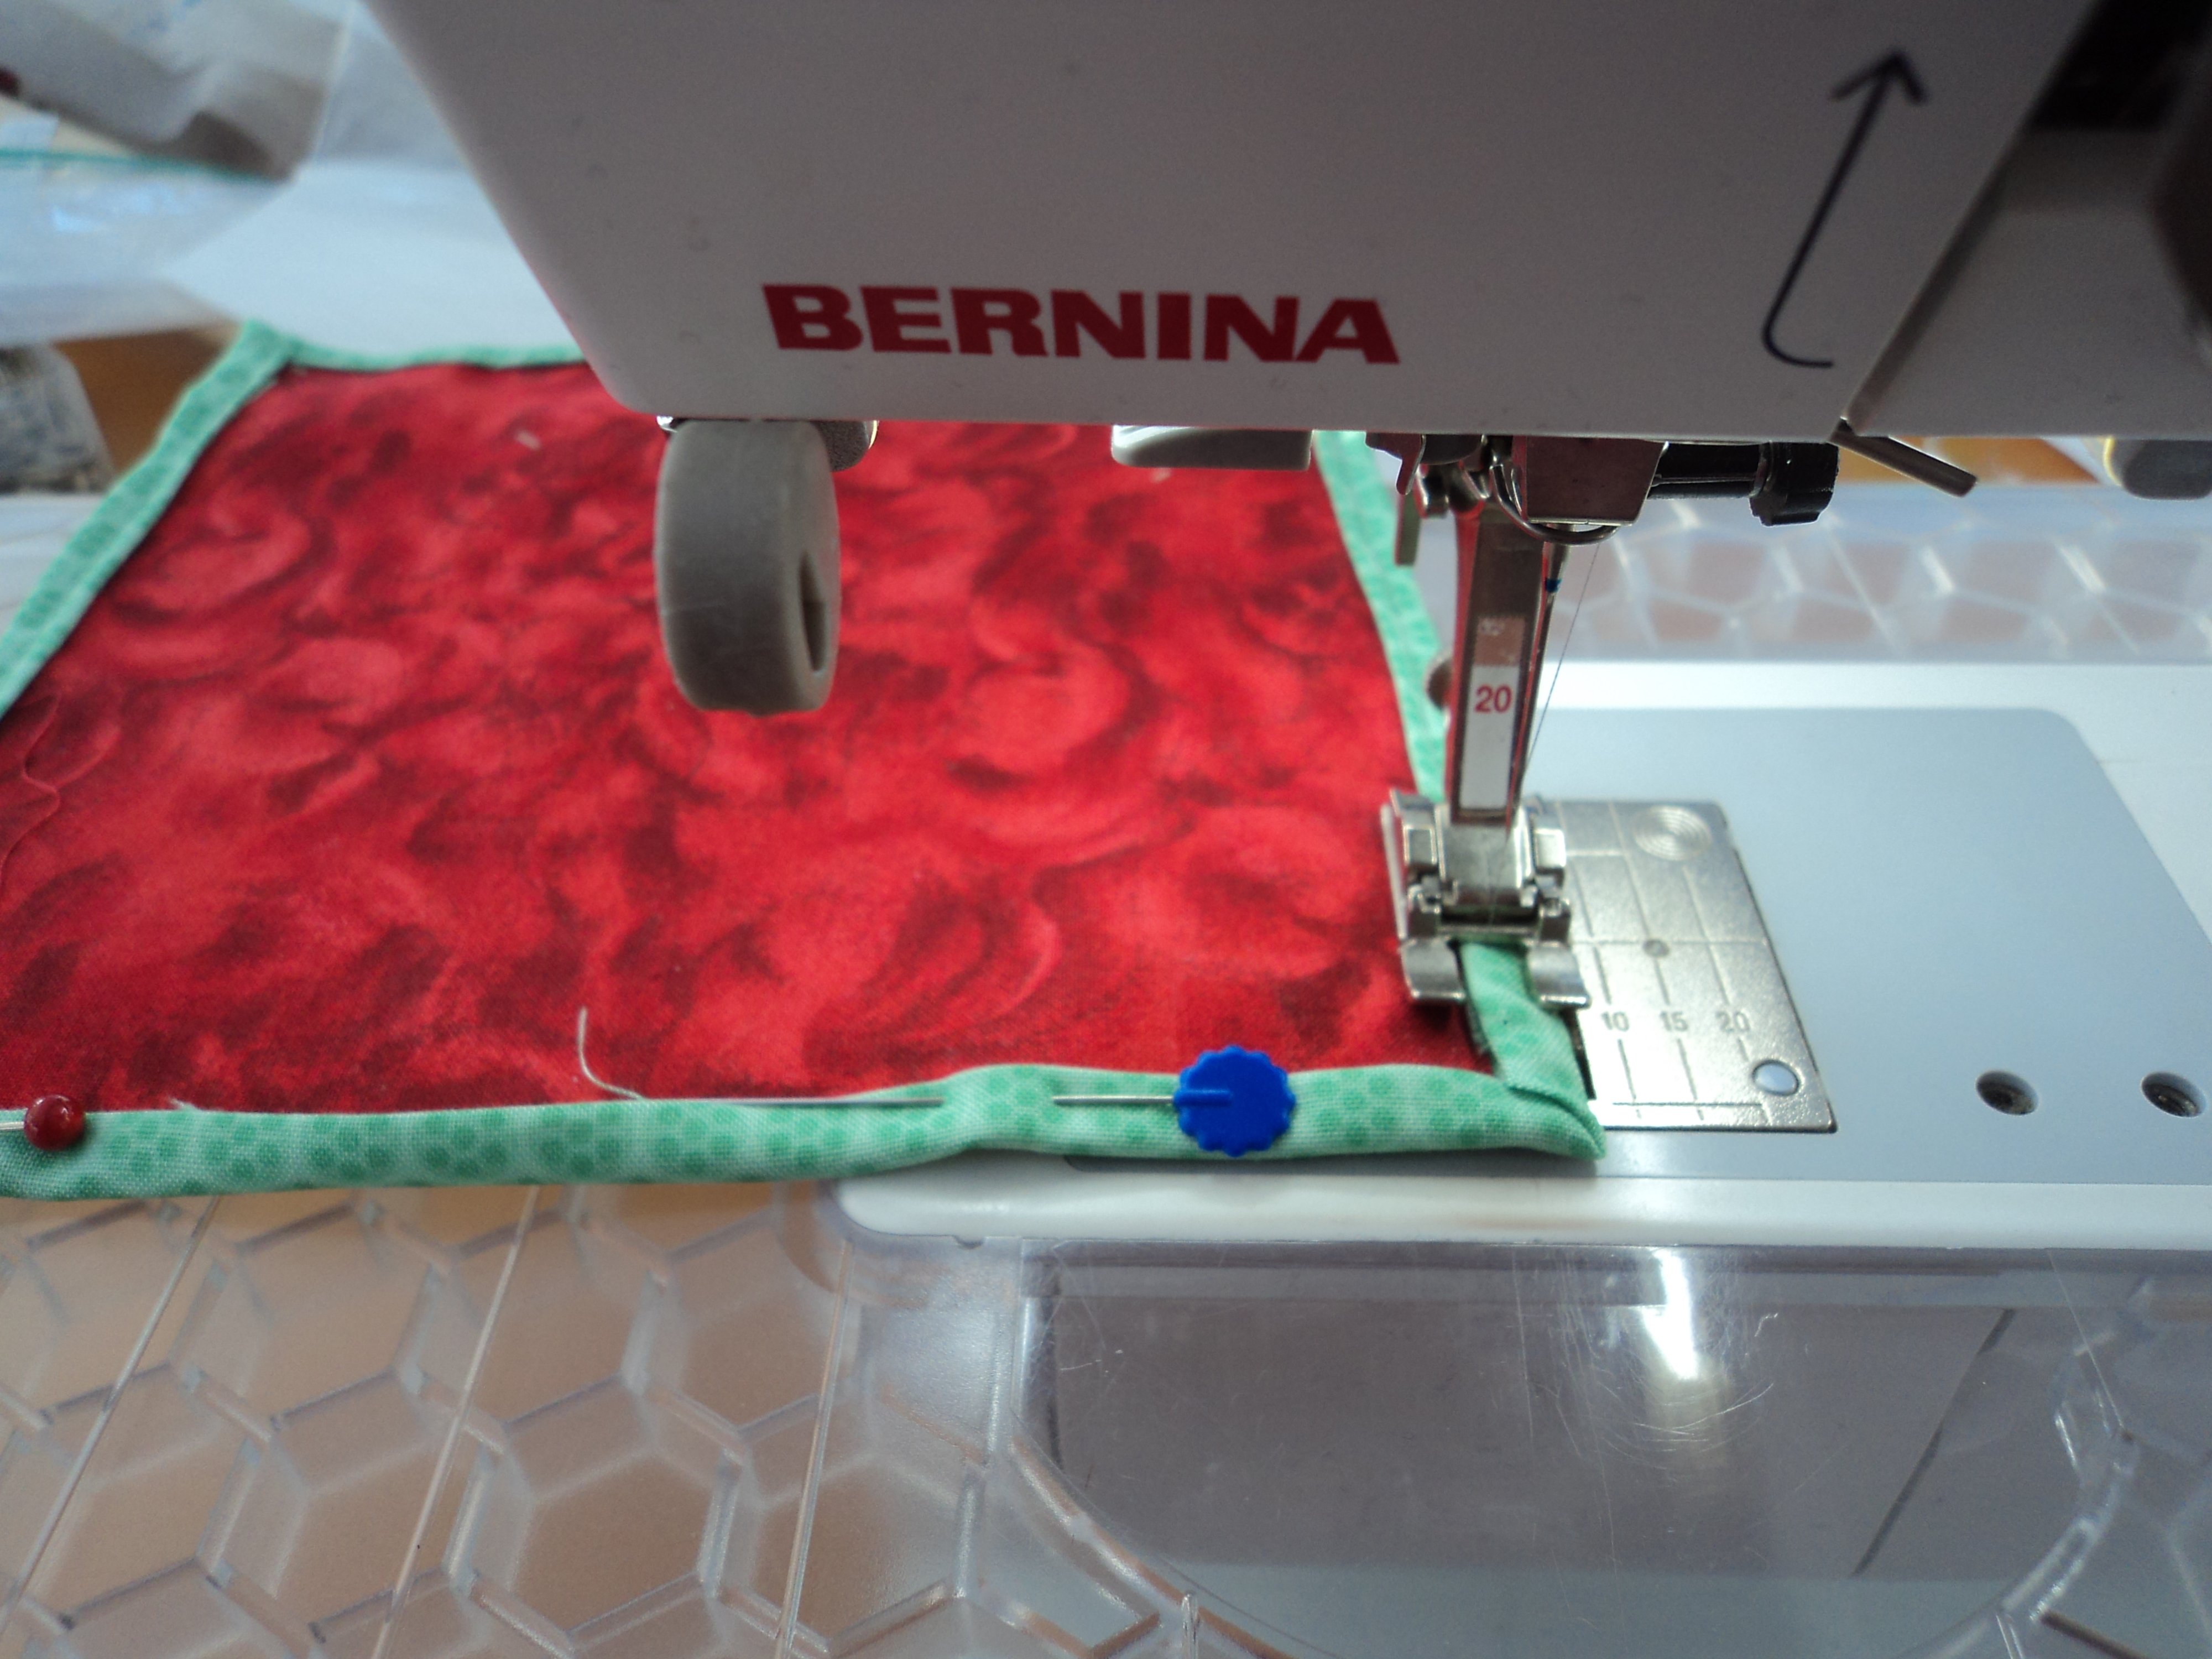
Now here’s a neat way to get a crisp clean border. Fold in one edge of the green fabric so it touches the edge of the red fabric and finger crease the fold.
Now fold the folded green fabric in again so it just sits over the edge of the red fabric.
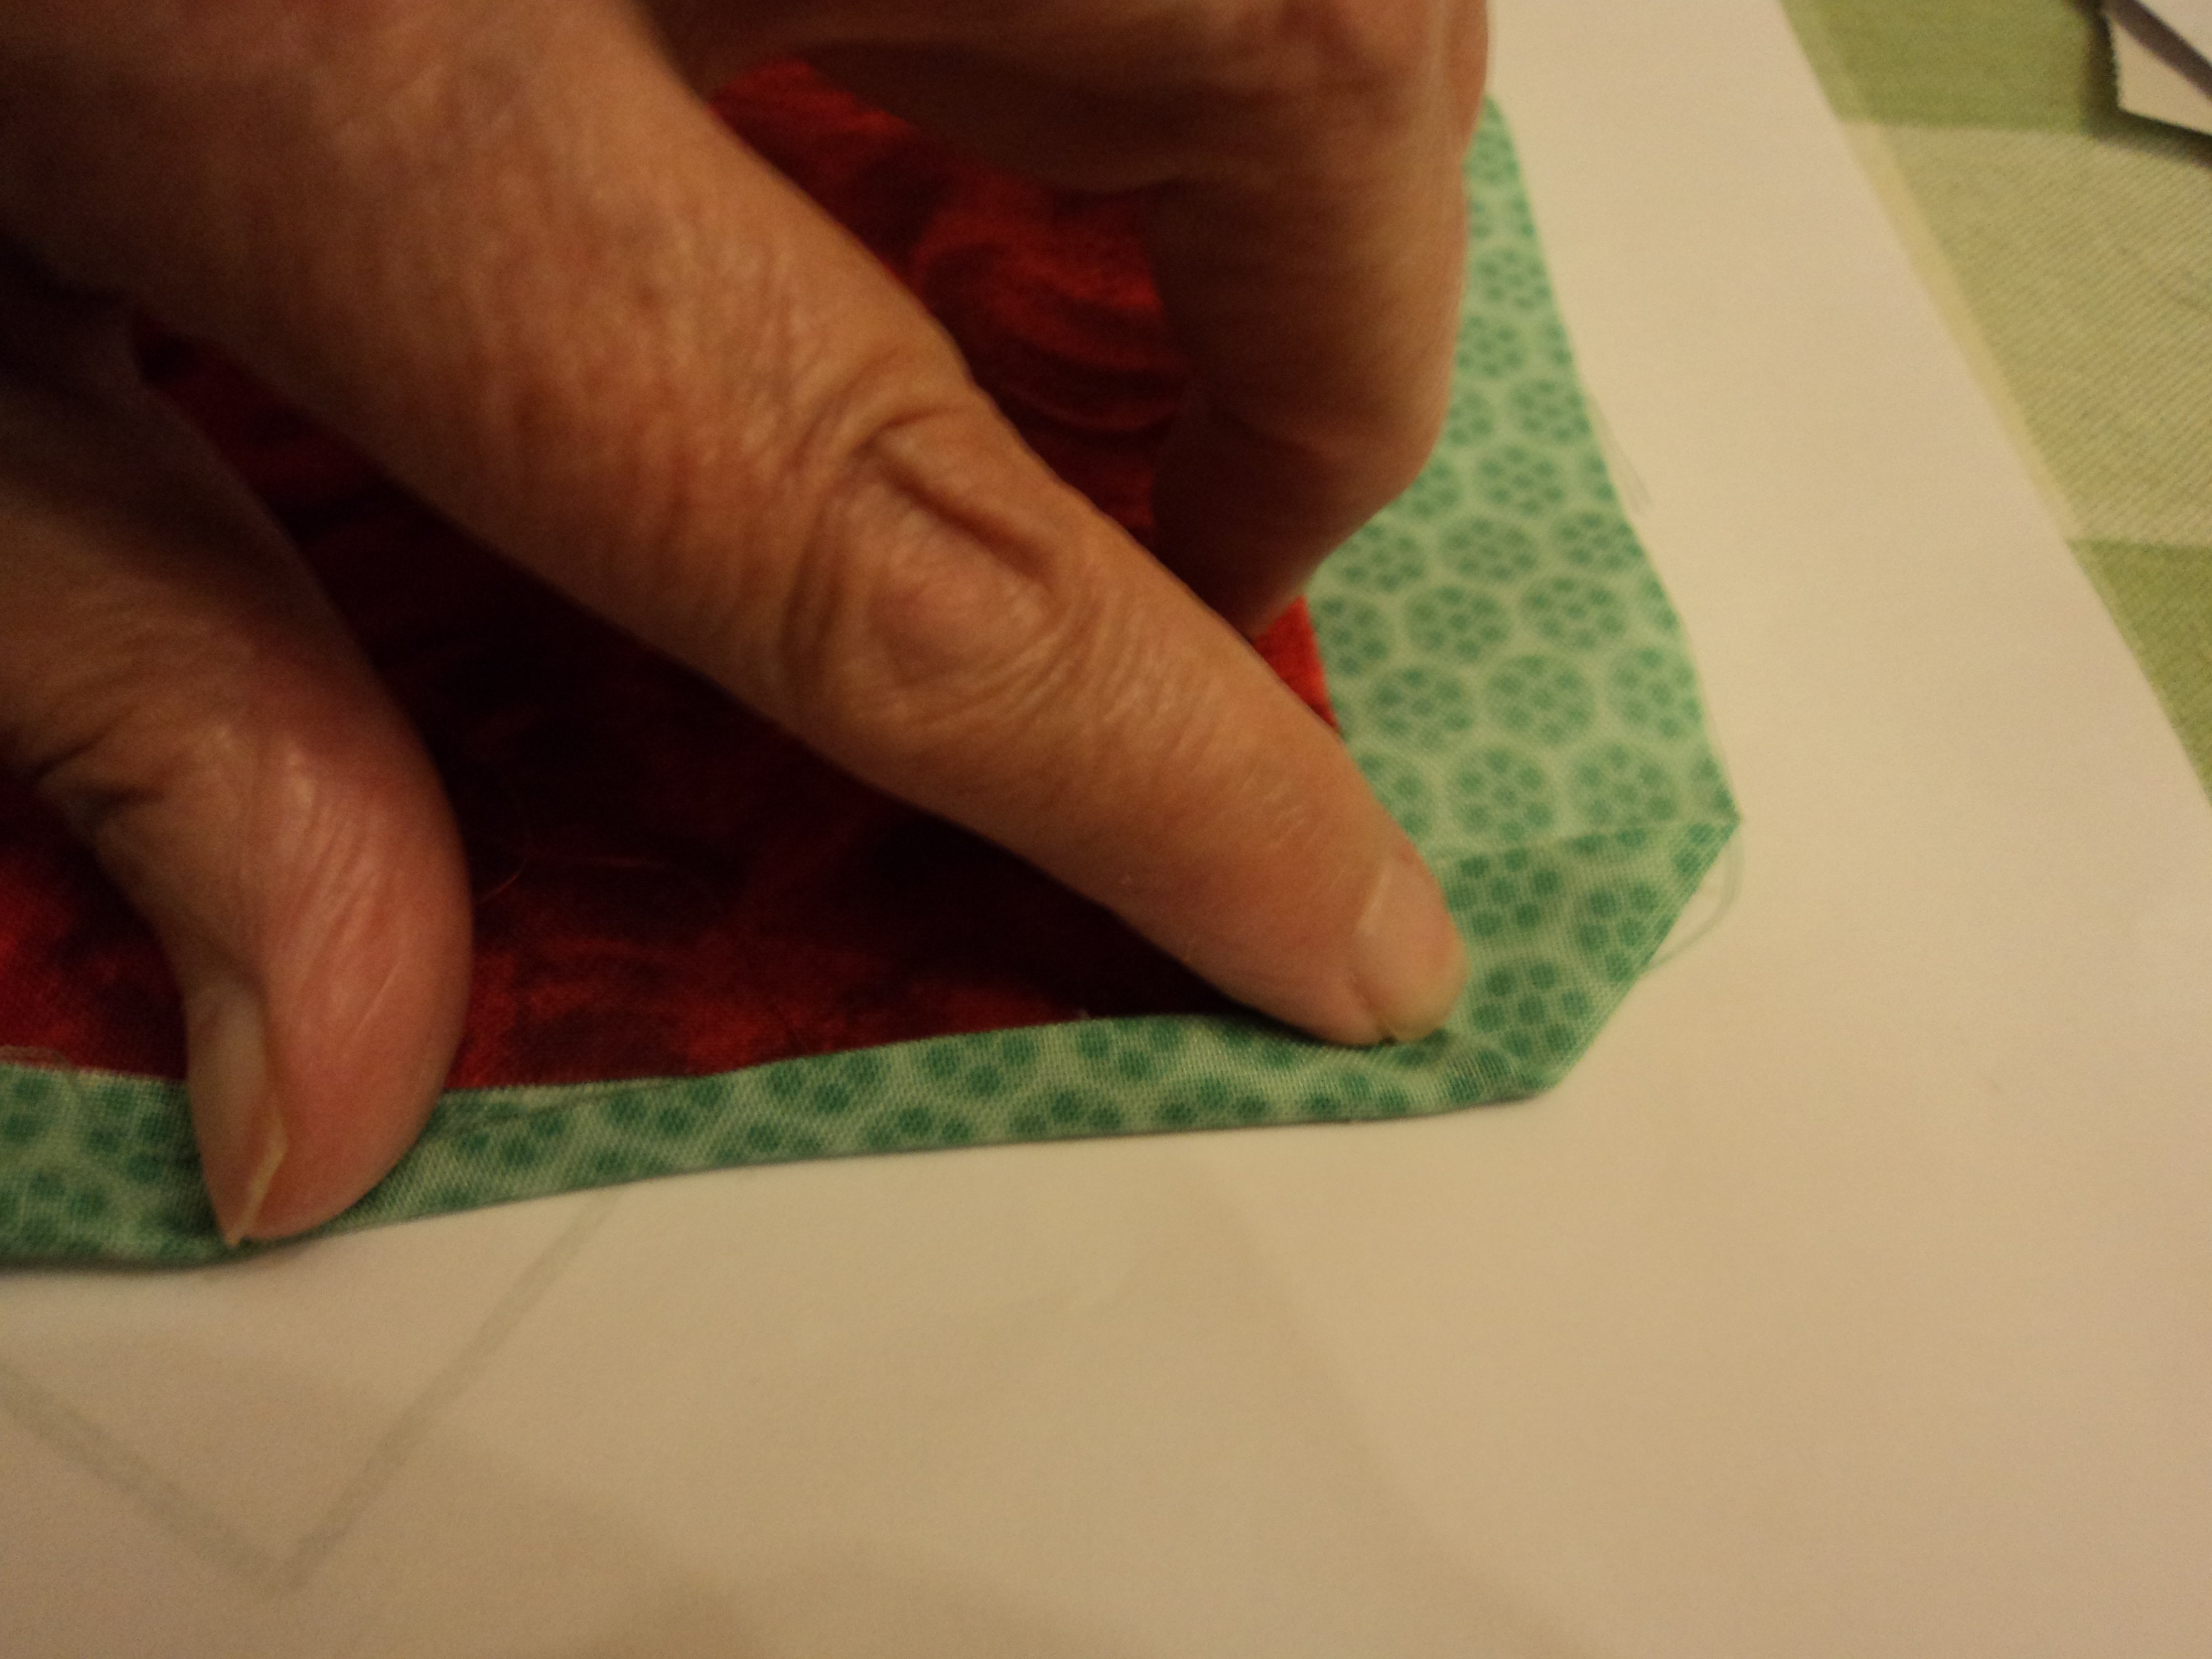
Fold over the corner at a 45° angle as in the picture below.

Then finish the folded edge which will mitre itself nicely in the corner. Pin or clip in place.
Fold over the second edge in the same way and the left corner will mitre nicely too.
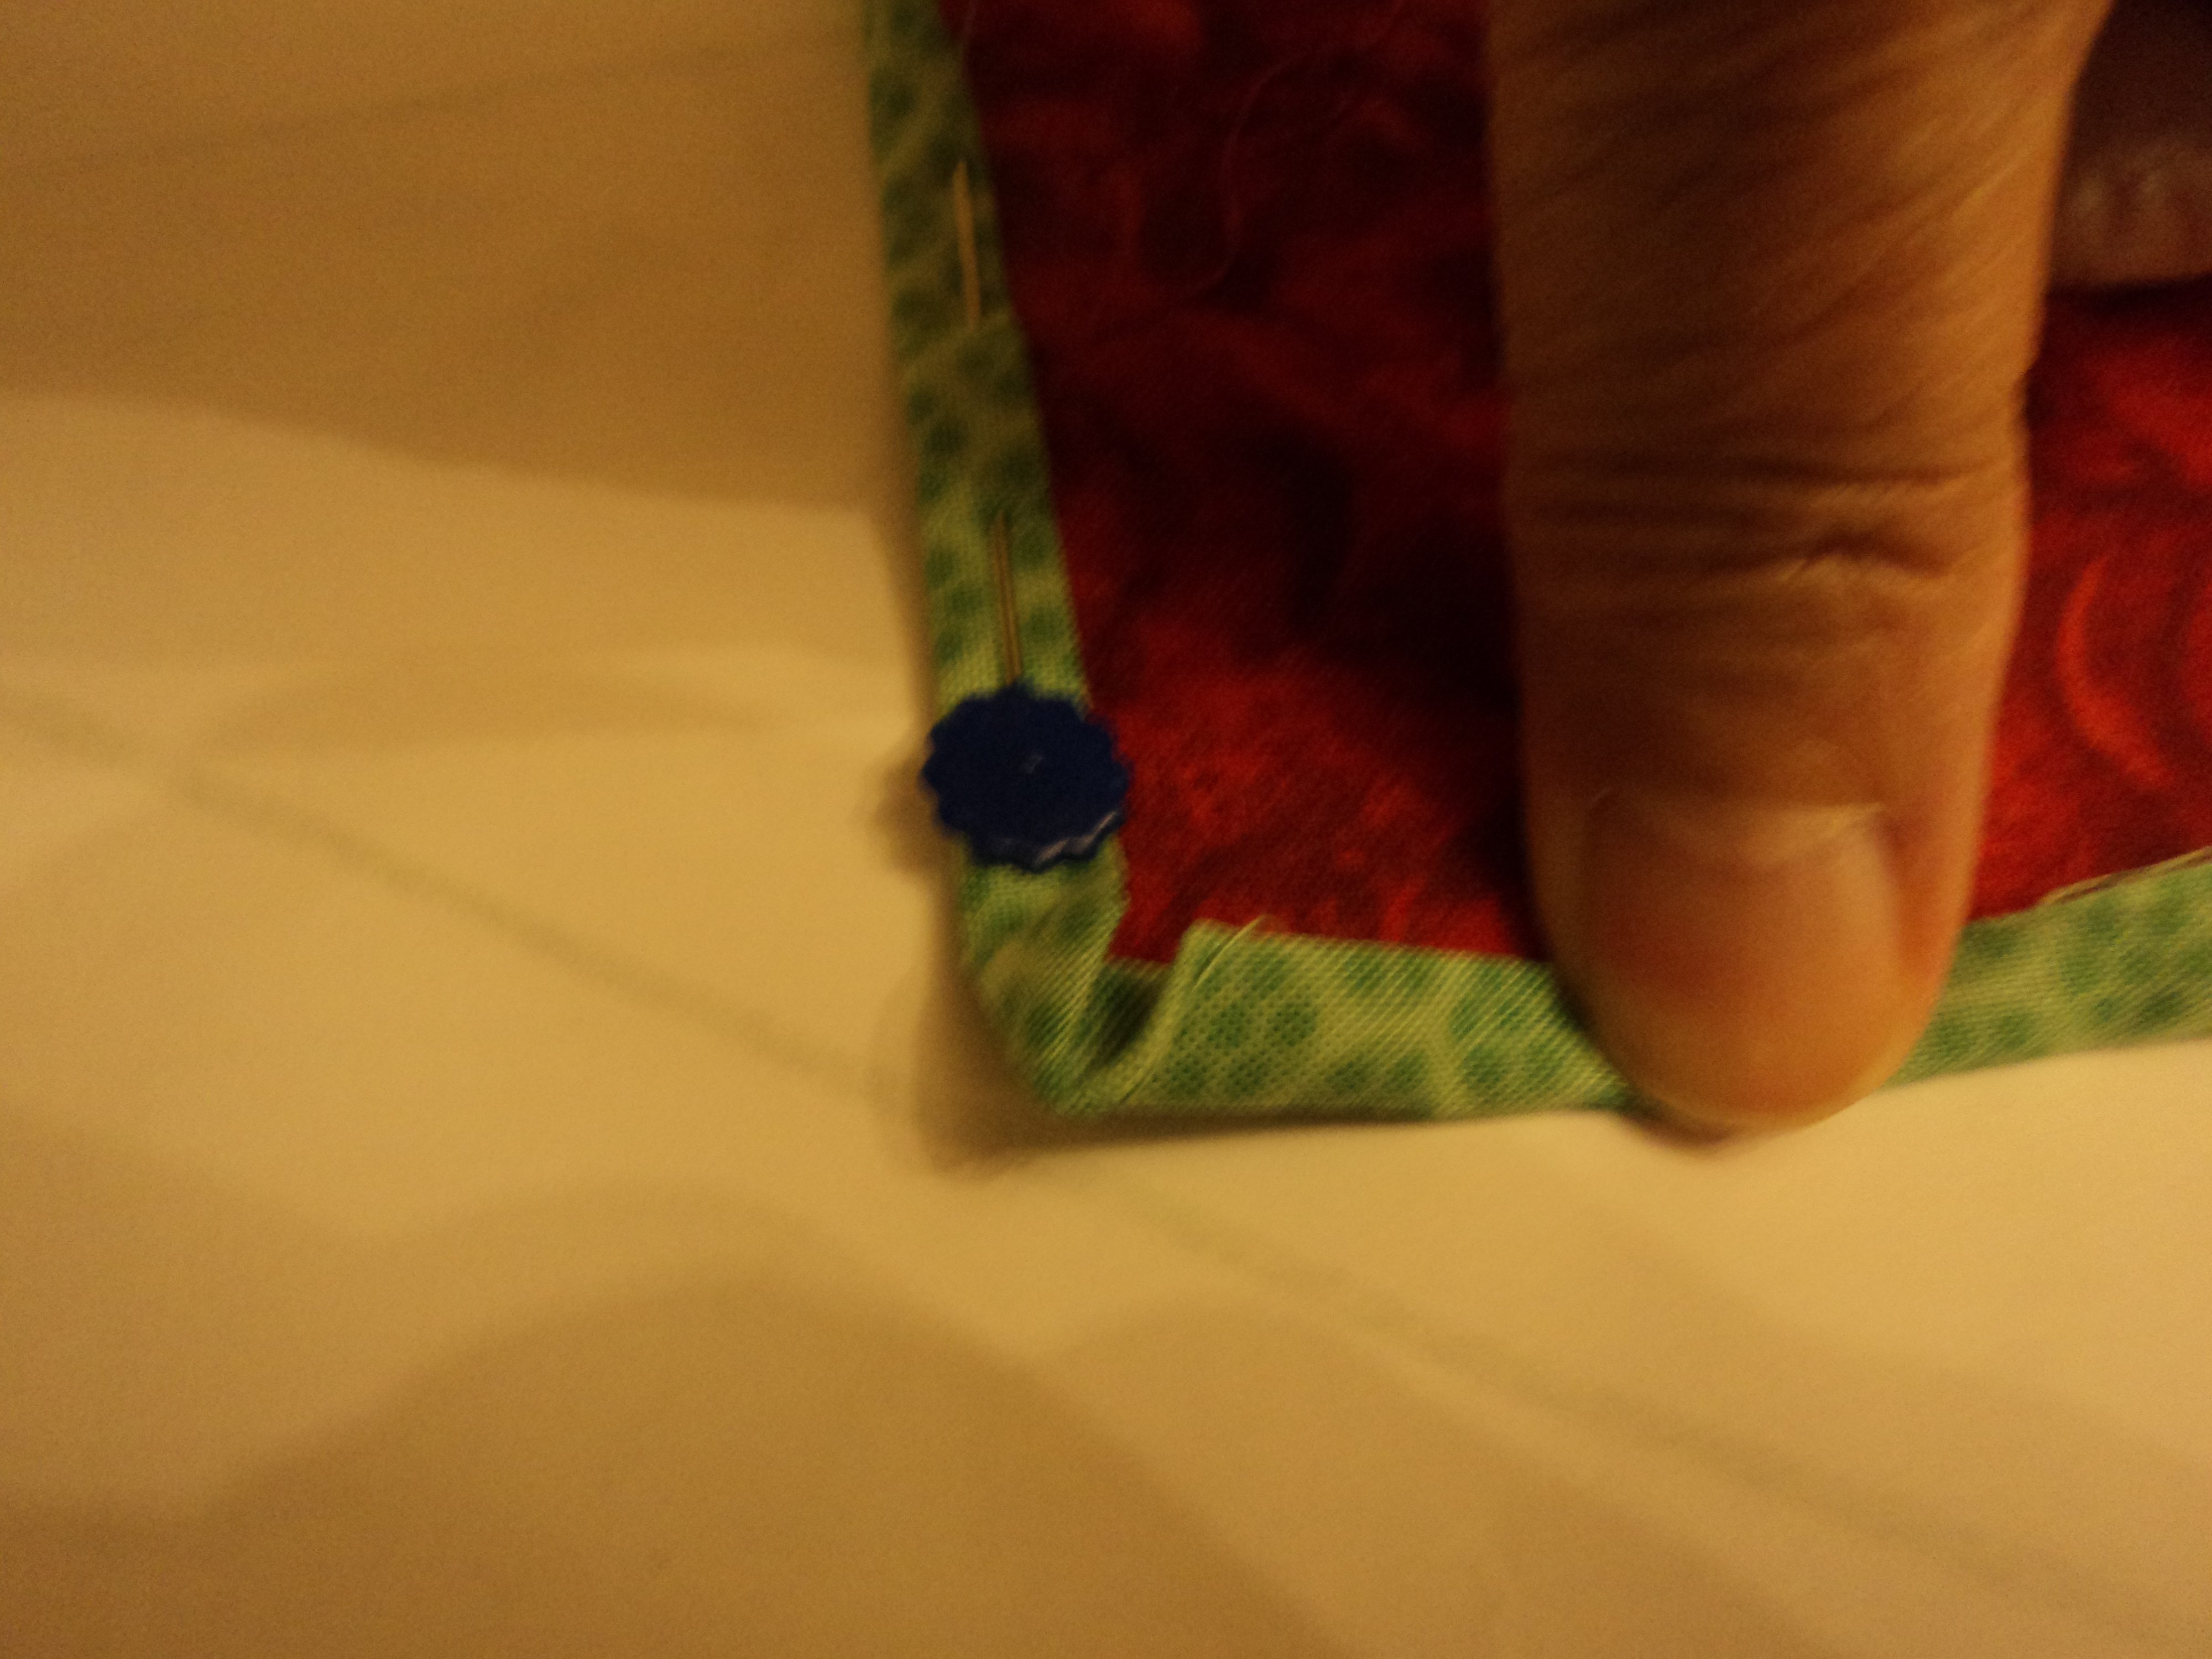
Continue with the other sides till you have a neat border all the way round.
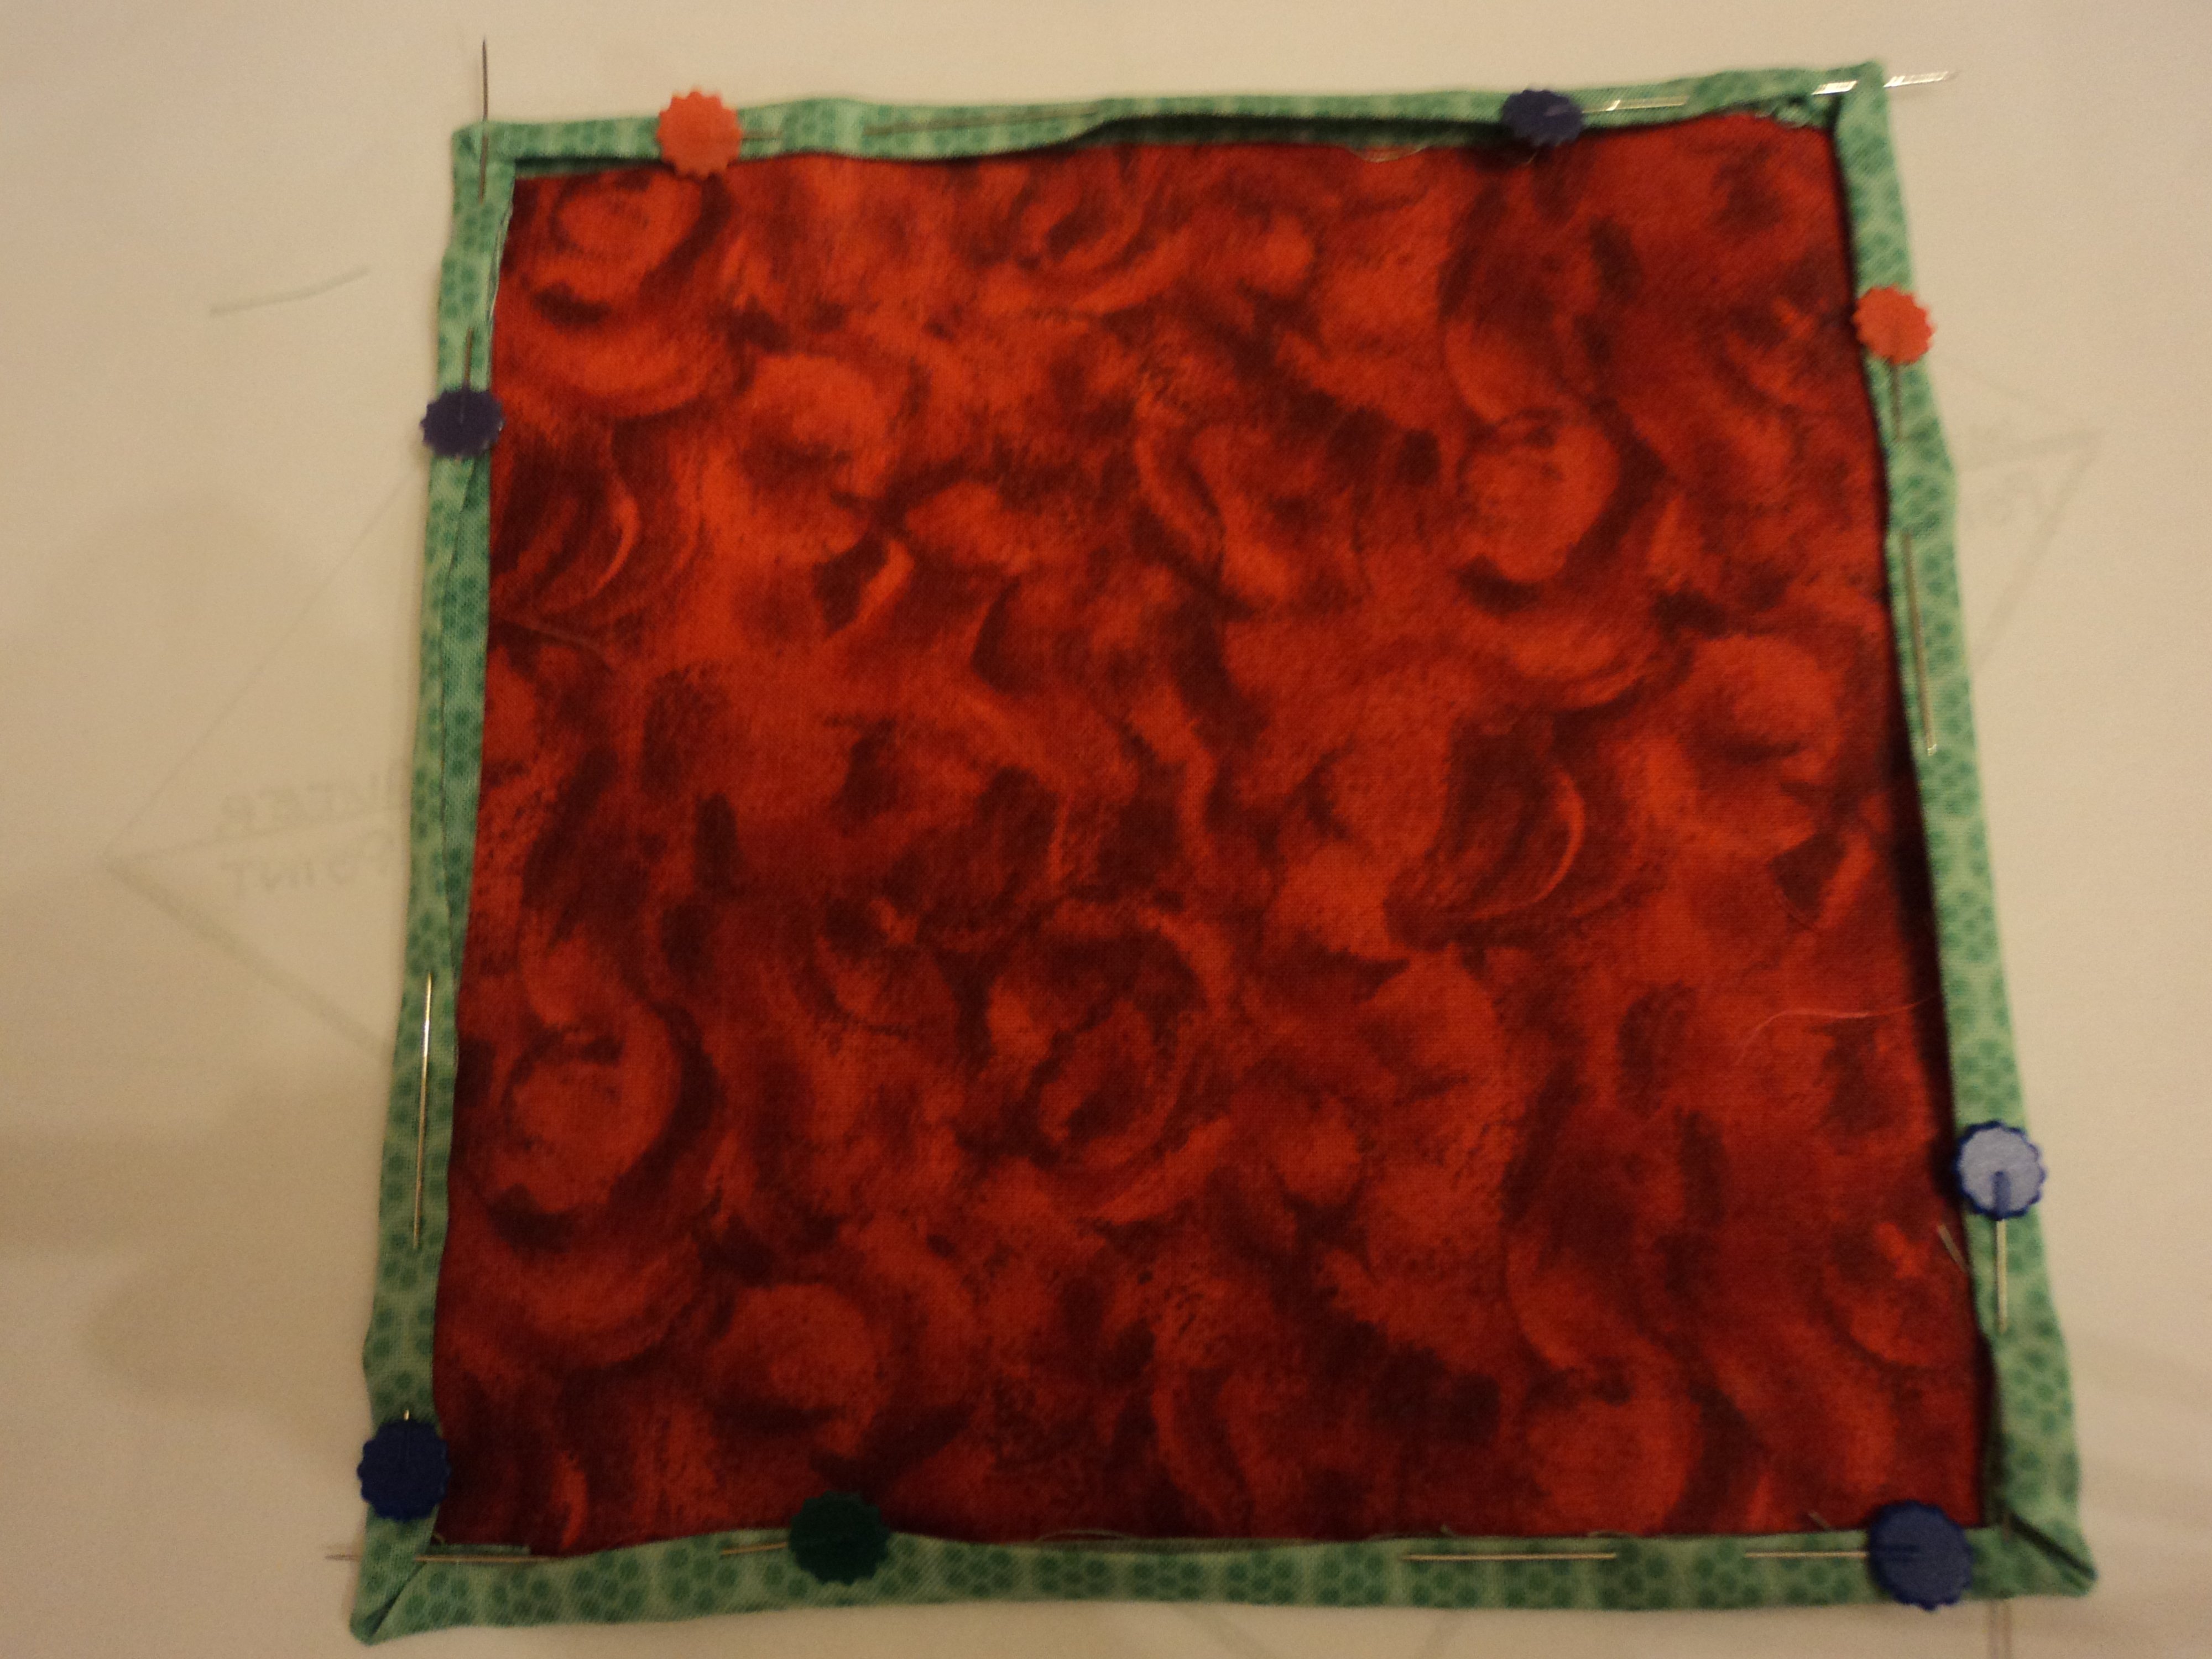
Stitch the green border to the red fabric. You could use a straight stitch, a zigzag or even the fancy stitches on your Bernina to make a feature of the stitching. Use a neutral thread to hide the stitches or a contrasting one to highlight them.
Now comes the tricky bit, but not too difficult.
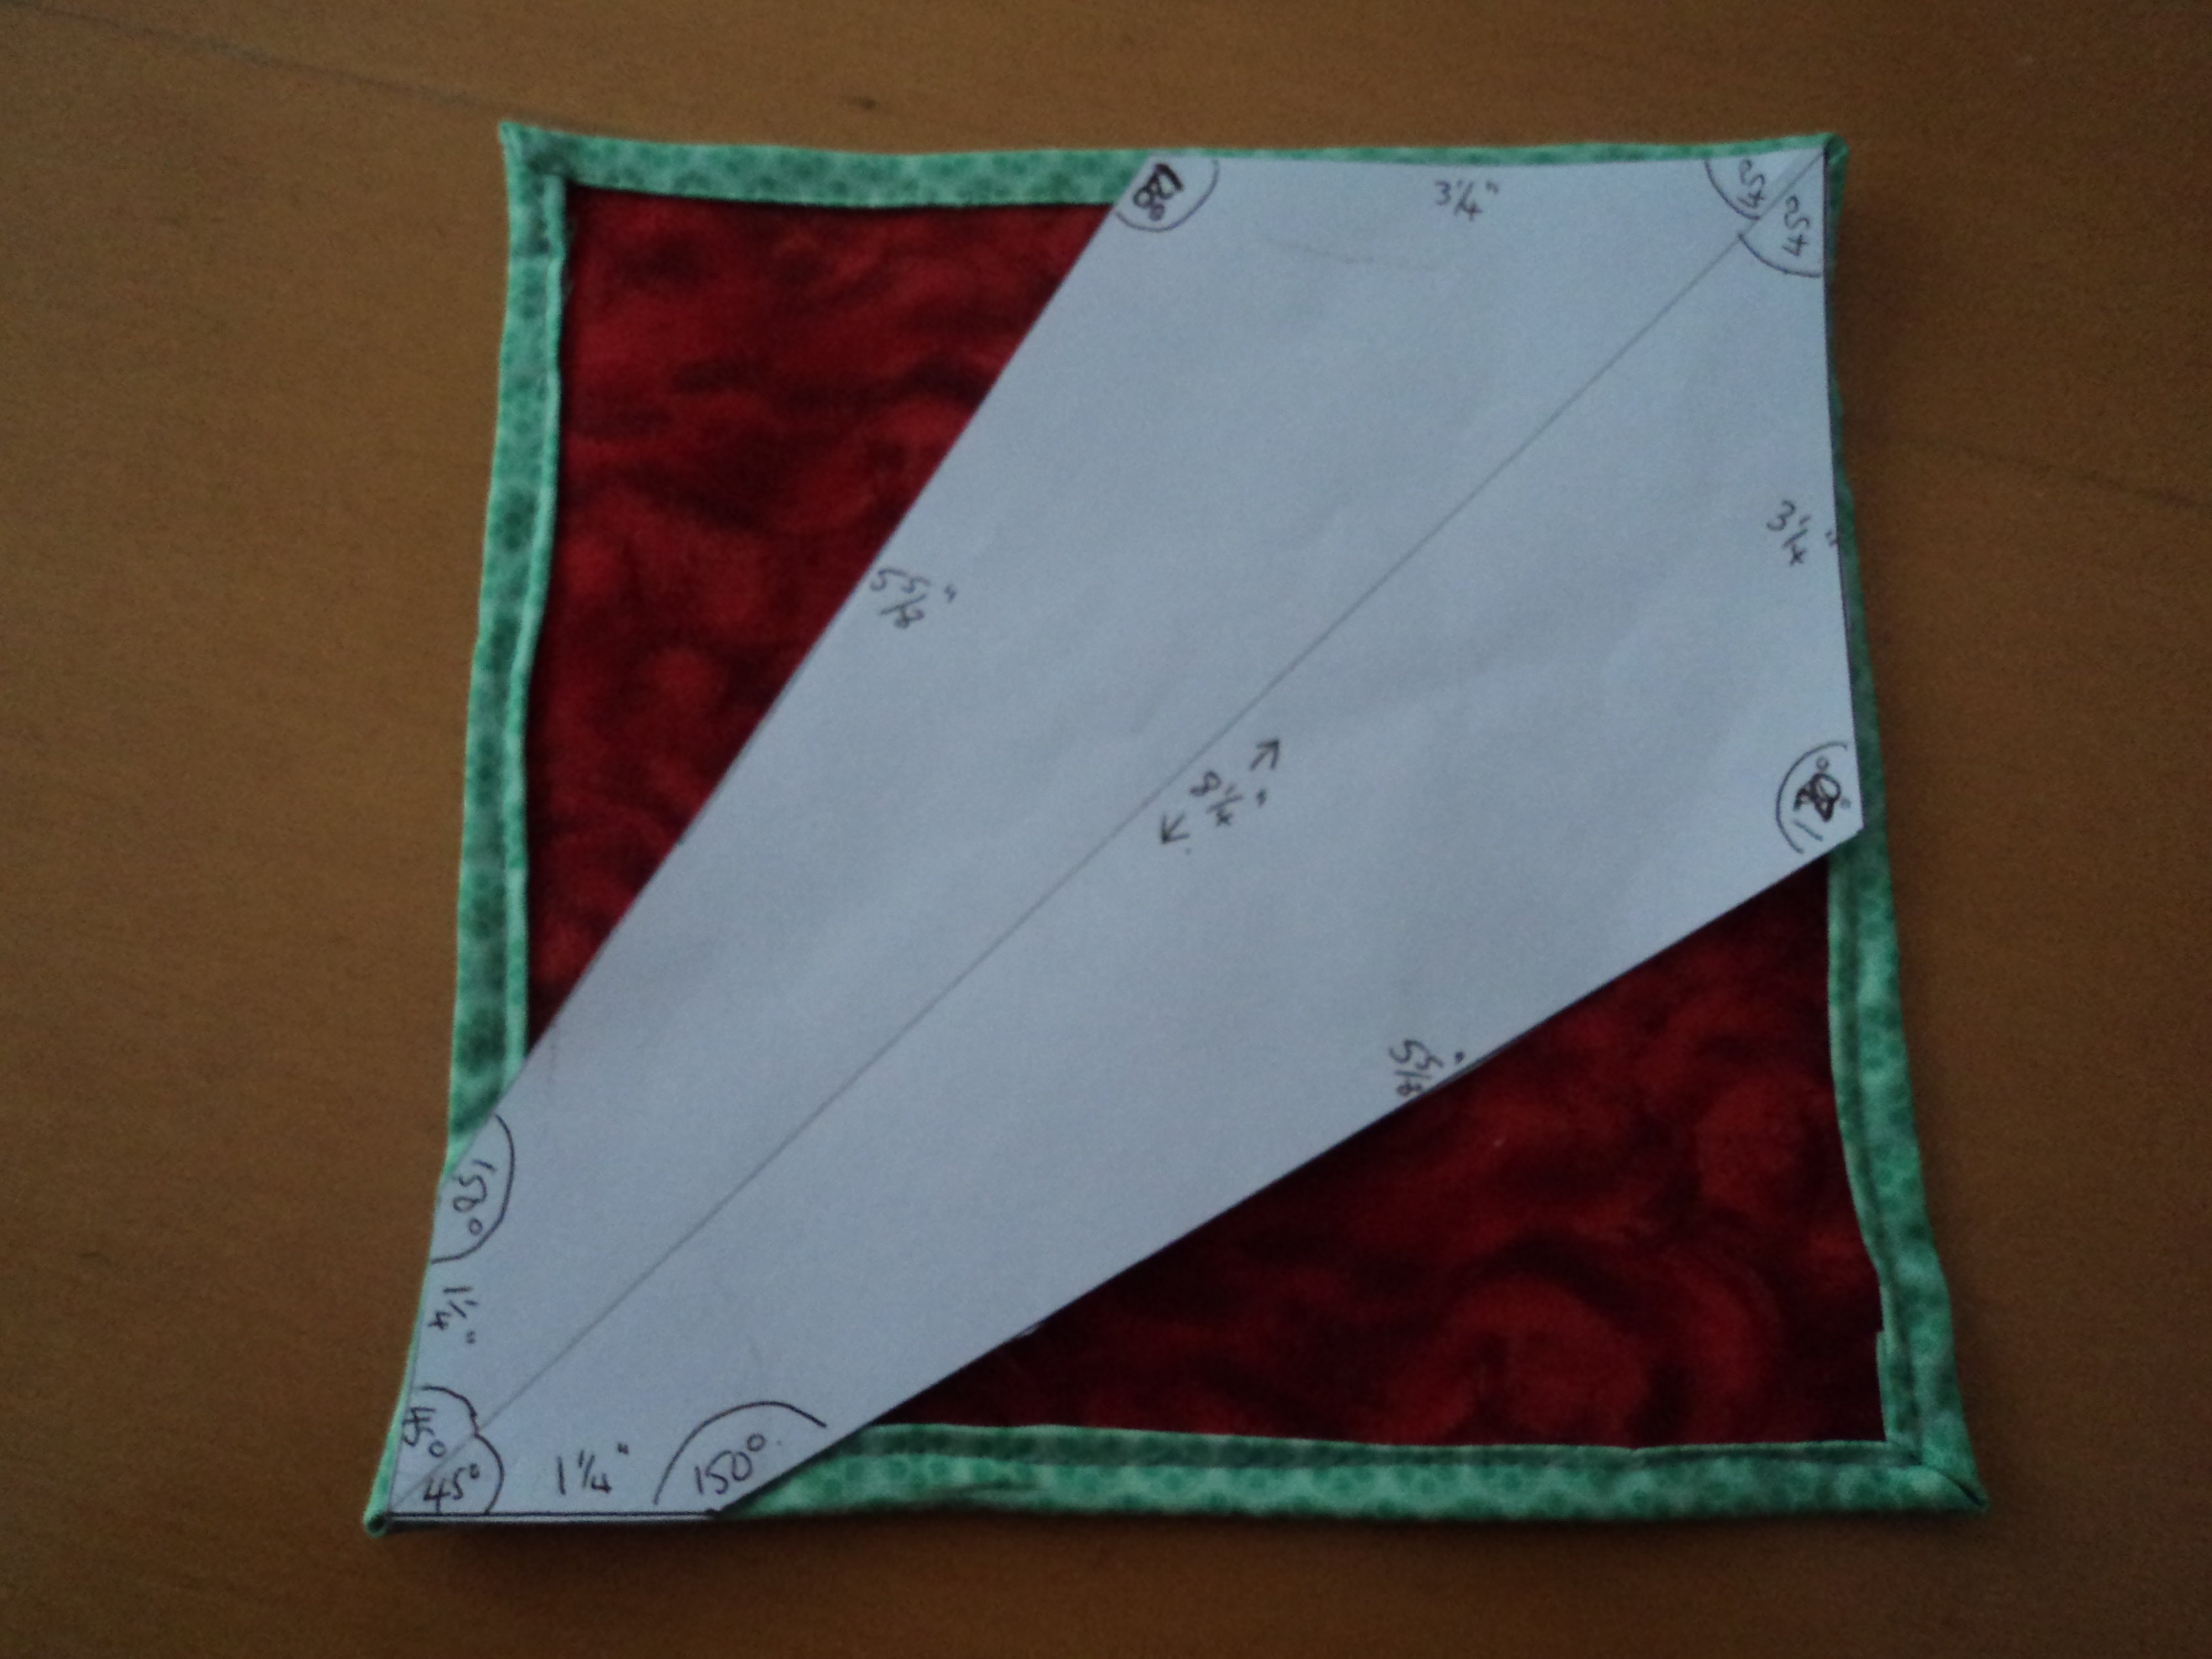
The photo below this diagram shows the measurements and angles you need for the segments to fit together nicely. Draw a 6 ½” square on a piece of paper and then measure 1 ¼” from one corner and put a mark. Do the same for the second side as in the diagram below. On the opposite sides, measure along 3 ¼” on each and put a mark. Join the marks from the first step to the marks from the second step and you will have a diagram like mine.

I’ve put the angles in for you below as well if you want to check yours are correct.

Cut out the shape in the diagram above and use it as your template. You can glue it on to stiff card if you like to give it more rigidity.
Place the template on the squares and mark the stitching lines with an erasable marker which allows you to see the lines and you can remove them when you have stitched the lines. I used a chalk pencil. The stitching lines are the 5 ⅝” ones on either side of the 8 ¼” diagonal.
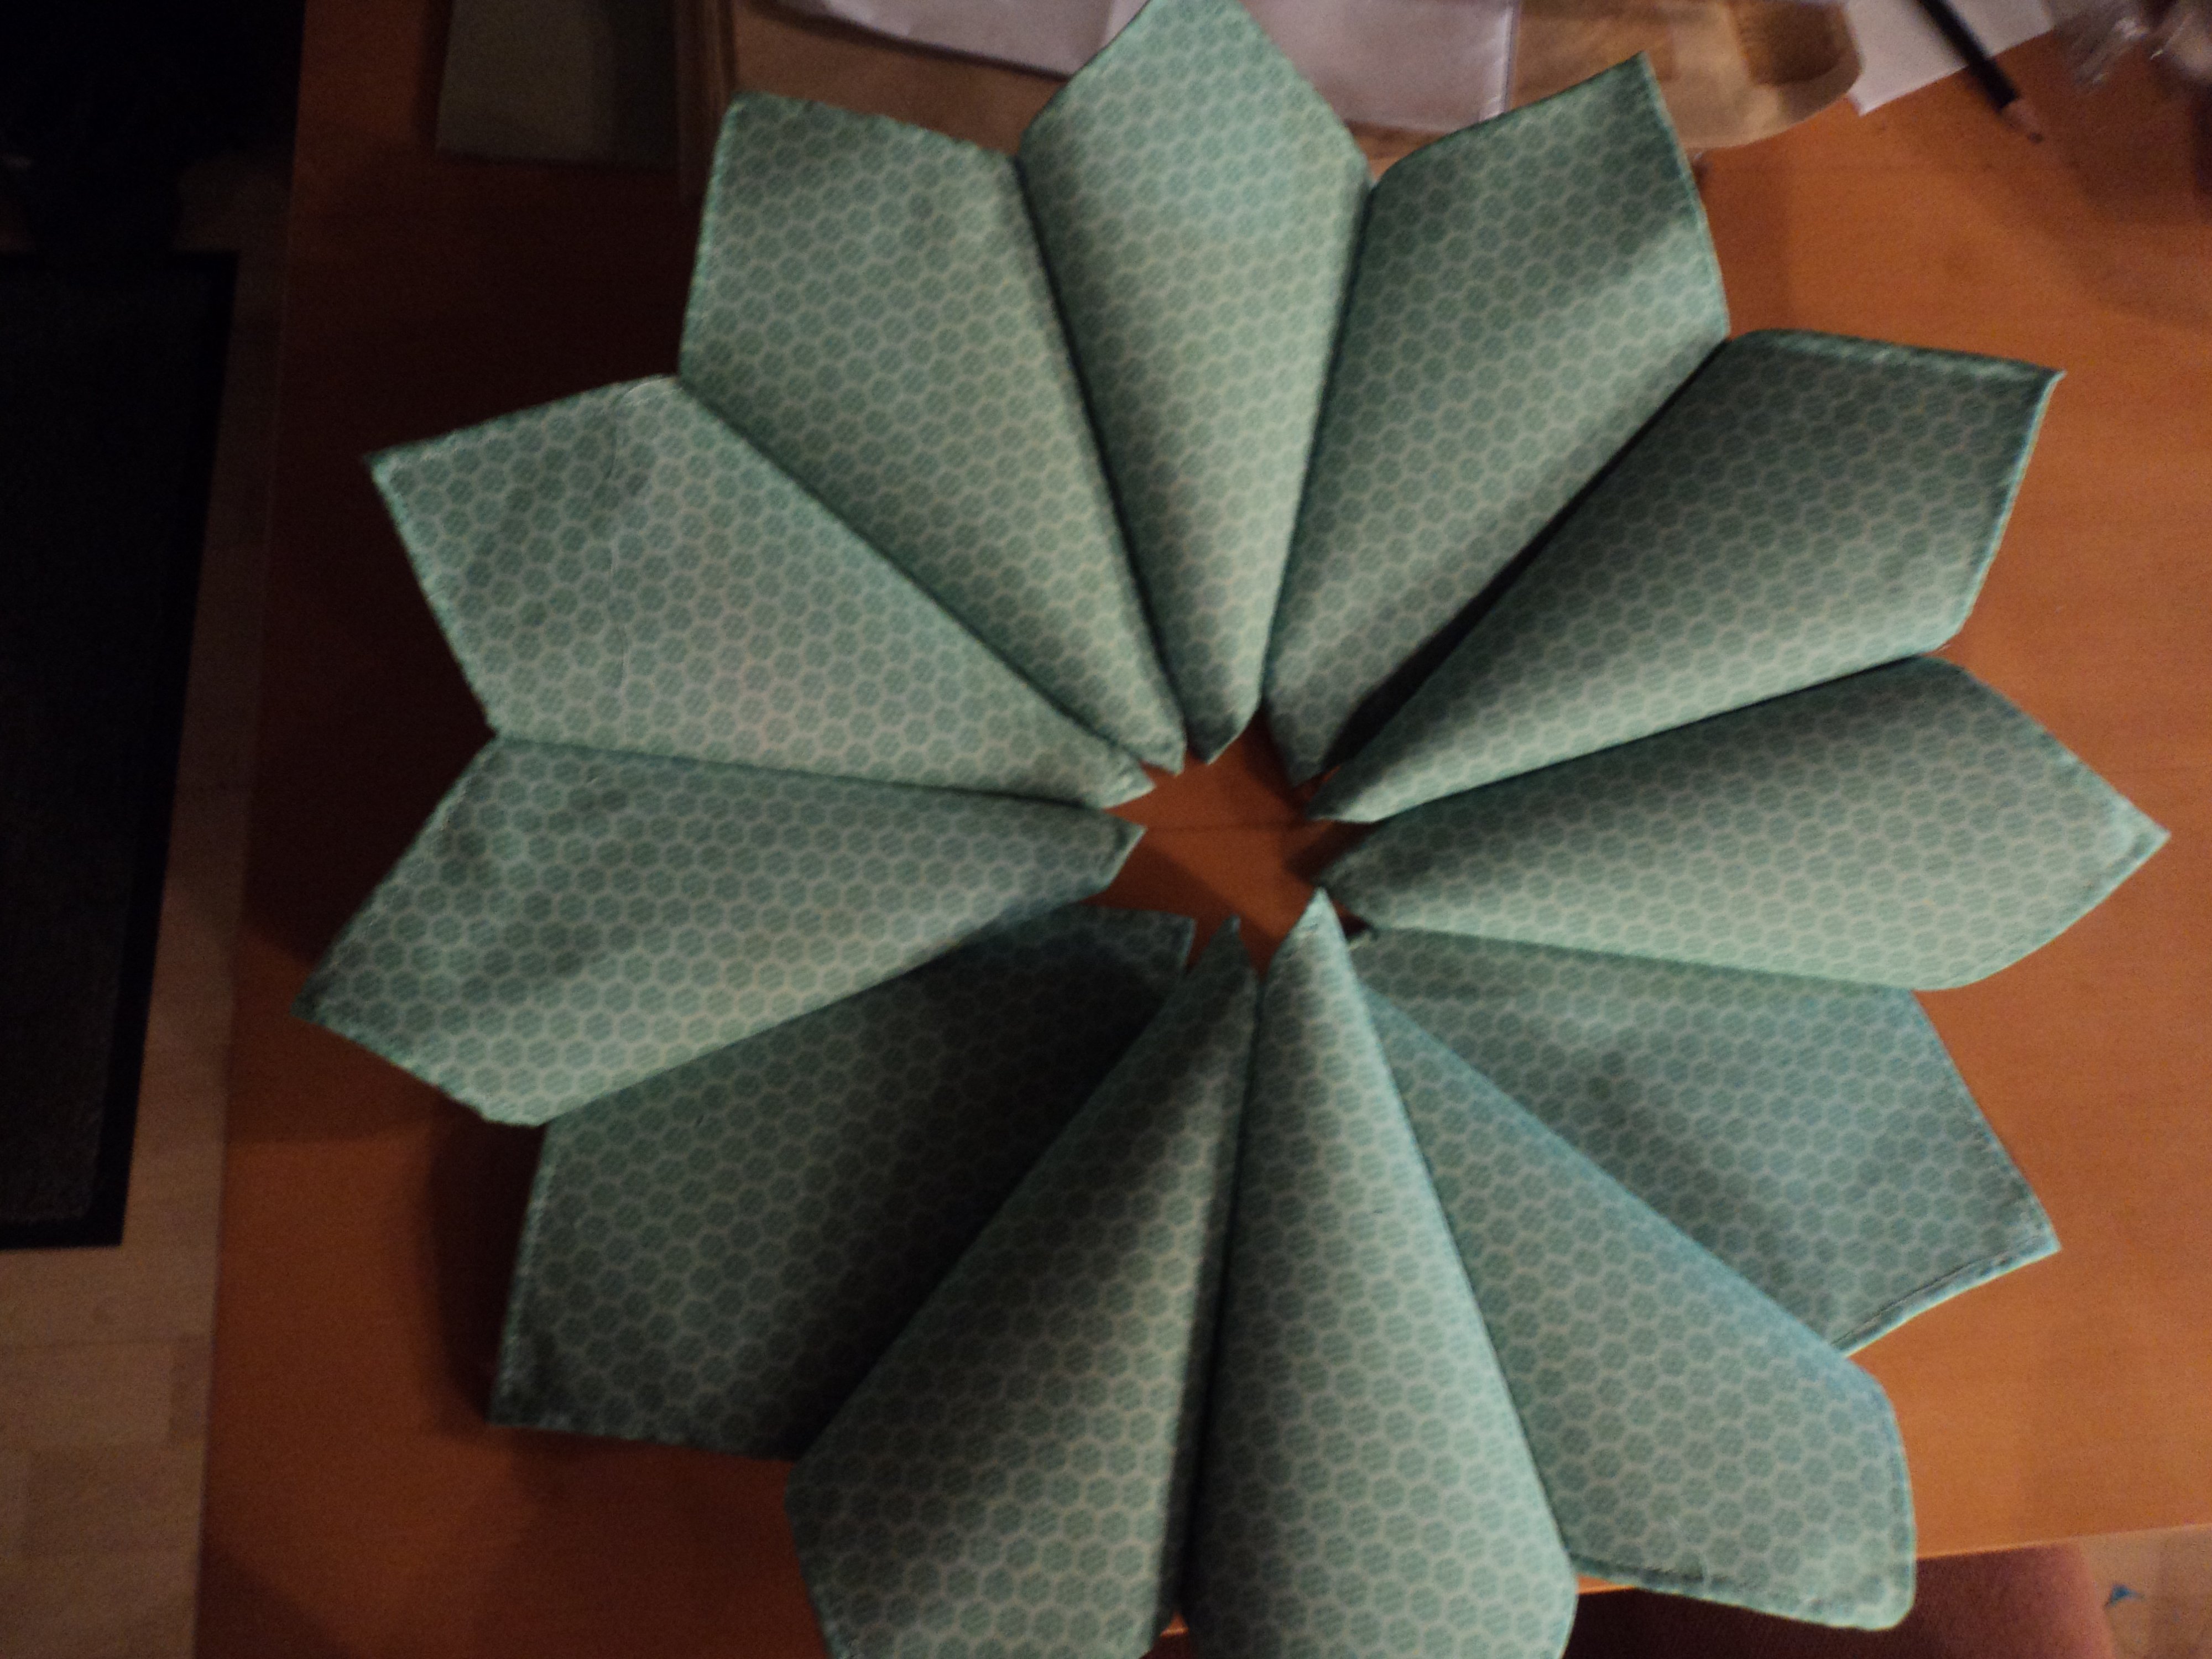
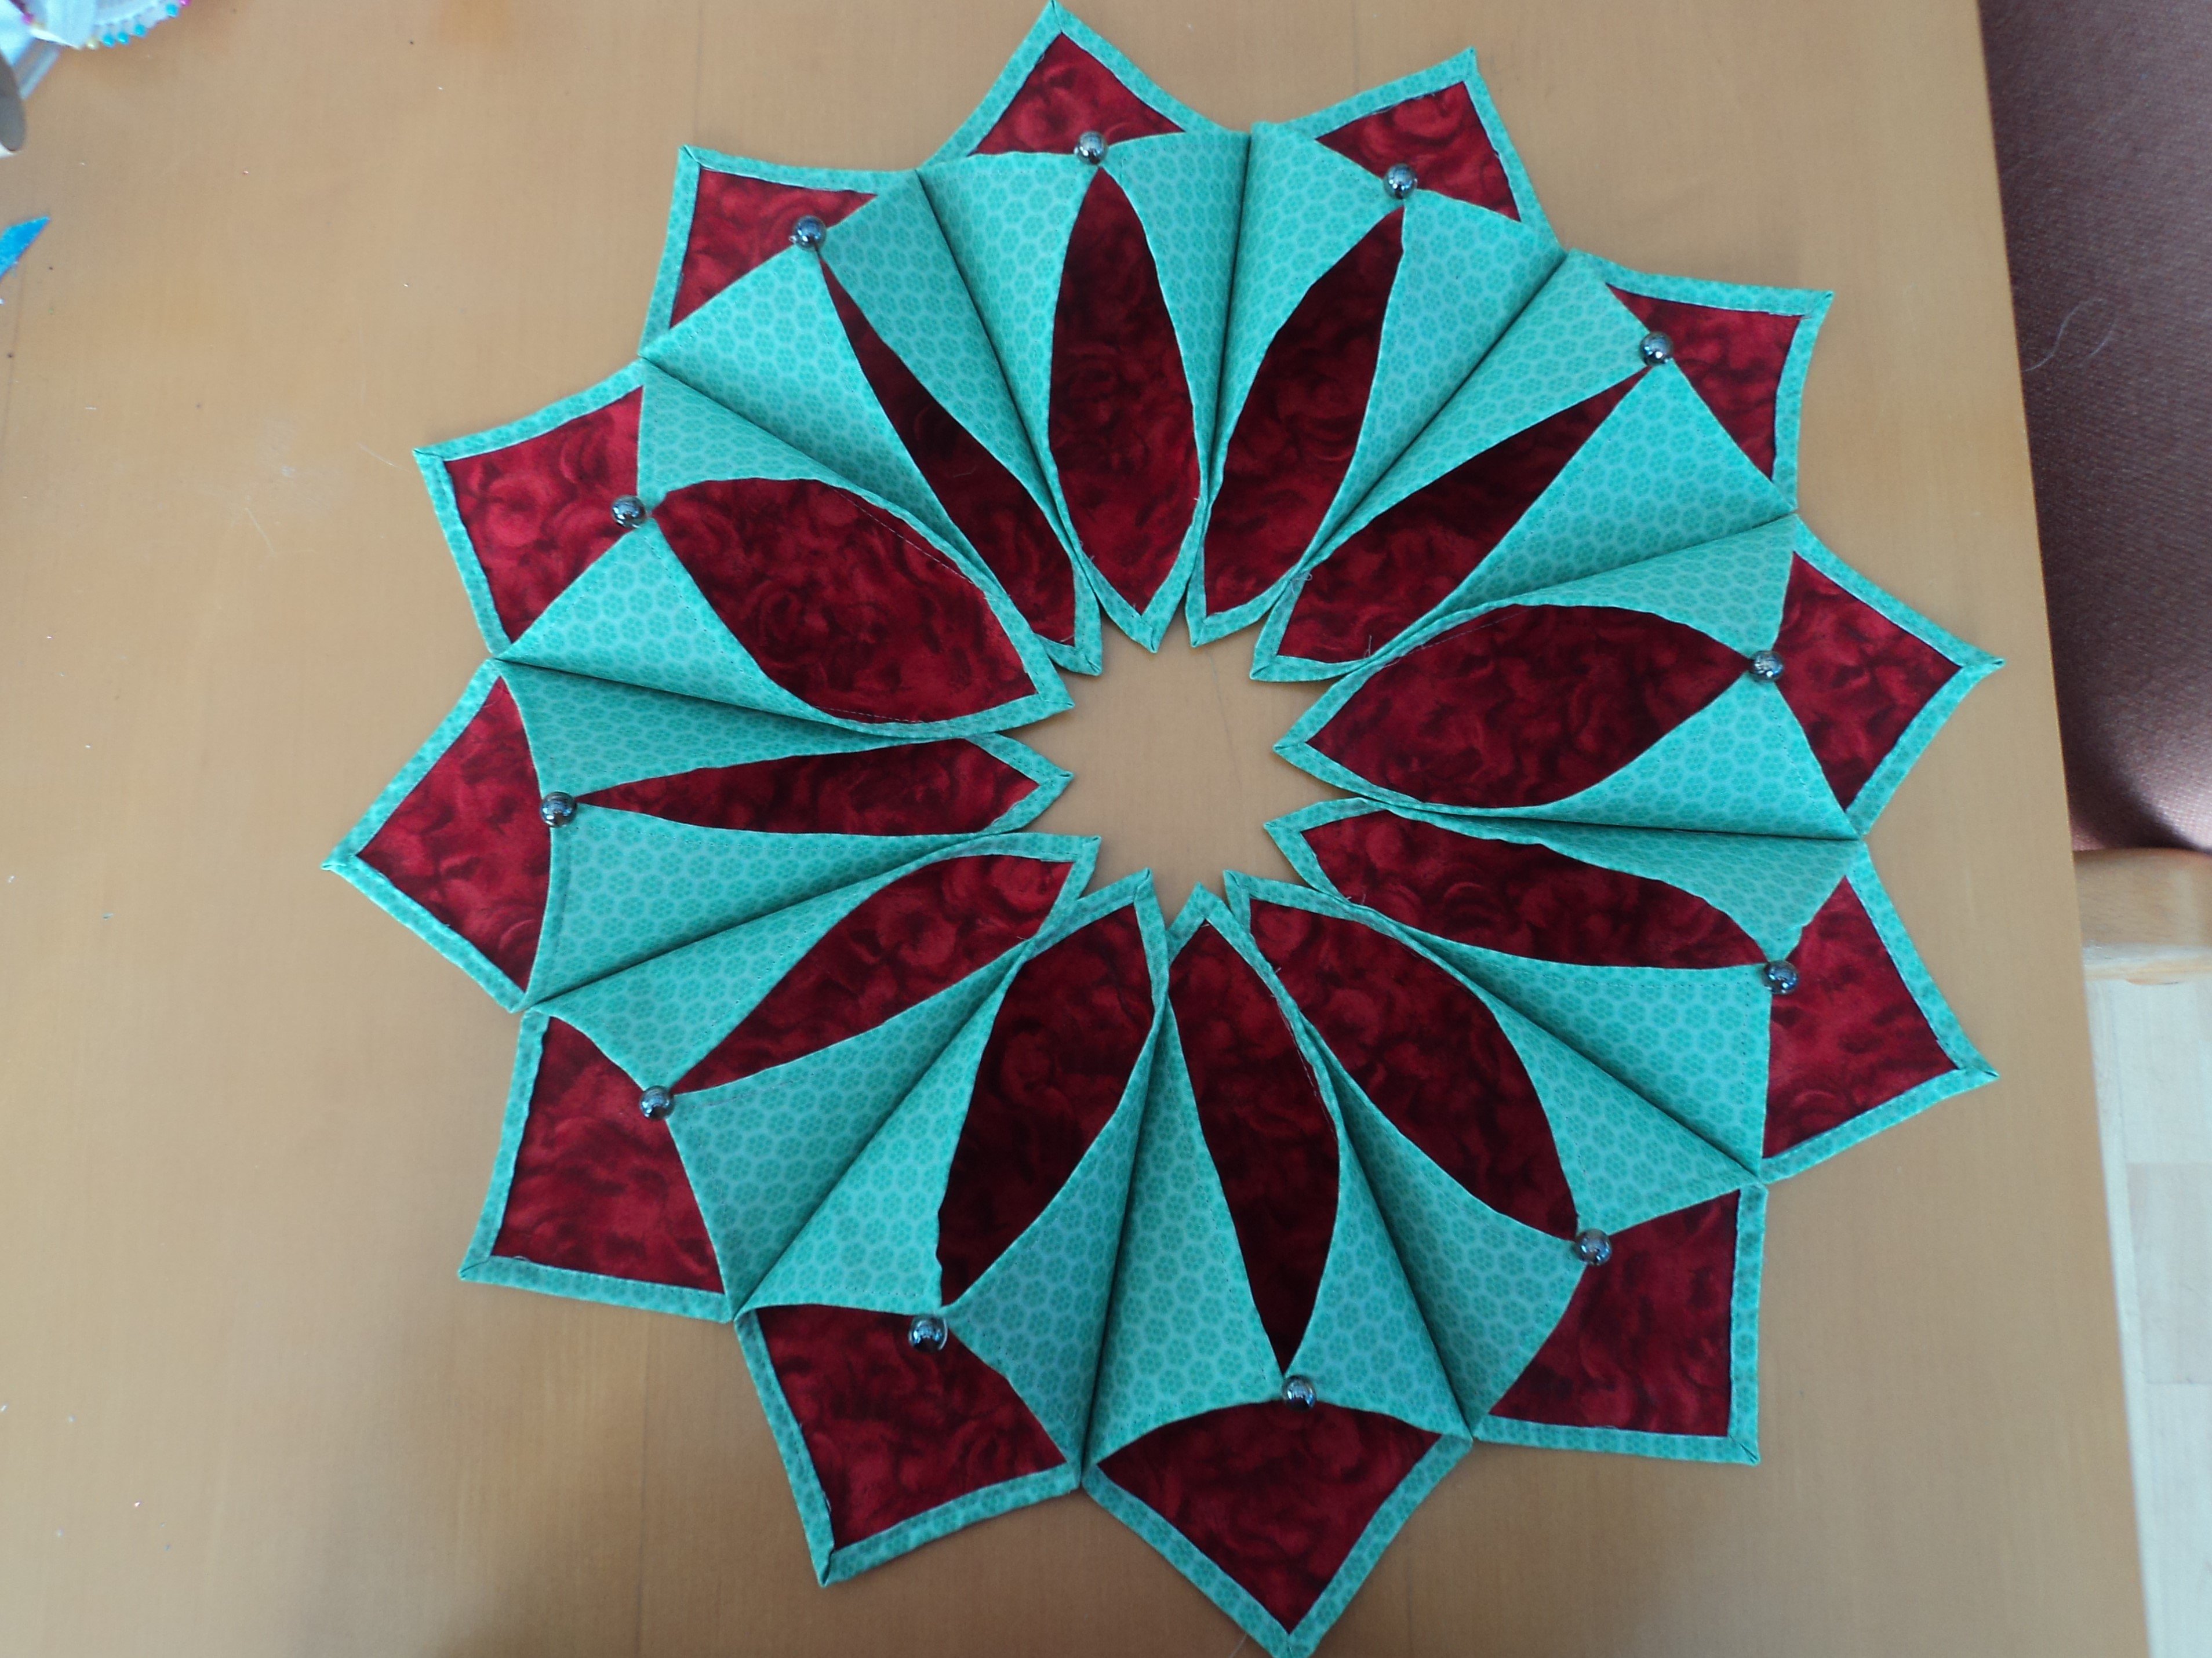
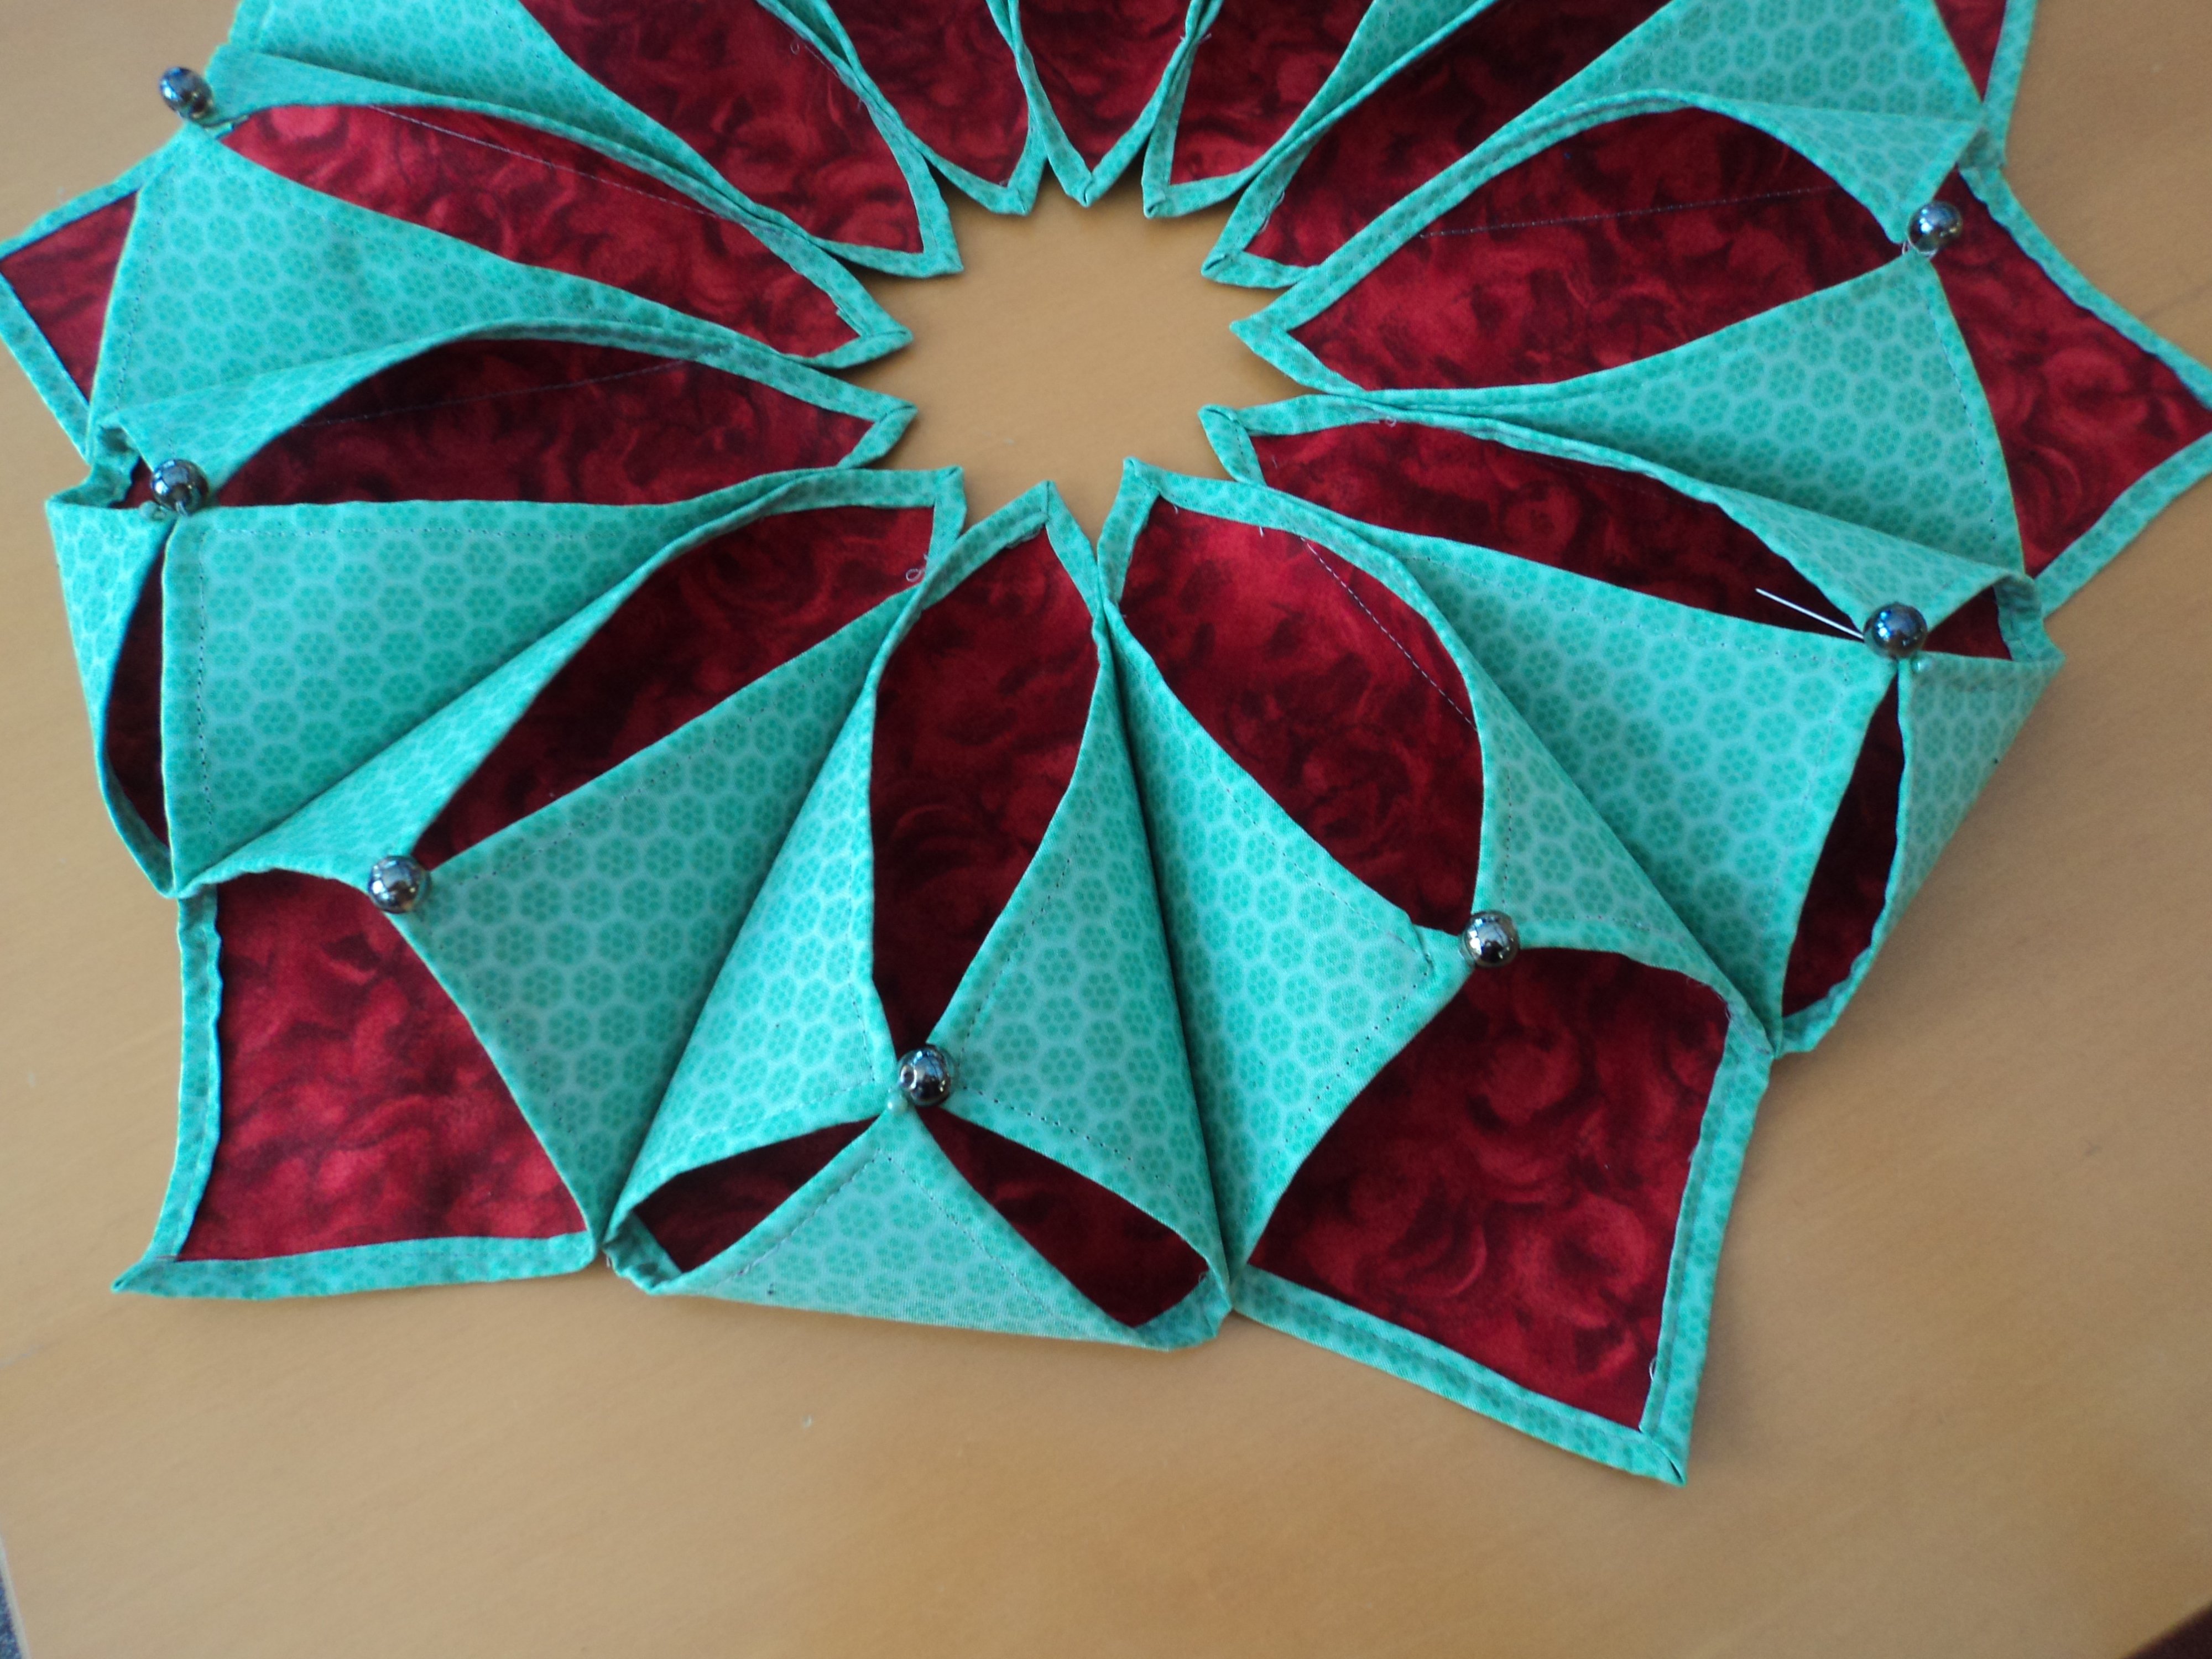
Placing two squares, green sides together so that the bottom lengths of the green border match and the stitching lines match – check by sticking a pin through so it is on both lines on either side of the seam you are about to stitch. Carefully stitch the fabric segments together. You should have a circle of segments like the one in the picture below when you have stitched them all to each other.
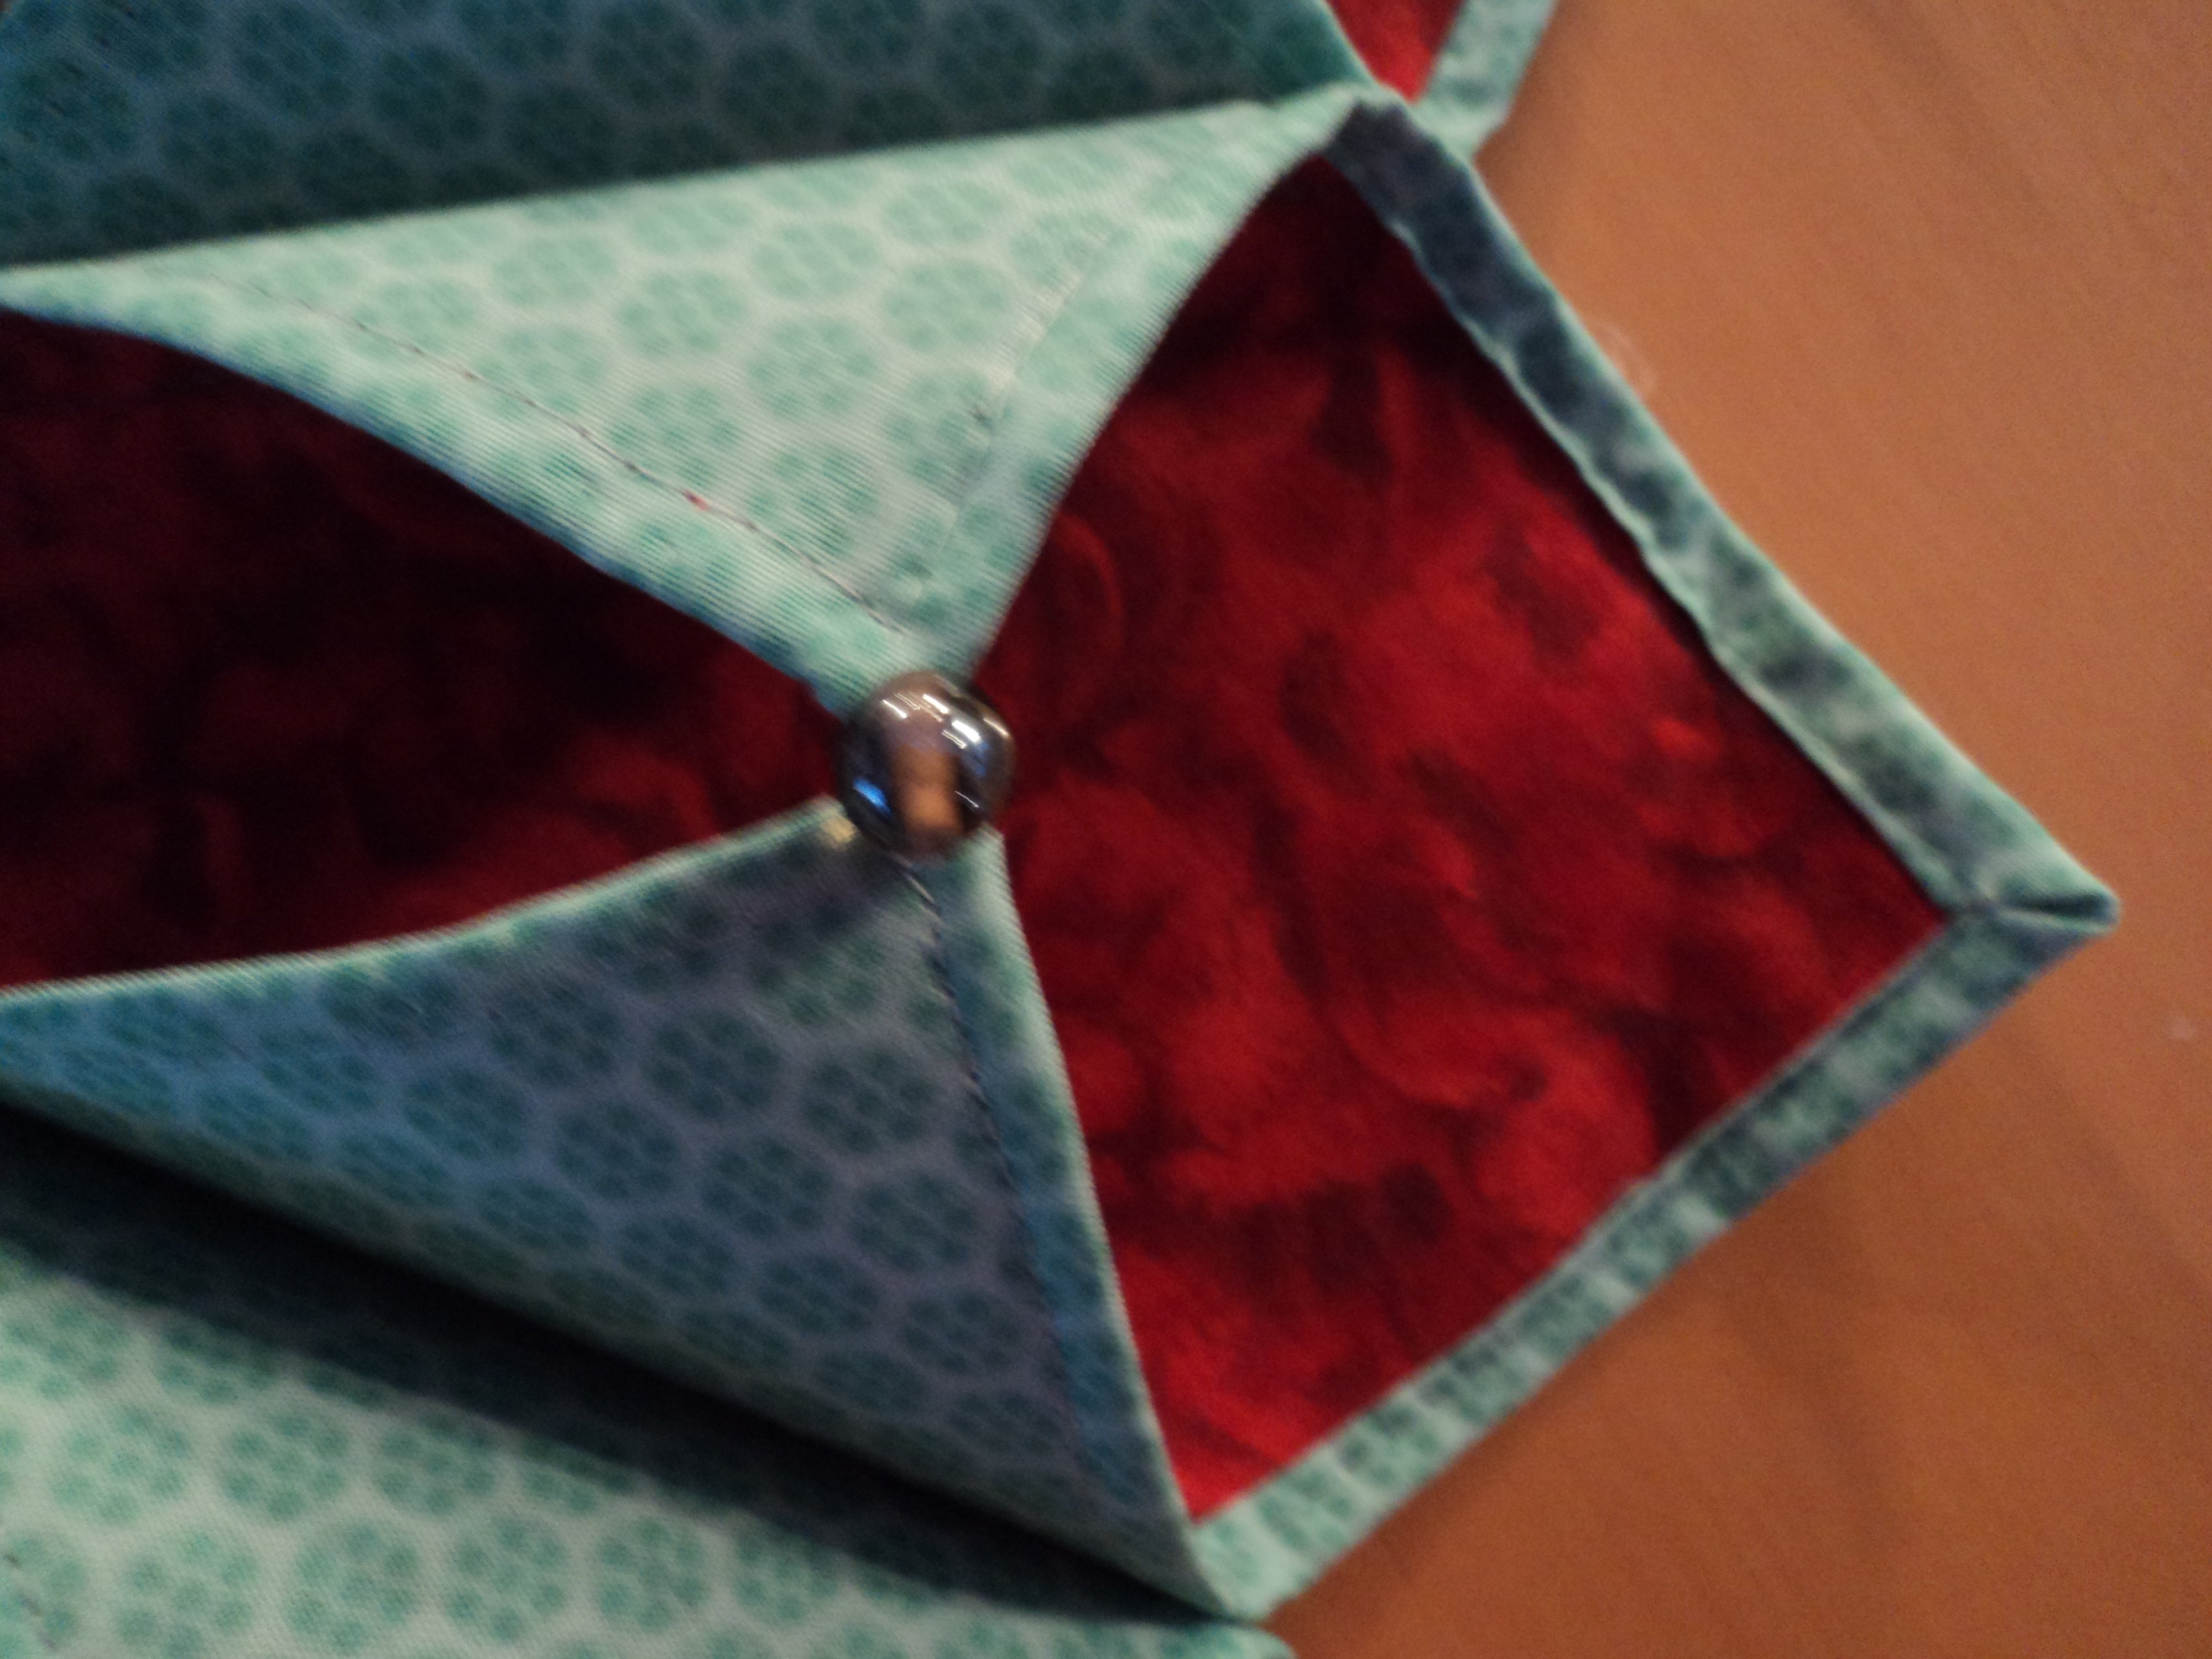
Take a loose central corner from the side of each segment and bend it over the centre of the segment so the corners touch each other. Stitch them together. Use a button or a bead to embellish them. Add a flower or a bell instead of a bead if you wish. Paint some glitter along the edges of the segments for effect. I decided to leave mine plain with just a bead on each segment.
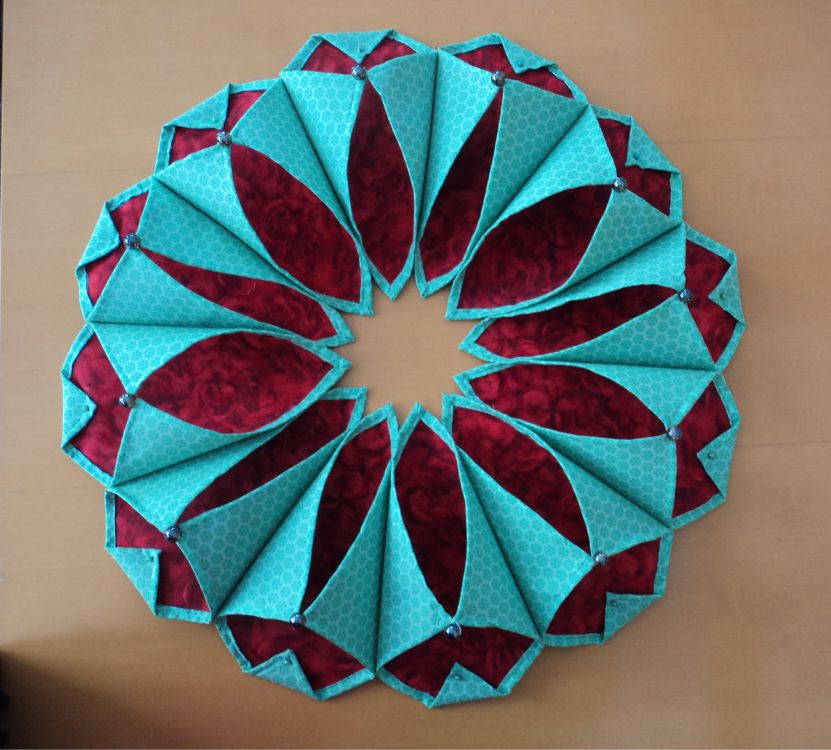
When you have finished your STAR-ter should look like the one in the picture below.
Place a candle in the centre – always keep a lit candle in a container and never allow it to touch the fabrics in case it starts a fire.

Here’s another idea – you could bring the points up to the joined corners on alternate segments.
Or how about folding the points over to the inside and stitching them down with a bead for embellishment.
You could turn the STAR-ter over and use it with the green side showing too!

Wishing you a very Meerkat Christmas and a Happy New Year for 2018!


Thank you so much for sharing. I’ve always wanted to make one. I think I’ll make one for my daughter and myself as we have a lazy Susan in the middle of both our table and I think this would look amazing. Again thank you.
Thank you so much for sharing this pattern. I have always decorated for seasons. Now that my daughter has moved out I thought this would be a nice surprise. Since being a little girl she has thought more of a present if it was homemade.
Glad you like it Lara C. Hope she enjoys receiving it too.
Can I make the squares larger to make a door wreath?
I am not sure. Why don’t you cut some squares out of old newspaper and see what happens when you put them together after joining the two opposite corners.
I use this pattern to make door wreaths, the size works perfect for a regular size door. I get metal wreath frames from the Dollar Store and anchor the wreath to that for stability to hang on my door. I get so many compliments on these.
I have made several of these I love them.i seem to not have big enough center hole. What am I doing wrong.
Could you upload a picture? That may help. It may has something to do with the folding of the bigger square…. This is the only step I had to check twice in order to understand how much to fold.
Thanks Ramona, I was going to suggest this.
No problem 🙂
Looks great and will try this