Dear community,
in this blog post you can find detailed instructions for creating festive feather pendants – perfect for Christmas and New Year’s Eve.
It’s almost time: just over a week until Christmas. For weeks now, the tree has been hung with baubles and other decorations, Christmas quilts have been hung up, Christmas table decorations and Christmas houses have been decorated with cosy lights … in short: the house has been transformed into a Christmas house. There are still some decorations missing here and there, so a final trip to a garden centre is still planned … but something else is also missing. Looked around and sure enough, the light above the dining table is empty.
Of course you could hang some ready-made baubles on it, but I rather like the idea of making something myself. I decided on small pendants, which I will make using the BERNINA Embroidery Software DesignerPlus 8. For months I have been working on figuring out this software V8 and, not so long ago, I extensively discussed the topic of ‘appliqué’ in various lessons. So this is how I’m going to make festive feathers.
What do you need?
- The aforementioned V8 software for creating applications (or the file, see 2-)
- An embroidery machine or sewing machine with embroidery module
- Water-soluble stabilizer, such as Madeira Avalon Film – 2 layers
- BSR or quilting foot for free-motion quilting, along with your sewing machine
- White embroidery felt*
- Application scissors or small scissors with curved point
- Silver coloured metallic thread for the machine, such as Madeira Metallic Wt. 40*
- White or grey bobbin thread, such as DecoBob/Wonderfil*
- Needle and thread/thimble
- Narrow white satin ribbon (3mm wide)
- Silver coloured beads
1. Create embroidery motif
Do you have the V8 Software? Follow this part to make a feather yourself. If not, skip this part and go to 2.
I am using the Dutch version of the BERNINA embroidery software, so the print screens are also Dutch. Surely you’ll be fine.
In the Stick workspace, click Application in the left column (Digitize): The background will turn yellow, indicating that the option is active.
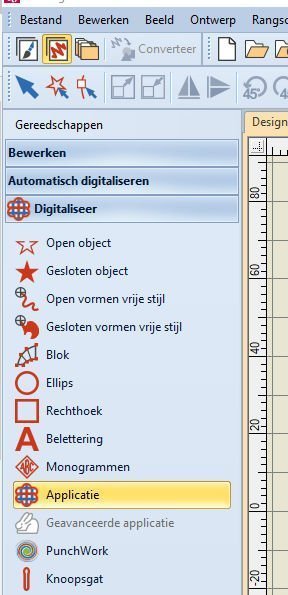
In the Embroidery Canvas, left column (Digitize), click on ‘Application’: the background will turn yellow, indicating that it has been activated.
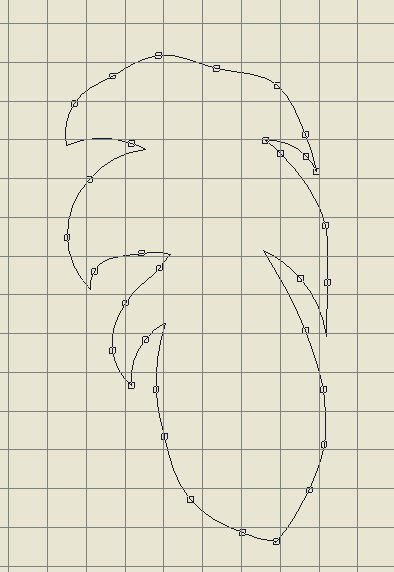
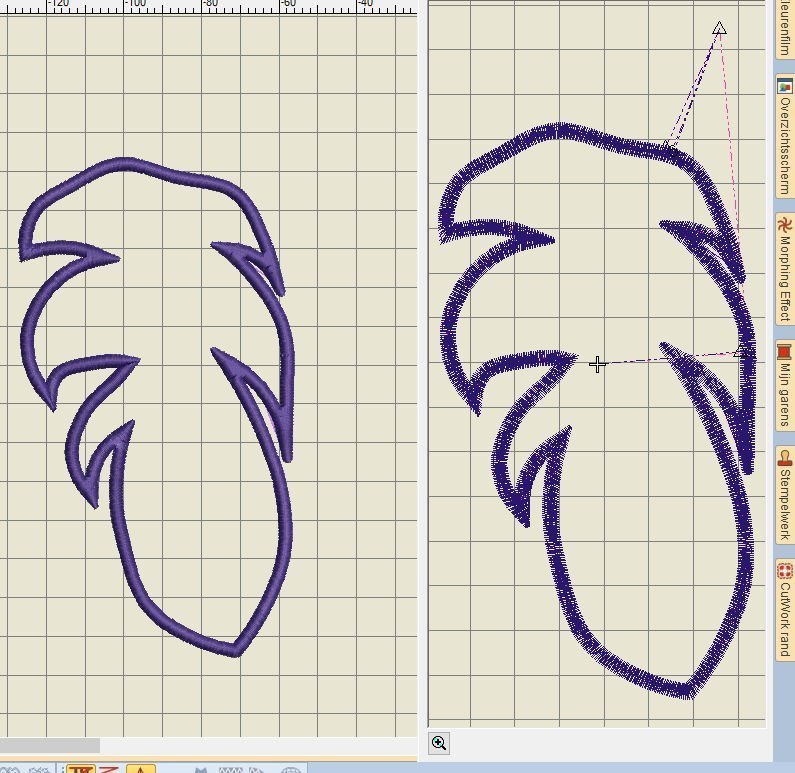
You will then make the shape of your application, by clicking on the grid to create nodes, in the form of a feather, for example (for a specific explanation on this, see lesson 41 on this BERNINA Blog). I use the right mouse button (click) to make round lines and, at each vertex of the feather, I left click on that last point to fix the corner. Starting at the top, I go down the right side with a few mouse clicks, then click before the corner, go up again with a few clicks, click before the corner again, go back down again and so forth until the right side of the feather is long enough. Then I go up on the left and work in the same way up to the starting point. I then click on ‘Enter’, closing the motive/feather.
After this I look at the status bar at bottom, messages appear on the left side of the bar: if you creating applications is set to ‘Manual’ (see lesson 41), then you will see ‘enter starting point’. I do this by right clicking on the created line, where I want the starting point.
I then see: ‘indicate cutoff point’, click again, and then see: ‘indicate Frame-out position’, after which I click top right outside the feather. After this last click, the feather appears with a finished edge and when I look at the docker ‘Overview screen’ (right in the image above), I can see the points made.
I now save the motif in this phase as ‘feather1.ART80’. I often save between each phase of creating a motive so that I can retrieve the ‘previous’ version if something goes wrong, so I don’t have to do everything all over again.
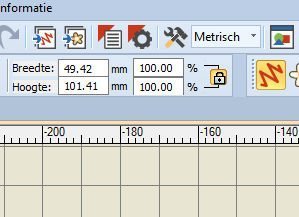
Then I make the feather slightly smaller, as it was very large. For this I select the motif and, in ‘Height’ on the Transform Task Bar, I enter the number 100.00, after which I click on ‘Enter’ (I leave the padlock next to it locked, so that the width is also automatically changed proportionally). The motif is now 101.41 x 49.42mm. That is the distance from the lowest point of the feather to the Frame-out point. The motif itself will be about 8 cm long.
You can make the feather much larger and, of course, in different versions, such as a mirror image: alter the measurements and store them as separate files.
It is important to check that this feather fits into a particular hoop and into which – I click on the icon ‘Show frame’ and click on the Medium Hoop and on ‘automatic centering’, so that the feather pattern is positioned in the centre of the selected hoop. And even if you think it fits easily enough, remember that the Frame-out point has been set outside the feather, top right, and this point must fit INSIDE the red border/safety margin of the hoop. To view this properly, de-activate the icon ‘Show artistic representation’, so that you no longer see the application as if it were already embroidered, but with the points that are important and then you will see a triangle in the top right corner, with lines leading to it: that is the Frame-out point. It is therefore inside the red border and should be okay like that. I now save this phase as ‘feather2.ART80’.
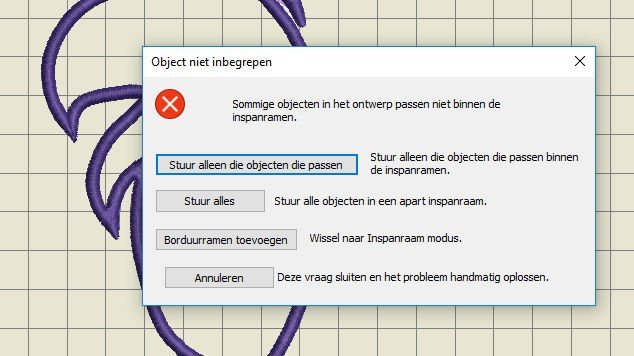
If you do not choose the hoop in advance and save the file as such, the Frame-out point may be outside the red border (which you do not see if you have activated ‘Show artistic representation’) and that – if you copy the application to your card/USB stick, you will get a notification: read everything that is on the ‘Object not included’ screen. If you have not chosen a hoop, or the motif is too big for that hoop (for example, because the Frame-out point is once again outside the red safety line), close this screen, go back to your motif, select the hoop and ensure that everything is within the red safety line.
Via ‘File’, at the top of the Menu bar, I then click ‘copy to card / machine’ and click on’.exp’ if I have a USB stick in the computer. This is how I transfer the motif (if it has first been saved properly). I put the USB stick in my embroidery machine and prepare the embroidery (see 3-).
Incidentally, if you want to make a feather without overly-sharp notches, you can: this may make cutting away the white embroidery felt easier. You can then further detail the vanes with free-motion quilting.
2. Download embroidery motif
You don’t have the embroidery software? But you own a BERNINA embroidery machine or sewing machine with embroidery module? Then you can download the motif I created here:
Download Stitch pattern Feather
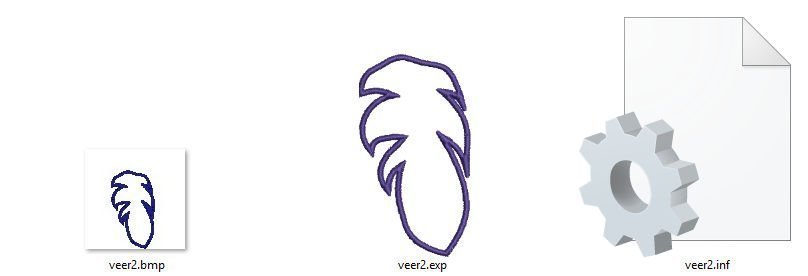
What do the three files look like?
Link 1 = .bmp = image of the application = feather2.mbp
Link 2 = .exp = the application embroidery motive = feather2.exp. You may actually be able to see the feather, or the Bernina ‘logo’ (red and white)
Link 3 = .inf = the necessary application information = feather2.inf
Keep these files together in a folder on your hard disk and transfer all three to your USB stick when you embroider them on your (BERNINA) embroidery machine. If any of the three files is not saved, your machine cannot read everything and nothing will be embroidered.
3. Embroidering the feather/application:
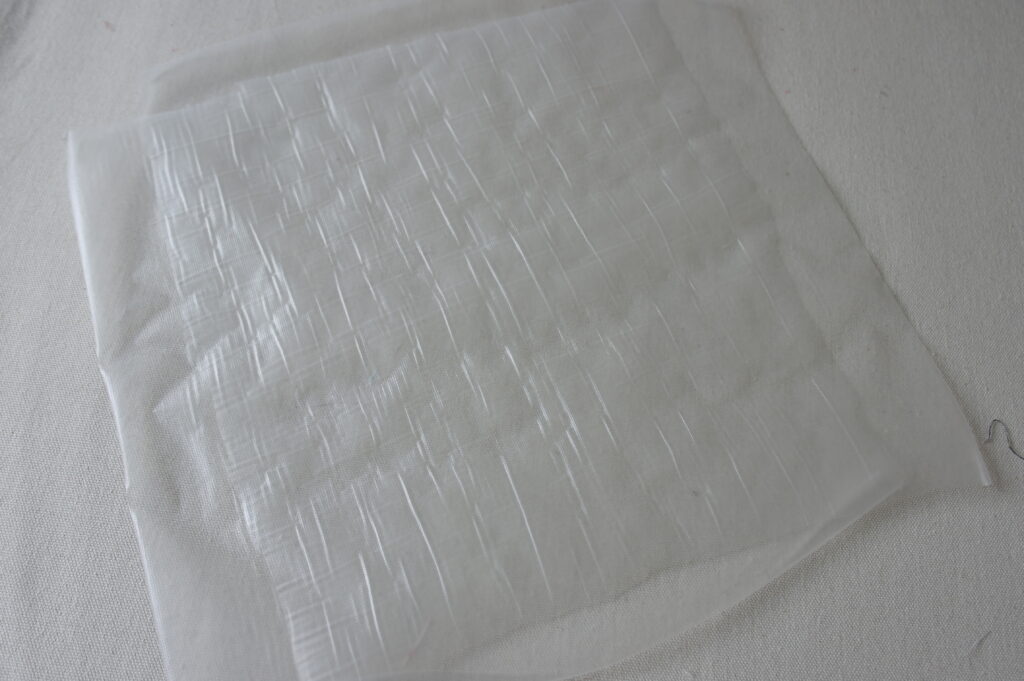
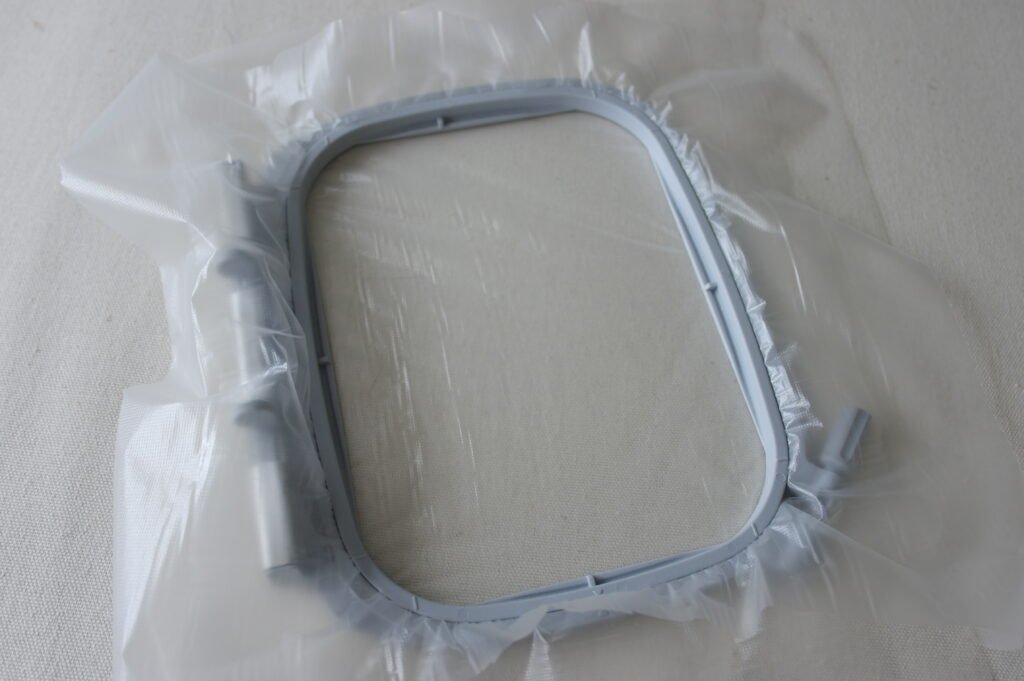
I am now going to position water-soluble reinforcement: for this I use Maderia Avalon Film, 2 layers – I cut them both bigger than the hoop. I place two layers on top of each other: the first horizontal, the 2nd vertical. This way the application cannot pull away or stretch during embroidering. With only one layer of this material, the reinforcement could come loose when making the last row of stitches/satin stitch: with 2 layers, this does not happen (although there may be some holes along the outer row).
I position these layers in the embroidery hoop (Medium hoop).
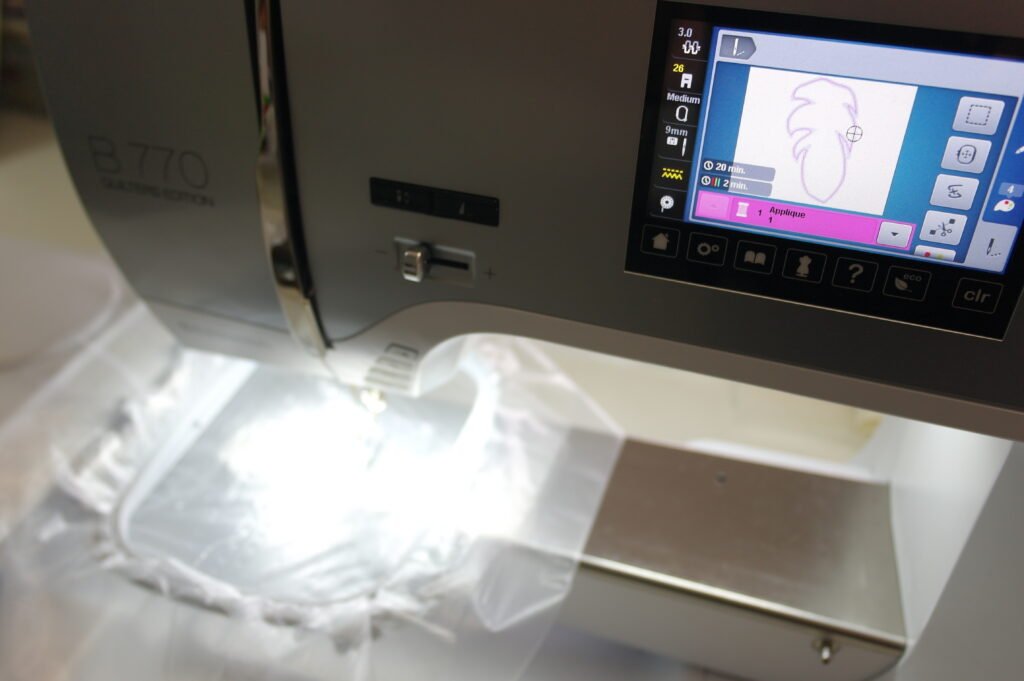
I put the hoop on the machine, select the design and embroider the first row of stitches – the placement line. I use silver-coloured metallic thread on top, and light-grey Decobob as bobbin thread. The placement line does pull the reinforcement slightly inwards (which means that the motif can turn out even smaller): if you don’t want this to happen, use a thicker water-soluble reinforcement, 2 layers (or increase the size of your motif).
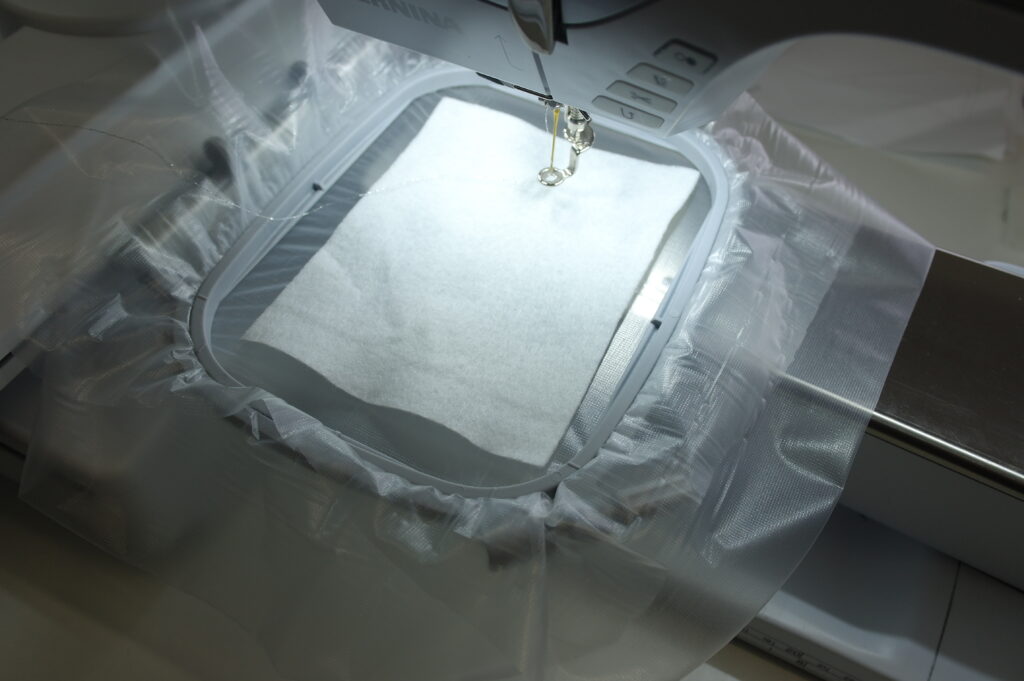
After the first row of stitches, place a piece of white embroidery felt over everything – it should be larger than the design itself – and let the machine embroider the 2nd row of stitches.
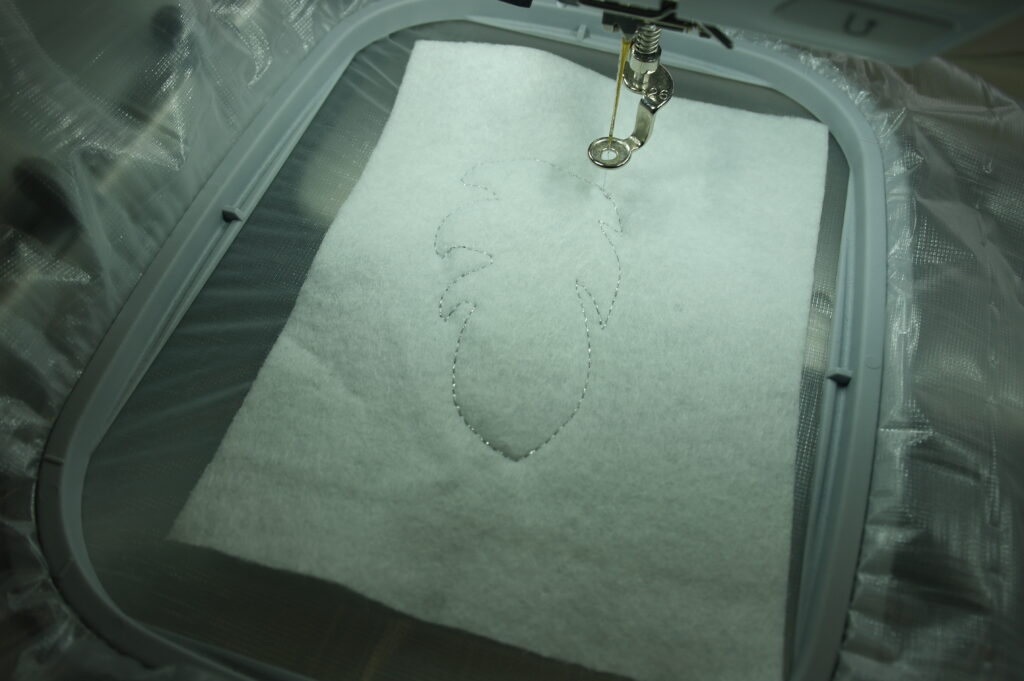
Above you can see the 2nd row of stitches that have been made: the cutting line.
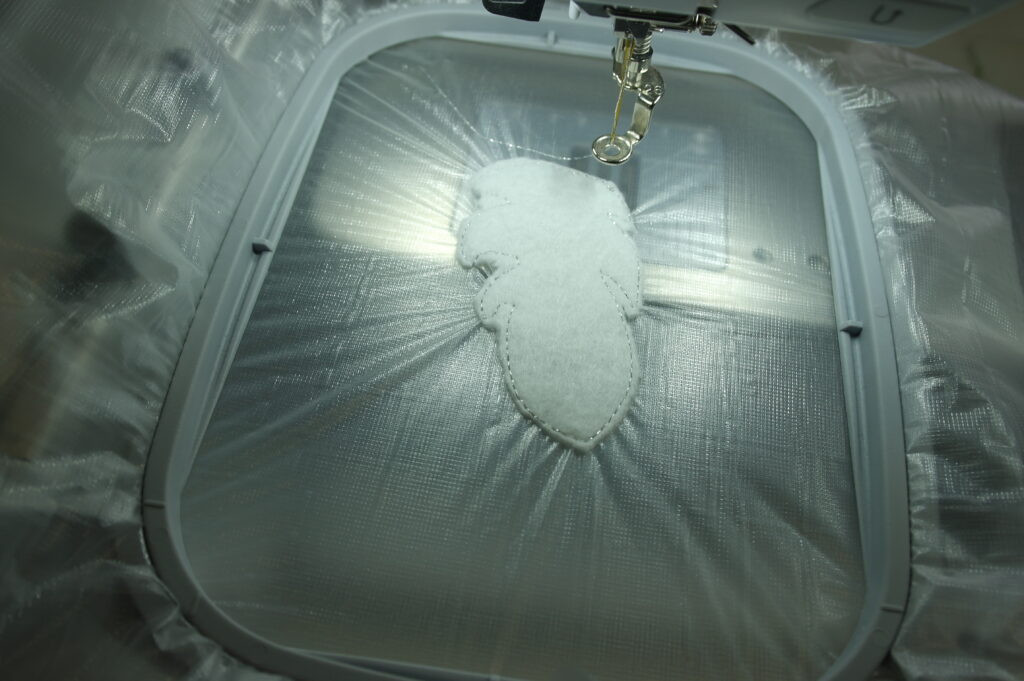
Then take the embroidery hoop off the machine and trim off everything outside the stitches with the application scissors or the small scissors with curved points: NOTE – leave a small edge – this will be covered by the satin stitch. The stitch row that is created indicates the centre of this satin stitch. IMPORTANT: be careful not to cut into the water-soluble reinforcement – if necessary, you can trim off some of the embroidery felt when the feather is ready. Put the hoop back on the machine and embroider the next stitch row: the Tack down line. This secures the edges nicely.
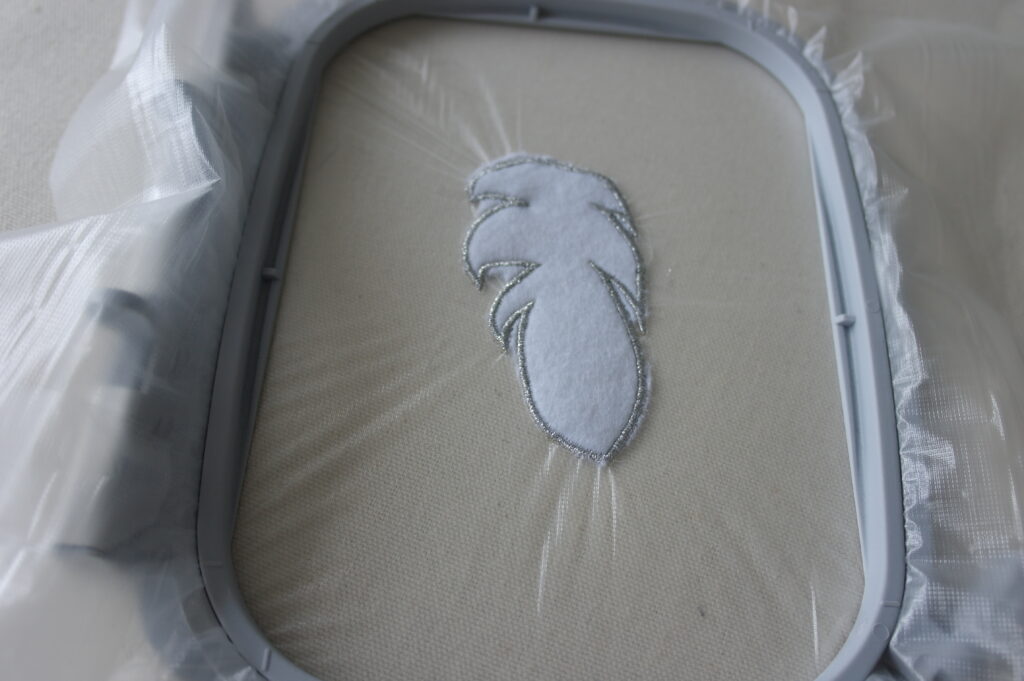
Finally, the satin stitch is made: because you are working with metallic thread, it is best to let the machine work a little slower, to avoid breakdowns. You can see from the picture above that I do have to trim away some of the felt outside these last stitches.
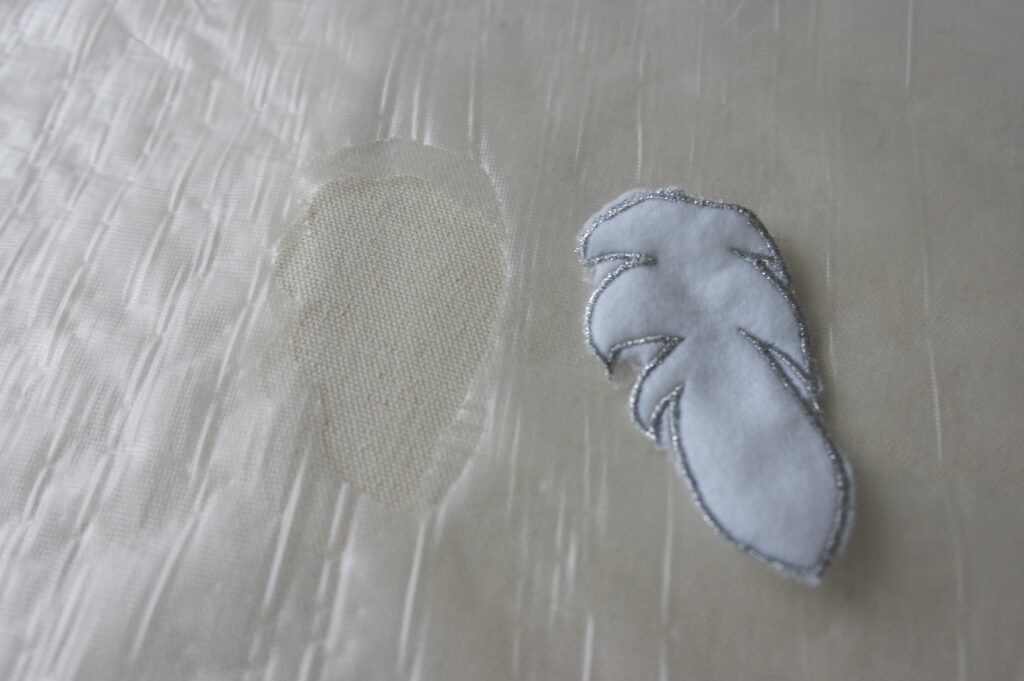
You can now carefully tear the motif out of the reinforcement, once you have removed everything from the hoop. This reinforcement can easily be torn and quickly gives along the satin stitch because of all the needle holes. On the left of the picture you can see the opening(s) in the reinforcement and, on the right the application that has been removed.
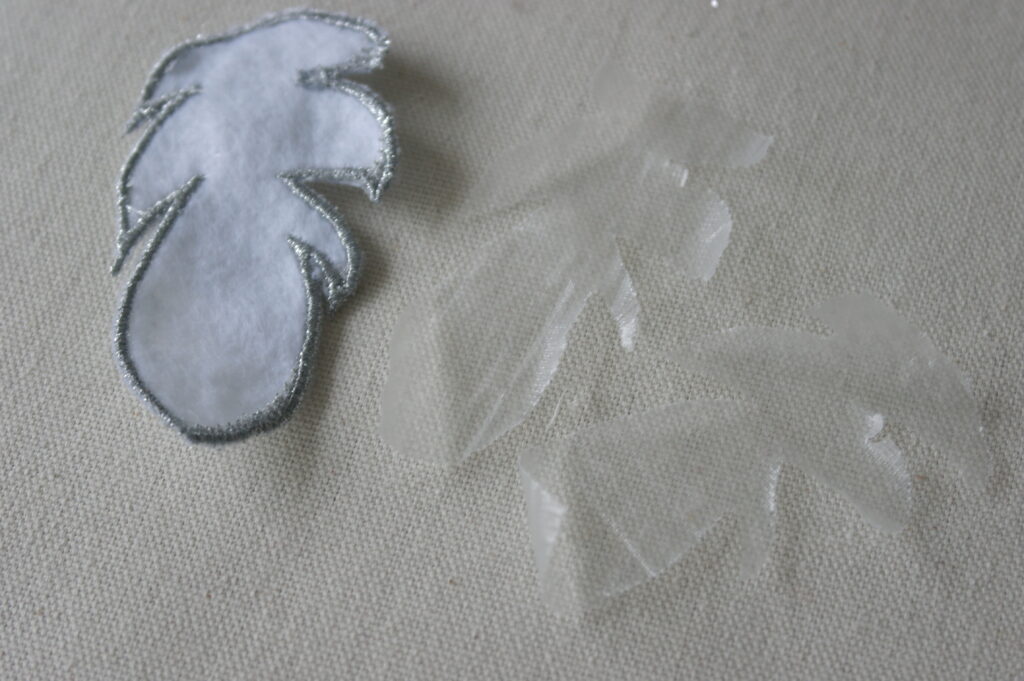
You also have to remove this reinforcement (2 layers) from the back of the application/ feather and here, too, it gives easily. You can now see the feather from the back: the silver-coloured thread can also be seen from the back – so it can be hung in two directions.
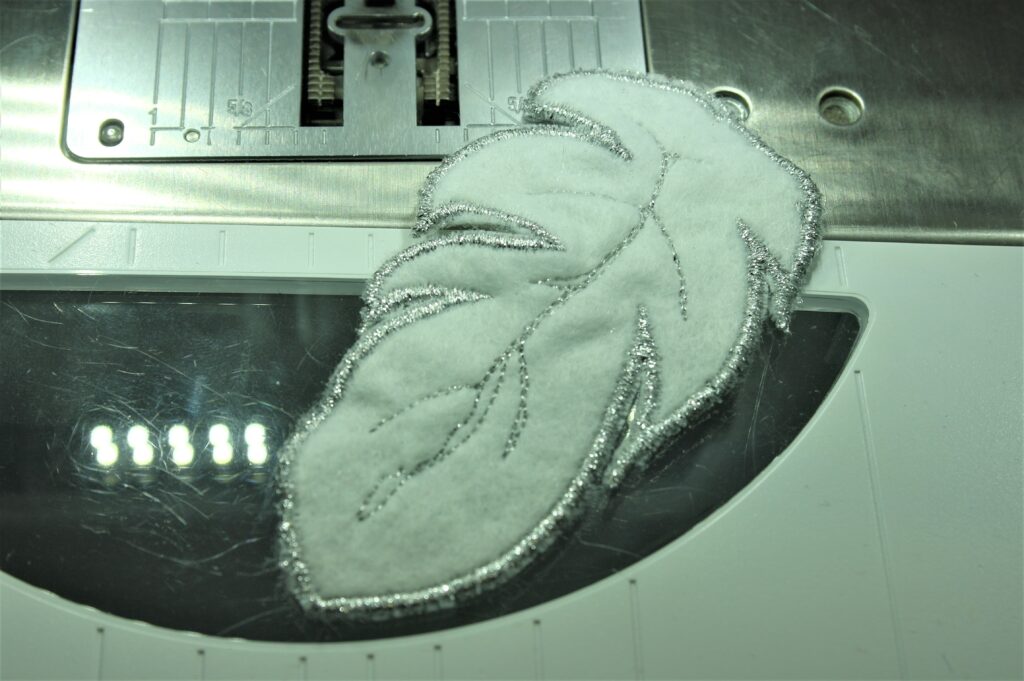
I then put the BSR on the machine and quilted some vanes freehand – so the feather already looks nicer.
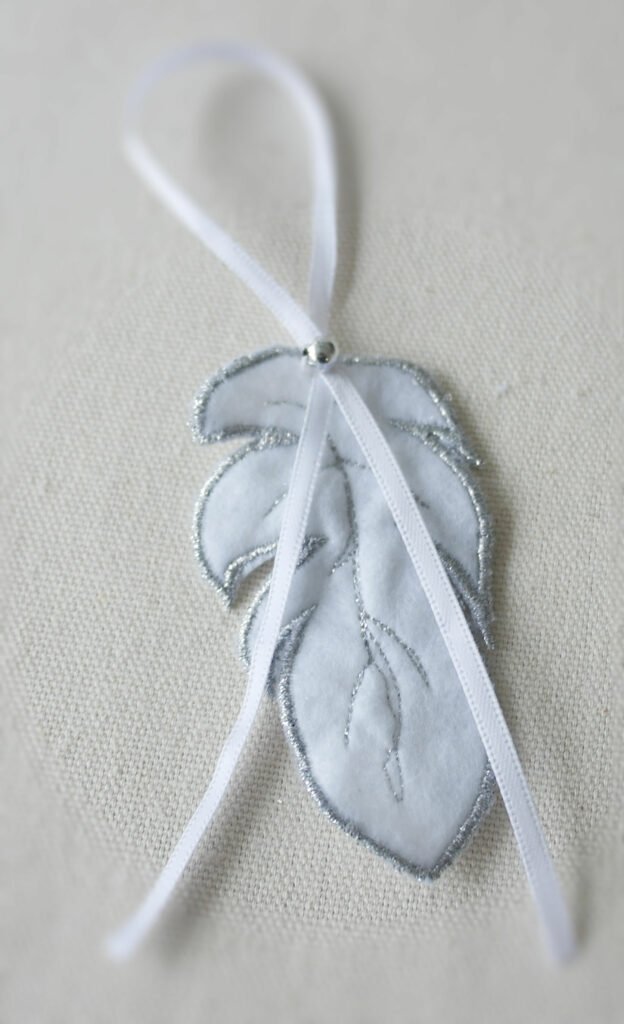
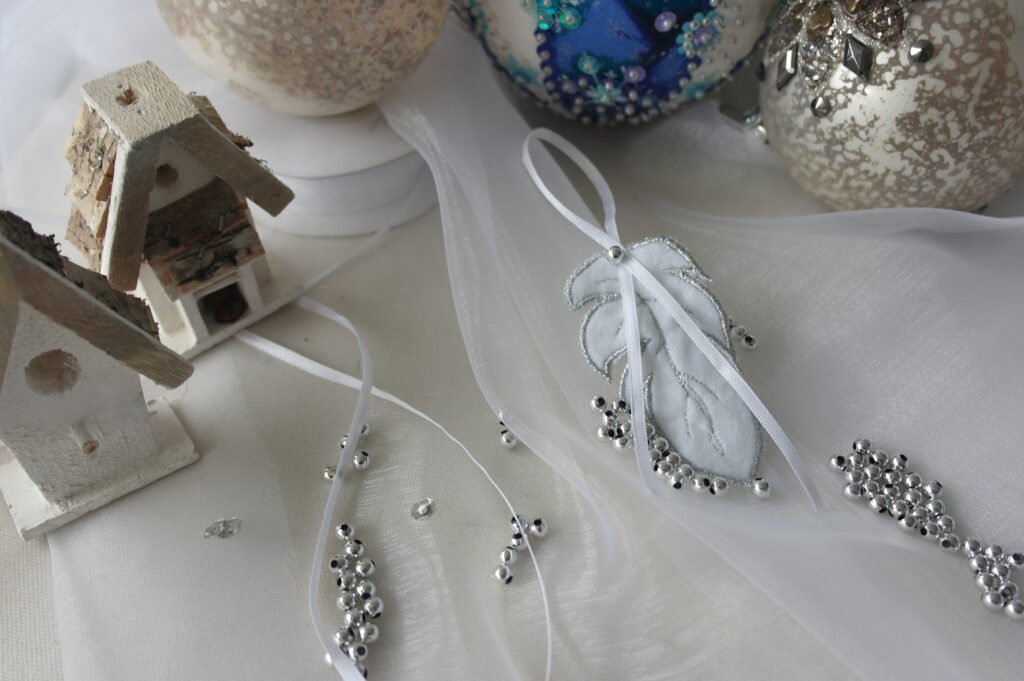
From here you can decorate a feather in many ways. I used narrow white ribbon – 30 cm long – folded double, and secured this on the top of the feather, including a silver coloured round bead. This way the feather can be hung. It is very simple, but just before the holidays you don’t want to take several days making a few ornaments.
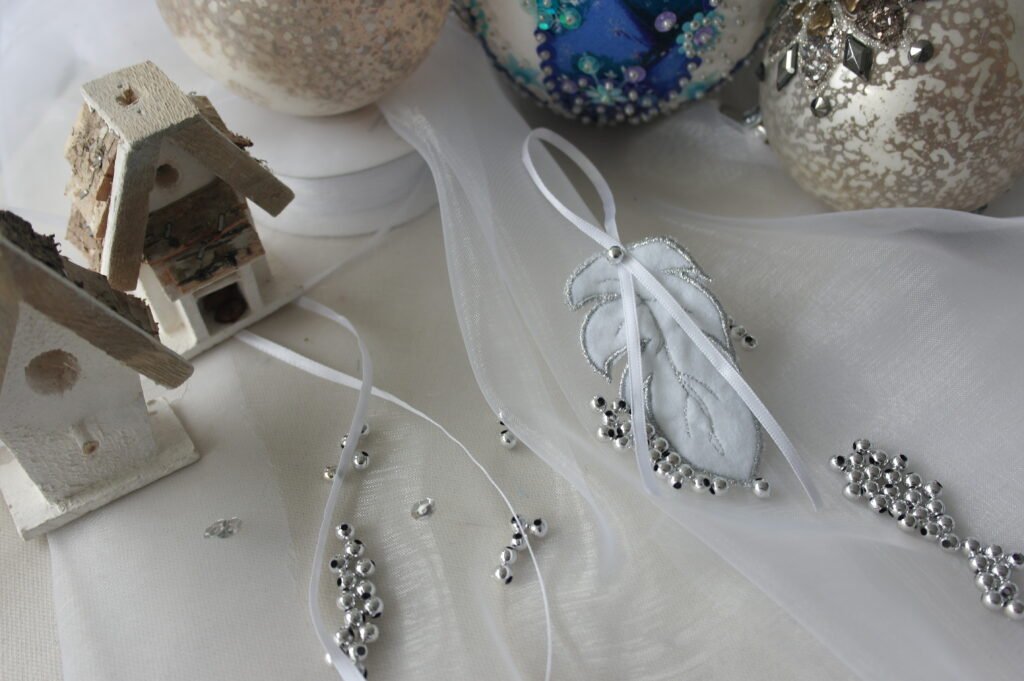
On this picture you can see the leaf with some ornaments: white houses and balls. I’m going to hang them all in the light, for which I’m going to make more of these feathers.
Incidentally, you can also use such a feather to make personalised Christmas cards, to put on a quilt or in a frame… there are more than enough applications imaginable to even make something fun.
I wish you a Merry Christmas!
Embroidery greetings
Sylvia Kaptein
Sylvia’s Art Quilts Studio
*Colours depend on the chosen base colours of the felt: you can make these ornaments in all kinds of colours.
 BERNINA Corporate Blog -



0 Responses