 BERNINA Corporate Blog -
Dear community,
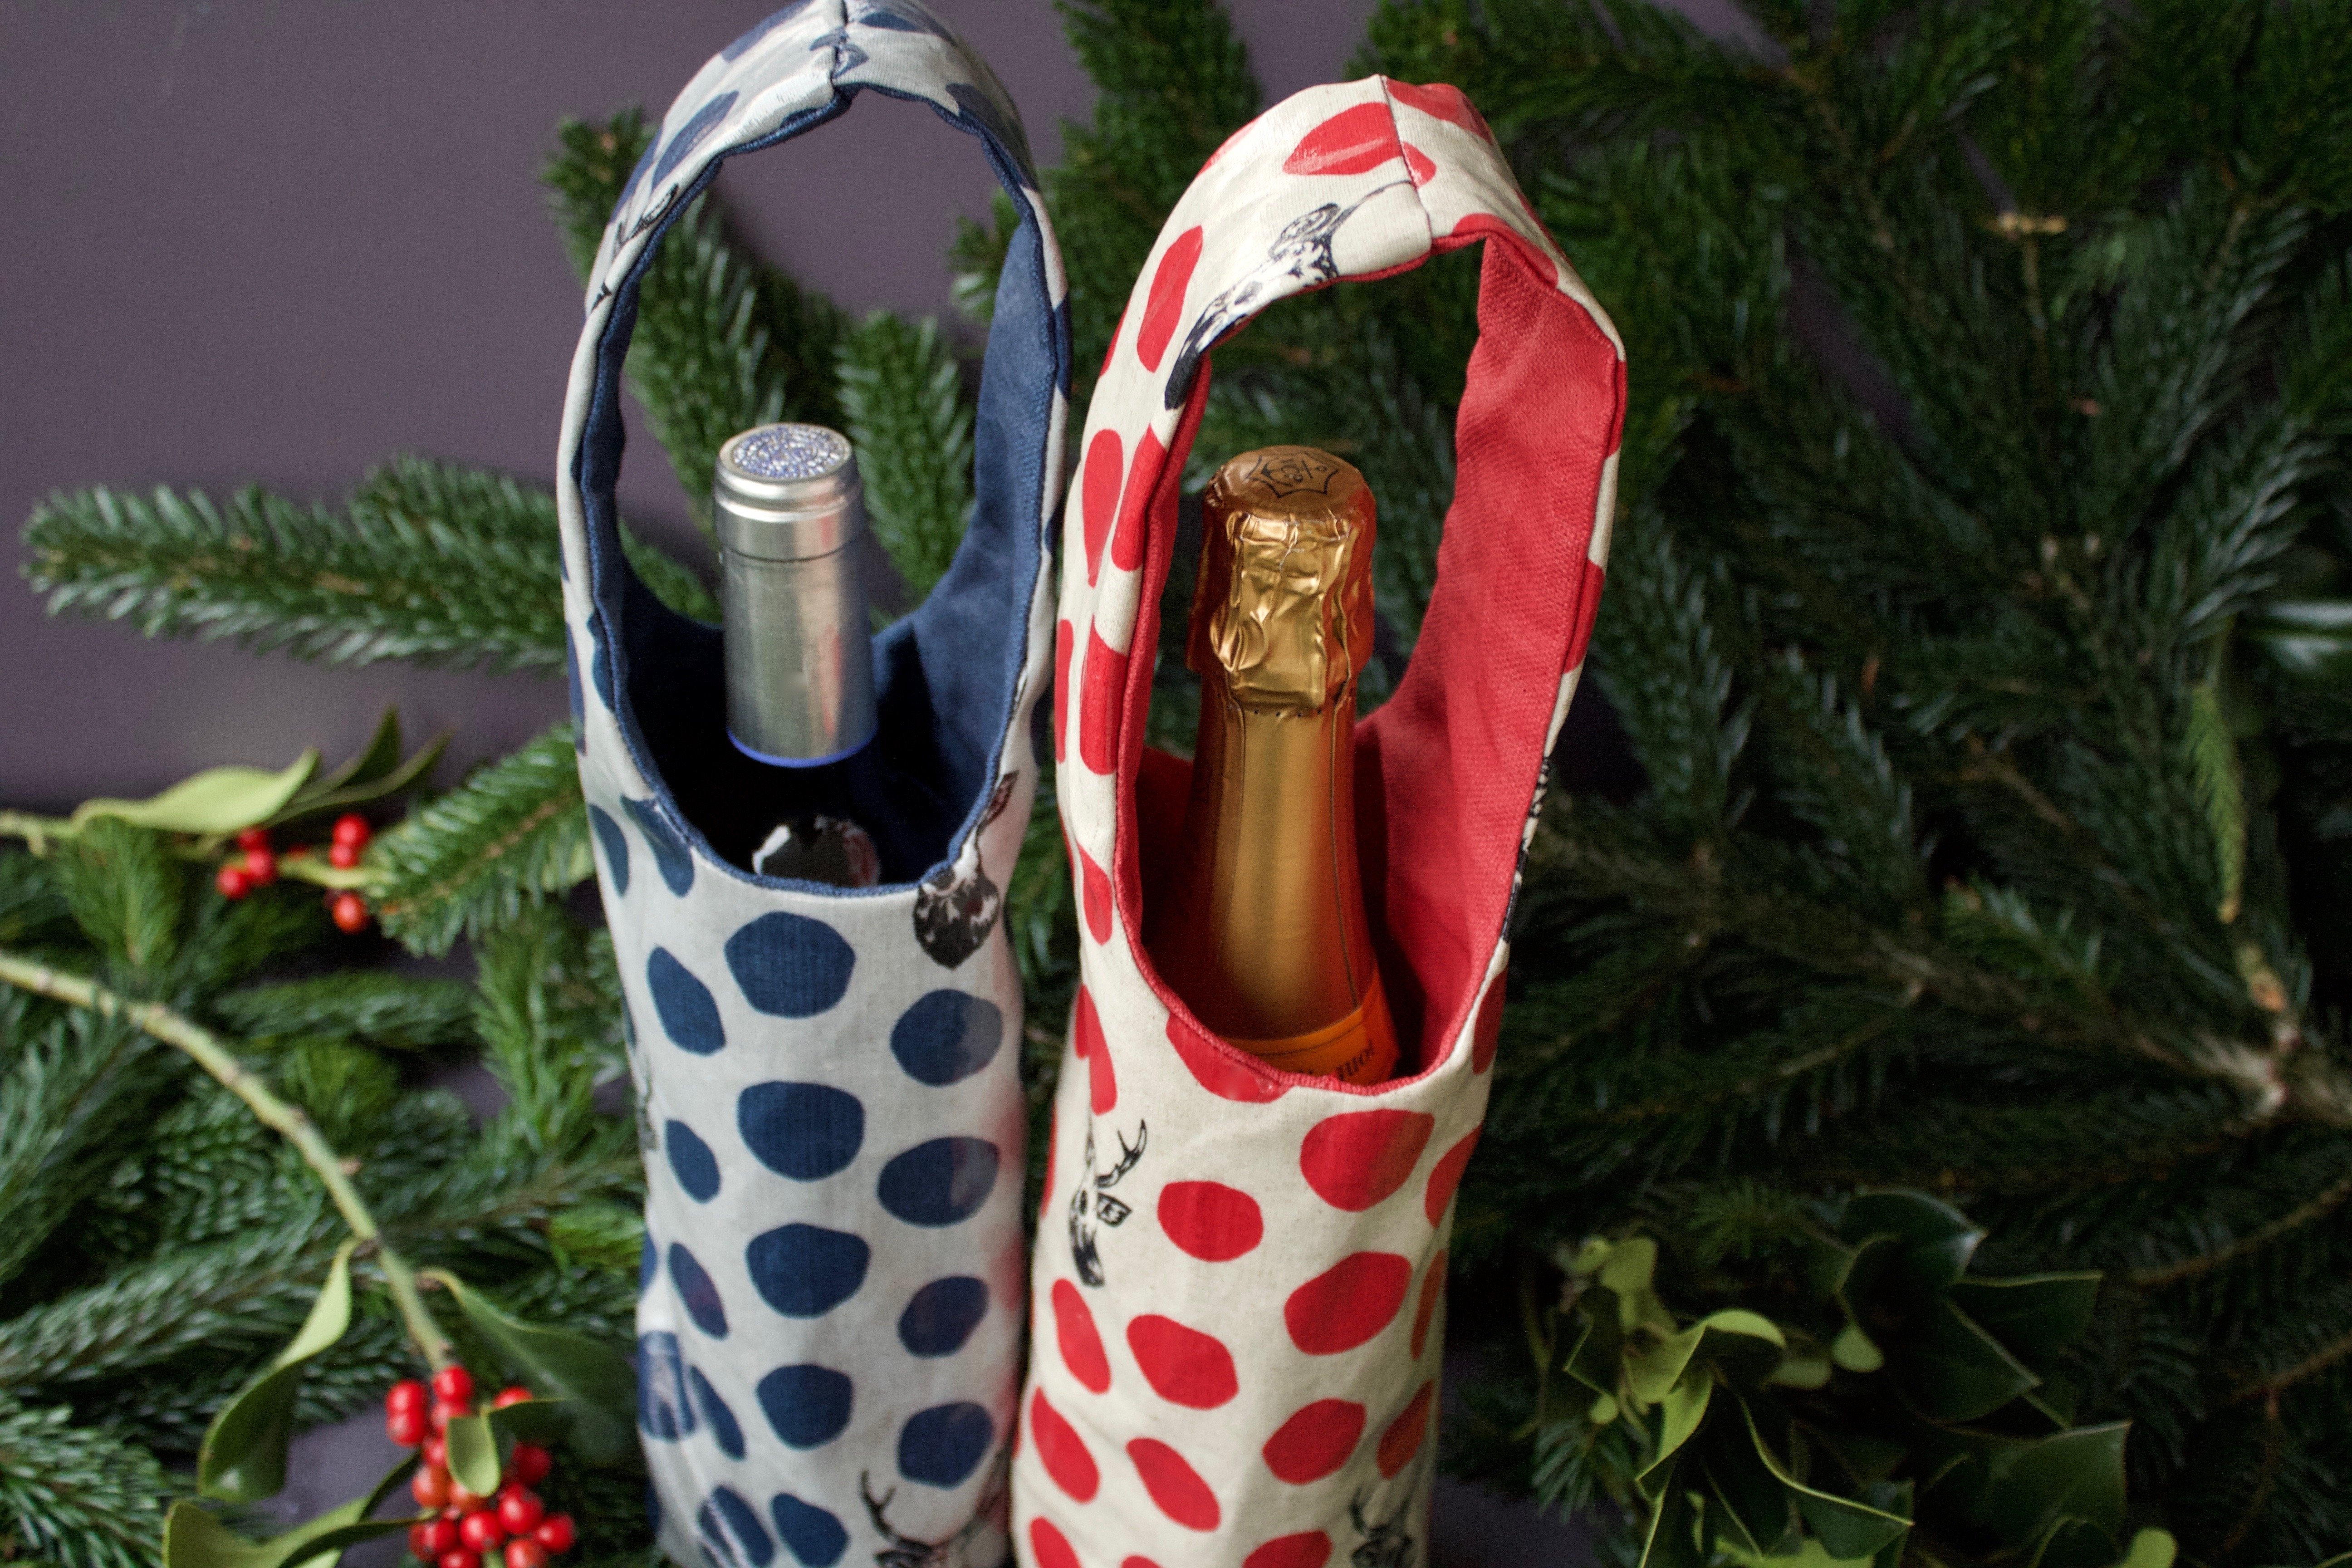
in this blog post you can find detailed instructions for sewing a bottle bag (with free pattern) – perfect for Christmas eve and other festive occasions.
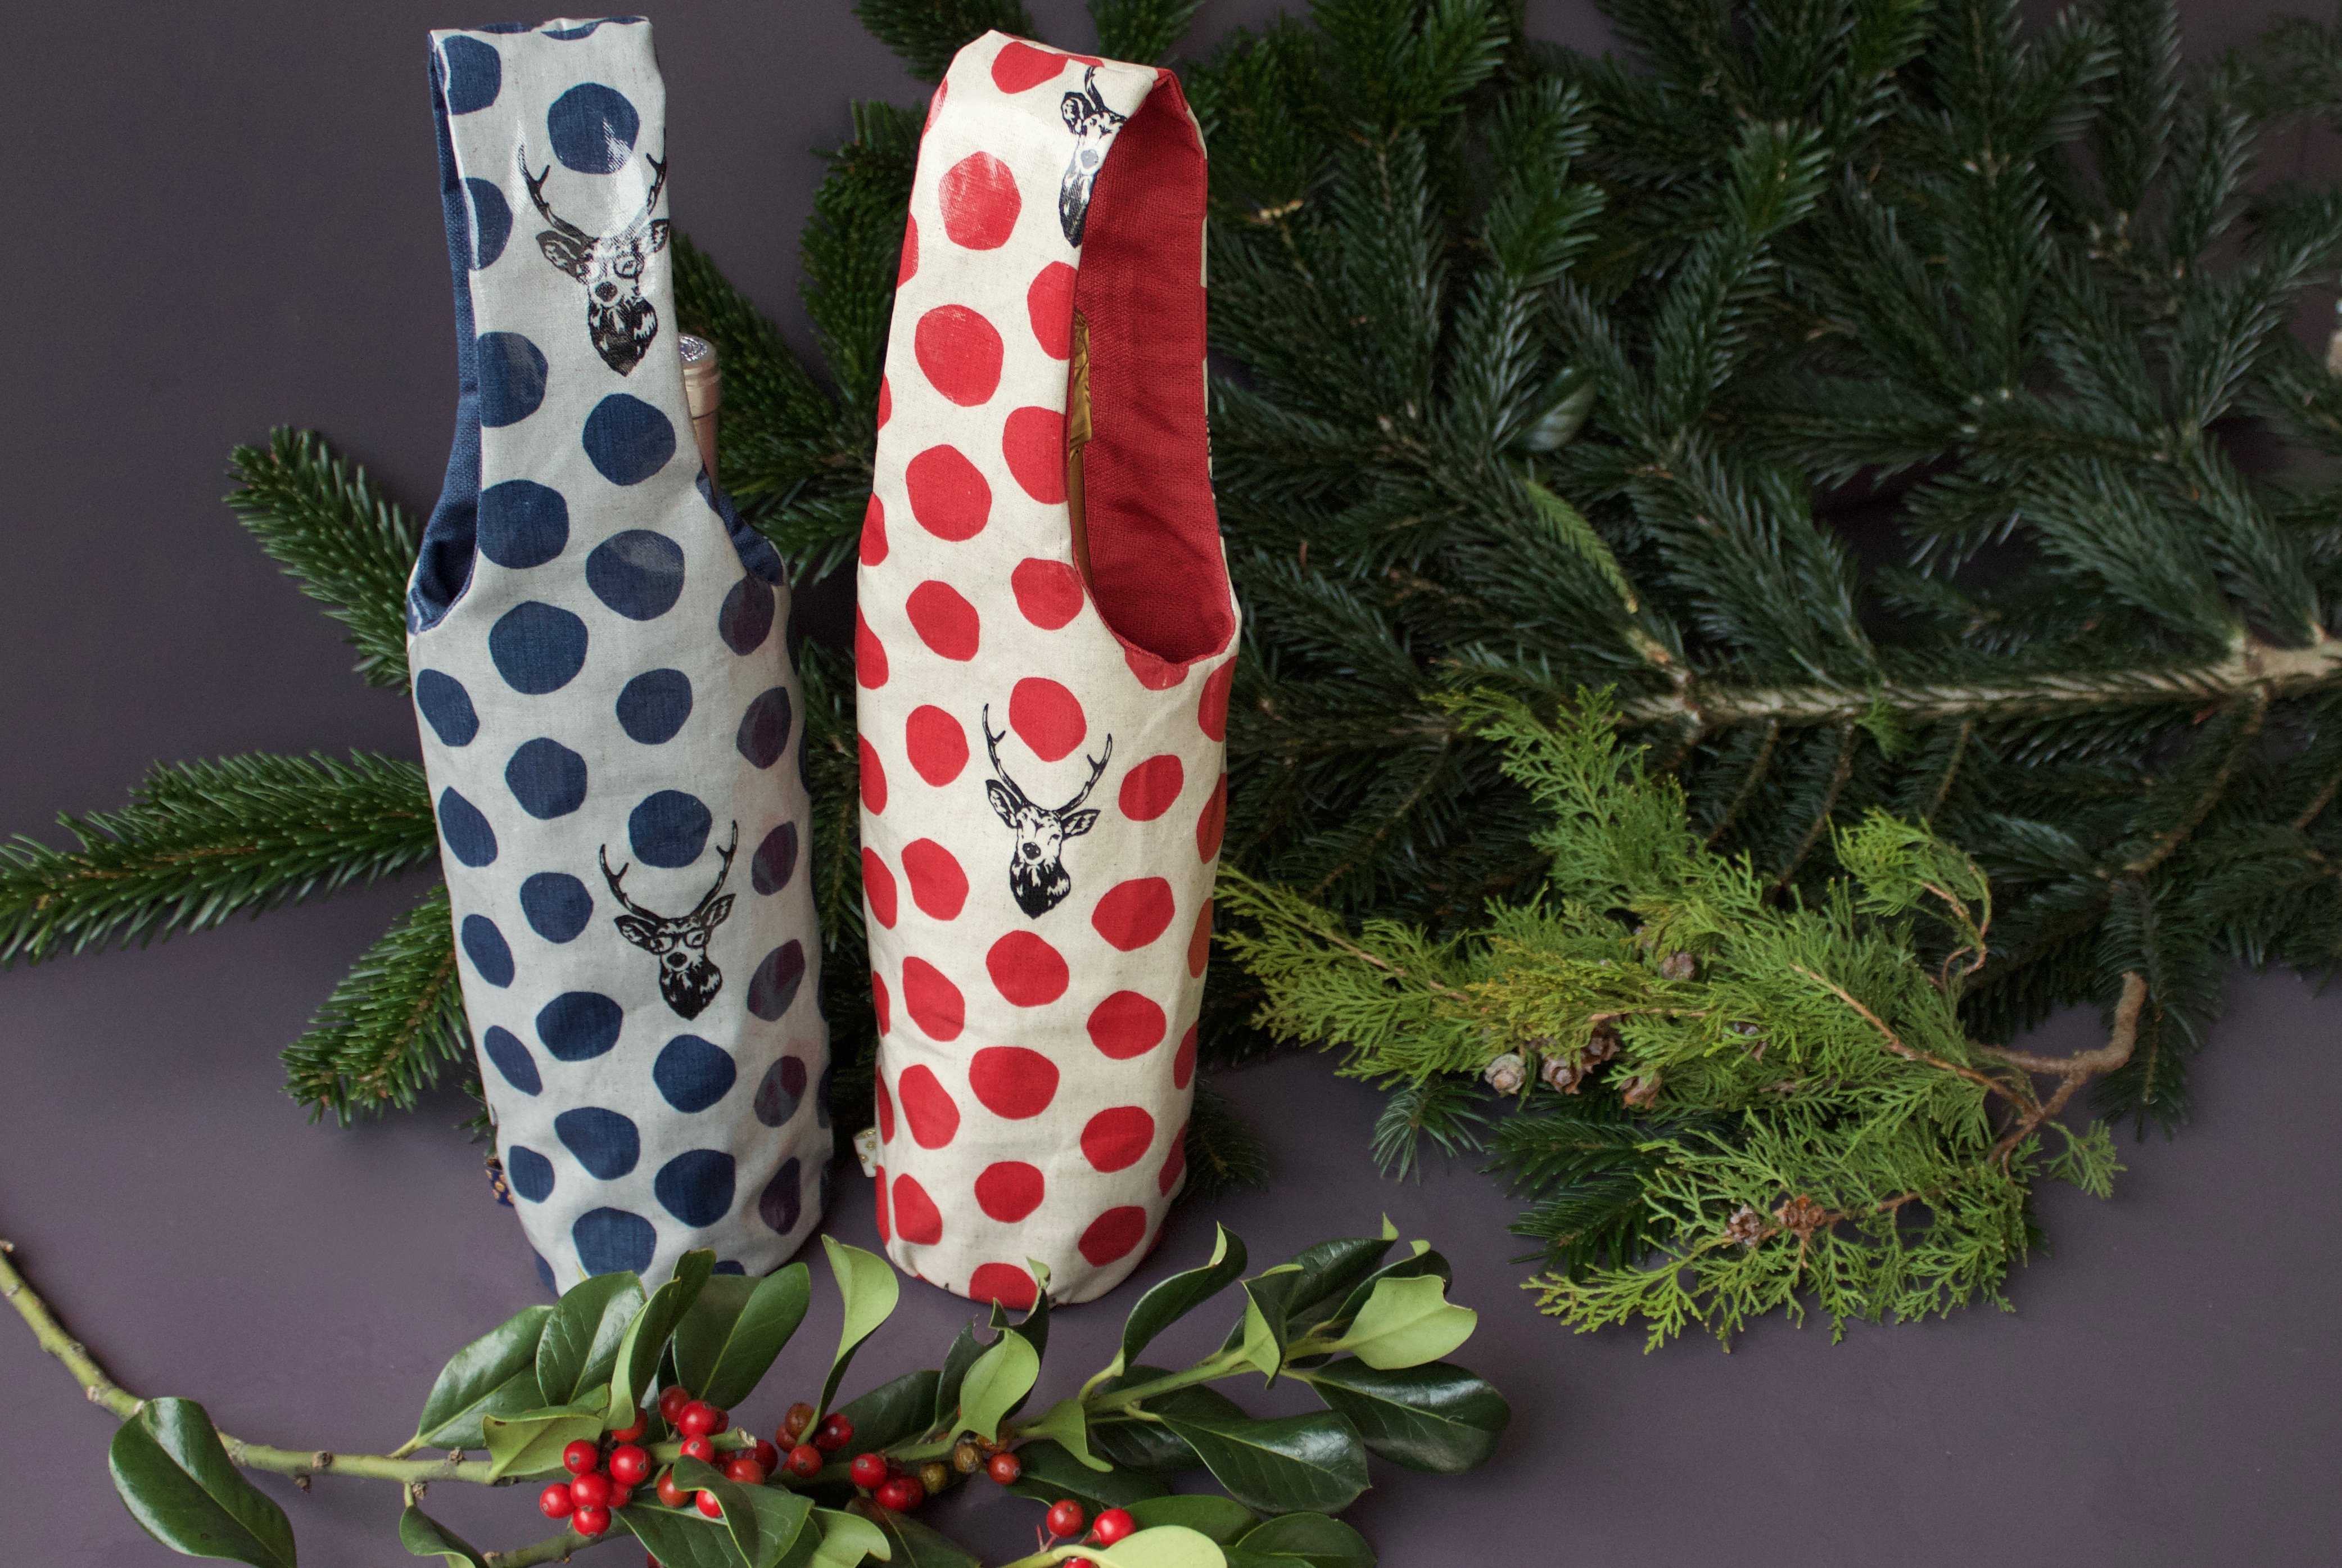
Welcome to the BERNINA Advent Calendar 2017! Behind the first window are sewing instructions for a bottle bag. I’m sorry, a what? You read it correctly – a bottle bag. Bascally, it is reusable gift wrapping for you to give as a present with a bottle of something nice inside.
The sewn bag not only transports the wine (or champagne) safely to the recipient, but also makes the gift more special. The best thing is that you can customise the bottle holder to your taste or to suit the occasion. (By the way, in my view, there’s no reason the recipient shouldn’t pass the bottle bag on to someone else. And why not? A hand-made present like this is far too good to store in a cupboard or (even worse) put in the bin.)
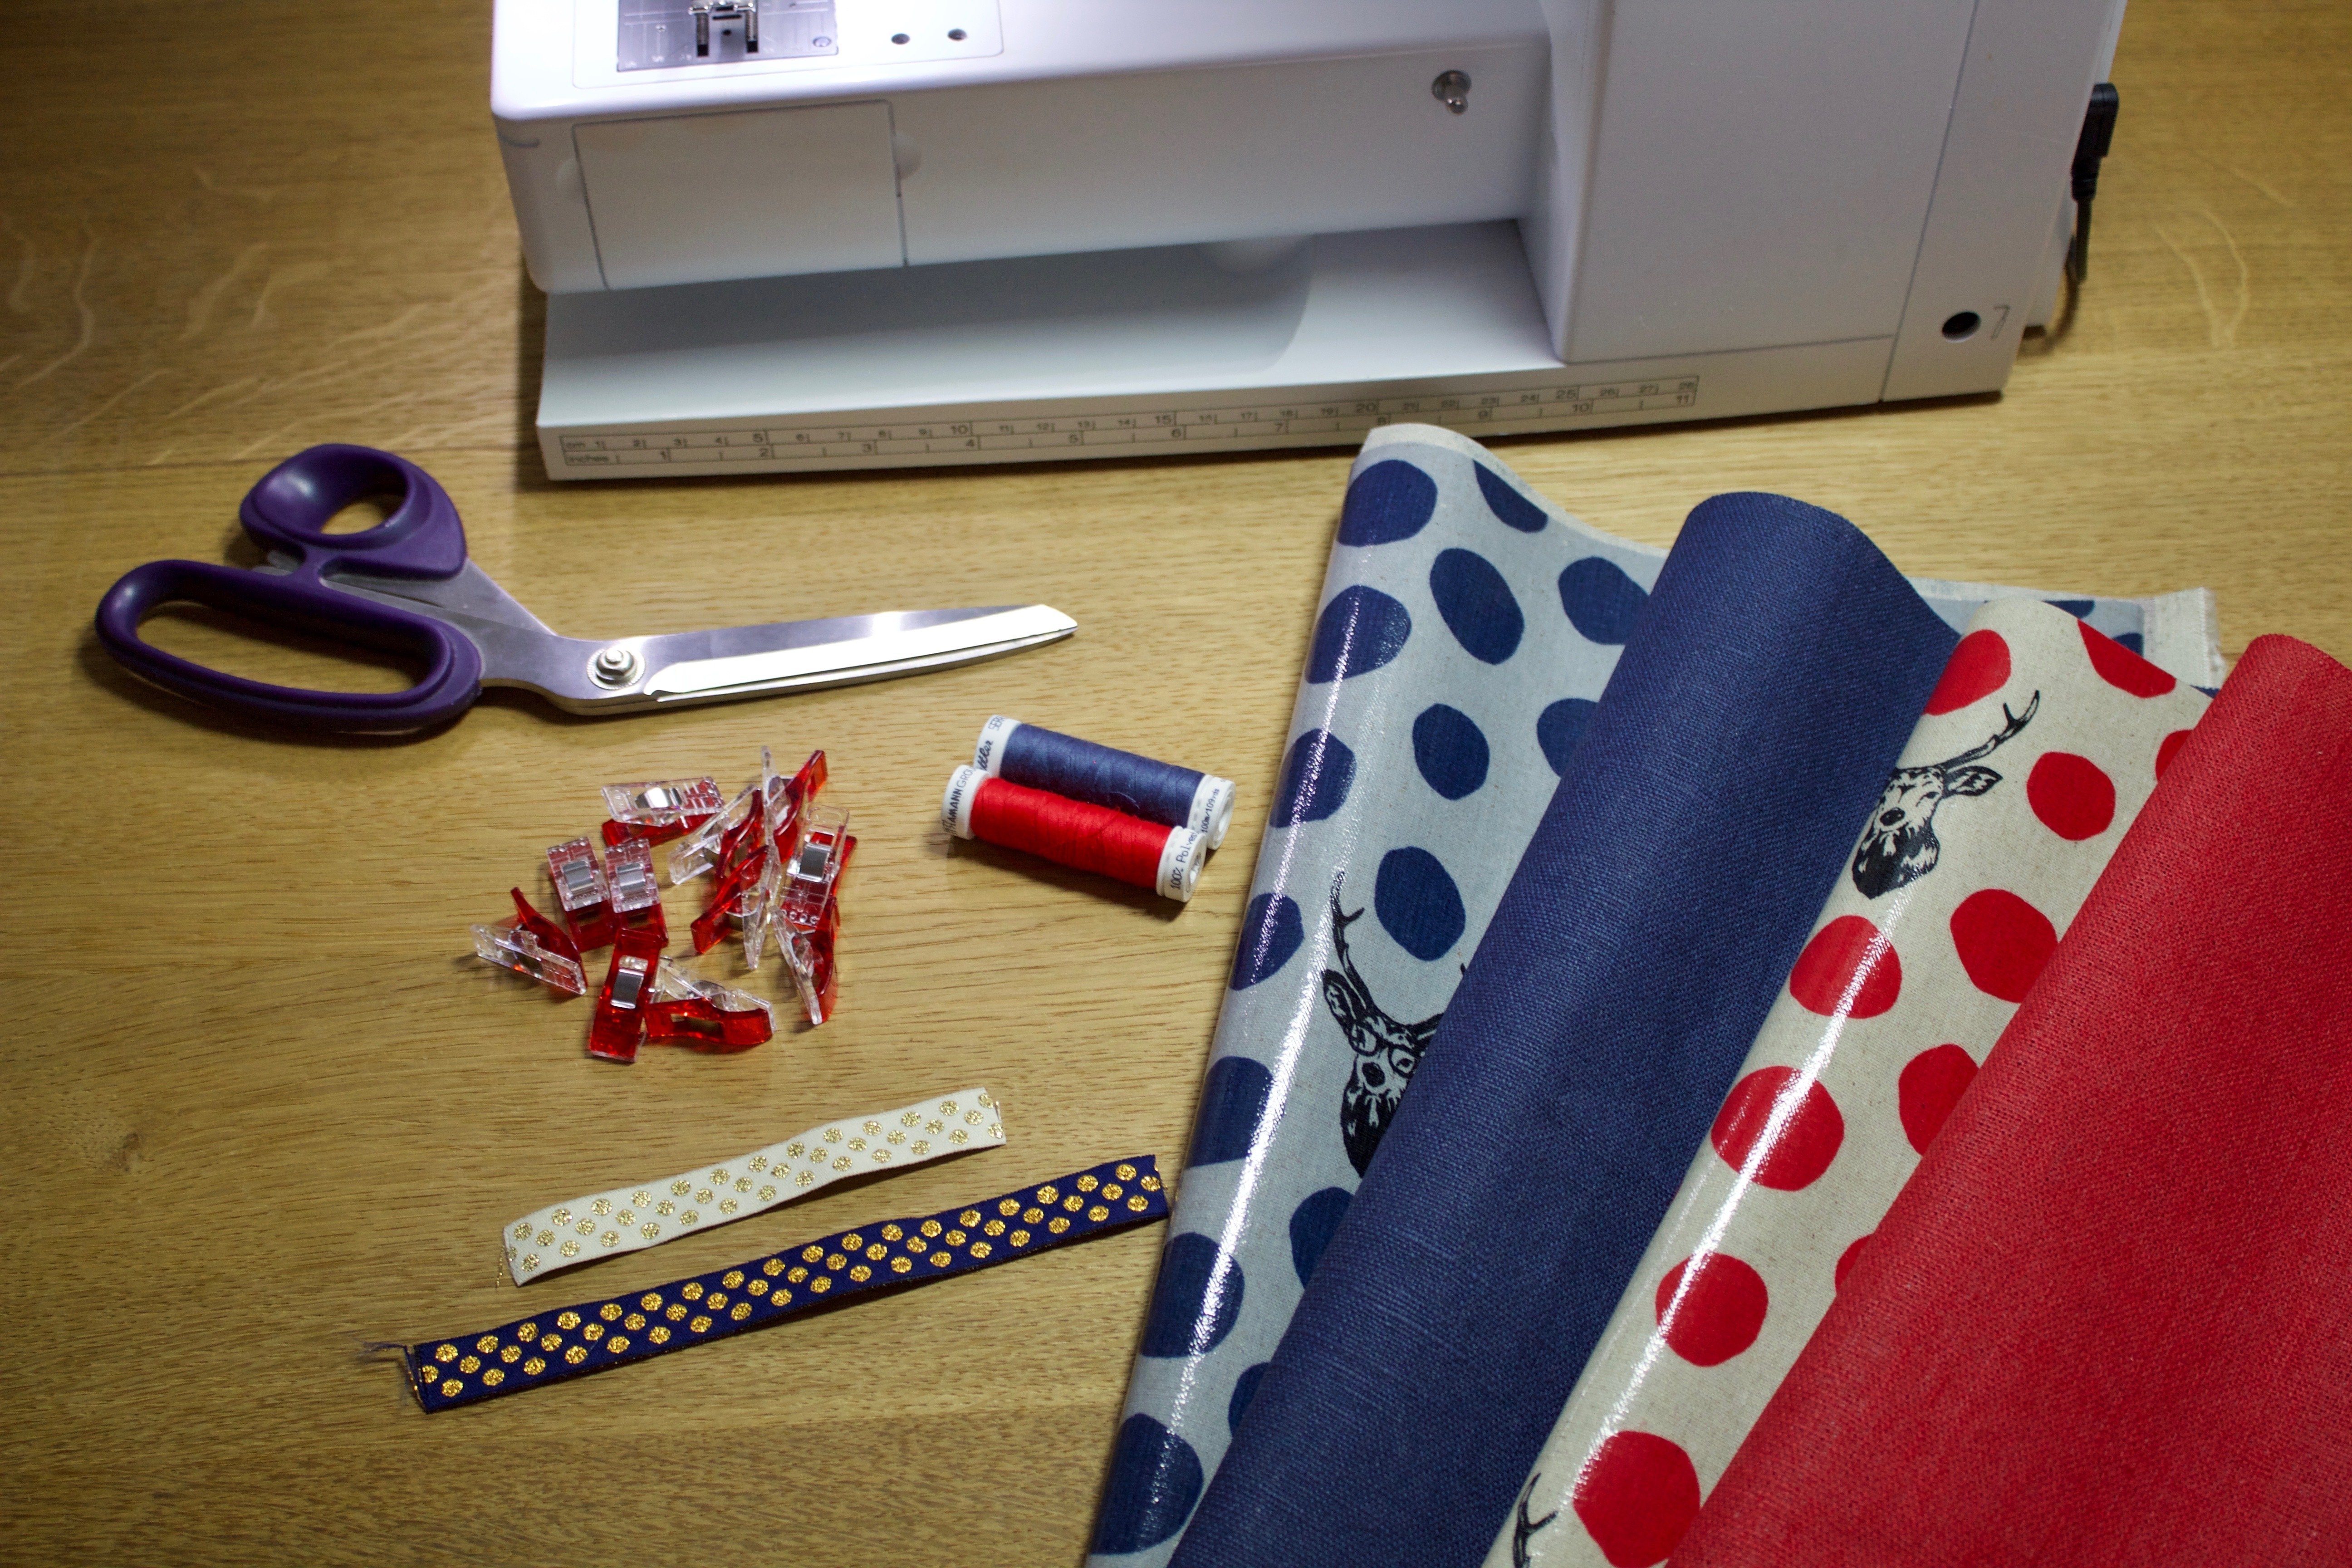
Materials for the bottle bag
You will need:
- My pattern as a download: Bottle bag pattern
- Woven fabric with body (canvas, oilcloth etc.), two fat quarters, one for the outside and one for the lining
- If your preferred fabrics are only of patchwork quality, you will also need a medium-weight iron-on interlining (e.g. H250)
- Matching threads
- Tape, if required
- Sewing clips (very practical and, in this case, easier to use than pins)
First, print out the pattern. (Make sure that the printer is set to 100 percent – to be sure, check the edge length of the test square.) With the fabric folded double, cut out the bottle pattern shape once each for the shell and lining fabric. You also need two bag bottoms, one from the lining fabric and one from the shell fabric. Don’t forget to include the seam allowances. If, like me, you want to use coated fabrics, I recommend that you add no more than a centimetre for the seam allowance to keep it manageable while you are sewing it together. If you are working with a fleece lining, you need to iron the interlining onto the wrong side of the shell fabric before sewing. All the other steps are the same.
Bottle bag sewing instructions
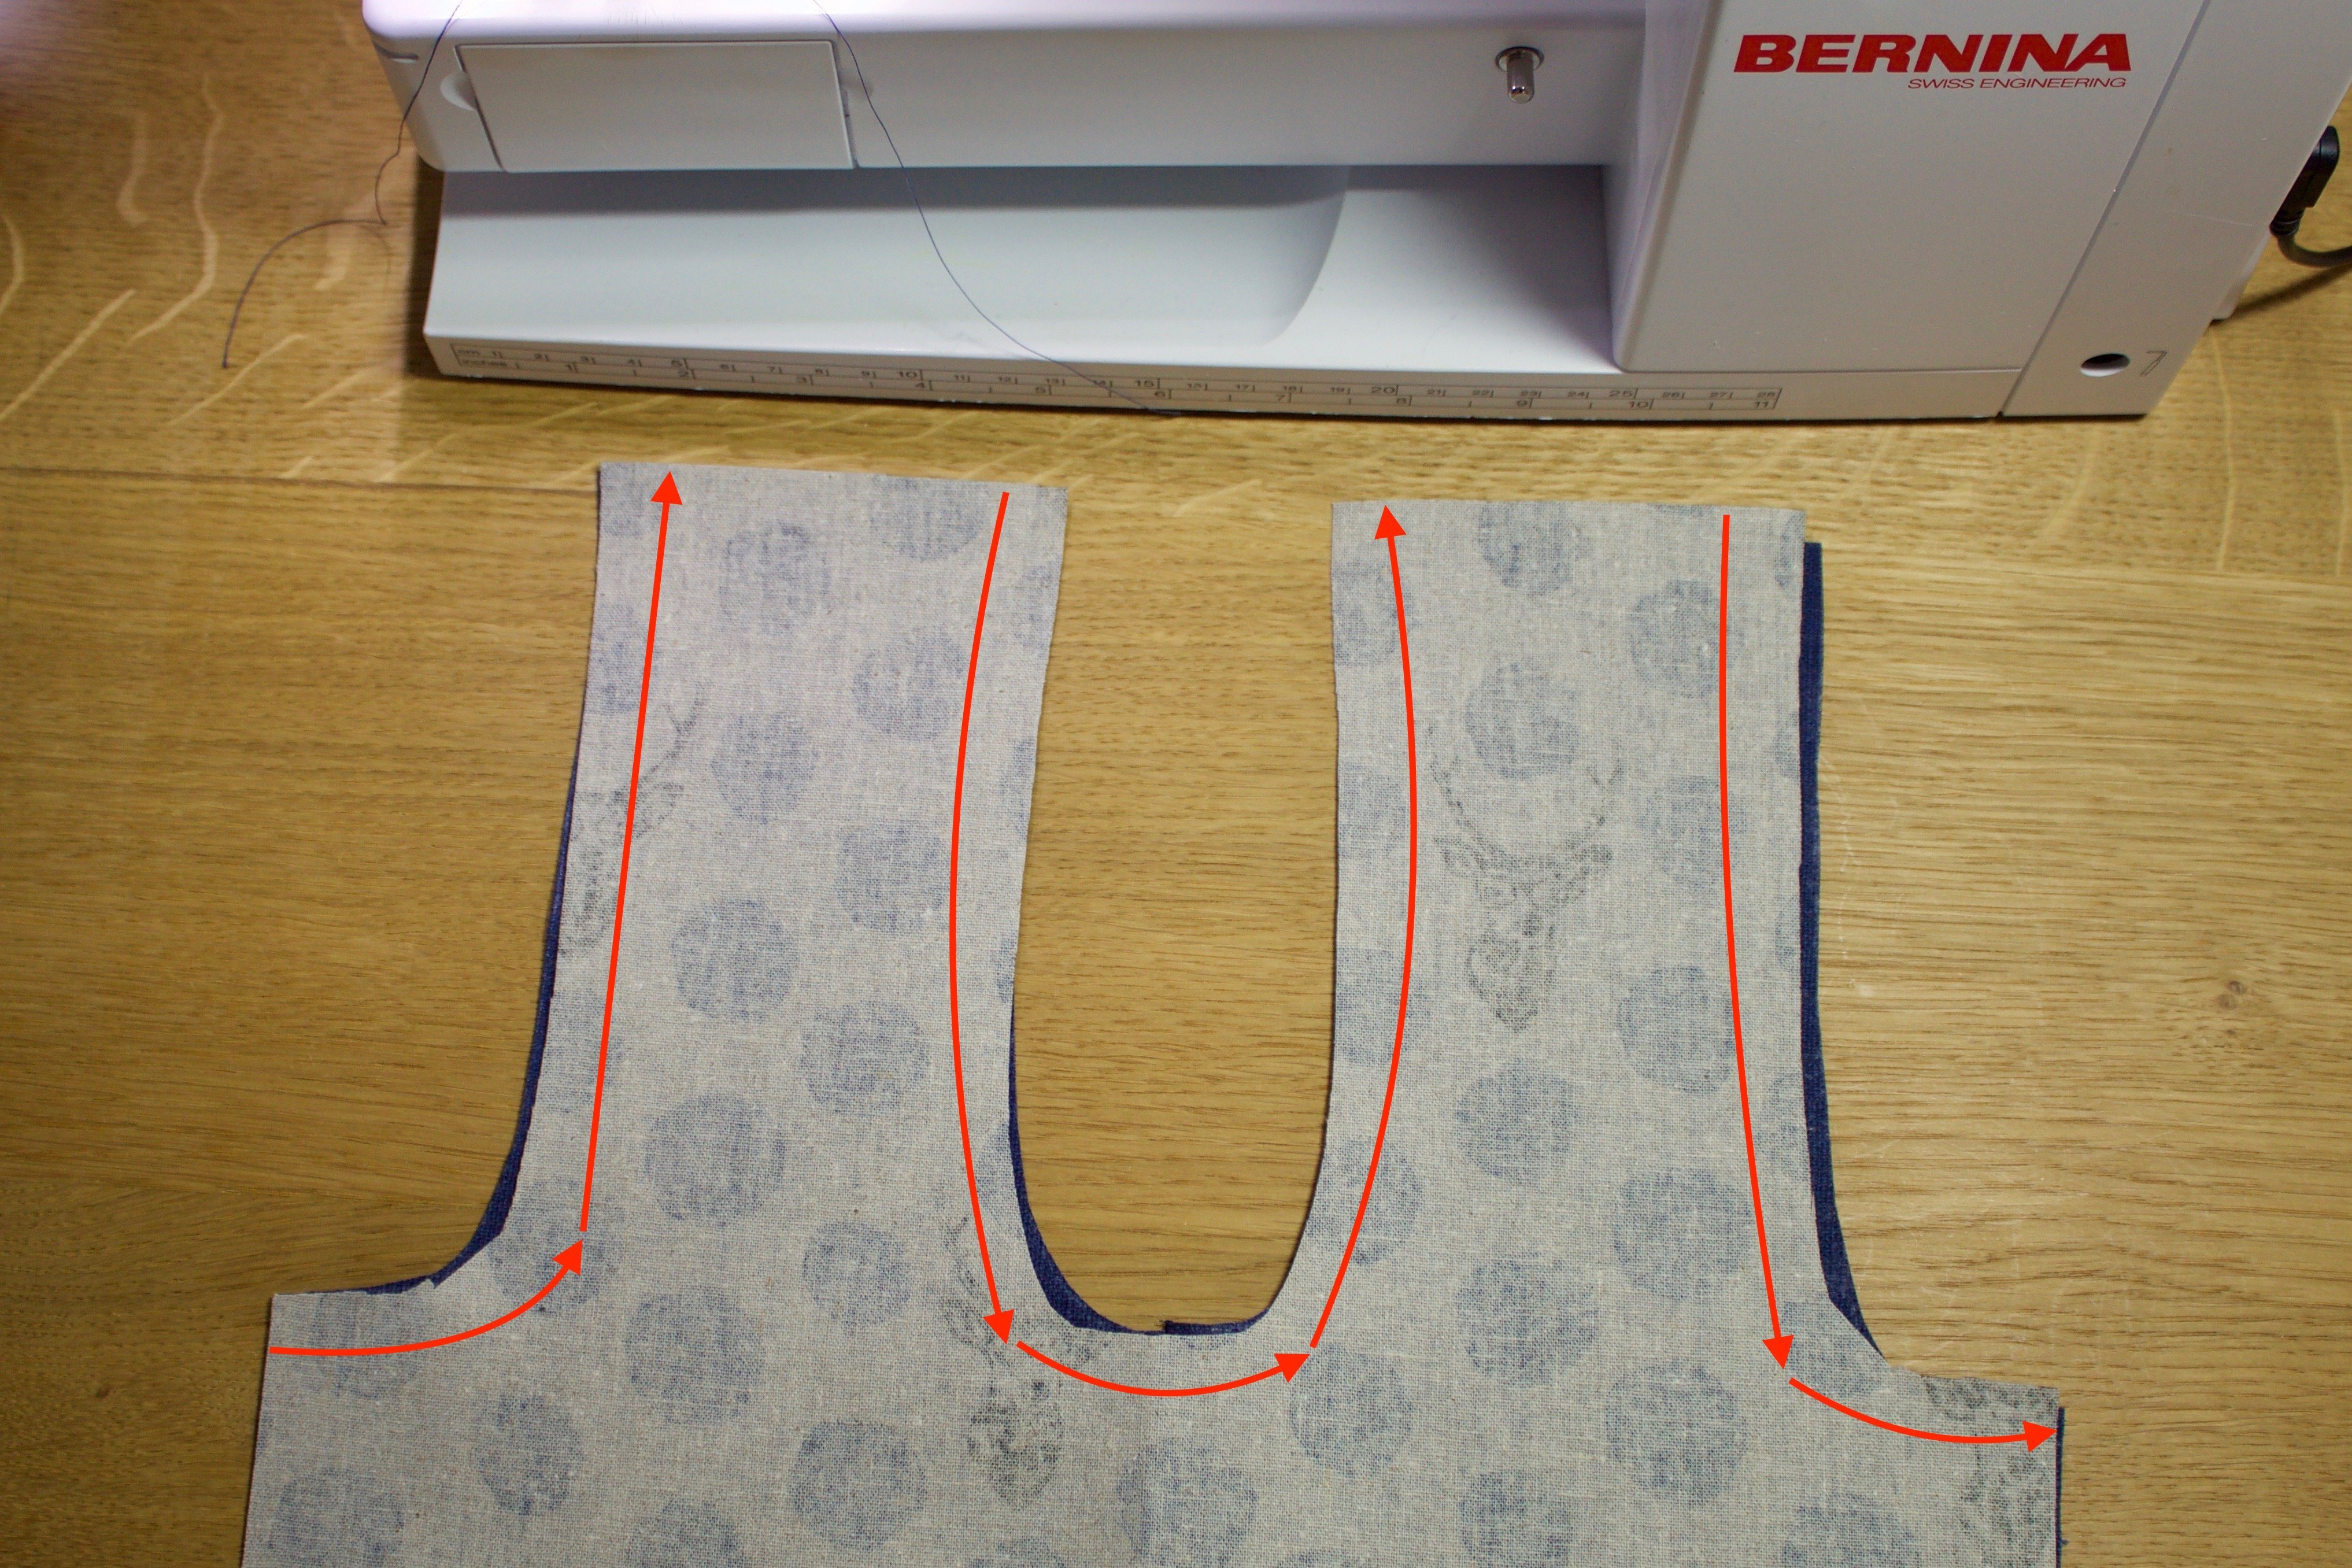
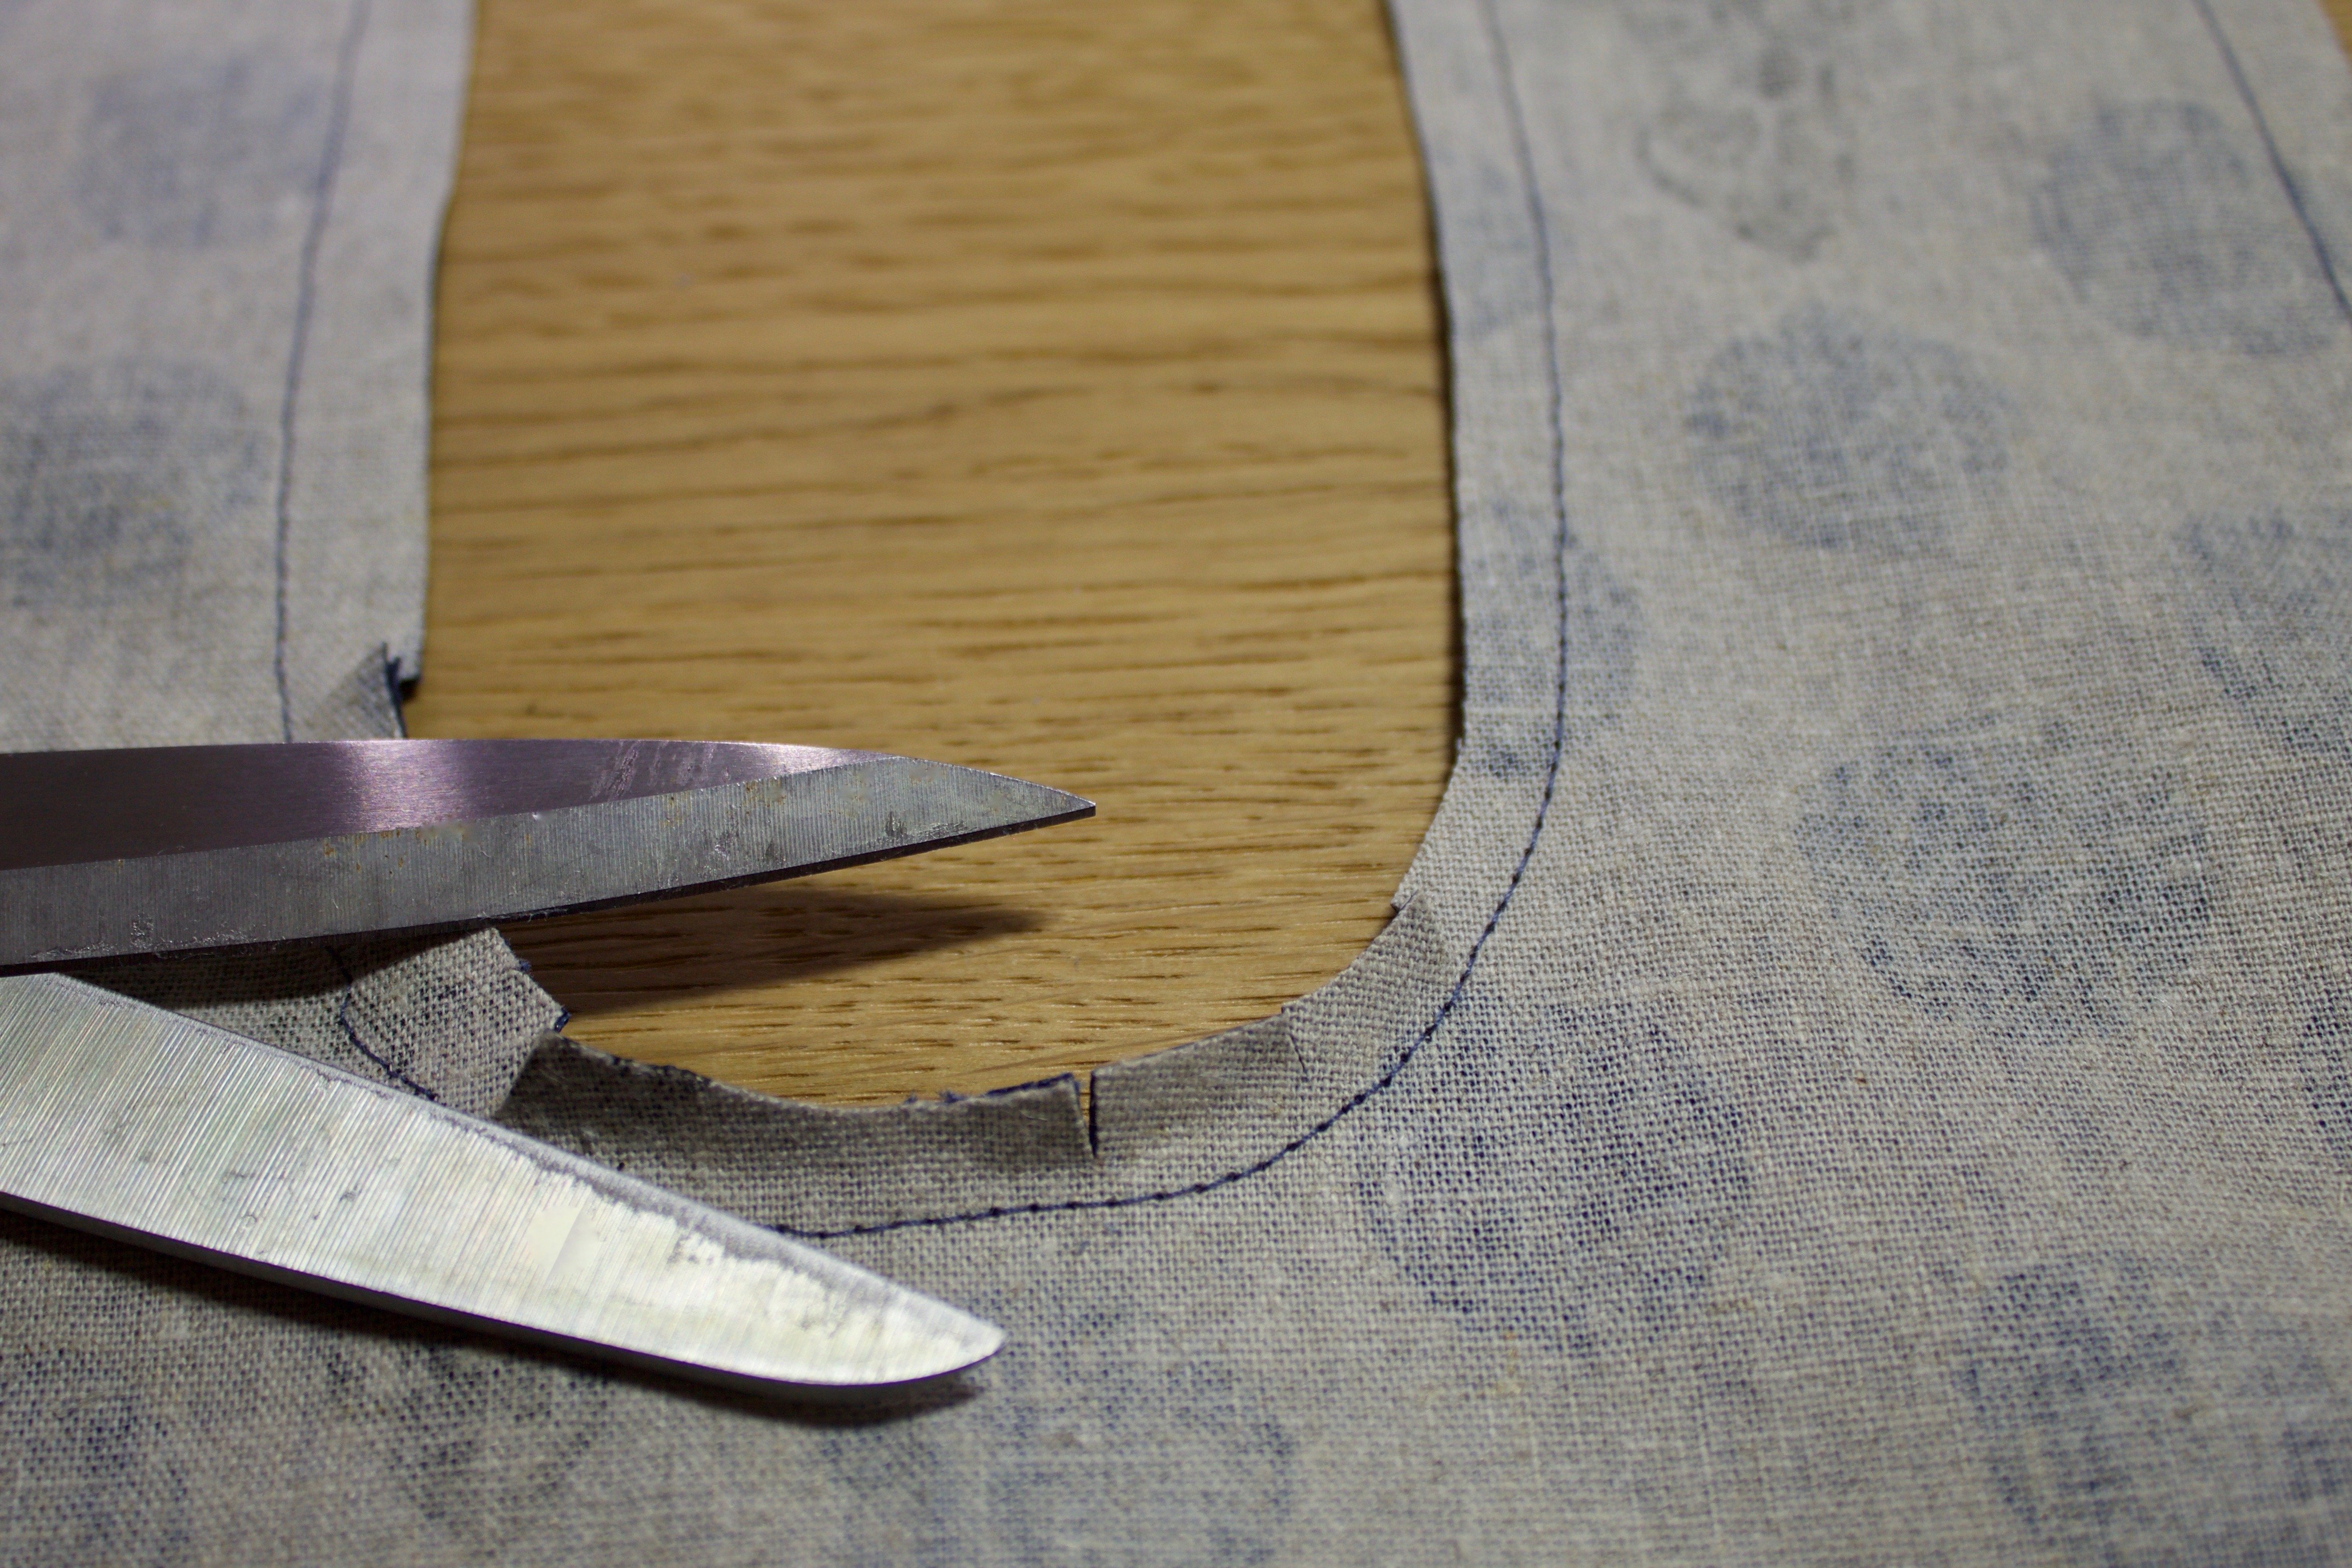
Lay the shell and lining fabrics in front of you with the right sides together as shown in the image and sew along the arrows using straight stitch. Secure the ends of the seams. Trim down the seam allowances and do not forget to cut notches into the fabric perpendicular to the seam on the curves. This is important to ensure that the curves have a nice shape later on. (Make sure you don’t cut through the seam of course!)
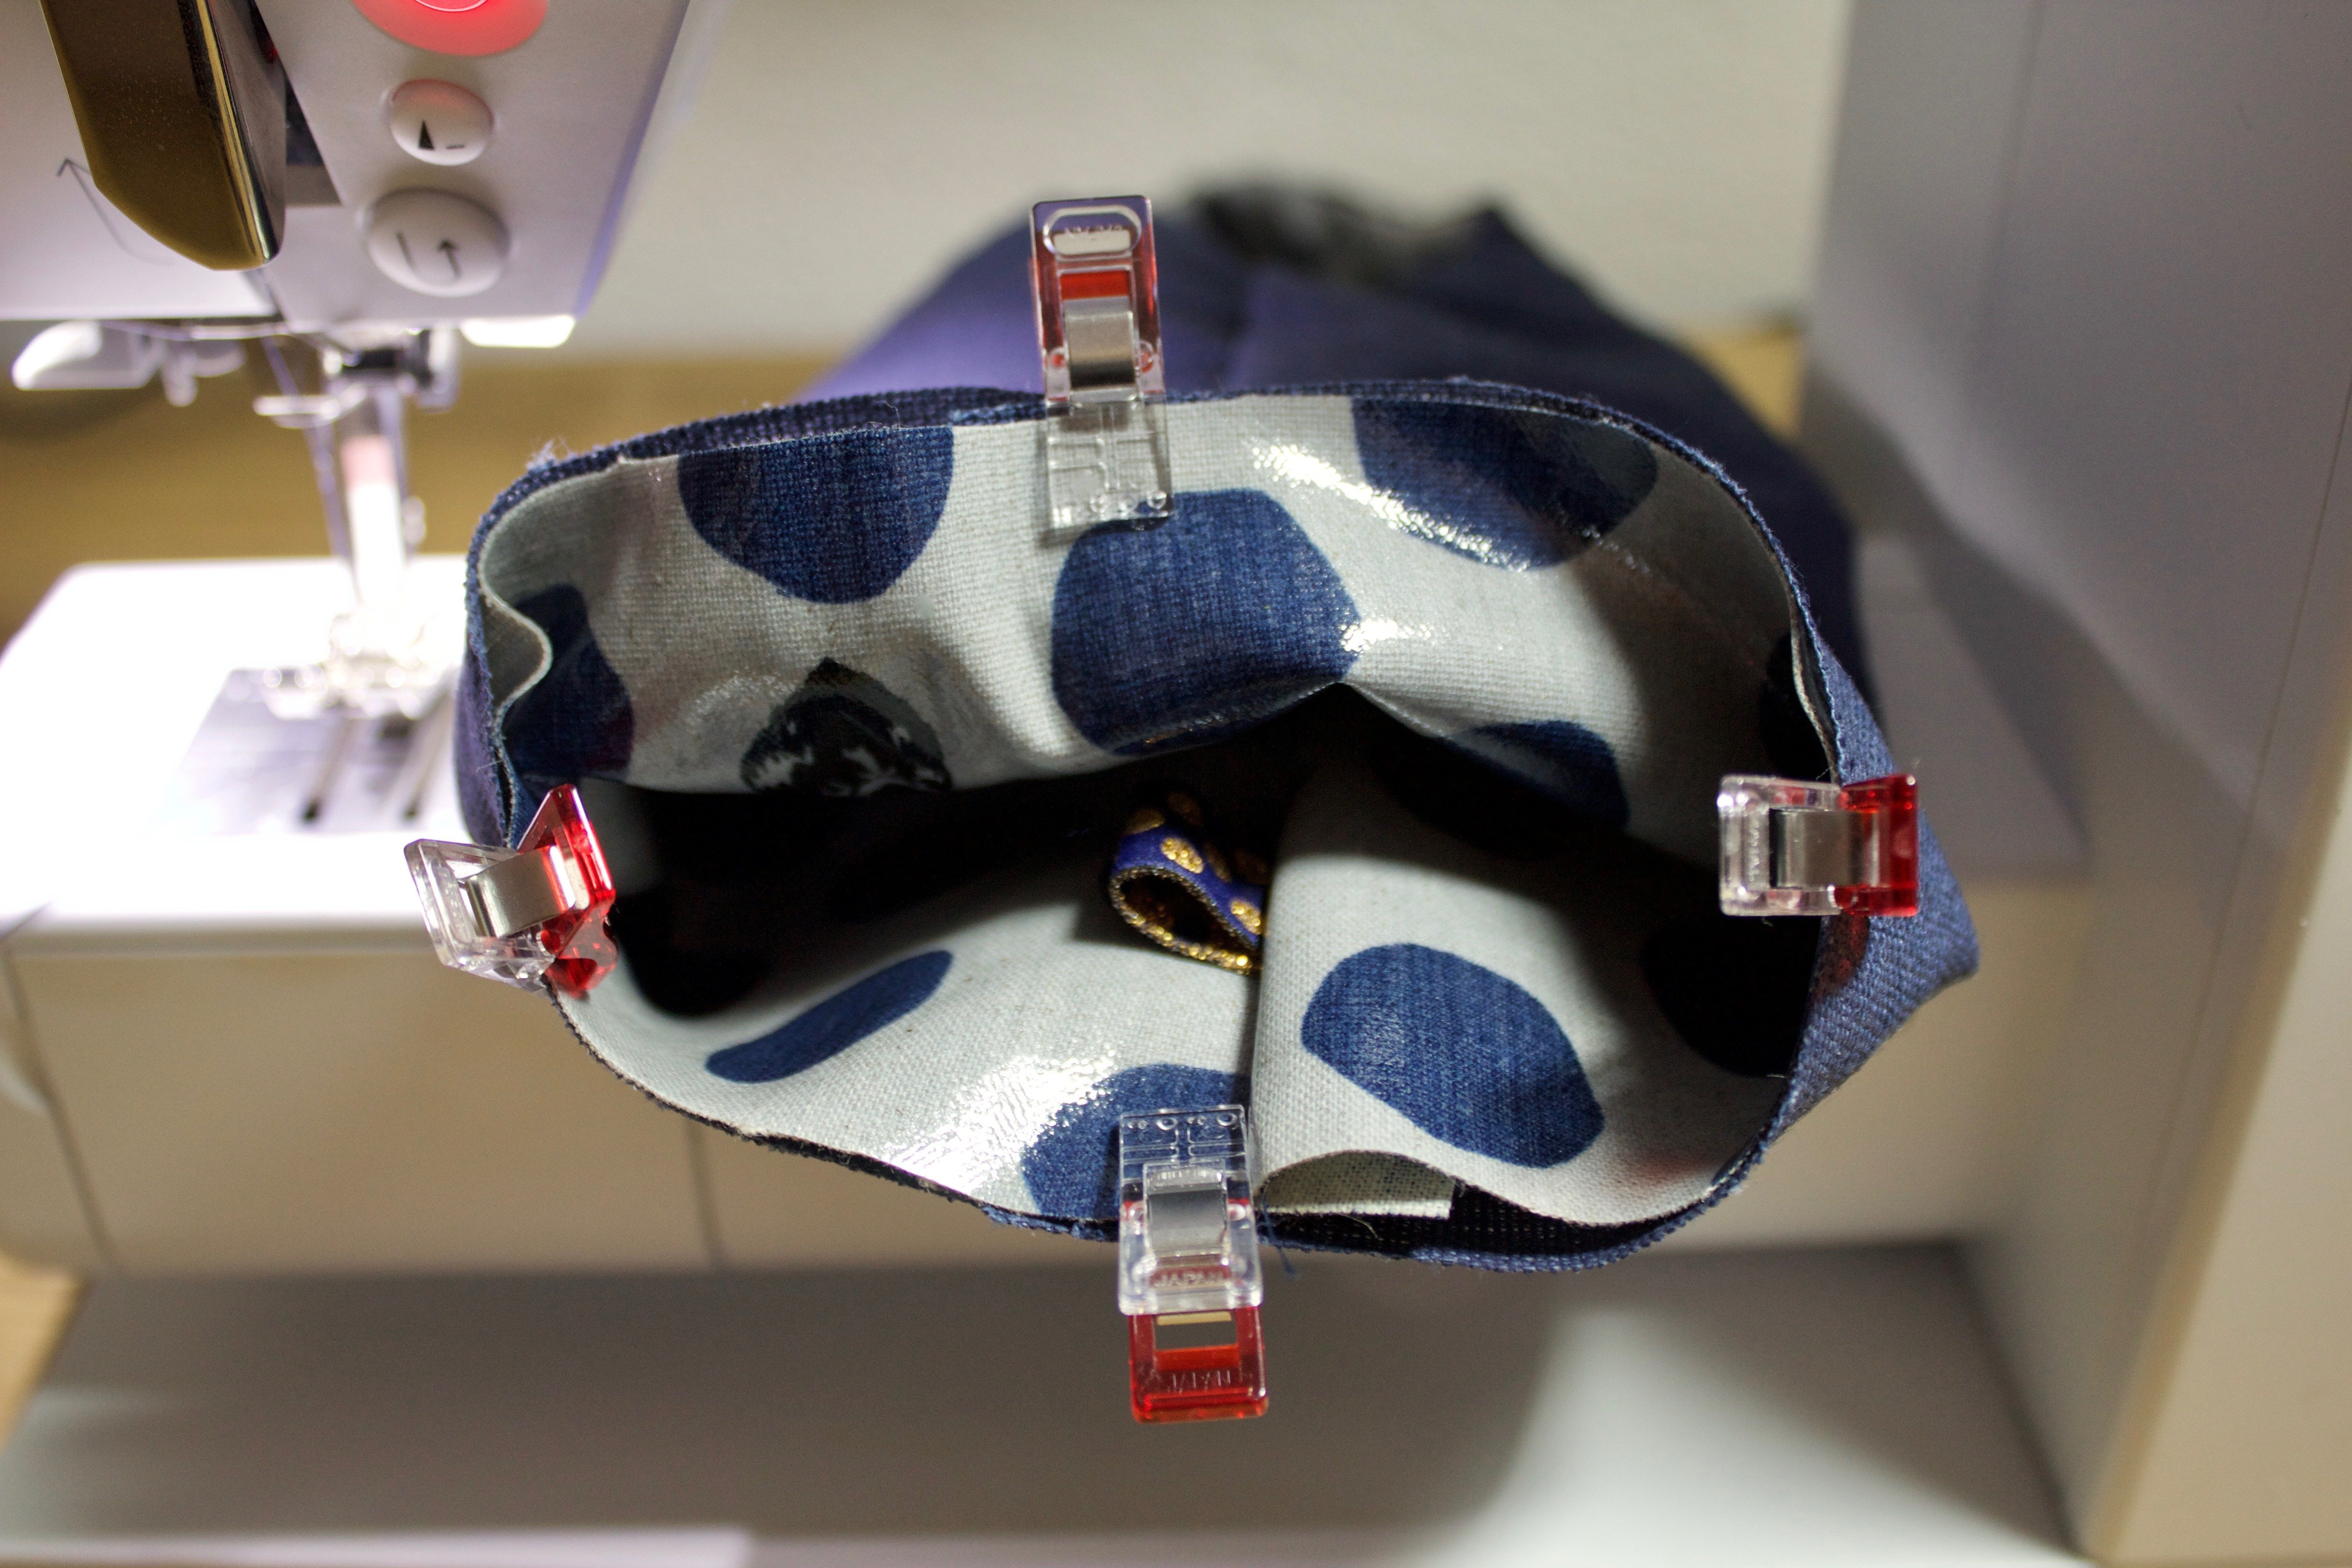
Now it gets a bit tricky. You have to turn one of the two bottlenecks inside out. Just think of a glove finger – this analogy helps me.
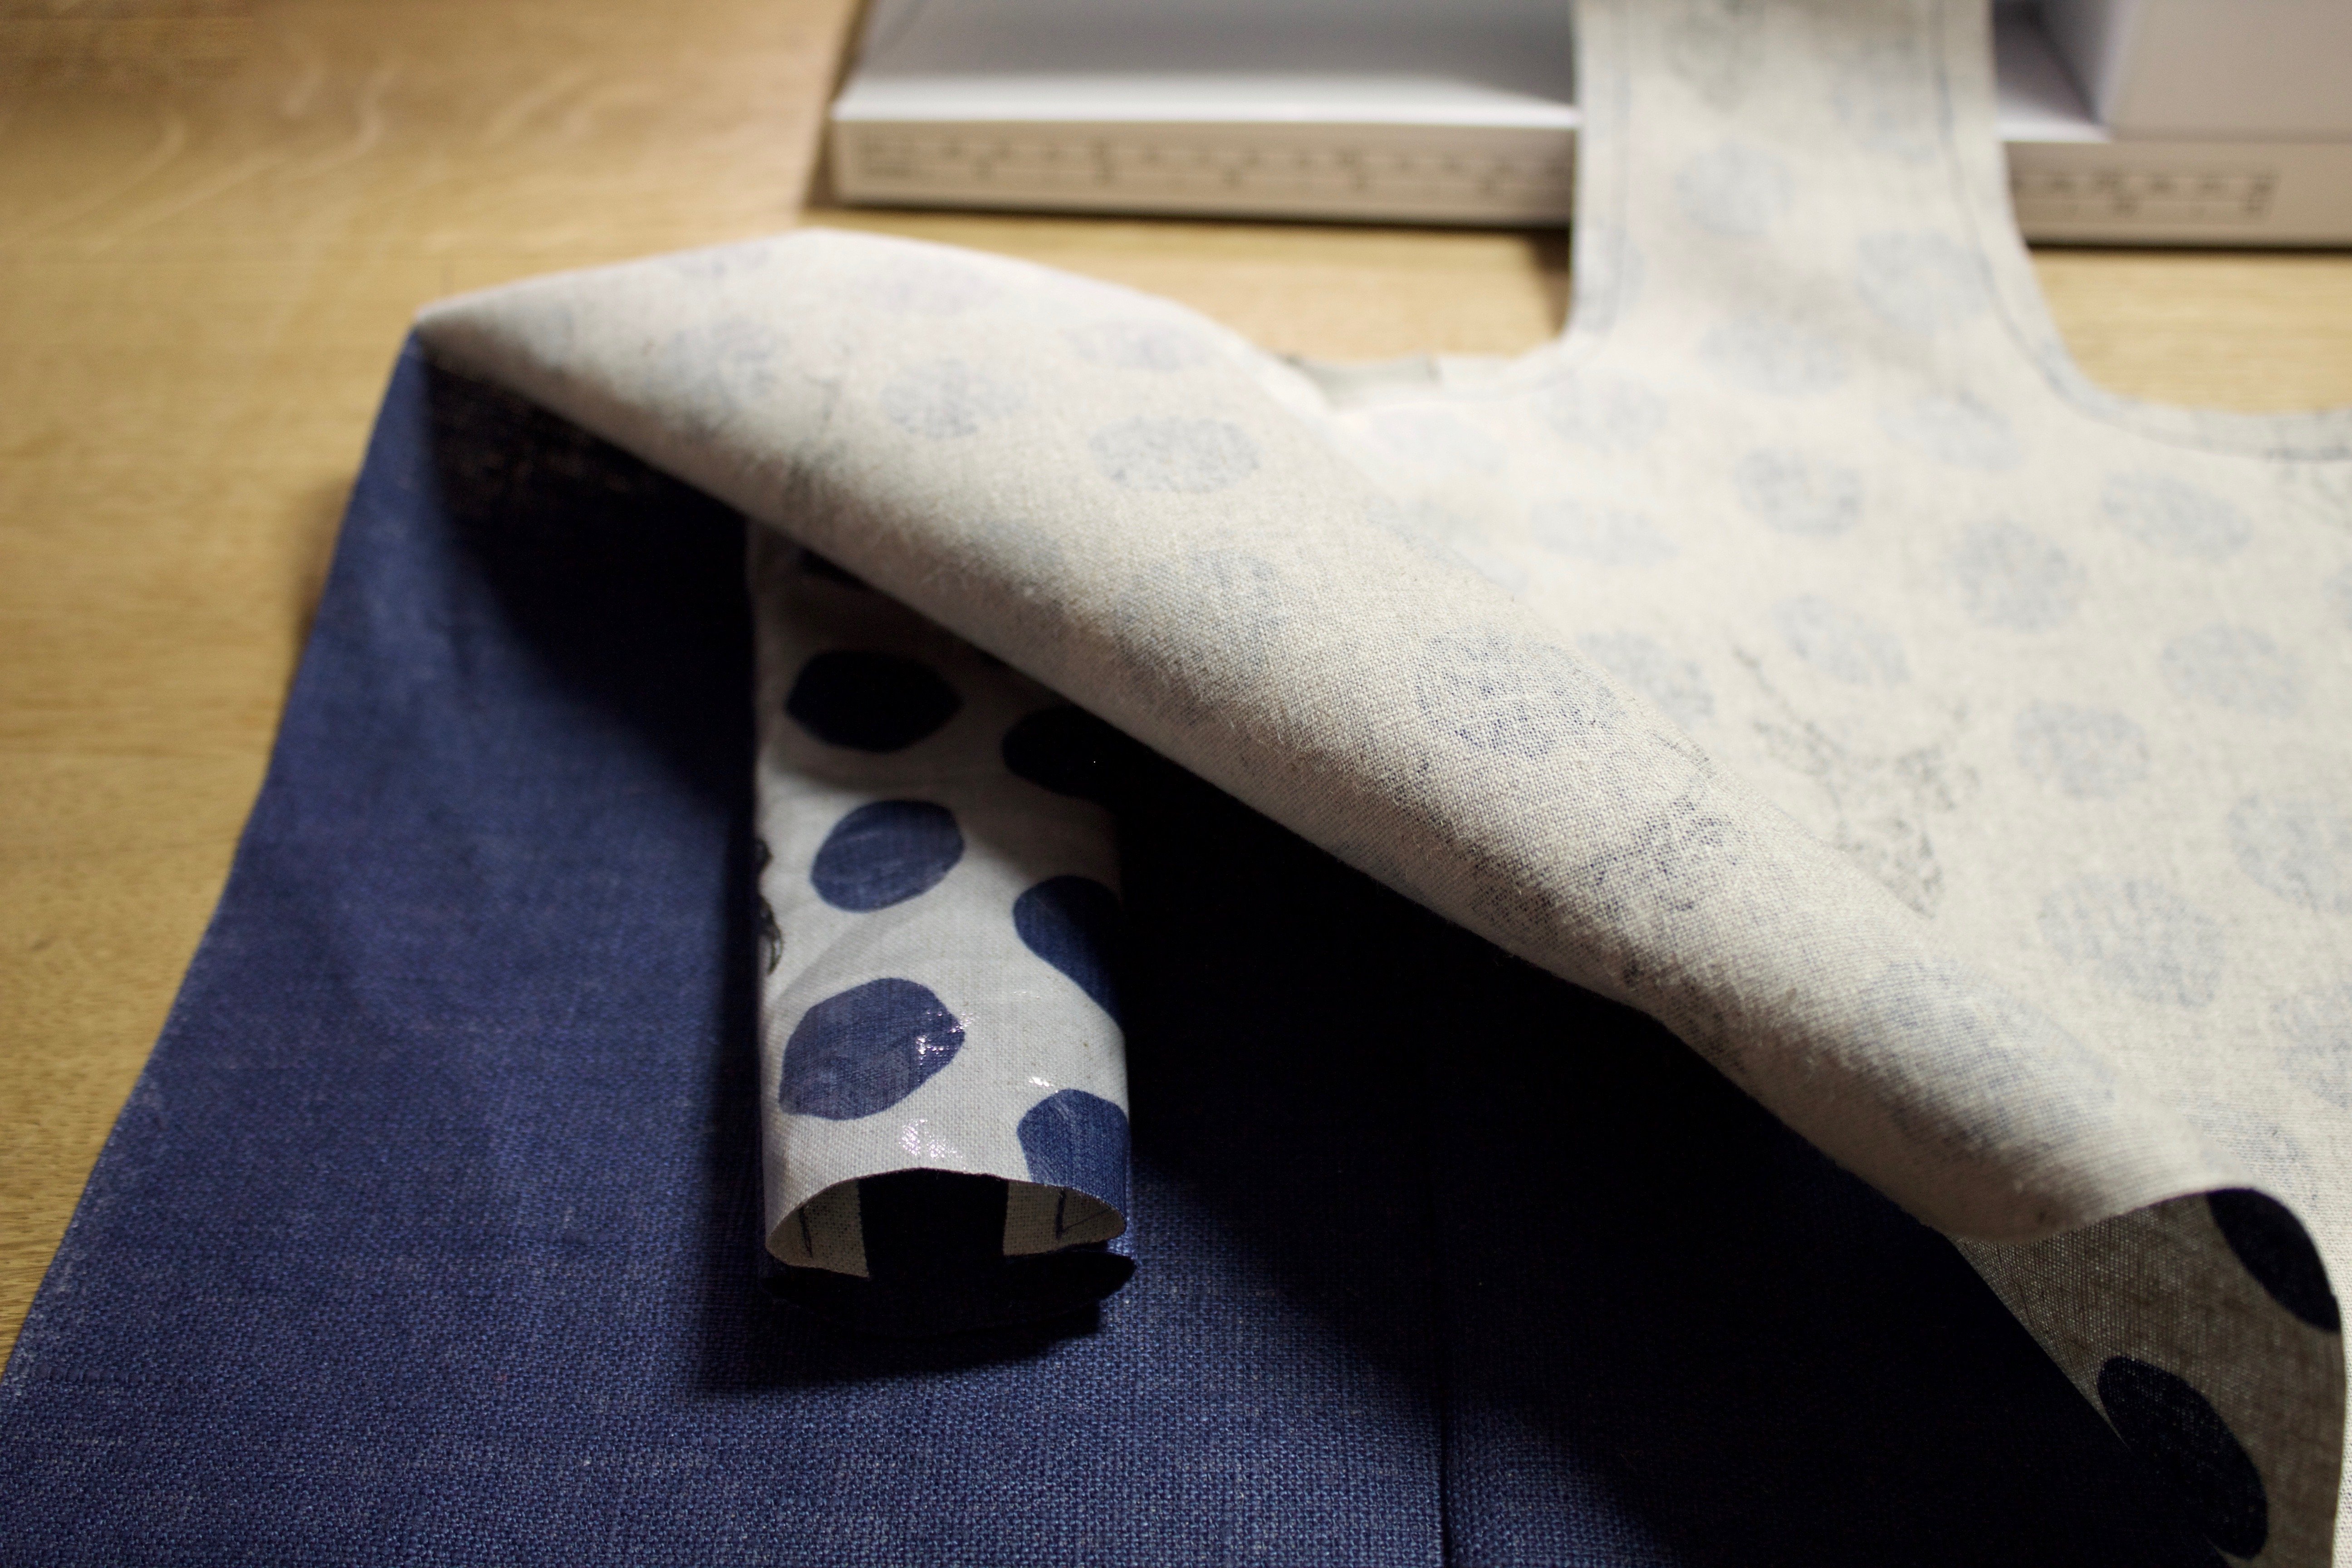
In my example, this “finger” is the right way out and is on the lining fabric. Now push this “finger” into the other bottle handle. Align the fabrics with each other with the right sides together. If you have done it correctly, it should look like this:
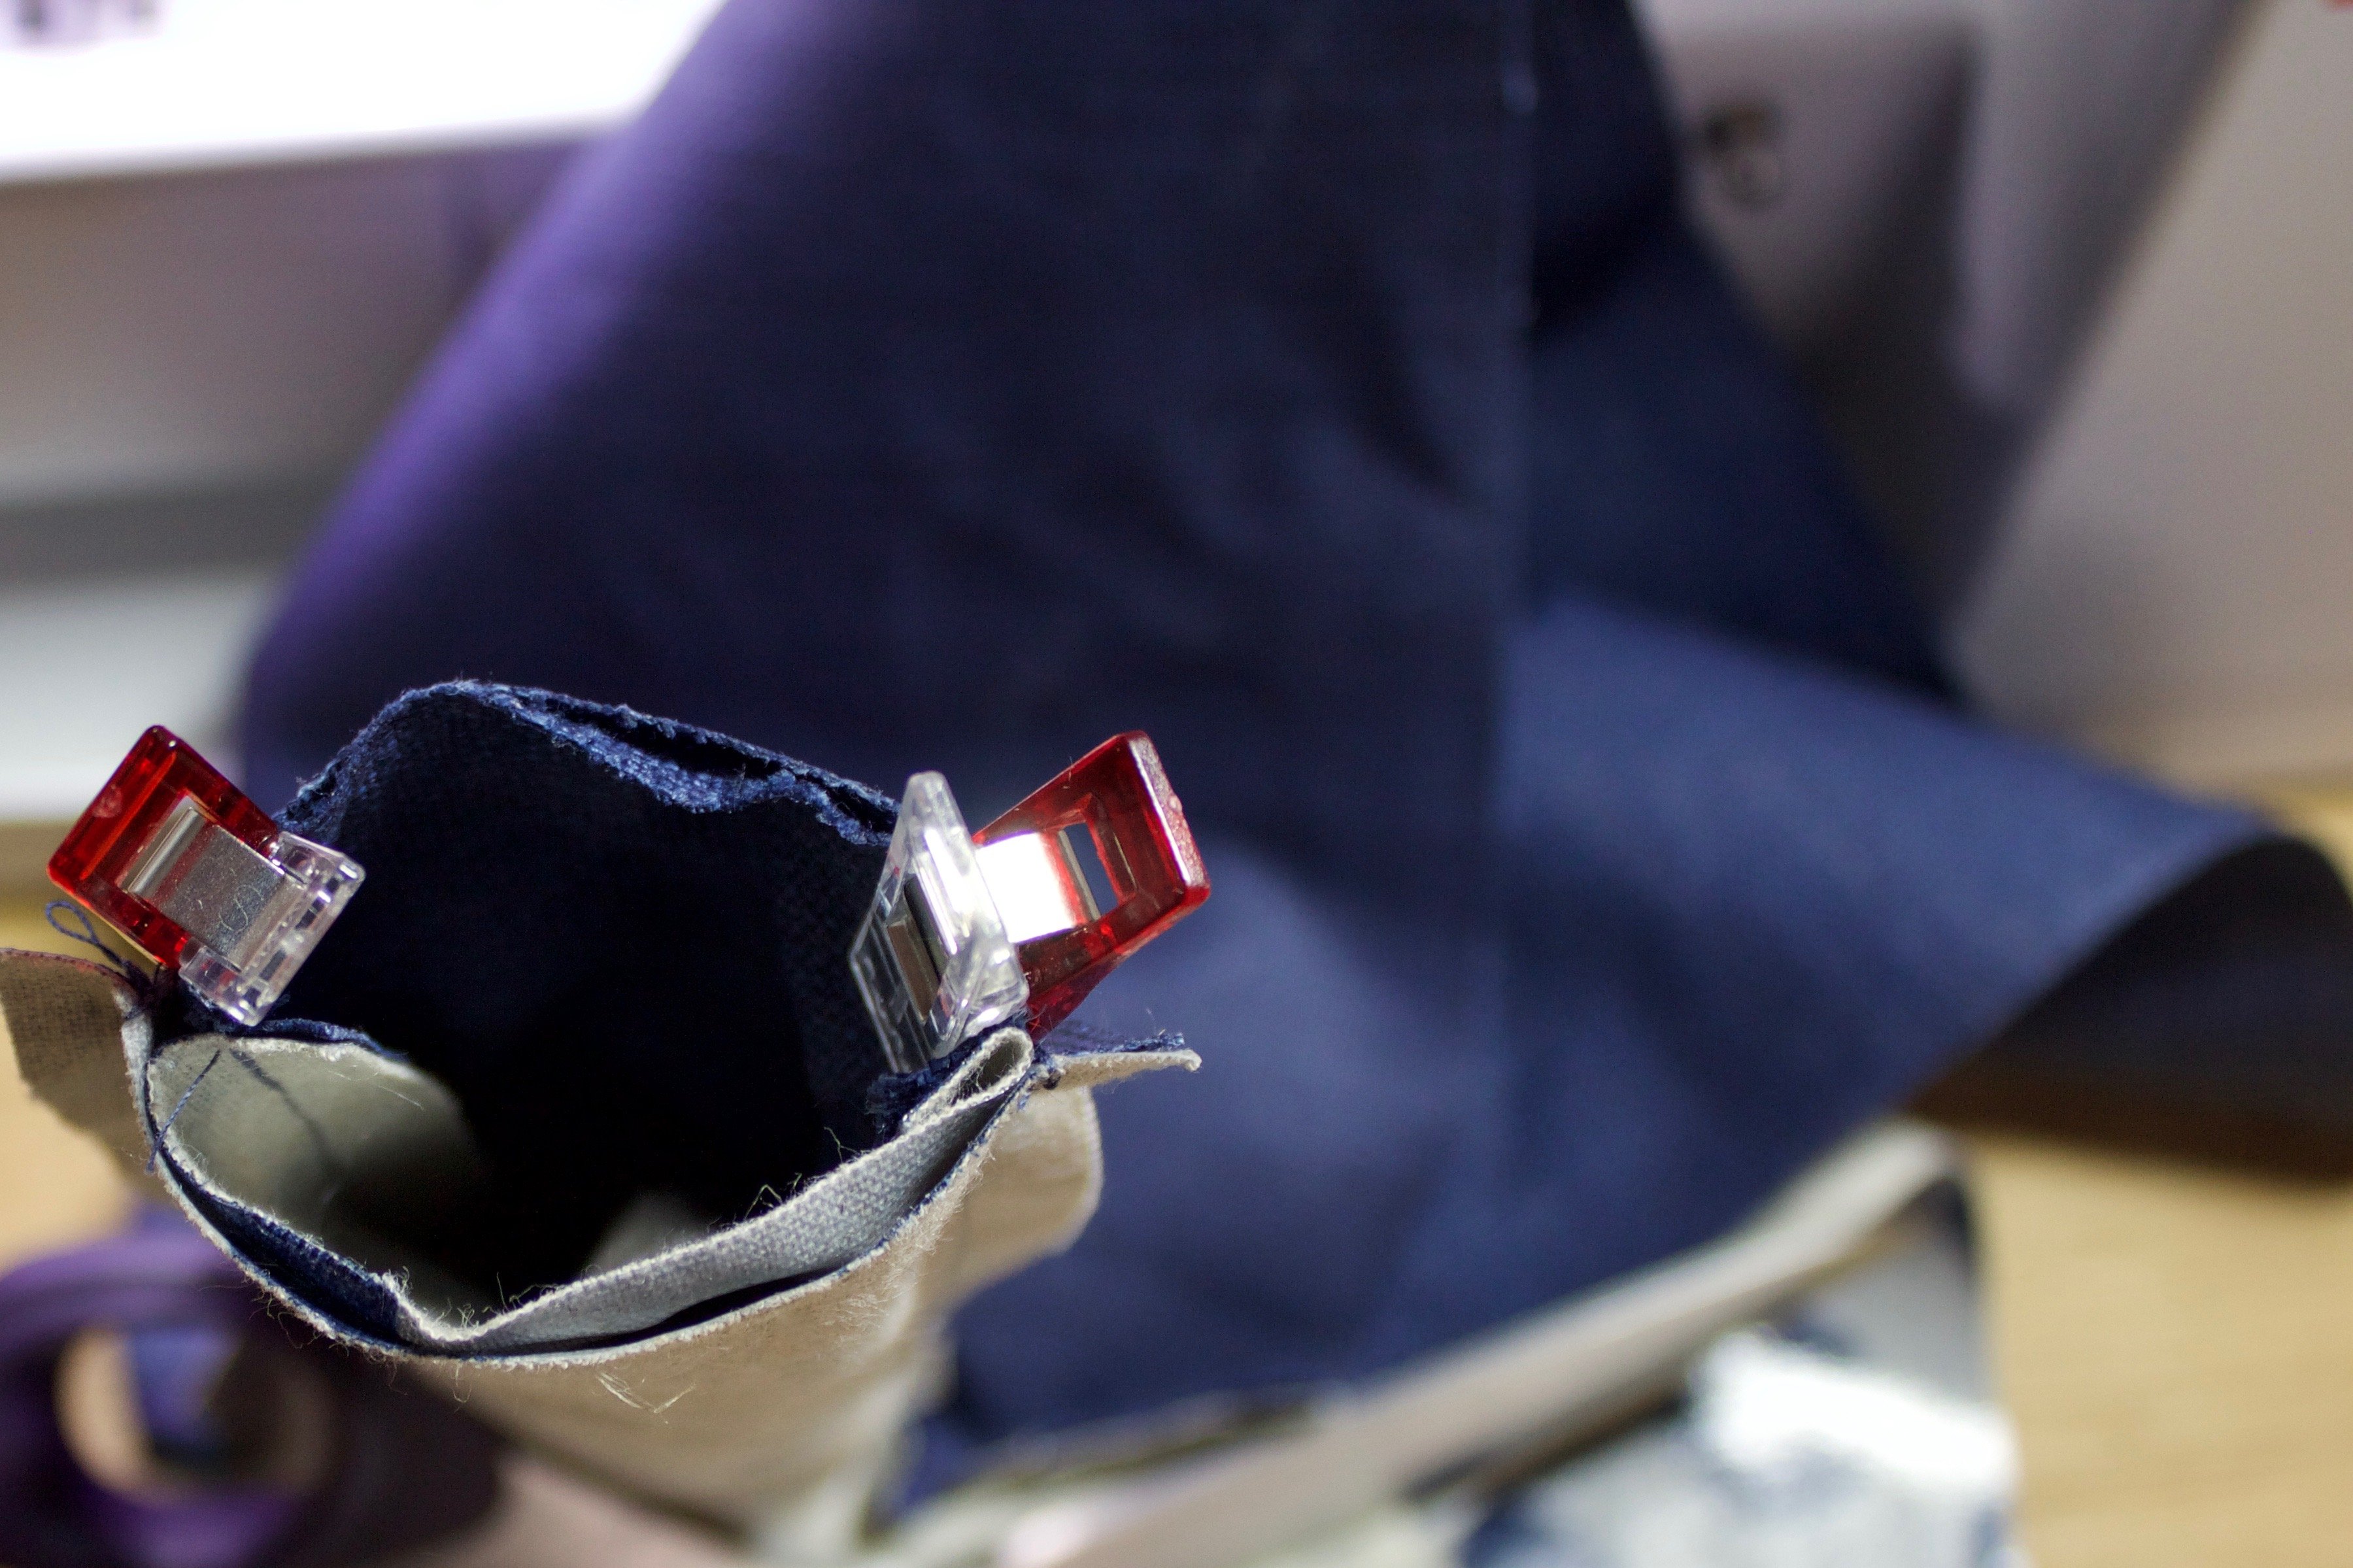
Now sew all the way round using straight stitch. If you use oilcloth, the seam allowance is a bit tricky to navigate. Ideally, one piece points to the right and the other to the left. As you can see well here, the clips are perfect for securing the fabric layers. Now carefully pull the “handle” of the bag apart. If you have done everything correctly, it will look like this:

If you are working with normal woven fabric, you could also topstitch the two handle sections close to the edge. However, with oilcloth, this does not necessarlly lead to a nice result. Anyway, I decided against the popular topstitching. Now open out the sewing again and put it in front of you. The shell fabric is folded in one direction with the right sides together, and the lining fabric in the other direction. The handle of the bag is like a hot dog in the middle of two halves of bread. Yes, I love analogies 🙂
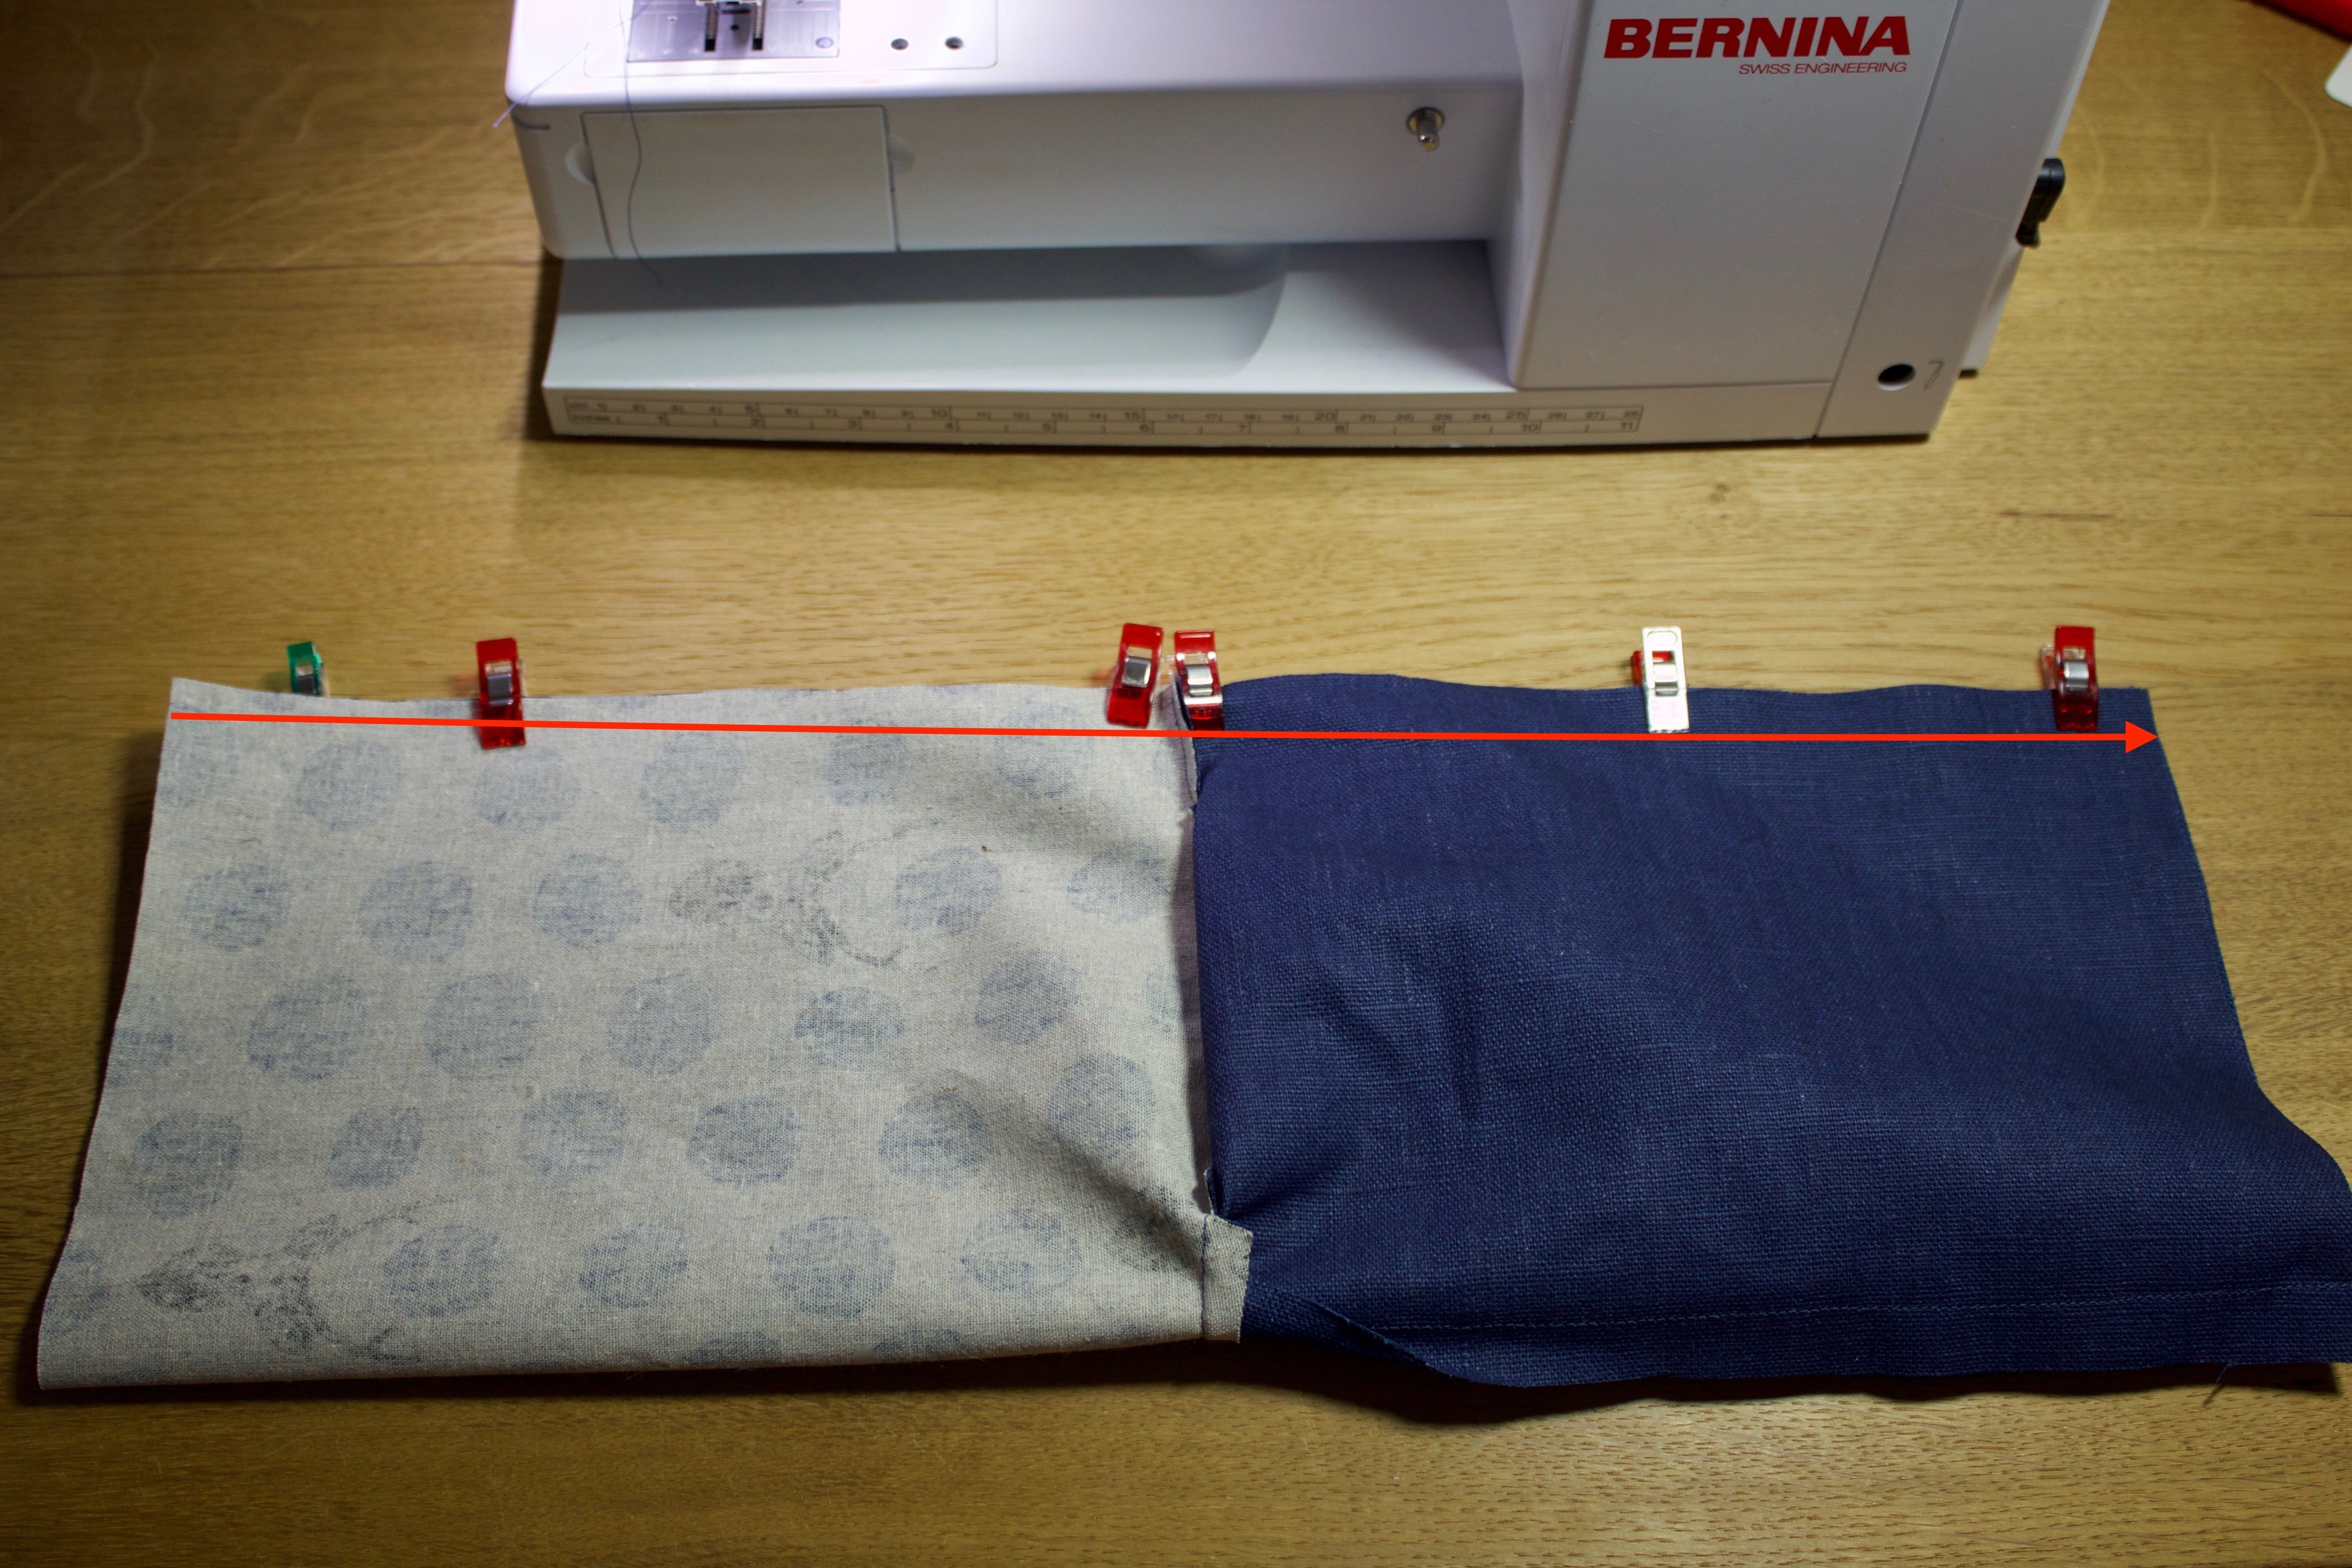
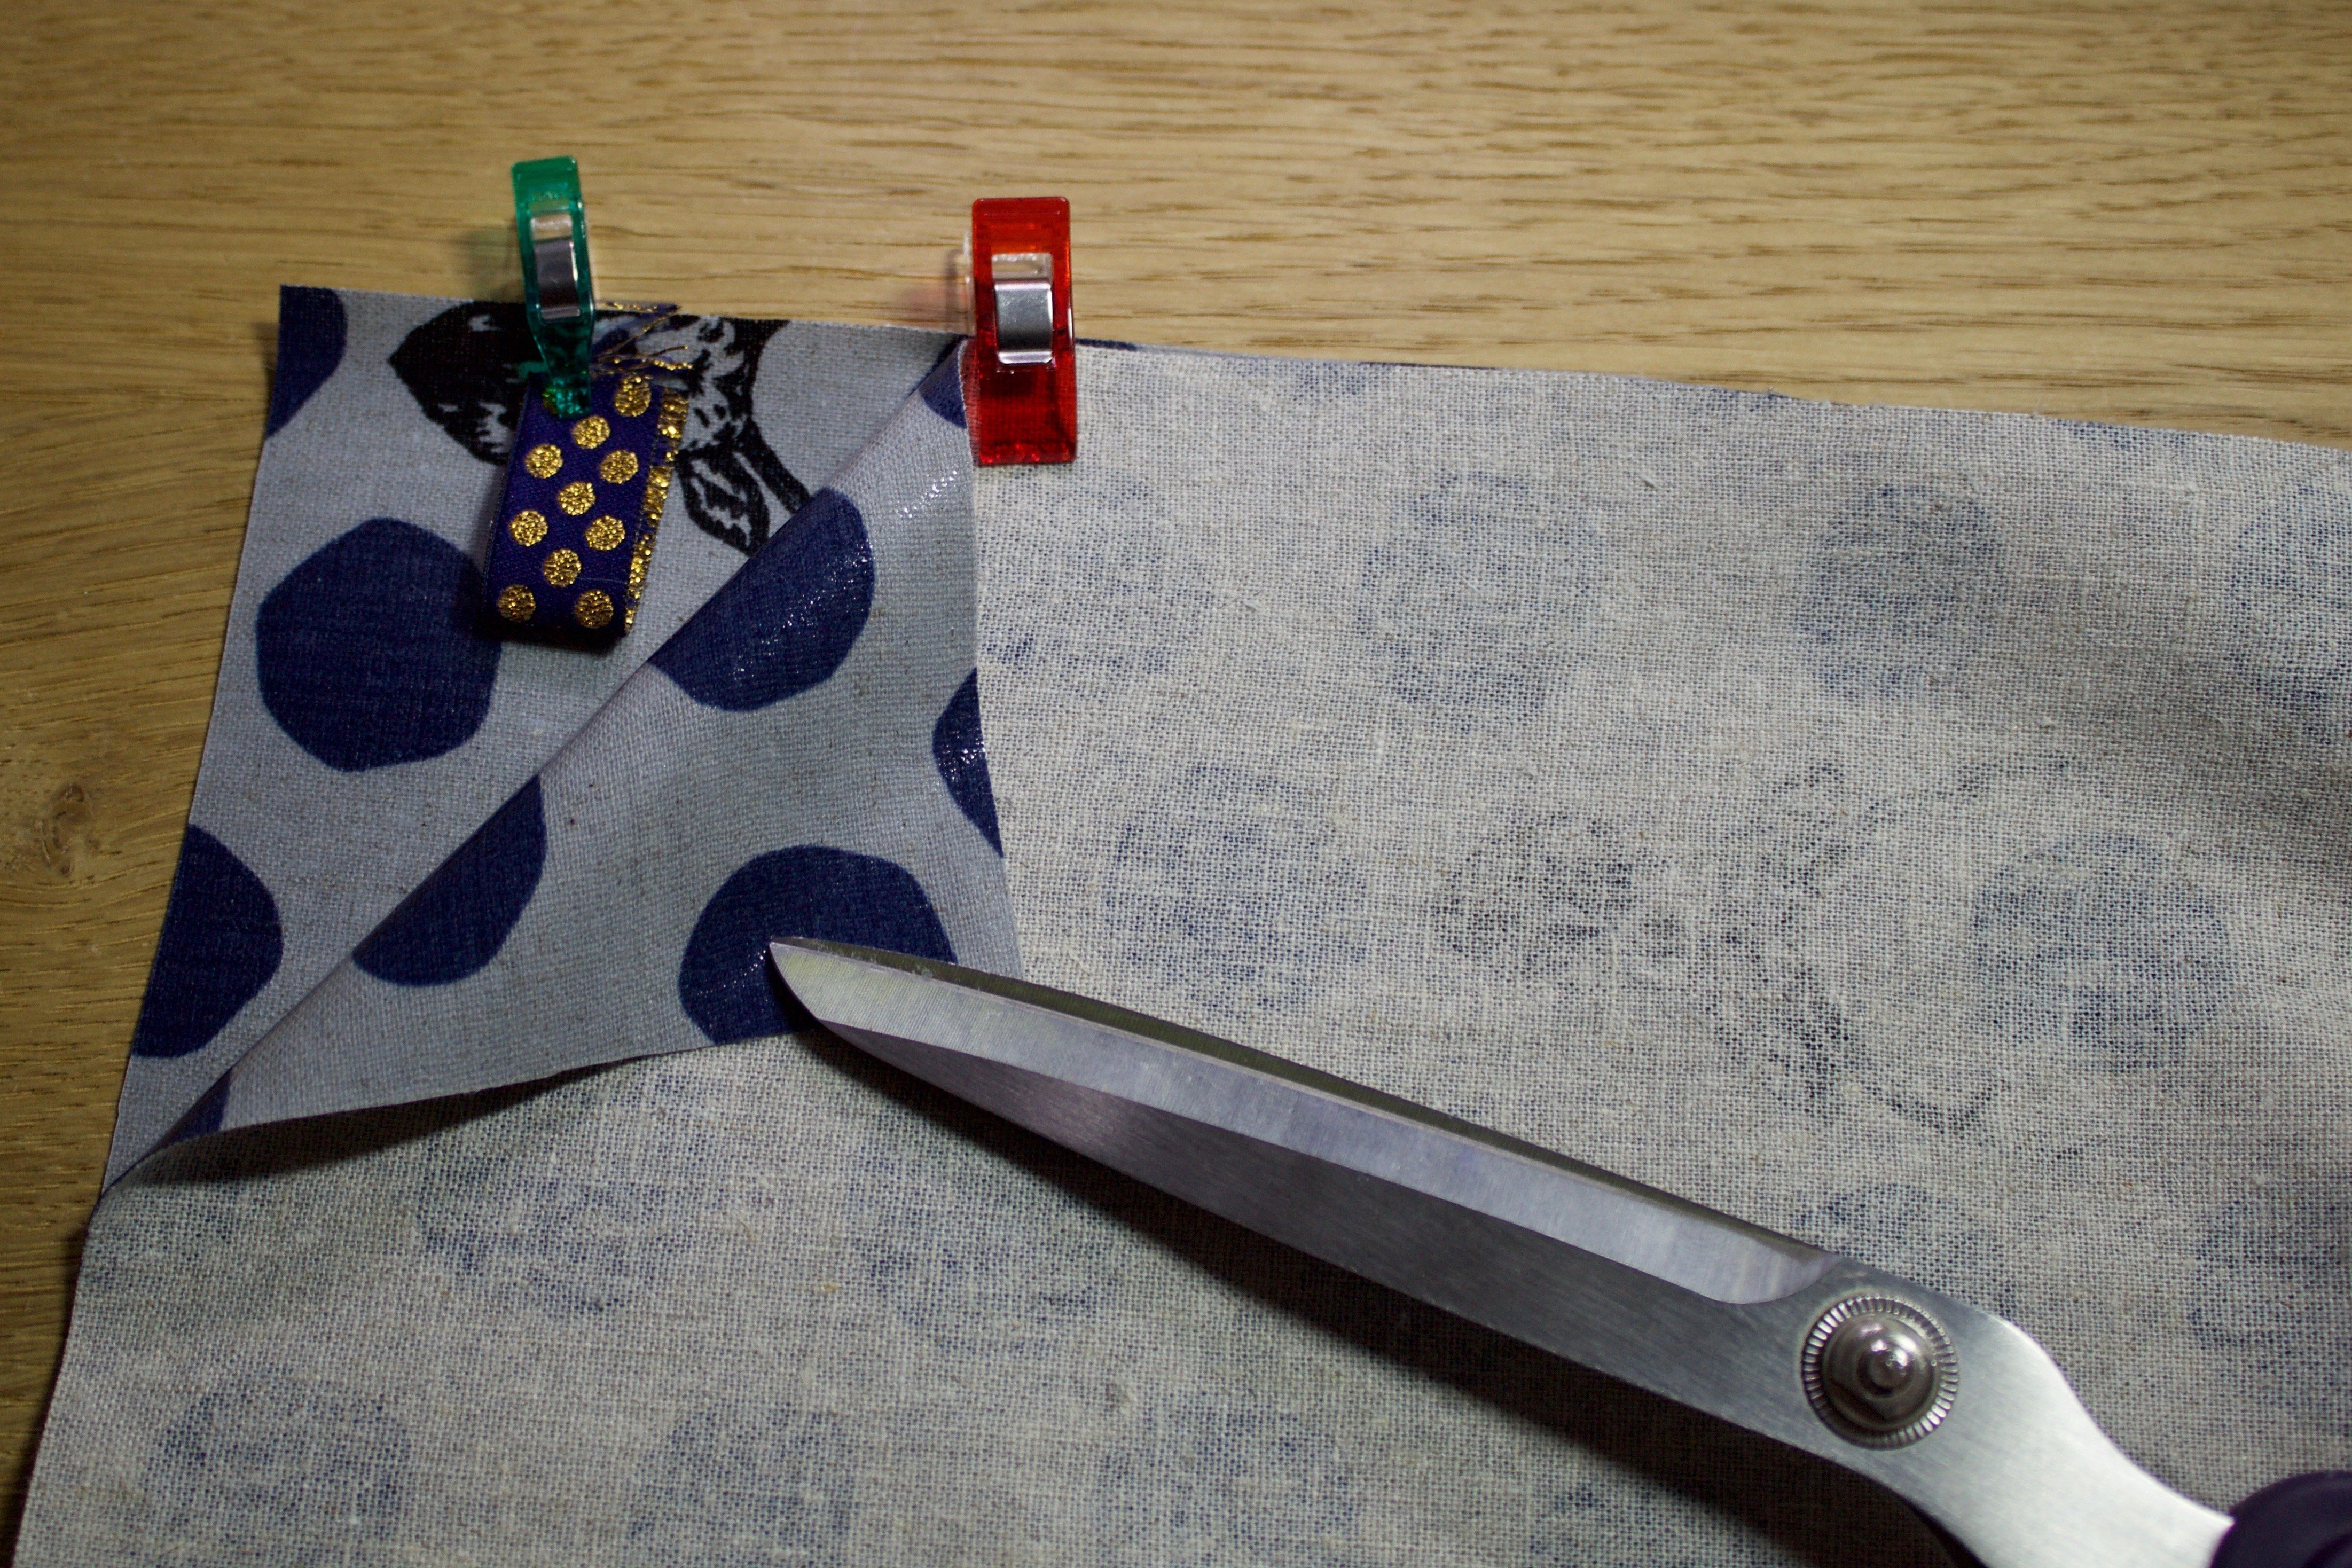
Sew again along the line indicated by the arrow. If, like me, you want to add a decorative ribbon as well, this must be inserted BEFORE sewing this seam. Make sure the seam allowance is outwards and downwards when positioning the ribbon.
We’re almost done. Turn the bag inside out. Align all the seams with each other.
The bottom of the bag also consists of two pieces, the shell and the lining. Place the two pieces of fabric together and clip the two circles onto the bag. In my example, the dark blue fabric (coated linen) is outside, with dots (oilcloth from the Japanese manufacturer Kokka) on the inside.
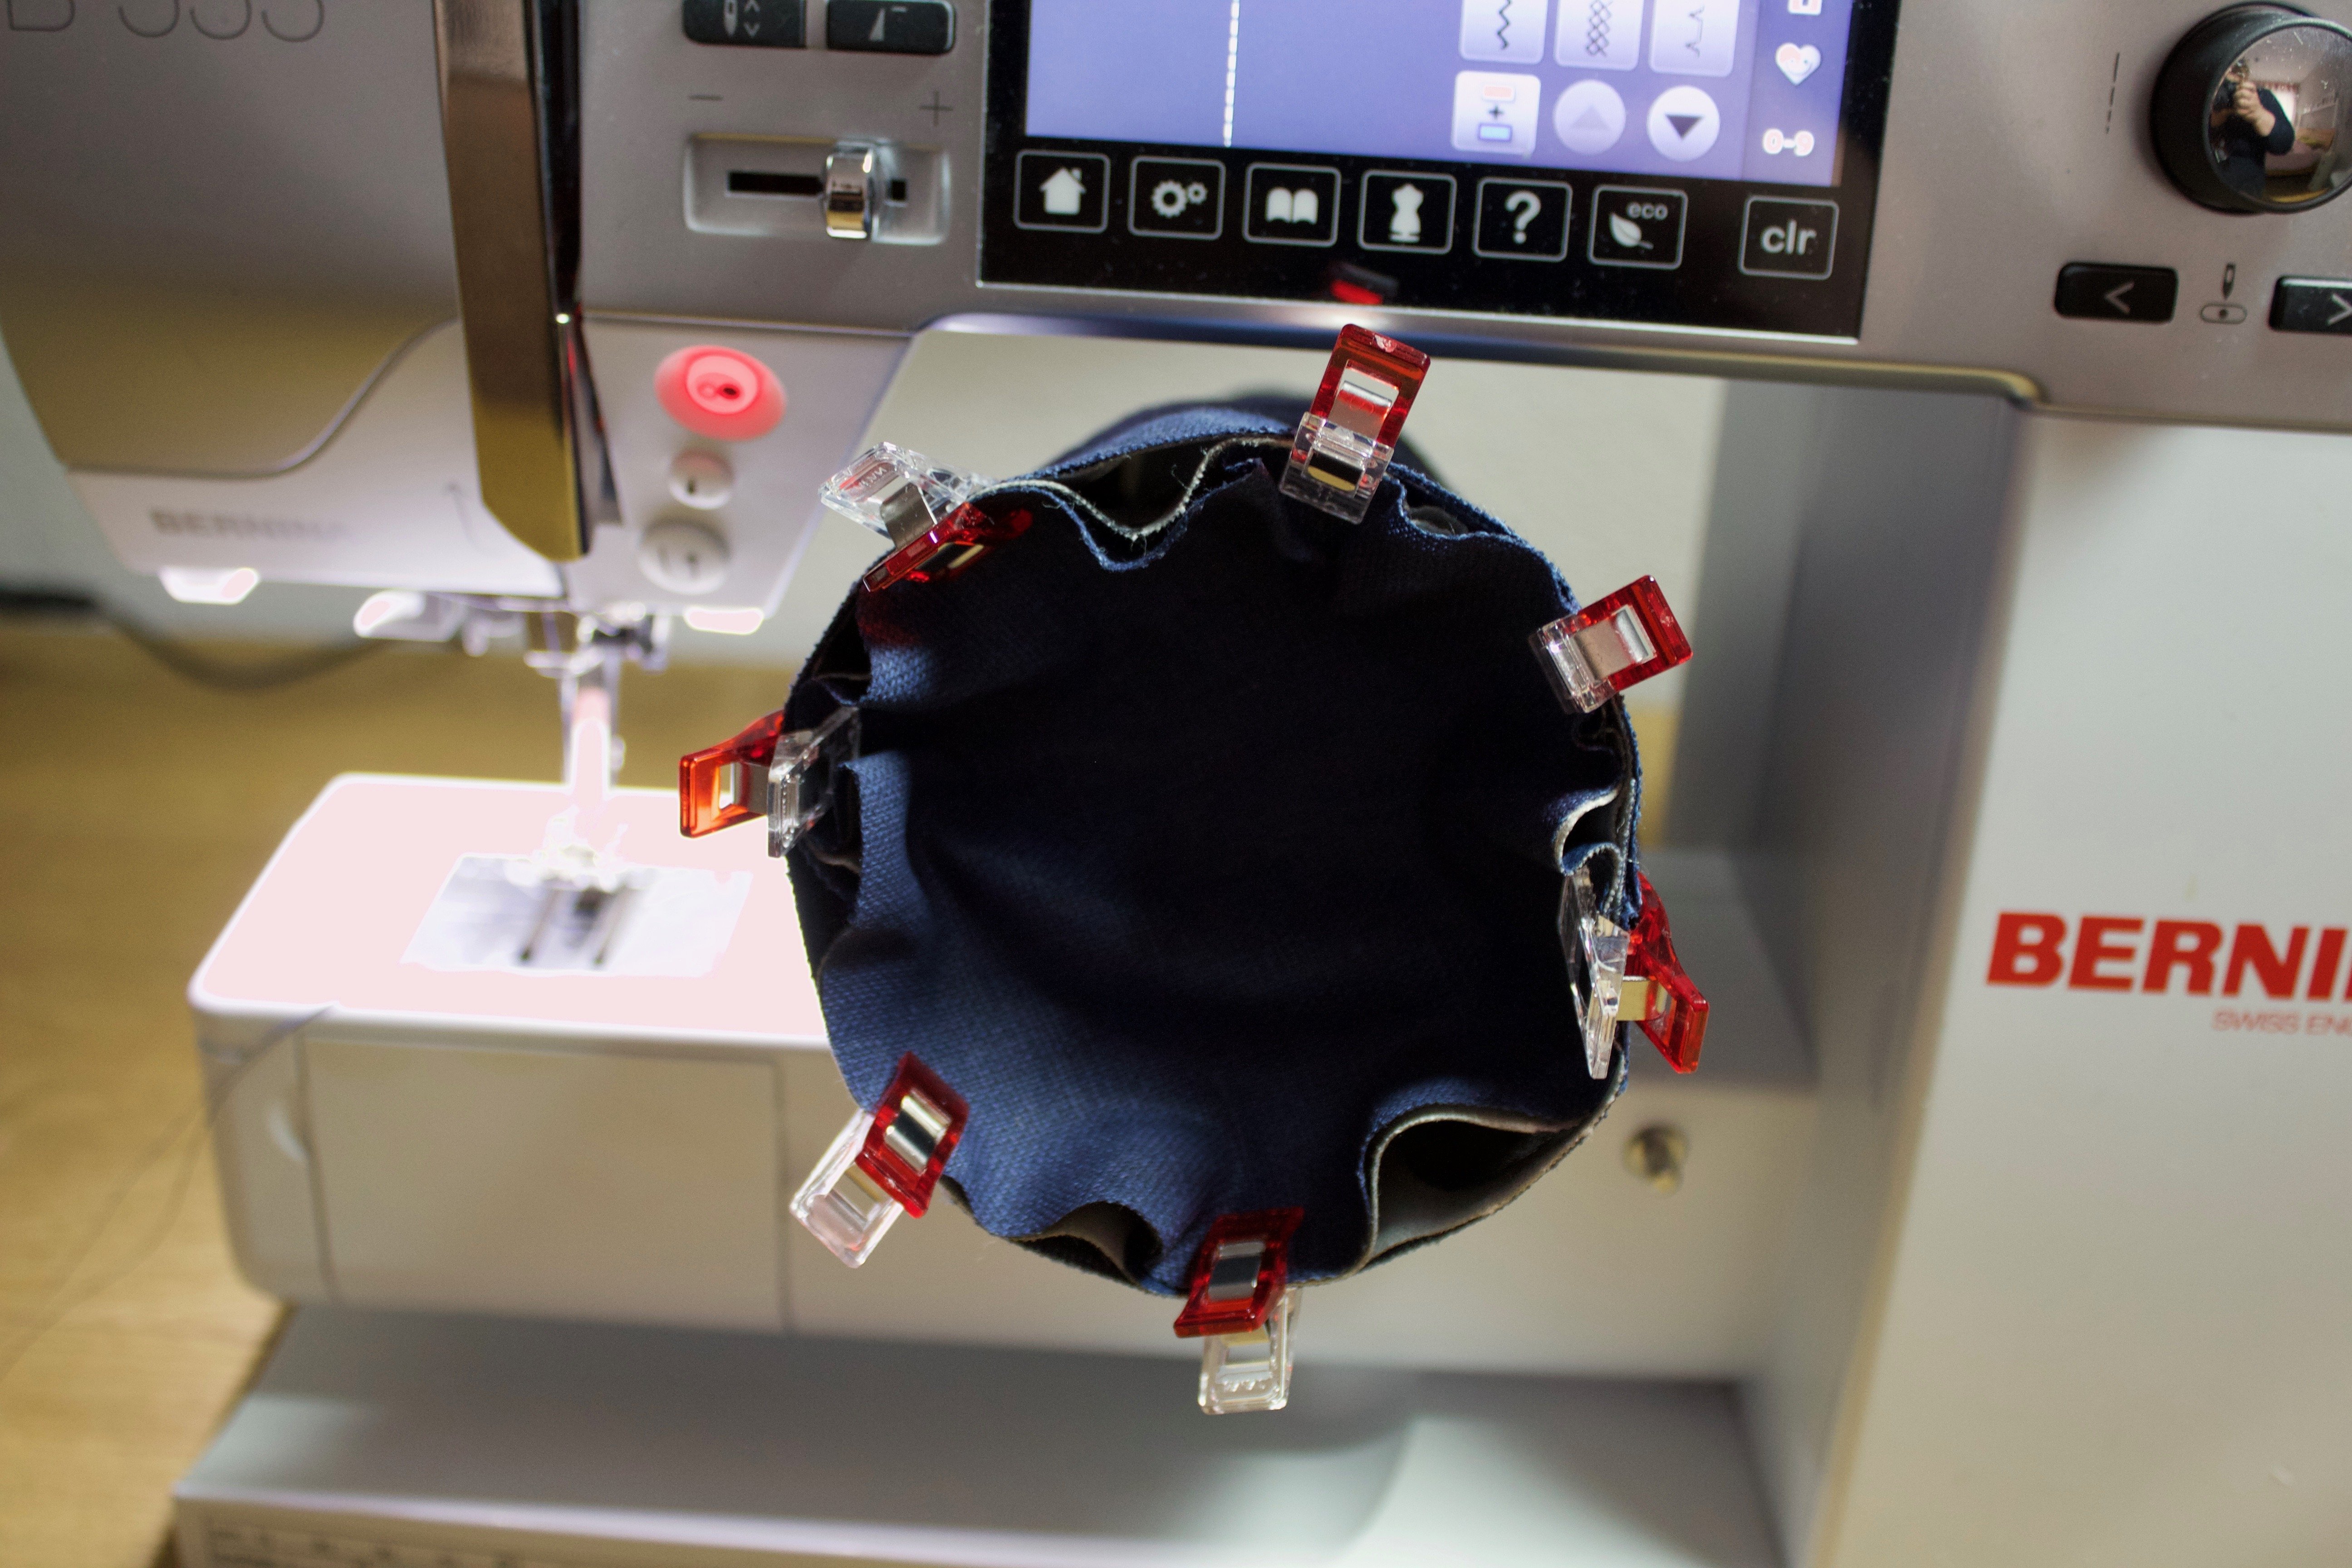
When you clip the bottom, some small gathers are created. This is quite normal and is due to the three-dimensional shape of the bag. Spread the excess material as evenly as possible around the whole circle. Now sew all the layers together using straight stitch. If you have an overlocker, you can finally overlock the edge; you can also use a normal zigzag stitch to do this. And that’s it!


I hope you enjoy your sewing and I wish you a relaxing Advent,
Bettina (Stahlarbeit)
P.S. I have calculated the pattern to fit both standard wine and champagne bottles.


Thank you for this pattern, I have made two already and they’re great. It’s easy to follow and the photos really help. The second one only took about 40mins from choosing fabric to finished! You need to be accurate with your seam allowance and base pattern cutting, otherwise you end up with extra fabric when joining the base. I did, because I rushed, but it was fine, just a little pleating. I’ve used quilting cotton, so I used batting on the external fabric and left the lining unquilted. It’s a lovely way to jazz up a bottle of wine present and will be useful for the recipient! I love the insulbrite idea too. Will give that a go on the next one! Thank you.
I will be making a few of these for gifts. Thank you for making this easy.
Thank you for this wine bottle carrier pattern. Very simple to make easy to follow instructions,
Years ago when making a vest I was taught to just sew across the ends (What is the the handle section here) with one side right sides out and the other one wrong side out just as done here. I wouldn’t even try to get inside there and sew the the way directed in this pattern. I can see where it might be neater, but for a wine tote, I think what I was first taught would be way faster. I even put insulbrite inside to keep the bottle cool. Thanks for the pattern!
Thought I’d try this as I’ve a general knowledge in sewing, but a beginner. It would have been really helpful to be told to tape the two bottle pieces together once printed off. When printed off there are three pieces so naturally thought I needed to cut out two of each piece in material.
Is there an English version of this pattern? Well the narrative in this page is English but the template is not. I’m guessing Stoffbruch means fold, Correct?
Dear Susan,
No, there is no English version of this pattern because Bettina is a German author and this blog post was first published on the German blog. But yes, Stoffbruch means to cut the pattern on the fold! If you need further assistance with the pattern, let me know 🙂
Happy sewing, Ramona from BERNINA International