 BERNINA Corporate Blog -
Dear community,
in this blog post you can find tipps & instructions on how to make a decorative and festive star table decoration (with free template) – perfect for Christmas and New Year’s Eve.

Today is the tenth of December and we are opening the tenth window here in our Advent calendar. In fourteen days it will be Christmas Eve, the start of the Christmas celebrations.
In keeping with the theme of the festive dinner table, I have prepared a decorative, festive and very easy-to-make table decoration for you today.
It’s best to read it all the way through to the end before you start!
You will need:
- Seven different fabrics of 15 cm with a fabric width of 112 cm
- Different fancy threads (metallic thread is the most festive)
- A4 photo card or another lightweight cardboard
- Fusible web
- Paper scissors
- Fabric scissors
- Printed paper template for the star
- Pencil
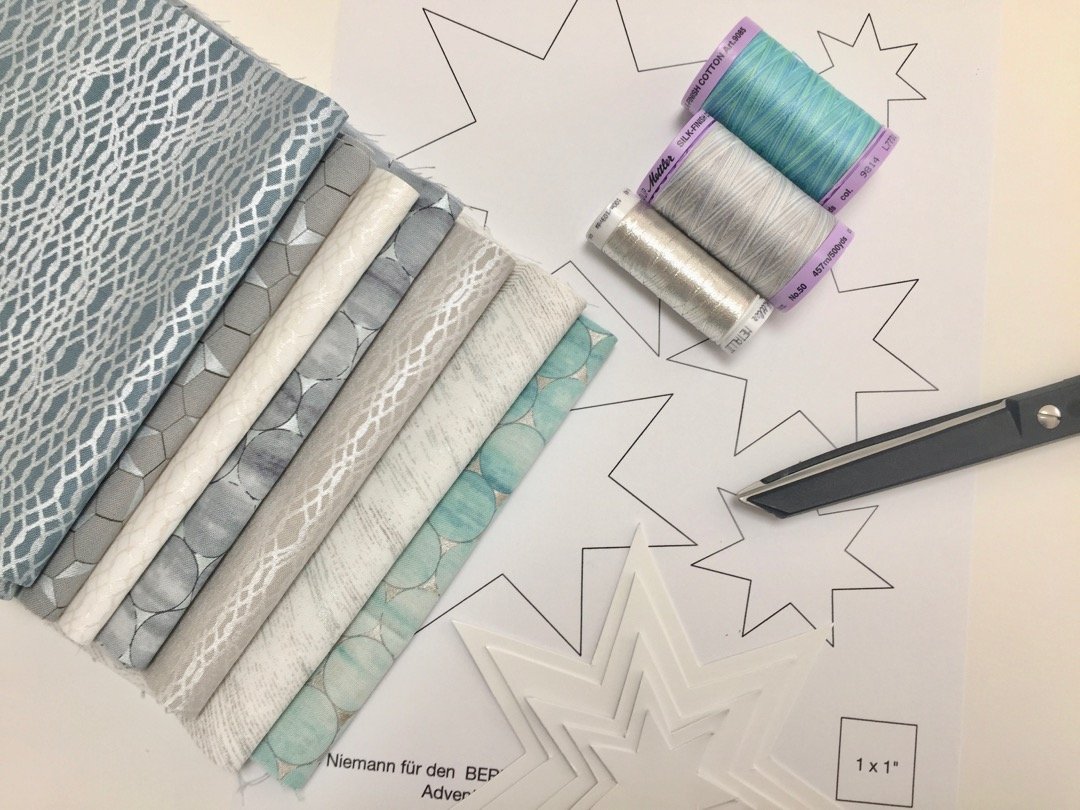
First, print out the stars I have prepared. Make sure you print them the right size. I have included a test square on the sheet so you can check.
Stick the printout of the stars onto the photo card and then cut out the stars. I have drawn five different sizes for you, which can be combined together.
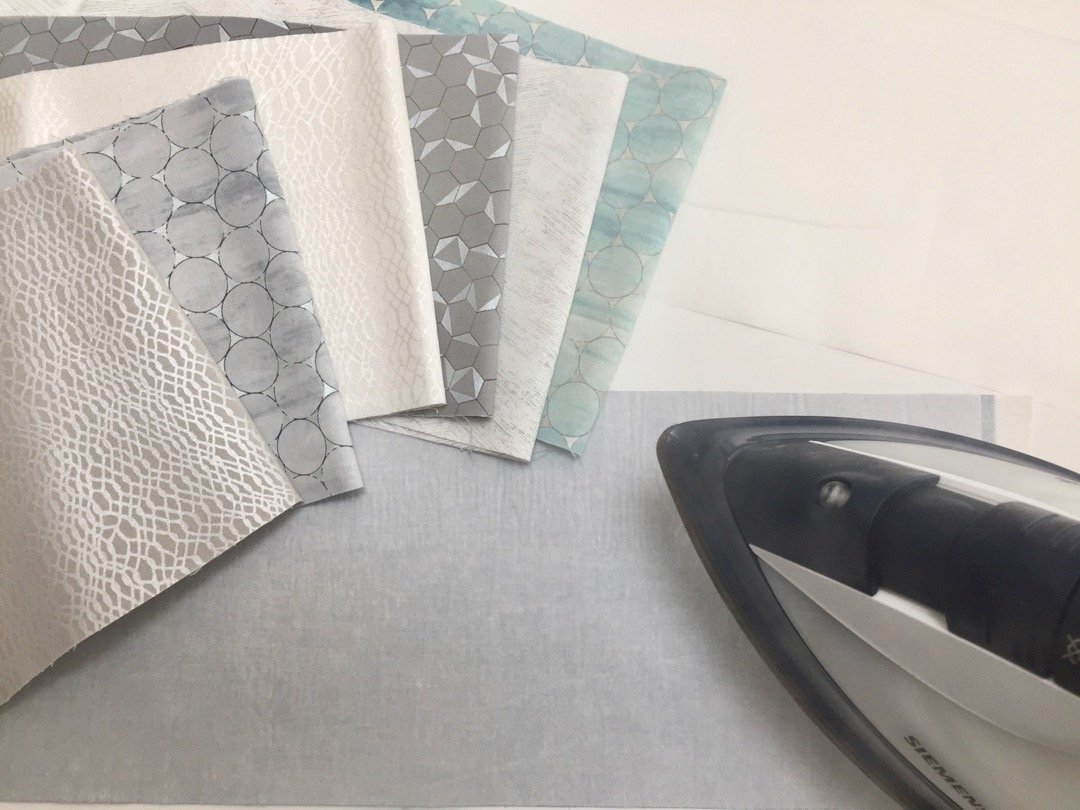
I ironed the fusible web with the rough side facing down onto the reverse of each of my fabrics. The smooth side of the paper is facing upwards, With a bit of pressure, the adhesive will stick to the back of your fabrics in about 5 seconds.
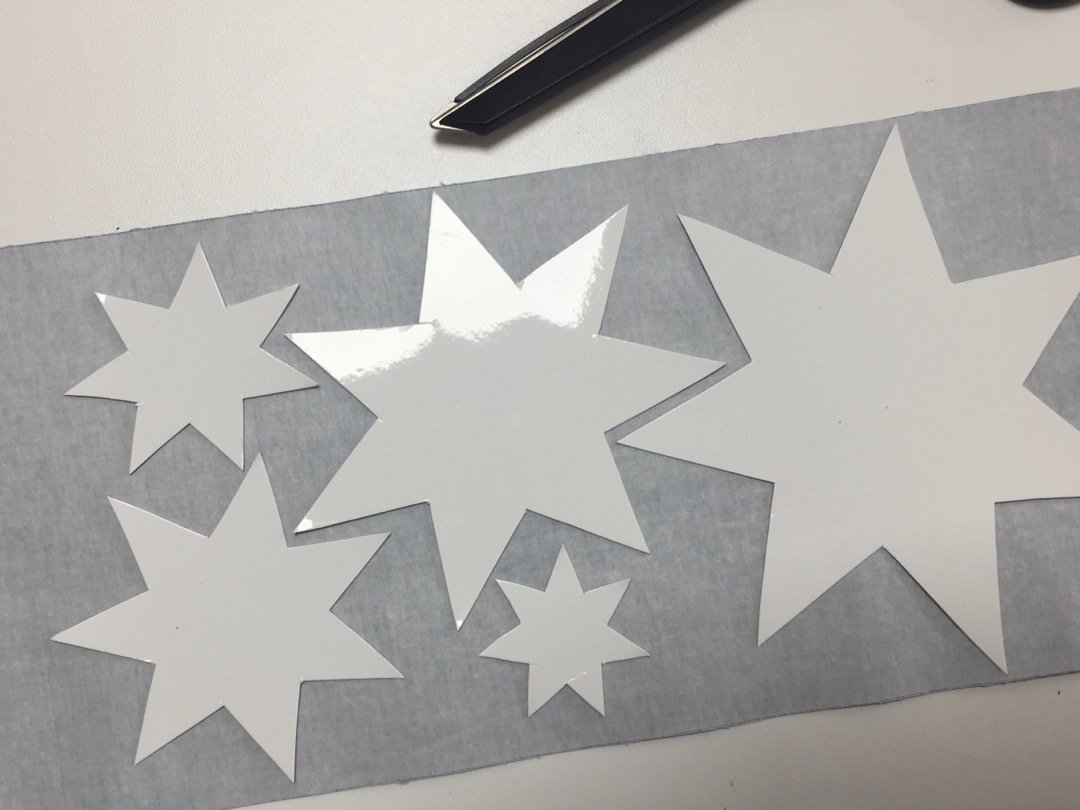
With the pencil you can now draw round the template outlines onto the paper. Now cut out the stars with the paper scissors. It is important to let the fusible web cool well after ironing so that the paper can be pulled off cleanly.
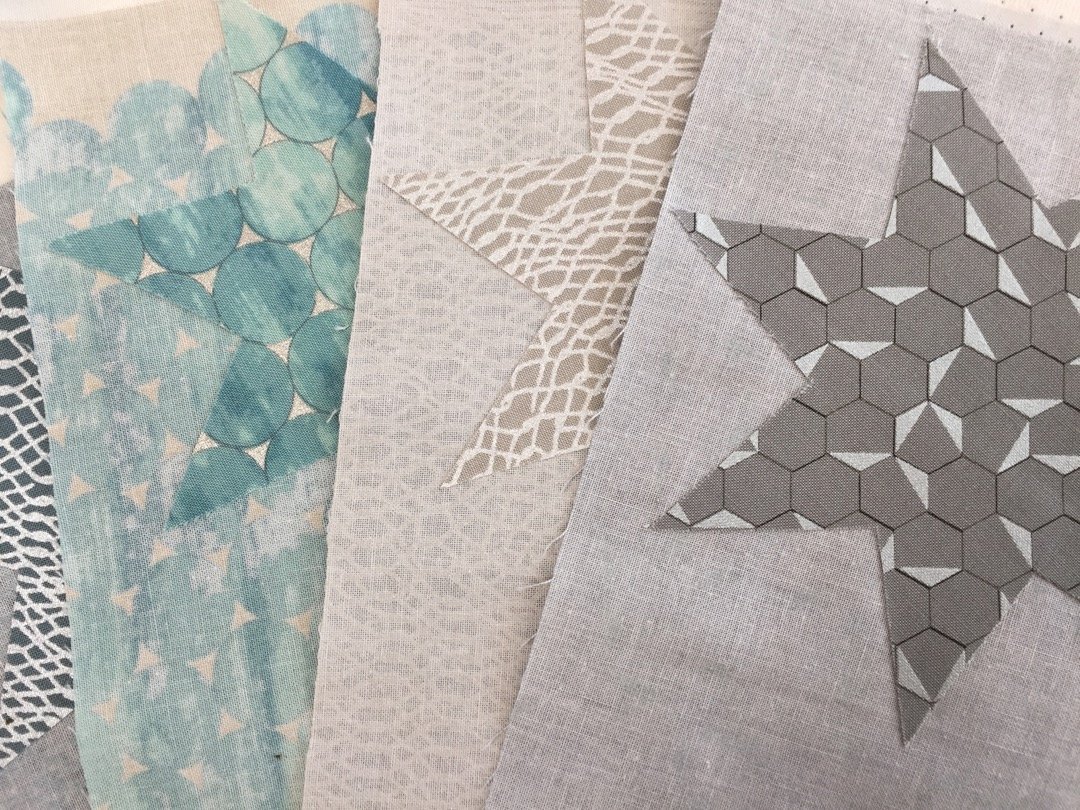
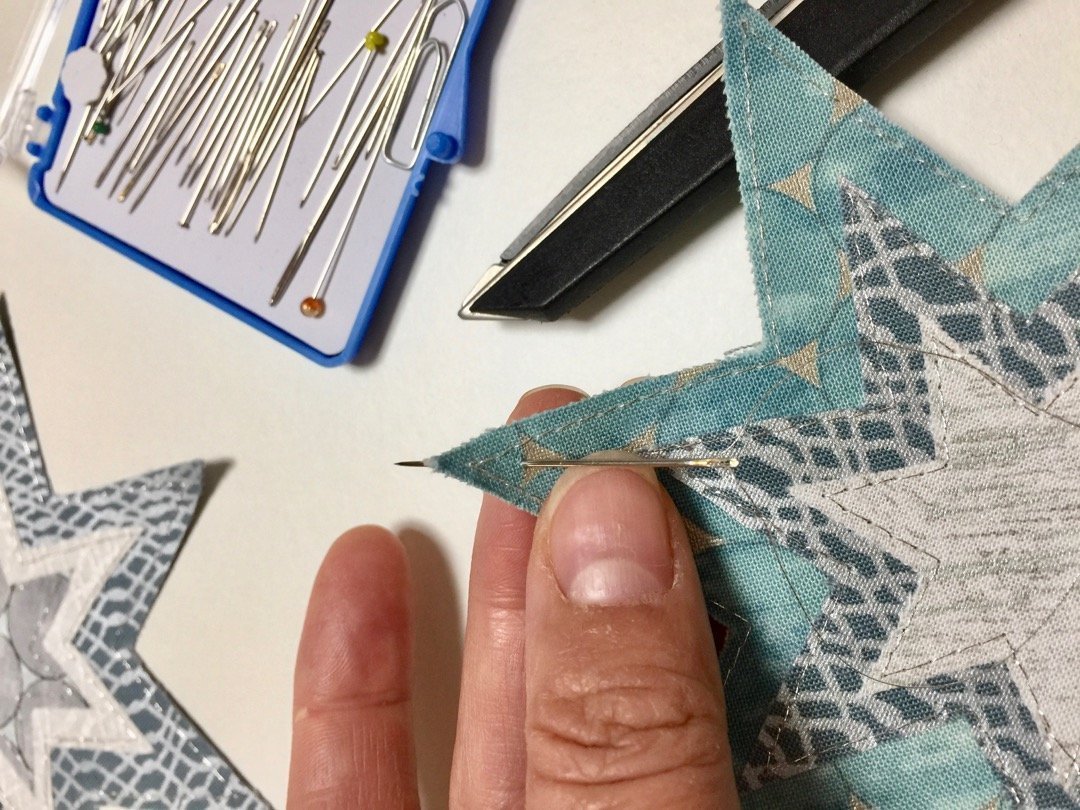
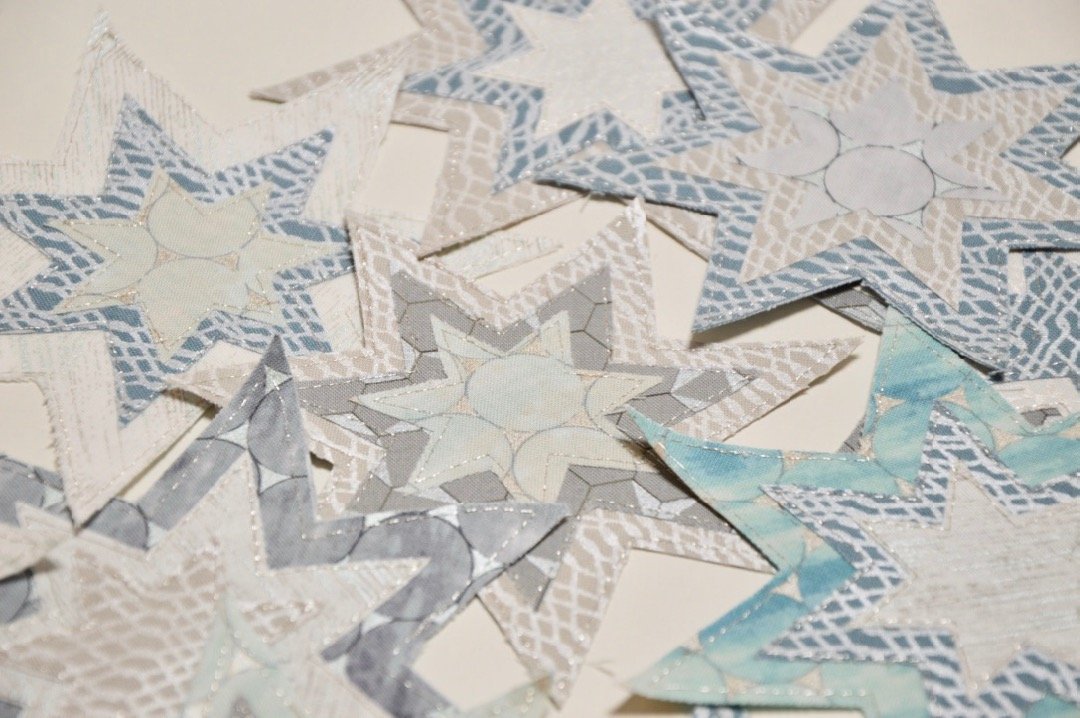
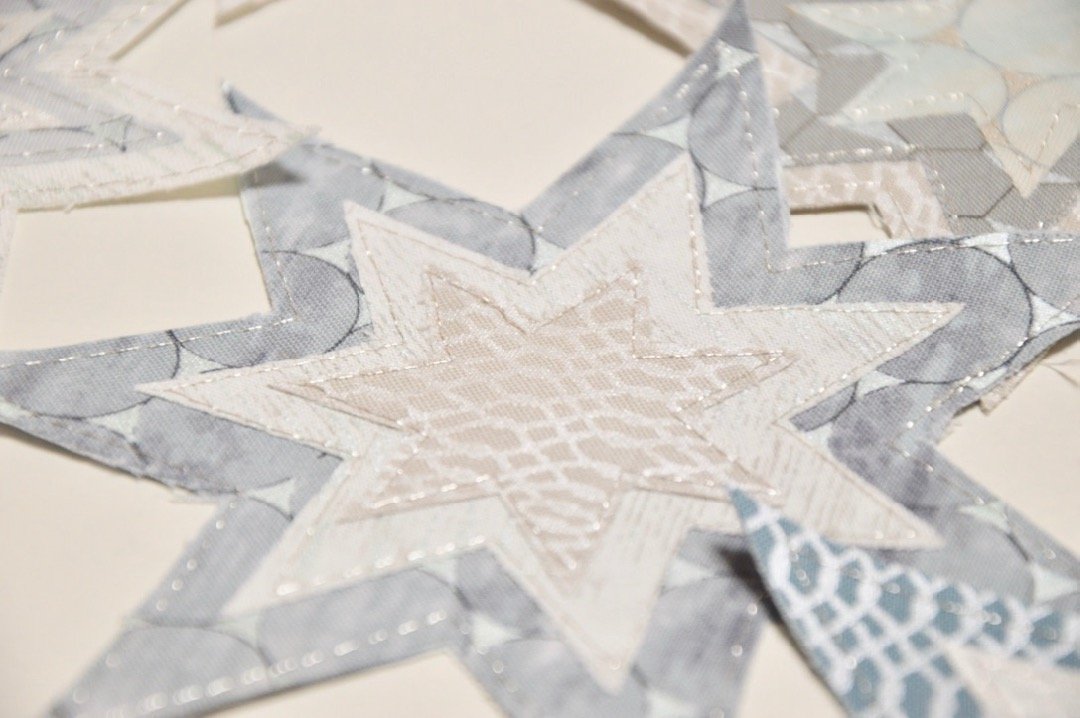
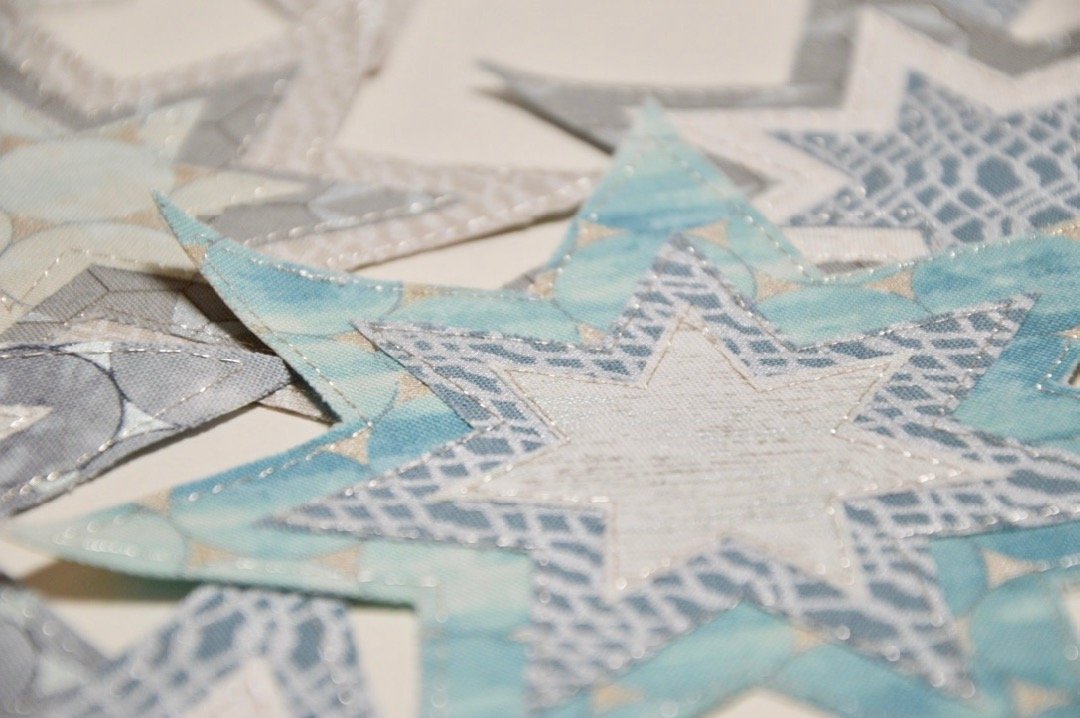
Now iron the big fabric stars again, with the adhesive layer, which is now attached to the back of the star, on the reverse of the fabric. This joins the two fabrics and sticks them together. Now it’s time to use your scissors again. But this time it’s the fabric scissors. Again, cut around the outlines and you have a star that looks nice on both sides.
You can now combine three different-sized stars or more. The stars can be ironed onto each other using the adhesive underside. To ensure everything is well joined, we now use the sewing machine.
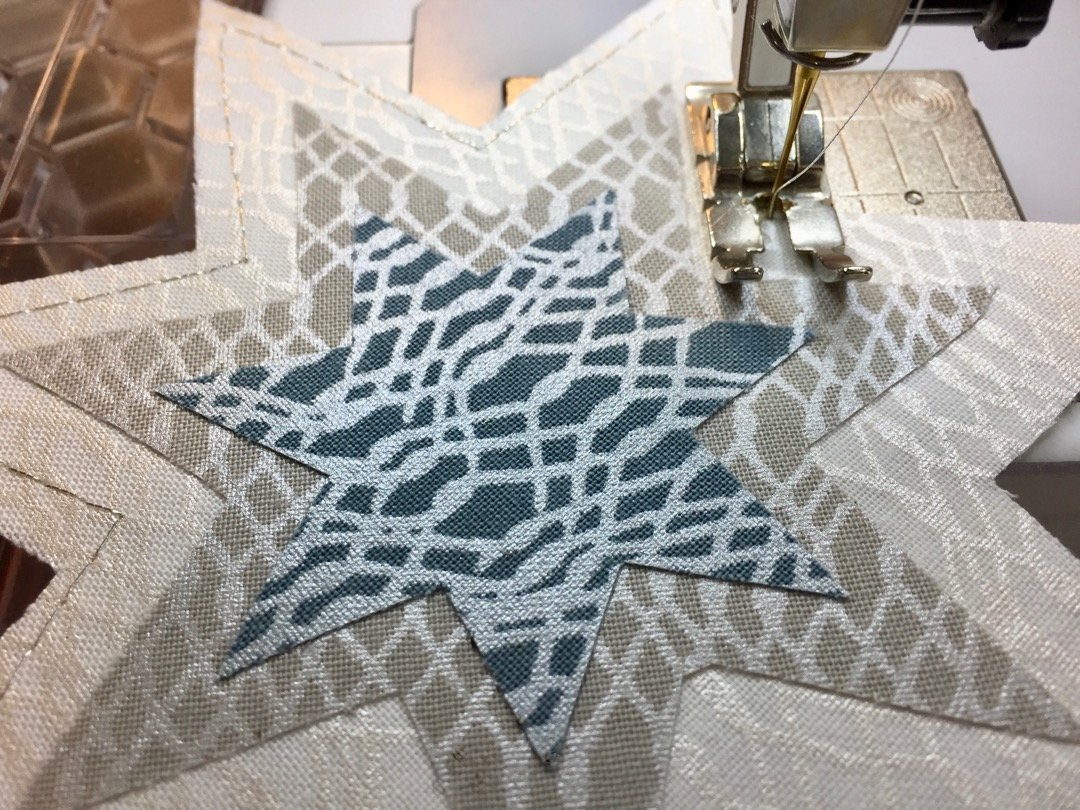
Combine with stitches
There are countless options for the sewing, combining different decorative stitches and different threads – let your imagination run wild.
I tried out a few of the options and in the end, the really simple one was my favourite. I chose straight stitch. I set the stitch length to 3. The thread I chose was Metallic thread from Mettler. For my bobbin thread, I opted for white. Metallic thread breaks easily. I therefore reduced the thread tension slightly and sewed very slowly.
The stars are also ideal as Christmas tree decorations. Simply draw a piece of thread through one of the star’s tips with a needle and tie the ends together. A Christmas tree decorated with these stars… lovely, don’t you think?
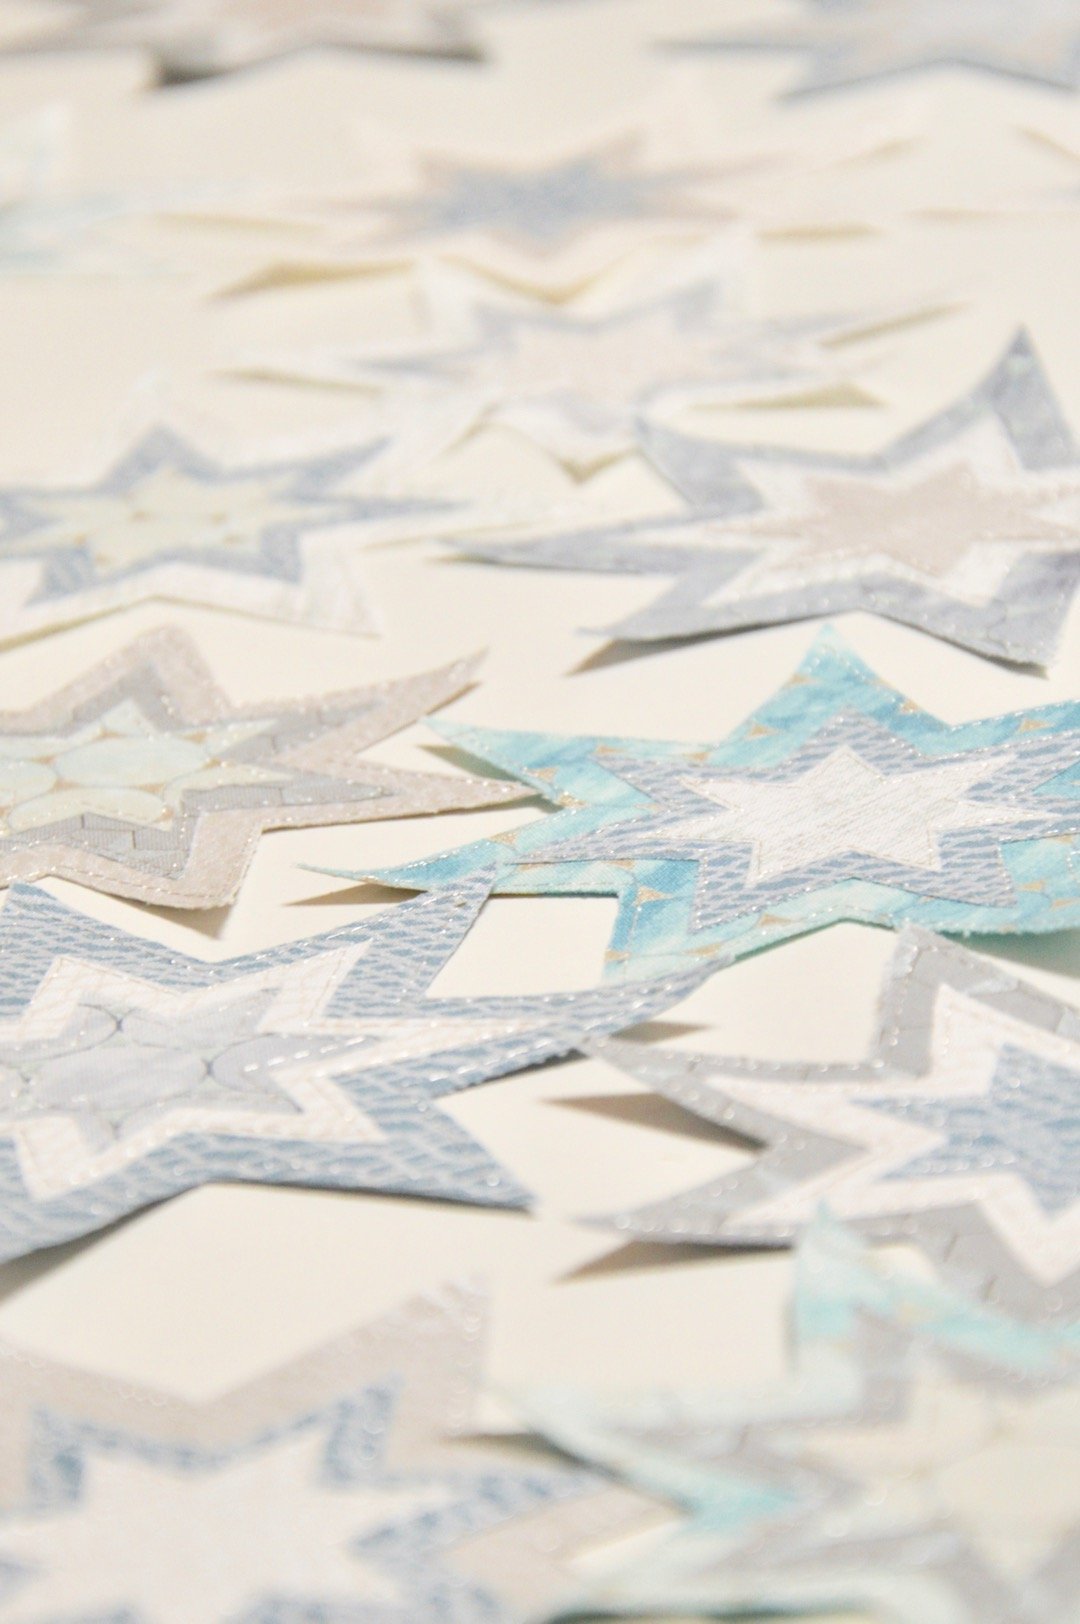
A cluster of stars on a festively decorated table is certainly a feast for the eyes…
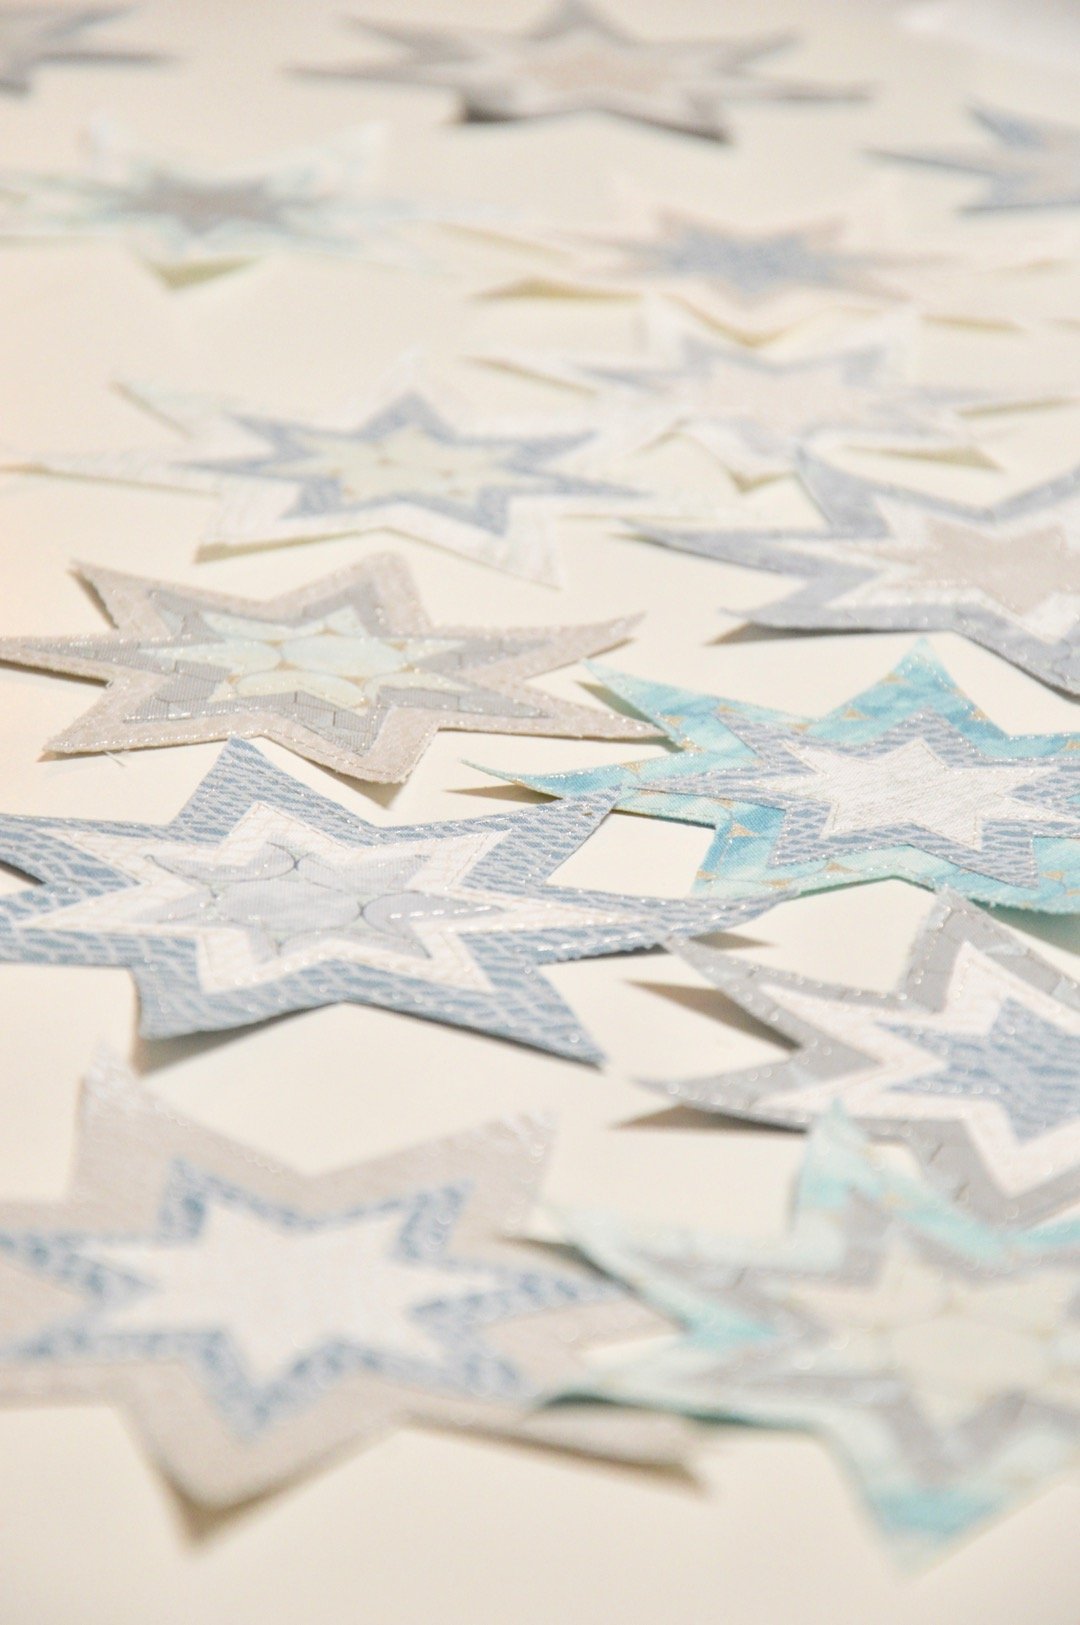
A cluster of stars on a festively decorated table is certainly a feast for the eyes…


0 Responses