 BERNINA Corporate Blog -
Dear community,
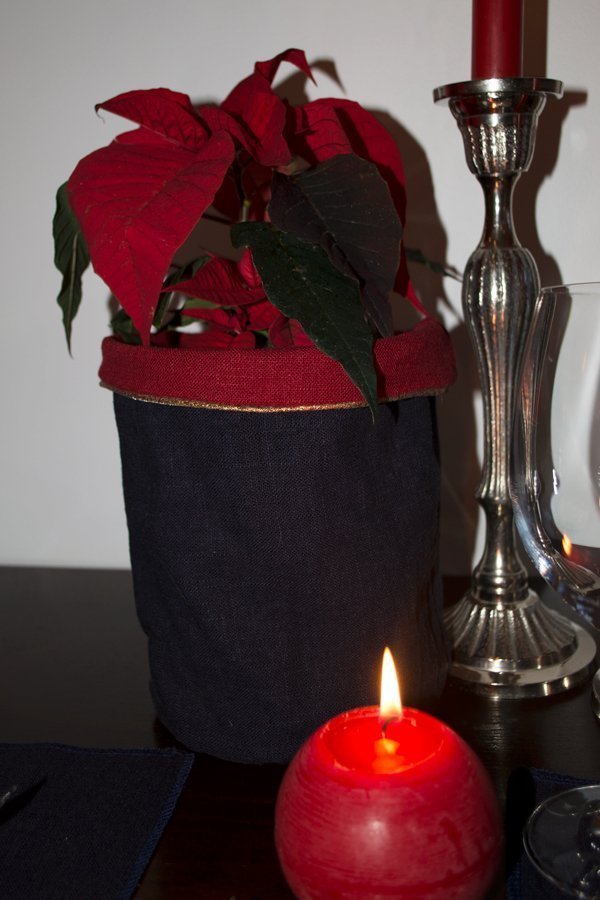
in this blog post you can find tipps & instructions on how to make festive fabric covers for your flower pots – perfect for Christmas and New Year’s Eve.

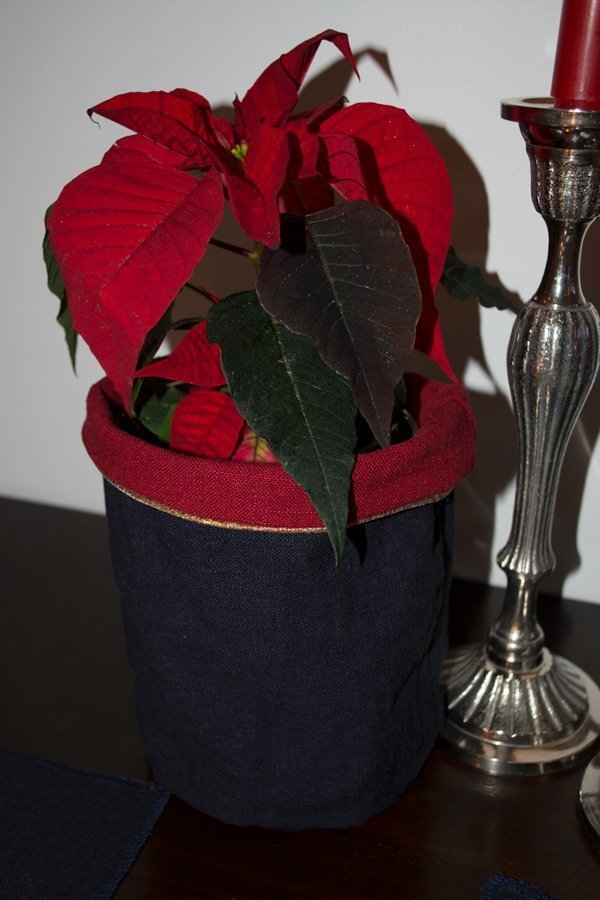
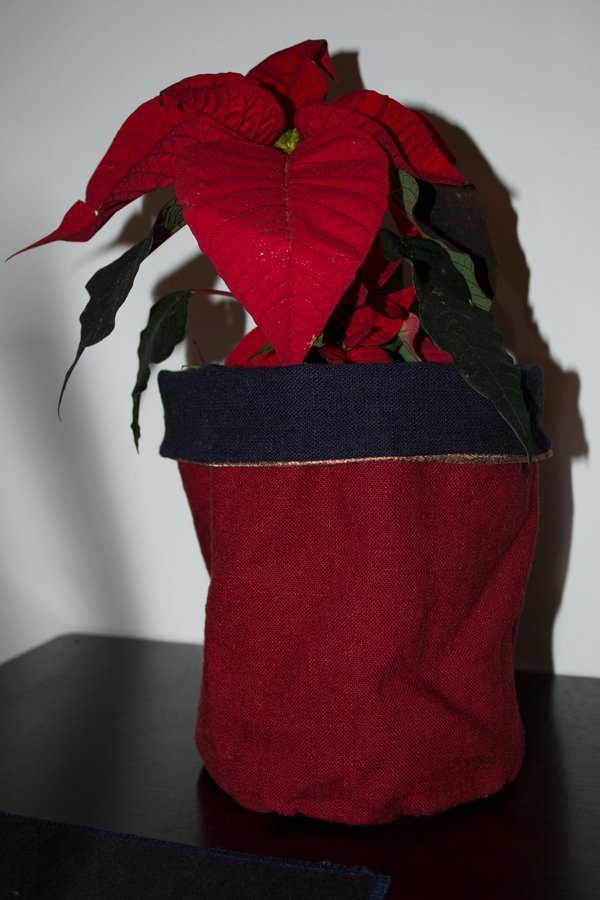
Welcome to day 9 of the Bernina advent calendar! Today I’m going to show you how to make reversible fabric covers for your flower pots, to get perfectly matching flower pots for your Christmas decoration without having to buy new pots. The fabric covers can’t just be used for covering your fabric pots, they could be used as nice fabric bread baskets, as baskets for sweets or small presents for children and so on – just let your imagination run free!
I chose to use a heavier linen cotton blend fabric for my flower-pot covers and whipped up some simple table mats in the same fabric to have a matching table decoration I live in Norway, and since the Norwegian flag is red, blue and white, a lot of Christmas decoration is made in these colours, too. This way the decoration seems festive but can be used for other celebrations as well. To get some extra sparkle I chose to add glittering bronze piping into the mix.
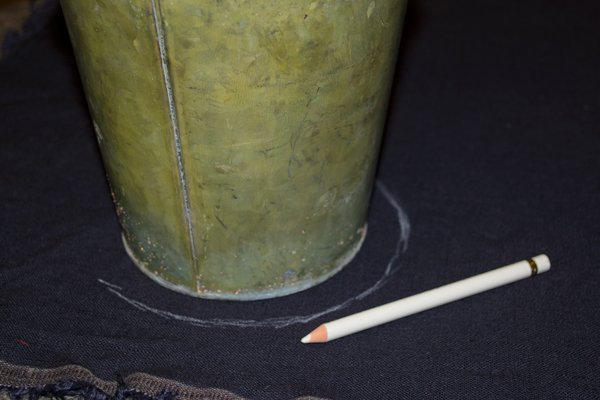
The flower-pot covers are pretty simple to construct: All you need is two circles and two big rectangles – and some piping, if you like the extra bling. The easiest way to get a circle in the right size is to put a flower pot onto your fabric and to trace around it. You need to add a generous seam allowance, since you want the fabric cover to be a little bigger than your flower pot. After cutting your circle, you can measure the diameter of the circle and use it to calculate the circumference of the circle. There are plenty of calculators online that do the job for you, for example this one.
After calculating the circumference, you can cut two rectangles, using the circumference of the circle as your width. I didn’t add any seam allowance, since you won’t sew at the outer corner of the circle, making the circumference of the circle a little smaller than calculated when sewing. The height of your rectangle depends on the height of your flower pot and on how much (if at all) you would like to fold the fabric cover at the top edge. Remember to check if your flower pot gets wider towards the top! In that case you shouldn’t cut a perfect rectangle, but angle the sides slightly outwards to make sure that the cover fits over your flower pot. In my case I added about 2 cm on each side at the top of the rectangle.
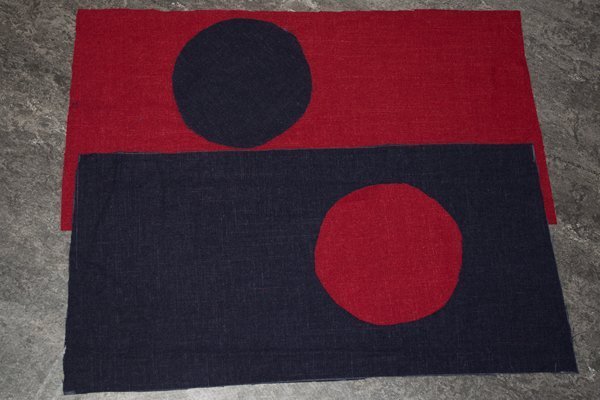
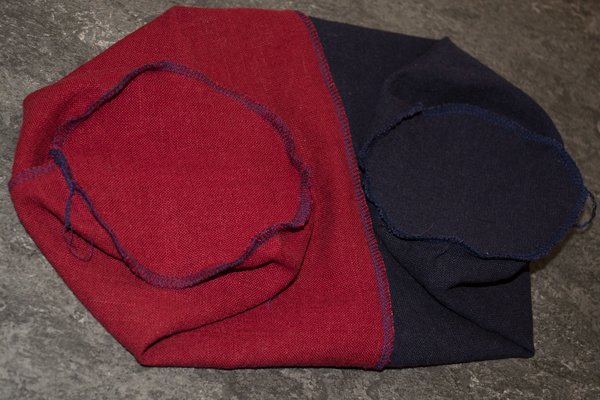
Now you should have two circles and two rectangles – one pair made of your outer fabric, one pair made of your lining fabric. Take your serger and simply sew along the shorter edge of both rectangles to create two fabric tubes. Don’t sew all the way along the edge when sewing the lining together, you need to leave a little hole in the middle of the seam to be able to turn the fabric cover right sides out after sewing the lining and the outer fabric together.

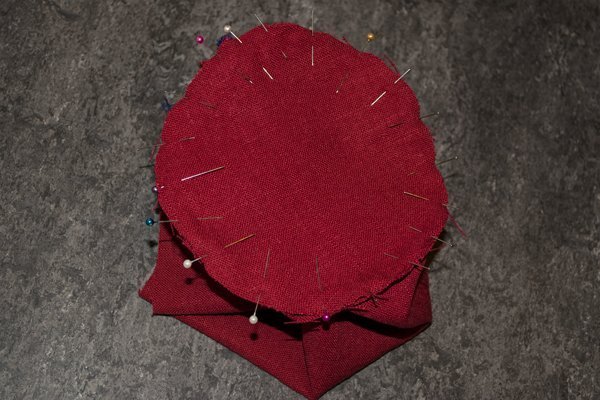
Now you need to pin your outer fabric tube to your outer fabric circle – I used a lot of pins to keep everything in place! Serge around the whole circle and try to avoid puckers in the fabric. Since all the serged seams are going to end up in between the outer fabric and the inner fabric, there’s no need to hide the end of the serger threads – I simply tied them to a knot to keep them from unravelling. Repeat the same step for your lining tube and the lining circle.
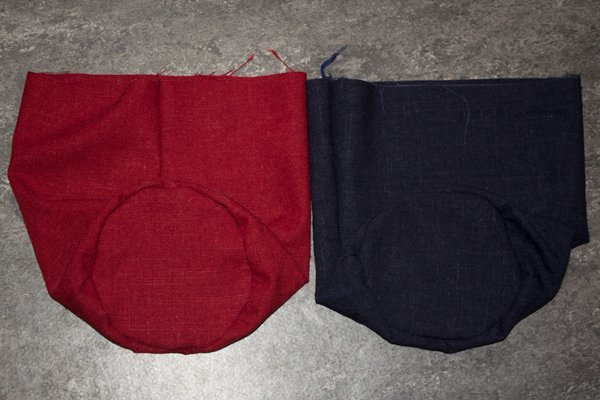
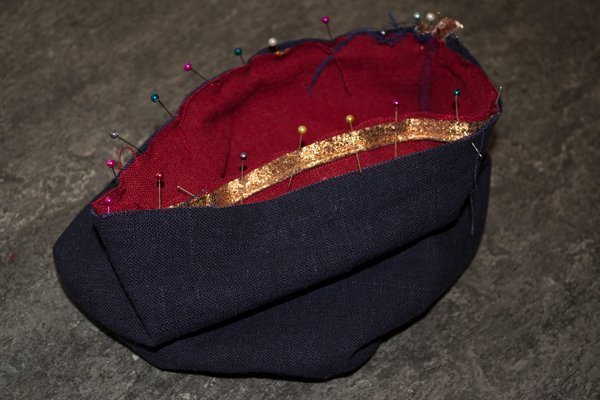
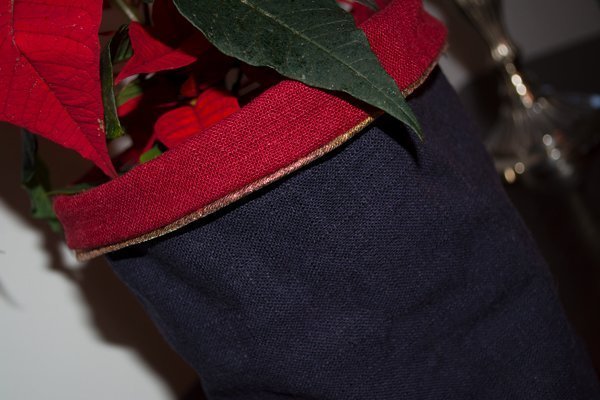
Now you should have two separate fabric bins. Place one bin into the other, making sure the right sides of the fabrics are placed against each other. If using piping, you need to place the piping between the two layers of fabric, making sure the thicker edge of the piping is facing away from the edge of the fabric. If you have a multi-purpose foot for your Bernina serger, this is the perfect time to use it, since it makes attaching the piping easier. I don’t have this foot, but attaching the piping wasn’t too hard with a regular foot, either. Where the piping overlaps, you have two choices: You could either just overlap the two ends of the piping and leave it hanging a little outside of the fabric to make sure that the cut edges are hidden after serging, or you could open your piping a little, cut off a little bit of the cord inside and sew the fabric ends together. The second option looks very clean, but I went for the first one, since the glittery metallic piping wasn’t very easy to handle. Both possibilities work just fine!
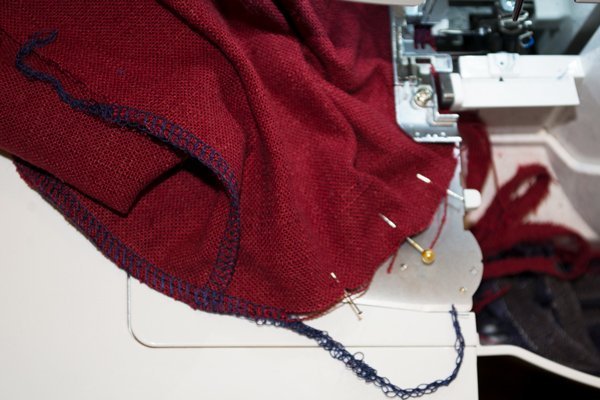
Now you have to sew all around the top edge of your two fabric bins, making sure that you’re sewing as close as possible to the piping without sewing over it. The piping is easy to feel between the two layers of fabric and my Bernina L460 has clear guidelines on the presser foot, making it easy to see where the serged seam is going to end up. Alternatively, you could serge the piping to only one layer of fabric, securing it before adding the second layer of fabric afterwards.
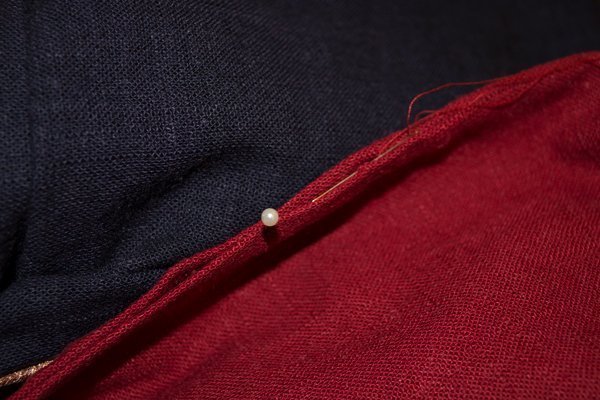
Now all you have to do is turn the fabric cover through the turning hole in the lining. You could sew the turning hole closed with your sewing machine, but I decided to sew a ladder stitch by hand to close the hole. The hole is close to invisible this way, which makes the fabric cover reversible. You’re done!
As mentioned earlier I made some very basic table mats as well. Just cut a few rectangles in the desired size (mine are about 45 cm x 30 cm) and serge all the way around them. You could either stop at each corner and hide the three serger thread tails left in the end inside the serged seam, or you could serge all the way to the corner of the fabric, lift your presser foot, turn the fabric and keep on sewing. This might need some practice, since it’s important to stop sewing at the perfect spot, but that way you end up with only one serger thread tail and less work. I chose matching dark blue serger thread, but what about using some contrasting serger thread for some visual interest?

Thank you for reading and have fun sewing your own flower pot fabric covers!


0 Responses