 BERNINA Corporate Blog -
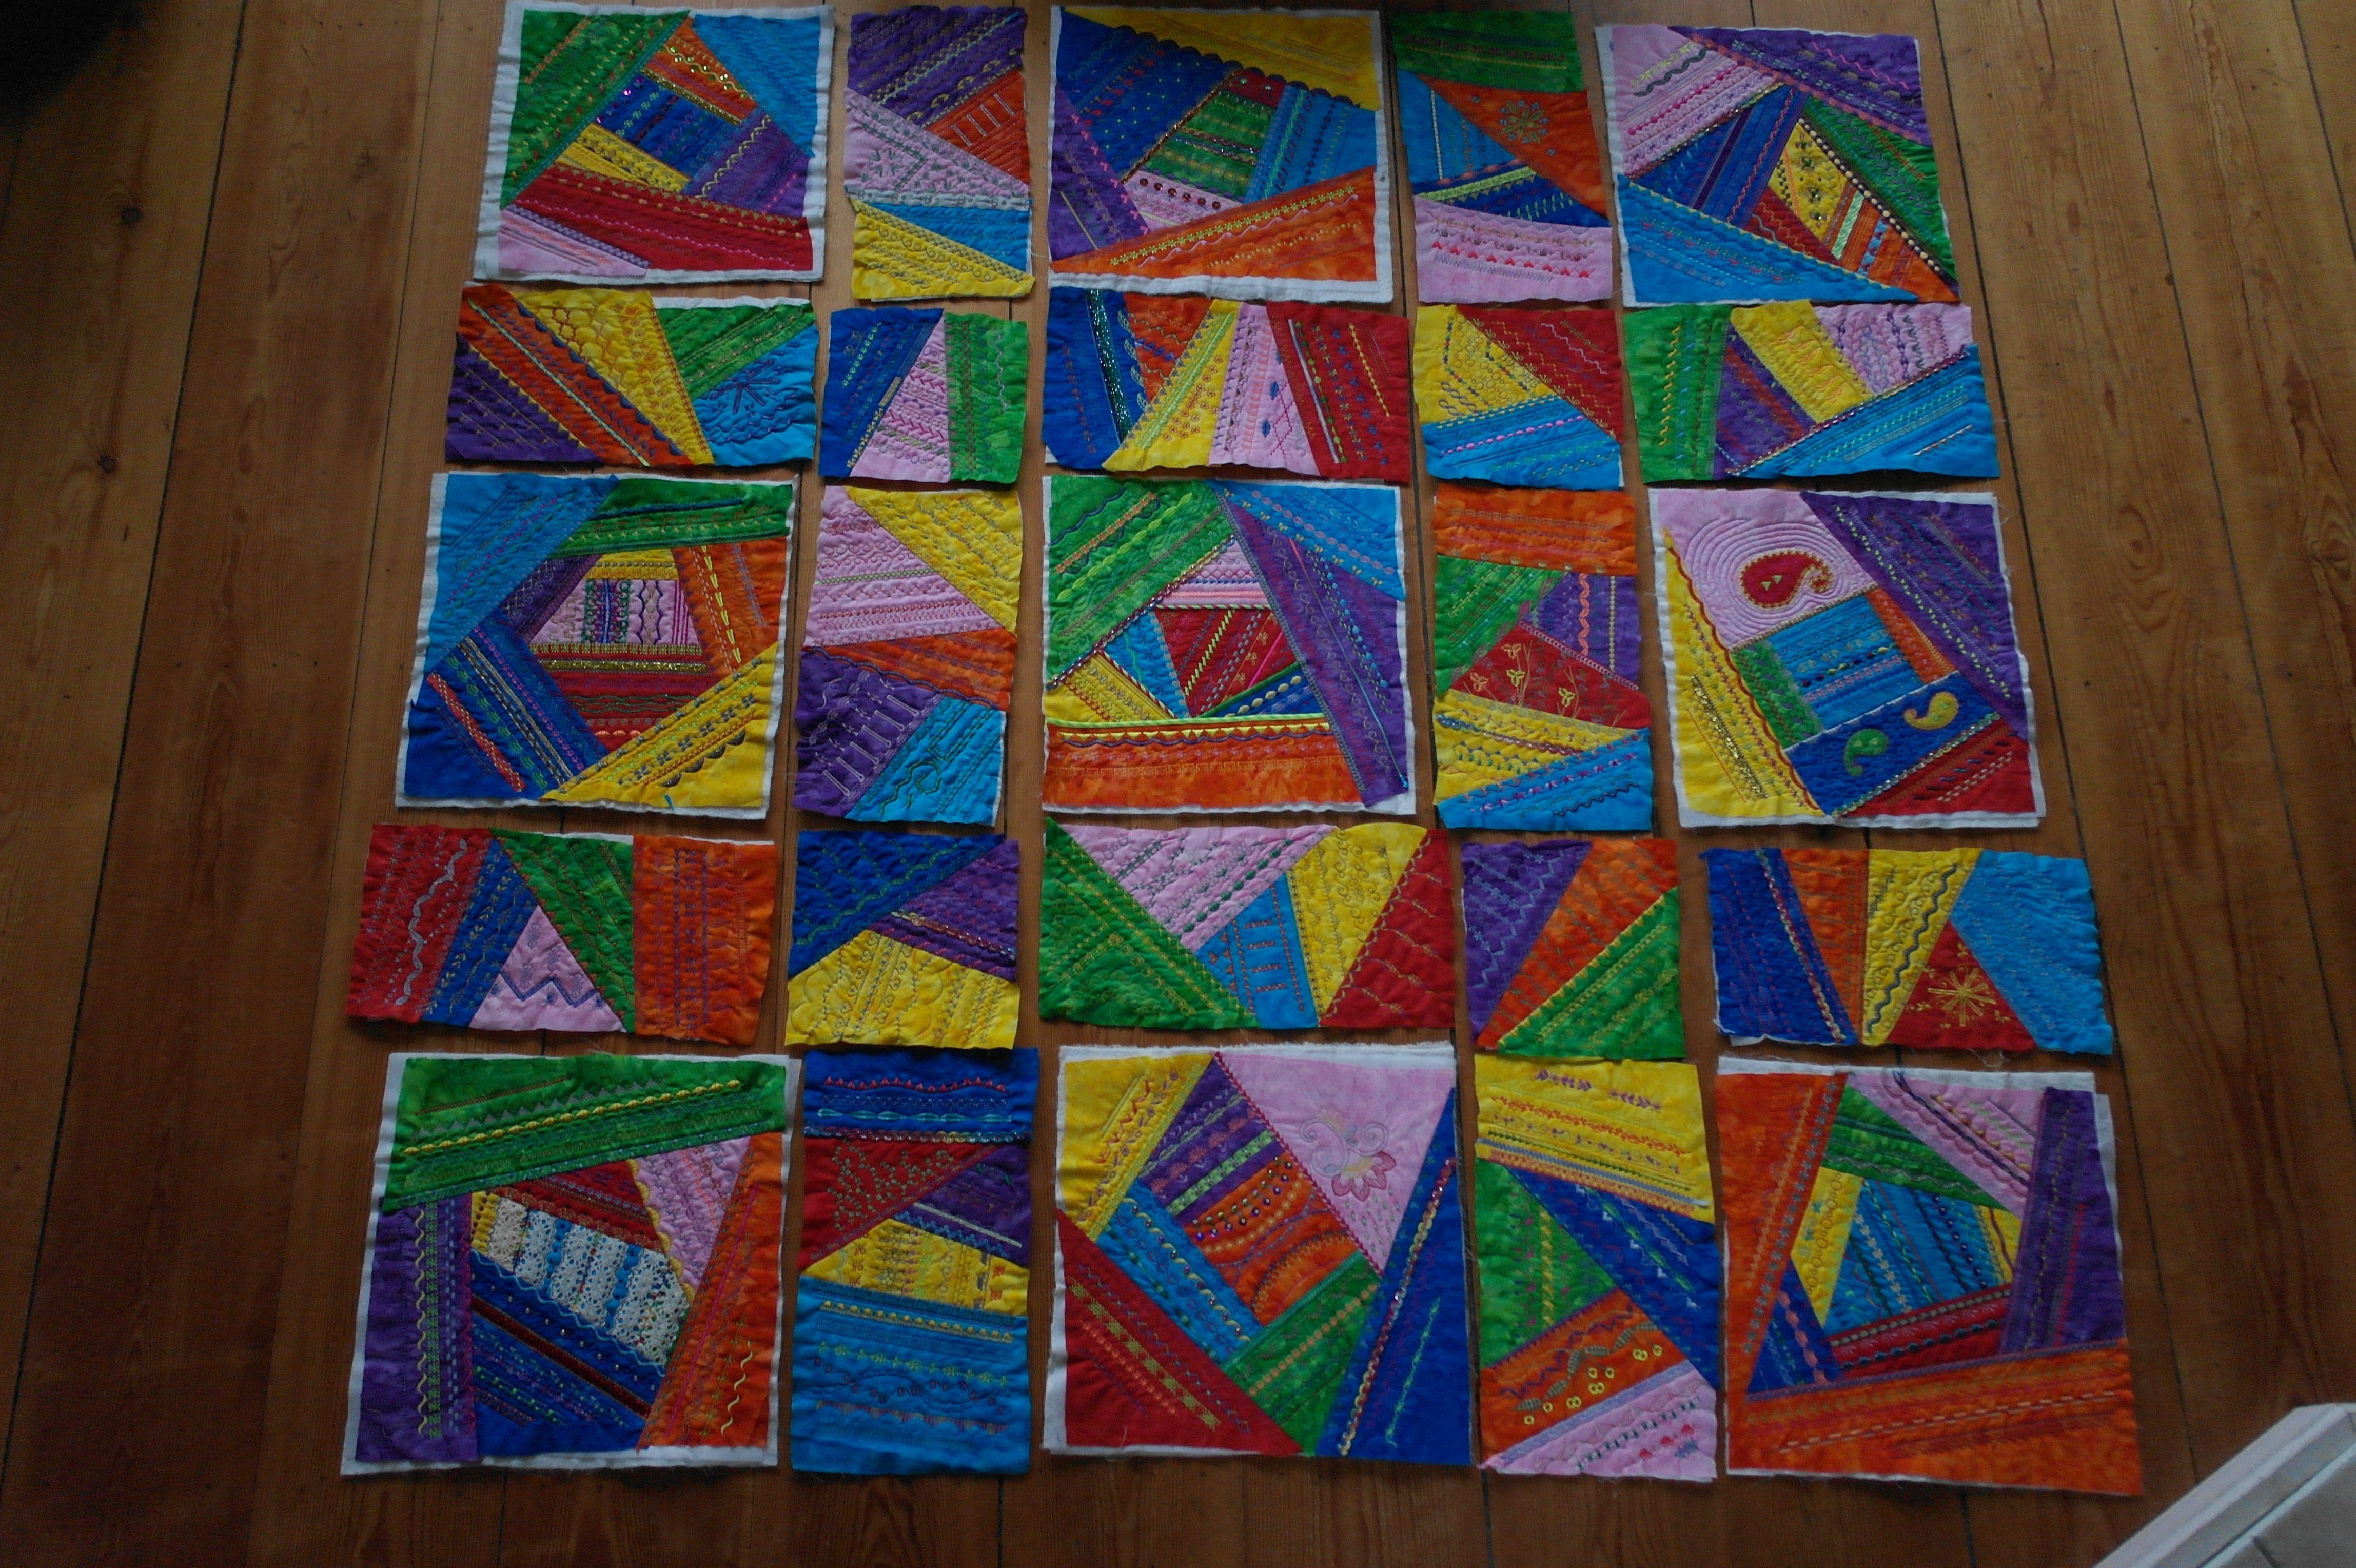
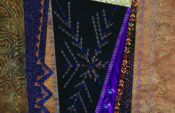
We have made beautiful blocks and ended up with a colorful stack of sandwiches! Special stitches, ribbons and lace, beads and other embellishments are sewn on and added in the past 11 months. The last 2 months were intensive, because of the number of blocks that had to be made. Many questions were asked, about how the quilt will look, how the blocks should be sewn together etc. But hey, it is a mystery quilt, so the secret will only be reveiled in the last month, and that’s today! If all your blocks are ready, the assembly begins, and you will finally see the end result.
Please take your time to read this blog: it is very long, with lots of pictures and text (divided into segments), because I want to explain everything the best I can. Read and work by segment and remember: this message will remain at the BERNINA Blog (like all the other ‘months’). So there is no hurry to finish this project, just have fun!
If you have followed this blog each month, and made all the blocks, there is a big stack ready for assembly, but all blocks/sandwiches are too big. This was neccesary for making decorative stitches in all directions, knowing your block would ‘shrink’ with all these stitches (which can be up to 1 cm, depending on the density of the decorative stitches, which batting you have used etc). To be able to join the blocks the right way, they will have to be cut back to a certain measurement. But first you have to layout your blocks, the way you want them in your quilt.
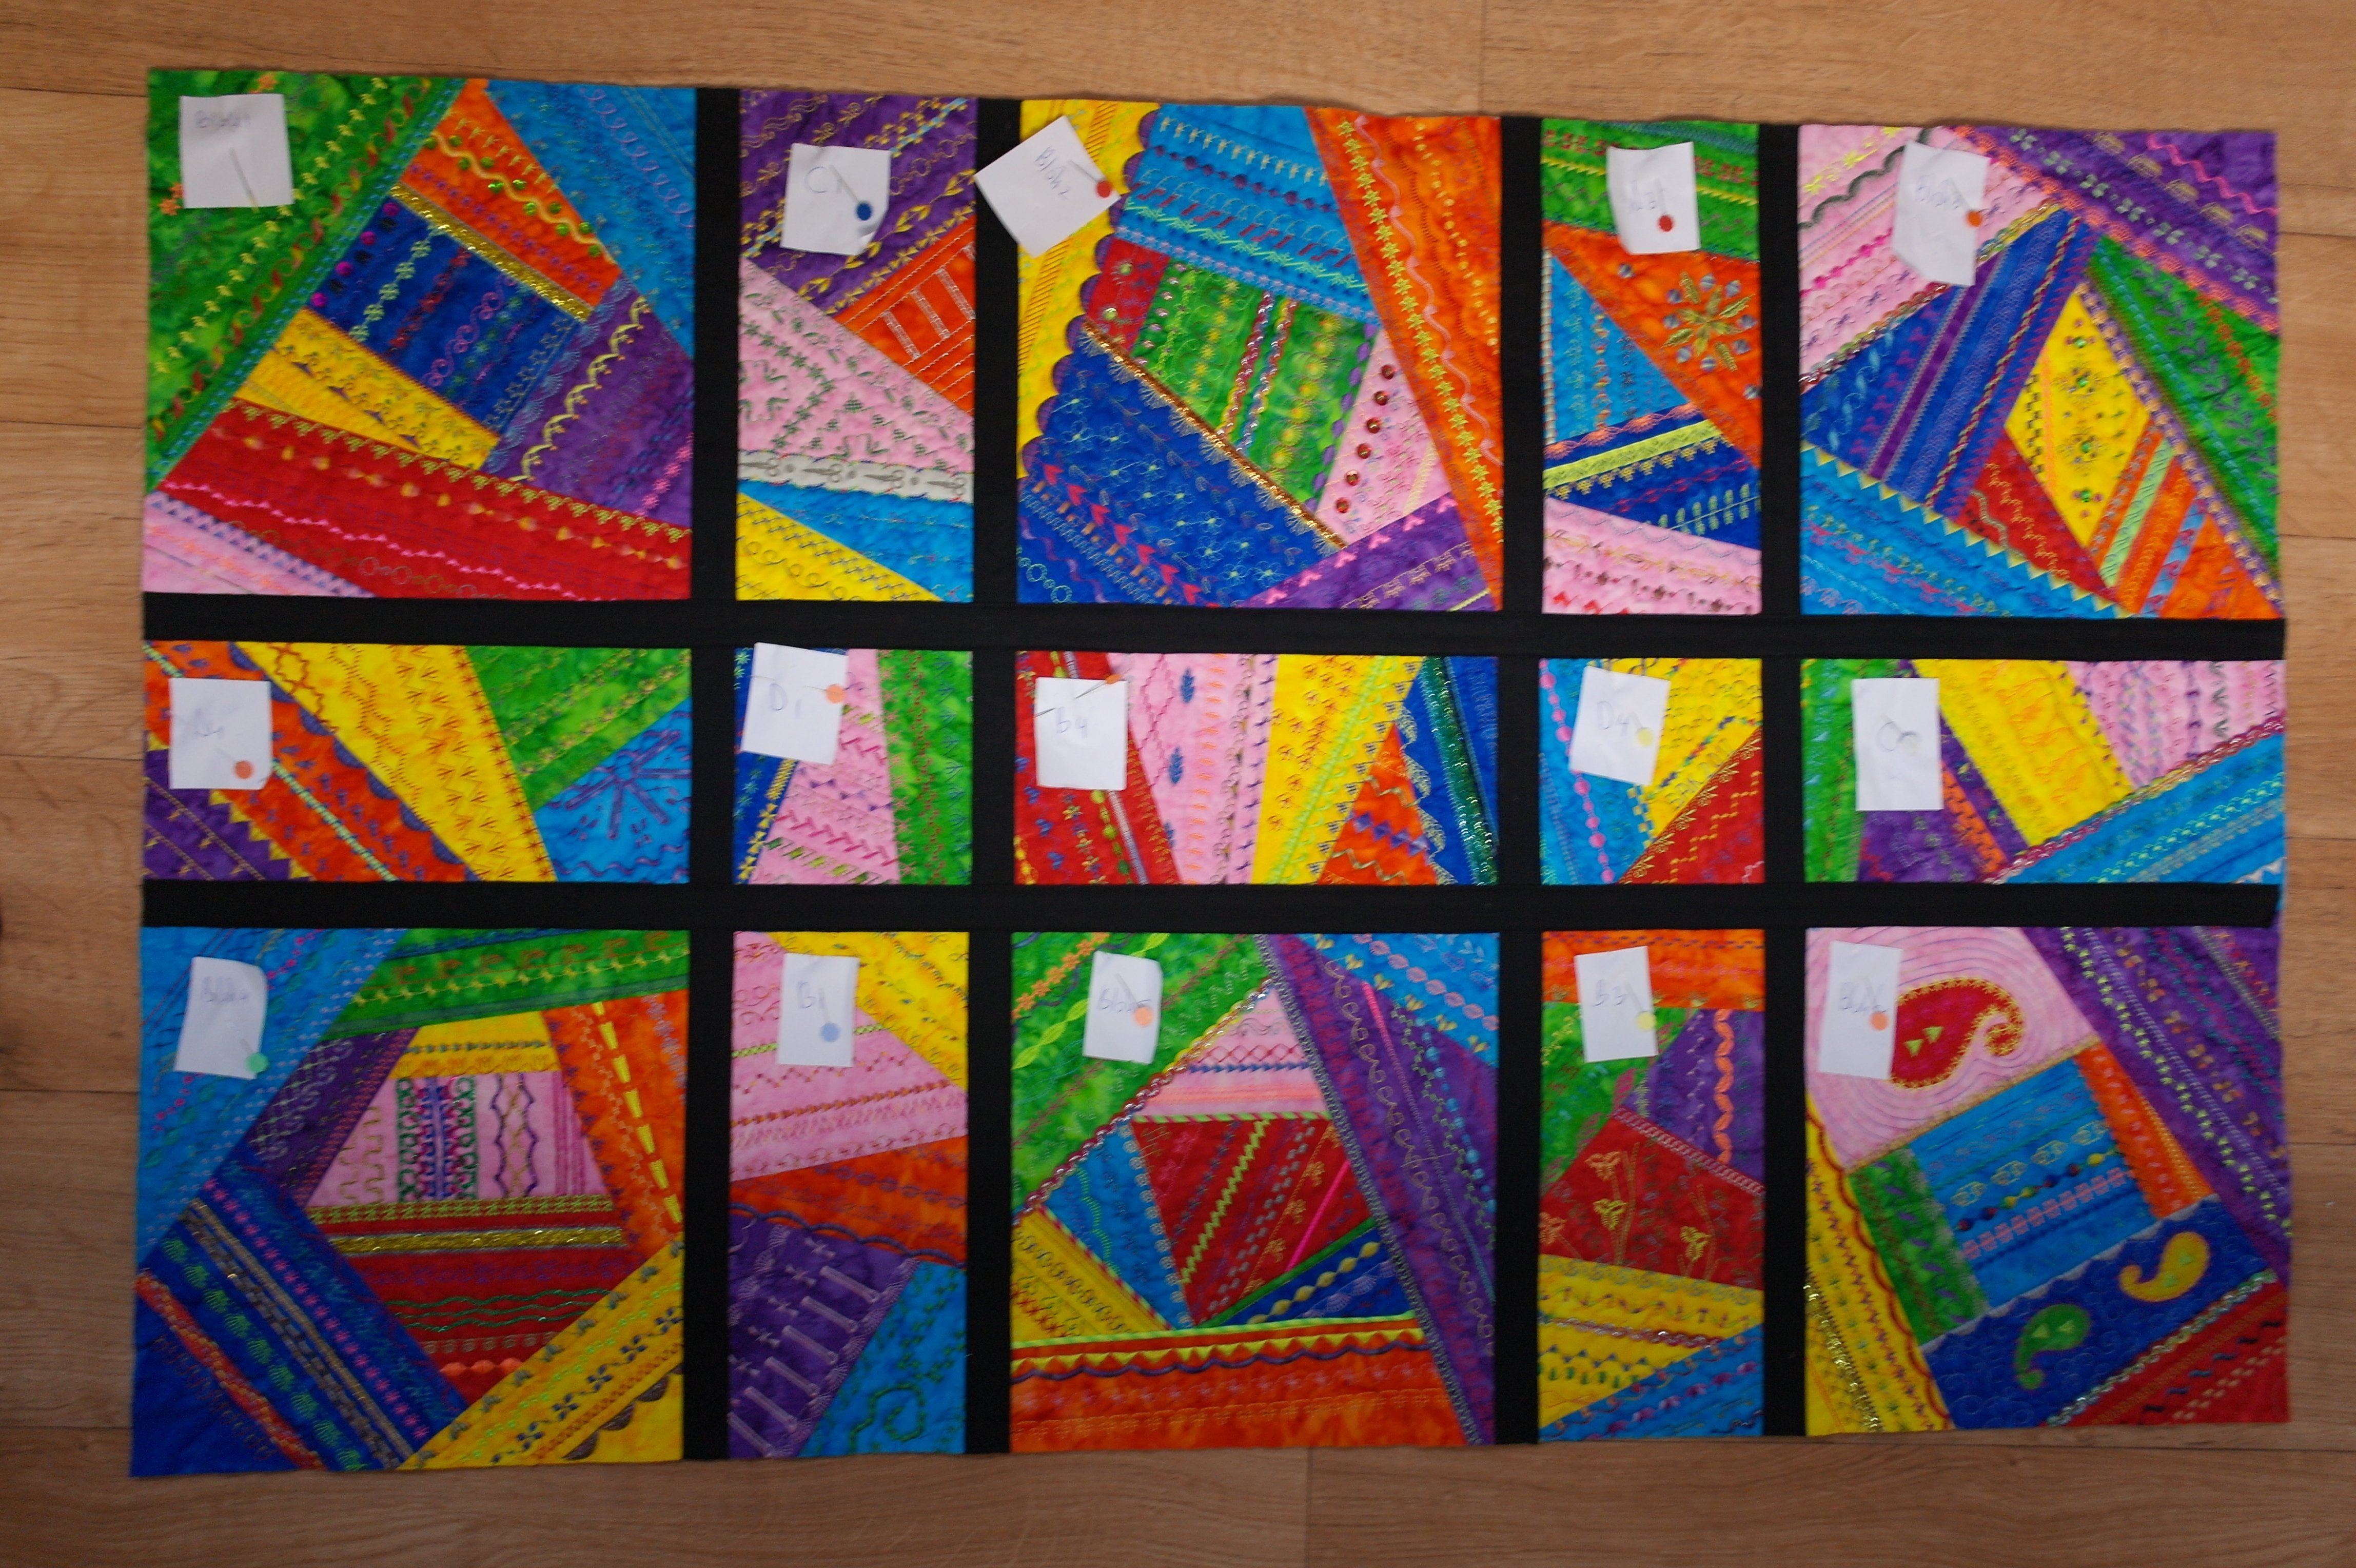
And then there’s the surprise: many of you thought the small and narrow blocks should be at the edge of the quilt, as borders. But I have thought of another way to place them, which is more to the center of the quilt.
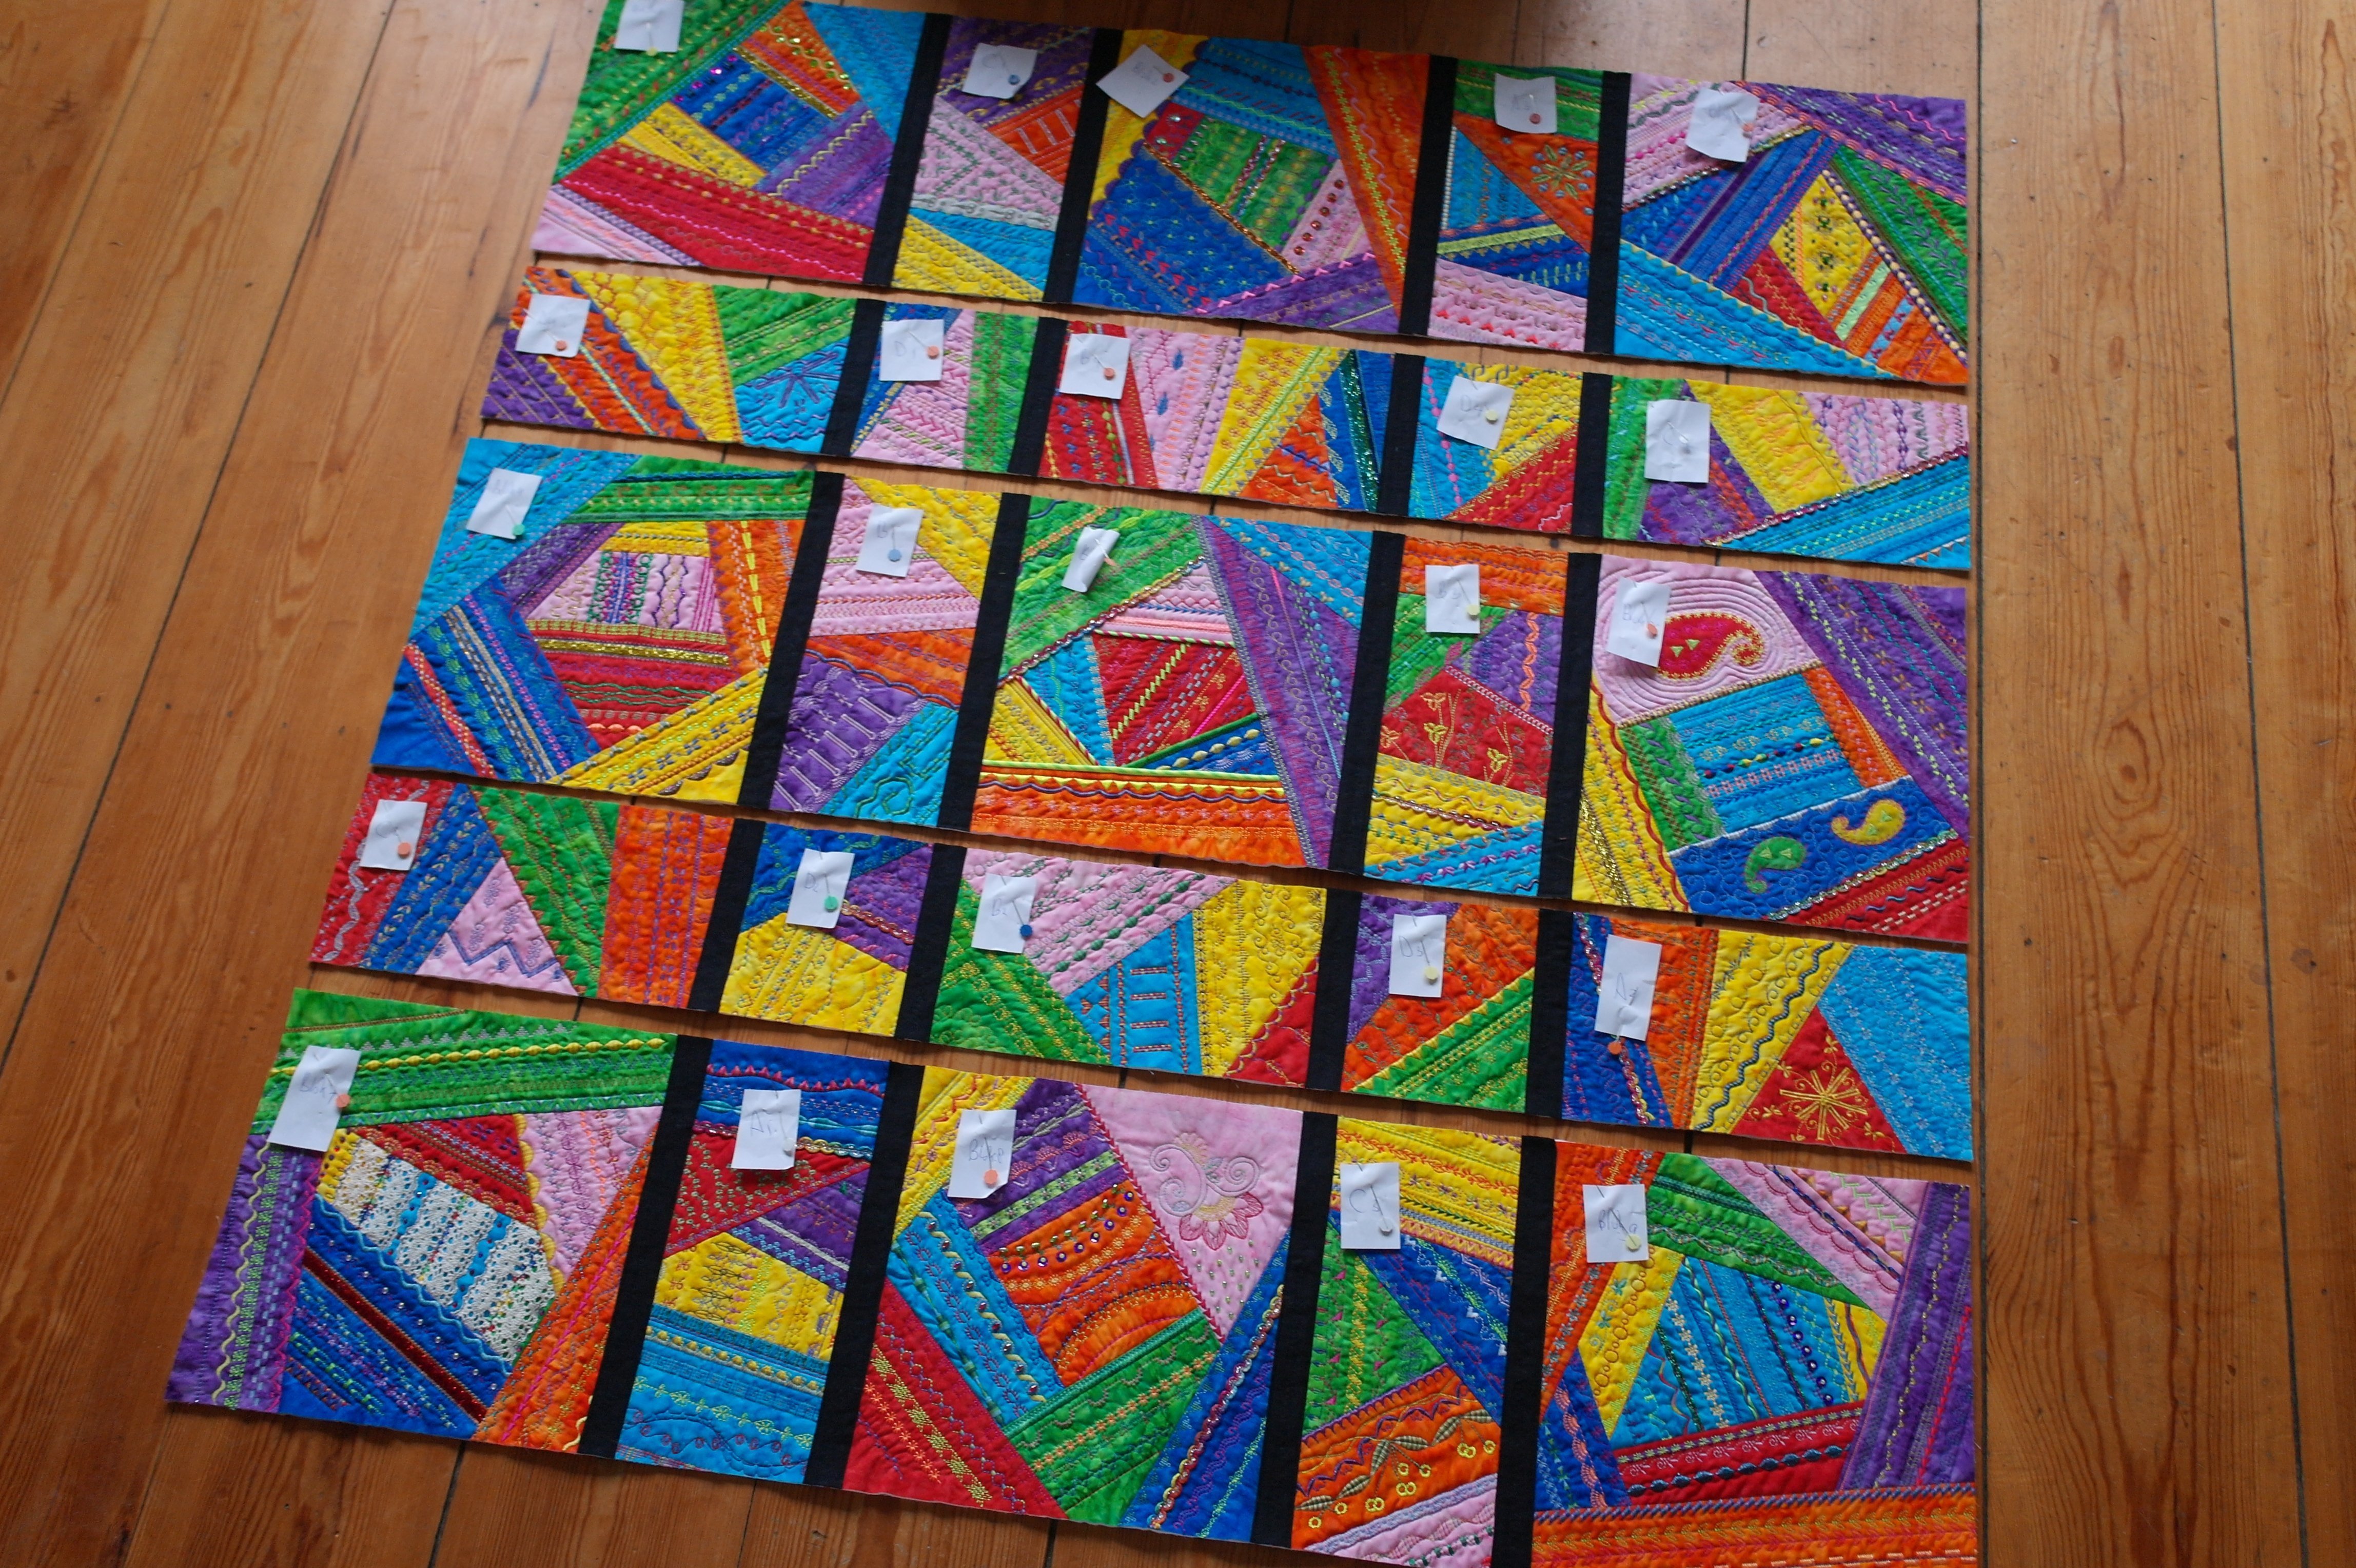
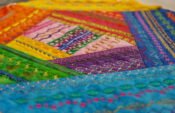
The picture above shows my layout: this is how I will place each block in my quilt. I will place a rectangular blocks between the 9 large square blocks (made the first 9 months) , and at the intersection of each rectangular block I will place a small square block. Have you thought about this option? Some of you already guessed it right. If you look at the layout, it appears to be a large quilt, but the blocks have to be cut back into smaller sizes, so don’t worry.
You can download the layout scheme for assembly of the blocks HERE: not only will you find the layout, but also three images for cutting back the blocks: DO NOT CUT BACK AT THIS TIME, but first take care of something else.
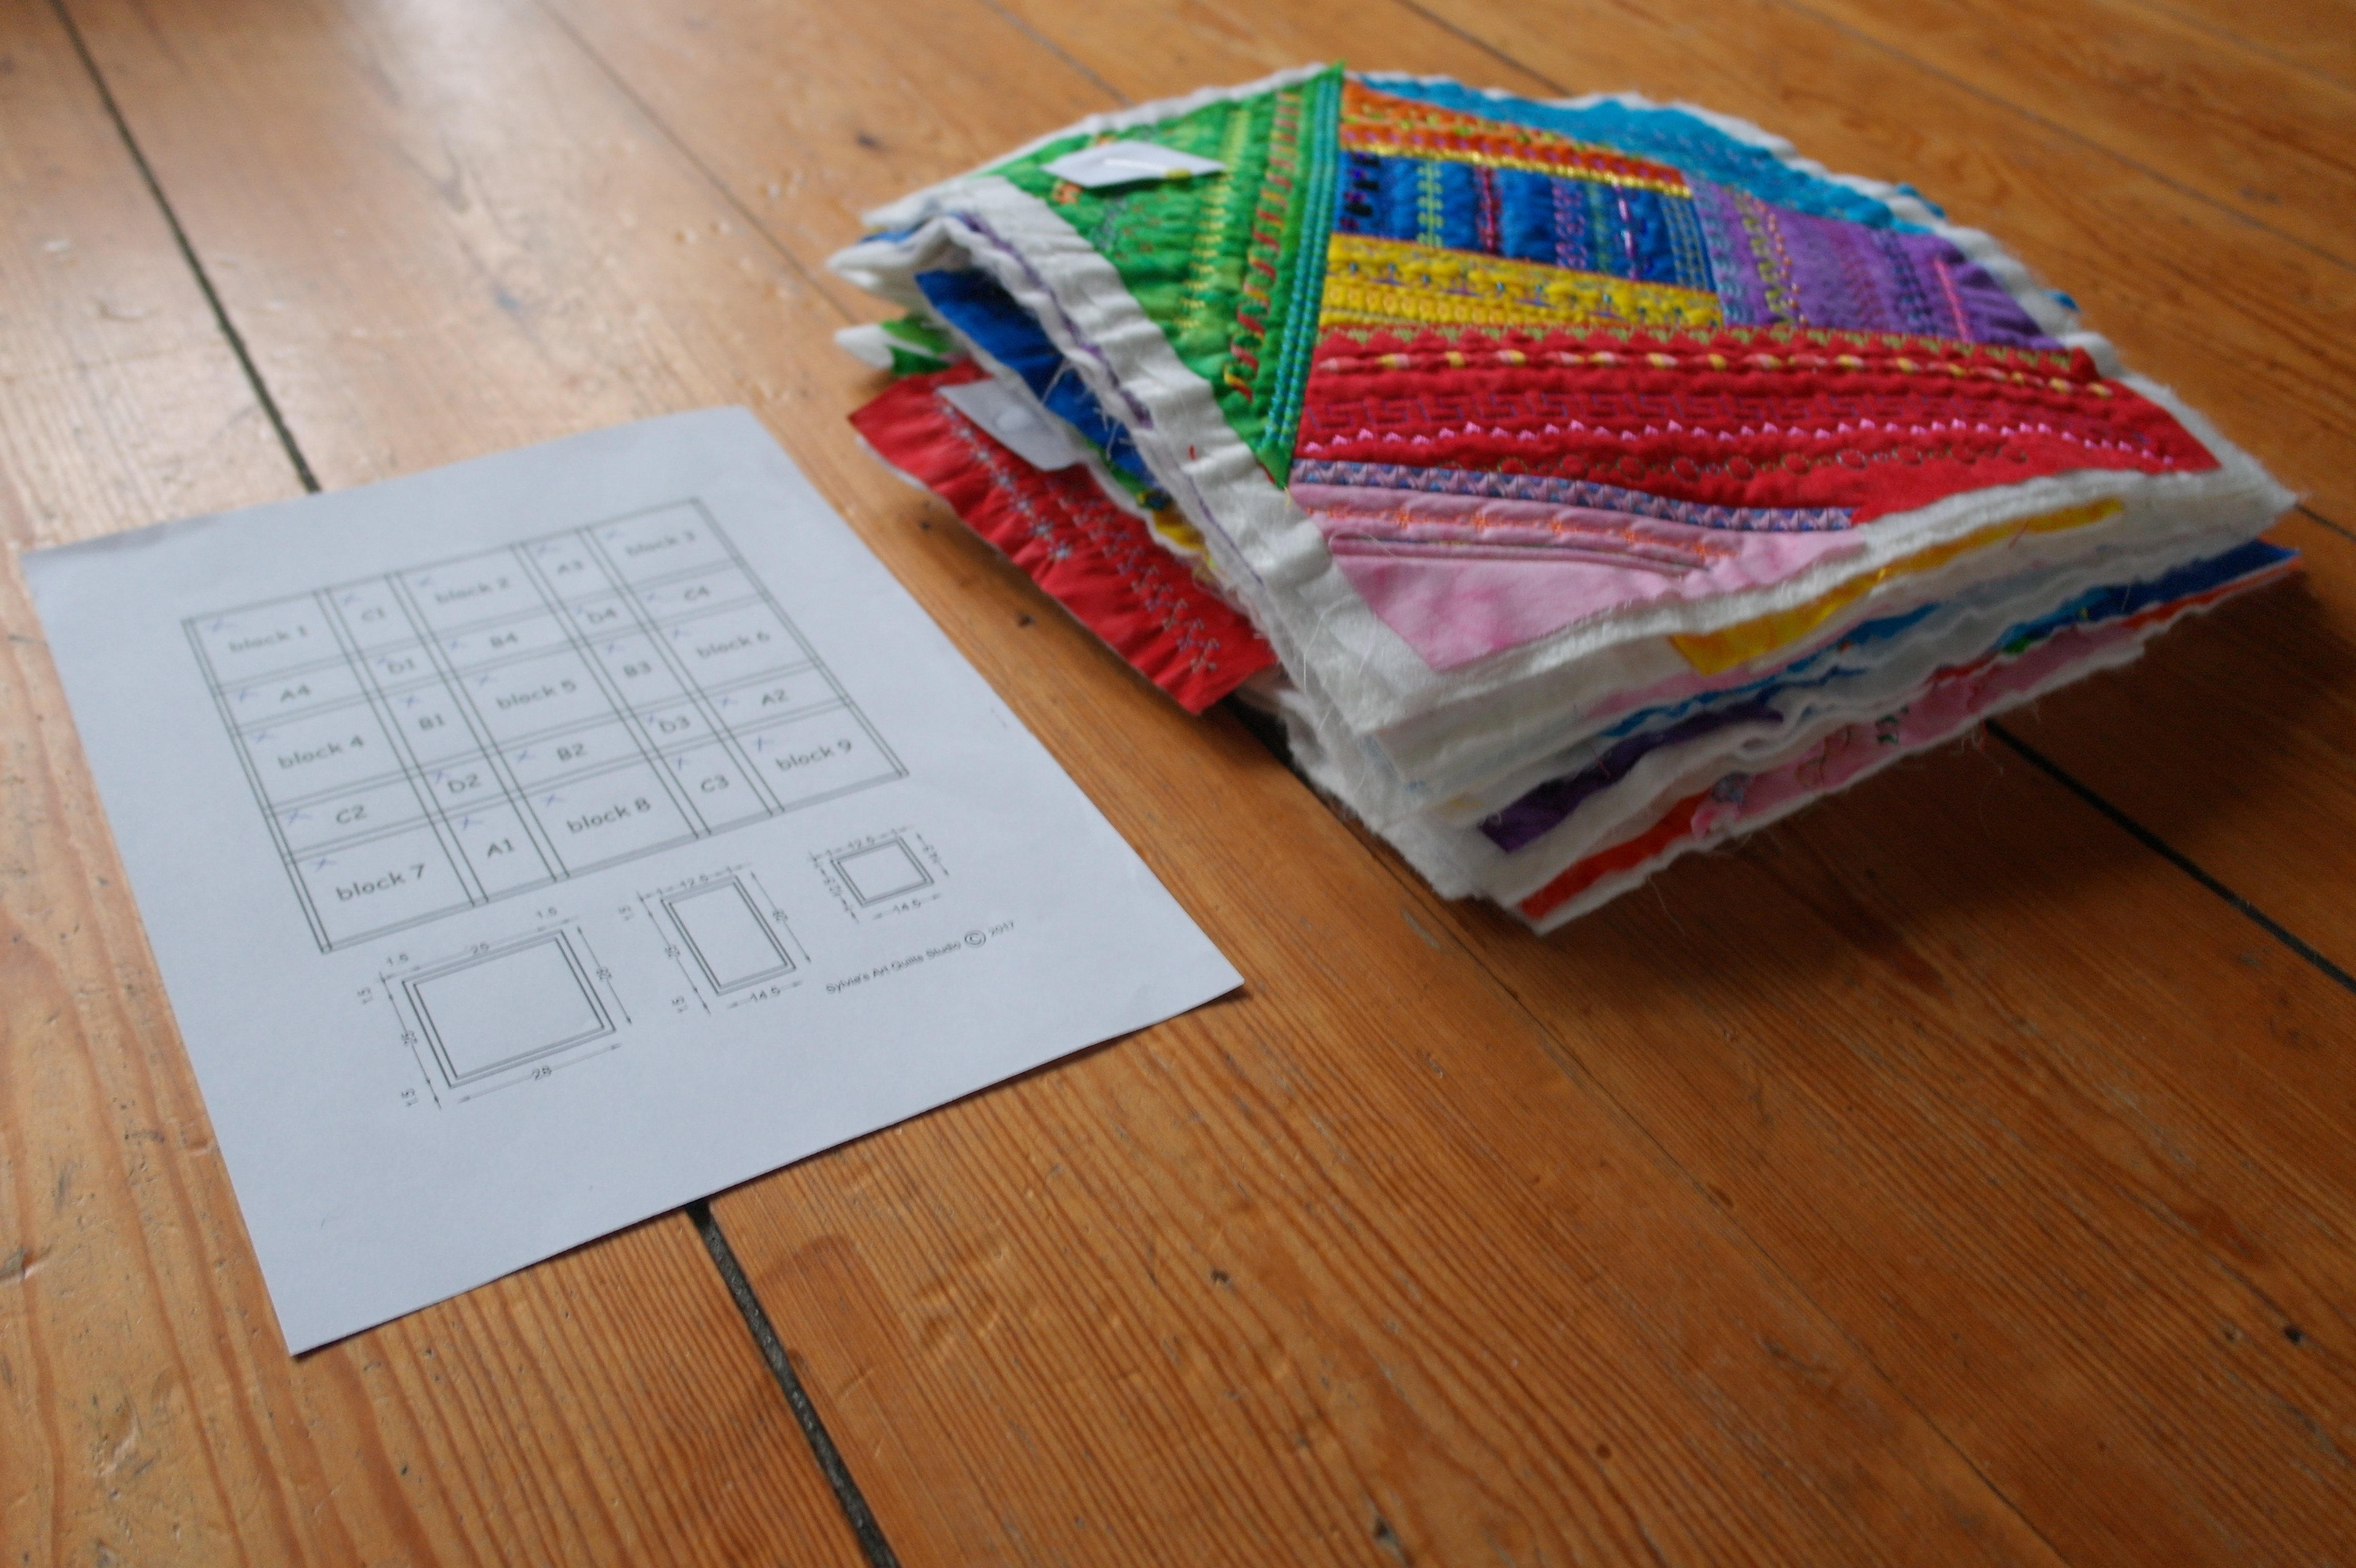
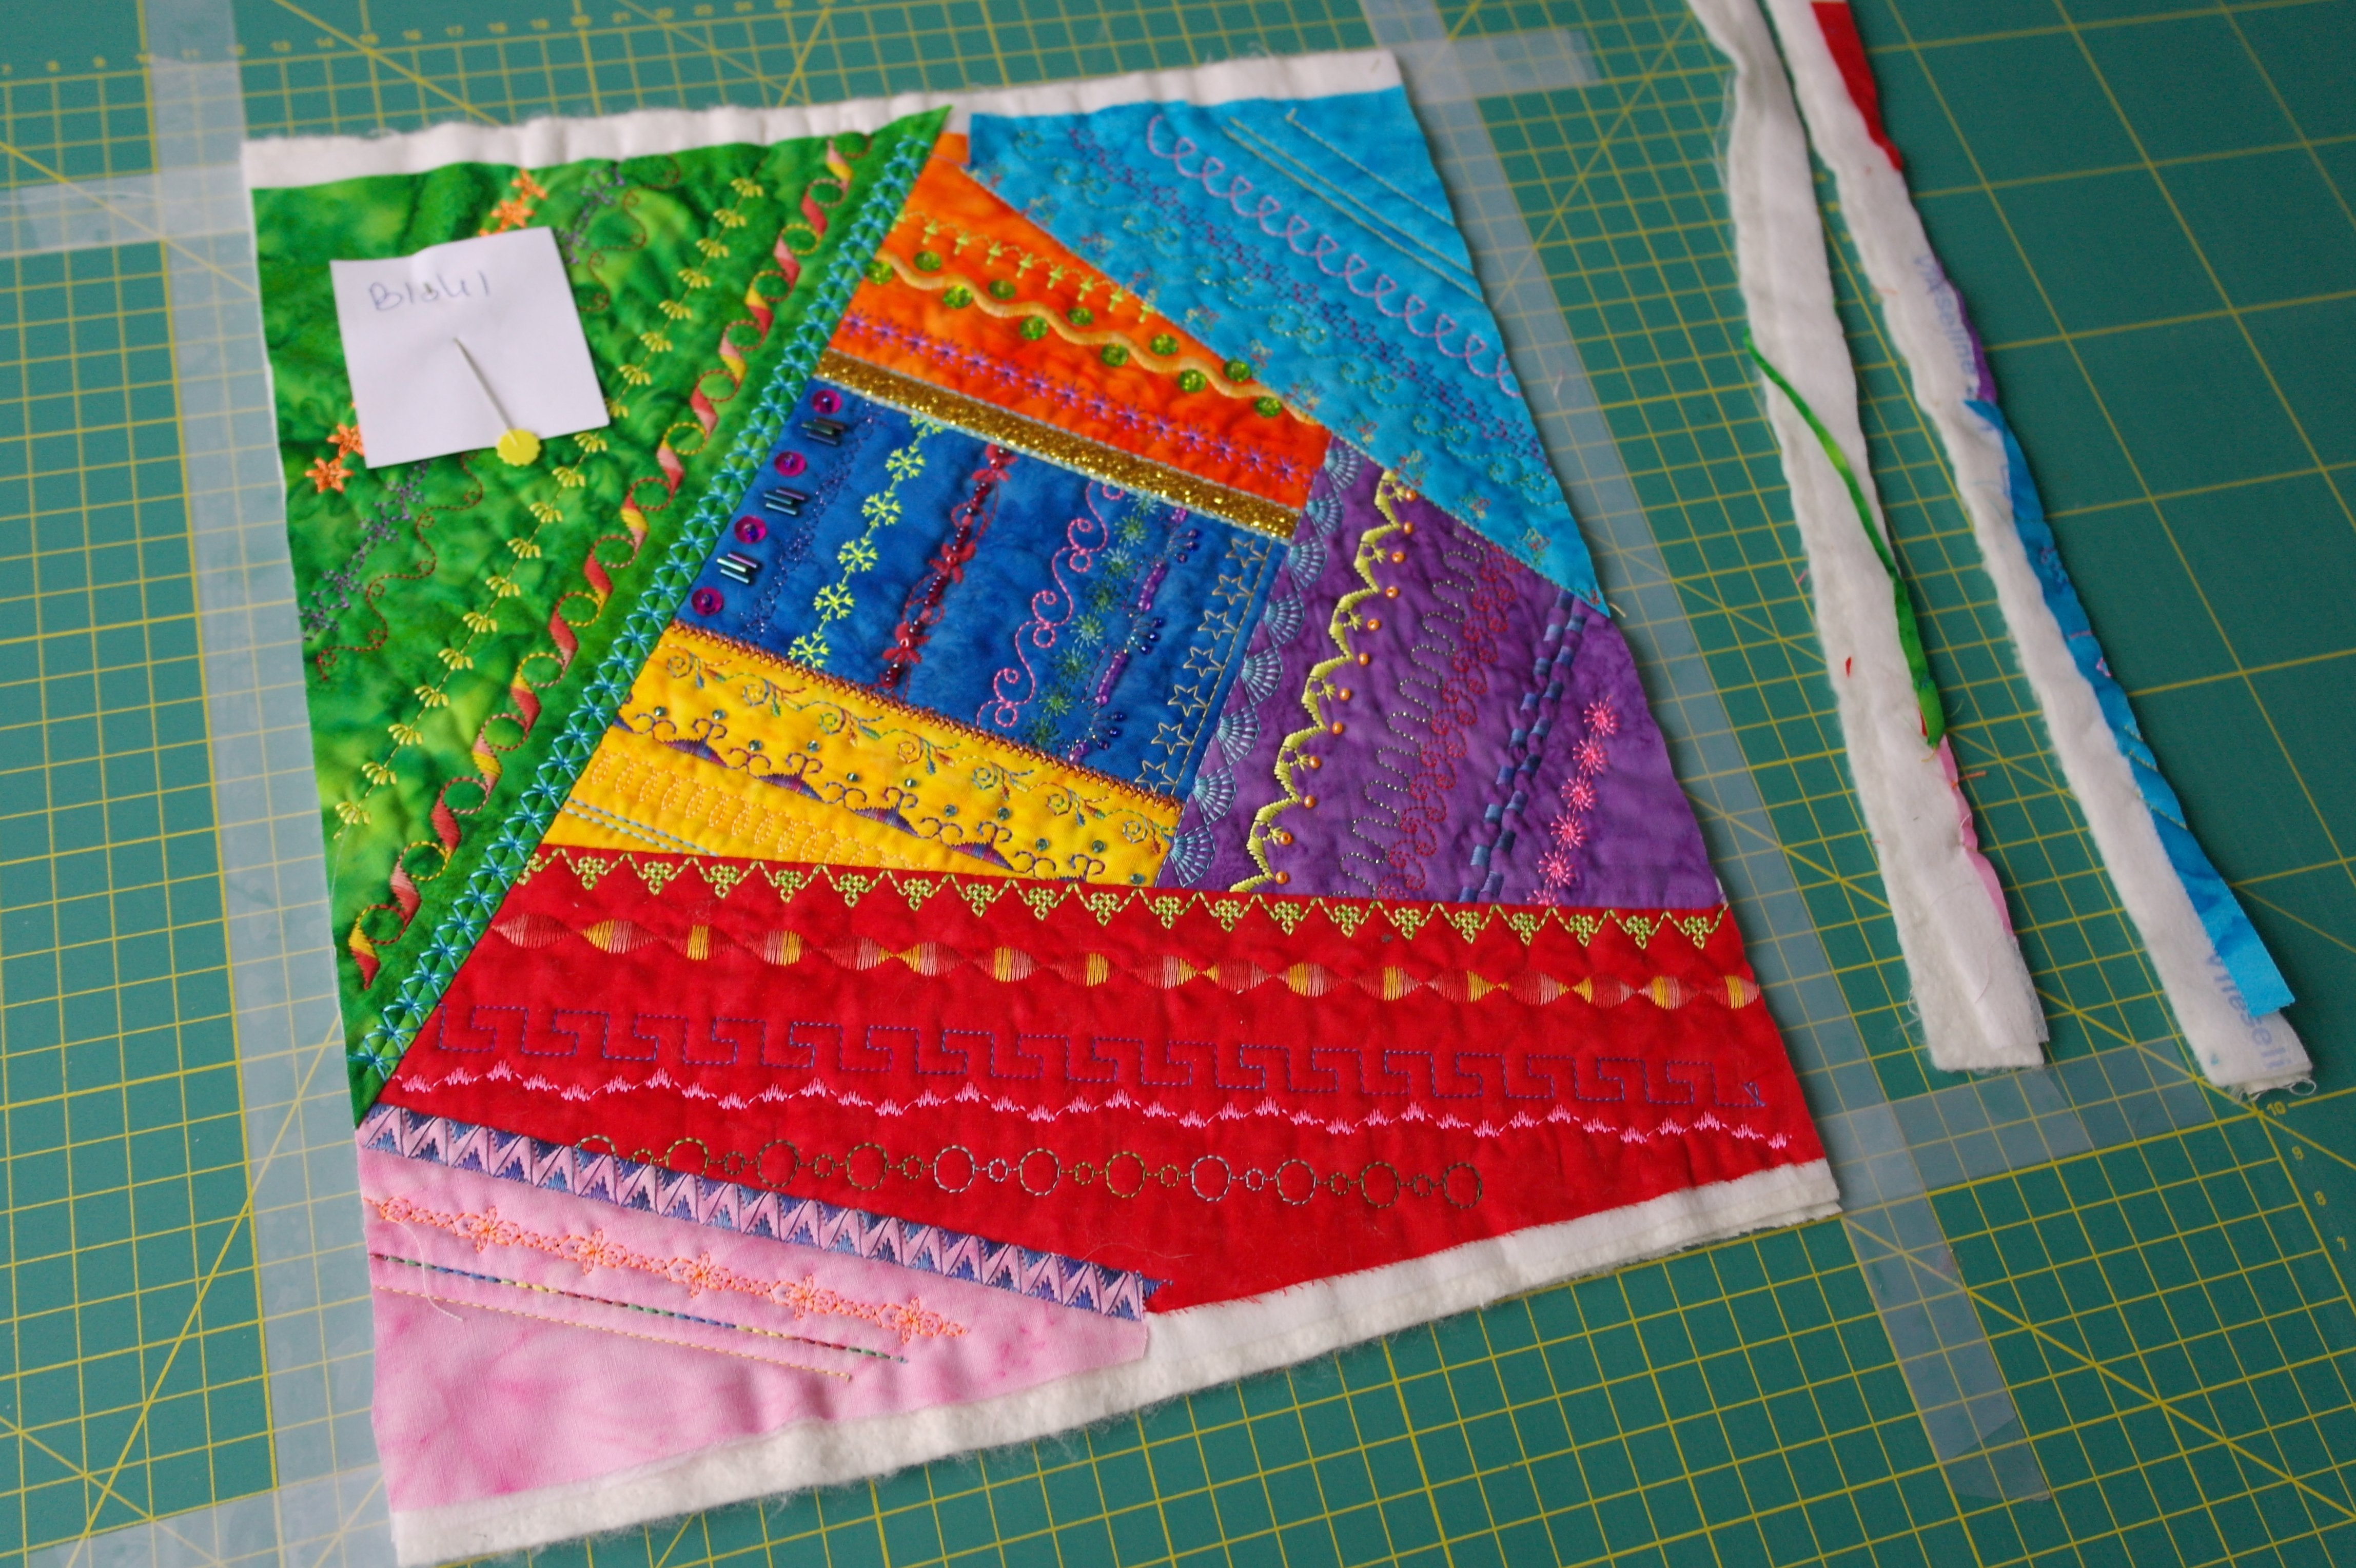
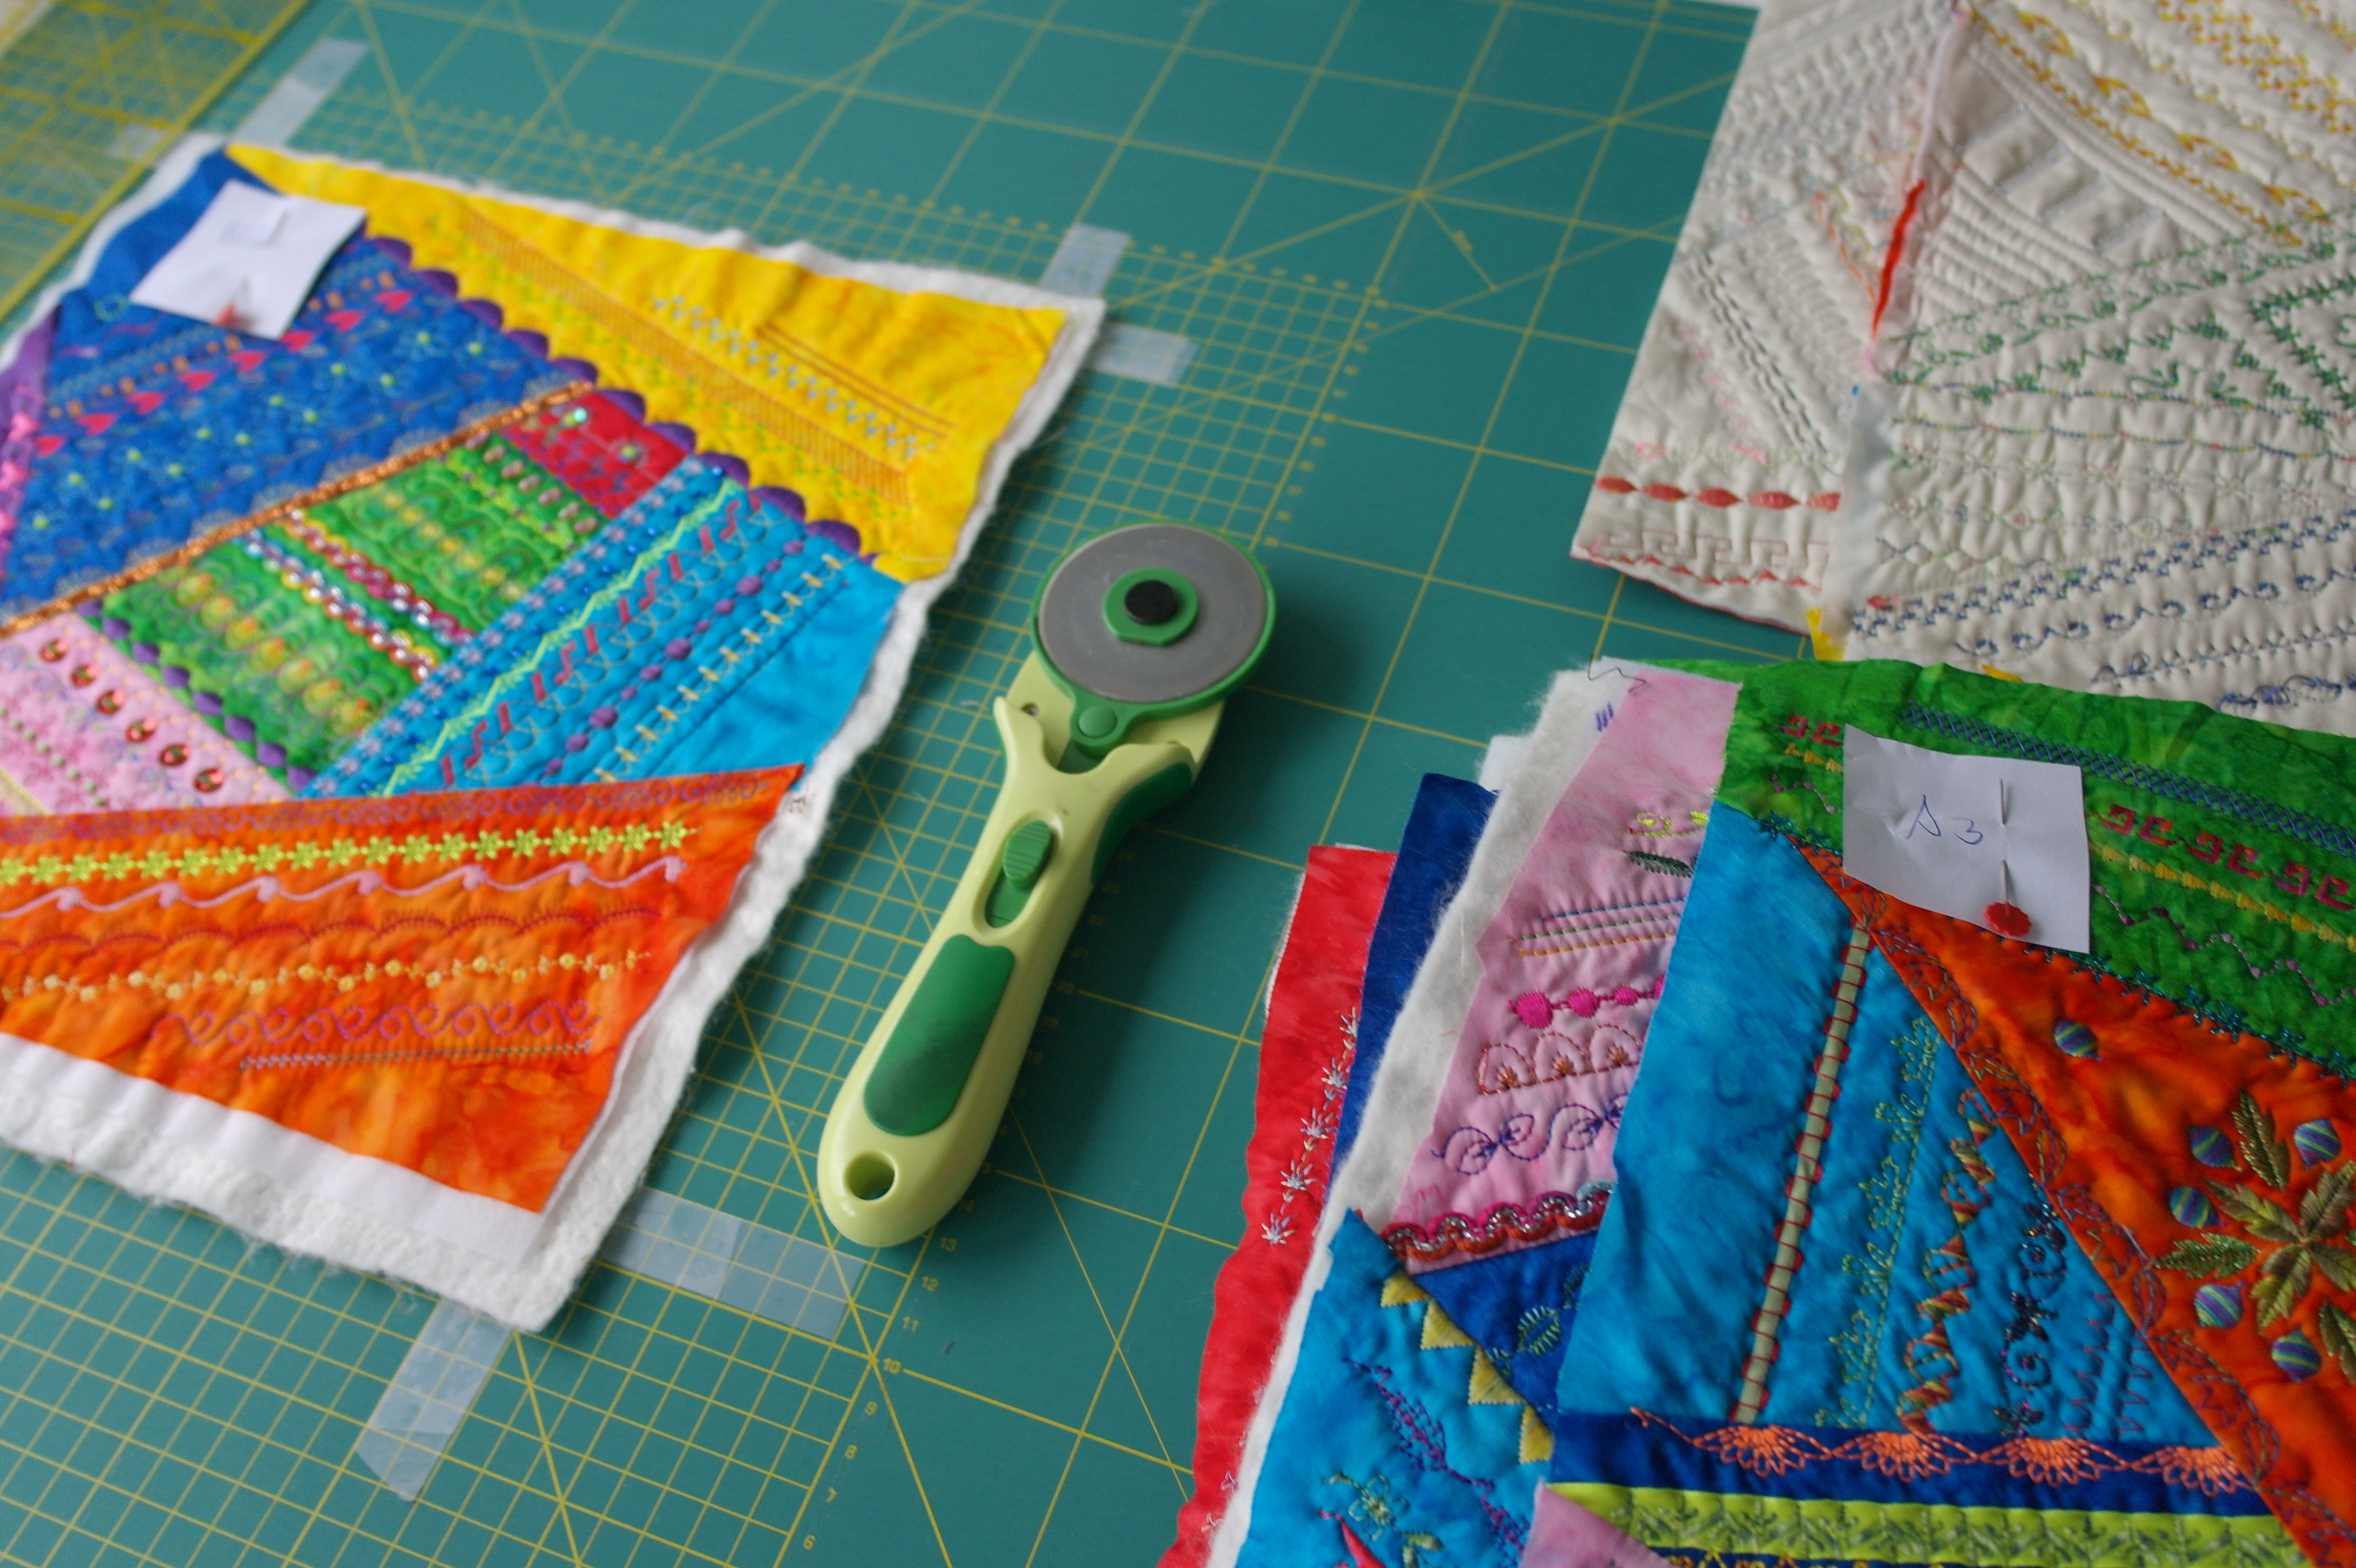
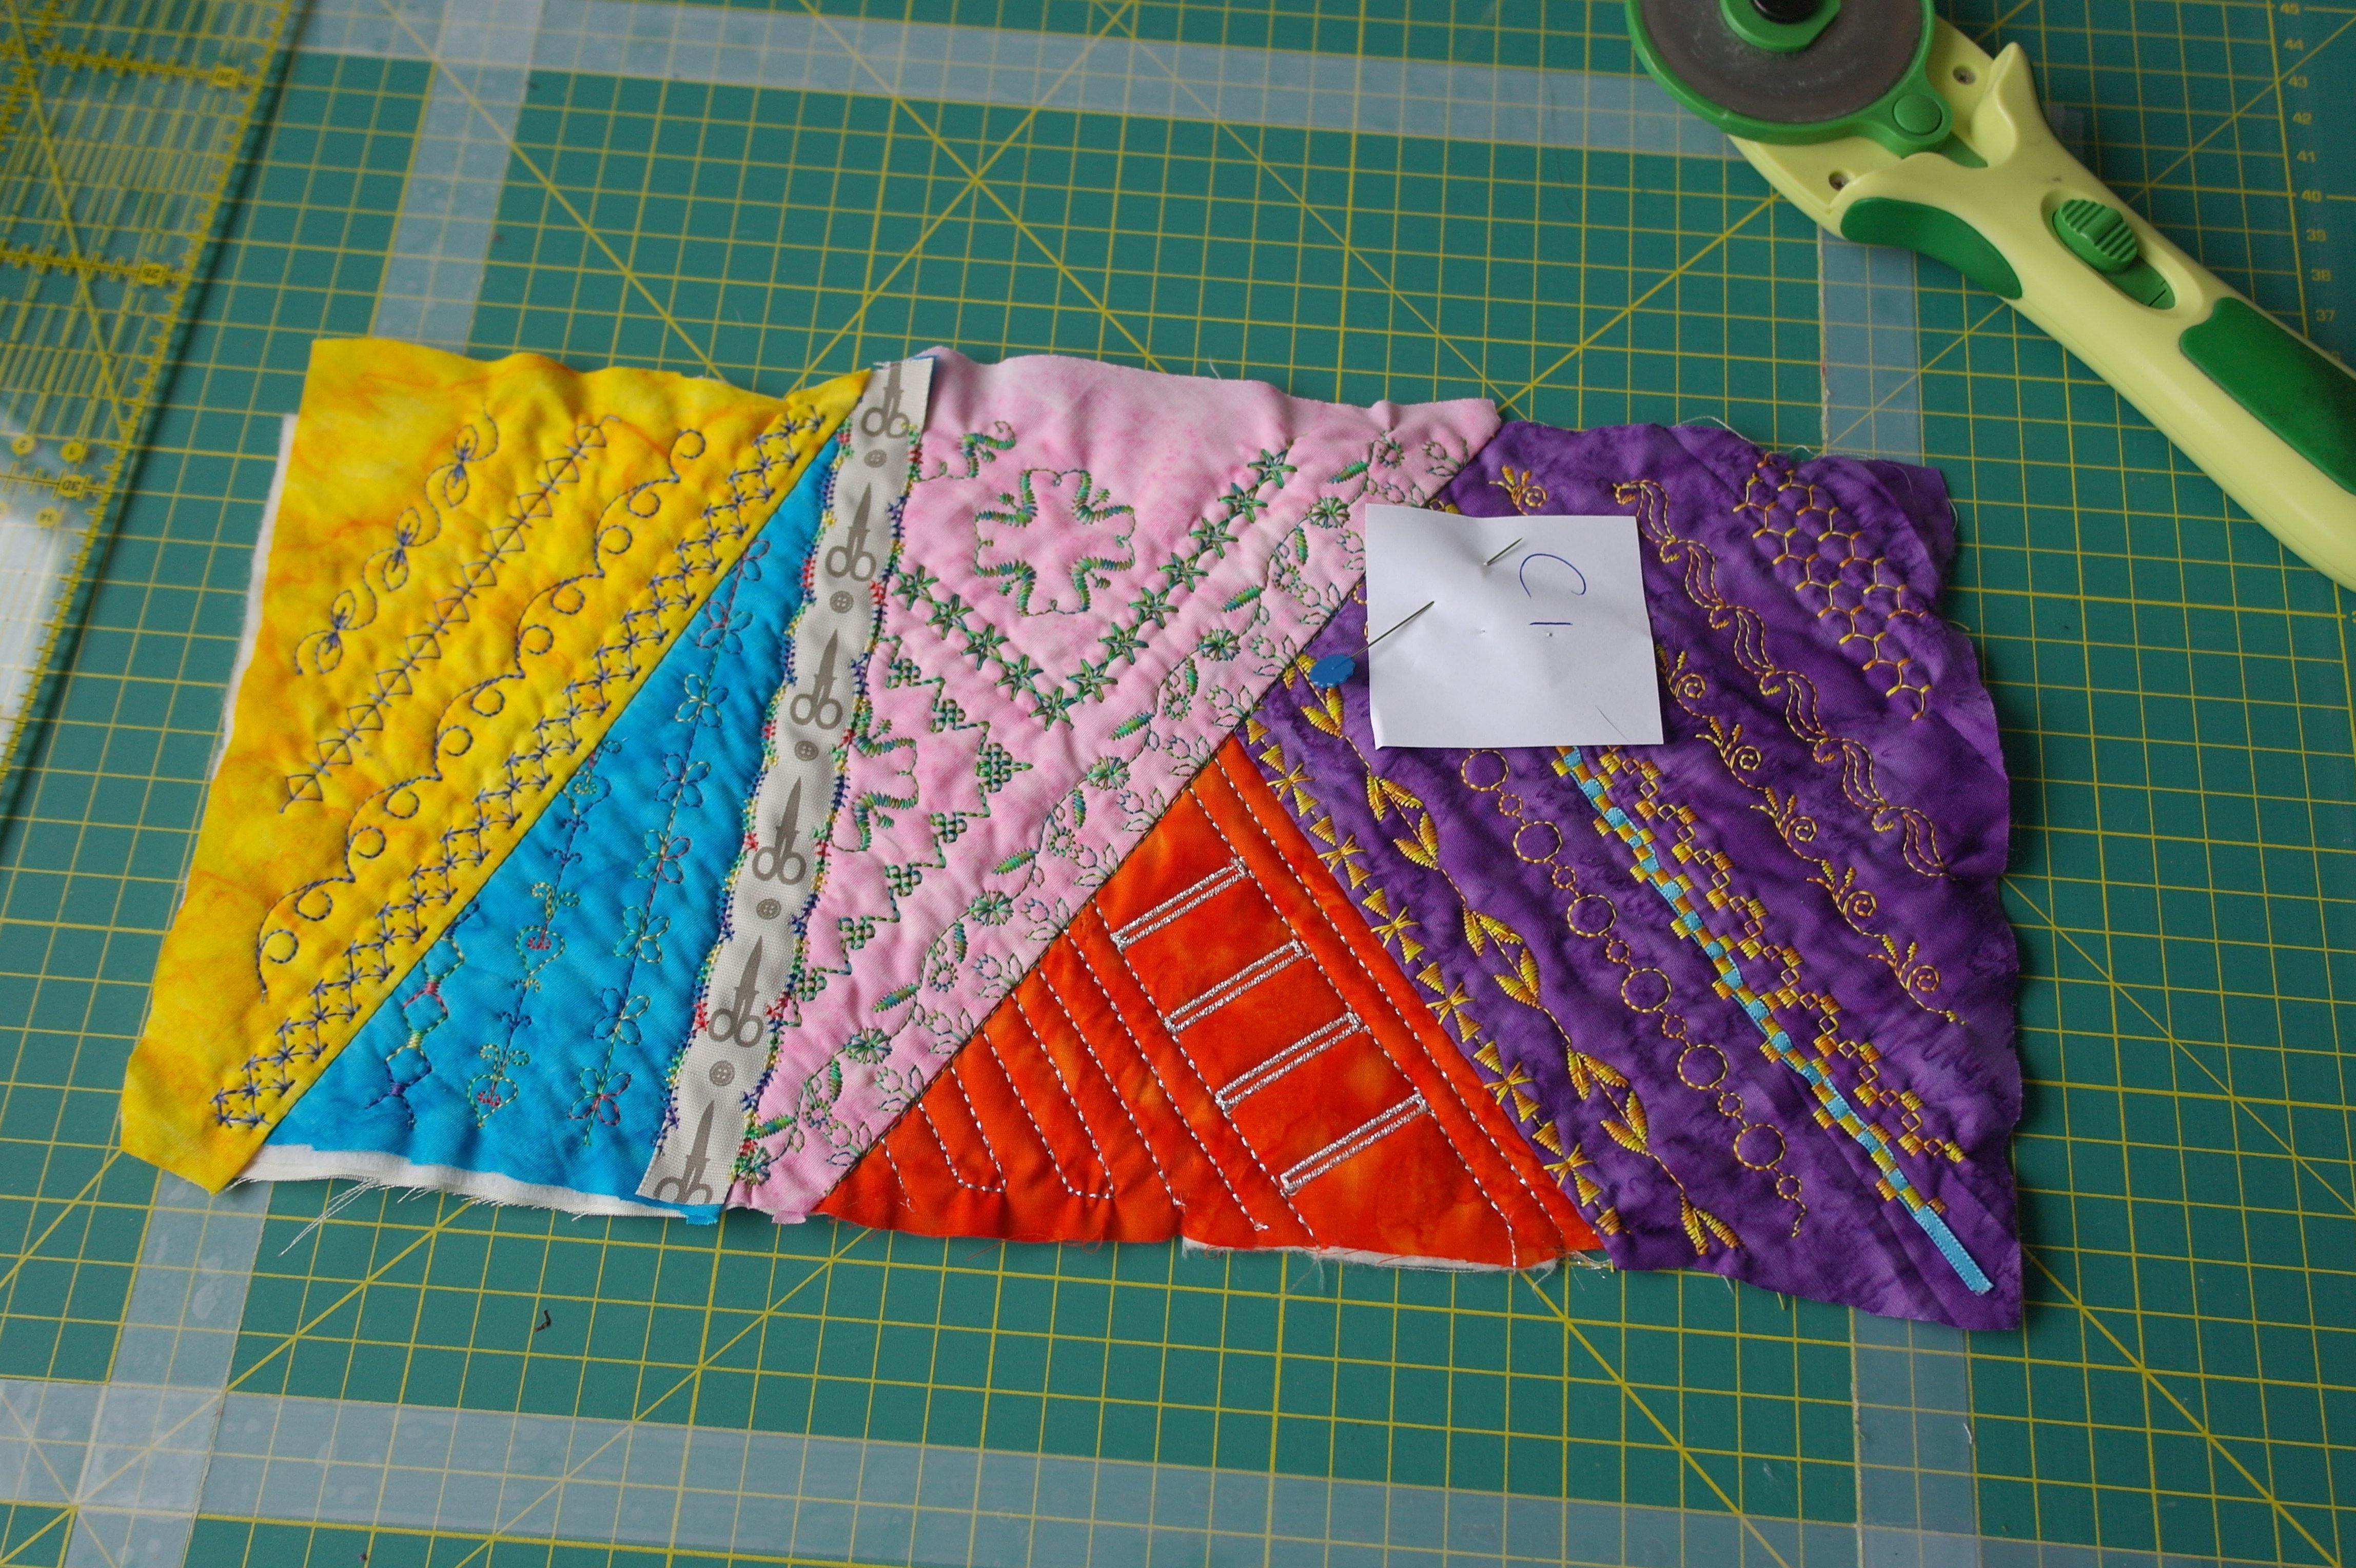
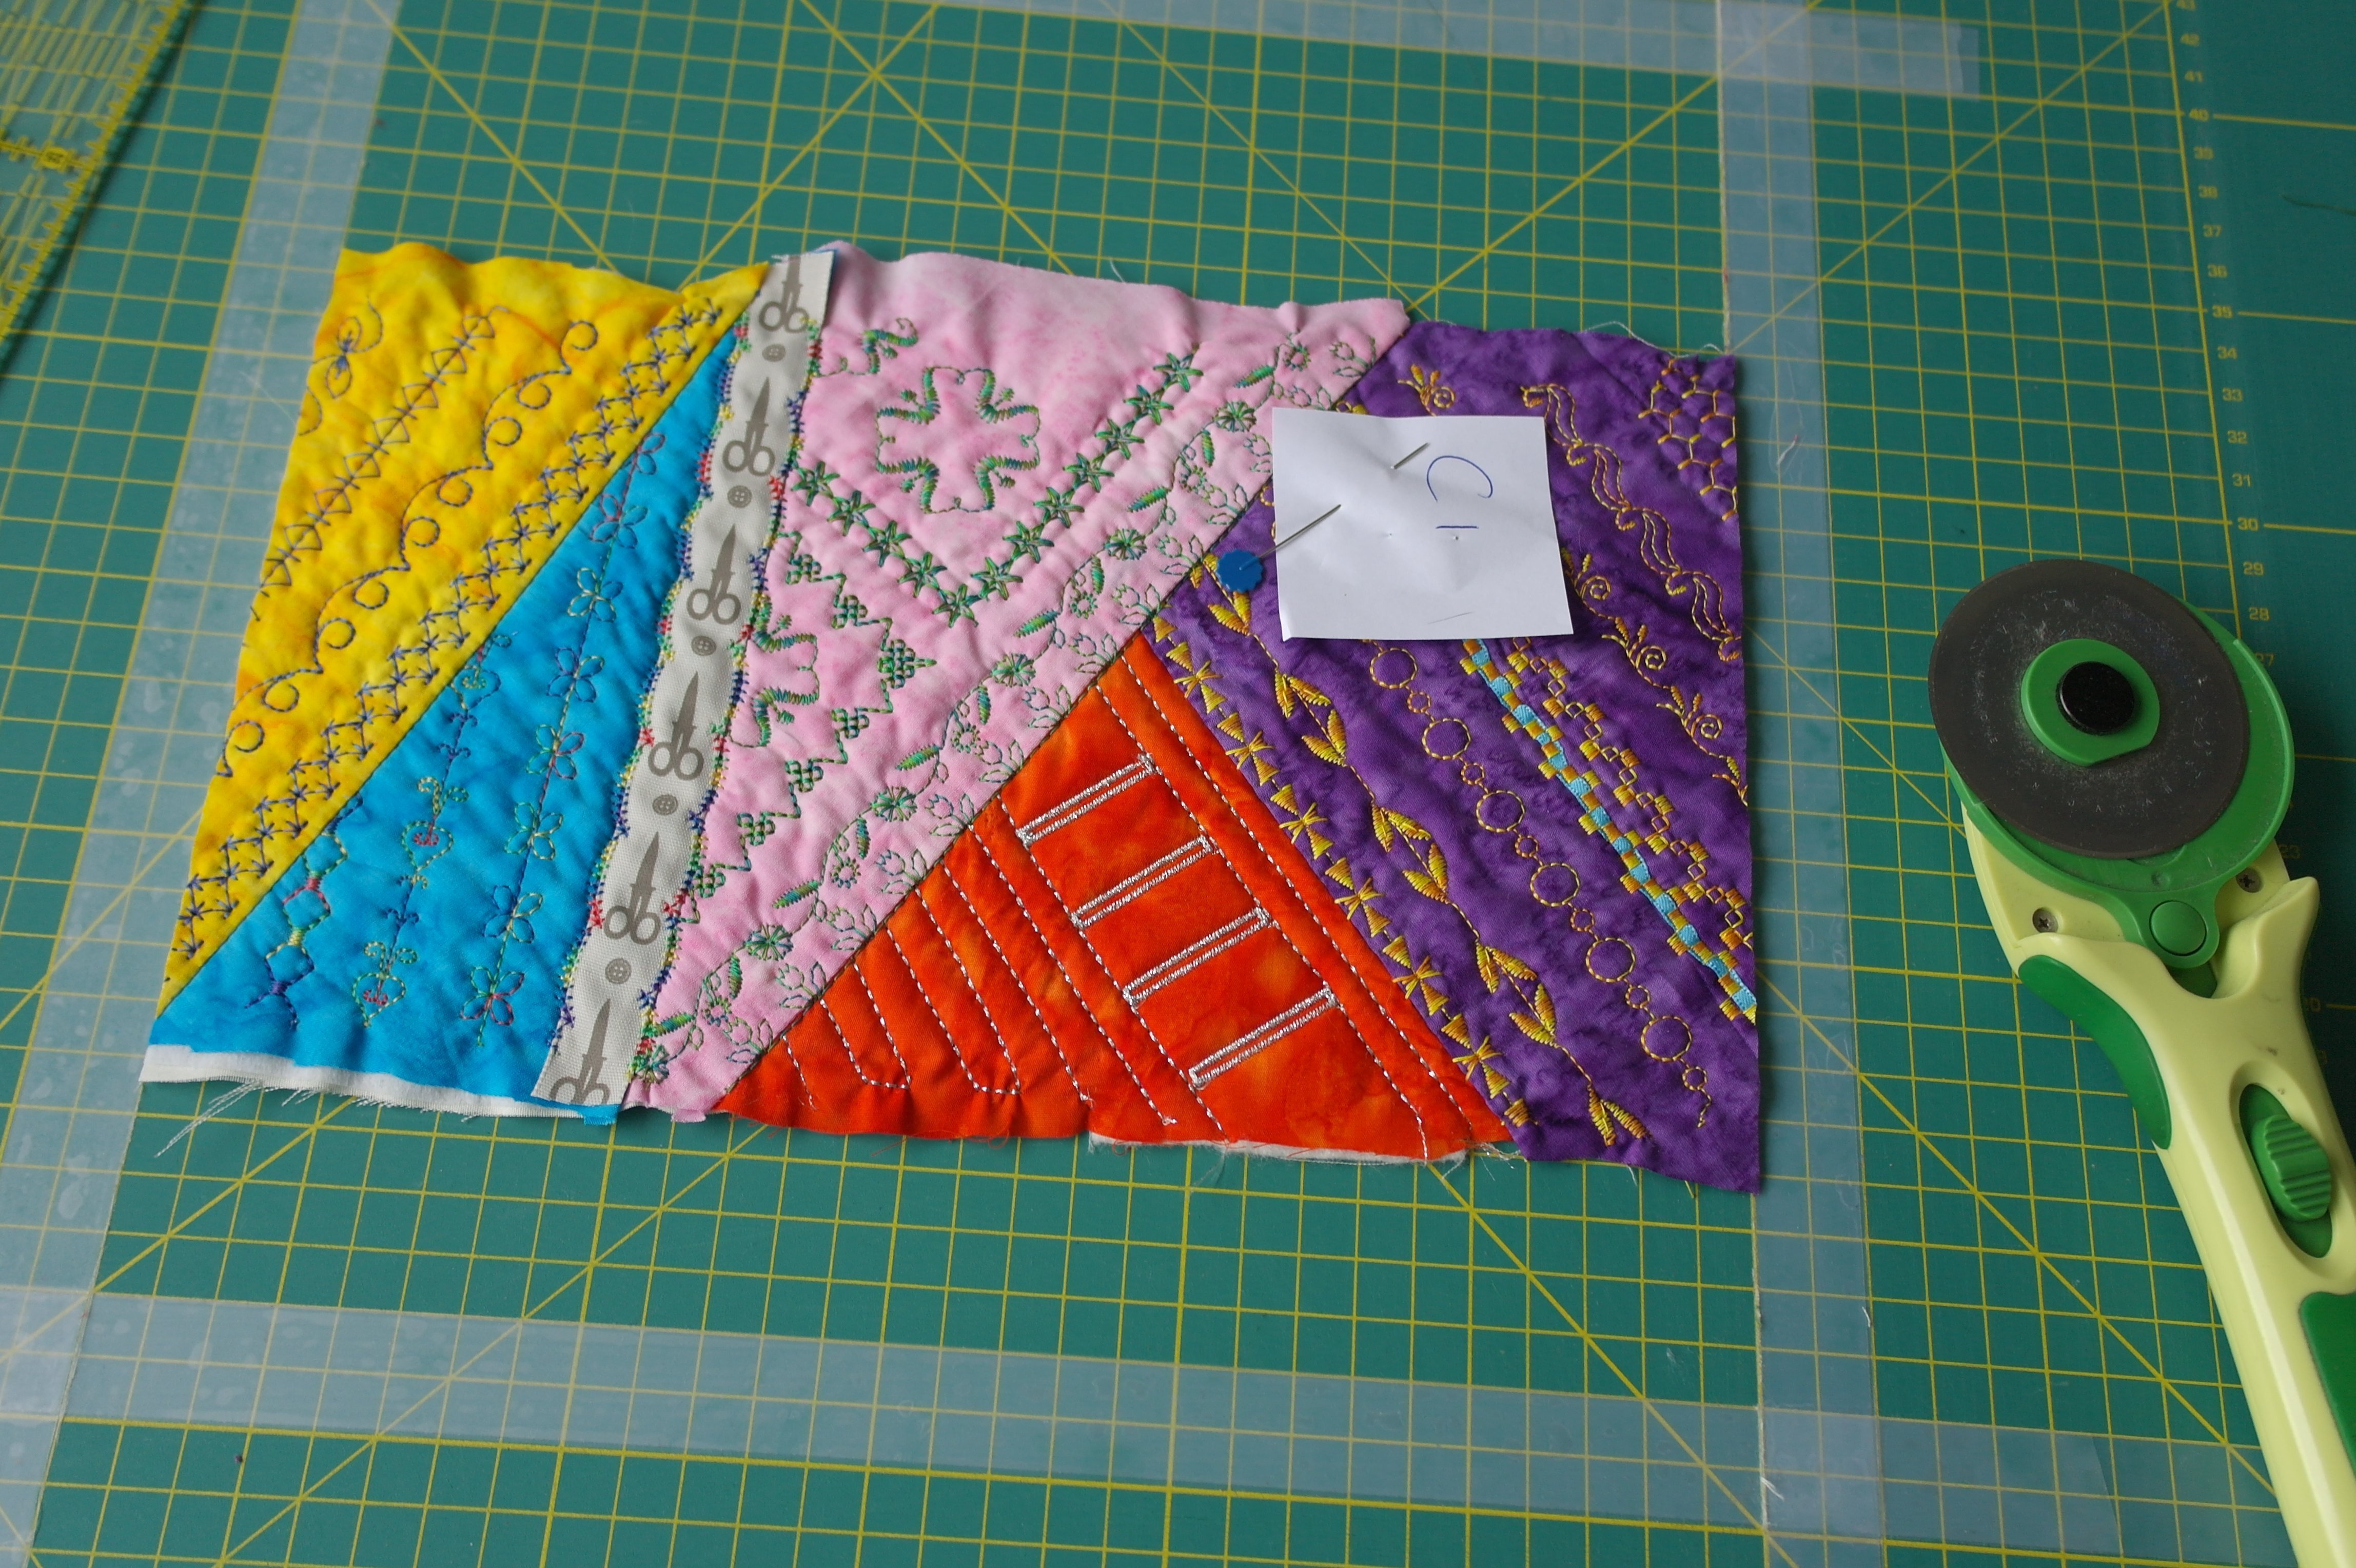
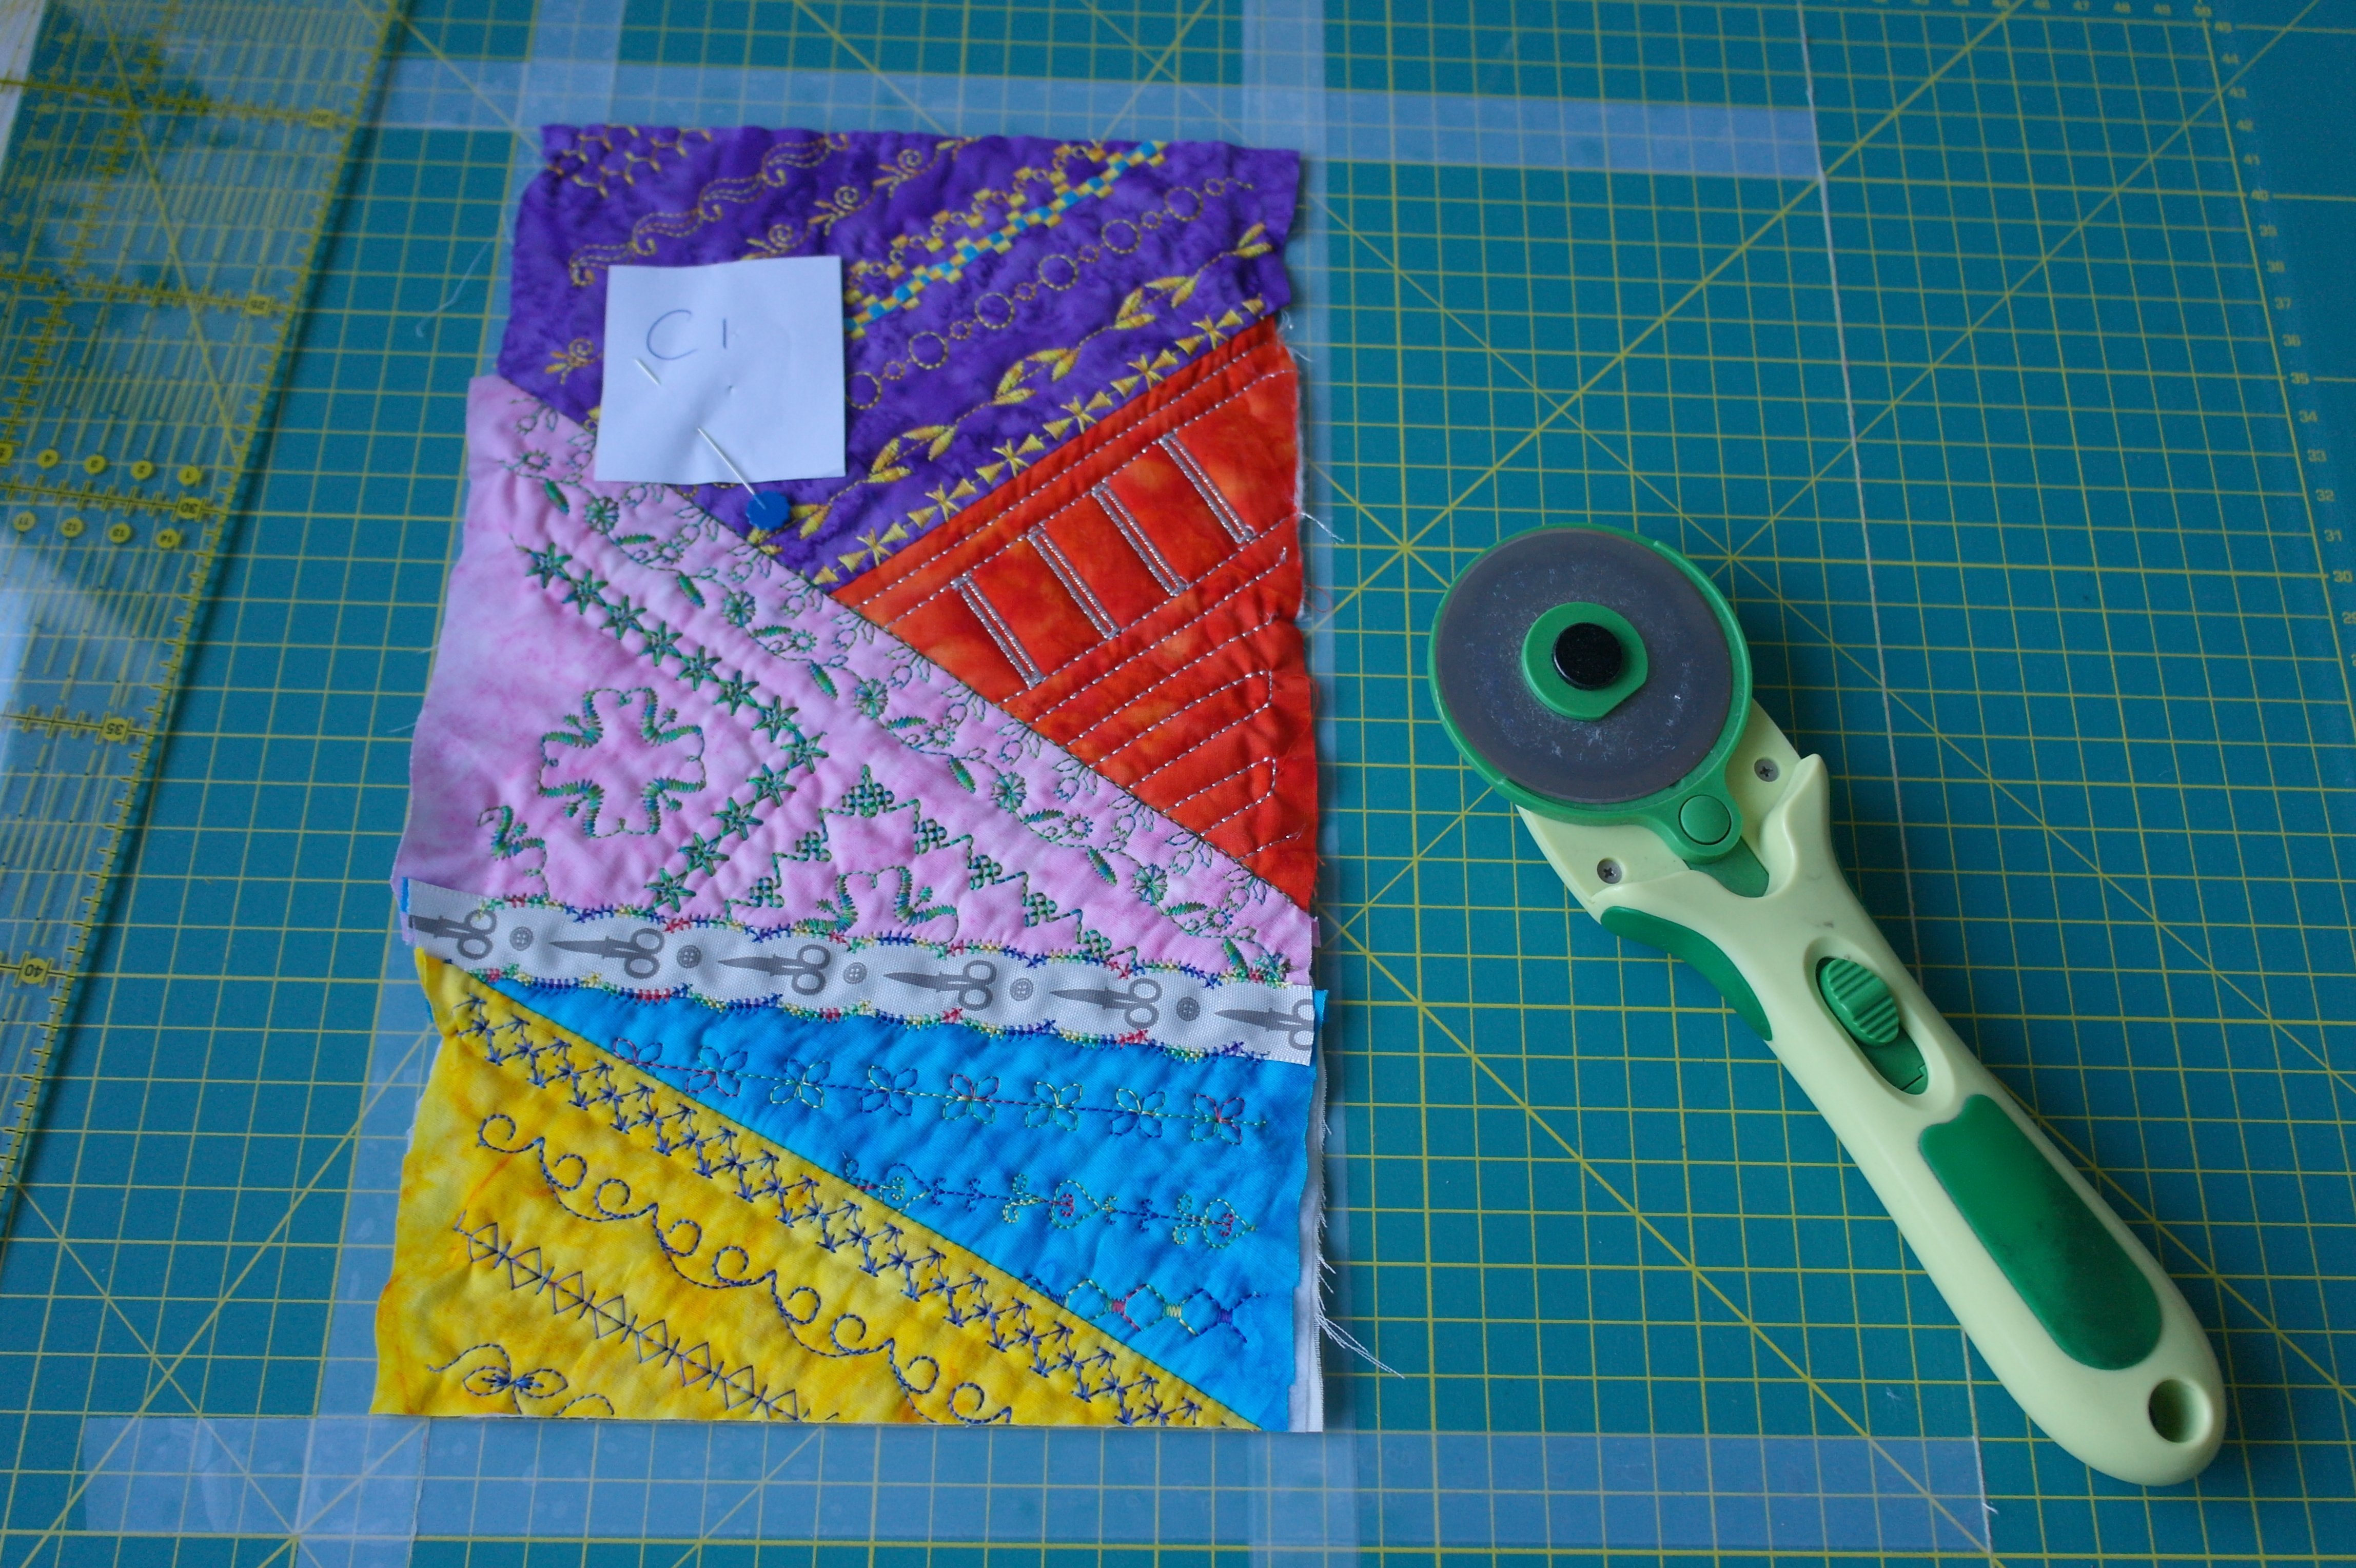
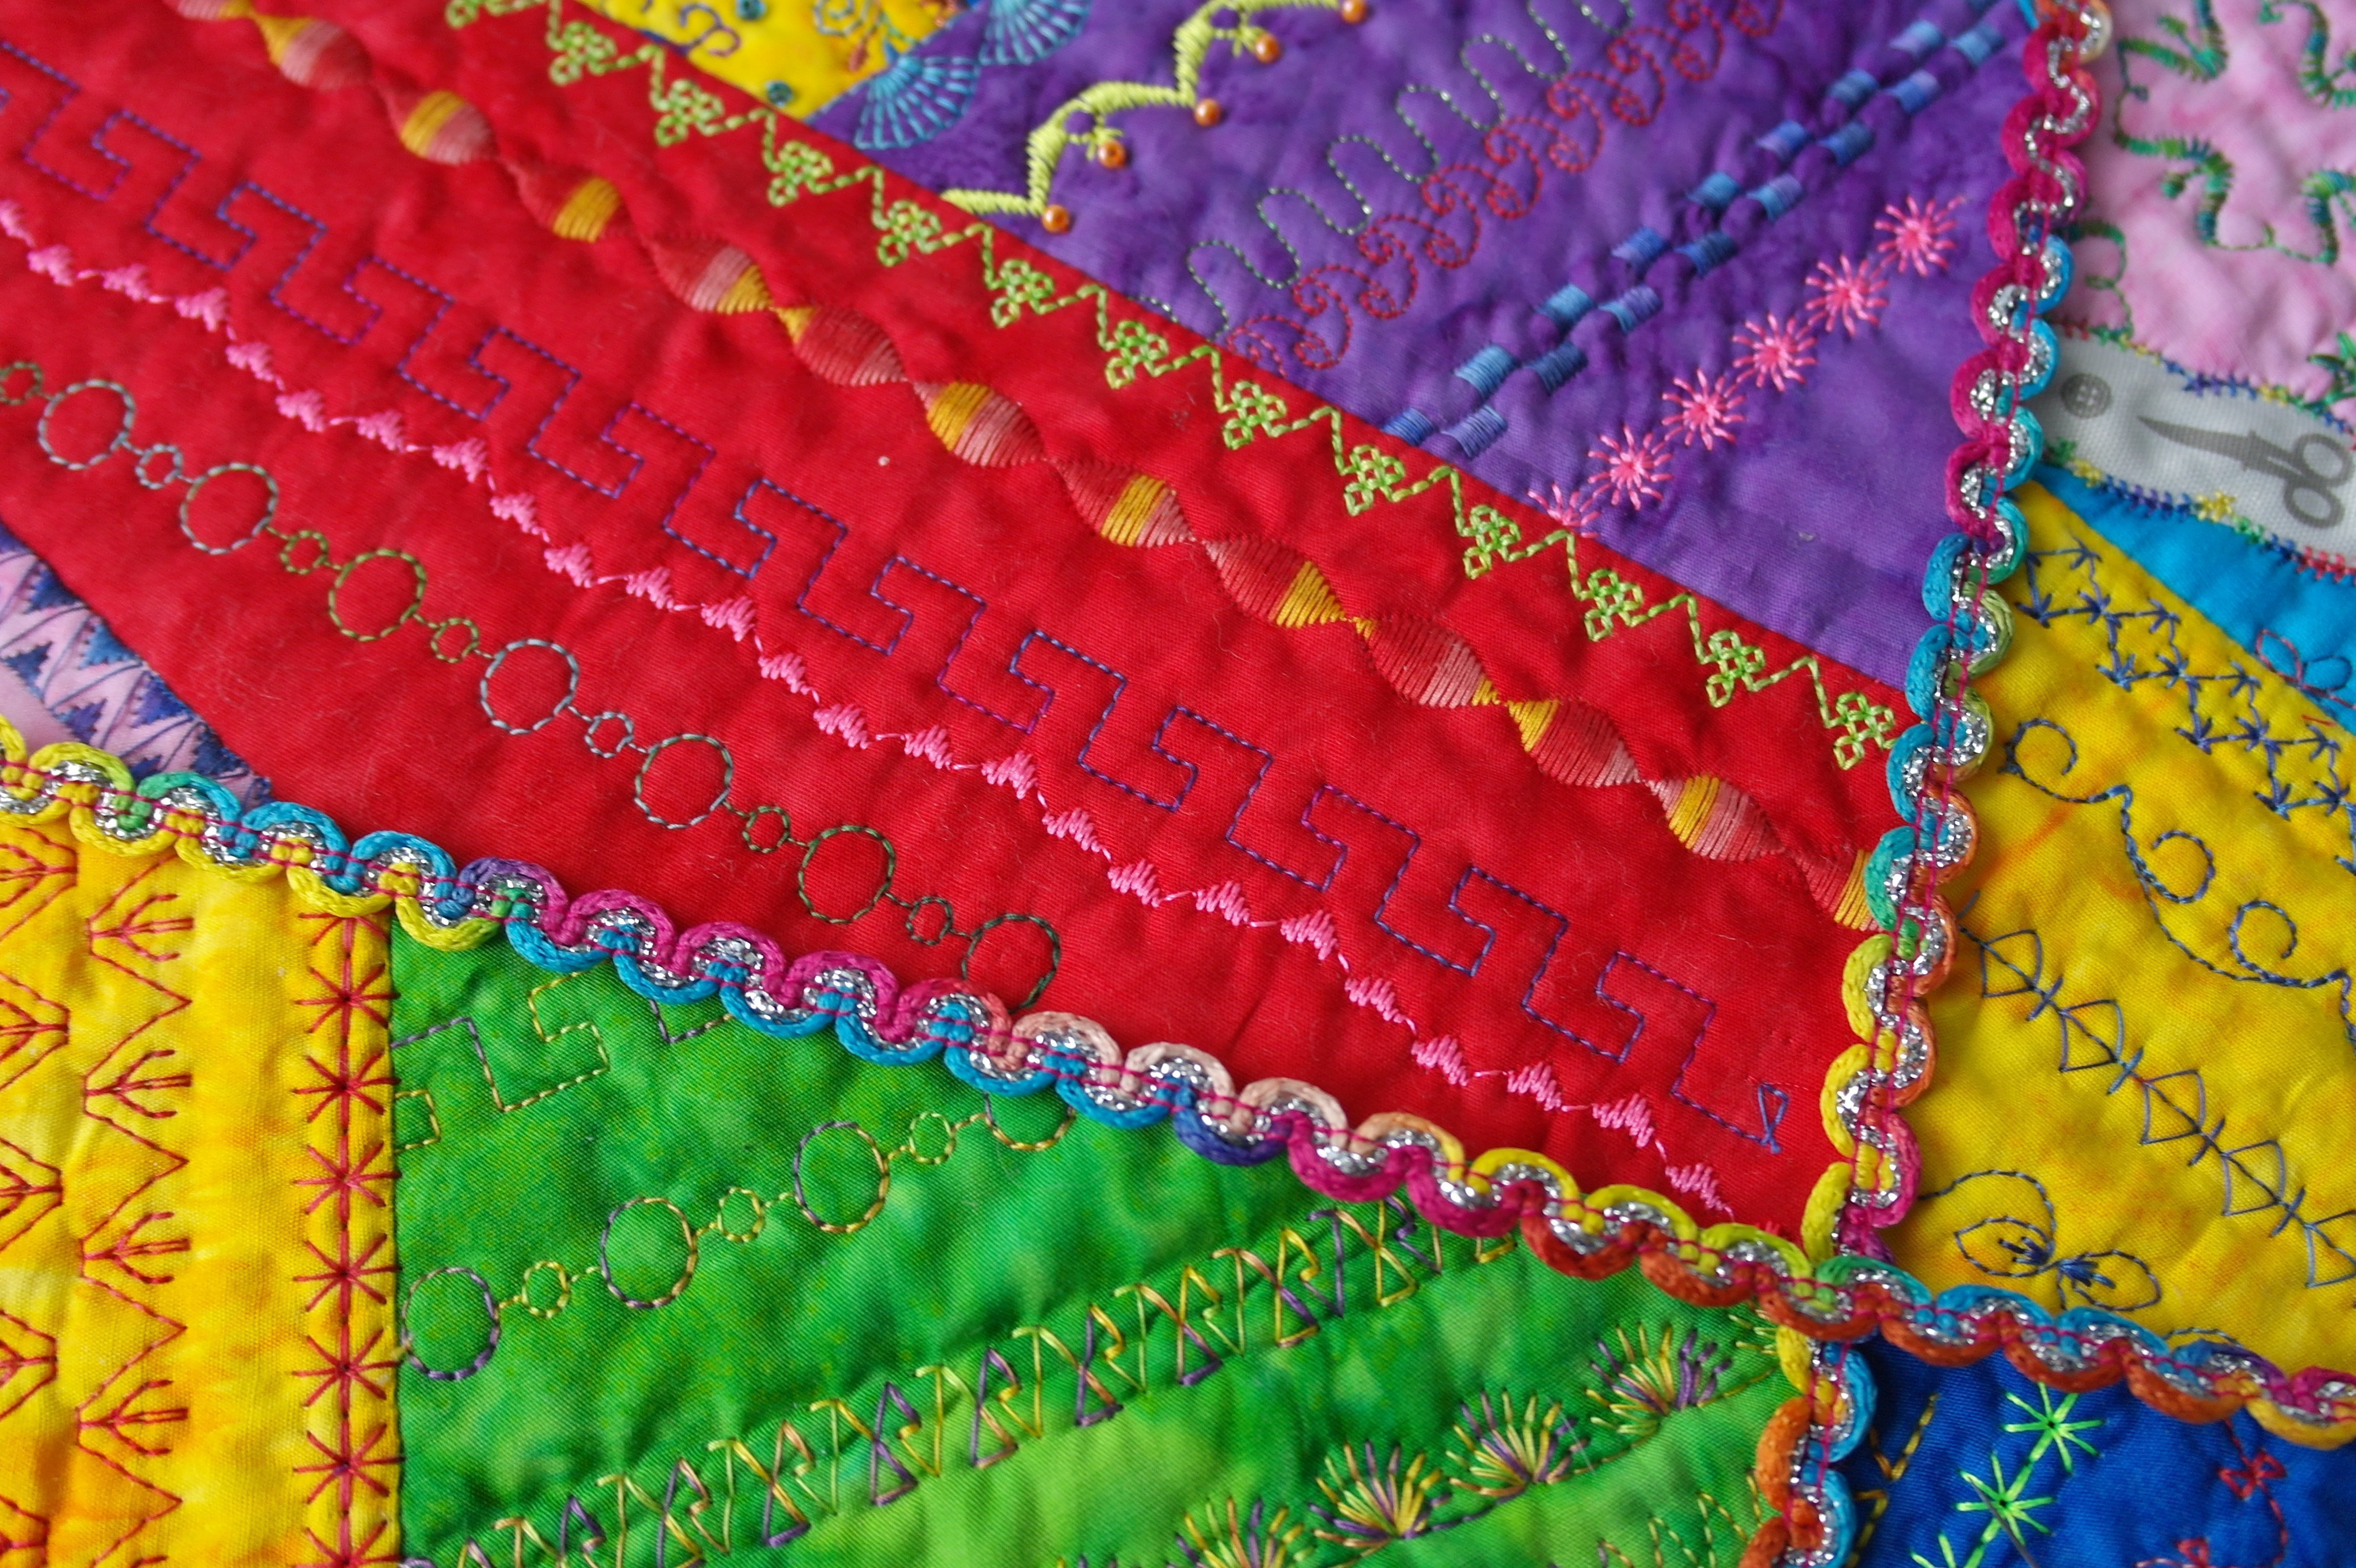
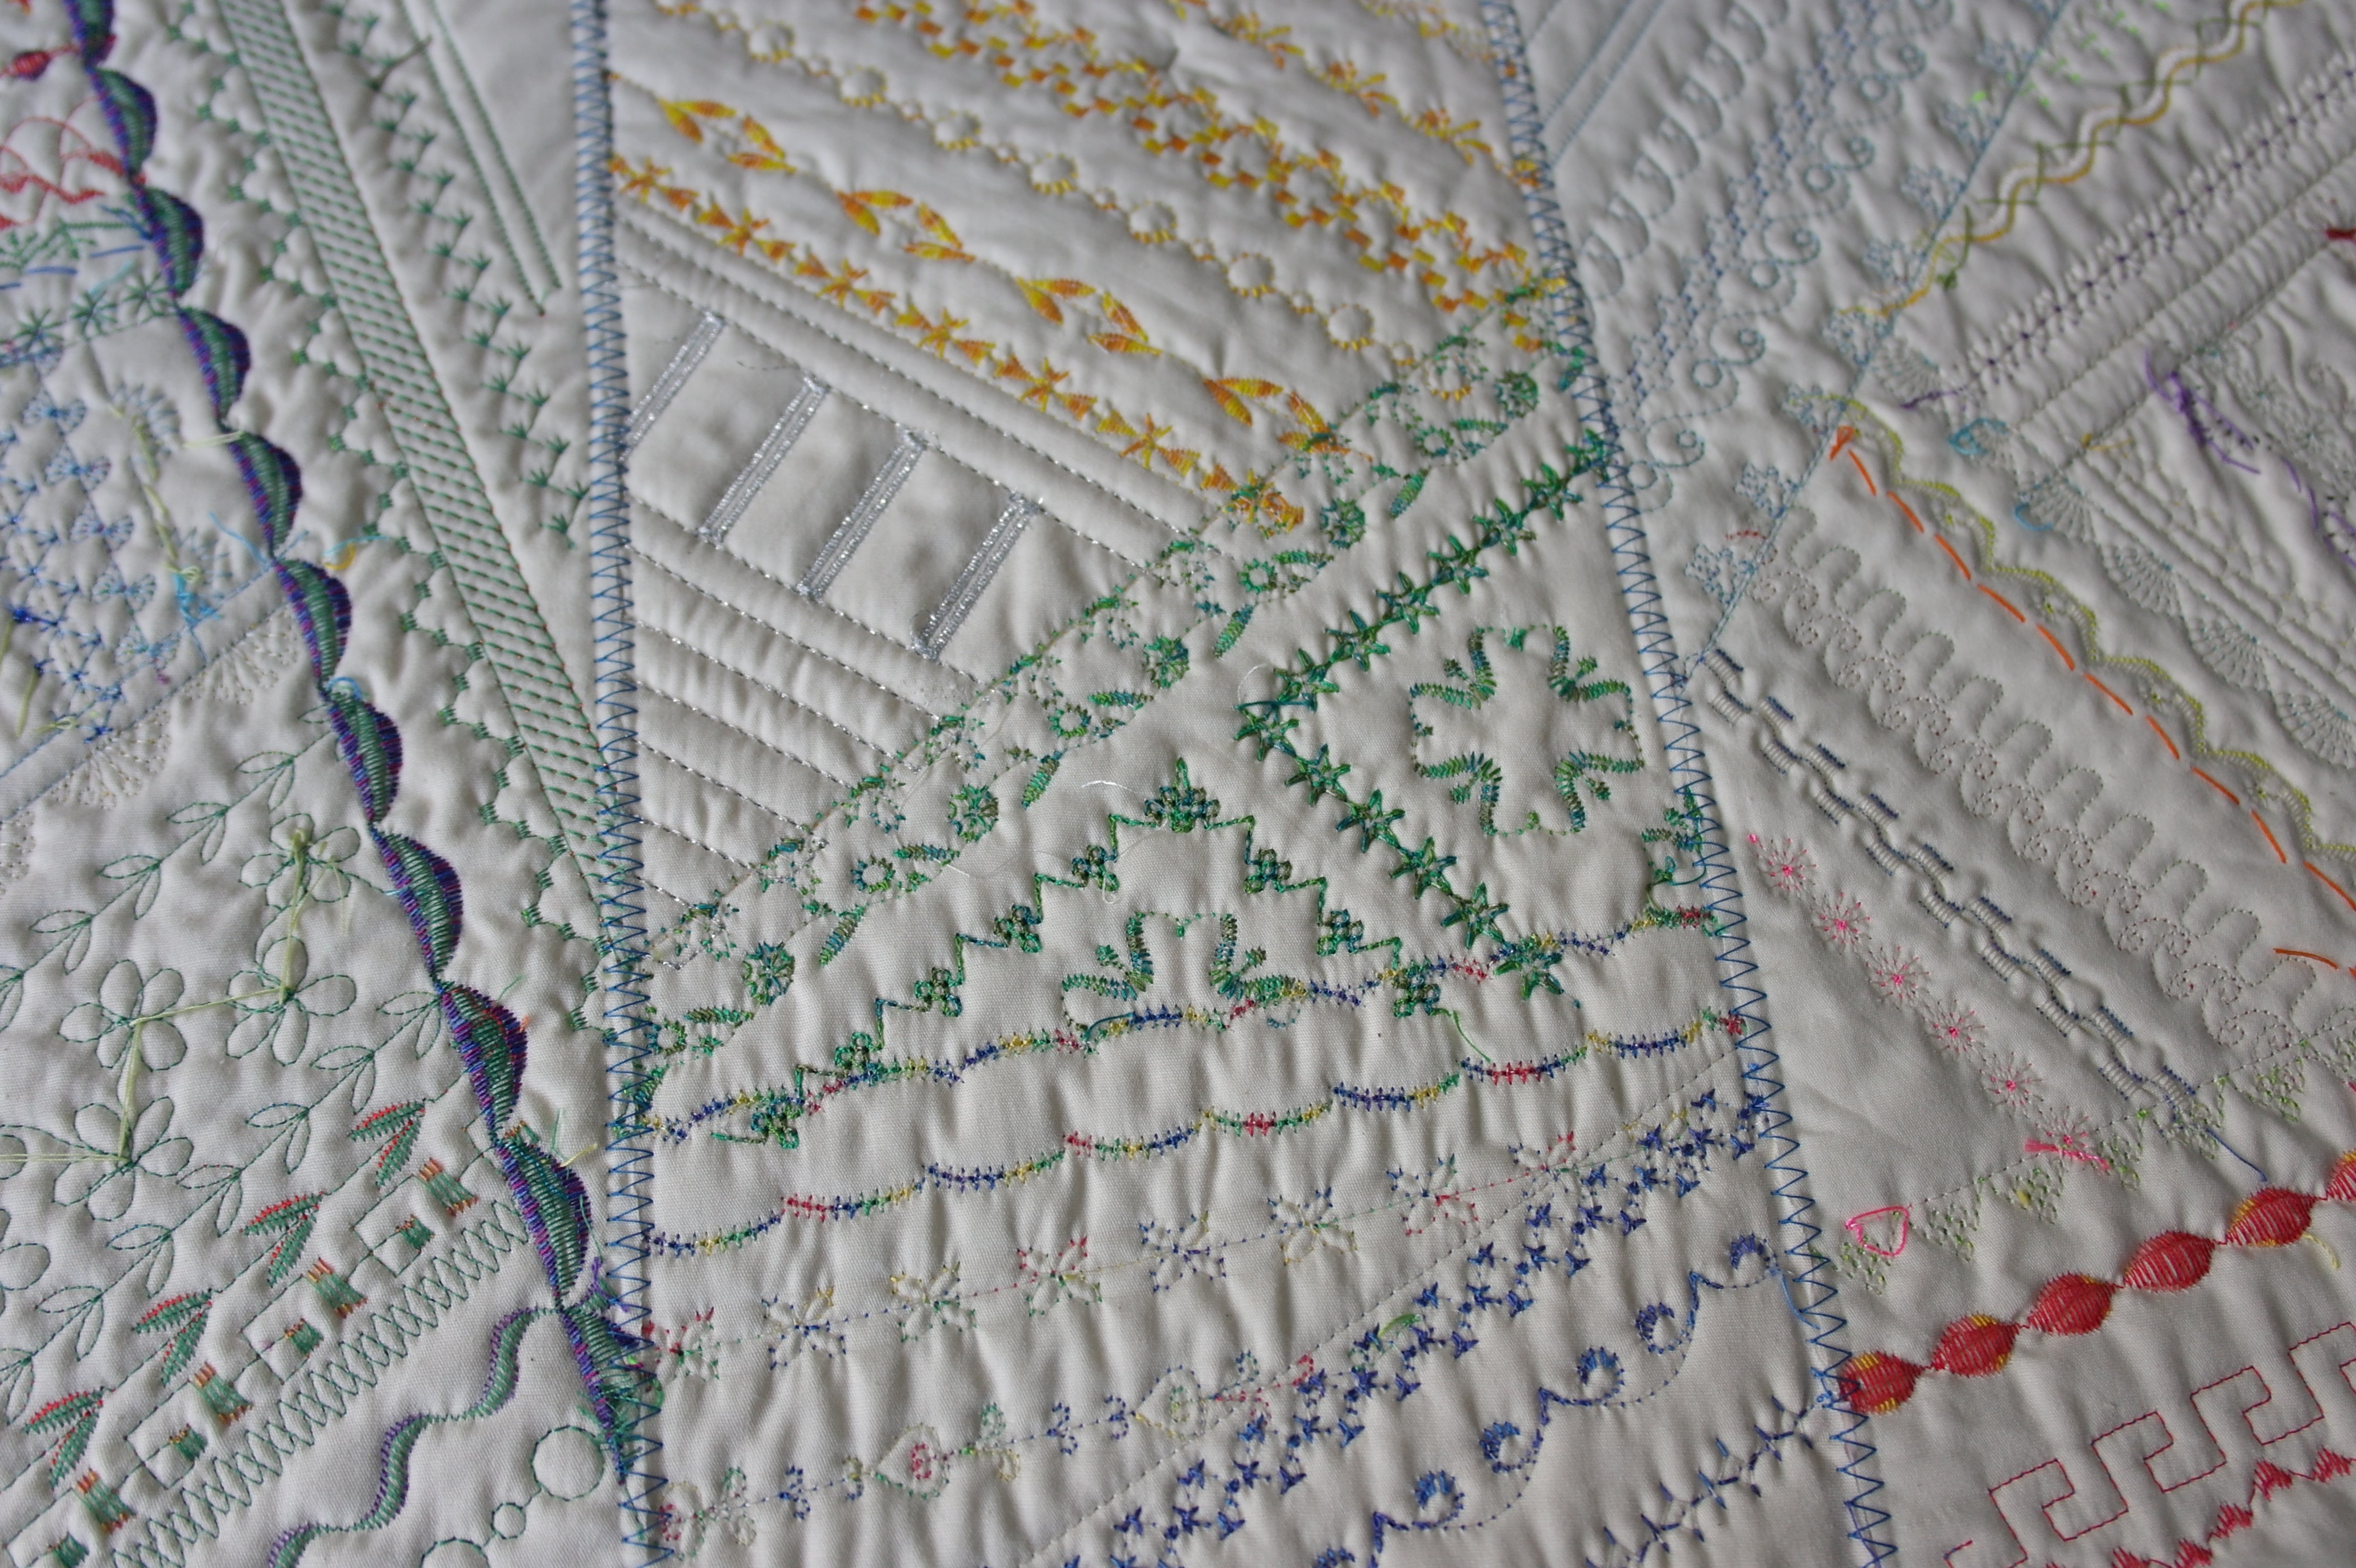
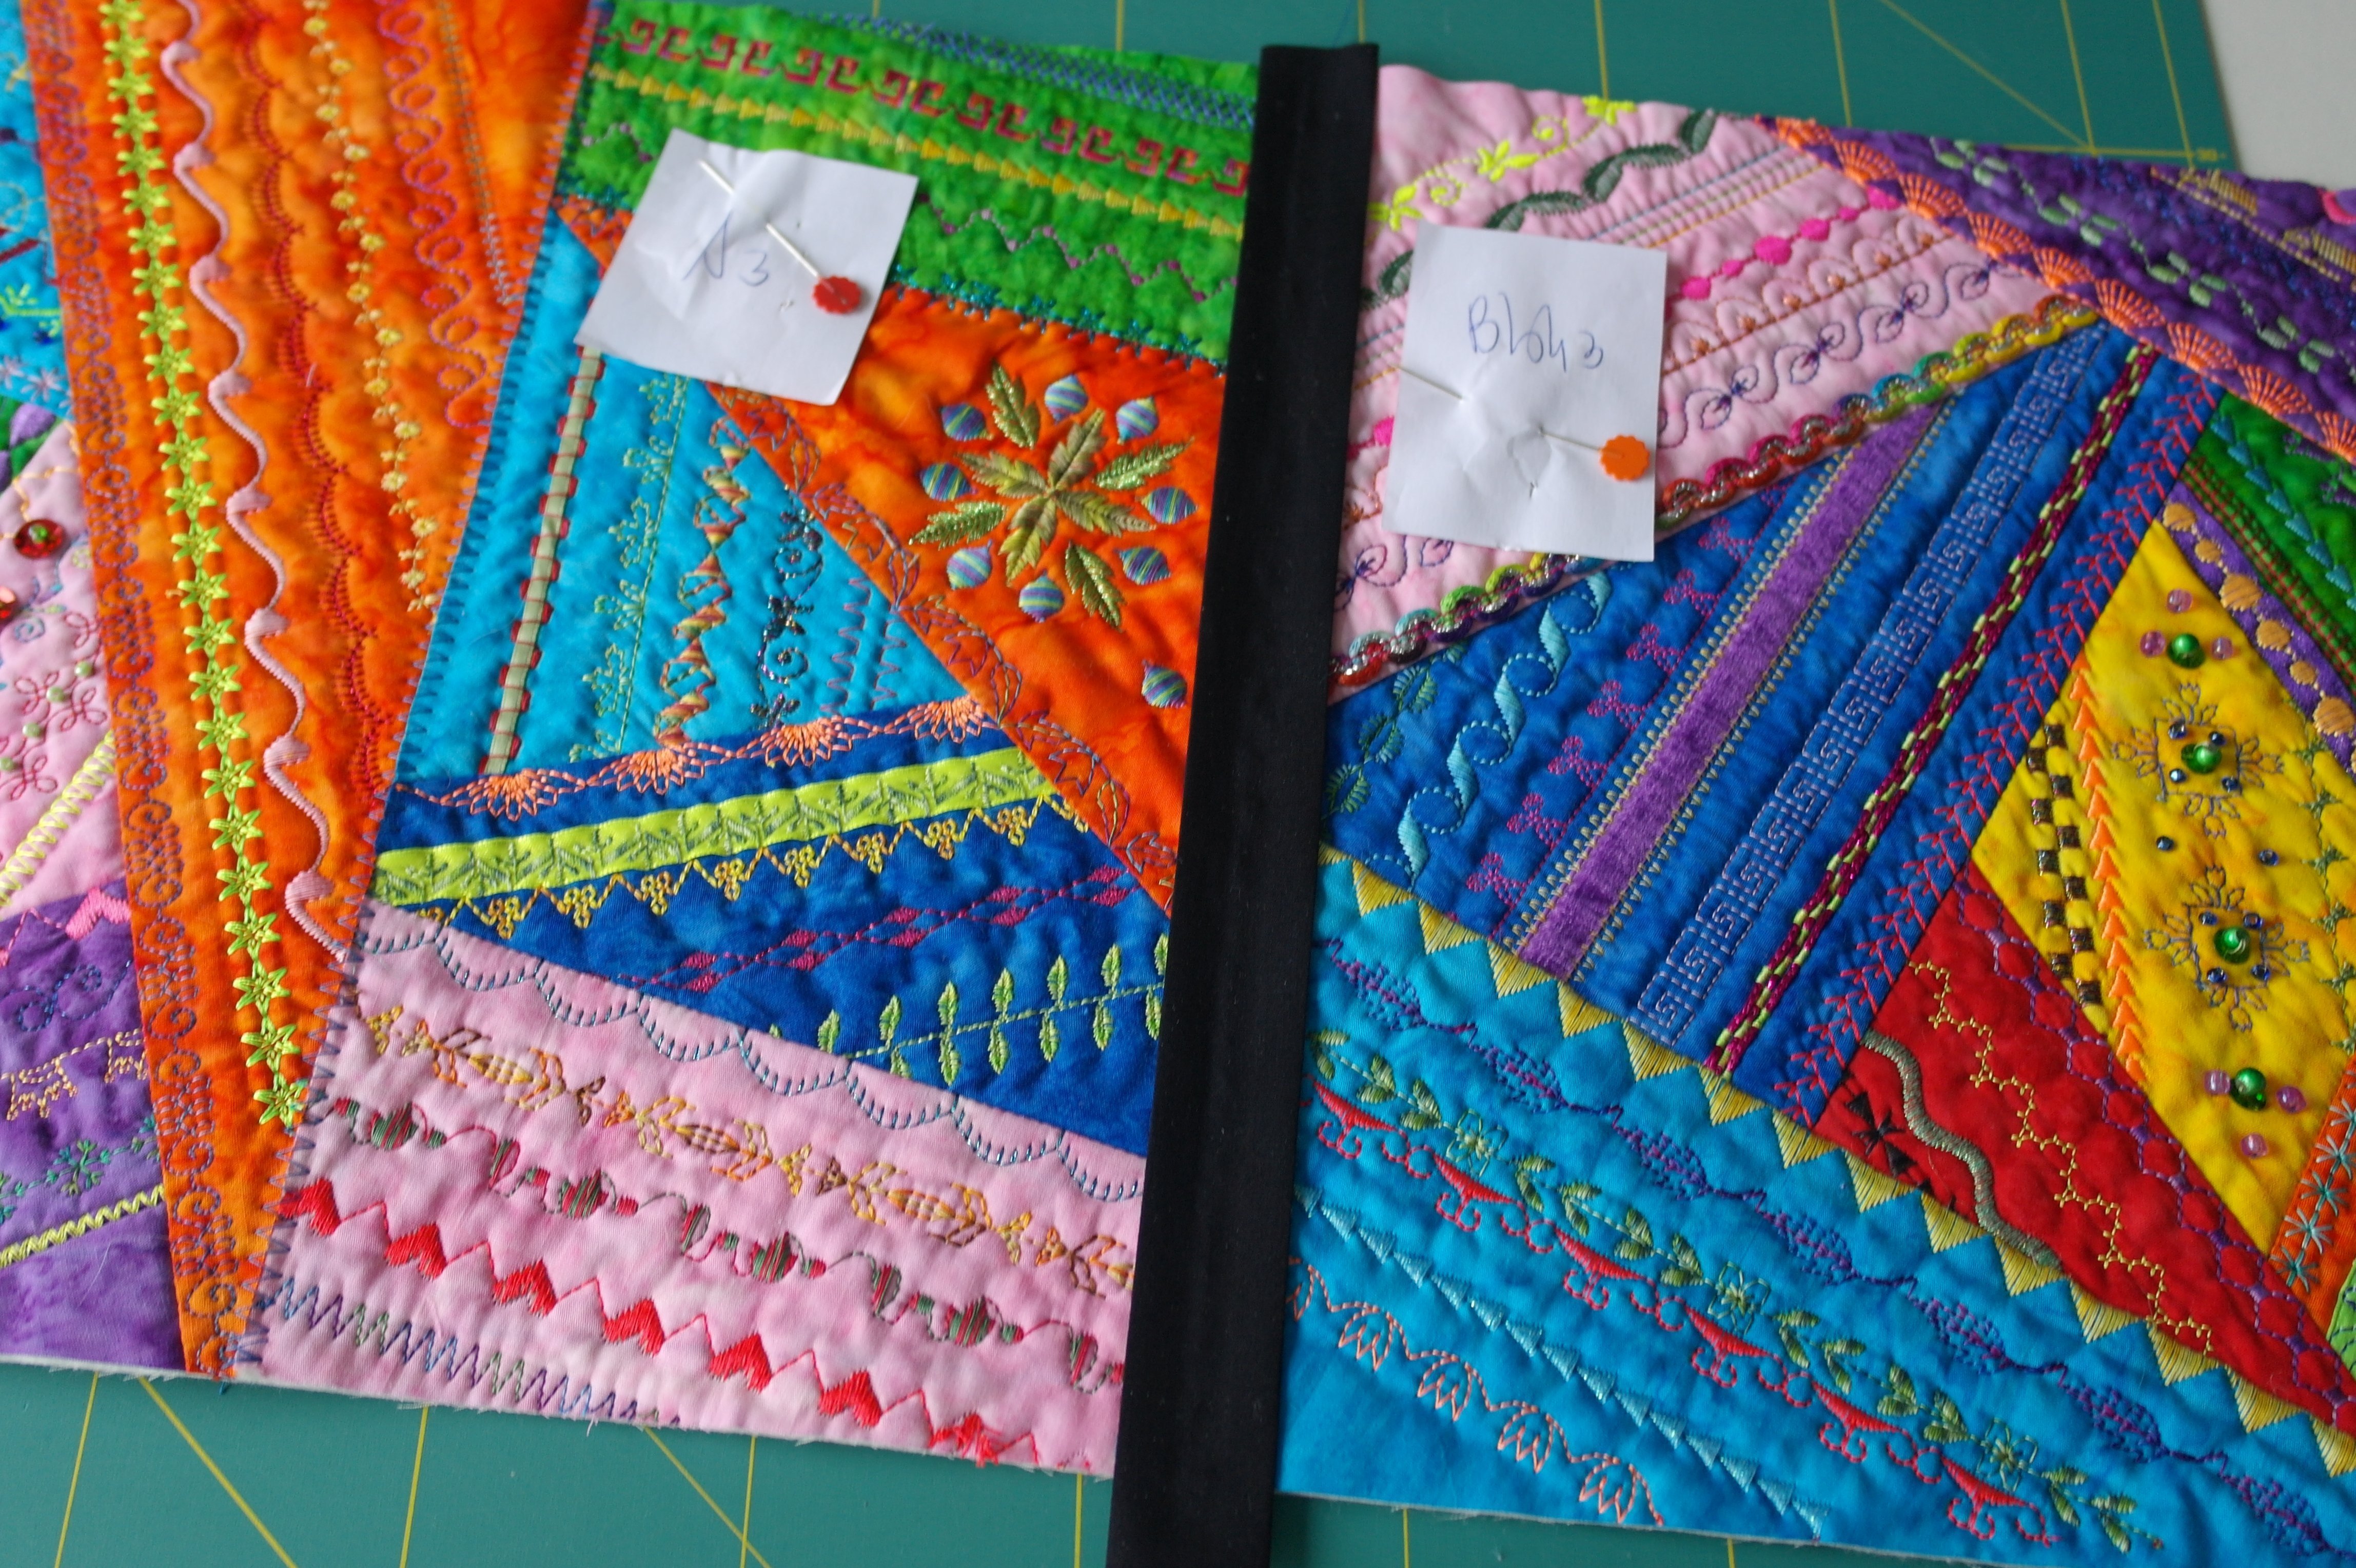
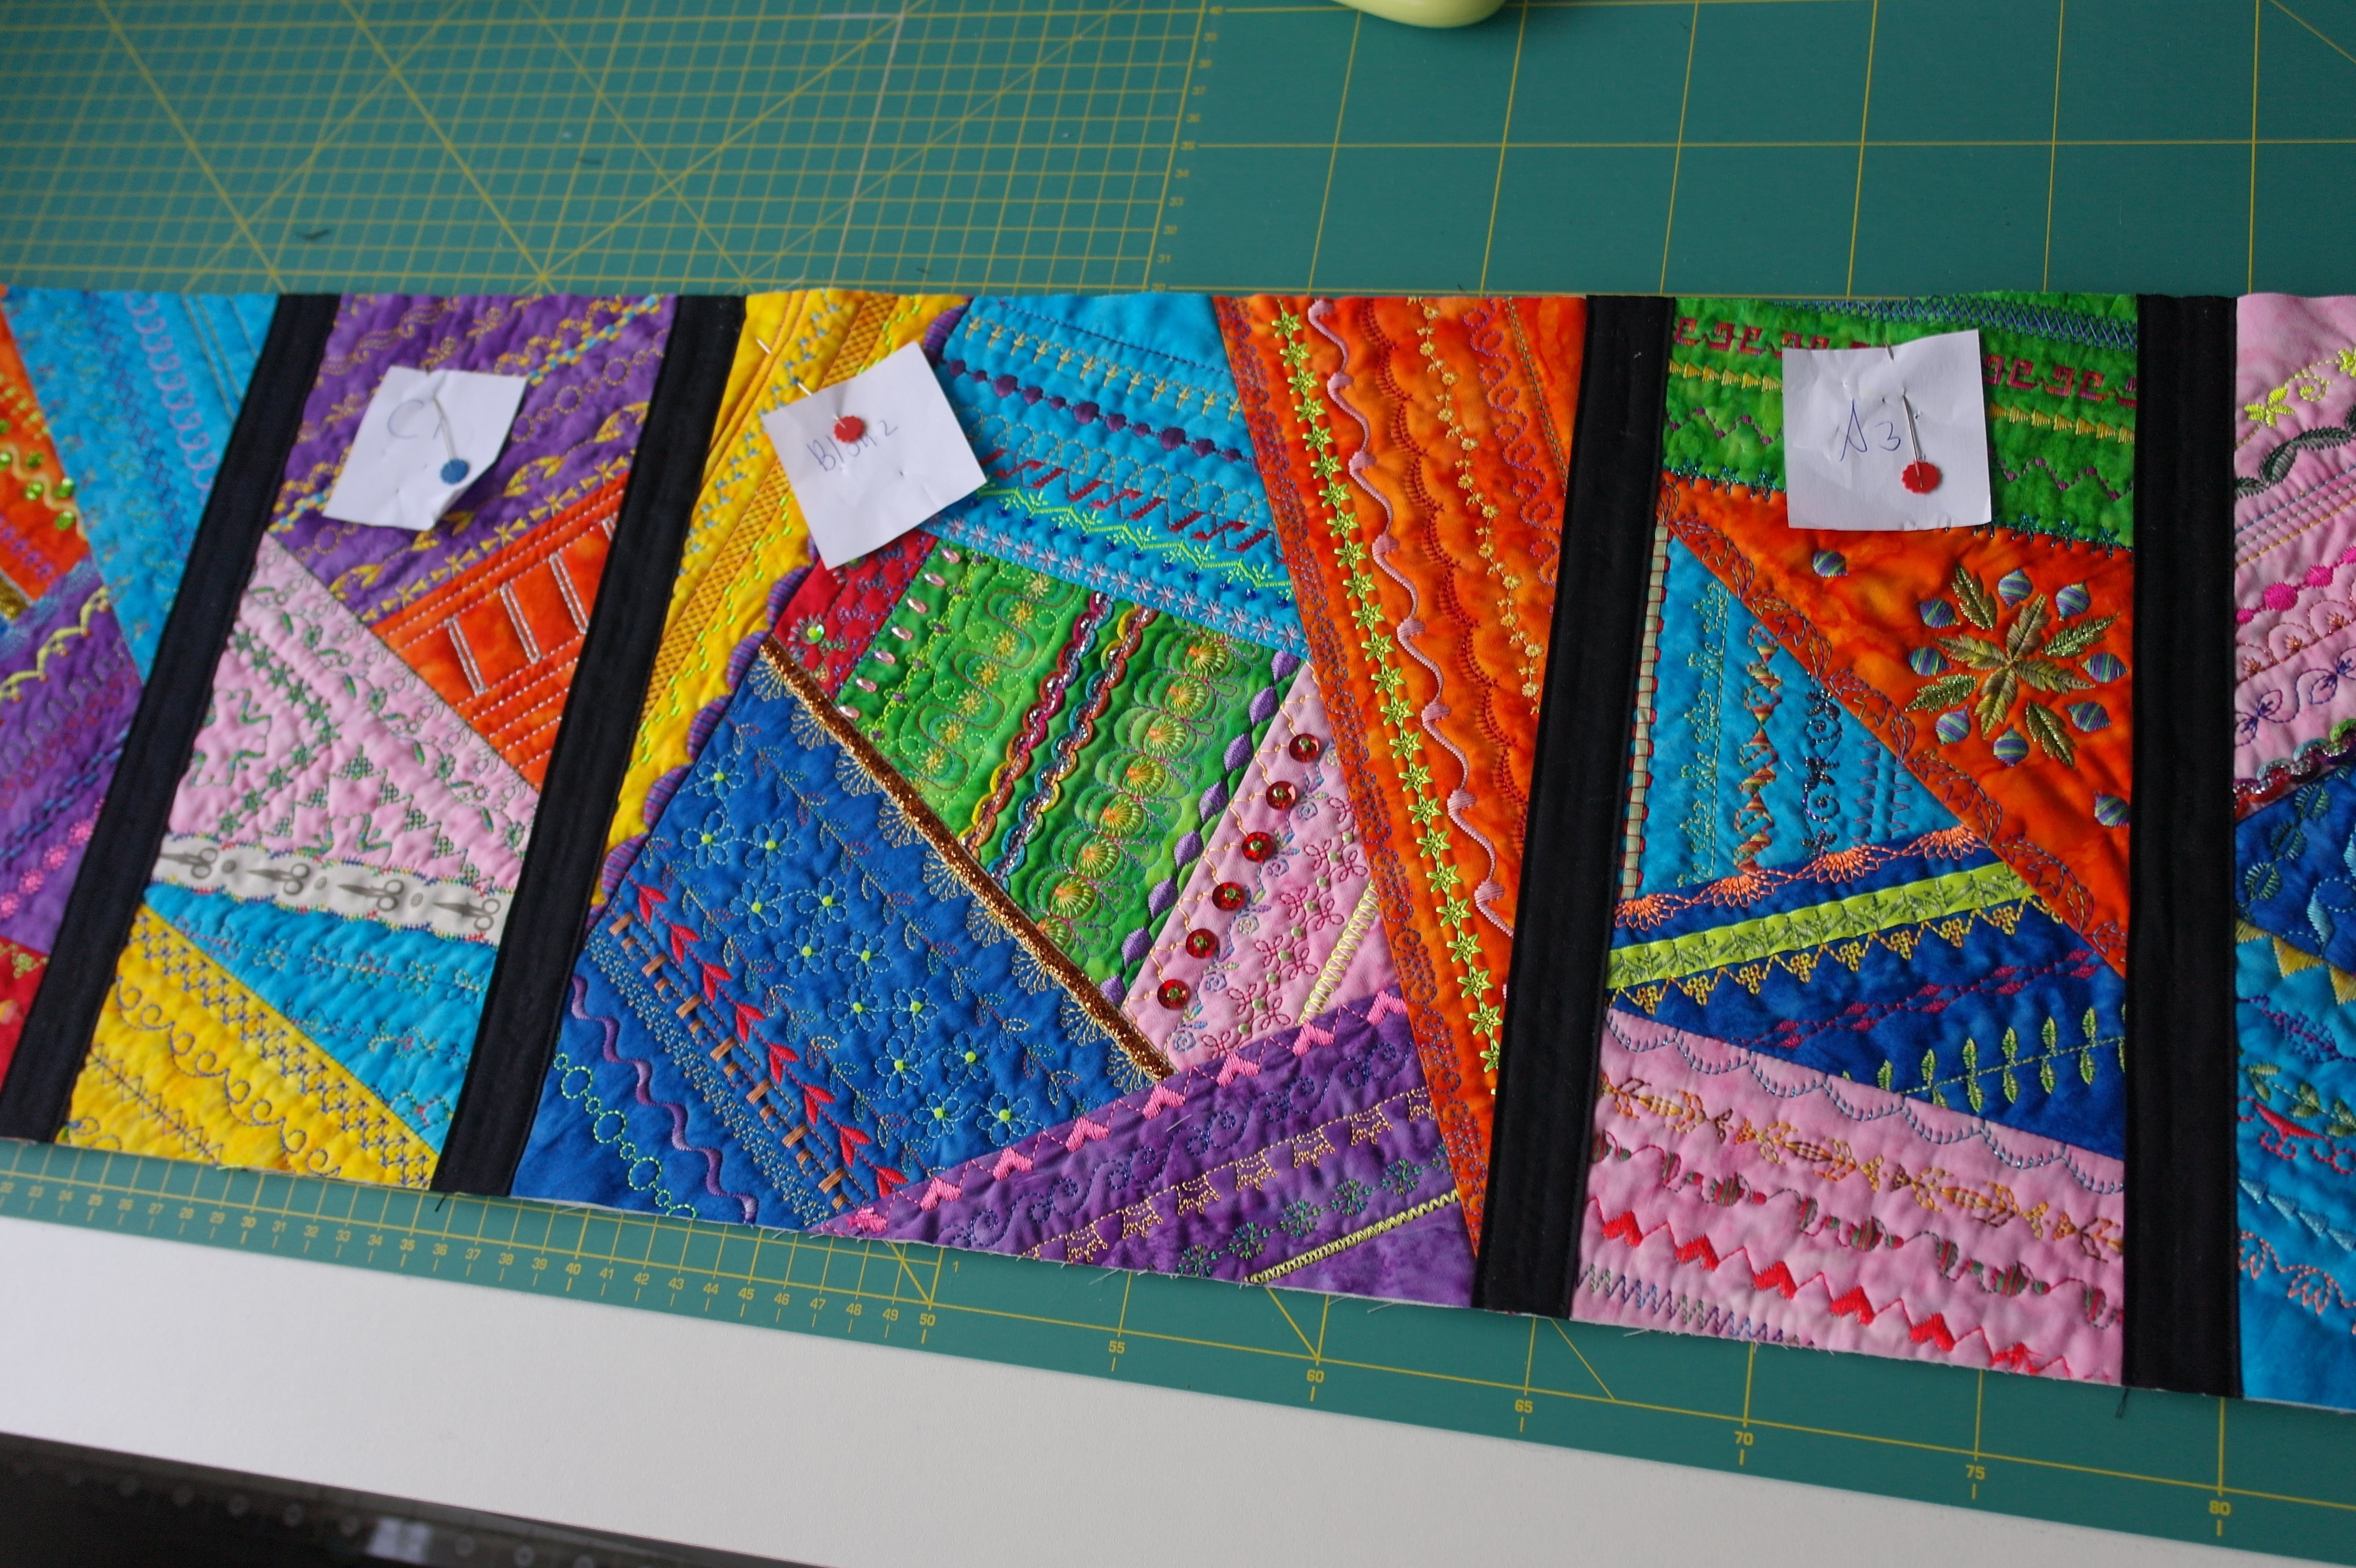
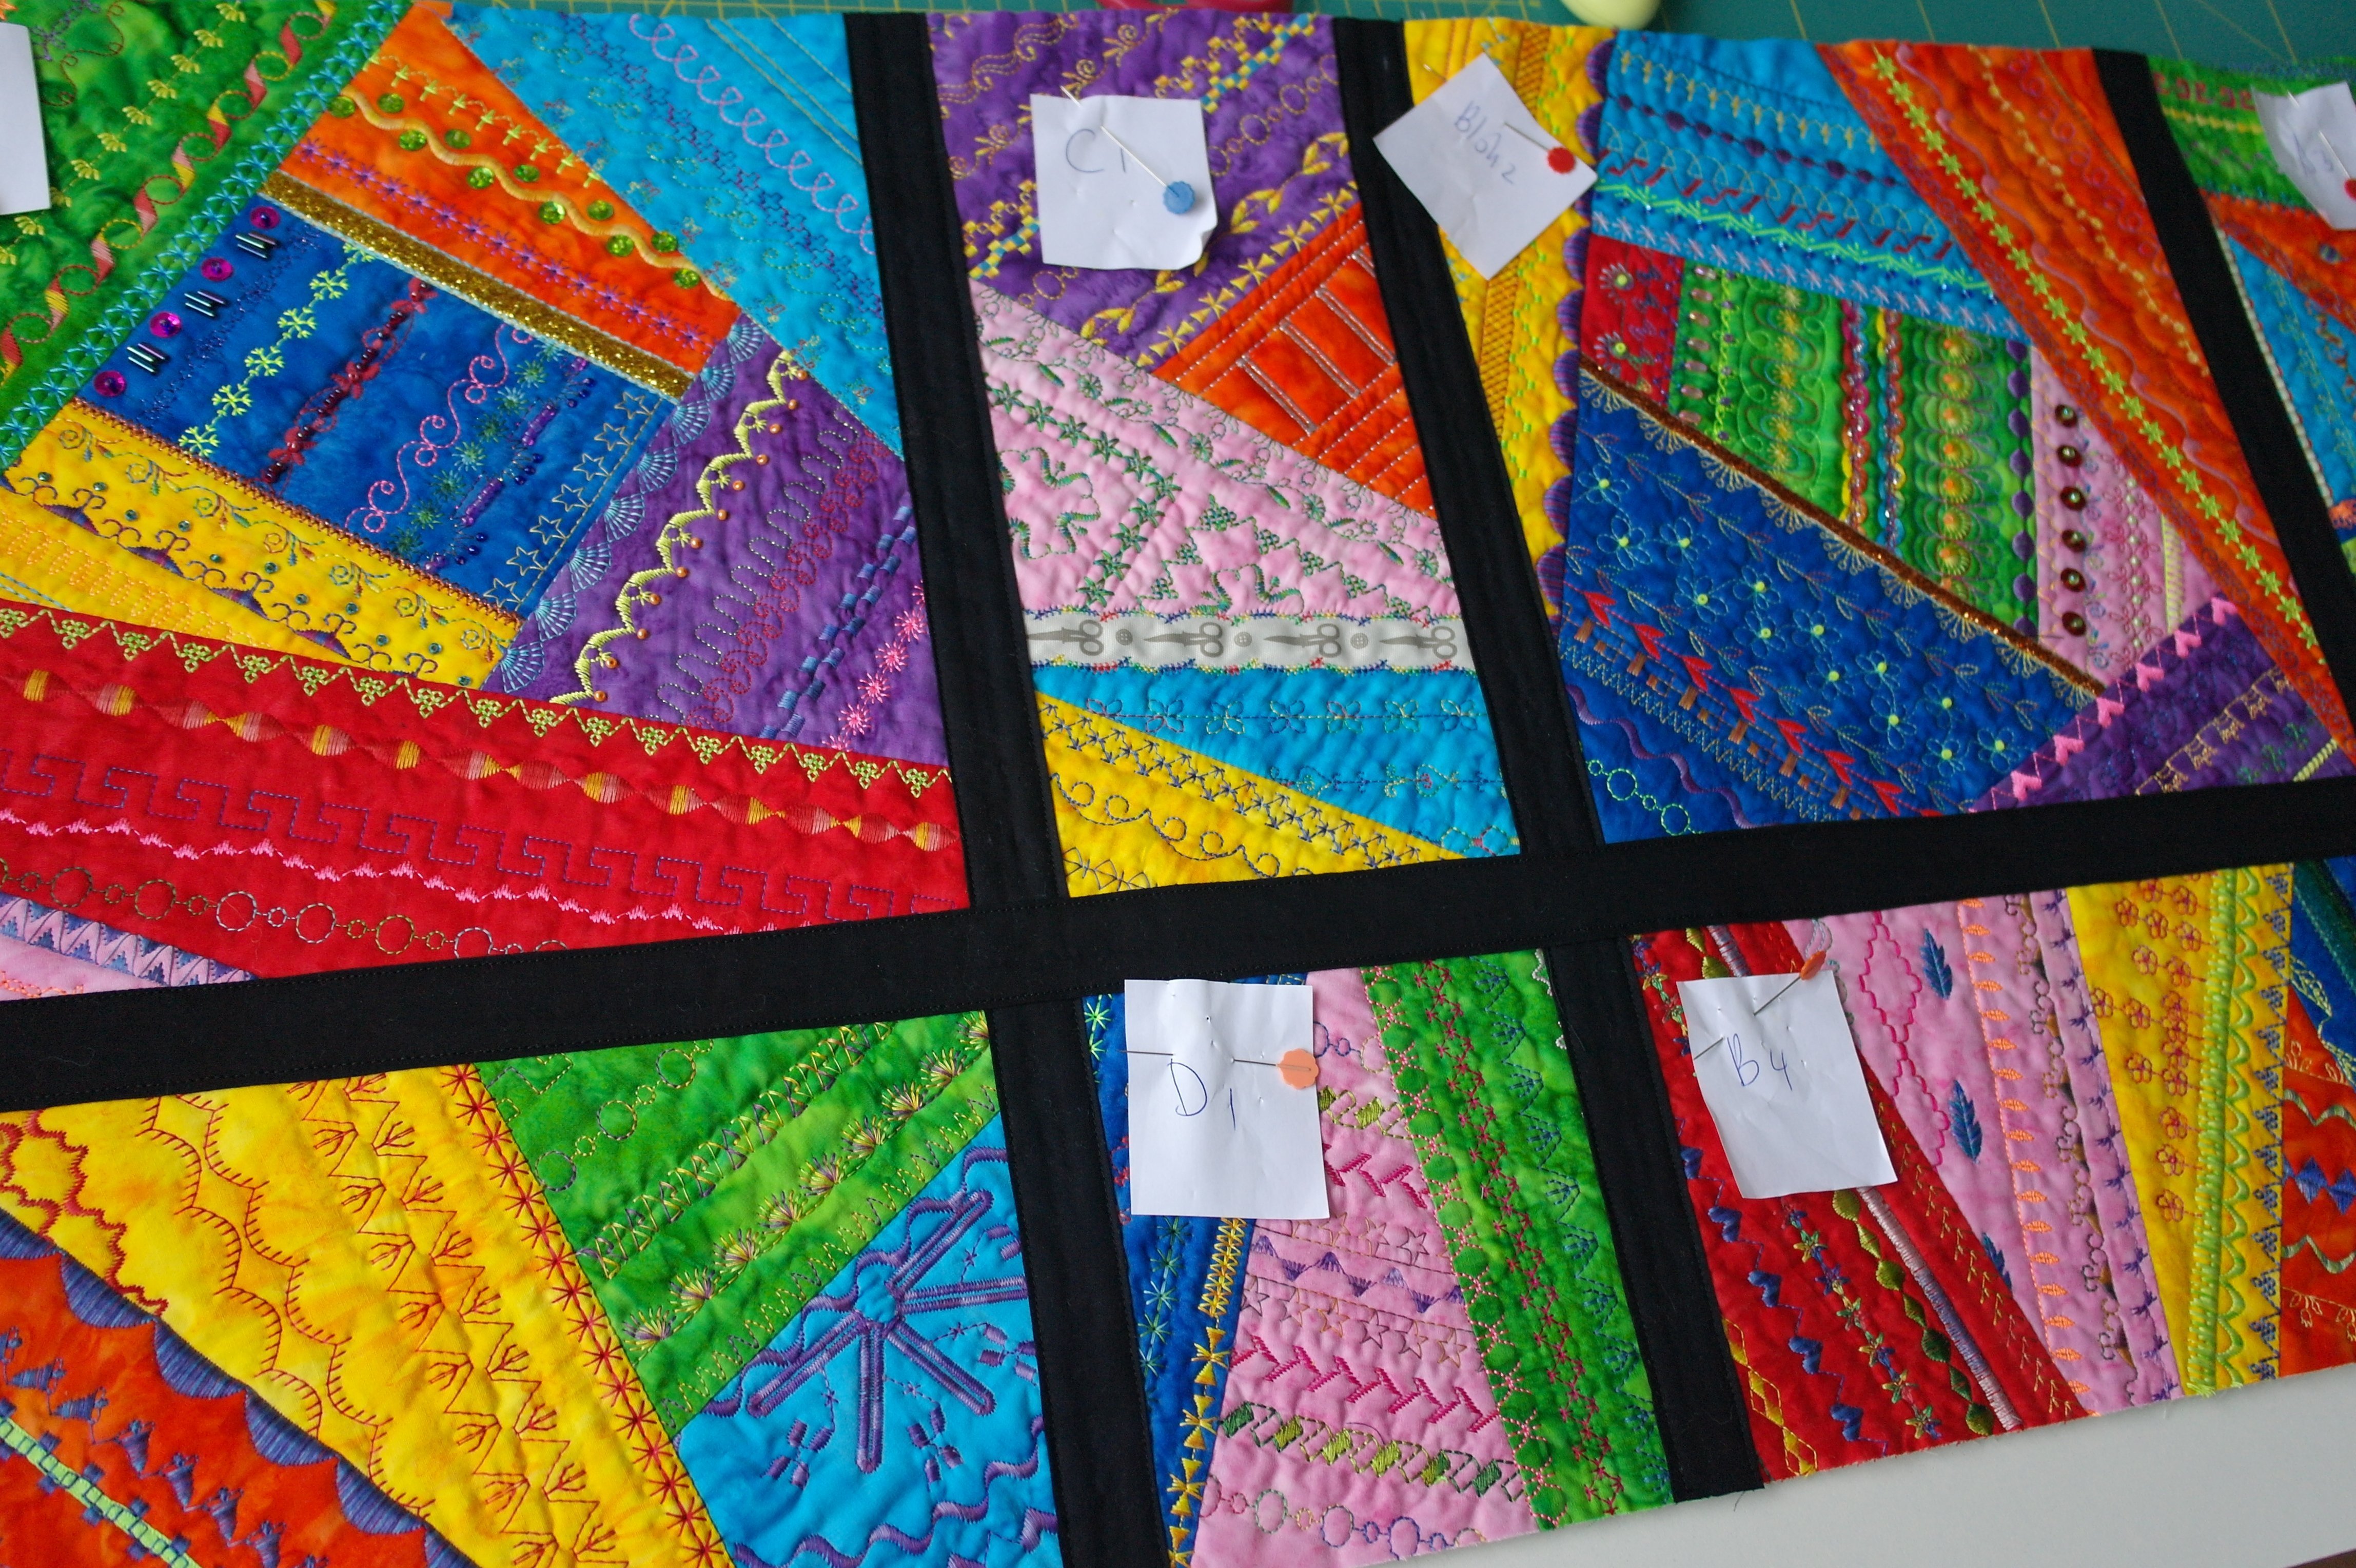
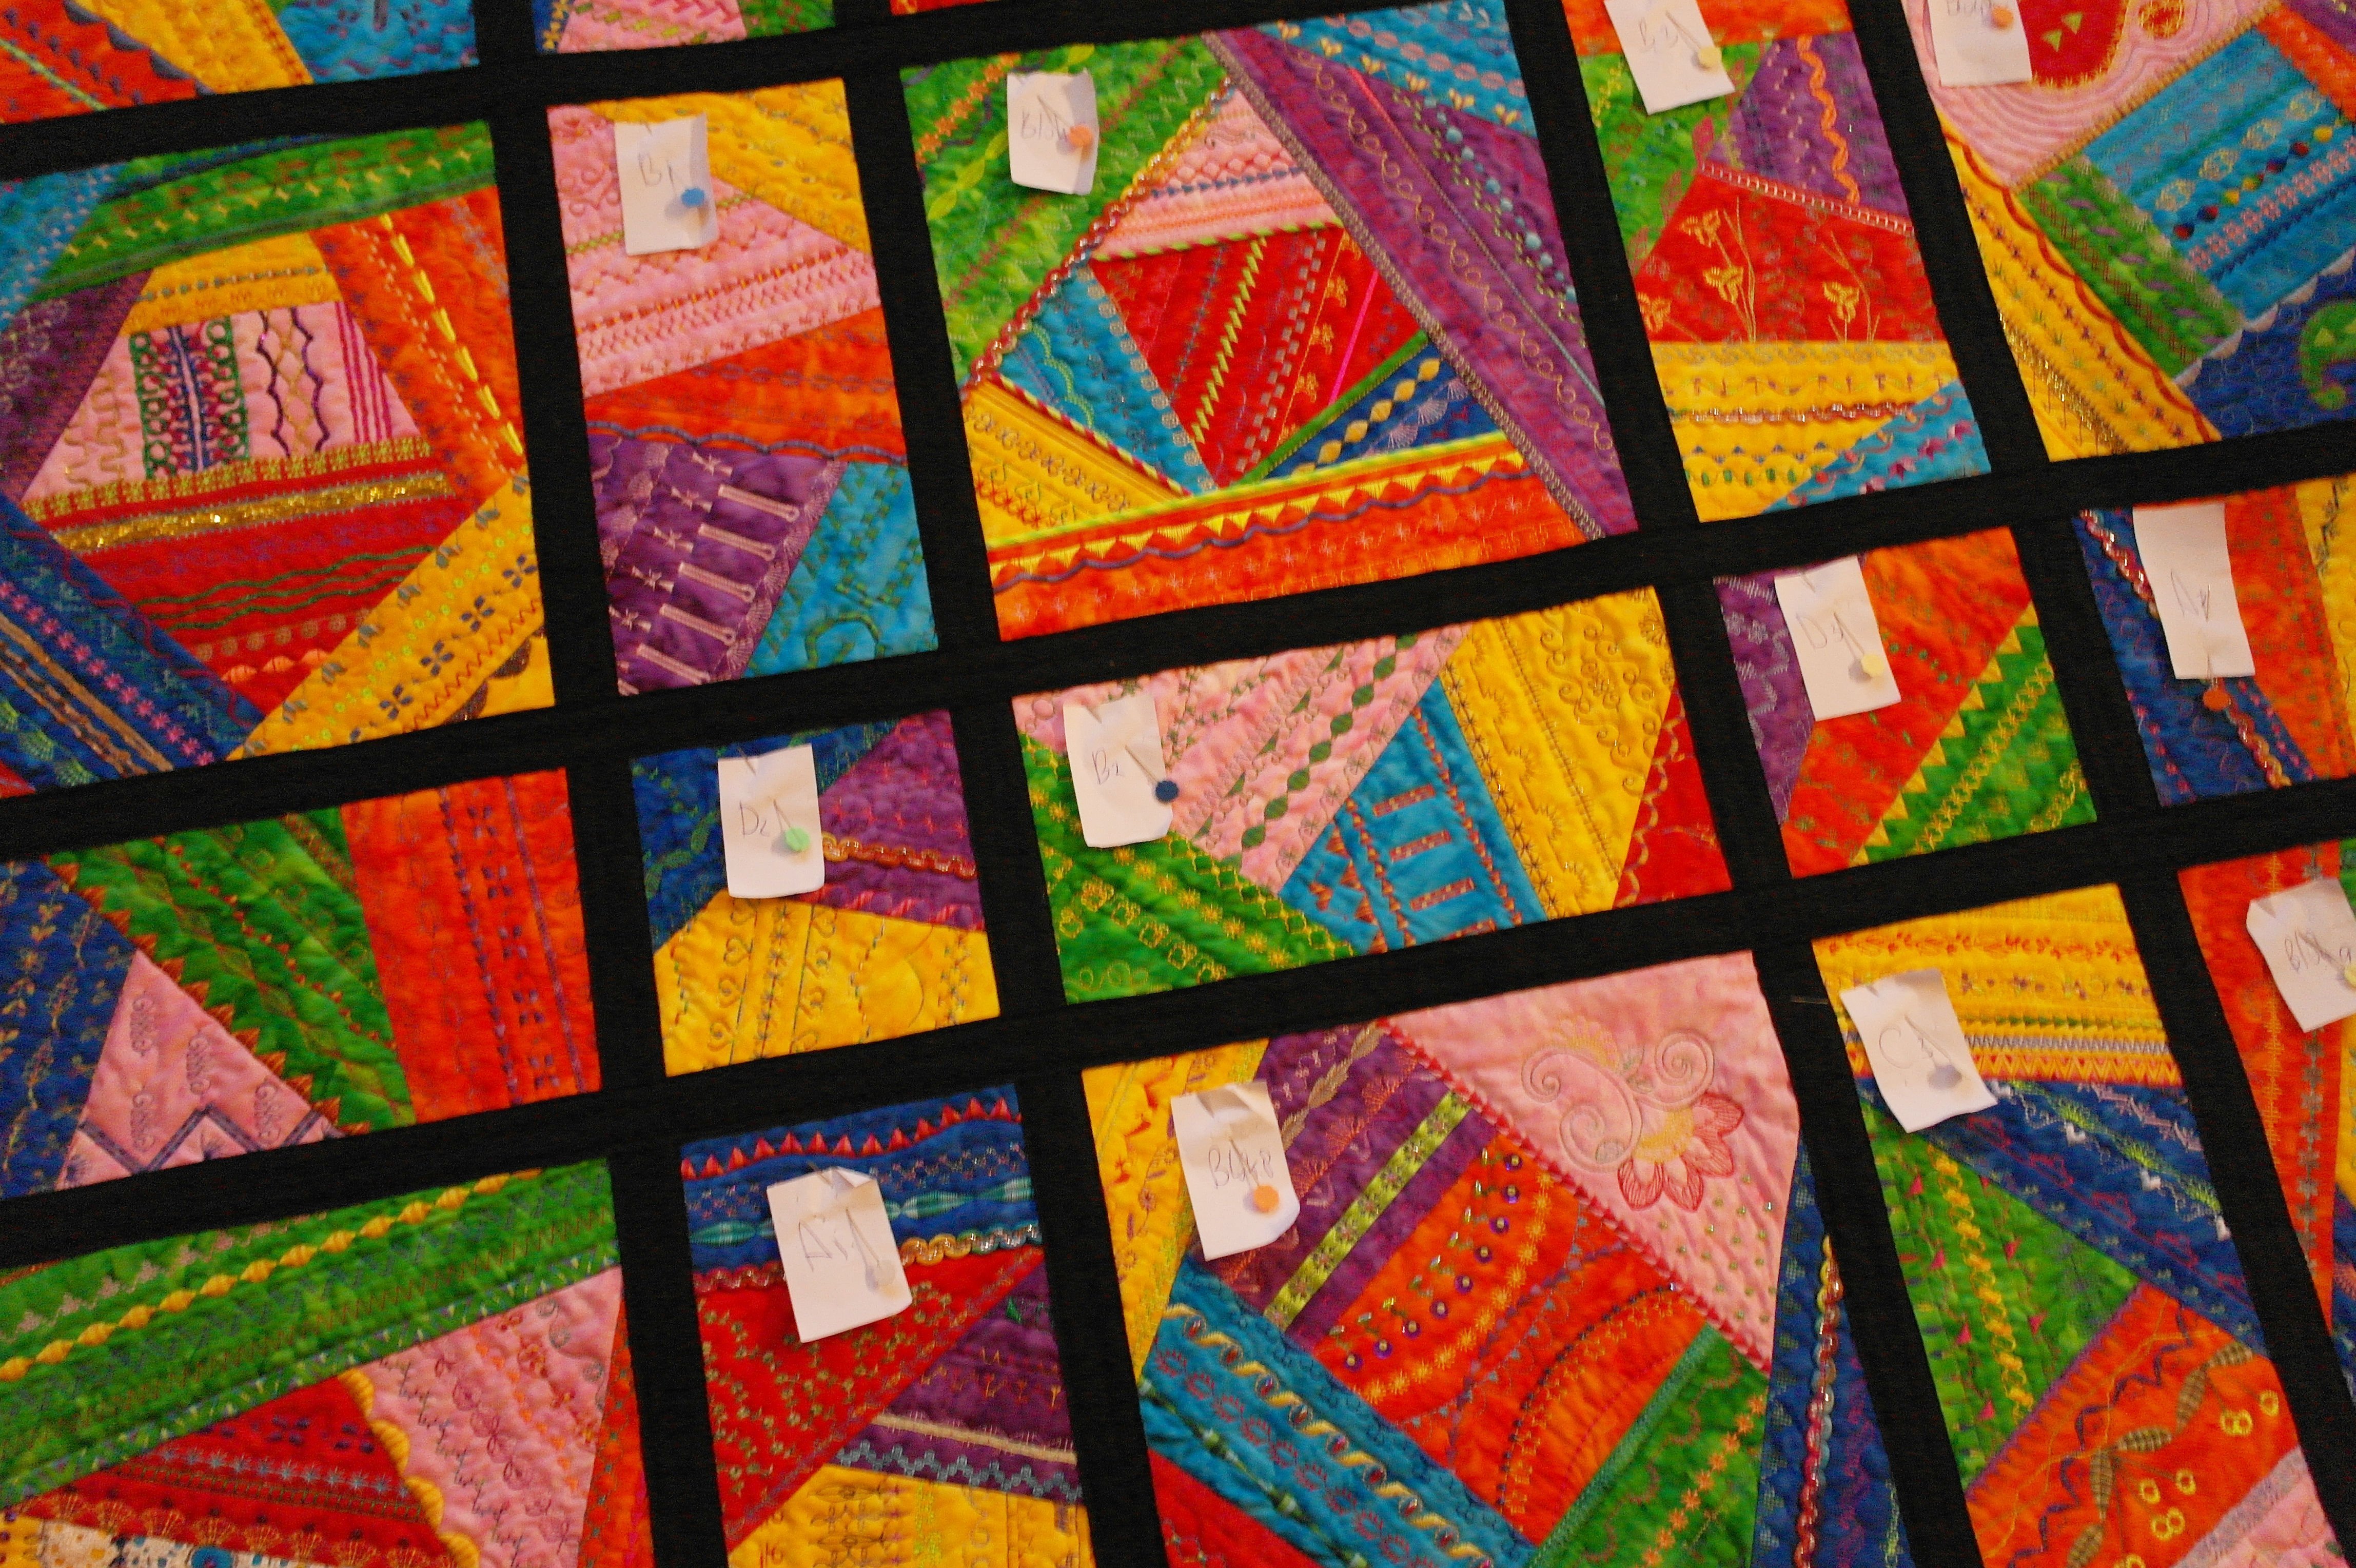
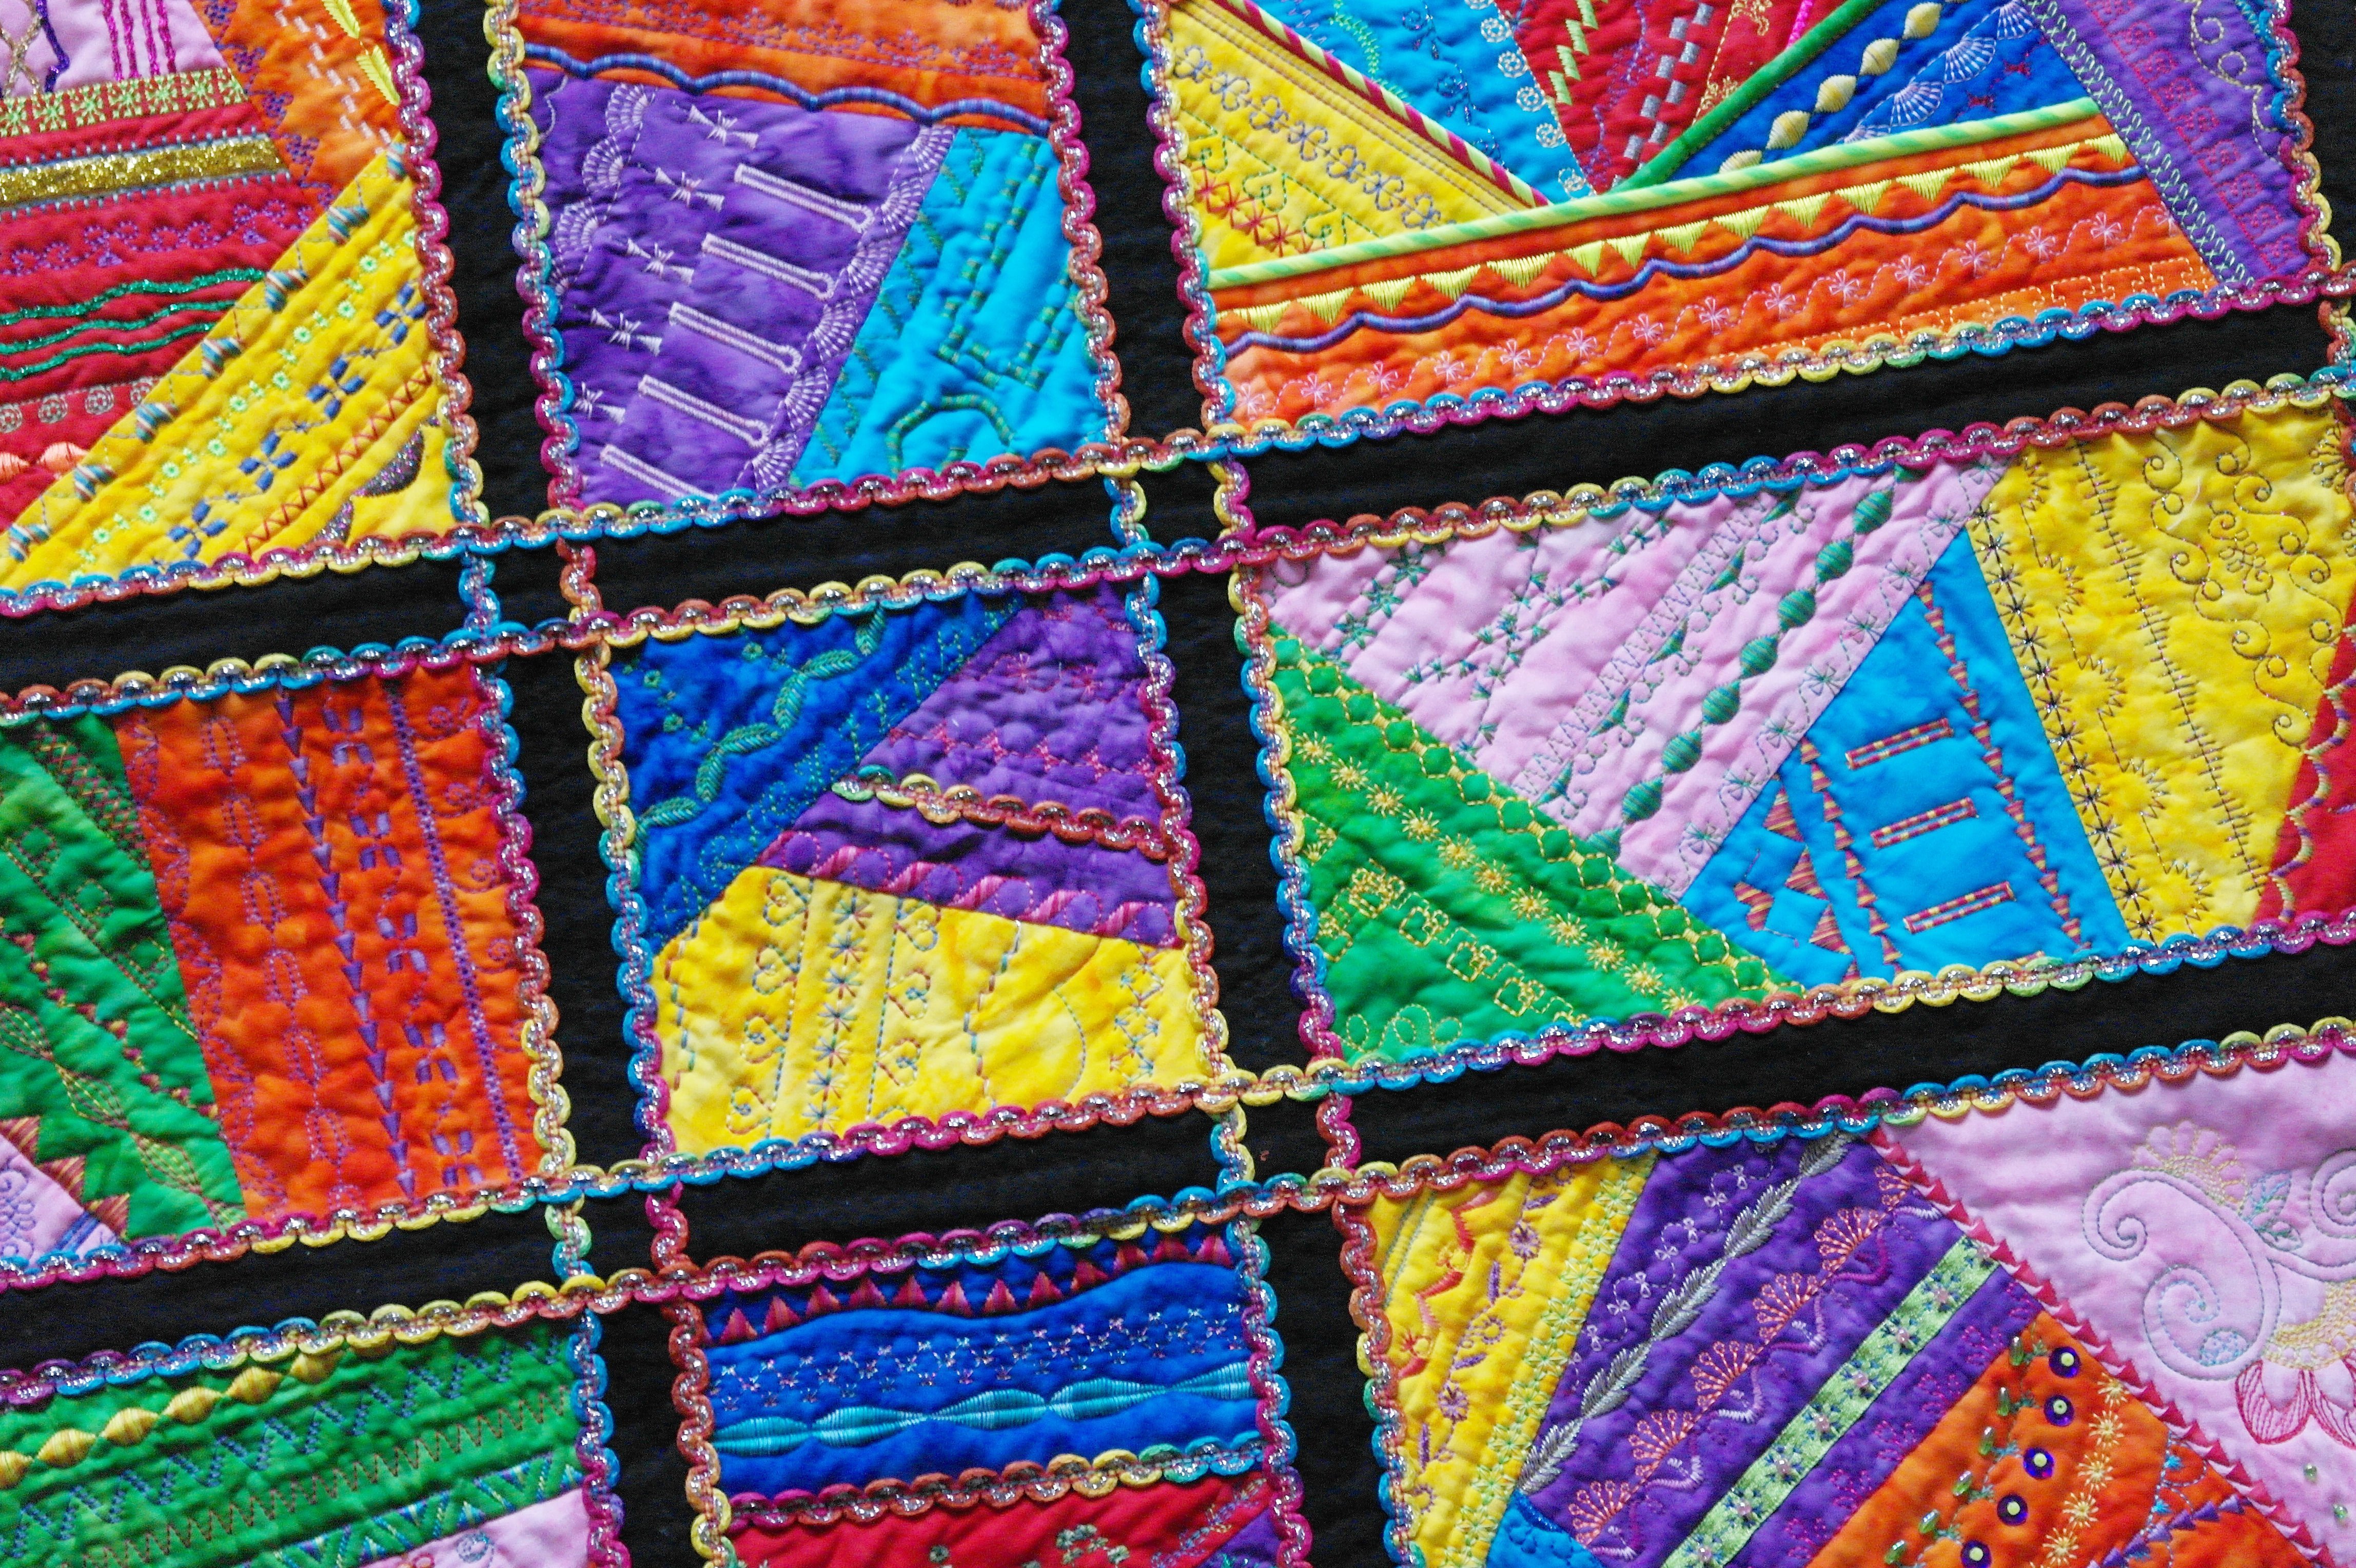
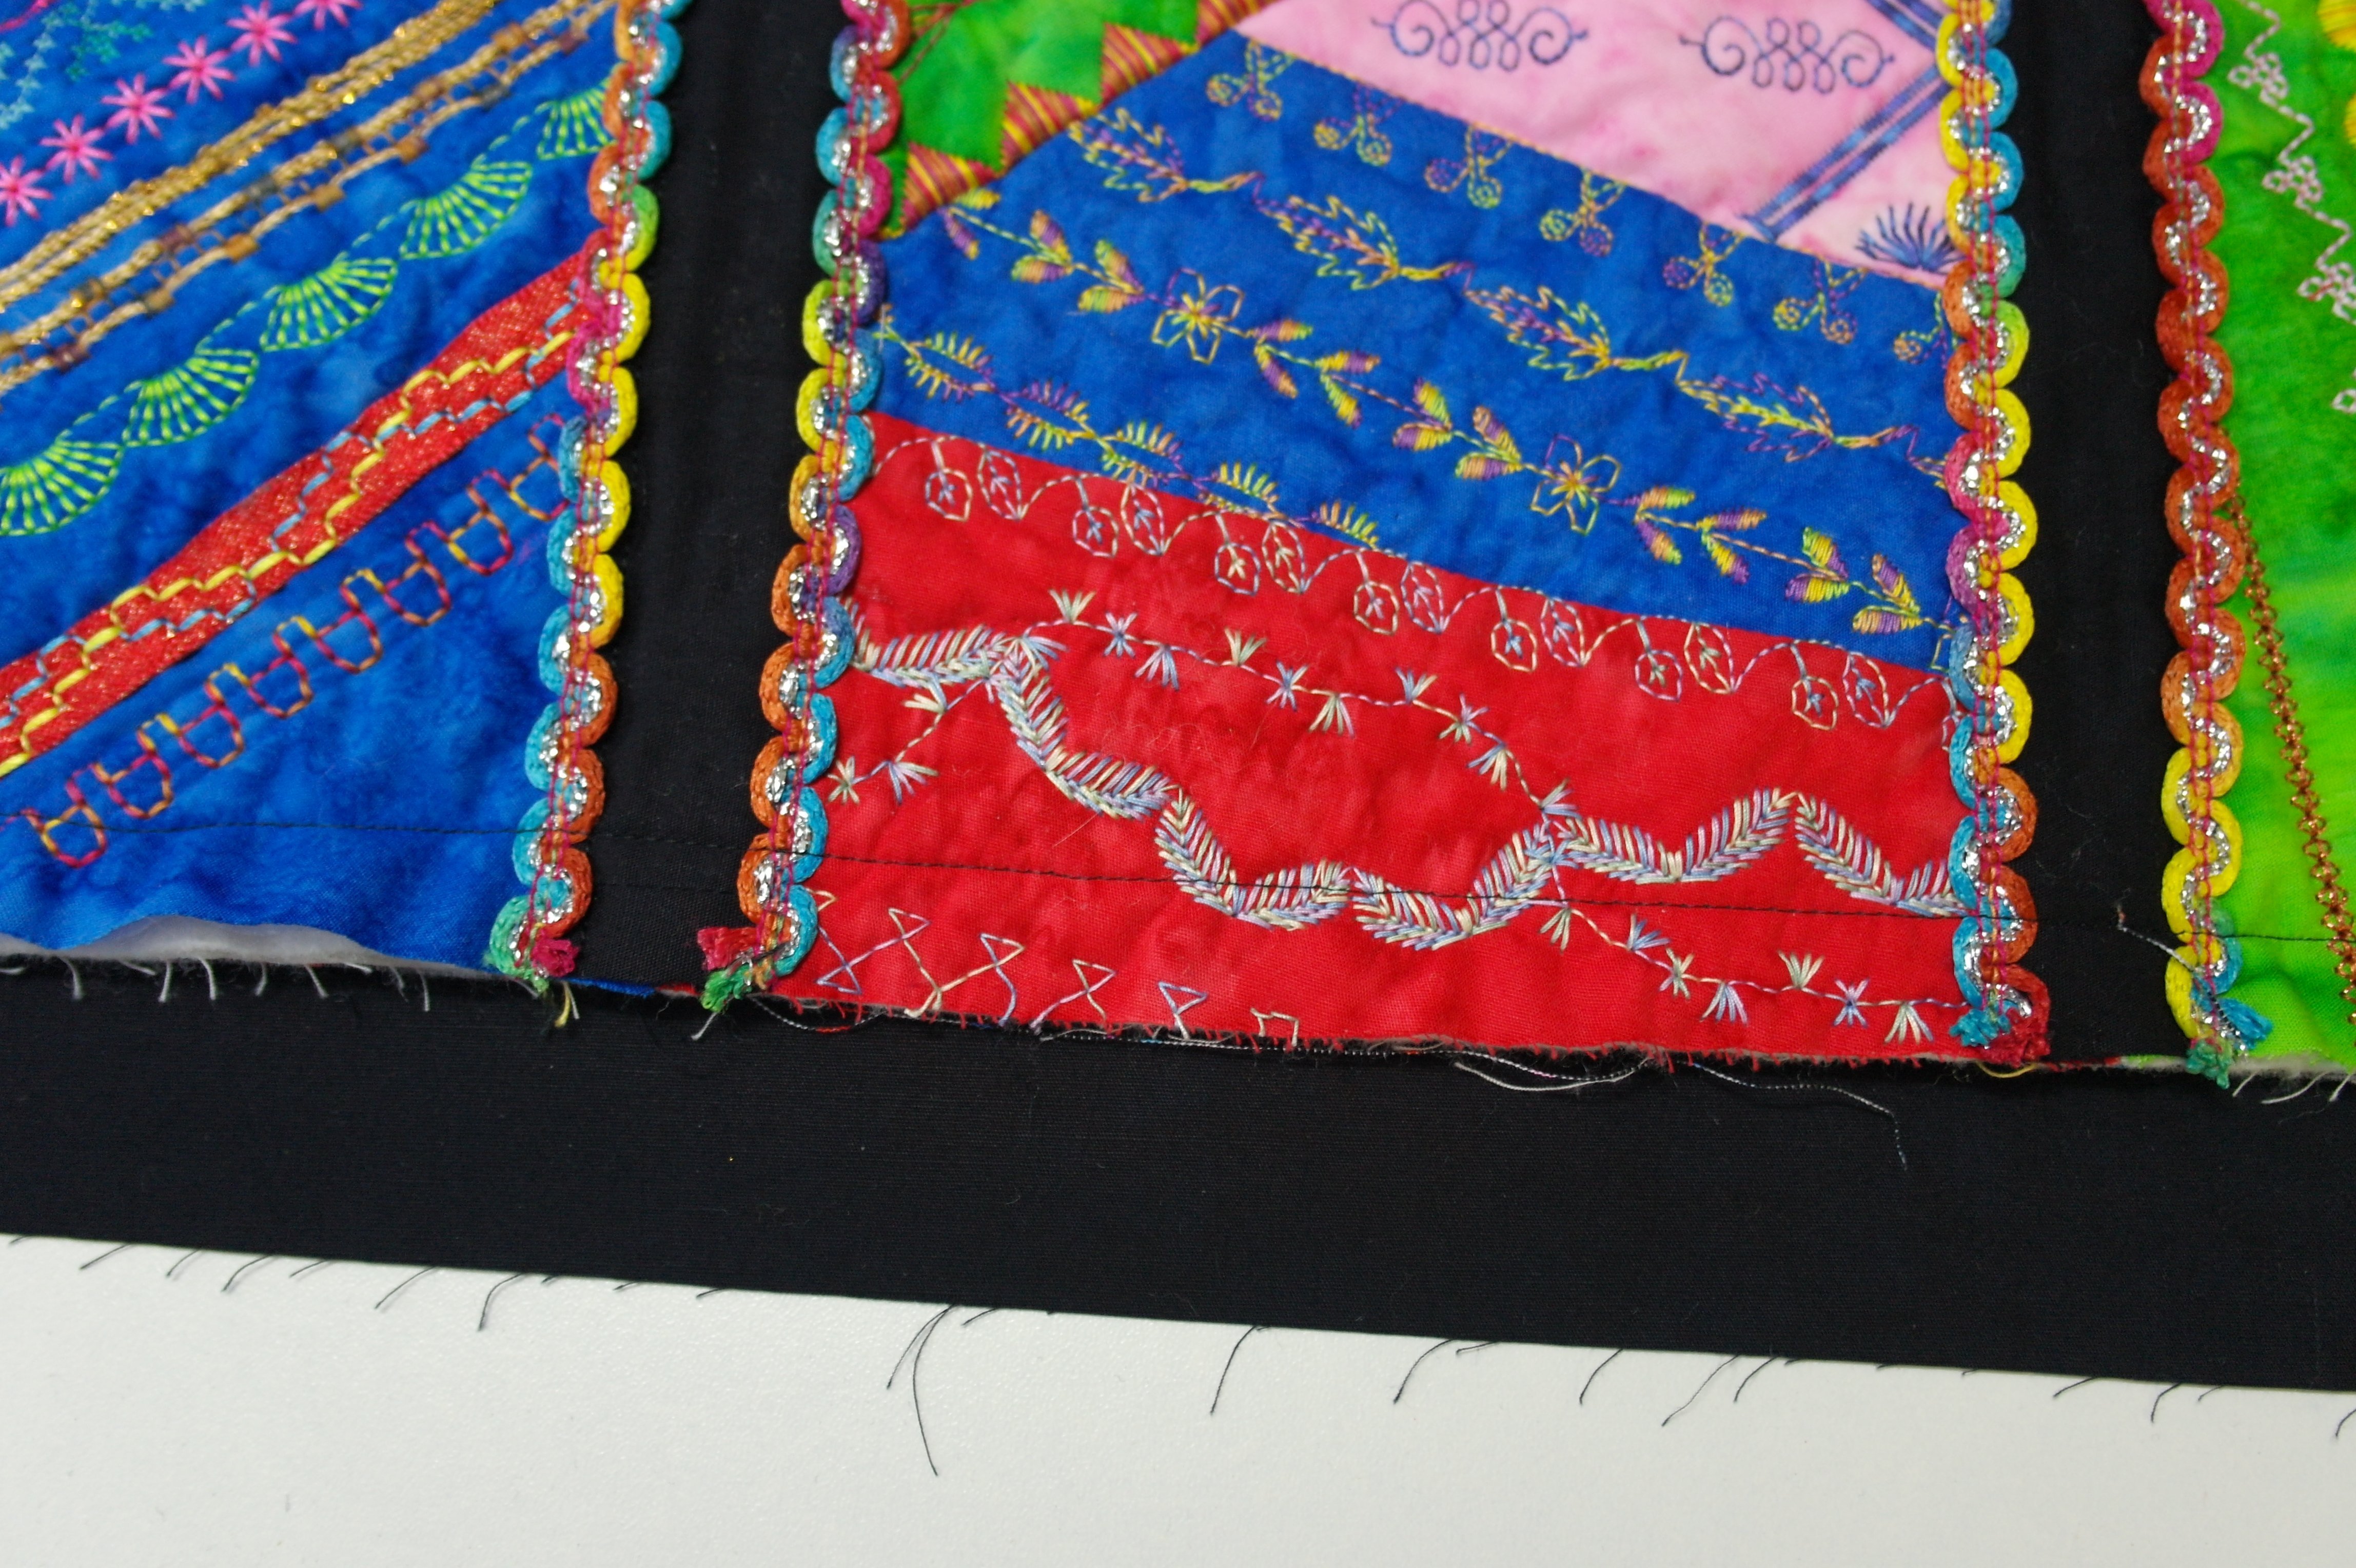
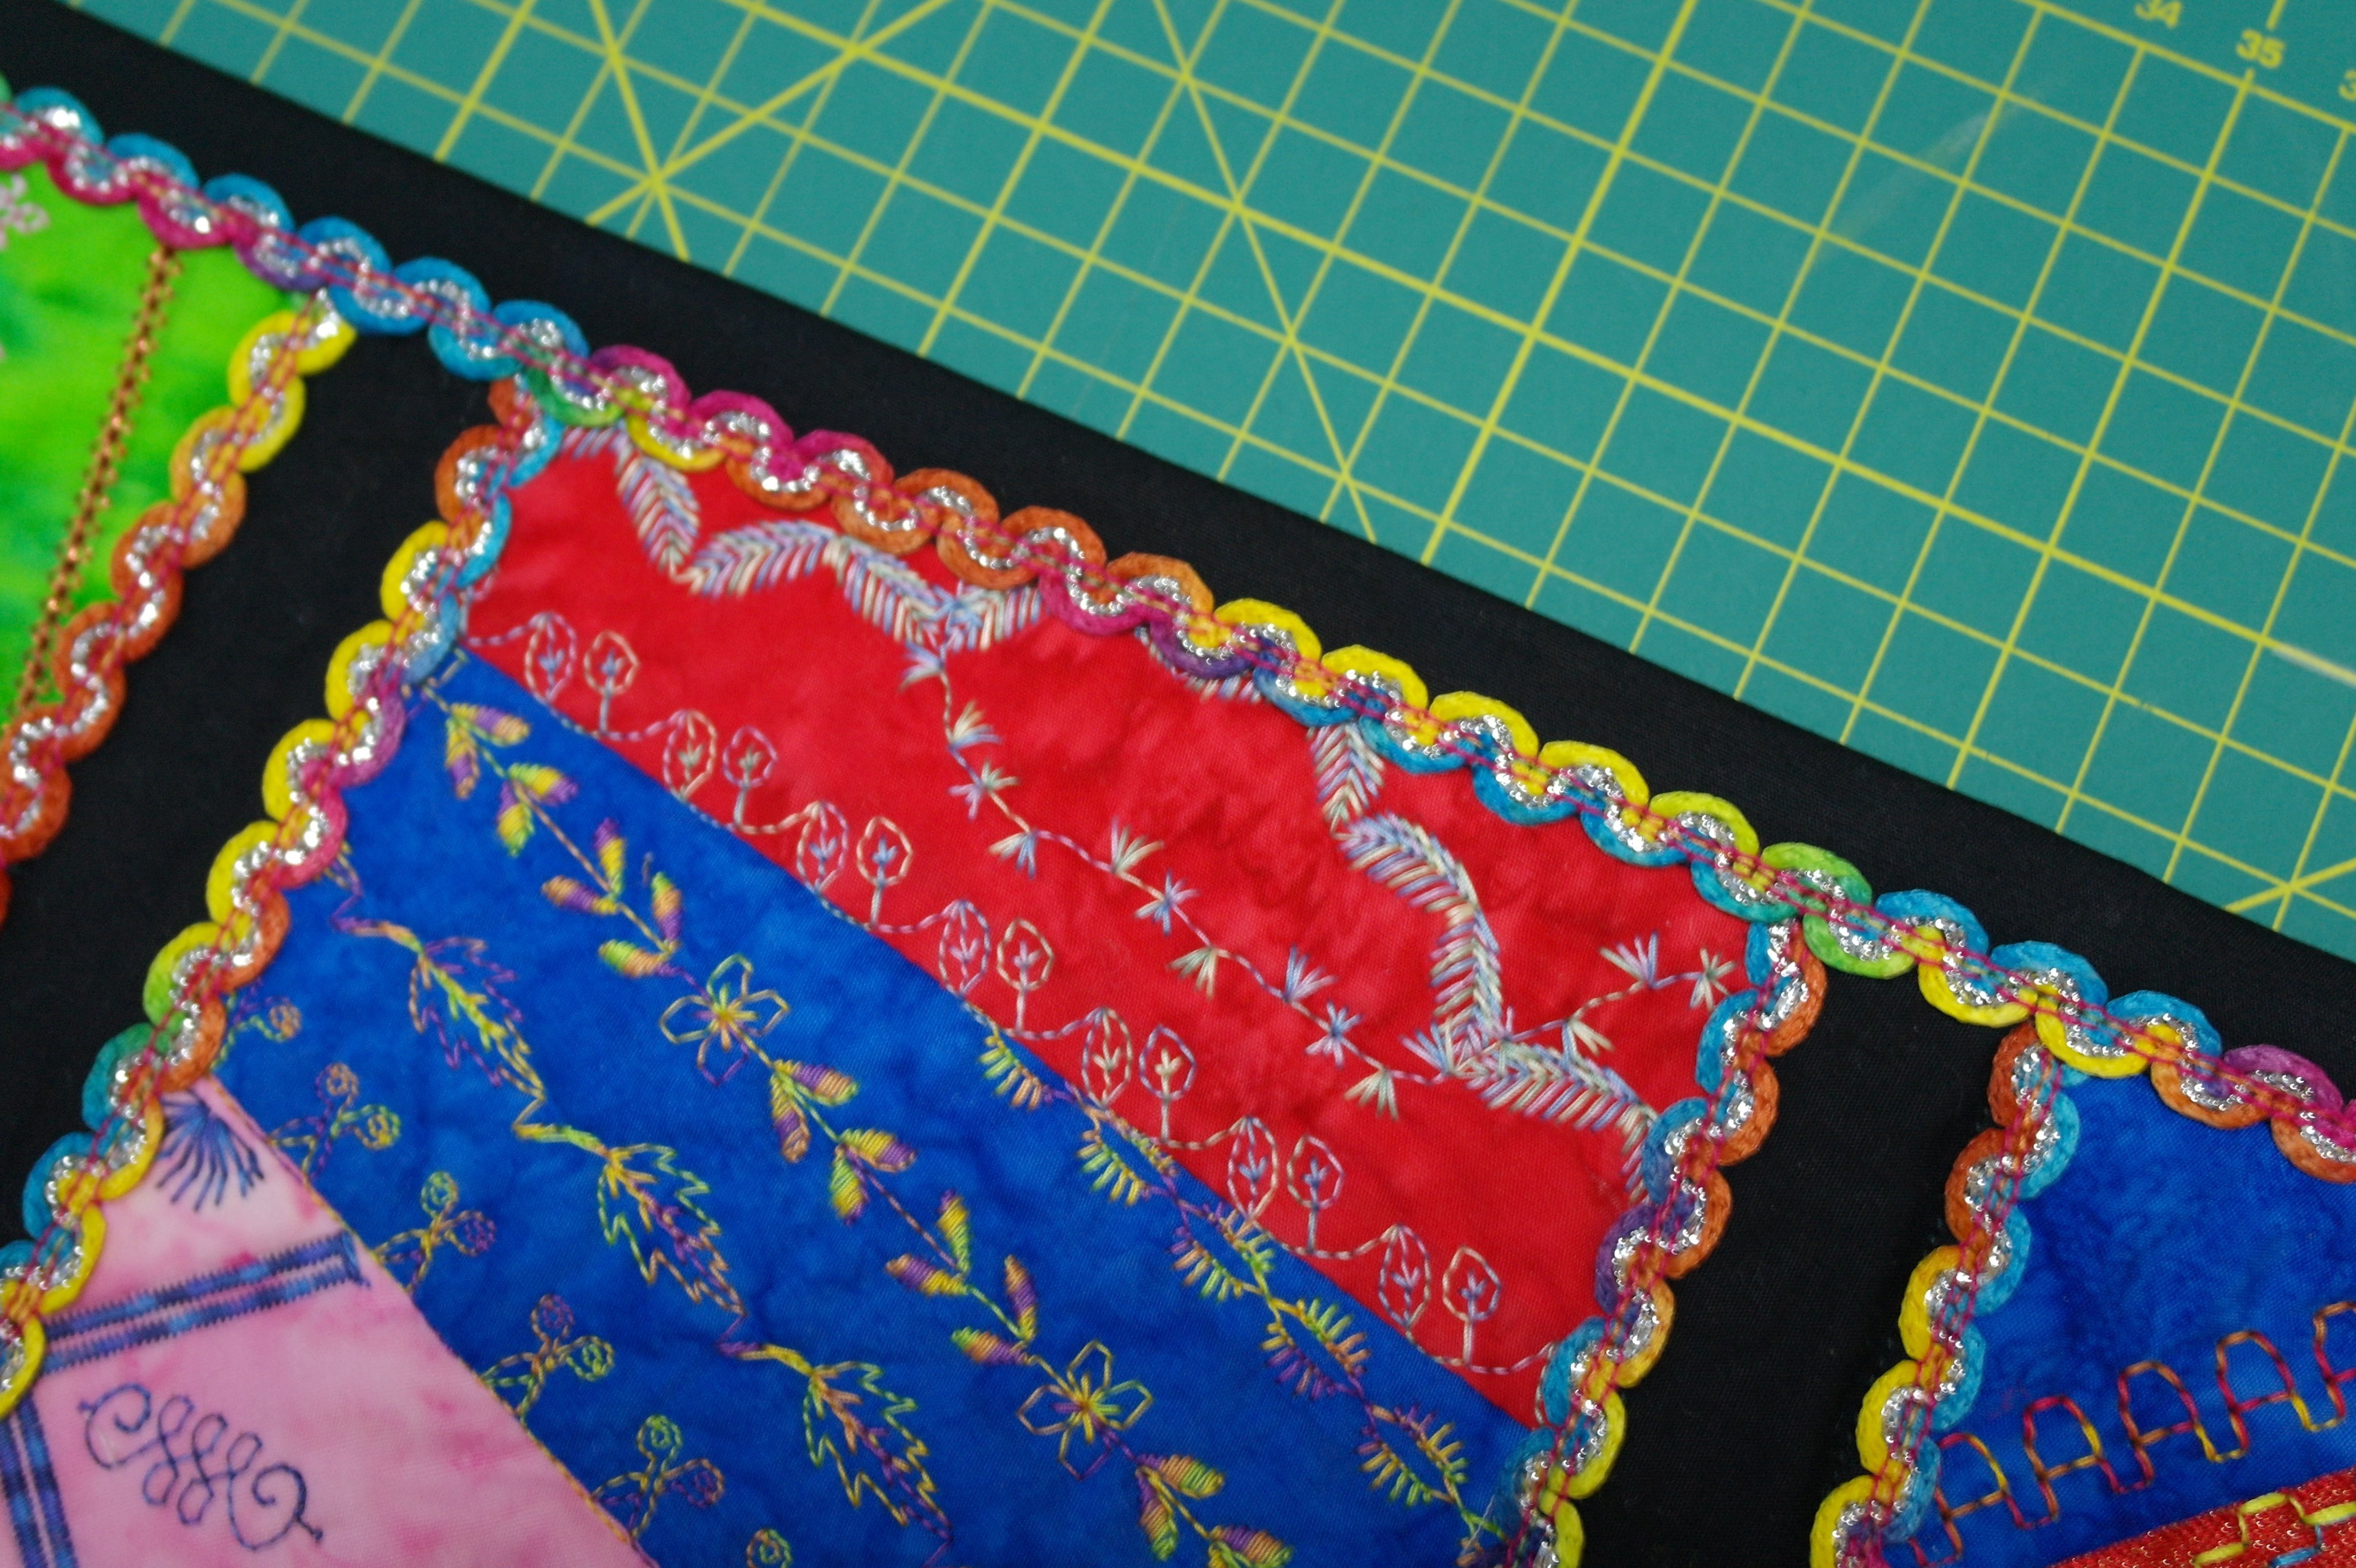
Take a closer look at the picture of my blocks; I have mixed them up to be sure that the same colors do not touch, when blocks are placed next to each other. If you should place the blocks in chronological order, according to the layout scheme you’ve downloaded (block 1 = month 1 = lift upper corner of the quilt, block C1 = month 10 = next to Block 1 etc), and your color scheme is allright, that’s ok. But I have switched blocks, rotated them as much as I had to, in order to get the layout I liked. Remember there will be sashings between each block, so things will work out fine in the end.
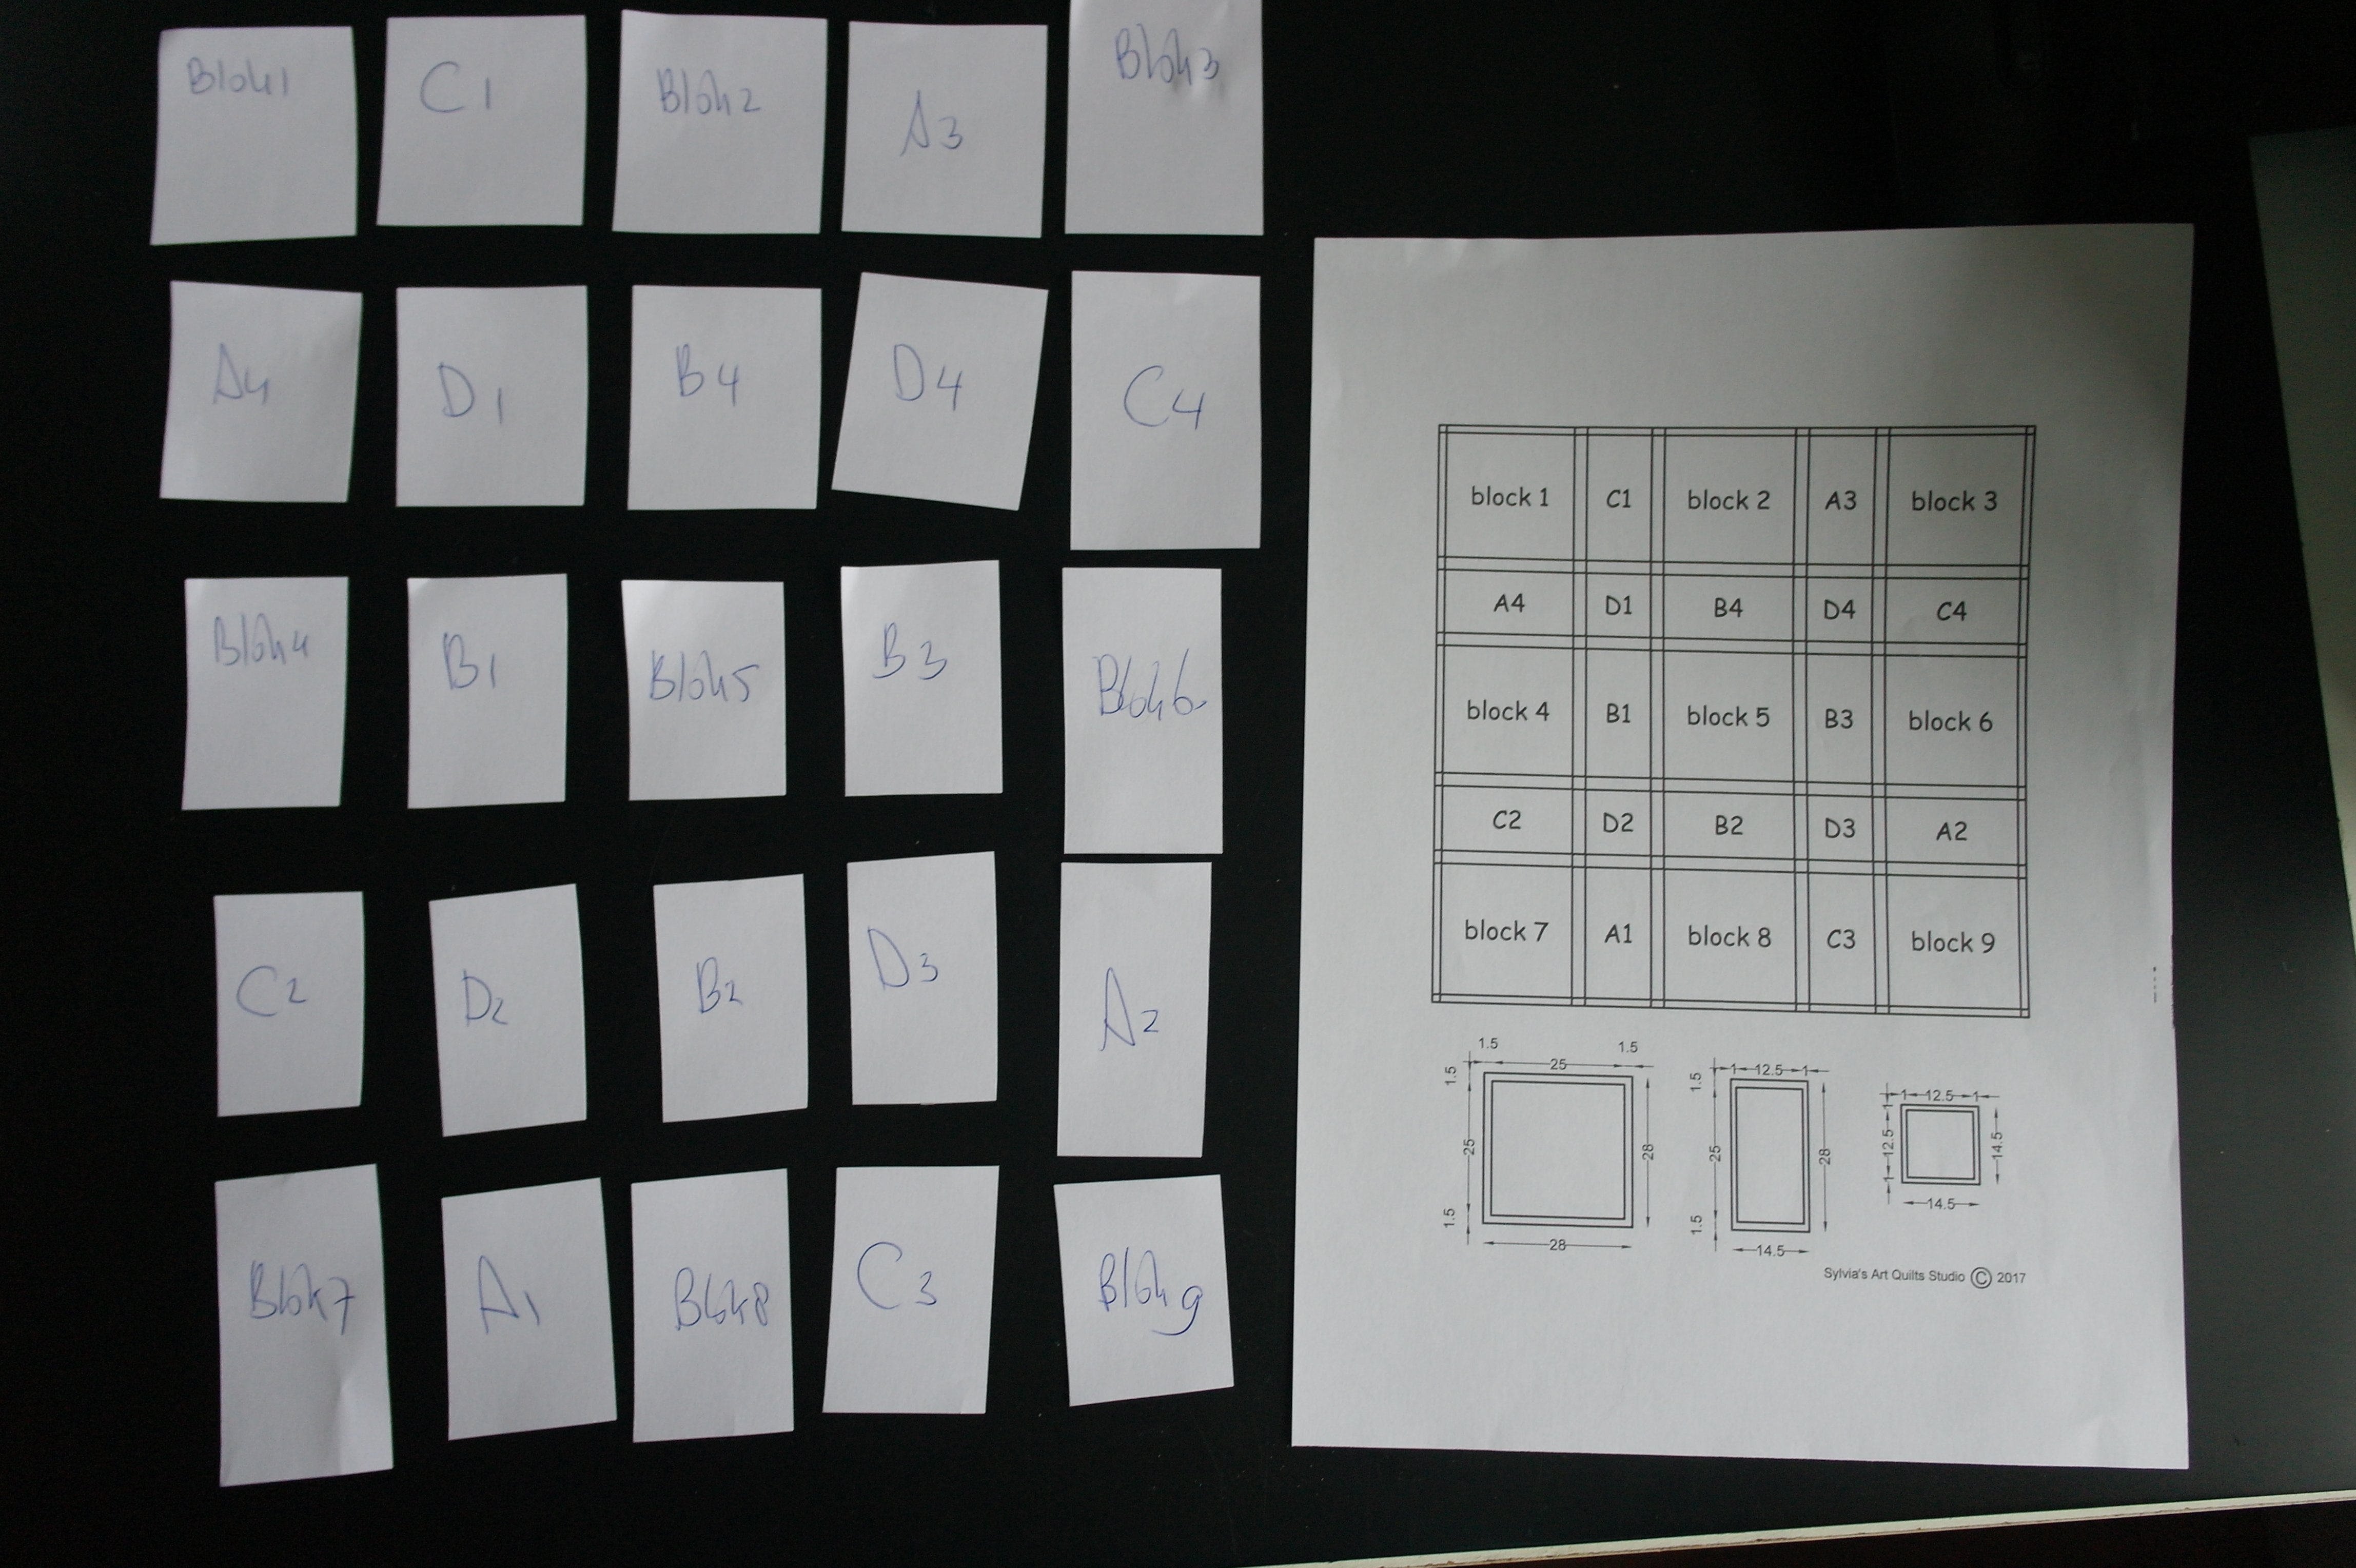
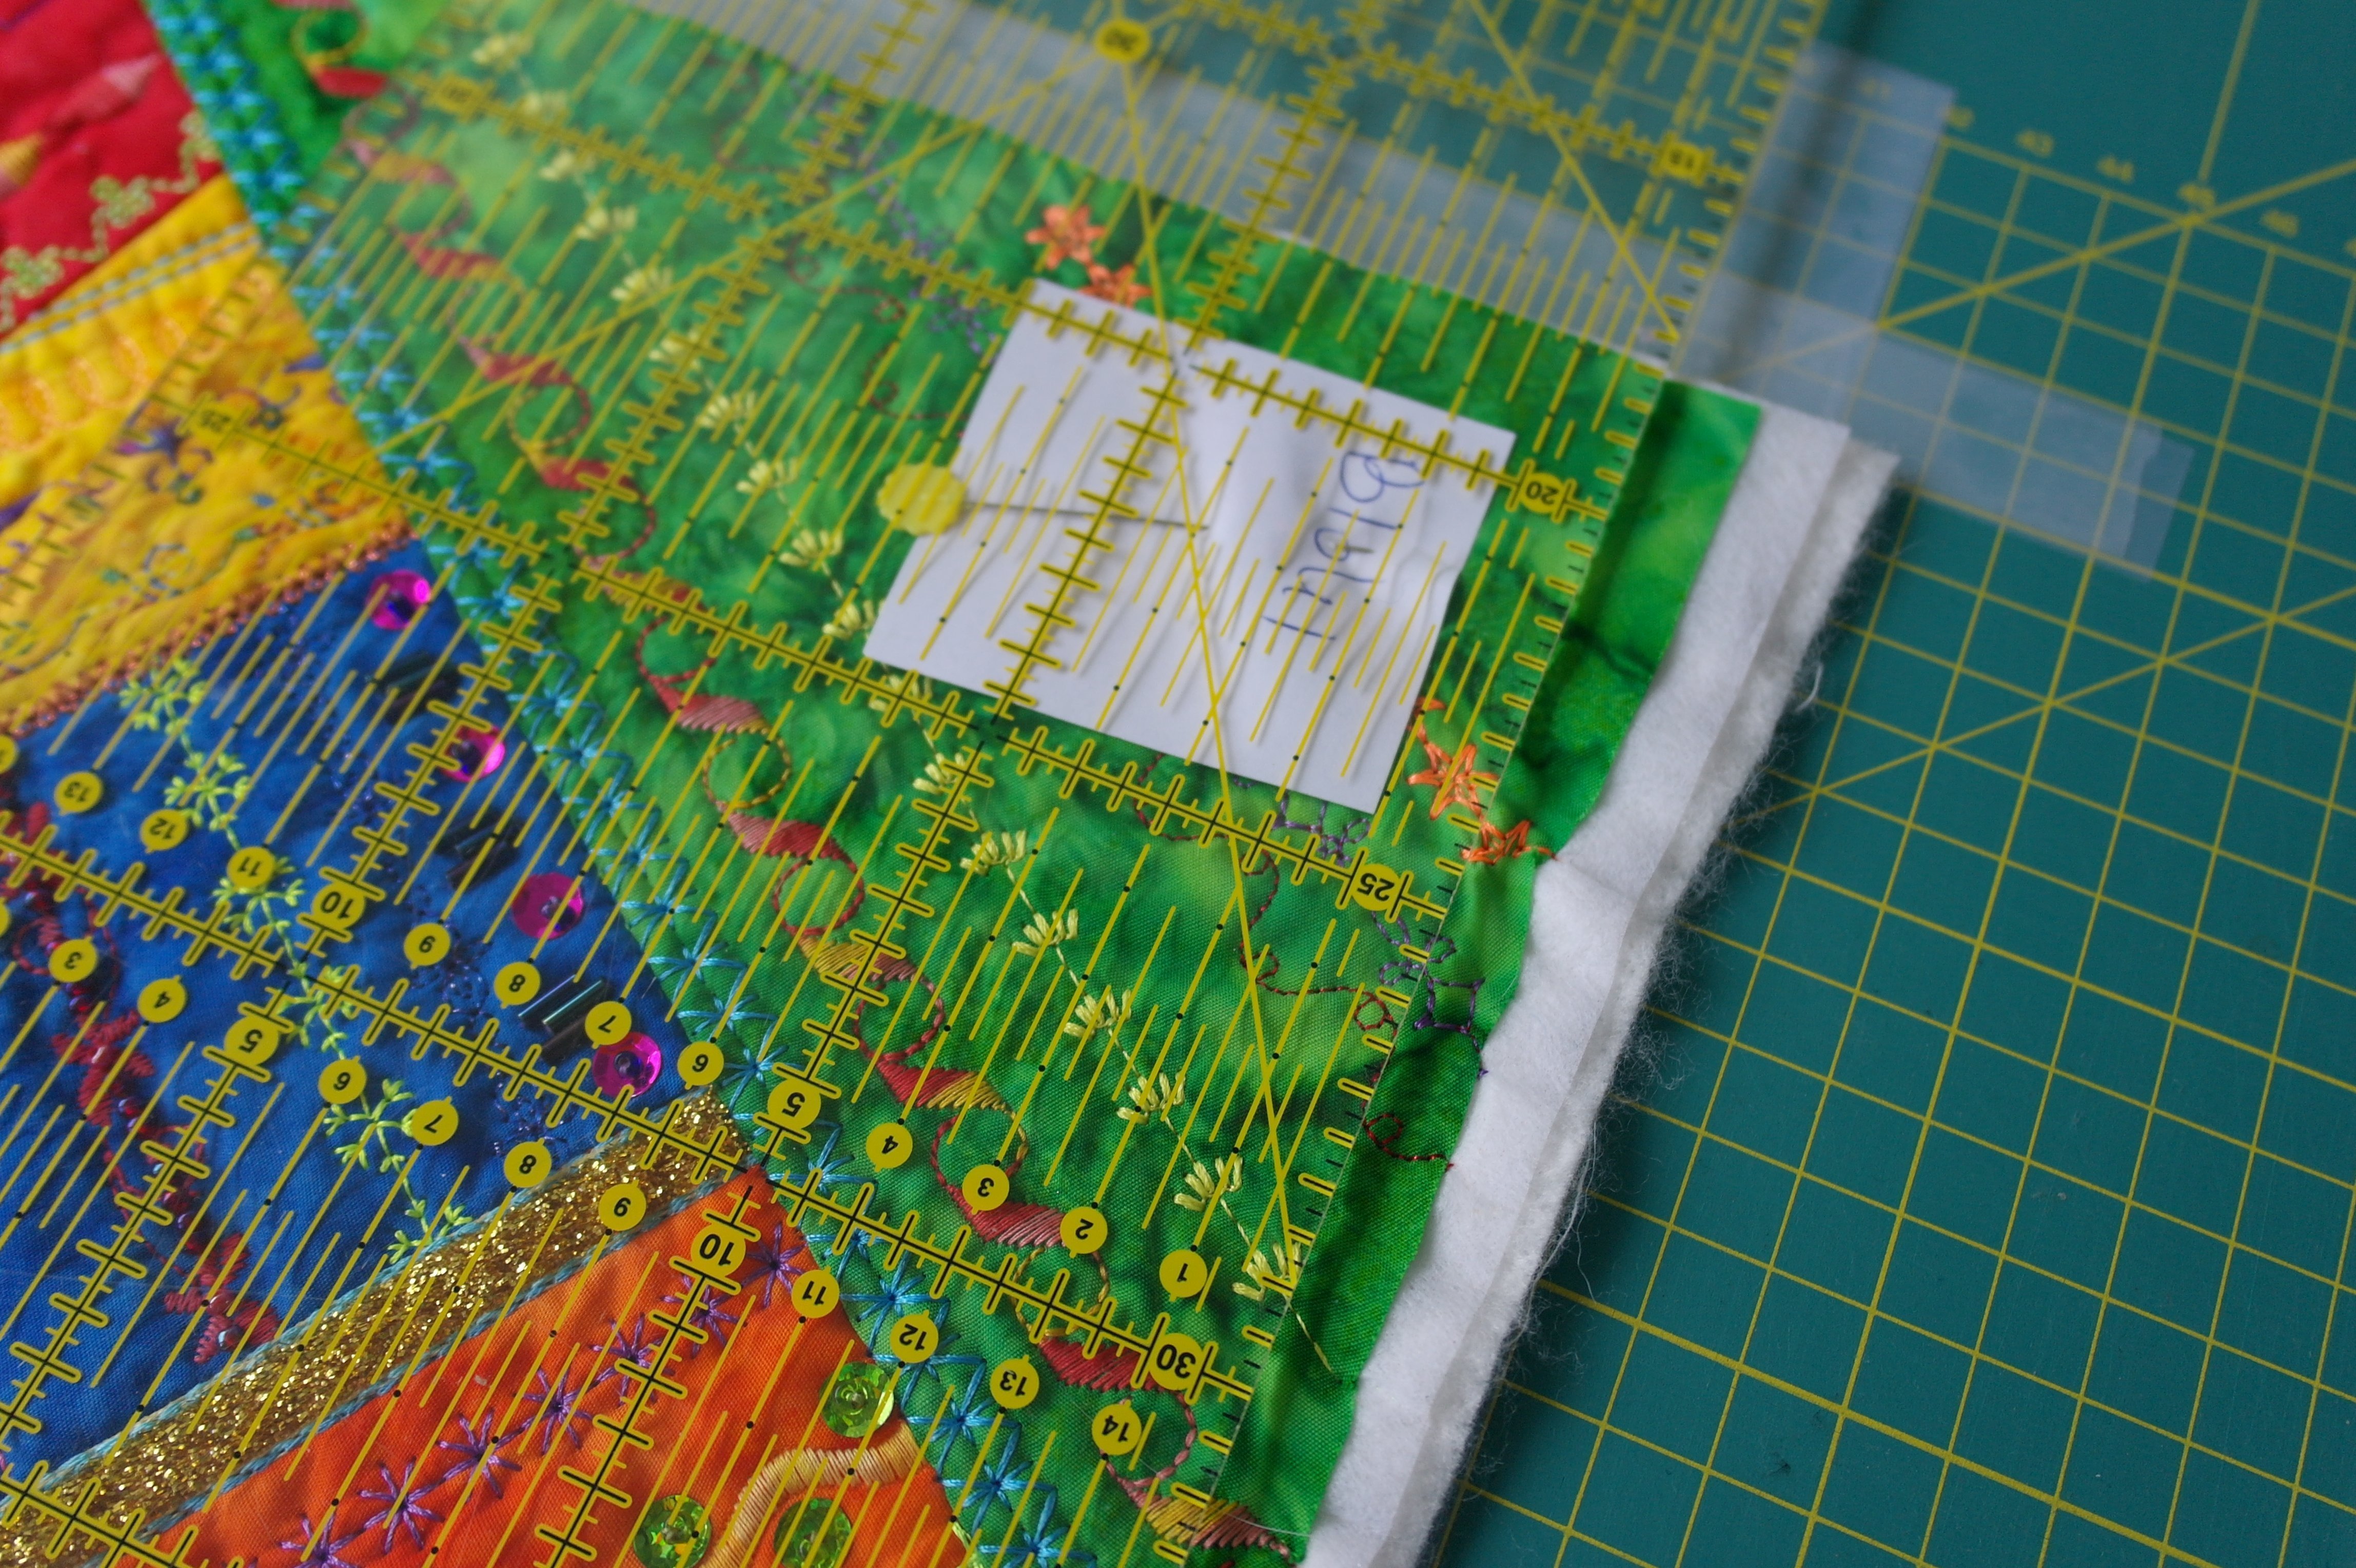
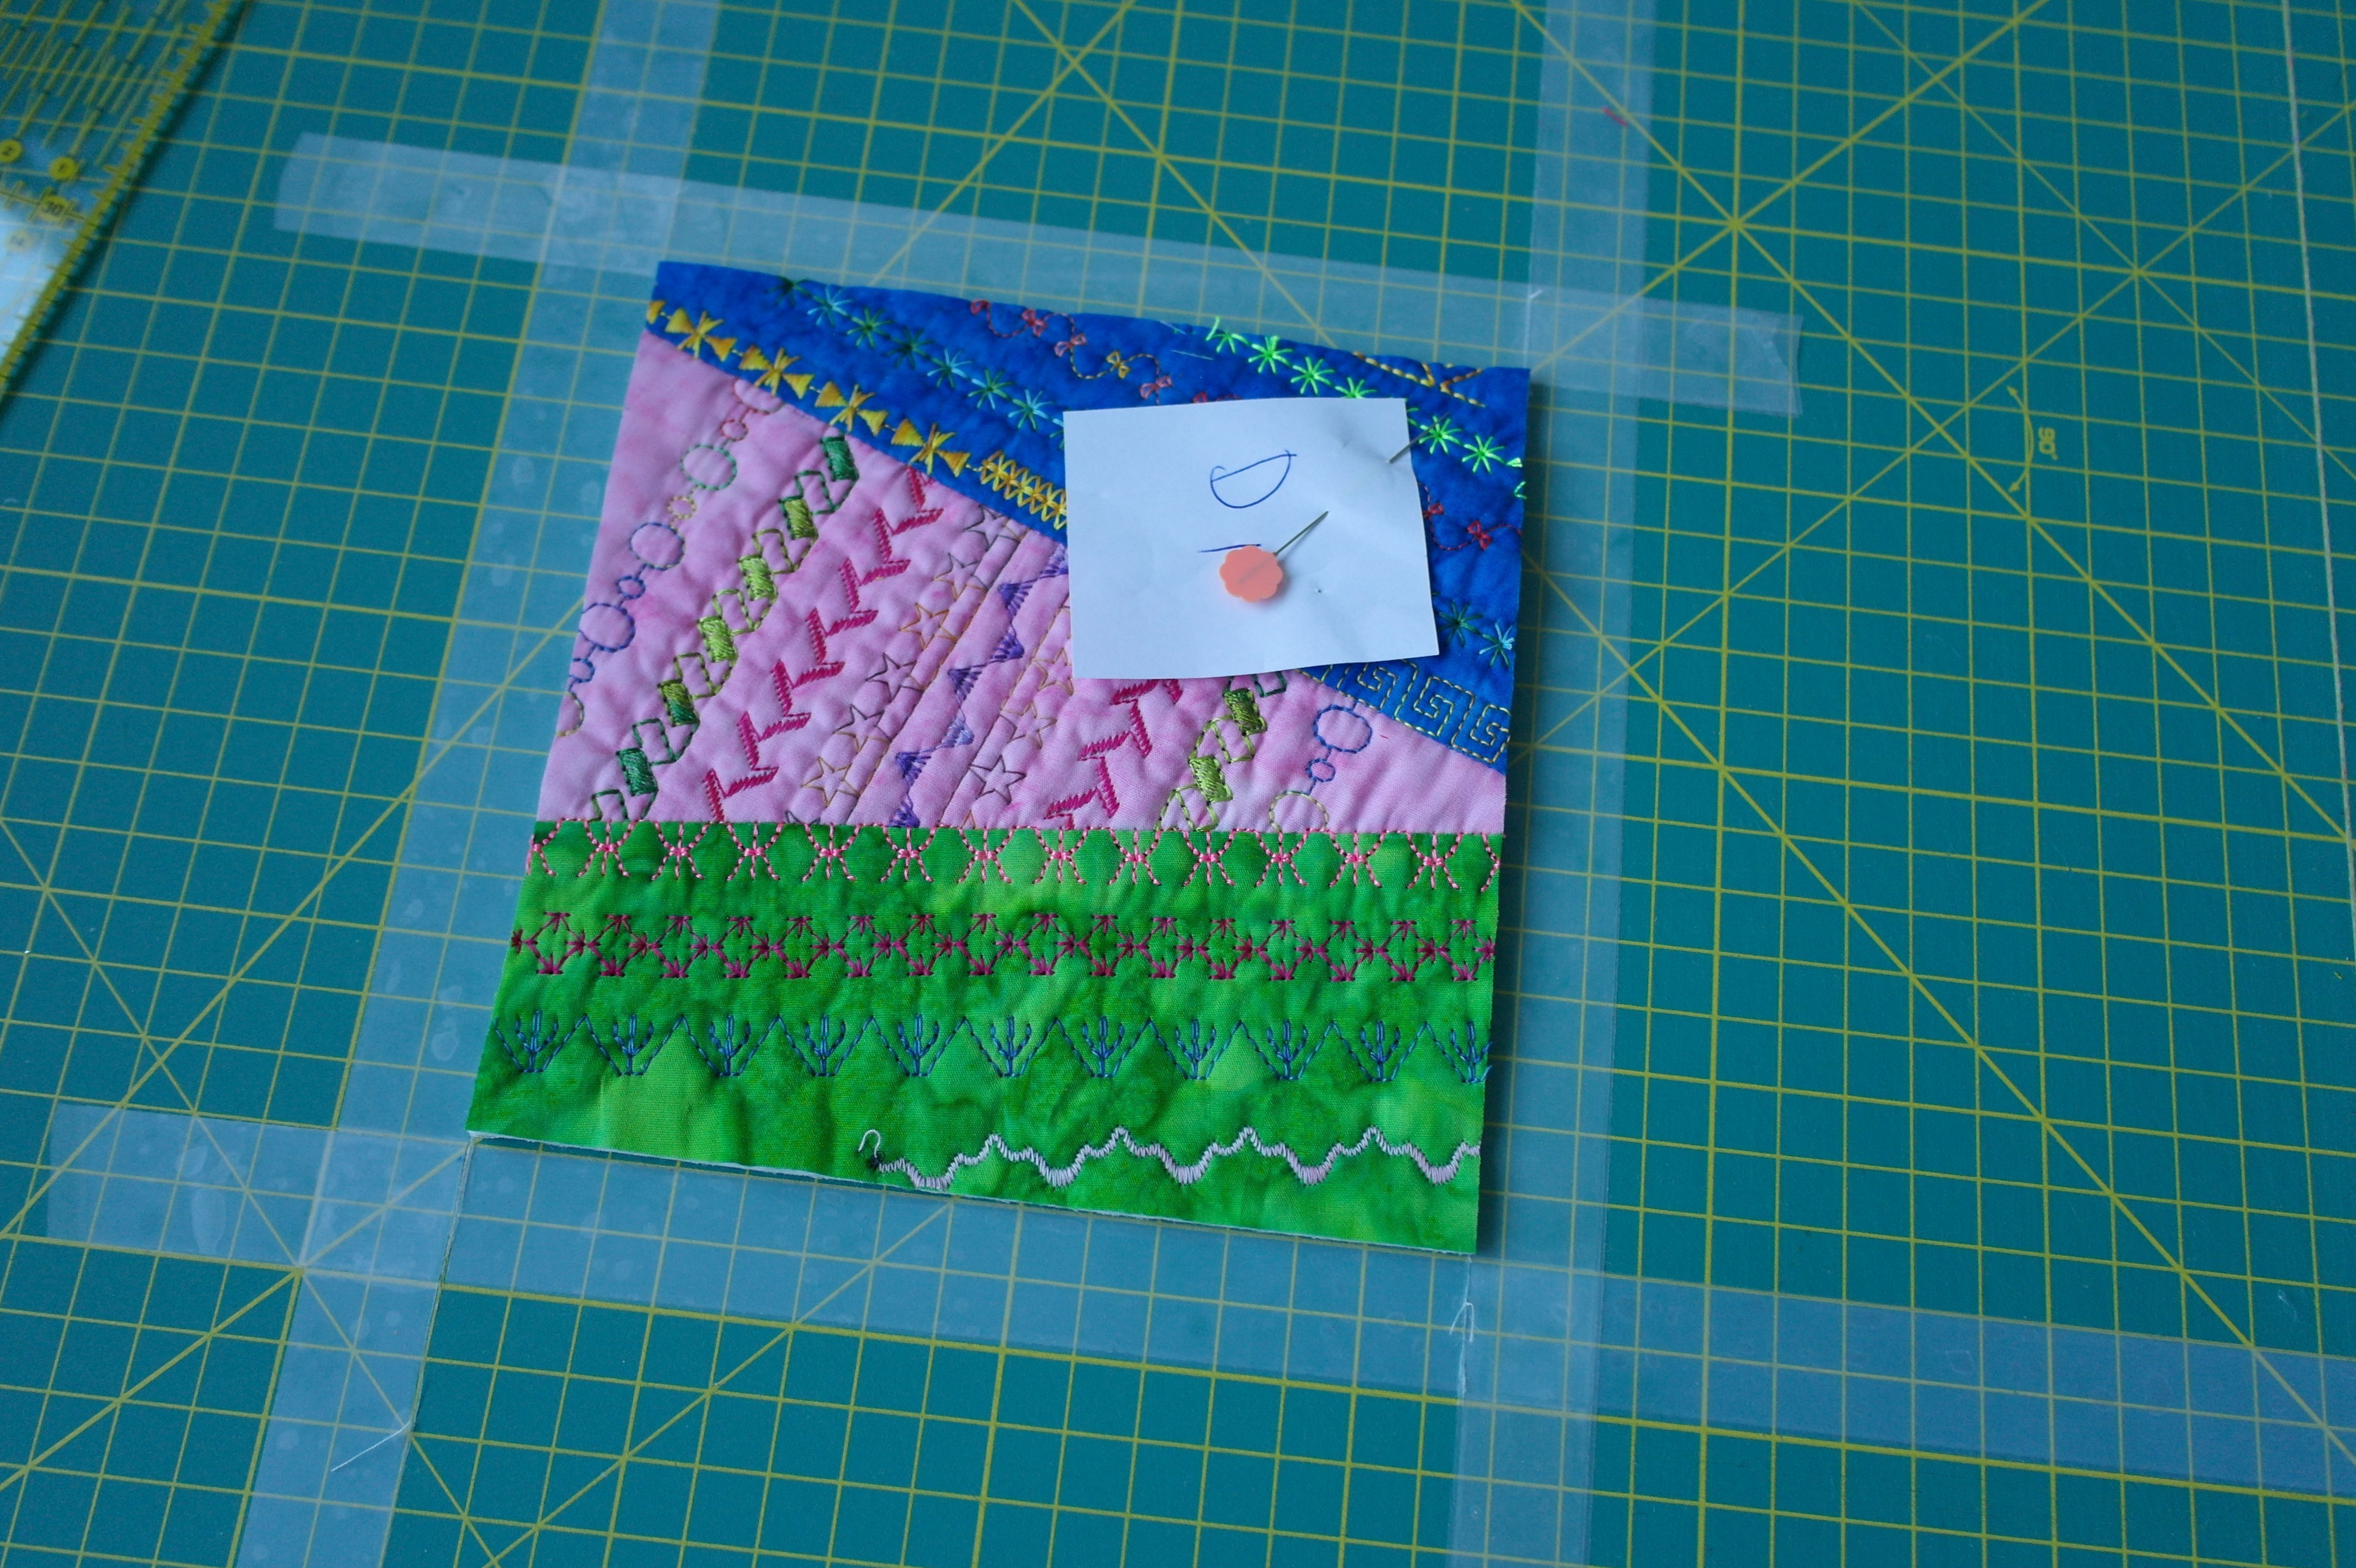
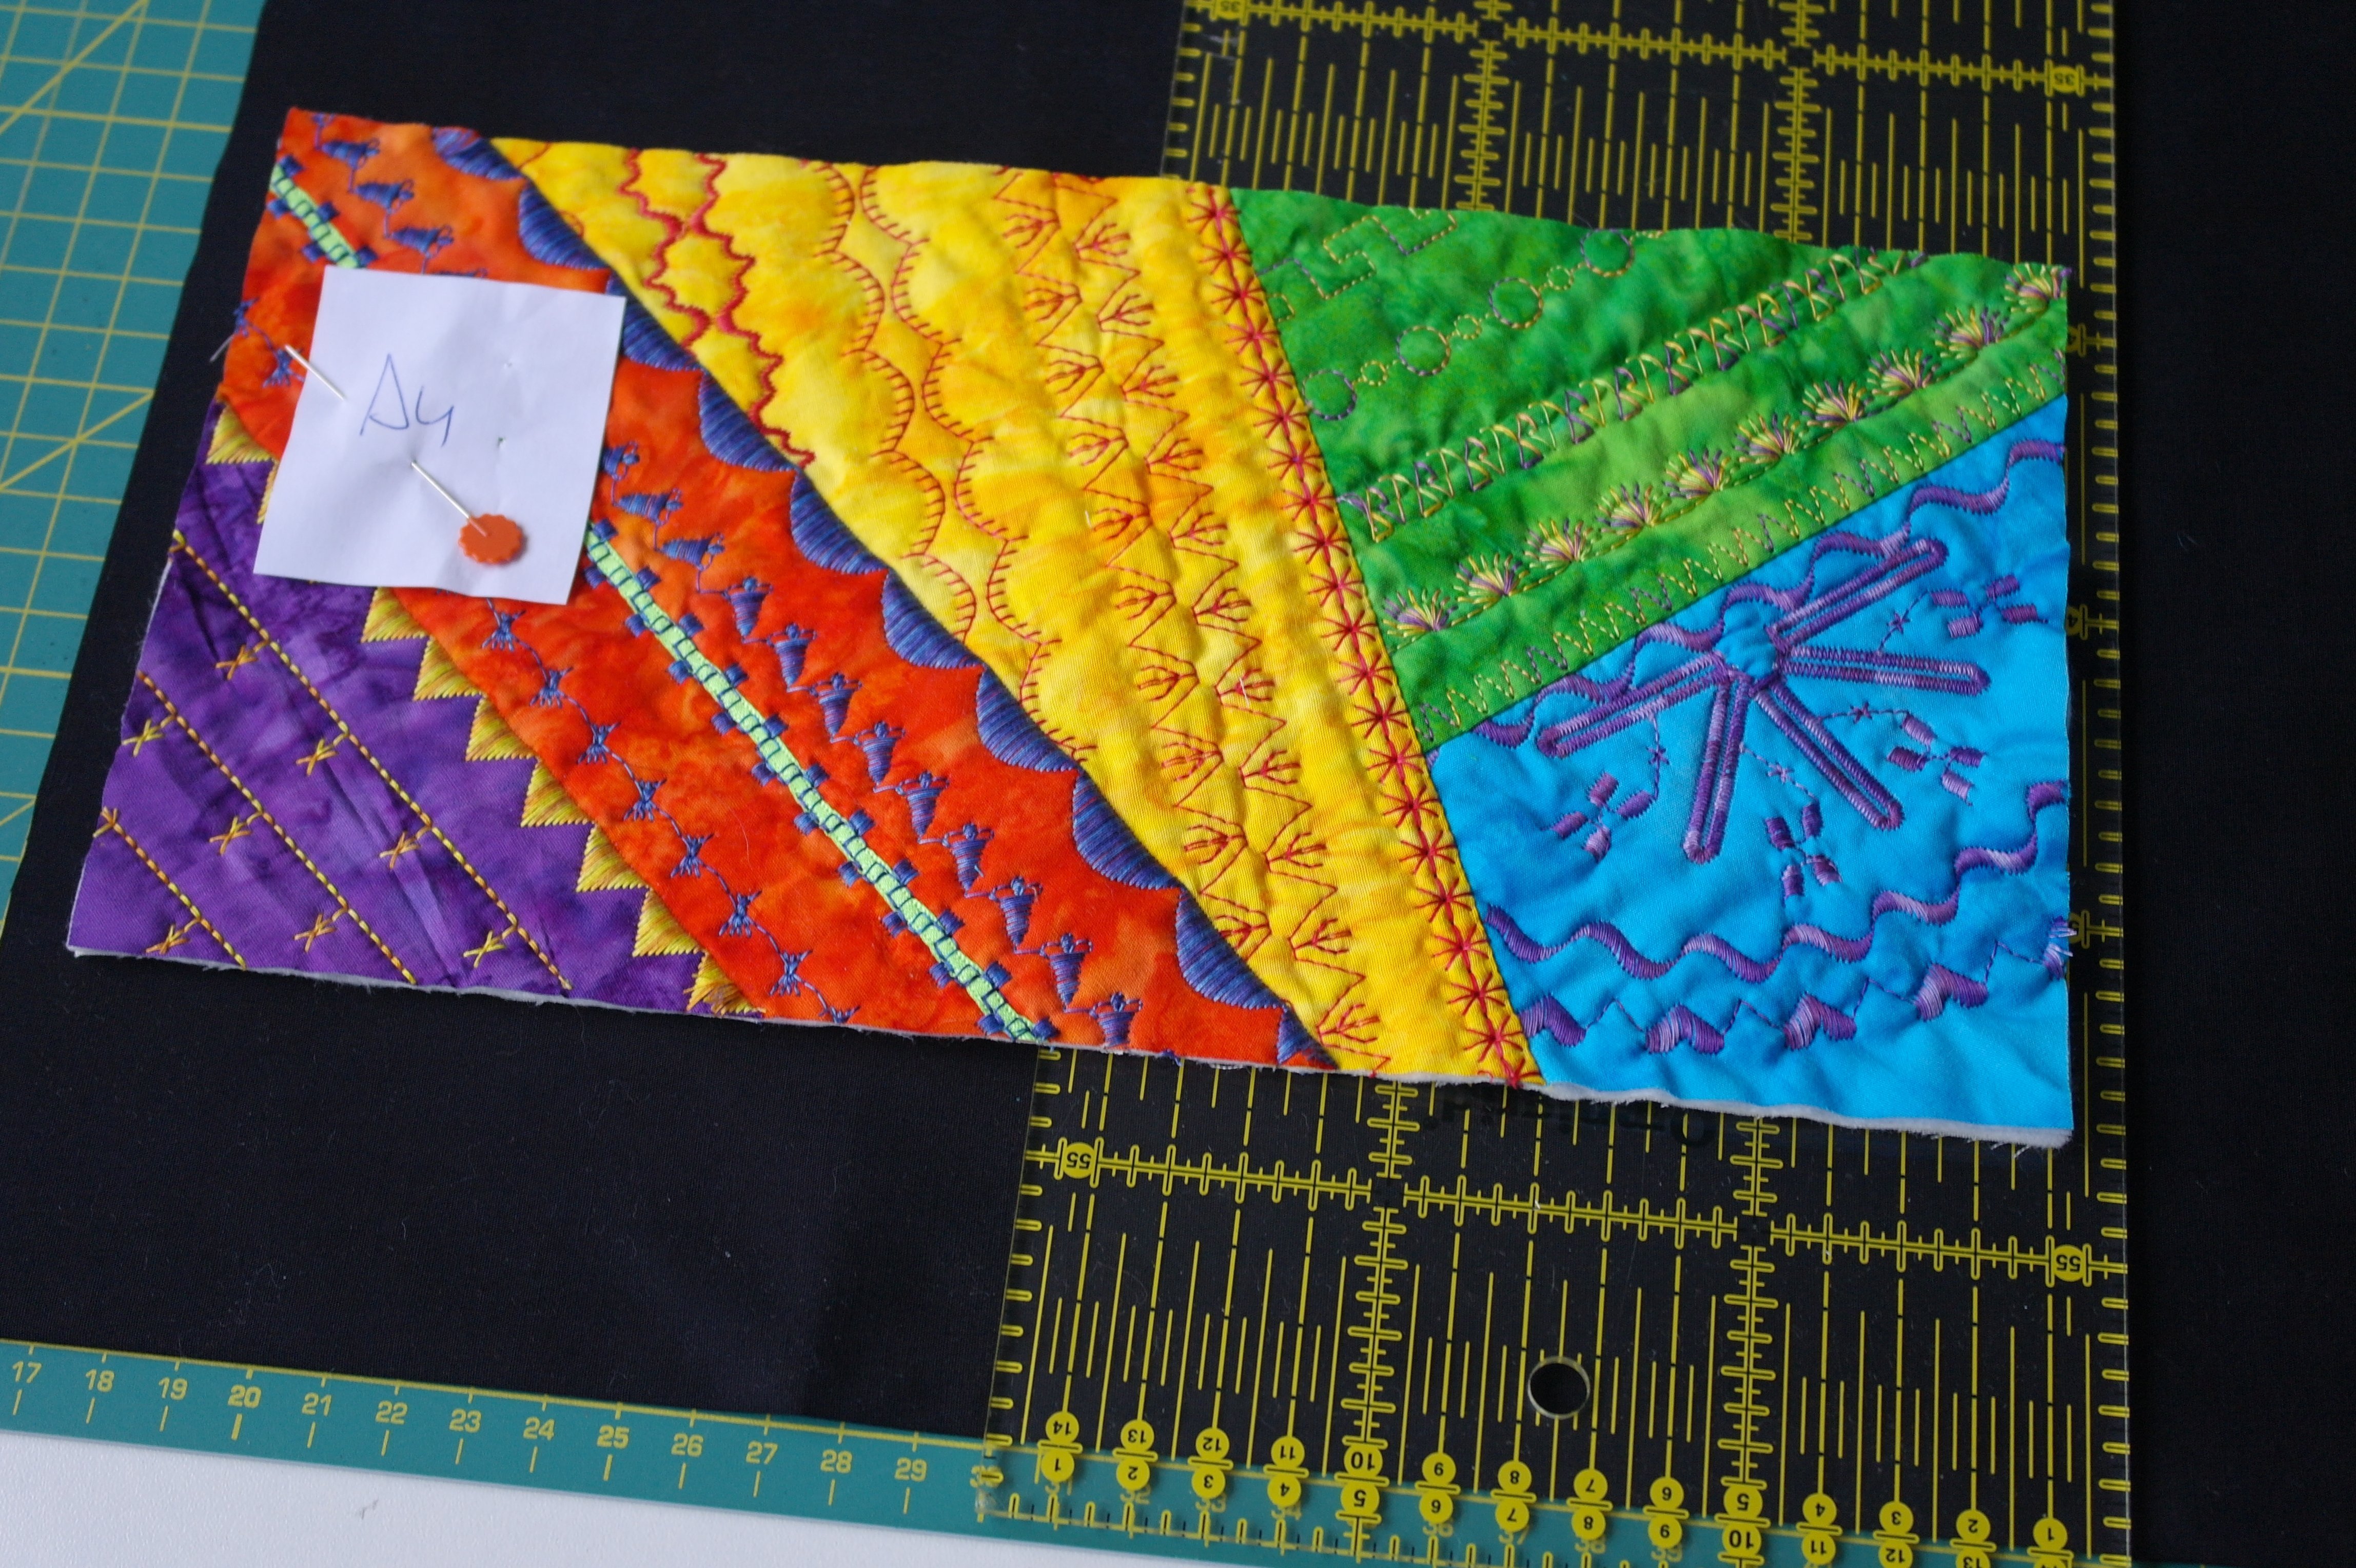
To be sure blocks will be in the right order, according to the layout, I have cut 25 pieces of paper. I have wrote the block number on each piece, like Block 1, C1, Block 2 etc, and pinned them on the UPPER LEFT CORNER of each block I have placed. IMPORTANT; I have used the large Flower Pins = quilt pins that lie flat. If I have to cut my blocks, the quilt ruler can be placed on top of them, without the pins causing any bulk. Just be sure not to cut through a pin!

I have placed an ‘X’ on each block on my layout sheet, in the same UPPER LEFT CORNER, so I have a reference where the pieces of paper should be. Sometimes I will have to rotate blocks in order to cut them, and the way the pieces of paper are pinned, I can always put the blocks back in the right order. I don’t want to mix them up after cutting.
TIP: take pictures of the layout of your blocs – you can always refer to the picture if you don’t remember in which order you have placed them.
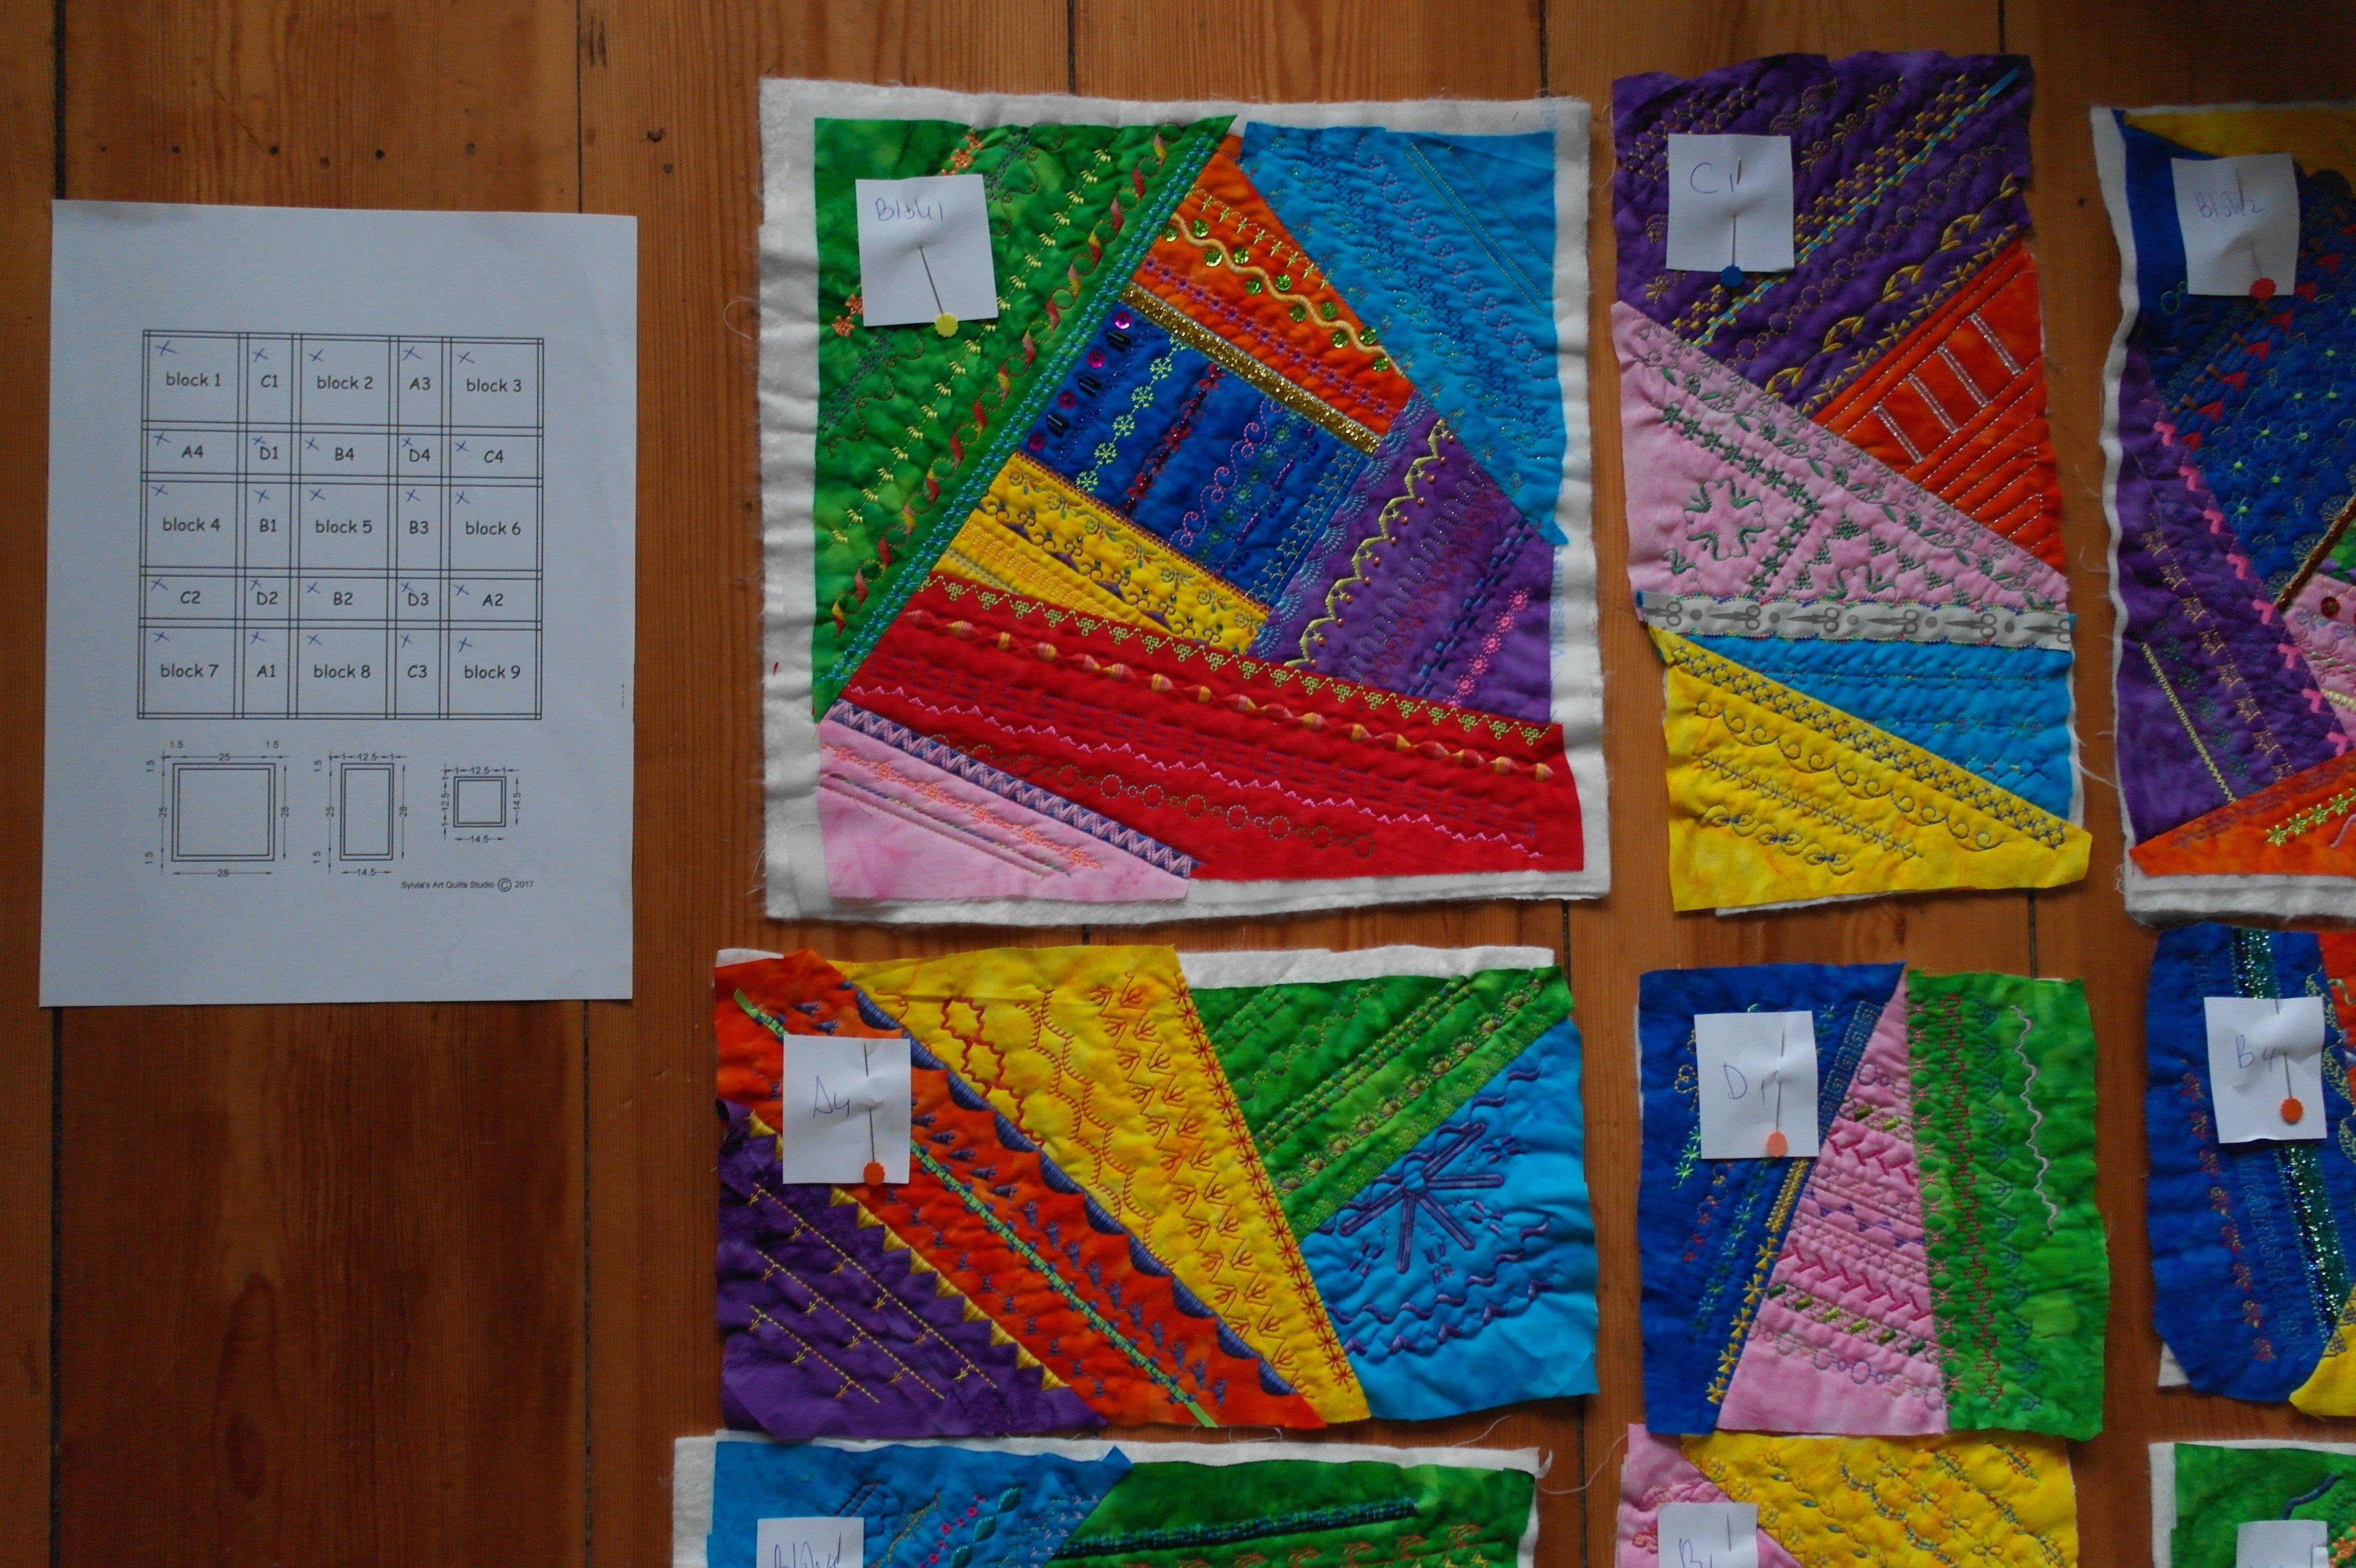
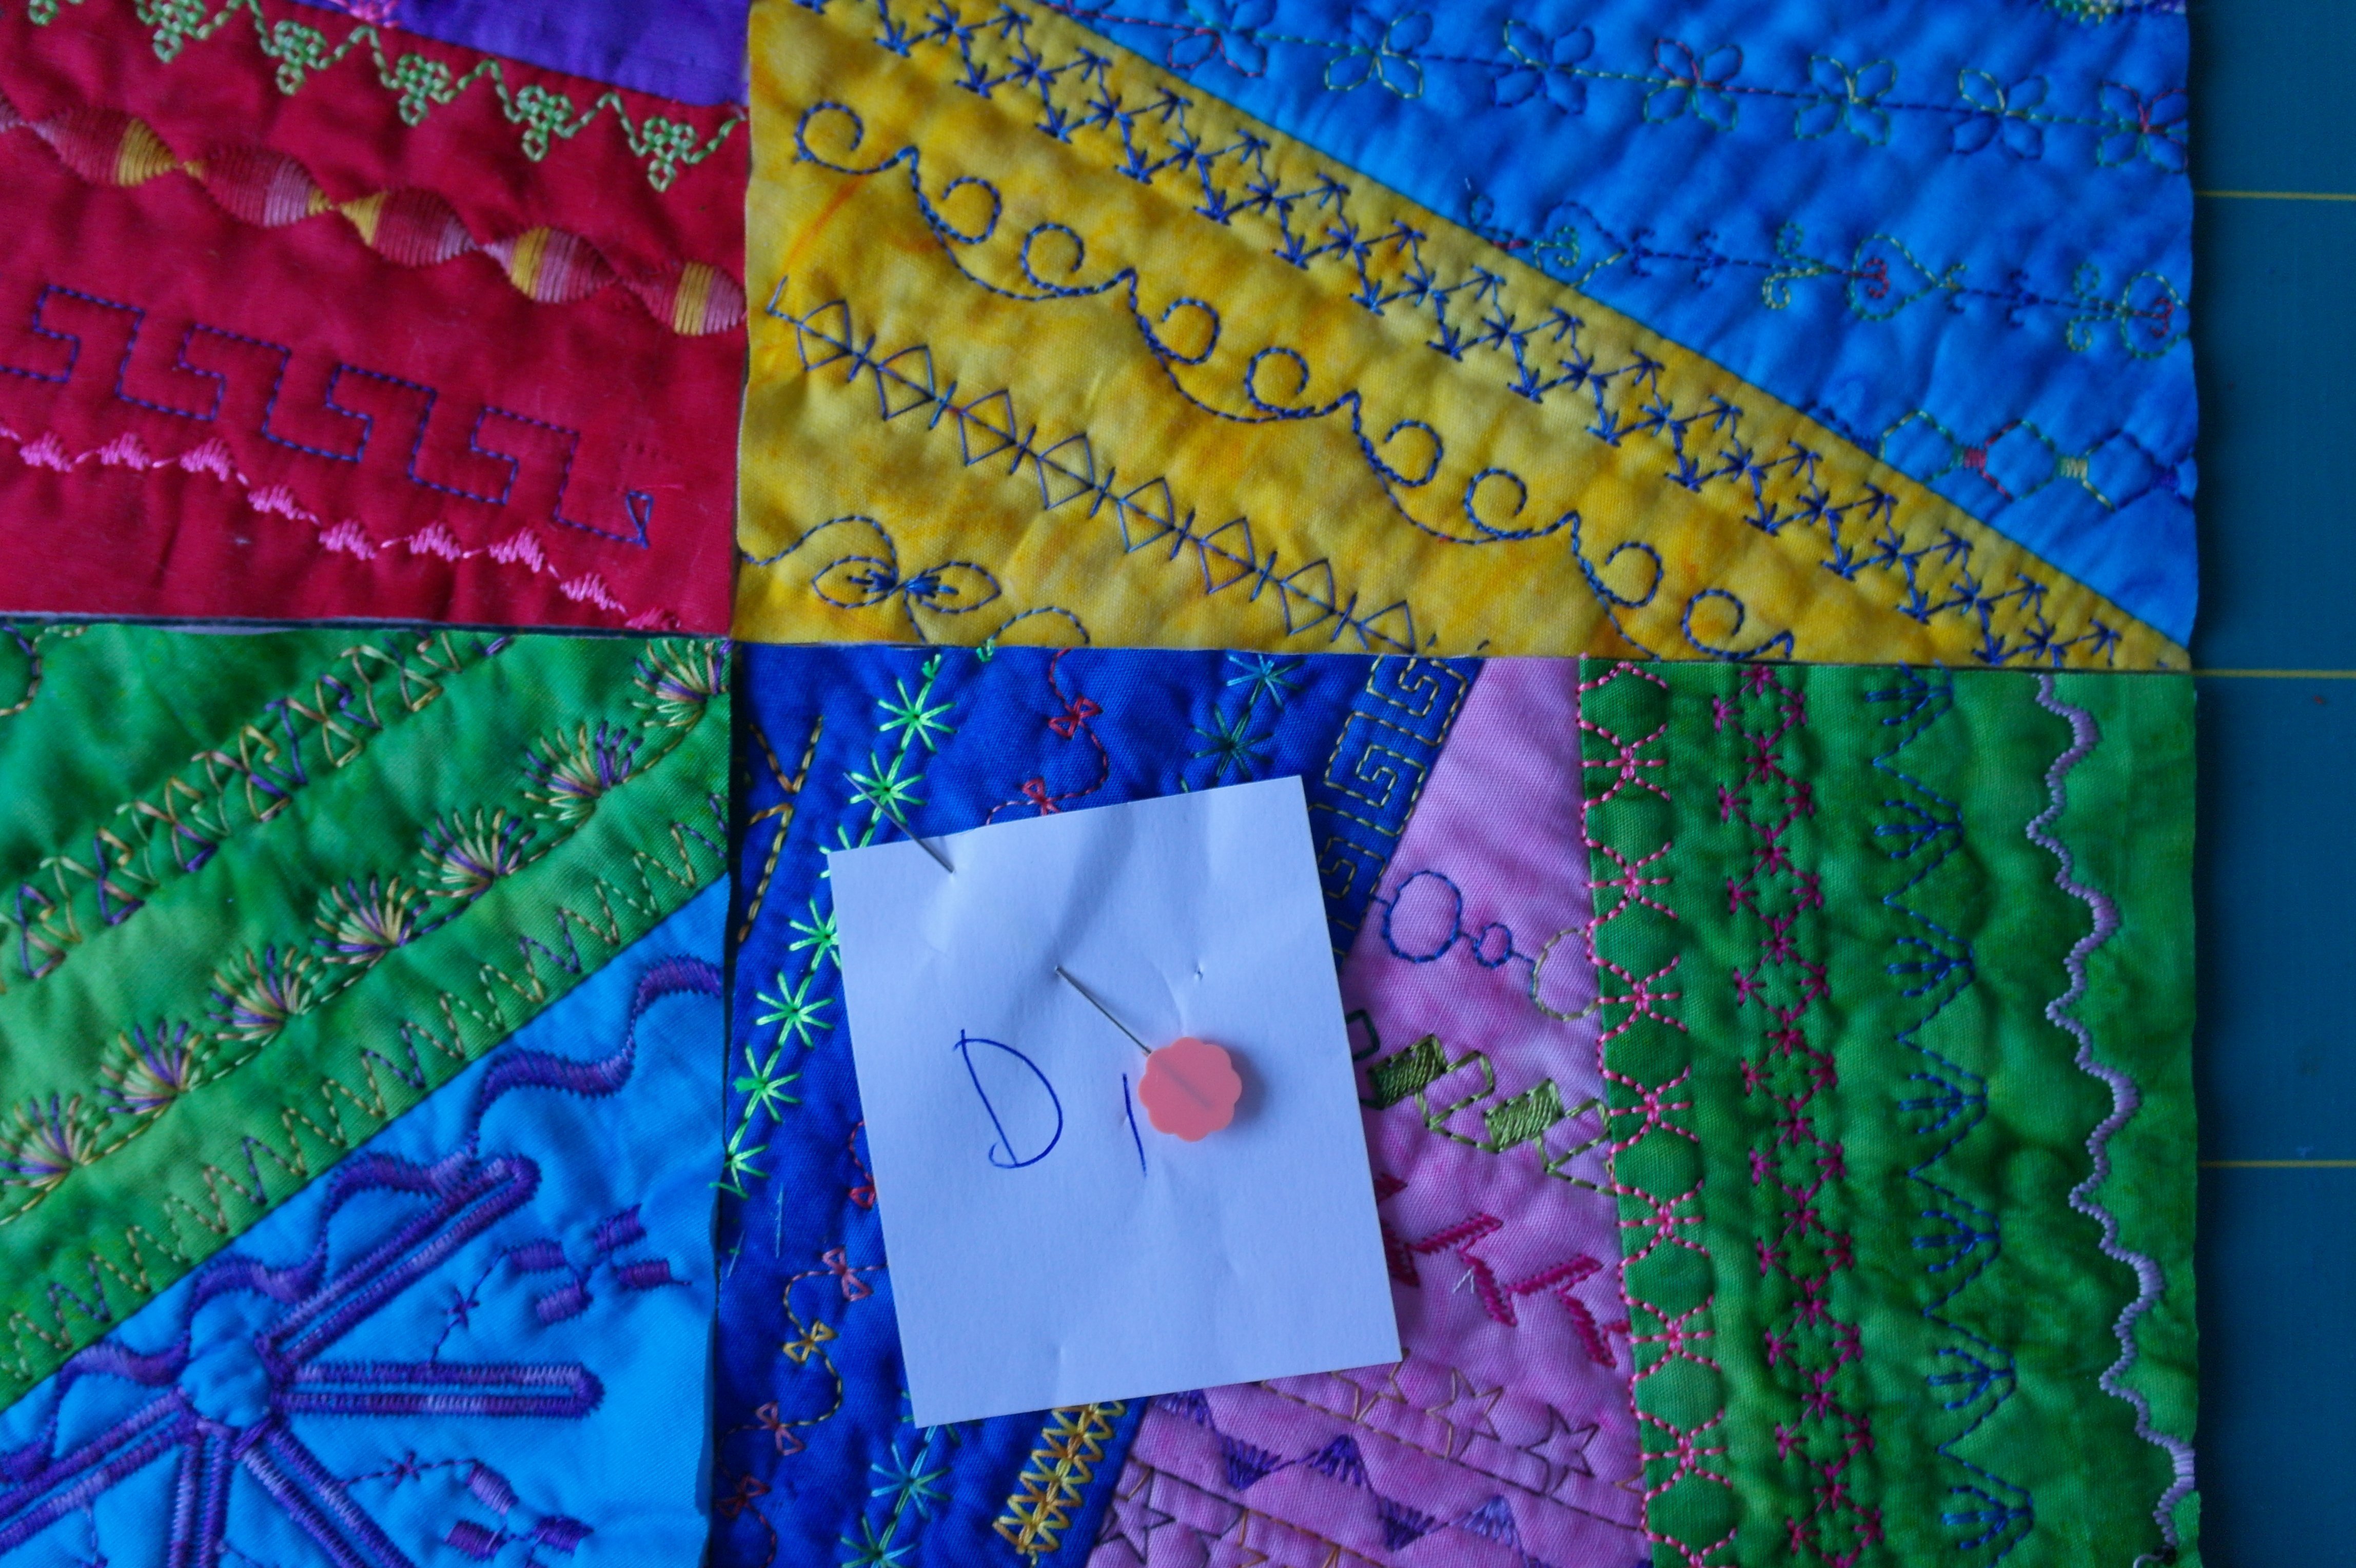
The picture above shows you the paper with the layout scheme to the left, and the pieces of paper pinned to my blocks on the right. It is not important if the block in the upper left corner is not originally Block 1: I have changed it into Block 1 with the placement. Also the way the block is positioned can be different from the original block – rotating them 90°, 180° or 270° gives a different appearance, and perhaps even better. It is a matter of shifting and sliding the blocks, untill you are satisfied with your personal layout.
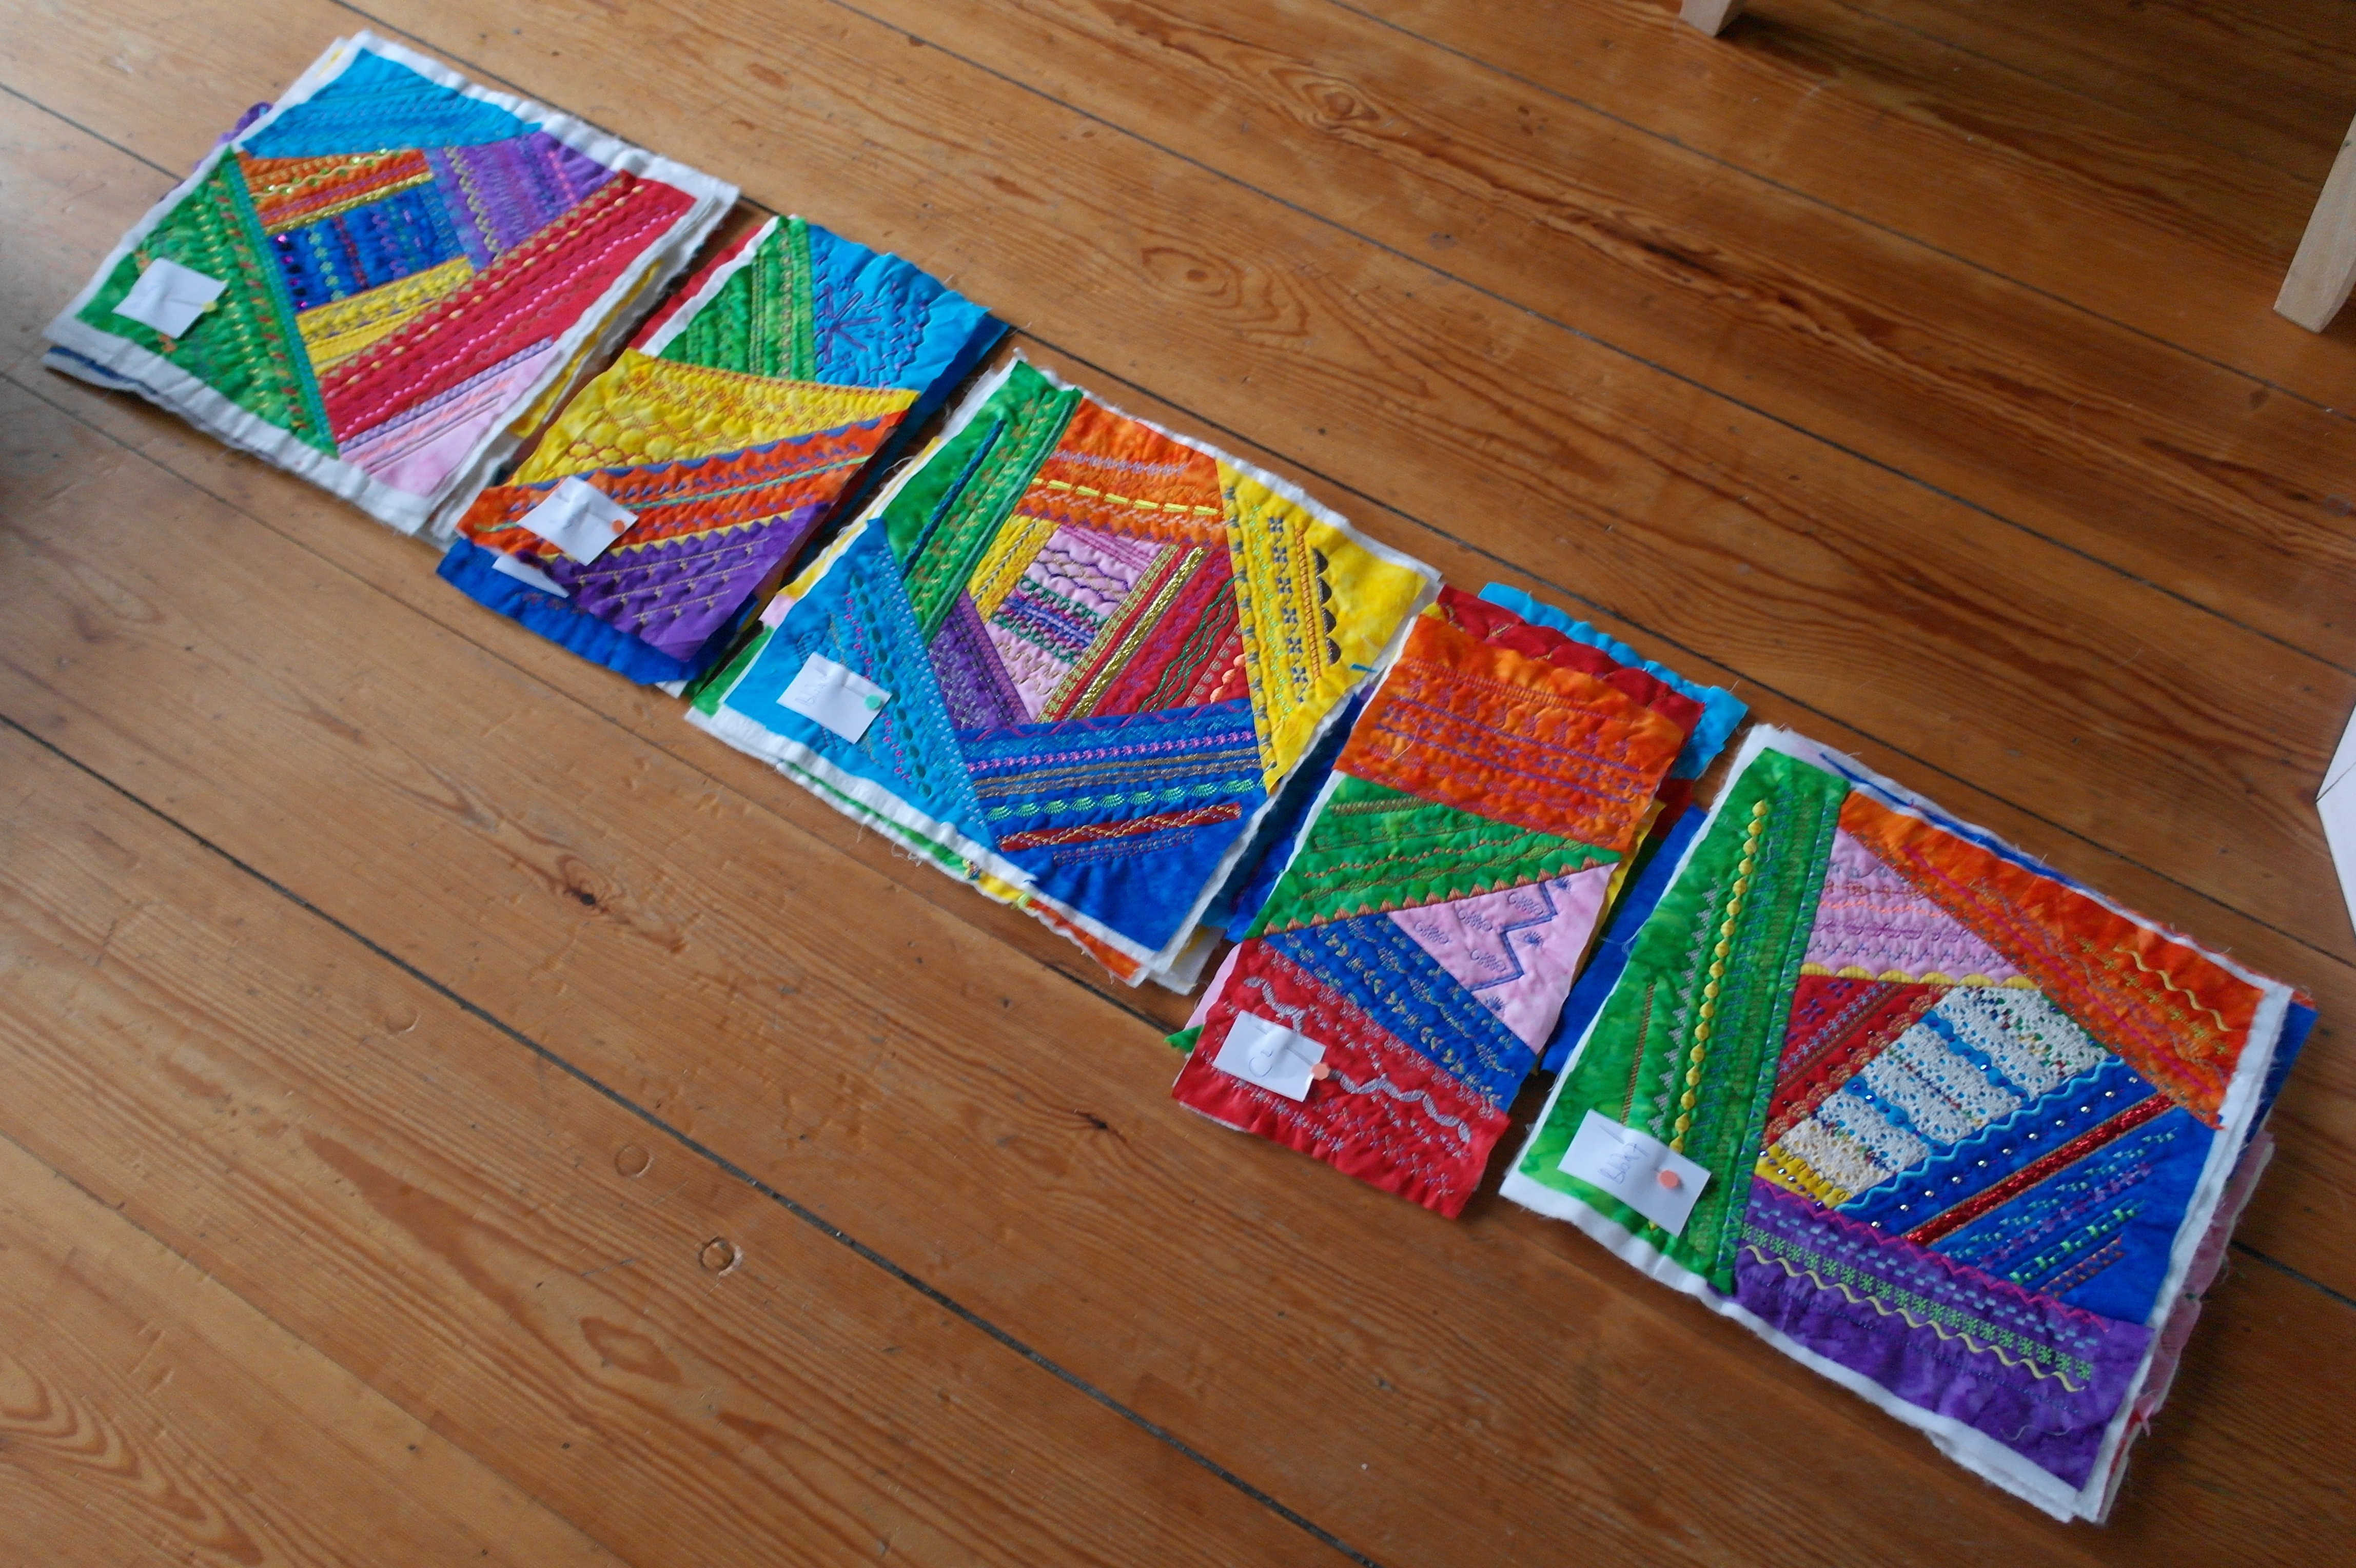
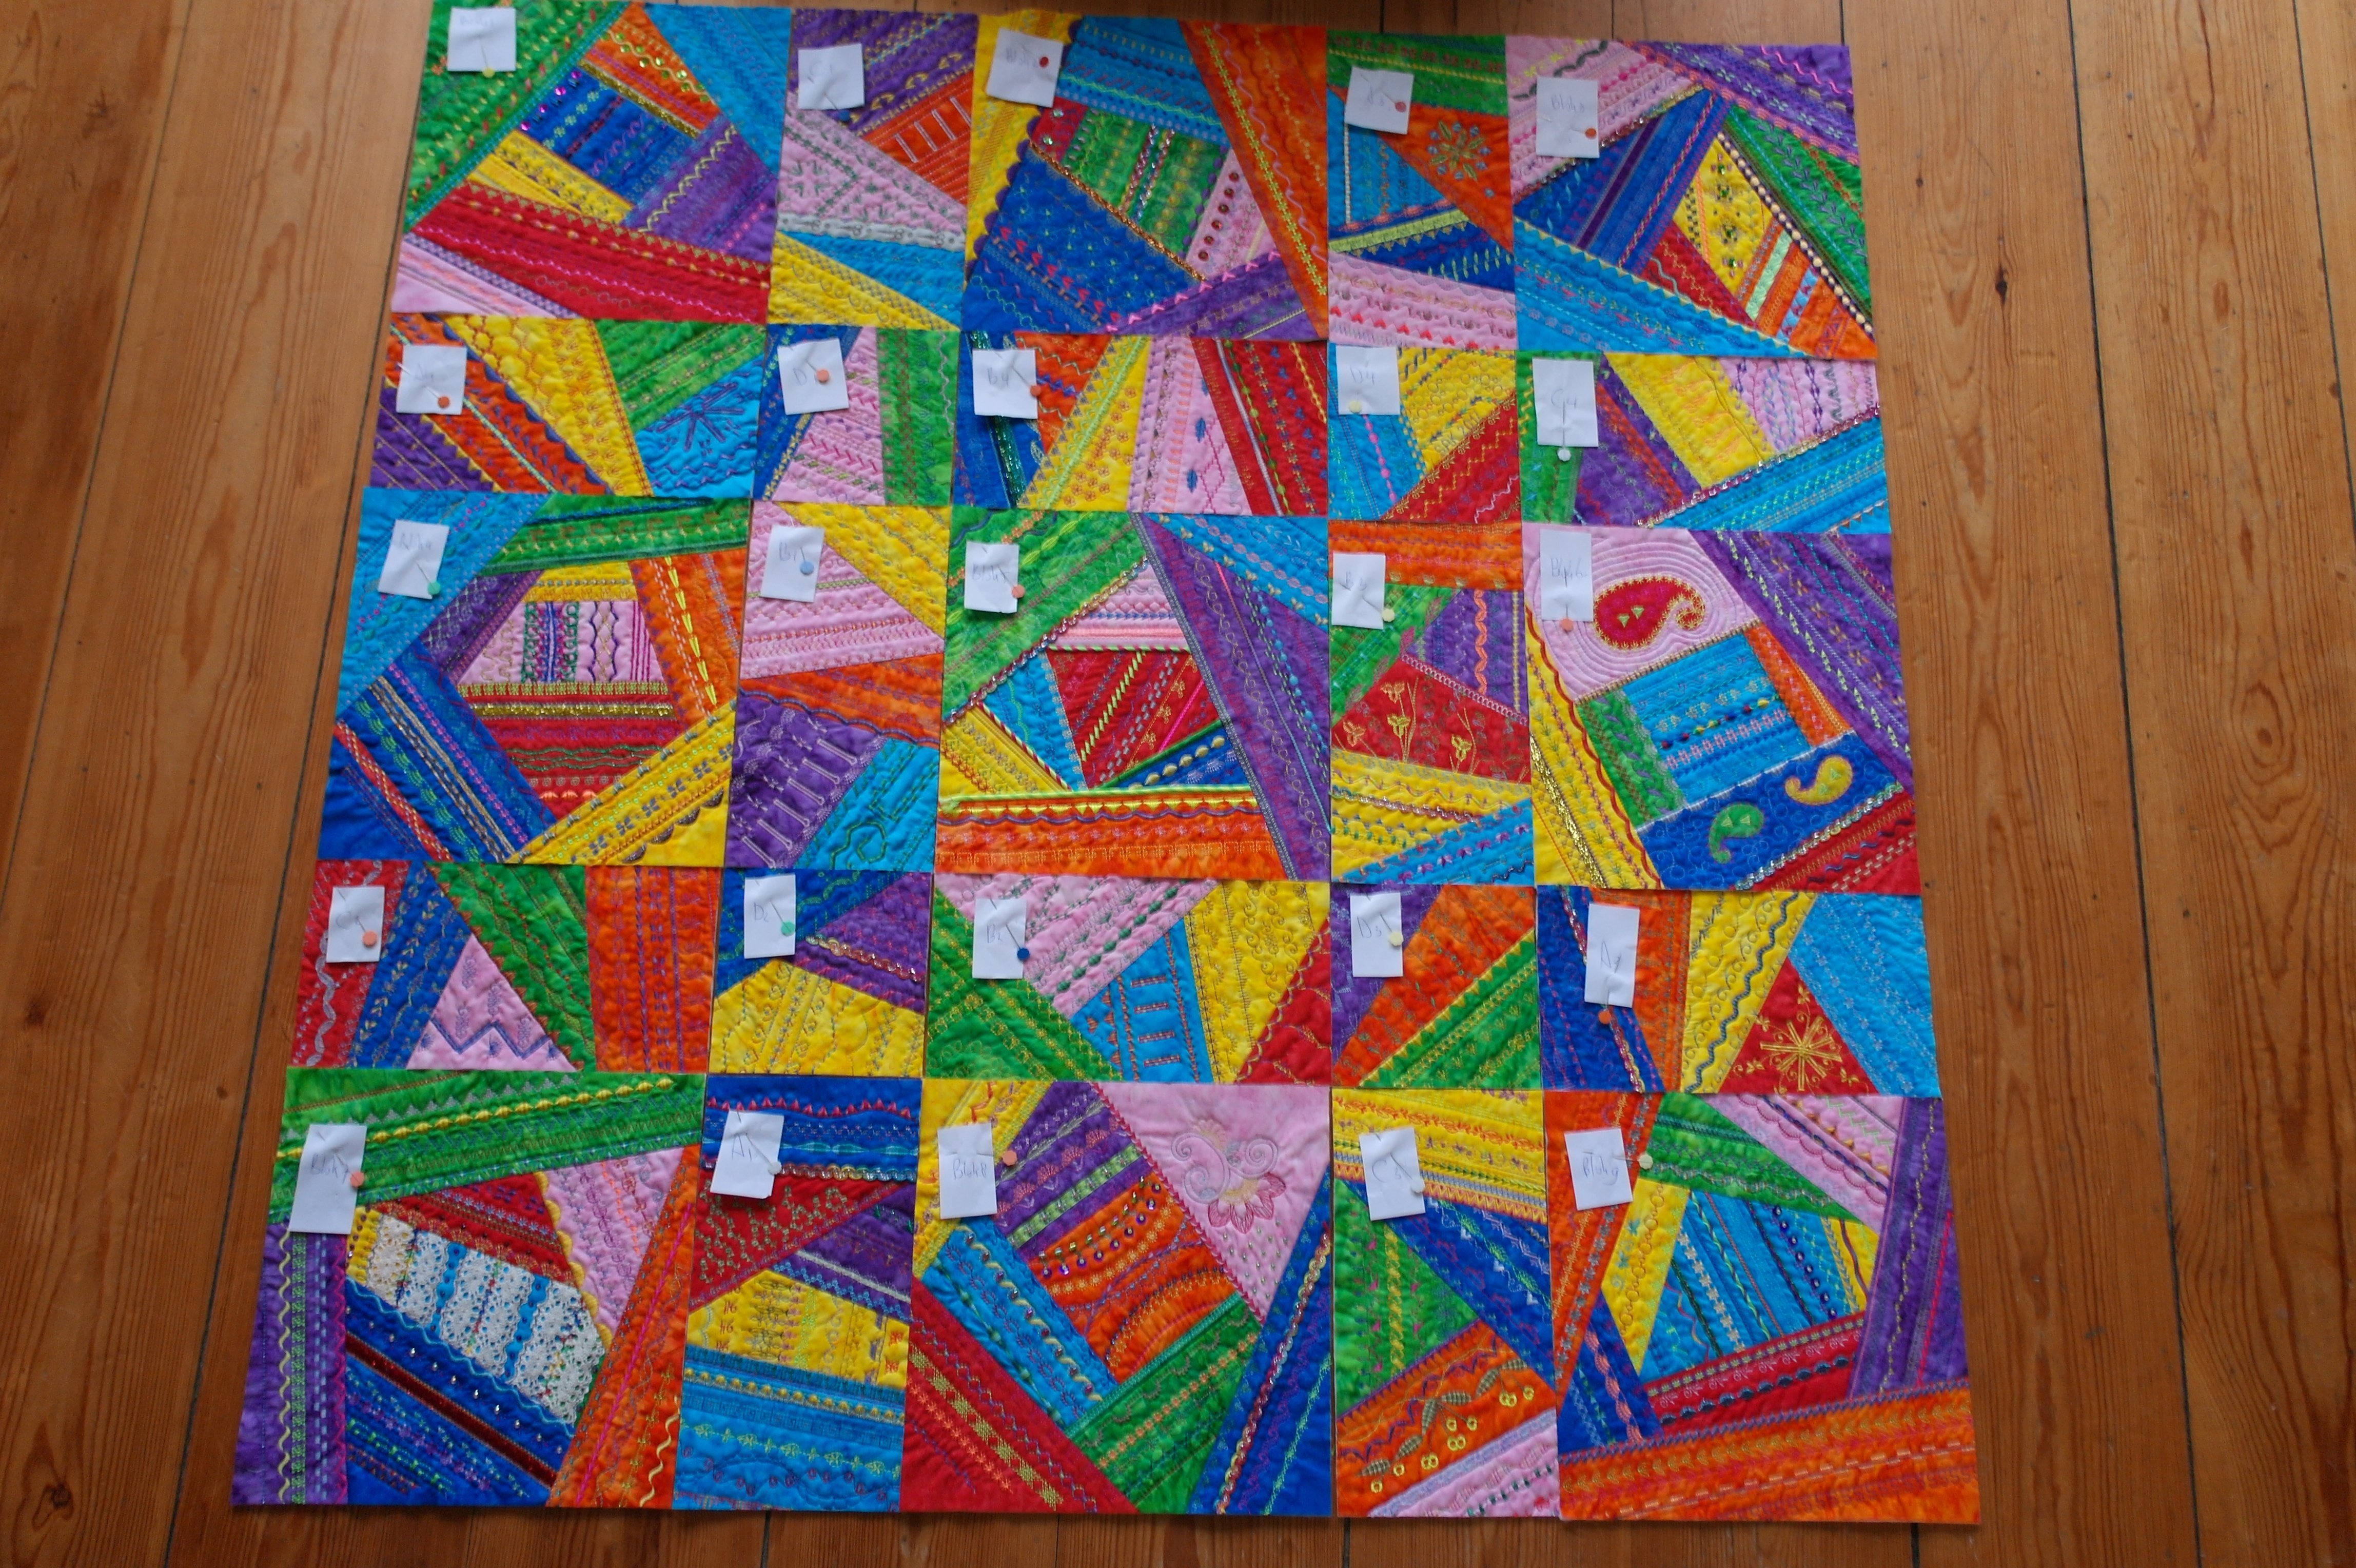
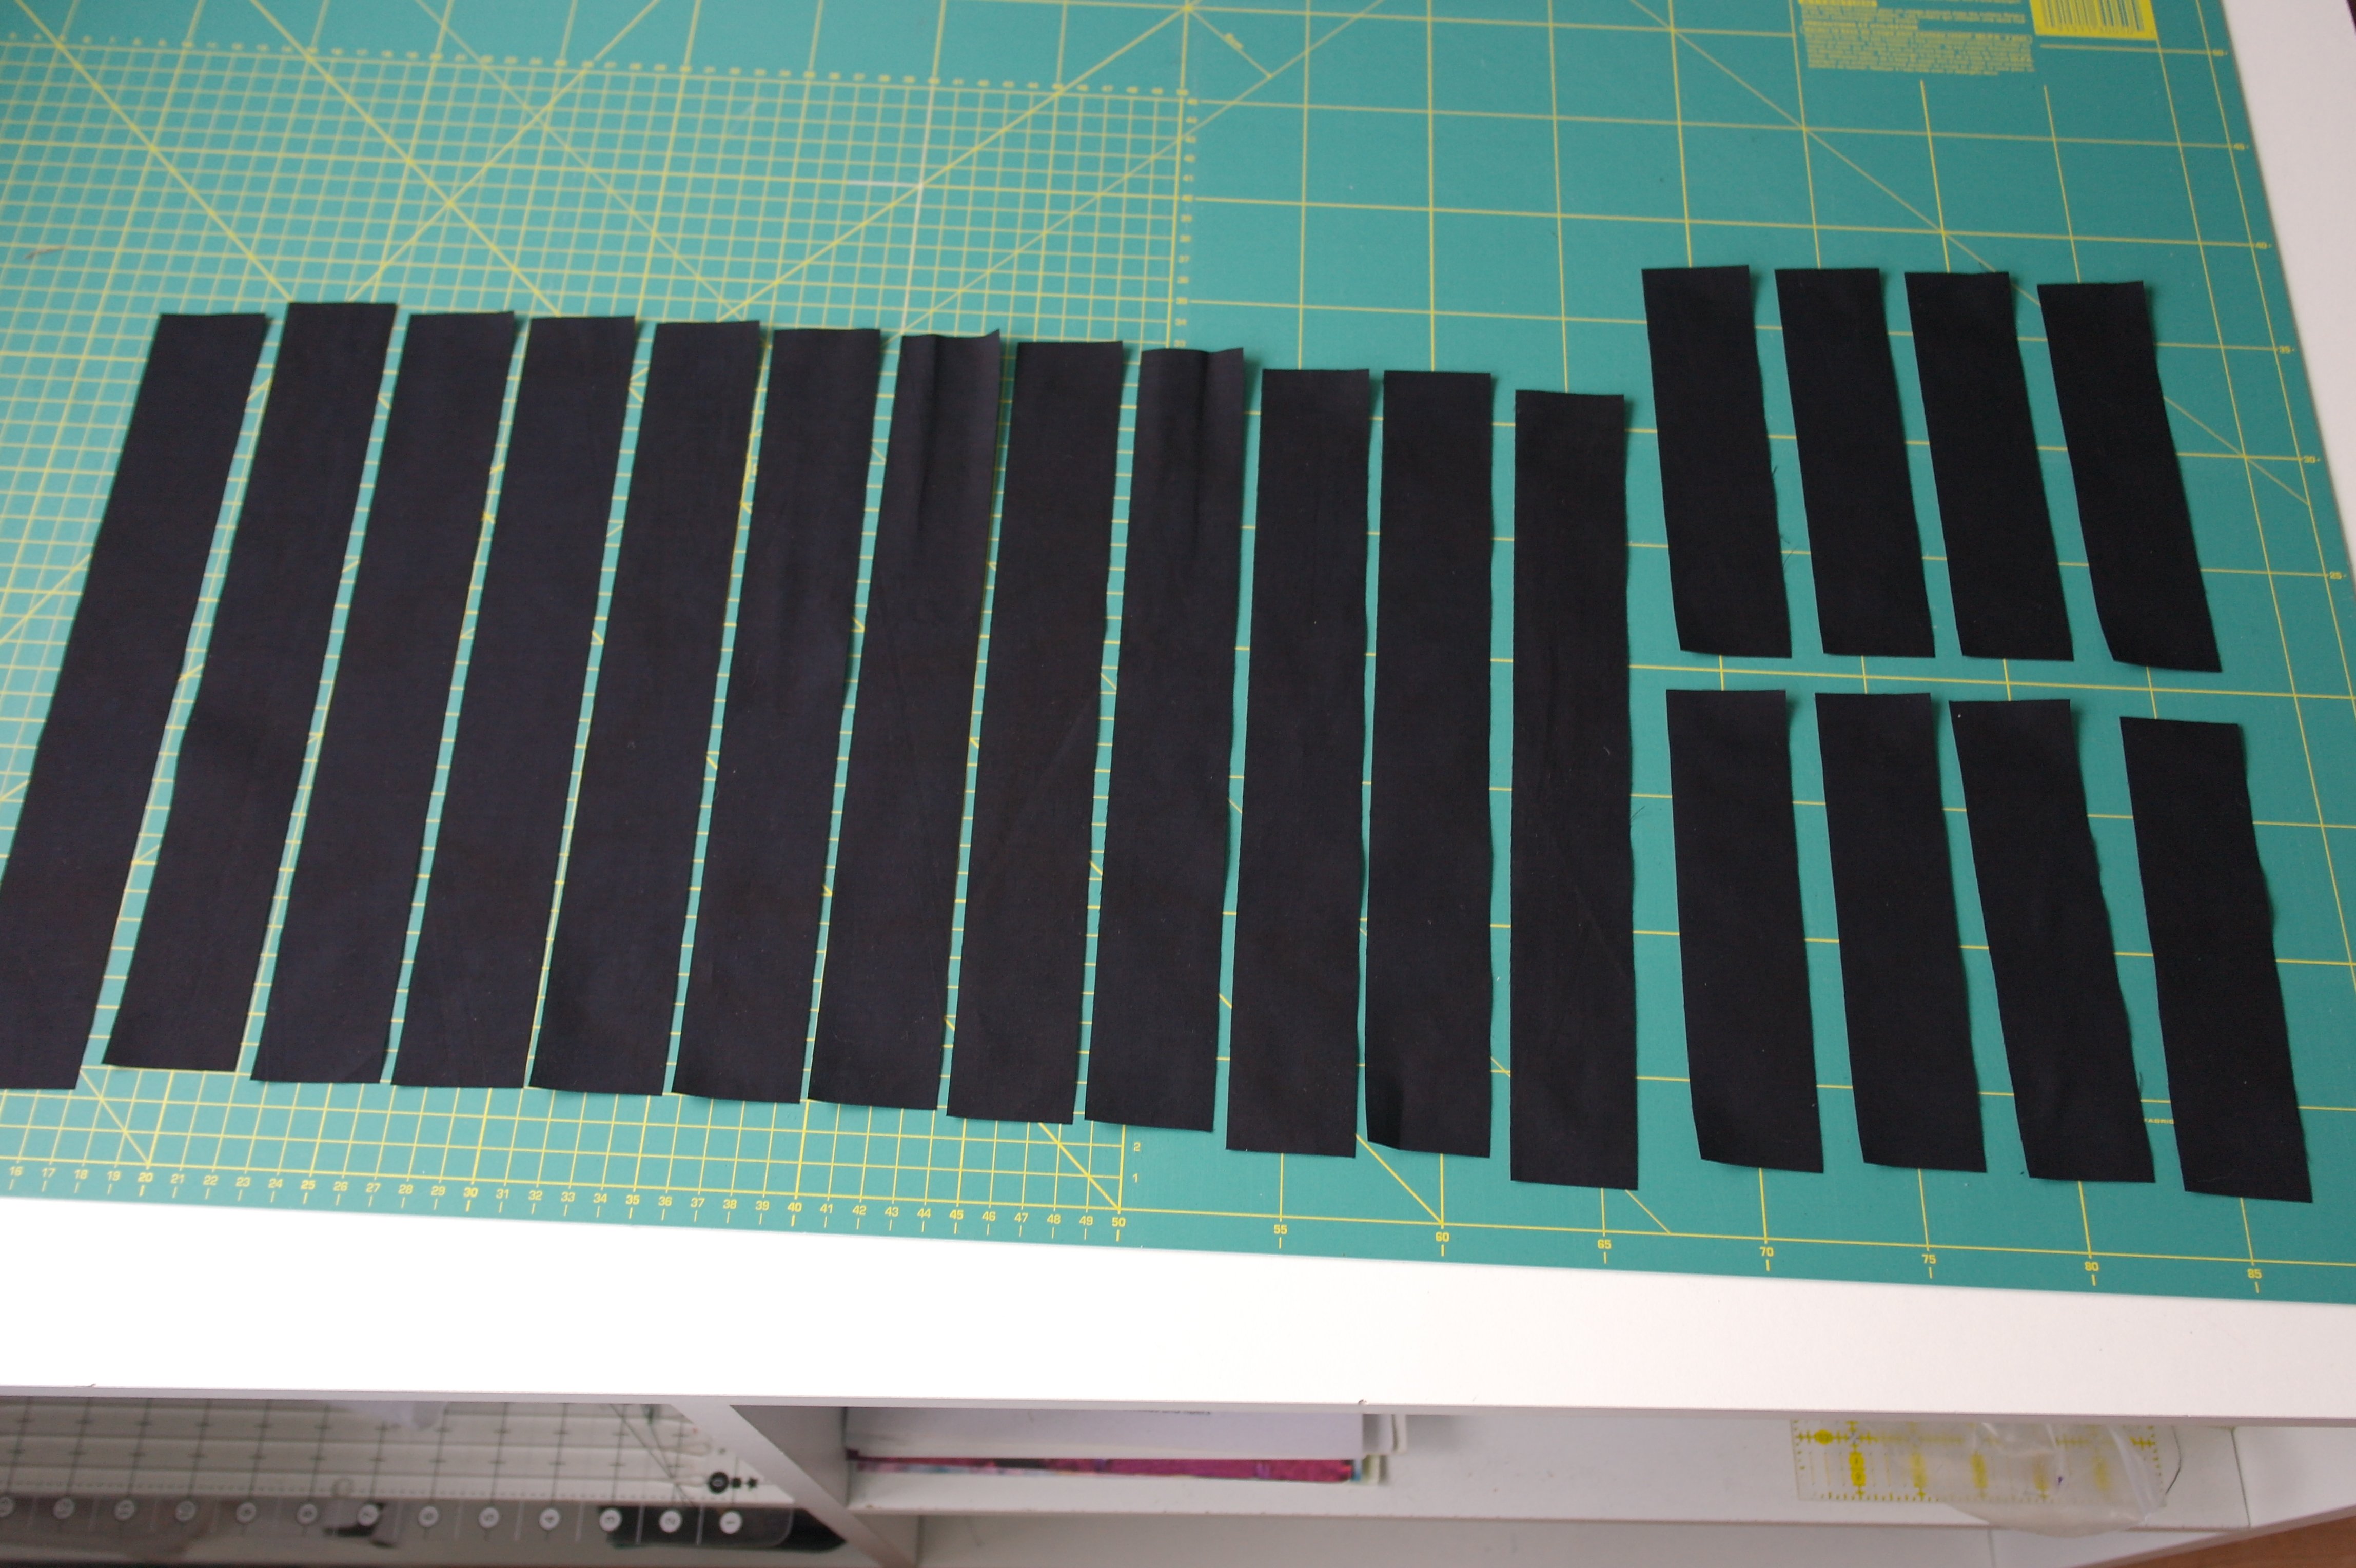
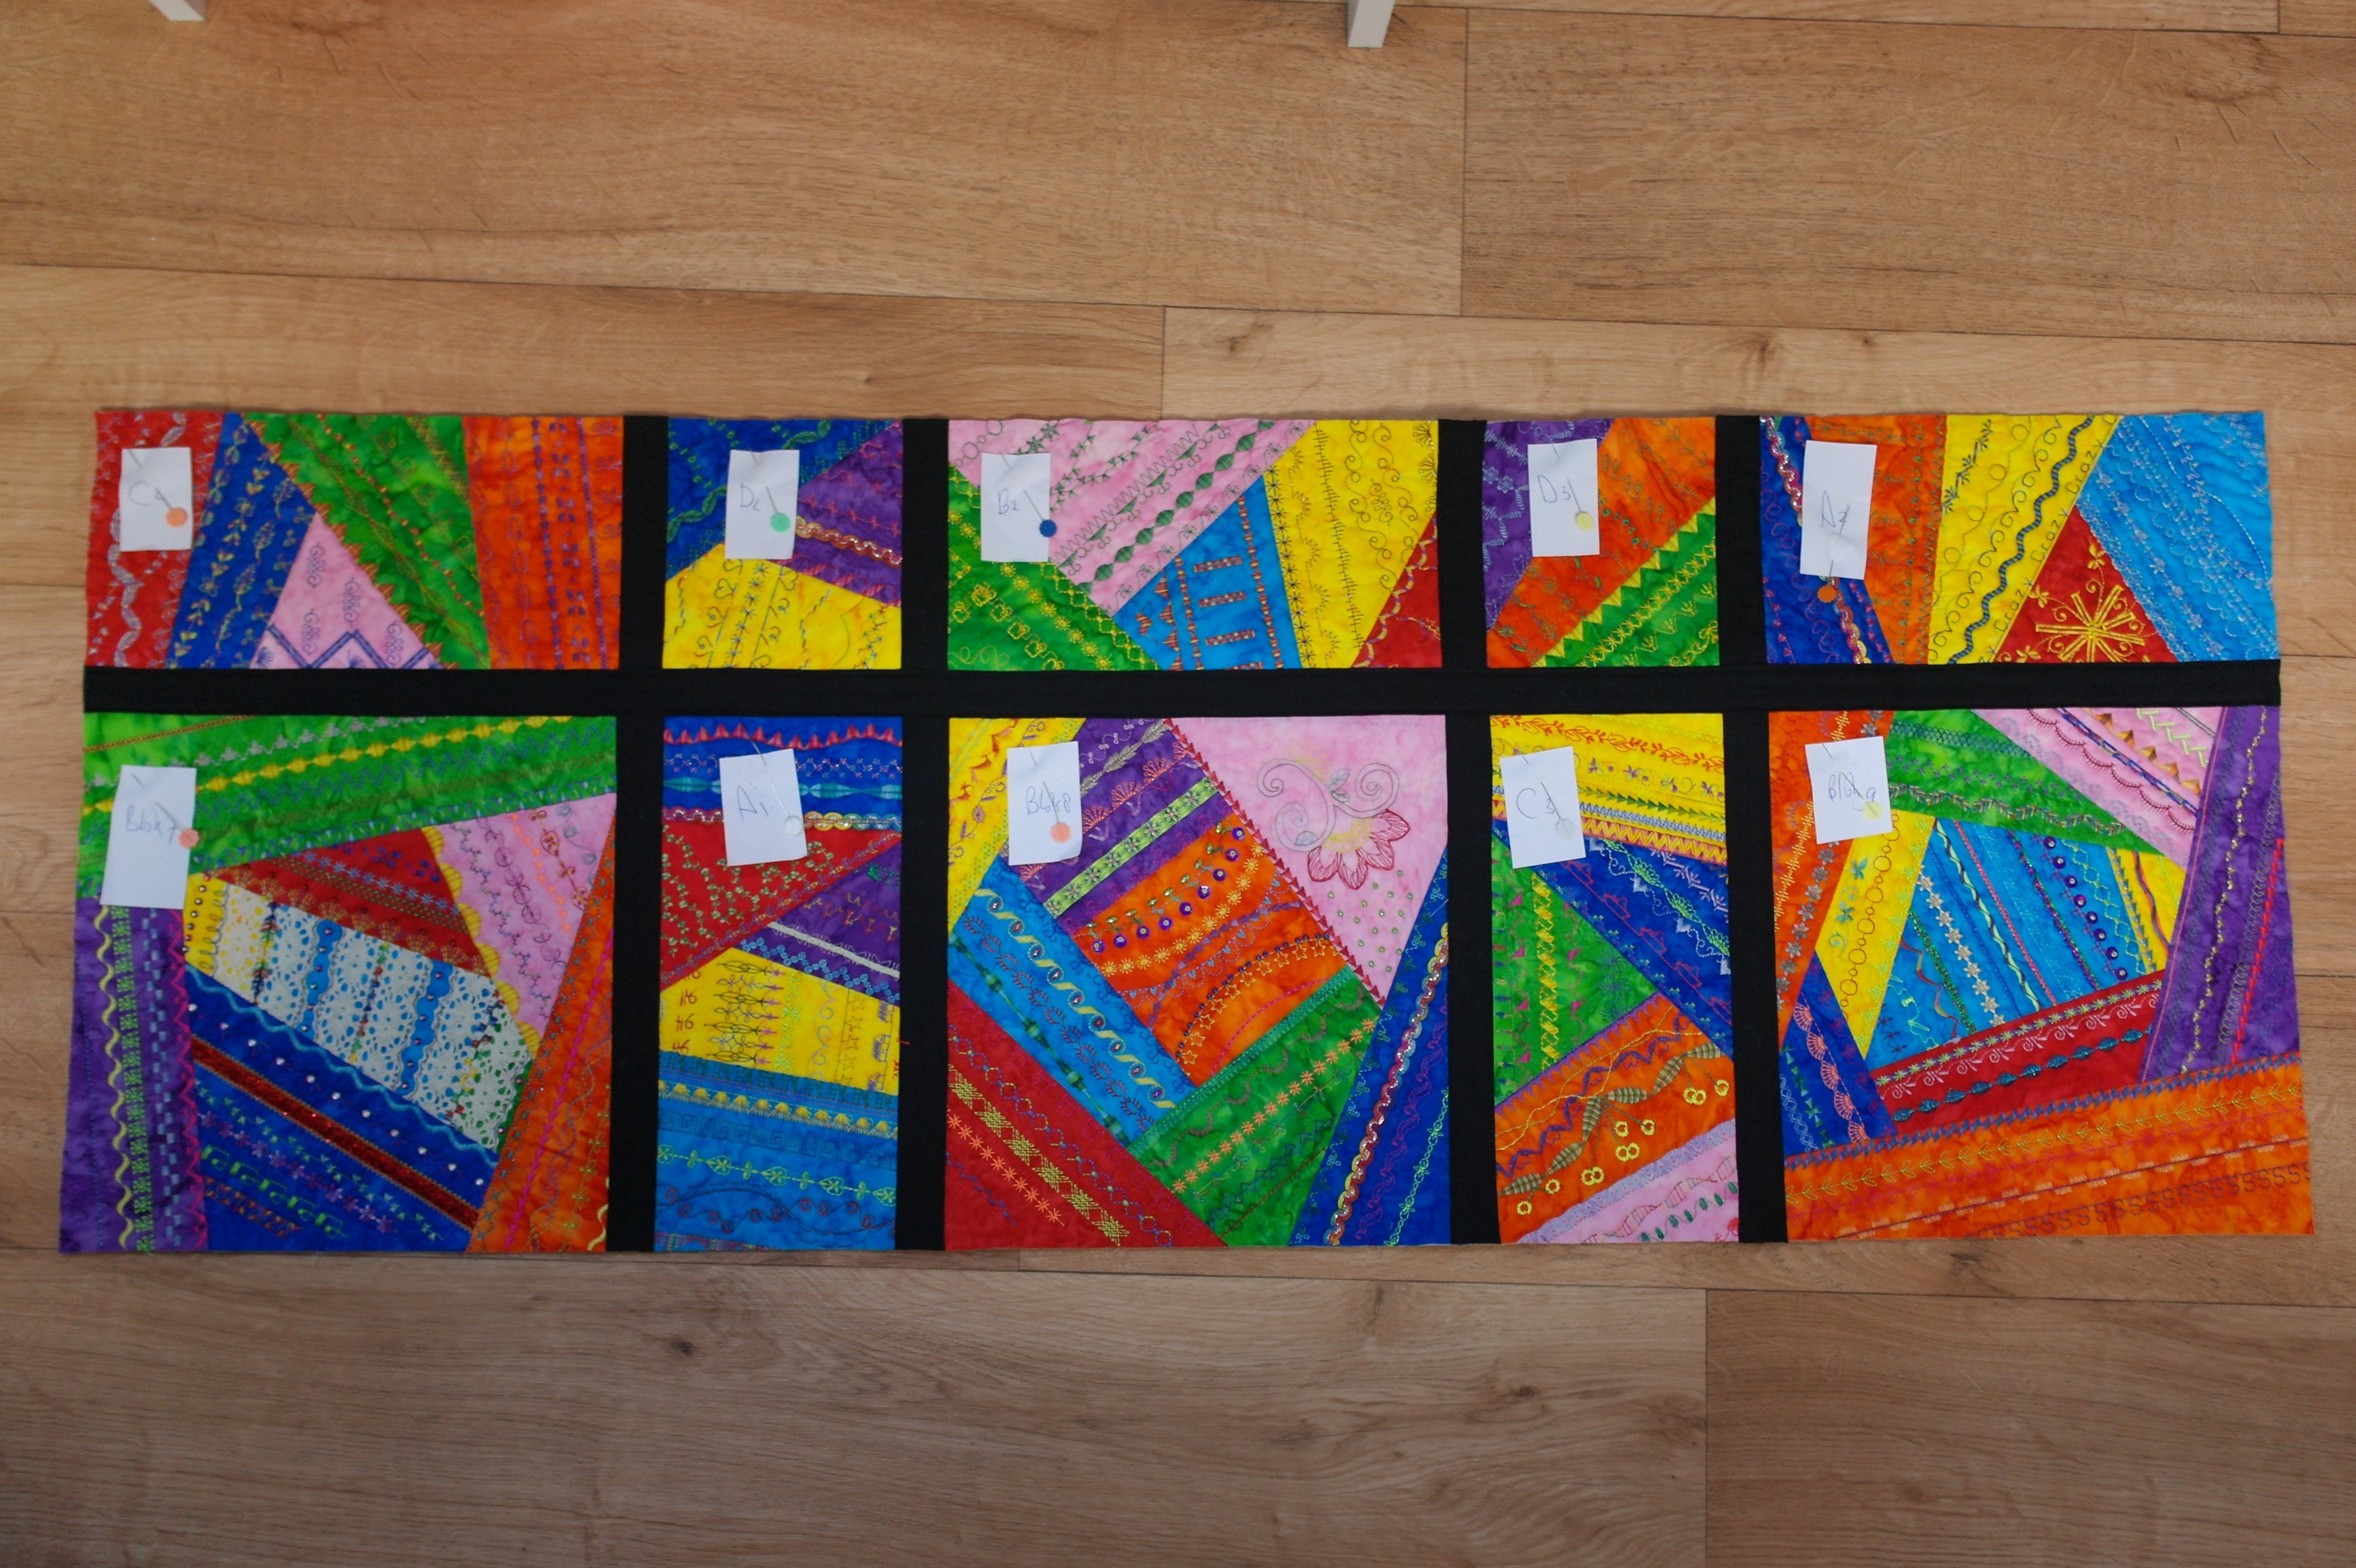
After choosing the layout, I have placed all blocks in stacks of 5: left block per row on top, right block per row on the bottom. I have made 5 stacks…
and finally stacked it all together, on top of each other, first row on top and last row on the bottom.
I have sorted this to have a proper sewing order. Preparing your quilt this way, gives you more overview and makes sure the right blocks are sewn together (but keep the pieces of paper pinned!)
You will have to choose, with cutting your blocks, which sides should be cut the most, or less, to get the right finished size. Sometimes you will have to cut for instance 2 cm from one side, and less on the other side, to make your block 28 x 28 cm (large square blocks), 29 x 14,5 (rectangular blocks) or 14,5 x 14,5 cm (small square blocks). That means that you will have to made a decision which row of deocrative stitches will be visible after cutting, and which row will not (or just partly). Remember there will be sashings added too, which will cover part of your stitches.
I can imagine there are beautiful stitches or special effects you’ve made, you want to see in your quilt, which could mean that you will have to avoid that part being cut, if possible. The stitches that will be visible are those in the ‘center’ of the blocks: all other decorative stitches at the sides could disappear underneath sashings, or after cutting.
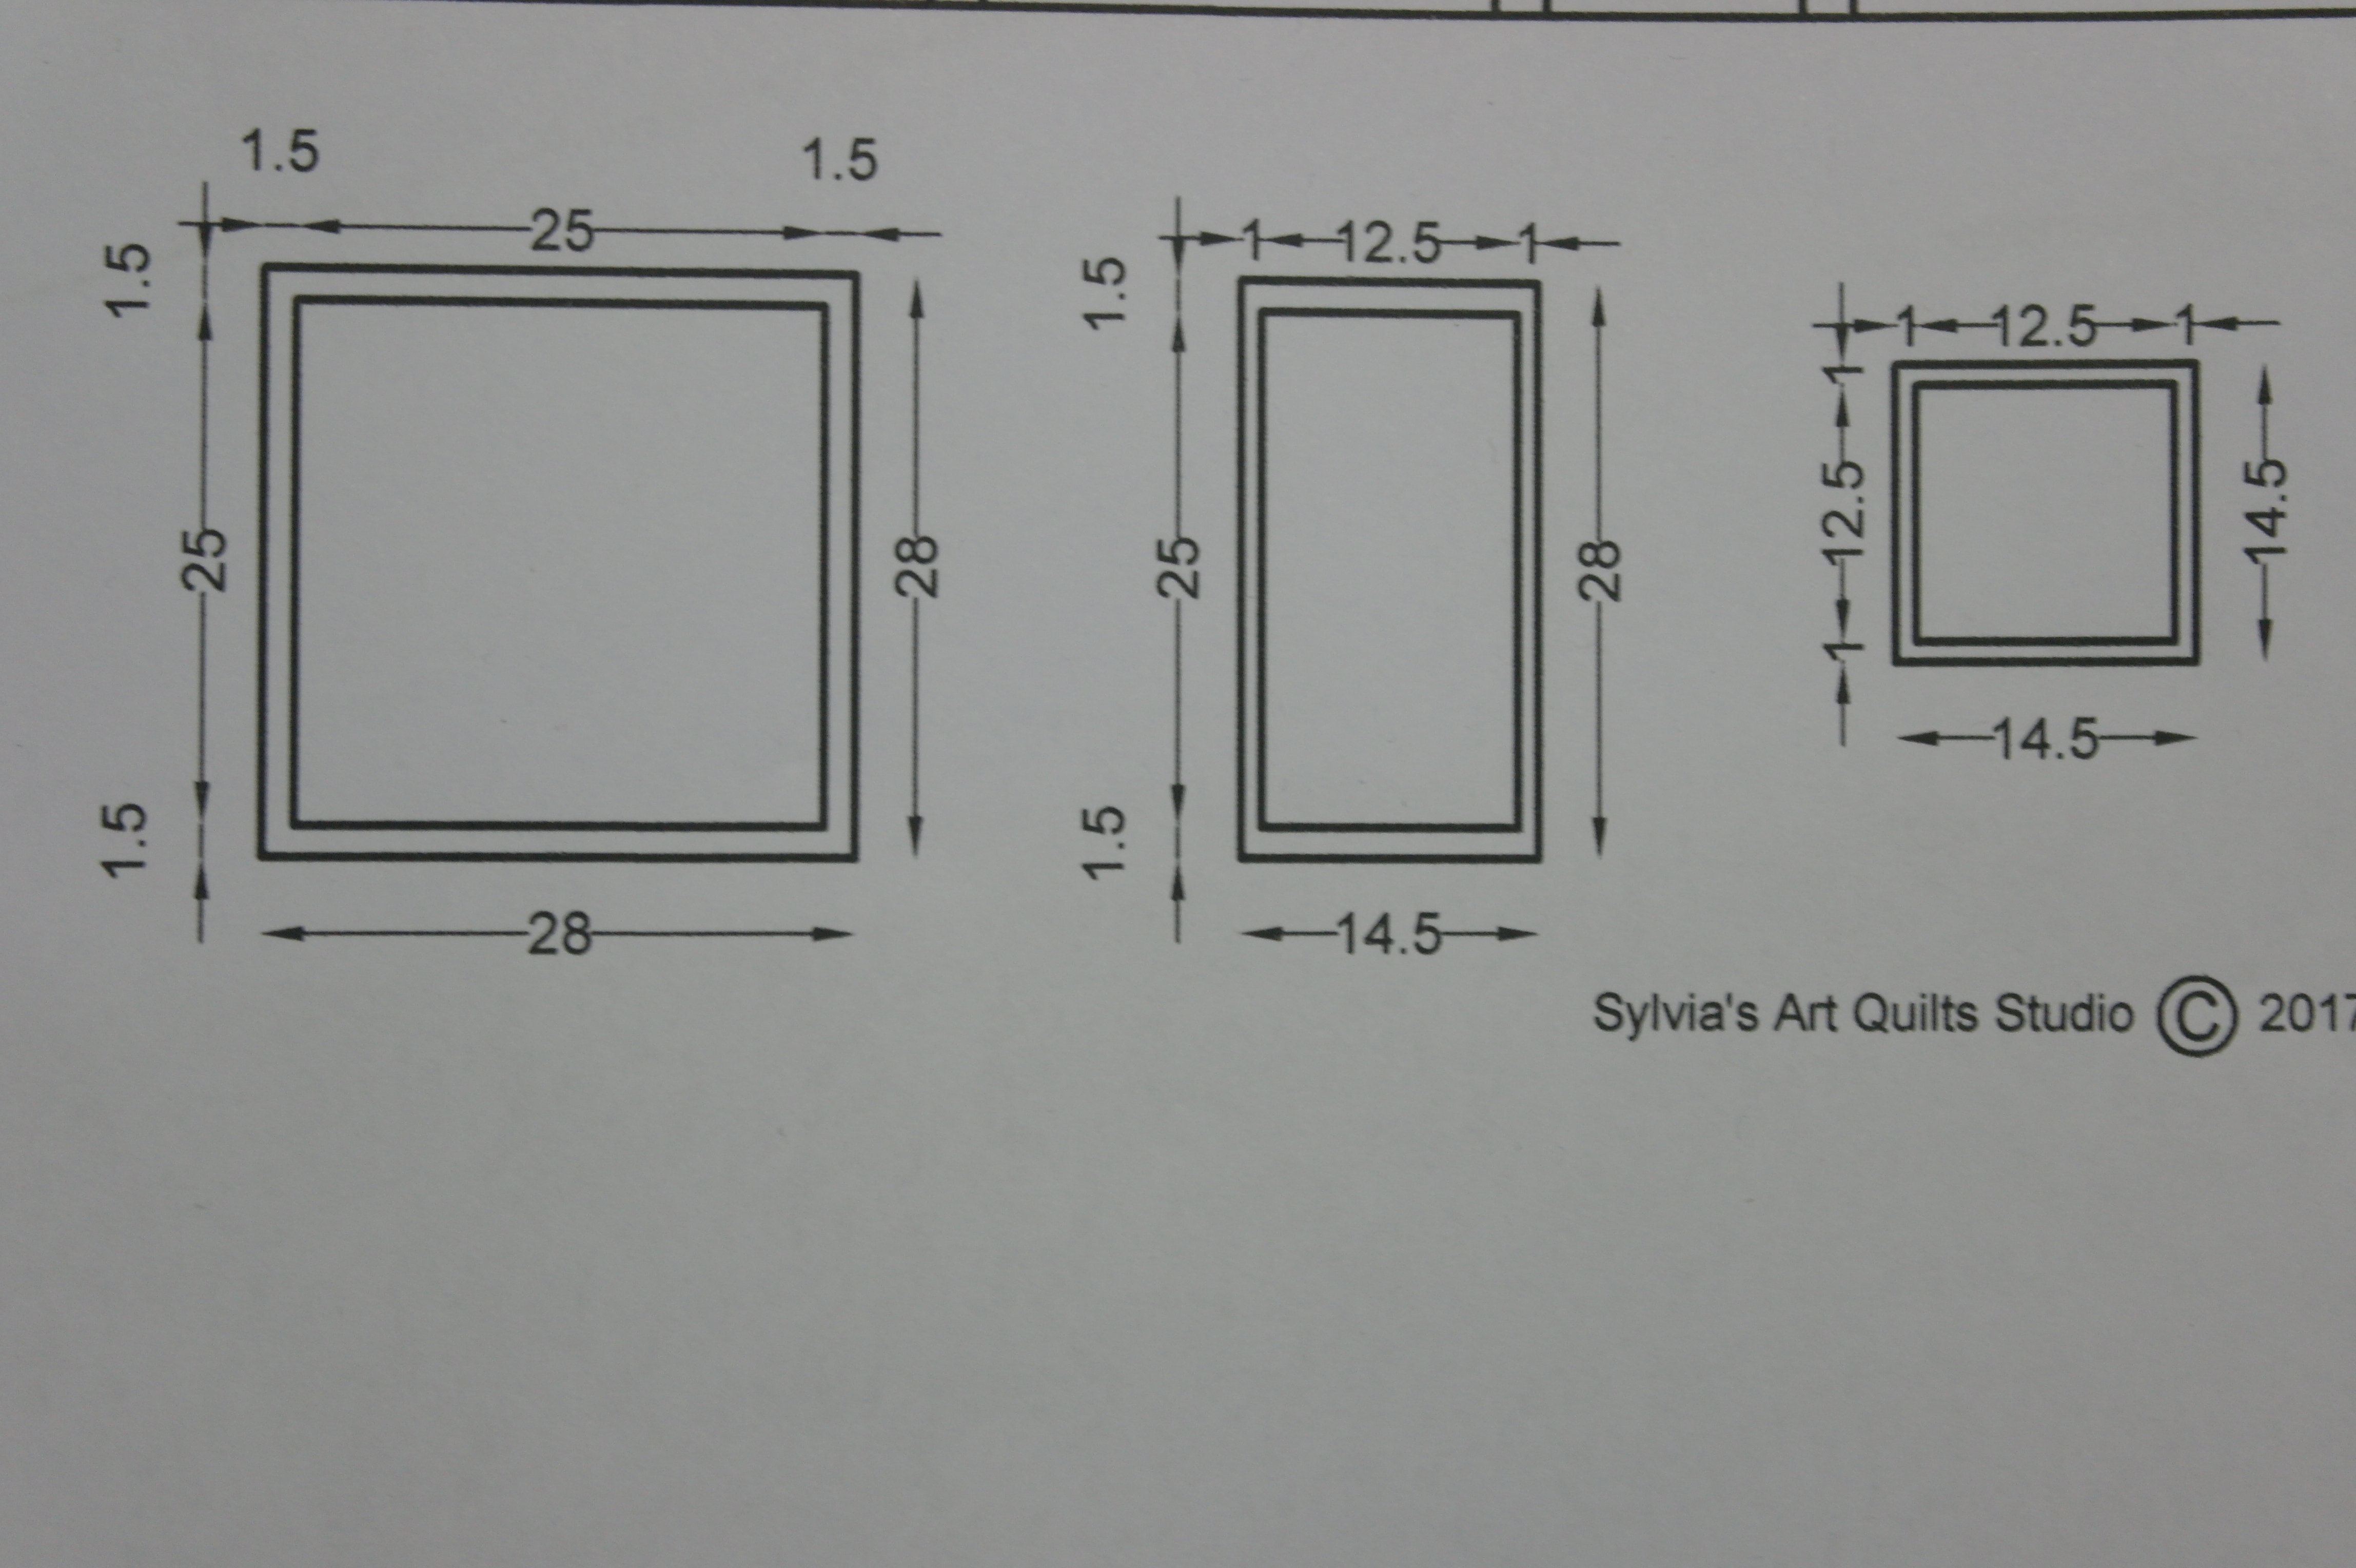
You will find cutting schemes for the blocks at the bottom of the layout scheme: three types of blocks are shown.
The large square block is on the left. You have made sandwiches that are aprox. 32 x 32 cm or slightly smaller. These blocks have to be cut back to precisely 28 x 28 cm. The numbers for this size is shown to the right and bottom of the image of the block. To the top and left you can see other measurements: 1,5, 25 and 1,5: I will explain this later.
The rectangular block is in the center. You have made sandwiches of aprox. 16 x 32 cm or slightly smaller. These blocks have to be cut back to precisely 14,5 x 28 cm. The numbers for this size is shown to the right and bottom of the image of the block. To the top and left you can see other measurements: 1, 12,5, 1 and 1,5, 25, 1,5: I will explain this later.
The small square block is on the right. You have made sandwiches that are aprox. 16 x 16 cm. These blocks have to be cut back to precisely 14,5 x 14,5 cm. The numbers for this size is shown to the right and bottom of the image of the block. To the top and left you can see other measurements: 1,5, 25 and 1,5: I will explain this later.
BEFORE CUTTING: PLEASE CHECK, CHECK AND DOUBLE CHECK EVERYTHING – once the blocks are cut, there is no turning back!
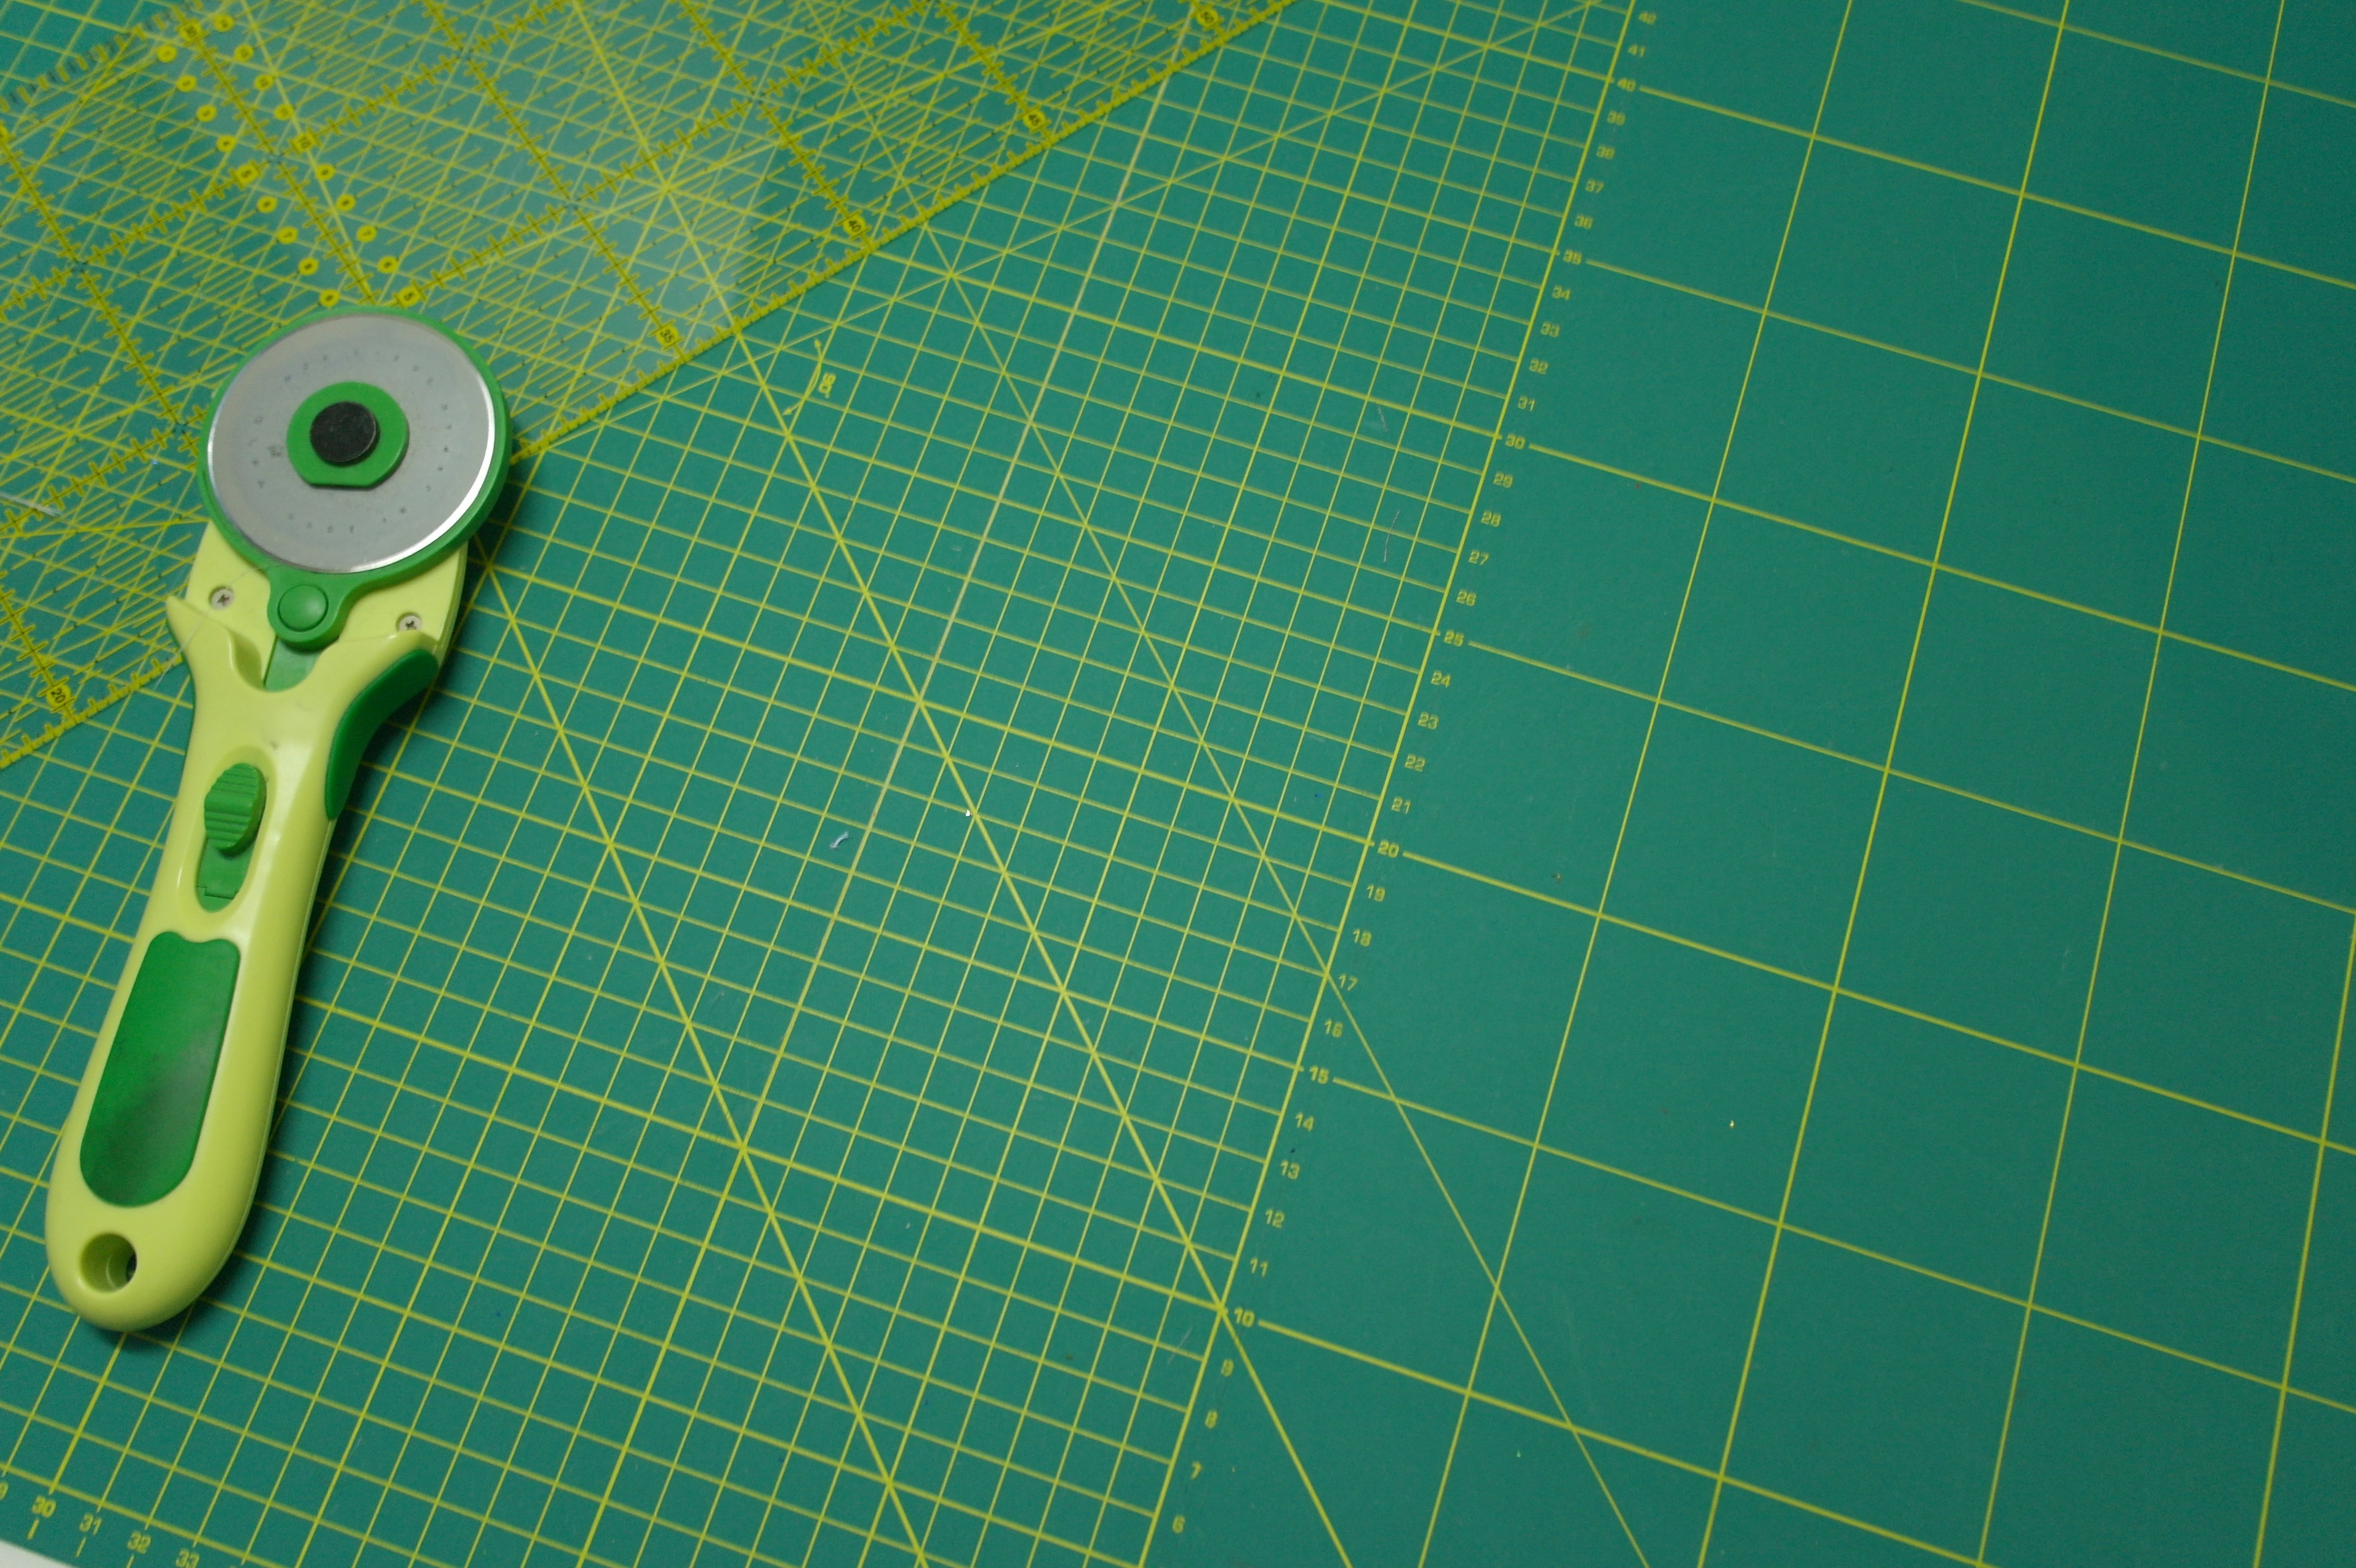
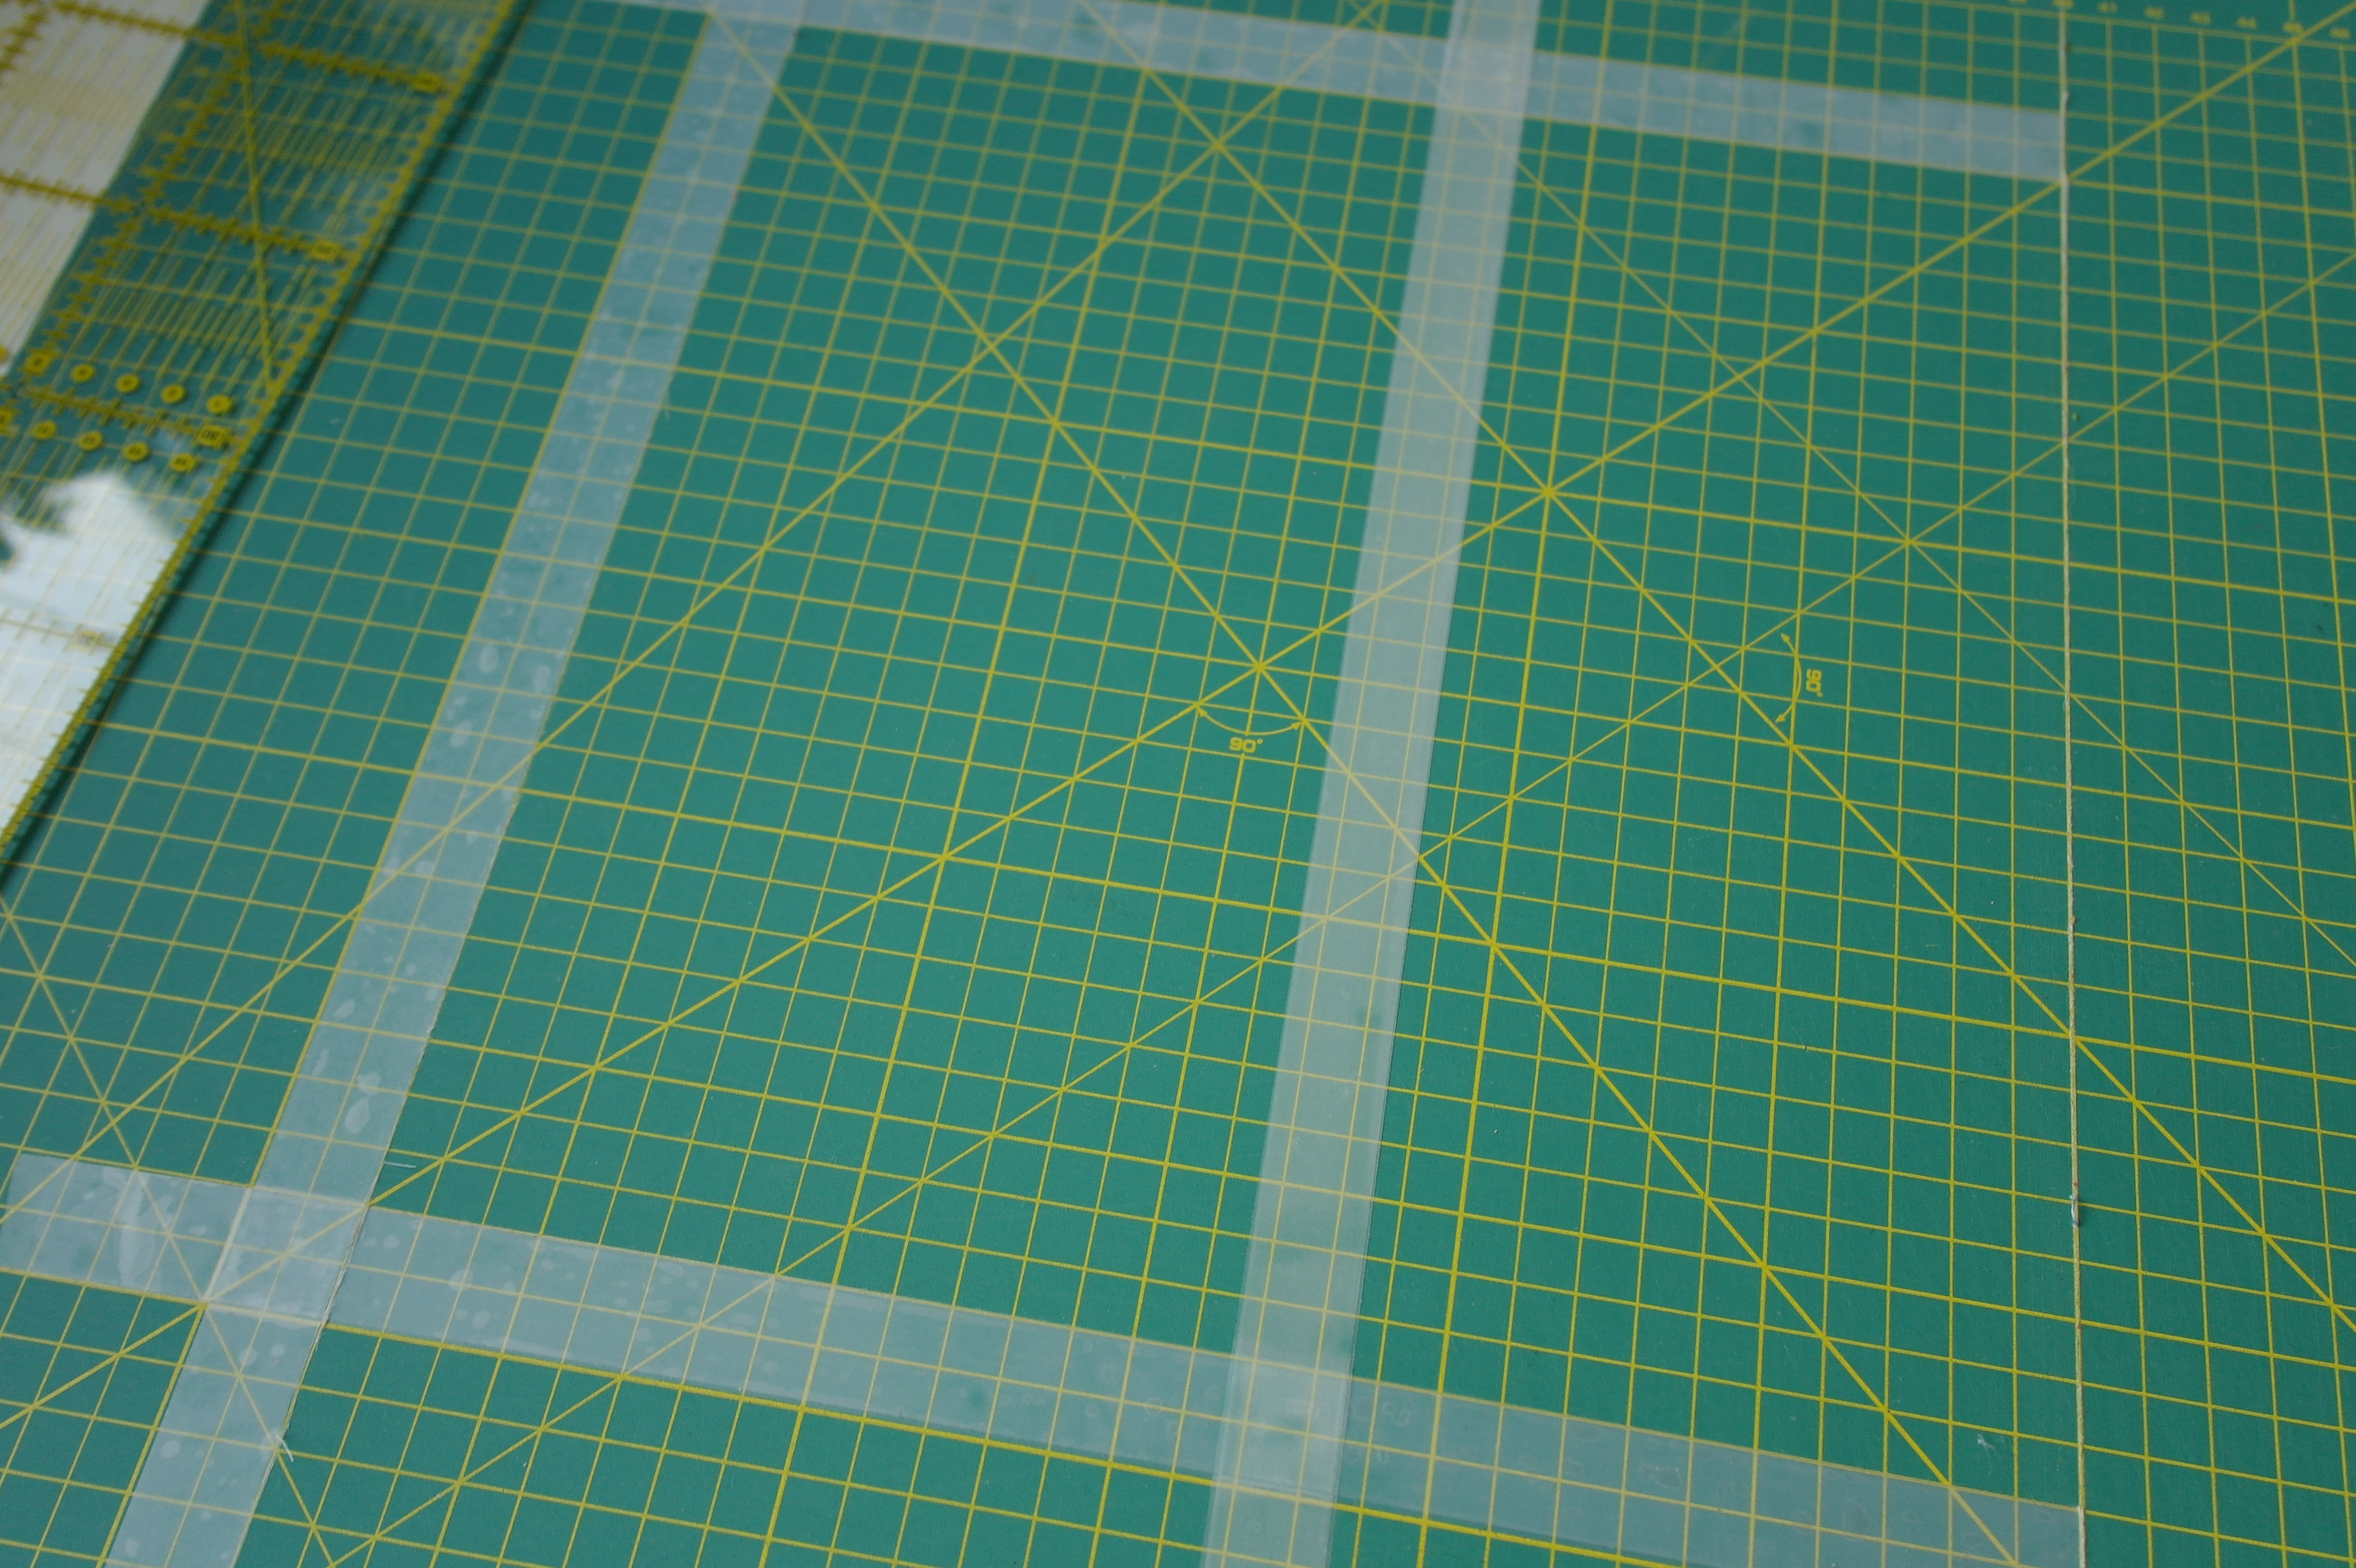
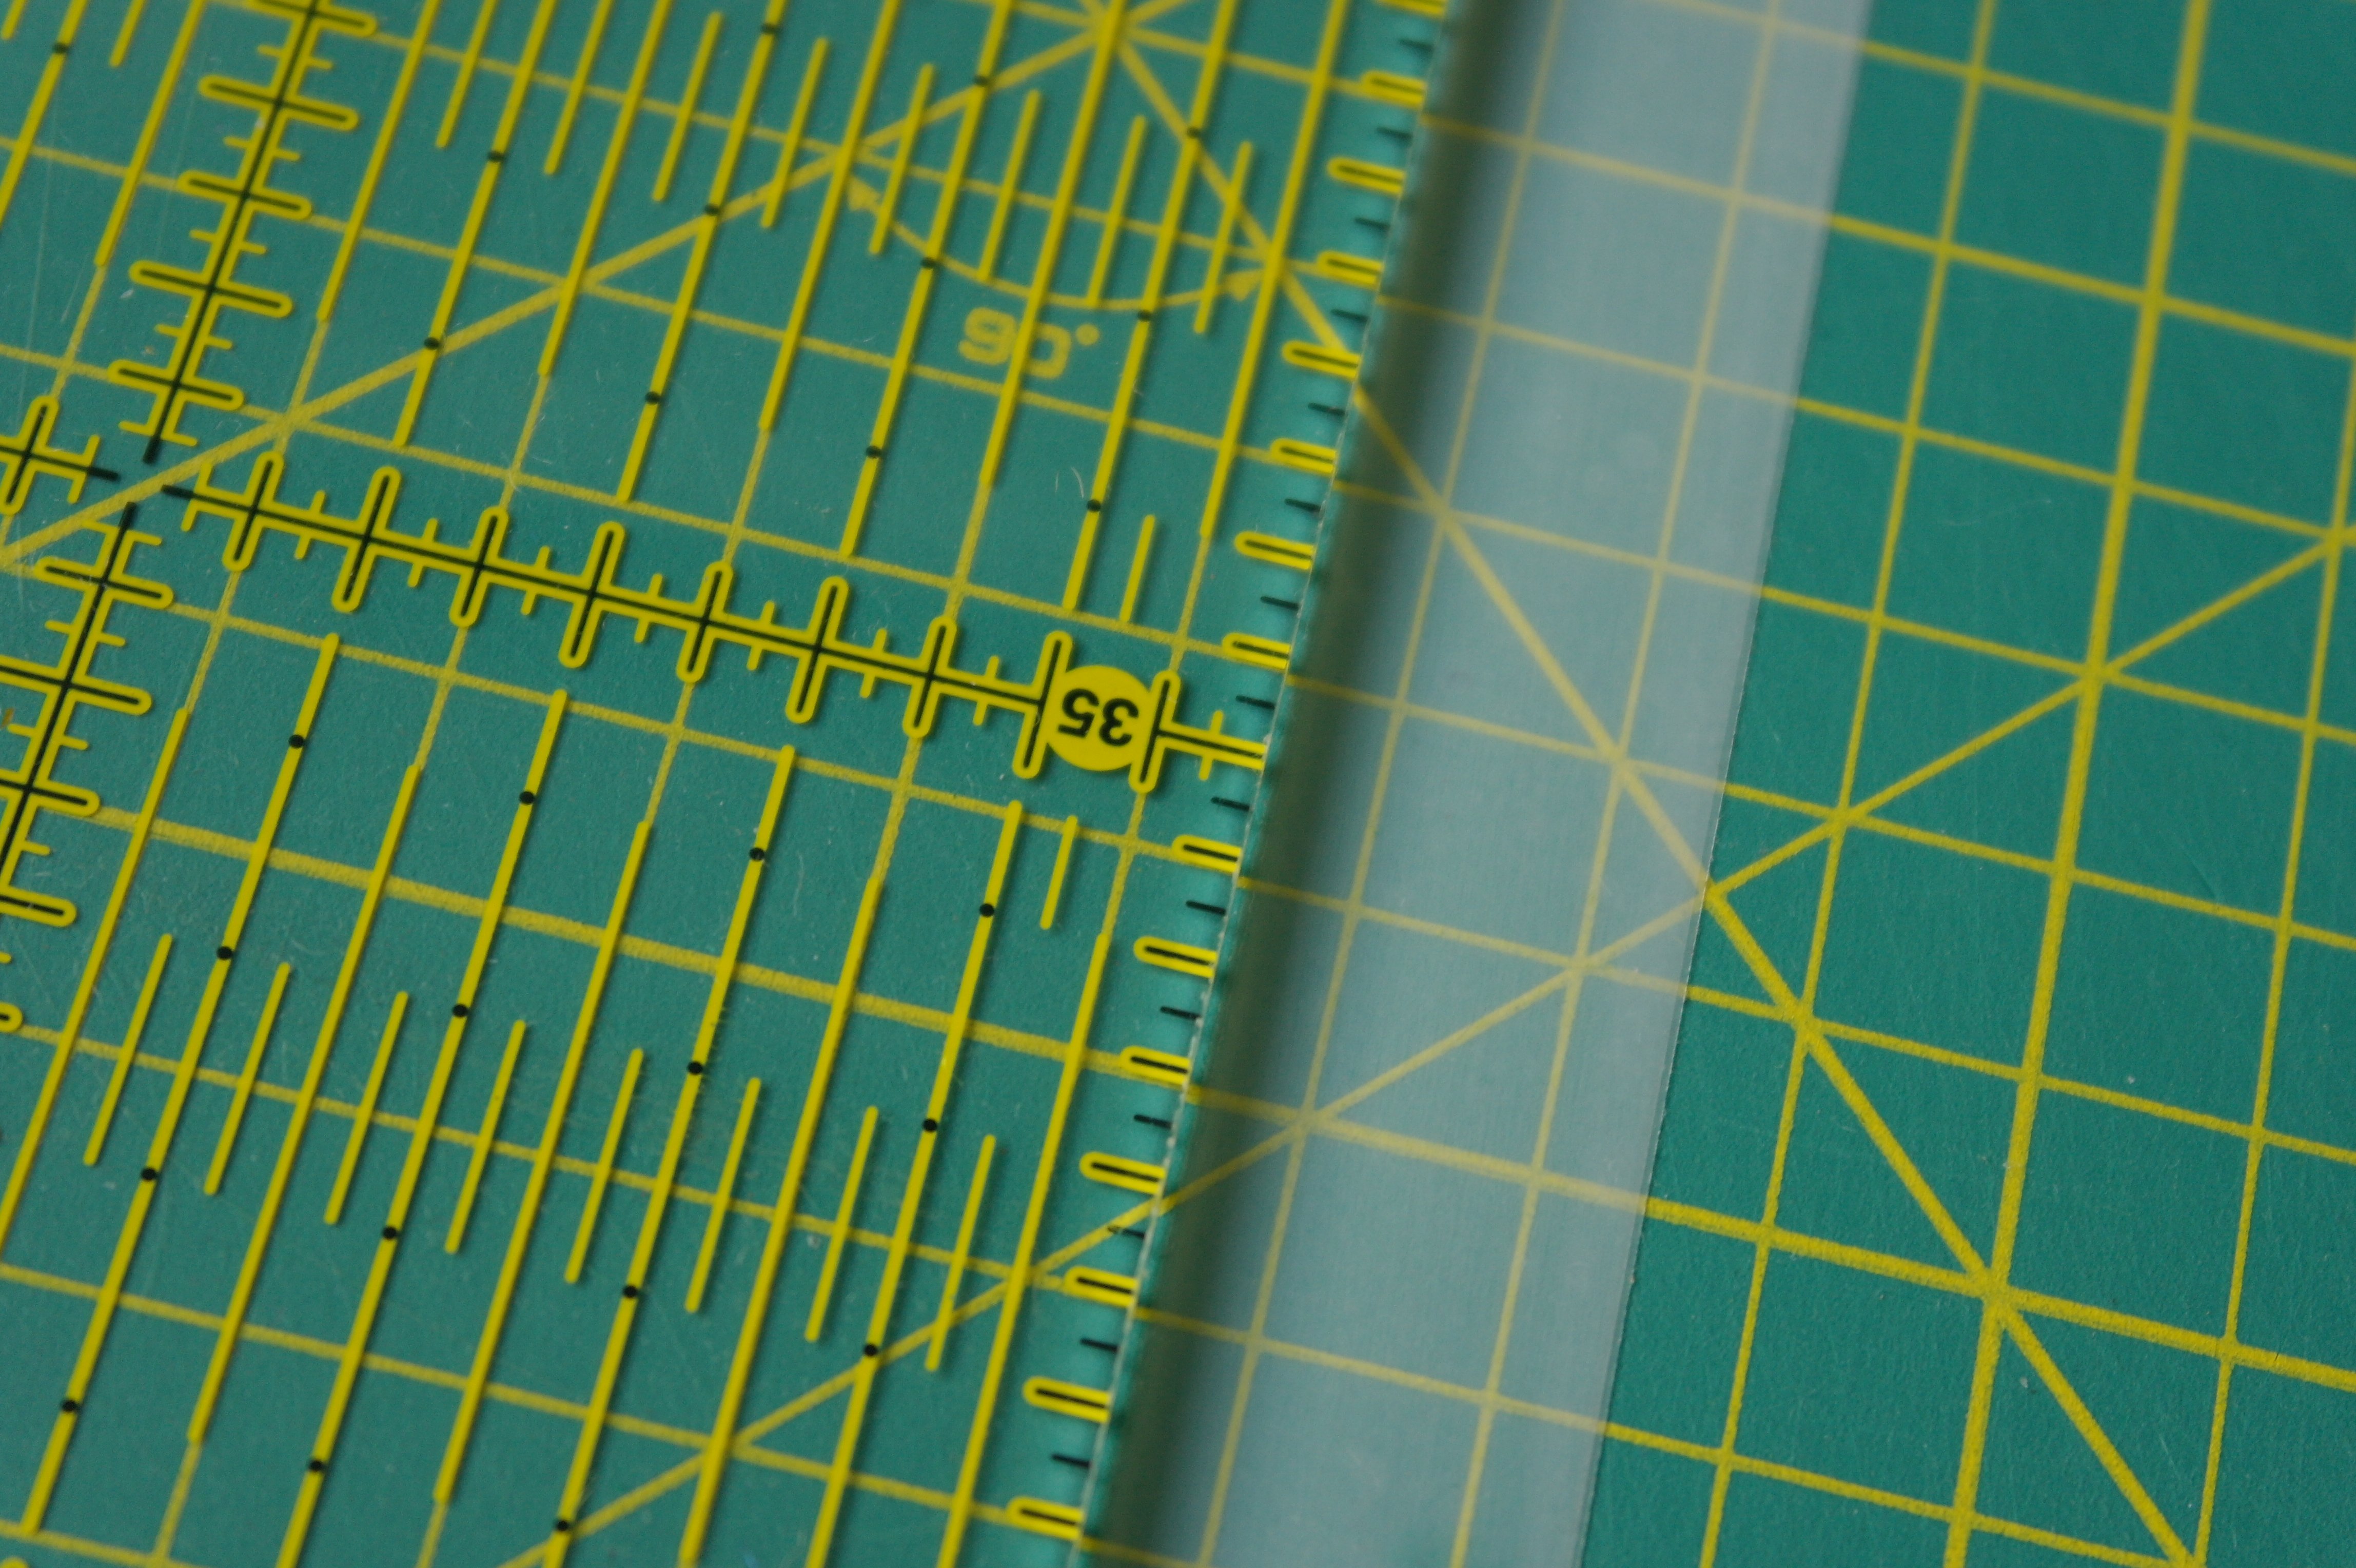
CUTTING THE BLOCKS: Use a cutting mat with centimters, preferably with small squares/centimeter indications (picture above). Some cutting mats only show squares of 5 x 5 cm (to the right of the picture): I prefer smaller squares for more accurate cutting.
To be sure all blocks are cut at the measurement indicated, use SCOTCH tape: this is a white, translucent tape, which leaves no glue residue on your cutting mat. It will give you a frame for precise cutting.
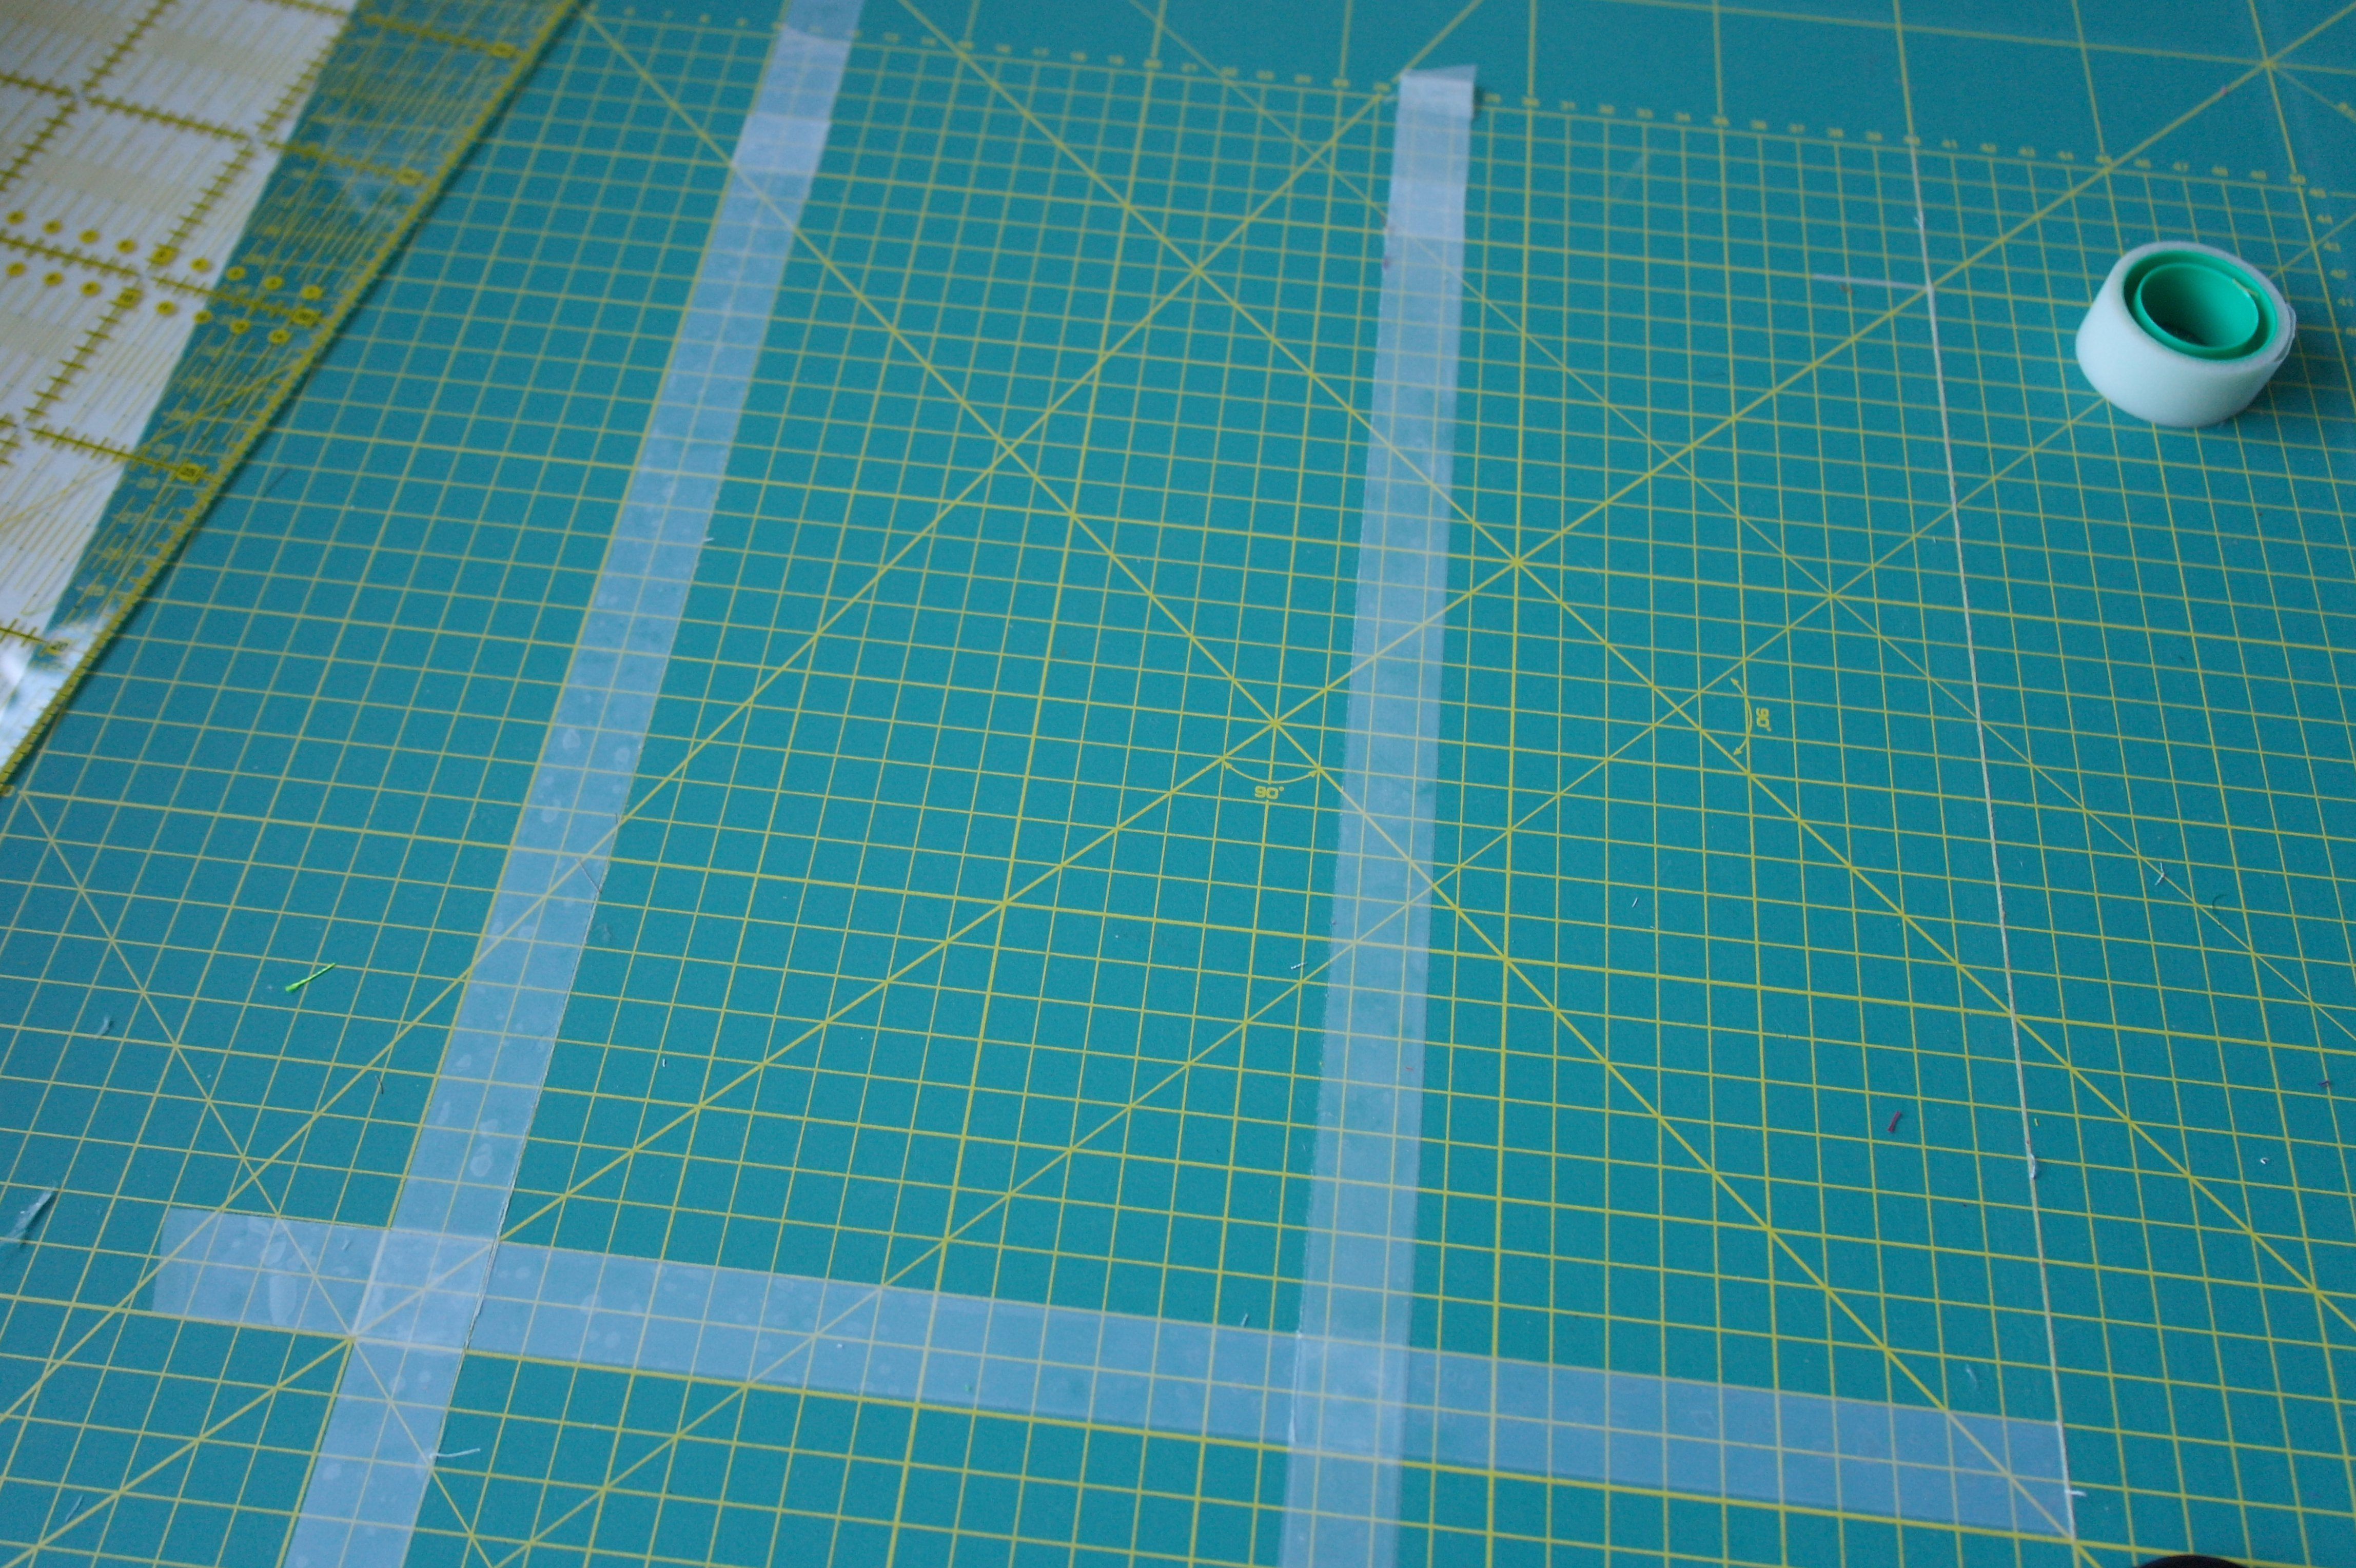
Tape a long piece of SCOTCH tape along a line of your cutting mat: be sure the tape is placed against the line, but the line still shows a bit. This piece of tape should be much longer than 28 cm, so make it about 34 cm.
Tape another piece of SCOTCH tape along a line of your cutting mat, precisely 28 cm below the first tape. Again, be sure the line on your mat still shows, and the distance between both tapes is EXACTLY 28 cm.
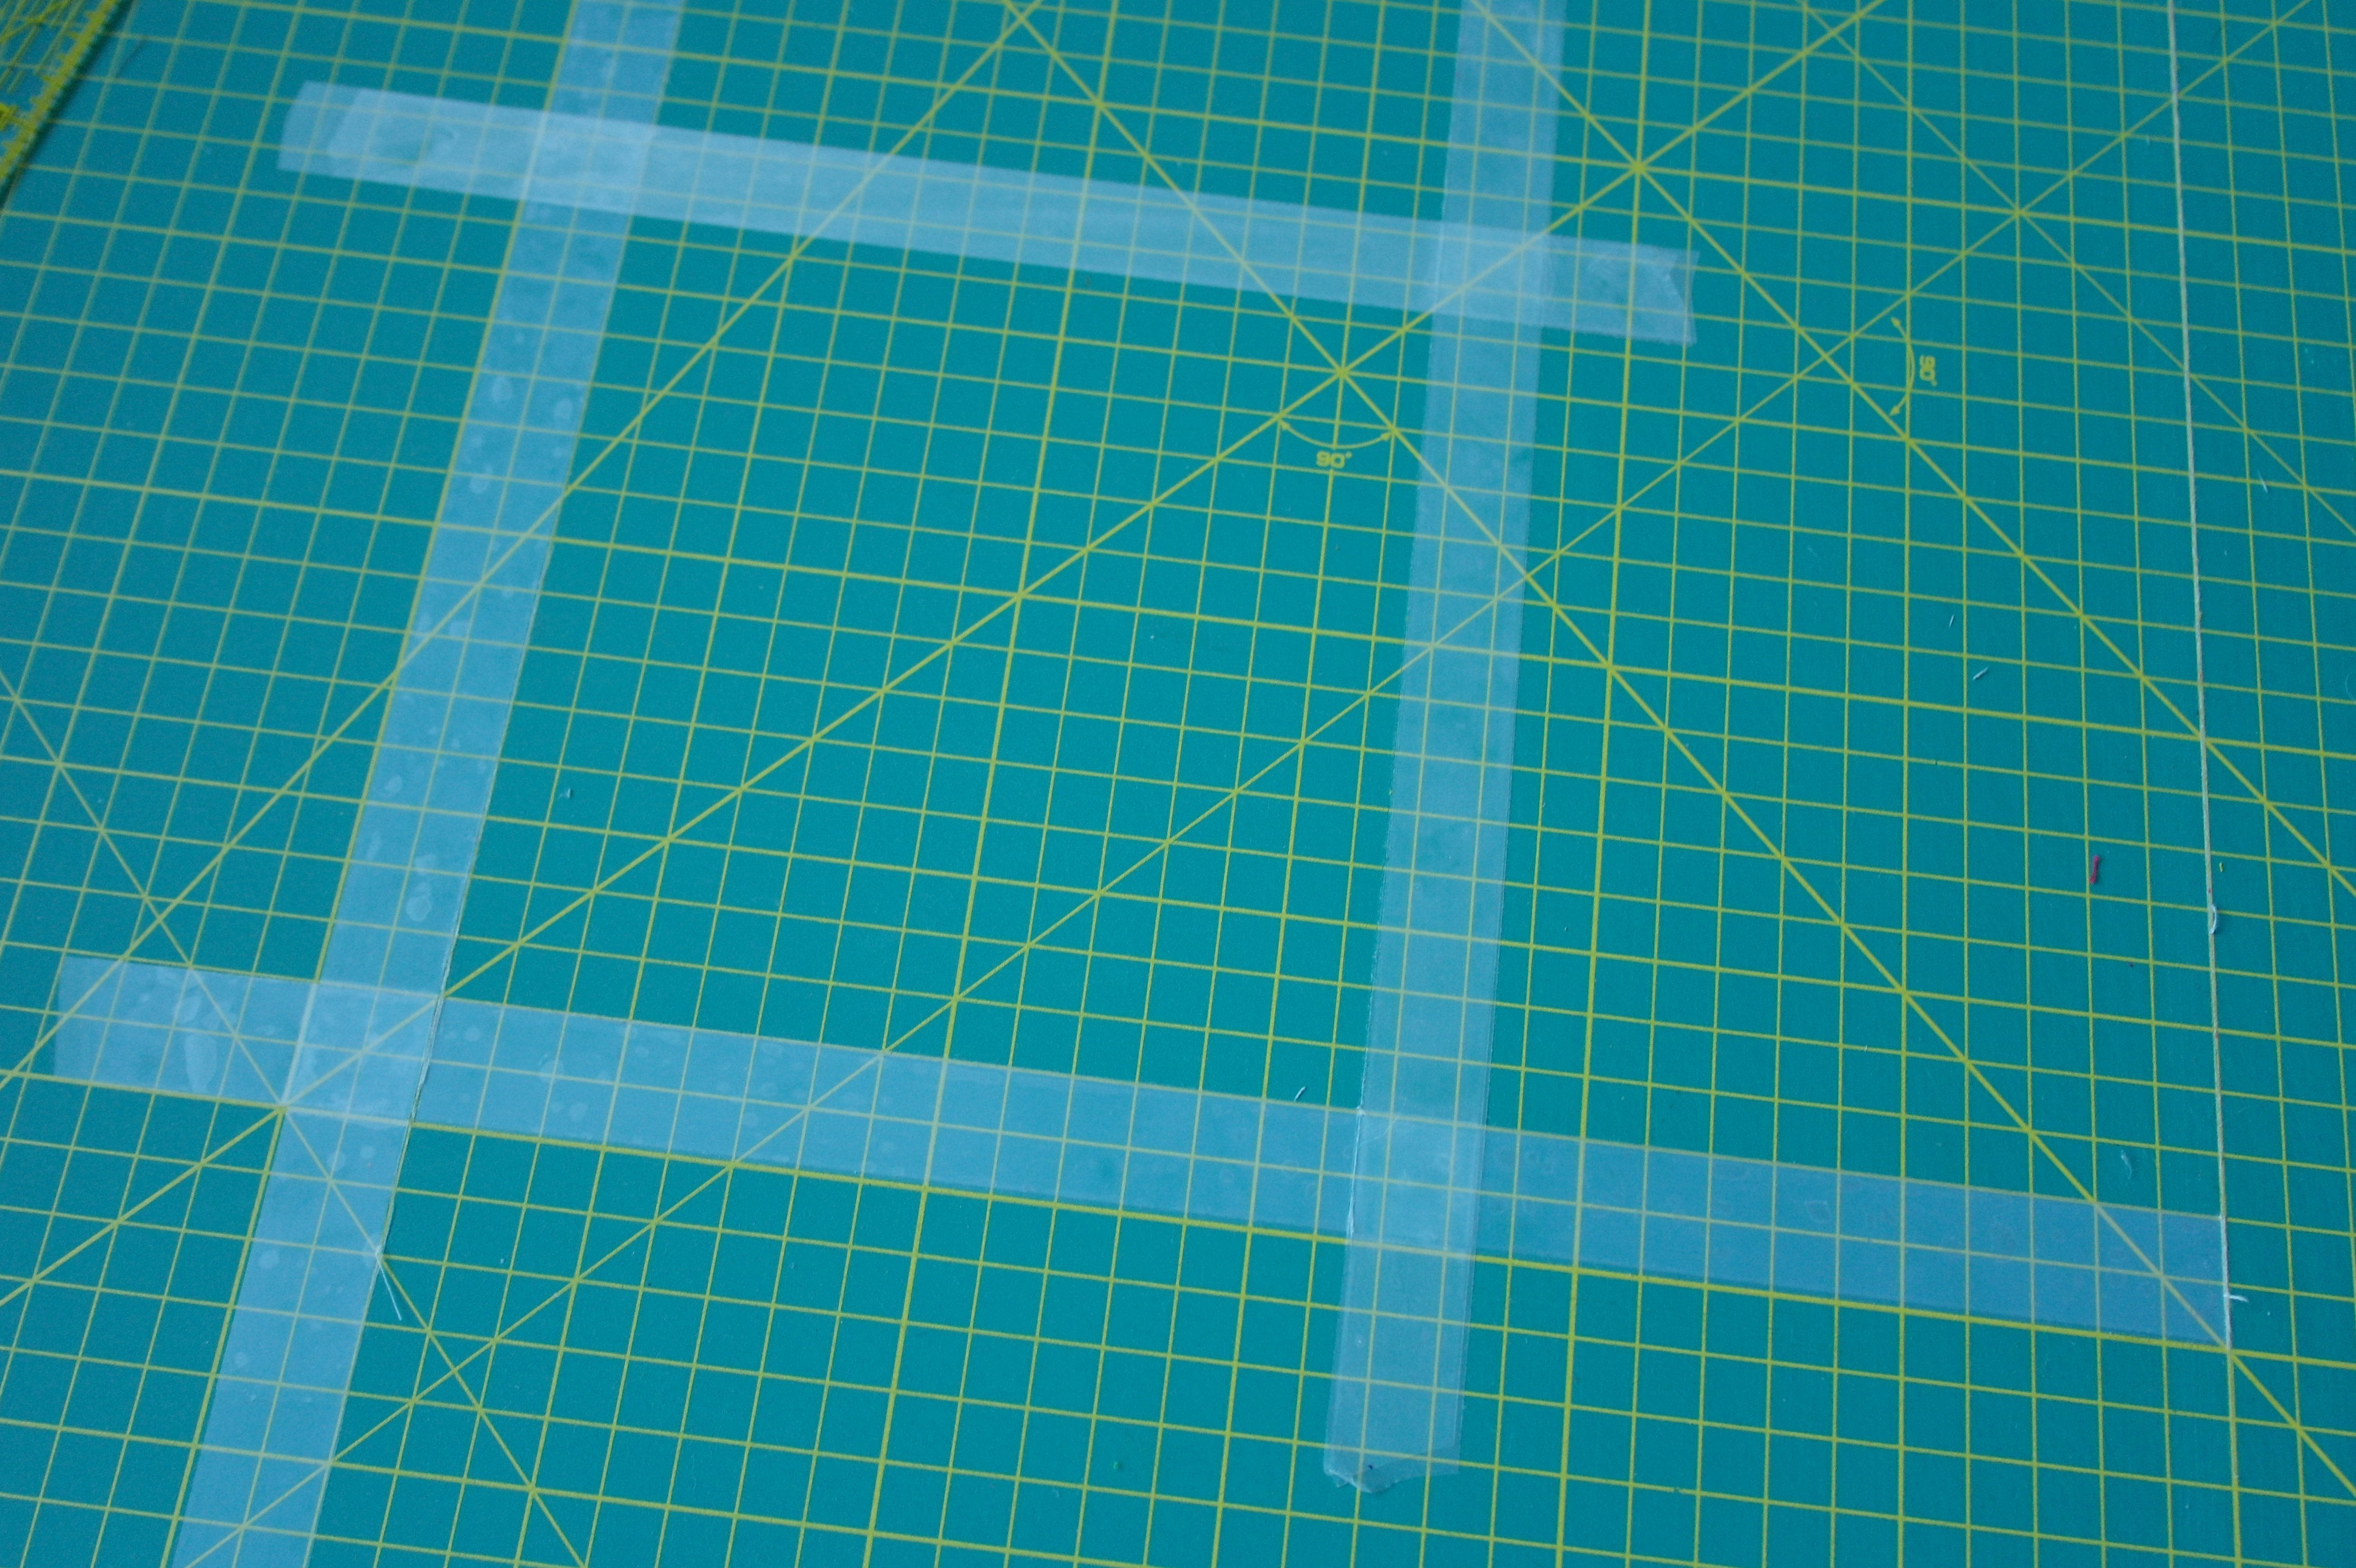
Tape two pieces of SCOTCH tape on the sides too, making sure there is a square of EXACTLY 28 x 28 cm. The SCOTCH tape protrudes on all sides, which is what you want, for visibility during cutting.

In the end I have taped 2 layers of SCOTCH tape on top of each other, because 2 layers are better visible. If you have another type of tape, perhaps color tape, use that, but be sure there will be NO residue of glue after removing the tape in the end. Now there is a visible frame on your cutting mat, for accurate cutting your 9 large square blocks.

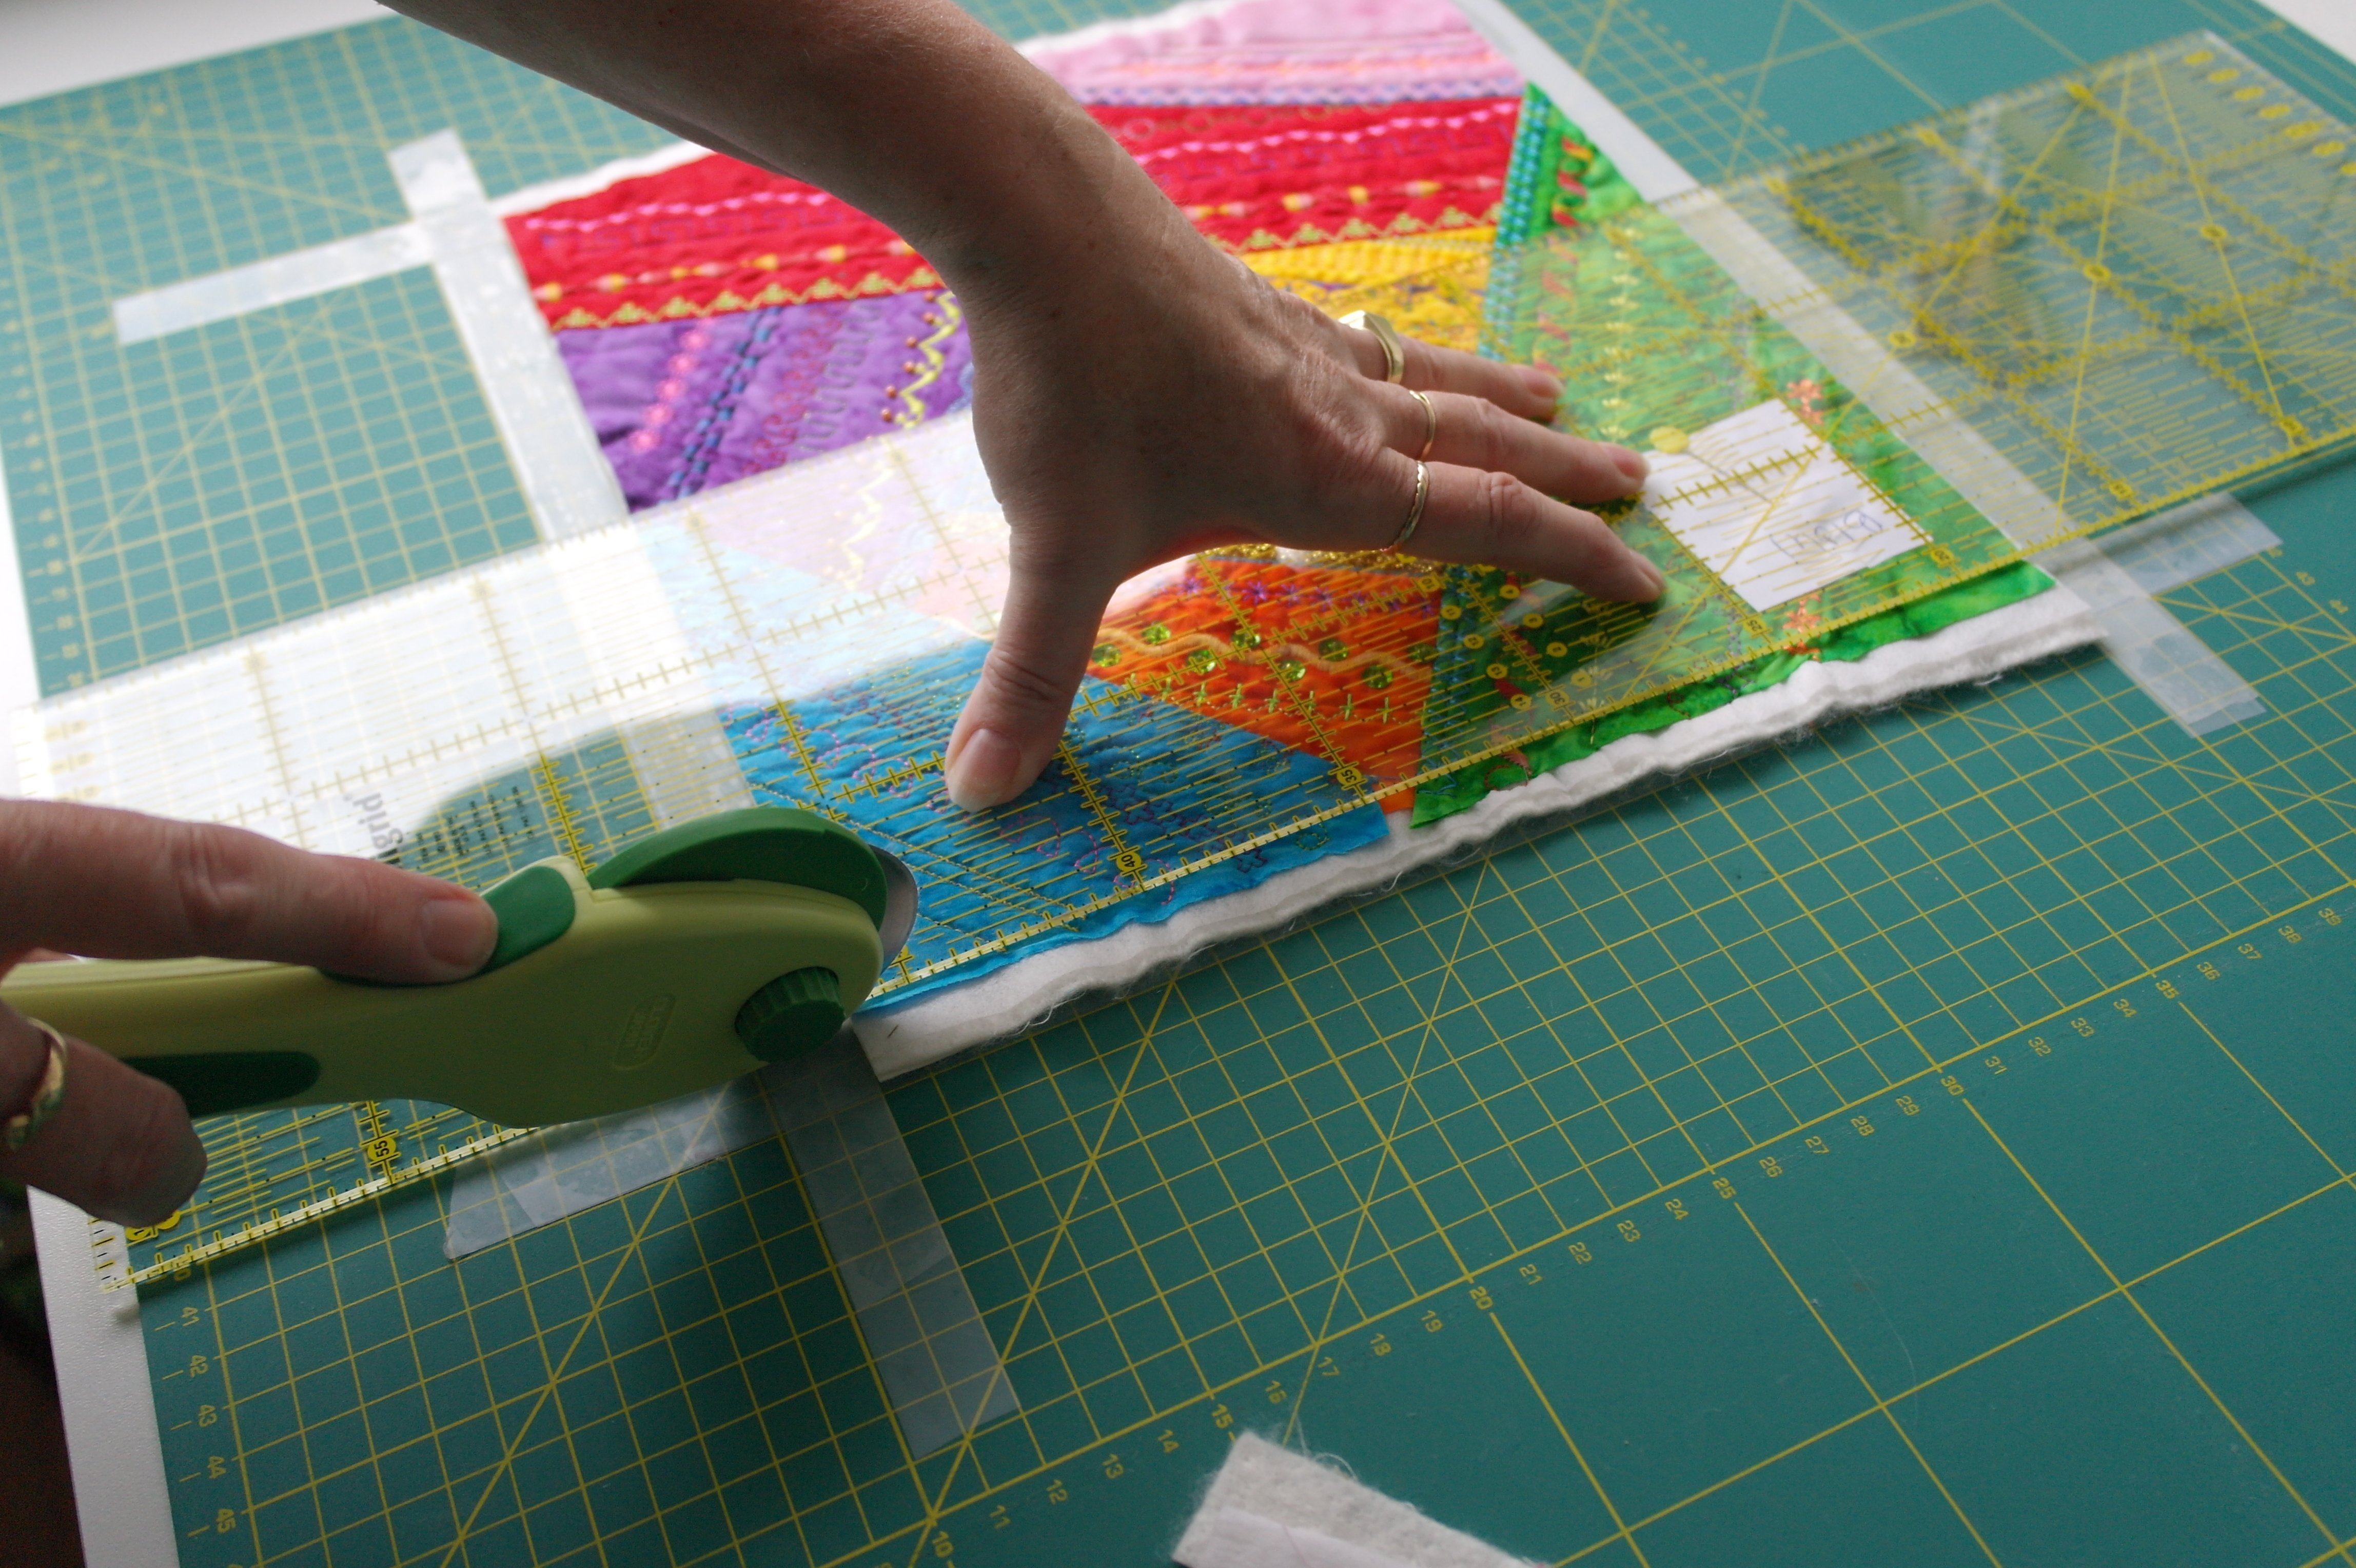
Place a block of 32 x 32 cm on top of the frame of SCOTCH tape: be sure it protrudes on all sides (because the block is too large). Your placement could be different, if you need to cut one side more than another side – perhaps you have to slide your block more to the left, right, bottom or top to do so. At this moment you still can choose which stitches will remain visible and which will dissapear after cutting, and sewing sashings.
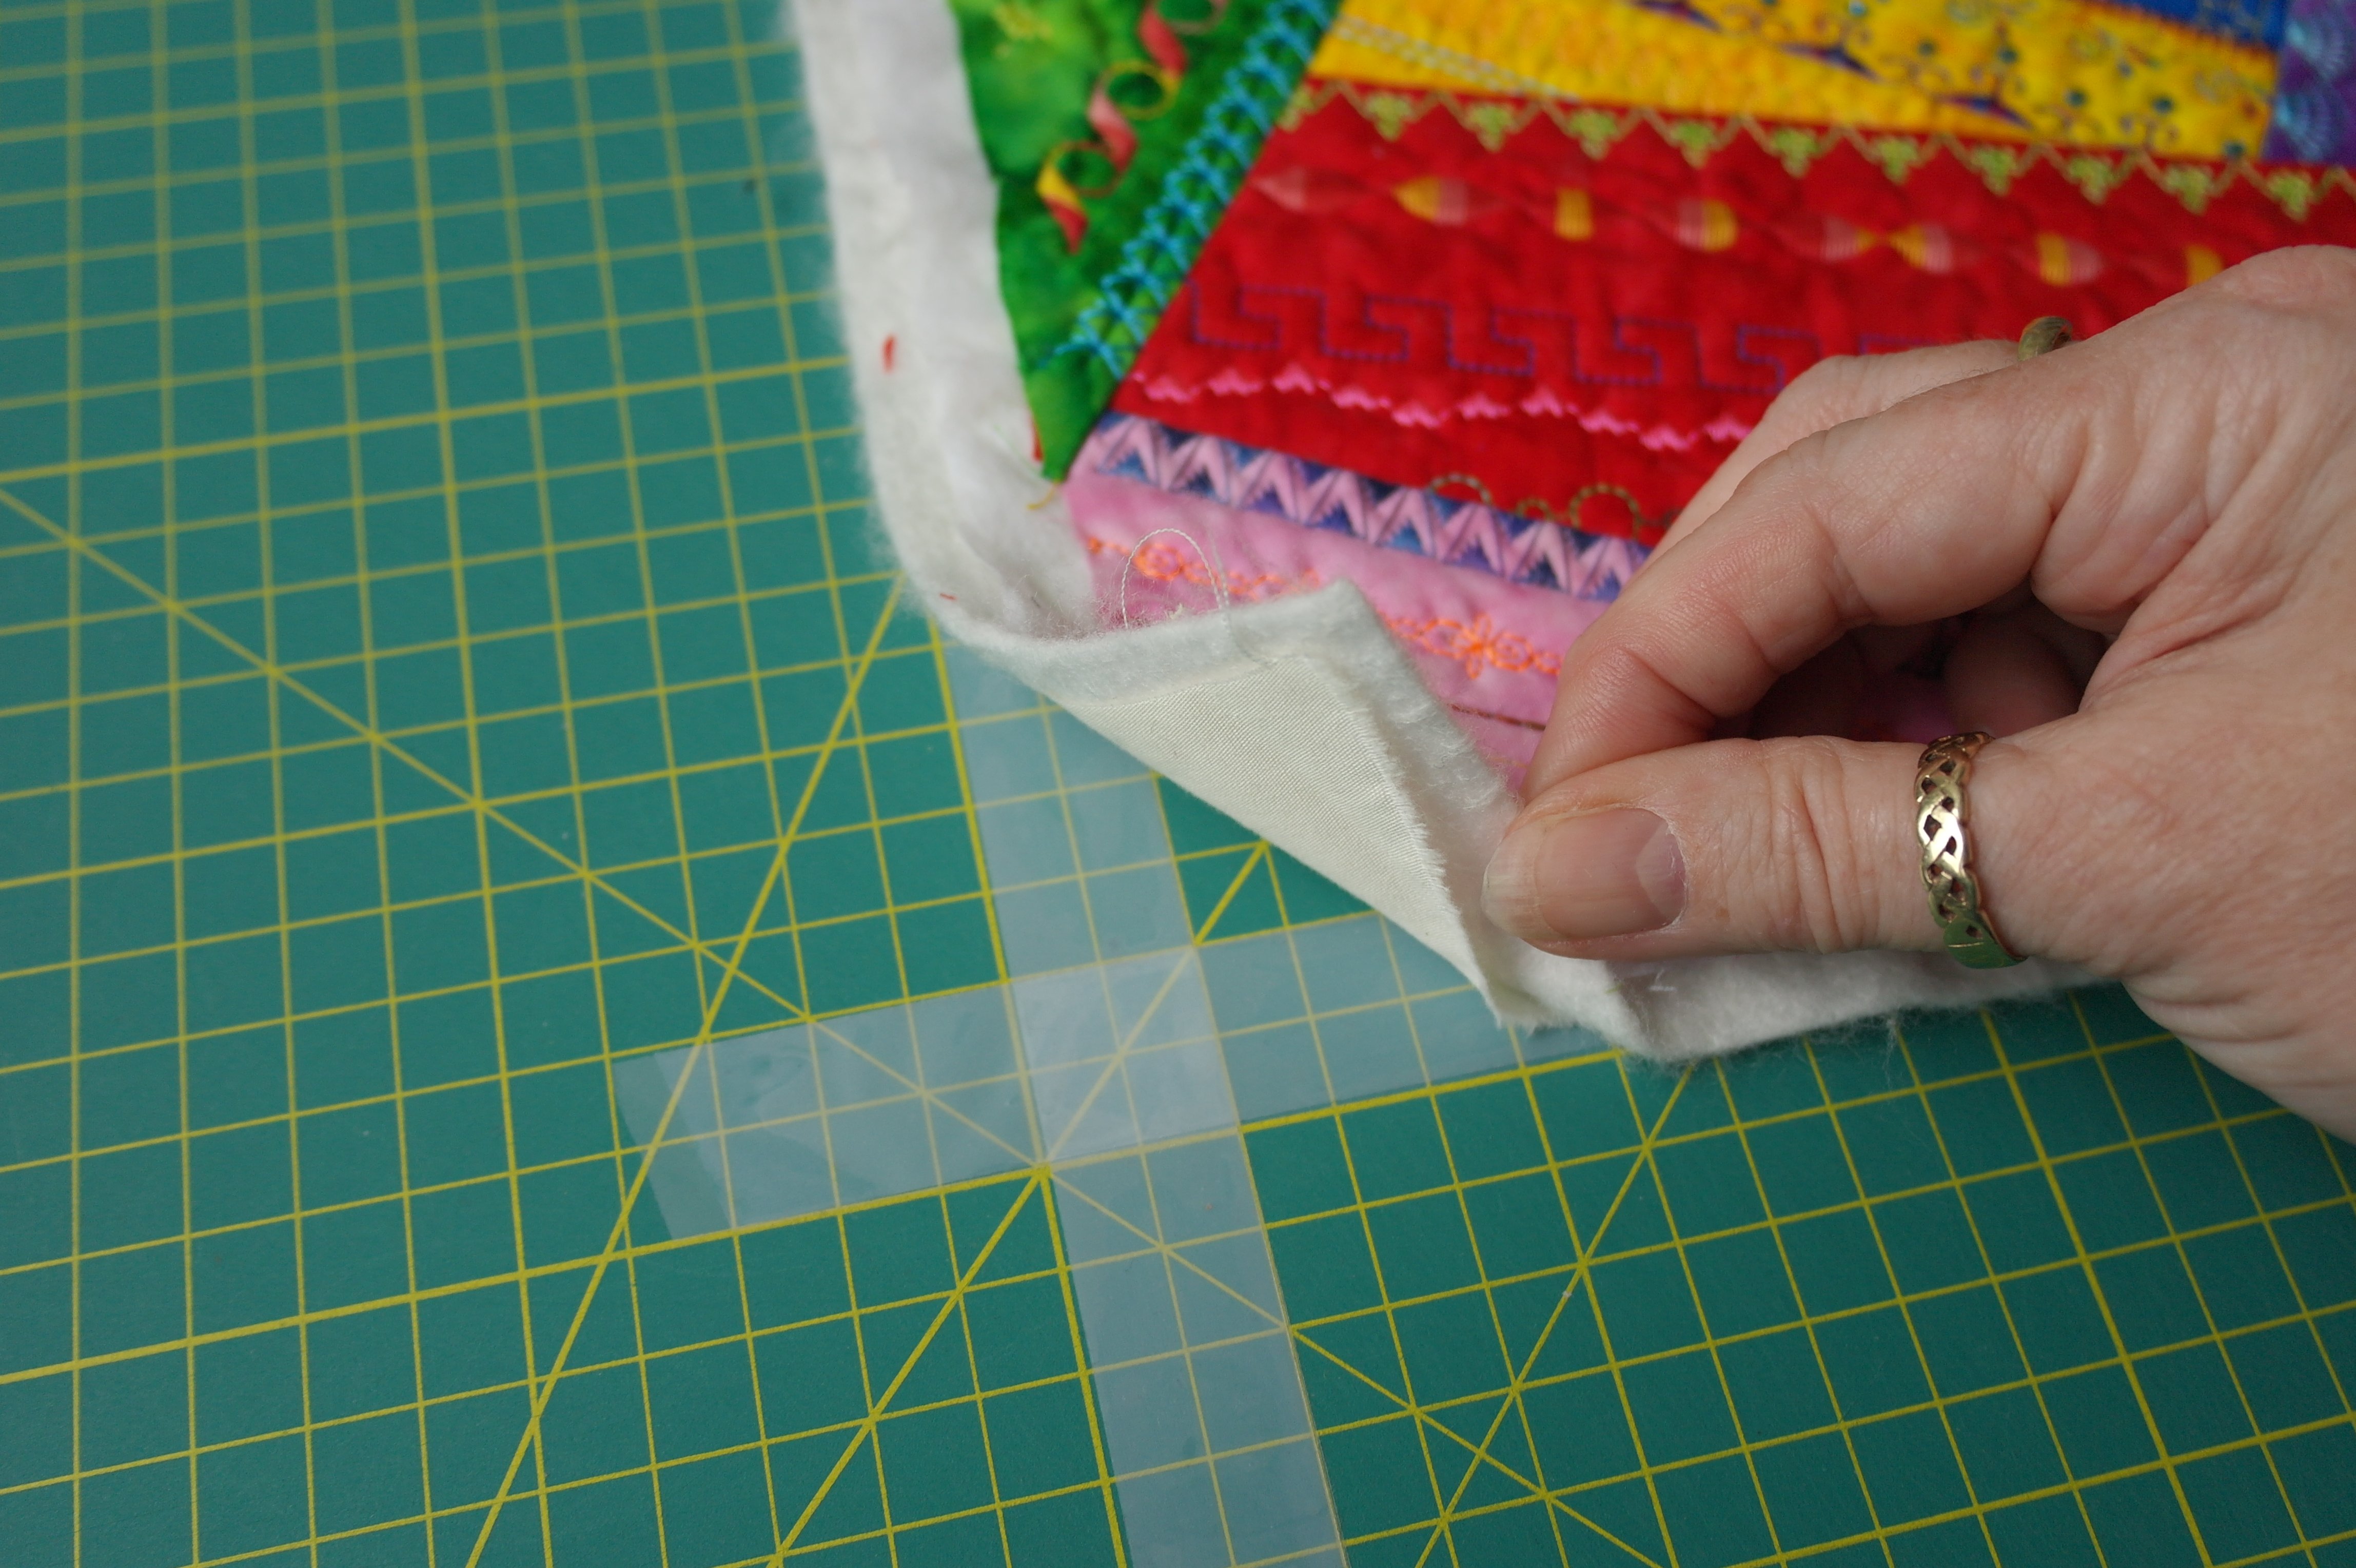
My block is too big also, which you can see, if I lift up a corner – everything that extends from the inner measurements/frame of the tape is too big and has to be removed/cut. Remember: it is not the width of the framed tape itself, that is 28 x 28 cm, but the inside.
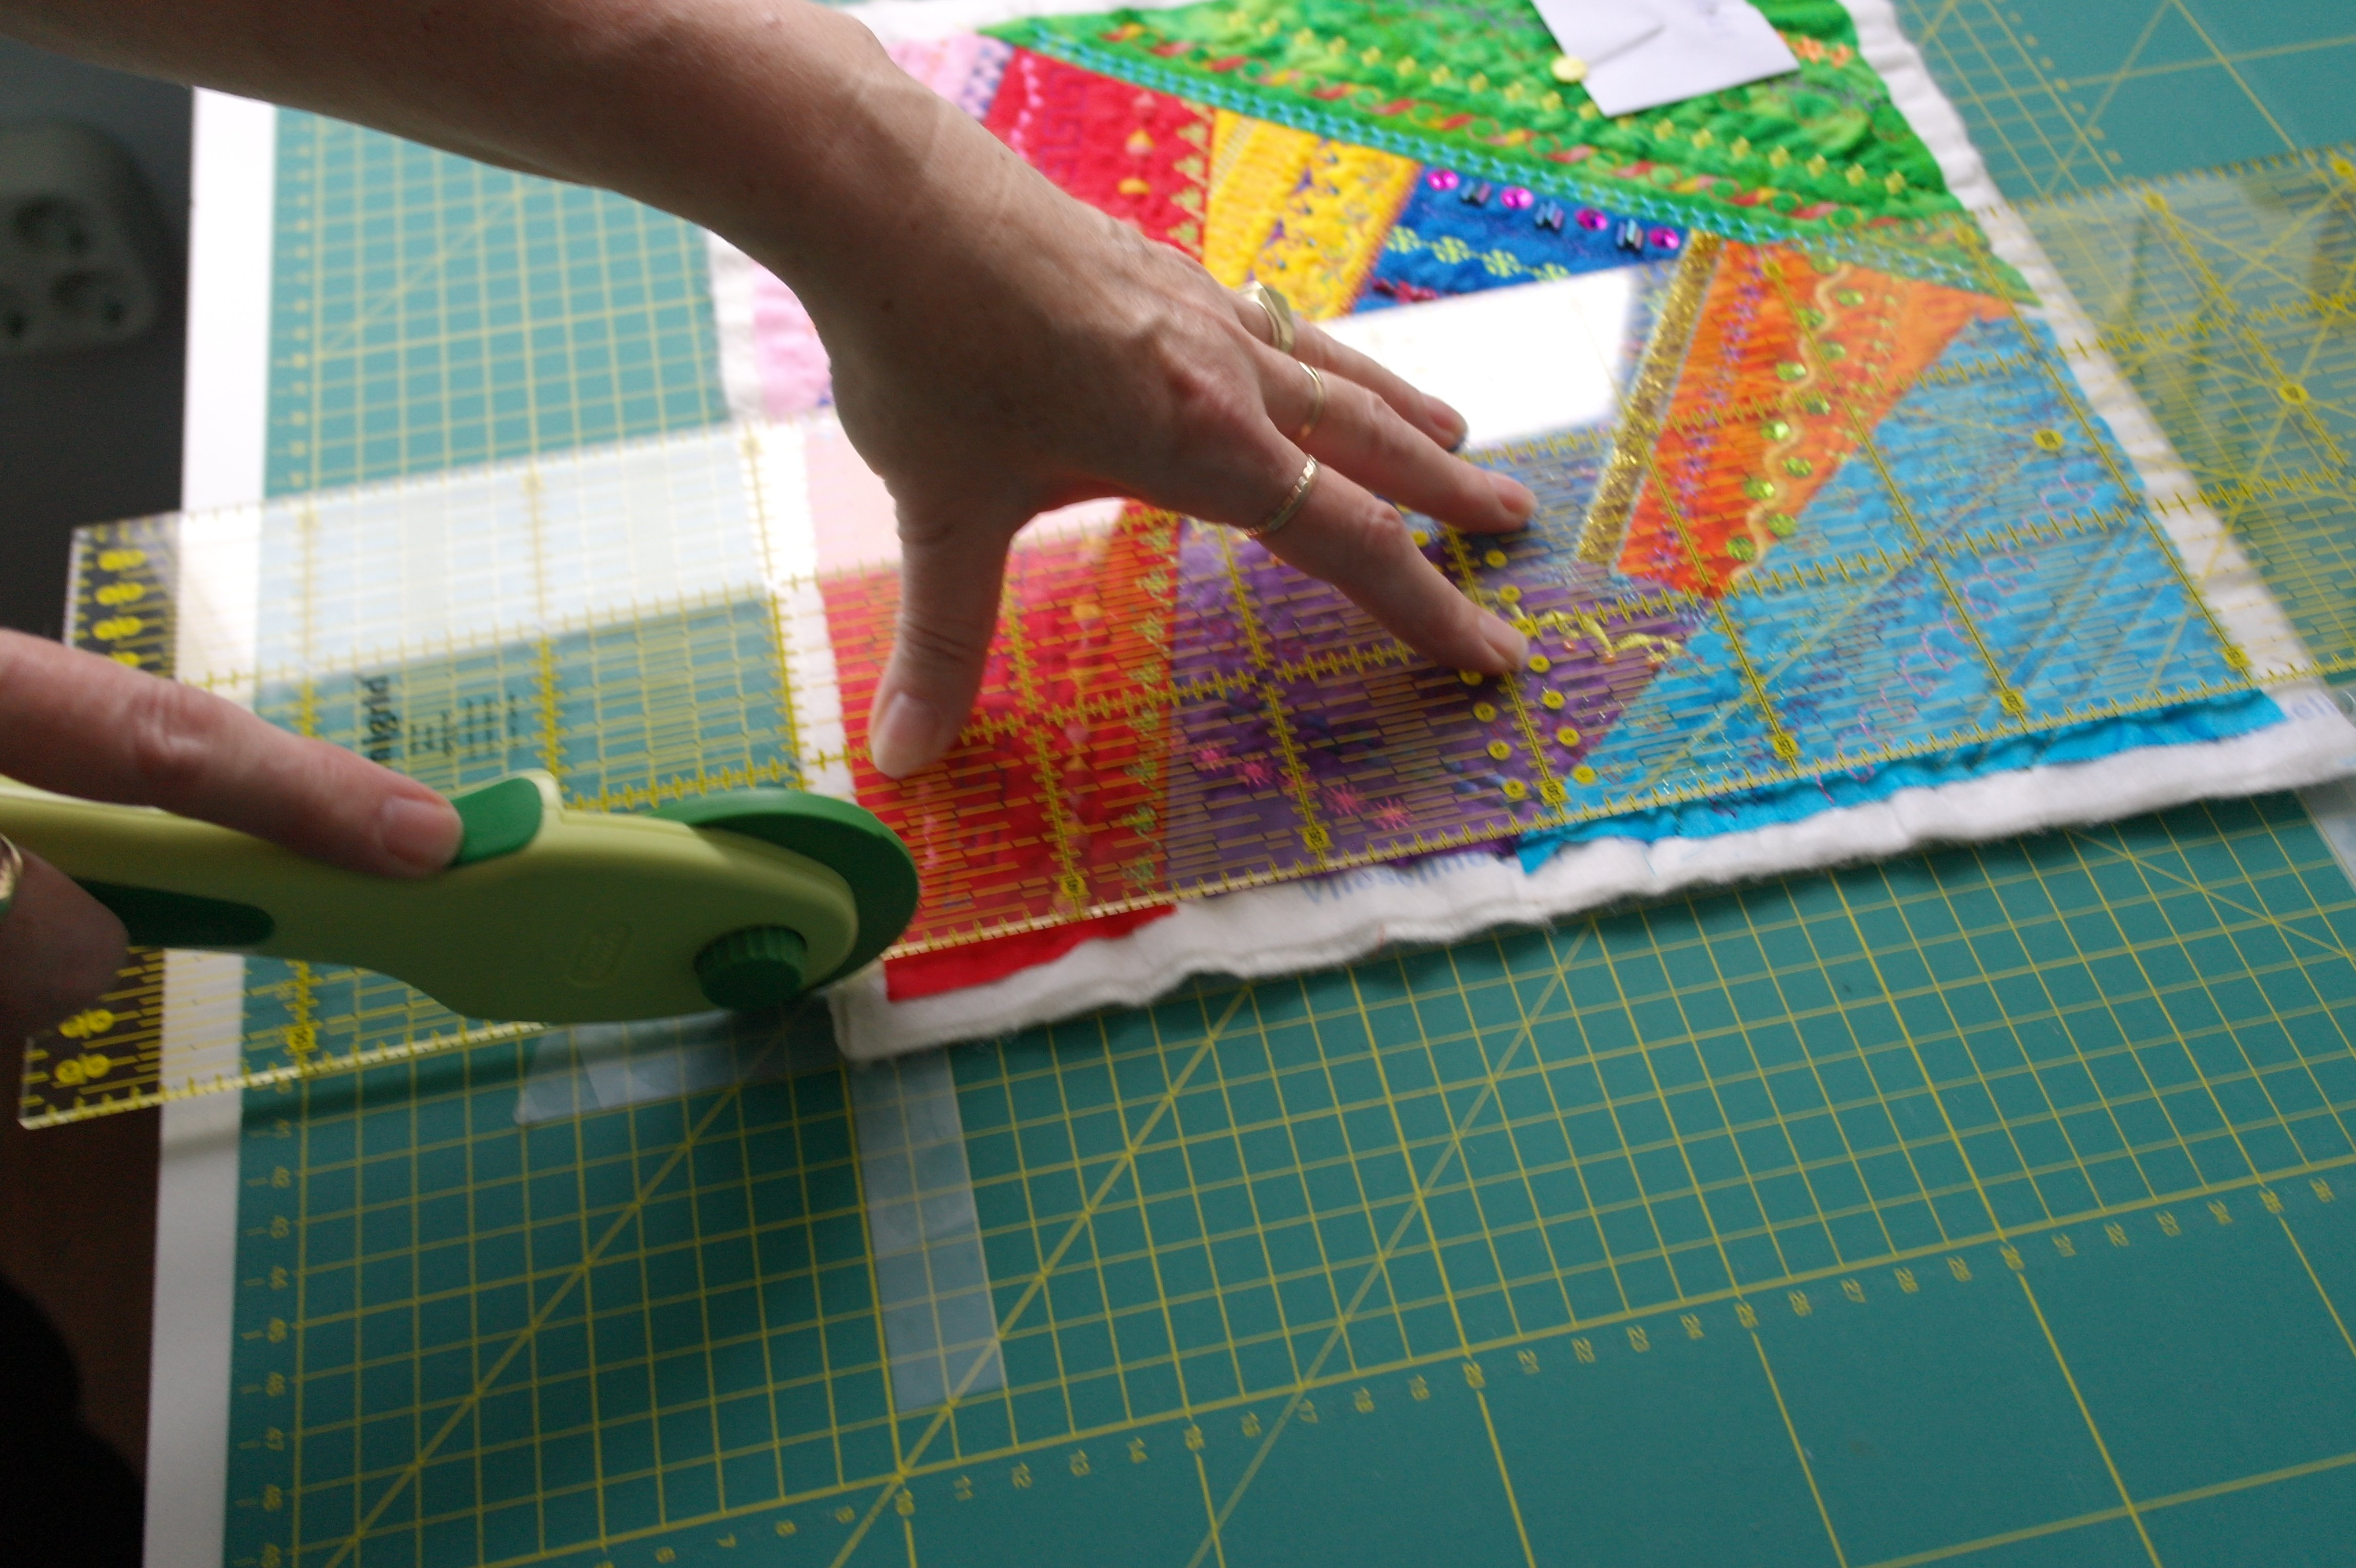
Place the quilt ruler 15 x 60 cm (with centimeters) precisely on the right line of the cutting mat, directly next/on the inner side of the SCOTCH tape frame. Check if the placement is allright (be sure the side of the ruler will be precisely on the line of your cutting mat above and beyond the frame of SCOTCH tape. Cut off the exess of the block. It doesn’t matter that you are cutting through the SCOTCH tape: it will keep sticking to your cutting mat. But make sure your block doesn’t shift during cutting – if your blocks is not cut straight, it will end up making a wobbly quilt.
TIP: The picture above shows you how the quilt ruler is placed along the frame/tape, regarding the lines of the cutting mat. It is important that lines of the cutting mat and the lines of the quilt ruler match: when using a quilt ruler and a craft mat, there can be differences in measurements, which can cause confusion and a lot of problems. Check that before cutting.
CUT ONLY IF YOU ARE SURE ALL THINGS ARE OK – once cut, there is no turning back.
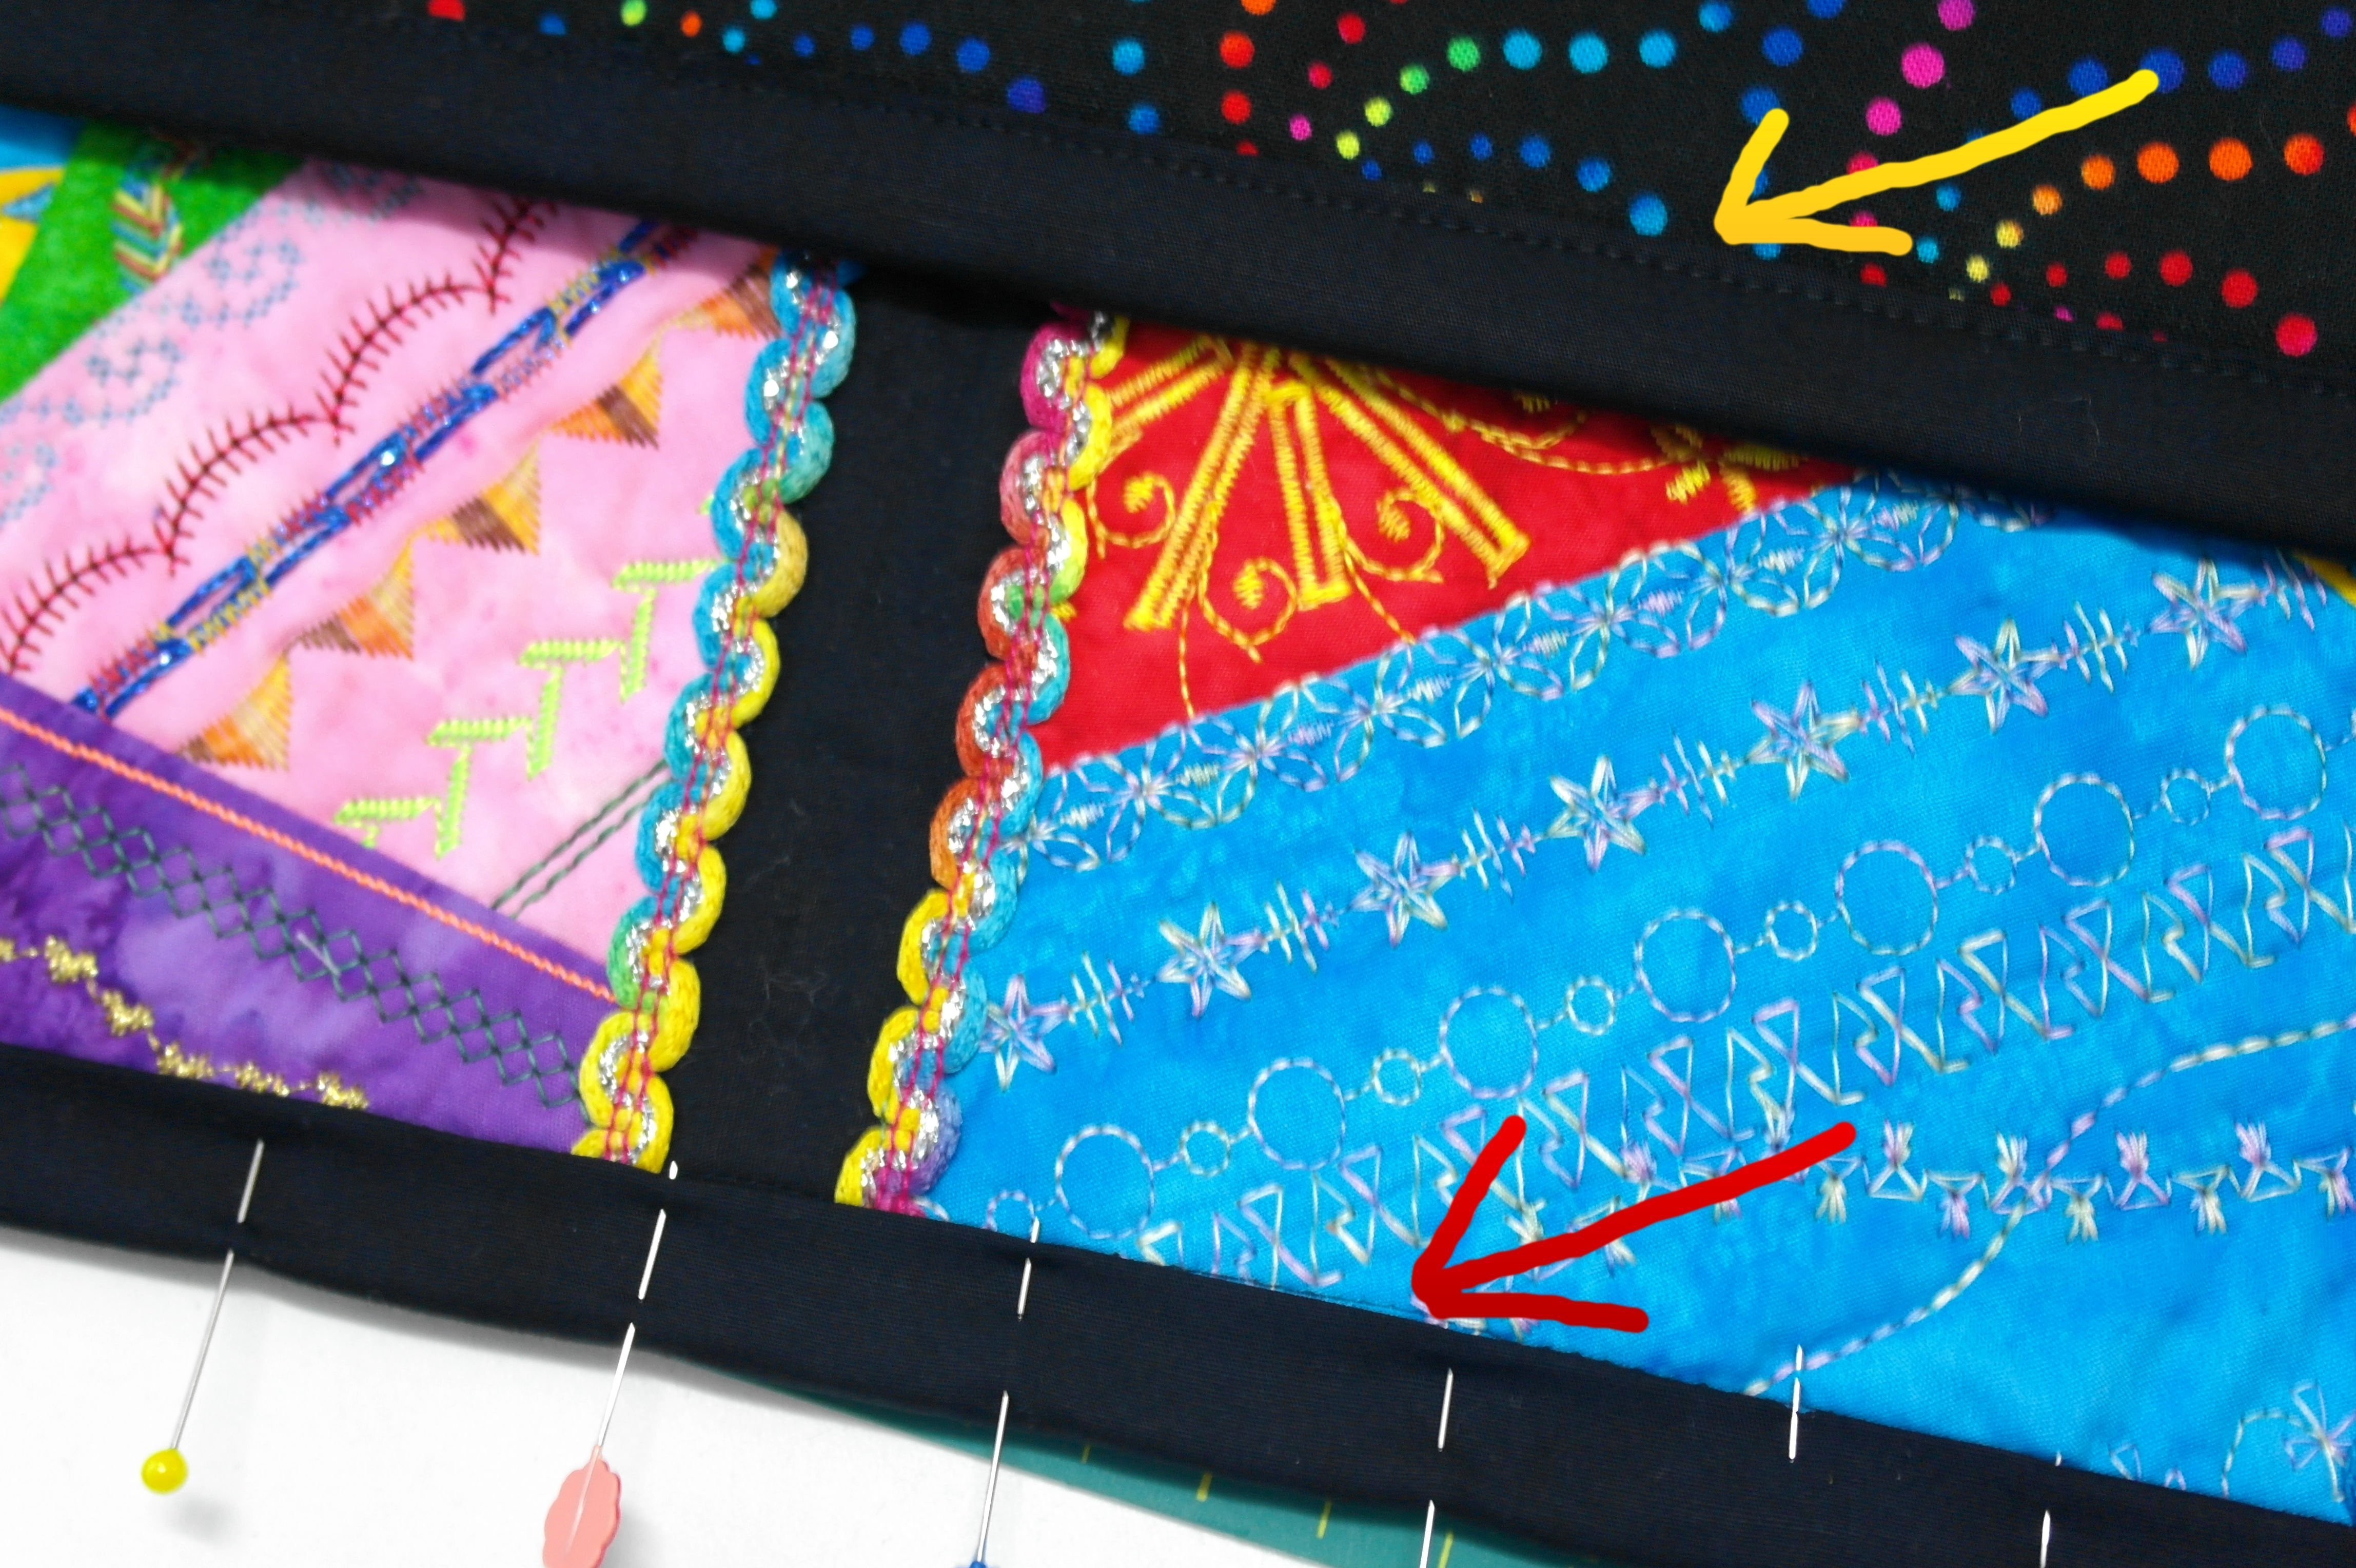
I hope that you payed attention when making the blocks, to NOT add beads, sequins or other embellishments close to the edges of your blocks. A distance of at least 5 cm had to remain empty (only decorative stitches are sewn there), to be able to place a quilt ruler flat onto the blocks and to cut them. Embellishments can be added afterwards. If there are beads or other embellishments closer to the edge at one side, you will have to cut more at the other side of the block, to compensate this and be sure the block will still be 28 x 28 cm. If you have added large beads or other embellishments already, and your quilt ruler shifts, when you place it on top of your block before cutting, just rotate your block and cut from the other side.
DO YOU FIND IT DIFFICULT, CUTTING ON THE OTHER SIDE OF YOUR MAT? Just rotate your cutting mat – your sewing direction is again the same as before.
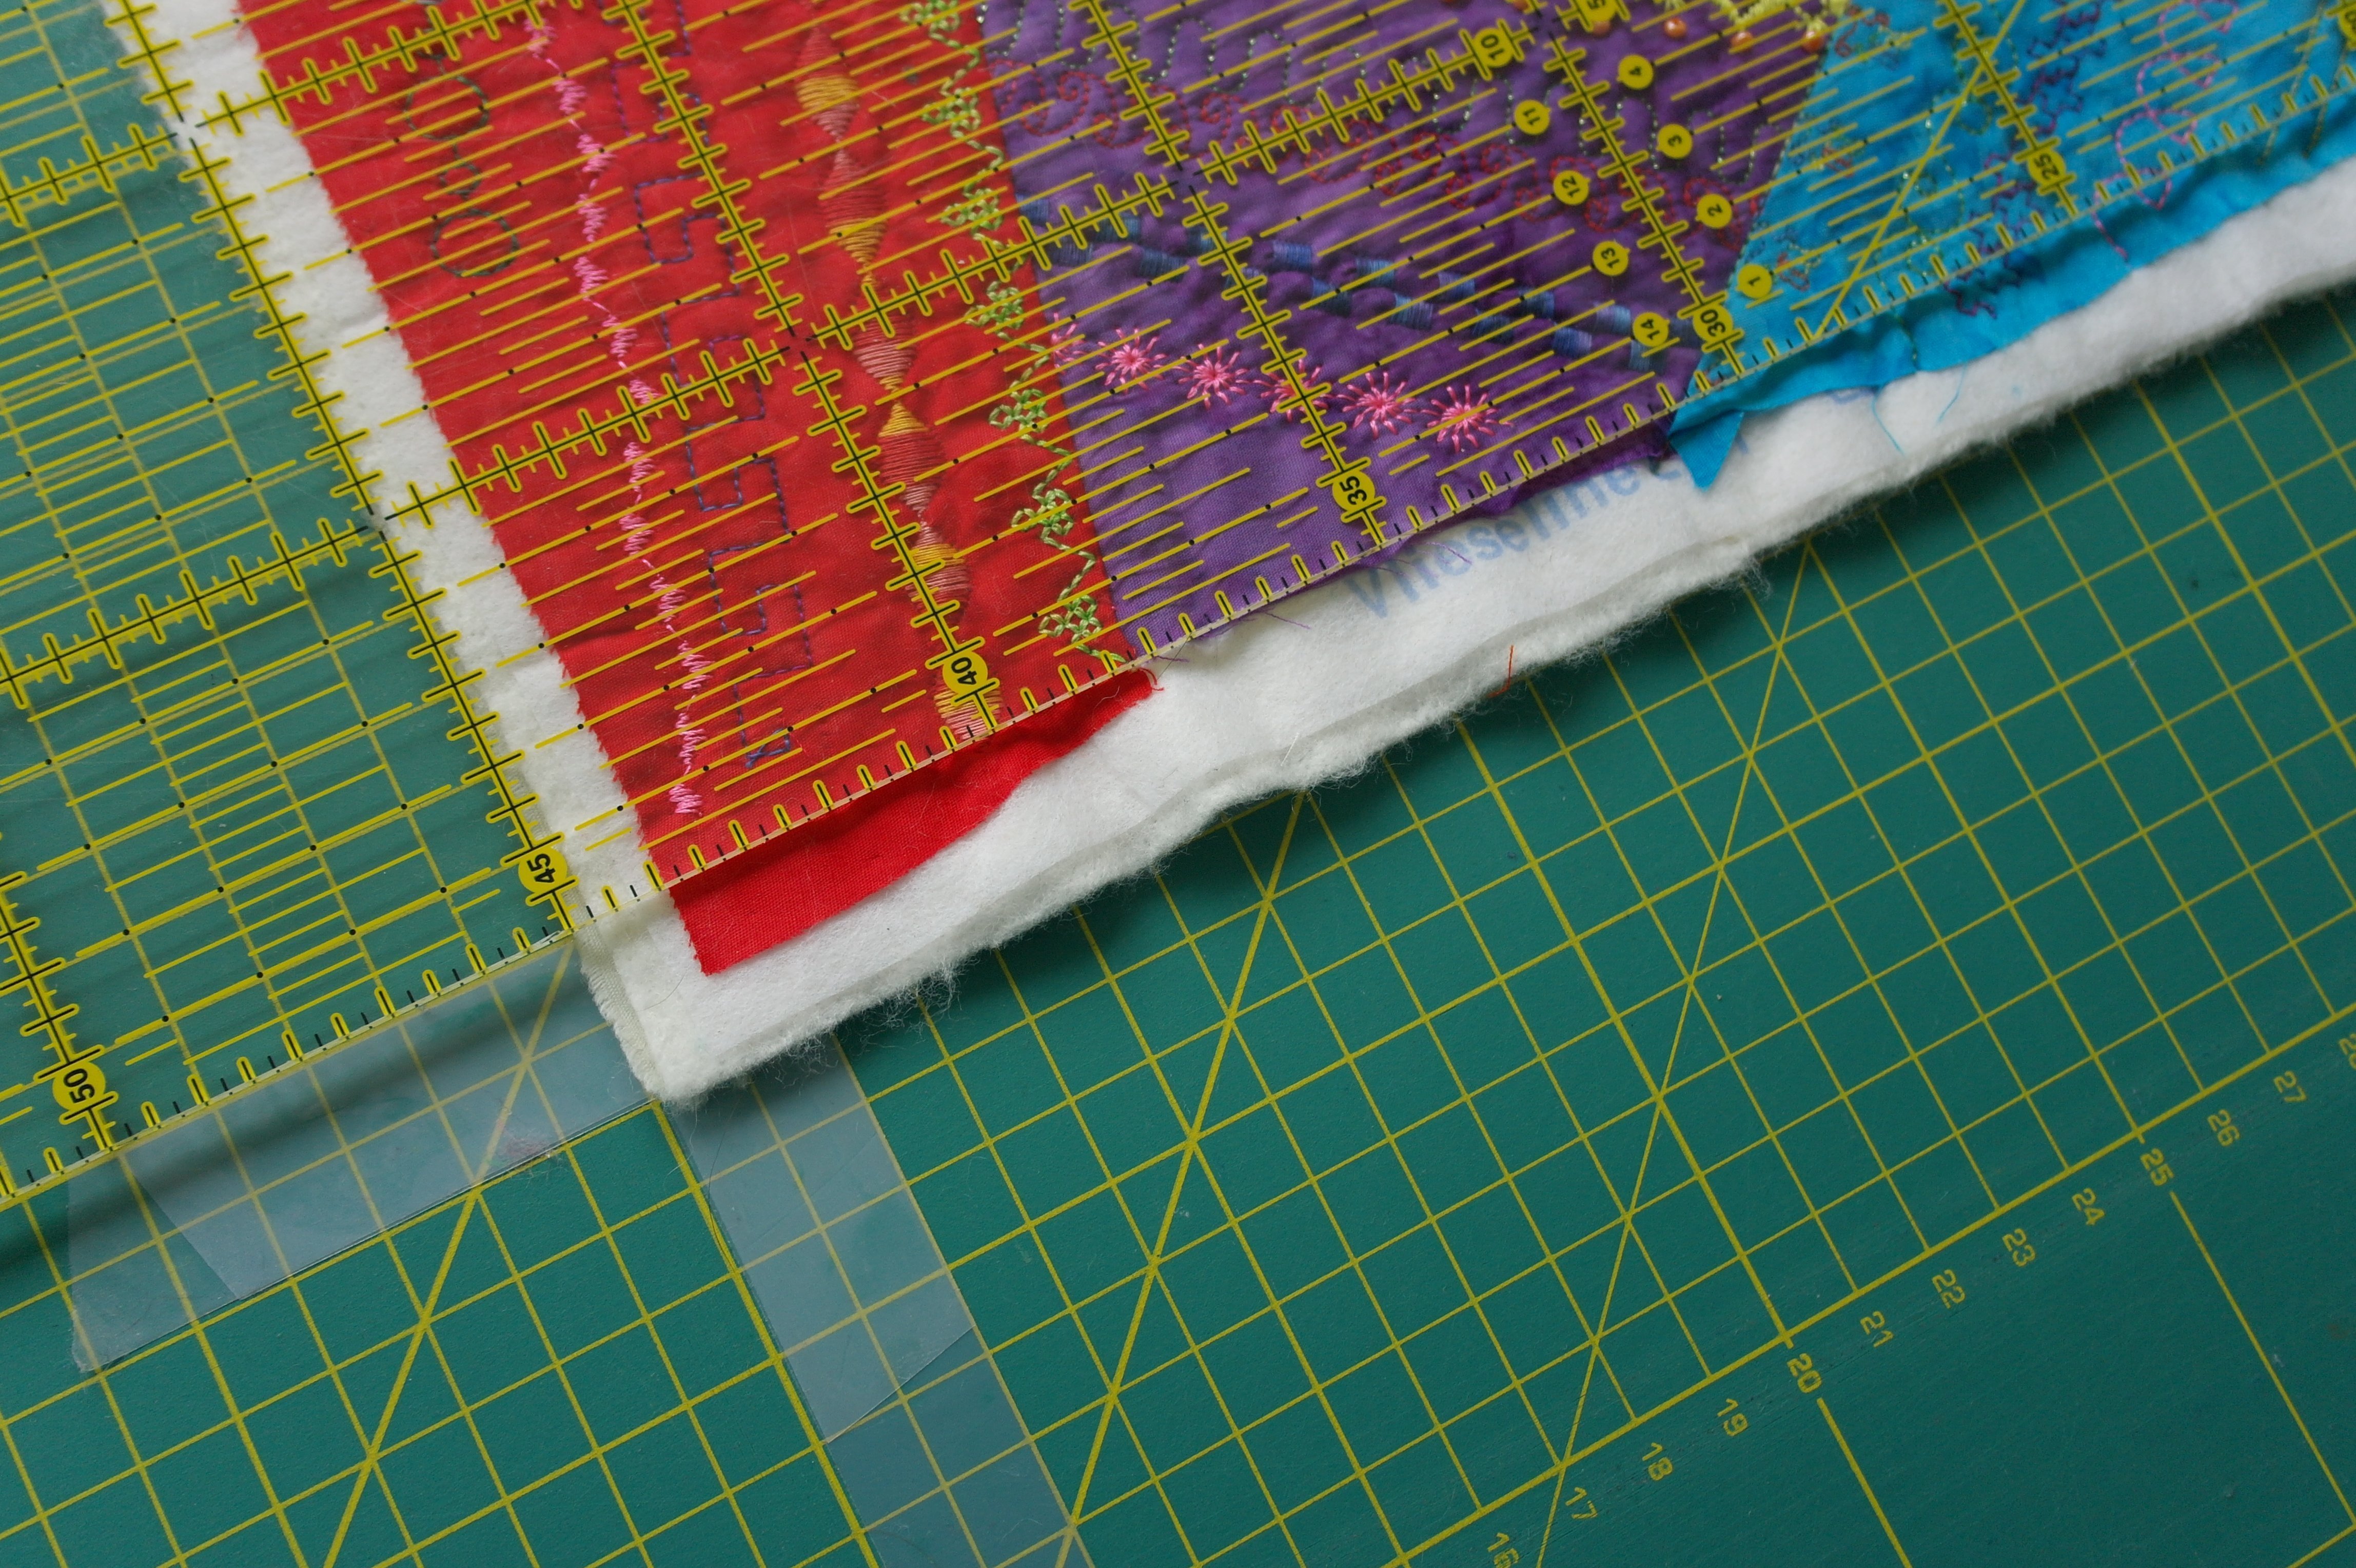
The first side of my block is cut.
I am repeating the cutting to the other side of the block – checking the block doesn’t shift before cutting.
Now there are two sides that are cut – check the measurements before the next step.
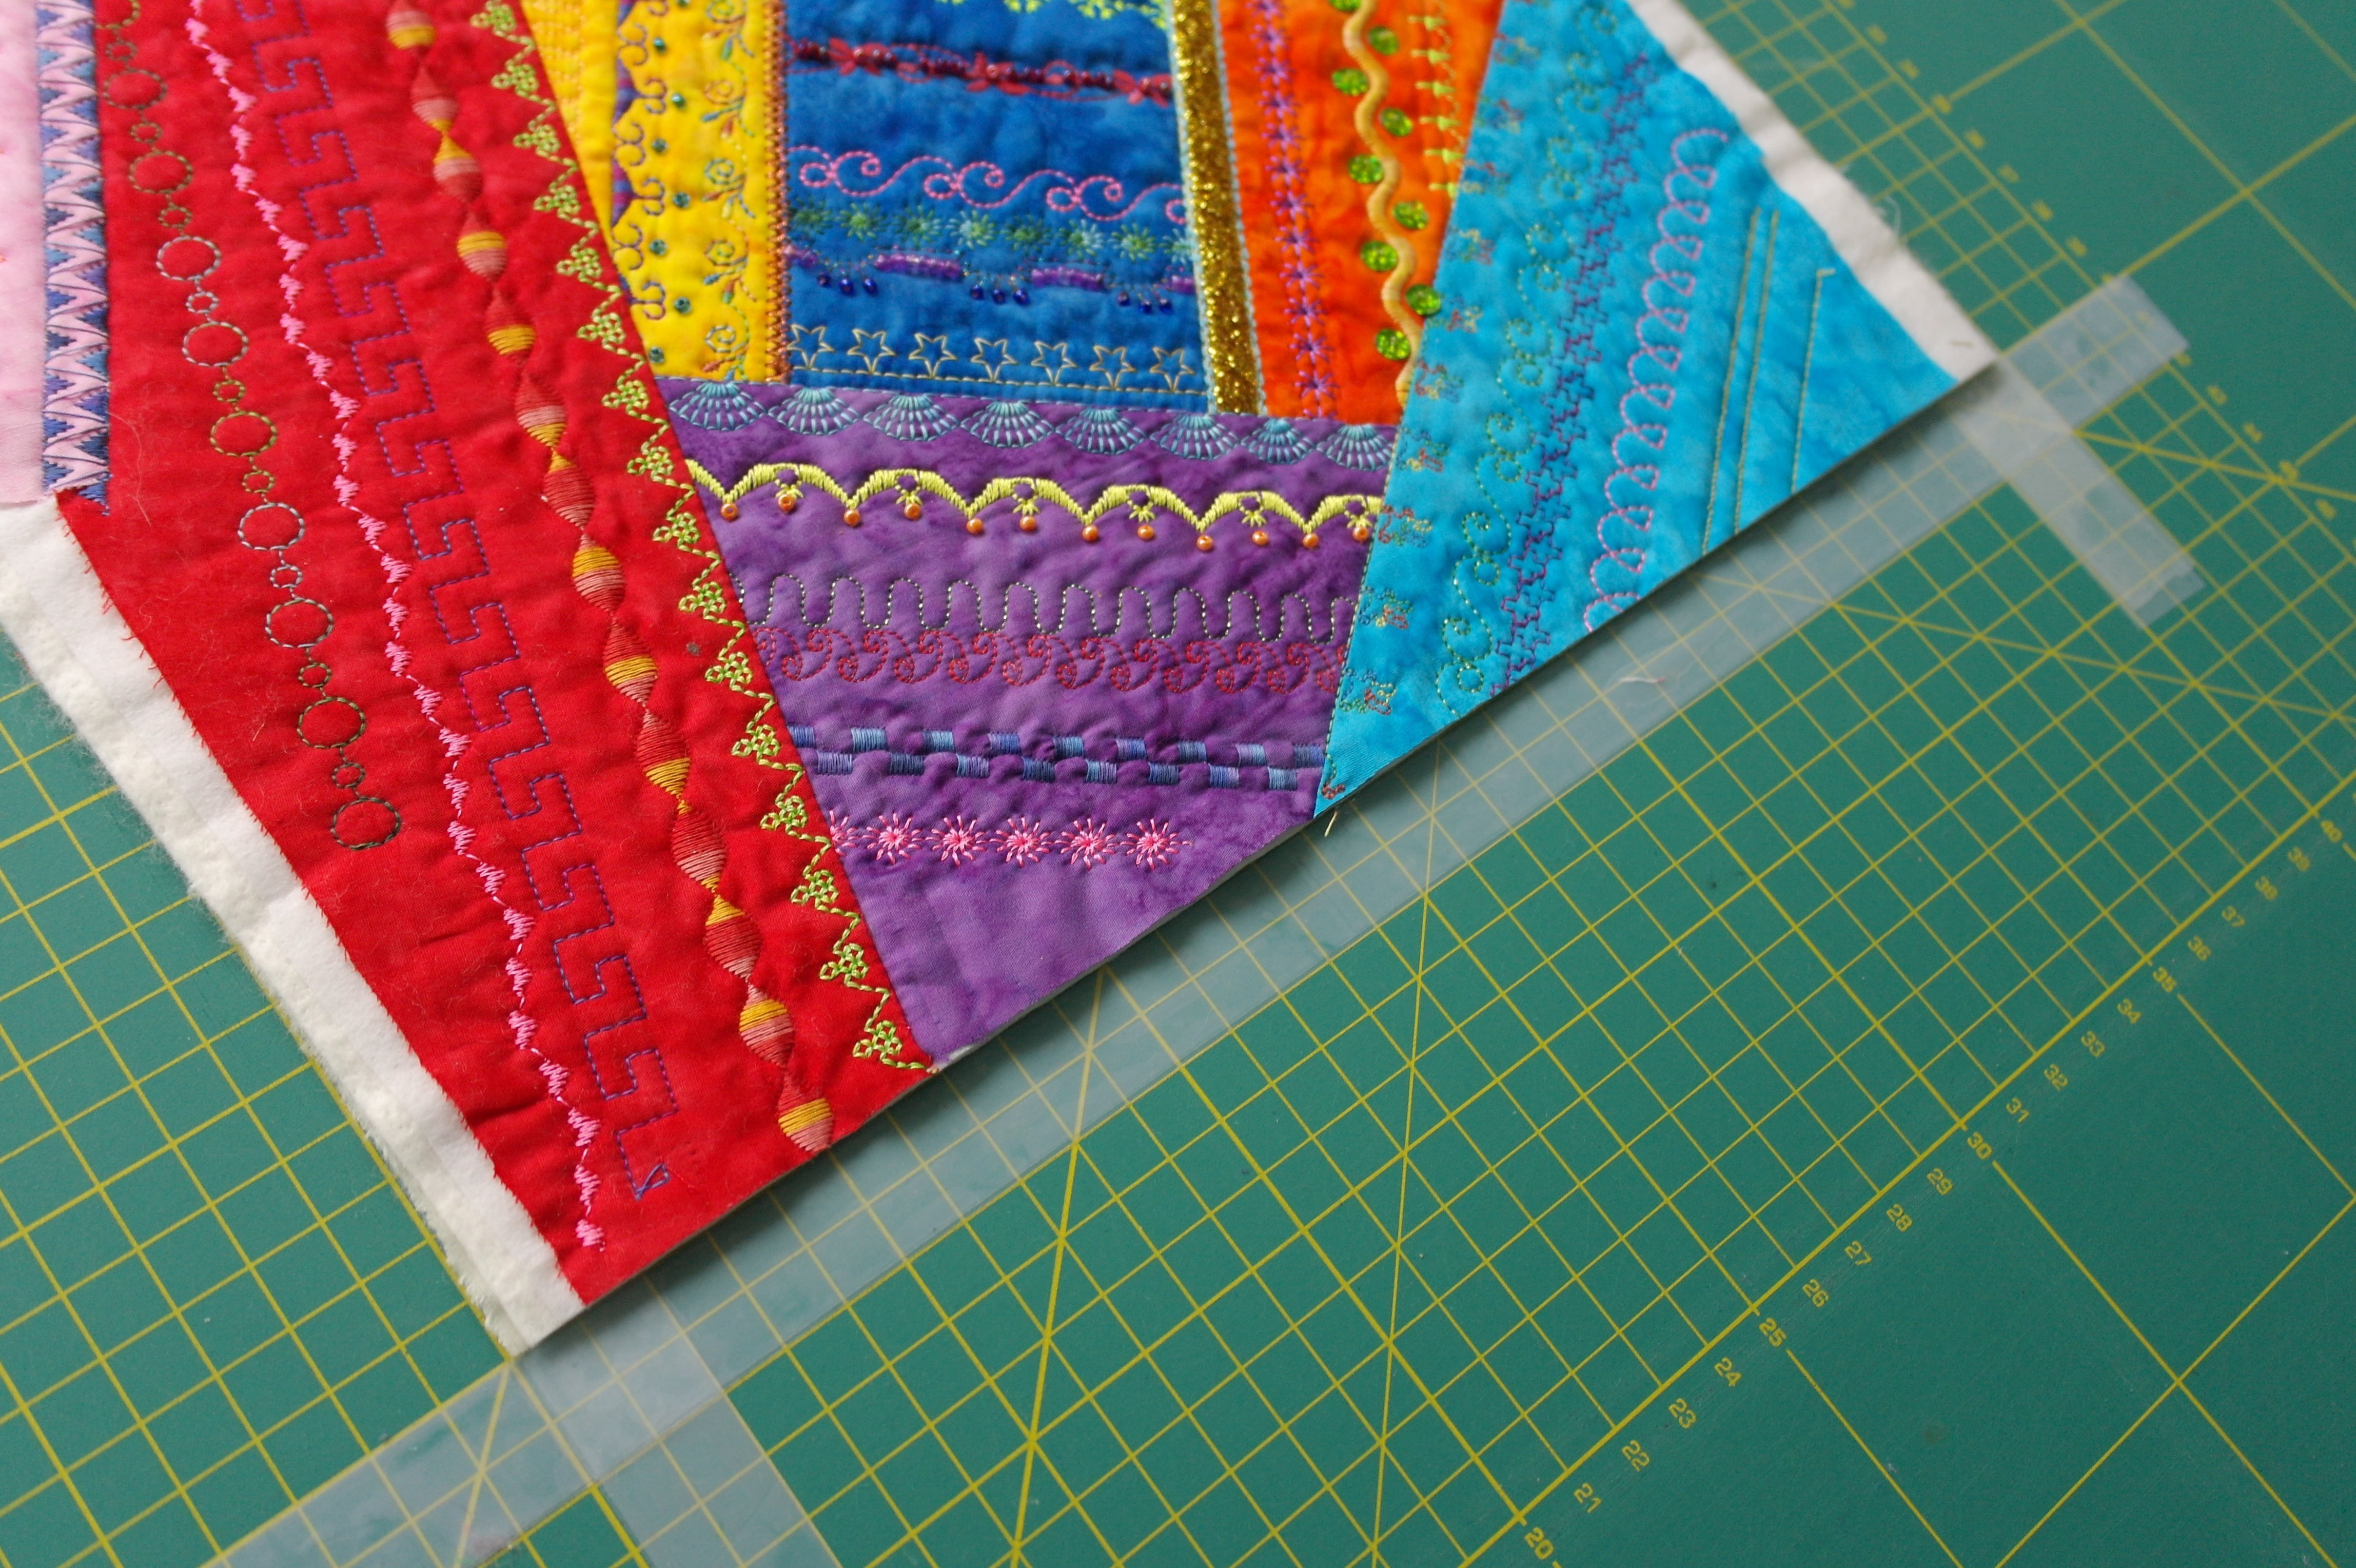
To cut the other two sides, rotate the block 90°, make it fit inside the frame of 28 x 28 cm on your cutting mat. CHECK if the sides that are already cut, are touching the lines of your cutting mat. This means they are cut at presisely 28 x 28 cm. They cannot be smaller, or larger!
Cut both remaining sides, again work slowly. I always cut slightly beyond my hand, which is placed on the quilt ruler, then replace my hand and cut further. This way my quilt ruler doesn’t shift while cutting.
Cut both remaining sides the same way you did with the first two sides. Check again if your block is now precisely 28 x 28 cm, and fits exactly in the frame.
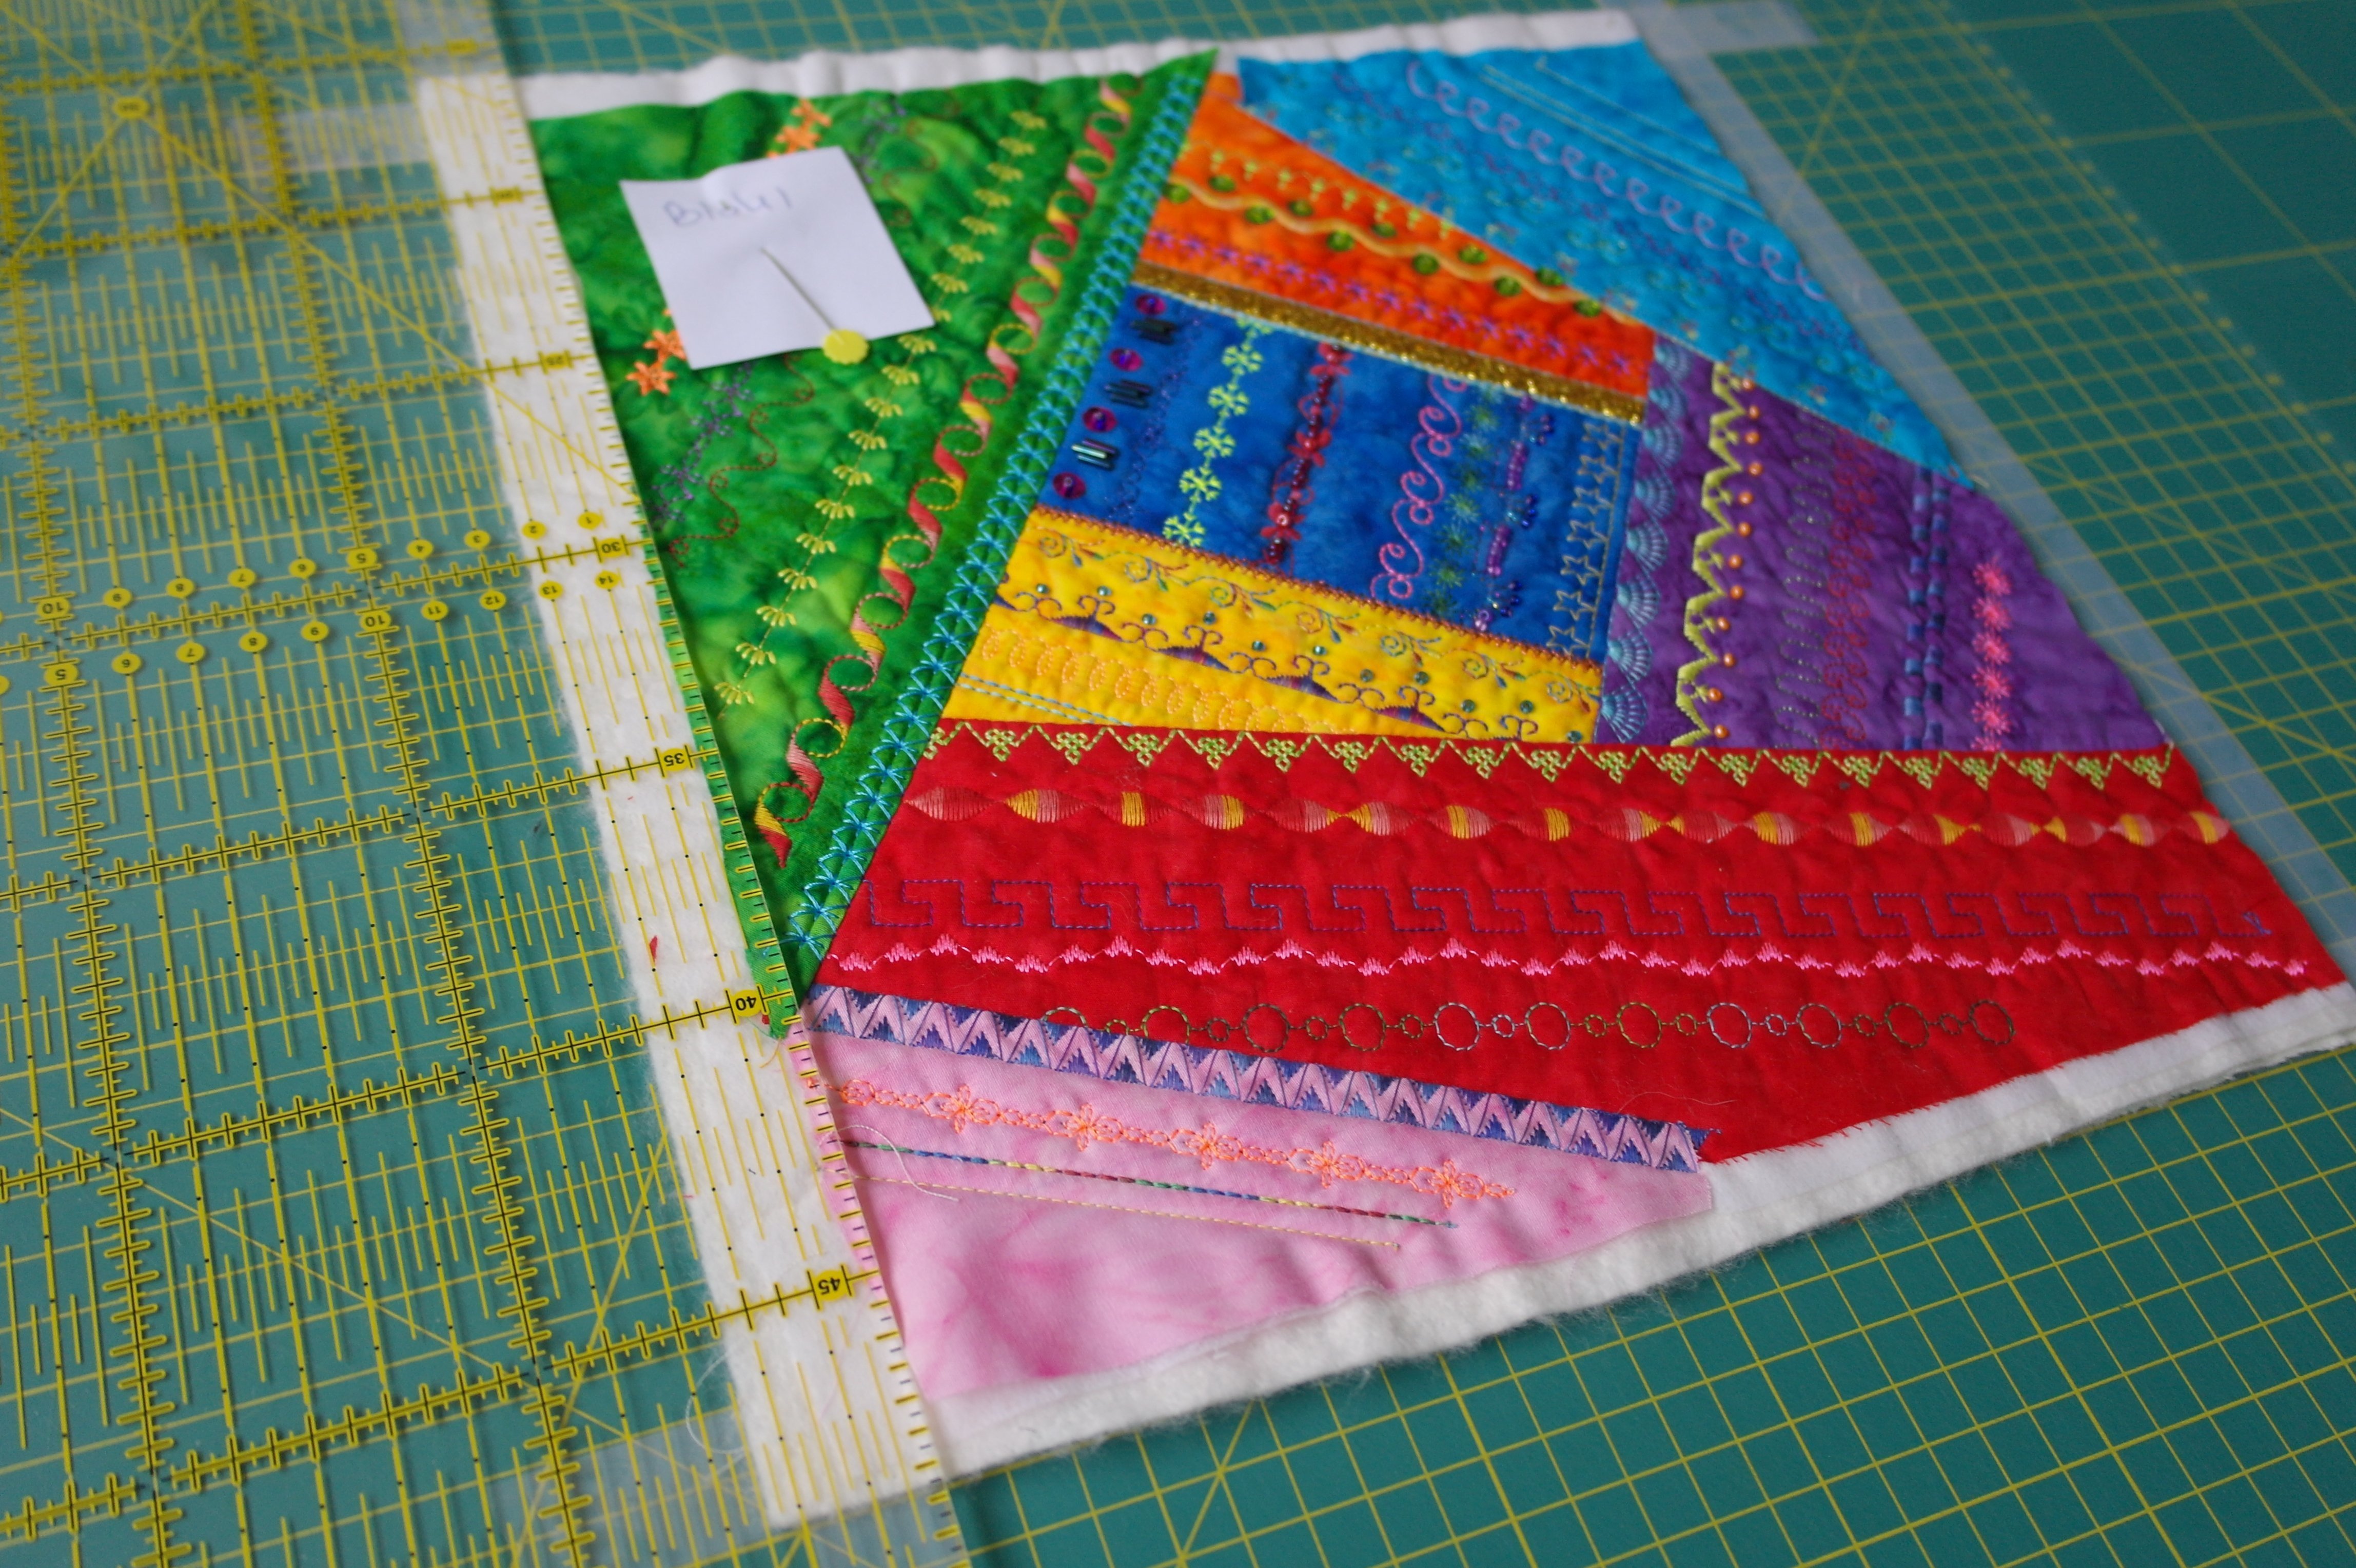
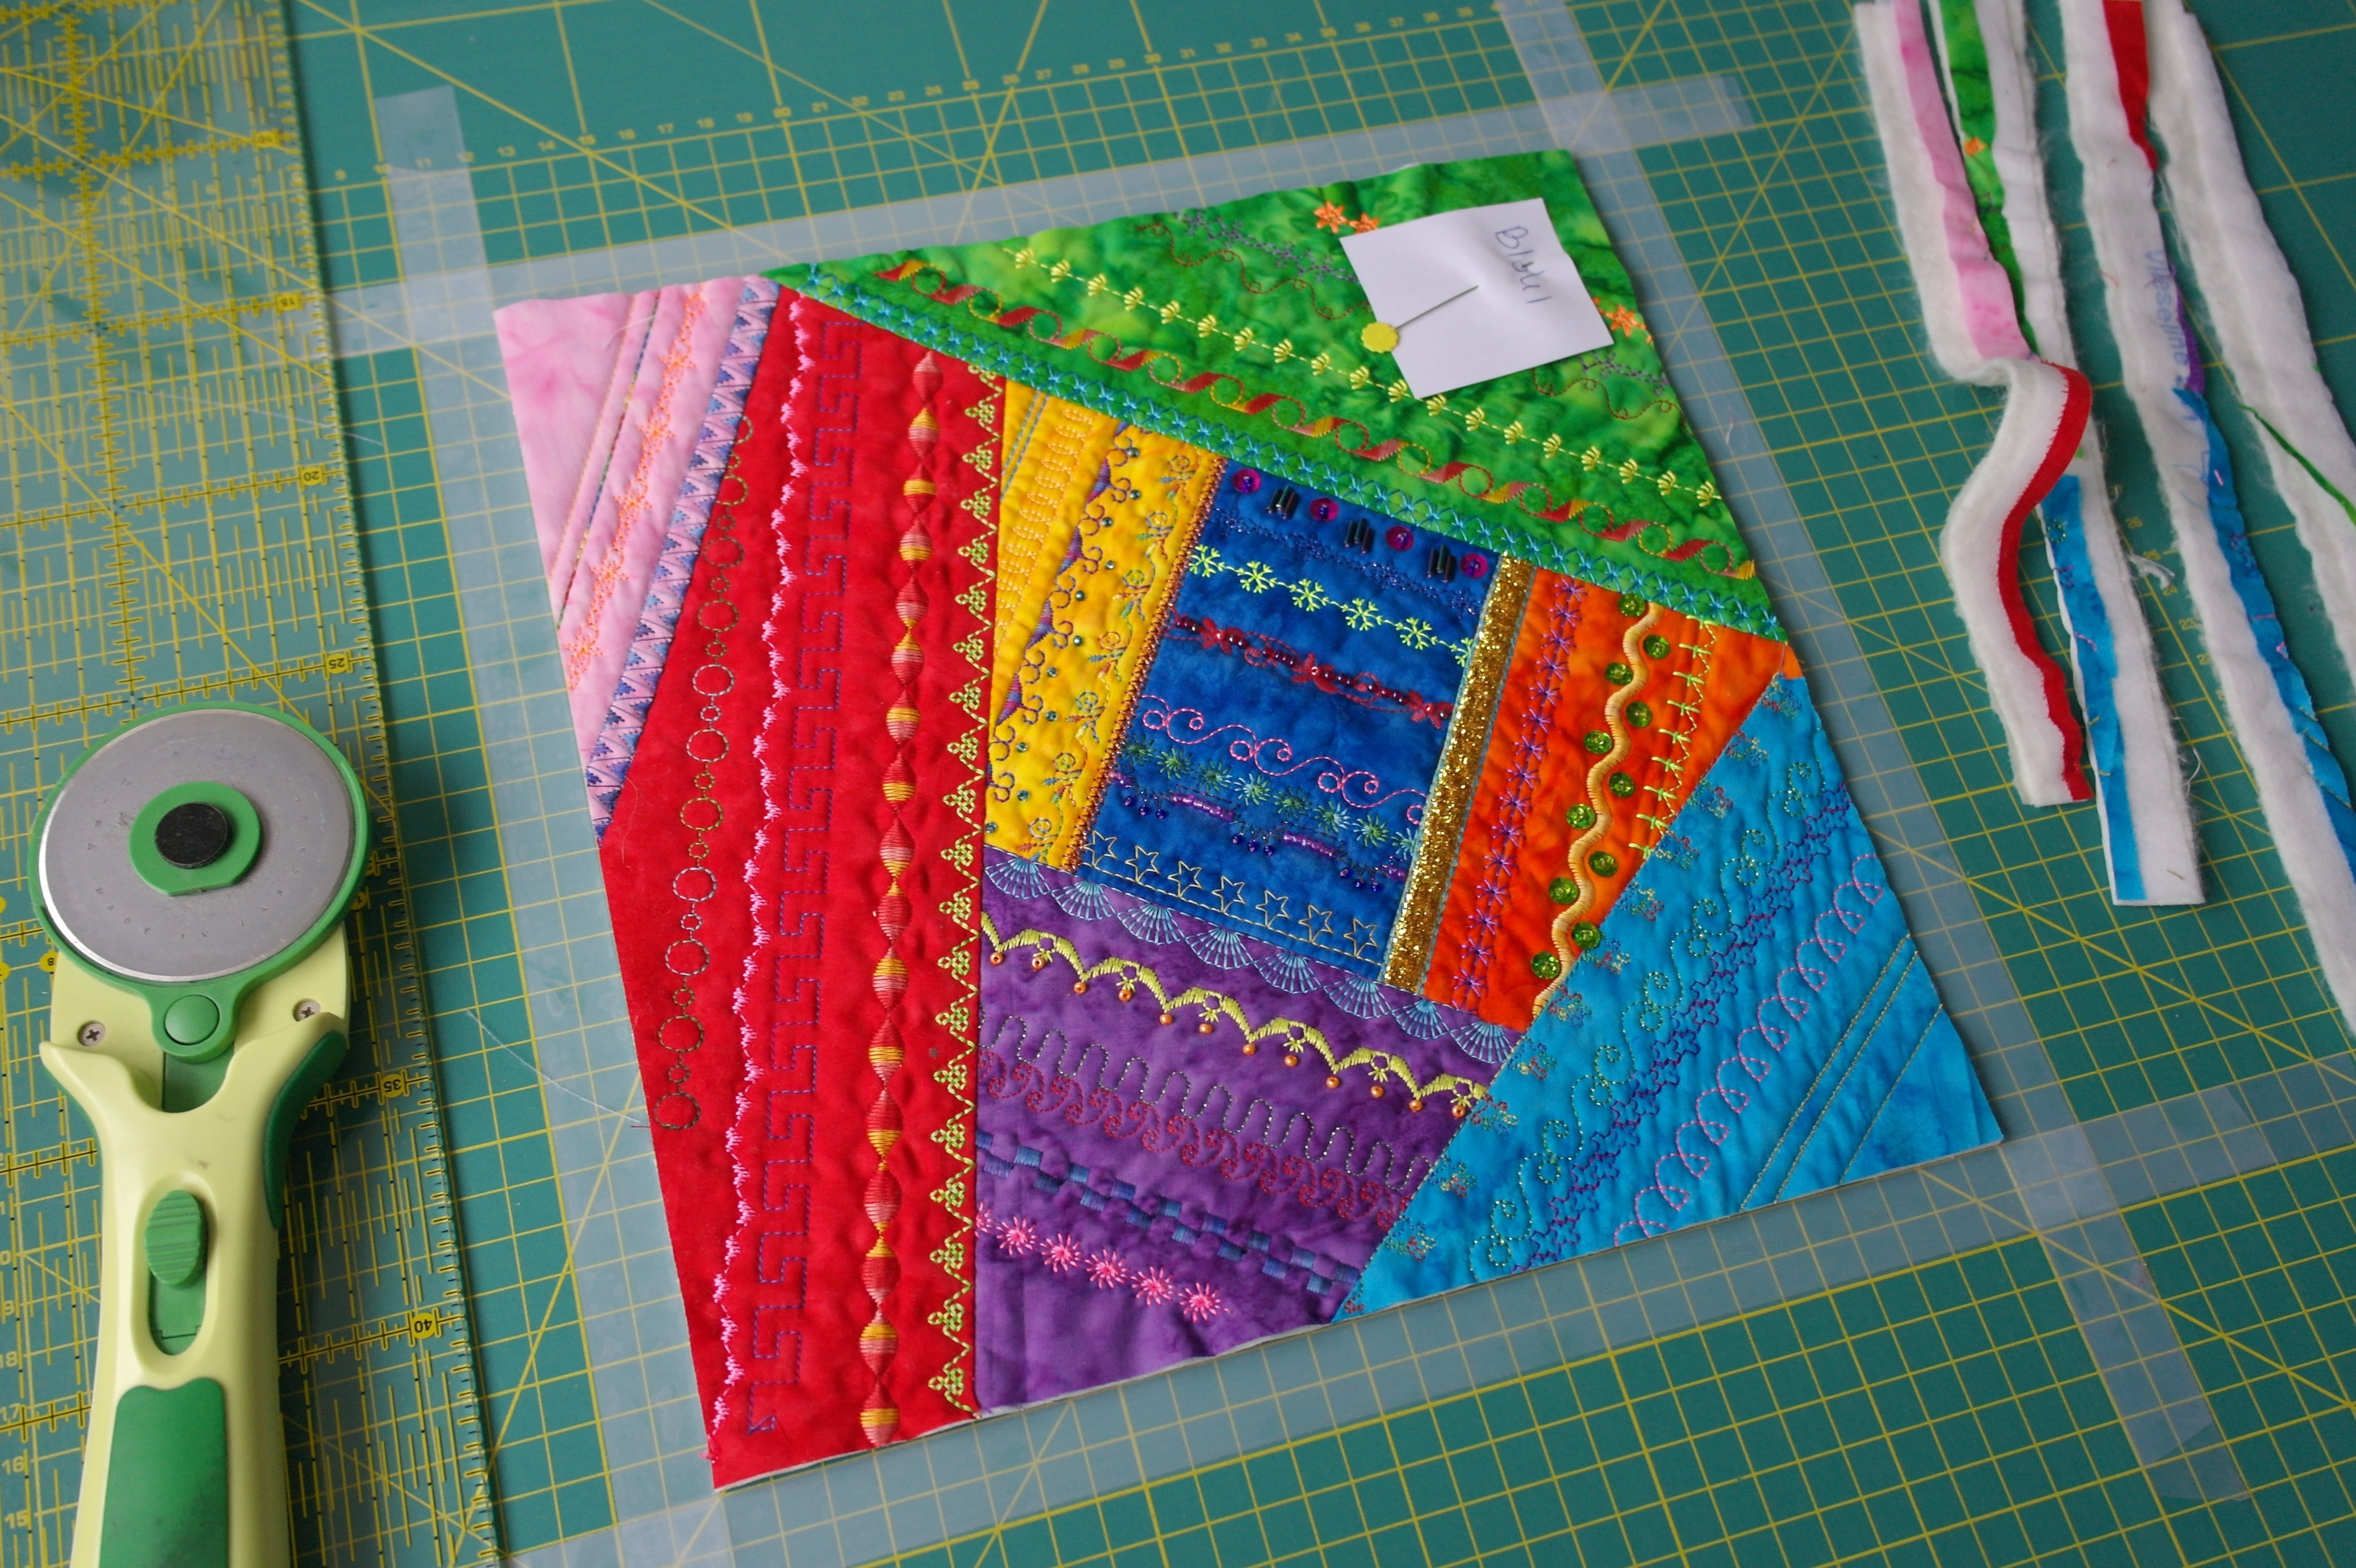
Cut the other 8 large squares the same way: but don’t cut the other blocks yet!!! Leave those in the order you have stacked them: I have stacked my blocks in the same order by placing the blocks I have cut, and the ones I didn’t cut yet upside down, in the same order I have placed them before. Turning the blocks in the stack like pages of a book. If you mix your stack of blocks up, don’t worry: you have pinned piece of paper on the left upper corner of each block to find their place in your layout again.

Another block is cut – all 9 large square blocks are cut back to 28 x 28 cm, and returned into the stack.
For the rectangular blocks: they have to measure 28 x 14,5 cm after cutting. 28 cm is the same size as the large square blocks – that means you can leave part of the SCOTCH tape frame on your cutting mat. You will only cut back the aprox. 32 cm to exactly 28 cm, at this time, by placing the block as it shows on the picture above.
I have cut back the two short sides of the rectangular block: remember that you can rotate your cutting mat for easy cutting. All rectangular blocks are cut this way, just the two short sides, BUT NO FURTHER CUTTING IS DONE AT THIS TIME.

As soon as all 12 rectangular blocks are cut as shown above, remove and/or replace one side of SCOTCH tape. Leave the left-, upper and lower tape as they are, just remove the piece on the right.
(Re)place tape to make a inner frame of 28 x 14,5 cm. Make sure the measurement of 14,5 cm is precise: it will be at half a square on your cutting mat if you have the small squares.
It is important to see if the 0,5 cm (half a small square on your cutting mat) is precise, when cutting the rectangular blocks. Check by placing your quilt ruler on top of the lines of your cutting mat – the lines should match like the picture. CUT ONLY IF YOU ARE SURE THE MEASUREMENTS ARE OK – once cut, there is no turning back!
I have placed the rectangular block the right way, to cut the long sides, which will make this block 28 x 14,5 cm.

And there it is: precisely 28 x 14,5 cm.
After all rectangular blocks are cut back, there are four small square blocks to be cut back too. They will be 14,5 x 14,5 cm after cutting. To be able to do this, remove/replace one line of tape – the upper/horizontal line of tape as it shows on the picture…
,…and replace it to make a inner frame of 14,5 x 14,5 cm.

Place a block on top of this frame: it is now aprox. 16 x 16 cm,
and cut it back to 14,5 x 14,5 cm precise, same way you have cut the other blocks, using your cutting mat and your quilt ruler.
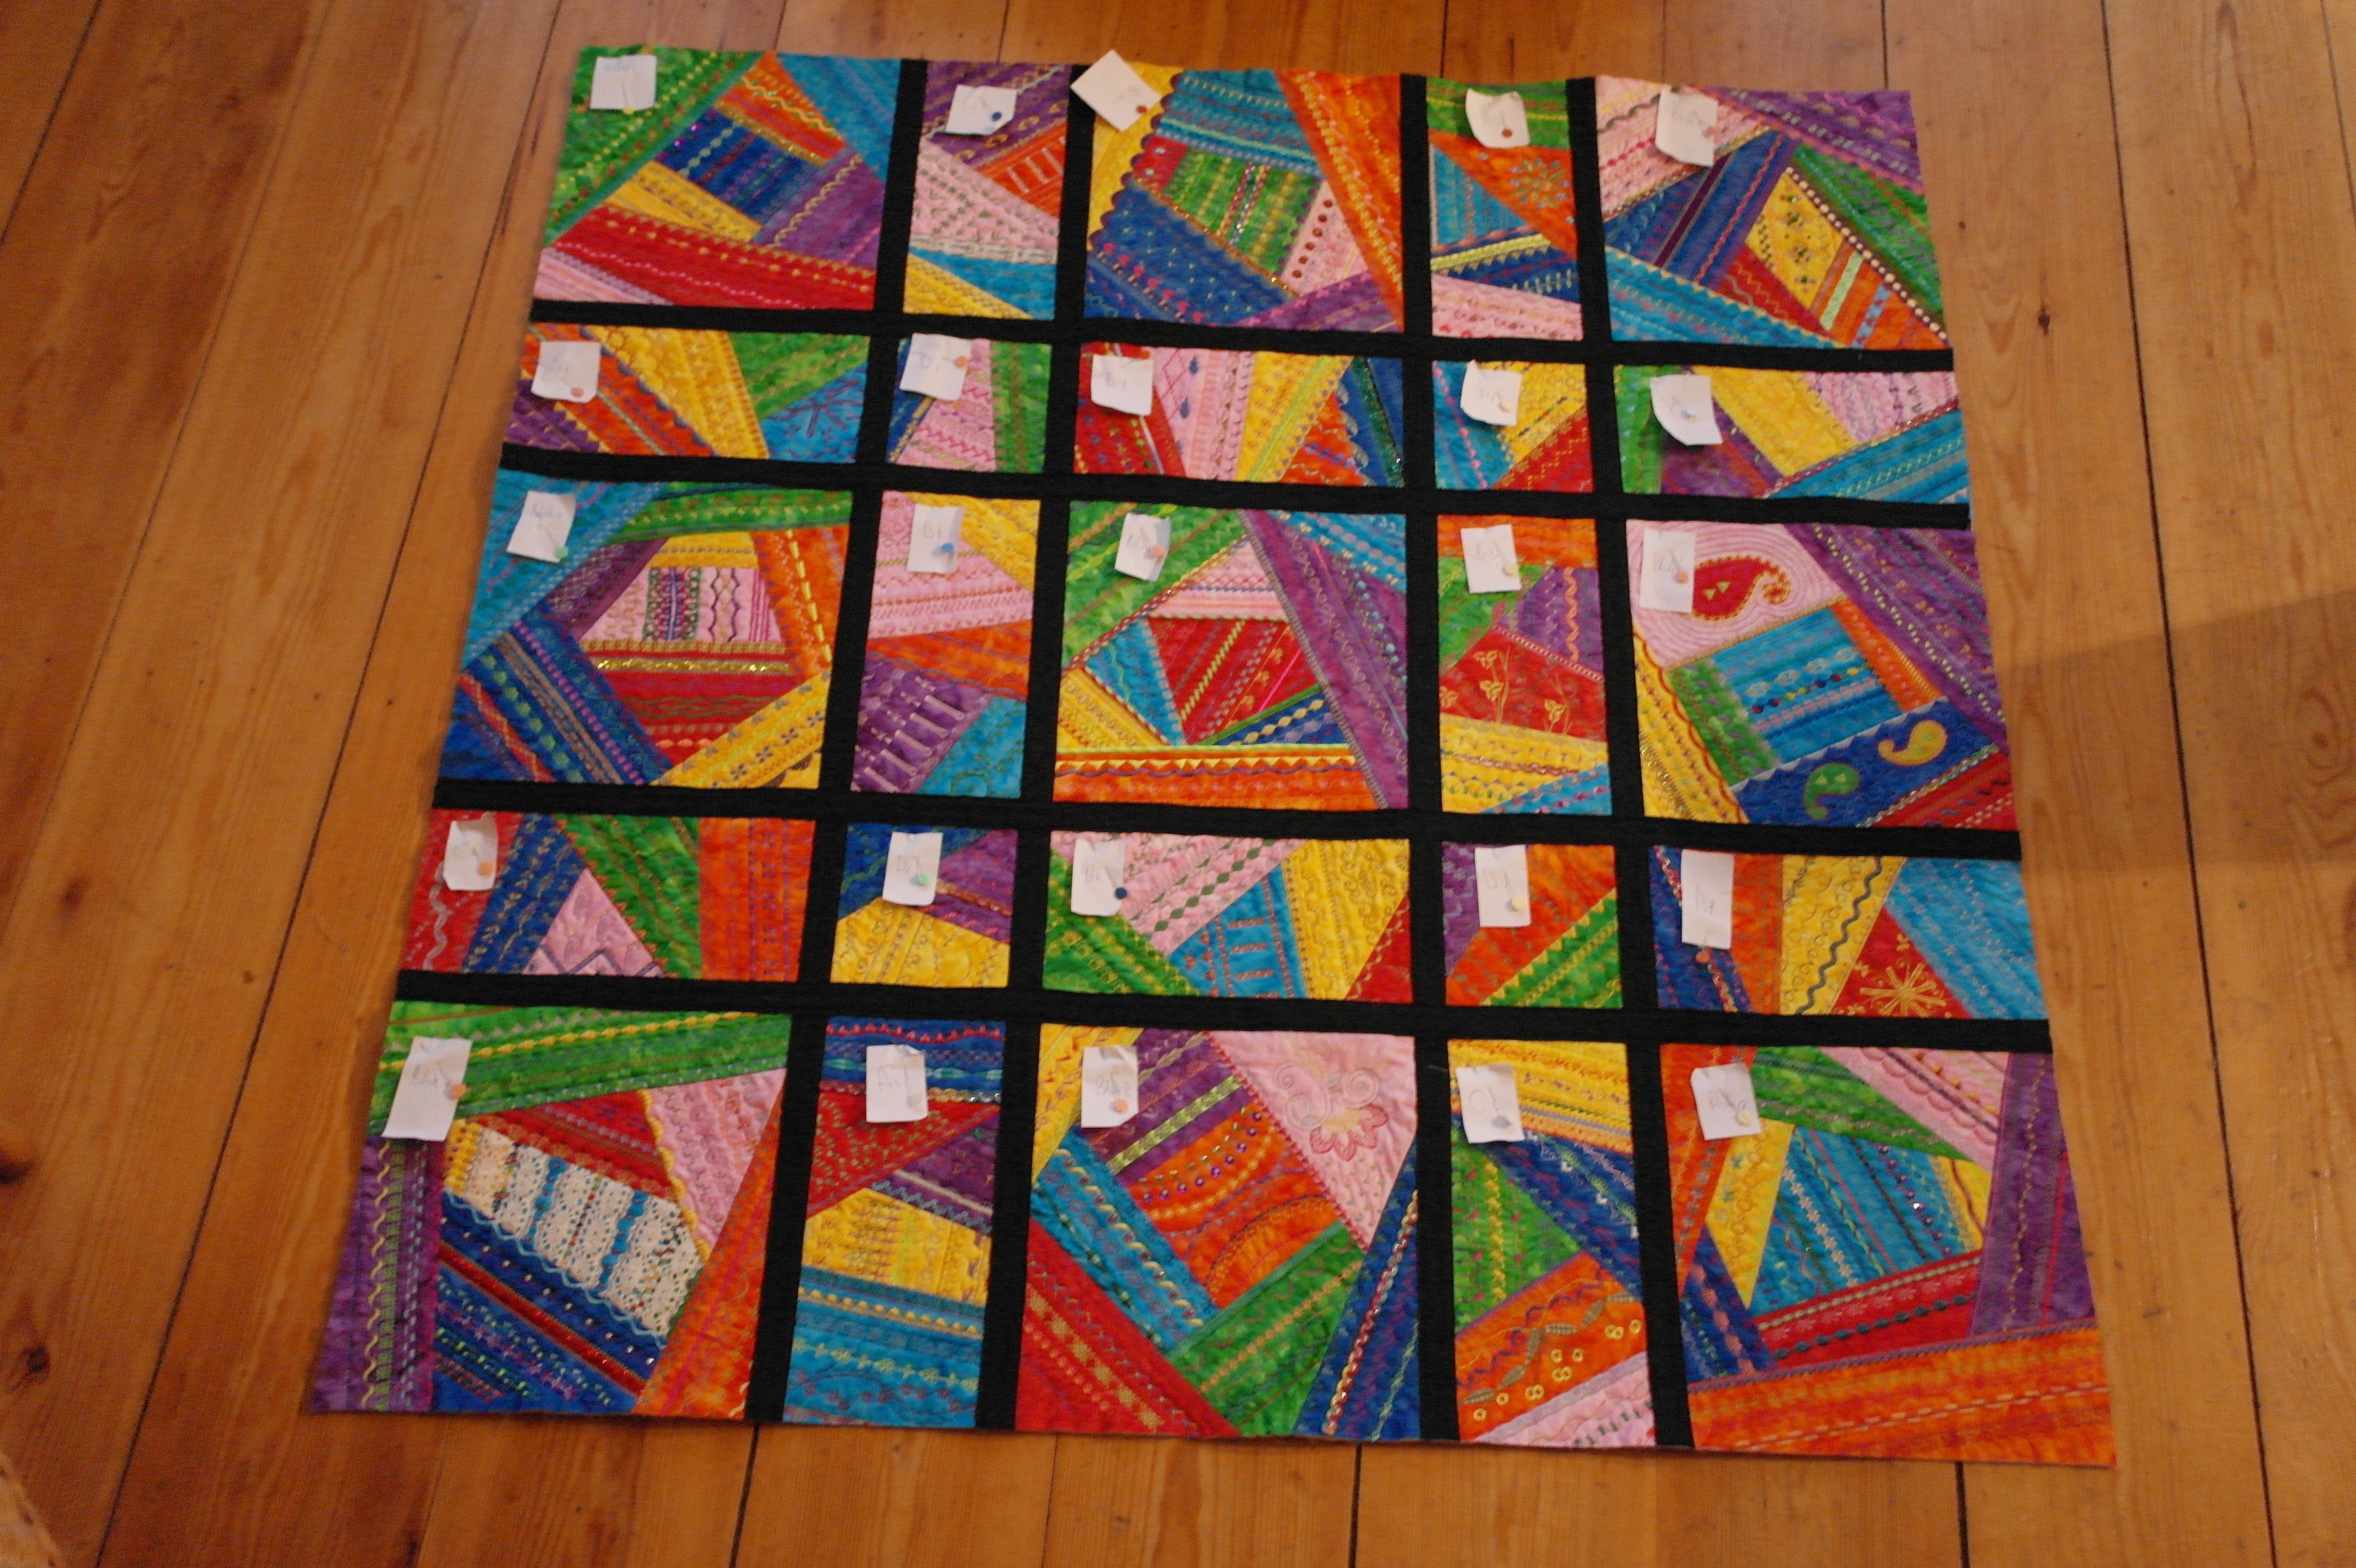
Eventually all 25 blocks are cut to the right size. Placing them together means they must lie exactly against each other.
This gives you an overview on the final measurement of the quilt.
WHAT TO DO IF A BLOCK OR MULTIPLE BLOCKS ARE TOO LARGE AFTER CUTTING? Cut them again, to the right size.
WHAT TO DO IF A BLOCK OR MULTIPLE BLOCKS ARE TOO SMALL AFTER CUTTING: see if you can cut your other blocks to this measurement too, which means all blocks will be too small, but fit according to the new measurements. BUT PAY ATTENTION: squares must be squares and the rectangular blocks should be the same size in length as the large square blocks, and the same size in width as the small square blocks. If a couple of blocks are, say, 0,5 cm smaller, for instance 27,5 x 27,5 cm, the rectangular must be 27,5 x 14 cm and the small squares 14 x 14 cm. This is the only way to unify them, which is important to make everything fit together.
Remember: even if you make a mistake, there is always a solution to get it right again.
Assembly of the blocks. There are a couple of possibilities to choose from: you will have to make a choice before proceding to the next step.
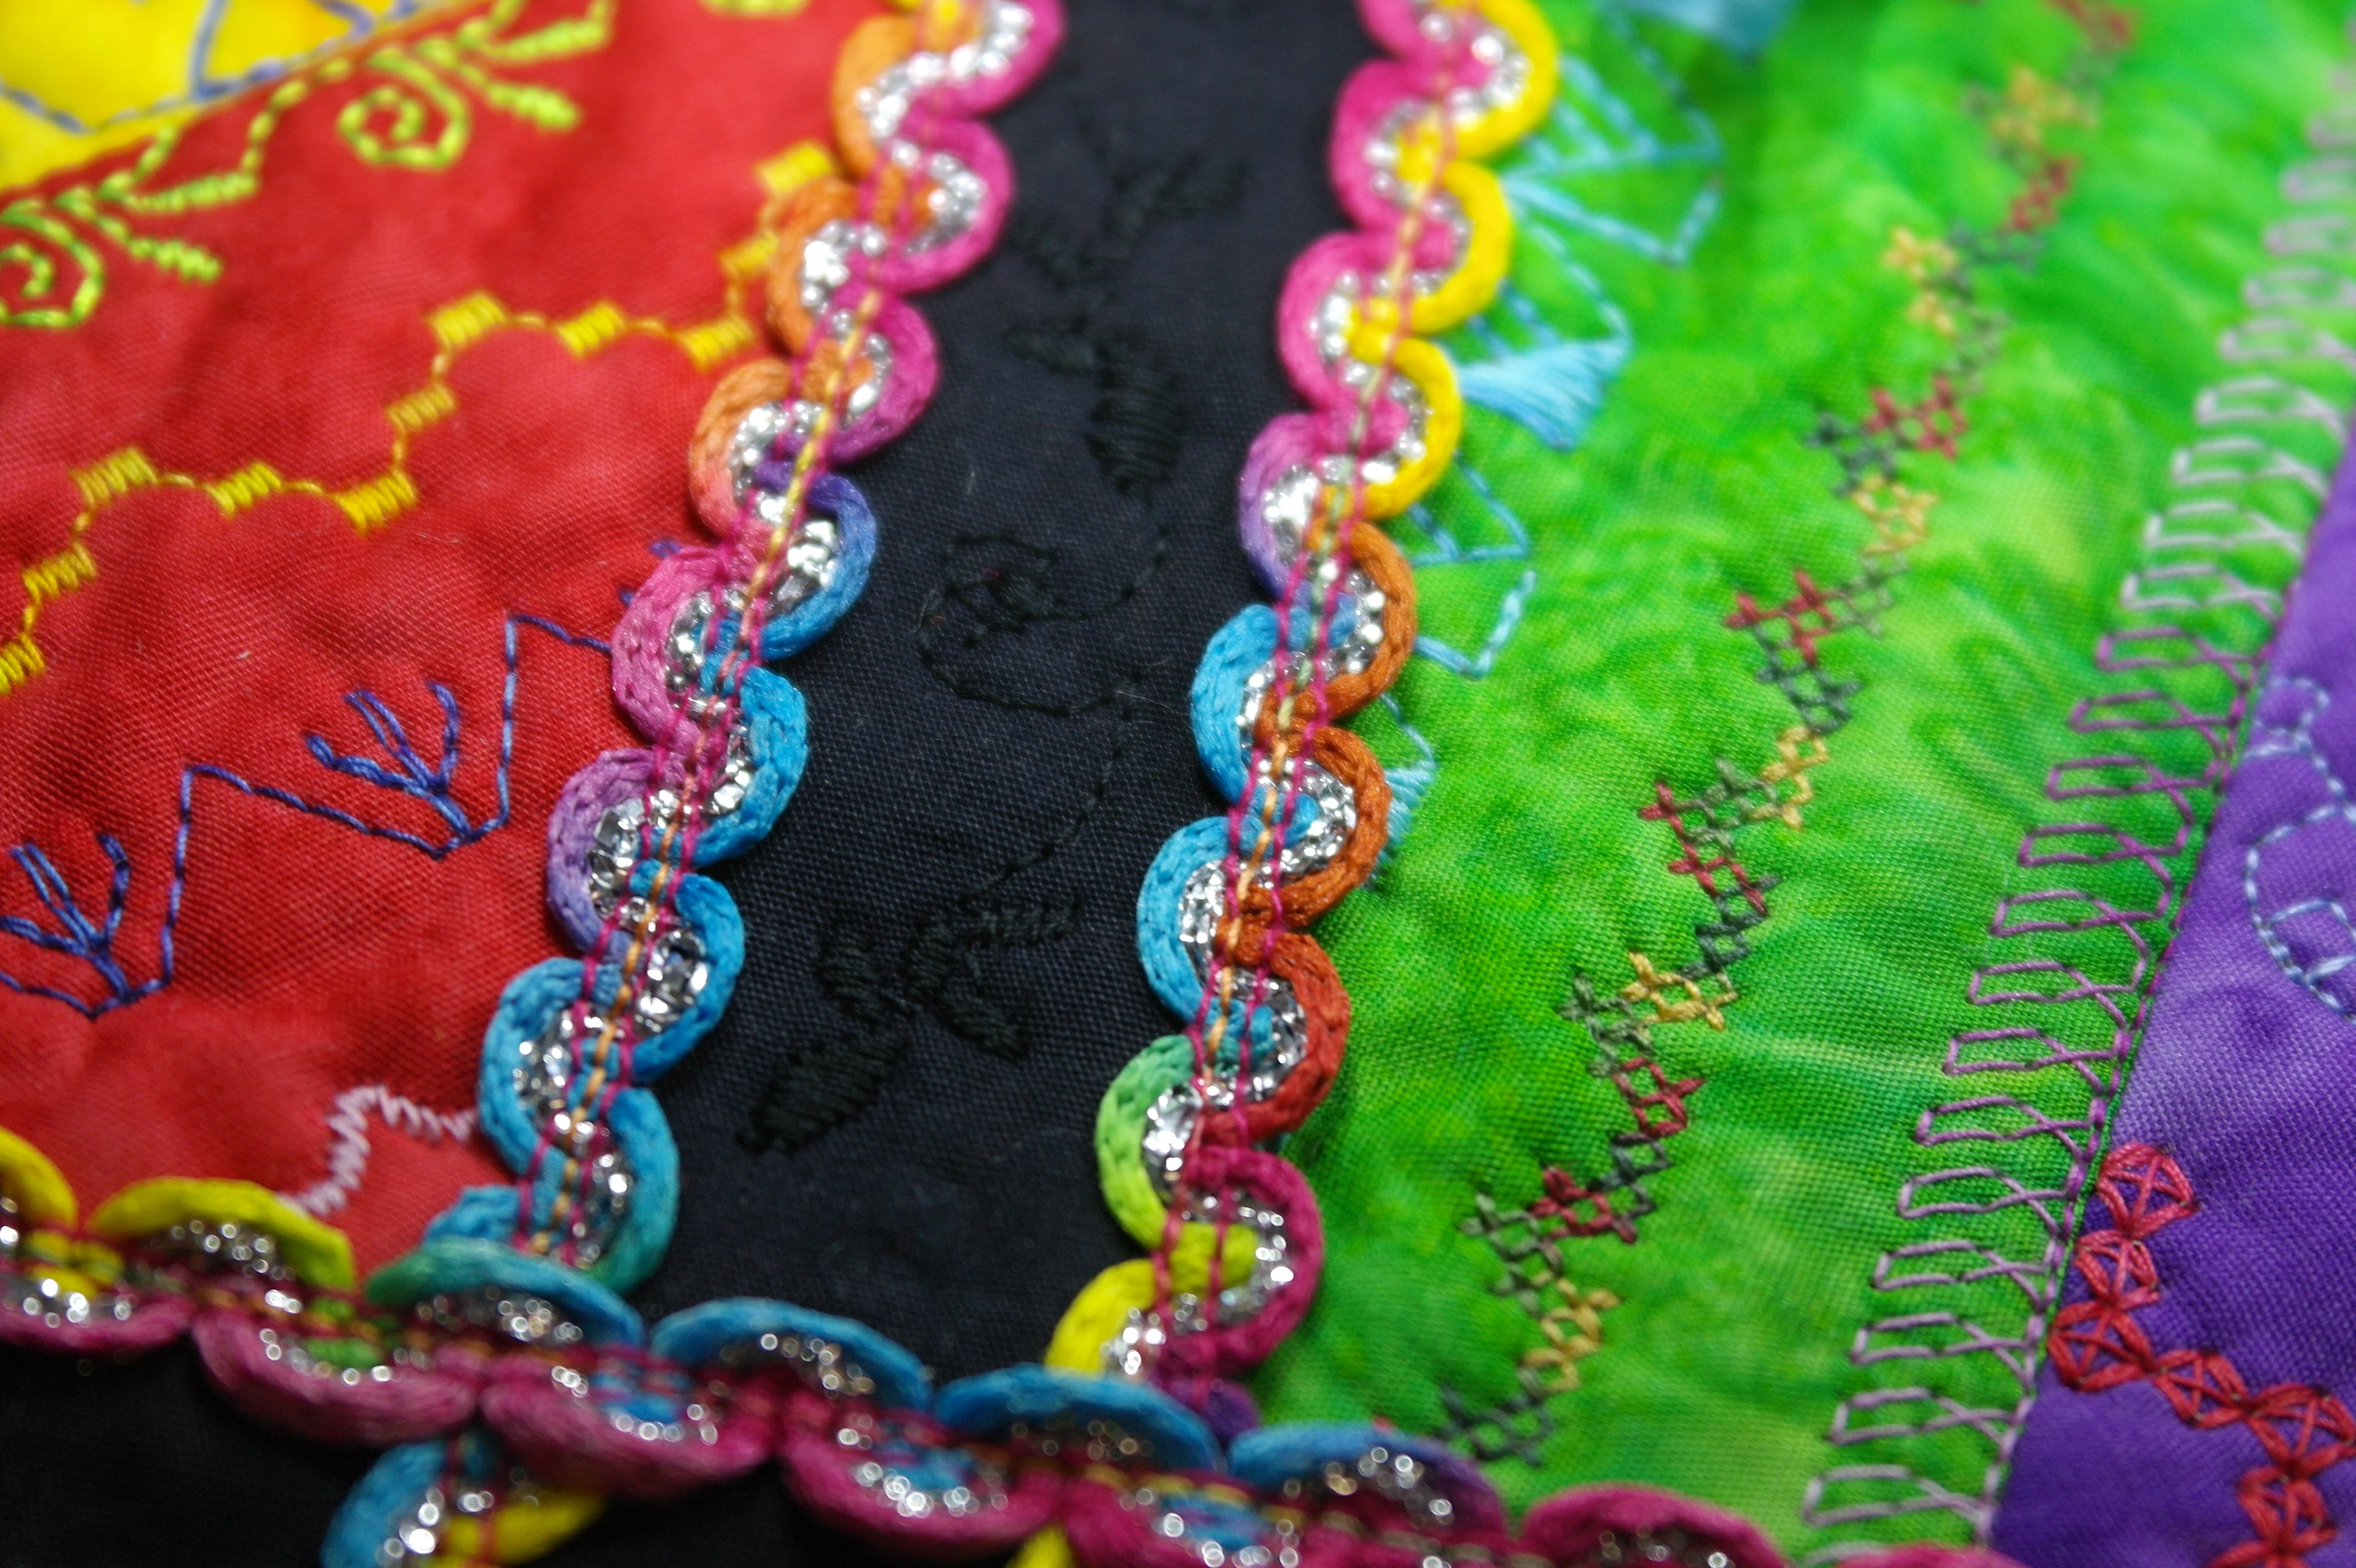
– blocks will be sewn together, using a wide zigzag stitch. You can later cover this with wide satin stitches, with metallic or variegated threads. Use them to cover the zigzag stitch completely, and also later on to cover the side of the binding.
– blocks will be sewn together, using a wide zigzag stitch. You can later cover this with ribbon, like the Multicolor ribbon with silver, which I have placed on the blocks to show you. You will then need 2 rolls of this Multicolor Ribbon with silver (each 10 meter). Or you can use different types of ribbons and different colors, each row of zigzag stitches covered and giving your project another colorful appearance.
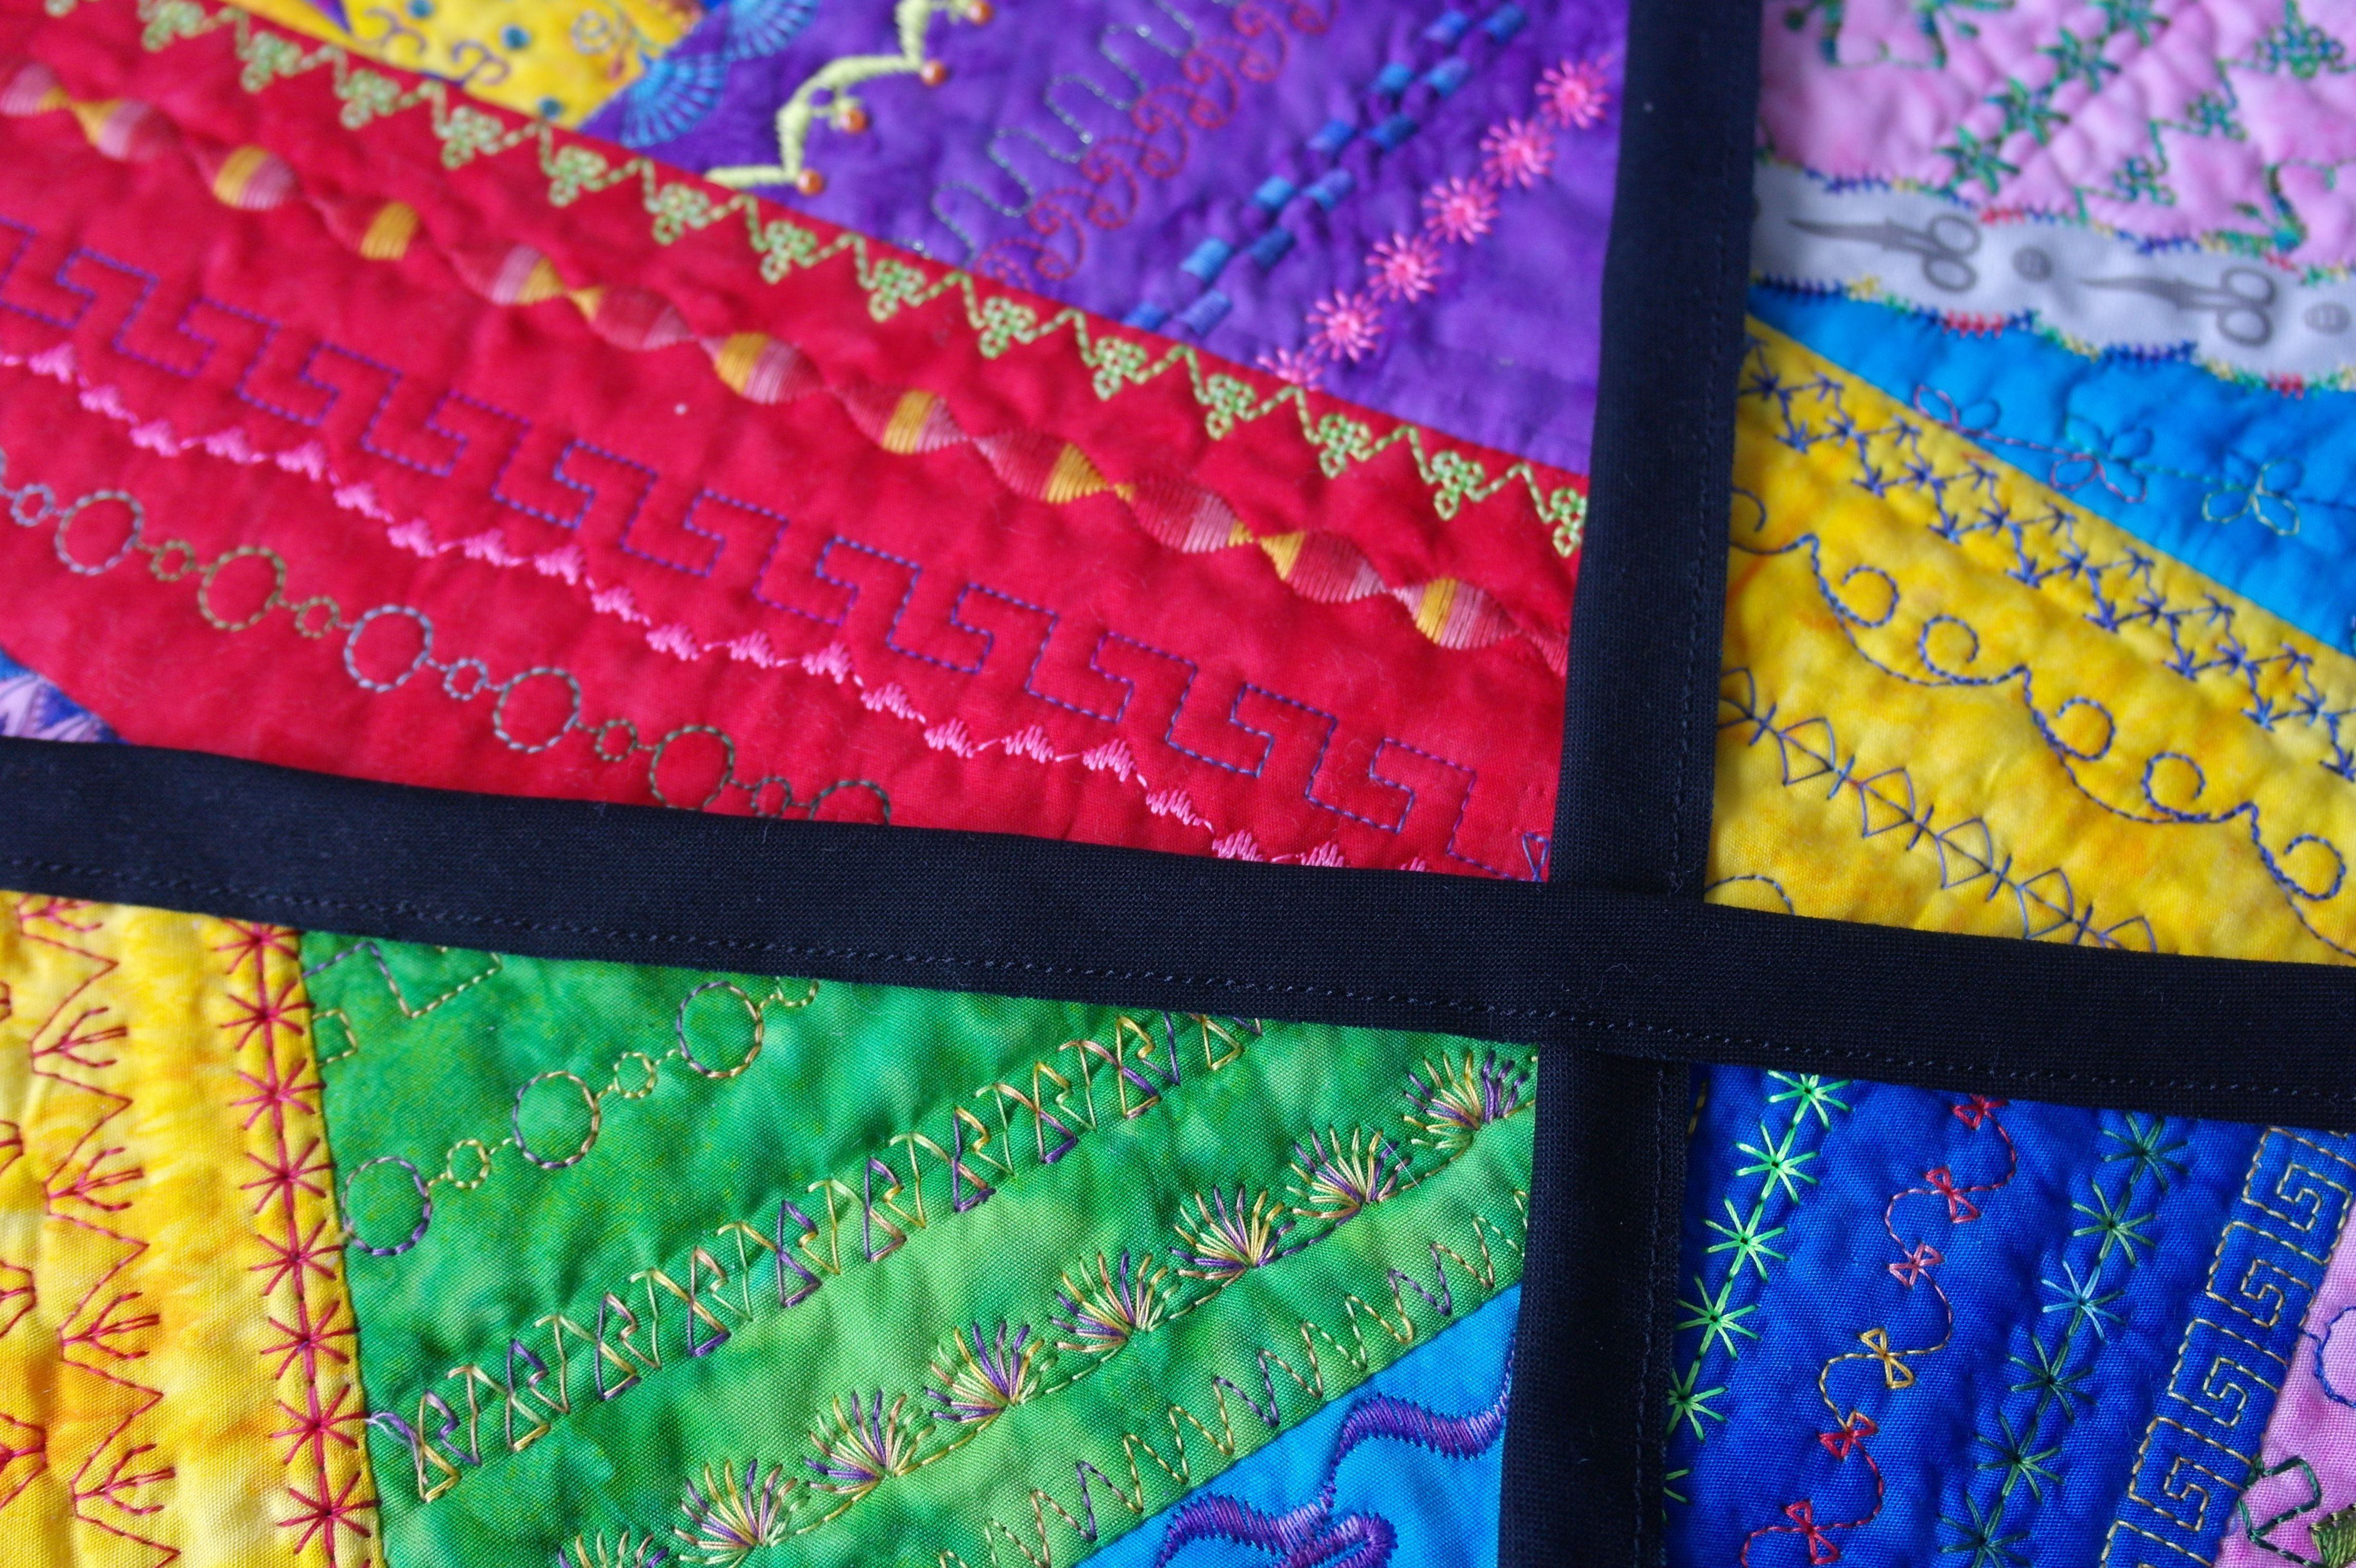
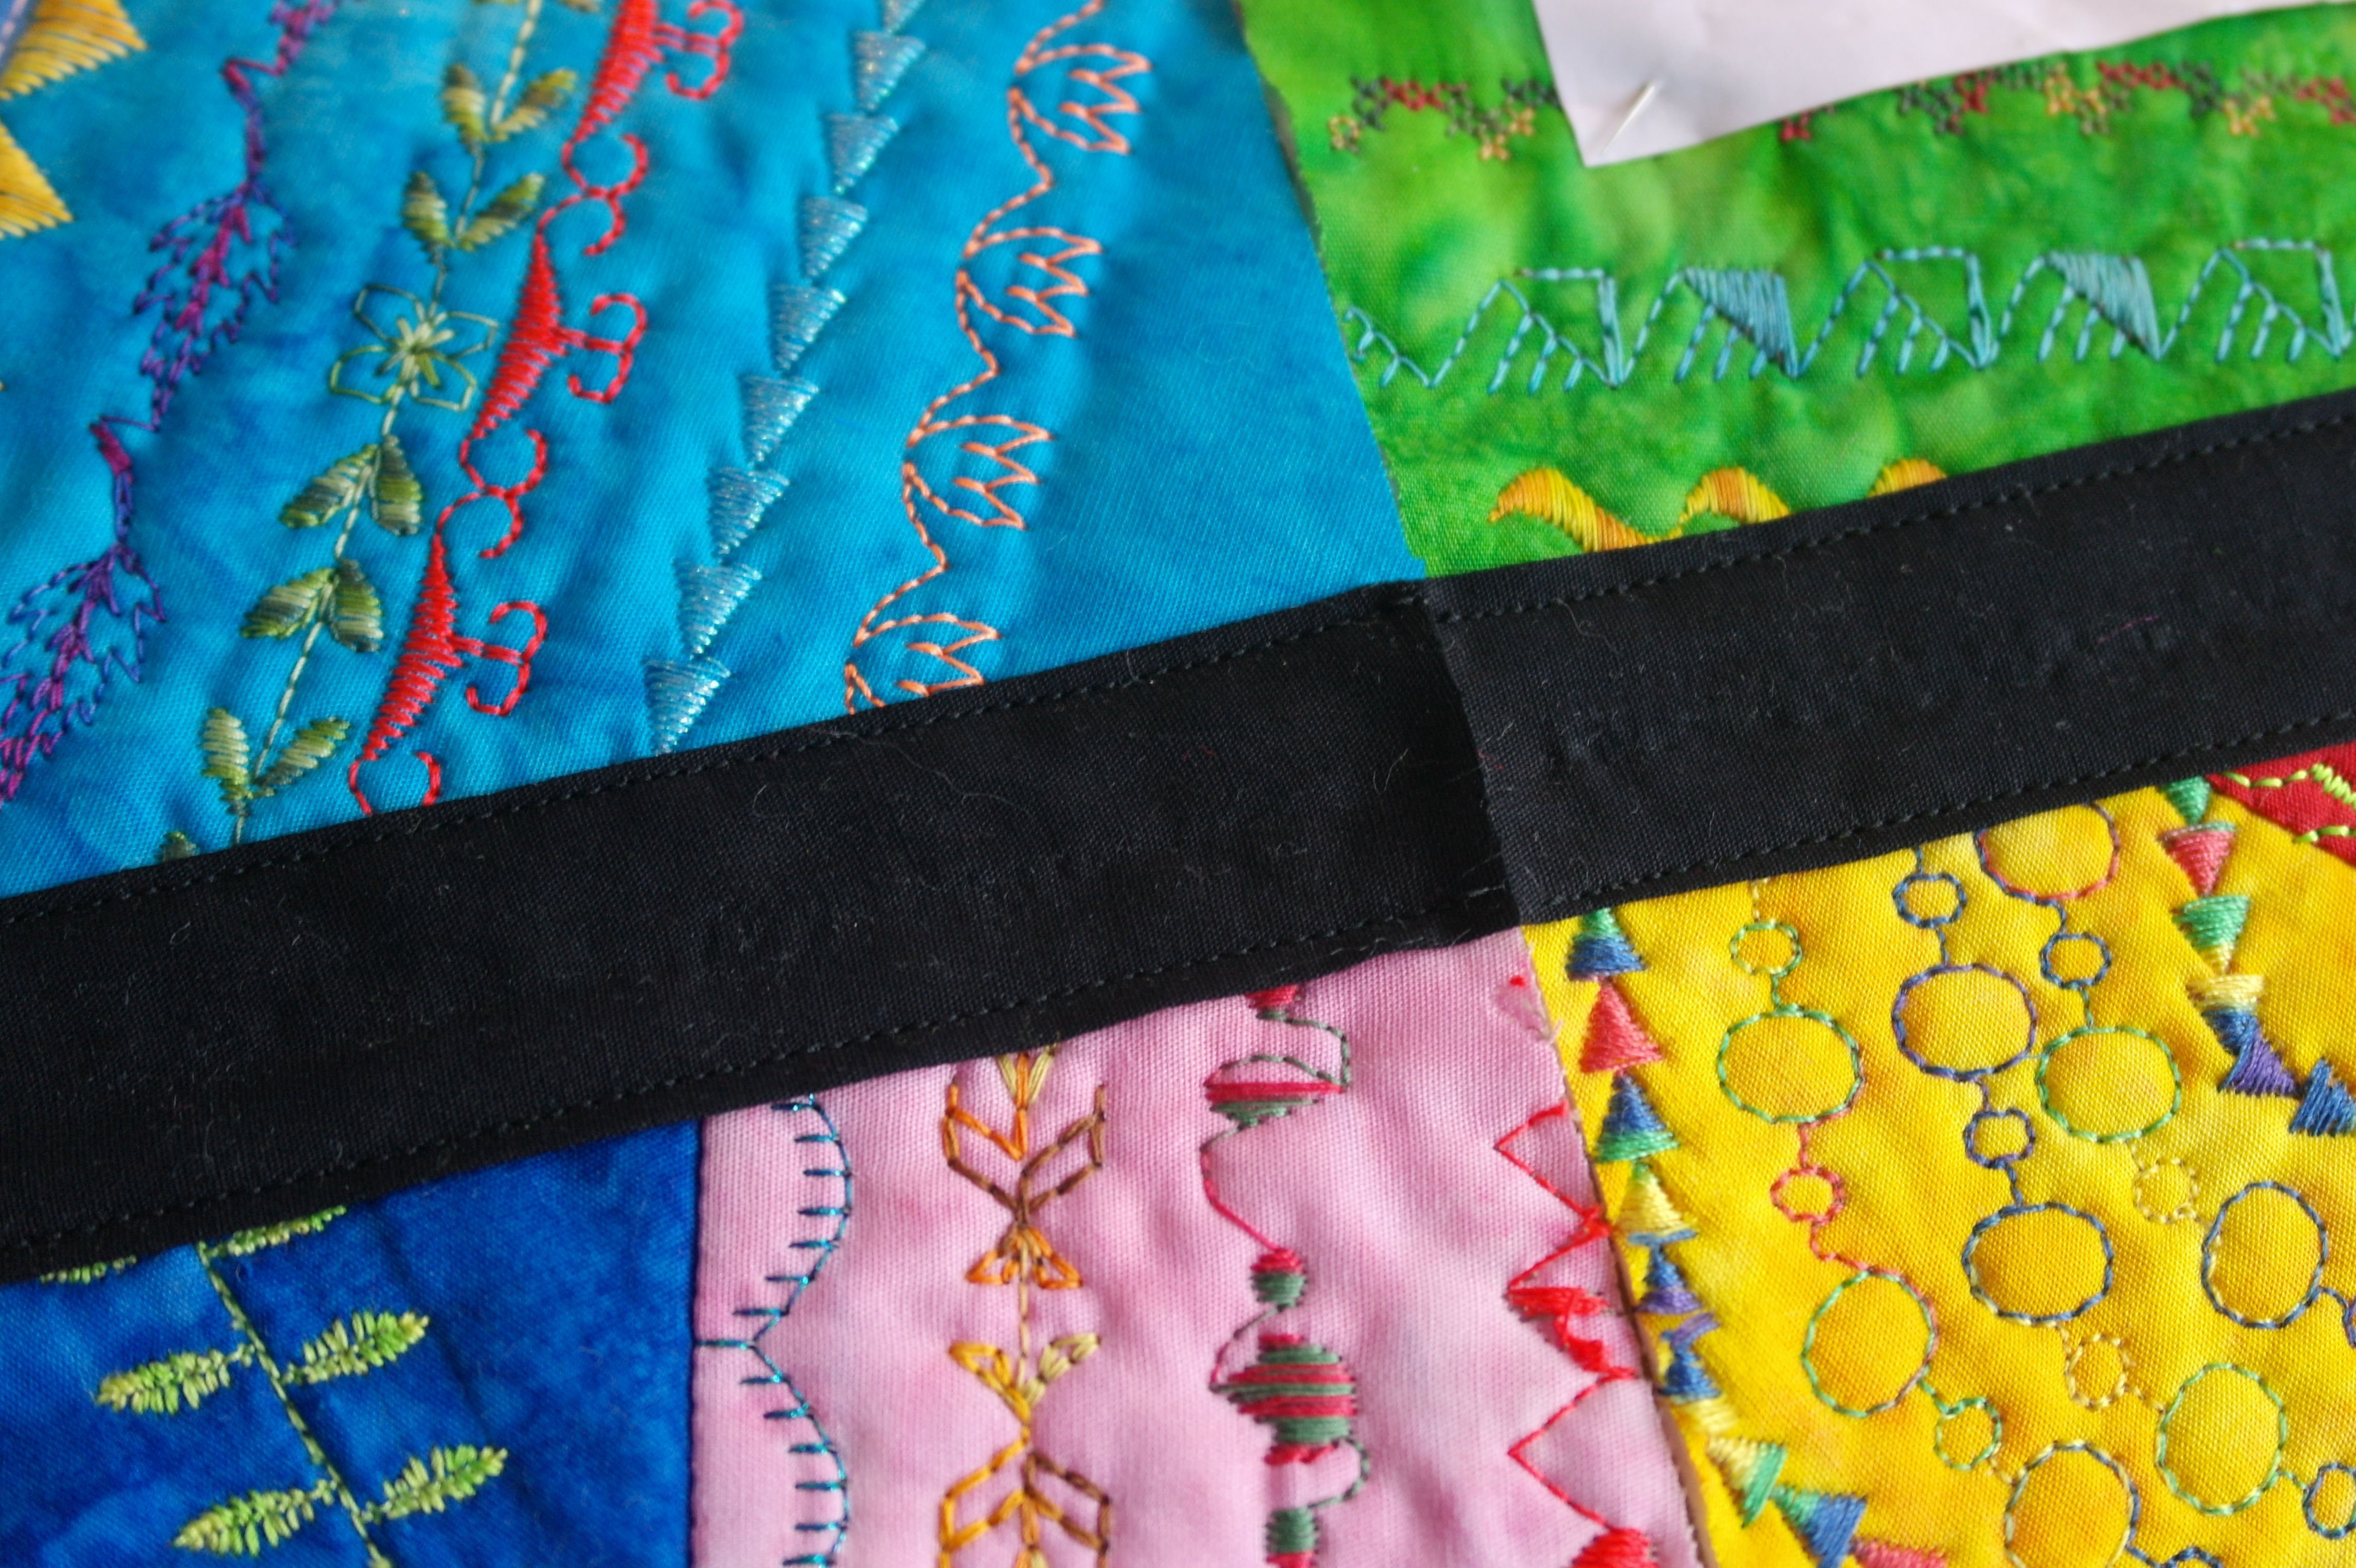
– blocks will be sewn together, using a wide zigzag stitch. You can sew a small (black batik) sashing to cover this. If you want to make smaller sashings, finished size 1 or 1,5 cm, ajust the width of the strips of (black batik) fabric you have to cut.
PAY ATTENTION: the binding of the quilt should be wider, because it also has to be sewn to the back of the quilt. Keep those measurements different from the sashings.
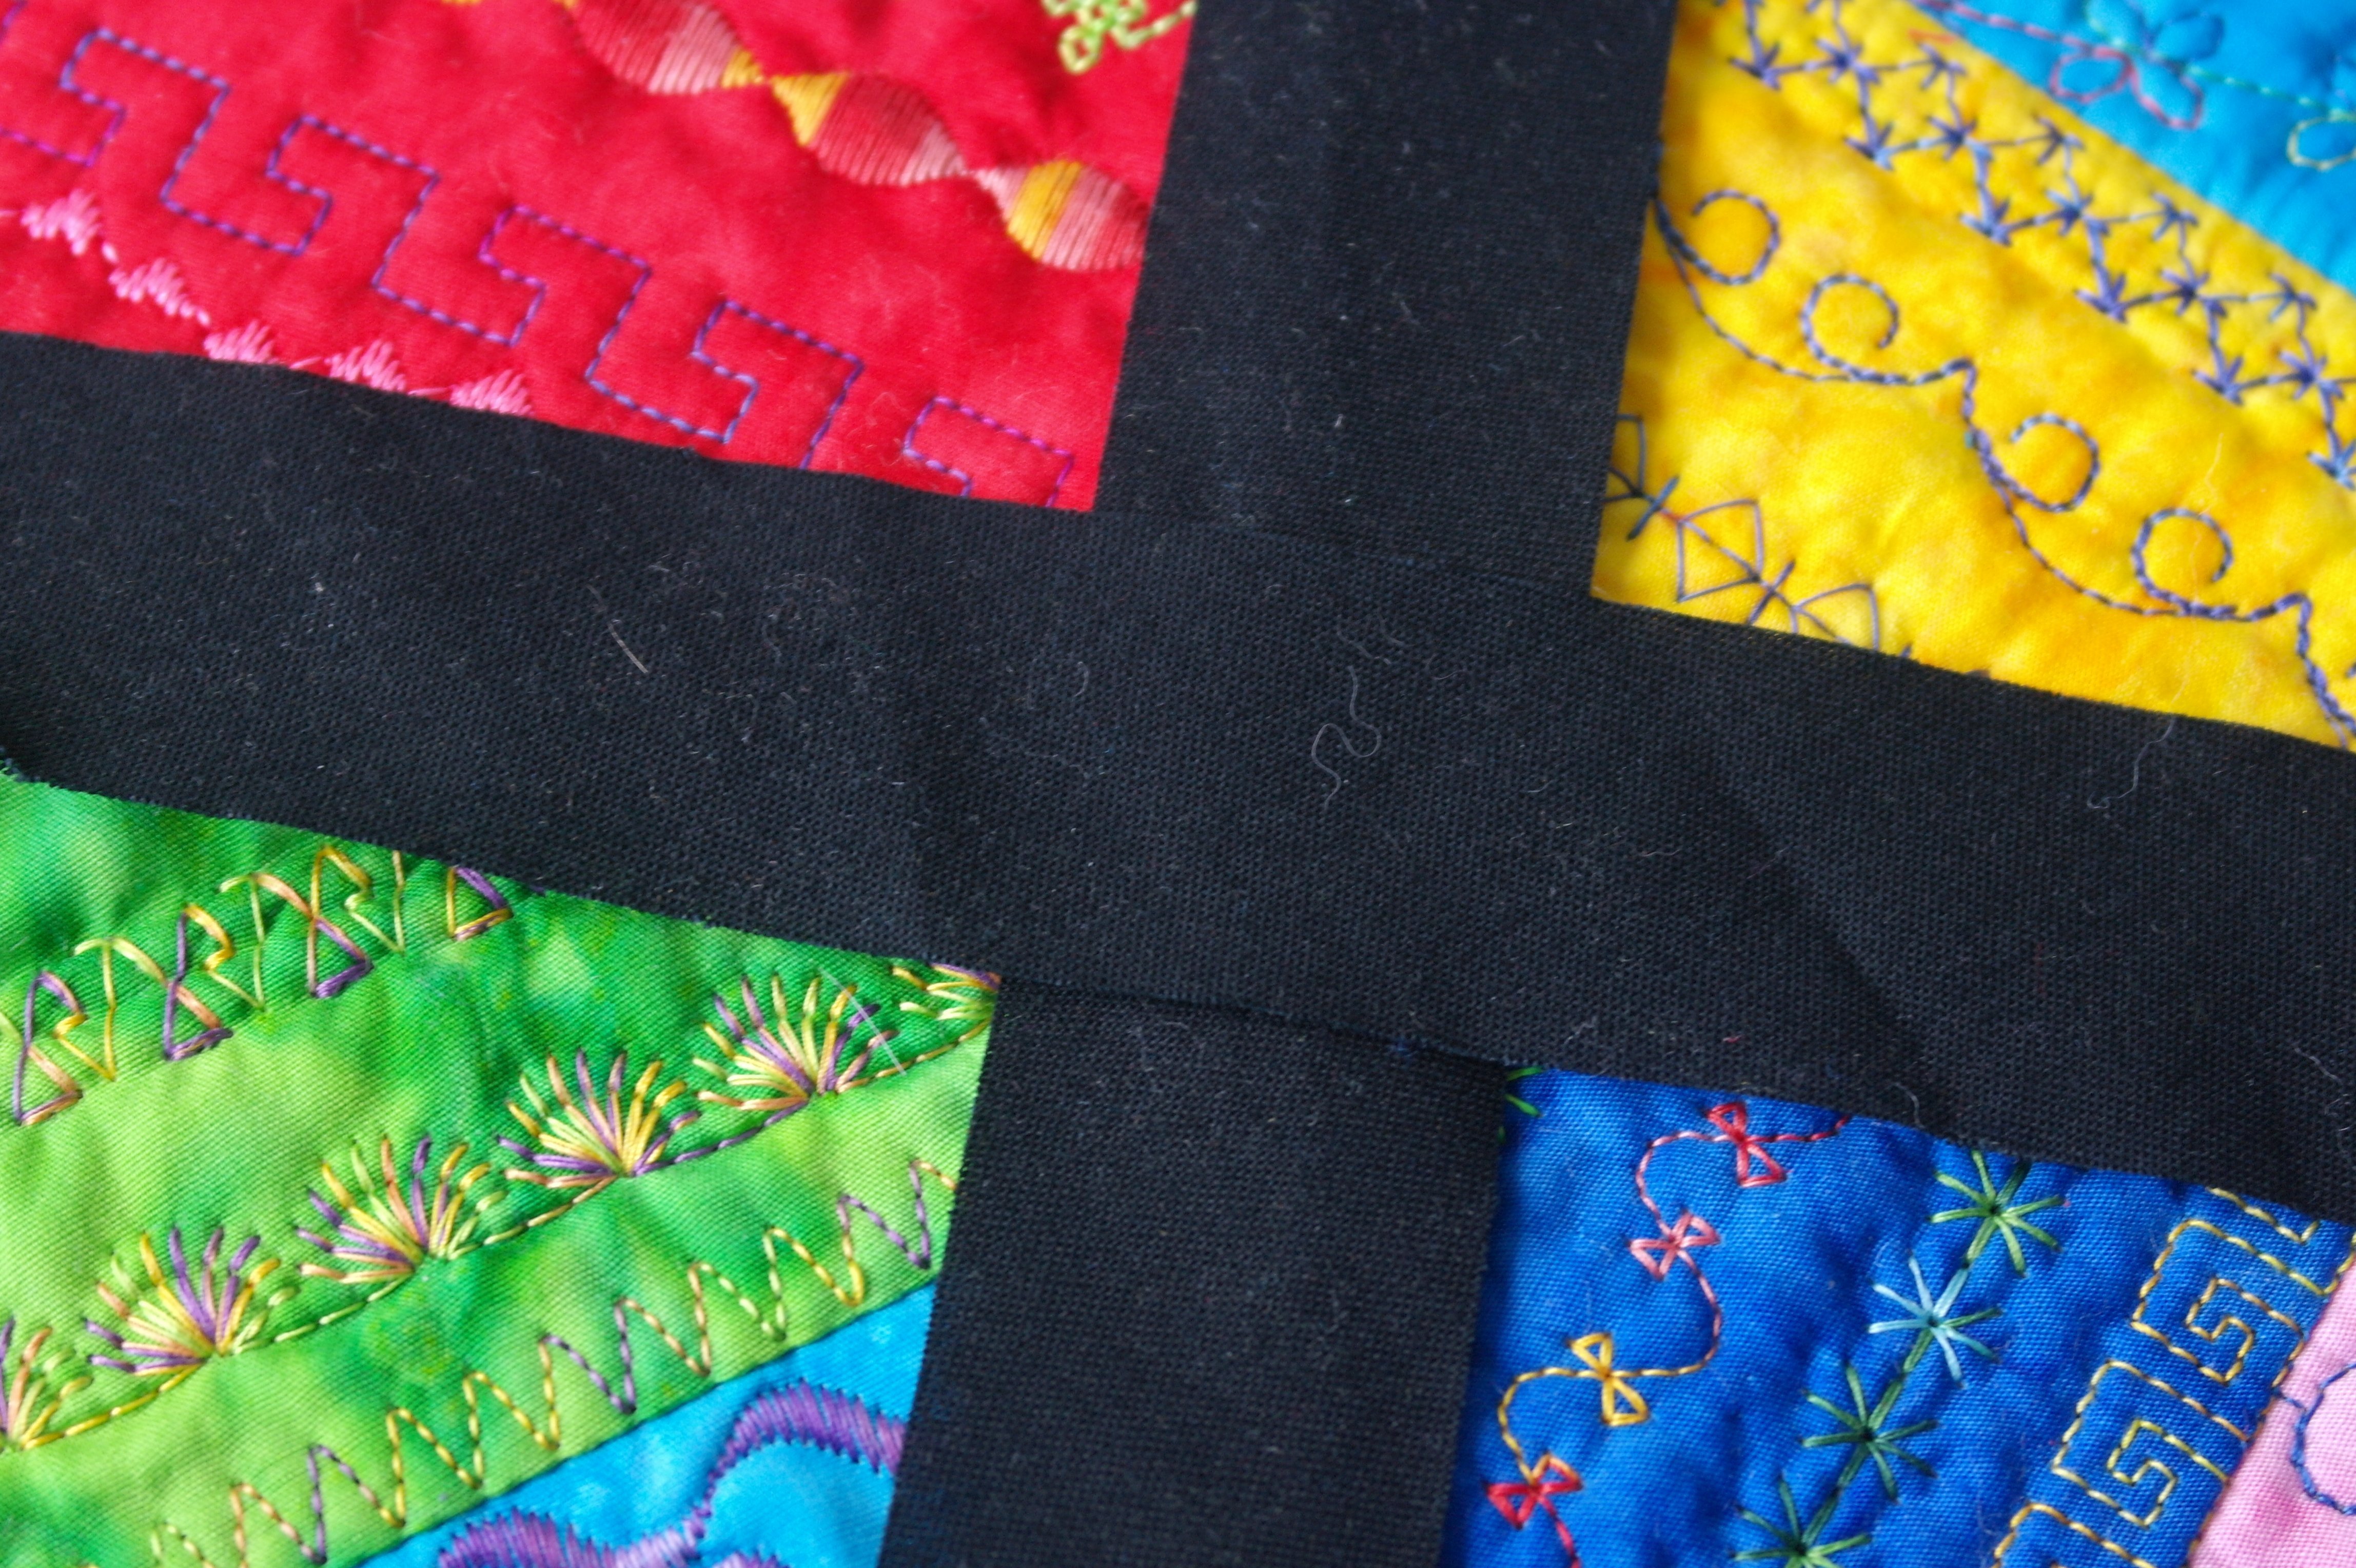
– blocks will be sewn together, using a wide zigzag stitch. Sew black (batik) sashings like it is orignally mentioned, in the sheme below. I have placed strips of black batik to show you. If you choose to do this, you don’t have to change anything and will work with the sashing scheme below.
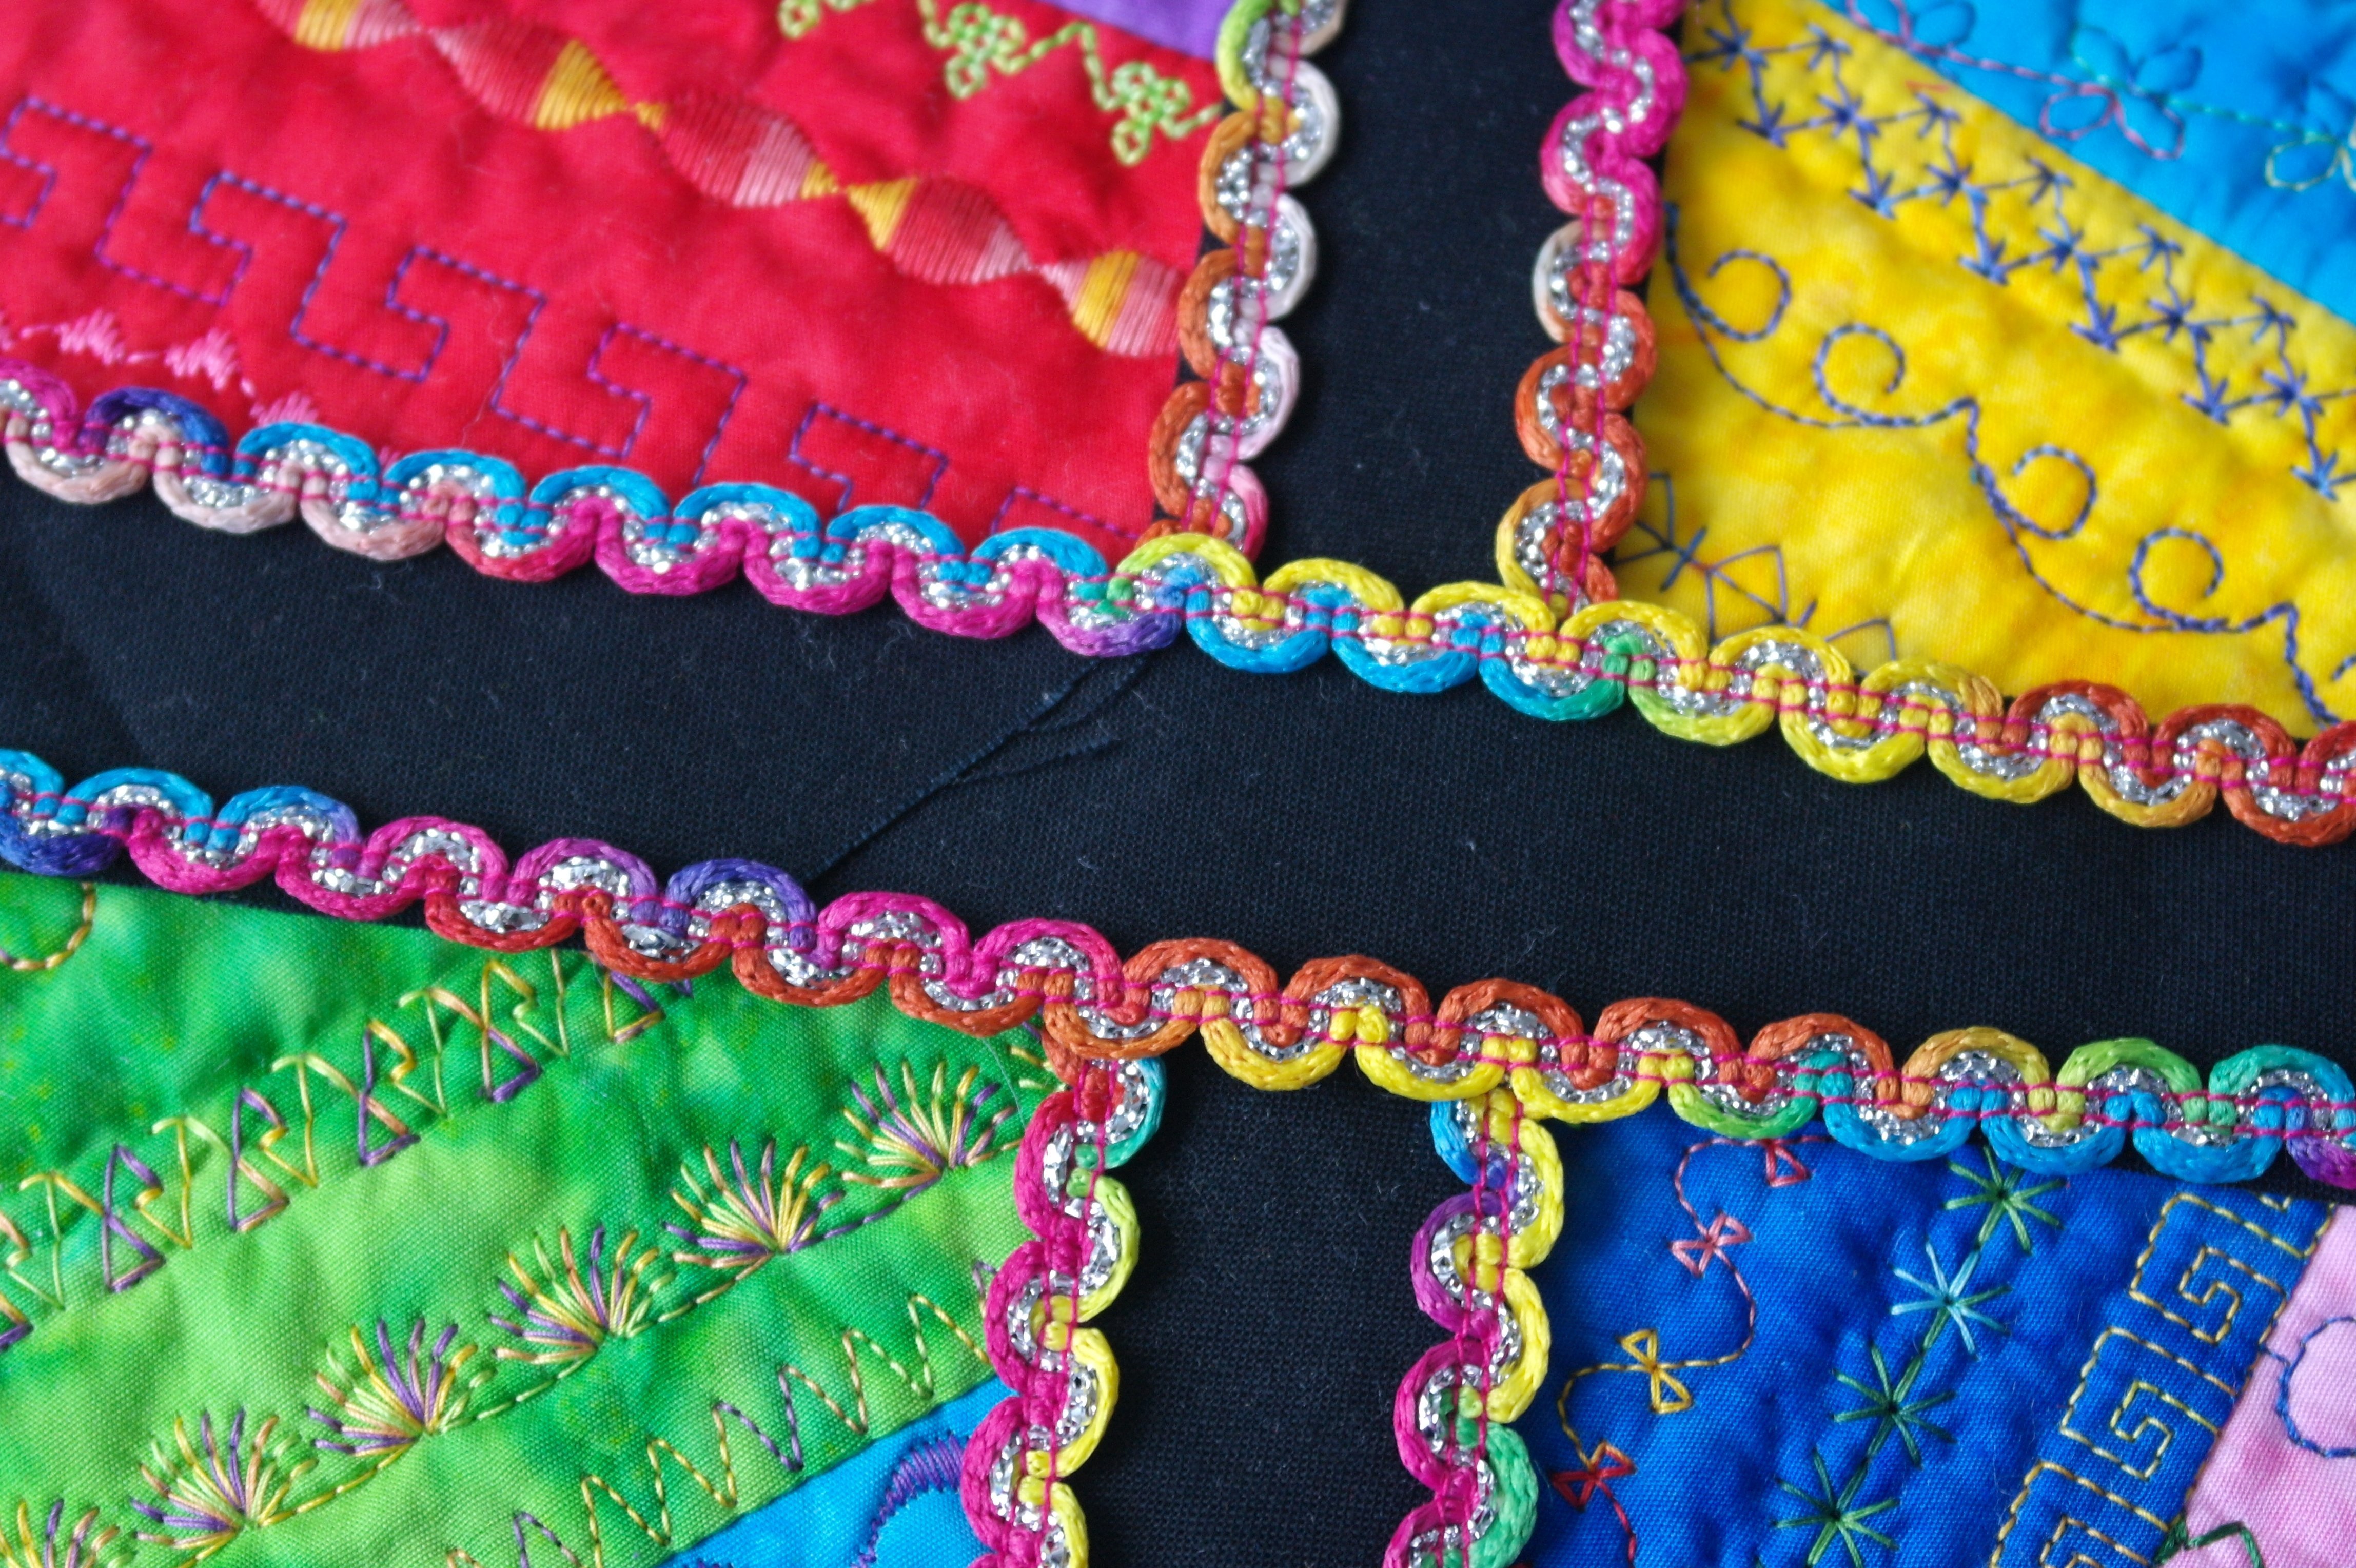
– blocks will be sewn together, using a wide zigzag stitch, the black (batik) sashings are added and extra Multicolor Ribbon with silver is added on both sides of the sashings. This gives your quilt the ultimate sparkle. You will need 3 rolls of this Multicolor Ribbon with silver (10 meter per roll). This is what I have done with my quilt.
Whatever you will choose: it depends on the amount time you want to take to finish your quilt, and the materials you want to use. Your quilt will be amazing, no matter what you will add to finish it.
In this part I will explain about the original way of using the wider sashings. You can download the scheme for the Black Batik fabric/sashings and binding here: just follow the text and pictures.
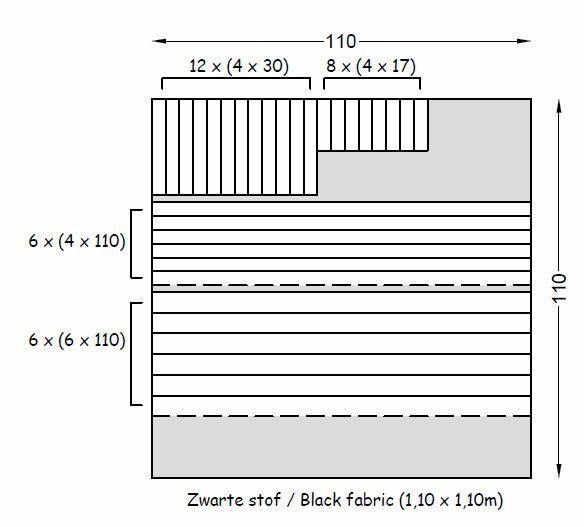
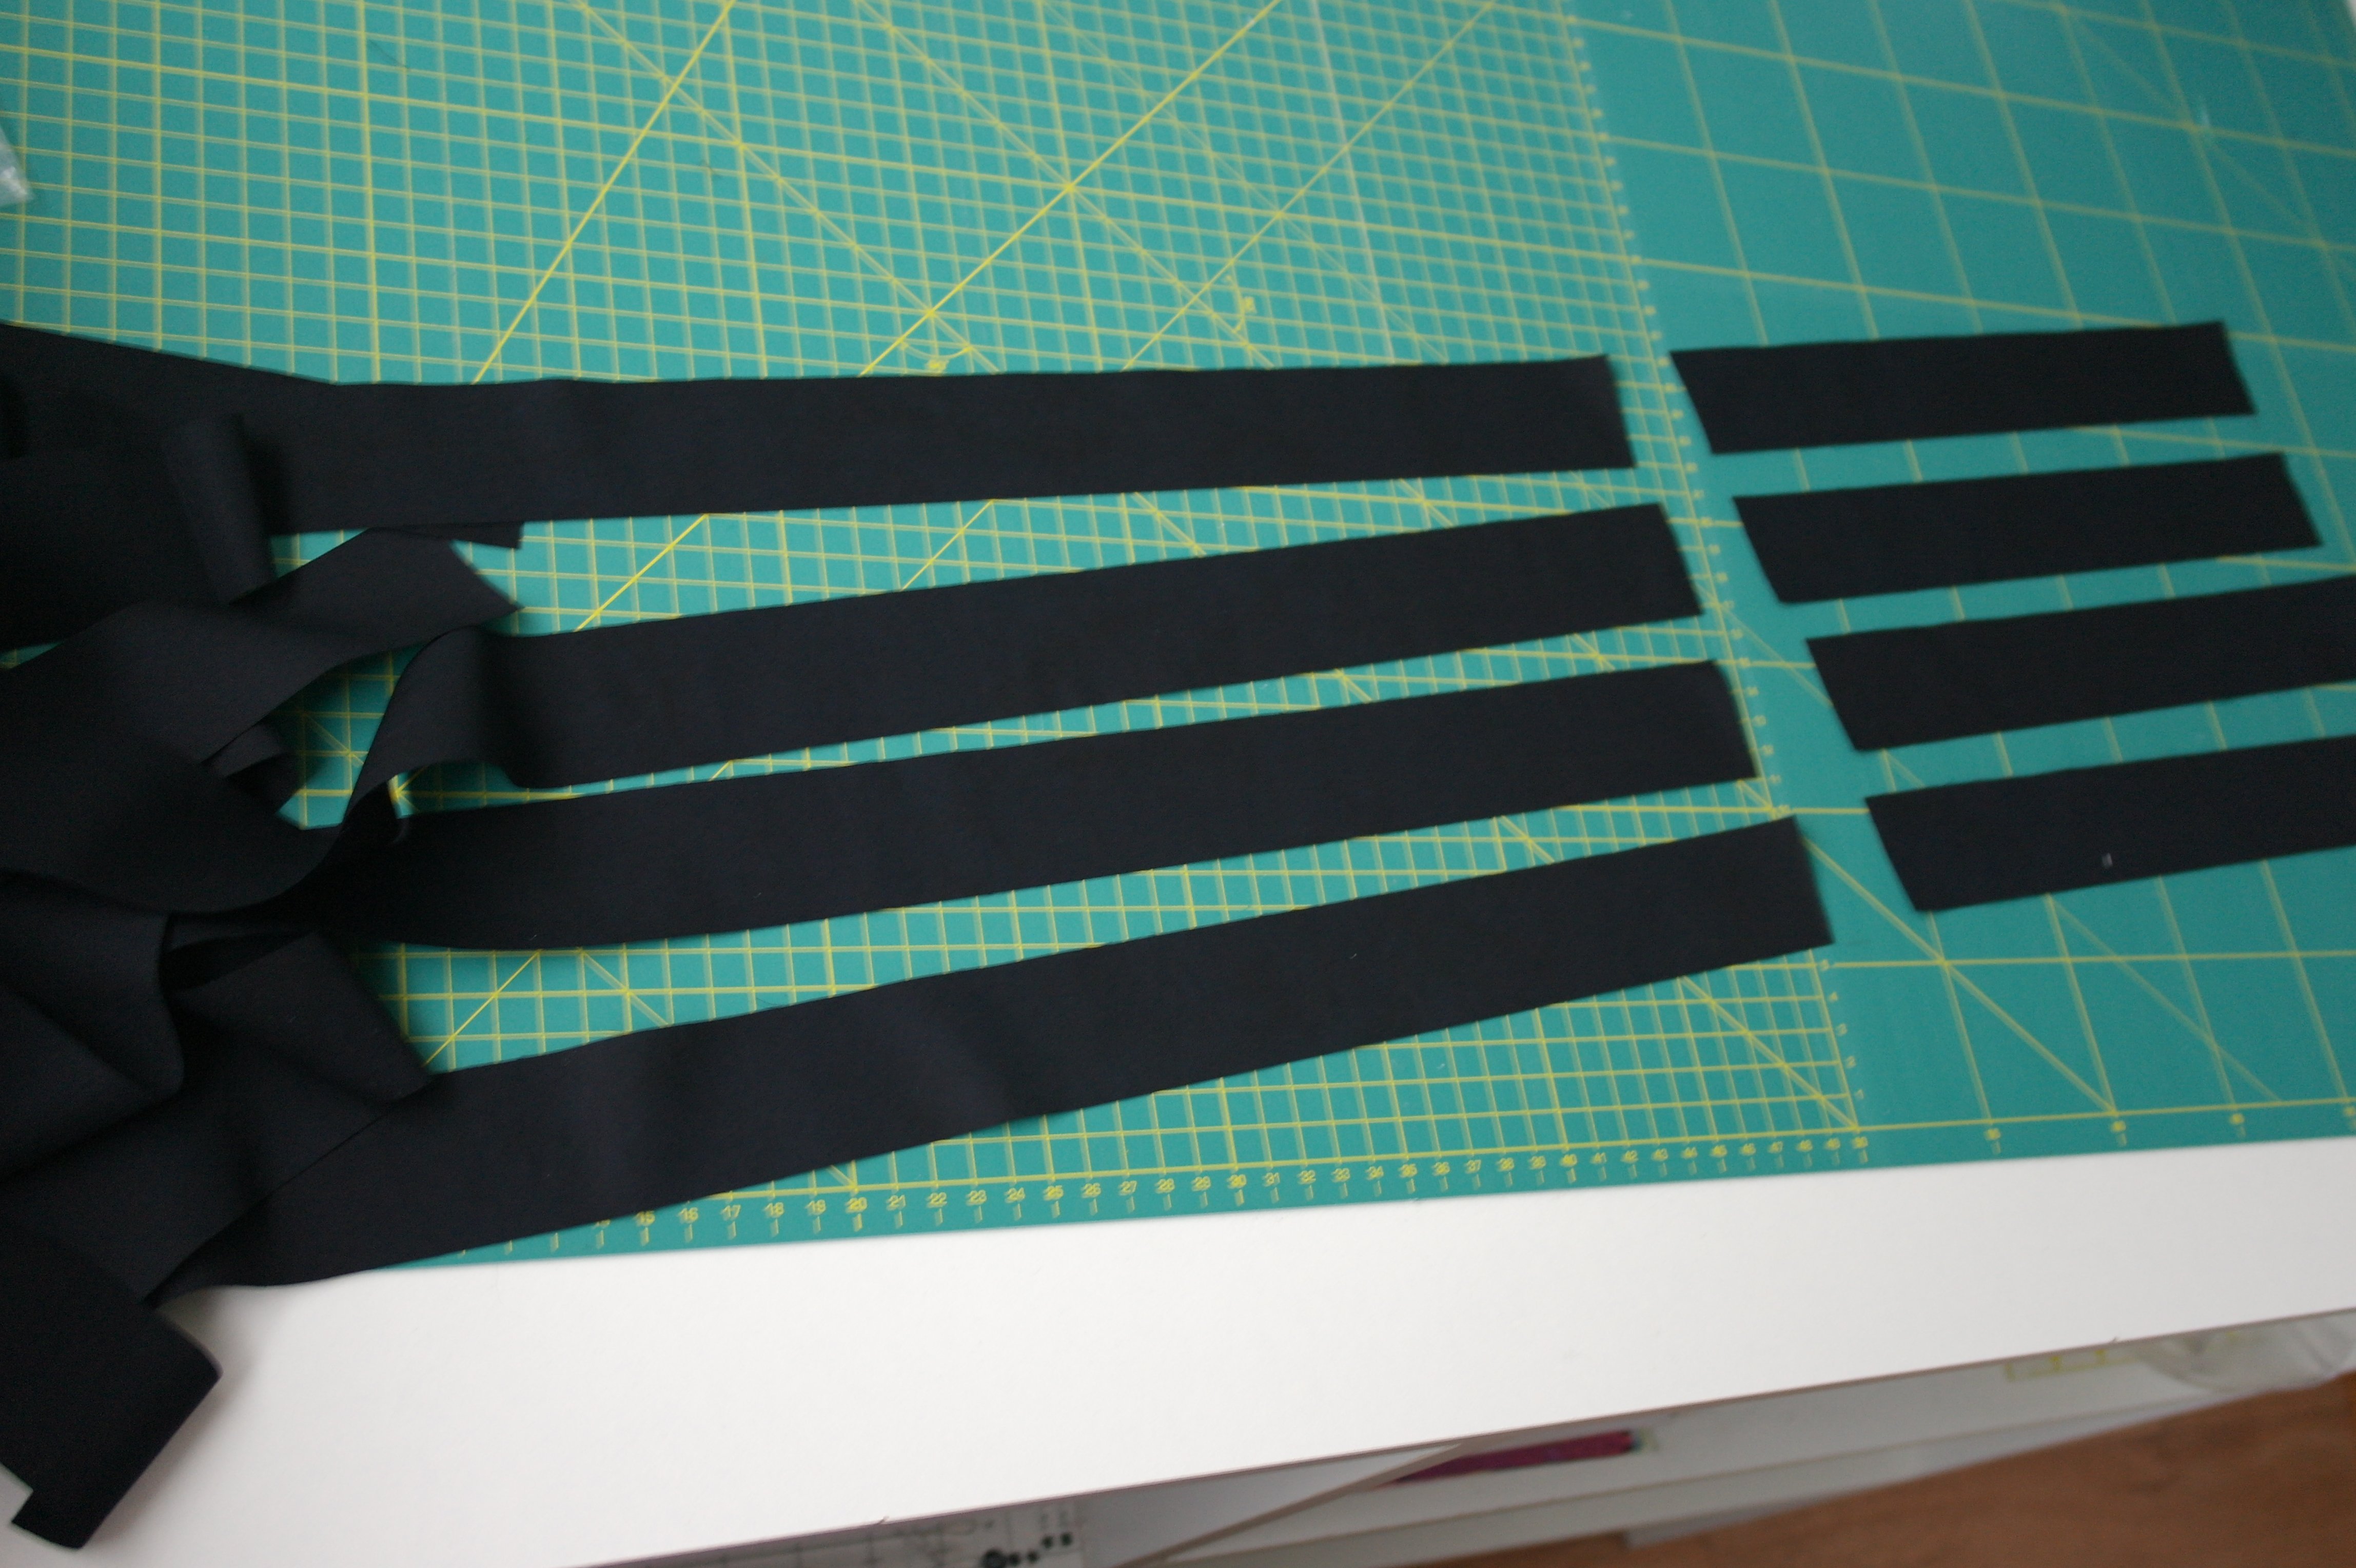
On the picture above you will find the scheme for cutting strips of fabric from the black batik. The width of the fabric is aprox. 1.10m. Some fabrics can be wider, but some are even smaller. Be sure to measure your fabric before cutting, to be sure you will have the right length for each of the strips.
For the vertical sashings you will need 12 long strips – each precisely 4 x 30 cm, which are cut along the length of the fabric, and 8 short strips – each precisely 4 x 17 cm, also cut along the length of the fabric. The strips are a bit too long, but that is attentionally.
For the horizontal sashings you will need the entire width of the fabric – they will be cut from the width of the fabric. The scheme shows you that you will have to cut 6 strips – each precisely 4 cm wide. Cut a minimum of 5, the 6th is your extra/spare. 4 Strips are used over the total width, the 5th strip is cut in 4 pieces, each of them sewn one of the 4 long strips. Iron the seams open. IF THE 4 STRIPS ENOUGH IN LENGHT TO BE SEWN ONTO THE TOTAL WITDH OF THE QUILT, YOU DON’T NEED THE EXTRA PIECES OF THE 5TH STRIP. It all depends of the finished size of your blocks, after cutting and sewing them together. I needed the extra pieces, because my quilt is aprox. 1.13 x 1.13m , and the strips were a bit too short.
For the binding you will need strips cut from the entire width of the fabric – the scheme shows you, that you need to cut 6 strips – each precisely 6 cm wide. Again, cut a minimum of 5, the 6th is your extra/spare. Sew the 5 strips together and iron the seams open.
Joining the blocks is easy: work in rows, 5 blocks per row. Place two blocks together, and sew them with a wide, open zigzag stitch.
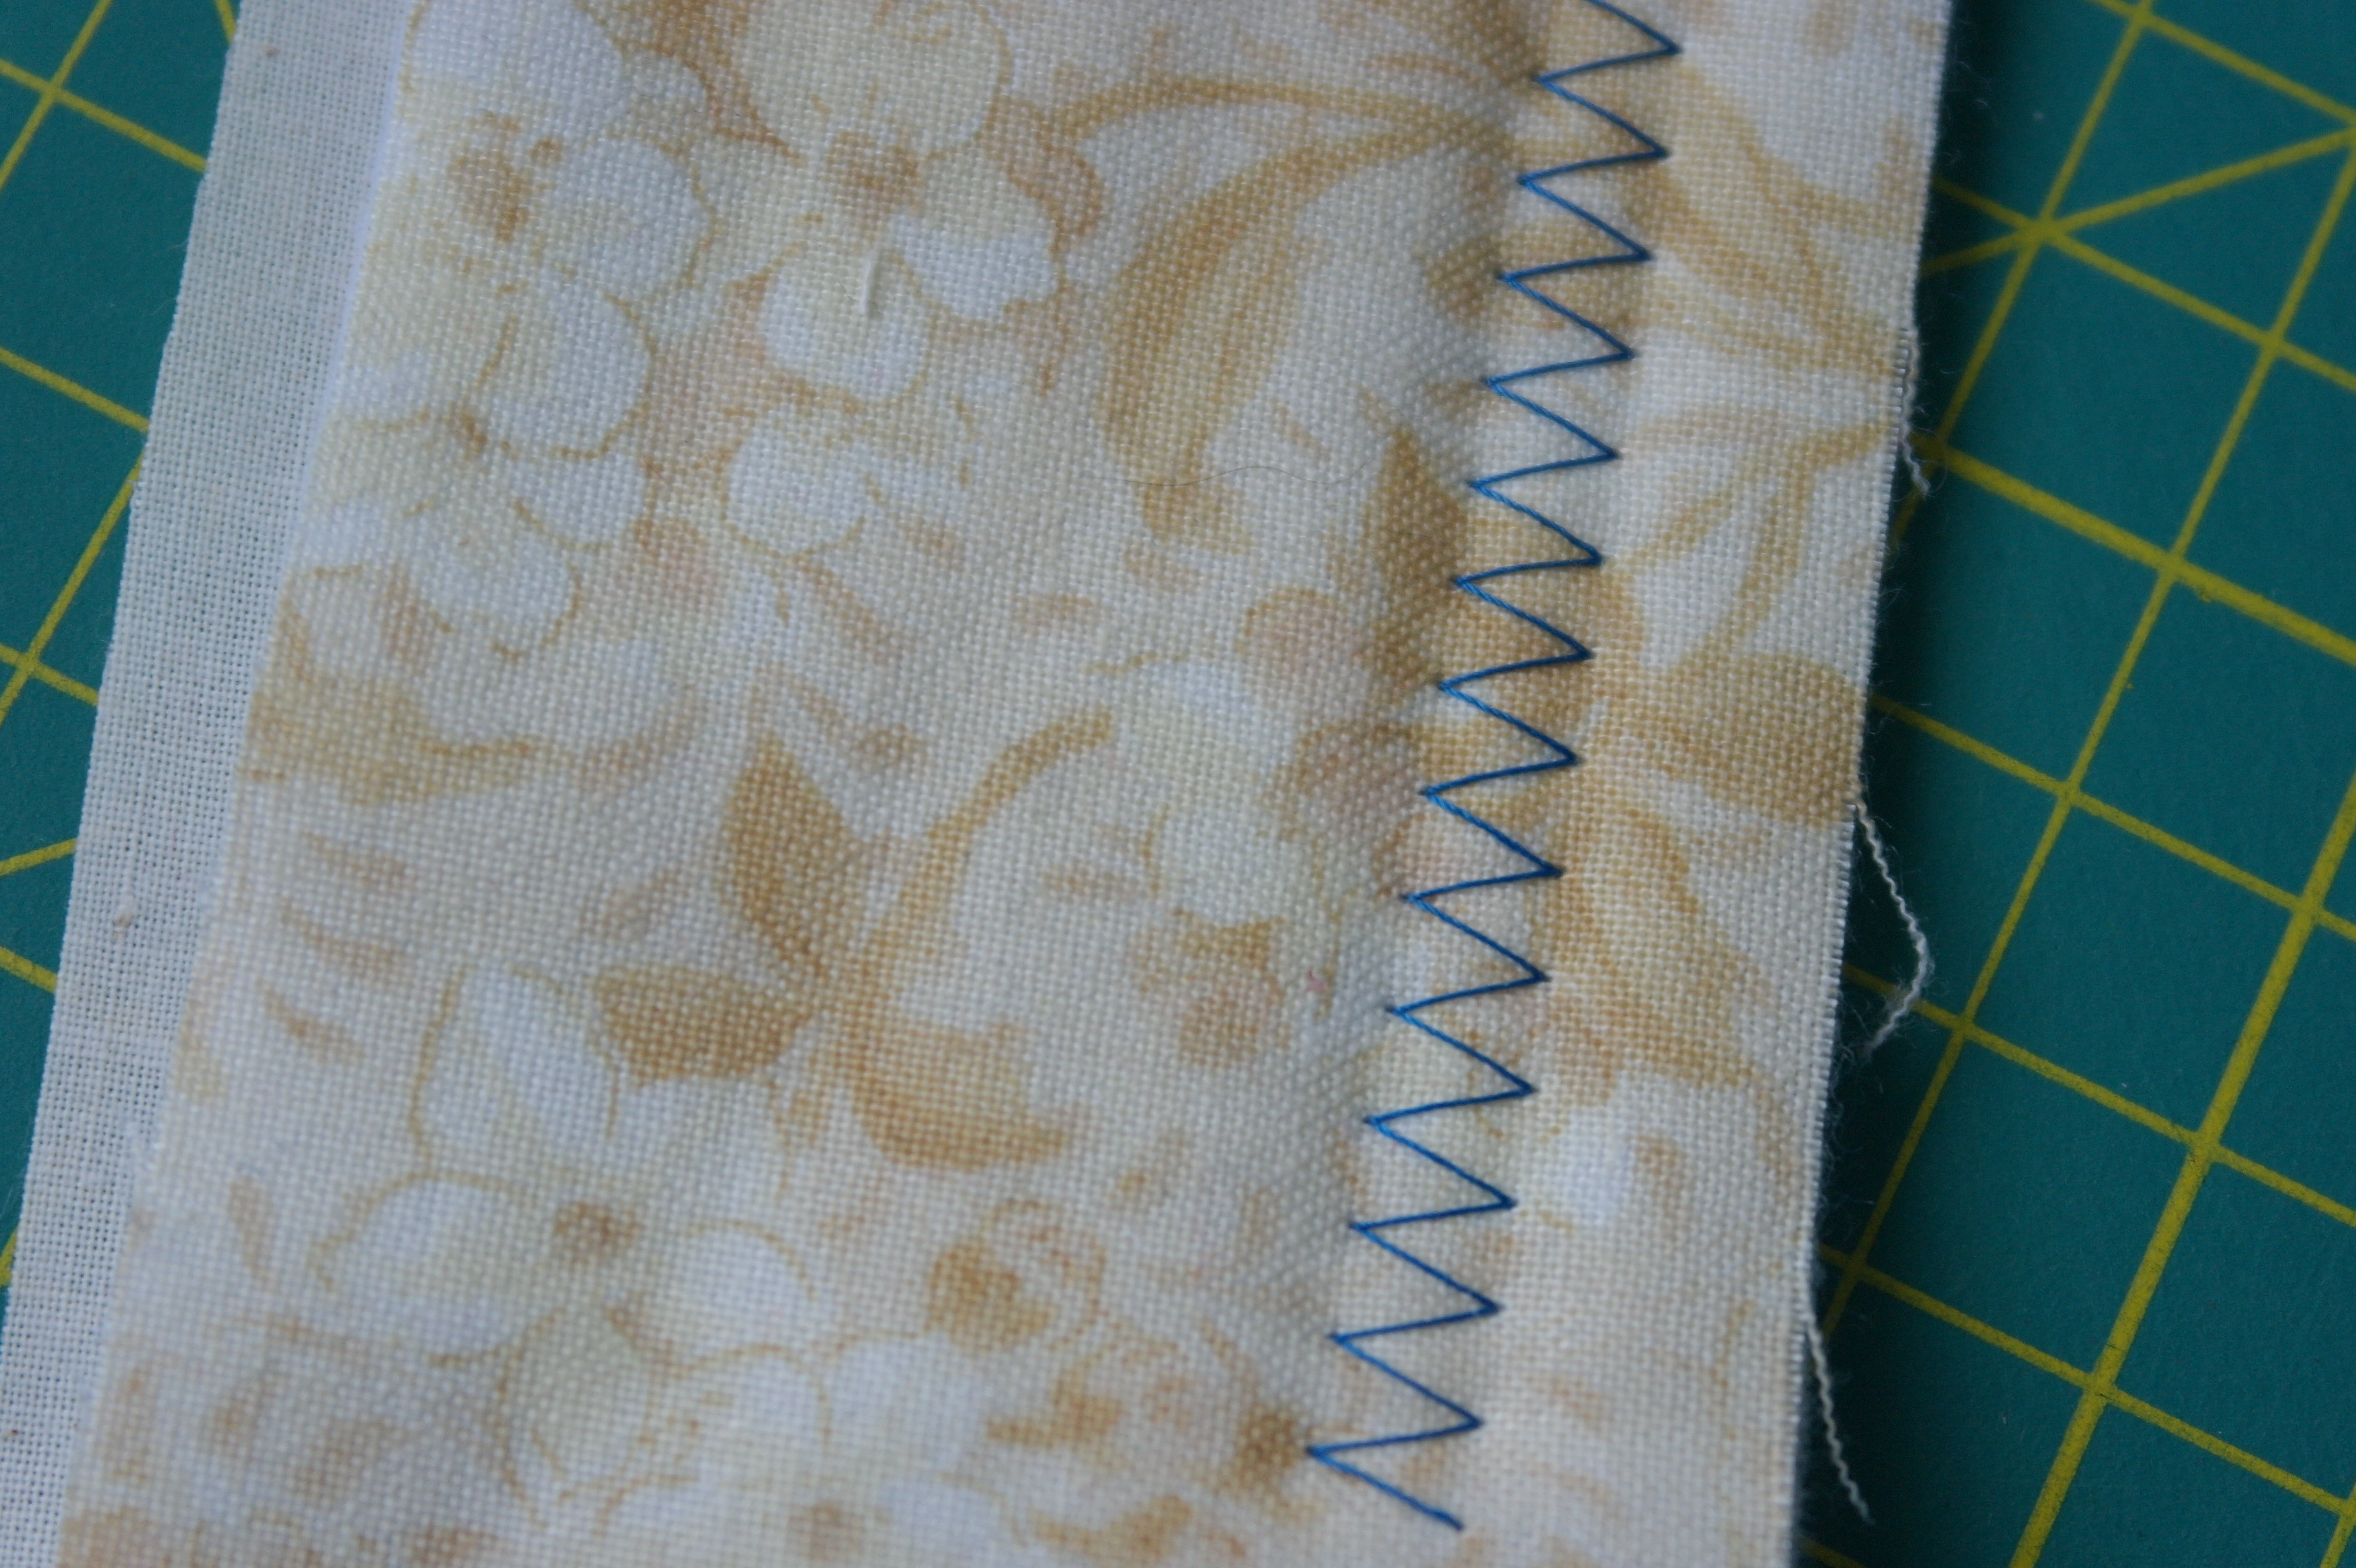
It is important to try this stitch out, on a sample. I have widened the stitch up to 6.0 mm, and lengthened it to avoid any density – that may distort the blocks/give bulk. Be sure to check if your machine allows you to made stitches that wide. Some machines will have a maximum width of 5.0mm. That’s ok too. But do not make your stitch any wider than 6.0 mm – you need to cover these stitches afterwards and the wider they are, the wider your sashing will have to be. This width of 6.0 mm is sufficient to ‘catch’ both blocks eaqually.
Do not be alarmed if – after joining all blocks – they have become a bit smaller: sometimes joining blocks makes them shrink a bit. If all works well, the sizes of the first/upper row of blocks should be 28cm, 14,5cm, 28cm, 14,5cm en 28 cm. A total of 113 cm. Perhaps your row is 112,5 or even 112 cm after joining the blocks. If this is the case with all your rows, that’s ok.
IMPORTANT: blocks are not supposed to shift next to each other; not in length or width, so work slowly. Check along the zigzag stitch if your blocks are still ‘running next to each other’, and one block doesn’t protrude. Don’t think you can cut such a piece that sticks out, because your block will be to short then, and it will distort your quilt. My first blocks are sewed together: they fit very well.
ALSO IMPORTANT: hold the blocks against each other when joining them, nót over each other. Check this along the way. If all blocks still remain on their original (cut back) size – the large squares should be 28x28cm, the rectangular blocks 28 x 14,5 cm (or your ajusted sizes). (It would be disapointing if there is bulk or distortion in your quilt).
Join the blocks 2 by 2, if possible: first the two blocks on the left, then the next two blocks.
Join the most rightmost block with the last 2, and then join the entire row of blocks to make a complete row of 5.
The back of my quilts shows the zigzag stitch: even the backing is captured too – this is how it is done the proper way.
Is the row with the blocks too large to fit under your machine? Roll it up, or turn your row and sew from the other side, with less blocks under the space of your machine. Particularly when joining all rows to make the finished quilt, it is advised to work from the center to the side, then turn your quilt if that fits better. Work slowly, and make sure your needle pauzes in the down position, every time you stop.
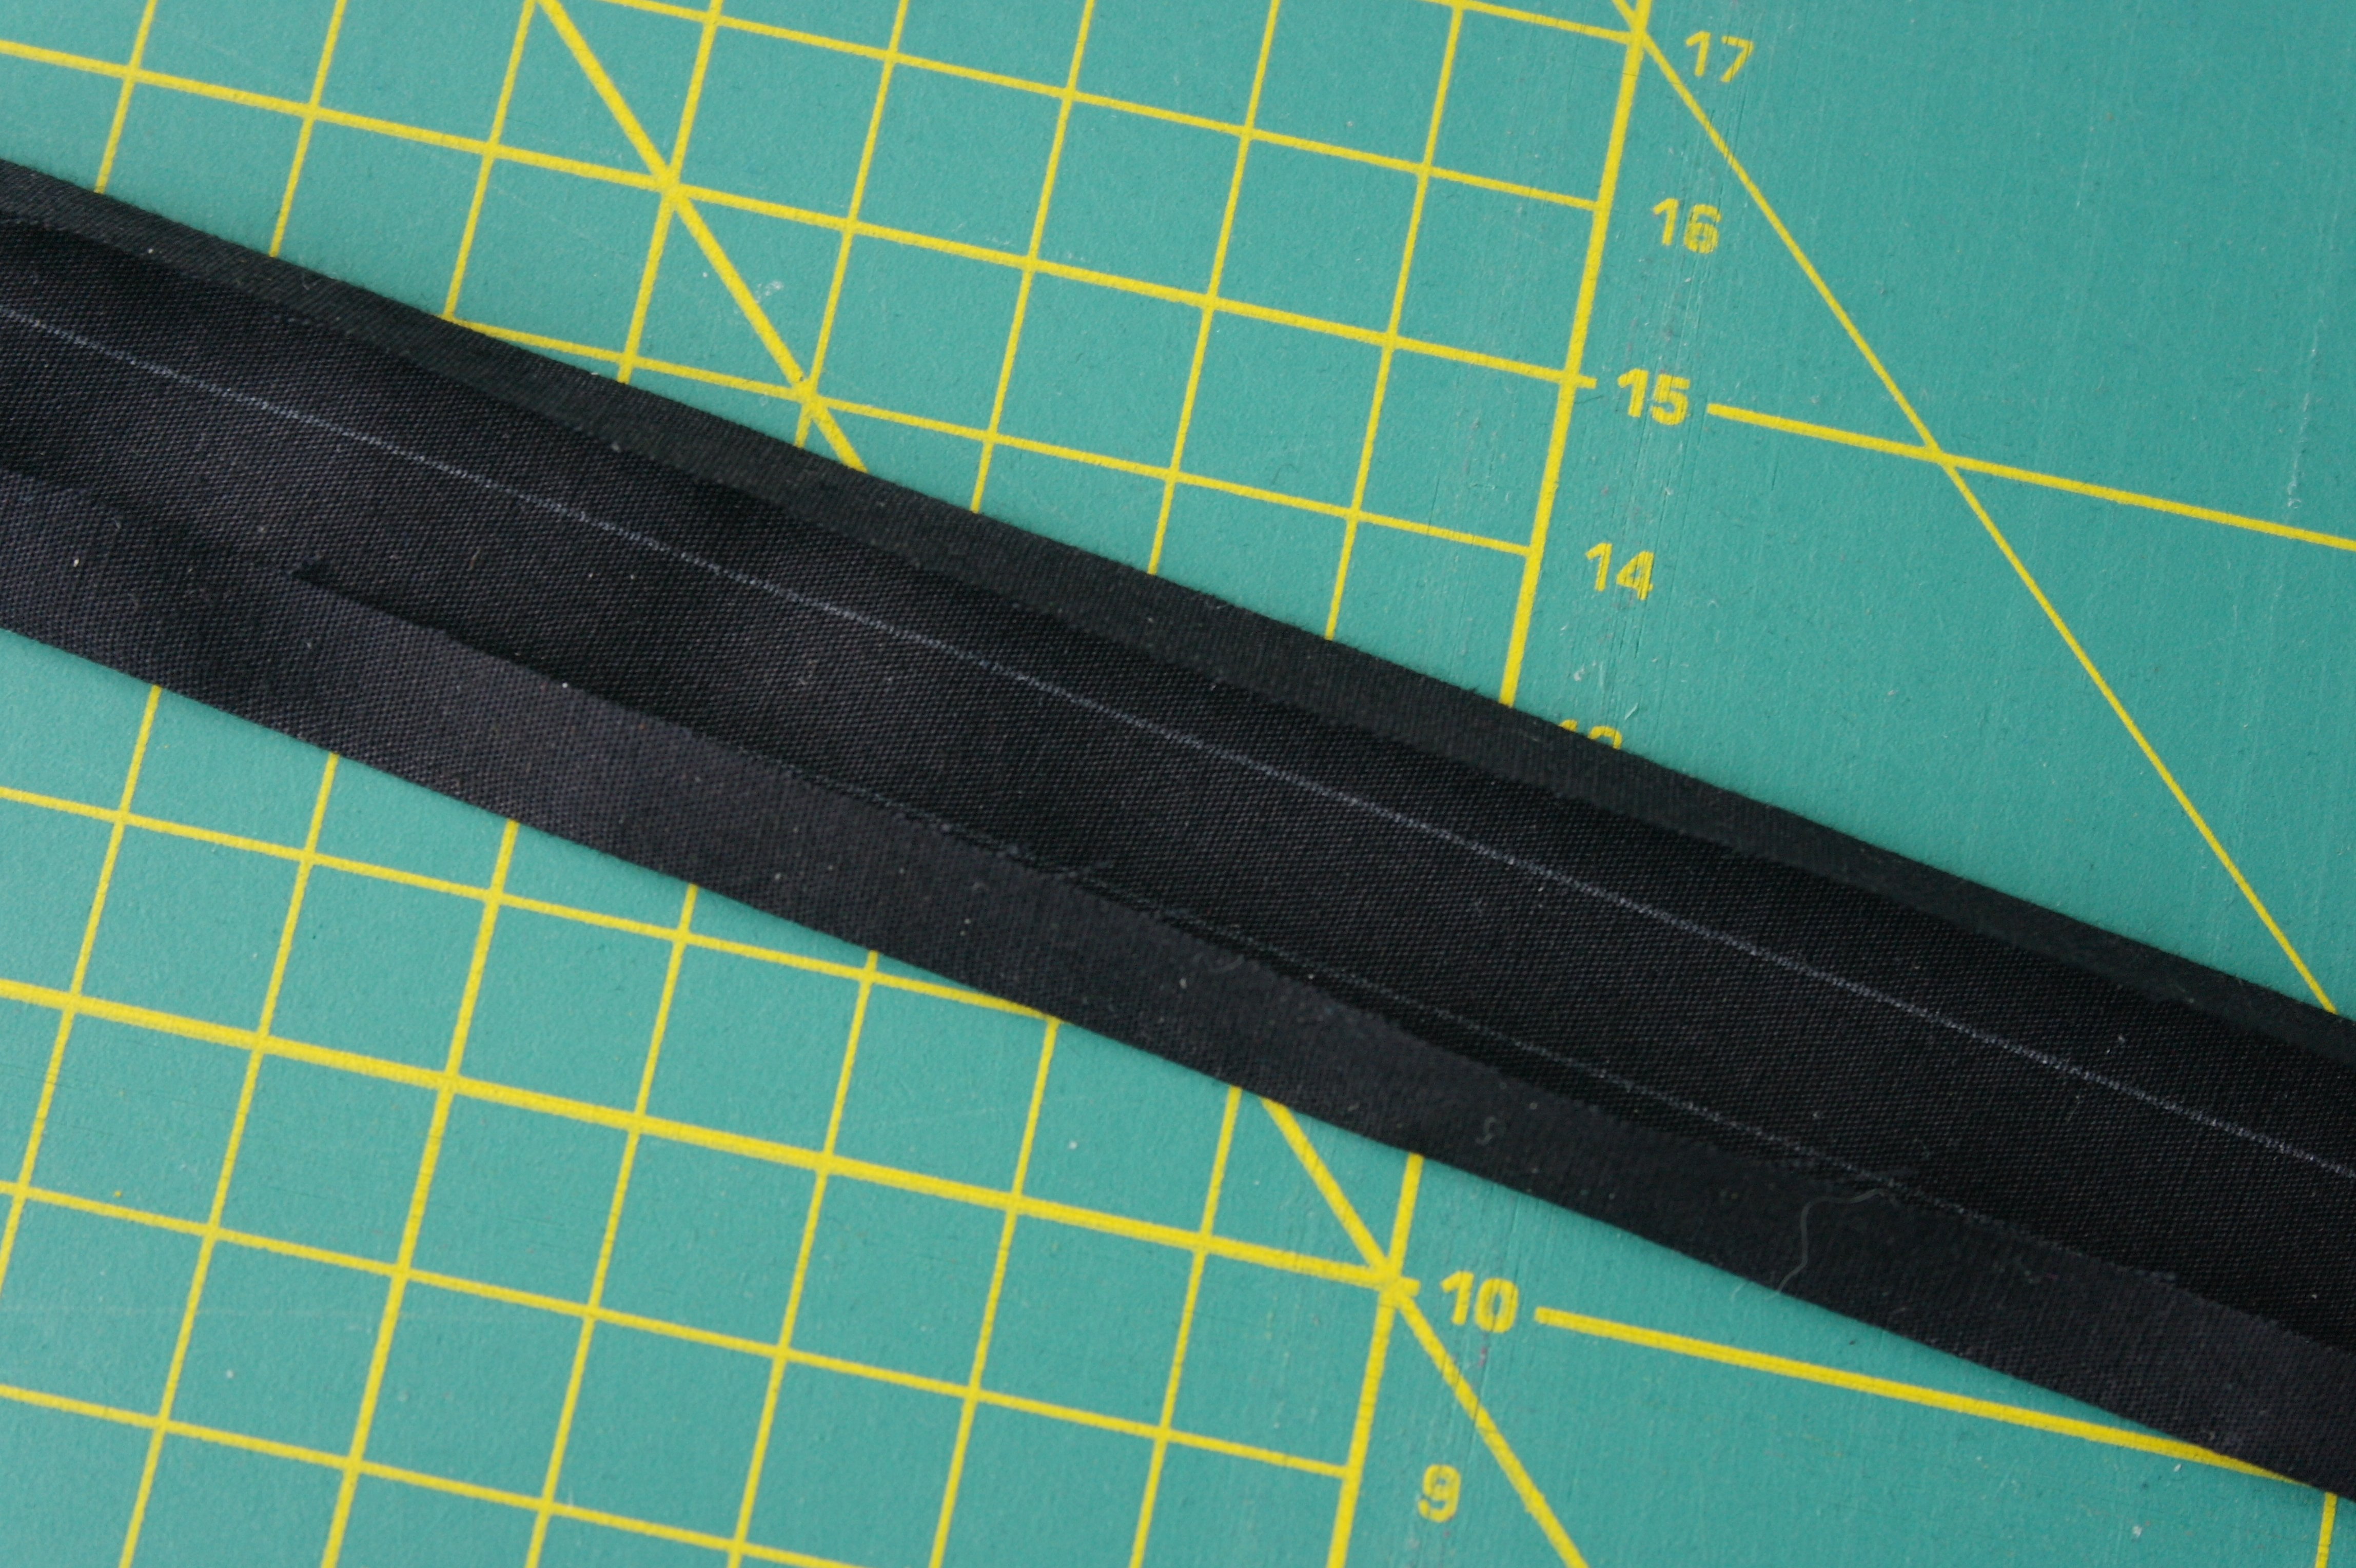
If you choose to make the original (black batik) sashings, this is your next step. They are cut from the black batik fabric: which is explained above. I will cut the sashing at a width of 4 cm, so I have placed the black batik on my cutting mat, measured 30 cm, and placed a block ((just to check things), width 28 cm) on top of the black fabric. This shows me that the 30 cm will be ok. I have cut 12 strips, each 4 x 30 cm, and 8 stroken, each 4 x 17 cm. They are slightly too large, but I need that extra for working easier.

By placing the black batik against a line of my cutting mat, and the quilt ruler over the fabric, finding the 4 cm line, it’s easy to cut strips this way. Check every time – before cutting – if the fabric and ruler are placed the right way. And check your measurements – 4 cm, not wider or smaller.
Cut all vertical sashings and check your numbers. If you are working with batik/solid fabrics, you don’t have to worry about which side is the right side. With printed fabric, be sure to use the printed side up when sewing the sashings onto your quilt.
To make sure your sashings will be of the right width, edges folded underneath (like with bias tape), you can use a white water soluble pen to draw lines onto the inside of the strips. I have placed the quilt ruler over the edge of a strip, and drew a placement line, to fold the fabric against this line.

Let me explain this more properly:
– If you want to have a finished sashing of 3 cm, you will have to fold the edges of the strips 0,5 cm underneath, towards the middle. Which means that you will have to draw a placement line at 1 cm from each side. Fold the edge of the strip towards and AGAINST the placement line.
– If you want to have a finished sashing of 2 cm, the folded edge must be turned under at 0,75 cm. Draw the placement line at 1,5 cm from each side (which is what I have done, showing on the picture).
Draw placement lines at both edges. The red arrow from the previous picture indicates that’s how you will fold the strip – agains the line. I have folded the first line, thumb ironed it…
and folded the other side the same way. Now I can take this (pre-folded) sashing to my ironing board.
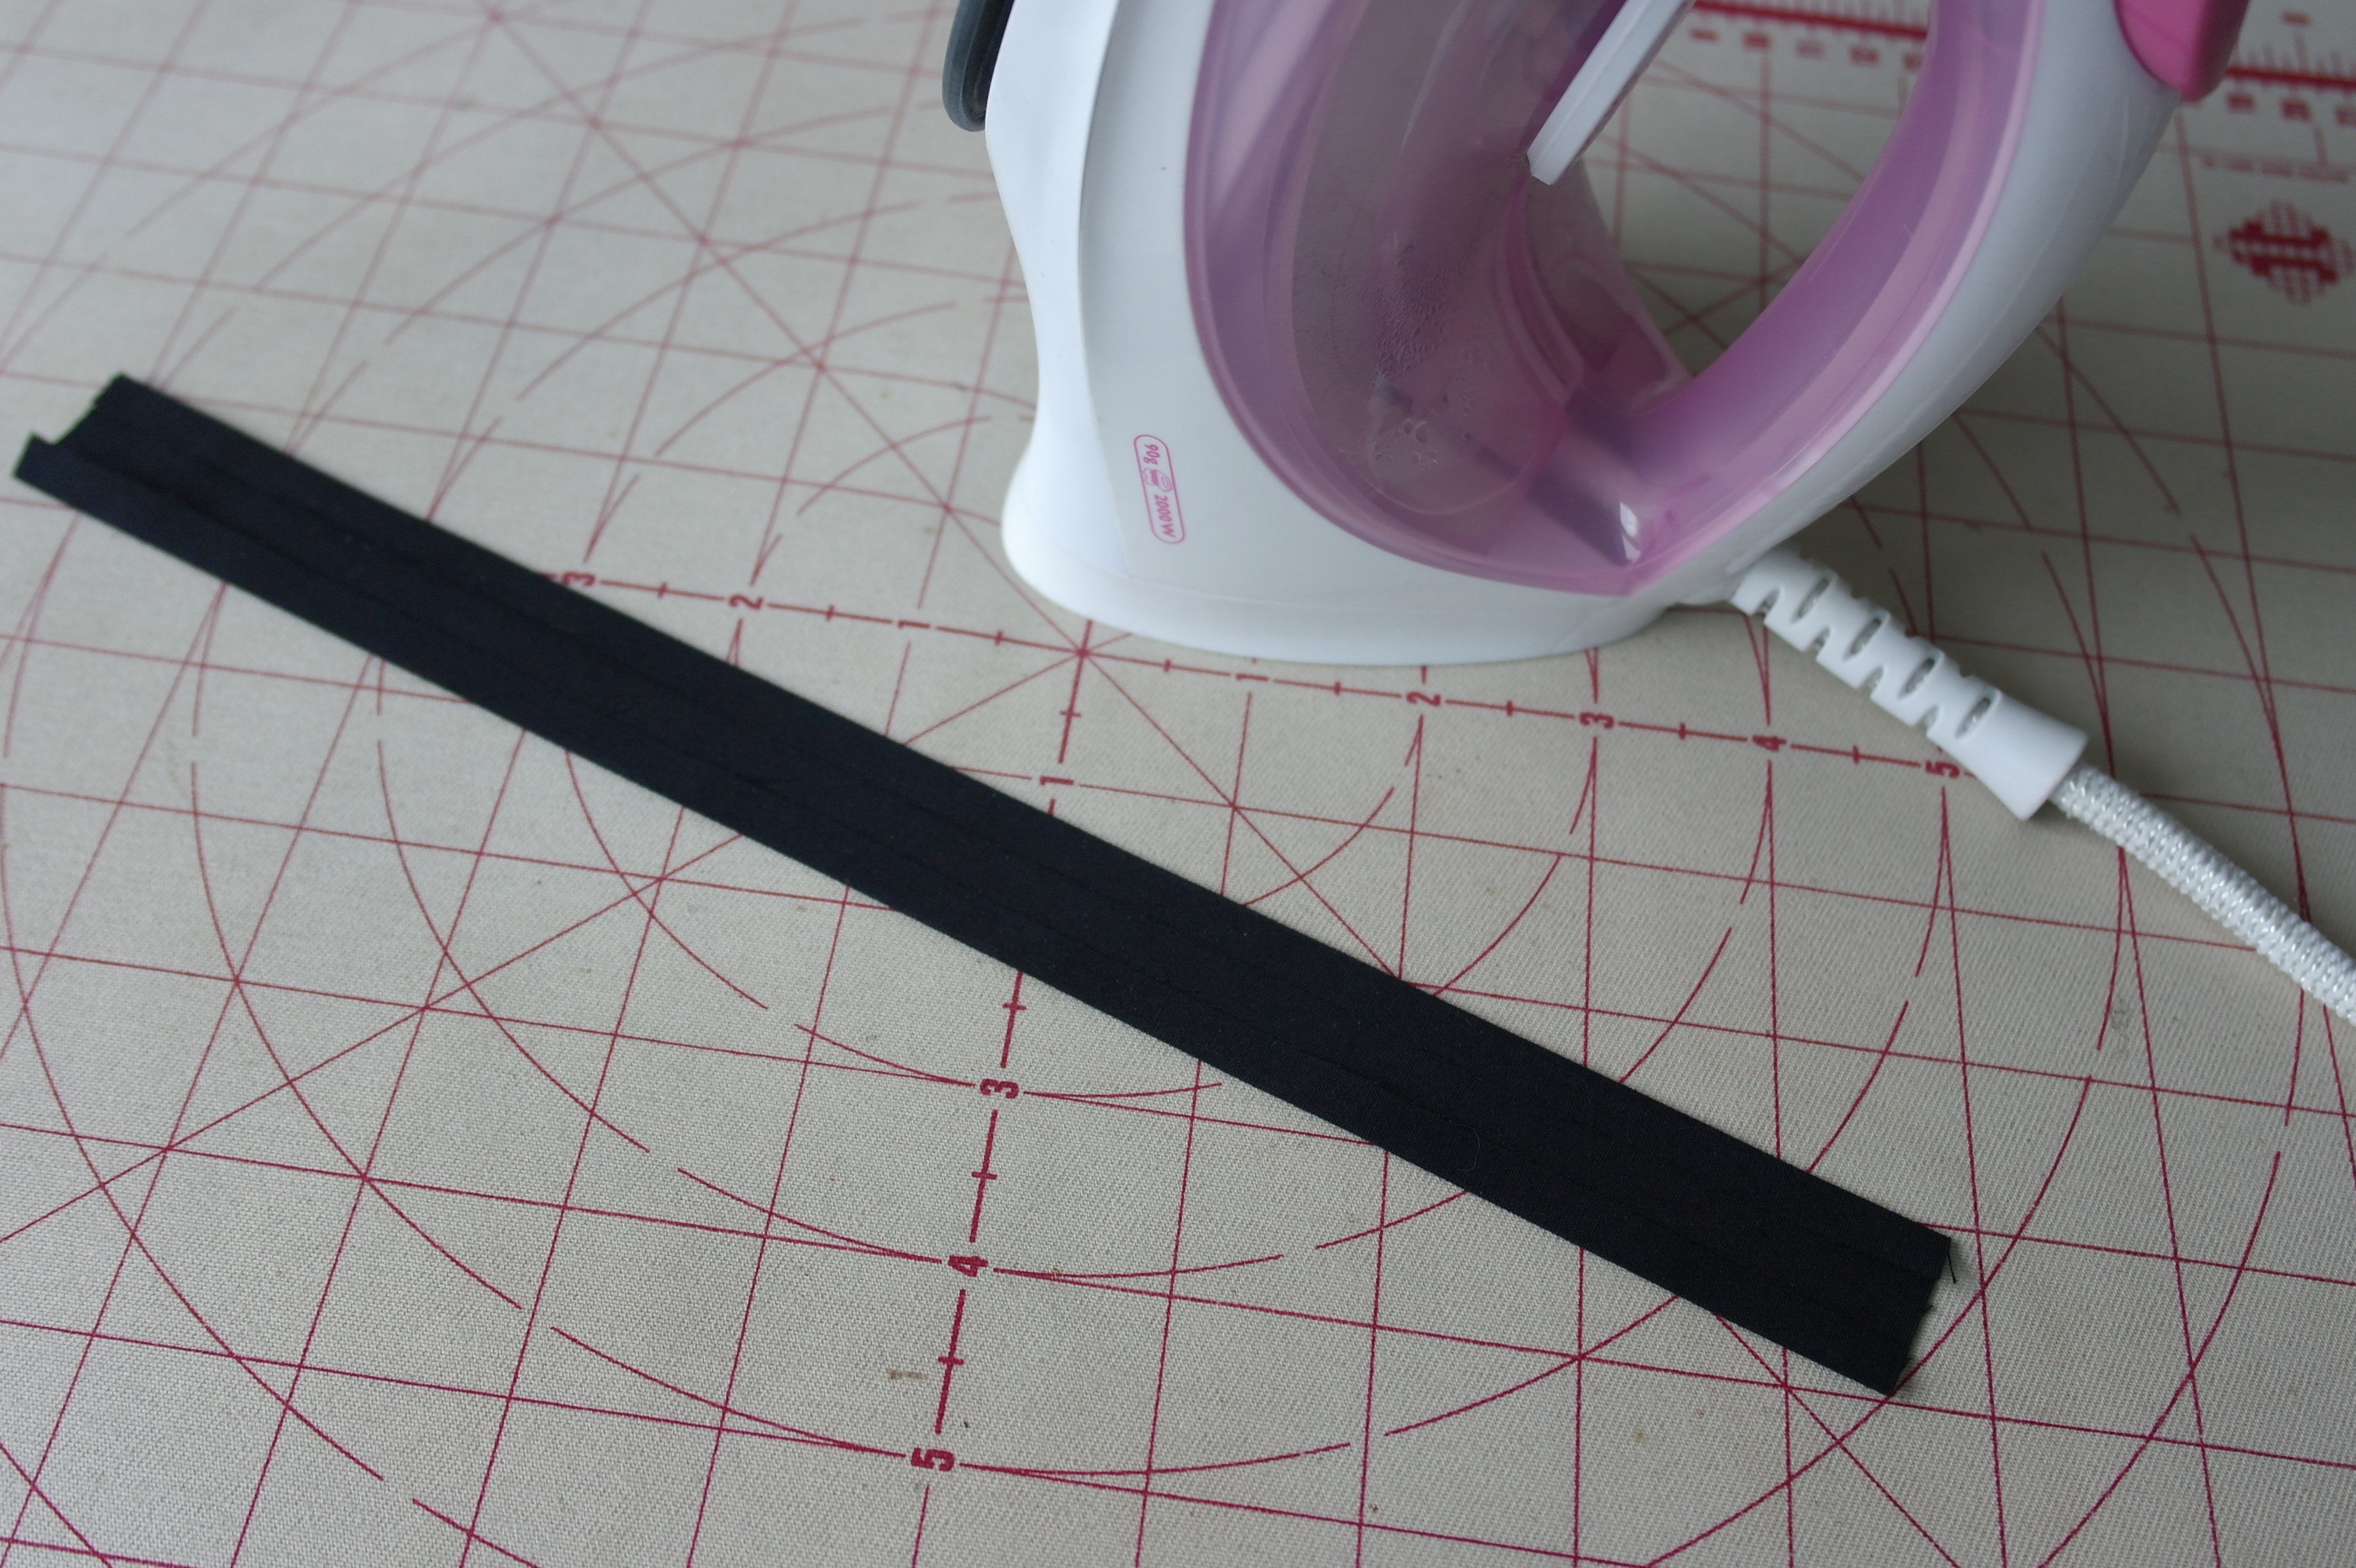
I have ironed the sashing, to make sure it stays at this width while sewing it onto my blocks. The white lines have dissapreared with the warmth of my iron: my white pen does this, but be sure to check this with your marker. It doesn’t matter if lines are still visible on the inside the sashing, as long as they don’t appear at the front.
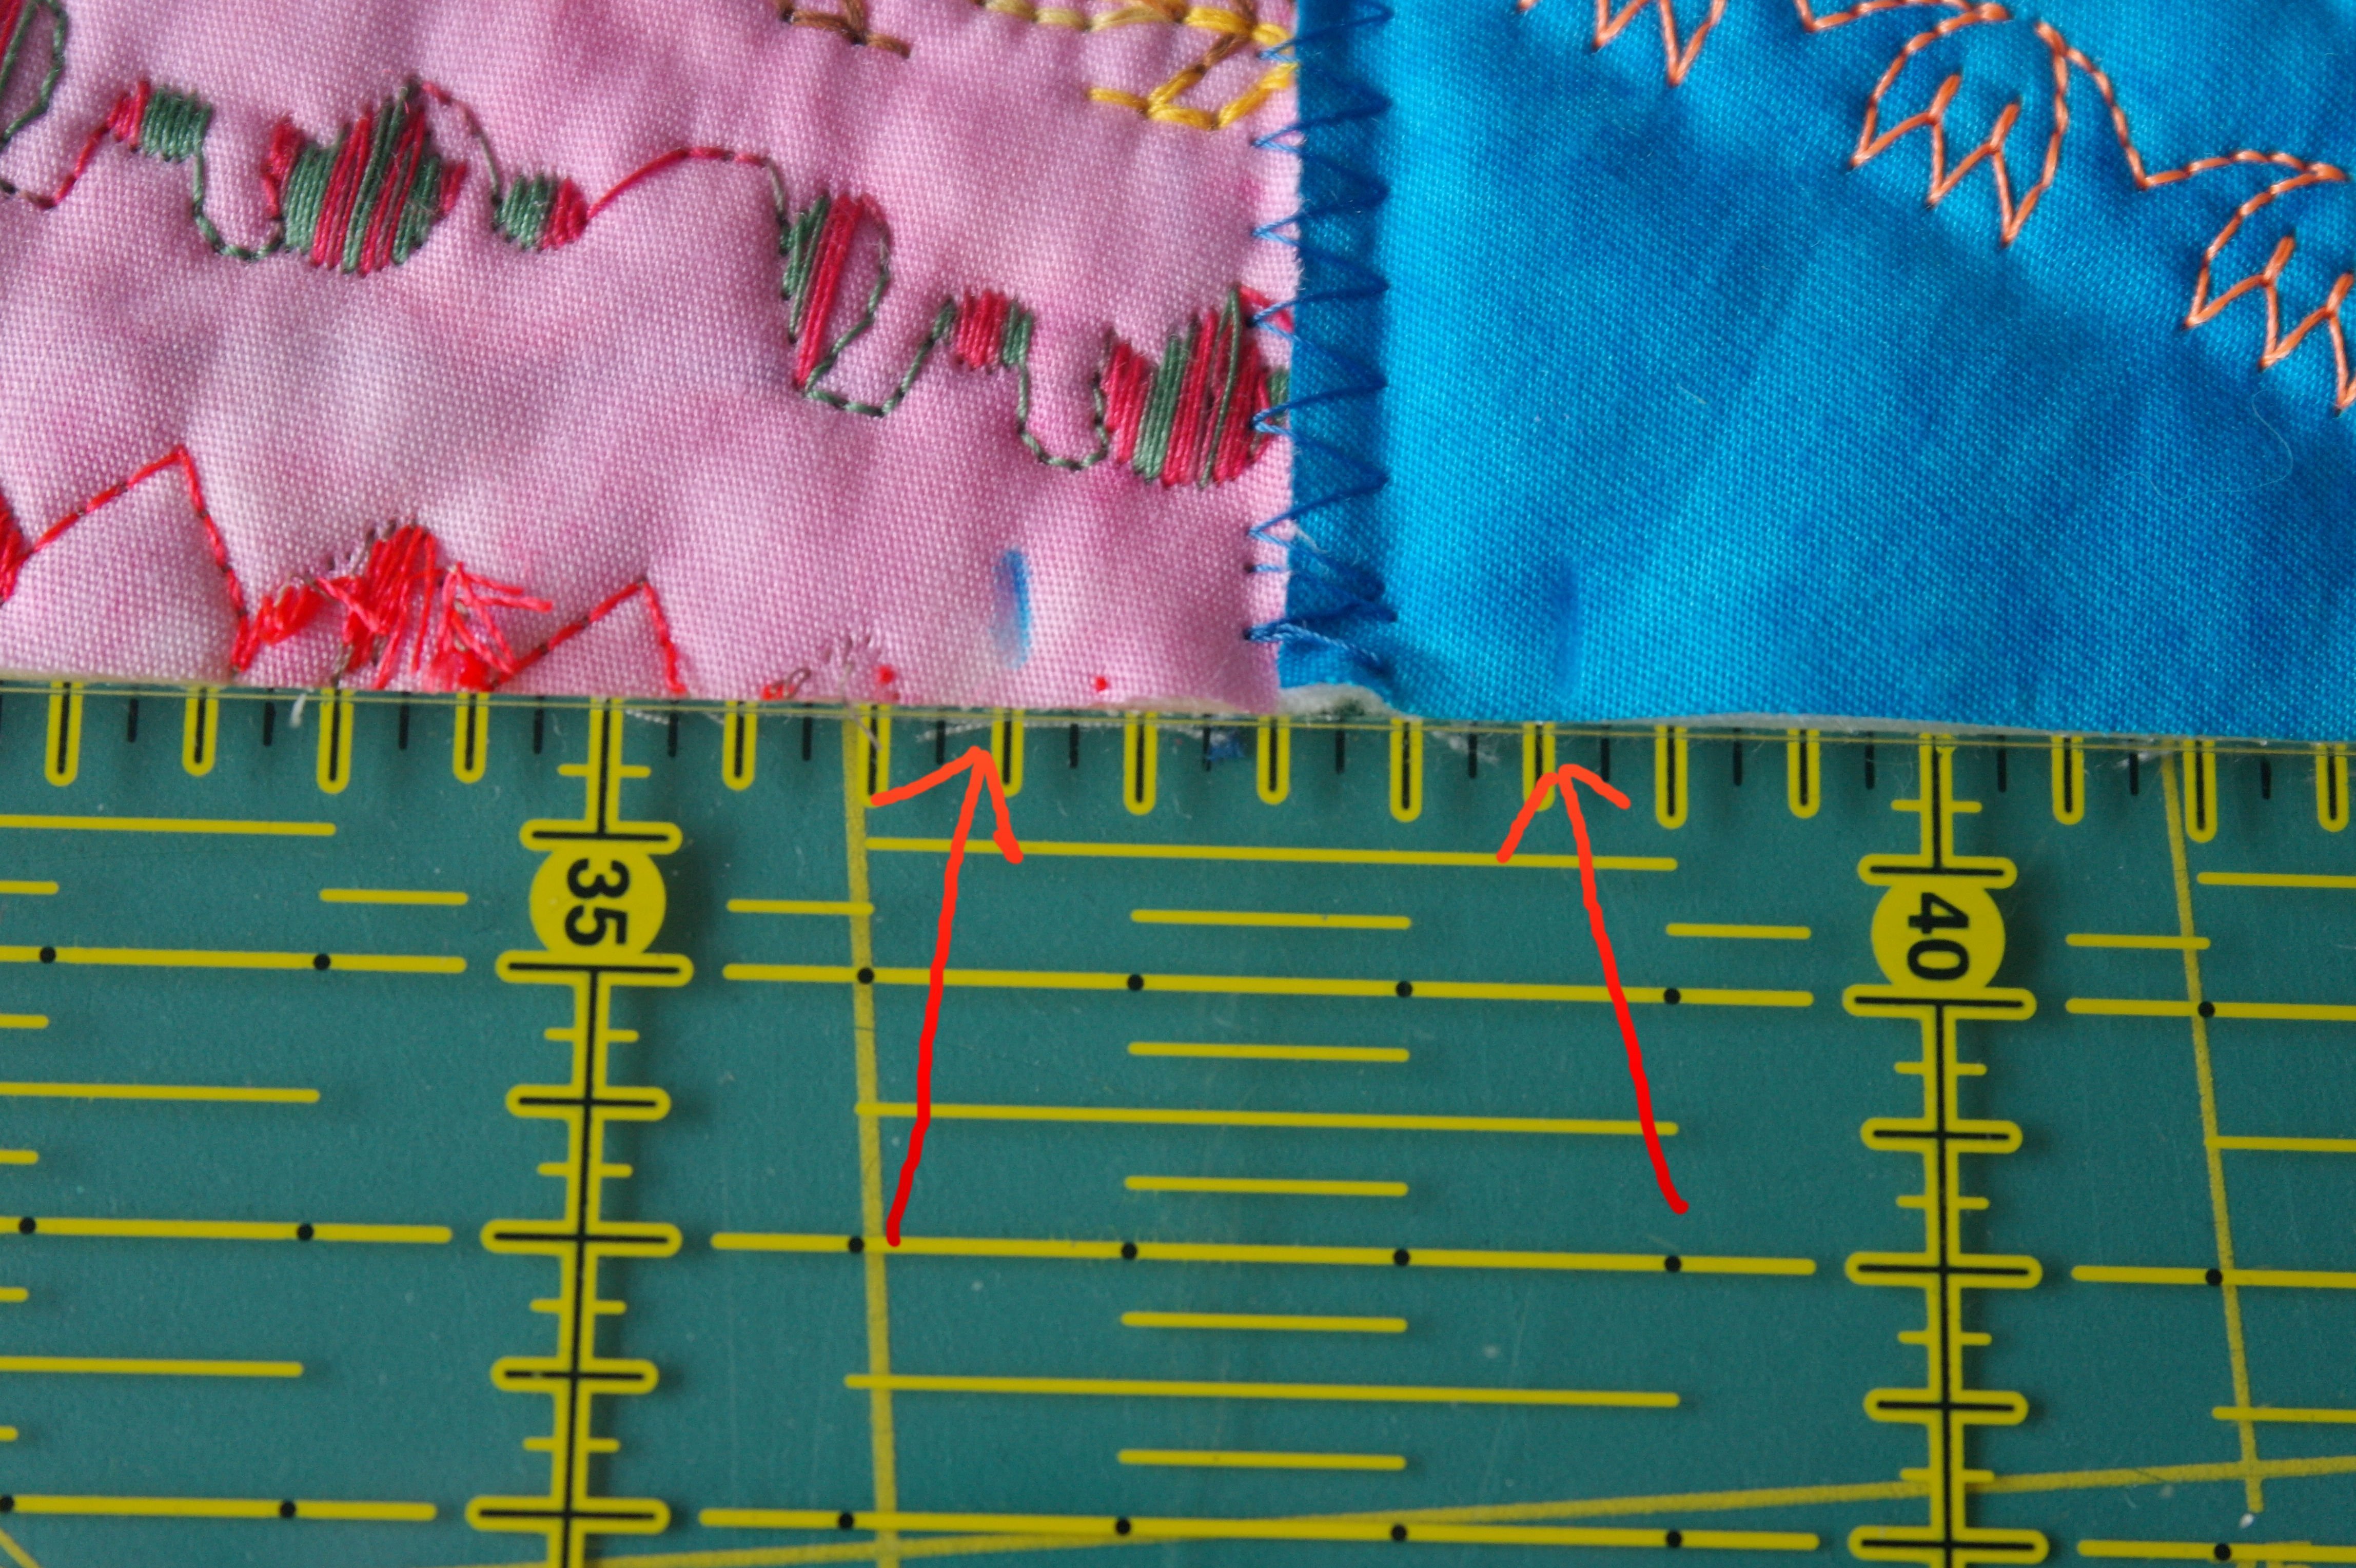
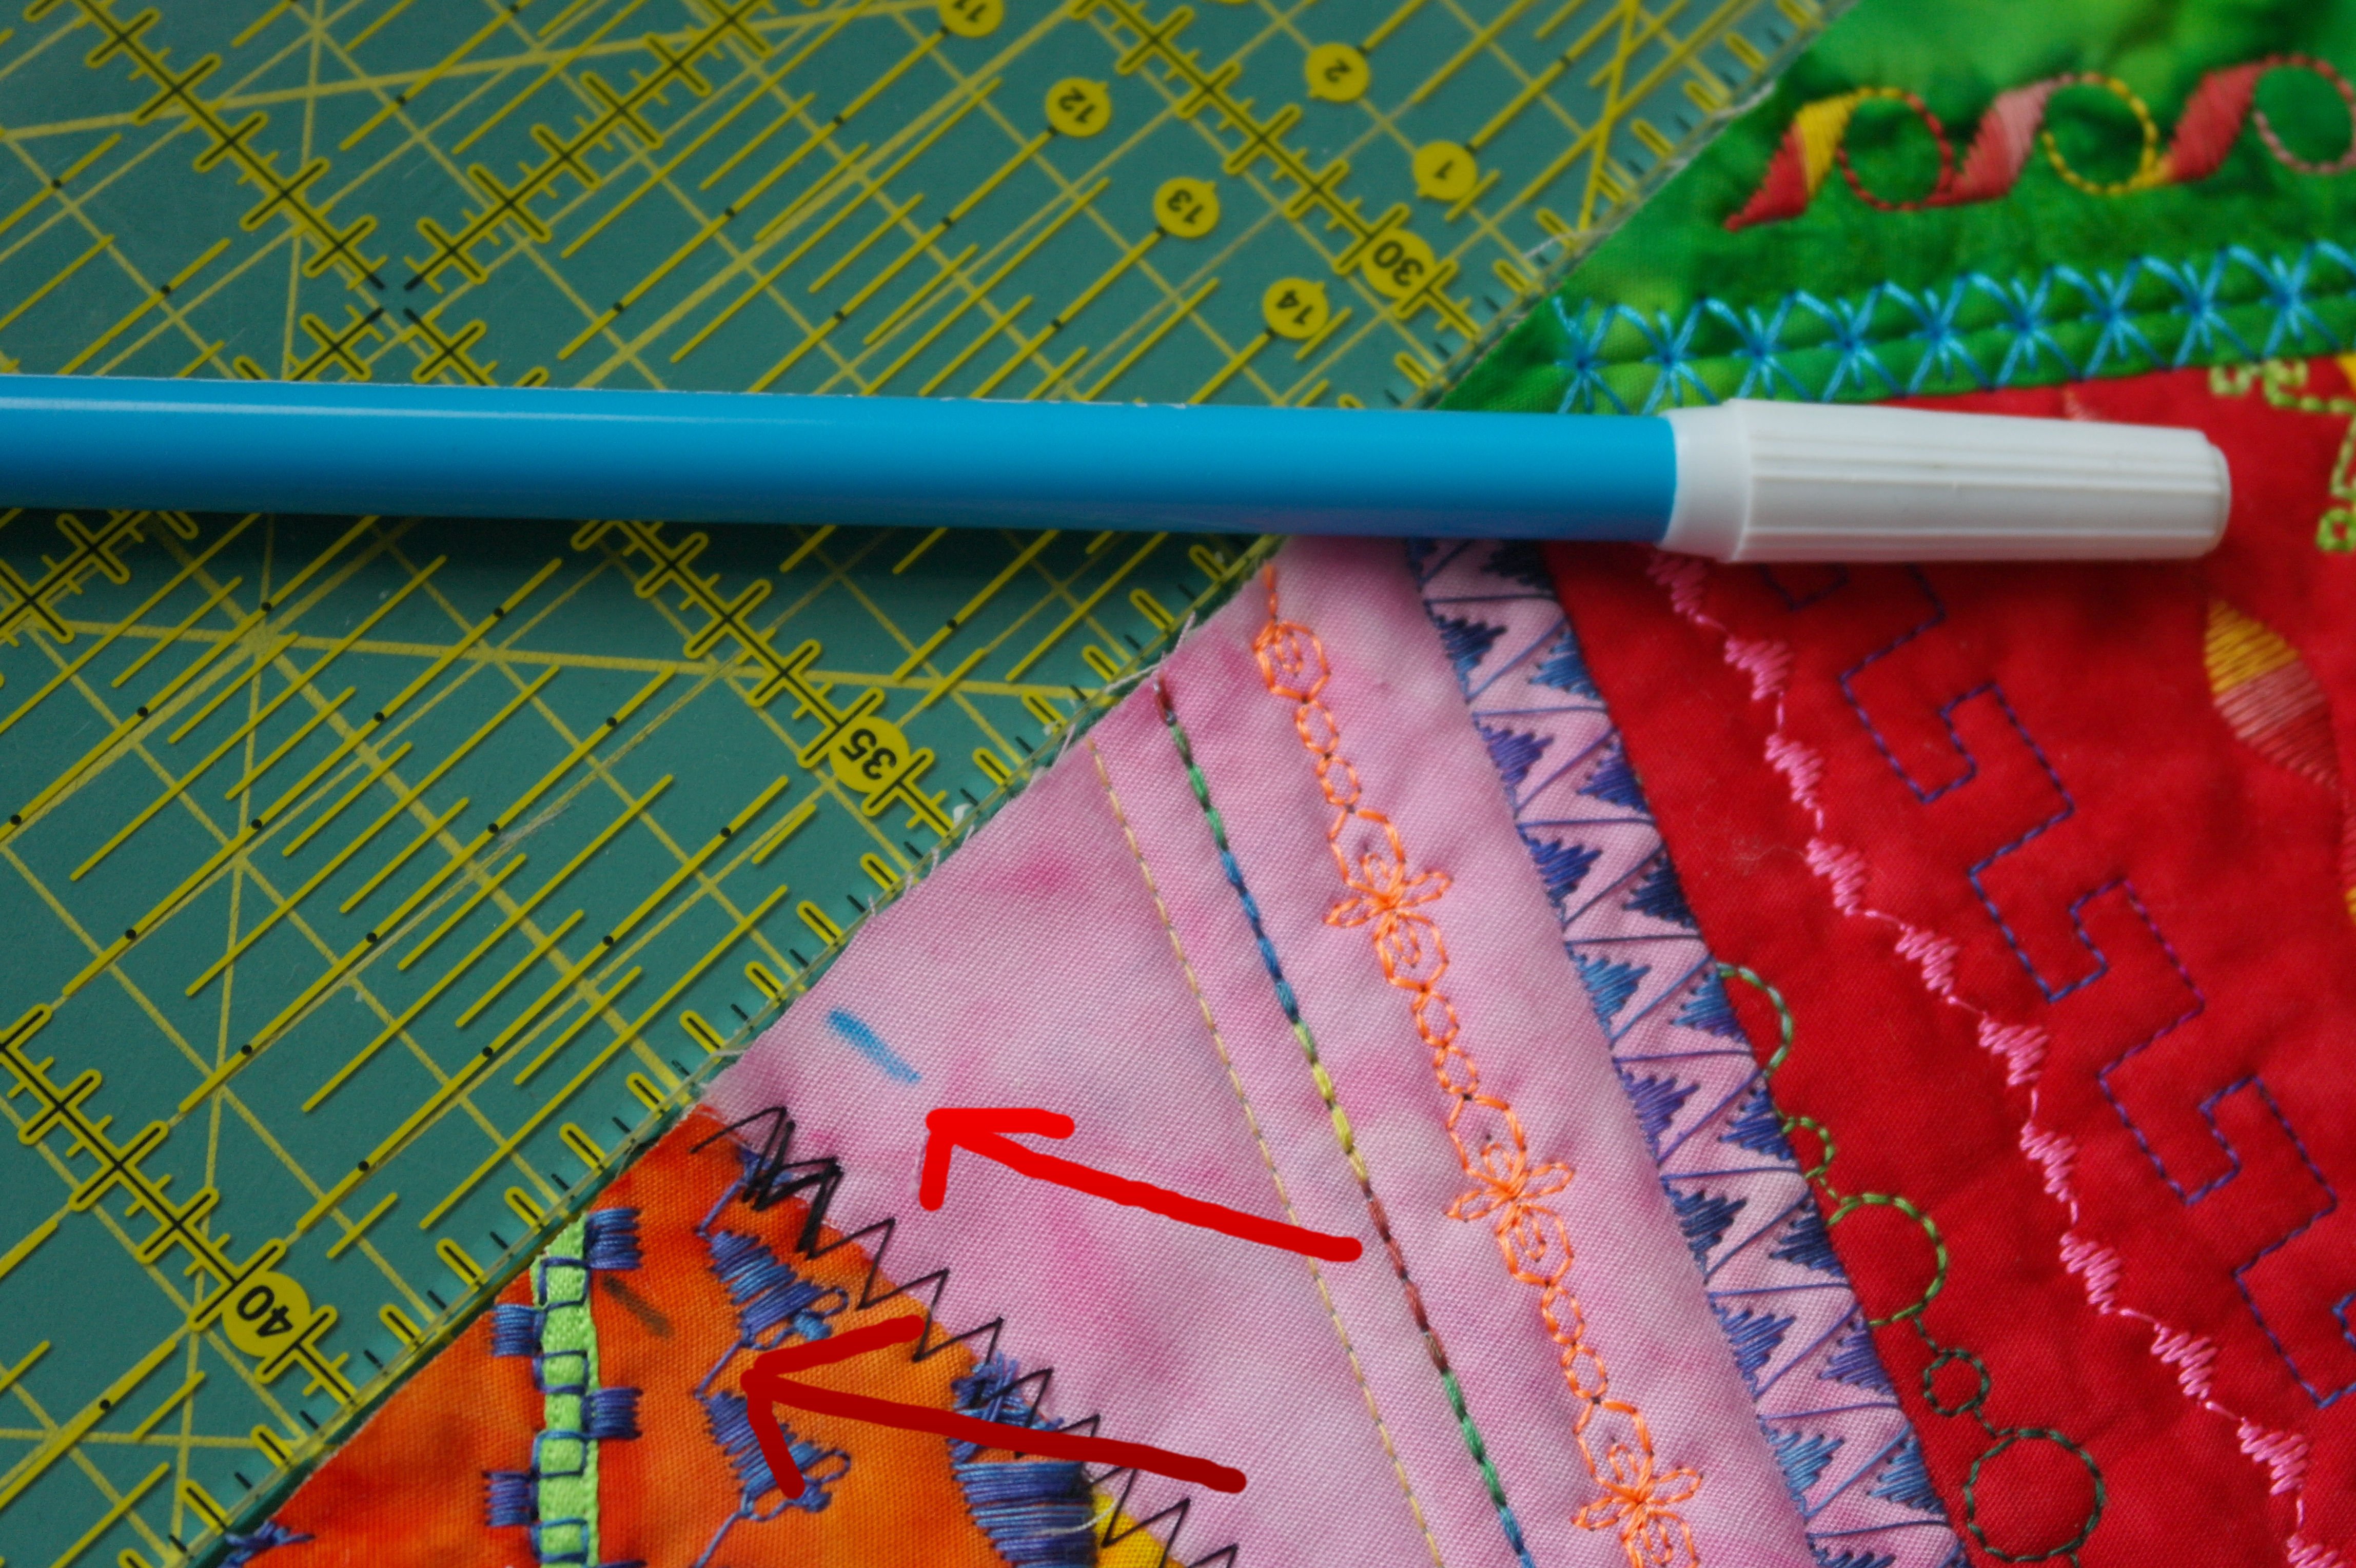
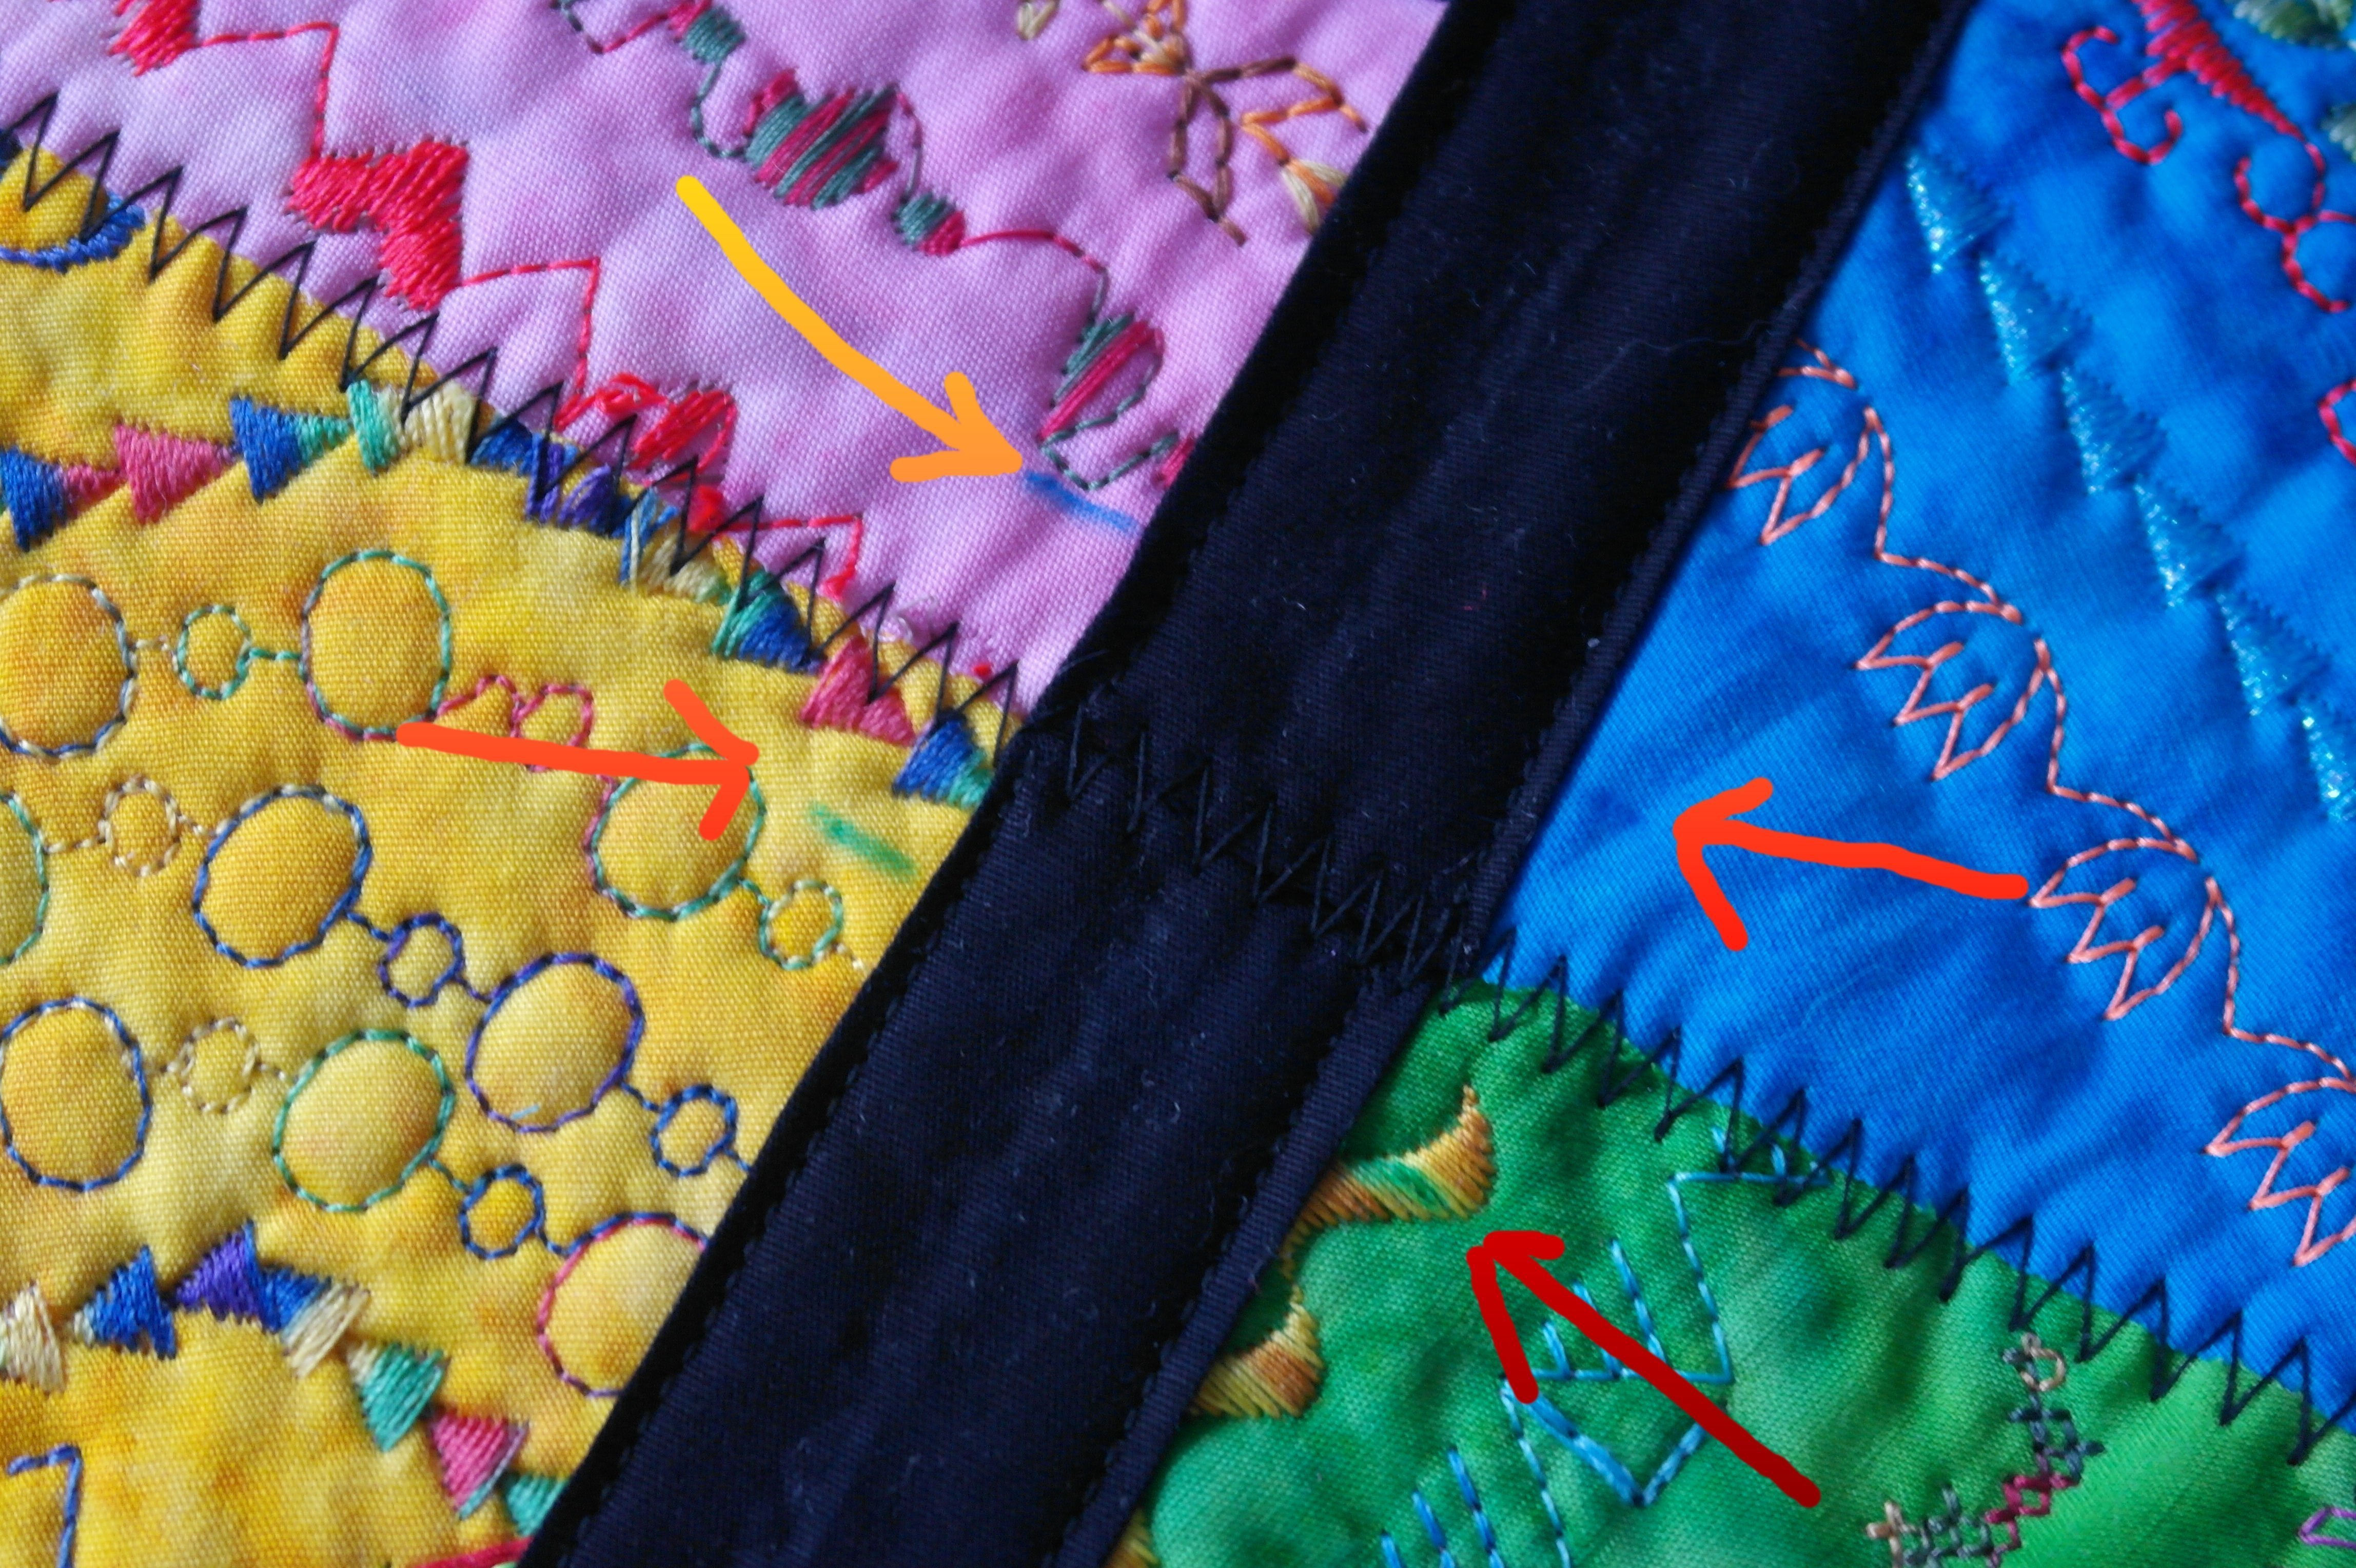
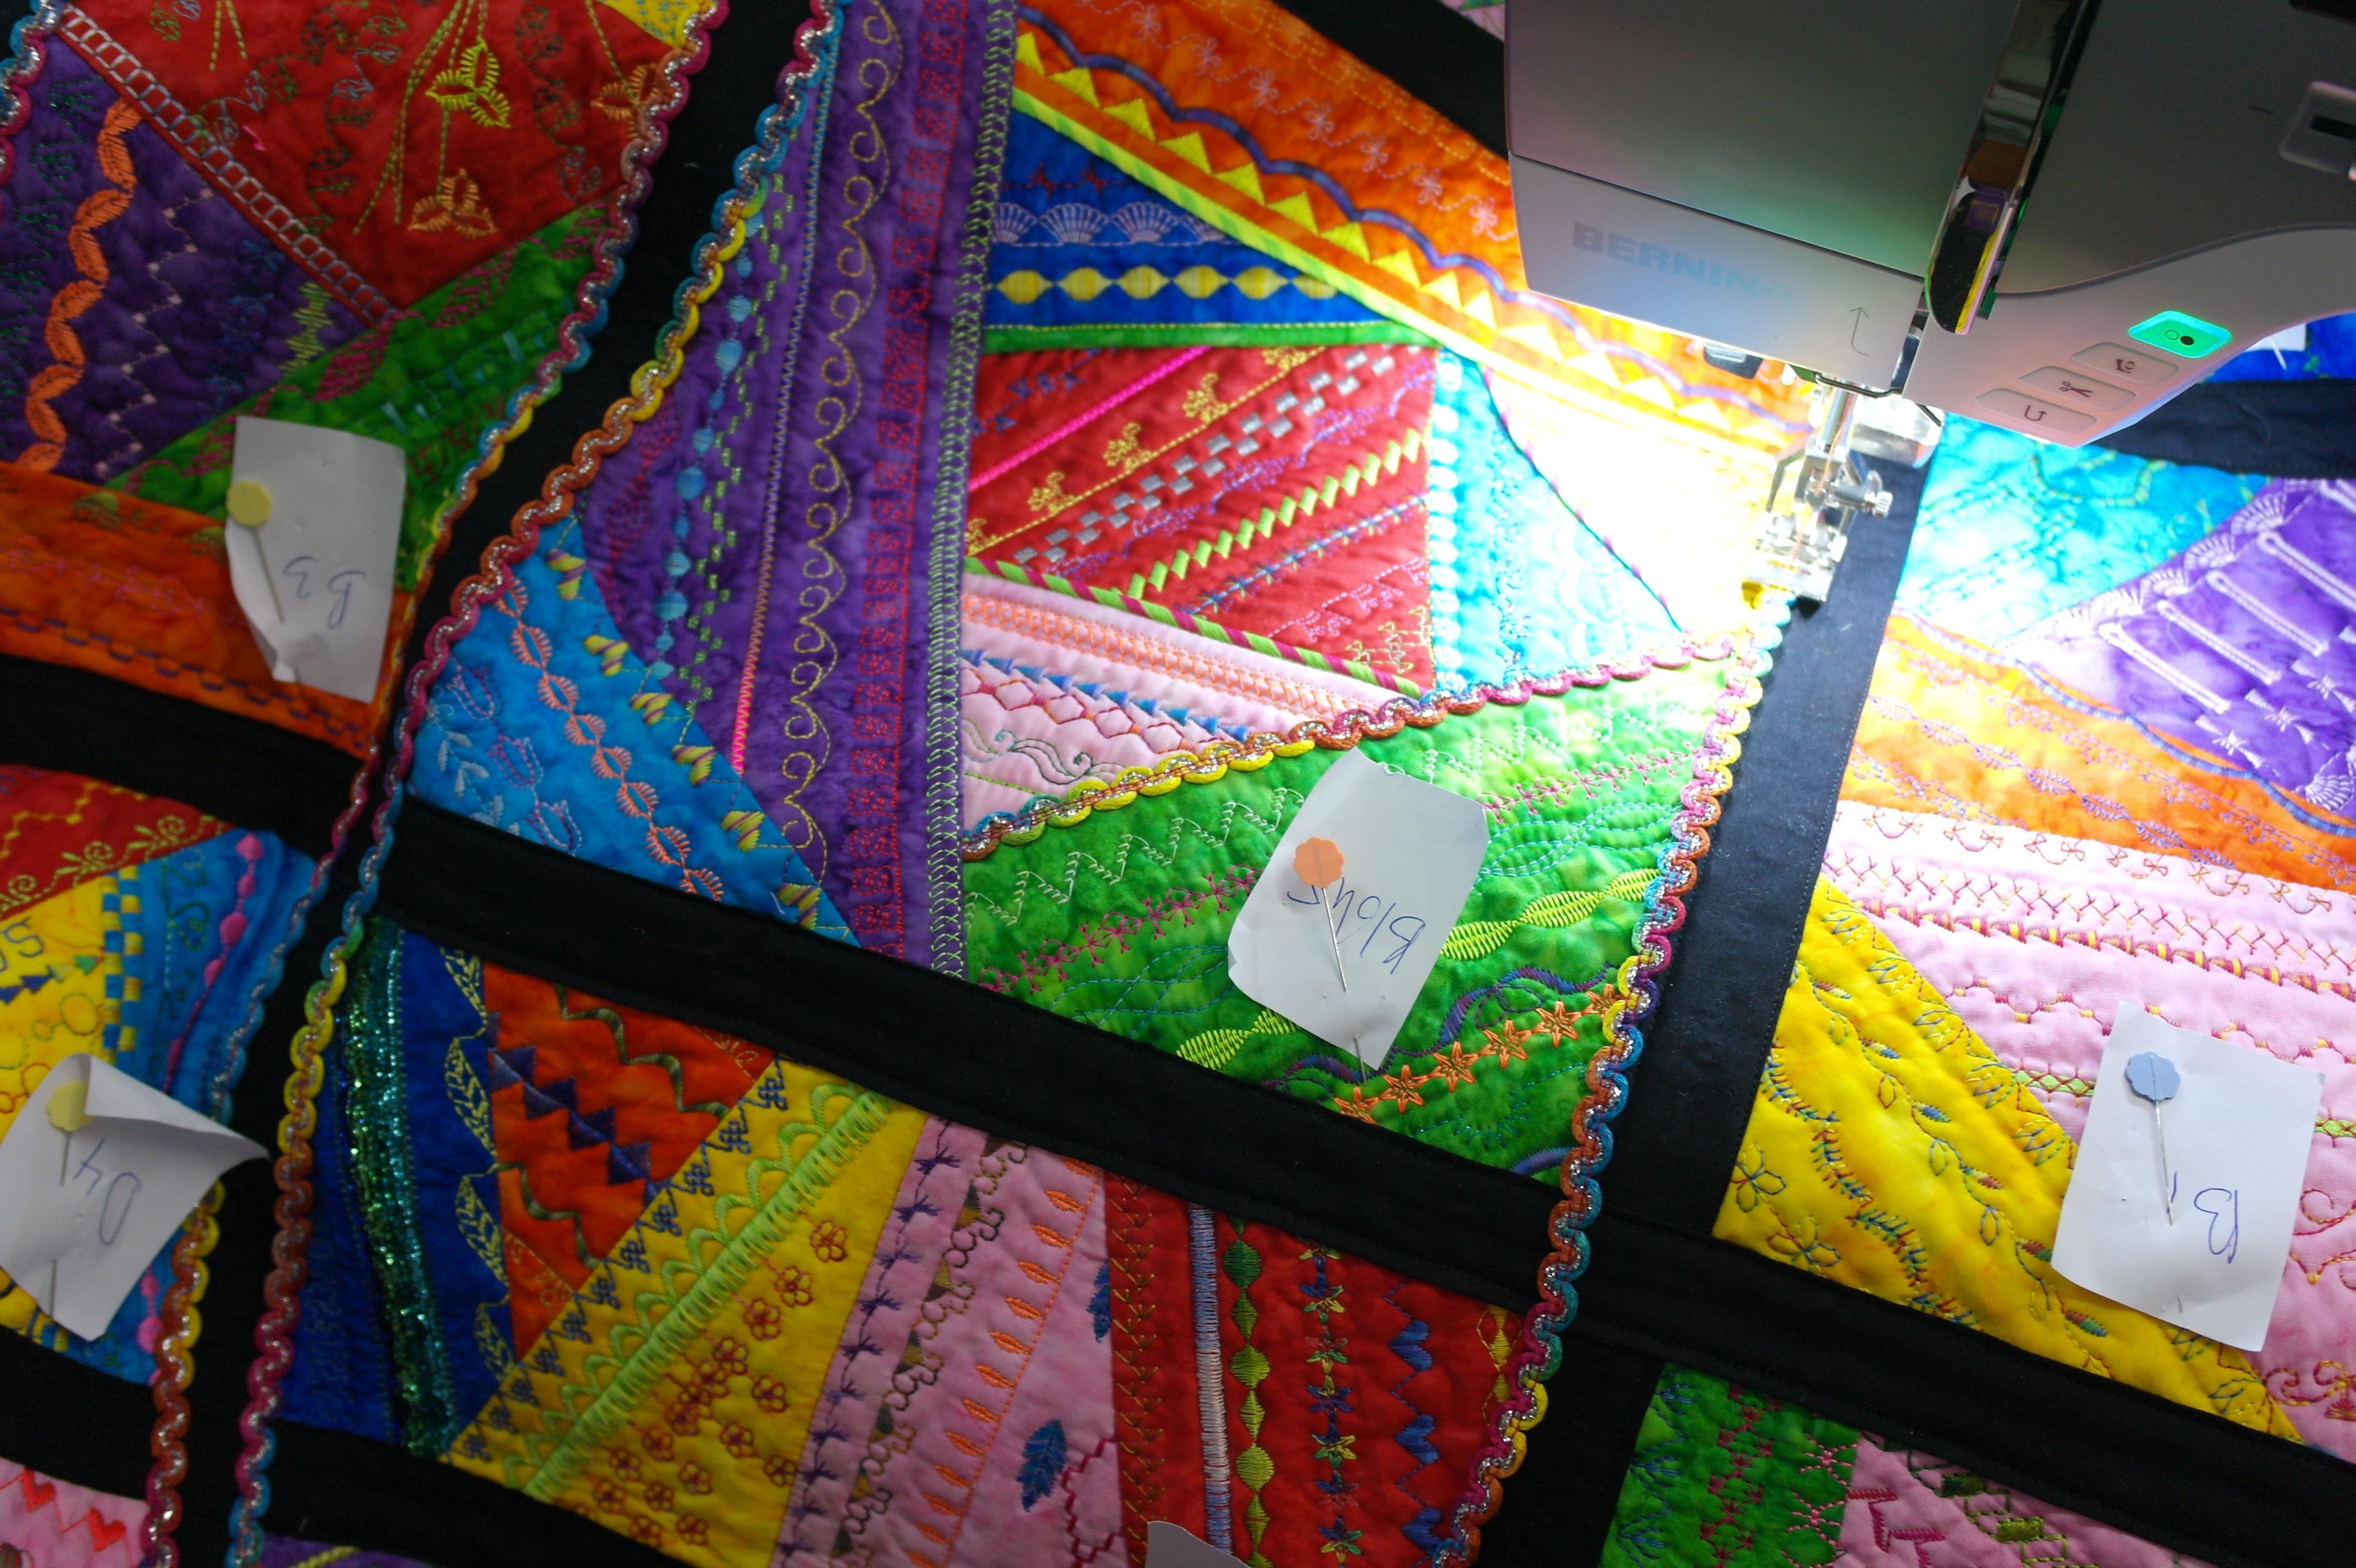
To place the sashing onto the blocks, I have used my blue watersoluble pen to mark points on both sides of my blocks, where they were sewn together. I want to place them at the exact spot, to be sure all sashings are aligned. My sashing will have a finished width of 2 cm, so I have marked 1 cm away from where the blocks meet.
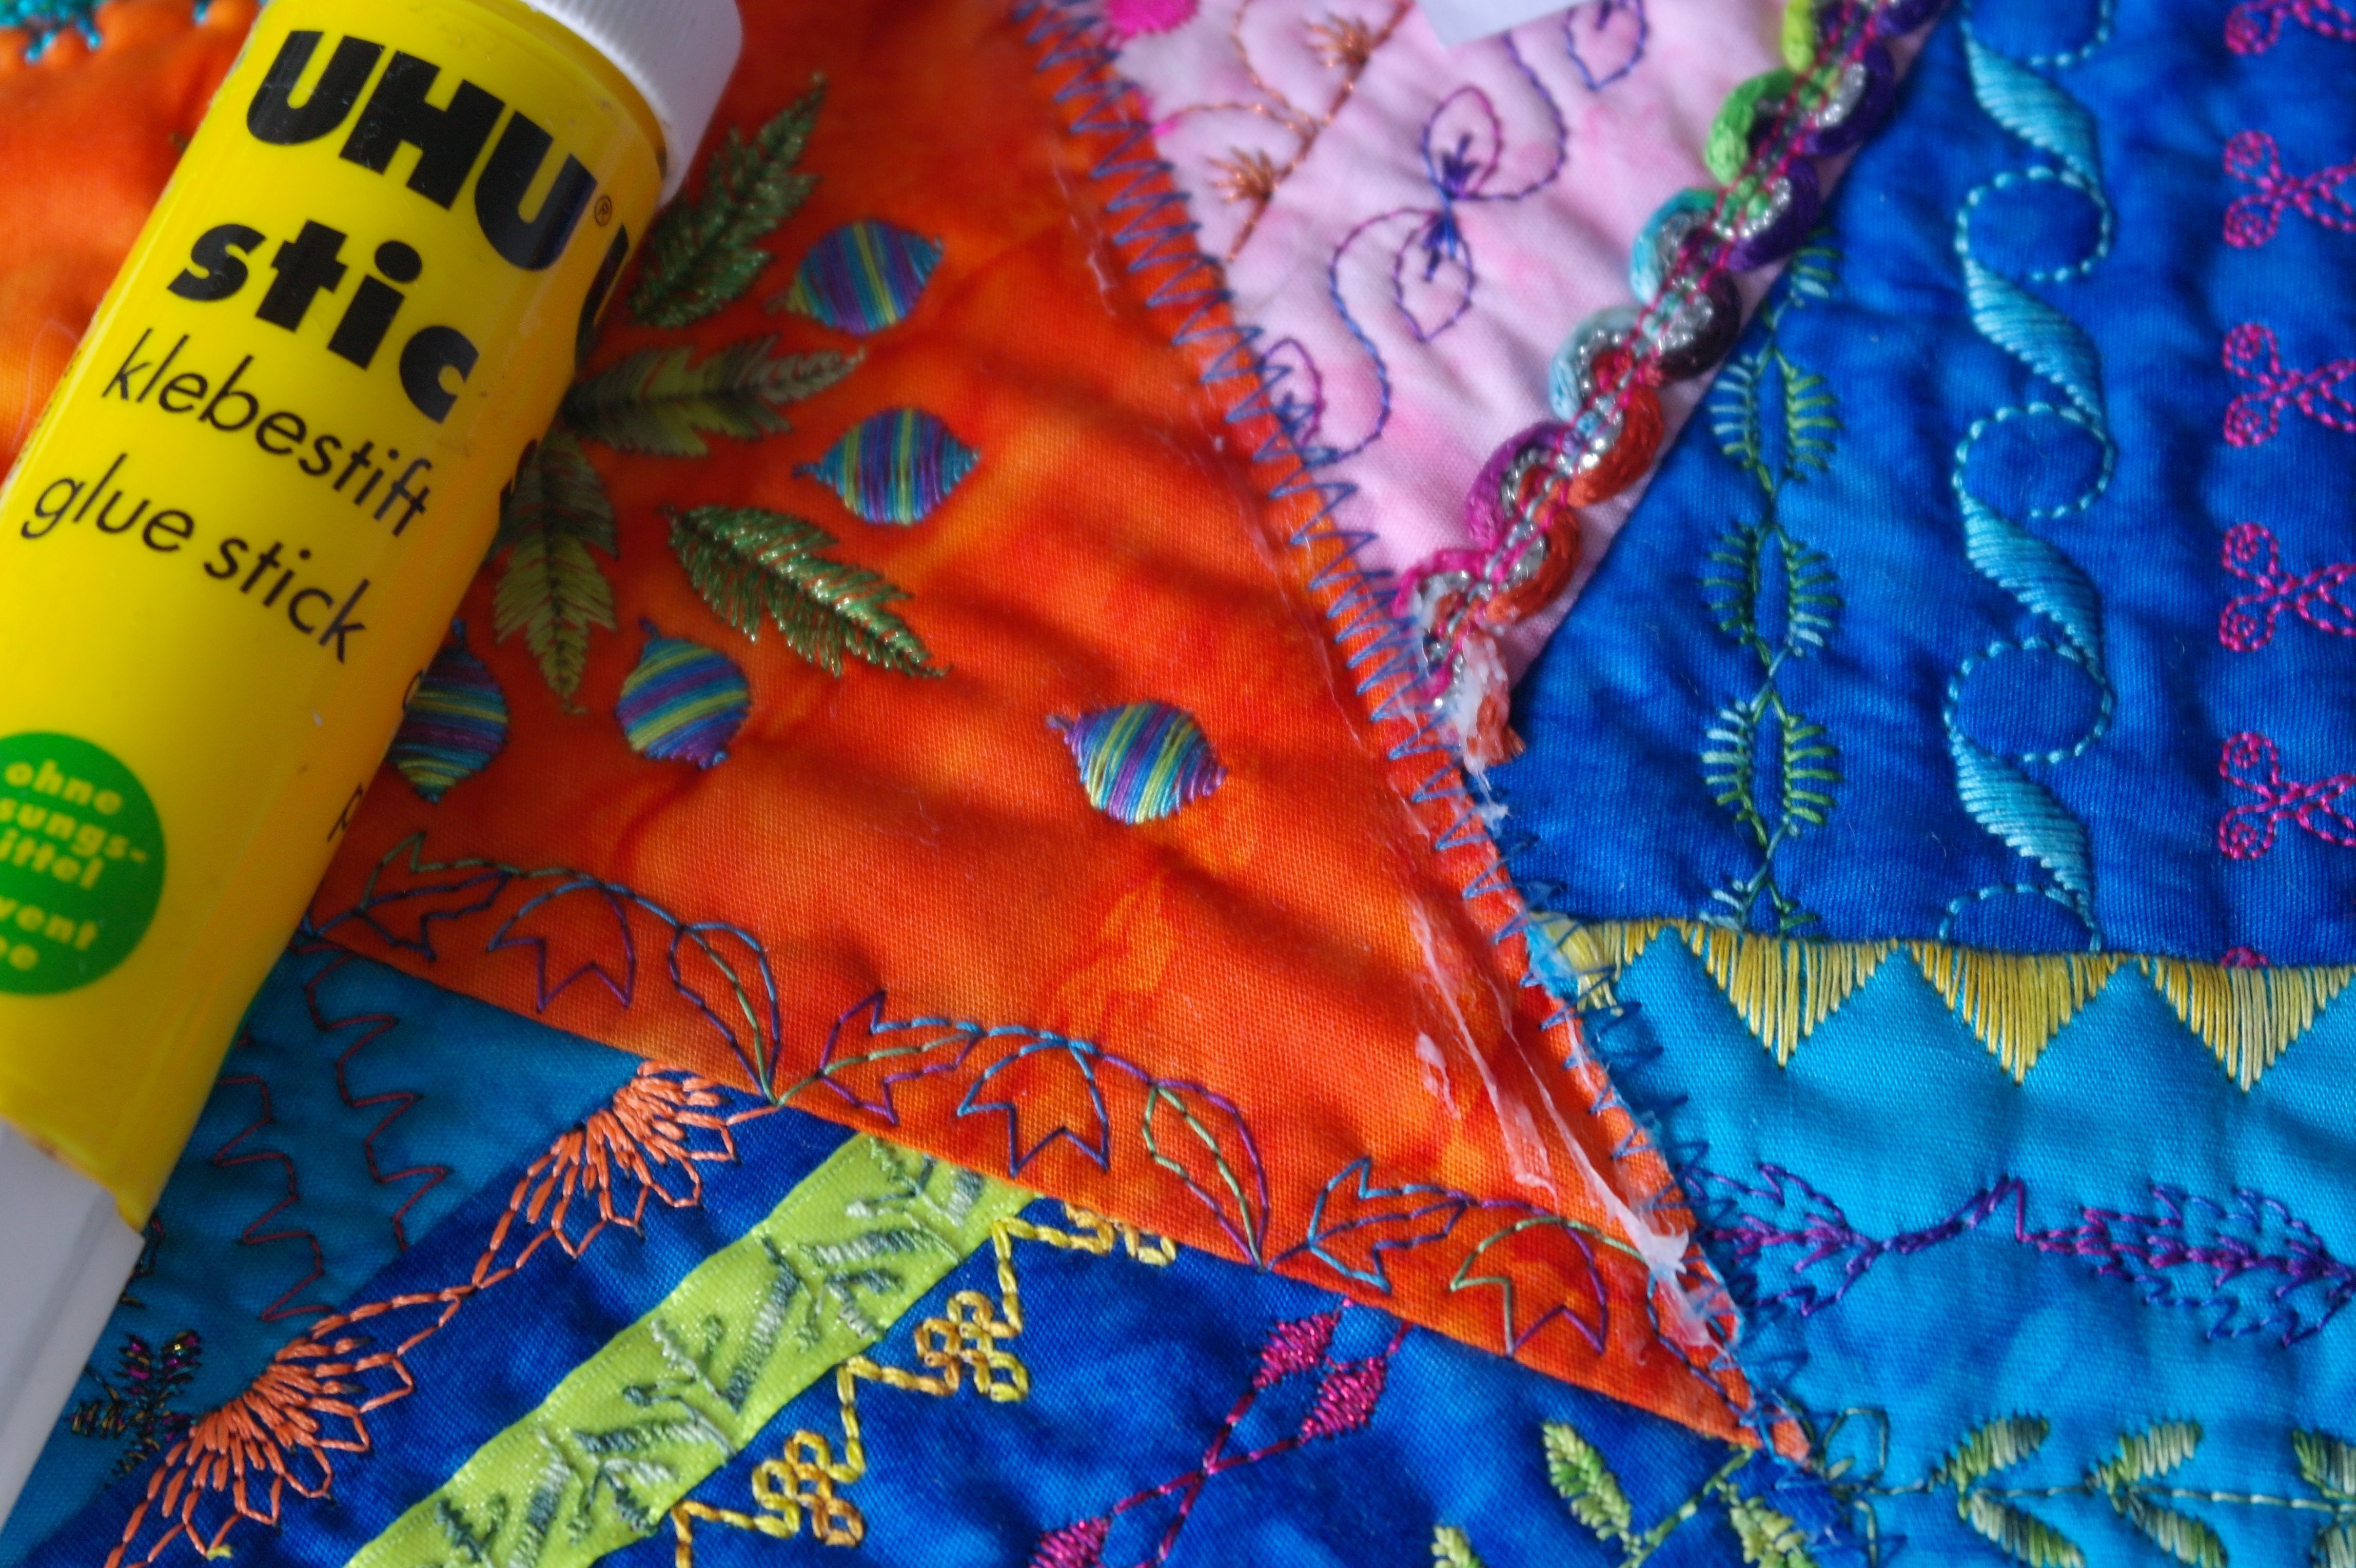
I have used my UHU (Pritt) glue stick – also water soluble – and placed glue over the row of zigzag stitches – I will place the sashing onto this glue, so it will stay when I sew it on both sides. Don’t use pins, because they can distort your blocks, and your sashings can shift during sewing. Make sure that the glue is only placed on the stitches, and not beyond, for you don’t want your needle to go through glue all the time.
Using UHU (Pritt) glue works really well: no pins have to be removed, also with larger/longer strips they will be held in place if you sew them onto your quilt.
Put the sashing on top of the zigzag stitches, be sure to check the marking points. Make sure the strip protrudes a bit on both sides of the blocks.
Now you can sew the sashing onto the blocks, using matching threads. Make sure the straight stitches you use are close to the edges of the sashing.
Place all 4 sashings onto the first row of blocks. CHECK again if the visible measurements of the blocks are still ok: do this before sewing them onto your blocks; if neccesary, you can replace the sashings, despite the glue, but don’t wait too long, for the glue hardens quickly.

Sew all vertical sashings onto the rows of blocks. Cut the exess of the sashings afterwards.
Now the 5 rows of blocks have to be joined together to make the quilt, and the horizontal sashings have to be added.
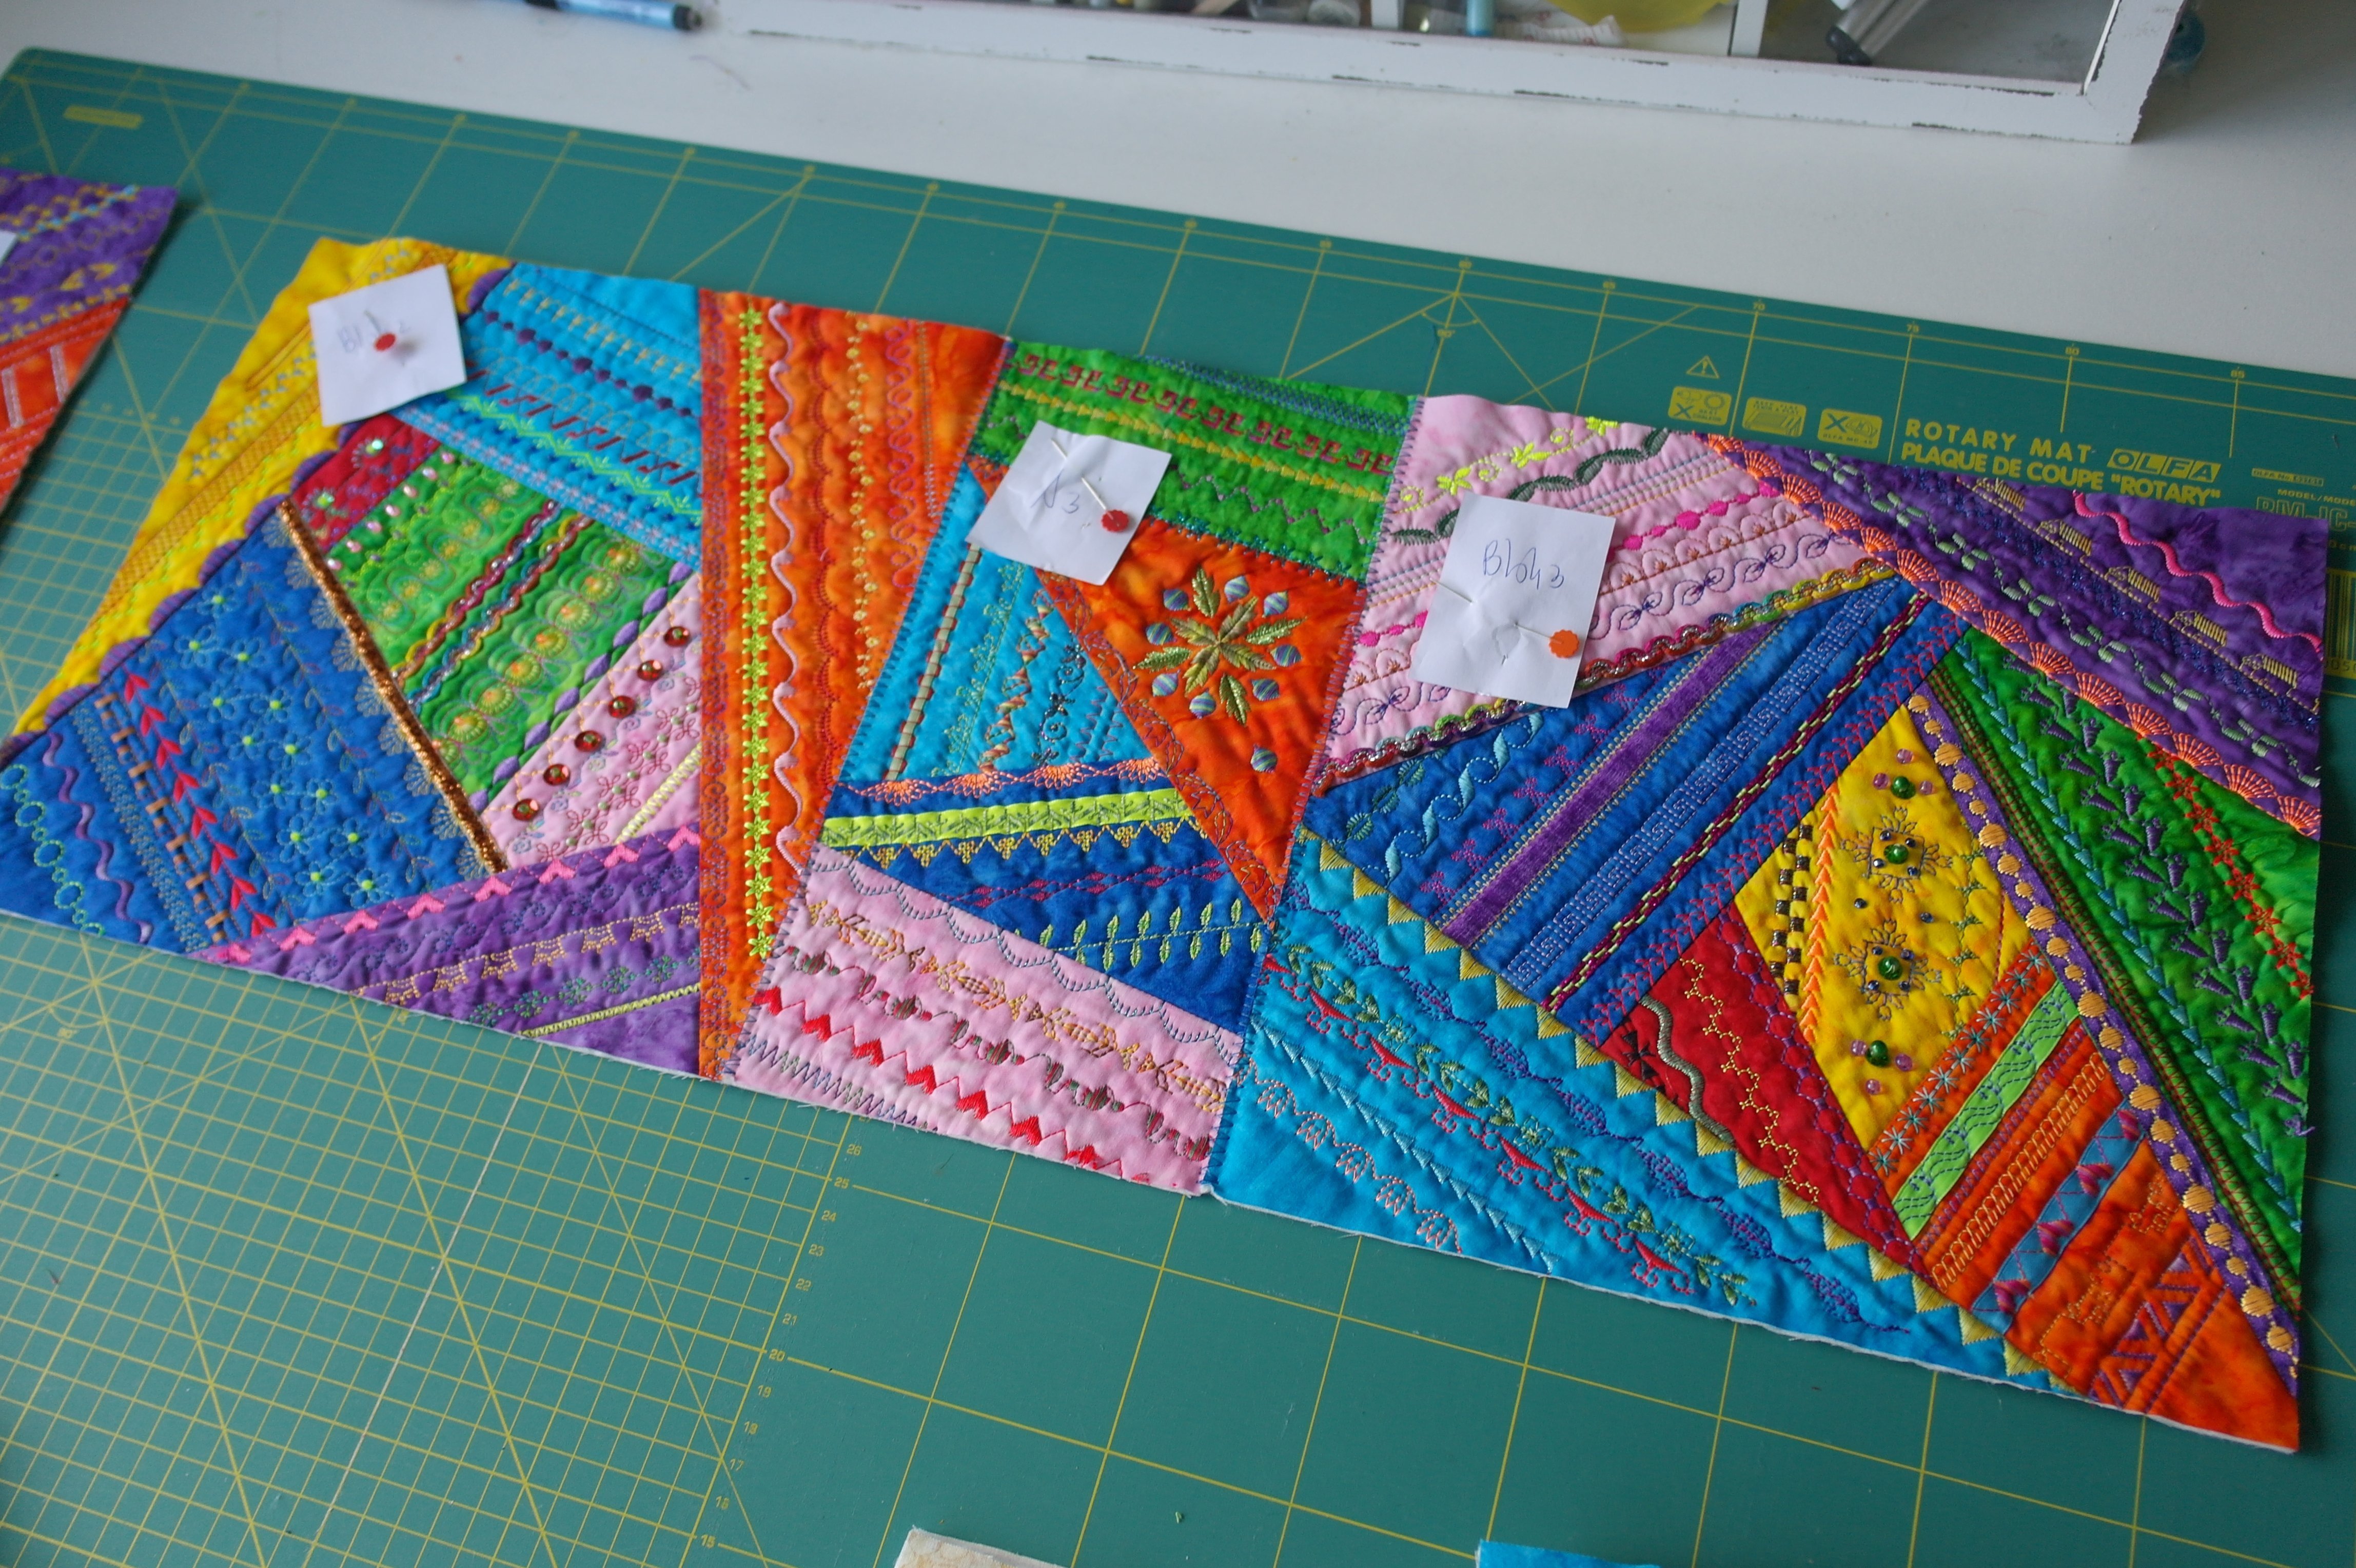
Check if all blocks are still in the right order for sewing: place the 5 rows with blocks the way it shows on the picutre.

Sew the first 2 rows of blocks together, using the same zigzag stitch as before.
PAY ATTENTION: the vertical sashings have to be aligned, as if they were sewn as a single strip. Work slowly, to make sure they fit.
The long, black batik sashings are cut into strips, 4 cm wide, made from 1 long strip and 1/4 short piece, sewn together.
IF YOUR SASHINGS ARE LONG ENOUGH TO BE SEWN ONTO YOUR QUILT WITHOUT THE EXTRA STRIP, don’t use that piece.

Draw the same placement lines, fold the fabric on both edges under, against these placement lines and iron the sashing.
Mark a couple of points on both sides on your blocks, where you’ve joined them, to be sure you have the right placement markings for the long sashing.
Also draw markings at the intersections of blocks, so there are many markings to align your sashing.

Use your UHUPritt glue again and place the sashing. CHECK if it is placed in a straight line, no curves. Place your quilt ruler along the sashing, like shown in the picture. As long as the glue is not hardened, you can lift the sashing up and replace it into a straight line.
Sew on both (long) sides of the sashing: looks really nice already, doesn’t it?
Repeat with the other rows. Be sure to sew the three upper of blocks and sashings first…
..and sew the two bottom rows separately, joining them with zigzag stitches and sashing.
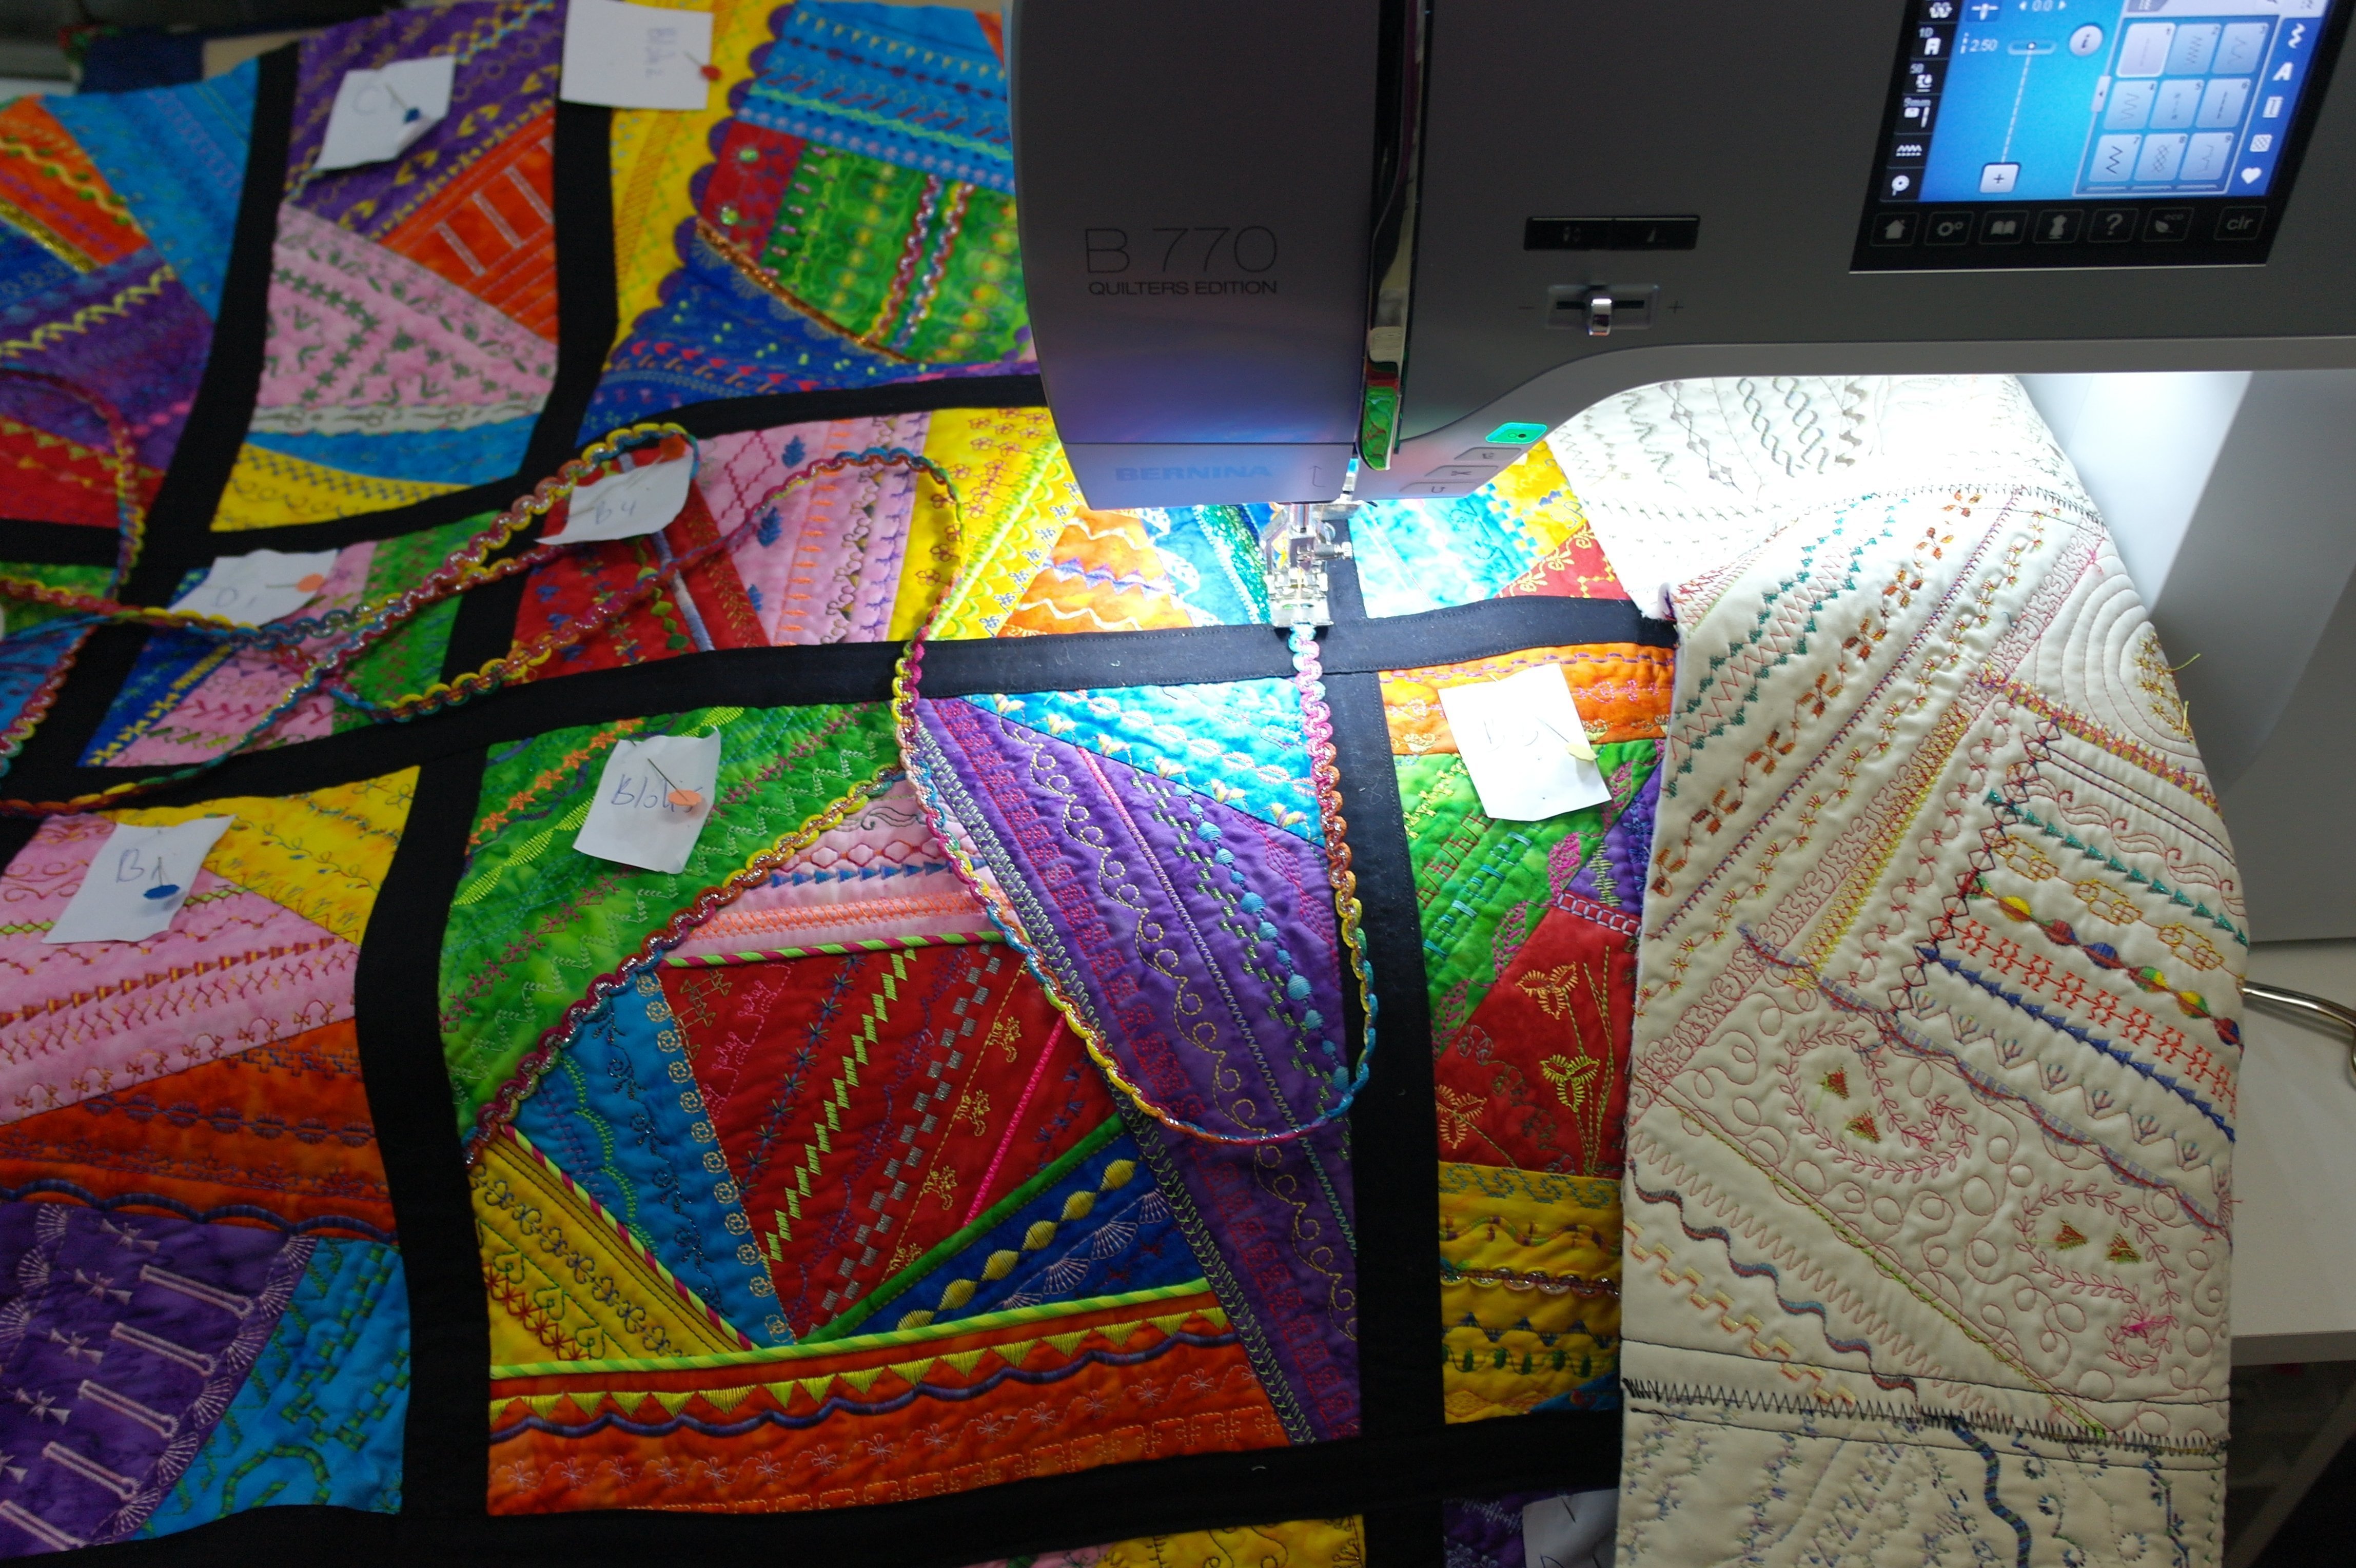
Then join the blocks and sasings, to make your square quilt, 5 x 5 blocks. It will be more difficult to make this quilt fit under your sewing machine: again, rotate the quilt if there is too much material to handle under your machine. Work from the other side, that makes things much easier.
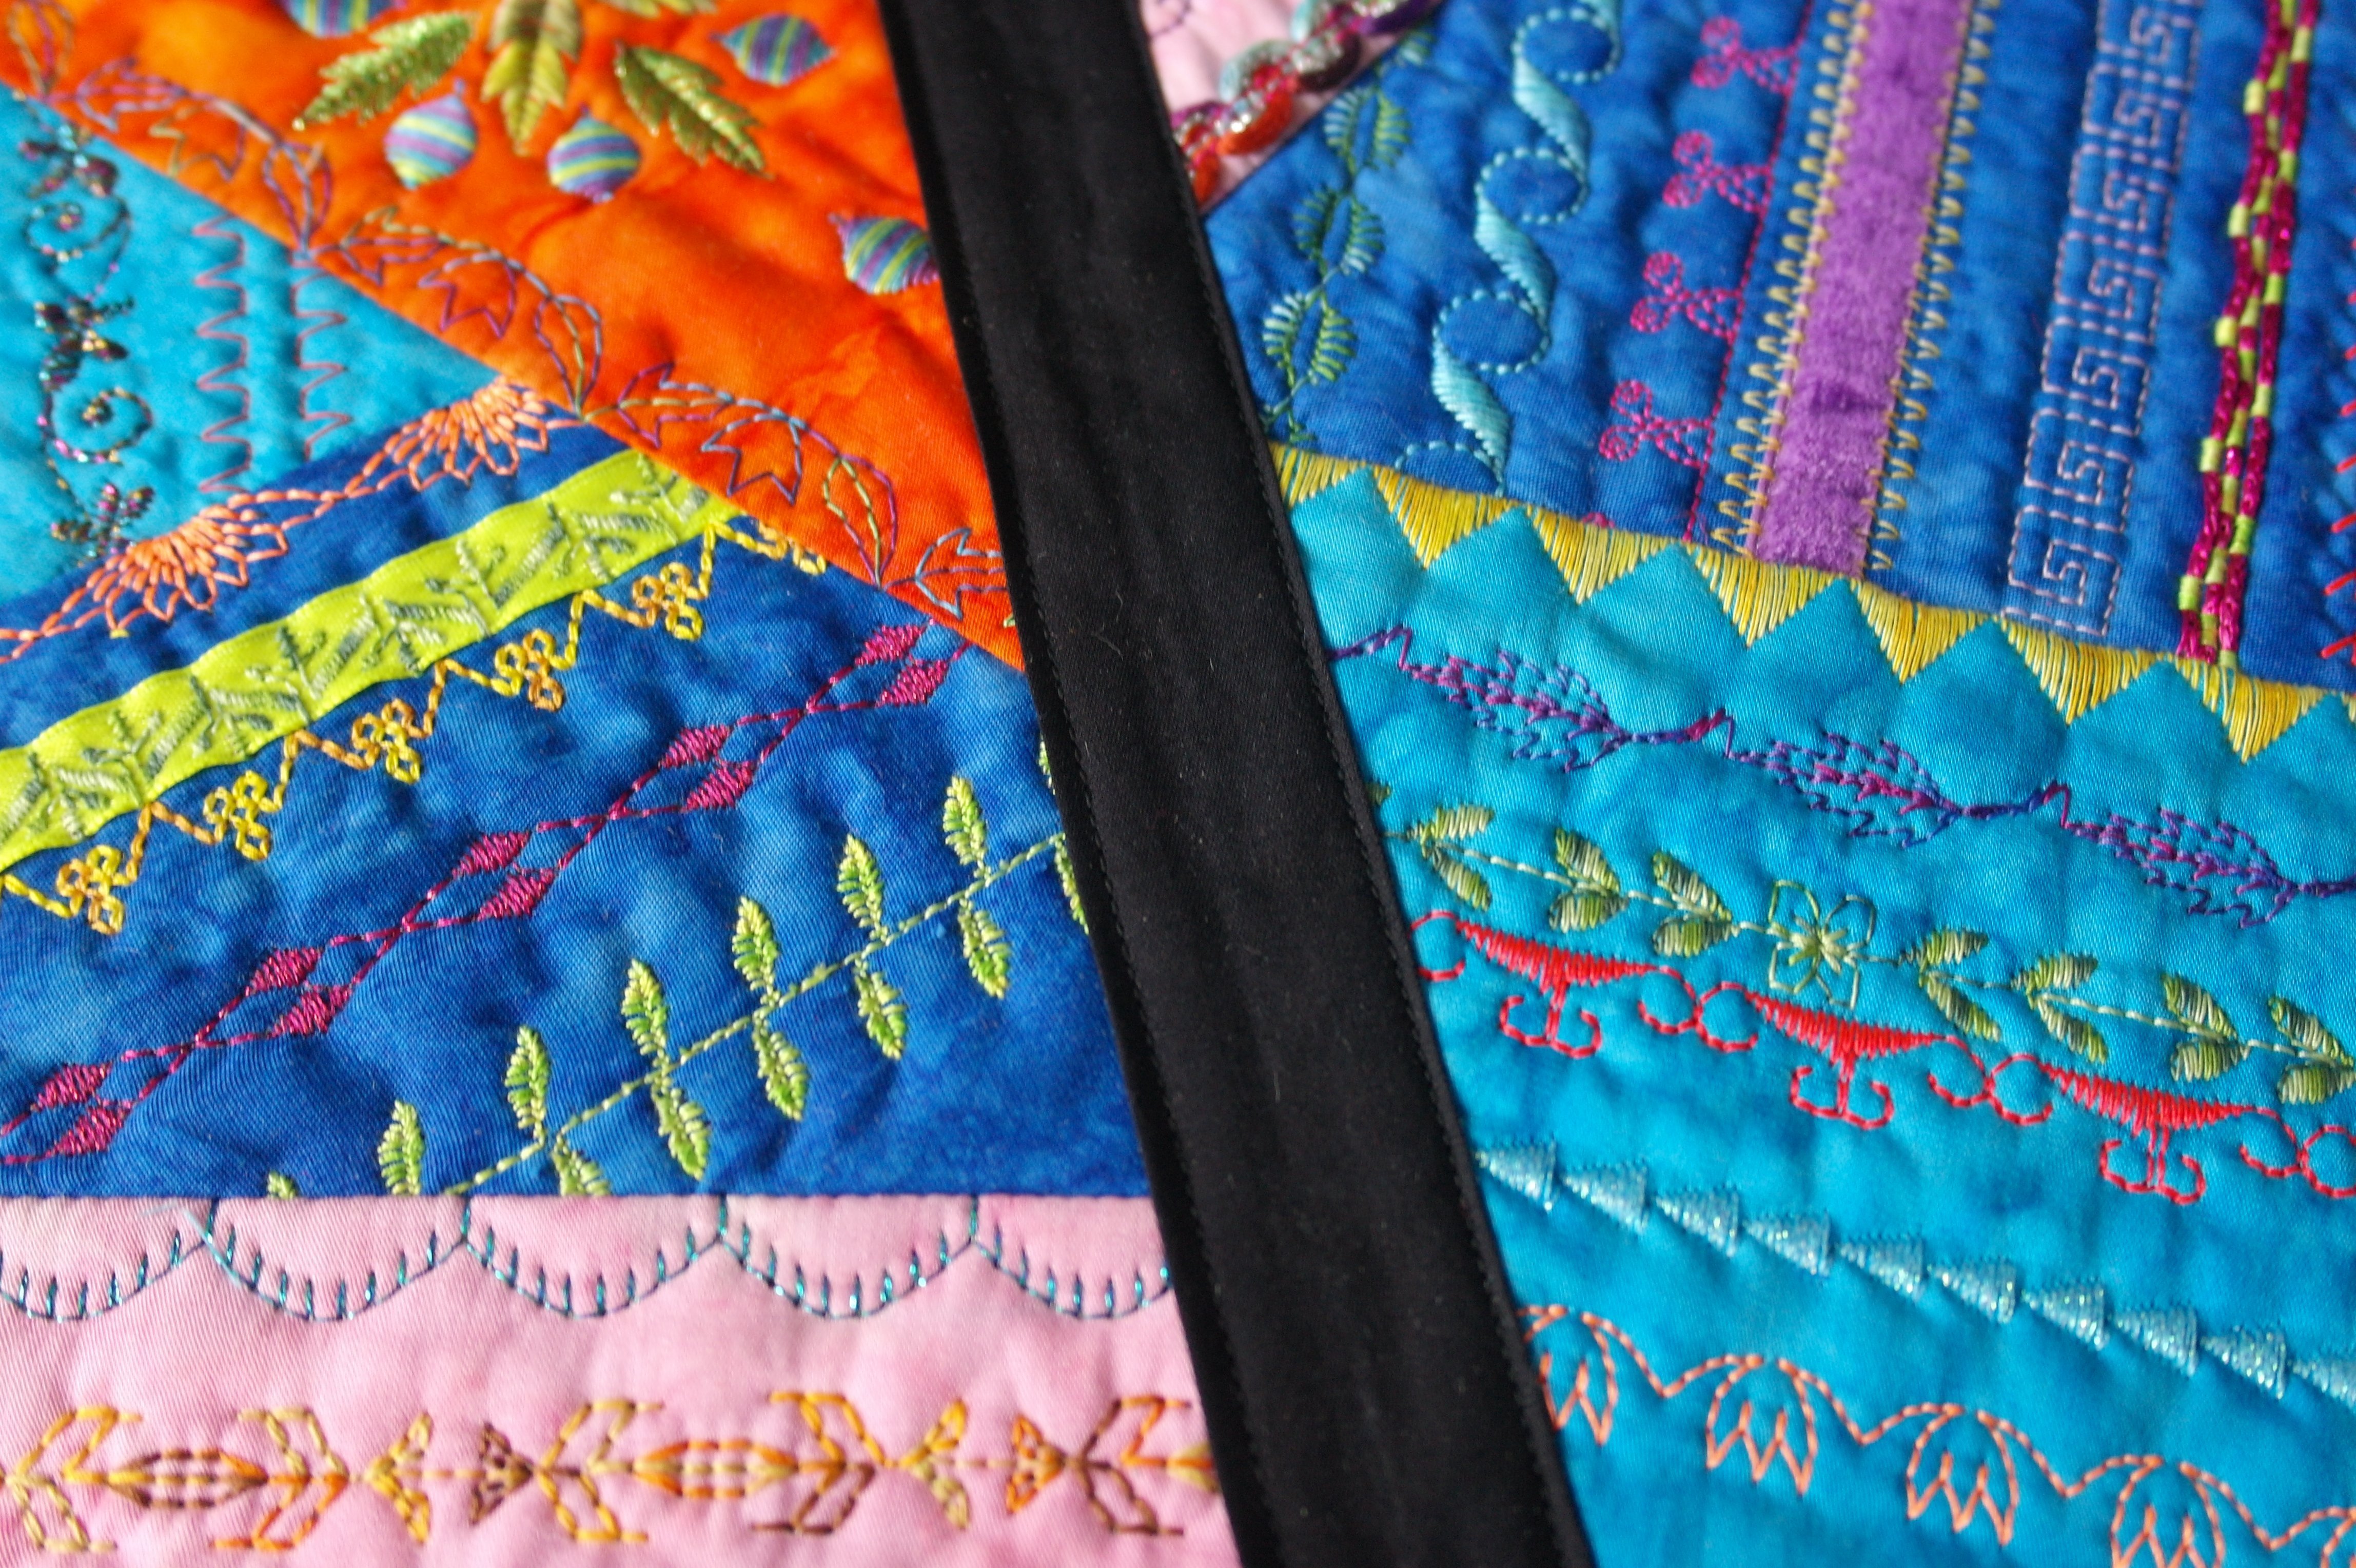
This detail shows you the colorful blocks, black sashings (which make the colors of your blocks stand out) and embelishments… a crazy quilt cannot go wrong!
If you don’t want to add extra ribbon, this is your finished quilt, a part from the binding. You can skip the next part and directly see how to add the fabric for the final backing and the binding.
Because this is a ‘Crazy’ quilt, with lots of colors and embellishments, I will add more color, with multicolor ribbon with silver.
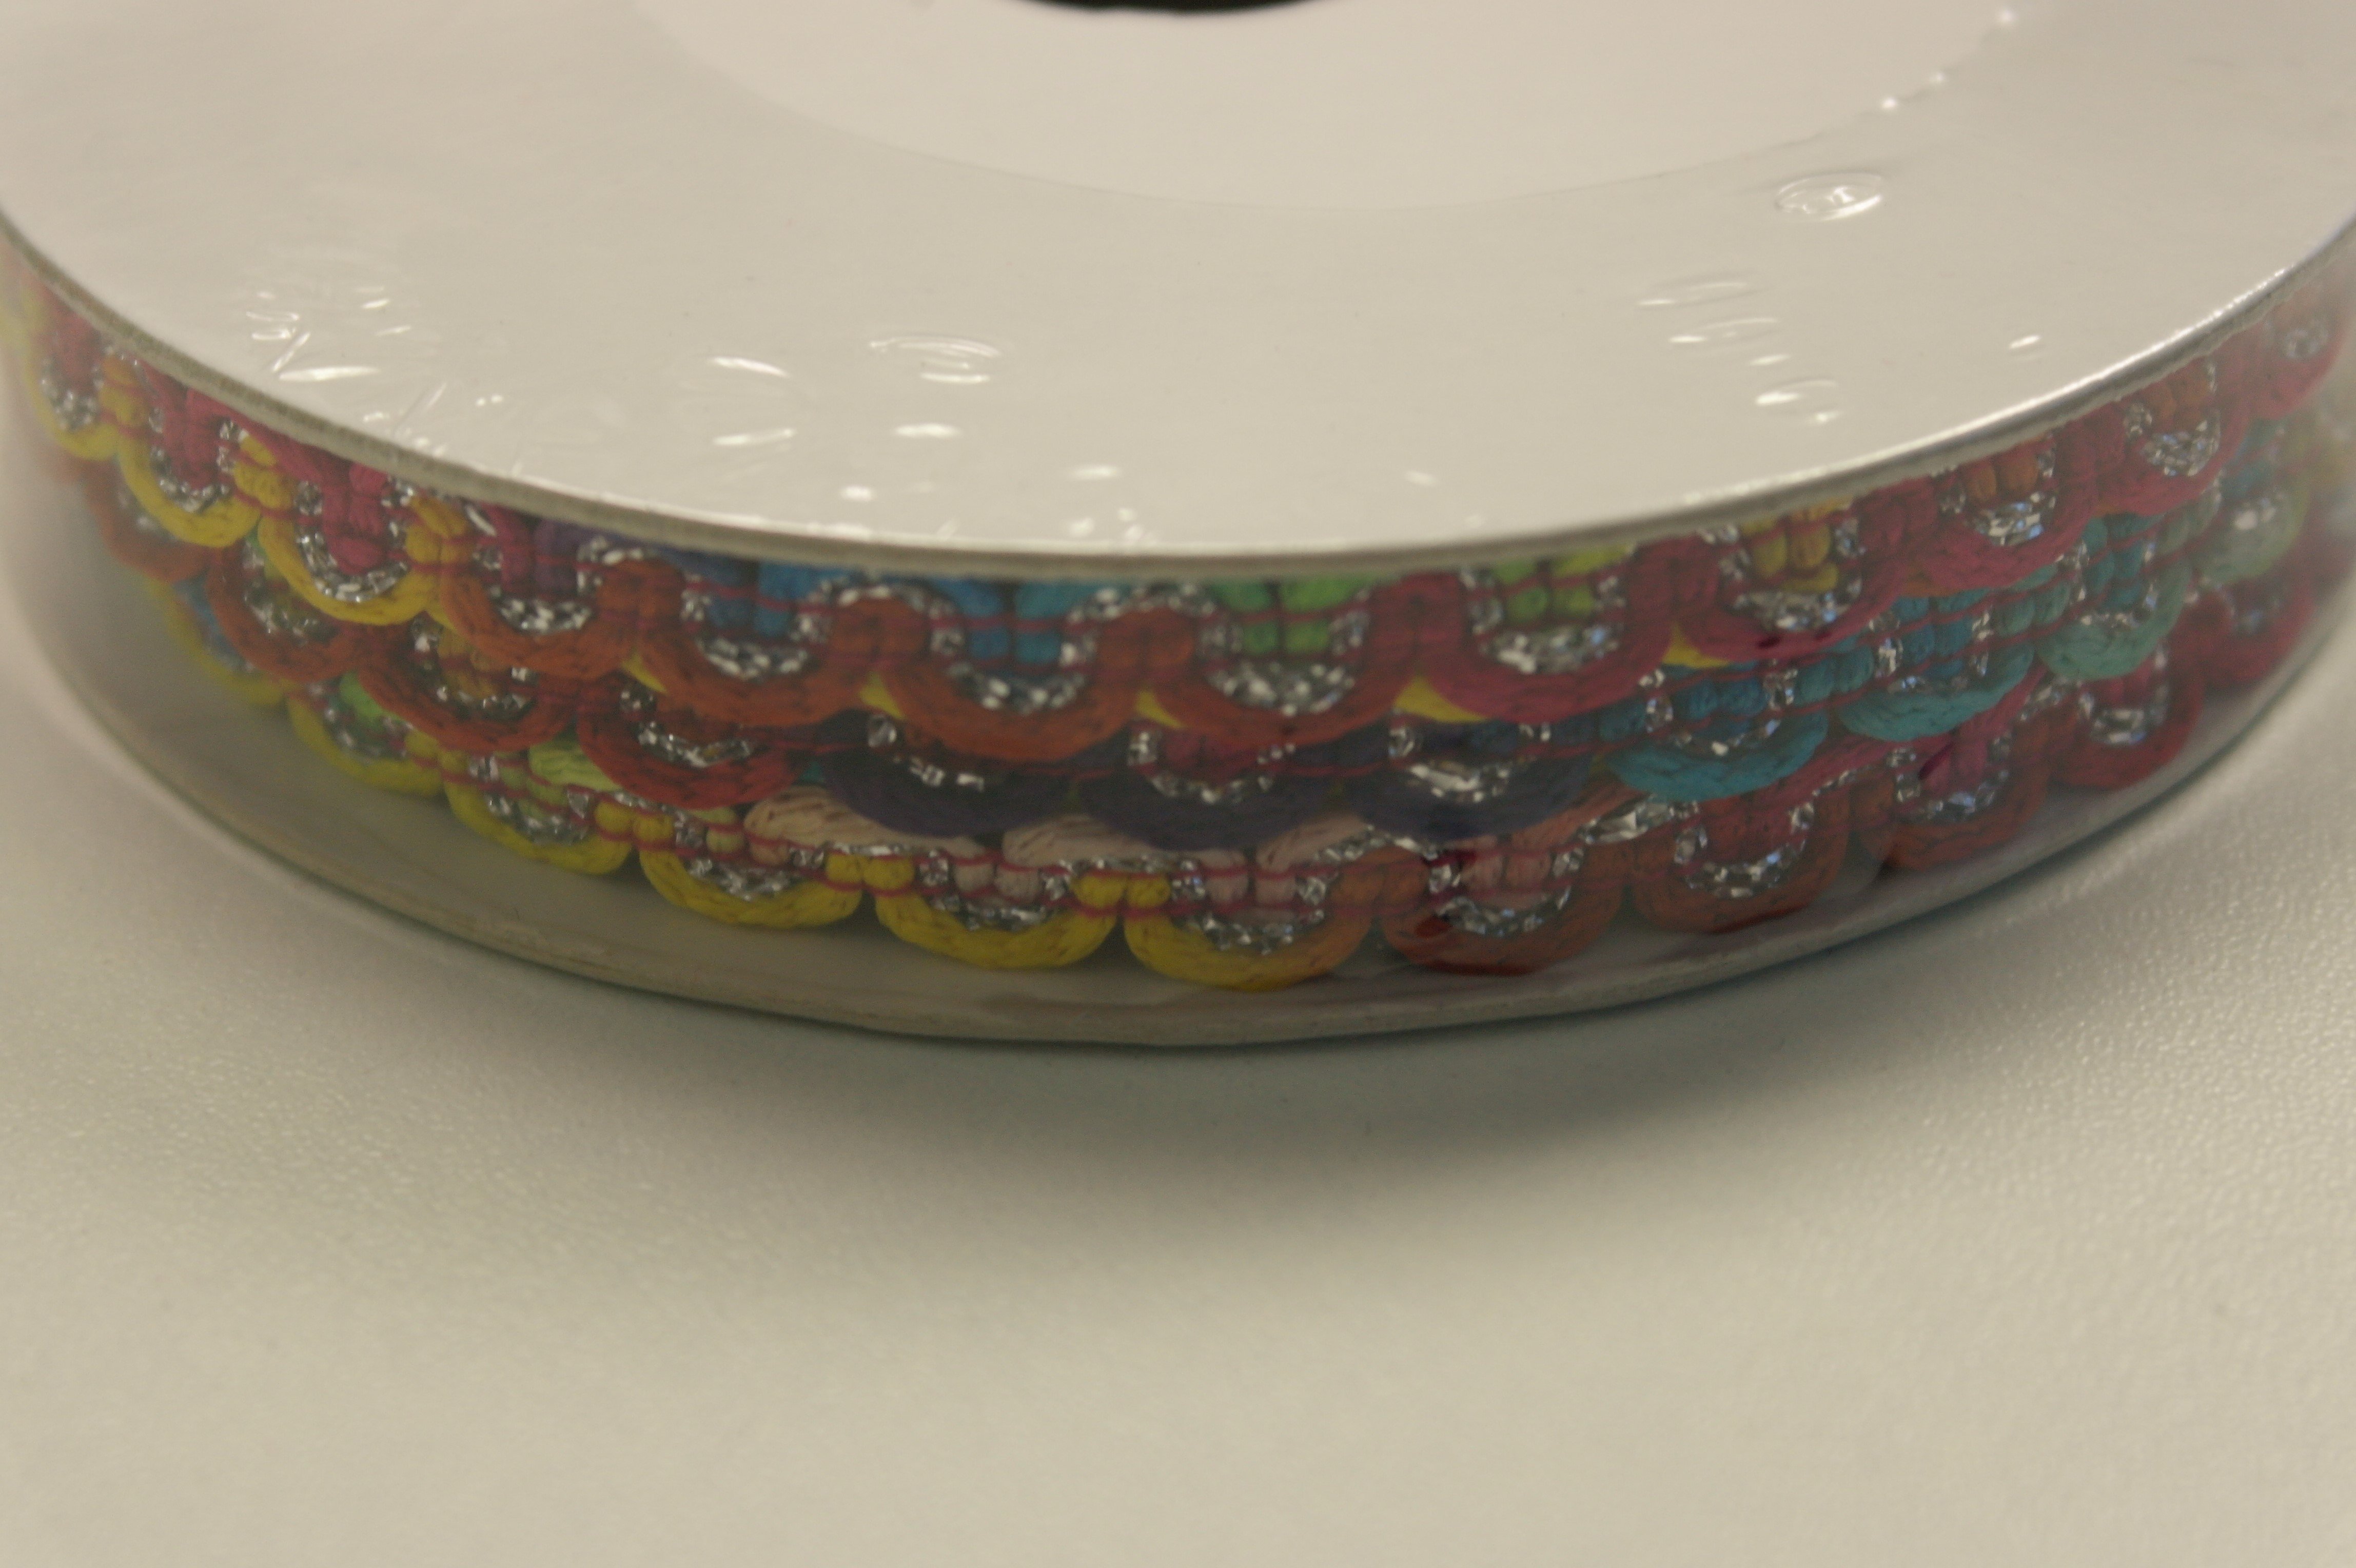
Colorful ribbon, Multicolor ribbon with silver, makes the sashings pop out more. You can use this ribbon, or use different ribbons: make your quilt the way you want to. I have used this ribbon on some blocks already, so it comes back. I can sew this ribbon with just a single straight stitch in the middle.
You will need 3 rolls (10 meter p.roll) if you sew them like I have done – aprox. 25 meter will be used. It is an extra decoration, but also usefull to hide distortions, if the sashings are not aligned precisely at the intersections.
I have sewn the Multicolor ribbon with silver on both sides of the sashings. First onto the vertical sashings, placing the quilt under my machine, starting from the centre (first rows), working my way to the sides, so he quilt fits under my machine. After that, I have rotated the quilt, starting again from the centre and worked my way to the sides.
The same was done with the horizontal sashings: from the centre to the sides, rotate the quilt and work again from the center to the sides. PAY ATTENTION: work slowly when you reach the intersections: the thickness of ribbons, sashings and blocks can make your needle break, or give distortion if you sew too fast.

I have used presser foot #1D, because of the Dual Transport (it works like a walking foot) . That way I am not bothered by the thickness of my material and all stitches are made even. Also I have added an extra table, to my left. That’s where the weight of the quilt stays, along with enough space behind my machine.

Looks great, don’t you think? I like it, also the way the silver of the ribbon catches light….
And the appearance of the quilt has changed totally. Sparkling ribbon is added to crazy stitches and embellishments.

This is my quilt so far….
The quilt itself with all the blocks and sashings is ready. Now is the time to add beads, sequins, charms, buttons, Hotfix stones, and all the embellishments you can find. Because there is no actual backing behind your quilt yet… Once that’s sewn to the back, you can still add Hotfix stones if you want to, because they are glued to the front of your quilt.
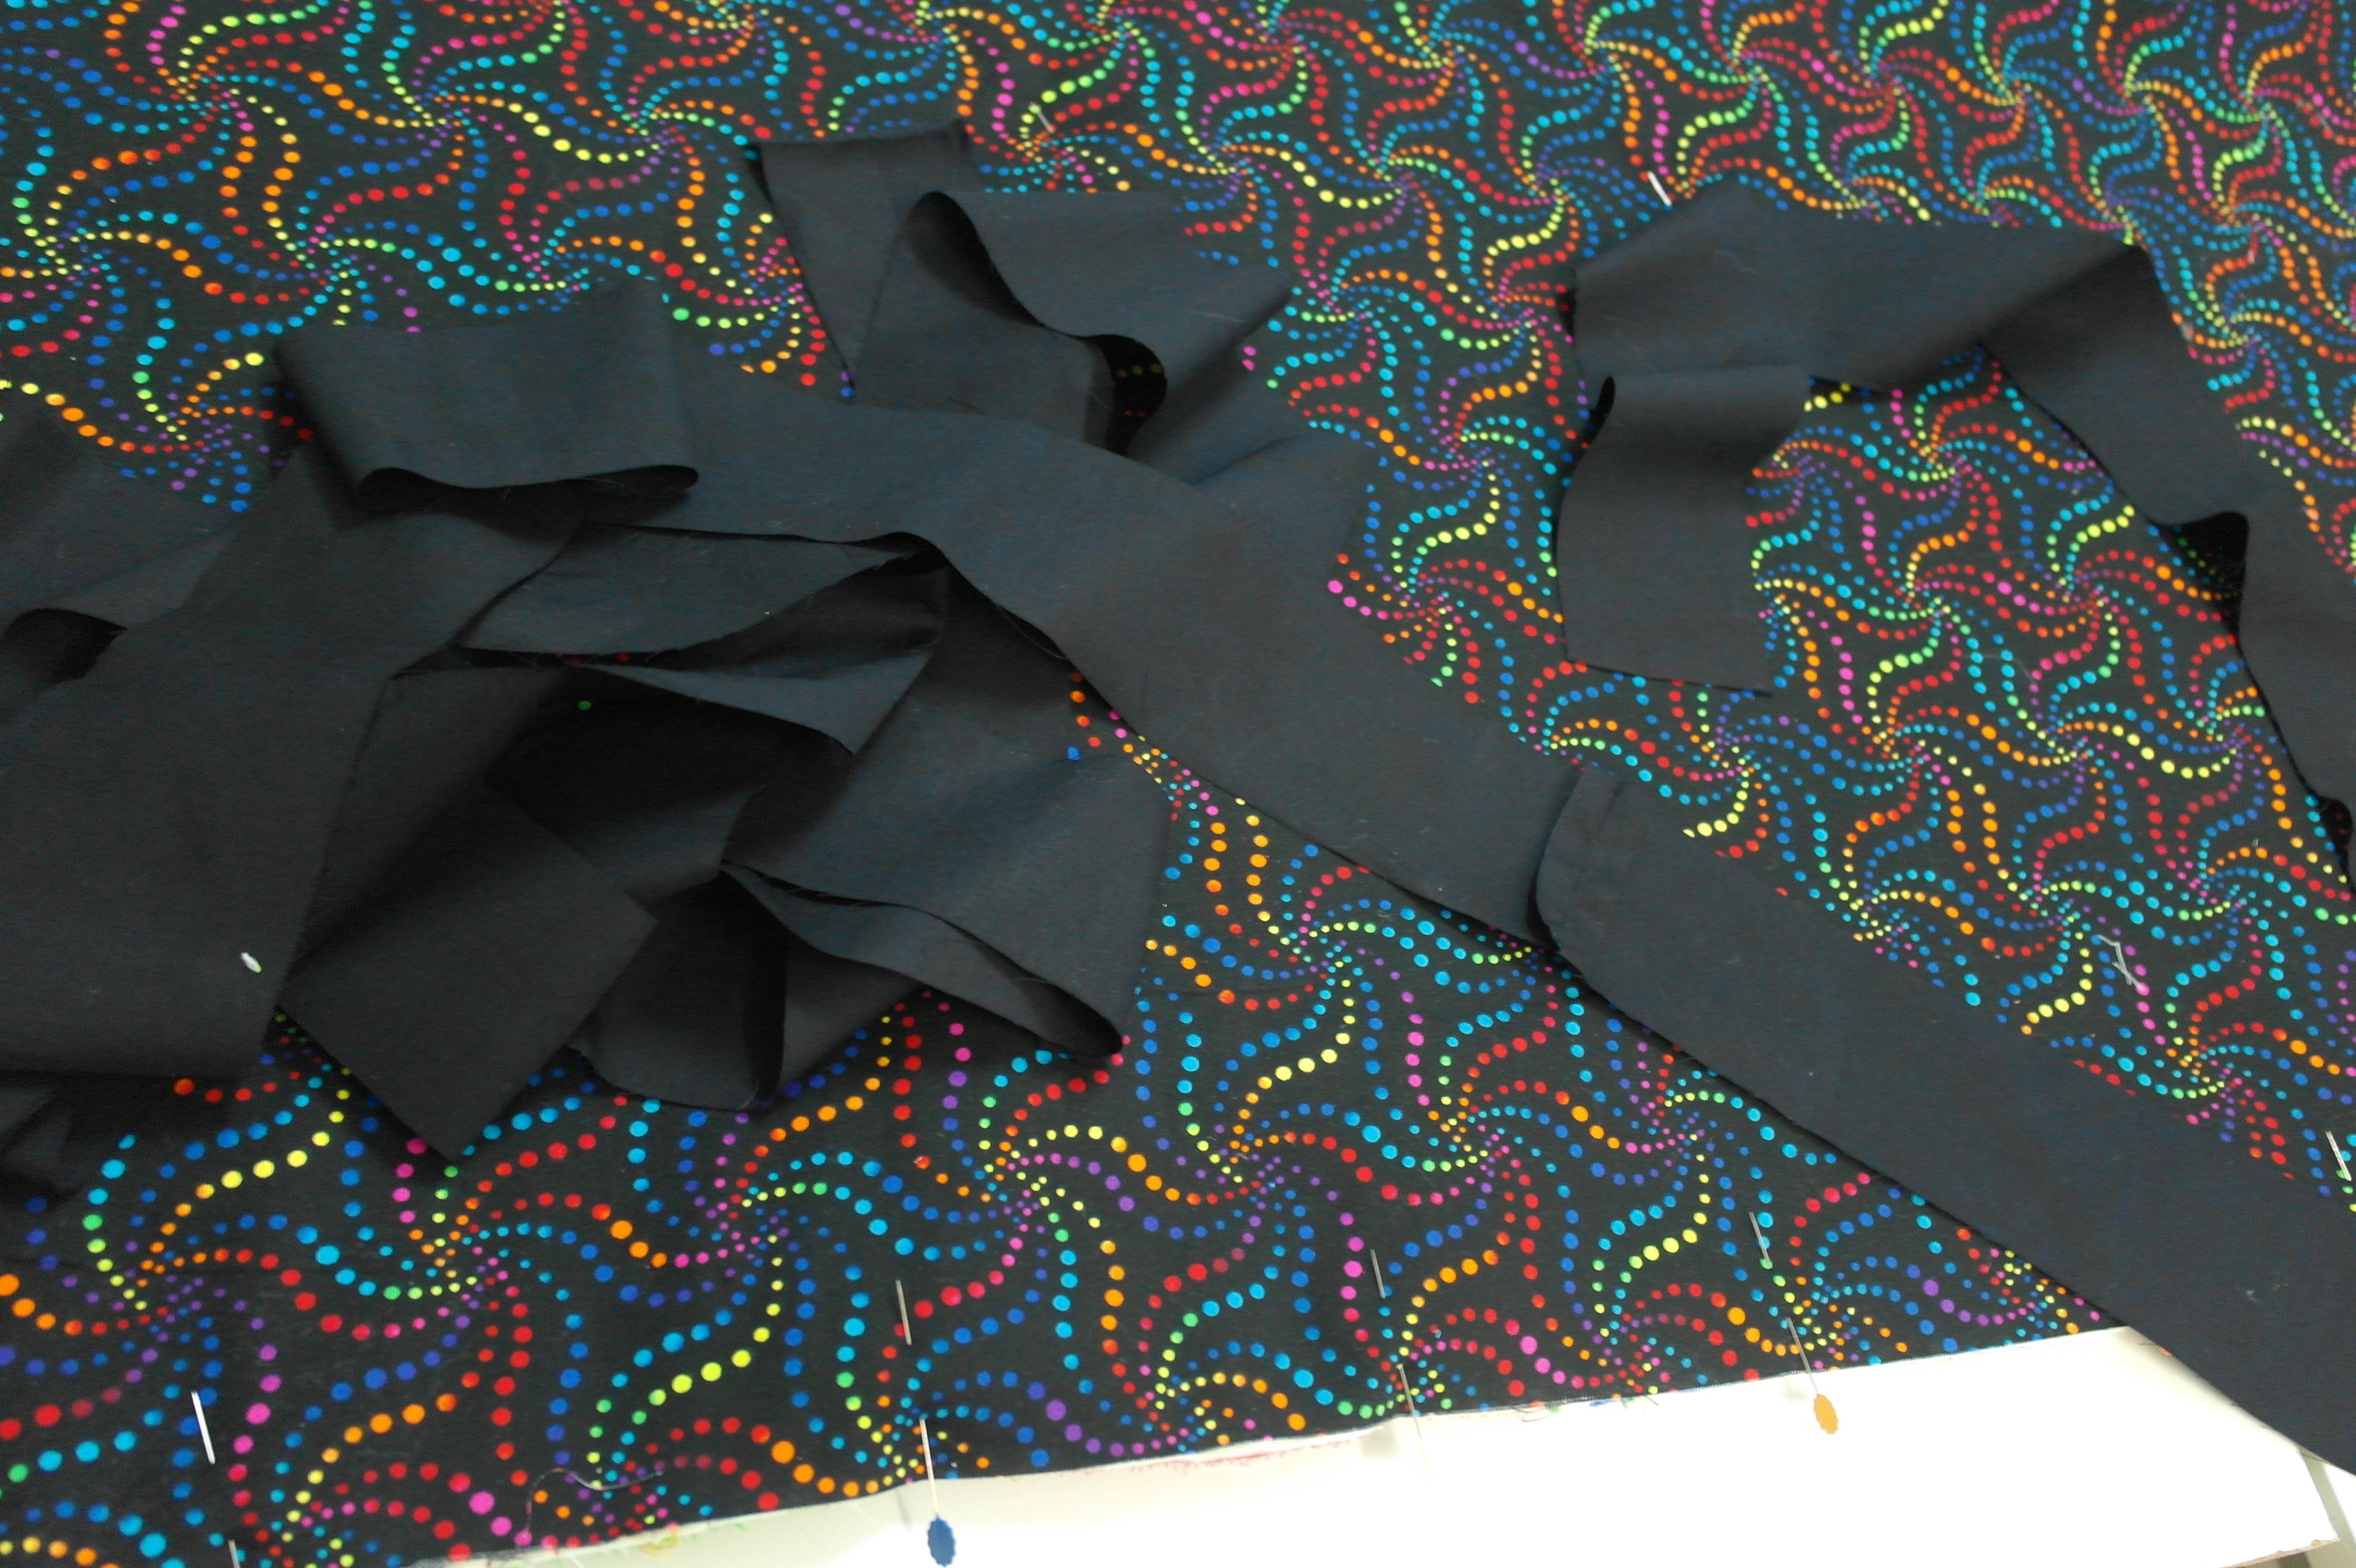
The backing, which has to complete the quilt, can be cut from a quilt fabric. But if that fabric has a width of 1.10m, it will be slightly too short. That means you will have to add some strips to this fabric to make it large enough to cover the back.
You can also use quilt fabric that is extra wide, aprox. 2.70 m and cut a square preferably slightly larger than the size of your quilt. Or you can piece different sizes of fabric together, to make a larger backing… either way the size of the backing has to be as large as your quilt and a bit extra. That’s because this backing can shift while adding it to your quilt.
The backing has to be added to the quilt, before adding the binding. The backing has to be tacked at certain places, to prevent too much loose fabric. If your don’t tack your backing, the fabric will crease or give distortion to the back of your quilt. Use invisible threads or a matching color thread to tack the backing. TIP: Do you want a visible and decorative effect when tacking? Use a small ribbon and a large needle, let the ribbon go through your quilt and tie it off at the front.
I have made decorative stitches, on top/in the center of the sashings, thus tacking the backing. It is not very visible, only if you take a closer look. The backing I’ve used has a black background too, and because I have used black threads, the stitches don’t show very much. But I am sure the backing stays in place and does’nt crease.
After finishing/tacking, cut the backing at the same size as the quilt.
NOW READ THIS FIRST, before adding the binding to your quilt. Use the wider, black strips – you have sewn 5 of them together into a long strip. This will give you enough length for all sides of the quilt. Because this is a project for working with your machine, you can add the binding entirely with your machine too. (If you don’t want to, please add the binding using your own method).
This is how it works: Sew the binding to the back, 1,5 cm from the edges, start at the left and right side of the quilt. Fold the strip/binding to the front and fold the edge of the strip under, placing the foldt slightly over the sewingline you’ve made, and sew it in place.
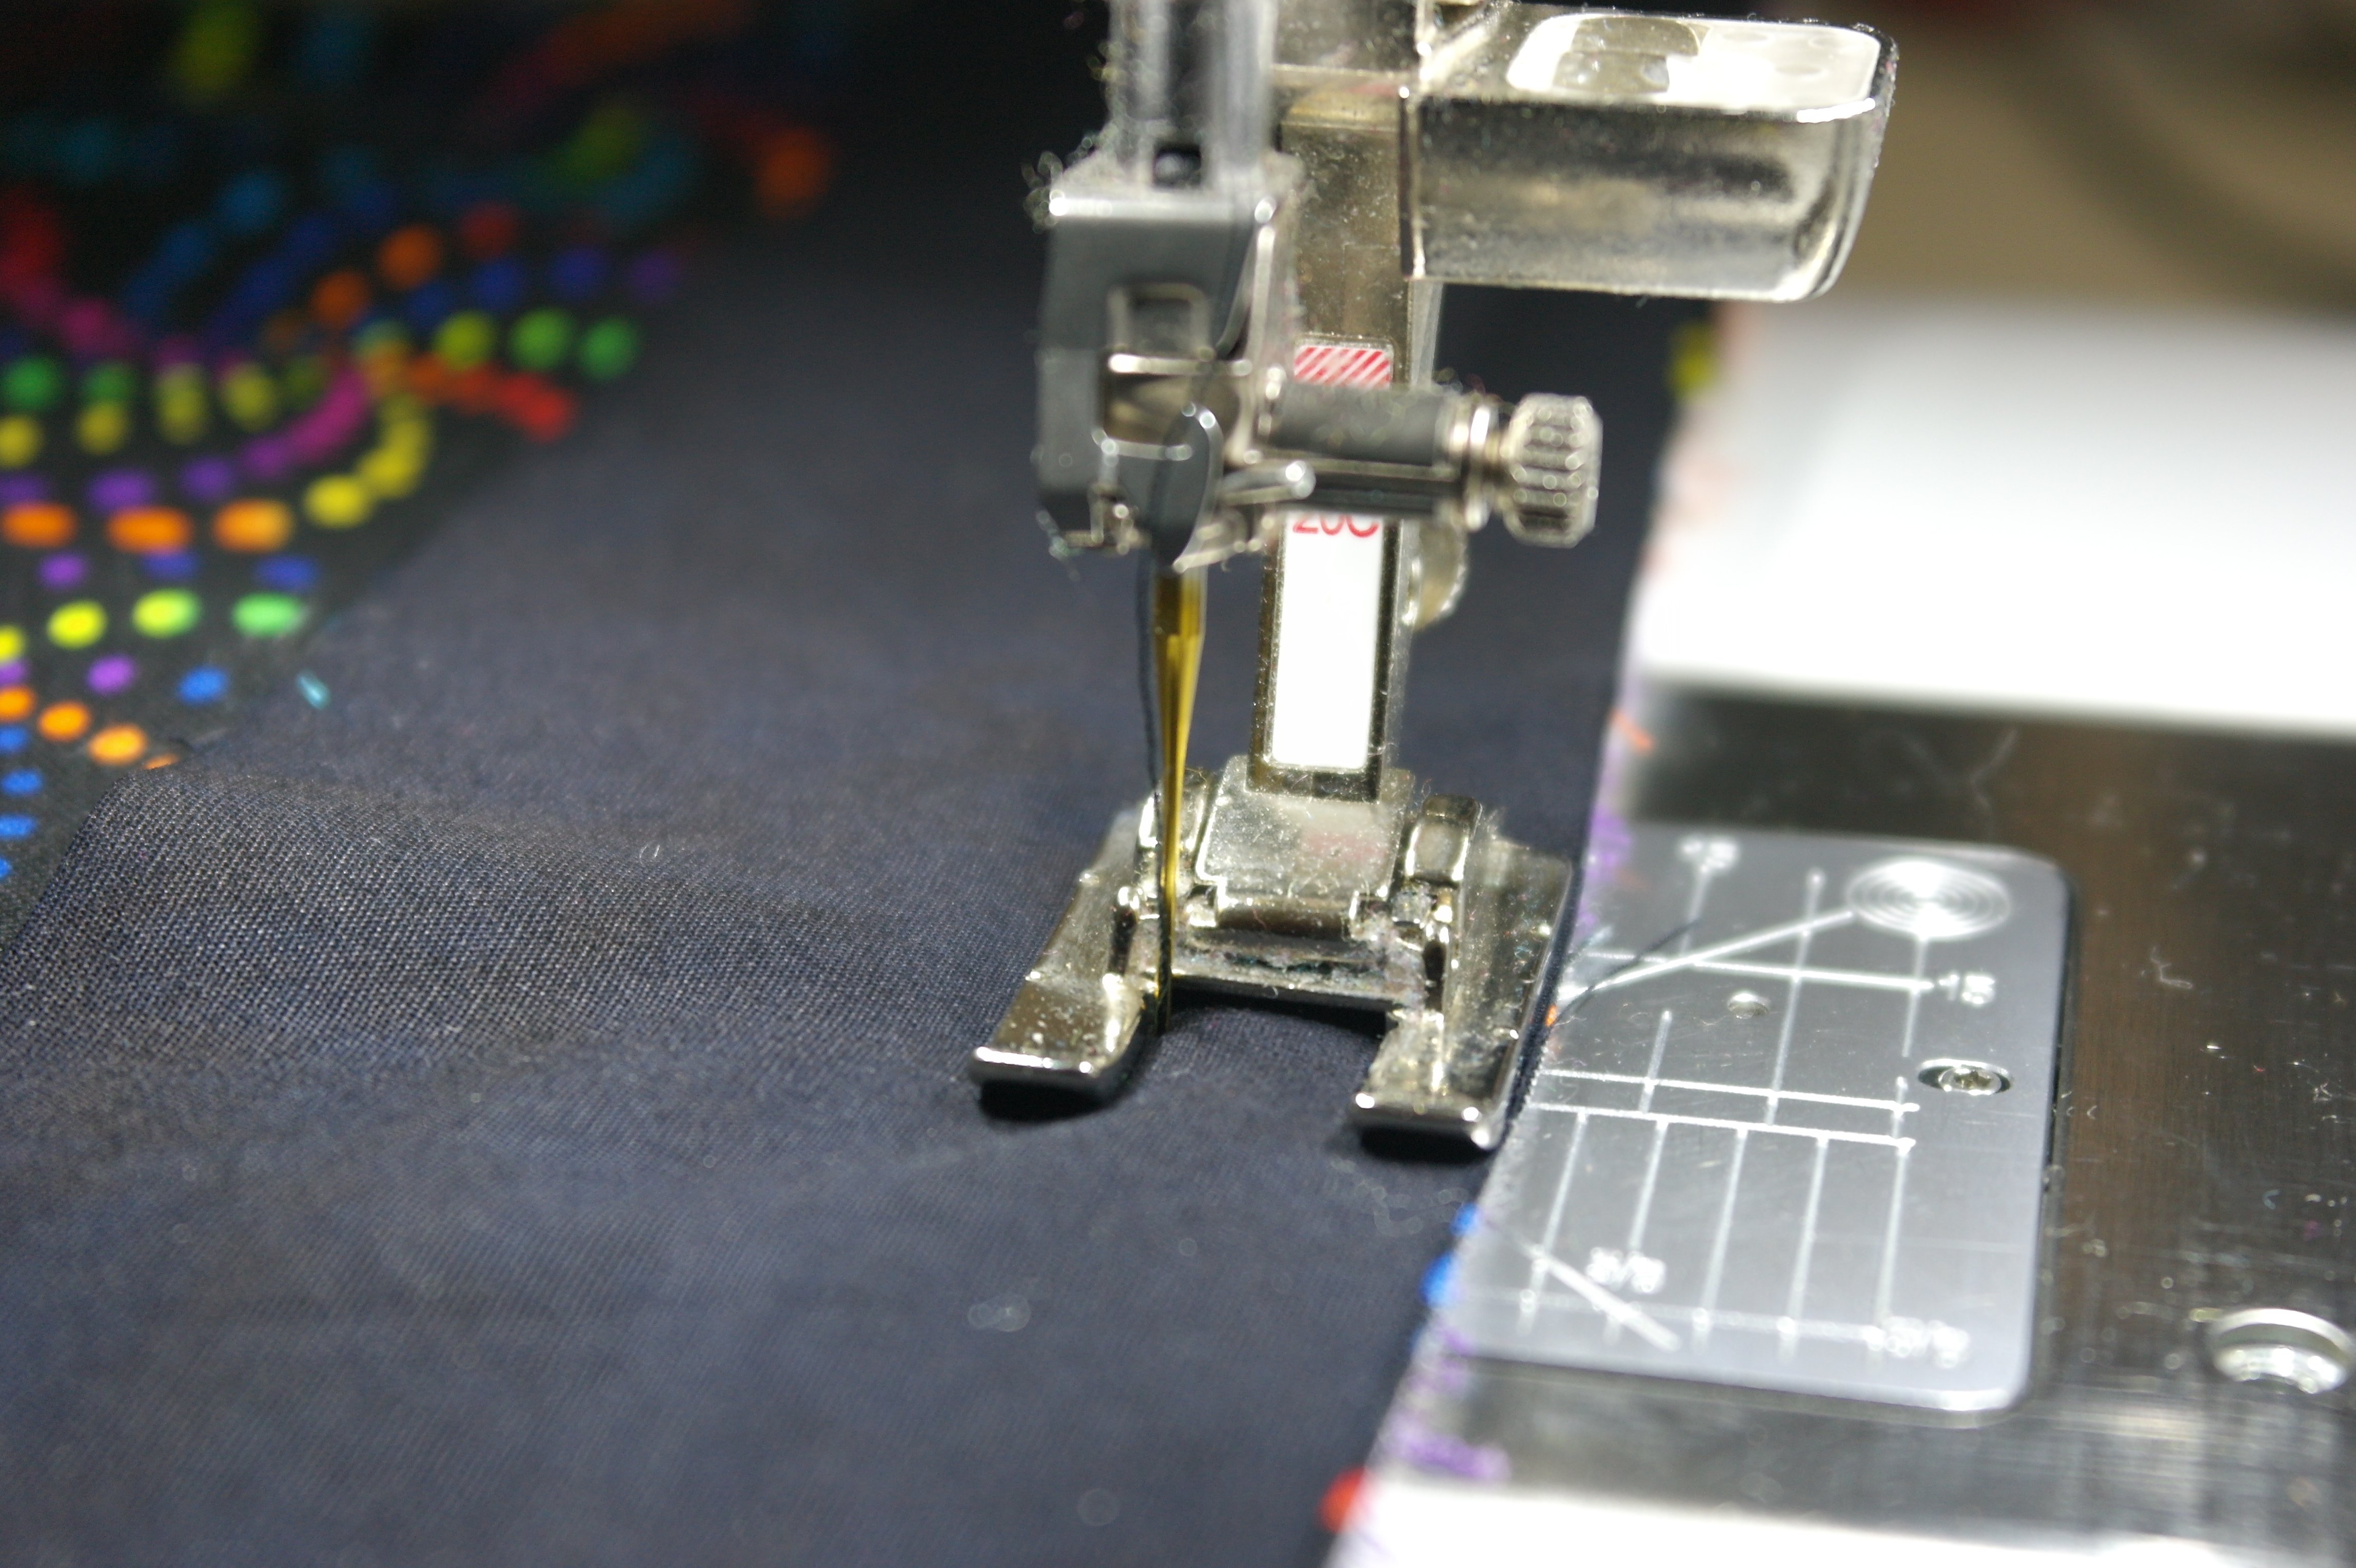
TIP: I have used my open embroidery foot #20C, because I found out that the distance from the right side of this foot to the inner left side is precisely 1,5 cm. I have positioned the needle all the way to the left (picture above), so I didn’t have to mark anything. Just keeping the right side of the foot along the edge. Be sure your machine has the possibility to position your needle to the left. AND BE SURE TO RETURN THE POSITION OF THE NEEDLE BACK TO THE MIDDLE AFTER SEWING.
First sew binding to both sides of the quilt, on the back (different from regular binding technique). Fold the strip to the front, and sew it against the stitchline/just over the stitchline, folding the edgeS under (picture above shows the first stage, where the binding is sewn to the back).

You can see (arrows) that I have used the stitchline to fold the binding, placing it against this line or just over this line. The picture shows yout the stitchline is still visible; after sewing it is covered with the folded edge of the binding.
The picture above shows the finished binding at the back (yellow arrow) and the front of the quit where the binding is pinned in place (red arrow) and still has to be sewn.
After finishing the binding on both sides of the quilt, I have added the Multicolor ribbon with silver, just like I did with the sashings.. The difference is that I have only used one row of ribbon, to cover the stitches of the binding. The ribbon doesn’t have to be finished off at the beginning and the end, just cut them the same size as the edge of the quilt itself.
Sew the black batik binding for the bottom of the quilt, the same way you did for the sides. Sew Multicolor ribbon with silver to the edges, be sure the beginning and end pieces of this ribbon protrudes aprox 3 to 4 cm. at this time. After sewing, fold these pieces to the back, fold the ends under and stitch in place (by hand). You still will see a part of this ribbon to the back: that’s ok, if you make sure your stitches are tiny, it will become part of the crazy quilt.
Sew the black batik binding for the top of the quilt, the same way you did for the bottom. Sew Multicolor ribbon with silver to the edges, be sure the beginning and end pieces of this ribbon protrudes aprox 3 to 4 cm. at this time. After sewing, fold these pieces to the back, fold the ends under and stitch in place (by hand). You still will see a part of this ribbon to the back: that’s ok, if you make sure your stitches are tiny, it will become part of the crazy quilt.
Make a hanging sleeve for the back/top of the quilt, or use another system to hang the quilt to a wall. Make a hanging sleeve the same way you do with other quilts – be sure the sleeve has some extra room for a stick/hanging system, so don’t sew it too tight/flat to your quilt. It is not nice when a stick is pushed through a sleeve, and it shows a bulk at the front. Leaving some room for it when making your sleeve prevents this: as you can see with my quilt/sleeve (picture).

Make a label and sew it to the back of your quilt. With a label, you sign your quilt, which makes you ‘the maker’, and tells people (perhaps the recipient if you have made this quilt as a gift) when you made the quilt, and why. You can use your machine to make text on a fabric, or – as I always do – use PhotoFabric for text and picture(s), with your inkjet printer.

This is my finished quilt – it decorates my wall (I took the picture from the stairs, so it looks like the quilt is not straight, but it is! Also it doesn’t show all the sparkles from beads and sequins, Hotfix stones and the silver from the Multicolor Ribbon. But believe me: it sparkles allright!
Now it is time to finish yours…… I hope you had a lot of fun making this project!
Thank you all, for your enthousiasm, your compliments and all your messages and questions about this project via FaceBook group, comment with the monthly blogs, Messenger (PM) and/or email. Please keep doing this, for you can work with this project at your own time, and it doesn’t stop after 2017. This project will remain on the BERNINA Blog.
Do you know there will by a another, new Crazy Mystery project, which I’ve designed for 2018, and will pass it through for FREE again via BERNINA Blog? It is called ‘Crazy Crystals Mystery Project 2018’ , that’s as much as I can reveil, because it is another mystery project! Different from the current one 2017, but also intersting and exciting to do: more about this soon at the BERNINA Blog.
For this new project, again there is a special FaceBook groep which you can sign up for, to share with each other. Will you join me again with this new project? Let’s have fun making this in 2018!
Happy Quilting!
Sylvia Kaptein
Sylvia’s Art Quilts Studio

0 Responses