 BERNINA Corporate Blog -
A new year, a new beginning and a new (very large) stitching project, that’s what you need when the new year has arrived. It is a project where a lot has to be prepared, much to be designed and eventually made with the embroidery machine. I will walk you through this project in the months to come, update whenever I can, to show the progress.
Some time ago I have purchased four old typesetter trays: beautiful big printers drawers with handles and the original indication of the type of setting letters that were used. I have traced the story of these drawers back to an old printing firm, dated them to 1930! I love it when I can find the history of objects.

The image above shows such a printers drawer: they were filled with setting letters, which were used in a printing press. Don’t you love it to combine old with new? I do, so I will fill these cases up with my own machine embroidery.
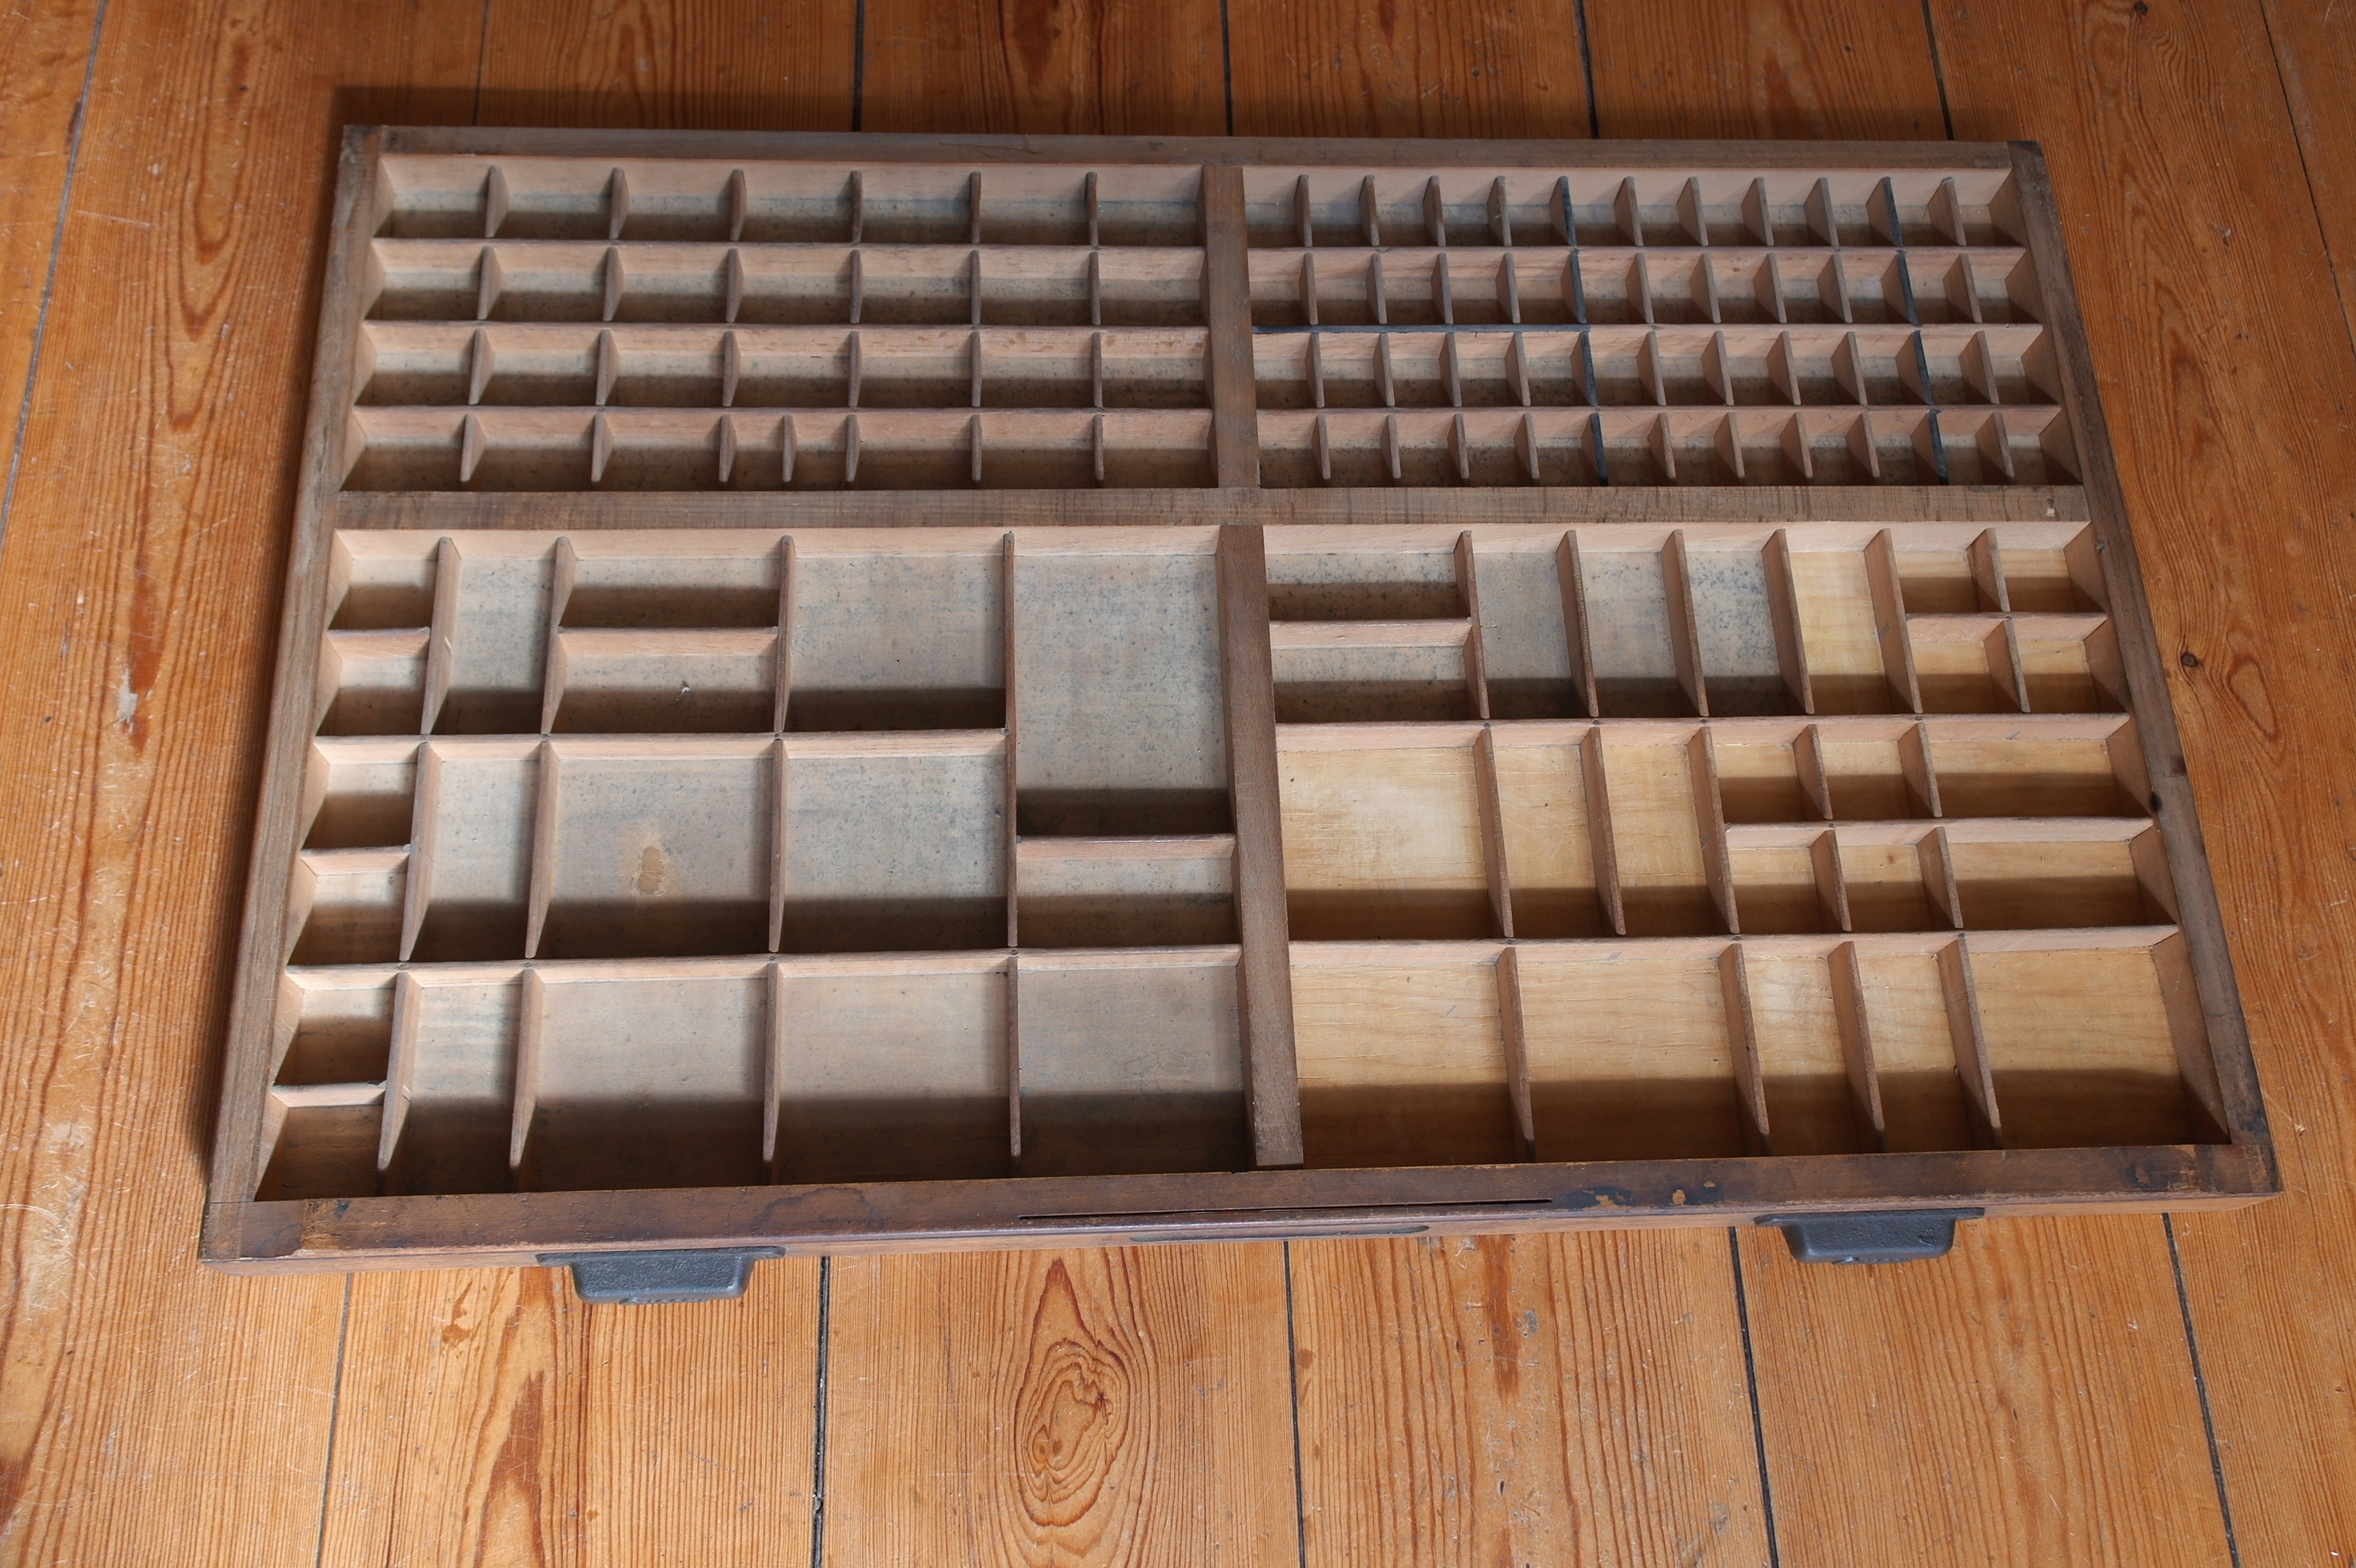
I have selected the four best letter drawers from the pile: they were very dirty and had to be cleaned. We thought there was a lot of mould, but luckely it was just ink residue: in the old days, movable type was sorted in this typesetter tray, before bringing it to an inked surface of the printing press. That explainis the ink residue.
After my wonderful husband cleaned every case thouroughly, I don’t have to worry anymore that ink will stain the (white) fabric I am going to use for the cases. You can see the difference between clean cases (bottom right), and stained cases (bottom left).
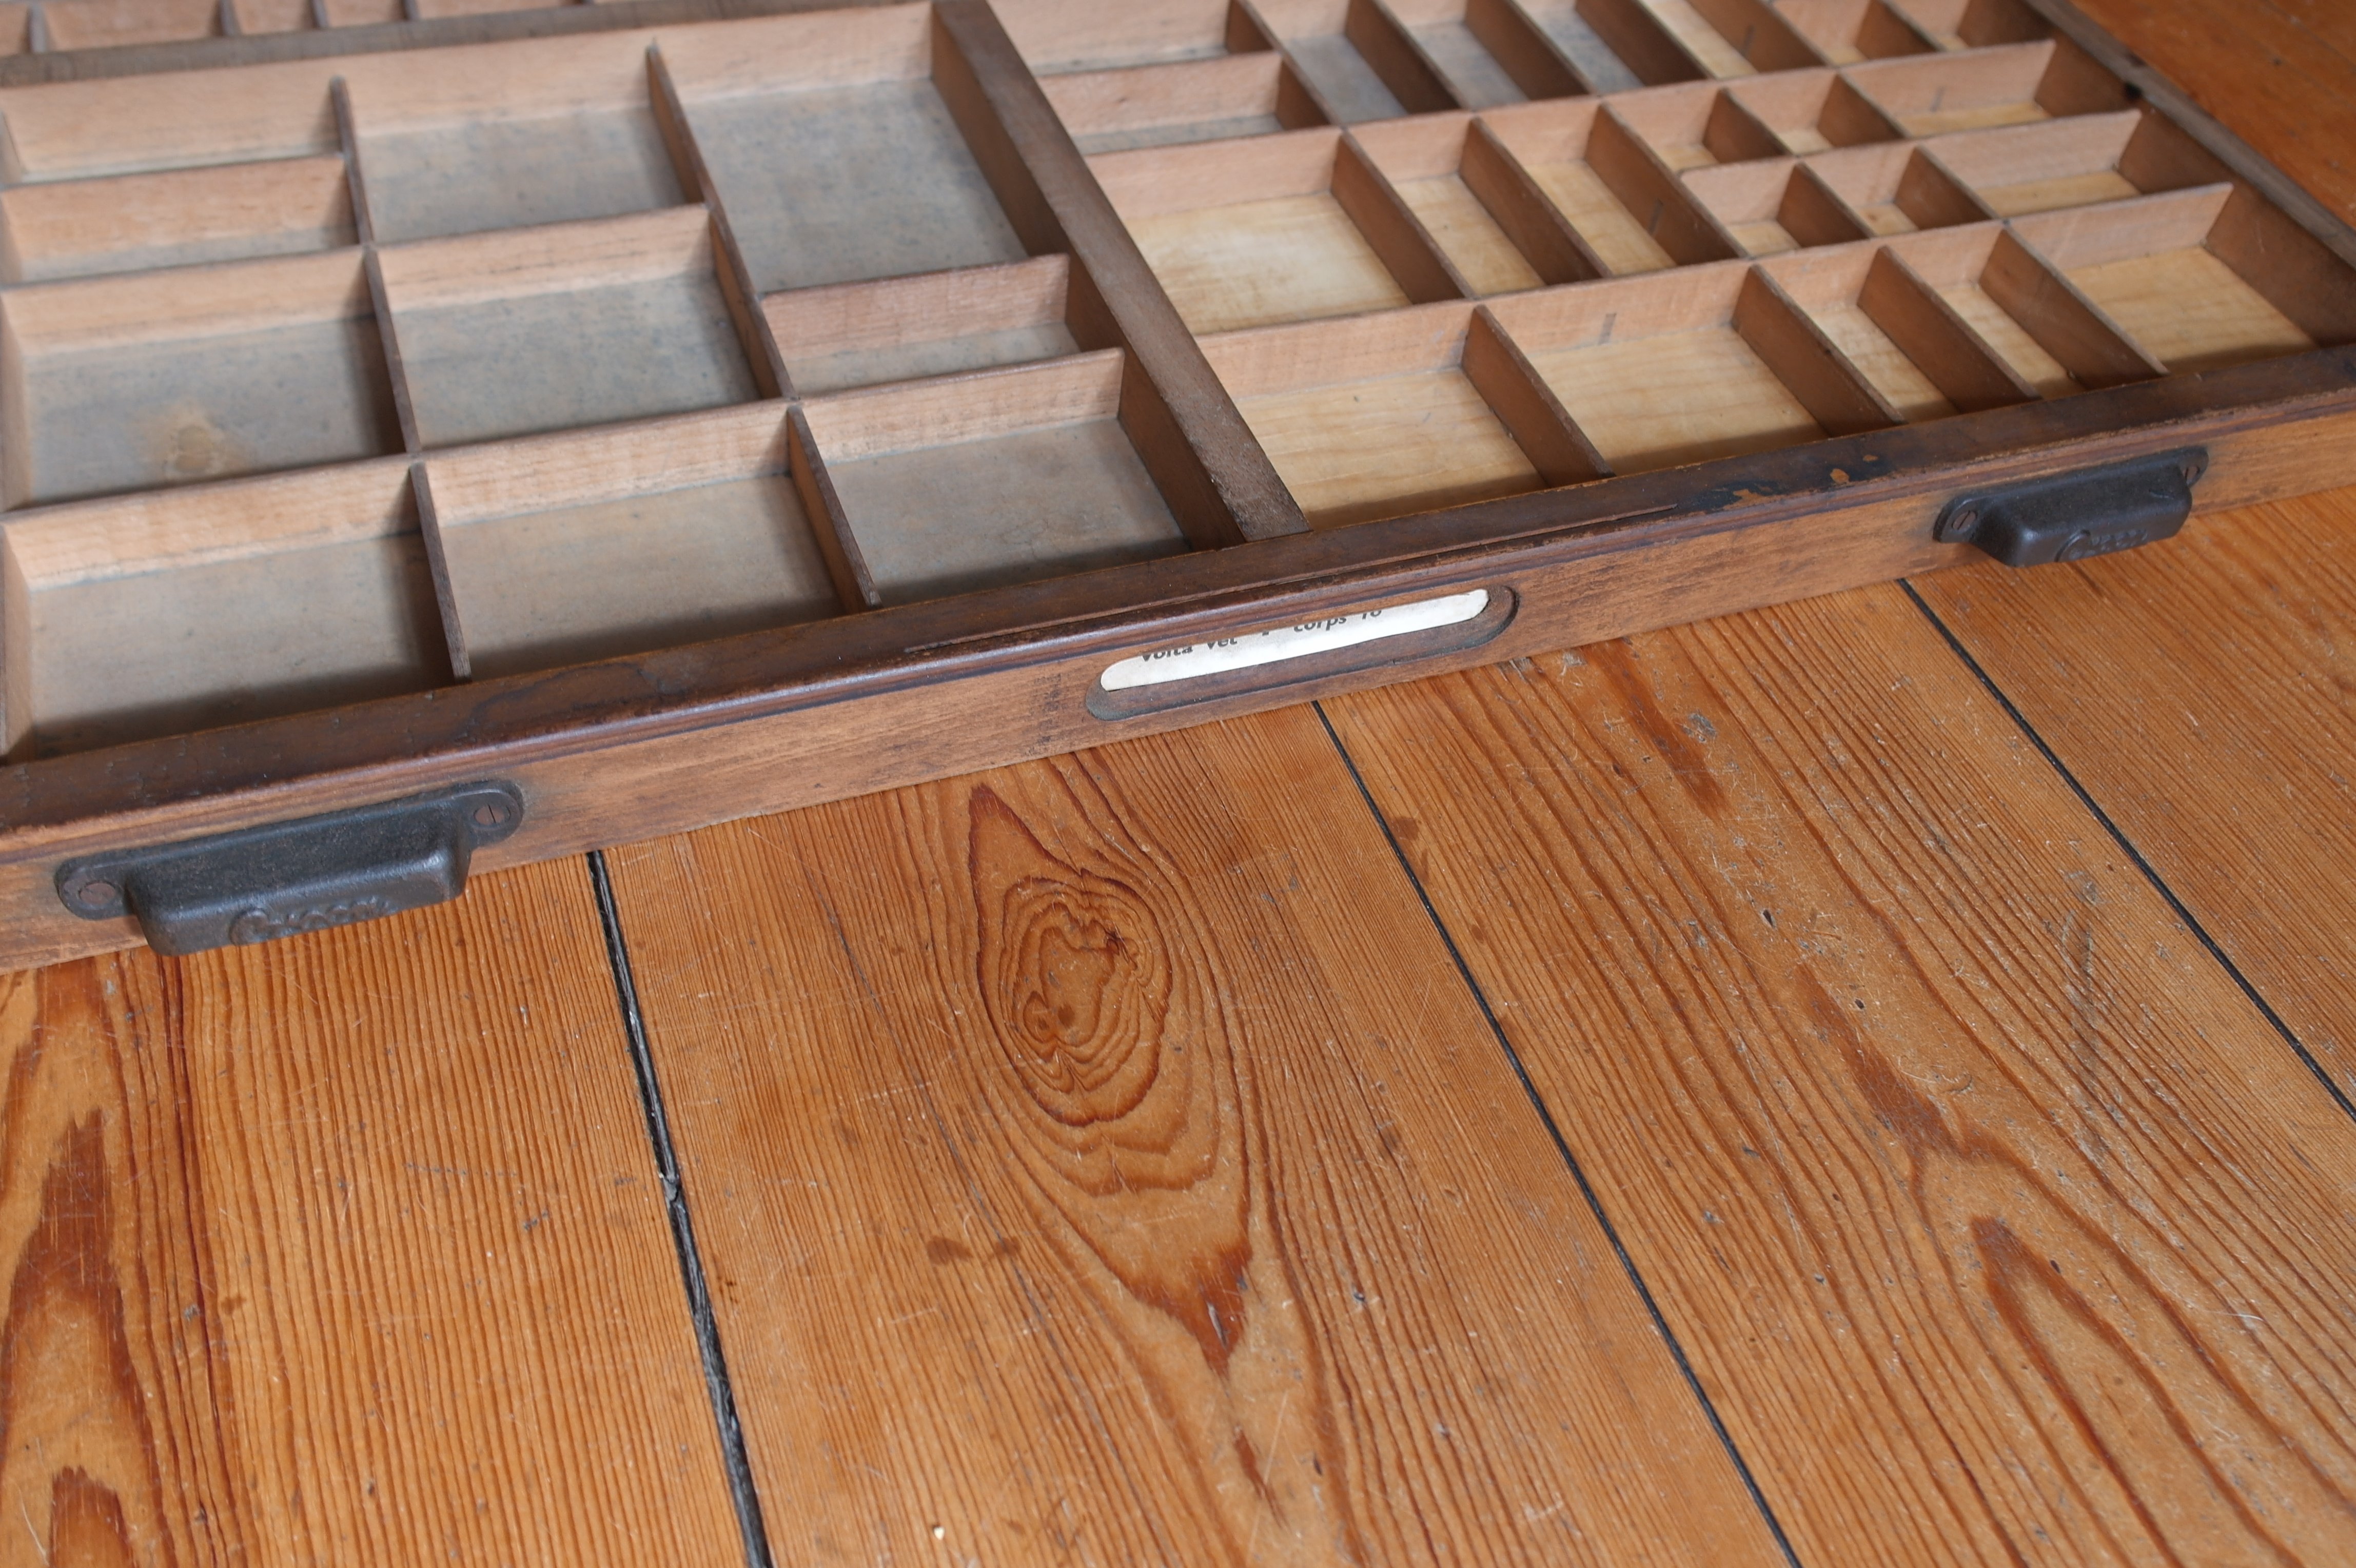
Details still remain on these drawers: the original handles and the indication of setting type still can be found at the front. I like these details: this way such an object has its own history. I know that many hands have touched this drawer, because it was used for many years.
To be able to put a piece of embroidered fabric in each case, I have to know the size of them all, form side to side and top to bottom. So I have measured them all seperately. It is an old object, so clearly nothing is straight, and no case is the same, even if it looks that way. Sometimes it saves just a couple of millimeters, but I still have to measure them all, to be sure that everything will fit properly later on. I know now that sometimes a rectangular shape can be a bit odd, because the top could be slightly smaller or larger than the bottom…
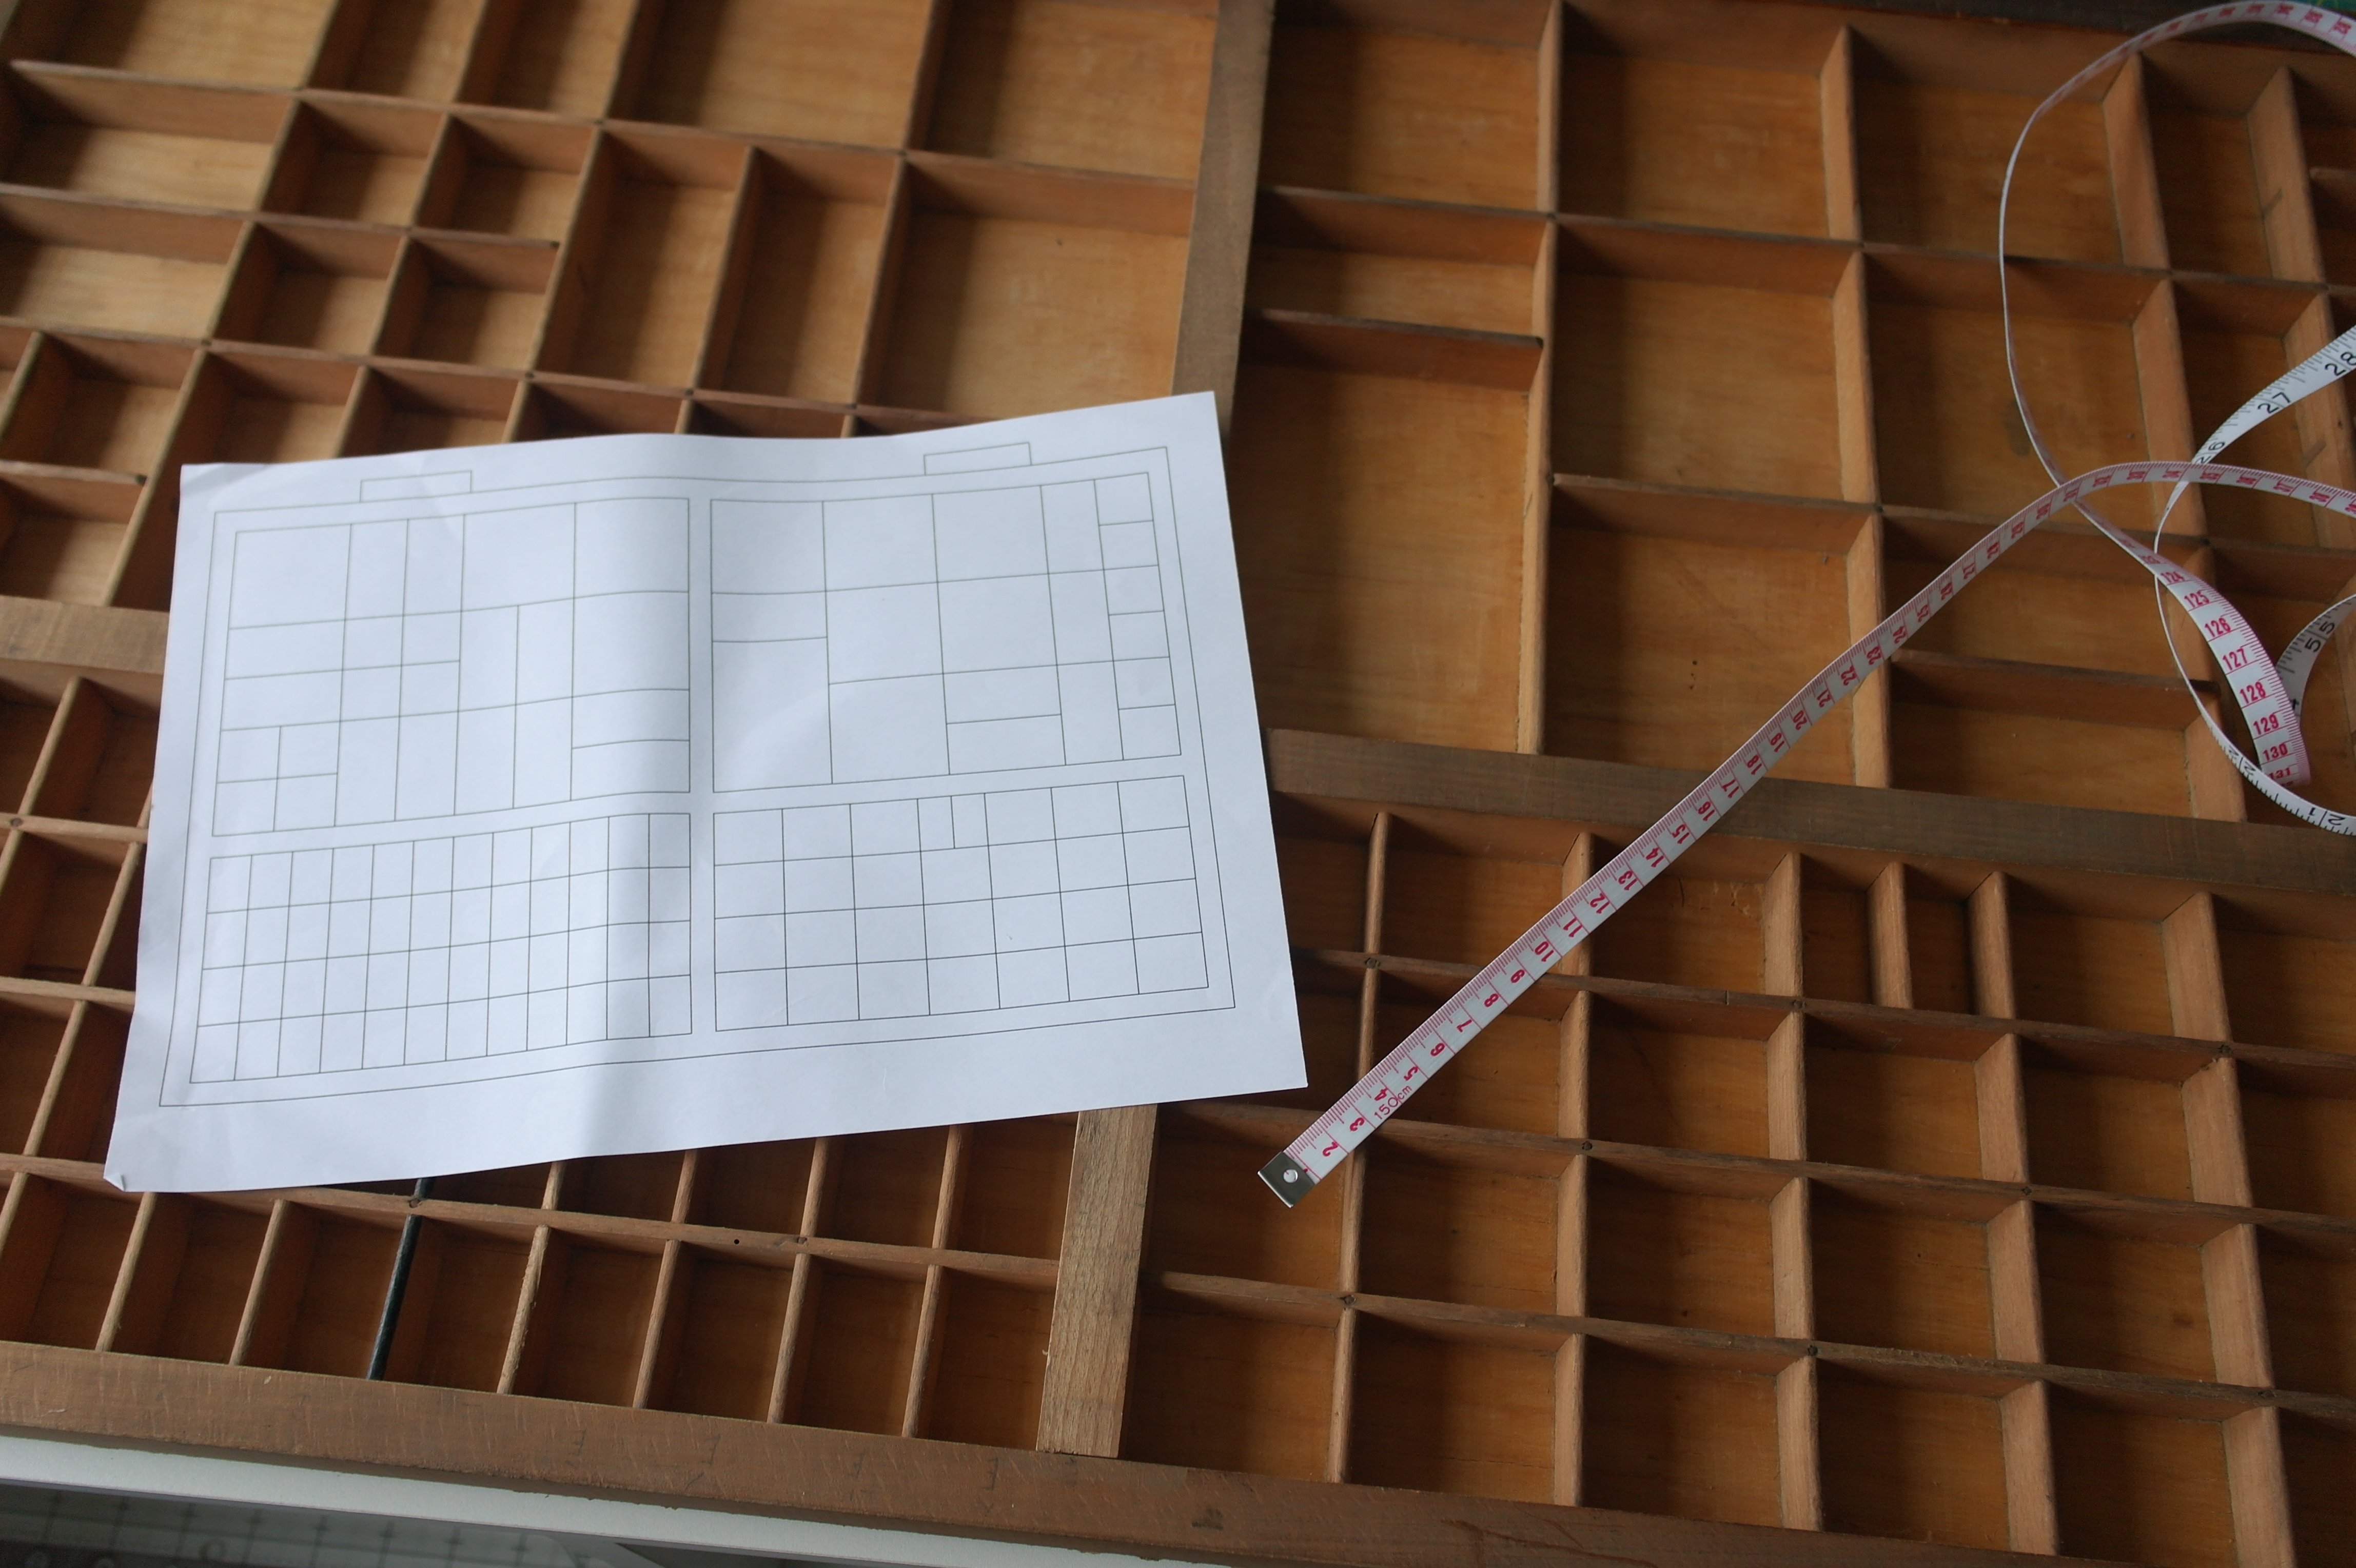
So I made a scheme, exactly to scale, where I have noted all sizes. No surprises for me!
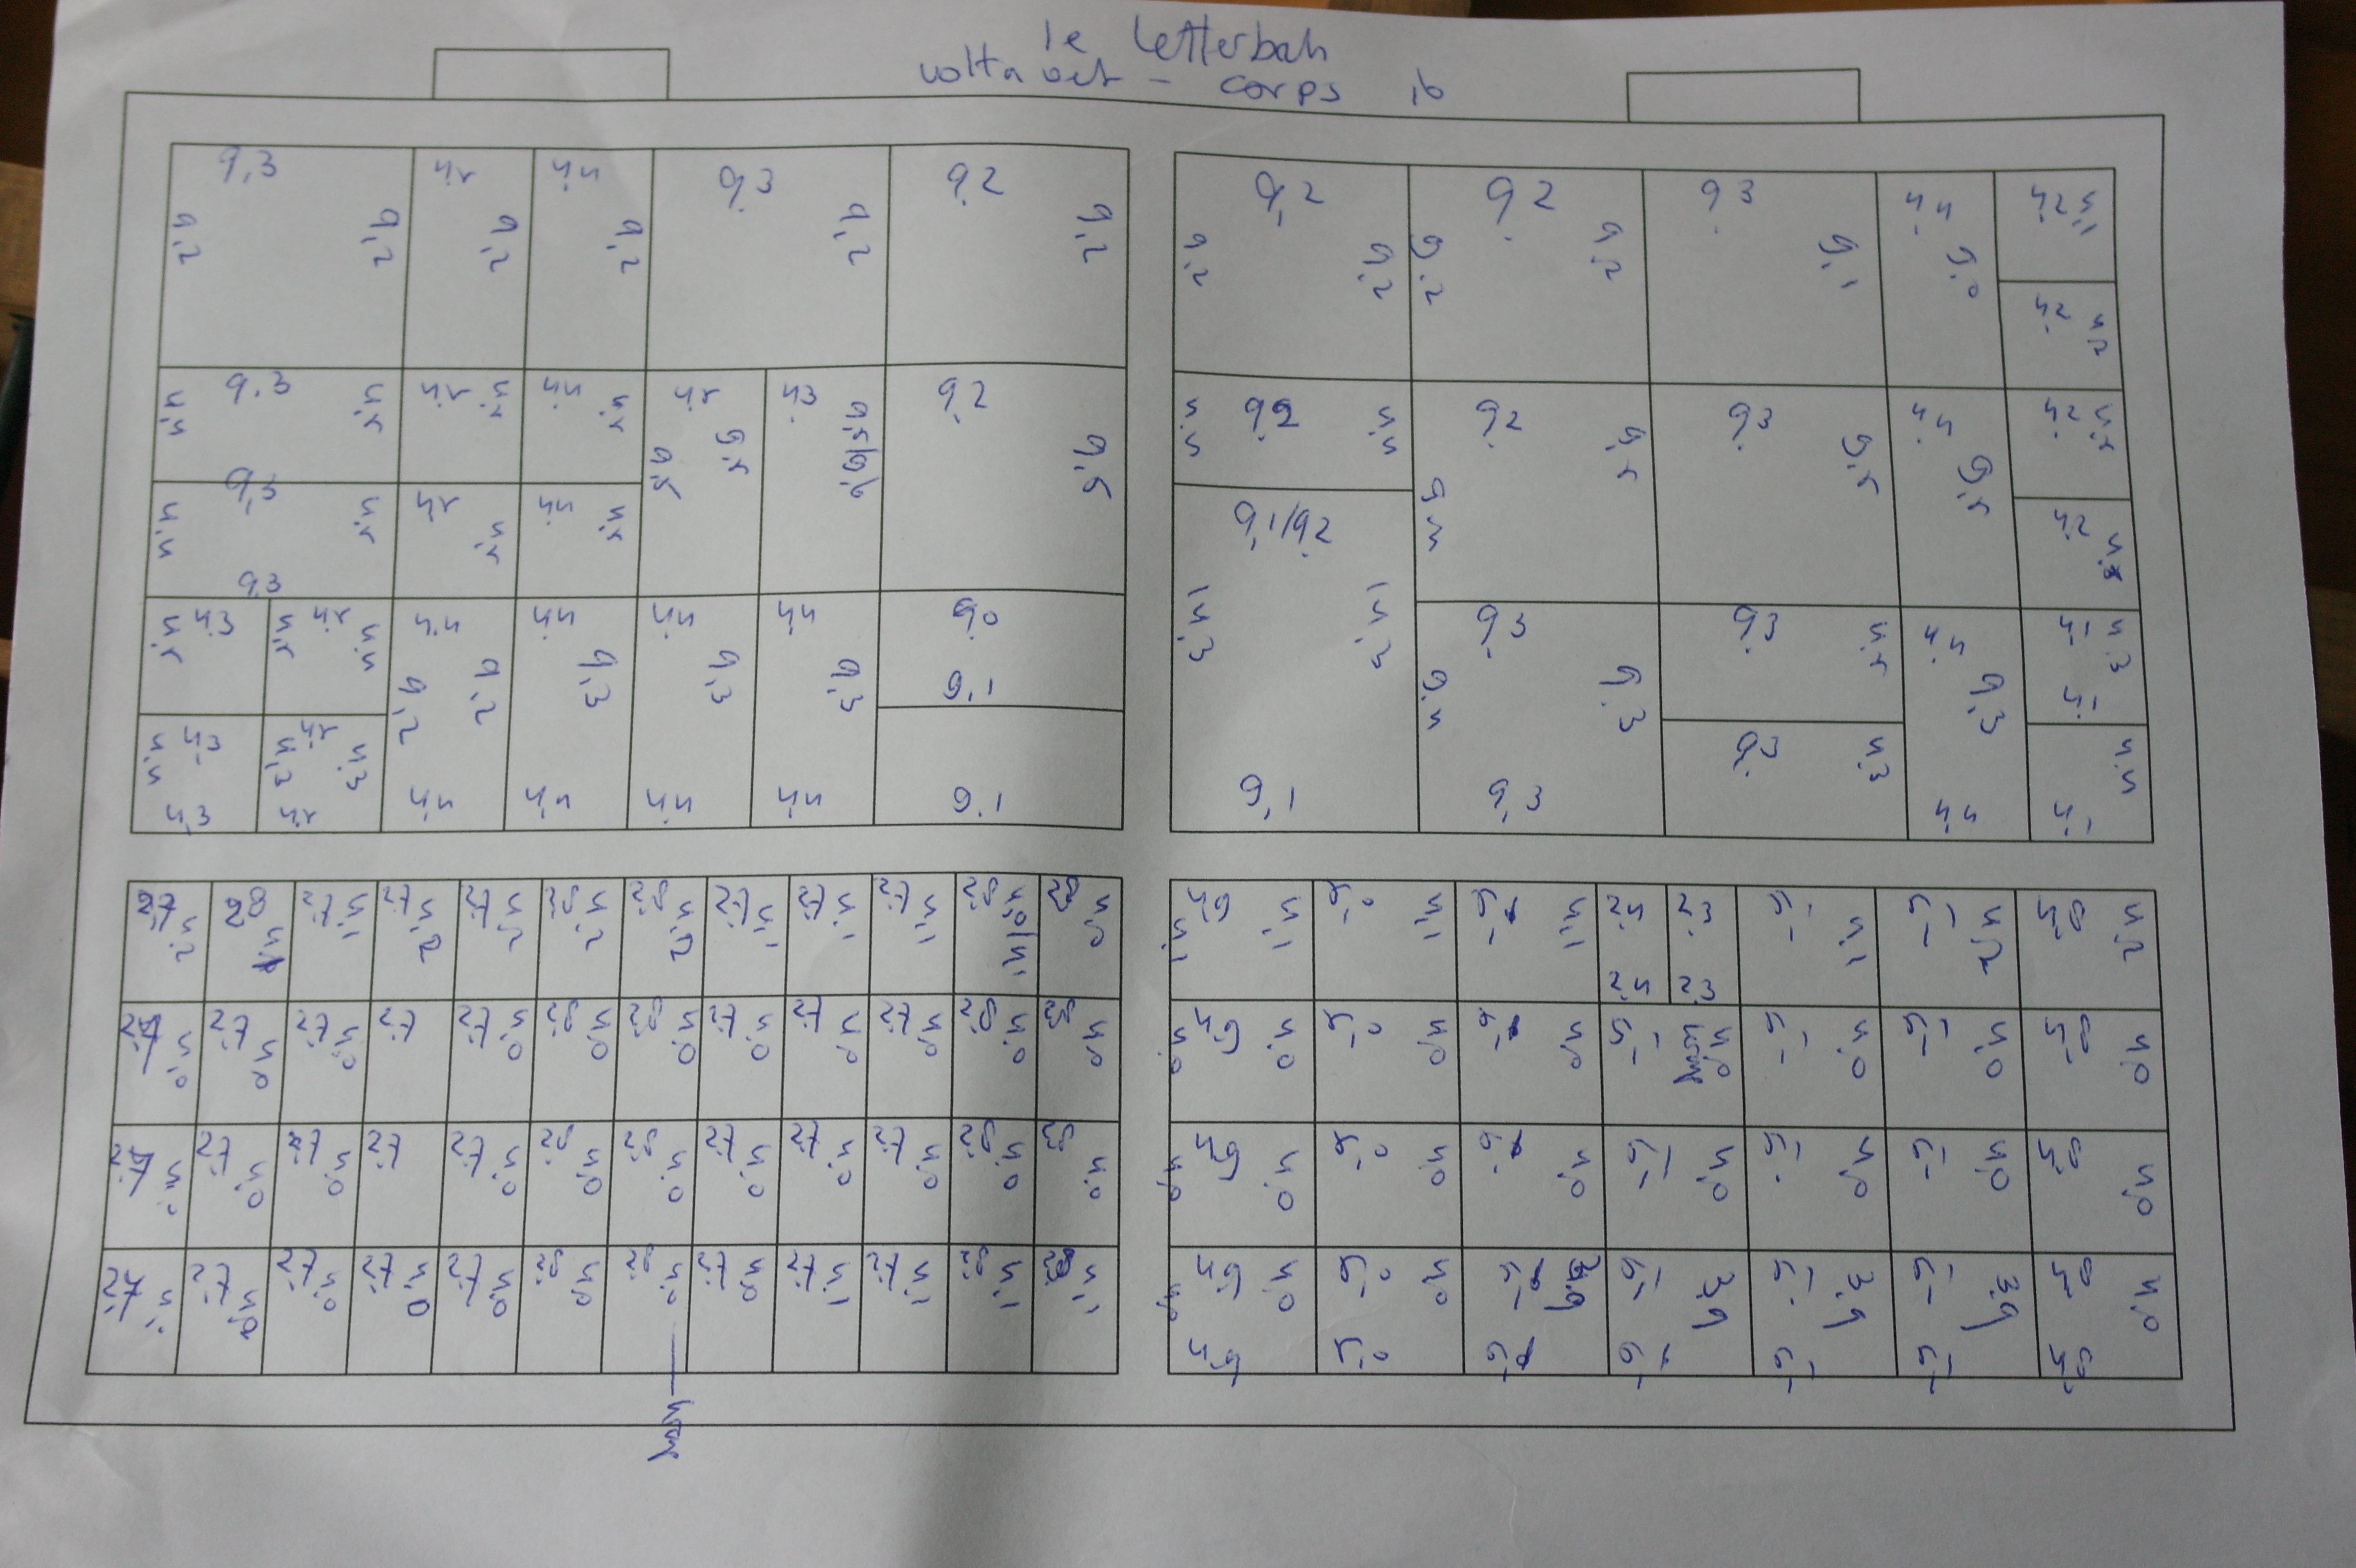
Quite the work, but it will be worth it. Better prepared then dissapointed if something does’n fit. I have measured the first drawer and will do so with the other three.
Now I have to find the right (probably white) fabric, and choose the color machine embroidery thread, to make the letters and motifs.
Happy stitching
Sylvia Kaptein
Sylvia’s Art Quilts Studio

I have brass miniatures in my Letterbox. Please continue…I can’t find Lesson 2 of your series…
This project hasn’t continued, I am sorry. I have planned a lot of projects, had to let this one go.