 BERNINA Corporate Blog -
A New Year, a new Crazy Project 2018: a festive project, made of 12 rectangular blocks, working with different techniques. I will use a lot of gold colored material, because of the anniversary of BERNINA: 125 years/celebrating your creativity. I will work with my BERNINA 770QE. If you have read the Blog/directions for the preparations, December 18 2017, you have collected a lot of basic materials, and will be able to prepare everything for the first block (or for all blocks, as I have done).
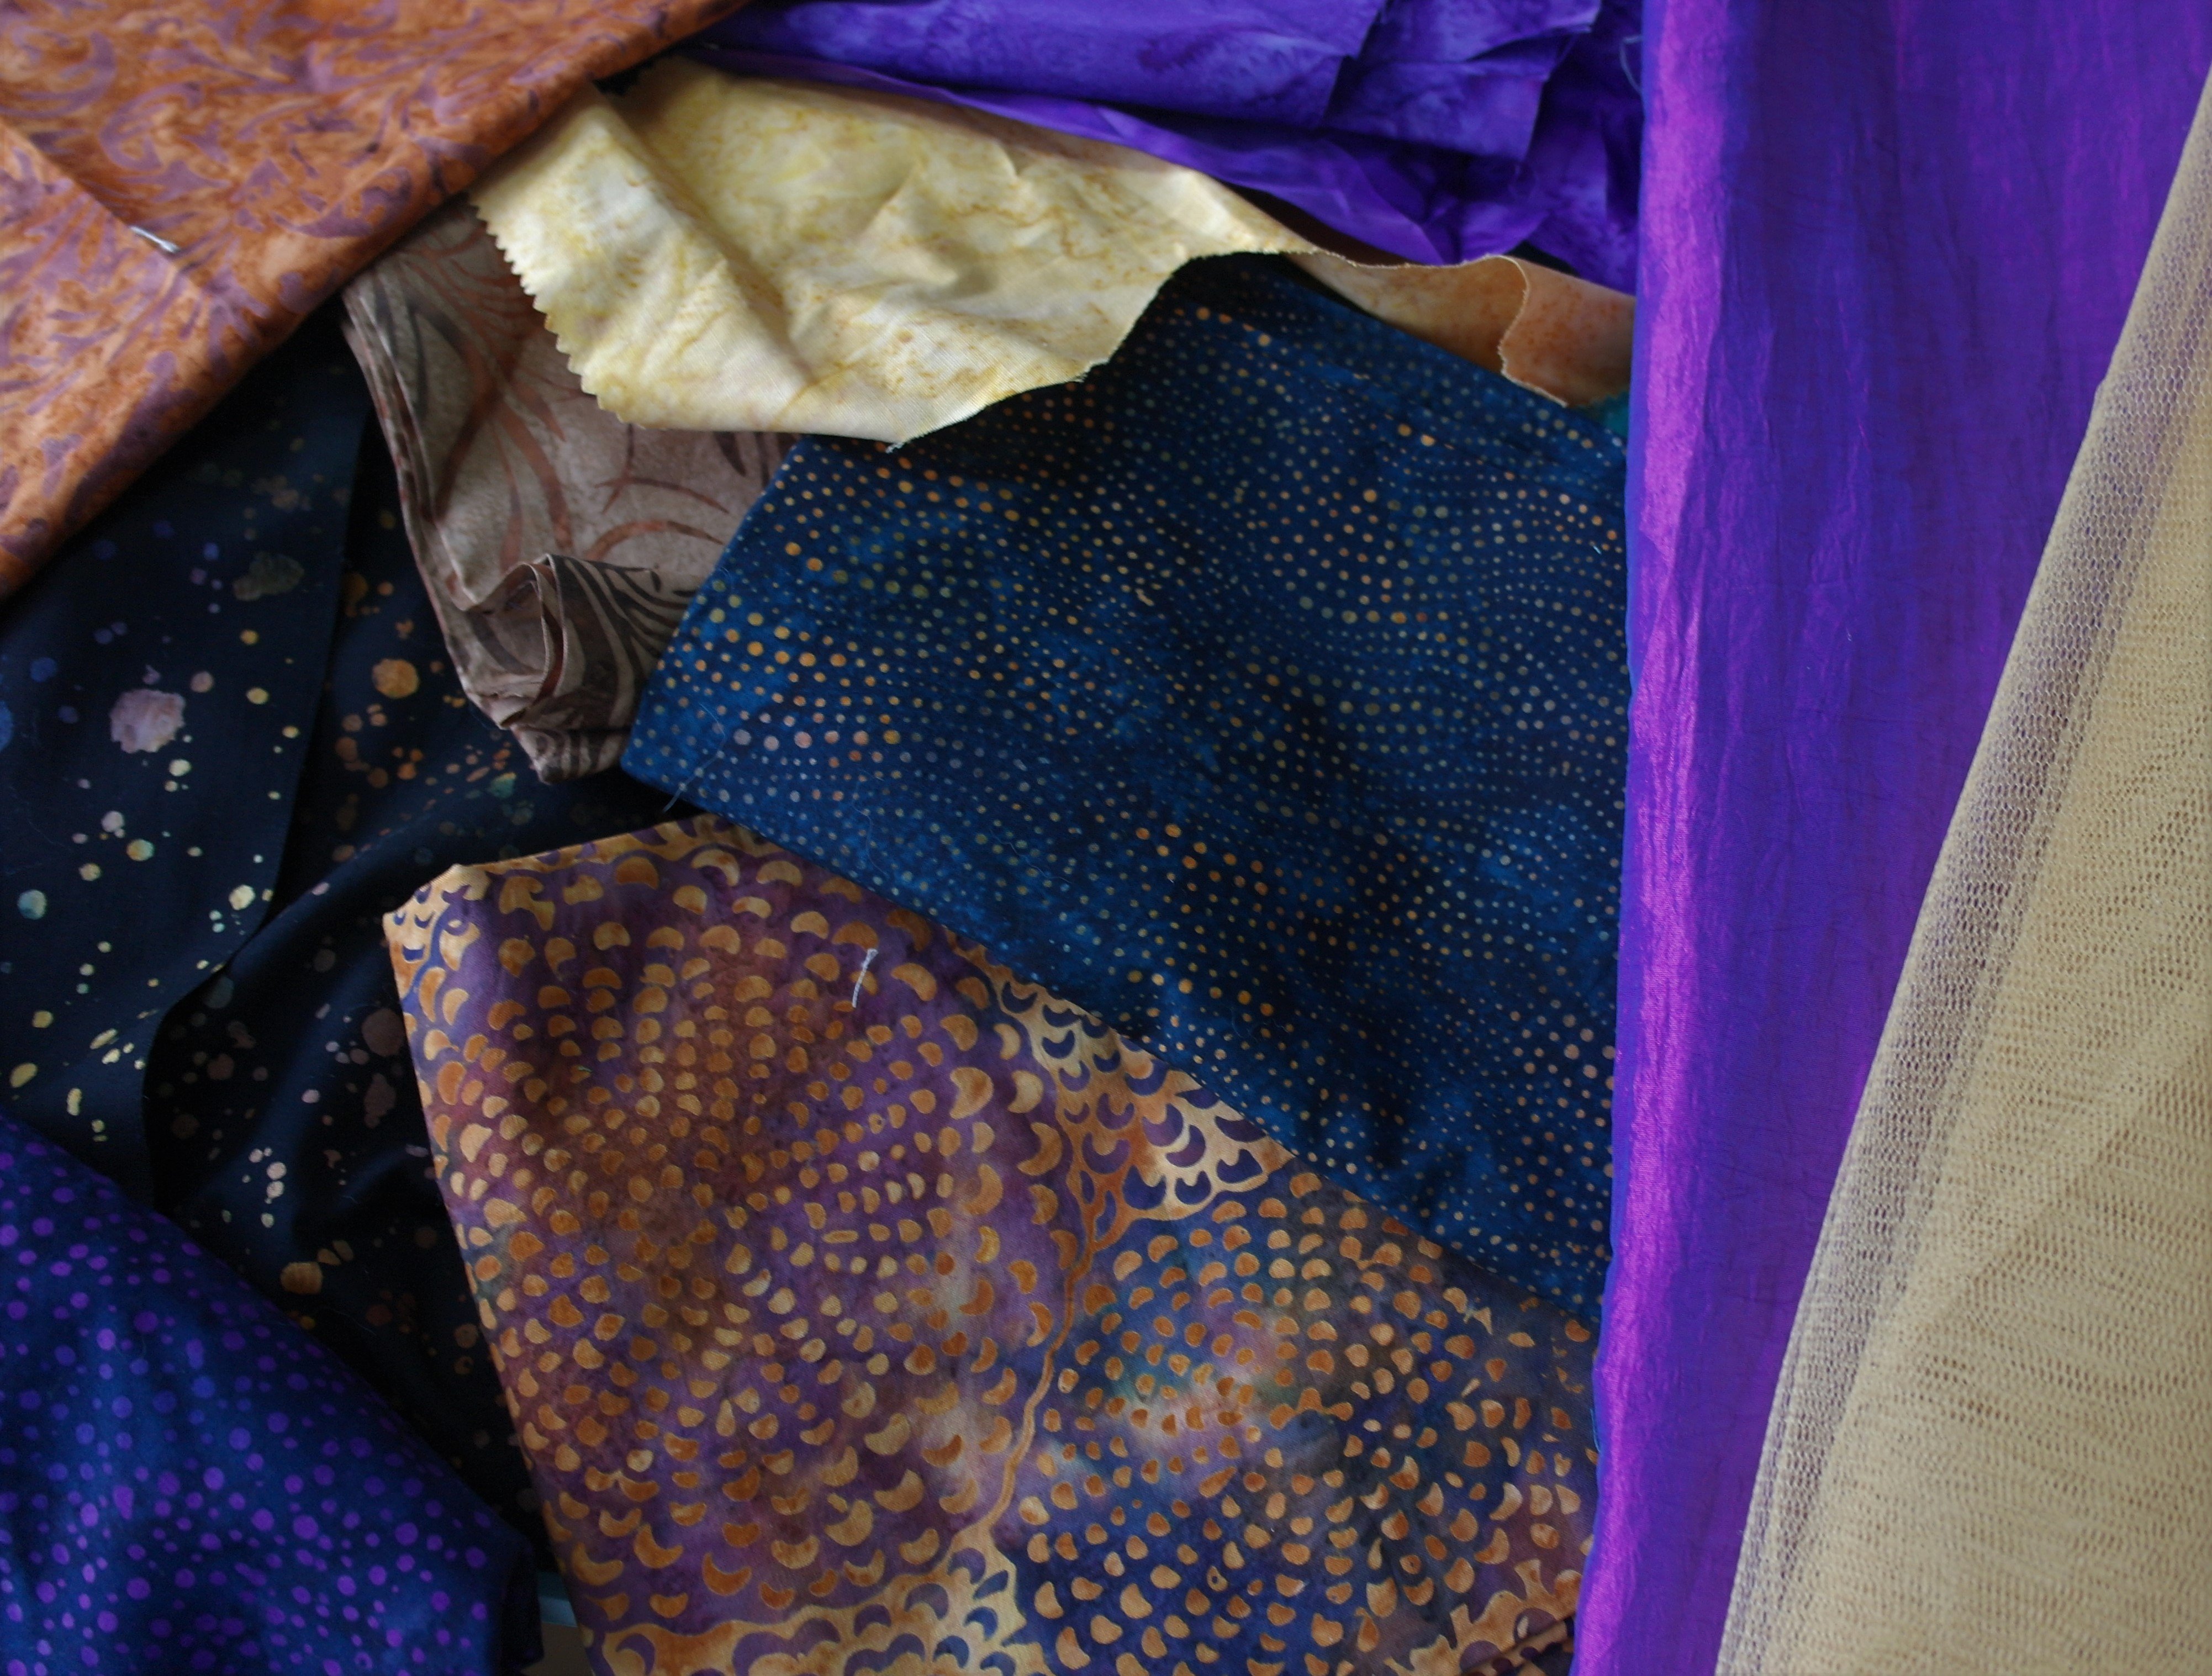
Next to the basic materials, you will need many different kinds of fabric: all kinds of festive and special fabrics can be used. Measurements of the fabrics are not specific: strips, long/large pieces, fat quarters or quarter yards/metres etc. All depends of the number of different fabrics you are using and for which place on your sandwich/blocks you have planned them. I have used aprox. 20 different fabrics, from quilt fabrics and batics to lamé and thin velvet, different colors each. Remember you can always add fabrics if you think your project needs more. No special list of fabrics is required – just add when you think your project needs extra texture or color. (If you are using just quilt fabrics, you can use fat quarters or quarter of yards/metres, if these fabrics are aprox. 42inches/1.10m wide. If you are (also) using festive or special fabrics, remember they are sold at a width of 1.401.50m – purchasing a quarter of a metre, different kinds of fabrics, will give you plenty to work with).
You can download the pattern for the first block below: two parts will make a whole pattern (a left and a right part). A third pattern is for the ‘center’ of the block – a Crystal. You will need the 3 printouts to make this block.
Blok 1 – left part
Blok 1 – right part
Blok 1 – Crystal
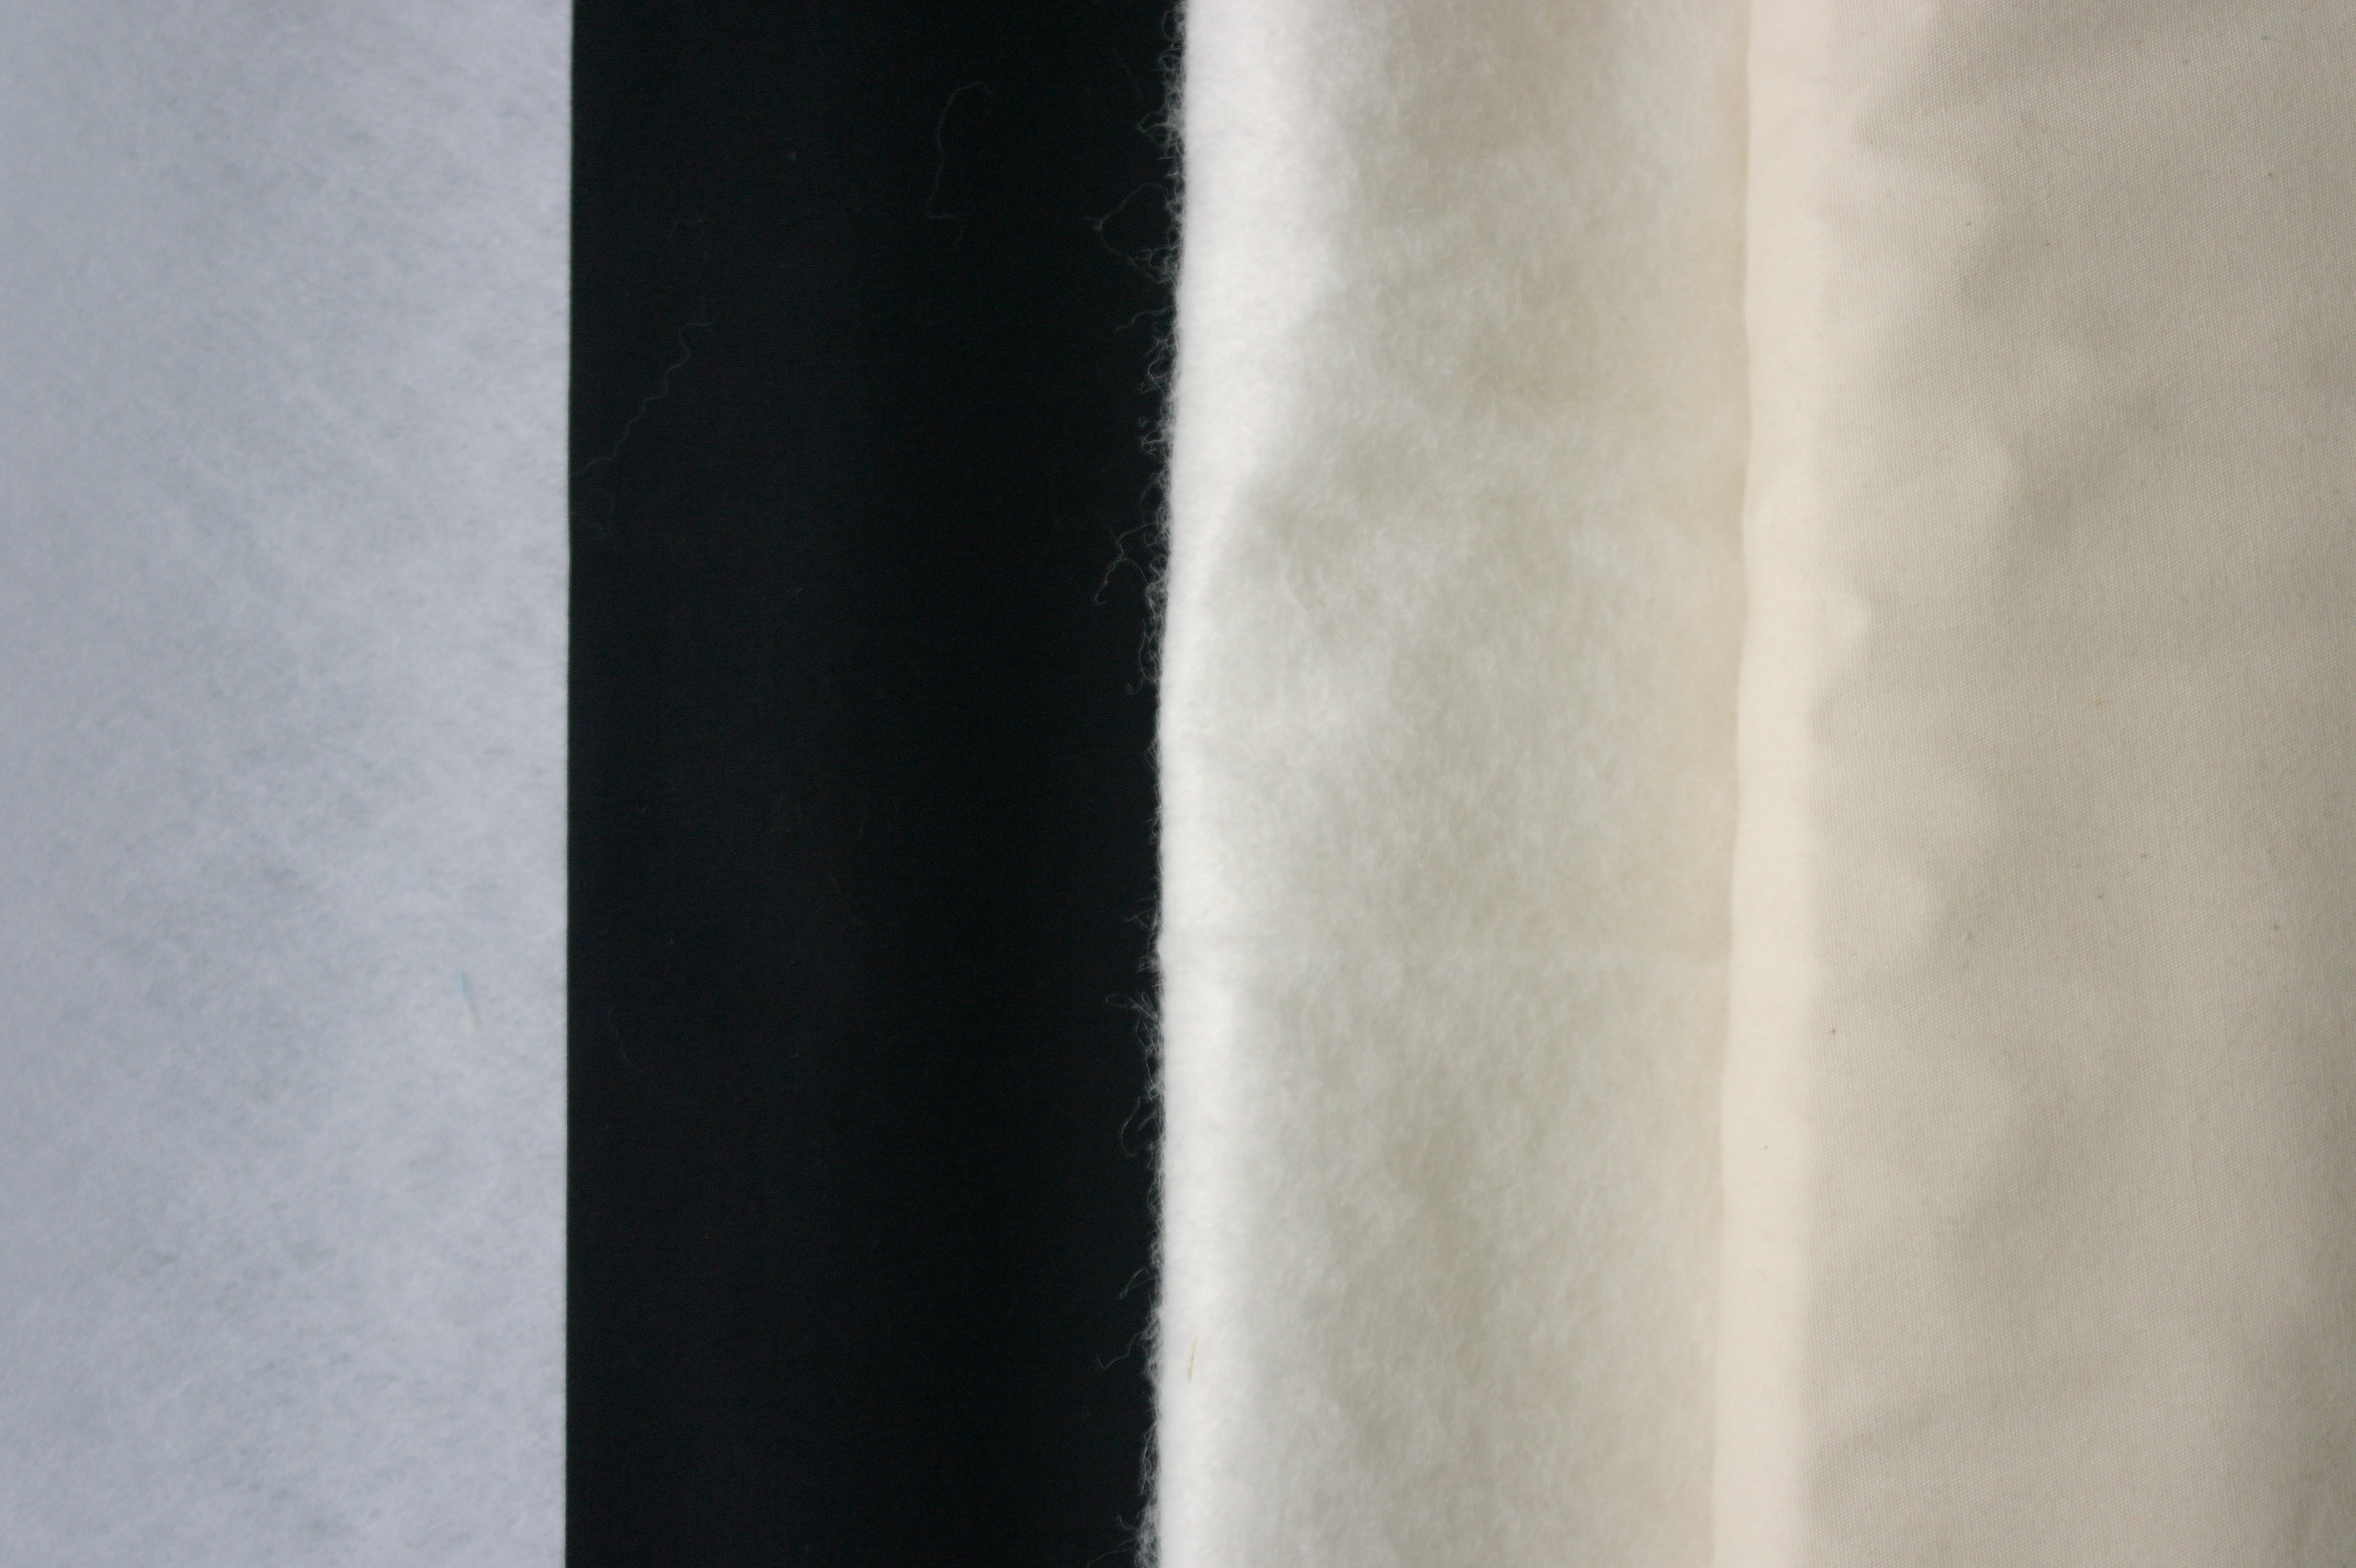
With this Crazy Crystals Mystery Project 2018 you will work with FOUR basic materials: the picture above shows them from left to right: Vlieseline L11 – black (batik) quilt fabric – 100% Bamboo batting – off-white backing .
You can cut the pieces that you need for this project all at once: the information was given already with the directions of December 18 2017. Or you can cut the materials you need per month/block. All blocks are of the same size with this Crazy project.

What is Vlieseline L11 and why will you use it for the upper layer of the sandwich? This non-woven interfacing is thin but firm. It doesn’t add extra thickness to the sandwich, so even after sewing the fabrics on top and making the decorative stitches and quilting, the sandwich is somewhat flexible. Another reason to use Vlieseline L11 is that this material is transparent, which makes it easier to place a pattern underneath and see the lines you have to draw. Cut 12 pieces, each 32 x 45 cm.
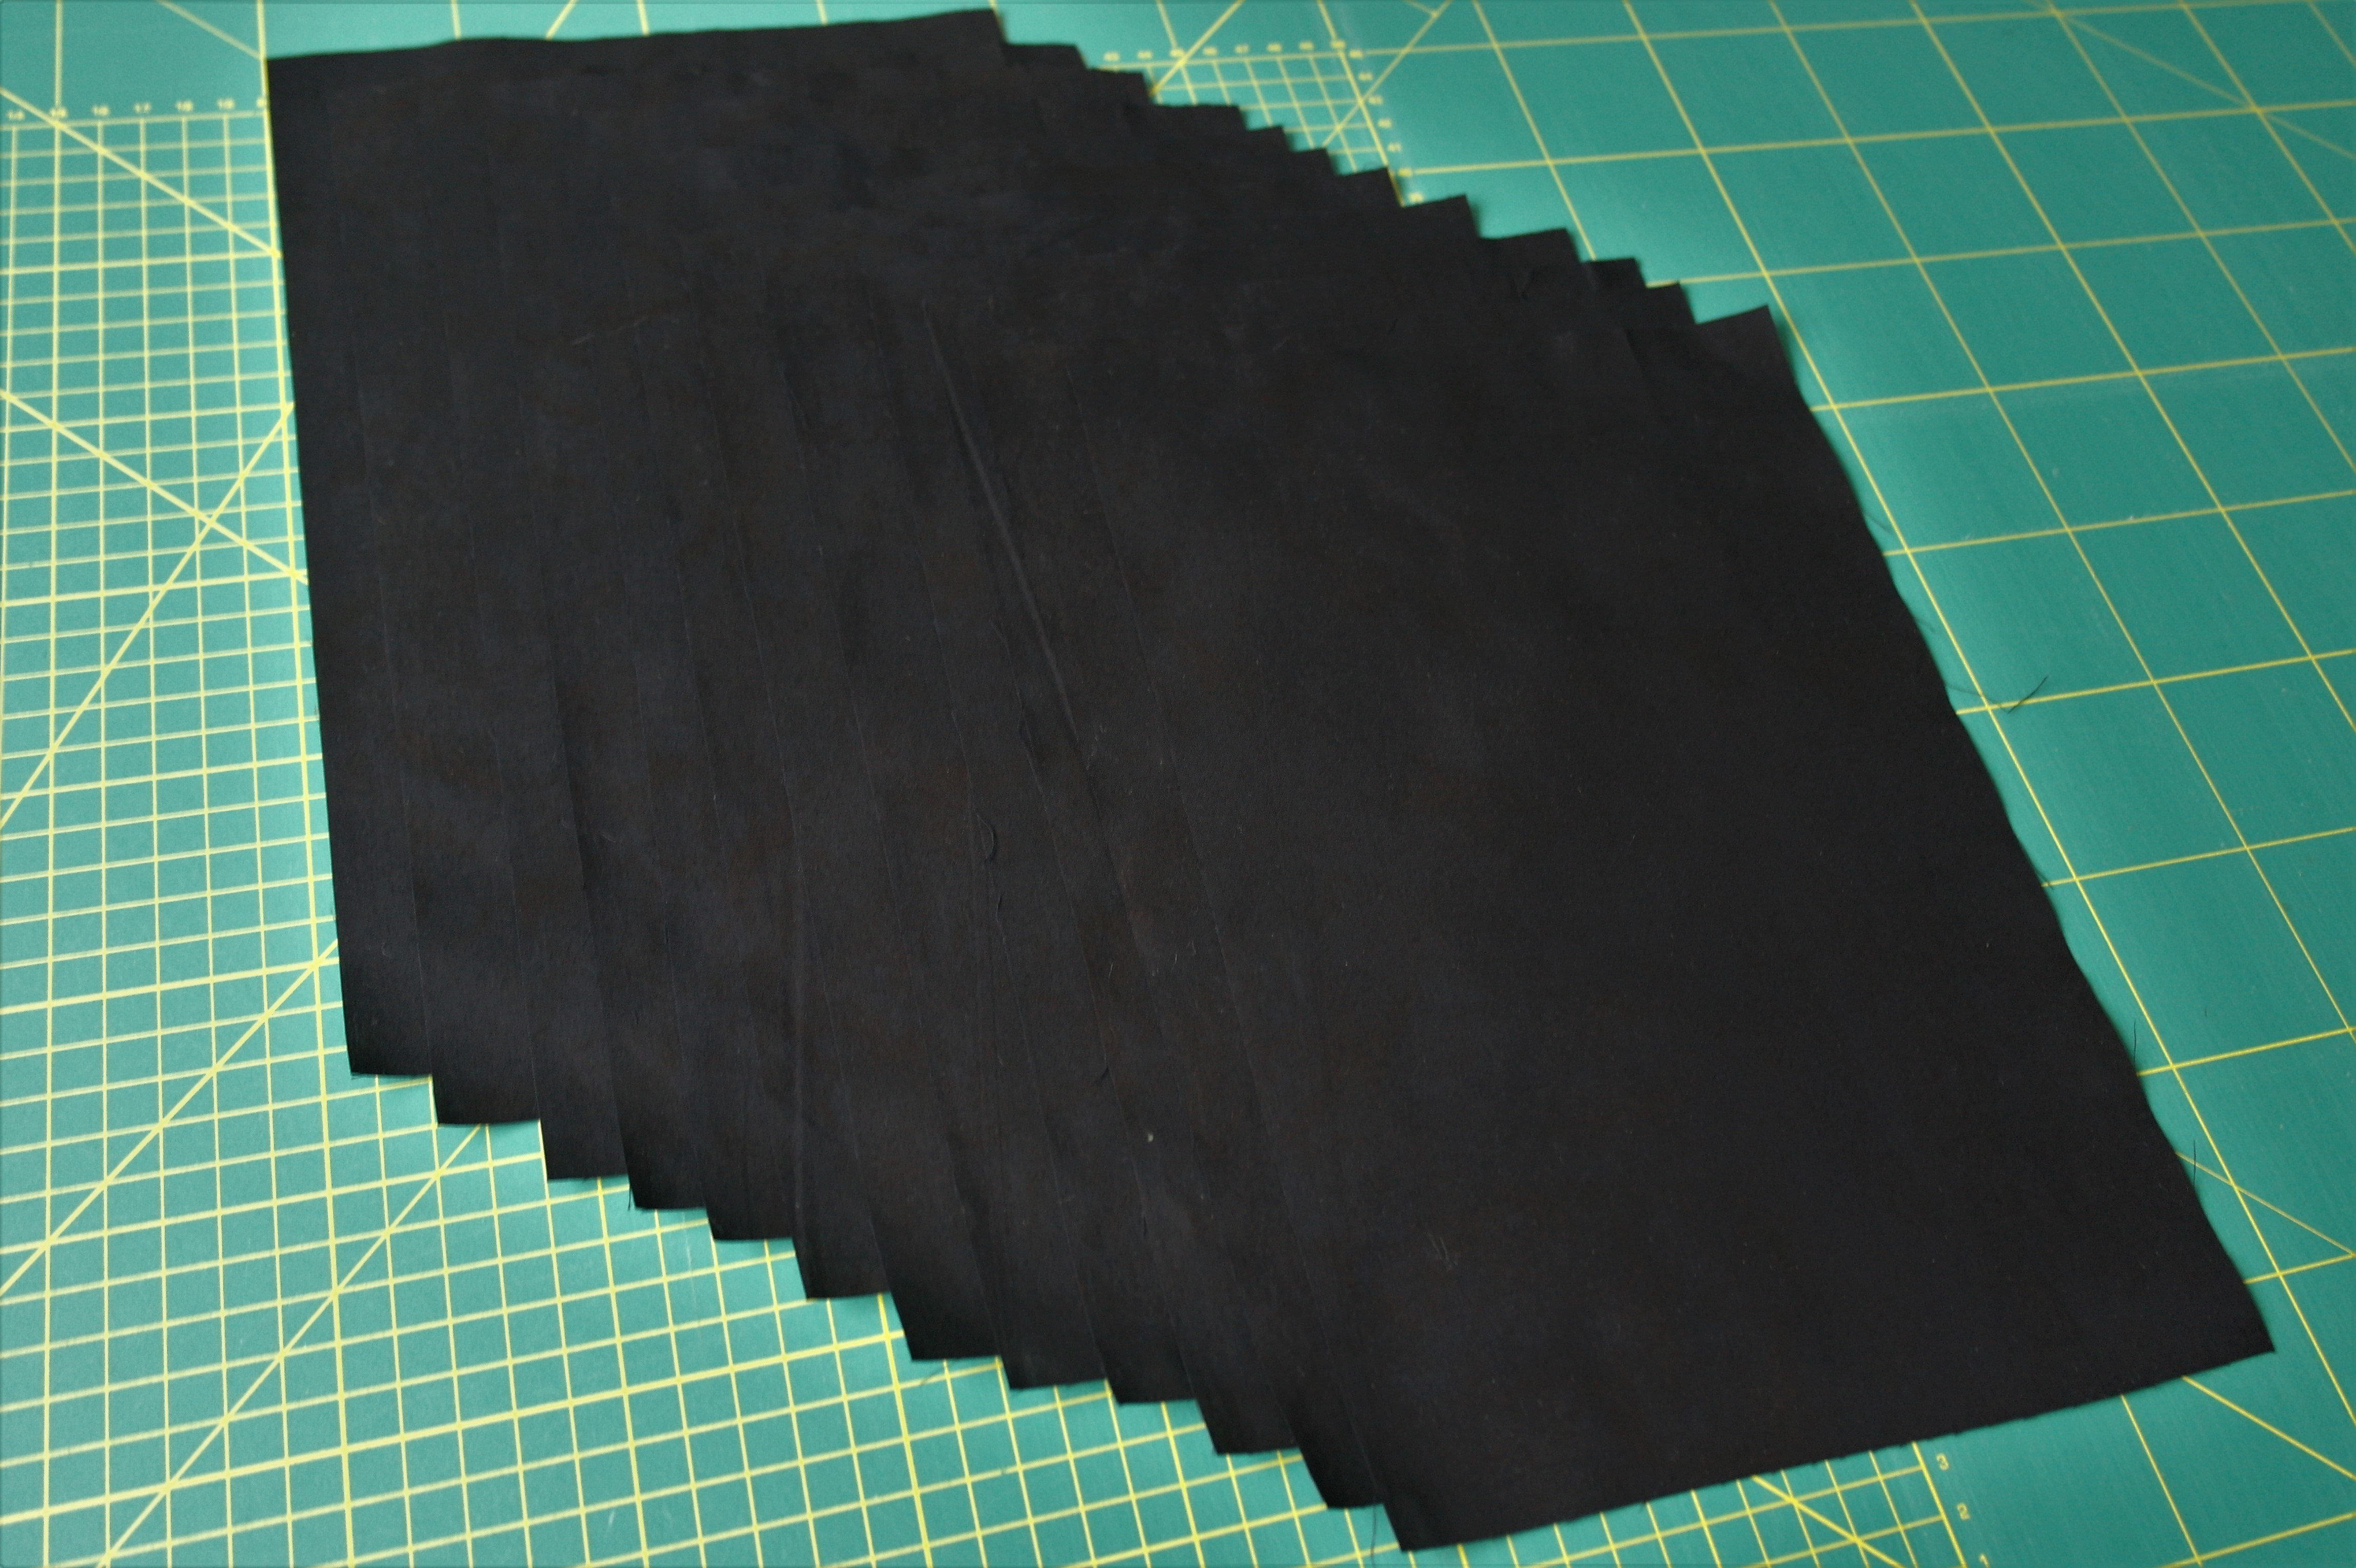
Why the use of a black (batik) quilt fabric? This is used for each centerpiece where a Crystal is placed. Because my project will hav a lot of special colors, like golden, brown and purple fabrics of different sorts and qualities, I will use black as a basic color to place stitches and effects (if you want to ue another color, be sure that the contrast between this basic fabric and the others fabric that are used. Also important: make sure the fabric (black, or the one of your choice) is SOLID: no prints or effects on the fabric. You will make a lot of stitches etc. , and each print and/or effect on a fabric will distort this effect. It is important that all Crystals that will be embellished will stand out. Cut 12 pieces, each of 20 x 30 cm.

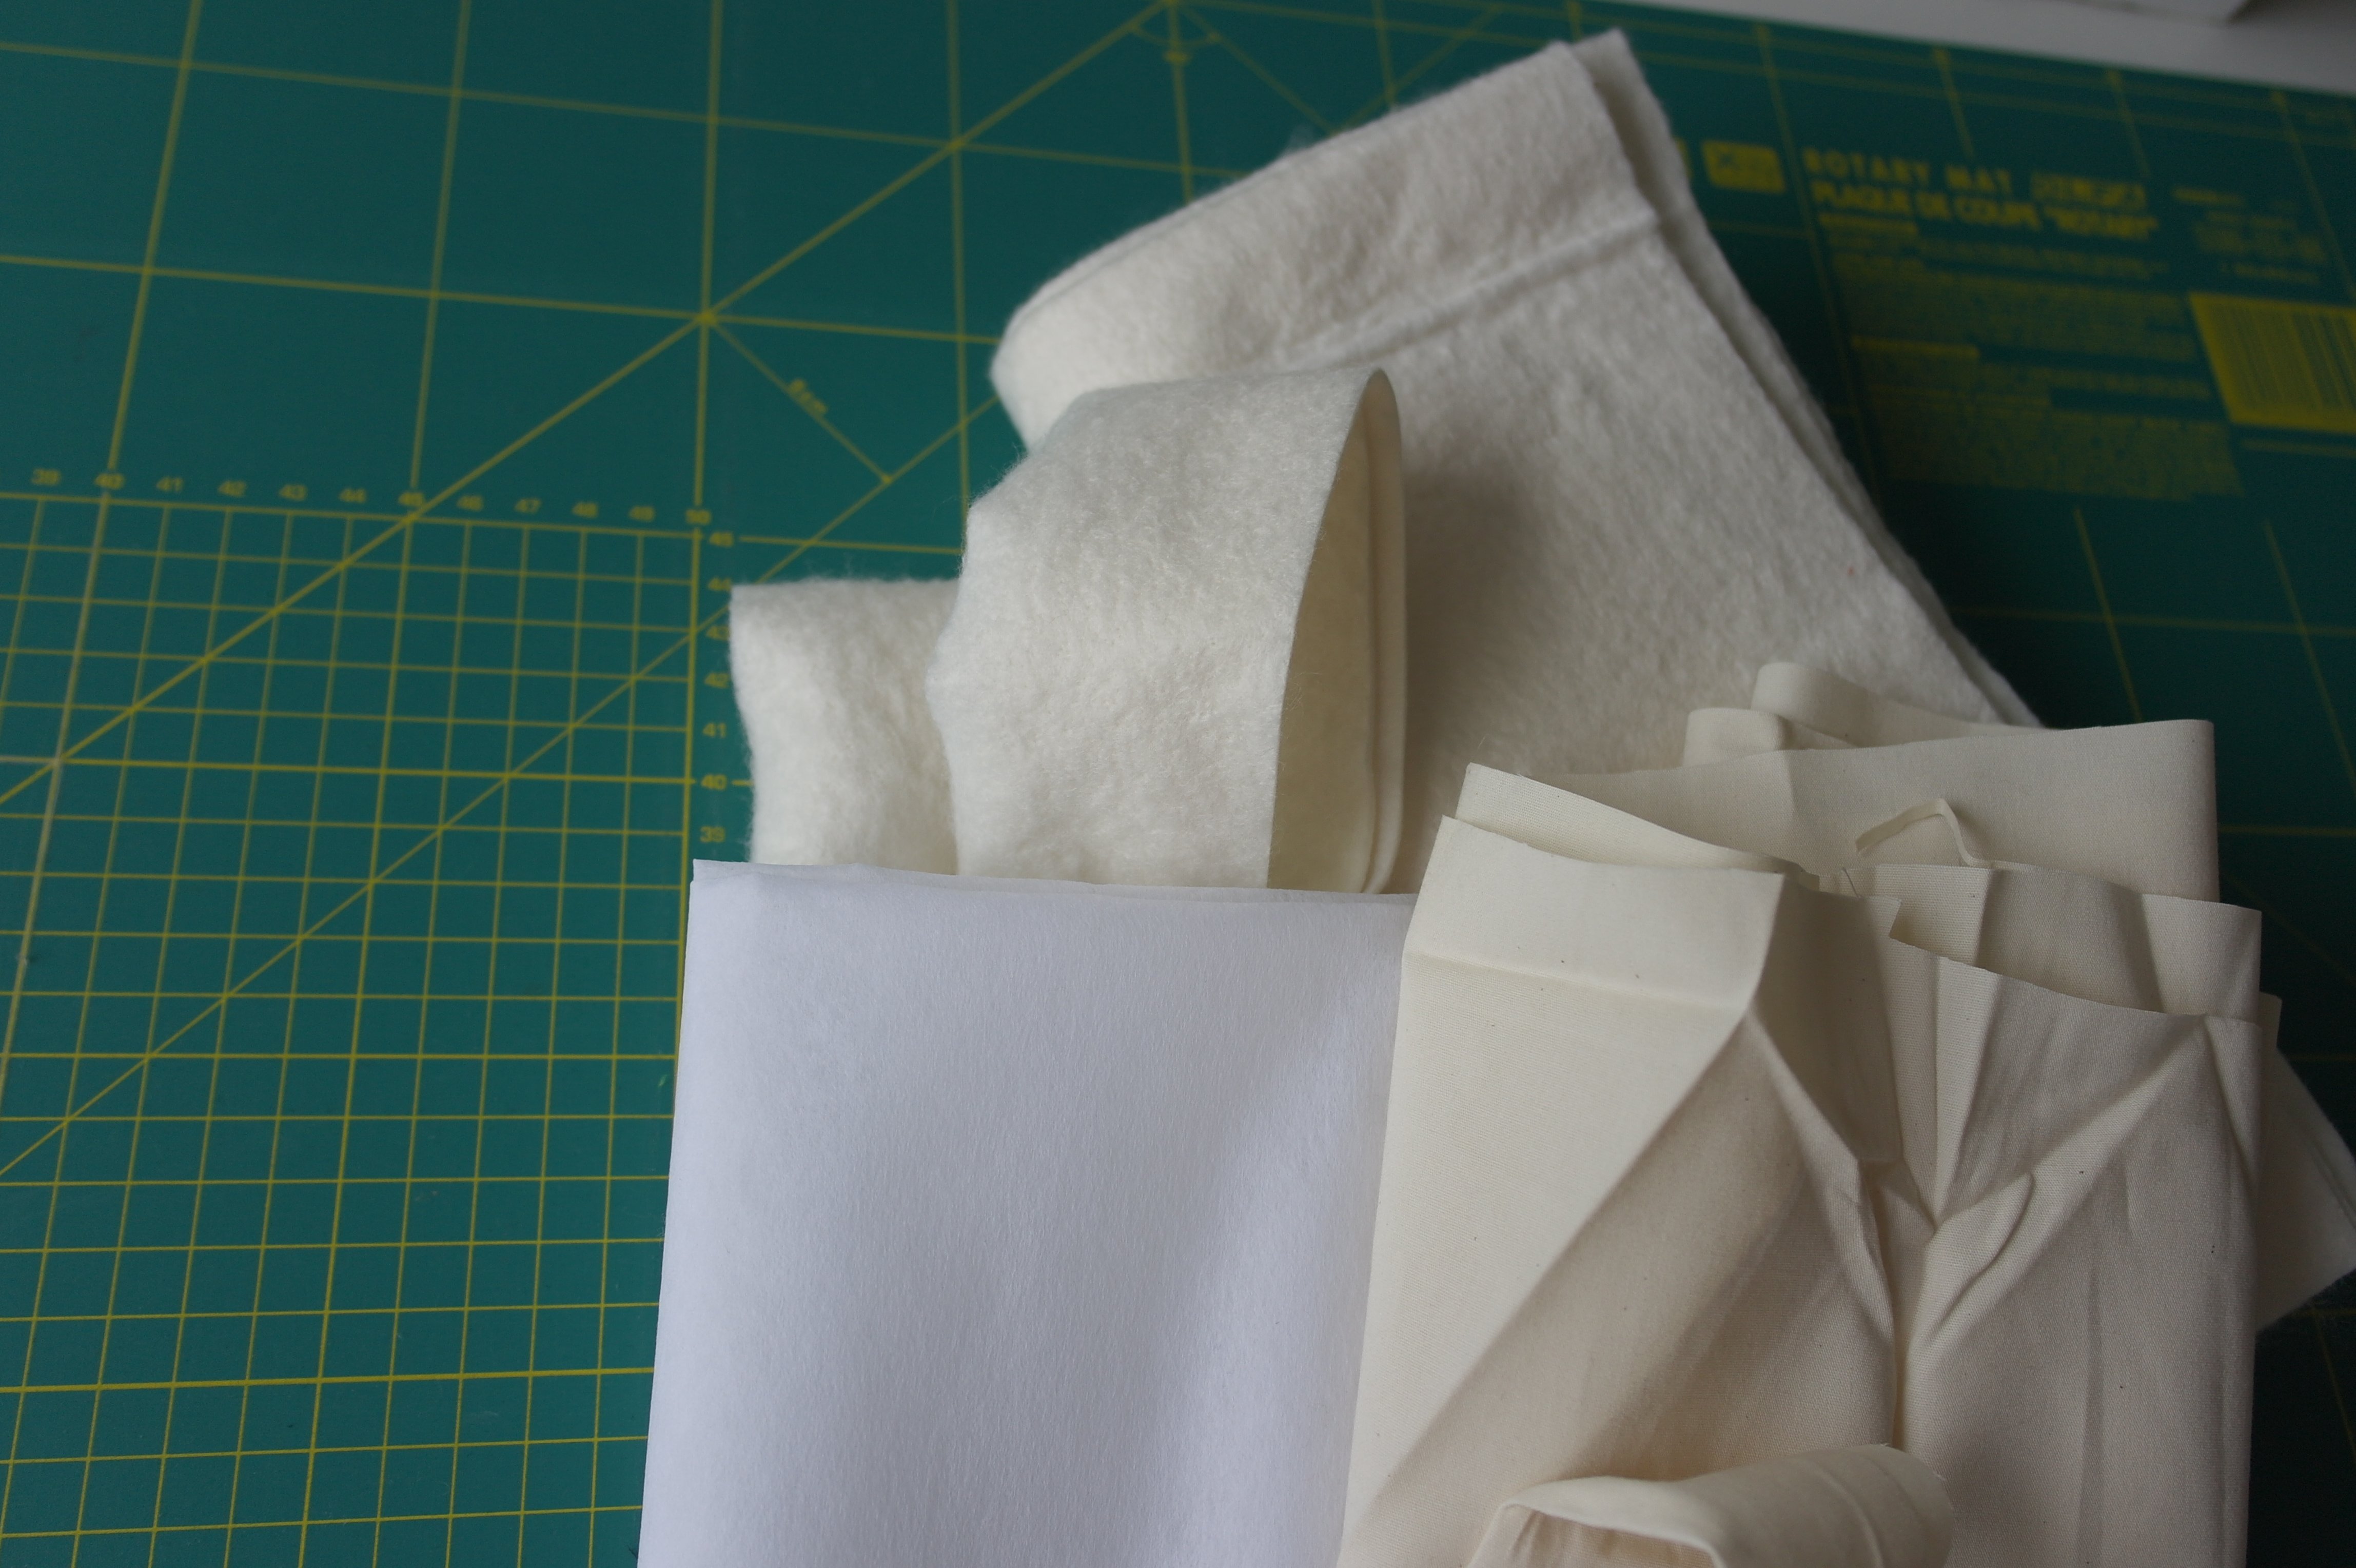
Why a 100% Bamboo batting? Because this is a thin, soft and compact batting. The decorative stitches, quilting etc. will be made in many directions, therefore it is recommended to use a batting that doesn’t shift while working, and has almost no loft: the higher the loft of a batting, the more friction it will give in all directions, and also more shrinkage. Matilda’s Own 100% Bamboo is also anti-allergic – which is very important! The fine scrim locks in fibres and prevents bearding. There are no resins used, no sprays, glues or bonding with producing this batting.
If you are using a polyester batting, there will be friction with every pass of the needle in the sandwich: the metal of the needle will react with the synthetic material of the batting, which can cause splitting or breaking threads, especially with metallic threads. And there will be a lot of passes of the needle, since there are thousands of stitches you will make with the decorative stitches and quilting. So choosing for this 100% natural batting has many advantages! Cut 12 pieces, each 32 x 45 cm.

Why an off-white backing? This fabric is a backing for all sandwiches: there will be quilting involved, sewing and adding sequins and beads, and this backing can look quite messy at the back when the block is done, which is just the way it is supposed to be. Why would one use a beautiful fabric when there will be another fabric added to the back of the project, after all the blocks are assembled and the off-white backing will not be seen anymore? But you still need this fabric, because the sandwich glides easily on your machine during sewing and quilting. Just choose a extra, beautiful fabric for the final backing when the project is ready for binding, in month 12. Cut 12 pieces, each 32 x 45 cm.
All remnants are used for making samples and for spare pieces, so don’t throw anything away! We will use an assortment of different types of fabrics for the Crazy patchwork, and you will need to try these out on samples, to make sure stitches are ok.
For the blocks: you will work on a sandwich, which will be you block. The sandwich is made out of off-white fabric, 100% bamboo backing and Vlieseline L11.
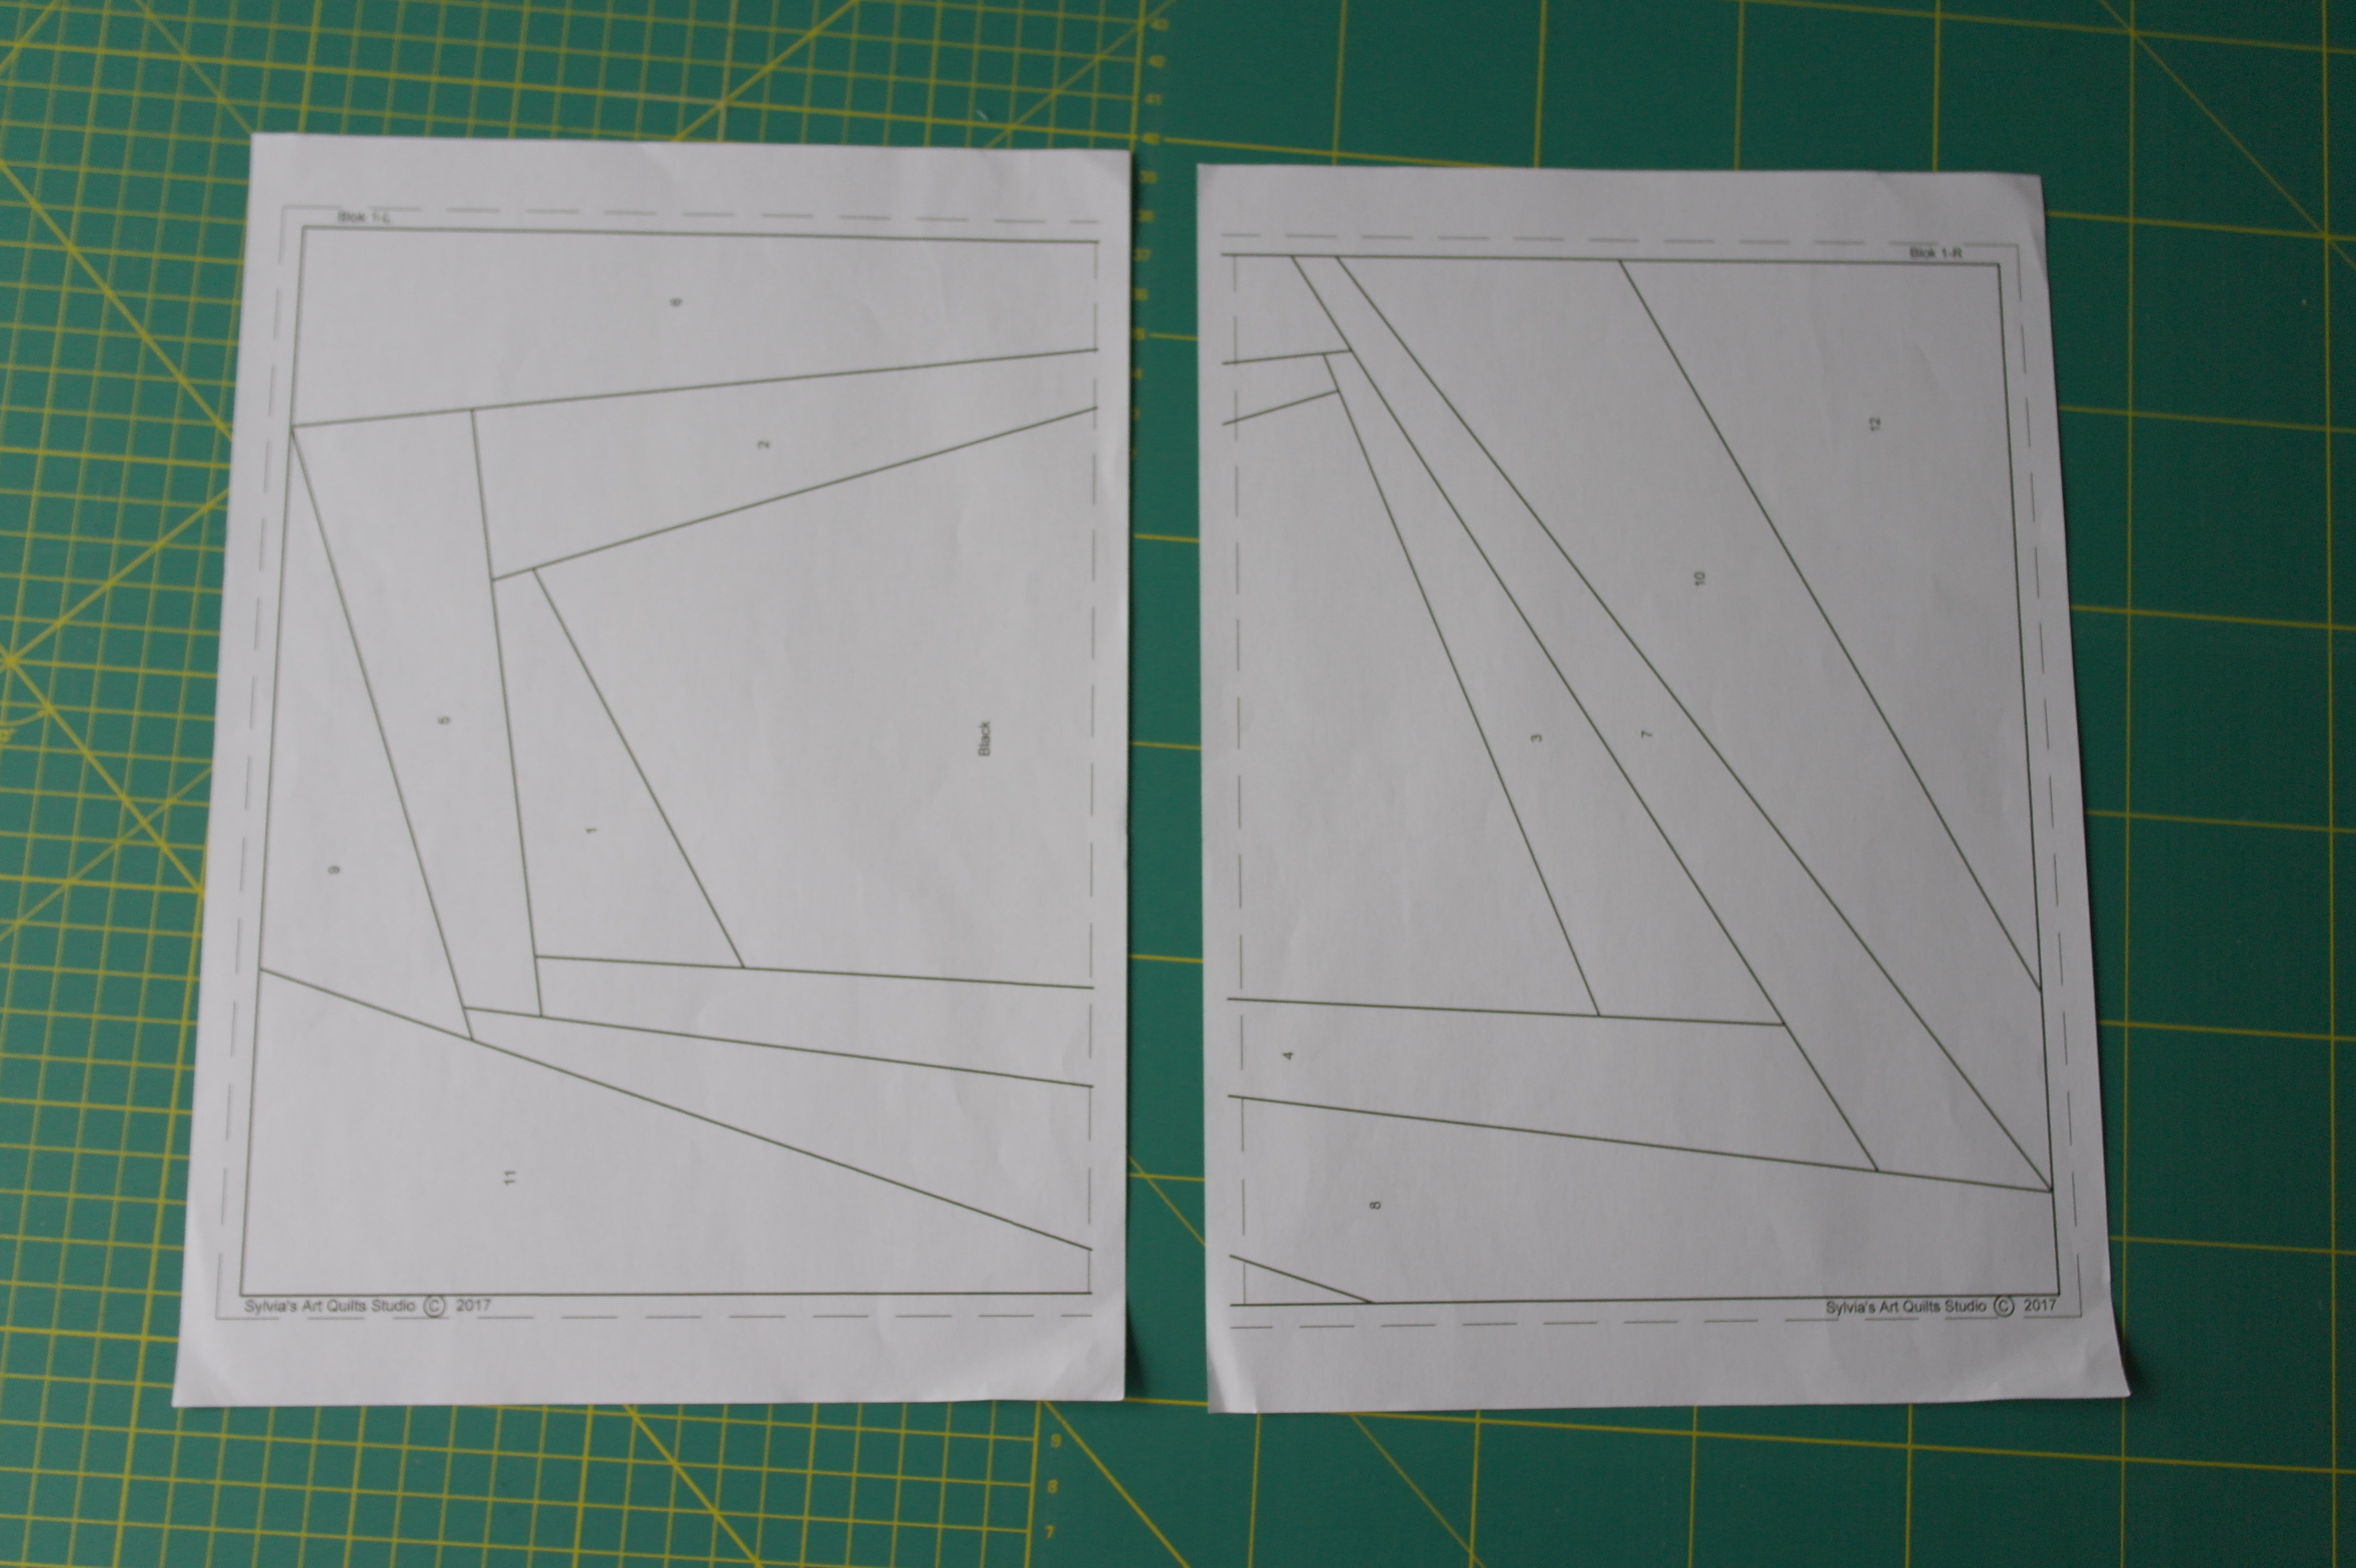
The pattern of each block consists of two parts: a left and a right part.
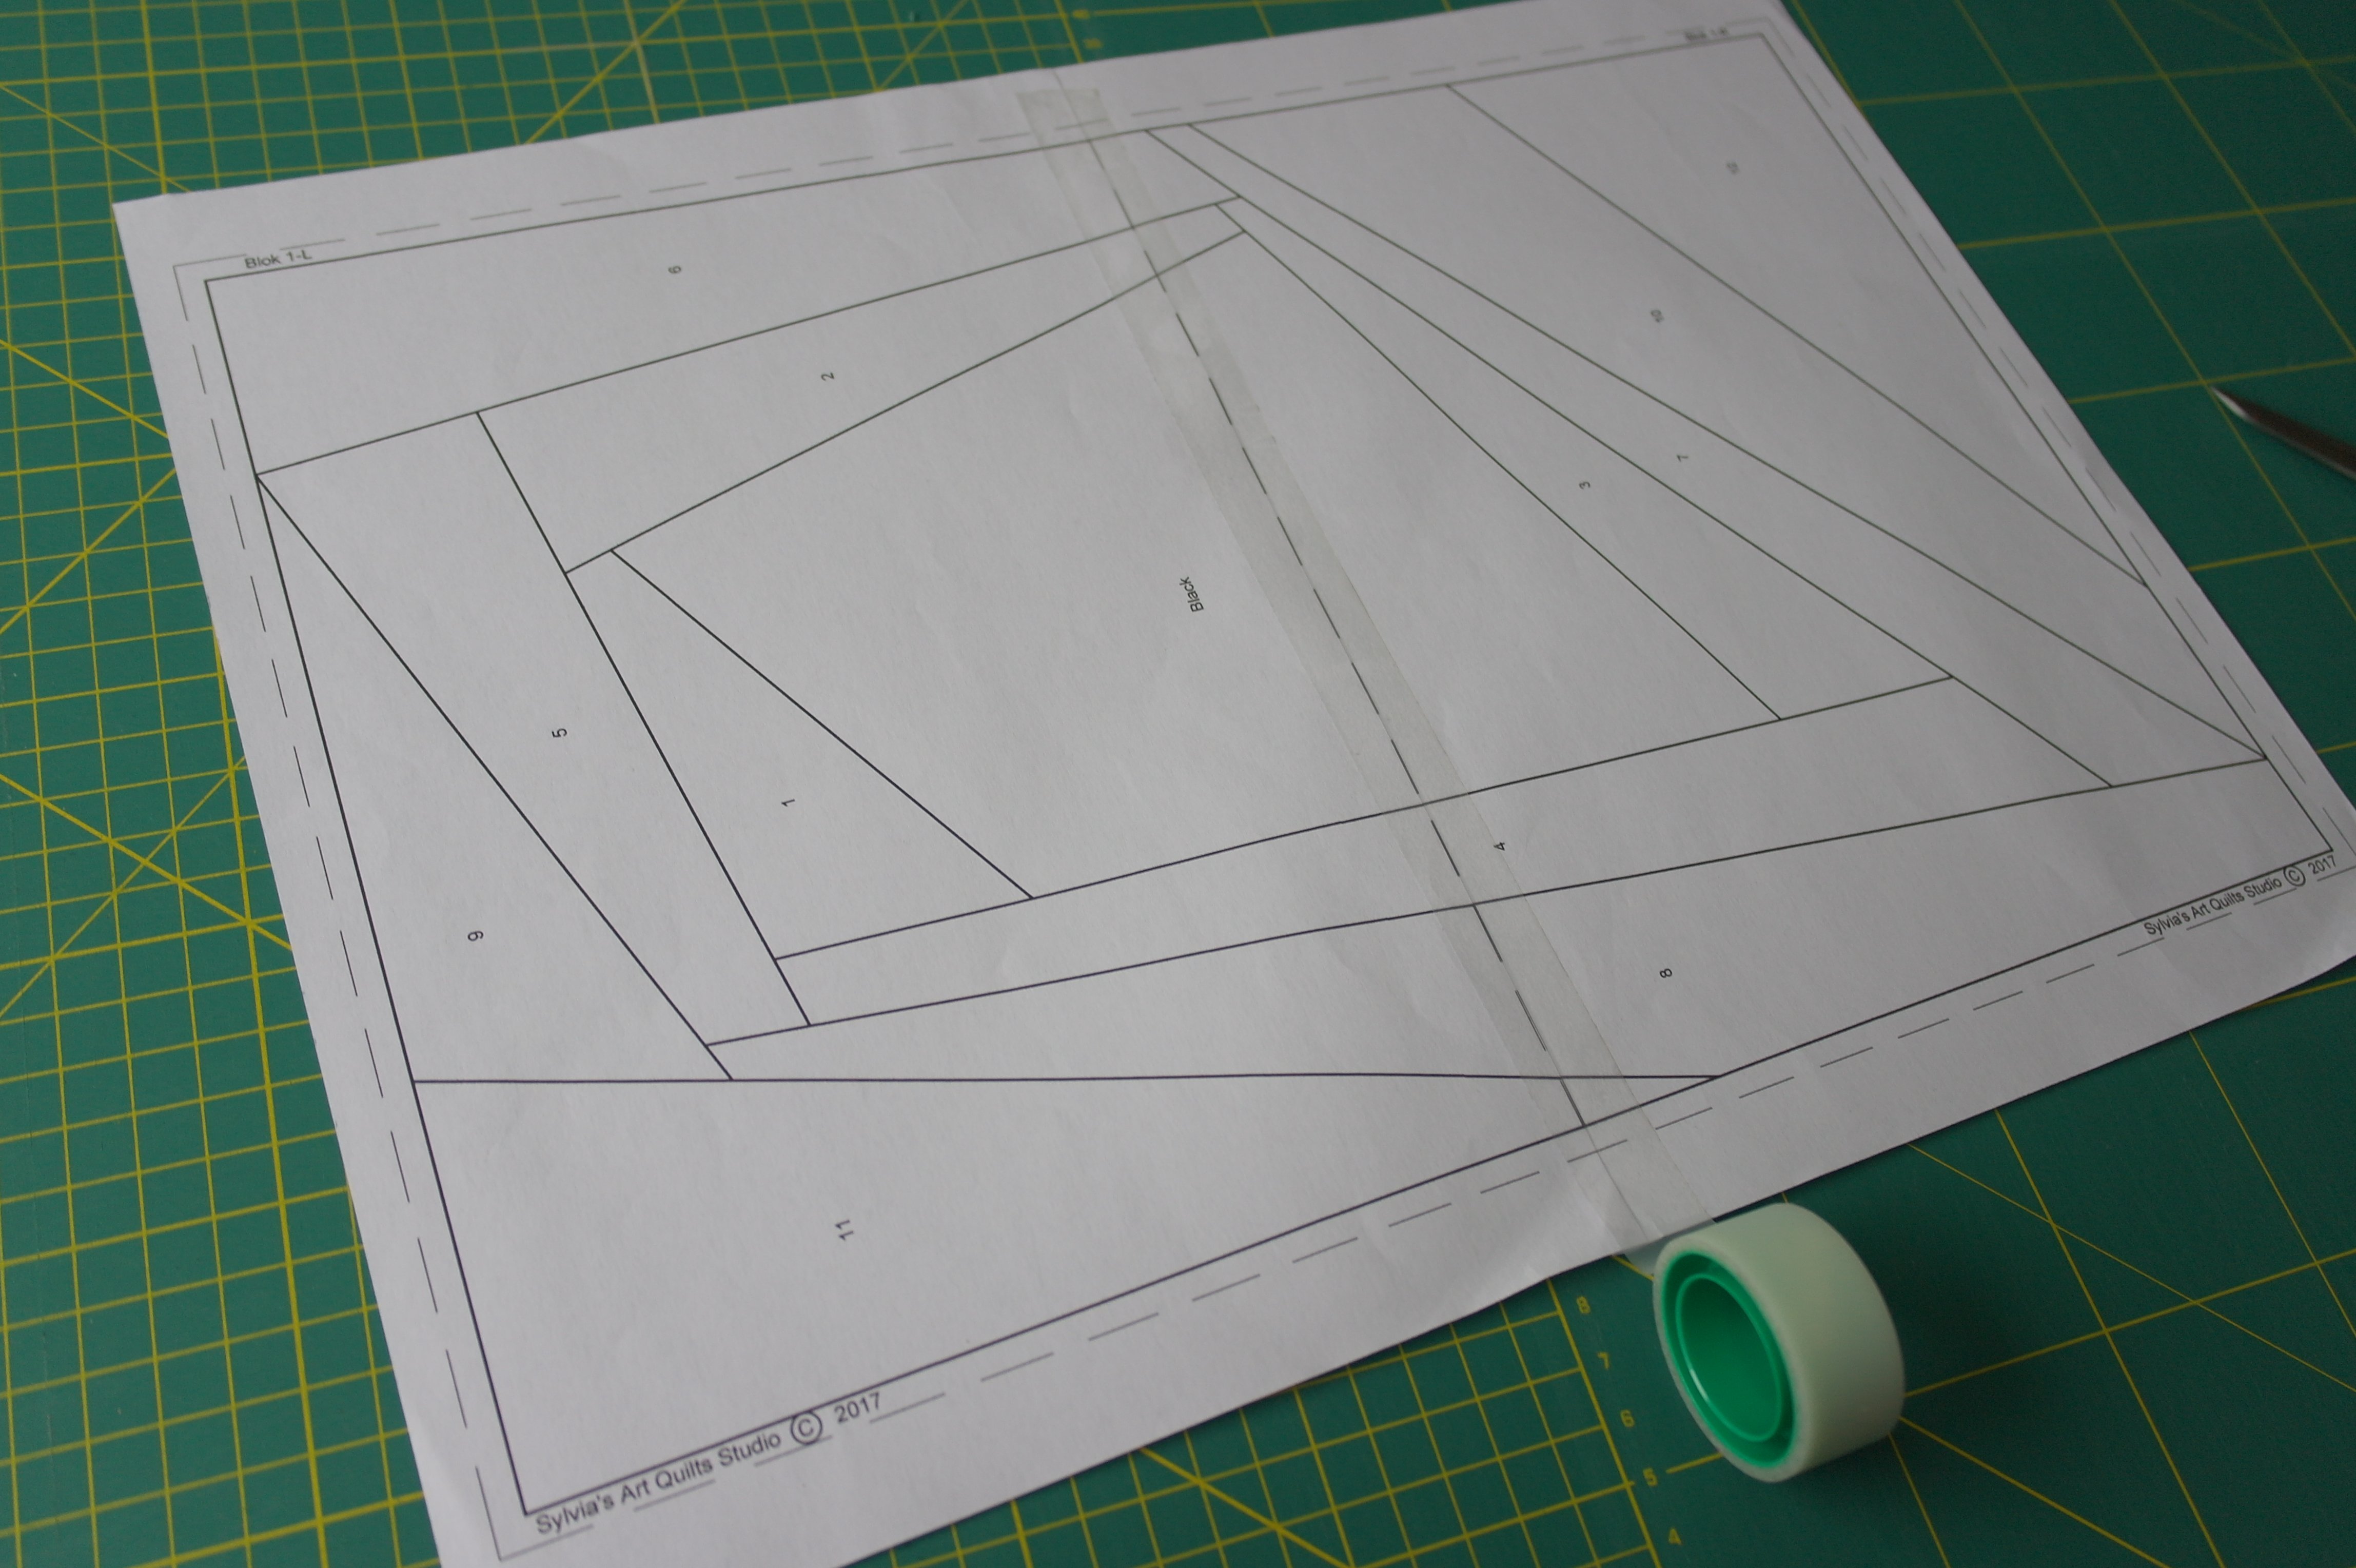
Cut along the dotted line with one pattern part, and tape it onto the other part. Make sure all lines are connected. JUST FOR THE SIZE: check of the inner solid lines of the riangle will measure 25 x 38 cm. This is just to make sure you have a printout with the right size. NOTHING ELSE WILL BE DONE WITH THESE MEASUREMENTS – they are just to make sure the measurements are correct. Be sure to print out on ‘actual size’, or 100%.
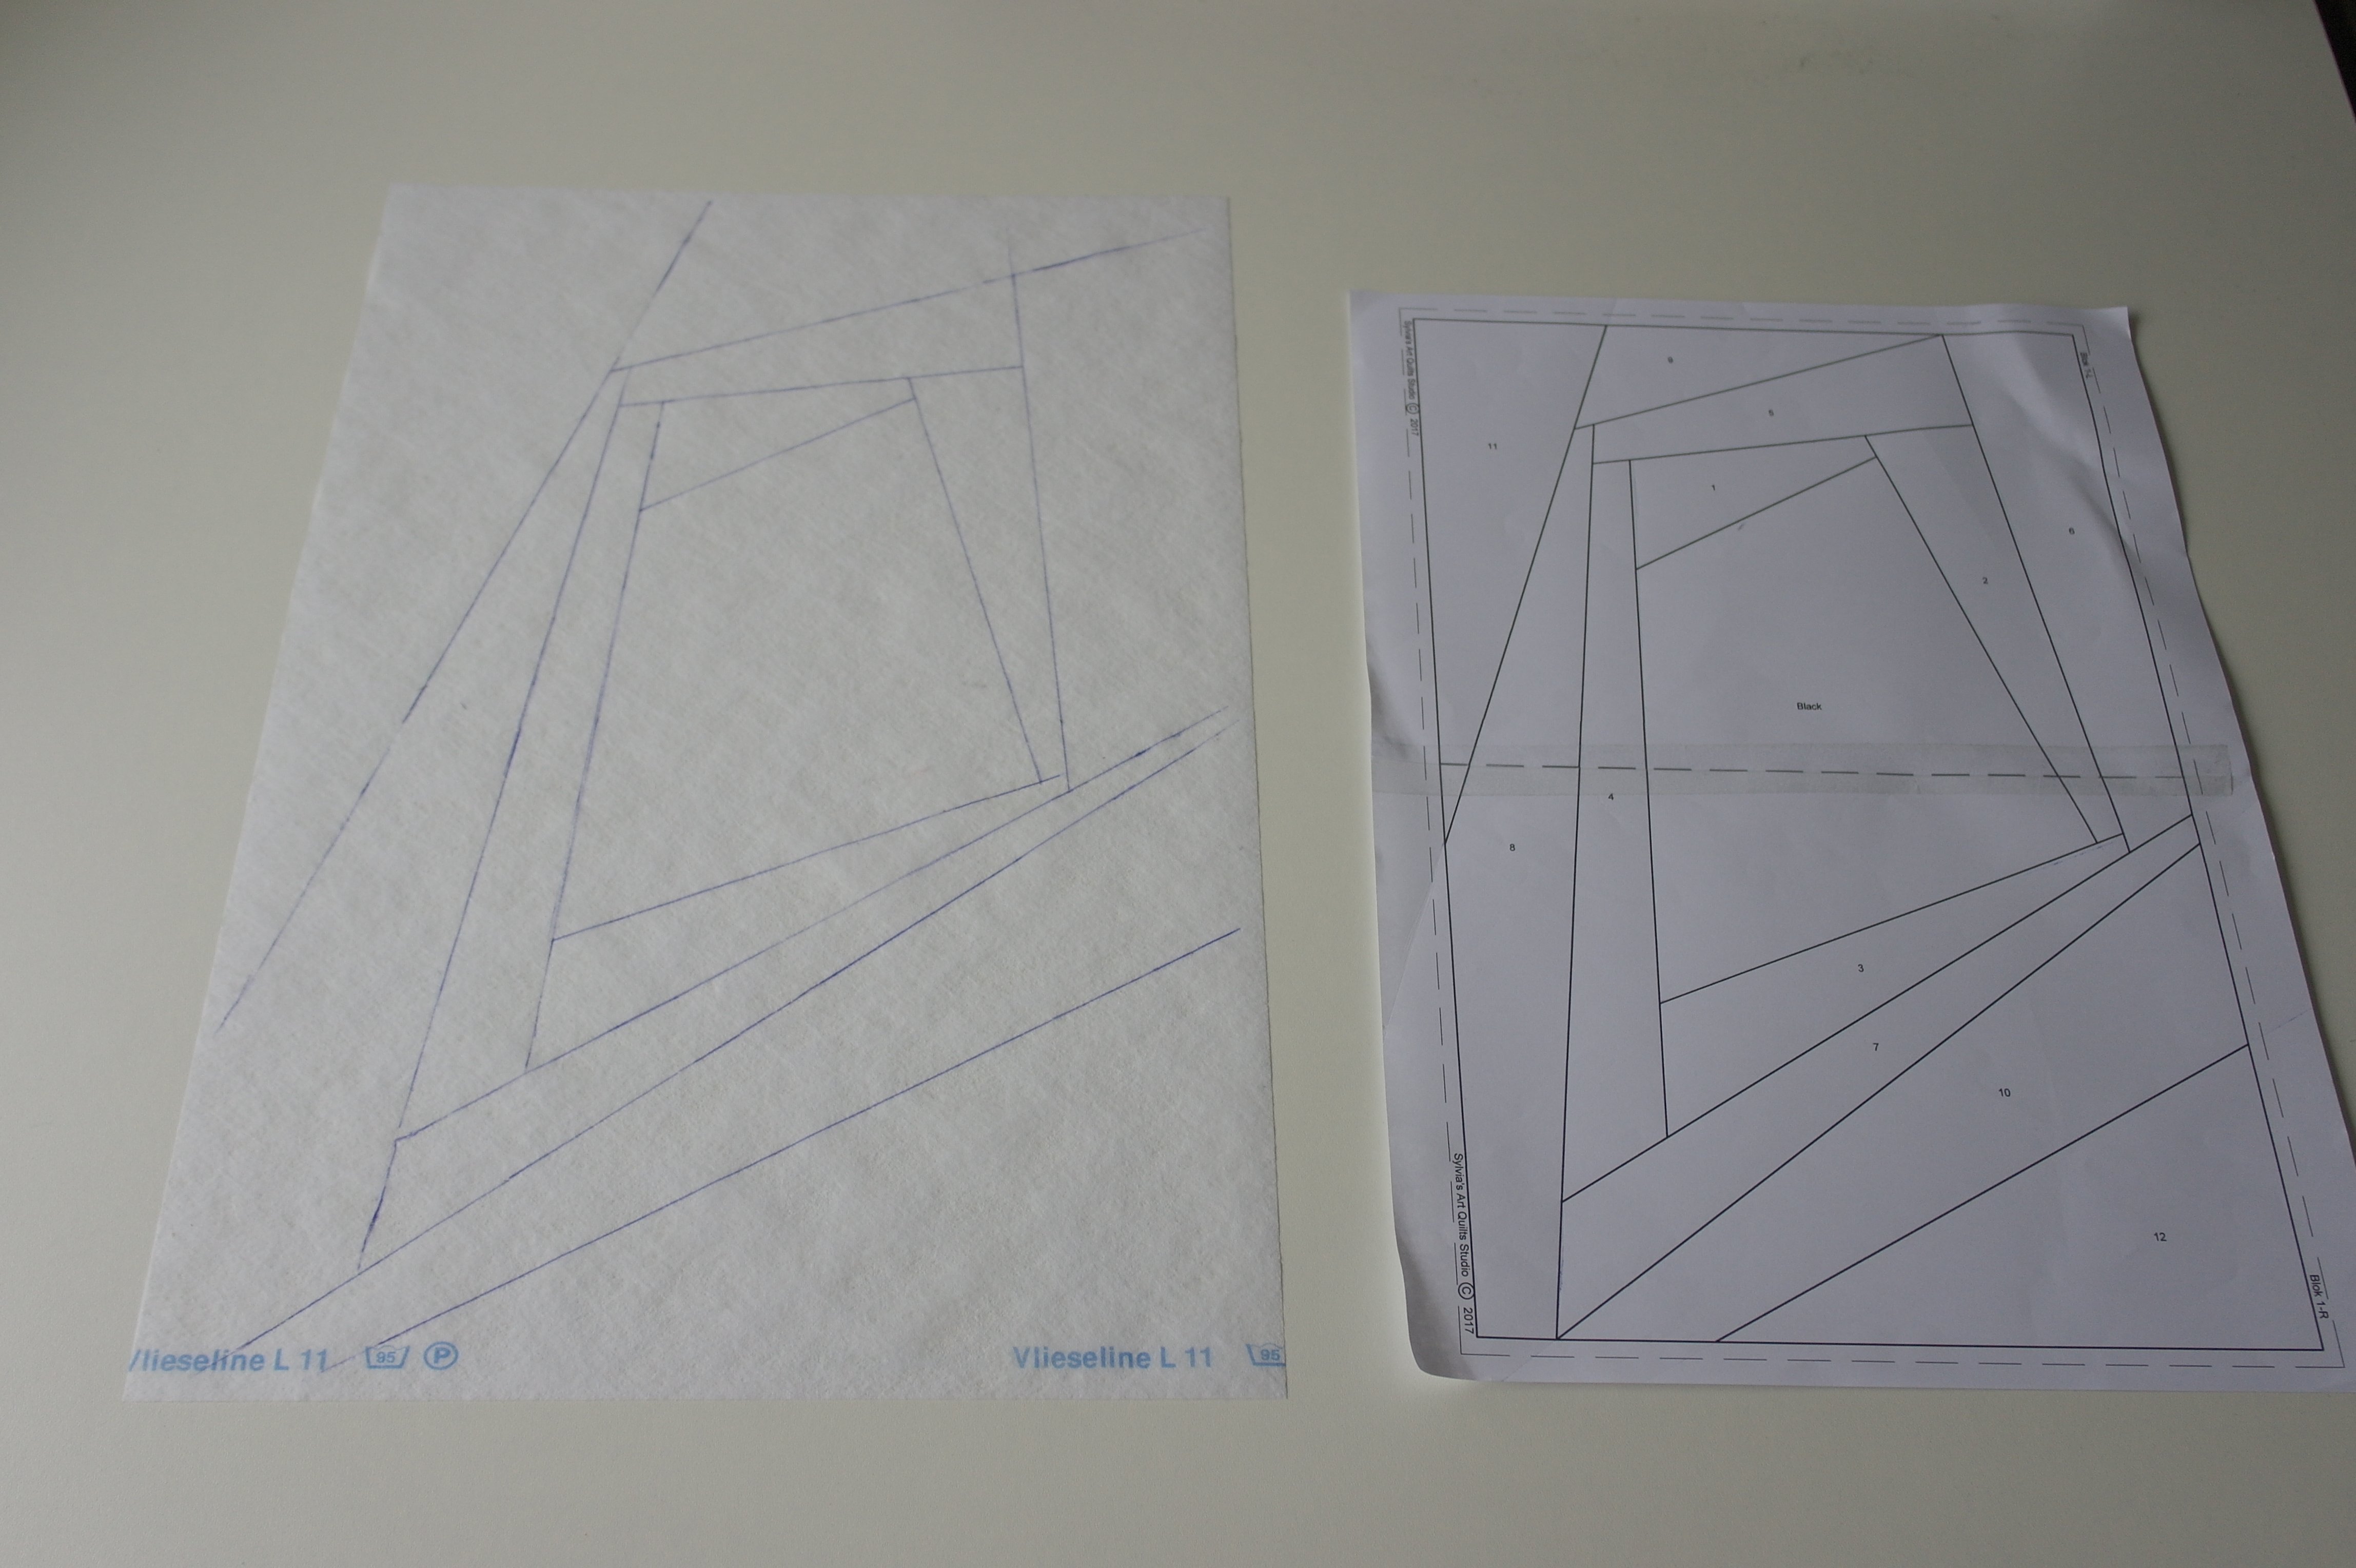
Place the pattern on you table (preferable on a white surface), or on a light box. Place the Vlieseline L11 – 32 x 45 cm – on top, make sure it is centered on the rectangle. Use a pen and ruler, and draw all lines of the pattern onto the Vlieseline L11 (just the lines, not the numbers and NOT the rectangular shapes). DRAW EACH LINE ALL THE WAY TO THE SIDES OF THE VLIESELINE L11 (this means beyond the rectangular shapes) TO BE SURE THAT YOU WILL SEW EACH FABRIC THAT YOU ADD ALL THE WAY TO THE SIDES, AND ALSO MAKING THE DECORATIVE STITCHES UP TO THE EDGES. To the left you can see my piece of Vlieseline L11 with the drawn lines, all the way to the sides.

THE SANDWICH OF EACH BLOCK SHOULD BE 32 X 45 CM, and made out of 3 basic layers: first the off-white backing, next the 100% Bamboo batting and on top the Vlieseline L11 with the drawn lines.
This is the size you will work on. Be sure to sew the fabris all the way to the sides of each sandwich, and fill them with decorative stitches and/or other techniques, which will be given with each block. If you have empty spaces, you can always fill them up with embellishments. Each block you will make with this projet CCMP2018 will be of the same size: 12 blocks for this project. If you have finished a block: DO NOT CUT IT/STRAIGHTEN IT, but put it aside untill the directions of month 12!

The pattern for the ‘Center piece’ of each month, is a Crystal – a snow crystal, which you can fill up with stitches. Center piece is relative, because it will not be exactly in the middle. It will be the piece that stands out the most, that is the reason I have named it ‘Center’ piece.
The piece of fabric for the Center piece of the Crystal is the black (batik) quilt fabric: you will need 12 pieces of 20 x 30 cm (directions in the Blog from December 18 2017). Use the first of such a black (batik) piece and place it on top of the paper pattern, which you can place on a light box.

If you don’t own a light box (like me), use your window: tape the paper pattern onto the window with Scotch Magic Tape,
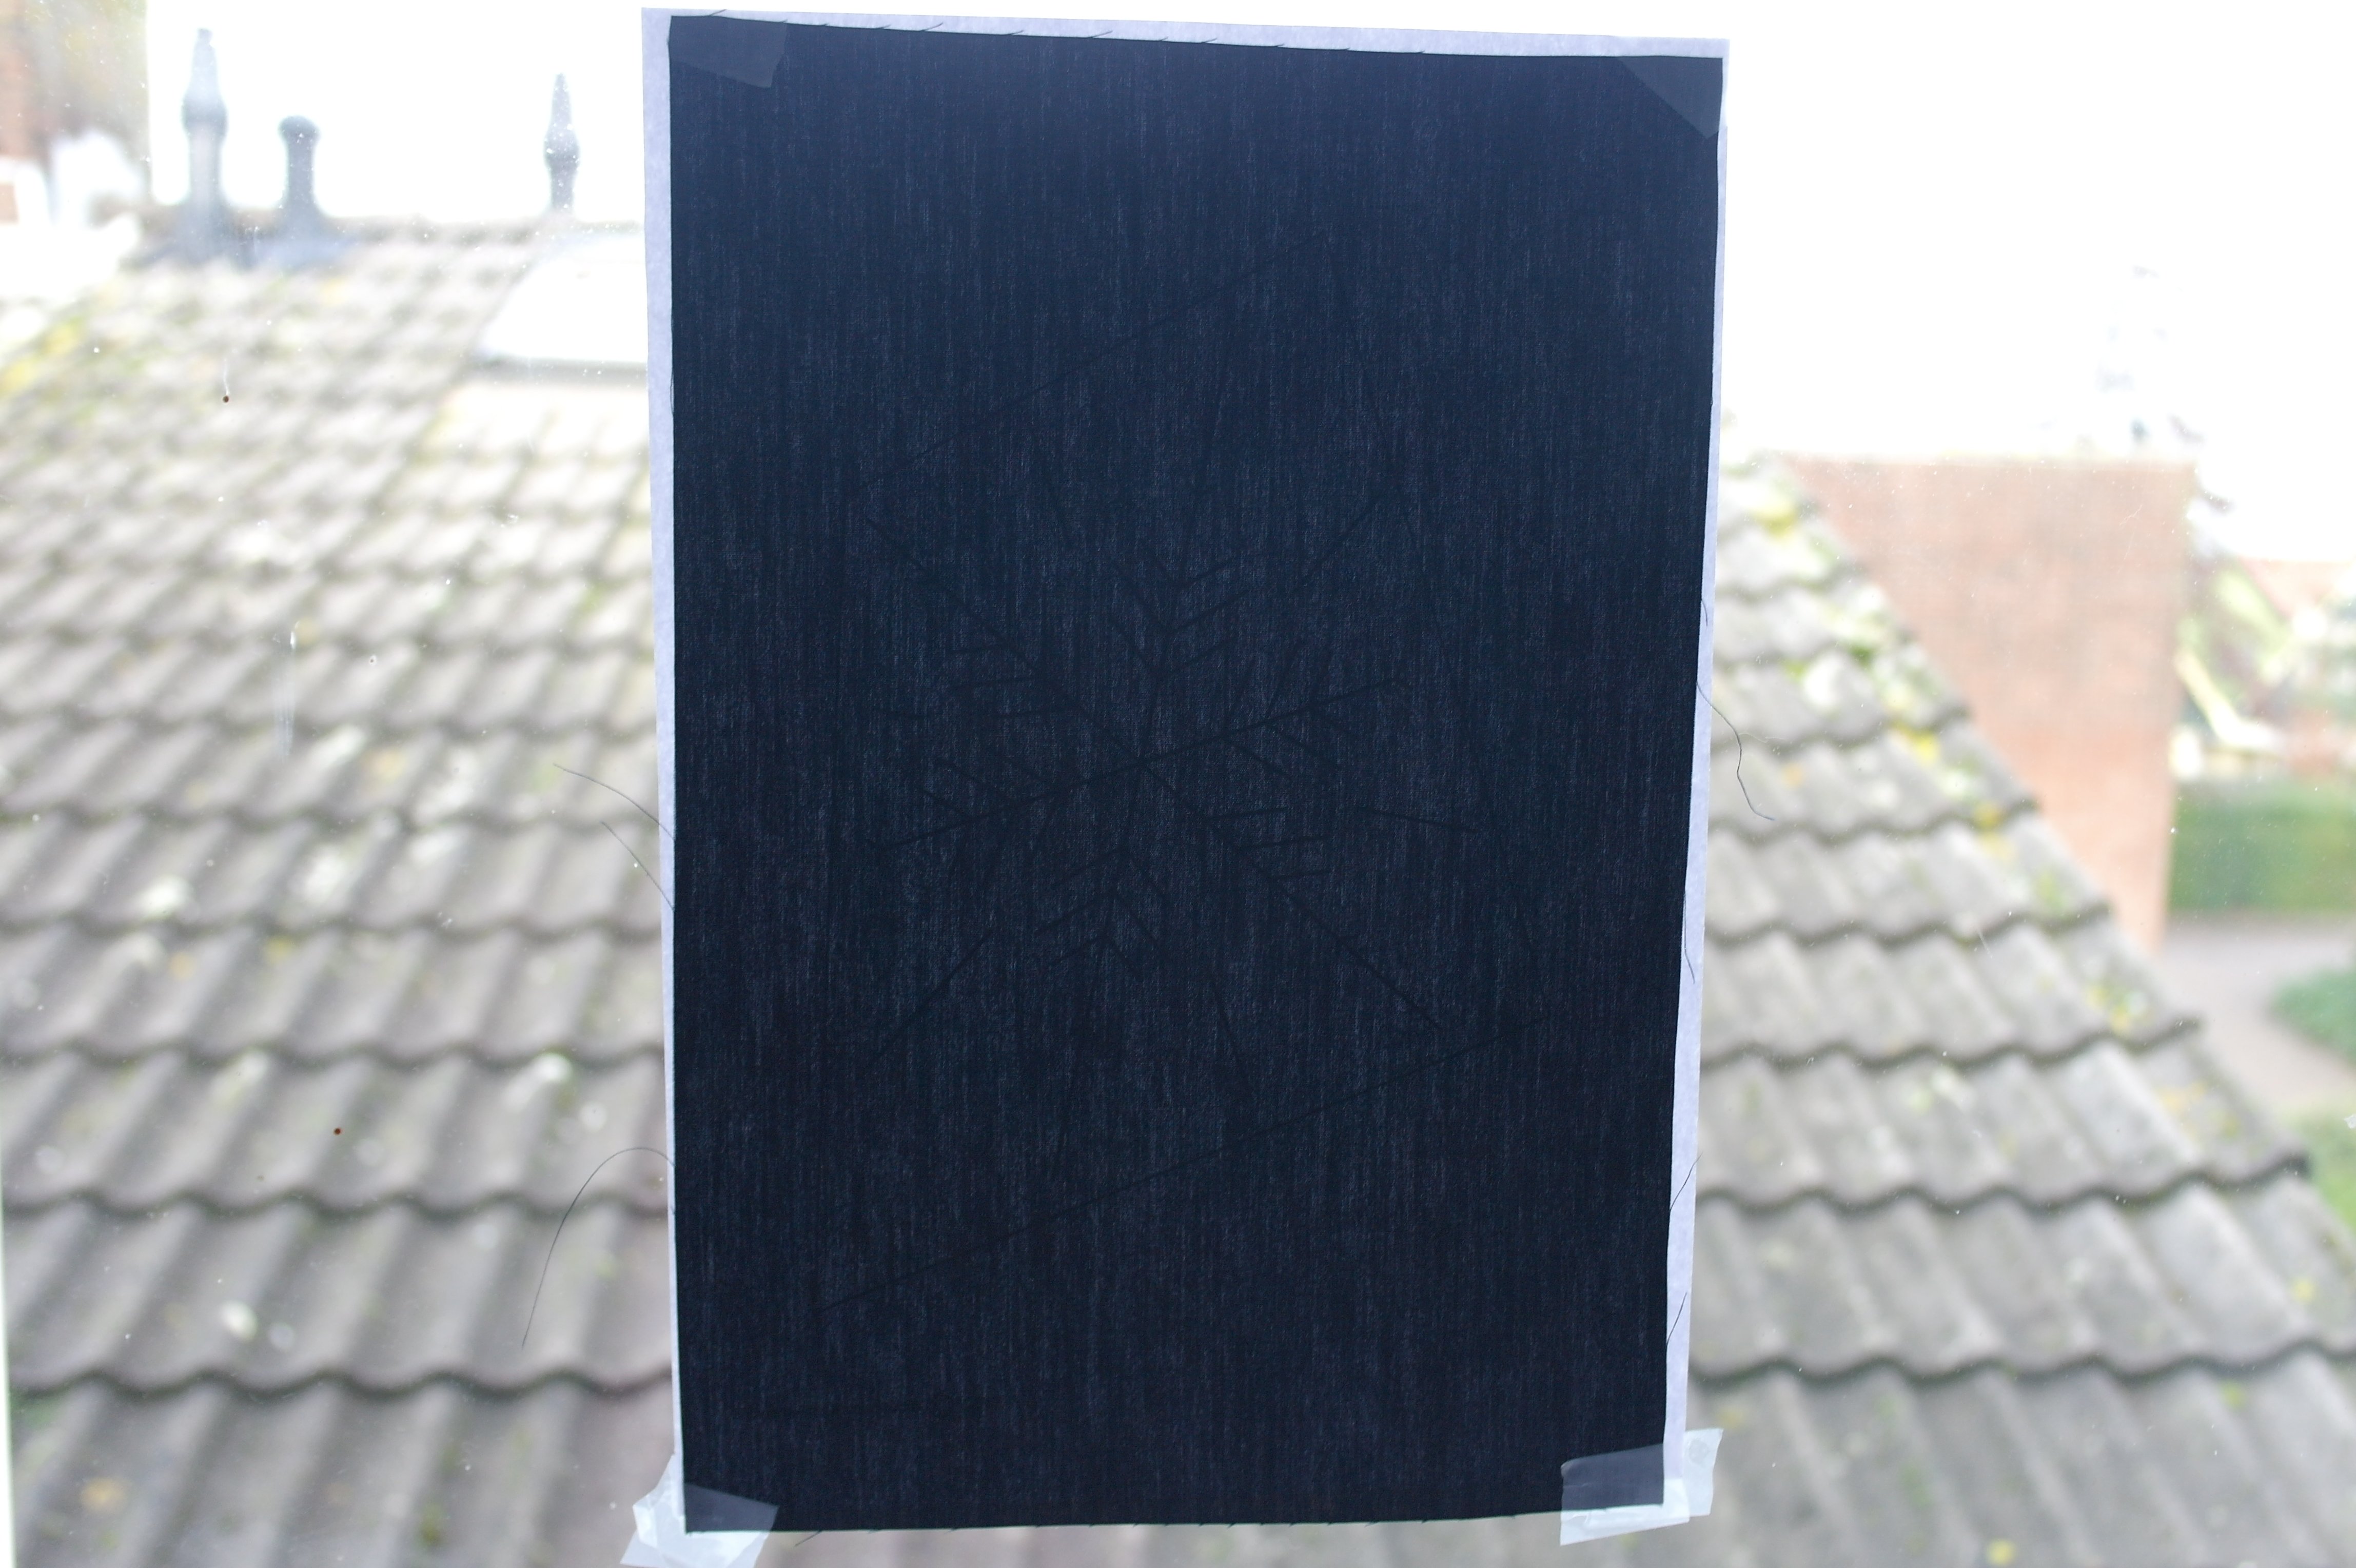
tape the black fabric on top of that: the lines of the paper pattern will shine through…
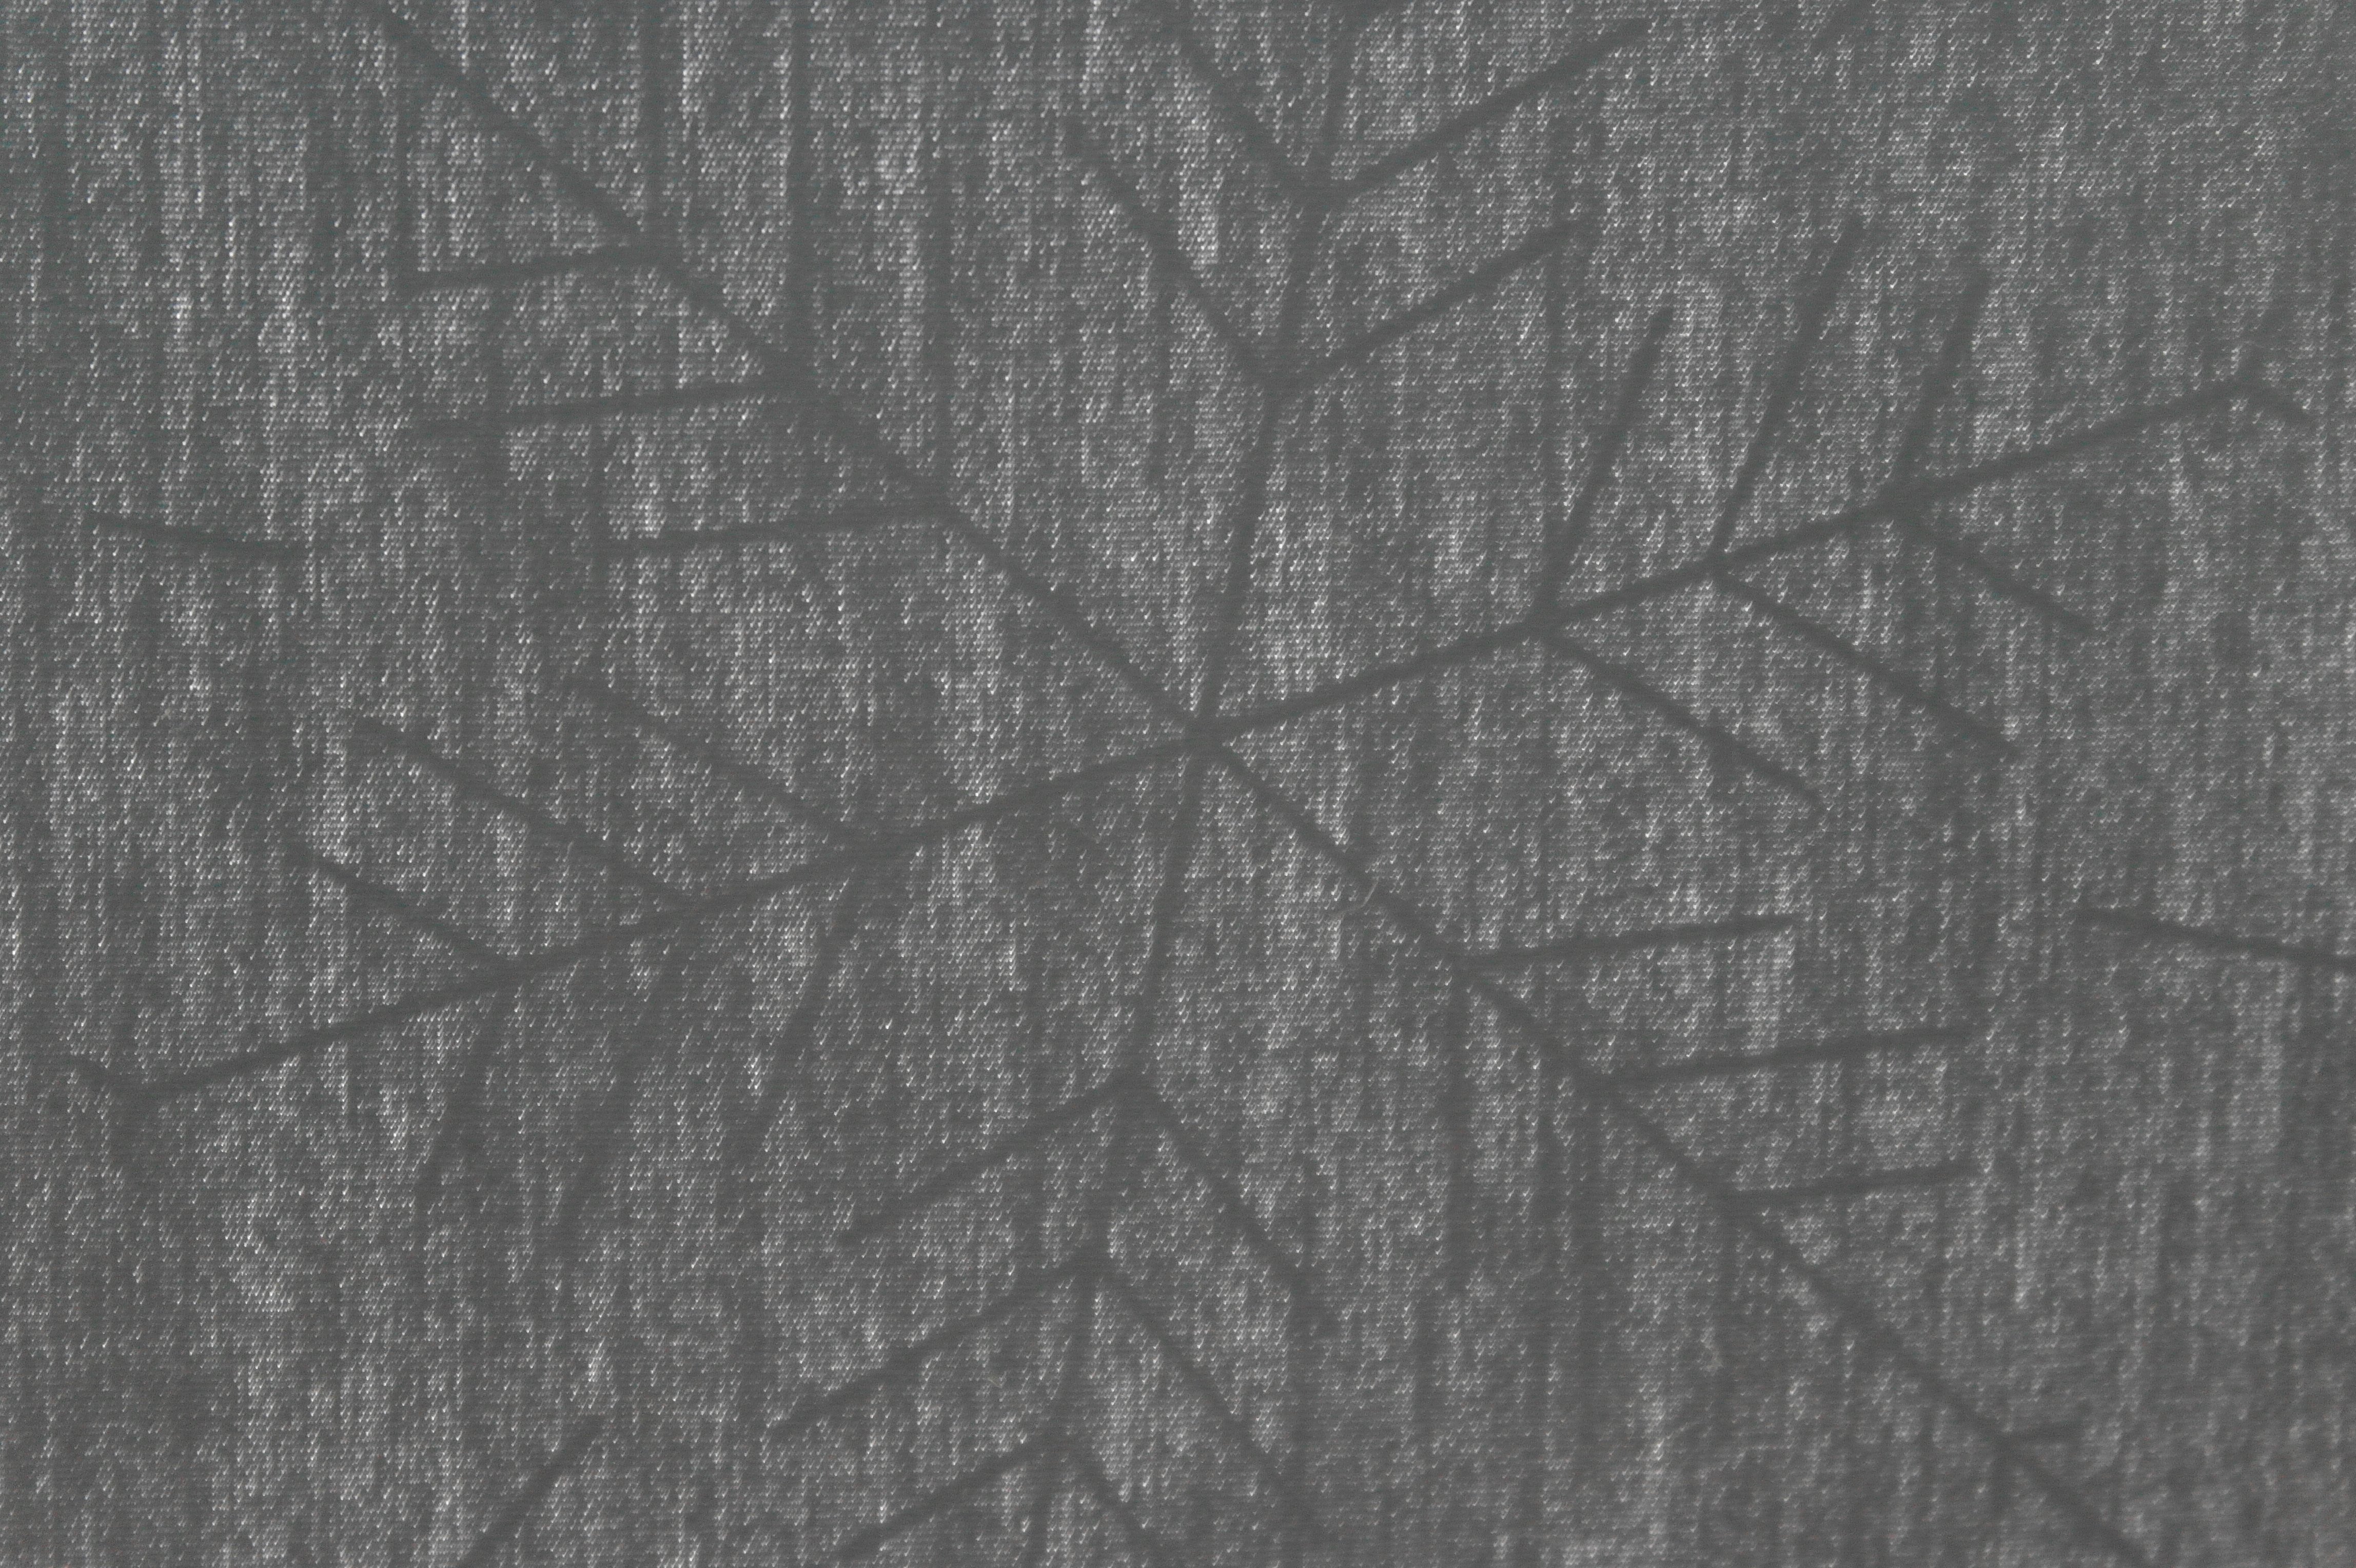
This is a close up, to show you that the lines will be visible to draw them onto the black fabric.
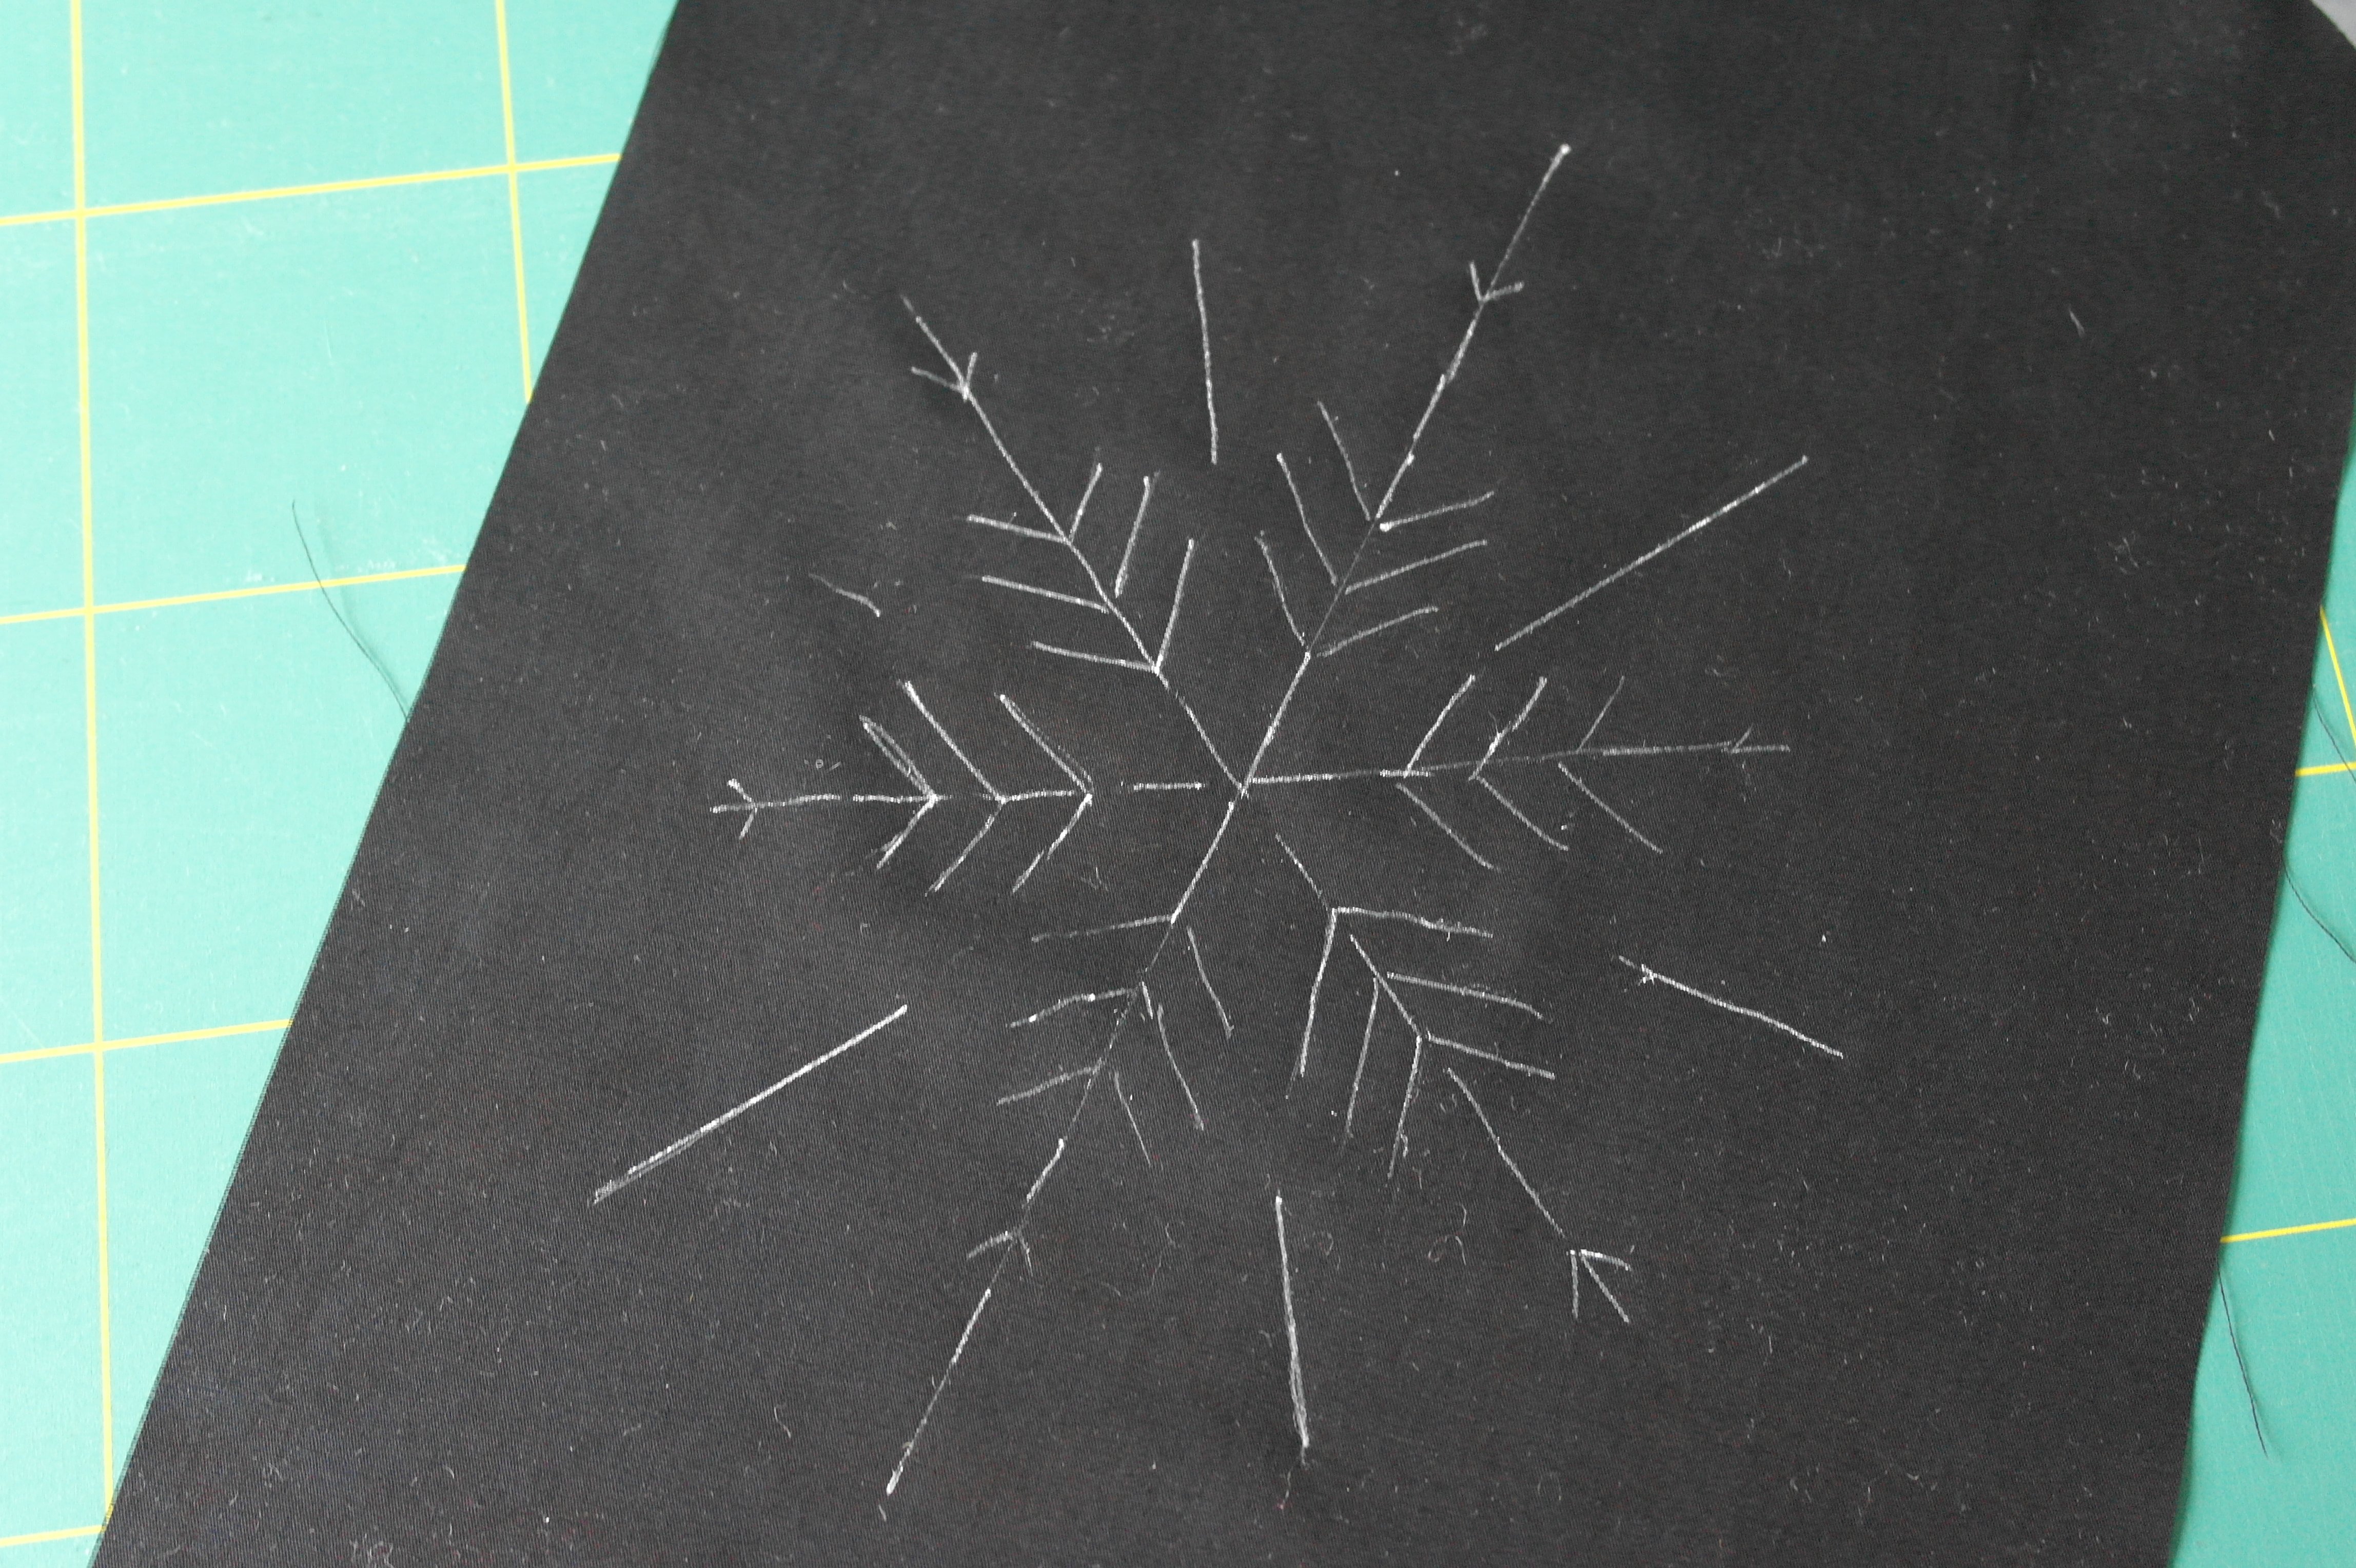
Use a white watersoluble pen (or a blue pen if you have a different color of fabric), and draw all basic lines of the Crystal. If you are using the white pen, just wait to see the lines you have drawn appear: sometimes it takes a few seconds before they show. Do not draw to many times over one line: it will be difficult to remove them afterwards.
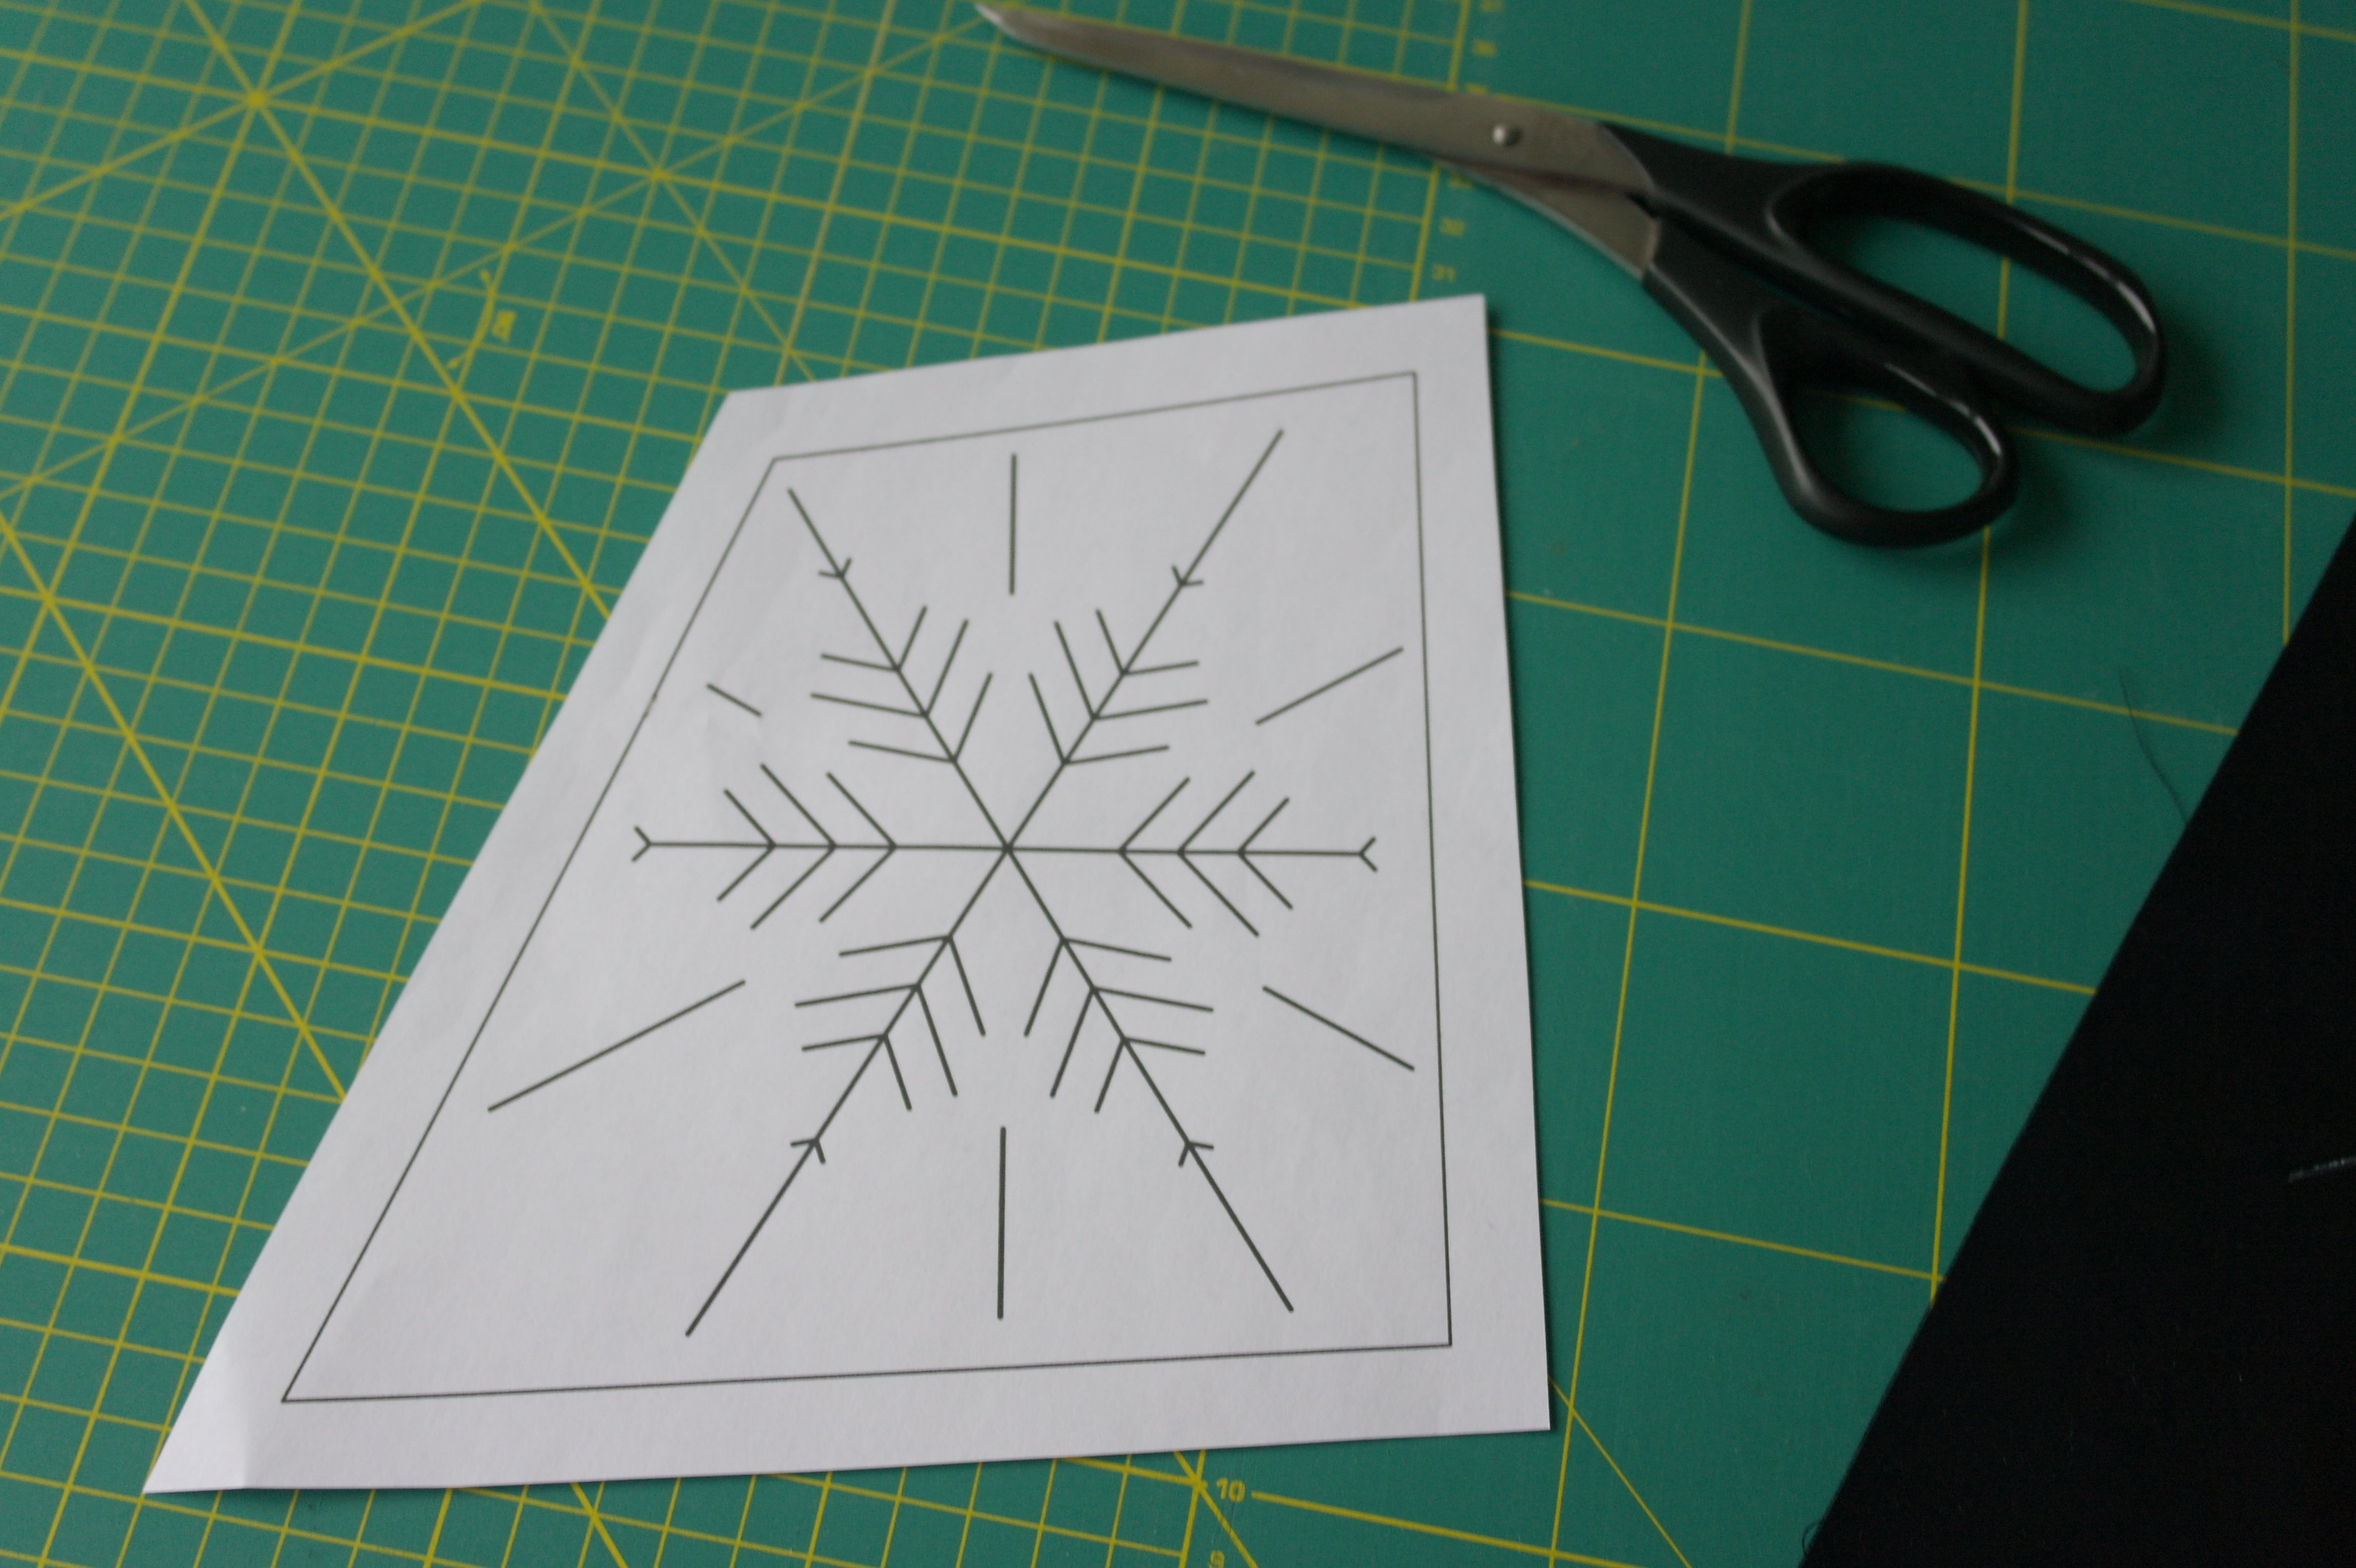
The solid lines around the Crystal on you paper are indicating the size of the center piece: after drawing the white lines onto the black batik fabric, remove the fabric, and cut the shape out of the paper pattern: BE SURE to add a seam allowance of aprox. 1 cm on all sides: this will be your template.

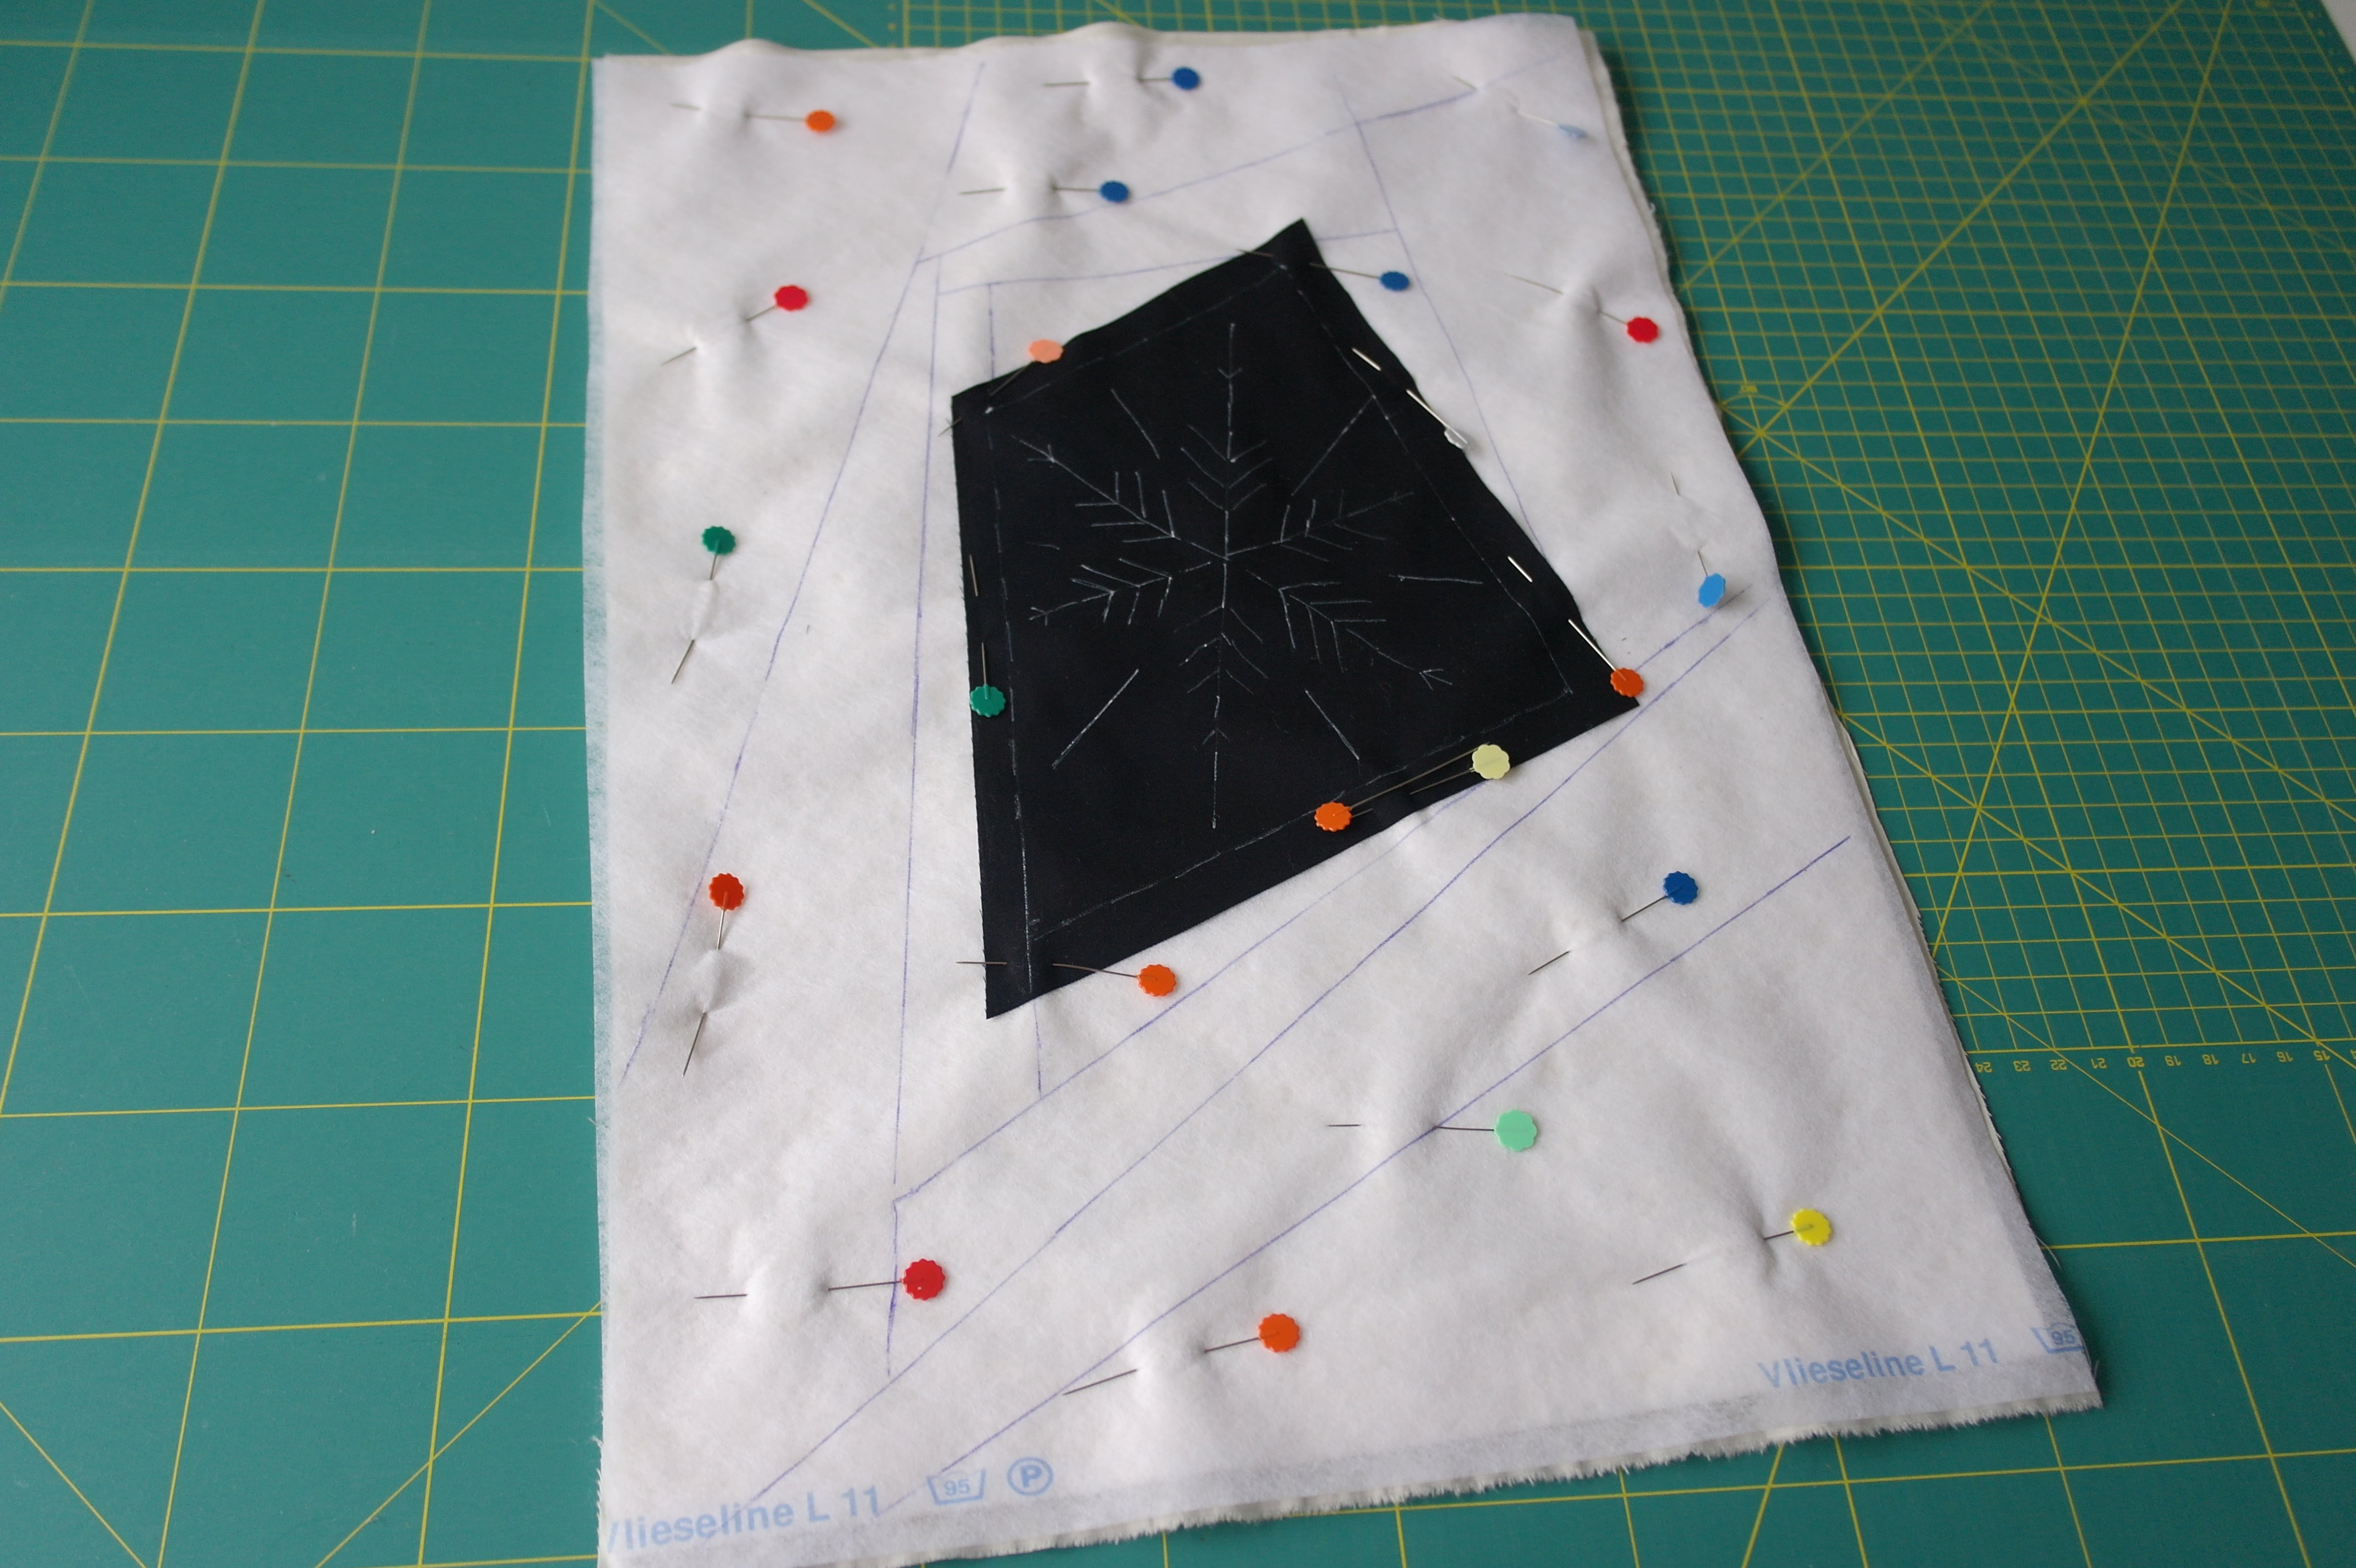
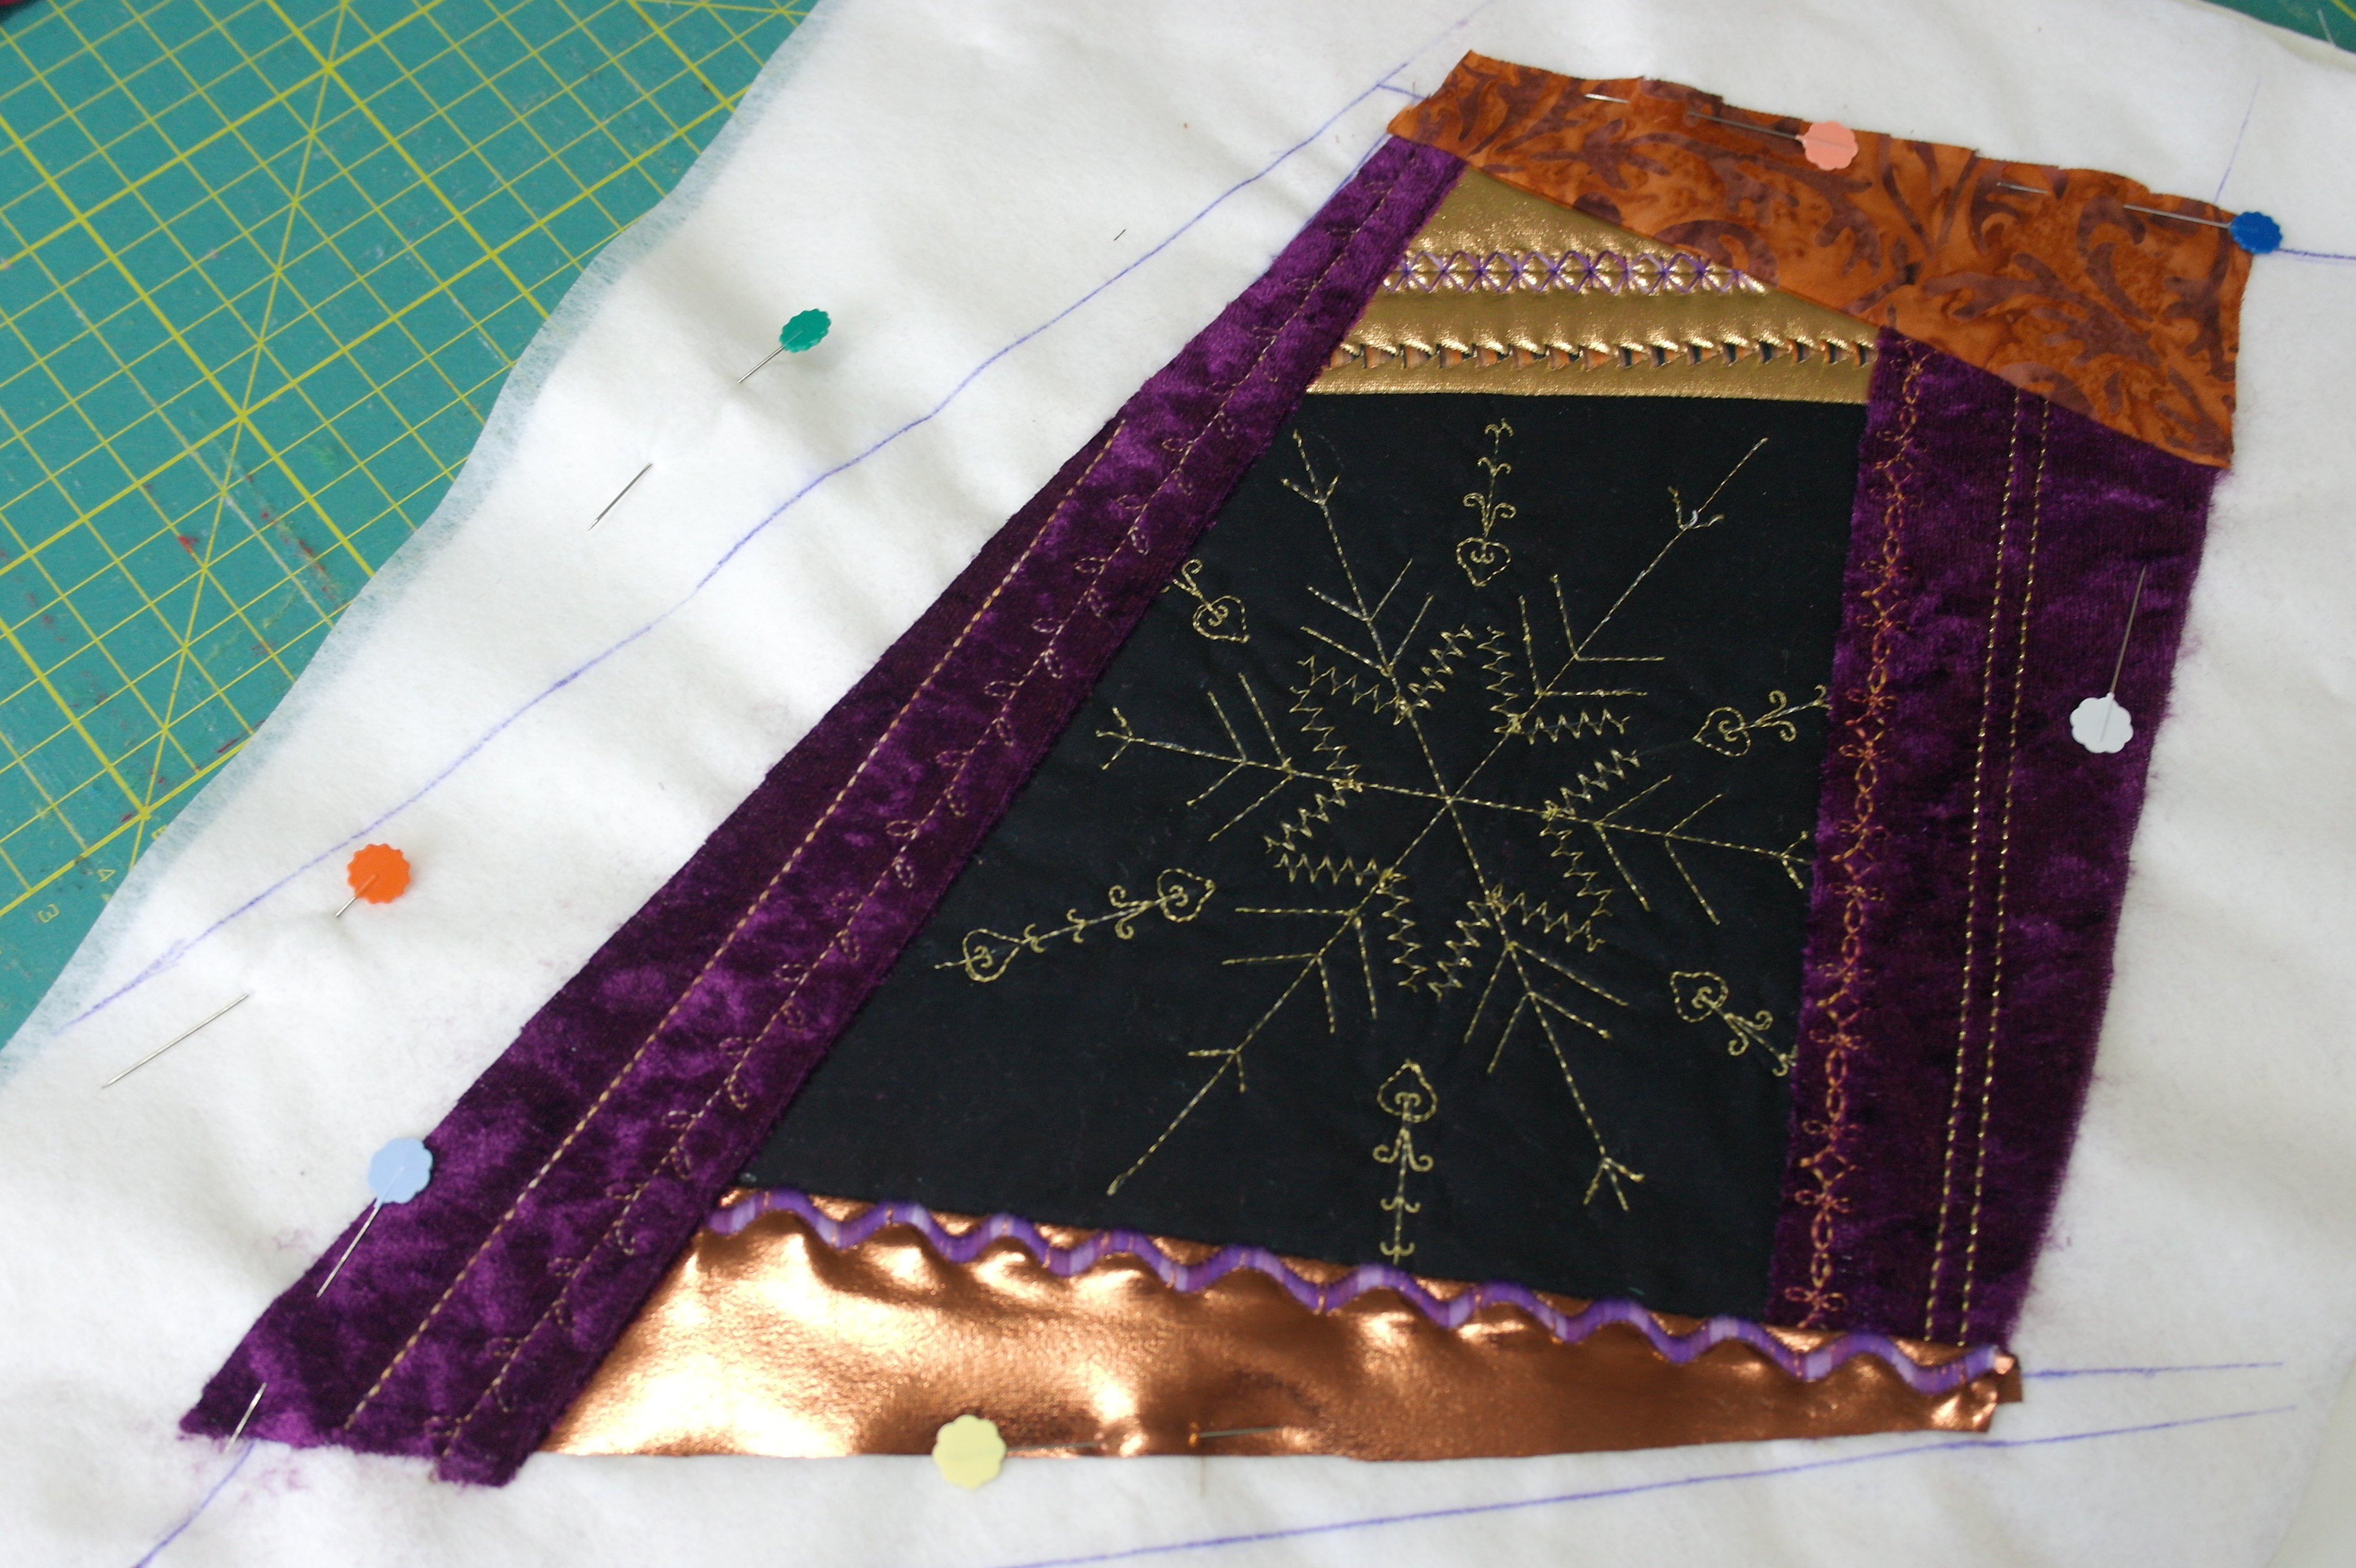
Use this template to place it on top of the black fabric. Use Flower Pins to pin the paper exact onto the drawn lines: you can see how I have done that.
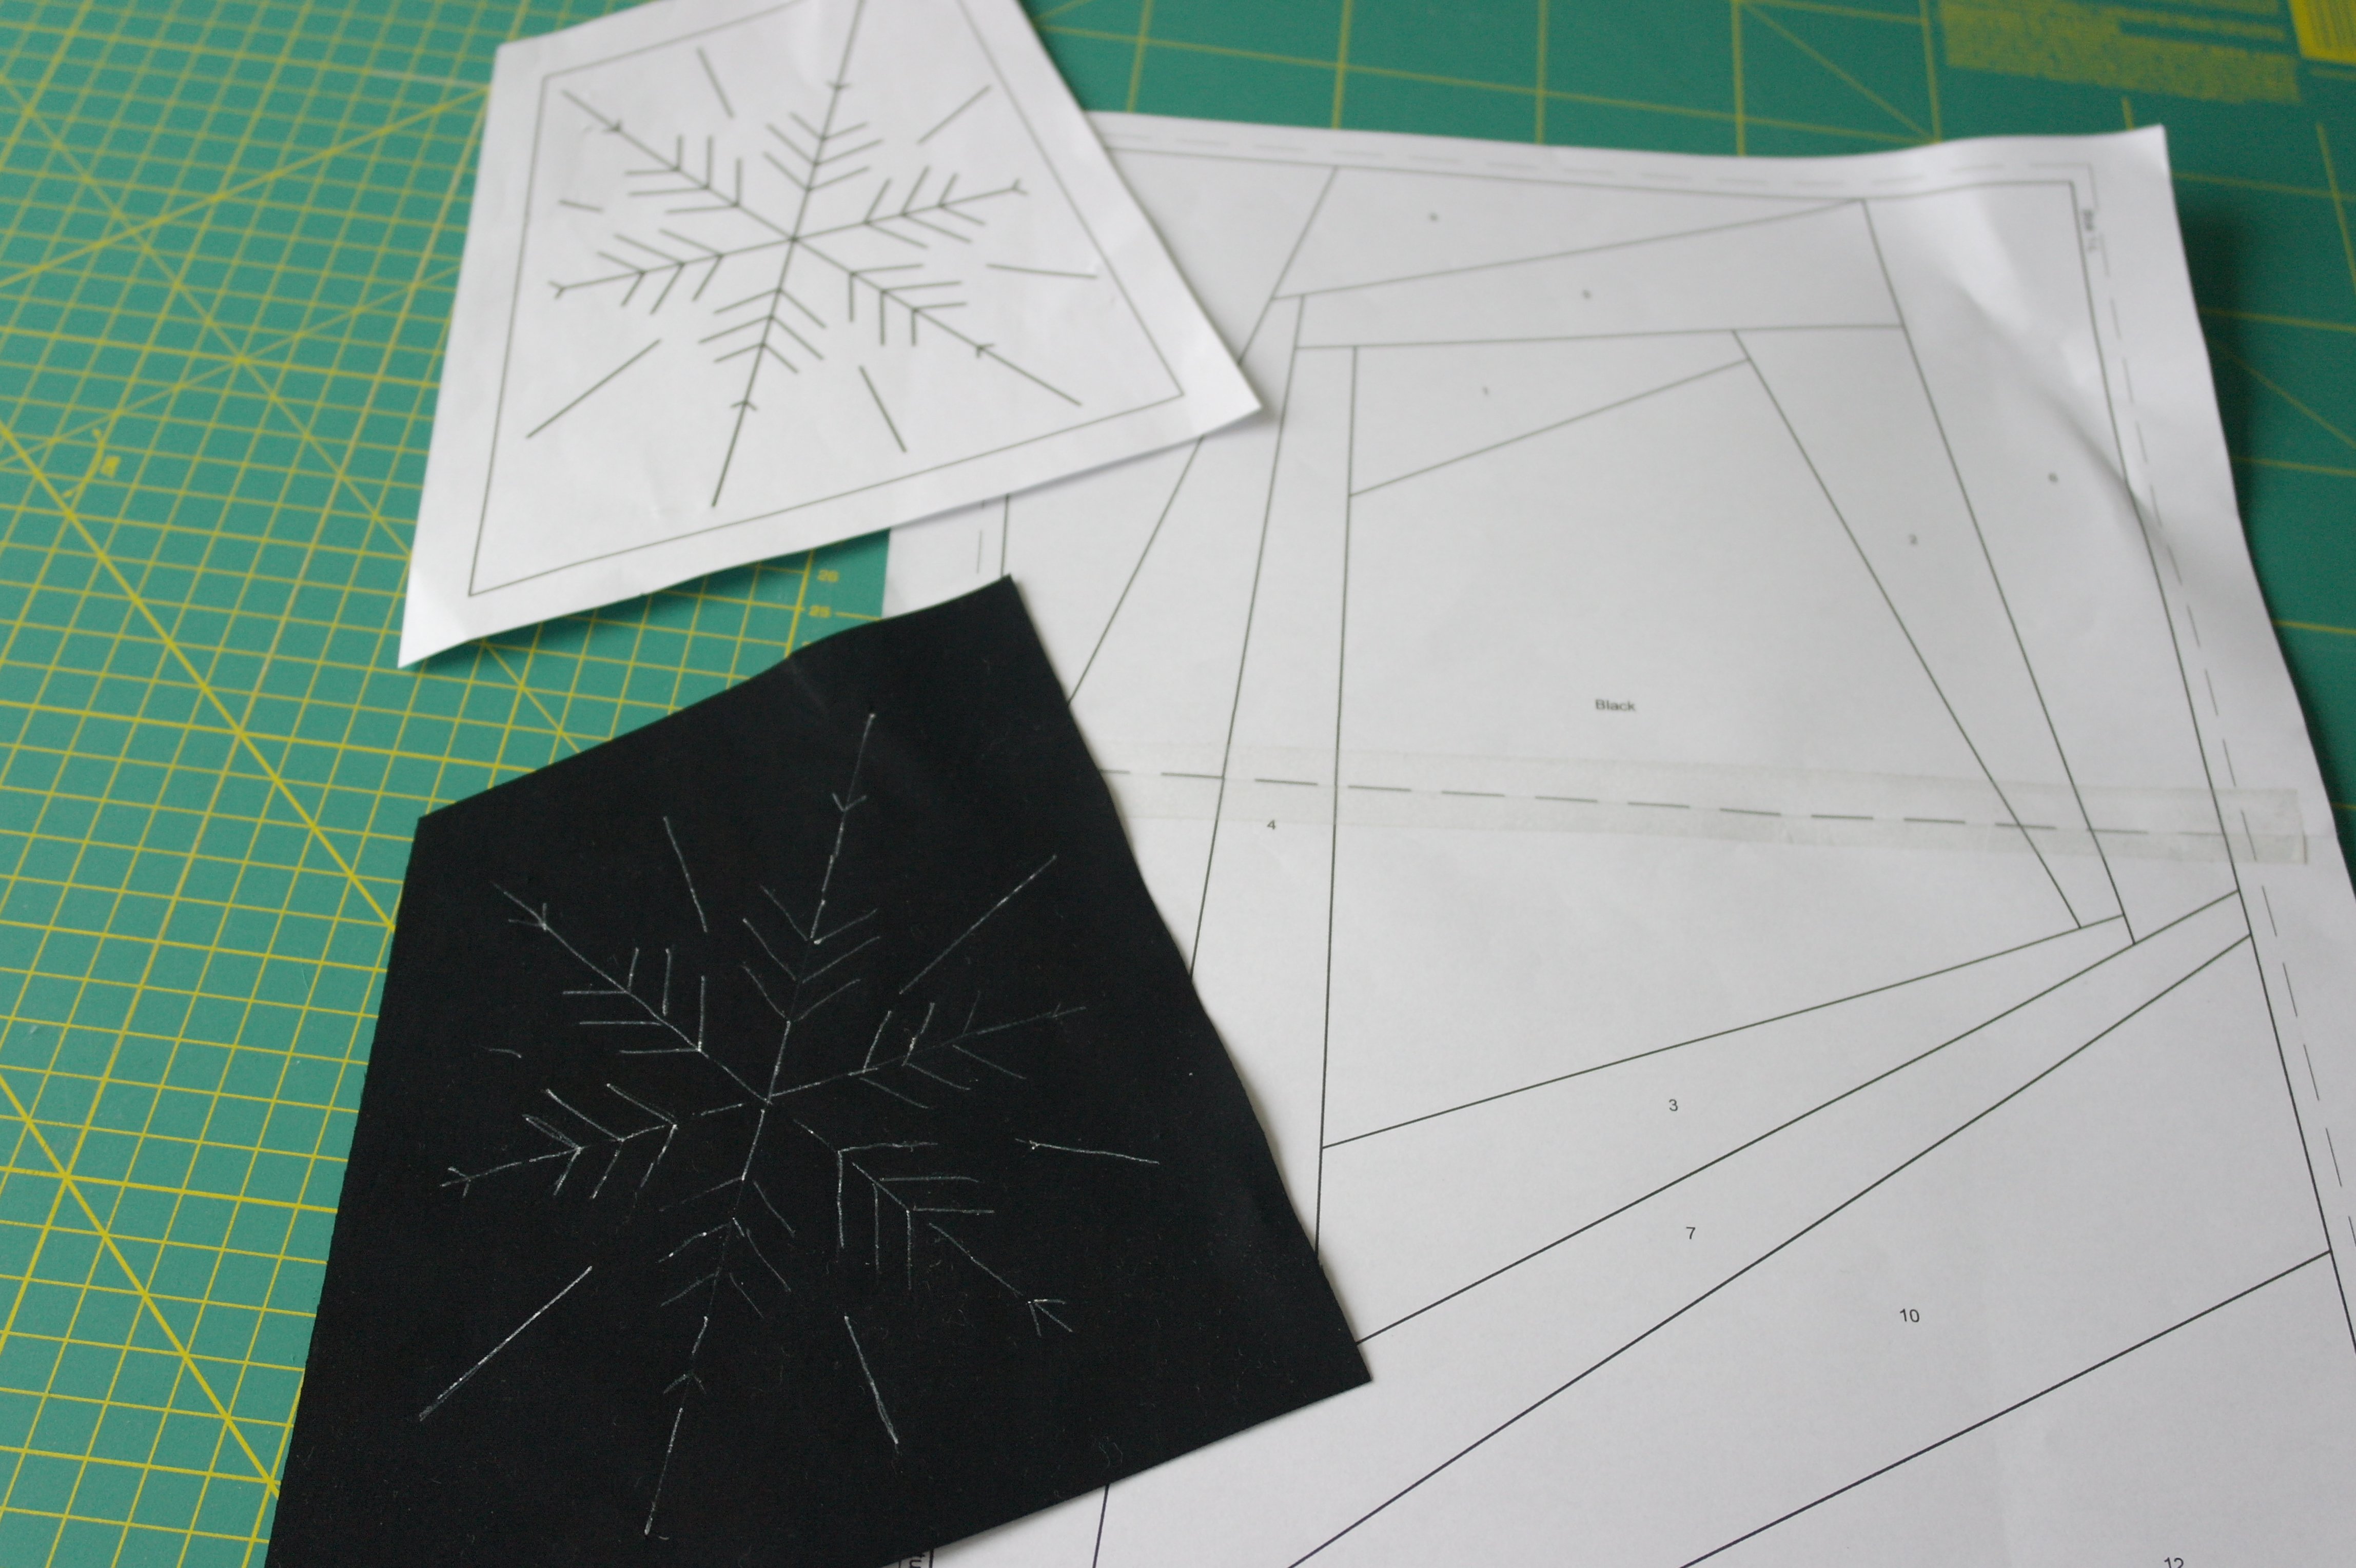
Cut the black batik fabric along the edges of the seam allowance of the paper template (the picture shows you: top left the paper template, bottom left the cut out fabric and to the right the pattern for the Crazy block)…

and place the cut out black fabric with the drawn Crystal on the right spot on your sandwich (seam allowance should protrude at all sides. Draw the lines of the actual measurements of the shape with white pen on the black fabric, as you can see on the picture above. This way you have a clear vision of the actual piece, and the seam allowances.
Pin the sandwich, use Flower Pins, and start decorating the center piece.
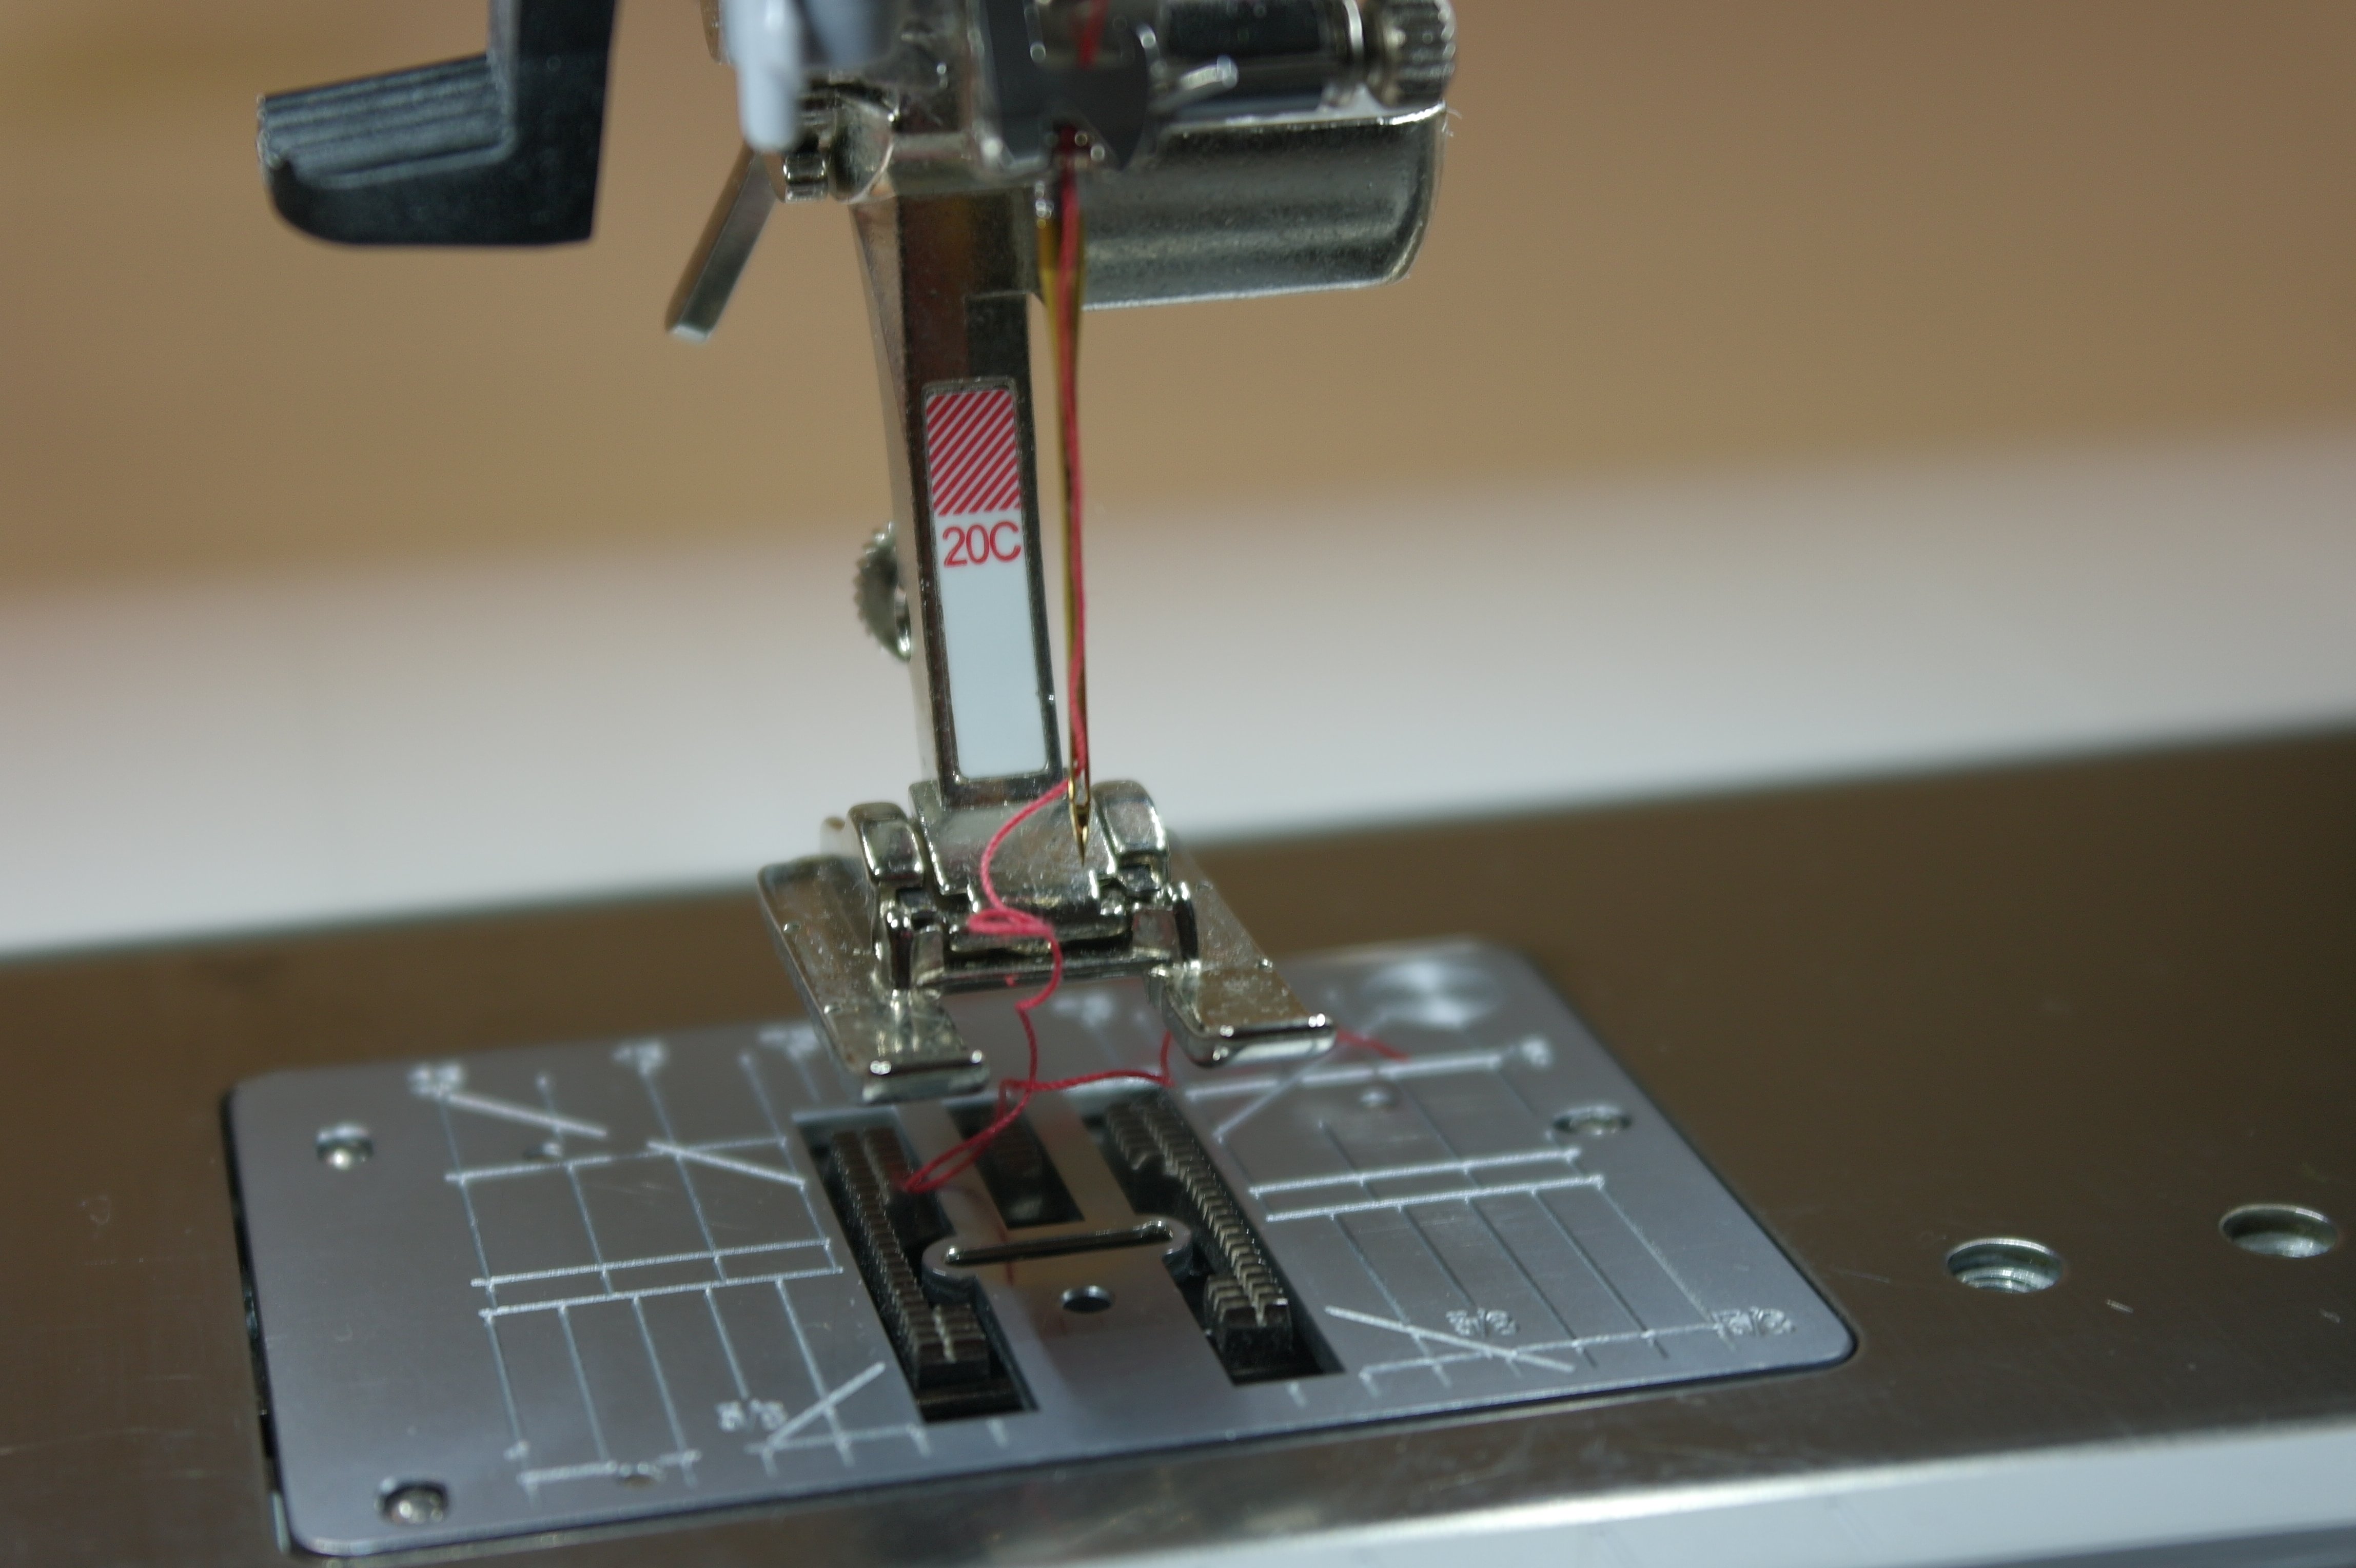
PREPARING YOUR MACHINE: be sure your machine is in good working order, cleaned and ready for use. Check if you have the right presser foot to make decoratie stitches. With the BERNINA 770QE this is the open embroidery foot #20C: The wide opening at the front of the foot affords a clear view of the stitching area, while the wide wedge-shaped channel under the sole of the foot ensures perfect fabric feed even over dense stitch formations. Some presser feet have a groove in the middle: this is handy to be sure decorative stitches will me made from a center point. But even if you don’t own such a presser foot, you can always use the side of a foot as guidance. Just be sure that you can use the largest possible width of stitches – with some machines that is 5mm, with others it is 9mm.
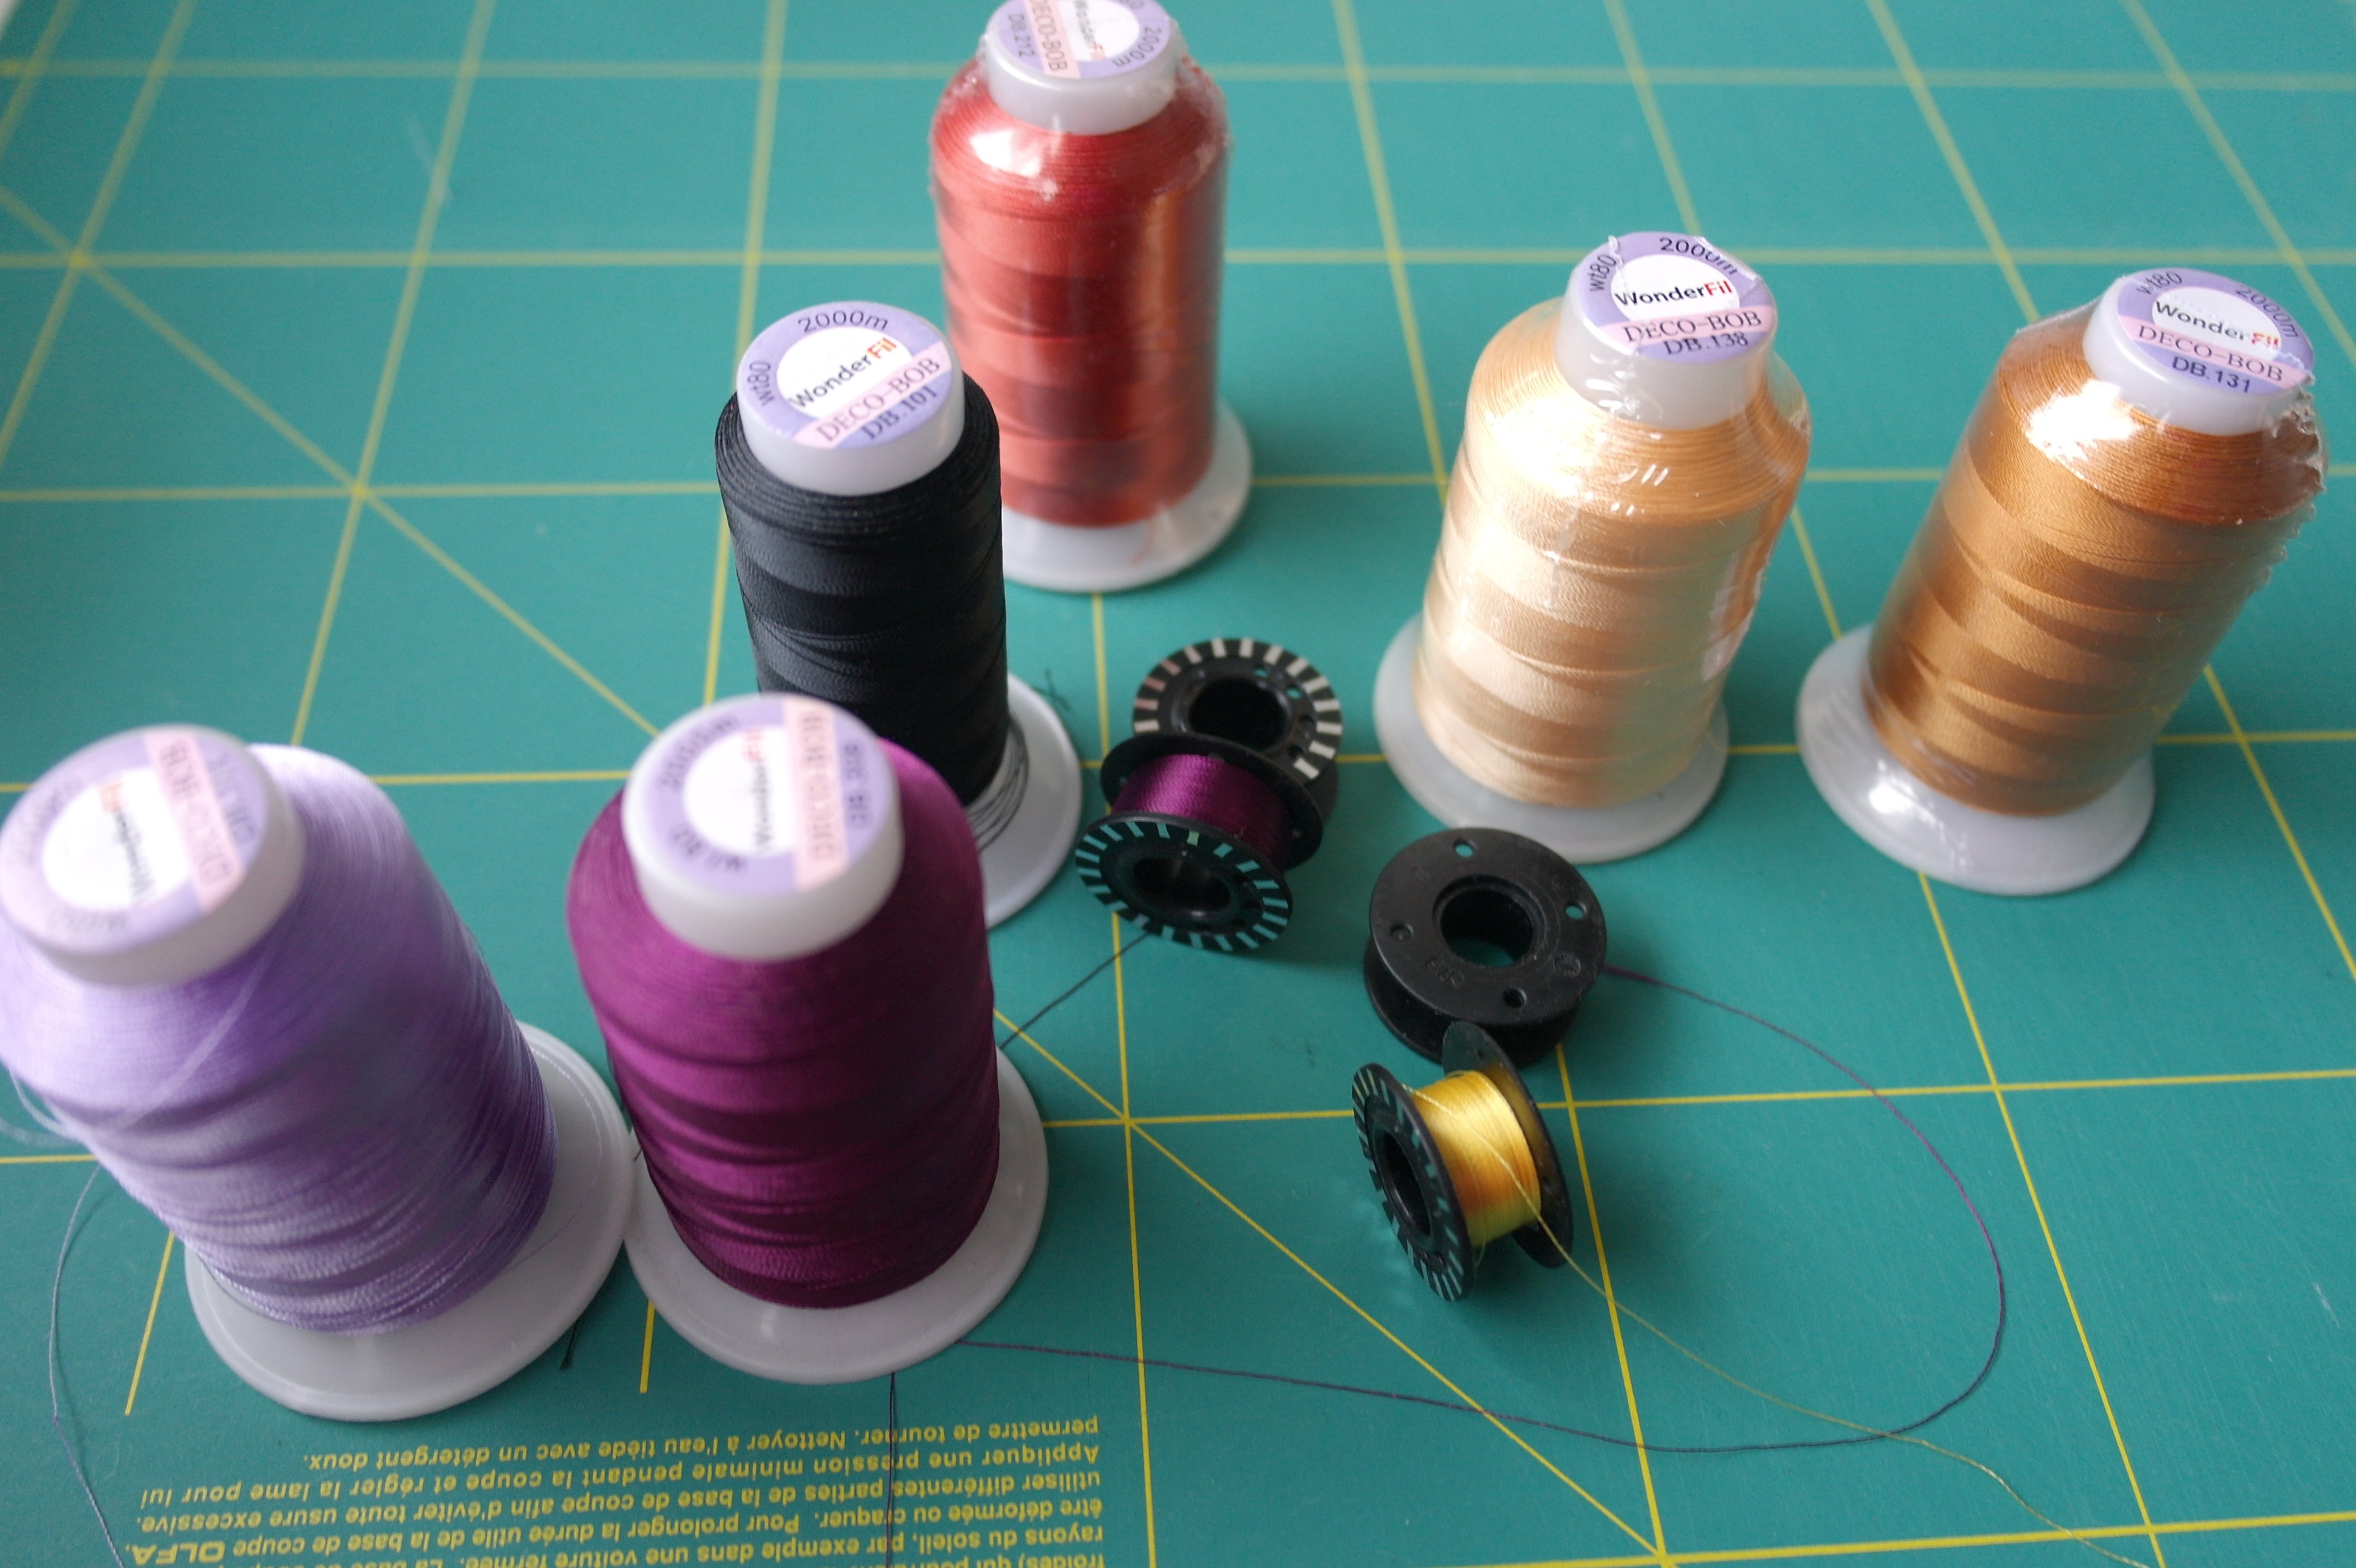
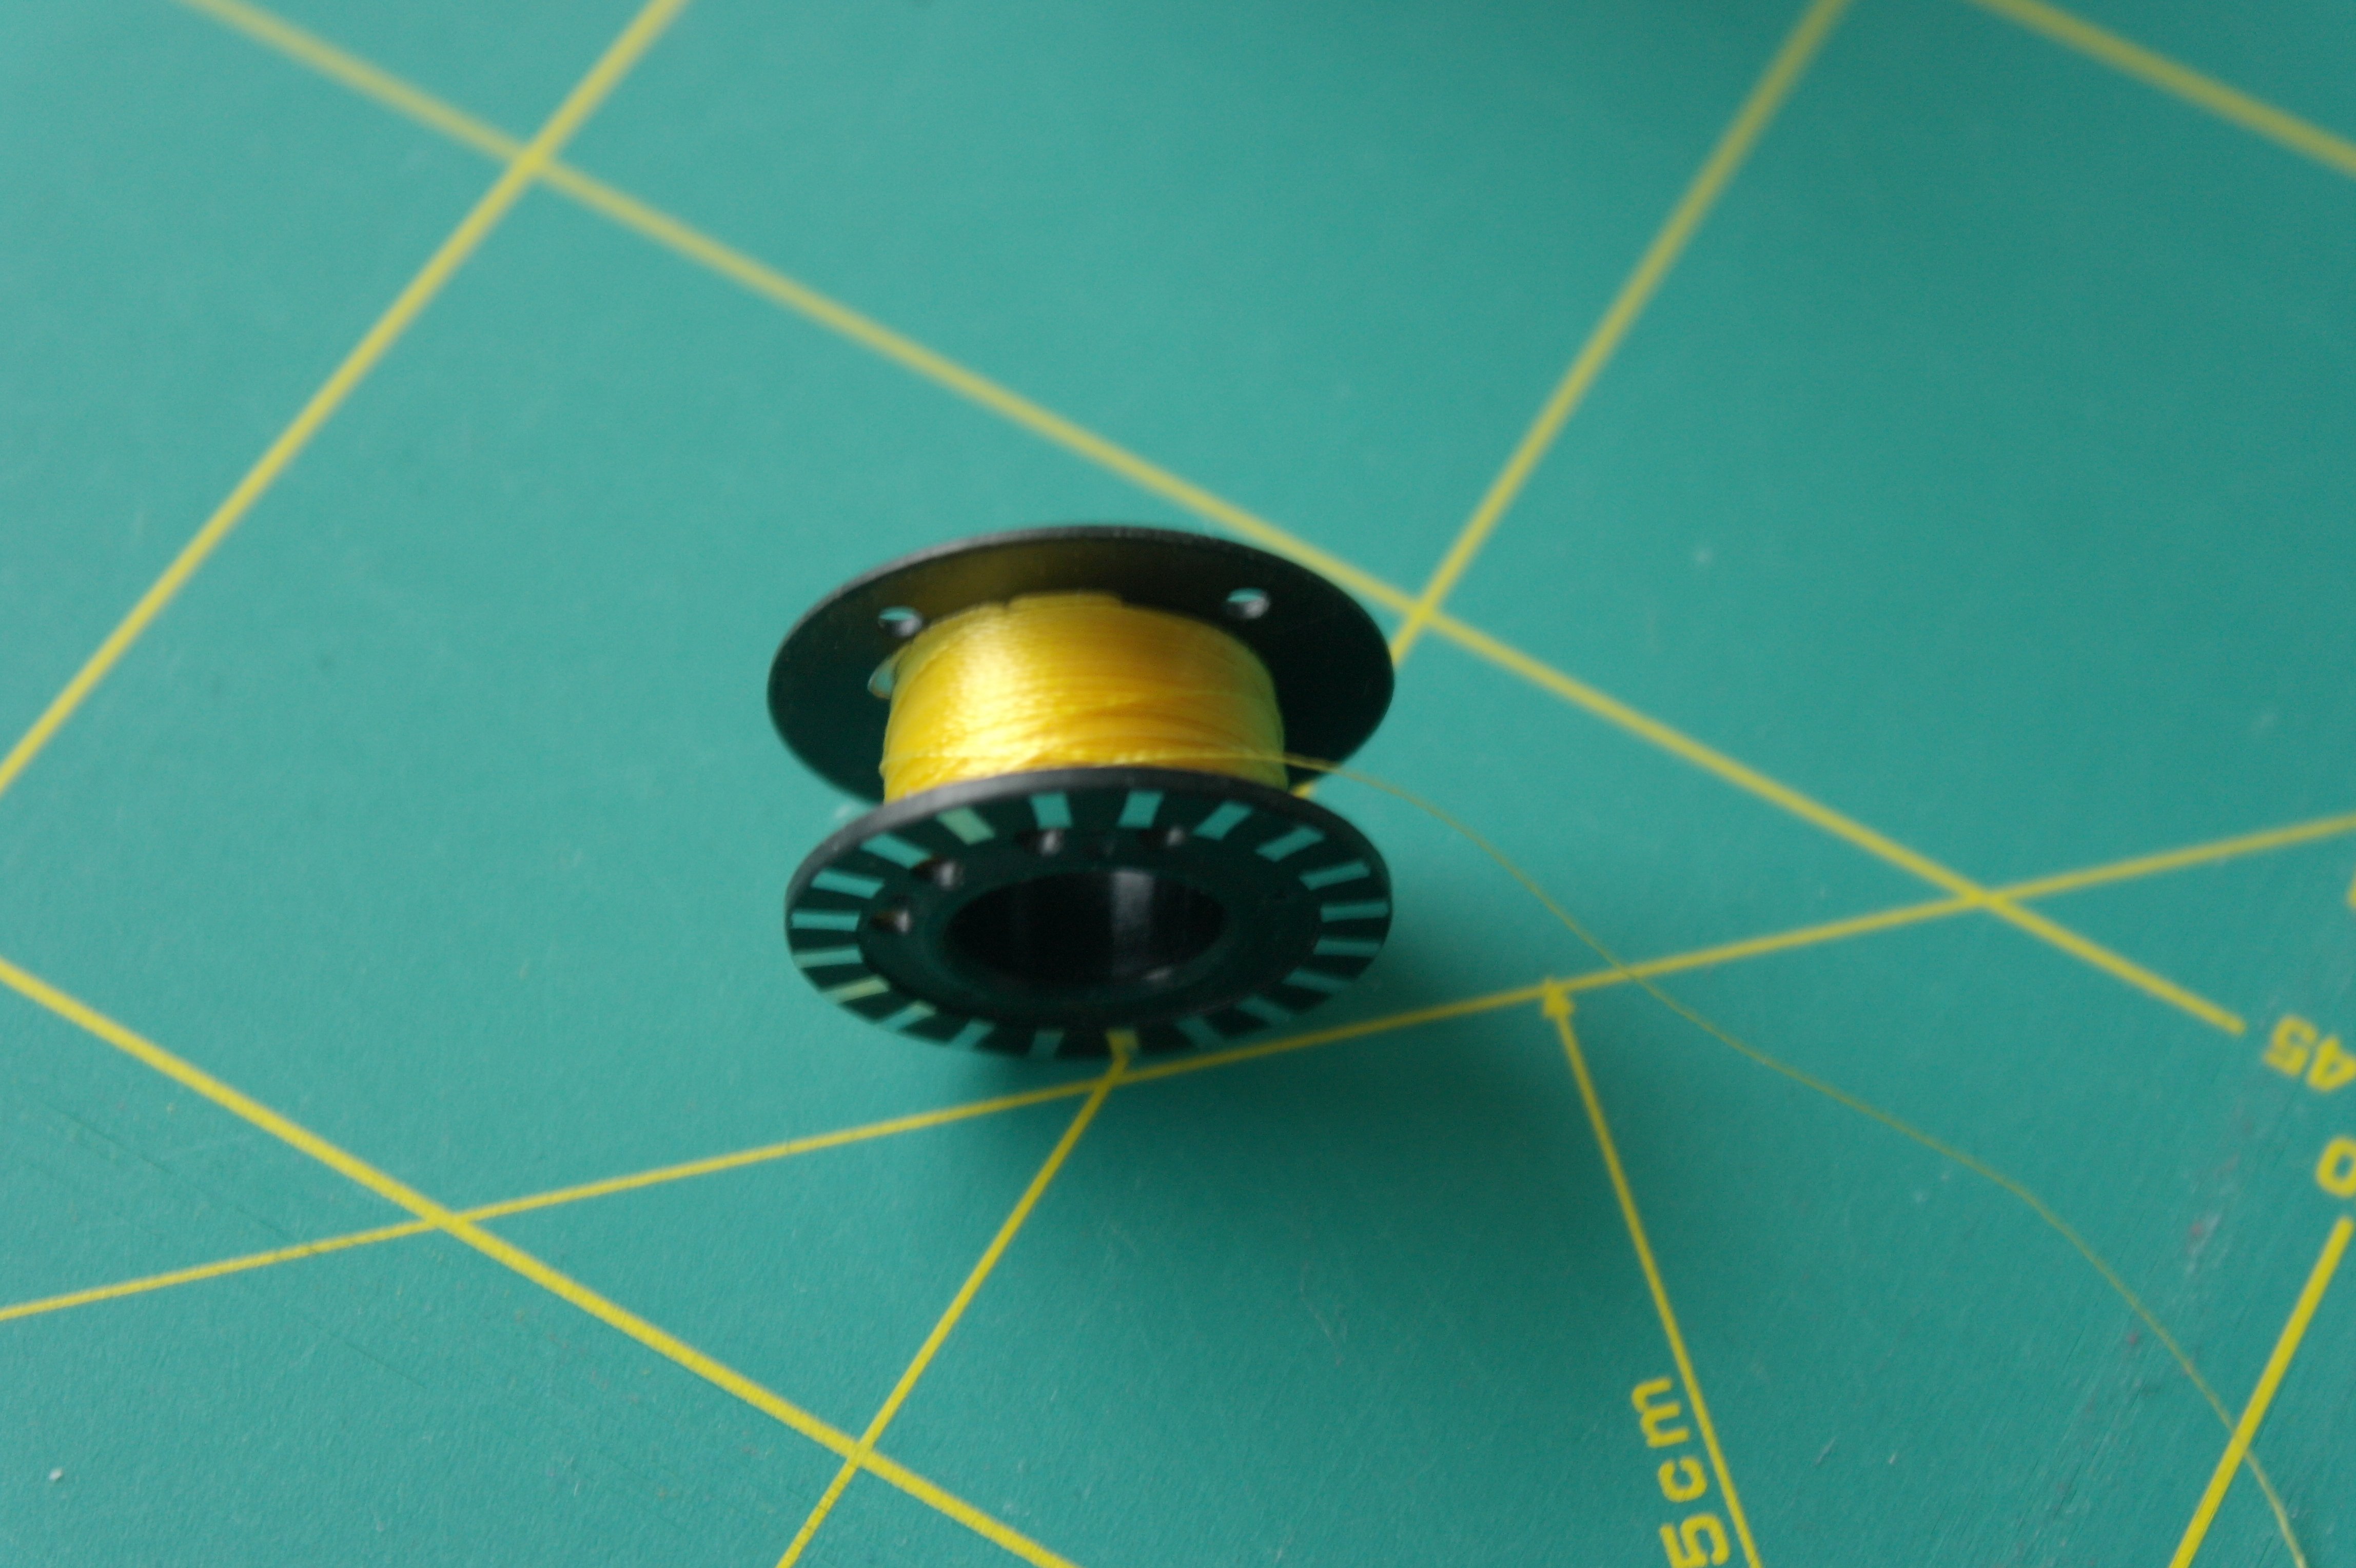
Be sure to prepare a lot of bobbins, ready filled with thin threads: I am always using DecoBob van Wonderfil, for this project yellow- and brown, purple and black. It is a wonderful thin (bobbin)thread (#80wt), which will work well with all types of machine theads. (There are also ready made bobbins with this brand/type of thead, but be sure you can use such a bobbin in your machine. This is not possible with my BERNINA 770QE, because with this machine we use very large bobbins).
Of course you can work with just one color bobbin thread, but sometimes the bobbin thread will appear on top of your sandwich. Using matching threads, for top and bobbin, makes your work so much easier.
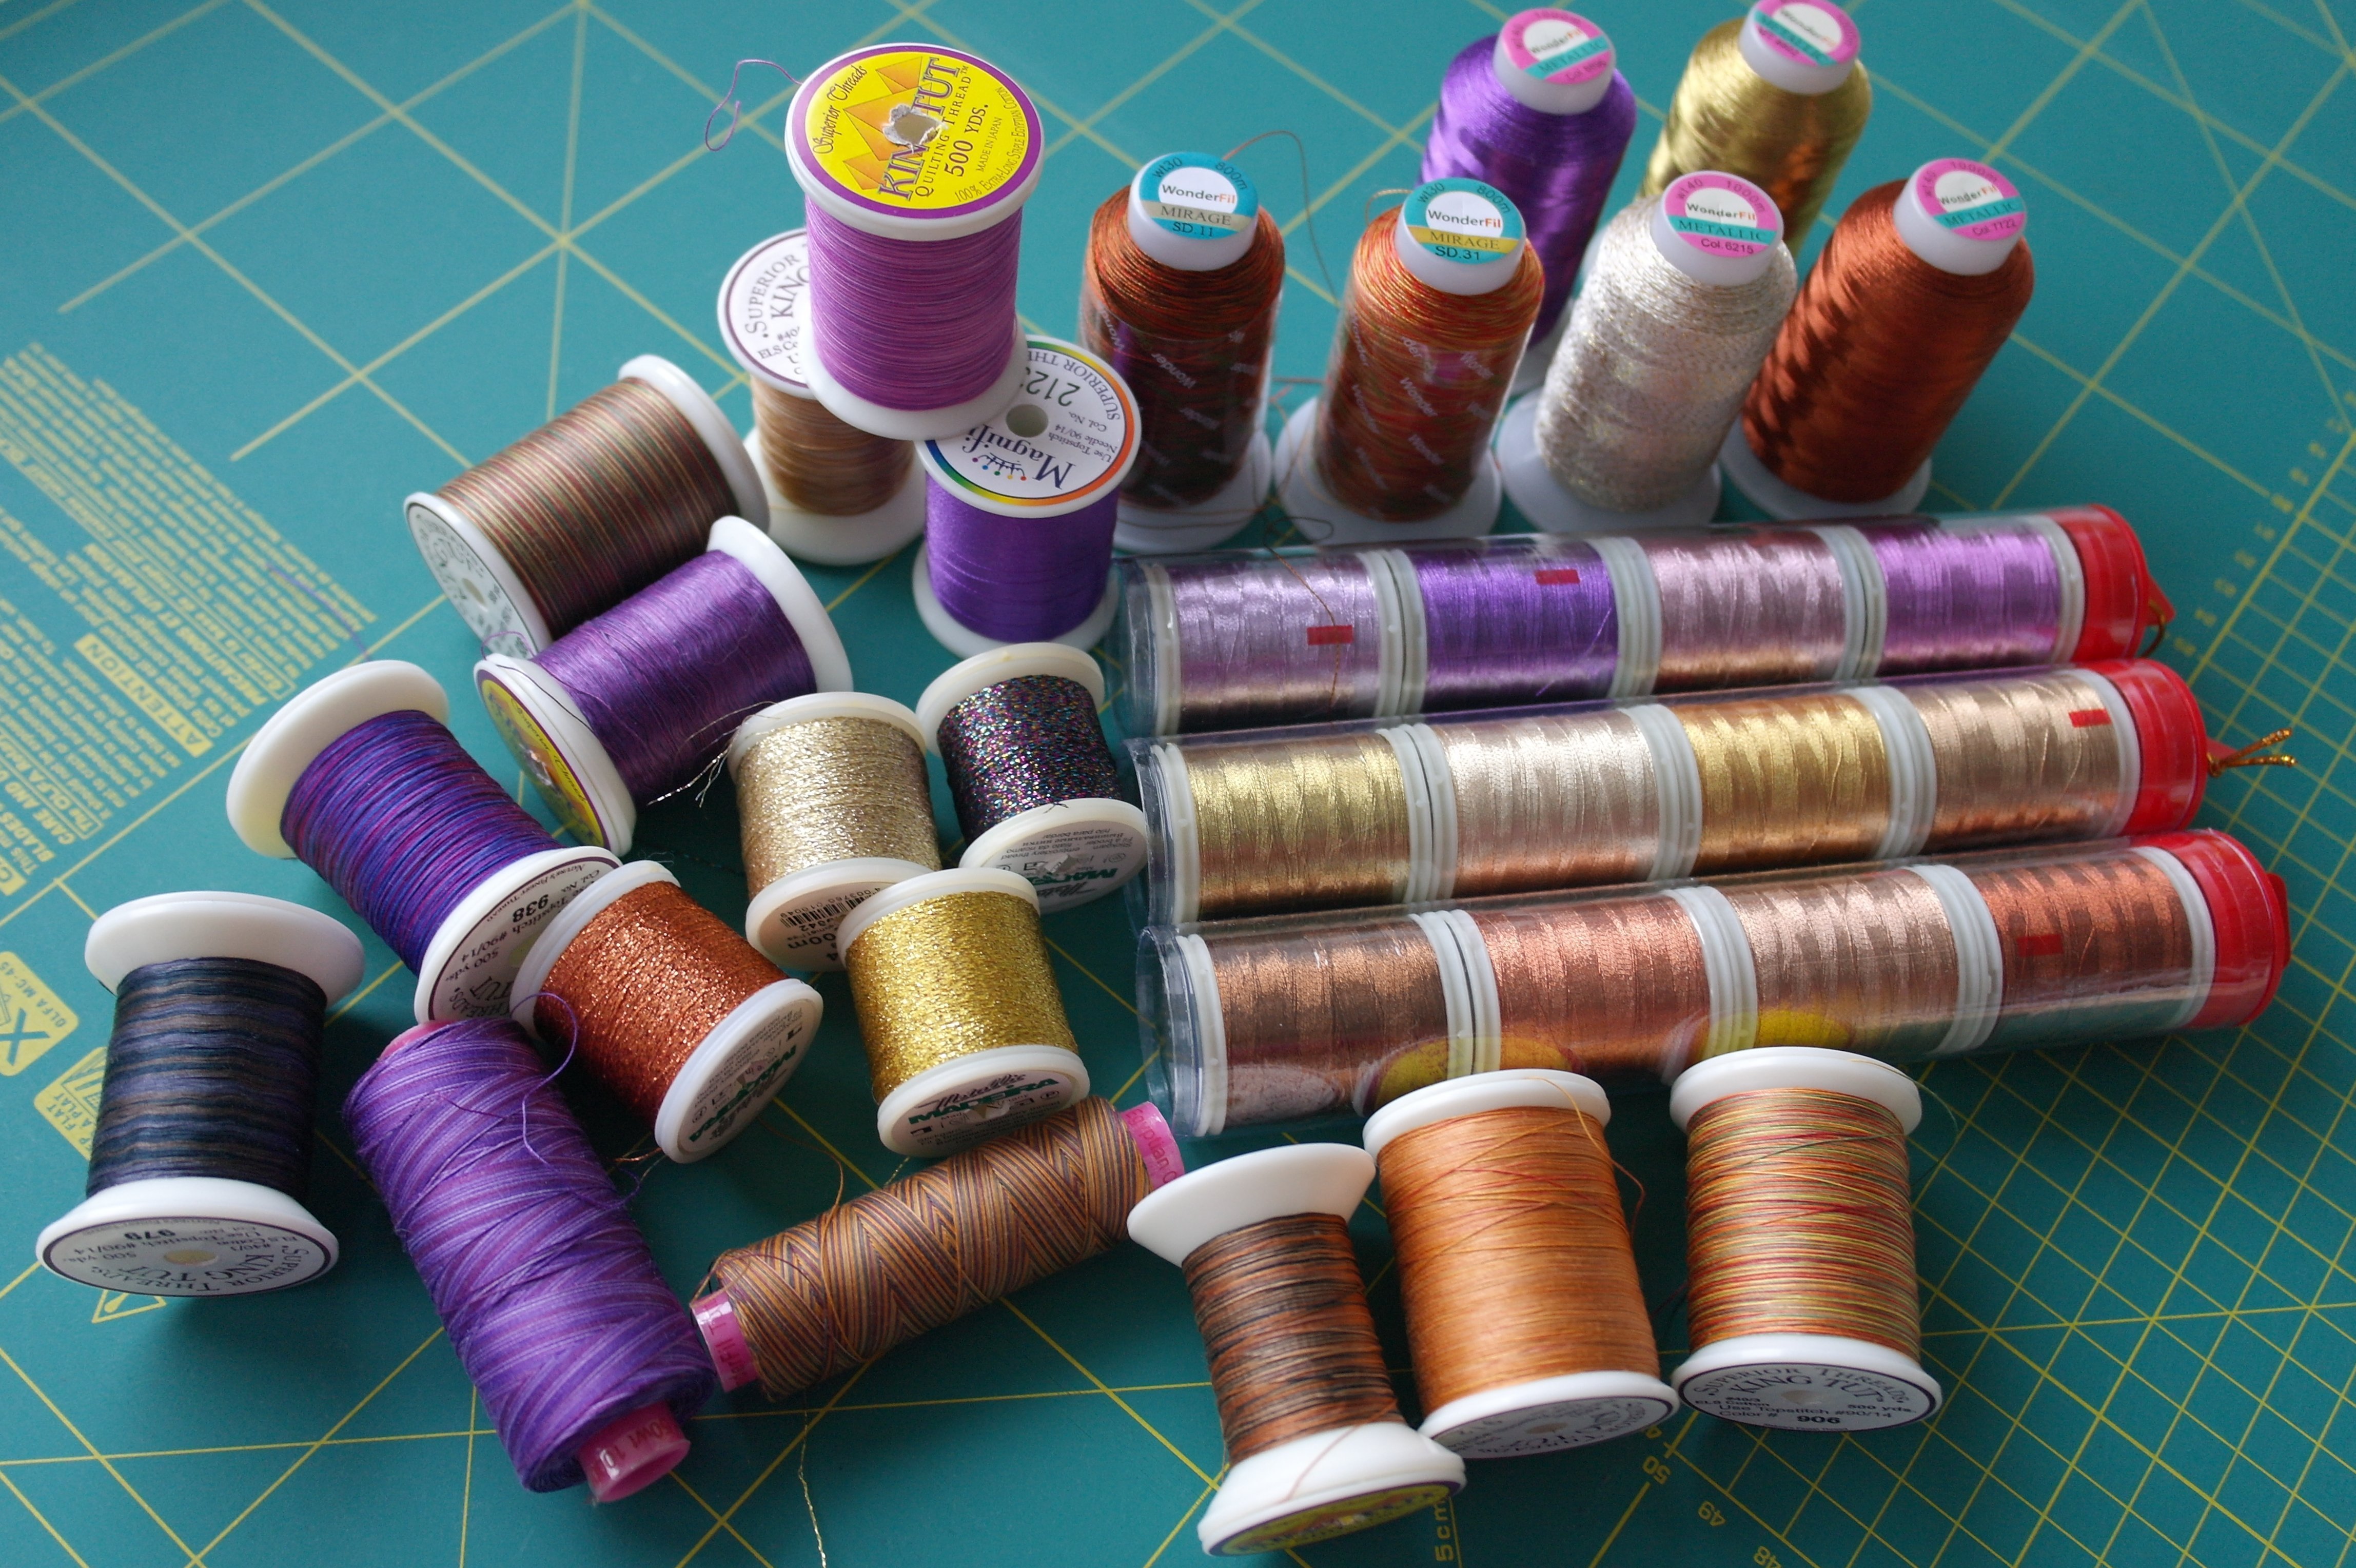
Use as many different top threads as you want: just be sure that they are machine threads. (never use hand threads in your machine: they contain wax, which can cause problems with your machine). I will use metallic threads, cotton- and polyester threads. I will use them randomly, whenever I think the color or effect of a thread will do. The picture shows my ‘basic’ colletion for this project, but I think more threads will be added along the way. To make sure all threads will fit through the eye of the needle, I will use a TOPSTITCH naald 90/14 .

Because I will use a lot of metallic threads, I will also us a TOPSTITCH 90/14 on my machine. A large eye, short distance from eye to point, makes this type of needle strong, and I can use metallic thread without any problem.
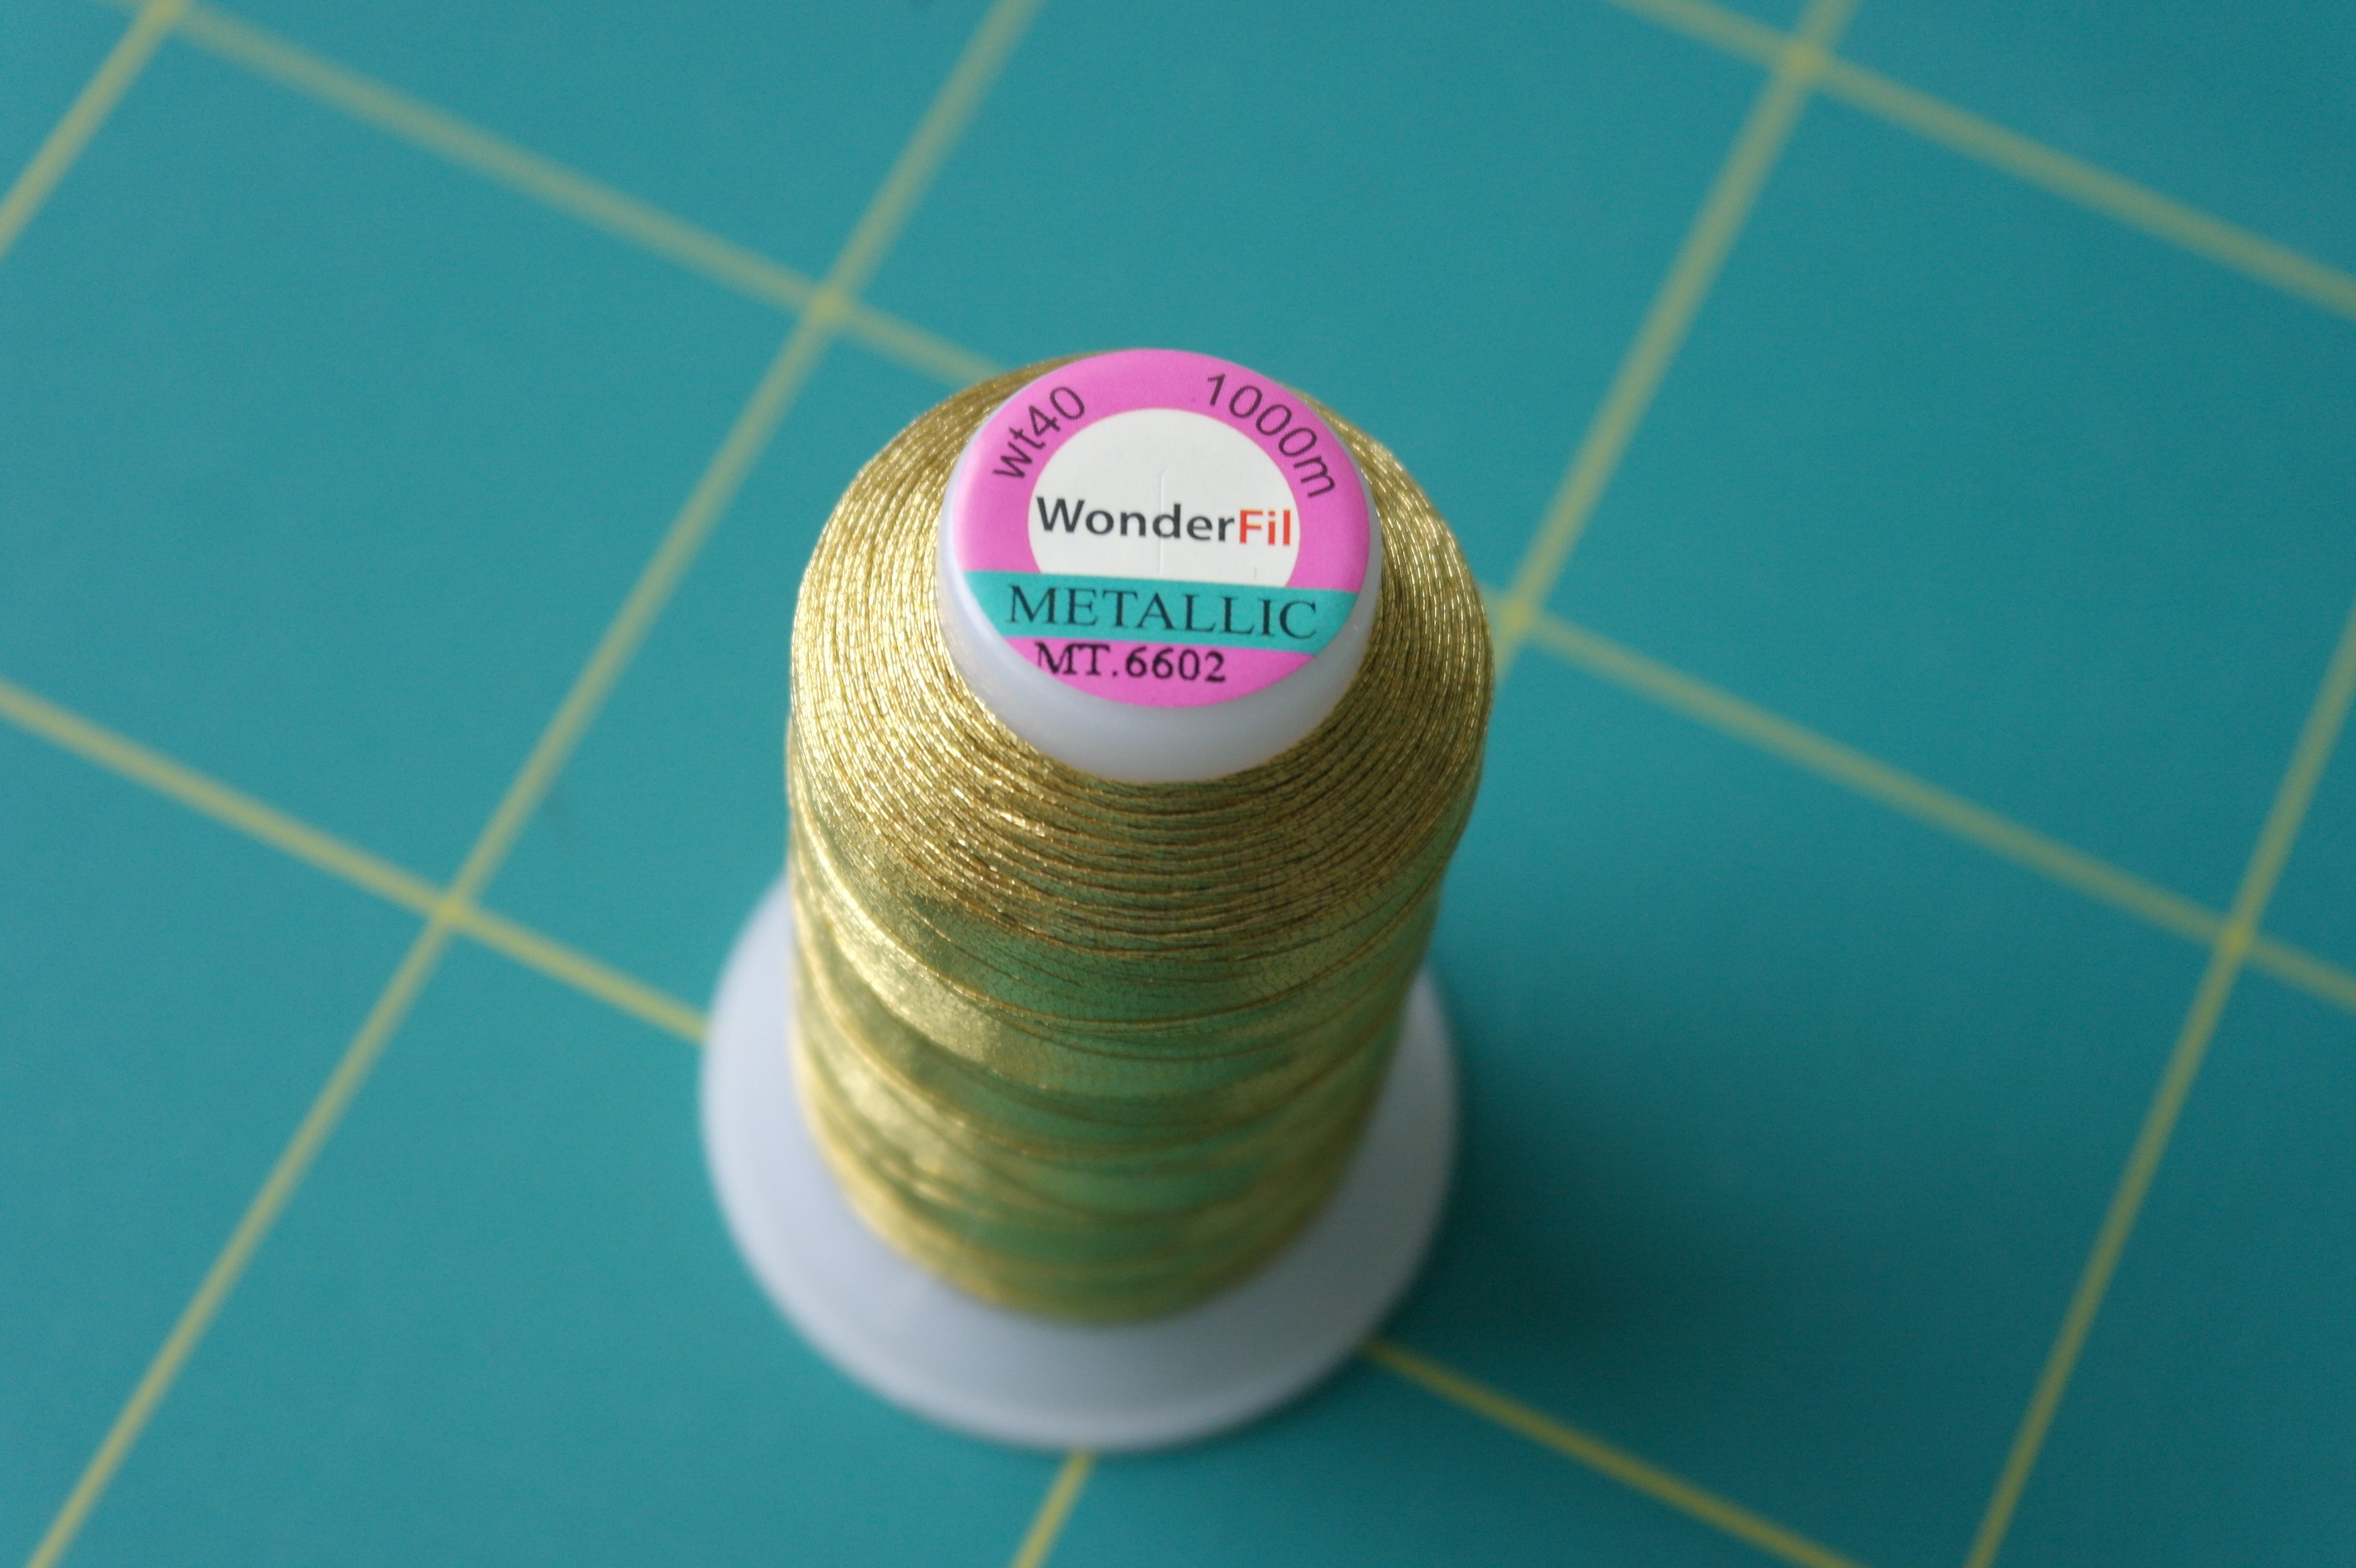
Place the spool with metallic (gold) thread on your machine, or place it on a short distance, away from your machine, to reduce the tension. You will have to place a cone away from your machine, because such a large cone cannot be placed on your spool holder.
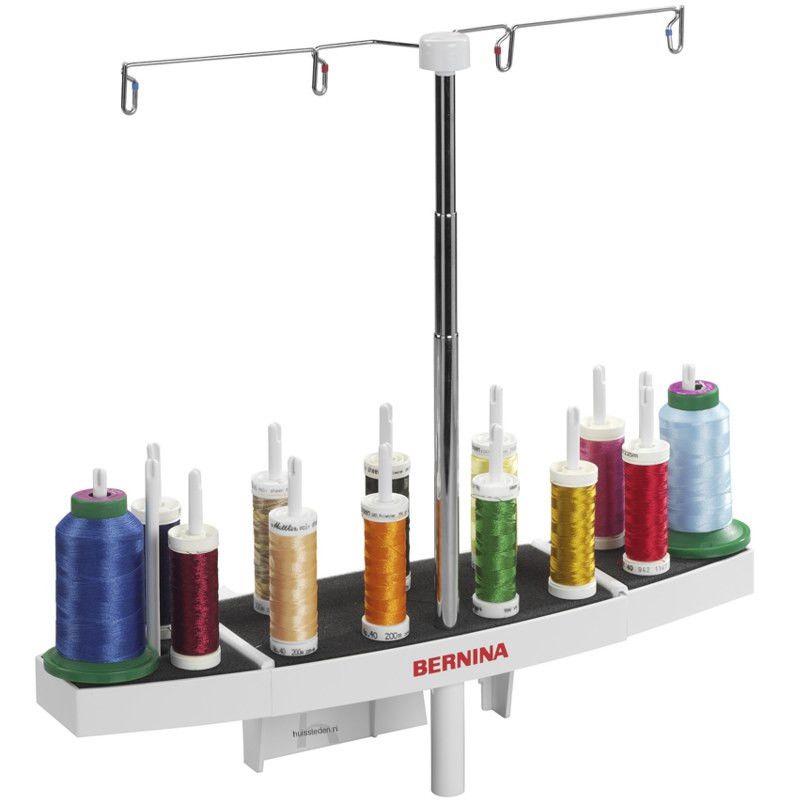
There is – however – a multiple spool holder available for most BERNINA machines: the multiple spool holder can be mounted almost effortlessly on a wide range of sewing machines, and can also be switched between two machines with the greatest of ease. The holder has room for up to 15 spools, enabling quick access to threads of different colors. If need be, removing individual spool pins from the multiple spool holder creates room for larger spools as well as thread cones, enabling you to execute your sewing, embroidery and quilting projects more efficiently. Quick access to a wide range of spools of different colors is a real time saver when working on multicolored embroidery designs. Also, the multiple spool holder’s telescopic thread guide can be adjusted upwards: the thread has a longer path to the needle, allowing difficult threads like metallics to untangle and flow freely before they reach the start of the sewing process.
With regular machine threads, you don’t have to change the upper tension of your machine (with some machines this is set to automatic). But it is important to make a sample first.
Using a thin bobbin thead, like DecoBob/Wonderfil, you don’t have any trouble with any top thread you will use. I always match the upper and bobbin threads colorwise, to be sure nothing is distorted.
For a sample: use all materials which are also used for your block: off-white backing, 100% Bamboo batting, Vlieseline L11 and the black fabric on top. Make samples with one repeat/stitch and check if the tension is ok.
Be sure to take the bobbin thread to the surface, before you start making stitches. You can use the cutting function of your machine, when available, but you can also resurface the bobbin thread at the end of the stitches: you will have to manually finish the ends off afterwards.
The Crystal, which is drawn onto the black (batik) fabric, will be filled with stitches. You can make the Crystal with a straight stitch, and choose to embellish everything later with beads, sequins, Hotfix etc. Or just choose a decorative stitch and beautiful threads, but in that case it is wise to know up front, how the stitch of your choice is made. Is the stitch wide, large, small, etc.
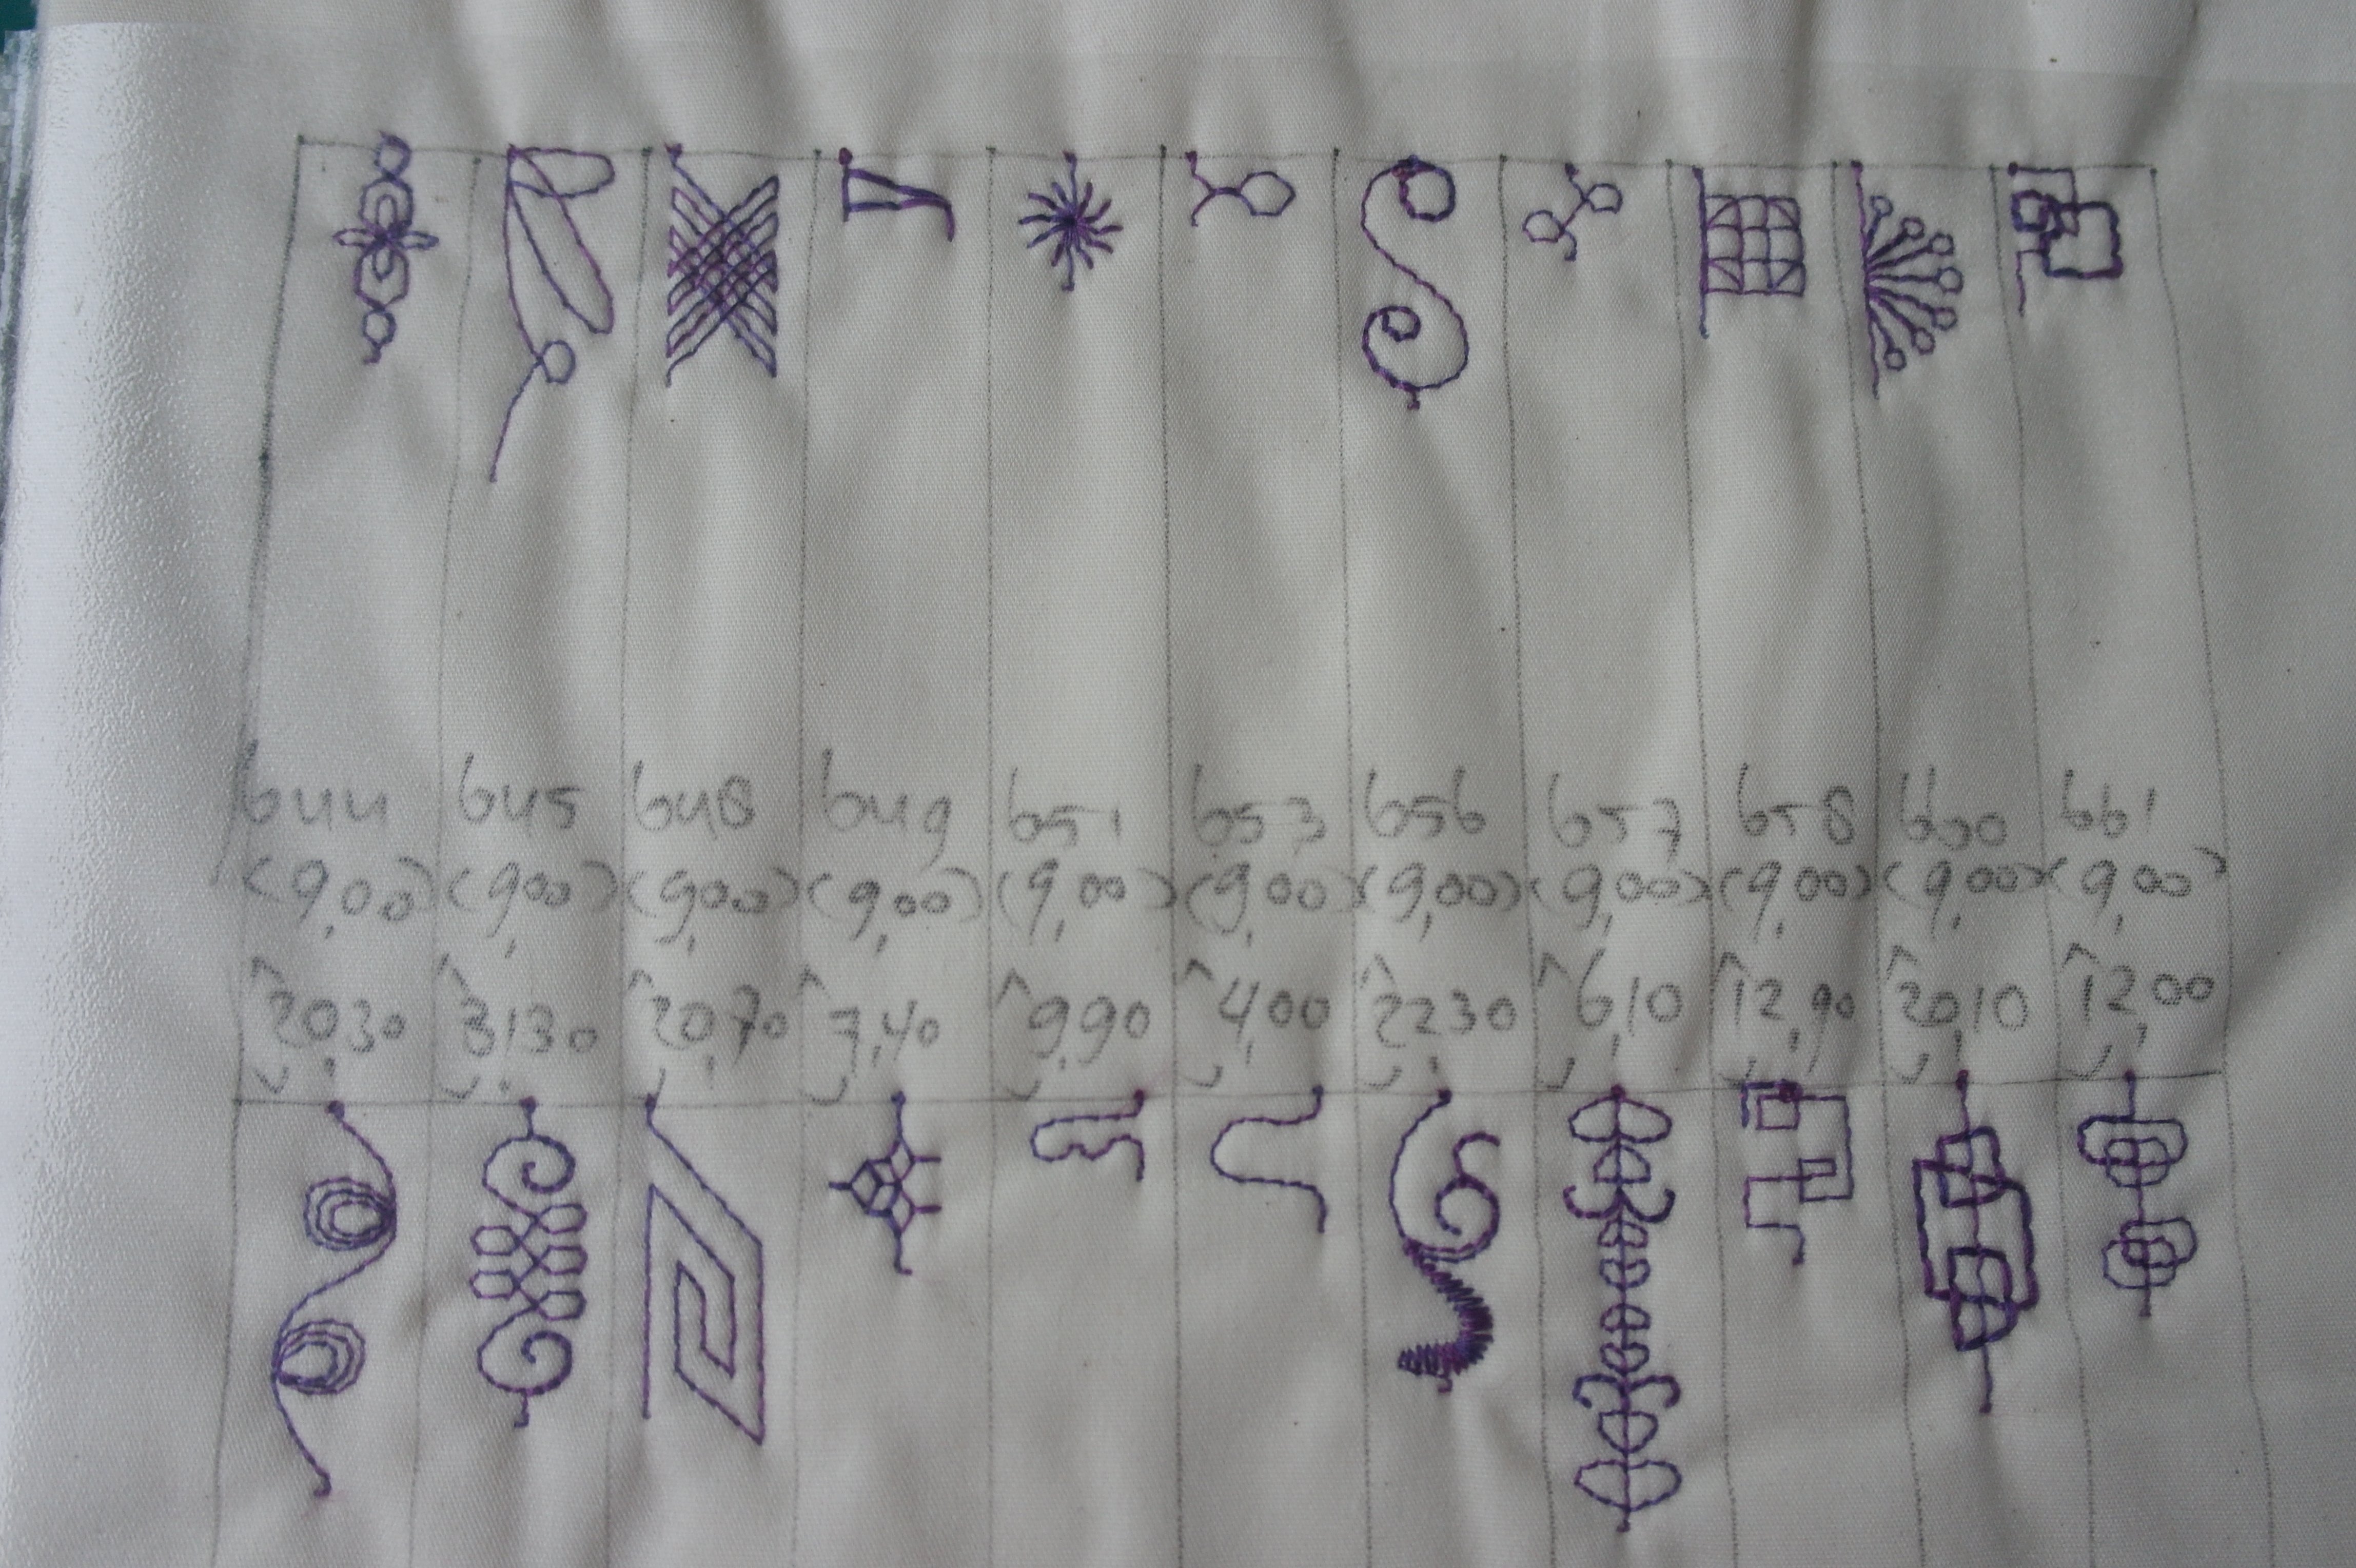
In the last months, I have made samples of ALL stitches available on my BERNINA 770QE, just for the record: each stitch just once, to know how wide they are, how long and what shape they have, all via the default settings of the stitches. I have filled an actual folder, filled with samples of these stitches. Of course you can use your manual, to see the stitches up front, but there they seem to be all of the same length. And that is NOT the case! Some stitches are just a few mm, otheres are 4,5 cm long etc. If you want to make decorative stitches on the short lines fo the Crystal, you need to know which size stiches will fit there.
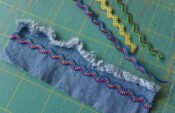
The basic lines of the Crystal are three straight lines, crossing each other at an intersection in the centre. I will fill these lines with straight stitches, using the B770QE. I could make these with decorative stitches, but then it will be too busy. Placing decorative stitches on the smaller lines of the Crystal will give it just the effect I am looking for. So the base will be made out of straight stitches, the other lines with decorative stitches.
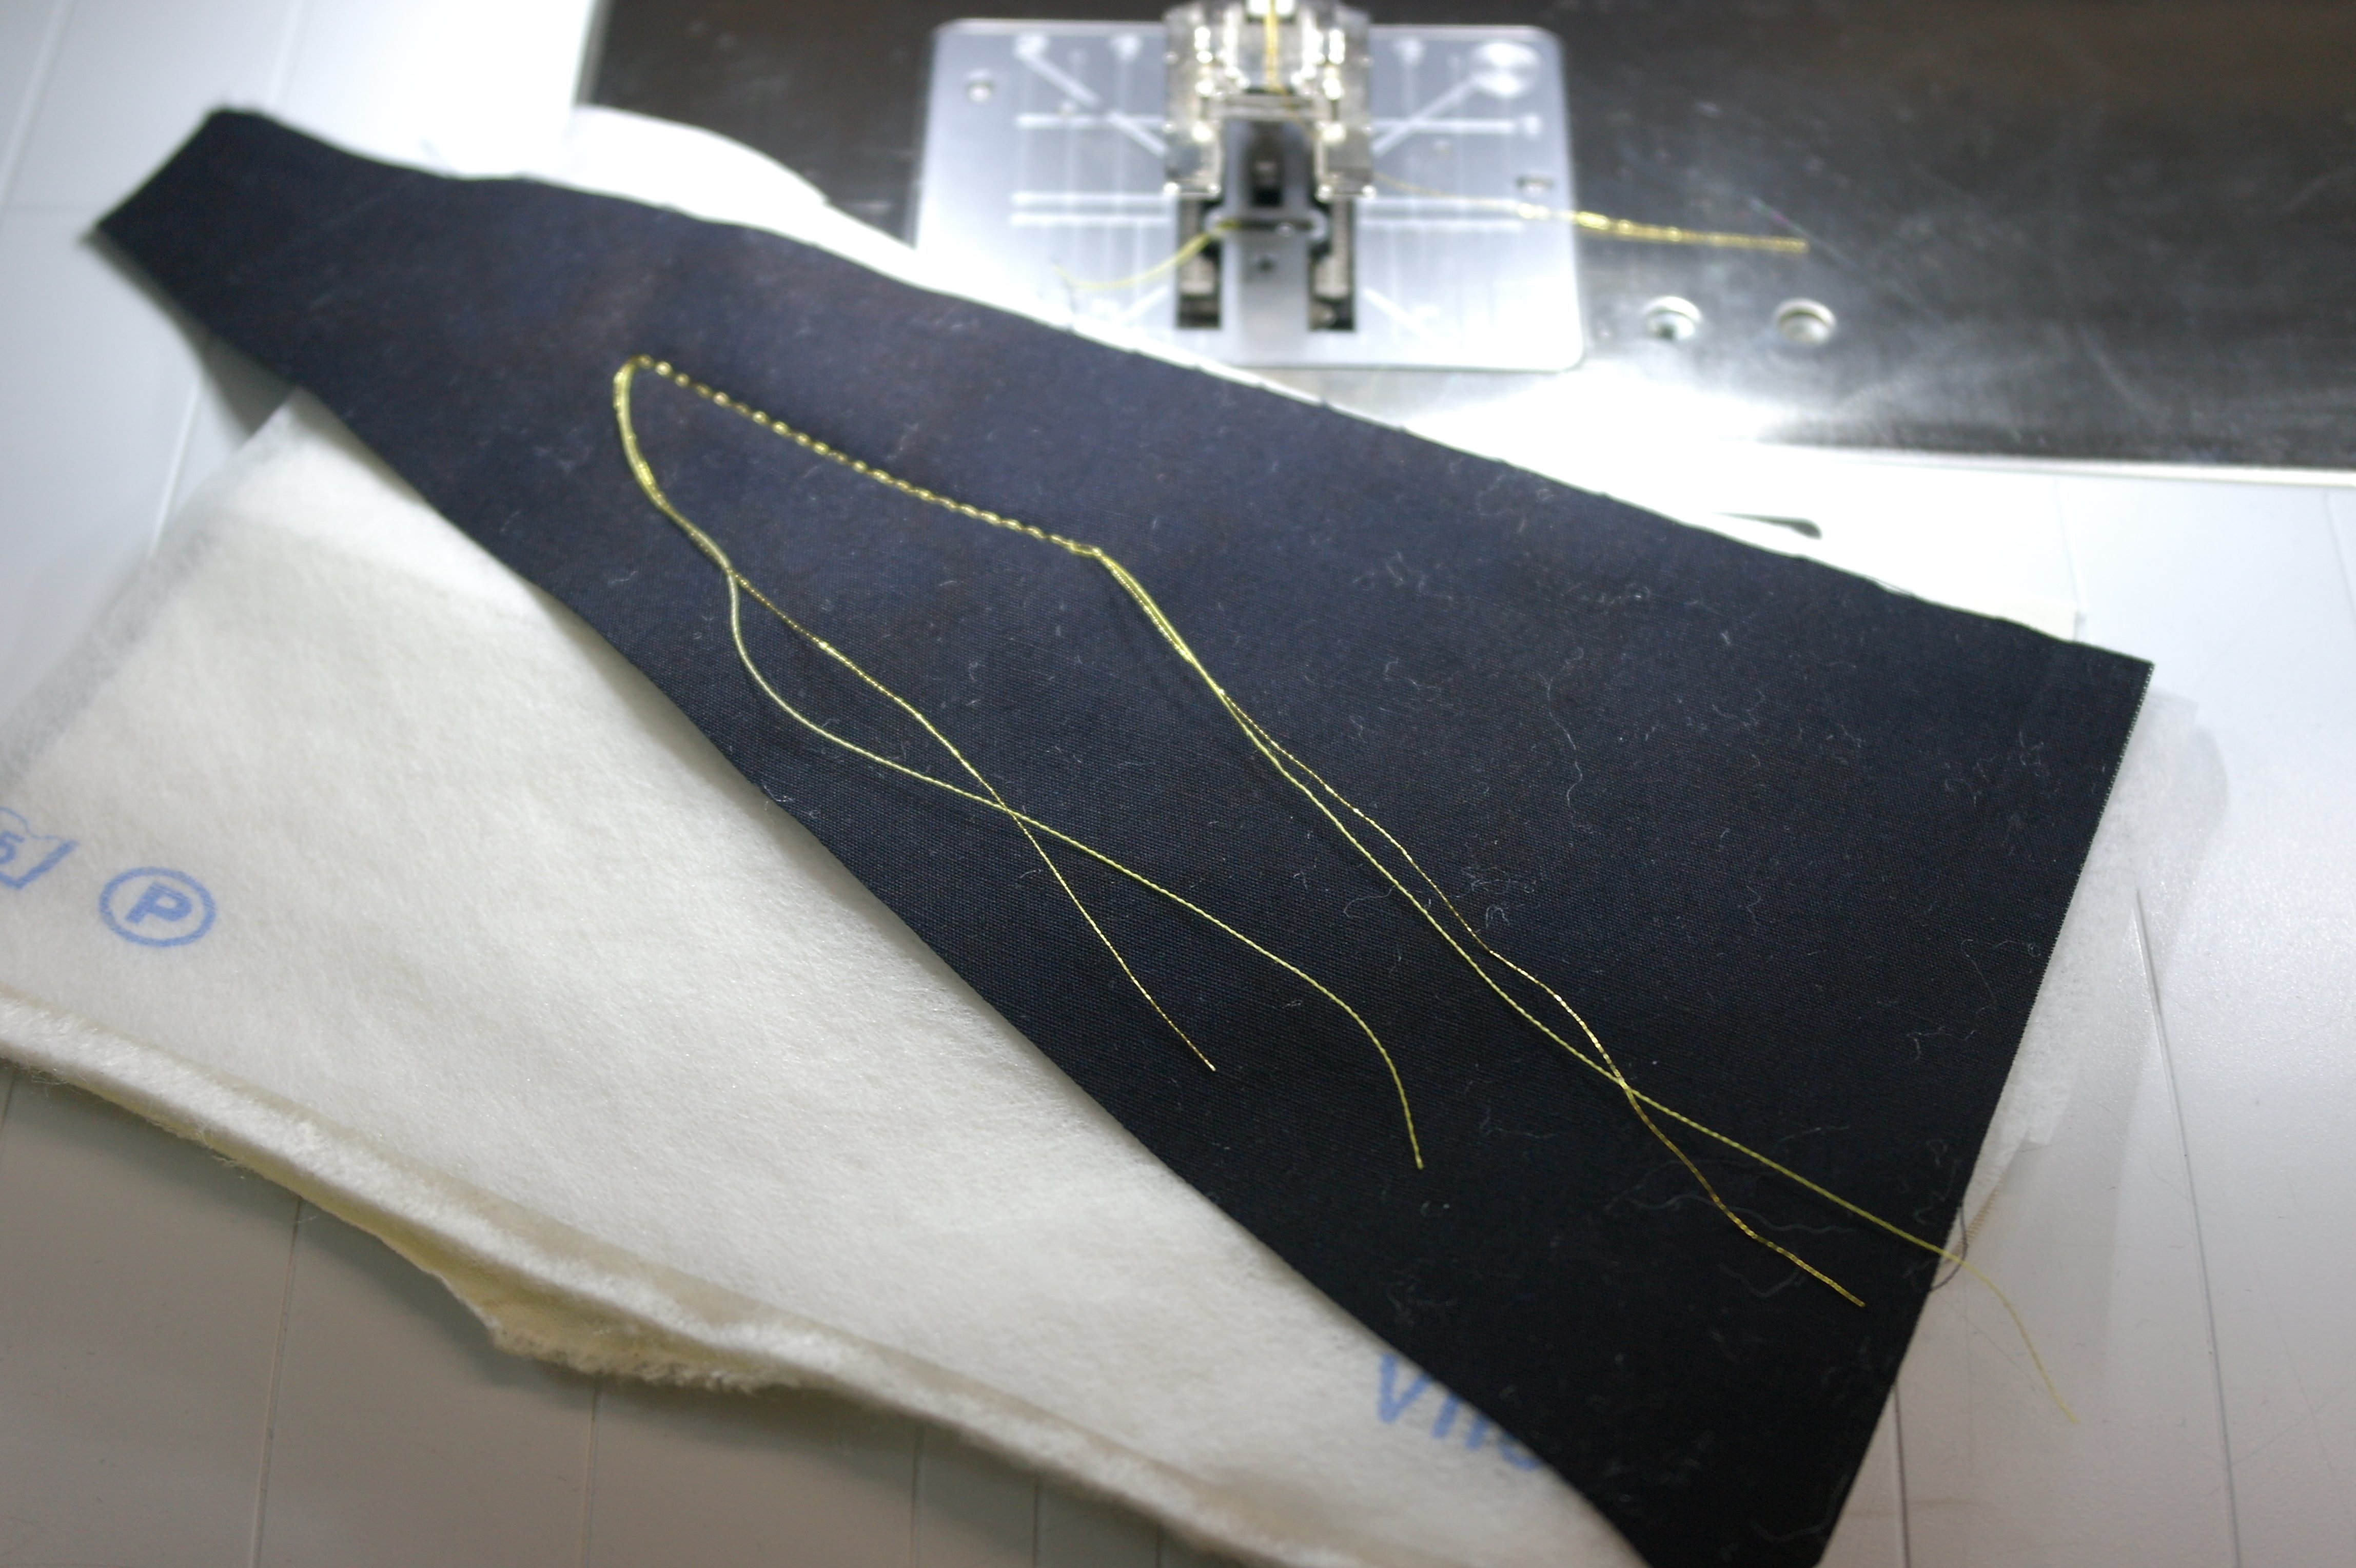
The three basic lines I’ve mentioned before will be made first, to make the actual base. I have made a sample with straight stitches: bringing the bobbin thread to the top, hold both top- and bobbin threads, making stitches, and bringing the bobbin thread back to the top at the end prevents ‘birds nests’ at the back (bulk of threads). The stitches are ok, the length is good (stitches a bit larger than normal, when using metallic threads), and the upper tension was ok too.

I’ve stitched the three basic lines of the Crystal, with gold colored metallic thread, the same way as I did with my sample.
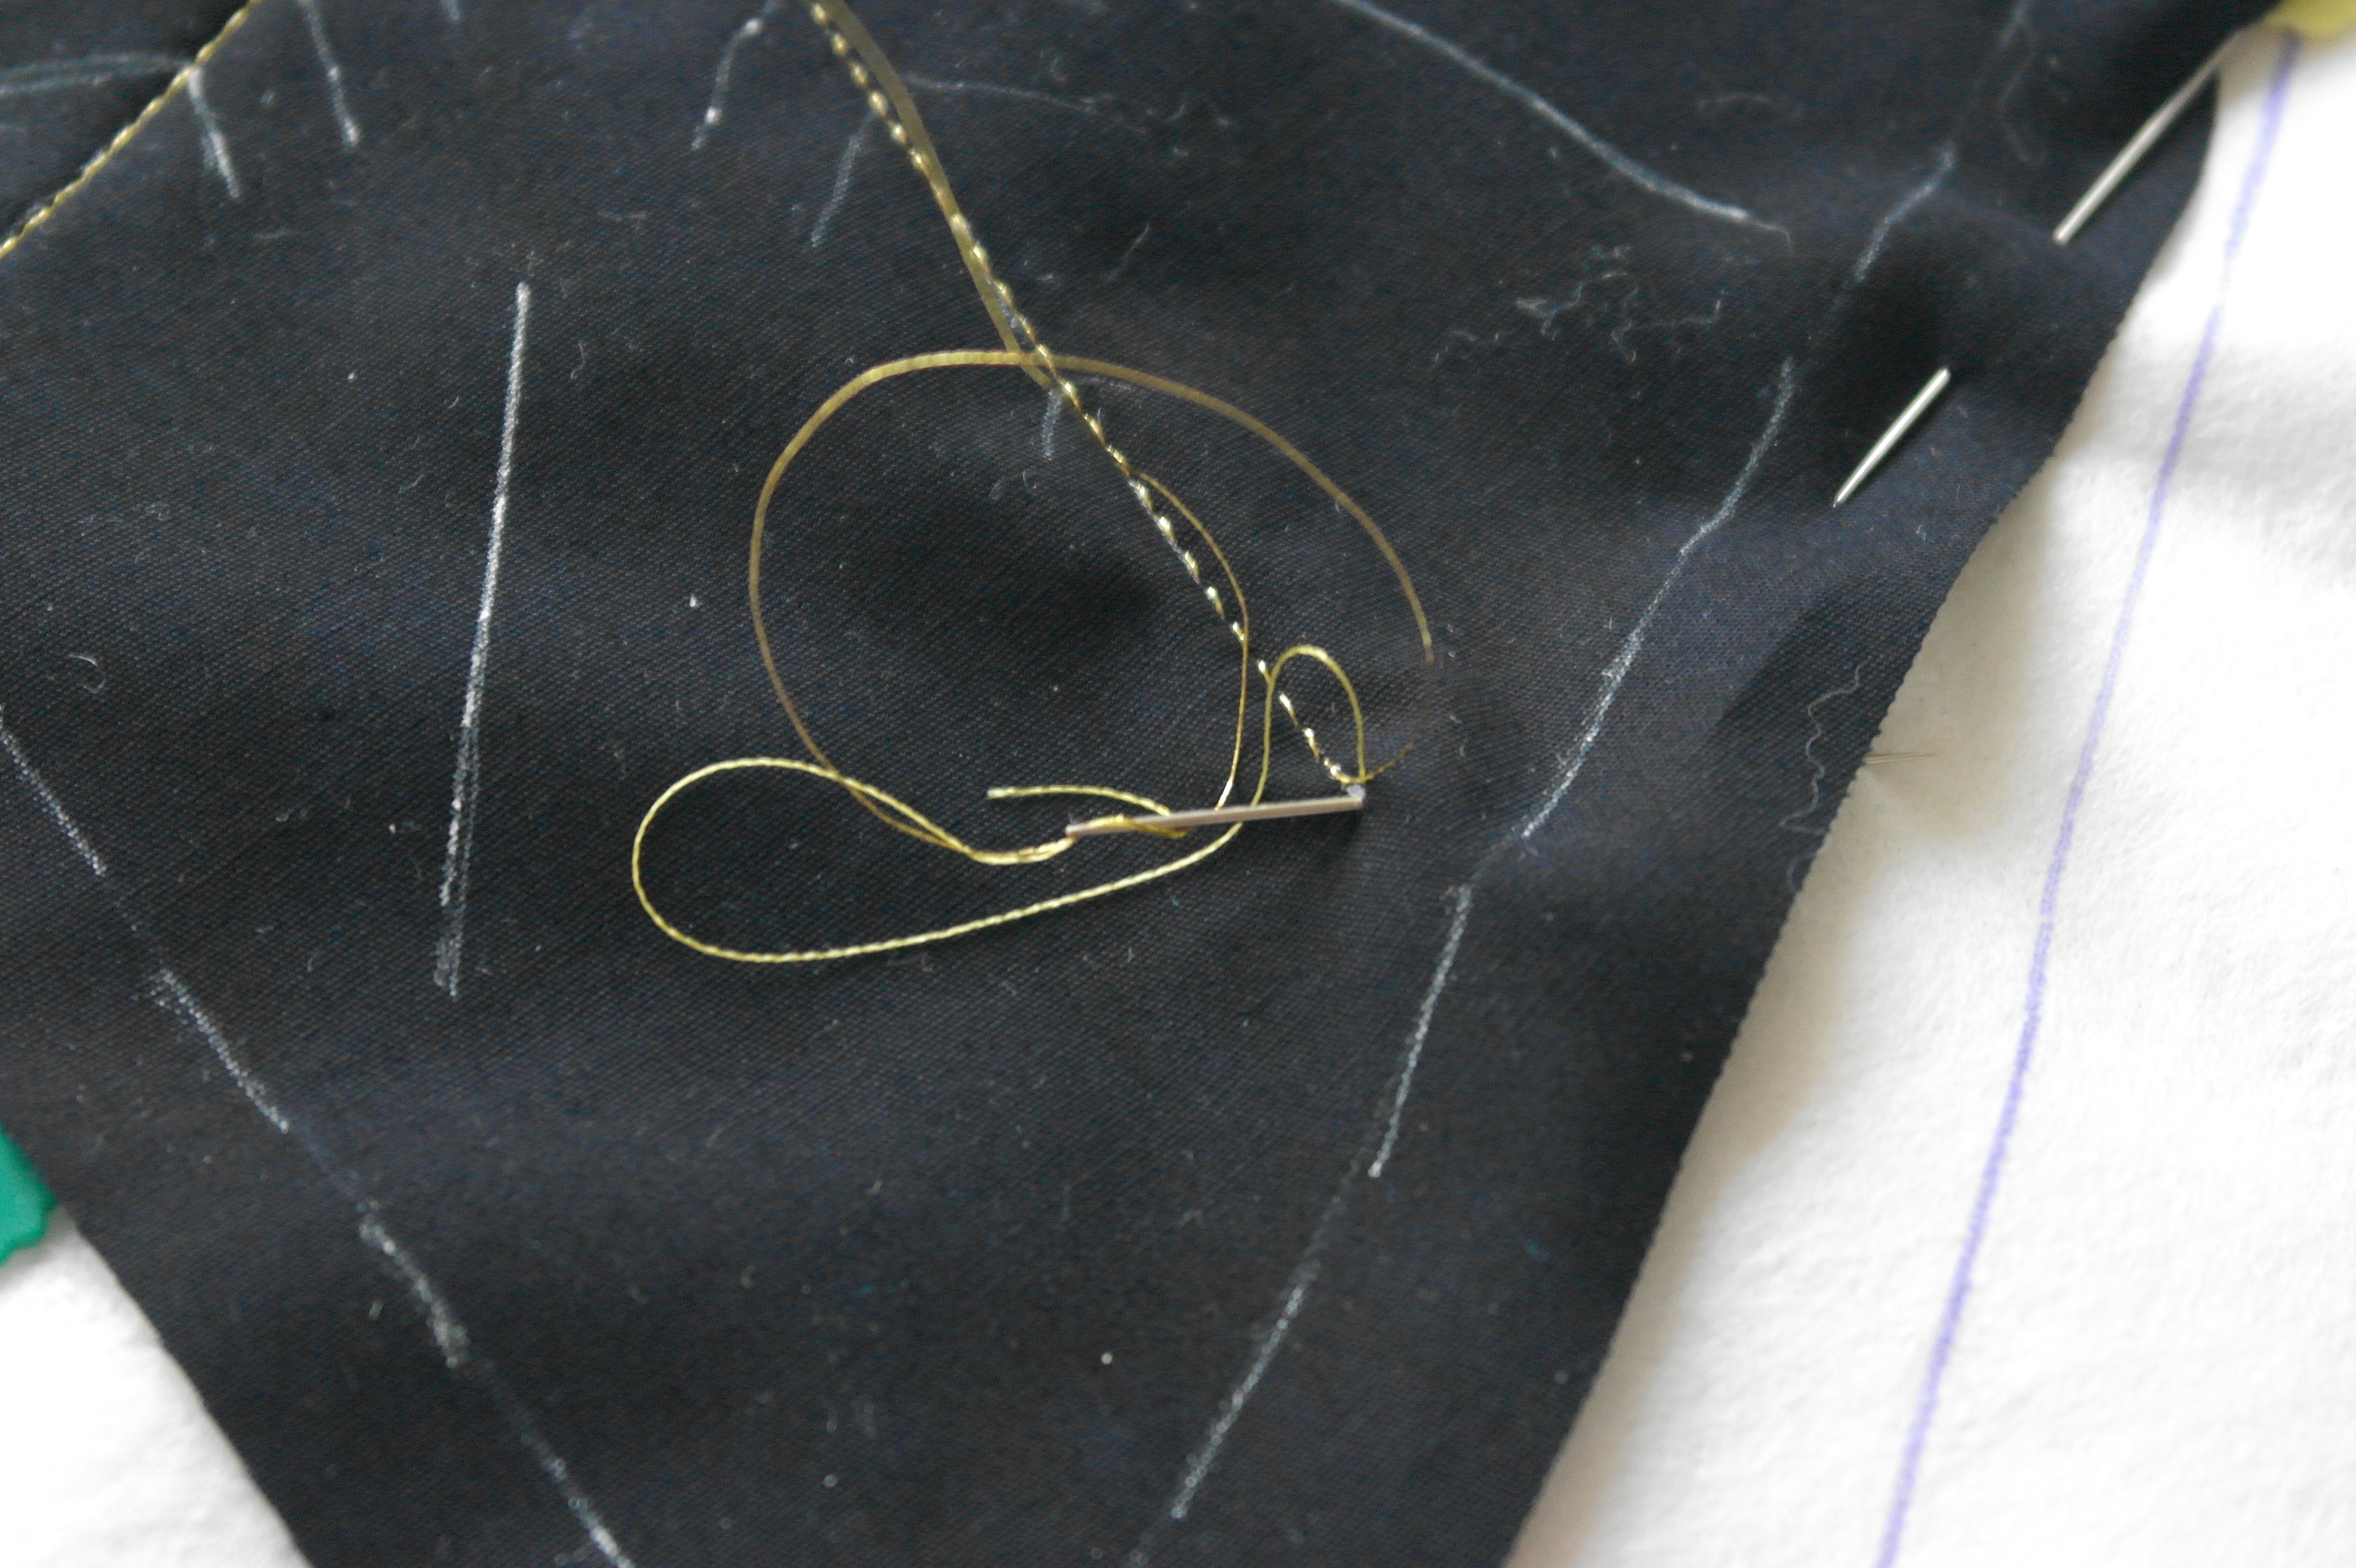
Beginning- and end threads are finished by working them through the top and batting, all by hand.
Now I can check the samples from my folder, to see how stitches are made, and if they are suitable to make the first decorative stitches. I have made the samples for reference, but that doesn’t mean that I cannot change stitches. There is always a possibility to enlarge them, make them smaller, shorter or longer. I have to check too, how long they are if I want to repeat them 4 or 5 times, just to be sure they fit on the lines I have choosen. So make a lot of samples from the remnants of the materials for the sandwiches.
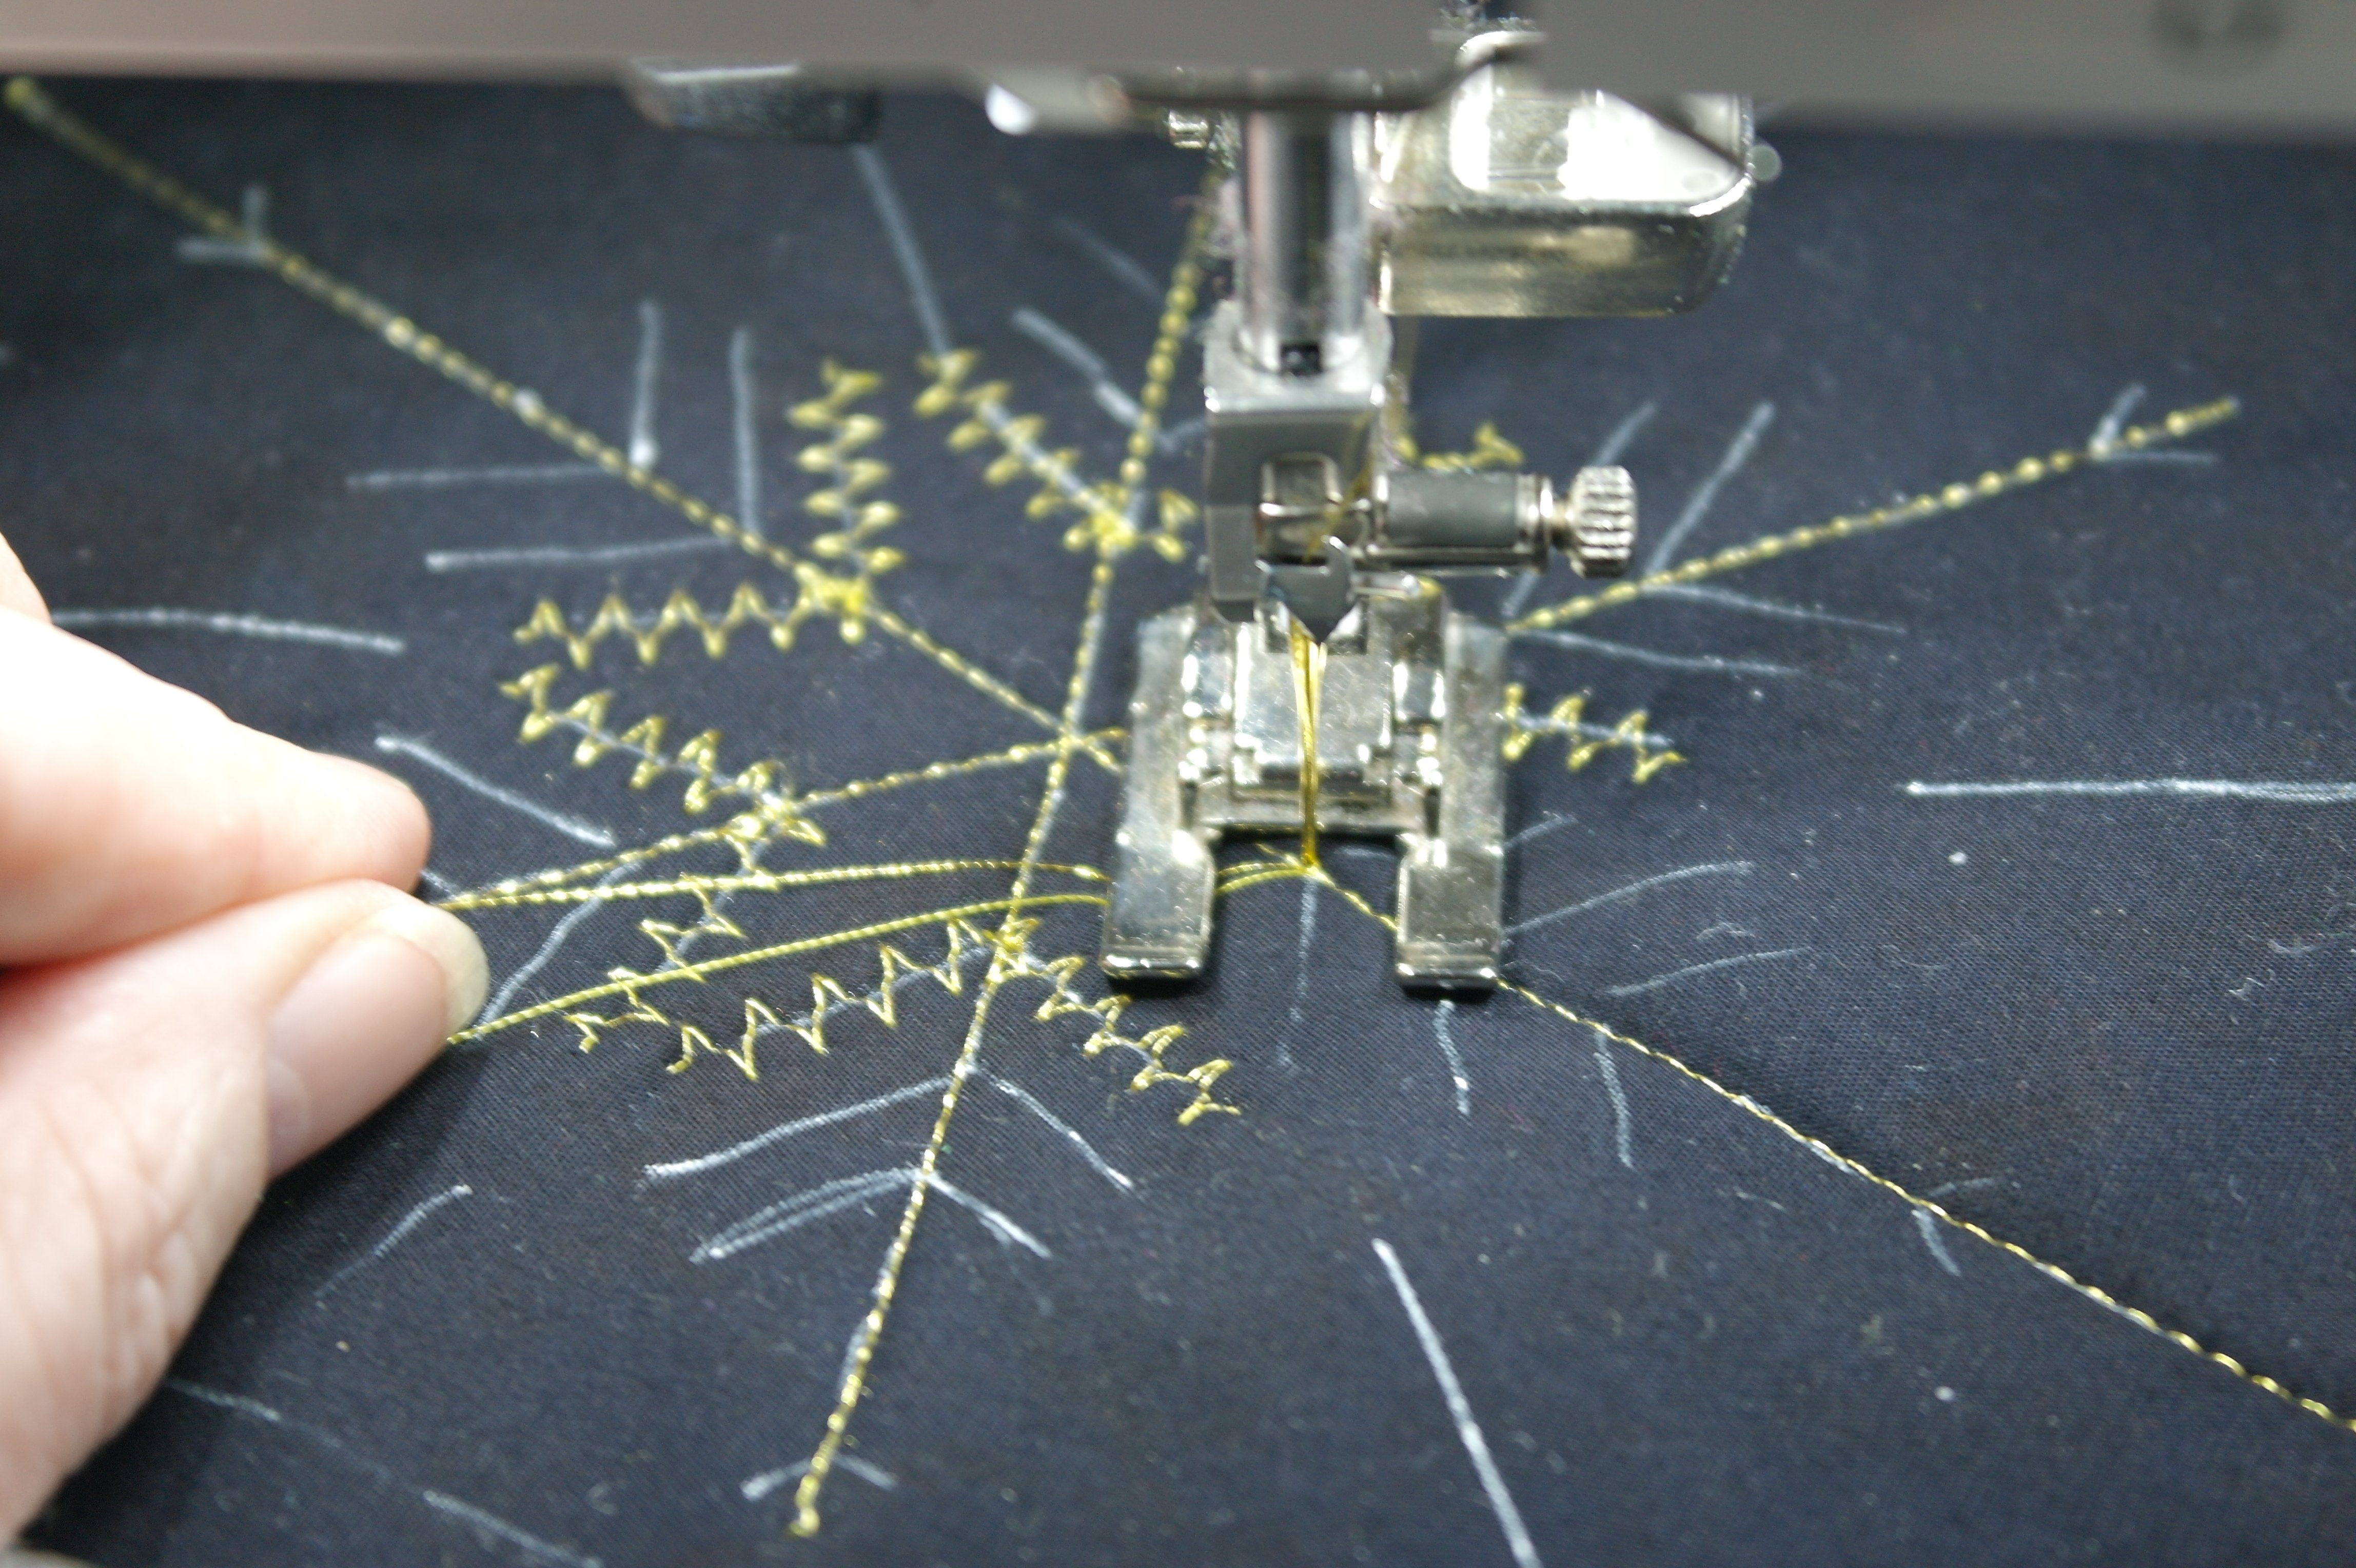
I have choosen a simple lock stitch to fill the inner ‘star’, (stitch 12 of my B770QE), which is also very decorative, made with metallic thread. I have started from the base line, pulled the bobbin thread up, and made a certain number of stitches (in this case a repeat of 6). If the beginning- and end of a decorative stitch are not neatly finished, don’t worry: you can always sew beads, sequins, Hotfix stones etc. at these marks. That would even give your Crystal the necessary shine!
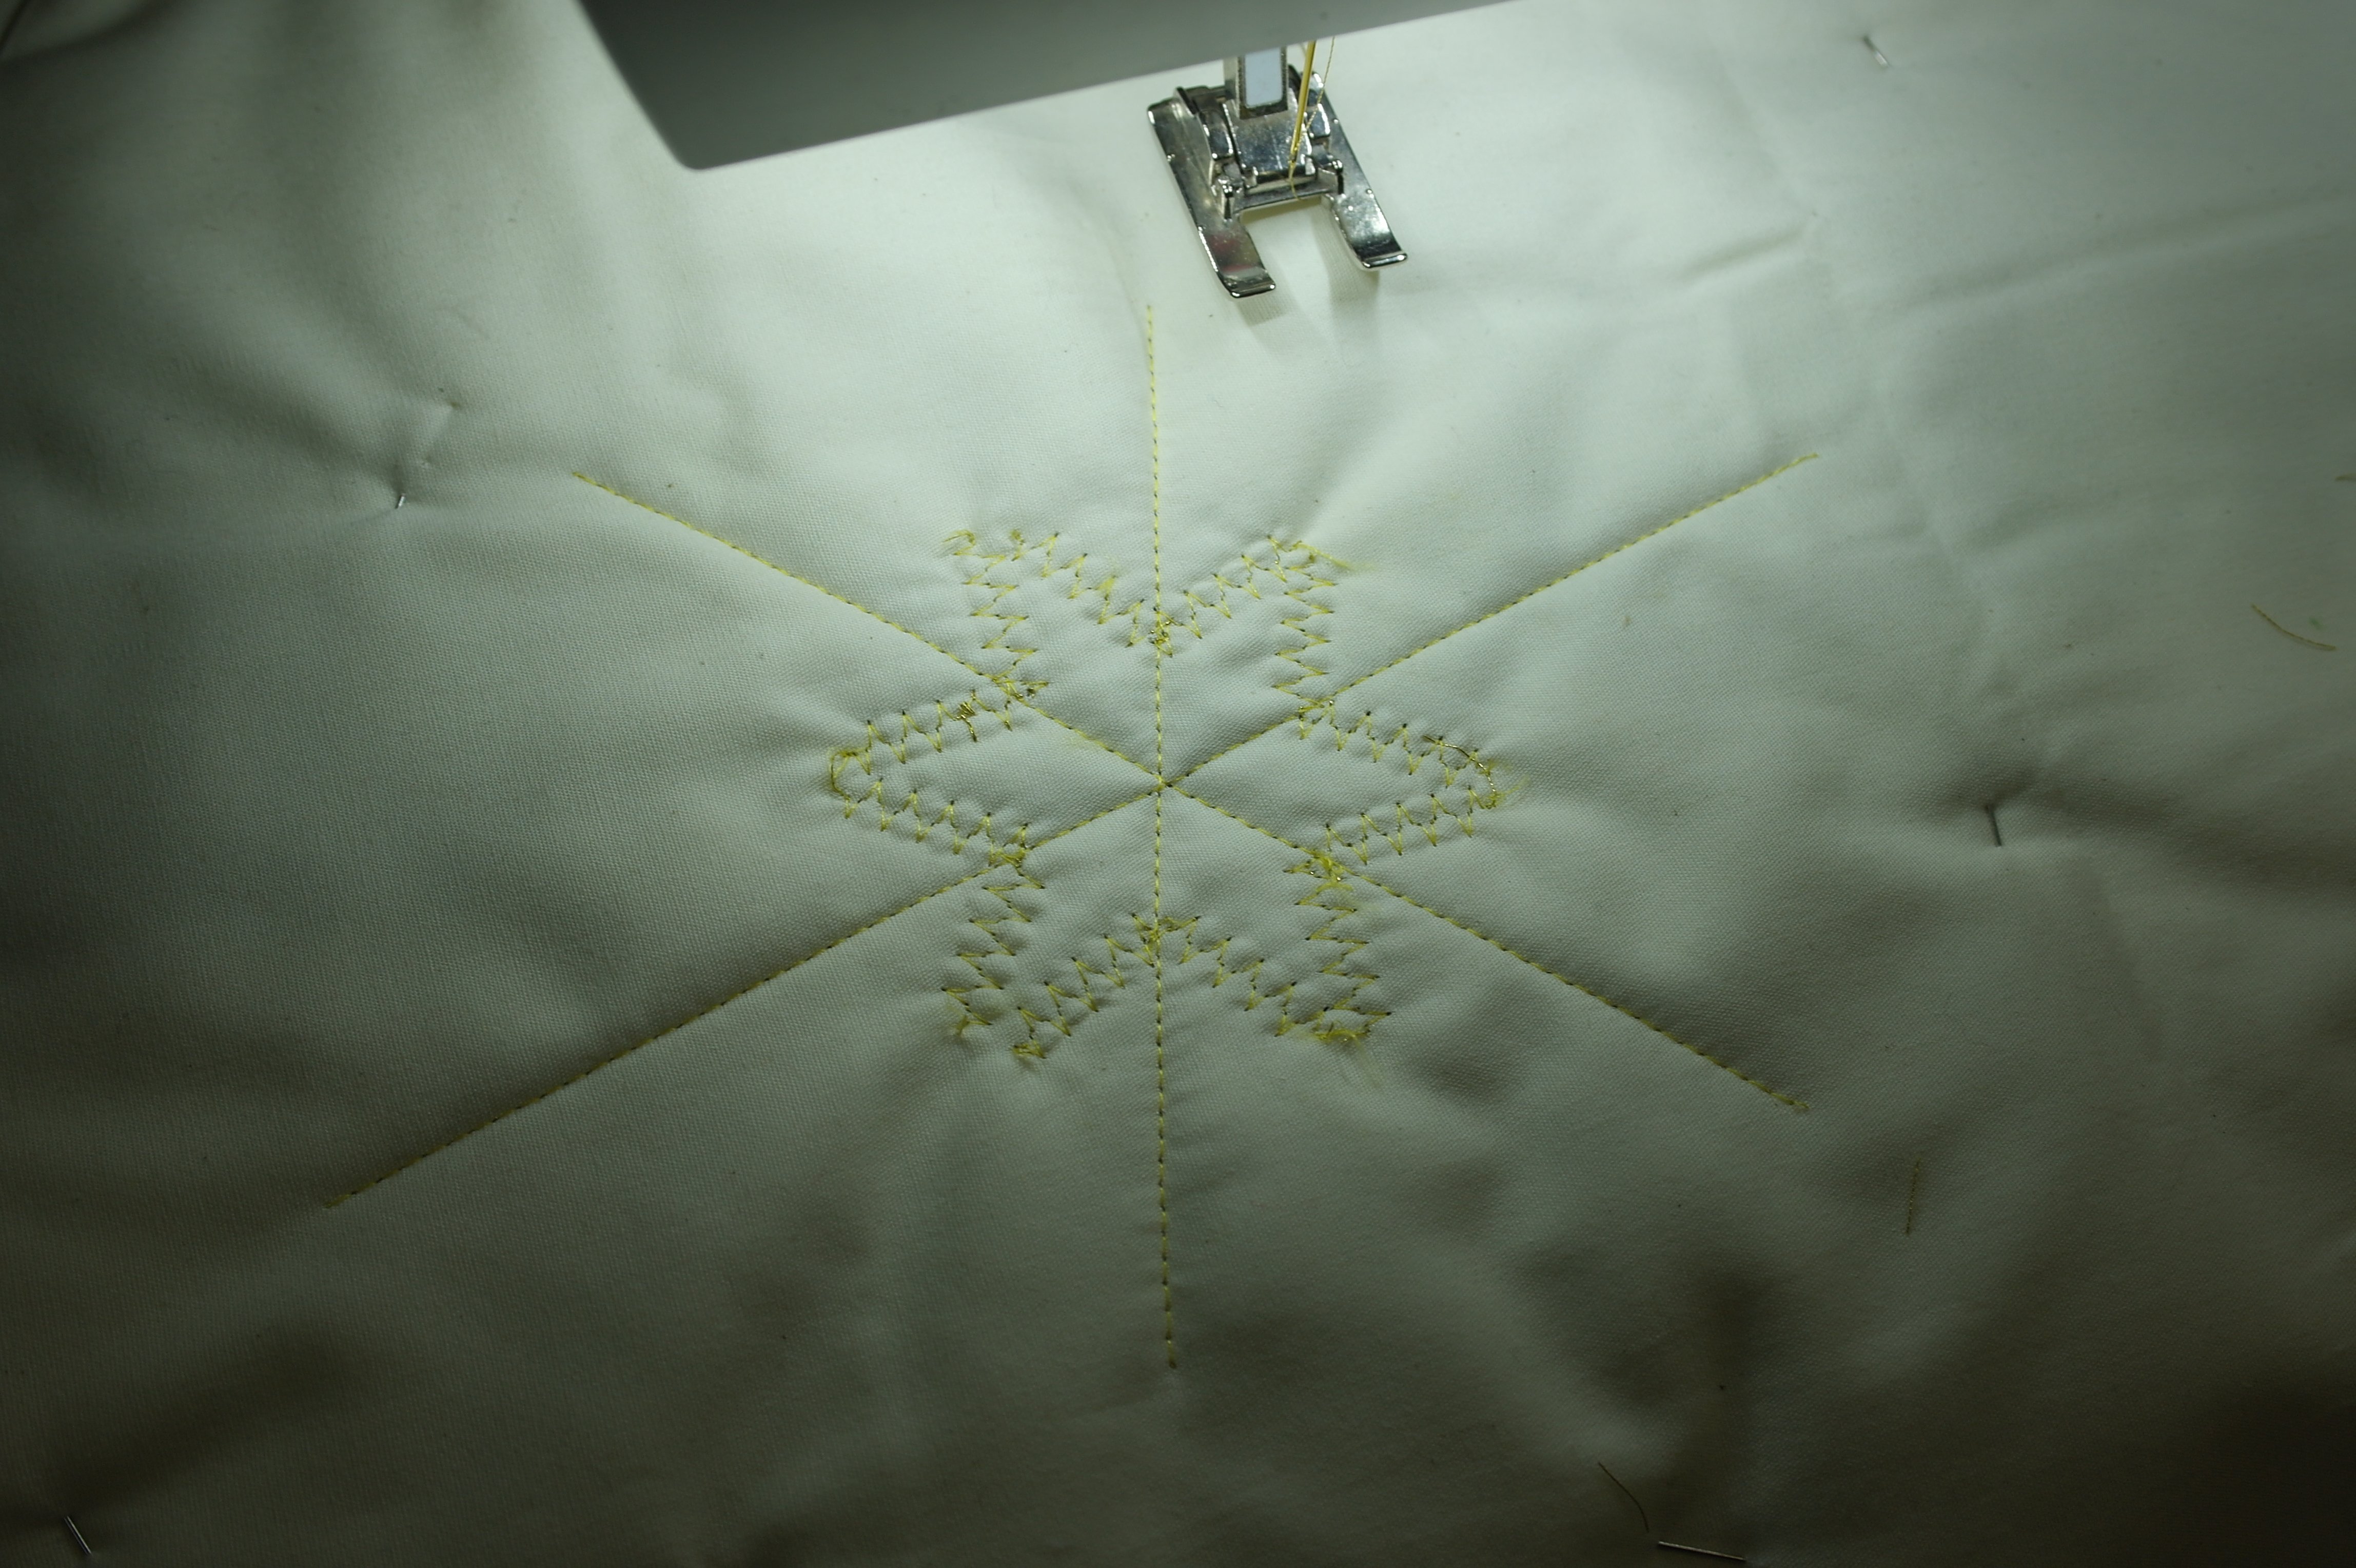
The back of the sandwich shows that the tension is fine: the star looks ok.
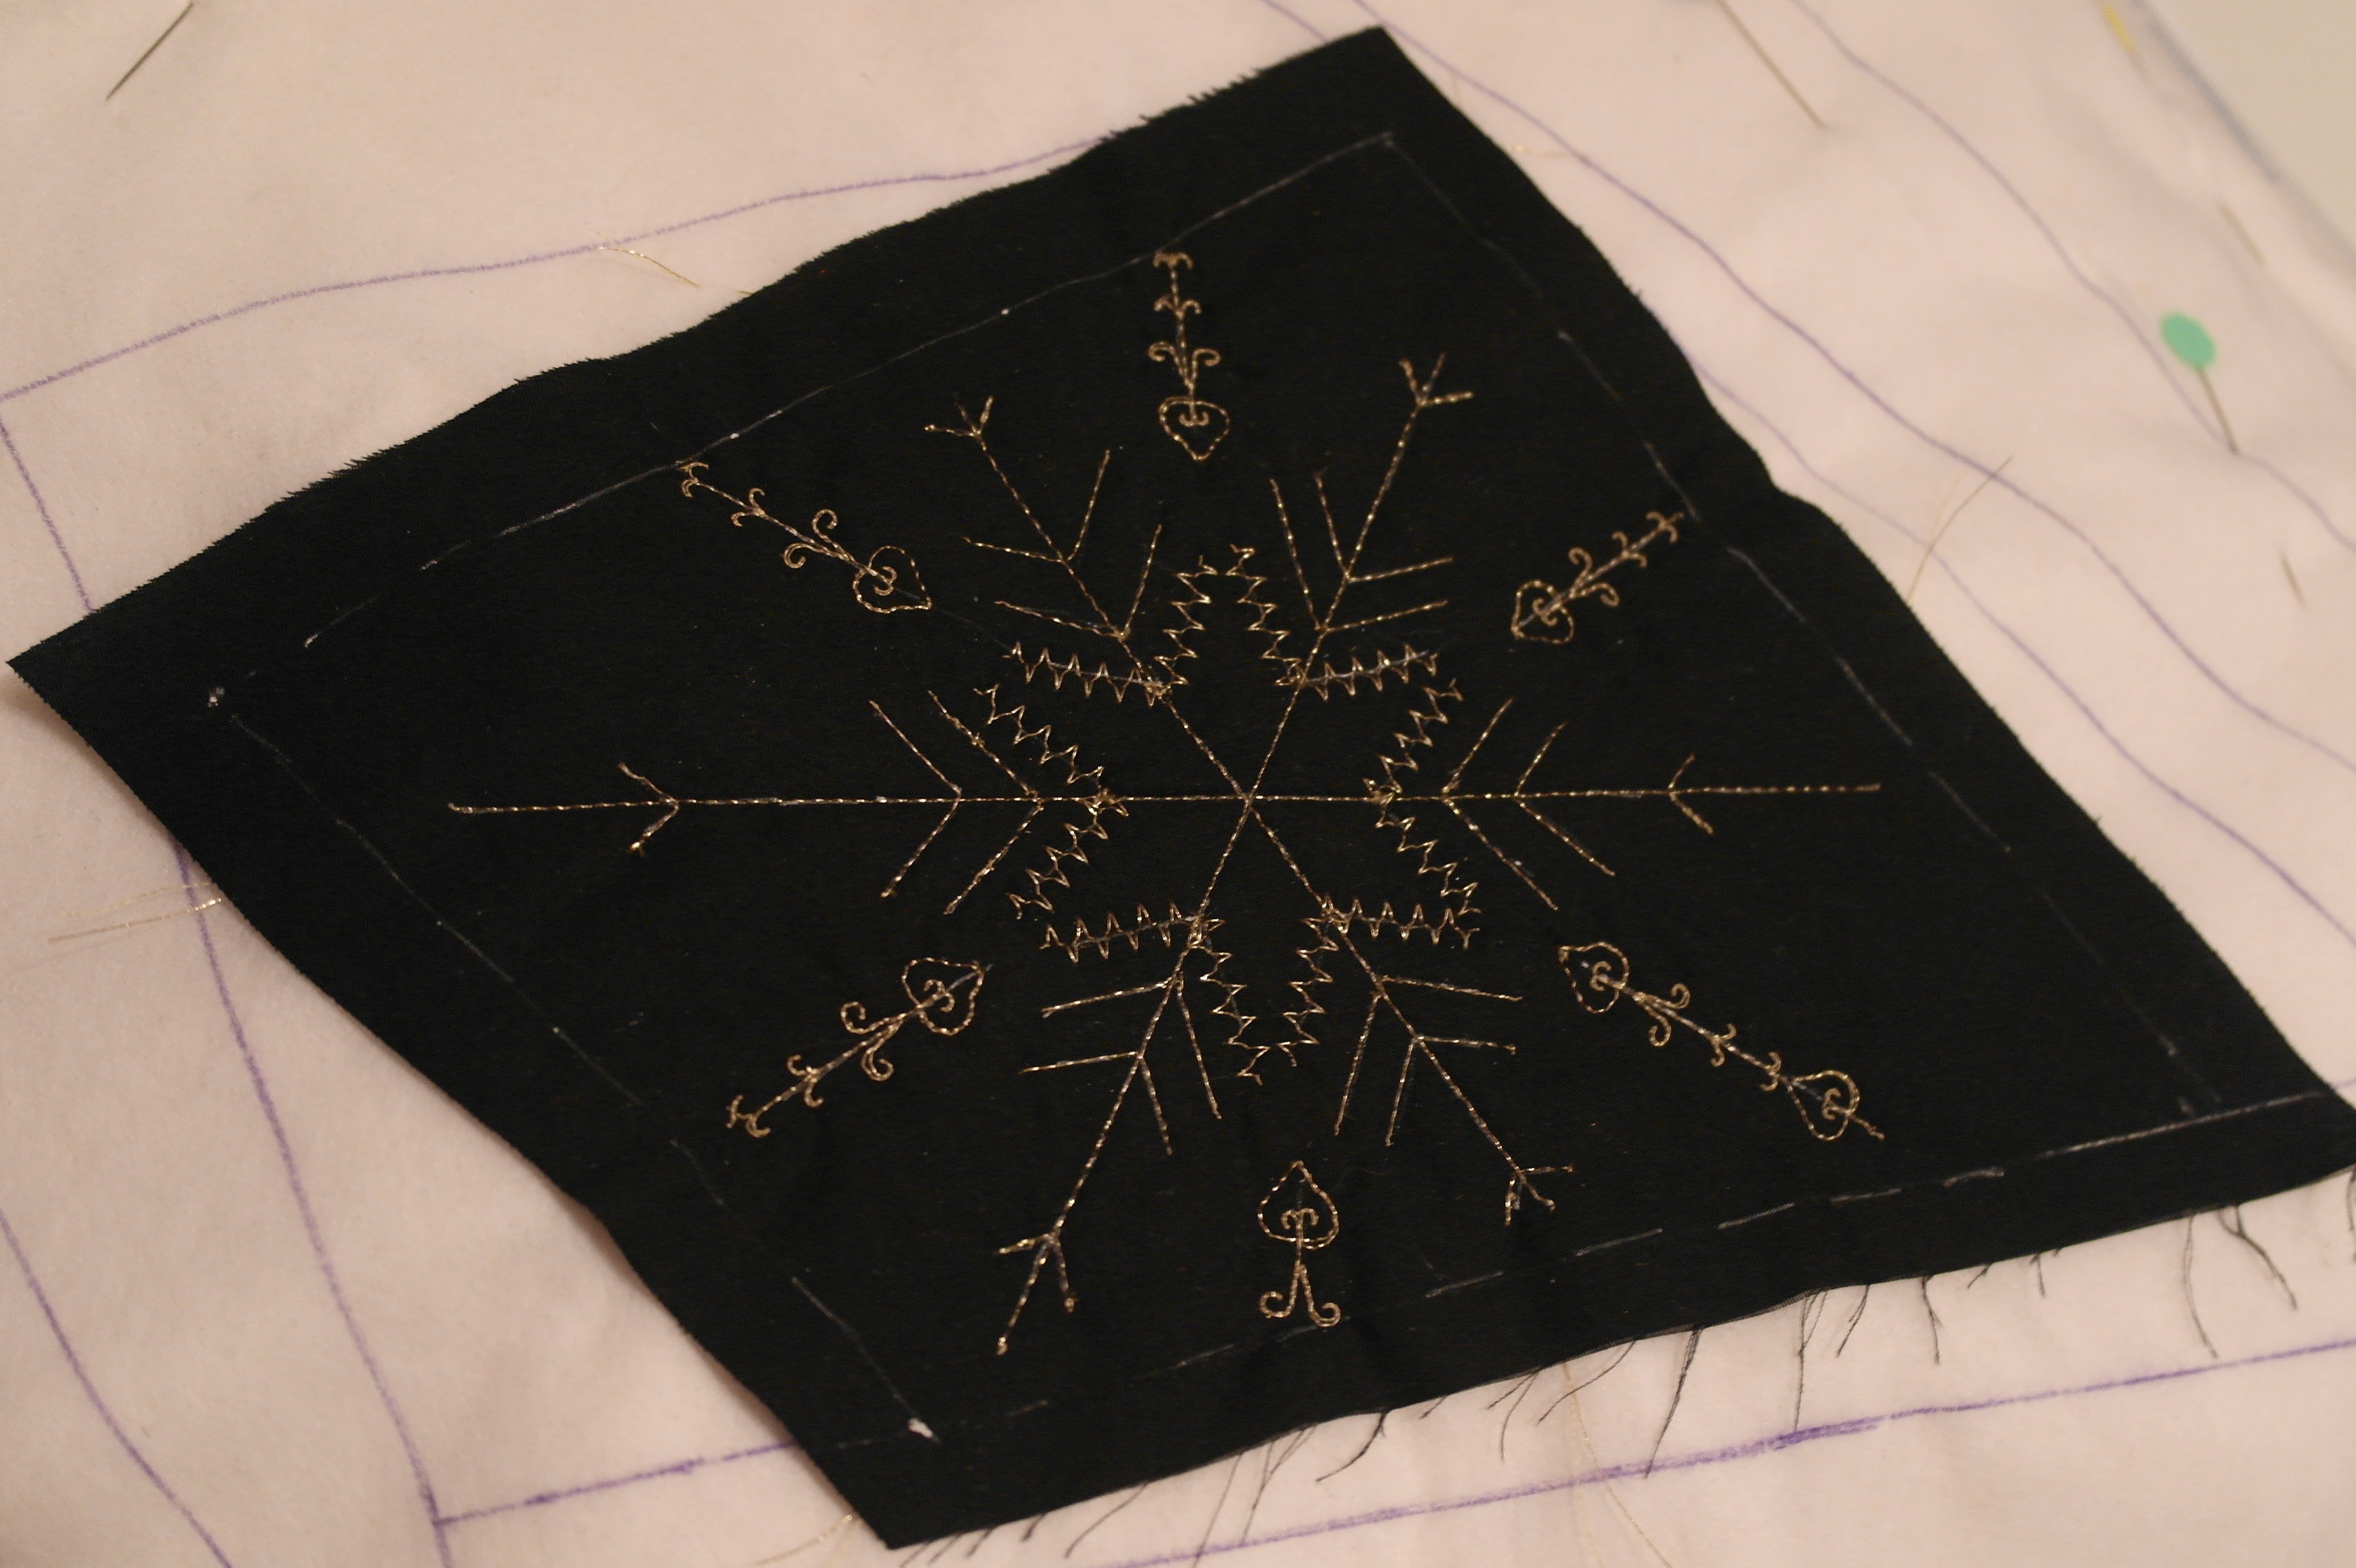
I have made straight stitches on all the other short lines of the Crystal. For the seperate lines in between I have used stitch 151 of the B770QE. The center part is ok: it shouldn’t be too busy, you can embellish this later. Just make sure you like this first appearance.
At this point you can remove the water soluble lines: use a plant spray with clear water. Make sure the lines are completely gone! Now you see why it was important NOT to draw these line too thick. The thicker you have drawn them, the more difficult it is to remove them. If you still see parts of the lines, you can cover them later on with beads, sequins, Hotfix stones etc. Make sure your sandwich is completely dry, before working onto the net stage.
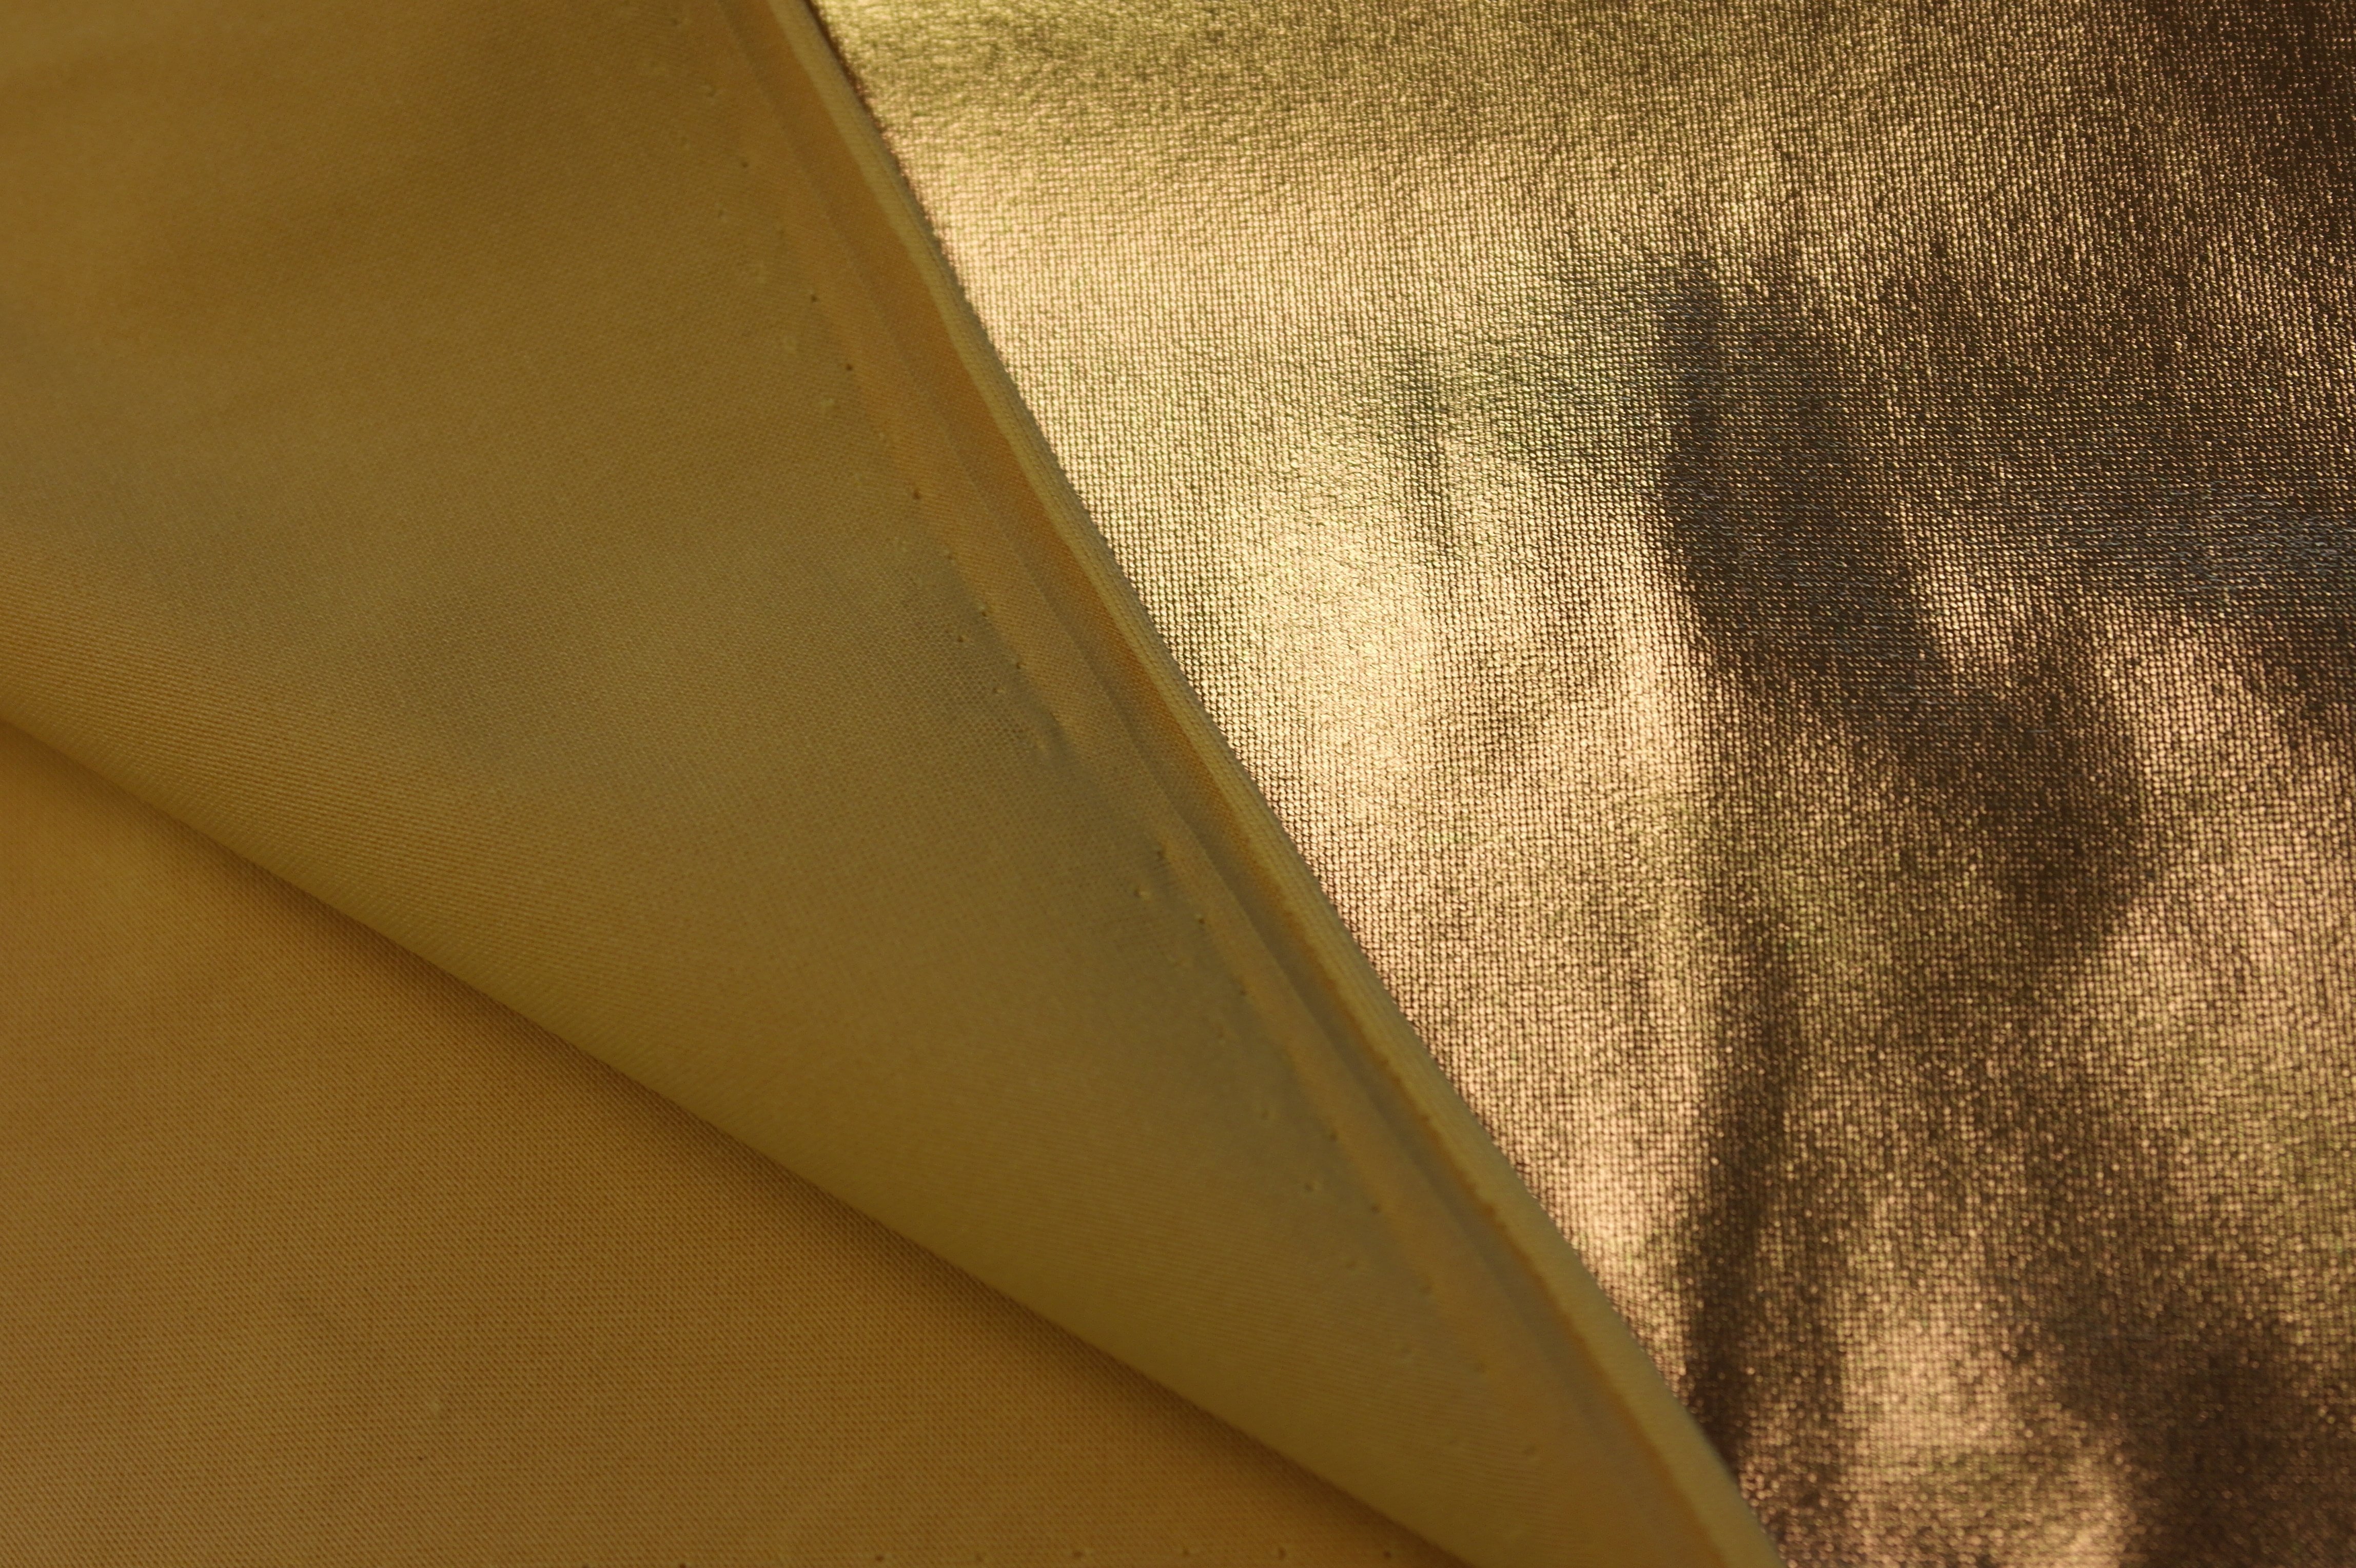
Now it is time to use your special fabrics: not just quilt fabric, but also festive fabrics, fabrics for garnments (not too thick!) etc. I have purchased a number of Lamé fabrics (gold, rust and purple): Lamé is produced from a combination of metallic fibers and polyester or nylon fibers. This fabric is not completely metal but rather metal coated plastic. This is a fabric you cannot iron! It will burn or melt, so be careful with this. It can be a firm, stirdy fabric, depending on the quality. A festive fabric for a festive project!
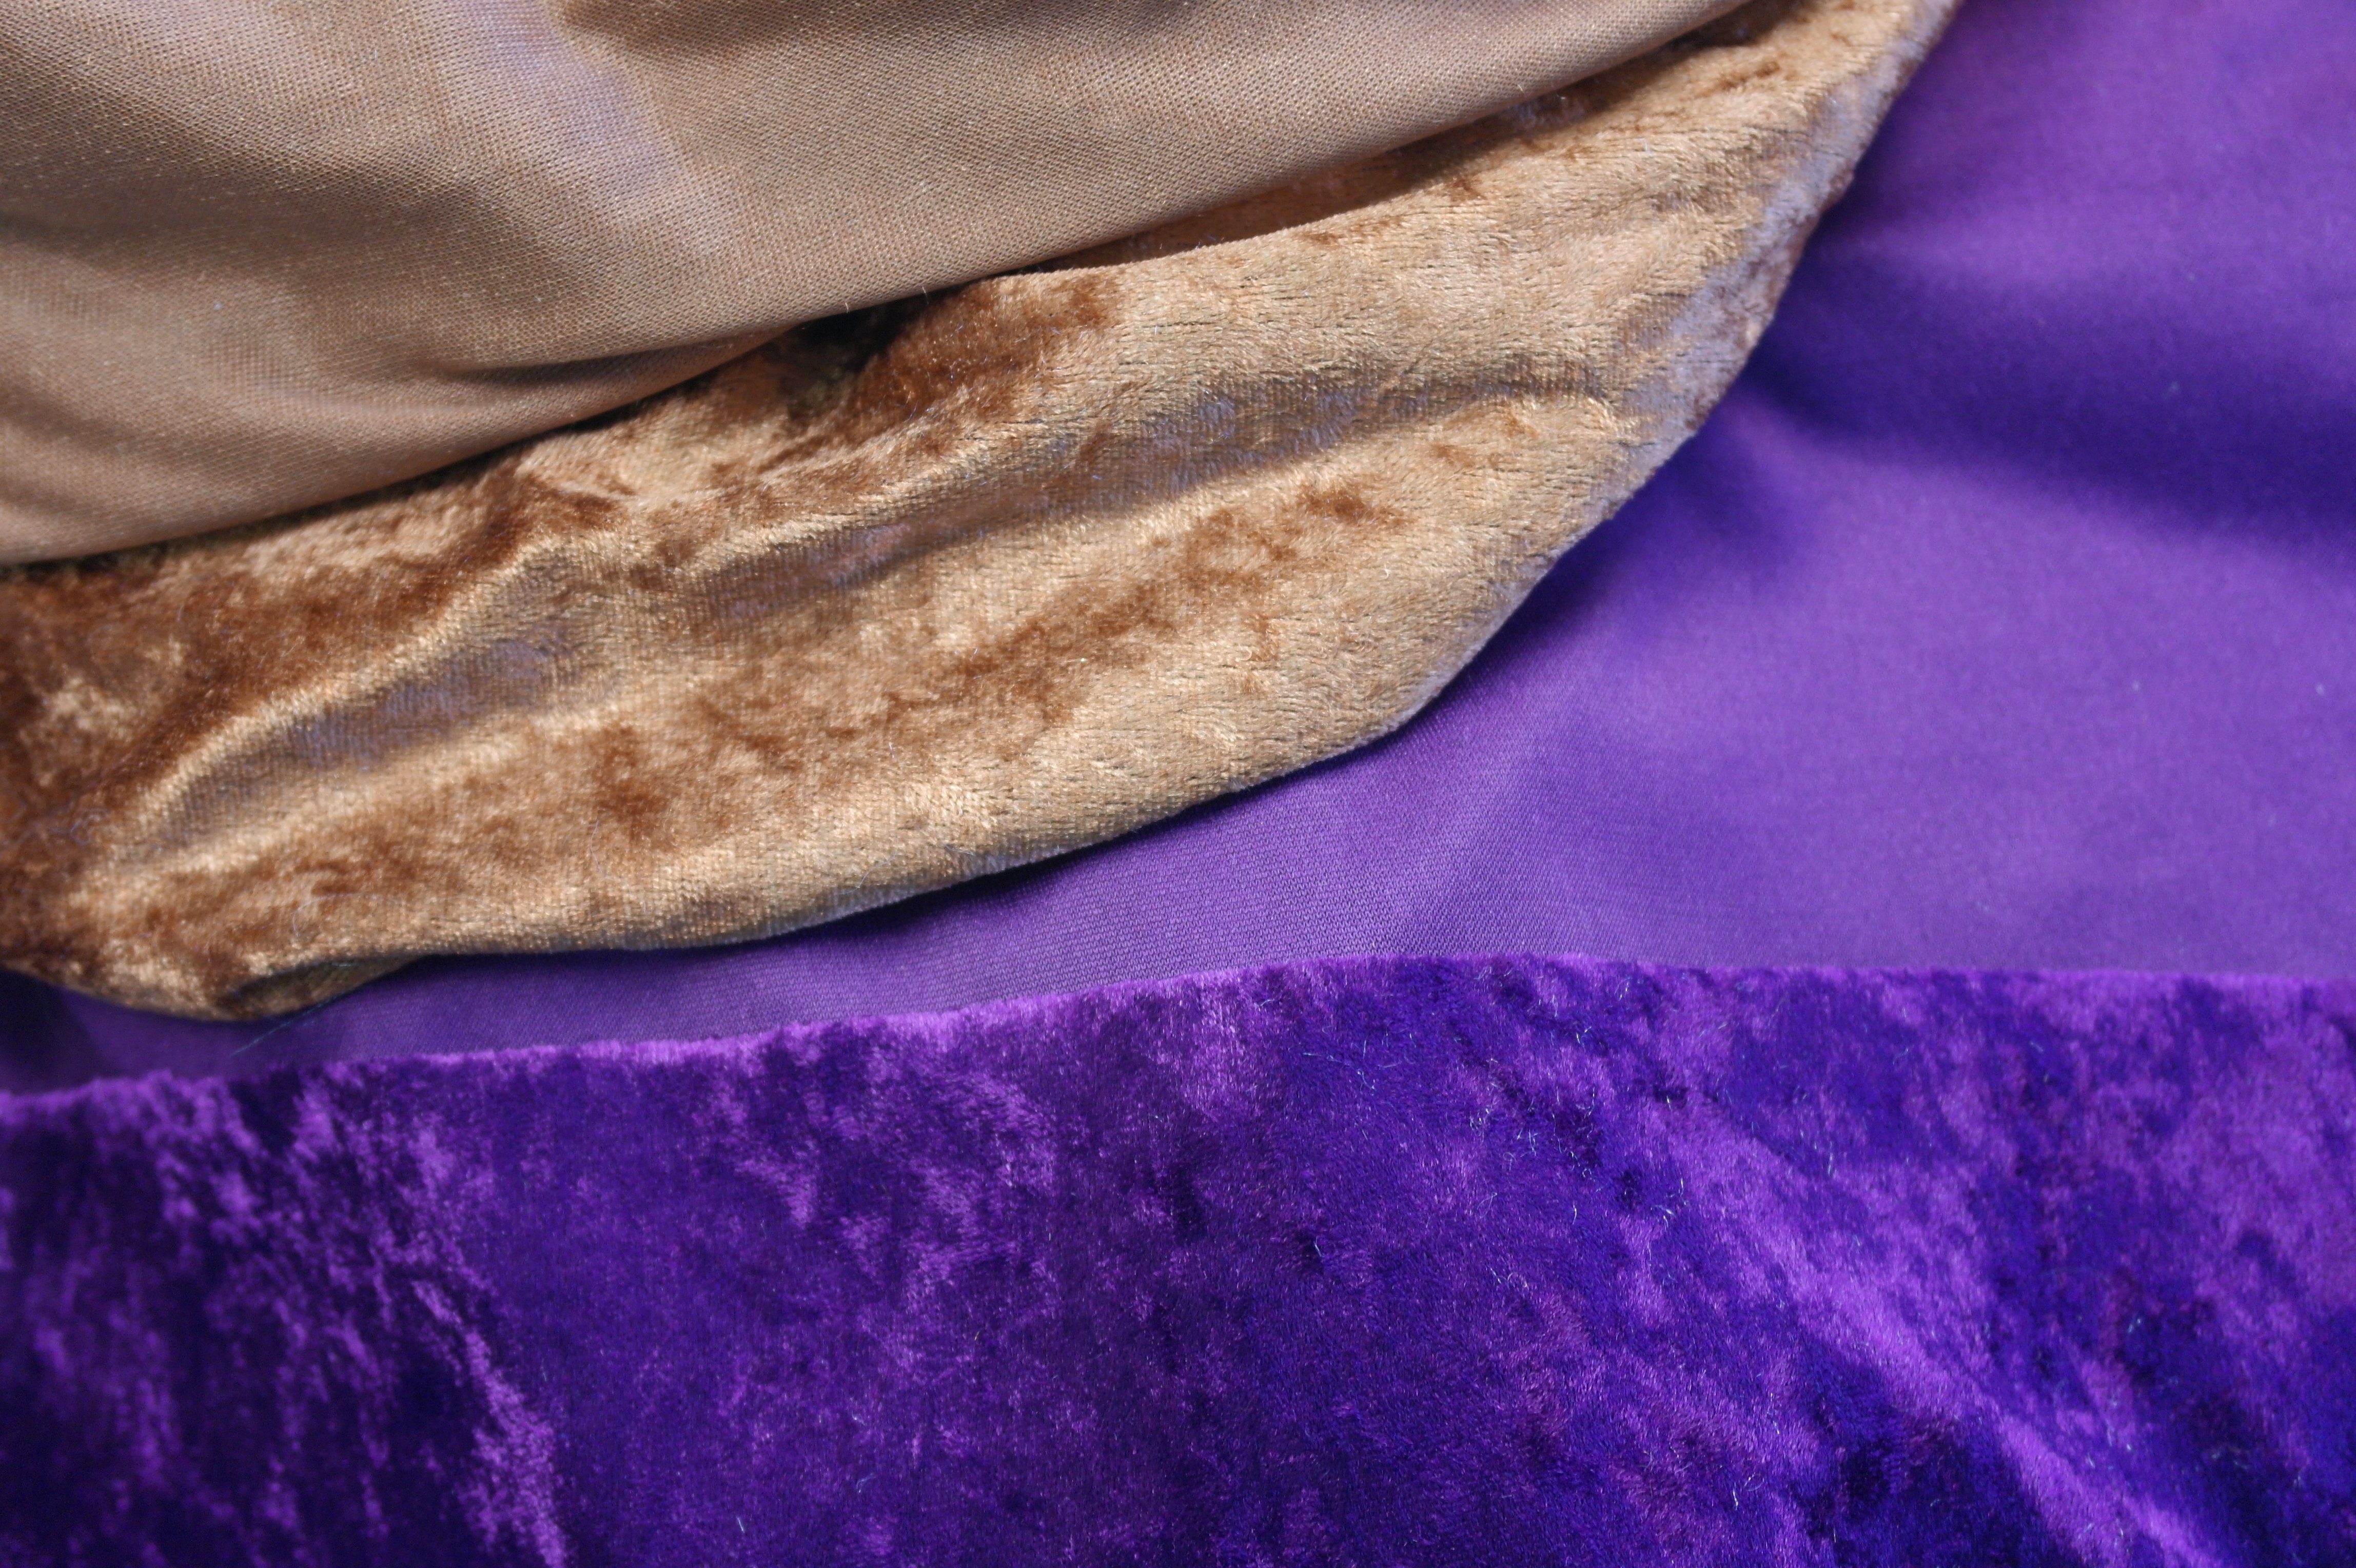
Also tule, Velours de Panne (Stretch velvet, velveteen) etc, can be used: the picture above shows the Velours in purple and lightbrown – my choice. The upper side is soft and has a slight loft, the backing is uni, a knitted structure. It is mostly synthetic, also be careful when ironing. You can also use lace, silk, taffeta, whatever you want and what’s available in stores.
When using stretchy fabrics, they have to be stabilized: you don’t want them to stretch on you sandwich, while making decorative stitches. Making a sample is always important.
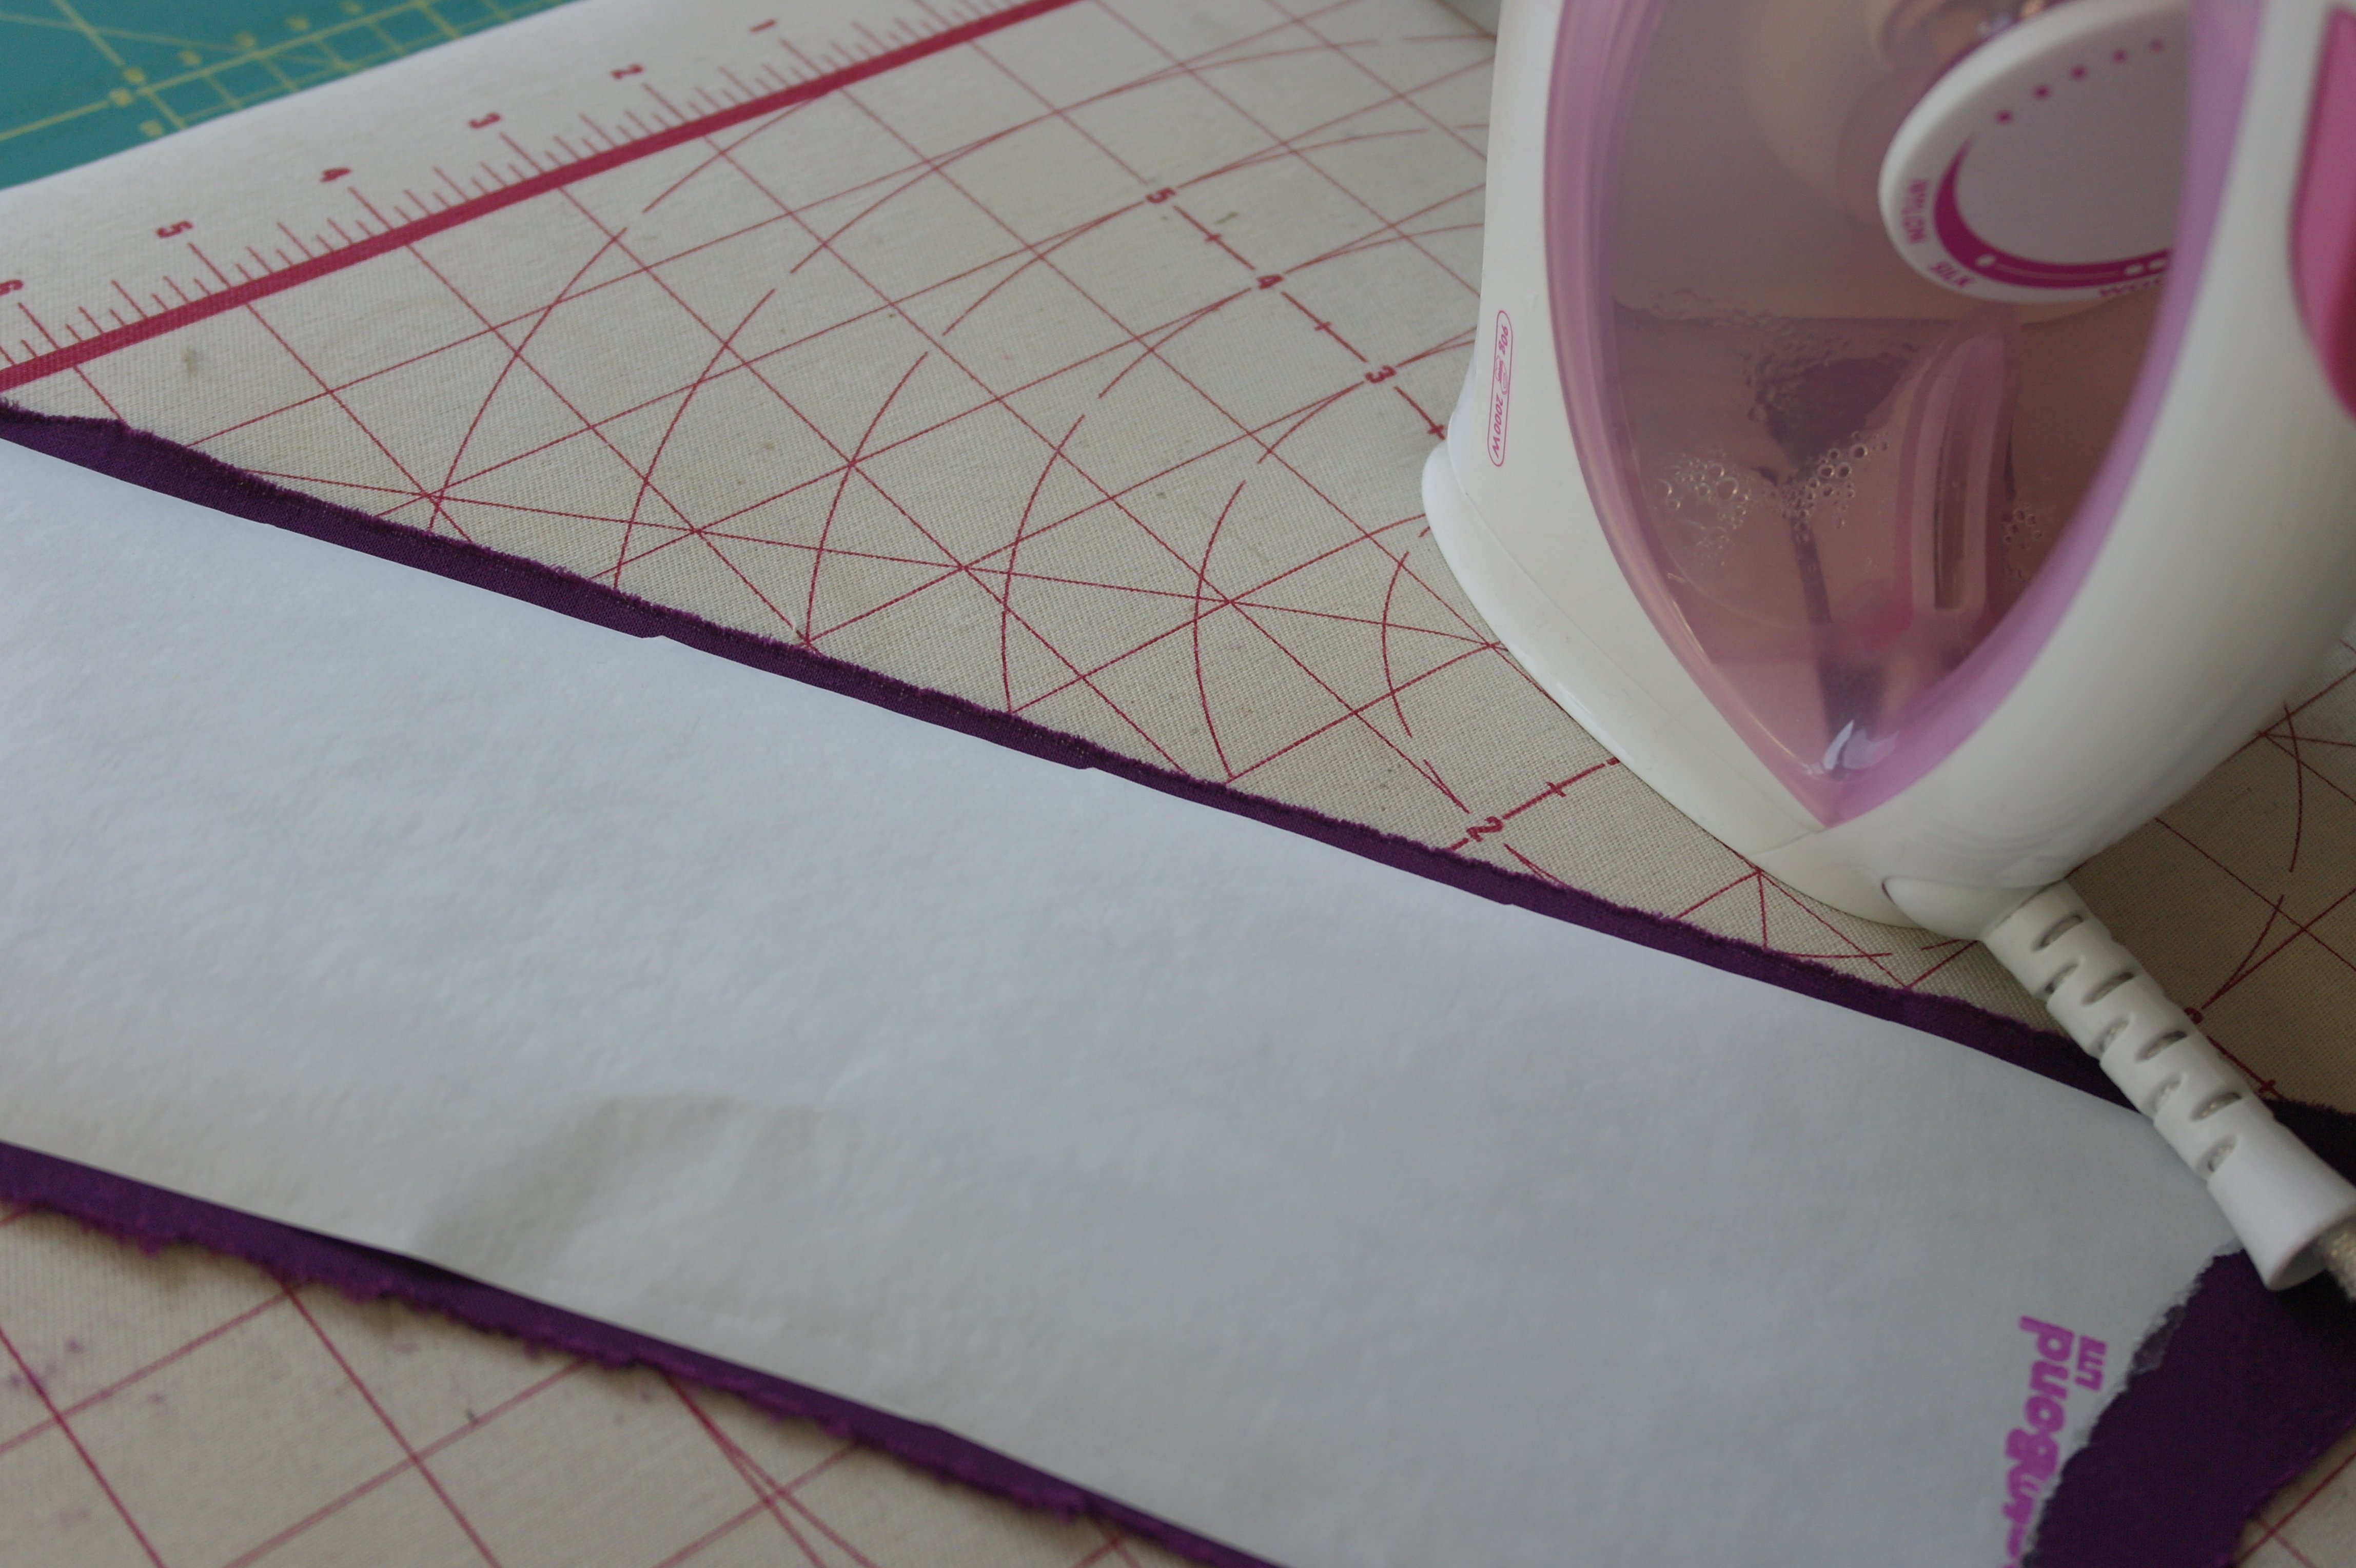
Velours de Panne has to be stabilized: it is stretchy and very flexible. The fabric could stretch, causing bulk while making stitches, so making sure it stays flat is important. I will iron Heat’n Bont Lite to the back of this fabric. I have to make sure the iron it not too hot (between 1 and 2), or else the fabric fould burn or melt.

Check if the glue of the Heat’n Bond Lite sticks to the back of the Velours, by removing just a piece of the paper. If it doesn’t stick, iron it again.
Sewing this fabric onto the sandwich, with the Heat’n Bont Lite side up, will make it sticky and stiff. Your ‘normal’ presser foot will not glide easy or will even be ‘sticked’ to this material. You can solve this by:
1) Using a zigzag foot with non-stick sole, #52C of #52D.
2) Place a piece of pattern paper on top of the Heat’n Bont Lite, draw a sewing line, make straight stitches, using that line, through all layers, and tear the pattern paper away after sewing (that is what I have done, worked fine by my).
Sometimes you will have to layer two fabrics on top of each other, before sewing them (together) onto the sandwich. This wil be done with using tule, organza or lace: fabrics that are translucent. This will be done for special effect. You can use solids, like batiks or other quilt fabrics, like black, purple and gold, depending on the color of tule, organza or lace on top. When using purple tule, I will be sure a black or gold colored fabric lies underneath that; with a gold colored tule I will use a black or purple fabric underneath. Your choice: the important thing is that you will see both fabrics/effects.
Cutting pieces for the Crazy Patchwork, can be challenging. The best way is to make paper templates, to be sure the size you will cut from fabric is large enough to sew on, at least 1 cm seam allowance on all sizes included. Cut the template out of a piece of paper, place it onto the fabric of your choice, cut the fabric and place it upside down onto the sandwich. Sew it down. This is done with fabric for no. 1, no.2 etc.
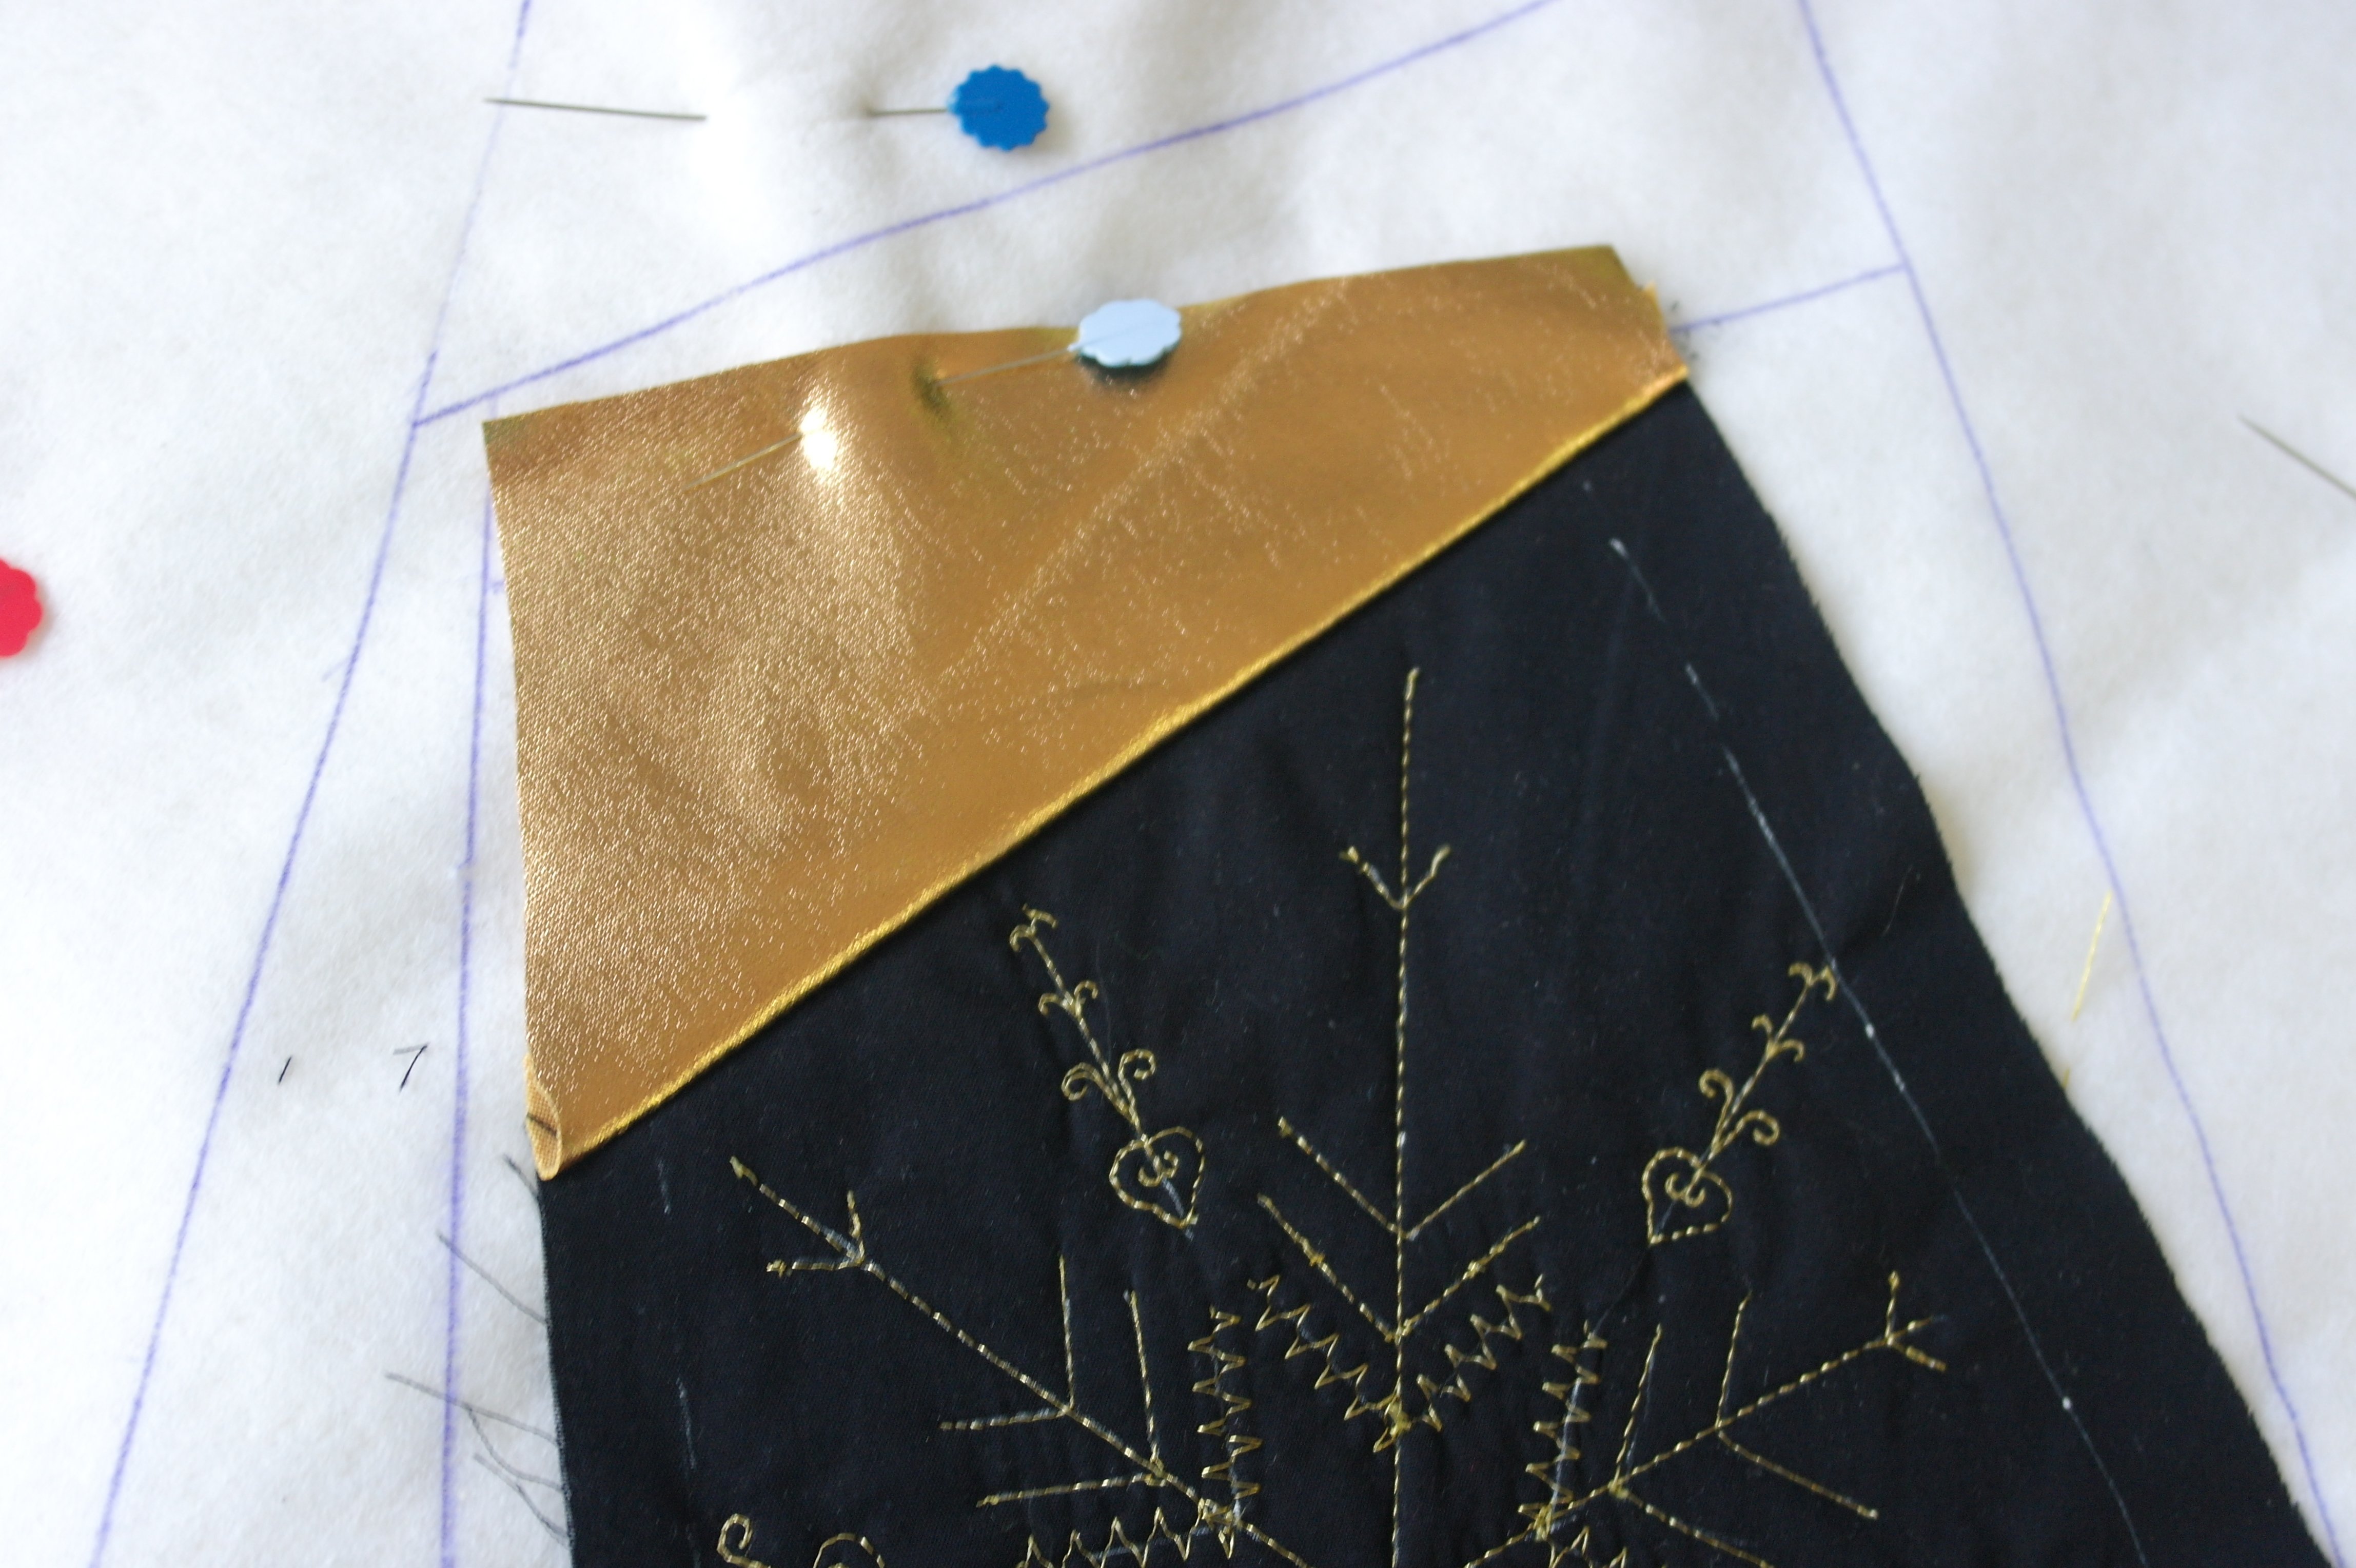
Fabric no. 1 is cut to size, and sewn onto the sandwich: I have placed it face down onto the center piece, sewn it with straight stitch, folded the fabric back to the right side. The picture above shows that I have pinned the fabric down with a Flower Pin (a large quilting pin), but JUST in the seam allowance. WITH SOME FABRICS holes that are made by pins will show permanently, so be sure to pin just in the seam allowance, which will be covered with the next fabric afterwards.
I have made some decorative stitches: used a new Topstitch needle (be sure the needle is smooth and has no burrs). I have just made two rows of stitches, because I want the lamé to stand out afterwards. Too many rows of stitches will cover the fabric entirely, and the glitter of the Lamé will not stand out. Empty spaces can be filled with embellishments afterwards.
Sew piece by piece of different fabrics onto the sandwich, and make decorative stitches, at least one row per fabric, and when possible more. IMPORTANT: when working on Velours de Panne (velvet), be sure to make stitches while the nap lies flat: check the direction of the nap – make sure stitches are made with the nap going down. If your stitches seem to dissapear into the nap, use thicker threads.
Velours de Panne (velvet) has a definite nap (direction of the pile). When you run your hand over the fabric, you will be able to tell whether the nap feels smooth to the touch (the pile is going down) or pushing against the pile (the pile is going up). If the nap is up, the velvet looks darker. If the nap is brushed down, the fabric looks lighter.
Make sure there is contrast between fabric colors and stitches/thread colors. I will work with a lot of gold colored fabrics and threads, but also brown/rust and purple, and also blacks. I will use contrasting threads to make the stitches stand out.
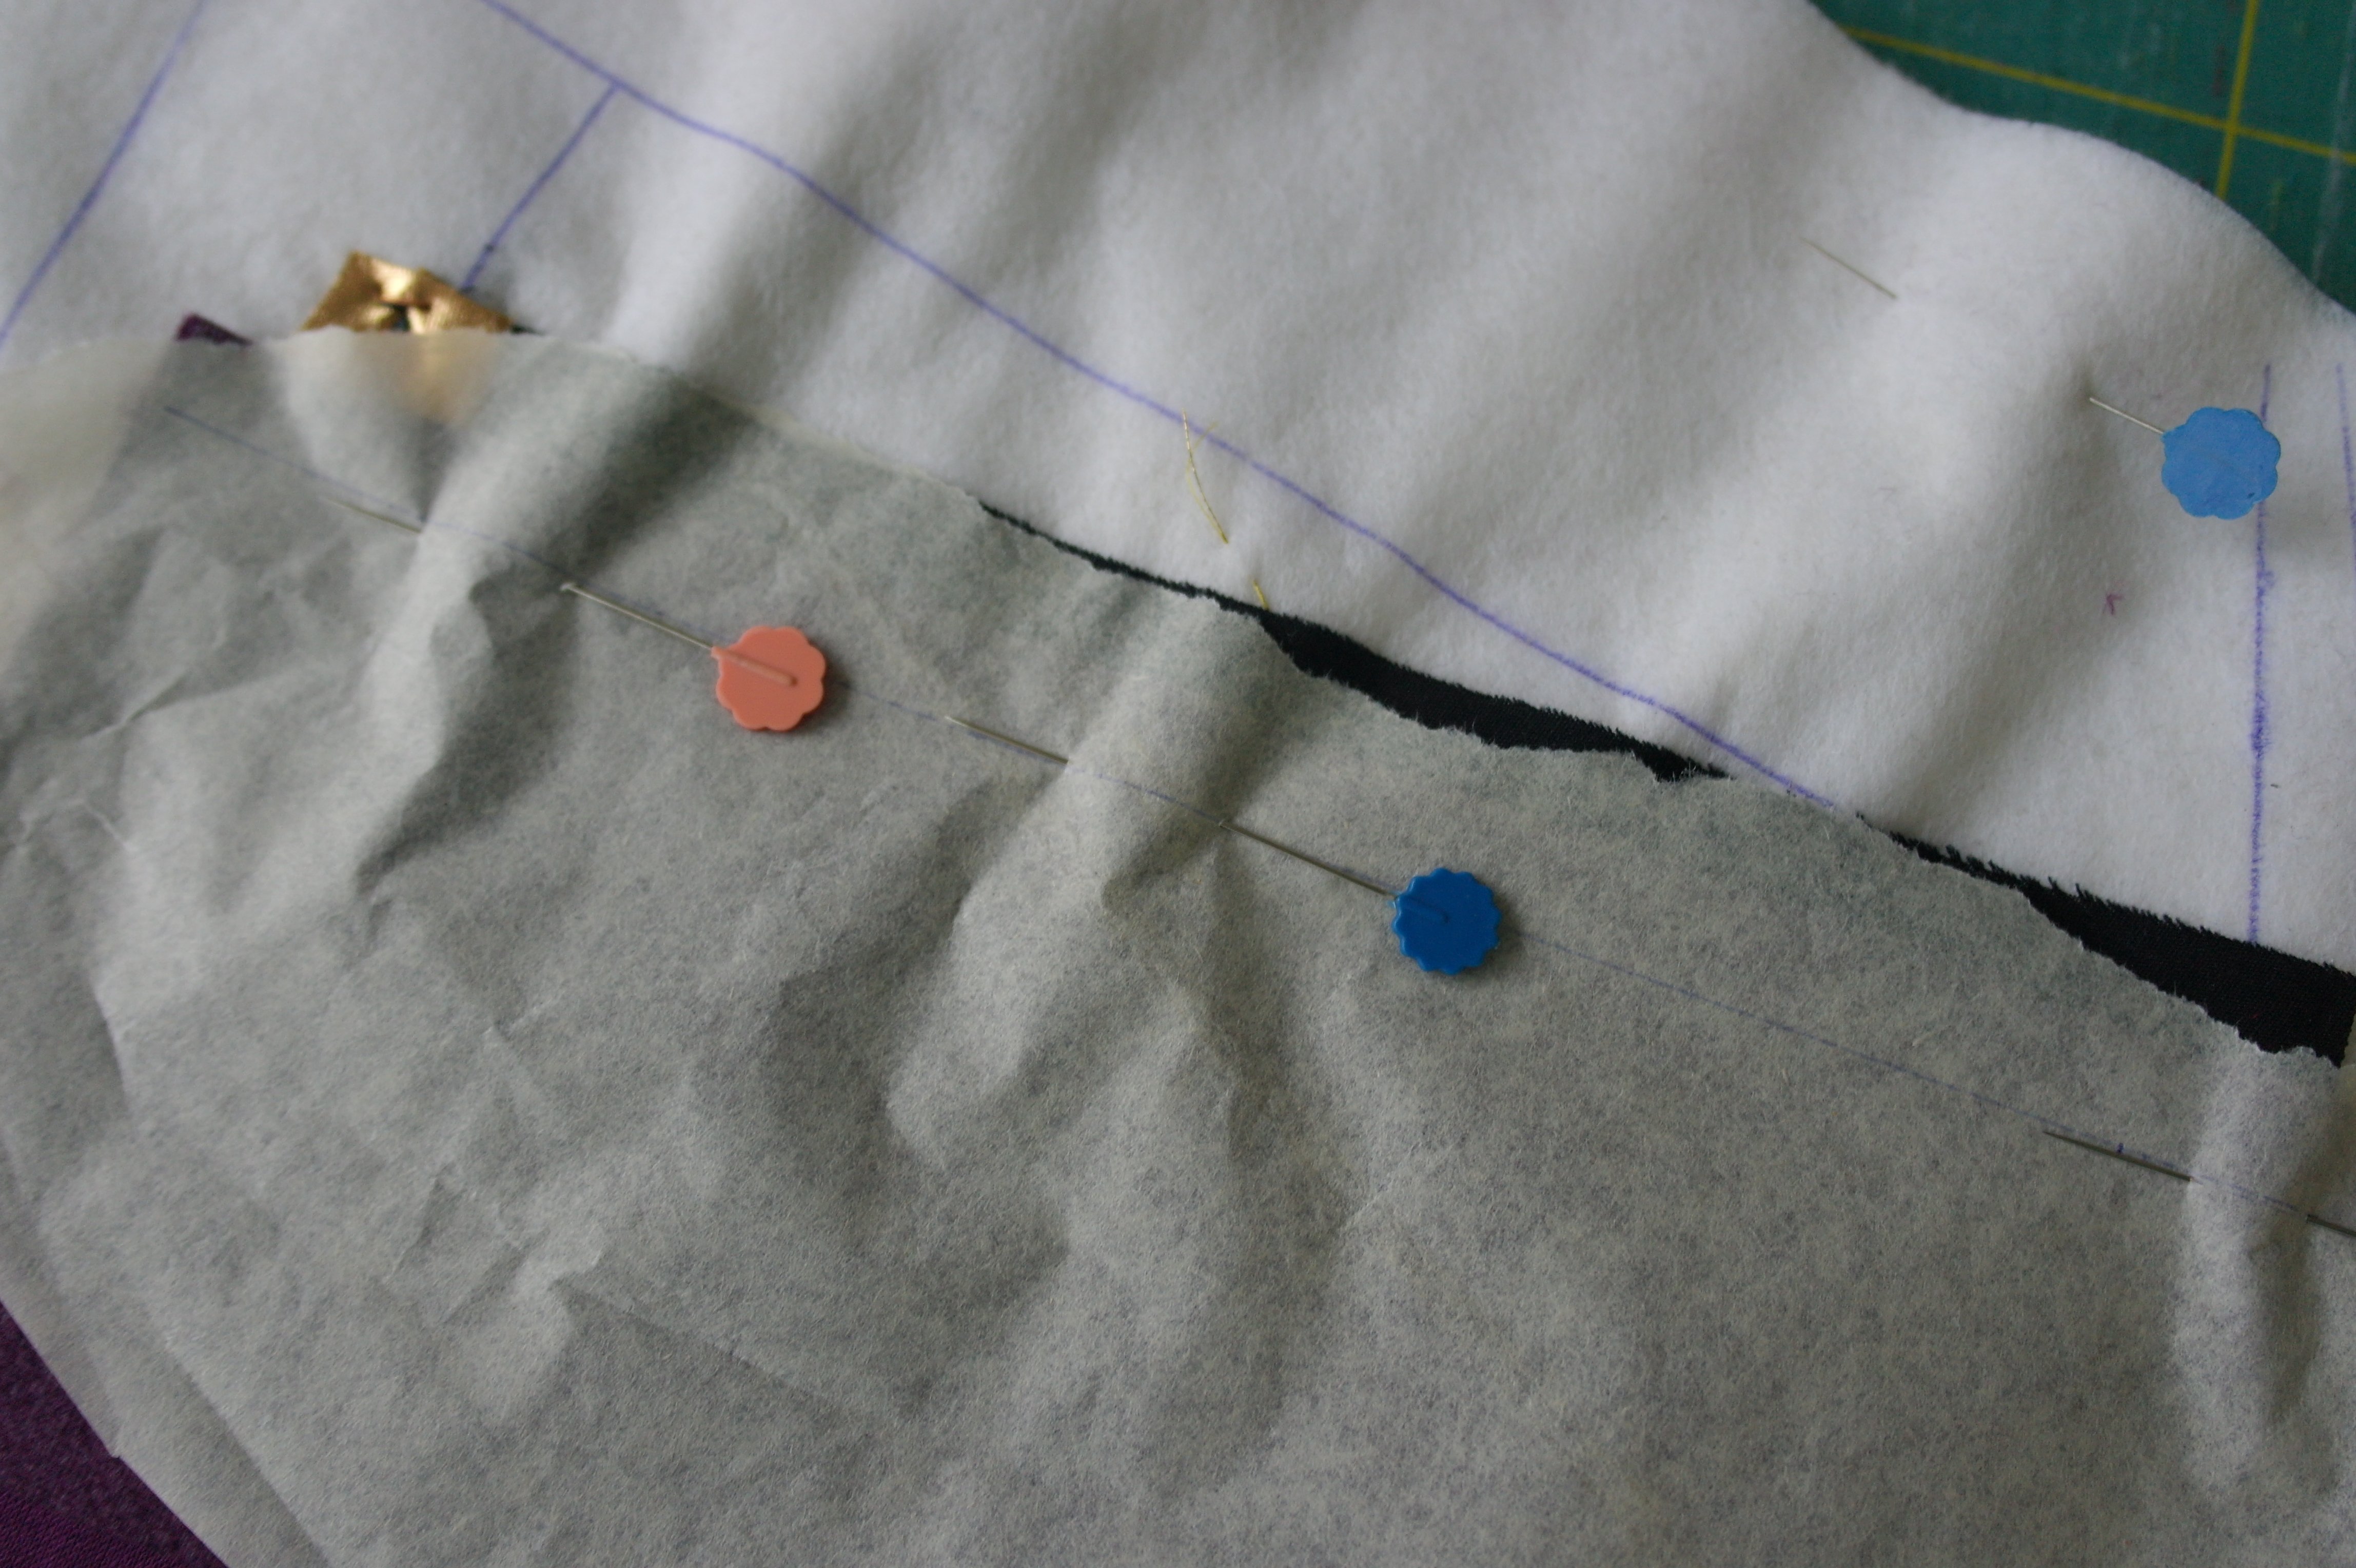
I will use a piece of Velours de Panne for section no. 2: I have cut a piece to the right size + seam allowances (Heat’n Bont Lite ironed to the back), and removed the paper at the back after sewing. If I would sew this with my machine, using my regular presser foot, the fabric will not move, because the foot #20C will ‘stick’ to the Heat’n Bont Lite. I took a piece of pattern paper, drawn a sewing line, and pinned this in place on top of the back of the Velours de Panne.

Now I can make stitches to sew the fabric etc. in place.
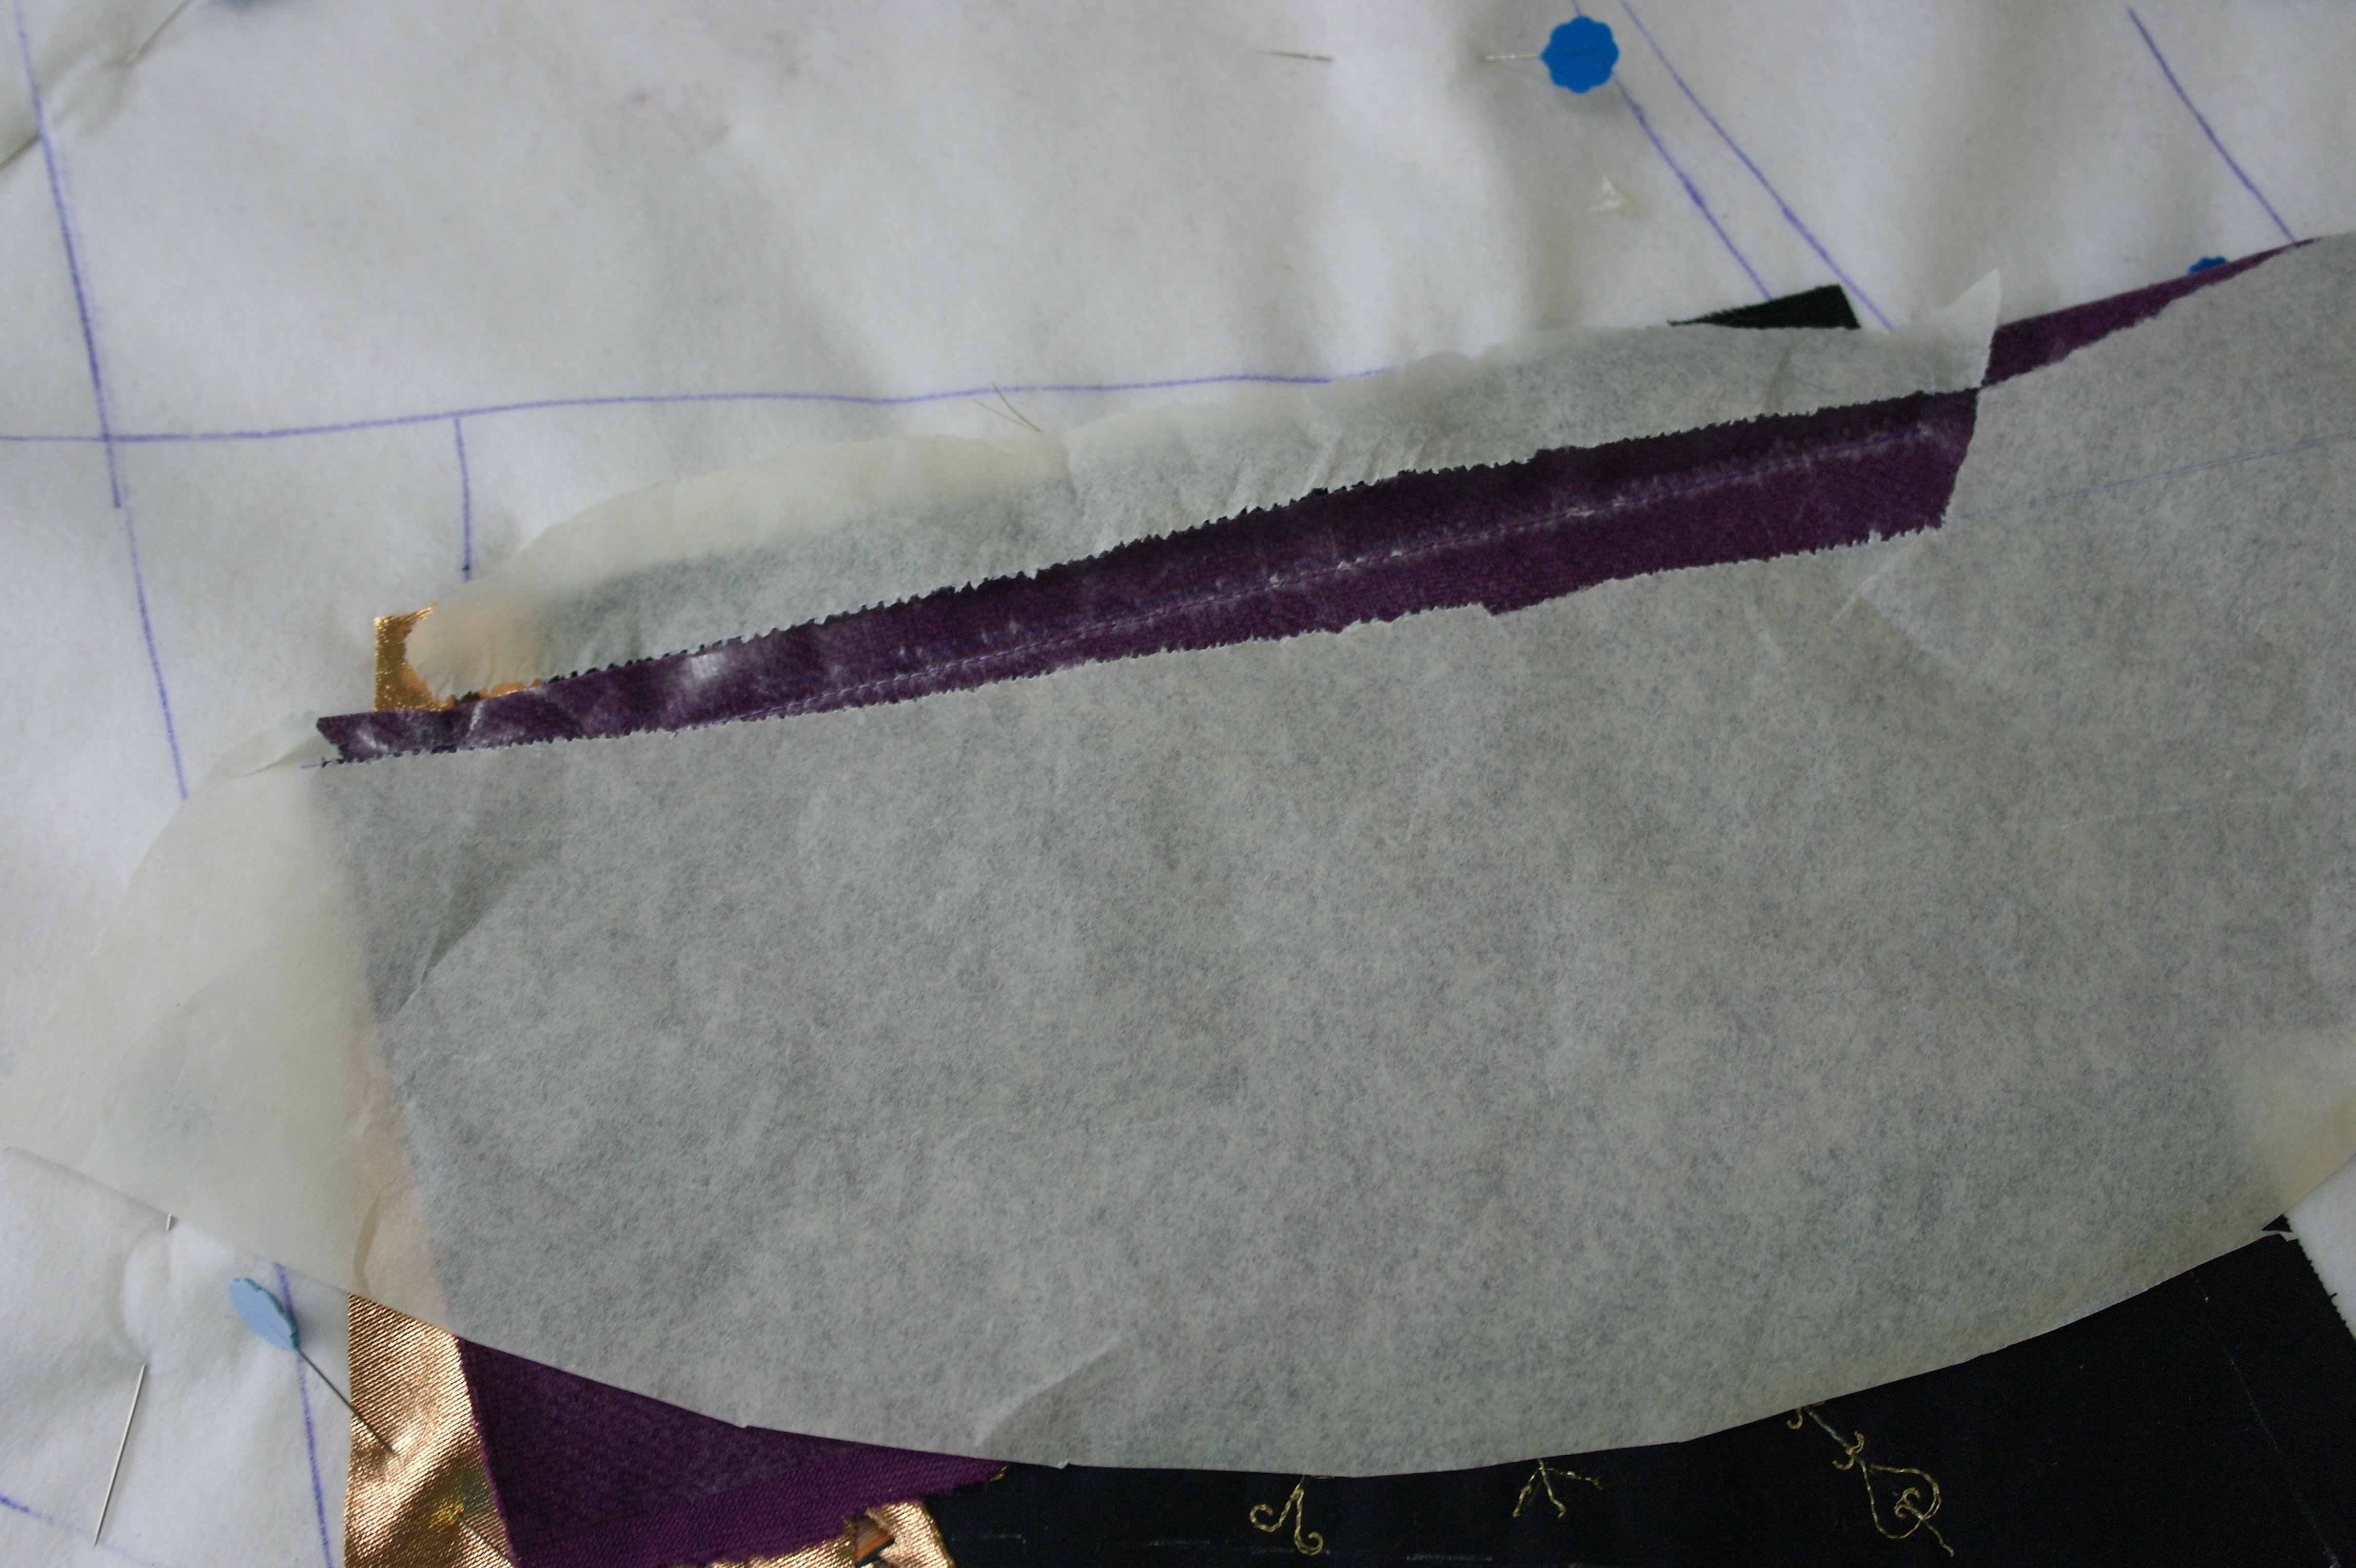
After sewing, I have torn the paper away: this worked fine for me. Folding the fabric to the right side…
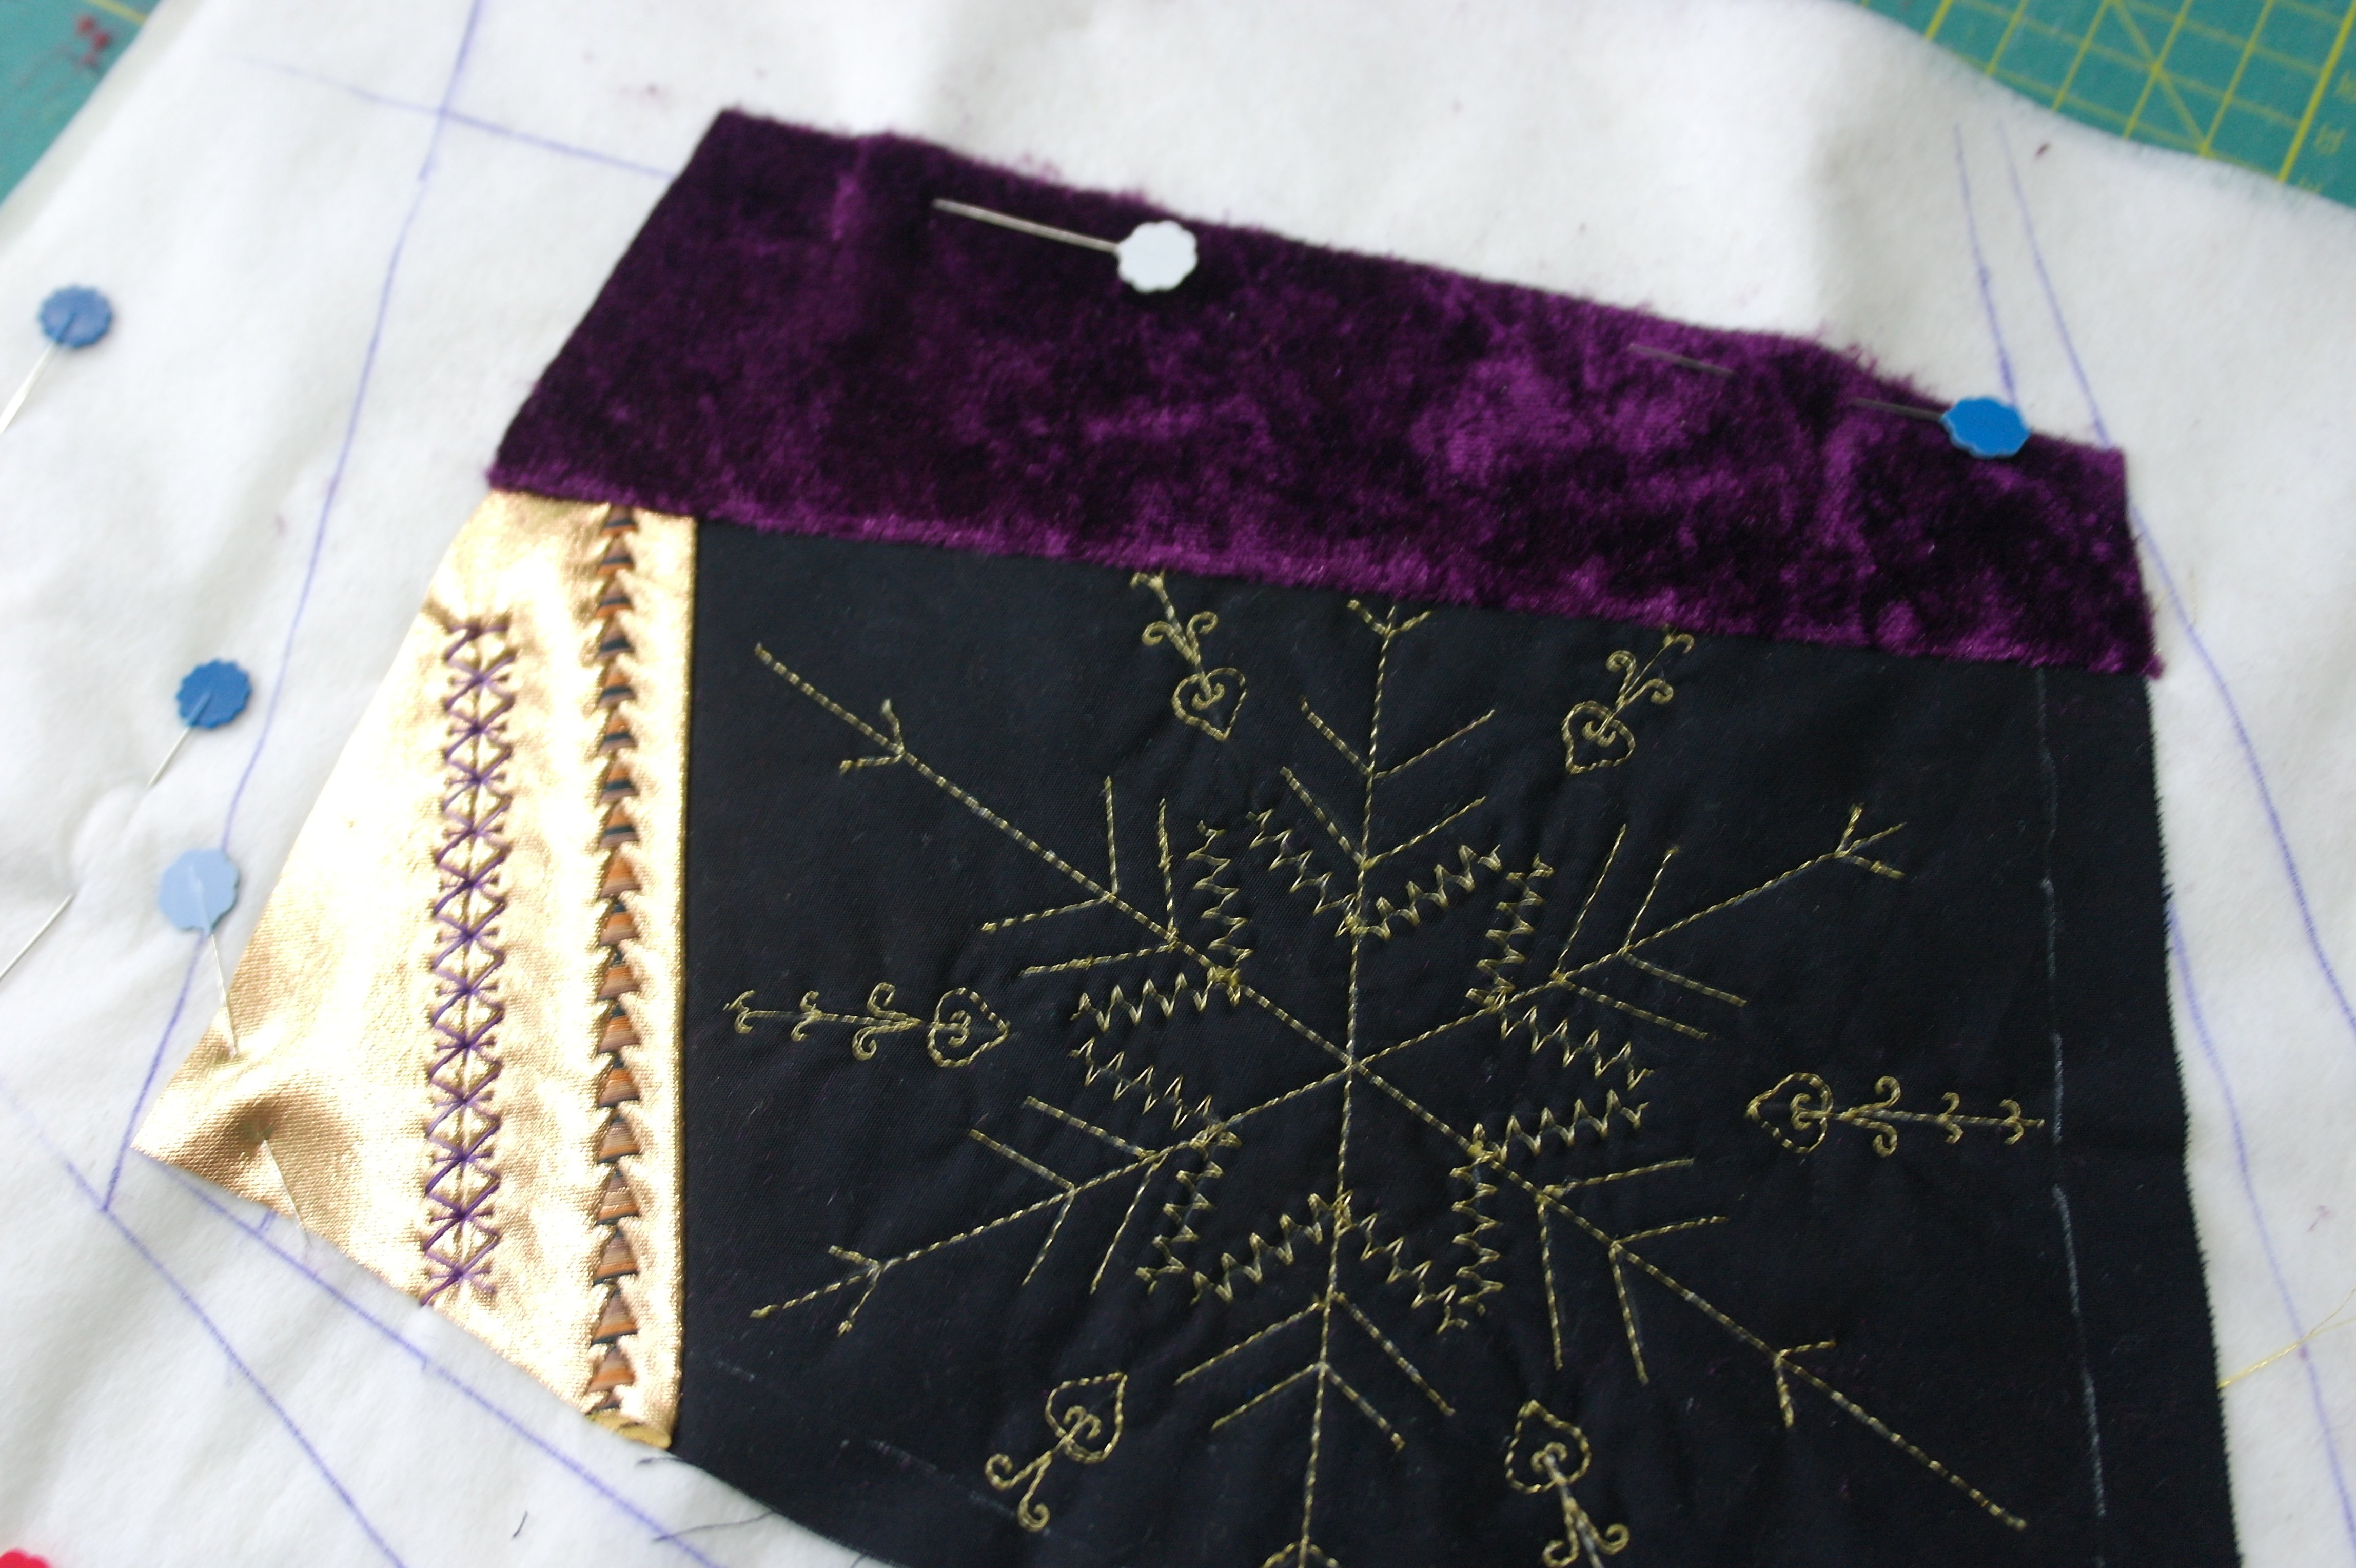
and check out: this looks great. Now making decorative stitches on the Velours de Panne…
A couple of fabrics are sewn onto the sandwich, and decorative stitches are added. Again, don’t worry about ’empty’ spaces: embellishments can be added afterwards. My block looks festive already, because of the shine of the fabrics and threads that are used.
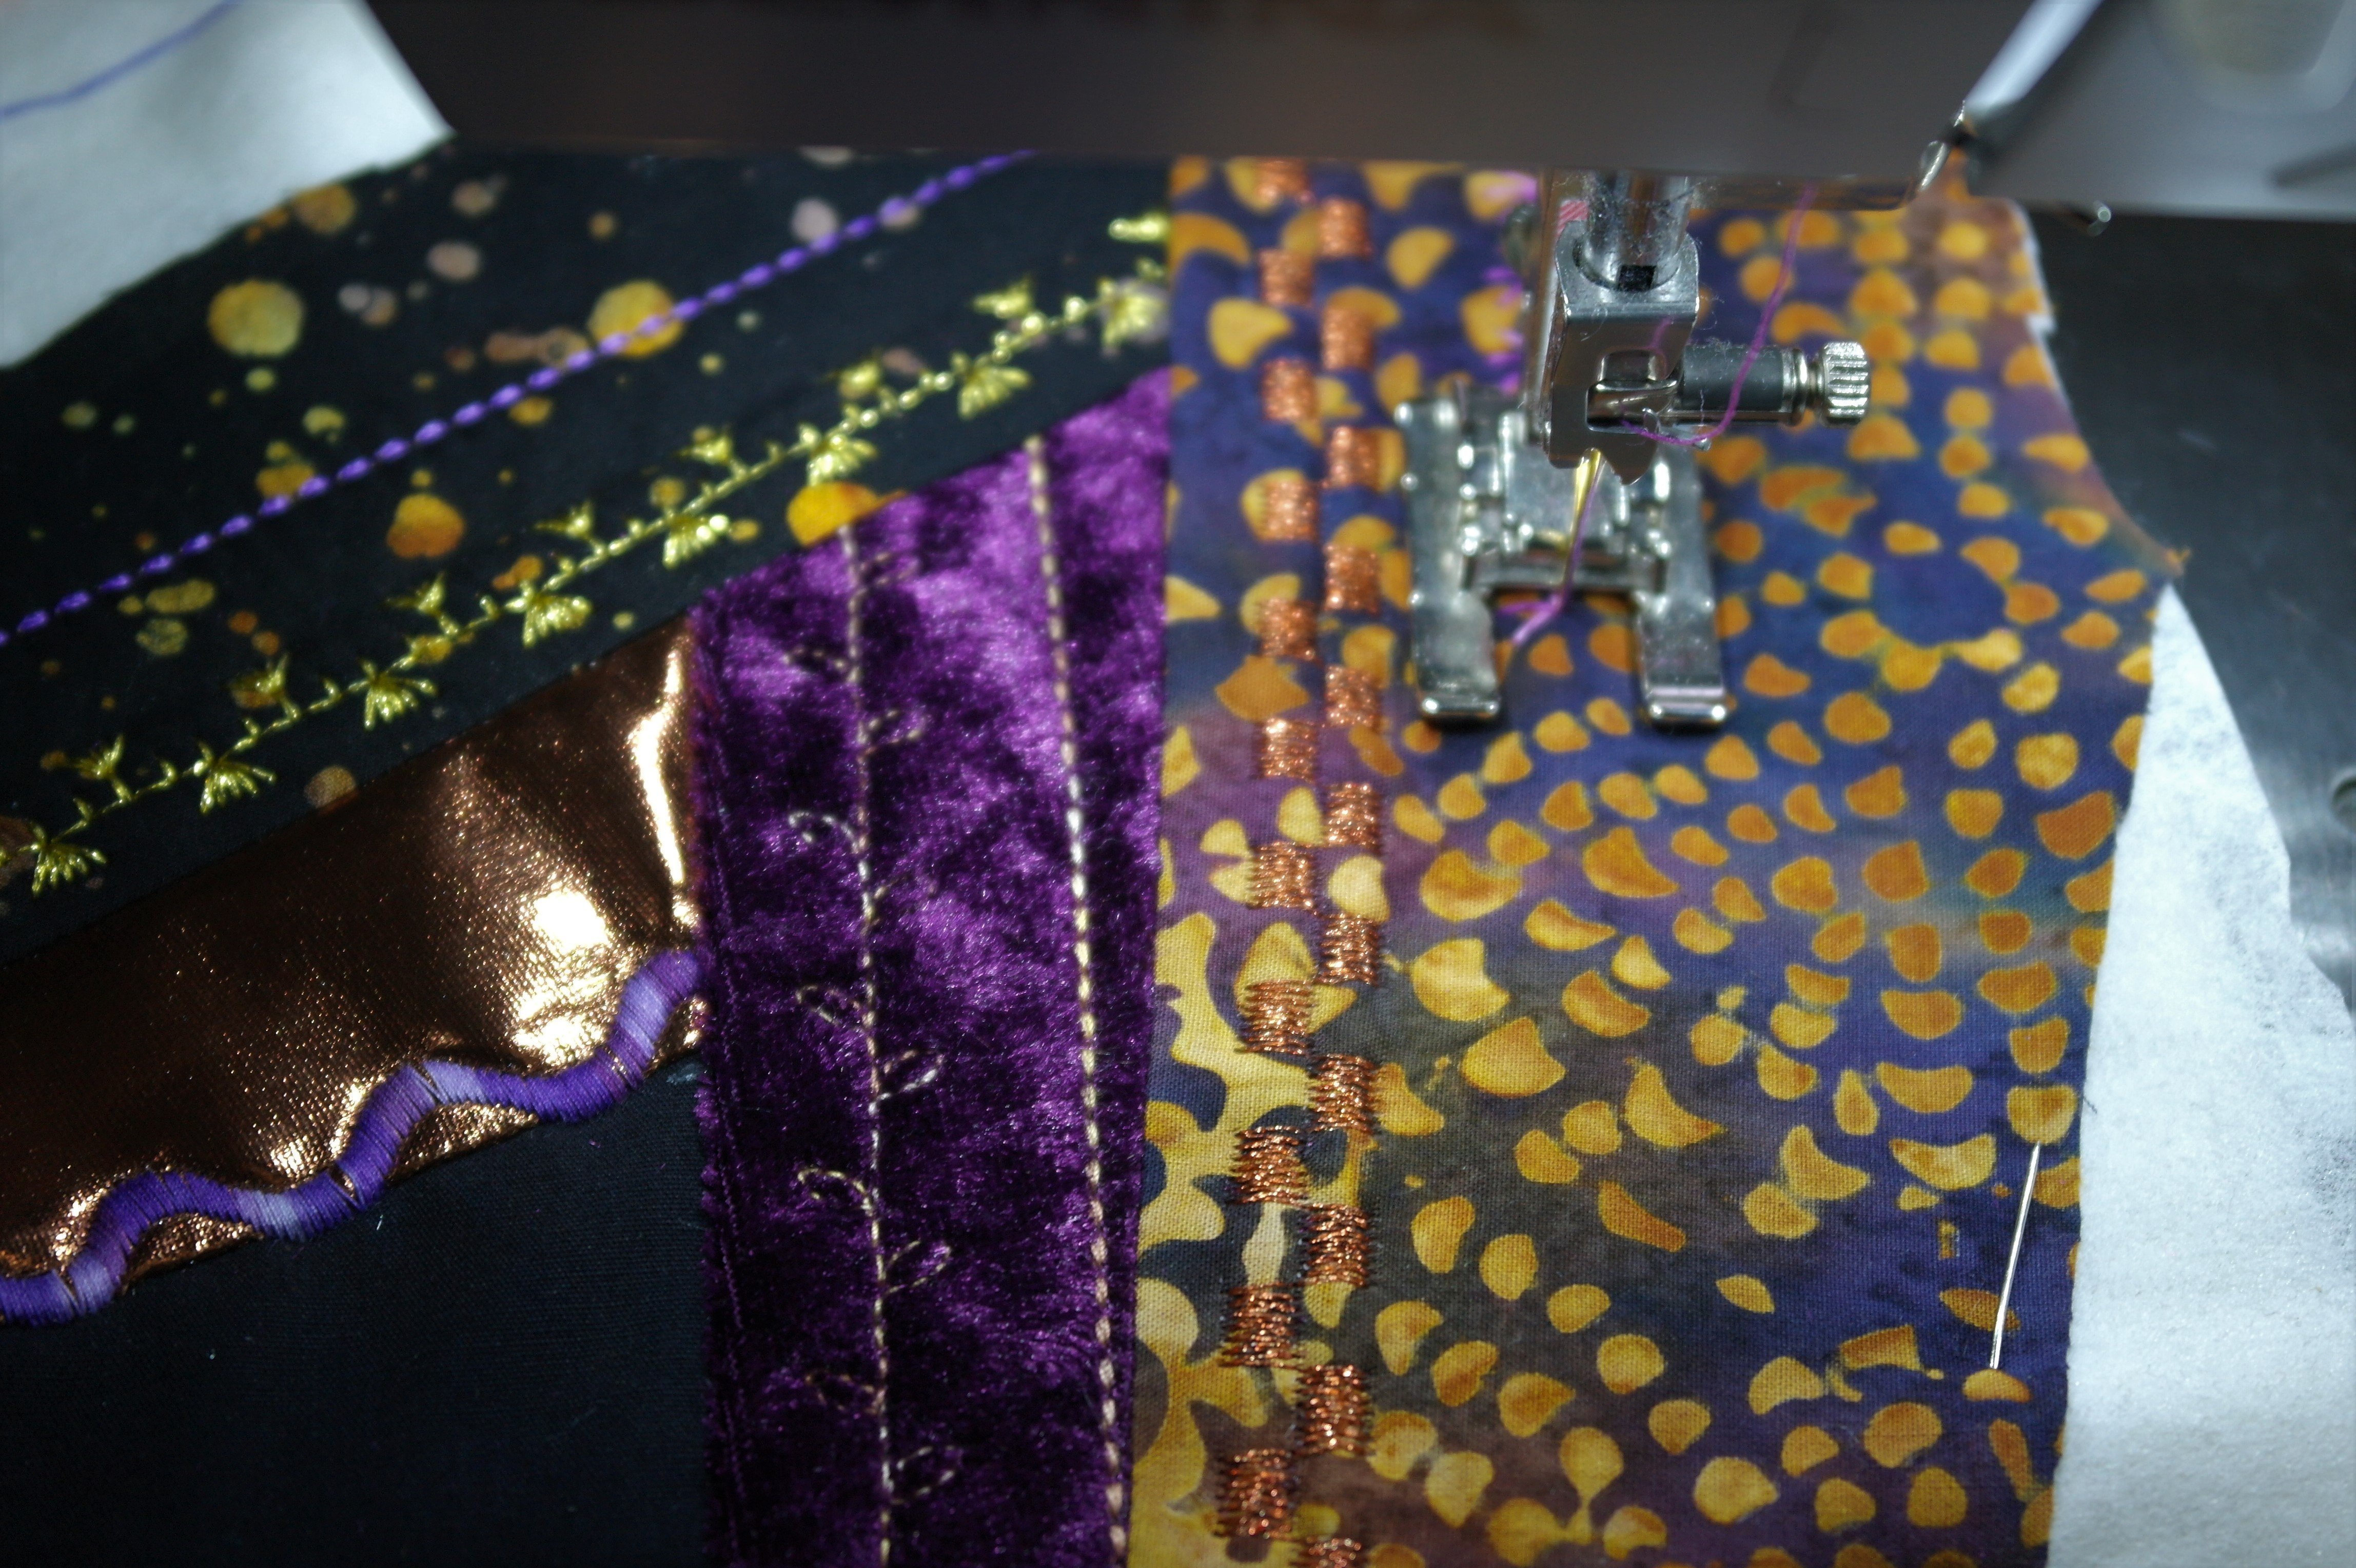
On and on it goes, I’ve used printed batiks and other fabrics. Working with metallic threads, or contrasting variegated threads…

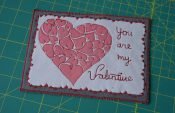
And this is my first block: I have sewn a piece of black/gold ribbon with sequins on top of my block, a bit slanted, for a special effect. And look: my Crystal has been embellished with Hotfix stones…
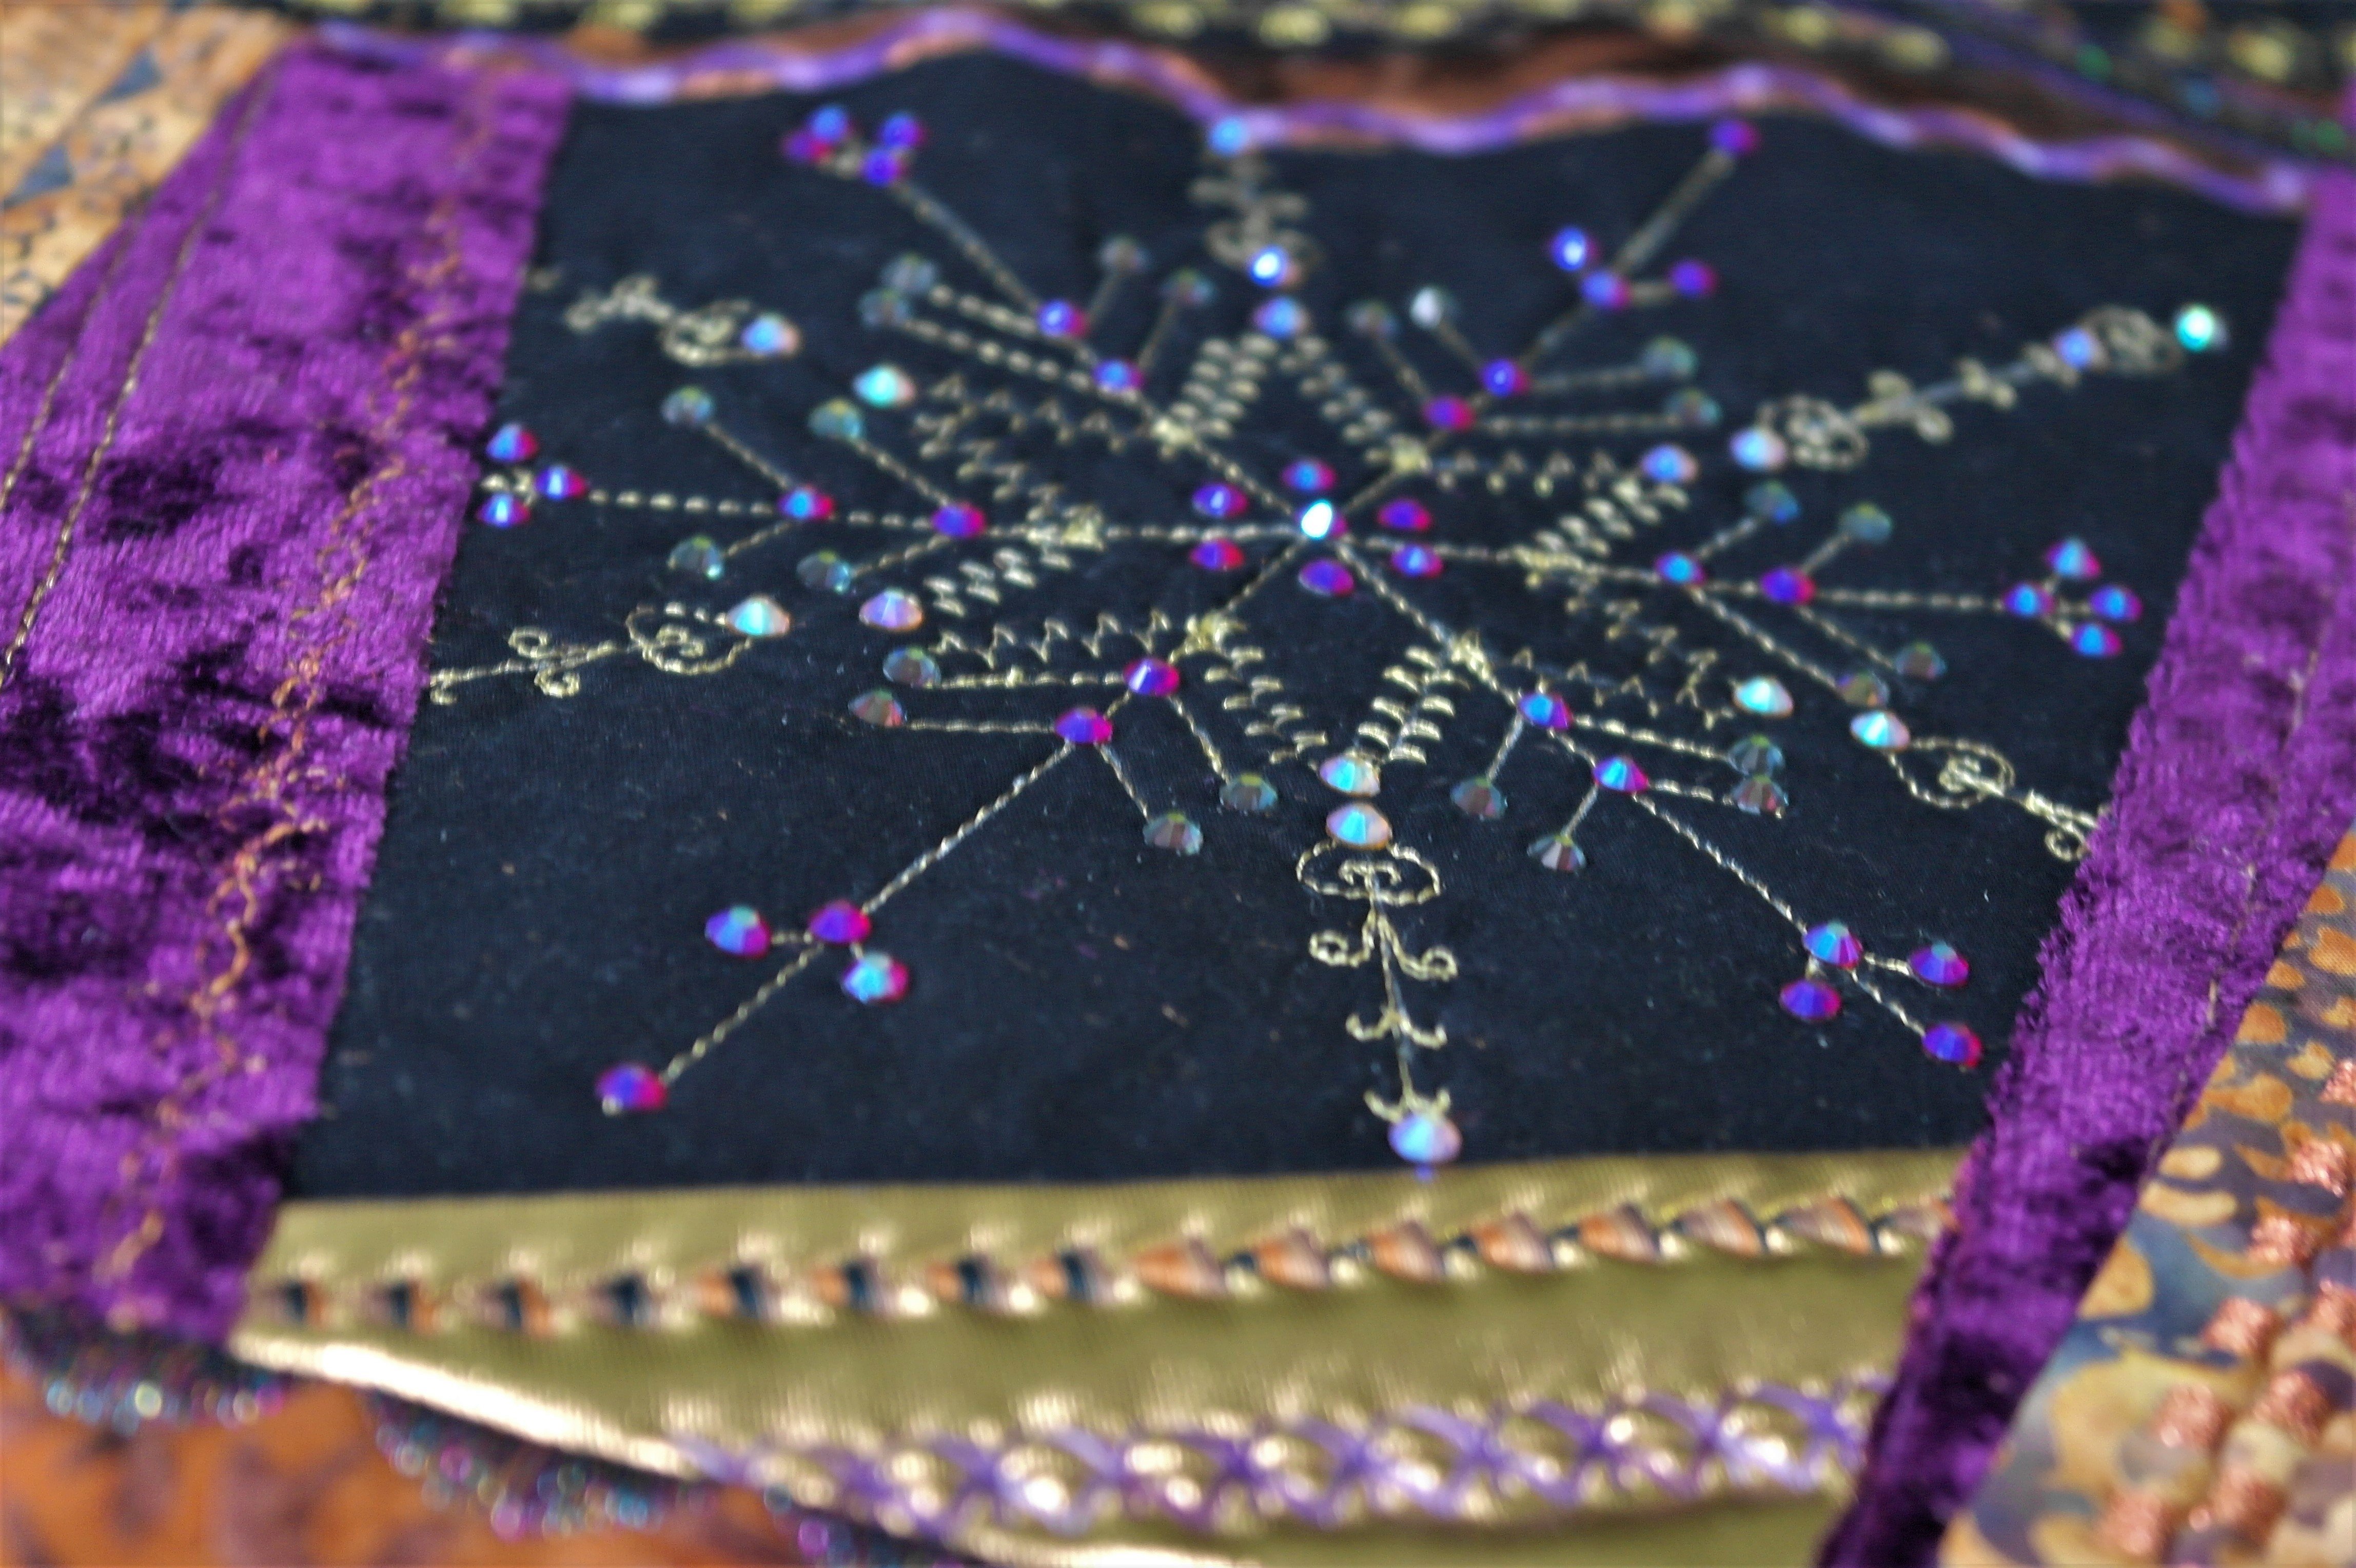
All Hotfix stones: they make the Crystal shine! I have placed them on all ‘ends’ of rows of stitches, and in between. Shiny and with special effect, just like a real ice crystal.
So the first block can be made this way: be sure the base of your block is not too busy, work with different prints/types of fabric, printed or solid, and make sure your machine threads are bold and contrasting. Remember the embellishing of your block in the end will make it stand out… If you want to add embellishments at this point on different parts of your block, BE SURE TO LEAVE 5 CM ON ALL SIZES EMPTY: this because of the assembly in month 12.
ALSO MAKE SURE THAT YOU DO NOT CUT YOUR SANDWICH/BLOCK, not even to make it look nice! LEAVE THE BLOCK AS IT IS and put it aside. You will get directions for finishing etc. in month 12, just like the last Crazy project (2017)
Make your block shine!
Untill next month,
Happy Quilting,
Sylvia Kaptein
Sylvia’s Art Quilts Studio
0 Responses