 BERNINA Corporate Blog -
Have you ever sewed a blouse? Traditionally, they have a slit/vent. A classic sleeve placket, like it is found on men’s wear, can be a challenge – however, there is another, easier way to sew a sleeve vent using bias binding.
Tutorial: Easy sleeve vent with bias binding
I find it easiest to sew the vent before you close the seam of the sleeve. This way, your work piece lies flat, which makes it much easier to work and shift around.
Your pattern will have a vent marked on the sleeve piece. Trace it onto the fabric. You’ll also need a strip of bias tape that is twice the length of the vent.
Cut the vent open, all the way to the marked end point.

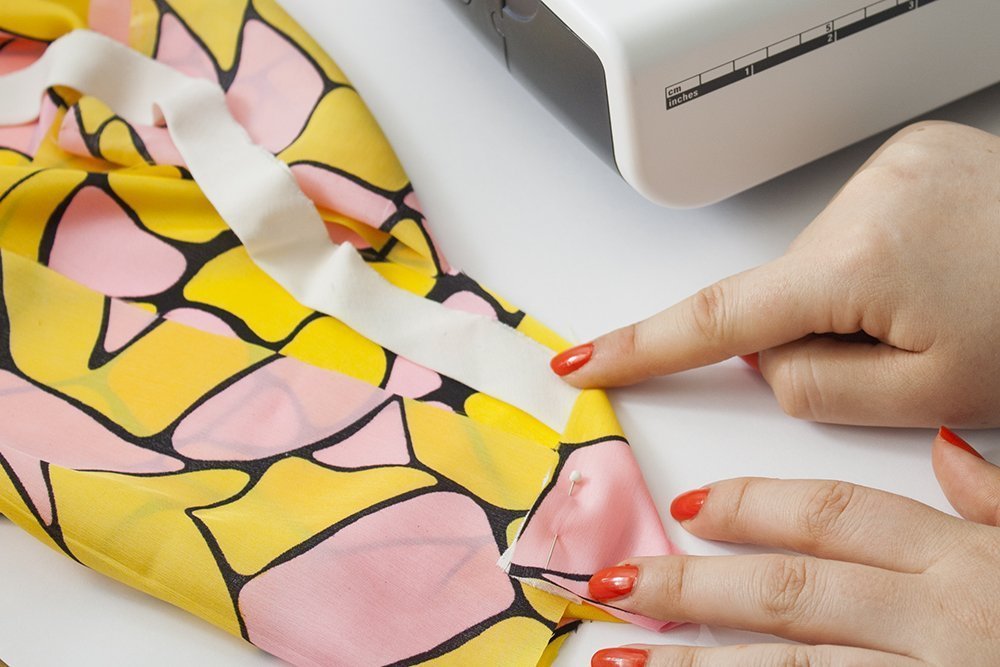
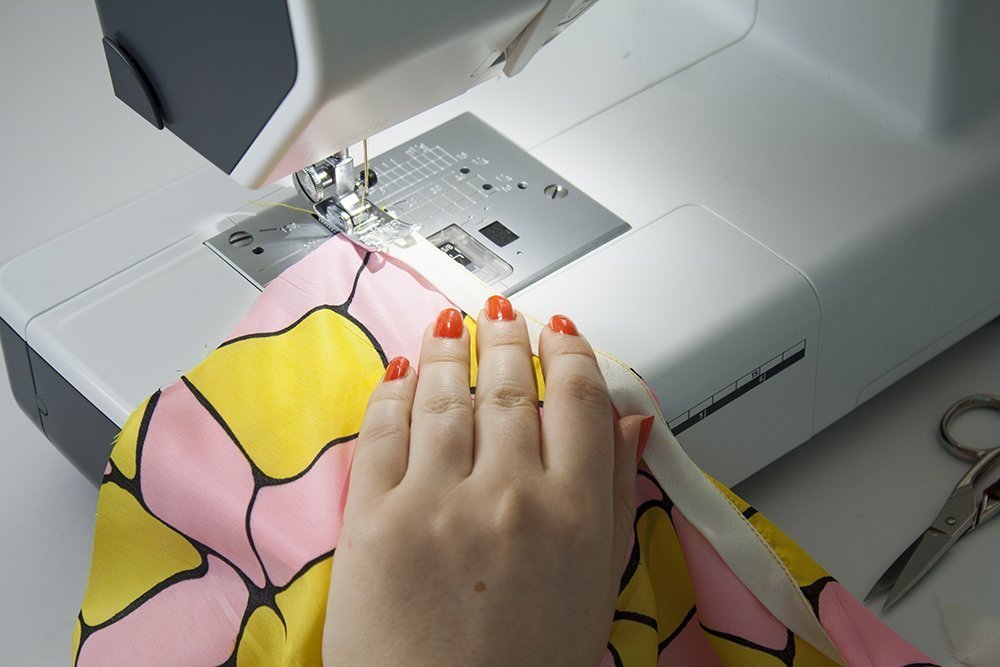
I used self made bias tape that I folded in half and pressed. The finished width was 1 cm.
I then started pinning the bias tape to the vent: the raw edge of the bias tape aligns with the edge of the vent. When you get to the center of the vent (the highest point where you stopped cutting), you need to spread the fabric apart, so the two sides of the vent create one line.
I sewed the tape to the sleeve using a allowance of 0.5 cm. When I came near the center of the vent (where I stopped cutting the fabric), I began to use less allowance, so the seam would be right next to the edge in this area.
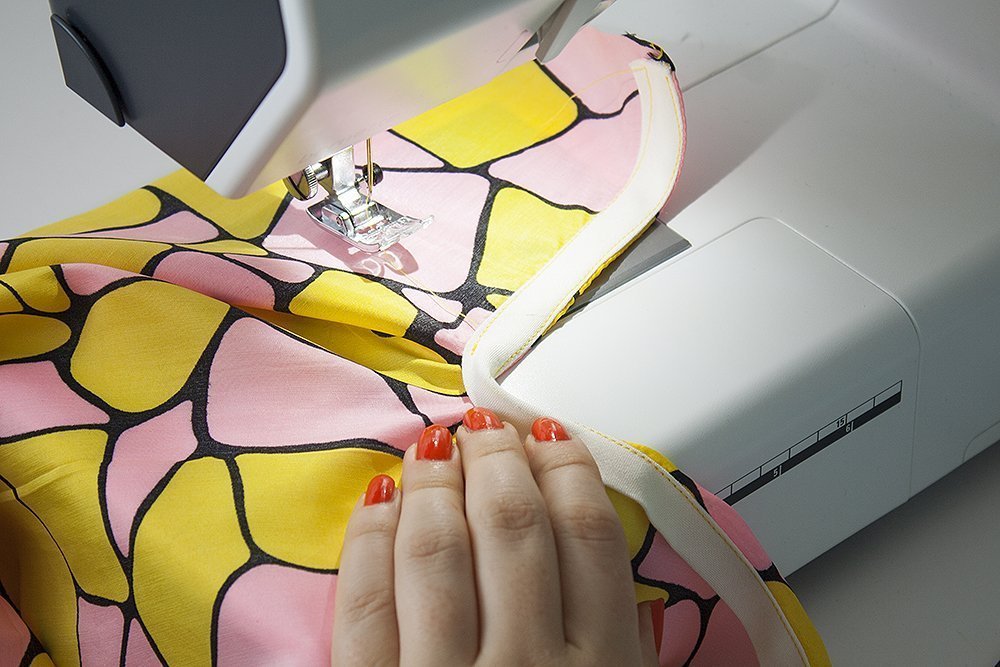
When you are at the very center of the vent, put the needle down, so the fabric can’t slip away. Pivot the work piece, so you can sew the other side of the vent.
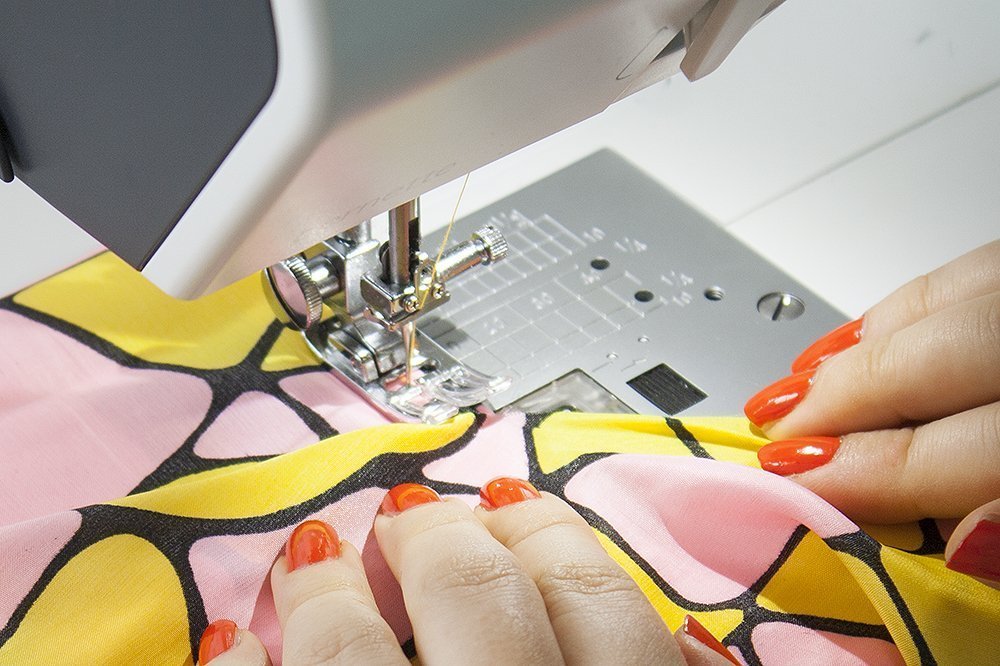
You want the seam at the center of the vent to be right at the edge of the fabric. Be careful when doing this step, it’s easy for the bias tape to slip away. You want the seam to catch it, even when sewing right at the edge of the fabric.
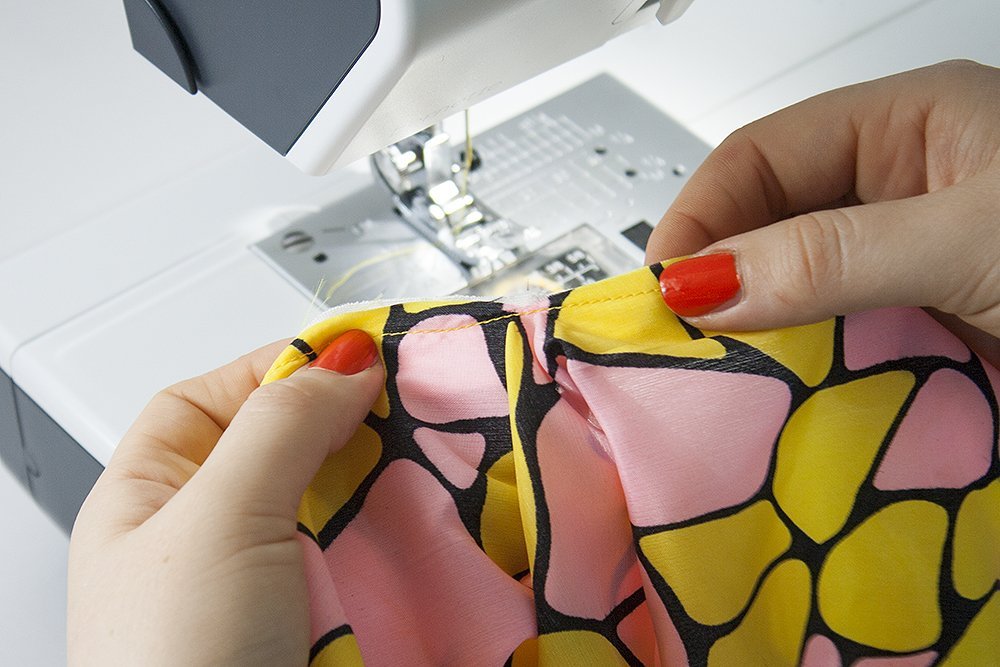
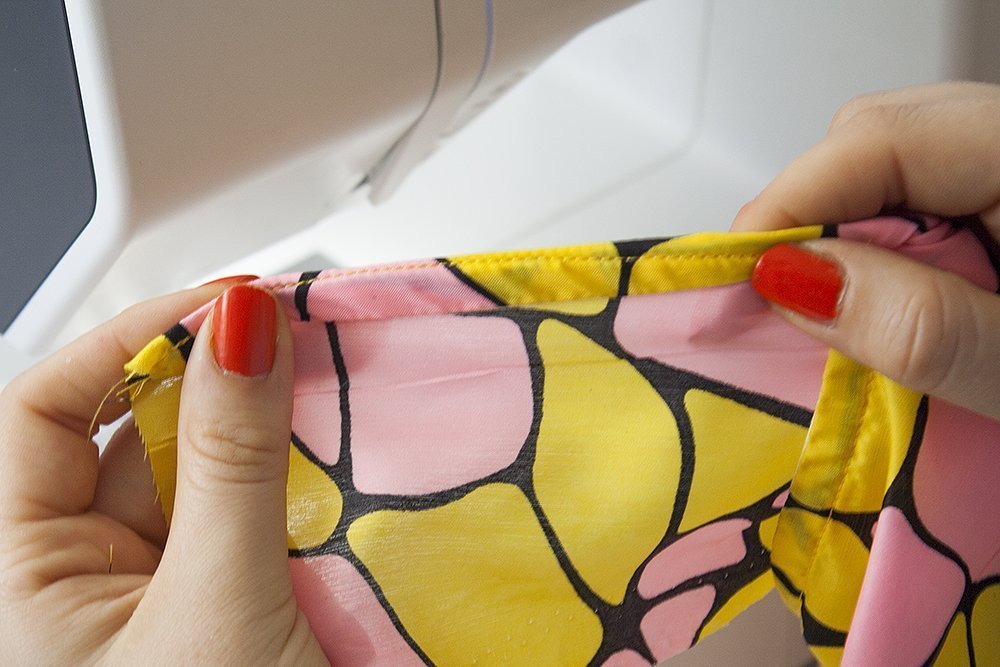
In the picture below you can see that the stitch line is barely on the fabric and right at the edge.
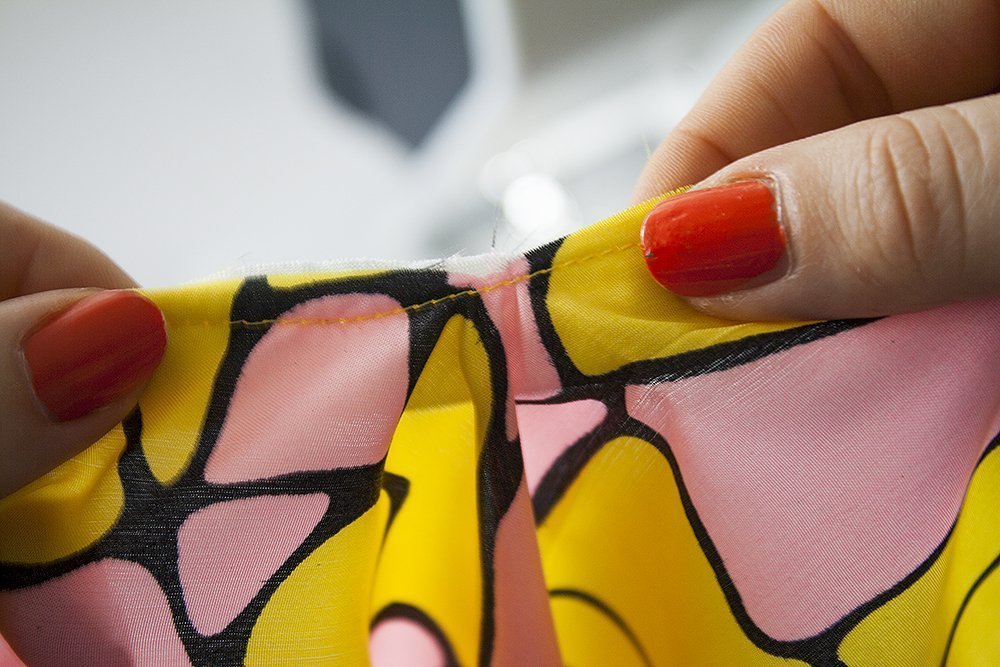
Now, you can press the bias to the wrong side of the fabric, so it’s not visible from the right side of the fabric. I decided to understitch it first, so it will always stay in place.
Next, I sewed the bias tape to the fabric of the sleeve. Start at the bottom and sew your way up. You’ll see that you can’t sew all the way up to the center of the vent; sew as far as you can, and secure the seam a few centimeters away from the center.
Do the same with the other side of the vent. This will leave you with a few centimeters at the center of the vent where the bias tape isn’t secured. That’s fine, as you’ll see in the next step.
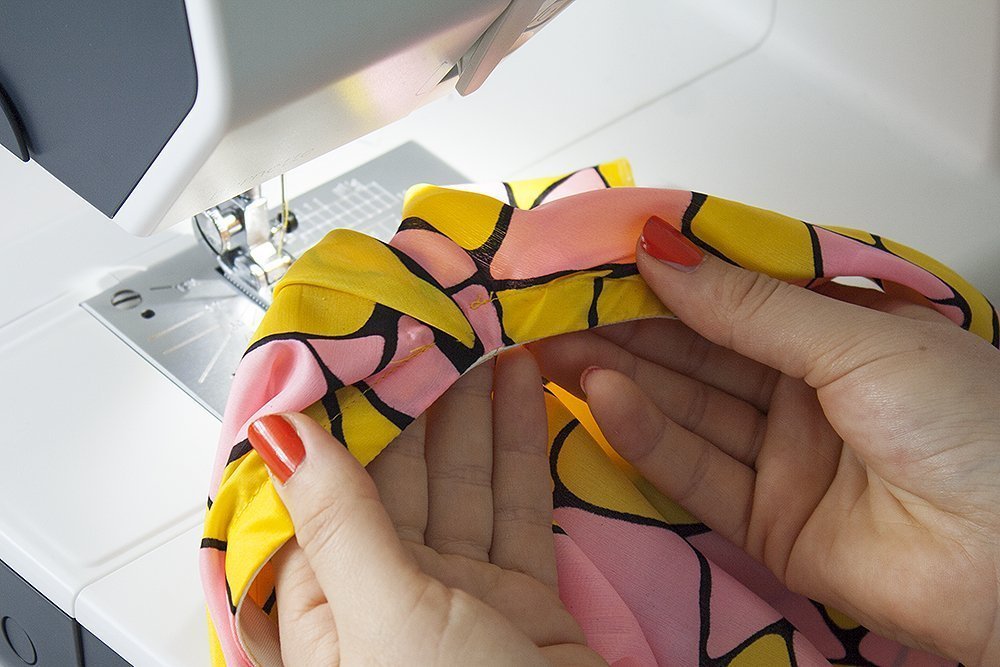
Fold the sleeve at the vent right sides facing, so that the edges of the vent align.
Sew a diagonal line over the folded bias tape, starting at the uppermost inner corner and ending at the outer corner, 1 cm below the upper edge.

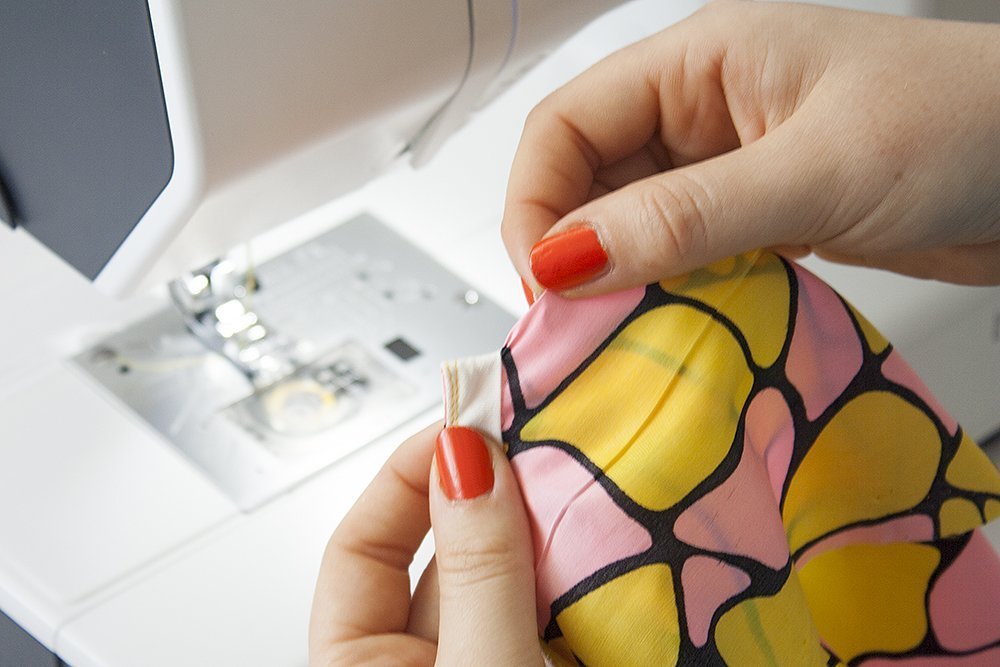
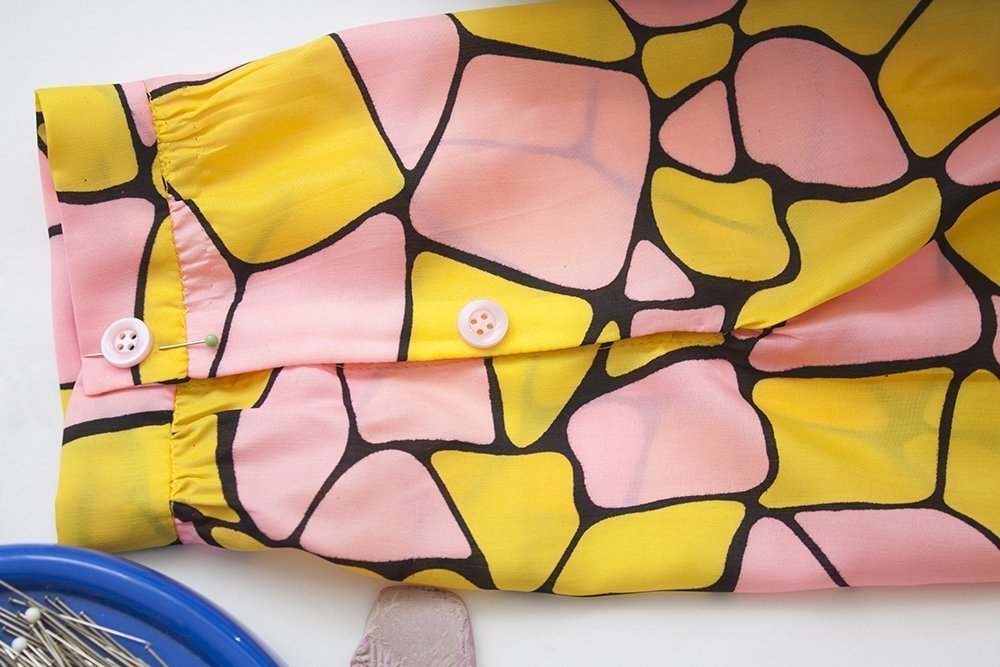
A traditional sleeve vent is closed with a button. Fold one side of the vent over again, so that the bias tape is concealed by the sleeve fabric. This side of the vent will lay on top later, and will feature the buttonhole. This buttonhole will also secure the fold, we don’t need to secure it with a seam.
Press the vent once more. Mark where you want your buttonhole to sit. At this stage, you can already sew the buttonhole.
Lie the sleeve down – you’ll see that the bias tape won’t be visible from the right side. Close the vent and mark the position for the button.

This is how my finished sleeve looks. After finishing the vent, you can trim bias tape that sticks out from the lower edge of the sleeve, and start attaching the cuff.


I’m very confused by these instructions. Are there two different methods being described? Or are the instructions and pictures out of order?
(I’m very experienced and I have an Associates degree in fashion. But I’ve never done a placket before.)
Nevermind. After reviewing the instructions again – I get it. Thanks for posting this.