 BERNINA Corporate Blog -
Did you enjoy making the first block of this Crazy Crystals Mystery Project 2018? Making the second block will keep you occupied too, and gives you the opportunity to work with different fabrics again. Please refer to the general directions of block 1 (January 15). The directions of this month are for making another festive block, with beautiful stitches and special fabrics.
You can download three pages for this second block:
Block 2 – Left part
Block 2 – Right part
Block 2 – Crystal
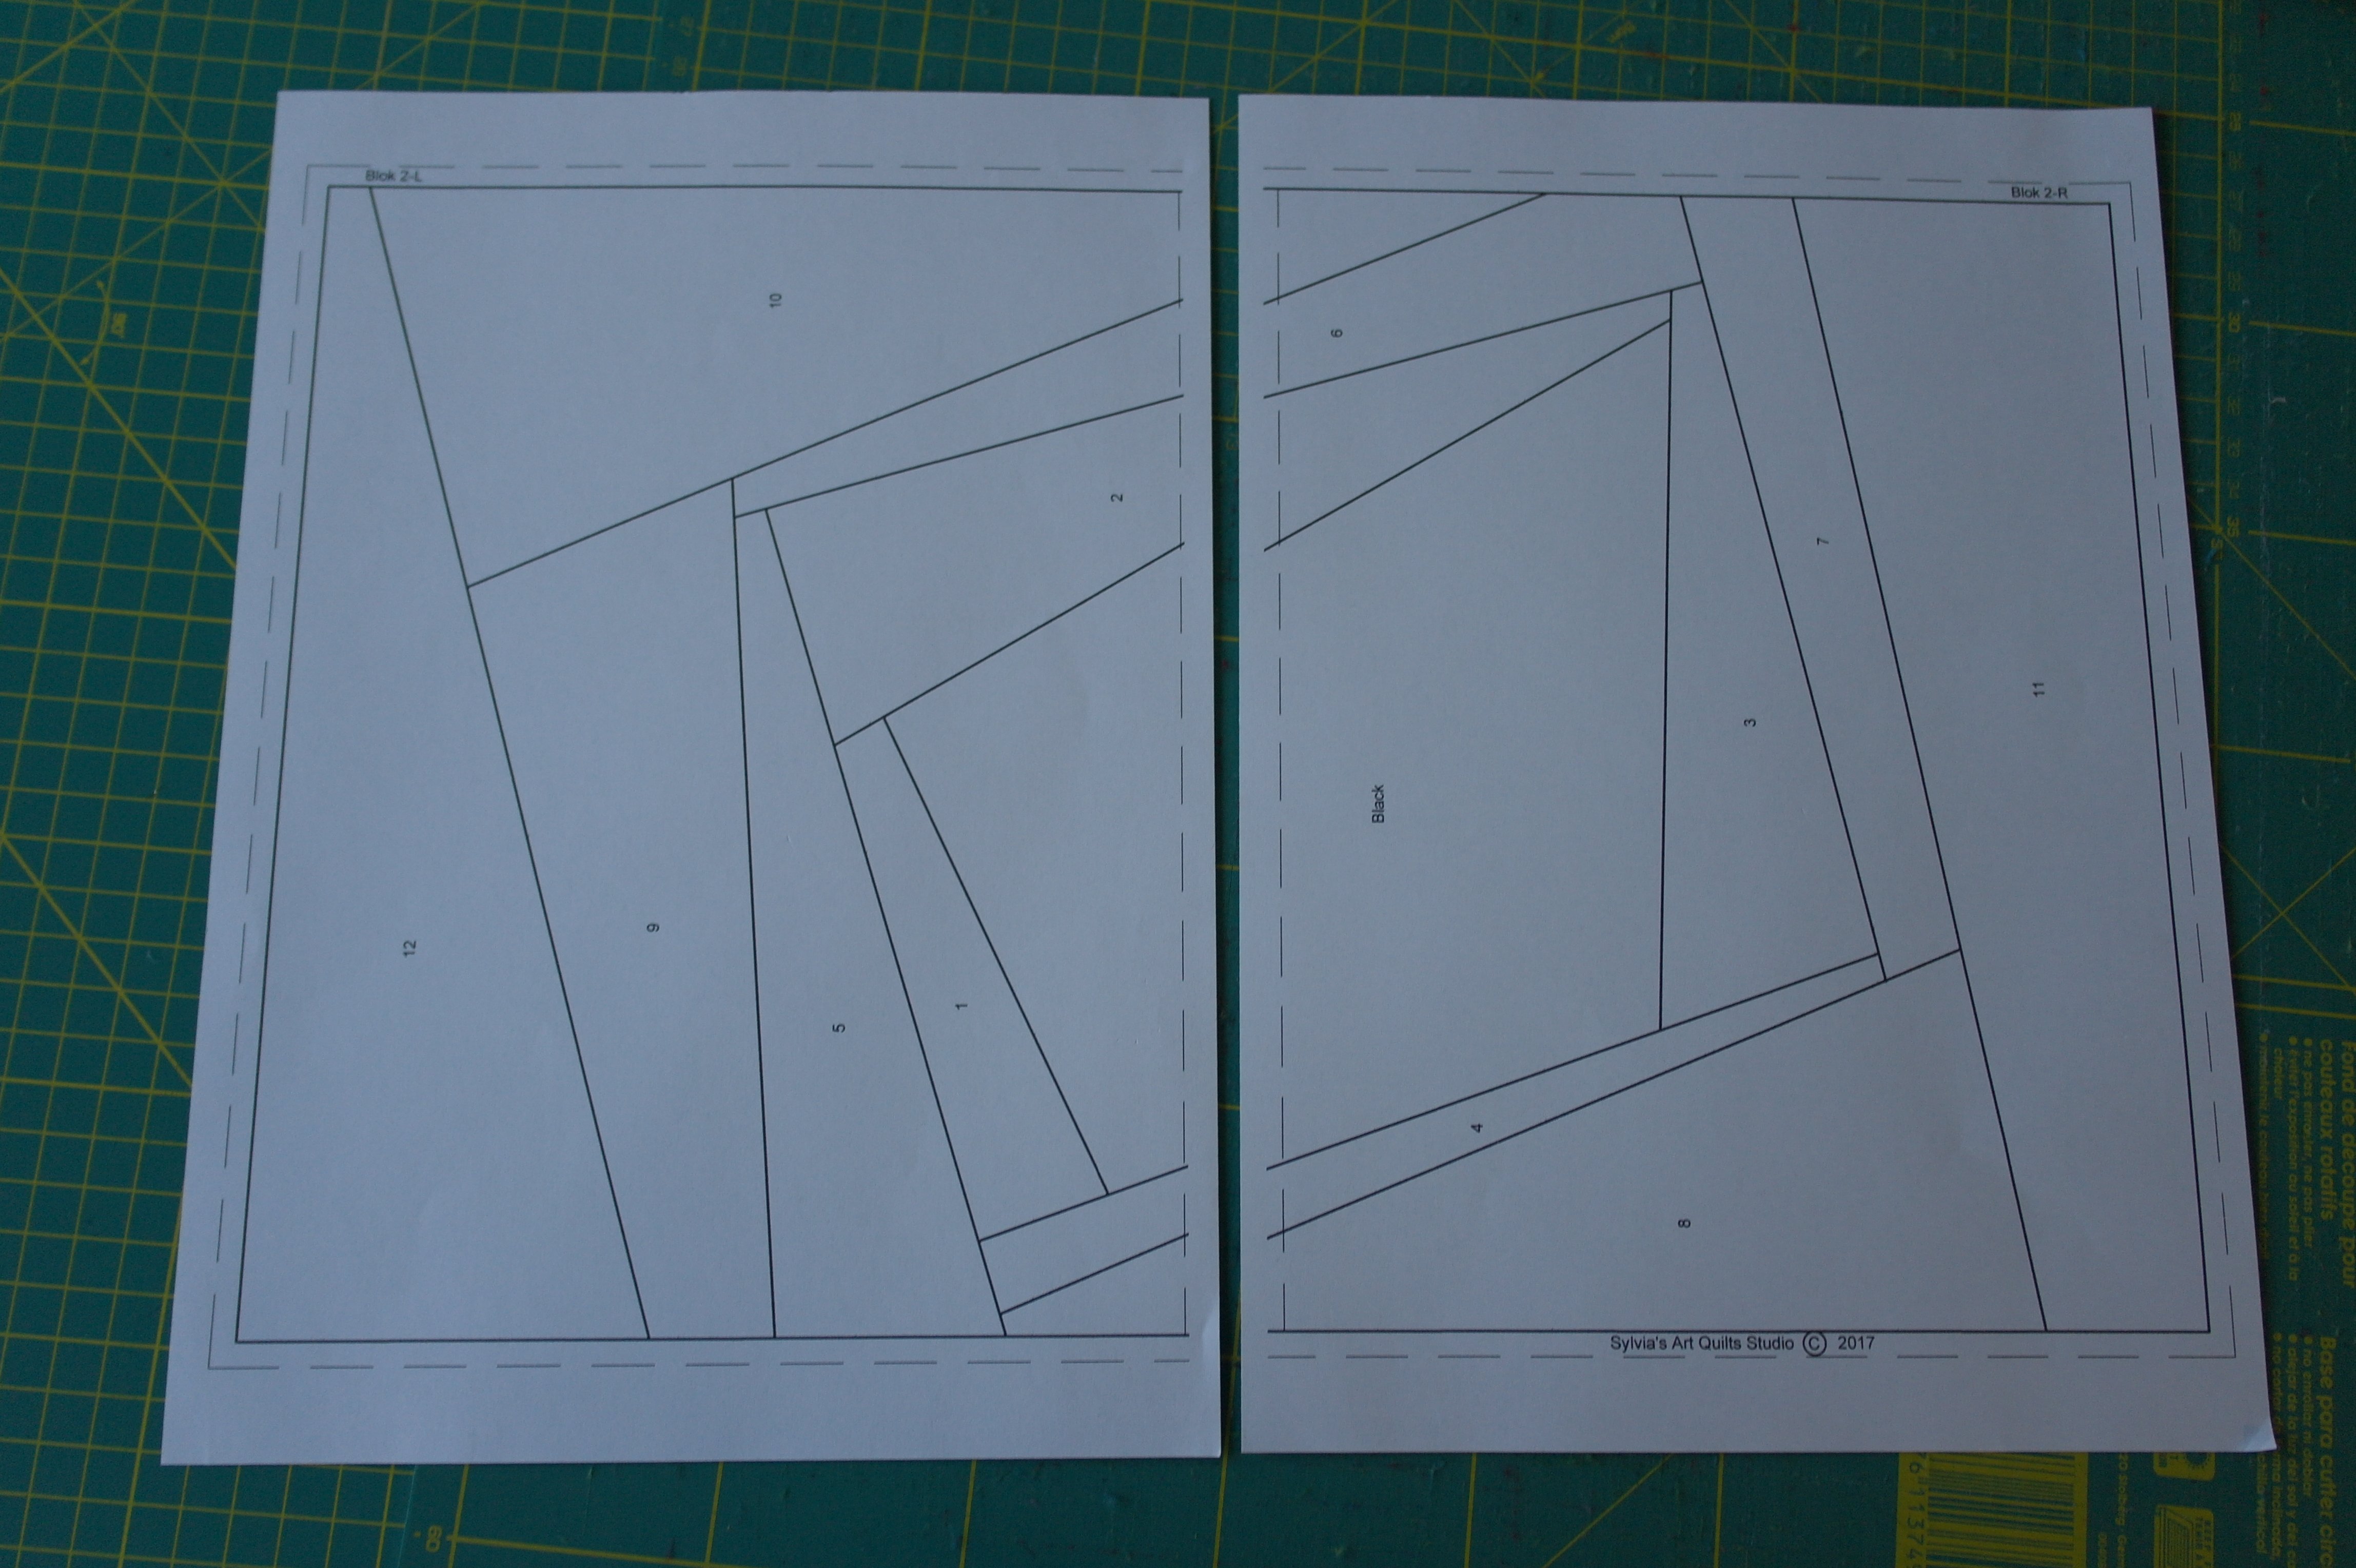
Print the paper patterns: Block 2 has to be made out of two pages: a left and right part.
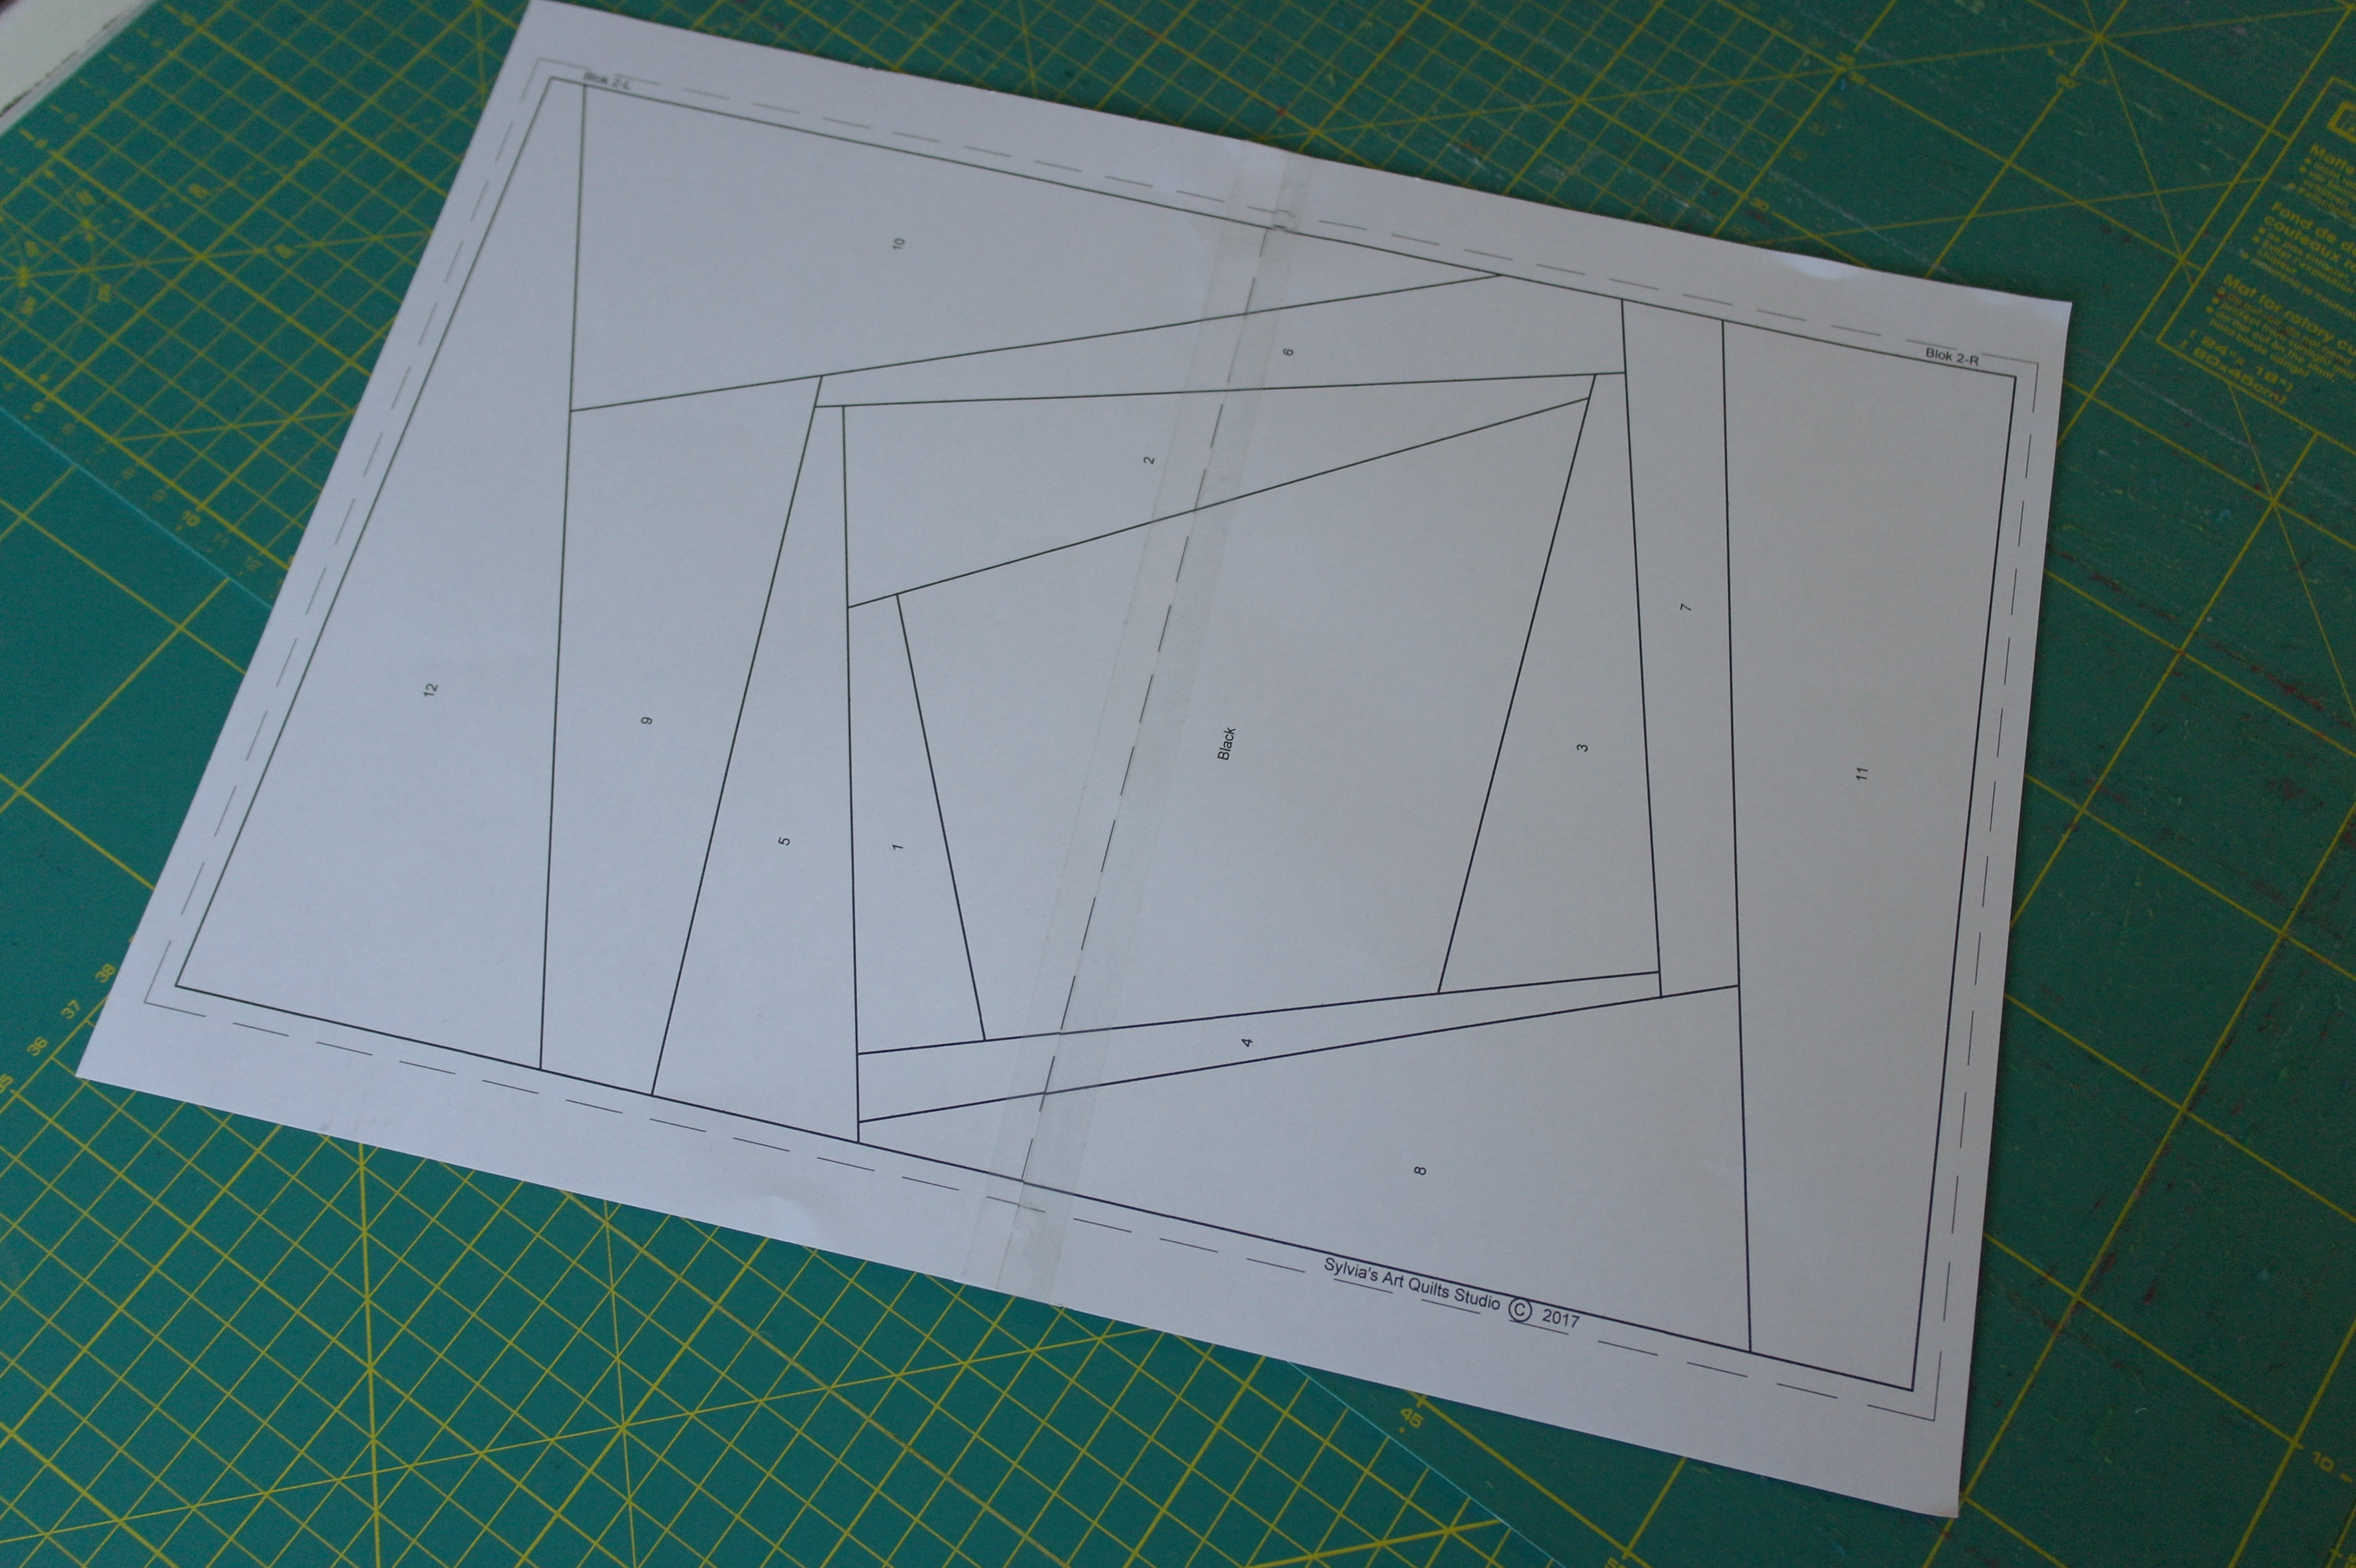
Tape them together, using the dotted line, to make one large pattern.
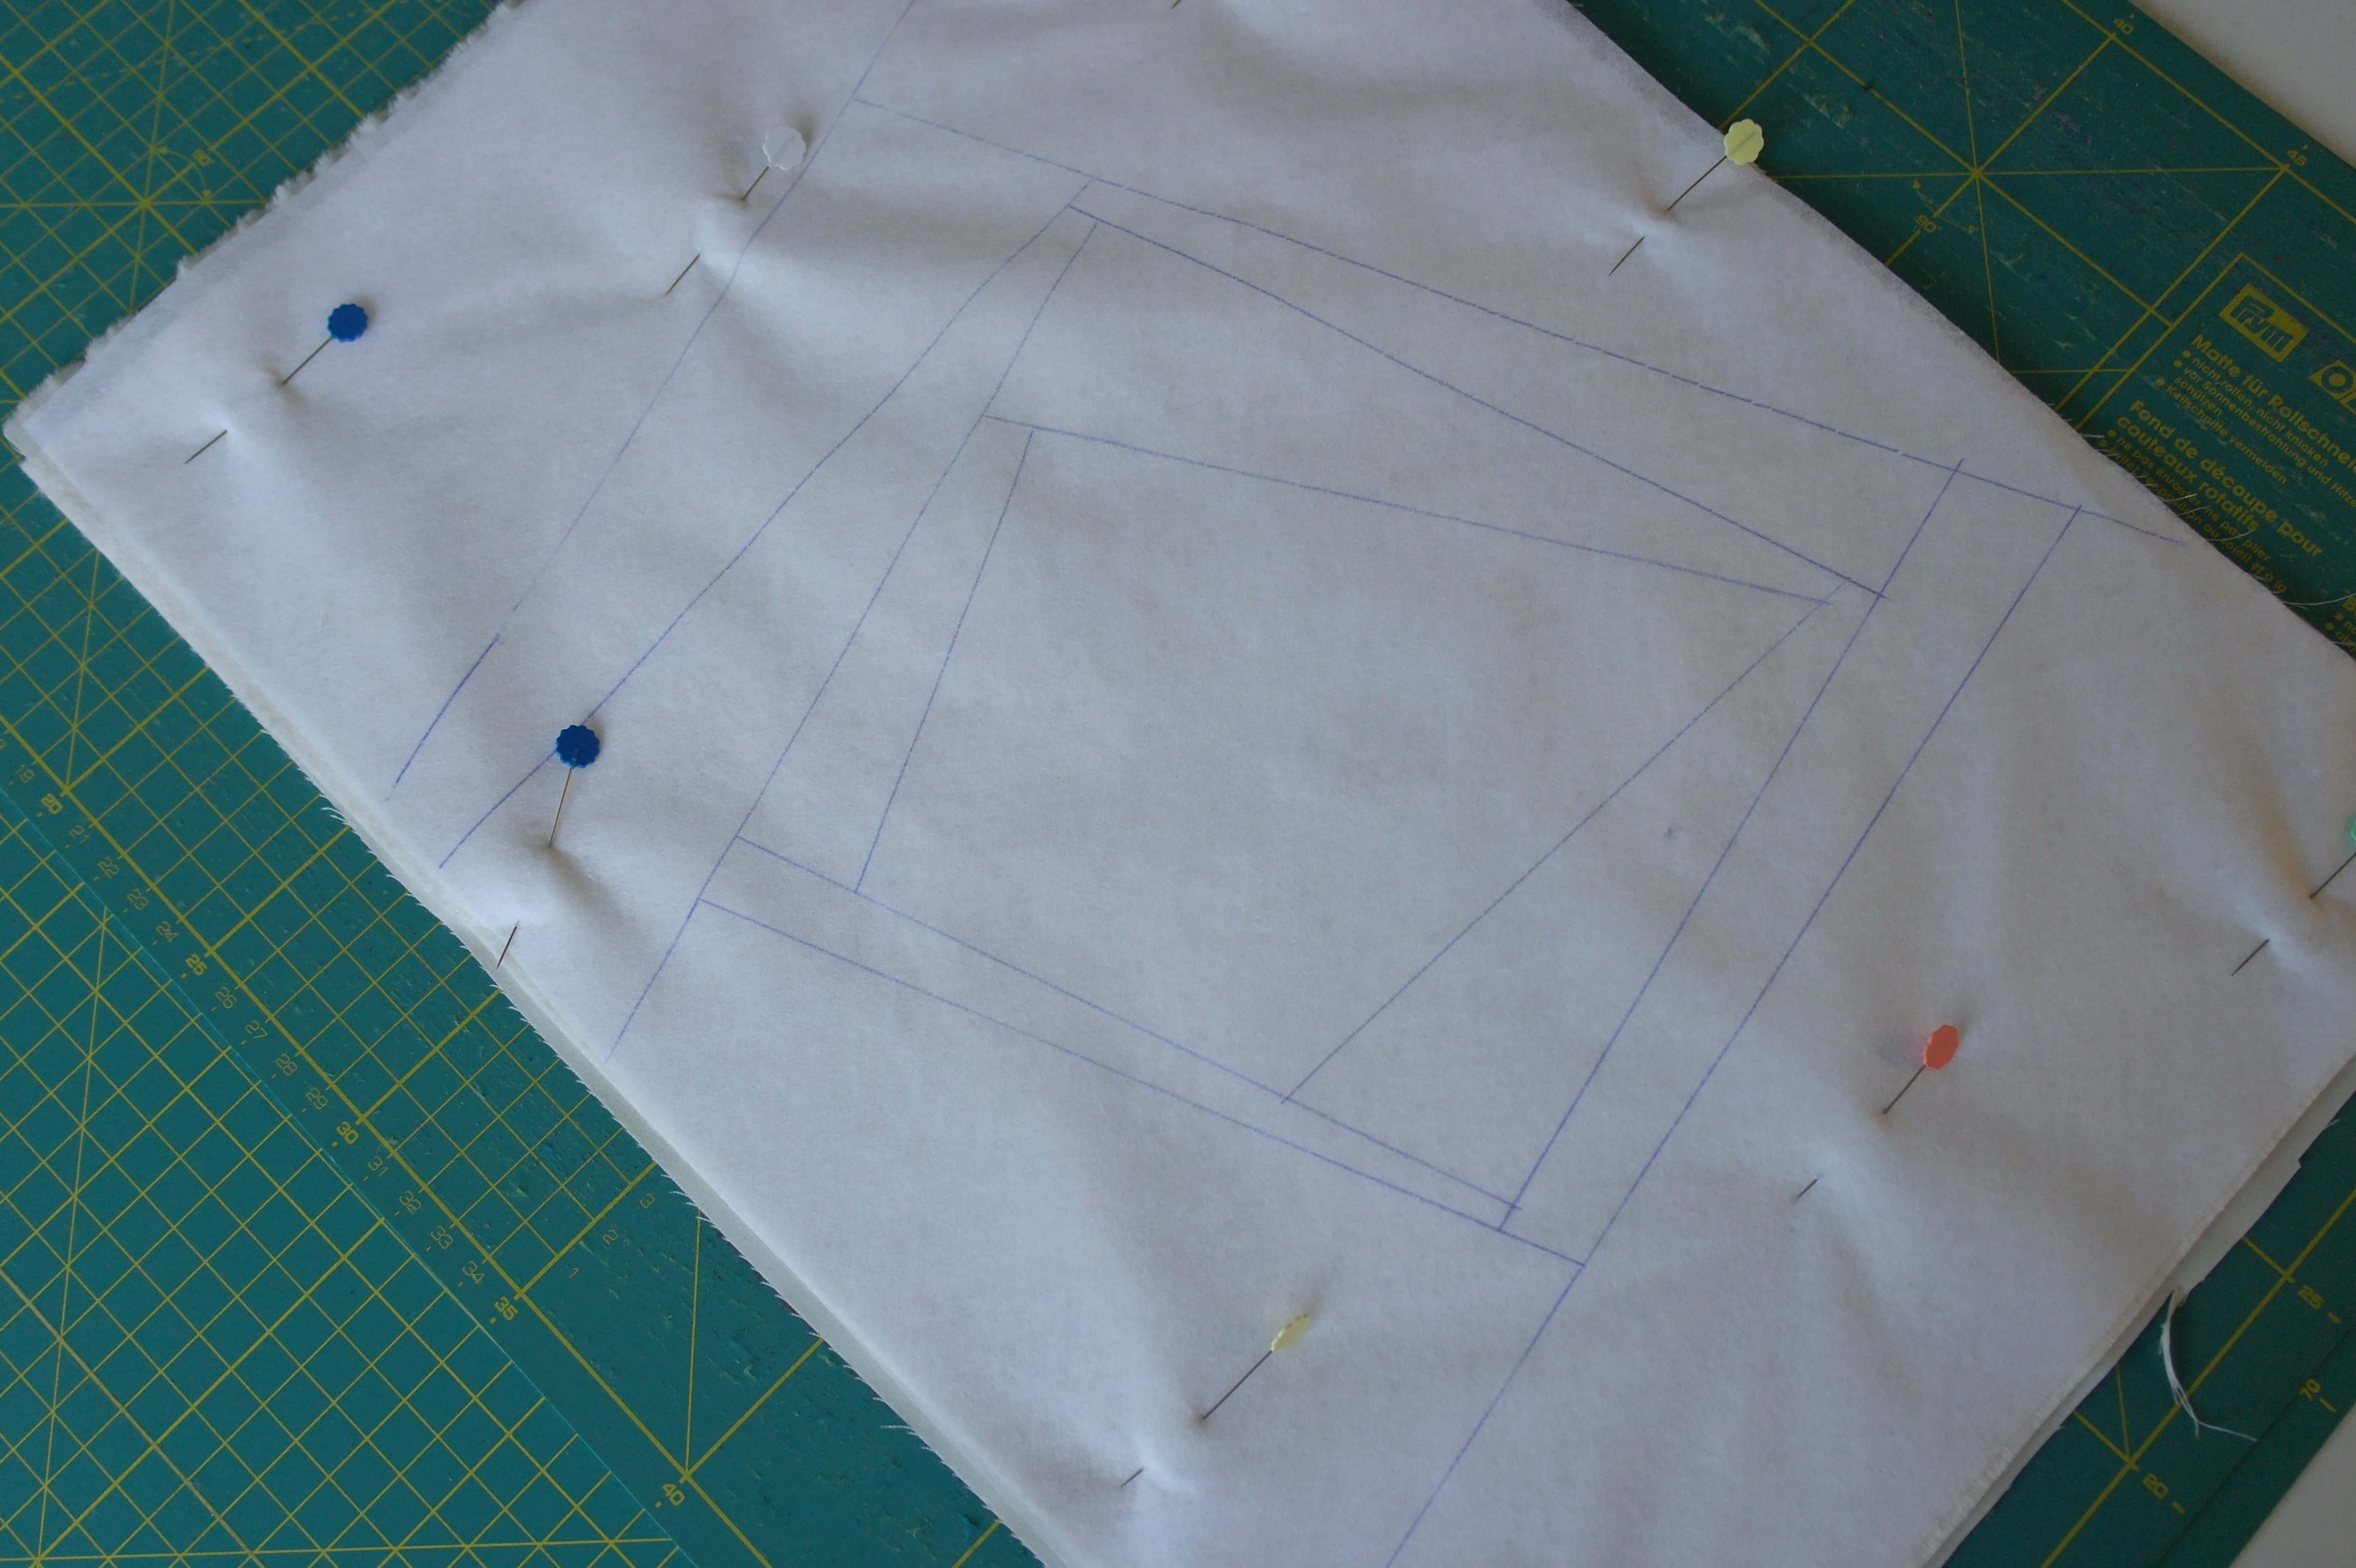
Use Vlieseline L11 – 32x45cm – and place this on top of the paper pattern. Draw all lines of the Crazy Patchwork. Be sure to extend all lines to the edges. Make a sandwich with off-white backing, batting and Vlieseline L11: pin in place with Flower Pins (large quilting pins).
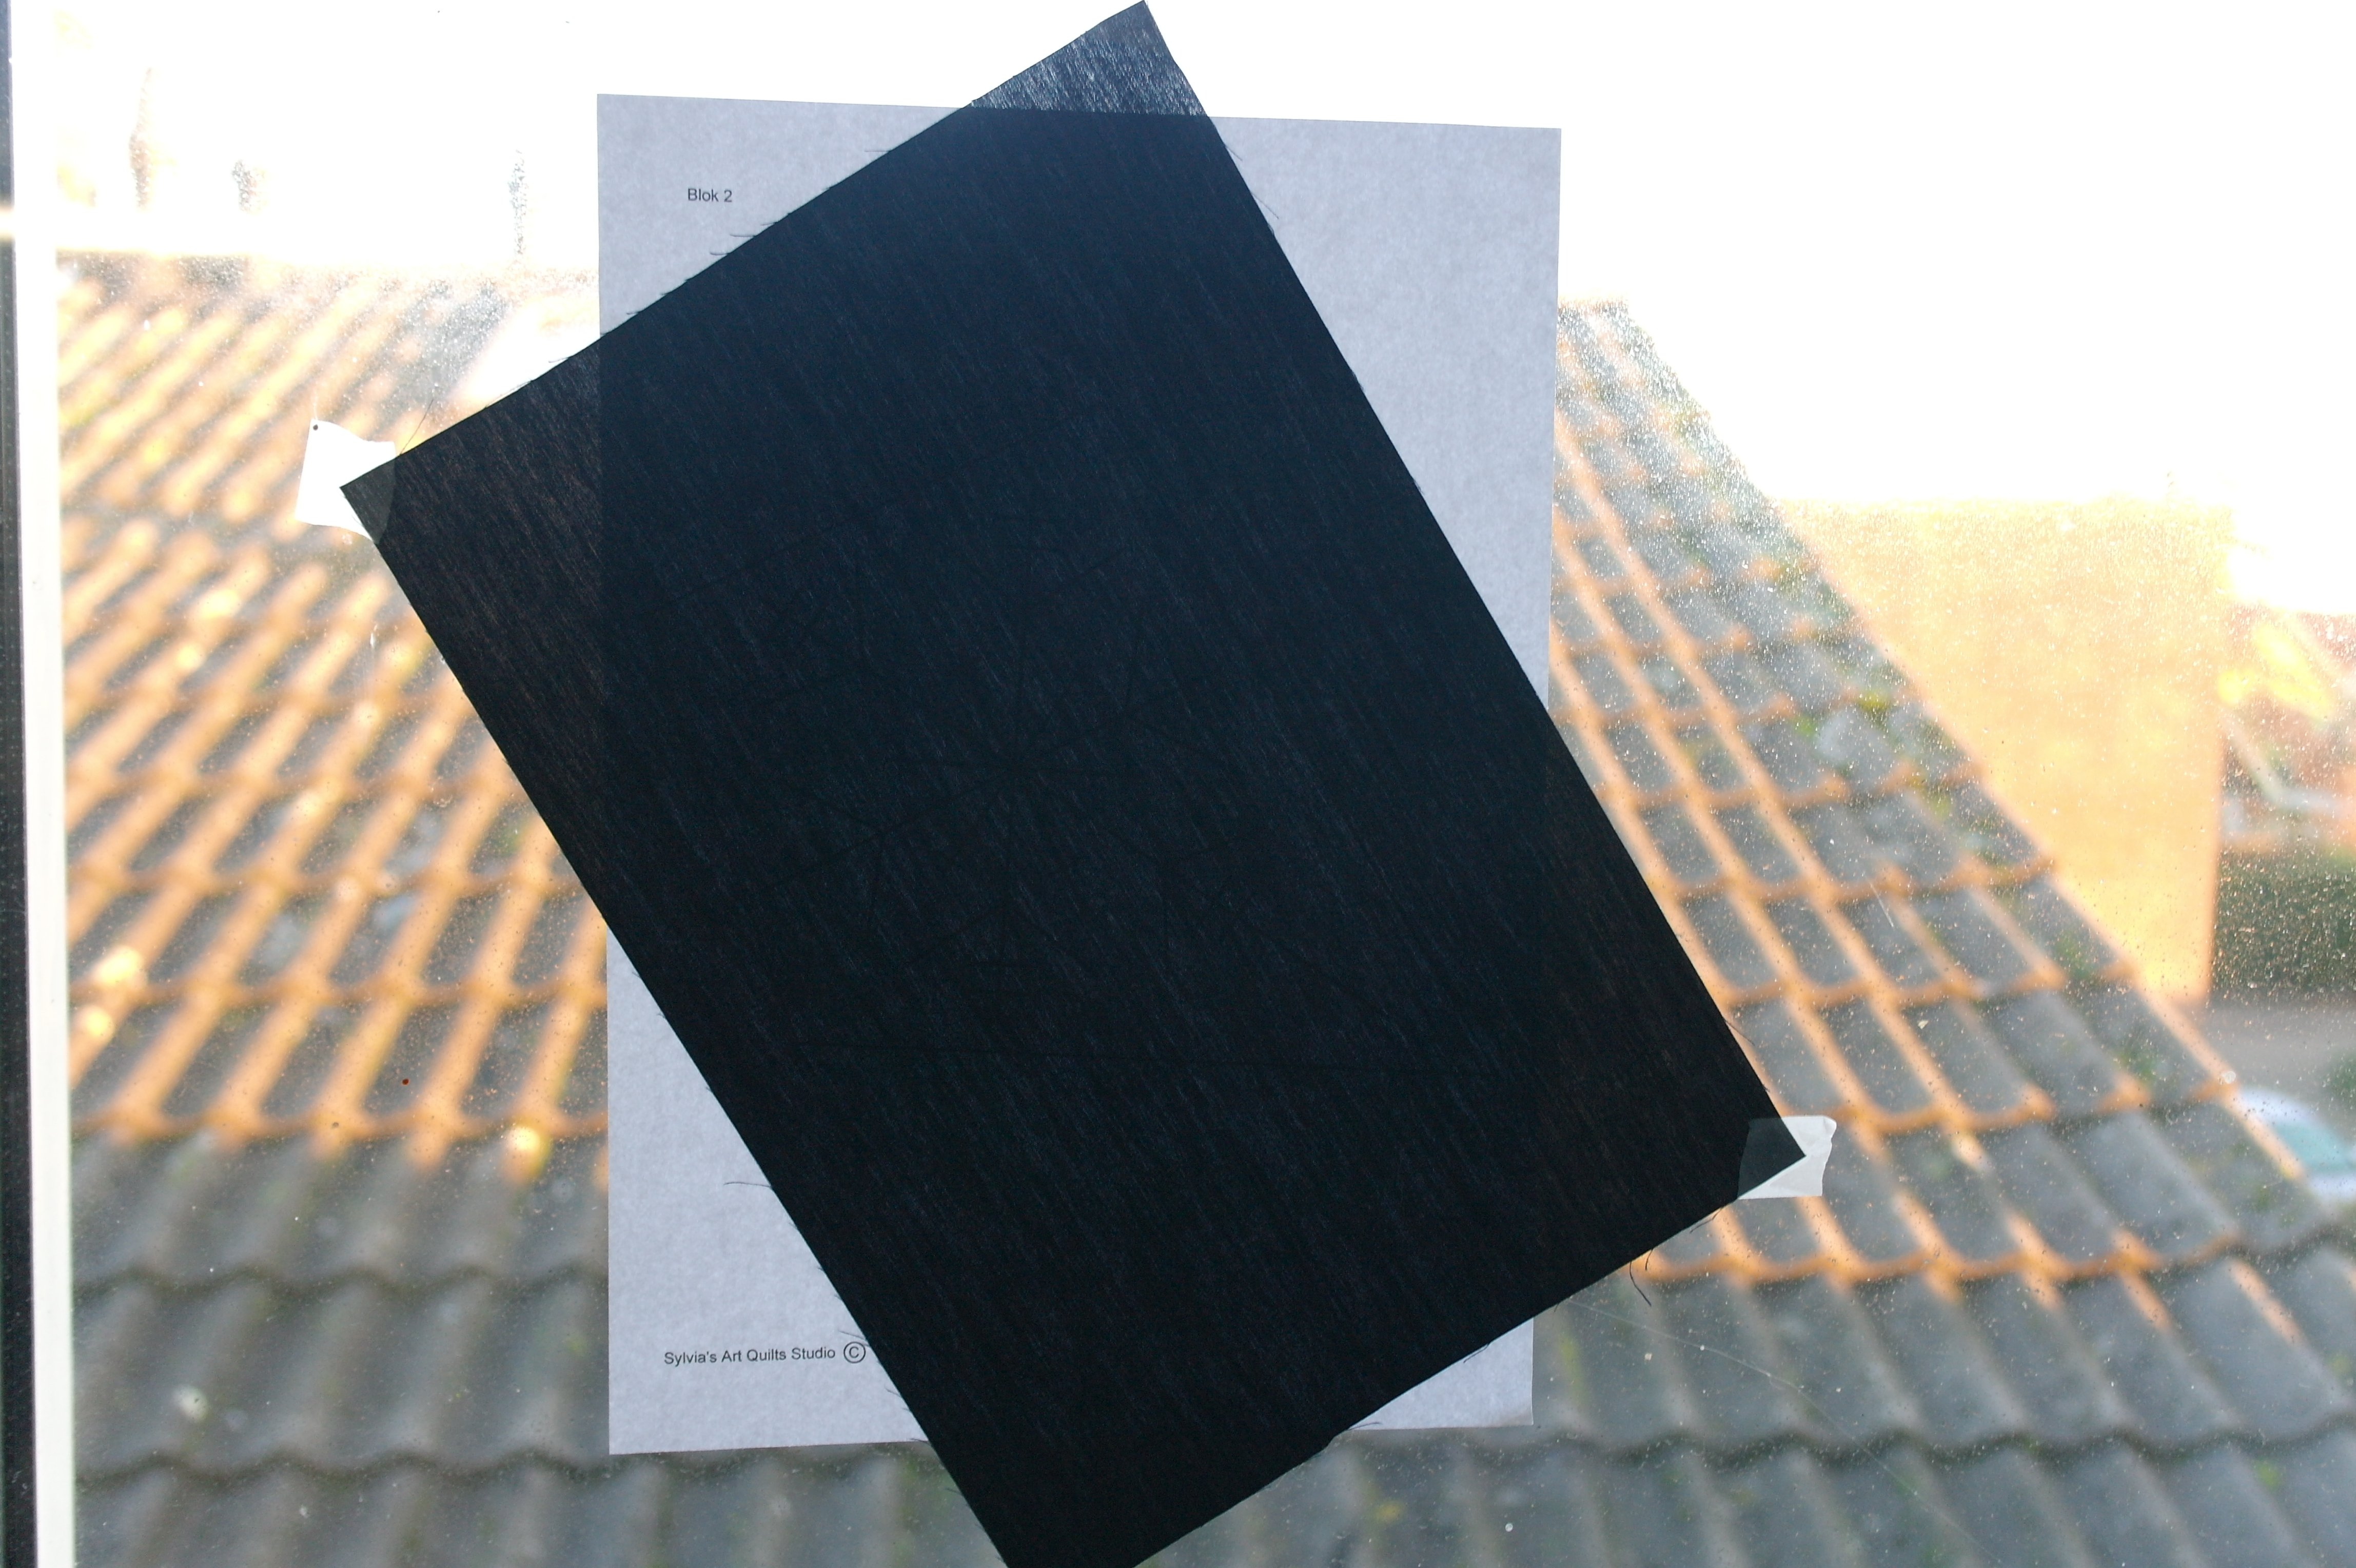
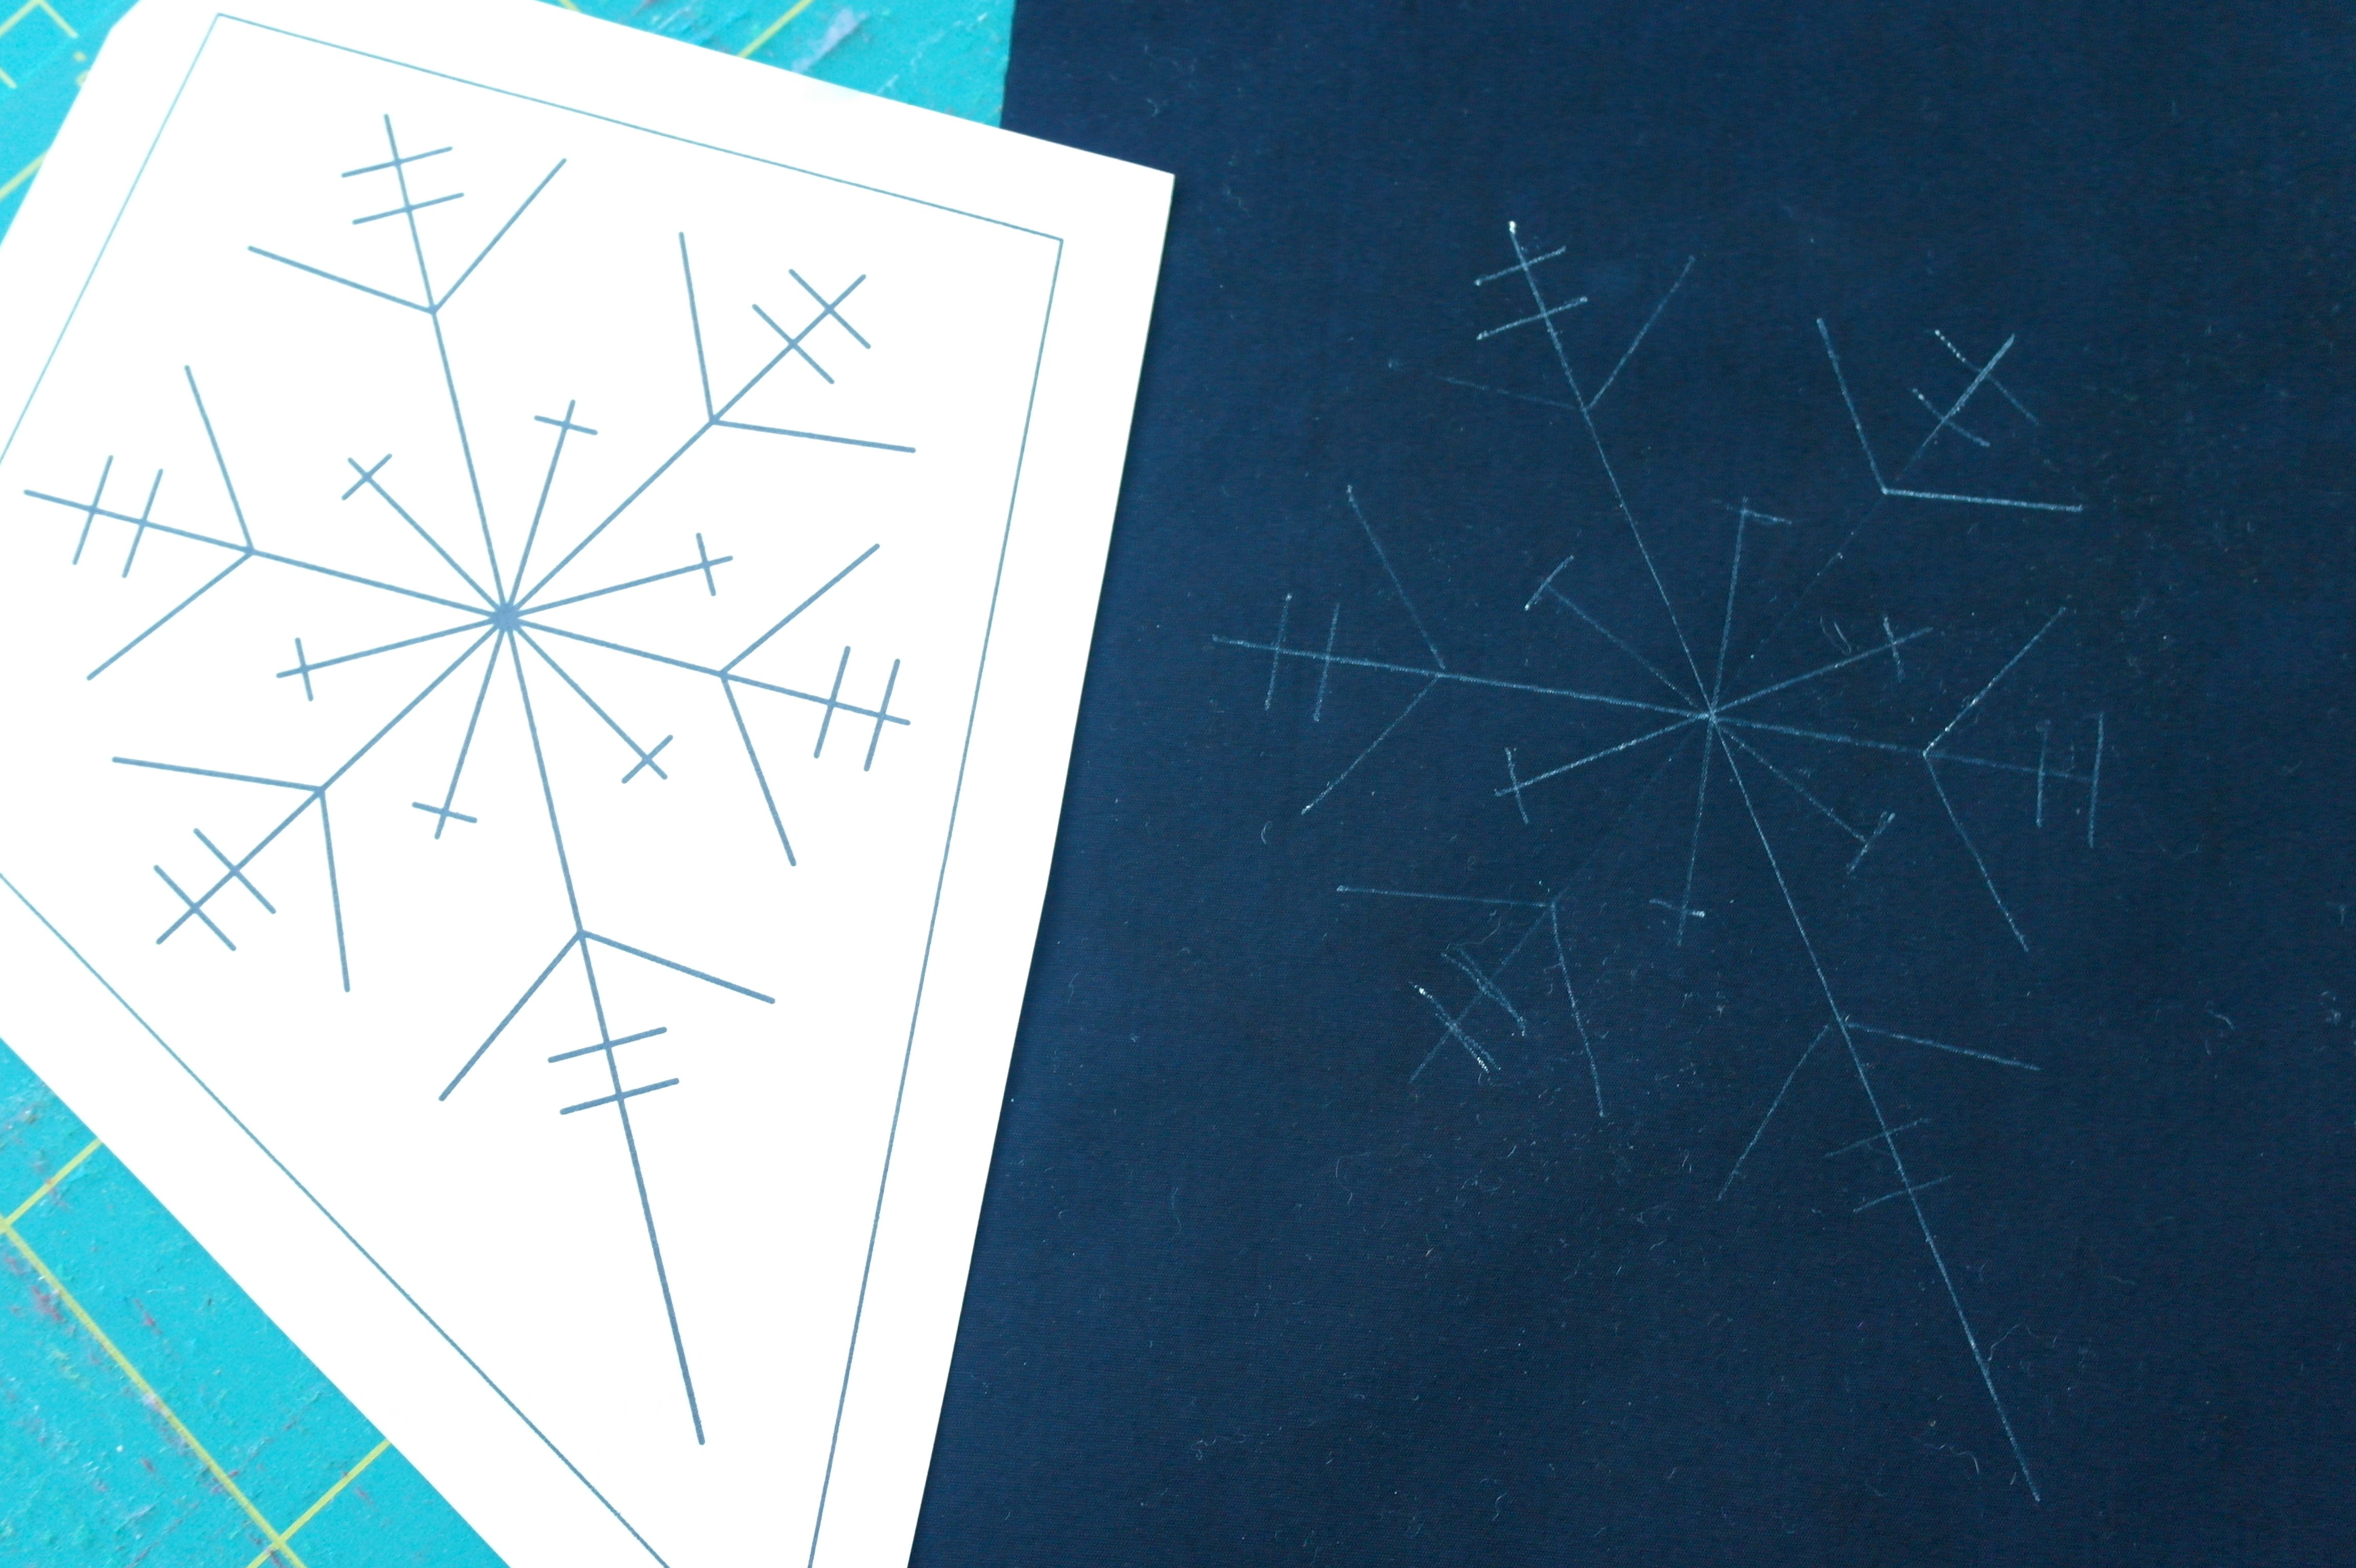
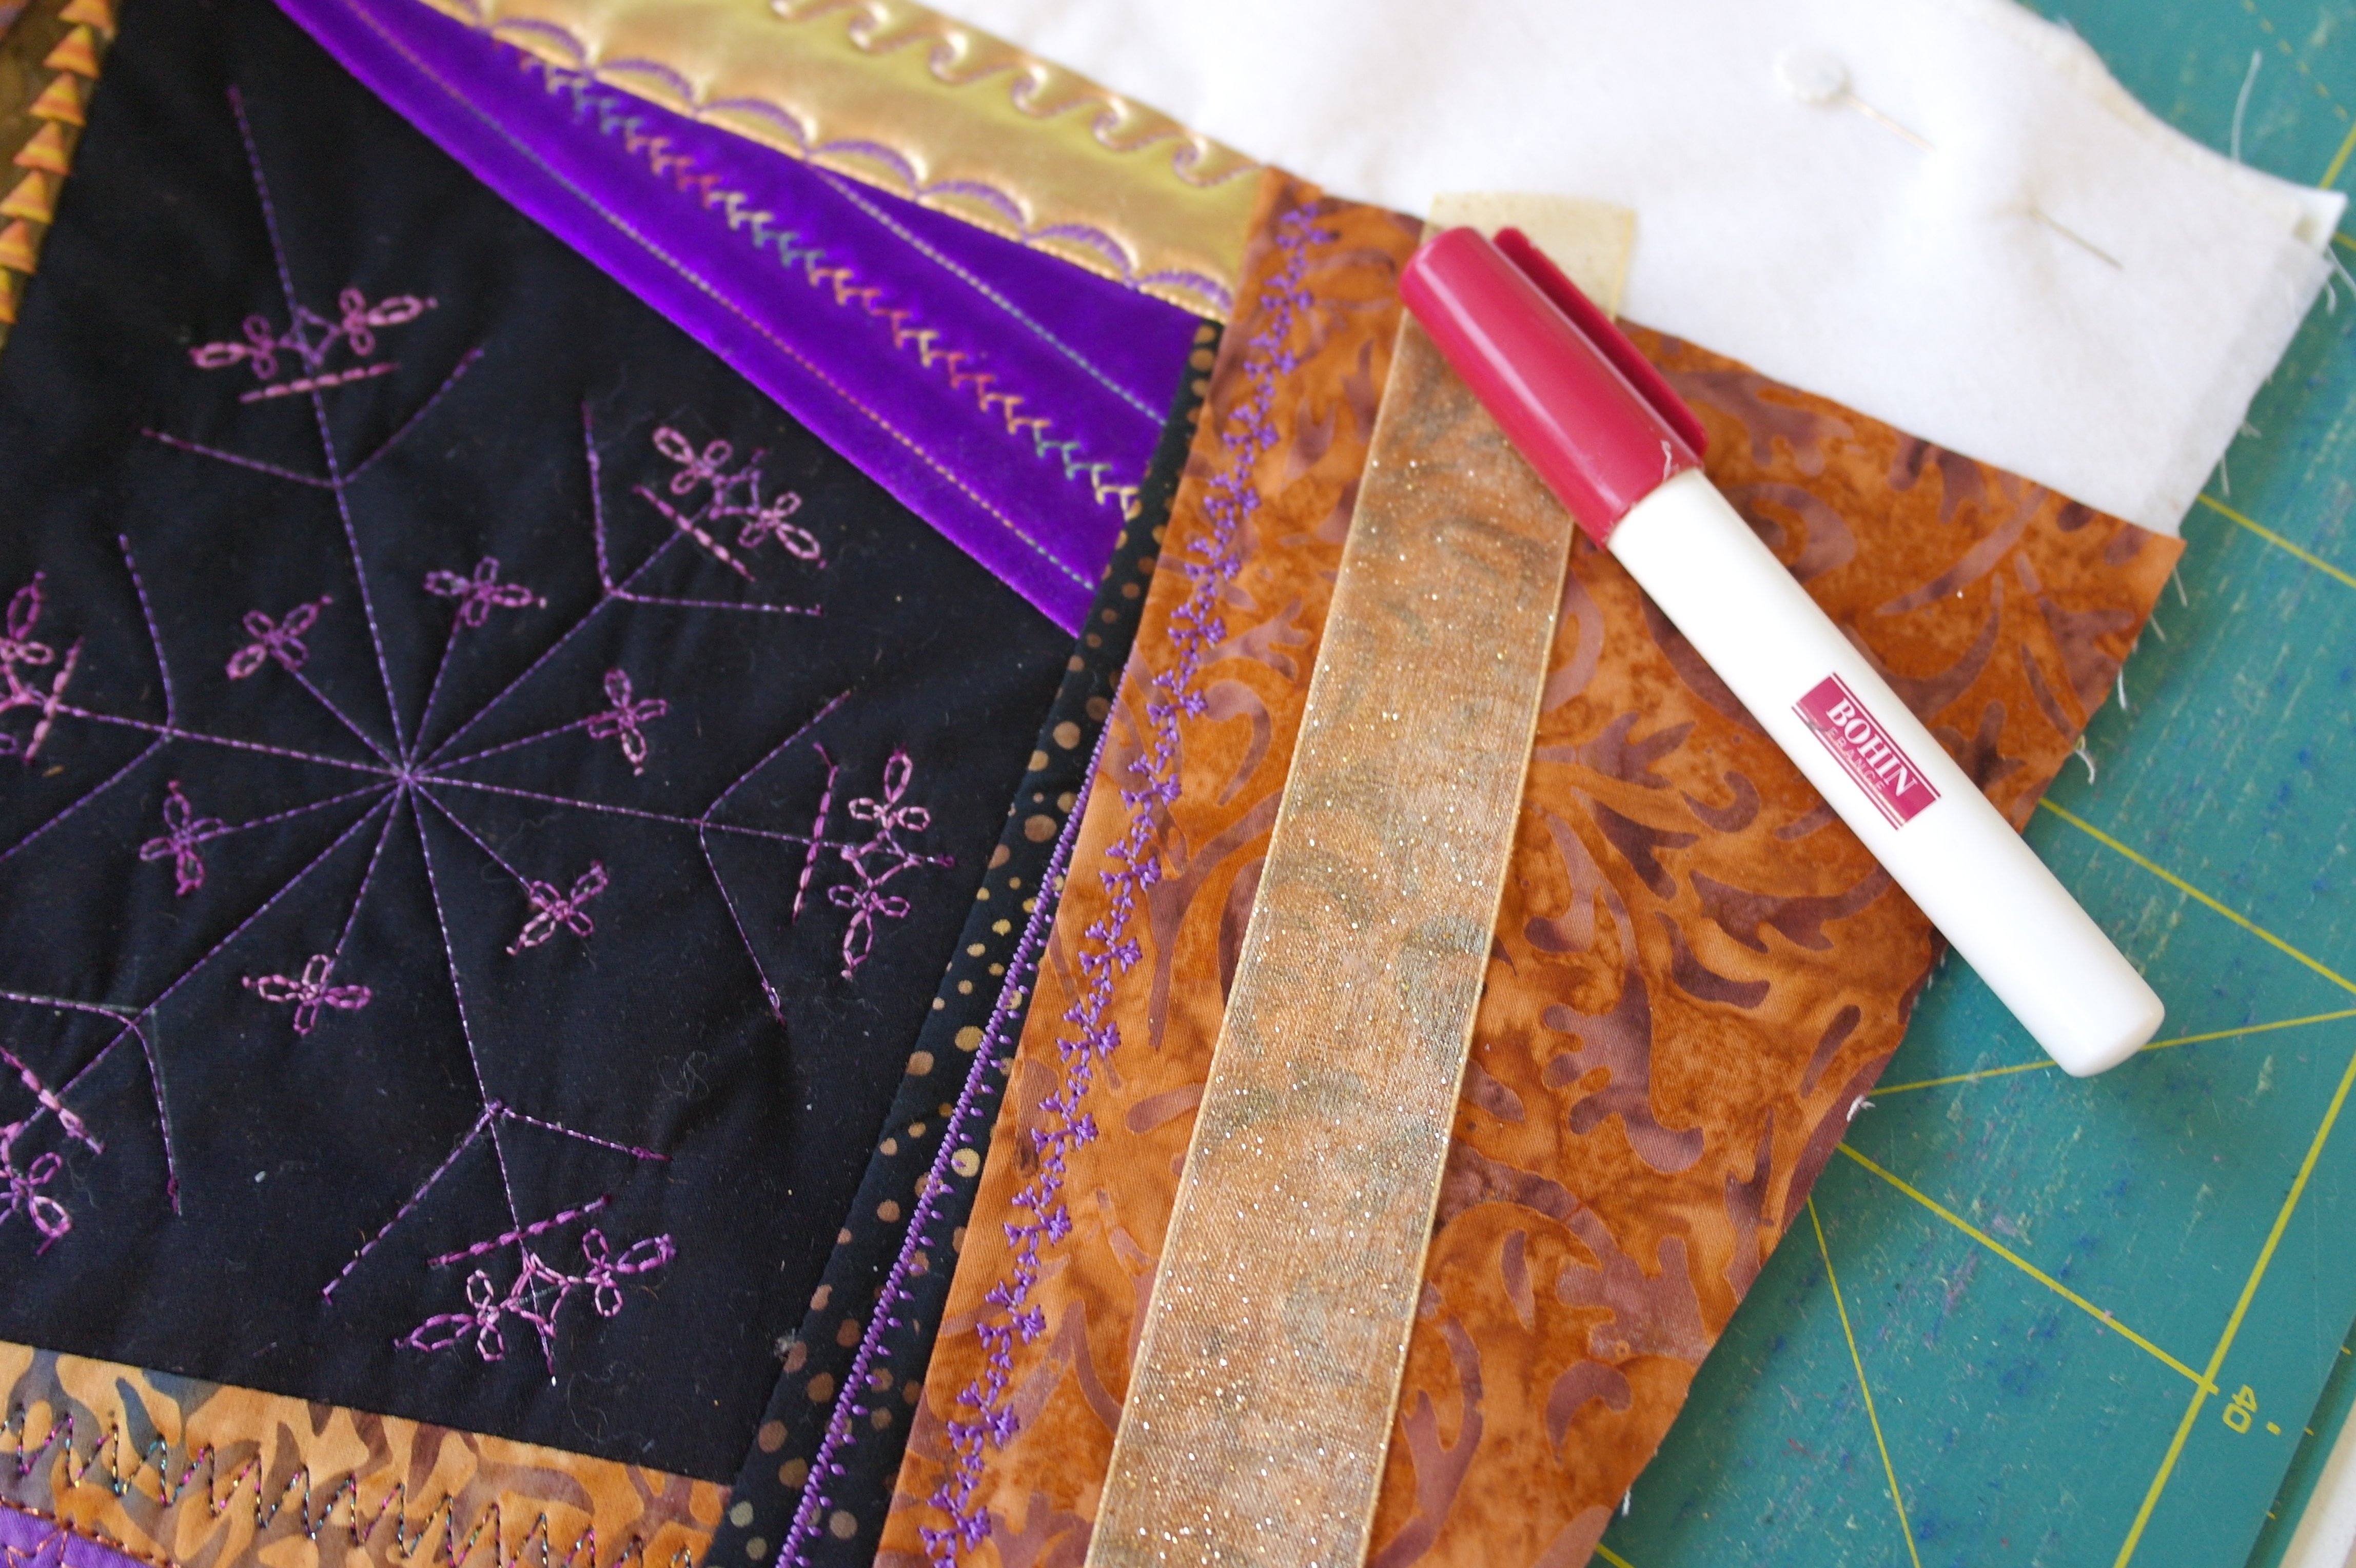
Tape the pattern of the Crystal for Block to a window/light box: tape the black batik quilt fabric (20 x 30 cm) on top of that. Be sure there is enough fabric around the shape of the Crystal to have a seam allowance of at least 1 cm in all directions (that is why I have tilted my black fabric). Draw all lines with white watersoluble pen (or blue if you use a lighter color of solid fabric for the center). BE SURE not to draw thin lines: they have to be removed with water afterwards.
Cut the paper pattern with the Crystal to make a template, be sure to leave a 1 cm seam allowance outside the solid lines. Place the pattern on top of the black batik with the crystal drawn, and cut the black fabric the same size as the paper template.
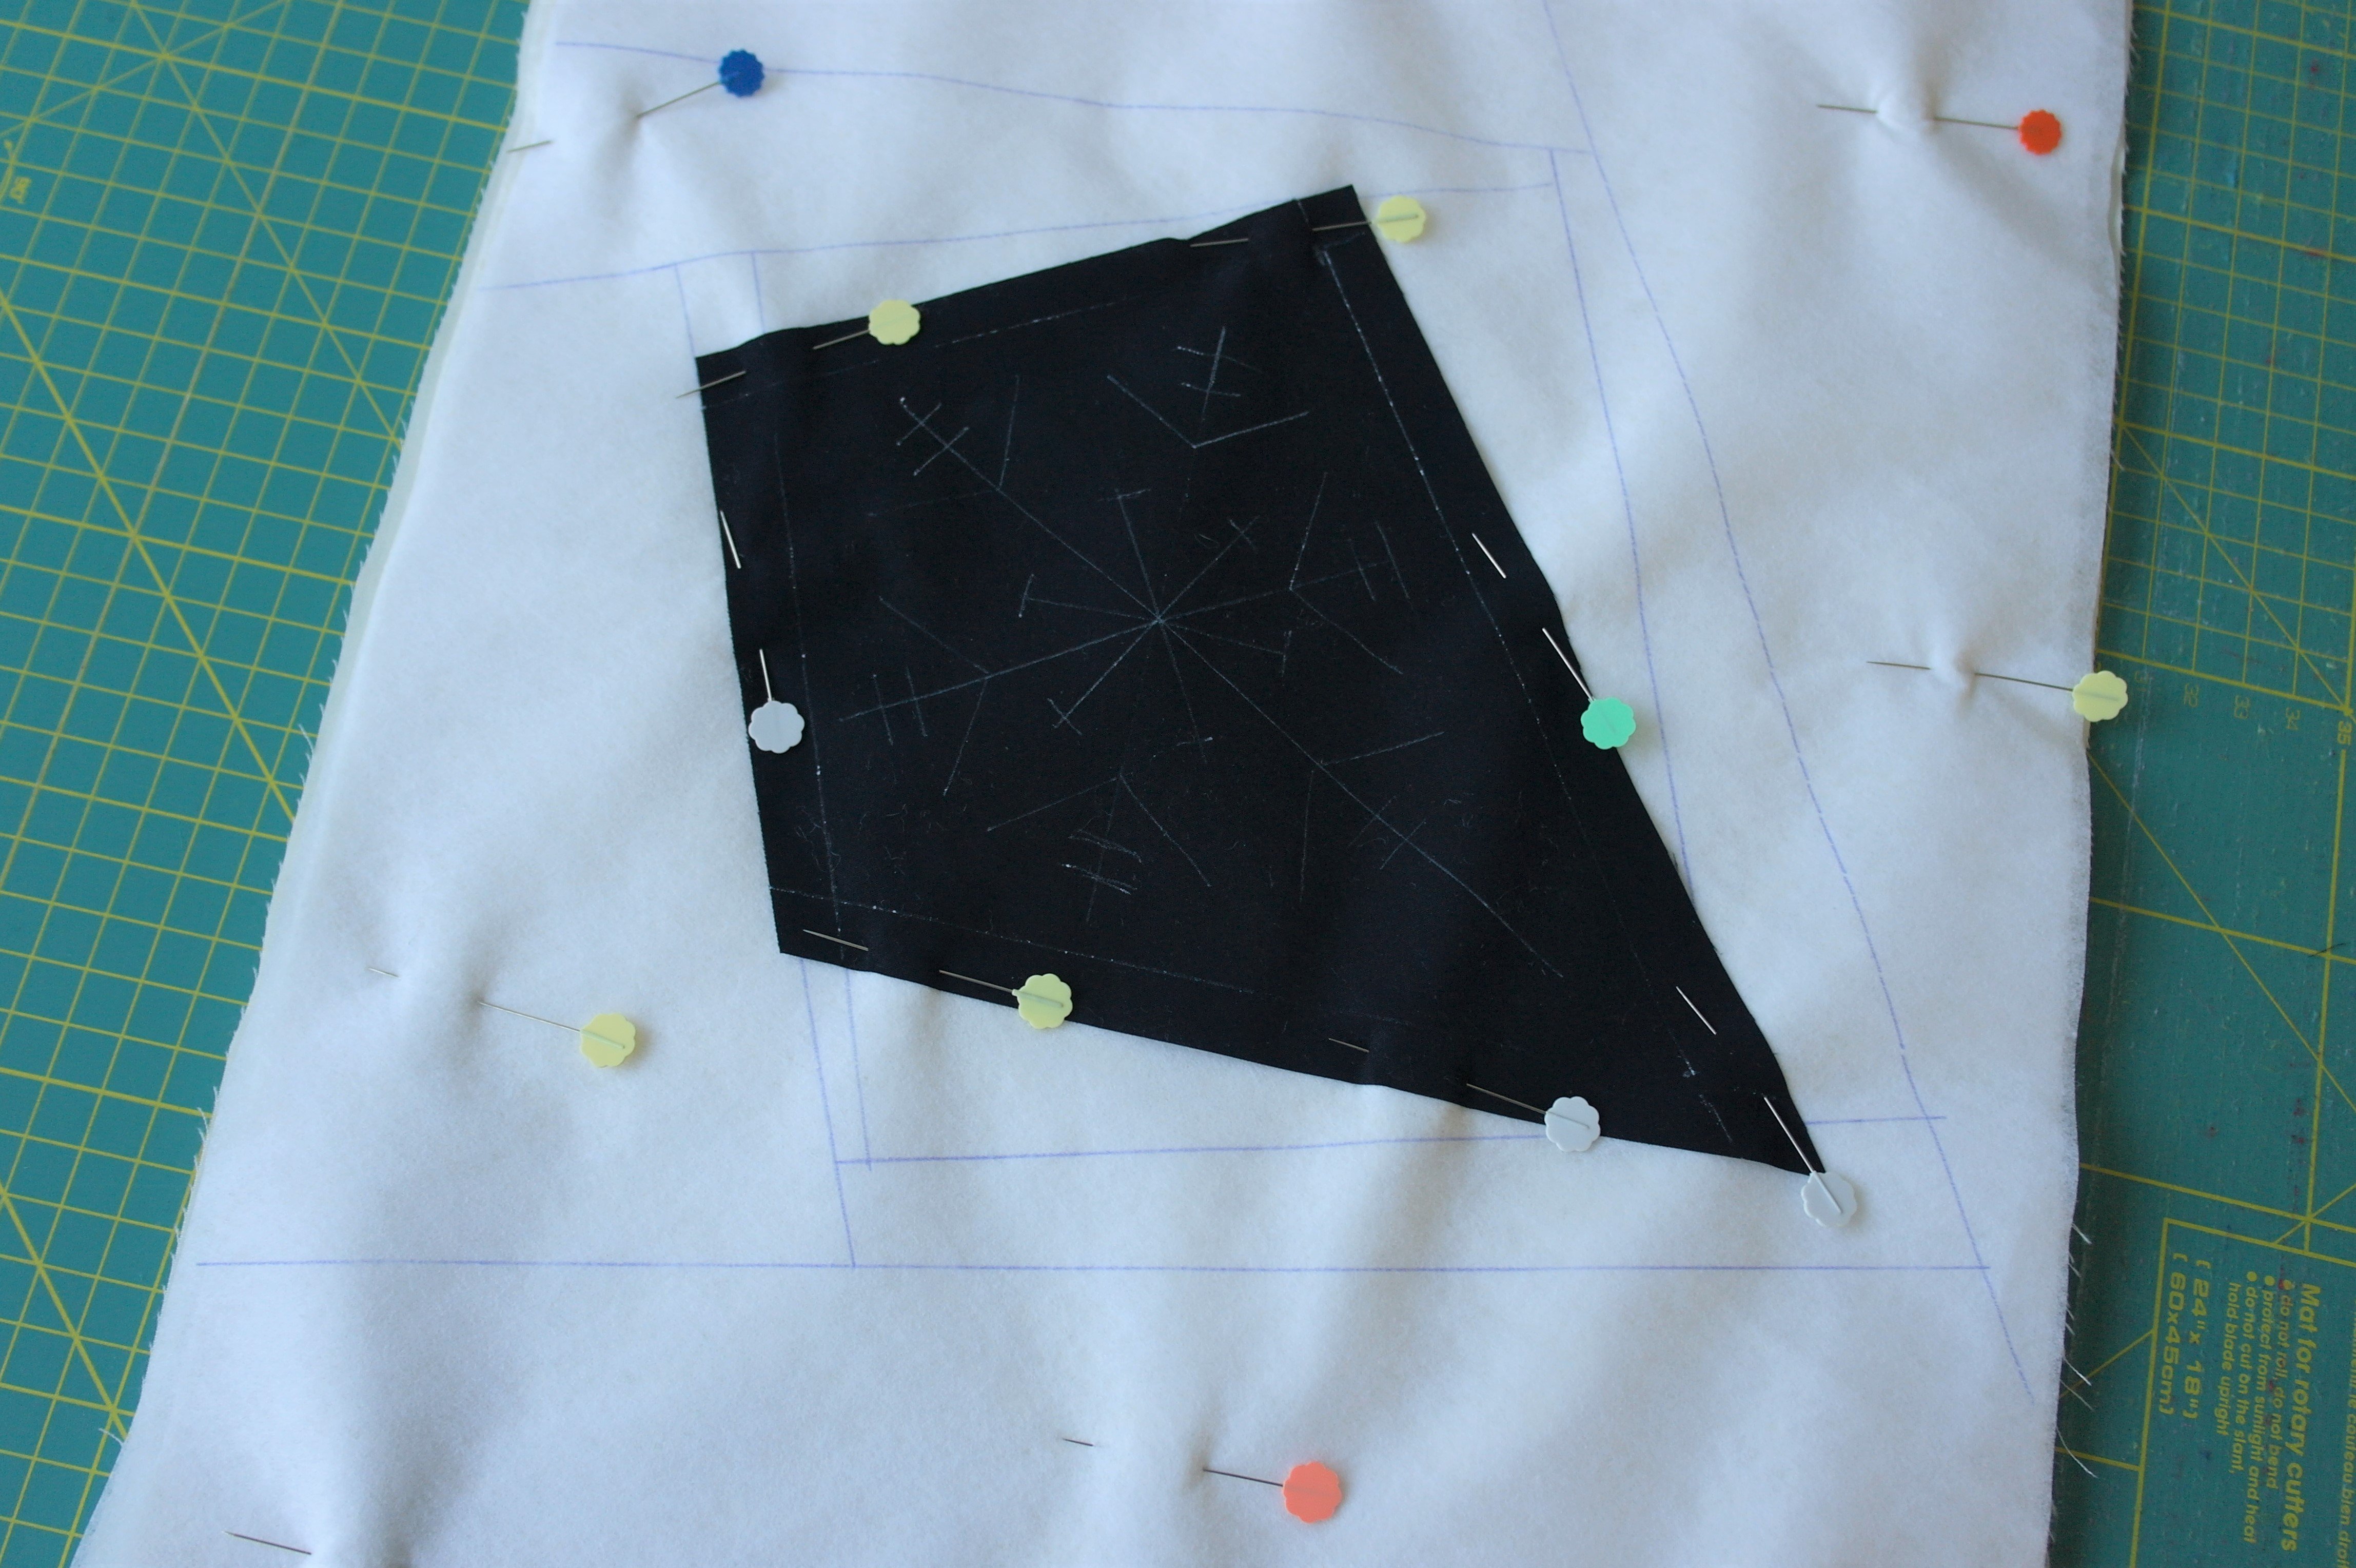
Place the black batik with the Crystal on the right spot, on the ‘center’ of your sandwich, pin in place with Flower Pins. Be sure to draw the solid lines with water soluble pen, to indicate the actual size of the section, inside the seam allowances.
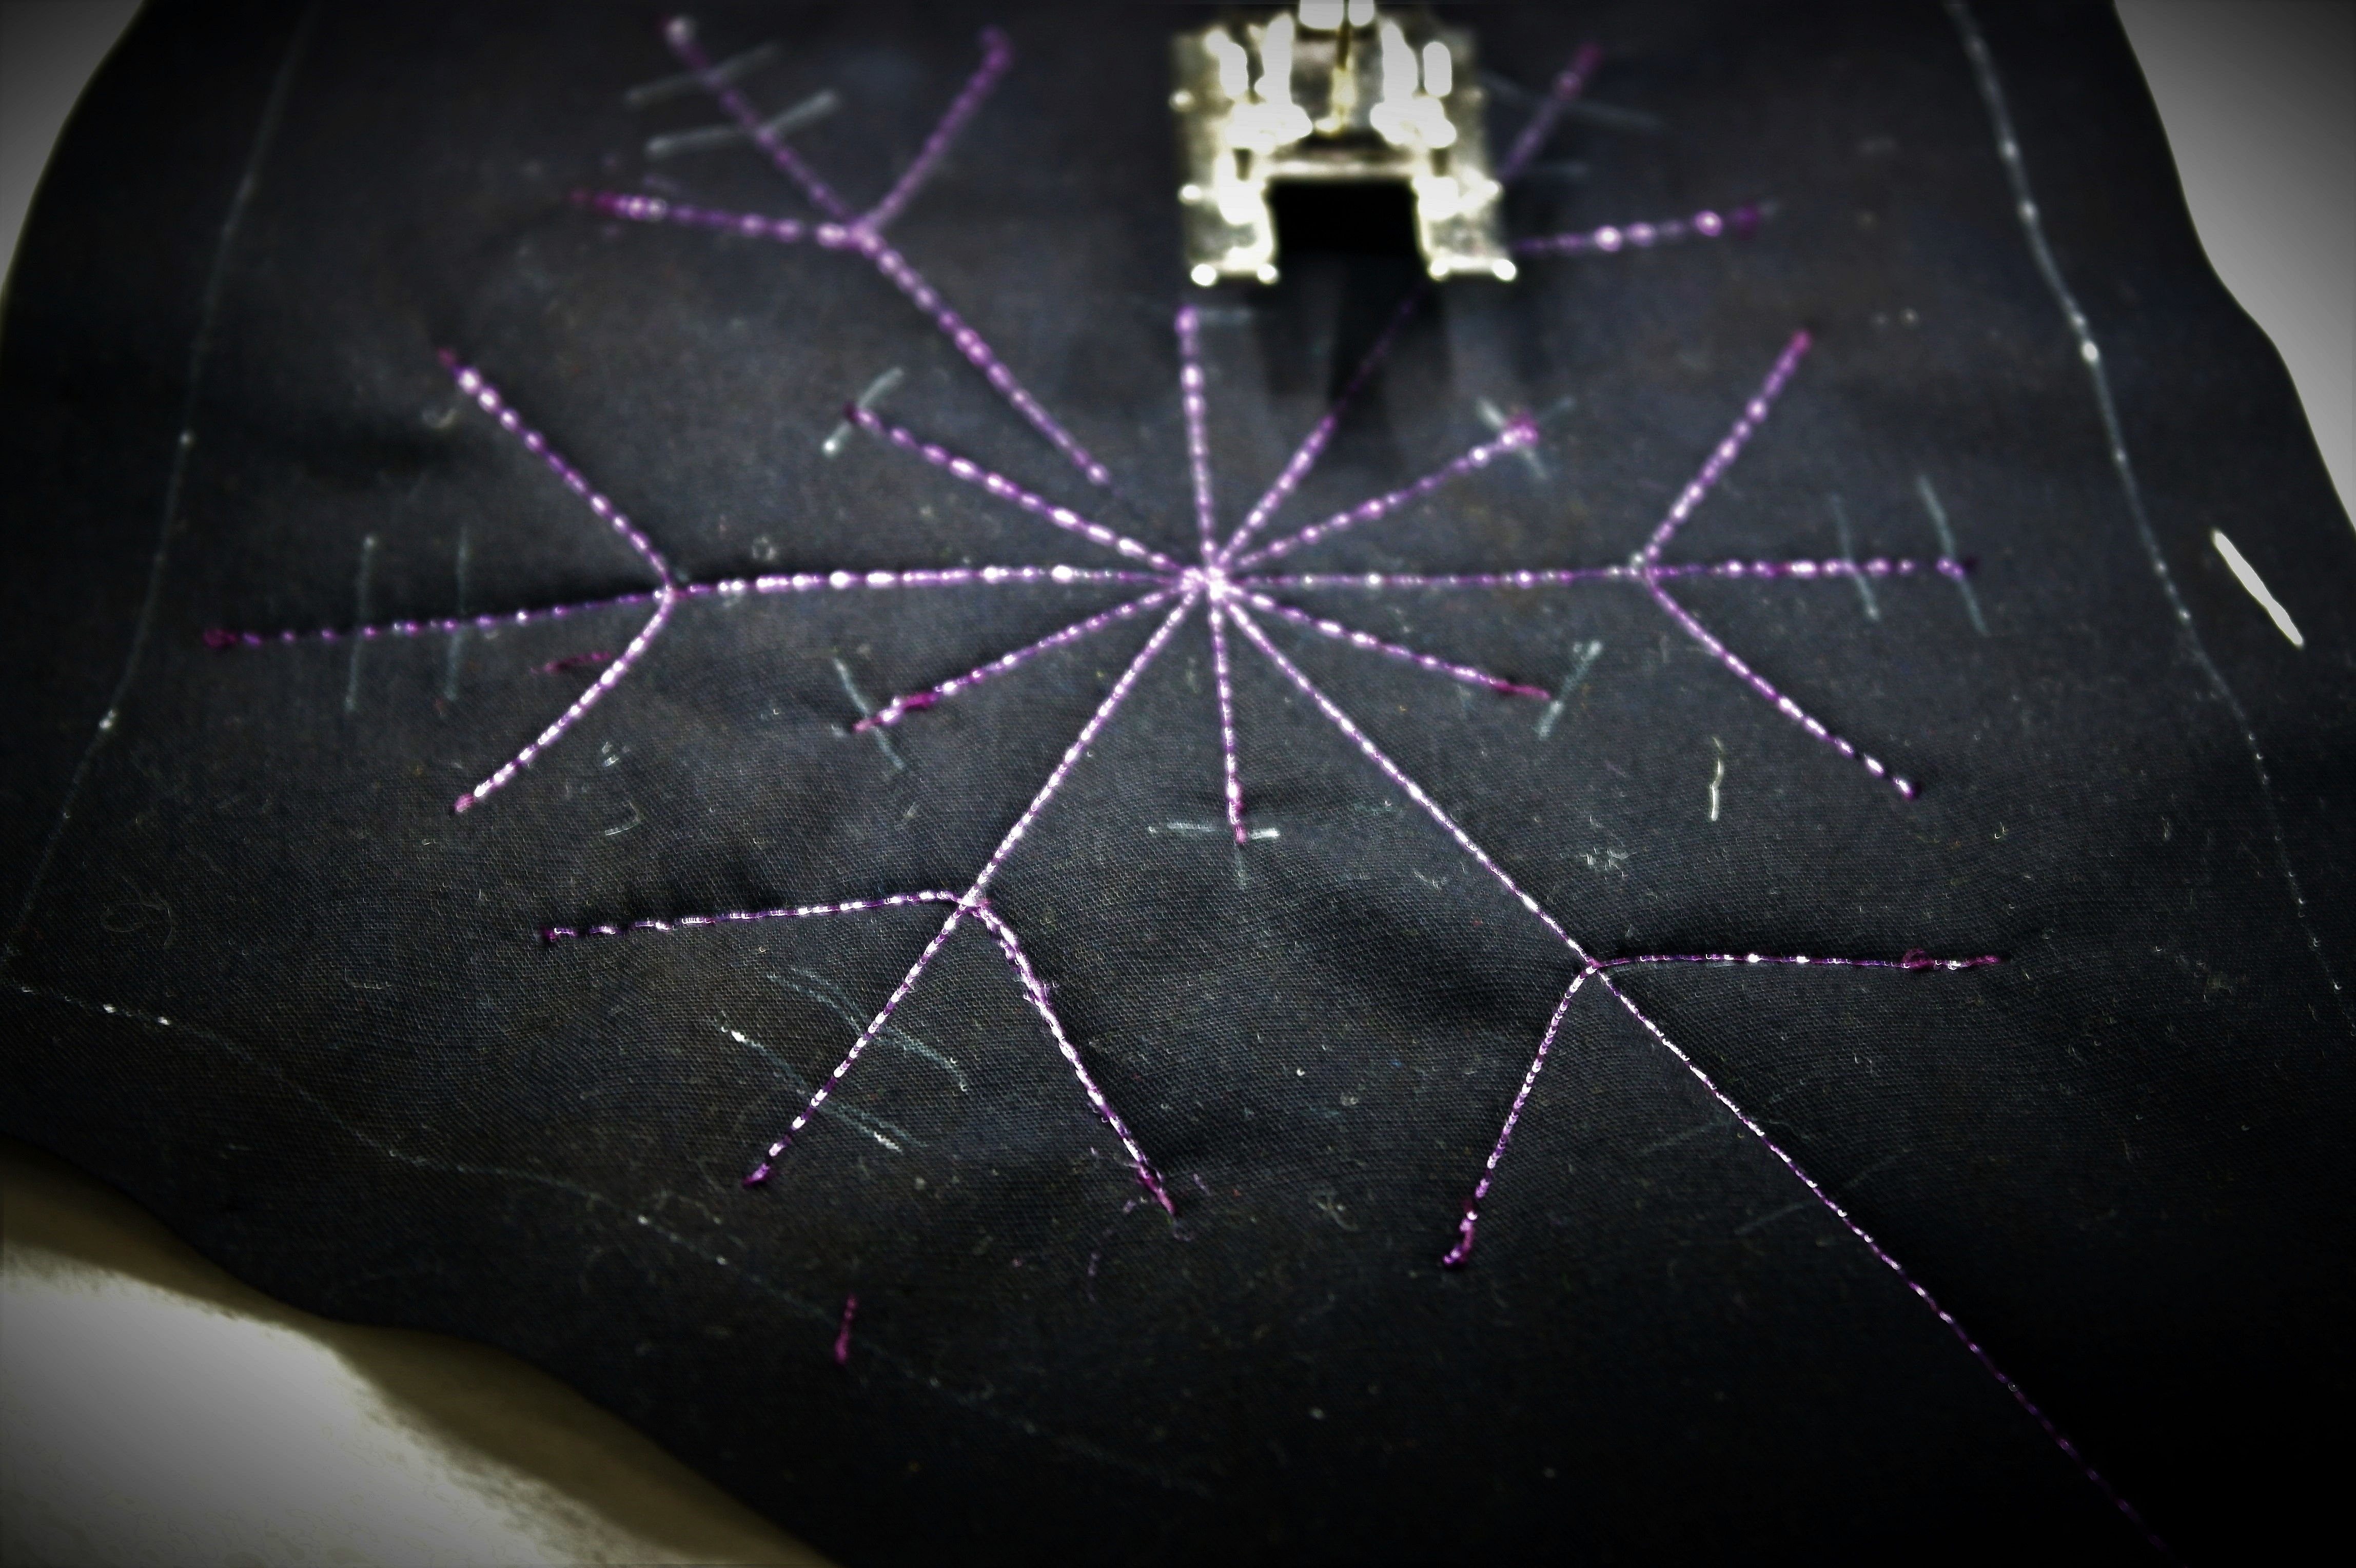
Make stitches on the lines you have drawn. I have used straight stitches for most longer lines, with a purple metallic thread on top, and DecoBob/Wonderfil in the bobbin. These are the base lines.
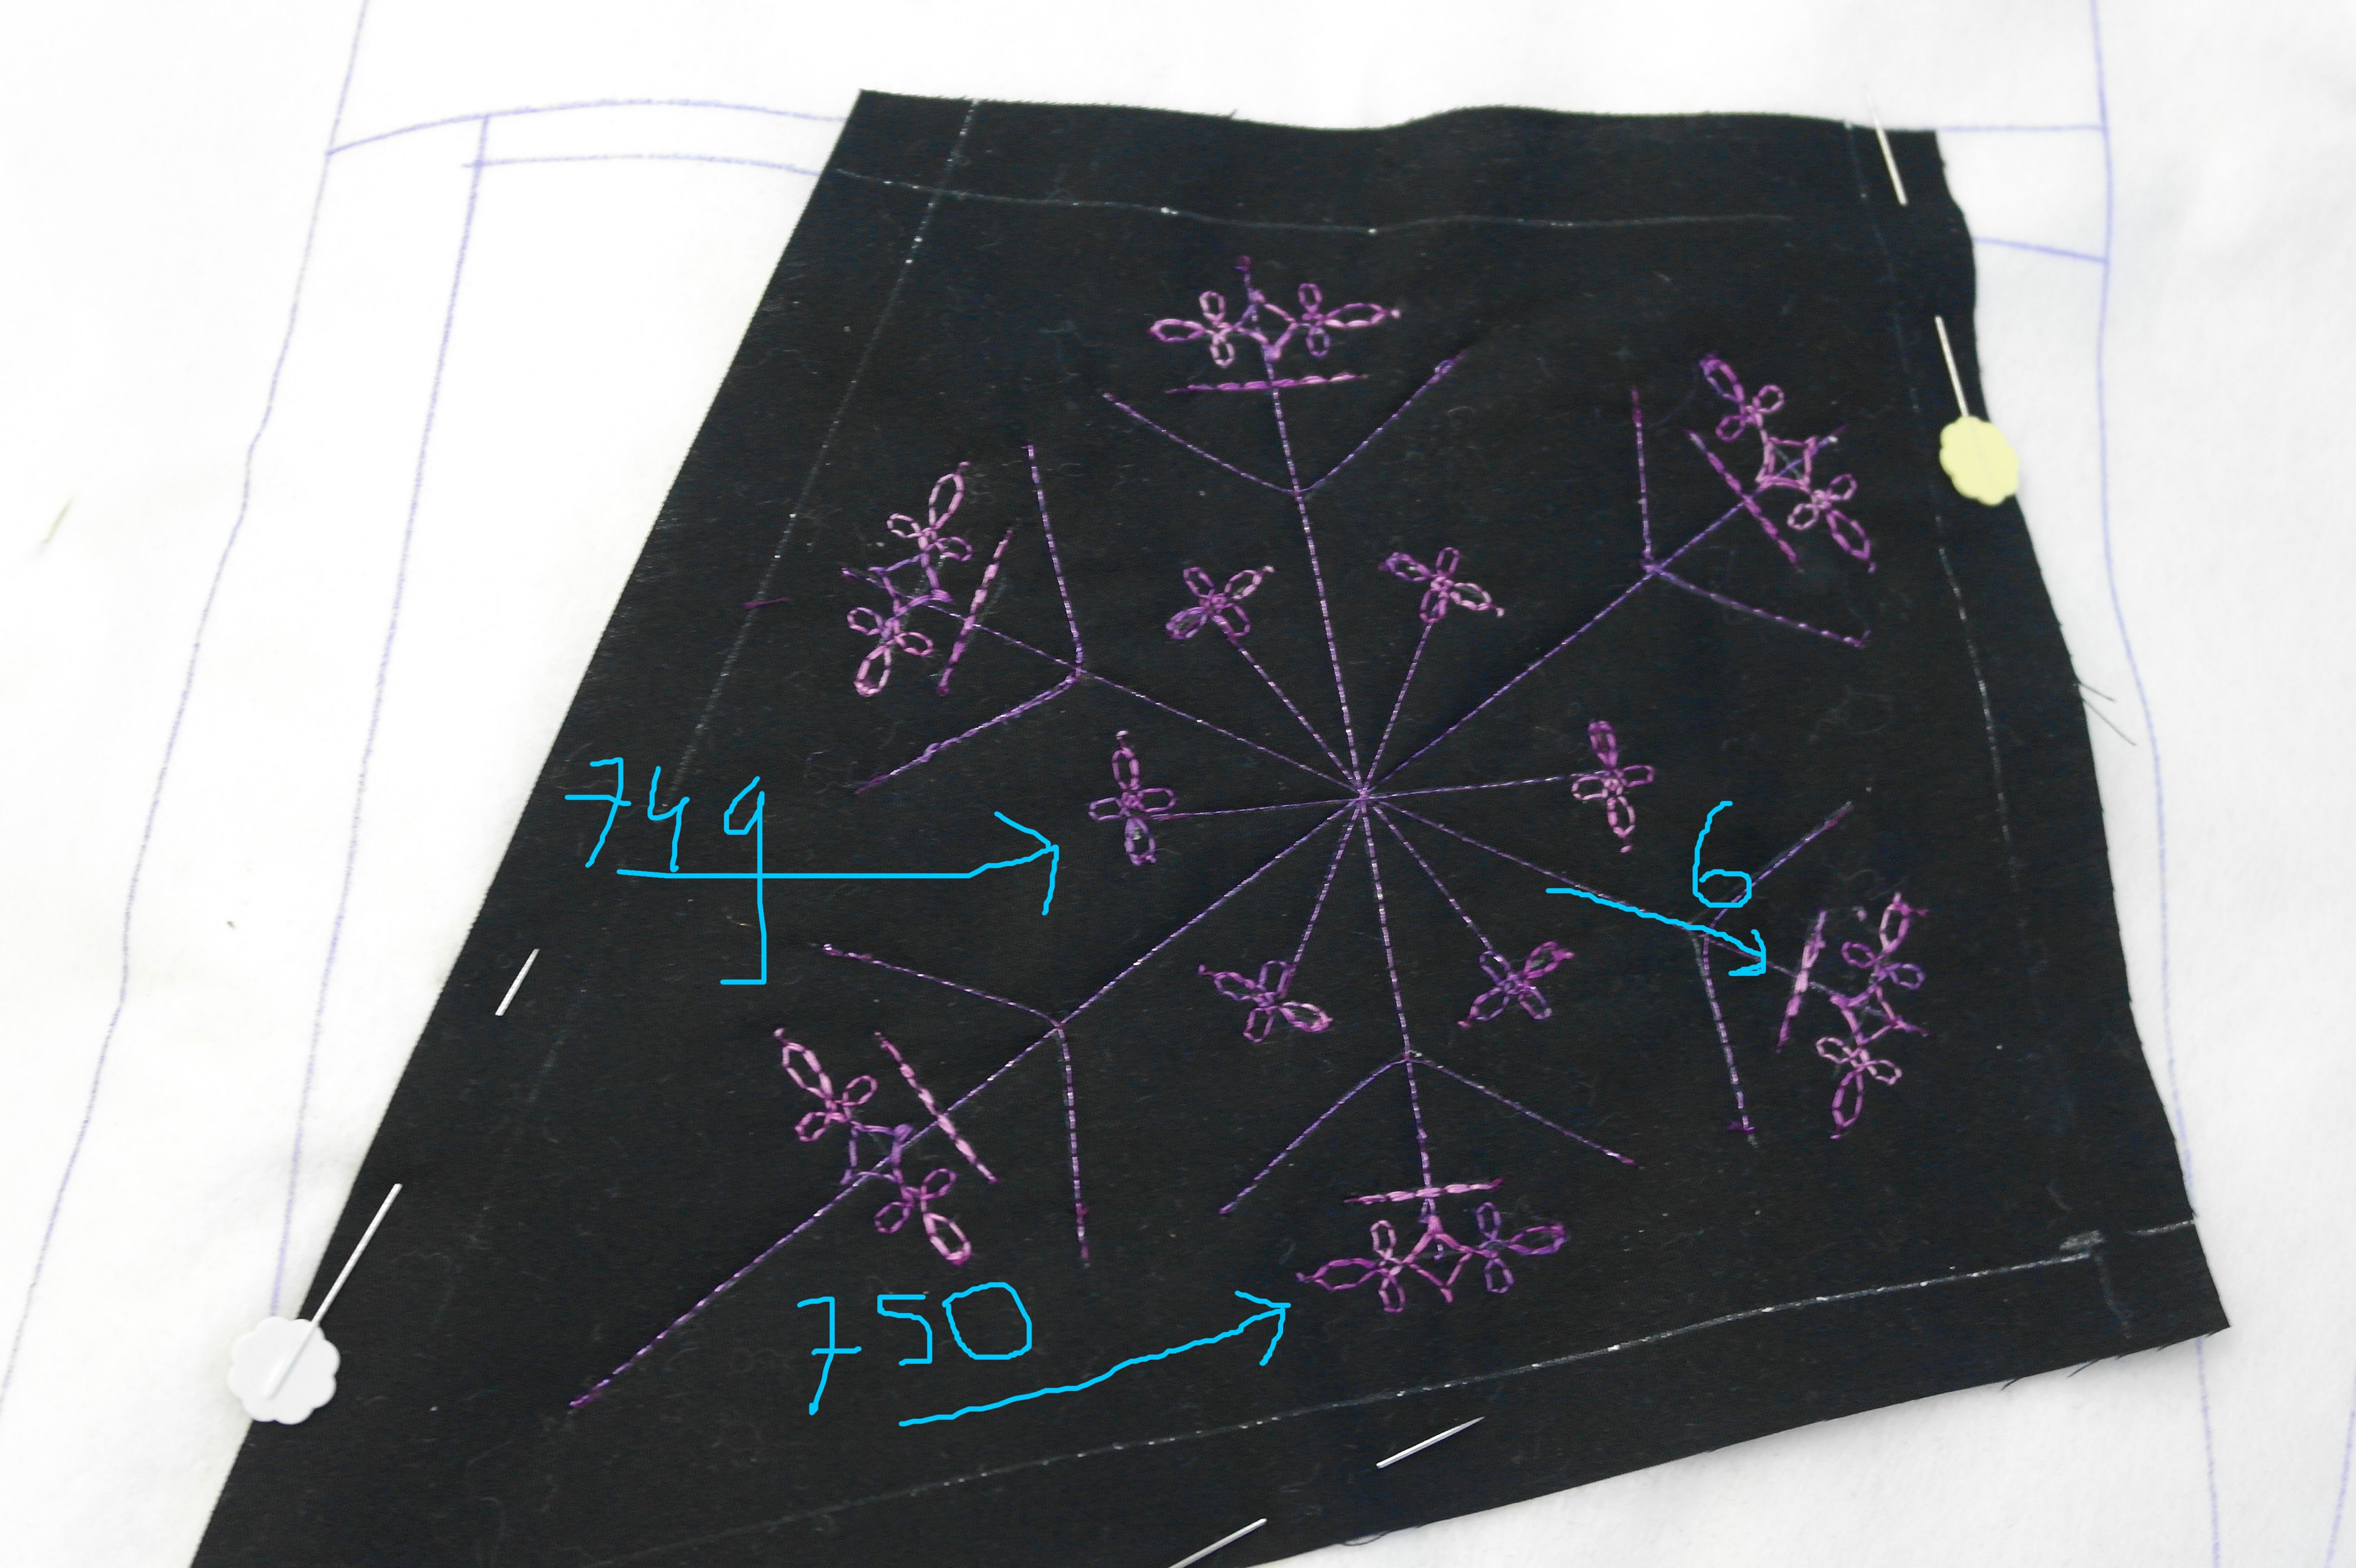
To cover the small lines, I will use certain stithes, repeat each 1x. Because I know what the actual size of these stitches is (I have made a sample book of all the stitches of my BERNINA770QE) I have choosen stitch no. 749 to cover the short lines in the middle. The length of these stitches is aprox. 1 cm, so I know where to start and finish a single repeat. It is important that you know this before stitching: make a sample to measure the length of the stitch you’ve choosen, to know where to start and end it.
Stitch no. 750 looks like a double version of 749: I’ve calculated where to start and finish. Stitch no. 6 is a thick straight stitch: forward, back and forward makes this a stitch that stands out. I’ve used King Tut/Superior Threads for the decorative stitches: a purple variegated thread.

The decorative stitches I’ve selected, are each made with one repeat: click on the ‘i’, and then on 1 with the icon for choosing the number of repeats. The stitch is made one time, and then finished by cutting the threads.
Remember you can always add Hotfix stones, beads, sequins etc. to embellish your block: so if you think the decorative stitches don’t cover everything, it will be done in the end with these items.
Next will be cutting the fabrics for the Crazy patchwork sections..
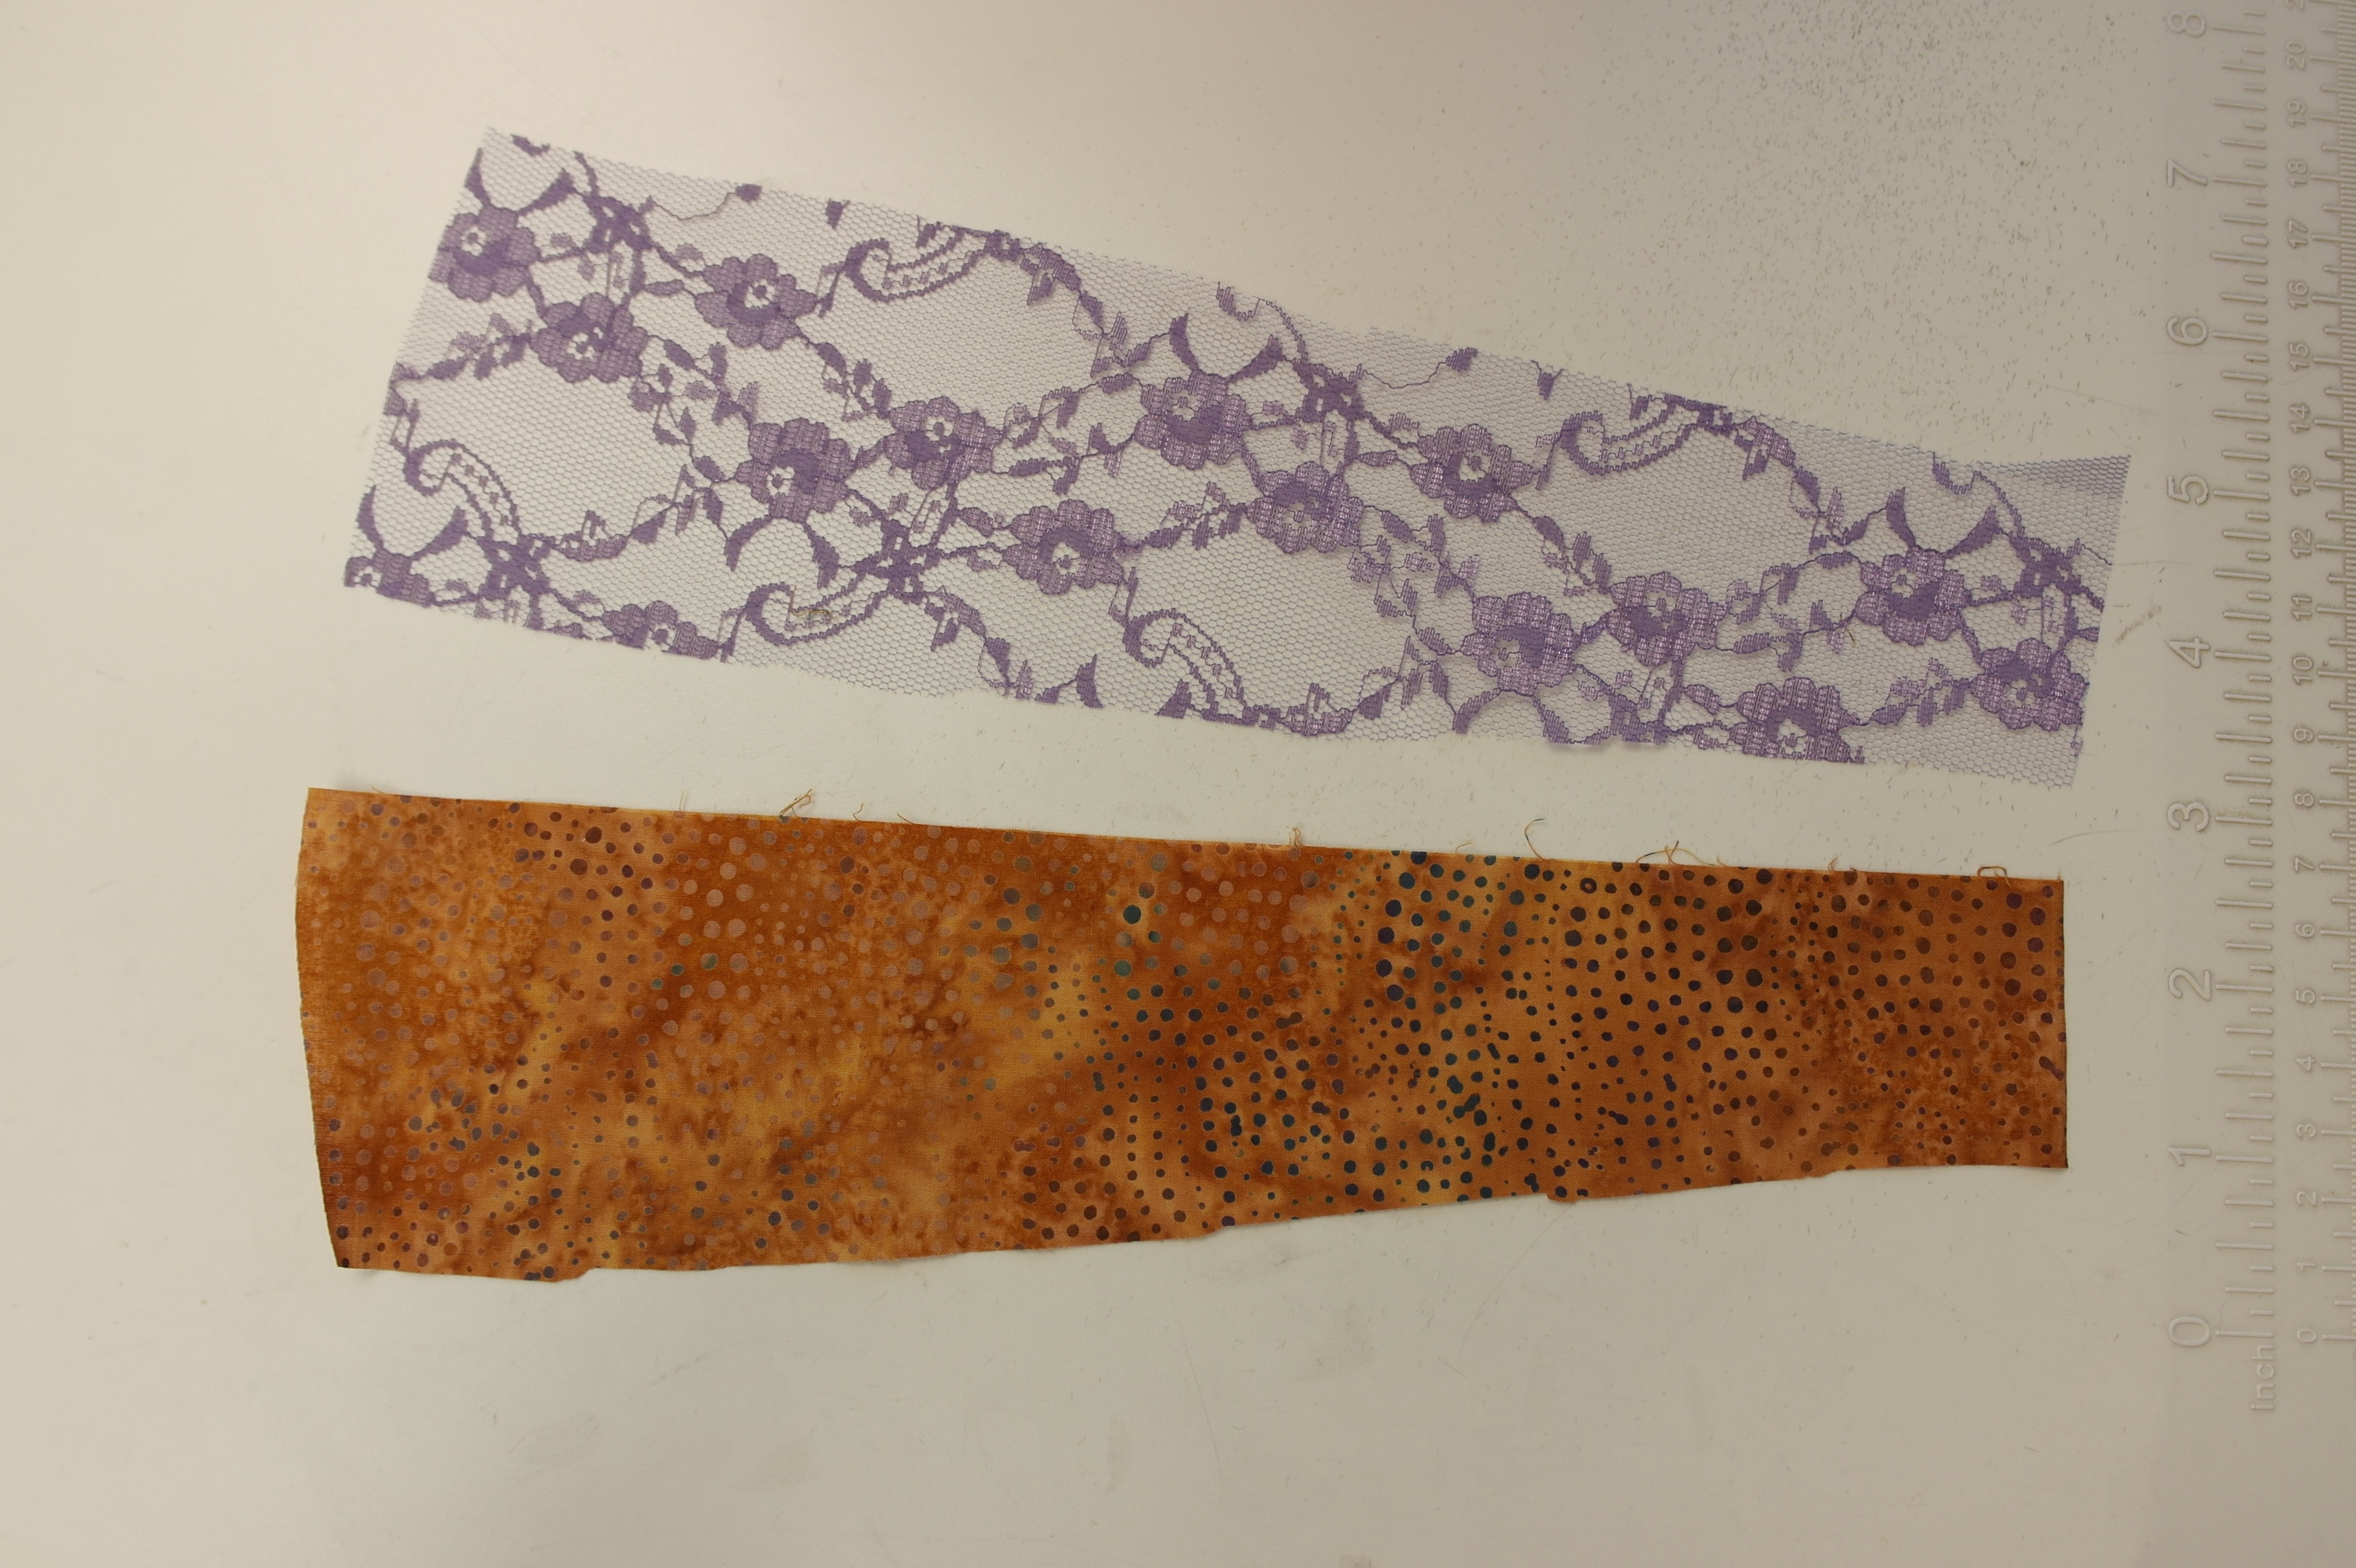
For the first section I have used LACE (synthetic,tule), lilac, which I will use for the ‘upper’ fabric, placed on top of a printed batik. The two pieces of fabric will be sewn together onto the sandwich. I have cut a paper template with seam allowance before cutting both fabrics. I have placed the Lace and printed batik on a white surface: you can see the wonderful effect of both fabrics when seperate…
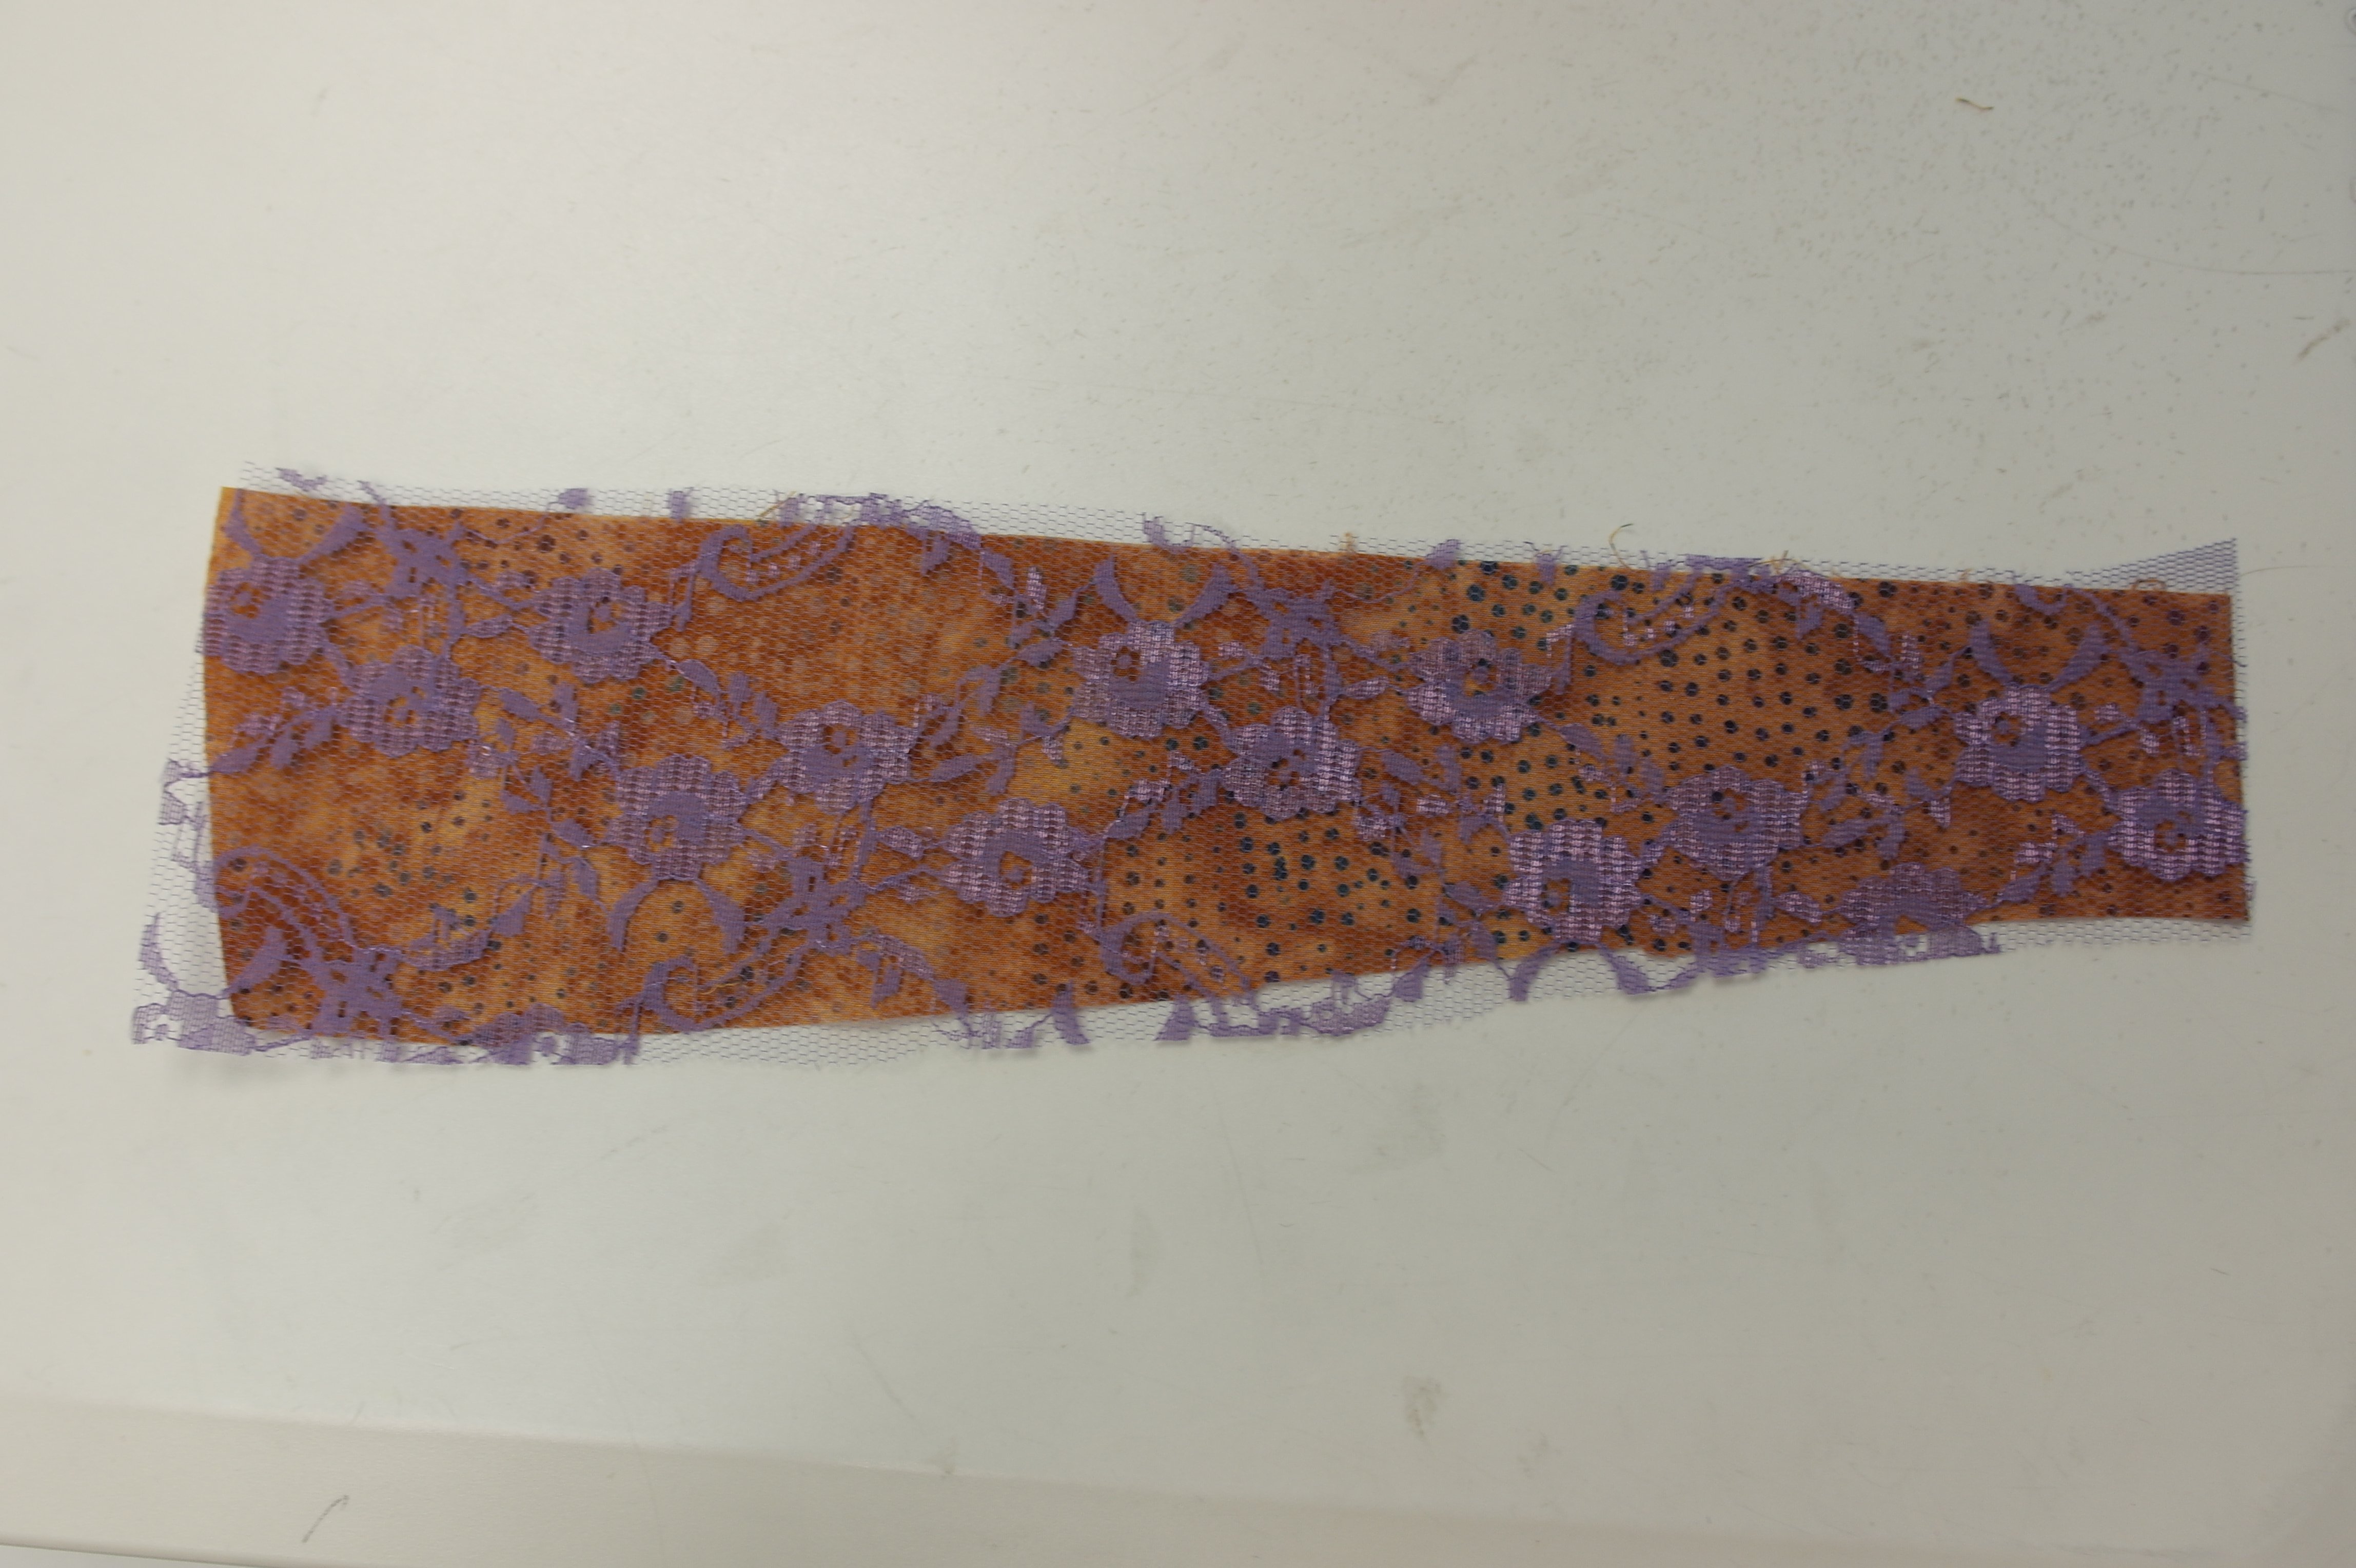
Because the lace is translucent, I have placed it on top of the batik: both fabrics are now supplementing each other. Checking the effect of different fabrics up front is the best way to see, if they will give you the required effect.
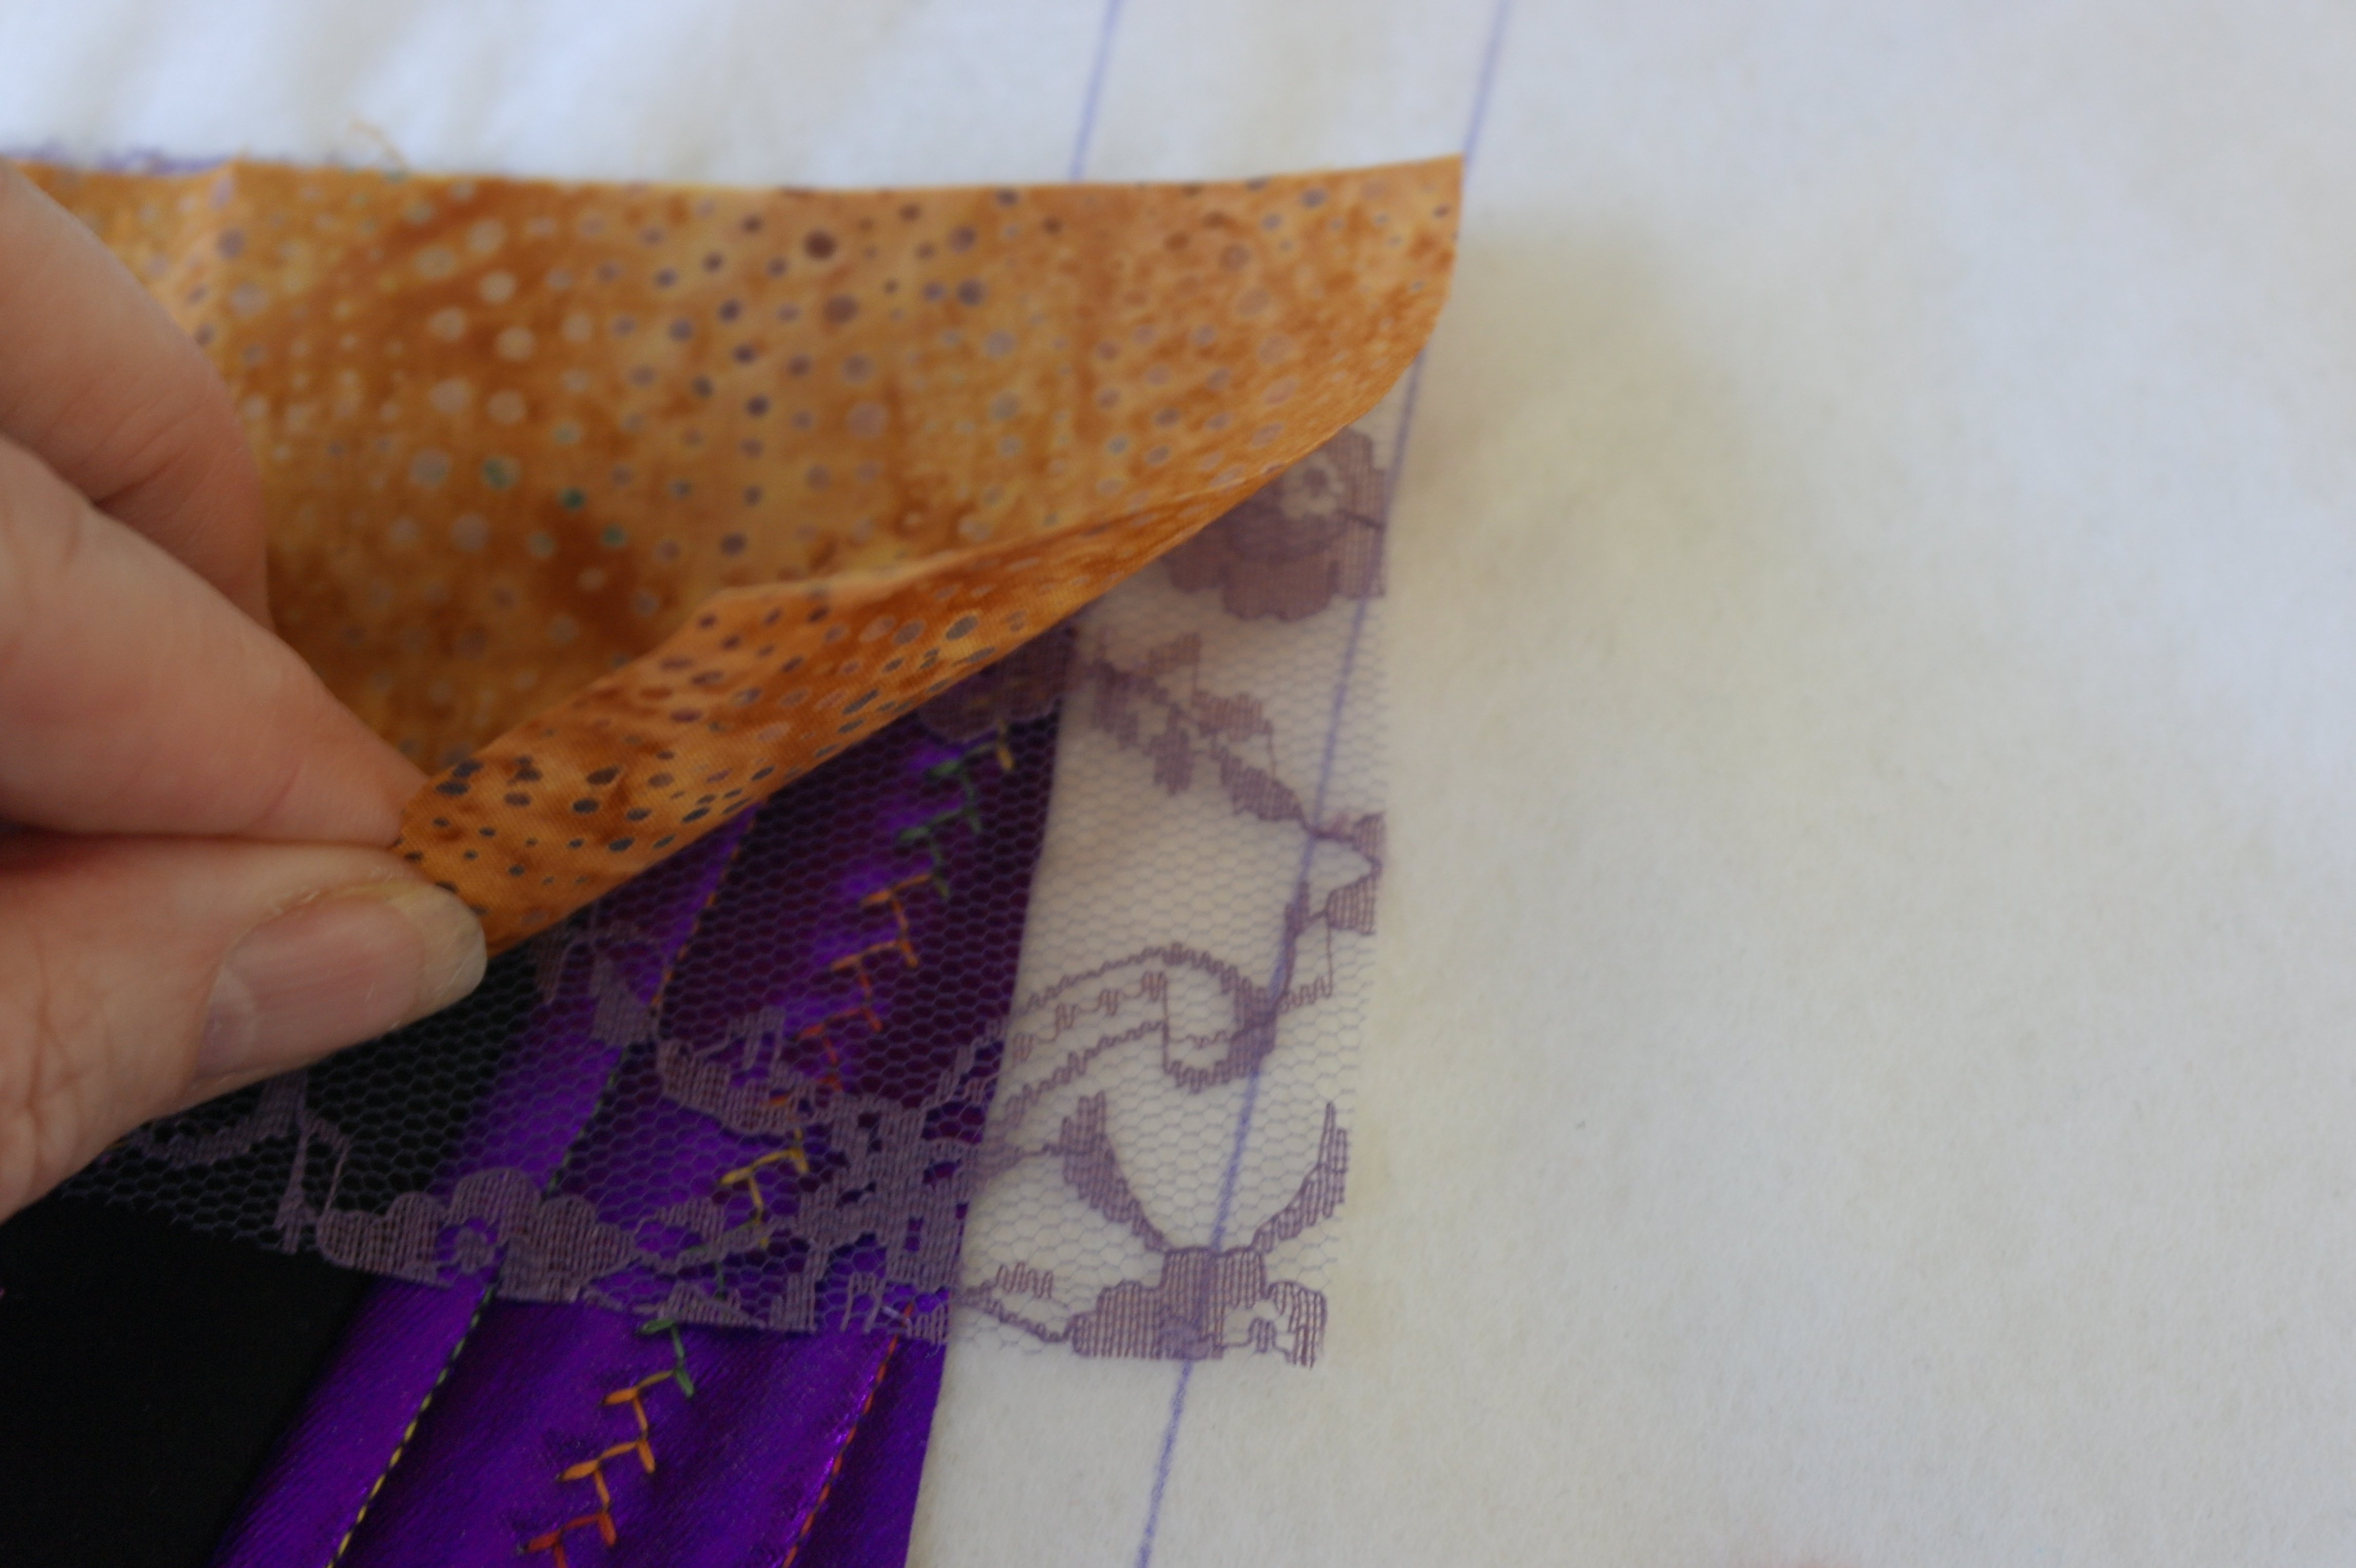
When sewing them onto the sandwich, place both fabrics wrong sides up. The lace should be on top after sewing and folding both fabrics to the right side, so be sure to place the lace FIRST, the batik last, wrong sides up. Check if they are placed ok, before sewing them onto the sandwich.

Both fabrics are folded to the right side and pinned with Flower Pins.
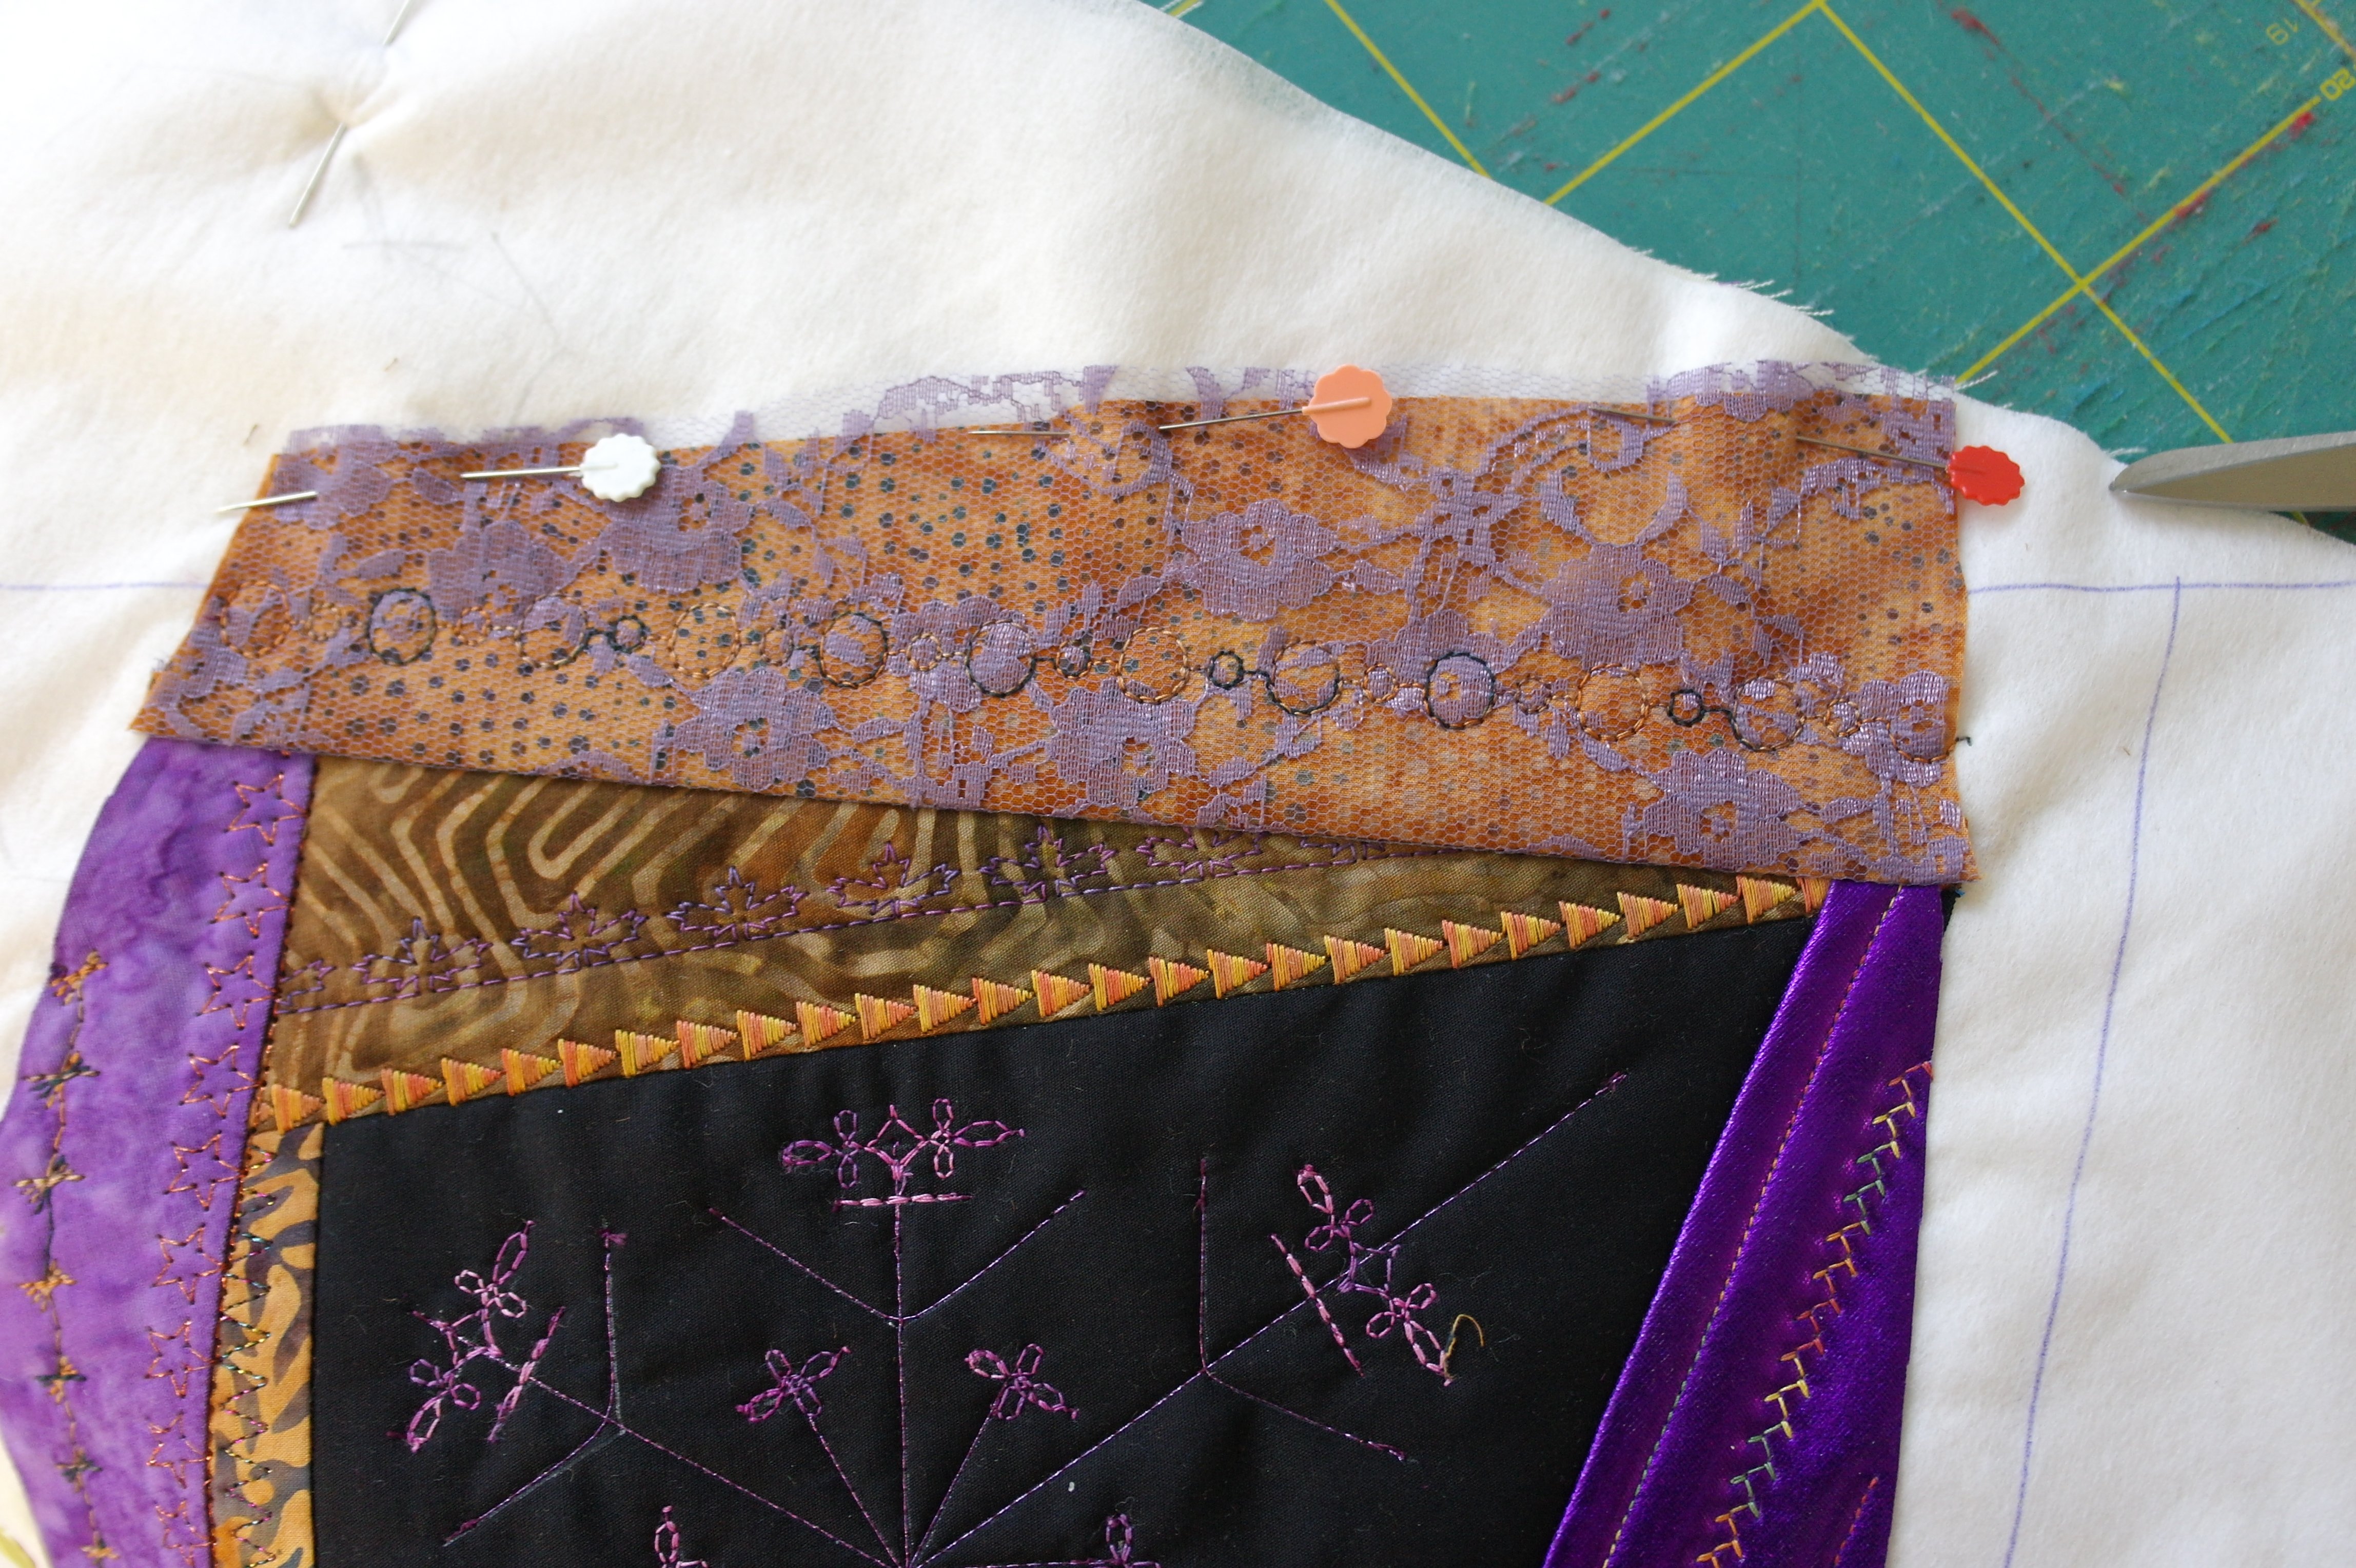
I have cut both fabics much WIDER than necessary: this way I can decide if I leave it this way, to make the section with the lace stand out more, or cut it back to a smaller strip. Leaving the fabric wider requires that you move the stitch line of the section: just draw another line, away from the first, and use that new line as sewing line for the next section.
I have placed a strip of Tule with glitter onto another piece of printed batik, for another section. Using Bohin Glue to fix the strip is very important: the strip is too wide to leave it floating, because it can shift while making decorative stitches to secure it onto the sandwich.
Section after section is covered with beautiful fabrics and decorative stitches. Working with Lamé or Velours de Panne: please check the January 15 Blog, to know how to work with these ‘unstable’ fabrics. If you have your own way to do so, and it works, feel free to make your own setting.
For the last section I have used Lamé: because this is a large piece, it will shine. I don’t want to cover this entirely with rows of stitches. So I came up with something different:
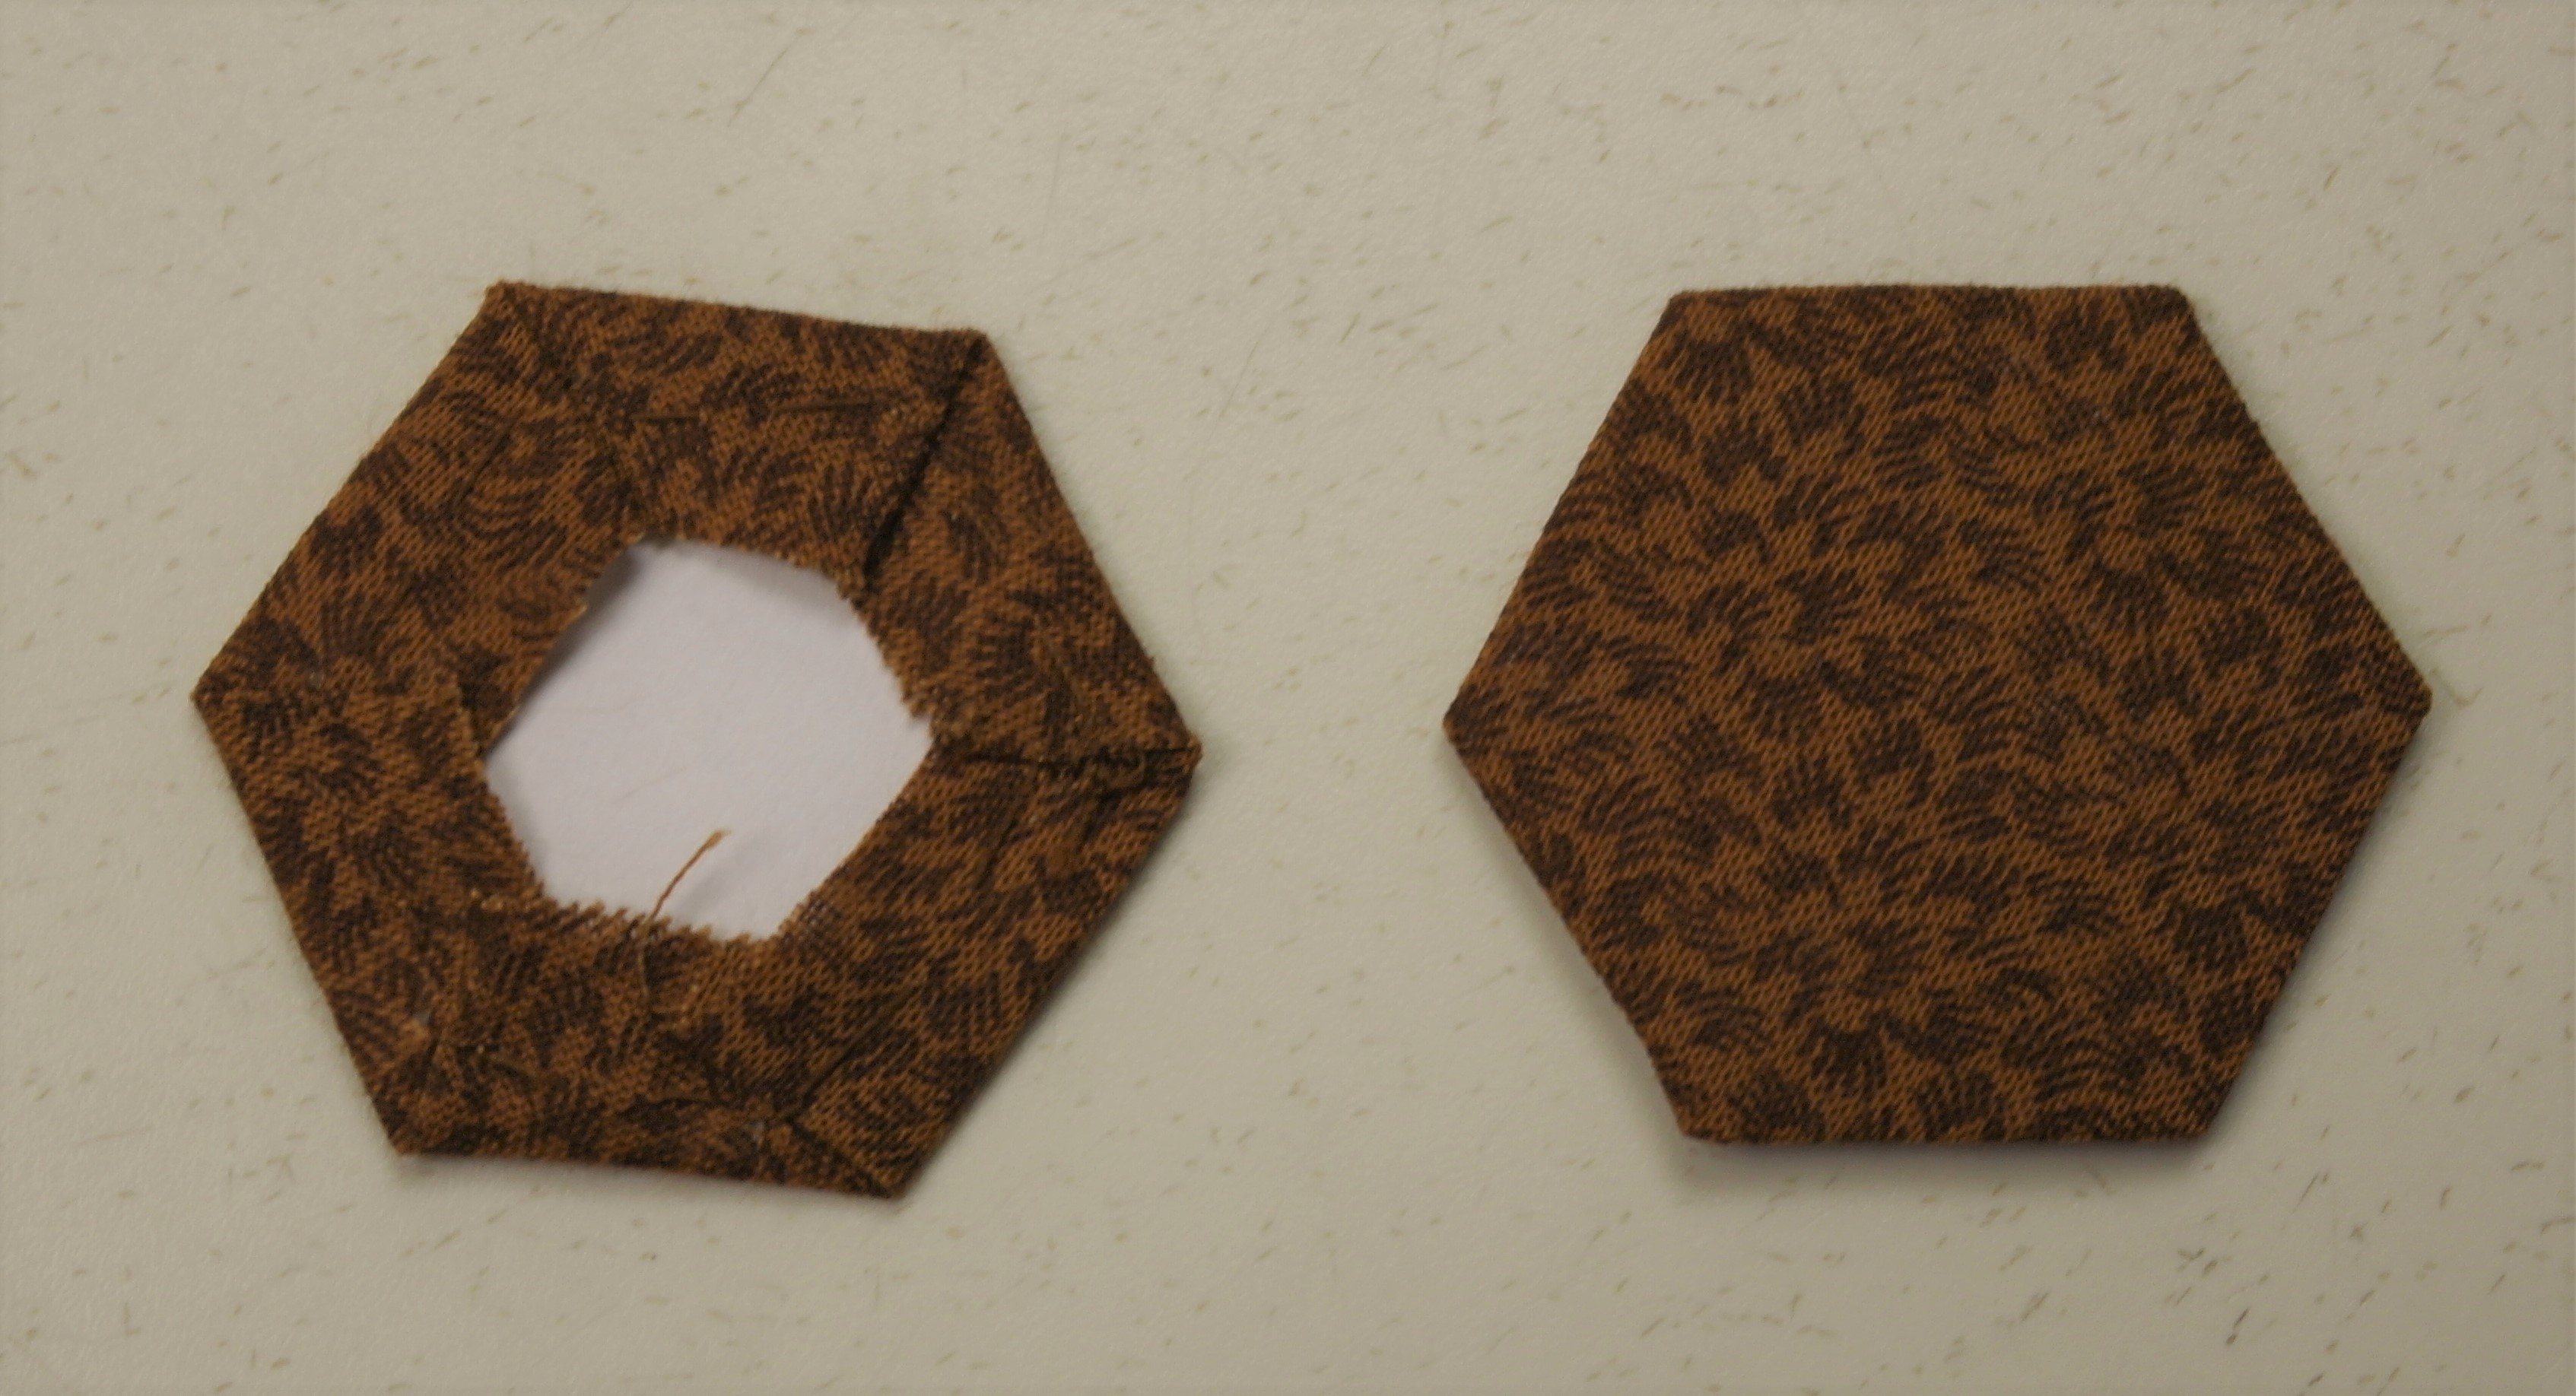
Using a hexagon paper template, 3/4 inch, fabric that is basted around this hexagon, and ironed. Paper template removed, and the fabric with the hexagon shape is placed on a cetrain spot of the Lamé. I have sewn it in place, and decorated it with a crystal shape with metallic threads.
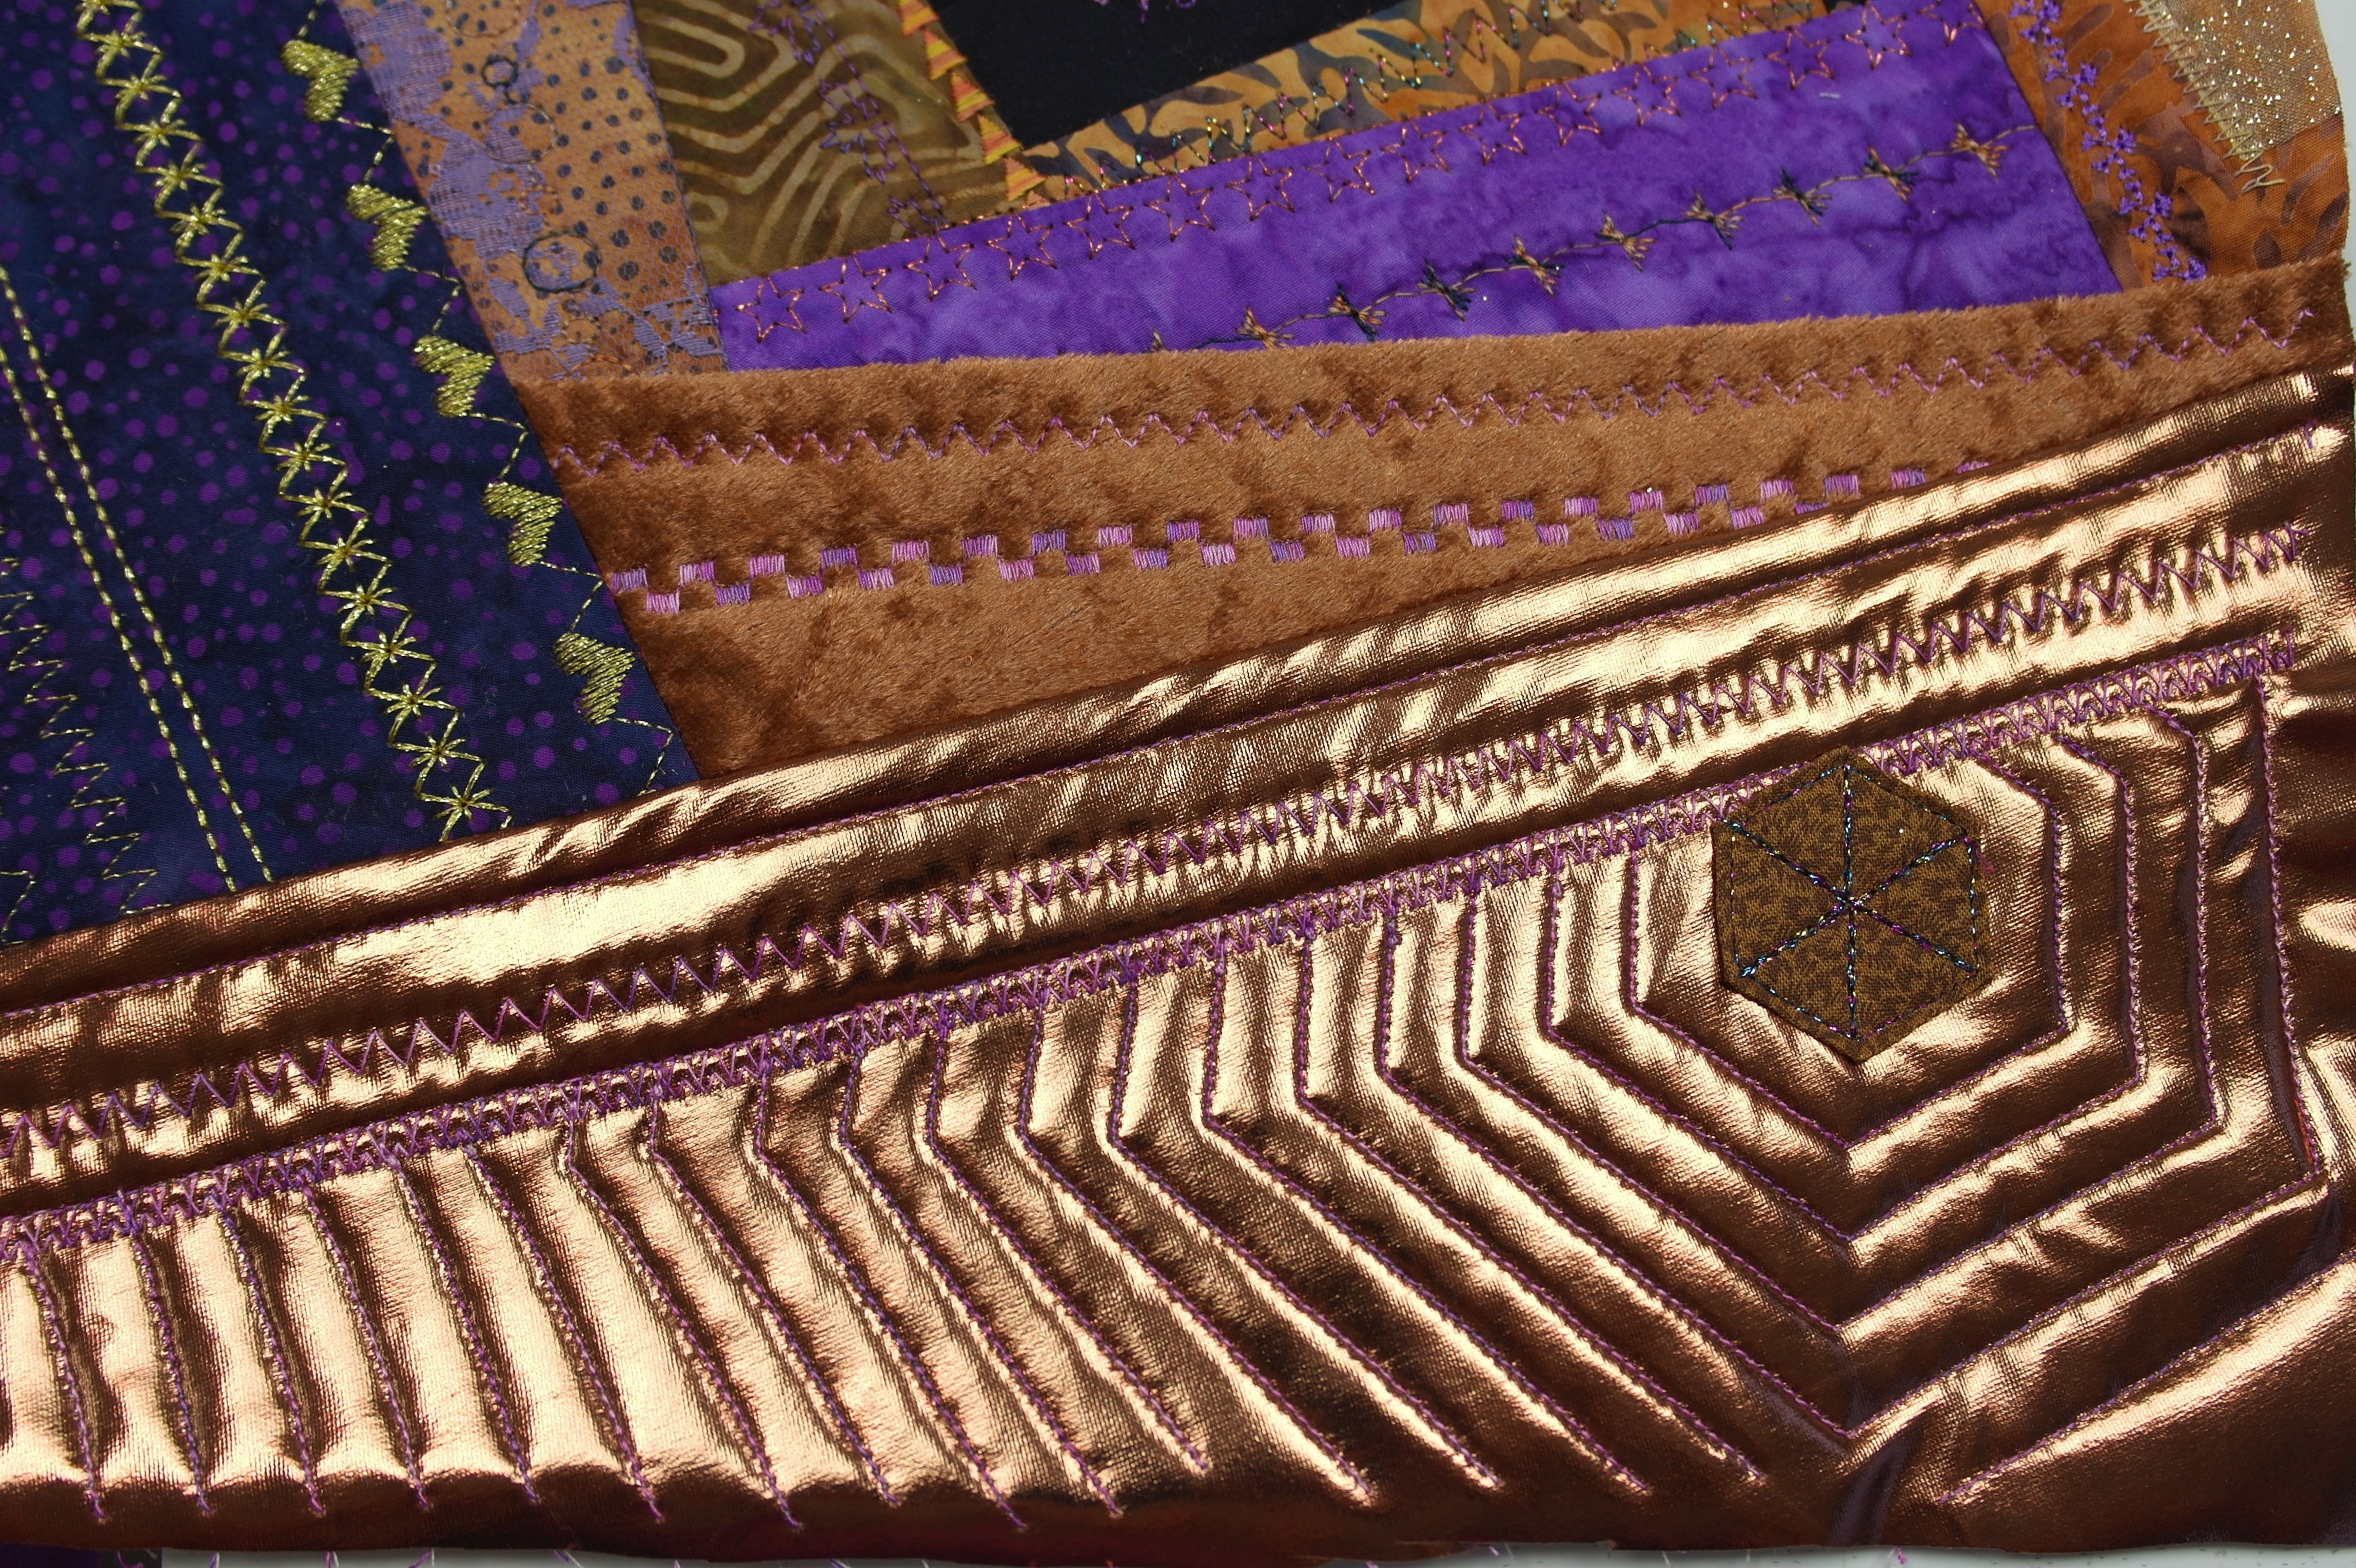
I have stitched around the fabric/hexagon, as much as I could, echoing the shape. Every stitch line after the first is done using the width of the presser foot, making lots of rows of stitches, going outward, repeating the shape. BE CAREFUL the Lamé doesn’t distort: lift your presser foot now and then to make it lie smooth. It is a fabric with stretch, that needs extra attention while making stitches. I like the relief that shows on the Lamé.

And of course, I have added Hotfix stones: decorated the large Crystal in the center, and the small hexagon crystal.
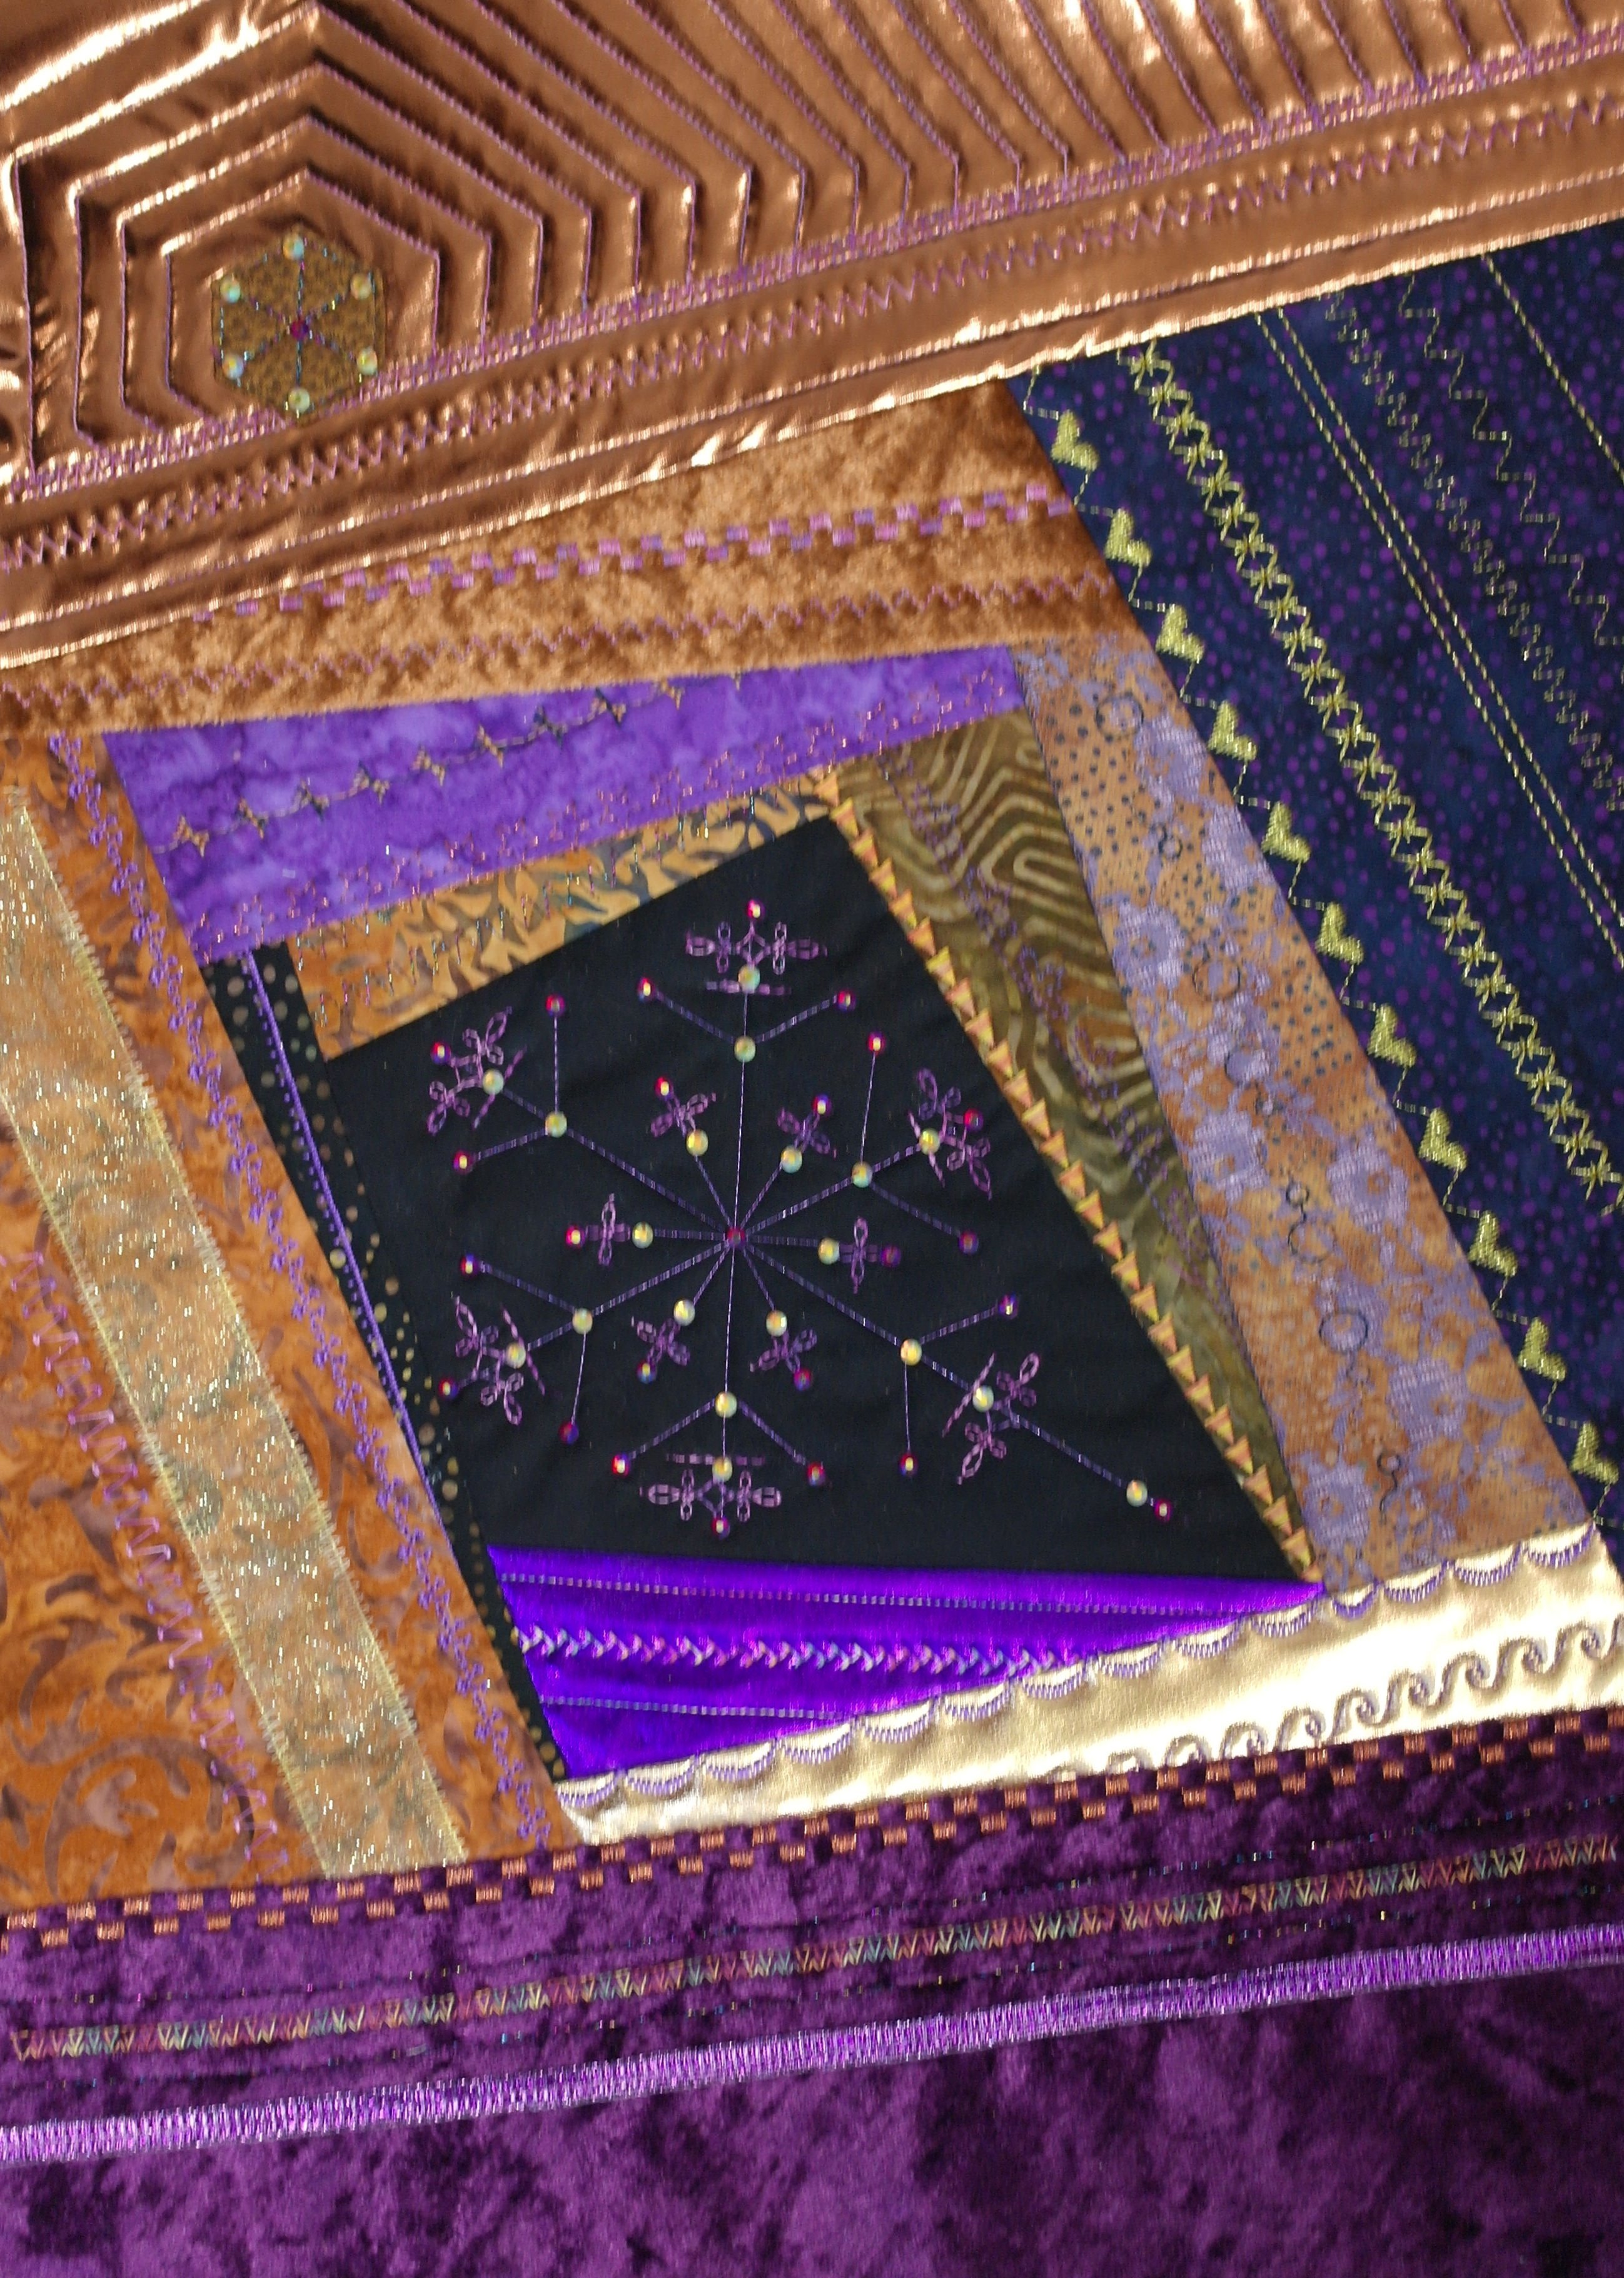
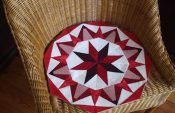
This is my Block 2: glitter and glamour! Make your block shine too!
Untill next time,
Happy Stitching!
Sylvia Kaptein
Sylvia’s Art Quilts Studio
0 Responses