 BERNINA Corporate Blog -
It’s always fun to work wil gold metallic threads: it gives your projects a special effect! I would like to get a very specific effect, to make the metallic thread sparkle. Sometimes that ‘s a matter of thinking out of the box, because the lock stitches themselves are not really what I want here, you’ll see… I have choosen stitch no. 11 to work with.
First I have placed a Topstitch 70/10 needle in the machine (just the left needle of two), this is for the metallic thread. I have changed the thread for the lower looper: gold/yellow.

To change threads, make it easy for yourself: cut the current threads on top, just before the first tension disk. Remove the thread cones. Place the new spool/cone, tie the threads from old and new together with a tiny knot, and pull the ‘old’ thread from the last metallic loop, just above the needle, through the machine. Be sure to do this slowly, because the tiny knot has to be pulled through all tension disks.
The spools I have placed are not very large – they have a smaller opening on the bottom. That is why I have removed the spool holder pin. The spool is placed over the small pin which will keep it in place. Spool holder pins are ment for large spools and cones with a large opening at the bottom, to keep them from wobbeling.

I have used the following threads: upper thread/needle Spotlite metaalgaren from Wonderfil (Wt 40), upper looper thread Seralene from Mettler (Wt 120). Lets see how this works…
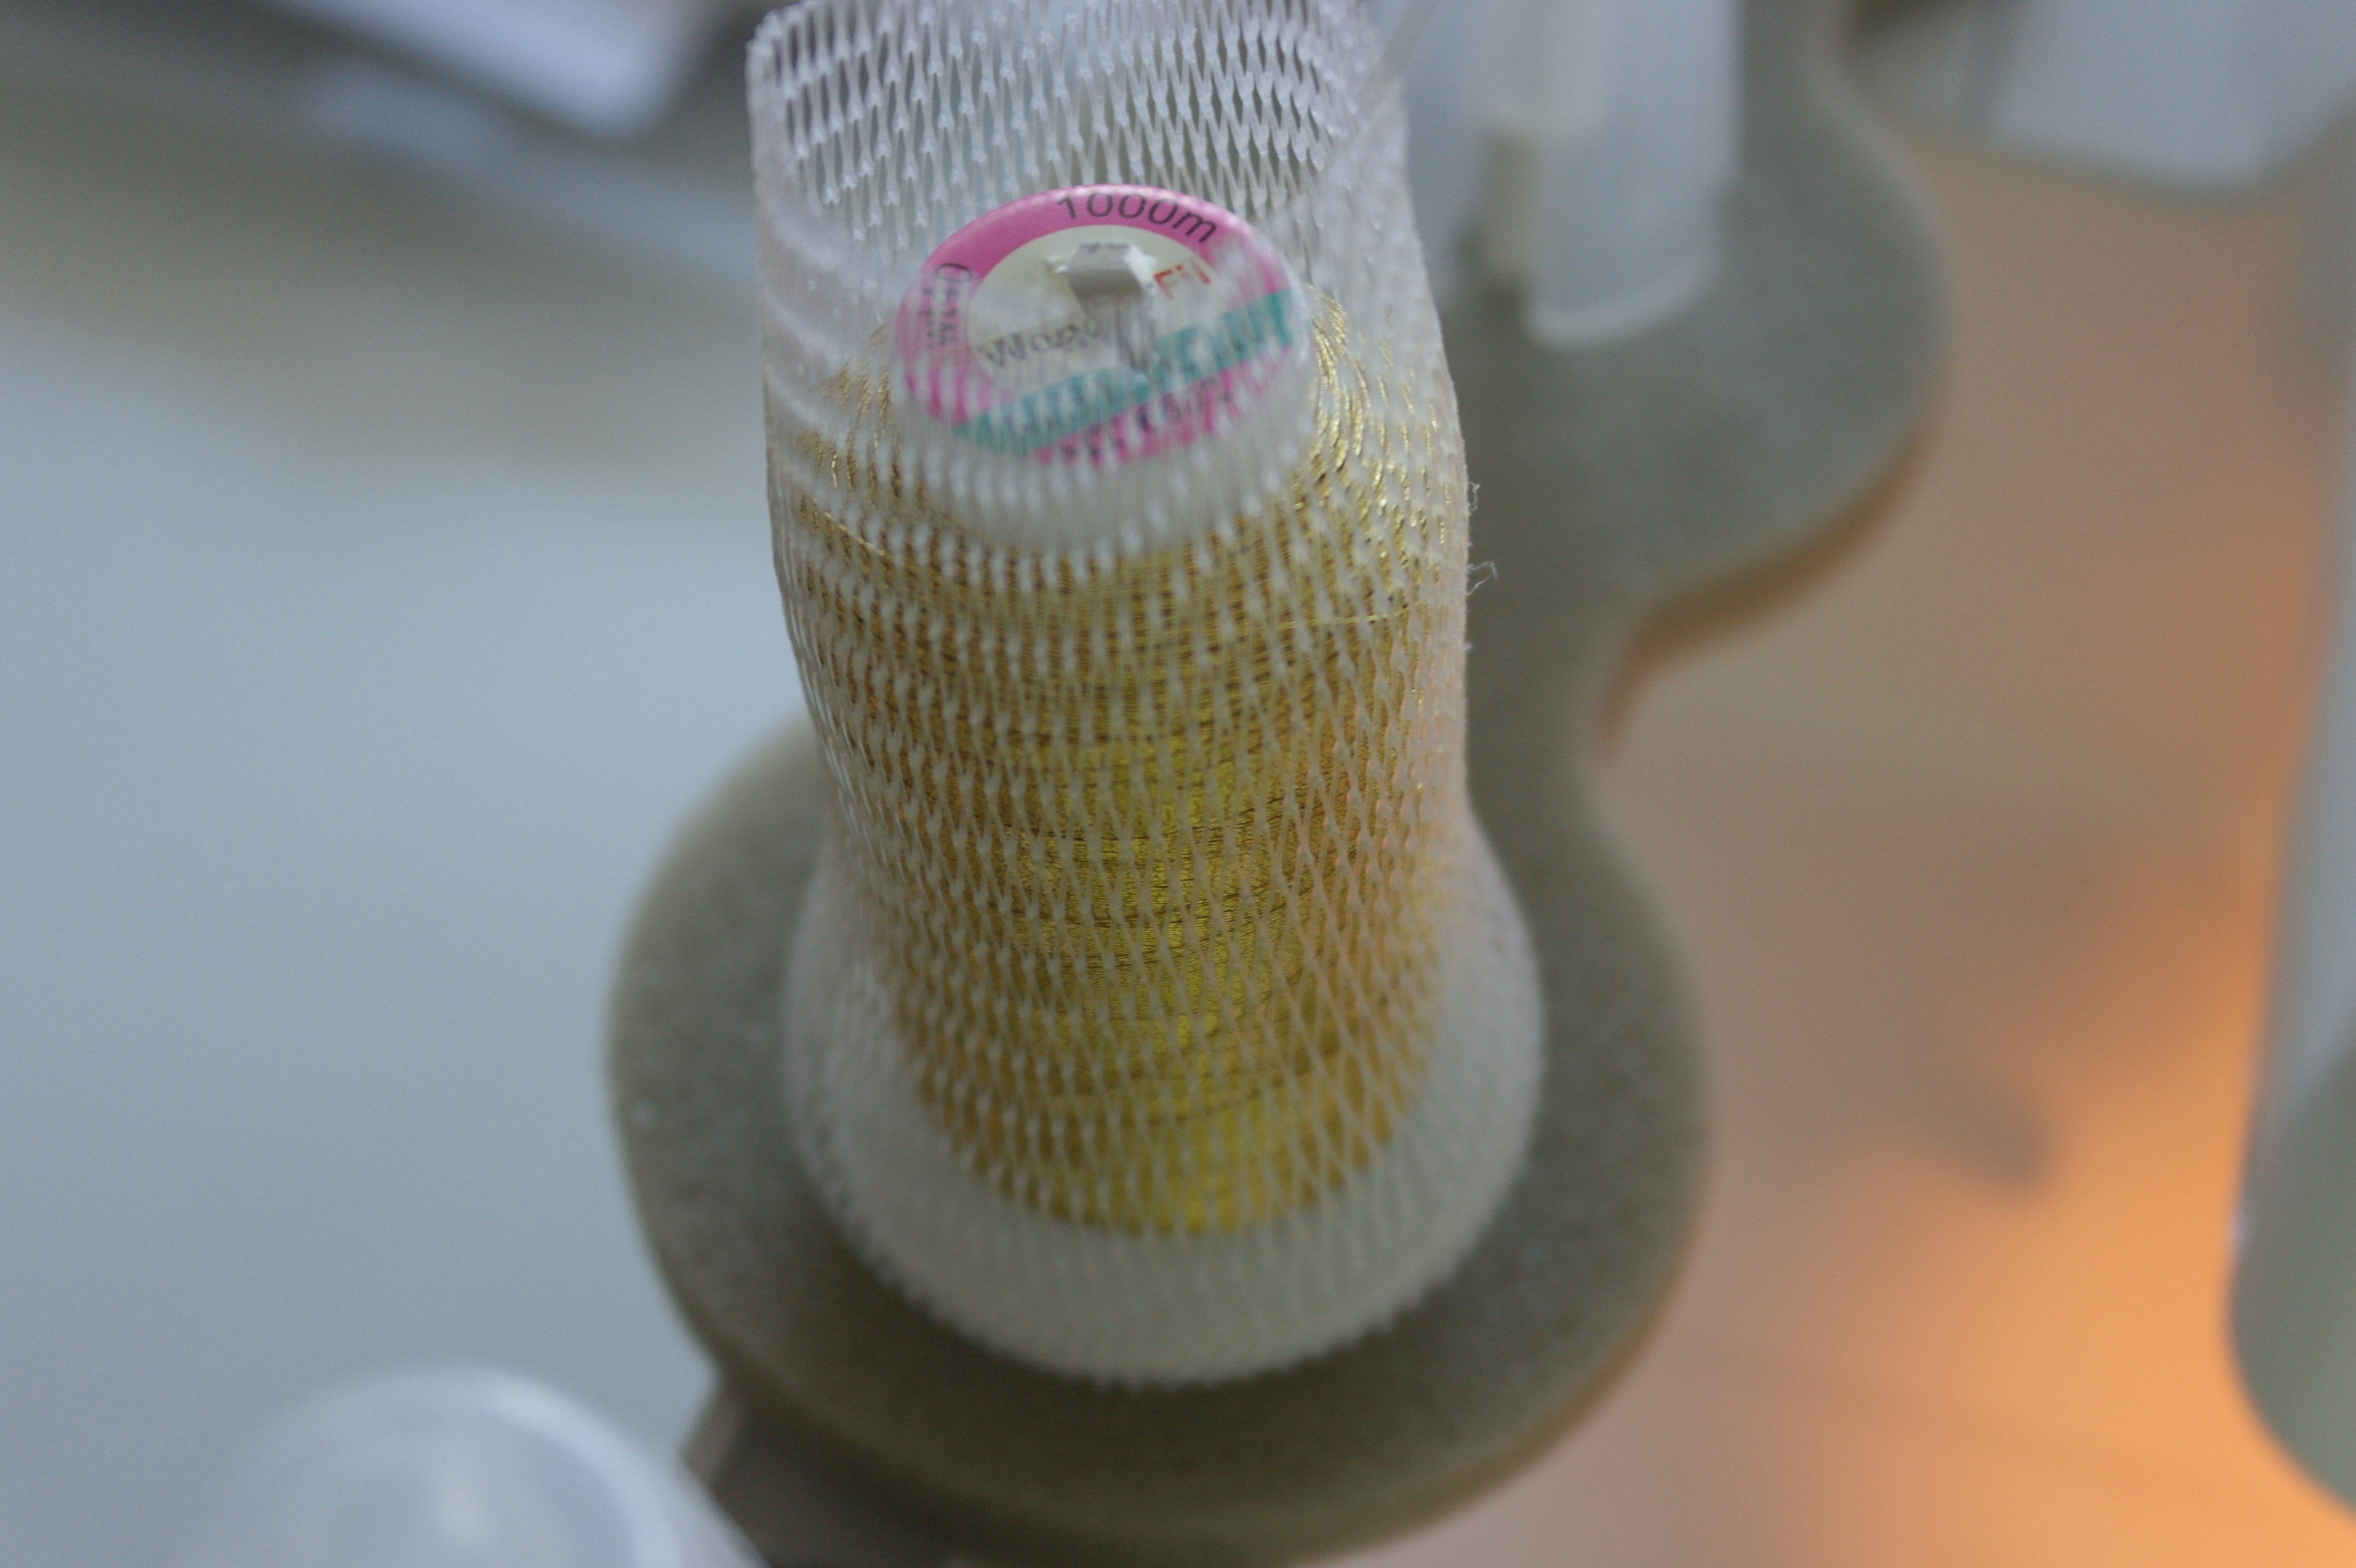
If your metallic thread curles or gets twisted while making stitches, just pull a thread net over the spool/cone: you will find such a thread net with your accessories. Slide the thead net over the spool, and pull the tread end trough the top opening, or you can pull the thread end through a hole at the side of the net, do what you are used to.
I am making Stitch 11: a 2-thread flatlock stitch, used for finishing a hem. Only the left needle will be used, and the lower looper. Machine display via ‘Set’ and stitch 11 appears on the screen, with all the settings.

I will see of all settings are correct:
Left needle.. tension 2.0
Lower looper …tension 5.0
Upper knife position, ok
Cutting width 1-3, I have choosen 2
Roll hem selection lever up
Stitch length 2.5 – I will see if this is ok, because of the metallic thread. Perhaps 2.0?
Difrential feed N (Neutral)
Upper looper converter needed, because the upper looper will nog be used. Page 51 of your manual shows you how to do that.
Extension plate= not
Upper looper release ok
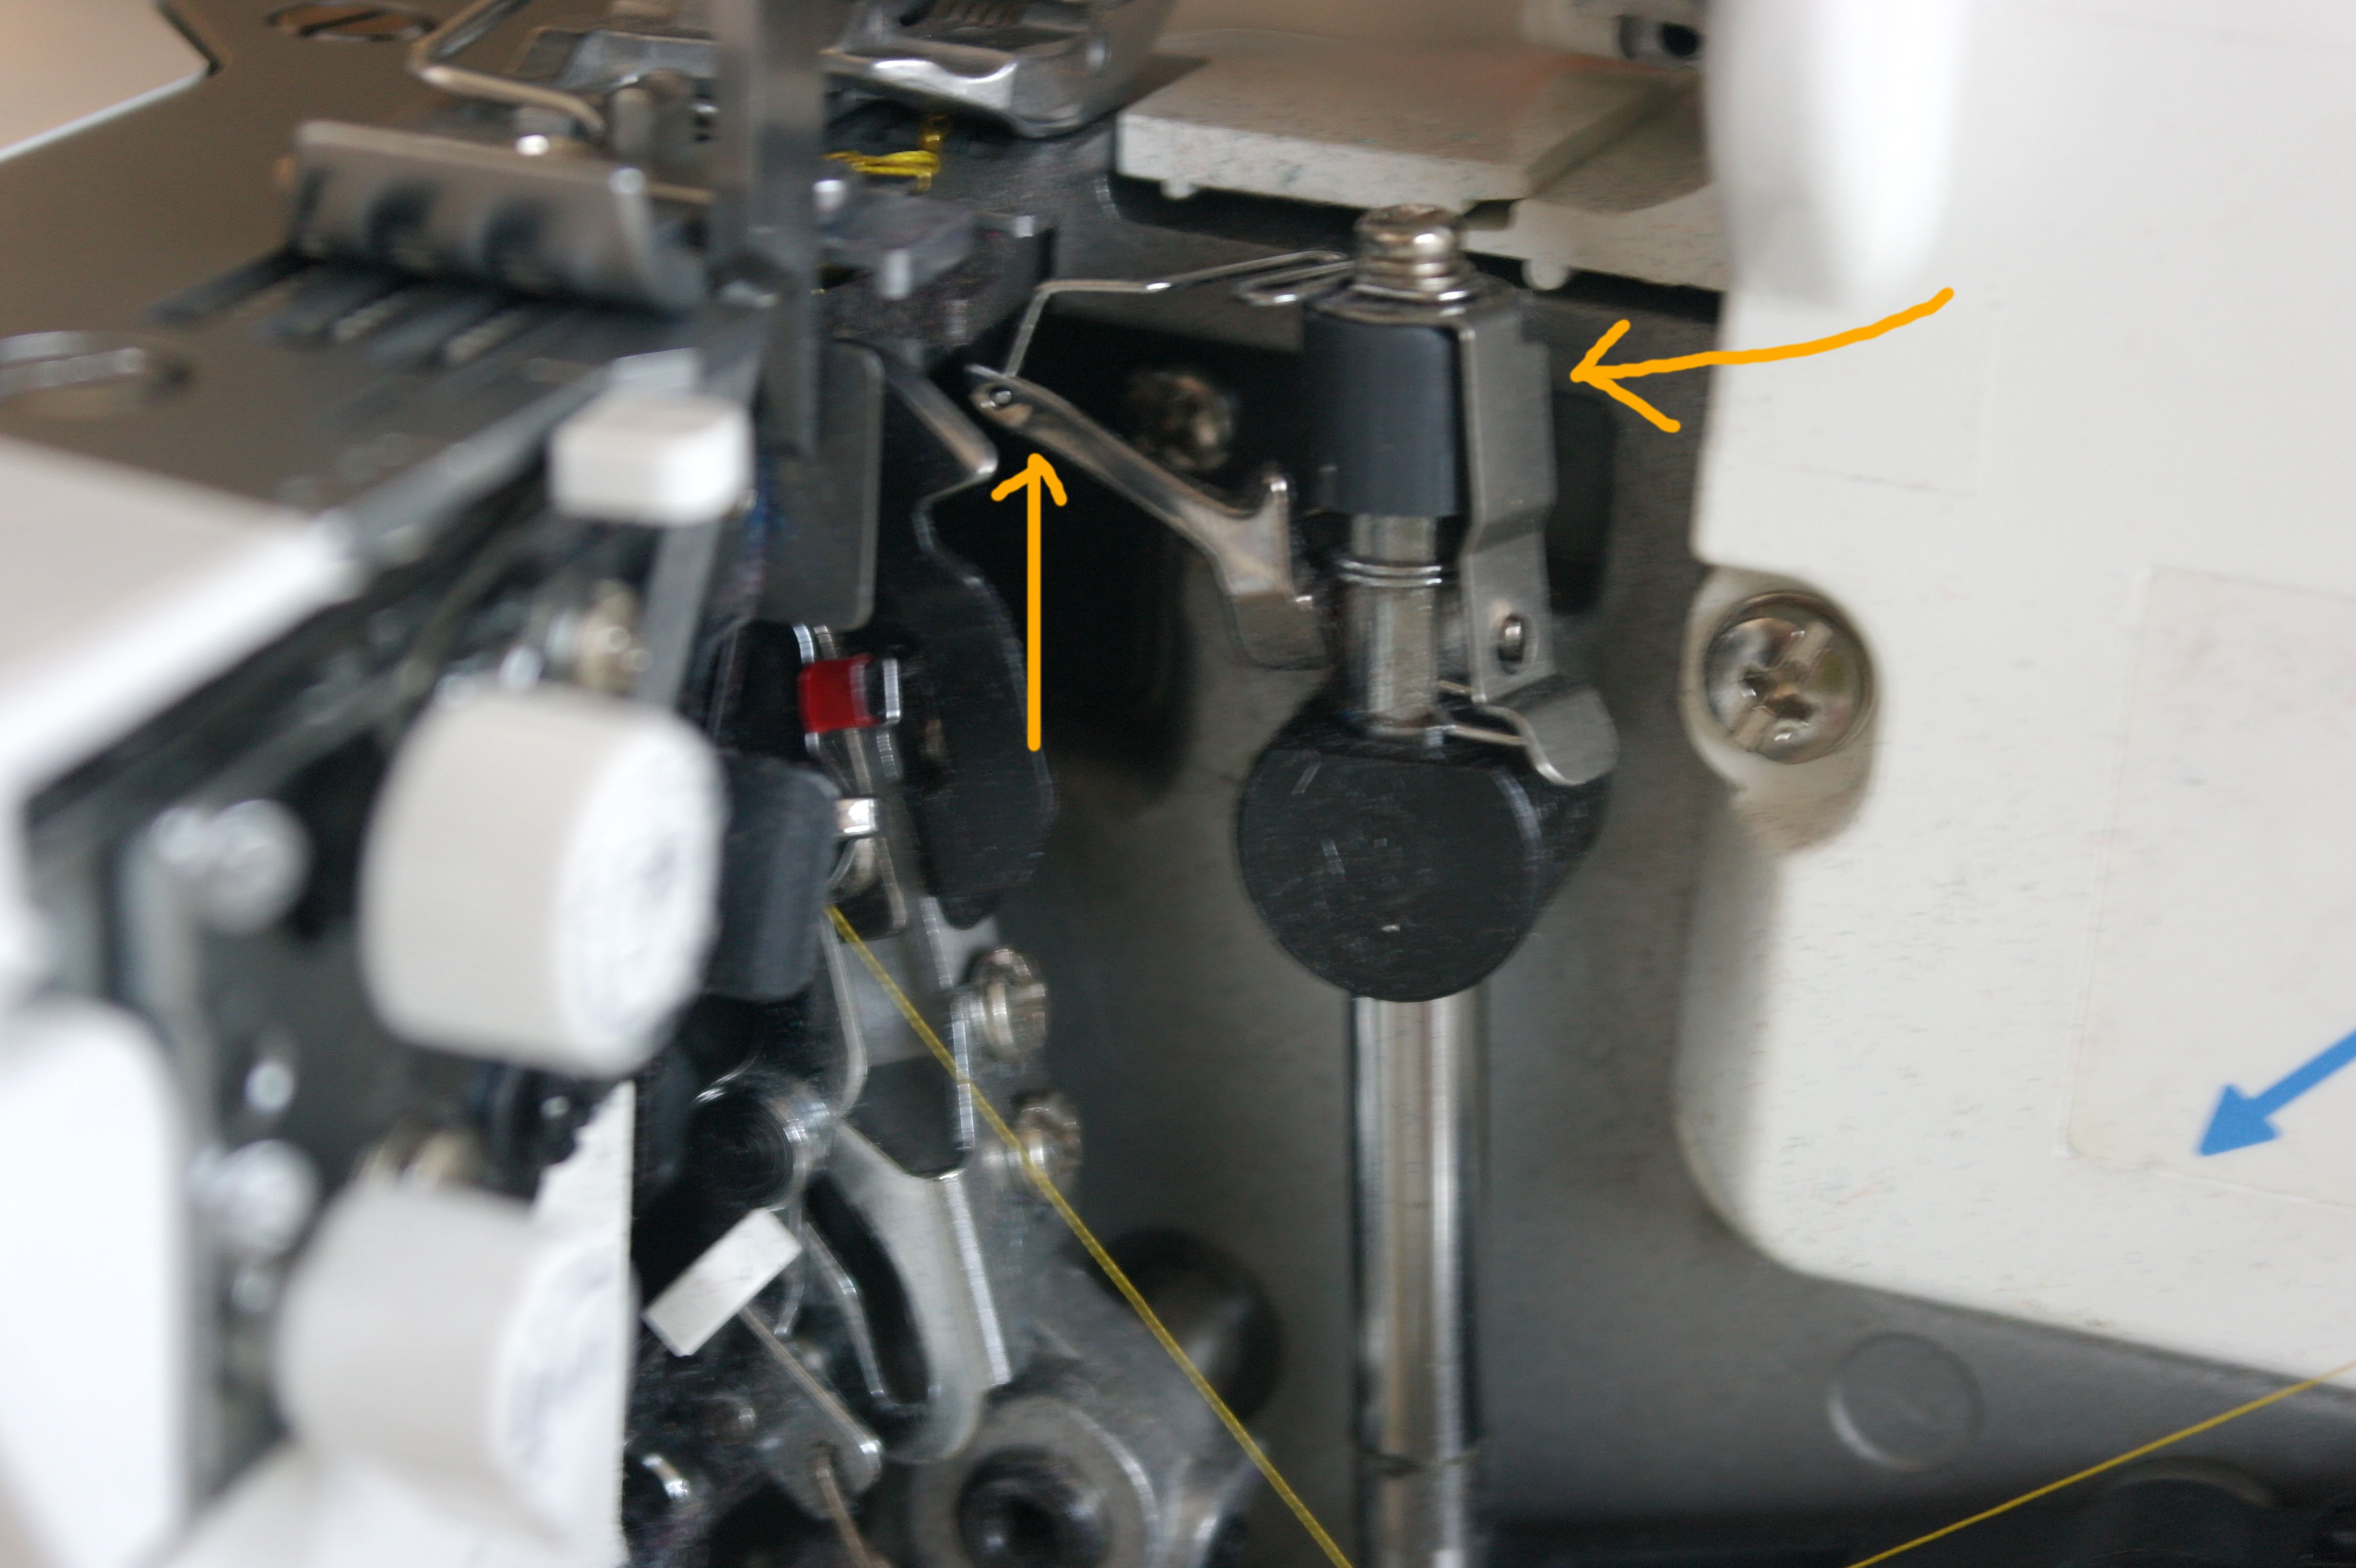
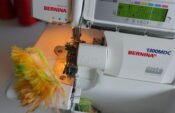
The picture above shows the placement of the upper looper converter: arrow to the left shows that I have locked the converter by inserting the tab into the pin of the upper looper, which itself is placed on top.

I have cut a strip of black Batik, aprox. 15 cm in width, 40 cm in length. I have drawn several lines with my white watererasable pen, 2 cm apart from each other. You can draw them 2,5 cm apart too, for a wider effect.
I have folded the fabric on the first white line, so I still can see it. The fabric is placed under the presser foot of the 1300MDC, and the first row of stitches is made.
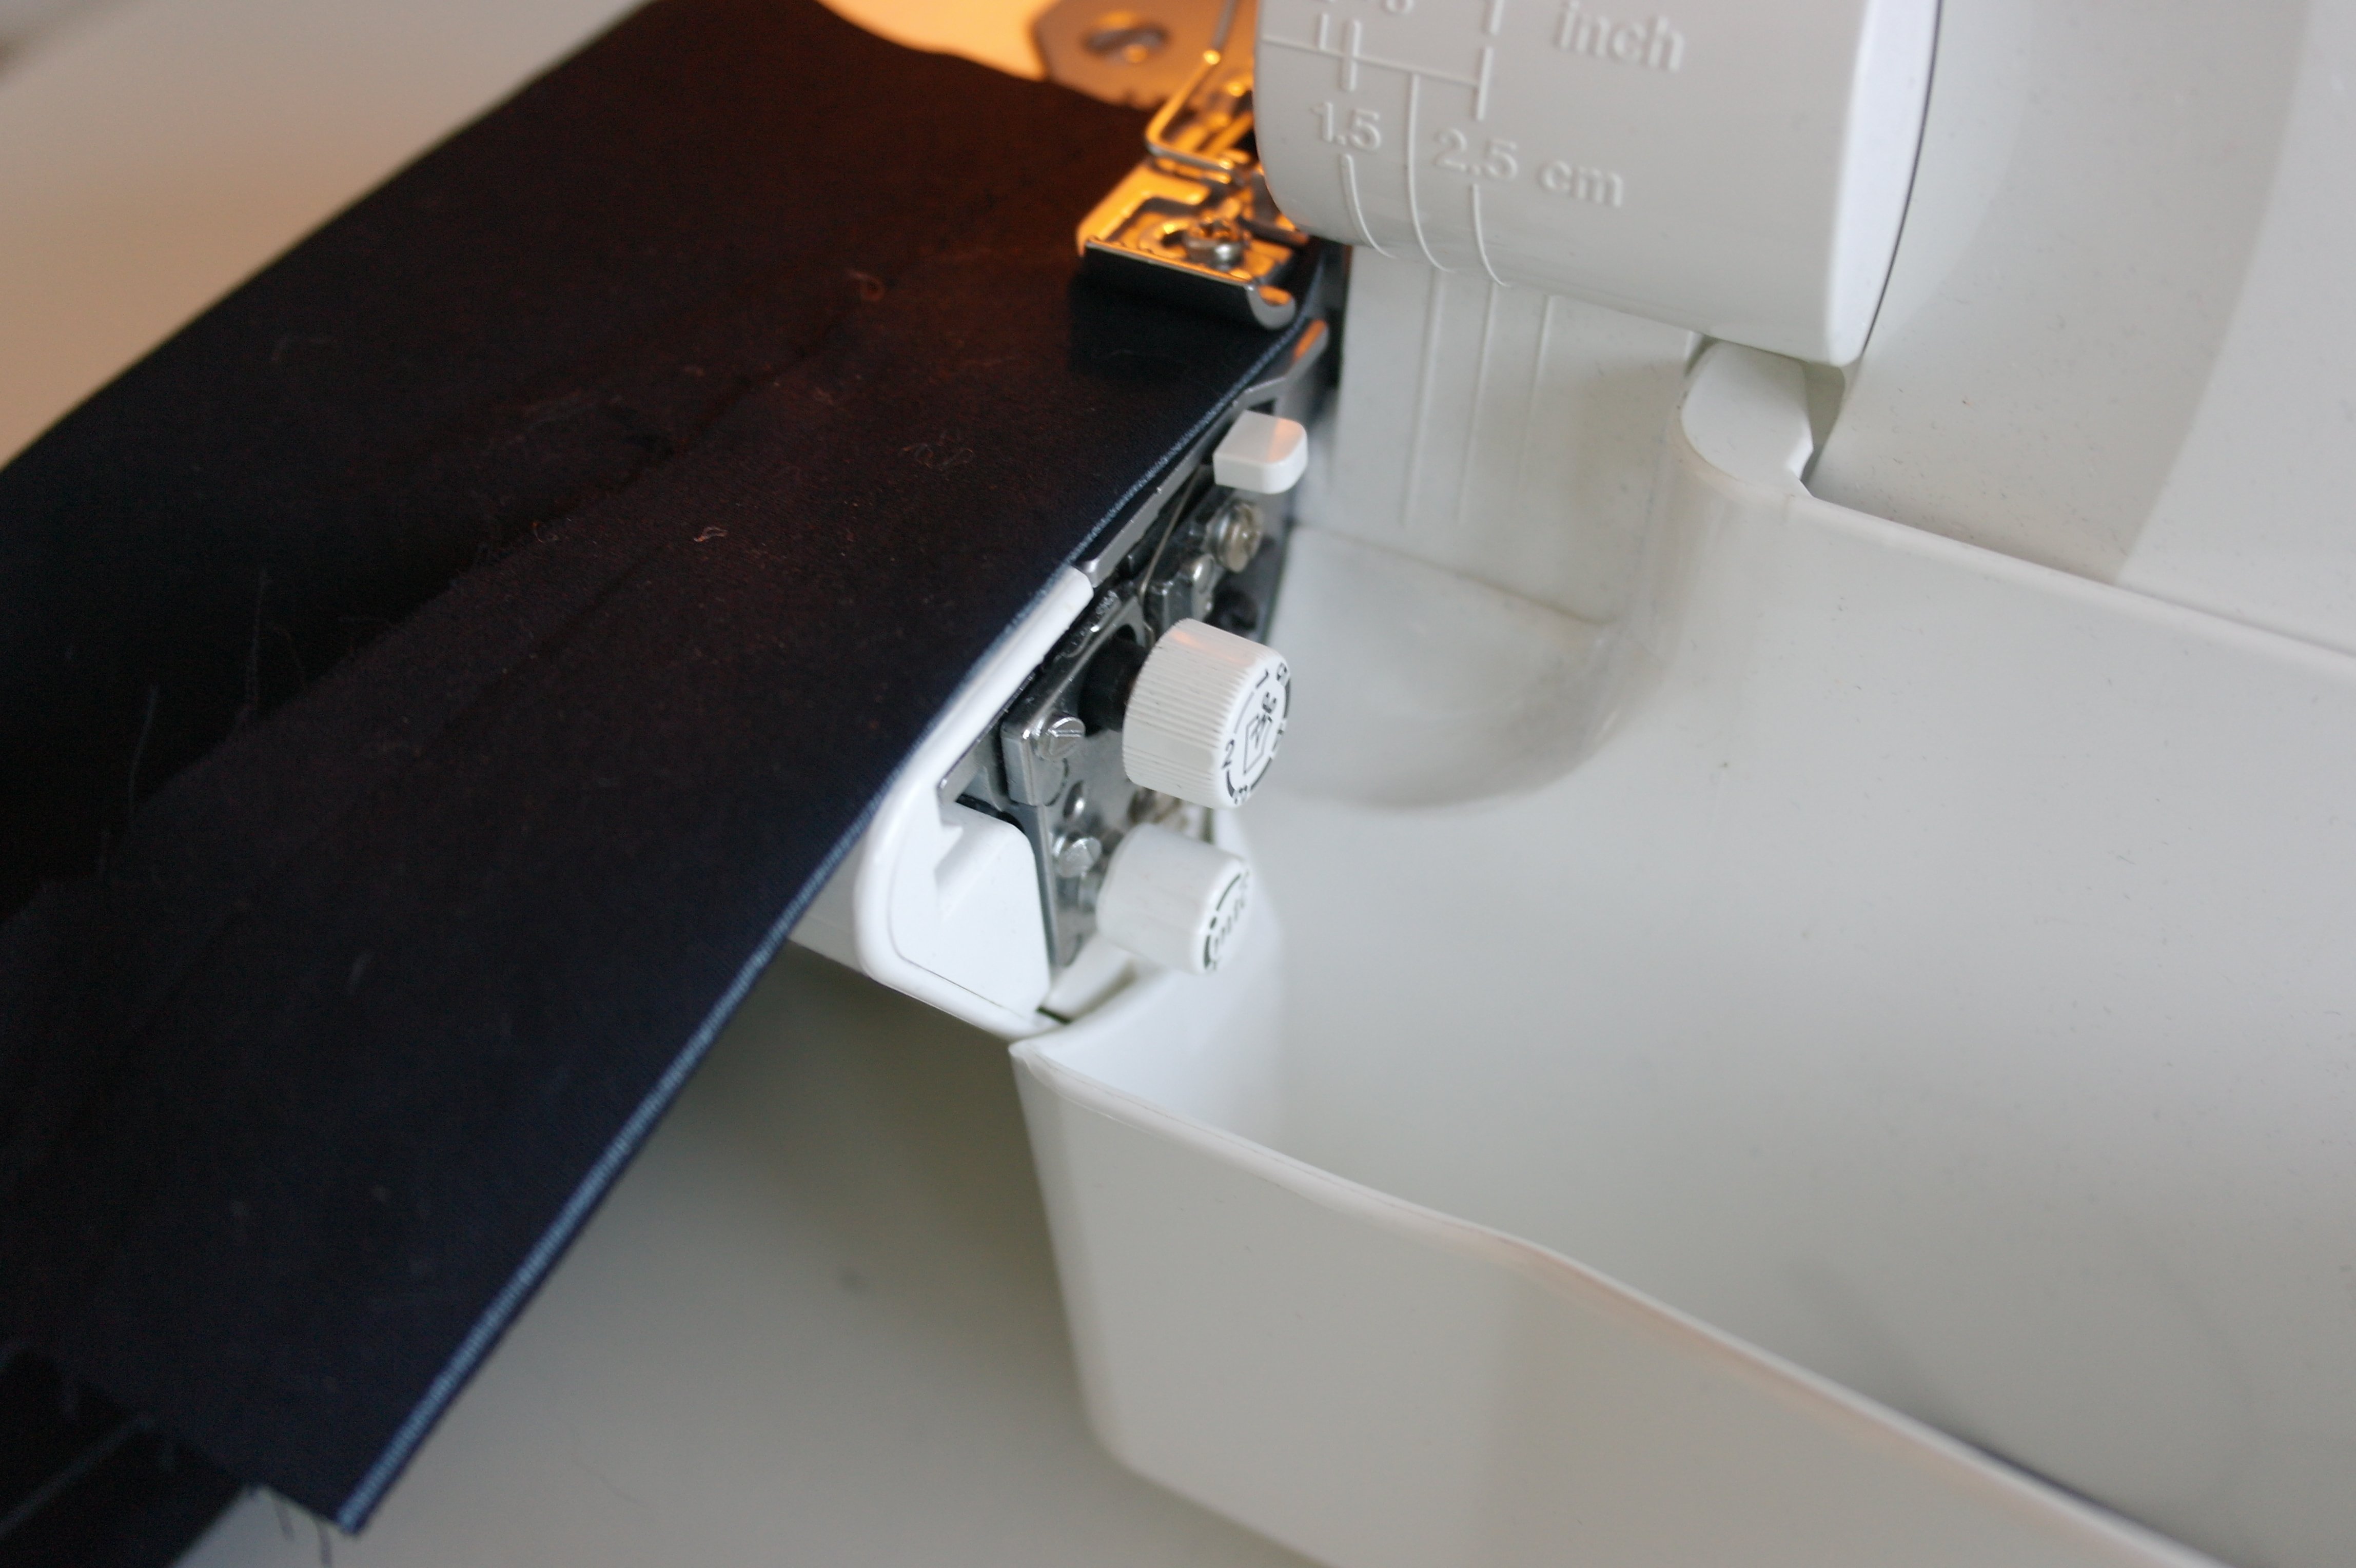
With the white line visible, I can be sure just a small part will be cut to the left of the white line, and falls into the waste collector.
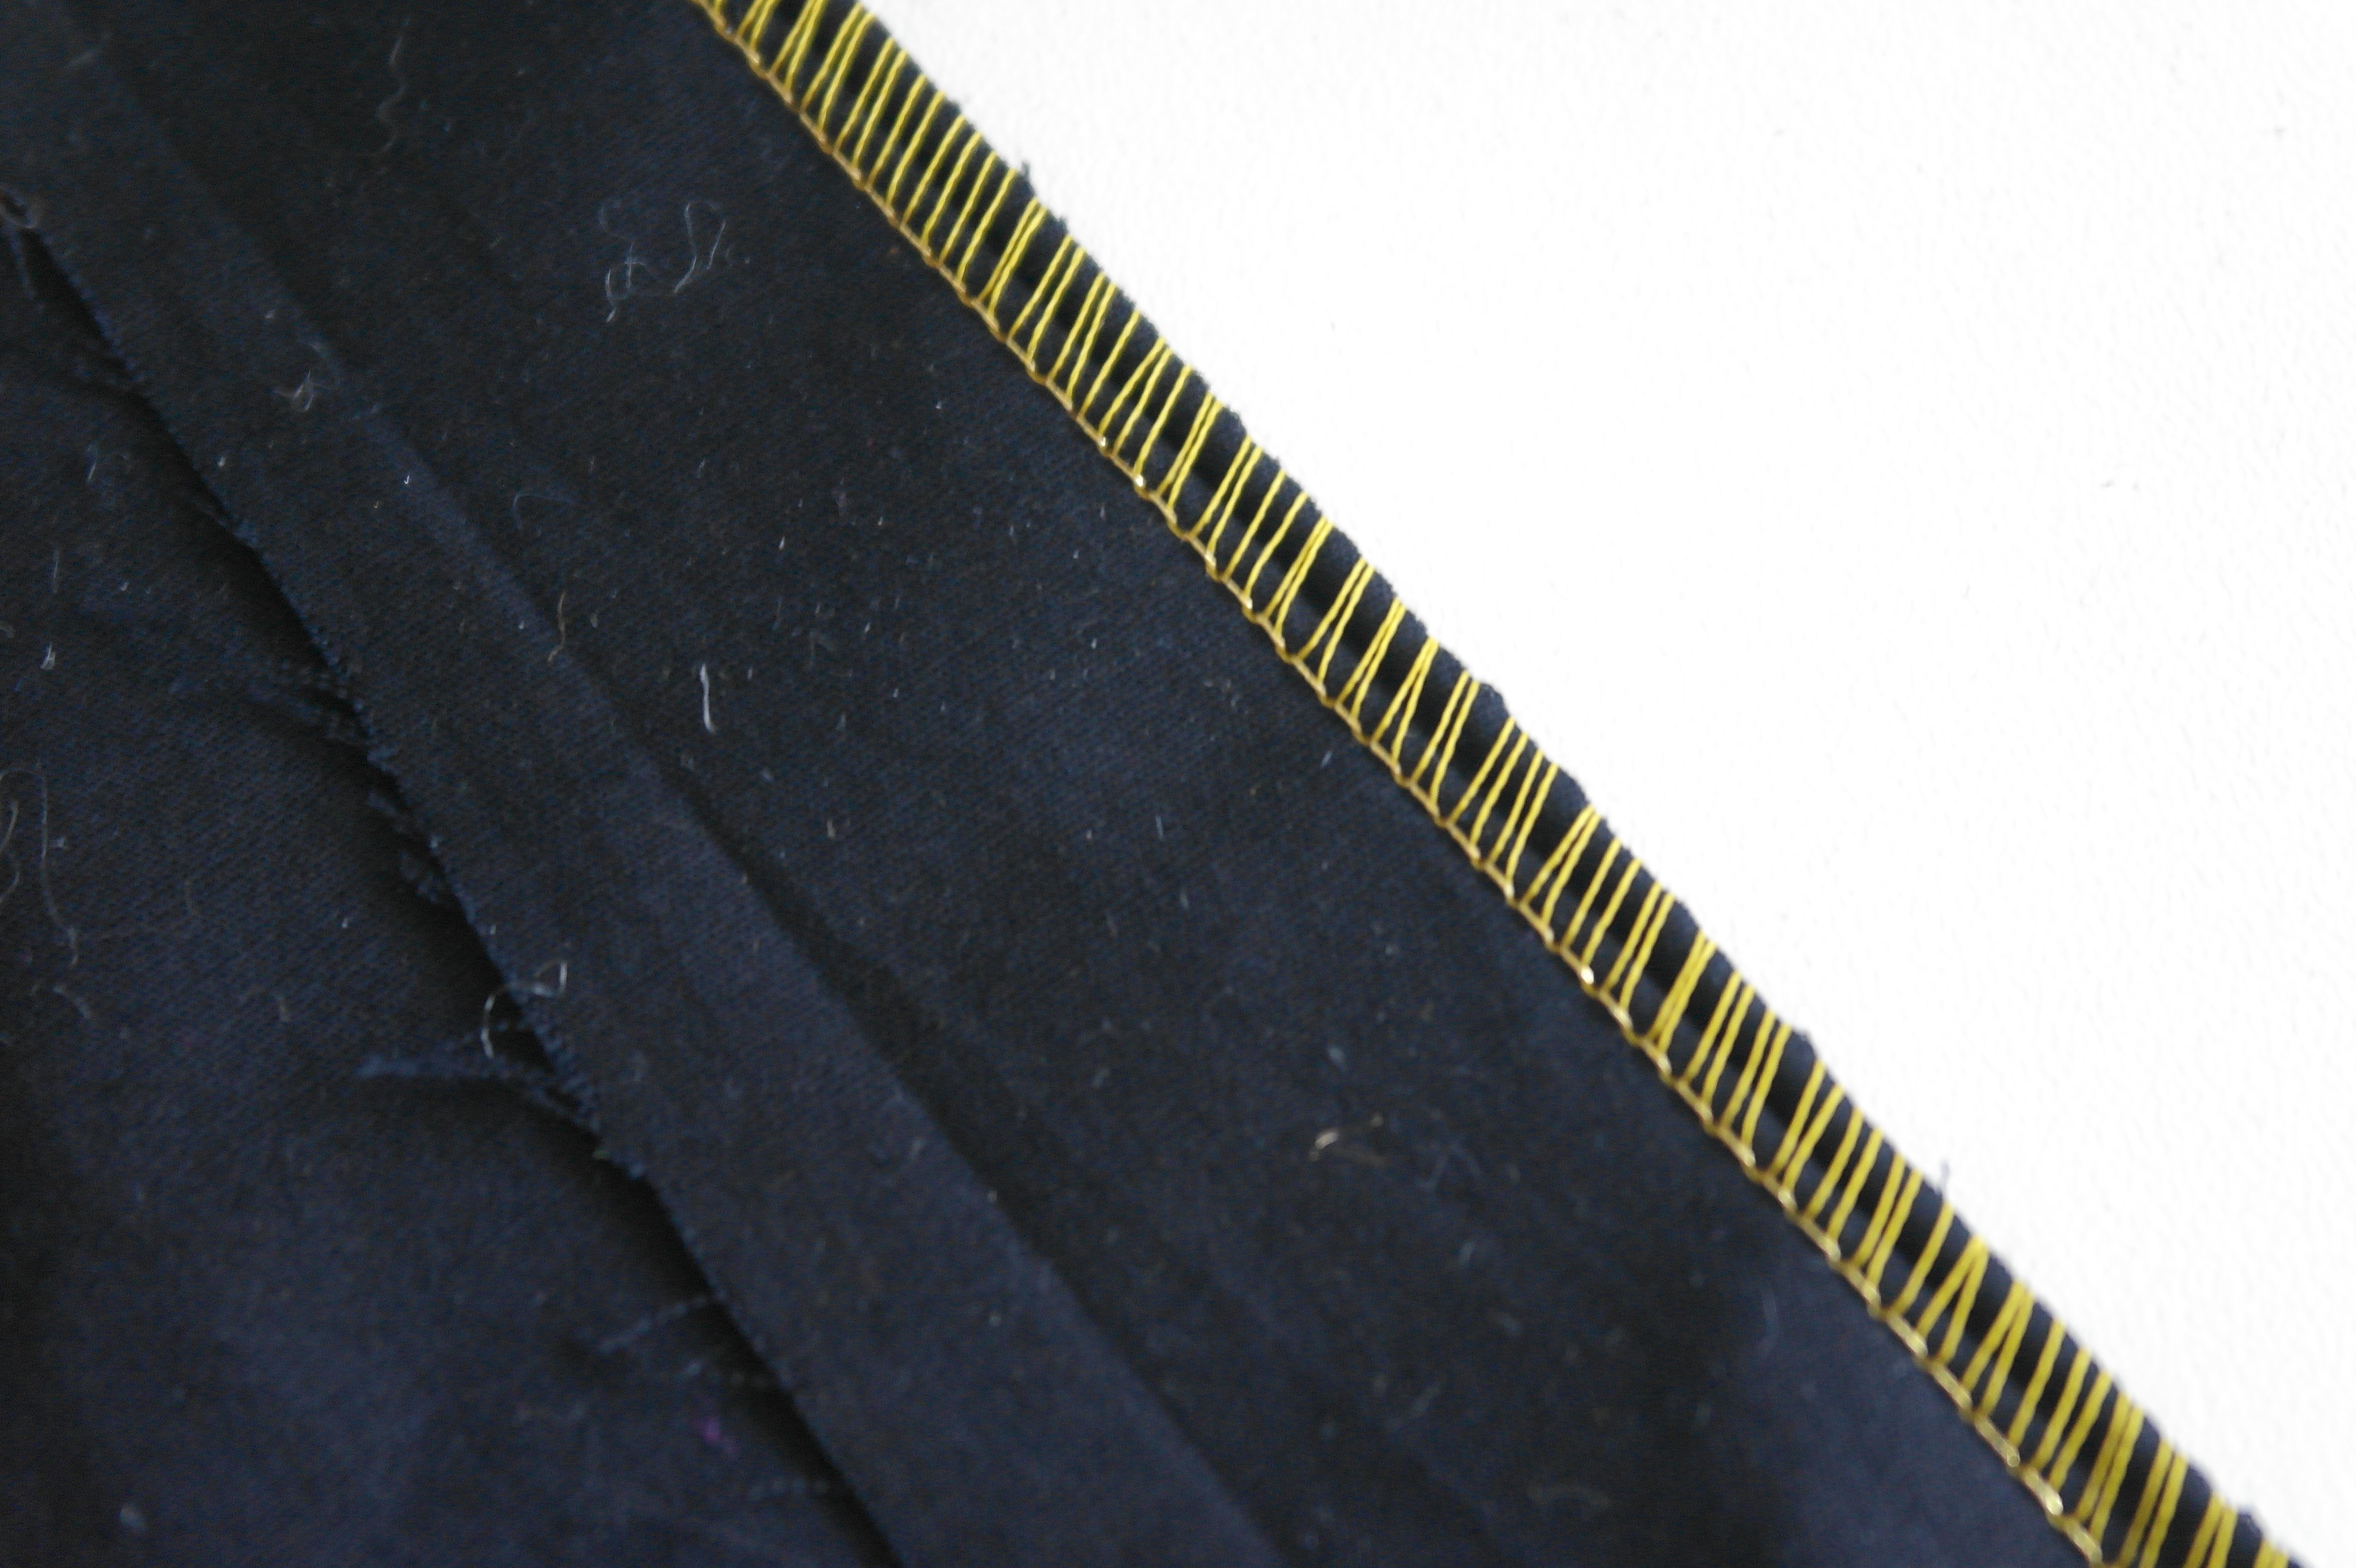
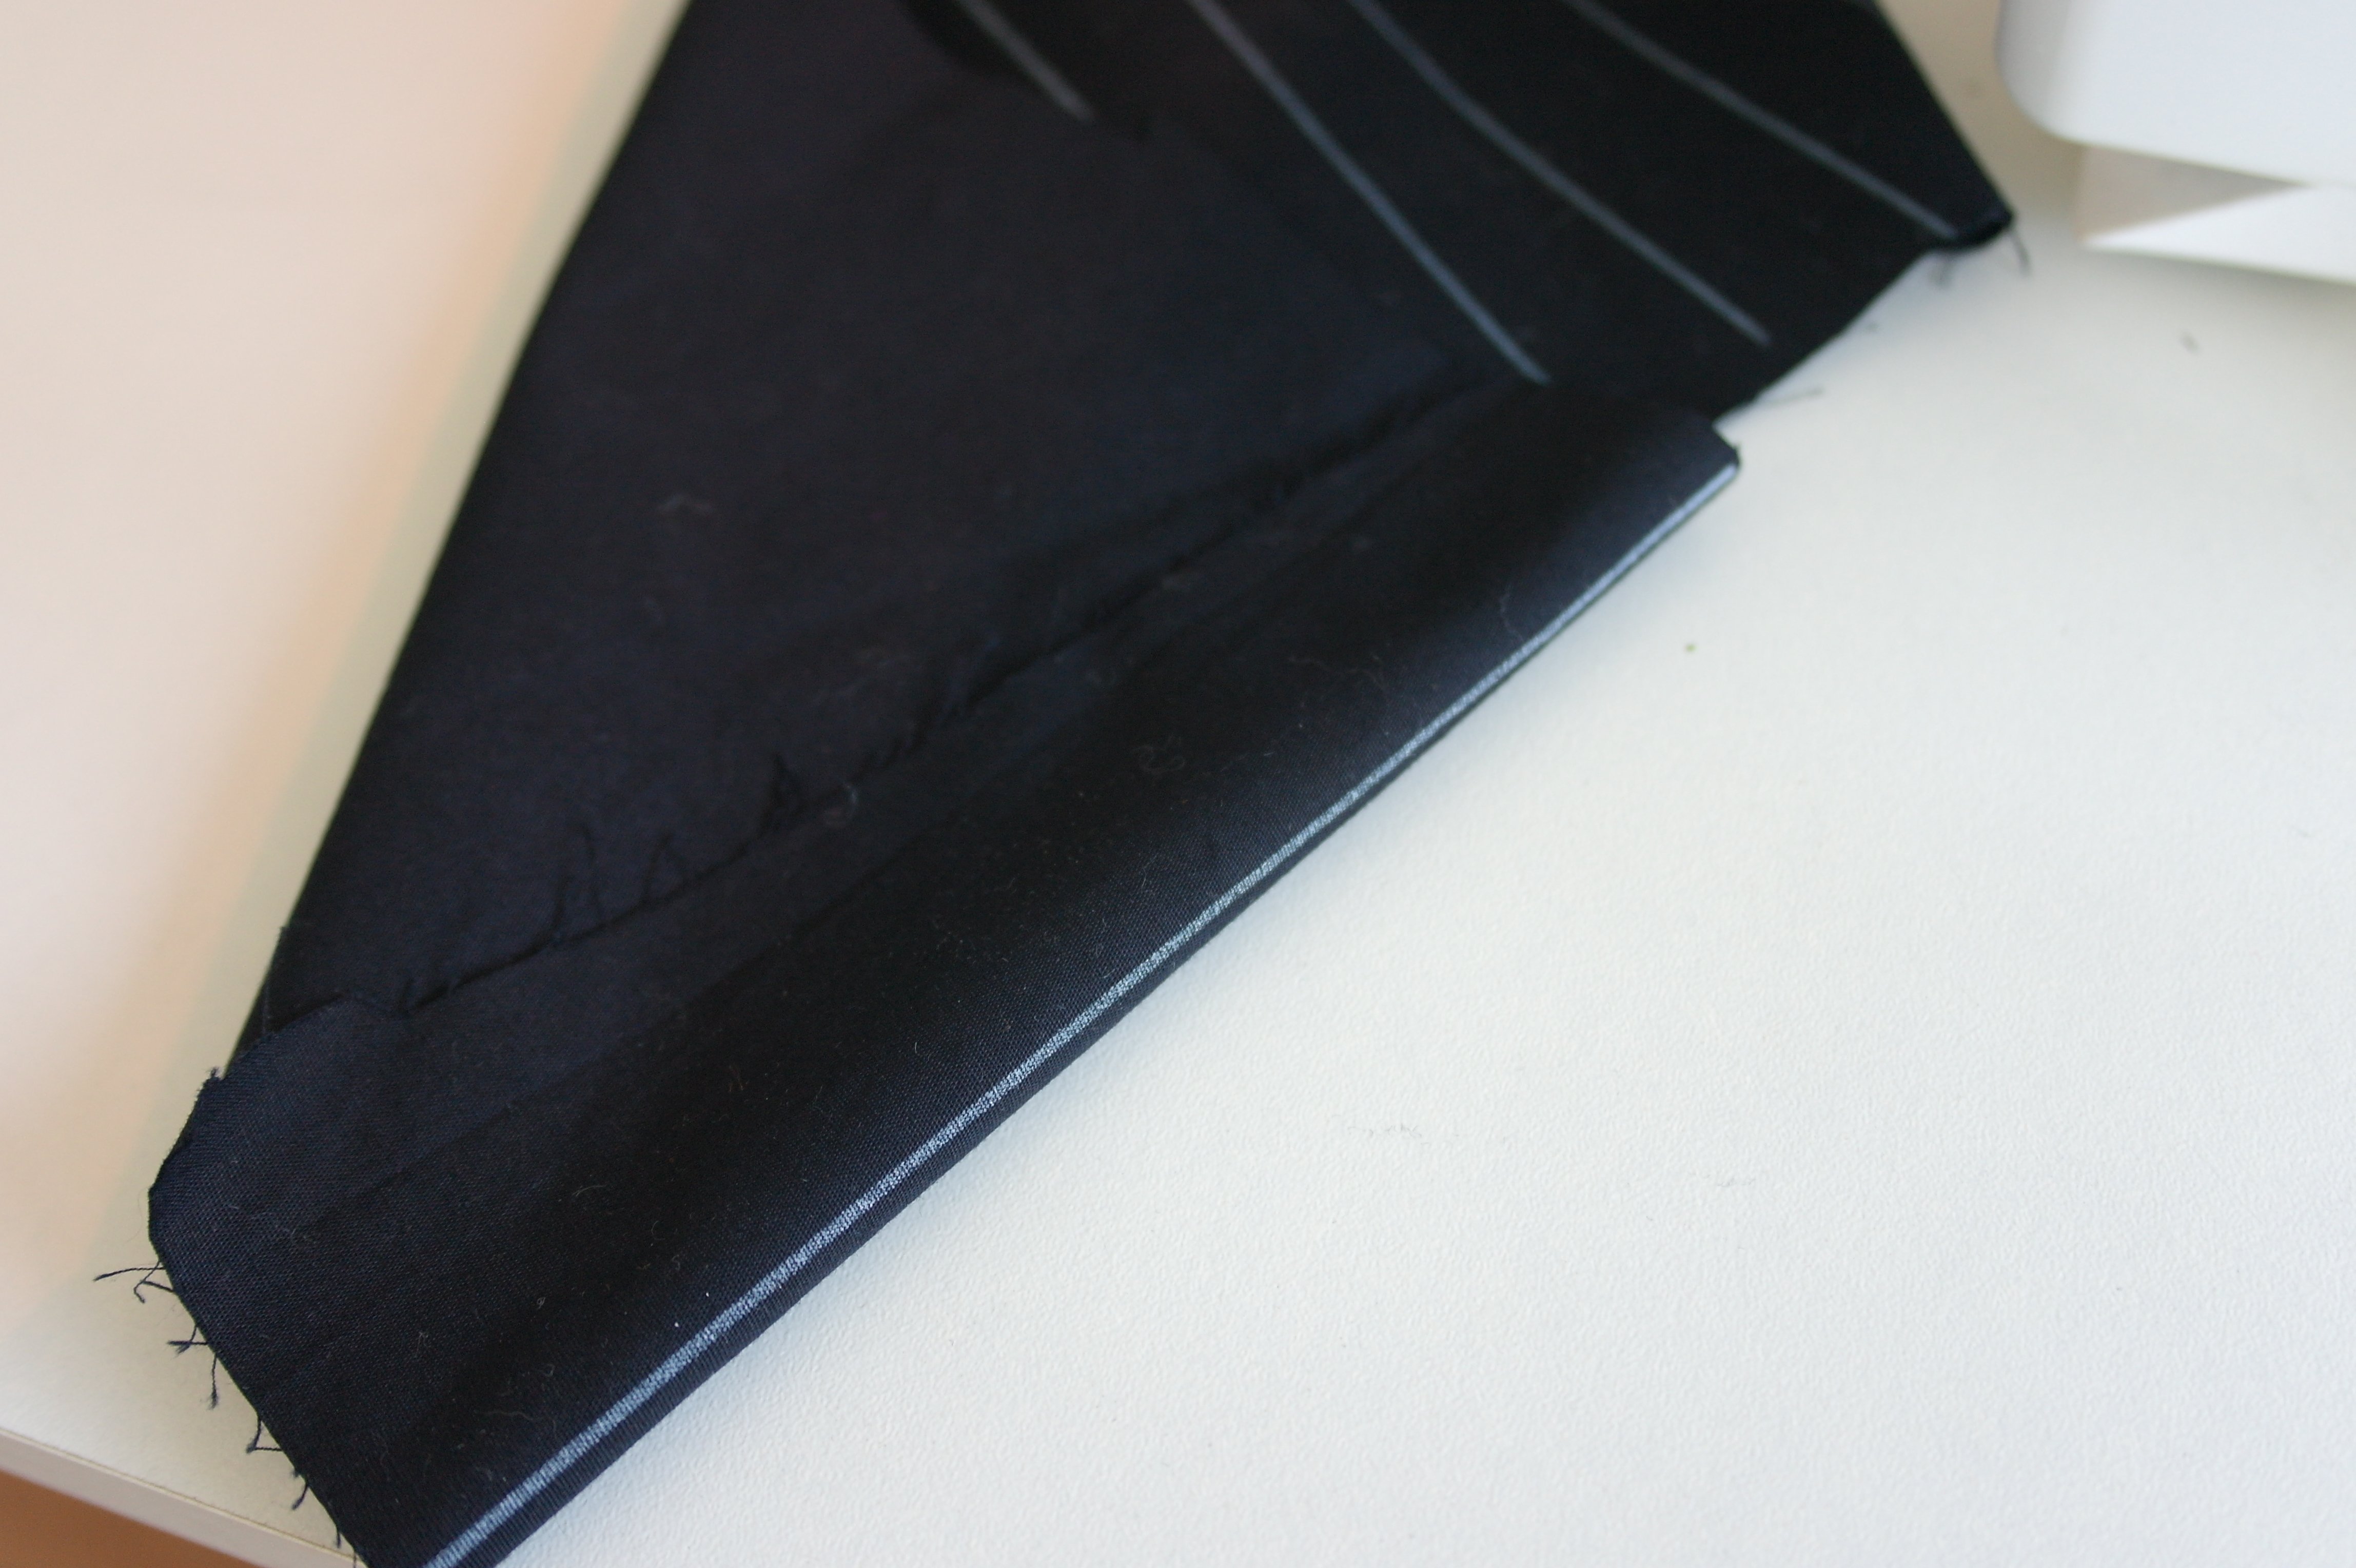
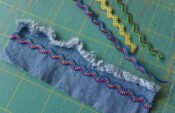
This is how the first row of stitches appears: nothing special, but do continue…

I will make more rows of stitches on the same side of the fabric (important), folding the black batik on each white line. BEWARE: the first stitches of the previous row are thick: just guide the folded fabric for the next row slowly with your hand, make the stiches, and pull the fabric through. Cut the row of loose stitches before going the the next row. 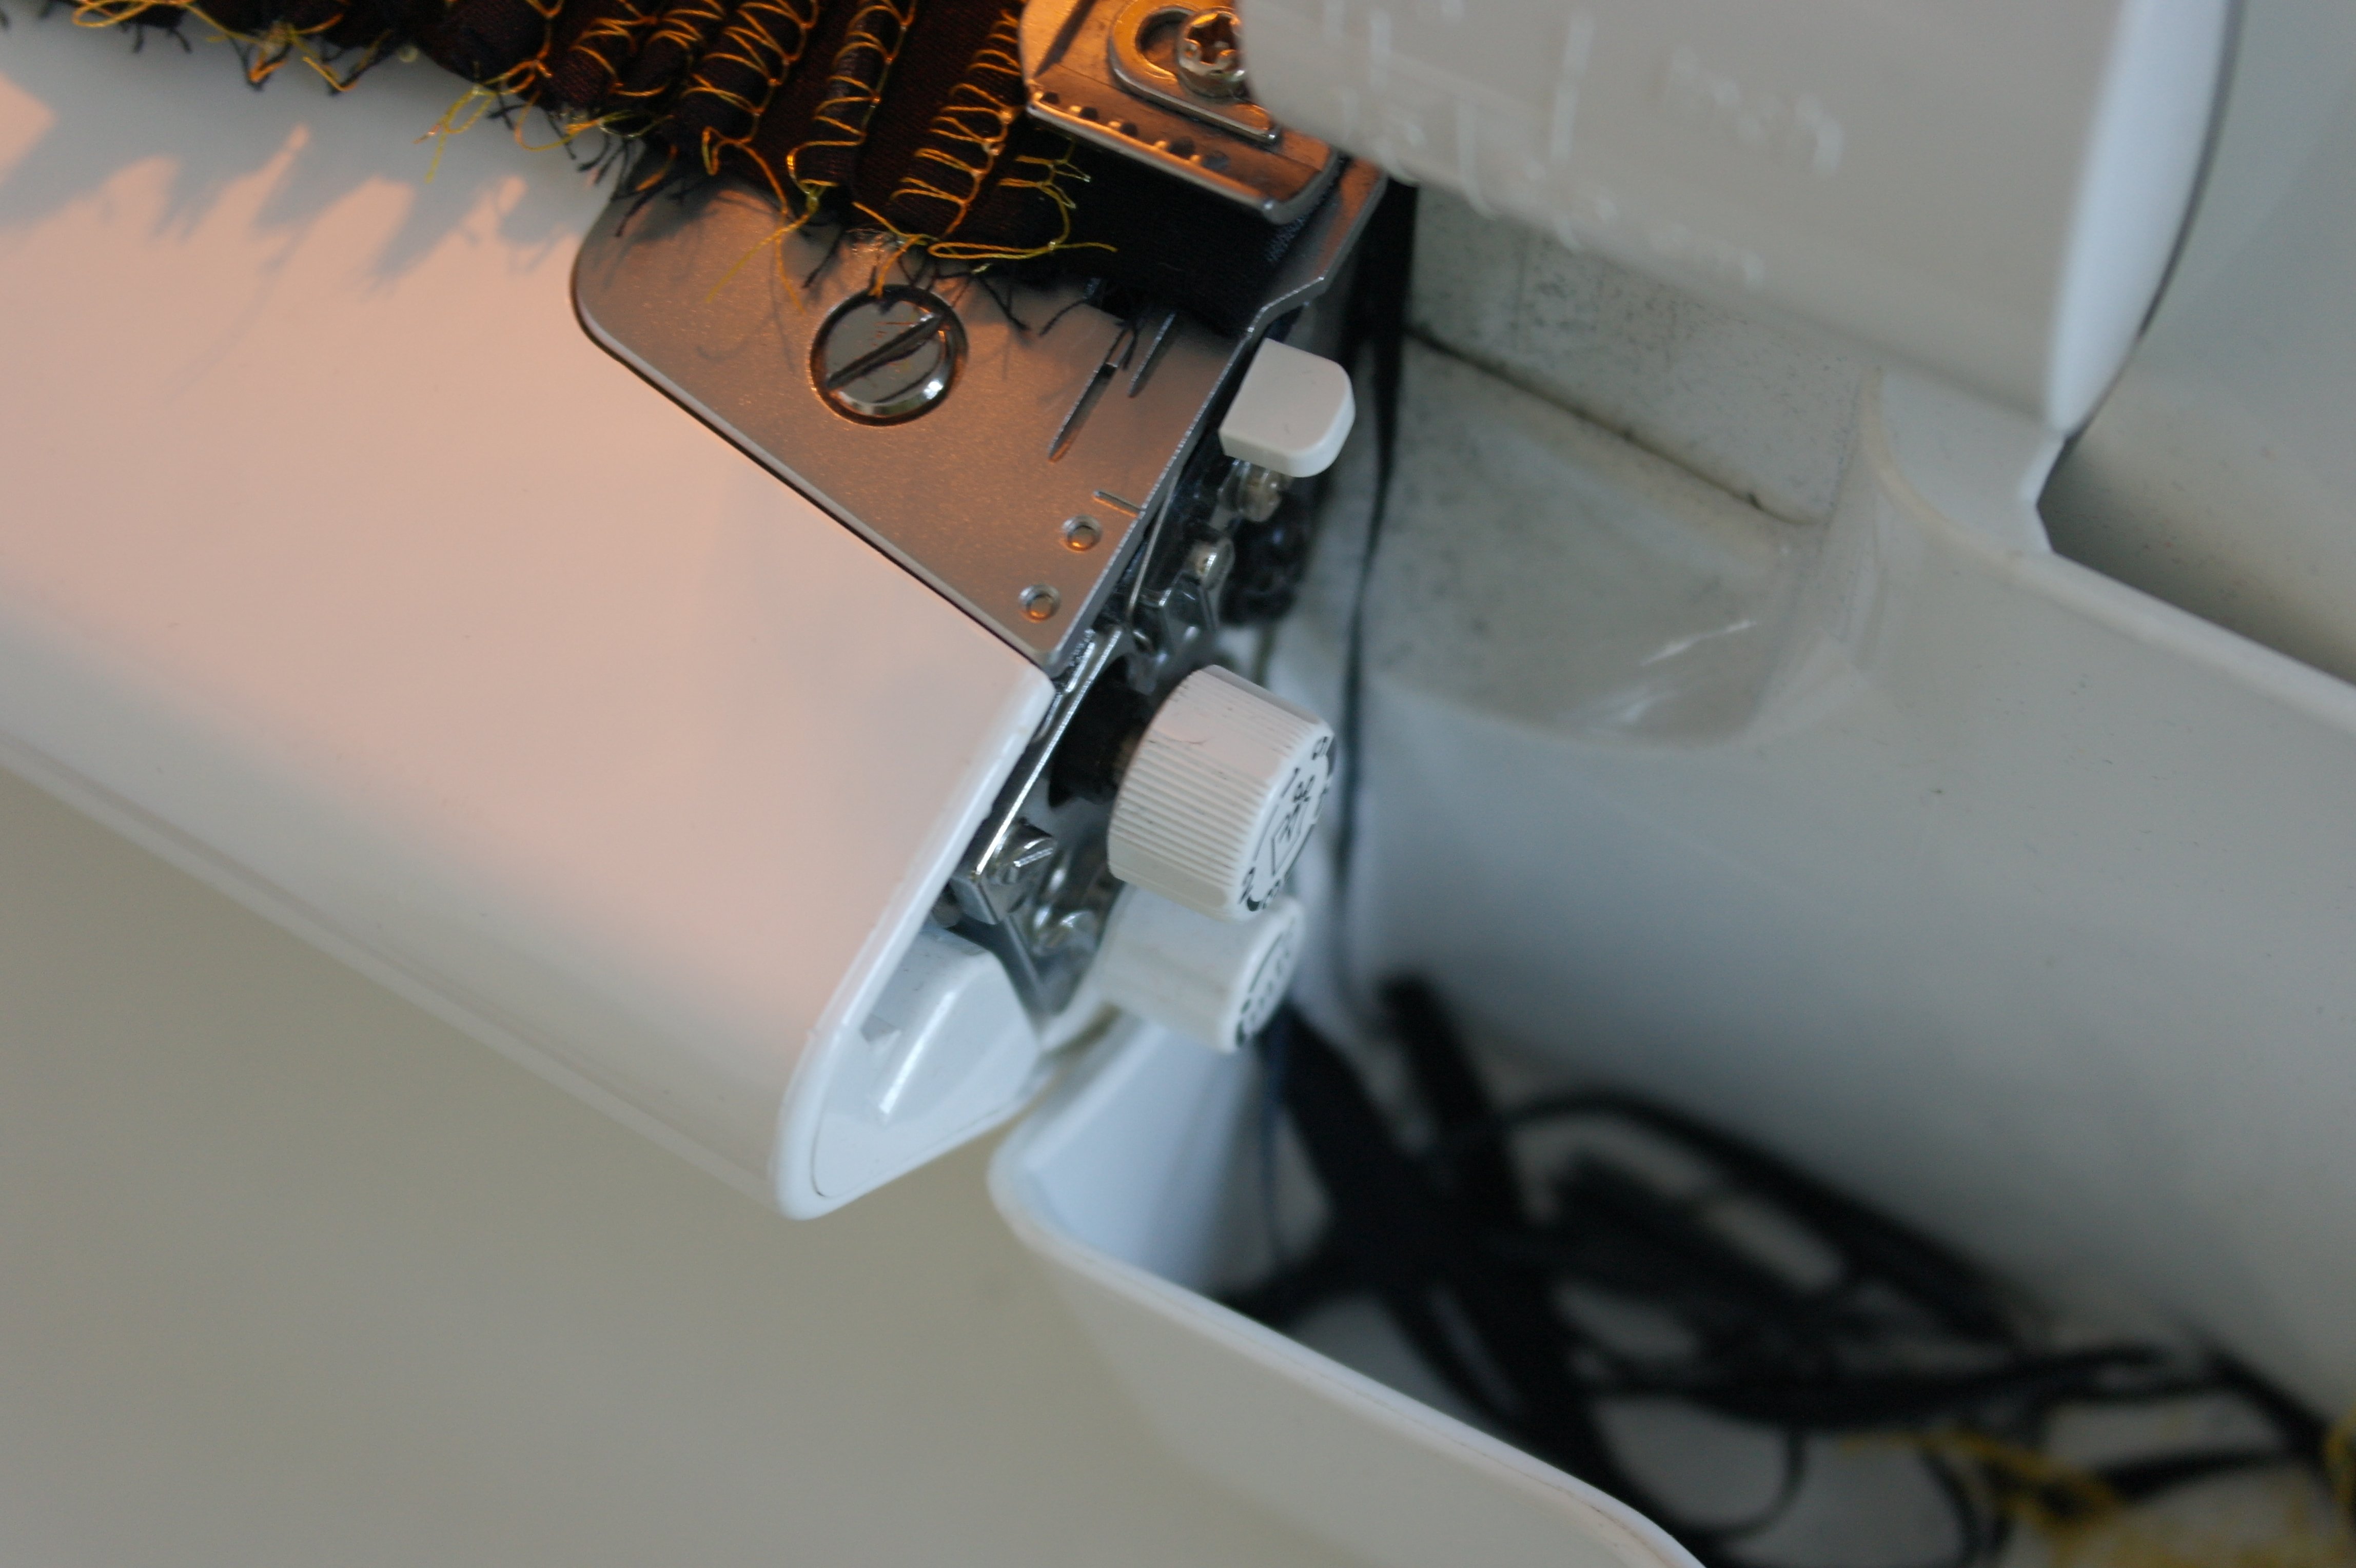
Don’t worry if the beginning and end of the stitches are a bit off: this part will dissappear in the seam allowance. Aprox. 1 to 1 1/2 cm will be used to sew under of between other fabrics, if you are using this stitched fabric in a project. The machine cuts off small strips of black fabric…

Have you noticed the shrinkage of the strip of fabric, after making all rows of stiches? That’s because of the type of stitch that is used. Be sure to cut a strip of black batik that is long enough, so that – after making the lock stitches – you still have enough length to use for a project.
When all rows are made, I gently pull at the length of the batik, all the way to make the stitches lie flat and they are stretched. By doing so, row by row, the stitches made a sound like a ‘crack’. This means they are stretched to their maximum length. Do be careful when stretching this way. If you don’t hear that sound, the stitches can be stretched more. The front of the fabric is not what I want: turn the fabric and there you will see the golden stitches… this will be the front.
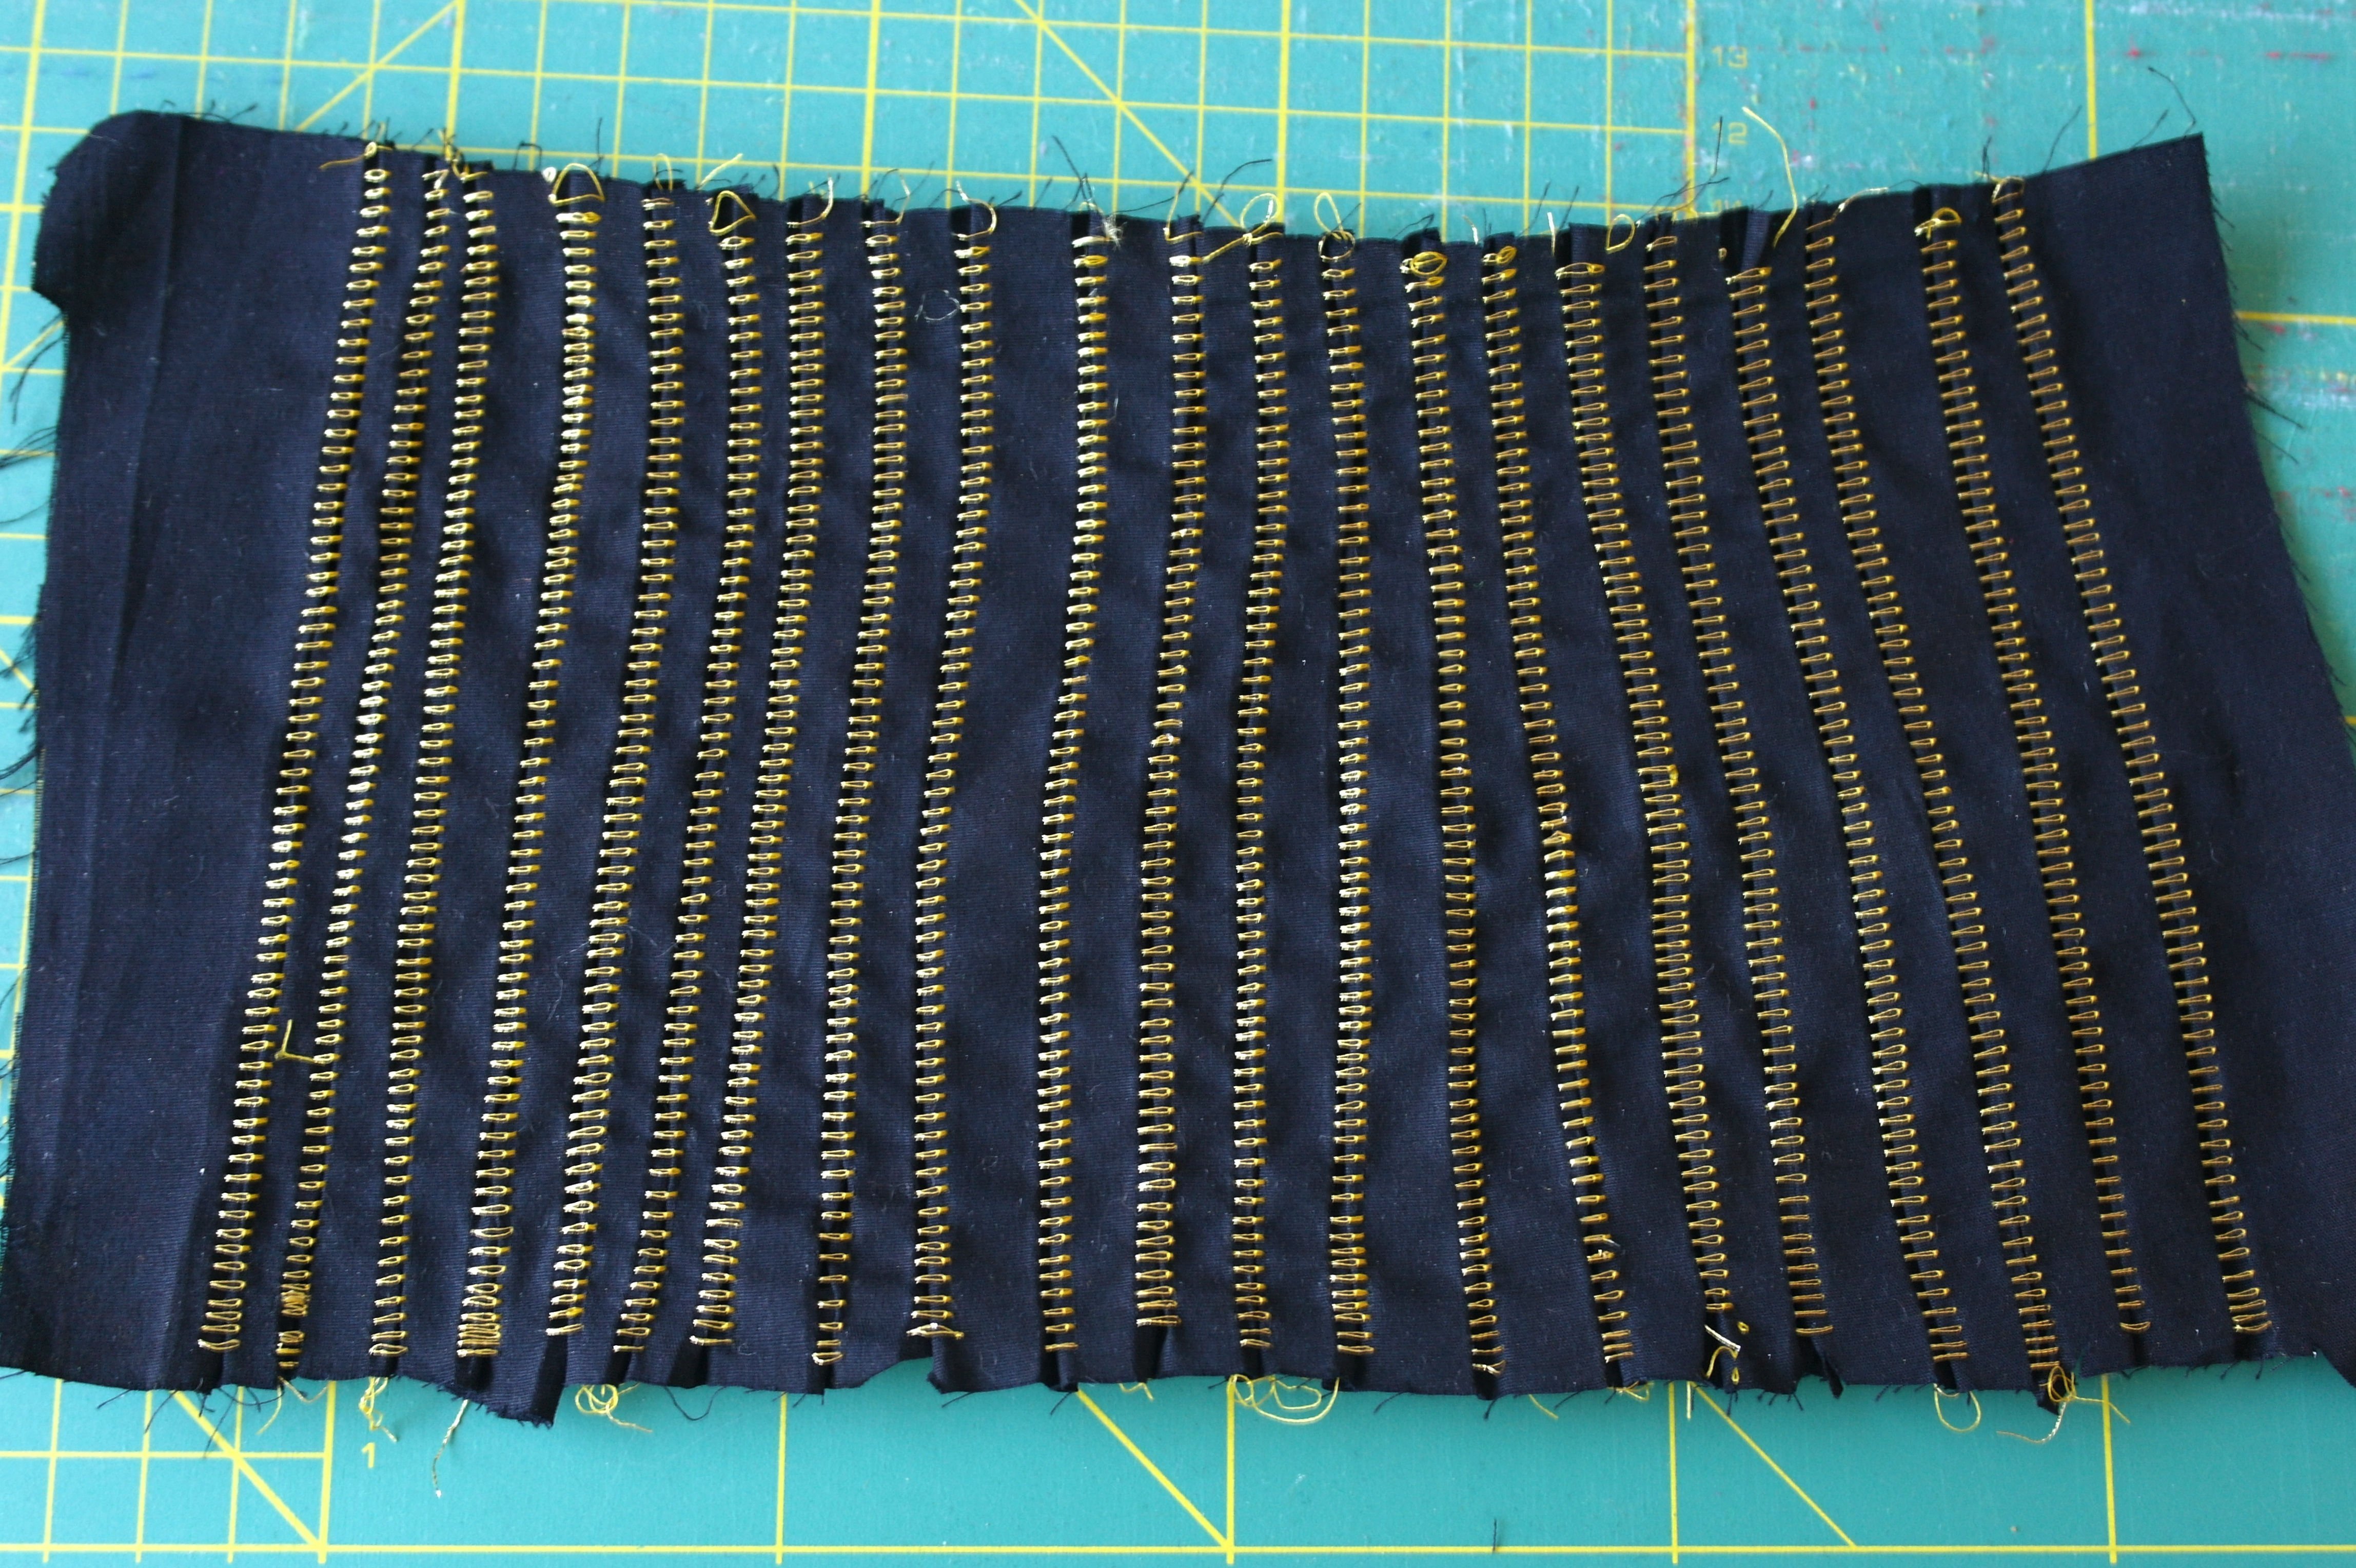
Now you can see why I have used threads that are so differnent in weight: the thicker metallic thread looks great after stretching the fabric. This is what I wanted, so this will be the front of my fabric. Don’t you think it seems like I have sewn a lot of zippers between the folds of the fabric?

I will not iron the fabric because of the metallic thread. I will stretch it on my ironing mat: using pins, stretching the length of the fabric for as much as the stitches allow it. Using water to just dampen the fabric, I will leave this to dry for a day.
Do you want to see what I will do with this fabric with golden stitches? Be sure to check my post on March 15th at the BERNINA Blog, where I will use it in my Crazy Crystals Mystery Project 2018!
Hope to see you there!
Happy stitching,
Sylvia Kaptein
Sylvia’s Art Quilts Studio

[email protected]