 BERNINA Corporate Blog -
In the Netherlands the 13th of May is Mothers Day: and allthough it seems far away at this time, it is never to early to make a personal gift for such a special day. I’ve noticed that in the UK Mothers Day has been celebrated in March, but making a special gift for your mother doesn’t need a date, does it? You can make it whenever you want to give her something special. And nothing is more special than a gift with hearts.
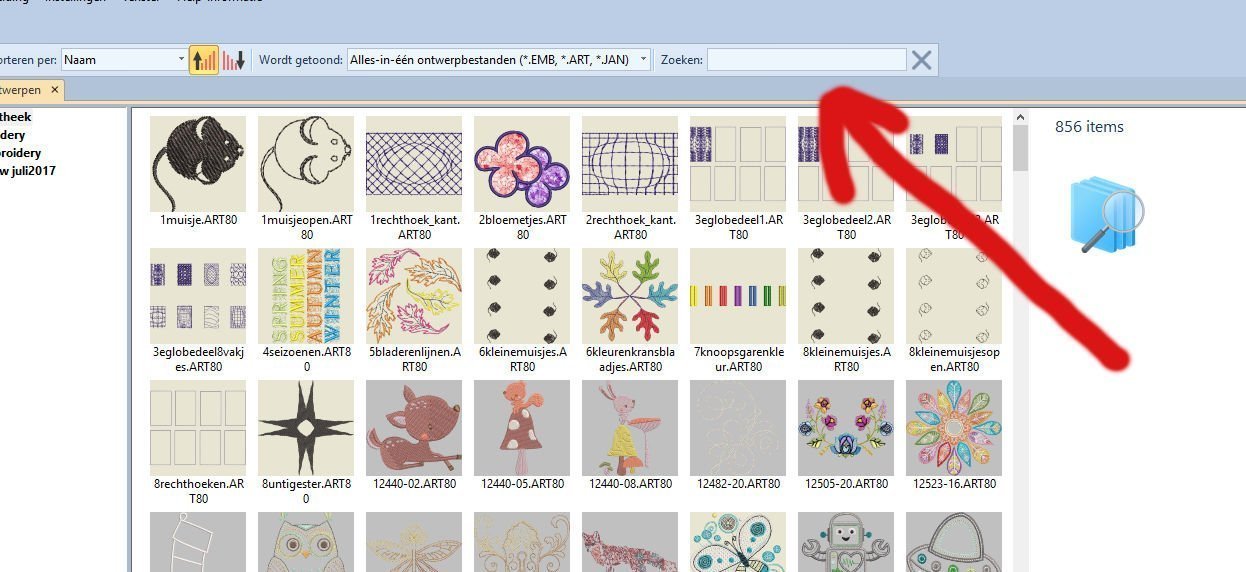
To find hearts in the Embroidery Library, I have typed ‘heart’ with search, top right.
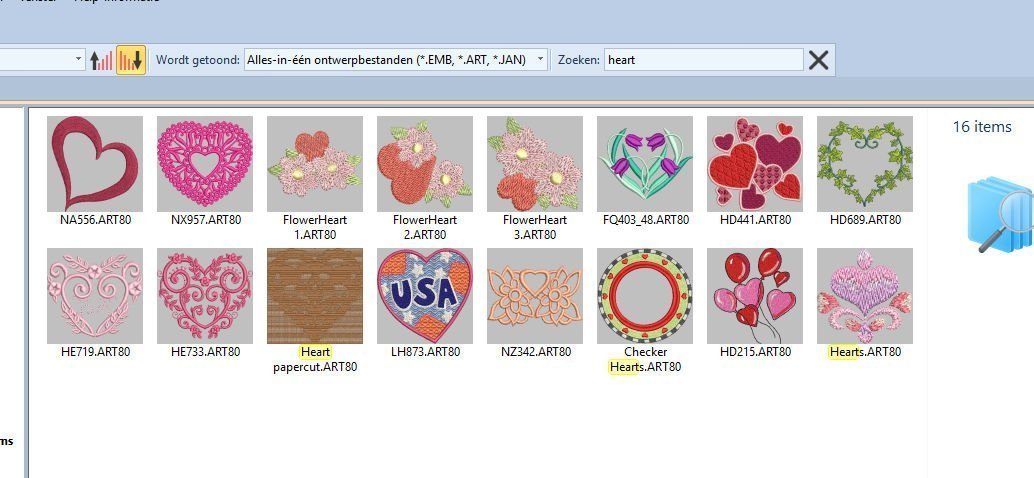
16 Motifs with hearts were found, so I have a lot of possibilities to make something special.
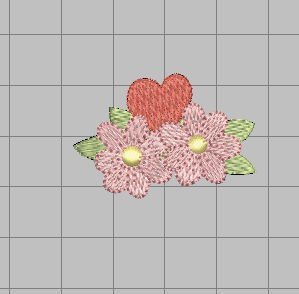
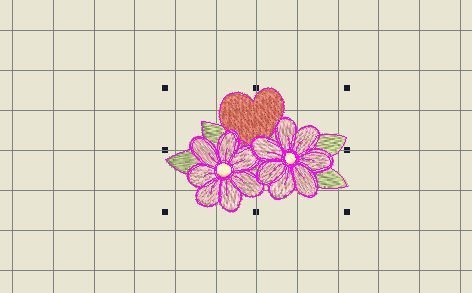
Double click on the 3rd file: FlowerHeart1.ART80: it is placed on my embroidery canvas: a small heart with two flowers. Selecting it, I can see that it is aprox. 4.5 x 3.1 mm, 2910 steken. Because this is a motif from the Embroidery Library, it will be placed at its own tab. The first – default – tab is ‘Design1’, this second one has the name of the file ‘FlowerHeart1’, for identification.
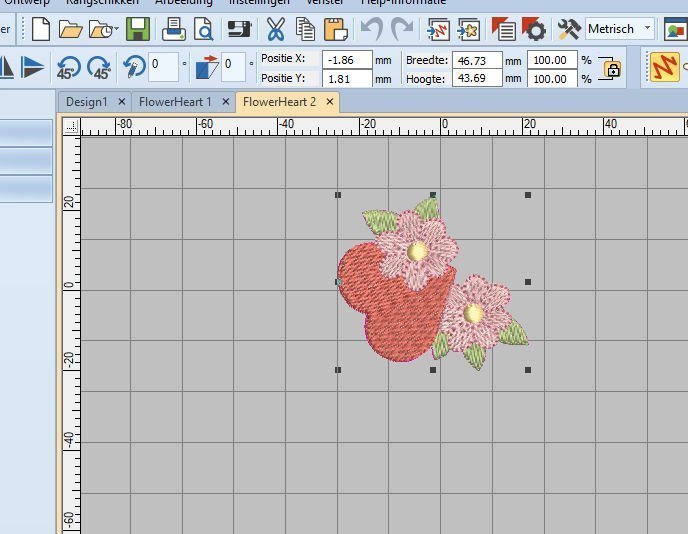
Back to the library, double click on FlowerHeart2.ART80, a simular heart, pointing to the left corner. There are 3 simular motifs with hearts and flowers: this is no. 2, placed on a next tab. This motif is slightly bigger: aprox. 4.7 x 4.4 mm, 3612 stitches.

And anóther motif from the library: FlowerHeart3.ART80: double click again and it is placed on a new tab. Size aprox. 3.7 x 3.7mm, 2911 stitches.
If you want to see them all three together, make copies of FlowerHeart1, 2 and 3 and place them on tab ‘Design1’: that is the canvas you will be working on. Just keep the tabs per flower heart open: these are the originals, for copying and pasting.
Select the first heart/flower on tab 2, by using ‘Copy’ with the General toolbar, then click on tab Design1 and use ‘Paste’. You can also use Ctrl+C and Ctrl+V of your keyboard. Motif 1 is the first: it will be pasted directly on the canvas. Have you noticed by the way, that – when placing an embroidery motif from the library onto your canvas/new tab, the background is grey? And that the canvas from tab Design1 is yellow (allthough it looks white with the picture above)? This is how you know that you’ve been placing motifs from the library (grey) or working directly on the default tab (yellow) with your own designs.
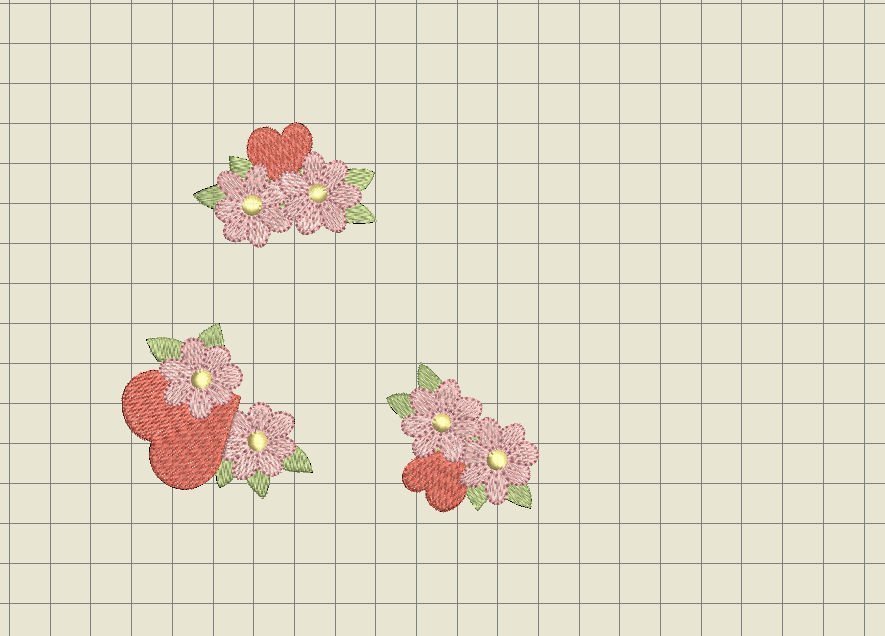
Copy and paste motifs 2 and 3 too, but notice this: when copying/pasting a motif, V8 placed this in the centre of your canvas. When copying/pasting the second motif, it will be placed on top of that first motif, so it seems as though there is just one motif. As long as the black nodes are actif (motif selected), you can shift the second motif, by sliding it sidewards. The first motif appears again, so there are 2 motifs visible on your canvas. If the second motif is unselected, you will have to select it again, but be sure you select the entire motif, and not just a part of it. If that doesn’t work, undo and truy again.
HINT: shift motif no. 1 directly sidewards, after placing it on tab Designer1: do the same with all motifs that you are copying/pasting, place them away from the center. This way every new motif is placed in the center, but not on top of previous one.
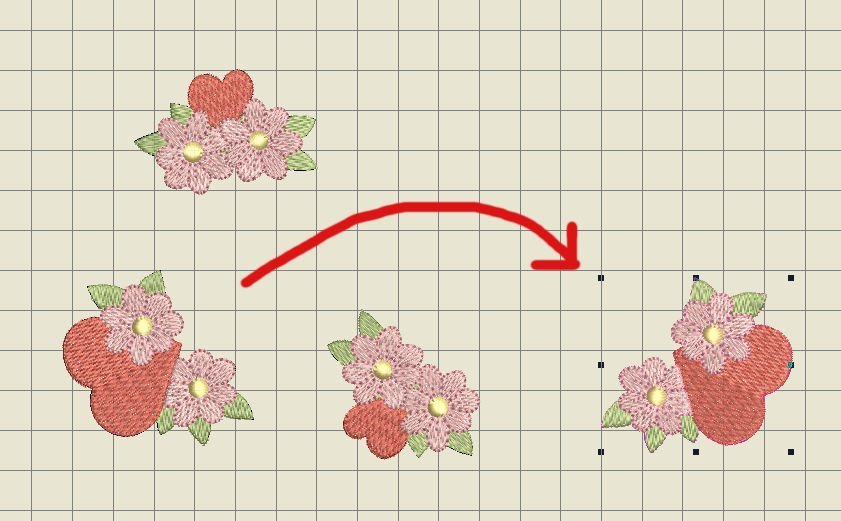
Now you can change, duplicate, combine, mirror etc. each motif, if you want to. You can select the larger motif, no. 2, copy and paste, then mirror (mirror X) and place it to the right.
Do the same with motif no. 3: I have made a mirror image first (mirror Y), to make the heart pointing to the left/upper corner. Then copy and paste, and use mirror X to place it in the opposite direction.
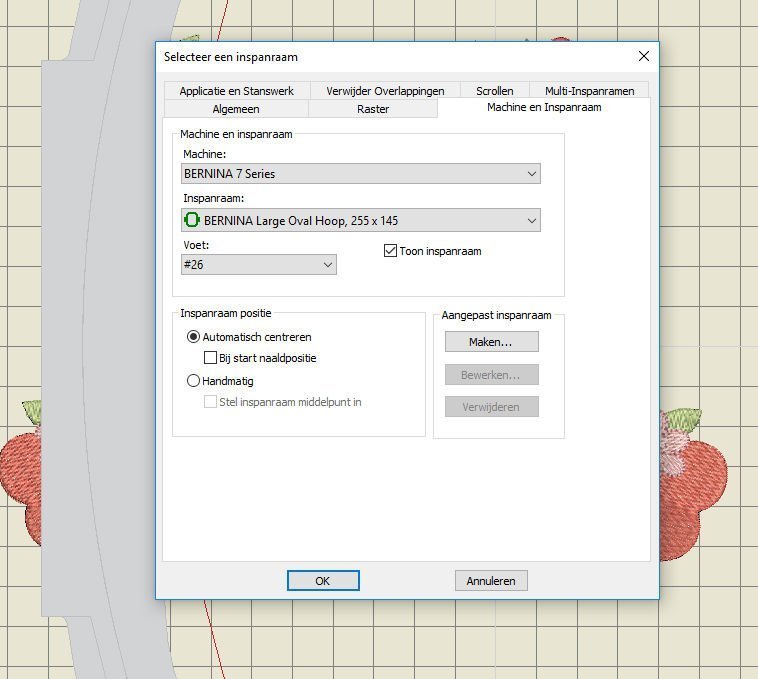
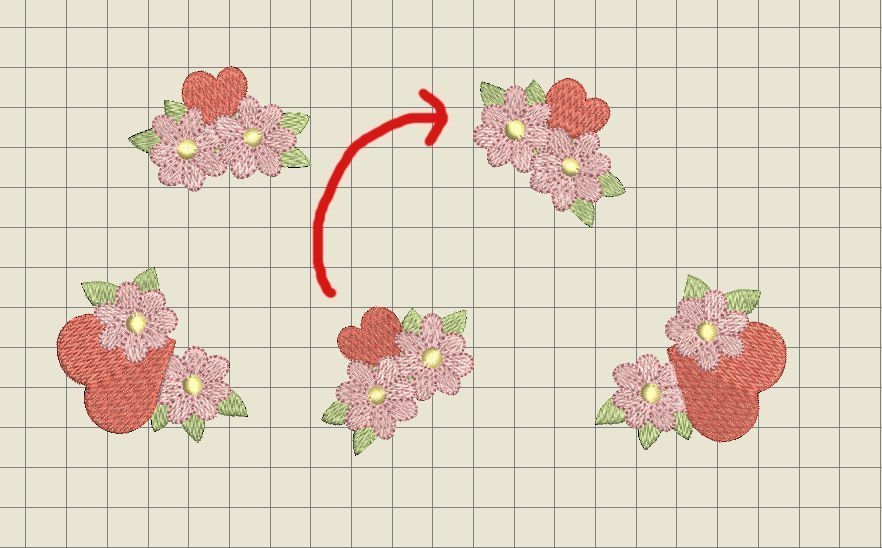
I have selected the ‘Large Ovale Hoop’ , checked ‘Centering automatic’.
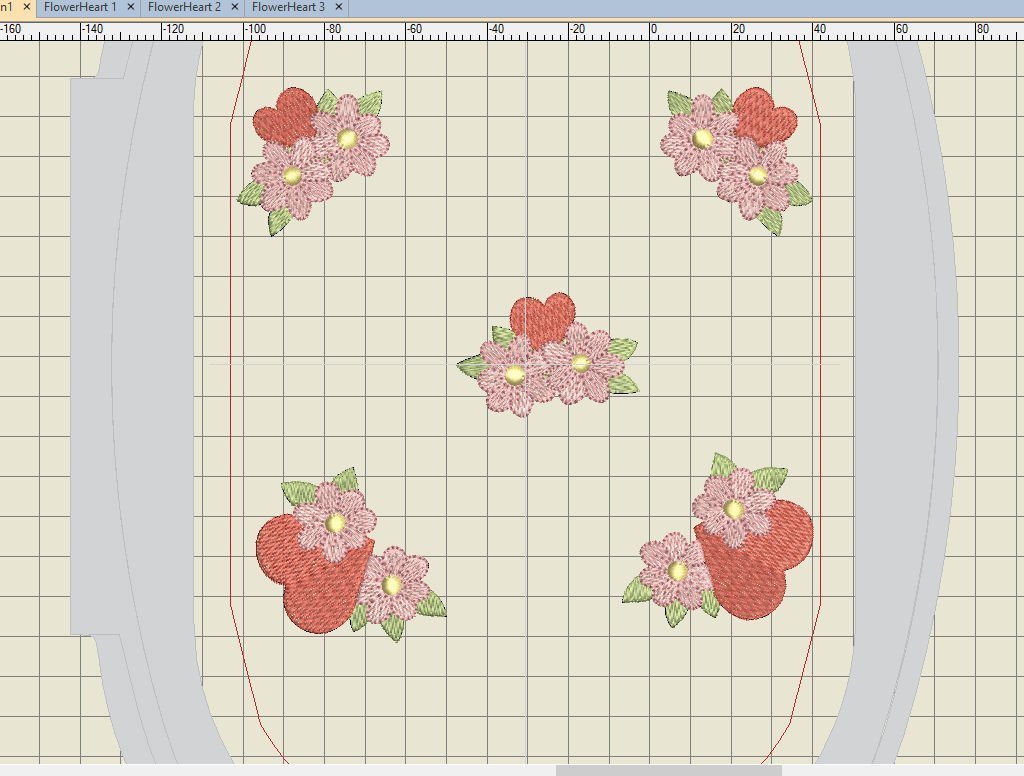
And then I’ve shifted the motifs, untill their position was right: two large hearts in the left- and right lower corners, two small hearts in the left- and right upper corners and the first heart in the center.
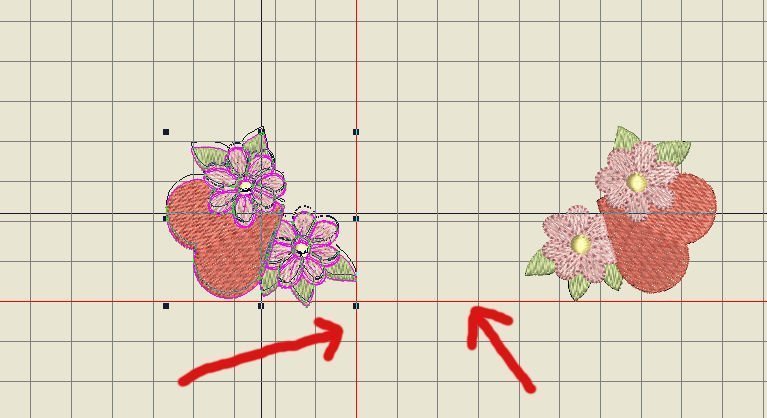
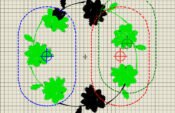
Now to line them up: select a motif and shift: red cross lines appear (X and Y), you can slide the motifs toward these lines, or away from them. The picture above shows that I am shifting the motif, while holding the mouse button down – a drawing (lines) of the motif appears, telling me that I am shifting at that time. After letting the mouse button go, the image has arrived at its new position, showing the motif as it was, with all the stitches.
You can also see black cross lines appear: these are the horizontal and vertical lines of your motif, crossing in the center. You can use the lines of the grid, and also the numbers (above and to the left of your canvas) to place motifs from the center (‘0’) to the side: I have used the 40 line to center all the corner motifs, while having the grid on 100.
For more accurate placement, use the arrows on your keyboard: clicking with your mouse and holding the button down, you can use the arrows for up, down, left and right, untill your motif is placed. Of course the motif needs to be selected!
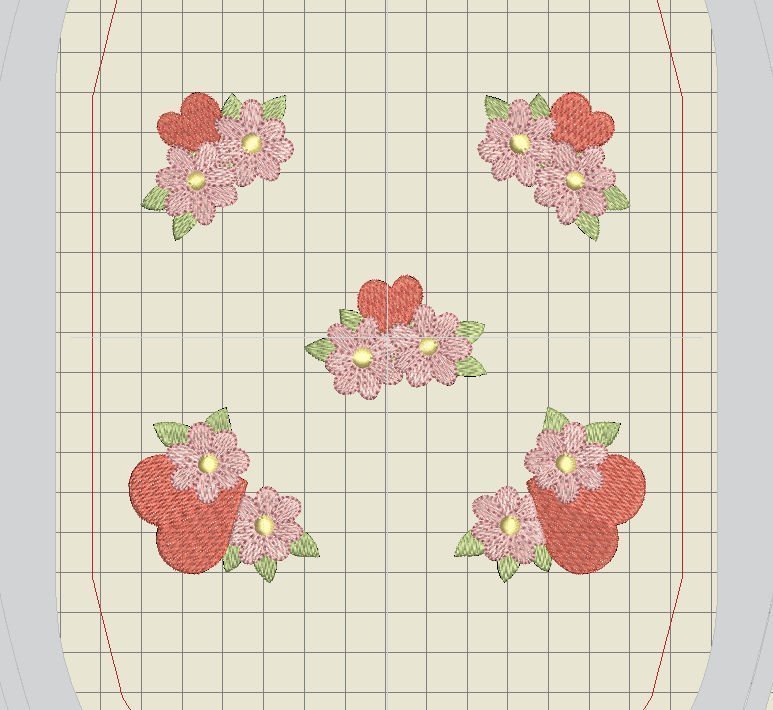
After replacing and lining them up, I have selected the Large Oval hoop again, and checked the new measurements: aprox. 127 x 122mm, 16561 stitches.
Because there are only 5 colors used, I would like my machine to make simular colors first, before moving on to the next color. Checking the docker ‘Color Film’ shows me that there are 25 boxes: 5 for each heart/flower x 5 colors. I want to reduce that to 5 in total: 1 box for each color. First I have to be able to see more boxes from each color by pushing the grey bar to the right, so the boxes will get smaller. This way I can see that there are more no. 1 boxes, each a part of the embroidery, and more 2 etc. Holding the mouse button down, while clicking on a box, I can shift that one on top of another with the same color number. This decreases the total amount of boxes per color.
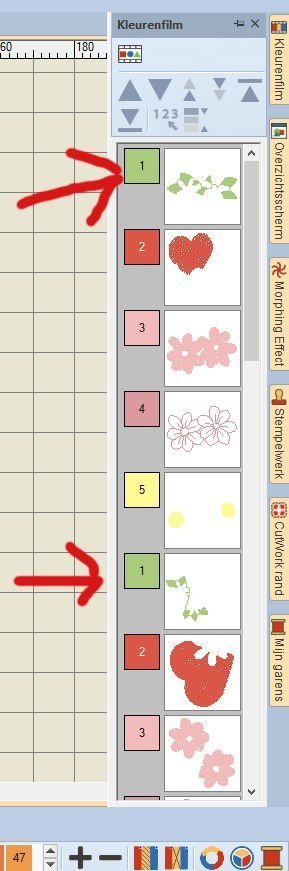
I have done this with all colors, but making the docker smaller is essential. A wide docker shows you just a couple of boxes/colors, a smaller one shows you a lot more.

In the end I have only 5 boxes: one per color. You can see that all parts of the 5 motifs, which are made with the same color, are showing up in a box. Your machine will embroider the first color for all 5 motifs first, jumping position, then moves on to the next color.
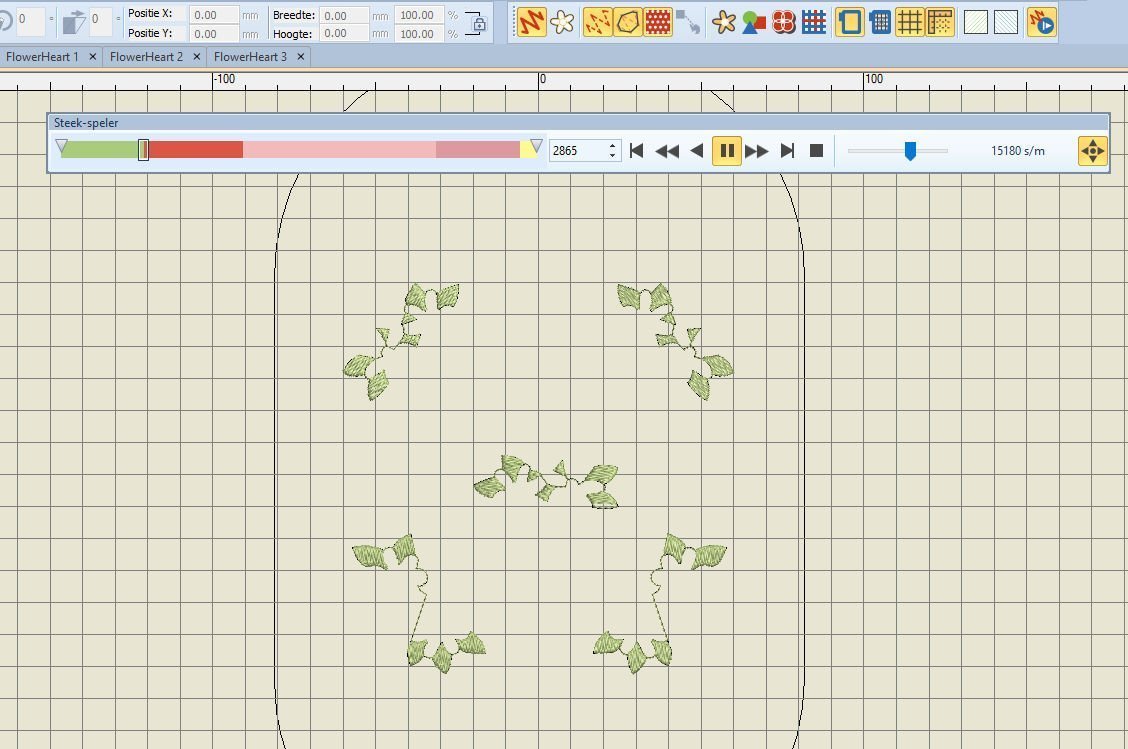
To check if all is correct, use ‘Stitch player’: there are only 5 colors in the color bar, and color 1 (green) is embroidered first with all 5 motifs. Don’t move the boxes in the Color Film though: they are already in the right order, so your machine makes the stitches for the parts that are ‘underneath’ first, and the parts that will be ‘on top’ last.
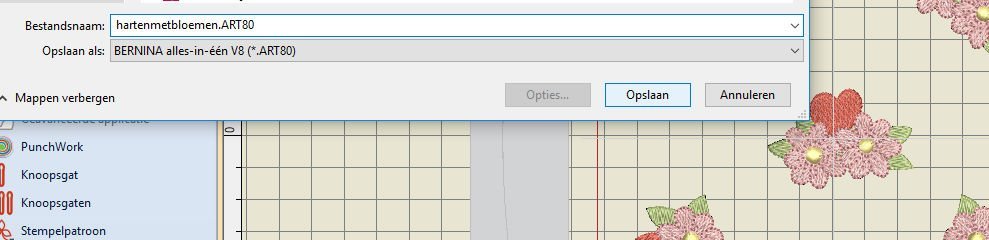
Save this motif, name it as you wish, so you can find it again in the Embroidery Library. You could embroider it like this, or add text. For taking it to your machine: put it on a USBstick and write the motif onto the stick. Make a printout if you want to.
The example above is just one of the endless possibilities: V8 has so much more to offer, not just ready-made motifs, but you can digitize your own too, even merge it into one from the library…
Have fun with your own project with hearts: give it to your mother with your love. Unfortunately I cannot give them to my mother anymore, but I will send them in my thoughts….
Happy stitching!
Sylvia Kaptein
www.sylviasartquilts.nl


0 Responses