 BERNINA Corporate Blog -
April is still a bit chilly, but soon lots of colors will appear in the area where I live: bulbs will be blooming. Perhaps you can make this fourth block of this Crazy Crystals Mystery Project 2018 a colorful one too. I will keep working with gold, brown, rust, purple and black, but also with colorful variegated threads.
You can download three pattern pages, for this fourth block: please click on the links below:
Blok 4 – left part pattern
Blok 4 – right part pattern
Blok 4 – Crystal
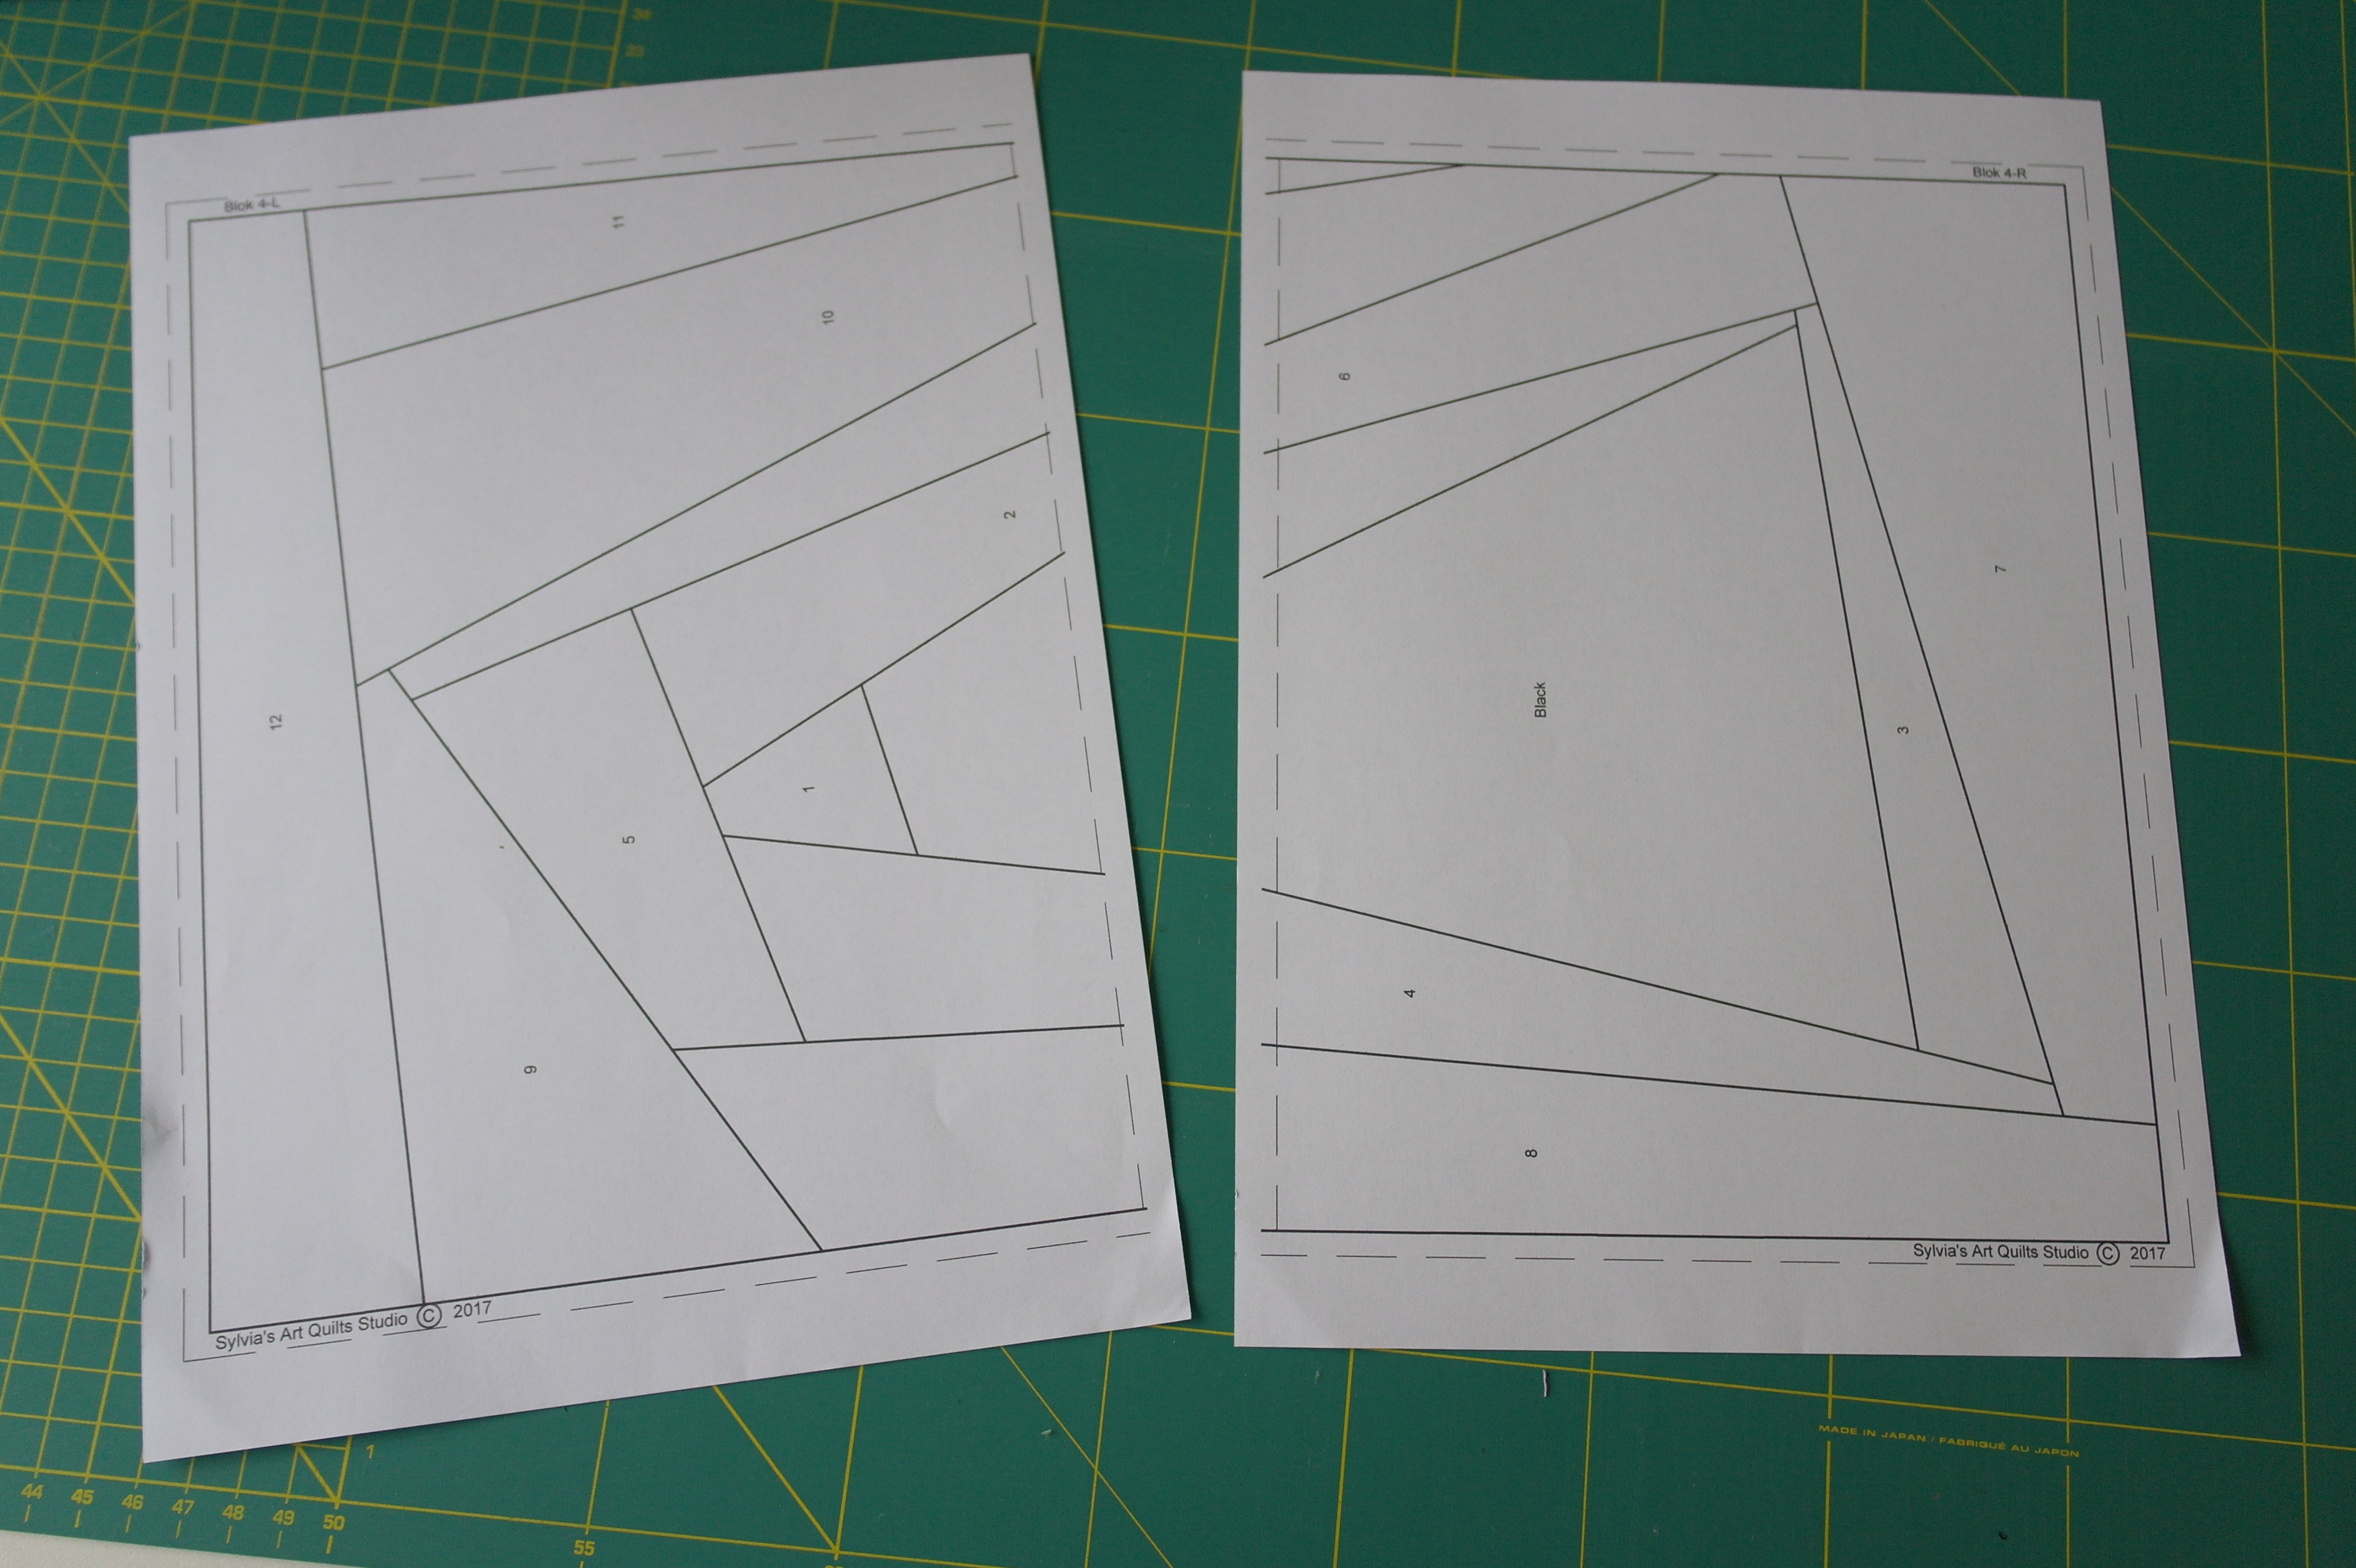
Print the paper patterns. There are two pages for block 4: a left part and a right part. You will need them both.

Tape these pattern pages together, using the dotted line to connect them.
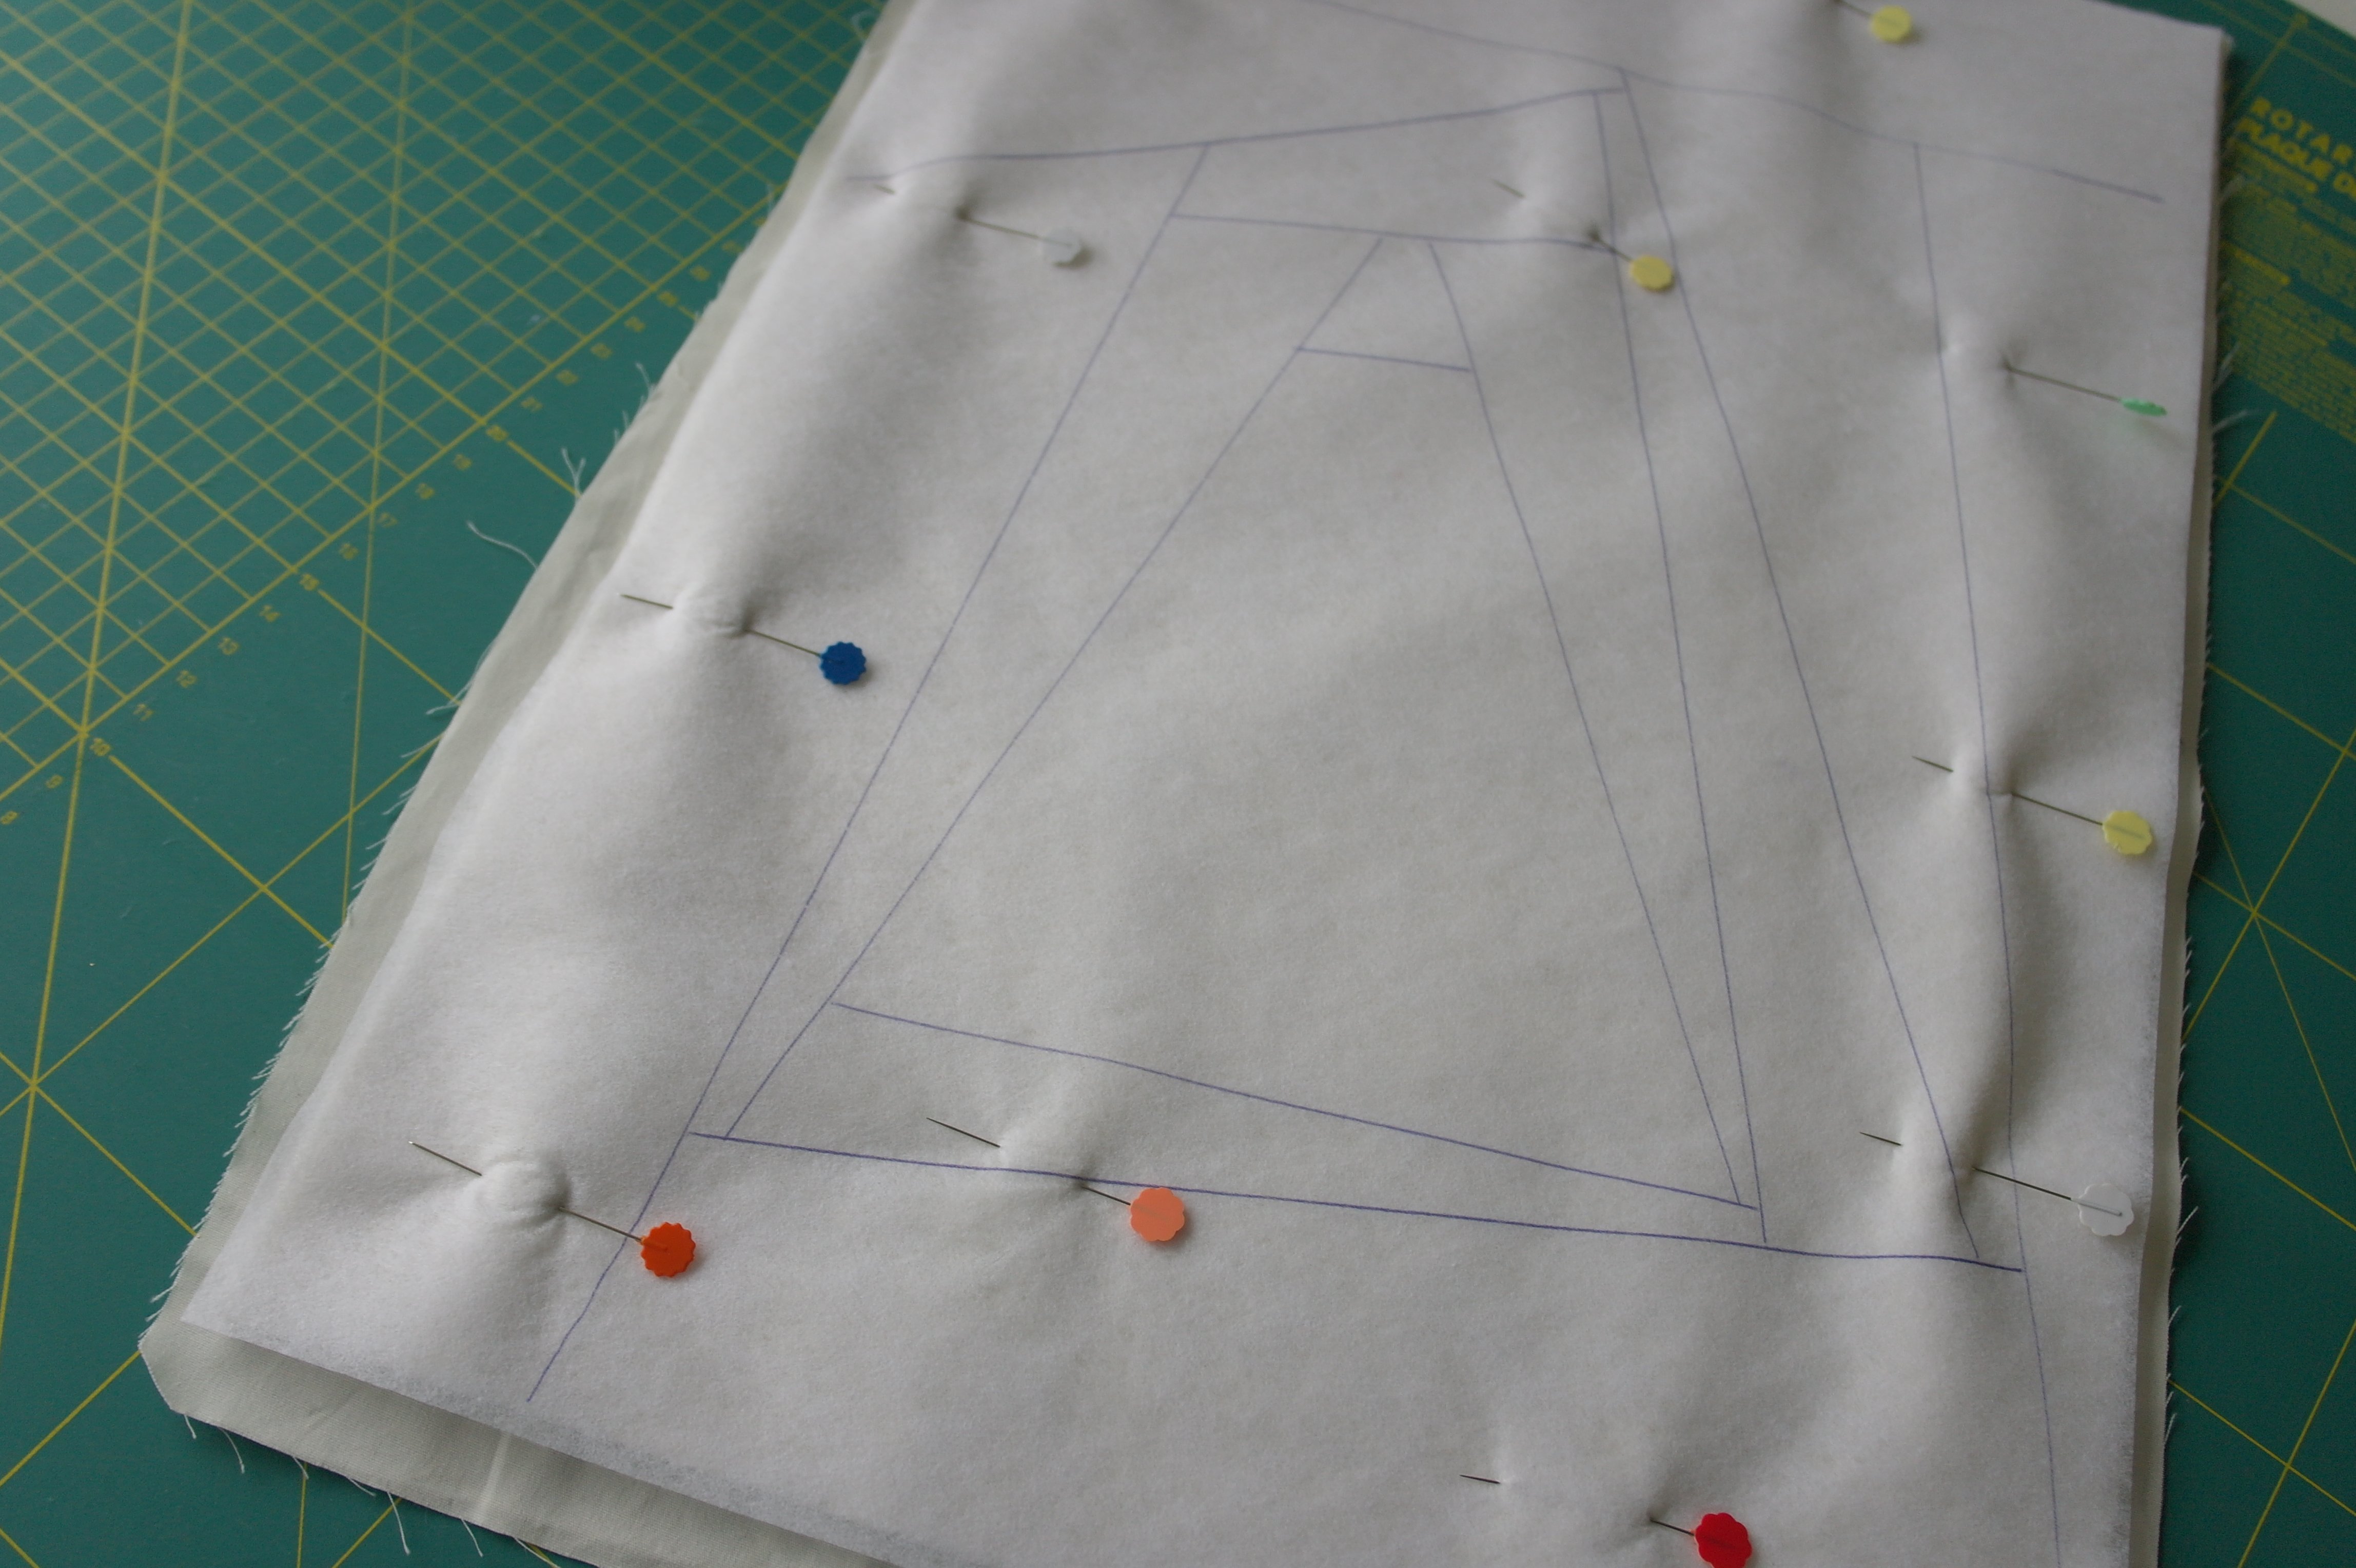
Use Vlieseline L11 – 32x45cm – and place this on top of the paper pattern. Just draw all lines of the Crazy Patchwork (the rectangle is for reference only), all to the edges. Make a sandwich from off-white fabric, 100% bamboo batting and the Vlieseline L11 with the patchwork pattern. Pin them in place.
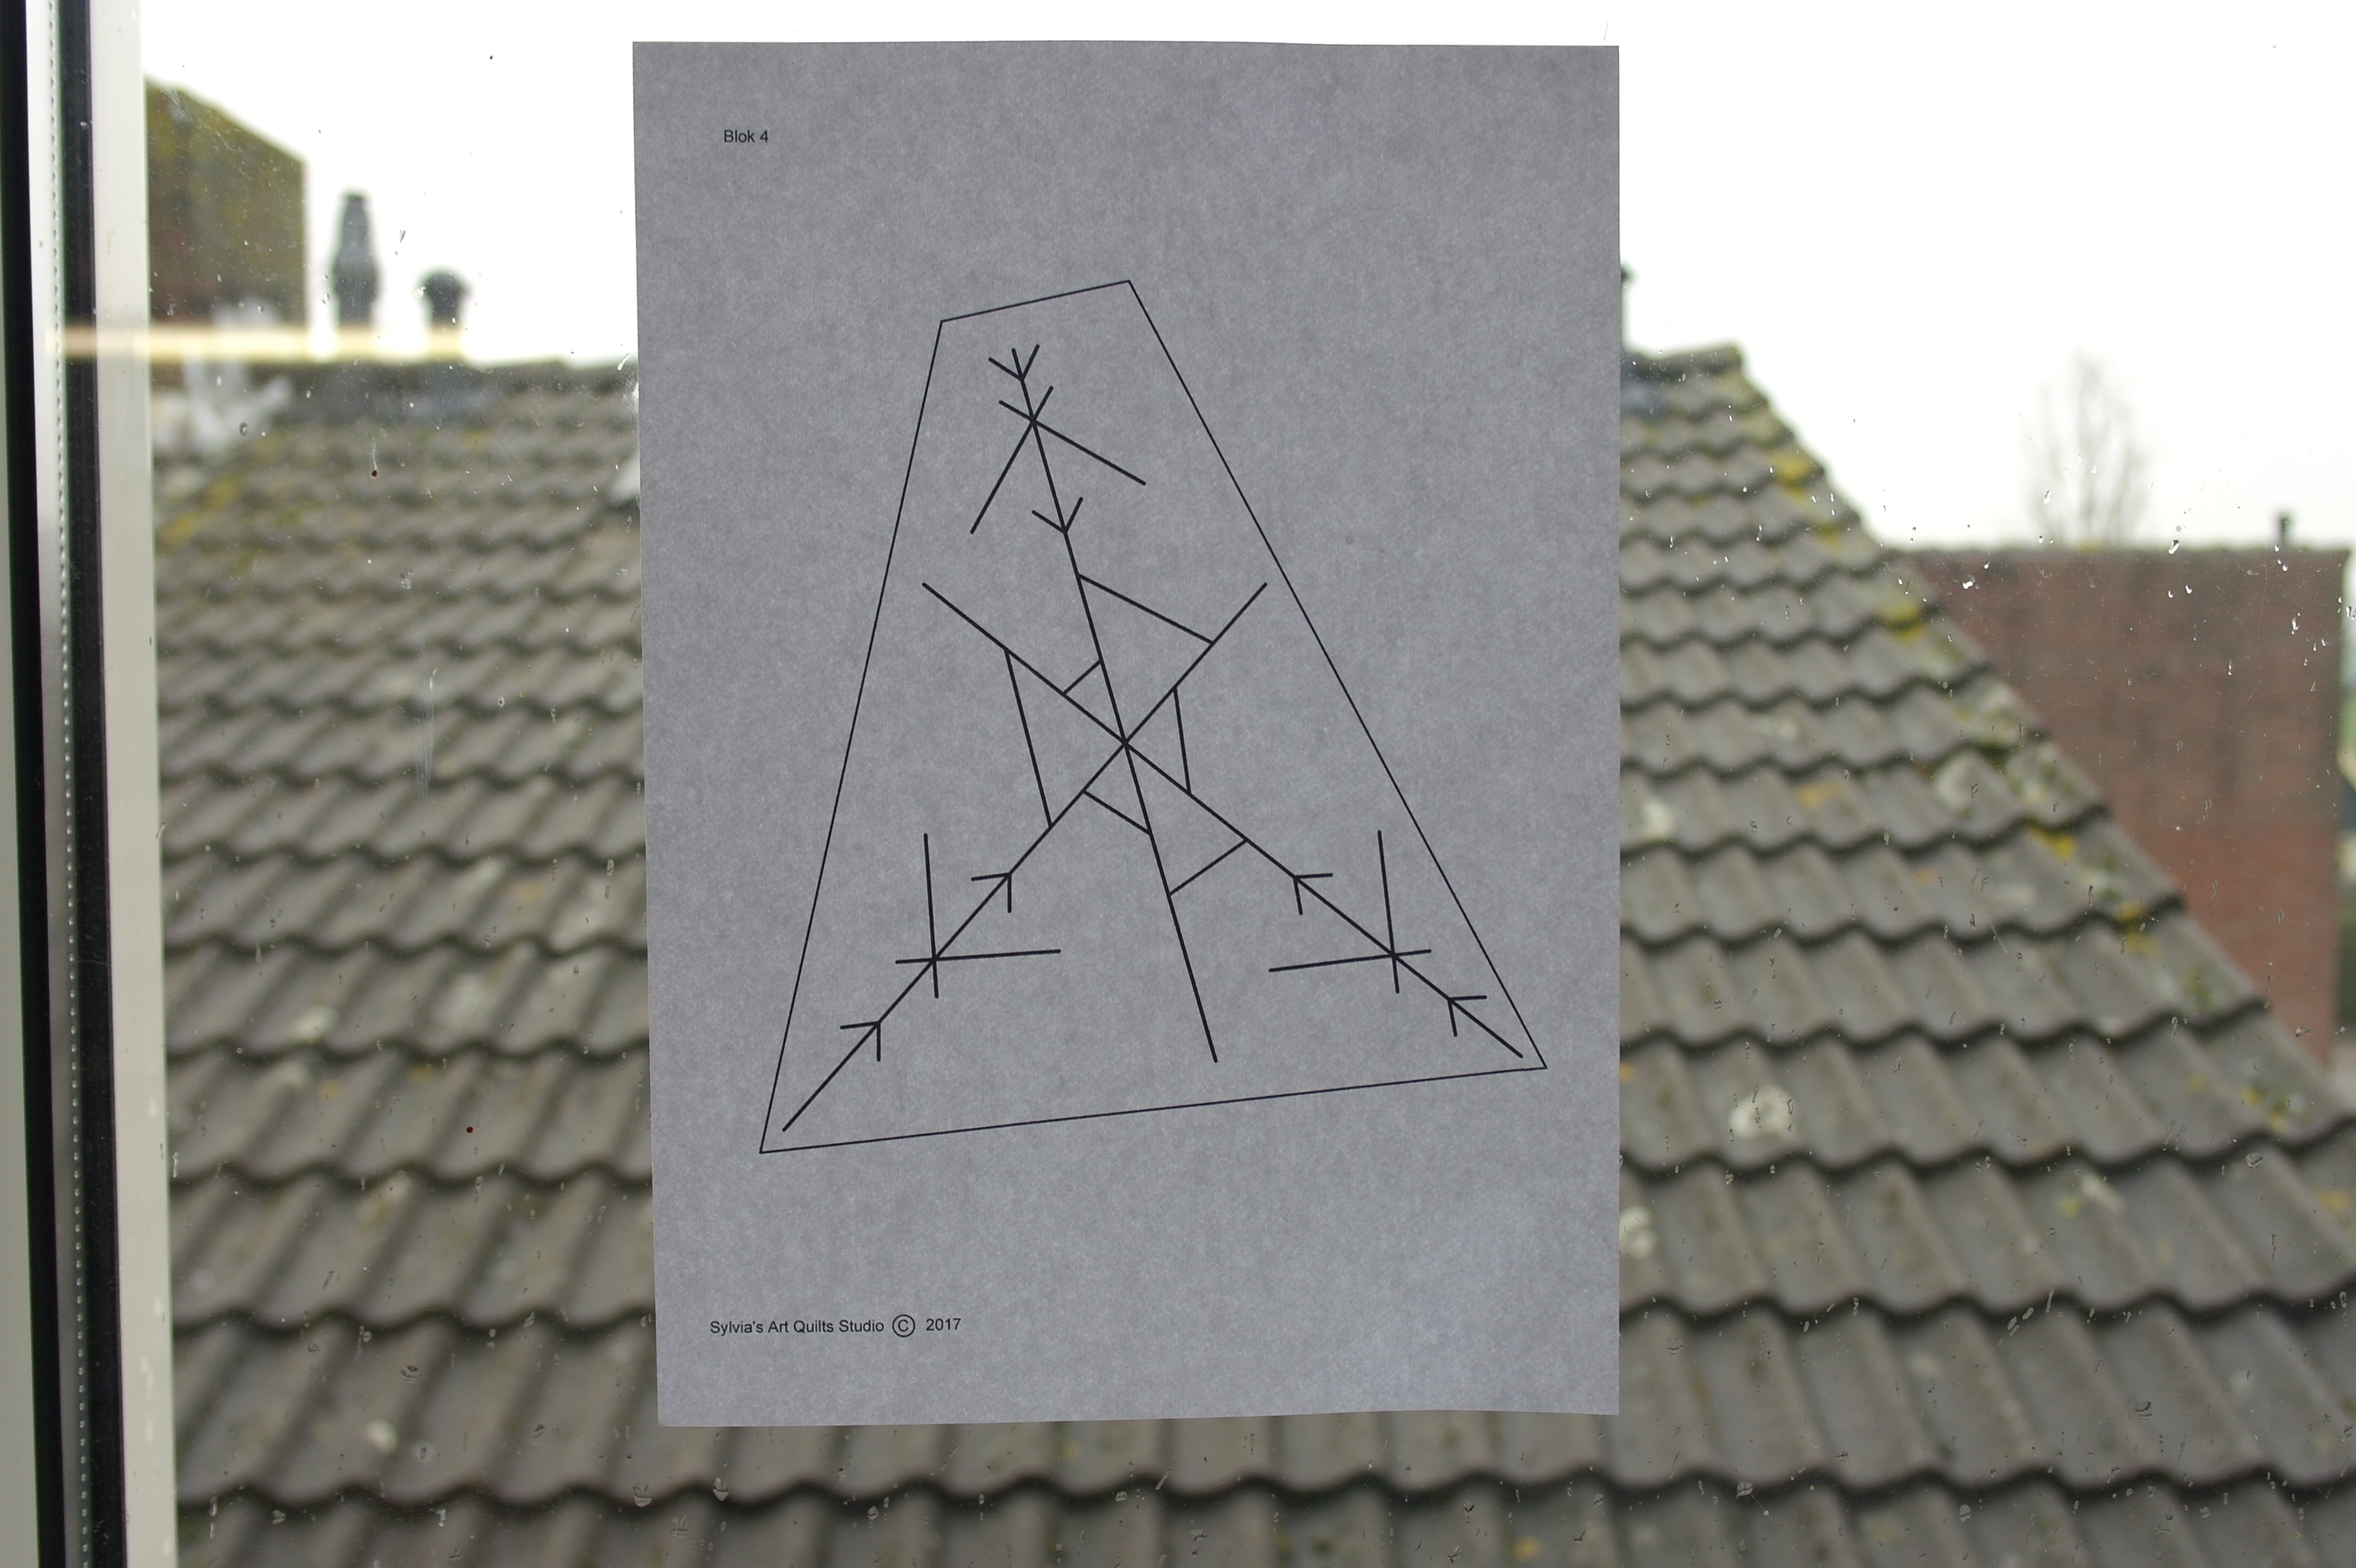
Tape the pattern of the Crystal for Block 4 to a window, or a light box,
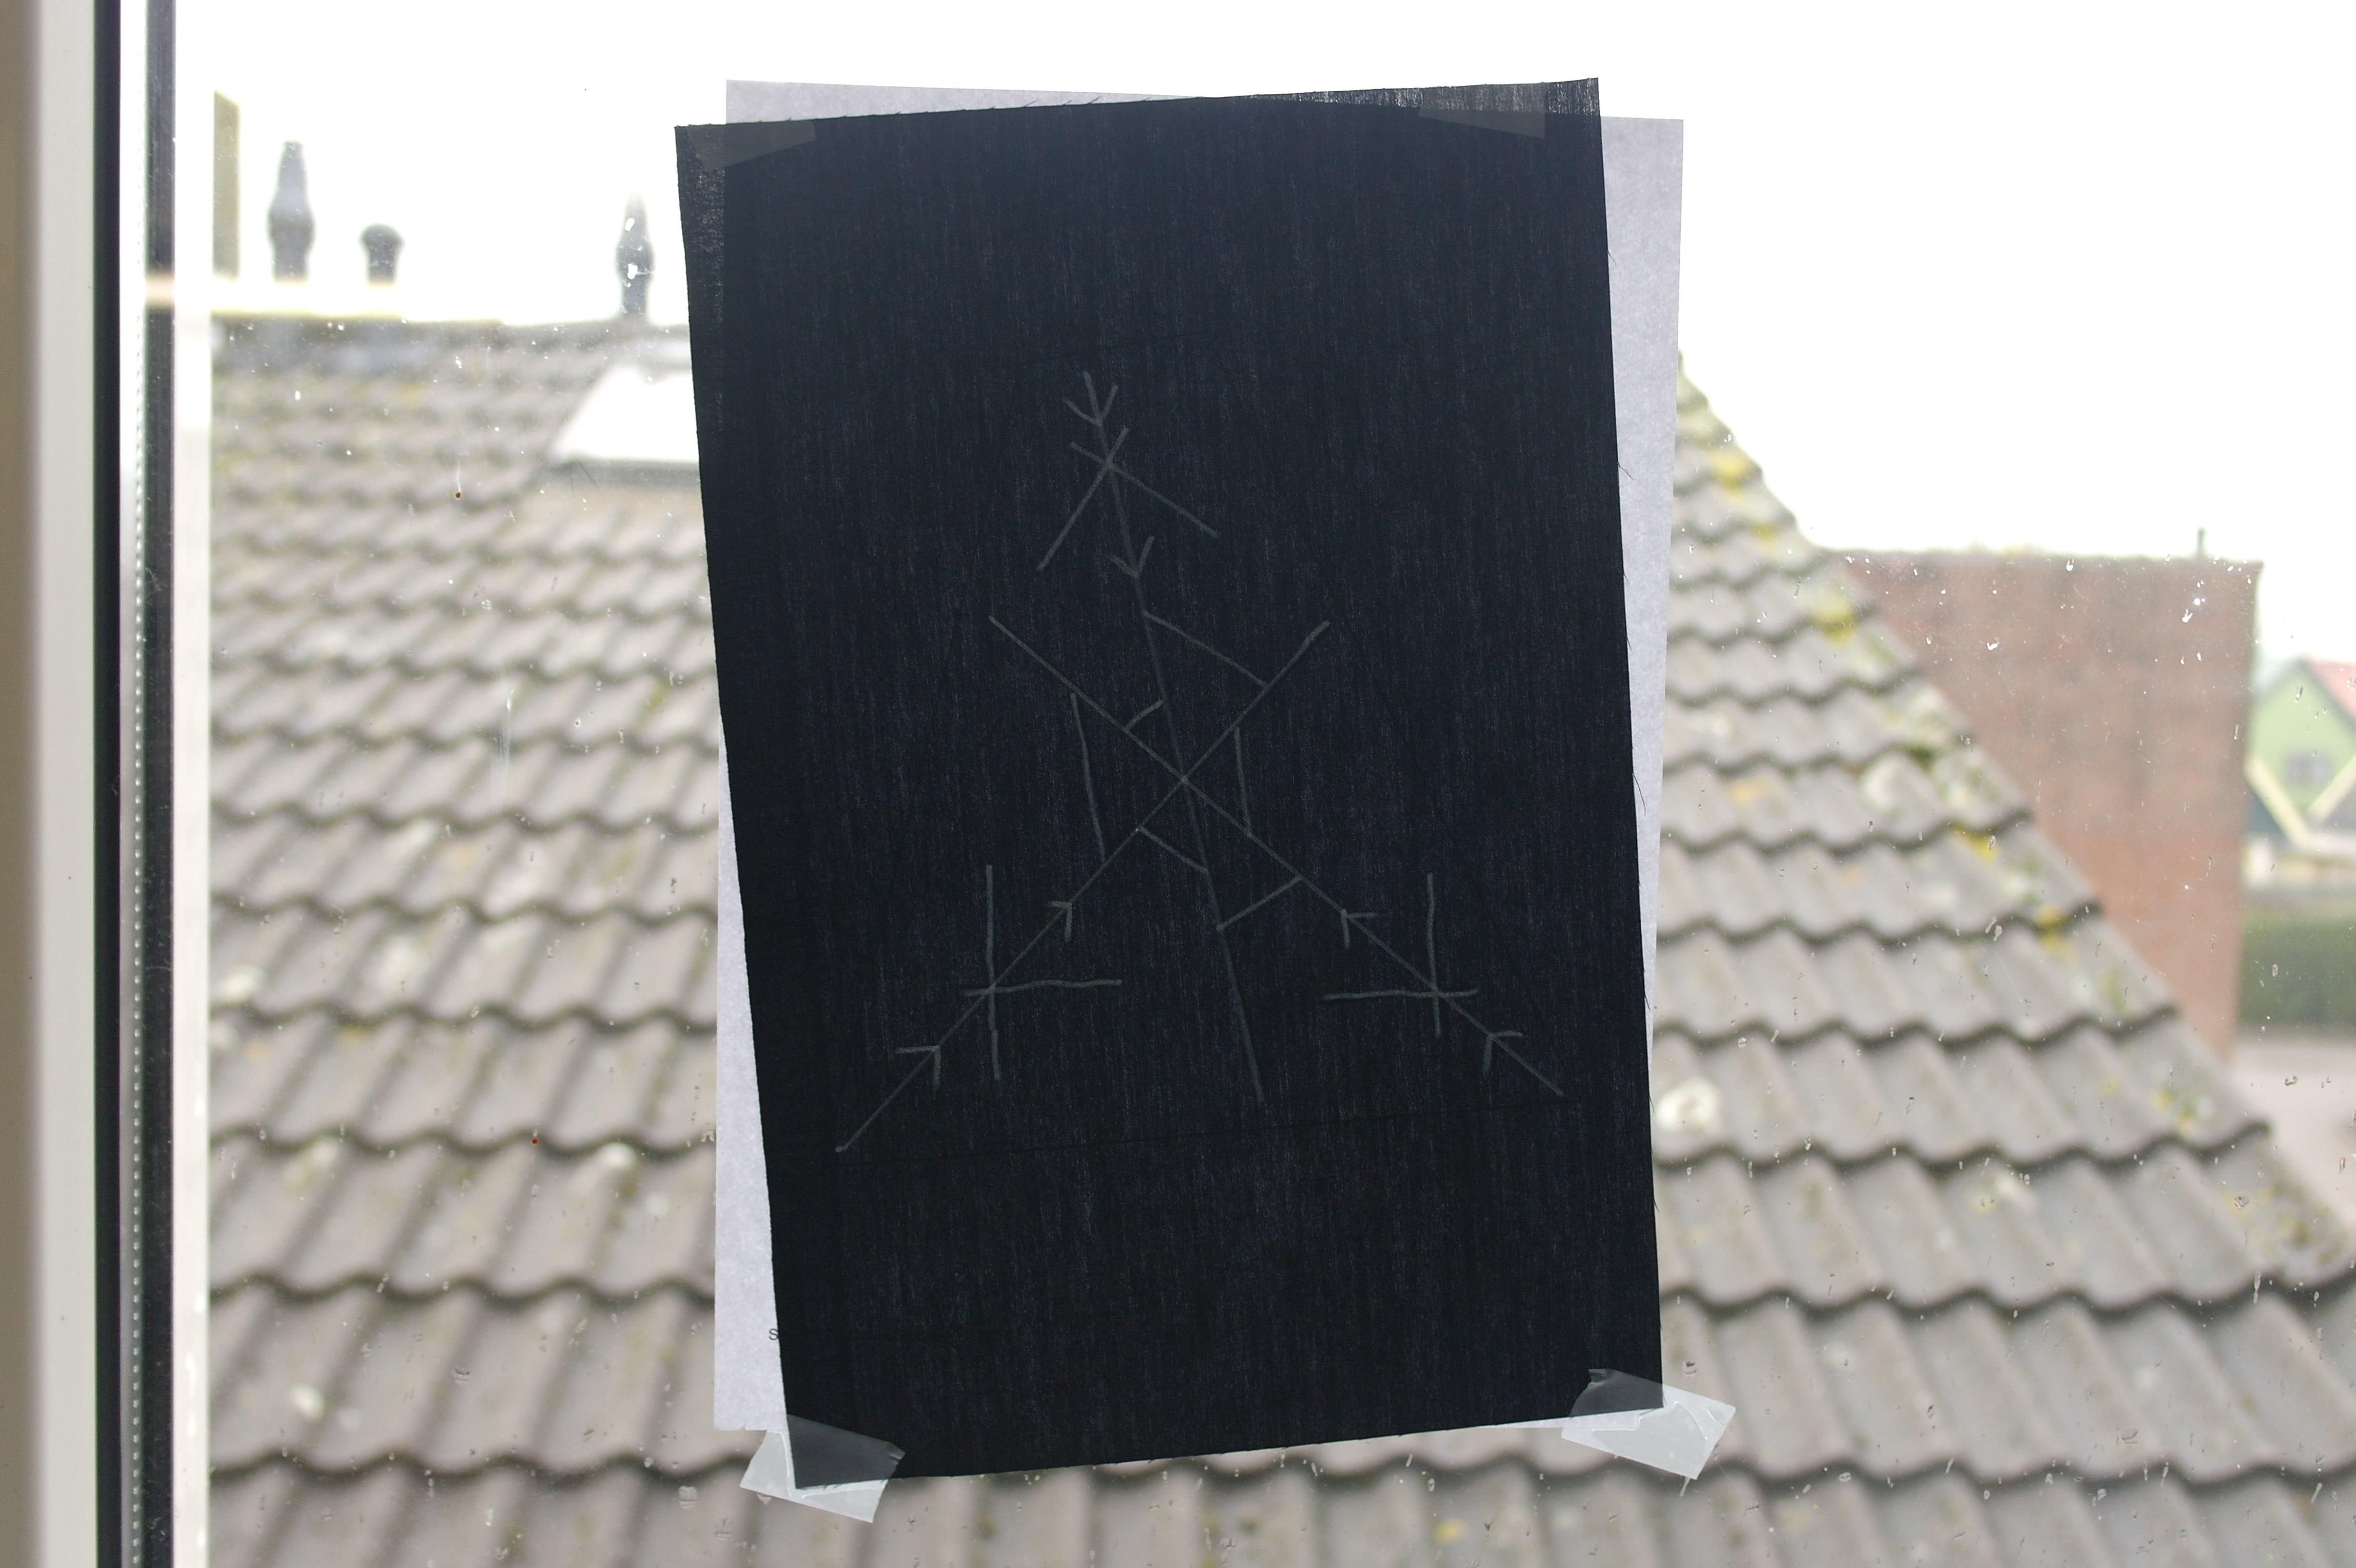
tape the black batik quilt fabric (20 x 30 cm) on top of that. Be sure there is enough fabric around the shape of the Crystal to have a seam allowance of at least 1 cm in all directions (that is why I have tilted my black fabric). Draw all lines with white watersoluble pen (or blue if you use a lighter color of solid fabric for the center). BE SURE to draw thin lines: they have to be removed with water afterwards.
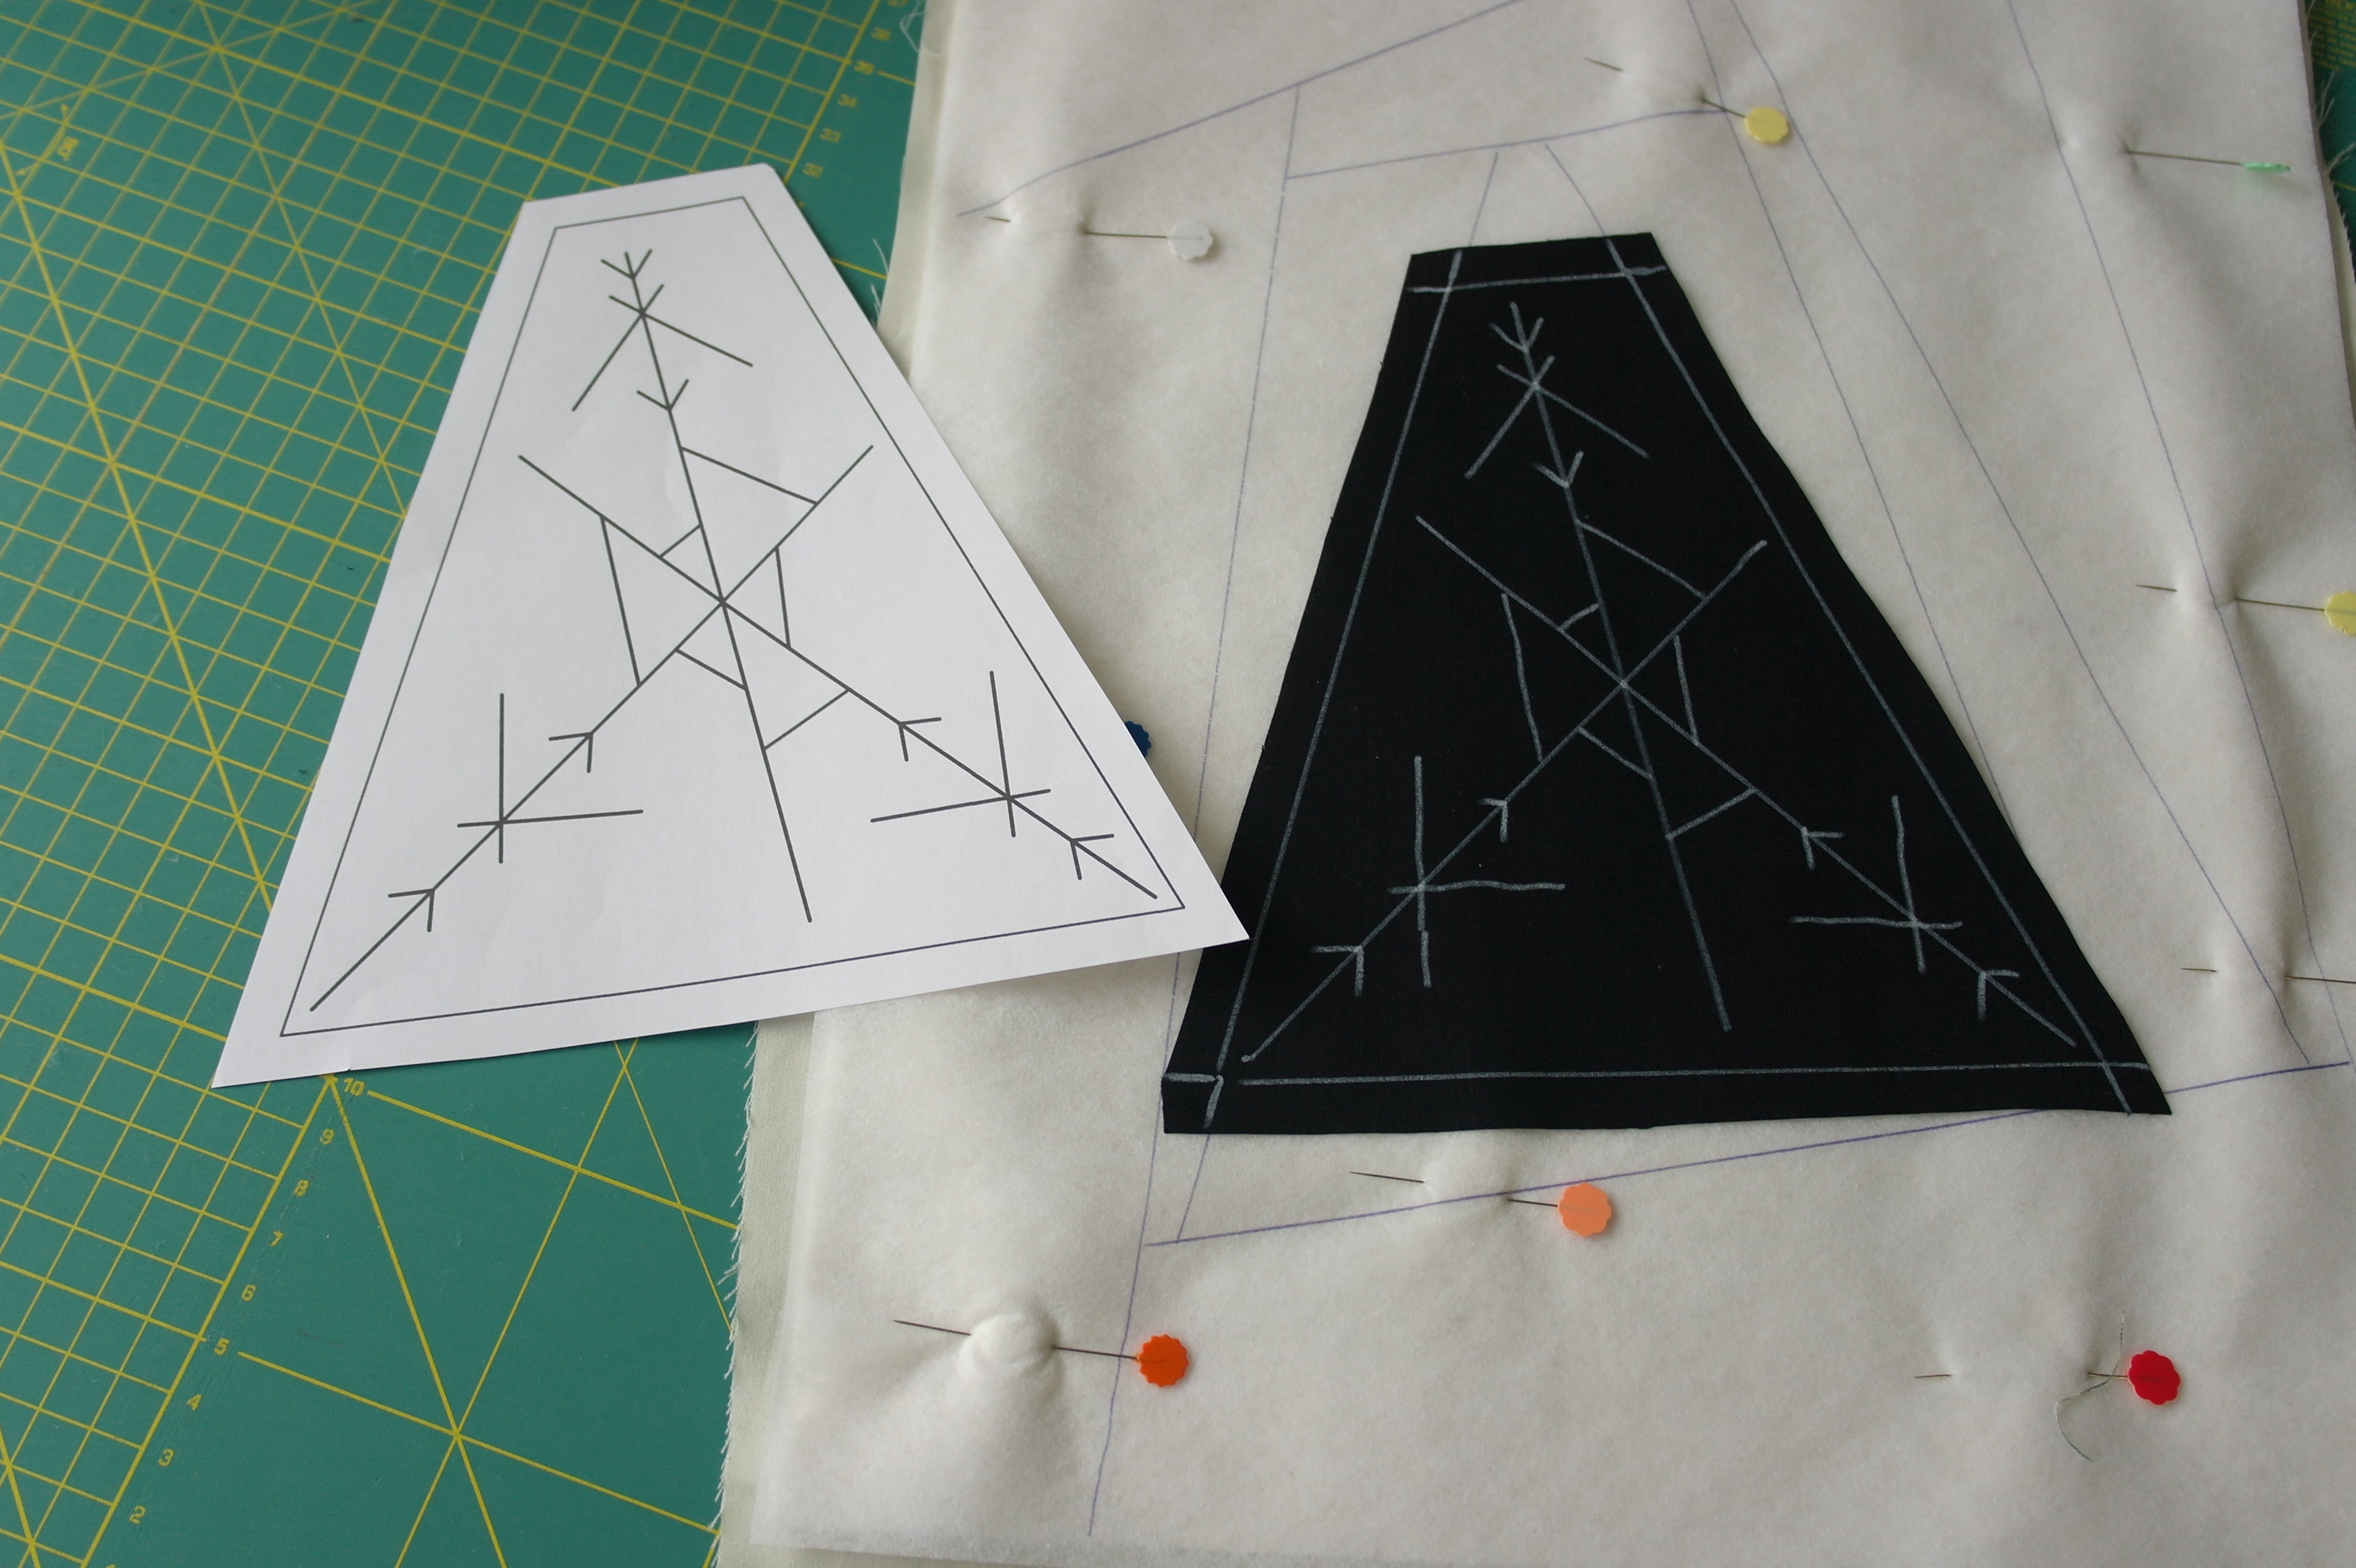
Cut the paper pattern with the Crystal to make a template, be sure to leave a 1 cm seam allowance outside the solid lines. Place the pattern on top of the black batik with the crystal drawn, and cut the black fabric the same size as the paper template. Place the black batik with the Crystal on the right spot, on the ‘center’ of your sandwich, pin in place with Flower Pins. Be sure to draw the solid lines with water soluble pen, to indicate the actual size of the section, inside the seam allowances.
I have covered the three long lines and the smaller onces around the centre with straight stitches. The other lines will be covered with decorative stitches.
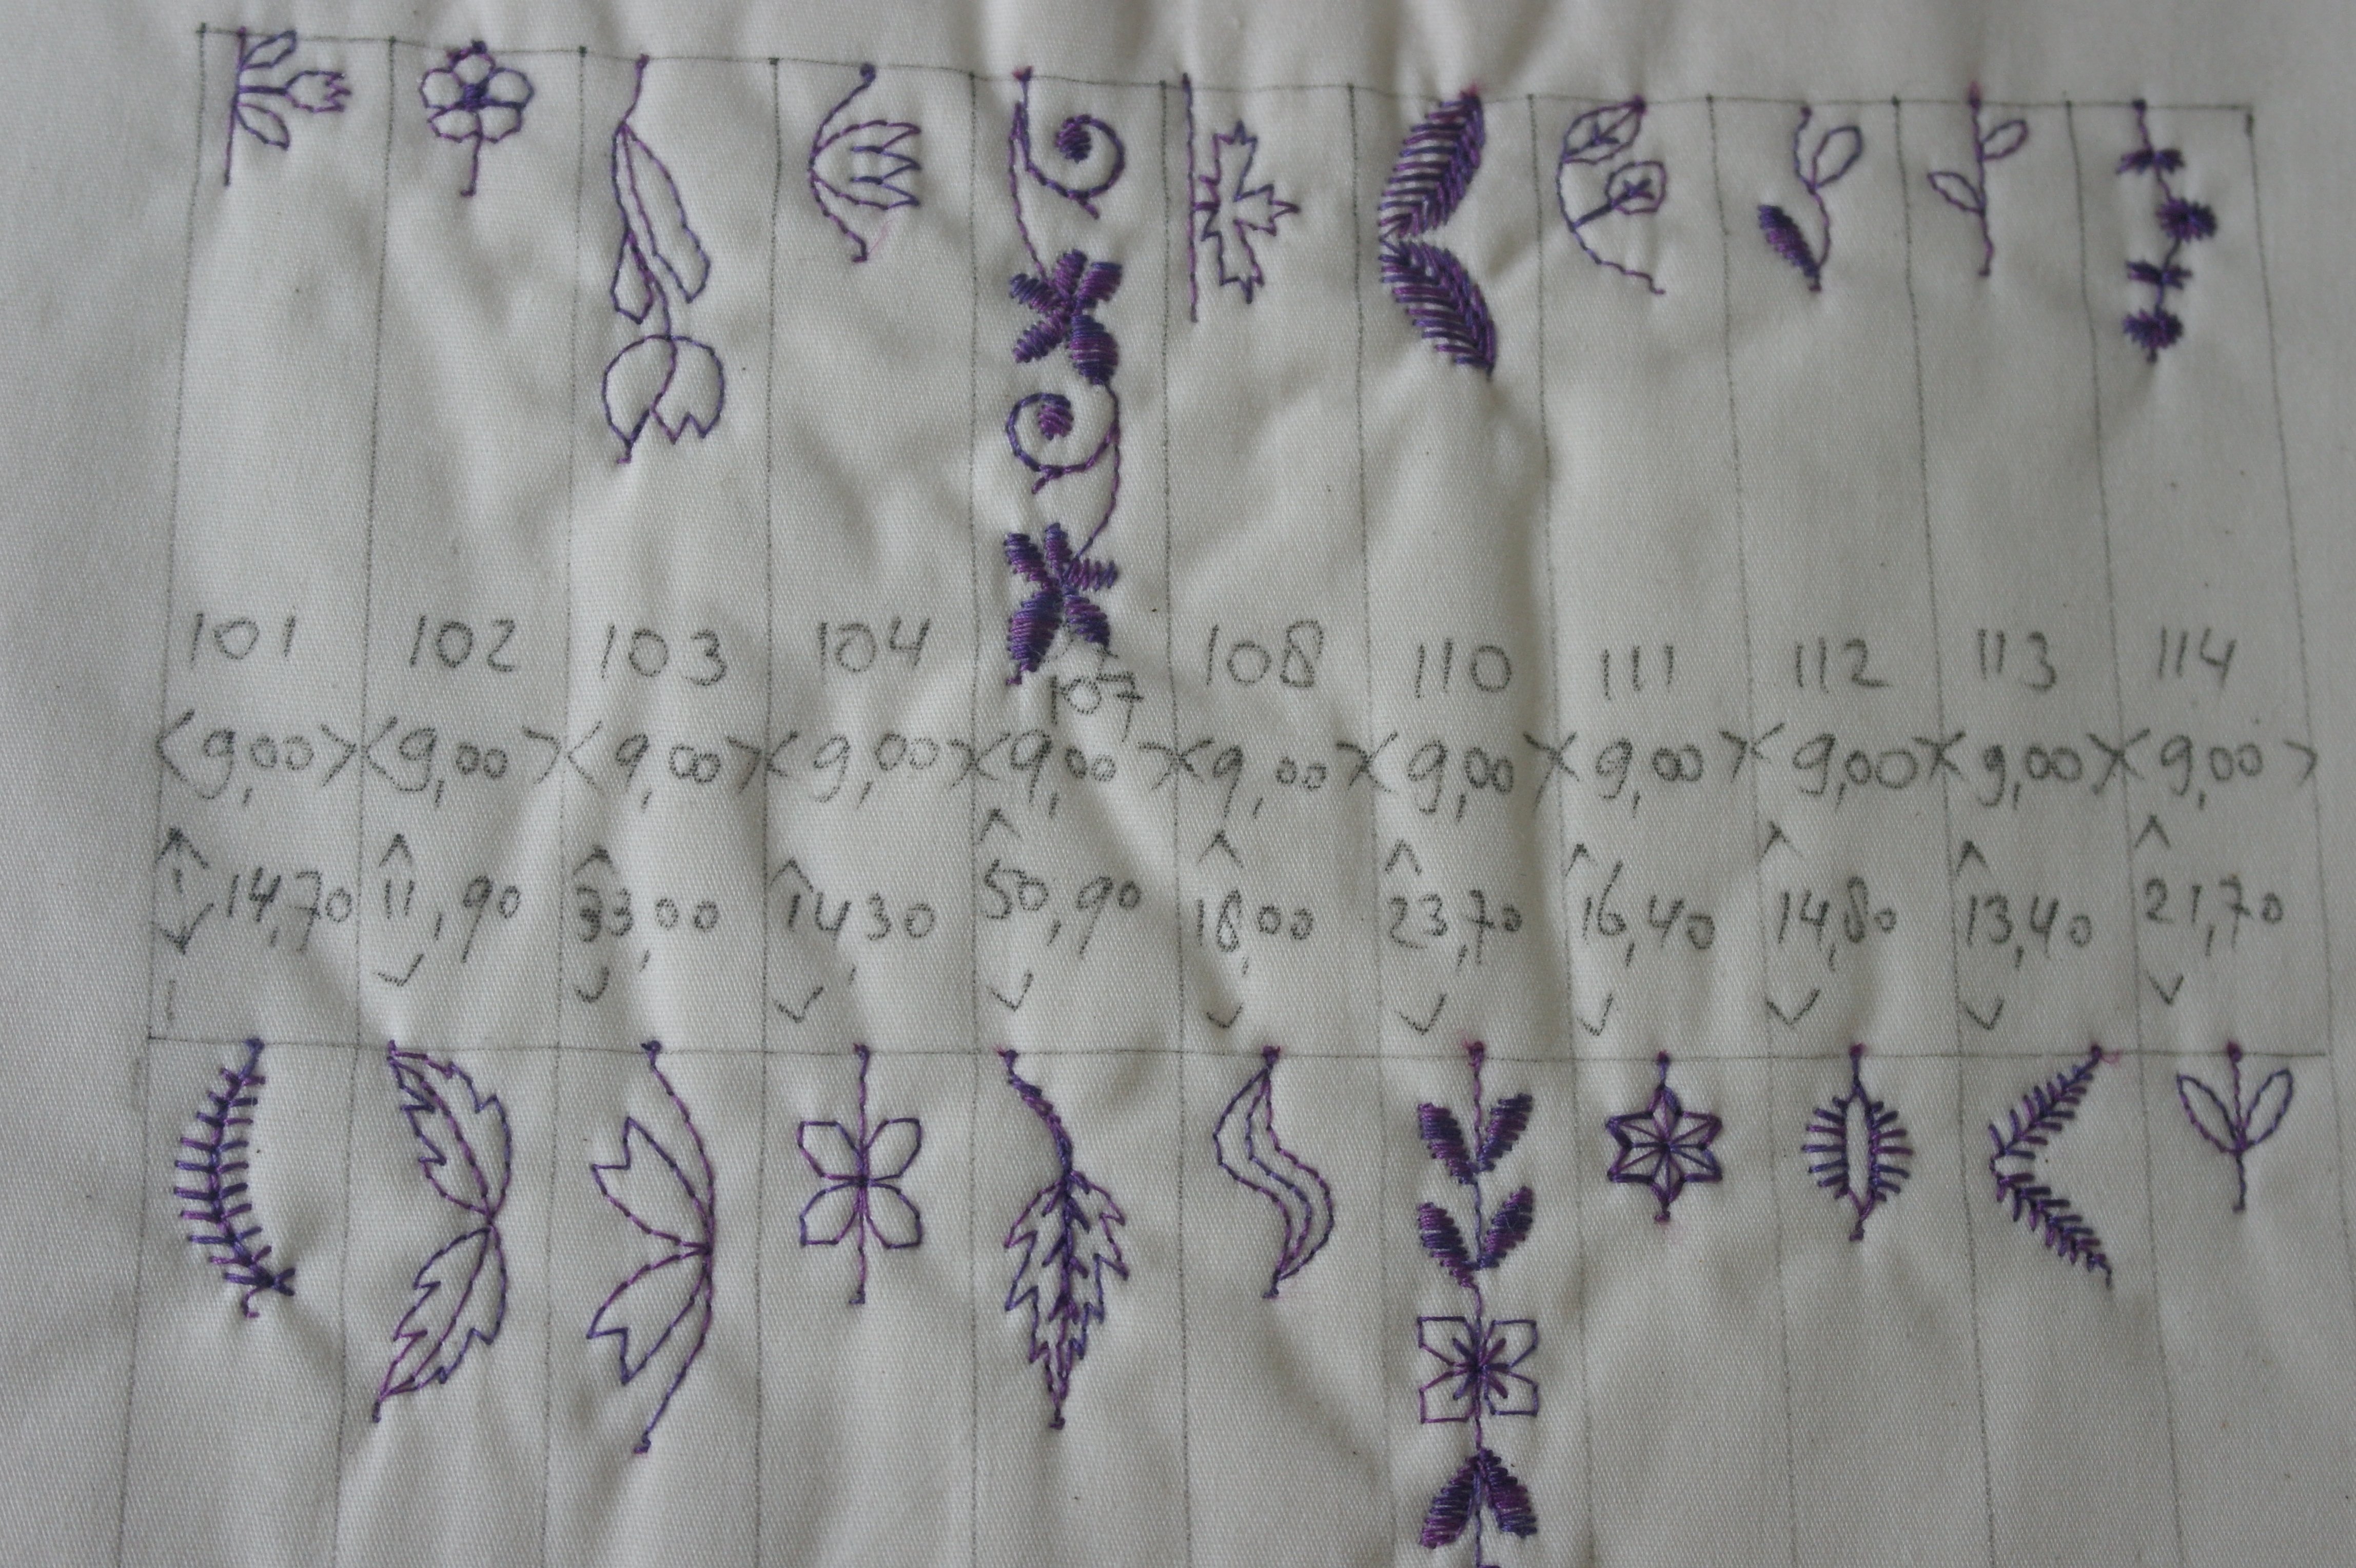
When my BERNINA770QE arrived, I have made a sampler book from all the stitches that were available. Made notes about width and length and the stitch number, for future reference. This way I can easily see what a single stitch looks like, and how long or wide it is, but also where the starting point is (left, middle, right) and how it ends. With block 4 I want to make a long stitch, starting at the intersection of the three base lines. I want the stitch facing outwards. I will use Stitch no. 107.

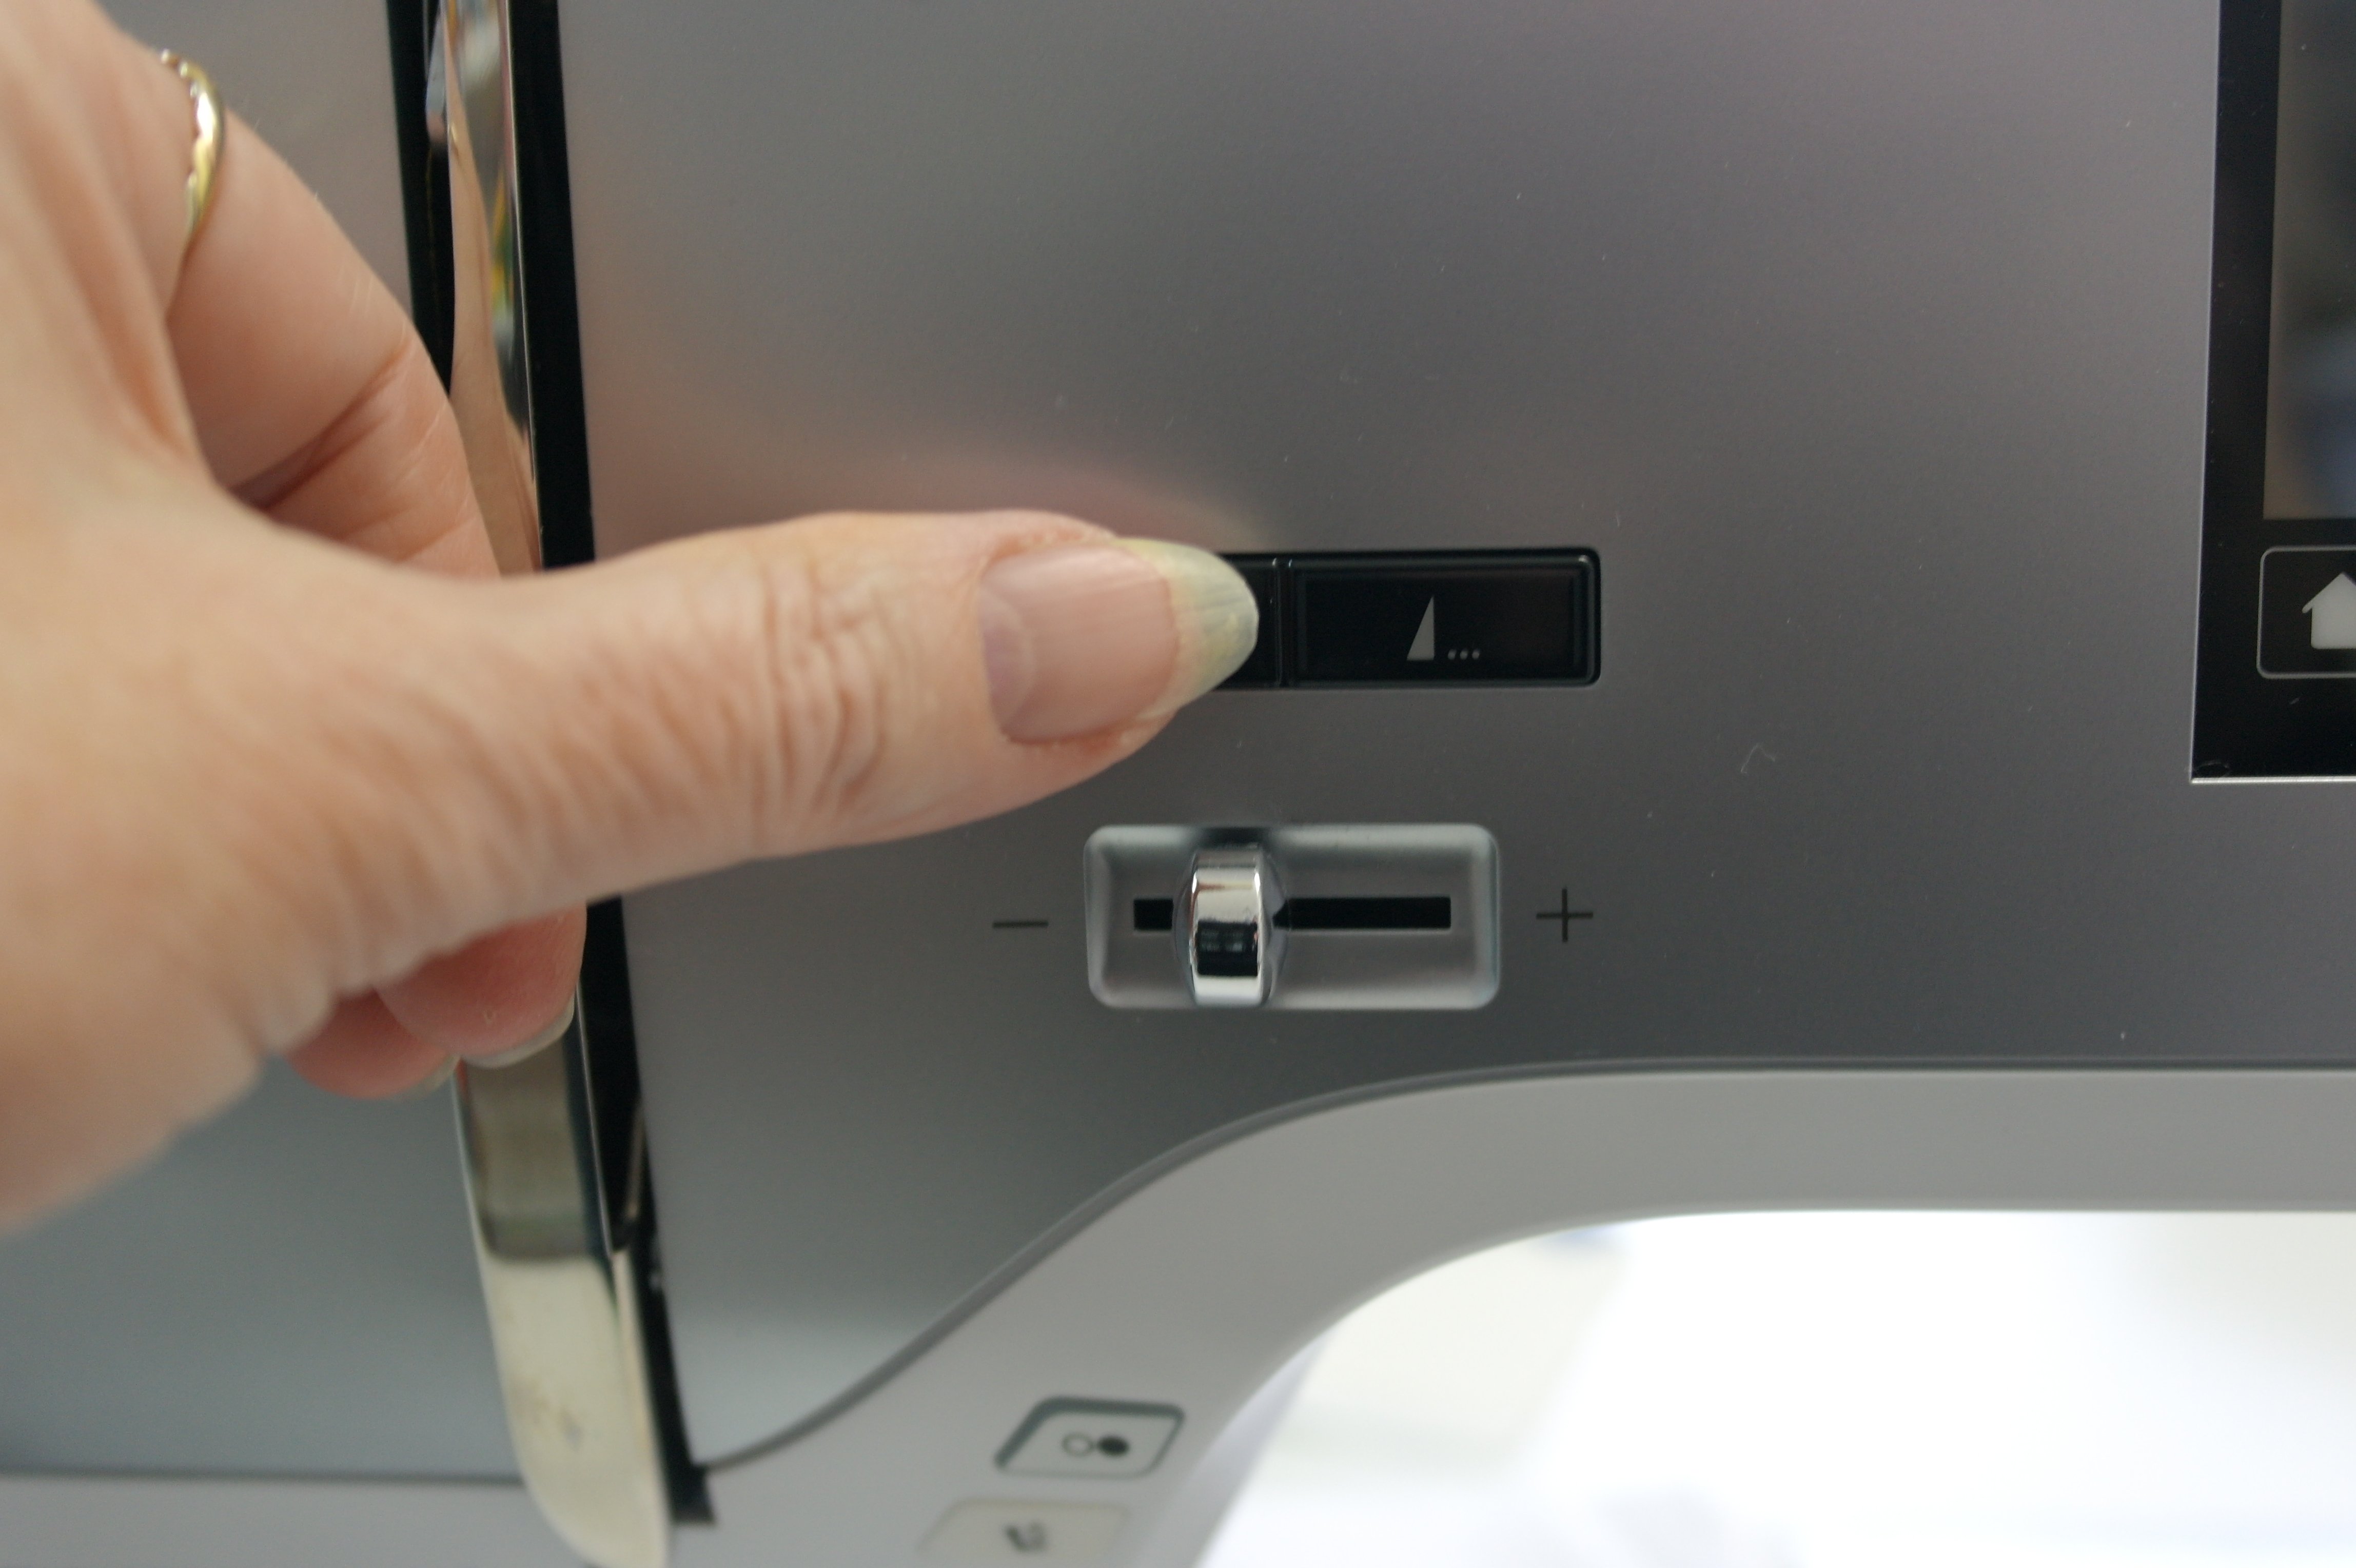
By selecting this stitch, I can see that it will start on the left of my presser foot: you can tell by the indicator at the left of the starting point at my screen. So I have to position the needle of my machine to start at the left of the line I want to cover.
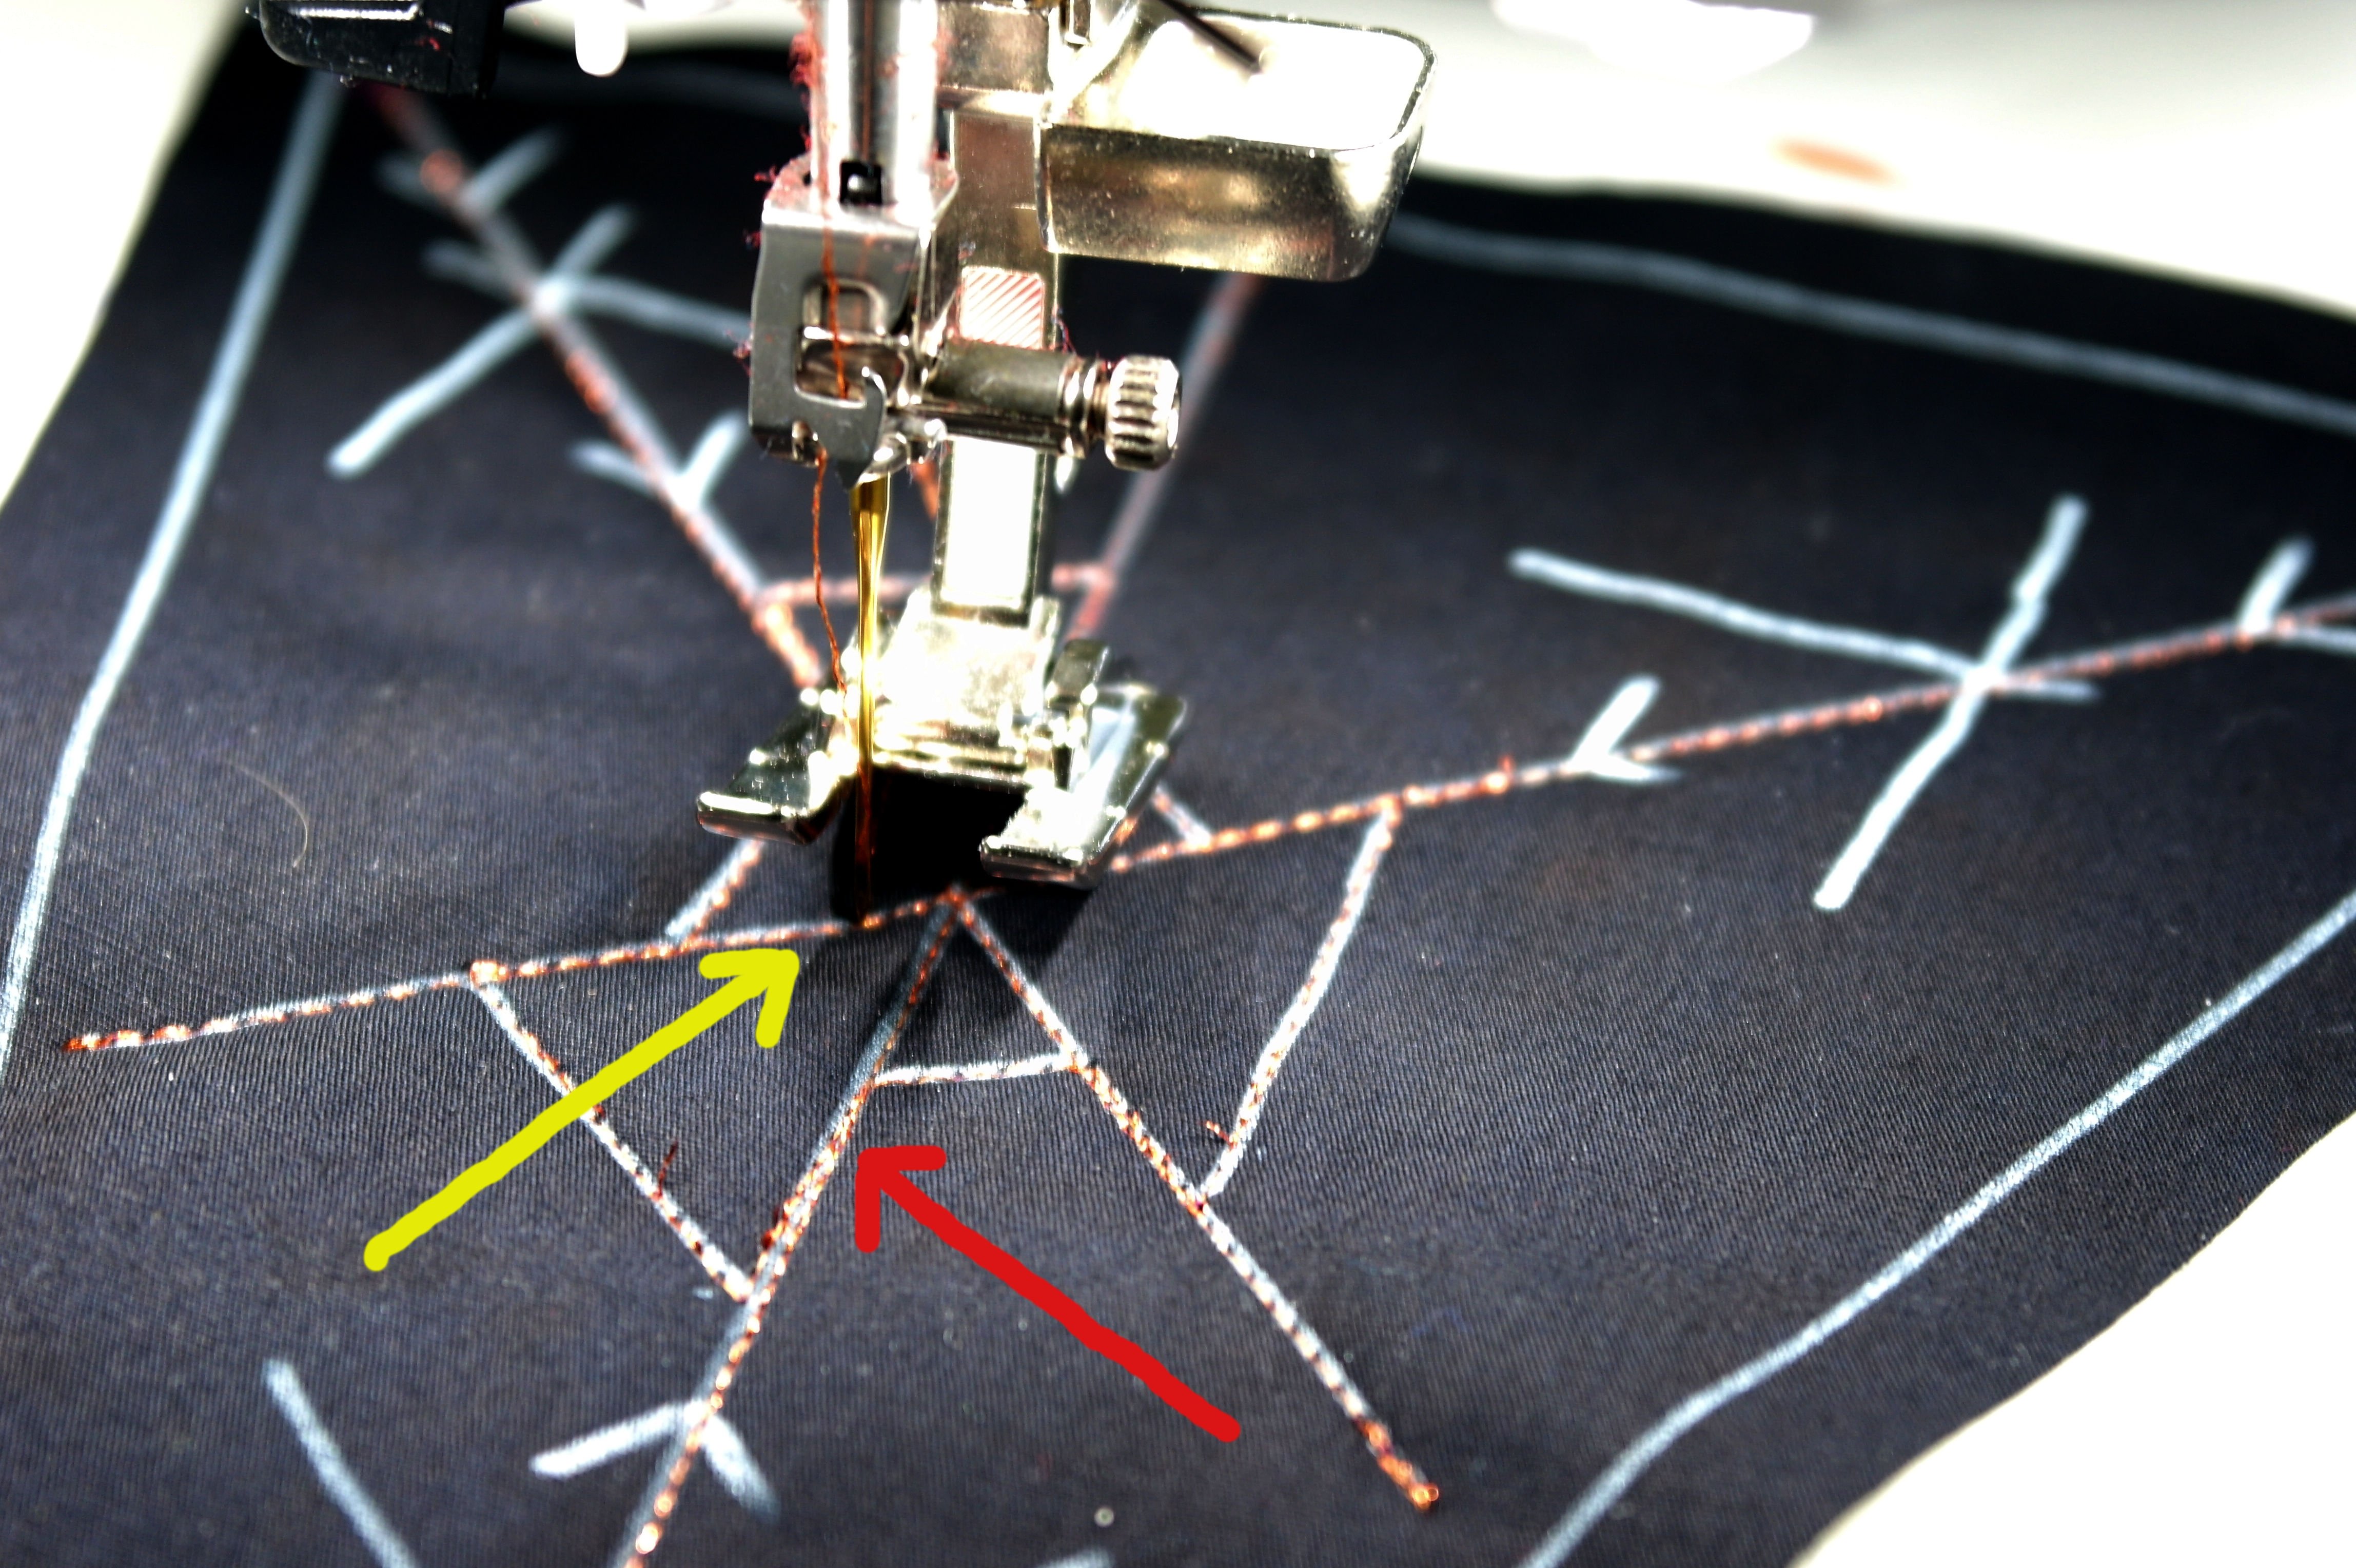
To cover the intended line the right way, I have placed the needle of the machine on the line to the left of it (yellow arrow), so the middle of the presser foot lies on top of the line I want to cover (red arrow). It is important to know how a stitch is made, before working on your block. Make a sample first: this way you can tell how the stitch is made: with the presser foot smoothly running over the sandwich, or if the presser foot is lifted now and then, working in steps, and knowing where to start and finish. If I had not made a sample first, I would have started directly on the line, thinking thát was my correct starting point, and the stitch itself would be made away from the line. I am glad I have made a sample, because I don’t like frogging!
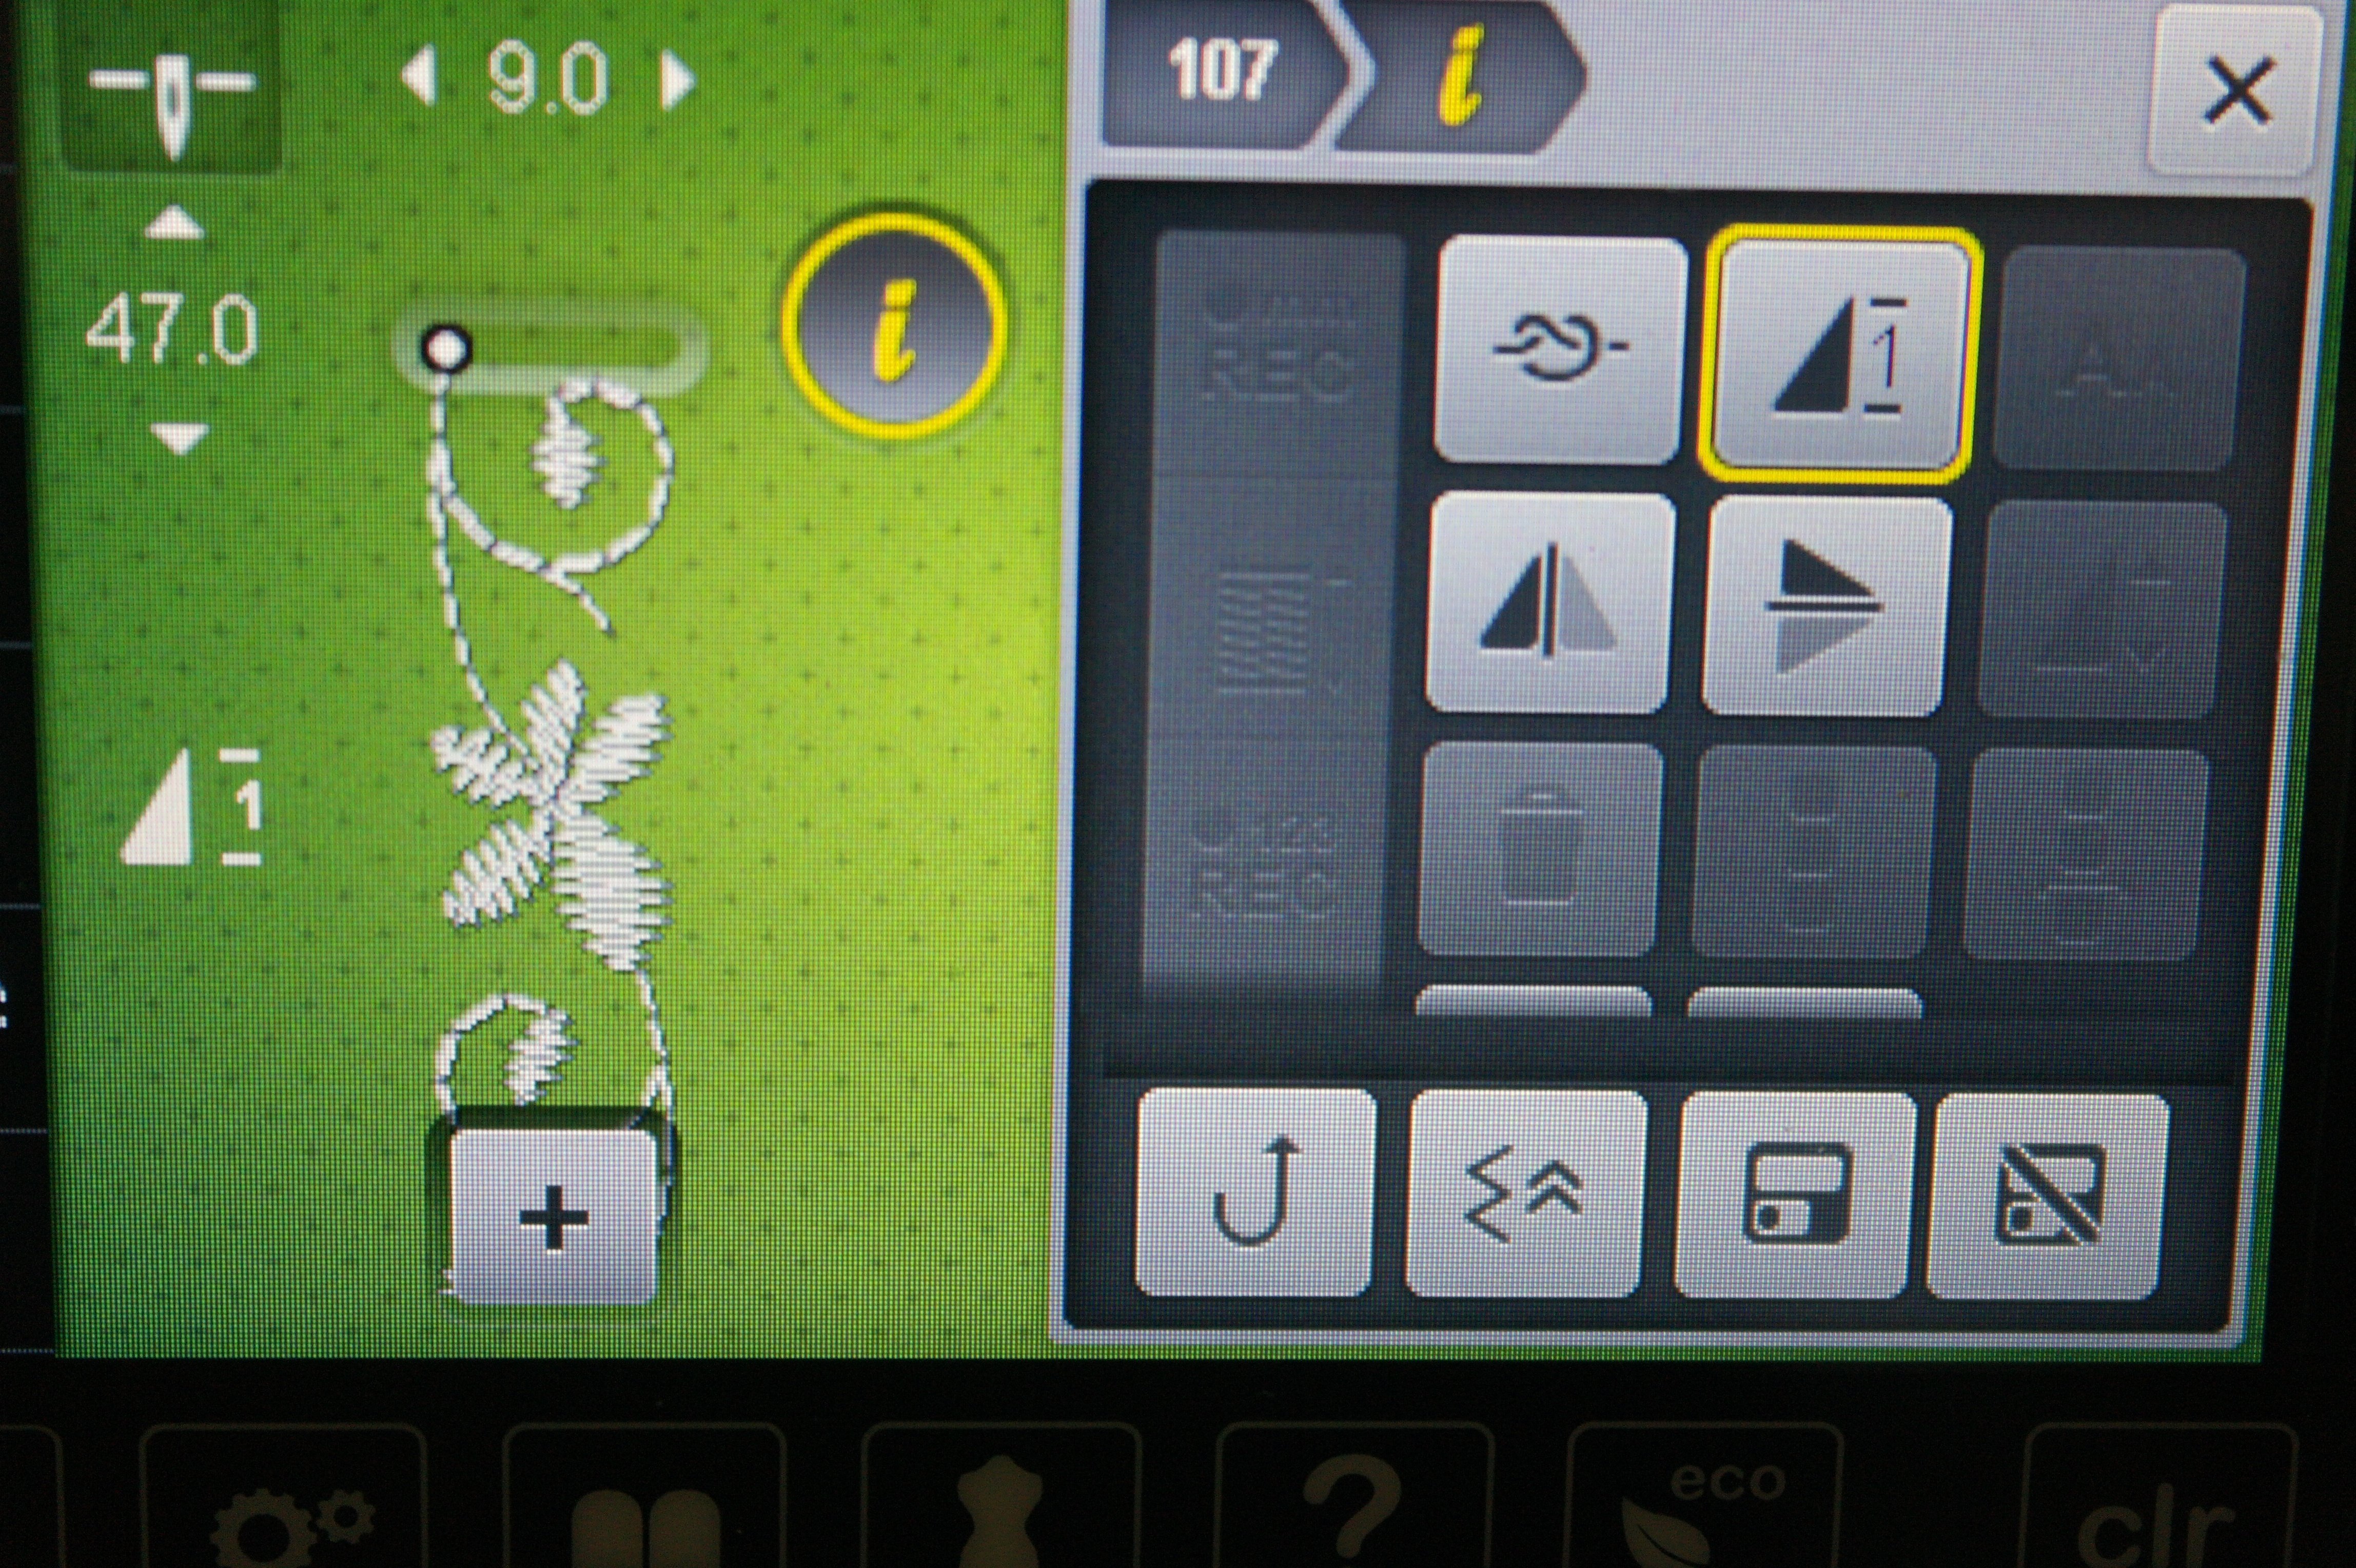
To make a single deocrative stitch, I can click with my B770QE on the ‘i’ Dialog and click on the icon for programming pattern repeat. As long as your foot is on the foot control while making this single stitch, the machine will automatically stop at the end of the stitch. The yellow marking indicates I have changed the default setting (which is an endless row of stitches). The ‘i’ Dialog has yellow marking too. On the left of the screen you can see the pattern repeat image, with the number that tells you that you have selected the option to just make one single stitch.
I can also use the button ‘Pattern end’. I can press this button while sewing: when this function is indicated, the stitch I am making will not jus end with the last stitch of the repeat pattern, but also the stitch will be secured with the programmed number of stitches, and will be clipped if you have selected this options in the ‘Set-Up’ of your machine.
If you don’t have a BERNINA770QE, but another type or brand of sewing machine, check the possibilities for making a single stitch. Stitch it out on a sample, to see where a single stitch ends, or where the first stitch of a row ends and a next one begins, so you will know where to stop.
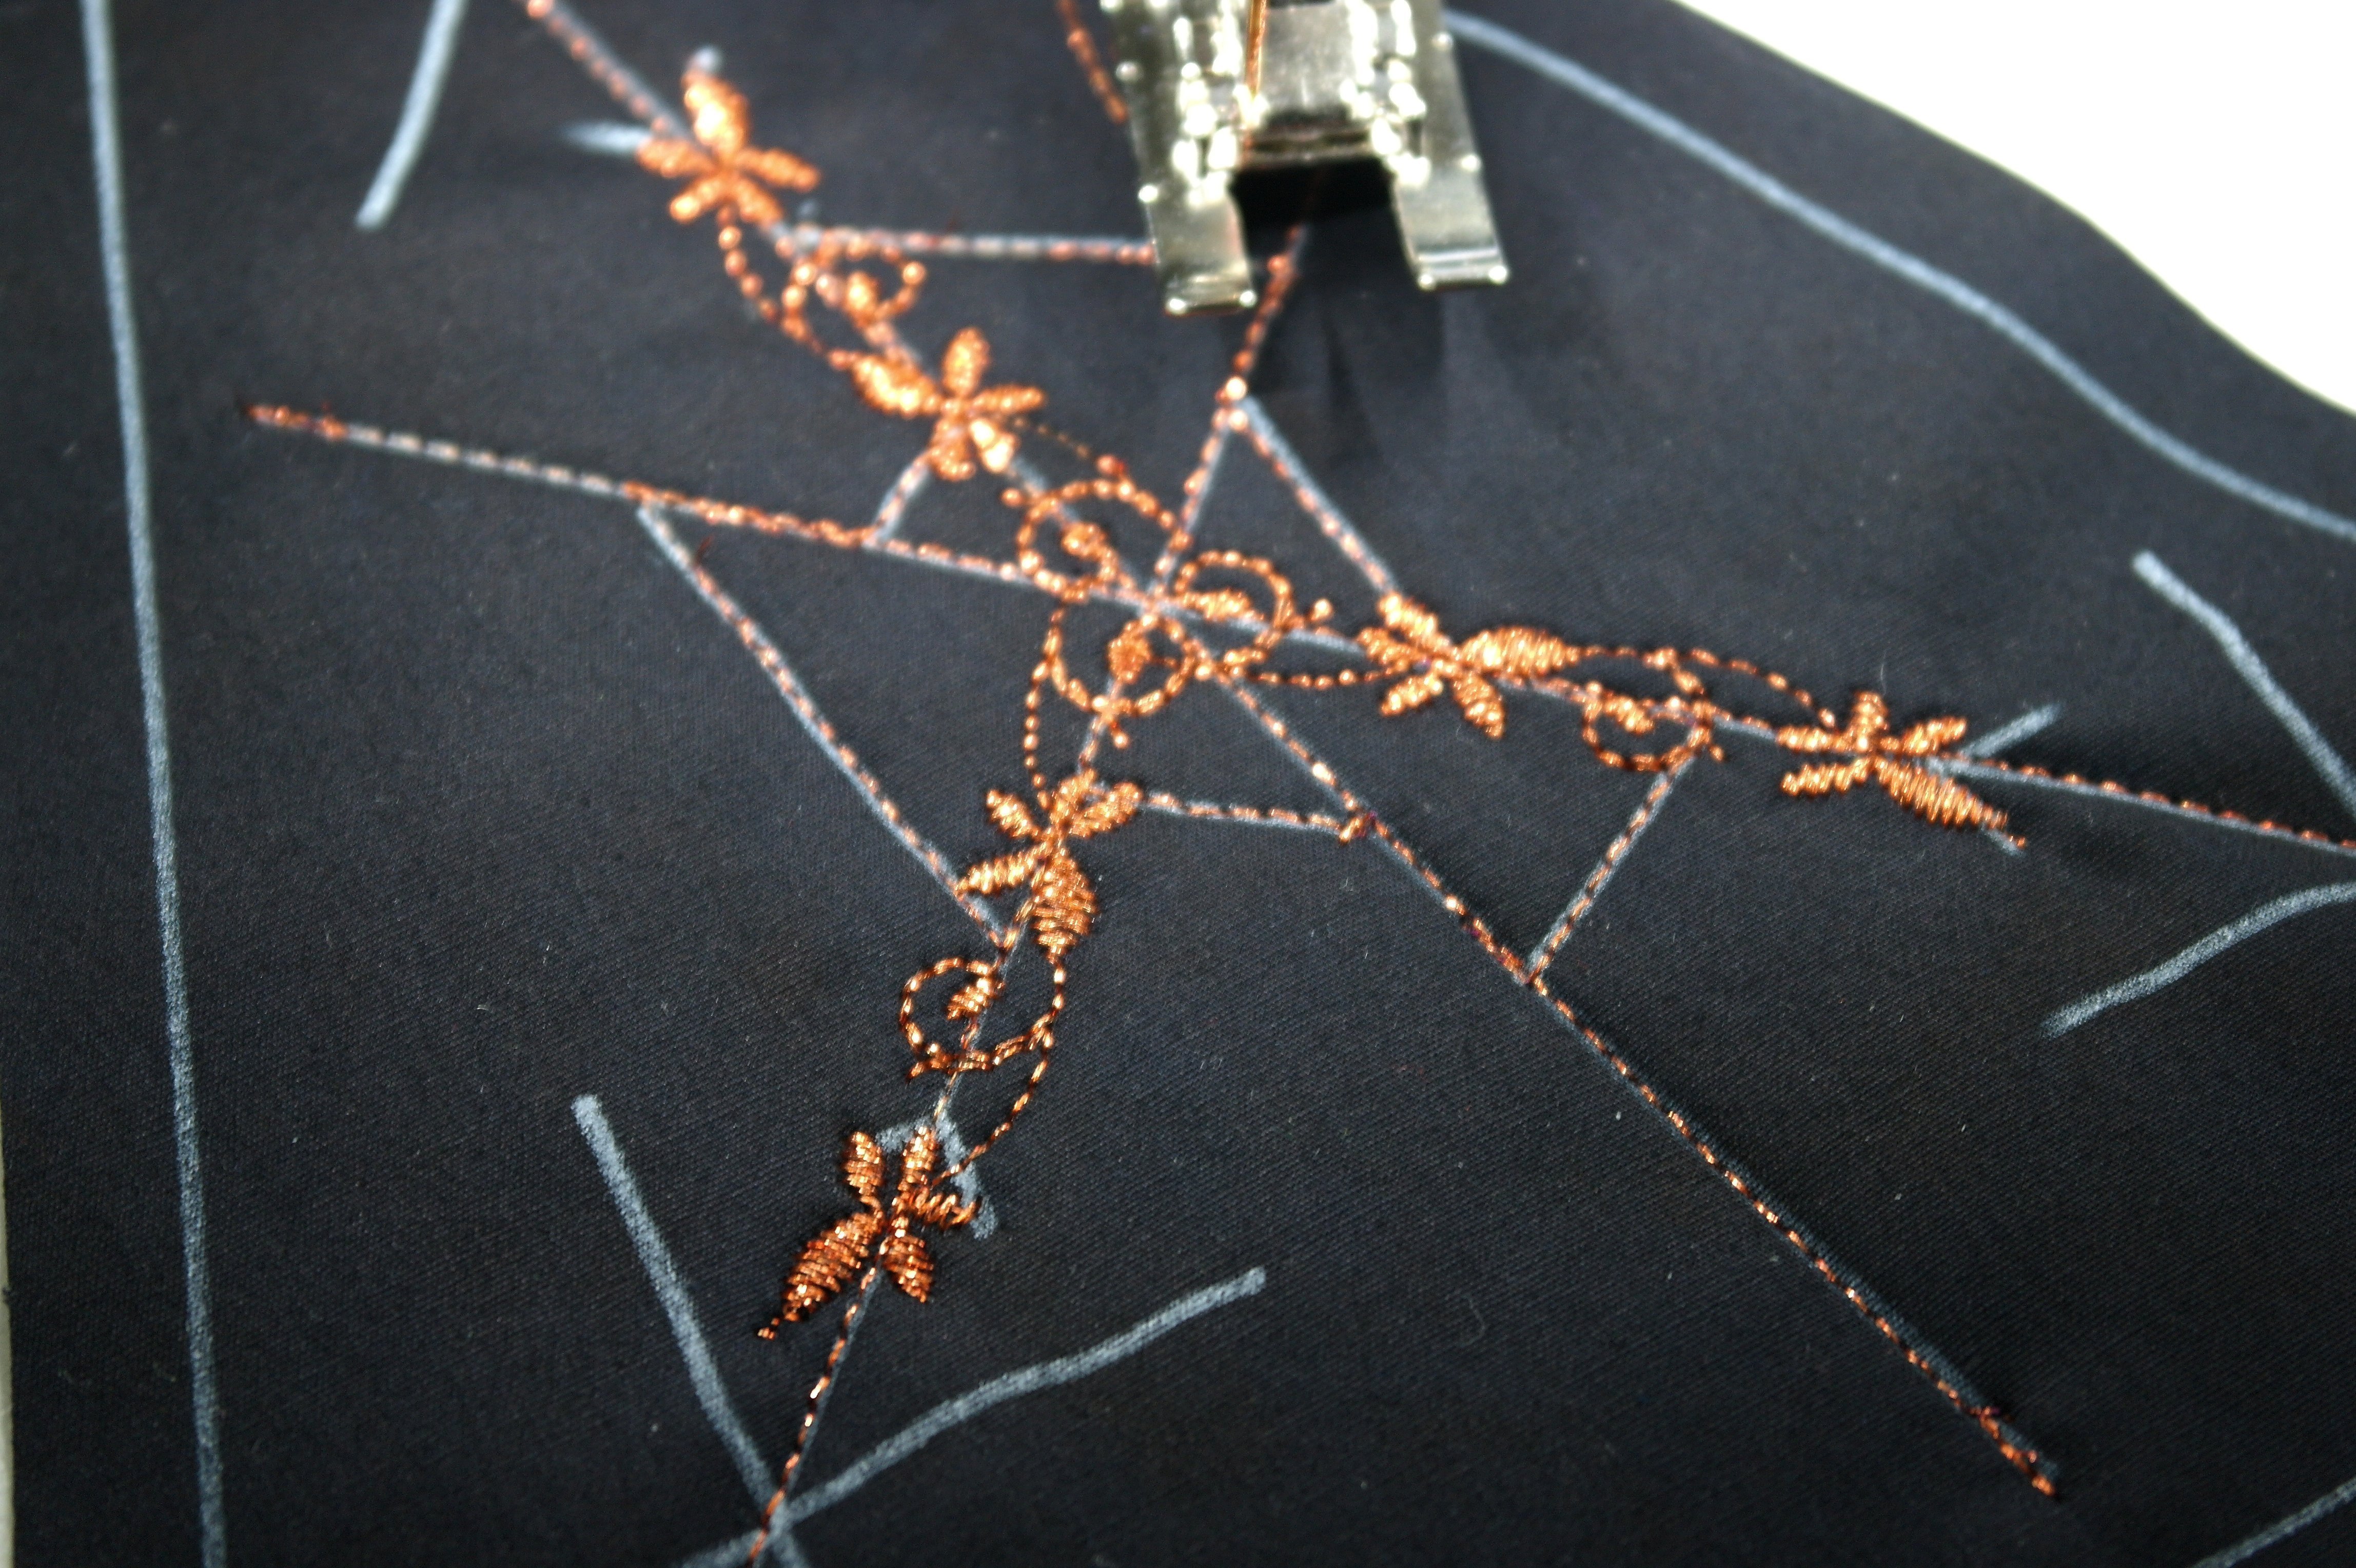
I have made three single stitches, all starting at the crossing. They are really long (aprox 5 cm), covering a couple of small drawn lines. That’s ok, you can use the lines but you can also ignore them: they are guidelines for making stitches, and it is up to you how to use/cover them.

More and more stitches are covering the Crystal: I have made a funny Crystal, using Madeira Metallic wt40 Amber. This is all for now, I will cover this centre with Hotfix stones later.
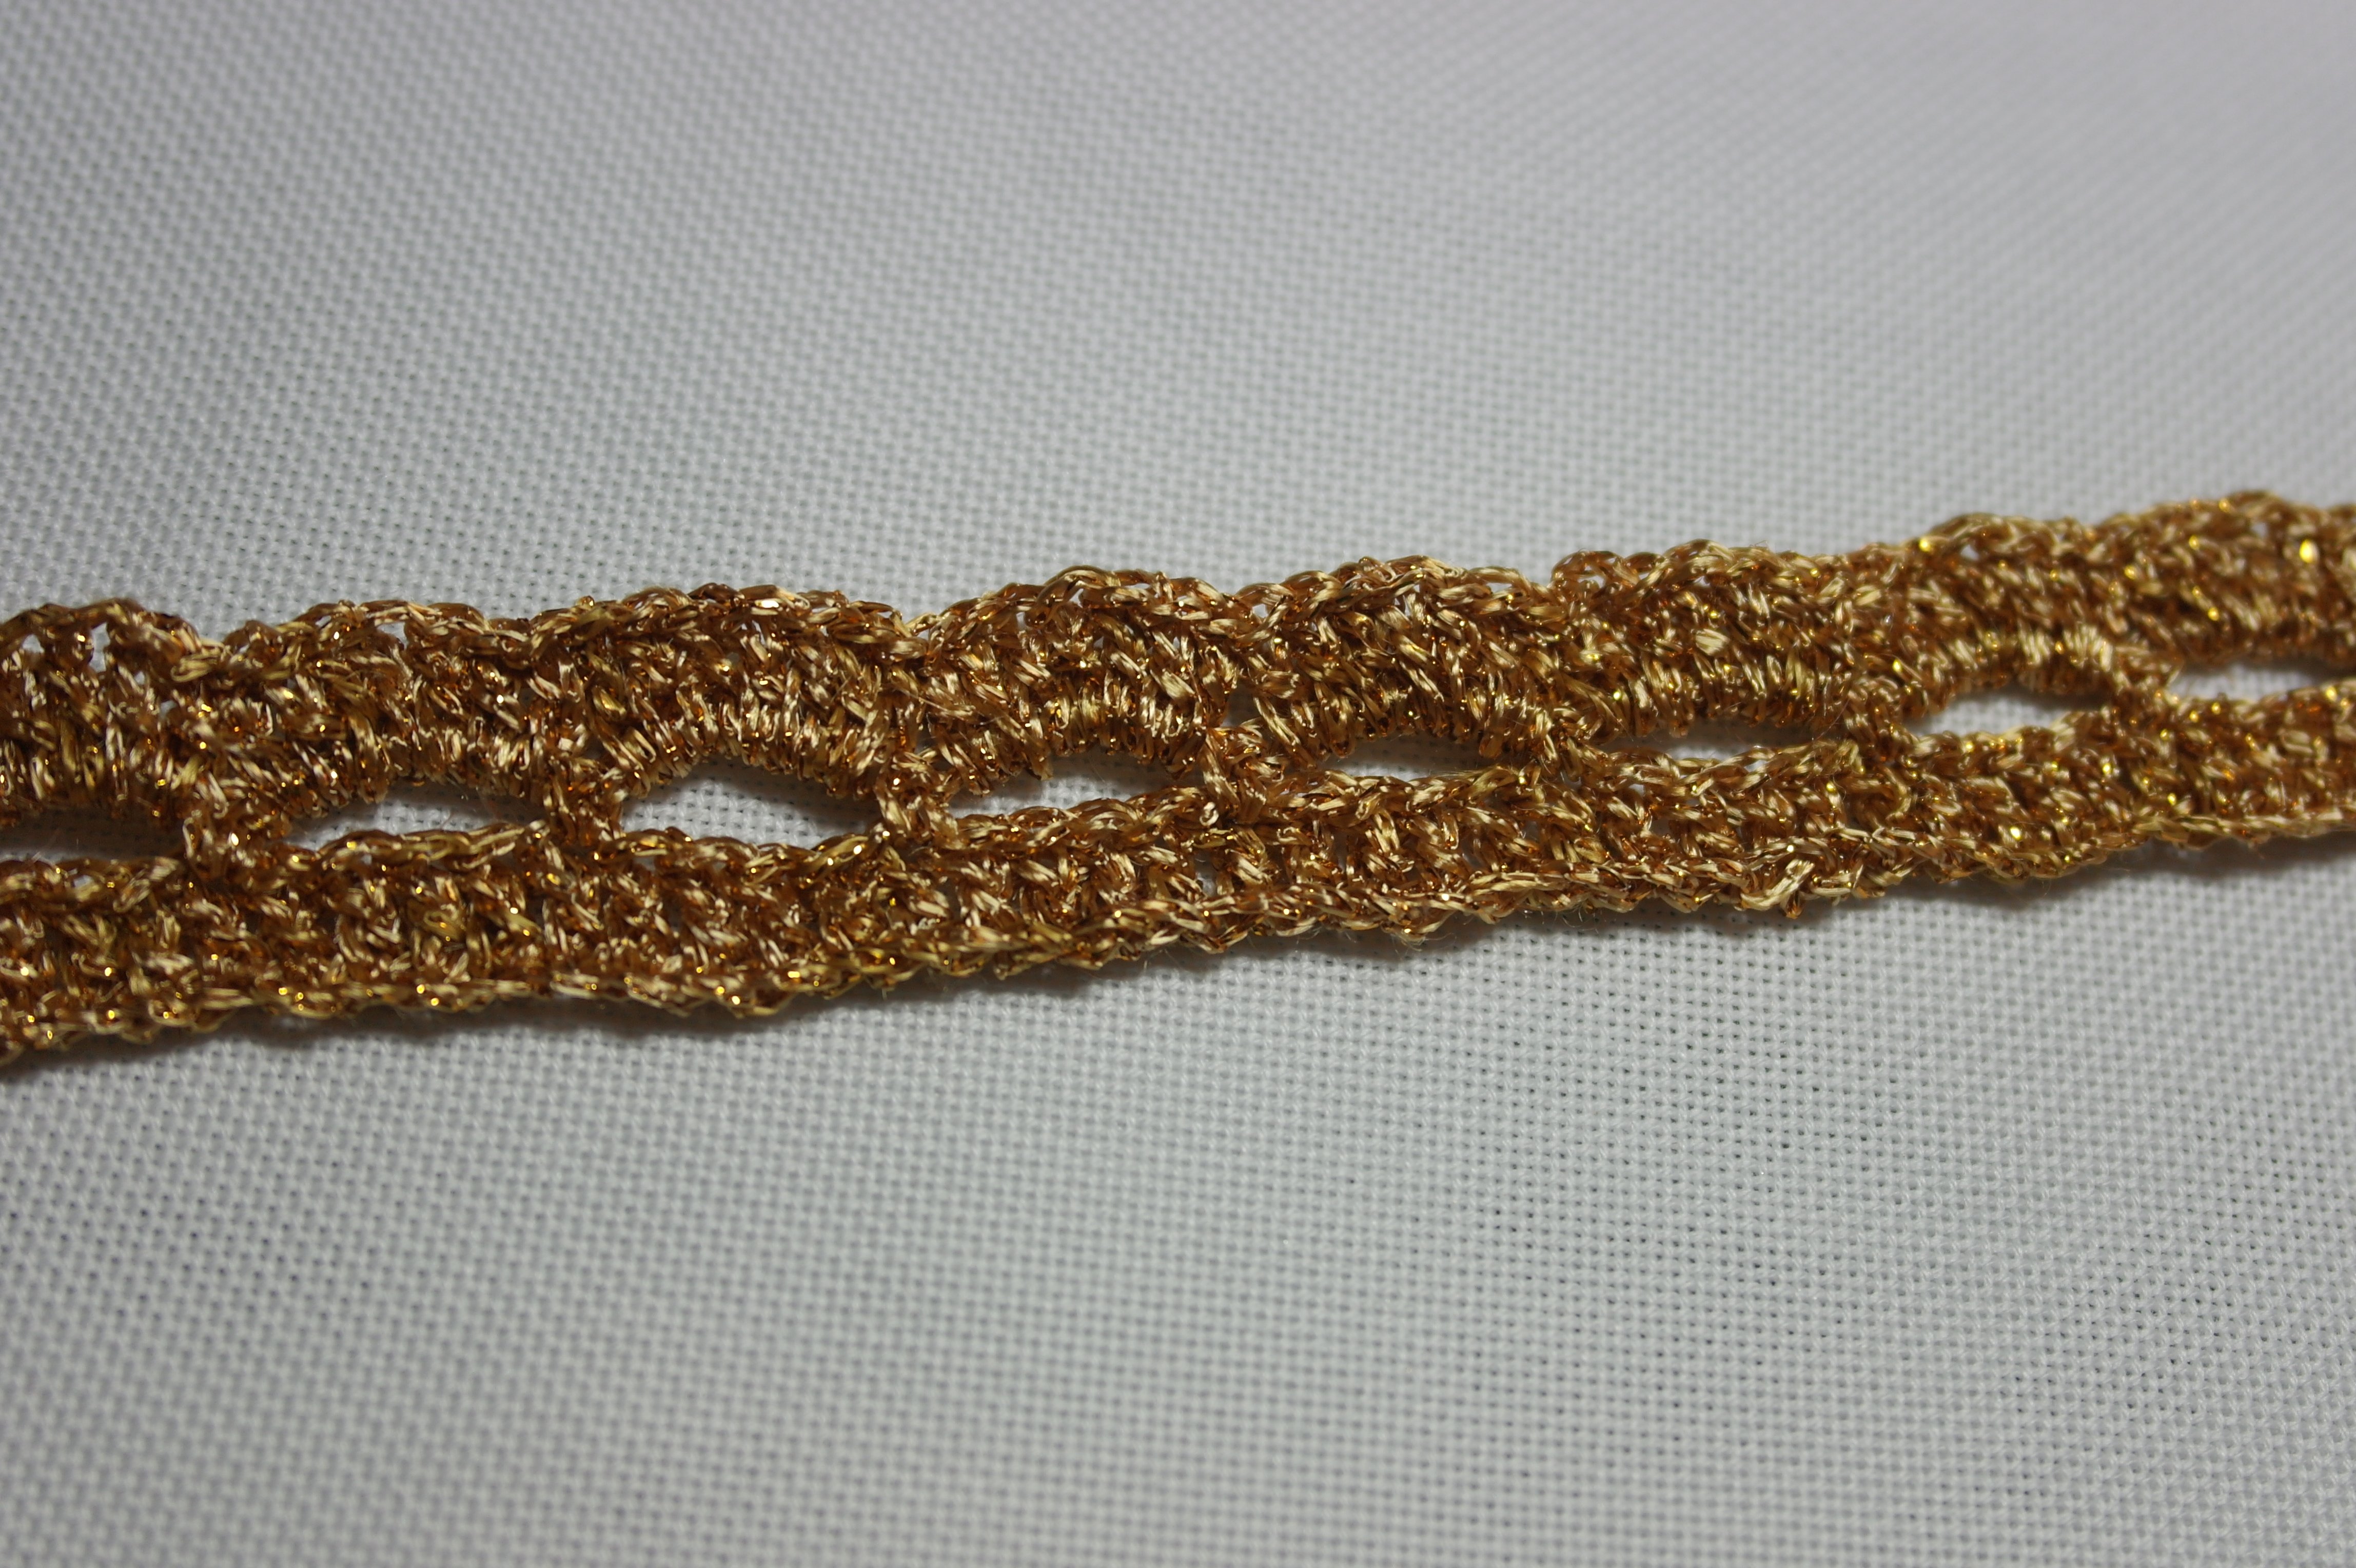
Before I will add fabrics to all sections, I will make a piece of crocheted ‘lace’. I will use ‘LIZZY’ metallic yarn. Crochet needle 3.0mm. You can make lace this way too, but you can also use a piece of (gold-colored) lace, ready made. This is how I made my lace: Cast on with a loop, make 82 chain stitches (or 92 if you want the ‘lace’ to be longer), turn, last 2 chain stitches are forming the first treble crochet. Make 79 treble crochets = total of 80 (or 90 when making 10 more). Turn. Make arches of 5 chain stitches and secure with a double crochet in each 5th treble crochet from the previous row. Turn, make 2 chain stitches = 1st treble crochet. Make 6 treble crochets around the previous arches of chain stitches, continue with making 7 treble stitches around each arch, cast off.
IMPORTANT: first measure length of the 80 chain stitches before making the next row, to be sure this ‘lace’ will cover the entire sewing line of section 10 (for which it will be used) and the ends can protrude. If it is too short, just add 10 (or 20) chain stitches.
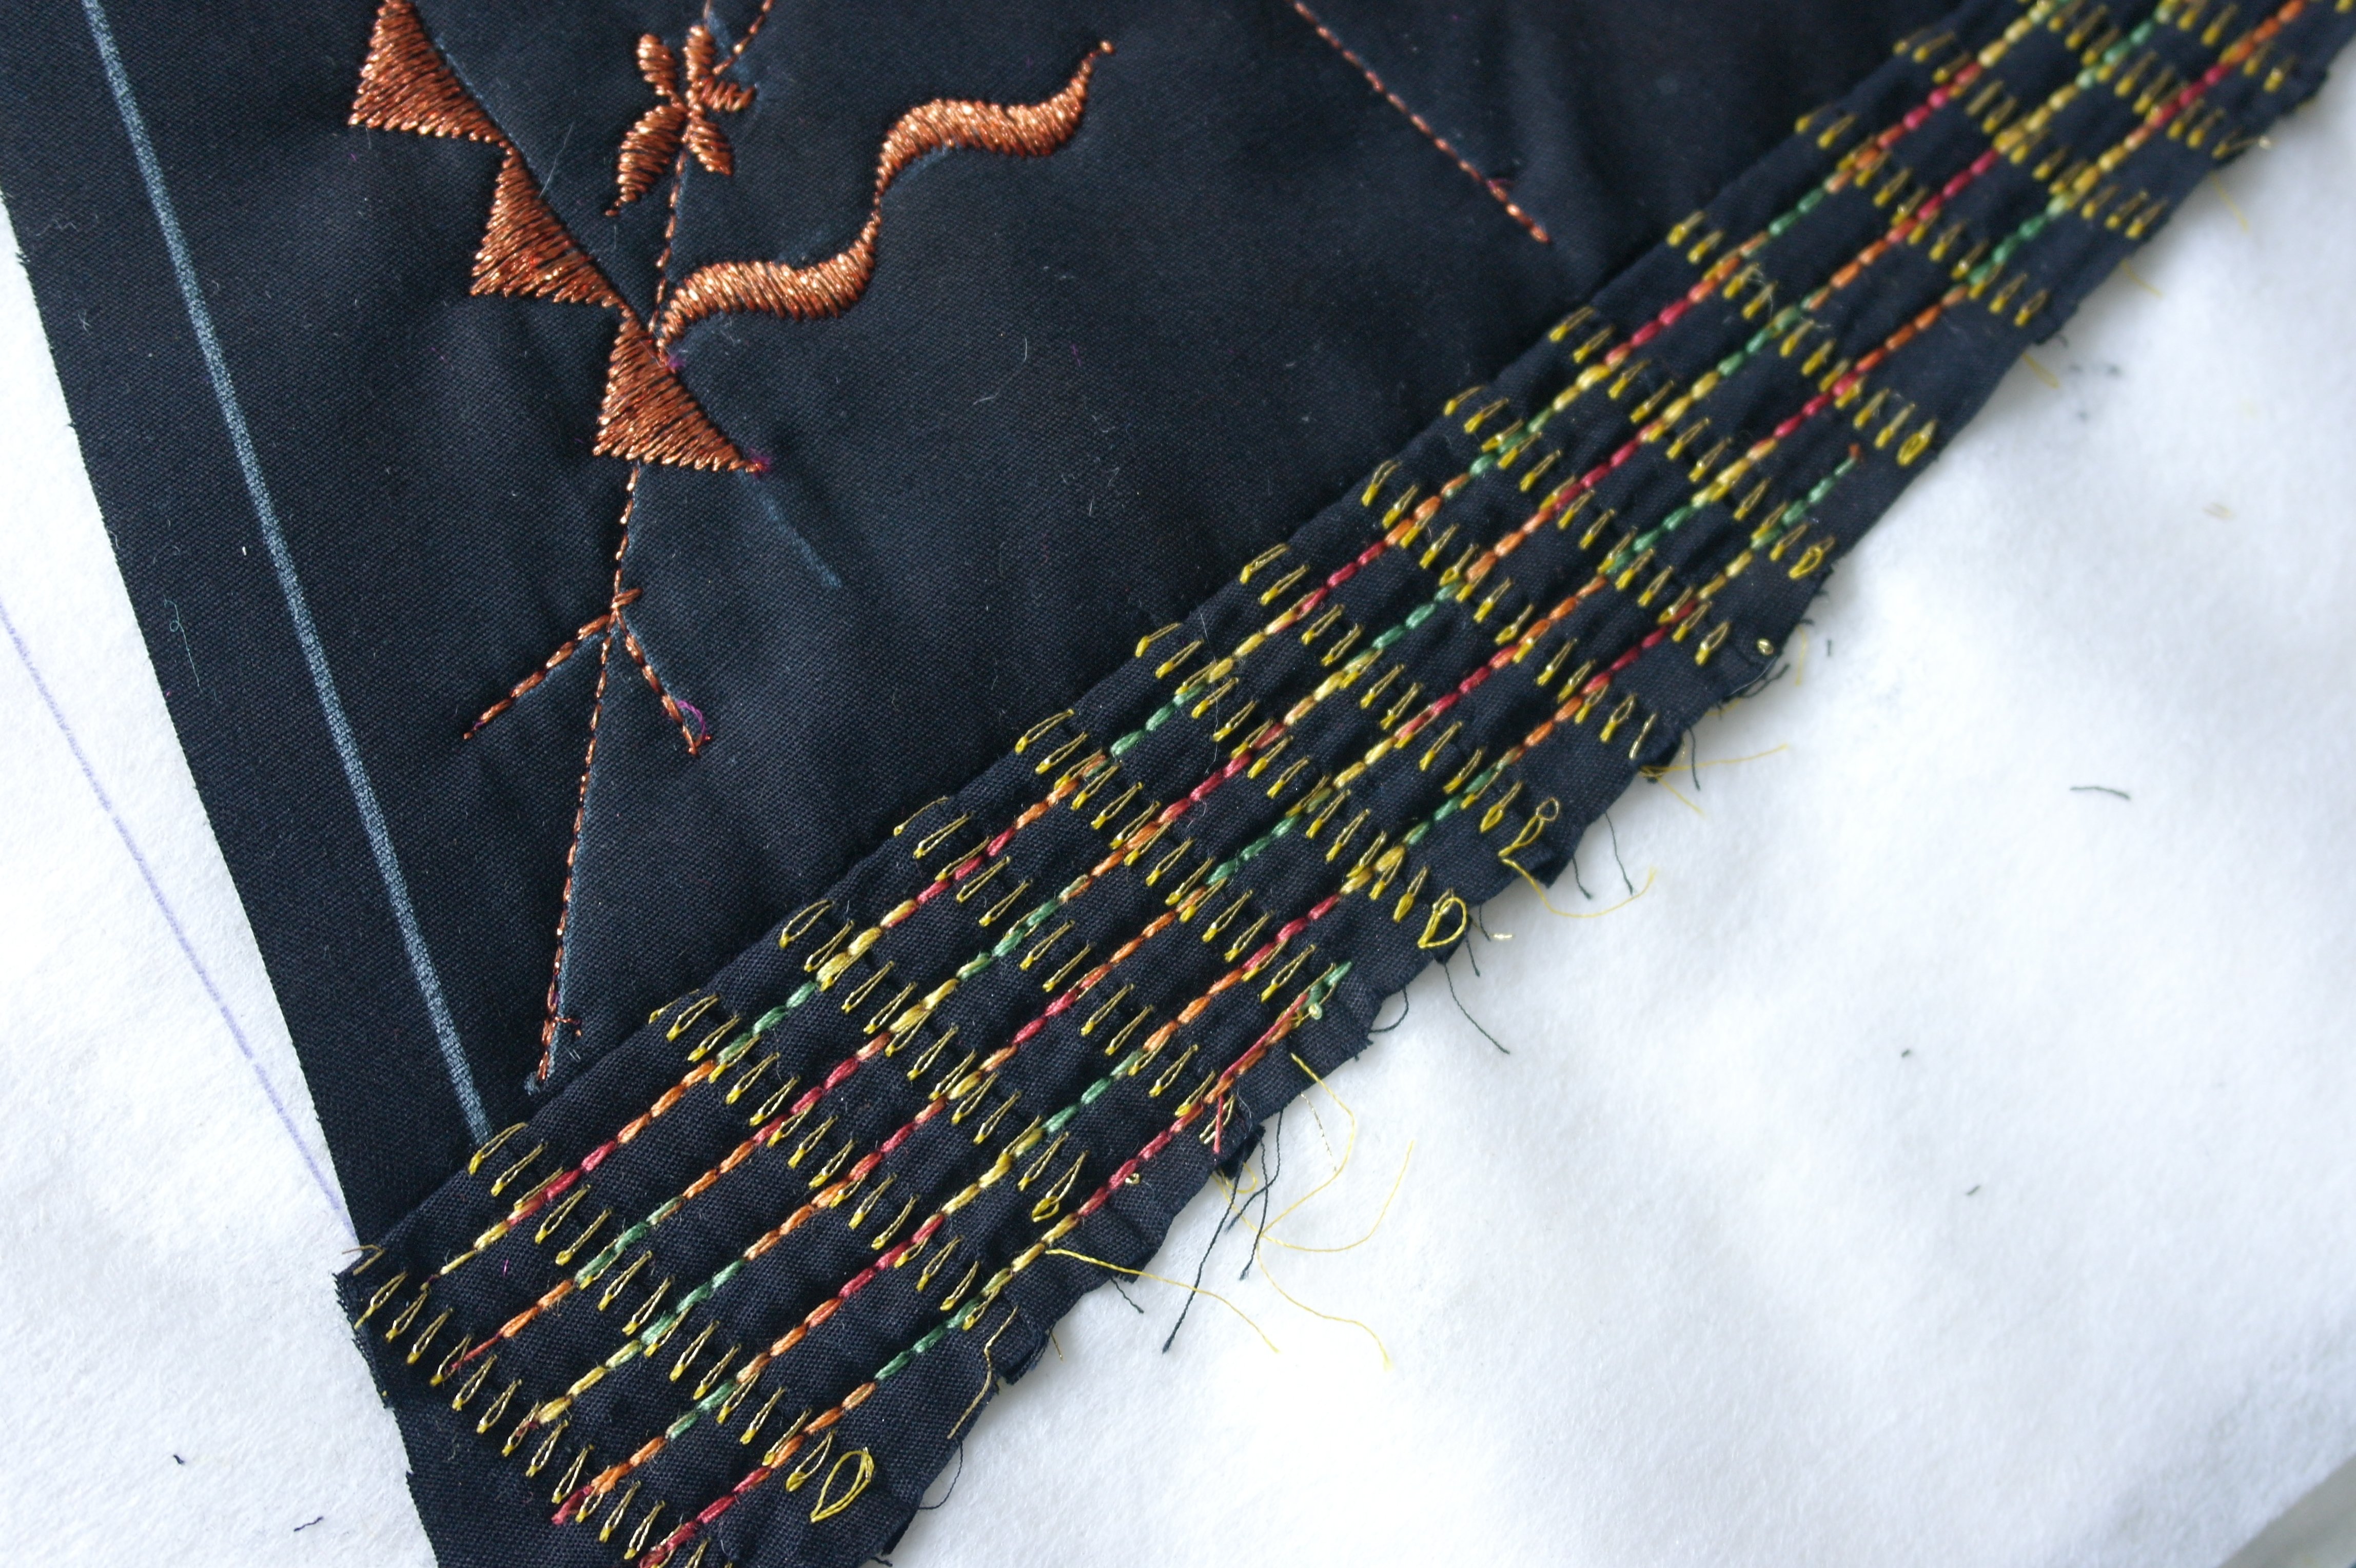
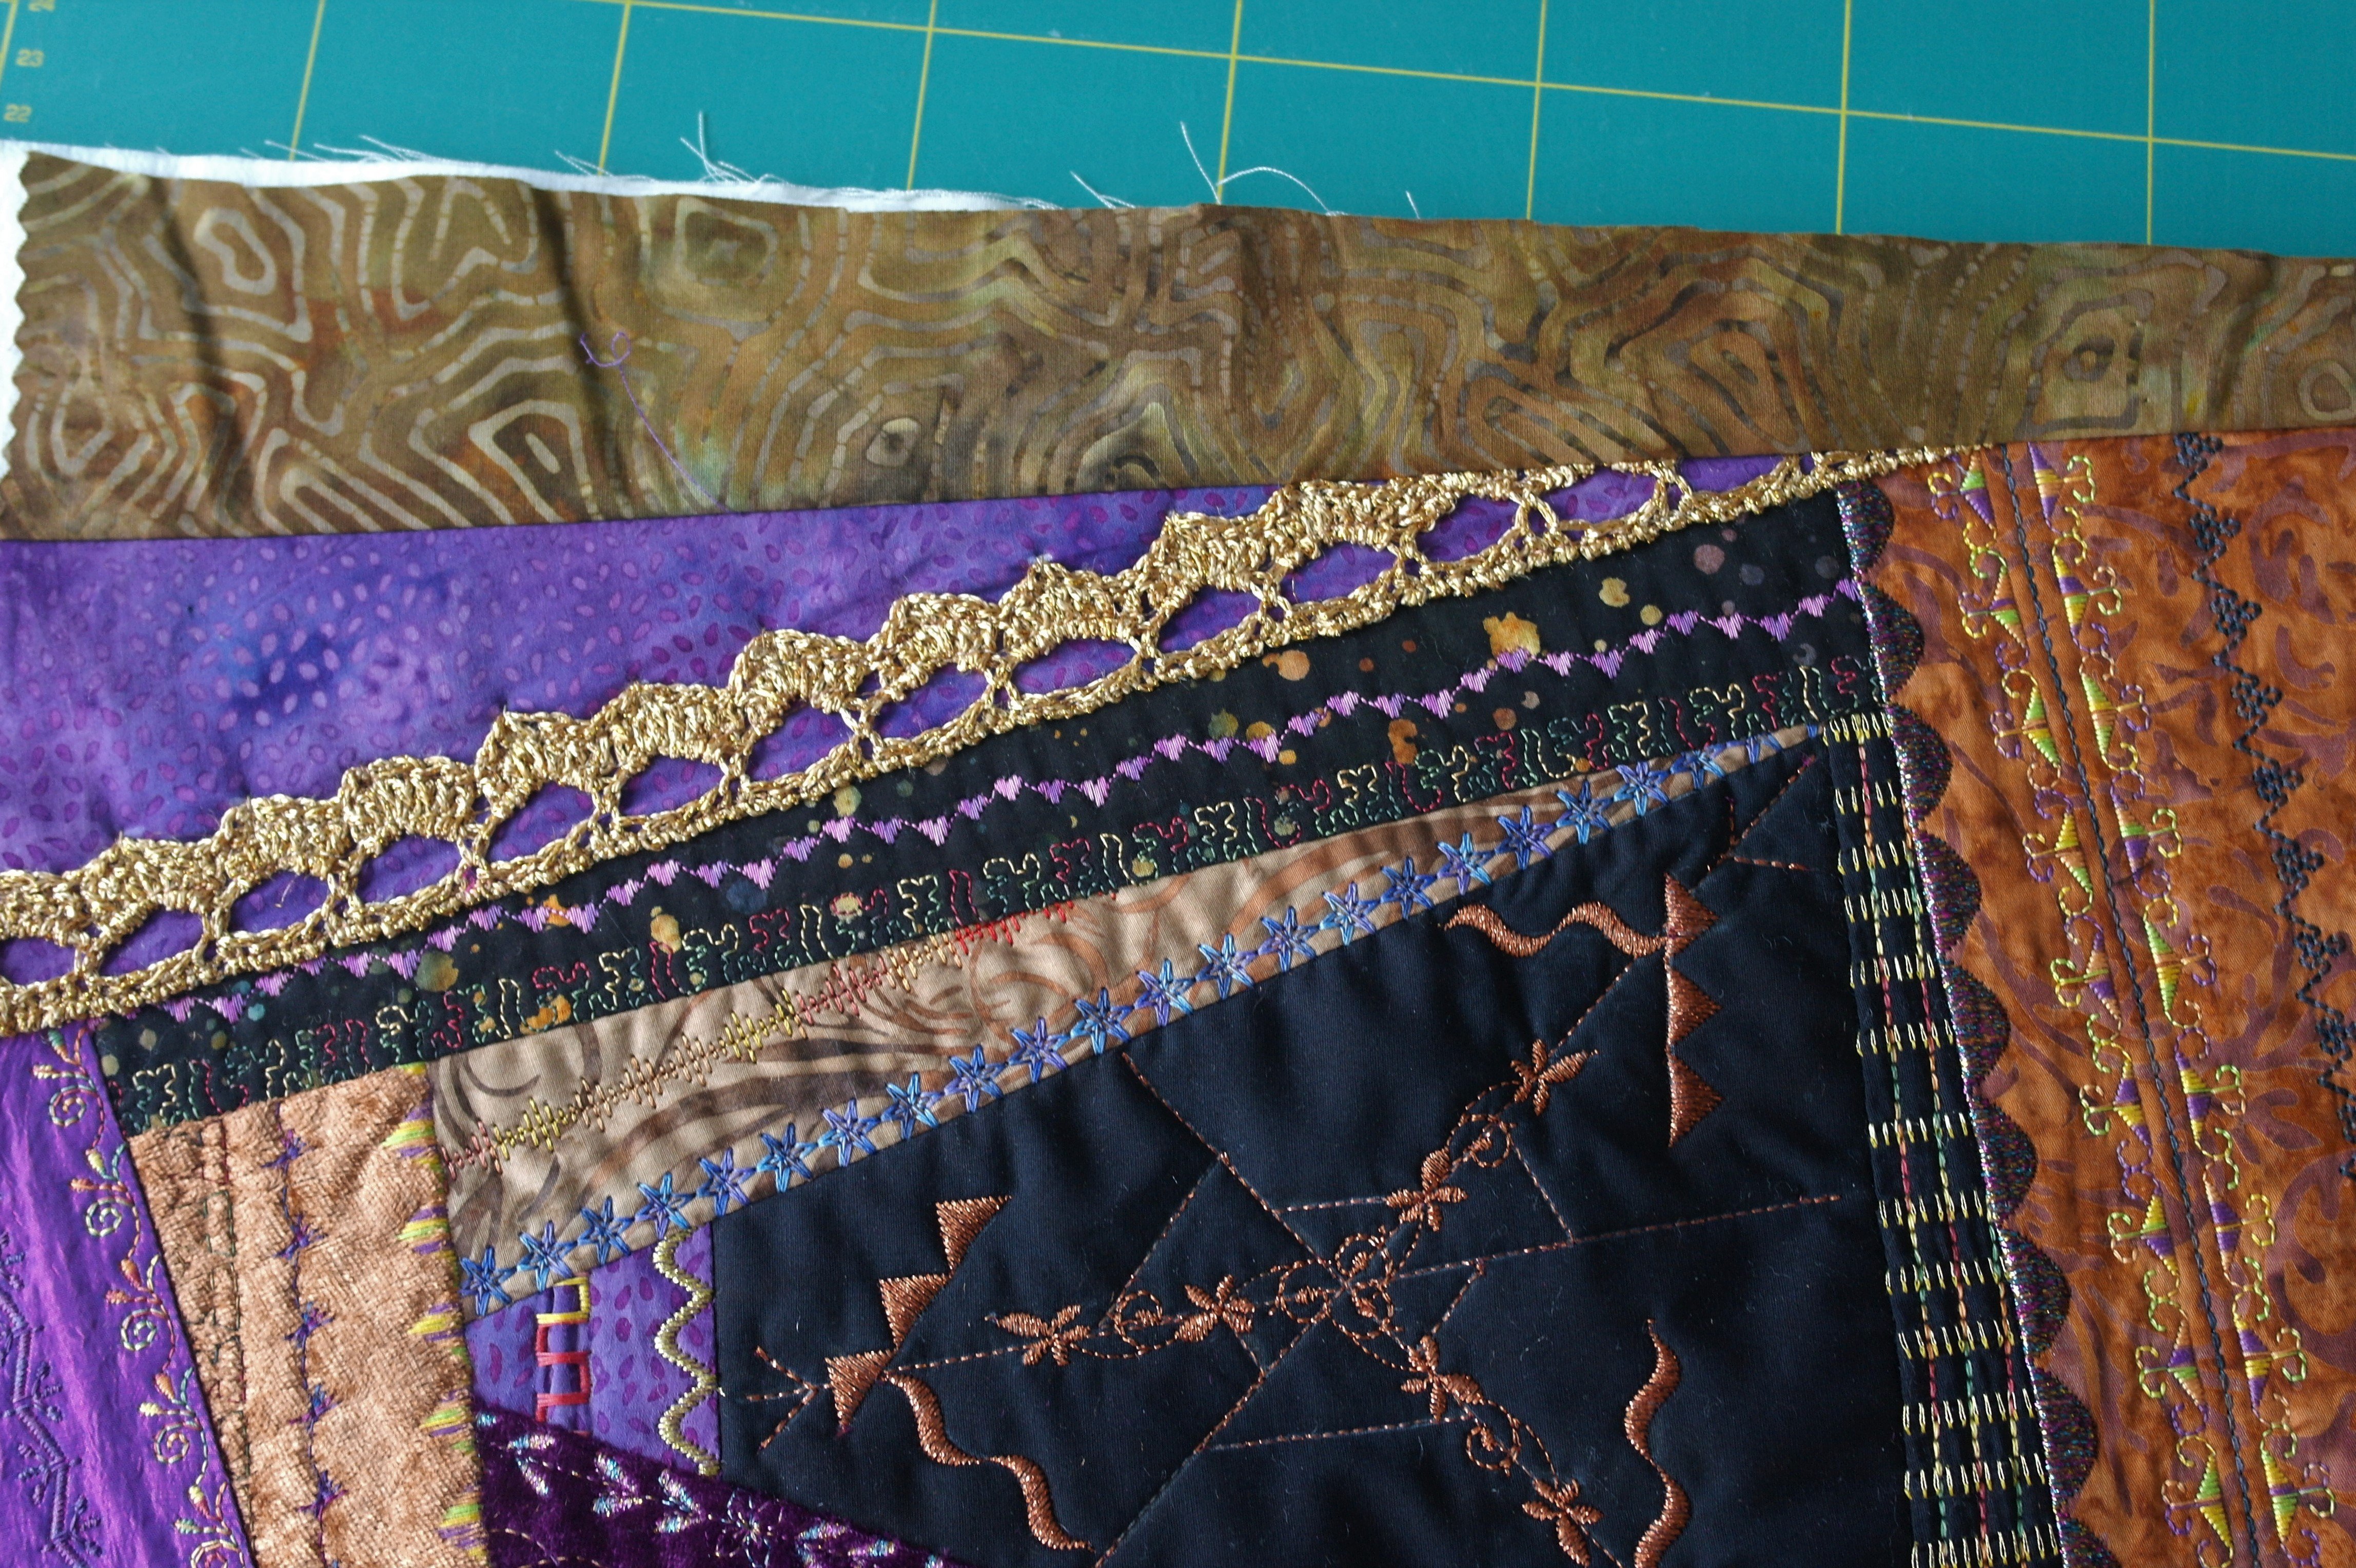
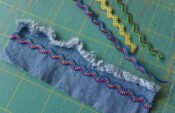
But first I will cover sections 1 to 9 with fabrics: sewing, making decorative stitches etc. You can see that I have used a remnant of the fabric I have covered with stitches on my BERNINA Overlock 1300MDC last time, with golden thread. I have made decorative stitches with variegated threads on top of this fabric, using Stitch no. 6 from my B770QE: the rows are extra thick: the stitch is made by going forward, back and forward again, so it stands out more.

Working with Velours de Panne, I have ironed Heat’n Bond Lite at the back, to stabilize it. But that makes the back stiff. Using a piece of pattern paper on top makes sewing it down much easier.
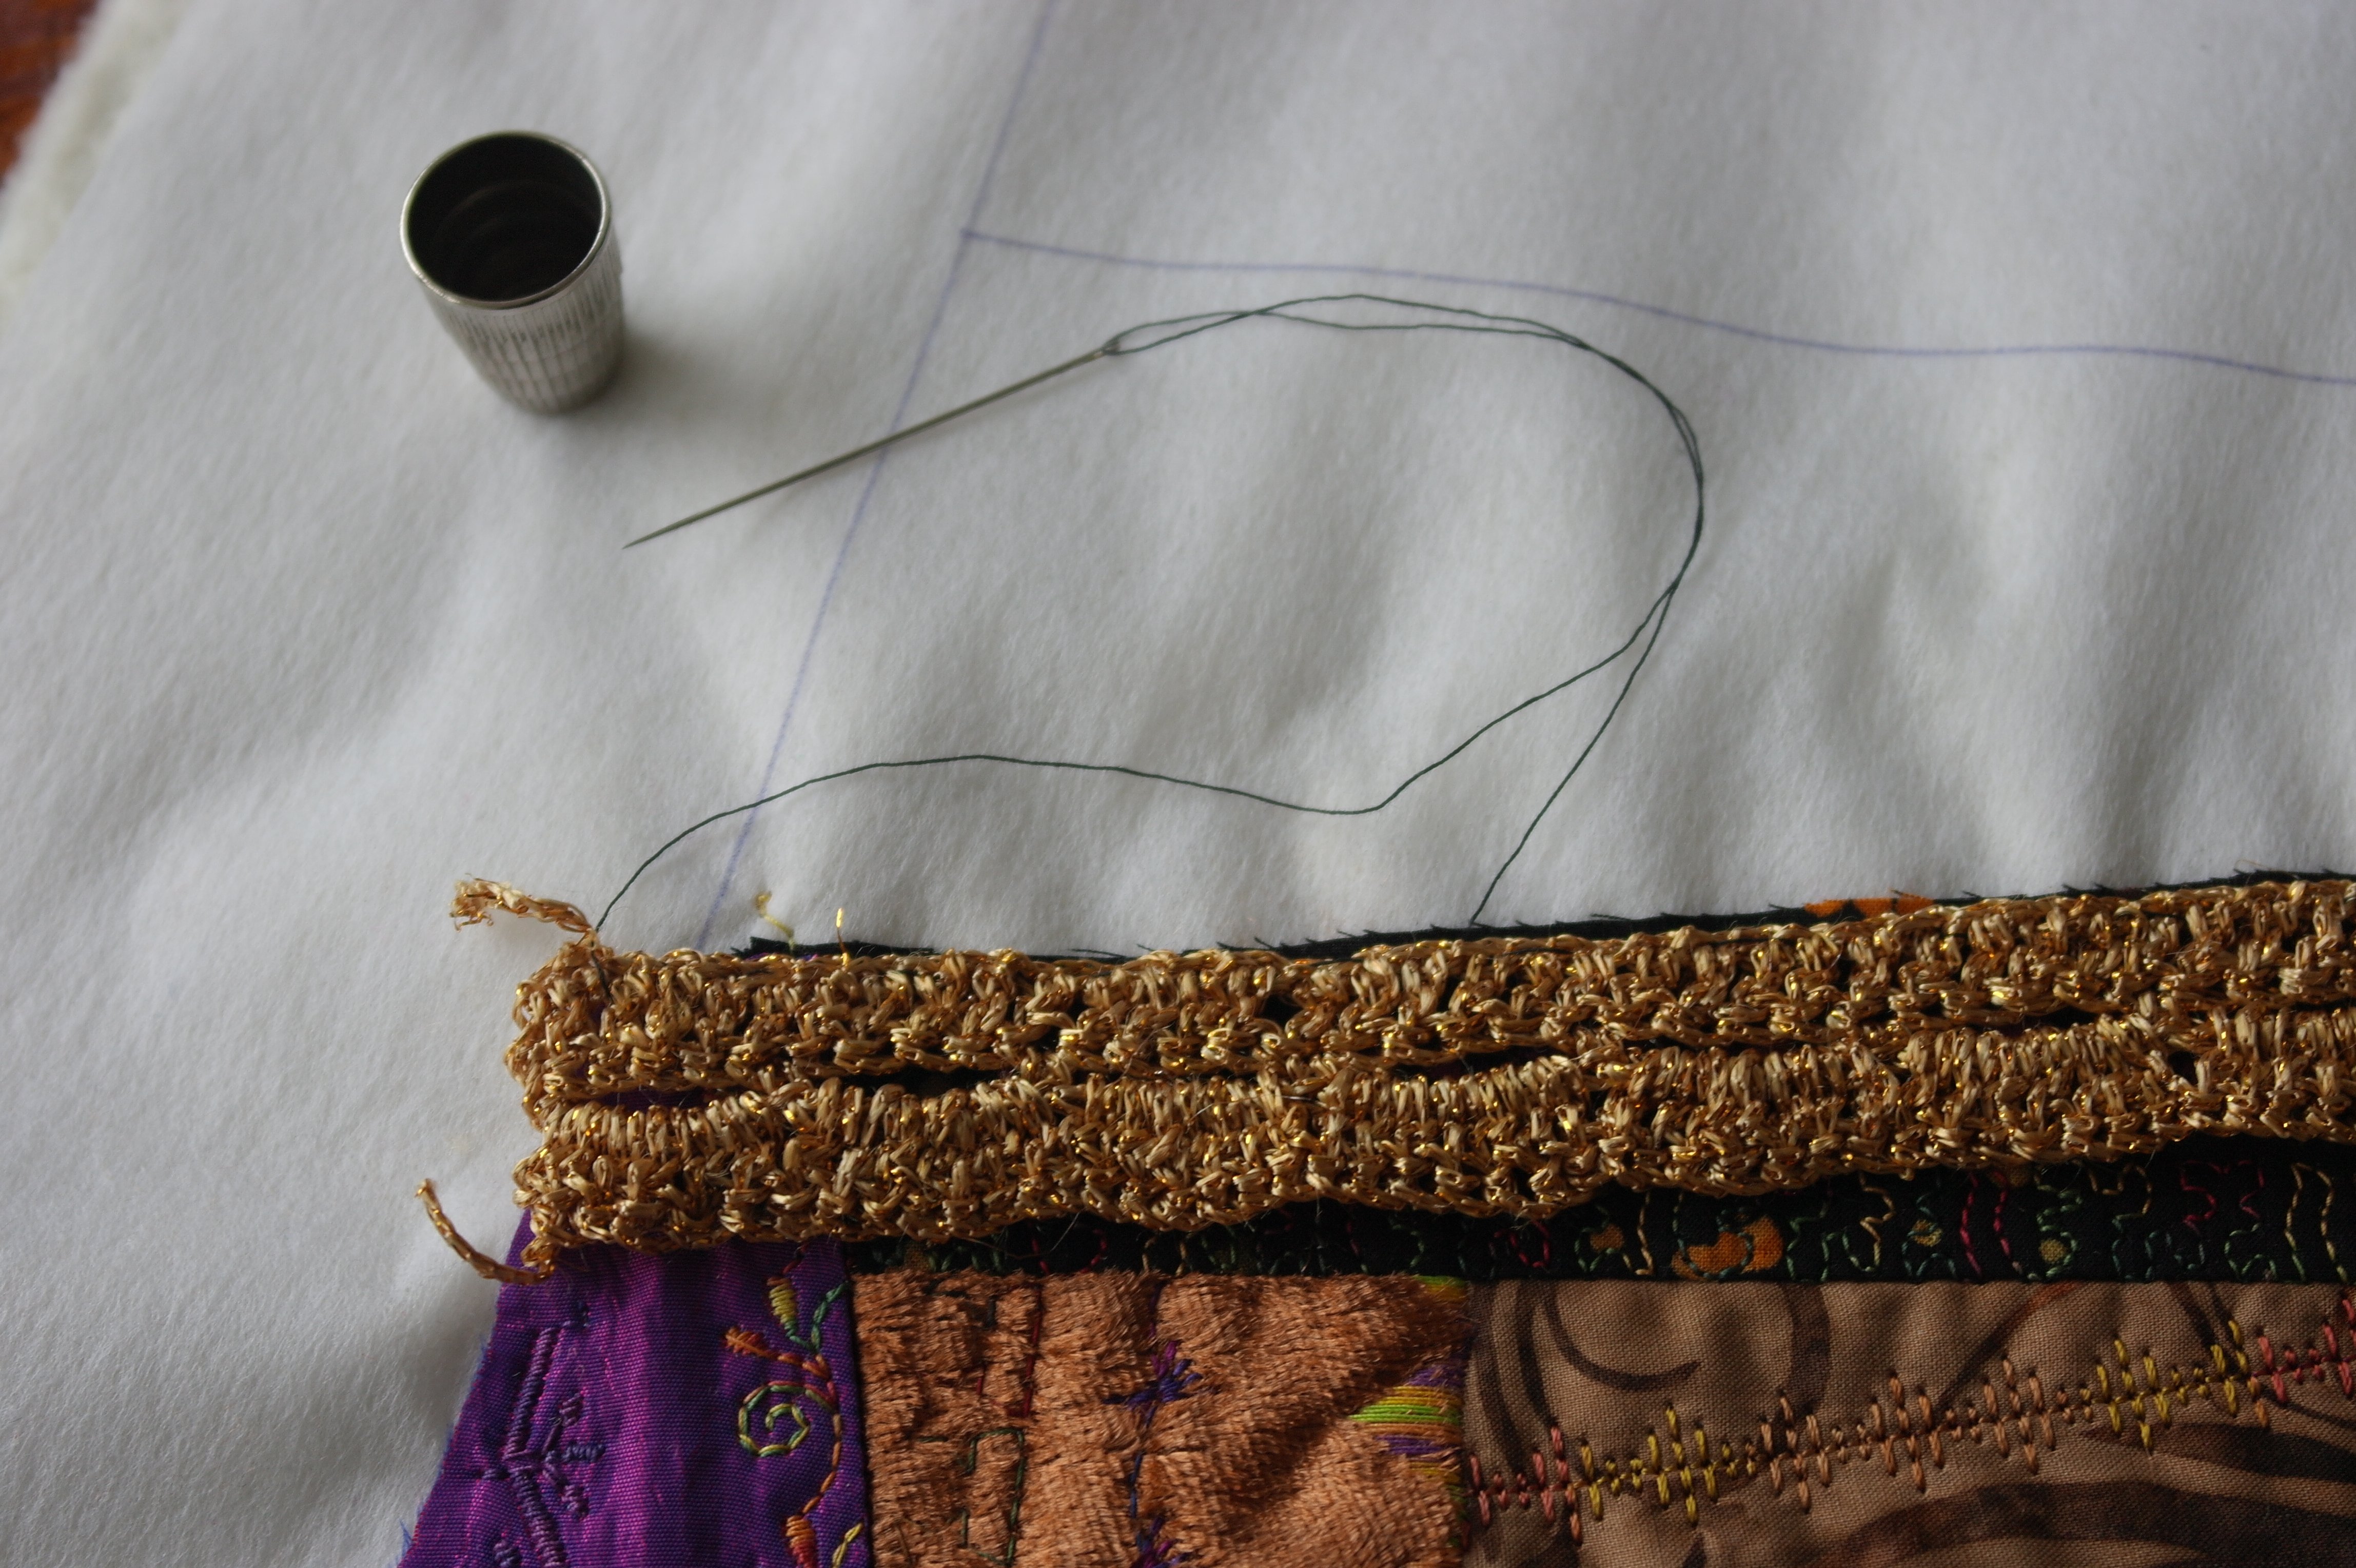
Before sewing the fabric onto the sandwich for section 10, the crocheted lace has to be placed. I have basted it onto the sandwich, along the edge of the previous sections, facing down. I have stretched the lace a bit, to stabilize it more. If you have crocheted it too dense, this is not possible – just baste it as it is. Basting it by hand gives you the control needed for exact placement. Sewing it down with machine stitches can be difficult, because the front of the presser foot can accidentily get stuck under the treble crochets, and that’s not what you want.
The fabric for section 10 is placed on top of the lace, facing down also, and everything is sewn with the machine, through all layers. Folding both fabric and lace to the right side, you can see that the lace is not the way you want to yet, because it doesn’t show the arches at this point.

I have stretched the crocheted lace, to show the arches, and the last row of treble crochet will form ‘points’. I have done this by hand again, securing each 4th treble crochet of the last row to the sandwich. It is important not to pull too much, though! It will distort the sandwich, as you can see at the picture above.
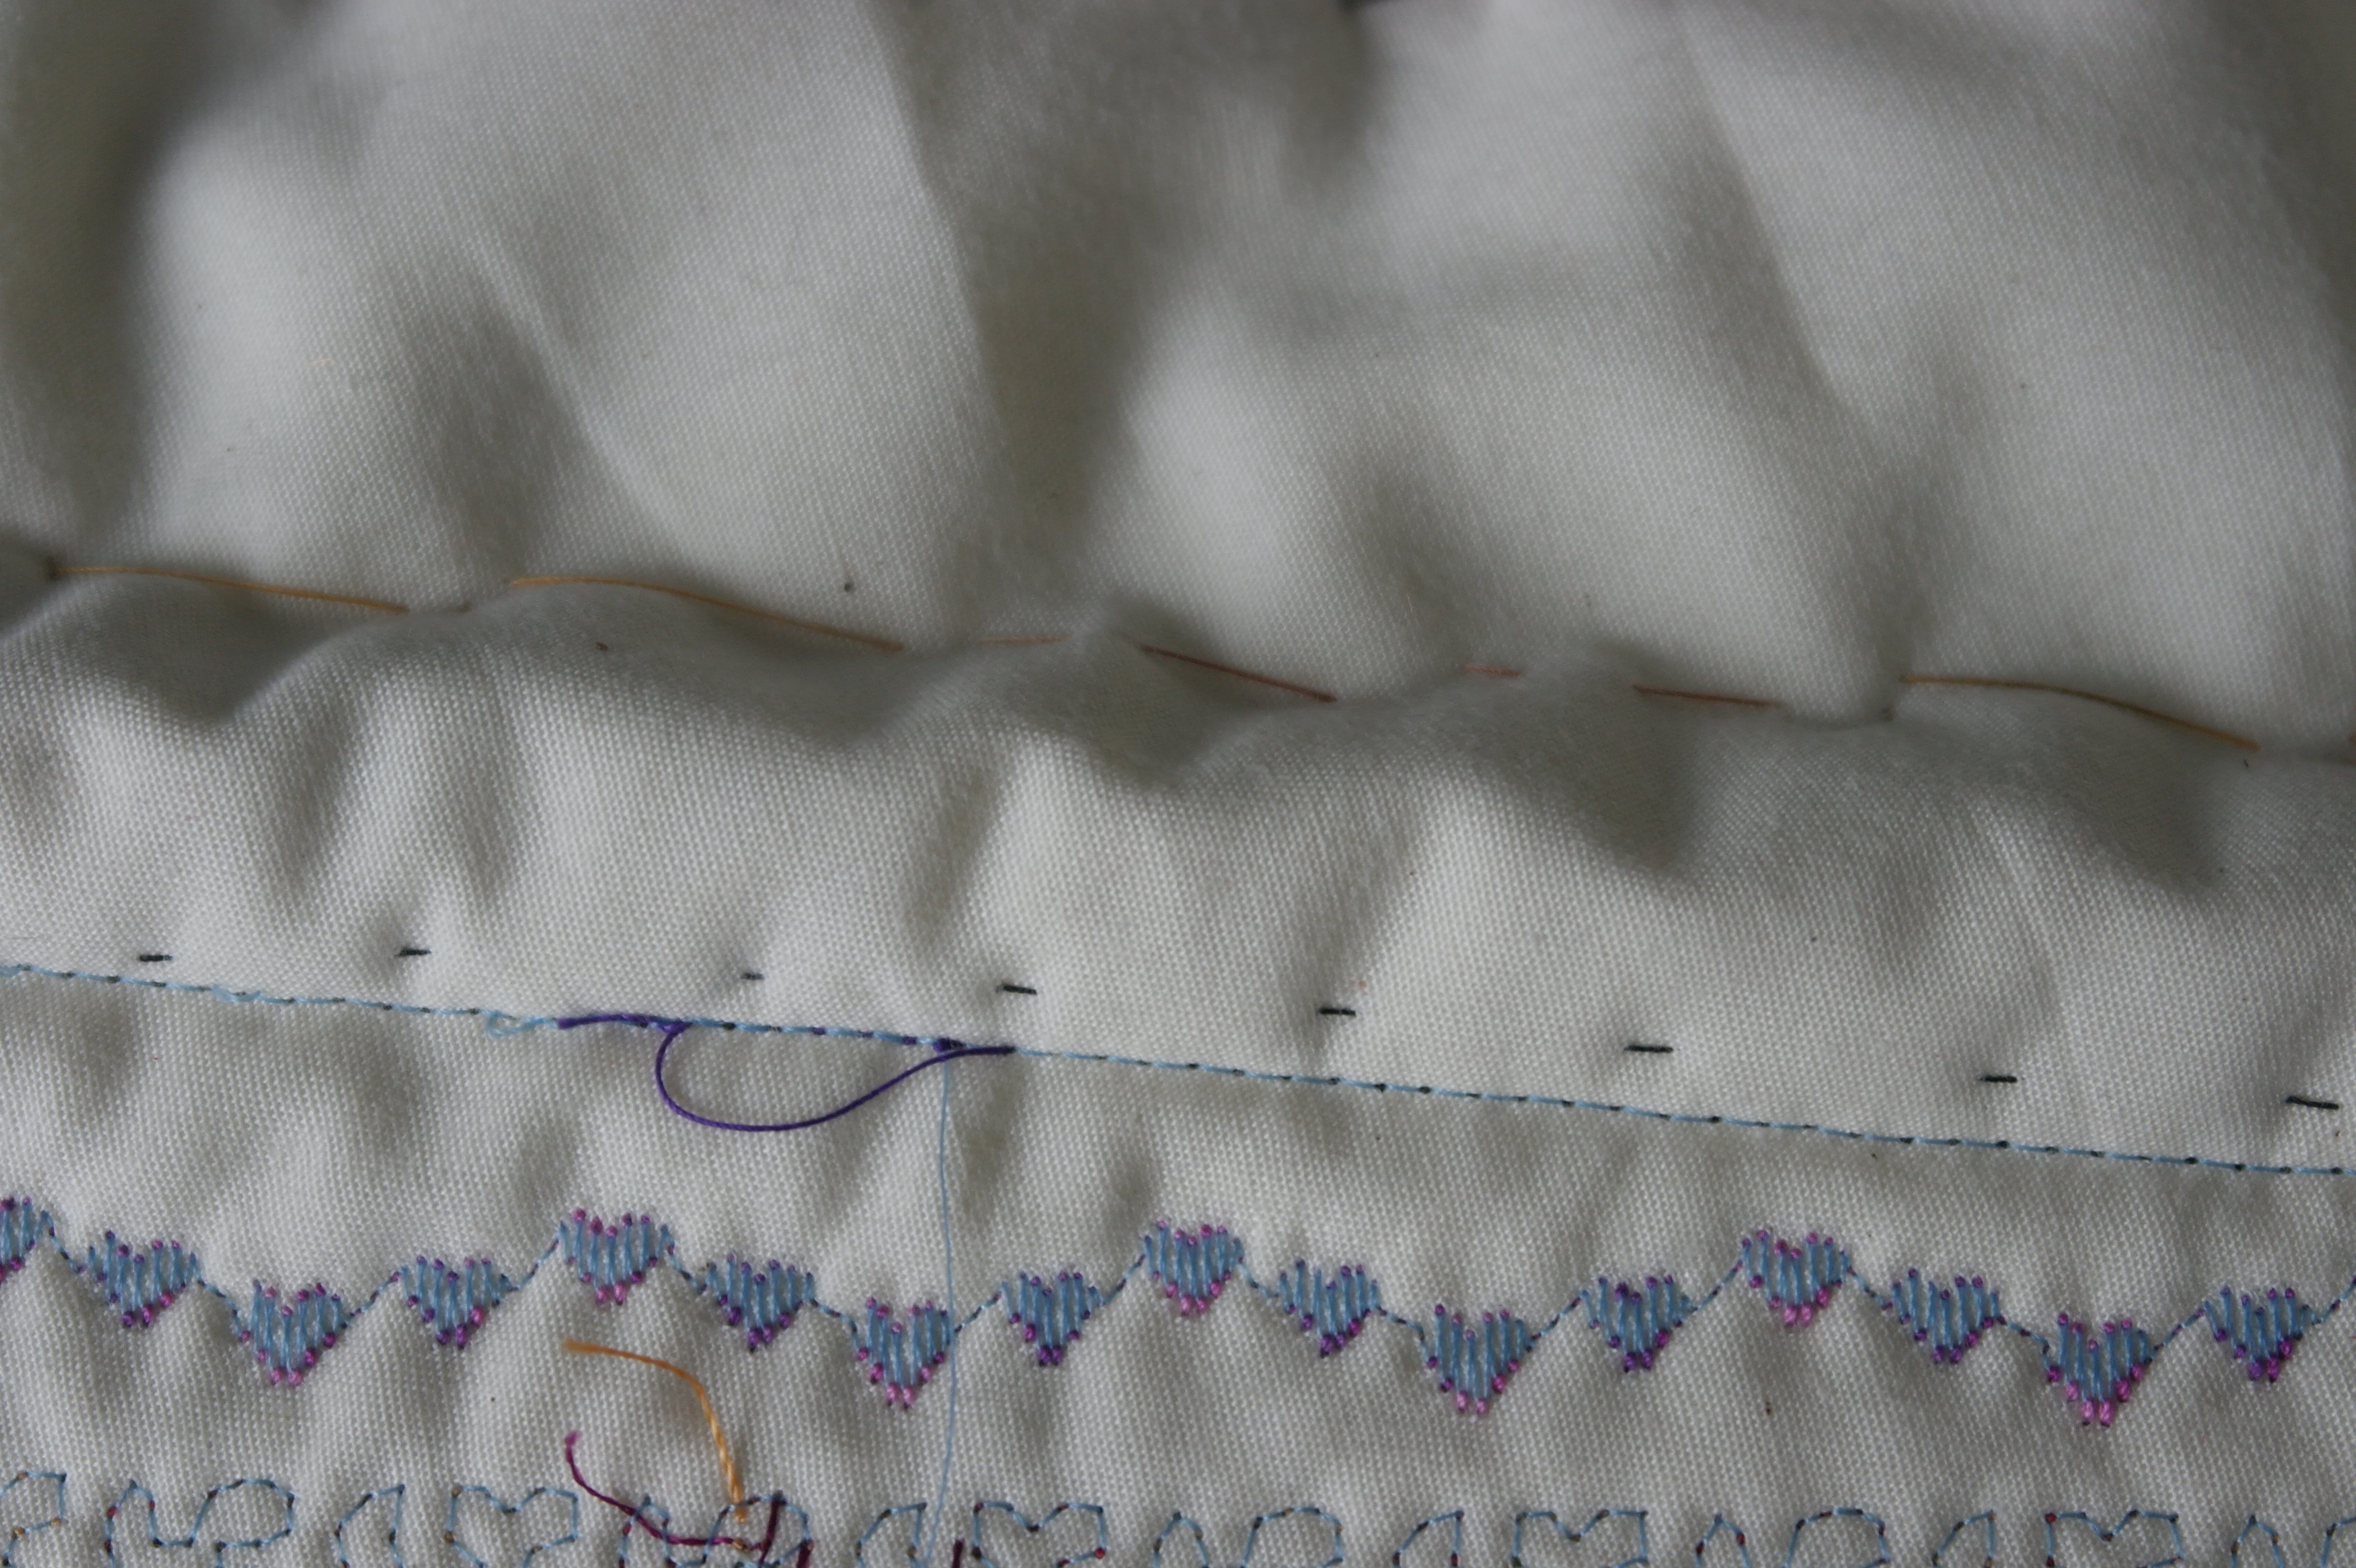
At this point I can see a bobble at the back, but I can fix this! Because I have made the crocheted lace loosely, I can also stretch the sandwich, back into the original position.

When sewing the crocheted lace down onto the front of the sandwich, through all layers, matching threads, I will ‘stretch’ the sandwich, making it flat again. BE CAREFUL that the front of the presser foot doesn’t get stuck under the stitches of the lace. Work slowly, and hold the lace down while sewing. It doesn’t have to be too smooth: to give the lace an antique look, make the sewing a bit irregular. Sewing down along the first row of treble crochet, along the top side of the arches and the top side of the last row of treble crochet will secure the lace properly onto the sandwich.
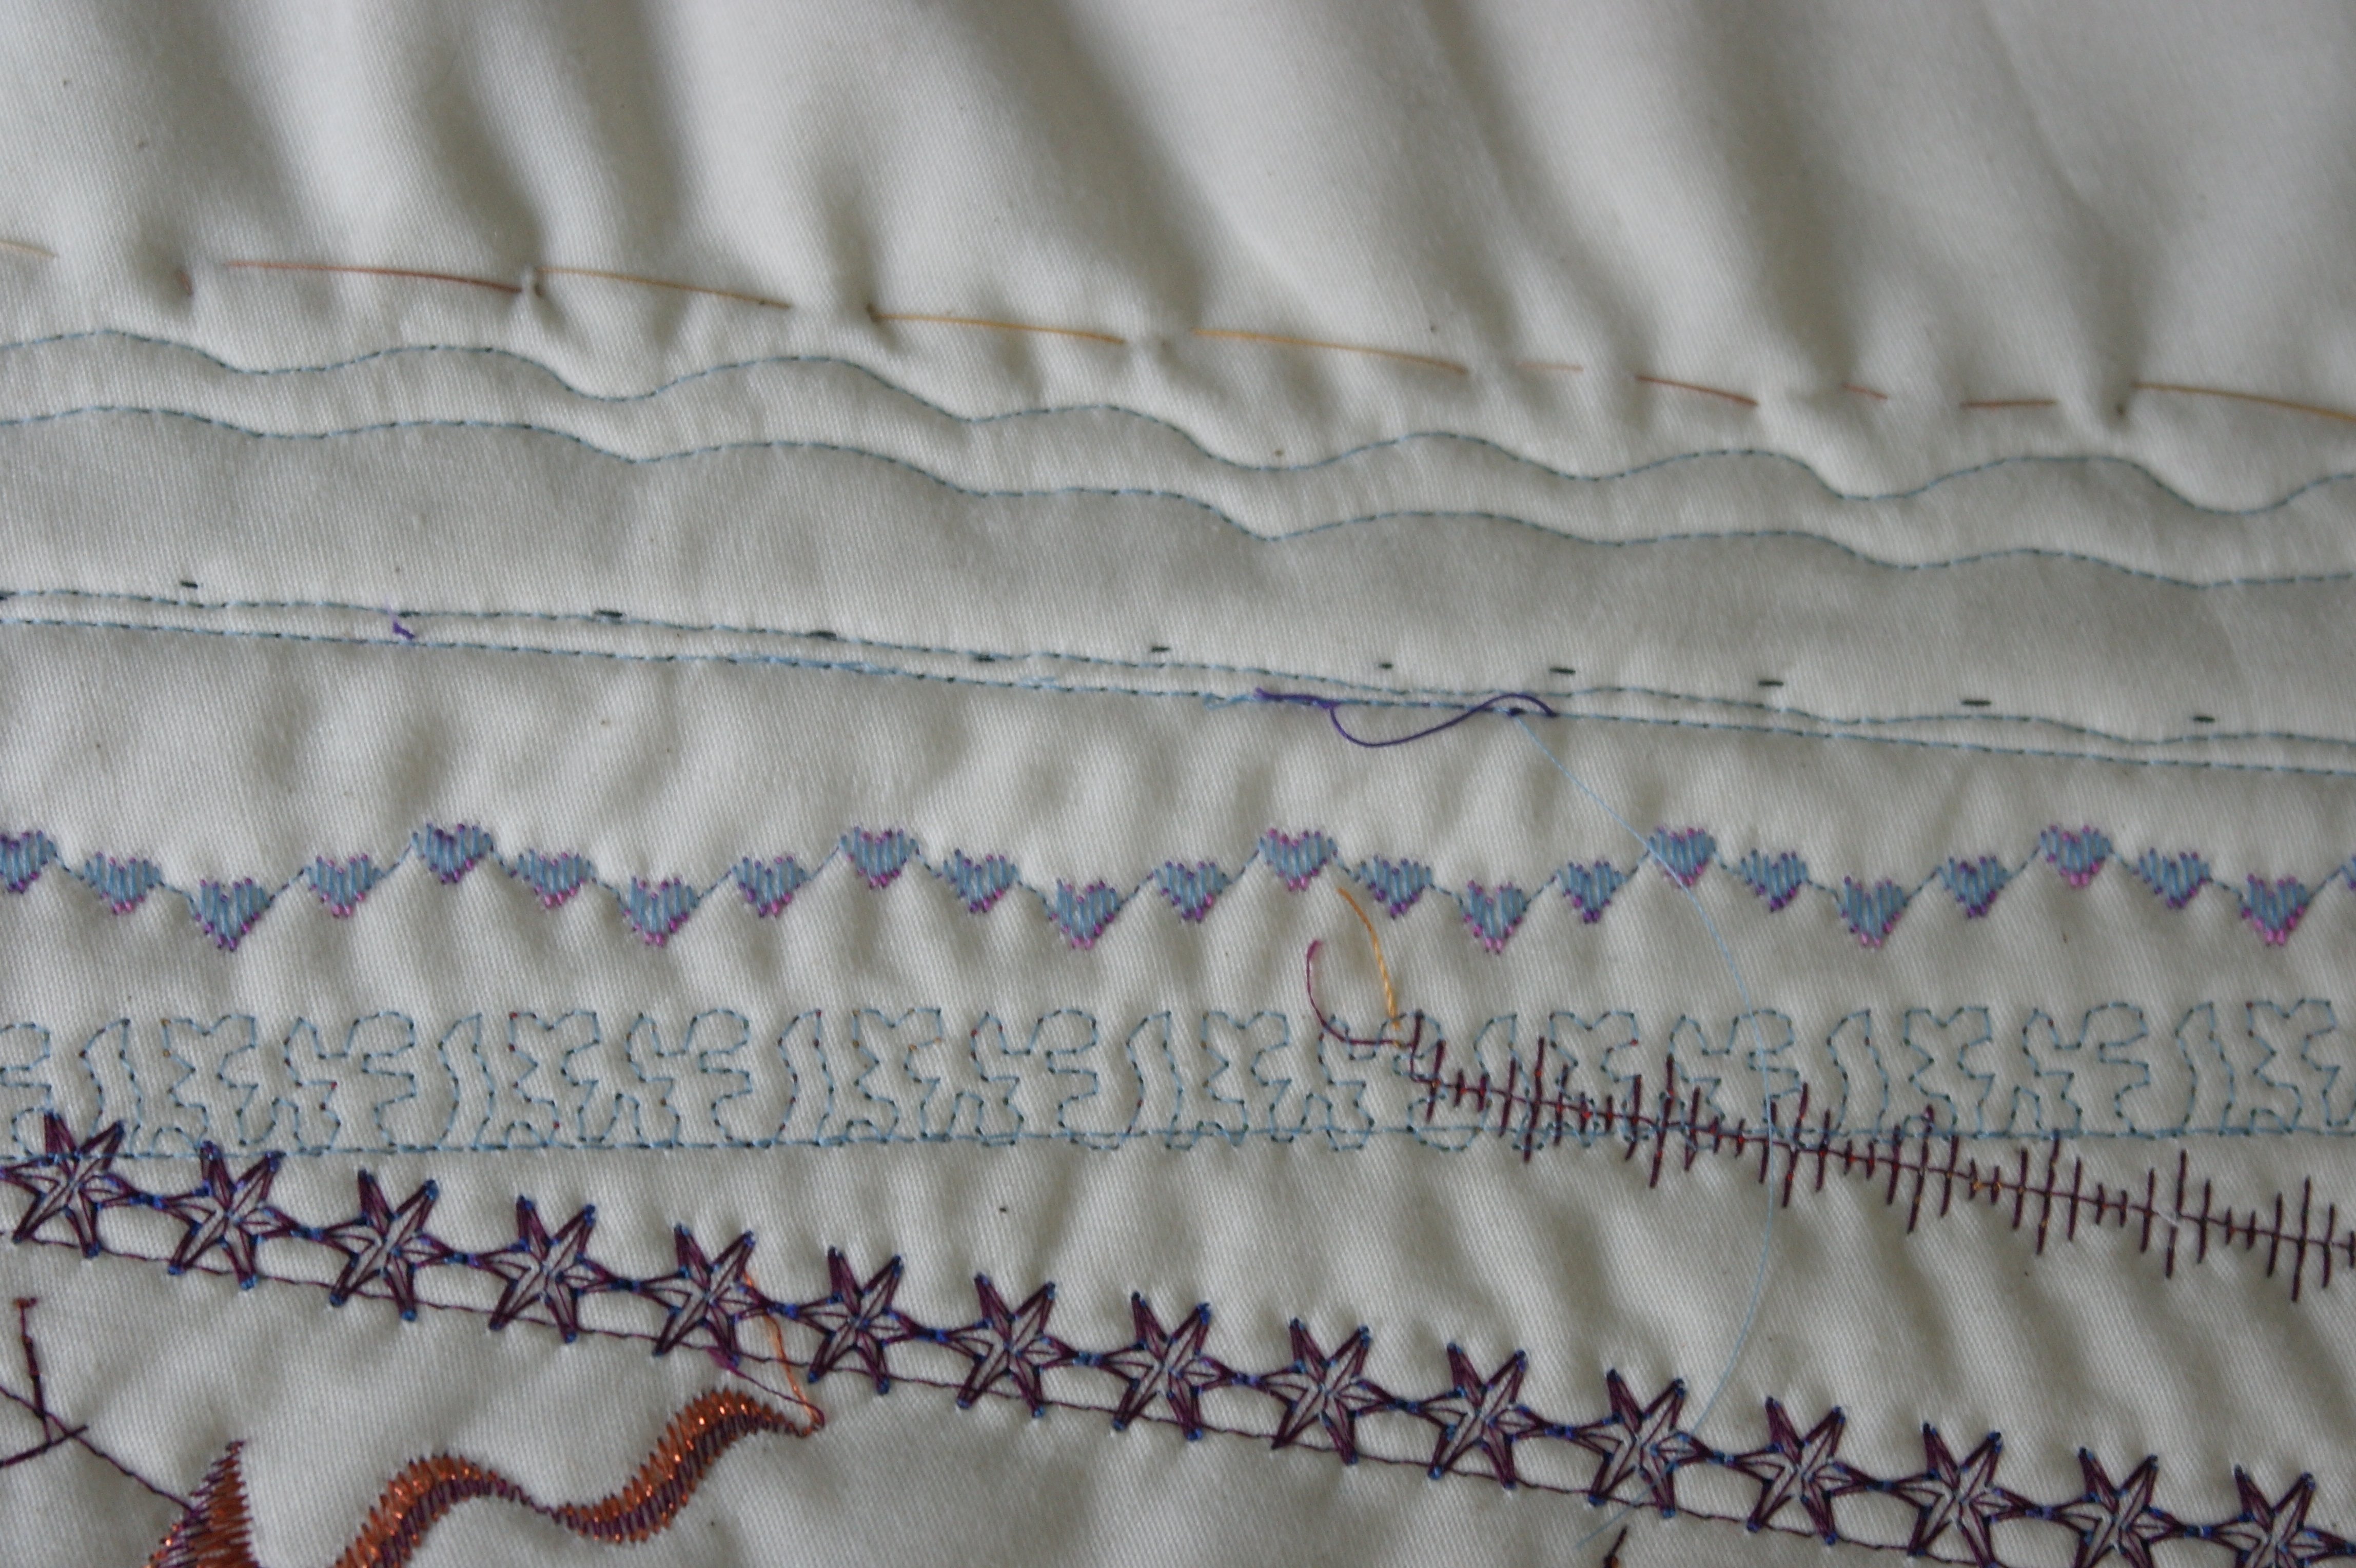
Looking at the back, the bobble is gone. Perhaps the sandwich has ‘shrinked’ a bit more than usual, but that’s ok if it’s not too much: there is enough ‘extra’ with the measurements given.
Next sewing the fabric for section 11, covering the end of the lace on the right. Perhaps you have to redraw the sewing line for section 11, depending on how your lace/fabric for section 10 is placed. That’s ok: just make sure the ends of the lace are covered.

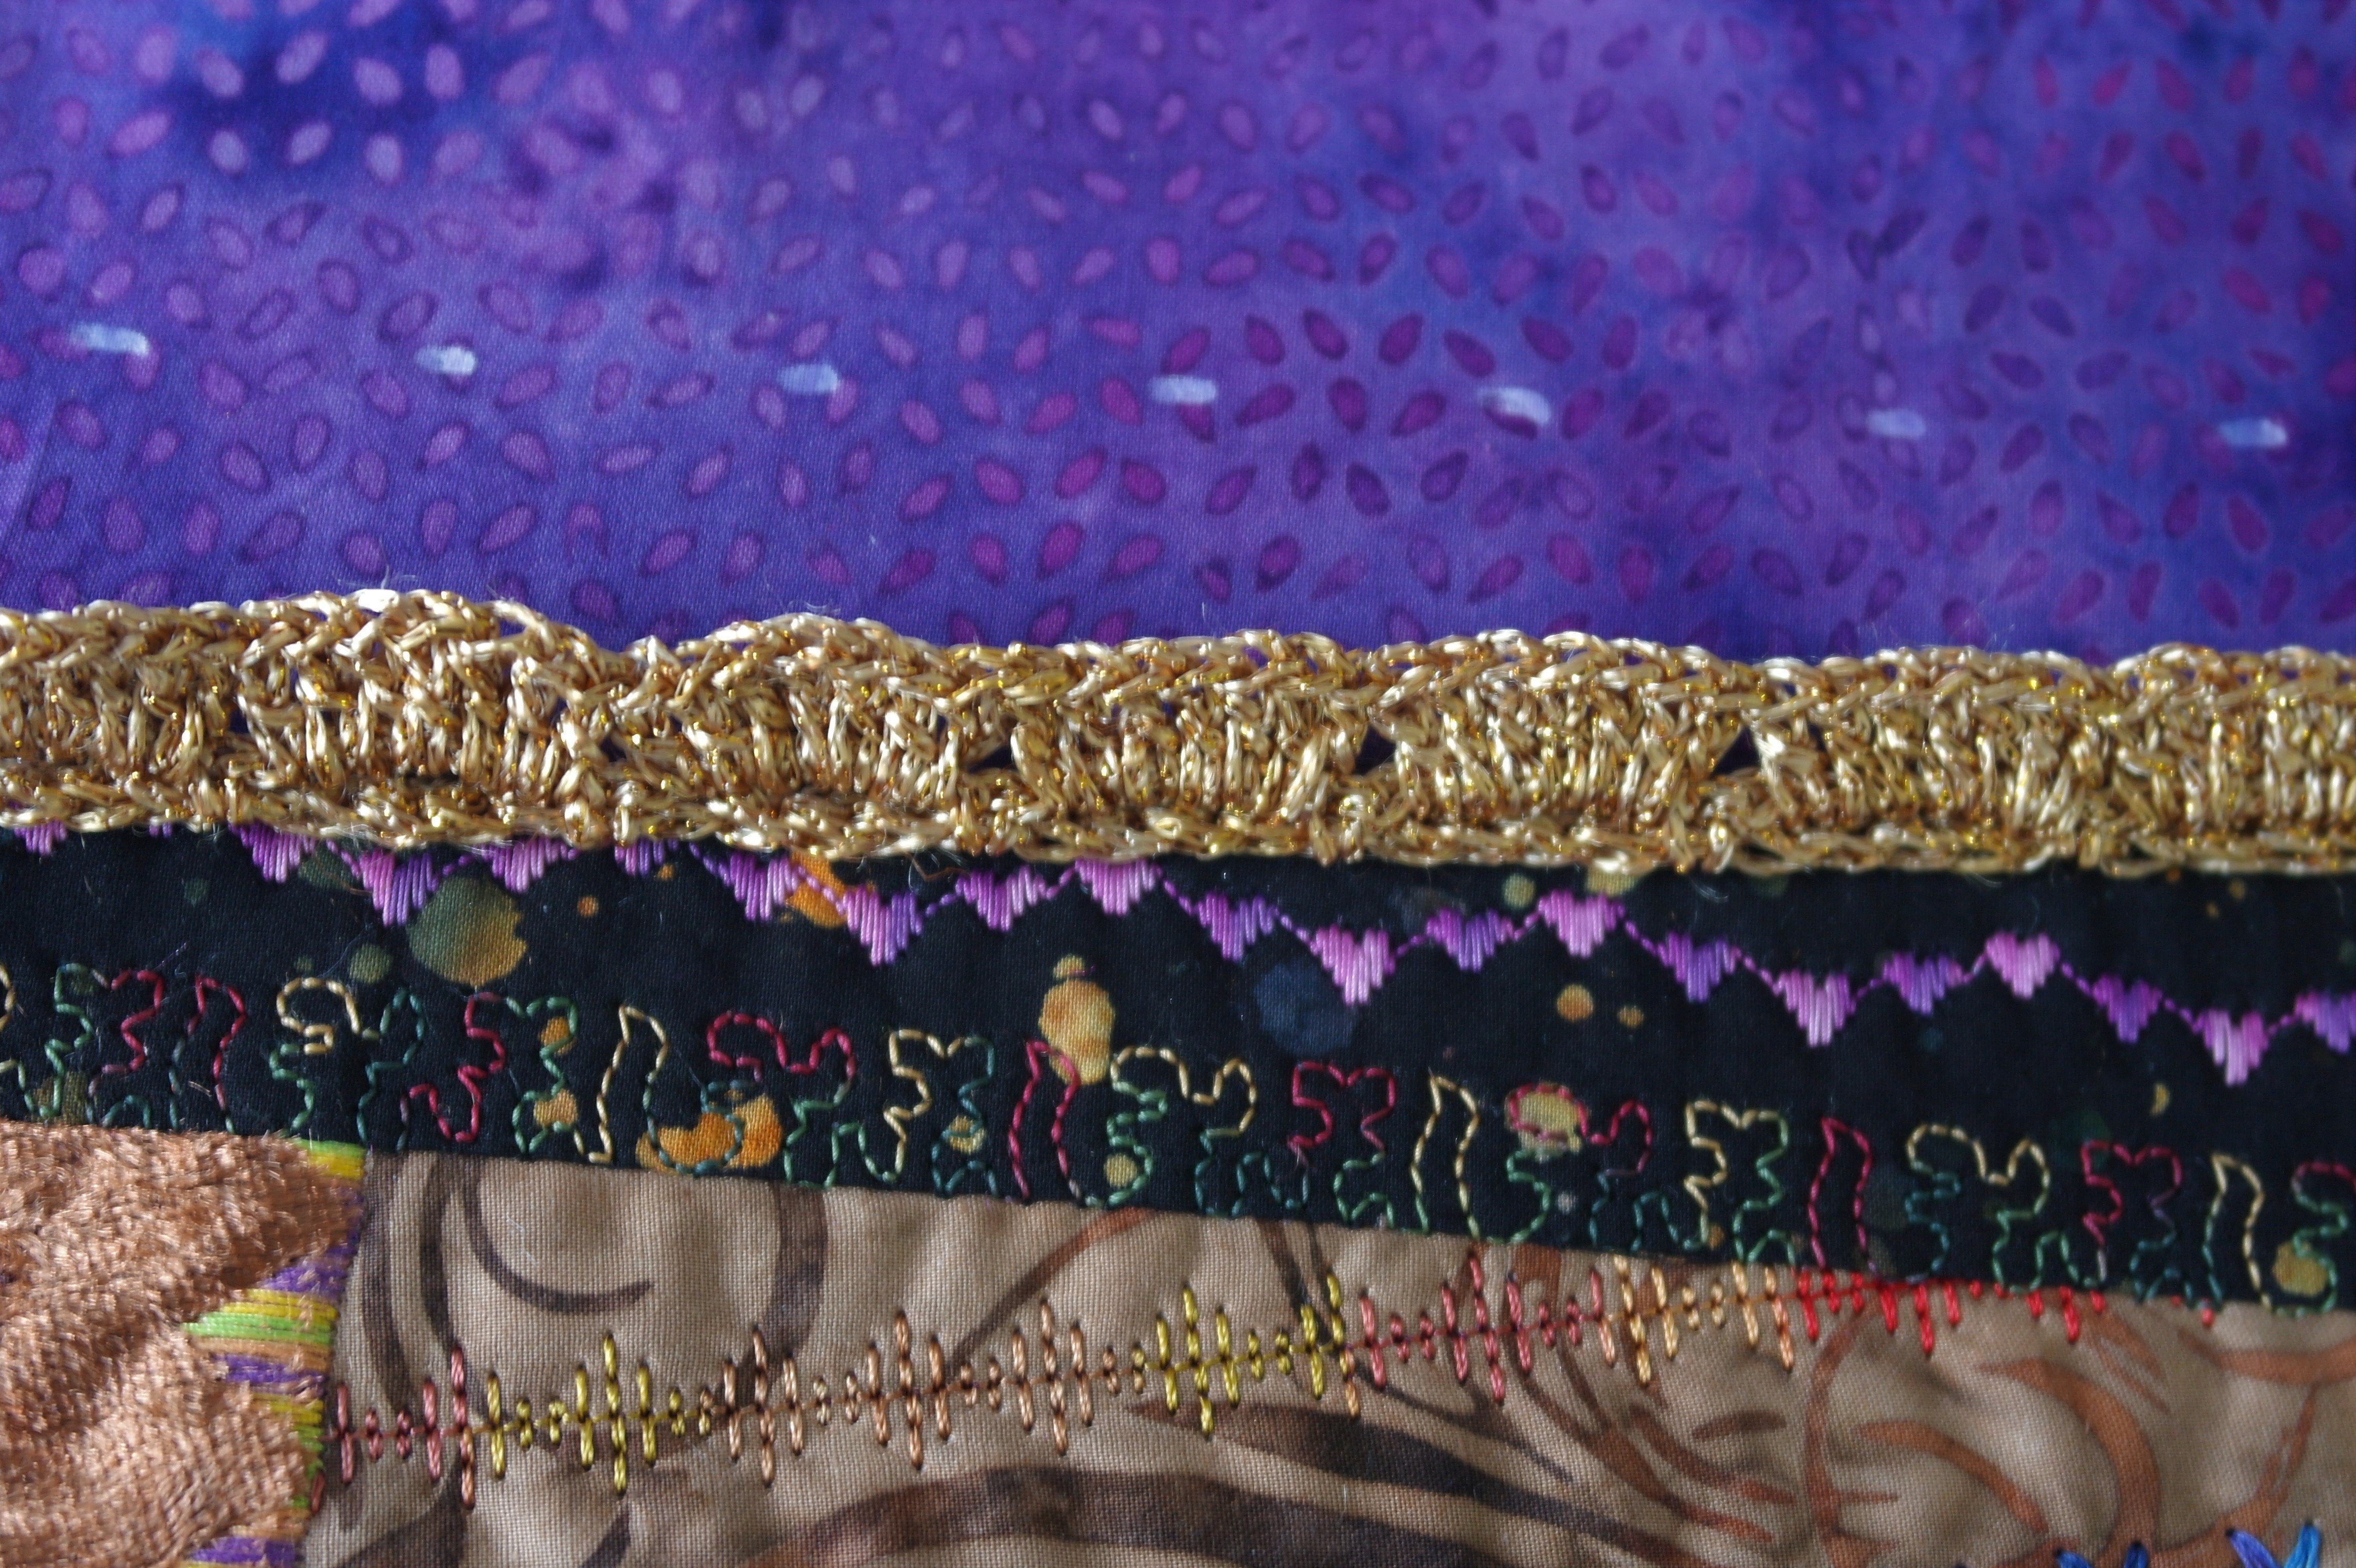
I have made a first row of decorative stitches along the seam of fabric 11, to stabilize the sandwich. After that I have made several rows stitches (no. 407), perpendicular to the lace, with the starting points halfway down the last row of treble stitches. I know that the decorative stitches are not covering the lace entirely, leaving gaps, but now it seems as if they are dissapearing in the lace – a fun effect. I have also made single stitches (407 again) in each arch, to fill the space there. Doesn’t this looks great?
If you have used a ready-made piece of lace, see how you can merge that into the background.
I have sewn a lovely piece of ribbon with sequins and made Satin arches with Madeira Metallic no. 270 . I cannot stop decorating!

The last piece of fabric, for section 12, is added. Glued Hotfix stones on my Crystal, and my Block 4 is ready.
Have fun with your block, see you next time!
Happy Stitching!
Sylvia Kaptein
Sylvia’s Art Quilts Studio
Ich finde Ihre Arbeiten großartig und bin sehr interessiert an Ihren Beiträgen .Ich lege dann schon mal los!!!!
Liebe Grüße aus der Oberpfalz
Rosmarie
Vielen Dank, Rosemarie! Schön, dass du es genießt