 BERNINA Corporate Blog -
We are almost half way this Crazy project: block number 6 is next. Again fun to make, with special effects adding small ribbons.
You can download the three pages for block no. 6:
Block 6 – left part
Block 6 – right part
Block 6 – Crystal

Print the paper patterns, block no. 6 consists of two pages again, just like the previous blocks – a left and right part.
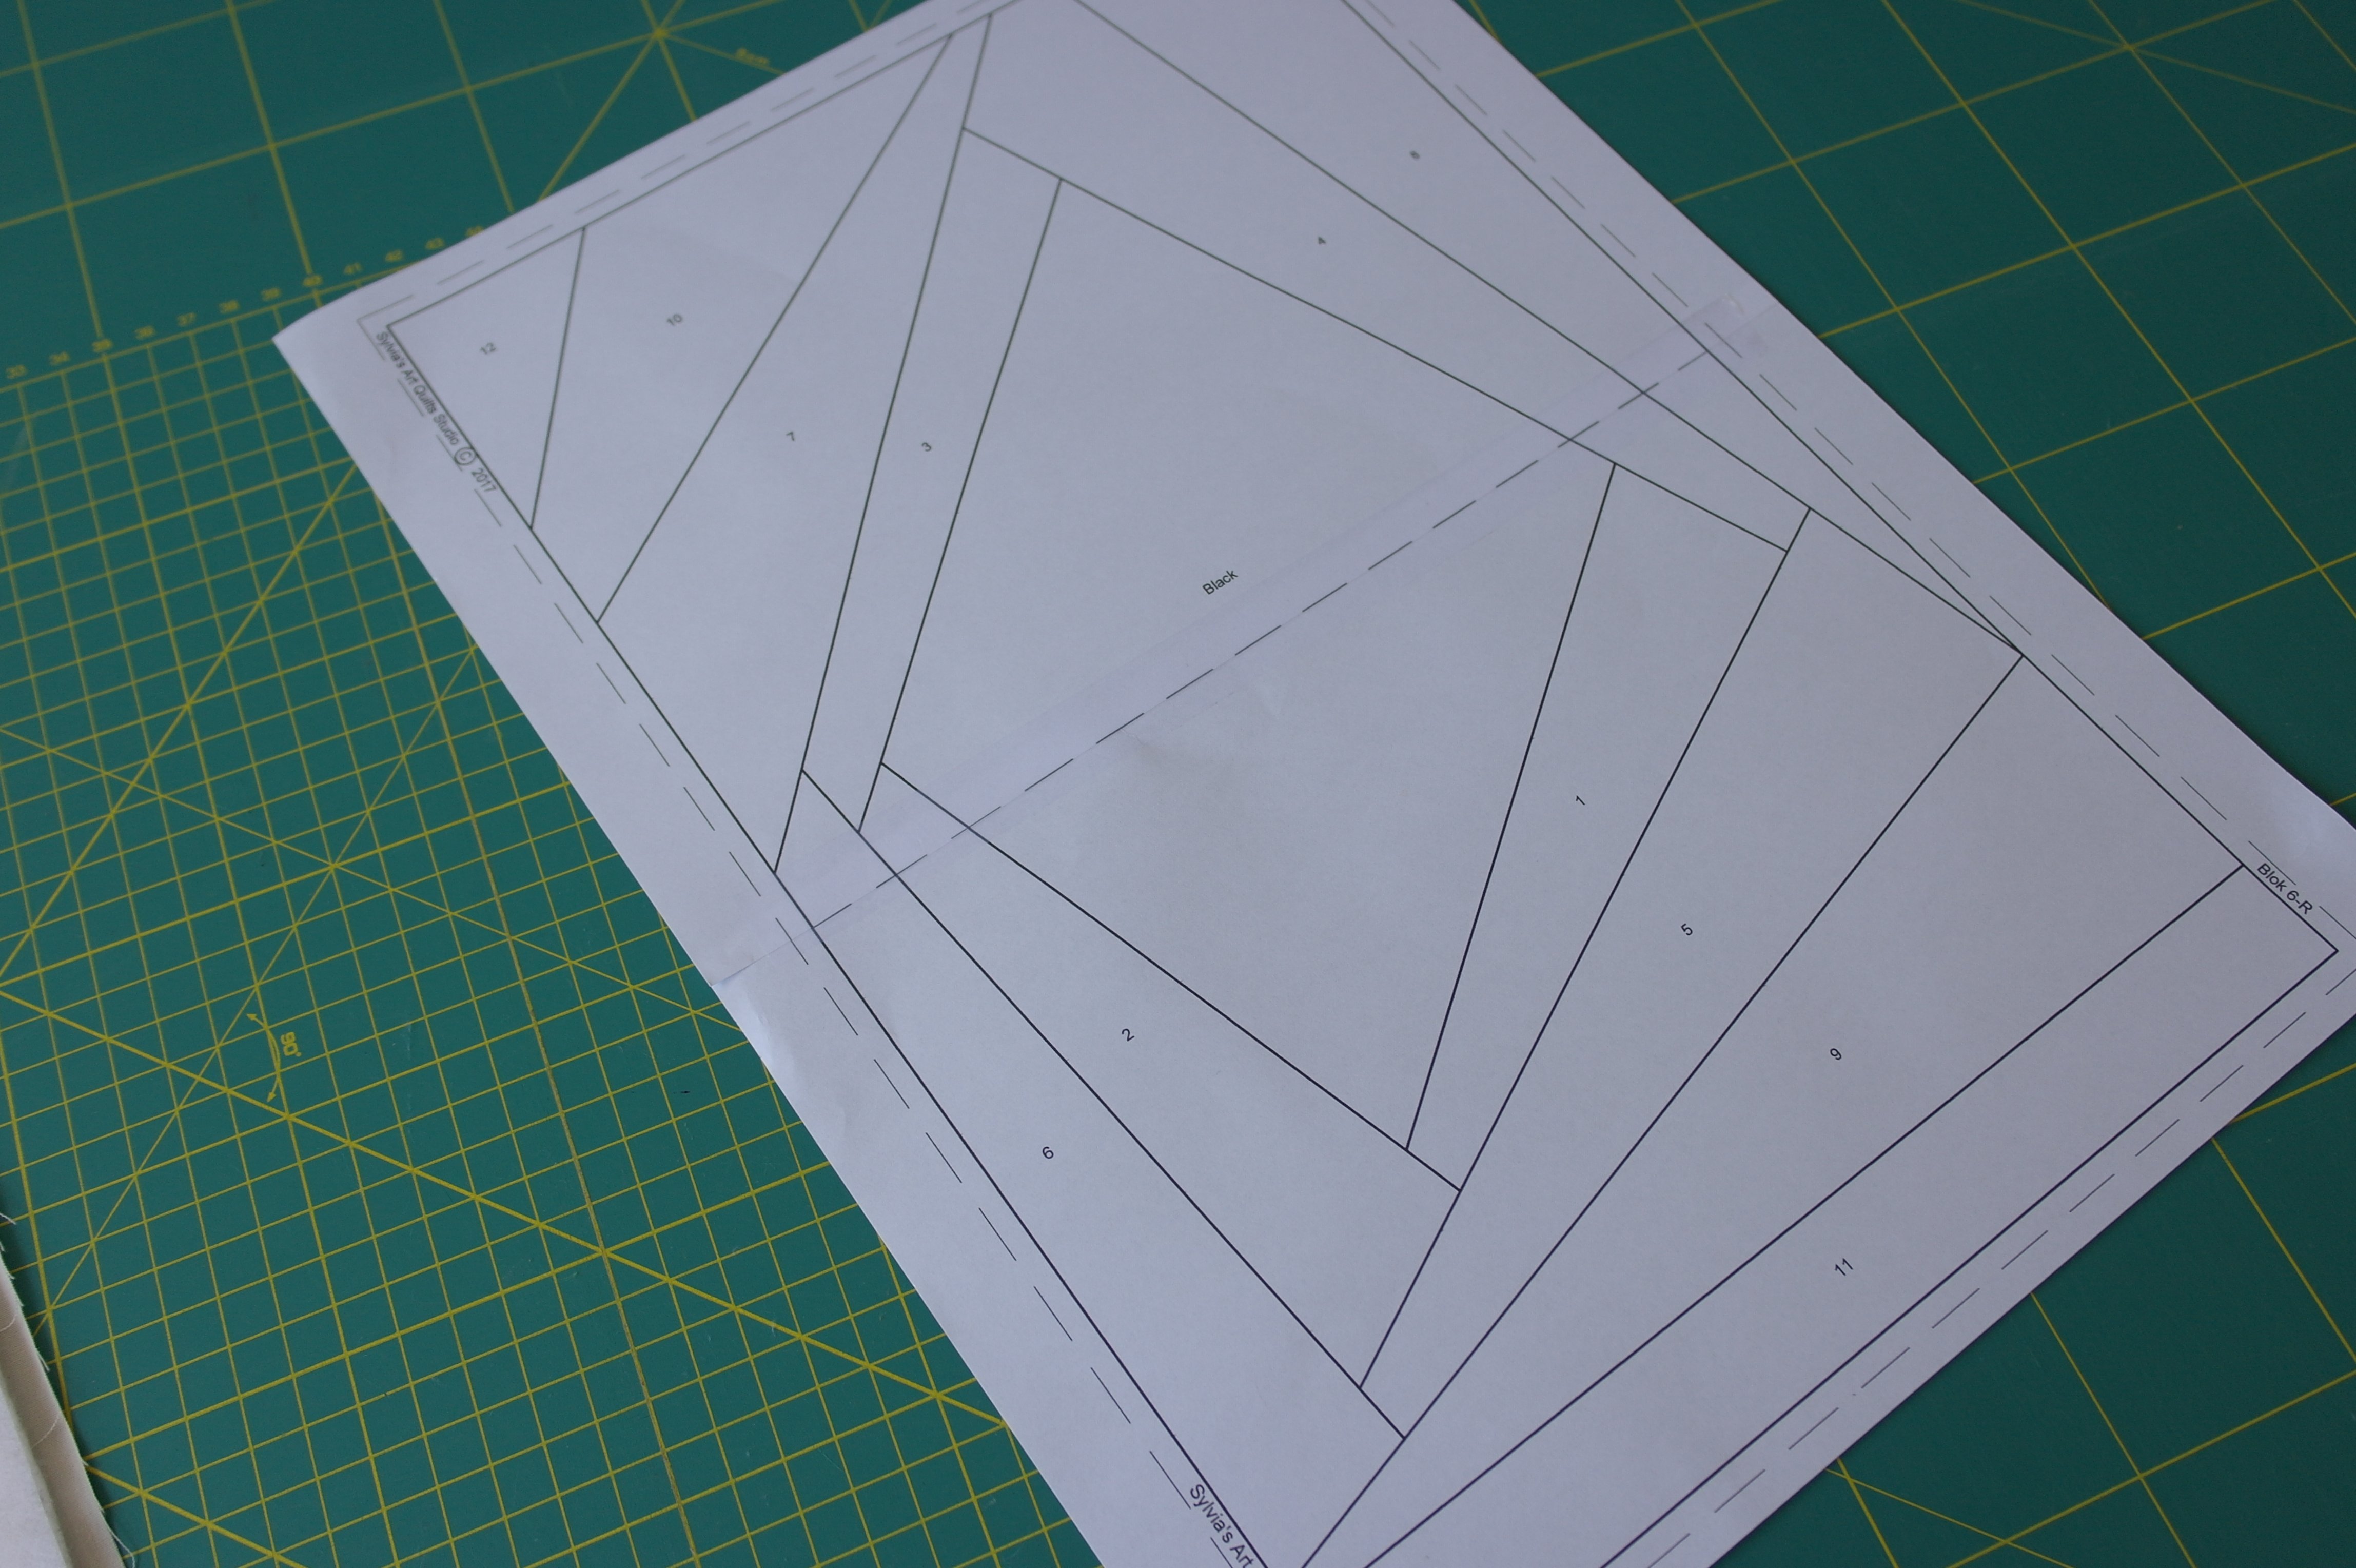
Make one large block, by taping them together (use the dotted line)

Use Vlieseline L11 – 32x45cm – place this on top of the paper pattern. Just draw all lines of the Crazy Patchwork (the rectangle is for reference only), all to the edges. Make a sandwich from off-white fabric, 100% bamboo batting and the Vlieseline L11 with the patchwork pattern. Pin them in place.

Tape the pattern of the Crystal for Block 6 to a window, or a light box,

tape the black batik quilt fabric (20 x 30 cm) on top of that. Make sure there is enough fabric around the shape of the Crystal to have a seam allowance of at least 1 cm in all directions (that is why I have tilted my black fabric). Draw all lines with white watersoluble pen (or blue if you use a lighter color of solid fabric for the center). BE SURE to draw thin lines: they have to be removed with water afterwards.
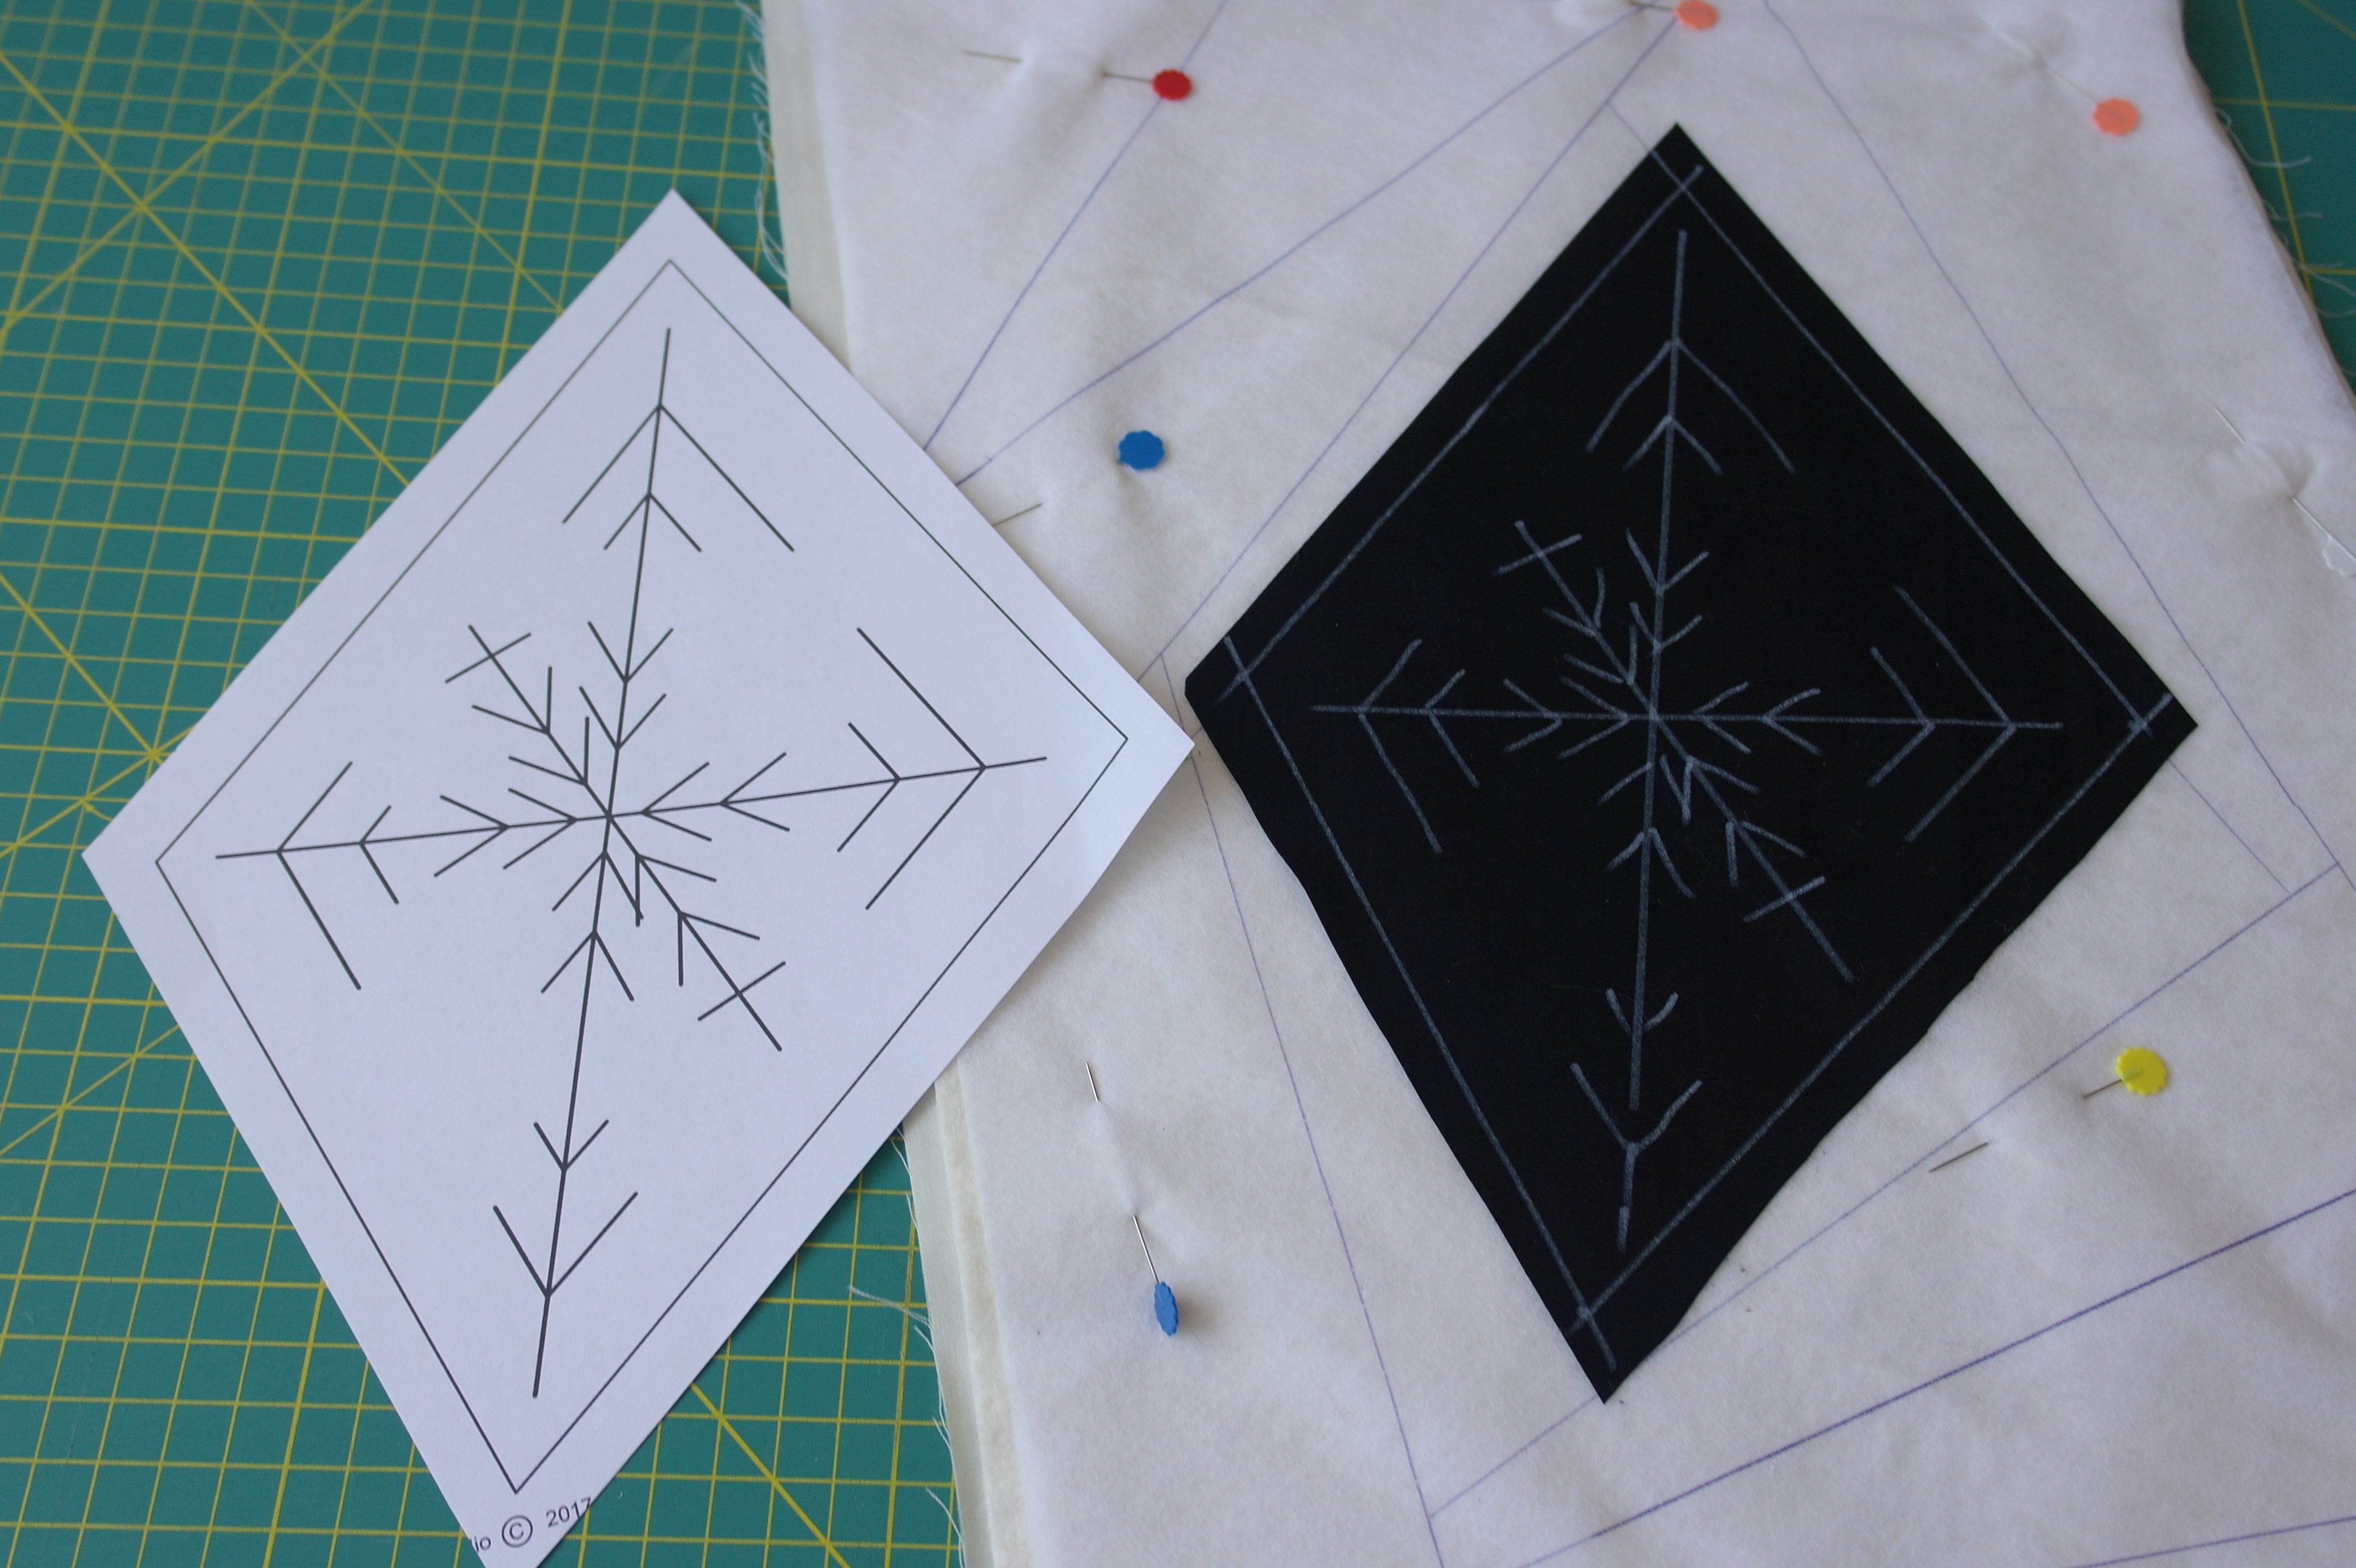
Cut the paper pattern with the Crystal to make a template, be sure to leave a 1 cm seam allowance outside the solid lines. Place the pattern on top of the black batik with the crystal drawn, and cut the black fabric the same size as the paper template. Place the black batik with the Crystal on the right spot, on the ‘center’ of your sandwich, pin in place with Flower Pins. Be sure to draw the solid lines with water soluble pen, to indicate the actual size of the section, inside the seam allowances.
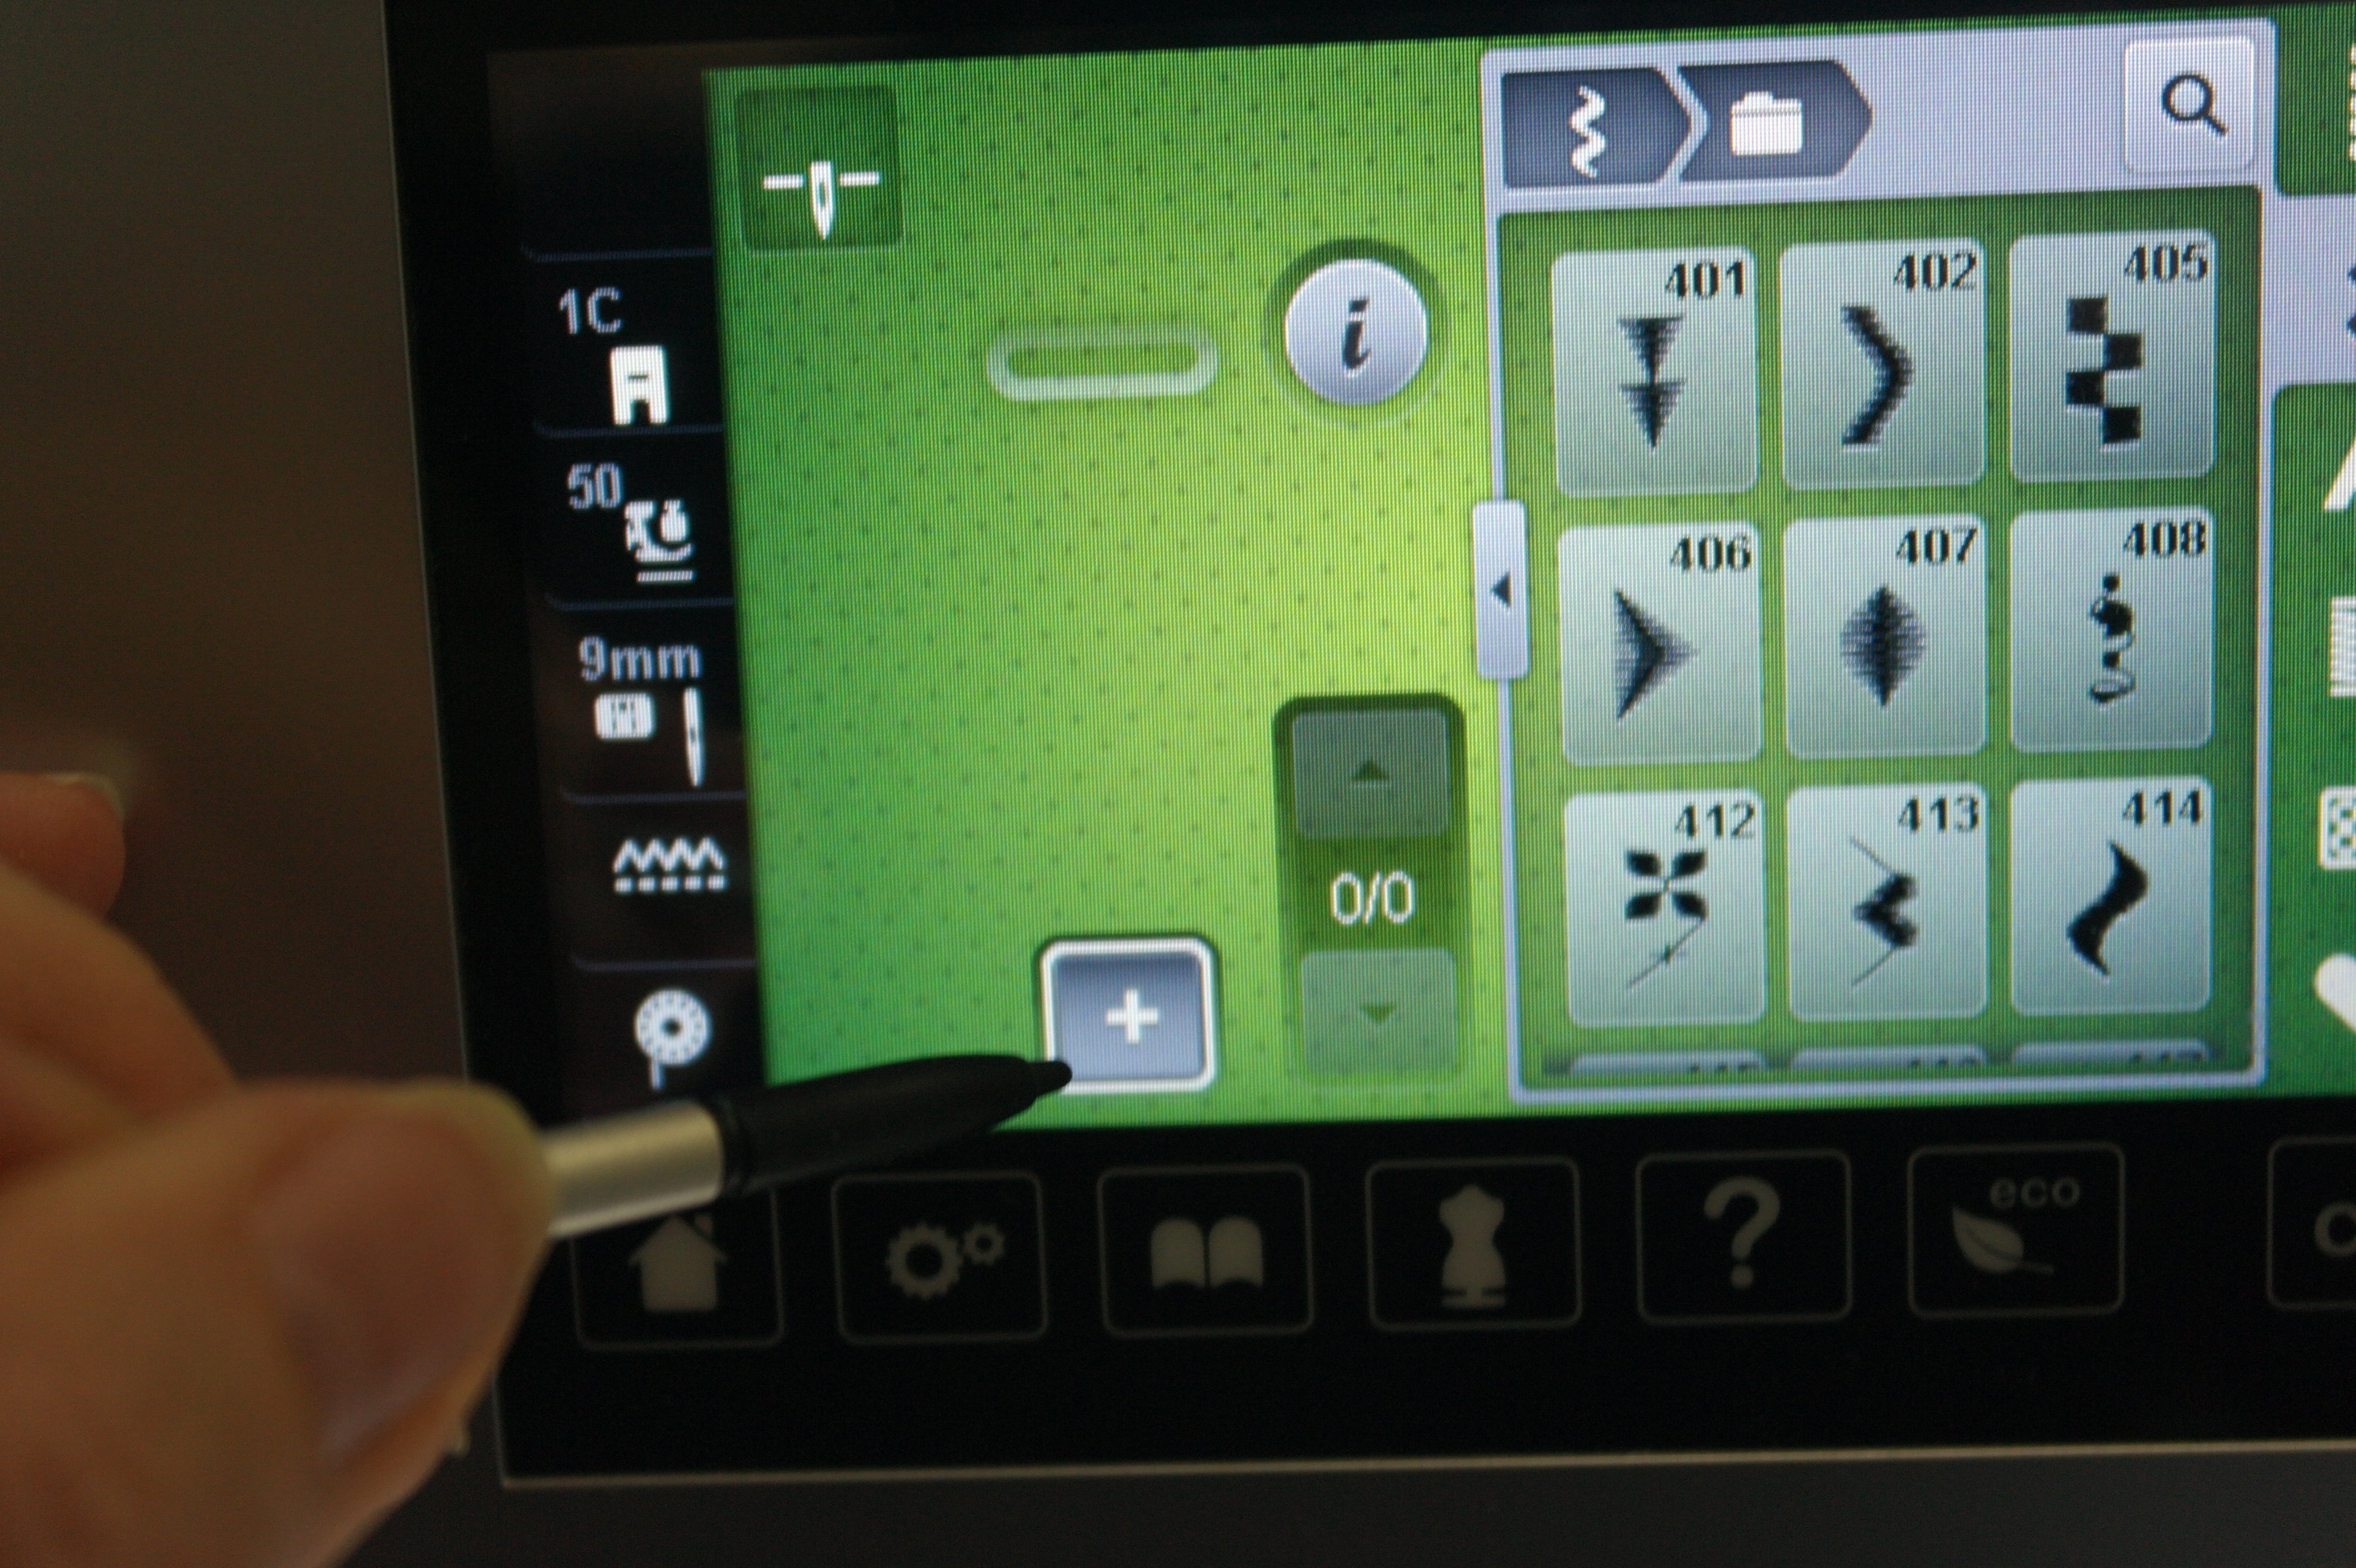
To cover the 3 long crossing lines, I will make curved stitching rows this time. Again of course with my BERNINA 770QE. I will combine two stitches (check if that option is available with your machine). With the B770QE, just click on the PLUS to activate the option.
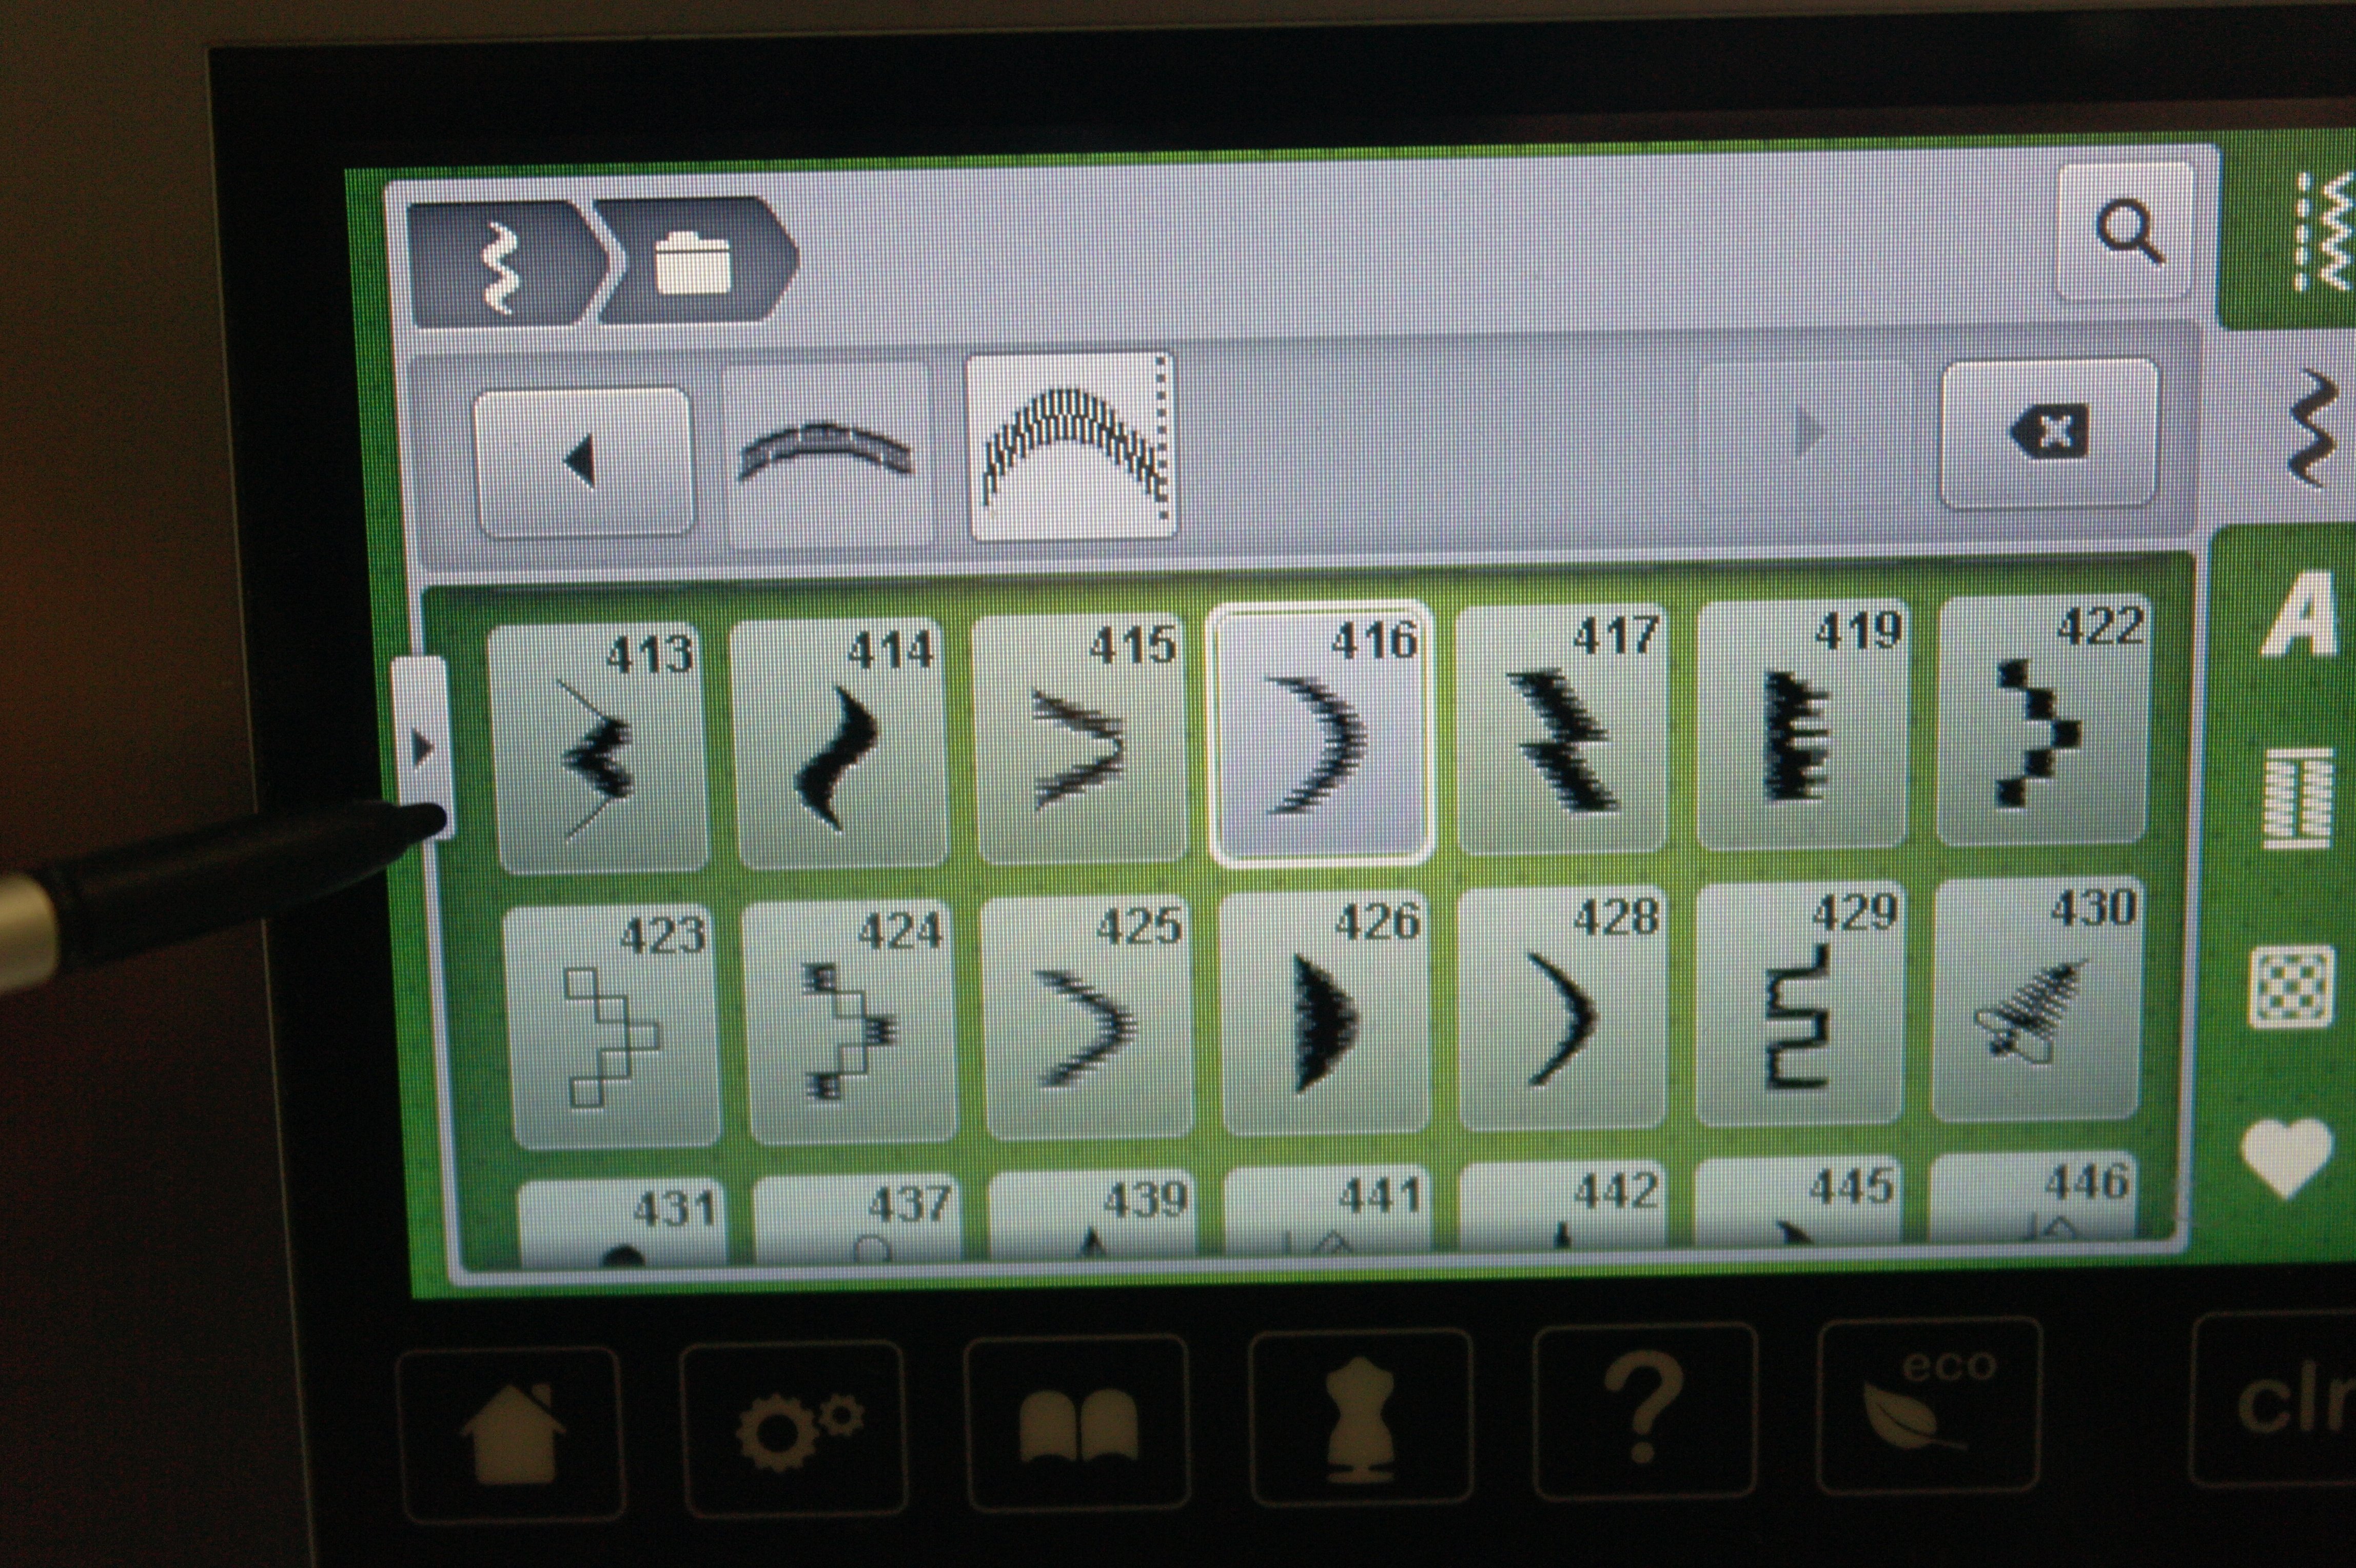
Lets find two stitches, which have the same startingpoint: arcs. One long, the other shorter. These two will be combined and stitched in a row. Because of the + they will repeat for as long as I want them. By enlarging the screen with the stitches, I can check the top of the screen which shows the stitches I am combining. Clicking the rectangular/arrow button, to the left, the screen dissapears and the stiches will show with the normal screen.

By making a sample first, it shows me if the stitches are matching up, and they do.
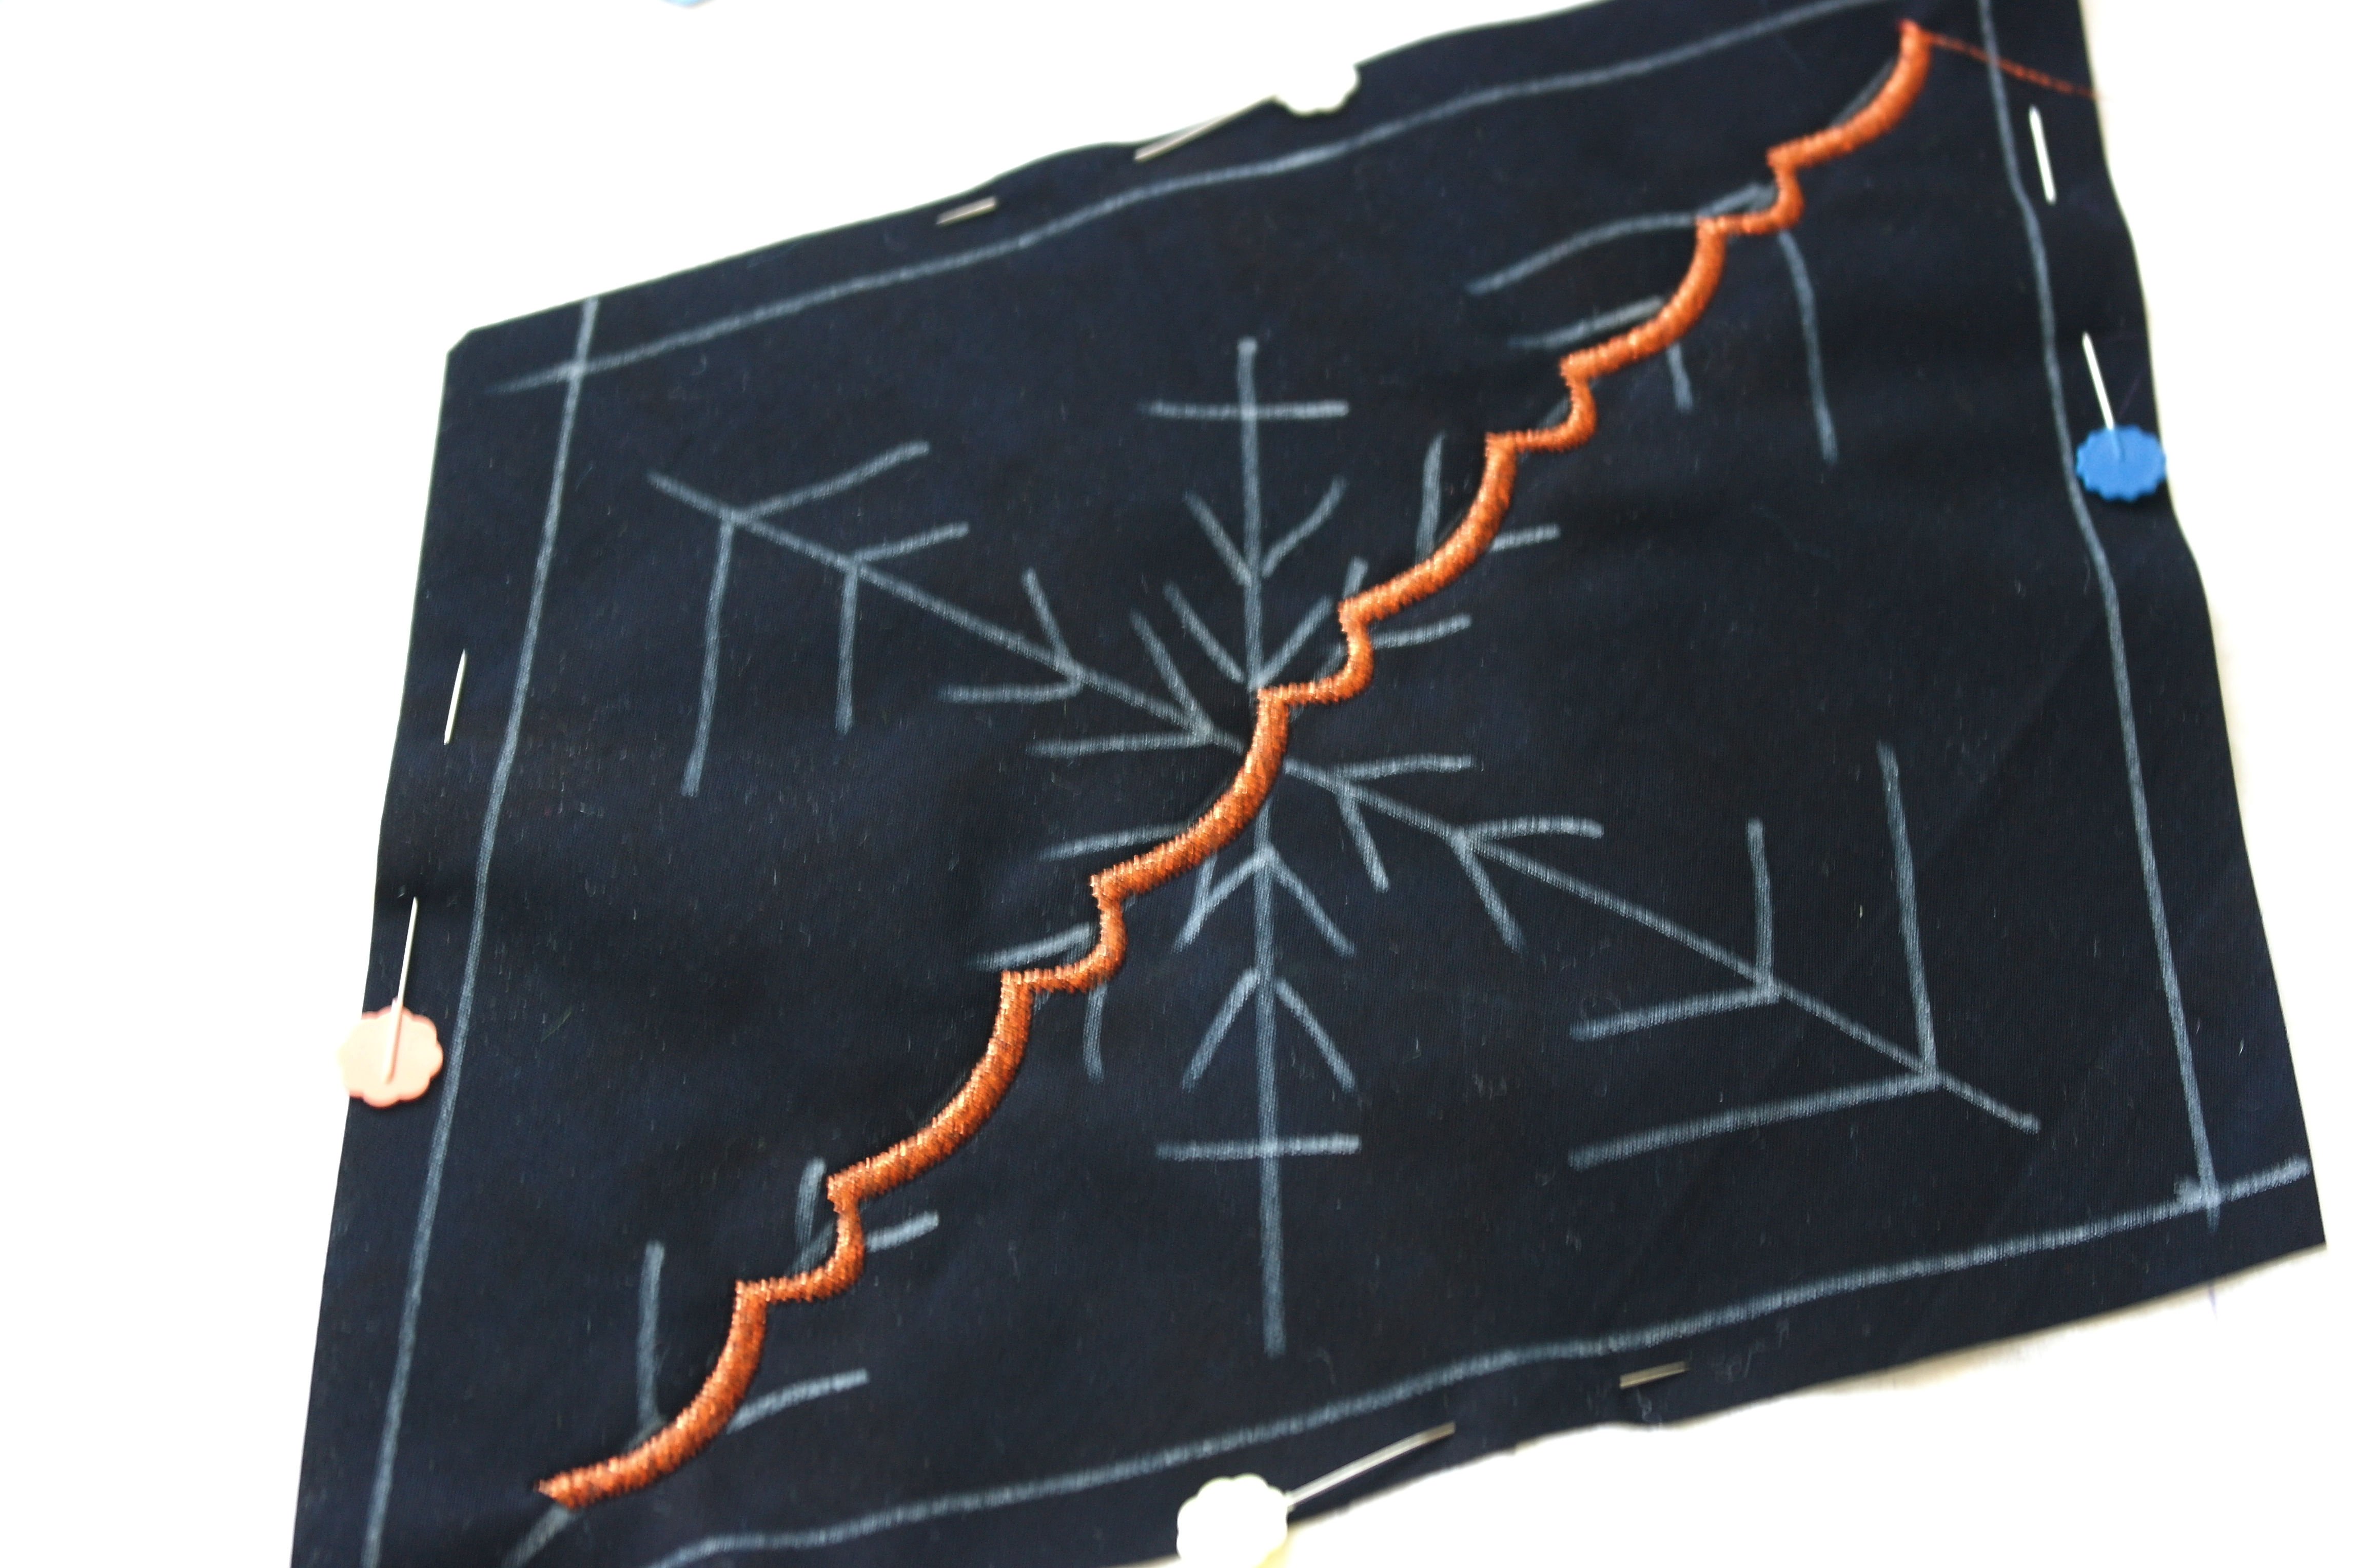
I will make the first row on my sandwich/black fabric, covering the longest line, trying to end with a complete stitch. This looks really different.. not a straight line, but curves…

The second line will be covered, but I will stop before the center, not covering the first line, but stepping over it. First the needle has to be raised, and then the presser foot.

Stepping over the first line and proceed just beyond this first row of stitches. If three rows of stitches were placed on top of each other, this cross section would be very thick, with a lot of distortion. By raising the presser foot and the needle and starting again beyond the previous lines of stitches, the center lies flat.
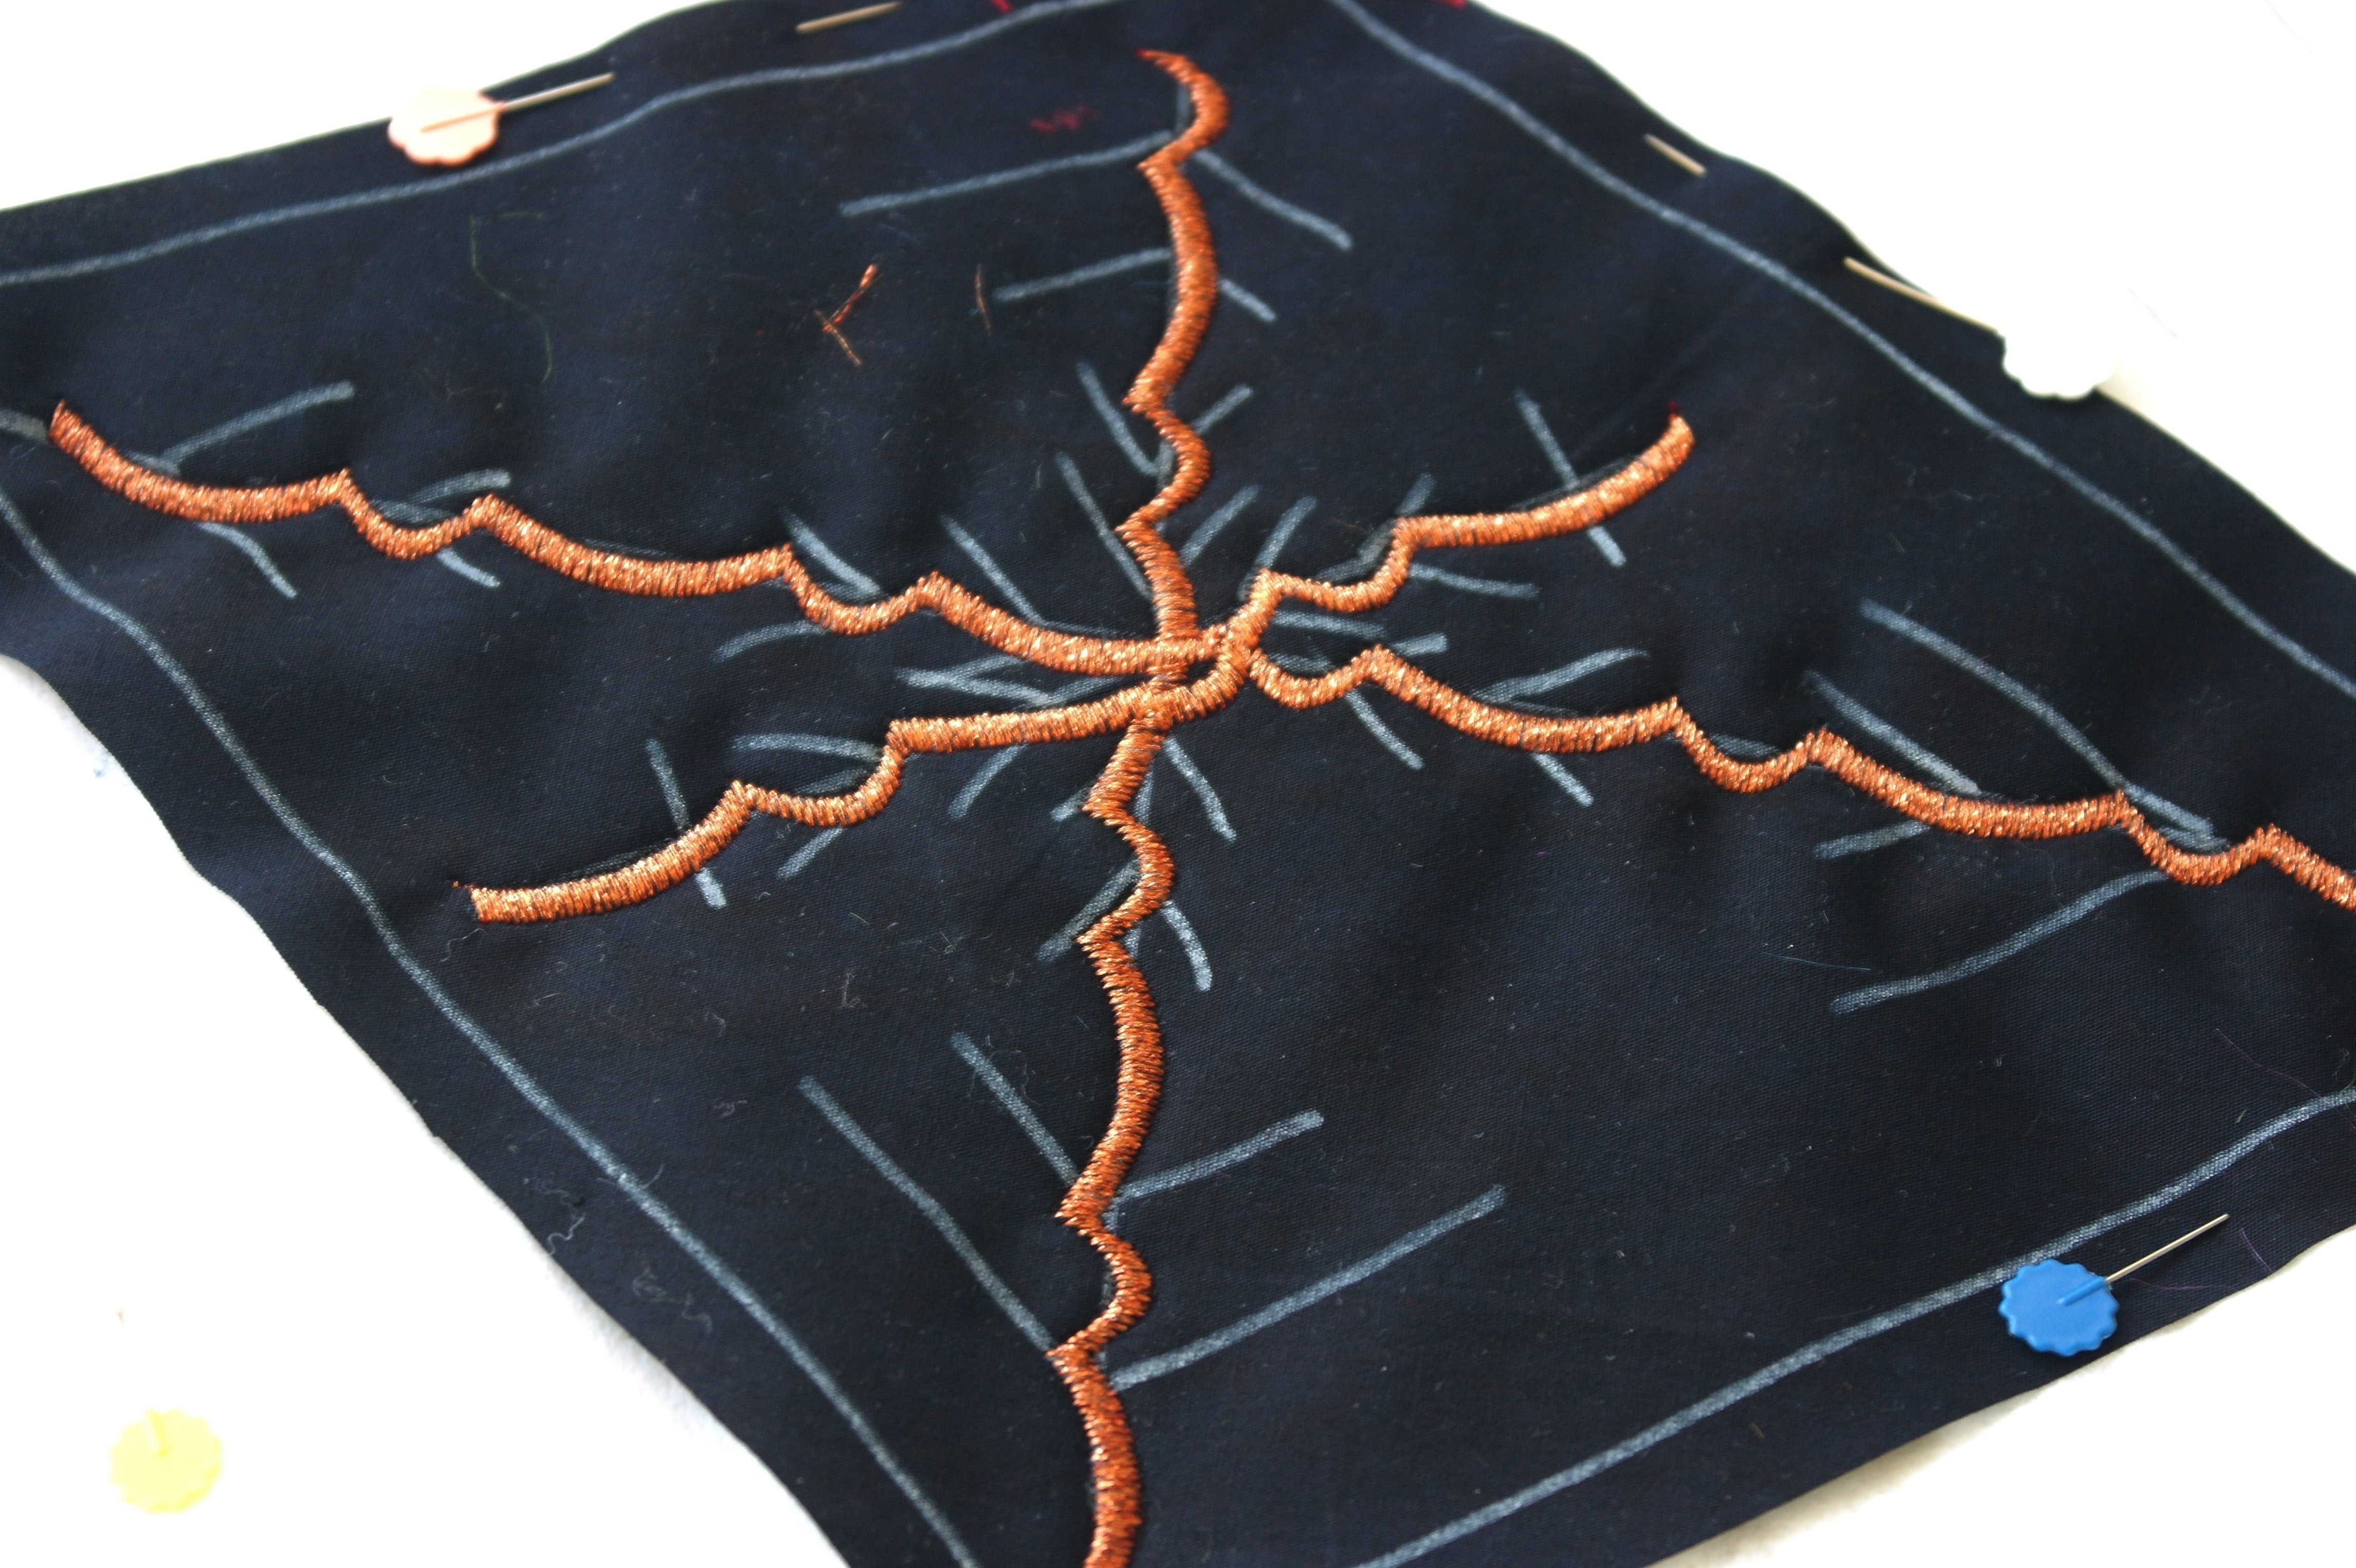
I’ve covered the three crossing lines, and will make stitches on the other lines (stitch 6) – but look at the intersection of the three crossing lines: it’s a bit messy… If you want them to be more matching up in the middle, start in the center and work your way to the outside of the lines. You will have to do this in 6 directions, because you will be splitting up the three lines into six shorter lines. The center however will look much better. I don’t mind how this looks, because I will cover the center with a large stone afterwards.
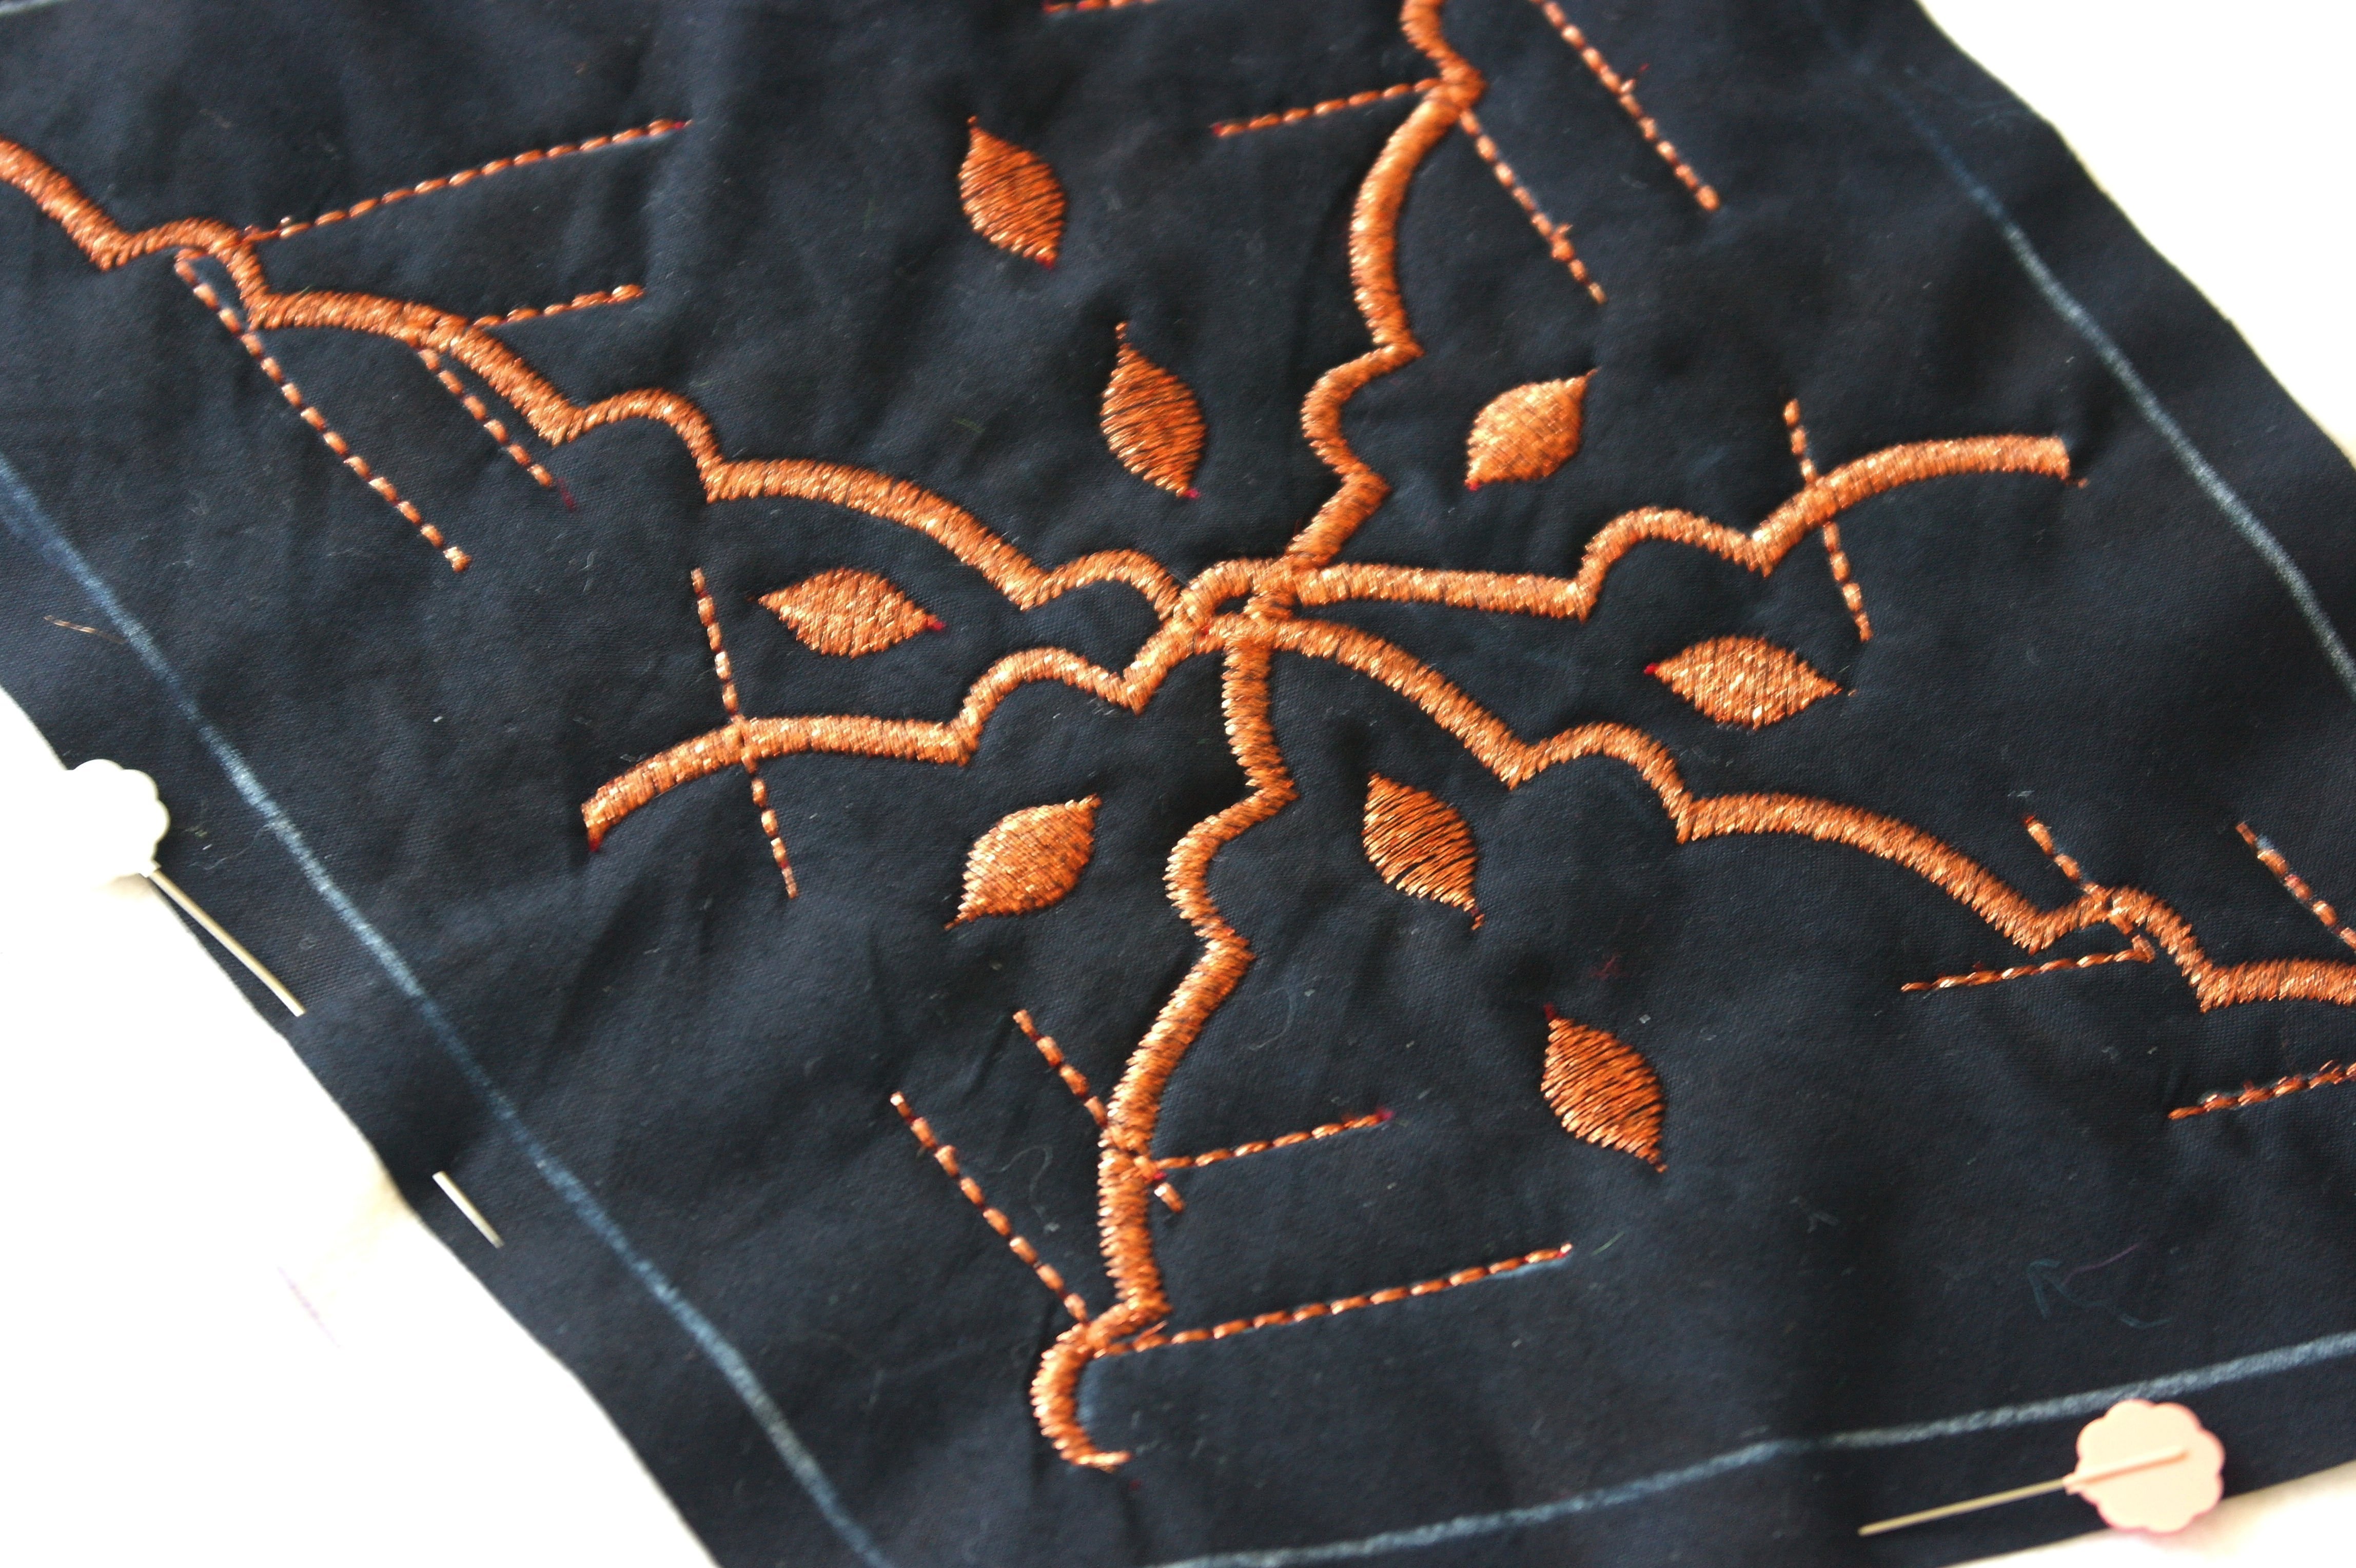
All the other white, short lines that I have draw are too cluttered in the middle part of my crystal: I have removed them with water. These lines are guidelines, so you can remove them if you do not want to cover them. A couple of single satin stitches will fill up the gaps between the lines of the Crystal.
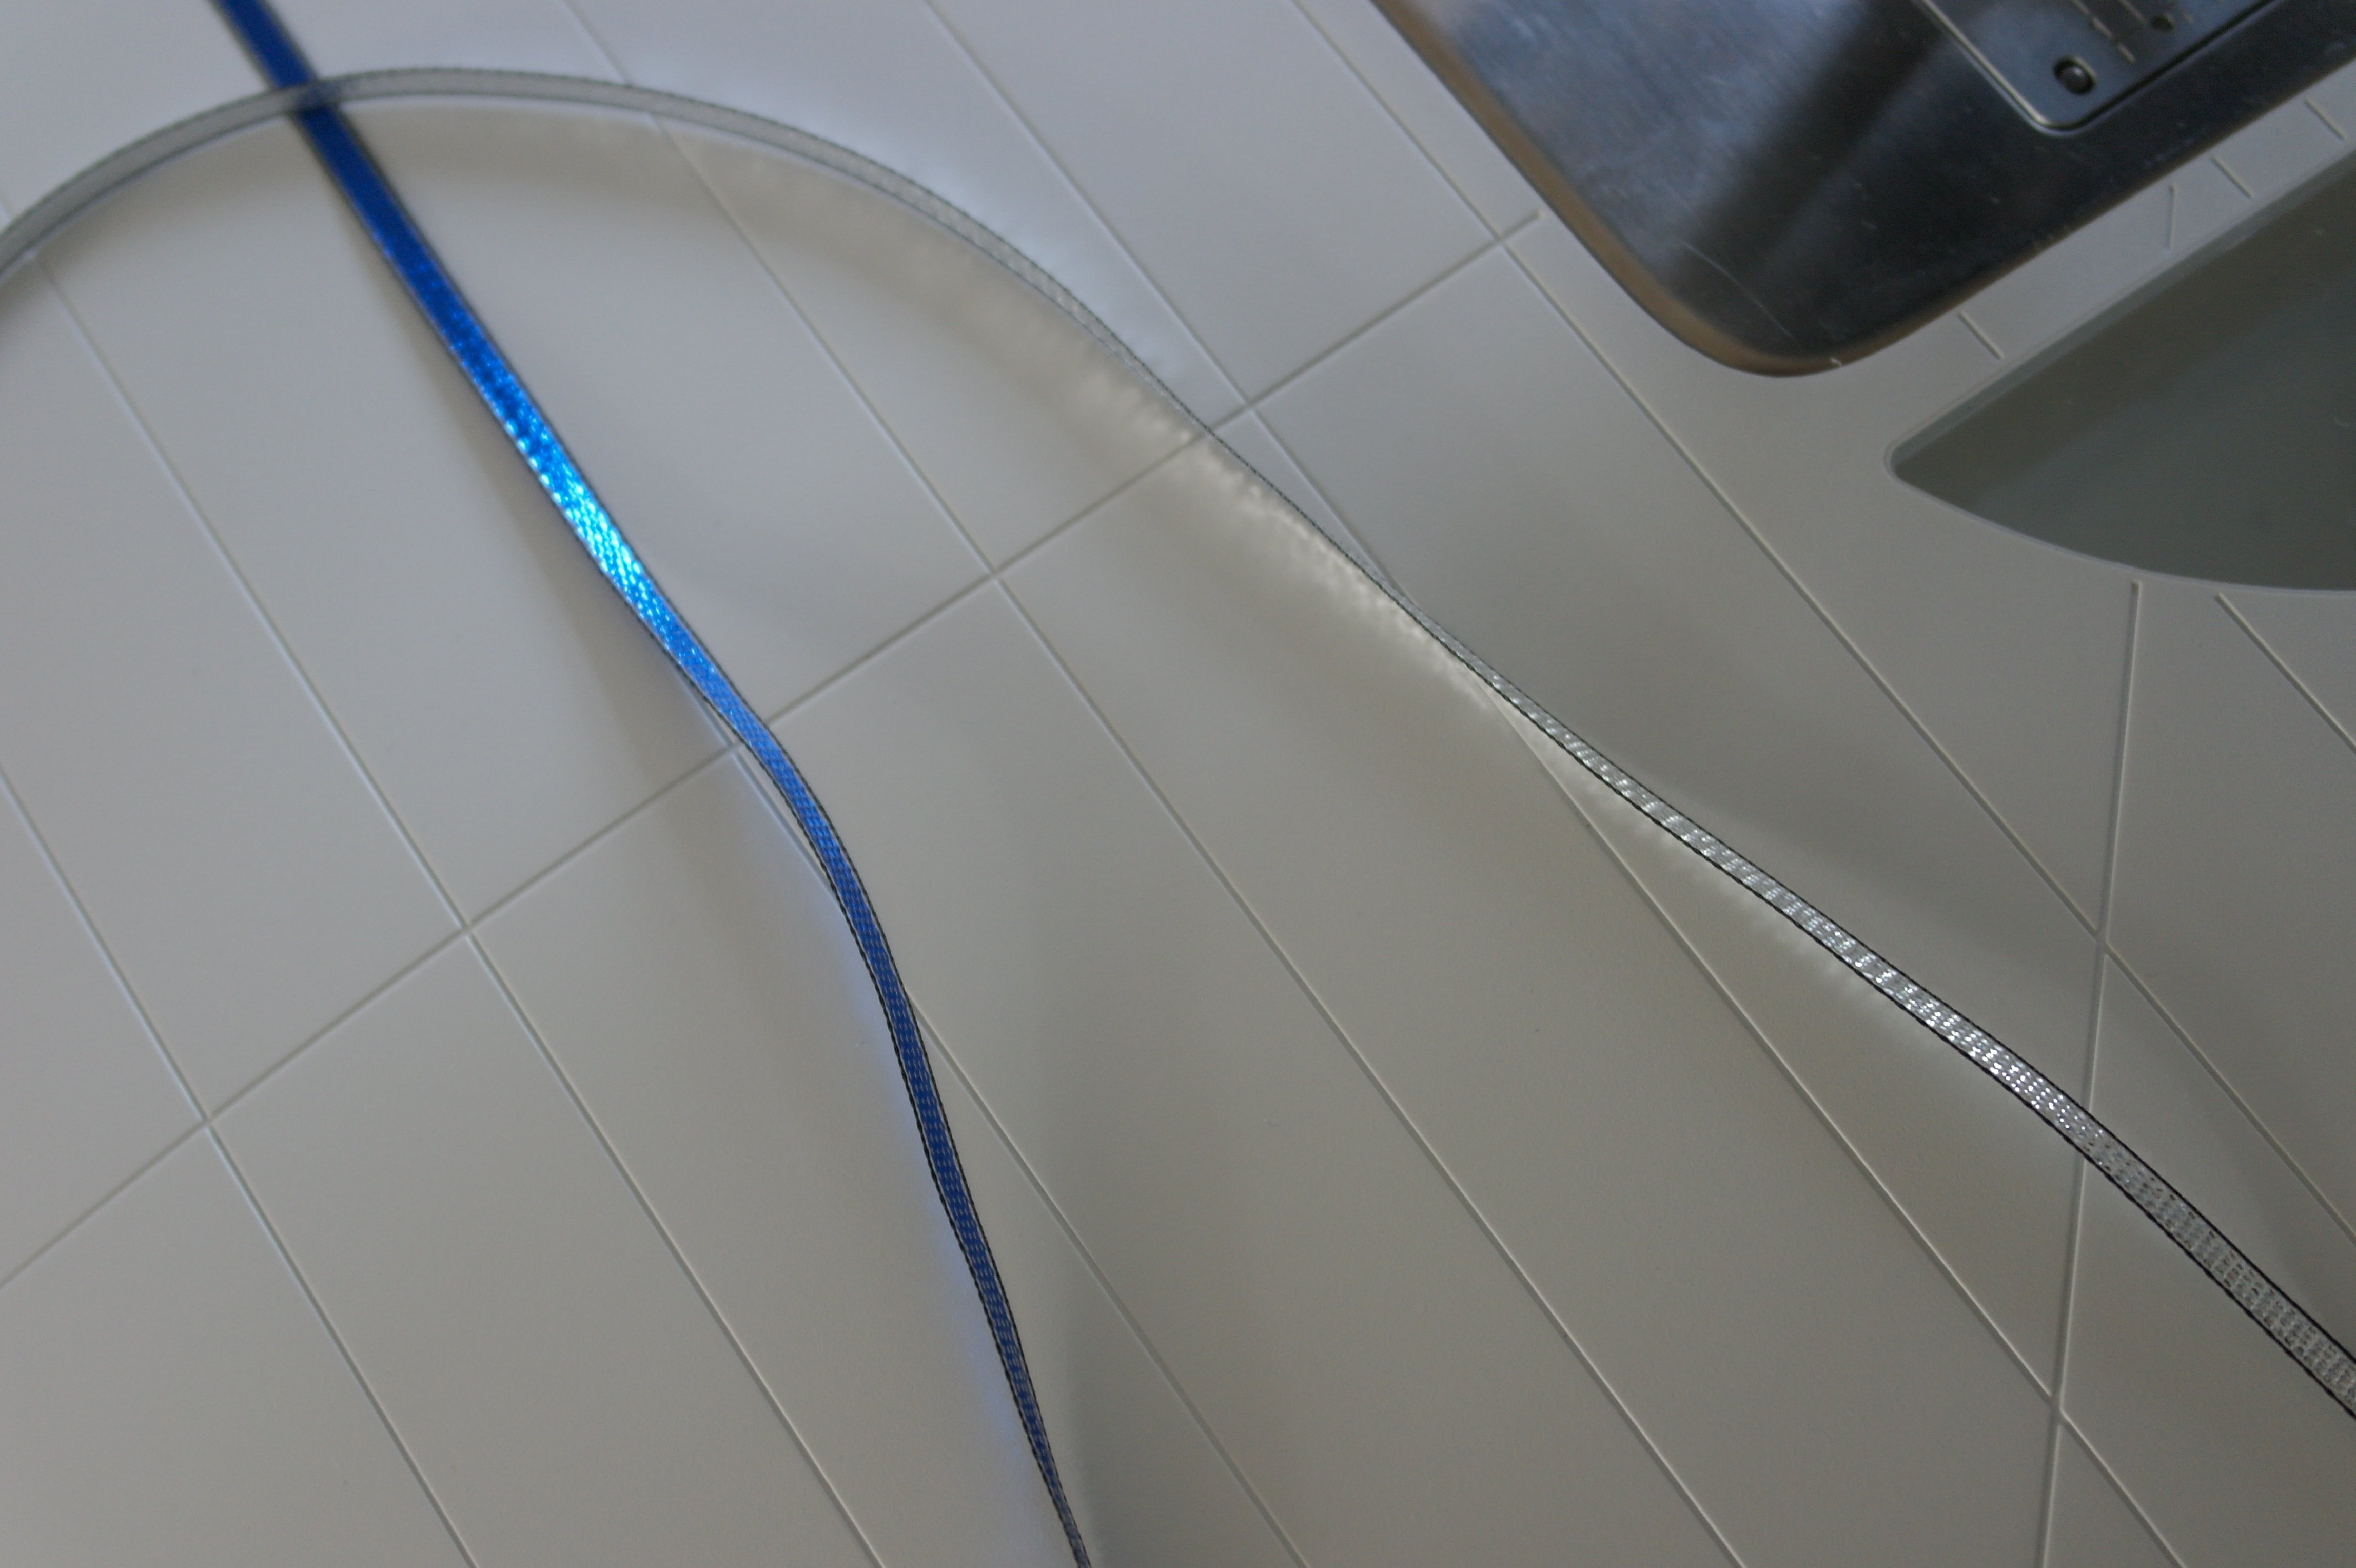
And after making the Crystal, it is time to cover the sandwich with fabrics again. This time I will add small ribbons, in a special way. I have choosen two sparkling ribbons: a blue (dark) and a silver (light). Check your stash for small ribbons…

Fabric 1/section 1 is sewn on: I have used an almost solid batik, making the first ribbon stand out more. Covered the seam with decorative stitches.
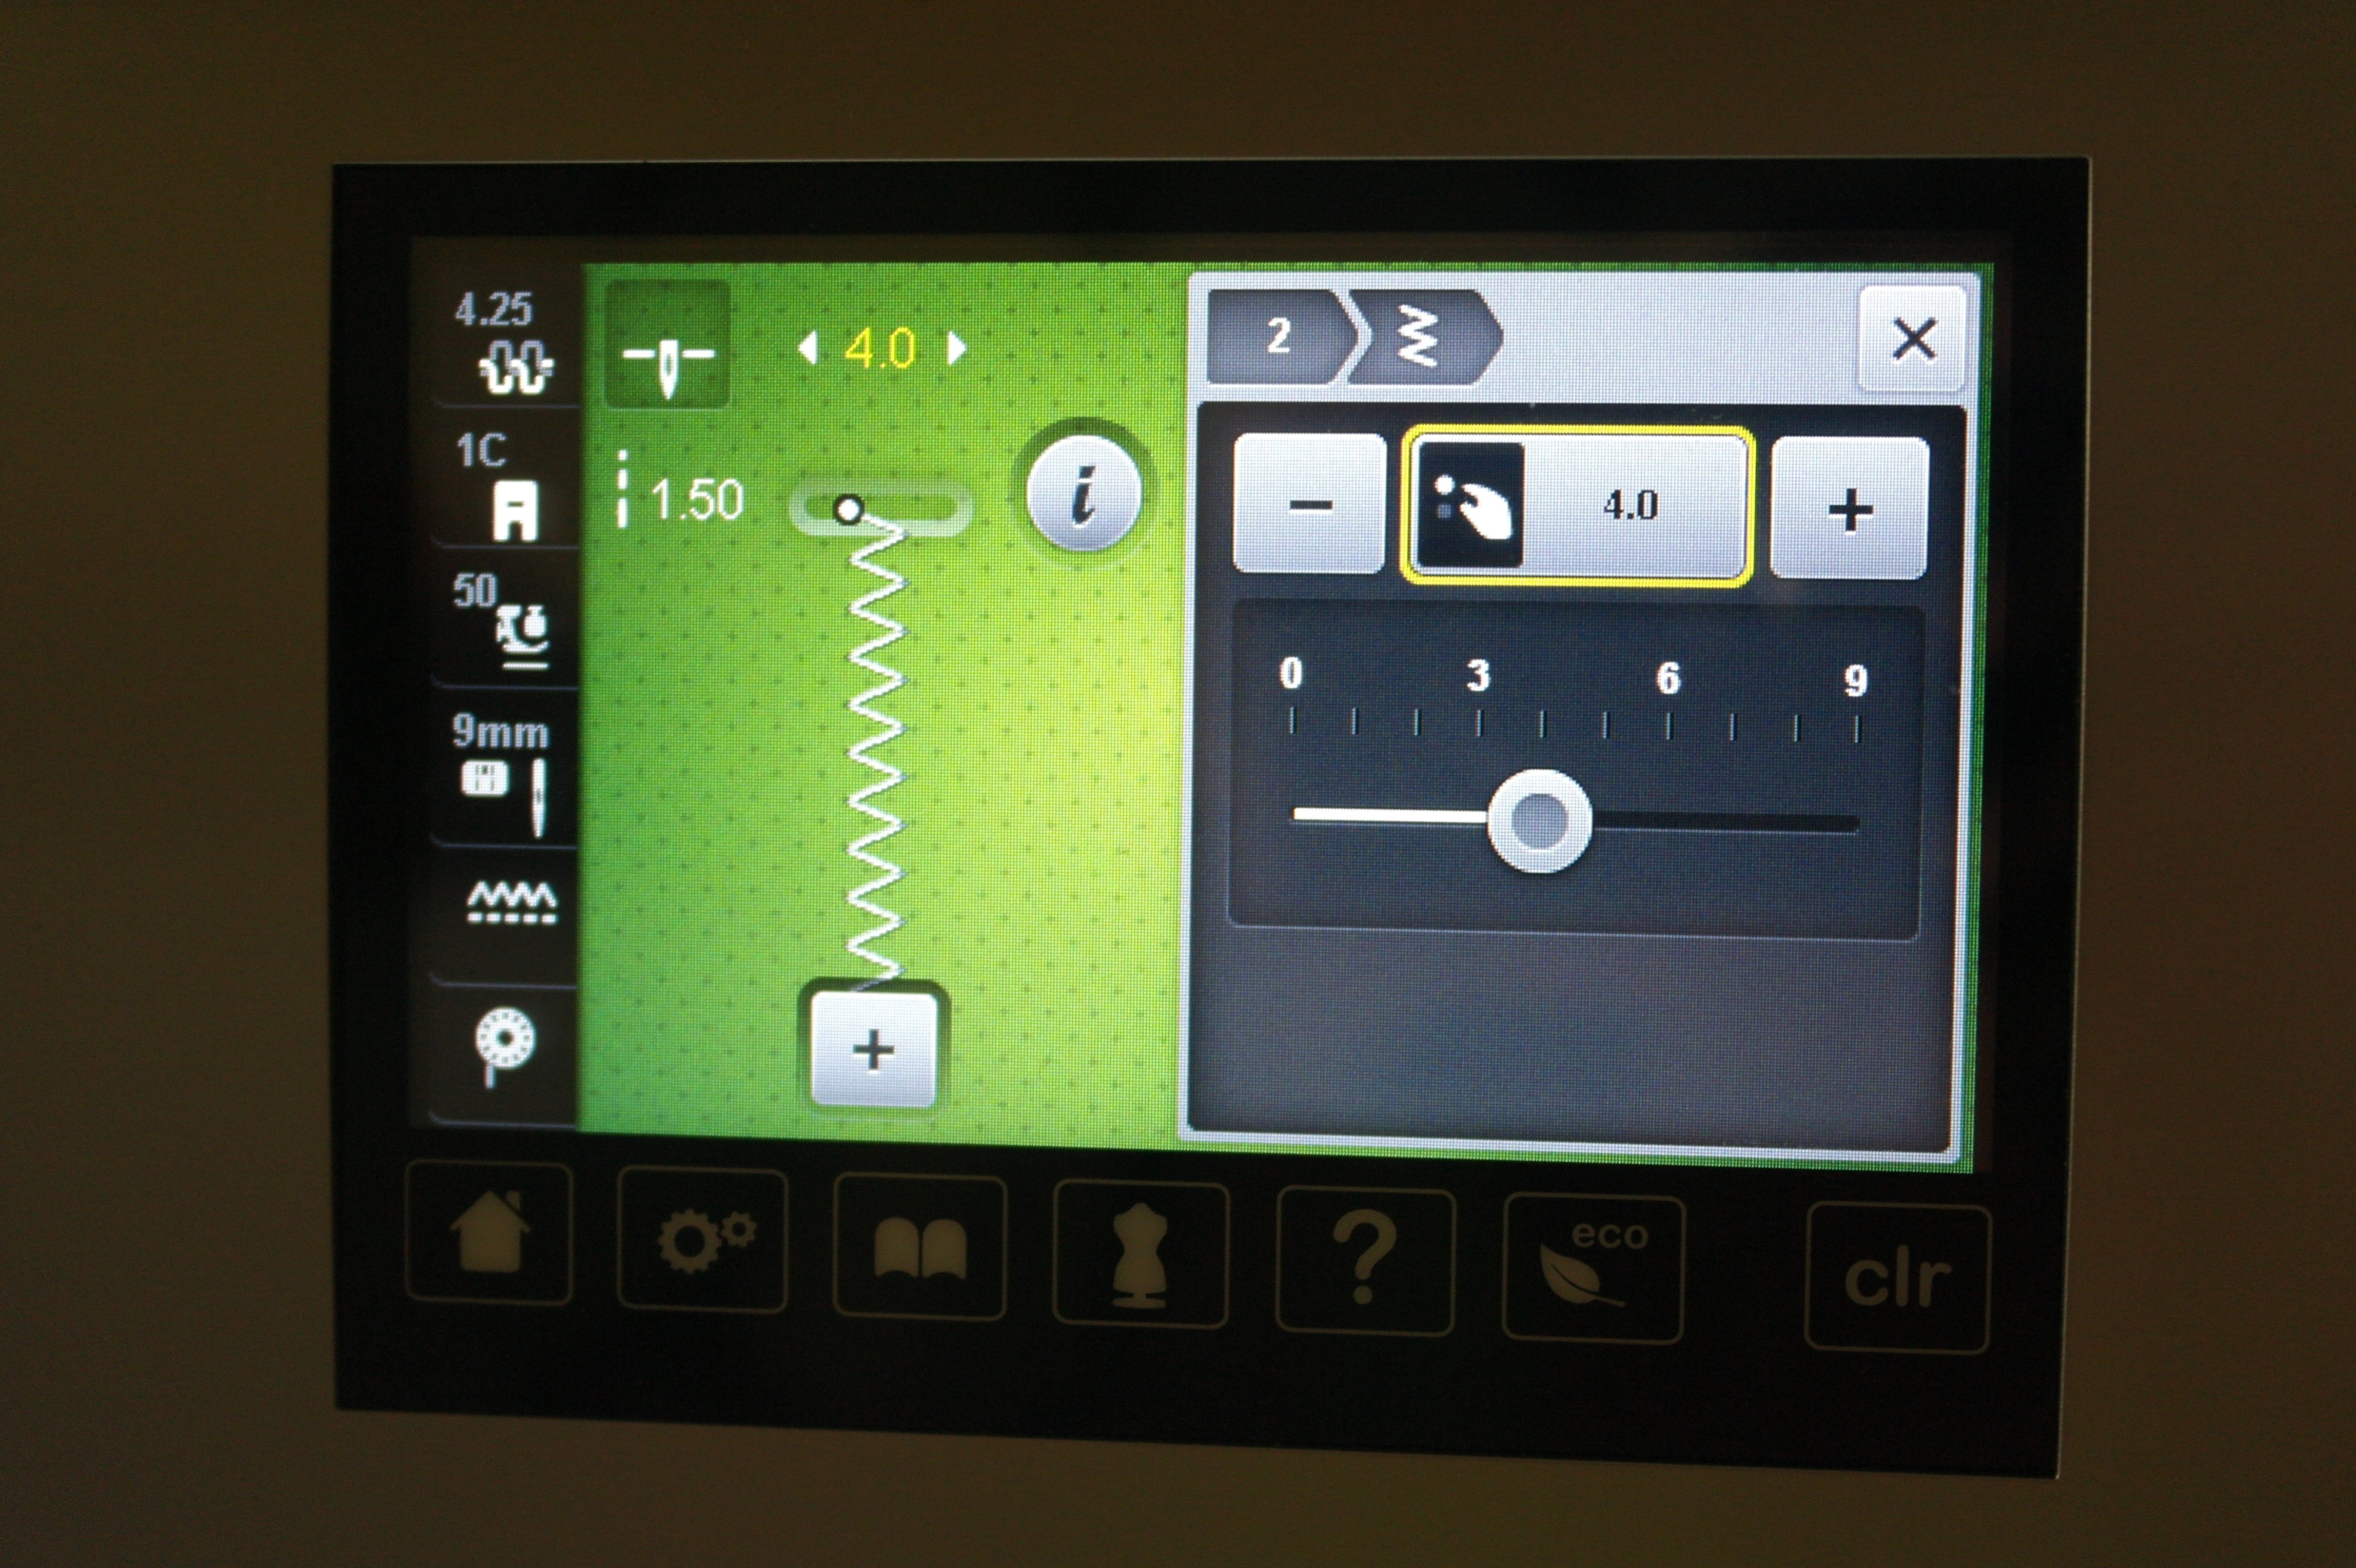
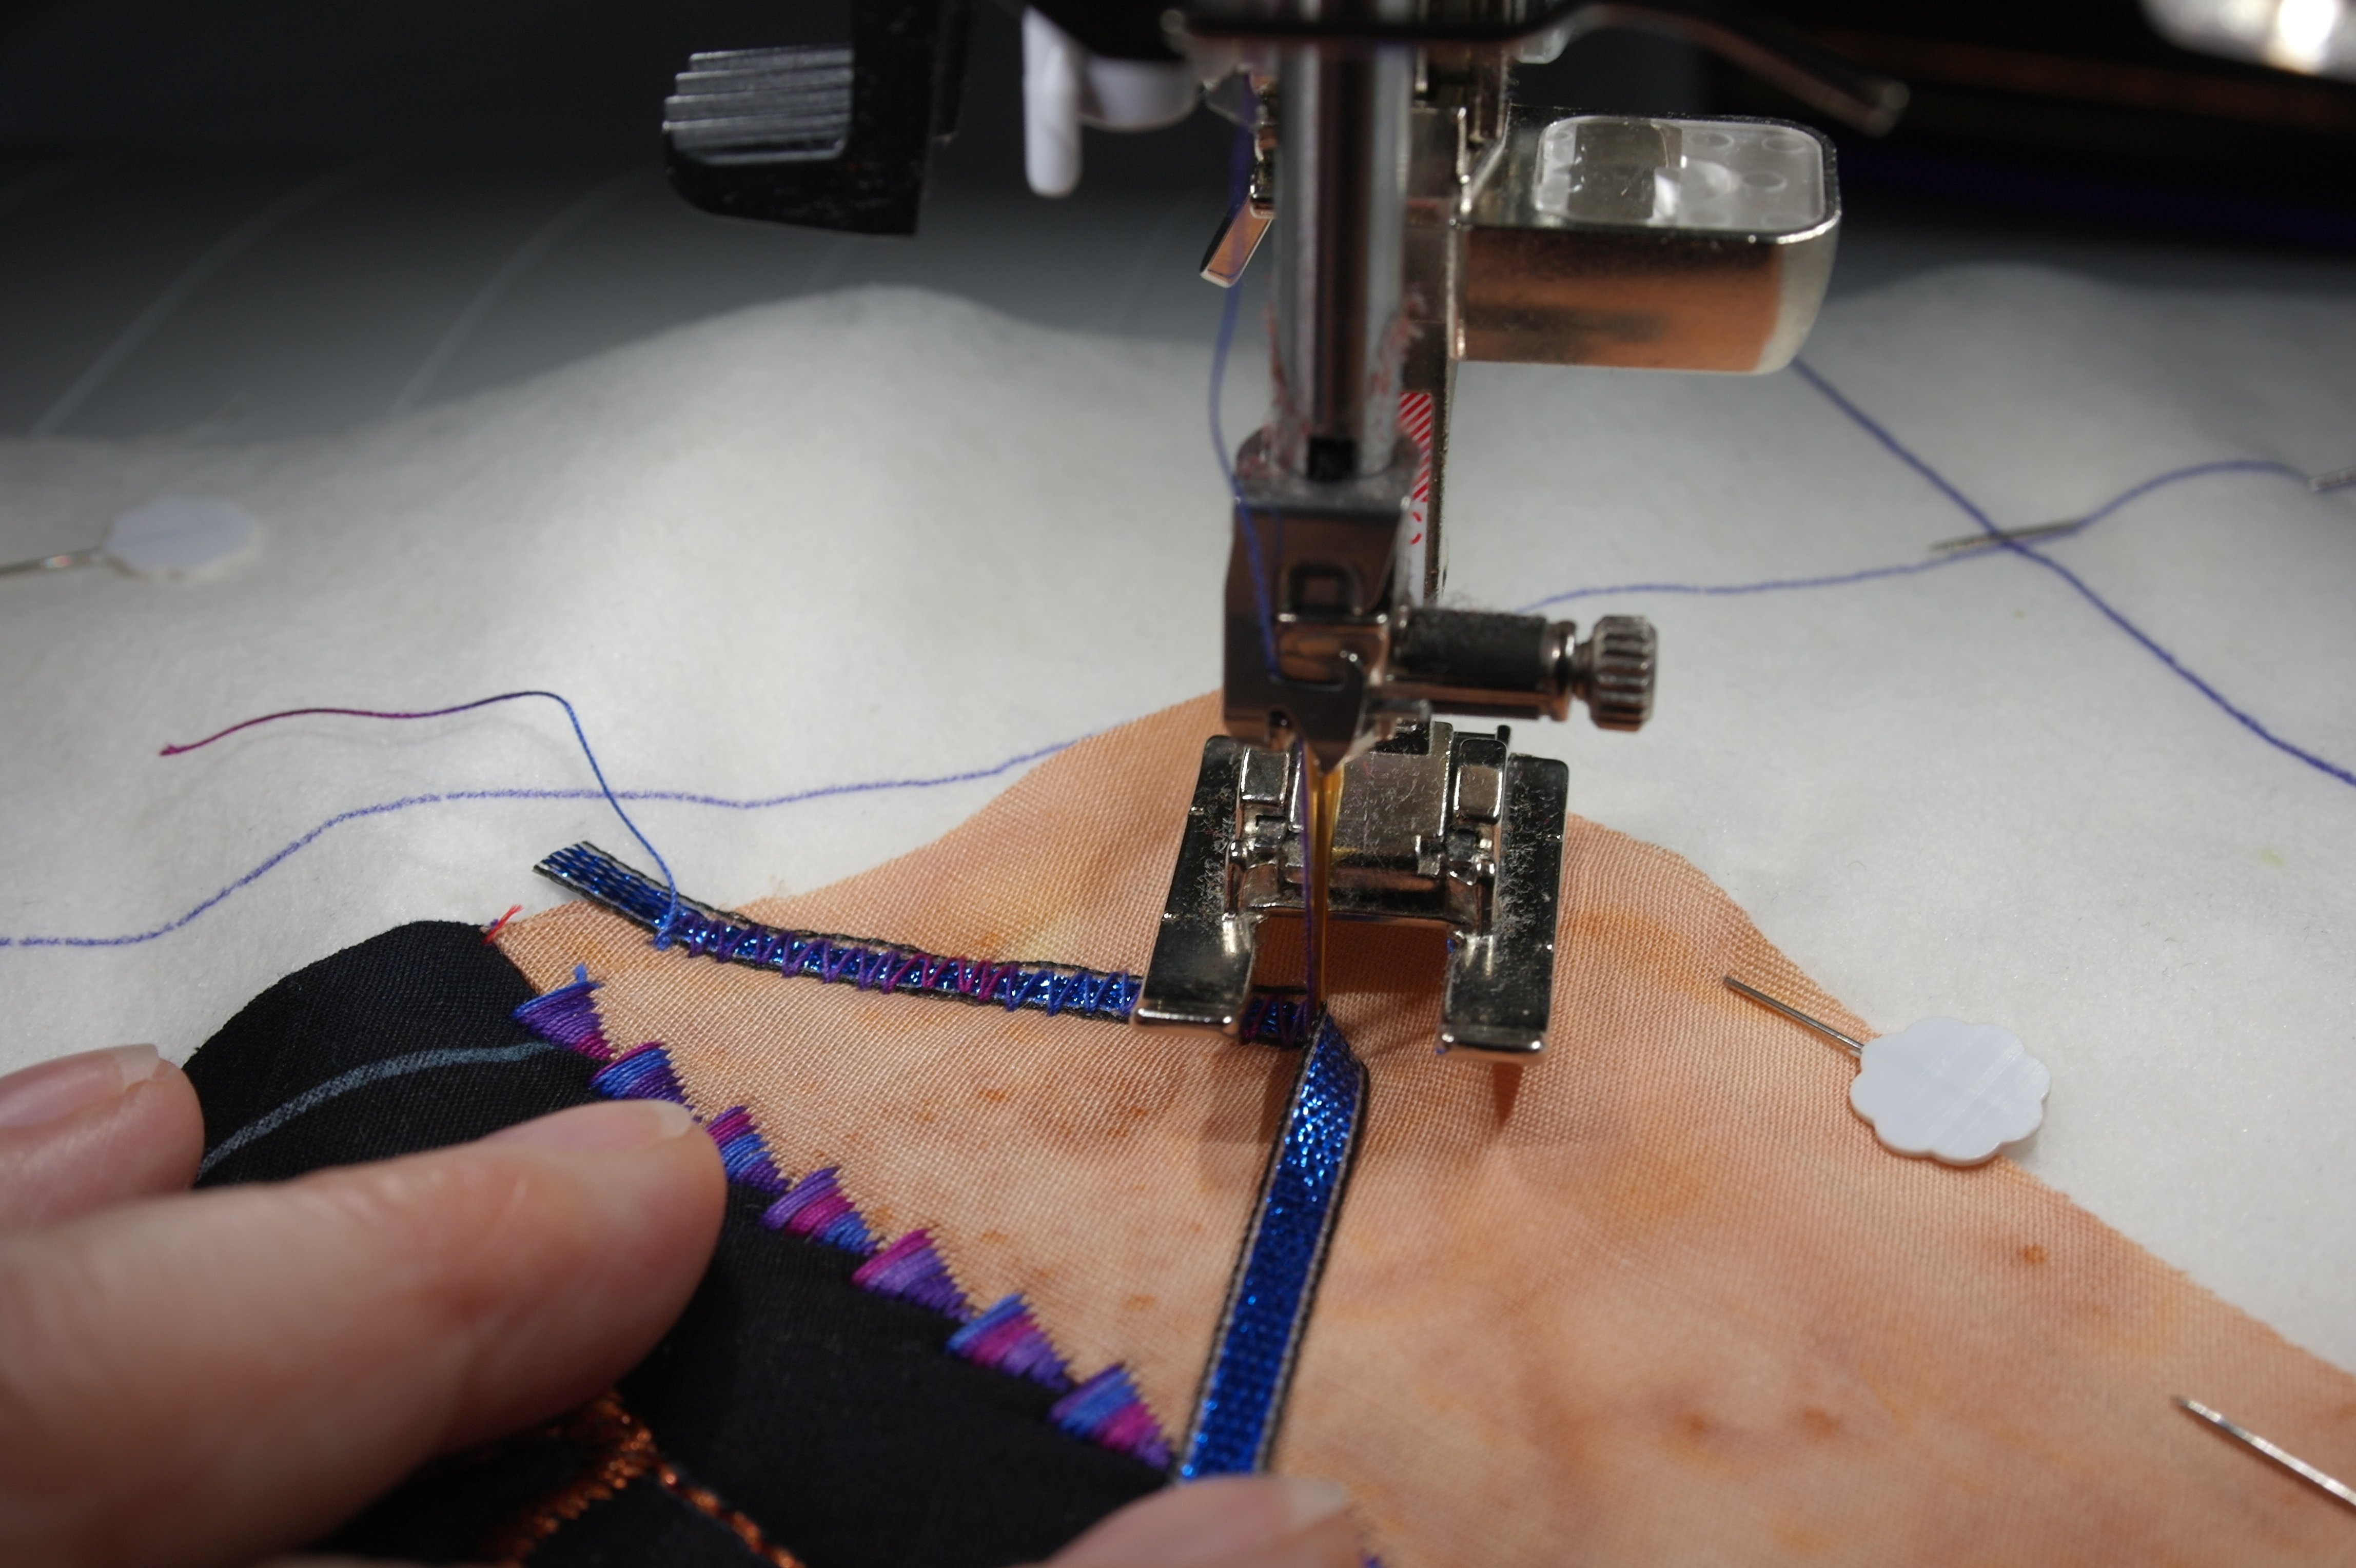
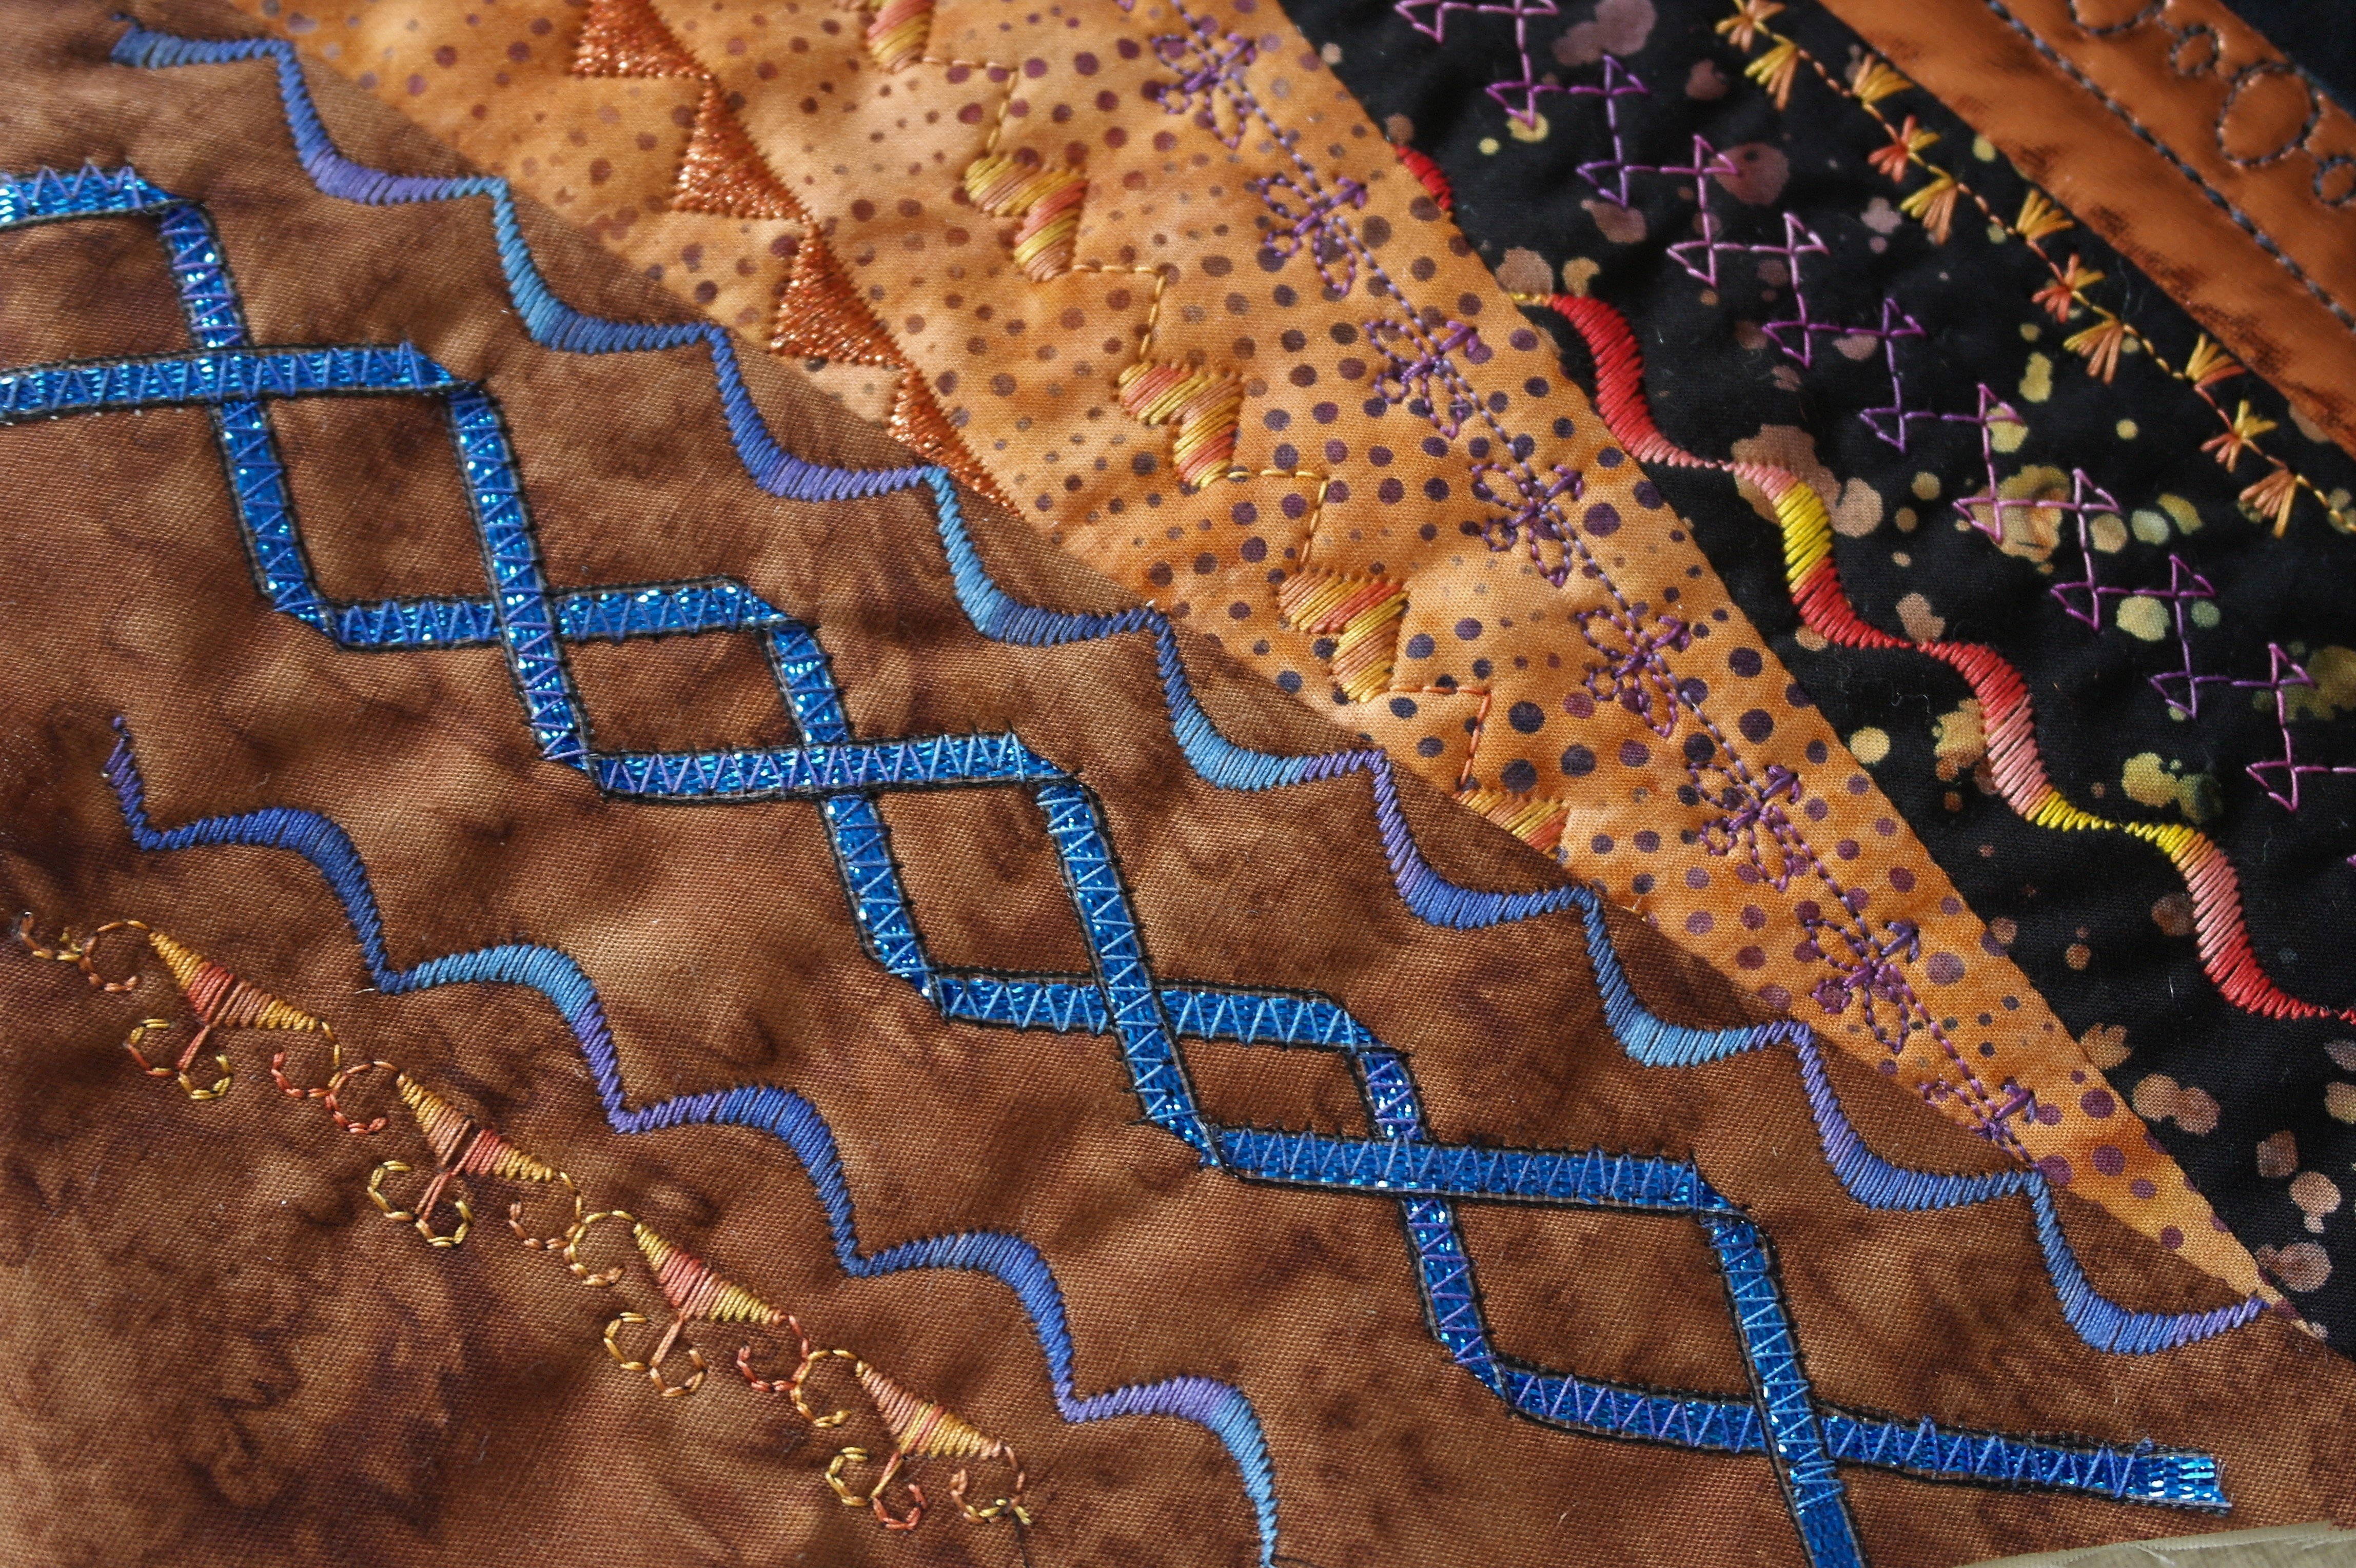
Working with a zigzag stitch to cover the ribbon: standard width on my B770QE is 3.6mm. I will make this wider, 4.0mm, because the stithes will be made júst next to the ribbon. If you have a wider ribbon, ajust the width.
Placing the ribbon diagonally, covering it with zigzag stitches, in a short row, because the ribbon will be folded and flipped over to the opposite direction.

It is important to end with the needle down on the left of the ribbon, before folding/flipping the ribbon. The left means the direction you will flip/fold the ribbon to. Stop with needle down, raise the presser foot.
Fold the ribbon (the under side will be up, which is no problem if you are using two-sided ribbon. Check this first!). Flip the ribbon at an angle of 90°, and cover it with stitches again. Stop before it ‘hits’ the stiches/seam, be sure the needle is down on the right side/direction you want to fold/flip the ribbon again = the other side. Etc, untill the ribbon has been folded, flipped and sewn all the way to cover the entire ‘lenght’ of the fabric. The zigzag pattern of the ribbon will be smaller working your way down the fabric, because the fabric is also smaller at the end. BEWARE: don’t place the ribbon to close to the sides of the fabric: be sure to leave a seam allowance for sewing the next fabric. You don’t want this special effect/ribbon to dissapear under the next fabric.

Working my way to the end of the fabric, I am eyeballing the places where to stop and flip the ribbon. If you want it to be more exact, draw dots on the fabric and work up to them.
If you need to practice first, use a sample. See if the stitch you have choosen covers the ribbon. Make sure you will still see the ribbon, so do not choose a stitch which will cover the ribbon entirely!
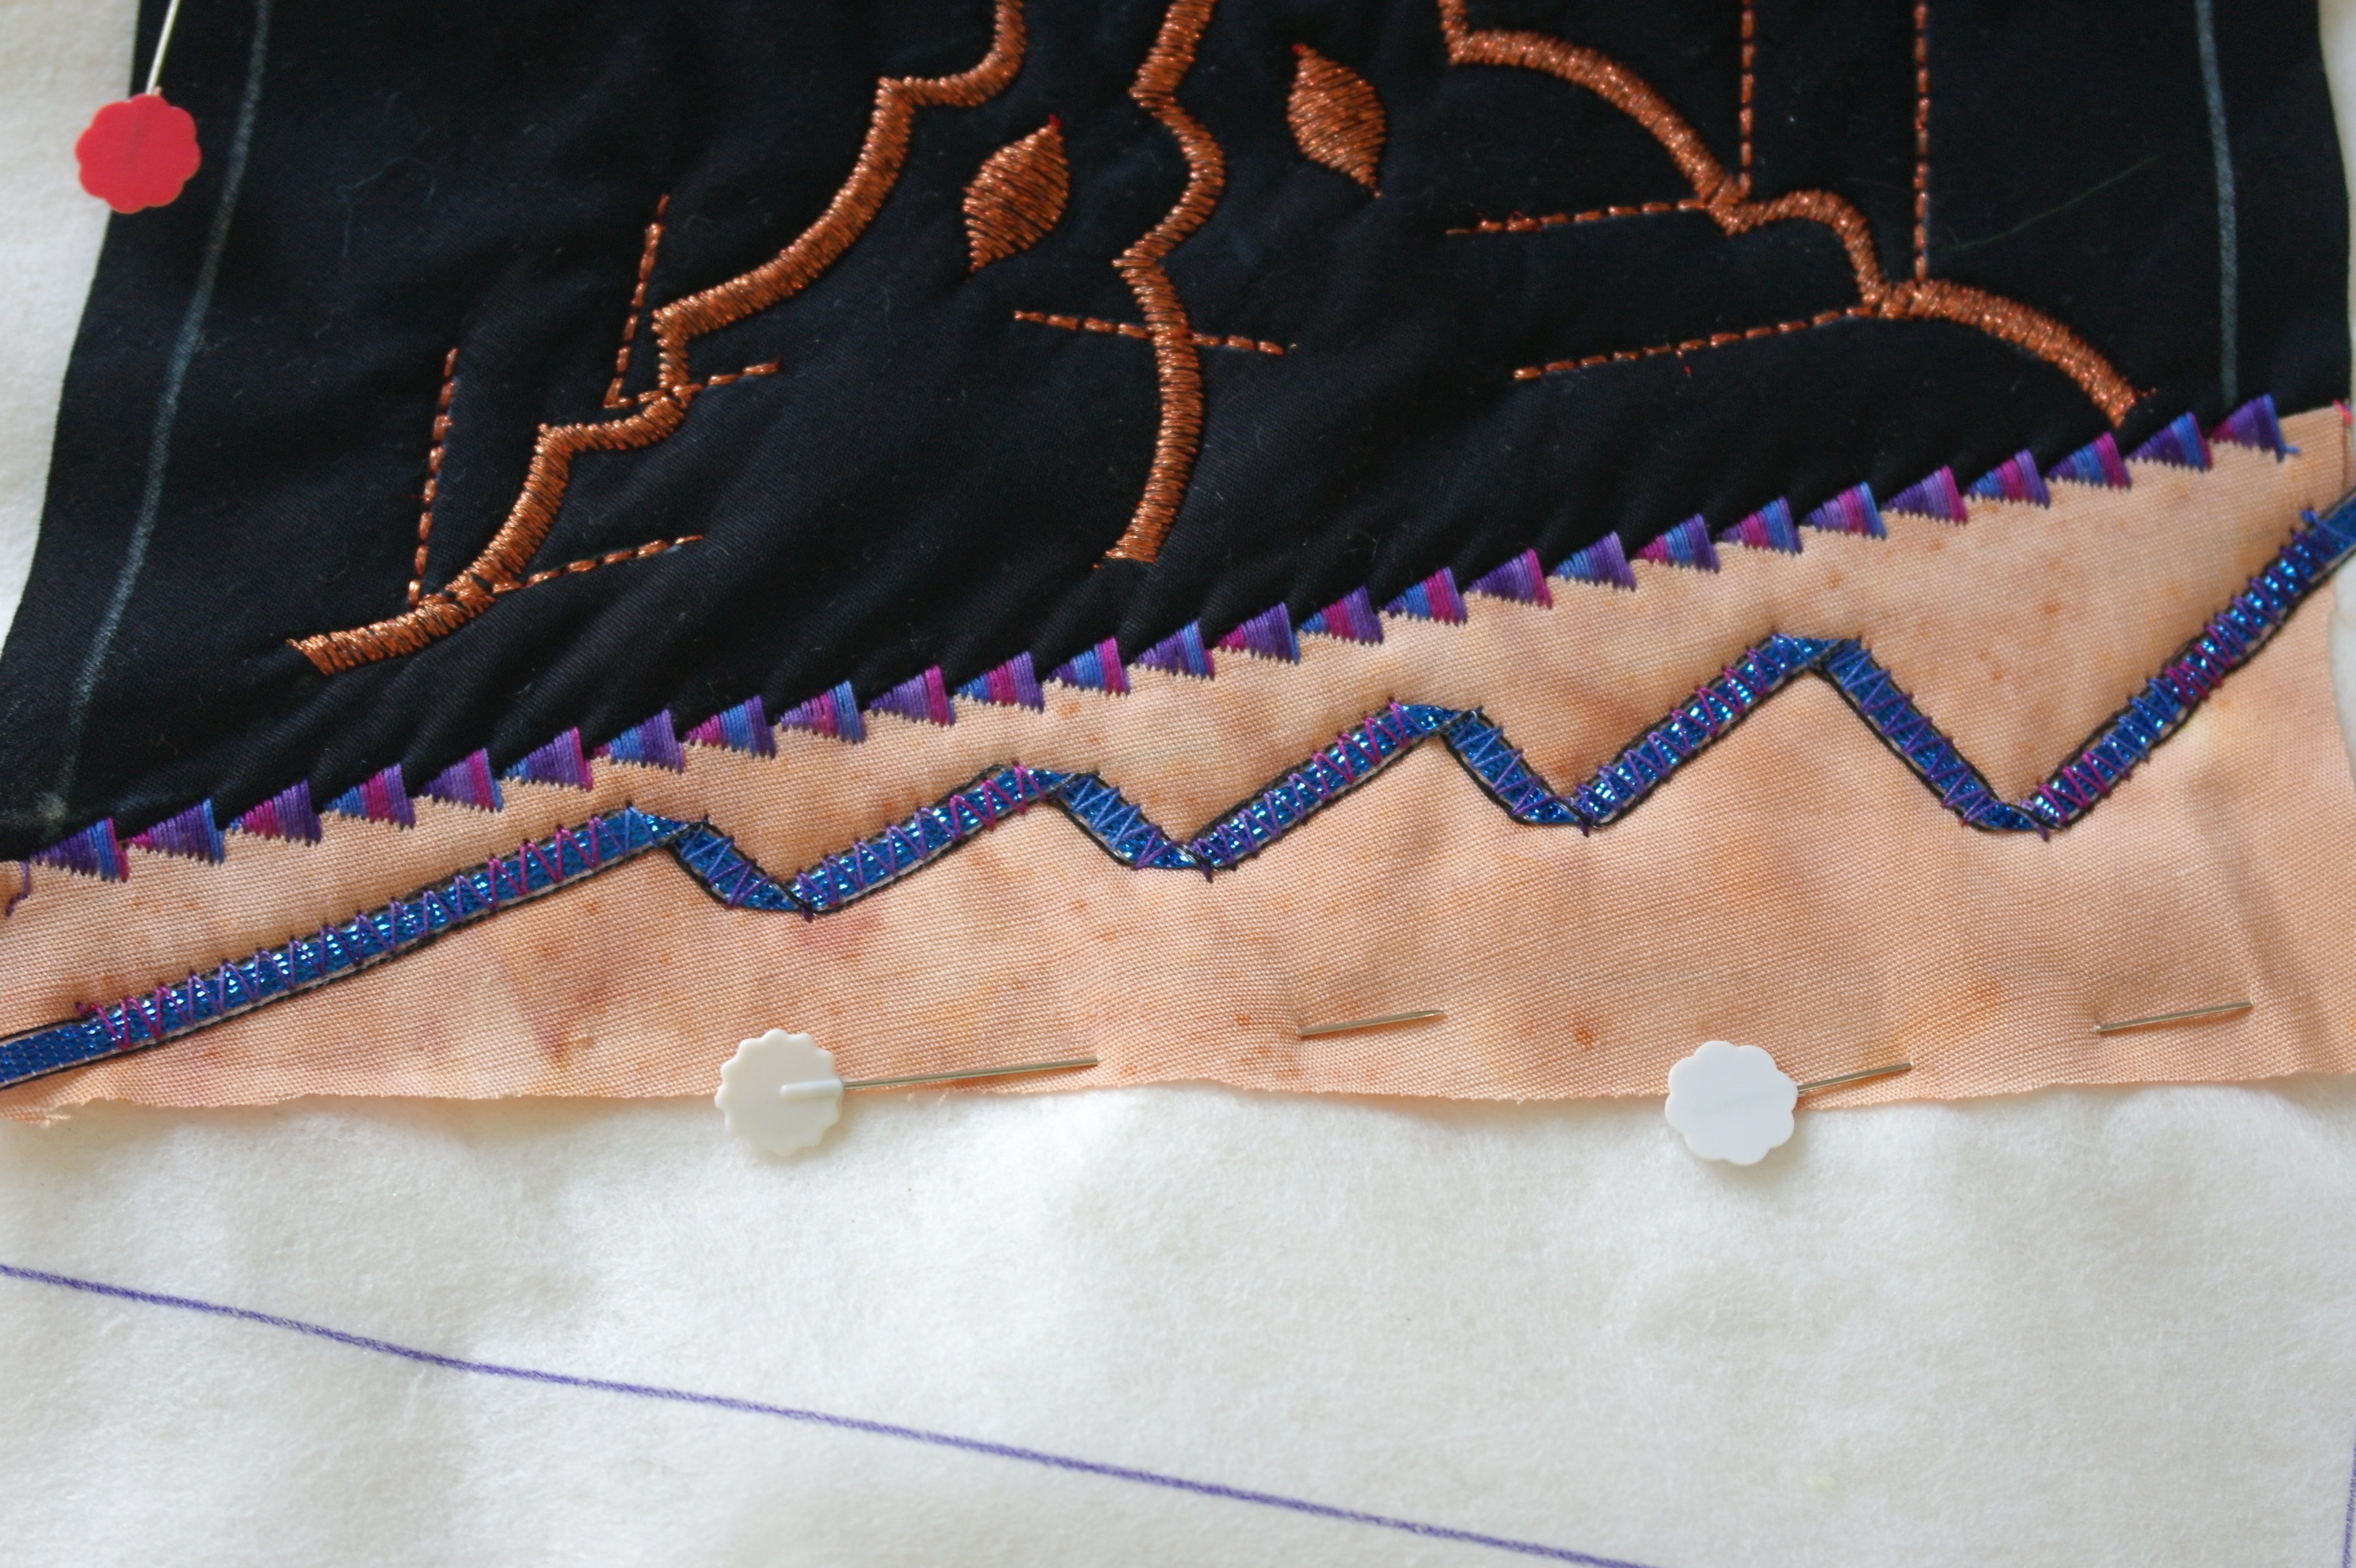
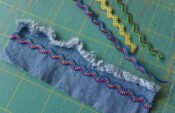
This is the result. The zigzag patterns and the ribbon are decorative: they are both visible.

Making decorative stitches next, using the zigzag pattern of the ribbon as guideline.
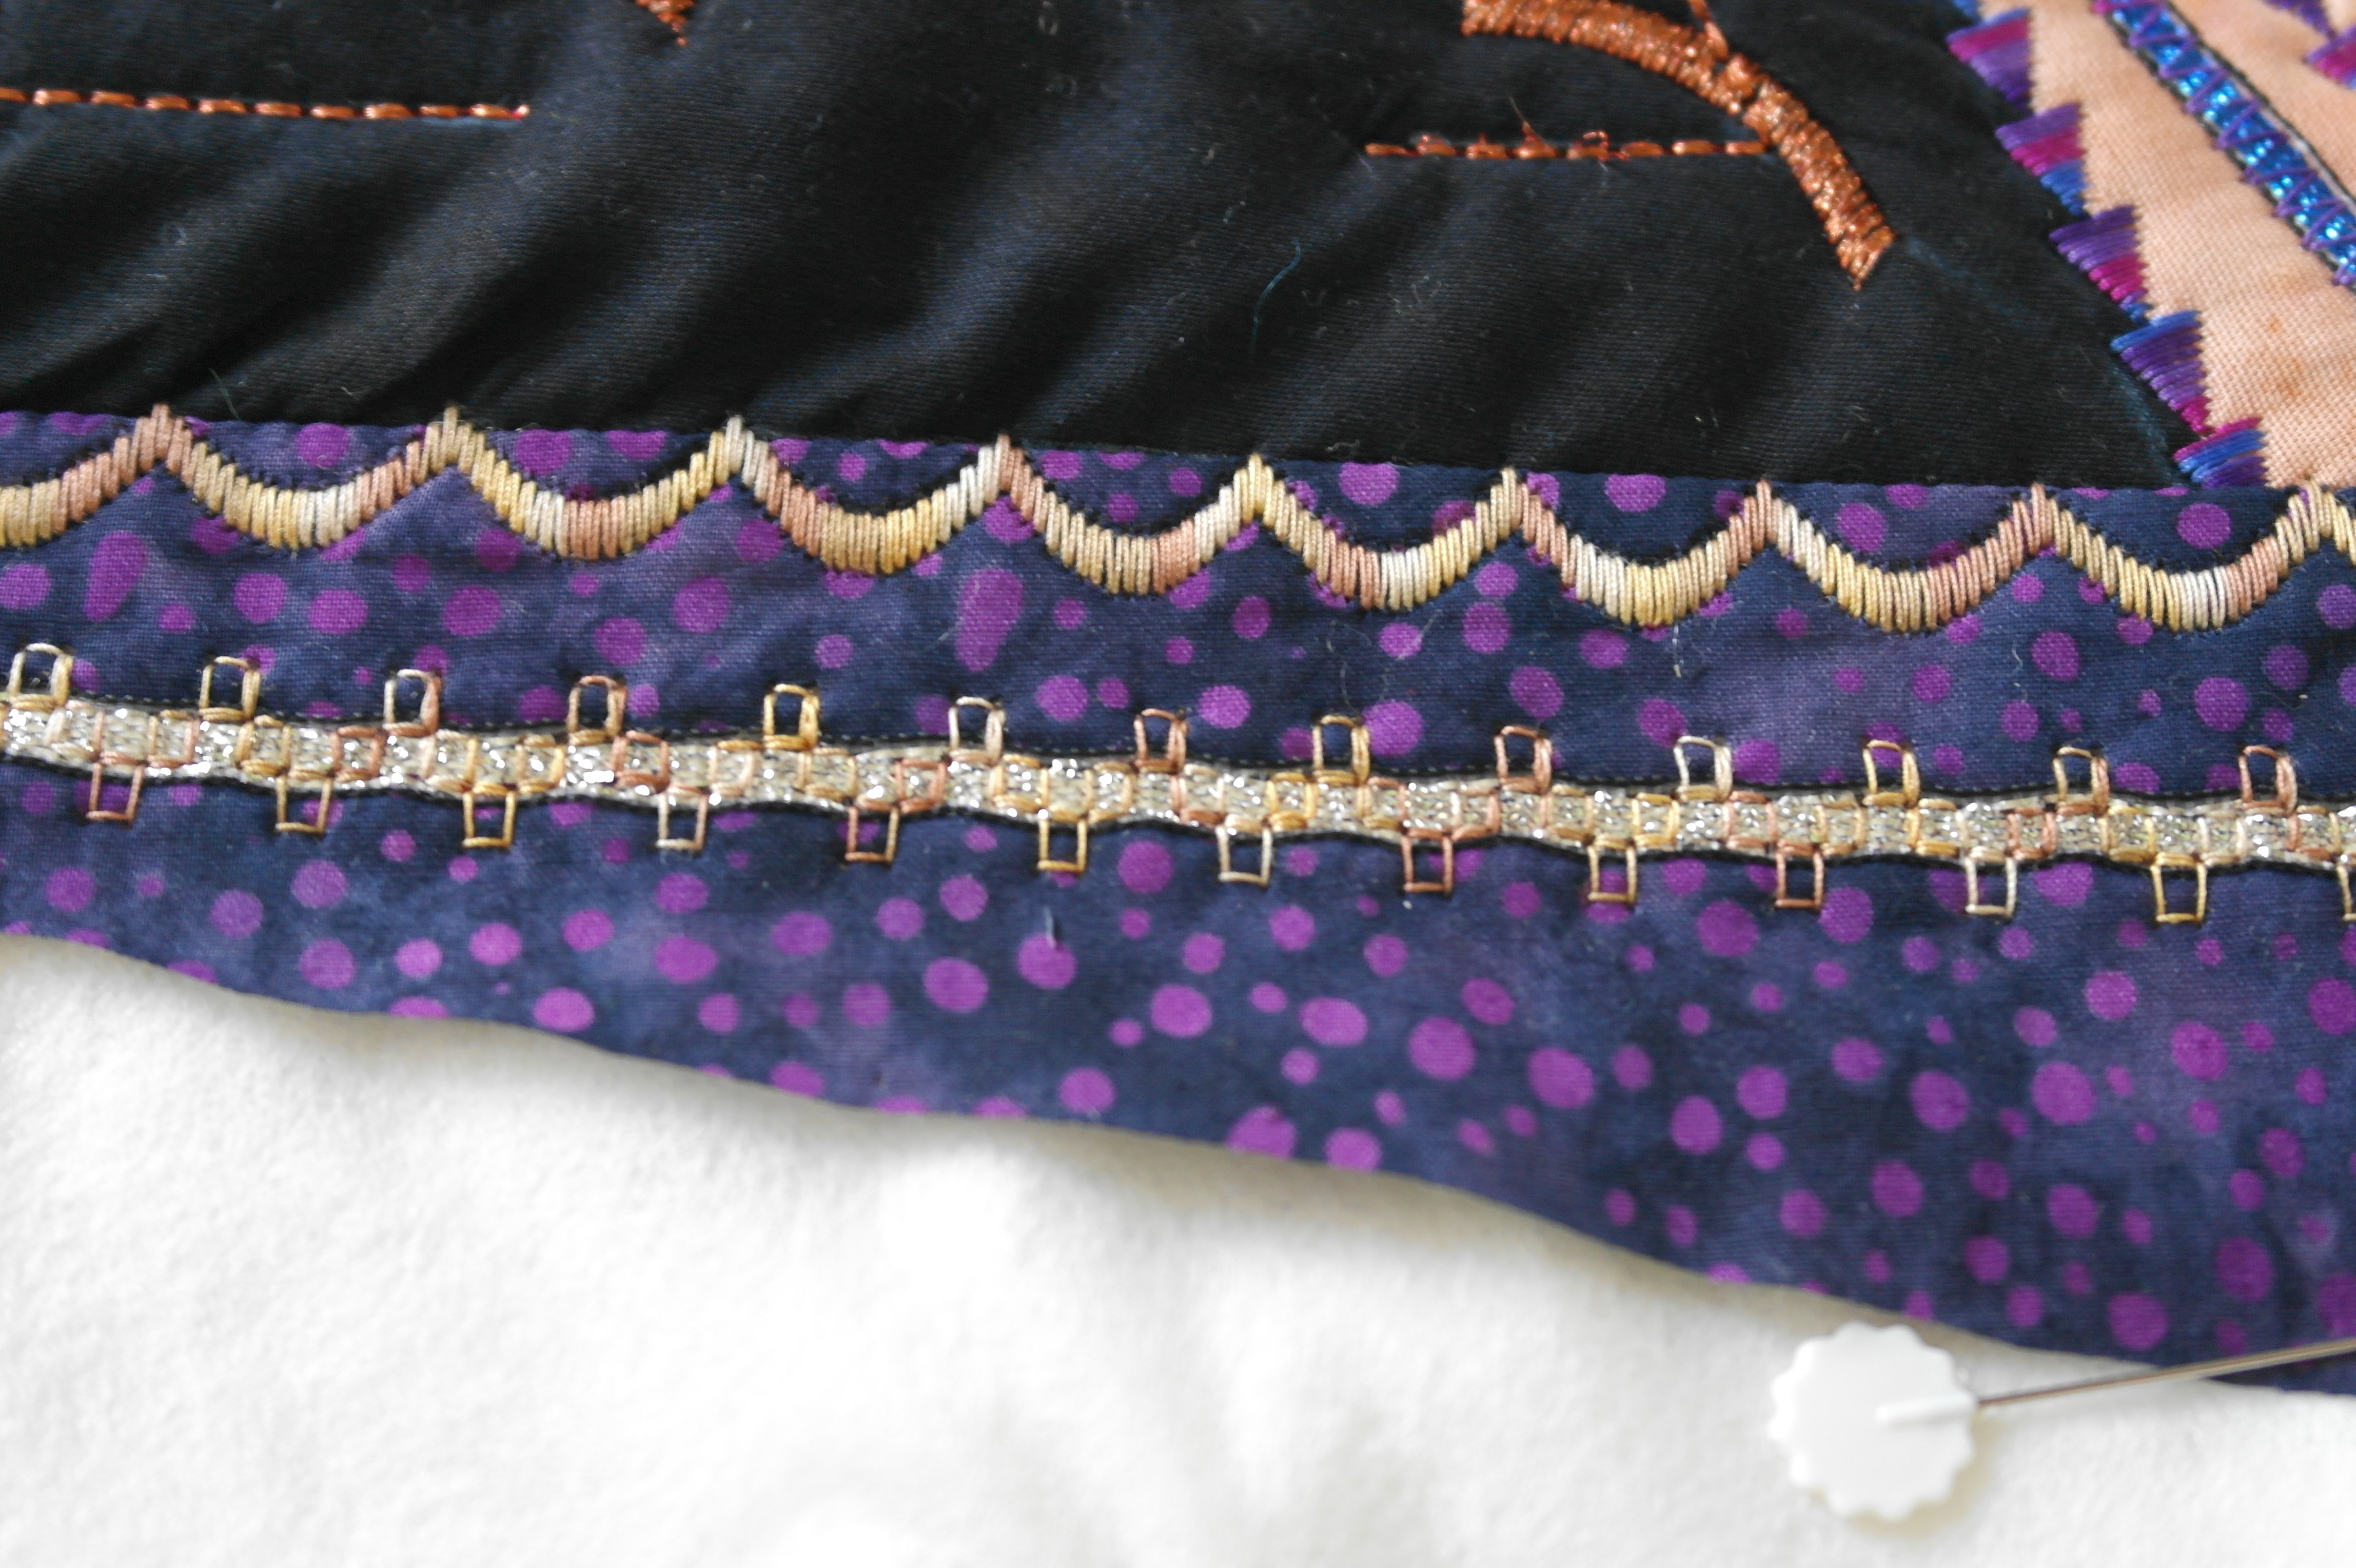
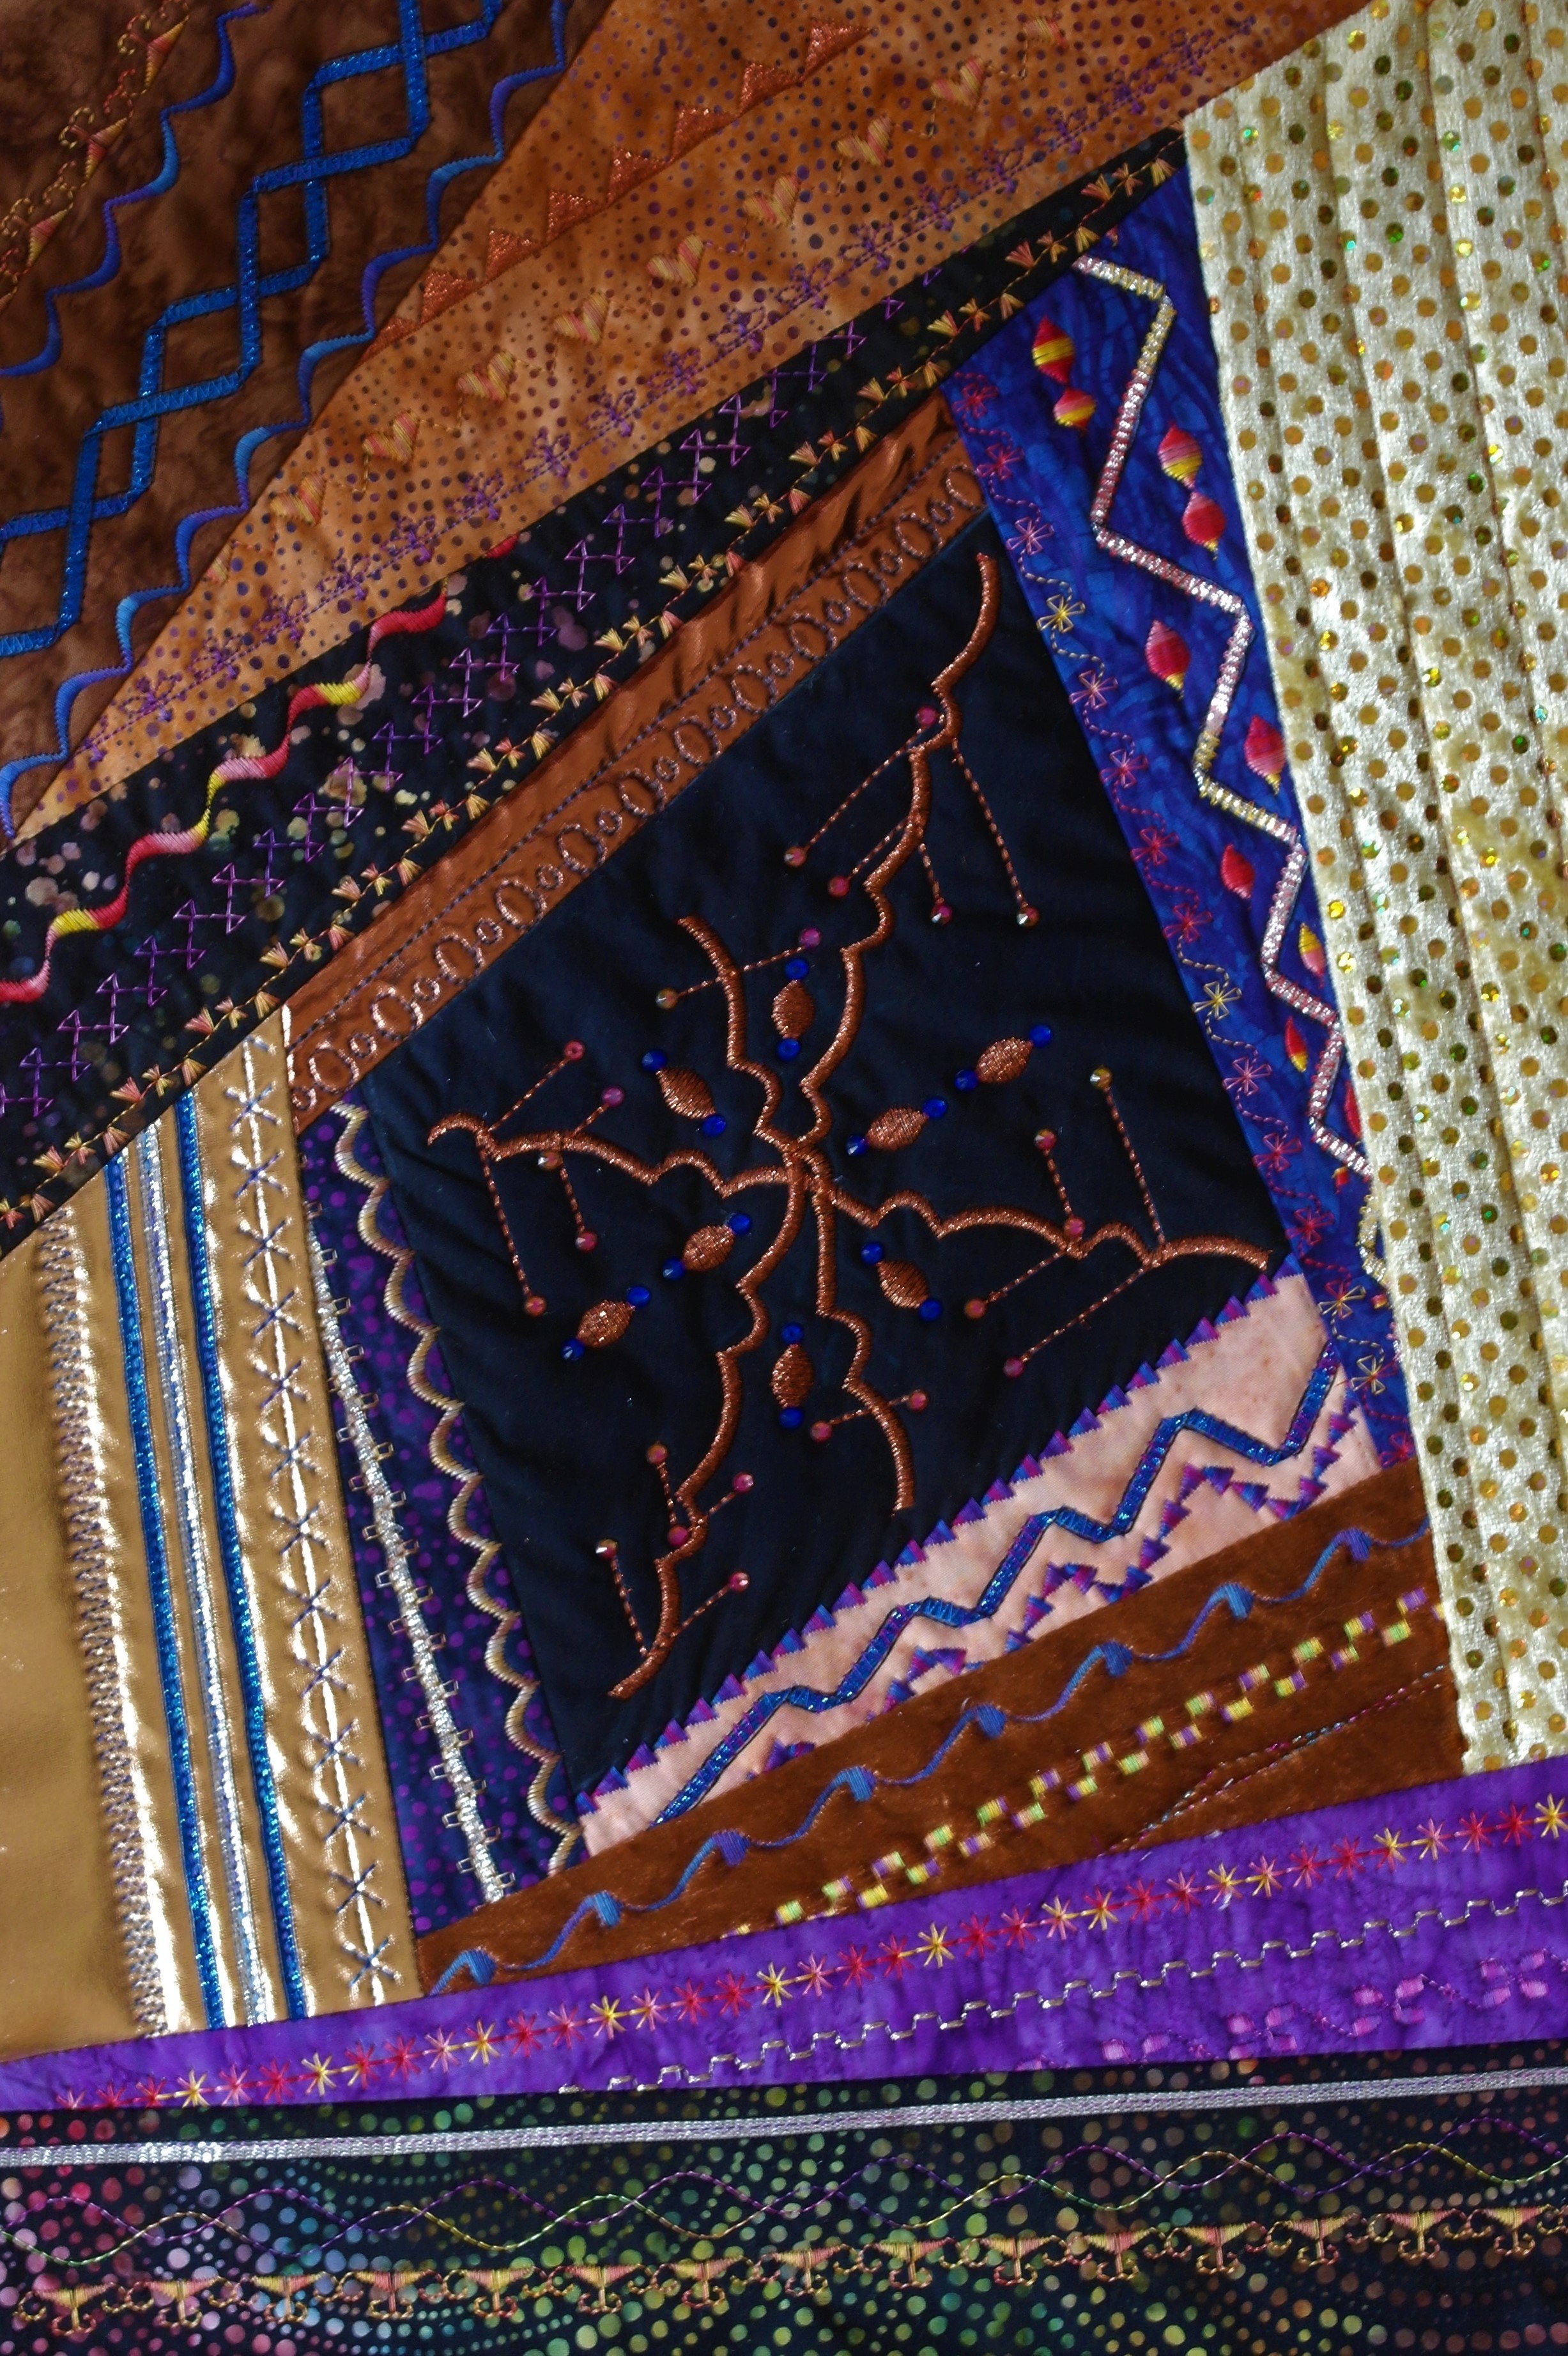
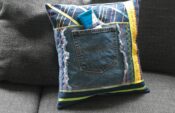
The next fabric is a darker one, made decorative stitches on the seam first, and added the silver ribbon, working over it with gold colored, variegated thread. I’ve placed the ribbon flat, just a variation.
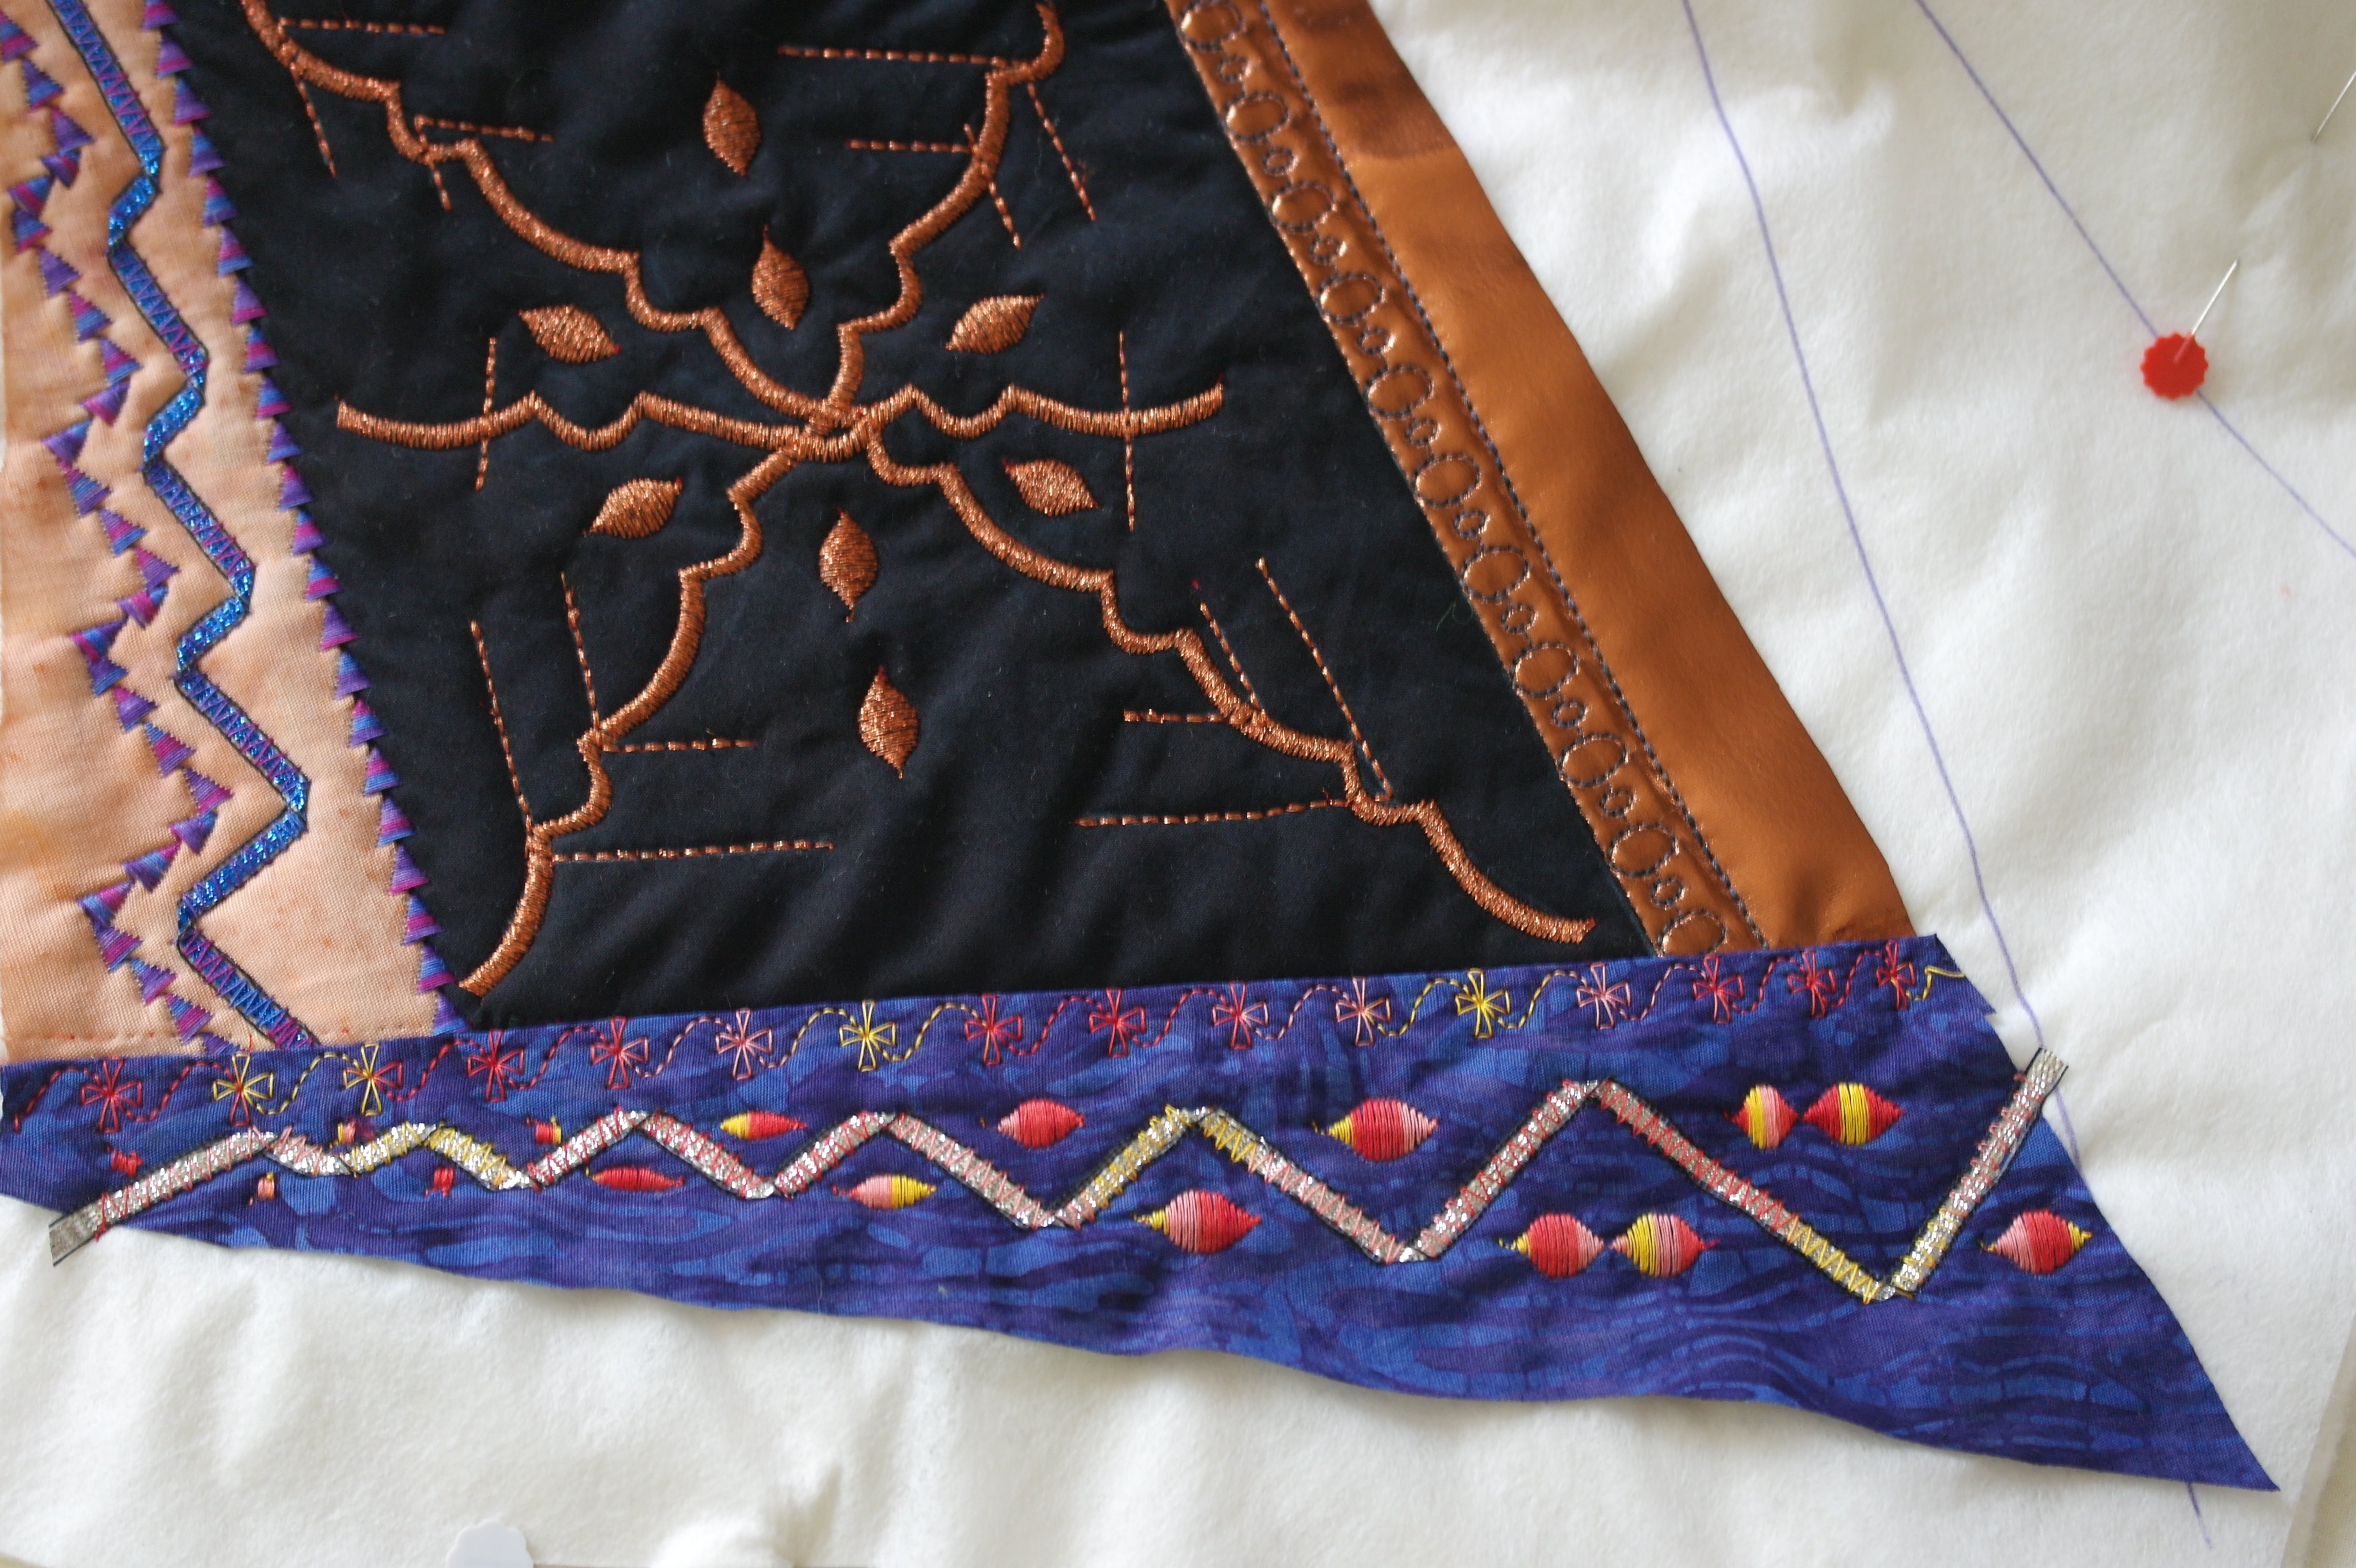
Adding more fabrics, decorative stitches, and ribbons. On this section I have place the ribbon (silver) again in a zigzag pattern, and placed satin stitches in the gaps between the zigzags. I have made each stitch smaller working my way down, because the gaps are smaller there too.
And with one of the last sections I have stitched the blue, small ribbon, again zigzagging, now making a double row. Just improvise: there are more ways to add ribbons onto your sandwich.
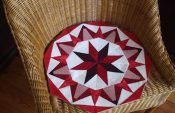
Some Hotfix stones in the center and my block 6 is ready…
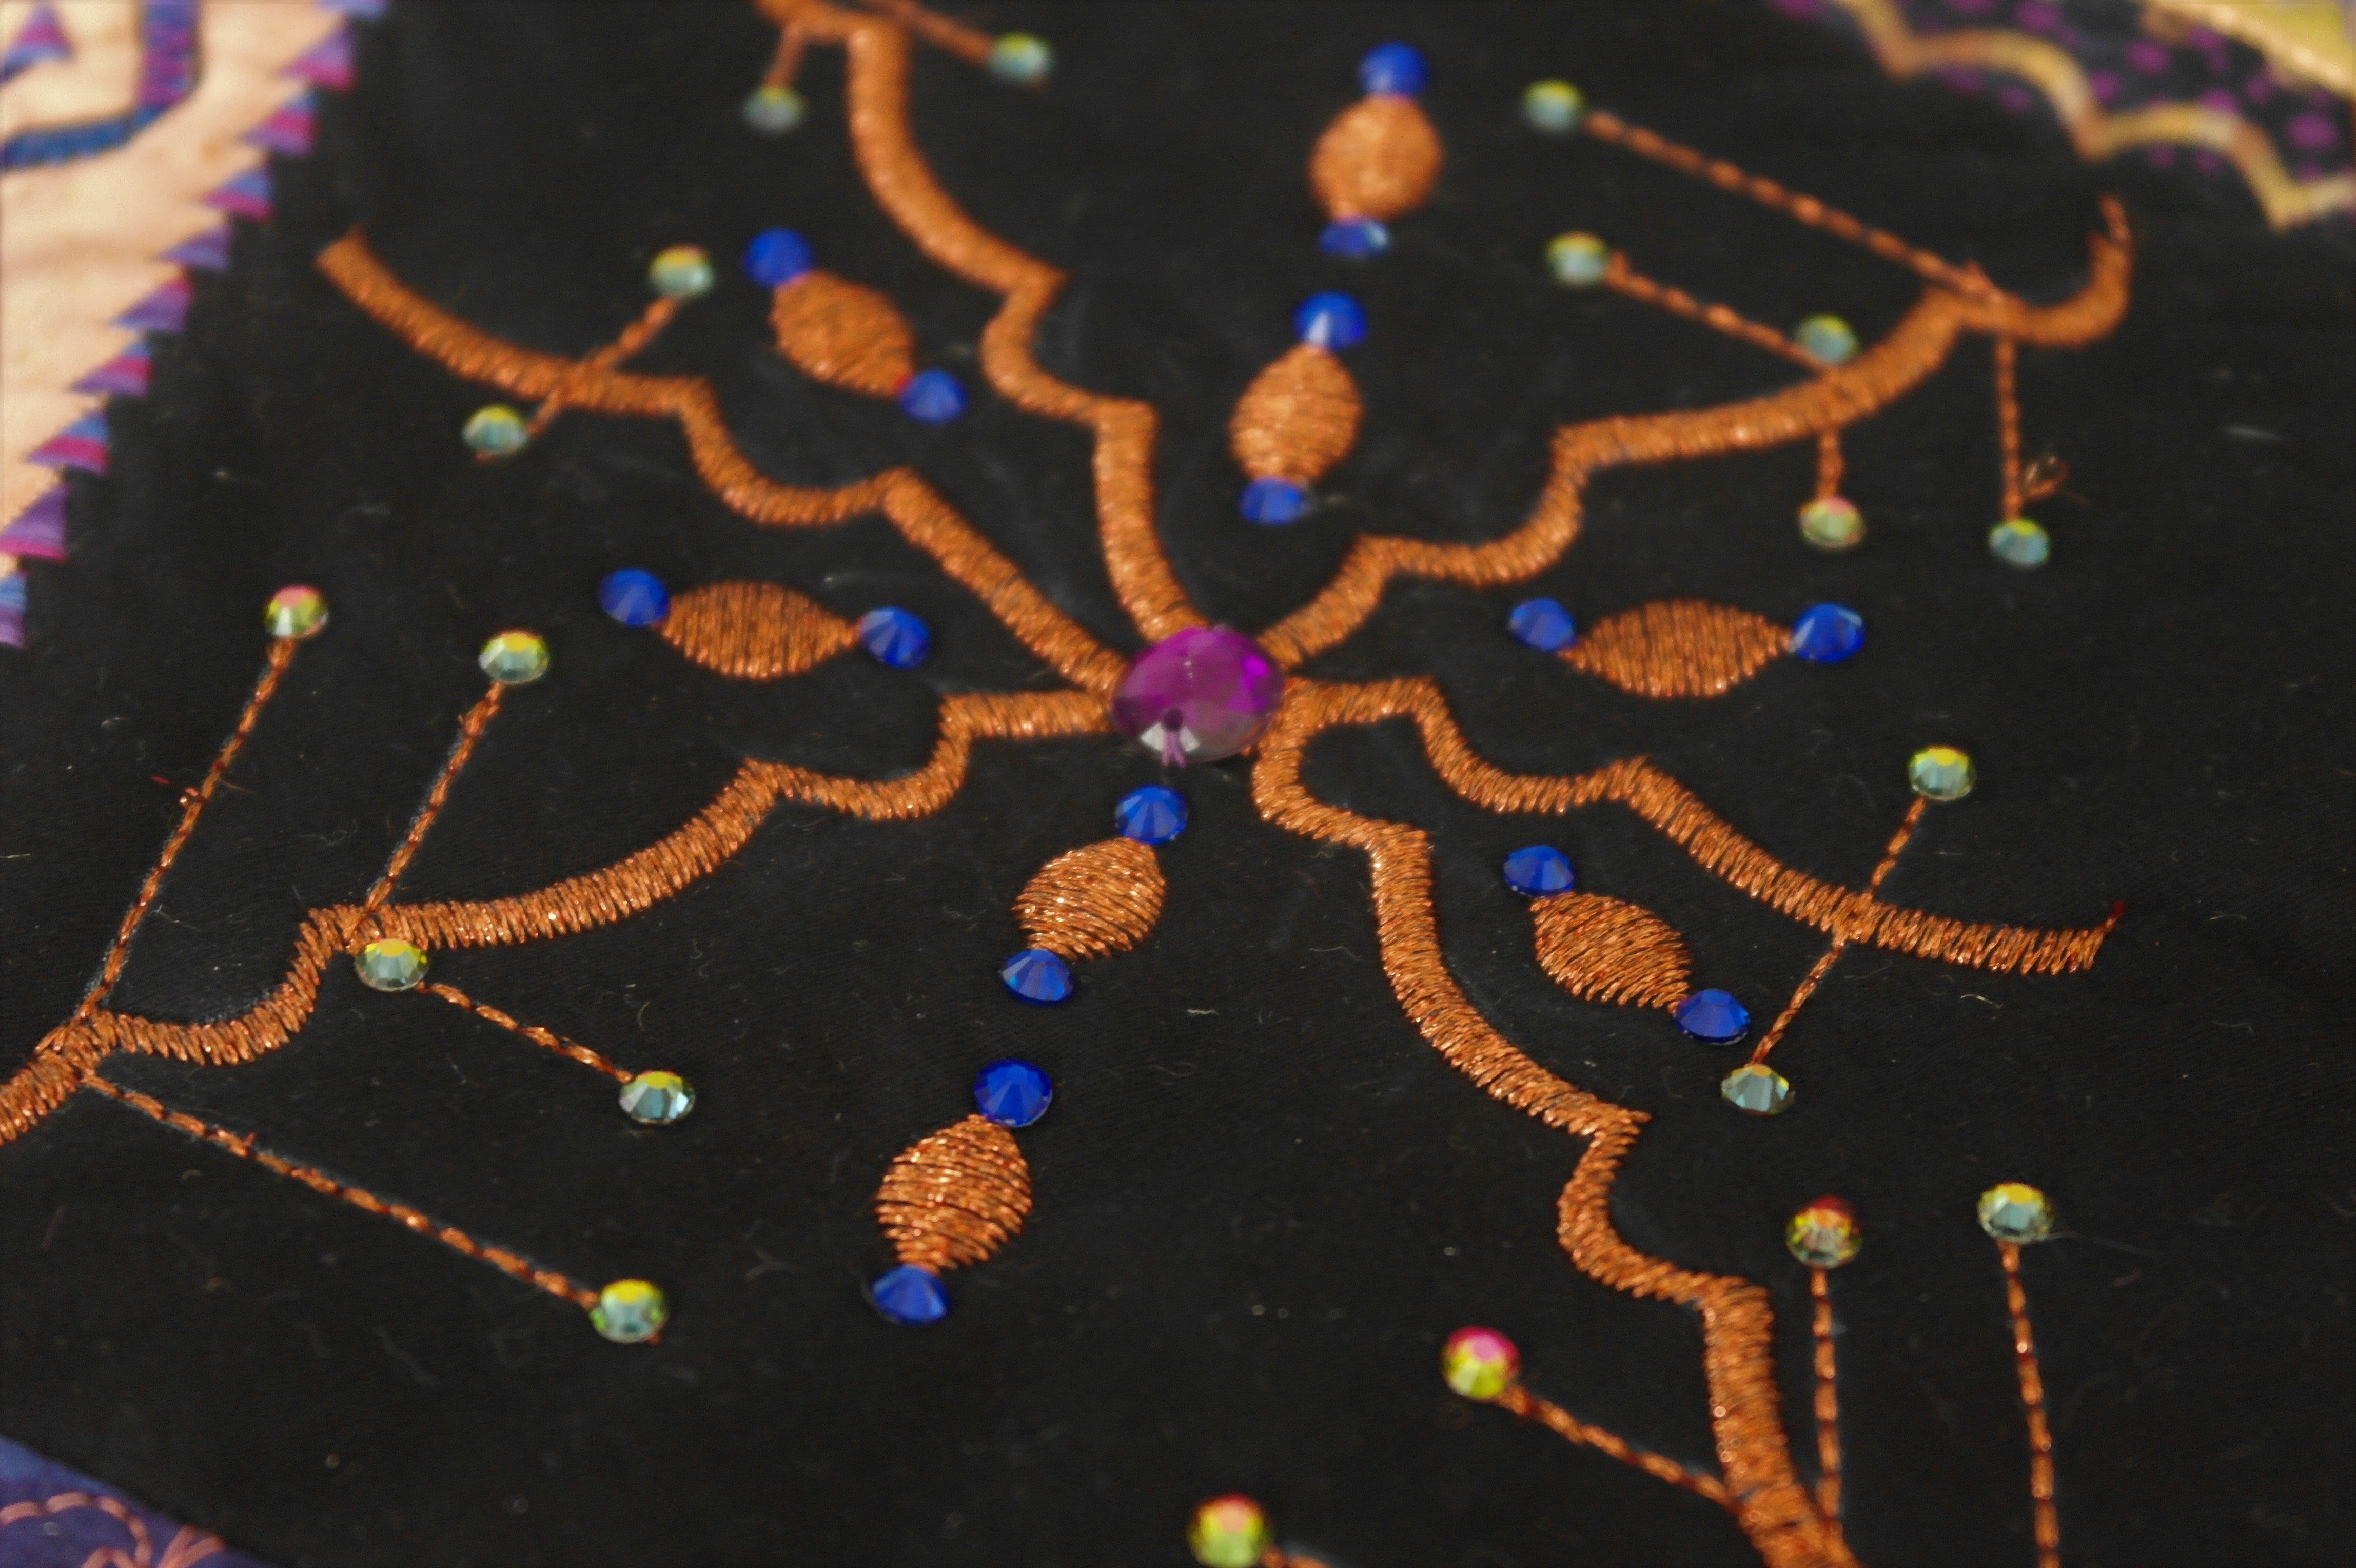
But wait, I almost forgot: placing a large faceted stone in the middle, makes my Crystal look more beautiful… the funny center part is covered. Now it’s time to make your own block 6!
See you next month!
Happy Quilting
Sylvia Kaptein
Sylvia’s Art Quilts Studio
0 Responses