June is the month to celebrate our Dads!
My dad has been a big supporter of my love of creating fashion and I am forever grateful.
Before I had my sewing space, he used to put up with me taking over the dining room table with all my sewing projects and bits of fabric, just clearing a space for dinner.
When we moved to a house with a big garden, he built my mom and I our very own Sewing Room, where we create to our hearts content.
He supported my desire to grow my skills at night school and then again at university.
Not many know this, but he is pretty handy with a sewing machine too! Every now and then I find him repairing a sail or making seat covers for the boat.
I am very fortunate to have such supportive and encouraging parents.
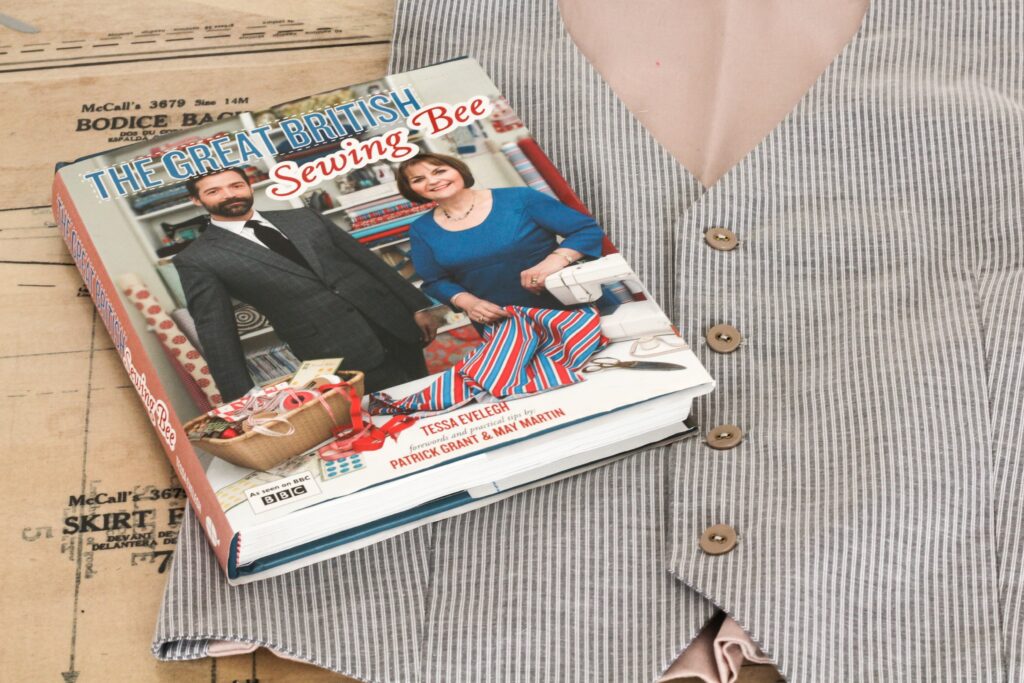
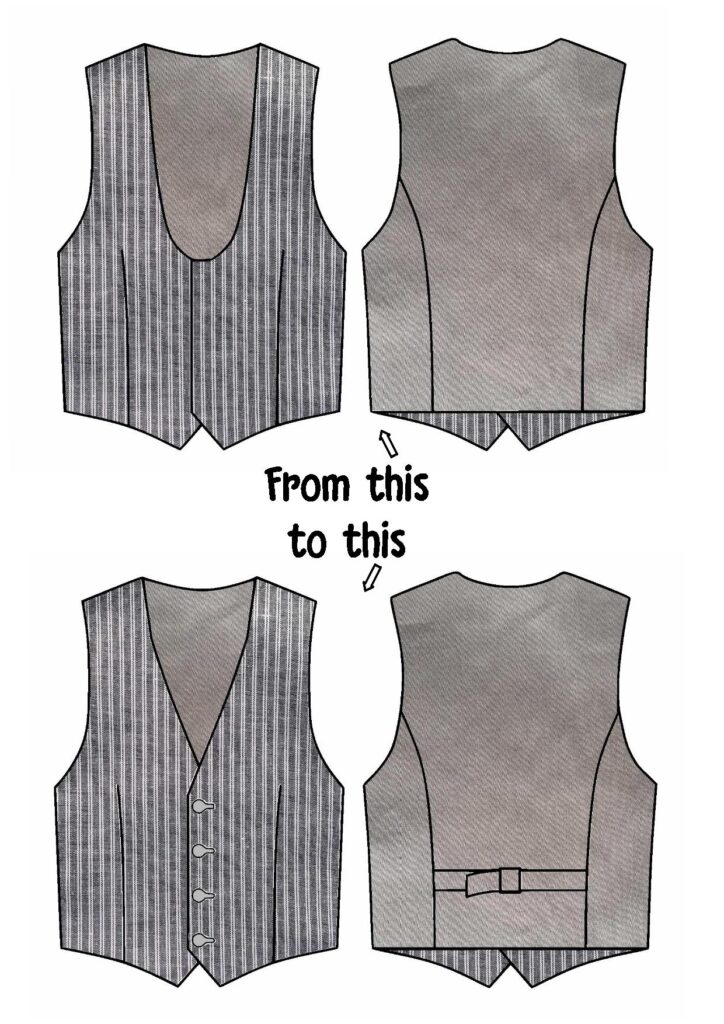
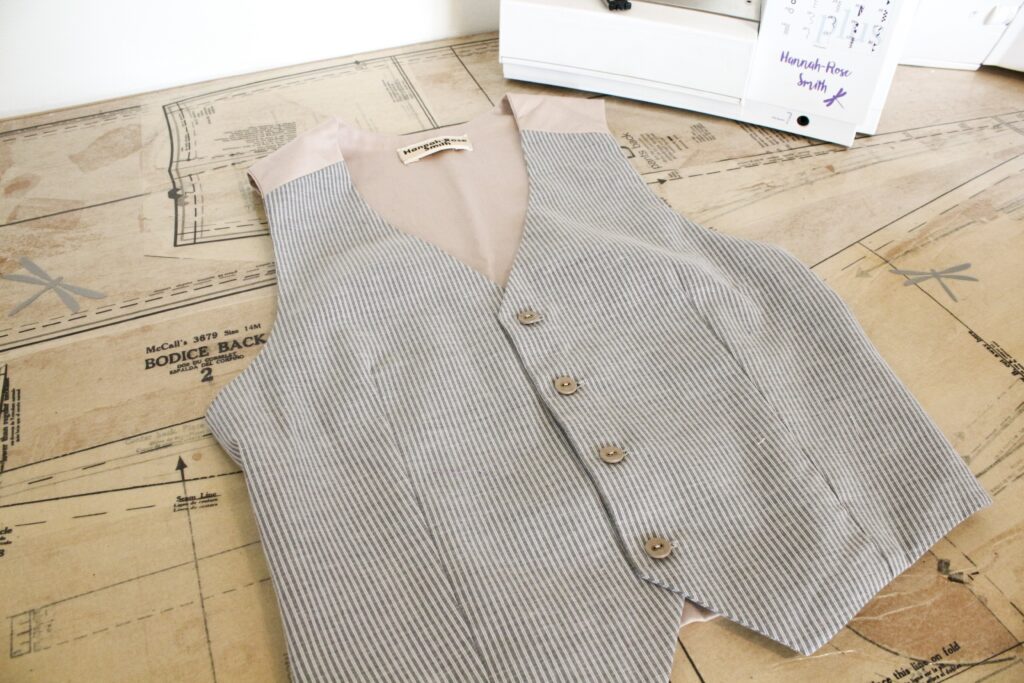
Here I will share a pattern hack for The Great British Sewing Bee Men’s Waistcoat Pattern that you can use to create a waistcoat for a special man in your life.
The original waistcoat instructions can be found in the first The Great British Sewing Bee Book among many other awesome projects.
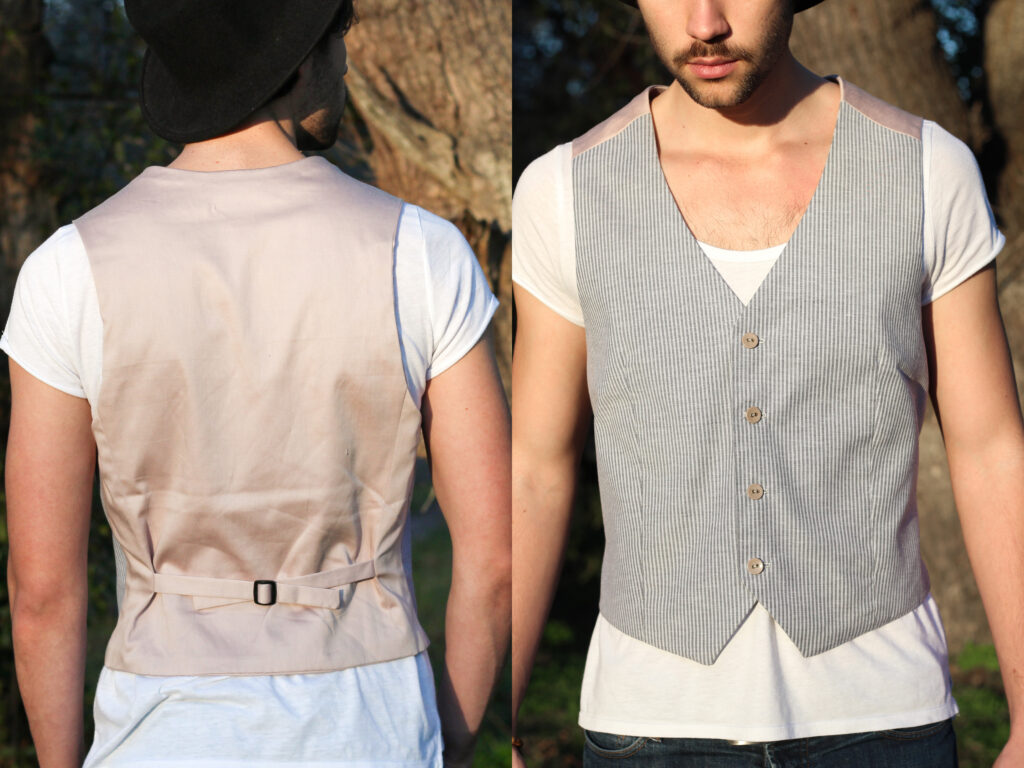
I made this waistcoat for my boyfriend who prefers a V-neck style neckline to the round neckline provided in the pattern.
I added adjustable ties at the back so that he could tailor the fit without restricting movement and comfortability.
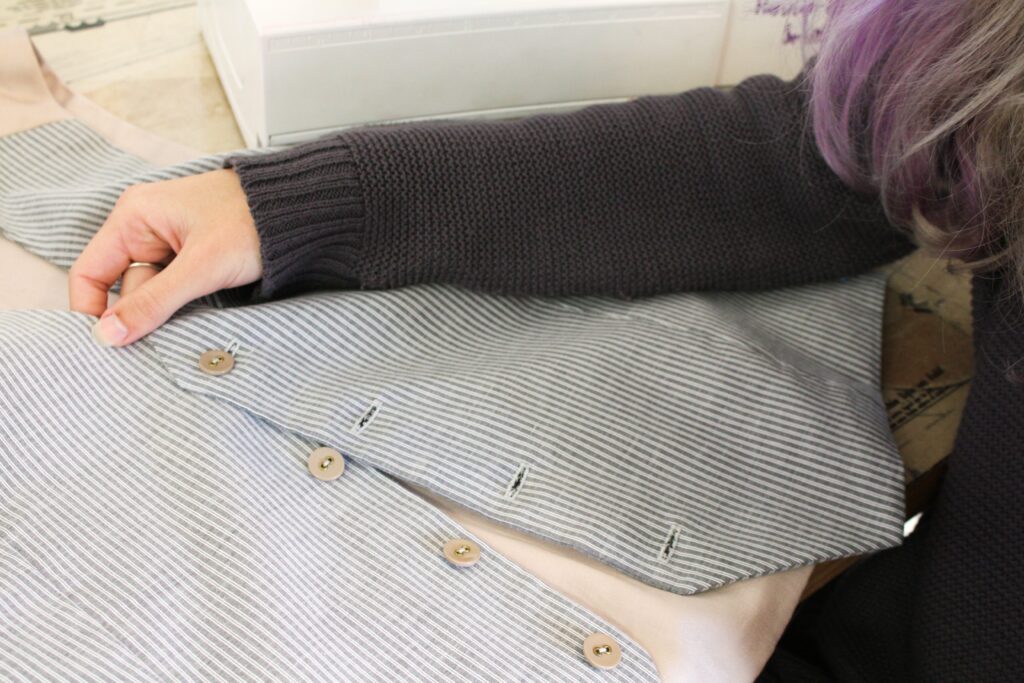
The addition of buttons & buttonholes create a professional looking and more versatile waistcoat.
This waistcoat features in a previous blog post of mine, if you want to make a matching necktie then I suggest checking it out: Necktie blog post
Needed
Pattern Hacking
- Pattern: Great British Sewing Bee Waistcoat
- Ruler
- French curve (don’t stress if you don’t have)
- Pencil
- Measuring Tape
- Paper Scissors
- Tape
Sewing
- Fabric for the front: 2 x the length of the Front [I used 1m by 150cm]
- Fabric for the back: 2 x the length of the Back [I used 1m by 150cm]
- Iron on Vilene: 1 x the length of the Front [I used 0.5m by 150cm]
- 1 Slider [2cm wide]
- 4 Buttons
- Sewing Machine with Buttonhole capabilities
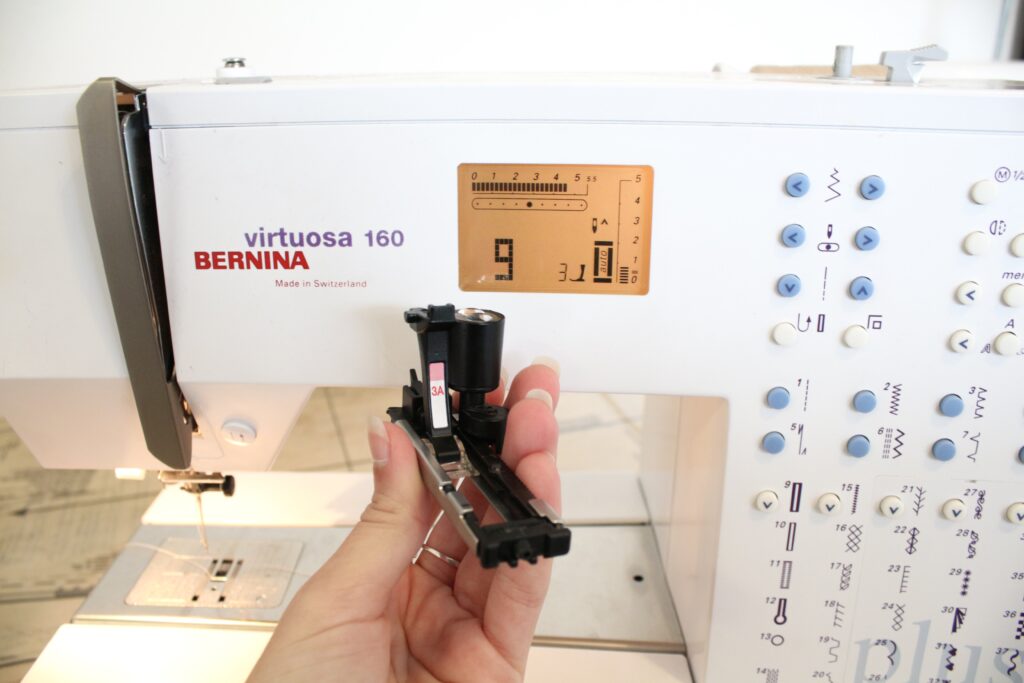
- Buttonhole Sewing Foot [I recommend #3A]
- Thread to match your fabric
- Needle for hand stitching
 *Unfortunately I can’t remember where I found this size chart but the measurements seem to be correct.
Pattern Hack
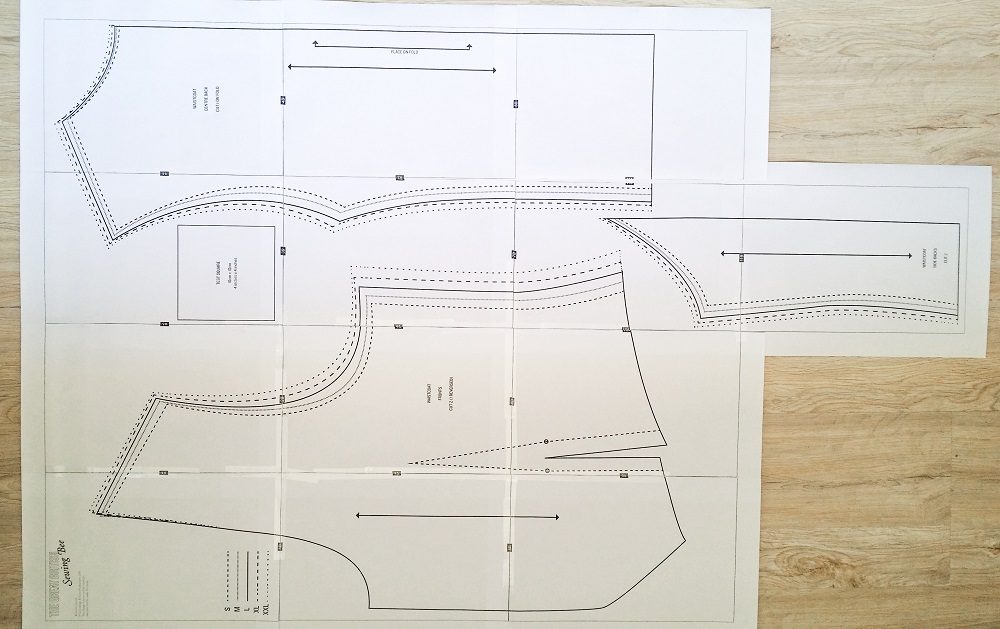 1. Print out your pattern and tape the pages together.
*Do not cut out the individual pattern pieces yet.
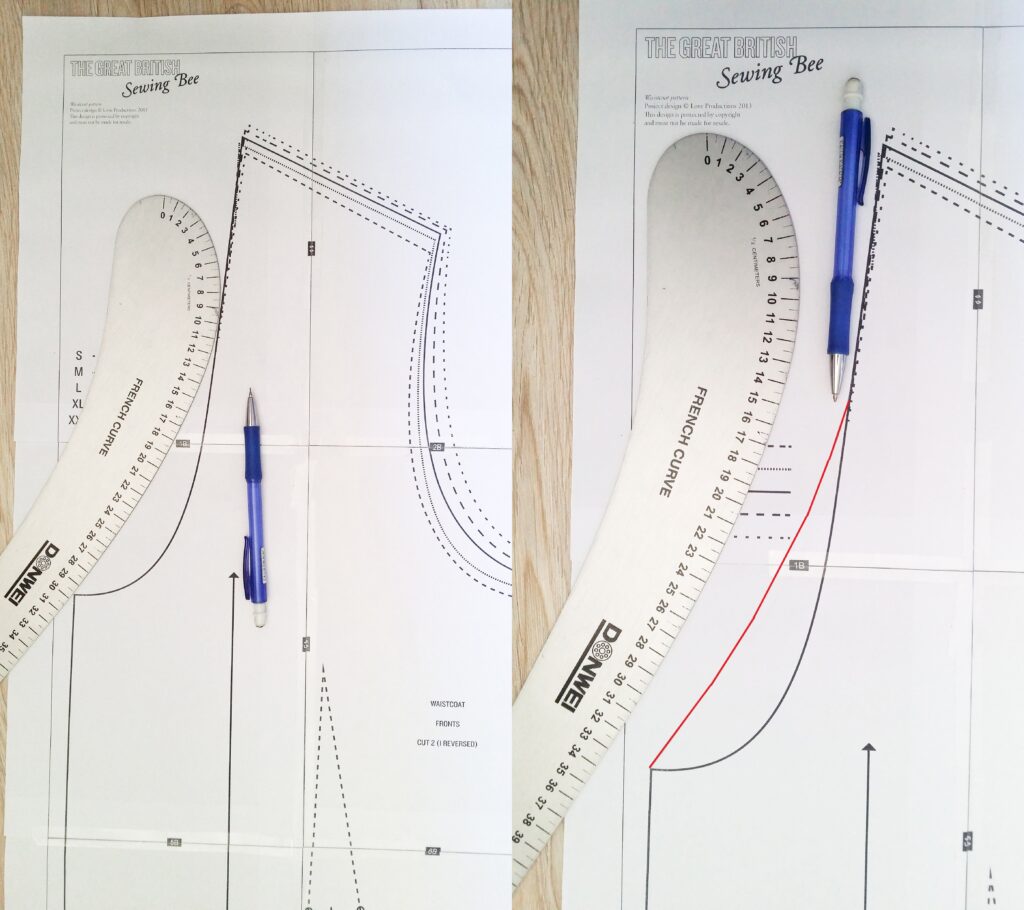
2. Using a French Curve, create a V neckline on the Front pattern piece.
If you don’t have a French curve then judge with your eye while drawing a satisfactory curve.
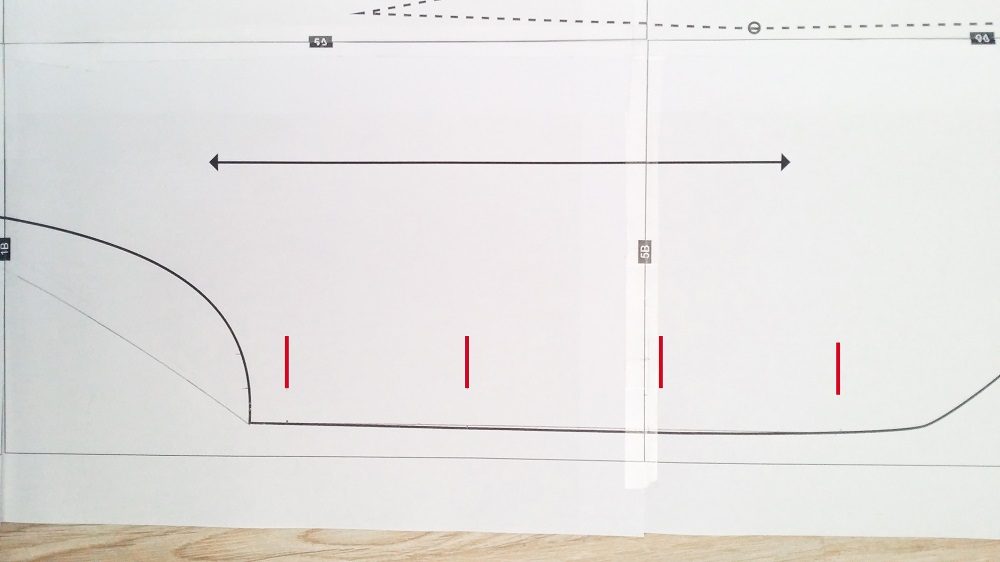 3. Draw 4 equally spaced button holes, 1cm in from the edge.
I made the top button hole 1.5cm from the neckline.
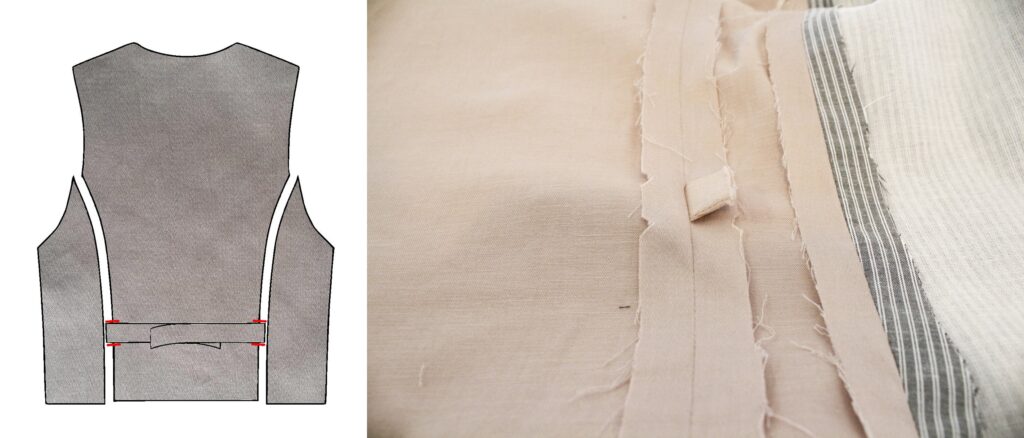
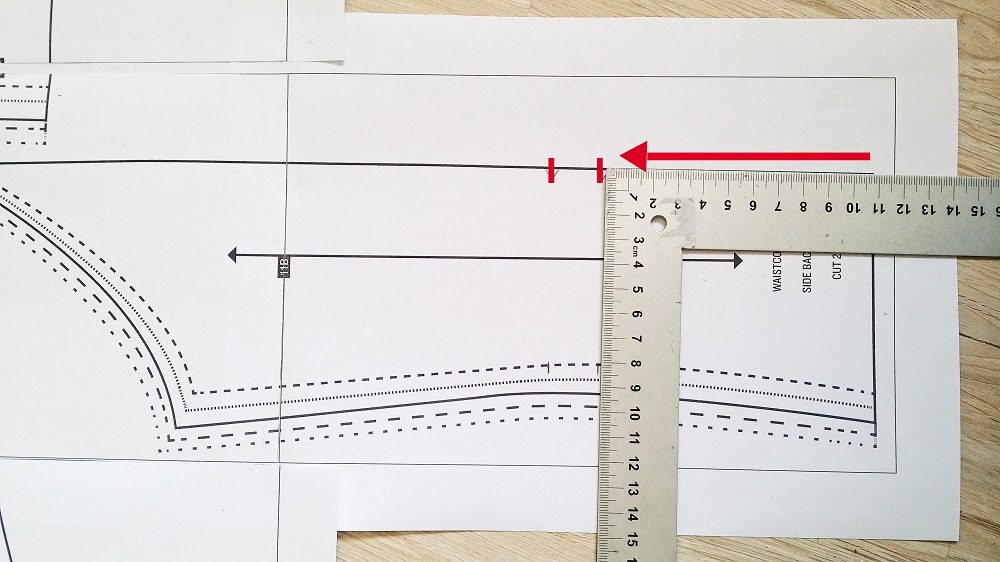 4. Find the Side Back pattern piece.
We are going to mark where the ties are going to be placed.
Use a ruler (a normal ruler is fine) and measure along the Back side seam about 11cm up from the bottom edge. Make a mark.
Measure 2cm above and make another mark.
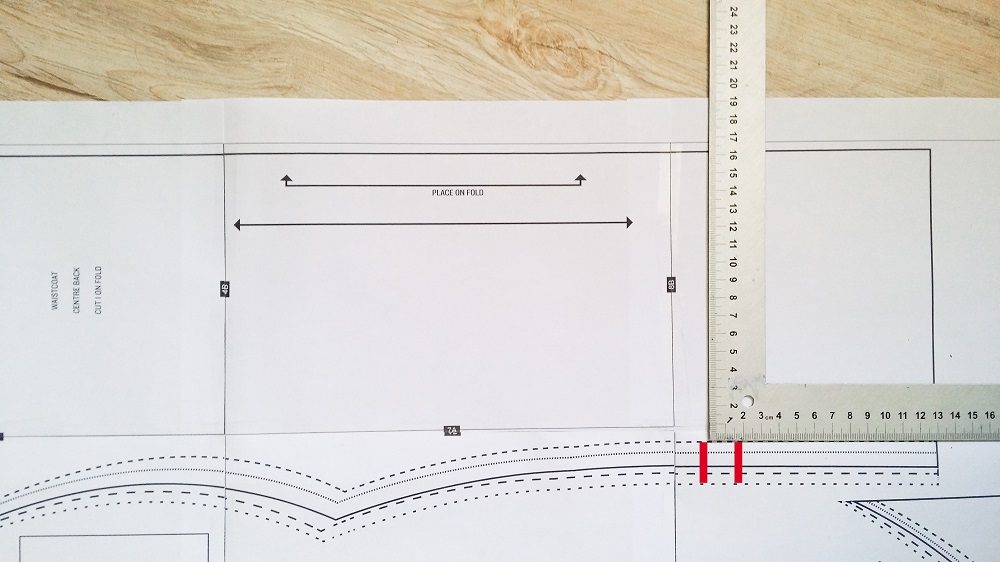
5. Copy the marks on to the Centre Back pattern piece.
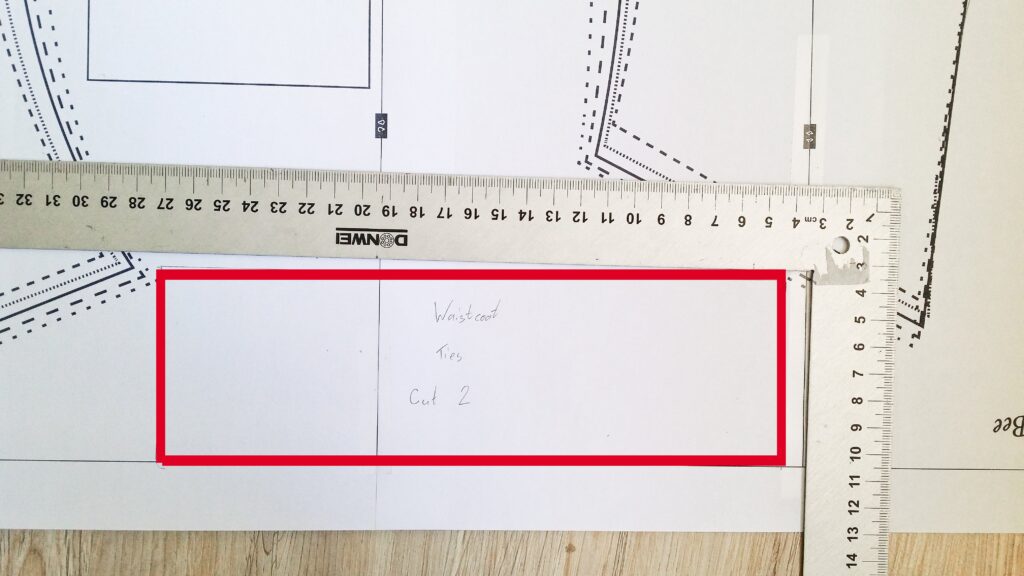 6. Now we are going to draft a pattern piece for the ties.
Find an empty space on the pattern or use another piece of paper.
I chose an area at the top.
Draw a rectangle that measures 6cm x 23cm (you can make the ties longer for bigger sizes).
7. Trace of the necessary size, cut out all pattern pieces and cut out your fabric.
You will end up with 4x Front, 2x Front in Vilene, 4x Side Back, 2x Centre Back & 2x Ties
Iron the vilene onto the Front pieces only (the 2 Front pieces that will be used as the outer fabric)
Sewing
1. I cut out my ties in the same fabric as the Side Back & Centre Back pieces.
Fold each tie in half (lengthwise) and sew a 1.5cm seam allowance along the 2 edges.
2. Trim the corners of the short edge.
Turn the ties the right-side out and press.
3. Insert the ties into the Back seams between the marks we made on the pattern.
4. Join the Front to the Back at the shoulder seams.
Repeat for lining.
*Don’t sew side seams yet.
5. Sew the Front darts.
Repeat for lining.
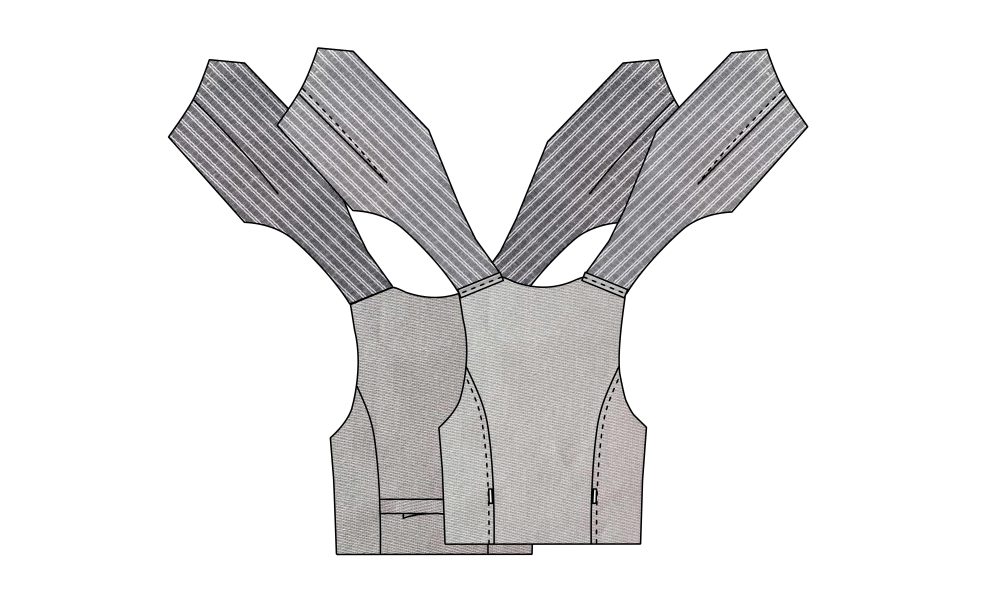 6. Place the lining exactly on top of the outer-shell with right-sides together
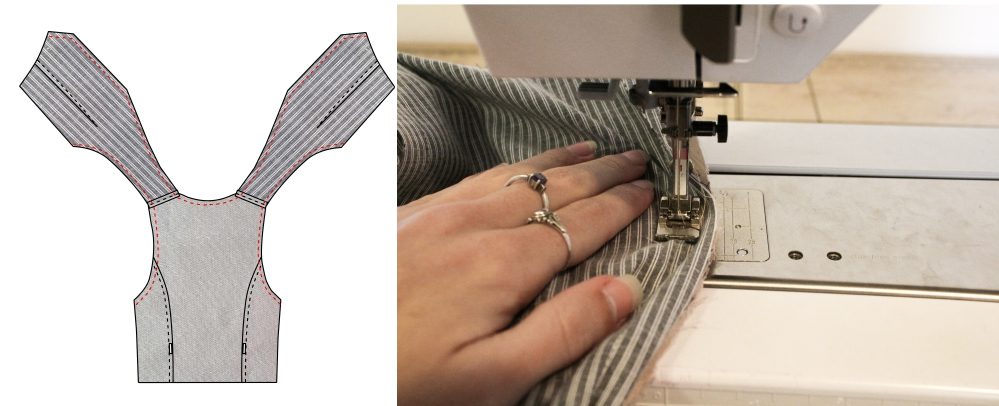
7. Join the lining to the outer-shell at the armholes and along the neckline.
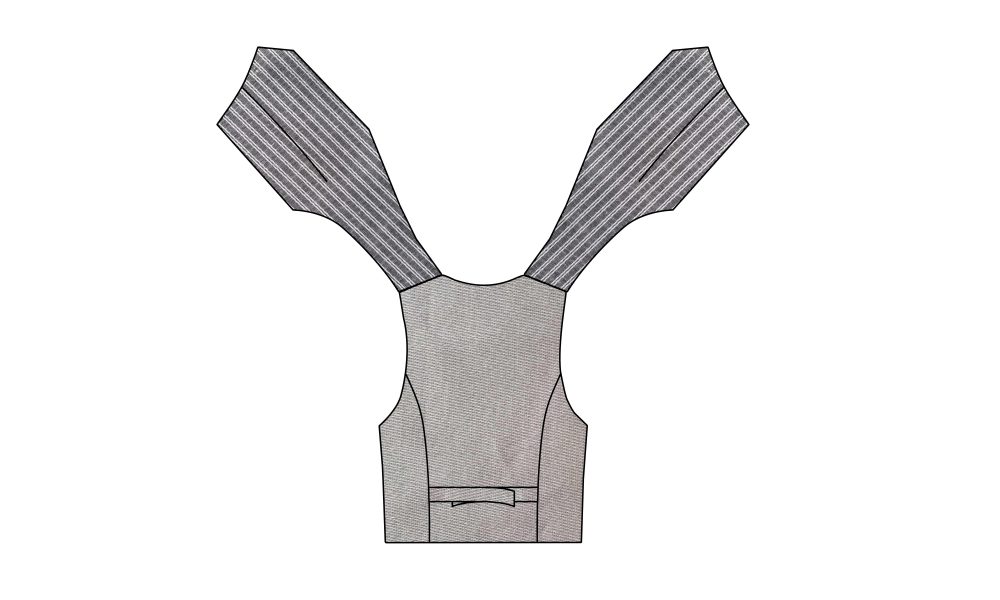
8. Turn the Waistcoat right side out.
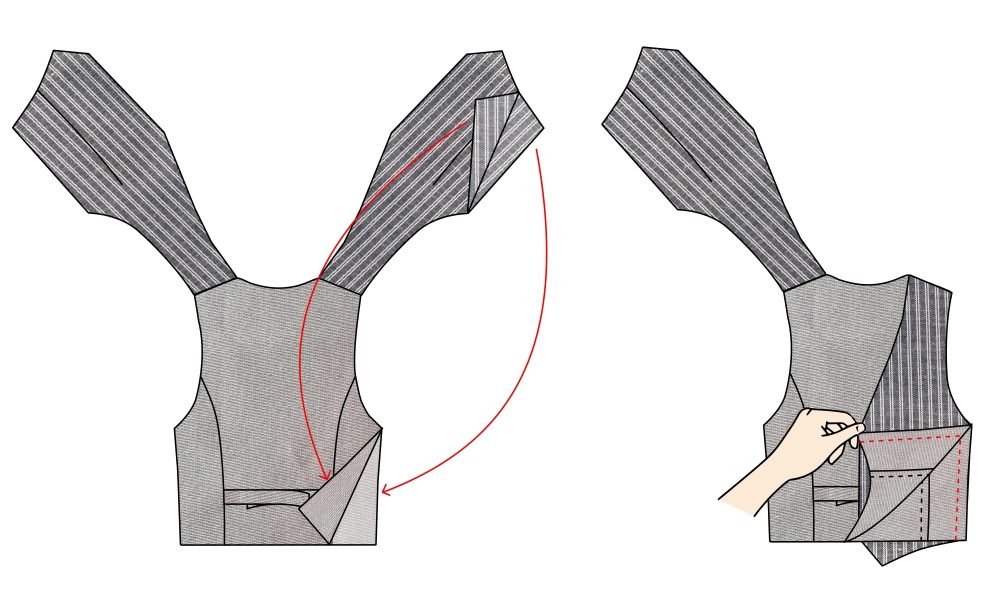 9. Join the respective side seams with right-sides together.
Lining front to outer-shell front, lining back to outer-shell back.
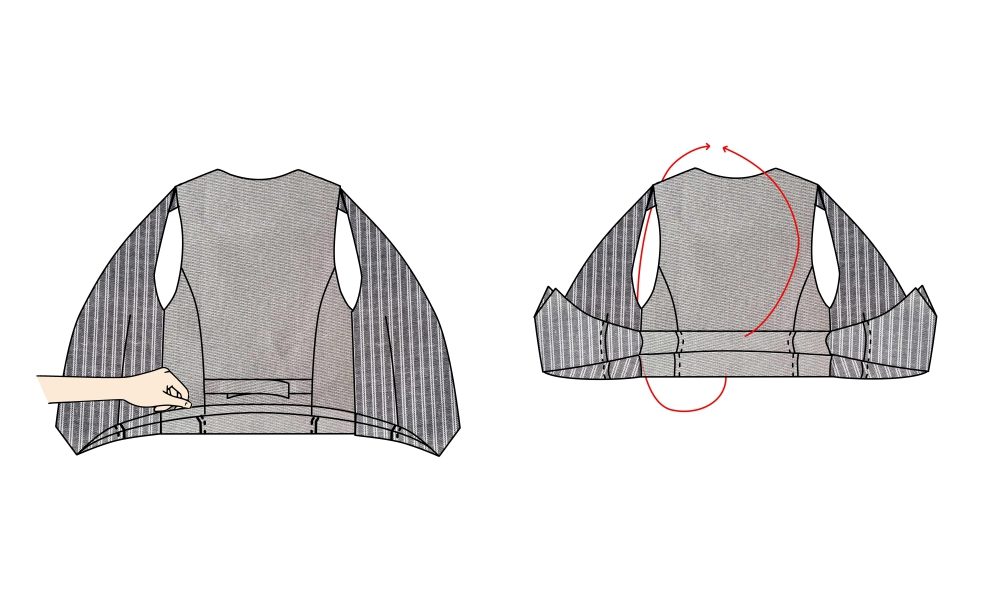 11. Bring together the hem of the lining and outer-shell (with right-sides together) encasing the garment.
You don’t need to turn the whole garment right side out, it won’t be able to anyway.
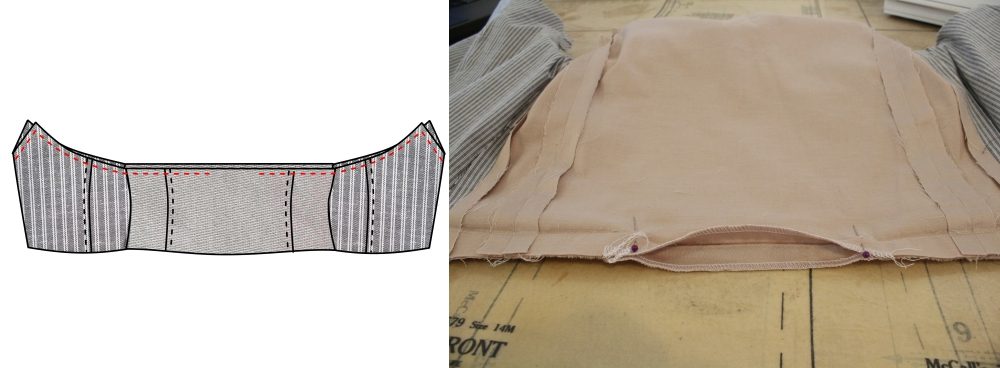 12. Join the hem of the lining and outer-shell, leaving an opening to turn it right-side out.
13. Turn the waistcoat right-side out and slip stitch the opening closed.
14. Copy the button hole placements on to the Front left of the waistcoat.
15. Prepare your sewing machine for button holes.
Here is a link to a video tutorial I made: Button hole with foot #3A Tutorial
*I would recommend you practice making button holes on a scrap piece of fabric before starting on your garment.
16. Open the button hole using an unpicker.
Place a pin at the top of the button hole to prevent the unpicker from cutting too far.
17. Sew your buttons onto the Front right of the waistcoat.
18. Feed the slider onto the ties.
19. Give all the seams a press.
I made my boyfriend a size Small and with the addition of the ties, the waistcoat fit really well!
I would love to see the waistcoats you create, please feel free to share them with me!
Instagram
Facebook
I hope all the dads out there felt extra special this month.
-Hannah-Rose
 BERNINA Corporate Blog -










How do you turn it right way round from the bottom? I had an attempt, asked for help to no avail. So eventually I undid the sides and sewed the bottom and turned it through the side
Hi Jennifer
Well done on making a plan.
I’ll see if I can draw a pic to explain steps 6-8 in bit more detail 😉
Will get back to you asap.
Hi Jennifer
I decided to update this blog post by adding in some drawings for clarification.
I hope they are helpful and answer your query 😉
Does the Pattern include seam allowance? And if so, how big is it?
Hi Emma
Yes it does, it is 1.5cm 😉