 BERNINA Corporate Blog -
The brooch is a decorative item, smaller or larger, which is designed to be attached to a garment. The first known brooches come from the Bronze Age and by the ages from which they come, have evolved in different directions. They are made of various materials. In the past, they were mainly made of metal, gold and silver decorated with multiple gemstones and were part of the jewelry. Today they are made of diverse materials.
Brooches are today very widespread, in many different shapes and designs, and represent one of the most popular accessories.
Although I wished for a long time with a brooch to decorate my garments, I just recently decided to make a few. I started with the simplest models because I have a lot of colorful clothes and I wanted to break that colorfulness without being too noticeable.
On the other hand, the felt has always seemed to be very interesting for processing, so I decided to make a brooch of felt. You can find felt in almost any handcraft supplies shop. It can be produced in many ways, from natural or synthetic fibers, and uses are various too.
After simple brooches, I started playing with the felt and designing various other ideas, and this item too. The instruction for making a similar one is shown below.
Felt and fall go together, and thus it is an excellent idea to make fall leaves from it, arrange them together, glue, and you have a beautiful decorative piece, that made your garment interesting.
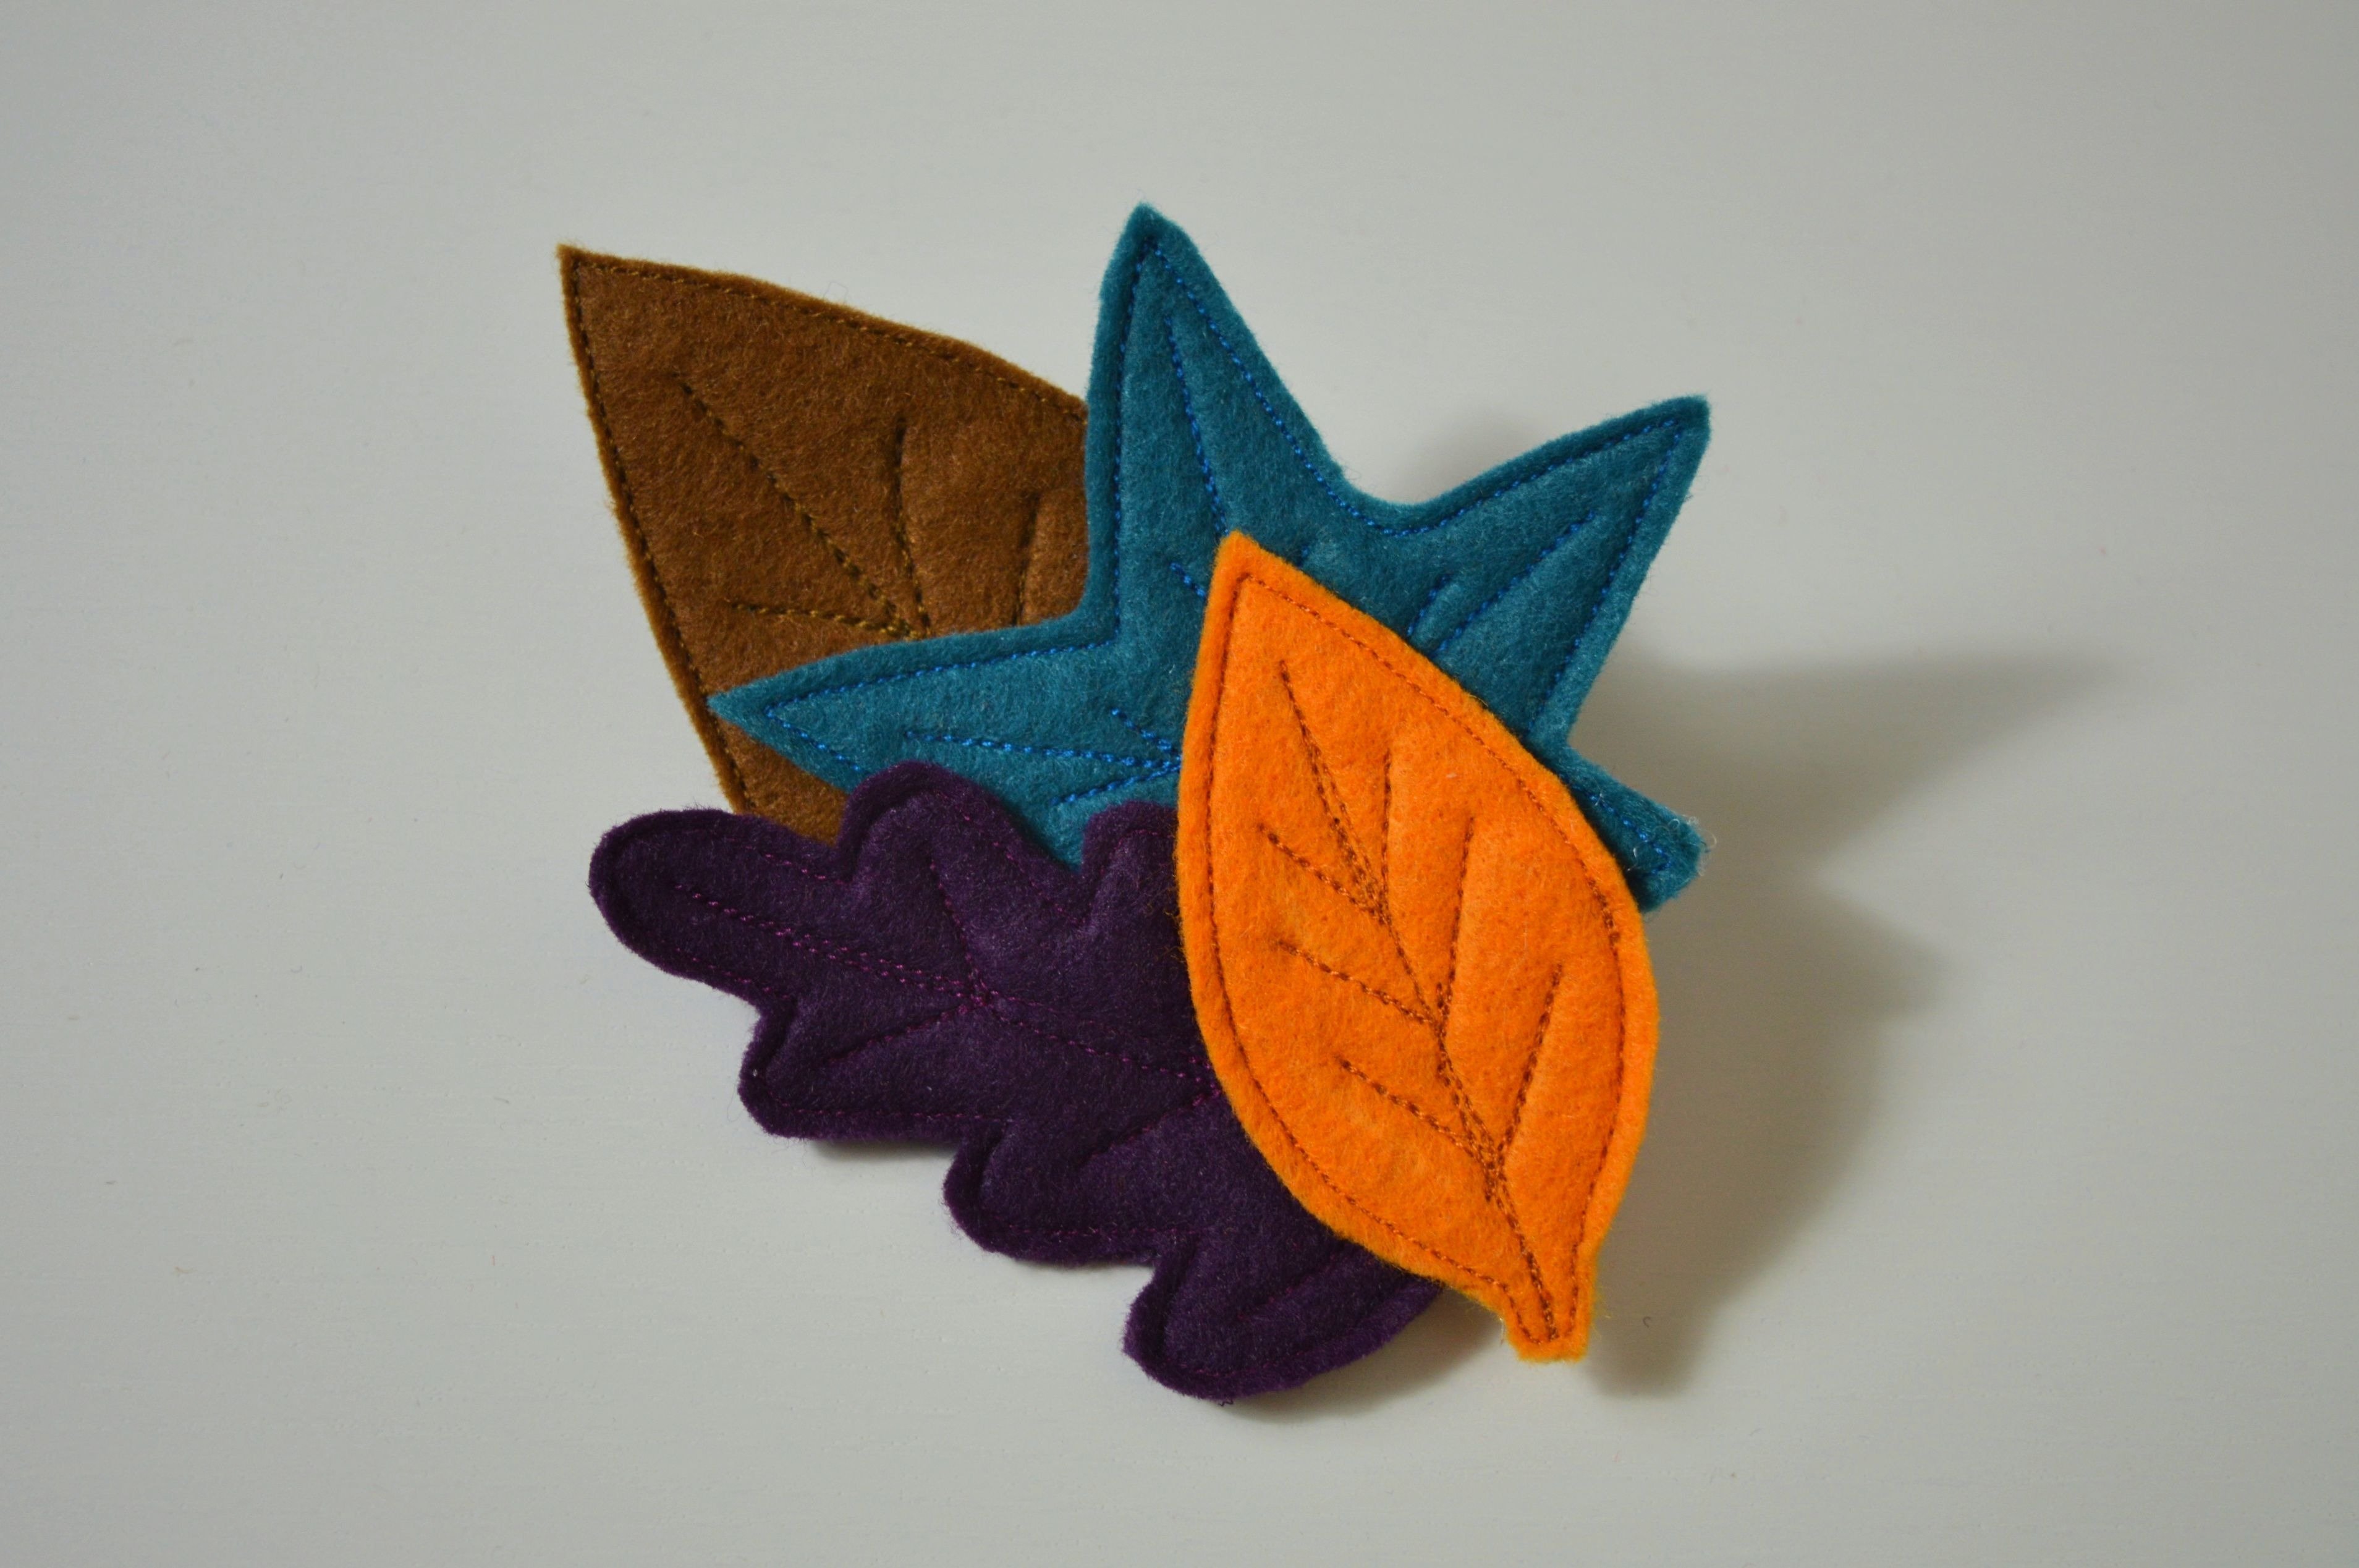
Fall Leaves Felt Brooch
MATERIAL for FALL LEAVES FELT BROOCH:
- felt in different colors
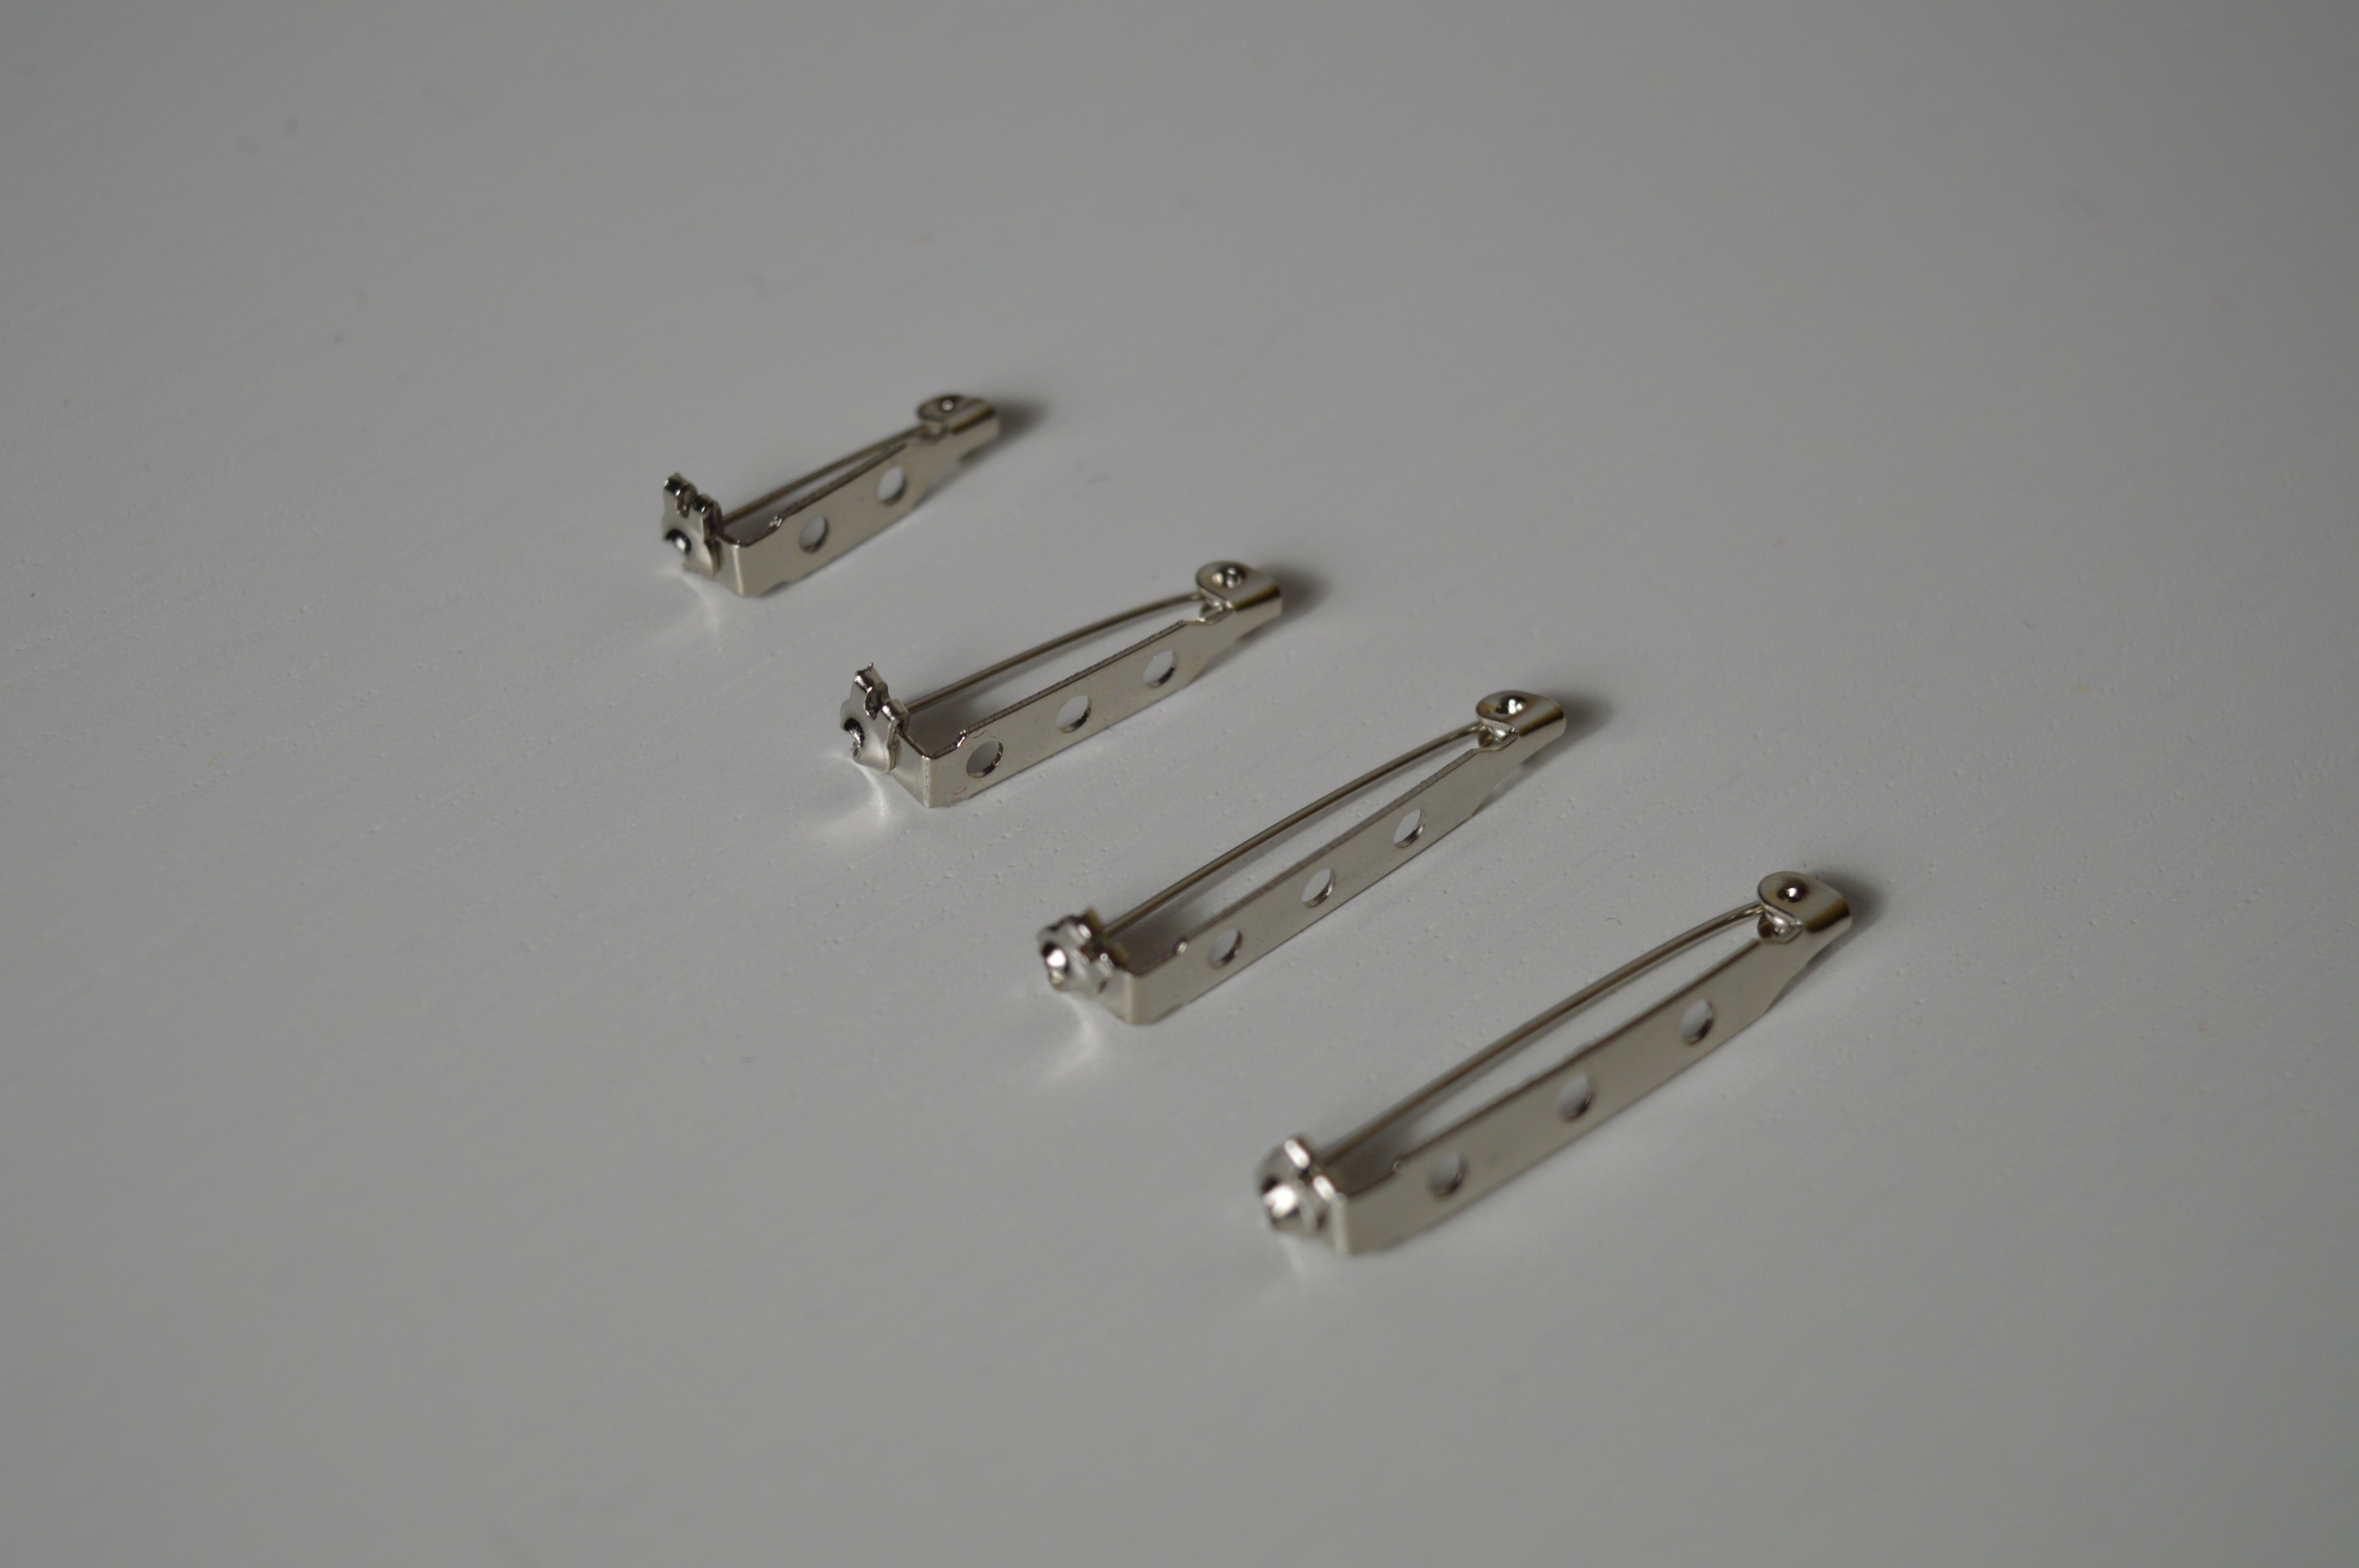
- brooch back safety pin
- leaves templates
- threads in (almost) matching colors
You still need: sewing machine, scissors, tailor’s chalk, and a glue gun.
Optional: pencil, paper sheet, printer
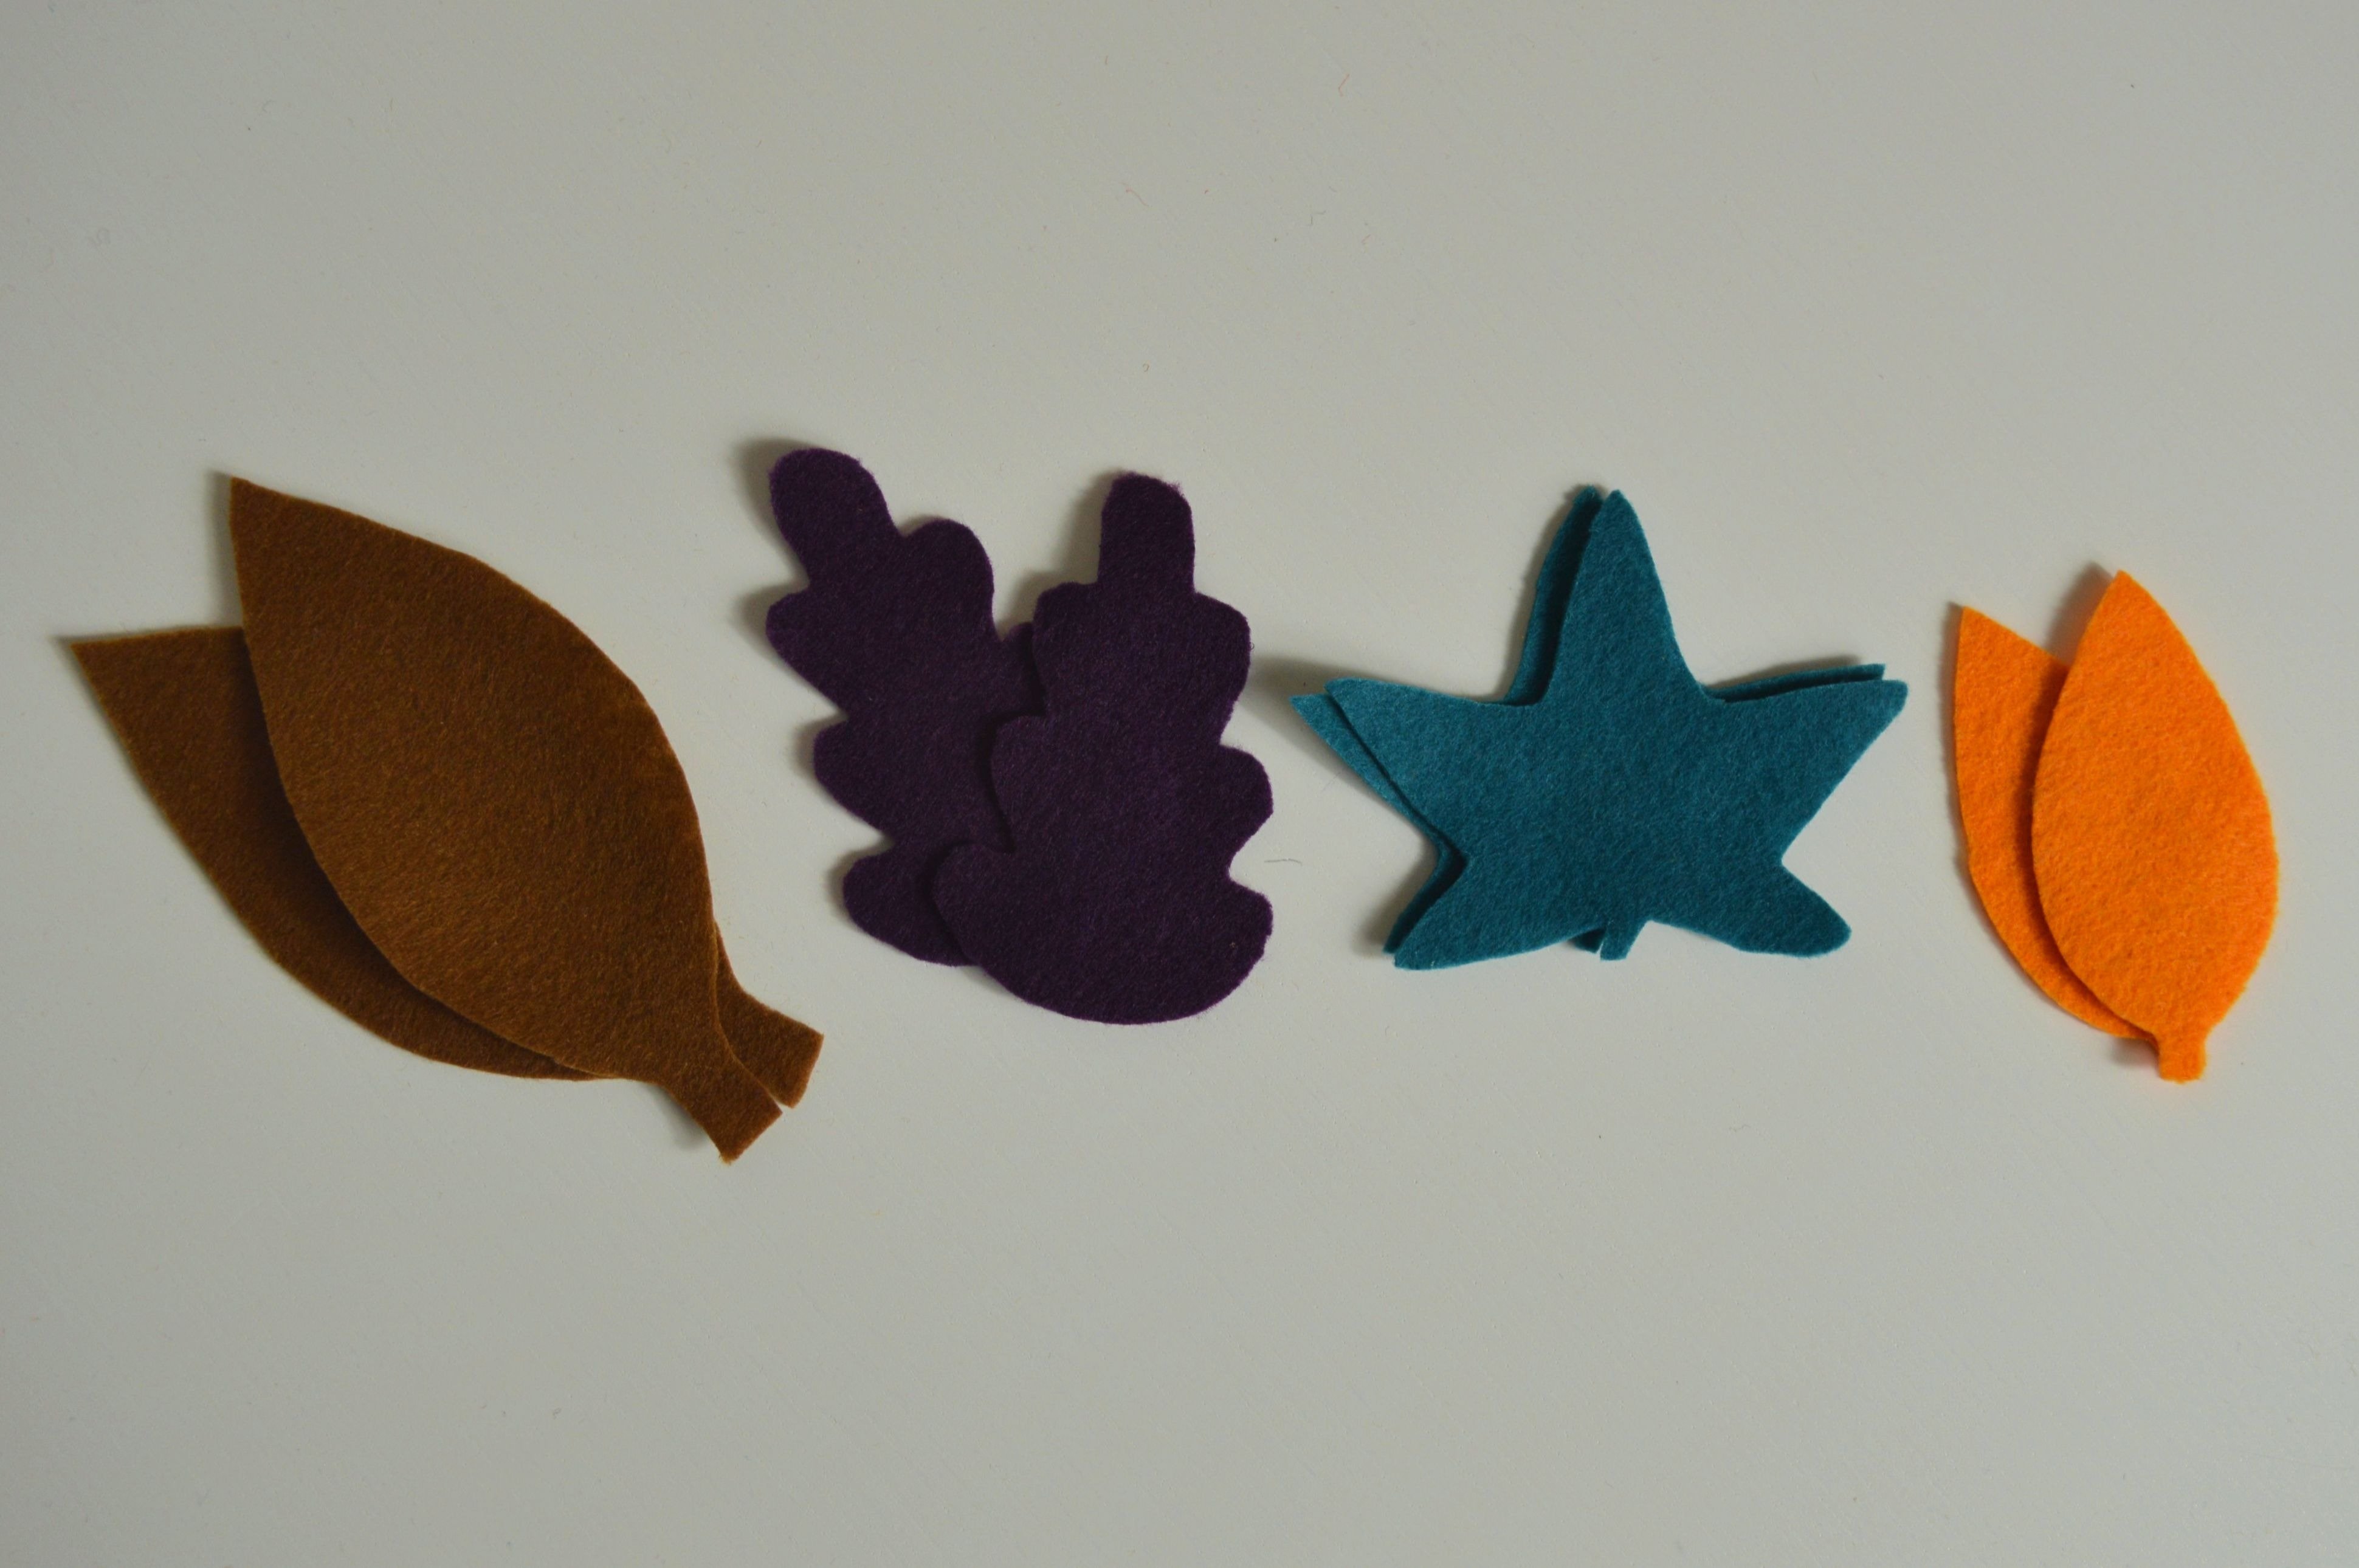
I bought the felt in 5 different colors, colors that represent fall, darker like petroleum and purple, brown, orange and beige, which you see in the picture below. But you will find out that I have used only four of these colors.

Felt
You can find the brooch safety back pins in any handcraft supplies store or on the internet. I ordered them on the Internet, and it was a package of 100 pieces in 4 different sizes, i.e., lengths. In the picture below are the pins of approximately 20, 25, 33 and 43 mm length.
For the brooch, I used back pin of 43 mm.
Brooch Safety Back Pin
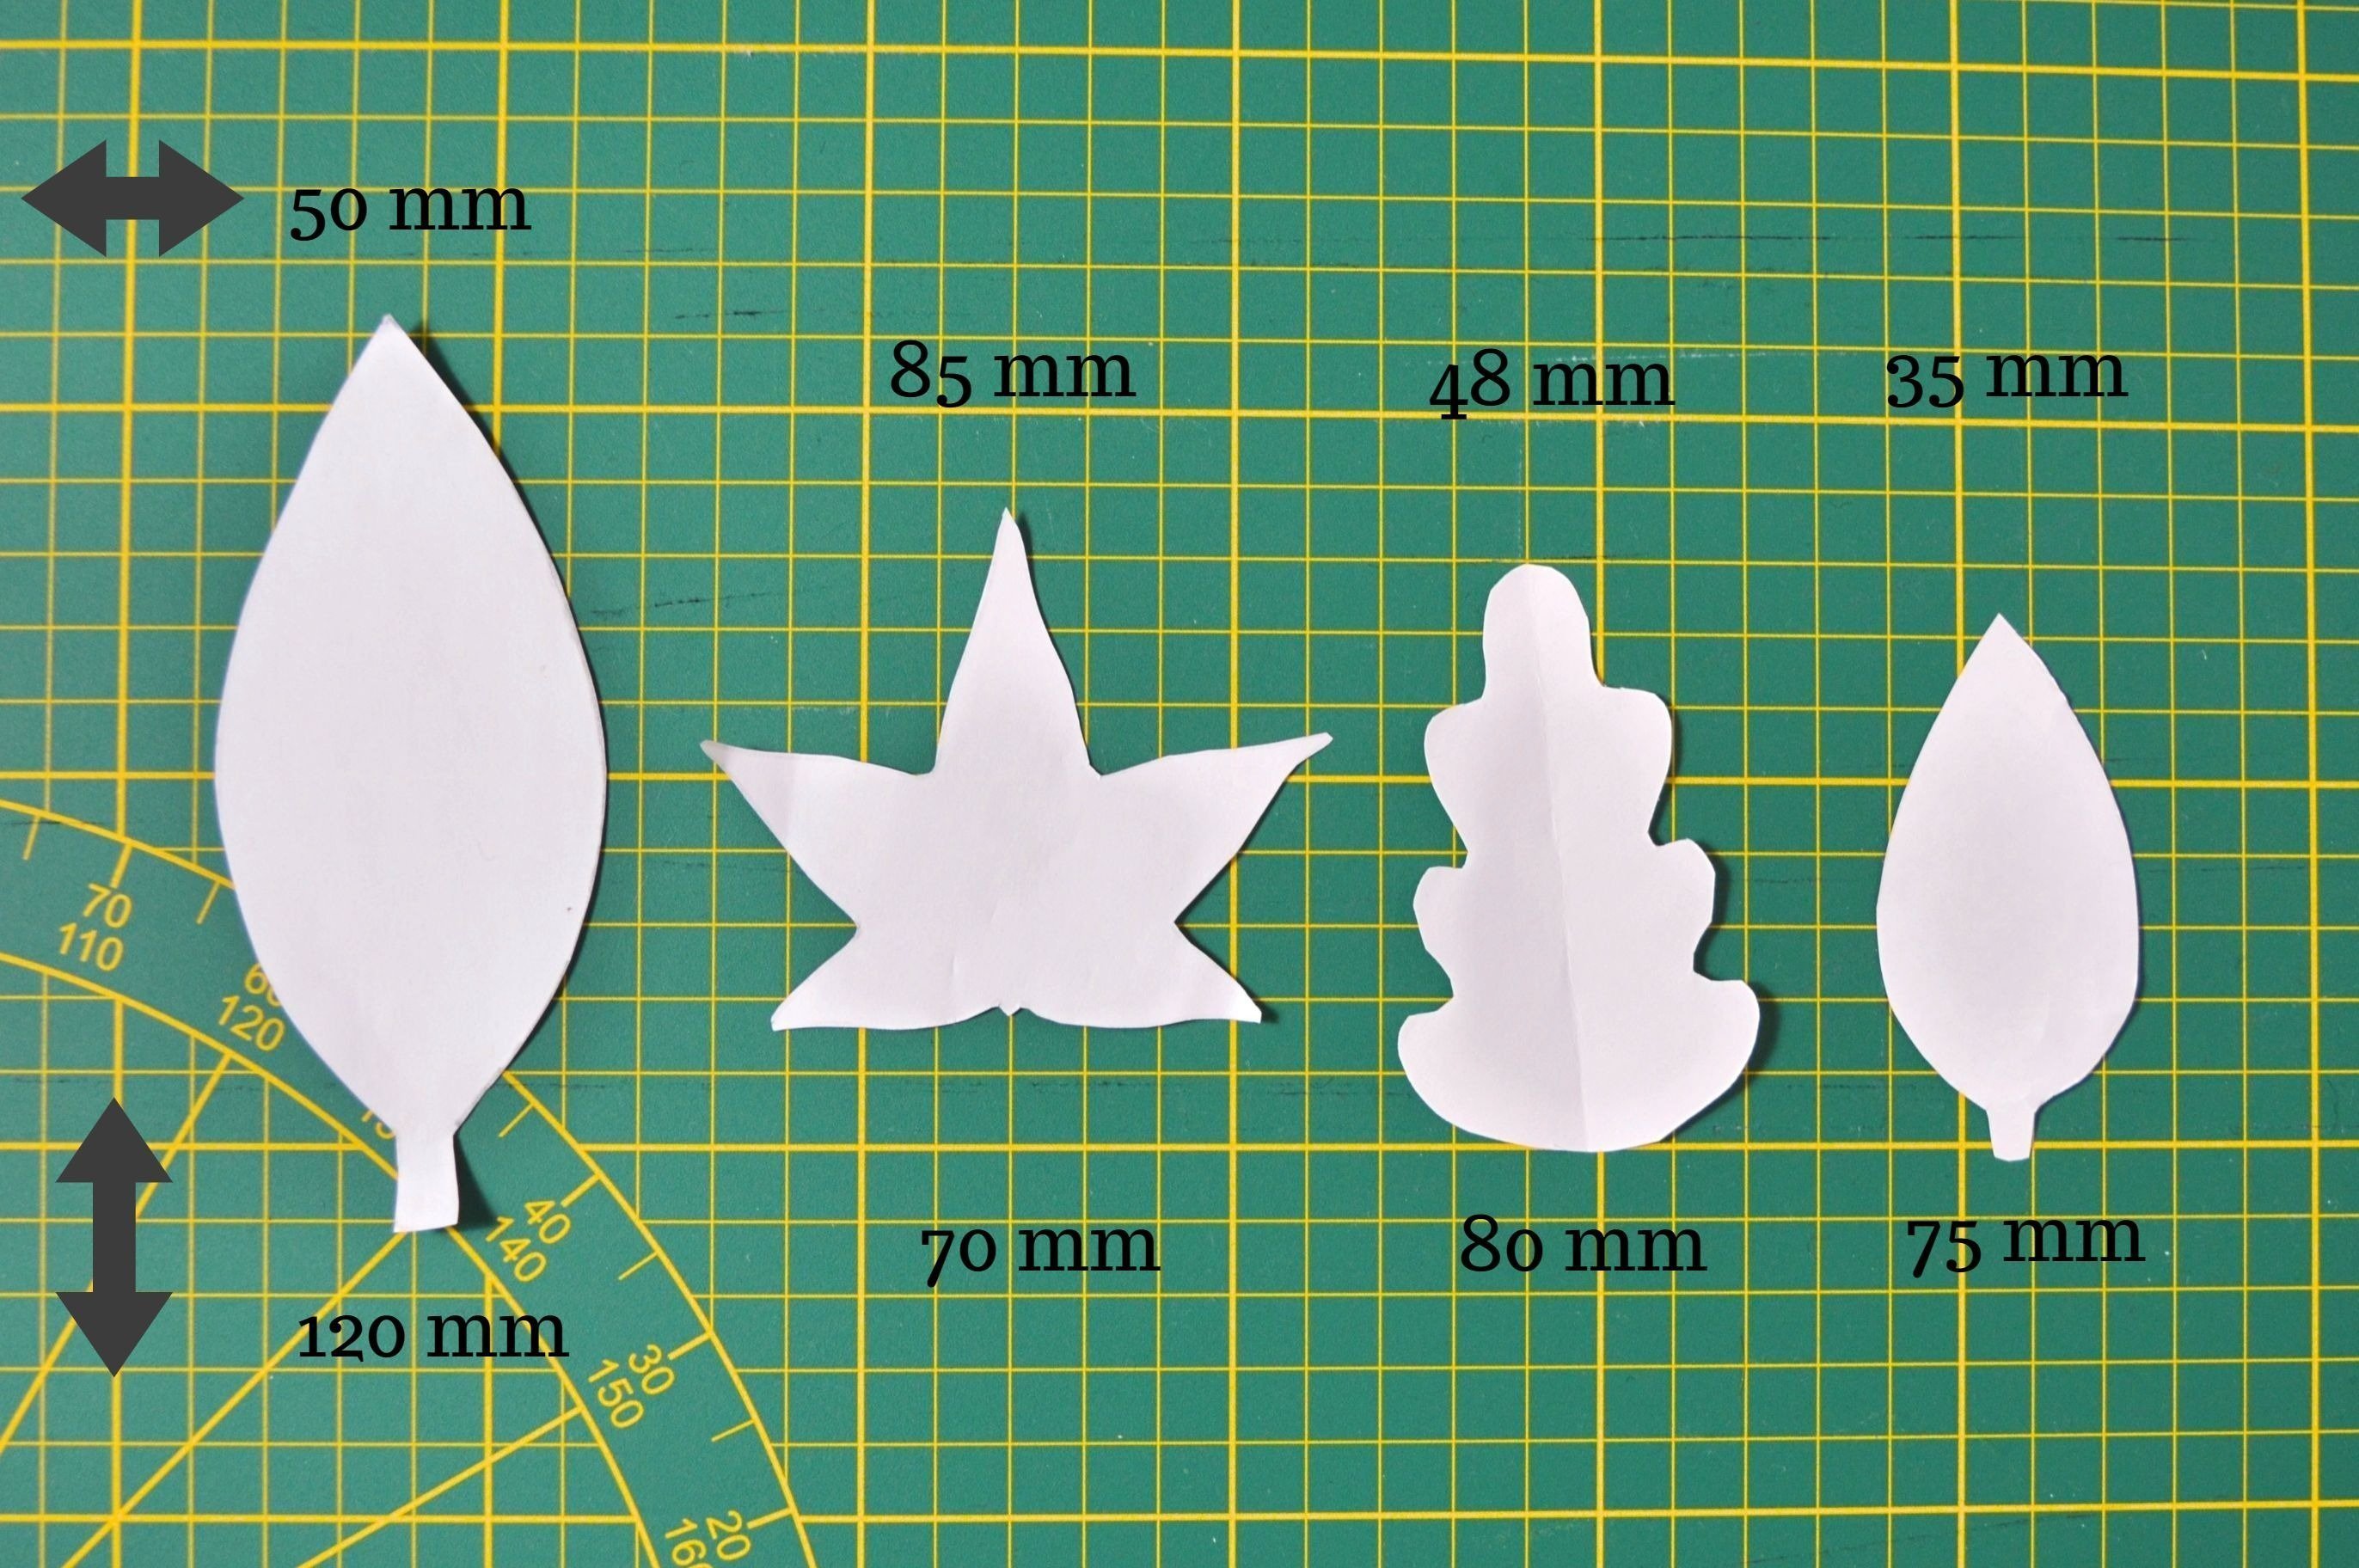
Fall leaves templates you can draw yourself or find on the link (Print onto regular printer paper and cut out the models.).
I tried a few templates how they would look together and decided on the four specimens of the leaves. I drew the third leave (from left to right) (although similar you can find on the mentioned link, I forgot to print it), while the rest three models are from the Internet.
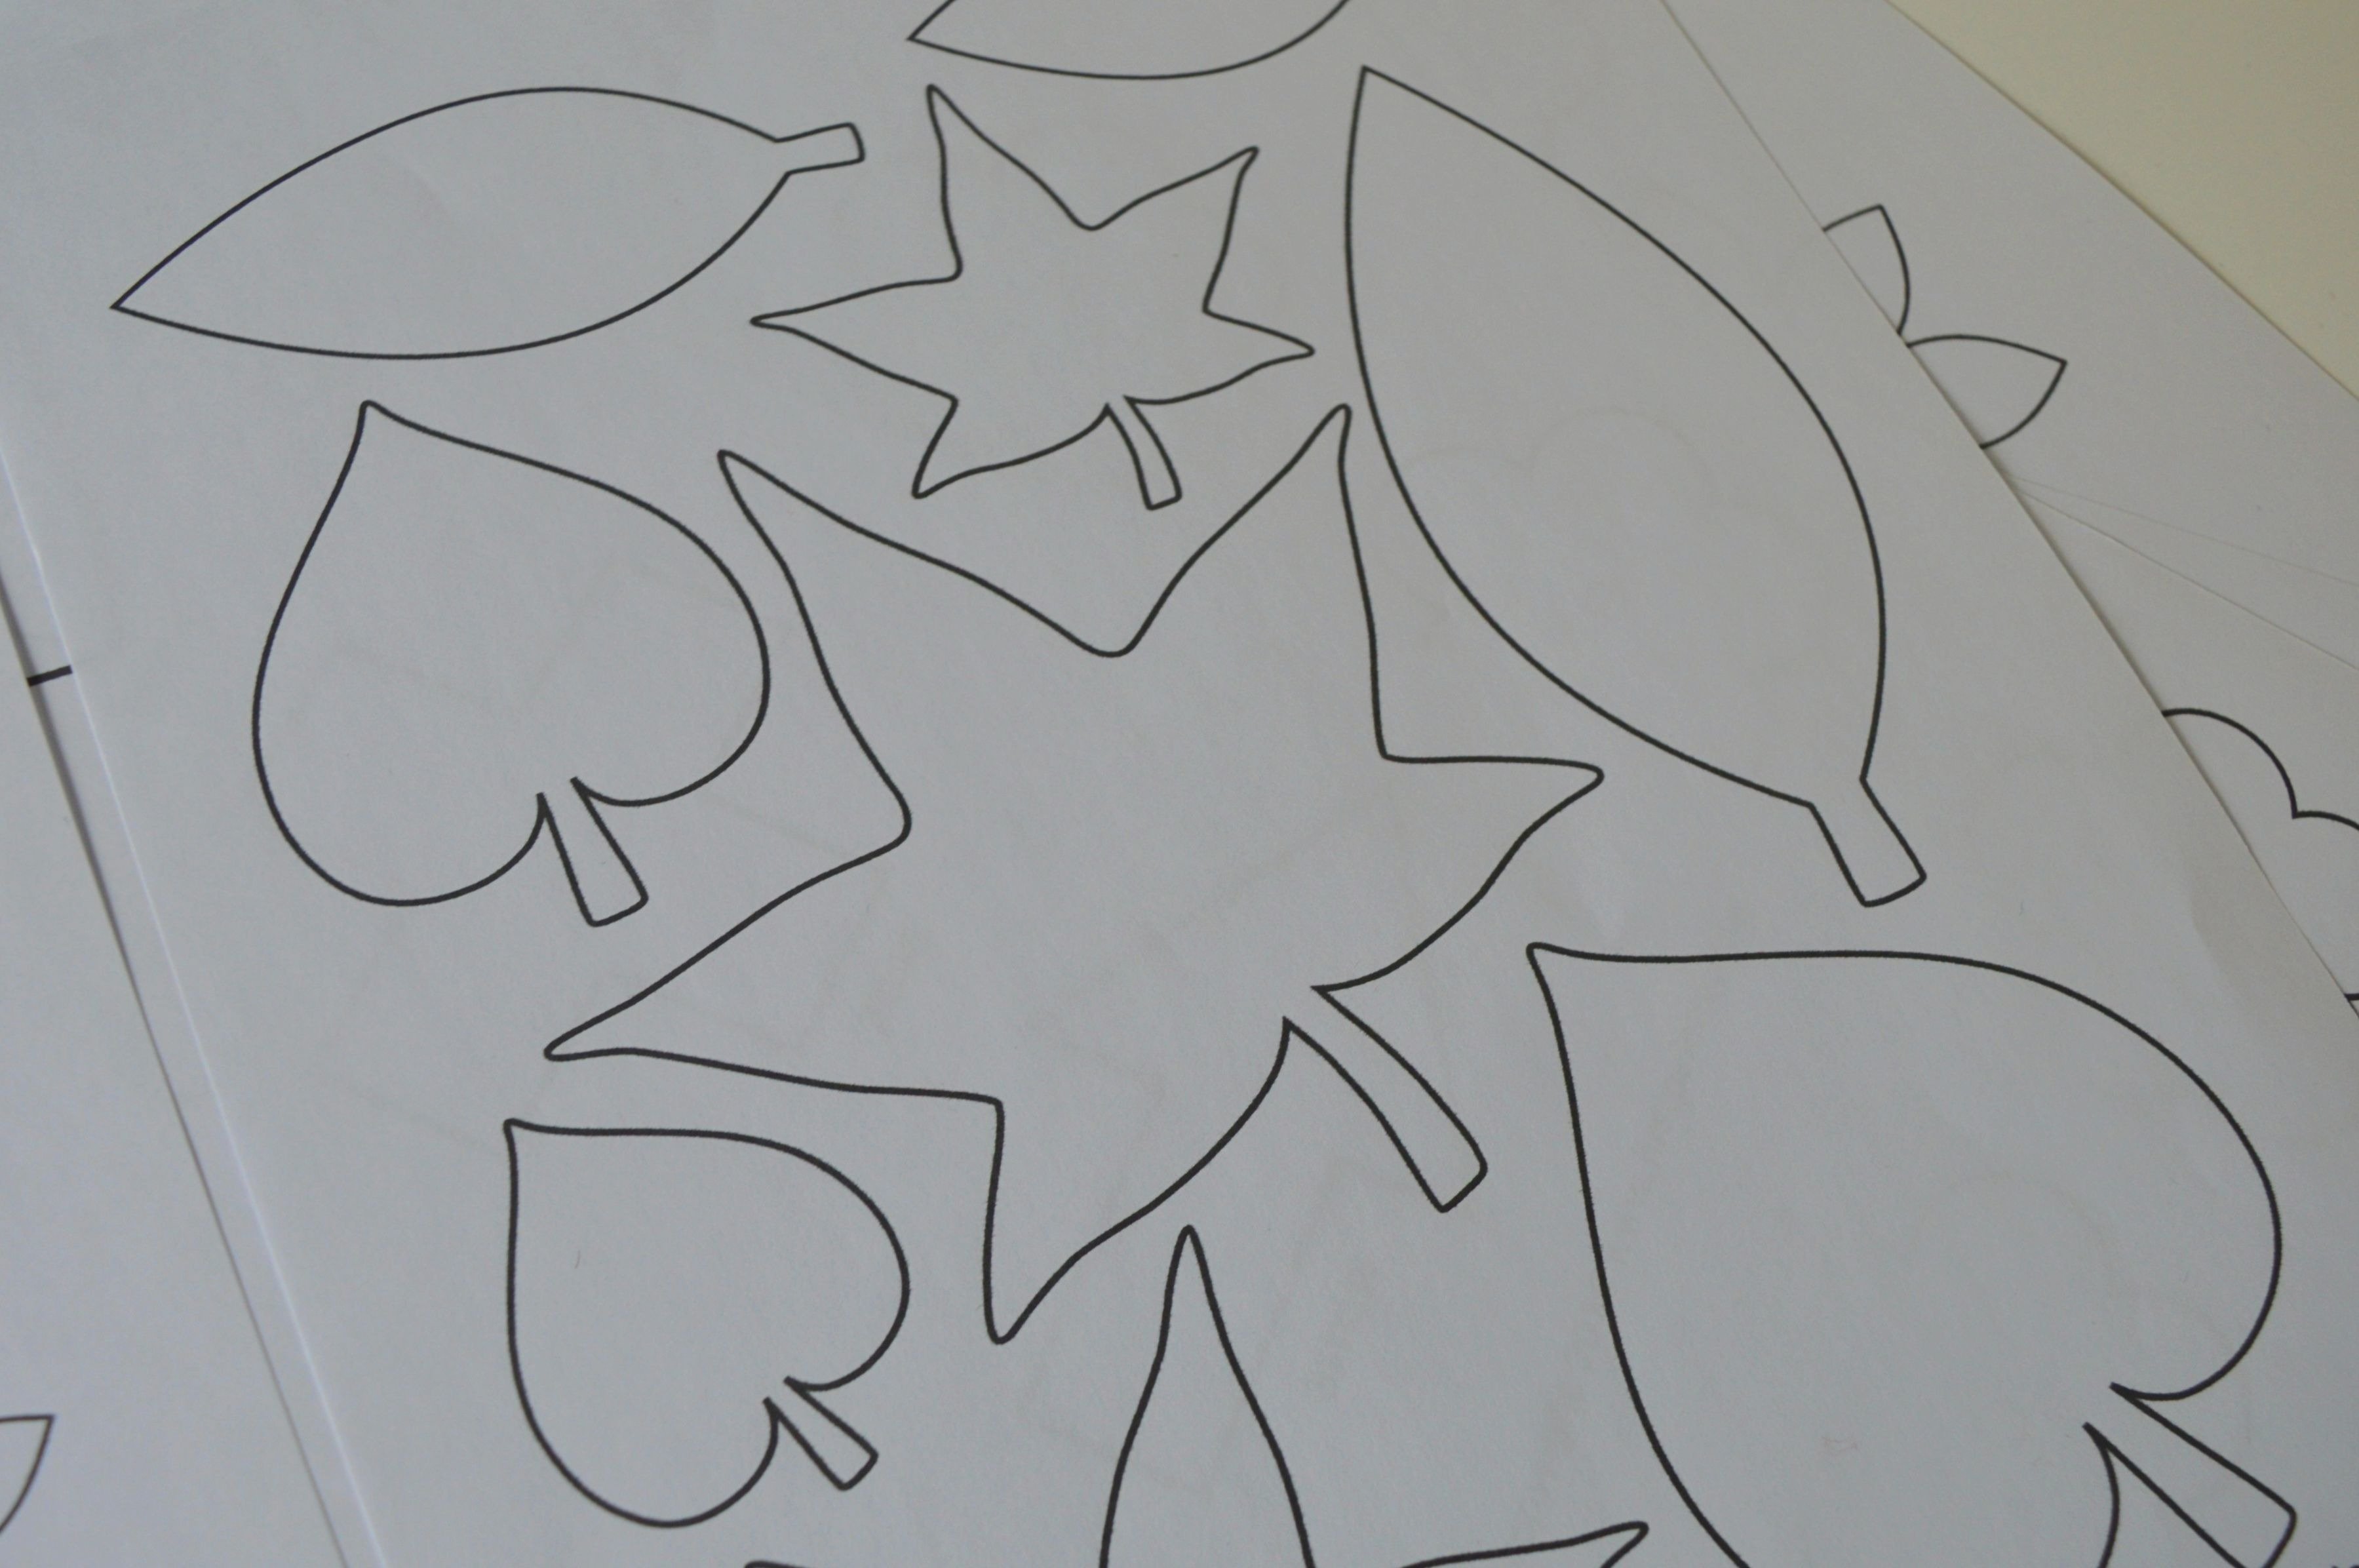
Templates
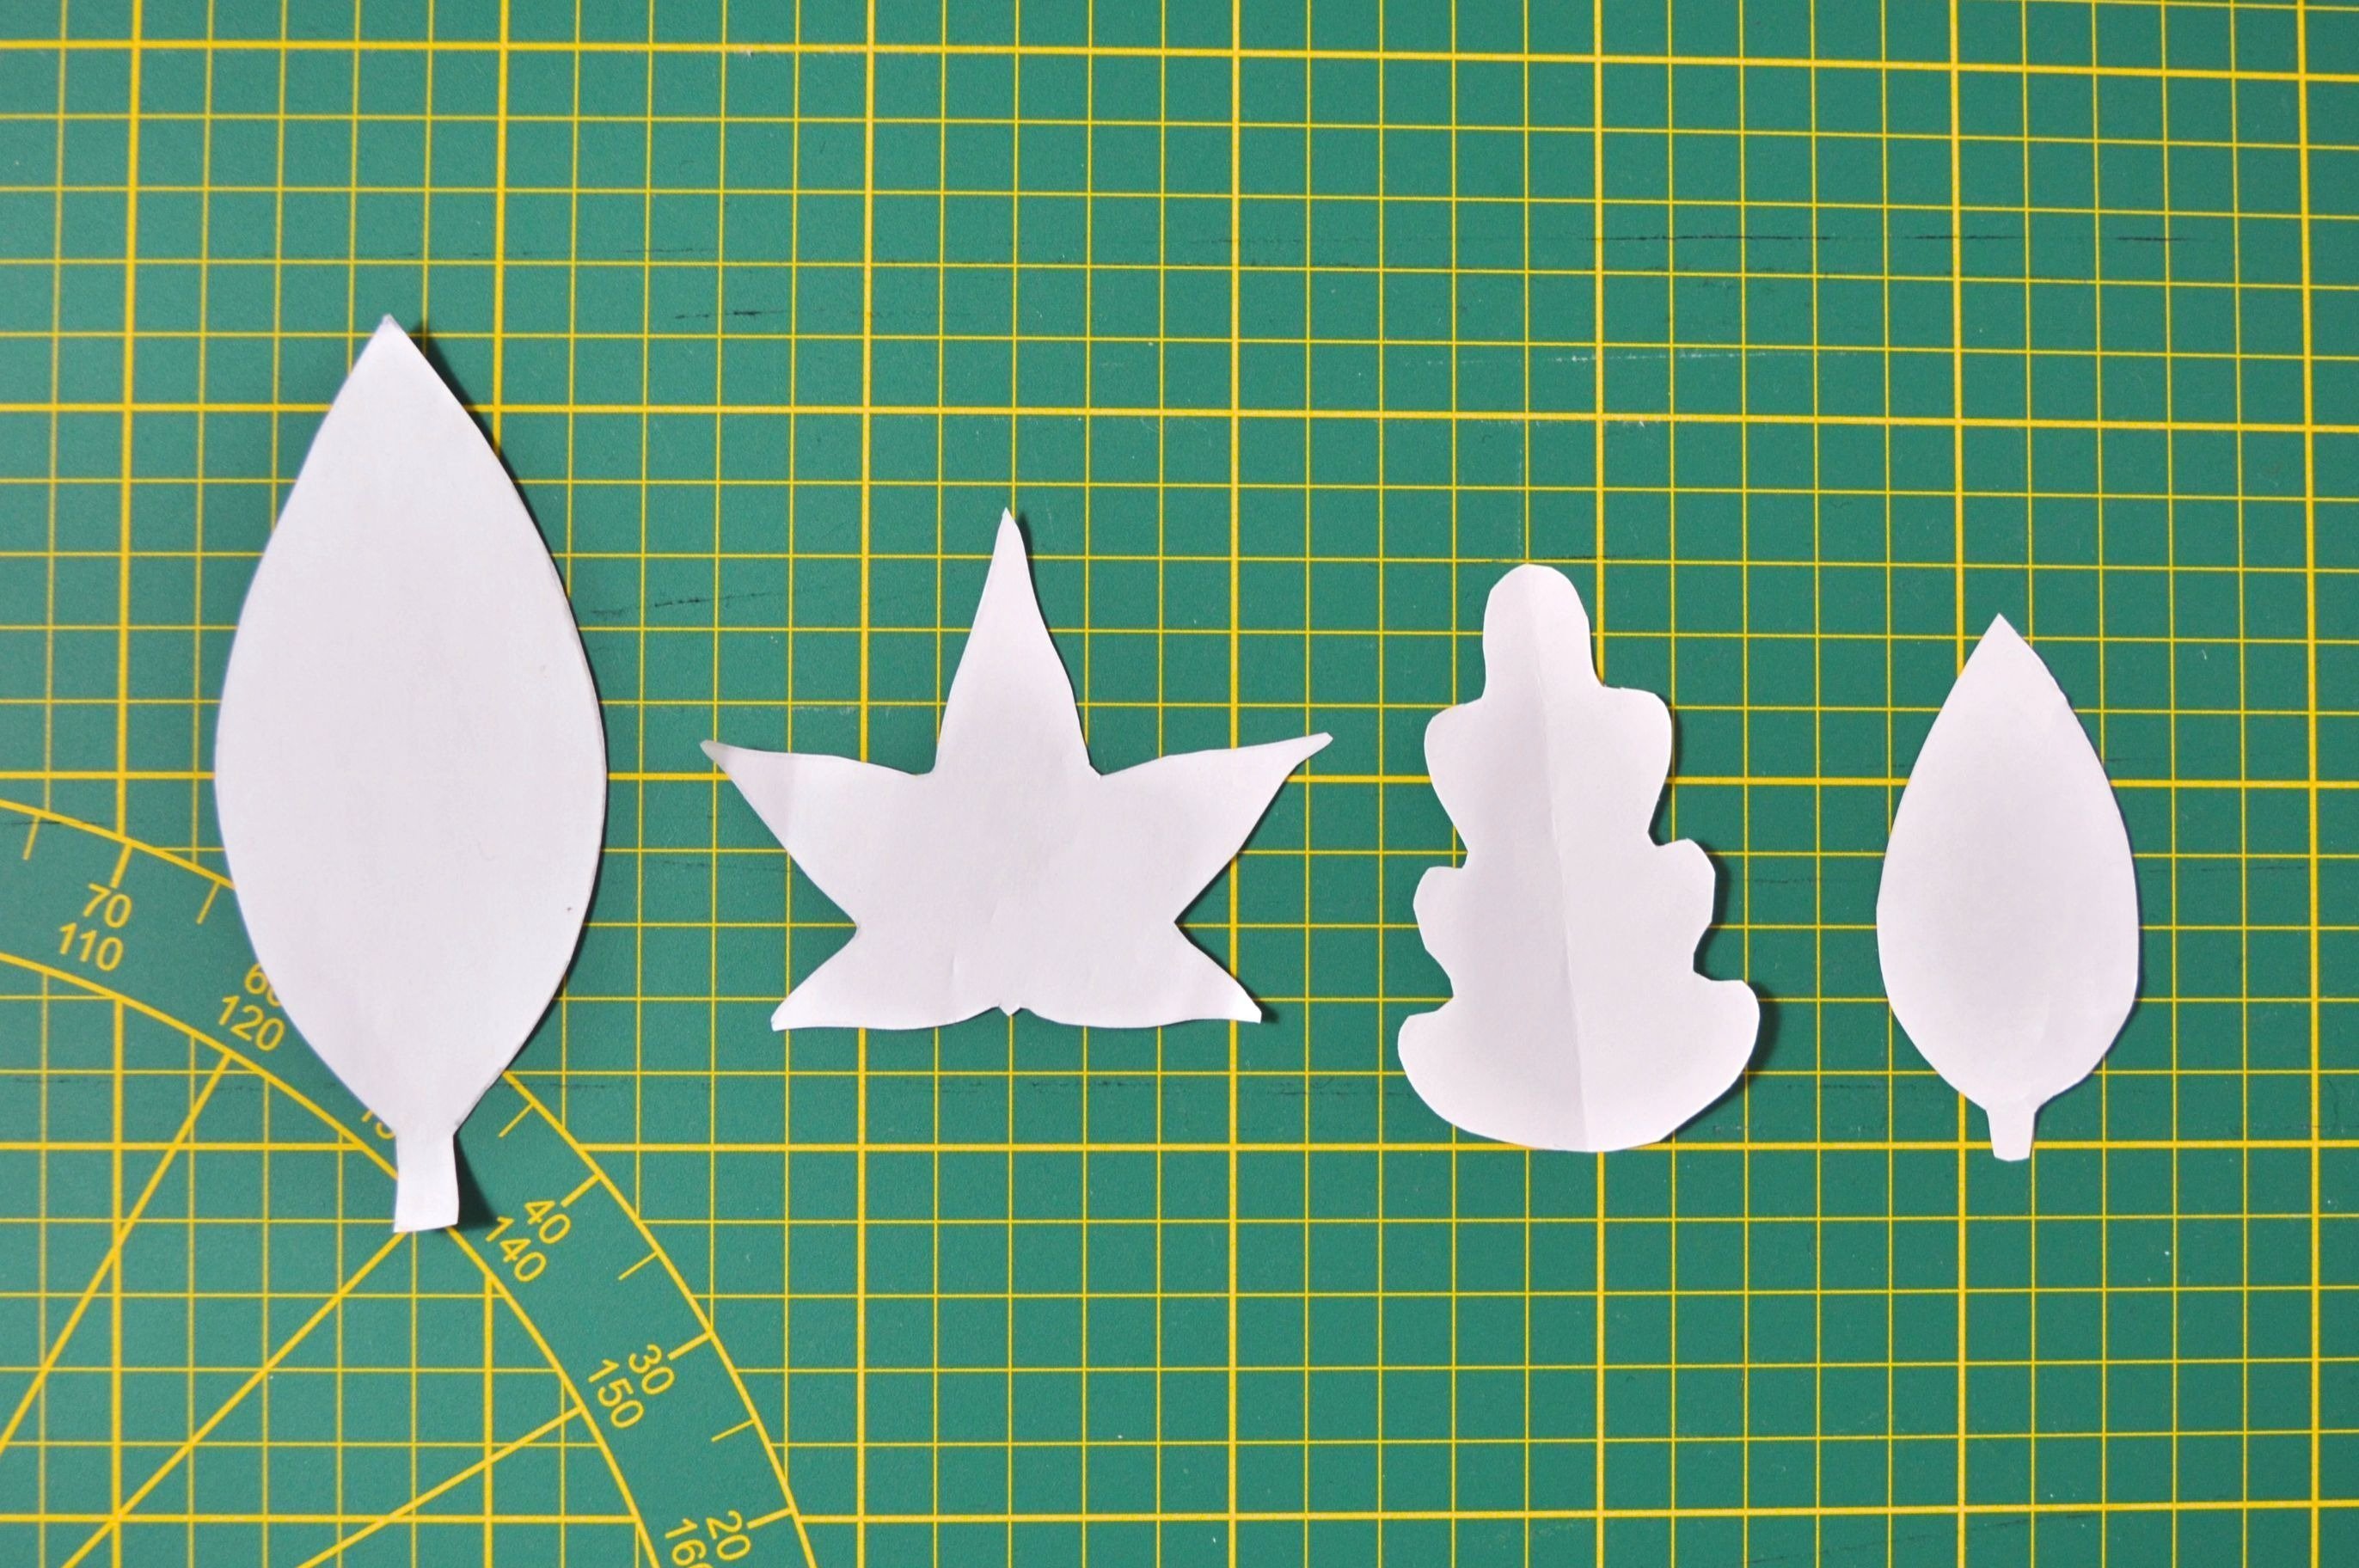
Pattern parts
CUTTING
Each of brooch leaves consists of two equal parts stitched together, and because of that, you cut two times the same leave from the same color felt.
Copy the paper pattern to the felt using the tailor’s chalk.
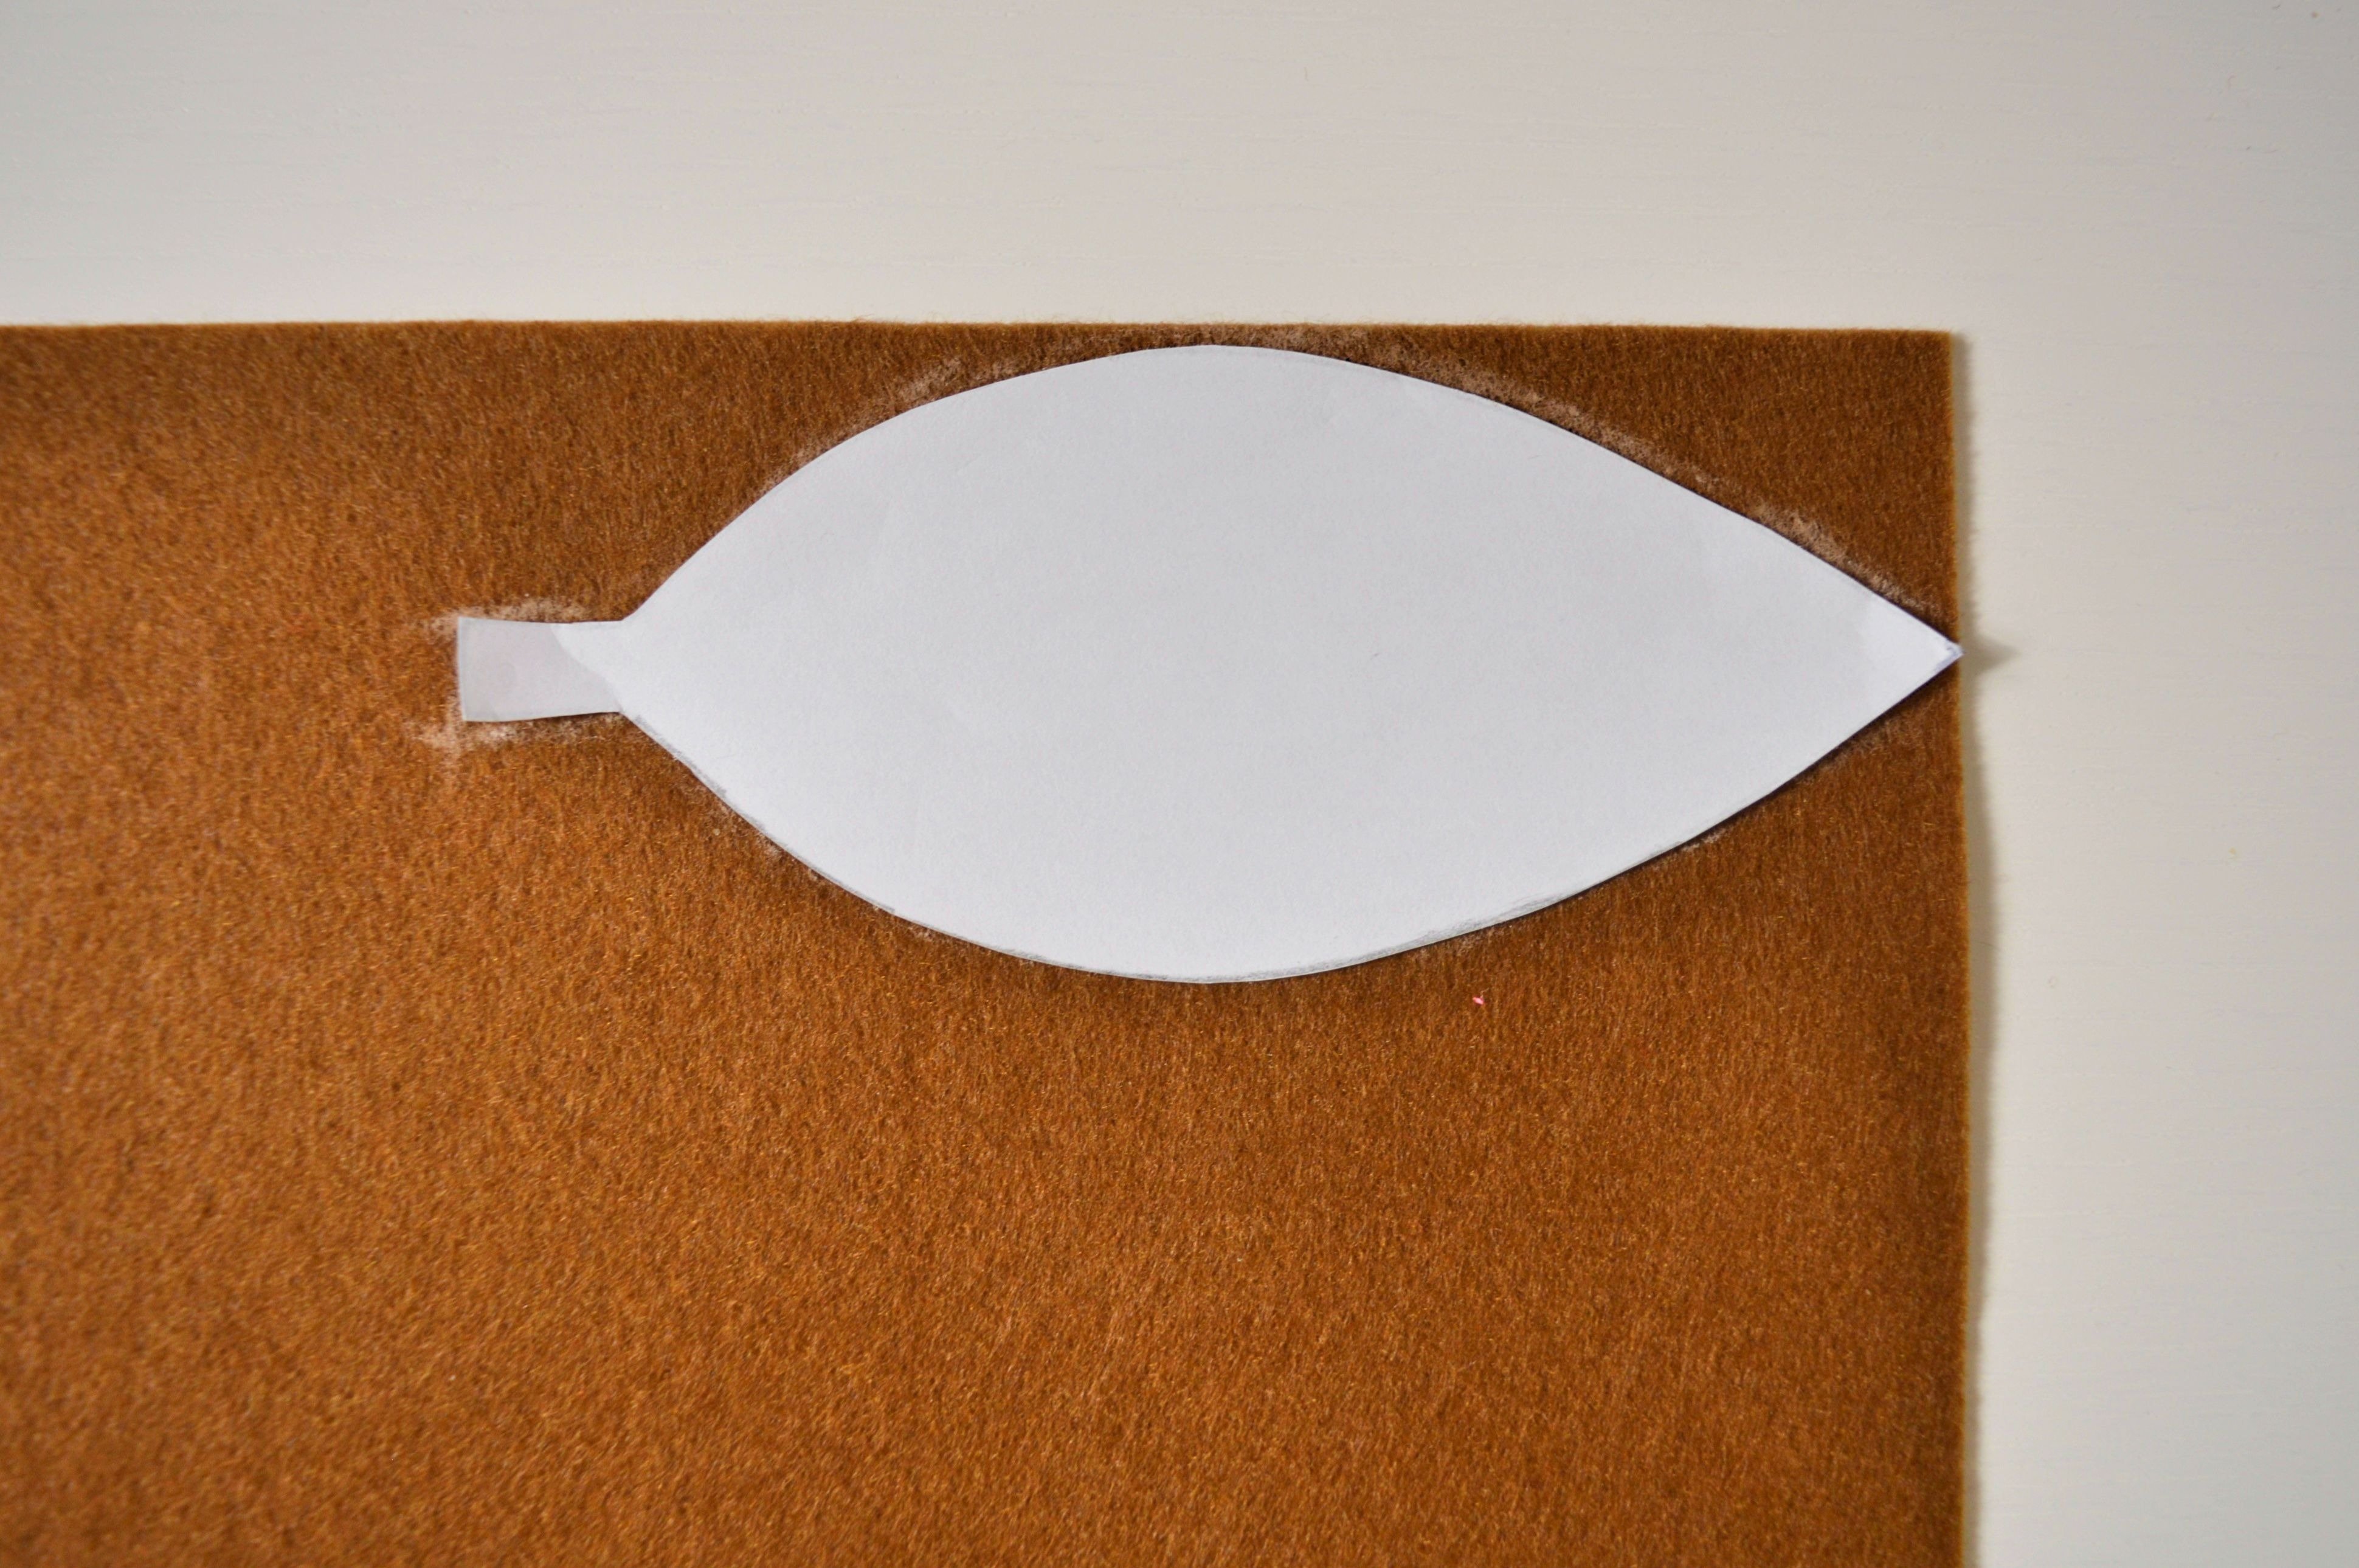
Cut the drawn pattern and copy it back to the felt.
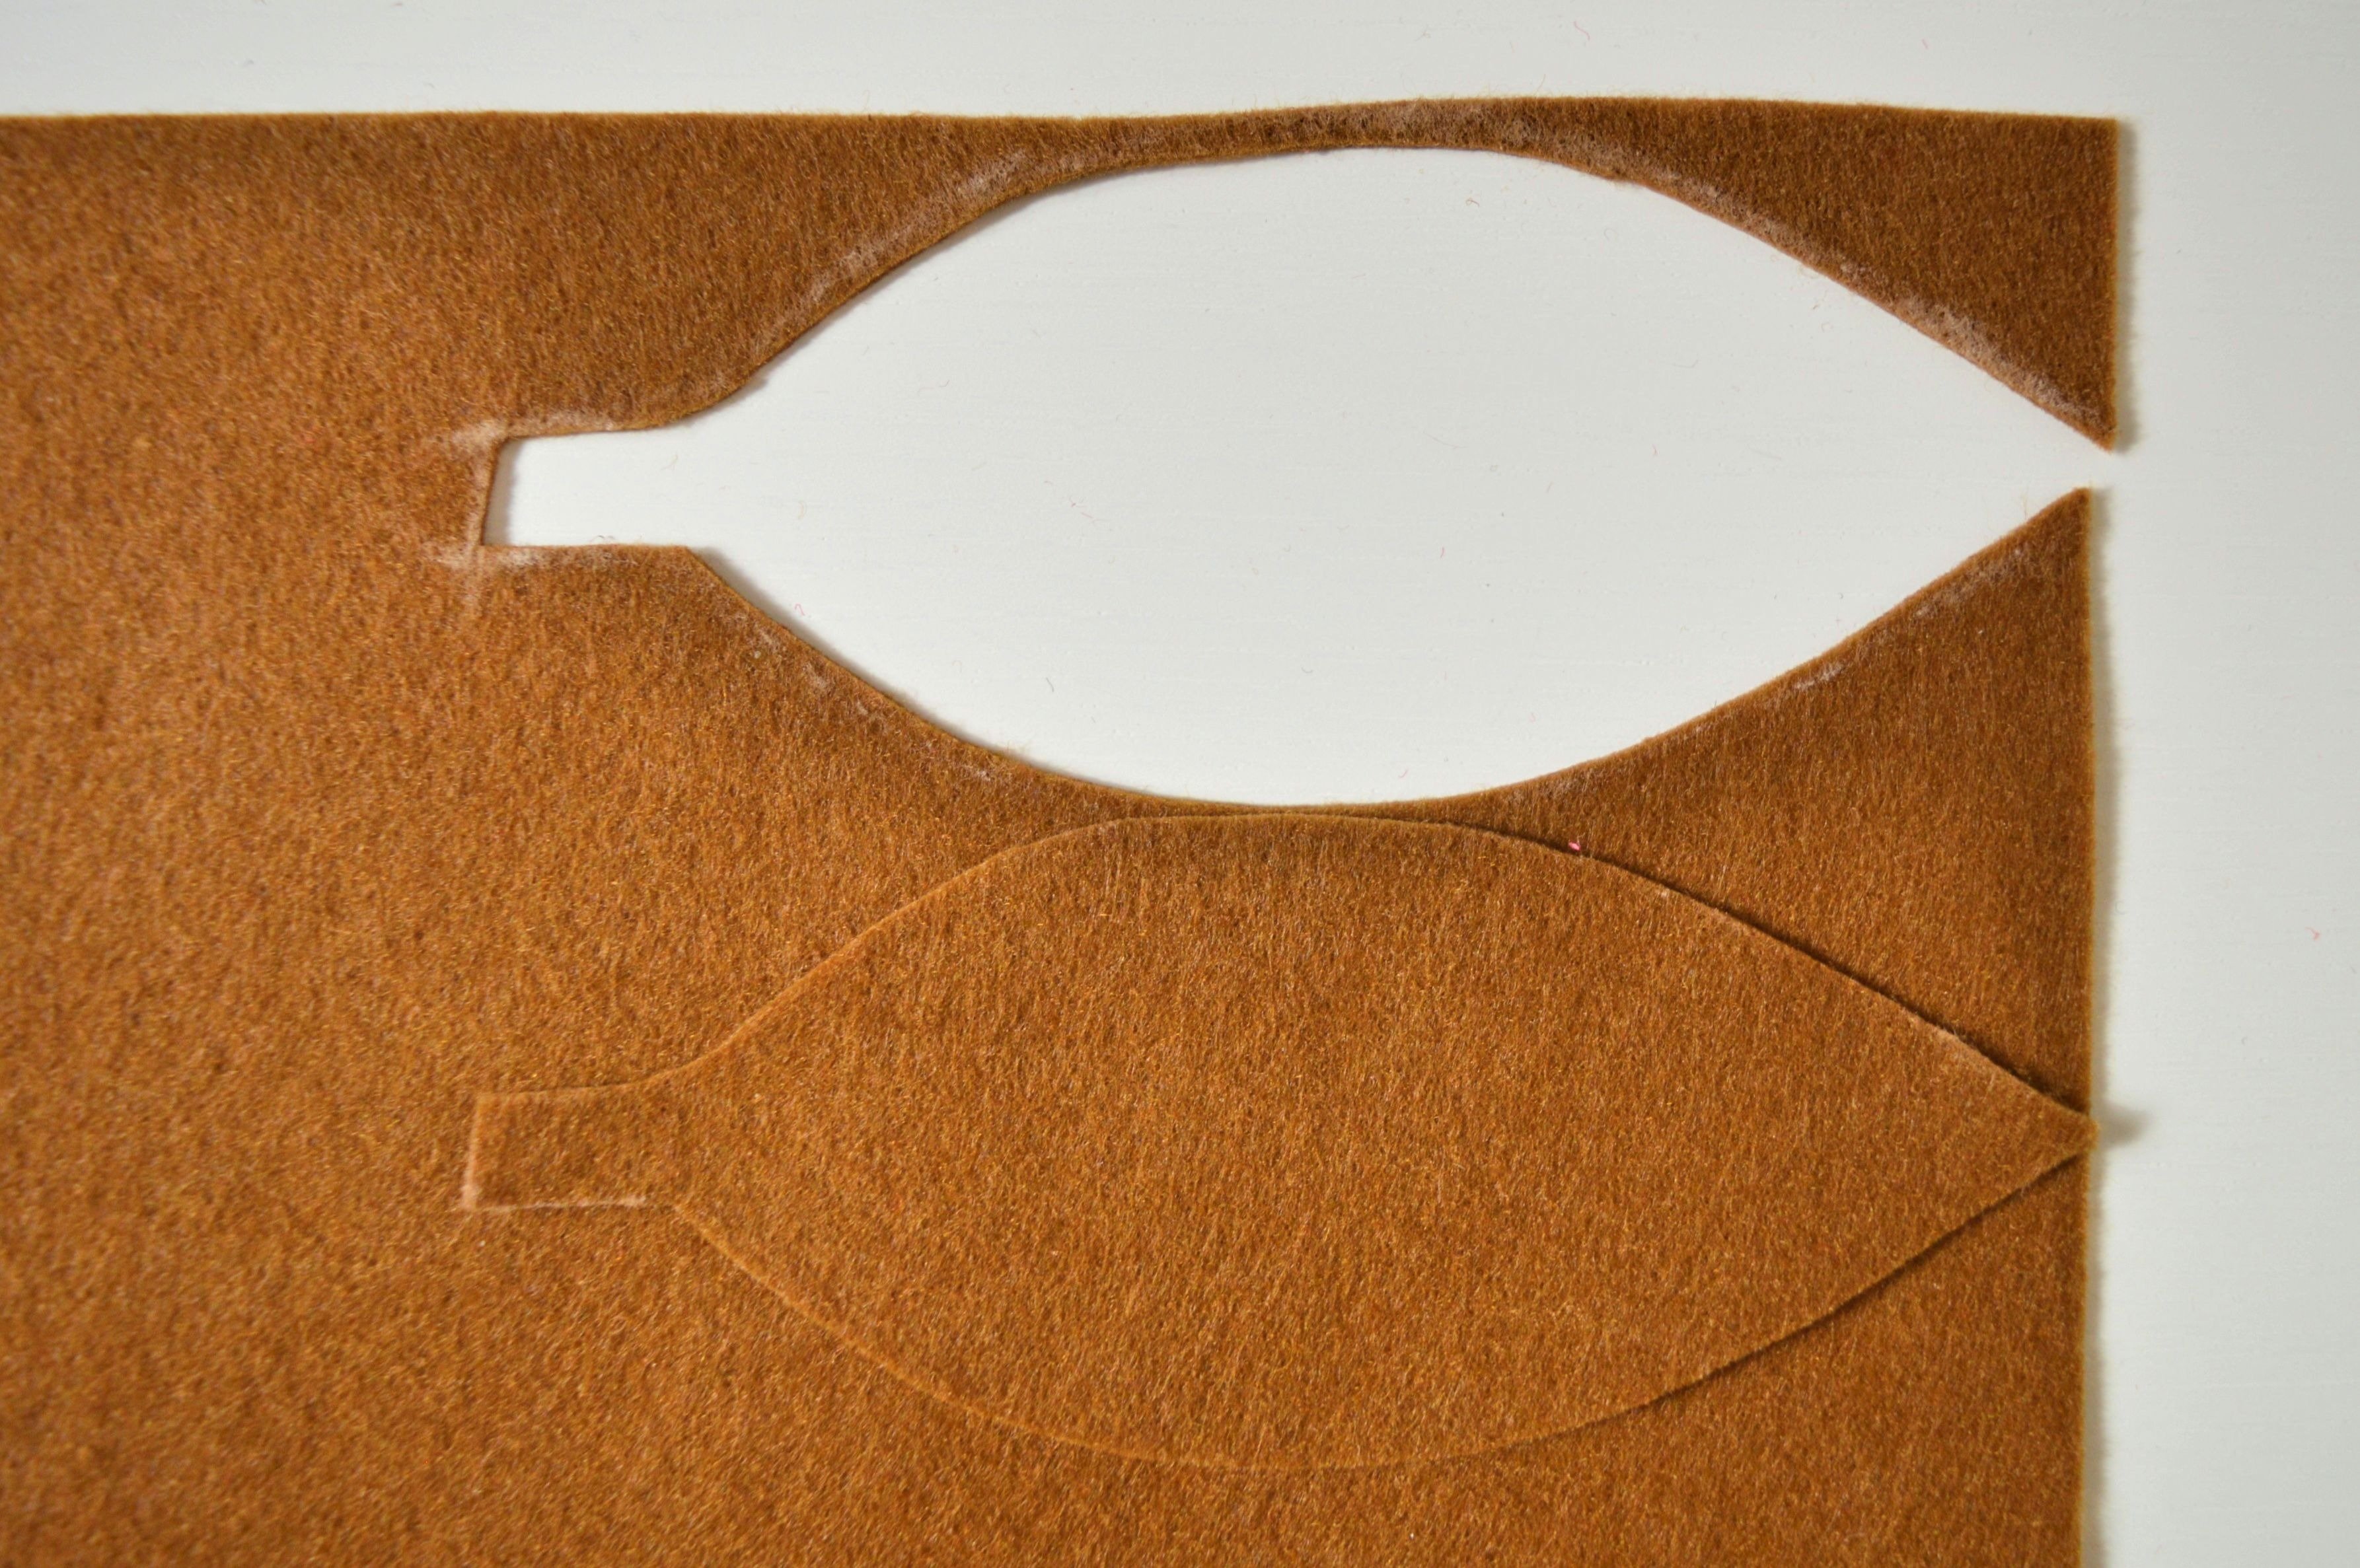
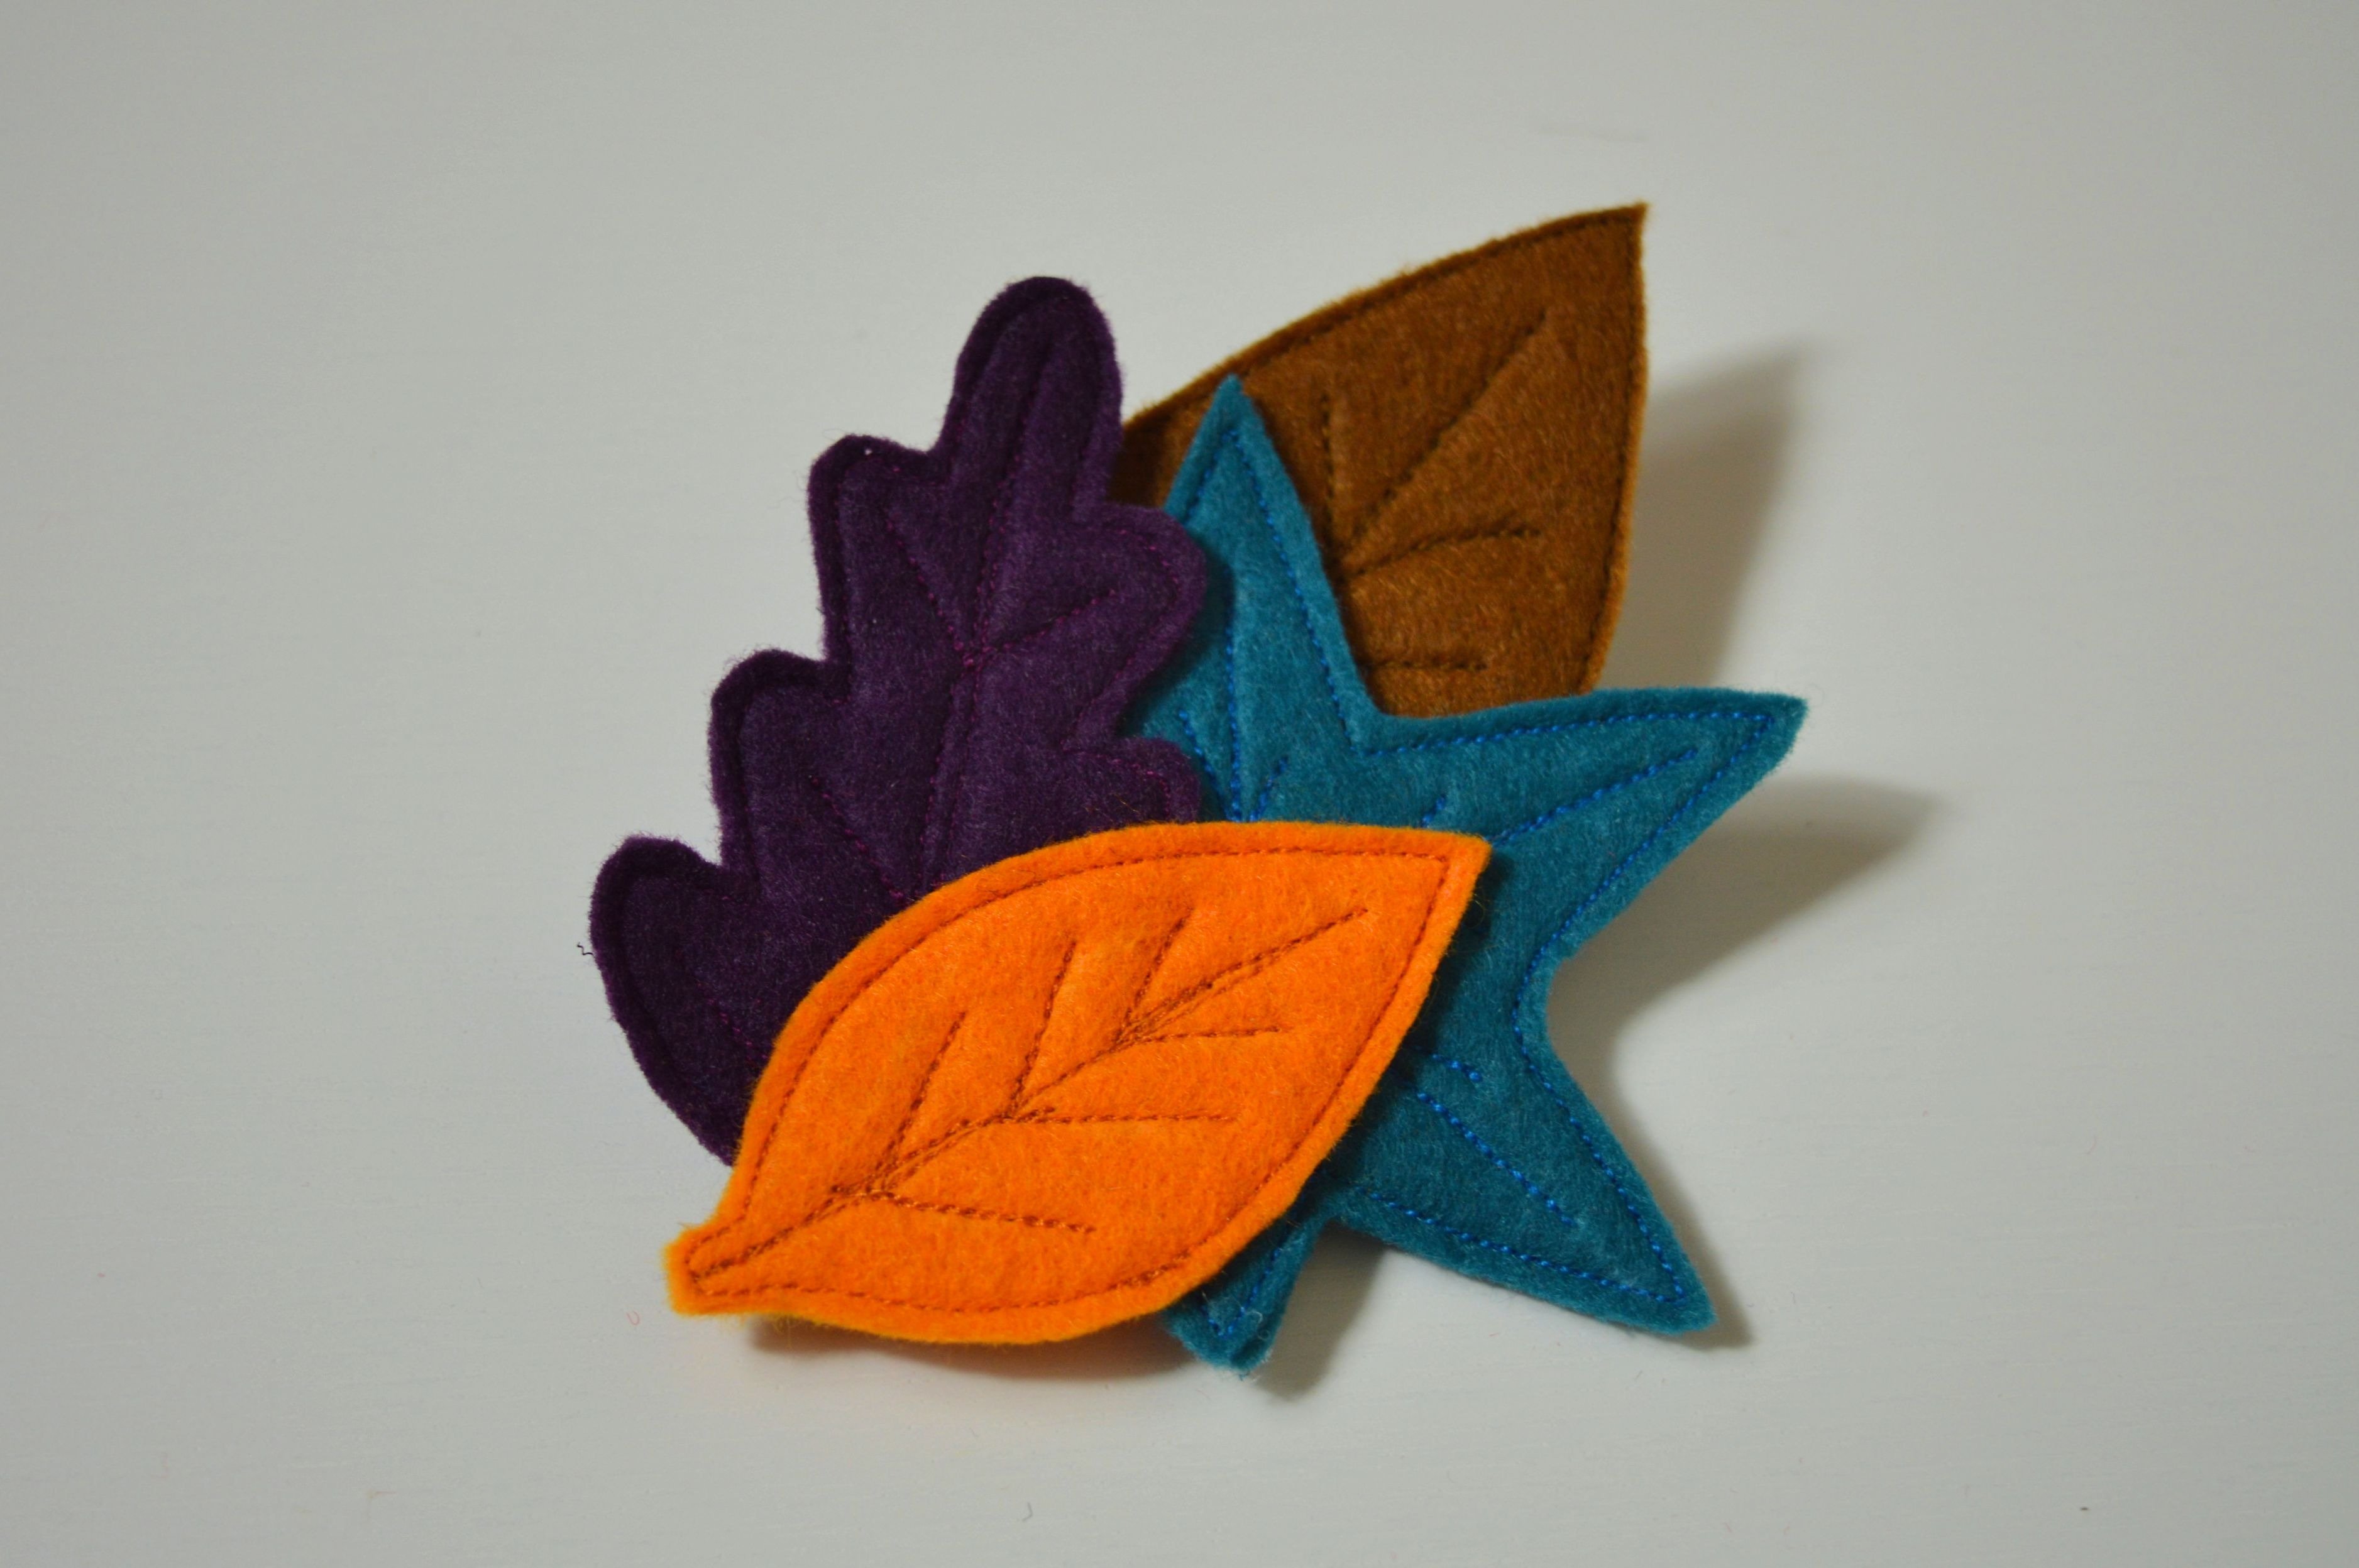
Repeat this with all leaves patterns but in different colors of felt. The final result of cutting them is in the image below.
Due to your more natural orientation, I measured the height and width of the leaves in this post.
SEWING
Now, sew each leave separately using a sewing machine in the following way.
NOTE: The thread doesn’t have to match the color of the felt perfect because it looks more interesting if the color of yarn differs a shade or two from the color of the felt.
Connect two parts of the leave using a glue gun or pin it.
Stitch the edge using the edgestitch foot #10.
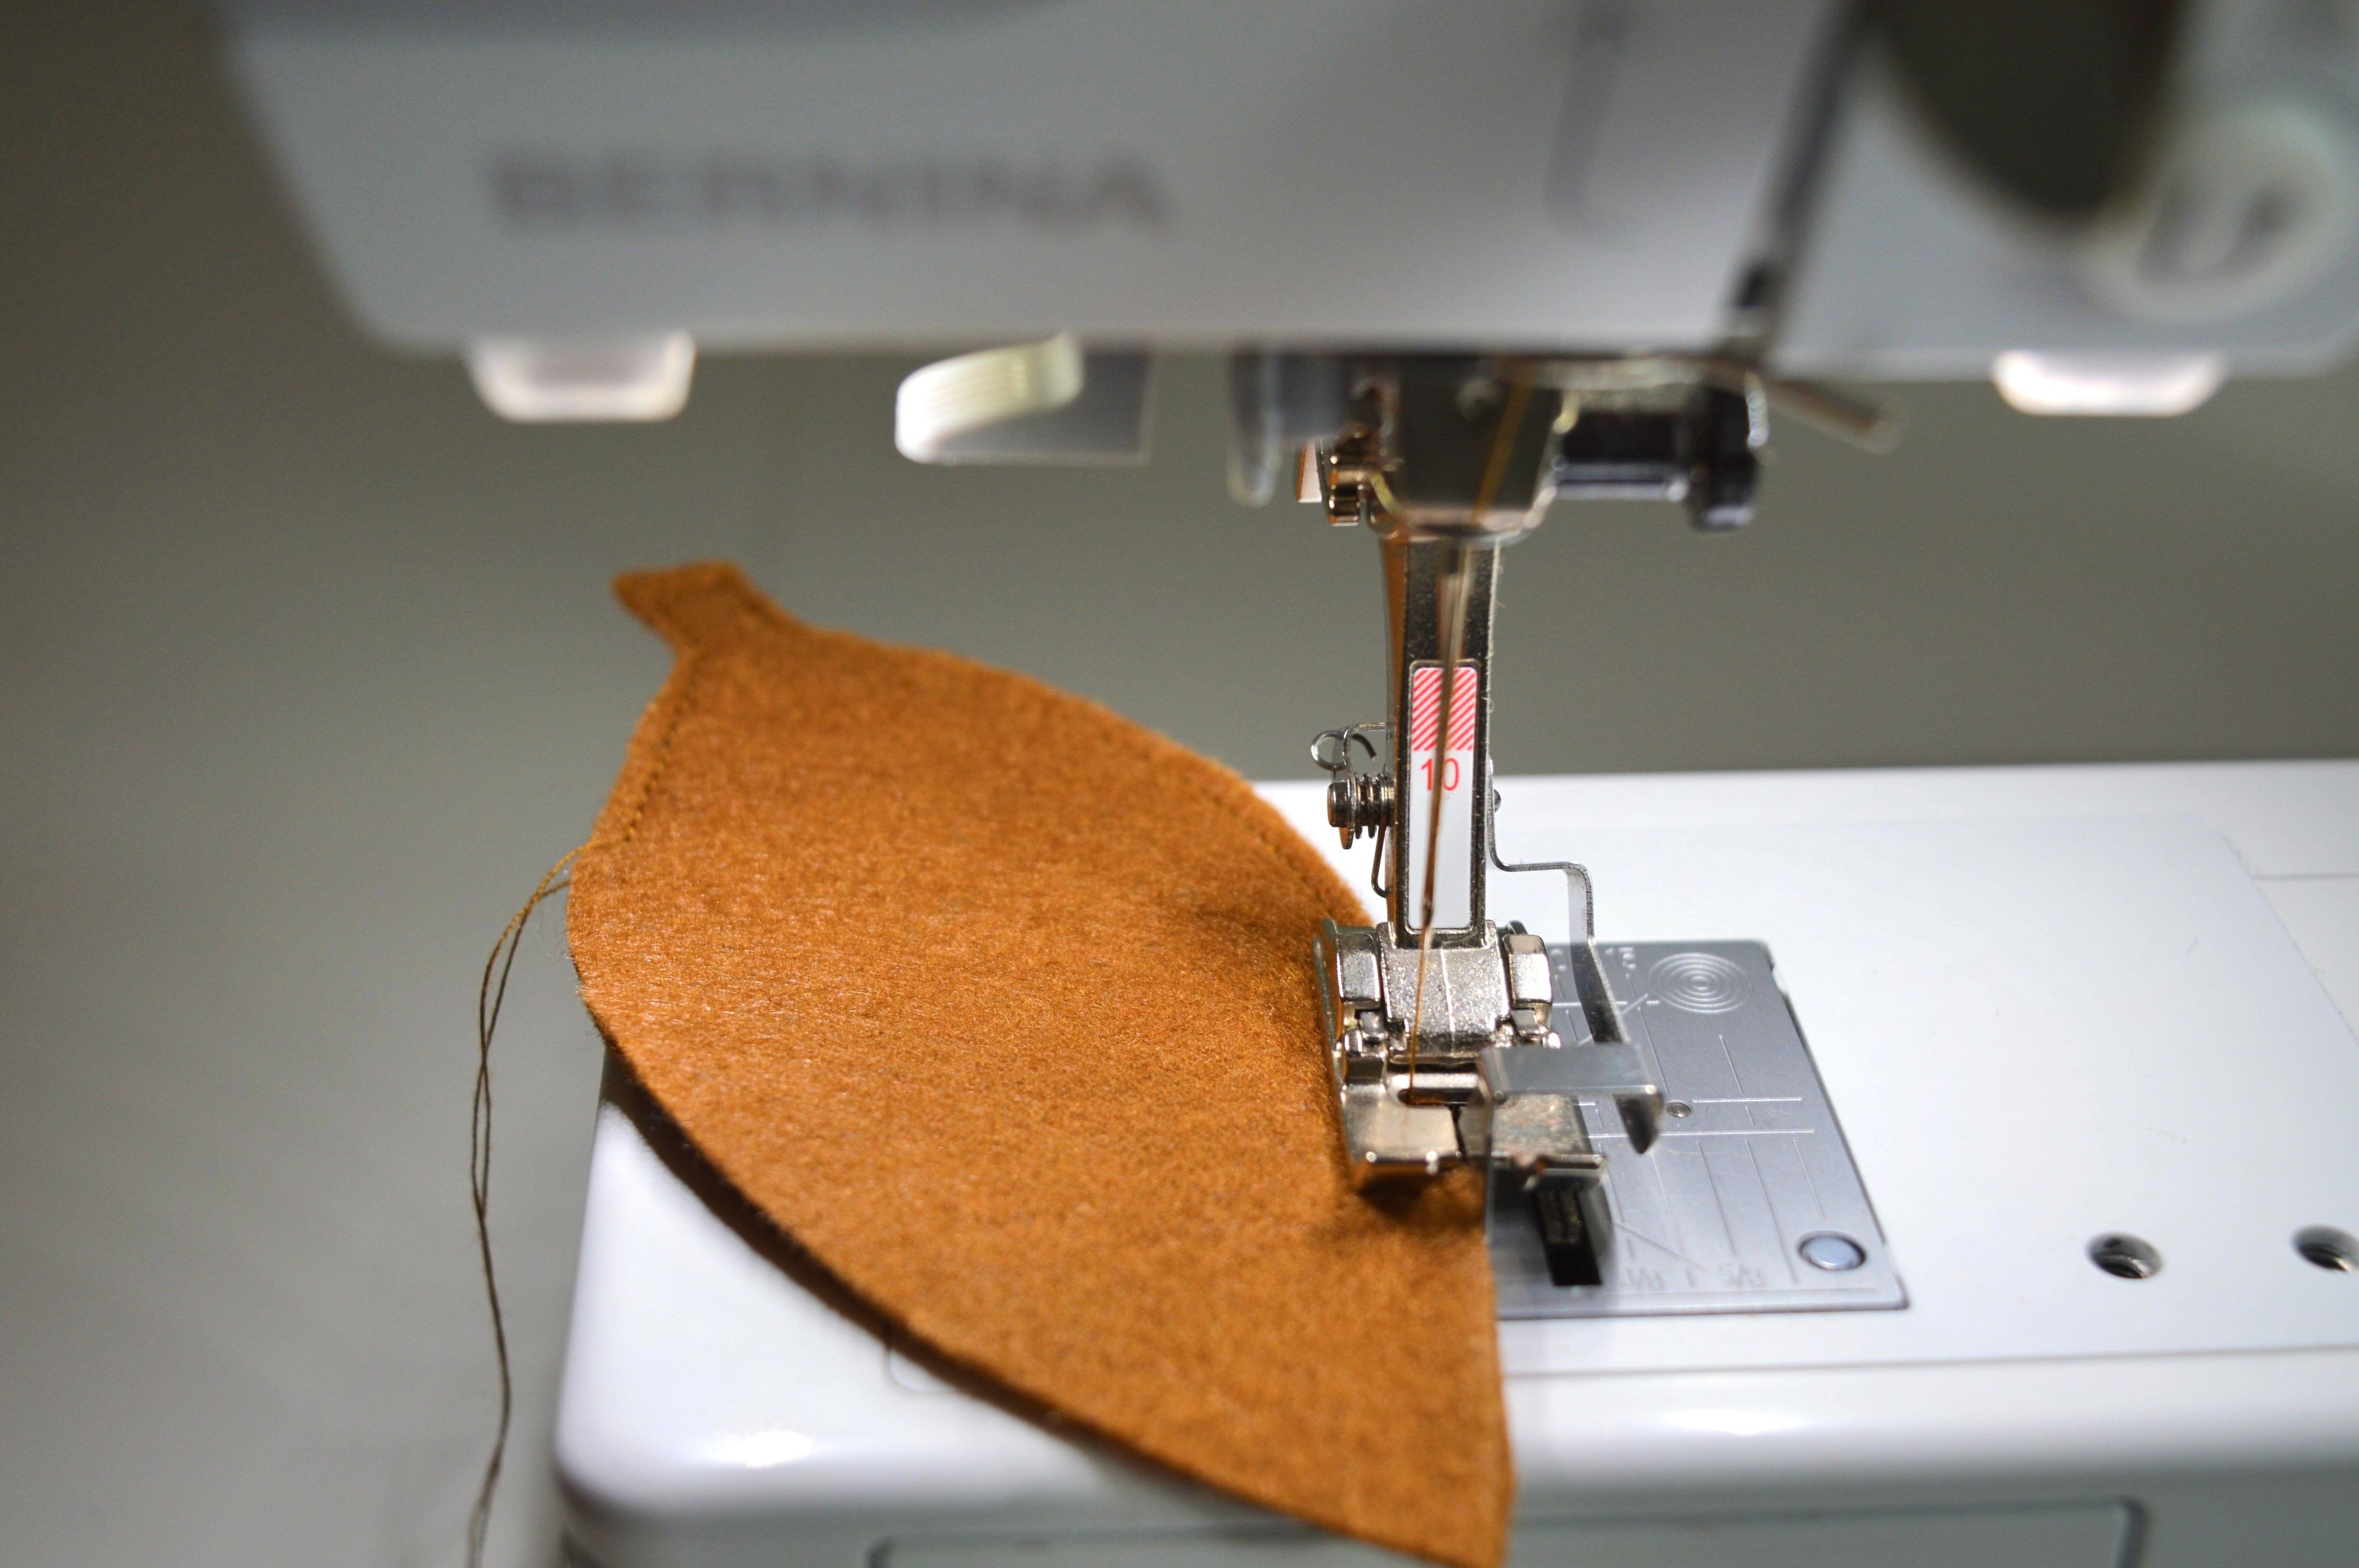
!!! Edgestitch foot #10, plain seam #1, the stitch length 2
(the needle is moved to the end left position)
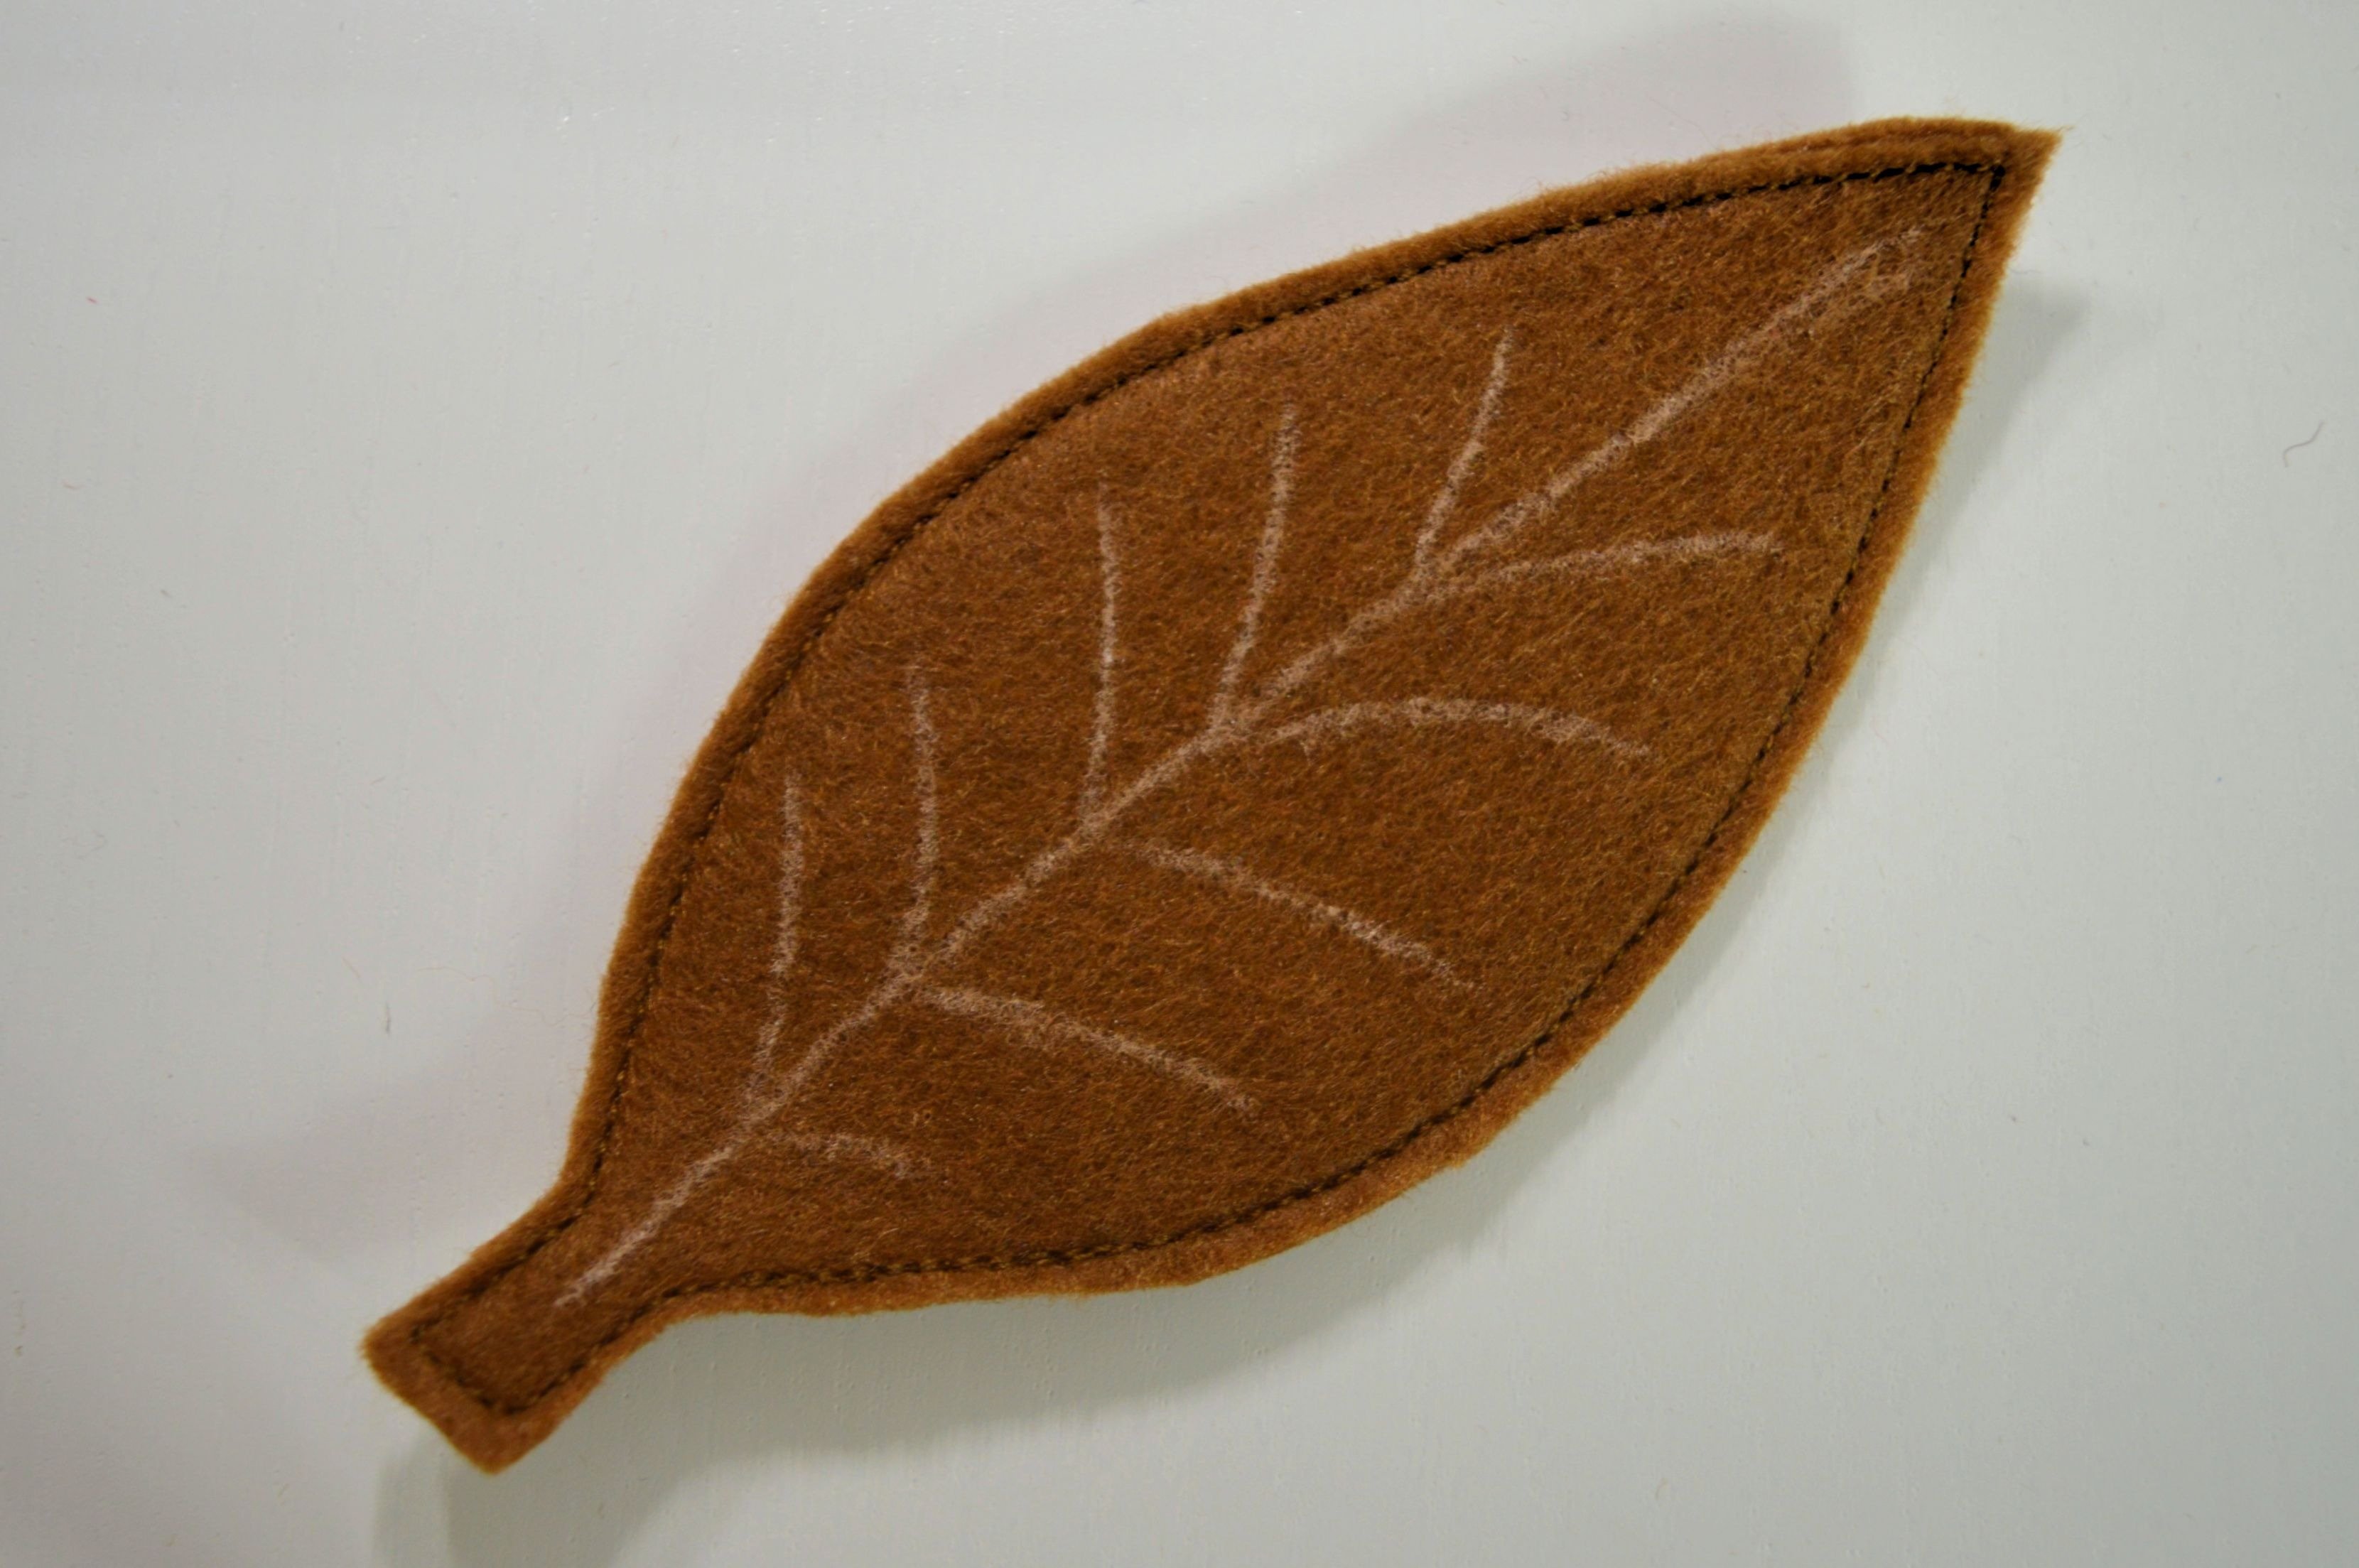
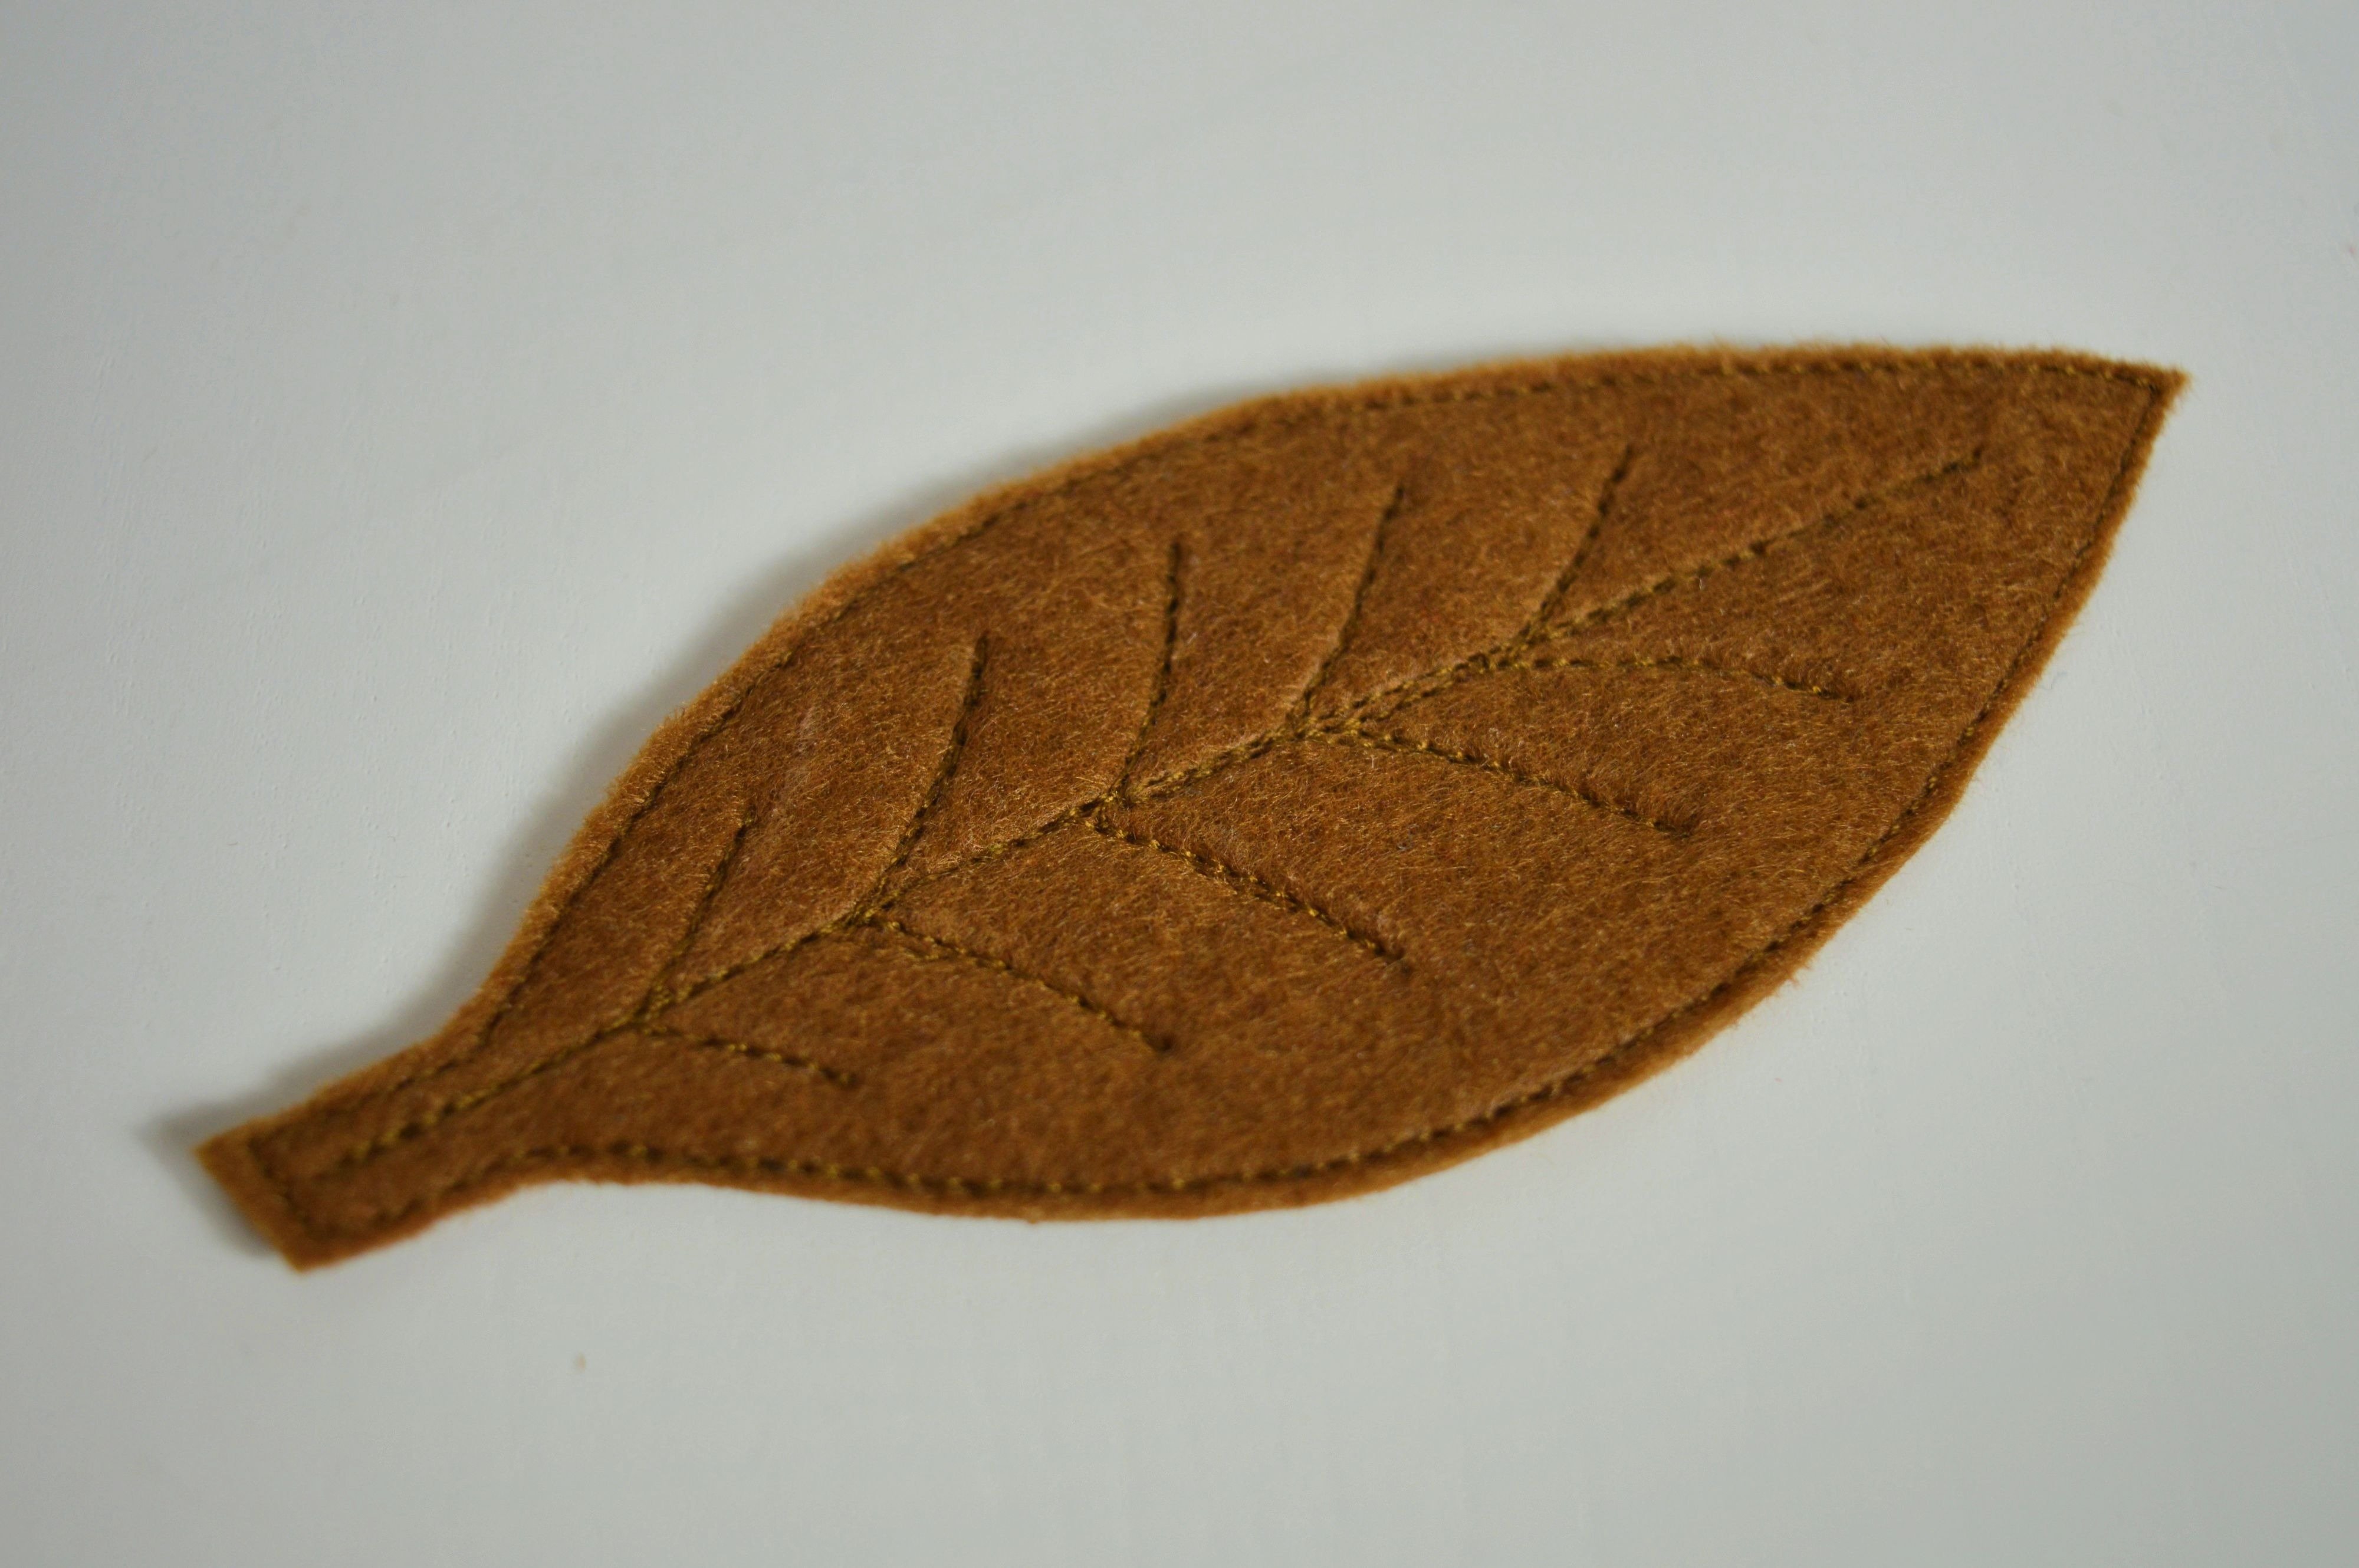
On leave, draw lines using tailor’s chalk. The picture shows how I did it, and you can arbitrarily make it on yours.
NOTE: No need to strictly specify the size, length and number of lines, as well as leaves, the brooch can be individually designed. The measures and templates given in this post are only informative.
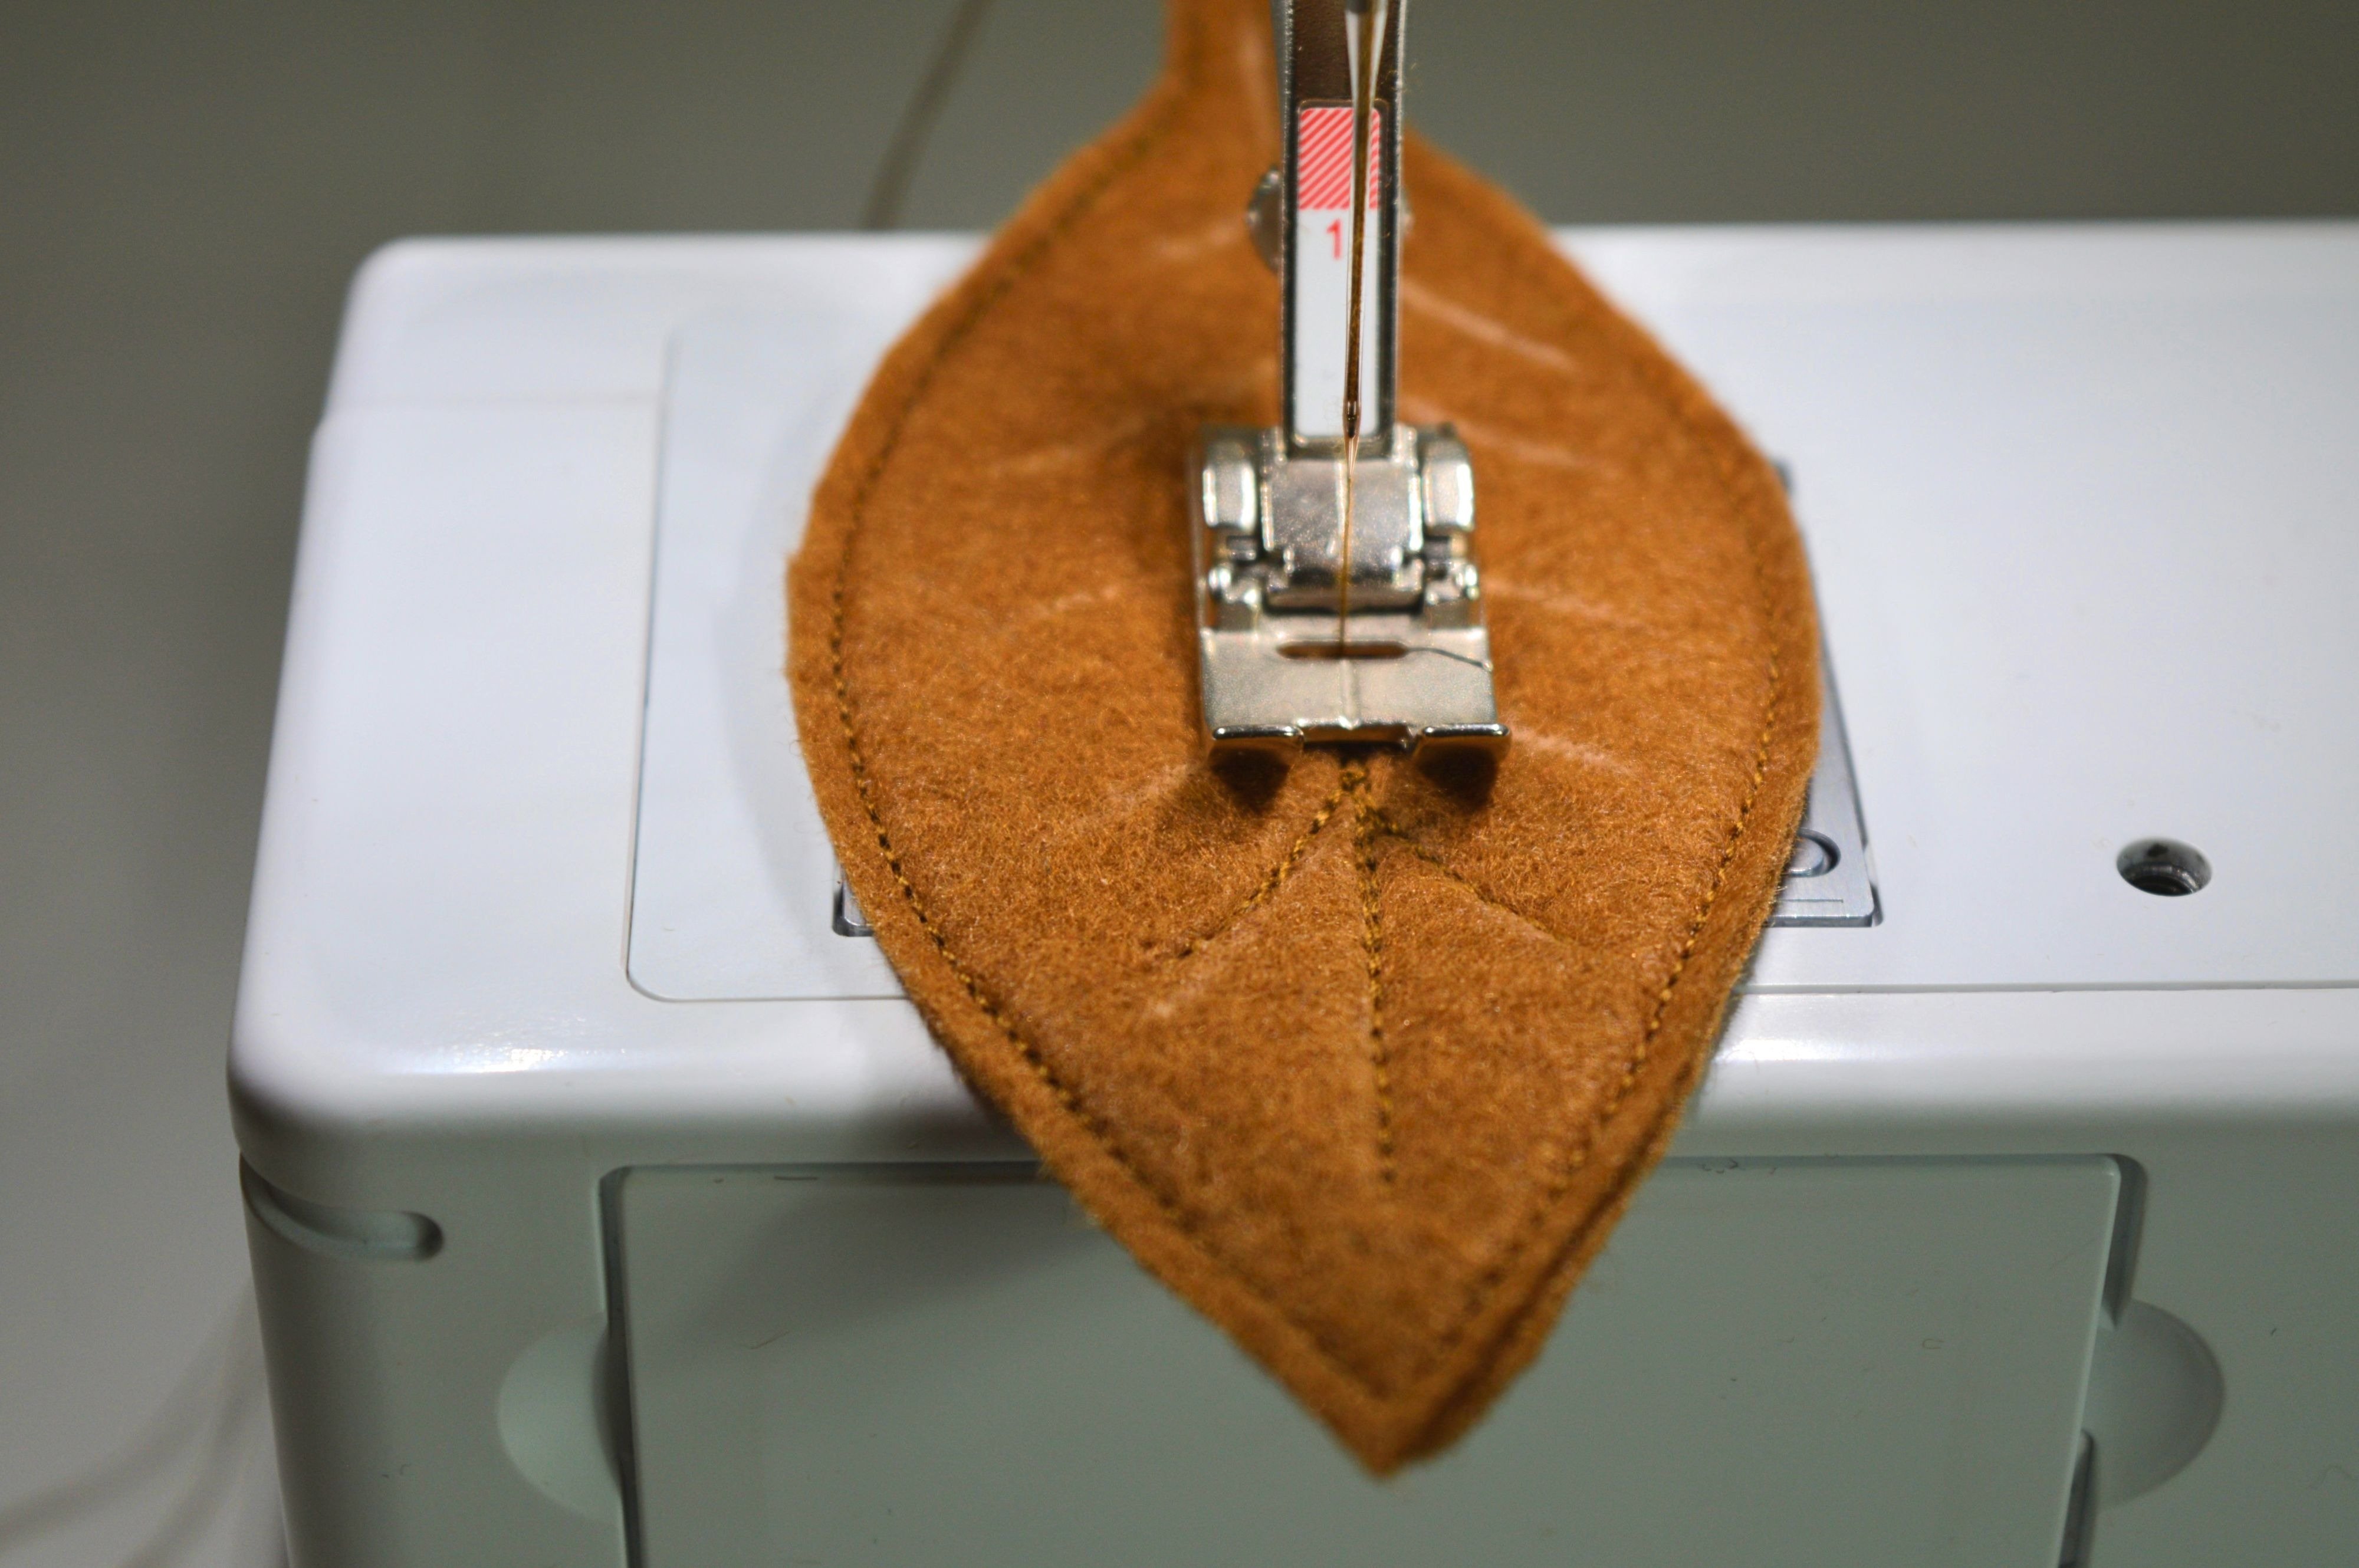
Stitch the lines on the list. The picture shows the use of the reverse-pattern foot #1, but last I used the reverse-pattern foot with clear sole #34.
!!! reverse-pattern foot with clear sole #34, plain seam #1, the stitch length 2
Moreover, how to do this, is shown in the picture below, marked with arrows and numbers.
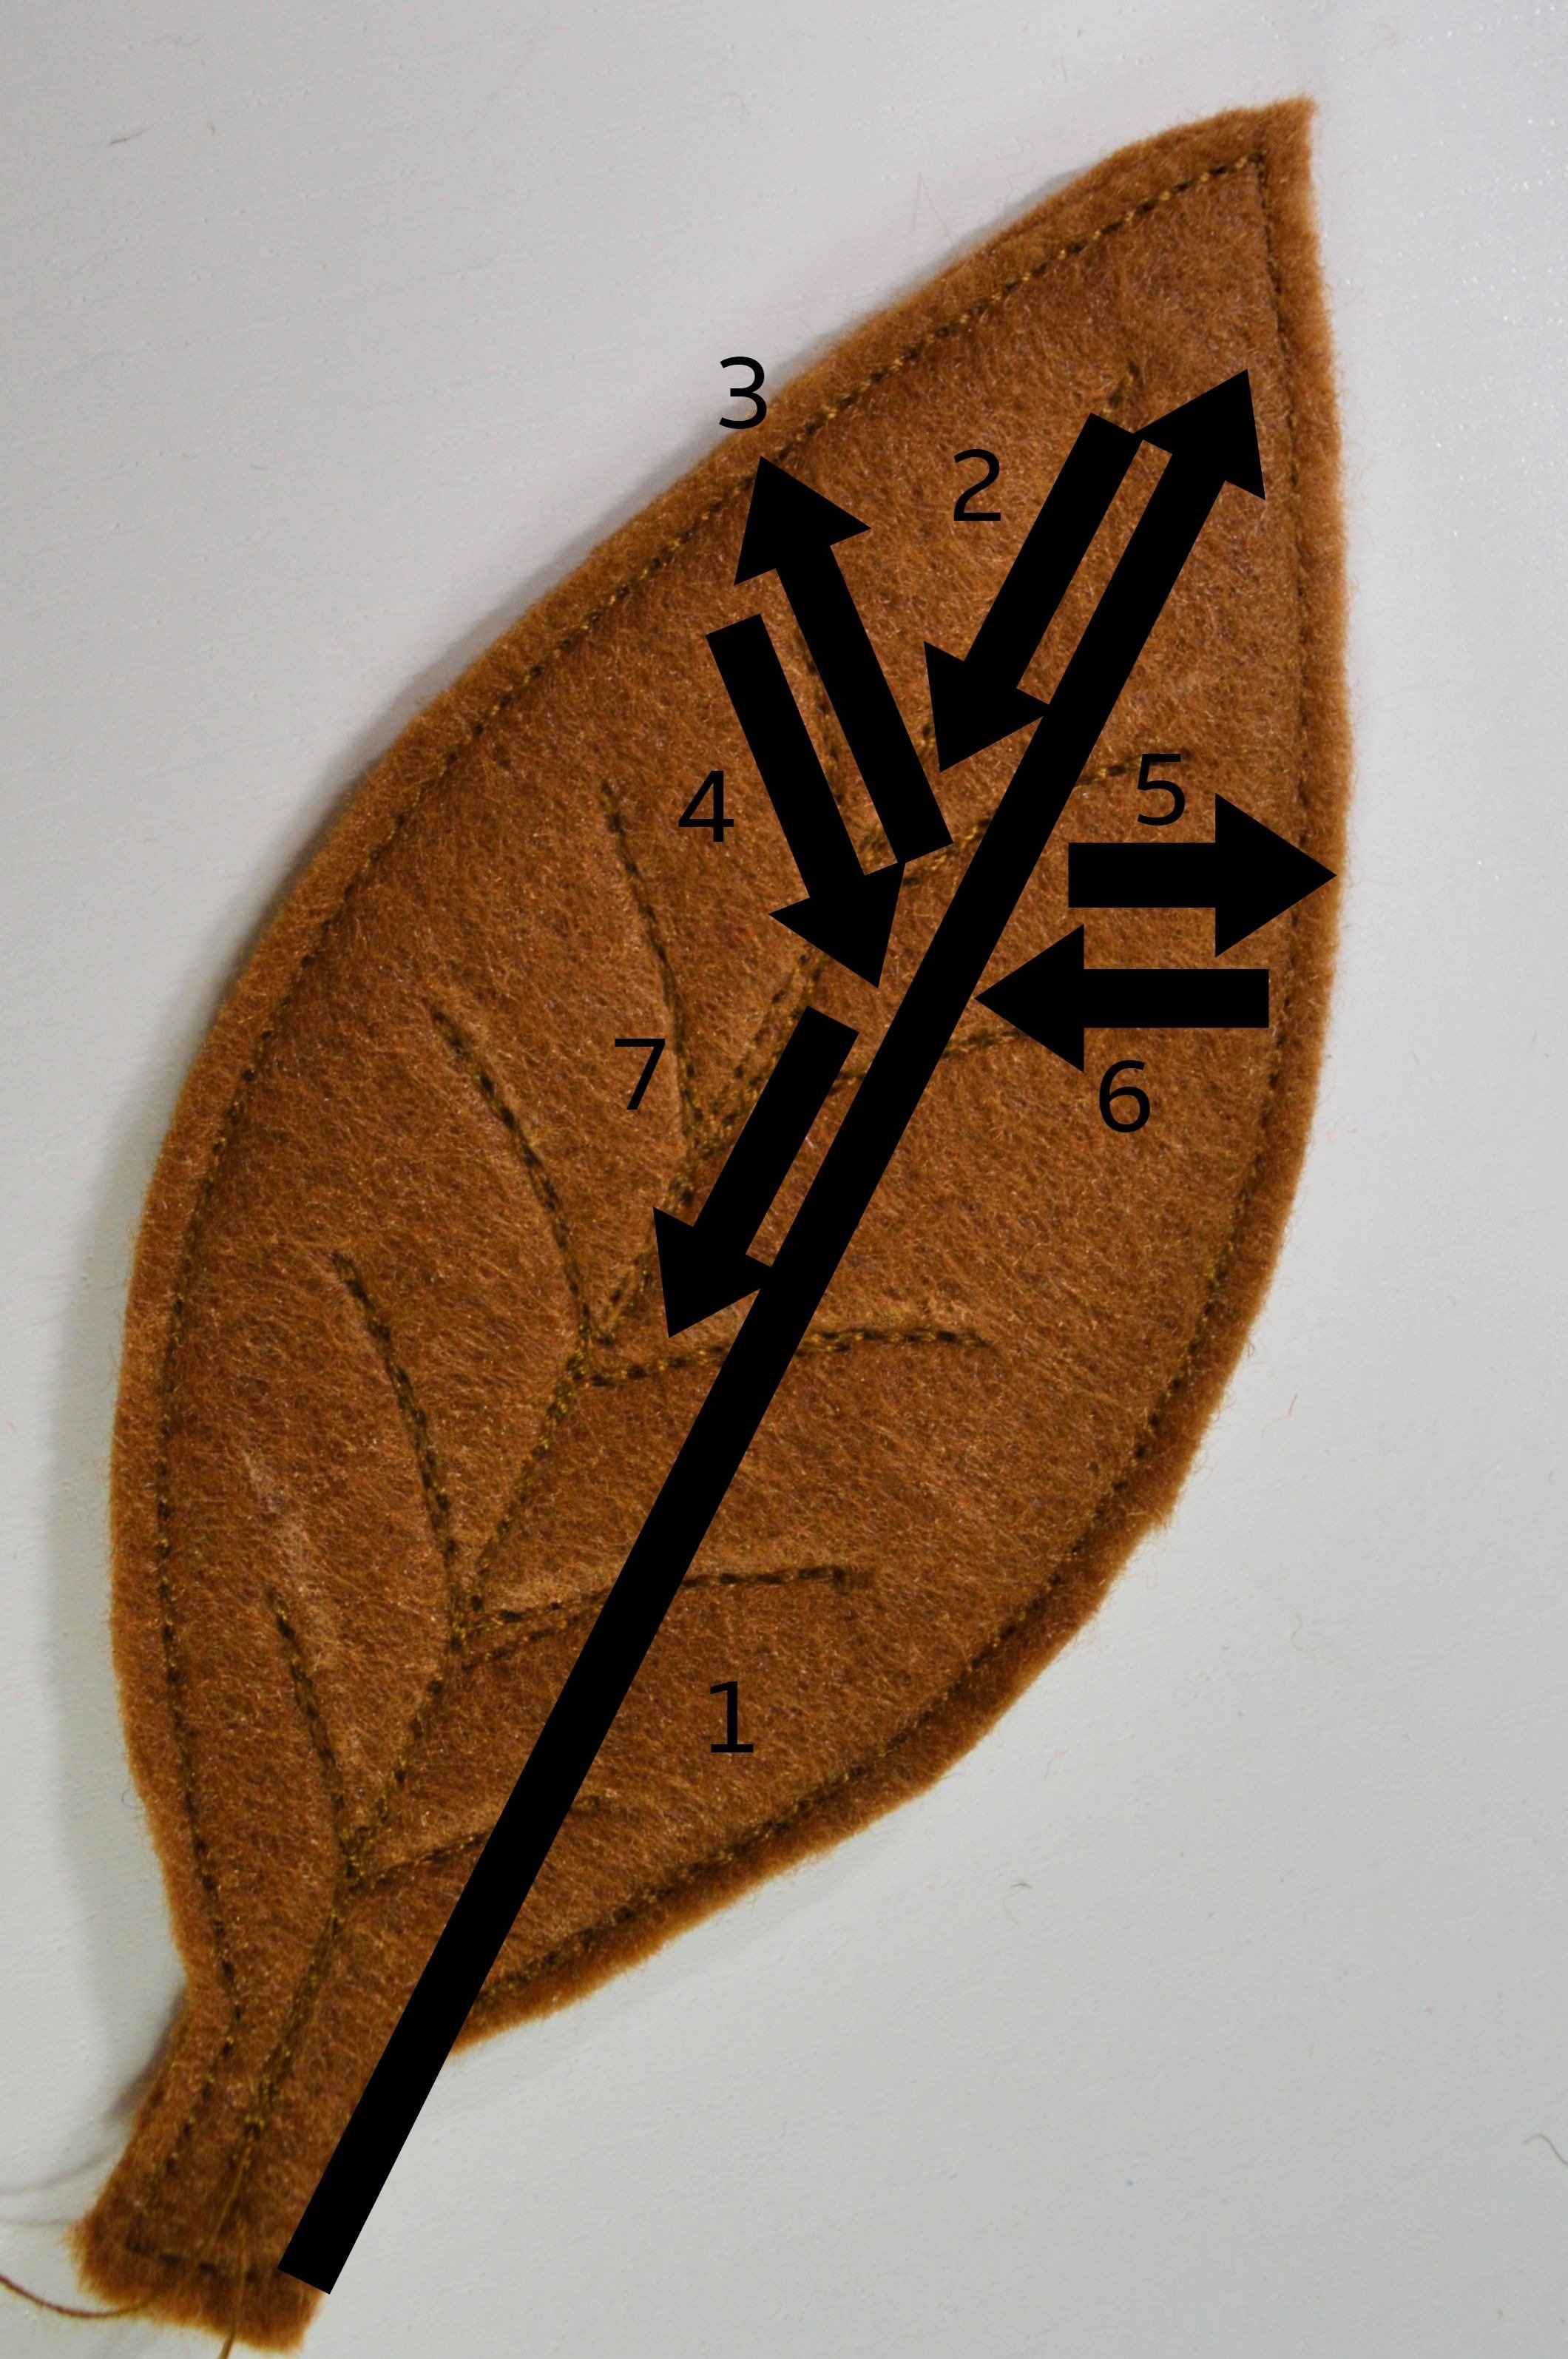
First, stitch seam number 1, from the bottom to the top (mainline), then return a few stitches (figure 2), stitch on one side of the main line and back (3 and 4), repeat it on the other side (5 and 6). Then again few stitches in the direction of the bottom over the main line (number 7), and then repeat steps 3, 4, 5, 6, and again 7 until you reach the bottom of the leave.
This stitching can be done by sewing in the right direction, rotate the leave in sewing direction or stitching it back and forth; it’s up to you to decide what’s more comfortable for you.
Trim excess fabric on edge and the finished piece is in the picture below.
NOTE: By stitching the lines you do not have to be too accurate and make sure that all seams are on the same lines, you can have deviations as long as your lines look as they should be.
In this way made sheets, you can use for making other creative things.
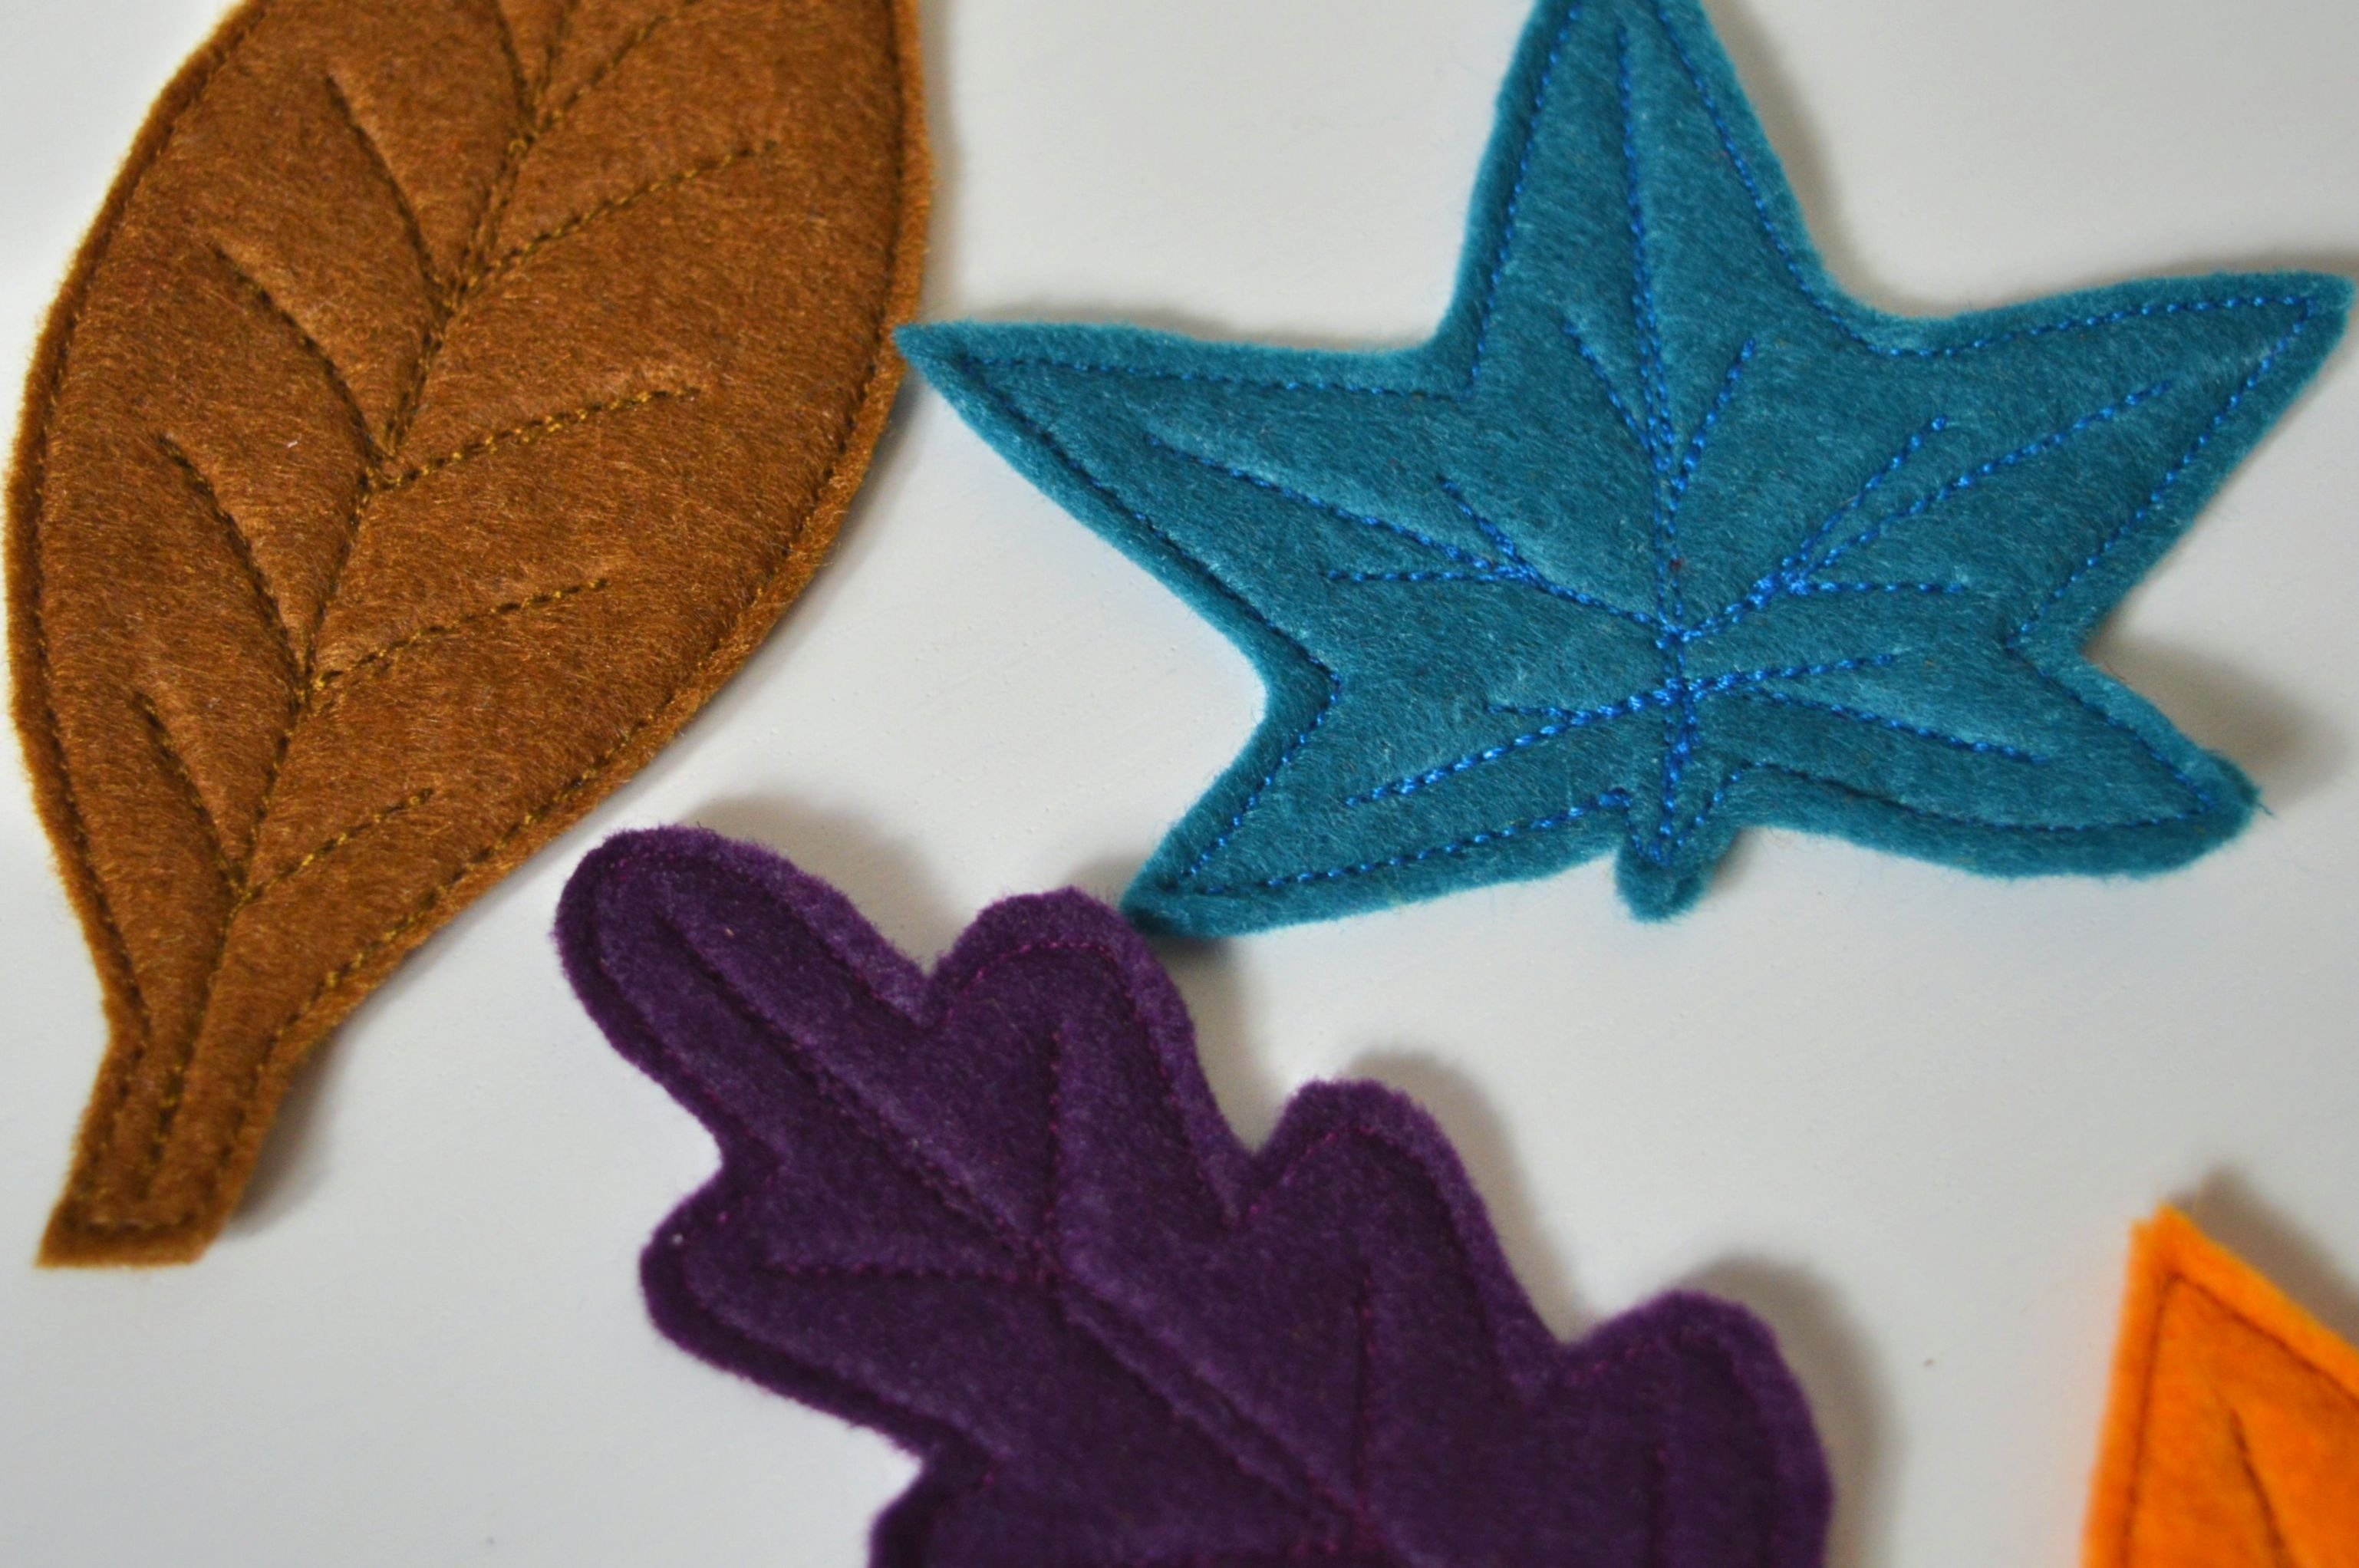
The finished leaves you can arrange to form a beautiful brooch.

GLUING
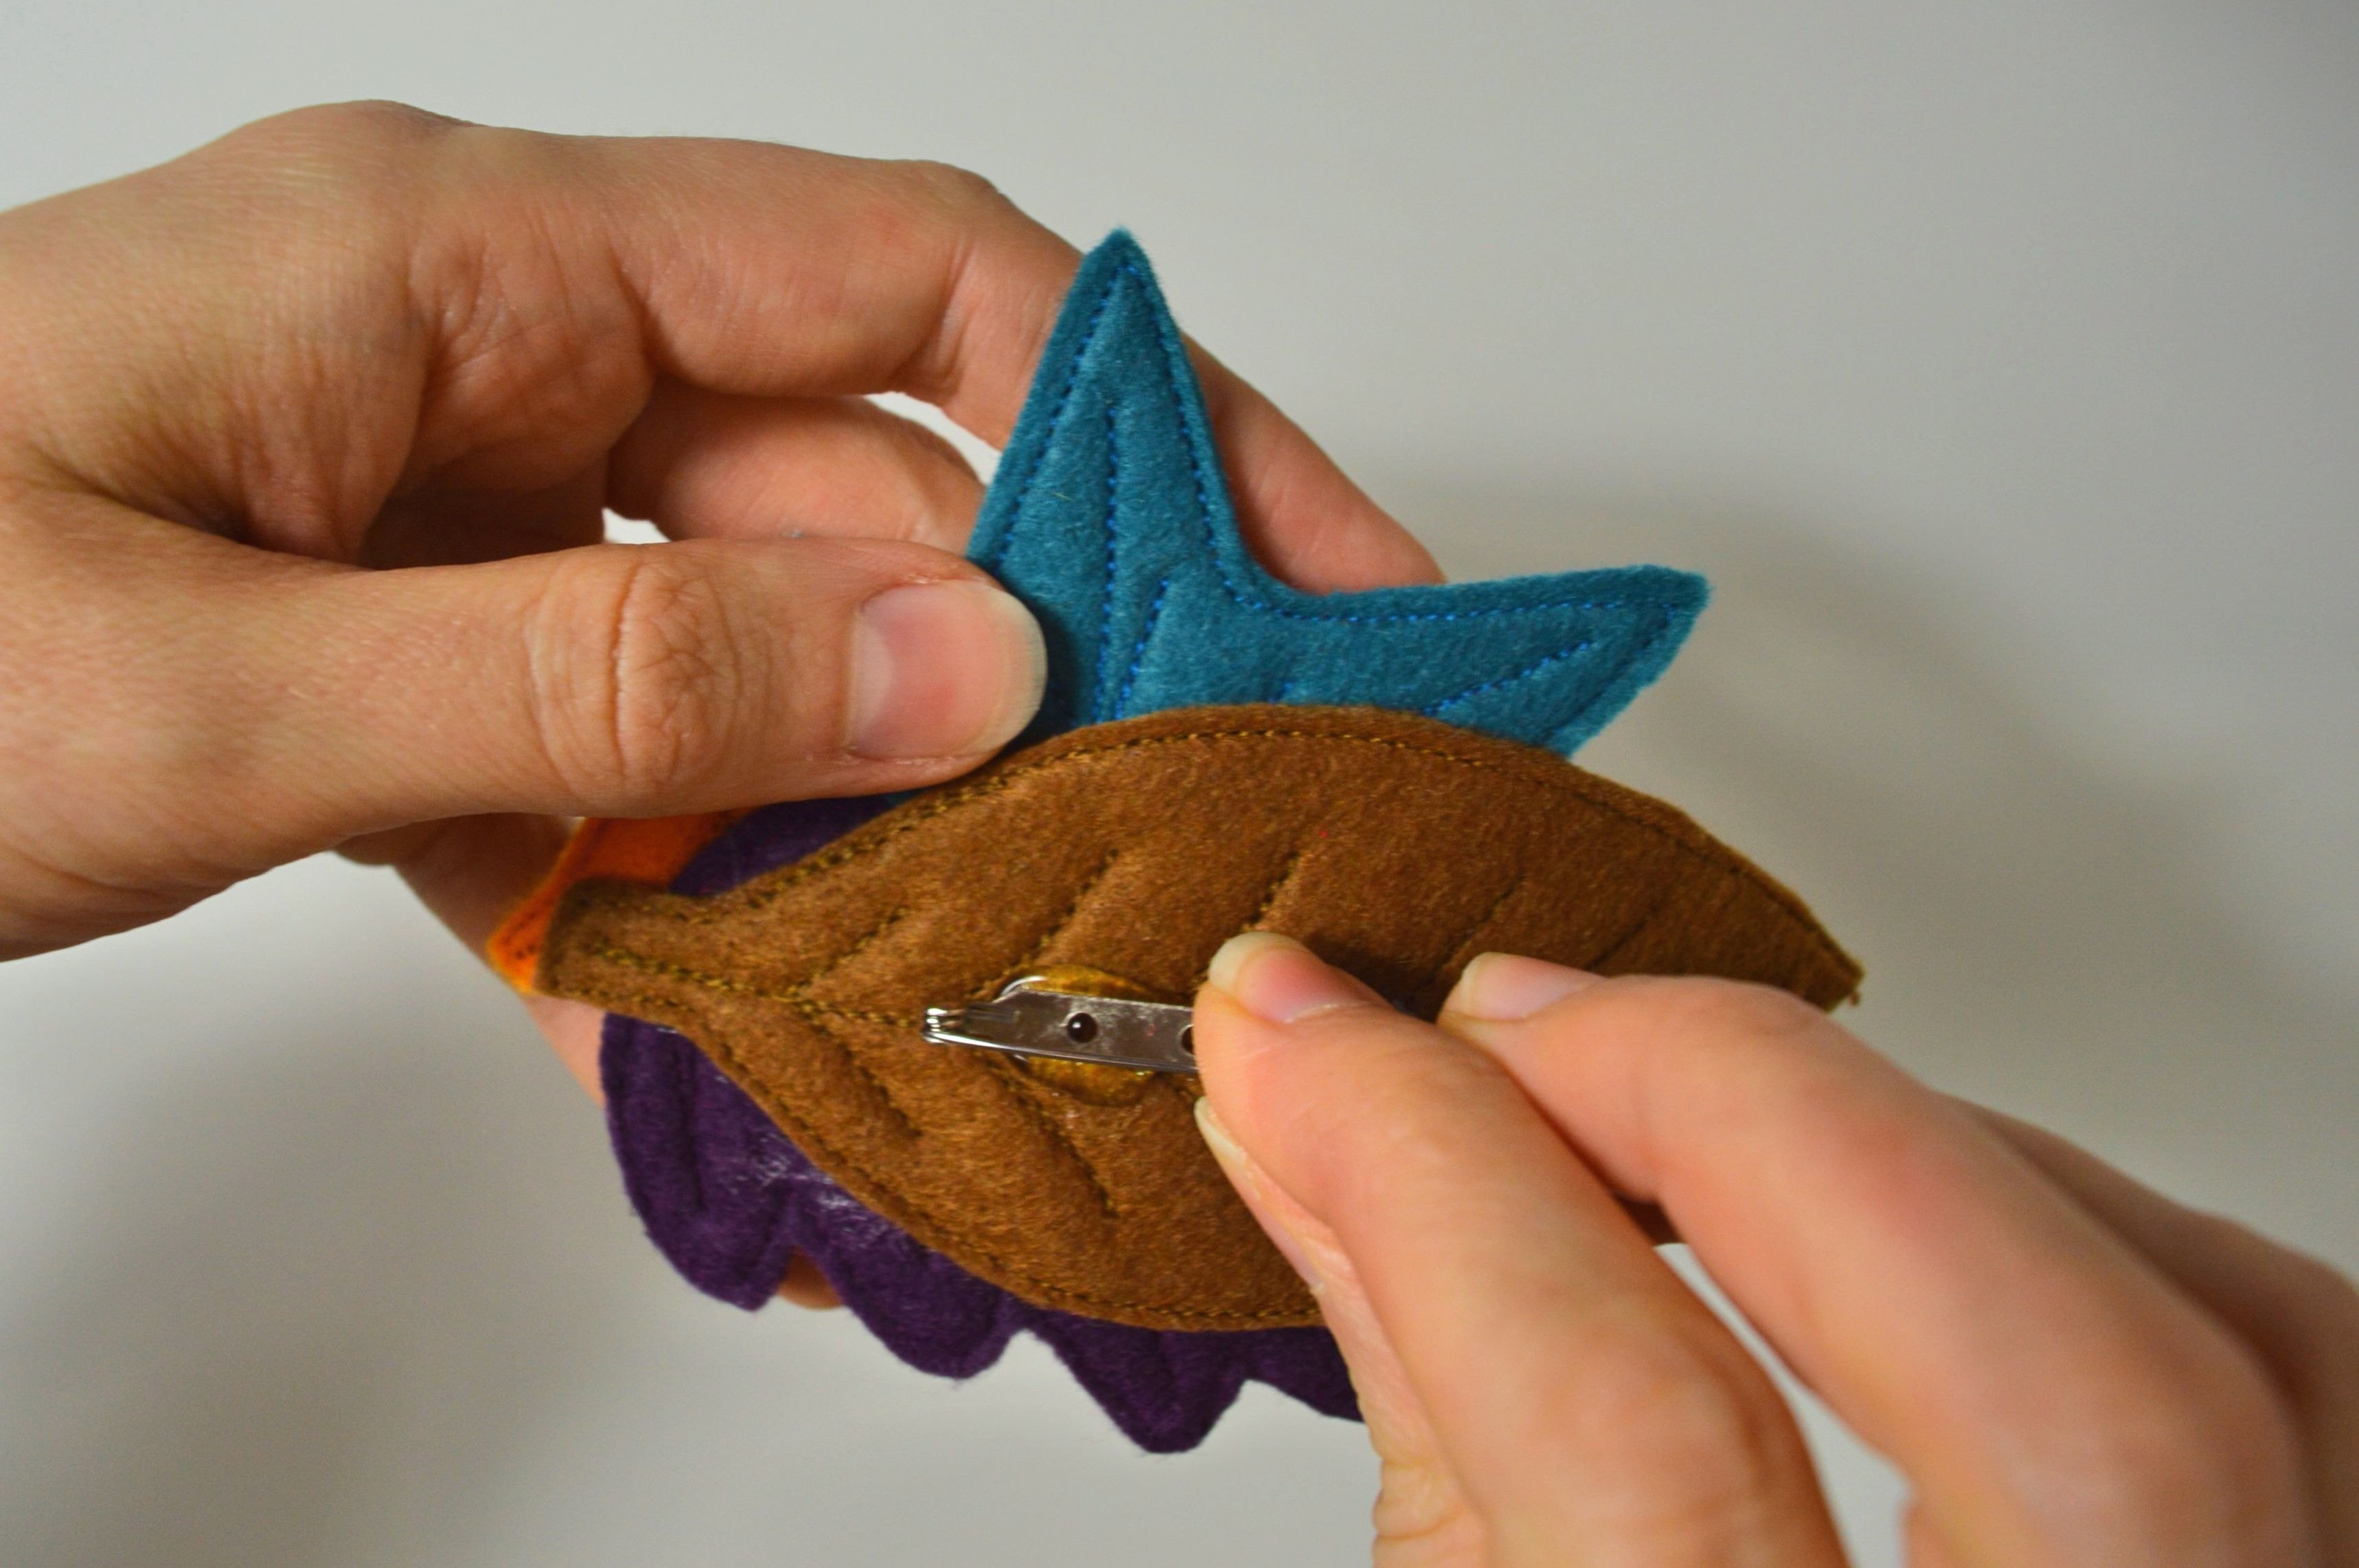
Once you have formed brooch from the pieces, stick them together using gun glue.

Glue Gun

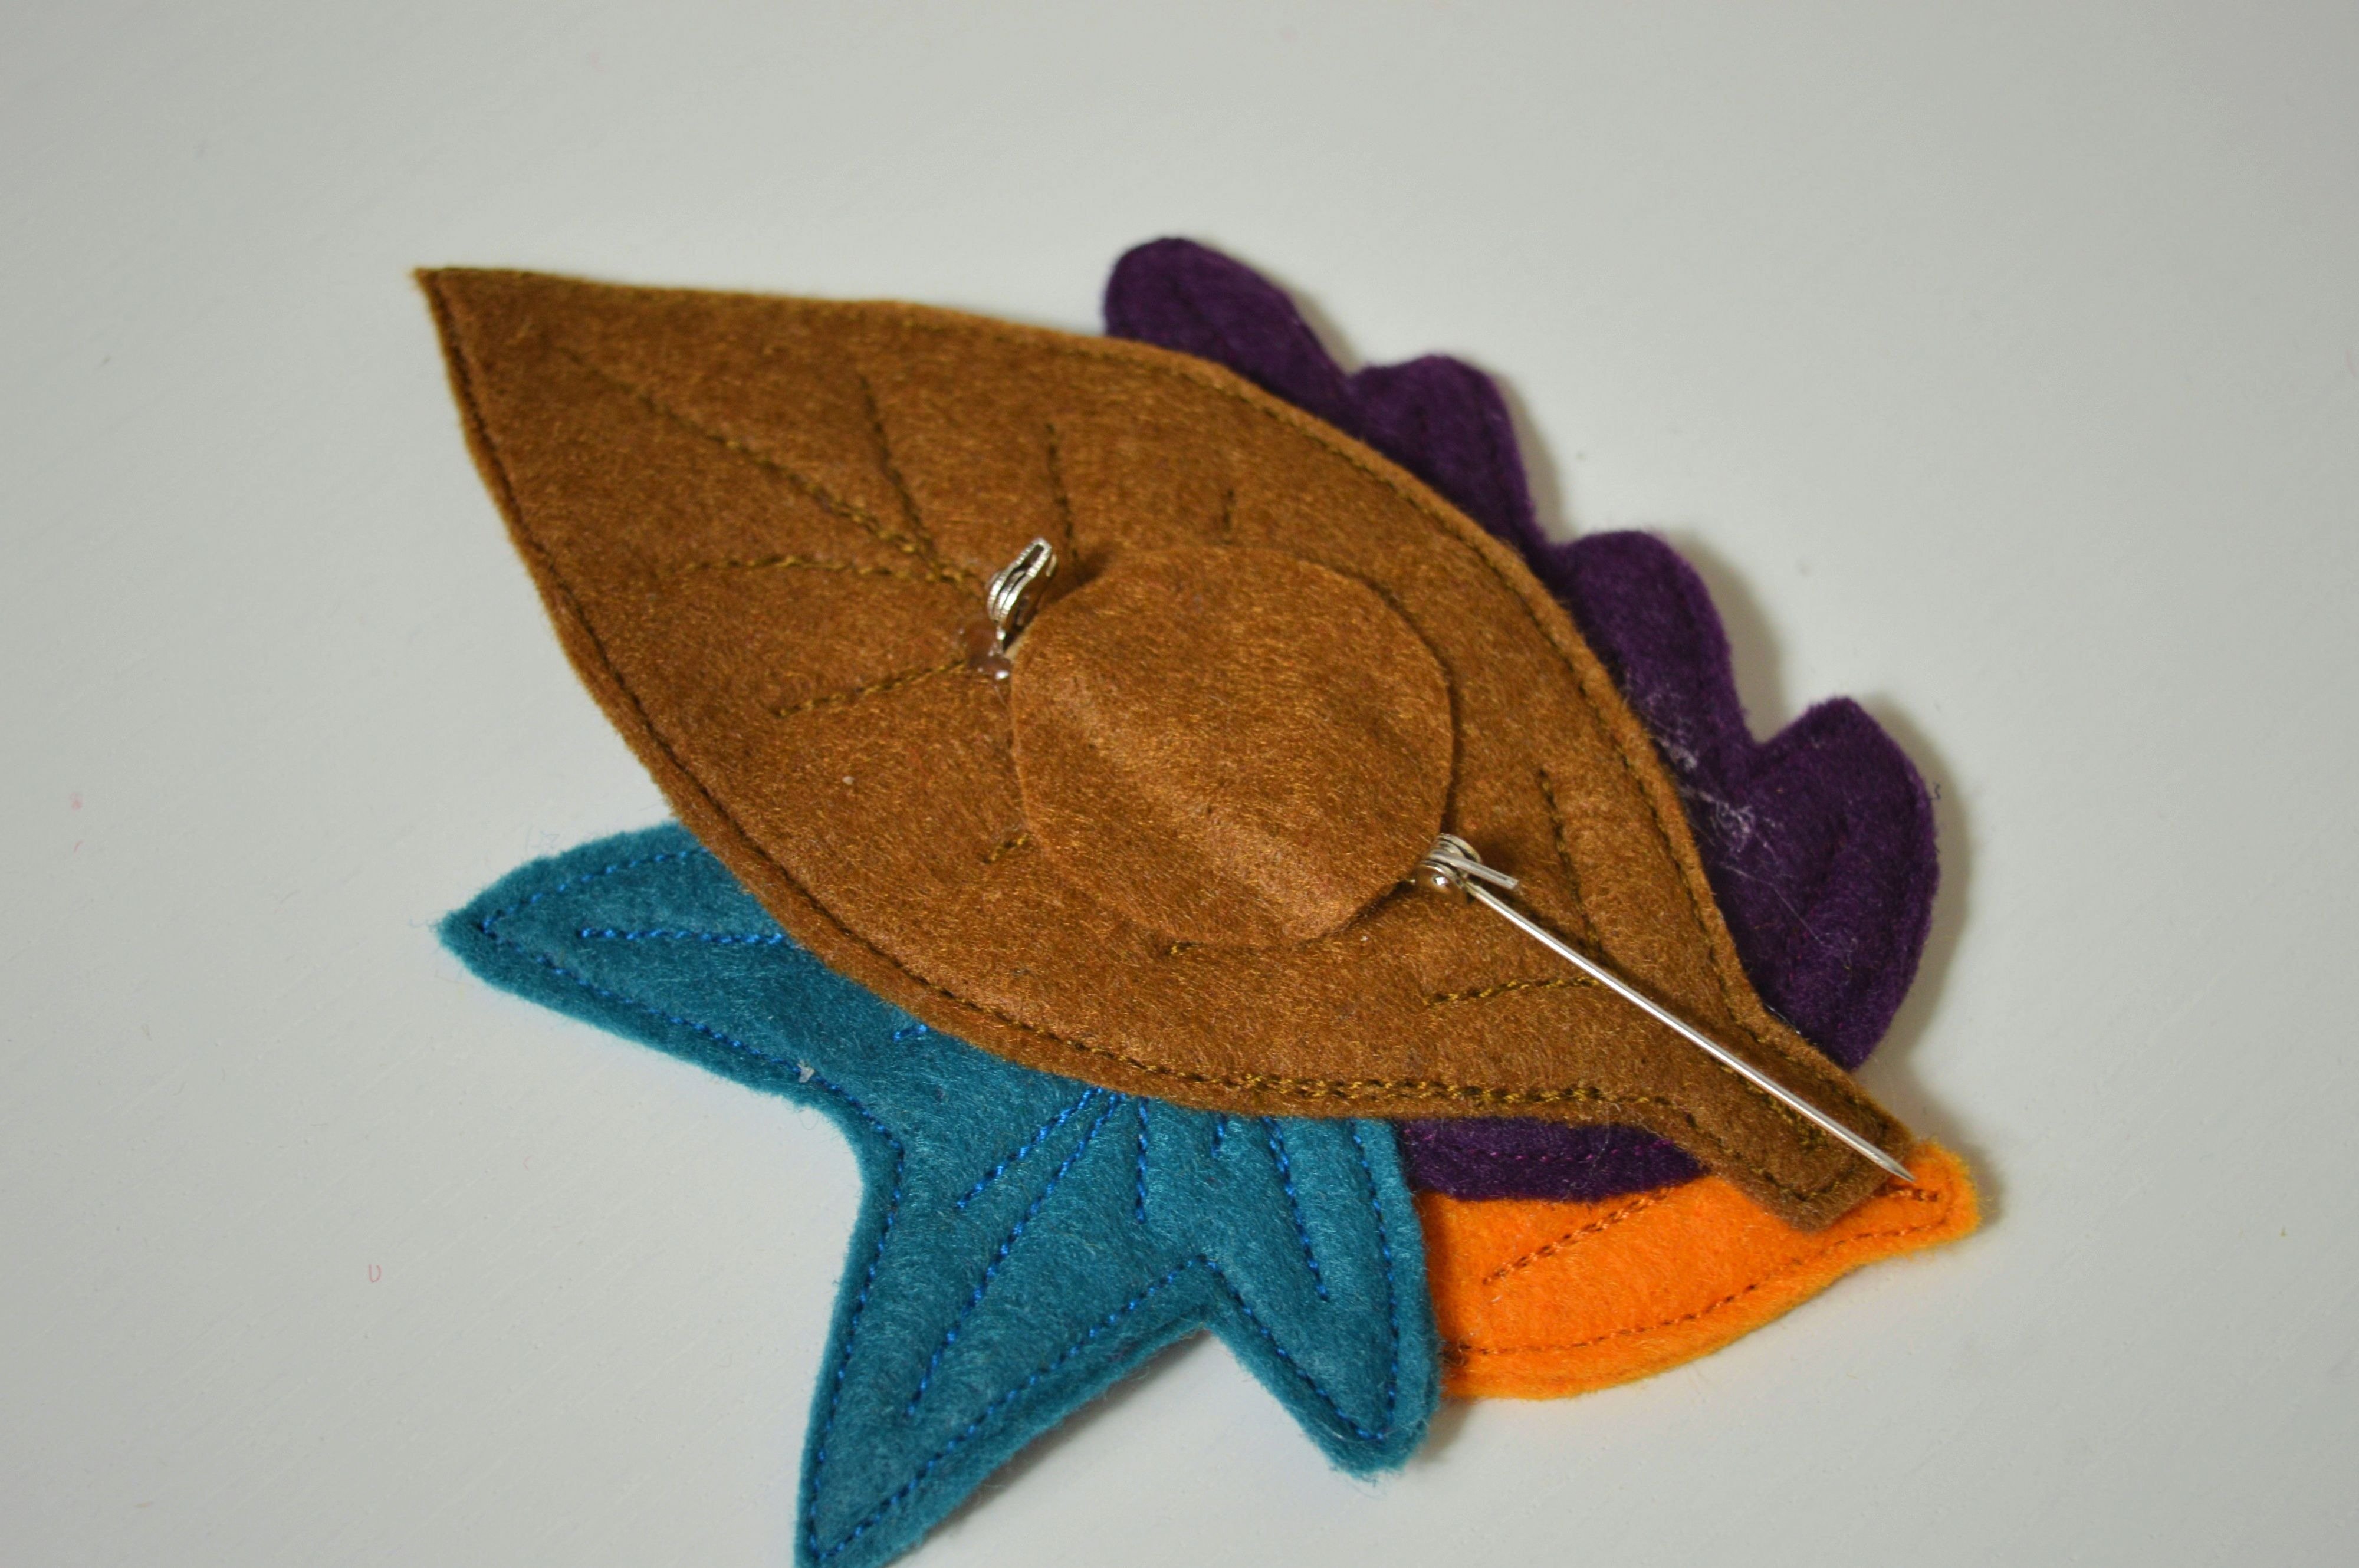
It remains to glue the pin to the back side of the brooch, so you apply a line of glue where should be pin located. Mark, before putting glue, using the tailor’s chalk on the back of the brooch where the pin comes in, so you know exactly where to put glue.
Press the pin on the glue so that the flat side (here with the holes) comes on the adhesive and the brooch.
Setting the pin is over.
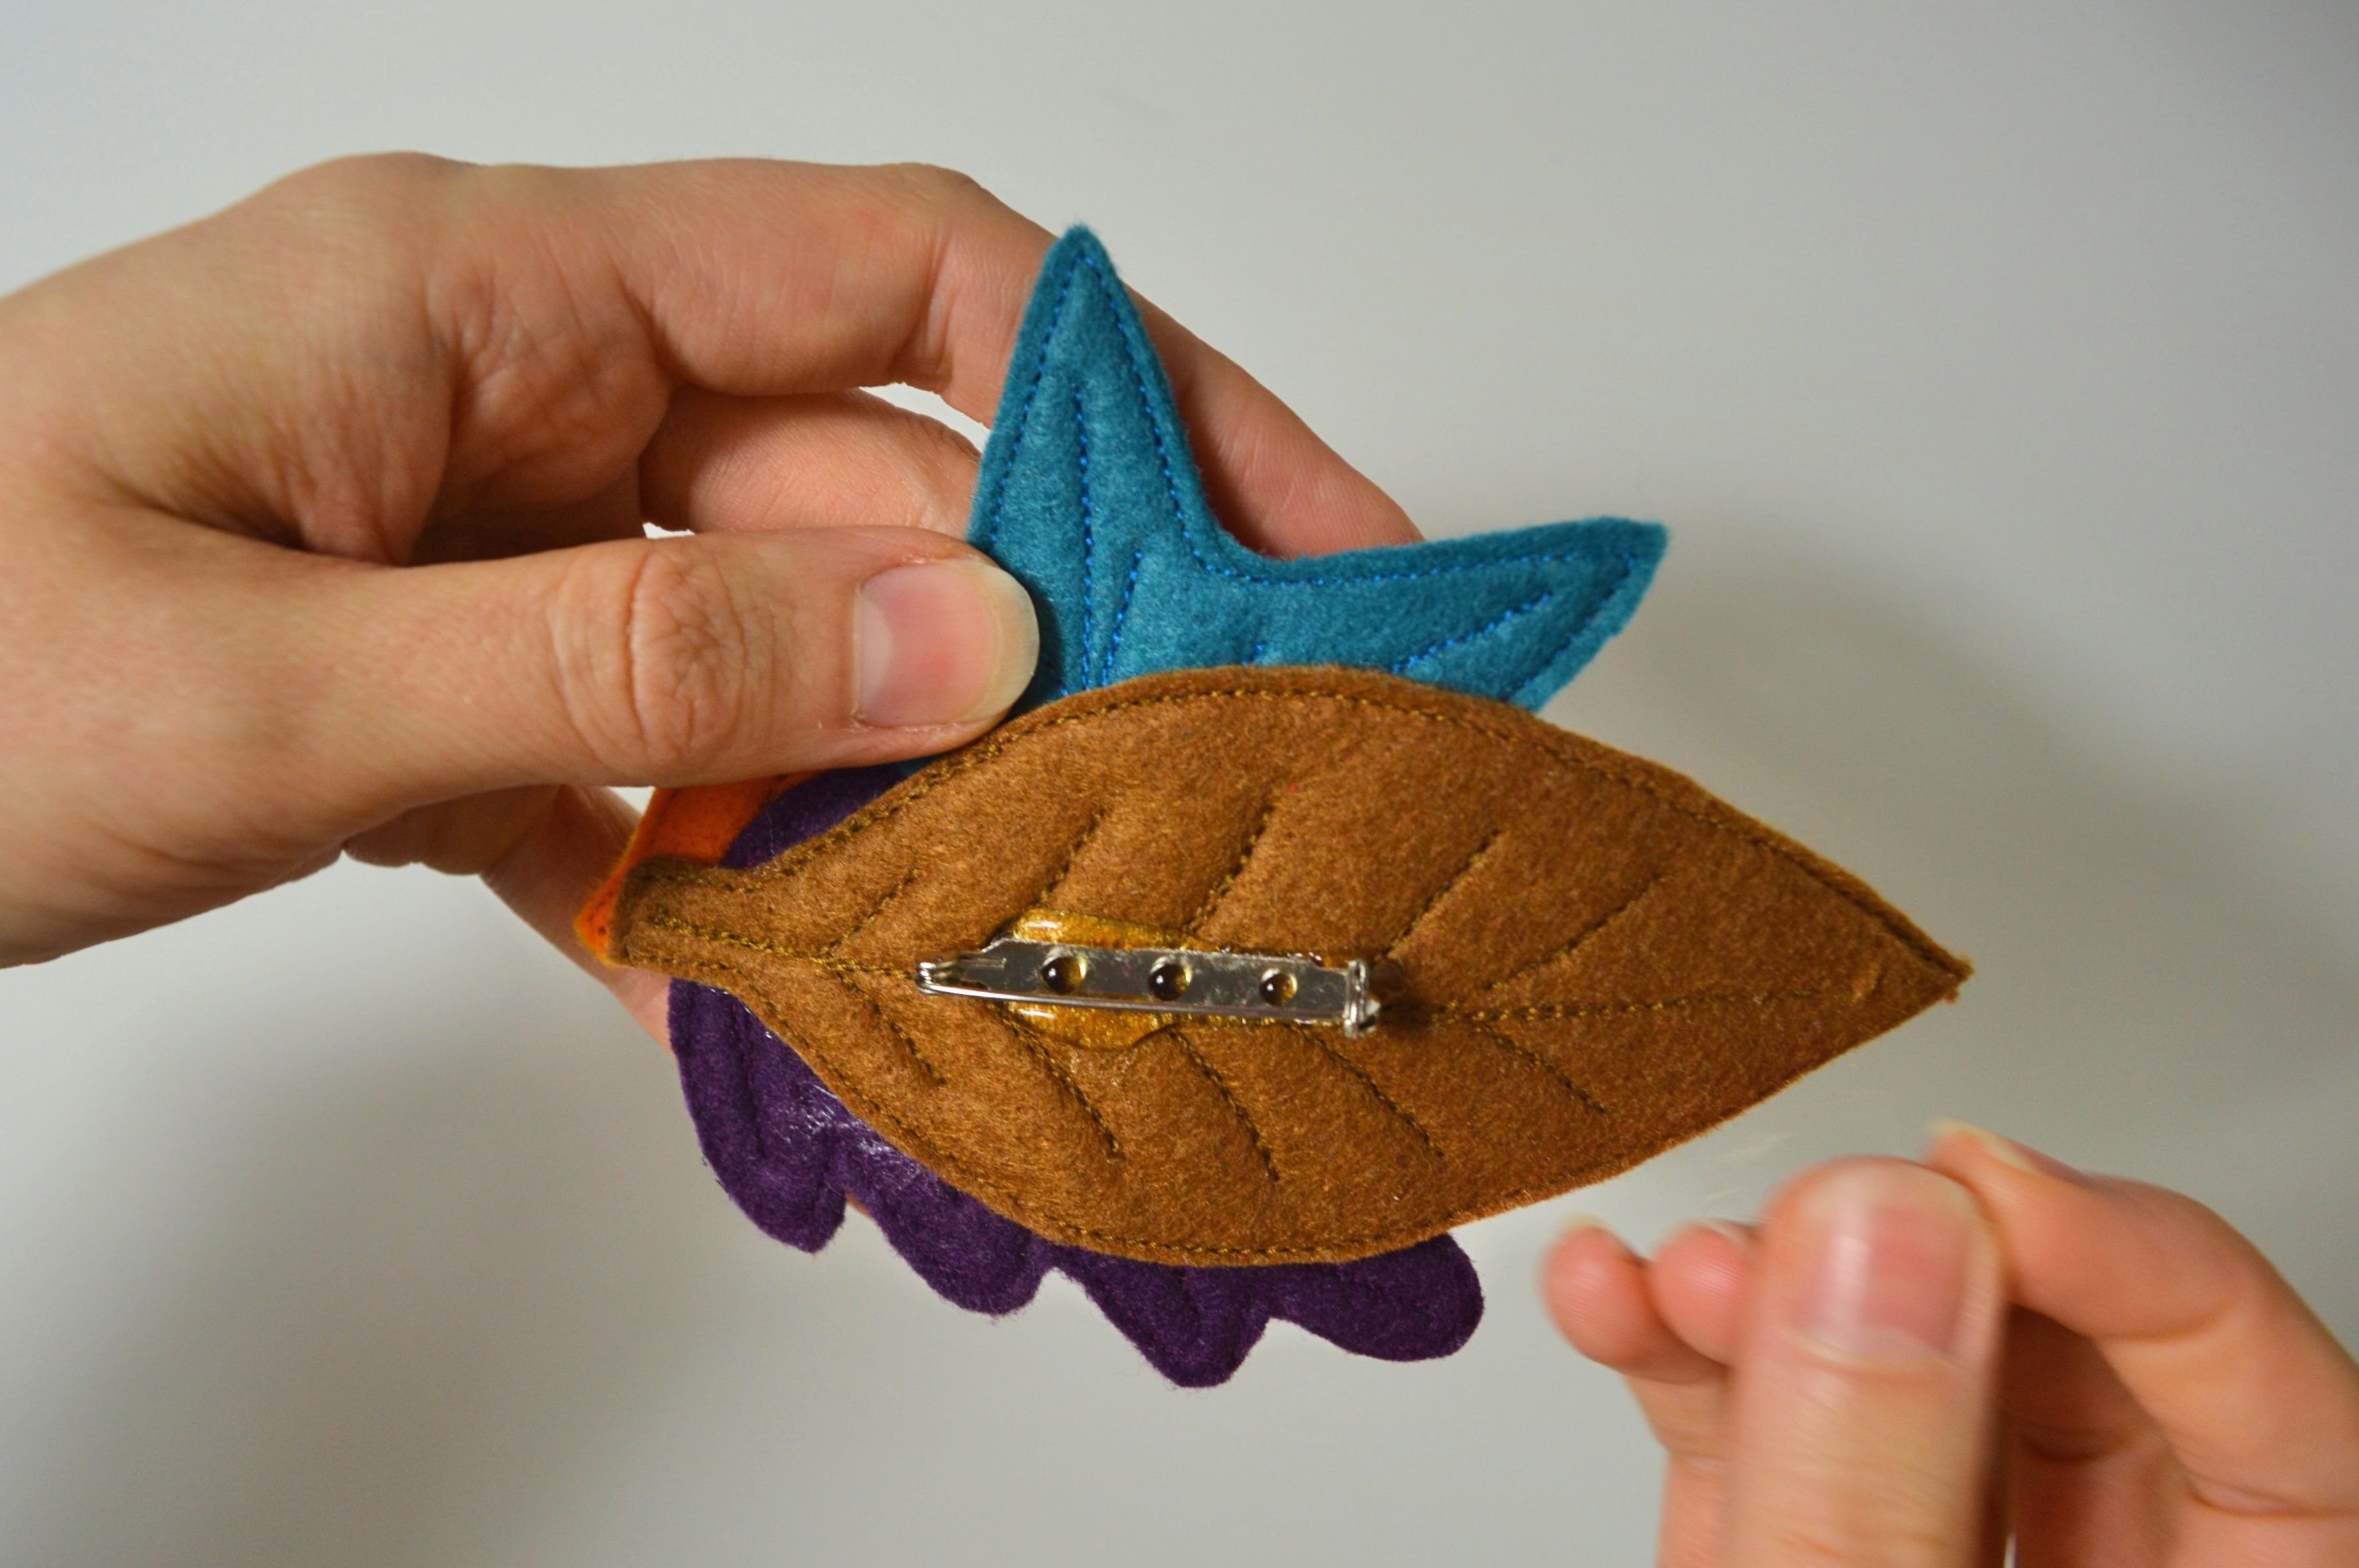
The adhesive that connects the pin and the brooch is visible from the back side. To achieve a beautiful and clean look of the brooch, cut from the felt circle. The circle diameter must cover the inside of the pin.

Glue that circle on the inside of the pin, as shown in the picture below.
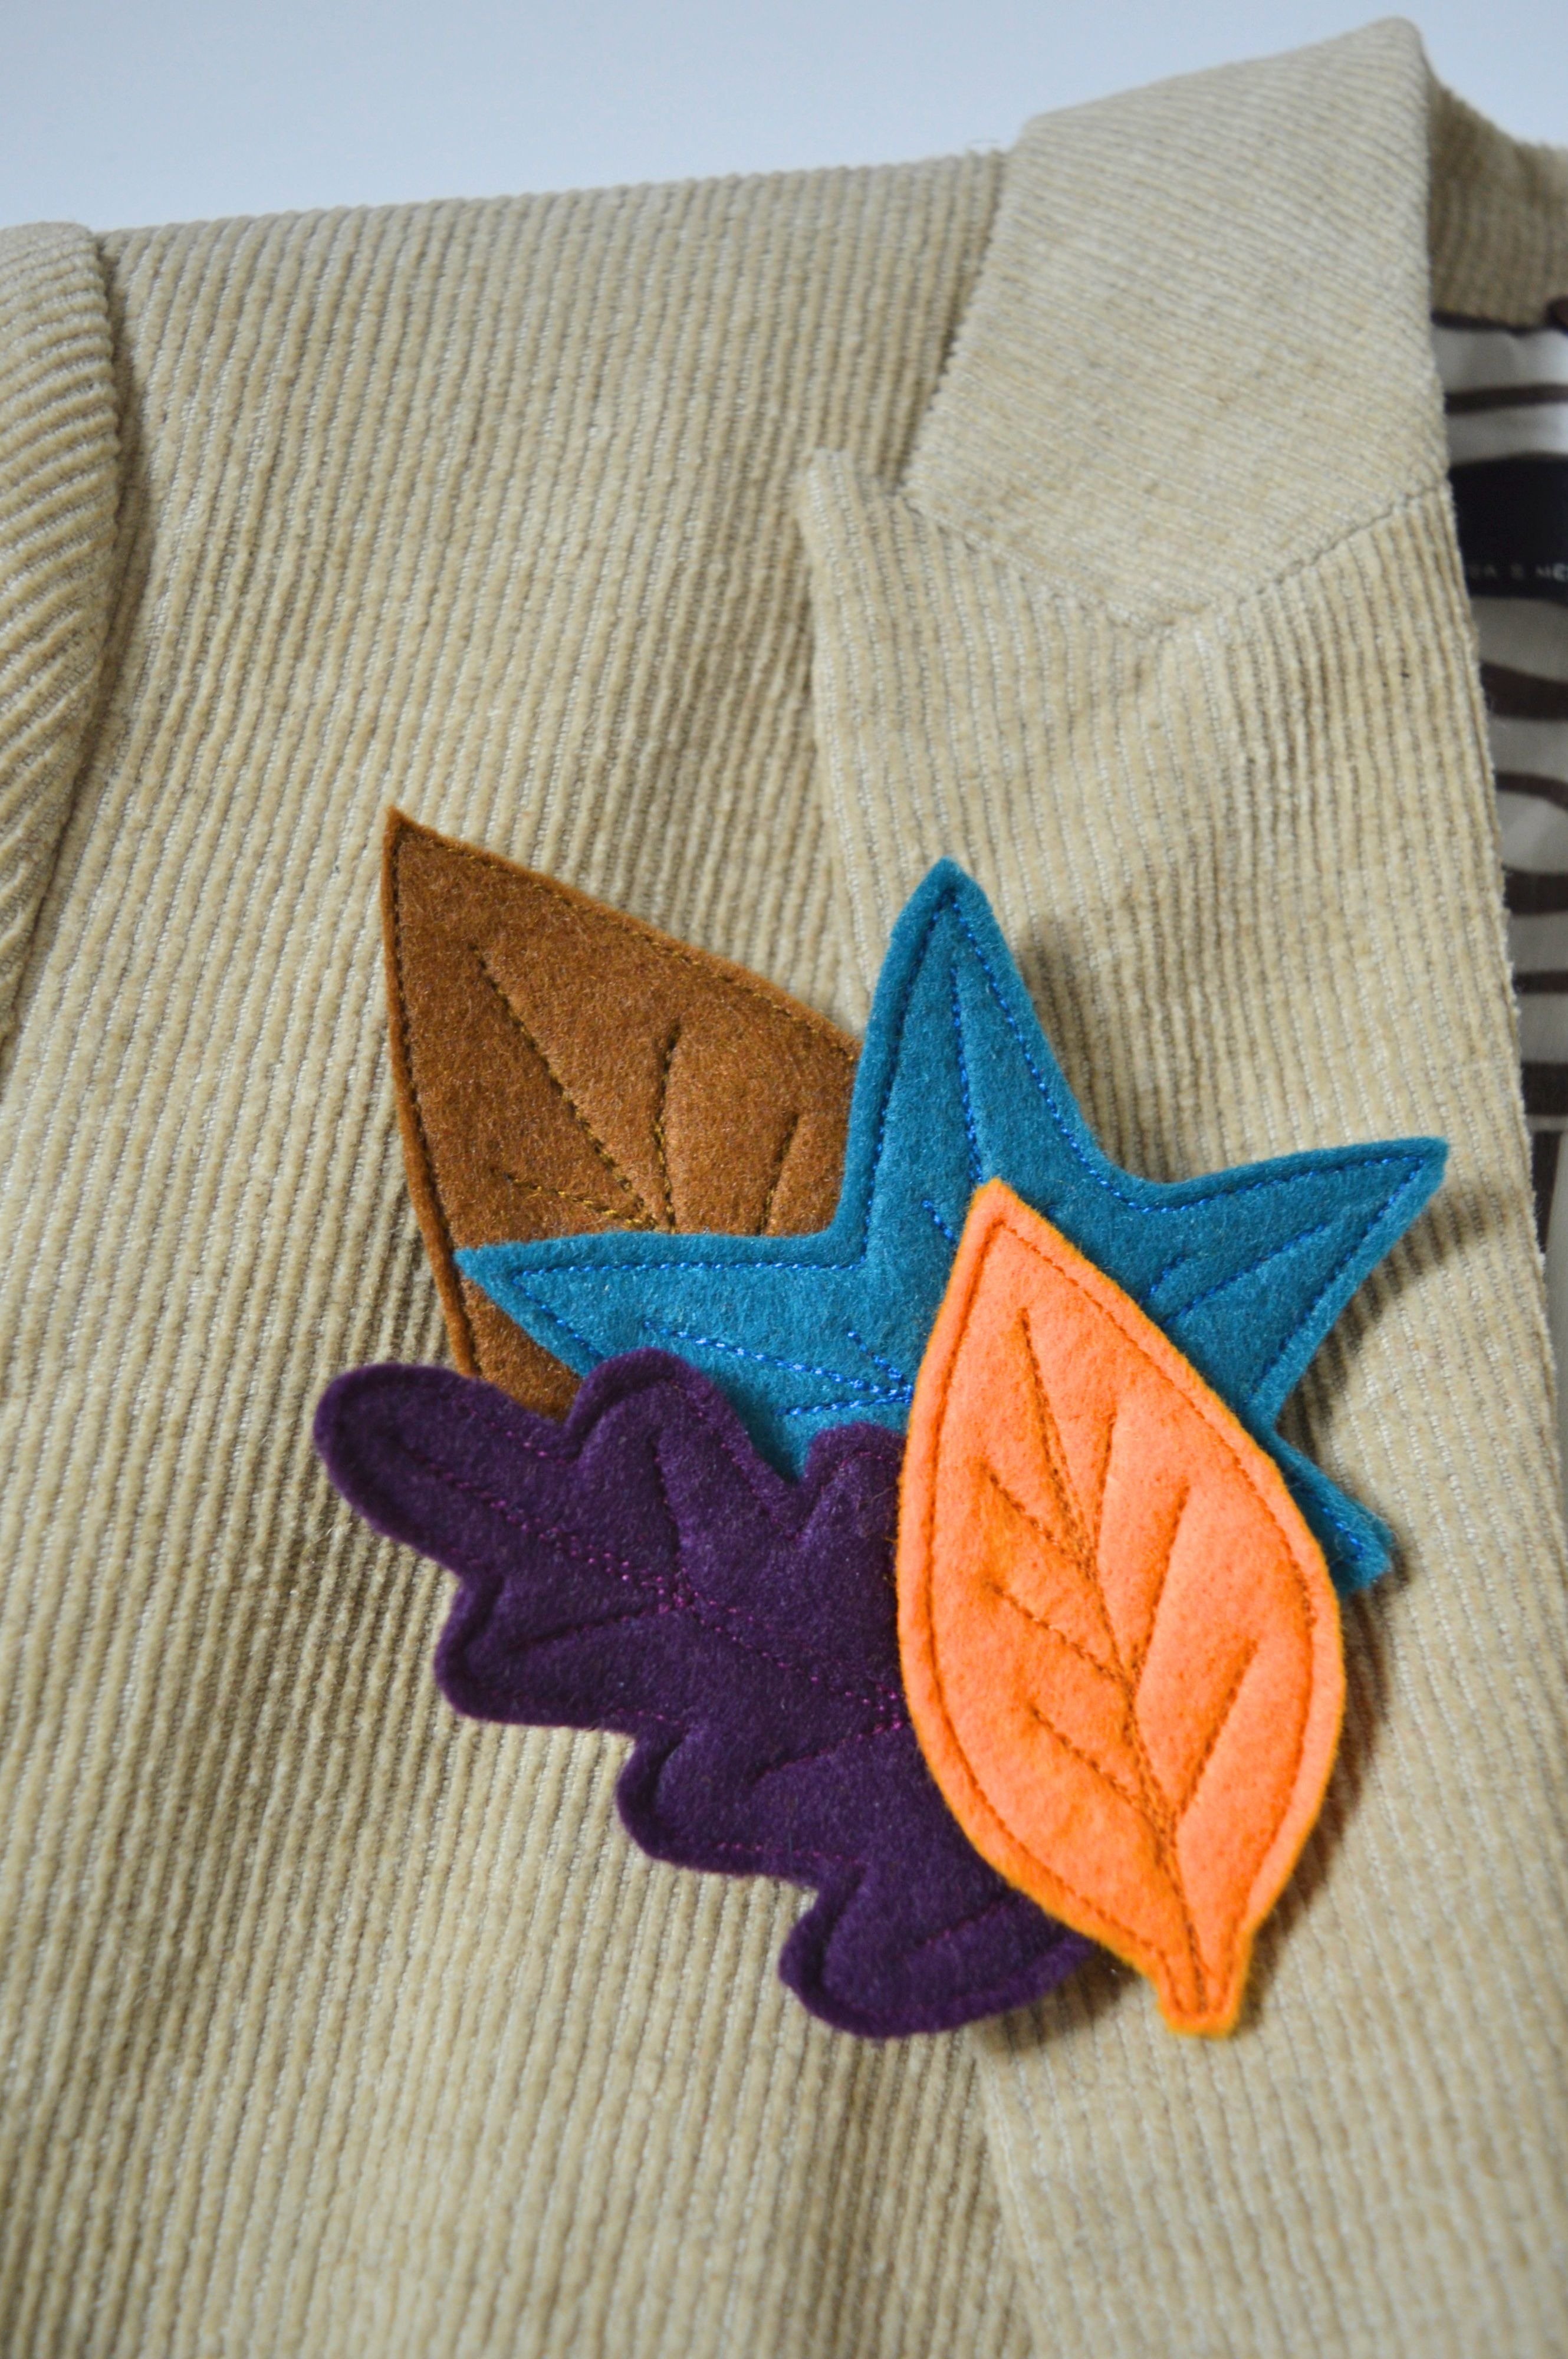
Fall leaves brooch is finished.
The finished brooch dimensions are 10 cm (width) and 12 cm (length).
Making a brooch is very simple, and it’s exciting and fast. The possibilities of varied designs are countless and sometimes is only a little enough to make your clothes more beautiful and interesting.
Nice seasonal brooch – thanks for sharing
très bonne idée je vais tenter, quelle aiguille conseillez -vous?