 BERNINA Corporate Blog -
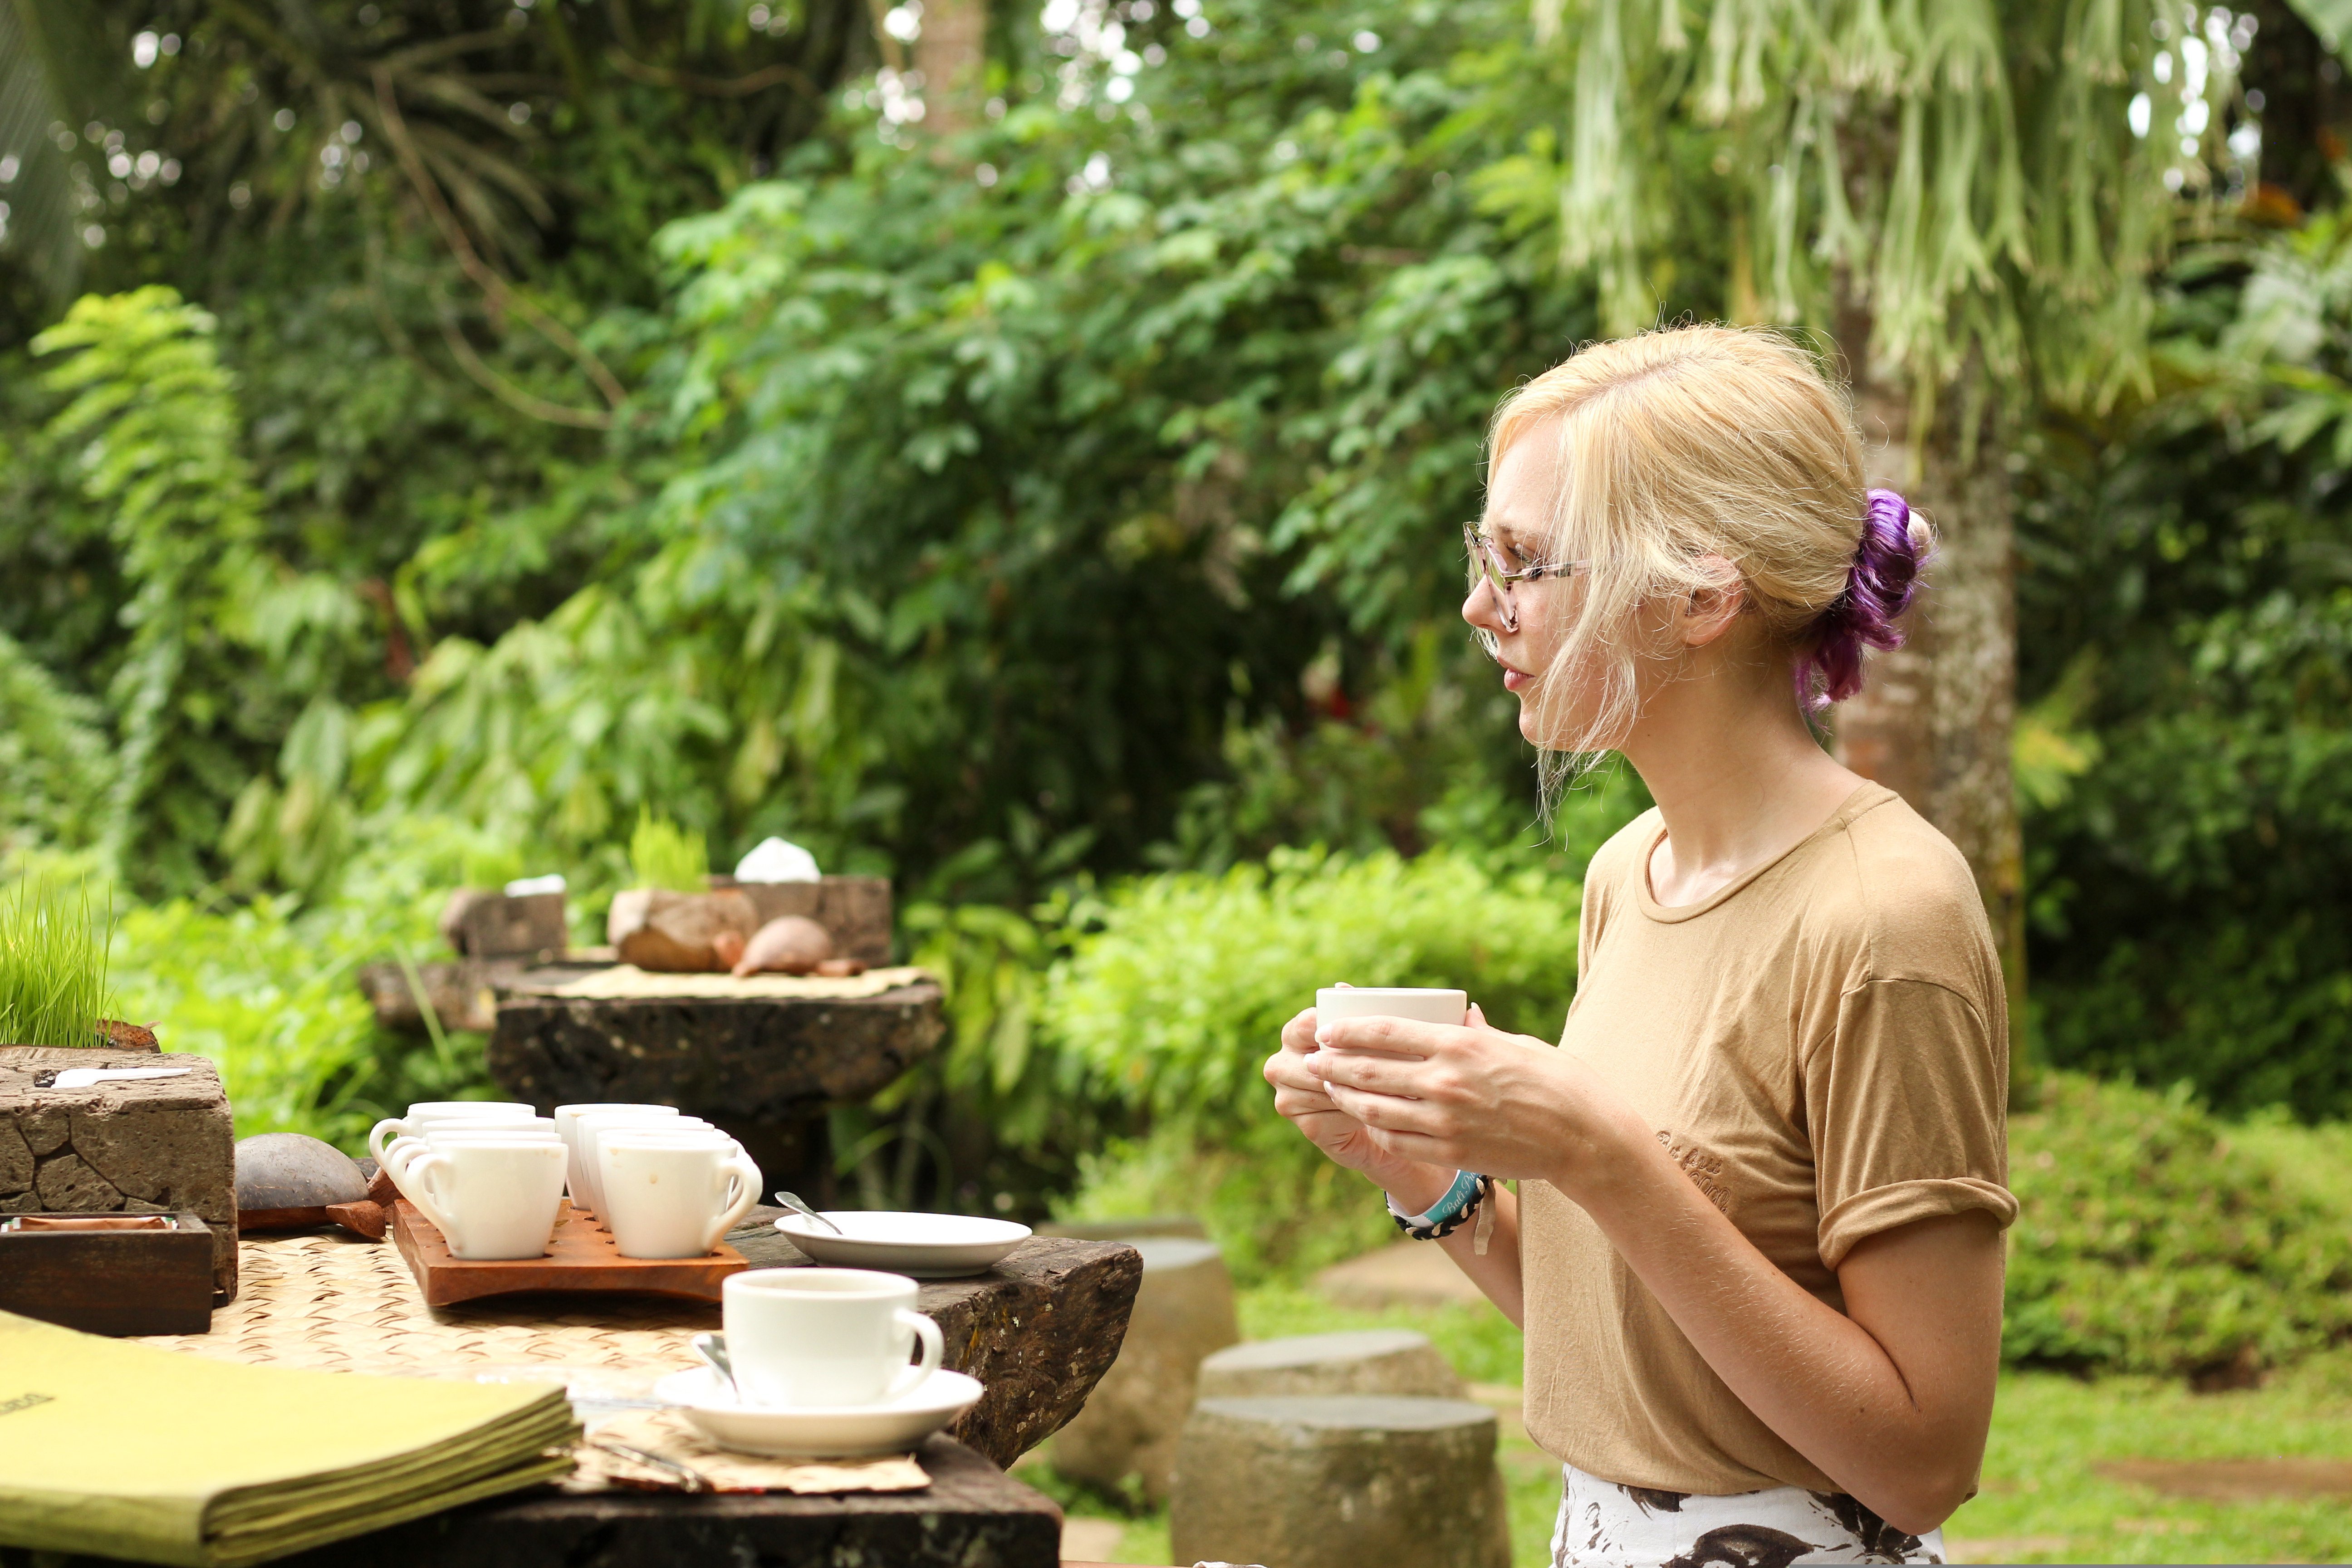
March is the month of my boyfriend and my anniversary. This year for our 10 year anniversary we decided to go to Bali!
Even though our airline offered a very generous 45kg baggage allowance, I wanted to pack a few very versatile garments to mix & match.
Recently one of my favourite local pattern makers (Sarah-May of French Navy) released a free tshirt pattern, The Stellan Tee. The pattern was quick and easy to make which was a bonus as our trip was rather spontaneous and I didn’t have a lot of time to sew. The pattern has a cropped boxy fit which works well with my wardrobe. I can pair it with my favourite high waist pants & skirts and even wear it under strappy dresses and jumpsuits.
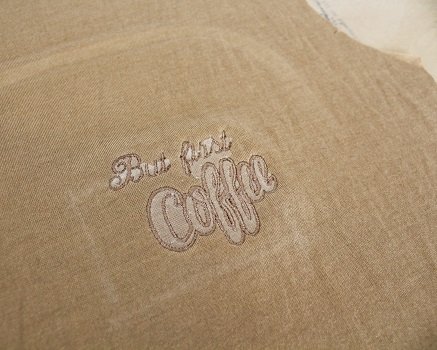
My boyfriend and I love coffee. We planned to visit a coffee plantation while in Bali so I decided to make a coffee inspired tee. The colour of the fabric paired well with so many of my garments.
My B535 afforded me the pleasure of extending the coffee theme with personalized embroidery.
I loved this pattern so much that I have made a white one and am even working on 2 long sleeved versions! Keep an eye on my instagram @hannah_rose.smith to see them.
What will be needed:
- The Stellen Tee Pattern
- Sewing machine
- Embroidery Module
- Overlocker
- 90cm Light to Medium weight knit fabric
- Light weight Felt
- Tear-away stabilizer
- Water soluble stabilizer
- Ballpoint Needles
- Twin Ballpoint Needle (optional)
- 3-4 matching threads
- Embroidery thread
Steps
Embroidery
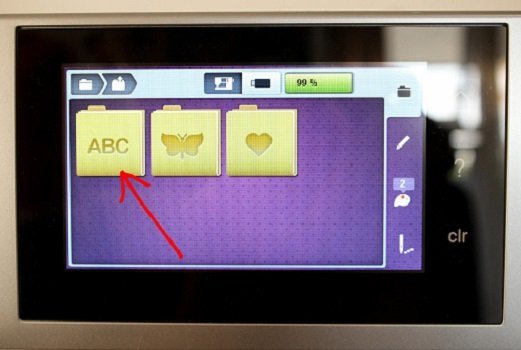
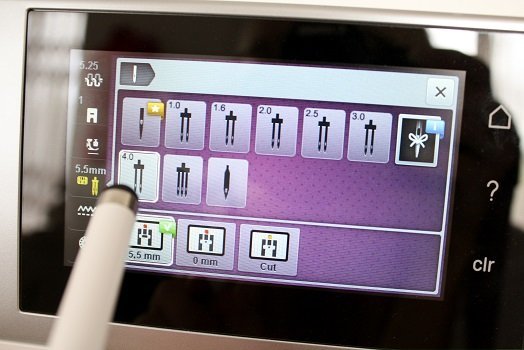
- Go to the font folder.
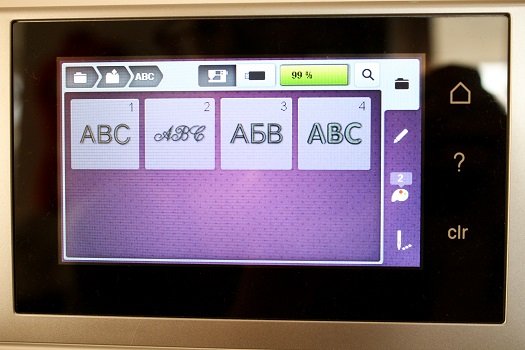
- Choose a font. I selected the cursive font which is saved to my machine.
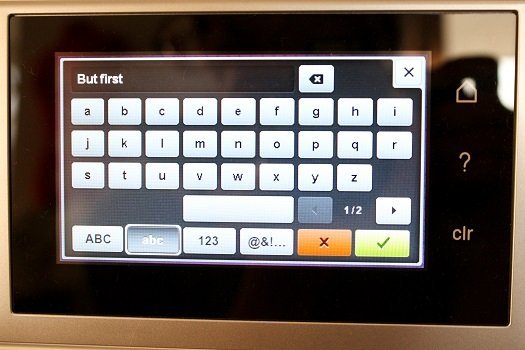
- Type out your motto or quote and select the green tick when you’re done.
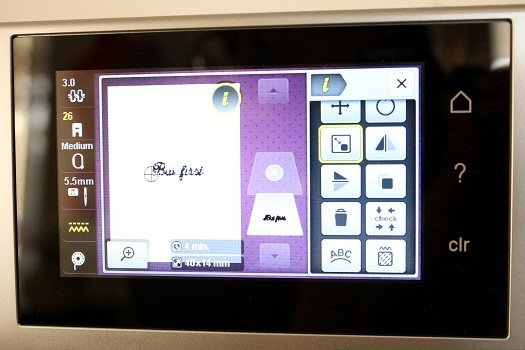
- Adjust the size and placement.
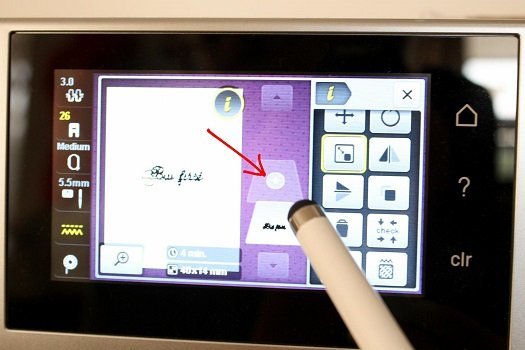
- Select the Add button
Coffee design by Igor Denisov
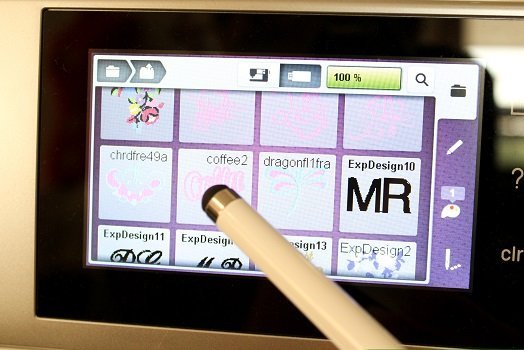
- Select the design you want to add. I chose one saved on my USB.
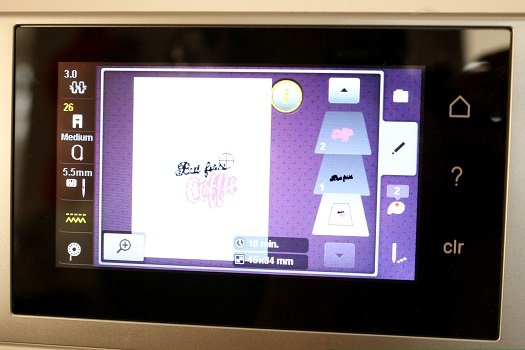
- Adjust the size and placement.

- For the base layer in the embroidery hoop, use a layer of tear-away stabilizer and felt.
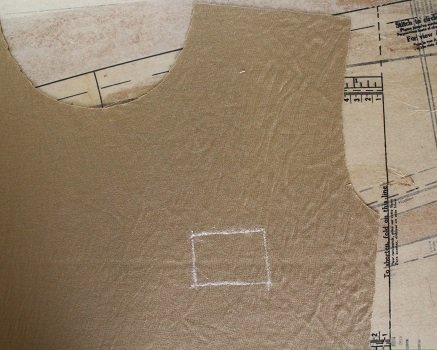
- Using chalk or a fabric marker, mark out the placement for the embroidery on the Tshirt front.

- Place the Tshirt front piece on top of the tear-away stabilizer and felt in the embroidery hoop. Place a piece of water soluble stabilizer on top.
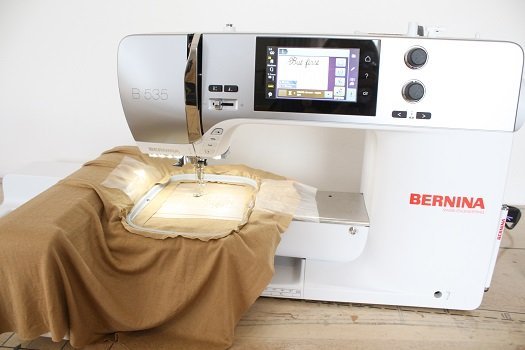
- Put the hoop in your embroidery machine and embroider.
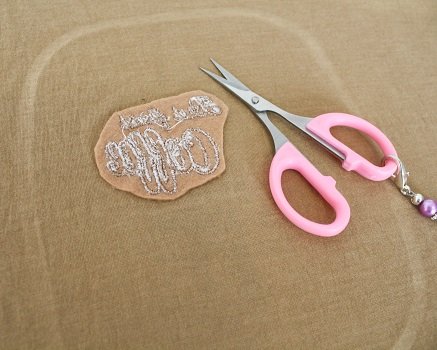
- Once finished, remove the tear-away stabilizer and trim the felt around the embroidery.
- Tear away the majority of the water soluble stabilizer and remove the rest with water (or leave it until you wash the finished garment)
Assembly
For more indepth step-by-step instructions, please also follow the instructions provided by French Navy for the Stellan Tee pattern.
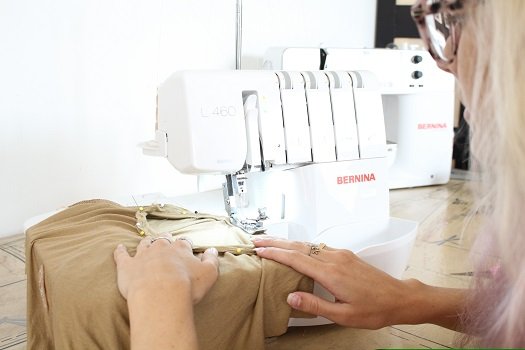
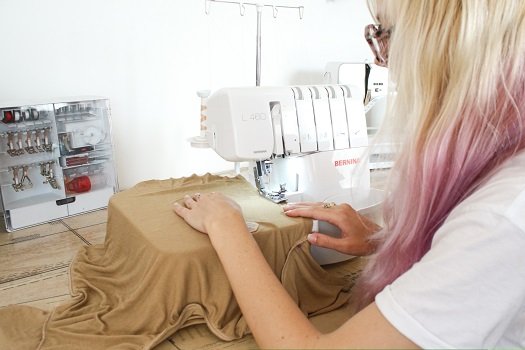
- Using the 4-thread stitch of your overlocker, join the shoulder seams, join the ends of the neck binding strip and then join the neck binding to the neckline
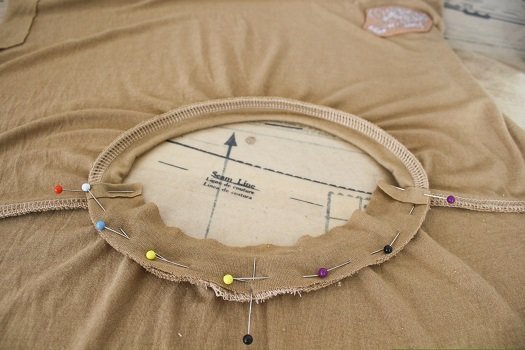
- Pin and sew the reinforcement strip along the back neck binding seam.
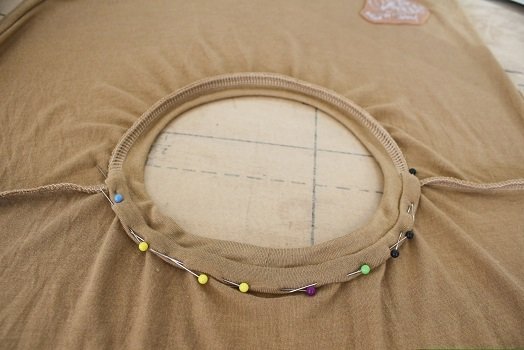
- Fold the strip over the back neck binding seam to encase it.
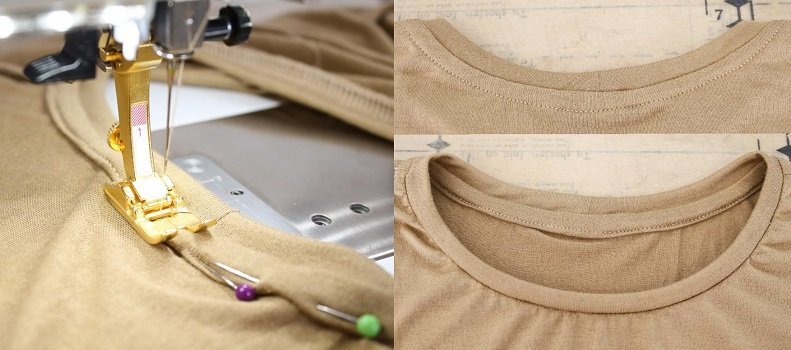
- Using a straight stitch, sew the reinforcement strip to the back of the tshirt.
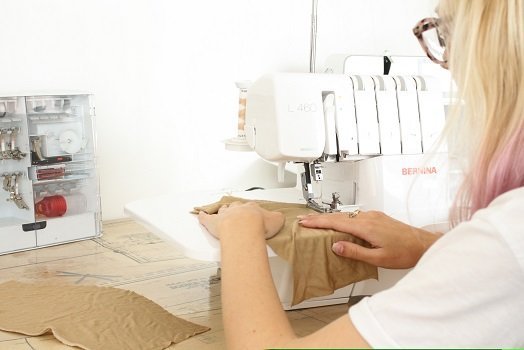
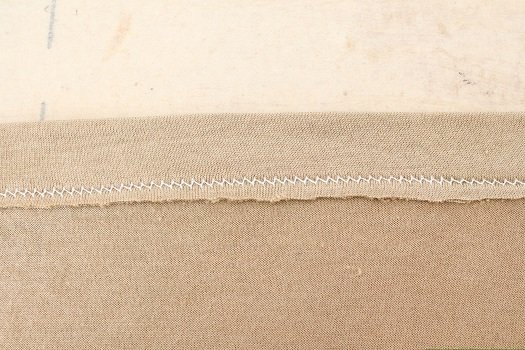
- Finish the hem edges of the Sleeves, Front and Back pieces with the overlocker.
- Using the overlocker, join the sleeves to the body and then join the Front and Back pieces along the side seams, including the sleeve seams.
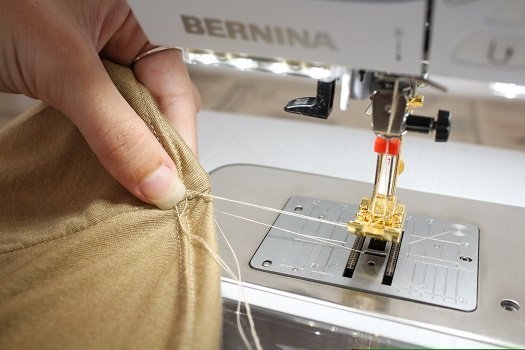
Twin Needle

I used the 4mm wide Stretch Twin Needle. I highly recommend that you practice on scraps until the stitch is to your satisfaction.
- You may need to inform your machine that you are using a special needle.

- When you thread your sewing machine, thread the threads at the same time to prevent tangling.
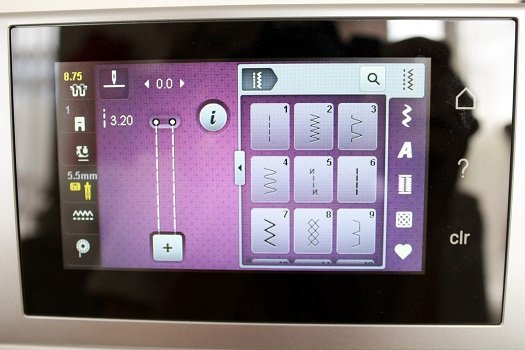
- Select the double stitch. Make the stitch length a bit longer than normal.
- Loosen the tension of the bobbin. The bobbin thread should want to zigzag.
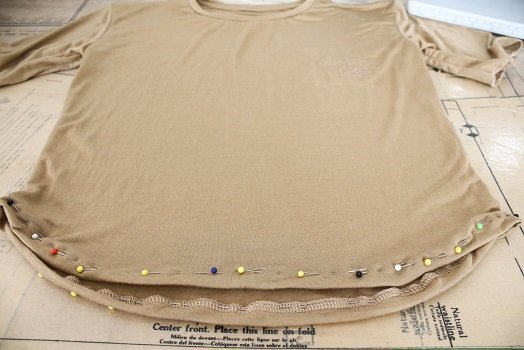
- Fold up the 2cm hem allowance.

- Topstitch along the hem. Do not backstitch as the needles are likely to break.
- Leave the threads long and gently pull the garment away from the machine, preventing it from creating gathers.

- Knot the threads and thread the ends in to hem.
- Do the same steps for the Sleeve hems.

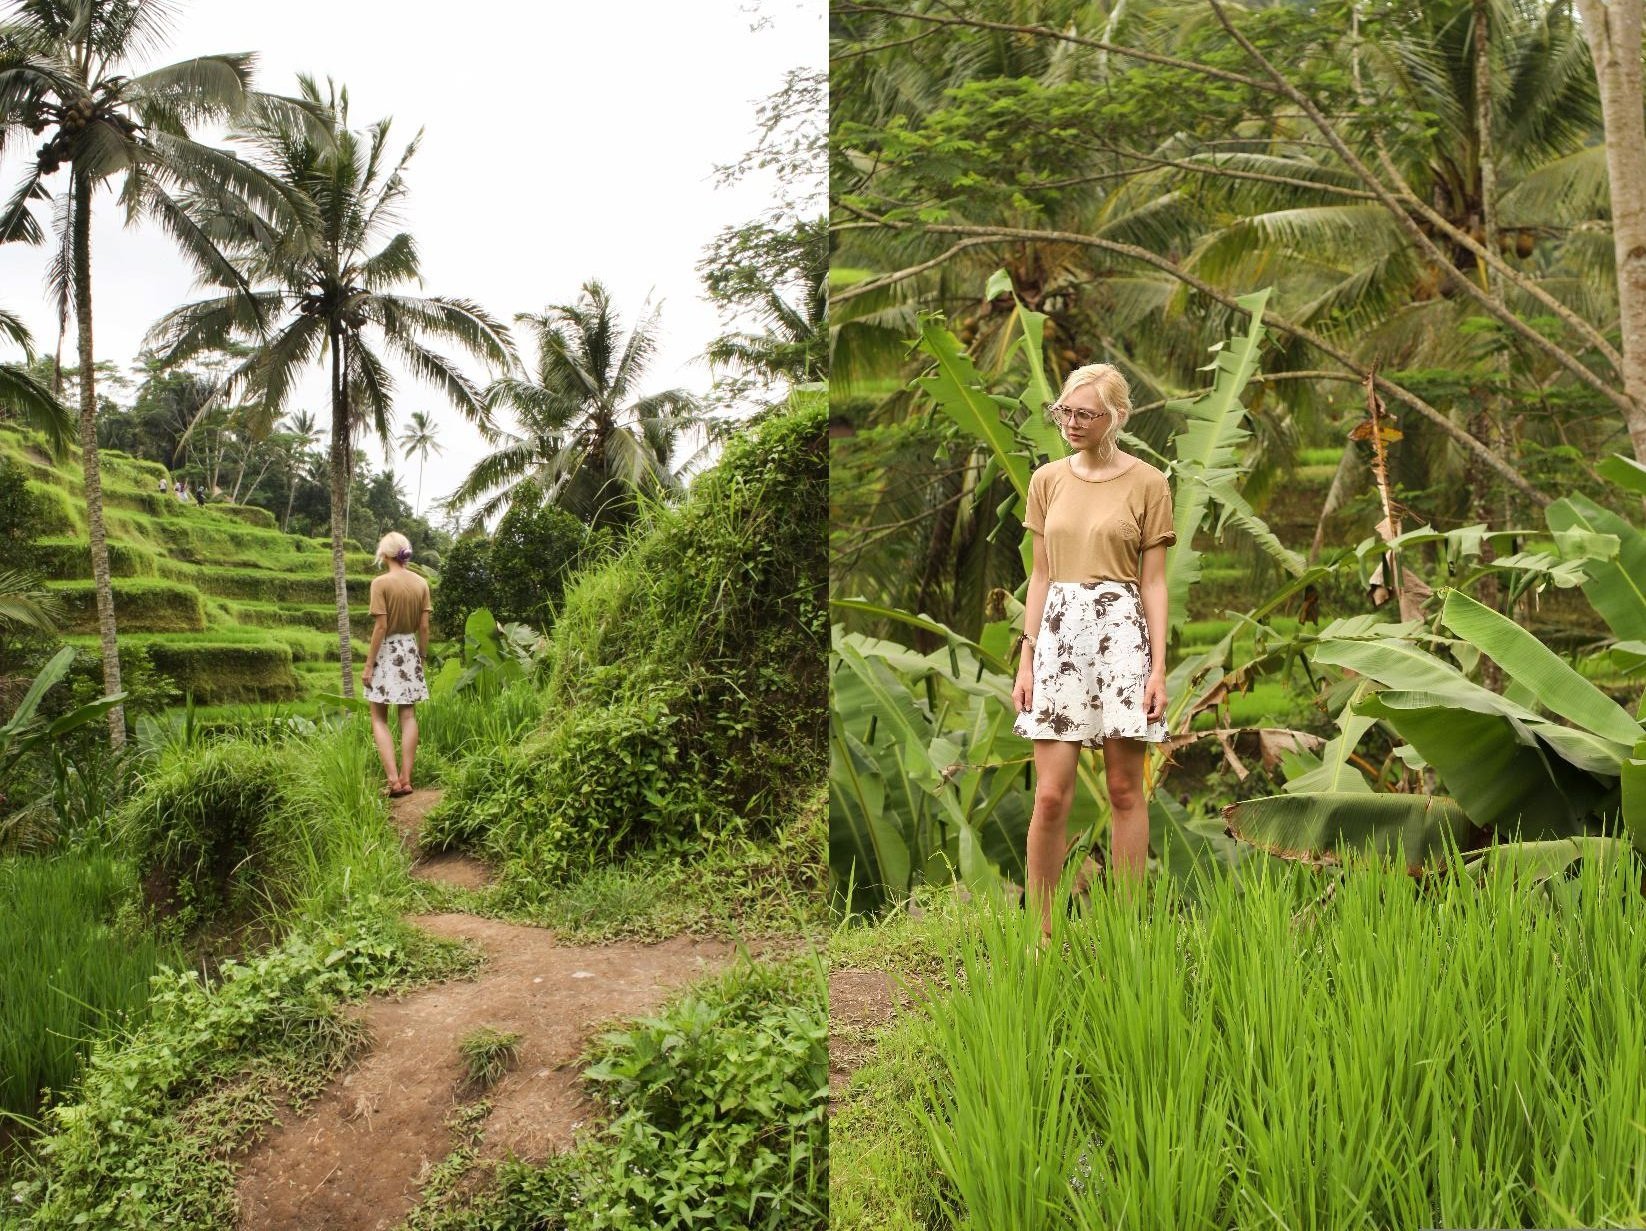

Bali Pulina Coffee Plantation & Tegalalang Rice Terraces, Bali
Tips
- The reason I used a layer of felt behind the fabric is to ensure the embroidery thread has something firm to embroider on to as the knit fabric tends to be a bit too flimsy.
- The water-soluble stabilizer layer on top of the fabric helps keep the fabric from moving while being embroidered. The tear-away stabiliser below does the same.
- For reference, I made a size XXS. As I have a short torso, I shortened the length about 5cm. The fit is also slightly baggier on me, which suits me fine, as I am a few cm smaller than the XXS measurements.
I would love to see the tshirt you make, please feel free to share with me!
And remember to use #thestellantee and tag the pattern maker @frenchnavynow_
Instagram
Facebook
-Hannah-Rose


0 Responses