 BERNINA Corporate Blog -
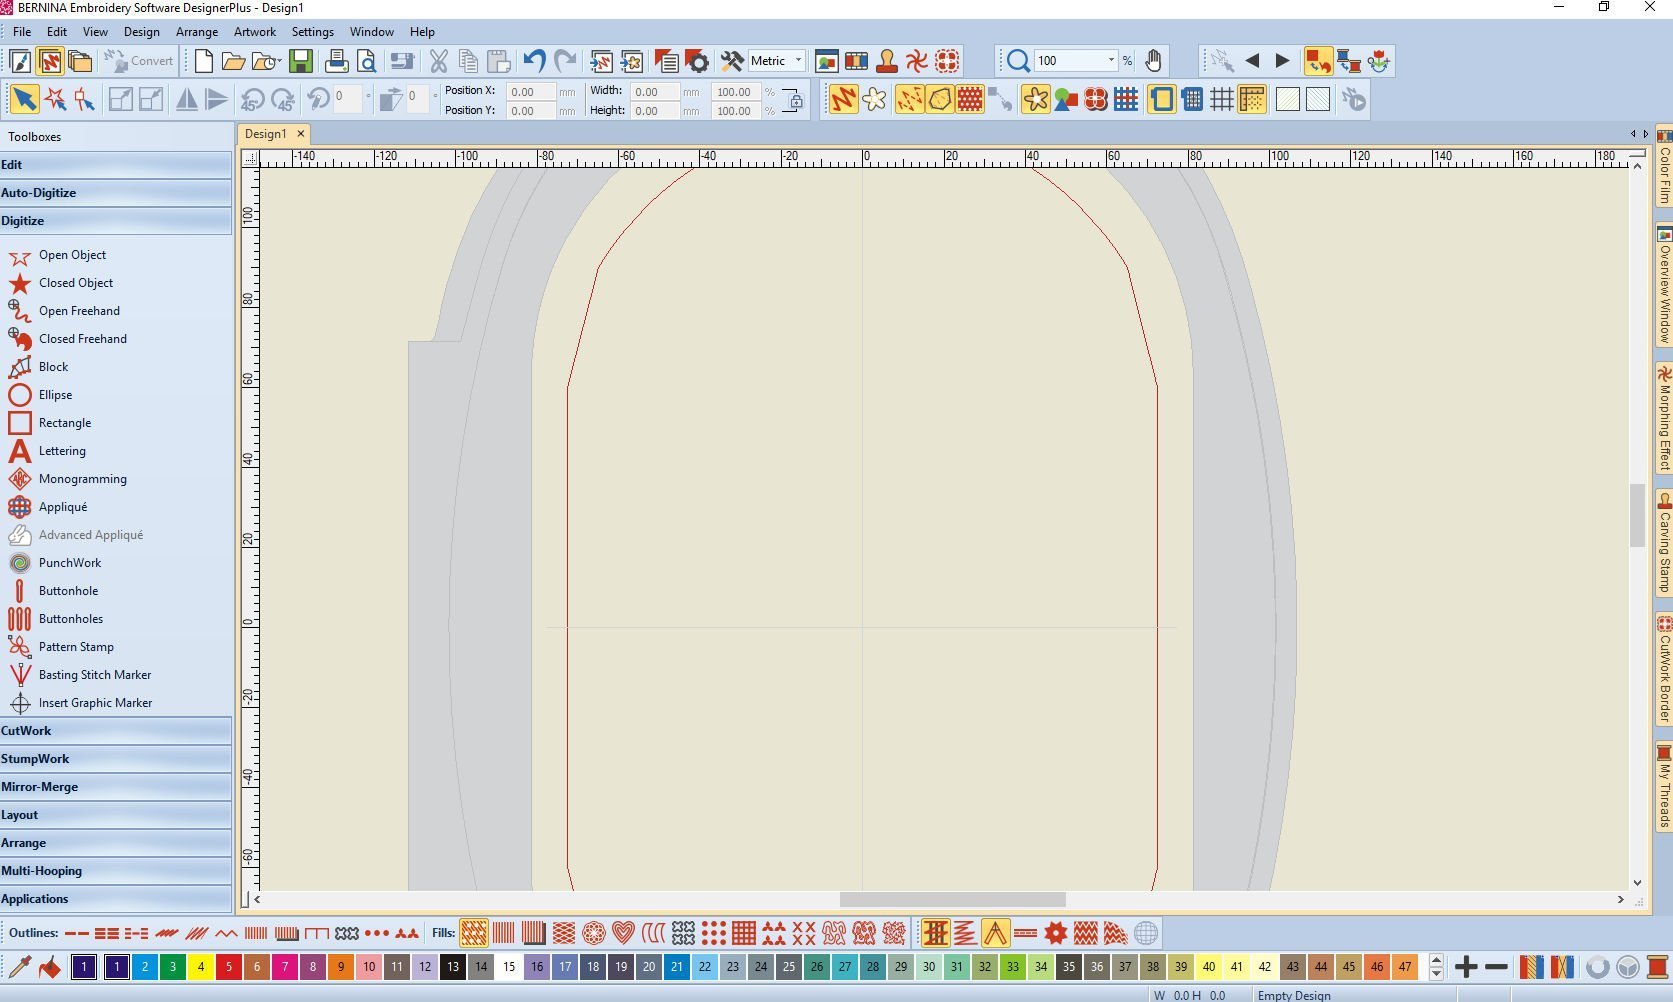
The first lesson about the BERNINA Embroidery Software V8 (the beginning) was about toolbars: the ‘graphical controlled elements with buttons, icons, menus etc.*’ Toolbars are integrated into the edges of your design window, but can be moved by clicking and dragging, placing them somewhere else for your convenience. But remember: the position that they are in by default, gives you the largest workspace. To know what functions there are available with toolbars, we have to study them more closely. The best toolbar to start with is the Canvas Toolbar, because you will use this very often.
![]()
There are three operating modes in the BERNINA Software V8, which are accessible via the Canvas Toolbar.
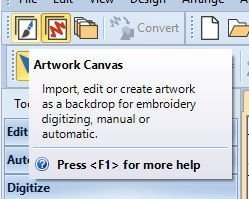
The first icon – (a paint brush) = Art Canvas is for importing, editing or creating vector artwork as a backdrop for embroidery digitizing, either manual or automatic, using CorelDRAW Suite SE**. (Need more information? Press <F1> for more help).
All available tools are integrated to the edges of the design window of CorelDRAW SE too, but some extra can be activated by certain actions: they can be grouped in flyouts. You can draw shapes, outlines, texts, using bitmaps and clipart and much, much more. There is a onscreen help available at any time, with hints and videos, and sometimes even projects are available for learning. Click on the icon Art Canvas to open CorelDRAW. Be patient: sometimes it can take a while…

The Artwork Canvas design window is active: there are toolbars and icons. By default a ruler is set, above and to the left of your workspace (which can be removed and placed back again) for exact measurements.
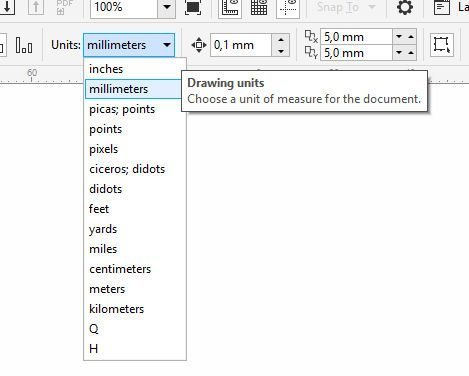 To preset your rulers, click on the small black arrow to the right of ‘Units’ to open a flyout menu (Proberty Bar). Click on the unit of measure (I have mine set to millimeters). Using the rulers is an easy way to check width and height, when necessary.
If you’re used to work with inches, click on ‘inches’, and the rulers are set to the choosen measurements. When hovering your mouse over this icon, all available units of measurements are visible: inches, millimeters, picas; points, points, pixels, ciceros; didots, didots, feet, yards, miles, centimeters, meters, kilometers, Q en H. OK, let’s sink that in. What are Picas, Ciceros? Didots? I had to look it up. If you want to use functions, you will have to understand what they are and where they stand for.
Pica: a typographic unit of measure, one point is 0,35146mm. The French Pica of 12 Didot points = Cicero generally is 12 x 0.376 = 4.512mm
Didot: a typographic unit of measure, one point is 0.376 millimeter. The name is derived from the designer of the Didot point system, François-Ambroise Didot (1730-1804).
Cicero: again, a typographic unit of measure, 12 didots. One cicero is 4,51279 mm. The name is derived from Marcus Tullius Cicero: his letters from 1466 were printed in that size.
The French Pica of 12 Didot points = Cicero generally is 12x 0.376 = 4.512mm
(All of these measurements were used in the early days of typography in Continental Europe. In modern times, all computers use pica (and the points derived from pica) as font size measurements, along millimeters (in countries using the metric system), for the line length and paper size measurement. They are available in Artwork Canvas because of CorelDRAW SE: this software is originally used for the graphic industry.*
Wow; getting additional information in order to better understand everything, often leads to more research, but let’s leave it at that. Just click on the different measures and see what has changed.

The docker ‘Hints‘ is available by default. There are three tabs to the right: Hints, Object Properties and Object Manager. Hints is already opened (tab is dark or lichtblue). Also to learn more, you can click on ‘Help Topic’, and often even view videos.
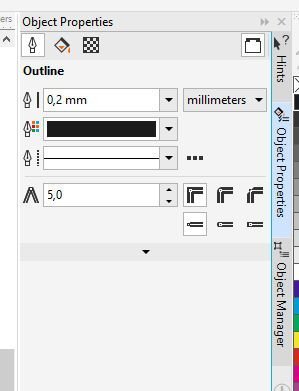
Click on ‘Object Properties’ for information about outlines, fill and transparancy. What you see on your screen may vary from the picture above, and will change by the design on your workspace.
 Click on ‘Object Manager’ for information about pages, guides and layers. What you see on your screen may vary from the picture above, and will change by the design on your workspace.
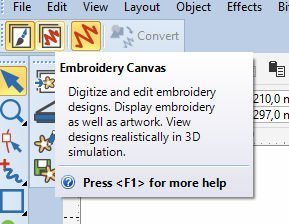
The second icon (a red zigzag) is Embroidery Canvas – it’s for digitize and edit embroidery designs, displays both embroidery as artwork, and you can view designs realistically in 3D simulation. (Need more information? Press <F1> for more help, is also available).
After clicking on Embroidery Canvas, your design window is set to the embroidery workspace; when working in Artwork Canvas you can use this icon to convert a picture into stitches, and more.
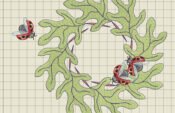
The third icon is Embroidery Library – use it to open the library window of the BERNINA Software V8. There are over 700 read-to-use designs, waiting for editing and actual embroidery. 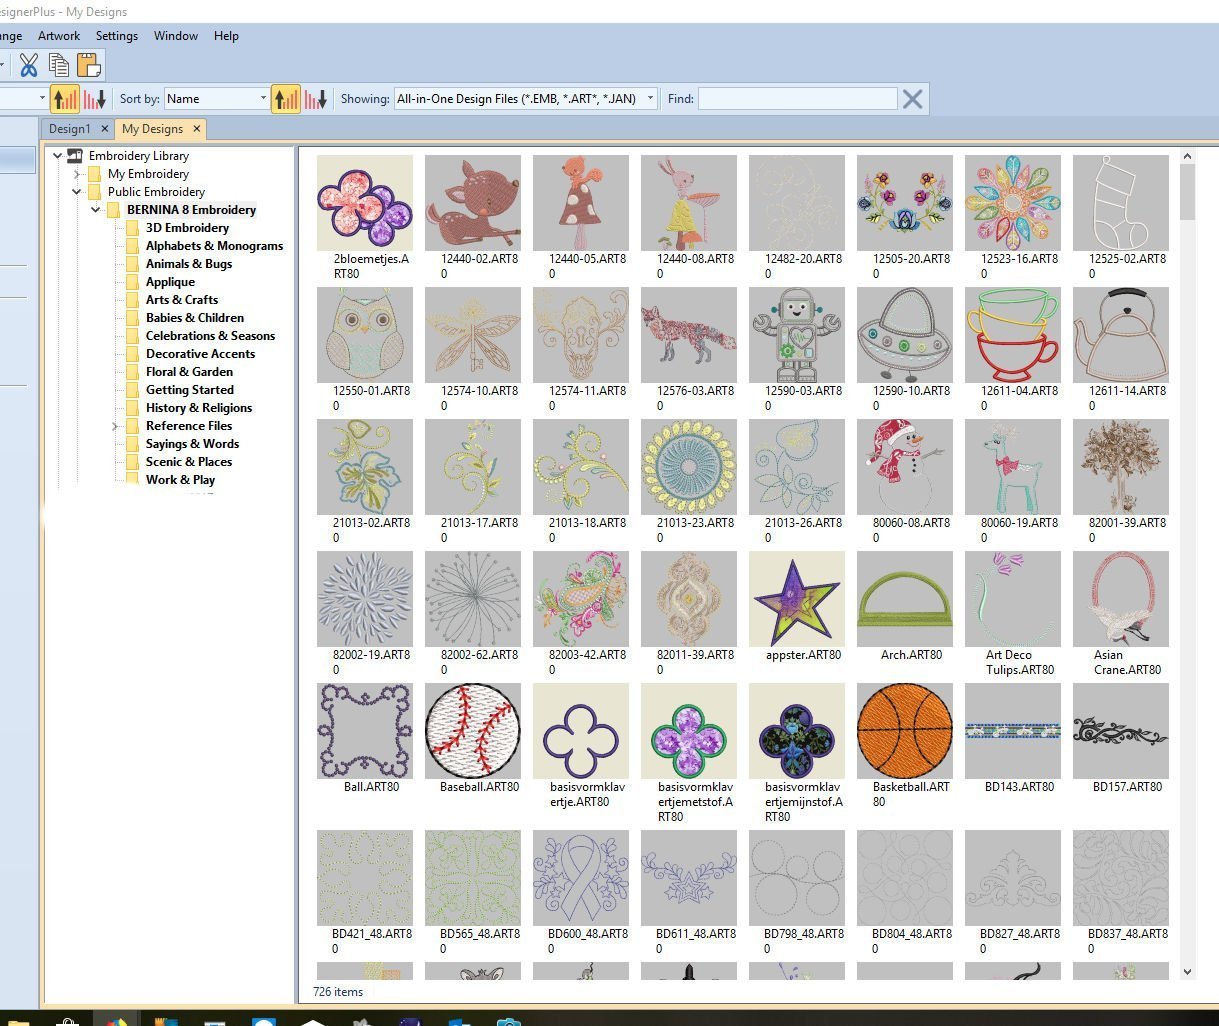
Some designs shown here are my own: I have saved them in the V8 library. So if you check your library and some of the designs shown here are not with your files, that’s the reason!
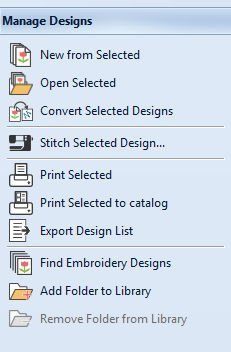
The menu to the left ‘Manage Designs‘ shows options that can be used when activated. Some might be grayed-out, which means they are disabled at that time. Click on a file, and most or all buttons are activated, ready to use. The buttons are: New from Selected, Open Selected, Convert Selected Designs, Stitch Selectid Design, Print Selected, Print Selected to catalog, Export Design List, Find Embroidery Designs, Add Folder to Library and (grayed out) Remove Folder from Library.

Click on an arrow to the left of the categories: the embroidery library unfolds itself. The more you click on arrows, the more categories are visible. You can ‘close’ them by clicking on these arrrows again, to a certain point. When an arrow points to the right, there is more to see. When it is pointed down, it means the file is unfolded. With the picture above, ‘My Embroidery’ is not unfolded yet, as is ‘Reference Files’. The categories themselves are not opened yet; just their names are showing.

Click on a yellow icon/categorie and all embroidery designs in that particular folder will appear on the large area. I have opened 3D Embroidery: 15 items are available on my screen.
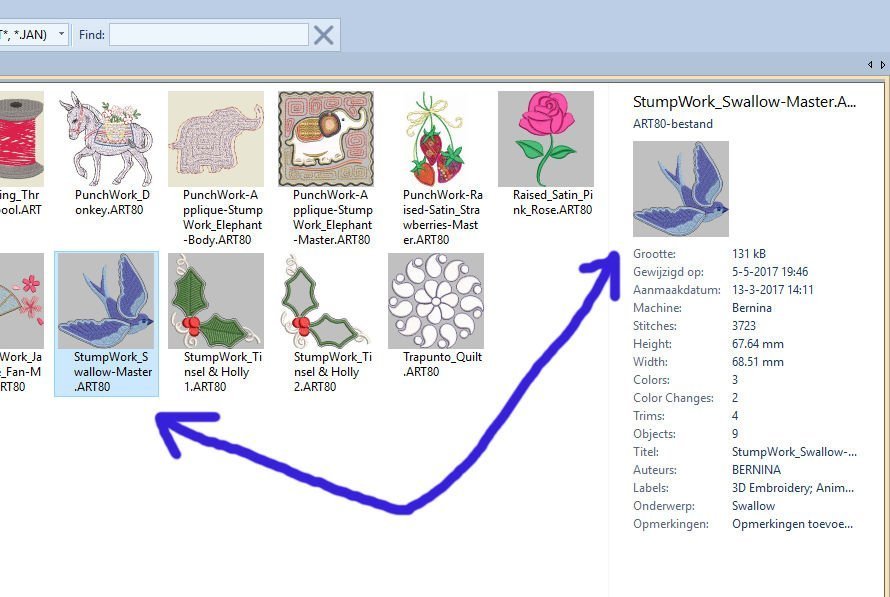 I have activated ‘StumpWork_Swallow-Master.ART80‘, by clicking on the thumbnail. To the right of your screen designer information is added: the (full) name of the file, size, date of change, date of design, machine, stitches height, width, colors, color changes, trims, objects, titel, authors, labels, subject and remarks are indicated – some of these texst appear in Dutch. Perhaps in English with your software?*** So even before you will load this design on your workspace, you can find out everything there is to know in advance.
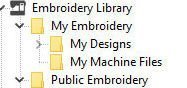
After designing your own embroidery, save it in ‘My Designs’. Be sure to add categories, for reference.
![]()
To the right of the three operating modes with the Canvas Toolbar, you can read ‘Convert‘, accompanied by an icon: this option is grayed-out, because it is not activated. You can activate this in Artwork Canvas, after drawing or designing/editing vector images and/or pictures (bitmaps), wanting to turn them into embroidery motifs. After selecting the entire image, just click on ‘Convert’ and V8 will turn it into the best possible embroidery motif in Embroidery Canvas. It often needs more editing there, because a drawing/picture is not always converted properly. A drawn image or bitmap is different from an embroidery motif with threads and effects. Sometimes you don’t have to edit at all, but mostly you do, to be sure the quality of the embroidery is the best.
Again, click on icons and command buttons to become familiar with V8. Use HINTS or Help for further reference. Next time it’s all about the General Toolbar. See you then!
Happy Stitching
Sylvia Kaptein
Sylvia’s Art Quilts Studio
www.sylviasartquilts.nl
[email protected]
*Source: Wikipedia
**CorelDRAW Suite SE is only available with the BERNINA Embroidery Software V8, after updating to version 8.0 update 1. Before Updating V8, version CorelDRAW Essentials X6 was available, but this is not supported by Windows 10 anymore. Please check if you have the right version.
***I am originally working with the Dutch version of V8, but have switched to English for the benefit of the English BERNINA Blog. Perhaps that is the reason that some texts are still in Dutch.

There is a giant P (Pinterest) on each graphic shown. It obscures some items in the graphic. How can I eliminate that P?
Hi Wendym,
About your question: I’ve asked BERNINA: it seems they have installed the PinIt button for direct pinning = saving a picture in Pinterest as an extra service to Blog readers. Since I have used very small pictures, the PinIt icon was too much in image, so I have enlarged the pictures now, making sure the icon PinIt is not covering the entire picture anymore. Hope this helps.
Sylvia