 BERNINA Corporate Blog -
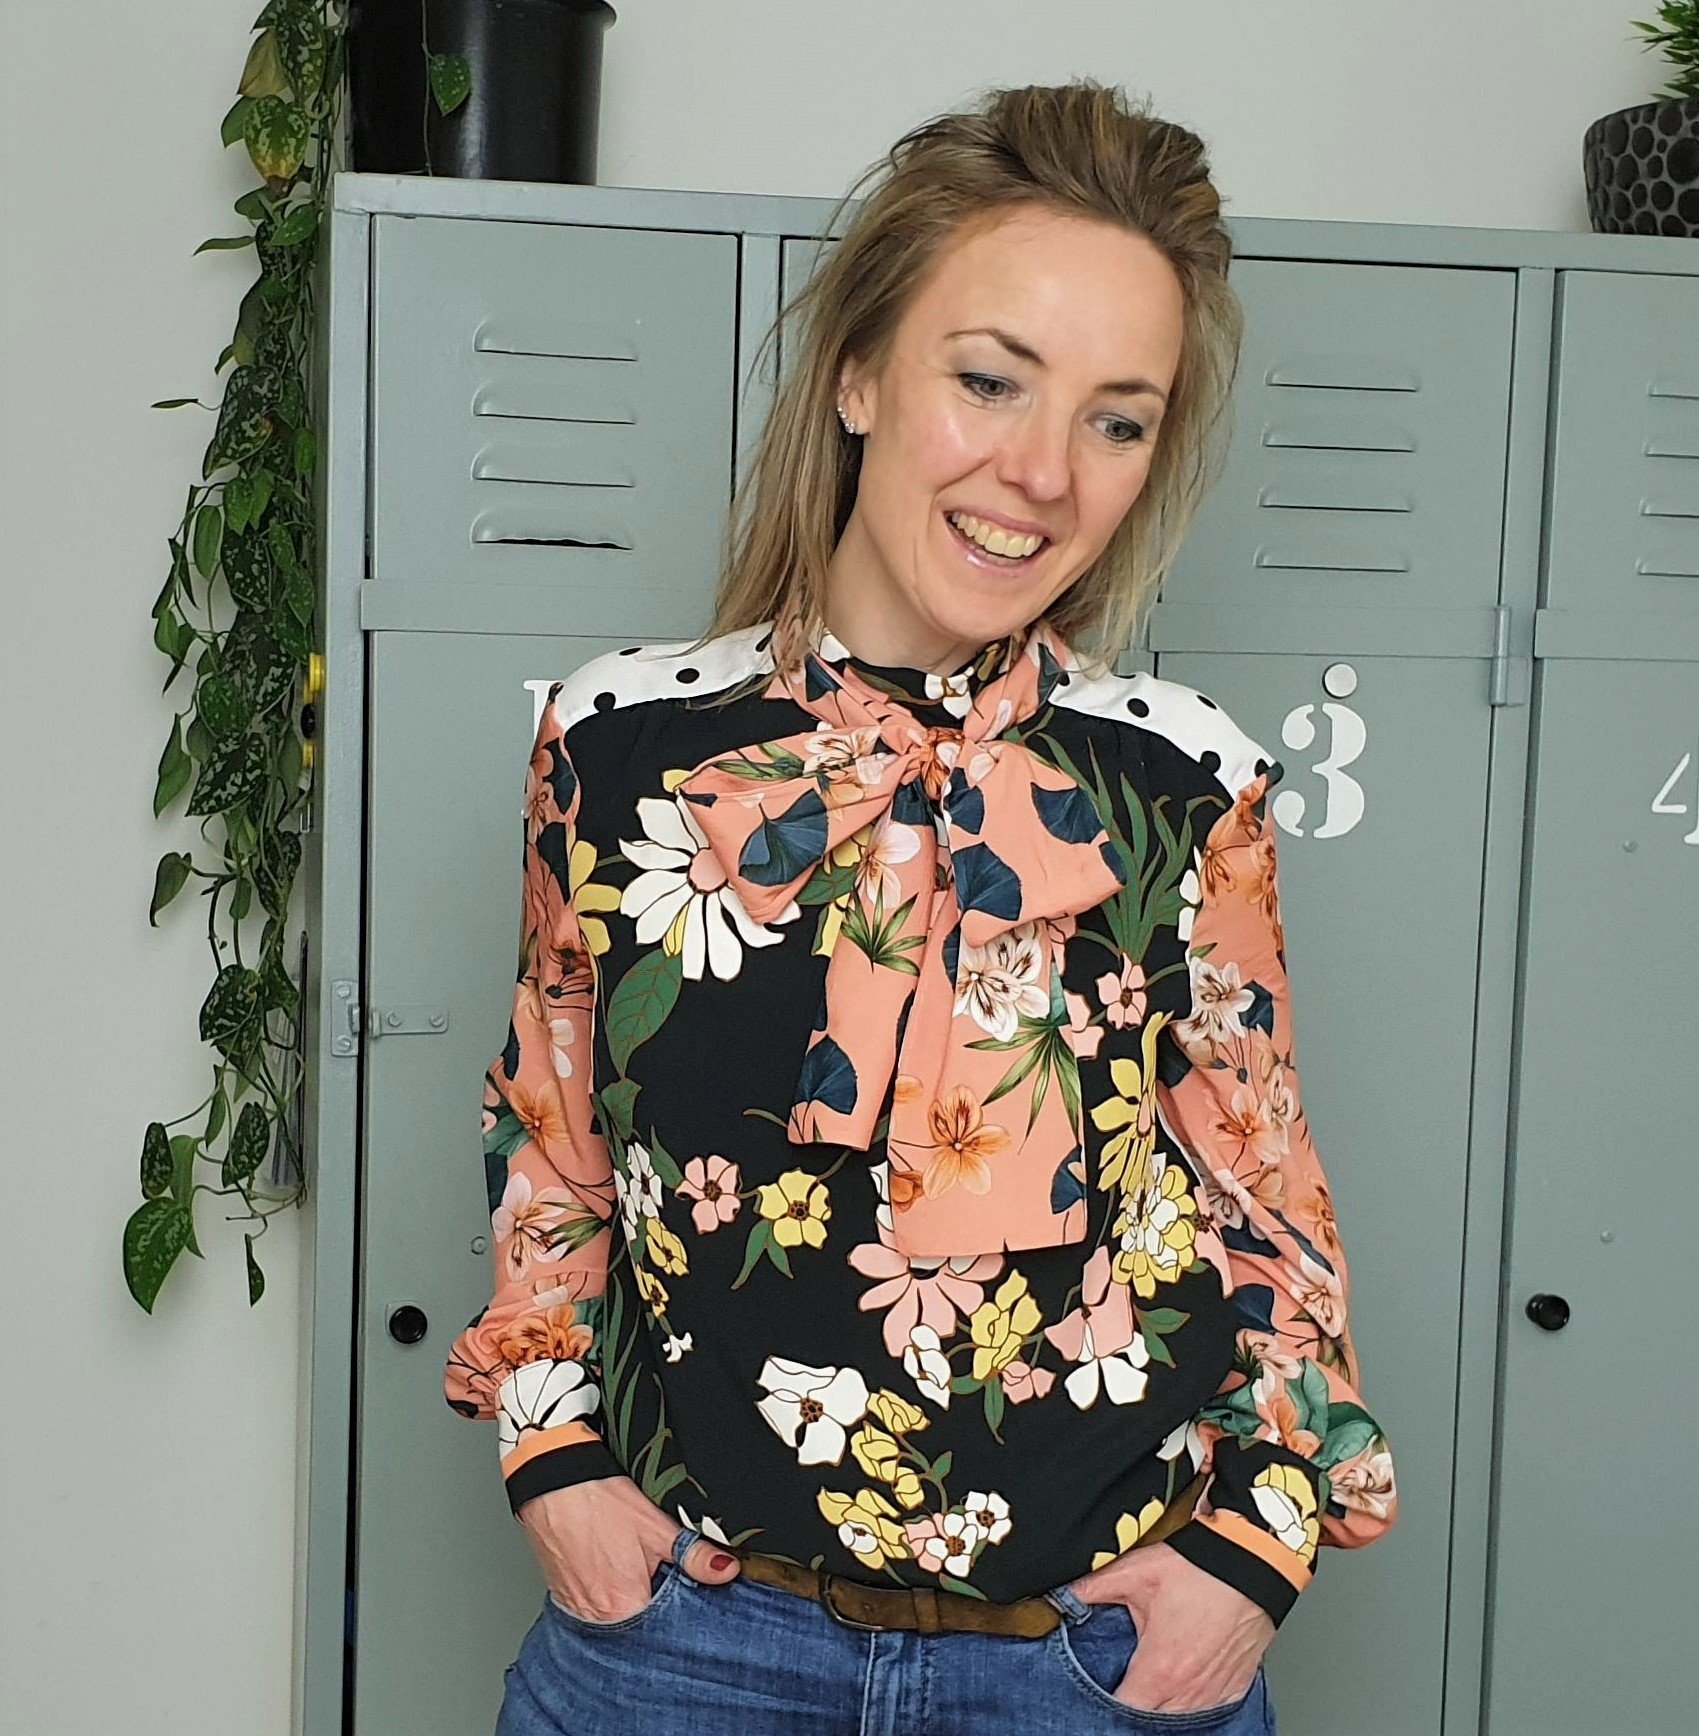
Pussy bow blouse on my new B540!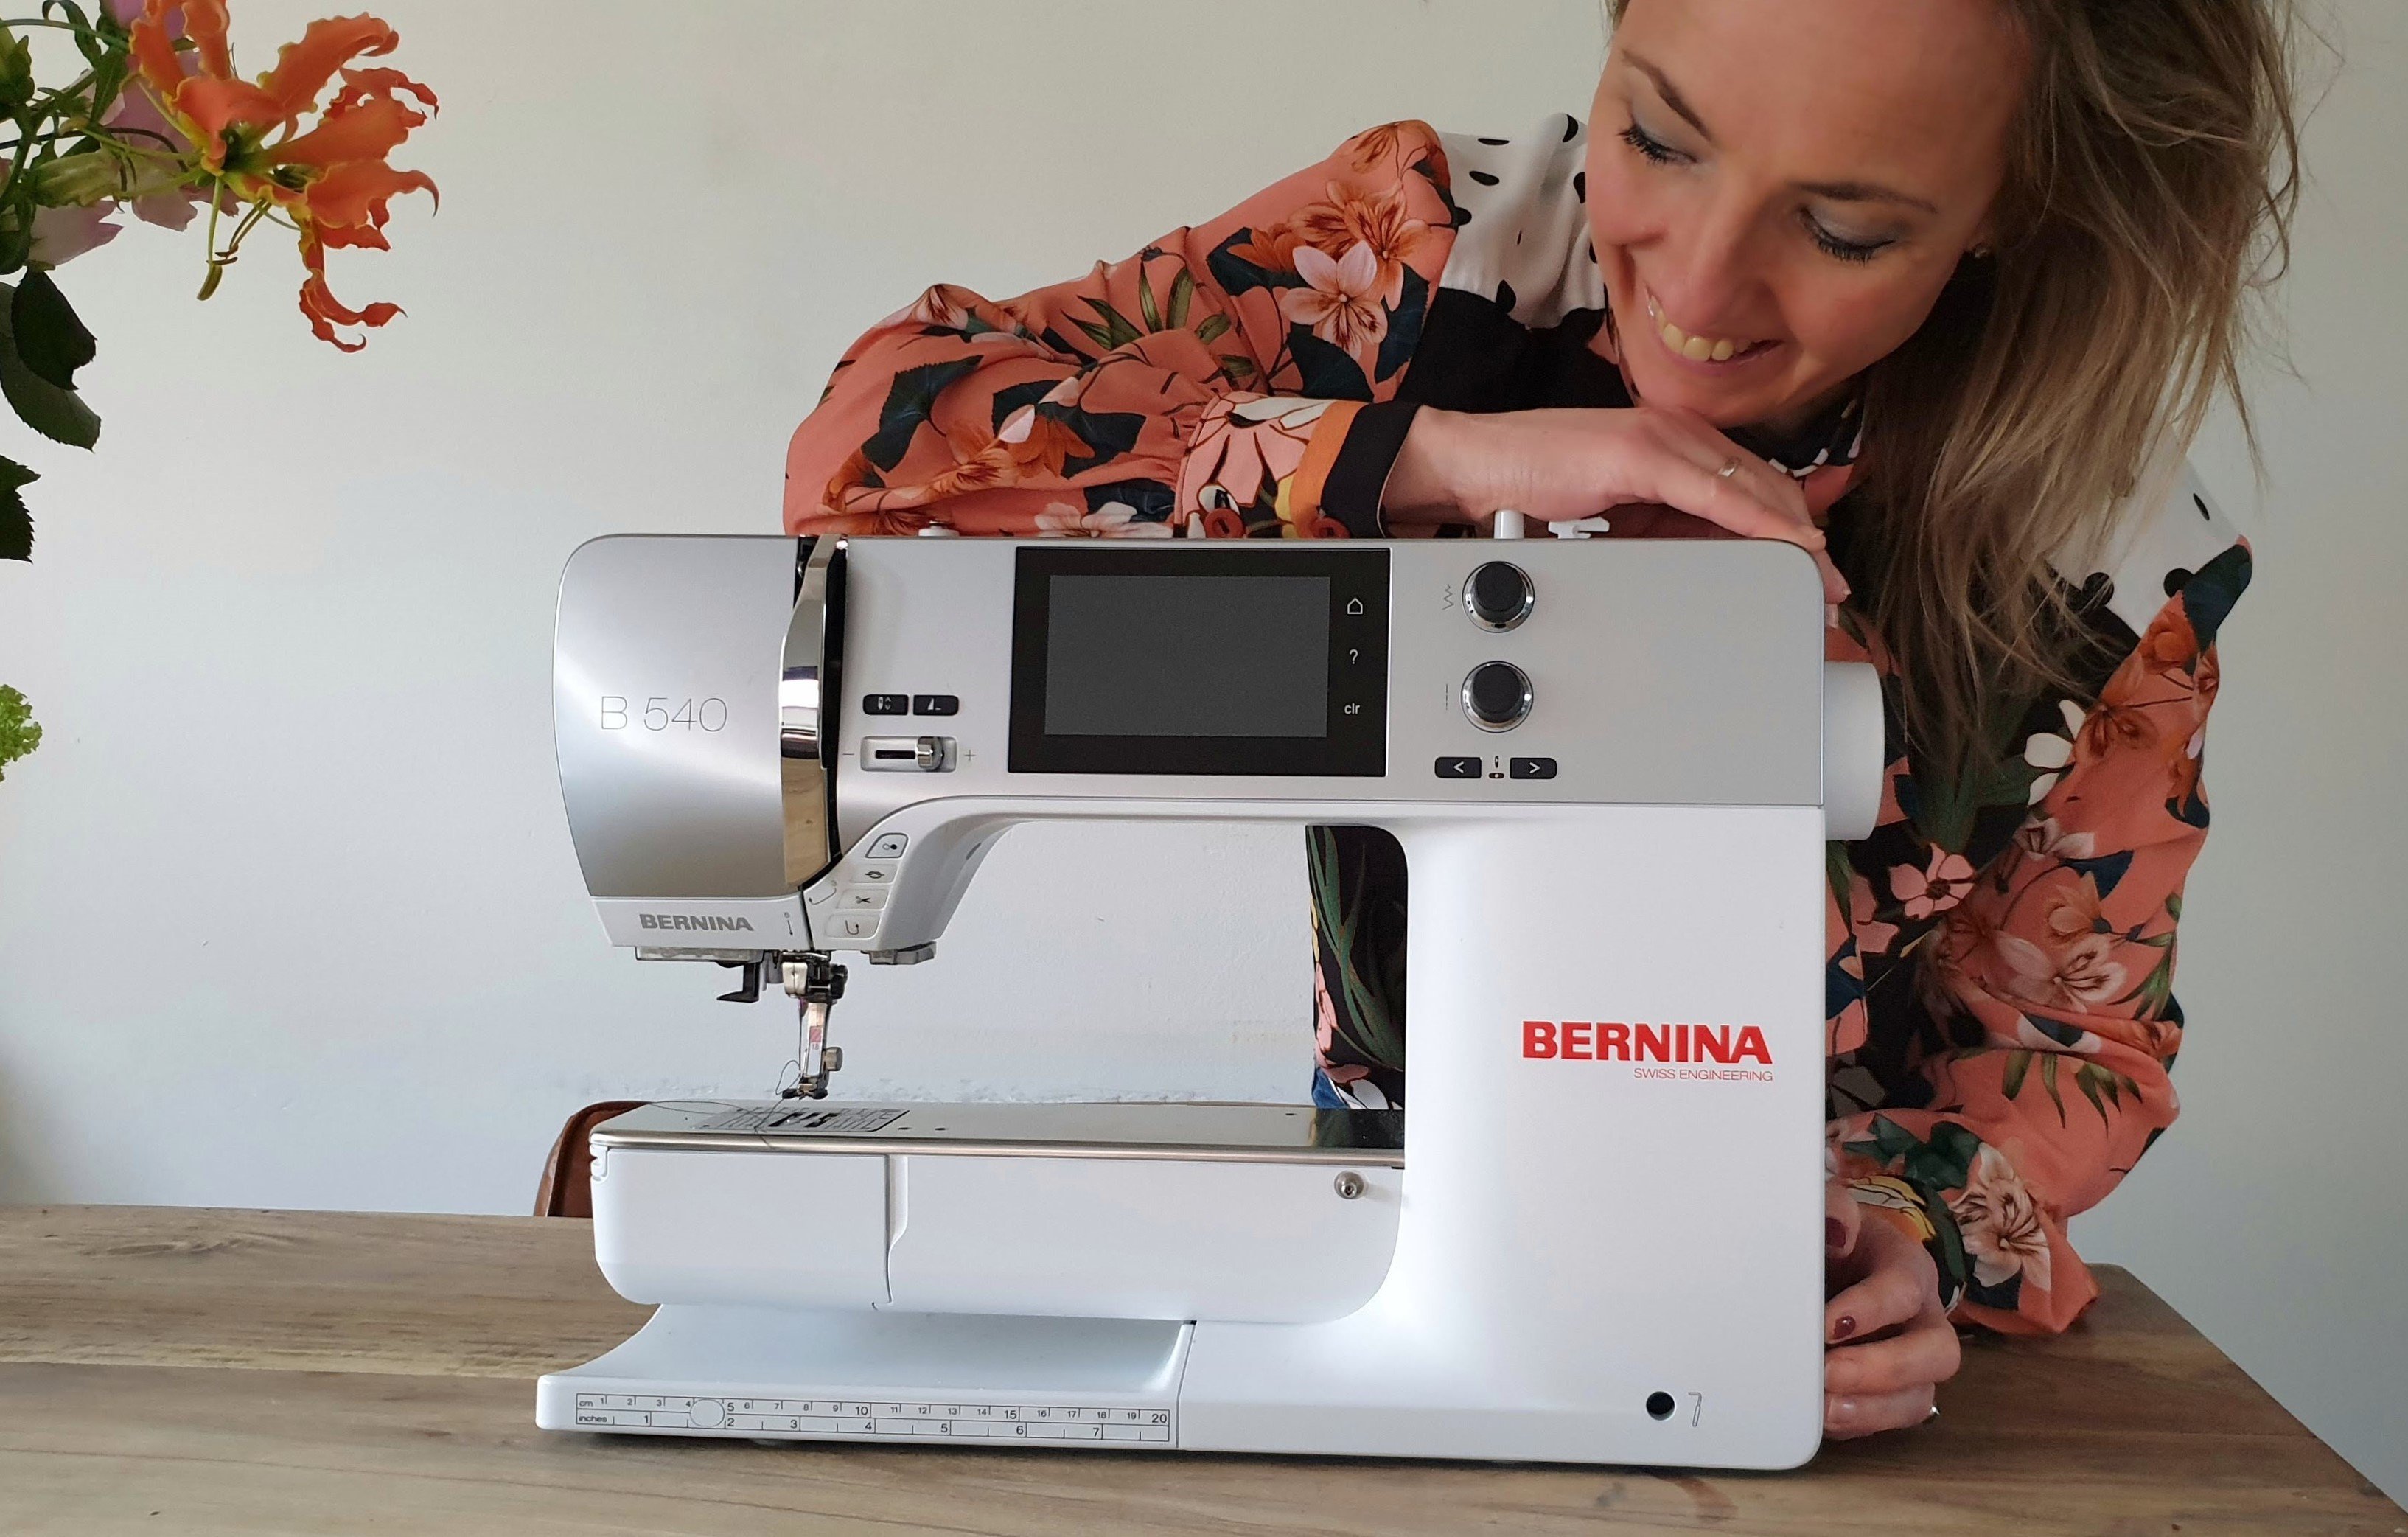
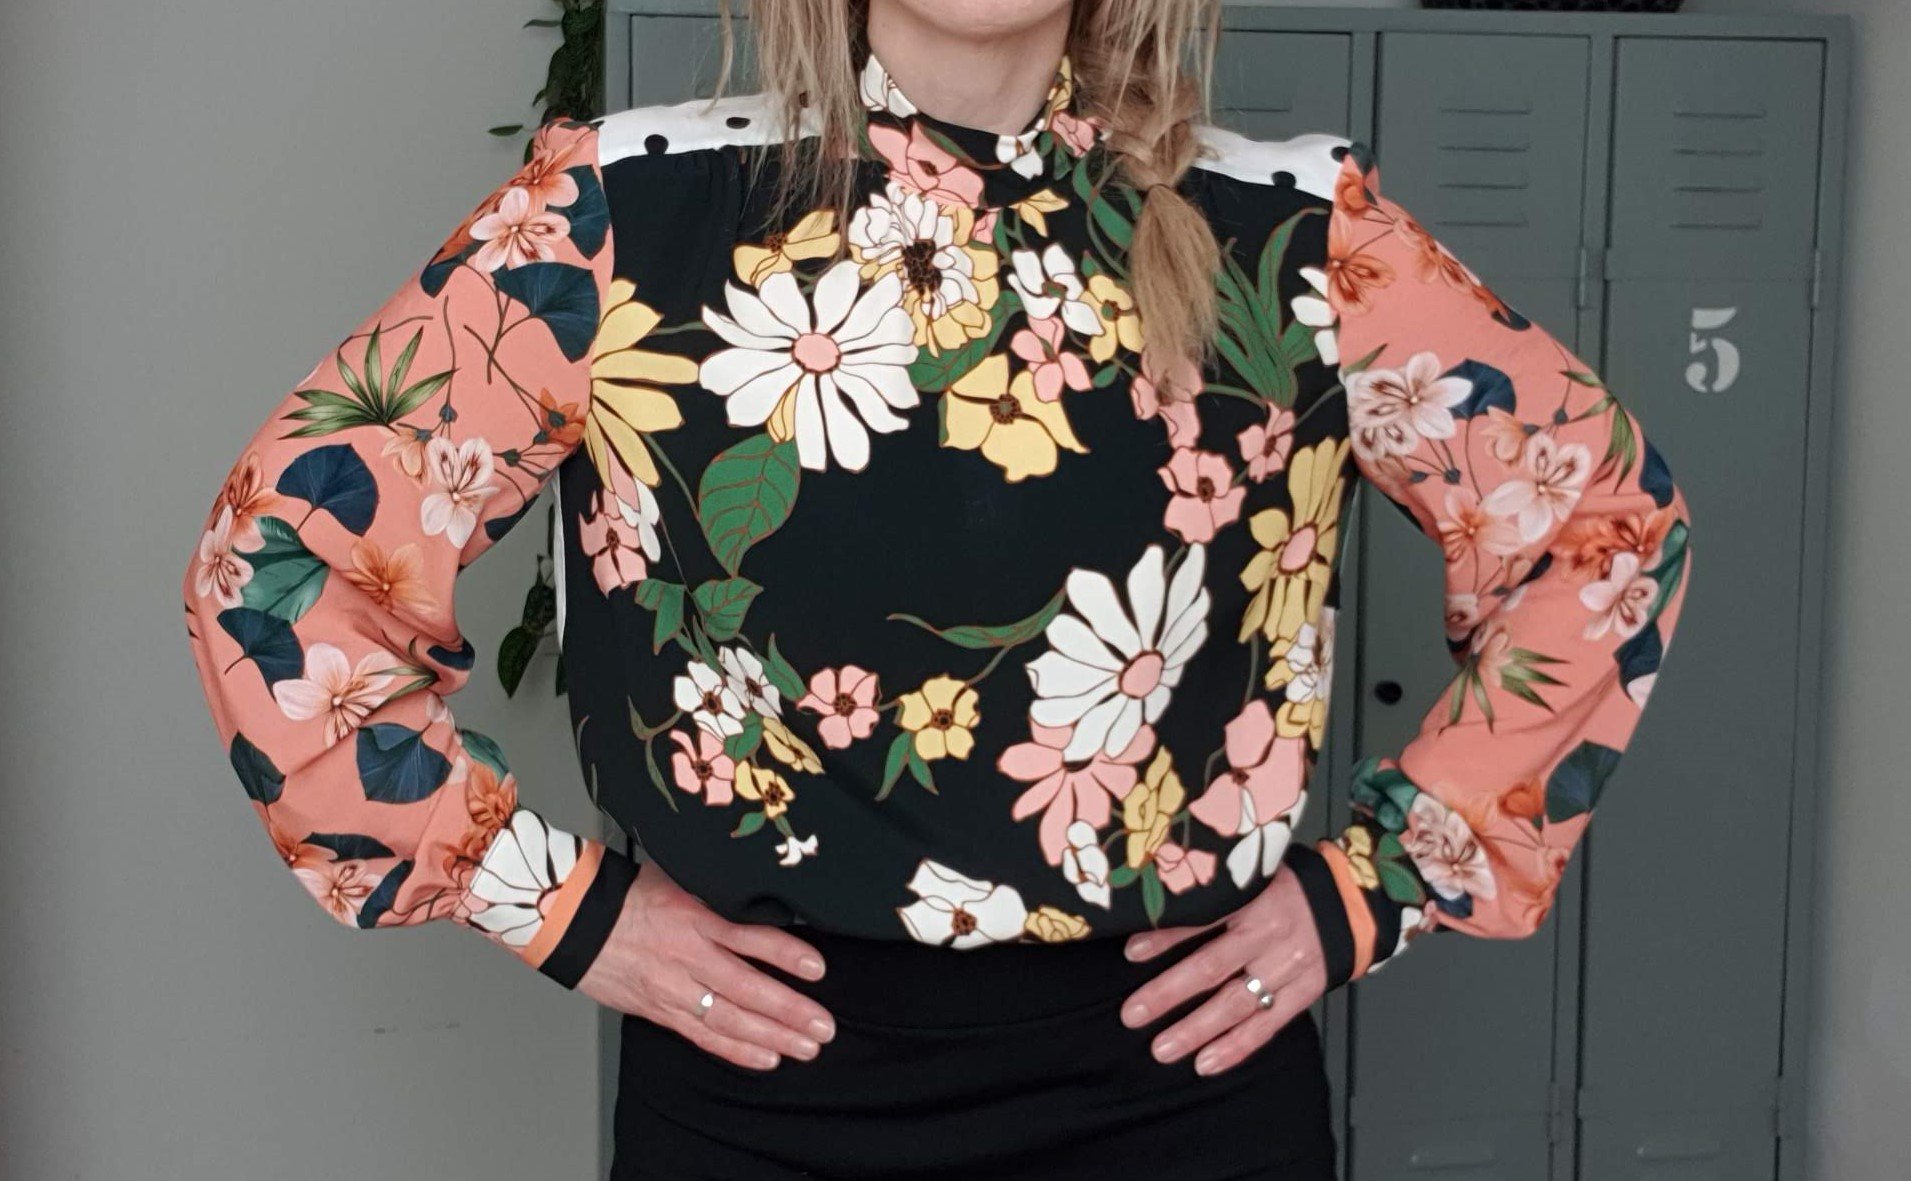
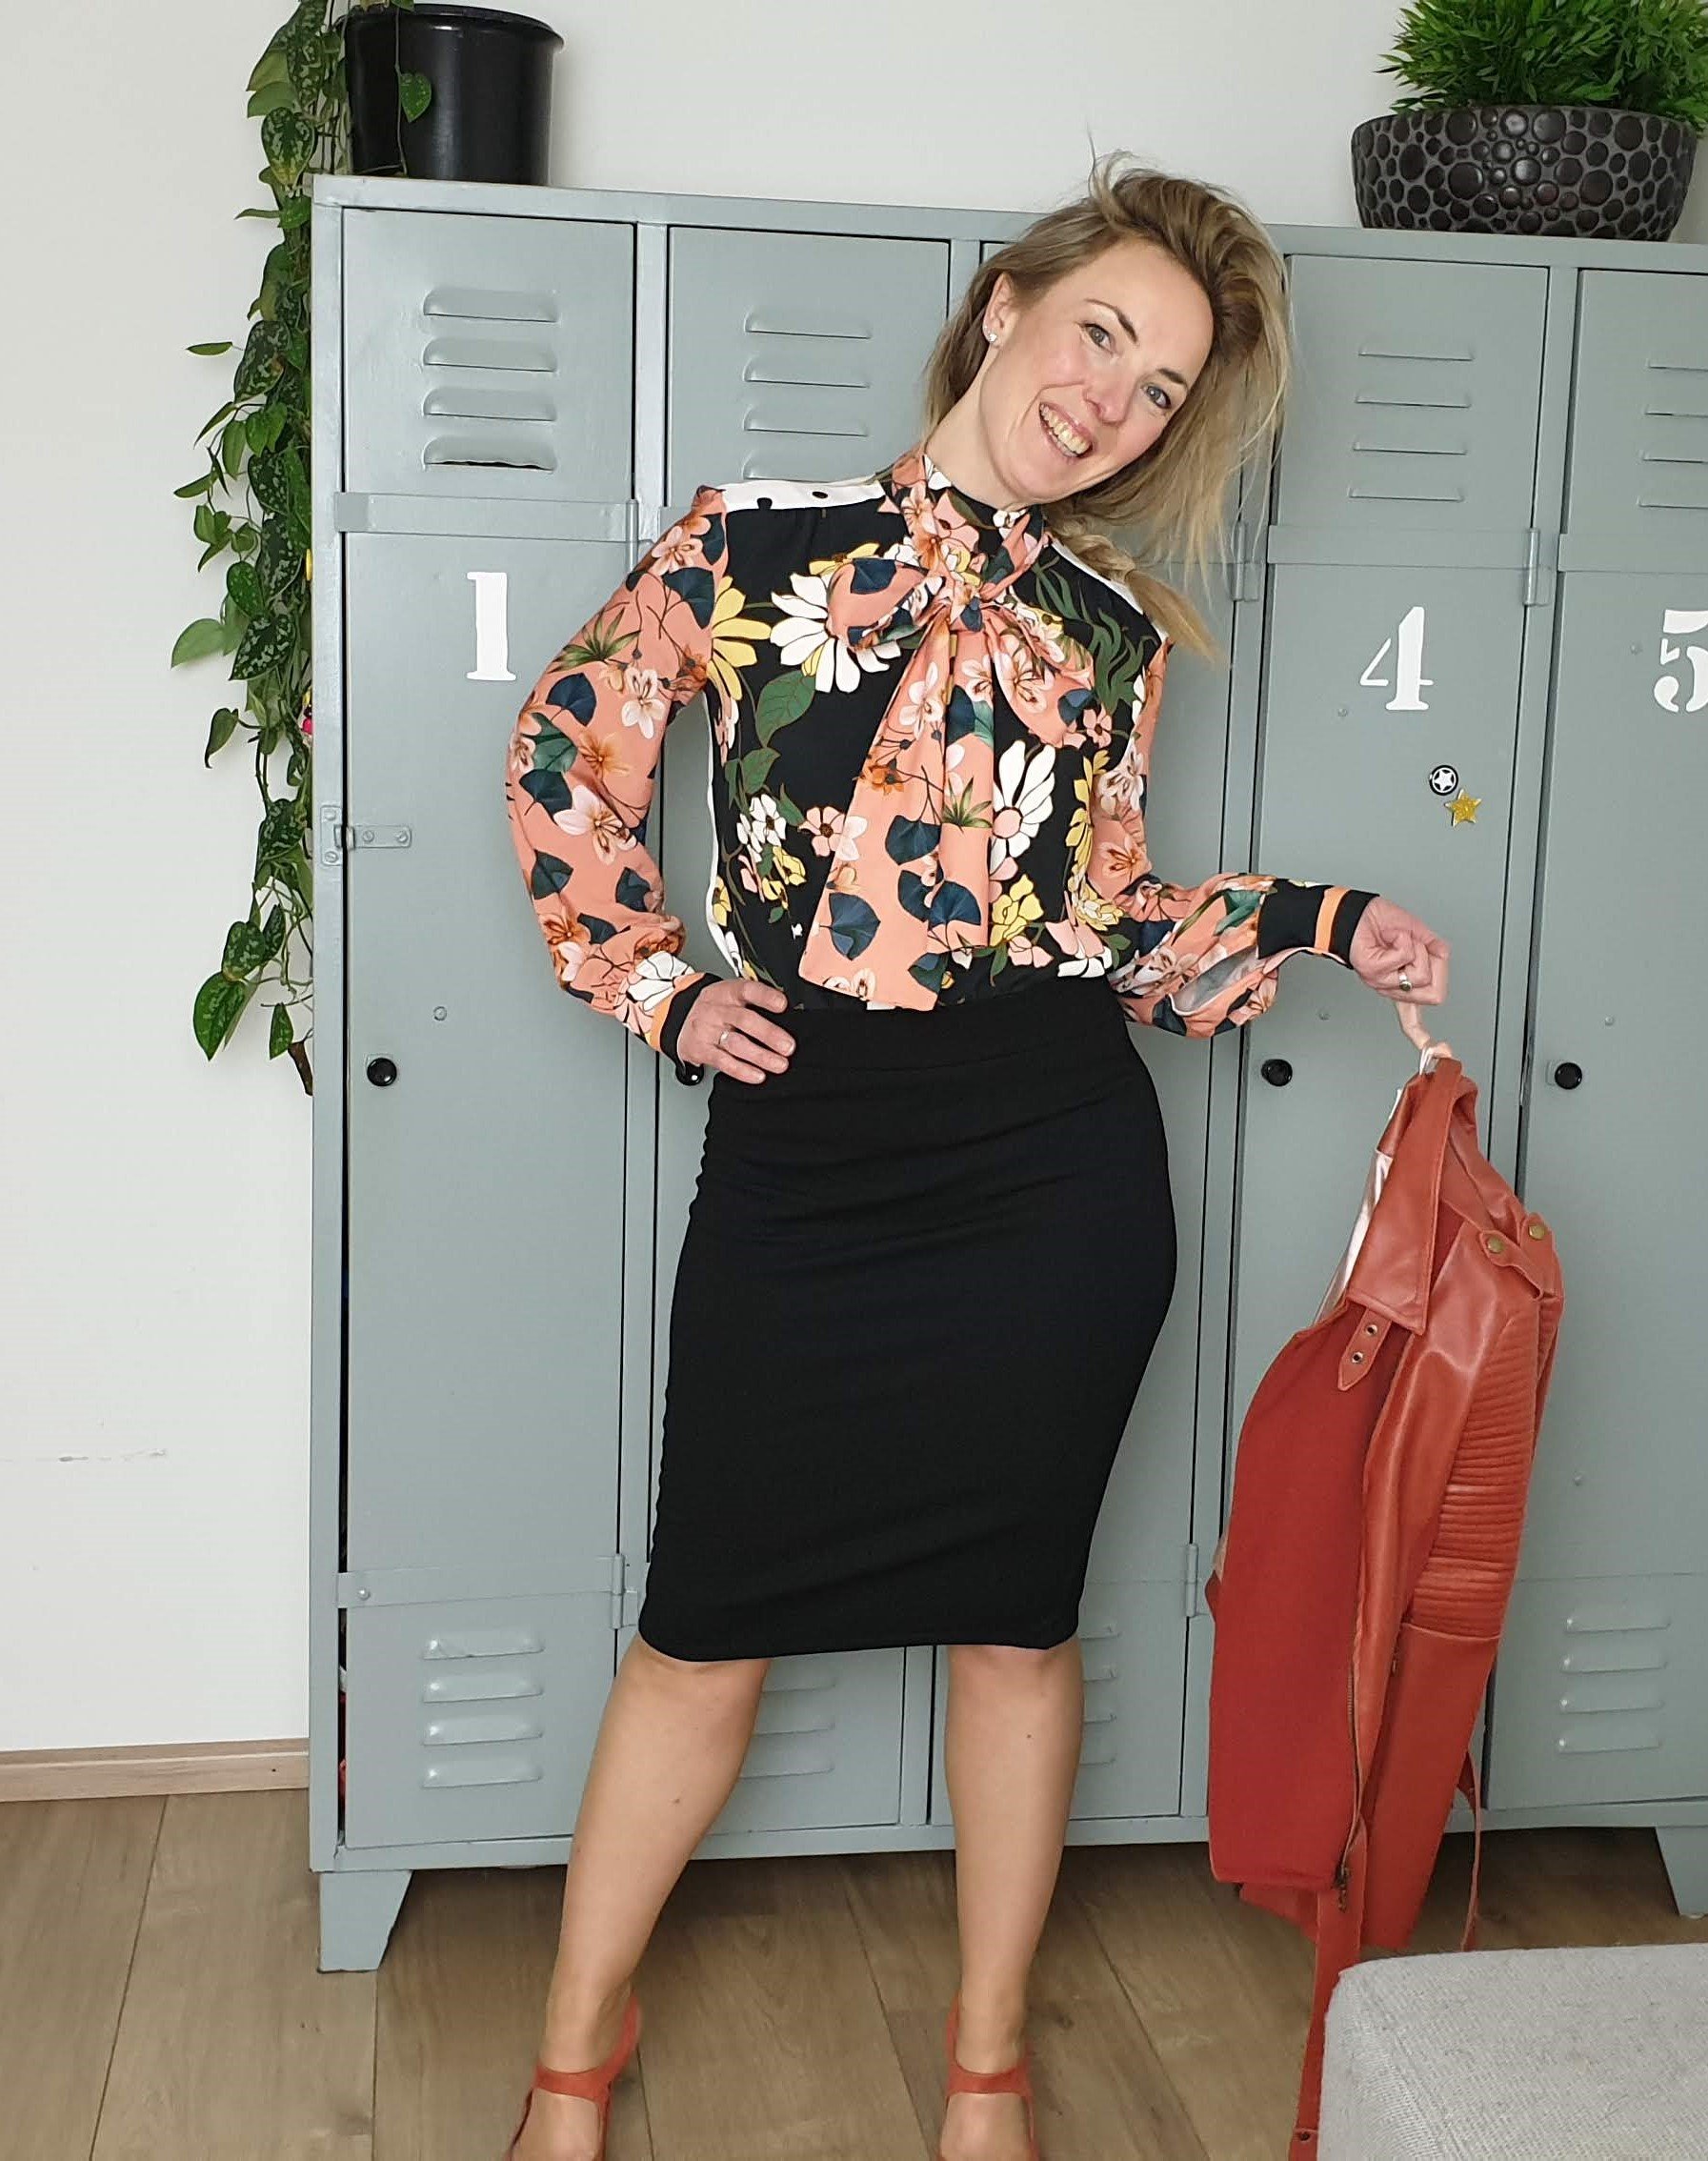
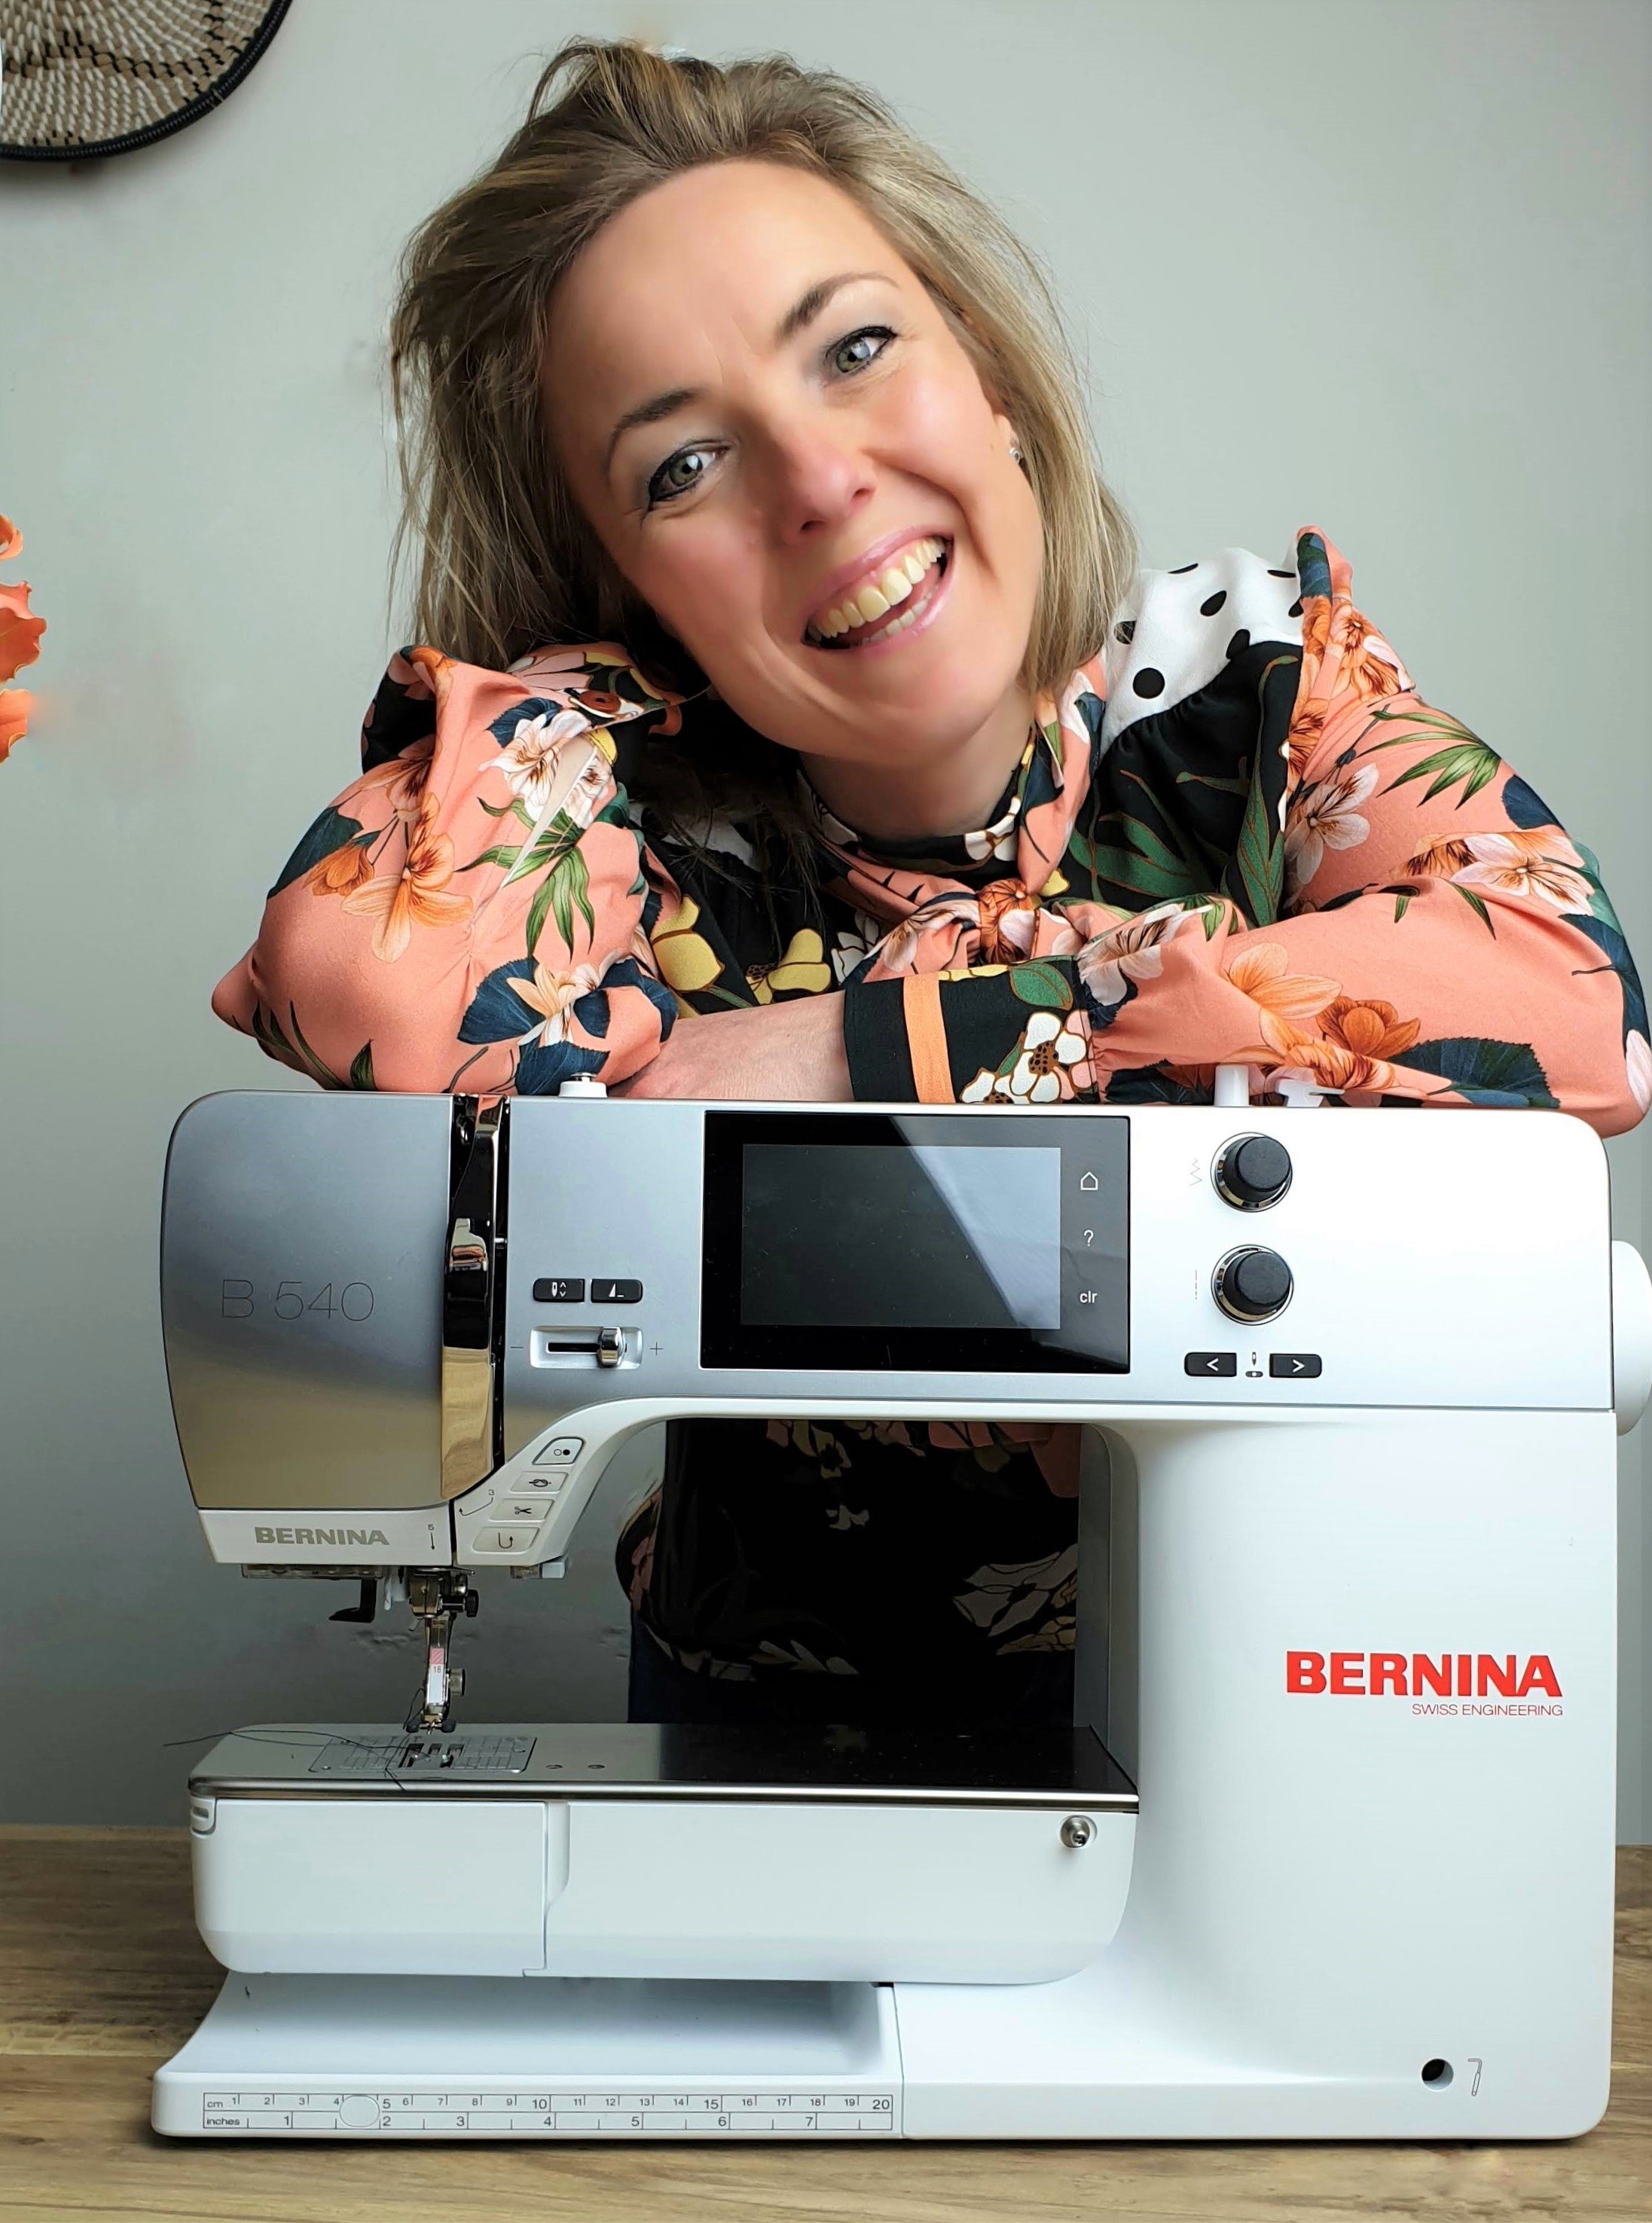
I have a new BERNINA machine … the B540. And what a beautiful machine that is!! It is bigger than my previous BERNINA, with a touch screen and an embroidery module. Love it! To get familiar with the machine I chose this blouse with a removable bow to be it’s first project.
Fabric matching
I used three different fabrics in the blouse. Which are somewhat similar in terms of weight and texture. I found them on a local fabrics market at a stall where they only sell small pieces of leftover fabrics. No waste! The floral salmon/pink one spoke to me and there were more beautiful fabrics. Before I knew it I had scored this nice combination. No better way to test out my new BERNINA 540 and new accesoires than combining these flimsy fabrics. I love a challenge!

I used the blouse pattern before (Knipmode, oktober 2018), so I knew that it was perfect for using different, for me new, accessories: Gathering foot 16 and Button sew on foot 18. 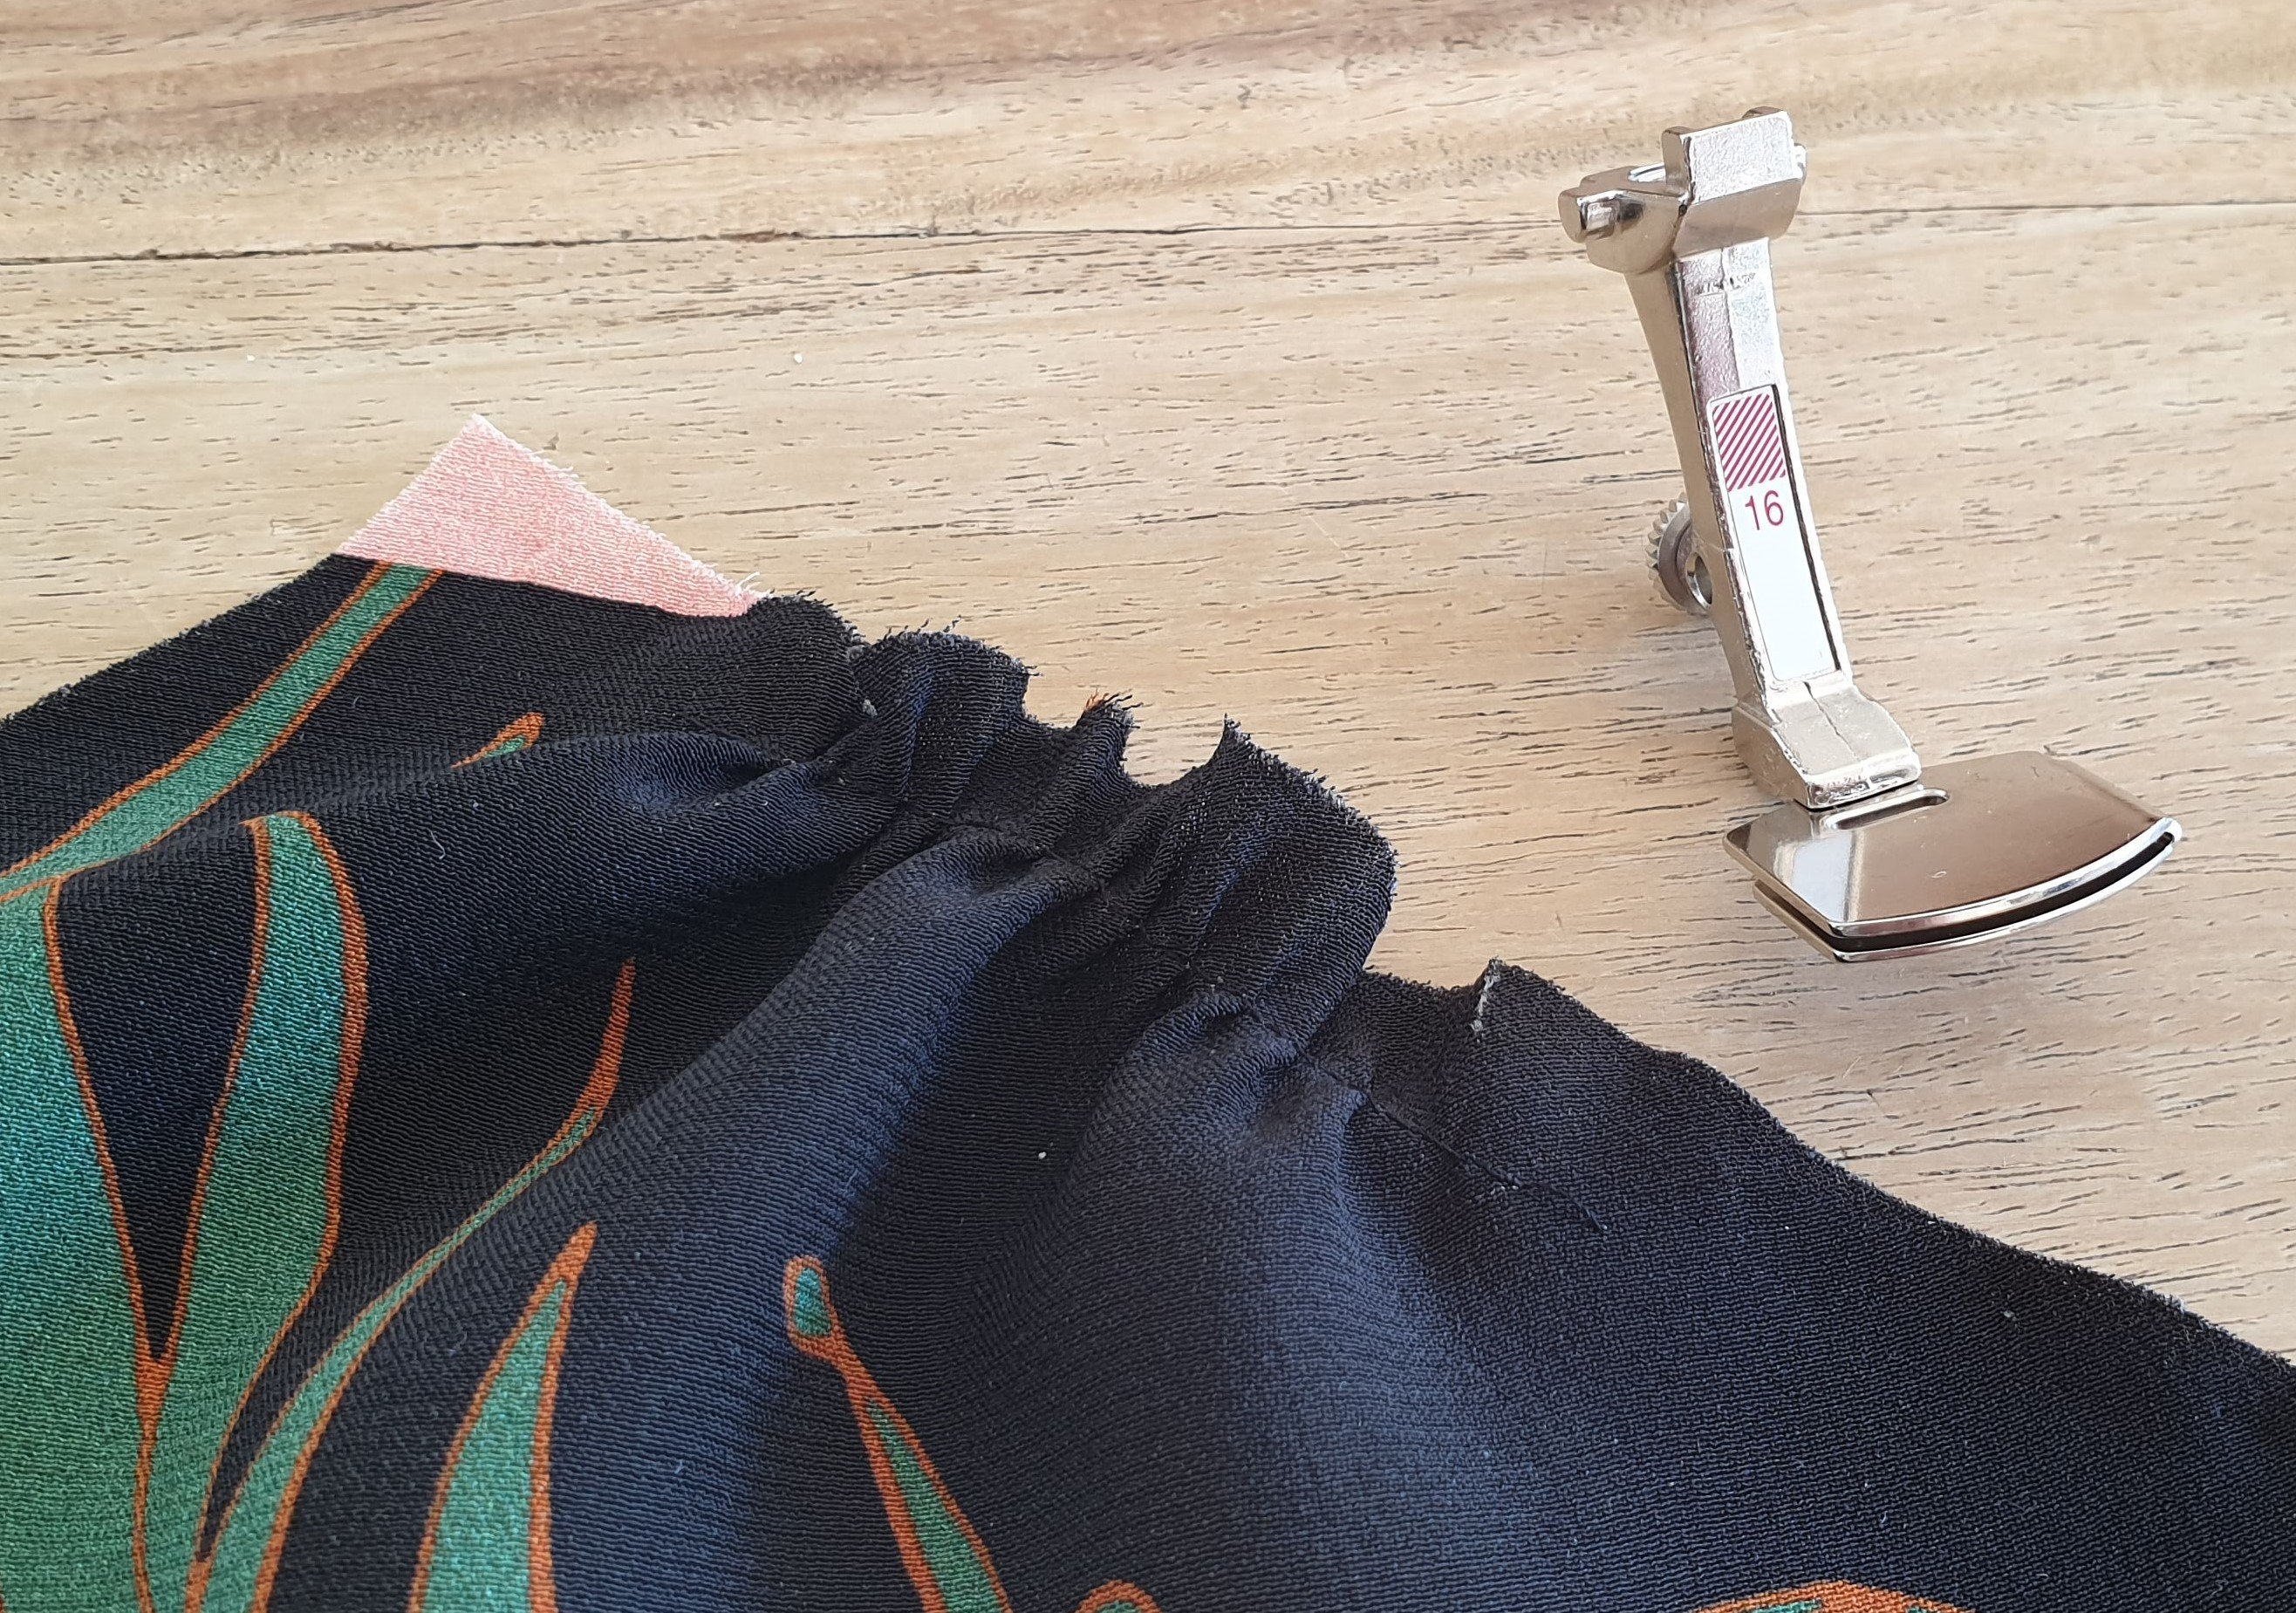
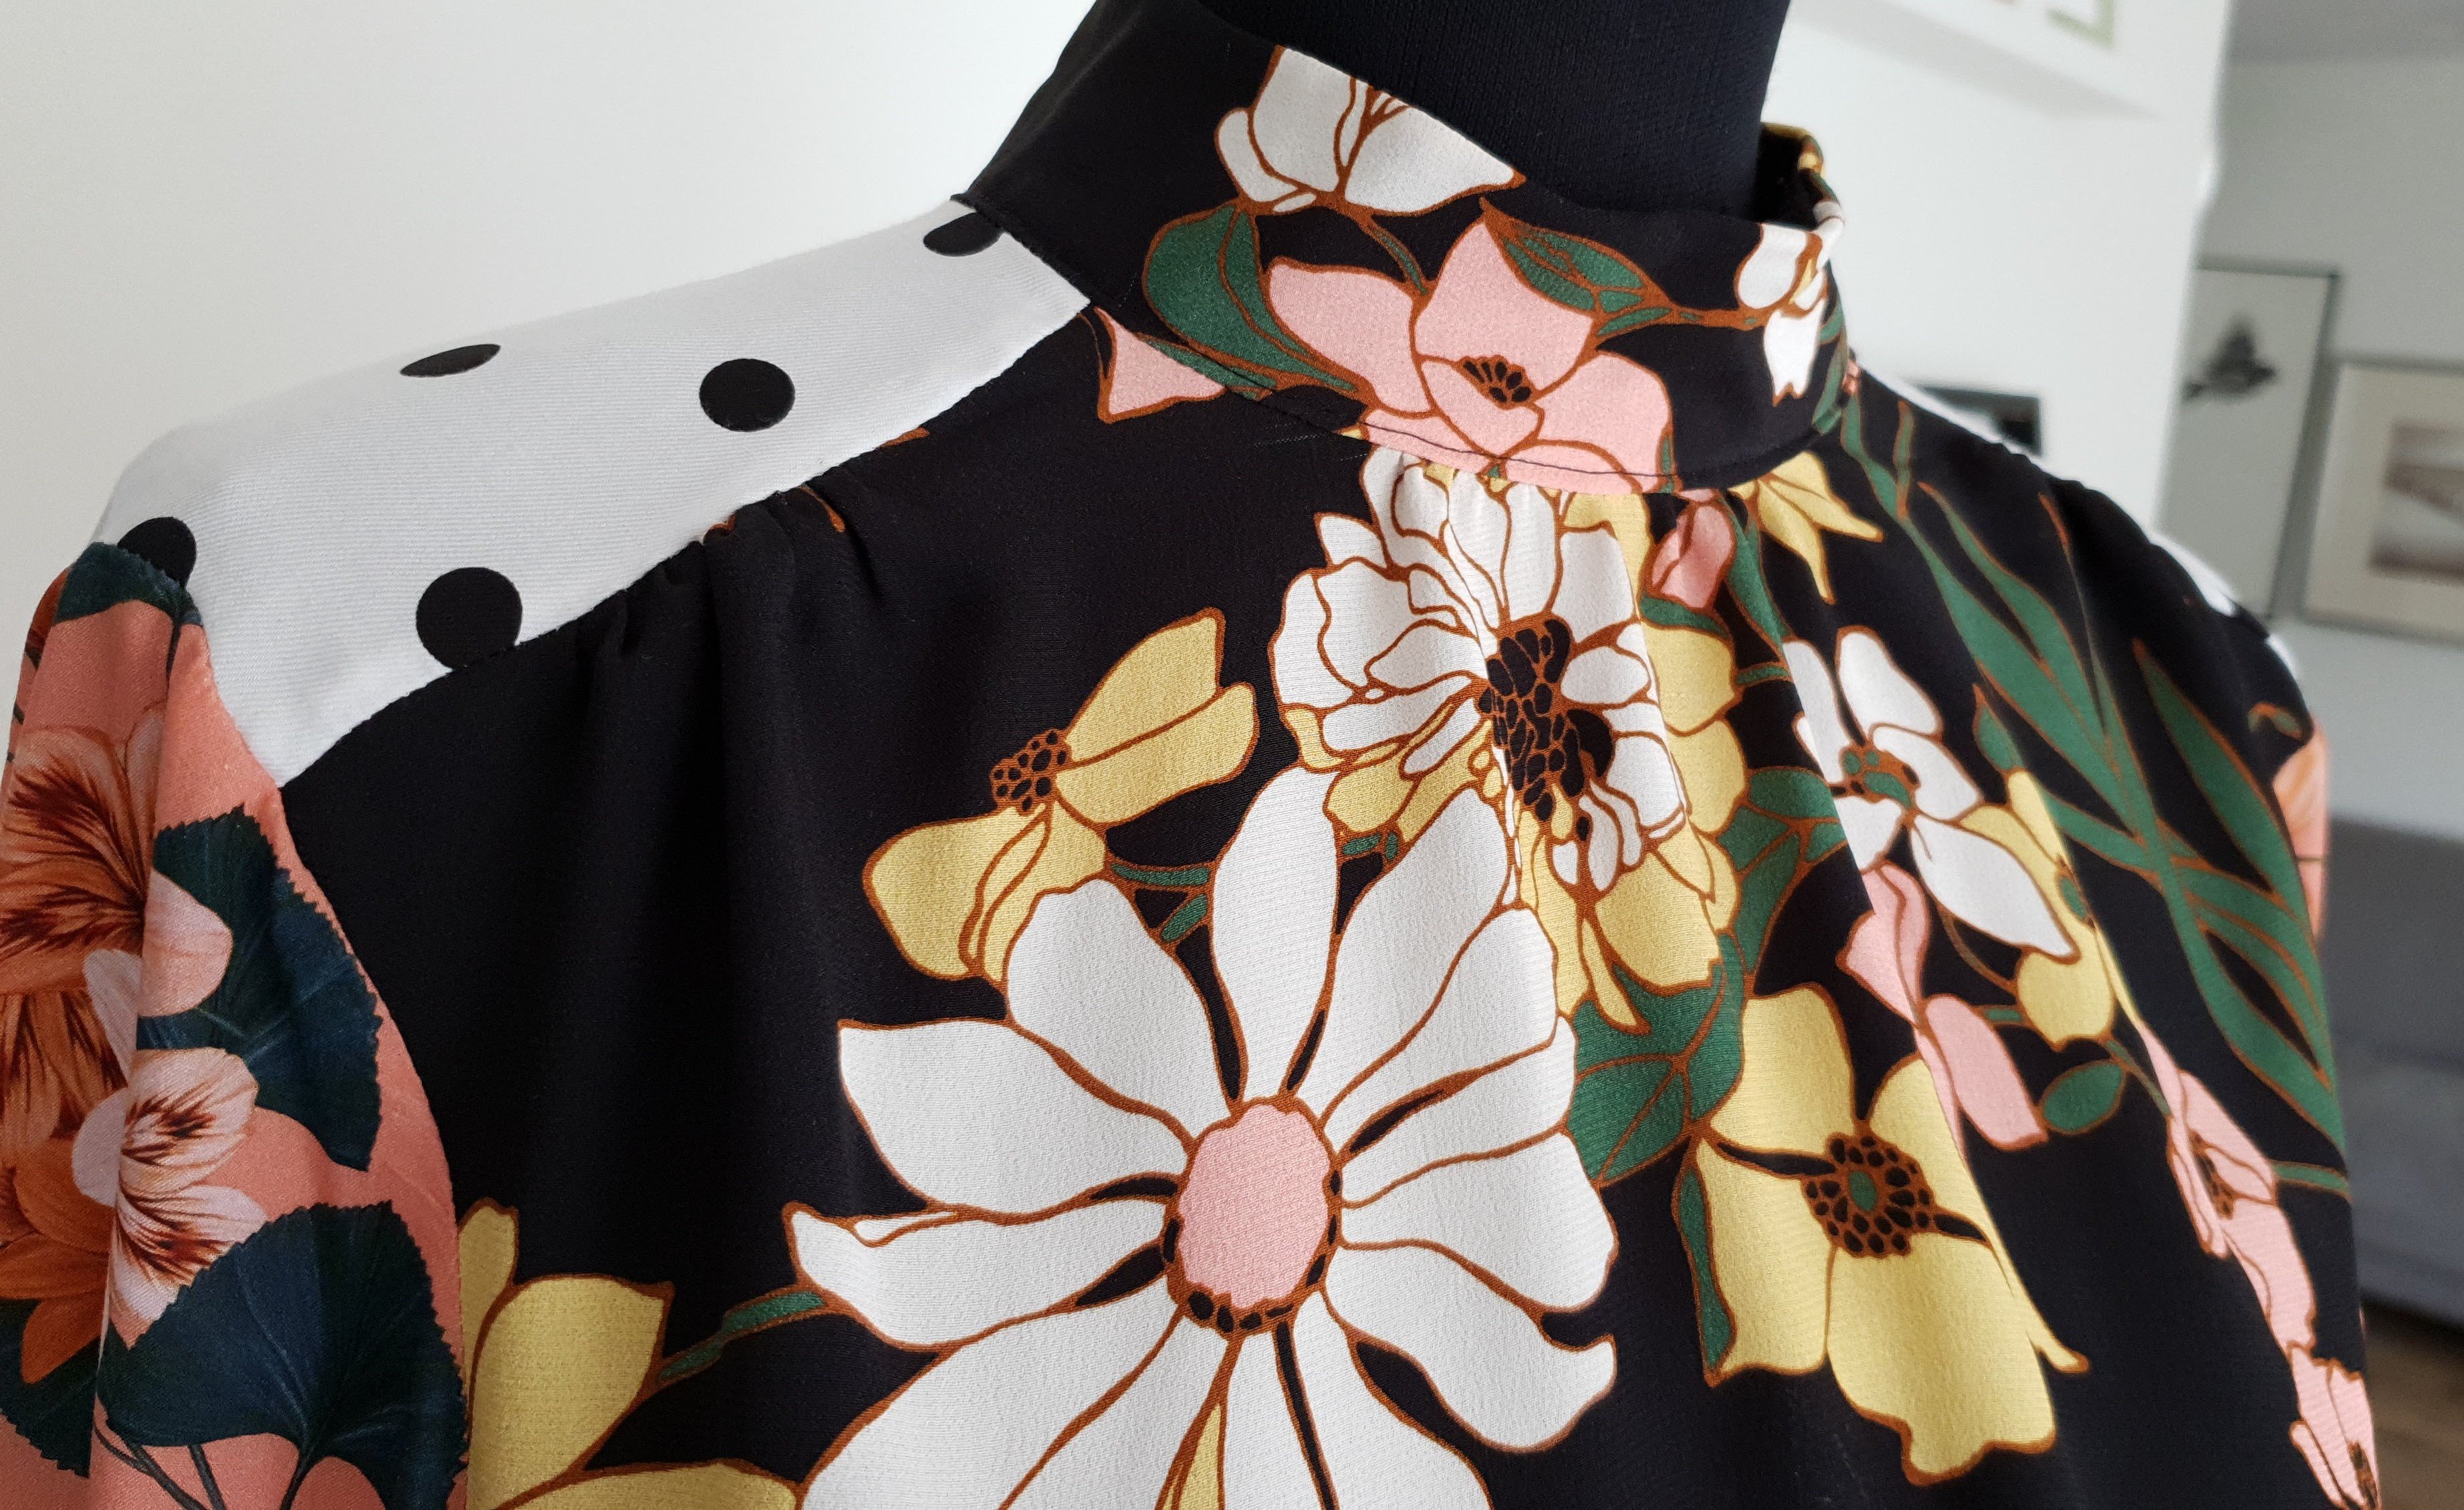
The gathering
Several pieces in this blouse needed to be gathered before attaching. The neckline, the shifted shoulder seams and at the bottom of the sleeves. This was an easy job using the gathering foot. To achieve the right amount of gathering I first tried it out on the same piece of fabric. By changing the stitch length you can alter the amount of gathering. Check out this BERNINA video how it works exactly.
French seam
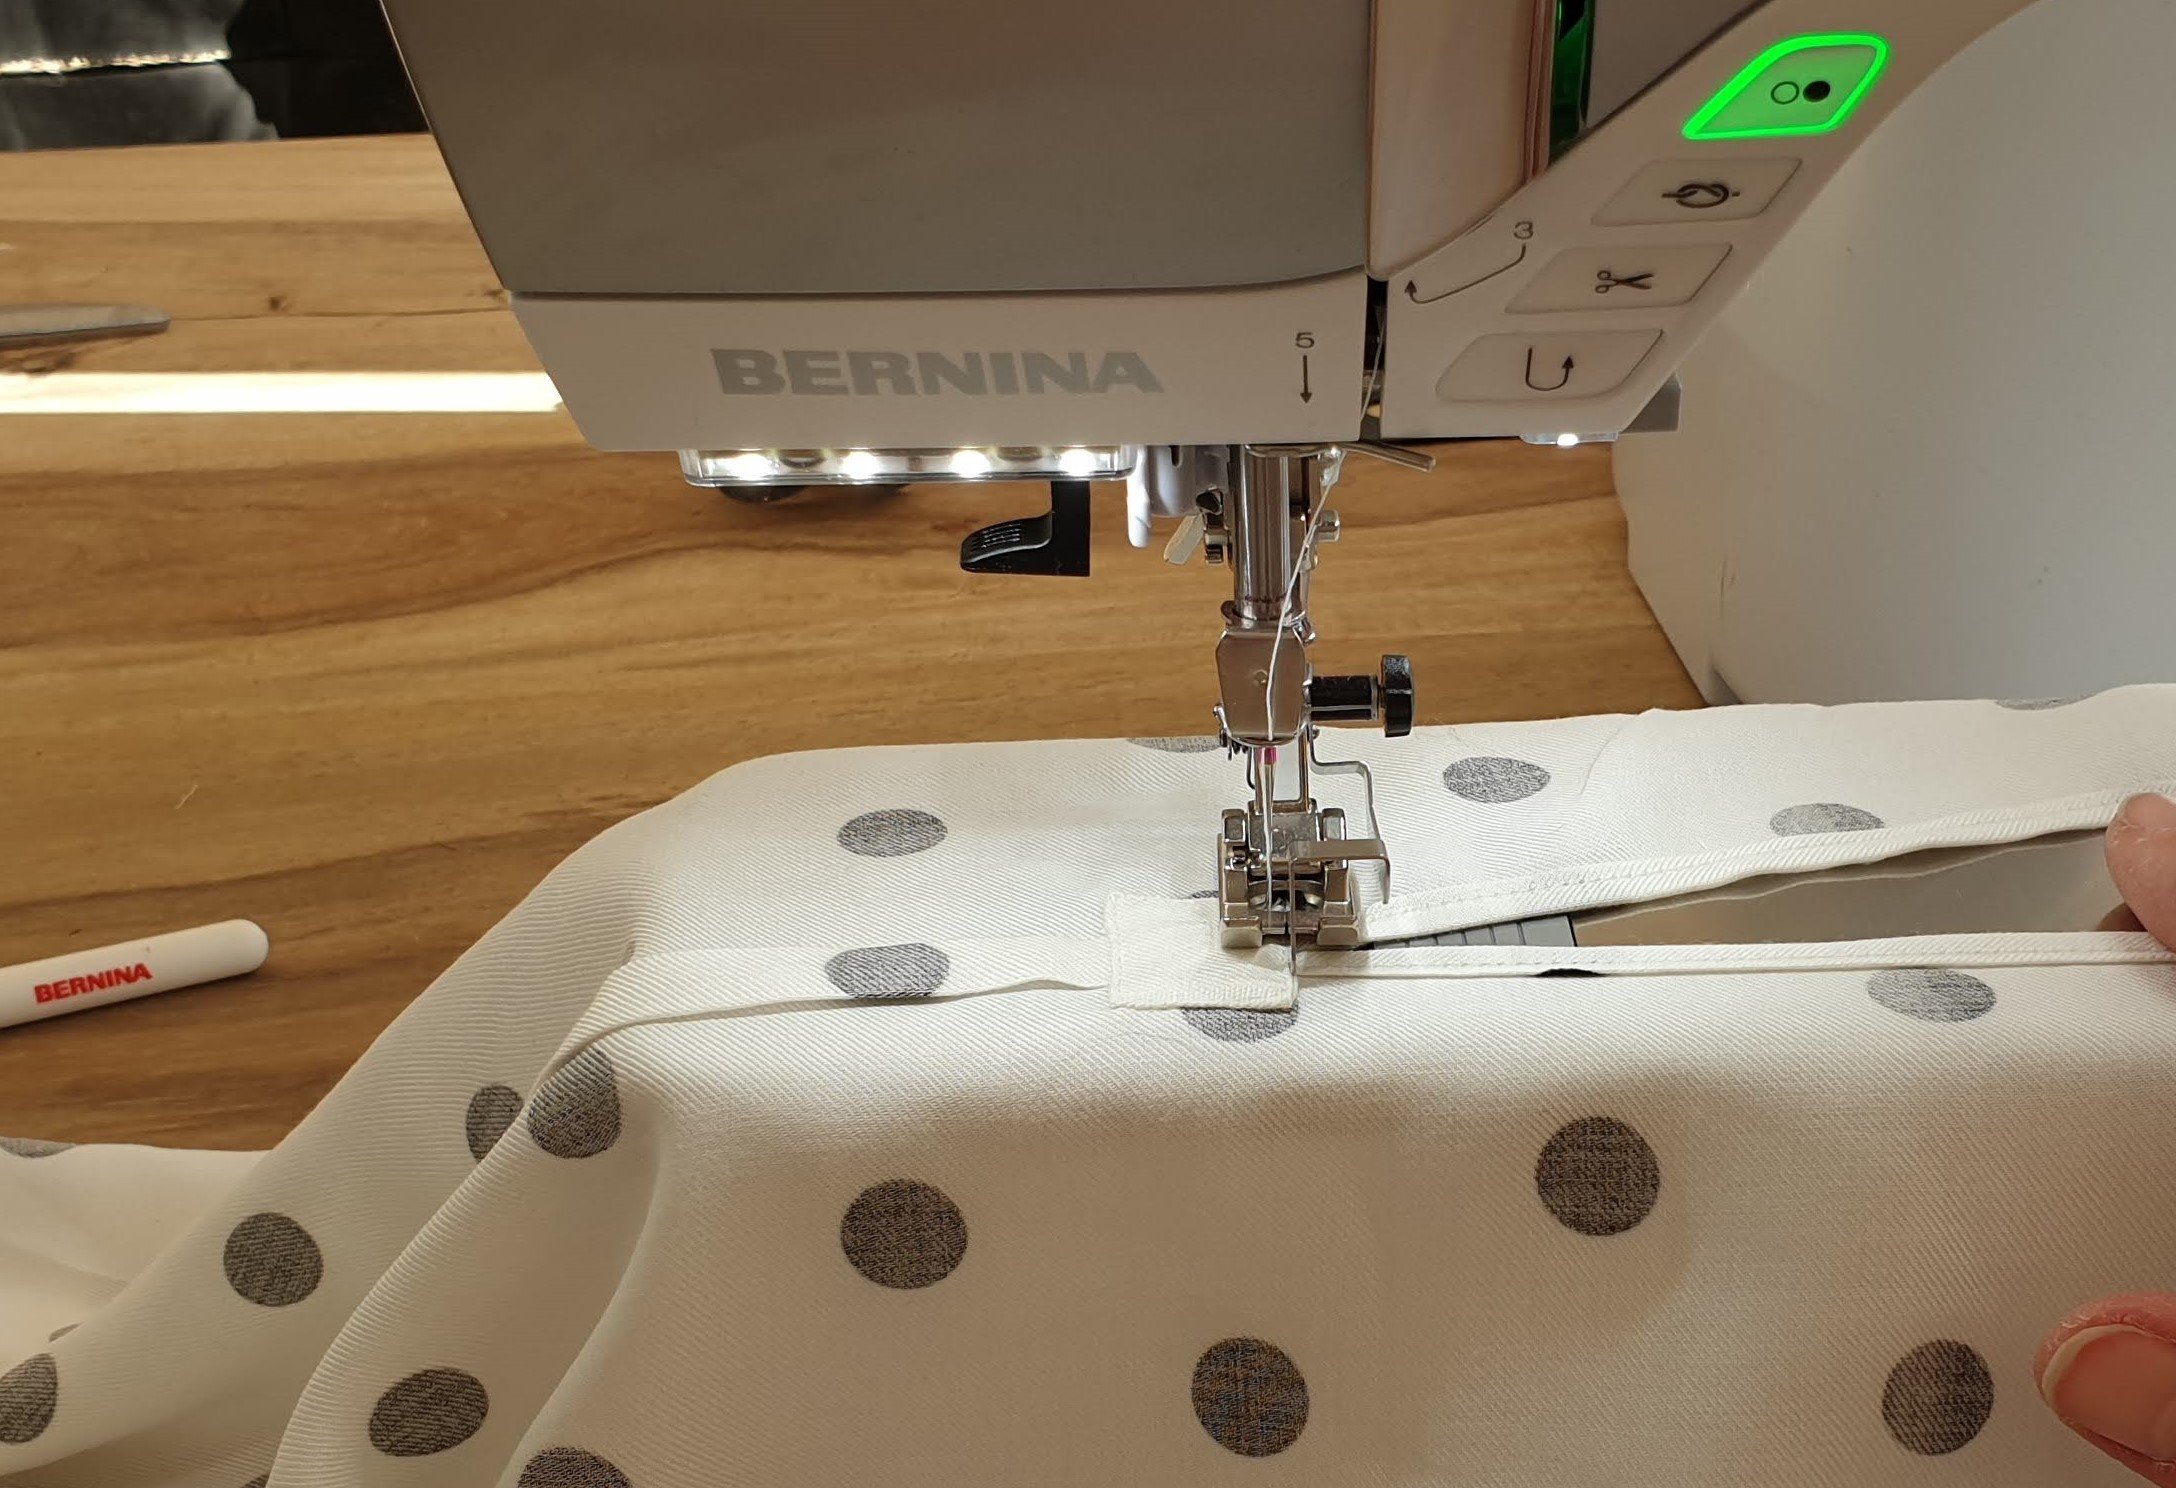
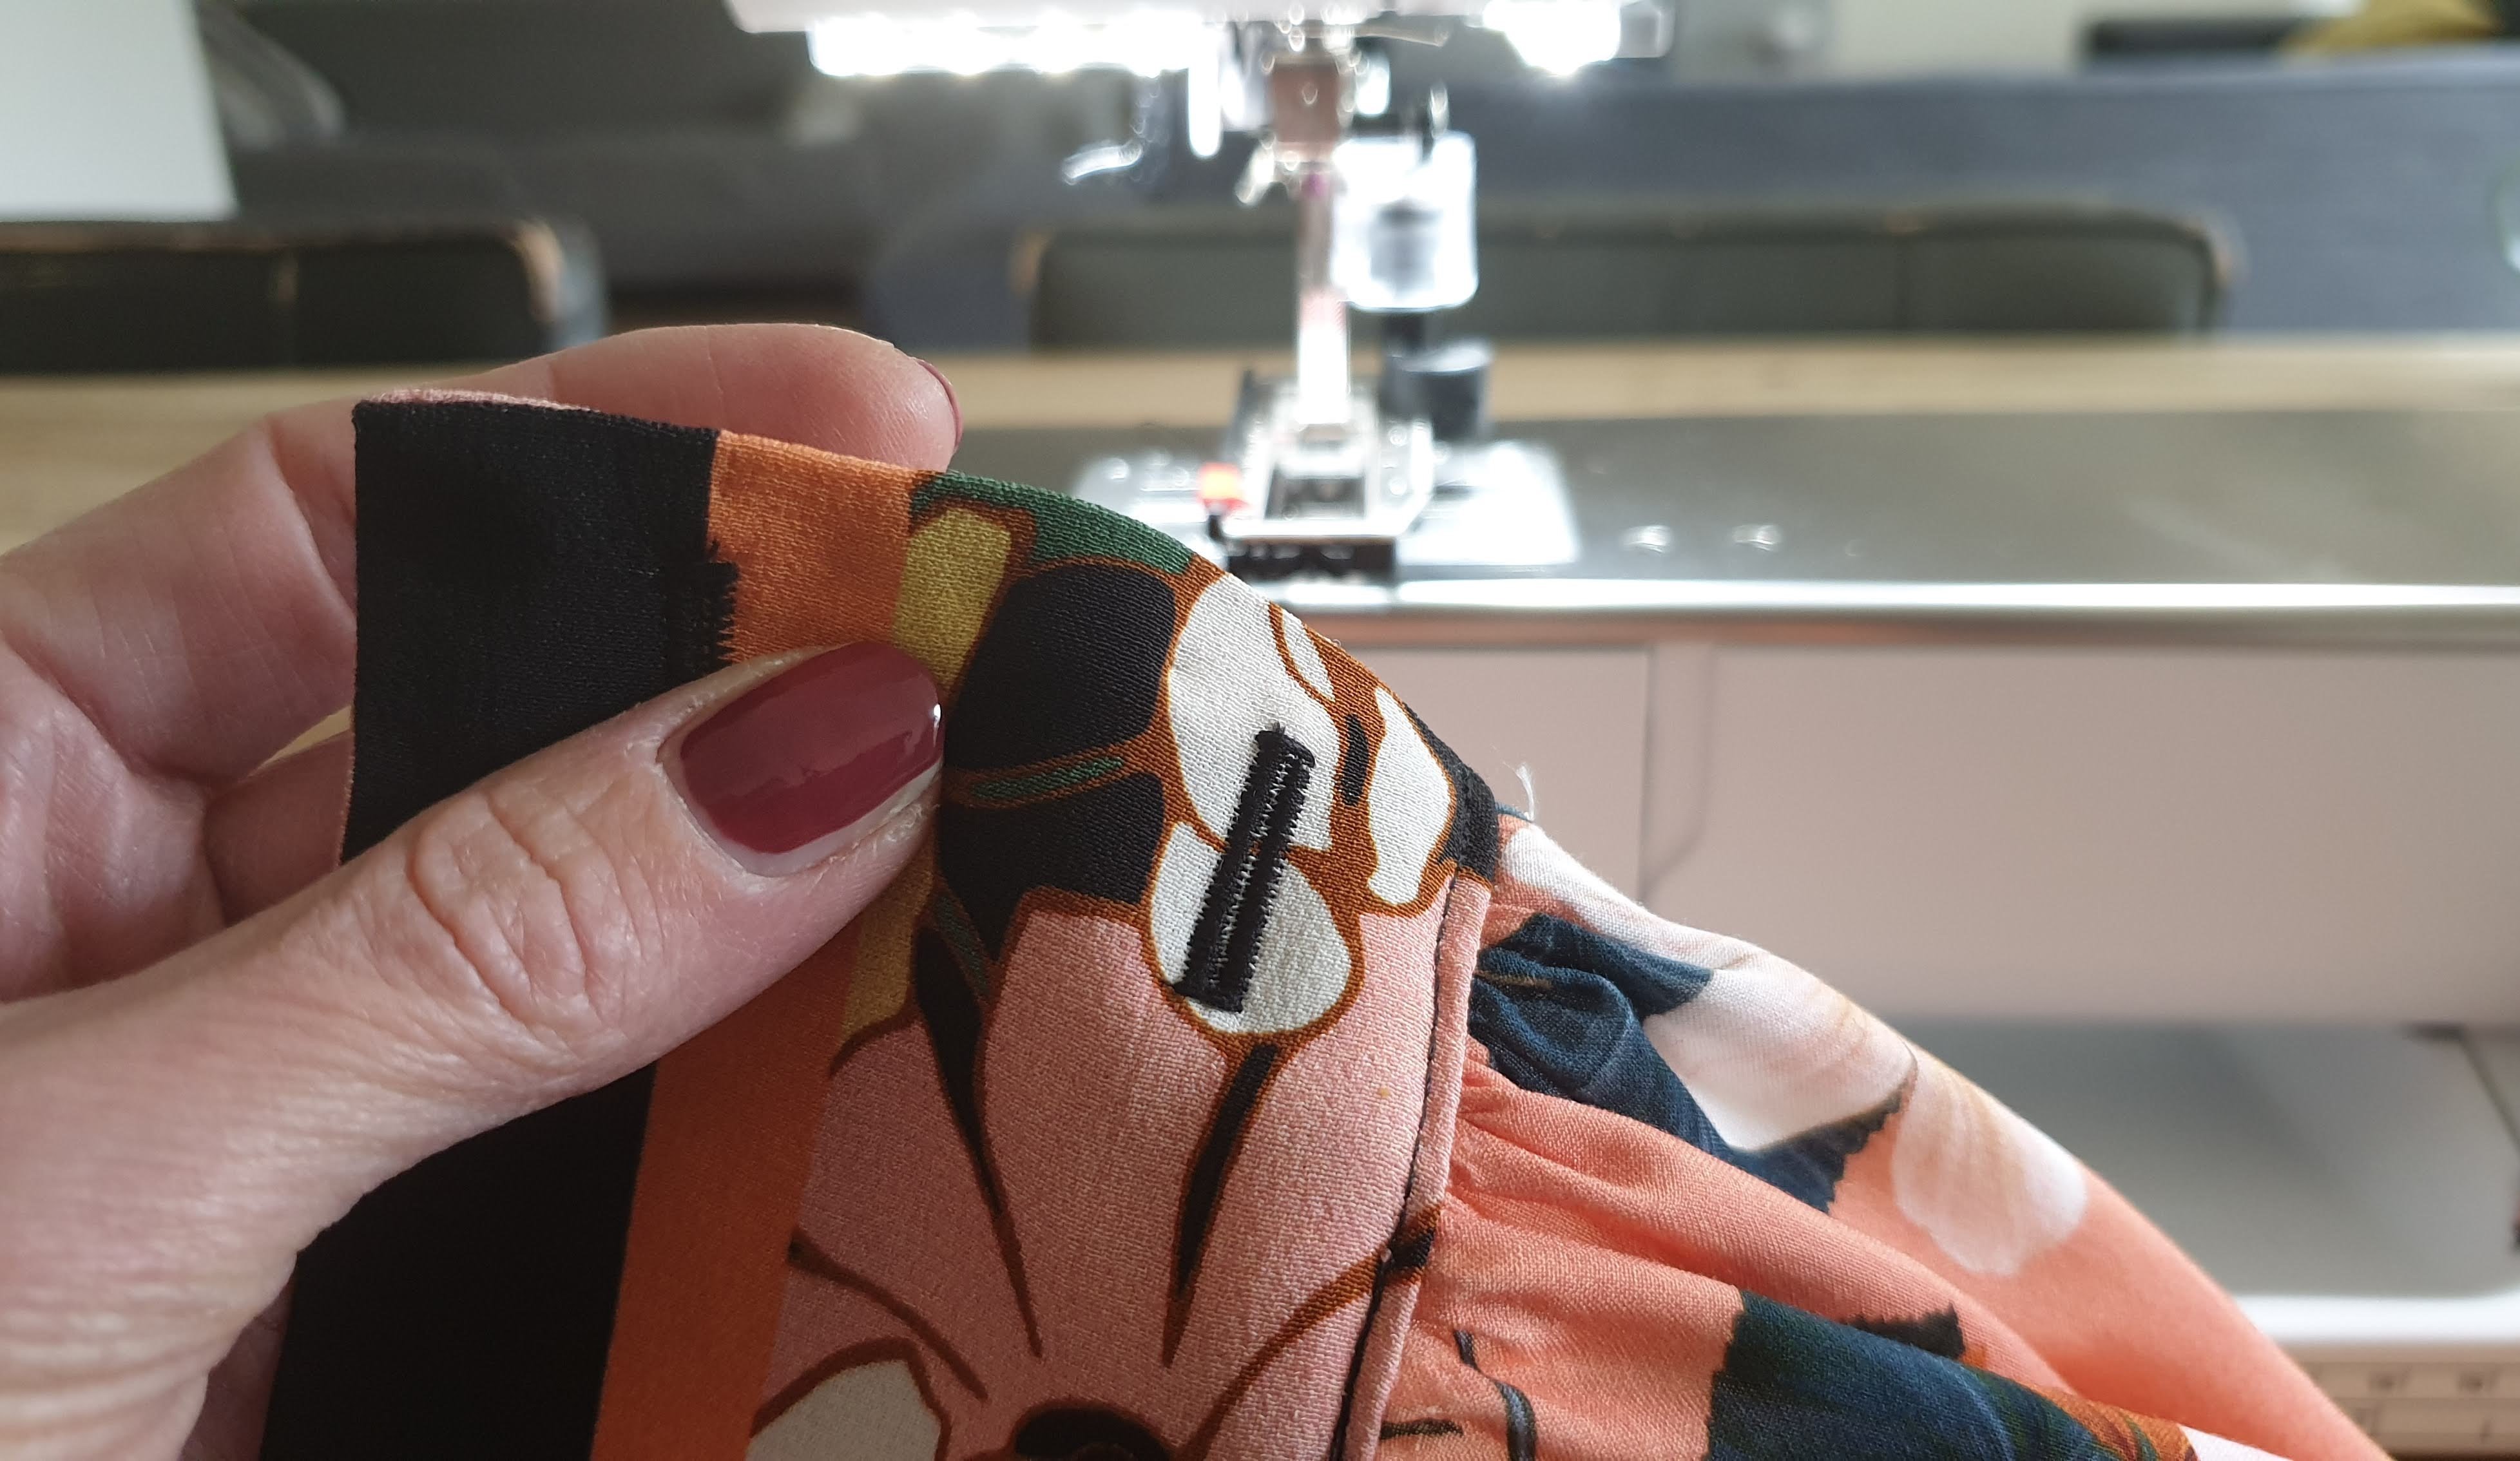
Assembling the blouse was an easy chore after that. Because of the transparency of the white polkadot fabric I chose to try out French seams at the back. I saw this done on The Great British Sewing Bee and it looked real easy. I first attached the back seam wrong sides together, folded the pieces over and attached the right sides together. Then folded in the slit, stitching it and neatly finishing it by stitching on a small rectangular piece of fabric. And this all ofcourse with the help of blindseam foot nr 5! My best pal!
Buttonhole making skills
Then it was time to practice my buttonhole making skills again with foot nr 3A. With the B540 it’s real easy to decide what size your buttonhole has to be simply by putting the button in the yellow circle on the display and turning the lower knob to change the circle as wide as the button. Say what? How!
Well, just follow the steps as shown in this next photo.
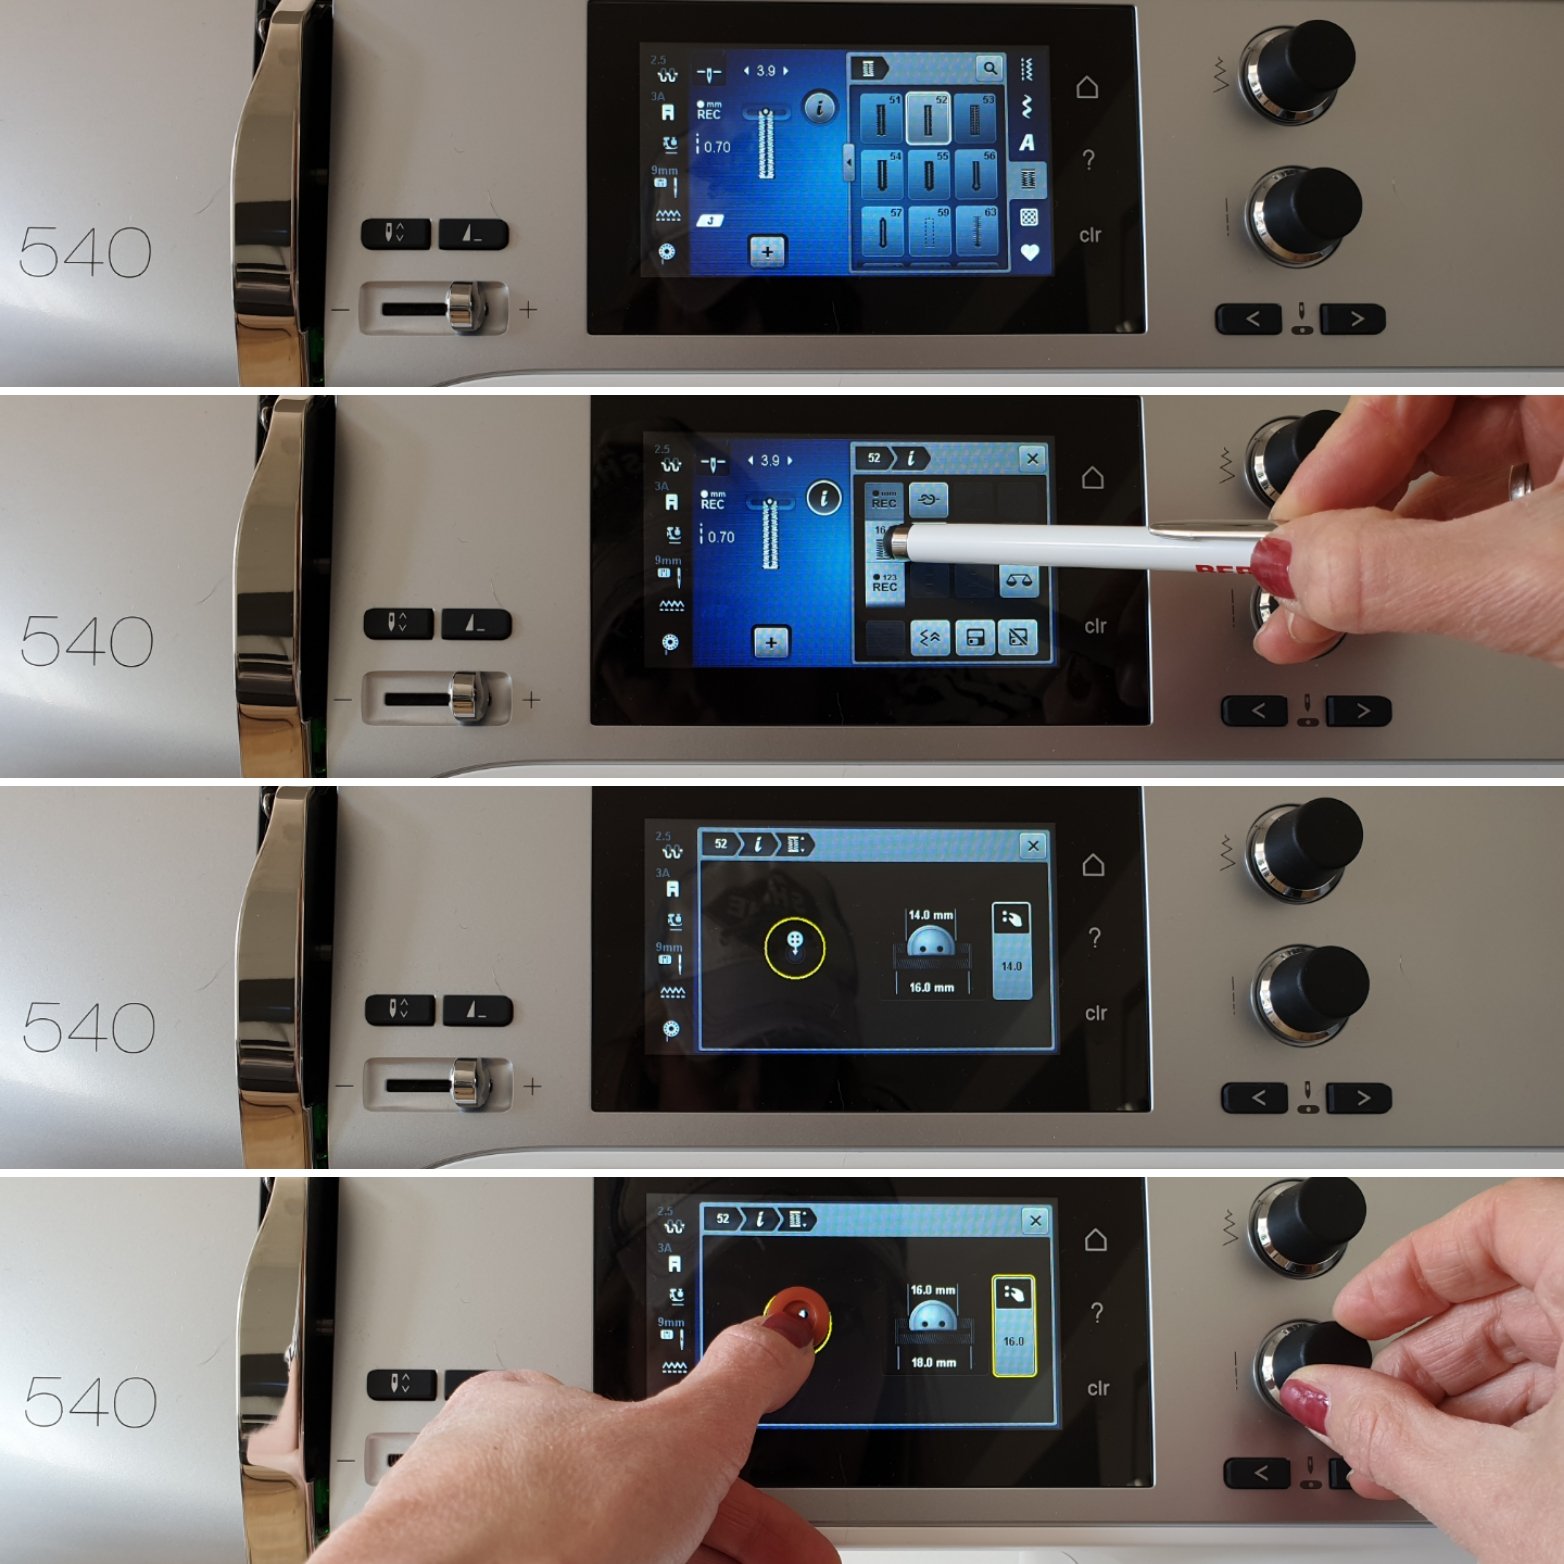
1 Select buttonhole option end type of buttonhole (I used 52)
2 Select i (info) and length of buttonhole
3 Put the button in front of this yellow circle
4 Adjust button size by turning the knob
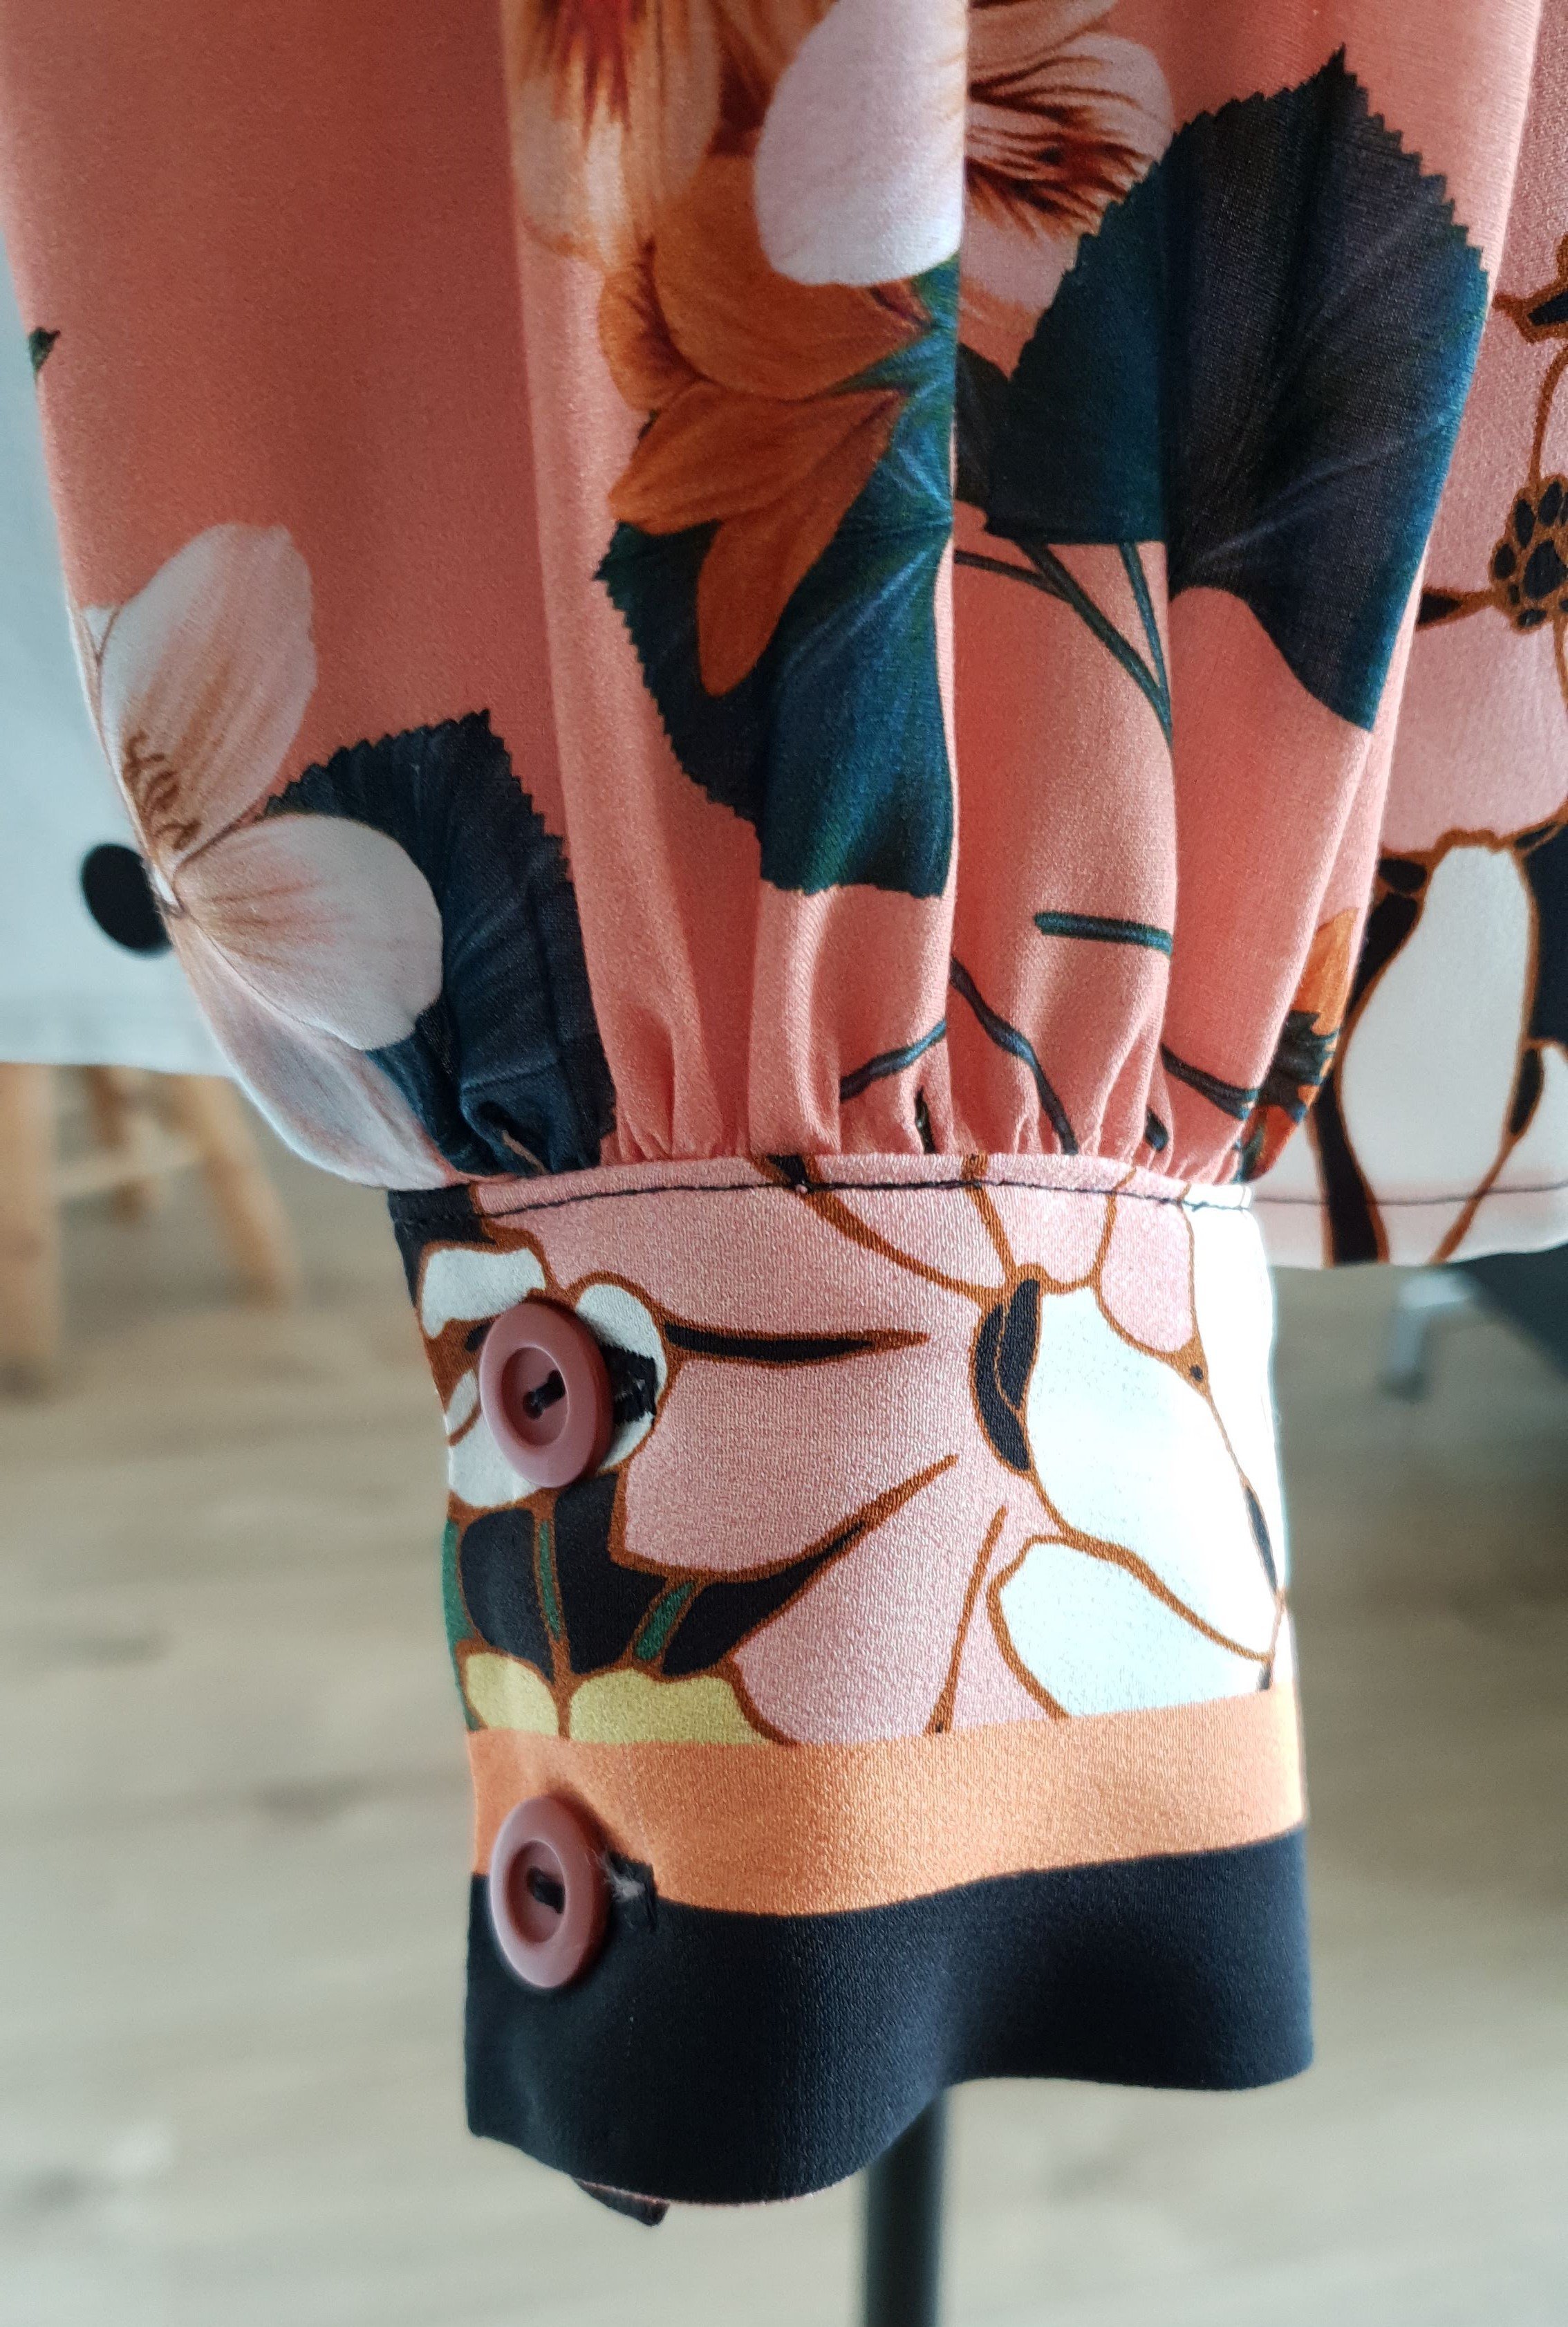
I had to sew six buttonholes in the blouse. Two on each cuff and two smaller ones at the back of the neck. Lot of practice!

Sew on buttons in no time
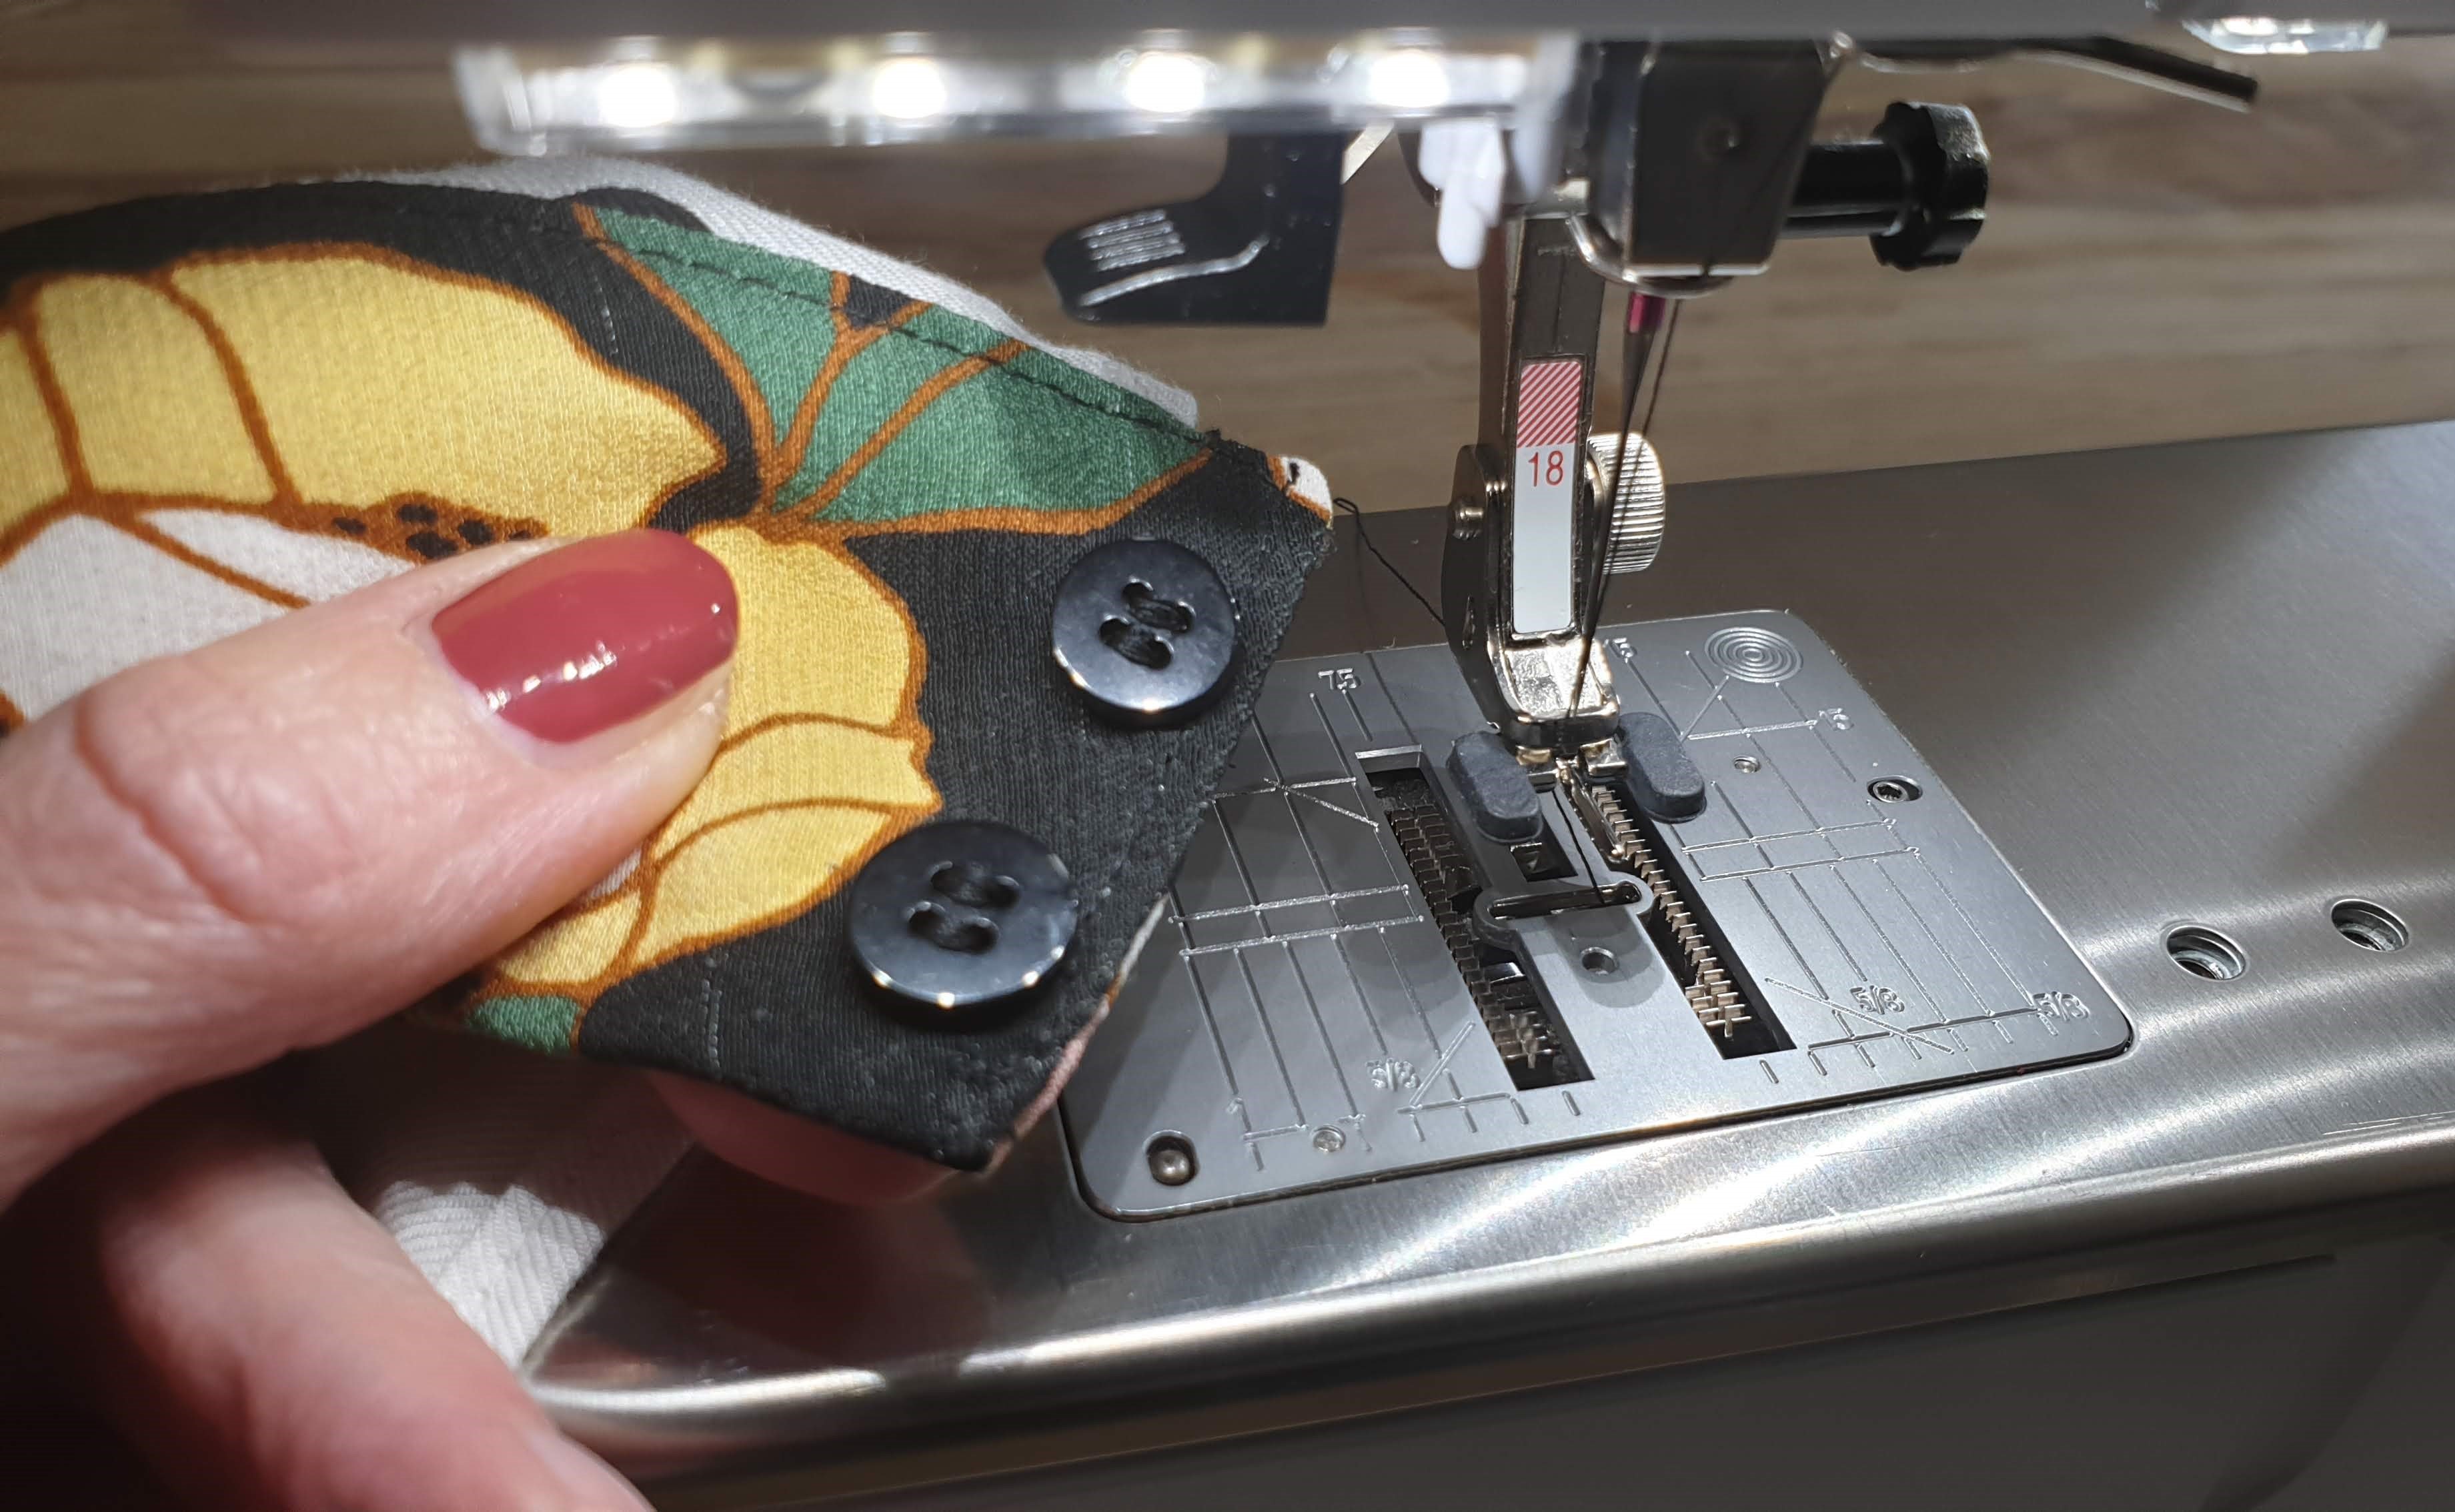
And than you want to wear the garment but you realize you still have to sew on buttons….. Happens to me very often. Now I own a perfect foot that saves a lot of time. I timed it….I’ve sewn on the buttons onder 1,5 minute per button! What you need for this is button sew on foot no 18.
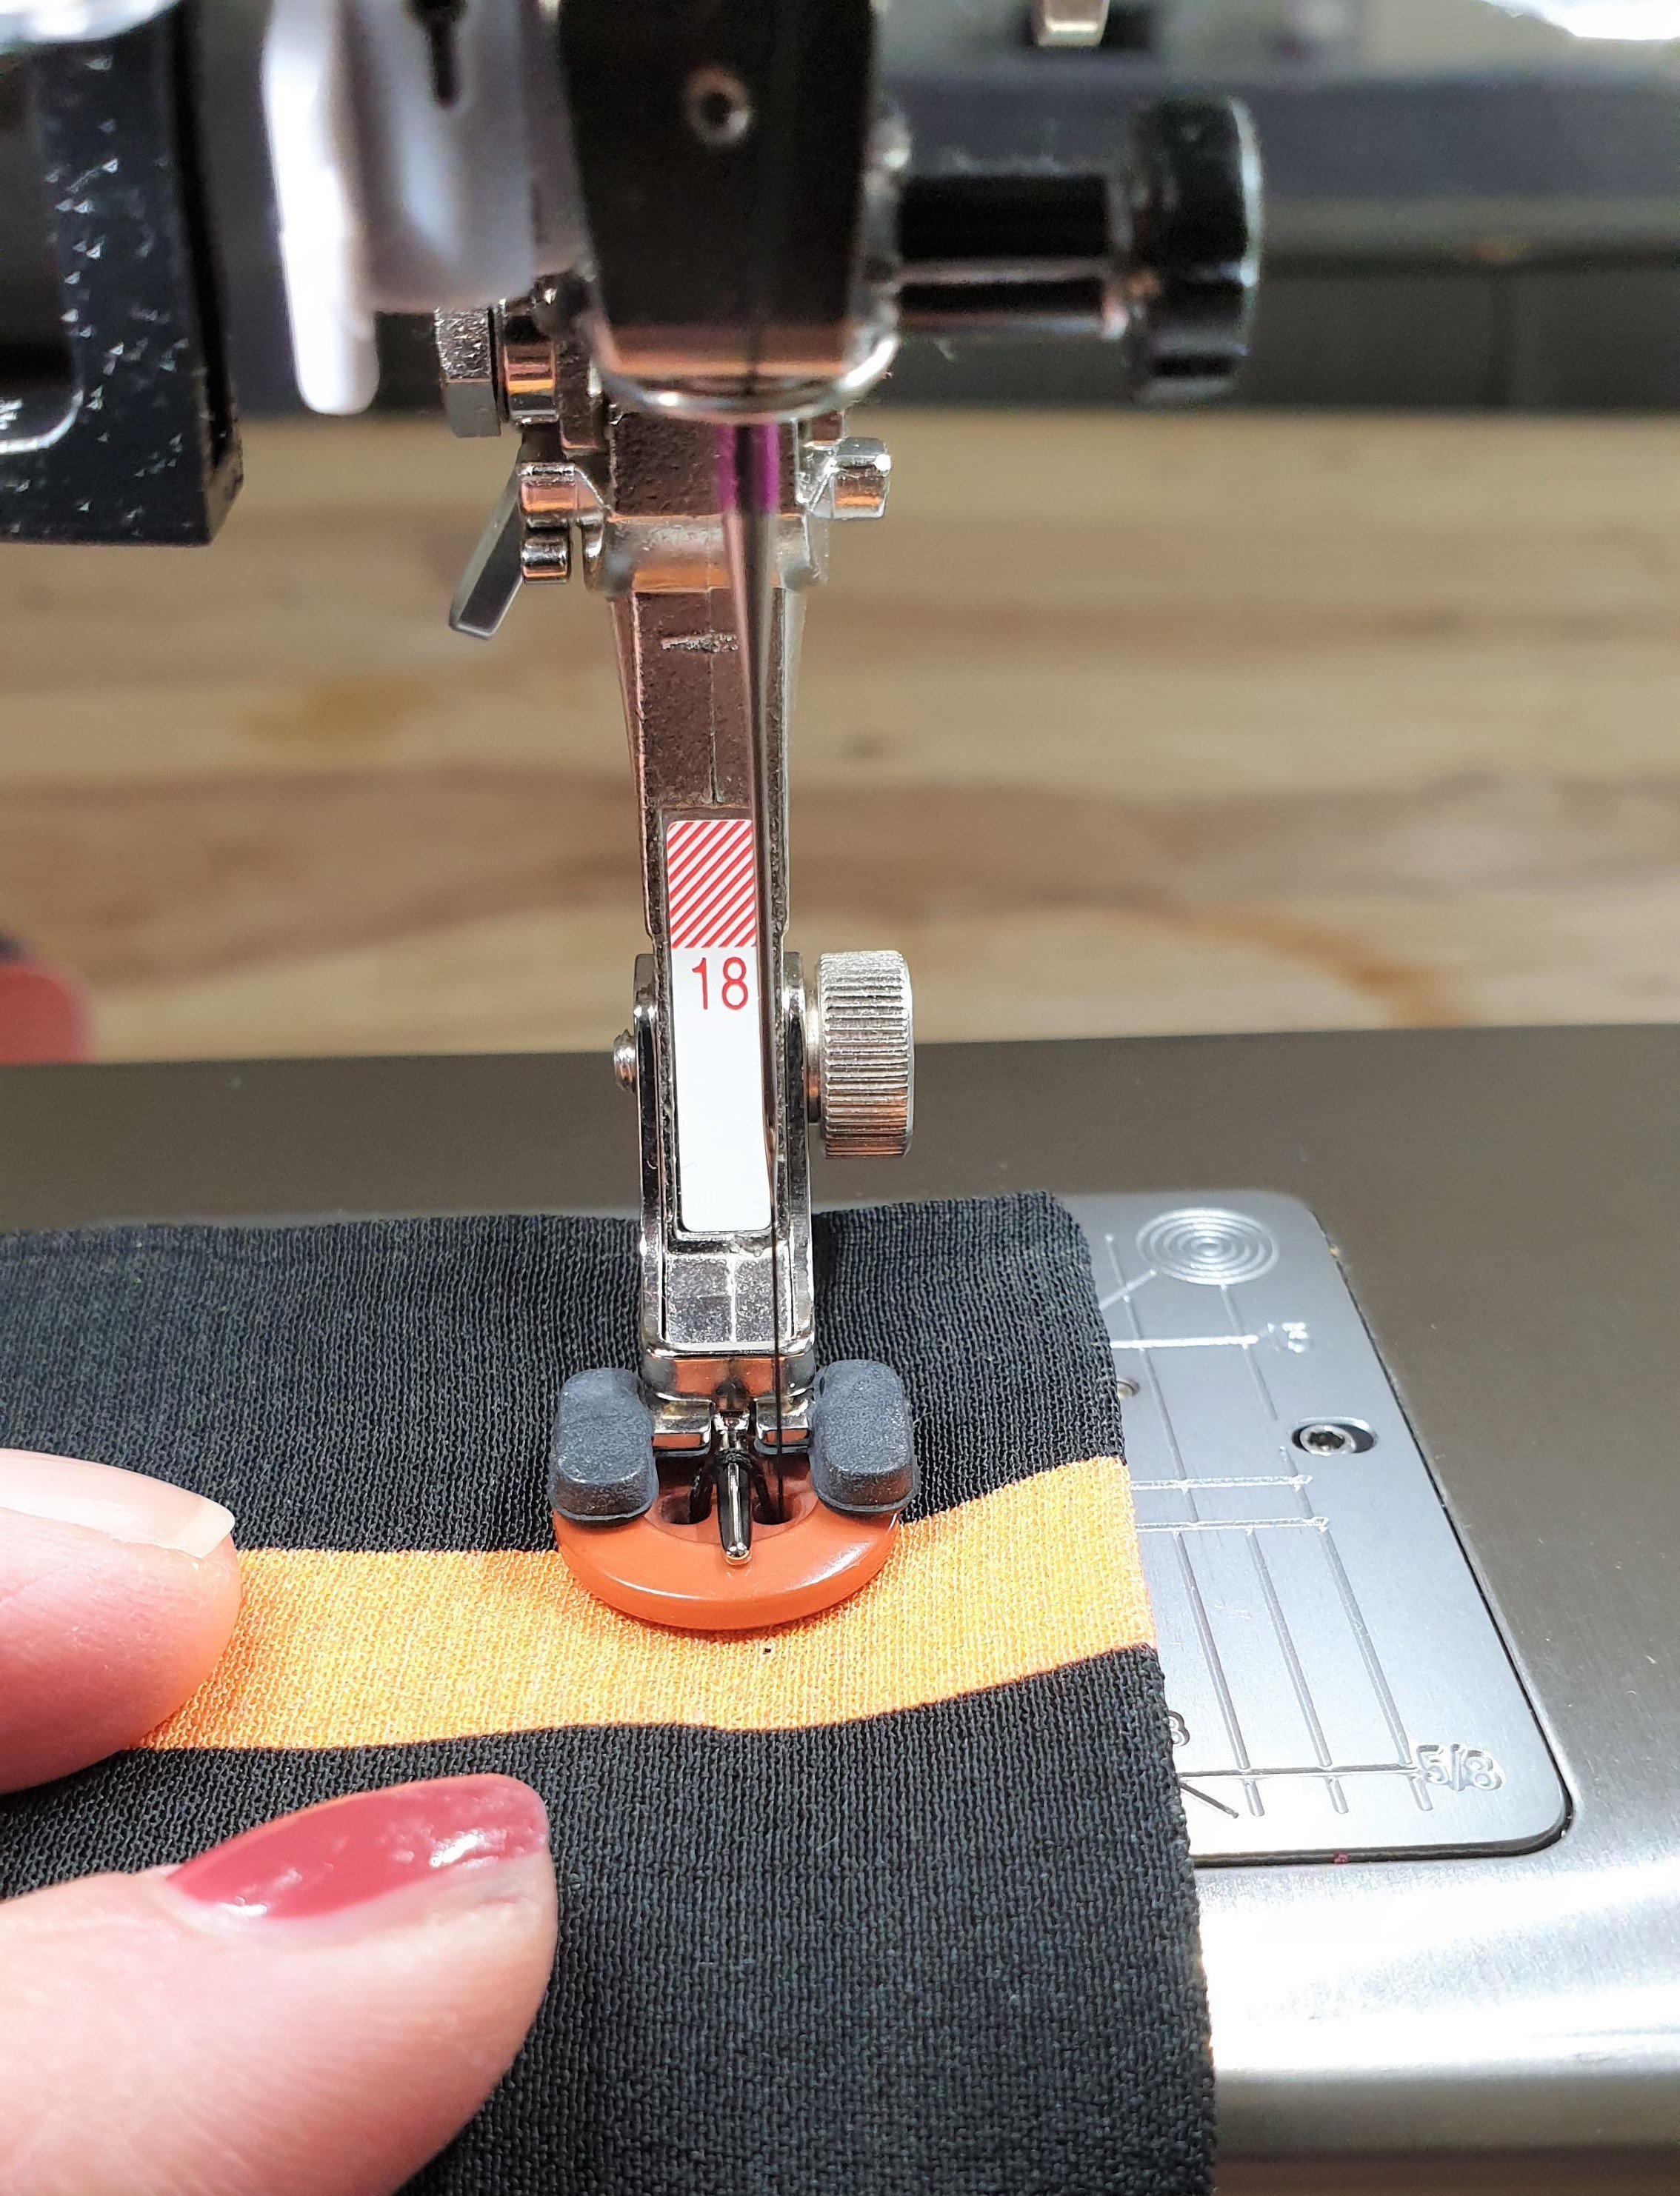
You can sew on flat buttons with two or four holes and even little hooks-and-eyelets. I used the machine to determine the width of the stitches by following the steps as shown in this next photo.
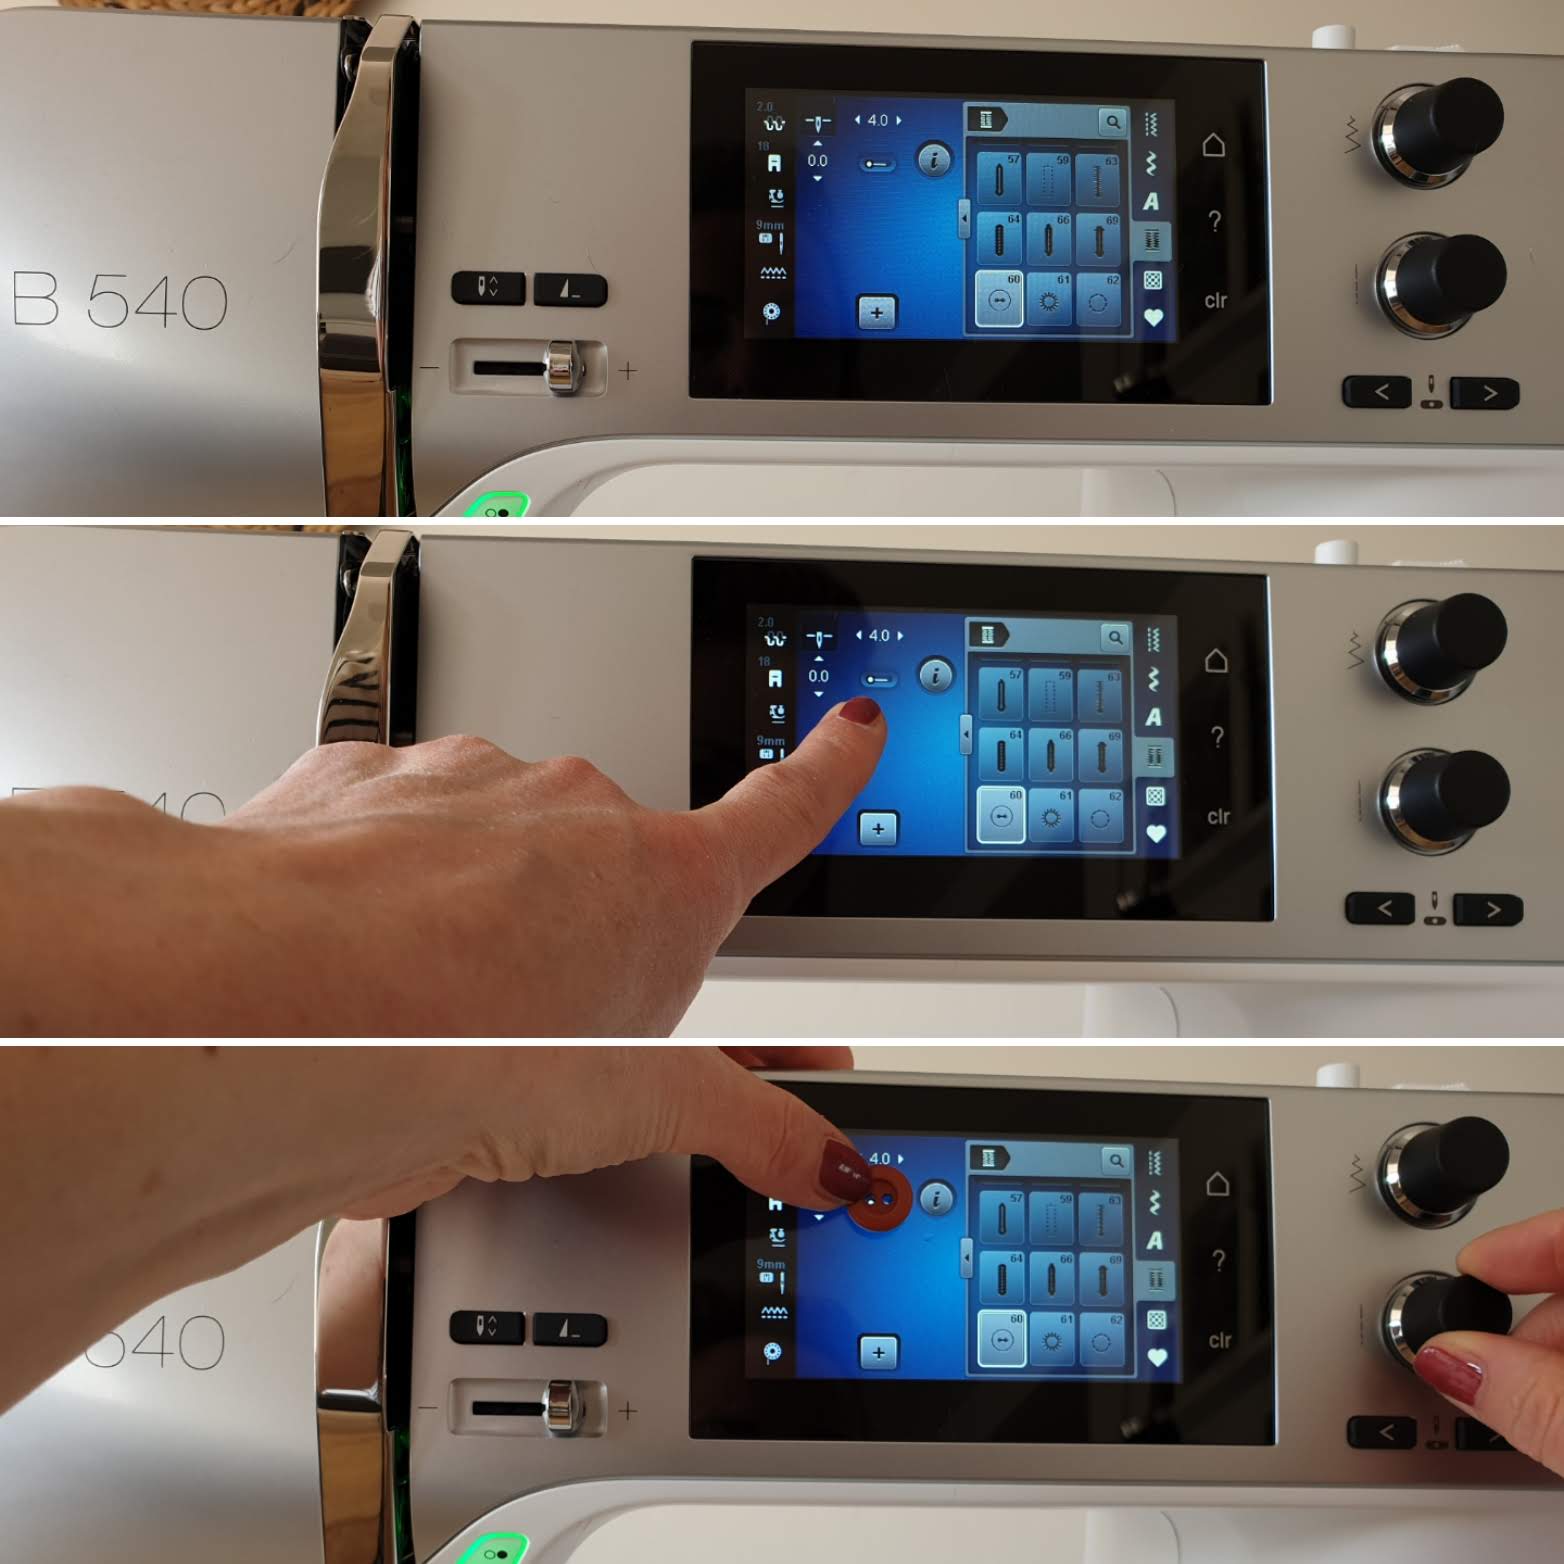
1 Select buttonhole program and then program 60
2 With this you can determine the width of the stitch
3 Place button on screen and turn the knob to adjust stitch width
Before placing the button lower the feed dog. Then lower presser foot and start sewing. To ensure that the button is really secure you can run the program twice. Than pull the lower threads so the upper threads are pulled through and tie them together.
For the buttons with four holes start with the front holes. If you want to see how easy it works. Check this little BERNINA video
Finished
My first project on the B540 is finished! Love how it turned out. A versatile piece of garment with detachable bow! Check out a little stopmotion video on this blouse on my Instagram.
Still have to try out some other new accessories such as the glide sole foot, tailor tag foot and the embroidery module! Those will be reviewed in one of my other blogs. So stay tuned!
Thanks for reading! And if you have any questions…please don’t hesitate to ask.
Love,
Marlies


Do you have the name of the pattern you used? Very cute shirt!
Hi. So sorry for the delayed response. The pattern is from a Dutch pattern magazine called Knipmode. https://knipmode.nl/shop/patronen/blouse-8-knip-oktober-2018/ It’s in Dutch 😉