 BERNINA Corporate Blog -
The Transform Toolbar: it contains all the necessary functions to select, change, scale and mirror etc. You will have to place a design on your workspace, and often select it for icons to be activated.
![]()
There are 11 icons and 3 groups, the last each with 2 fields. At the end a padlock. Lets find out how we can use it all:

1) Select (O): Click to select an object or group. Or drag a selection marquee to select multiple enclosed objects or groups. Black nodes will appear around the selected area(s)/object(s), and the object(s) turn(s) pink.
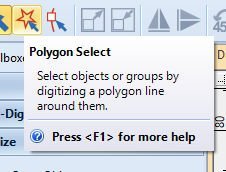
2) Polygon Select: Select objects or groups by digitizing a polygon line around them. Click around an object: with every click a node is placed, use ‘Enter’ to close the selection.

3) Reshape: Click to reshape an object, shape, stitch angles or enveloping. Corner reshape nodes = square or round, entry point and exit point and angle lines with orange nodes on each side appear.
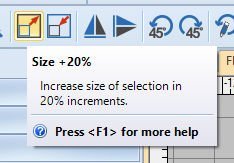
4) Size + 20%: Increase size of selection in 20% increments. You will have to place an embroidery design on your worksheet and select it, or seperate objects, otherwise this icon is grayed-out. Stitches will be automatically recalculated and adjusted.
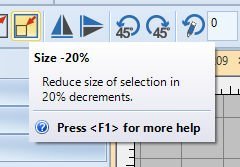
5) Size – 20%: Reduce size of selection in 20% increments. You will have to place an embroidery design on your worksheet and select it, or seperate objects, otherwise this icon is grayed-out. Stitches will be automatically recalculated and adjusted.
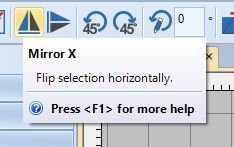
6) Mirror X: Flip selection horizontally. You will have to place an embroidery design on your worksheet and select it, or seperate objects, otherwise this icon is grayed-out. Stitches will be automatically recalculated and adjusted.
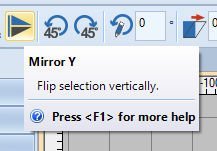
7) Mirror Y: Flip selection vertically. You will have to place an embroidery design on your worksheet and select it, or seperate objects, otherwise this icon is grayed-out. Stitches will be automatically recalculated and adjusted.
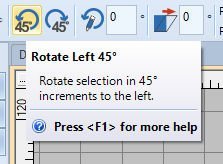
8) Rotate Left 45°: Rotate selection in 45° increments to the left. You will have to place an embroidery design on your worksheet and select it, or seperate objects, otherwise this icon is grayed-out. Stitches will be automatically recalculated and adjusted.

9) Rotate Right 45°: Rotate selection in 45° increments to the right. You will have to place an embroidery design on your worksheet and select it, or seperate objects, otherwise this icon is grayed-out. Stitches will be automatically recalculated and adjusted.

10) Rotate: Rotate selection by specified amount – positive or negative – in degrees. Fill out the number of degrees you want to rotate: for positive = to the right, just the number will do, for negative = to the left, place a ‘-‘ (minus) before the number of rotation of your choice. You will have to place an embroidery design on your worksheet and select it or objects, otherwise this icon is grayed-out. Stitches will be automatically recalculated and adjusted.
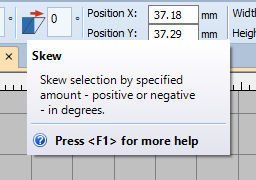
11) Skew: Skew selection by specified amount – positive or negative – in degrees. Fill out the number of degrees you want to skew: for positive = to the right, just the number will do, for negative = to the left, place a ‘-‘ (minus) before the number of skew of your choice. You will have to place an embroidery design on your worksheet and select it or objects, otherwise this icon is grayed-out. Stitches will be automatically recalculated and adjusted.
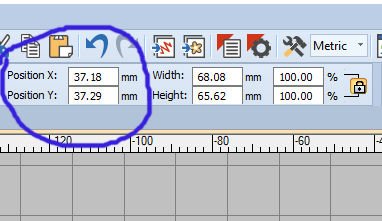
First field (of 2): Position X and Y settings can be adjusted for precise positioning selected objects. Use this in conjunction with Rulers & Guides.

Second field (of 2): Width and Hight, adjustments can be made to change the size of your objects/embroidery motif. Use this in conjunction with Rulers & Guides.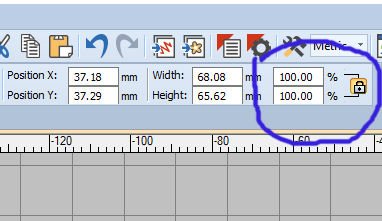
Third field (of 2) with padlock: Proportional scaling Width and Height in percentage.
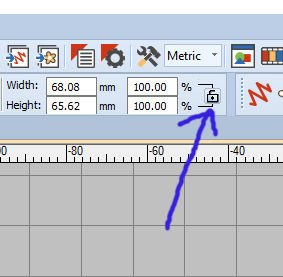
When padlock is closed: both Width and Height will be scaled to maintain proportions. Open the padlock (just click on it once and you will actually see an opened padlock)) and each can be scaled separately.
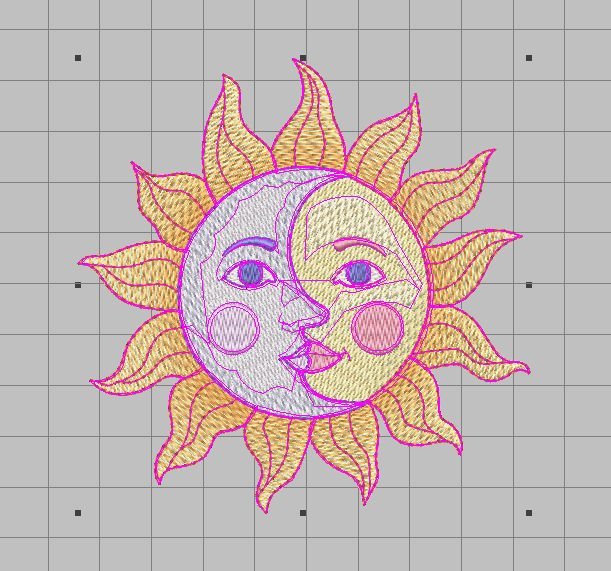
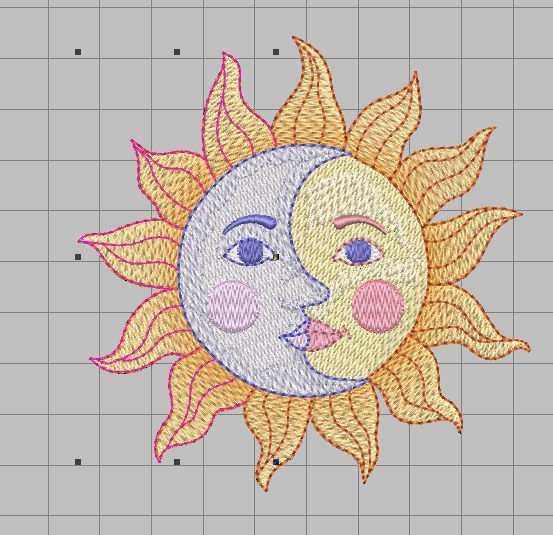
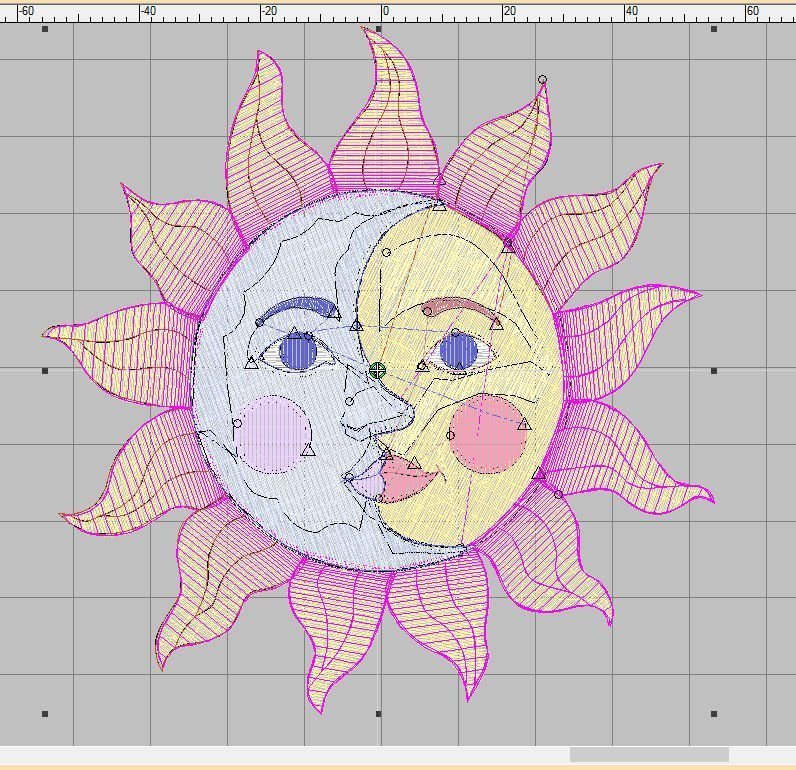
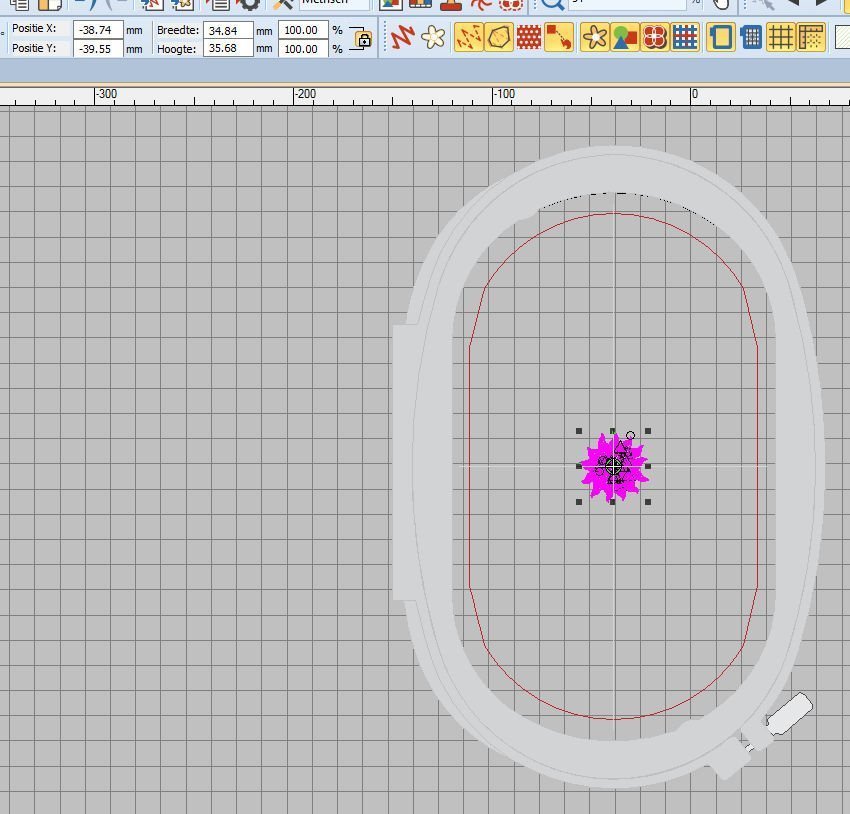
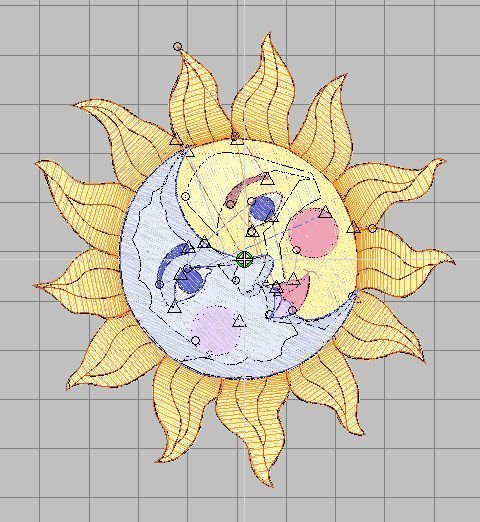
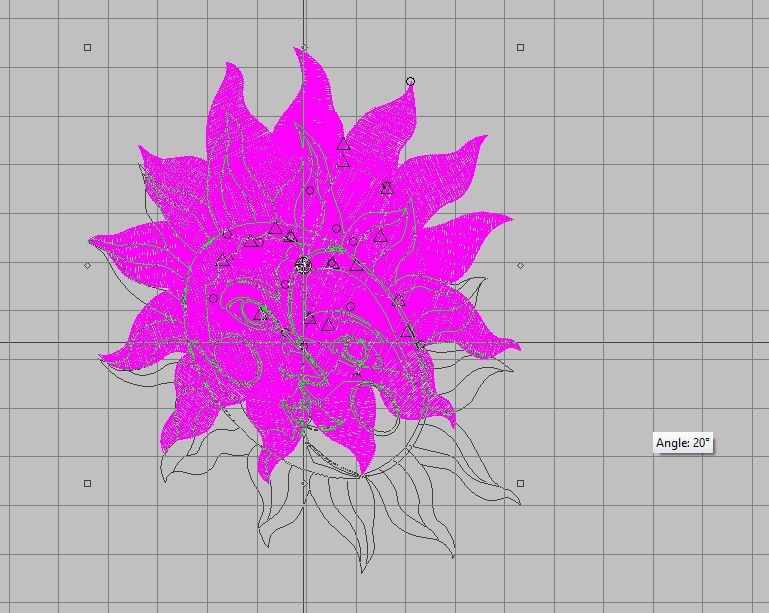
Let’s start by placing an embroidery object on the workspace: I have saved it, renaming it, so I can work with it as much as I want, without changing the original file. This is Embroidery motif LJ634-48.ART80, a sun and a moon, interlocked: you can find this embroidery motif in the BERNINA Embroidery Library. Most of the times the icon ‘Select Object’ (1st left, Transform Toolbar) is activated when placing an embroidery motif on your workspace. If not, click on this icon. Click and drag a marquee around the entire motif, to select all.
When everything is selected, and ‘Show Artistic View’ and other icons of the View Toolbar are activated, the entire embroidery motif will turn pink (at least the significant lines are shown). This means you can drag it to another section of your workspace, scale, change settings with all objects and lines at once: width and height, copy, delete, shift etc.
Clicking on a section of the embroidery motif, turns just that section pink = selecting it, after which you can drag and shift, scale, change settings, move, delete, copy etc.
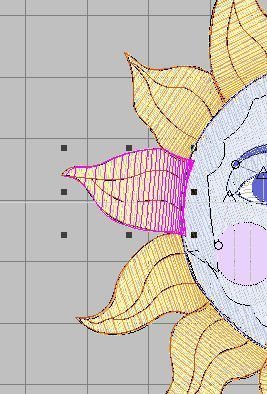
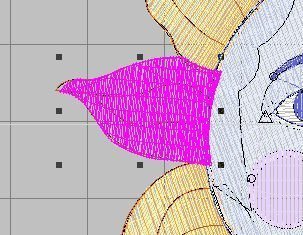
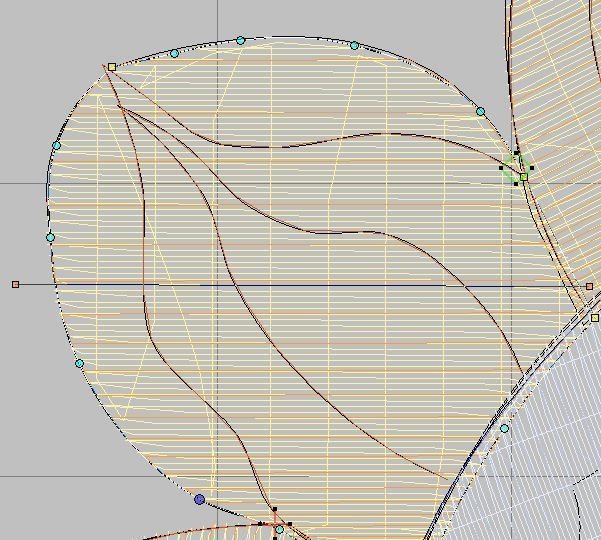
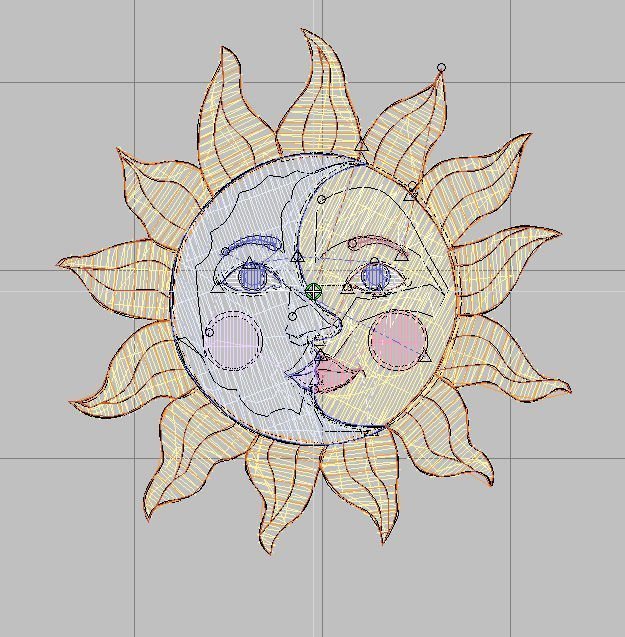
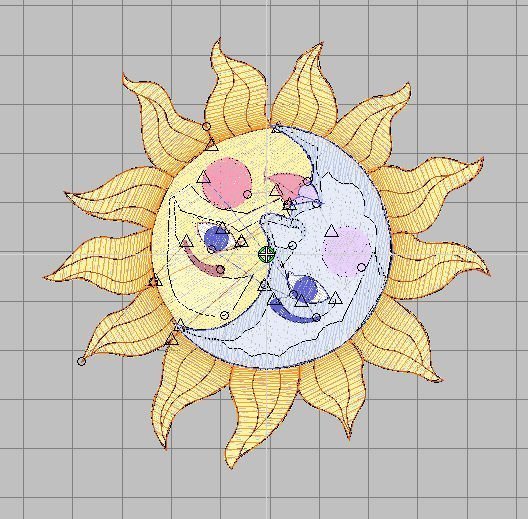
To show this more clearly, I have deactivated ‘Show Artistic View’ to see the actual stitches, outlines and, connectors etc. By clicking one ‘flame’- not the outlines, but the object itself – this area turns pink, and black nodes are placed around it so I can edit.
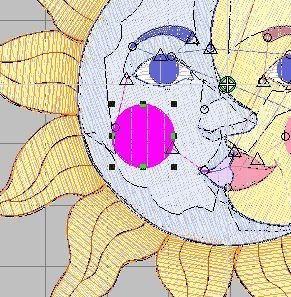
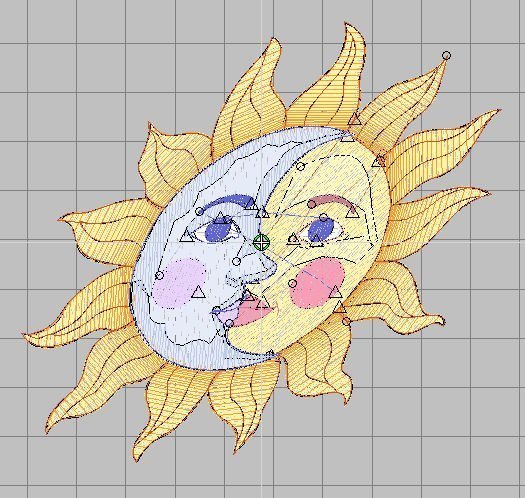
Every object can be selected separately: like the cheek of the moon. To undo a selection, click on an empty spot of your workspace or use Esc: the black nodes will disappear. Selected the wrong object? Just click on the right one and the previous is deselected (unless you hold the Ctrl key of your keyboard).

If you want to select an object, which lies under another, zoom in. Click on the object you want to select. Zoom out to check if you selected the right object and zoom in again to edit. The selection turns pink again: this time I wanted to change something with the mouth of the moon, but the lips are designed on top of that, with offsets: you can see this because the pink selection of the face/mouth is covered by the lips/outlines. Because I have zoomed in and the object/face of the moon is large now, the black nodes are not visible, but they are there. Just zoom out to see them.
Clicking on the lips, they will turn pink = selected. because this object is visible on my screen, the black nodes will show, even with the embroidery motif zoomed in .
If you want to select multiple random objects, select the first, hold Ctrl down while clicking on other objects. All flames are selected = turned pink, but the rest is not, even though you can see black nodes around the motif: that’s because the outer objects are selected. Remember to check this: with the ENTIRE motif = all objects selected, all lines of outlines and objects turned pink. With just the outer objects selected, only these turn pink.
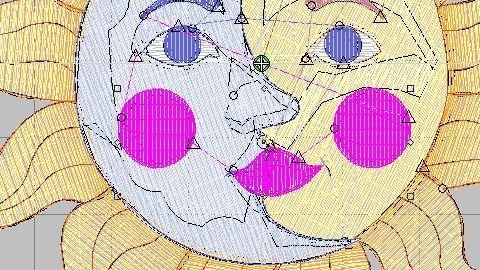
Selecting a number of objects at the same time: hold down Shift while clicking on the objects of your choice. I have selected both cheeks and the mouth: these can now be edited. Although these objects are made of different colors, it is possible to edit them at the same time.
Would you like to know the sequence of the actual embroidery? Click on an object, then use TAB by multiple clicking: every time you use Tab, the selection moves to the next object. Want to go faster? Hold Tab down, and you will ‘fly’ through the objects.
Using Tab with every click, you will find out how in which order the embroidery motif is designed to be embroidered. Because each next object is selected/pink, you can recognize the shape and know what comes next.

Polygon Select is for selecting an irregular shaped object. If you cannot select it at once, because it is hidden underneath another object, or sometimes there is not enough space between objects to draw a marquee between them, use this option. Clicking at certain points makes this way of selecting more flexible. With every click a square node and lines are placed. Click until the second last node is placed, then use Enter to close the selection. When you look closely at the picture above, the selection is not actually closed: the first and last nodes are placed on top of each other. Better use Enter instead of a last click on top of the first to make sure the selection is closed. 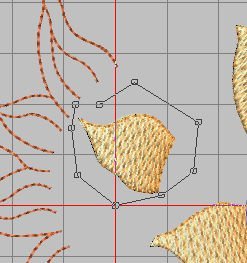
Just to show you, I have shifted some objects. If I wanted to select the separate object – I have to use Polygon Select, to place nodes around it. Spaces between the objects are at some places very narrow. A marquee won’t work: that will be a square or rectangle, which will include other objects. With Polygon Select it is more accurate. You don’t have to follow the exact shape of the object, just place nodes around it as well as you can.
You will hear ‘beeps’ every time a click is made. Closing with Enter gives a different beep, so you will know something else is done. There are many beeps with V8: recognizing them is one of the finer tricks knowing (actually hearing) what you are doing.
The ‘Polygon Select’ button will be deactivated after closing the selection, by which the ‘Select Objects’ button is activated again.
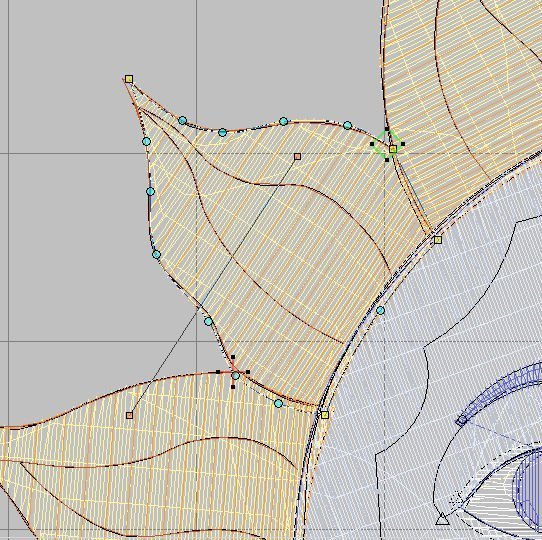
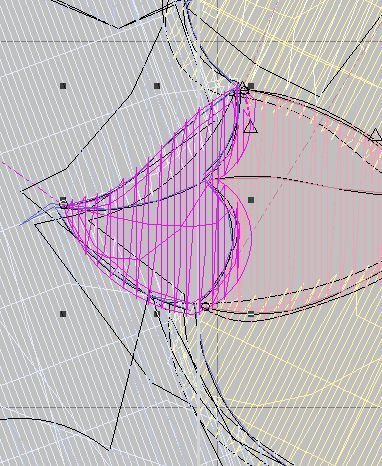
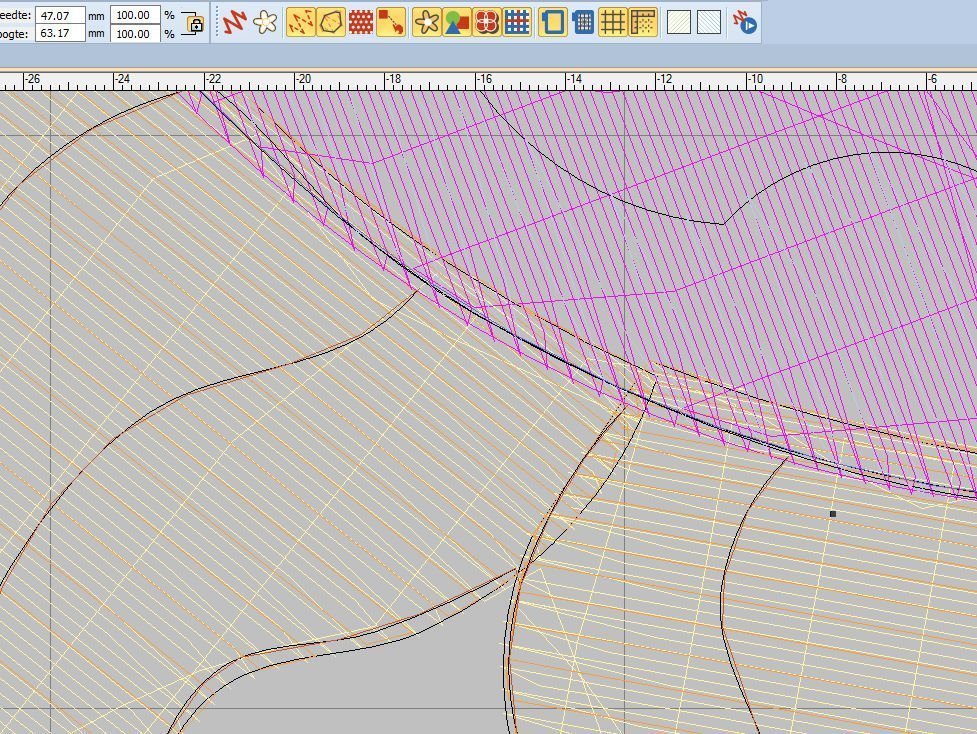
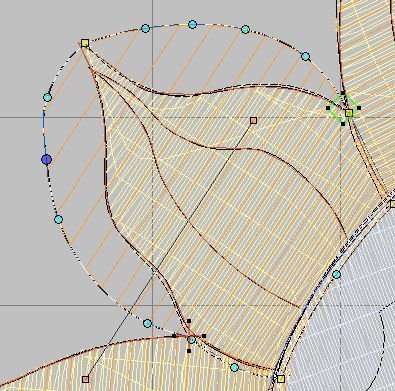
Using ‘Reshape’, multiple nodes appear – round and square, depending on the shape of the lines of the object. More special nodes, like entry and exit points are indicated and the stich angle.
The entry point is indicated by a green square, with black nodes surrounded.
The exit point is indicated by a red cross, with black nodes surrounded.
Square nodes are placed on straight lines.
Round nodes are placed on curved lines.
Orange nodes on each side of a black line = stitch angle tool.
You can click and drag nodes: as soon as you click the color changes, so you know that’s the node you want to use for reshaping. Clicking on another one to change that color, and the first is turned back to its original color. Click and drag the node to change the shape of the object at that point: it will show immediately and V8 will adapt the number of stitches to fill the new space. Back one step? Use ‘Undo’ or Ctrl+Z.
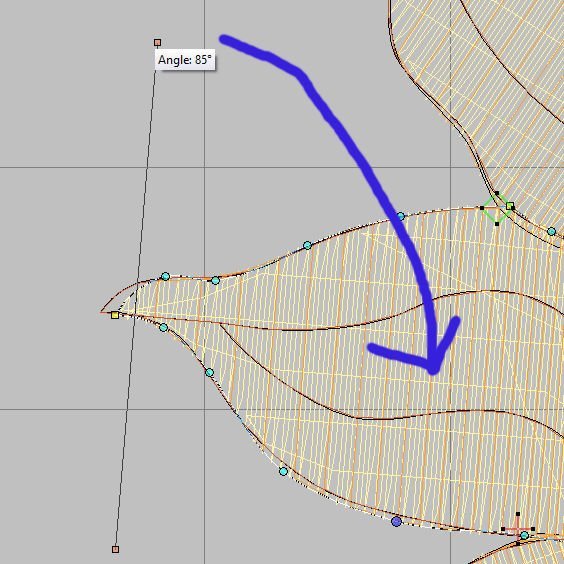
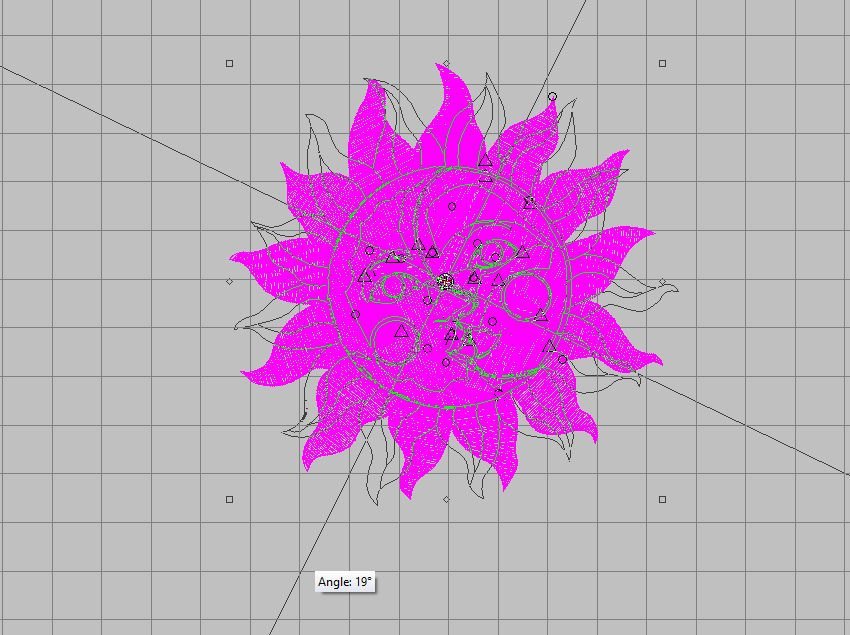
Enlarge the objects for better vision to change = Zoom in. The stitch angle tool will not always be enlarged too. Just click and drag one orange node to stretch the line, until the node itself protrudes from the object. If you want to change the stitch angle – which is now at 85° – click and drag one orange node to another position: a box with the actual angle will show until you stop.

The picture above shows that I have changed the angle to 19°. Remember: I’ve changed the stitch direction for the Fill stitch of the flame, NOT the extra stitches on top of that: the flame consists of multiple layers of stitches. It is good to know before editing.
Changing these extra stitches too, to an angle of 0°, is possible. Just try until you are satisfied with the way your objects/stitches are looking. Check how the number of stitches will change every time you reshape your objects.
Scaling objects is also possible: the next icons Size +20% and Size -20% will do the trick in 20% increments. You can enlarge or reduce the size of an object, line or your entire embroidery motif. This original motif is made with 18675 stitches, indicated on the Status Bar, bottom right.
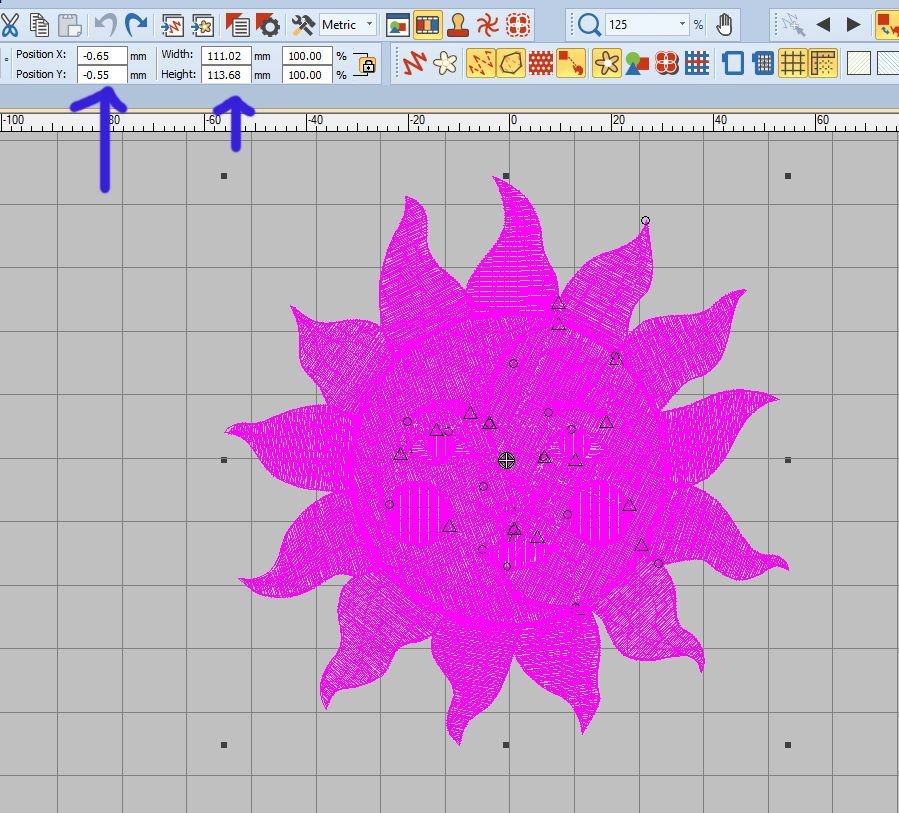
I have selected the entire embroidery motif = all objects/lines: it all turned pink. Black nodes appear around it. The measurements of this motif can be found in the boxes on the Transform Toolbar (blue arrows).
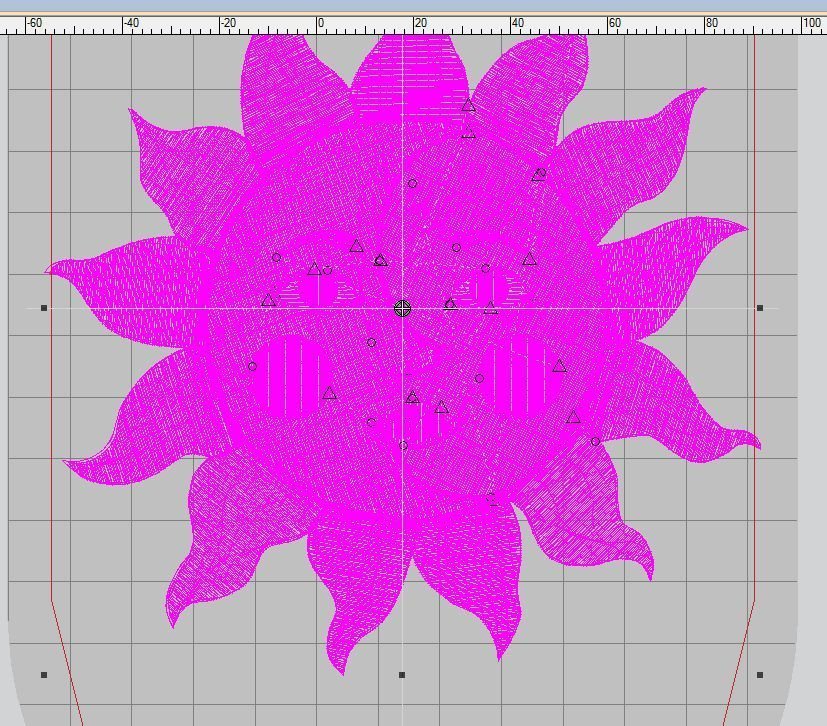
If you want to enlarge the entire motif, i.e. 60%, click 3x on Size +20%. It will enlarge with every click, so you can see this changed with every step. With my embroidery hoop already selected, I can see that my motif will be too large for this size. The red lines are indicating the boundary of embroidery: nothing can protrude, because your embroidery machine will refuse to stitch this. The density of the stitches is maintained, but the number of stitches has increased to 28894.
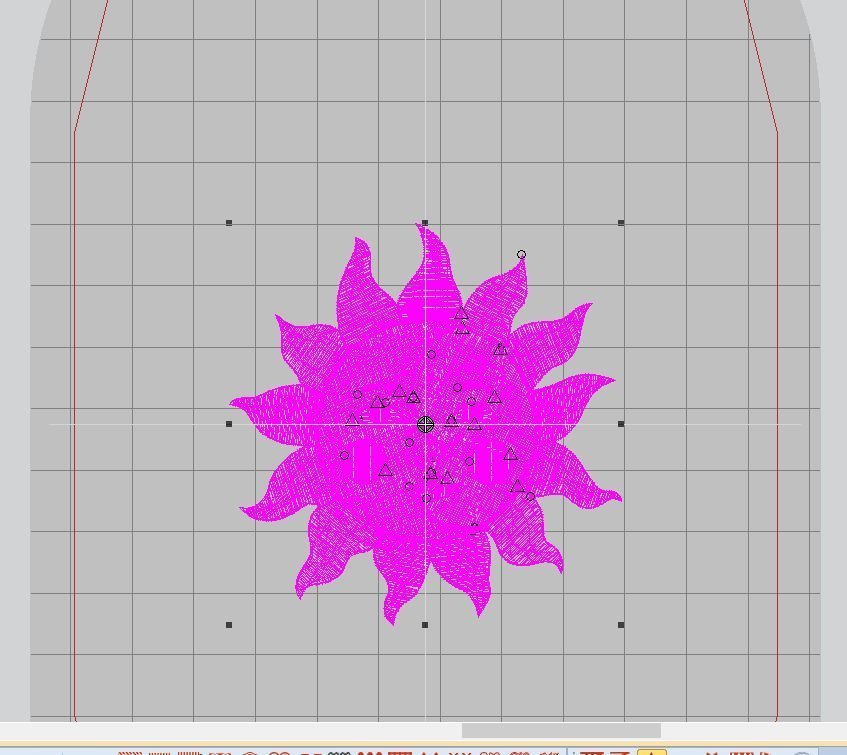
Reducing the entire embroidery motif to make it much smaller? Click 6x Size -20%. It will shrink with every step. The density of the motif is adjusted again, number of stitches now 11515.
And making it even smaller, there are less and less stitches involved to make this – now really small – motif. While enlarging or reducing the embroidery motif, the X and Y values are adjusted at the same time. It fits very well in the embroidery hoop, even more can be added if you need multiple suns/moons at the same time.
Even as small as the image above, which you can see because of the larger squares of the grid, V8 has adjusted everything in an excellent way: only 6182 stitches left. Sometimes you want to have smaller and larger objects: just select them, cut and paste, drag to another place and enlarge or reduce the second motif. They can be placed in the same hoop.
If you want to mirror your motive, use the two next icons. Vertical or horizontal mirror = select, draw a marquee around the motif, turning it pink.
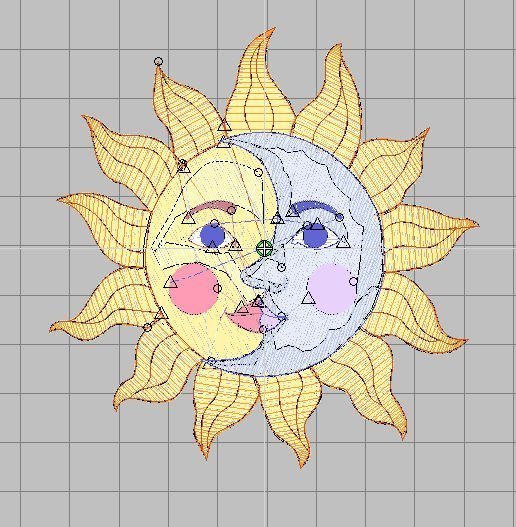
Mirror vertical: click on the icon, click on an empty spot on your workspace or use Esc to see your embroidery motif unselected: the sun and moon are now facing left. Want to change it back to the original setting? Use Undo.
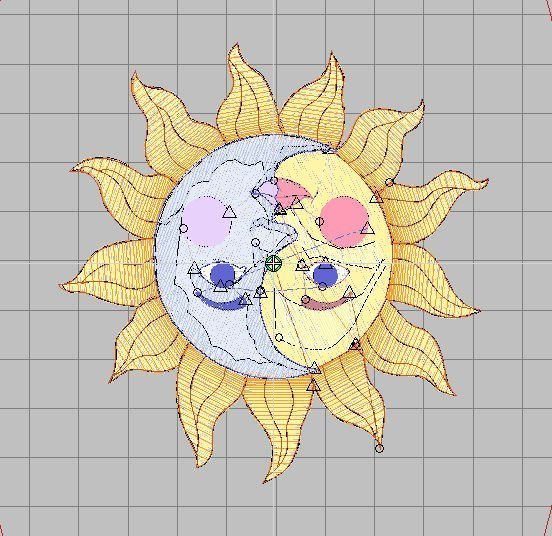
Mirror horizontal: click on the icon, click on an empty spot on your workspace or use Esc to see your embroidery motif unselected: the sun and moon are now upside down. Want to change it back to the original setting? Use Undo.
Rotate Left 45° and Rotate Right 45° works the same; the difference is that your selected motif/objects will not mirror, but rotate. Rotating is a circular movement of an object around a center (which is called point of rotation). My example shows that I have used Rotate Left 45° once after selecting the entire motif: it is turned to the left.
An object can easily been rotated by hand, without fixed increments, by filling out a number in the Rotate box. For my example I wanted to rotate a lot, so I’ve filled out ‘150’ = positive, then ‘Enter’. The motif has turned 150° to the left, because when using a positive number, that’s what it will do: Positive rotation = left, Negative rotation = right, rotating along the X and axis.
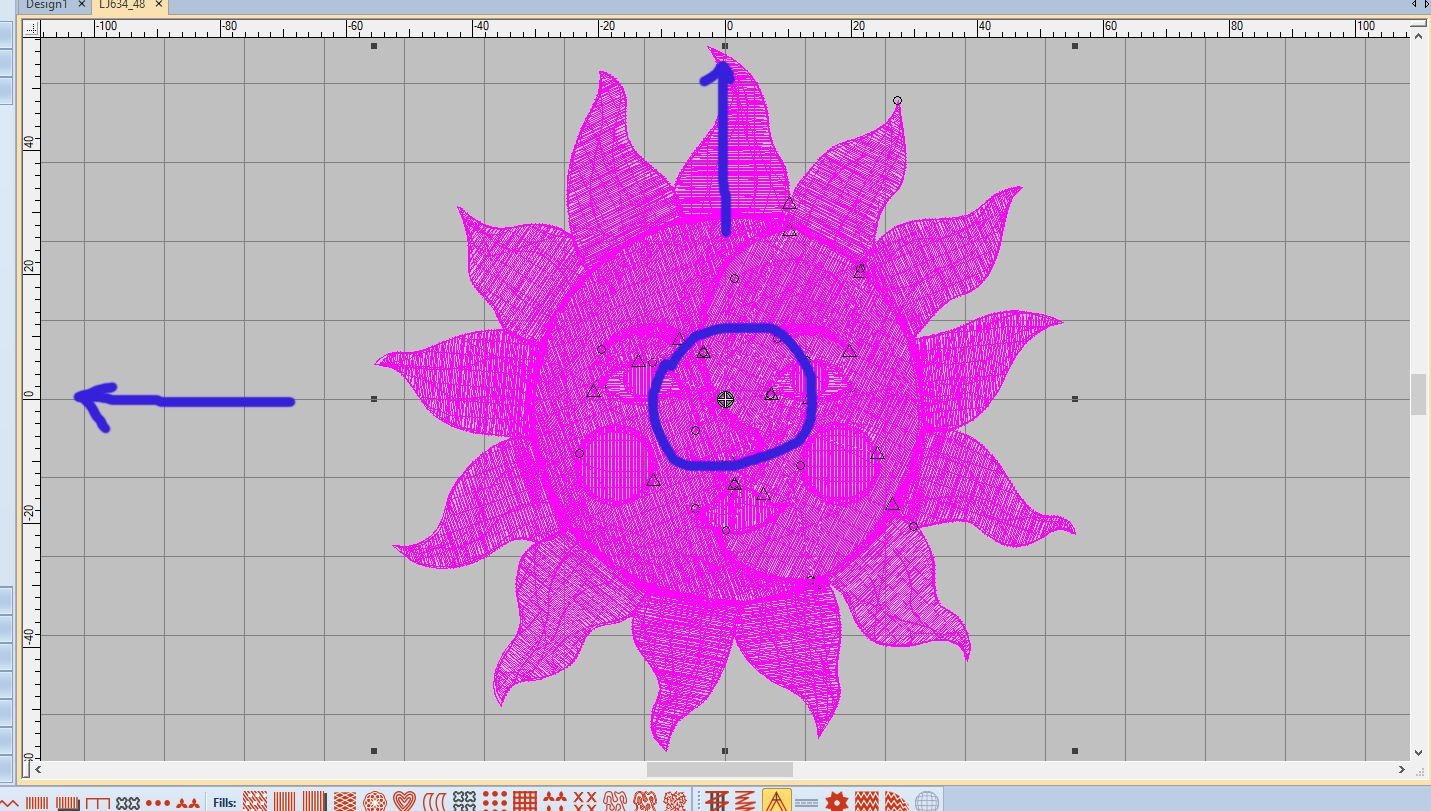
If you want to rotate to the right, use a – (minus). Place it prior to filling out a number = negative. Because the number that is filled out is the % of rotation, which starts at the top of the selection, you can see the direct result of rotation after using ‘Enter’. Remember that a full circle is 360° = full rotation, so there is no point in filling out a higher number. Nothing will change when filling out 361° or 400°. Nothing will change with 360° also, because you have rotated to the exact point where you began. I want my sun/moon rotate to the right by 26 degrees: that means I have to fill out ‘-26’ in the Rotate box.
You can also rotate by selecting objects/the entire motif; black nodes appear. Click on the selection again and you will see different nodes, translucent. By pulling at a corner node, your selection will rotate by angle/degrees. By doing this, the X and Y axis appear to show you in which direction you are rotating: these axis will disappear once the rotation is complete, setting the X and Y on the grid again. The nodes are cornered too, in the same position as before the rotation: only your objects/motif are moved to different coordinates. Each time you rotate, the temporarily X and Y axis are shown. Depending on the node of your choice (upper right, upper left, lower right or lower left) and the direction of rotation, you will get a positive or negative outcome.
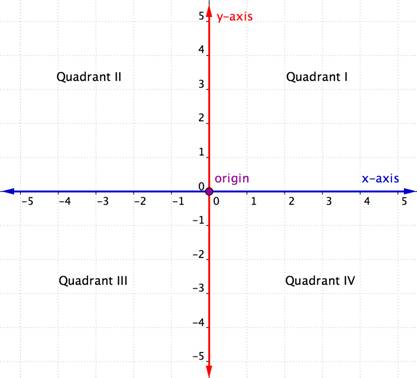
A little math: the workspace is divided into a grid (when activated). This grid uses horizontal and vertical lines, to convey information about an object’s location. When an object/entire motif is selected, it is divided by a horizontal and a vertical axis: lines that intersect at right angels, perpendicular to each other. A cross divides the object/motif in four quarters. The horizontal axis = X, the vertical axis = Y, the center where the X and Y meet is the Origin = 0,0 = point of rotation. All numbers moving right, left, up or down from that starting point are coordinates = position of a point. Quadrants are named using the Roman numerals I, II, III, and IV* beginning with the top right quadrant and moving counter clockwise.
TRIVIA: Quadrant I is the only one where X and Y are both positive, which is where coordinates (values, numbers on the grid) start looking for their X and Y: that is also why it is called Quadrant I = starting point.
Skew: another fun way to change/deform your objects. You can do this two in different ways.
1) Select your objects/entire motif to get the black nodes. Click on your selected objects/motif again to see different nodes (translucent = small diamond). Pull a horizontal or vertical node away from the objects/motif, diagonally. I have pulled to the right/downwards, until it said ‘Angle 20°. Getting a positive or negative angle/° depends on the node you are pulling and the direction you are moving. While skewing, a ghostlike image appears to let you know how far your selection will be skewed. When releasing the mouse button, this image disappears. Also the X and Y axes will follow the direction of skewing, so you can keep them in sight. You can skew until you see that your ghostlike image won’t change anymore. (Don’t pull the nodes at the corners: this will rotate your selection.)
2) Use the Skew box: the red arrow with the icon indicates positive numbers will skew your selection to the right, so negative numbers (adding a ‘-‘) will skew them to the left.
Skew in the other direction, Enter, Esc. All stitches are immediately adapted. Number of stitches at this moment: 18662.
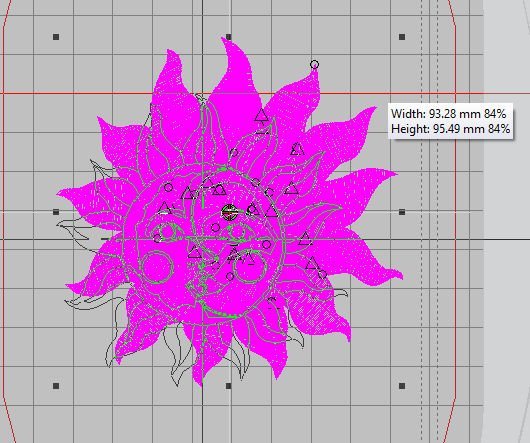
Let’s look at Position X and Position Y: indications about width/horizontal information = X, about height/vertical information = Y. Used on your workspace but also for showing position in your embroidery hoop. You can change the numbers in the fields next to Position X and/or Position Y, but you can also pull or push a black node with the selected objects/motif until you get the right width and height and percentage of enlarging/reducing. I’ve reduced my sample to 84% of the original size.
More accurate is to fill out a number with the Position X and/or Position Y on the Transform Toolbar: they will change per millimeter (or the measurement you have selected). By default when opening this Sun/Moon embroidery motif, the X position was set to -0.65, and the Y position to -0.55. By changing this, then using Enter, moves everything to another position. If you want it centered on your grid, fill out X 0.00 and Y 0.00, as the picture above shows. The center of the embroidery motif is placed on the actual center of the grid = 0,0.
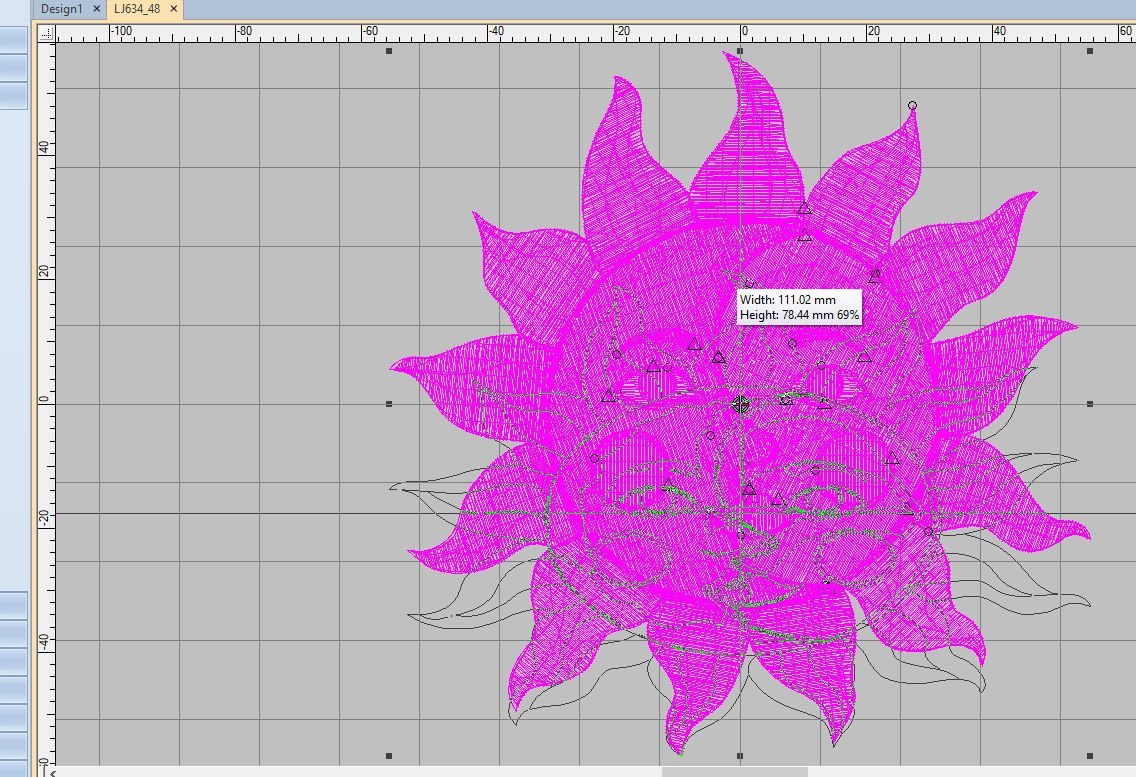
Flattening the selection: pushing the middle top or bottom node down. You can see that just the Height % has changed = now 69% of the original size. Notice the X axis has being pushed to another position.
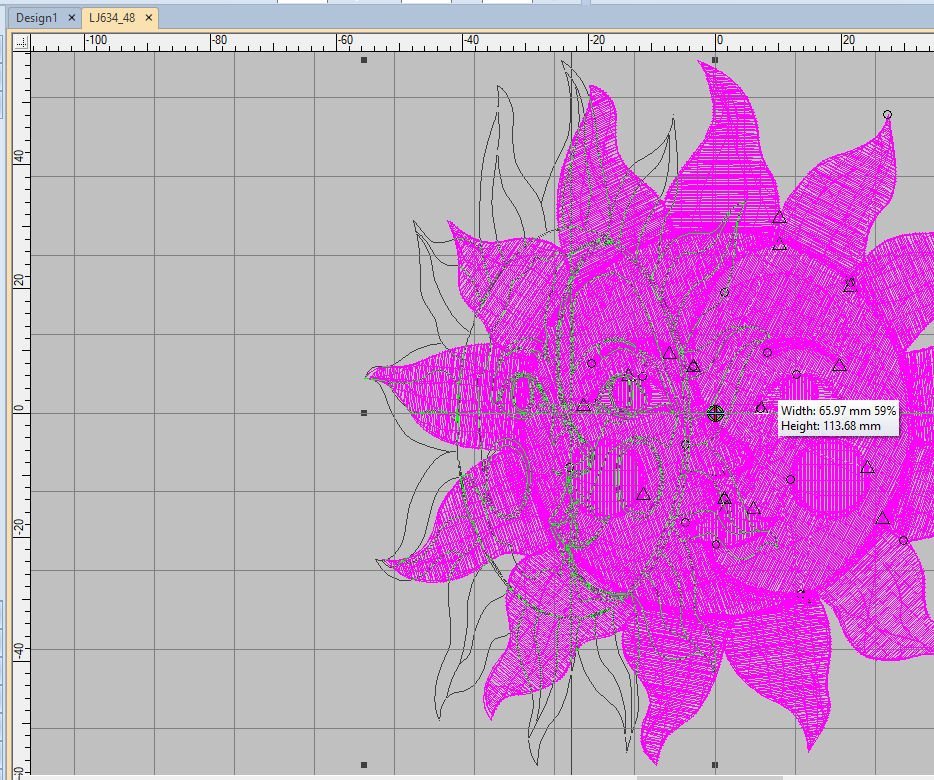
Thinning the selection: pushing the one of the side nodes to another position. You can see that just the Width % has changed = now 59% of the original size. Notice the Y axis has being pushed to another position. 
Want to change just one position of the X or the Y? Unlock the padlock by clicking on it: you will see it actually being open. Now Width and Height can be changed separately.
REMEMBER: All samples are for practicing purposes, not to be actually embroidered. Some changes will make the objects too dense or deformed to properly embroider them. Just play with the different shapes to see what is possible.
Quite a lot to take in, but practice as much as you can and it will become easier. Of course there are many more ways to get things done, but we’ll keep that for other lessens, after checking more toolbars, like the Stitches Toolbar… See you next time!
Happy Stitching
Sylvia Kaptein
Sylvia’s Art Quilts Studio
www.sylviasartquilts.nl
[email protected]
* Quadrants are named using Roman numerals, because should you write a number inside the quadrant while doing math, it could cause confusion as to whether it is a quadrant identifier or a point/coordinate in itself.

Recently Pinterest keeps saying, invalid parameters something went wrong at our end. Any thoughts? I used to Pin all your classes happily. ?
Hi Ann,
I really have no idea, could be something with Pinterest? Come back another time and try again? Hope it will work
Sylvia